Search the Community
Showing results for tags 'Kotobukiya'.
-
Thought it might be good to have a Fembot and related Genere Thread. Examples Transformers Windblade/Arcee, Macross Frontier, Frame Arm Girls or Shin Mazinger Minerva. or whatever you want to show(Forum Rules Apply).
-
http://www.crunchyroll.com/anime-news/2018/07/02-1/life-size-border-break-mech-becomes-the-biggest-model-kit-ever-made http://www.taghobby.com/archives/292785
- 2 replies
-
- sega
- kotobukiya
-
(and 1 more)
Tagged with:
-
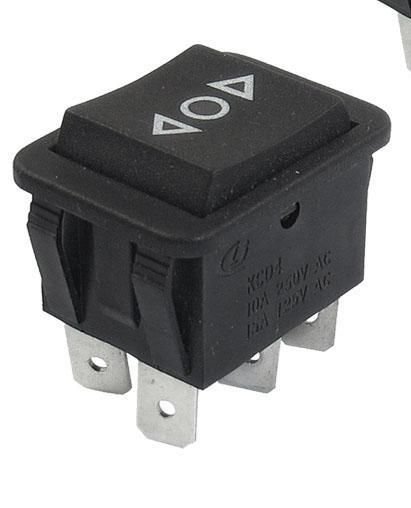
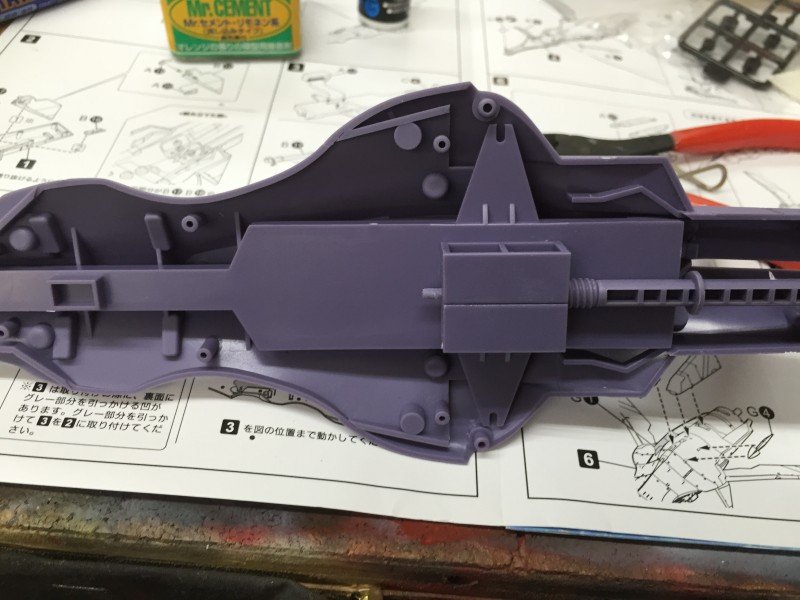
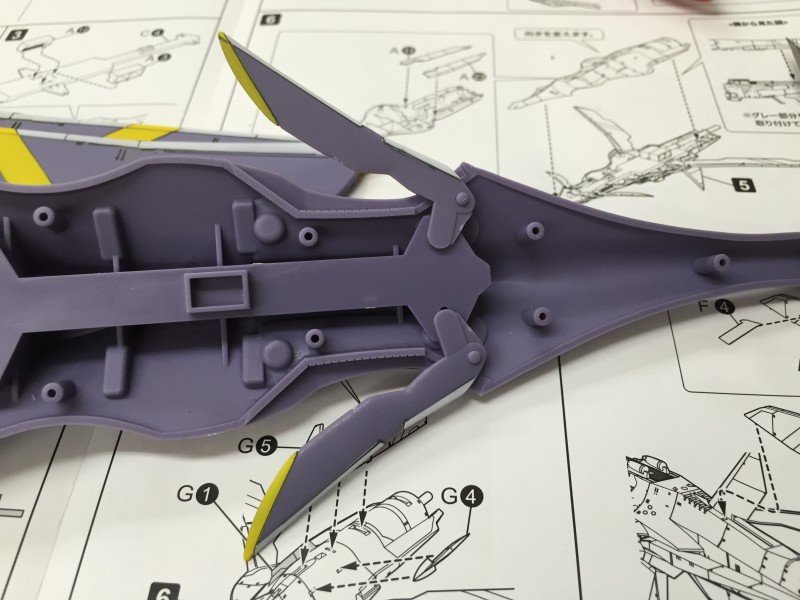
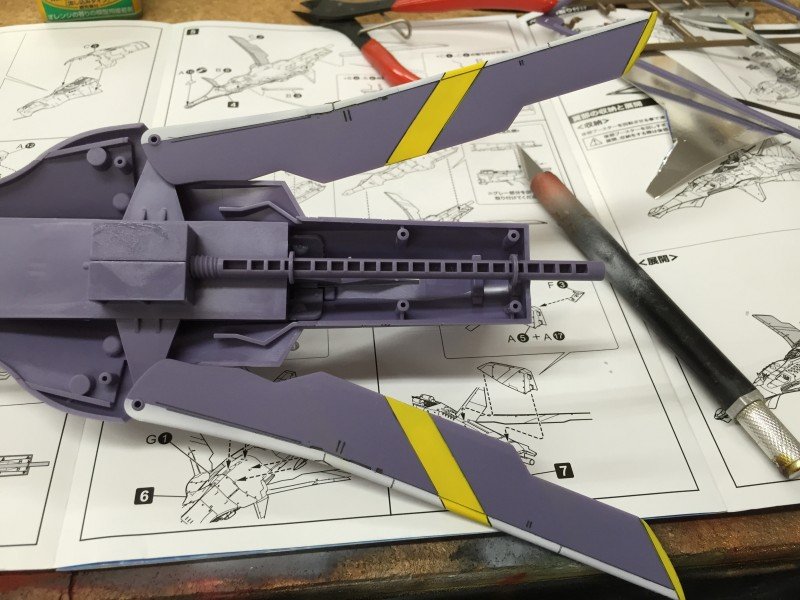
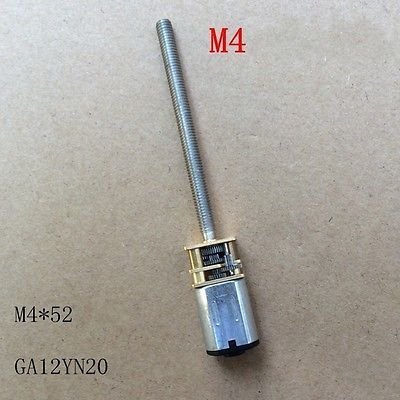
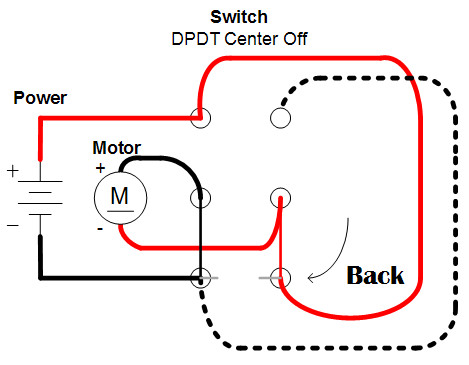
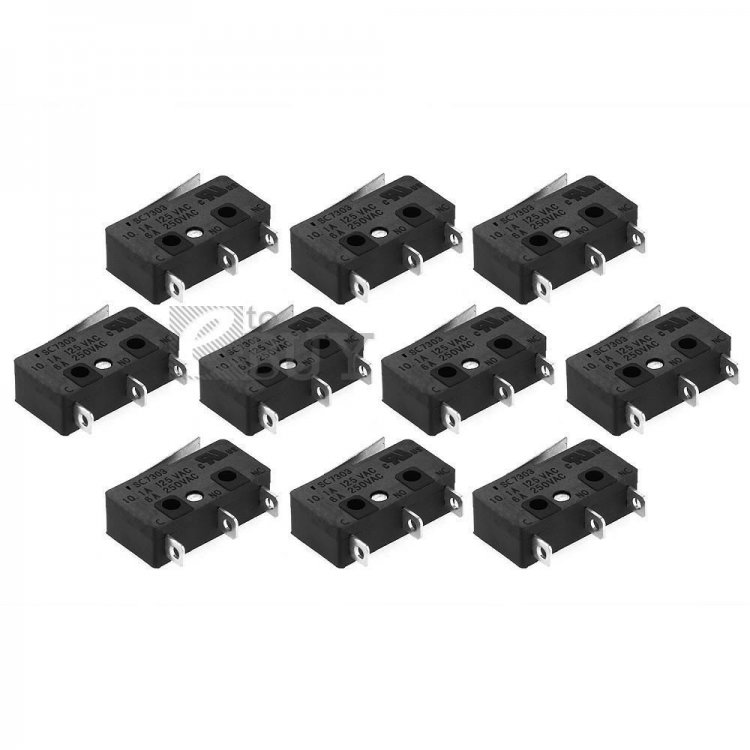
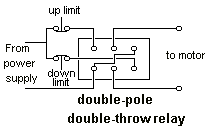
This is the final project video. Hi Ya'll, I got a new motorized custom planned here which I thought you might find interesting. I will tell you right up front that I had to get a lot of advice from MechTech to plan for this custom, and I thought that his feedback may help with builds you have always wanted to motorize yourselves. . The initial idea was to build and paint one of my all-time-favs, the Super Space Battleship Neo-Nautilus. I was planning to just add some nice UV and flashing LEDs, and maybe even add some sound ("Don't forget to try in mind..."). This kit has a nice feature, because if you turn the tail engine, the two sets of wings open and close, as well as the tail fin detracting. Jump to 1:35 of this video to see the wing system working. However, my simple plan changed when I saw the internal parts on the web. It seemed to me that maybe the Nautilus could be automated to open/close with an electric motor. The Problem: But how was I to get this sucker motorized? I have no electric experience more than lighting up an LED for my kits. I have never played with motors, trains, or R/C. And I am, in general, technically challenged. So can it be done? That's when I reached out to MechTech to see if it was possible, and began a journey of electric enlightenment. As a result of my research, the following is my current work plan to motorize the Nautilus. Step 1: The Motor To make this baby move, we need a motor which will replace the ship's internal "male threaded styrene rod" in the image above. This image above is a micro (N20 sized) DC 3-6V motor. A 4mm nut is screwed on the motor's male threaded rod, and then glued to the female threaded styrene part of the model. The female part is actually the only moving part, which retracts all the wings. The first 15 sec of this video demonstrates what will happen mechanically with a "Ball Screw Driven Machine". The key to understanding this mechanical process, which took me a maddening while to figure out, is that the nut doesn't revolve around the threaded rod, it just glides along, moving the part it is glued to. Step 2: The Switch As may have occurred to you, the motor only goes in one direction, so how do you make it reverse direction? And how do you slow it down to a reasonable speed? Apparently, the way to do this is to reverse the polarity of the motor so it will turn in reverse. To do that, first I need a DPDT rocker switch with forward, off and reverse positions. But, I also need to wire the DPDT switch in a particular way to cause the motor to reverse direction, as shown in this diagram. I actually found some good videos on how to wire this diagram, and it is easier than it seems. You can also buy pre-wired "Forward-Off-Reverse" DPDT switches. To slow down the motor, you can get the motor in the RPM (rounds per minute) that you need. I am planning to test this at 150 RPM at 6V, and if needed, I will reduce to 3V in order to get half the RPM. I am a bit concerned if this will still be too fast. But I found you can also get motors as low as 30 RPM. (Motorized Battleship Yamato gun turrets, anyone?) Step 3: The Limit Switch After getting this wired up, I also need what are called "Limit Switches" to prevent the motor from running along and tearing apart my model. A limit switch will automatically cut off the power to the circuit when it is physically triggered. As you see in the image below, the limit switch has a lever which triggers it. So I need to set up two limit switches, one at each end of the moving plastic female threaded part of the model. When the moving female plastic part physically hits the limit switch's lever at each end, it stops the motor before it crashes everything. (Guld should not have removed his limiters. Just look what happened.) This video shows how a limit switch works with an LED and seems to be an easy job. To prevent complete disaster, we need to wire in these switches to our existing forward-off-reverse switch. This diagram shows how the two limit switches are wired into to a DPDT "relay circuit". It is not exactly the same as our circuit diagram above, but it will do the trick. I do have a bit of concern about wiring in these switches, but I think trial-and-error will do it. Step 4: Await Parts and Practice Soldering So with all of this new motorized enlightenment courtesy of MechTech, I am assembling all the necessary parts to begin testing the motor. I will not even touch the model until I feel that the motor speed and limit switches are working perfectly. If things proceed smoothly, I might also try figure out how to make this baby remote controlled (which BTW I also have no clue about what so ever). I will update as I proceed testing. Any advice on improving this plan would be greatly appreciated. I would also love to hear about your ideas for projects you might want to motorize.
- 32 replies
-
- dpdt switch
- motorized
-
(and 8 more)
Tagged with:
-
Seems legit... Source: http://www.tomopop.com/kotobukiya-is-making-a-metal-gear-rex-plamo-kit-25526.phtml
- 69 replies
-
- Metal Gear
- Rex
-
(and 4 more)
Tagged with:


