Less than Super Ostrich
-
Posts
935 -
Joined
-
Last visited
Content Type
Profiles
Forums
Events
Gallery
Everything posted by Less than Super Ostrich
-
amen... an airbrush and a cheap compressor will make your life soooo much better (assuming that modeling will be a long-term hobby).
-
everyone's entitled to their opinion, but grayson's right... i think we already beat this horse to death.
-
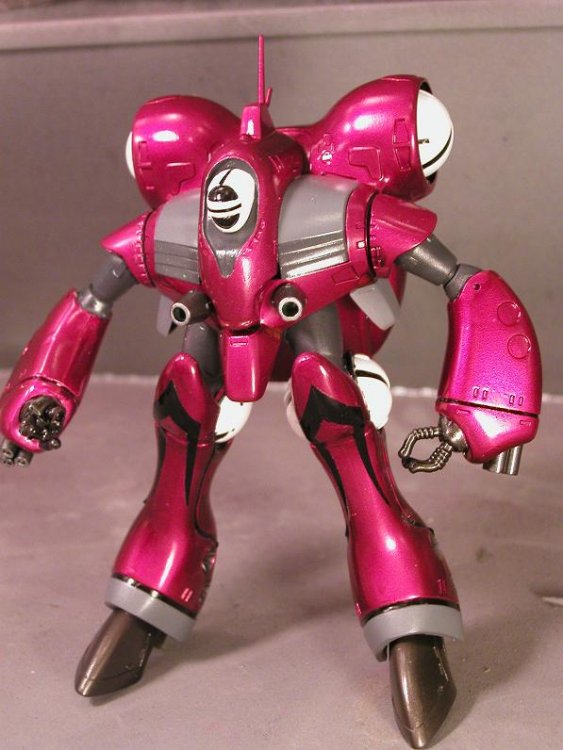
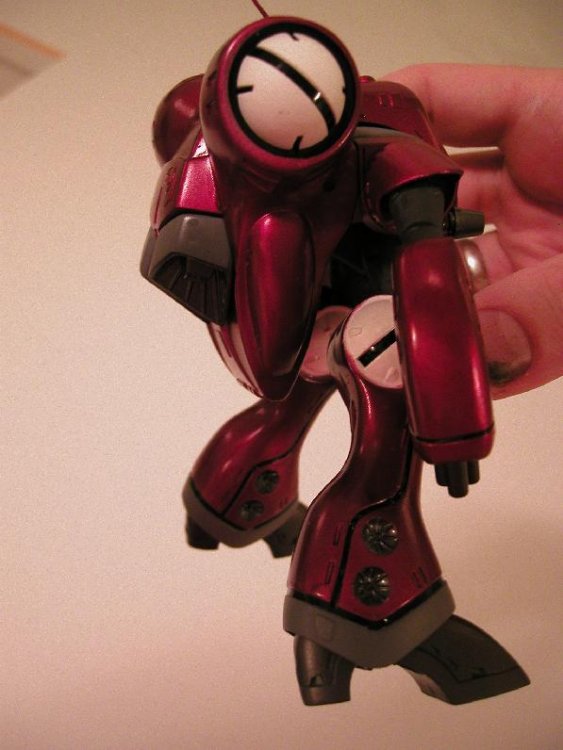
Ok... I'm in the home stretch. Basically all I've done is scratchbuilt a new head to make it the Milia Red Version head instead of the one that comes with the Bandai kit. I think it turned out ok. As you can see, I still need to add a few decals. I'm just going to choose a couple of the Bandai decals to give it a little character. I've added the leg decals, which I made myself. Basically all I did was cut some out of this black line sticker material that you can buy at most hobby shops. If you're interested I'll post a picture of it. I also plan on doing an oil wash to highlight some other crevices, but that's it. I'm not going to do a drybrush or anything else. I'm going to keep it kinda new looking. That's partly because I'm lazy... and I'm itching to move on to my next few models. I have three models already under way: Hasegawa VF-2SS G-Systems SDF-1 Cruiser Mode Club-M Jamming Bird Battroid
-
Ya know... I saw this CG effort in the Fan Works section and I decided it looked sooooo cool that I'd try to replicate it.
-
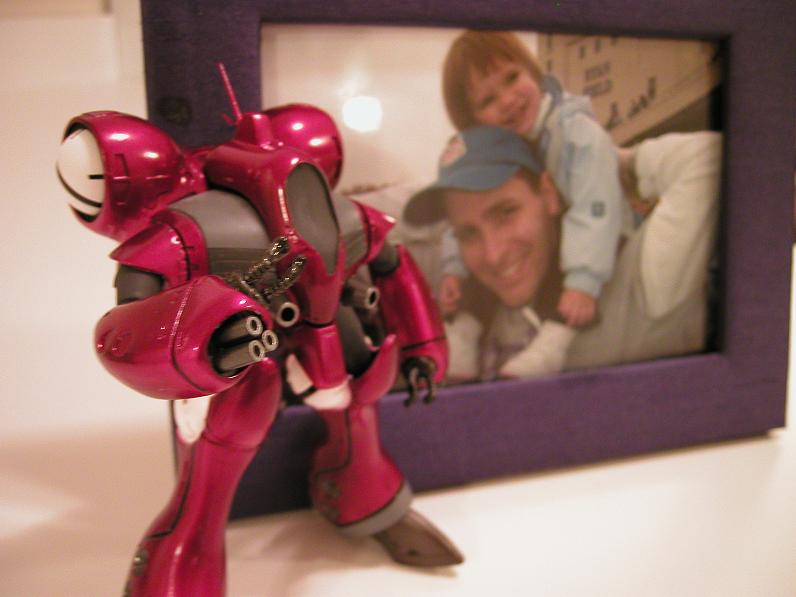
Ok... just for kicks. Here is a picture of the Q-Rau with a picture of me and my kid at a Northwestern football game (Go Cats!).

-
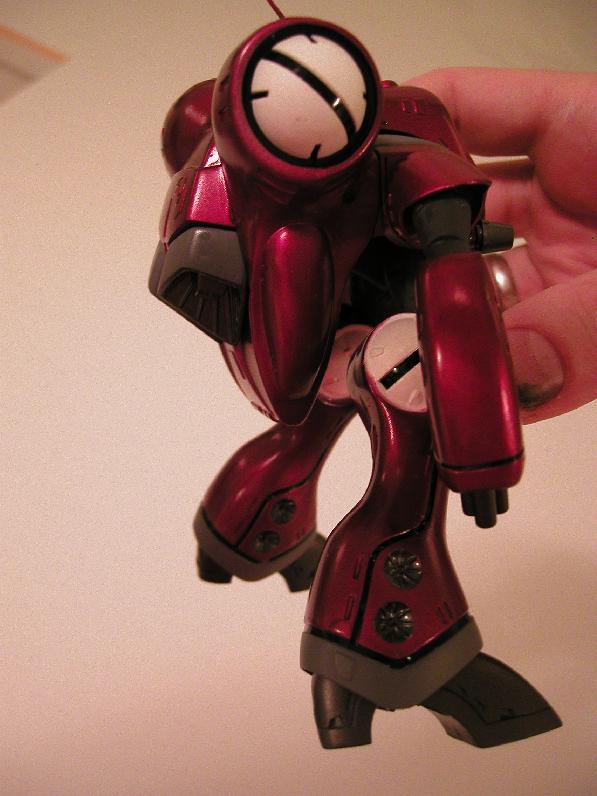
I've started to put a couple of the pieces together. I have not had a chance to do any of the weathering or any of the touch up painting. I am going to have to piece together some of the Milia markings since the Bandai version does not come with Milia options. Does anyone have some good line art of the Milia version? I don't have the headpiece on yet... its the only major piece I have missing. I noticed after all this time that I screwed up on the legs. One leg has the missile bays on both the inside and outside of the same leg... I can't believe I didn't notice until now. I have alot of painting to do around these areas. These pictures are still coming out very pinkish. The real life version is much more blood red looking. I will have to take it out into the natural sunlight to do final pictures.
-
Sorry to hear about this, Rob. Nothing gets me madder than someone whelching on a deal. You know what they say in Barter Town... Break a deal, Face the Wheel. Give him the Gulag.
-
Where have you seen line art of the armor?
-
I think I'll start with the Jamming Bird, so I save the more expensive ones for later. Maybe I'll do the SDF-1 Cruiser after the Jamming Bird.
-
Next up will be one of the tough ones. I'm going to start my second resin kit. The likely suspect is one of the 1/100 Wave kits. The quality is oustanding. I have test fitted a couple of the big pieces and I'm thoroughly impressed.

-
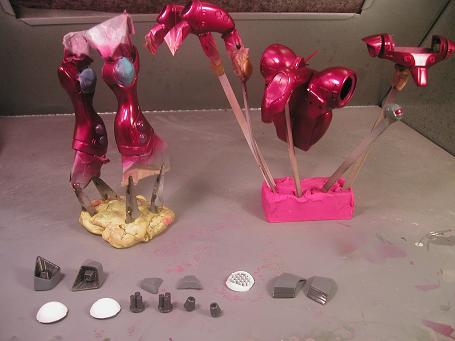
Its been awhile... lots of stuff going on, so I haven't had much time to model. I added a couple more coats of the clear red and smoke, so hopefully it doesn't look so pink now. Maybe the lighting is slightly off with my camera... the real color is a blood red color... very nice in person. Does anyone have any nice reference pic of Milia's Q-Rau? I'd love to see any detail on markings?... since the markings that came with the Bandai kit do not coincide with the Milia version. Thanks in advance.

-
wasn't that fighter mode one in 1/72nd scale?
-

So... How was Wonderfest?!?
Less than Super Ostrich replied to Less than Super Ostrich's topic in Model kits
Im lucky enough to be a proud owner of one of the Y-wings! -
MACROSS VF-1 BUILT FROM SCRATCH 1/32 SCALE
Less than Super Ostrich replied to MACROSS MODELLING's topic in Model kits
Muy bien! It looks like it is coming along very well. I think it looks absolutely great! Thanks for posting your progress. This is exactly what we need... some more artists to design some original beauties! Thanks again, LTSO -
Official VB-6 Koenig Monster Order Thread
Less than Super Ostrich replied to ChristopherB's topic in Model kits
I never said you couldn't be excited with it. I never suggested there was a problem with your questions. I also never said that you had been bothering Ken too much. All I wanted to do was make sure that you know what a super involved project this is. No harm no foul... even for the verbose ChristopherB (just kidding Chris!). -
Official VB-6 Koenig Monster Order Thread
Less than Super Ostrich replied to ChristopherB's topic in Model kits
Just remember guys... this is NOT an easy project. I imagine it will take several months. Now I doubt it will be "Tanmen time," but those molds will take a bunch of time to get right. -
So... How was Wonderfest?!?
Less than Super Ostrich replied to Less than Super Ostrich's topic in Model kits
I think the main artist on the Space Station Project was a guy named Tony Augustin. He is truly a master on the scale of wm cheng. And he is a VERY nice guy too!! Here are some of his works: Y-wing Diorama Tie Fighter Diorama -
So... How was Wonderfest?!?
Less than Super Ostrich replied to Less than Super Ostrich's topic in Model kits
Nice job, Ken! That looked like a really fun project to be involved in! I'm not a huge Star Trek fan, but that just looks awesome. The lighting and the weathering were superb. The docking bays were excellent. I hear the thing rotates... is that true? THanks again. -
I need to know how the fest was this year. Were there any good limited edition Macross stuff available? Gimme some details!! Found some picture here... but no anime as far as I can see. I think I saw a Gundam and a Five Star Stories kits in the background of a couple http://www.fire-house.net/jheilman/Index.html
-
Yes Yes! Wonderful progress. Please post more info on how your CAD designs work with the router... sounds amazingly cool. Thanks.
-
I have the G-System resin kit of the SDF-1 in Cruiser Mode and it is a great quality kit. You can get away without pinning that because many of the large anchor points have interlocking pieces like this: ___.... _________ .....|_ ..|_ ........|... | ......_|. _| ___|...|_________ If these interlocking pieces were not there... then I think you'd have to pin the pieces. And especially for important pieces to get flush (like fuselage halves), I think it is really tough to line them up perfectly. I don't want to lose panel lines by just sanding the hell out of them to make them flush. By the way, Stamen, GREAT ARTICLE!
-
There has to be a more exact way to line up the pinholes. Even just a smidgen off could ruin the effect. I wonder if it makes sense to skip the pins, thus sacrificing the strength... but you gain more flush seam lines.
-
yeah, what grayson said!
-
can somebody explain the "pinning" process in more detail? i have a club-m Yf-19 and I was contemplating pinning the main fuselage parts together, but how the heck to you get the pin holes to match up perfectly? and what do you use for pins?
-
wm cheng... you know i'm your biggest fan. thanks again for another great walkthrough. just out of curiousity... do you venture into other modeling subjects in the sci-fi world or is it primarily Macross?