GunnerX
-
Posts
241 -
Joined
-
Last visited
Content Type
Profiles
Forums
Events
Gallery
Everything posted by GunnerX
-
Oops! Here's the pix!
-
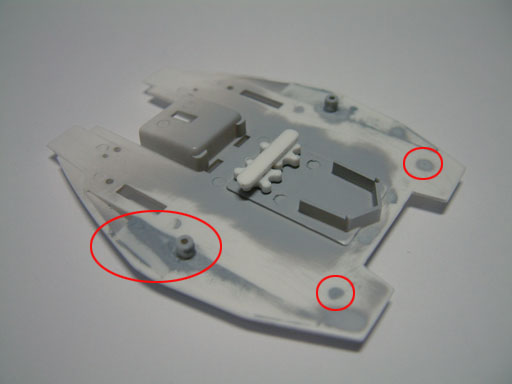
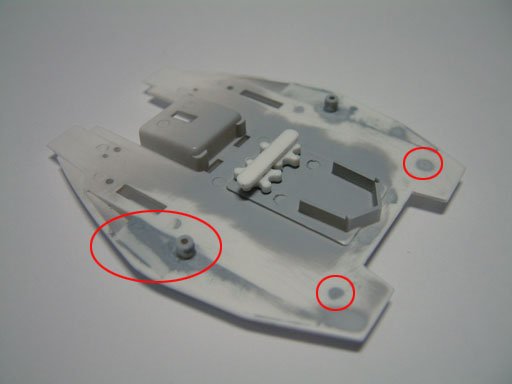
Remember to fill up the spots ( circled red ) with putty! These are not hidden and will show up quite clearly. Also, place and pice of styrene plate in the gap ( oval circle ) and cover it up, if not, there'll also be a gap when the wings are swept back.
-
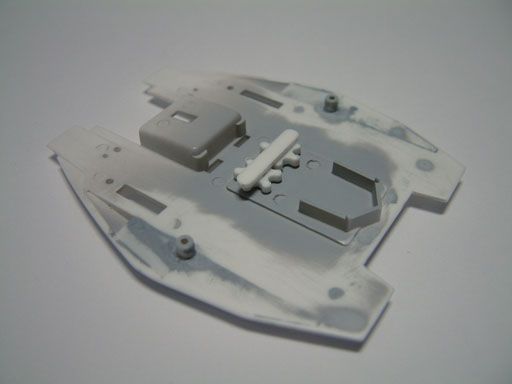
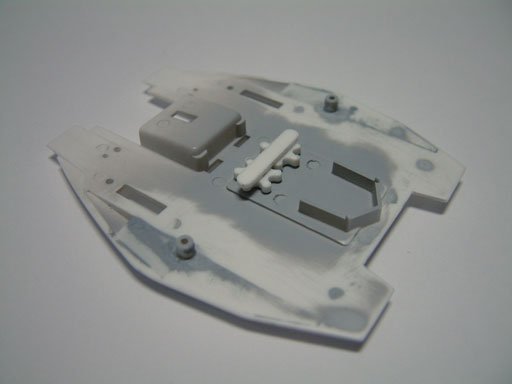
Ok, here's the base body. The grey stuff over the whole thing is Gunze Surfacer, a sort of base coat i use.
-
RECON - > It's just pieces of polystyrene strips, you can purchase these plastic sheets at most model shops WM CHENG -> Thank you so much! i'm hoping that more people will do their model kits up because i don't want it to be a dying art! Especially with all these prebuilt toys out there now TheFrenchOne -> Thanks thefrenchone! lessee... about 4 to 5 hours for the pilot (waiting for paint to dry and decaling it) and about slightly longer for the cockpit? It do the model only on weekends though! Work cuts into my building time a lot!
-
Hi! Thanks! Hope it'll turn out ok! I found the side panels sooooooo bare, so i cut up little strips of tamiya pla-plate and just glued them on! Hope to see your kit too k? Cheers!
-
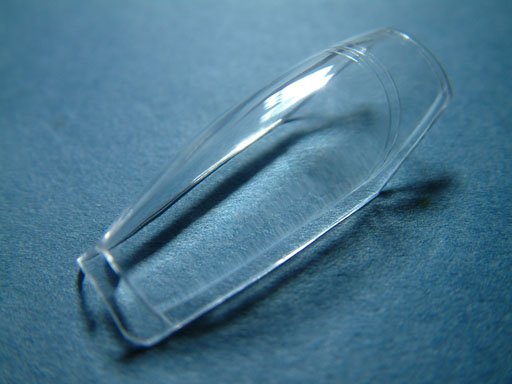
WM CHENG'S canopy polishing tips were invaluable here! Using about 800 sandpaper till the finest at 2000 to get rid of the line, then using TAMIYA polish (1000 grit) and another type called modeller's polish (2000 grit). It looked pretty good, but i wanted to see the effect of Future Polish that everyone's been talking about! So i dipped it in the stuff and it looks great!
-
I bought a couple of the photoetch sets, but i decided to leave them out this round! I'm basically using this as my testbed for my future kits, so i'm not expecting anything great.
-
Had to put in the pilot to see how he'd fit!

-
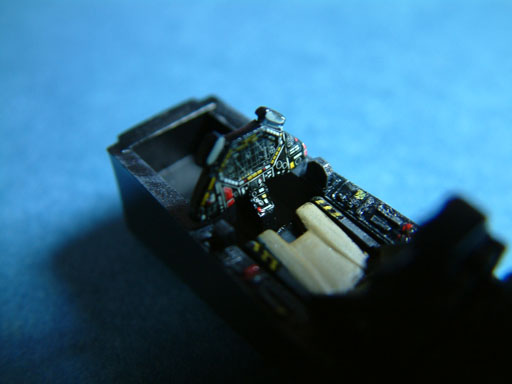
The Cockpit painted! (Sorry about the Yellow and Black stripes!, borrowed idea!) dabbed MicroSol on the panel to get the decal to conform.

-
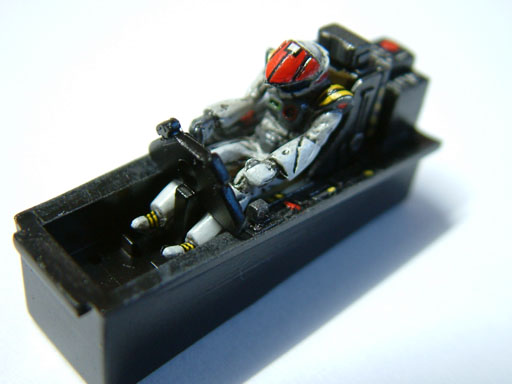
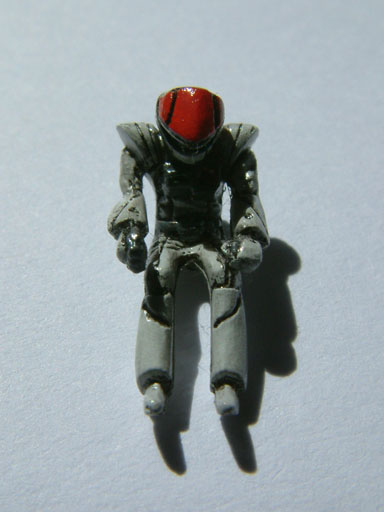
Here's the pilot with the decals added, The MicroSet comes in useful here. And that's my pinkie for size comparison! It looks pretty rough in the photos, but looks quite ok to the naked eye actually!

-
Here's the pilot, didn't expect it to be so small! Quite a challenge to paint!

-
Hi all! Ok, i've been following the board for a LONGGGG... time, but never actually posted, so this is my first! Anywayz, i saw WM CHENG's hasegawa Valks and man, was i blown away! That REALLY spurred me on to build my VF-1J! It's coming on quite ok now, probably not up to standard, but it's my 1st try at a Valk kit! Hopefully i can upload the pix soon and have your expert comments! Thanks a lot for looking! ================================================== Update : 7-10-2003 For those who've just read this, maybe i can help a little more by giving a list of materials i use for my work! Badger Model 200 Airbrush - Fine/Medium heads/needles Badger Compressor - Very old stuff! The usual range of brushes Gunze Sangyo Acrylic Paints and Thinner Tamiya Acrylic paint (metallic grey / sky grey) Tamiya Enamel Paint and Enamel thinner (X series for washes) Tamiya Putty Tamiya Polishing Compound 1000 (Canopy polishing) Master Modellers Polishing Compound 2000 (Canopy polishing) MicroSET/SOL - (for decals) Gunze Mr Cement Deluxe ( Careful! This melts styrene very fast!) Tamiya thin cement Testors Canopy glue <- Avoid this, too thick, i think microscale also makes a canopy glue, might be better. Tamiya masking tape - various widths FUTURE FLOOR POLISH! (for that canopy shine!)