Rockhound
-
Posts
103 -
Joined
-
Last visited
Content Type
Profiles
Forums
Events
Gallery
Everything posted by Rockhound
-
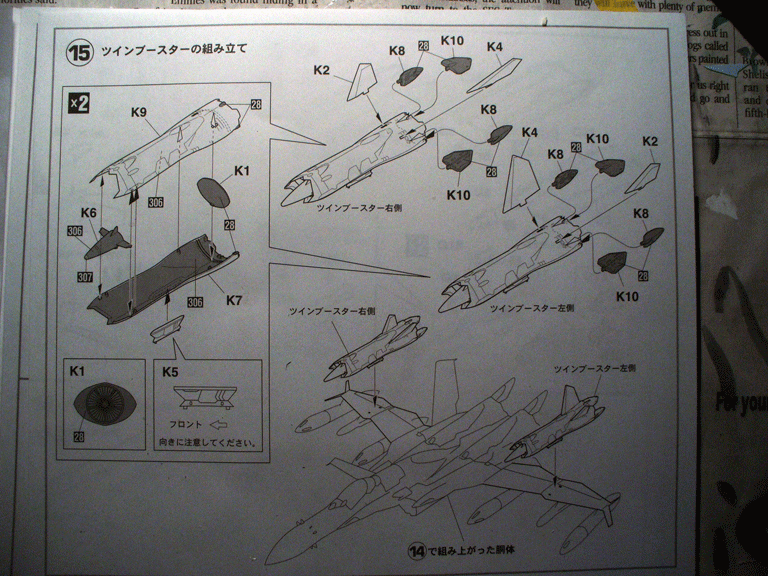
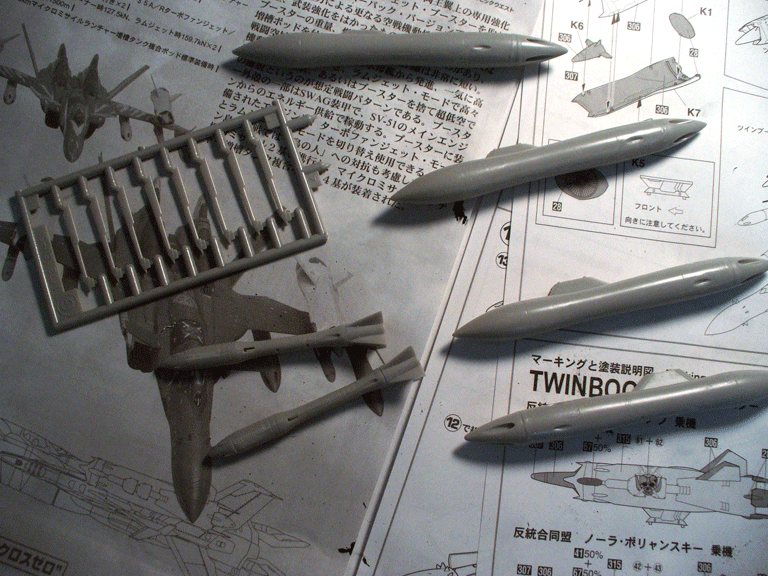
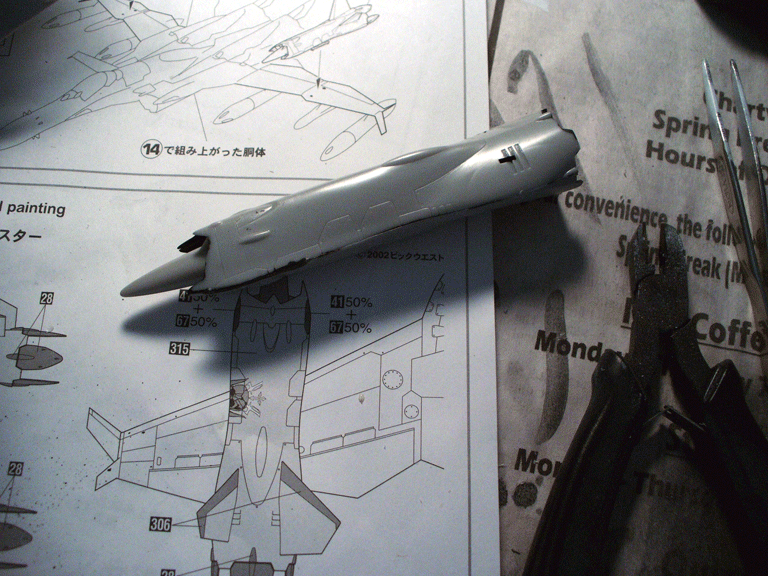
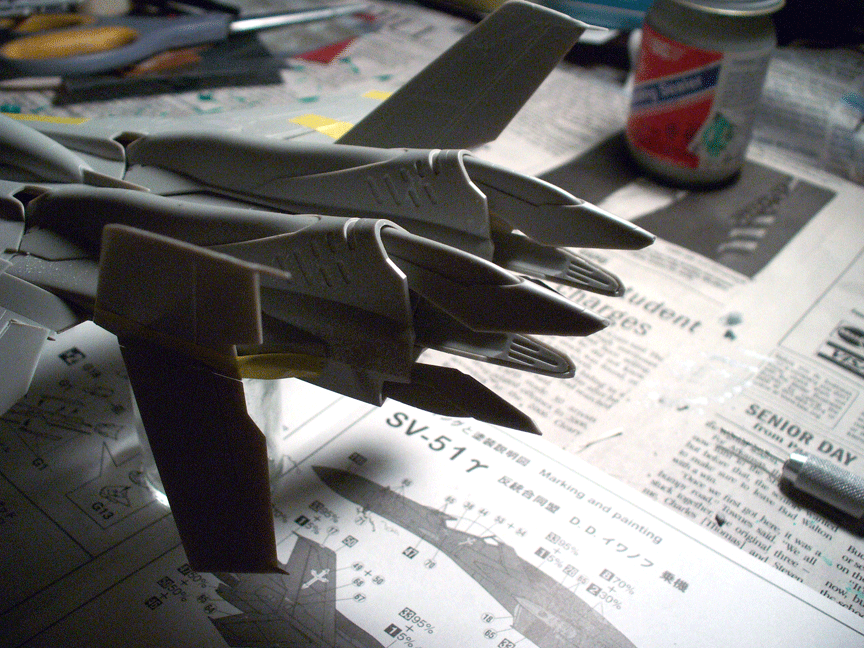
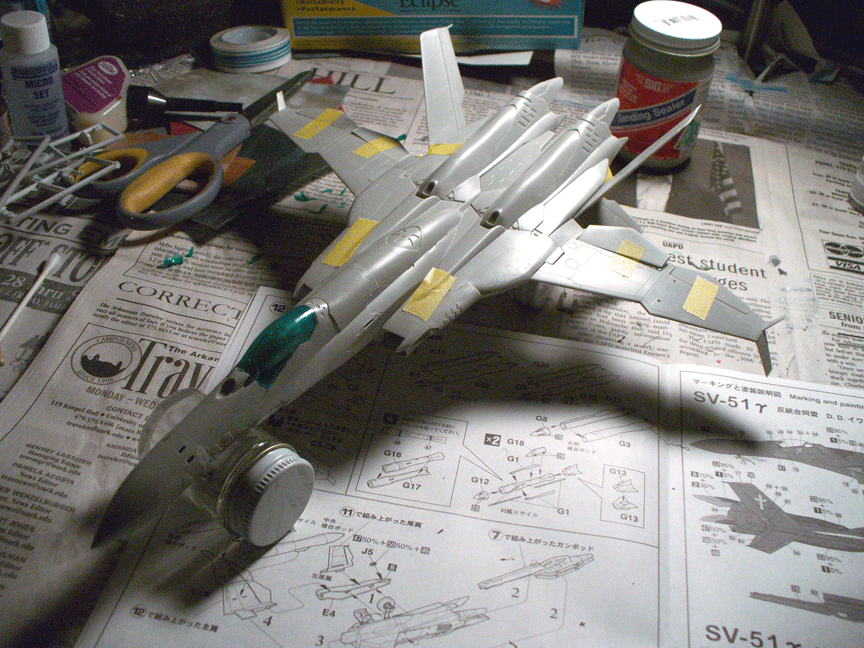
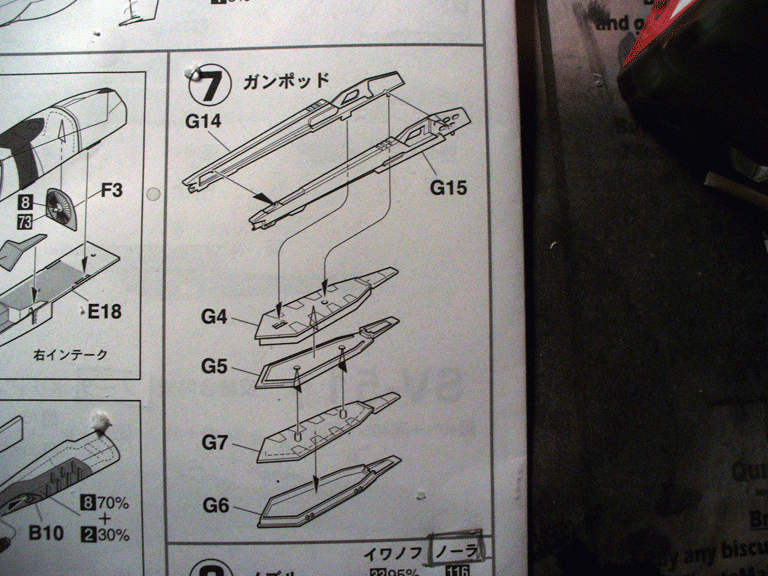
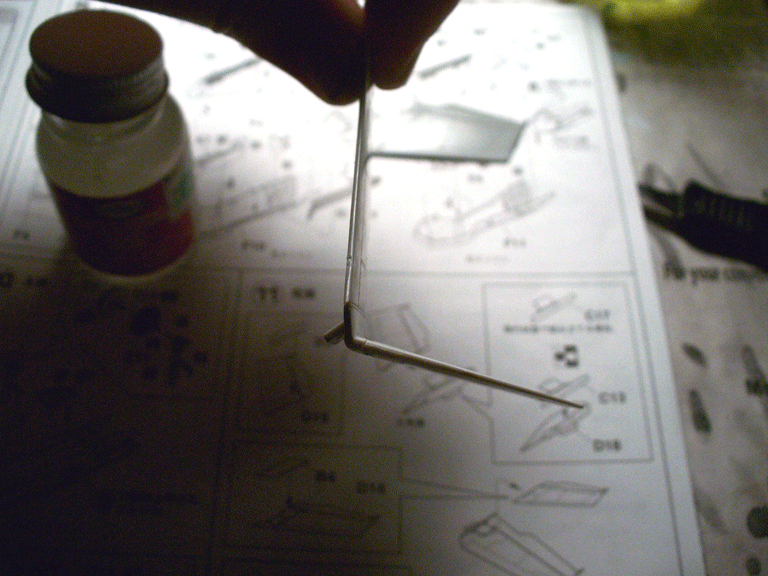
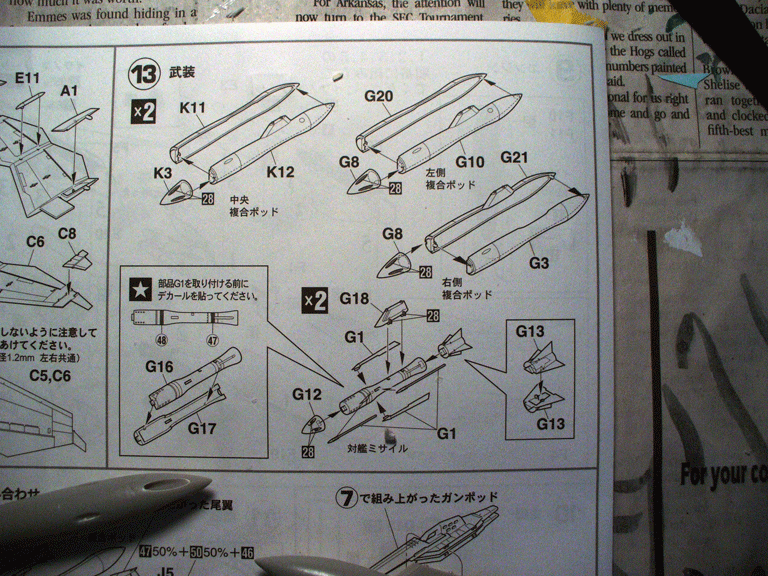
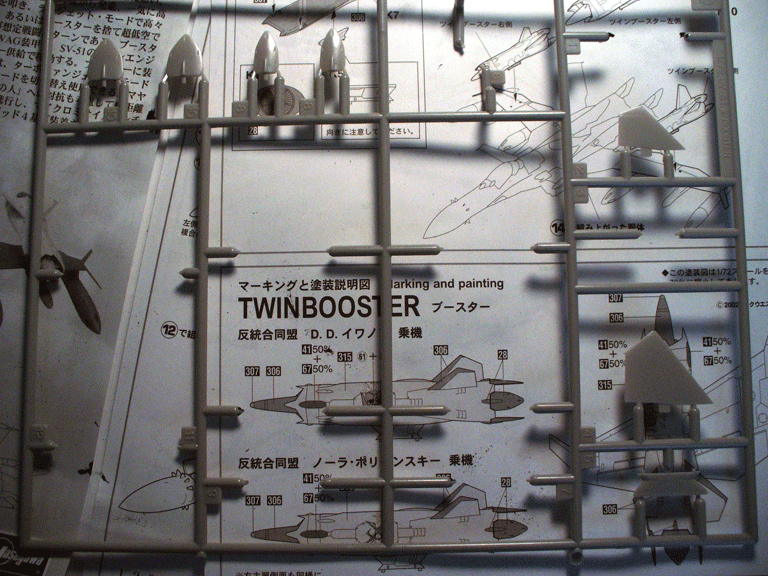
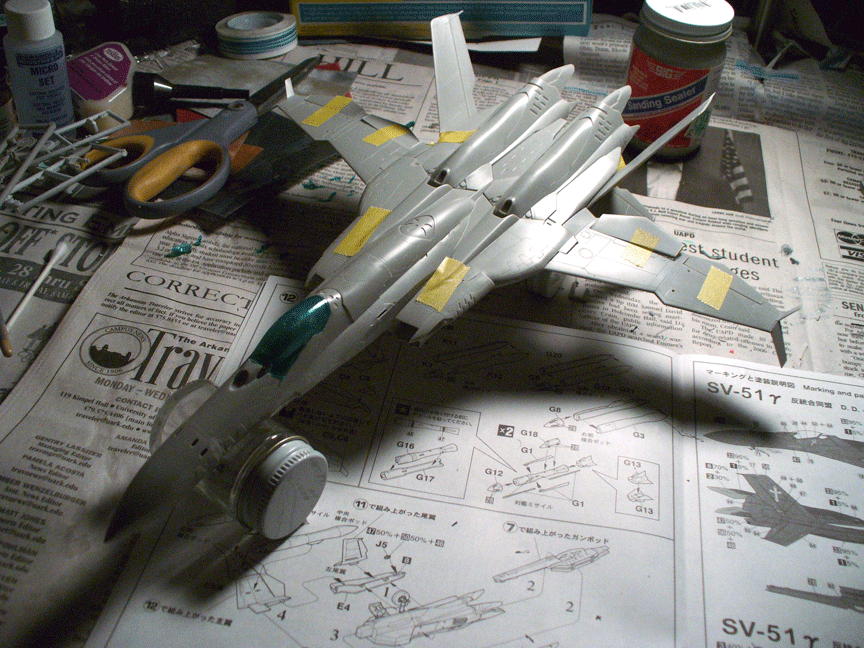
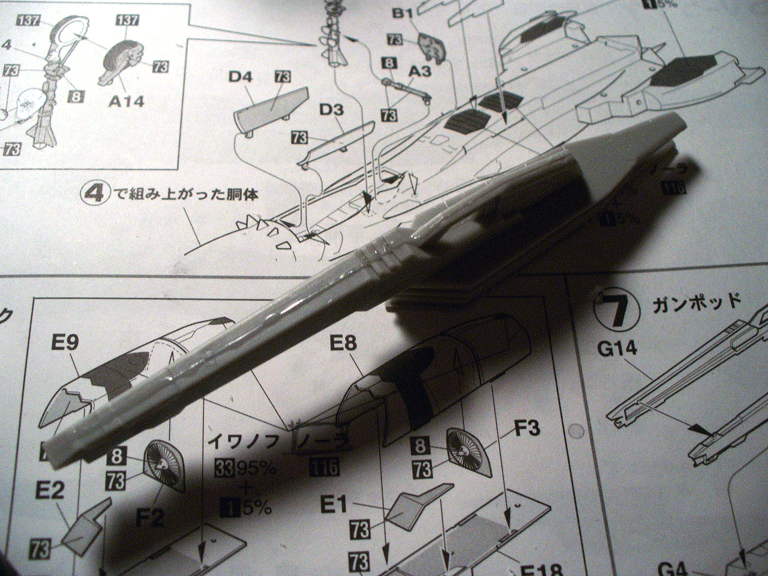
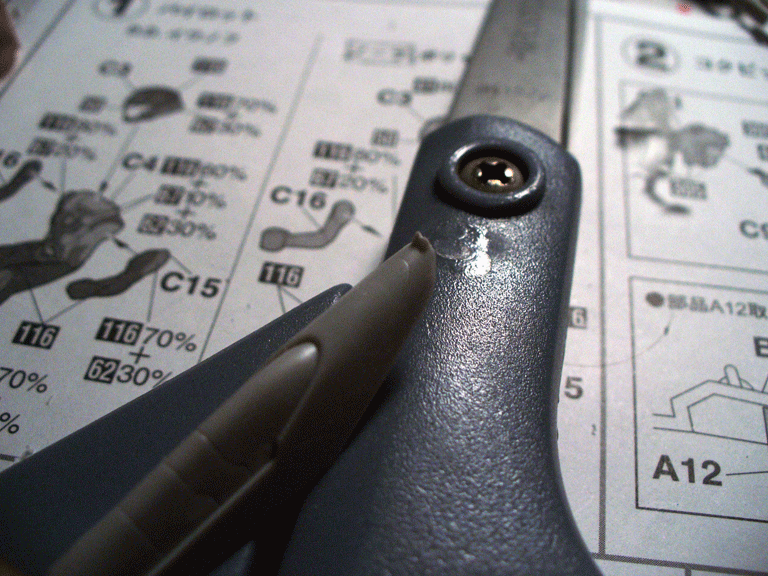
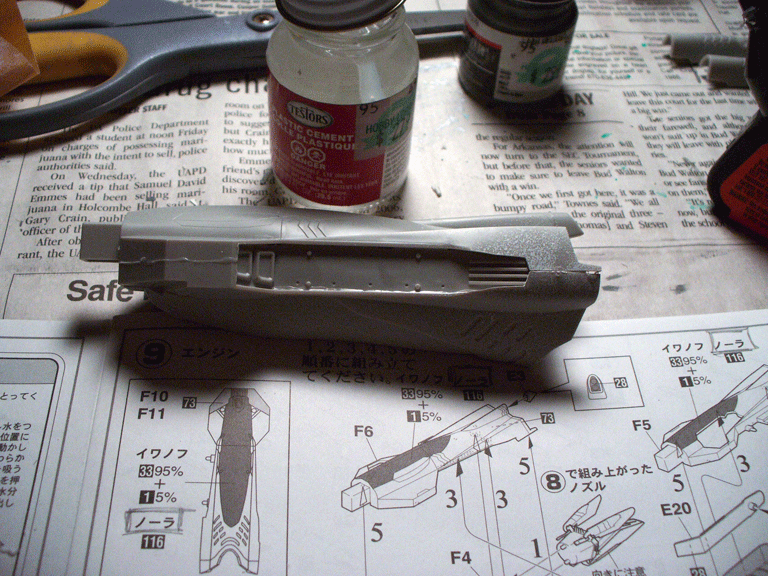
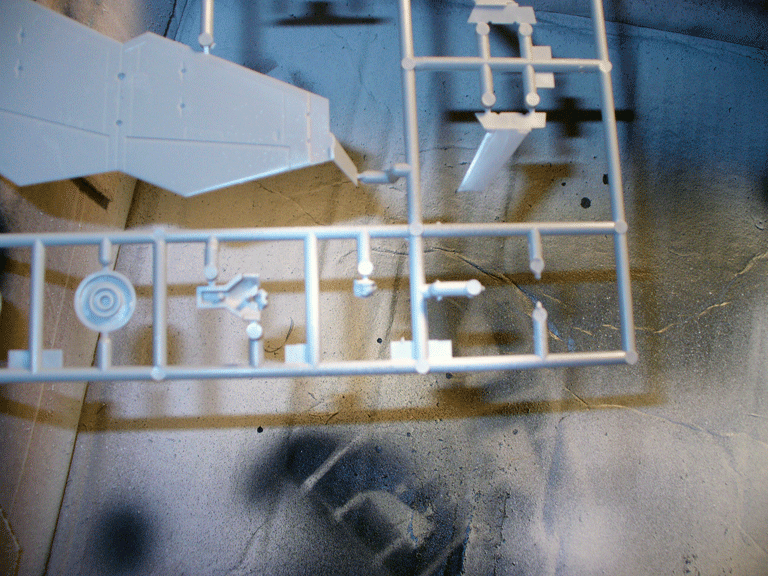
Update: Boosters and armament/tanks. Again, very very straight-forward. The fuel tanks ( I think that's what they are anyways) already have the pylon attached to it. The missile pod however, might be a little tricky. Each pod has little fins that run the length of it, and according to the decal sheet a straight, black decal runs underneath them. So, it's best to paint them on the sprue and then attach them AFTER the decal is applied. Just clip the attachment point on the top of the fin and you should be able to have complete paint coverage. Also, you can glue the pylon to the pod now, or you can wait after painting. Personally, I'll be waiting. The boosters are easy to assemble, save for the nose cone sticking out. Since the contact points are not that defined, yoiu have to be a little careful to make sure it doesn't fall out when glueing the two main halves together. Also with the booster, there are parts that need to still be attached to the booster, like the stabs/fins, vector engine fins (or whatever they're called.), and the pylon. These can all be painted on the sprue with no problem.


-
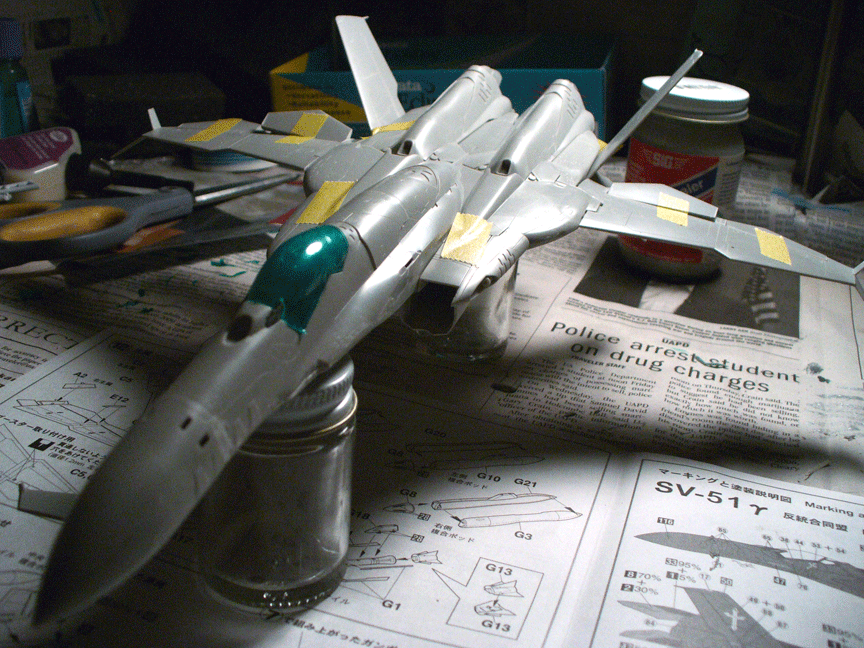
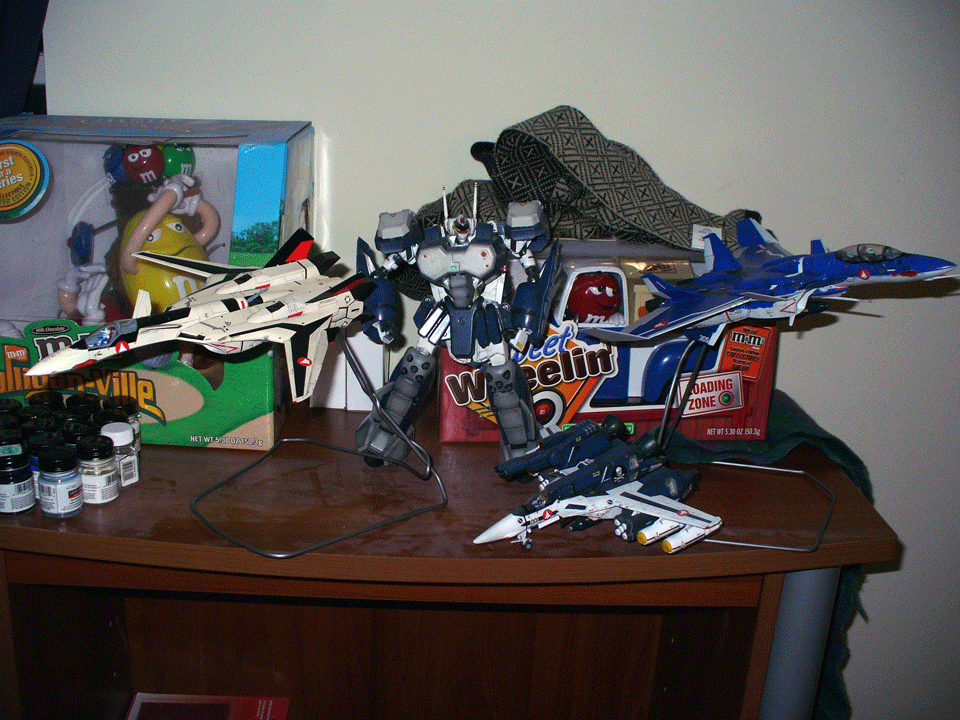
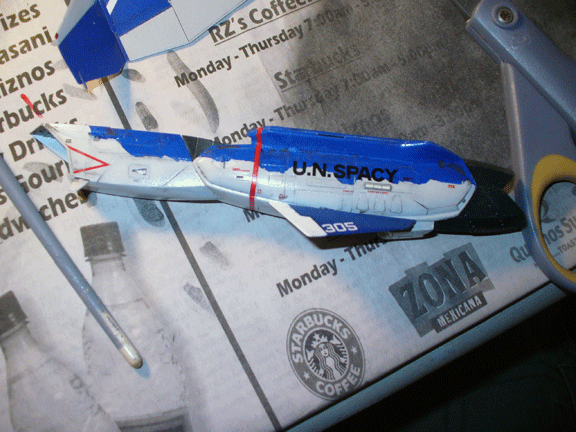
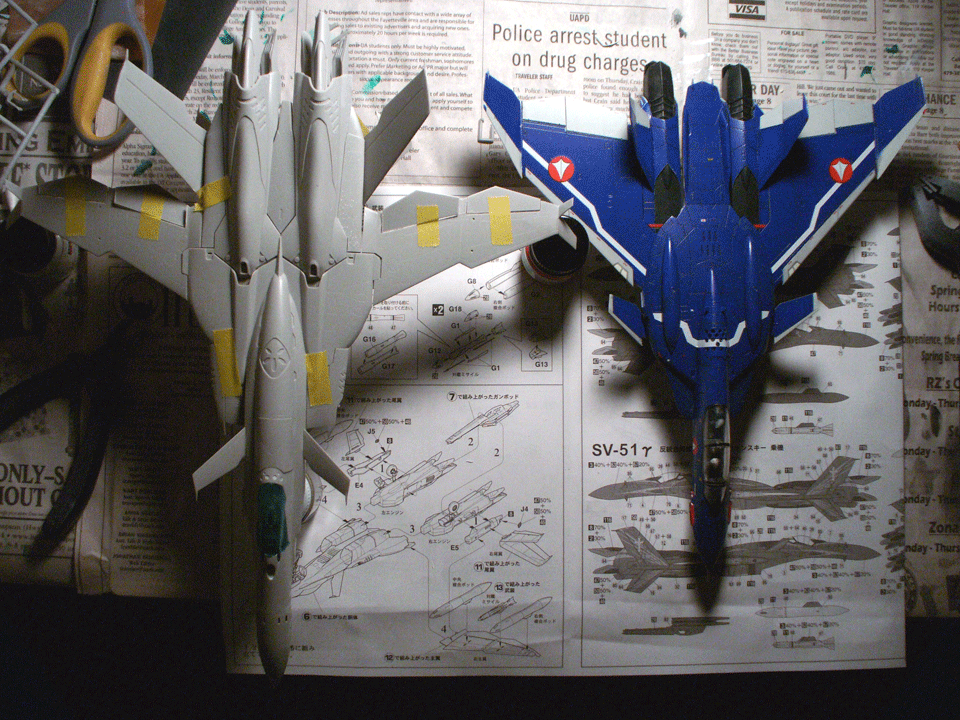
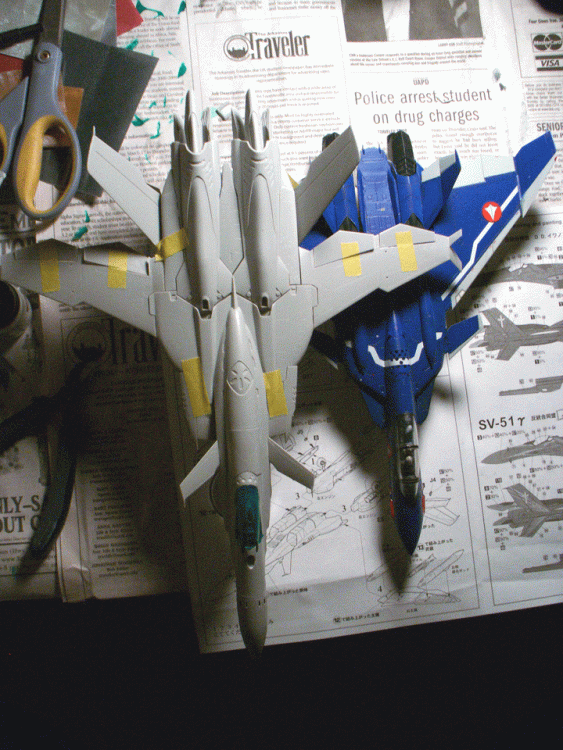
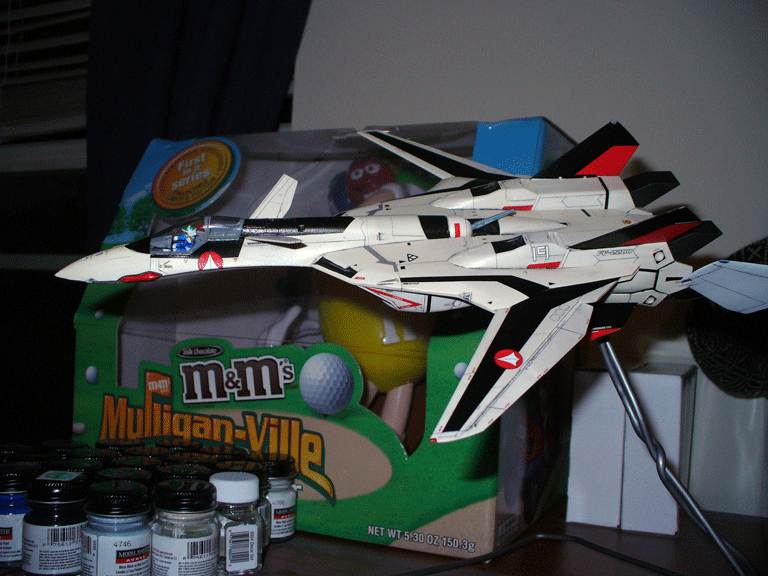
And of course, the always needed size comparision shots. Here is the SV-51 compared to the VF-0D. The SV-51 is so far, the largest macross model made by Hasegawa. It's huge!!! I love it. Well, that's it for now. Time for a lengthy sanding session. See ya tomorrow!
-
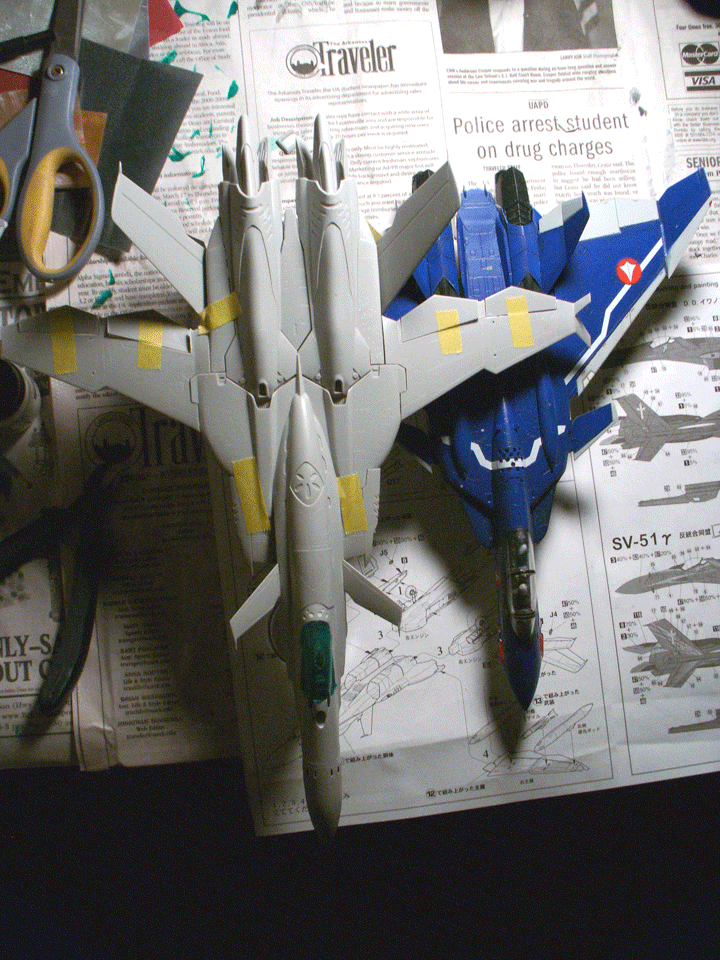
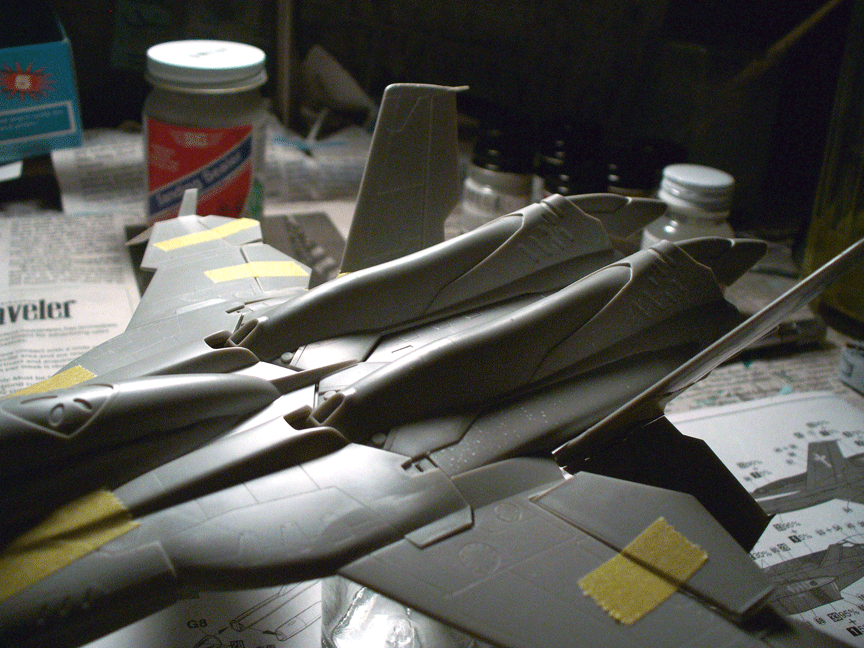
Once you've finished those major subassemblies, it's time for a dryfit! This will give you a sense of accomplishment and let you know if you need to do anything else. After the dryfit, I looked at what might be better when it came to the forward canards. With or without? The anime obviously has them with, but I can't help but wonder if it looks better without them. You decide.


-
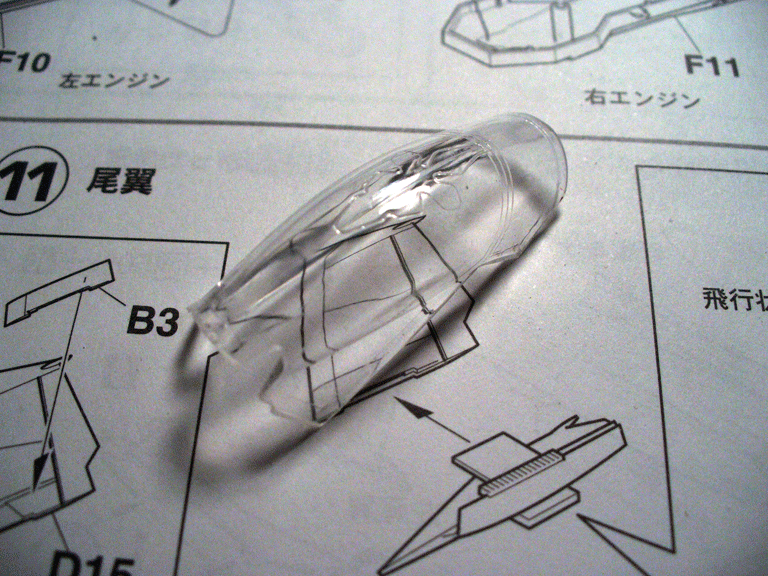
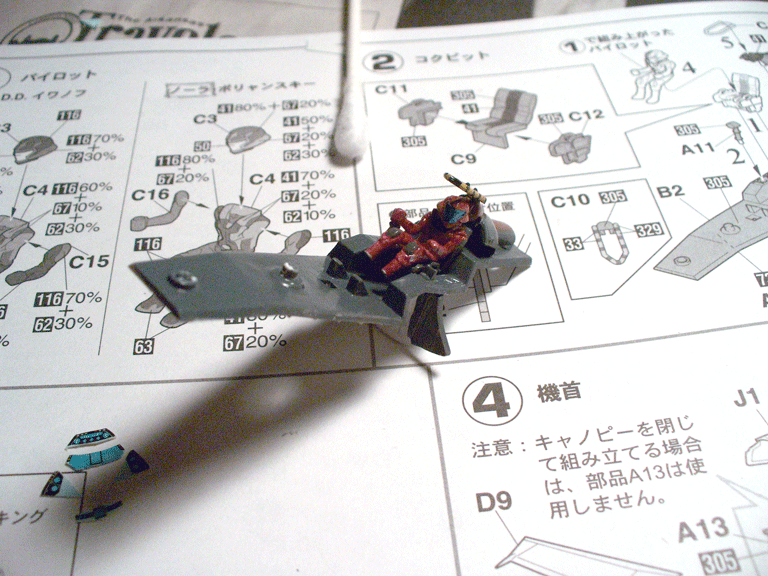
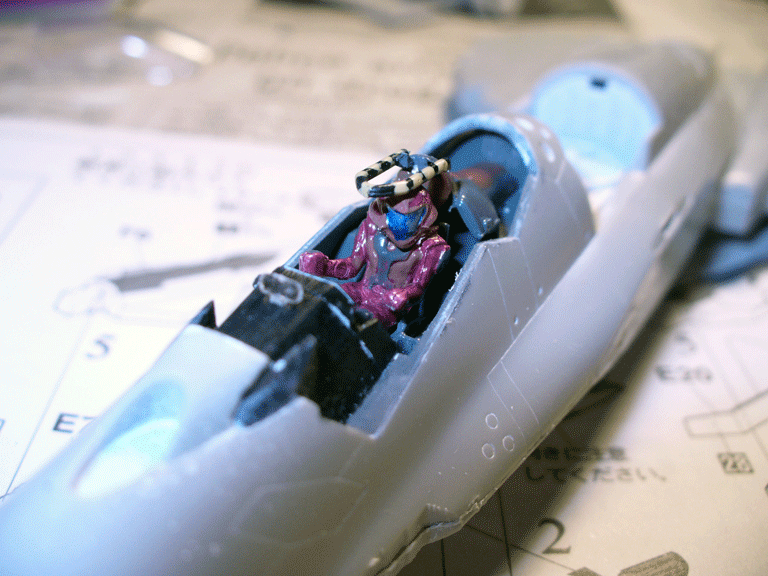
Update: Cockpit and canopy. Here are some shots of the pilot and cockpit. Also, a close up of the instruments. Also, the canopy. The dreaded center seam. What looks like it might complicate the sanding is the stenciled cross on the top. Don't worry, it will be covered with a decal later. Just start with a 400 grit sandpaper, wet it, and sand for a bit. Then switch to a 600 grit paper, wet it, and sand some more. And if you have anything higher than 600 grit, use that. Once that's done, test it in water by submerging only the top of the canopy. You want to see that it disappears. Once you're satisfied with your sanding job, dunk it in Future floor wax, dab the bottom of the canopy on some tissue to remove excess future, then let it dry. DO NOT TOUCH IT! Here is the finished product.


-
Update: Side gun turrents. 3 pieces each side. Very straight-forward. I love the gatling gun sticking out.

-
Update: Gun The gun is 6 pieces and are stacked on top of each other. Glue the two halves of the main gun together, then pancake the four layers on top of it. I'll be sanding the glue off of the main section tomorrow after it's had time to dry.


-
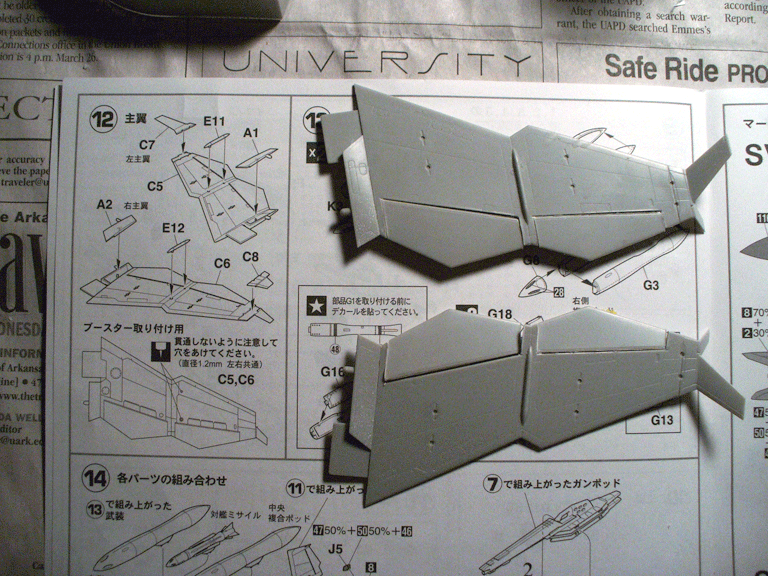
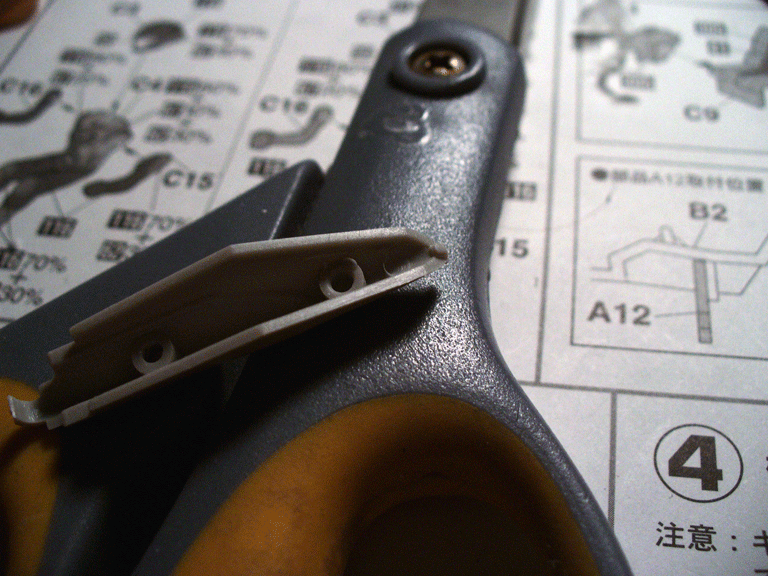
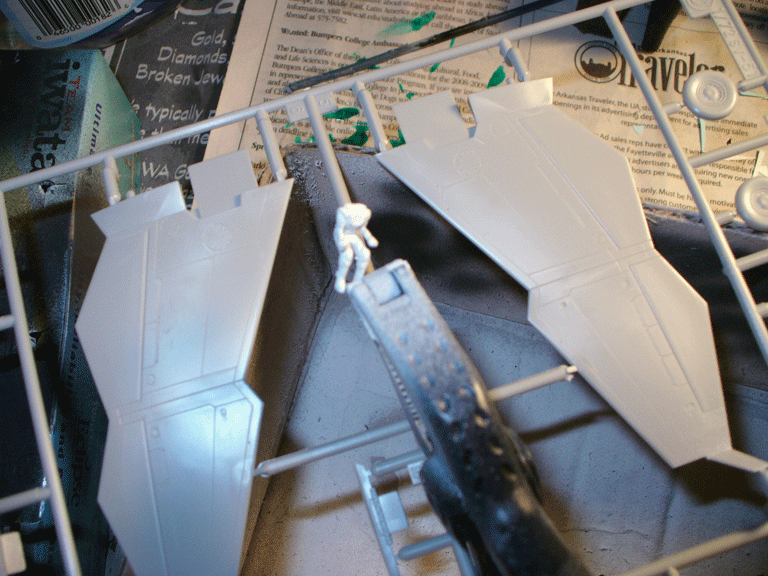
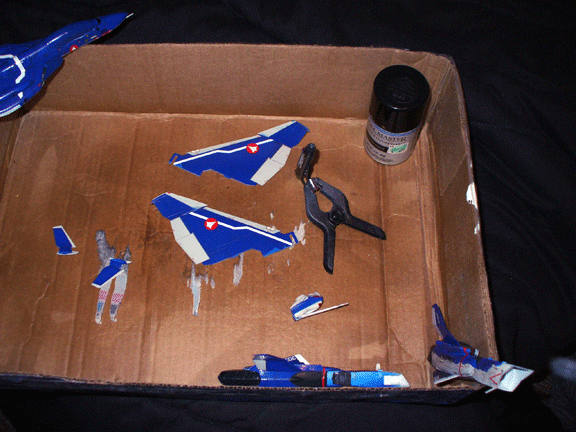
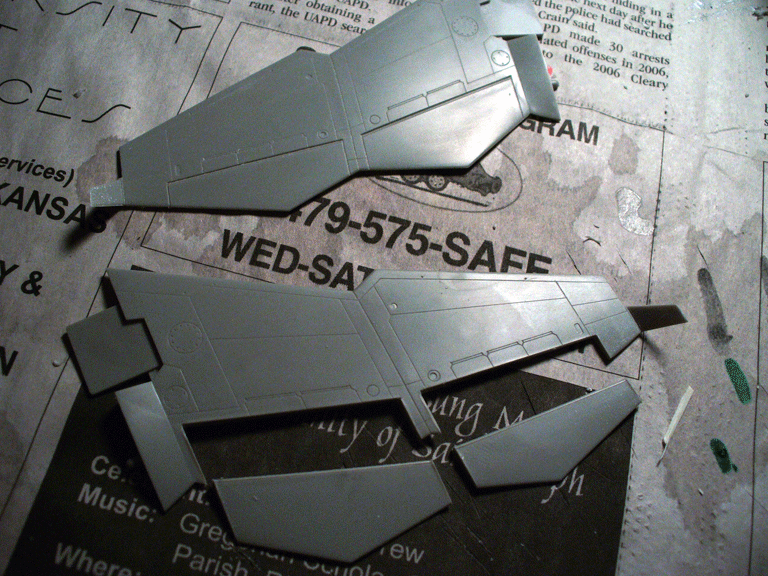
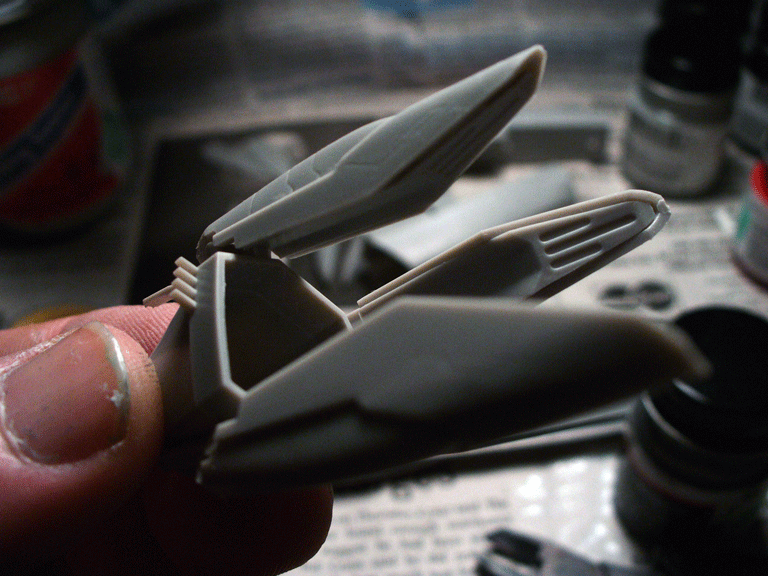
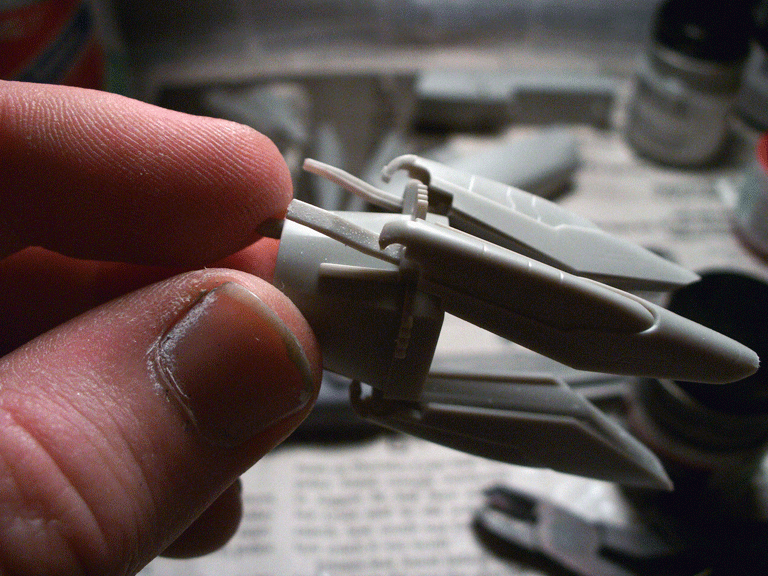
Update: Wings The wings are straight-forward. However, I wanted to do something different. I cut the flaps and will reposition them later either up or down. All I did was cut with my x-acto knife along the recessed lines very, very slowly. It's best to use multiple cuts instead of a couple heavy pressure cuts. This helps avoid any stress fractures or breaks on the wing. But as you can tell in one of the pictures, I sneezed during on of the cuts and kind of extended the cut farther than I wanted to. Oh well.

-
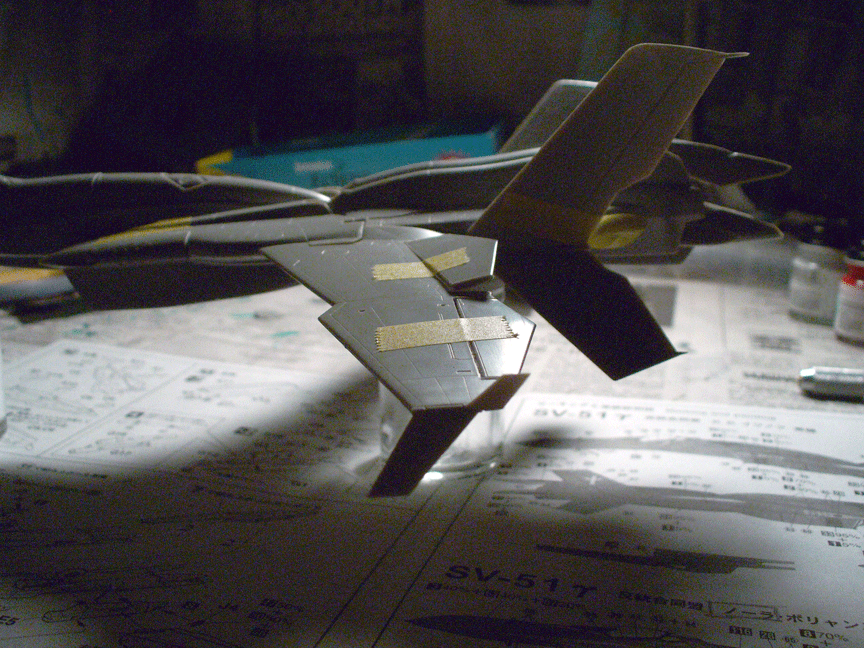
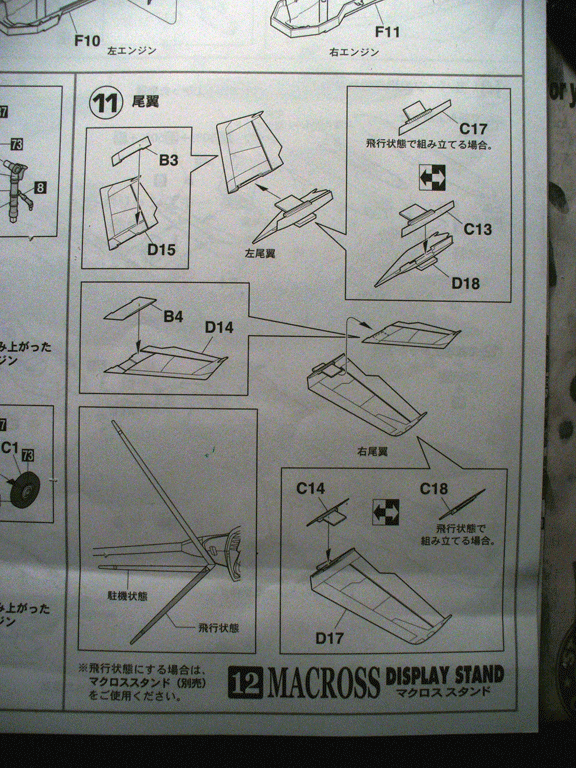
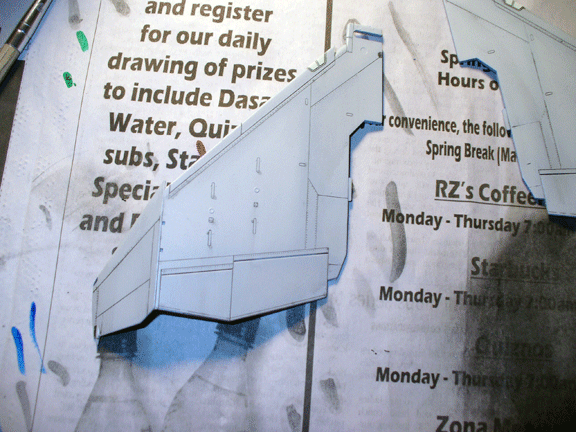
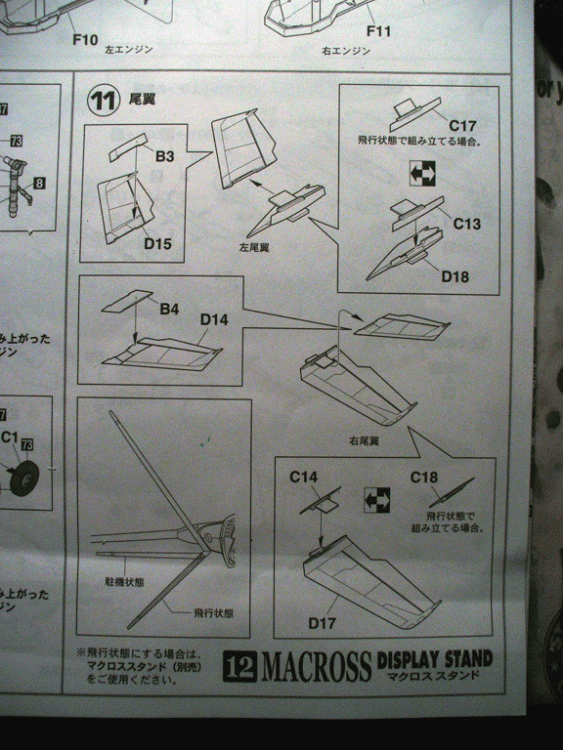
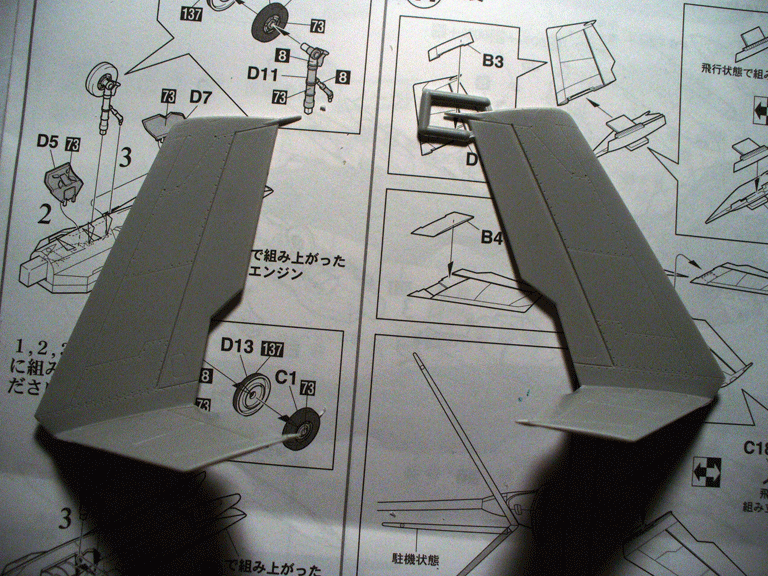
Update: Read Stabilizers. There are two ways of assembling the rear stabs. One is in the inflight position, the other is in the landed position. Since this bird will be in flight, I assembled it as such. 4 pieces each side. The main large part has a little flat part that needs to be glued to the bottom of it. Then the smaller stab is glued with the piece that allows for the angle, in this case C17 and C18 are the required pieces. This is the correct angle for the inflight position. Notice it's roughly a 90 degree angle.


-
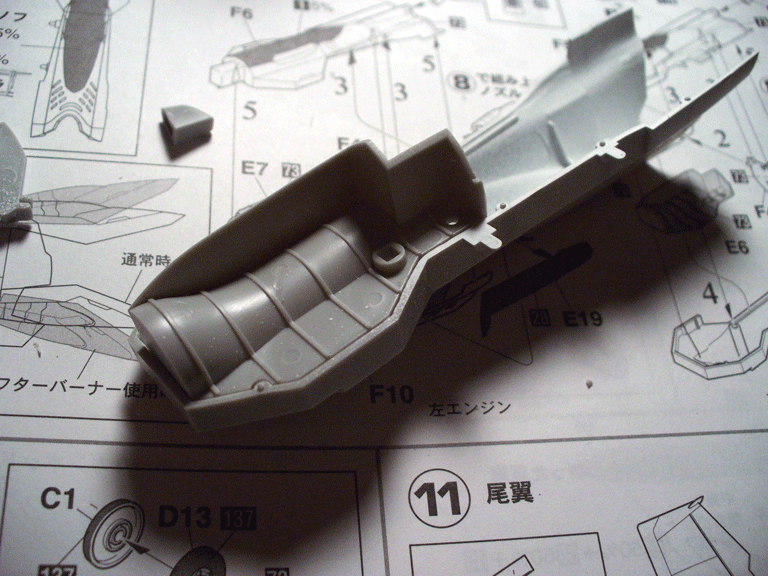
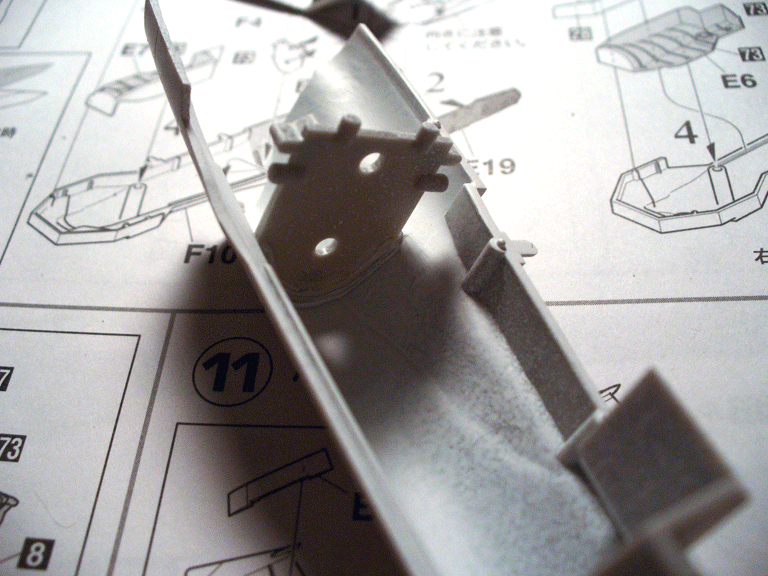
Update: feet/burner things. Each "toe" or "feather" is two pieces for a total of three toes each side that attach to the engine exhaust similiar to the YF-21 exhaust. Also, you can see when the clippers clipped it from the sprue. These pegs need to be filed or shaved off. When glueing the two pieces together, they may not look like they belong in the right spot, but rest assured they match perfectly. It's just an illusion with angles. Also, the end that attached to the exhaust is very loose. This is beneficial since you can attach the two together after painting. Here is the whole part assembled. The toes are very, very loose. But don't worry. This becomes a Nonissue when attaching it to the legs. Also, the white paint on my thumb has been there for the past three days. Friggin' enamel primers.

-
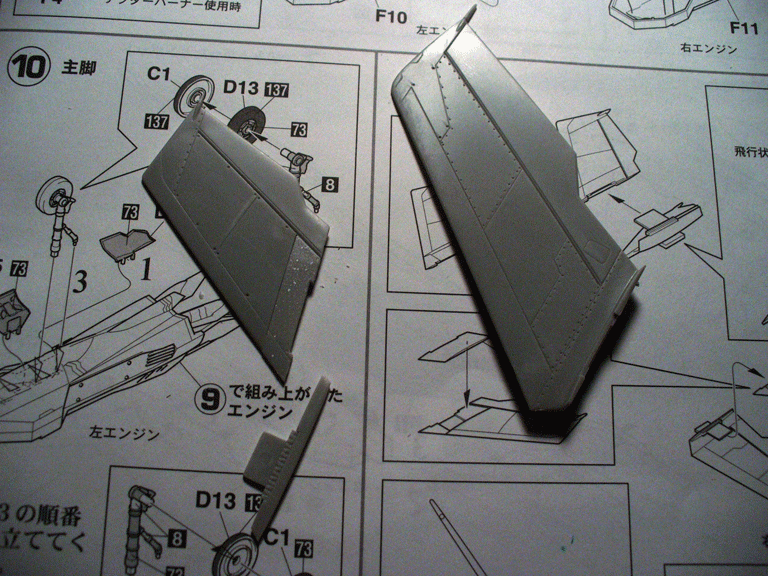
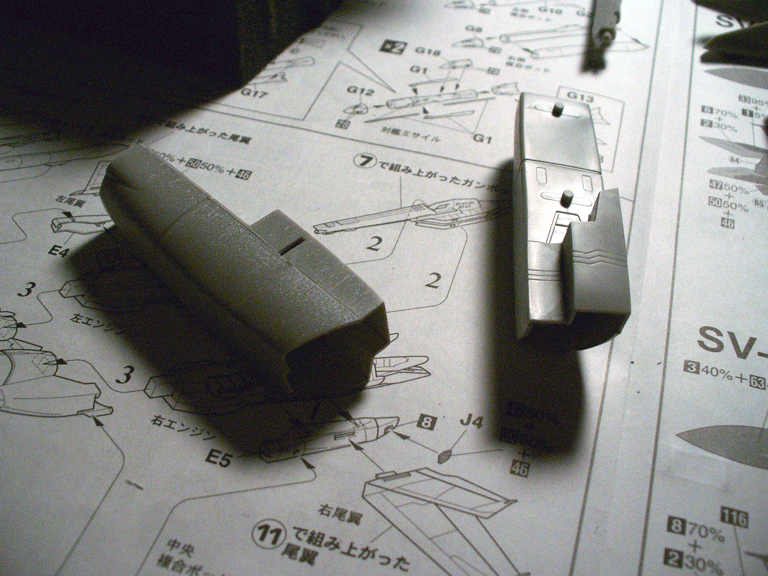
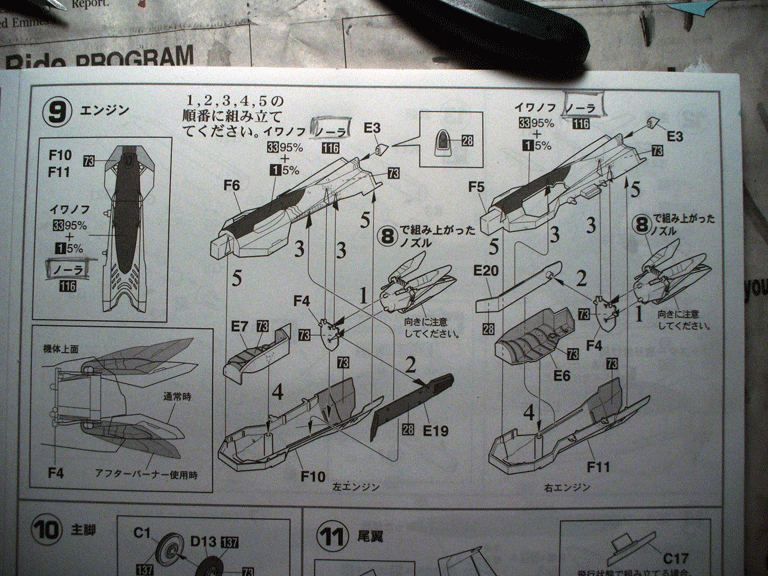
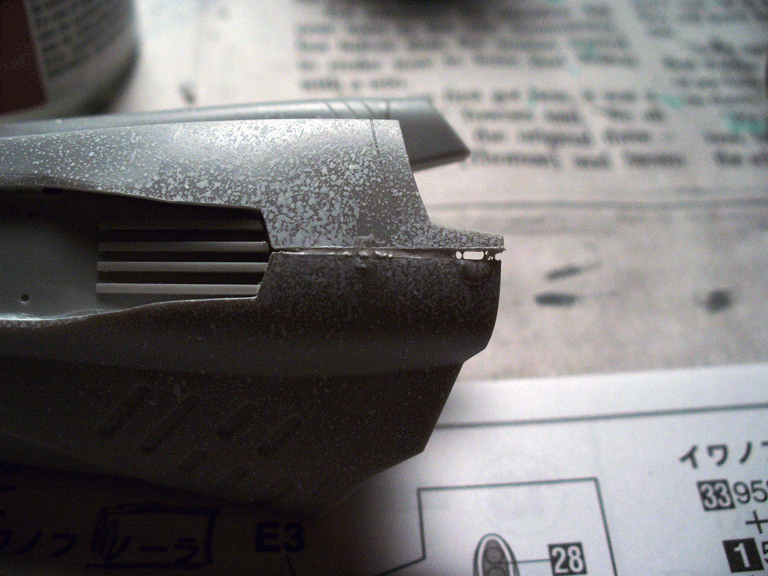
Legs/engines update. This one might look tricky, but it's straight-forward. 6 pieces each side. I glued the wheelwell part to the bottom first, then the piece (F4) that holds the foot/burner in place. Make sure that F4 goes in front of the raised lip. Also, make sure that the wheelwell piece is flush with the connecting part. If it's raised at all the whole part will not fit properly. Next, attach the long, flat piece to the bottom. It looks like it might not fit properly, but it does. Then I finished the whole leg. However, sometimes it won't always be a perfect fit. Here's my problem area in the read of the leg. But enough filler and it should be good.


-
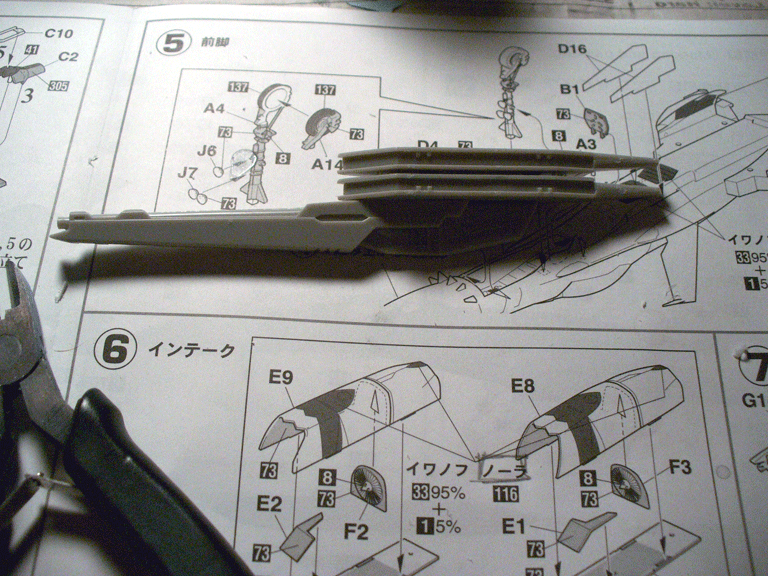
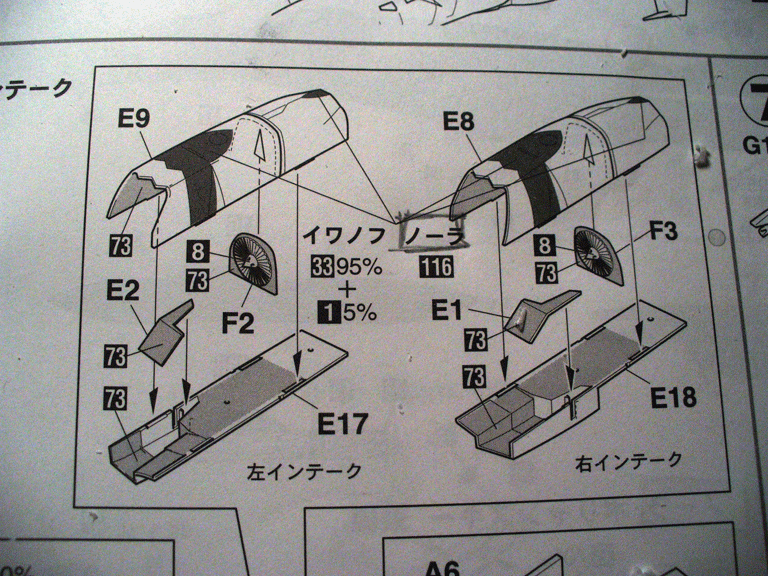
Next update: intakes The intakes are pretty stright forward. 4 pieces each side. I assembled the angled piece to the bottom (according to the sheet), then the intake fan to the top. Afterwards, I painted the inside with camoflage cray since I didn't have aircraft gay, and the fan with enamel chrome silver. Then I assembled the whole part together.


-
Bandai 1/72 Scale Macross Frontier Plastic Models
Rockhound replied to Graham's topic in Hall Of The Super Topics
Yeah, looking at the poster behind the Vajra, it actually shows the phases of transformation from the jet to gerwalk to battroid. -
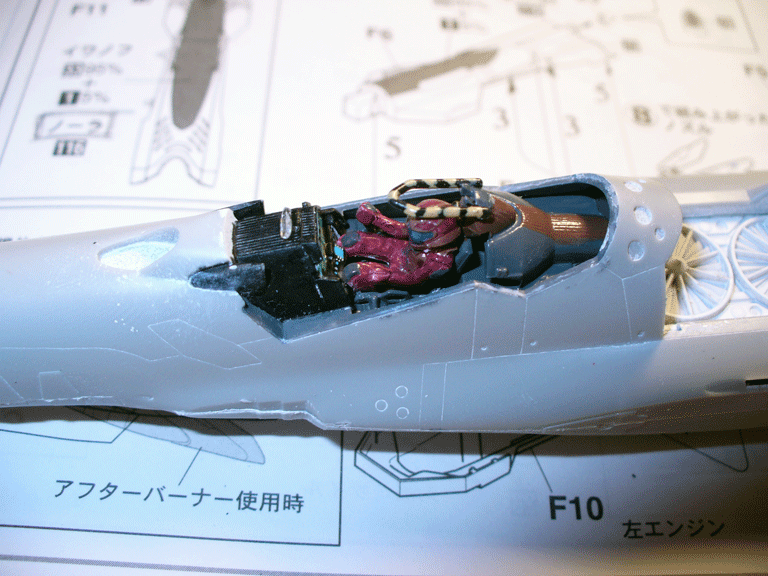
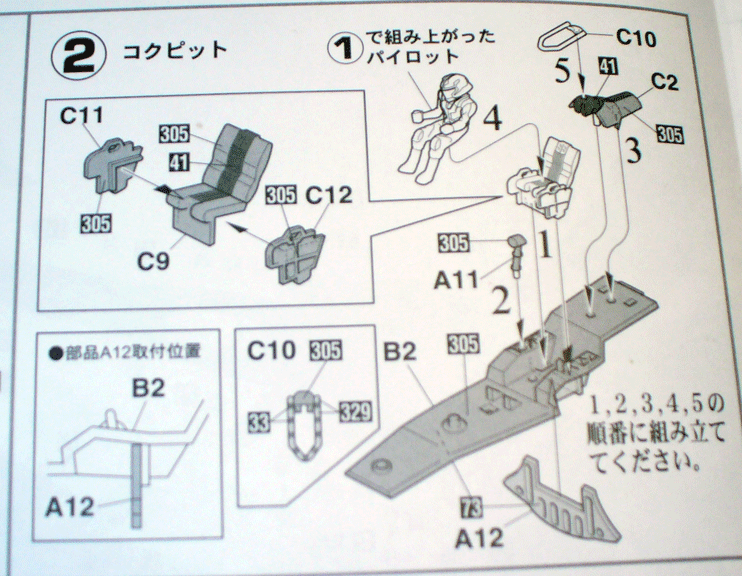
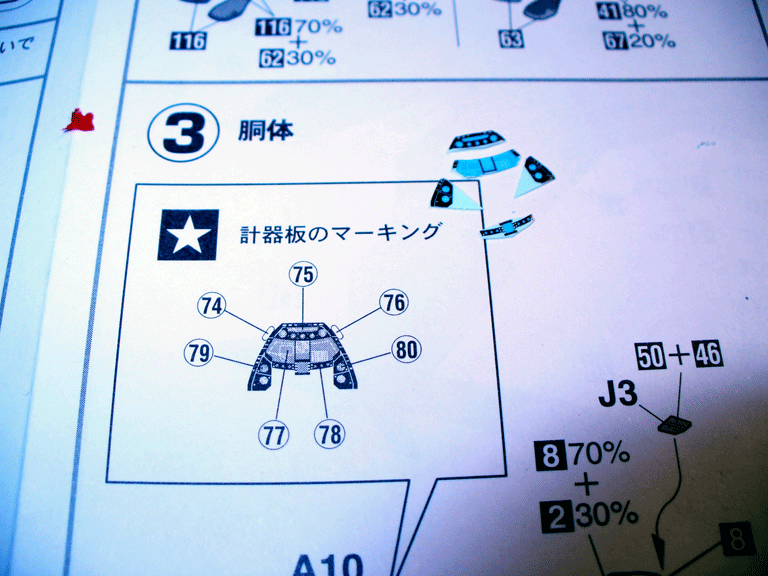
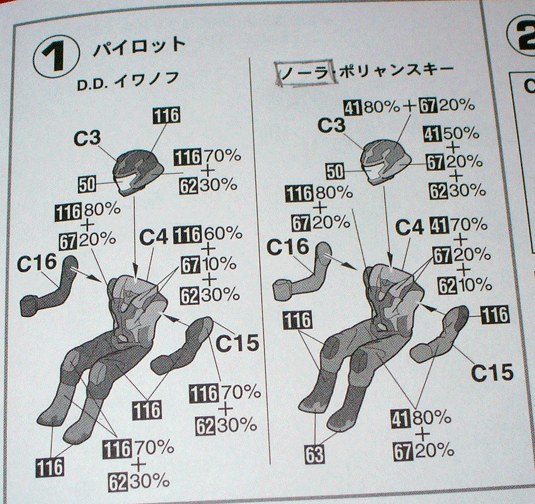
I then assembled most of the cockpit and then primed it. After I primed it, I went back to the pilot and started painted her. Unfortunately, my battery on the camera was going dead so I didn't take any shot I felt didn't need to be taken. But, I mixed up some red and a crazy purple/red and got a pretty good color. Then I hit the highlighted curves with the same color mixed with a little white for a good contrast. I then used some dark gray on the raised surfaces of the shoulders, knees, and life preserver thingy round the neck (116 is RLM 66 Schwarzgrau for ModelMaster line). The visor was dabbed with some enamel chrome silver from ModelMaster. I always liked that silver over the others. After that dried for a bit, I hit it with some clear blue. I then painted the whole cockpit in Gunship Gray (305 according to the Hasegawa paint guide.) For those that didn't know, the paint guide provided by Hasagawa does infact use mostly ModelMaster paints. I found this out by looking at the barcode and found that the numbers for the grays are the exact same as the ModelMaster codes, as well as those weird RLM colors. The brown line down the middle of the cockpit was mixed from olive drab, tan, and red. The ejection handle above the head is painted while still on the sprue. I painted it black first, then hit the yellow lines (I didn't have yellow so I used tan.)Then the back was painted in the same gunship gray. The order for assembly is just like what the instructions say: Floor, attach seat to floor. Then I attached the rounded back section, and then the flight stick. Once I painted the flight stick, I attached the pilot. Unfortunately I had to cut off her feet (didn't realize she was diabetic) and shave some of her butt to get her to conform to the seat (shame too since I'm a fan of dabutt). Once the pilot was in place, the last thing I attached was the ejection handle. The pilot is pretty much impossible to get in if the handle is already glued in, if you wait to place the pilot AFTER assembly to the fuselage that is. Now, before attaching the the cockpit to the top of the fuselage, you have to decal the instrument panel. It's just much, much easier to do the decalling first. And of course since this was the last picture I took, I suddenly discovered the macro setting for my POS camera that I've had for almost 4 years... All this time, I could of been up close with these damn shots. And then my batteries died. You can see from the sheet the instrument panel is in fact 7 DECALS!!!! OMG!!!! Don't worry. The two side mirror decals can be painted on, so that leaves you with five. To do the instrument panel well, you need to paint the whole thing black first, as there are still some exposed surface. Then, cut your decals as close to the edge as possible. This is especially true for the 3 middle decals. Once cut, place the middle blue decal (77) first since it's the deepest one. Then do the bottom middle (78), then the top middle (75). Once those three are in place, slide the 2 side decals on (79 & 80). These should be cut as close as possible also since the panel pretty much rests on the pilots legs. Pictures will be posted once I get new batteries. That's all for now. Happy modelling! EDIT: Some grammar errors


-
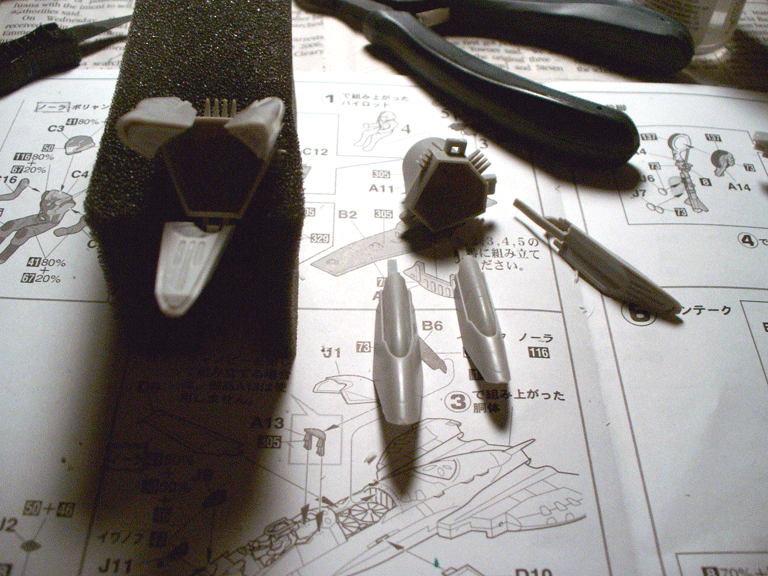
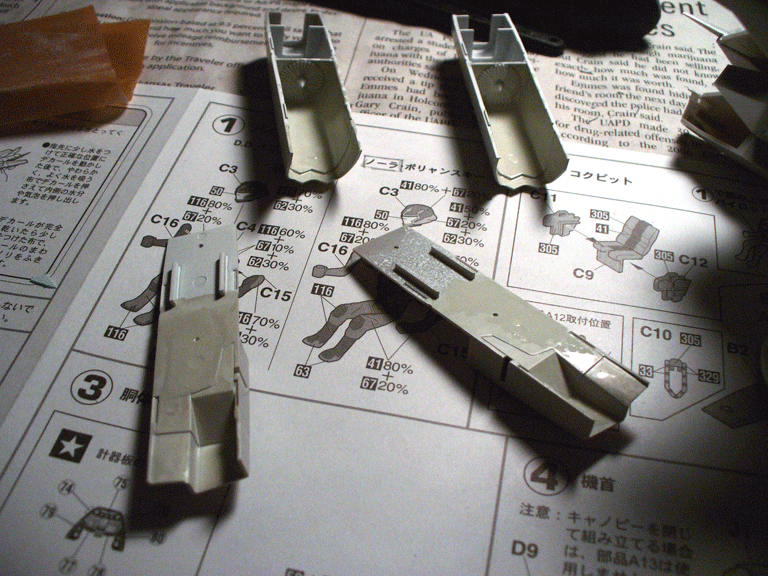
Evening modellers! Here's some updates, mainly the pilot. Everyone pretty much starts with the pilot. After all, how can a plane fly without a pilot in it? This instruction panel, albeit confusing to look at at first glance, but it pretty simple to follow. What makes it look confusing is the paint directions. The body itself is only 4 parts. I first assembled the body and arms, but left the head on the sprue. It's easier to paint the body without the head, and it's easier to paint the head on a more stable point.

-
Looking for screenshot for model custom idea...
Rockhound replied to Rockhound's topic in The Workshop!
That's an awesome thread you have Chas! Your gerwalk came out perfect. I'll definately be looking at it when it comes time for the knee and shoulder joints. However, I'll be making the flying, feet forward, missiles blaring, spinning in circles scene so I won't be too concerned with worrying about it standing up. Didn't you make the fully transformable Valk a while back? All gray, all sexy, transformable gray valk? -
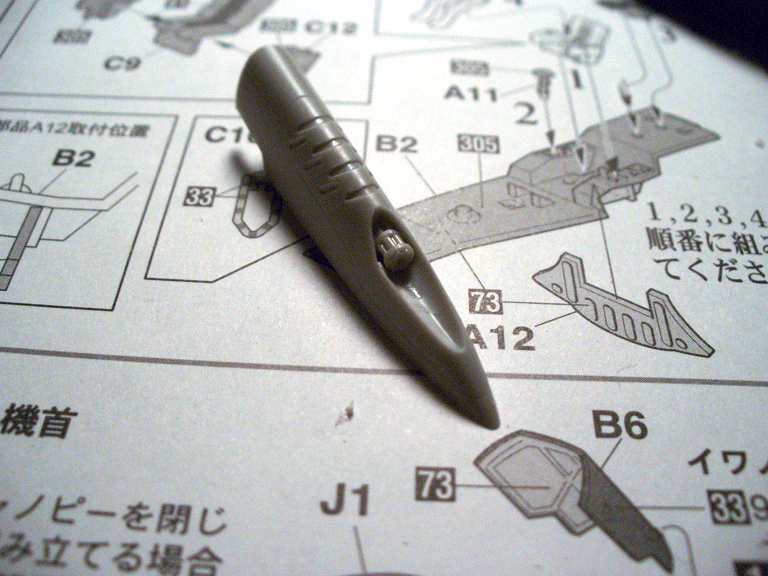
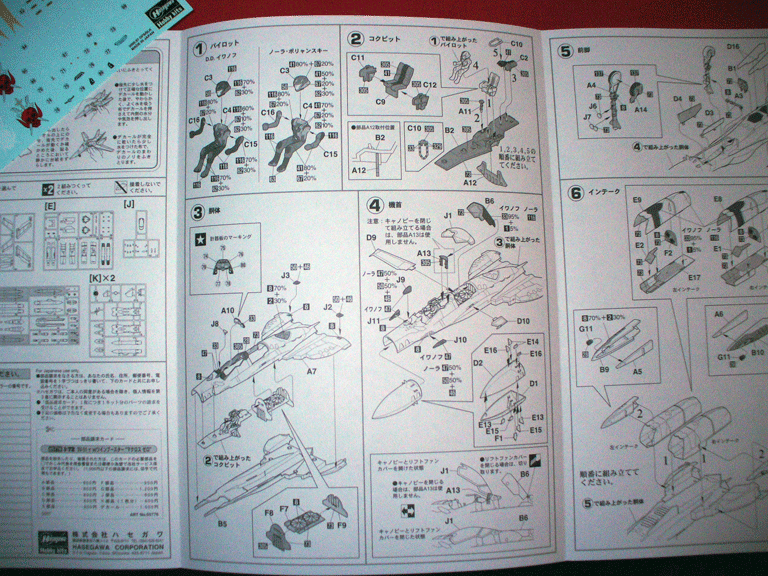
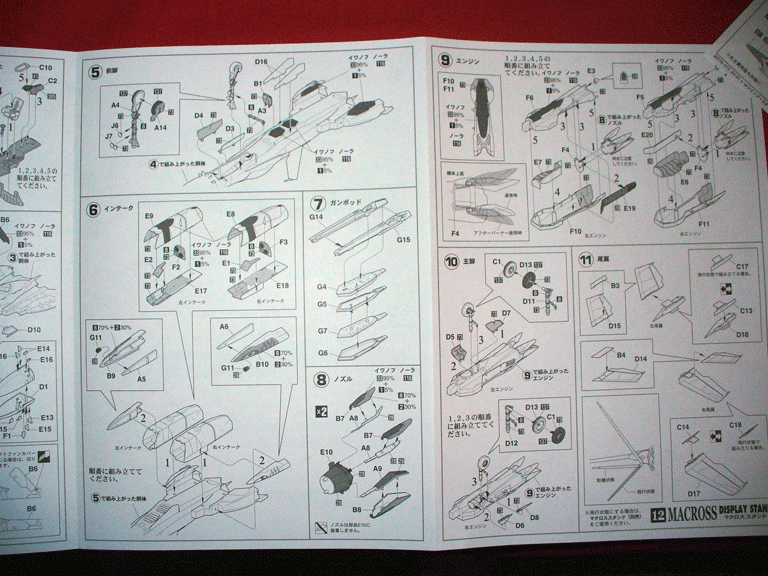
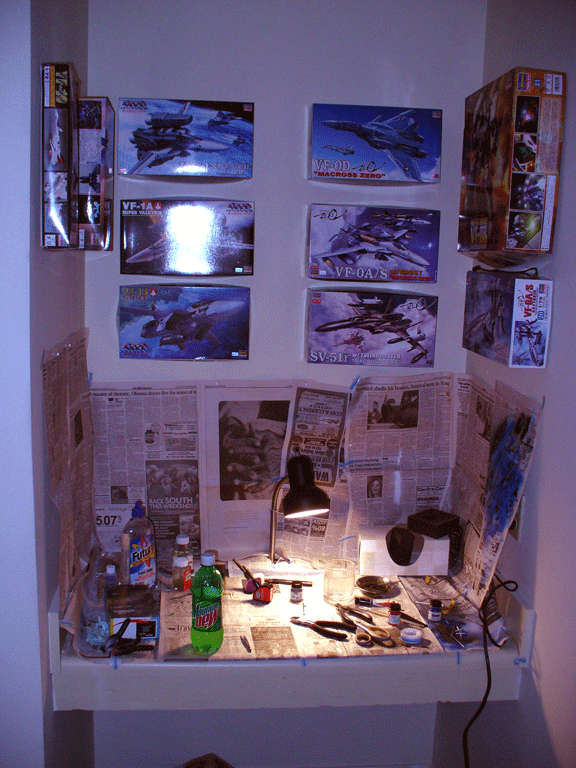
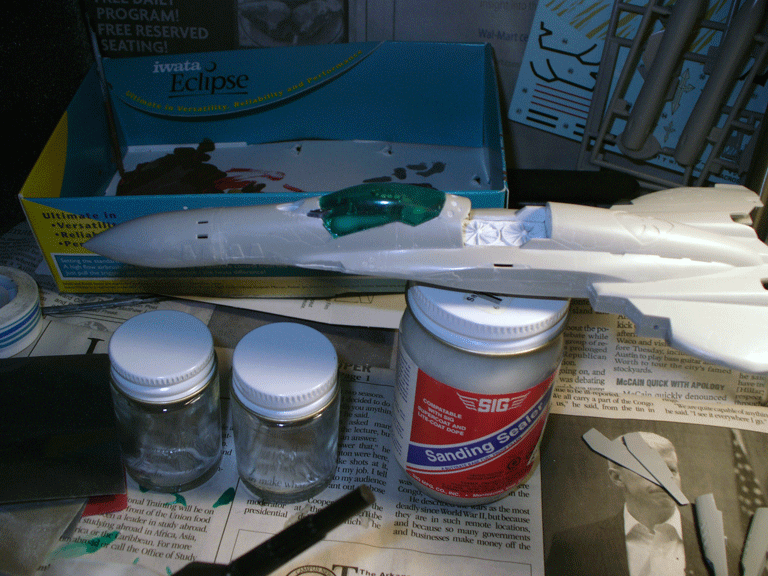
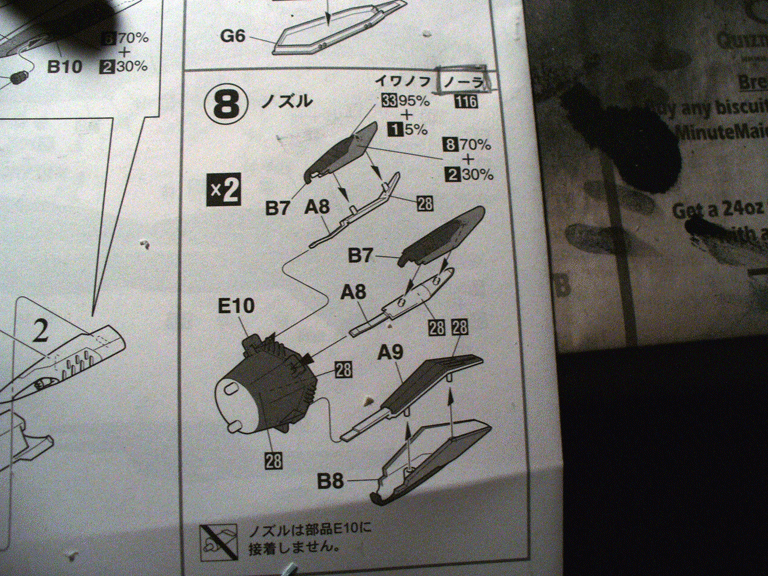
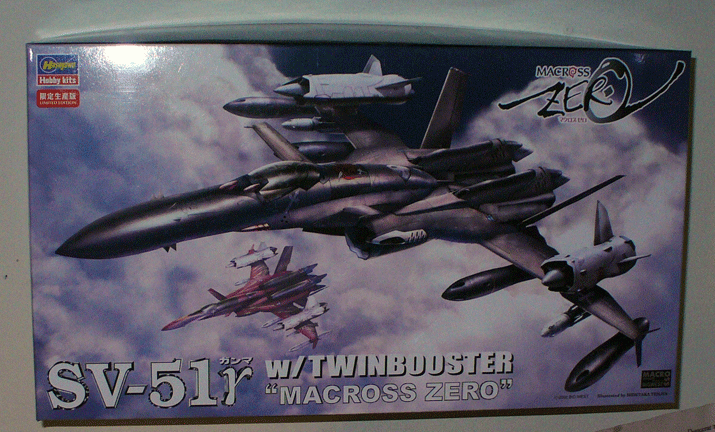
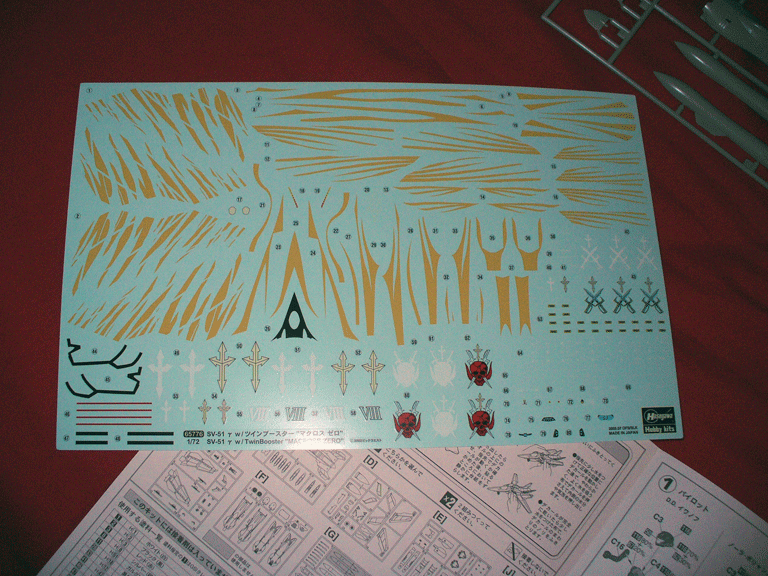
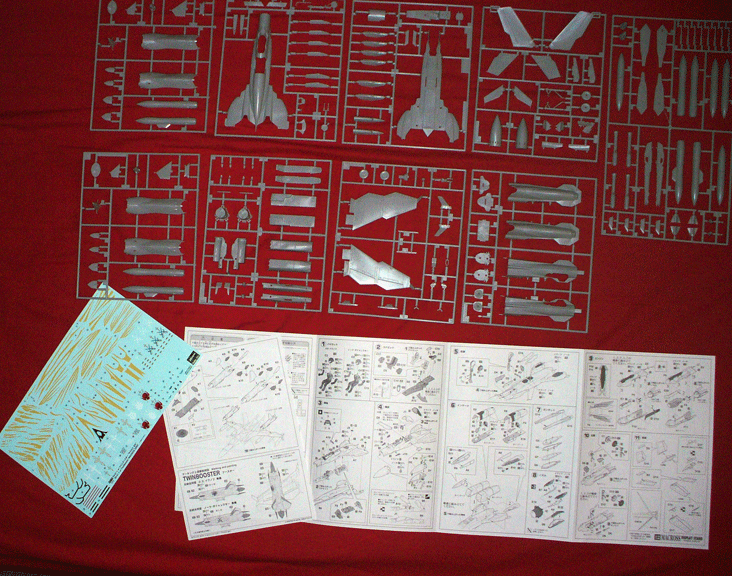
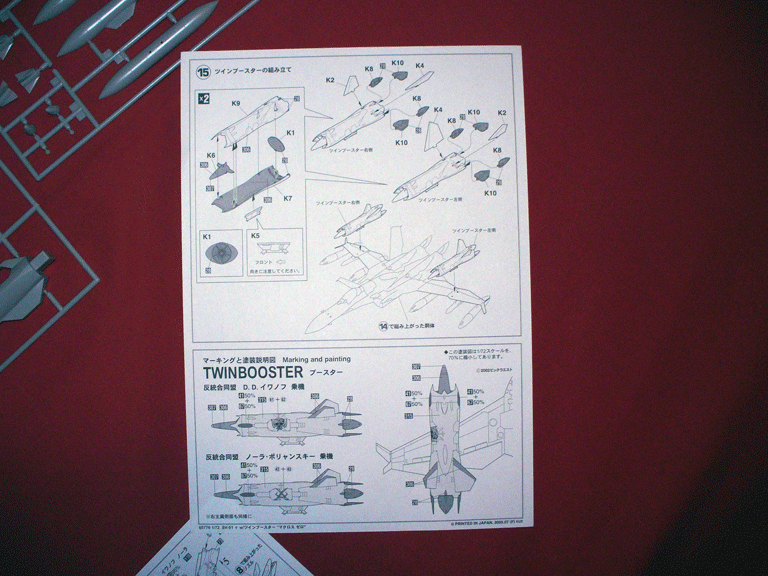
Good evening modellers!! It's time for an all-new episode, this time featuring Hasegawa's SV-51, now with low-calorie twin boosters! Yay!! I know you must be saying to yourself, "Rockhound, what mesmerizing feats will you pull of this time!" And your answer would be, "I"m just hack trying to get by footloose and fancy free." Now it's time for--- "How to build a model with minimal skill but maximum payoff! (and possibly stress out in the process.)" Looking at the model, it does in fact look intimidating. Alot of parts, insane paint scheme, nightmare decal work if you build the Nora type (which I will be in this WIP.) Since this is the first time I will be building this kit, I'll take it slow and carefully weigh and measure each step and hopefully any readers that have advise or criticism will let me know if something looks like it could be done better. Let's start with the overall kit. The box art is lovely. That was my main inspiration for even building this kit. The sheer challenge and uniqueness of the model just screamed build me. Here are the instructions. They look complicated with some many parts, but I'm sure it will get easier as we build. A few things I noticed off the bat was the amount of internal painting even before the main pieces are built. Not to worry, it's alot of flat space and single color application, very easy to do. The decals. I wanted to do the Nora scheme because it looks like a viscous fighter with the yellow stripes. I am not, however, a fan of the main color in the anime and the kit. I'll be looking to keep the red and maybe toning down the vividness of it with a possibly darker, richer red. And for giggles, here's my workbench and model collection so far. And here's the YF-19 I just finished this afternoon. Anyways, that's all for today. We'll start the actual build tomorrow! Till next time, Enjoy the Show.


-
Good evening! I've got the VF-1S super model, and the VF-1S super valk battroid is on order but on its way. I'll be working on a GERWALK custom (Hasegawa parts) and I need a good reference picture. Namely this specific one: In the Macross series, it is the episode where the Super valk is introduced and Hikaru is piloting. The exact scene I'm looking for is when he fires off the missiles, swings the legs forward, and spins around while still firing off missiles. I'll be trying to recreate that scene with the super valk: jet nose/canopy/body/wings/top fast packs, and the valk battriod arms/legs/corrosponding armor packs. The missiles will actually be the front ends of the missiles in the valk weapon pack attached to the ends of fine, stable wire, and some torn cotton for jet trails (it maybe in space, it's all about style.) If anyways could help me out, send me a PM or just post into this thread. Any help would be greatly appreciated. Thanks! Rockhound
-
Man, all these great mods people are doing to the "toys" is enough to make a person switch from models! Those are awesome! Right now, I'm trying to figure out the best way to do some flap work on a YF-19 hasegawa while in flight. Time for research.
-
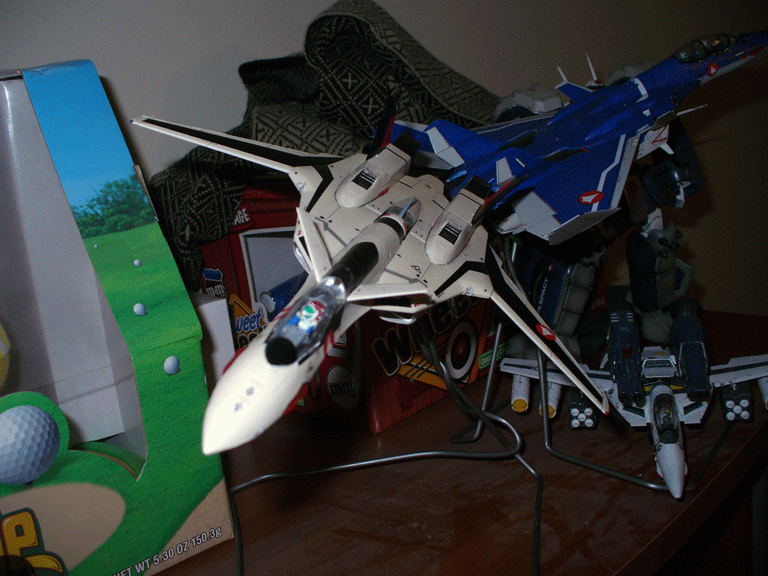
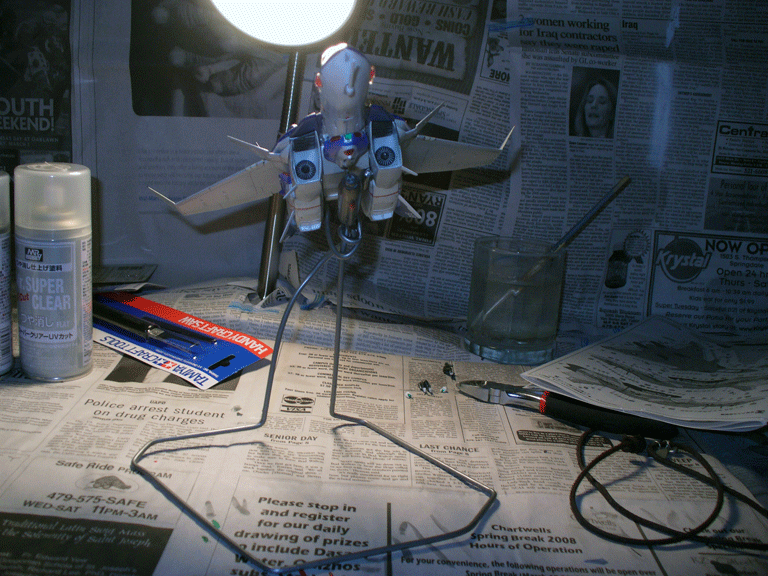
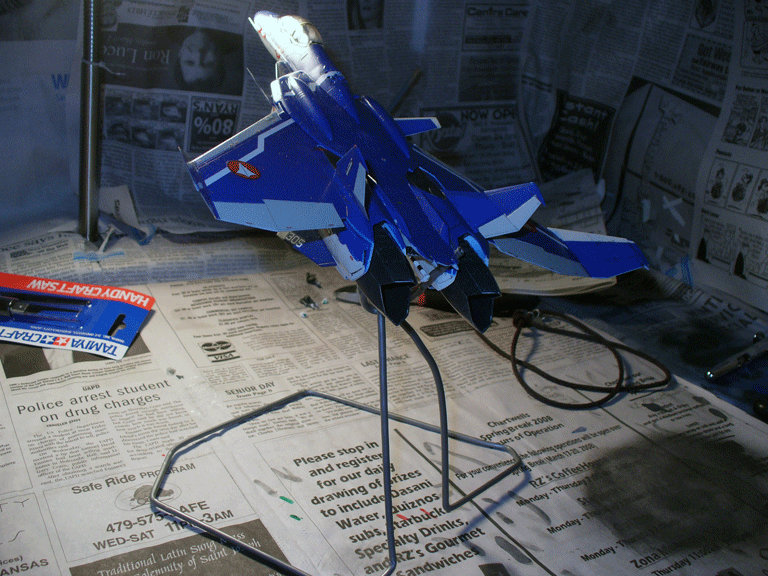
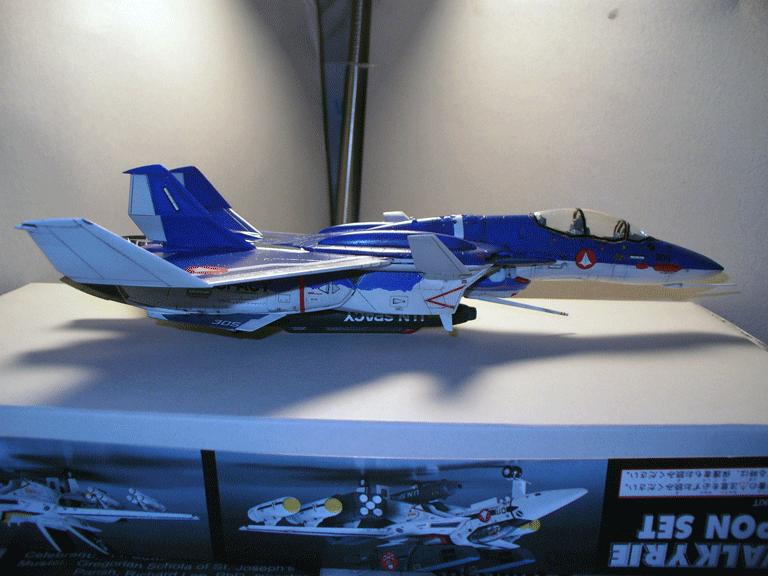
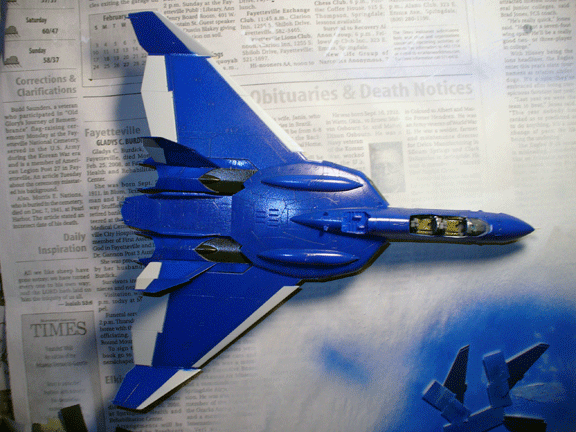
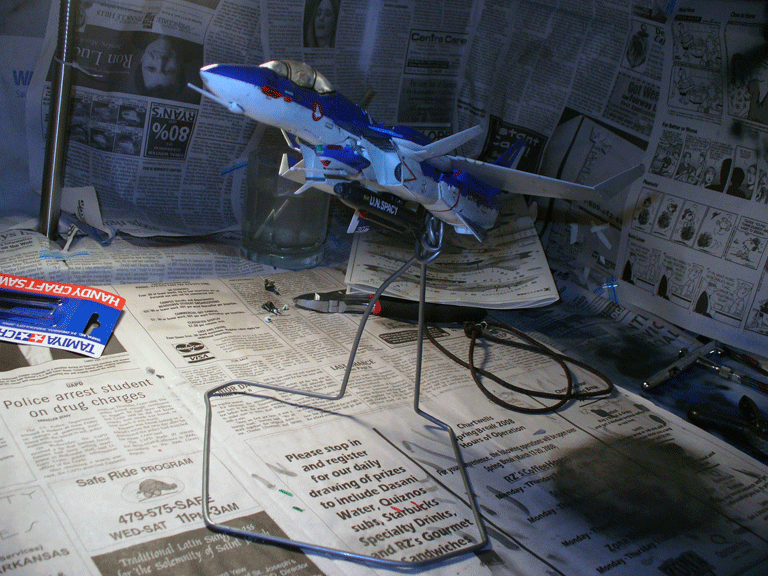
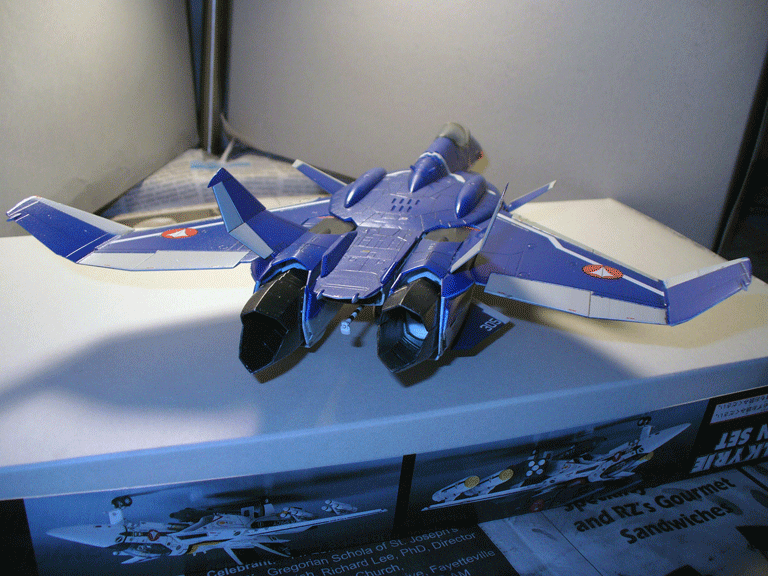
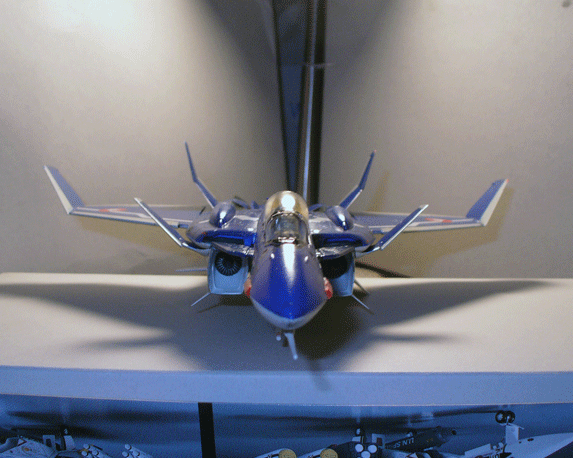
Thanks for all the awesome replies guys! Blue is a tough color to use it seems, especially when you're having to contrast it with color such as white or off-white. I added an in-flight stand I made out of a heavy coat hangar. Because of the size f the kit, it needed to be sturdier. Plus, since I made it wheels up, it just needed to fly! Last but not least, the final size comparison to the VF-1S. See you guys after finals! Rockhound


-
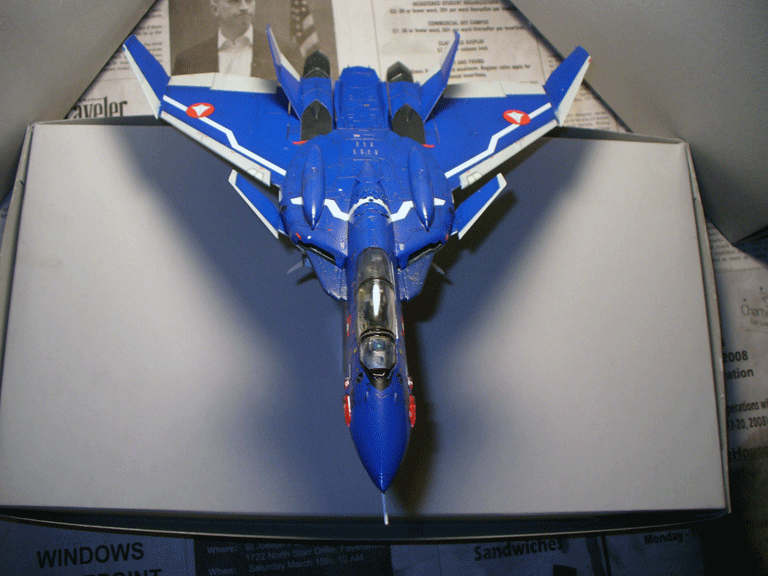
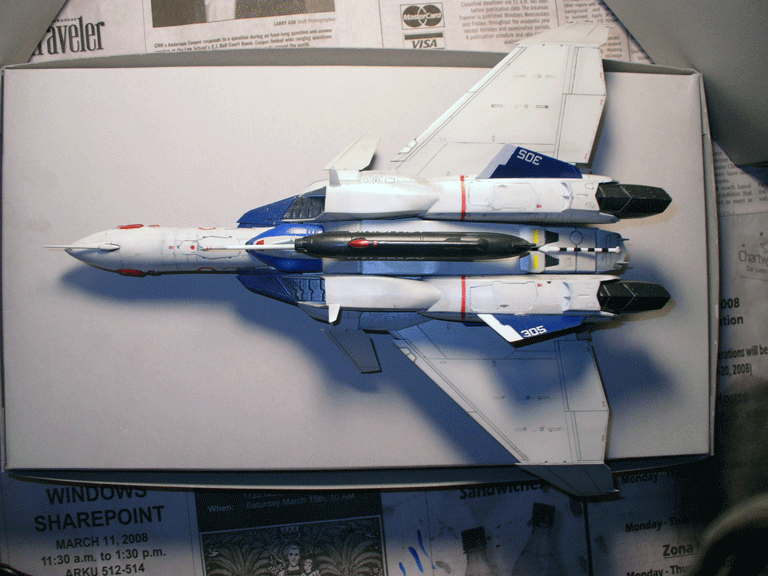
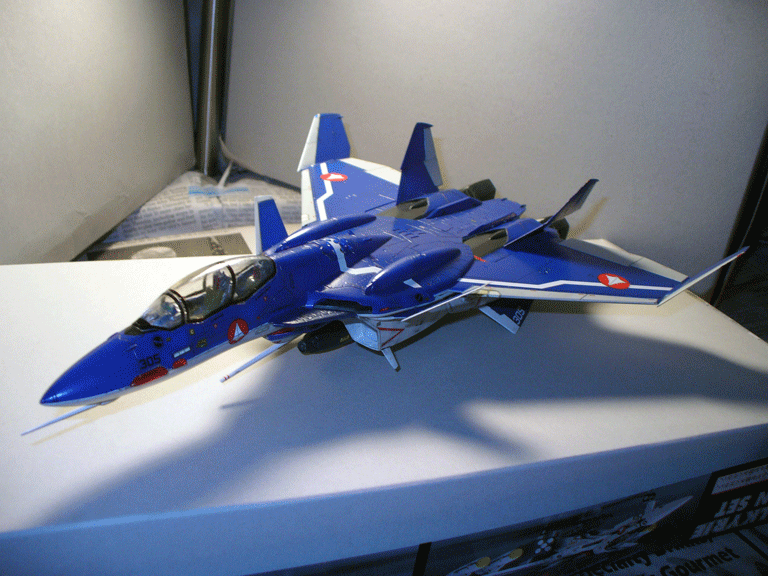
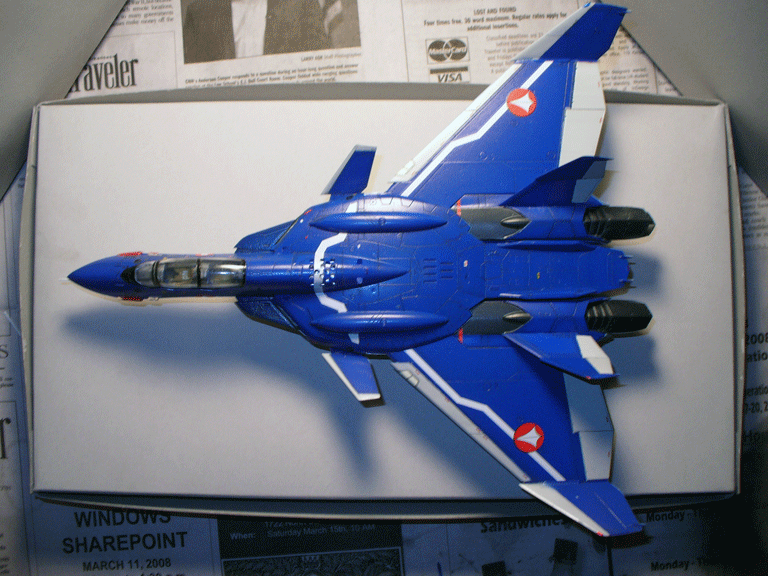
Finished! Here are the pics. Some lessons: 1. Never try to mix enamel and acrylics when having to paint in layers. Use one or the other. I advise acrylic easier to use, easier to clean-up. 2. Be patient! There's a reason why good models take 3 weeks to a month or so. I tried to crank this out as fast as I could, and it shows. 3. Be sure you know exactly what you're doing when it comes to masking! Make sure you cover everything you need to avoid overspray. 4. Panel-lining is easy... if you know how. Make sure you use an opposing medium when lining: acrylic coat: black or gray oil paint and mineral spirits (not low-odor thinner for oil!), laquer coats: pastels, water, detergent (I still don't know how to do it.) 5. Let everything have time to dry! My problems were mainly fro the speed of building this kit, not spending enough time to throughly think ahead, not researching enough on pre-shading and panel-lining, and mixing paint mediums. Well, lesson learned and I'll do better on my next project once finals are done this week. Till next time! If you can't be naturally outstanding, be aggressively average. Rockhound


-
Decals are done, just waiting on the white strip on the airbrake to soften up some more so I can poke holes in it. I still need to clean up some wash on the legs, but all-in-all it's just waiting on the semi-gloss coat, holes in the airbrake, the canopy, and the pilots.


-
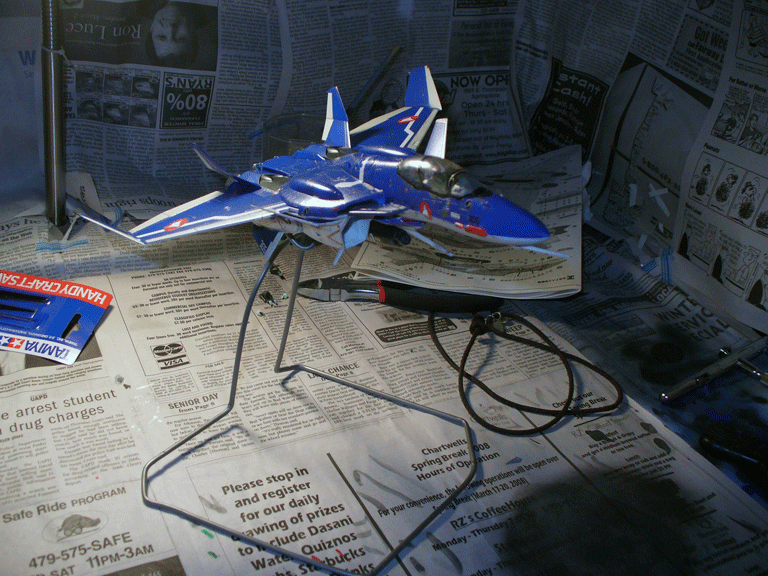
Panel-lining was finished. I wasn't too happy with some parts. It seemed I sprayed way too much gloss cat and now the lines kind of got flatten out. However, the parts I left alone, mainly the wings, canards, and stabs came out great. My main problems were with the legs. Here's a shot of the good lining. (I did't take any bad photos, my ego wouldn't let me.) Disclamer! I actually finished the lining and decalling as I wrote this update, but not the protective coat.

-
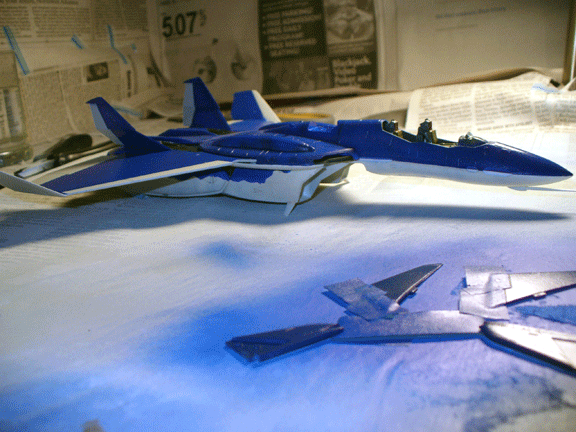
Model update: I painted the part that attaches to the back of the legs a dark gray, as well as the folding spaces behind the knees. I then hit the metal sections (the two spaces on the back thruster thingy- techincal term, the burner nozzles, parts in the intake that fold down during transformation, and the turbine/fan parts.) I also painted the gunpod gunmetal gray (seemed like a good choice till my Alclad II Steel gets here.) I also did a major assemblies dryfit to see how it all went together. So far everything has an ultra-gloss clear coat on it, ready for panel-lining and decalling. I'm kind of hesitant to do the panel-lining, only because of my somewhat unsuccessful attempts on my last two models. Since it's a laquer coat, low-odor oil thinners tend to strip the paint underneath them. I read in one of the earlier posts that you should use an opposite medium when it comes to panel-lining like water and pastels for laquer or enamel coats, and thinner/oils for arcylic coats (or somehting along those lines.) It wouldn't be too much of an issue if it was a white or off-white model, but it will really stand out with that blue paint. I heard about using water, black pastels, and some kind of detergent but I have NO idea how to mix it and/or use it. Any tips? Anyways, now I just got to wait for the coats to cure then attach them to their respective assemblies. Man, I hate waiting. I got three other models I gotta do, not including the two in the mail.


-
Not a model update but, Woohoo! Got some more new models in today. The VF-0A/S Battroid, YF-19, and VF-0S w/ghost booster, all Hasegawa. In a week or so I'll have my SV-51 w/twin boosters and YF-21. Also have bids out on the VF-1S and VF-1A Super, old school boxes. I'm afraid I might fall into my old trap, the dreaded BACKLOG!!!! Anyways, painting the drak gray parts in a few minutes, then assembling the legs but not attaching them to the body. EDIT: I want to try some flap work on my next model, either the YF-19 or the VF-0S w/booster. Has anyone done flap work on these models before? I know WM Cheng has done it on his VF-1A, very beautifully I might add, but I haven't seen this done too much on the others. Any tips, advice, etc, one could tell?
-
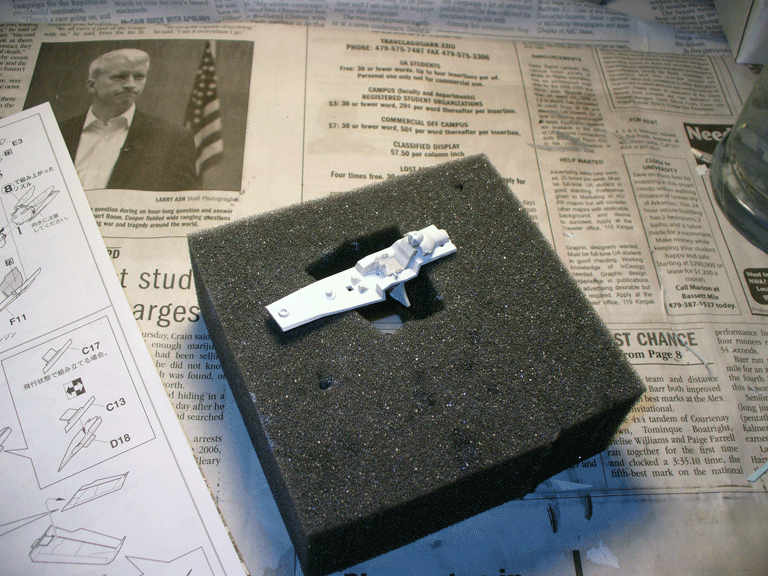
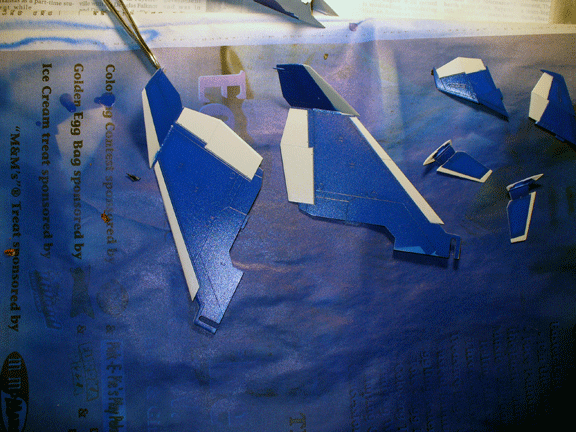
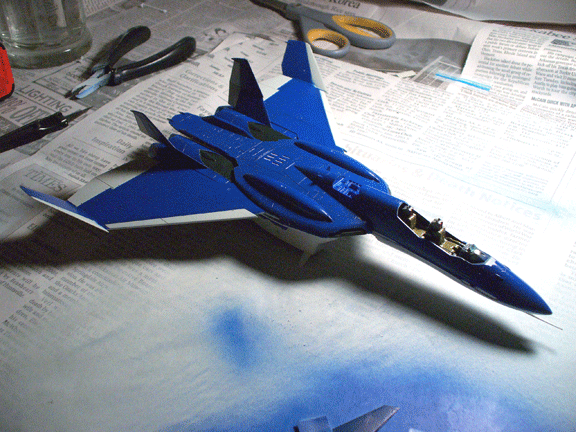
Here are the parts that were unmasked. There was a little bit of overspray, but since it's acrylic it's easily removable. For the legs, one side was masked with masking sol, and the other side was just tape that was cut to make a wavy seperation. After painting it, I was happy with the protection the masking sol offered, but the tape had a "truer" shape I guess but with some overspray that found it's way between the tape. Agian, easily removable. I also pieced together the main body of the model, seen here. You can see that keeping the pieces separate helps alot. The clean lines could not of been masked so well due to the complexity of the shape of the nose and fuselage. I did have one little accident on the rear stabs though. The masking tape pulled a little bit of the coat and blue paint up. But I just remasked over the finished surface and painted the bare spots. It came out pretty well. Now I just gotta paint the dark grays onto the parts that attach to the back of the leg/engine and the lower leg "canards?" Once that's done, I'll glue those pieces onto the legs, recoat with one more layer of ultra-gloss, and start working on the metal parts such as the feet, engines, gunpod, and turbines. Till then!