drifand
-
Posts
1305 -
Joined
-
Last visited
Content Type
Profiles
Forums
Events
Gallery
Everything posted by drifand
-
Photoshop's Replace Color function will do the job easily.
-
Extras are welcome but some kind of improvement in the shoulders would be REAL GOOD NEWS. Stop dropping the ball, Yamato!
-
Google is your friend: http://www.imageanime.com/markers.html
-
Well, I'm just your average enthusiast modeler... I don't even use an airbrush :-) I basically got into Bandai's original HG color-injection molded series because I was dying for a Gundam toy back in the 90s. The MG series that followed got me to advance from blunt scissors to using nail cutters (big step up!), and from using cheap enamel spraypaint to costly Tamiya and Gunze spraypaints. I was aware of sanding+putty+priming for a long time but couldn't commit myself to learning and applying those methods for a very long time. Even today, I tend to build MG/PG kits for the pleasure of the detailed construction and subsequent playability... not so much for my fine-modeling skills :-) So my compromise is to take good care with the sprues - use good cutters and if necessary, make it 2-step cut; minimum sanding to even out the scars - must have super-fine grade paper handy; and finally a clear coat to smooth everything out for an 'almost painted' look. For panel lines, Gundam Markers has a fine-point dark brown inking pen which seems to be better than the usual black liner. Haven't tried it yet though.
-
Took me about 3 solid nights to complete this kit. The instructions are VERY DETAILED and the builder must take his time. I made a couple of booboos with the legs (reversed parts etc) but luckily the kit IS FORGIVING... parts fit is excellent but easy to pry apart if needed. My tools were very basic: Tamiya sprue cutter, 45-degree NT cutter, rough and super fine-grit sandpaper, 005 Micron Pigma (panel lines), black wash marker, GUNDAM MARKERS (Dark Gray, Blue, Gunmetal), paper towels for wiping excess ink/paint. Planning to spray over with a clear dull-coat instead of regular paint job. OK, here's the pix of my completed Shield Liger... I tried to shoot for maximum surface detail, so you'll definitely see my shoddy sanding and whatnot :-) Blades in open position... A very agressive cat indeed! Close up of fangs, foreleg and chest launcher detail. The springs are real but the pistons are fixed position pieces. I haven't had so much fun posing a ZOID since... the 'Metal Action' Ligers! Kotobukiya's 'Master Grade' approach totally blows away the recent 'BIO...' series. Here, you can see the cool piston detail on the forward haunches. A top view reveals the multi-plane capable shoulders and hips. BTW, the gorgeously knurled 'tubes' are molded plastic, not fabric-tubes. I suppose resourceful modelers will find them easy to replace. Close up of the rear portion of the head. Note the details! Koto went all out to ensure a minimum of undetailed exposed surfaces. Kudos! Cockpit detail. I haven't put together the tiny pilot yet... I also need to get a fresh Grey Gundam Marker to paint the canopy edges, my current marker nib is totally whacked. Torso detail: The back mounted twin-cannon swivels and stows away under the blue panel. The side 'wings' swivel open to deploy the tip mounted missile pods. I like the wing pods but feel that they are too close to the body to be effective weapons. In most poses, the front legs are 'in the line of fire'... And, oh - the whole body is made up of 3 segments linked together by ball joints. All 3 blocks are intricate and very satisfying to build. A view from the hind quarters. And lastly, the 'ZOID Core' capsule can be removed from the hollow compartment directly behind the cockpit/head. The core itself is translucent red PVC... I added some paint to detail the studs. All in all, I give this kit a solid 8.5/10... Main caveat: Everything is nice and tight FOR NOW. Truth is, the polycaps in the shoulders and hips seem a bit small to me and will wear out if you pose the cat too much... hard not to play with it, ya know? Give it chance, ZOIDS lovers! More pix from a Japanese fan: http://www.geocities.jp/hetare_d_max/galle...hieldLiger.html
-
Miyatake is always getting the short end of the stick while Shoji basks in the limelight... :-)
-
You can tell he had fun! I used to make 'secret bases' for my toys and action figures out of discarded styrofoam packing pieces... the shapes and hollows were perfect fuel for the imagination. :-)
-
Thanks, the largest I have is 1600x1200: http://homepage.mac.com/drifand/EVAbootleg/EVA03-Large.jpg Enjoy... :-) A bit of history for this shot - The night scene was taken in 2002 with my then brand new Canon G2 while crossing the road in Chinatown. A couple weeks later I bought the 15" tall bootleg EVA toys on a whim (since given away to a neighbor's kid) and decided to try a little photo-diorama work in PS... The big black EVA-03 was carefully posed on a simple white table top, with the camera on a tripod to get the 'right' angle I wanted: a street level 'snap' of a gigantic rampaging monster on its hands and knees. Several exposures were taken at different apertures to allow for experimentation in DOF. Both images were then composited in PS; the EVA's image layer was masked out, Curve-adjusted for contrast, color temperature matched to night scene. Giveaway toy elements like sprue-cuts, exposed screws etc were cloned away. Lastly, elements from the night scene (eg. the lamp post) were 'lifted' on top of the EVA to create dimensionality; lamp reflections, glows and dust were cloned or painted on for realism. All in all, I was greatly inspired by Hajime Katoki's 'documentary photos' in the GUNDAM FIX book.
-
Mmmm, Photoshop dioramas! How-to...? First thing is to get the angles right - match the horizons and perspectives of the background and toy. Then you have to match the lighting - take note of the sun's angle in the sky and try to simulate a similar angle when shooting the toy. Then comes the 'merging' of the two (or more photos) - which requires practice with the MANY methods of edging out your required elements. I remember my 1st important lesson in Photoshop: Learn how to select only the areas you want to affect... ya gotta practice. Here's an old fav of mine:
-
Has fuel consumption for VTOL been drastically improved since the days of the Harrier? Always had the impression that VTOL compromised the max payload...
-
Jurong Pt, heh.
-
Remastered Patlabor Movie I Is Freakin' Sweet
drifand replied to Penguin's topic in Anime or Science Fiction
WXIII was released as a deluxe 3-disc set that included the film on Disc-1, the extensive making-of on Disc-2 plus the 'Minipato' episodes on Disc-3. The content is top-notch but the slipcase was flimsy. -
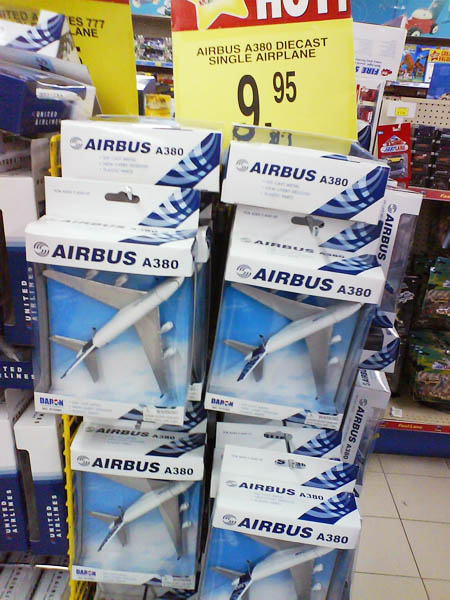
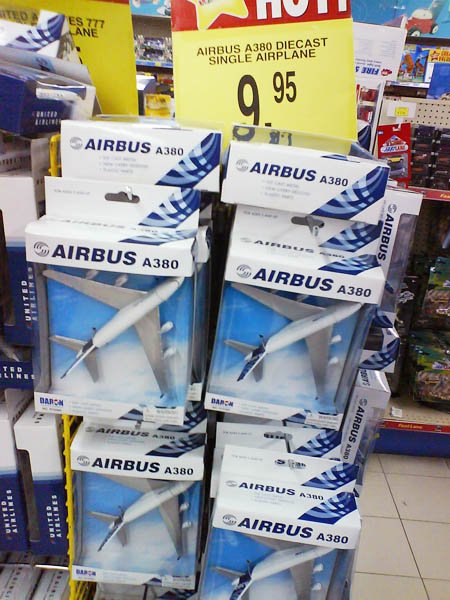
A380 finally rolls out on massive discount after repeated fubars! (Sort of...)
-
Remastered Patlabor Movie I Is Freakin' Sweet
drifand replied to Penguin's topic in Anime or Science Fiction
Ya, if you're keen enough to know all about the creative direction for the franchise, the LE boxsets are a must-have. The content is not focused on the mecha or charas! For line-art, you'll need to track down some of the old 90s-era books. There were also a couple of super cool Hobby Japan published 'Patlabor in 3D' volumes with the various garage and plamo kits assembled into gorgeous dioramas, with several scenes by the master modeler Takuji Yamada. More recently, there was a MG-kit diorama book: http://www.hlj.com/product/HBJMK-06 <- HLJ says it's 'discontinued' but you might luck out on Amazon Japan or Kinokuniya. -
Remastered Patlabor Movie I Is Freakin' Sweet
drifand replied to Penguin's topic in Anime or Science Fiction
Yes. These are the definitive DVD releases for the rest of the world outside of Japan. If you don't want the book or extras, just get the non-limited/film-only versions. -
Briefly, I understand the anime timeline to be like this (apart from the films): 1. First OVA 2. TV series 3. New OVA (aka 'The New Files') And yes, I did play the Super Famicom games. I lived for the brief animated action sequences during the fights :-) Never could read the Japanese script but the gist of the story was simple: Stop the baddies, sometimes w/o guns etc.
-
Oh yeah! LOVE is in the air. That was one hilarious ep! And when you've fully enjoyed the TV and OVA series, the humanity in P2 is all the more poignant.
-
Guppy, it's really tempting when you see brand new incarnations of favorite mecha at highly affordable prices, esp those that didn't get the DX treatment back in the day. But then again, the blockiness of the Dougram designs are what endears them to me... afterall, I never had the opportunity to watch the anime, so the excellent Takara 1/72 toys DEFINED the whole series to me. So while I love the poseability in these RvT combat armors, the exaggerated 'humanoid' proportions doused my enthusiasm somewhat. For the same reason, I never bought the 'newly old' Kaiyodo series Macross mecha... I was saddened to see the Tomahawk sculpted more like a Super Robot than a Real Robot, just to achieve some 'hip thrust' action. To each his own! :-)
-
No, no. The 'LiA' is pure unadulterated PVC through and through The patrol lights are indeed clear, which is a nice touch. If the hunger for all things Patlabor gets to you, it's definitely worth considering...
-
Well, p-man The translated manga was a flop. They never proceeded beyond Vol 2, which is a shame. IIRC, the orginal manga had 22 vols... The anime is generally excellent no matter where you begin... very character driven and episodic, usually lighthearted comedy but with standout episodes filled with action and tension. I think the cheapest would be with the original (first) OVA. If you like it enough, you'll definitely follow up on the full TV series, followed by the 'New OVA'. The films: I love all three but generally, the second (P2) is considered the 'best' because of its timely story (precedes actual cult gas attack in Tokyo), high quality animation and mature handling of charaters. The first movie (P1) was also 'serious' in tone but had a fair bit of action as well, plus an intelligent thriller-plot. The 3rd movie 'WXIII' is considered 'weak' because it is more of a side story occuring within the world of patlabor. Its timeline situates the story between P1 and P2. The deluxe release of this DVD included a 'bonus' - the Minipato DVD: a series of funny animated sketches in 2D/3D 'paper puppet' style, exploring inane themes from Patlabor... pretty worthwhile for any Patlabor fan. As for collectibles, I've only pursued the more realistic offerings, and prefer toys over kits. I really like the detailing on the newer MG kits but the line-up is short and I had a terrible experience with the rubber shrouds on the older 1/60 kits. The SD figures are pretty cool if you don't mind 'cute'... :-)
-
Ver. 1.5 couldn't get here quicker! I really can't wait to hear the first hand reports on this baby. :-)
-
Looking good, Ghostryder. As to your earlier question, my personal preference is for Aperture priority mode - I decide on the aperture and let the cam figure out the shutter speed. Since I always shoot my toys with a tripod, slow speeds of 1 sec or more are of no concern. For most compact digicams, the extreme settings are almost always never optimum. So I almost never shoot at f2.0 or f8 on my G2. - For close ups, I use f2.8 - f3.2; (focused area sharp/backgrounds blurred) - For group shots where all the toys are more or less in a line - f4.0 - f5.6; (row of toys sharp, background/foreground blur) - For staggered groups (eg. 2 or 3 rows of toys), I'd use f5.6 - f8. (Toys sharp, but background will also be sharp unless kept further away ~2 feet or more) I'm not up to explaining how f-stops affect depth of field (DOF), but the above works well for me. Good luck and keep shooting!
-
I truly believe that good shots don't happen by chance or 'Auto' functions. Having a good 'infinity' backdrop like izzy's is a dream for me, but like he said even cheap lights USED WELL can add helps of quality. More important is the selection of angle and aperture, eg. Are you hoping to achieve 'dramatic' shots? Then shoot from a (lower) angle that creates the feel of the photographer being 1/1 scale, on-scene with the 'real' mecha. Using the Macro mode helps a lot if your cam is within 30cm of the toy. Also, turn OFF the flash - the strobed shadows are terrible. Use a tripod to enable longer exposures (1/30 sec or more) with a natural look. 'Bracket' your shots if possible to enable creative combinations of darker/lighter areas in related shots. Only experimenting with your cam can reveal what works best. My 4MP Canon G2 is like what, 5 years old? Still getting fantastic performance from it!
-
Transformer Starscream Masterpiece has arrived!
drifand replied to kentgh's topic in Anime or Science Fiction
Hmm, I've seen pix of that setup BUT it did make me wonder: Isn't it risky? Always had the impression that missiles 'dropped off' the rack before the rocket ignited... What if the AIM-9 hit the tank underneath? Or do the missiles really just 'fly off the rails' straight out? -
Transformer Starscream Masterpiece has arrived!
drifand replied to kentgh's topic in Anime or Science Fiction
Deckard, Woah, I'm not so sure I want to mess with METAL The last time I did it was on the Aoshima diecast Terminator... forced to file down some plates because the darn toy couldn't pose well, but it was hell to work with. Before I snip off more from the front skirt, I'd defintely want to assess the possible benefits. Let's hope Takatomy makes a Yamato-worthy improvement sometime in the future...