mechaninac
-
Posts
4272 -
Joined
-
Last visited
Content Type
Profiles
Forums
Events
Gallery
Everything posted by mechaninac
-

Science and Technology MEGA THREAD
mechaninac replied to Max Jenius's topic in Anime or Science Fiction
Cloaking device in the works...life imitates Star Trek. http://www.latimes.com/news/science/la-sci...-home-headlines -
The way I look at it, the perception of time, and it's relativistic time dilation effects in the Macross universe's version of space fold is entirely distance and energy dependent. Like Keith posited, the distance a ship can fold is related to the amount of energy a space fold generator can muster and/or handle. Unlike Keith, I think that there is only one type of fold, but it's effects on the passage of time within the fold relative to the rest of the universe is dependent upon the distance being traversed in a somewhat exponential relationship: the longer the distance the greater the relativistic time dilation. Therefore, the SDF-1's impromptu fold to Pluto's orbit would seem instantaneous to those on-board, and anyone observing from Earth; but the fold to Bodolza's headquarters would have taken days or weeks within the folding ship, and several weeks or months to an Earth bound observer. In a way, fold in Macross seems to be somewhat akin to near light speed travel in real space, in that the faster you go the more time slows down to the traveler; but in Macross, distance, and not speed, is the factor. My two cents on the subject. Man, did I just geek out that much??? Well, at least it's out of my system for a while.
-
Like you said, modern fighter aircraft are designed to be inherently unstable to improve maneuverability. However, internal weapons stores on fighters have far more to do with stealth considerations than aerodynamics. Sleek is important, but sleek in the right places to maximize lift, minimize drag, and optimize control surface efficiency is paramount: Yukikase aircraft may be sleek, but they are drag hogs with no aerodynamic merit, and if able to fly would do so only through brute force. The same can be extrapolated to all the VFs. The VF-0 series, having been penned 1/4 century after the VF-1, naturally looks more streamlined, even more sophisticated, than the VF-1... that's only natural. Within the continuity, the VF-0 is, maybe, more primitive as a narrative device; hence the fuel burning engines (I know it was to have prototypes of the thermonuclear power plants installed), inability to operate in space (assumedly), larger size, etc. Another way to look at the relationship between the VF-0 and VF-1 is to take the Gundam universe as an example: The VF-0 is akin, after a fashion, to the RX series mobile suits and the VF-1s are the RGMs. The VF-0 was more complex and slightly more sophisticated precisely because it was a test bed for the VF-1, and included features that would not find their way into future VFs until they matured and/or became easy to manufacture.
-
It does look like those two pilots fudged their pants. That must've been some bad chili they were serving in the SDF-1's cafeteria.
-
I don't know... getting grown men to buy most, sometimes all, and even multiples of everything they make associated with the Macross license counts as a major win in my book. Don't get me wrong, I think their stuff is great, leagues beyond anyone else, but I do reserve the right to point out something that I think is boneheaded.
-
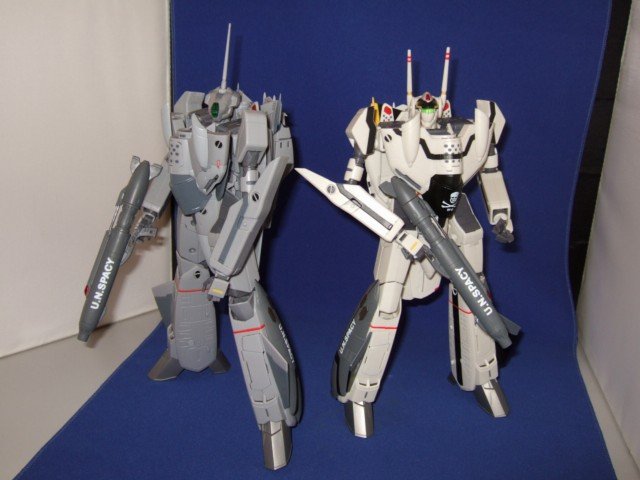
Since the missiles are PVC (or similar), and the struts and tow bar are ABS, there is no way they share a common mold; therefore, they could have completely different colors if Yamato so chose. However, pigment sourcing for their raw materials supplier may be a factor. @Dante74: I must have missed that particular post. See what a difference, and improvement, the "white" missiles make to the overall look of the plane? Yamato, your grey missiles are poo!
-
If there is a problem with the gummy pilots reacting and/or adhering to the paint in the seats, the easiest solution would be to just put a small piece of translucent scotch tape on the pilot's ass to isolate it from the painted surface. That will prevent the two trouble surfaces from contacting each other and the low tackiness of the tape won't harm the pilot, and it's plastic side should be completely non-reactive with the paint on the seat.
-
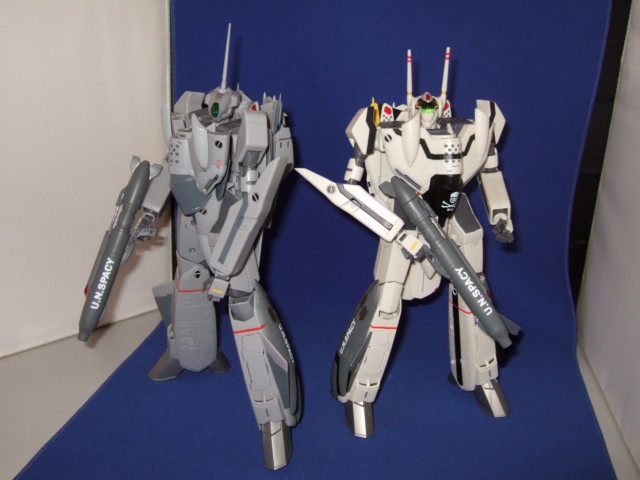
After reading all the comments and ogling all the posted pictures I must admit that the VF-0A is indeed an improvement over the VF-0S, although my 0S is near flawless to begin too (major gripe are the too easily collapsible feet... most of the other minor looseness is easily fixed/ignored). However, I do have one nit to pick with it: Why are the missiles molded in grey PVC?... they should be, at the very least, off-white like the ones for the 0S; just like the VF-1A LE LV, while the pylons are fine, the missiles are unworthy of being displayed with the plane and should remain inside the box.
-
I have no idea what you mean... WHAM! This SDF-1 is like a bolt out of the blue, isn't it? It is a bit pricey, but it looks so good that if it is confirmed that it is fully transformable, and pre-painted with minor assembly, I'm very tempted to pre-order one. Does anyone know if HLJ will be carrying this thing... the 5% early bird discount will make the deal a little sweeter.
-
Mom taught me that if I couldn't say something nice, I shouldn't say anything at all. However.... daiuhm! That's one fugly Mech!
-
Everytime you think that they've reached the bottom of the barrel, Hollywood prooves that if you lift the barrel...
-
Why wait?... Looky HERE Too rich for my blood, but if you want CA's masterpiece now....
-
We have a winner!... The next movie should be about, and called, Zombie Snakes on a Plane.
-
Your best bet for getting your hands on a 1/72 Regult, or a Glaug for that matter, is eBay. However, they command a sizable sum when they show up... around $90.00 before shipping. Or, you could get lucky and grab one of the iron series models (not the Glaug); they are the exact same kit, decals and all, shot in a dark metallic color, and include a display base. I got one a couple of month ago for $39.00, shipped. As previously mentioned, I would not hold my breath for Bandai to re-issue any of the rare stuff any time soon, if at all. So old plastic kits and resin recasts on eBay, and/or making a request in the wanted thread, are about it.
-
What's so special about a plane full of zombies that it would warrant a movie?... Have you been in a flight lately? From the TSA screeners to the flight attendants, they are all mindless undead.
-
Now, that does sound like the Graham we all know and despise... err -- admire.
-
Net nannies suck, don't they? Here is the last picture, and the one relevant to my last post.
-
Would You Buy A New Perfect Variable 1/60 Vf-1?
mechaninac replied to Shin Densetsu Kai 7.0's topic in Toys
And a VF-11. And a VF-4, and a VF-17, and a VF-5000, and a VF-2SS, and, and, and.... -
keg armors? ...you must be wishing for a tall, cold, glass of beer, aren't you? The conformal leg armors seem to be the same color and tone used on the 0S to me; the minor difference can be attributed to the interaction of light and shadow, and the way the camera balances them out. I think it's safe to assume that when the Ghost pack is released it will be visually compatible with both VF-0s.
-
Clint Easwood's new WW2 epic. Flags Of Our Fathers.
mechaninac replied to UN Spacy's topic in Anime or Science Fiction
I didn't much care for A Thin Red Line myself. I found it tedious to watch... good thing I did so on DVD; it was far too long for it's sparse plot. In the end, I think I fall under the category of people who went in thinking they'd get Sands of Iwo Jima, but instead got the last two episodes of Evangelion. -
Clint Easwood's new WW2 epic. Flags Of Our Fathers.
mechaninac replied to UN Spacy's topic in Anime or Science Fiction
Unfortunately de-saturated colors indeed seems to have become the convention for depicting WWII. You can thank, or blame, Steven Spielberg and his Saving Private Ryan for that, BoB's look, and Enemy at the Gates ' for that matter, was inspired by SPR; and it does tend to imbue the pieces with a vintage "news reel" quality to them. BTAIM, since I'm a sucker for war flicks, I'm sure to check it out. -
Okay... how about a hinged, yet still removable, nose cone so that the VF-1 can be displayed with it swung open for radar maintenance access? Also, piston(s) for the chest plate air brake.
-
The only things I've done that could be loosely referred to as modifications to any of my 1/48s are drilling the head lasers to simulate the bore of the barrels with a little black paint added also, and to sand down and buff the seam lines on the air intakes/thighs to make them look less toy-like... with the parting lines removed those pieces look a lot better.
-
I haven't seen it yet, but the one thing that bugs me with the trailers is the overabundance of Fokker Tri-planes. That particular plane was never that common, specially during the time of the Lafayette Escadrille, before America officially entered the war. Other than that apparent anachronism and the wiz-bang action sequences implied by the trailer, it does look like a fairly cool movie, and better than almost anything else currently showing.
-
There are many available brands of plastic welds that will do the job, even Testor's liquid cement might work since ABS IS styrene, but here is one that has many more applications: Click Me The pin vise can be purchased on-line (Micro-Mark, for example), at hardware stores, or in most hobby shops; you'll also find the tiny drill bits you will need at the same places... the drill bit should be no bigger in diameter than the metal pin (seamstress' pin, for example) you choose to use. Practice the technique bellow on some model sprues, or anything, before attempting on the toy. When drilling, first mark the drill start point with an exacto knife by turning the blade to get a small depression started; that way, the drill bit won't wonder off center at the start of the process. Work the drill slowly, a few turns at a time and back off to clean the whole and make sure that you're drilling straight... keeping the drill concentric with the shaft and base, and properly aligned with each other is important; you don't want to drill at an angle and risk punching through the outer skin of the part, or the holes not match -- very unsightly. Drill into both parts about 4-7 mm depending on the size of the part, and cut the pin .5-1 mm short of the total added drilled distances. You may also want to cut the pin on both ends with a wire cutter so that the resulting cut edges, which will be flat and splayed, will act as an anchor within the holes once pushed in. Insert the pin all the way on the shaft side and apply a small drop of the plastic cement on the exposed metal... capillary action will carry some of it into the hole. Blow away from the part to dry it. Now test fit to make sure the broken edges are properly aligned (you may want to give yourself a visual key by marking the pieces in their correct alignment with a tiny drop of paint you know to be easily removed later); if so, just pull the parts away from each other and add another small drop of weld to the metal pin, and before it evaporates push the two parts together until you see a very small amount of oozing from the crack. Let the fixed laser cure for about two hours before putting it through any stress. Clean up the marking paint, any oozed excess, and touch up any paint that the weld may have damaged. You're done, good as new!