captain america
-
Posts
3527 -
Joined
-
Last visited
Content Type
Profiles
Forums
Events
Gallery
Everything posted by captain america
-

Quirtra Queramitzuu: Kamikaze Space Cucumber
captain america replied to captain america's topic in Model kits
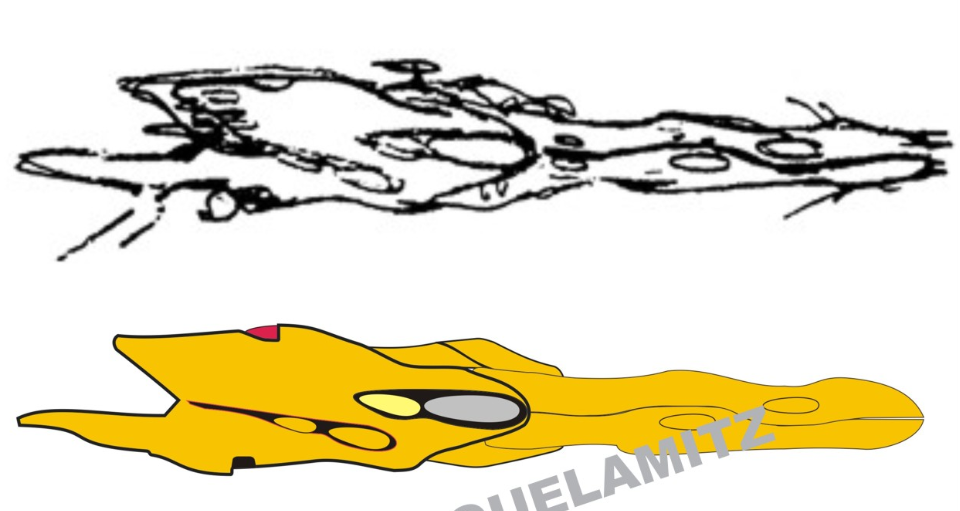
:lol: Actually, that's one of the aspects that was problematic. When you look at the line art, especially that 3/4 rear view, the ship looks narrow but in the animation, when you see it take off at the beginning in episode 36, you can clearly see from the bottom view that the ship is quite wide. Then, I have to consolidate those two (somewhat) contradictory views with the (tiny) side view of the ship. Sometimes it's like trying to nail a zucchini to the wall

-
Quirtra Queramitzuu: Kamikaze Space Cucumber
captain america replied to captain america's topic in Model kits
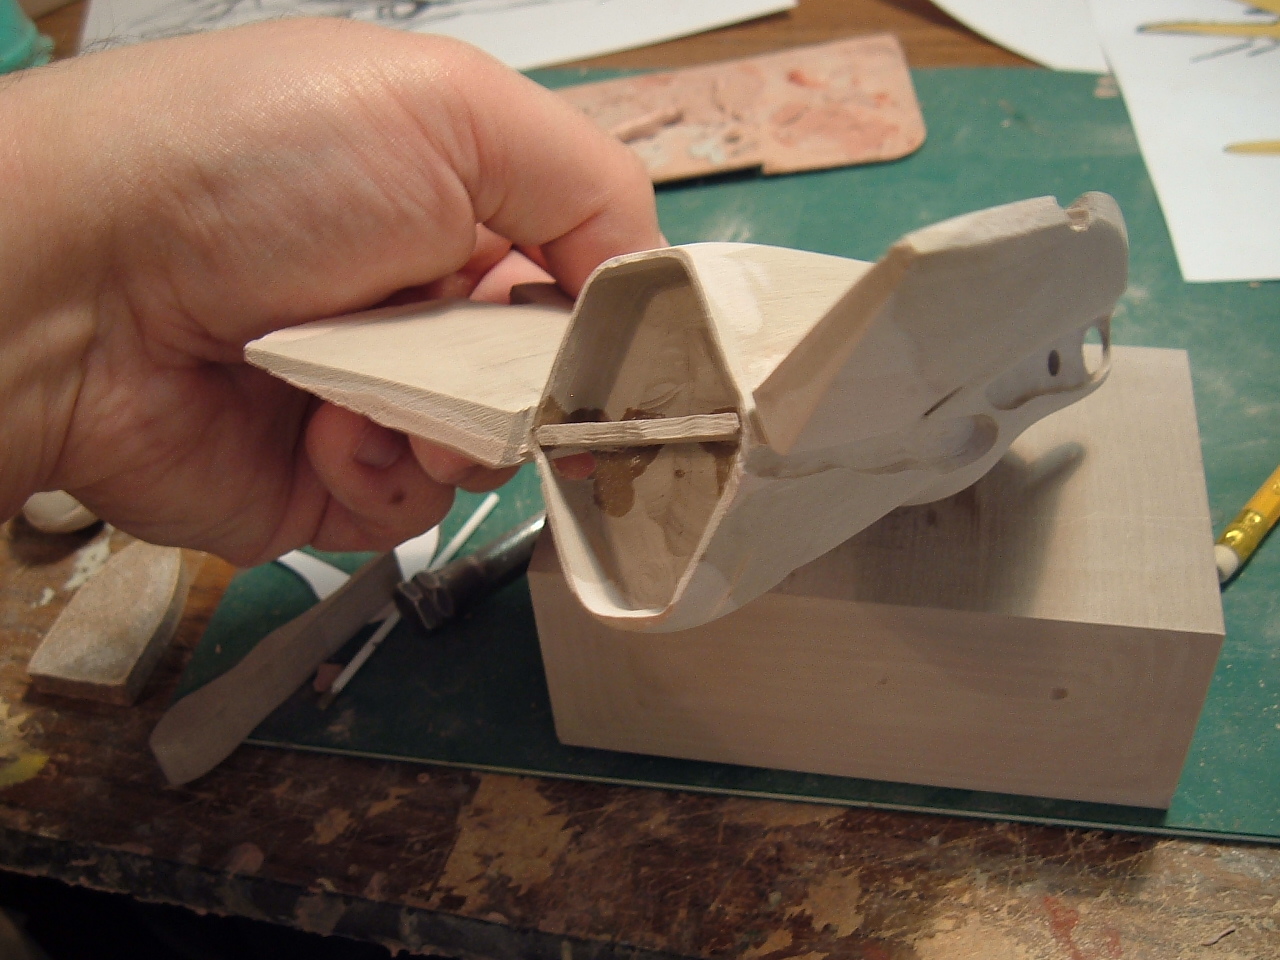
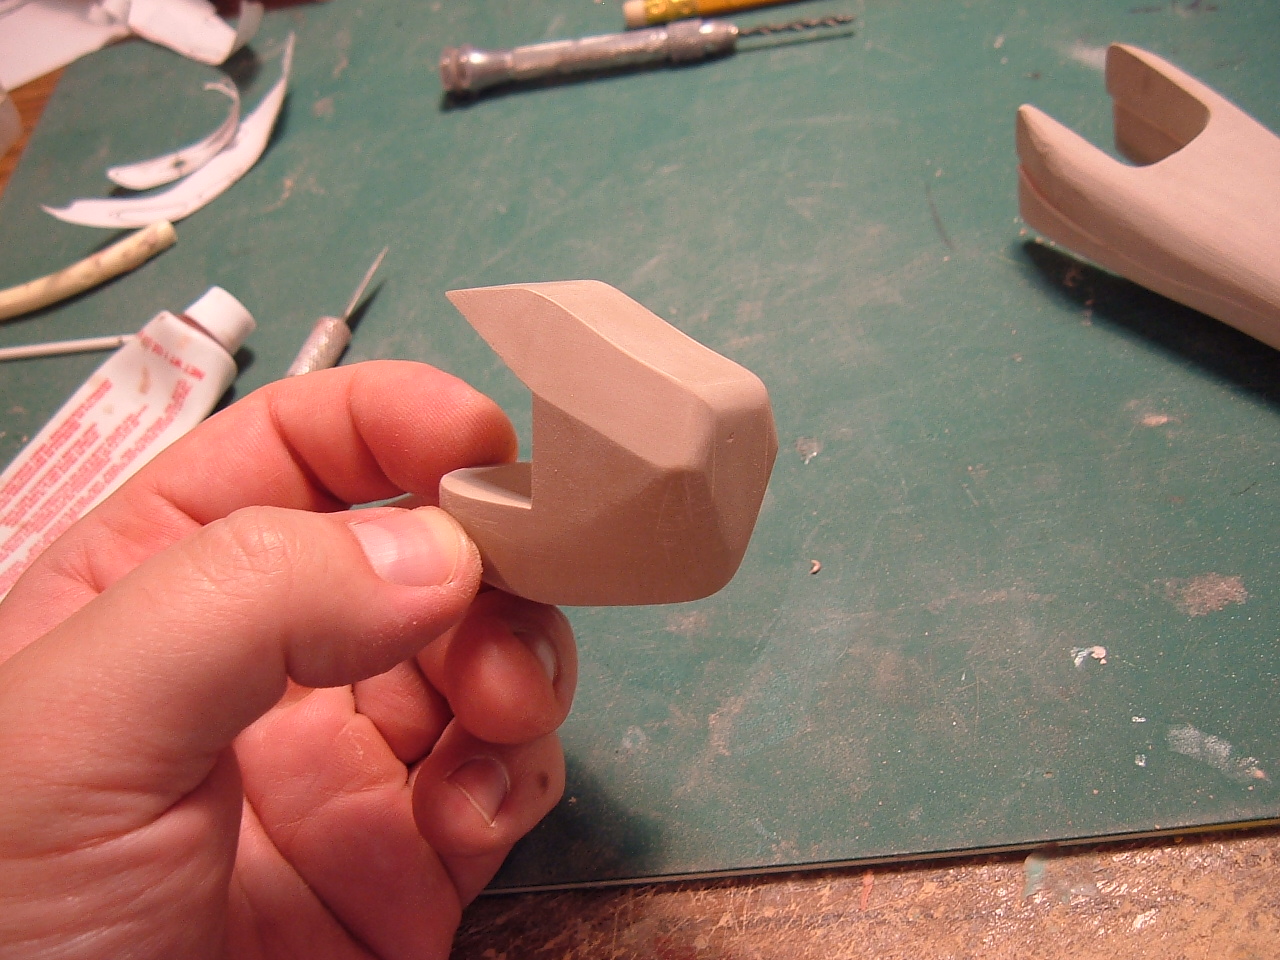
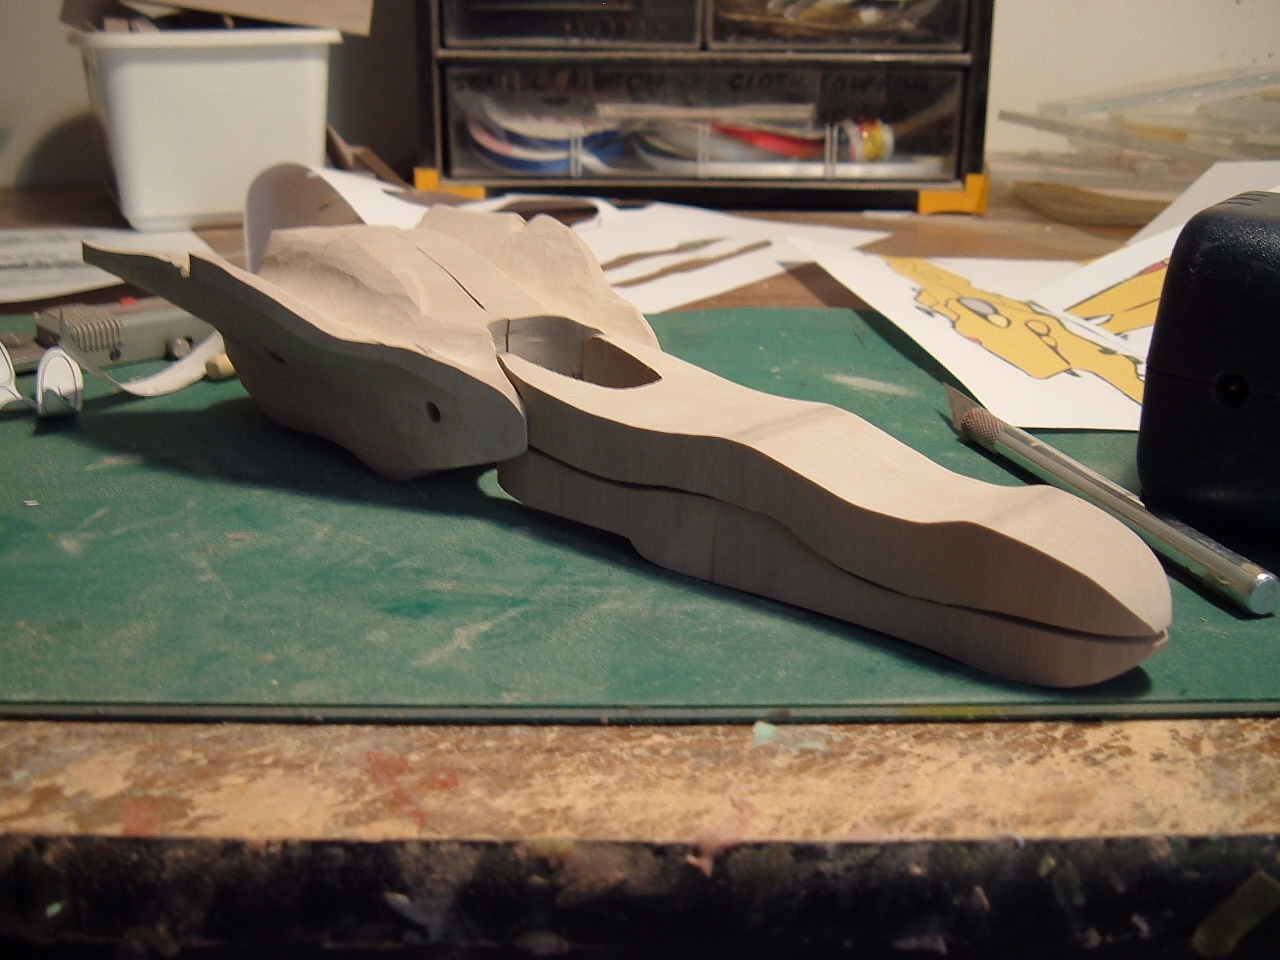
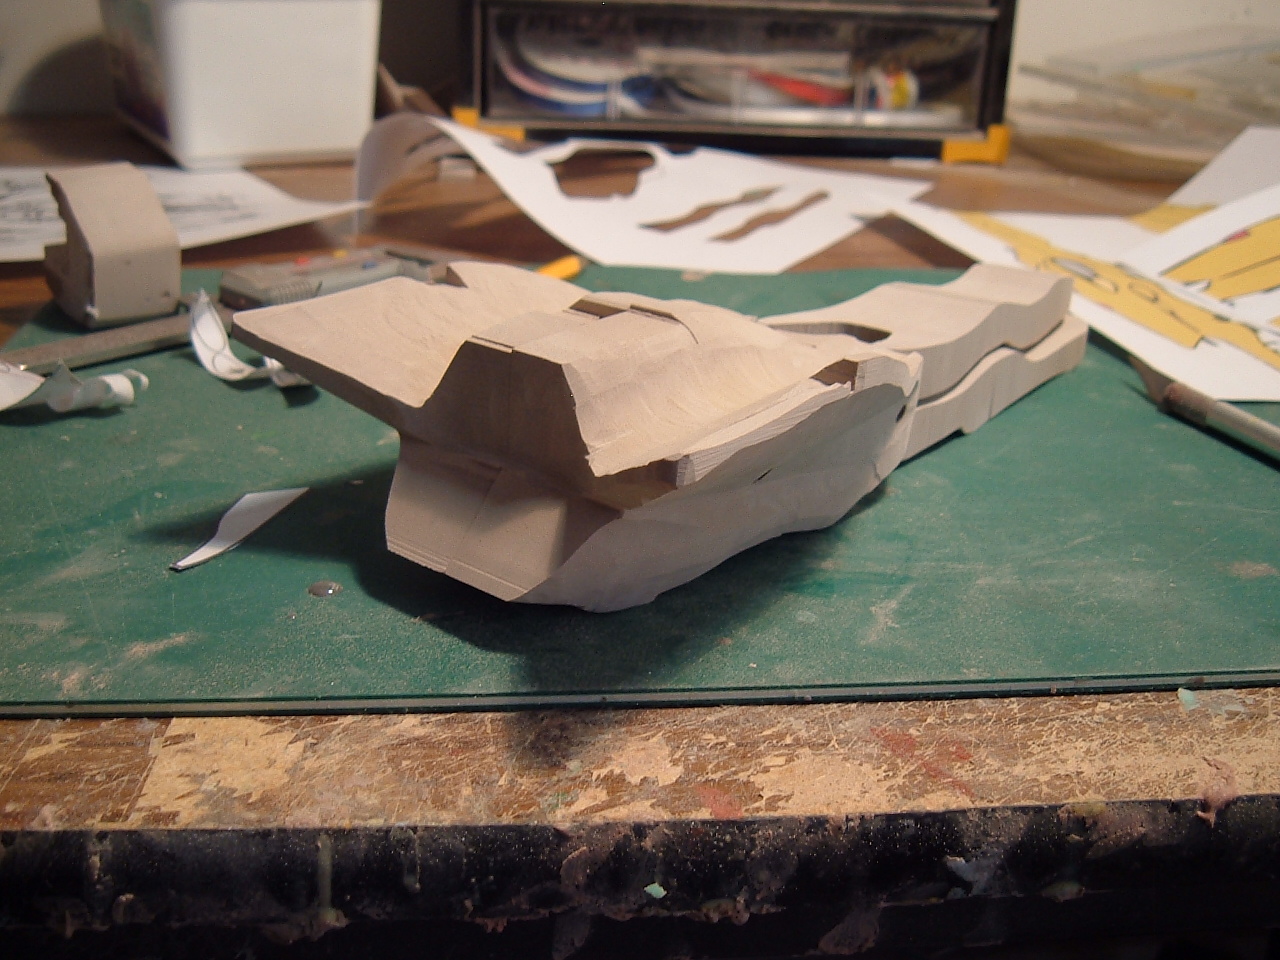
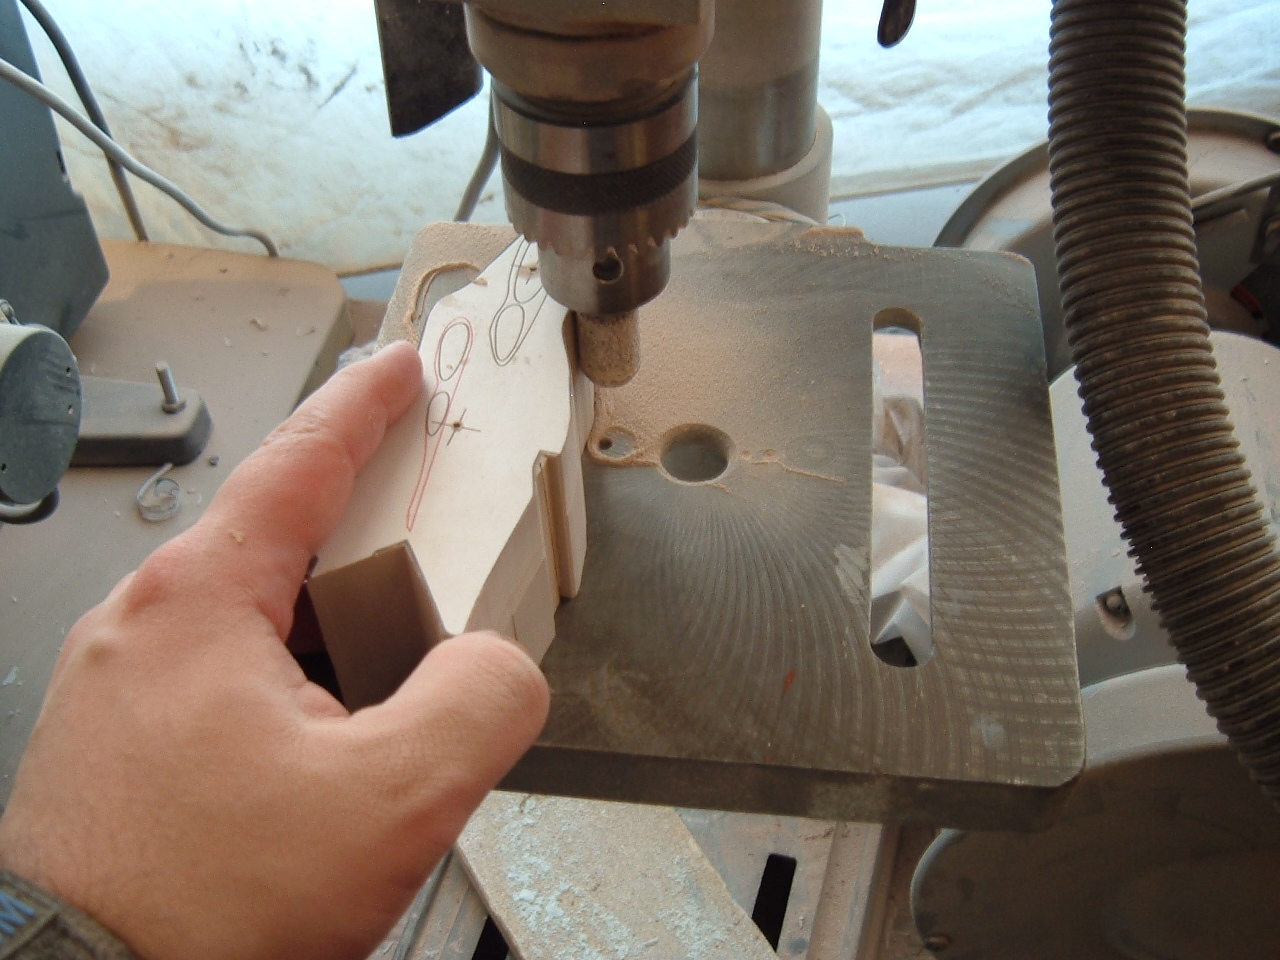
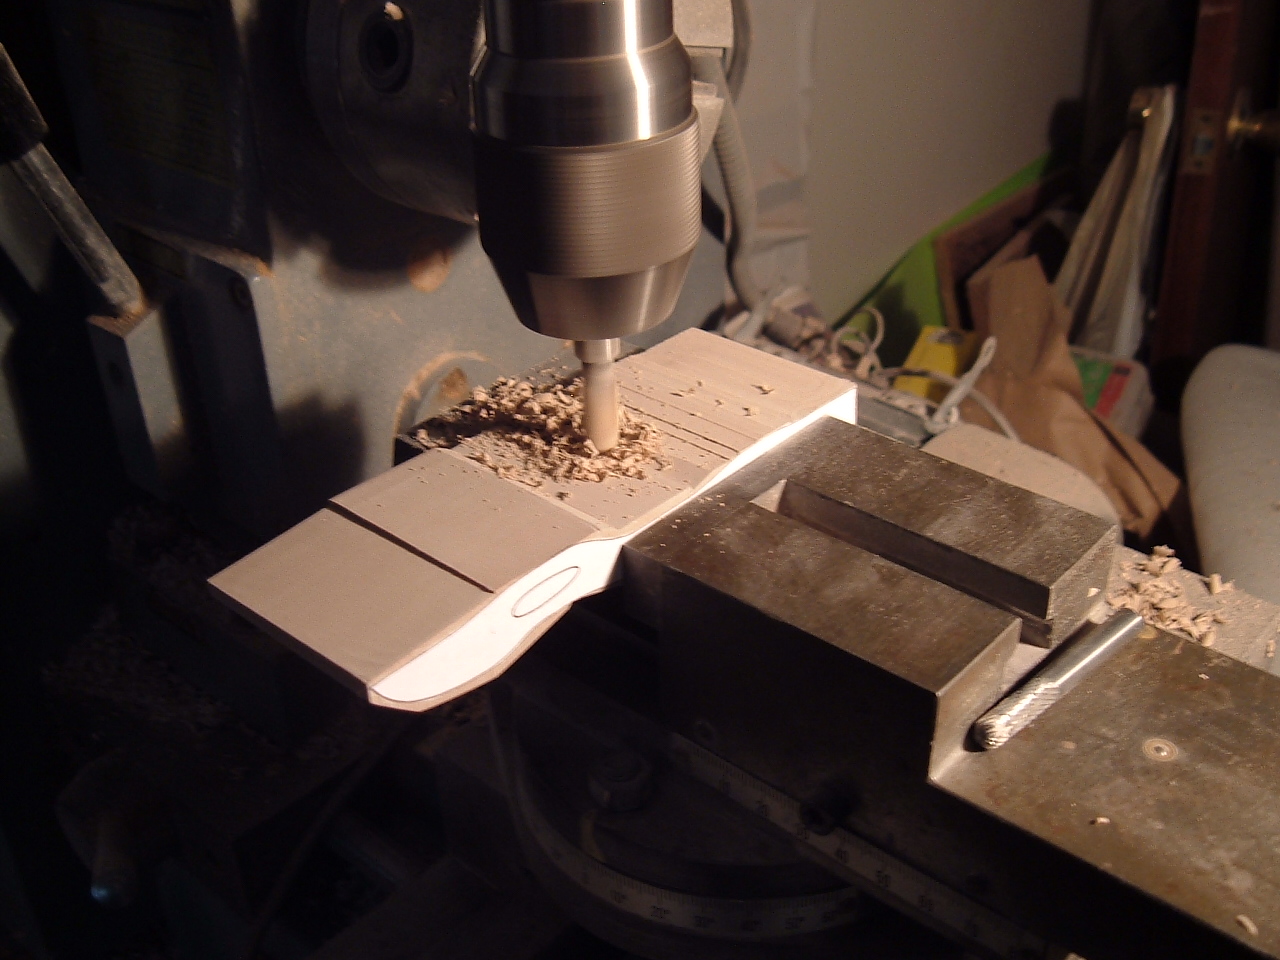
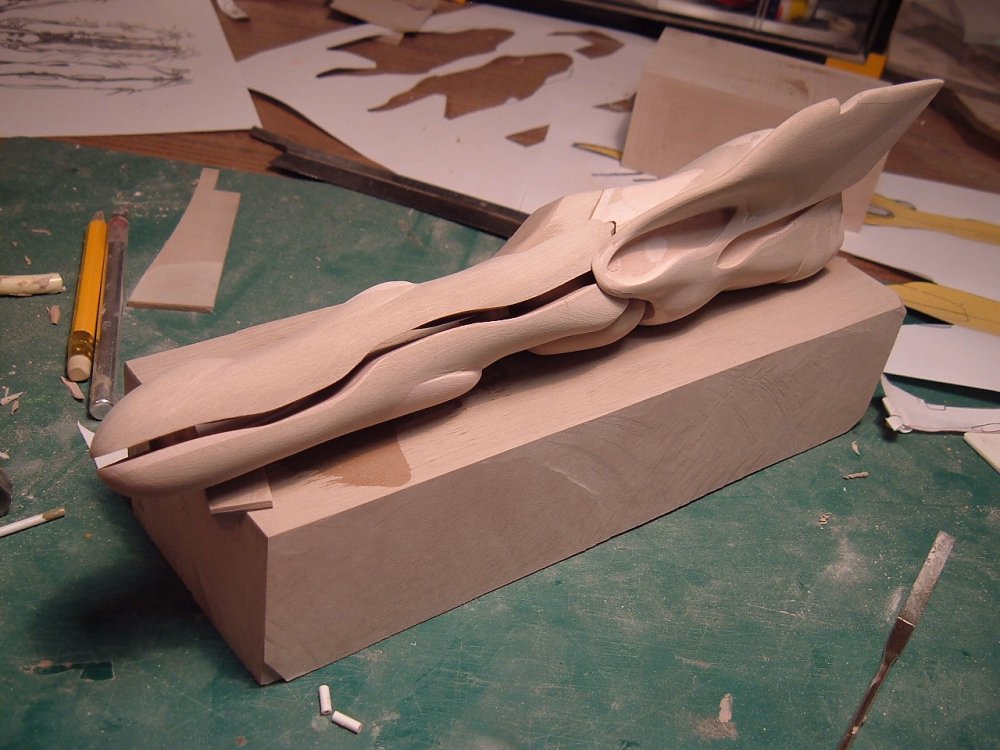
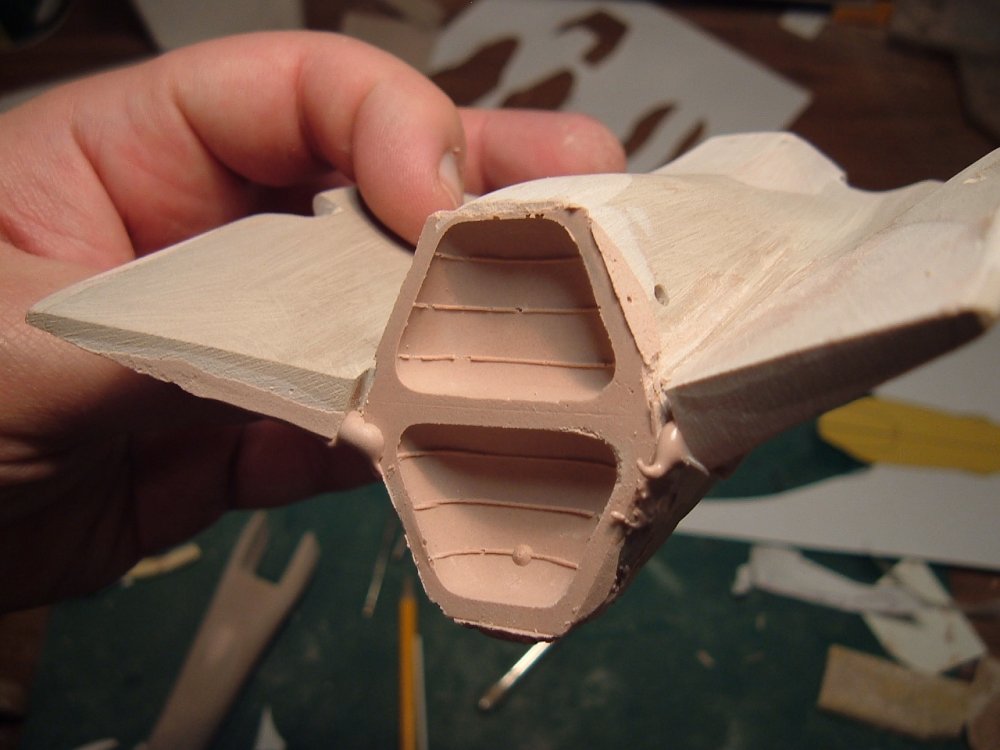
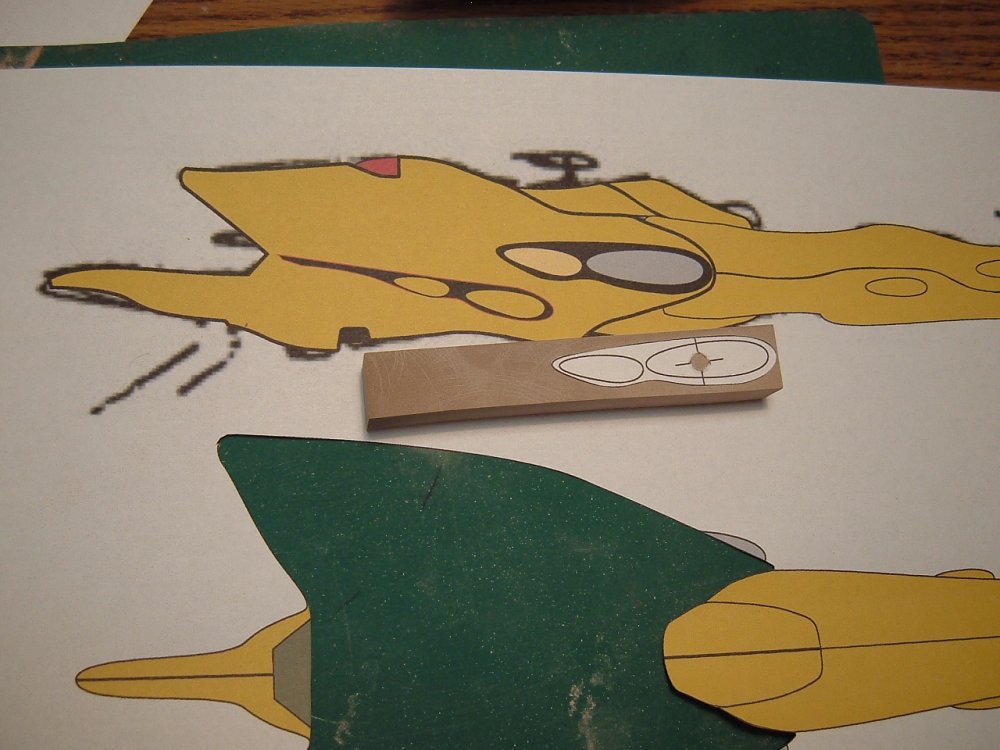
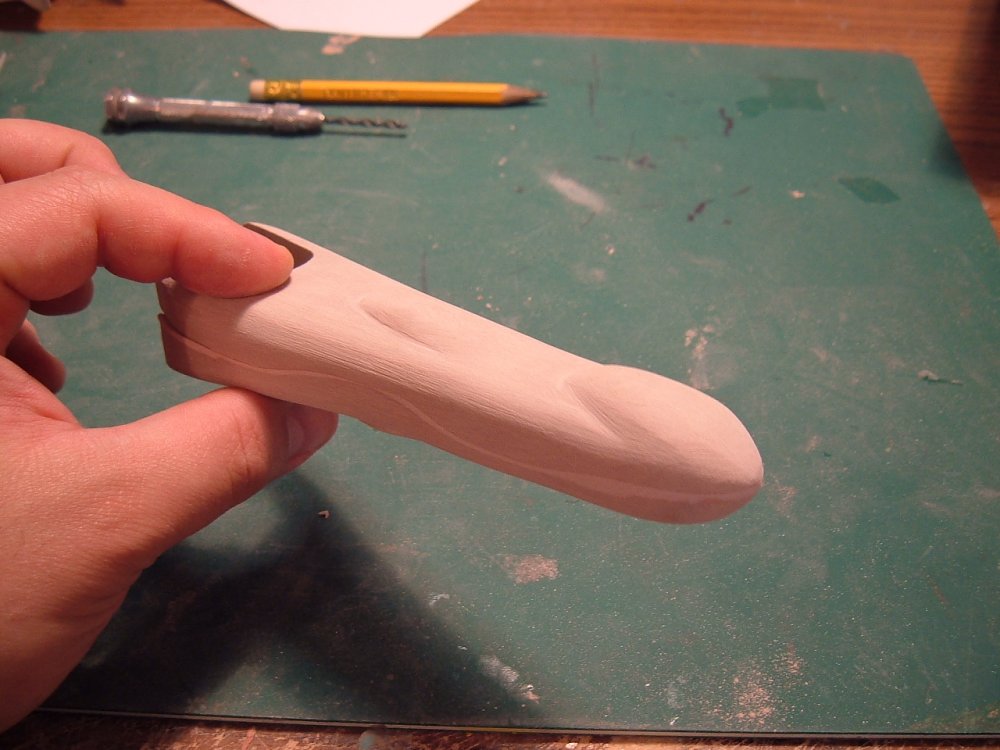
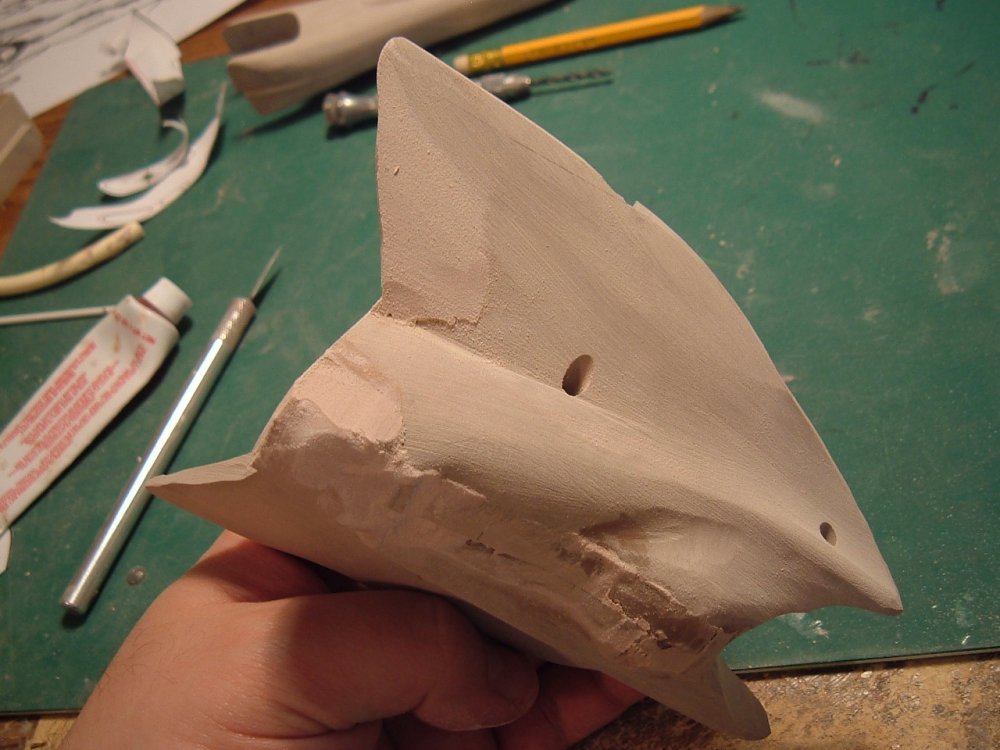
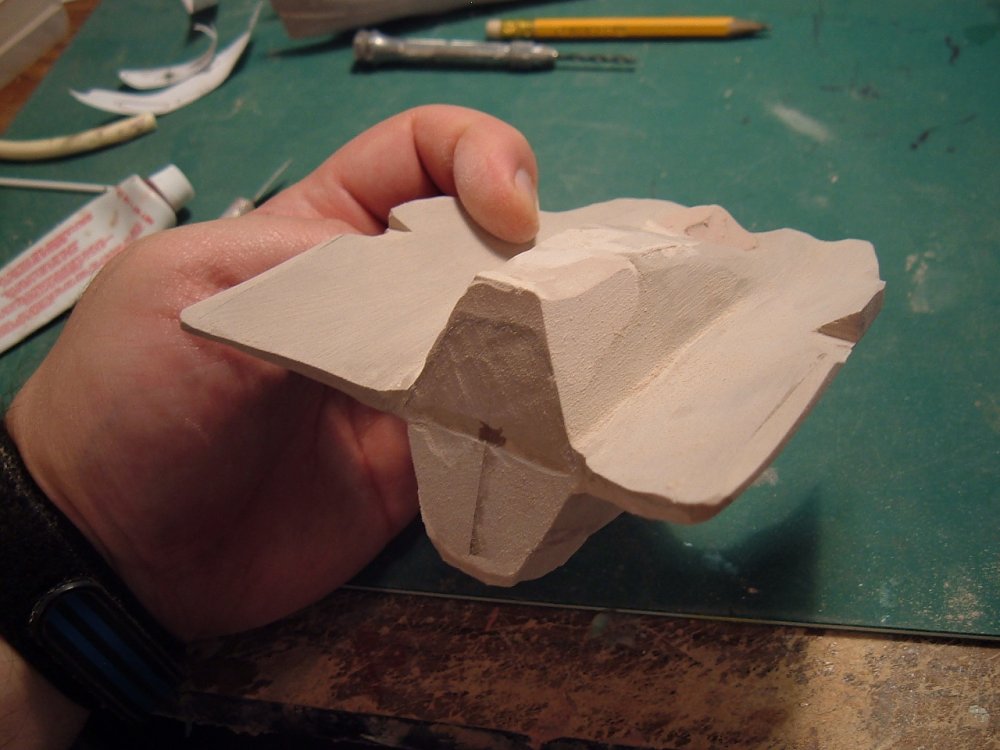
Captain's log: September 17th. Hi everyone! There is no rest for the wicked, especially when they scratchbuild… Though I could have postponed the update, I was quite happy about the level of progress that I made in the last few days, so I figured I'd share. Pic 1: though initially neglected, the rear of the ship is finally getting some much-needed attention. As you can see, I've done some crude hollowing of the area that will become the main thrusters. Precision isn't necessary in this particular operation, as the actual shape of the thrusters will be achieved by squashing a male plug (made from the piece I'm holding in the pic) into the cavity filled with polyester putty. Pic 2: this same "putty squashing" method will be used to achieve the openings of the eye-like sensor pods on each side of the hull. But before I do that, the hull has to have the general areas around the openings carved out. Pic 3: back to the aft thruster. I have made a crude separator to act as a visual guide as I calculate the shapes and carve-out the plug pieces Pic 4: here, you can clearly see the plugs sitting in the unfinished cavities. I want to ensure that the cavities I dremeled are large enough and deep enough, so lots of checking and re-checking. Pic 5: the plugs are given a generous coat of mold release and placed aside. Then, I mix up some polyester putty and place a good amount inside the cavity and then press the plug gently into the putty… Sometimes it feels (and looks) like I'm making a complete mess of the masters, but fear not, there is a method to my madness... Pic 6: the same procedure is used for the rear thrusters, and with excellent results! The crude, horizontal lines are merely guides for the thrust diverter fins which will be added later. The same piece that was used as a plug will be segmented and made into the fins, and since one is moulded from the other, the fins will fit perfectly, like a glove! Pics 7, 8 and 9: aaaah, now it's really starting to look like a ship! The overall shape of the craft is almost there; just a few minor details to adjust here and there, but I'm really excited; all that work is finally starting to bear fruit… Those Microns will rue the day they crossed paths with Quamzin!!!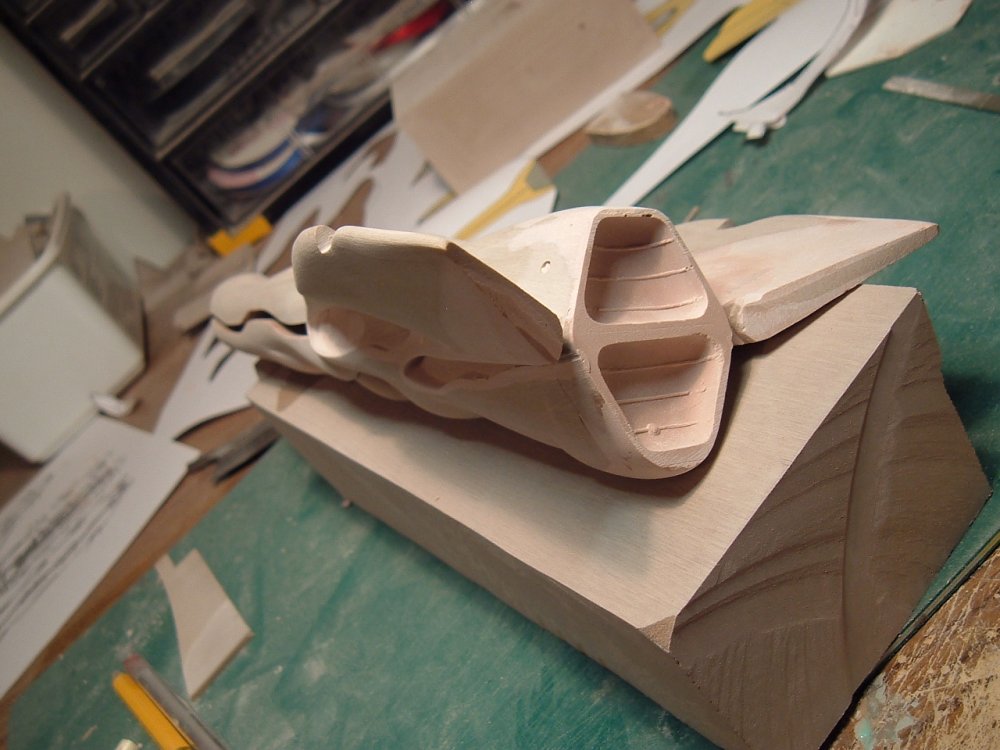


-
Wow Ruben, top notch work!!! Hope the castings aren't giving you too much trouble. It's really fantastic to see your skills advancing with every new model. Heck, your progress reports are more interesting than mine
-
There have been several different people who've finished/shown pics of my kits. Just off the top of my head: cool8or, Neptunesurvey and HWR MKII, and I'm sure I'm forgetting a few.
-
Quirtra Queramitzuu: Kamikaze Space Cucumber
captain america replied to captain america's topic in Model kits
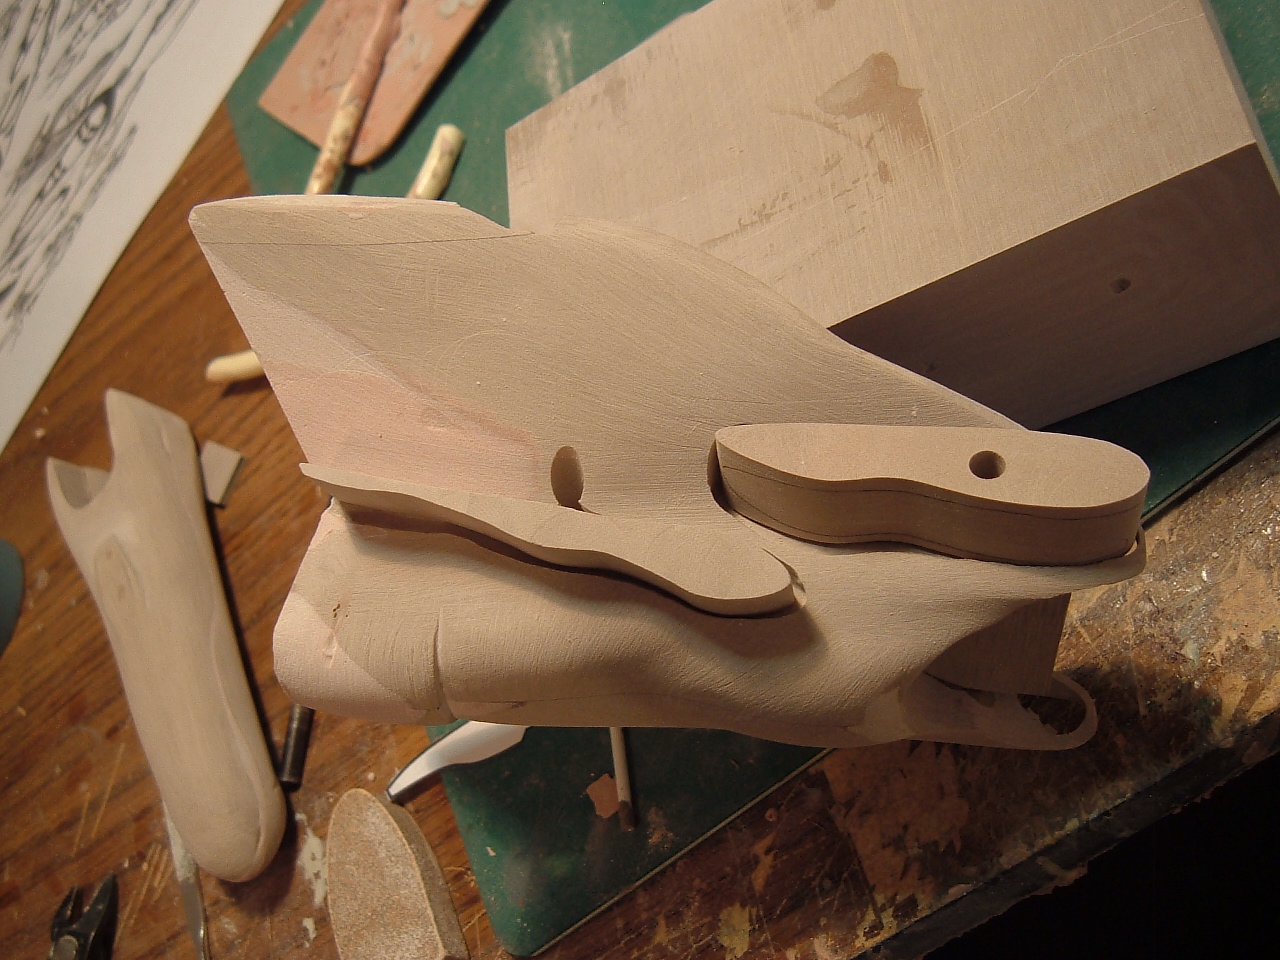
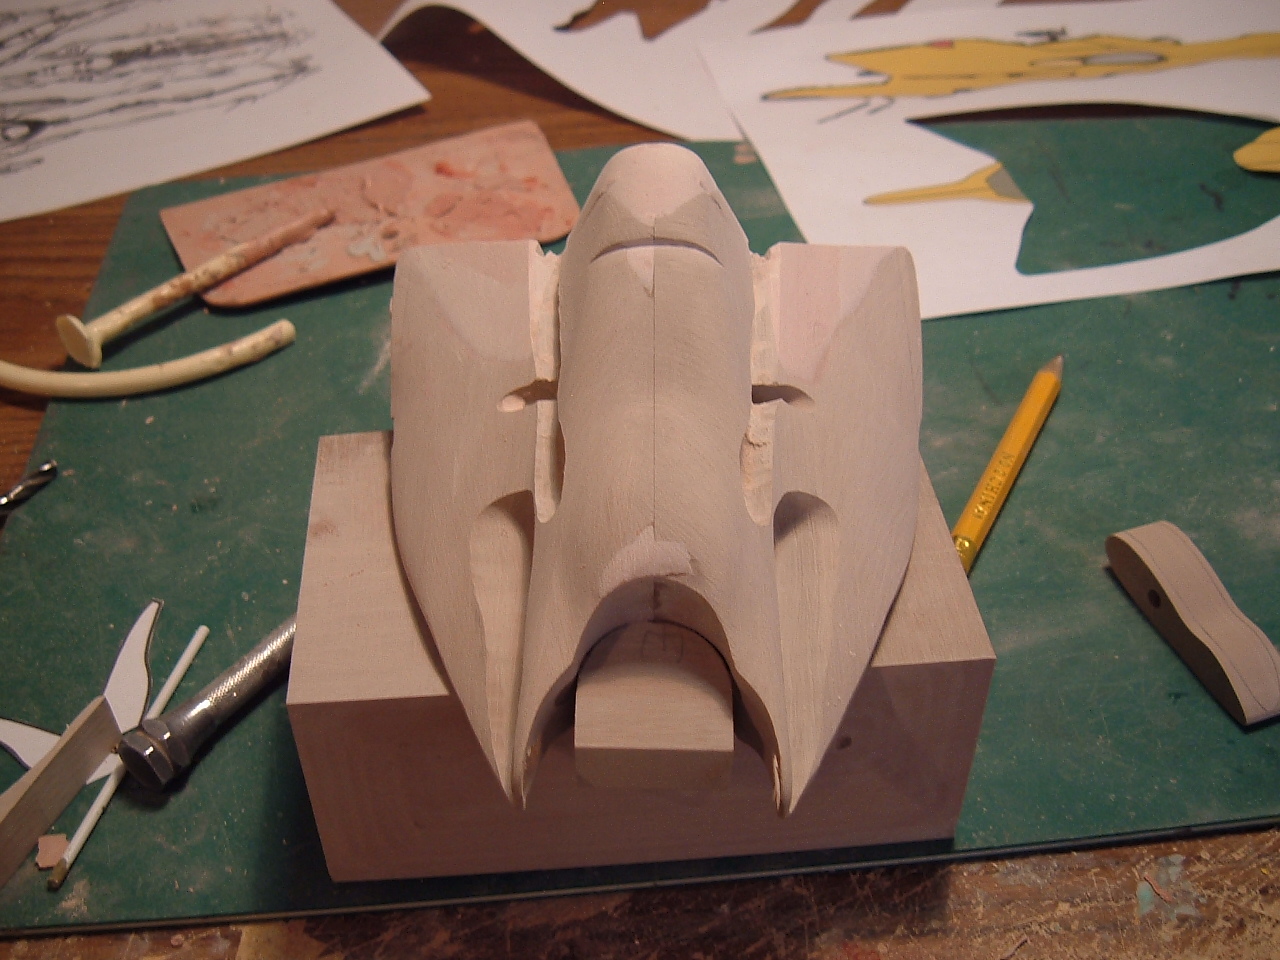
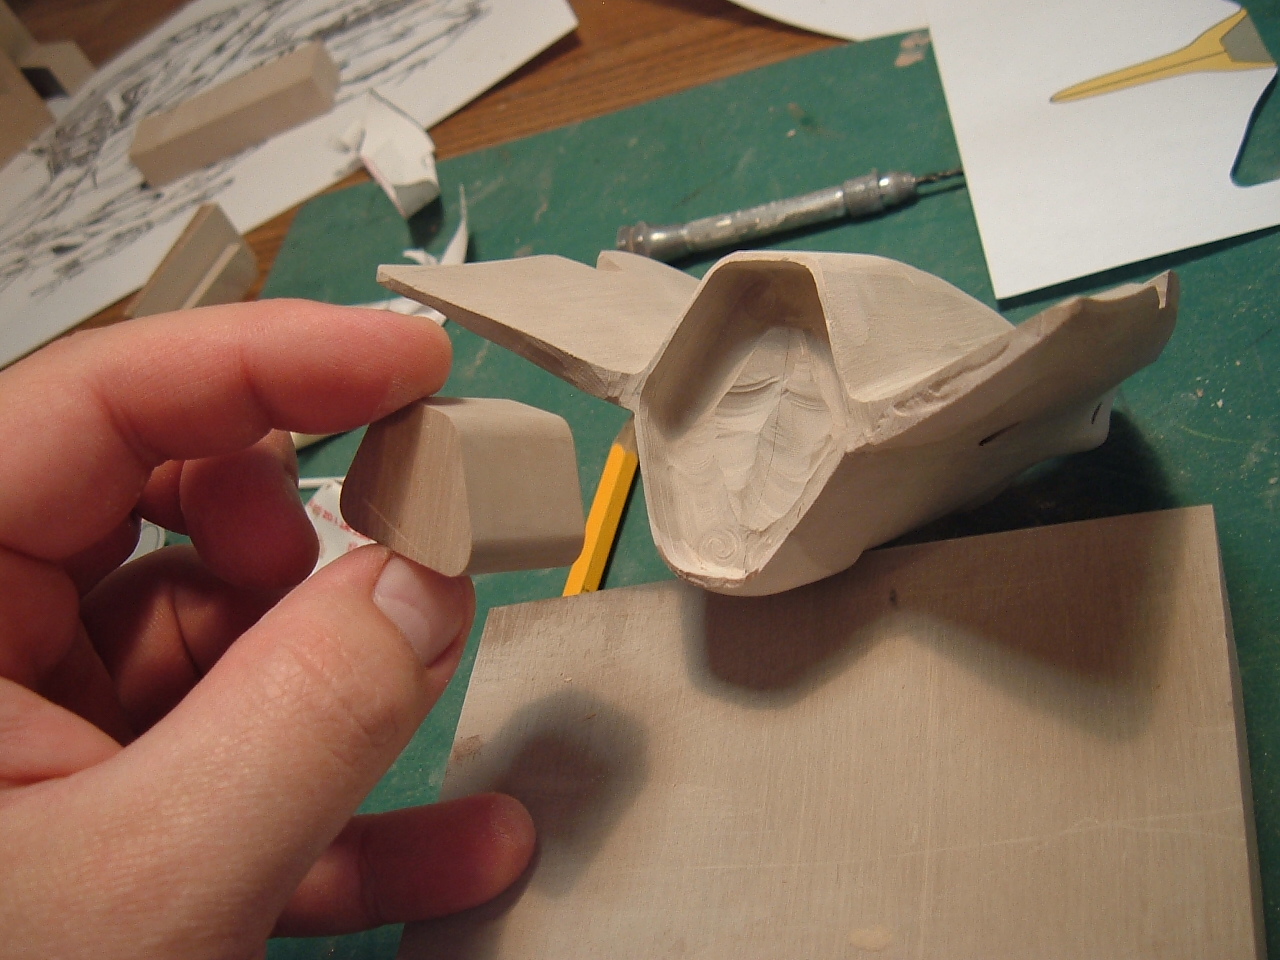
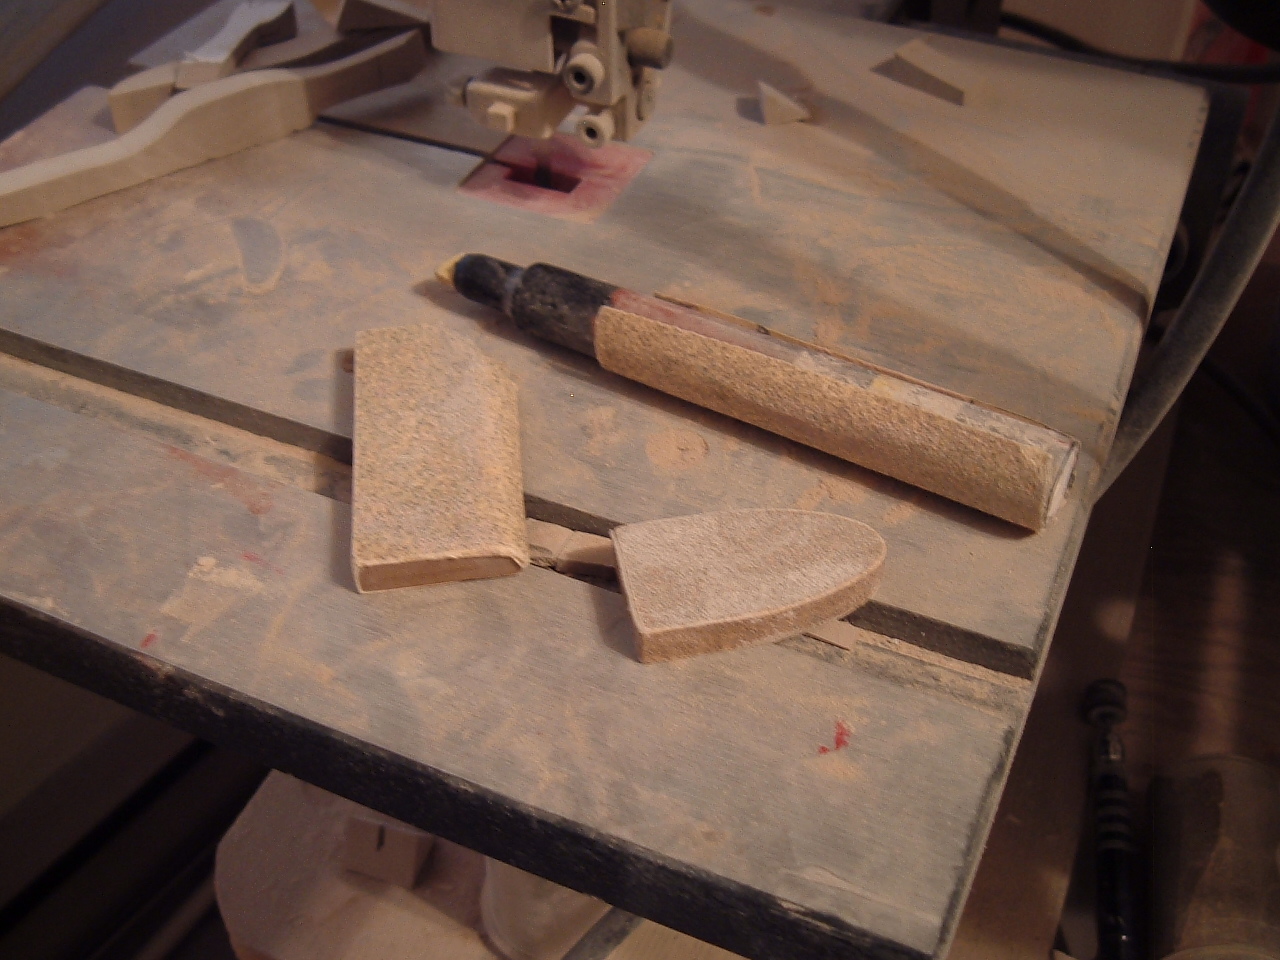
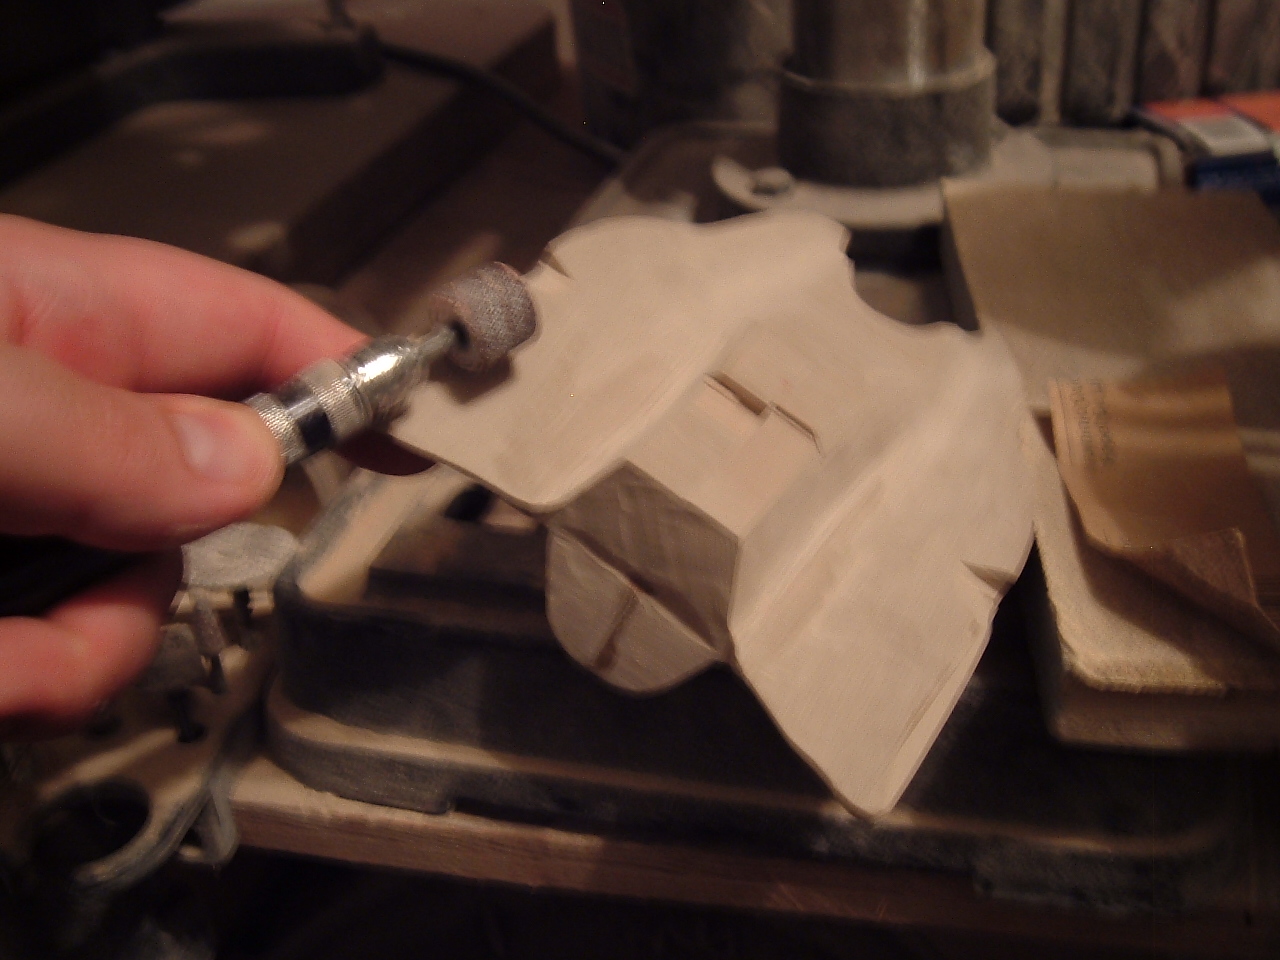
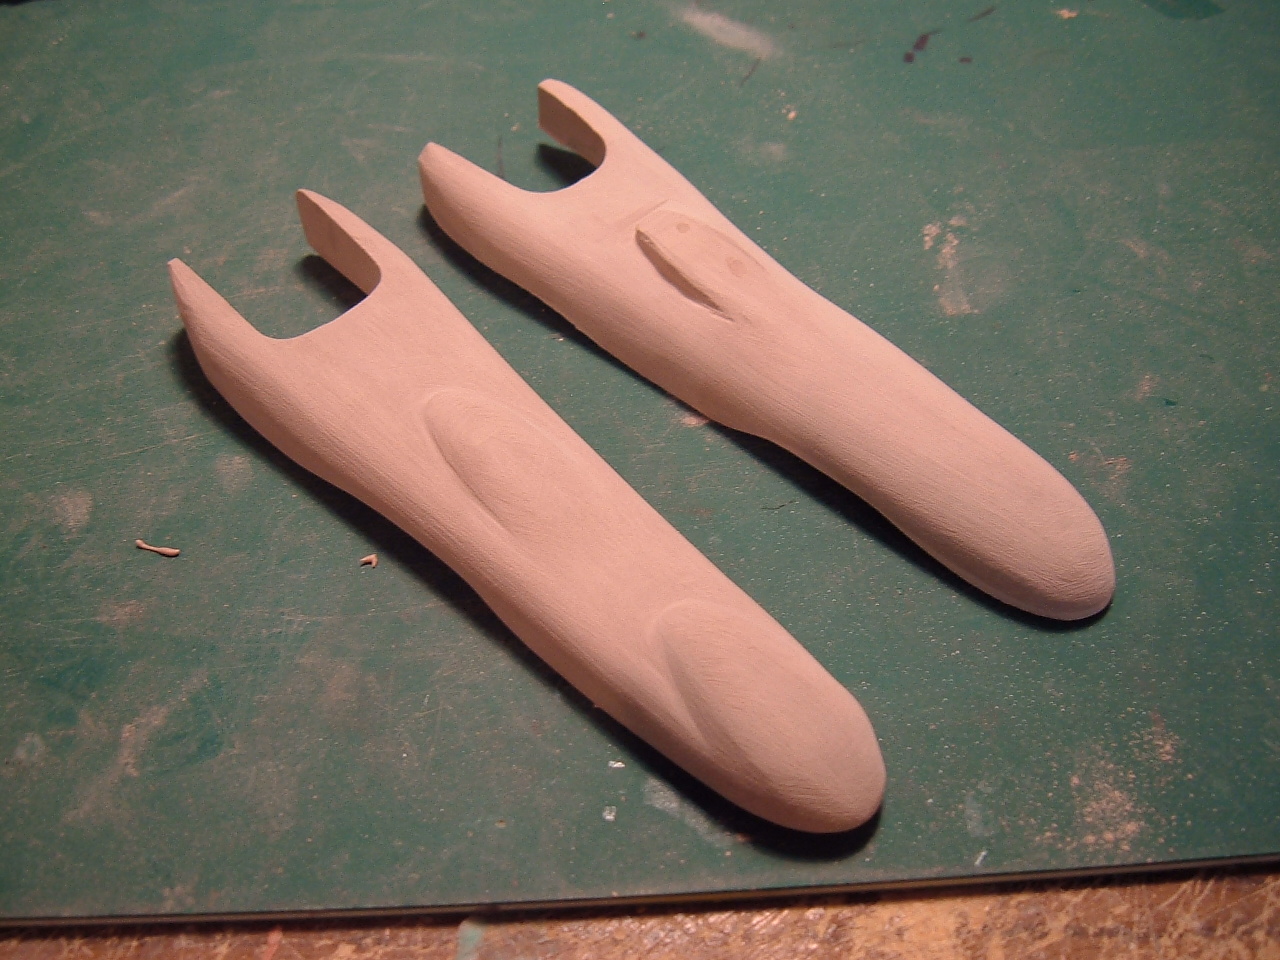
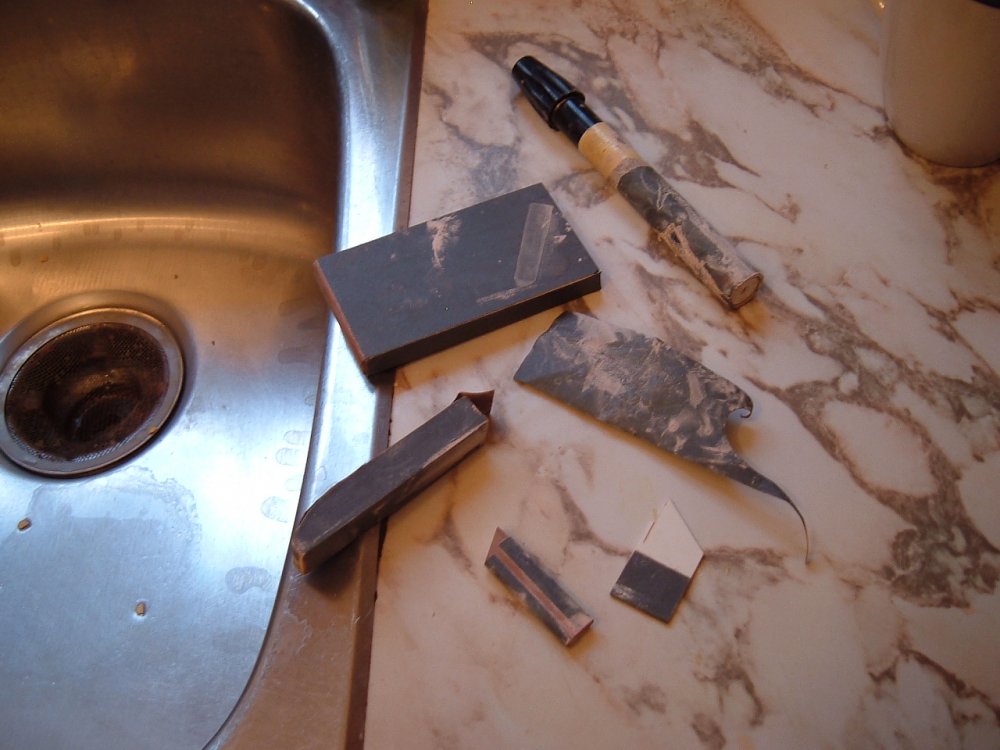
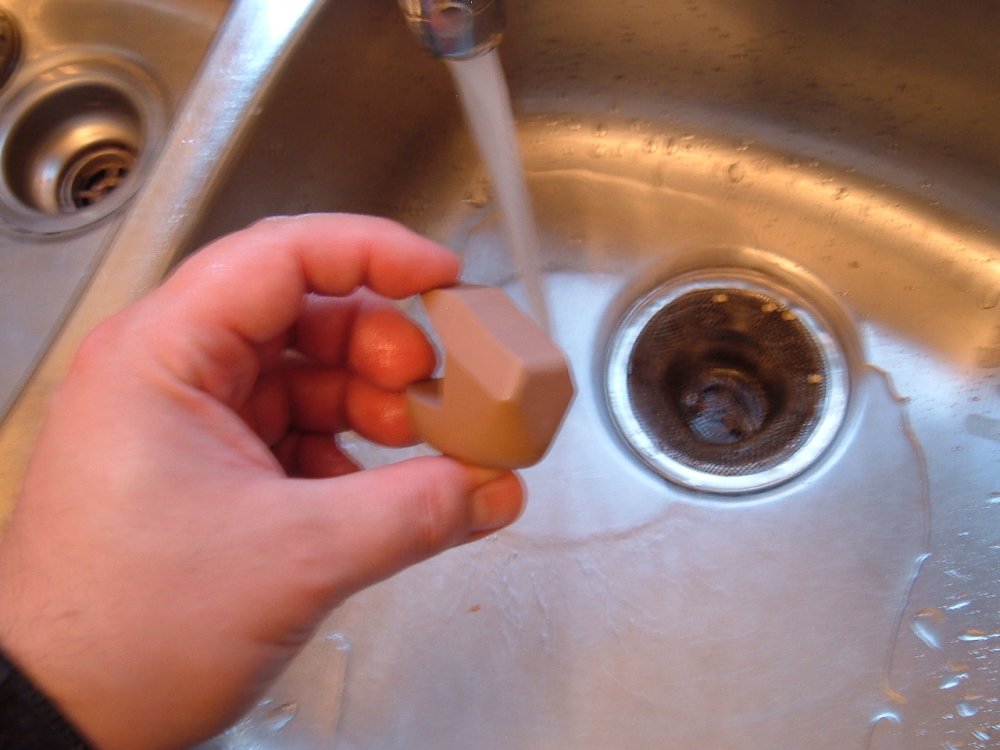
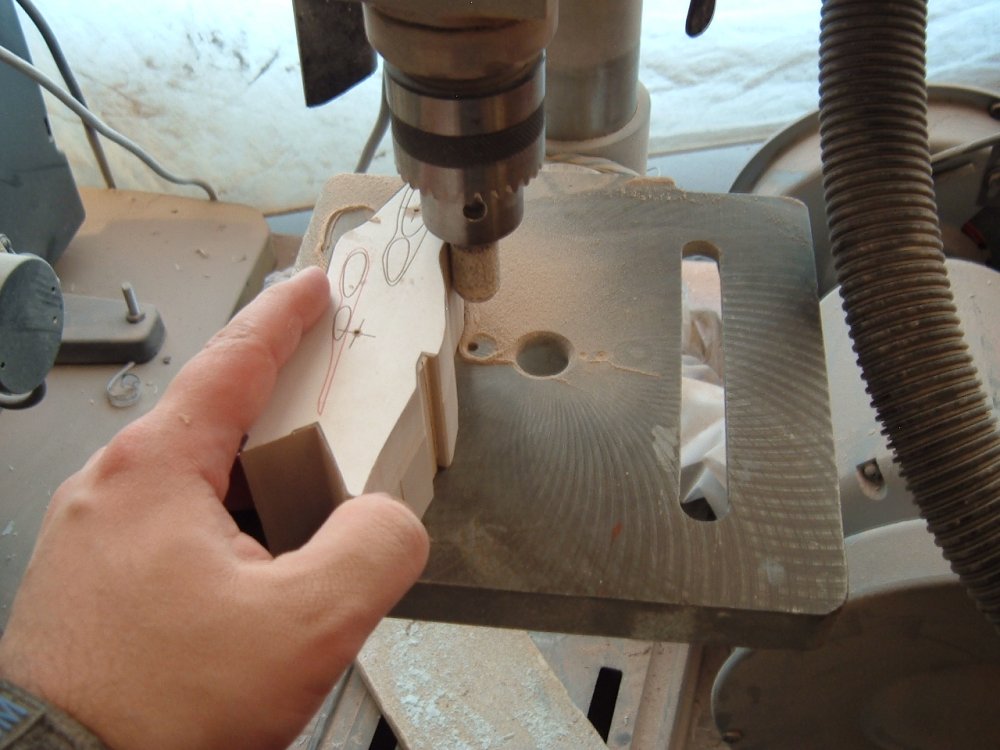
Captain's Log: Monday, September 13th. Hi everyone. Please forgive my tardiness with this latest update, it seems that my camera developed a serious malfunction last week, which disrupted the usual flow of things. Alas, that is now rectified, so on to business as usual! Pic 1: while I spend a lot of time showing the master patterns of my works in various stages of completion, I thought that it might be interesting to focus on some of the simpler but critical tools that I use in the shaping of parts. Despite what you might think, much of the work I do does not involve the mill or the lathe; those are merely to accentuate the manual labor that goes into making a given model. The Dremel and sanding blocks are really the "meat and potatoes" of the operation, and as such, I have quite a variety of oddly shaped blocks and sanding shapes which I rely on. Many are themselves made of modelling board, but also sometimes made from more common, household items like a marker (but never again, because those markers are now over 5 bucks each at the art store--OUCH!!) I use spray photo adhesive to bond heavy grit sandpaper to the shapes for sanding. When they wear out, a bit of lighter fluid is used to remove the worn sandpaper without damaging the block. Old-Earth technology, but it works! Pic 2: a (obviously) staged pic of me pretending to Dremel the aft hull of the ship. For an organic ship like this, I generally go slower, because I want to keep the ship symmetrical, and also, it takes just a fraction of a second to remove too much material, and easily 5-6 as much time is needed to repair it. Pic 3: similar sanding blocks and forms are used for wet-sanding; I generally do this under the kitchen tap, and using a little bit of dish soap to keep the sandpaper from clogging. Pic 4: this particular piece is/will be the "heart" of the ship. It's where I imagine the bridge would be, and serves to link the forward hull/gun halves and the aft hull. Special care was taken to make sure all the dimensions followed my diagrams. Pic 5: here I will be producing a buck with which I will "imprint" the shape of the ship's "eye socket" into the hull. By making one master with two usable sides, I ensure that the organic curvatures will be identical left and right. Pic 6: the "bridge" module again. The shapes were a bit tricky due to how it appears in the line-art on top (more squarish) and the bottom, which looks almost egg-like. Still-frames of episode 36 were useful in getting these details, and was also helpful in determining the overall shape of the ship in Plan view. Pics 7, 8 and 9: the forward hulls having been further refined. Some crude tab-and-groove technology was used to align the hulls while they are shaped. Details will, of course, come later. Pics 10 and 11: the aft hull, undergoing some minor putty work and re-shaping to match the line-art. As usual, the various views of the ship tend to not be in harmony with each other, but not nearly as bad as when I was working on the Destroids. The hull is actually a bit further along than is sown in the pics, but I didn't want to let the update slip too far back. More pics to come next week, so stay tuned


-
Pics or it never happened!
-
Just double-checking here. Someone had asked me for an extra radome... Could this member please raise their hand? Thank you Also, I will be shipping tomorrow, so I'm giving an official heads-up.
-
Quirtra Queramitzuu: Kamikaze Space Cucumber
captain america replied to captain america's topic in Model kits
BILLLIONSSSS!!!! Just kidding. Honestly, I have no idea, but likely over $100. It's quite a large ship and thusly, will require lots of resin. -
Quirtra Queramitzuu: Kamikaze Space Cucumber
captain america replied to captain america's topic in Model kits
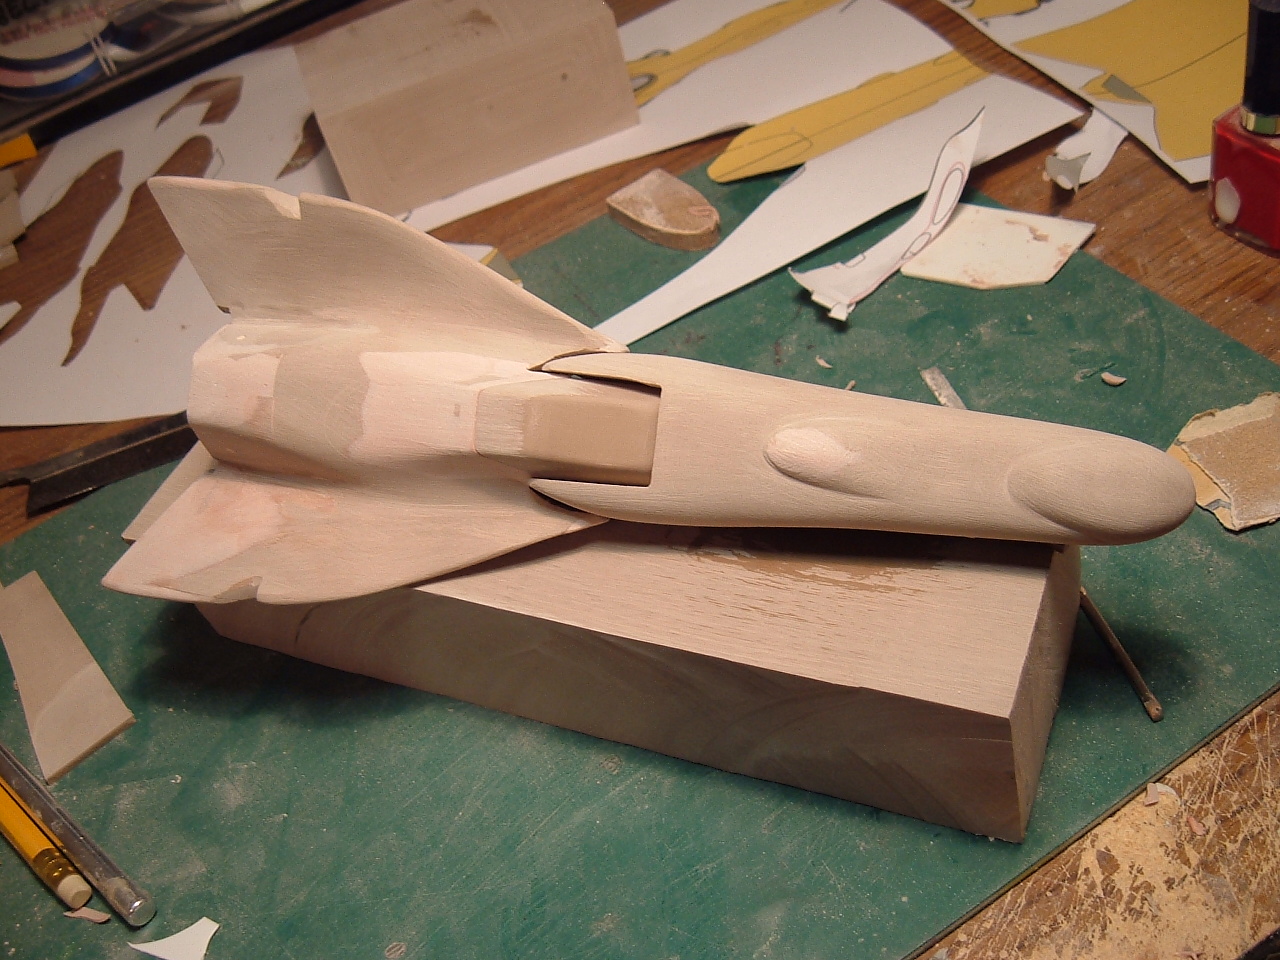
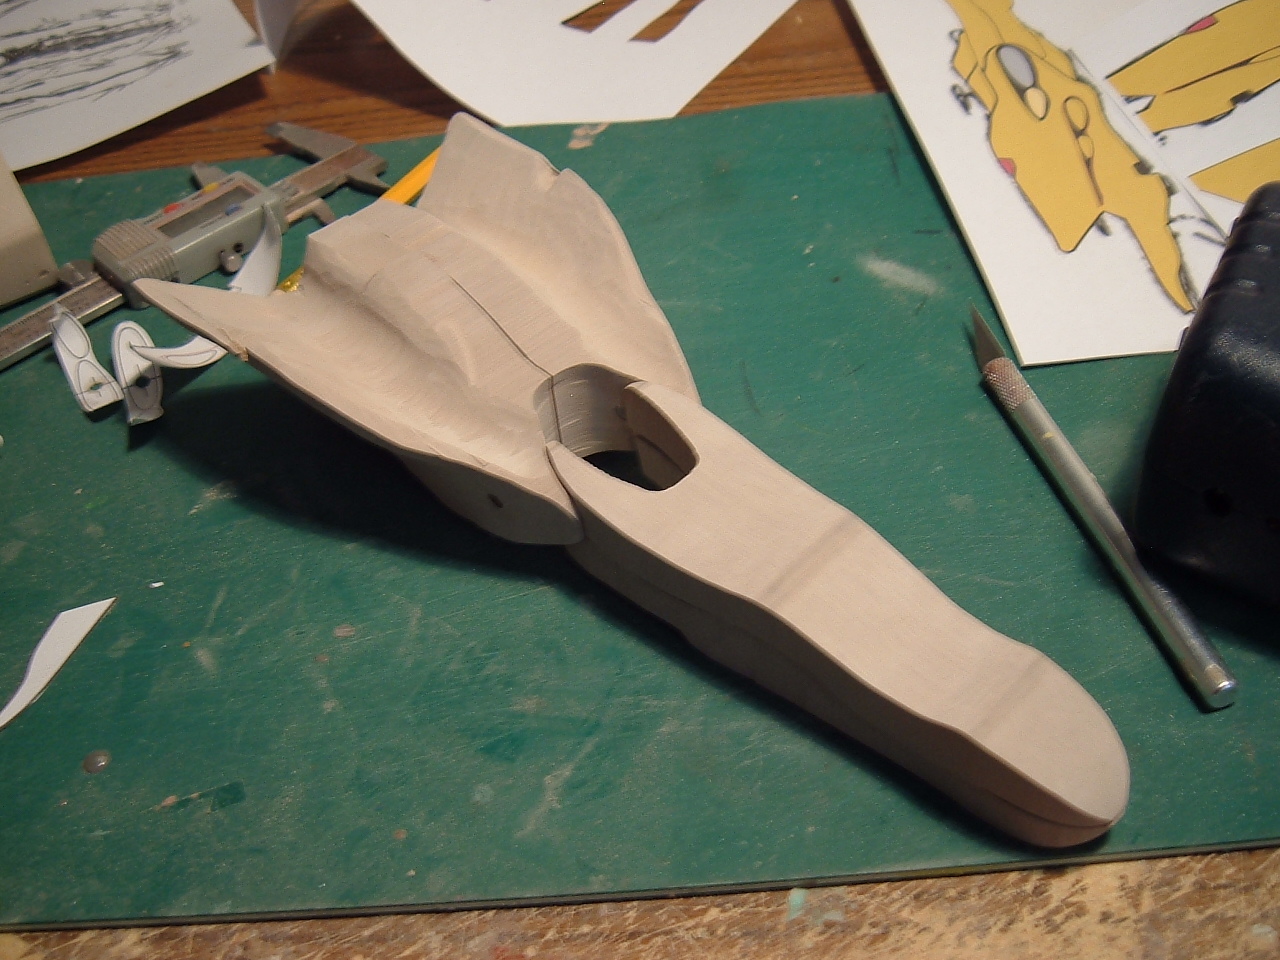
Pic 9: yet more milling. I do as much excess removal on the mill as possible not just for accuracy's sake, but because Dremelling produces copious amounts of very fine dust that gets into everything. Not good! Pic 11, 12 and 13: well now we're getting somewhere! Bare in mind that this is the result of about four days' worth of chopping, but it already has a decent profile. As you can see, I have already started with the Dremeling to start giving the hull that neat organic look. The hard stuff is yet to come, but will also be the most gratifying. Stay tuned!


-
Quirtra Queramitzuu: Kamikaze Space Cucumber
captain america replied to captain america's topic in Model kits
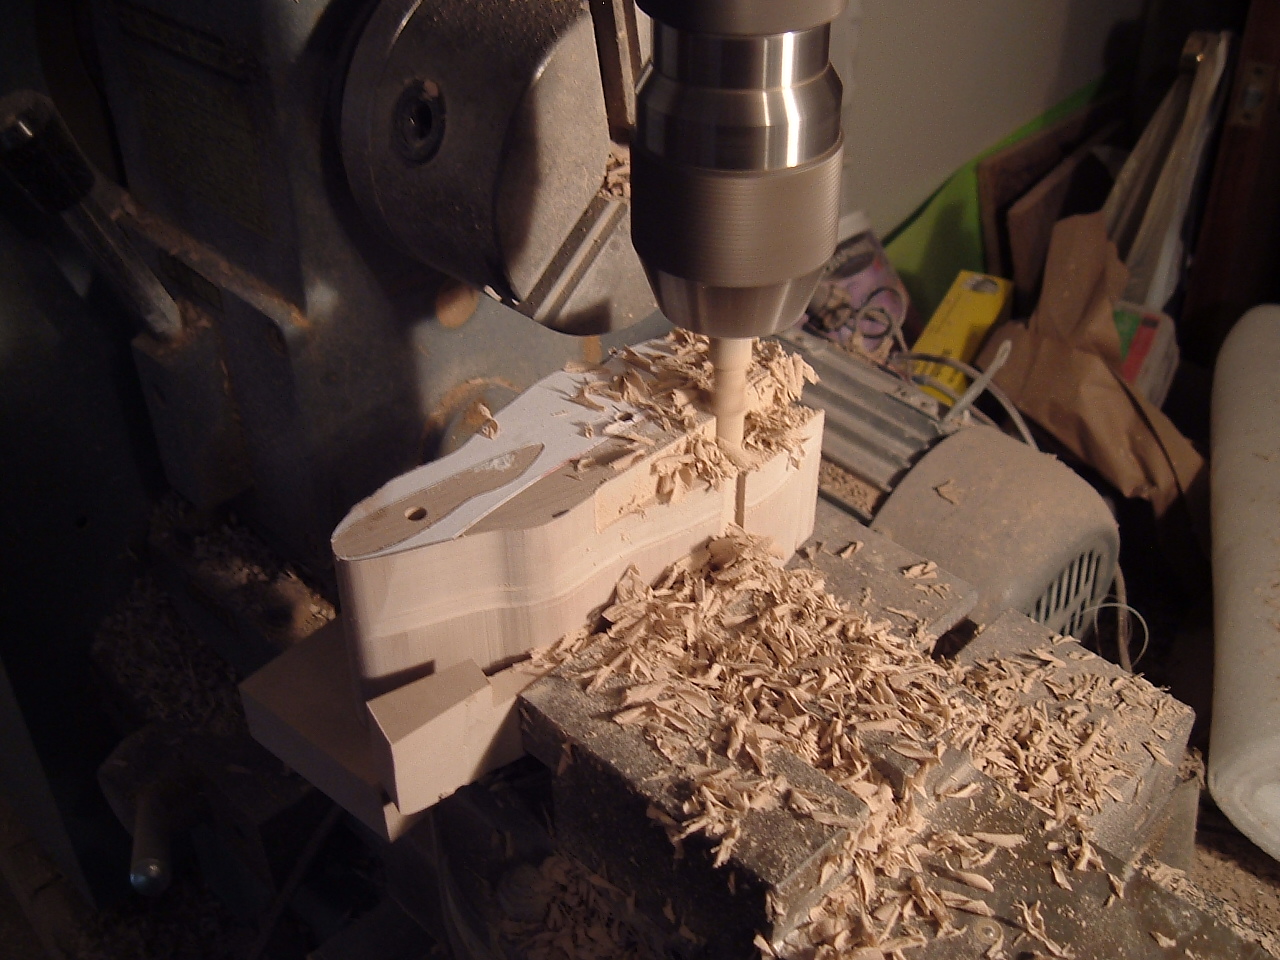
Pic 5: one of the aft hull halves being milled. The organic shape of the part makes the amount of milling challenging, but removing excess material this way is preferable to hand-dremelling as it maintains precise dimensions. Pic 6: the same part now goes under the grinding stone to remove the last of the excess for the profile dimensions. Pic 7: one of the forward hulls also being milled. The shape is very organic, so I mill resolution "steps" by eye to remove as much excess as possible. I get to play "CNC" with the computer being my eyes and brain. This was actually a very long step. Pic 8: the forward hulls milled and needing to pass under the grinding stone.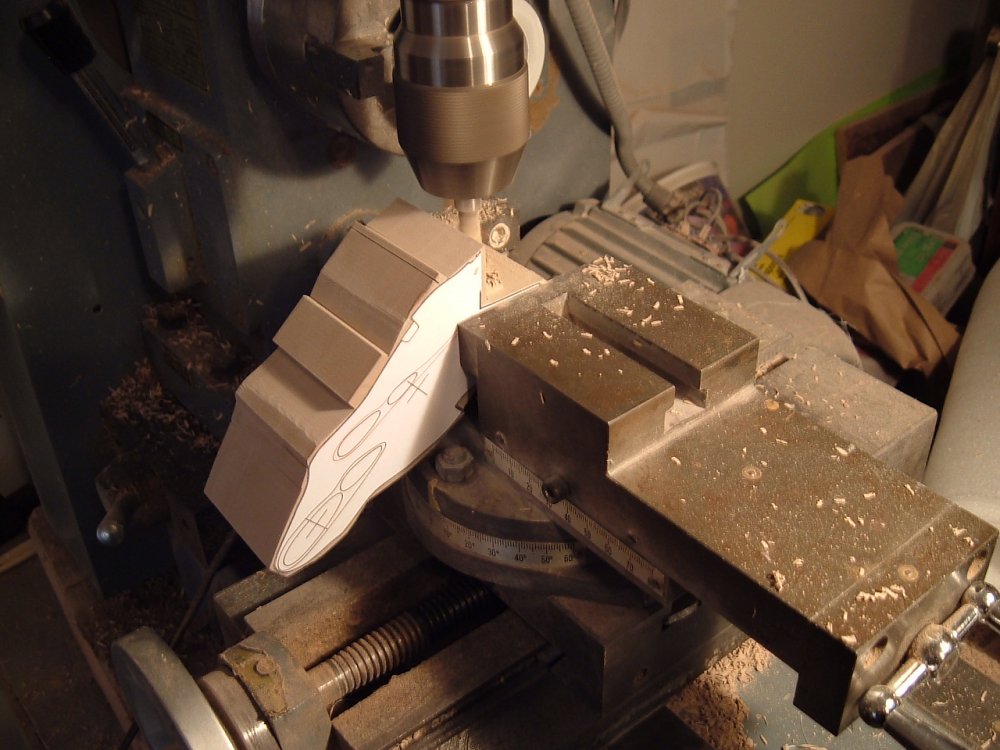


-
Quirtra Queramitzuu: Kamikaze Space Cucumber
captain america replied to captain america's topic in Model kits
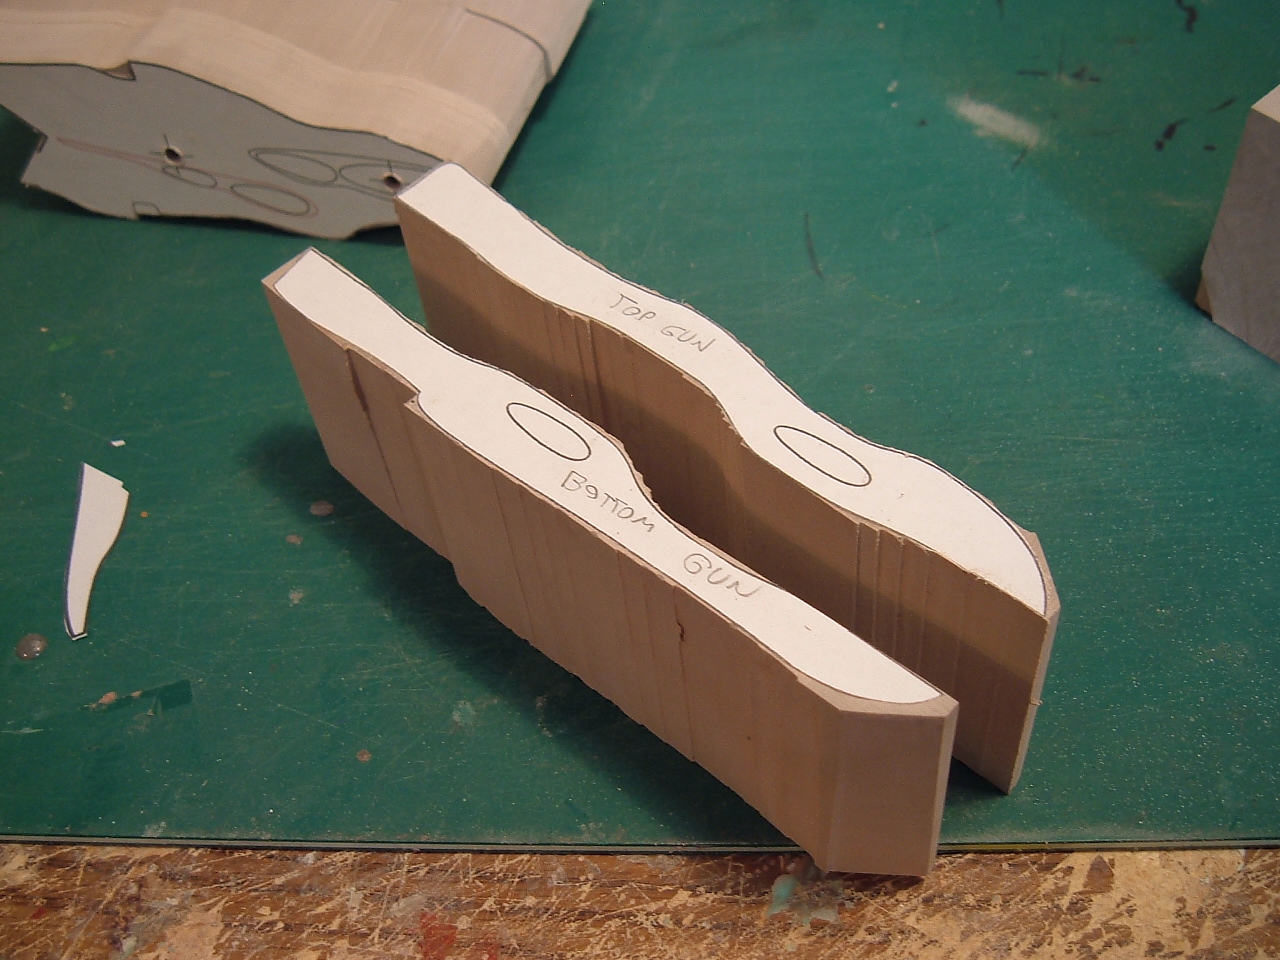
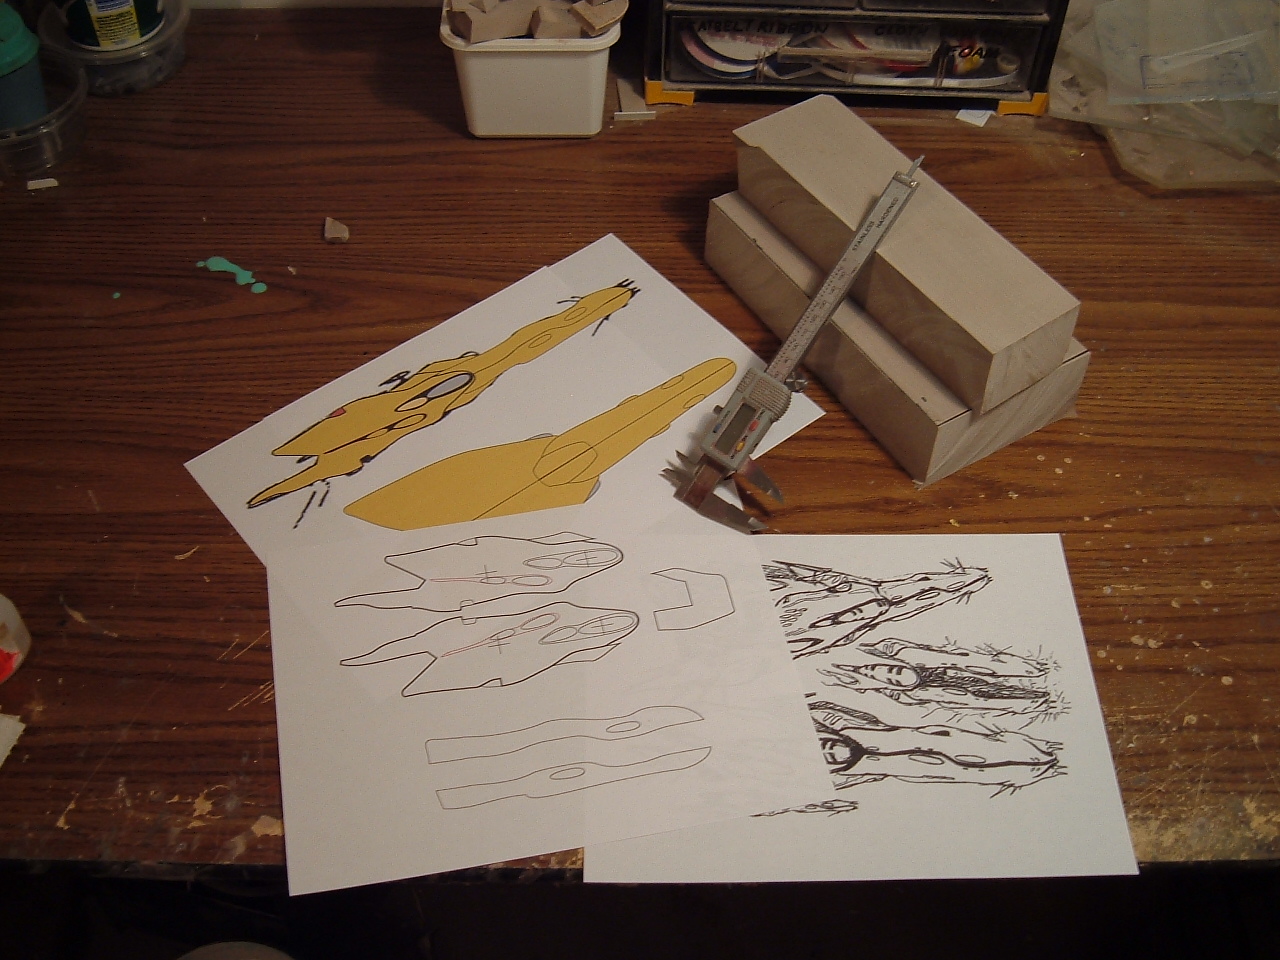
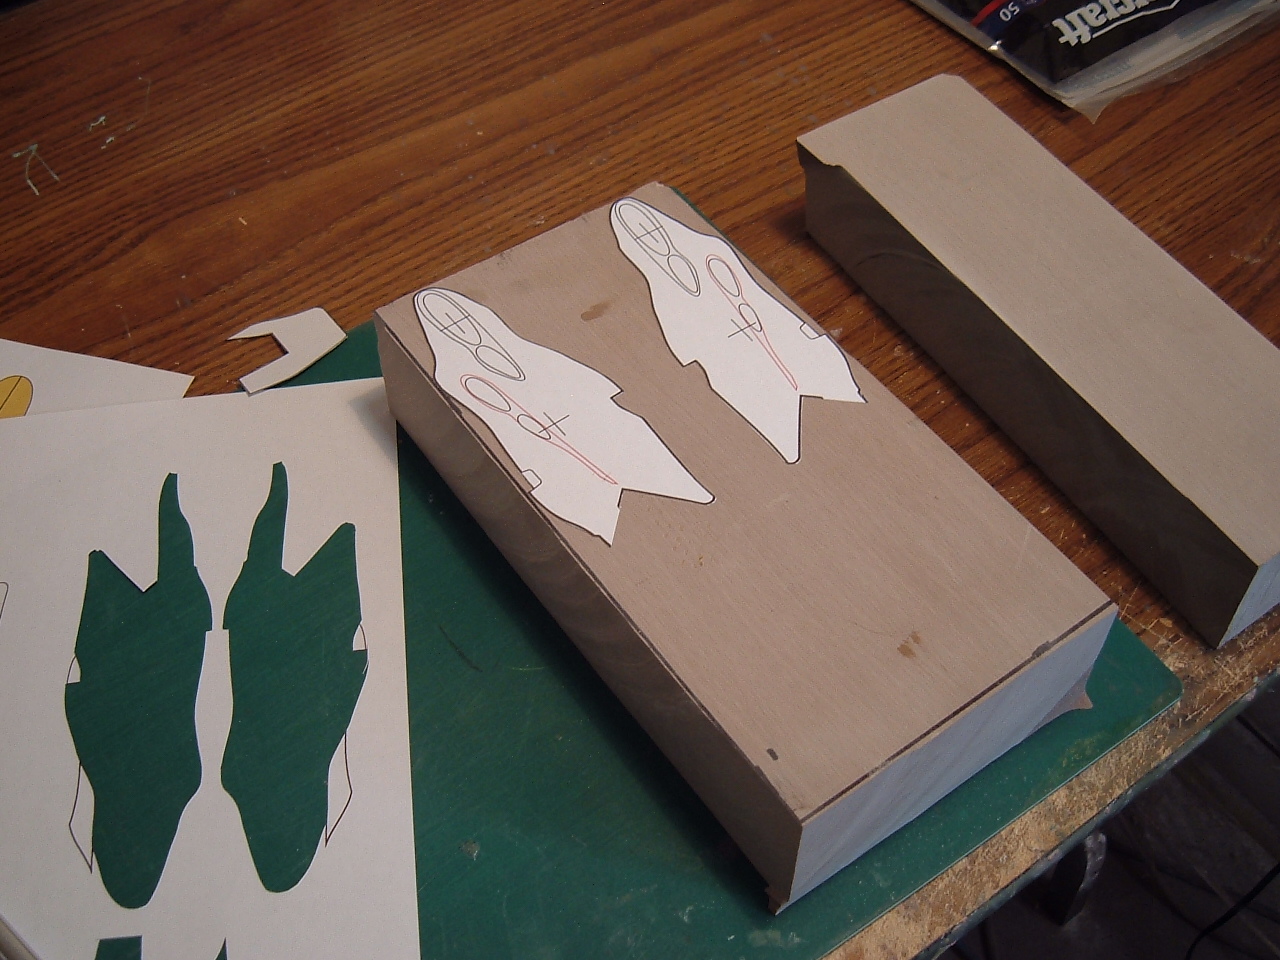
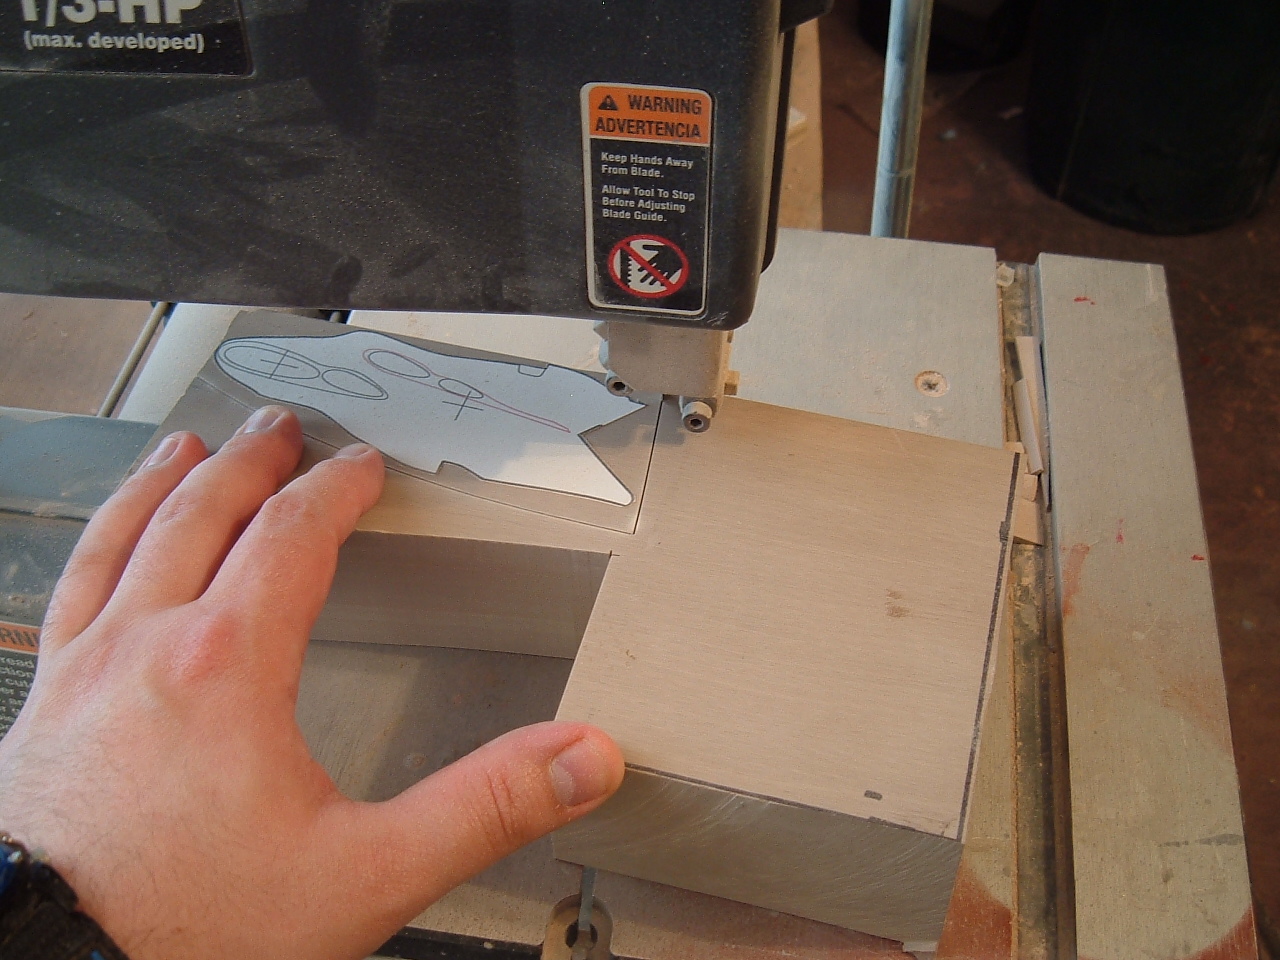
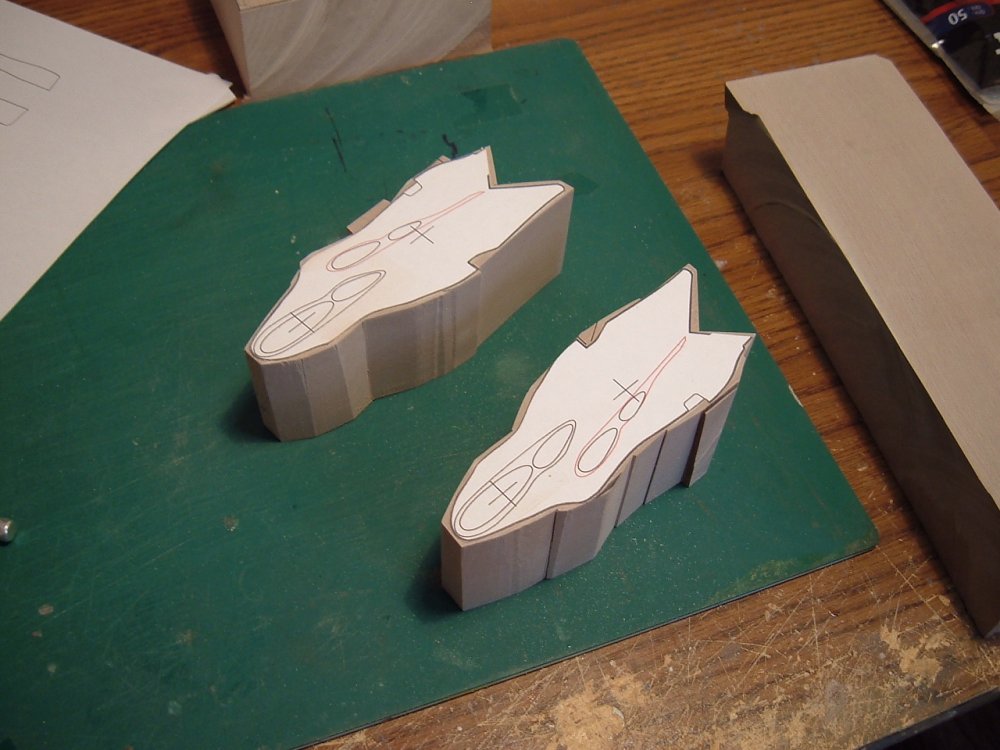
Captain's Log: today. It begins... As per my usual procedure, every project begins with planning and plotting, and this project is no different. While the Quelamitz might look like a really quick, organic and simplistic project, I can assure you that nothing could be further from the truth. Since symmetry is important with regards to a ship like this, it's very important to nail the cross-sections down before starting, and after lots of careful observation, I opted to use modeling board as opposed to clay. This will allow me a greater level of precision and control as well as maintain the 1/5000 scal look established with the Picket Ship. Pic 1: after a few days of designing, the plots are printed and the modeling board is cut into more manageable chunks. Pic 2: plots are manually cut and glued to the modeling board... Cookie-cutter style. Pic 3: the band saw is used to cut away the big stuff and separate the modules. Pic 4: the parts are relatively close-cut and awaiting further refinement. These parts represent the left and right sides of the aft hull: splitting complex parts into halves like this makes it easier to monitor symmetry.


-
Good news! The canopies are finally in!!!!!! I'll start doing the canopy triage today, and should be able to get a few kits shipped tomorrow, and the rest early next week. **Does cartwheels down the hall**
-
Absolutely too late.
-
Quirtra Queramitzuu: Kamikaze Space Cucumber
captain america replied to captain america's topic in Model kits
No idea yet, there are still quite a few factors to figure out. It's quite a large model though. -
Not yet, but I should have them any day now. I can't wait too, cos I've got this huge pile of kit boxes in front of my TV and it's driving me bonkers!
-
Quirtra Queramitzuu: Kamikaze Space Cucumber
captain america replied to captain america's topic in Model kits
Oh yes, main gun will be able to be built open or closed. Battle-damage seemed pretty spread-out over the ship, so I'll likely make it un-damaged and allow modelers to make any damage as per their own interpretations. -
Quirtra Queramitzuu: Kamikaze Space Cucumber
captain america replied to captain america's topic in Model kits
Actually, the Kamikaze ship wasn't brown, but purple (it was a Meltran vessel.) The reason it looked brown is because I think the top of the hull rusted from exposure to the elements and such. I know because I just re-watched Ep 36 a few times just recently -
Quirtra Queramitzuu: Kamikaze Space Cucumber
captain america replied to captain america's topic in Model kits
Yup, so roughly 30cm from bow to stern -
Hi Everyone. As per the title, I've decided to set my scratchbuilding sights on the infamous "Kamikaze Space Cucumber" from episode 36 of the series that Quamzin uses to ram the Macross. I happen to really like the shape of the vessel and of course the main gun design is the cat's meow! http://www.macross2.net/m3/sdfmacross/quiltra-quelamitz.htm I'm not yet sure if I want to render her in full battle-damage or not, but I think I'll cross that bridge when I finally get to it, and that's still a ways off. I've settled on 1/5000 scale (the same as the mini-me Salan Scout) in order to keep a level of consistency with existing models. Also, the fact that there's a Macross Storm-Attacker in plastic that's been floating around for 25+ years makes the potential for a diorama too sweet to resist! Alas, this is where it begins: I'll start rendering some diagrams and will probably have a first update by Friday or next Monday. After that, I'm off to pick an adequate-size cucumber to make the hull and some corn nibblets for the sensor thingamabobs
-
All the sourced I've found list the ship's length at 1500m
-
Yes and yes, respectively! It's the gunboat that Quamzin used to ram the Macross in his suicide run of episode 36. I think that 1/5000 would be just perfect in size (about 30cm) and in scale with mot only the tiny Salan Scout, but also the plastic Macross kits.
-
You mean that ol' lullaby? That won't be until close to Christmas if at all. In the meantime, I think we needs another space cucumber: something with a deployable main gun... Like a Quelamitz.
-
Update! Looks like the canopies are done and shipping!! I should have those in the next couple of weeks, and shipping will begin almost immediately after Many thanks to all of you for your patience
-
Clear resin isn't all it's cracked-up to be; pretty much all the brands I've used are tempermental and don't offer sufficient rigidity in cases of extremely thin castings, not to mention the flow problems they exhibit with very thin cavities, even under pressure. Plus, vac-formed lexan provides unsurpassed optical clarity. Only the best option will do.
-
Nothing lately. I'll send Onezero a nmessage tonight.