captain america
-
Posts
3563 -
Joined
-
Last visited
Content Type
Profiles
Forums
Events
Gallery
Everything posted by captain america
-
Are they members here? Re: Inbits. Even in scale with my 1/32 kit, a Gurab (the grape-flavored mecha) would only be about 22-23cm tall, and no where near as spendy as the armored fighter, due to the relative simplicity and low parts count. An Eager (little sand crabby thing) would be even cheaper; maybe the price of a Destroid. Once again, that's still a ways off but well within the realm of possibility.
-
Nope. The current workload is already very high; pilot/stowed ride-armor would have to be offered separately later.
-
I can actually re-do the artwork, no problem. What I'd really need is someone who can do excellent quality printing from a Corel Draw X4 file.
-
Ok, for those of you who have contracted in, the down-payment will go as follows: -$140 per kit ordered. -Shipping North-America: 1 kit = $19.00. 2-3 kits: $32.00 -Shipping International: $40.00 -Transaction fee: 3% (downpayment(s) plus shipping multiplied by 1.03 will give you your total) IMPORTANT: do NOT, I repeat, do NOT send funds until you have reviewed and returned the agreement as requested. For info on that agreement and how to get things going, refer to post #92. If anyone needs me, I'll be having a snack in my office
-
Umm, sure, you can throw your name into some hat if you want to... Dunno what that has to do with the Beast... I kid, I kid! Sure thing, buddy! Welcome aboard
-
If you do a little search for threads I've started in the past here in the modeling section, I'm sure you'll find quite a few that describe my building procedures & materials I use. It's pretty much all the same, only the final shapes differ slightly
-
Holy moly, what a whopper!! Actually, even at 1/24 it won't be massive; maybe a tad bigger than a 1/32 F-14. Will you be using PU resin? Fiberglass? Keep it up man, that looks kickass!
-
Hi Akim, long time no see! Yup, I think I have pretty much all I need as far as visual reference. I've also added a lot of little things that weren't in the original line art, like a crew boarding ladder, access hatches, radar assembly, etc, etc. You know me, I like to put my own little touches on things ^^
-
You'll have the ability to pose the kit however you like and make a few adjustments here/there, but I would advise against constantly trying to change the pose, as it will loosen the joints over time. Think model, not toy Oh yes, it's f%$*ing huge
-
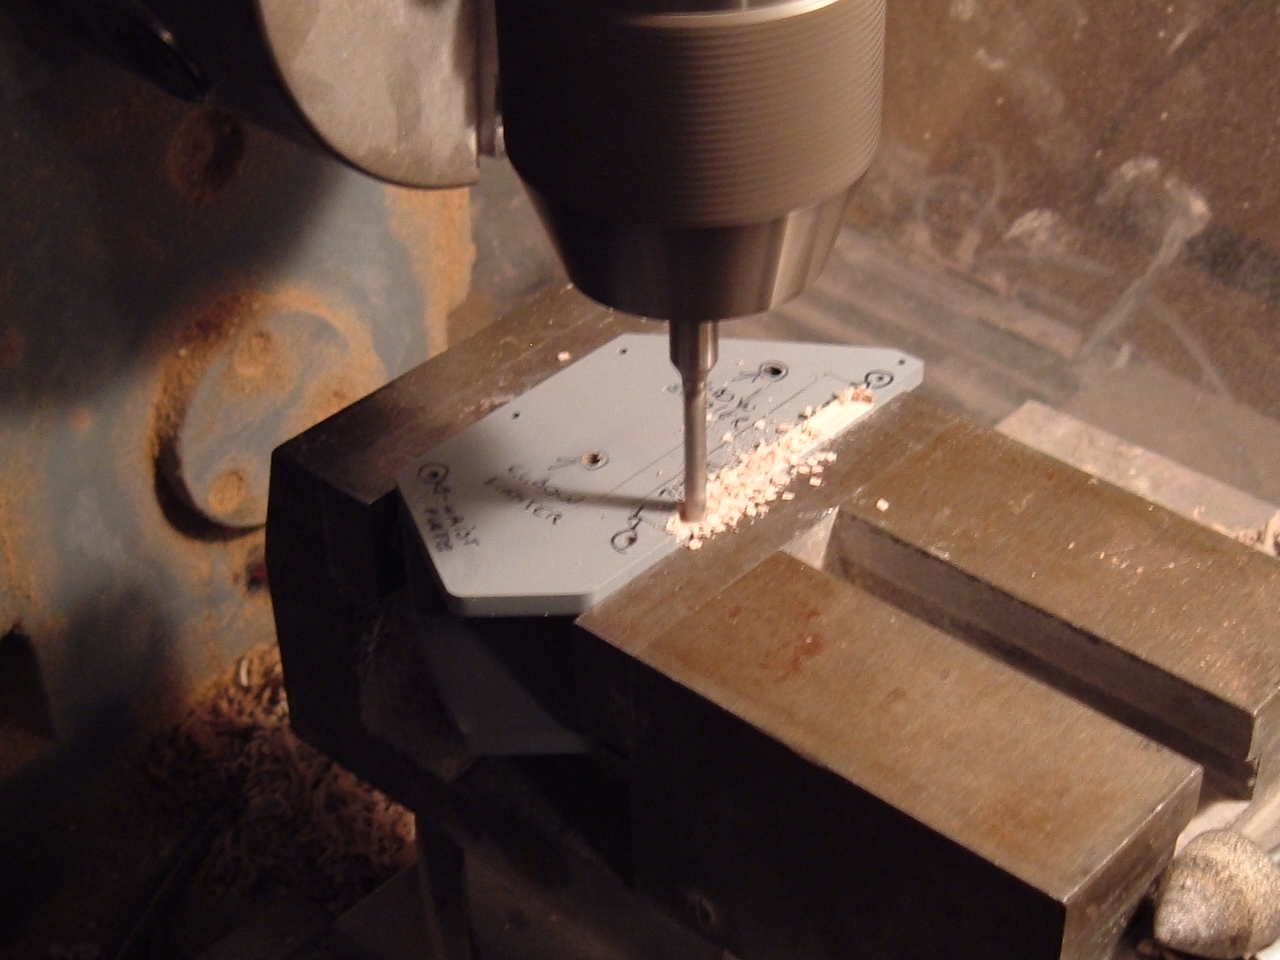
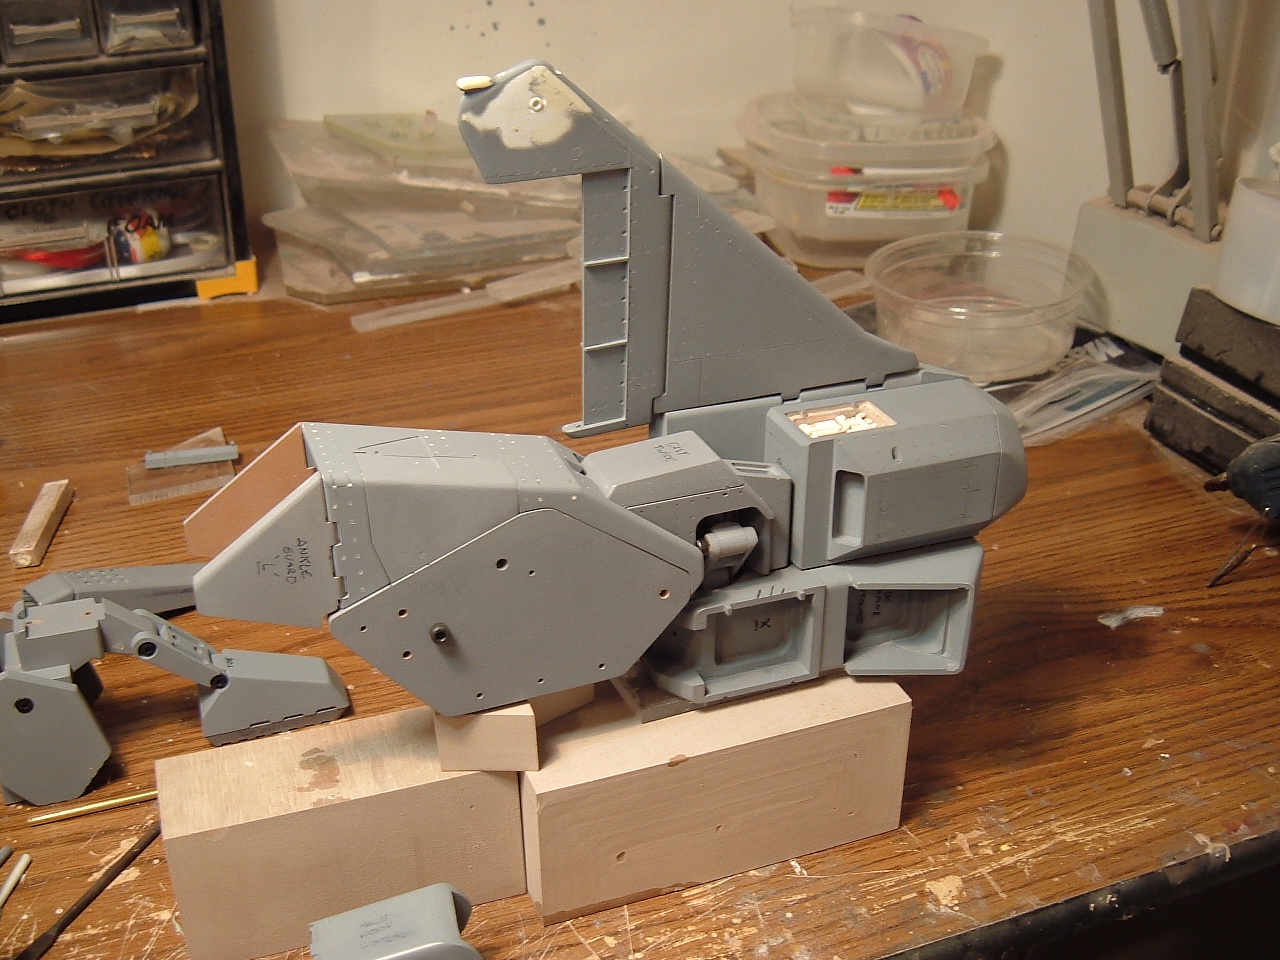
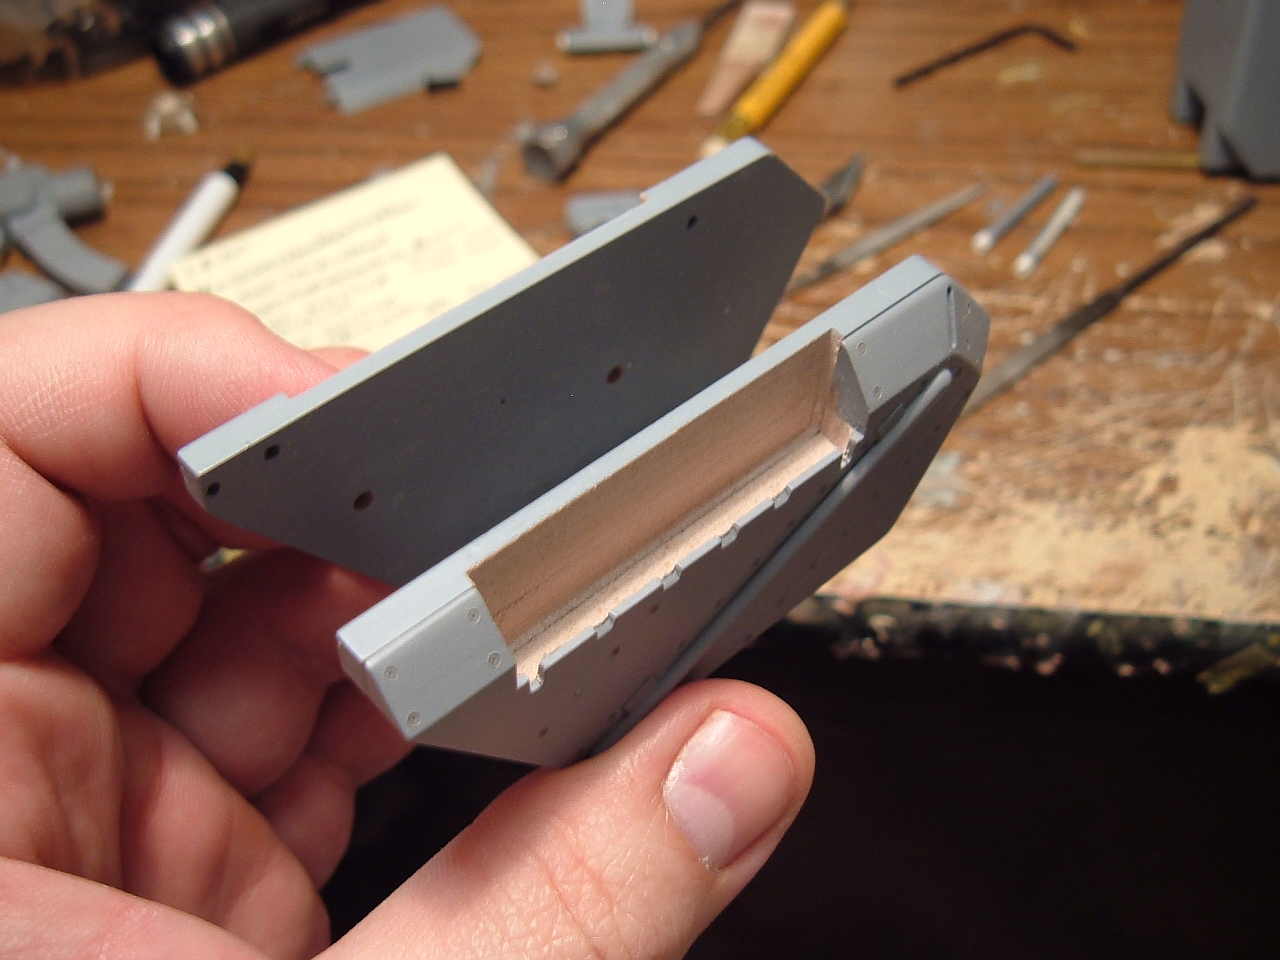
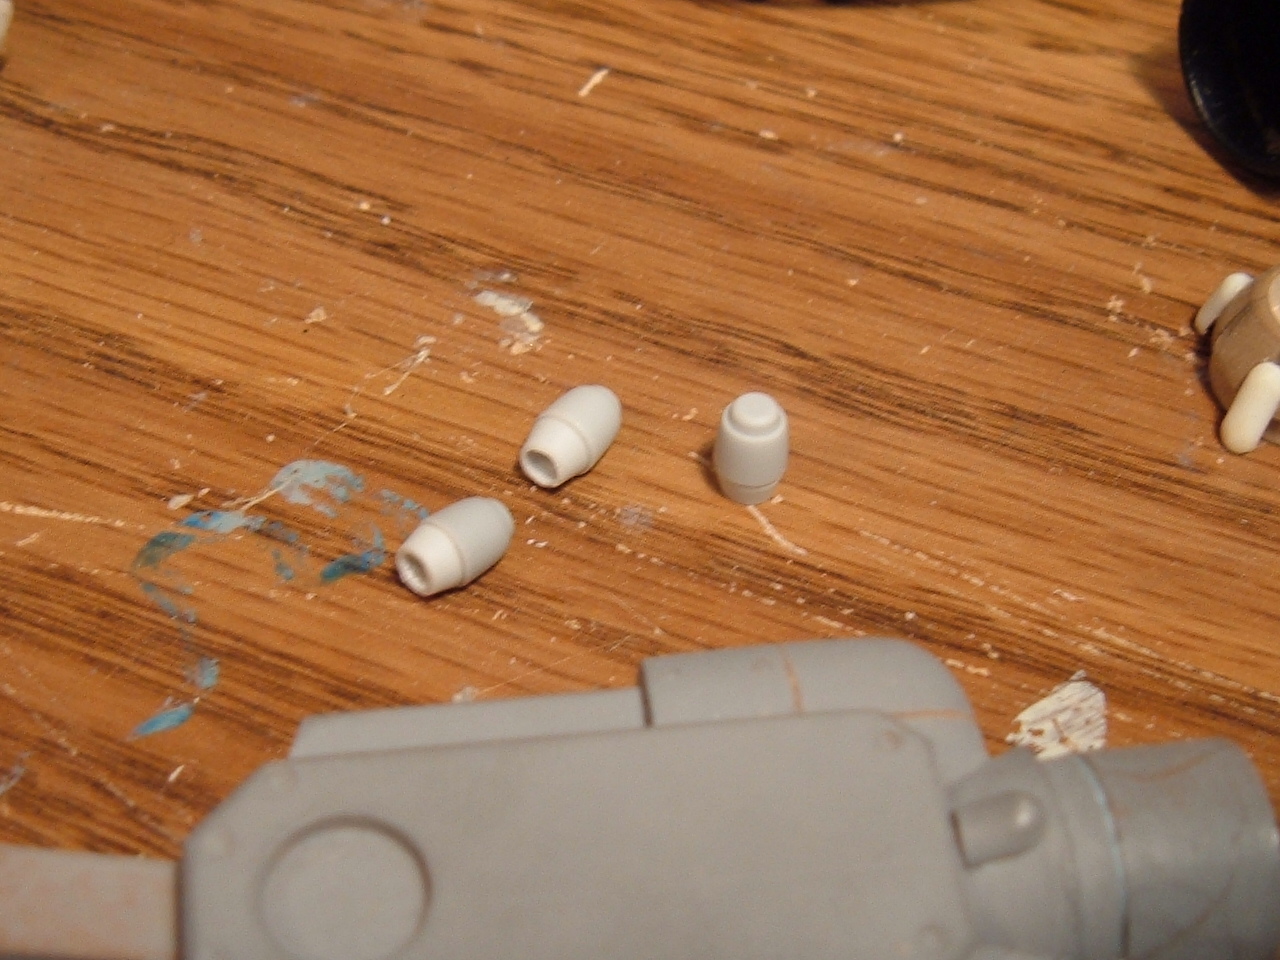
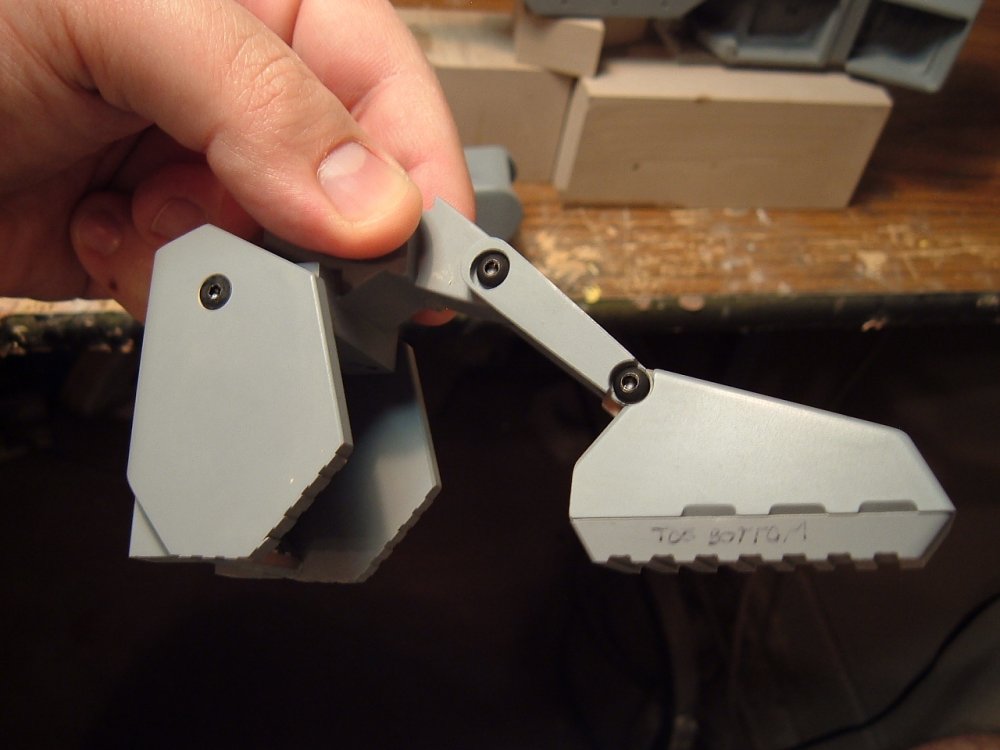
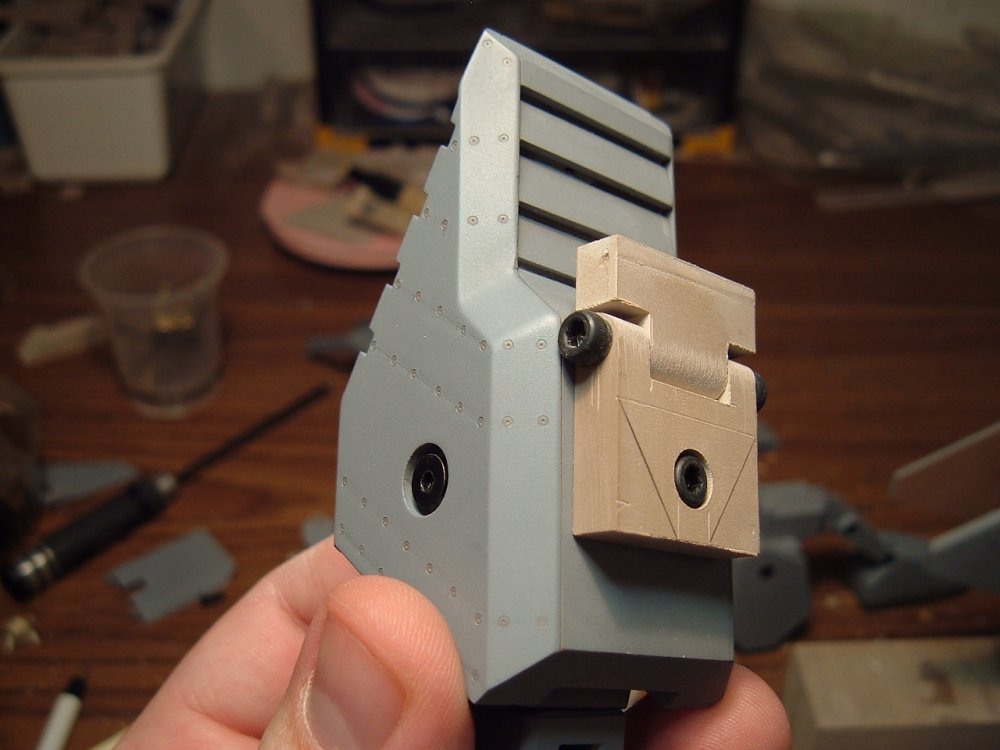
Pics... I've done a little machining to certain parts I felt could use some improvement. In pic 1, I've opted to remodel the forearm missile housings so as to allow for slightly larger warheads. Pic 2: testing and fitting of parts, to make sure everything goes together as it should, and try to pick up on any shortcomings I may have missed 8 years ago. Pics 3 & 4: STEEL HARDWARE' BABY!!! In stead of using punier, wimpier Walthers brass bits, I opted to go for full steel 3m hardware throughout the kit. This will not only make the model rock-solid, but will also stay within the sturdy, over-designed look that the Legioss is famous for. Most screws will be hidden, but the ones that are visible won't detract from the kit one bit, thanks to the strategic use of countersunk screws. You can also see in pic 4 that certain parts are being rebuilt entirely; the originals just weren't cutting it with regards to tolerances. Pics 5 & 6: the enlarged missile bay and new missiles, respectively. Detail will be added and refined in due course. That is all. Carry on


-
Hi everyone. Yes, I'm still alive. Barely... I've been busy doing inspection, re-engineering and re-working of some of the BEAST's details. All of which needs to be done to make this the best model I can make, and oh boy there are a lot of parts! I will have pics shortly detailing some of the changes I'm making to the kit, but just as a heads-up, you'll need a good quality 2 and 2.5mm Allen wrench What I need from you guys ATM: send me a PM with an e-mail address that you check regularly. I will use it to send you a User Agreement that will be the back-bone for this project. This is to cover both my but and your butts because it's such a spendy and sensitive project. Still putting the finishing touches on this, but you can expect to receive it by day's end Friday.
-
Hi Carl, I have that jpeg too, but I was referring to the actual vector file. At least I can size that image and use it as a quick reference.
-

Quirtra Queramitzuu: Kamikaze Space Cucumber
captain america replied to captain america's topic in Model kits
Looking good! Did the sprue antennae pose much of an obstacle? -
Hi Pat, Nightmare. Welcome aboard! Guess what guys, it looks like we have our 20!!! I'll kick the project off on Dec 1st officially, but will be doing some prepping behind the scenes until then... I also have to redo all the decals from scratch because the original file was lost, but that'll be a labor of love. Oh, and by the way... IT LIVES!!!!
-
Hi Mike. Yes, 2 month intervals is the plan. While I may decide to take it upon myself to do some advance molding of certain parts, I promise to honor the 2 month interval for payments. Oh, and happy to have you aboard
-
List updated. Still awaiting a response from someone, but looks promising.
-
No Beagle Blow Superior... that blows superior...
captain america replied to EXO's topic in Anime or Science Fiction
Just in case some people might not be aware... A shameless plug http://www.macrossworld.com/mwf/index.php?showtopic=34100 -
Hi Carl. Indeed, too much exposure can be counter-productive. The only thing I can think of is word of mouth; if you know anyone off MW that might be interested in the kit, just direct them here. I'll leave the proverbial door open until Nov 30th.
-
Honestly, I would feel more comfortable with 21-22. It seems that one order may not be certain.
-
Who needs college when you can have your own Supreme Detail Henshin Robo?? Just think of the possibilities... Not only can it be built in any of the three modes, but has the possibility to be converted to Iota, Zeta, or even Mujin configuration with the right parts.
-
Not in principle, though we're still at least 6 places short of a go. Umm... Don't forget to tell your friends about the project?
-
It would be in installments; about $140 (+ shipping) roughly every 2 months. This makes it not only more manageable for you guys, but also for me, cos that kit has over 300 pieces So far, it looks like we have 18 solid confirmations and 1 tentative: RKSC (2) jorwar_b Ignacio Ocamica Codam23 neptunesurvey Ghadrack Thor DarrinG WWWMWWW (3) Major Tom Viceland Valkyrie Jadefalconguard SILVERDRAGON MSLZ 22 Yaco (tentative)
-
Correct. Due to the nature of the project, I'd likely do this by private contract w/deposit.
-
Hi guys. Other possible variants: the Iota conversion could be done easily with a new head/decals; Zeta too, with the addition of new engines and a few other bits. Other (Dark) variants would be a stretch, due to the need for significant alterations. Mini Lide Almor & pirot: maybe as a separate set, since the base Eta kit would already be a handful, what with the need for decals, vac formed canopies, metal screws, metal insert-cast parts & machined joints. As it stands right now, I would need an absolute minimum of 20 orders to even kick things off. Baddies: the Eager & Gurabs are very feasible, depending on demand as always. The bigger baddies might be a stretch due to size/complexity/cost to demand ratio. What I had planned is as follows: "IT" would be released in 6 separate installments (arm, leg, torso, arm, leg, nosecone) of $140 each; each installment roughly 2 months apart. The one aspect that really gives me pause is the main landing struts; still have to figure that out somehow. Alas, I just wanted to lay it all out on the table so that people have a good idea of what they'd be getting into.
-
It's "real" 1/32, which is to say significantly larger than the given anime dimensions, which are fine if the pilot is the size of a 12 year-old girl. I started the whole design from scratch starting with a 6 foot tall man as the pilot and designed the rest of the mecha around him. Roughly 14" tall in Soldier, and 18" long in fighter with the short nose.