captain america
-
Posts
3561 -
Joined
-
Last visited
Content Type
Profiles
Forums
Events
Gallery
Everything posted by captain america
-
Whoa, that thing is huge! Will it have its own zip code? Seriously though, that looks quite impressive! Keep it up man.
-
Instructions: are presently underway. Will need another couple of weeks to complete the plates. Folded ride-suit: may be offered later as an option along with a pilot, though the former can't actually be placed in the stowage compartment because it wasn't made hollow on the Legioss for structural reasons. Unlike in the anime where Stick just presses a button and up pops the MOSPEADA, on my version the bike is stowed in about the same place, but due to the impracticality of anime magic, the pilot has to physically detatch the main soldier mode viewscreen (in the chest cavity) and haul the bike up manually. Not nearly as glamorous, but waaaaay more realistic. Ghadrack: I would recommend test-fitting the installments as you get them, just to get the feel for the way things go together. Of course, painting/finishing is recommended to be done all at once, because as you plug the different modules together, you may want to drill & add pins to strengthen certain components, especially in Fighter mode.
-
As it stands, there are/were more people wanting the kit than I can furnish. Technically, the molds can handle a couple more castings, but as a policy I always leave a bit of juice in reserve in case of a mishap, lost parcel, etc. As was mentioned in the contract, there's no problem with transferring the obligation over to someone else in the event of a "situation." I'm sure that if someone needs to unload one of theirs due to unforeseen events it'll pop up here on the forums. Much easier for people to trade between themselves than have me come in as a 3rd party/fifth wheel to broker the deal.
-
Hi guys! Just wanted to know that as per our agreement, the two month interval has lapsed since part 1 kicked-off, and I'm now commencing work on part 2 (the left arm.) As such, you guys can send payment now(same as for part 1); things will go a little more quickly to ship this time around, since much of the prep and scut-work is done. Will post a quick pictorial update before the 11th. Also, does anyone know someone that does good quality white metal casting?
-
You can try the nearest car-care center in your area; things like primers are more or less the same wherever you go, just labeled differently. Just make sure that you don't get a filler primer, as there are generally 2 types of the same color primer: regular (thin) and one with filler, which is much thicker and used as a very fine scratch-filler that will drown very fine detail.
-
Careful with that trap; they lose more postmen that way
-
I use the automotive stuff a lot; works fantastic for resin kits, though it may be overkill on a styrene kit. I also use Canadian Tire generic rattle can primer for all of my masters; it's inexpensive and coats rather well, though you're limited to mid grey and rust brown as colors. If you're working on a styrene kit, you can try SIKKENS brand Kombi Filler putty; works well for fine stuff and deep scratches left by sanding. As for painting, I never use primer on a styrene kit; just a base coat of light grey paint, or spray the desired color directly if it's a cool hue. This not only adheres fabulously but it also doesn't dull the fine detail you have on some kits, like 1/72 panels and rivets.
-
Hi everyone! Just wanted to give you all a heads-up that Installment 1 of the Legioss is now ready to ship. A few packages will be going out today, with the remainder on Thursday & Friday! It took me a little longer than I'd hoped because I was also prepping some parts/packaging for Installment 2, which will kick-off Feb 1st.
-

Stopping a non-primed model from flaking...
captain america replied to SpaceCowboy's topic in Model kits
There could be several causes for poor paint adhesion. What kind of paint are you using? If you're using hobby paint directly on styrene, you don't even need primer assuming that your plastic was either washed with mild detergent or rubbing alcohol. Greasy fingers? Incompatible paint? Improperly mixed paint? Residue on the part surface? High humidity? These are just some of the potential causes, but as nightmare mentioned, no overcoat/sealant will help to fix flaking paint; the core problem needs to be assessed. -
Hi guys, just a little update to cap off the week. Most of the parts for installment 1 are done, and I just have a few miscellaneous items left, like the missiles. Shipping should begin in the next 2-3 weeks. Also, I just want to make it official that the Beast project is now closed, meaning that only the agreements that have been filled-out and returned as of yesterday will be filled. I'll post again once kits start to ship so that you know when to expect your kits
-
Oh yeah, been there done that, got the Ben Gay! The bigger the mold and harder the rubber, the harder it is to actually cut into it and there was this one time when I slipped and, well... The rest of the story involves 5 stitches to my right hand! Thankfully I've learned how to make things easier on myself in the last 15 years; I was running out of spare body parts!
-
Sorry I didn't get to this sooner. Nope, I never use clay because it would just create a very messy seam line which I consider unacceptable from a detail perspective. I just pour the silicone rubber over the parts and then surgically extricate them with a sharp X-acto blade and a little elbow grease.
-
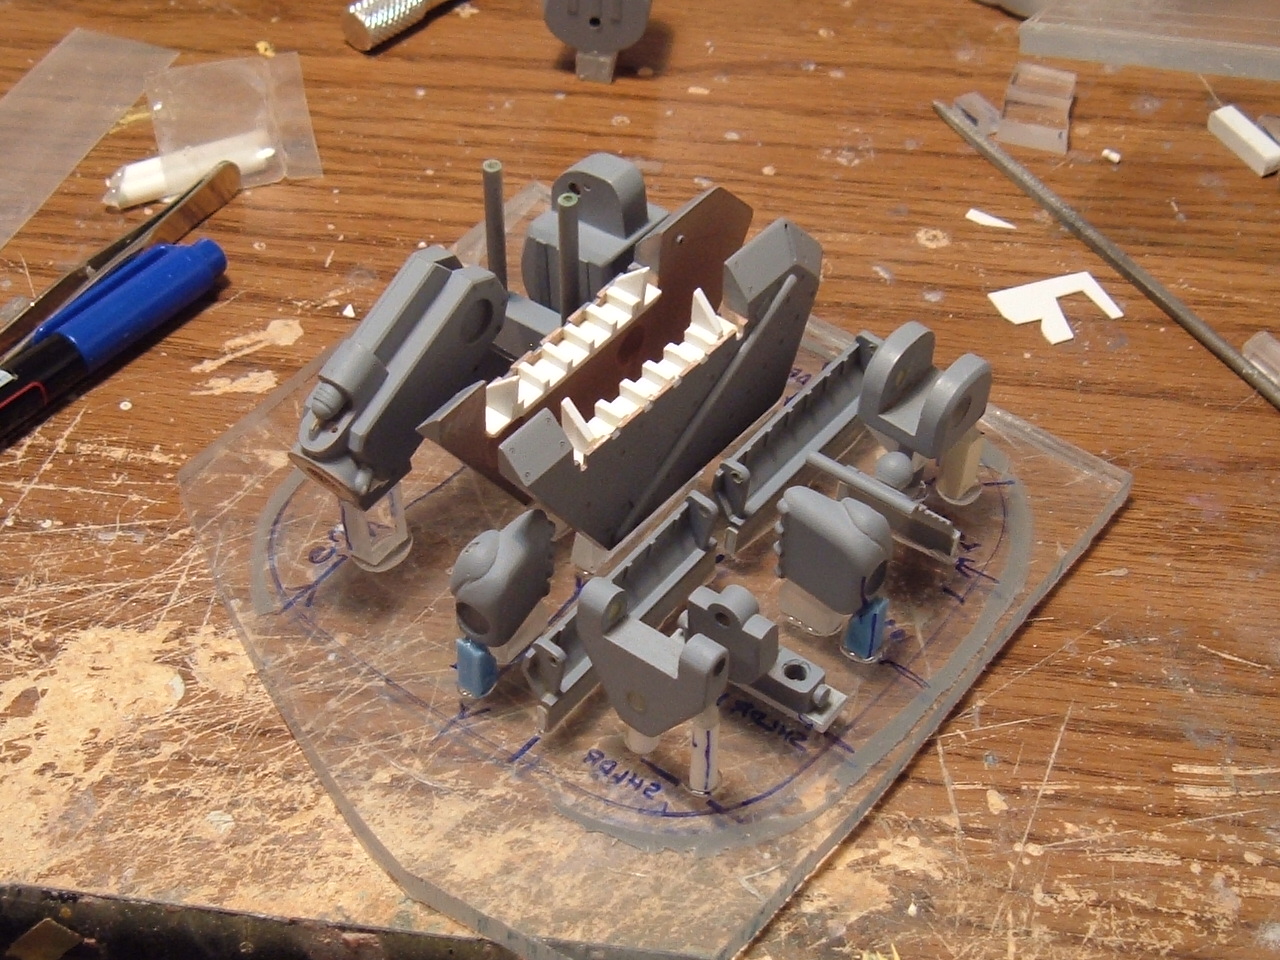
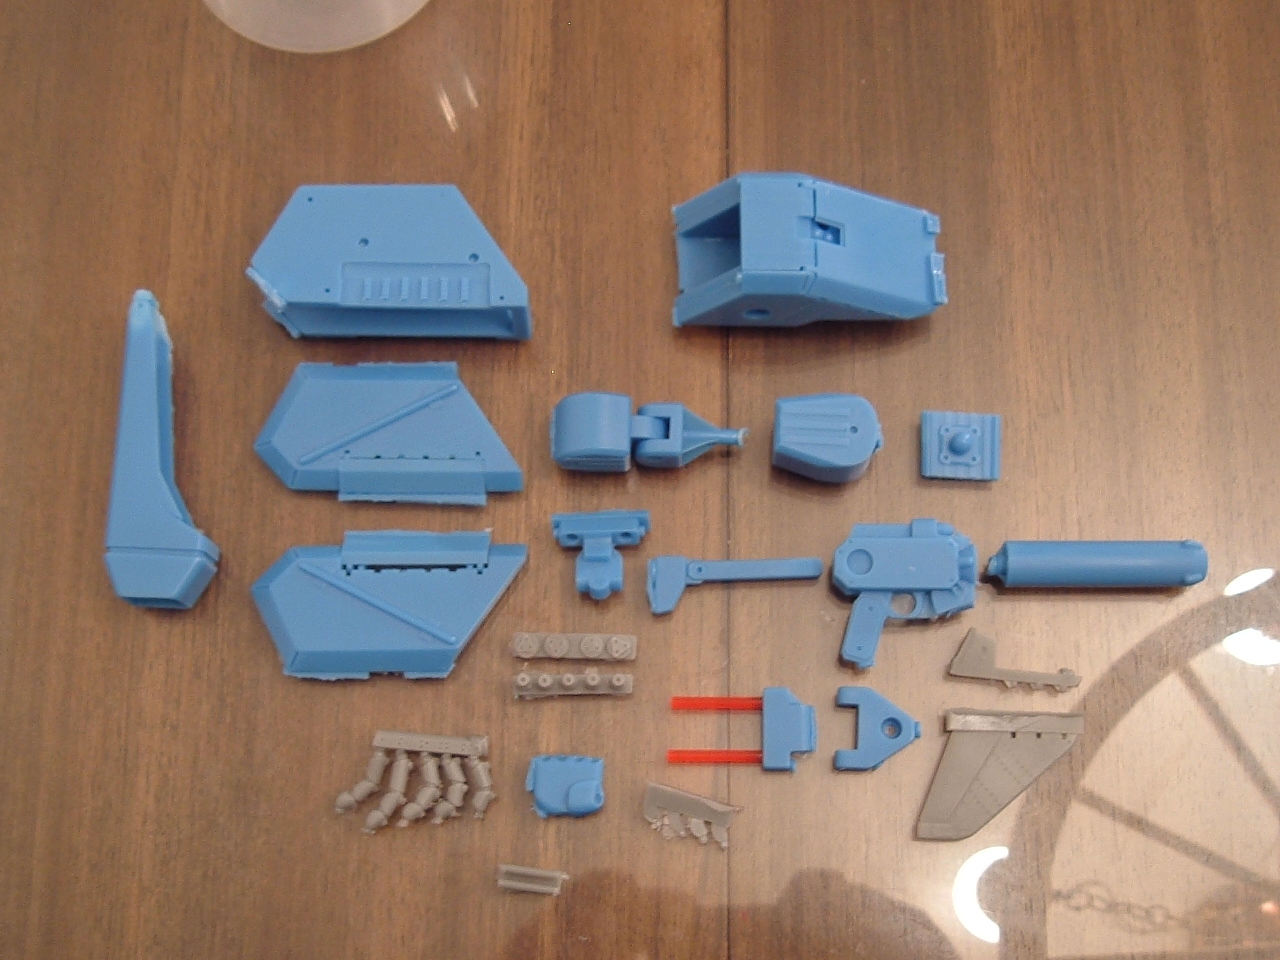
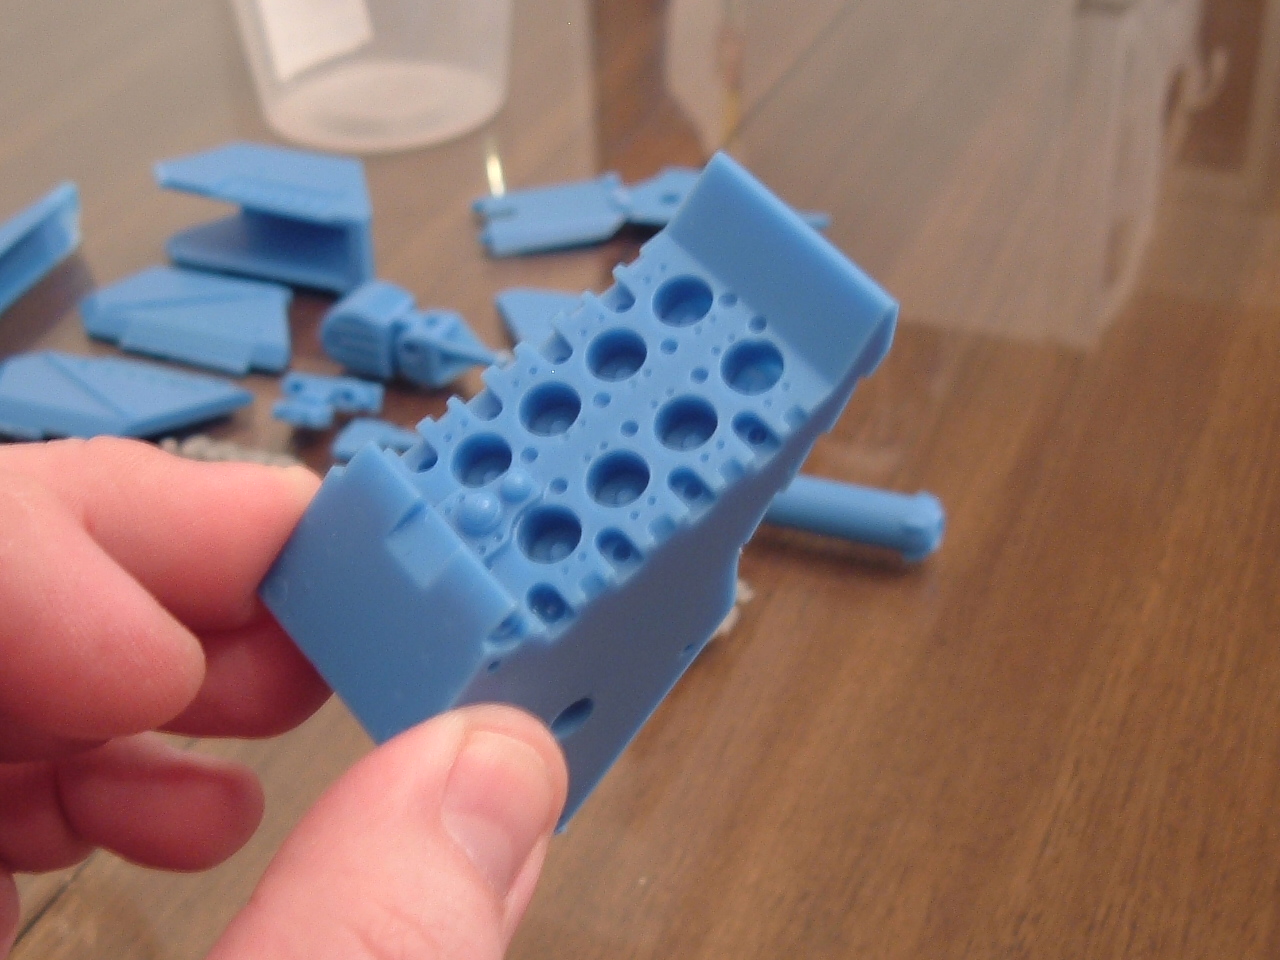
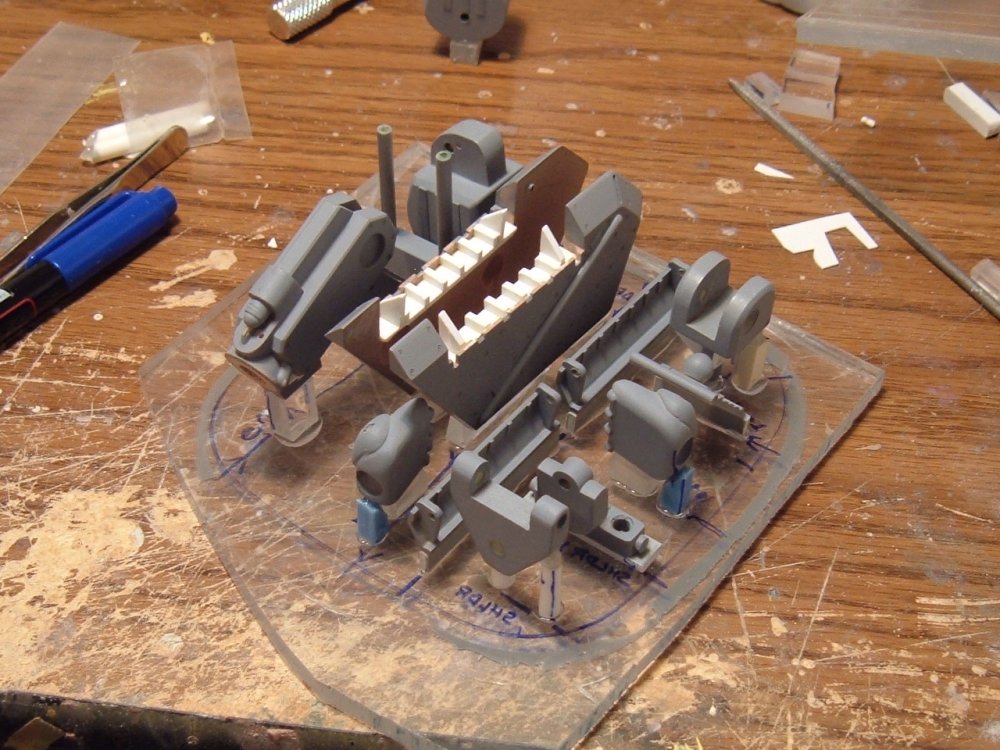
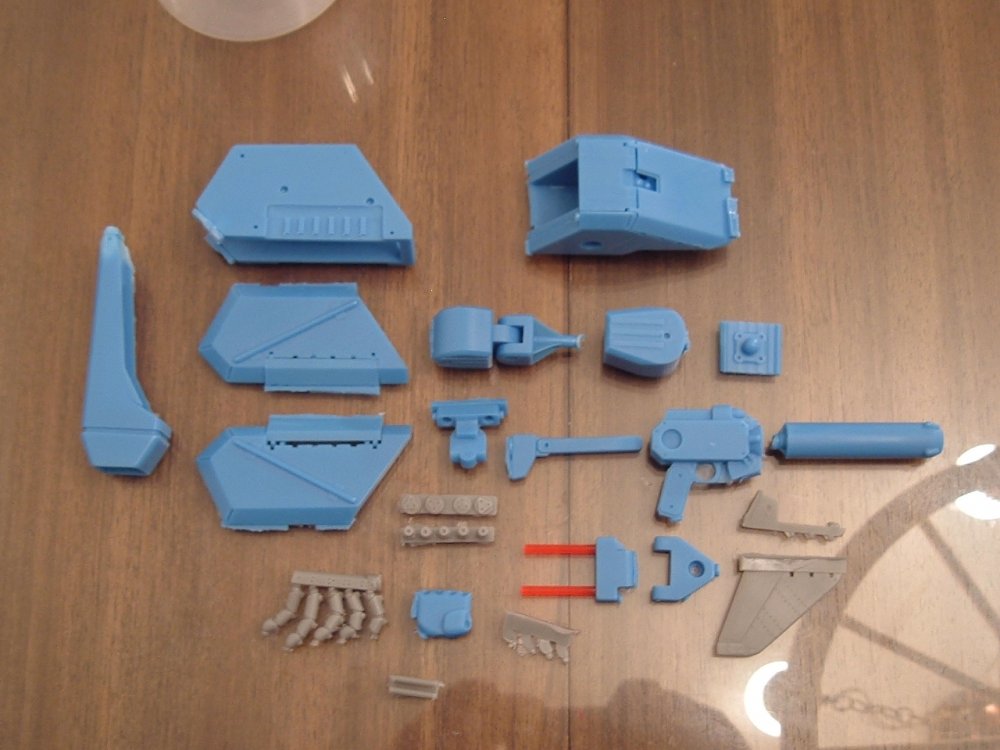
Hi folks! Quick little update before I slide back into the incohesive babble of semi-consciousness brought about by too much food and drink. Molding has gone exceptionally well, and over the last few days I've started the casting process. I took a pic of the masters just prior to pouring the rubber, followed by the castings made from them. Hope everyone likes blue I also wanted to take the time to wish everyone a happy and prosperous new year 2011!!!!

-
Anyone else notice how Rinzler emitted a faint but distinct growl/humming noise? Kind of like the sound that a servo makes when it meets resistance? I didn't catch that the first time, but noticed it during the second viewing. Very subtle but clever.
-
I haven't seen the original Tron in a very looooong time, but wasn't the reason that Flynn broke into the Encom building that Encom had stolen some of Flynn's work and used it for their own purposes?
-
ZOMG, they HAVE to put that on the blu-ray release; that would be epic win-ness and an open door for chapter III!!!!
-
Ditto! I don't understand the negativity and criticism leveled at the film for the story or the acting, I thought it was delightful... And worth seeing at least once again on the big screen
-
The Transformers 3 Thread--A Michael Bay Thread
captain america replied to areaseven's topic in Anime or Science Fiction
I actually like the new Megatron look, and I'm sure that the toy doesn't do the film design justice either. -
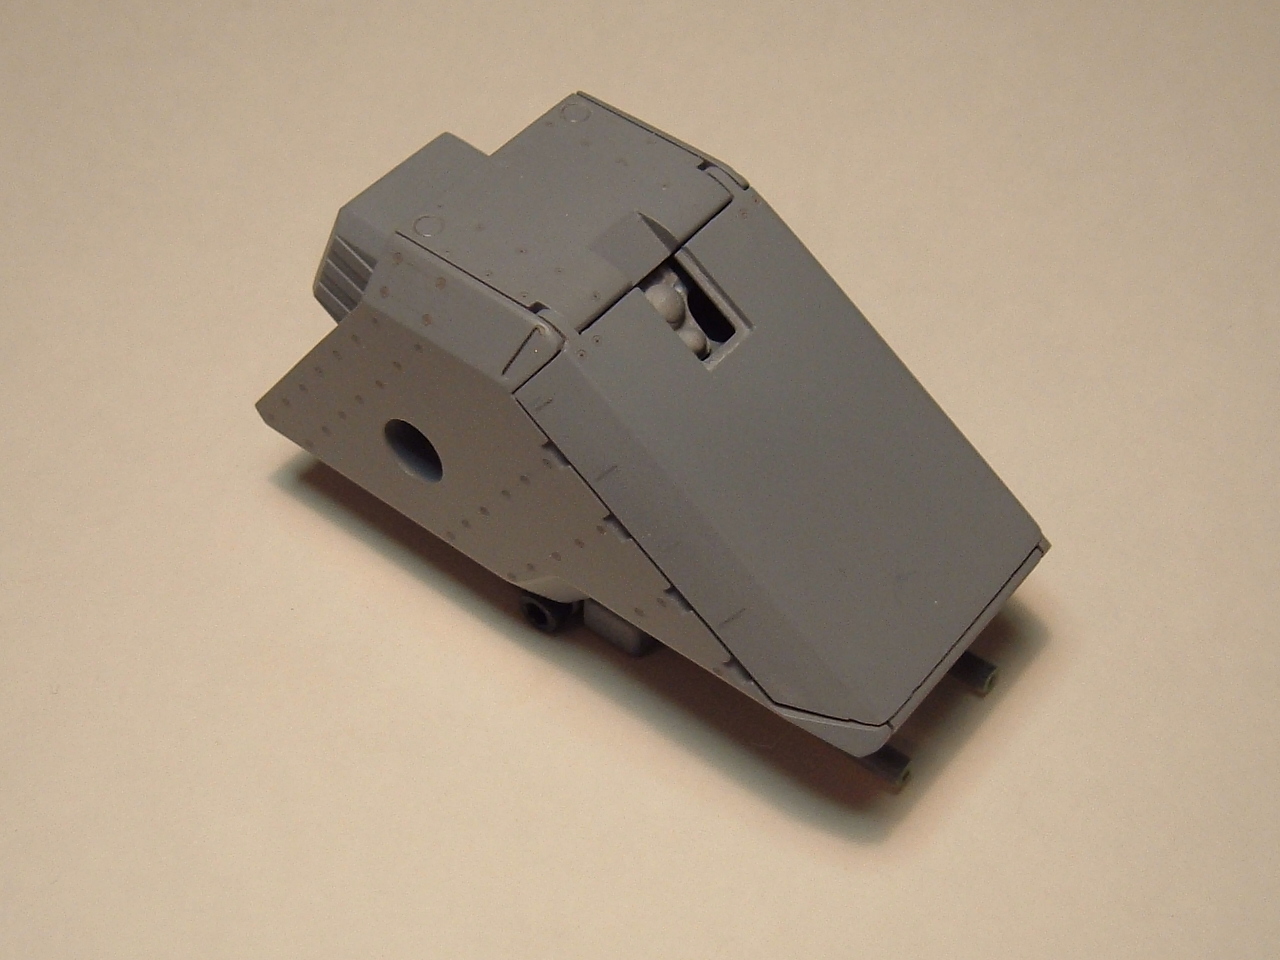
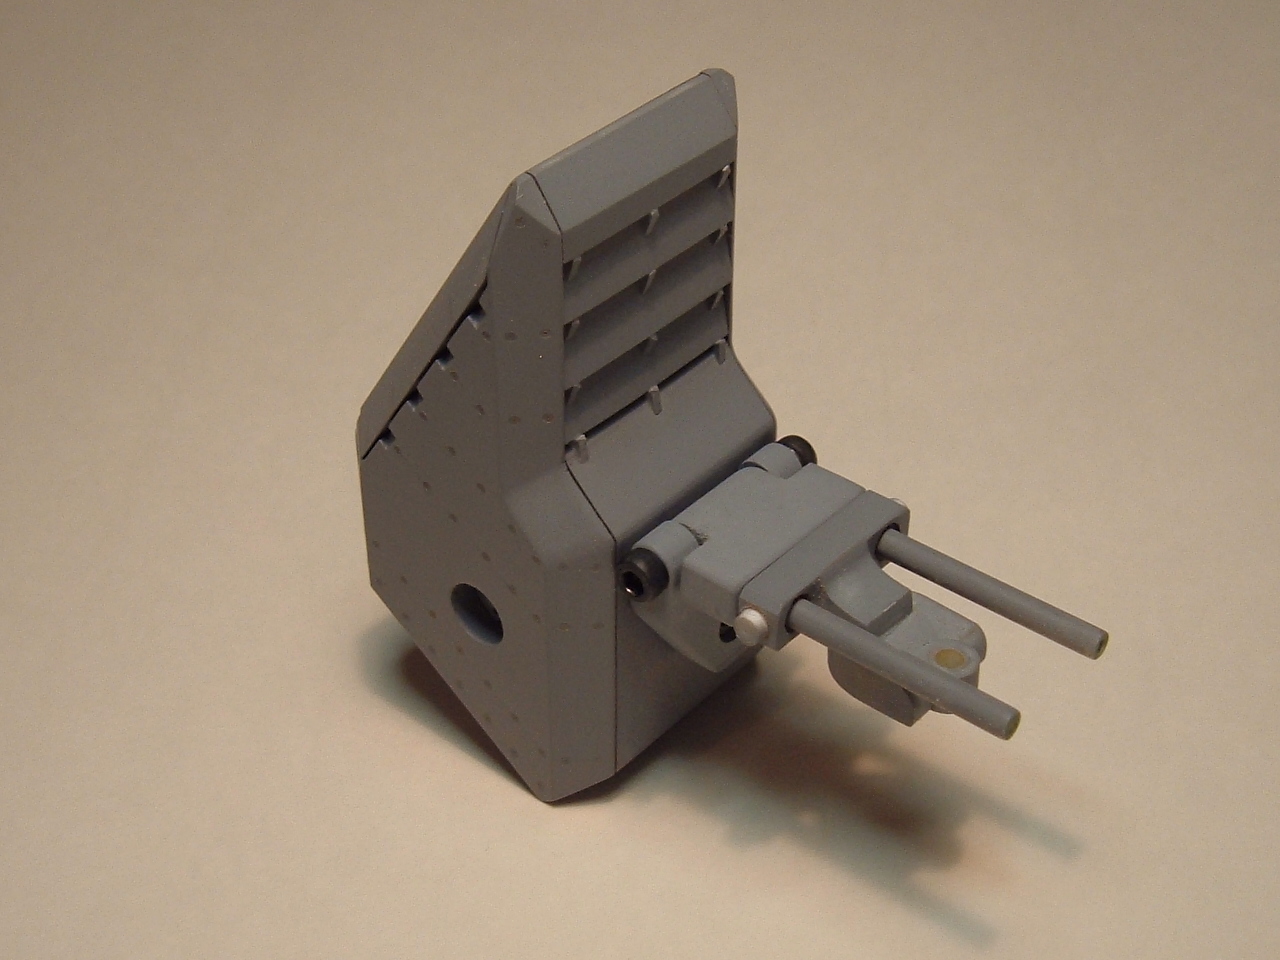
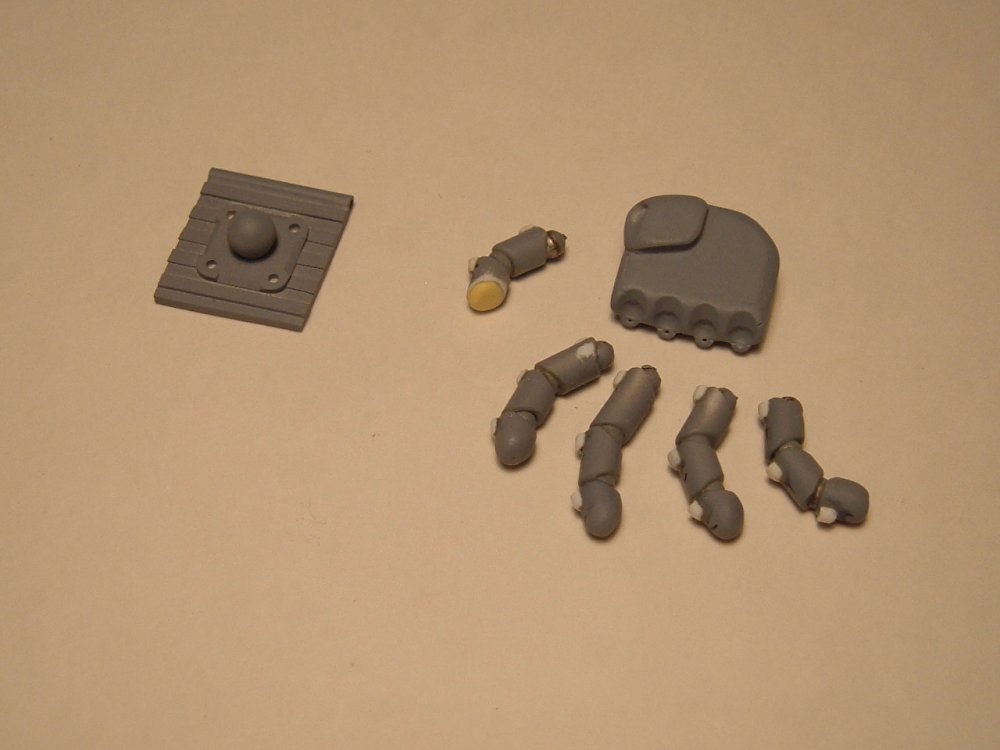
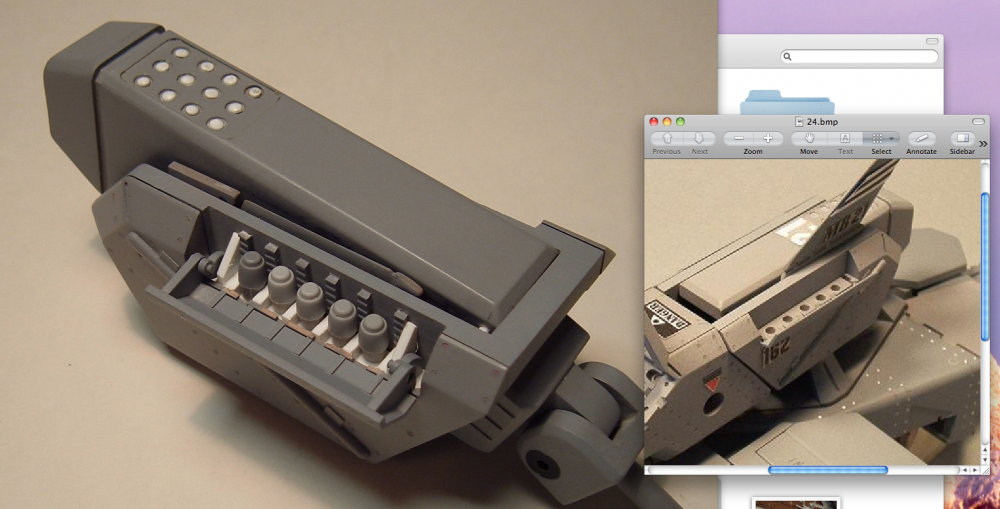
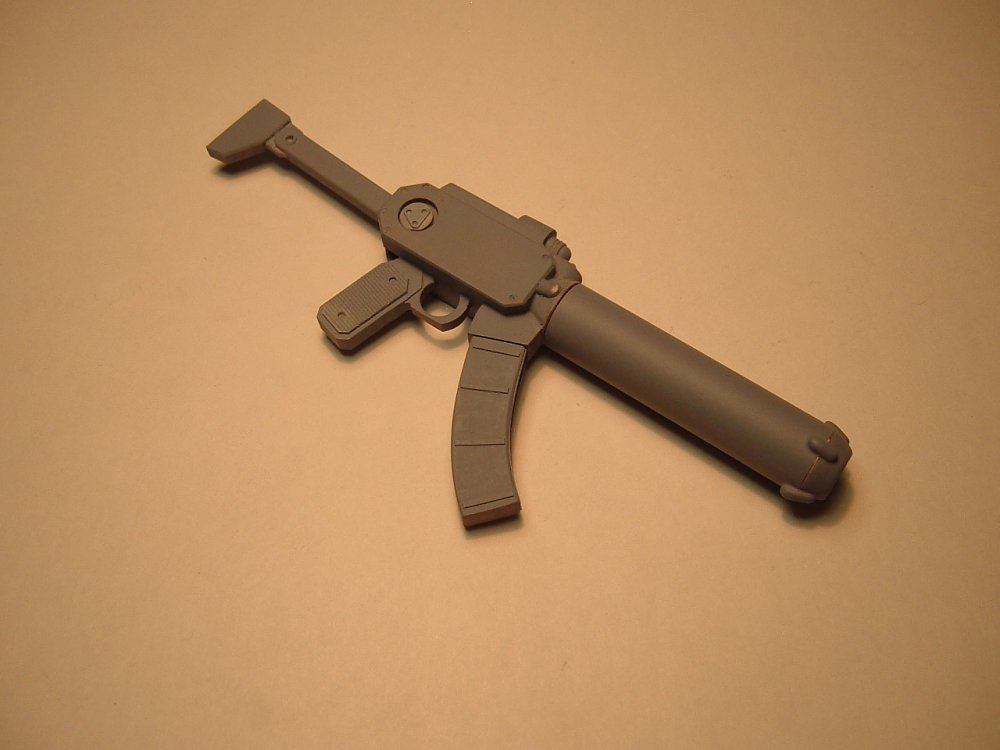
Hi guys! Sorry for my tardiness; I wanted to give a quick pre-Christmas update to show some of the little tweaks I did to the patterns. Pic 1: here is a comparative view of the shoulder missile pod. The updated version on the left now has hydraulic actuators for the missile door. I also added a sensor housing that would be visible through a clear cover in the door (see pic 2.) I figured that something like the Legioss would have a series of sensor/cameras located at key points to overcome blind spots and provide the pilot with a more 360-degree view of the battlefield. Just one of the little details I had never gotten around to doing originally. In pic 3, we see the main shoulder joint which I completely re-fabricated. The original was meant to be cast in white metal, but with the better resins available now, I can make a sufficiently strong hinge with resin, all while keeping the weight down. Notice the beefy 3m cap screws! Pic 4 shows the same shoulder pod assembly, but with the new joint mechanism in place. The louvers on the back of the shoulder now have a little extra detail. Pic 5: the hands have also been reworked somewhat. The knuckles all have little armored pads added and the palm has been re-sculpted to make positioning the gun handle a little easier. Pic 6: one area that received the most re-working was the forearm. The original forearm missile housings were crude and underdetailed (on the right) but were completely redone along with all-new missiles. Detail was also added to the expendable countermeasure tubes atop the arm thrusters. Last but not least, I machined out the front of the gun's targeting system and added a sensor unit that will be housed in a clear housing. Masters are currently being prepped for molding and that should be completed before the week is up.


-
I won't be touching that til after the holidays. Cockpit will be the same, just a longer nosecone & radar housing.
-
Hi guys! Quick little update for the Festivus season -Finally refined the masters for the arms; all parts needing TLC have received it, so there will be a few minor upgrades to the masters which I will reveal in pictures before the weekend is out. -Ordered all the screws (all 2000 of them!) -Will begin work on the destructions first, then molds early next week. Also, it would seem that there a few more people that would like to clime aboard the Beast ship. As it stands, I'm theoretically booked, but there are some question marks remaining, so I would ask that the following members please contact me ASAP: -jorwar_b -nightmareB4macross -Silverdragon -THOR Thanks guys
-
Realistically, the base Eta model could be modified to make 3 other variants, the iota, Zeta, and Dark (manned) Legioss with just a few conversion parts. I don't see why a little conversion kit with new head/ride armor/pilot/decals couldn't be offered later on.
-
Quirtra Queramitzuu: Kamikaze Space Cucumber
captain america replied to captain america's topic in Model kits
That looks awesome, Marc! How's the version with the charged/firing main gun coming along? I seem to recall that you were contemplating how to go about achieving that effect a while back. -
Are they members here? Re: Inbits. Even in scale with my 1/32 kit, a Gurab (the grape-flavored mecha) would only be about 22-23cm tall, and no where near as spendy as the armored fighter, due to the relative simplicity and low parts count. An Eager (little sand crabby thing) would be even cheaper; maybe the price of a Destroid. Once again, that's still a ways off but well within the realm of possibility.
-
Nope. The current workload is already very high; pilot/stowed ride-armor would have to be offered separately later.