captain america
-
Posts
3563 -
Joined
-
Last visited
Content Type
Profiles
Forums
Events
Gallery
Everything posted by captain america
-
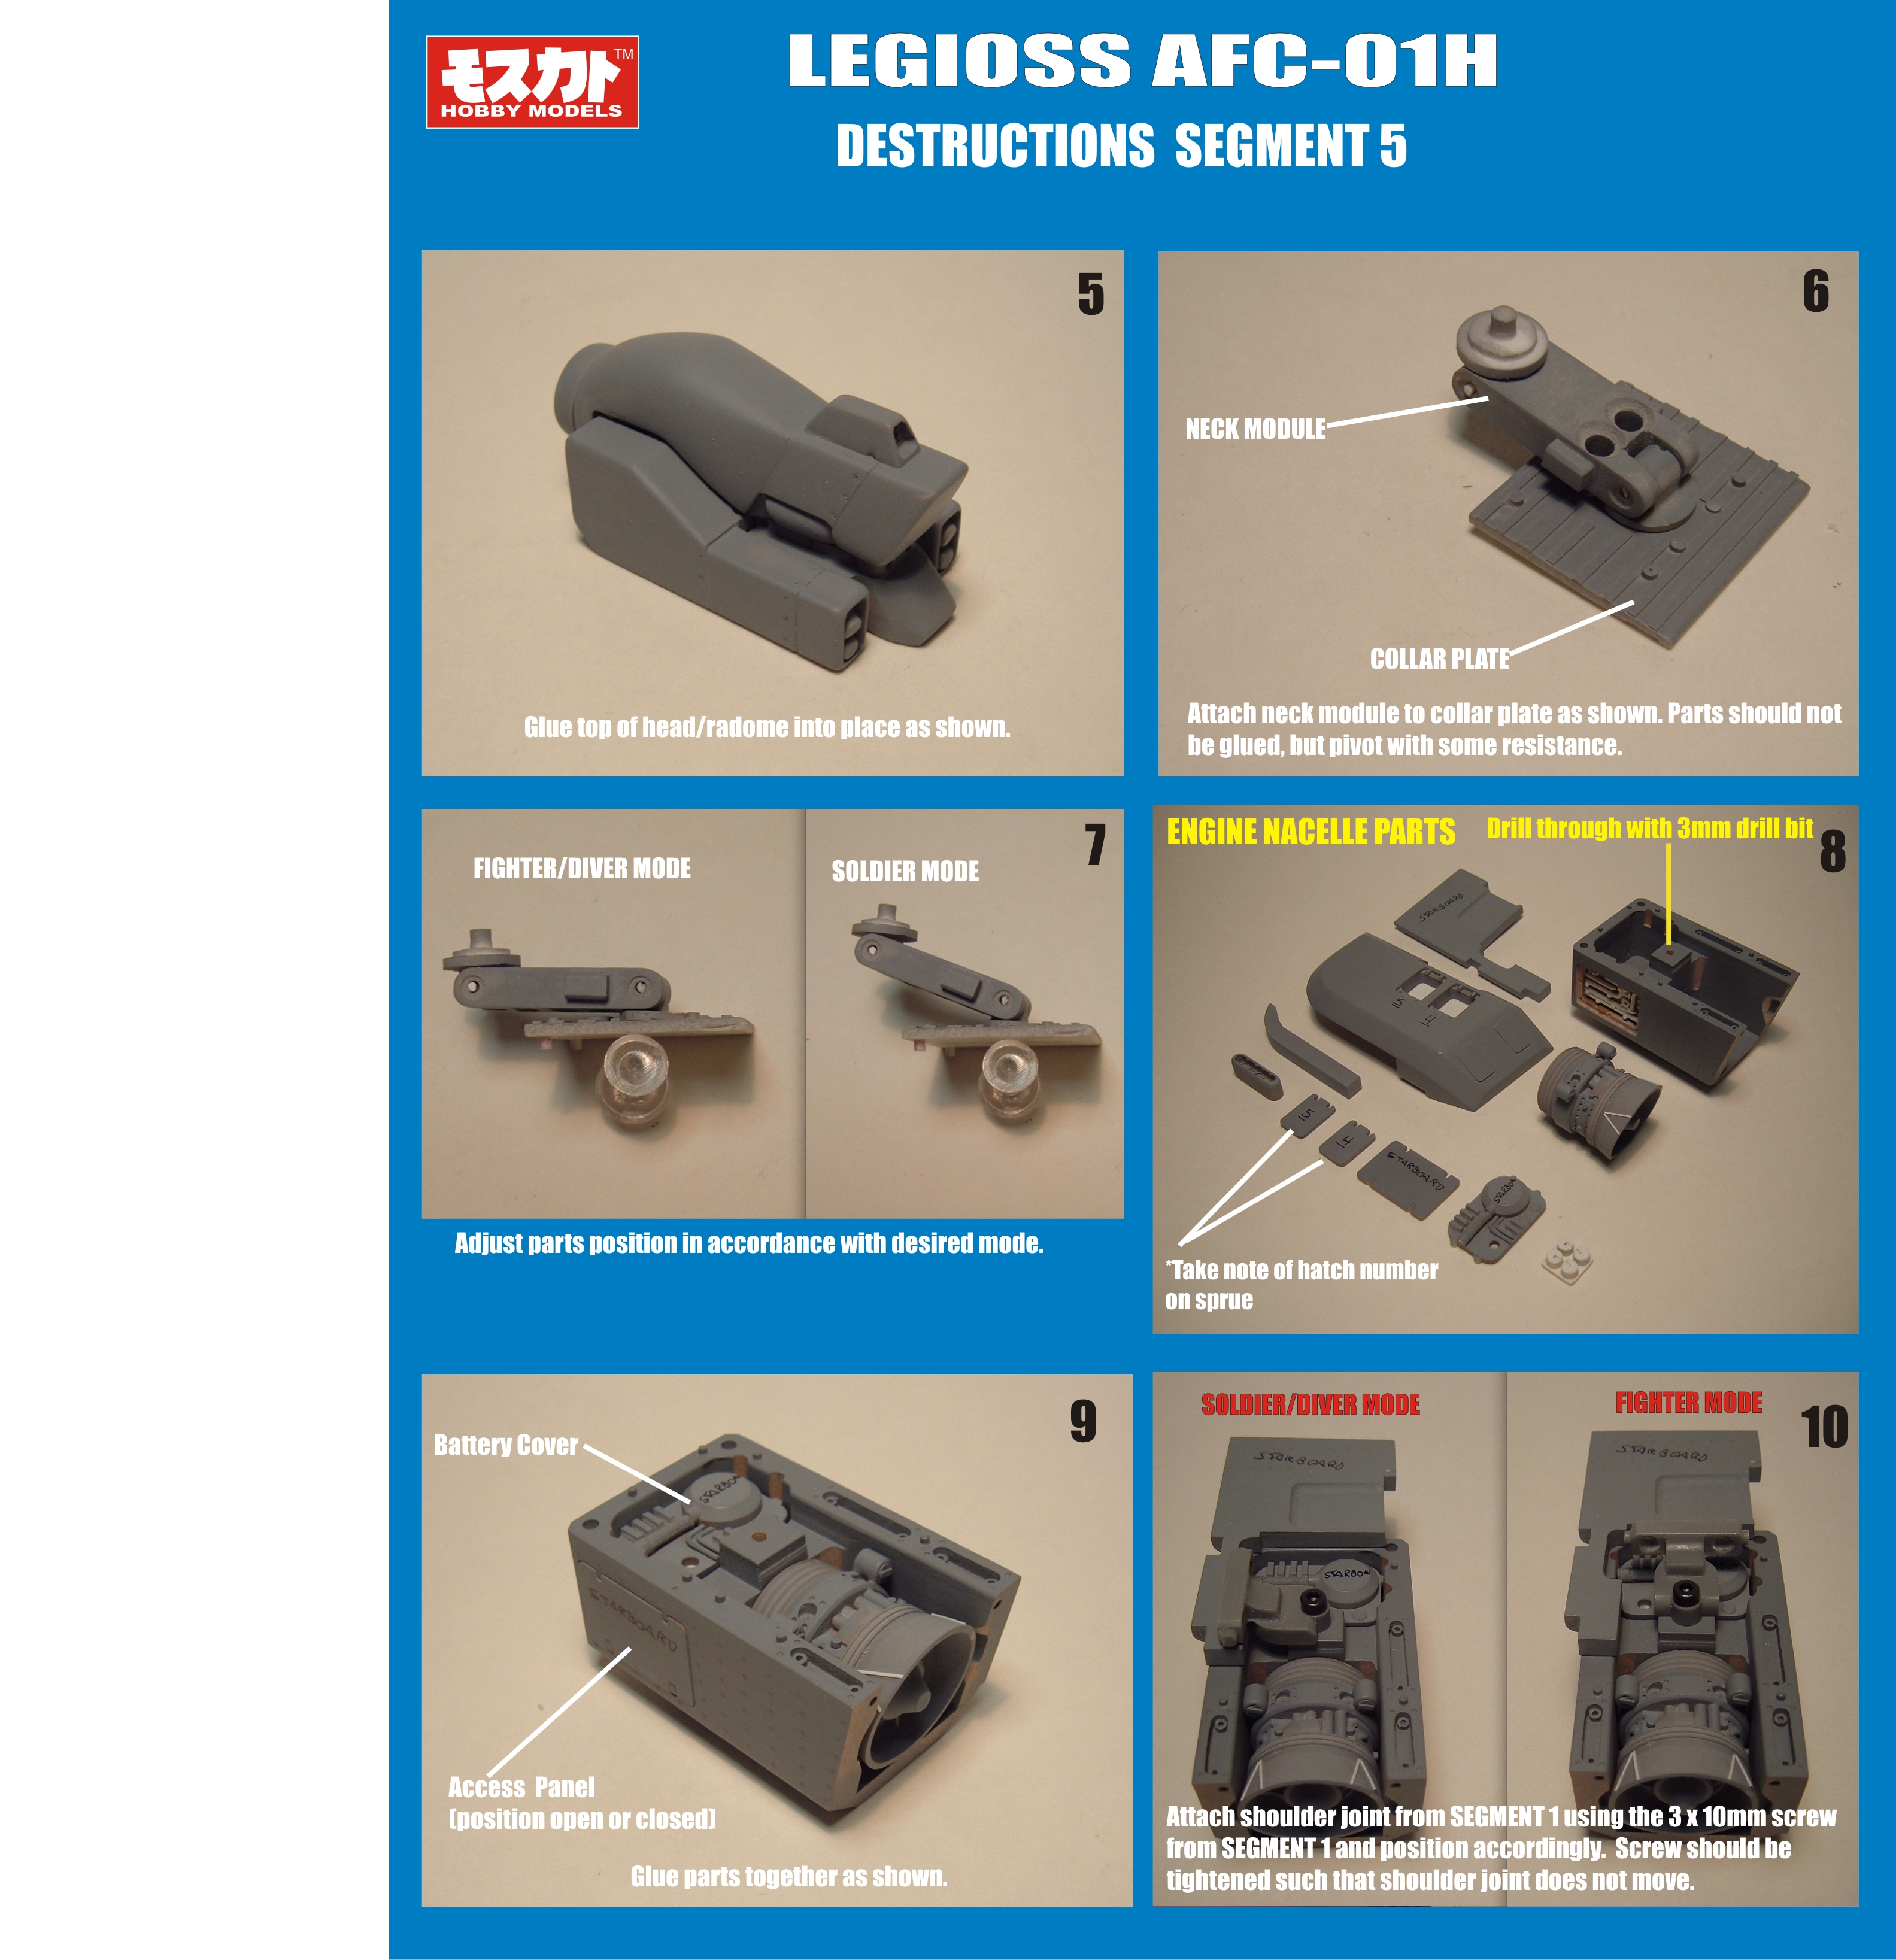
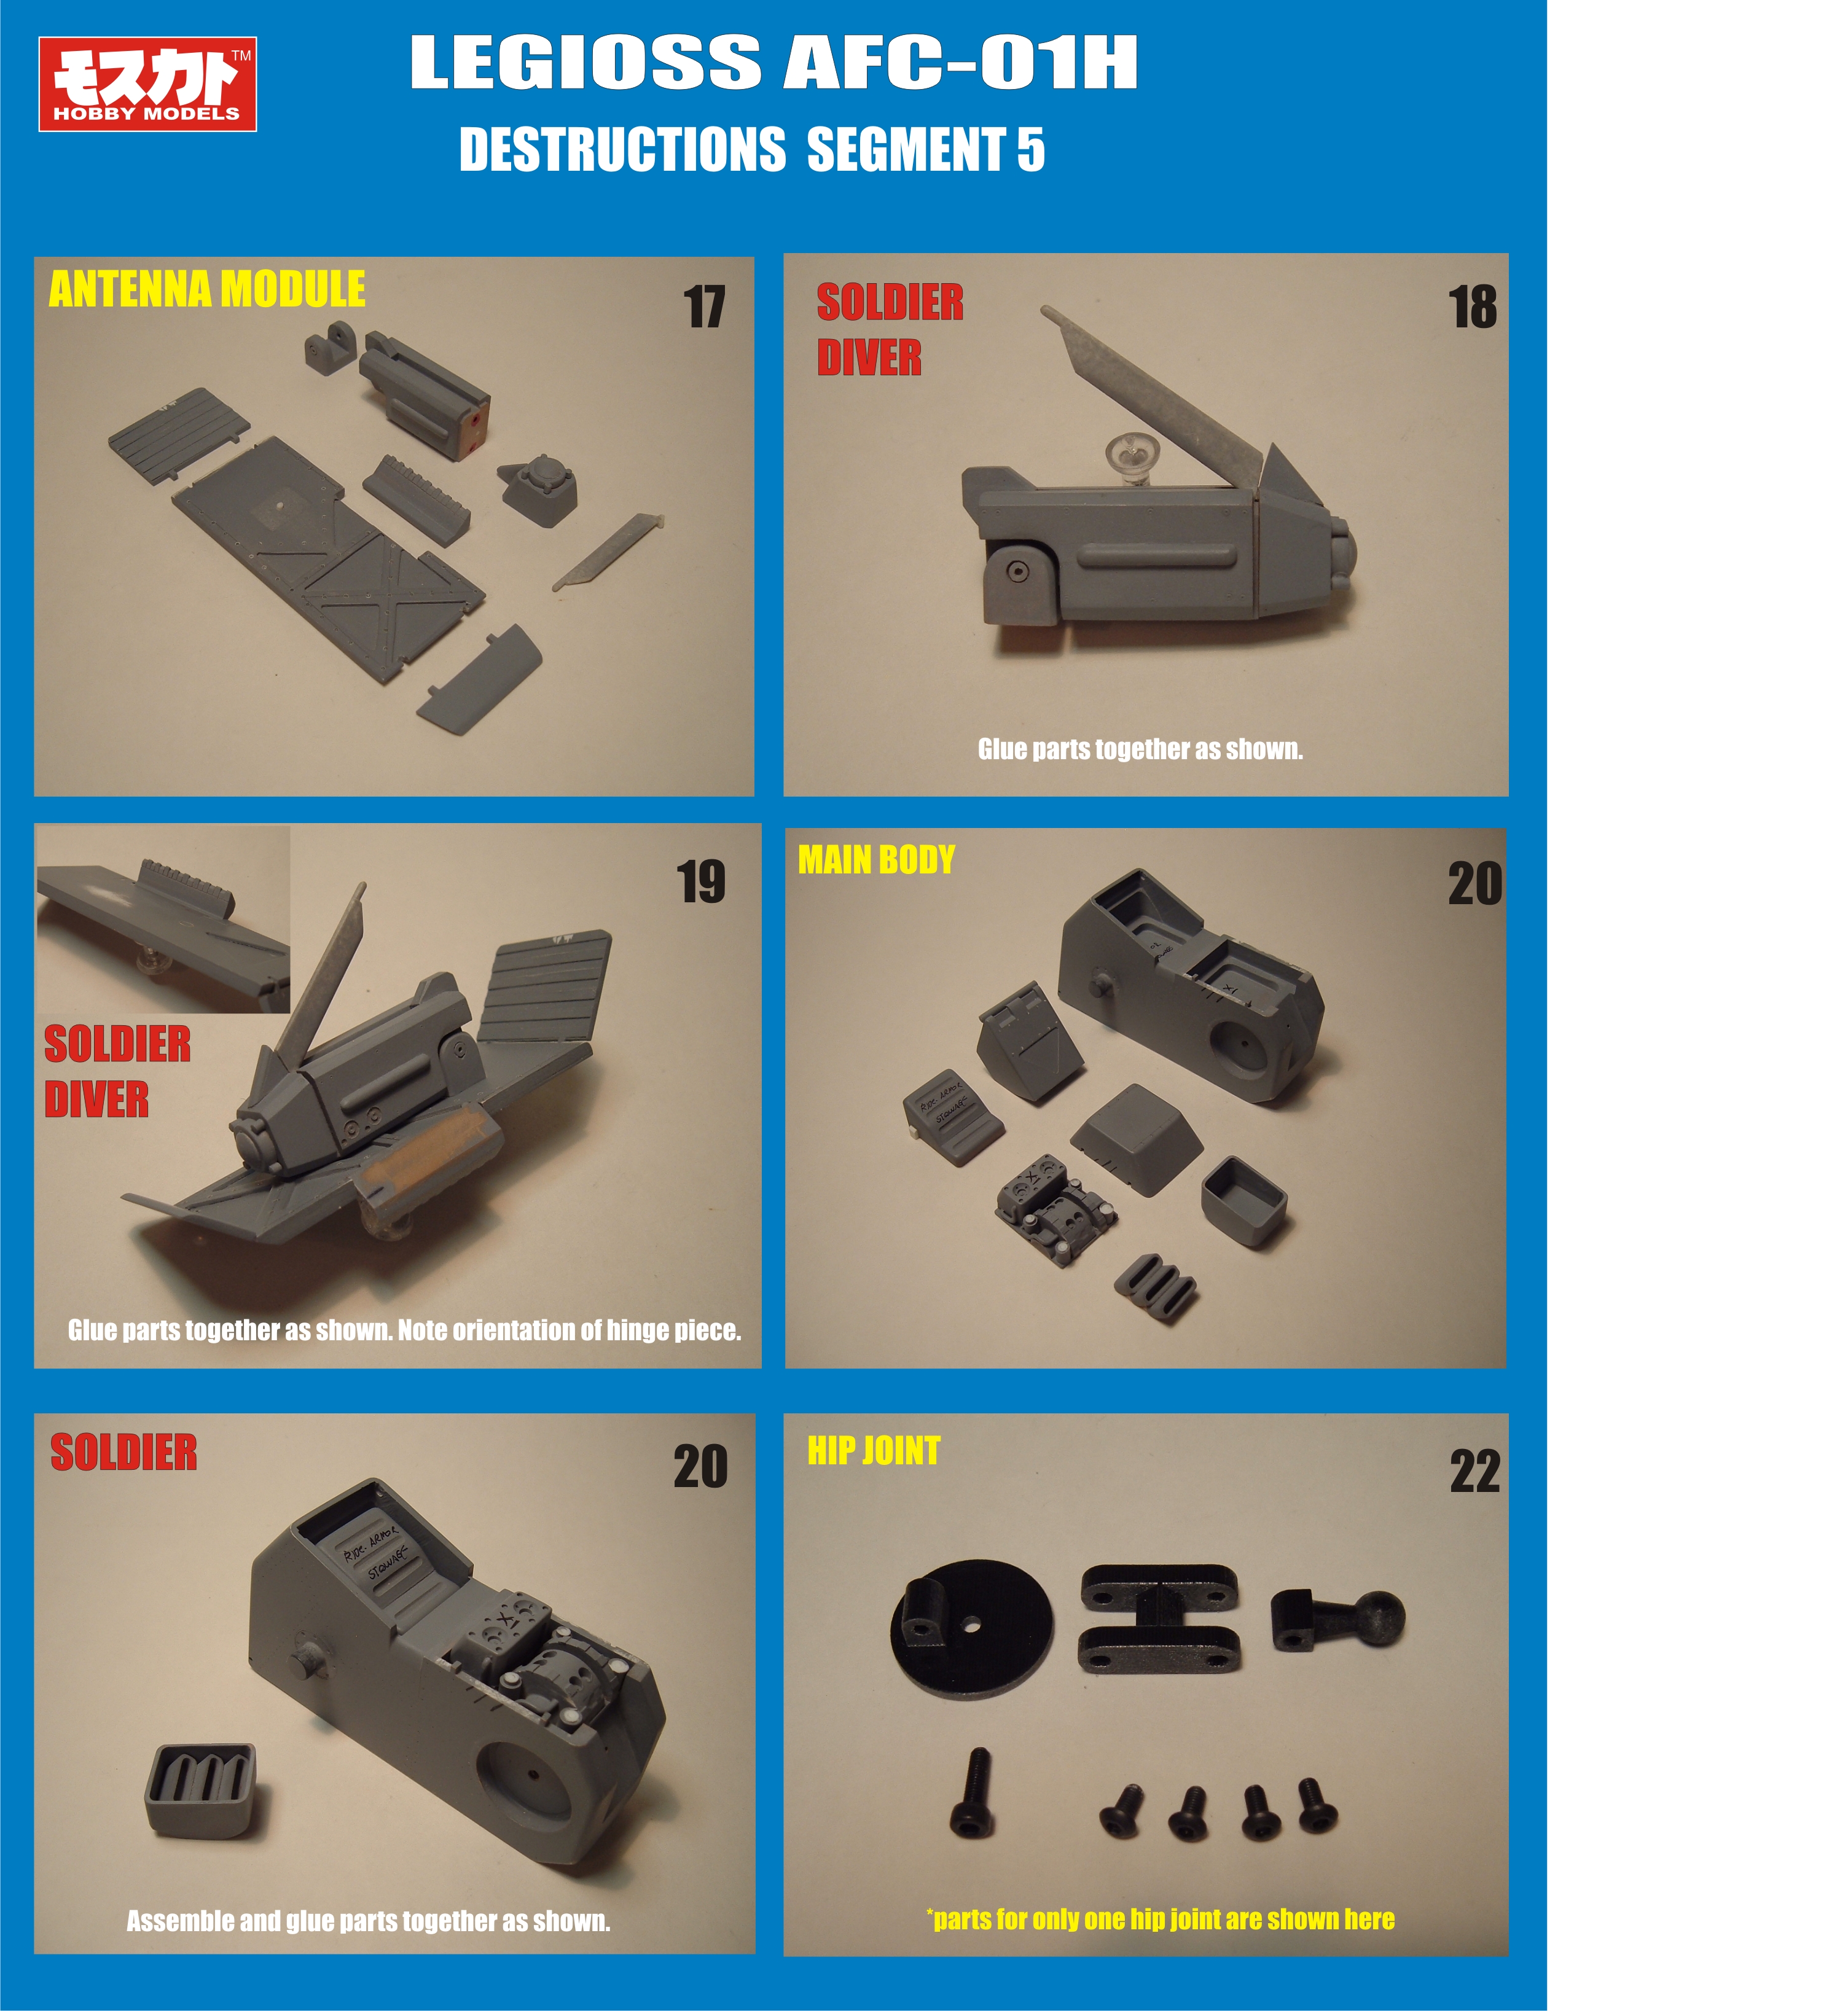
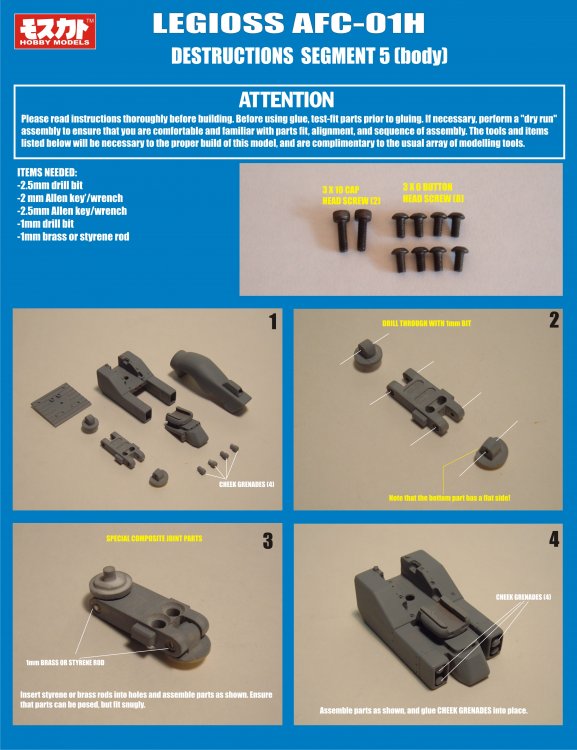
Hi everyone! Well as it stands, I've finally gotten the destructions for the body (part 5) done! Be sure to download them at your convenience

-
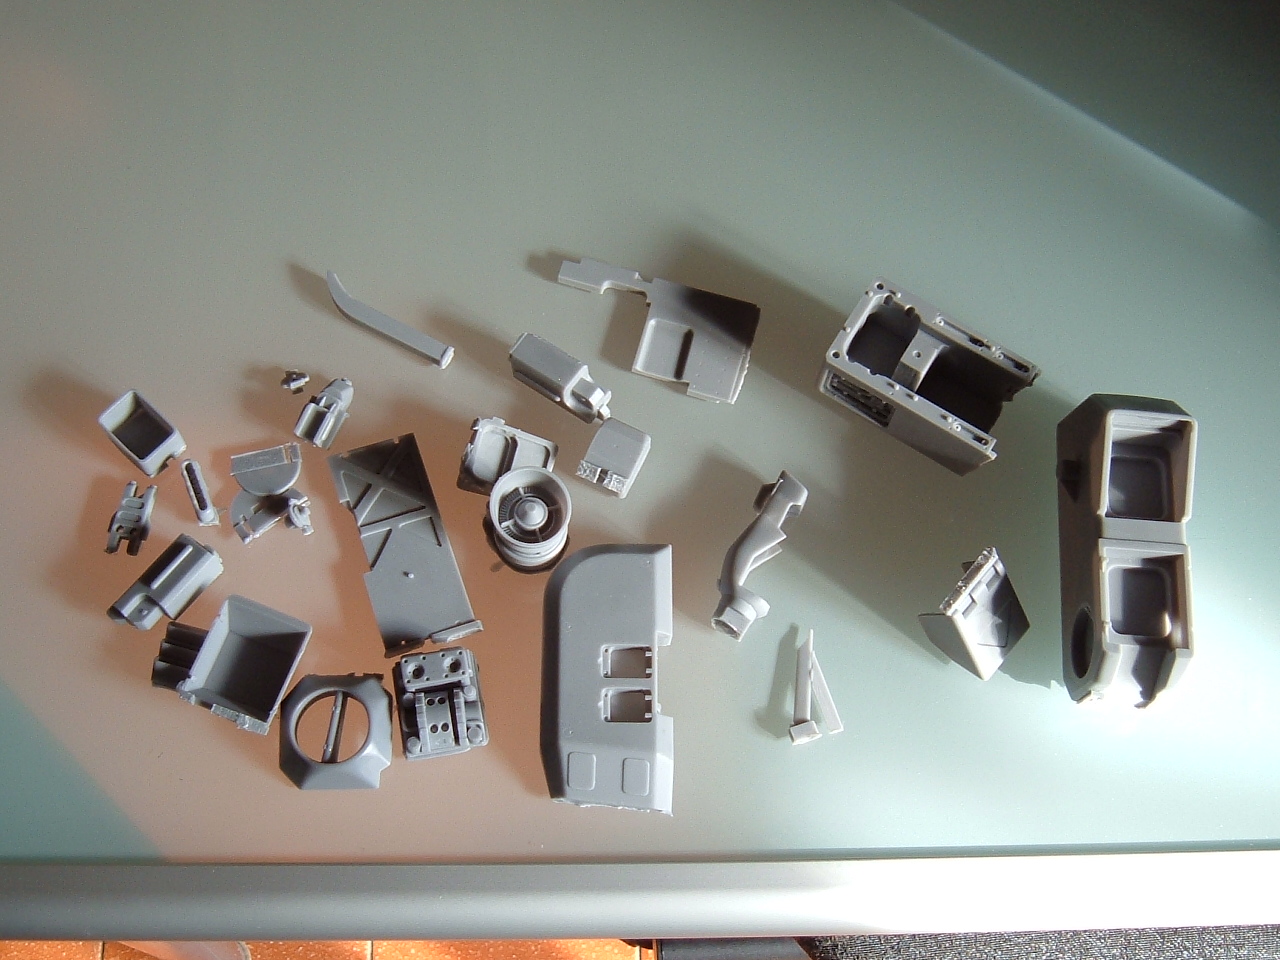
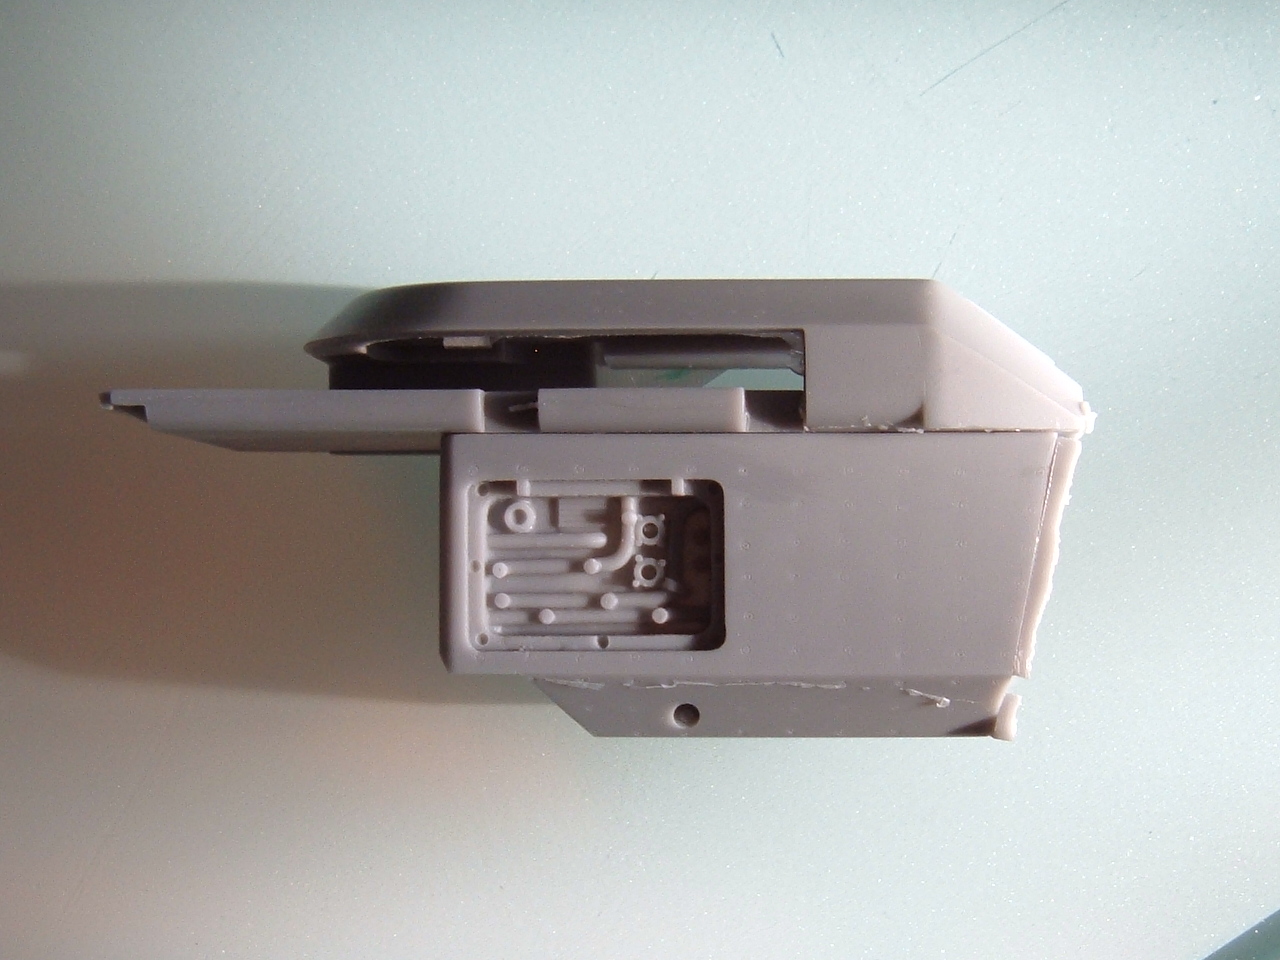
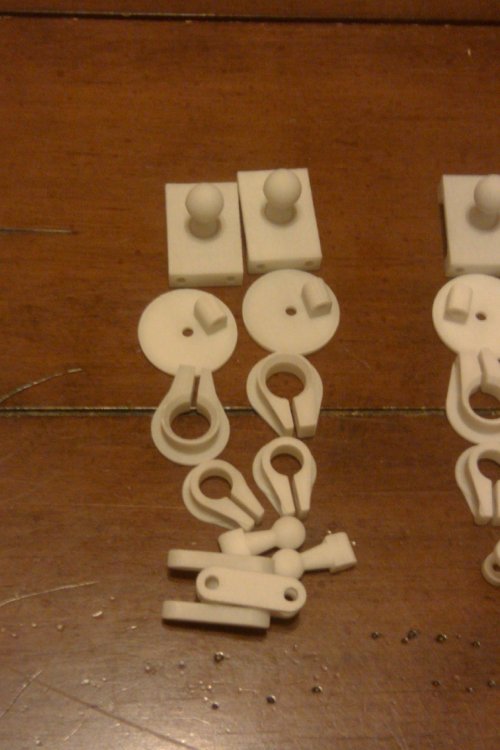
Captain's log. Stardate: today, somewhere between lunch and my afternoon snack. Hi Everyone! Another week, another update. I merely wanted to show-off the castings from the latest installment: they're coming out excellent (in reality, they have no choice: if the castings come out crappy, the molds get re-done.) Also, I took the time to check the fit of the parts as a precaution, and everything is coming out aces! The third pic is of a new series of landing gear masters: my first attempt to contract this service out was an unmitigated disaster and a waste of time, so let's all cross our fingers they my second attempt will prove more successful. I do deeply apologize that these are taking so long. That having been said, they will get done one way or another.


-
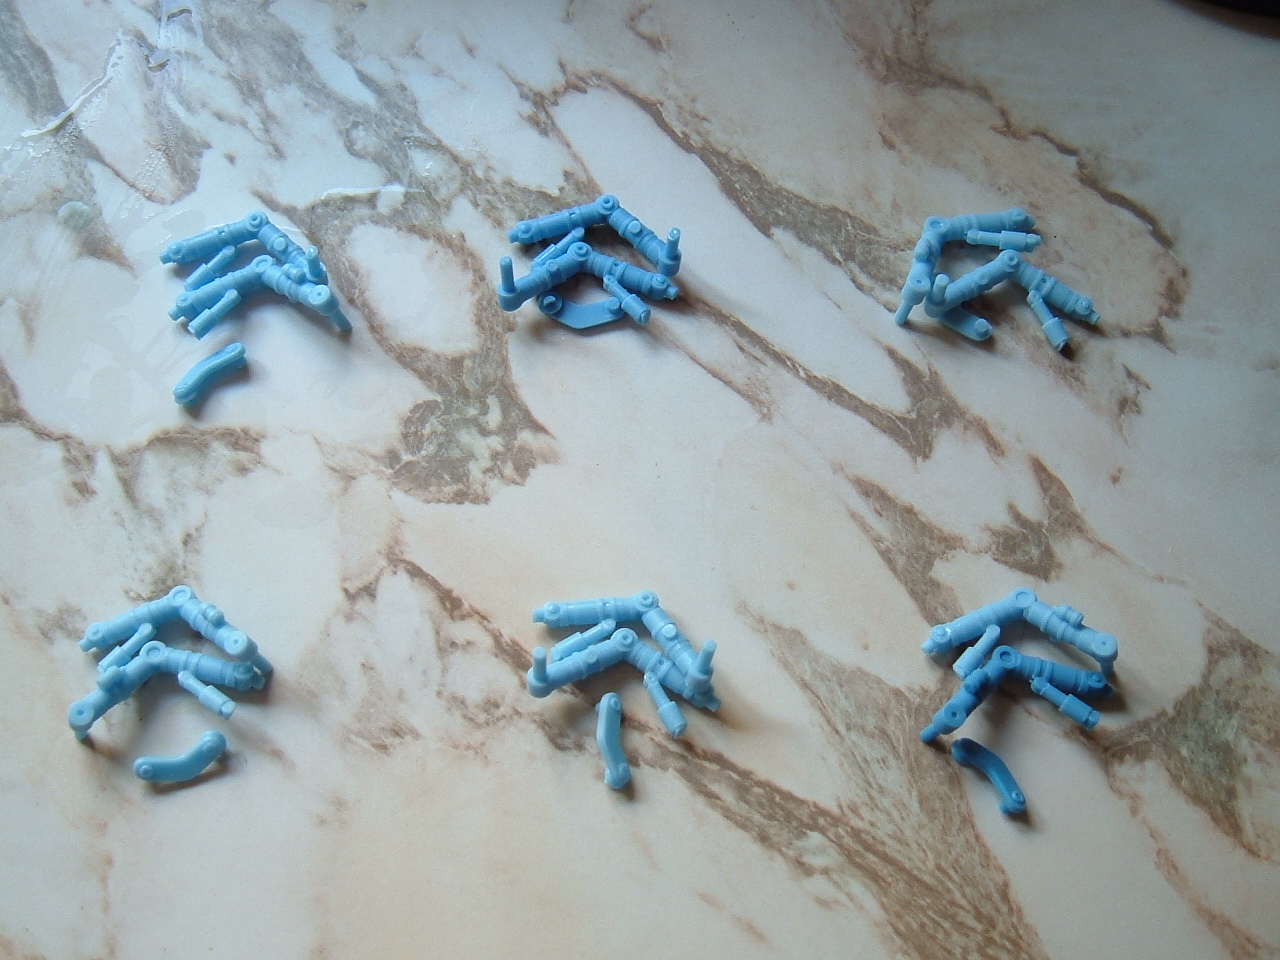
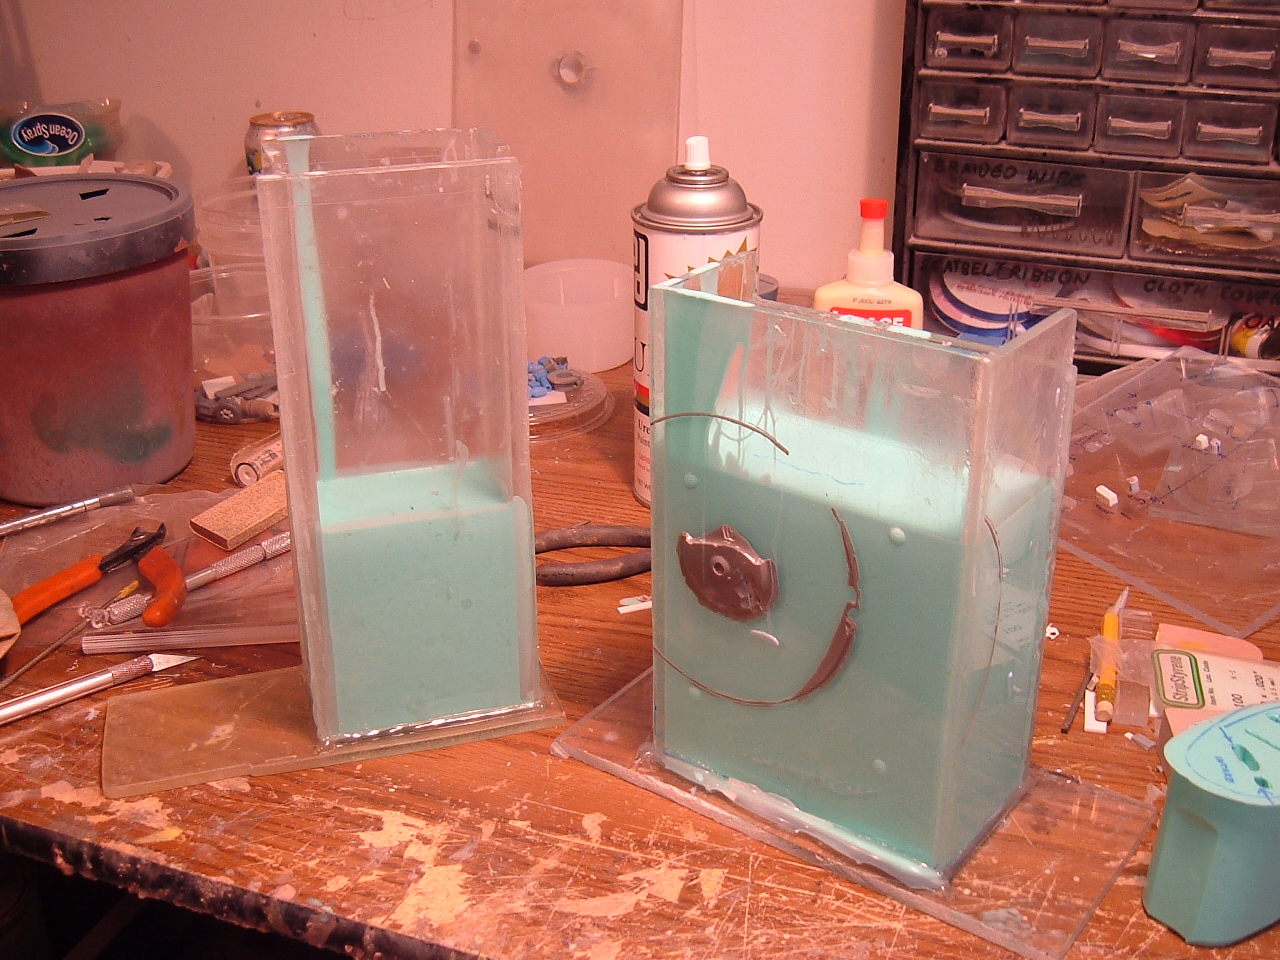
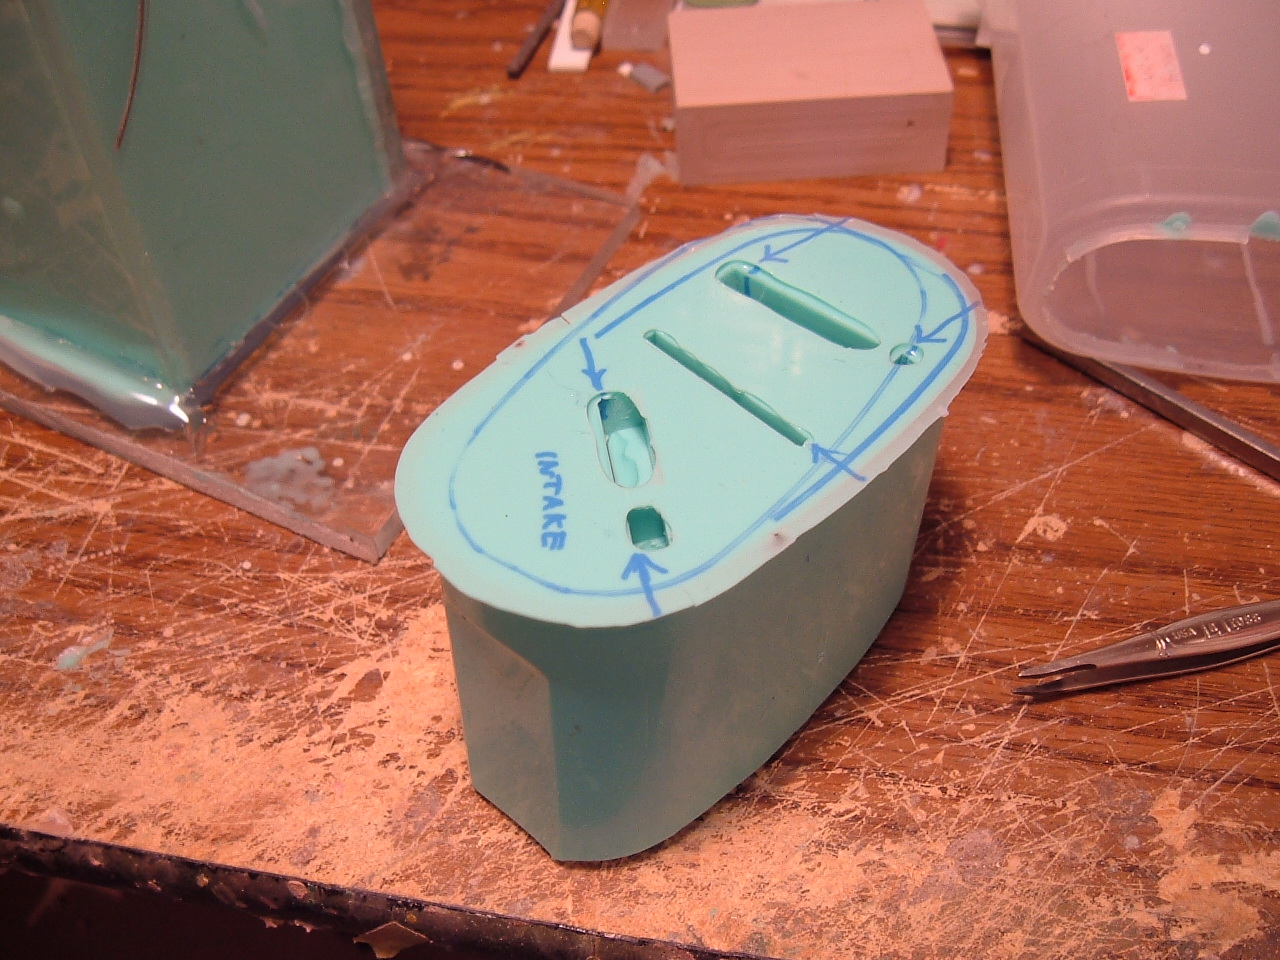
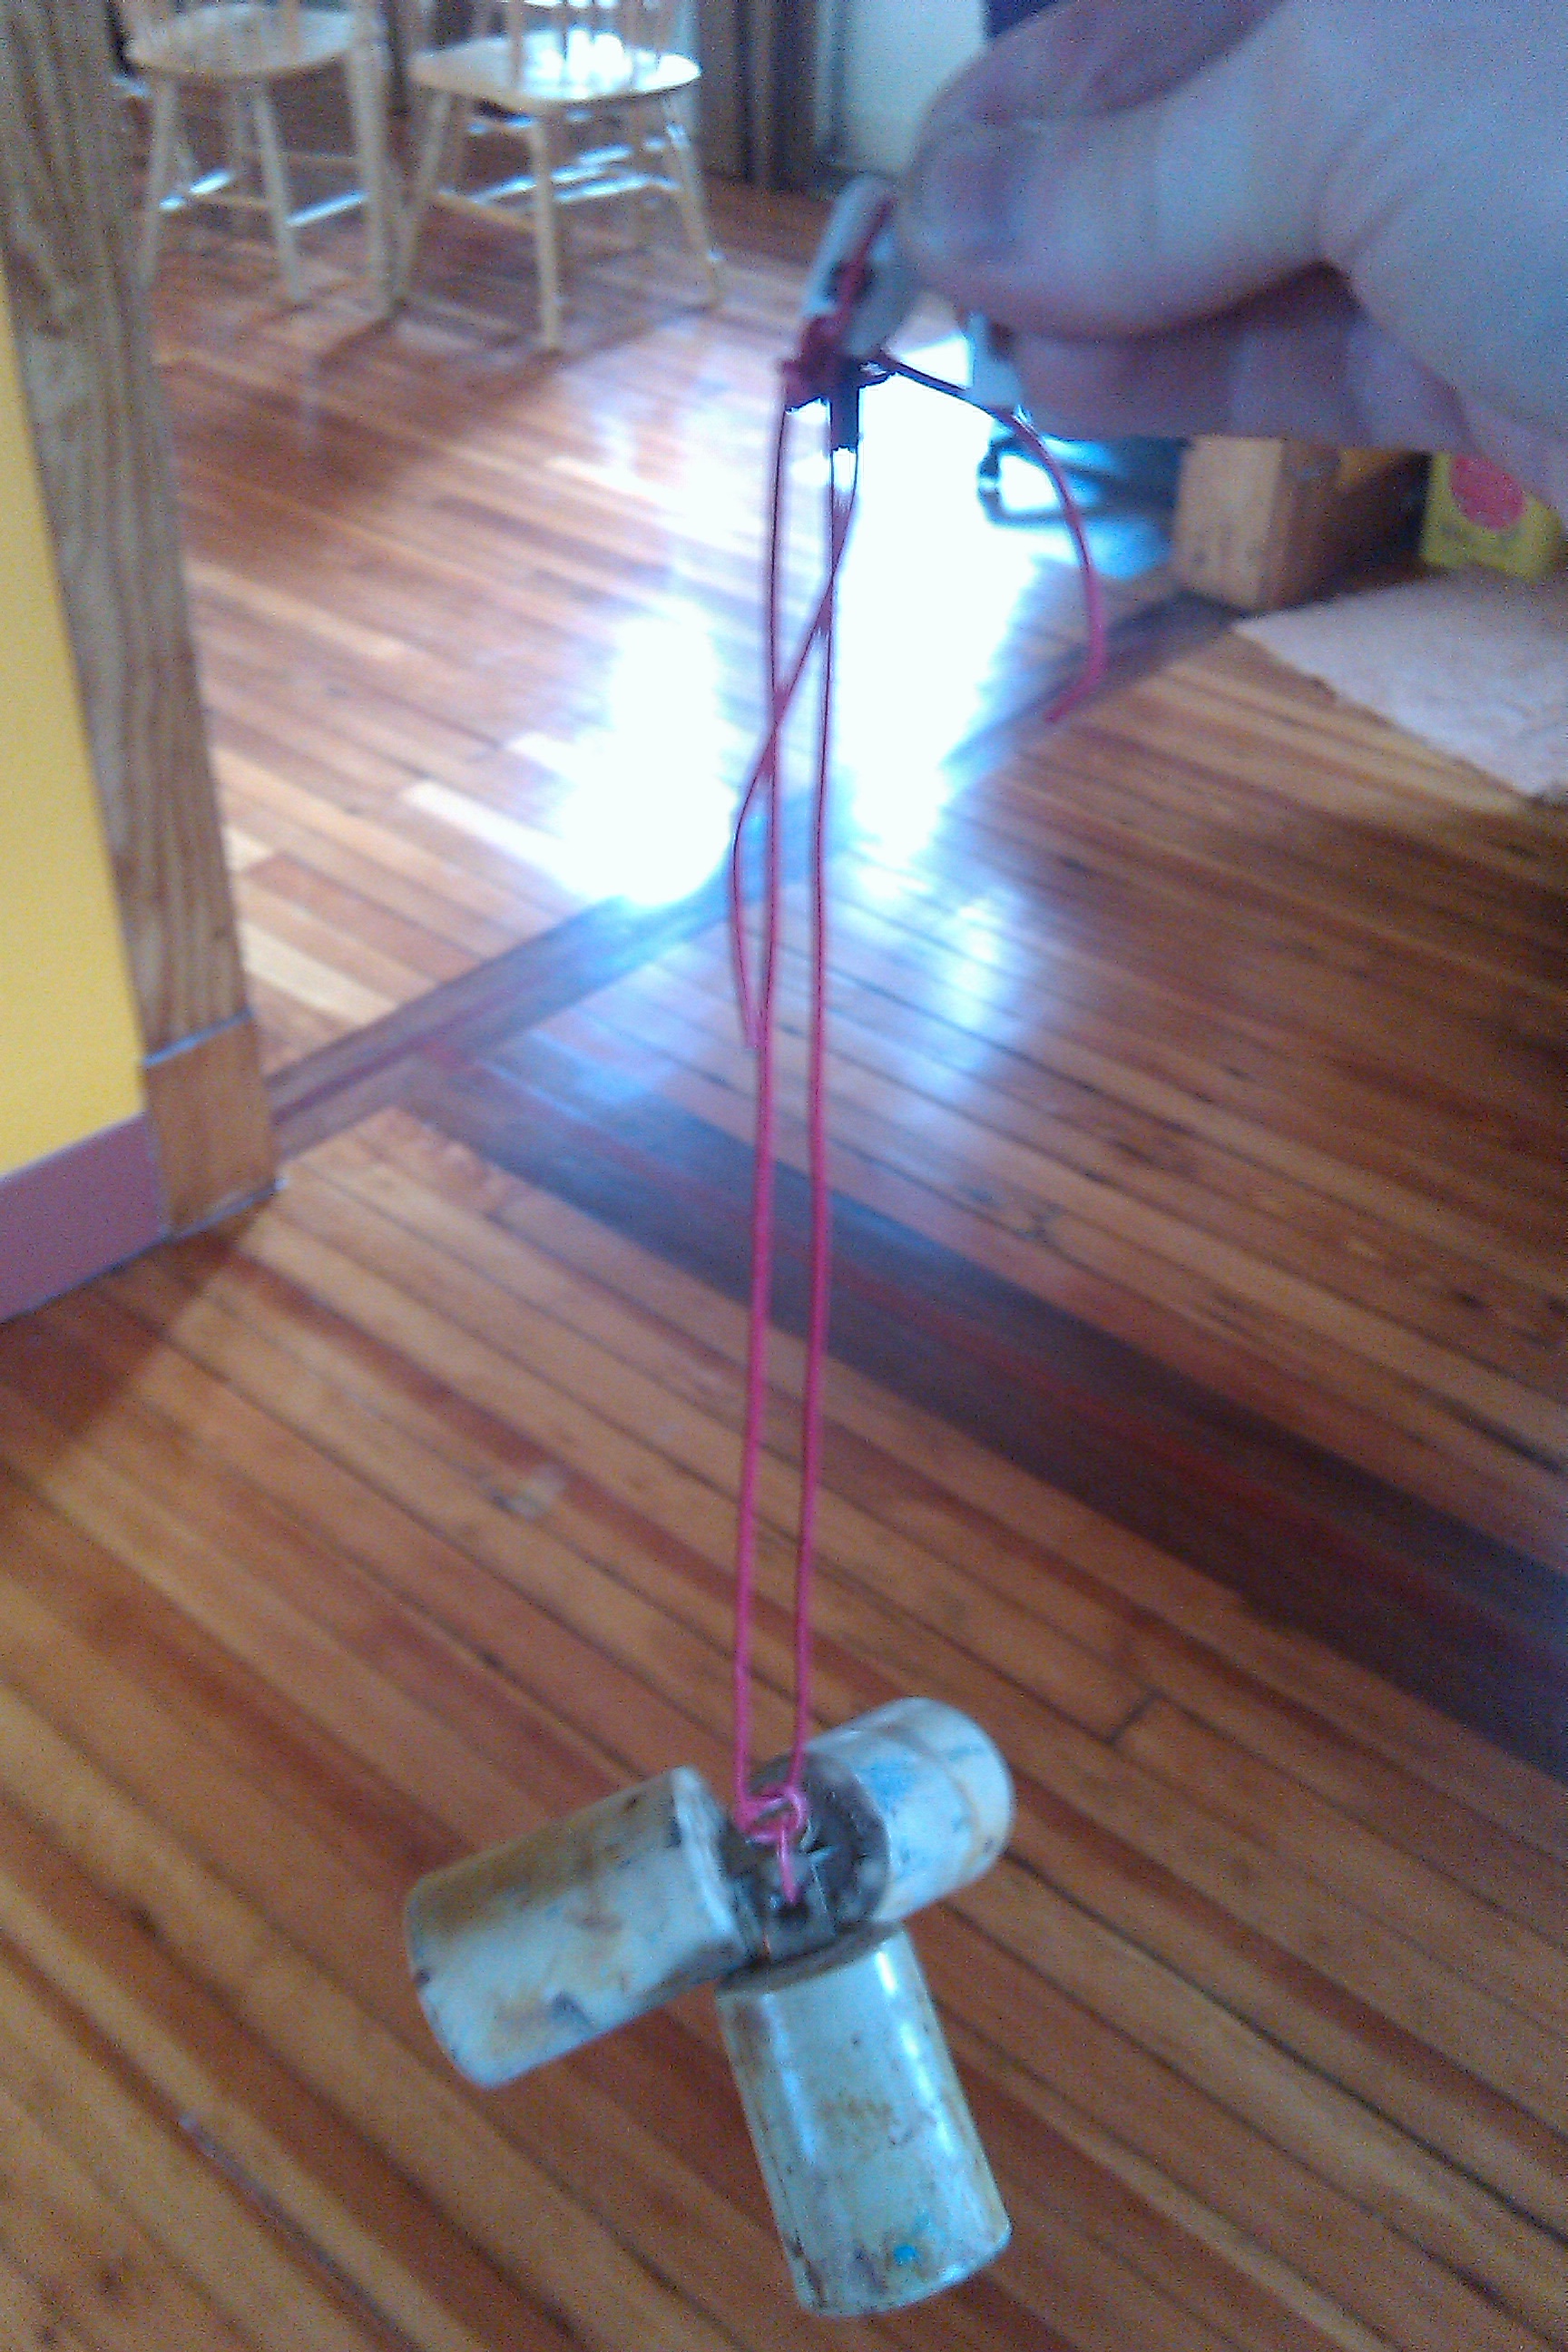
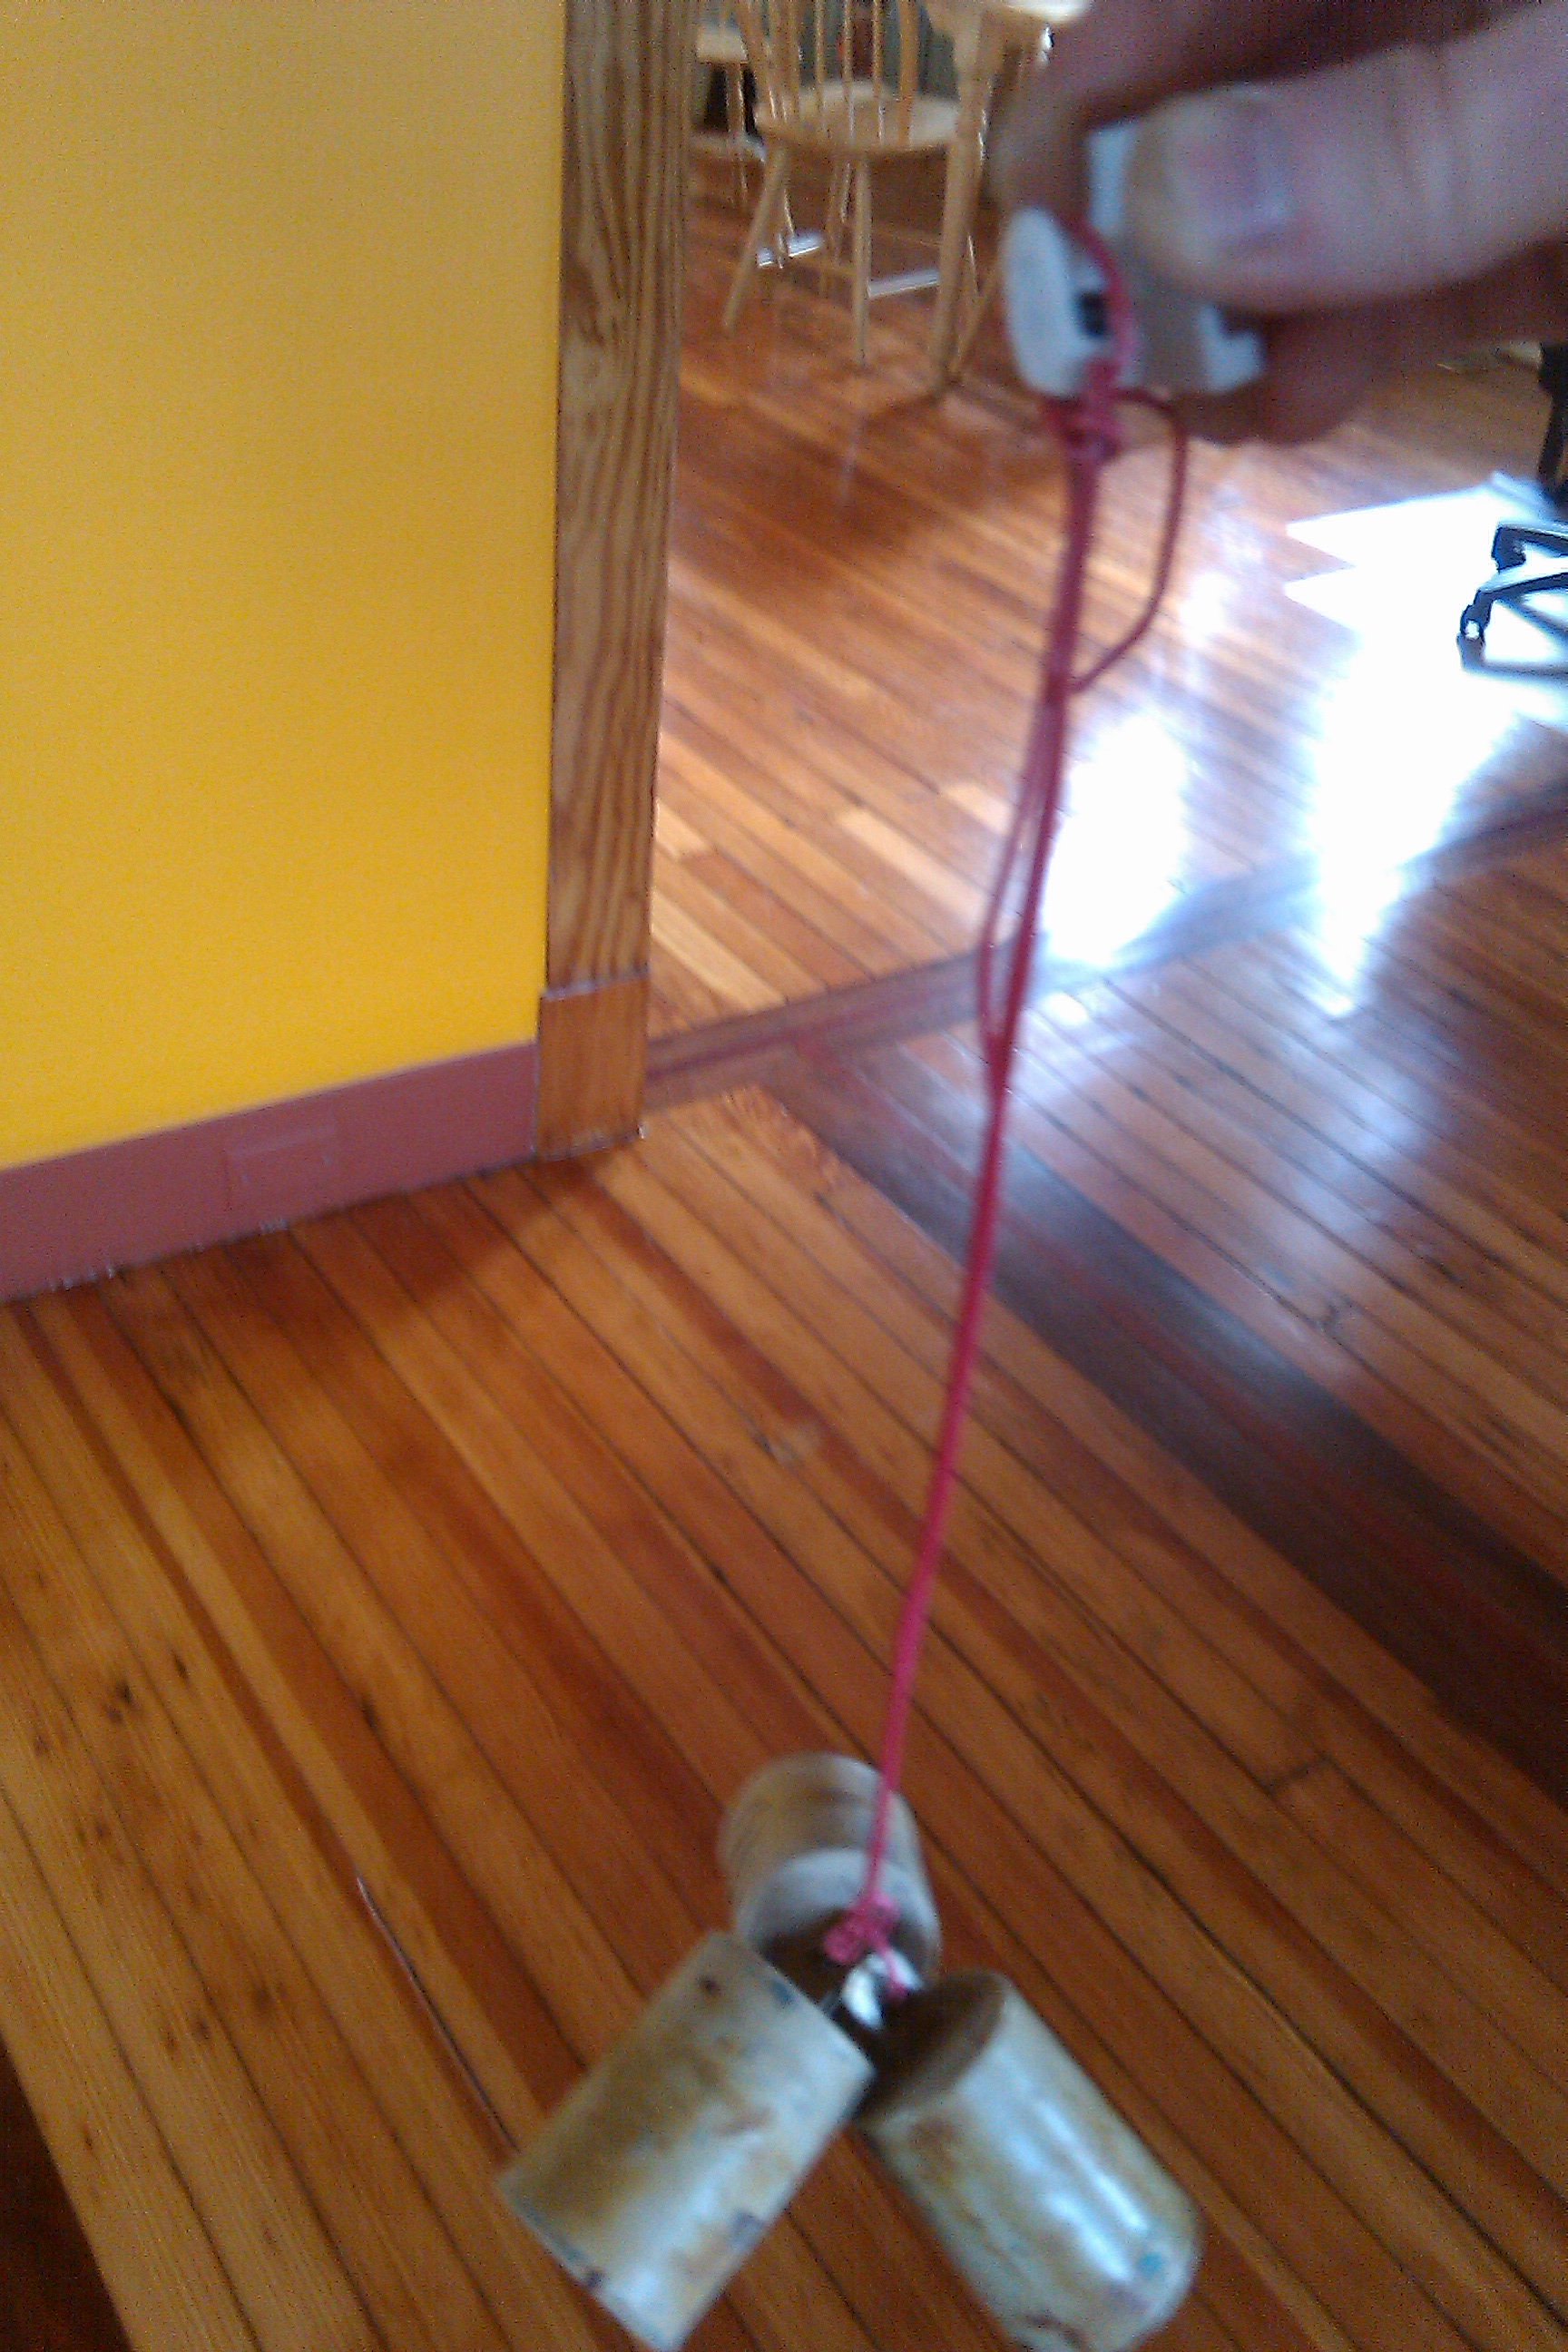
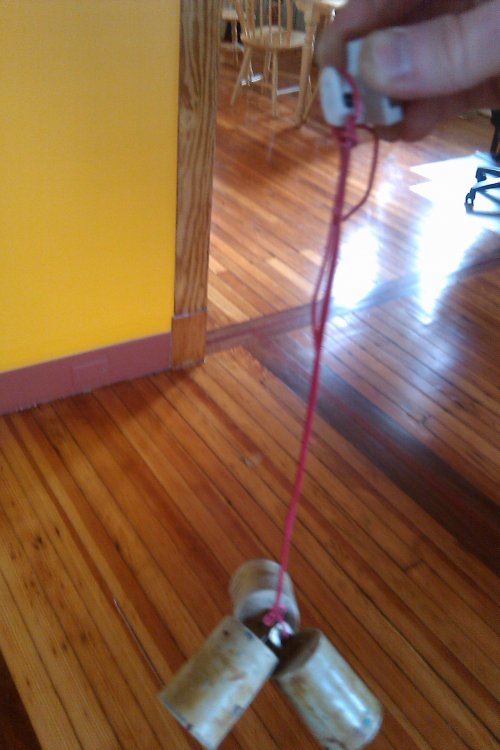
Captain's log, stardate: September 3rd, 2011. Morning. About to have coffee. Hi everyone, I'm happy to report that the newest set of moulds is complete and the first test-castings will be done by Monday evening. The procedure seems to have gone exceptionally well, as I've inspected the new tooling and found no problems, which is always a sigh of relief when you have to mold some rather complex shapes. The first 2 pictures are of the moulds themselves. The first pic shows two of them being poured, while the third is a finished unit. If you're wondering why I sometimes use tupperware as mold boxes, and acrylic jigs for others, it's simply to suit the size of the pieces being moulded. Some parts are so awkward that custom mold boxes have to be made to accommodate them, like the main body and the engine nacelles. The next series of pictures are courtesy of our very own Codam23, who is making the joints using 3D printer technology; something that would have been unthinkable a scant decade ago. The photos show the joints in question supporting a whopping 1.9 lbs of weight each, without bending or moving. I can confirm from the prototype joints that I have that they will be very strong indeed, and when built properly, will be able to handle the weight of the kit, no sweat! By next week, I should have some test-shots to show, as well as some mocking-up of the parts to give you an idea of just how massive this model will be. Stay tuned!


-
There are actually numerous deviations from the source artwork, especially with regards to proportions. As I've stated on a few occasions previously, this model is not intended to be a 100% anime-accurate version (which would not be physically possible anyway) but a design with my own touches, envisioned as it would exist in a more real-world scenario. A Legioss: Moscato version, if you prefer.
-
Excellent question! In fact, it doesn't affect the posing any more than the stubby version, though it is more noticeable visually. Not nearly as much of an eyesore as I thought it would be. I'll post some pics when the torso parts are finally molded.
-
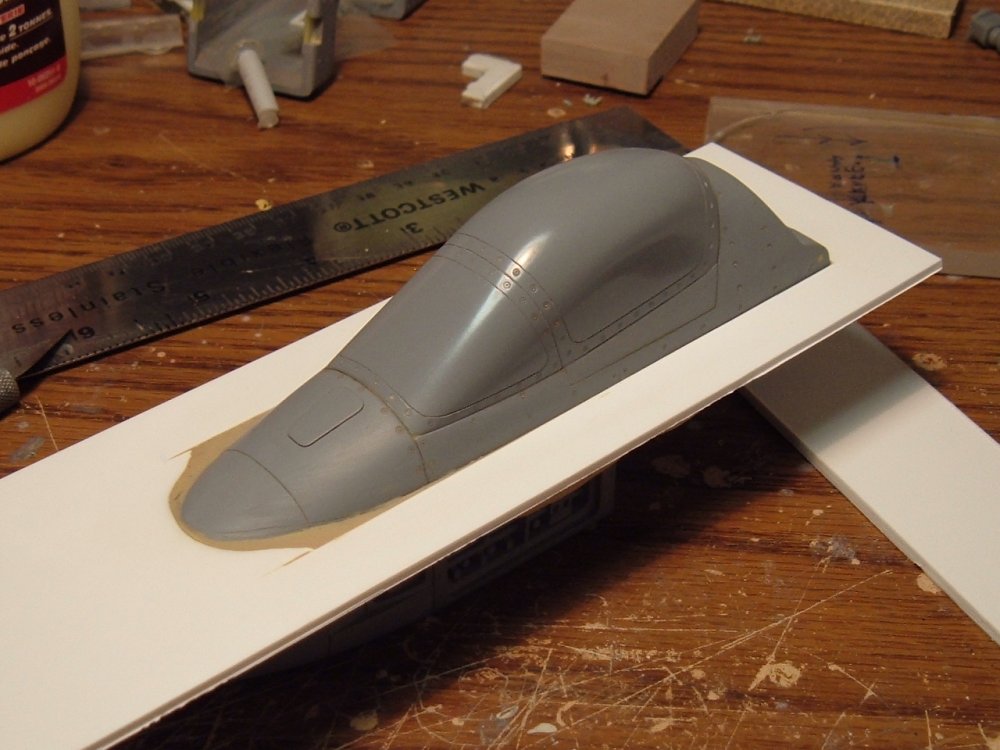
A better comparison between the old and new nose. Night and day difference!

-
That depends on market demand. I tried polling for Inbit mecha a couple of years ago; the interest was abysmal.
-
I'll let you know how I feel when she's done; still no light at the end of the tunnel, so I just keep my head down and do what I gotta do. Oh yes, I definitely have a couple of kits for myself; this is iconic mecha pr0n for me
-
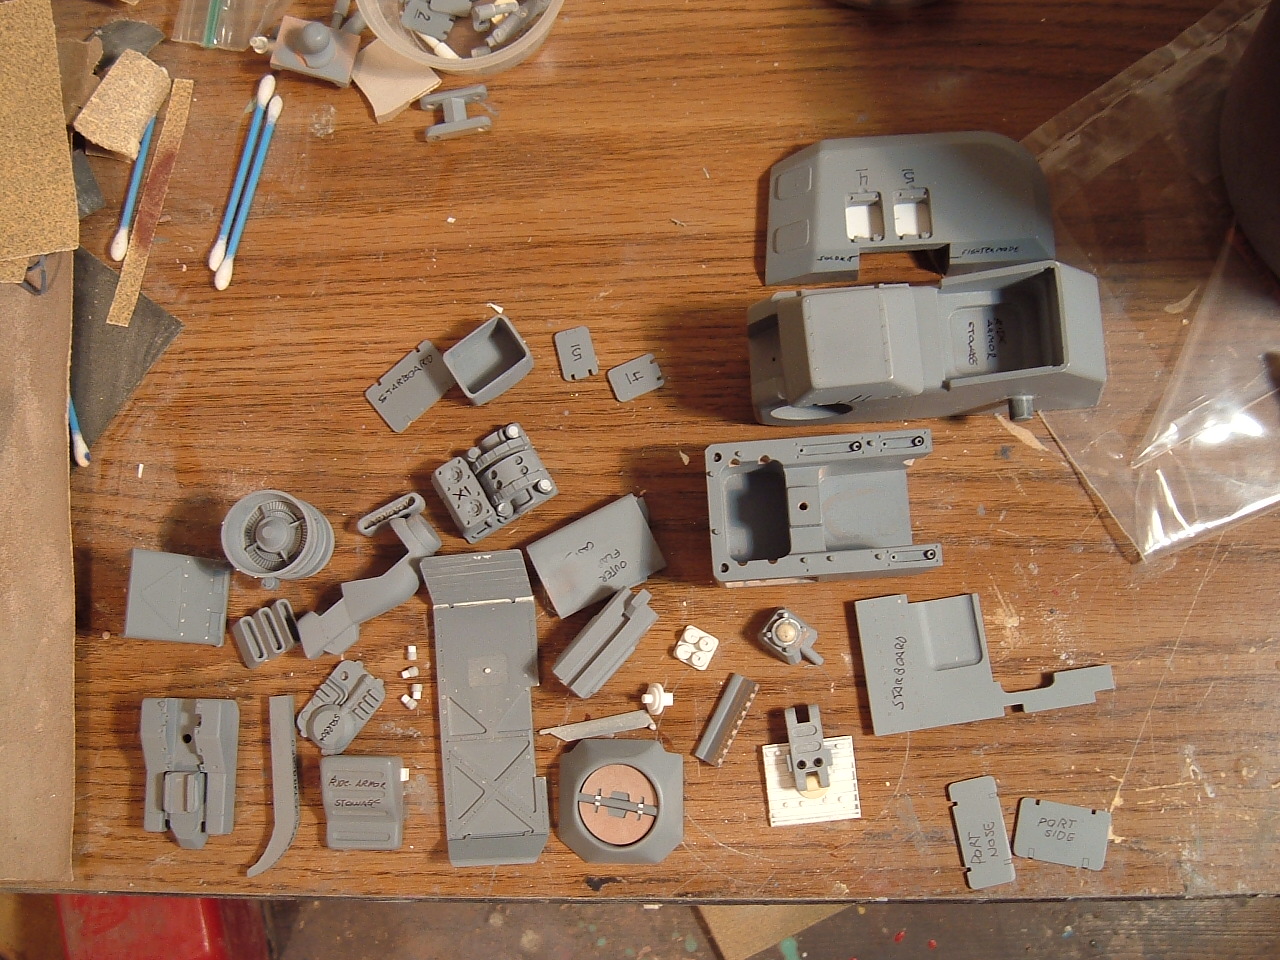
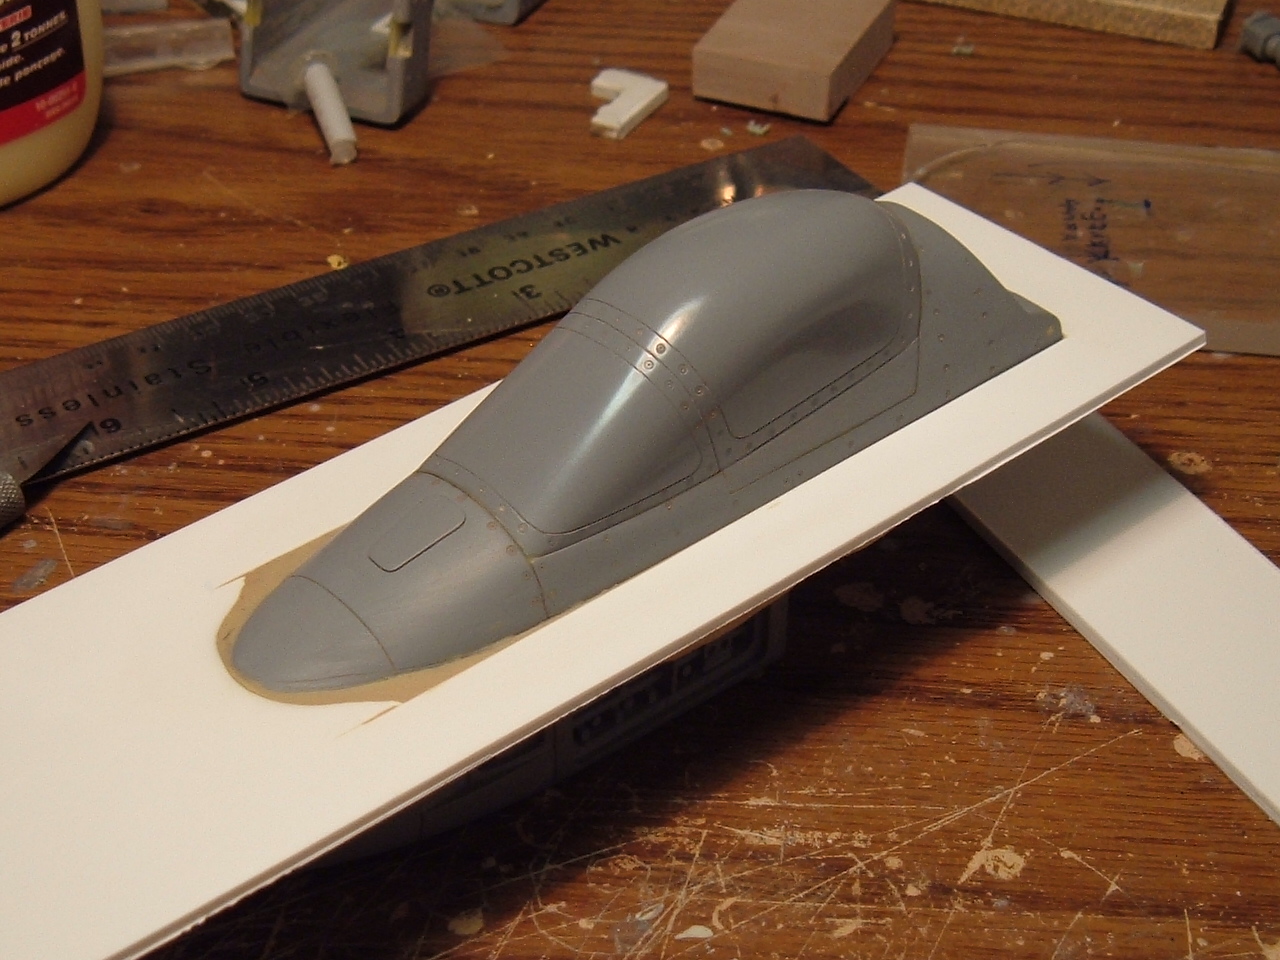
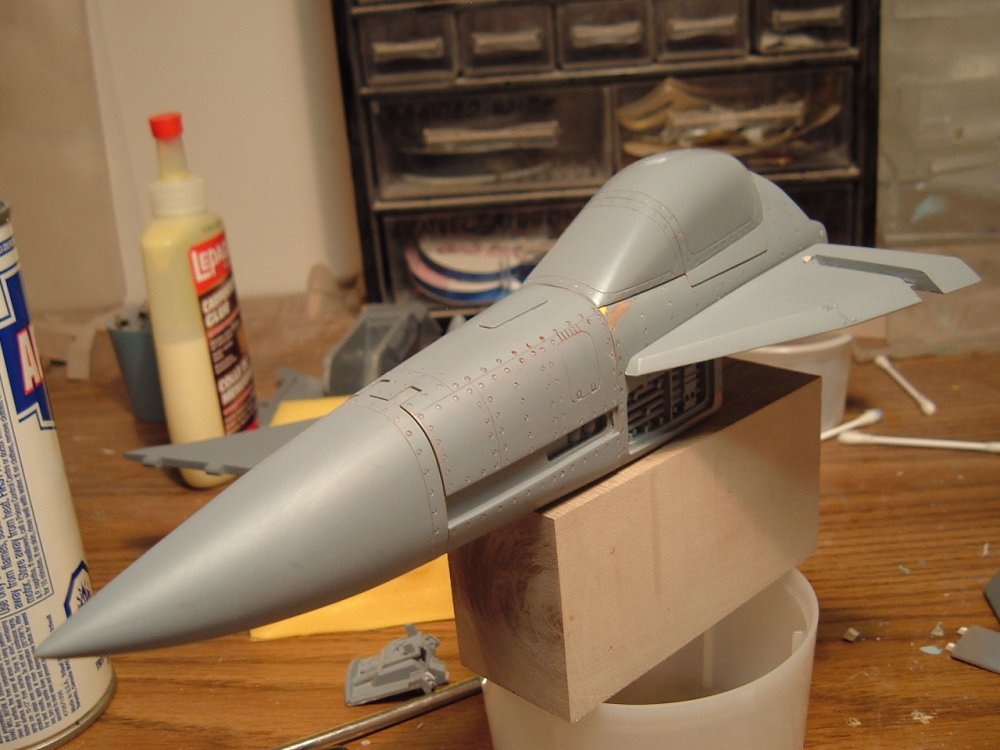
Hi guys! Welcome to the latest installment of Building The Perfect BEAST. Captain's log: Monday August 22, 2011. After lunch. I was going to post the update last Friday, but by the time I got to taking pics, I was already quite pooped… Guess I'm starting to show my age. Anyhoo, probably the most significant alteration to the Legioss is now done, and by that I mean the newly-reworked nose cone. The first two pics show the new nose in all its riveted splendour. There will be a few little details fixed here and there, but it's essentially complete. The oblong rectangular access panel on the starboard side of the nose grants access to the on-board oxygen generator and cockpit air-conditioning unit, whereas the small rectangular panel on the port side is for access to the air-conditioning/cooling system for the avionics. I made the semi-triangular raised shape on top of the nose a rain-repellant unit for the front windscreen. For those concerned about painting the necessary demarcation on the nose, I will provide a computer-made, same-size template that can be used for masking, so as to take the guesswork out of the equation. Pics 3 and 4 show the radome in the open position and the avionics suite extended forward. Some extra detail was added on the top and starboard side (replaceable mission cartridges) of the unit. Also, you may have noticed that the nosecone hinge is now beefier and mounted topside, as opposed to the starboard side. I did this to both offer the look of a more secure latching mechanism, and also allow the crew better, unrestricted access to all the plane's goodies. Pic 5: all the parts that are being prepped as part of installment 5, namely: the main body, right boobie, one engine and related intake ducting, the head, and the 2-way multi-mode data transmitter/receiver. Parts are being primed and prepped for instructions photography, and will then be moulded and cast as per my usual procedure. I will likely skip next Friday's update, but expect another progress report on September 2nd. Oh, and slightly on-topic, if anyone knows someone who does white metal casting, it seems that I would have need for that service again. There are problems with my current/previous provider. More on that subject as details emerge.


-
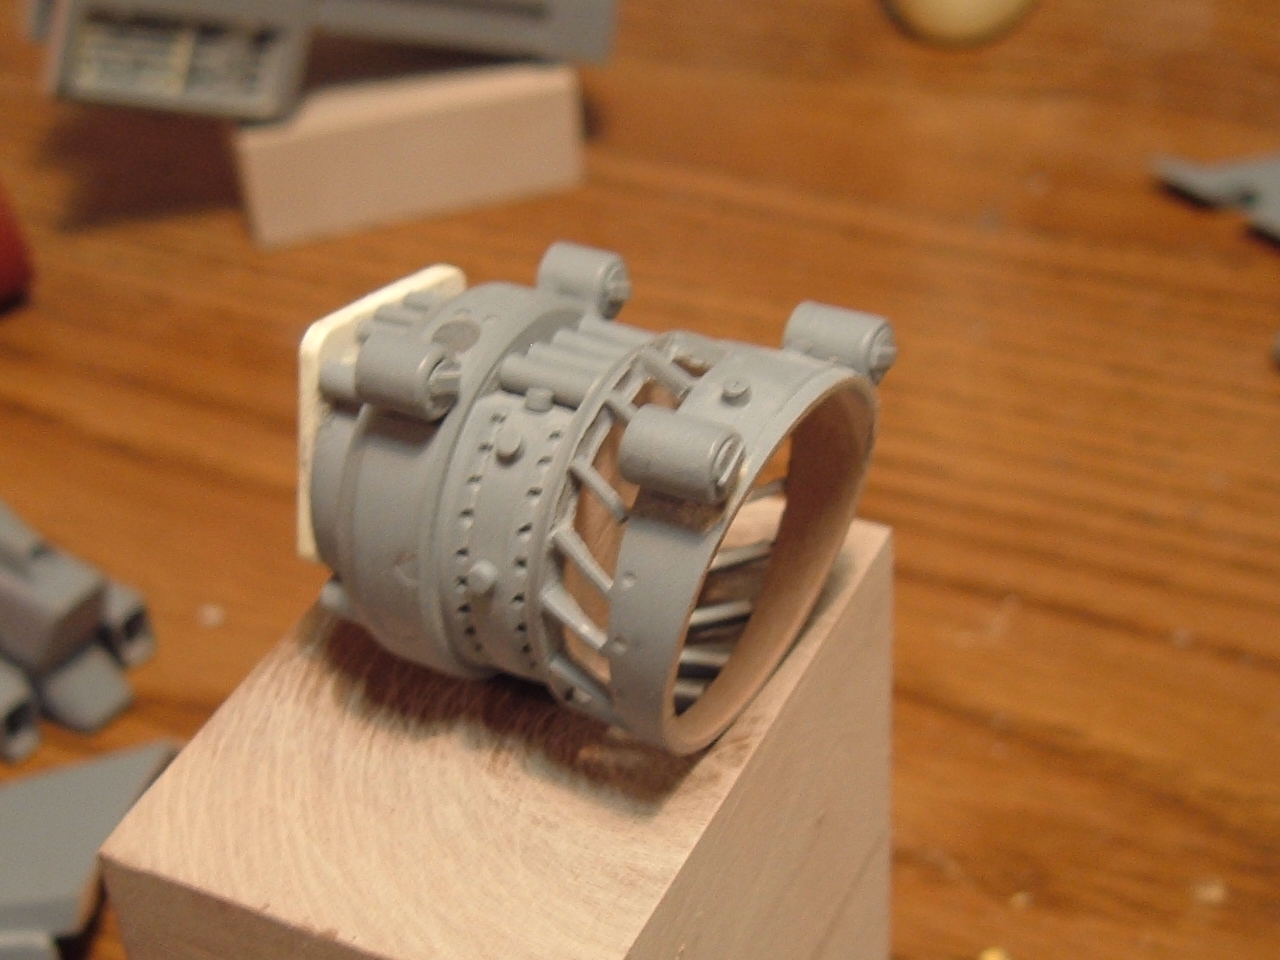
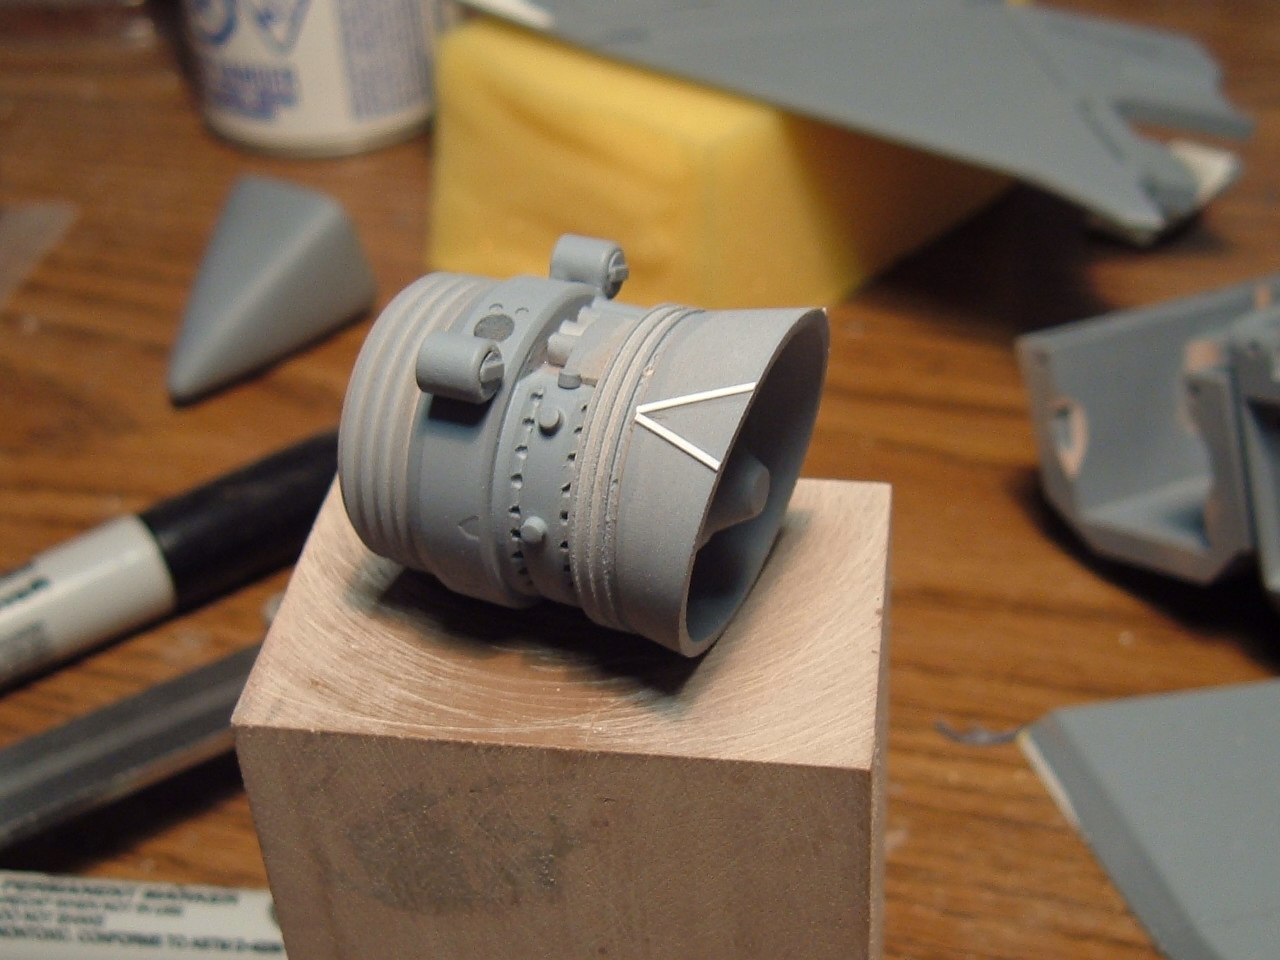
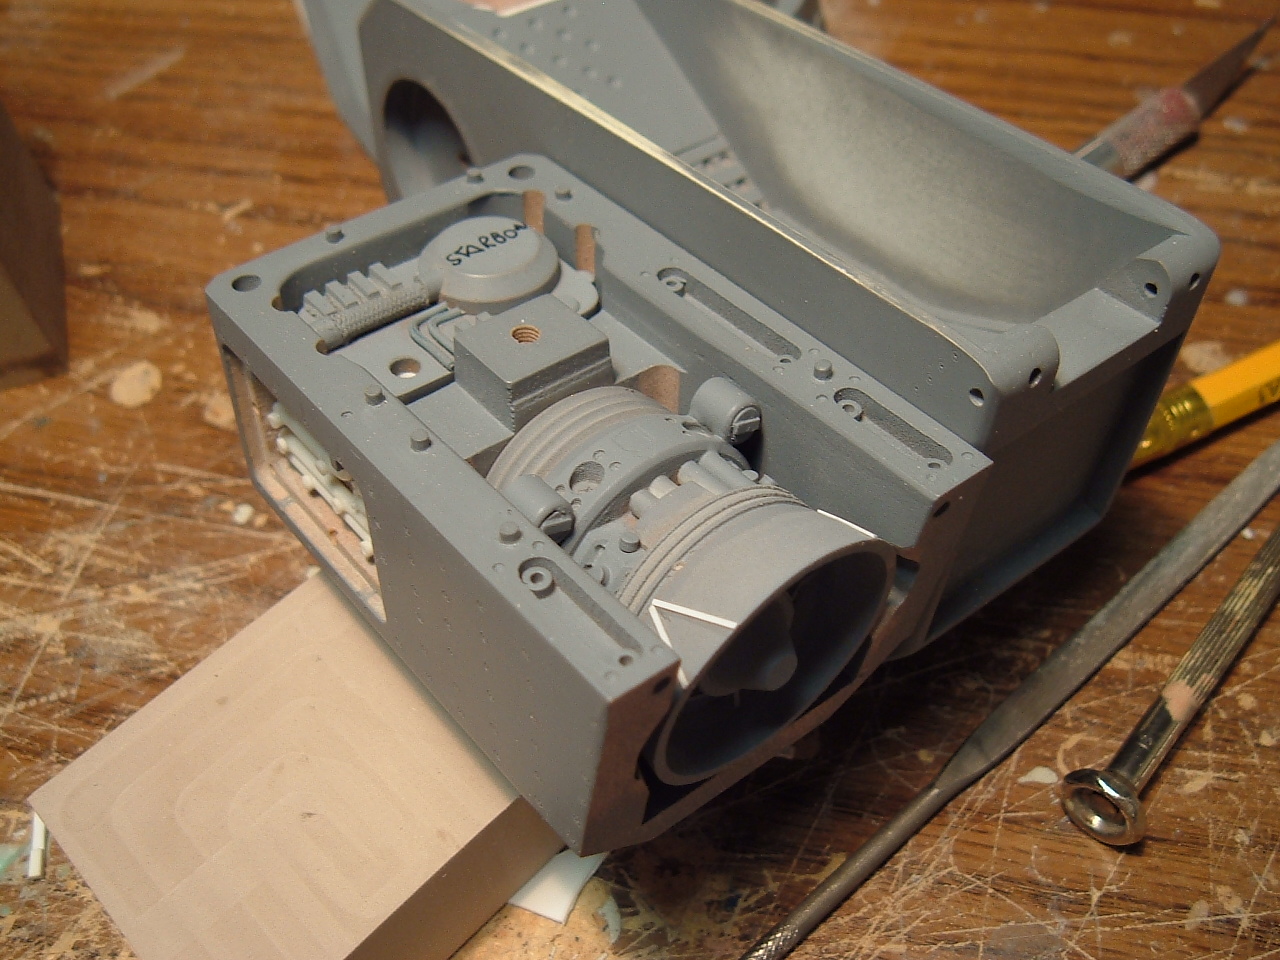
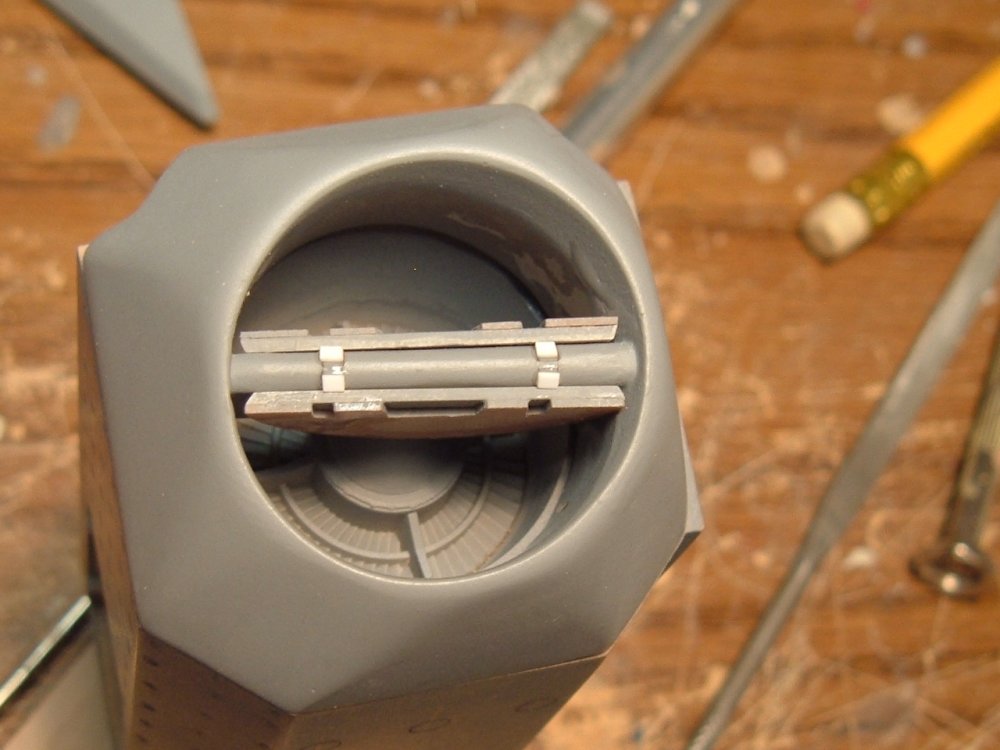
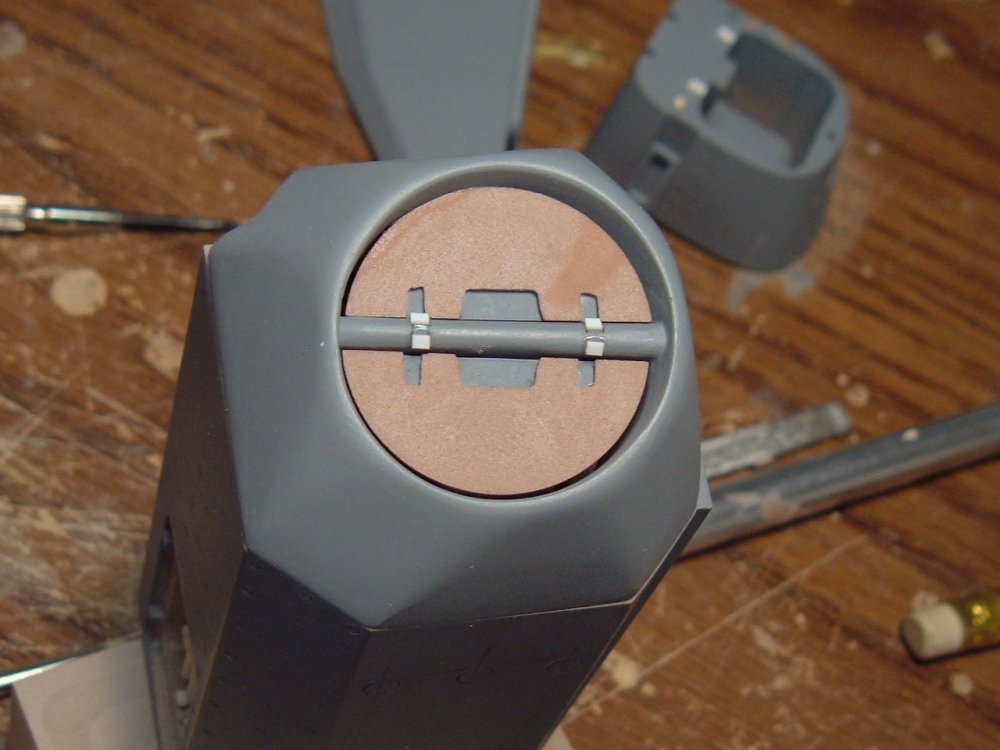
Hi guys! Welcome to the latest installment of Building The Perfect BEAST. Today we're going to take a look at parts for the 2 last installments; namely the main body and the nosecone. Though normally I prefer to concentrate on one segment at a time, these two sets of parts are such that they must mate very carefully with each other when building, so alterations to one part inevitably spills-over and affects other parts: a simple principle that translates into more tedious and time-consuming work. In pics 1 and 2, we see the old-style JG-97M power generator, as it was made almost 10 years ago. I was never quite happy with the look of it, and wanted something that was a little more realistic in appearance, not to mention that as it is in the pics, it would be a complete casting nightmare. Therefore, with a bit of clever machining and fabrication... …I end up with something much nicer (pics 3 and 4.) The new powerplant is more along the lines of what I'd envisioned, and sports re-tooled fan blades and no bleed-slots; much more efficient looking IMHO. Pic 5 shows the engine in its chest housing. Since the entire mouth/intake of the powerplant was re-tooled, I wanted to ensure that there were no fit problems with the unit. Pic 7a: the movable intake doors. THe one on the left is the old version, while on the right is the 2.0 version. Pic 6: The engine/housing and intake doors. This shows the parts in flight configuration. Pic 7: intake doors in closed (armoured) position. In my head, I'd envisioned the doors to serve 3 purposes: one to protect the engines from Foreign Object Damage while taxiing on rough runways, two, to serve as intake ramps to control the high-speed airflow to the compressor face in high-speed flight, and third as armored shutters in heavy-duty engagements. Pic 8: the new forward fuselage/radar tray about to be machined. The nose section took quite a while to shape adequately, since I really wanted to nail the shape that would allow the fighter to really come alive. The rough version I'd shown previously was too bulbous and really didn't work with the rest of the fighter. Pic 9: the new nosecone tested for fit and aesthetics. All I can say is wow! The old 1.0 nosecone really doesn't hold a candle to the new one. Be warned though, the Fighter mode should be over 20 inches in length: it has presence!! Well, that's it for this update. I should have all the masters ready to begin mold prep by next week--stay tuned!


-
Mori-Mori & Tamiya Polyester putty are pretty much the same product based on my experience; it's a fine grade of automotive polyester build putty and I love it to pieces! It's spendier, slower to harden and harder than Bondo, so I don't use it quite as frequently, but it's definitely a top-notch product. See, you can get a similar grade putty from a local automotive finishing supply provider, but the putty comes in this huge-a$$ tin, and what happens is that since I'm only using a small amount at a time, the stuff starts to harden in the tin (exposure to air from constantly opening the container) and goes bad before I'm half-way through. Therefore, even though a tube of Tamiya is 18 bucks, it's still cheaper than a huge tin that will mostly end up being wasted.
-
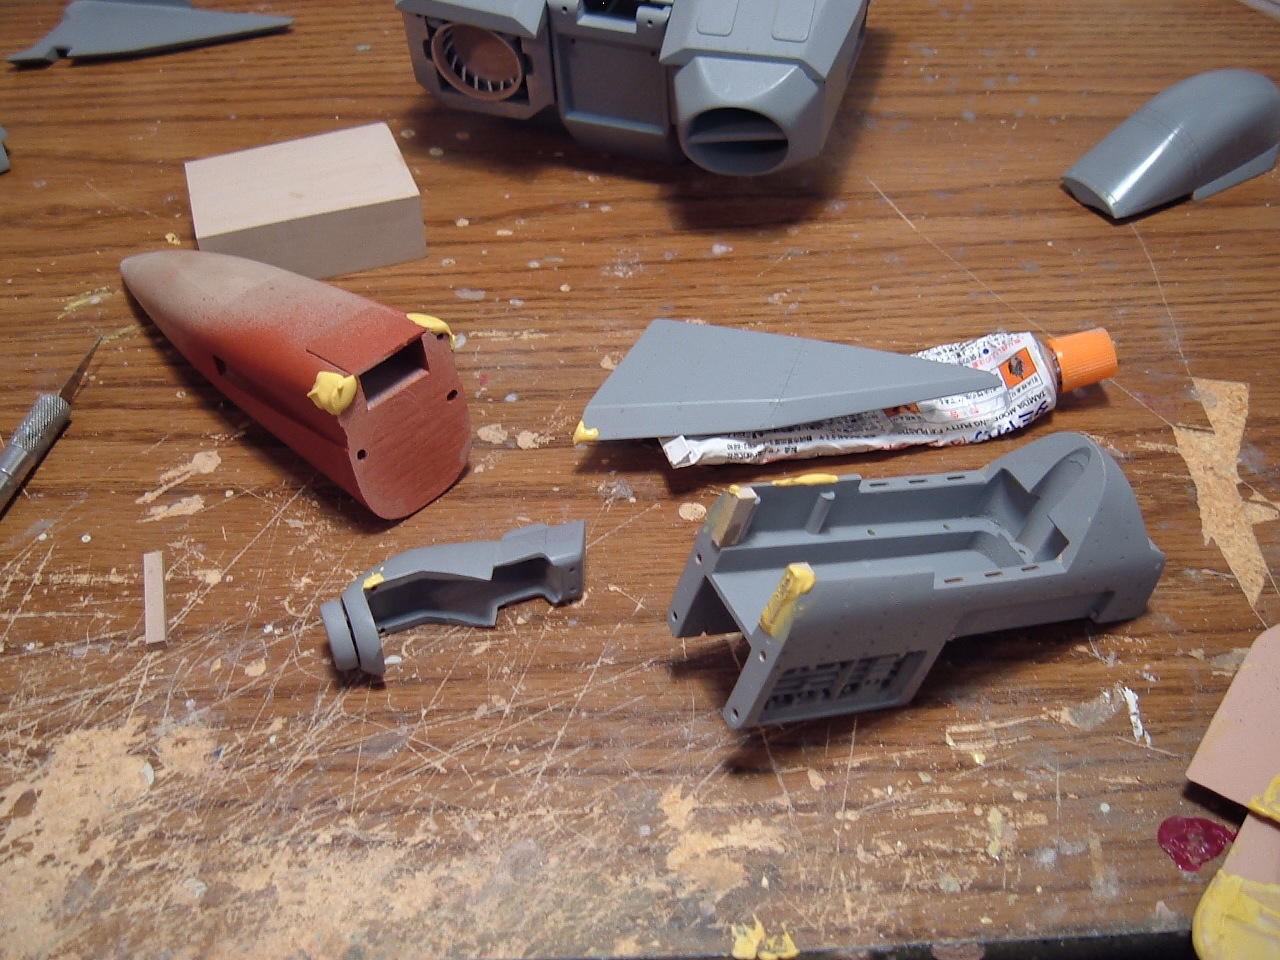
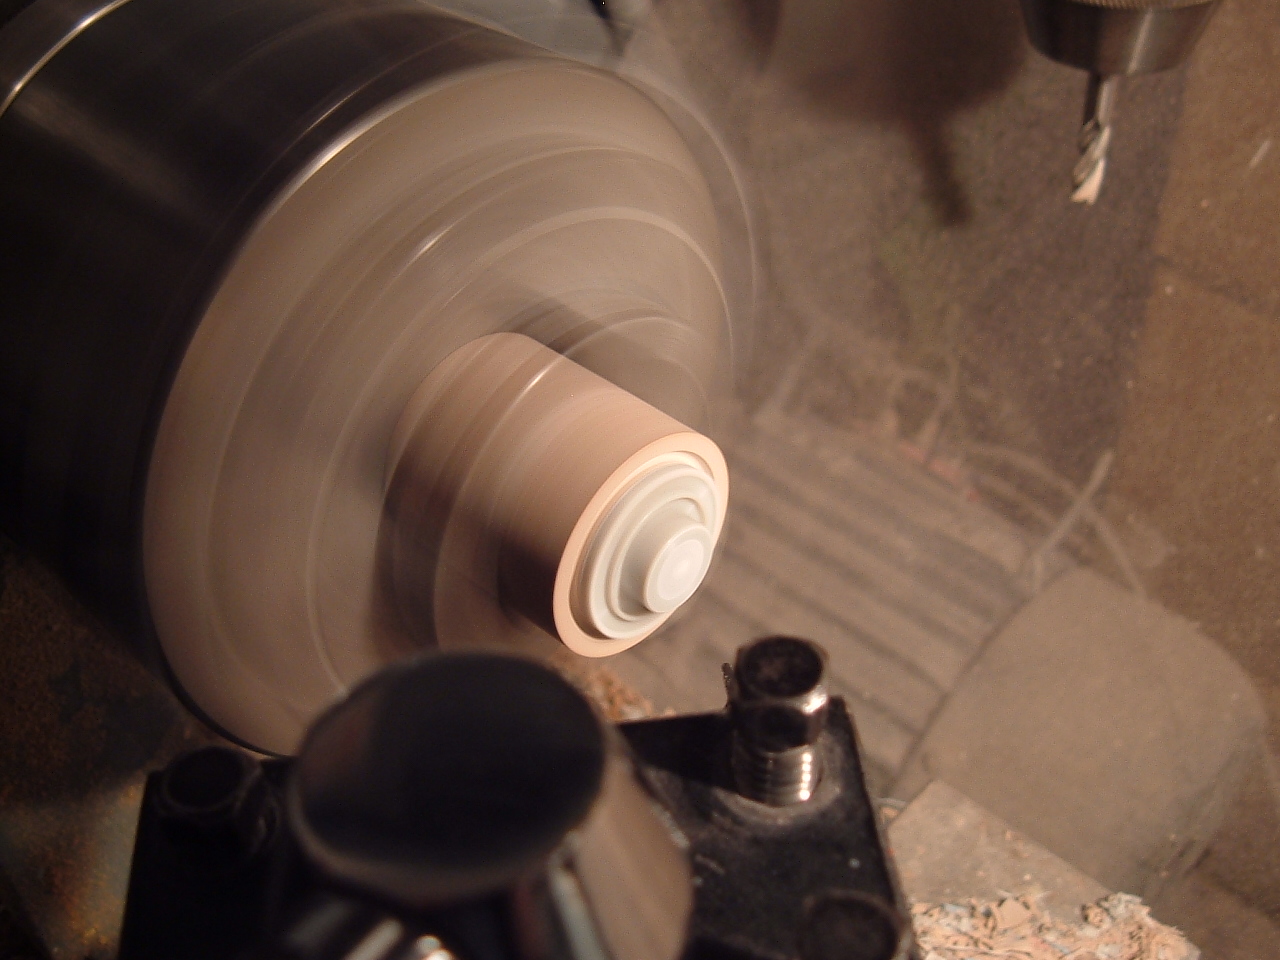
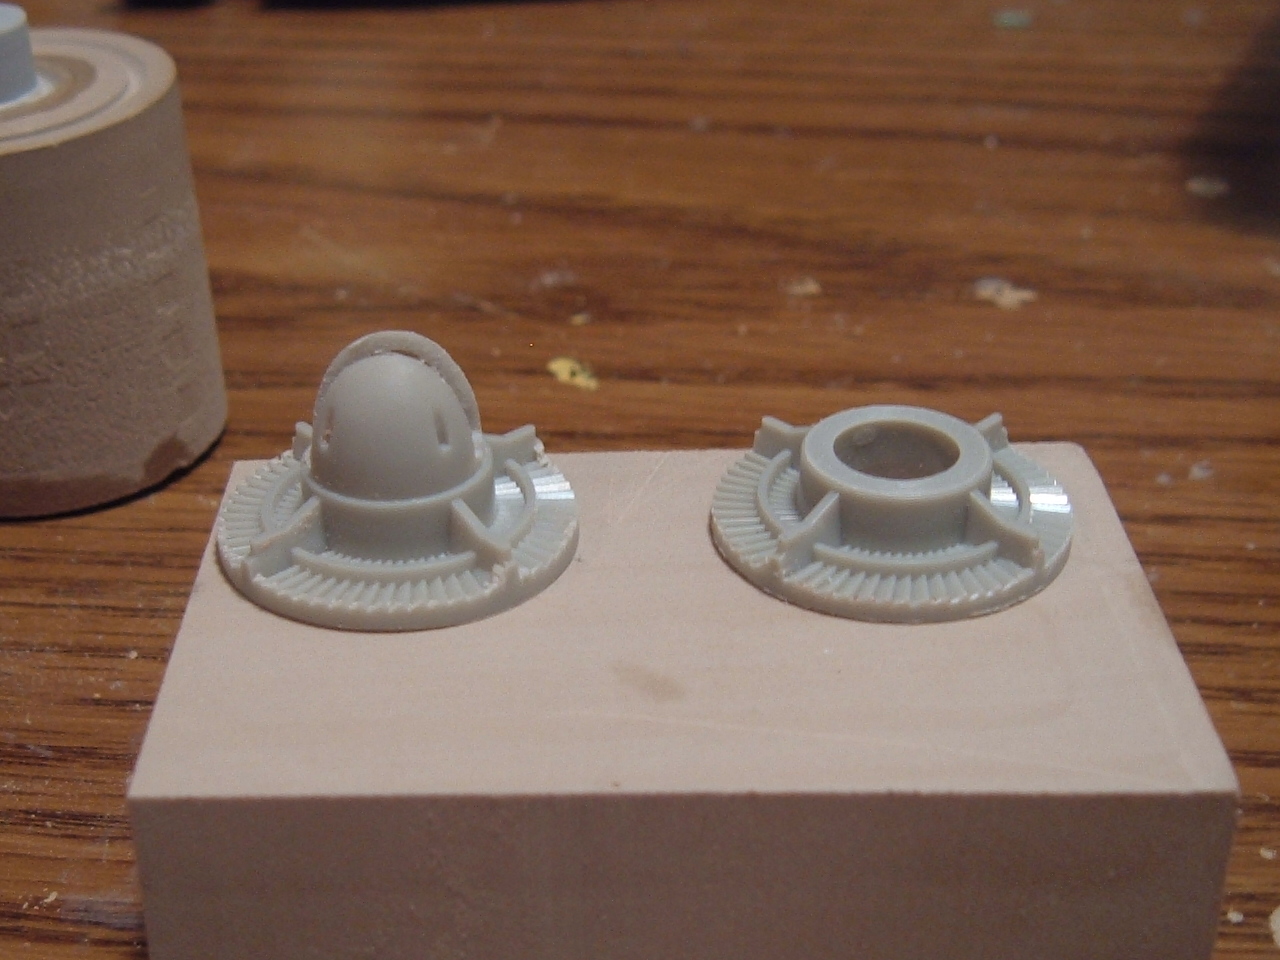
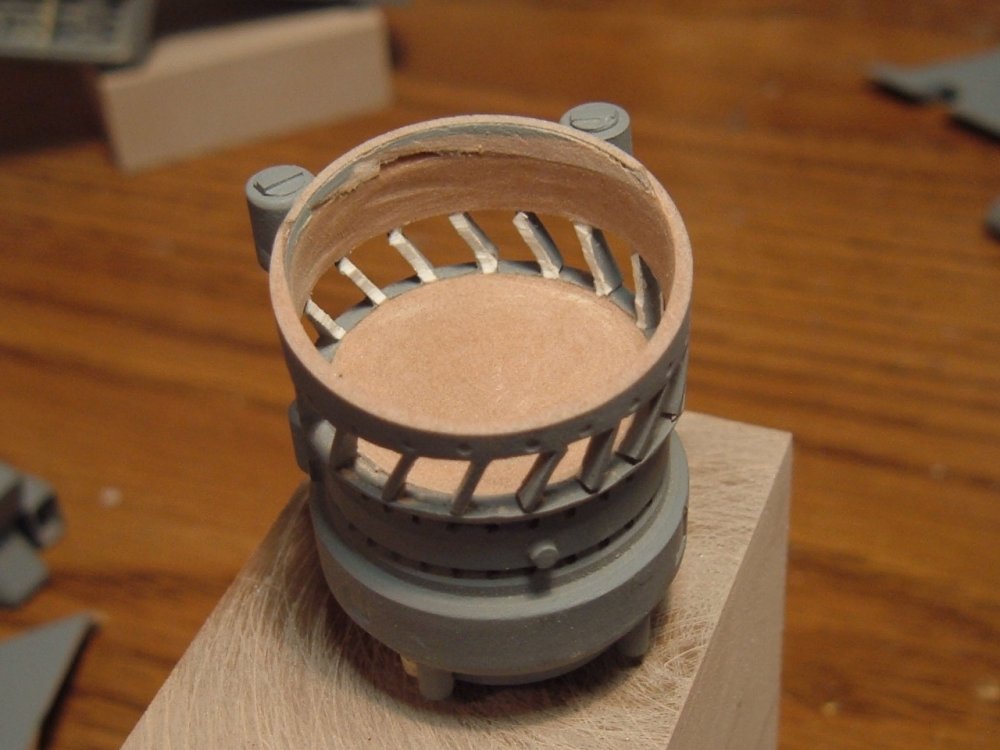
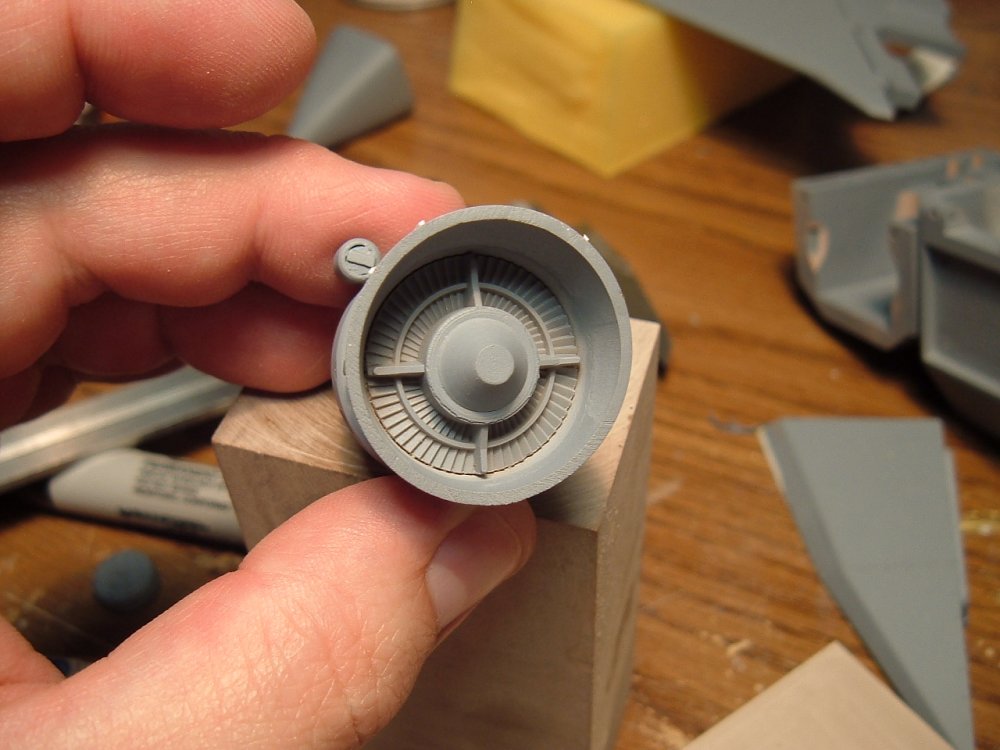
Hi everyone! As promised, I've compiled a short update of my current goings-on with the Beast, which is coming along nicely. One of the realities of old masters that have been handled and moved around over the course of a decade is, unfortunately, damaged parts. This is due primarily to 2 things: one being the very fragile nature of modelling board, and the other being very sharp and delicate edges crafted from that delicate material. Therefore, before anything else, little chips and dings have to be repaired, as seen in pic 1. I find that Tamiya's Polyester Putty is great for this because it's very fine and cures harder than Bondo. Next, I wanted to re-work the compressor face for the engines/generators to better fit in the nacelles and allow all the parts to integrate harmoniously. It's something that I had neglected back in the day, and will now finally be addressed. Step one involves correcting both the diameter and deleting the "bullet" on the compressor face. This is where a lathe comes in handy Pic 3: On the left is the part before the mods, and on the right is the updated piece. More work is coming so as to integrate everything, but I'll get into that more in next week's update. Stay tuned!


-
A dirty mech is a smexy mech! I think the effect looks awesome, great job! I used to use hairspray as a fixative too, but it gave my kits a bit of a girly smell so I stopped
-
Ugh, sorry to hear about that. I really don't know what's going on globally with mail service in the last year; it's like everything's going haywire. Let's hope that they're just slow like the last time. On a higher note, it's August 1st, so time to send payment for installment 5. Part 4 starts shipping today, later than expected due to a few unforeseen snags that were mentioned in a previous post. Anyway, since we're on to a new installment, you can expect a mini photo update by week's end, followed by a more comprehensive update the following week
-
Holy guacamole!! That build just totally blew my mind I've gotta hand it to you Petar, you did a masterful job on that kit! I feel like a proud father
-
Hi everyone. Apologies for my long absence, I've been trying to take care of a few things behind the scenes and enjoy some of the summer weather while we have it. As it stands, installment 4 has been ready for quite some time; I was hoping to have the joints done by now, but it seems that there are delays related to that, meaning that the joints and the landing gear have been (unfortunately) pushed back and will be included in the last 2 segments yet to come. As such, installment 4 will begin shipping August 1st, just as I begin taking payments and doing the prep for installment 5, which will be the main body/right engine nacelle/right wing. There are a few components that I'll be updating for the next installment as usual. In the meantime, I've tasked myself with doing molds for the buck that will be used to vacuum-form the canopy; seems that there will be some very interesting technology used to make this. More news as it develops Lastly, a single, solitary pic of the canopy masters being prepped for molding. More to come next week!
-

The Transformers 3 Thread--A Michael Bay Thread
captain america replied to areaseven's topic in Anime or Science Fiction
Got back from the theater a little while ago; I think that this is the last time I go see a 3D film. If anything, the effect didn't really improve the experience and honestly, it made the battle scenes blurry and hard to follow. I think I'll have to see the film a few more times in 2D to really take everything in. -
Epic win!! Thank you so much for doing this, the parts look fantastic!! Gotta love it when the community pulls together like this, you guys are awesome!
-
Hi guys. Casting for Installment 4 is already underway and has been for some time. I'm sort of on forced leave ATM since I ran out of resin and am awaiting replenishment. In the meantime, I'm occupying myself by preparing boxes and doing some minor prep for the last 2 installments. Oh, and I may take some time off in July also; mostly to avoid doing too much casting during the sticky season (problematic due to most resins' sensitivity to moisture/heat.) Until then, the Little Engine That Could, soldiers on!
-
Actually, there IS an ARII kit under there, believe it or not, it was just heavily modified with Super Sculpey because the basic kit was, well... Not that great. When it was made: 1993 Scale: 1/15000 (approximate) Can you still get this: you could never get it, even back in the day: it was a one-off that's still in my display cabinet collecting space dust
-
Hi everyone! Just wanted to provide a quick heads-up to all that Installment 3 will be shipping between tomorrow and Friday. The kit will contain screws, but the joints and landing gear parts will be contained in Installment 4. Also, since payment time for Installment 4 starts tomorrow, I merely want to give a quick reminder to use my new paypal ID, which changed approx. 2 months ago. If you're not sure if you have the updated info, just shoot me a PM, thanks
-
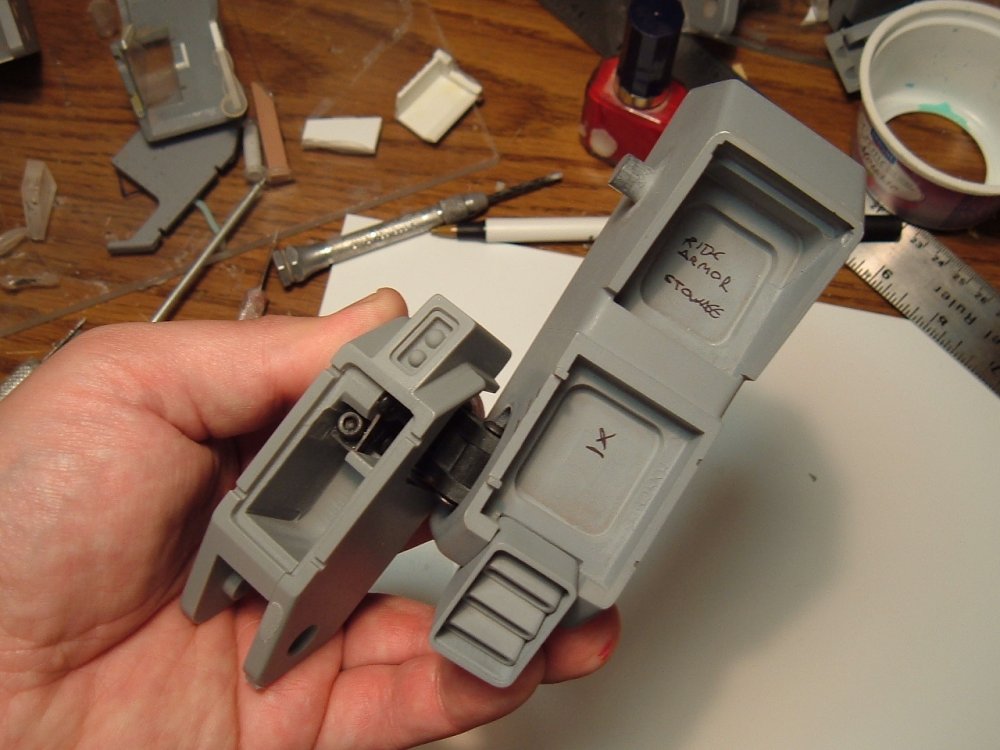
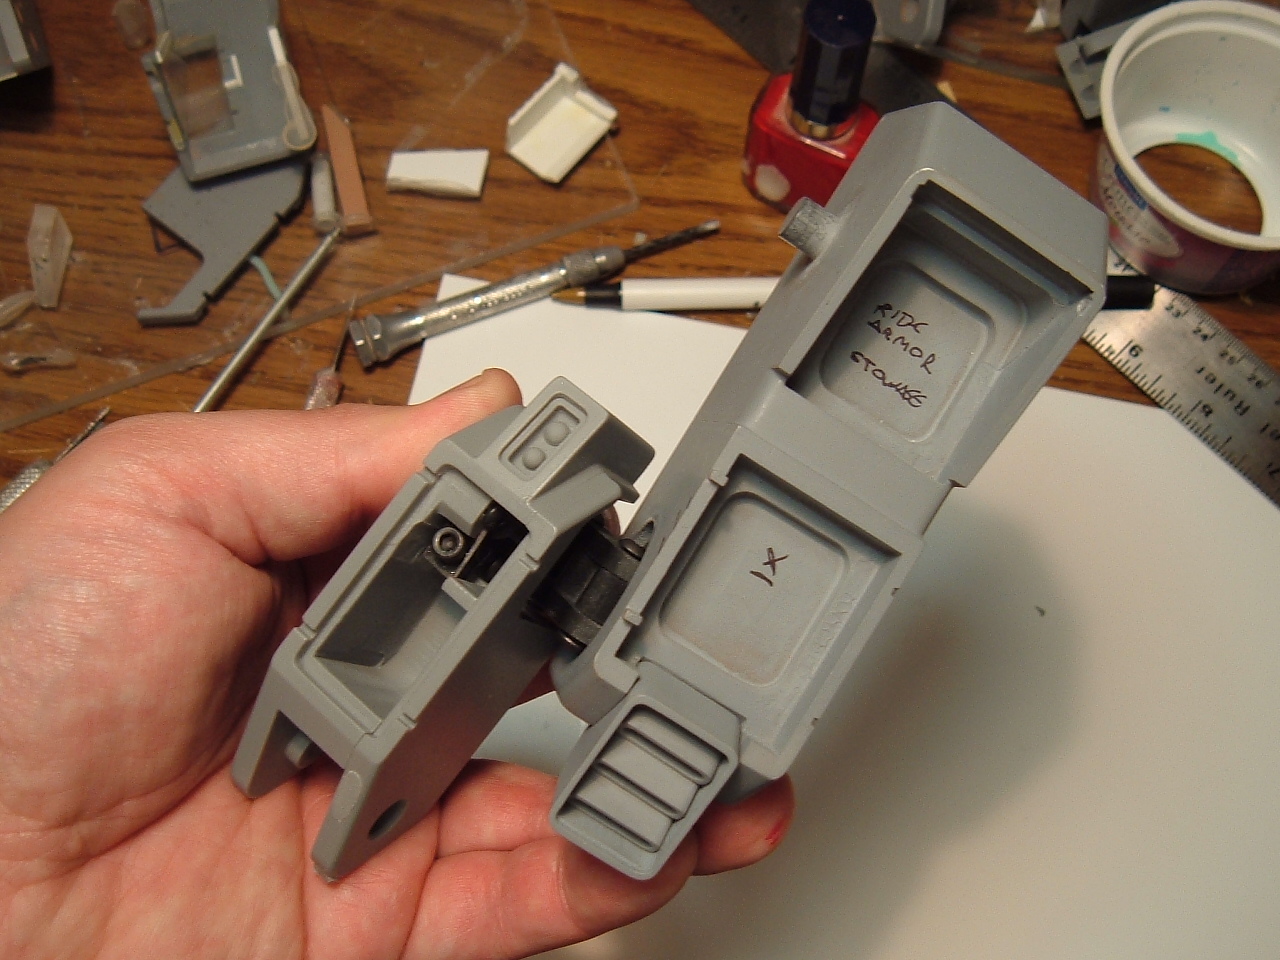
Good catch! In fact, the bottom of the ride-armor stowage compartment is visible under the chest thruster when the model is complete. No ride-armor will be included in the base kit, but dimensionally, the stowage compartment space was taken into consideration when I did the design. However, I feel that it's important to mention that for reasons of moldability and structural integrity, you can't actually put a ride-armor in the stowage location. When I did my re-design, I made it such that the ride-armor would have to be manually lifted from the compartment by the pilot or a technician: the compartment is accessed by removing the main viewing monitor inside the chest module. I did it this way because it seemed more realistic considering the space limitations on the fighter, and I also wanted to do away with any unnecessary gadgets; just makes for more stuff to break-down and cause problems in a real-world scenario. Payment 4 will be due June 1st; just about when i'll be shipping installment 3.
-
I tend to think that the Legioss flying backwards in Ep. 3 was a kind of animation mistake. FOD stands for Foreign Object Damage (doors.) I inspired myself from what was done on the MIG 29 & SU-27s to allow them to taxi on rough runways & grass fields and not have to worry about the engines ingesting debris that would wreck the turbines. The way that the LEGIOSS' intakes are designed made this a natural choice. I have no plans to scratch-build a VF-1, since that's been done to death, but maybe 1/32 Inbits if there's enough demand later on.
-
Oh yeah, I went nuts: droop-able air brakes, positionable flaps, multi-axis thrust-vectoring main engine nozzles, FOD doors for the engine intakes, maintenance/access panels, detailed radar array, you name it, it's in the kit. Without wanting to seem like I'm bragging, when you see all the technological goodies that I designed into the Legioss to make it real-world, a VF-1 would simply pale by comparison in terms of performance and survivability.
-
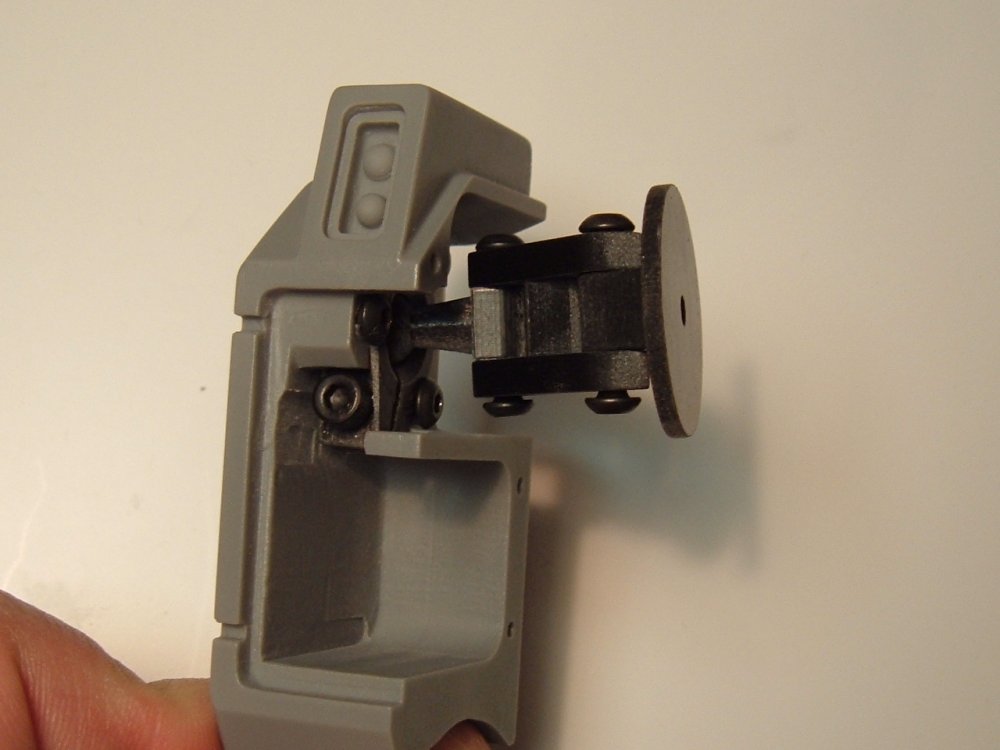
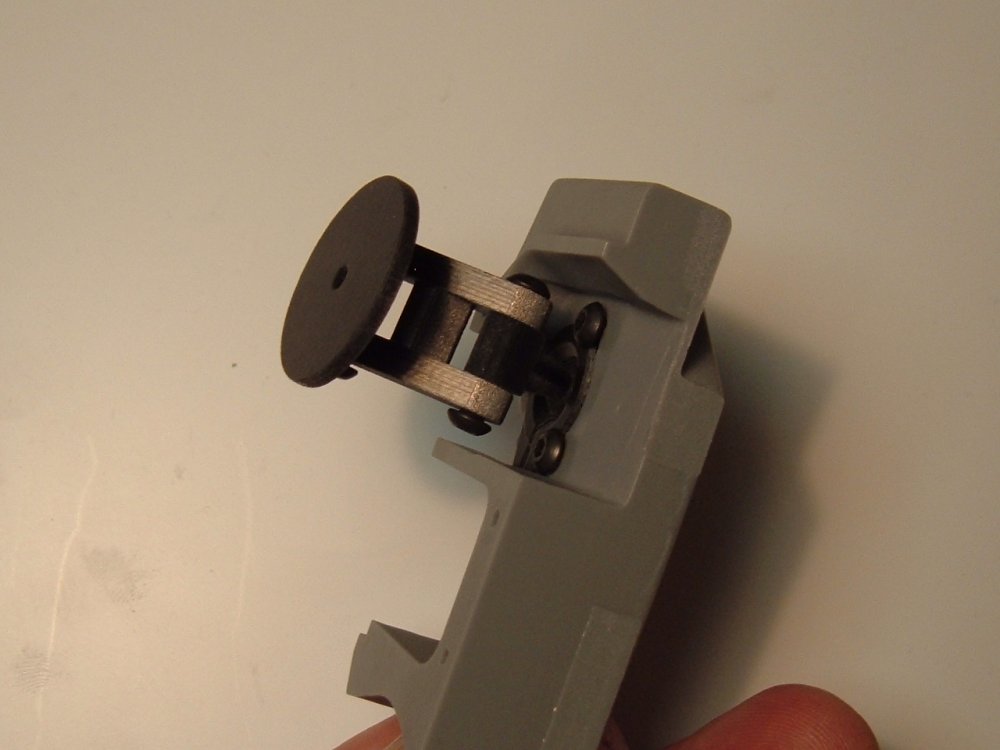
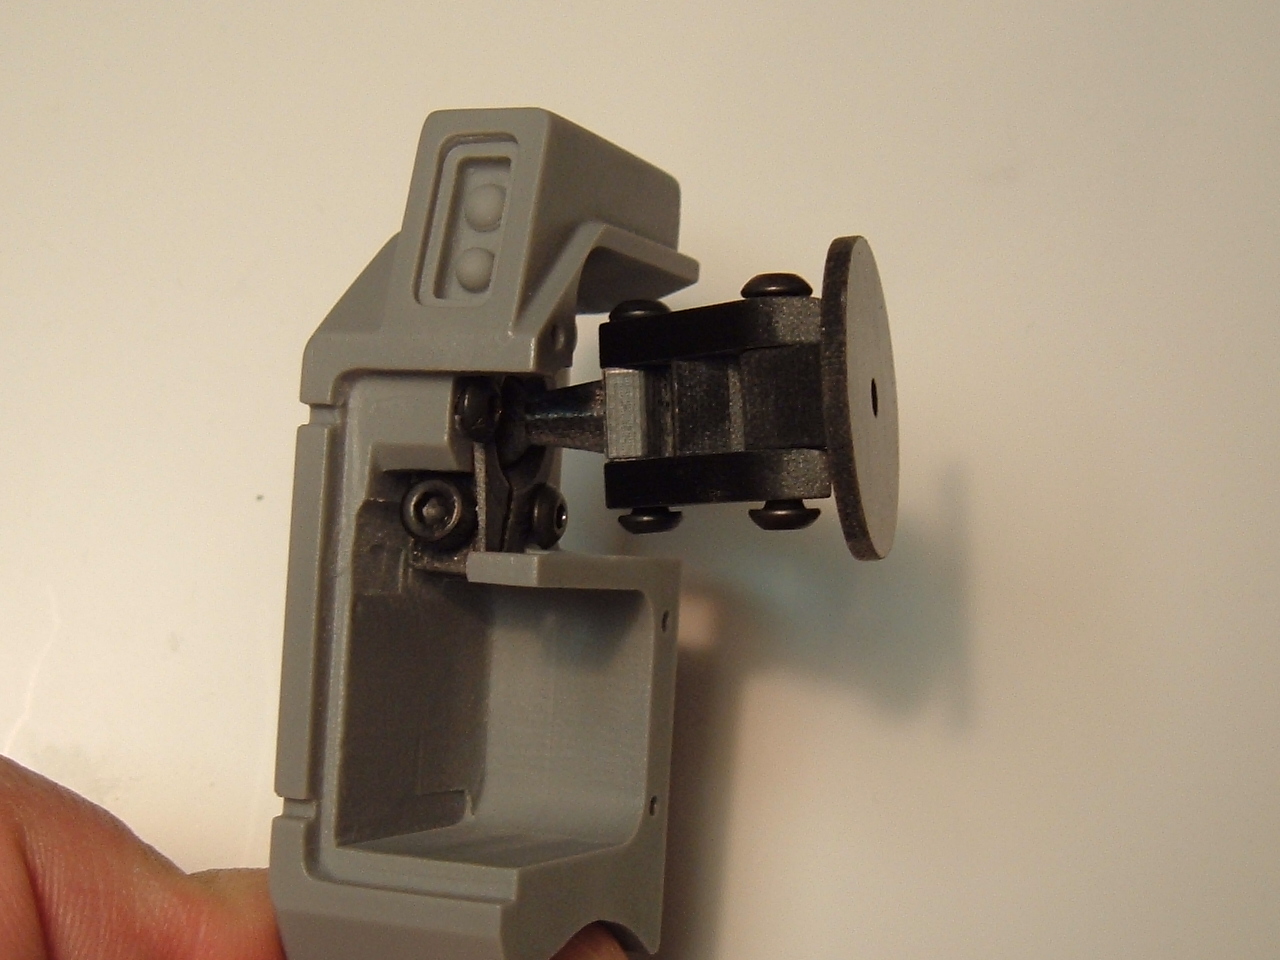
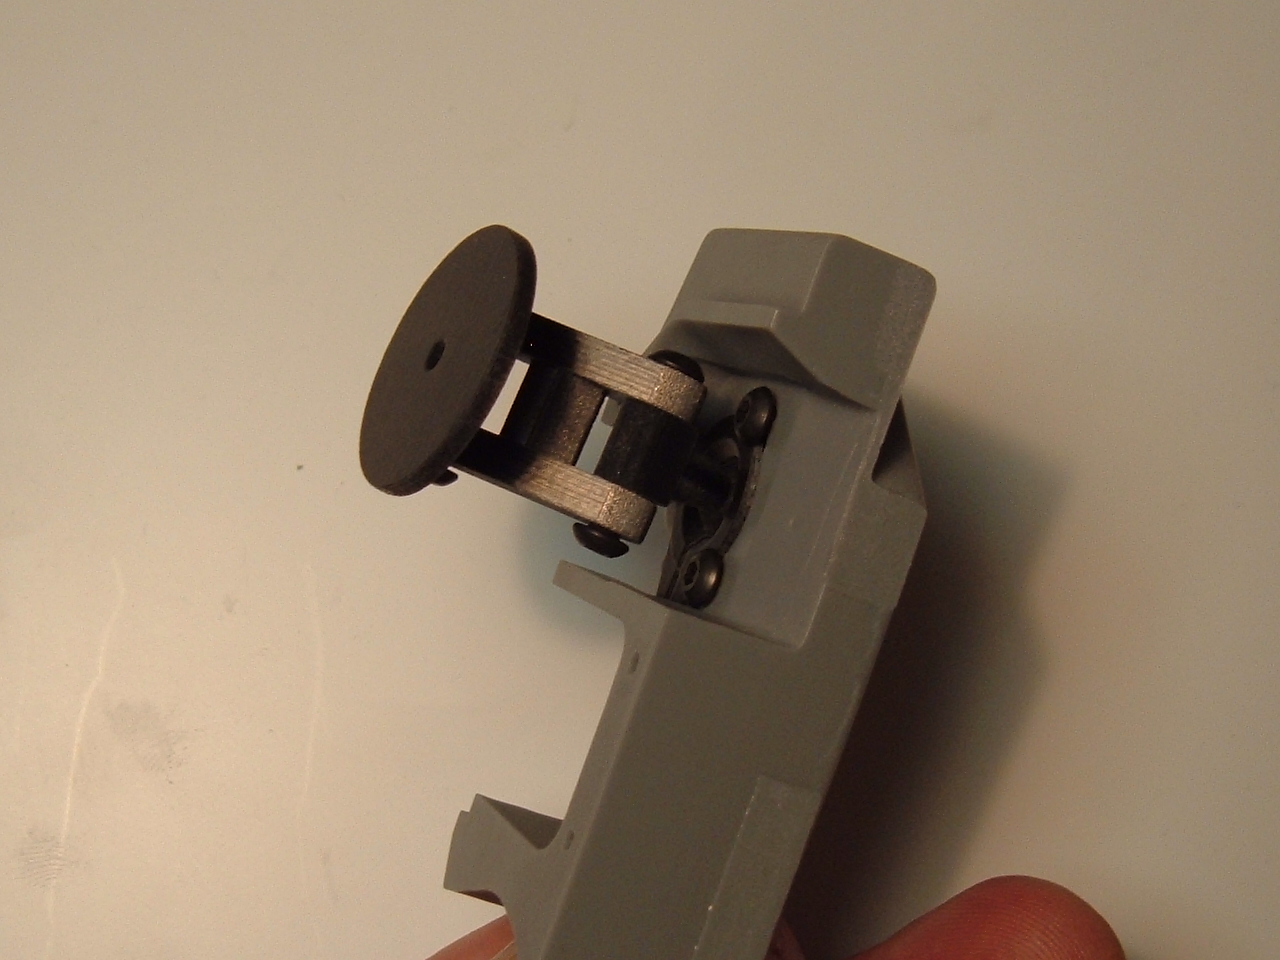
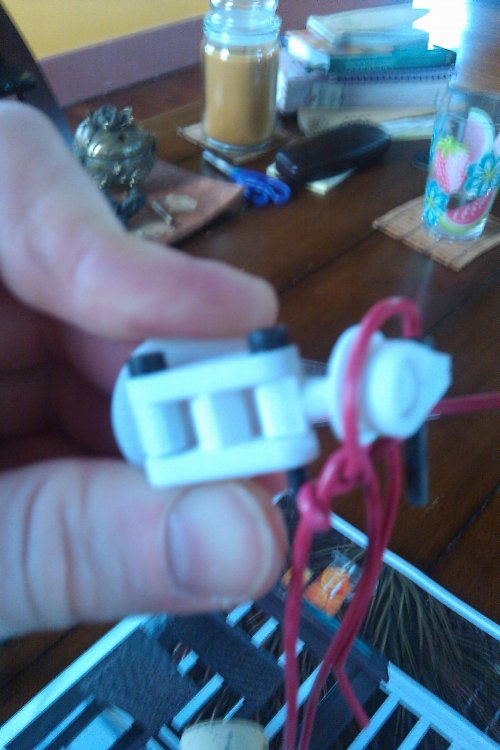
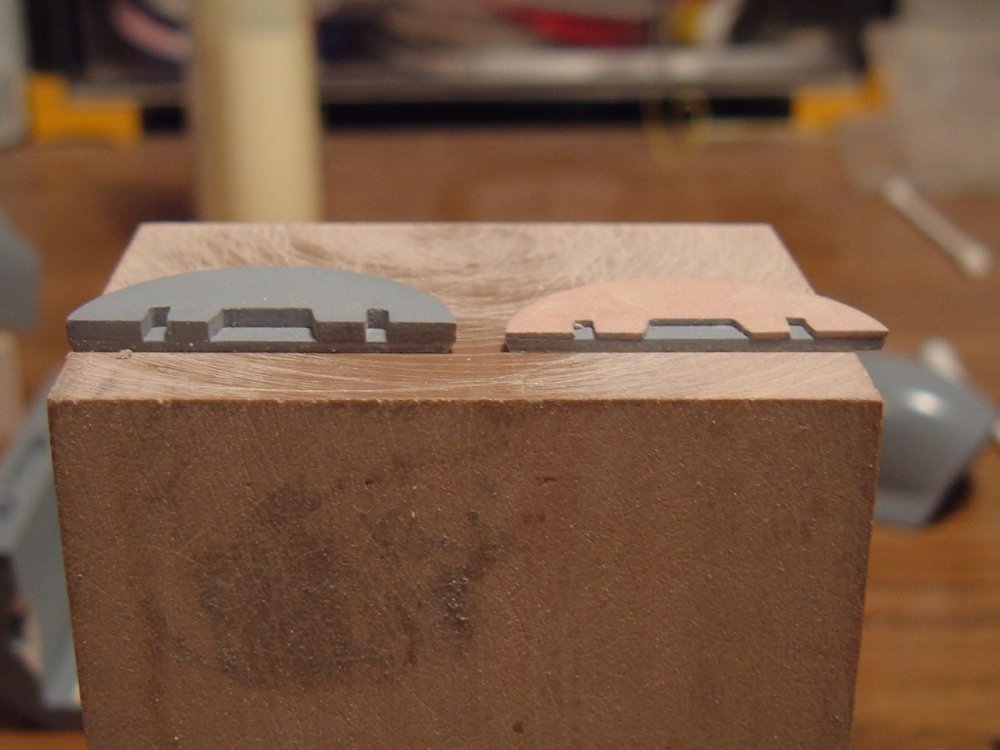
Hello again, it's me: The Beast Master! I just thought I'd provide a mini-update with the new joint parts that I've been raving about lately. These are provided courtesy of fellow MWer Codam23, whose help and expertise have helped make this project possible. As I'm told, the parts I have are actually pre-production prototypes, and the material to be used for the final parts will actually be even stronger than what I have now, which are already ridiculously tough, especially considering that they were made in a 3D printer. Pics 1 and 2 show the joint parts in question, complete with 3mm alloy screws for optimal strength. Pic 1 shows the socket joint for the hip, while pic 2 shows the ankle joint (left) and hip hinge assembly (right.) Pics 3 and 4 show the assembled hip joint as it will fit into the thigh module. While complex, this elaborate setup was needed in order to not only allow the joint sufficient range of motion, but also configure the parts to allow them to line-up correctly when in fighter mode. Pics 5 and 6 show the same parts mated to the main body in both fighter and soldier modes, respectfully. While CNC technology was available a decade ago when the Legioss was being fabricated, the 3D printing technology certainly was not, and consequently, the parts would not only have been devastatingly expensive to make, but would have had to be made of aluminum, which I'm told is perhaps even a tad weaker than the new composite material, and the latter is much lighter.