captain america
-
Posts
3563 -
Joined
-
Last visited
Content Type
Profiles
Forums
Events
Gallery
Everything posted by captain america
-
Nice to see some Mospeada interest on the boards! This whole project seems eerily familiar somehow.
-

A Little Mospeada Love!
captain america replied to captain america's topic in Anime or Science Fiction
Poof! Castings are now in progress and looking excellent.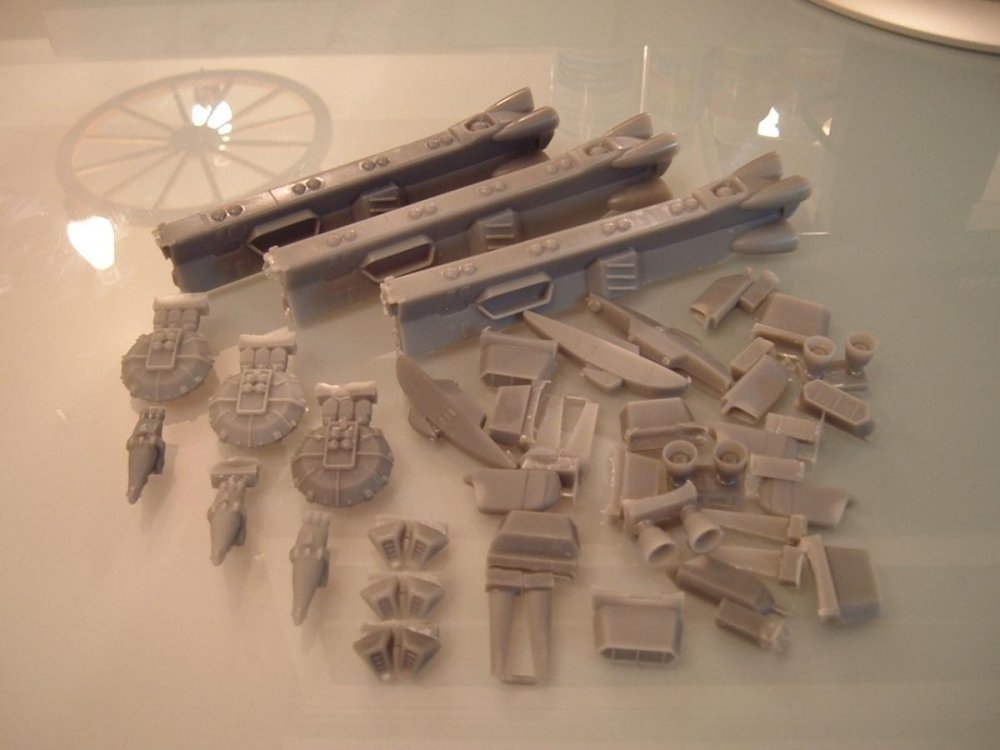
-
A Little Mospeada Love!
captain america replied to captain america's topic in Anime or Science Fiction
Hi guys. Sorry for the long delay between updates, it seems like there just aren't enough hours in a day to do all the stuff I need to do... Anyhoo, molds have been poured, opened, and I will be doing some test-shots early next week. This is a great little project and I'm thoroughly enjoying myself; hopefully you guys are deriving a little pleasure from it too

-
Hi guys! Just wanted to let you know that the decals arrived and they look fantastic! Now for the canopies, joints, and landing gear parts...
-
A Little Mospeada Love!
captain america replied to captain america's topic in Anime or Science Fiction
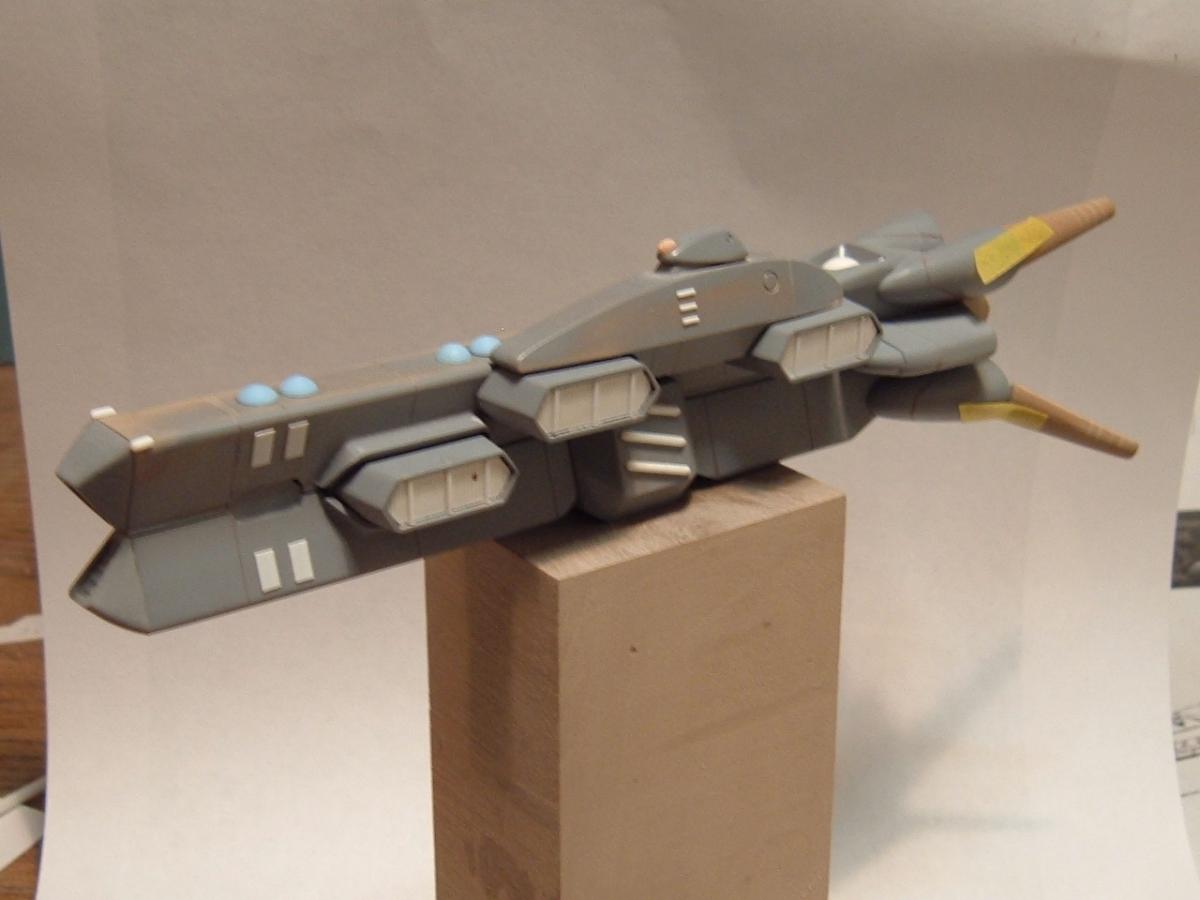
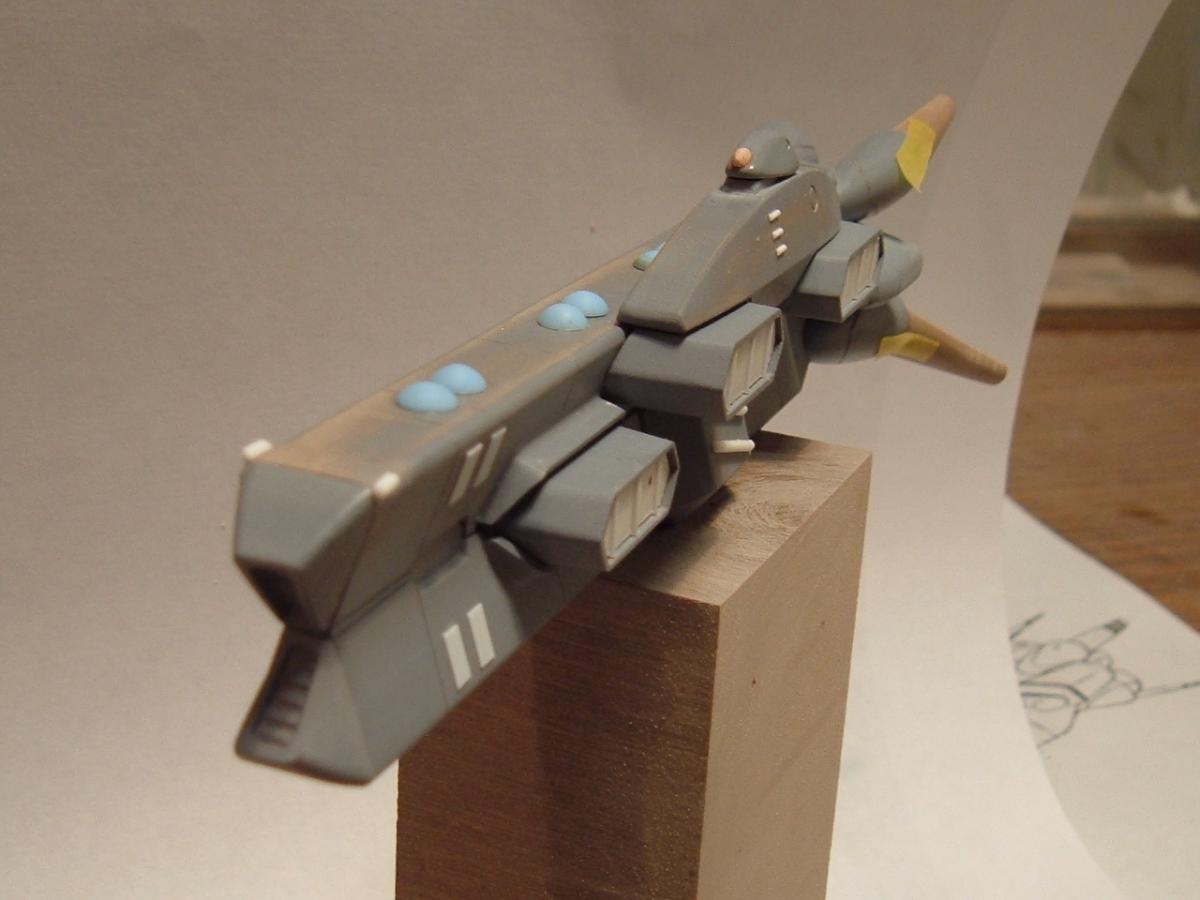
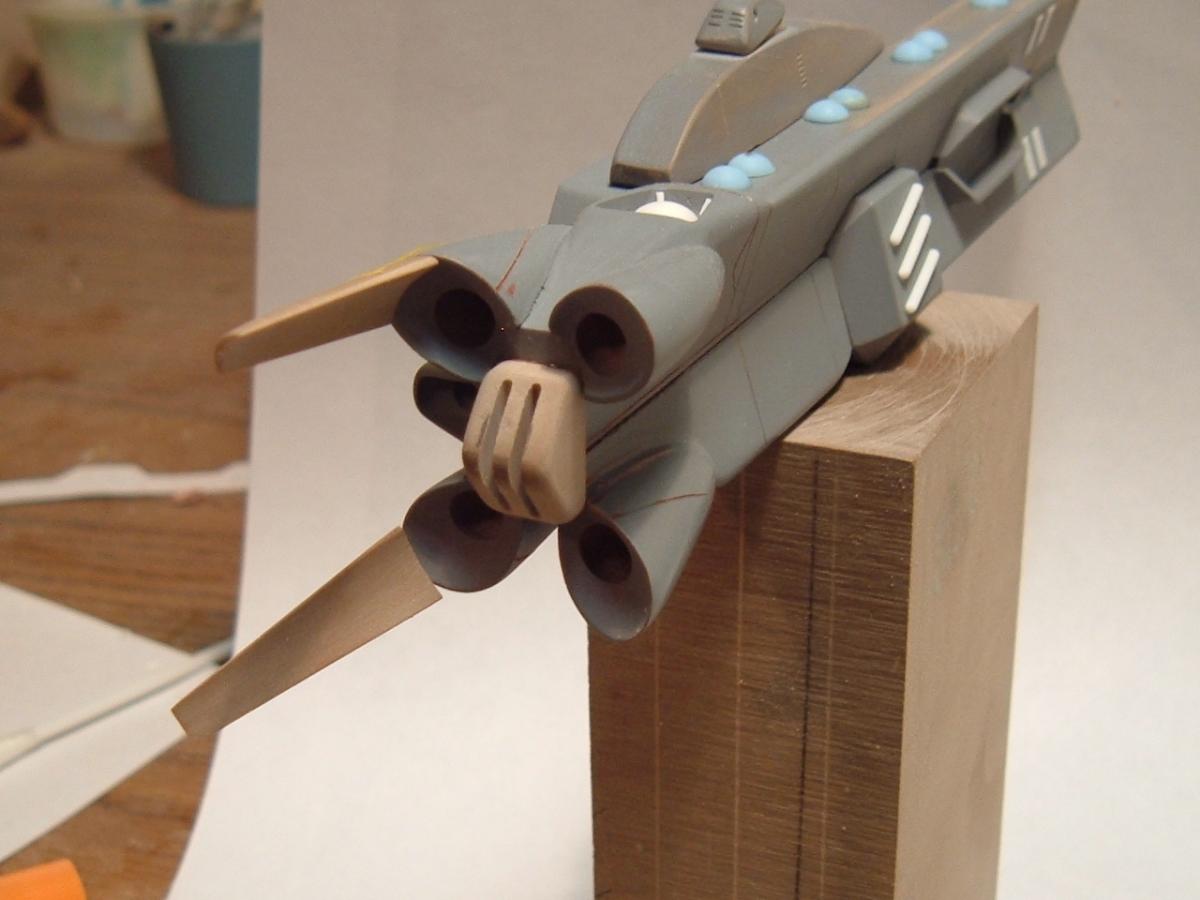
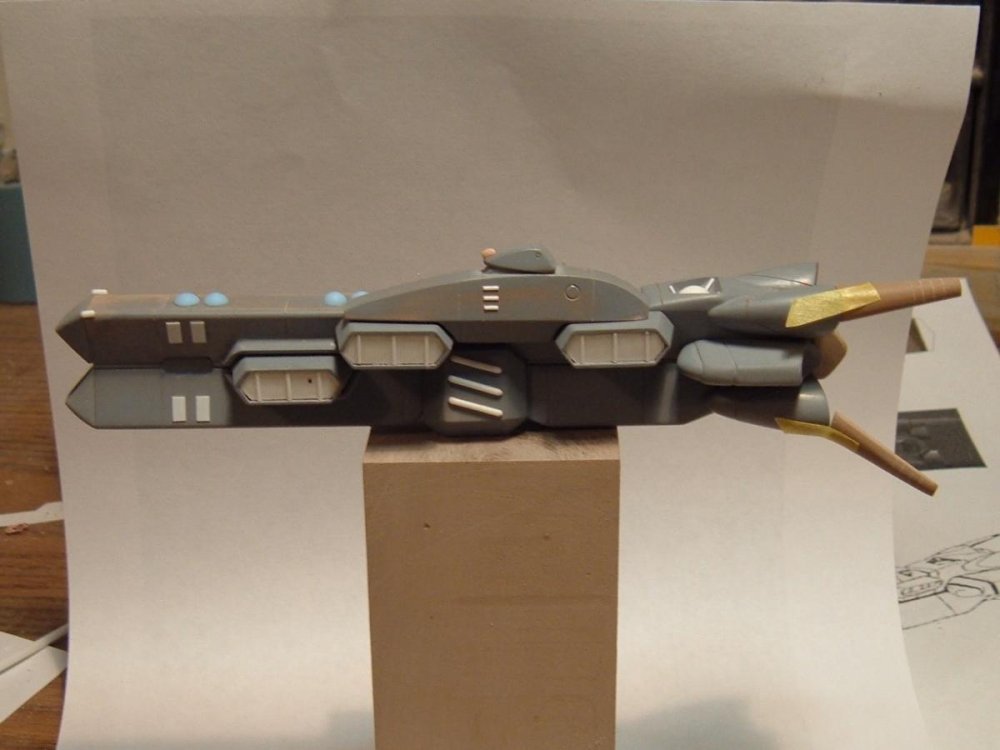
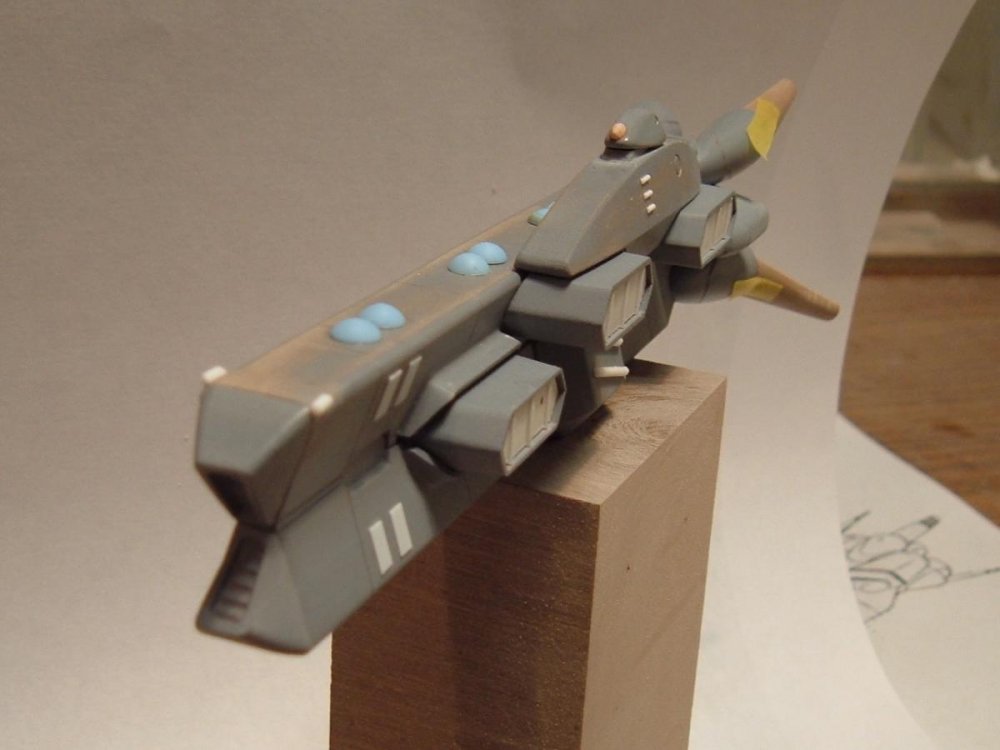
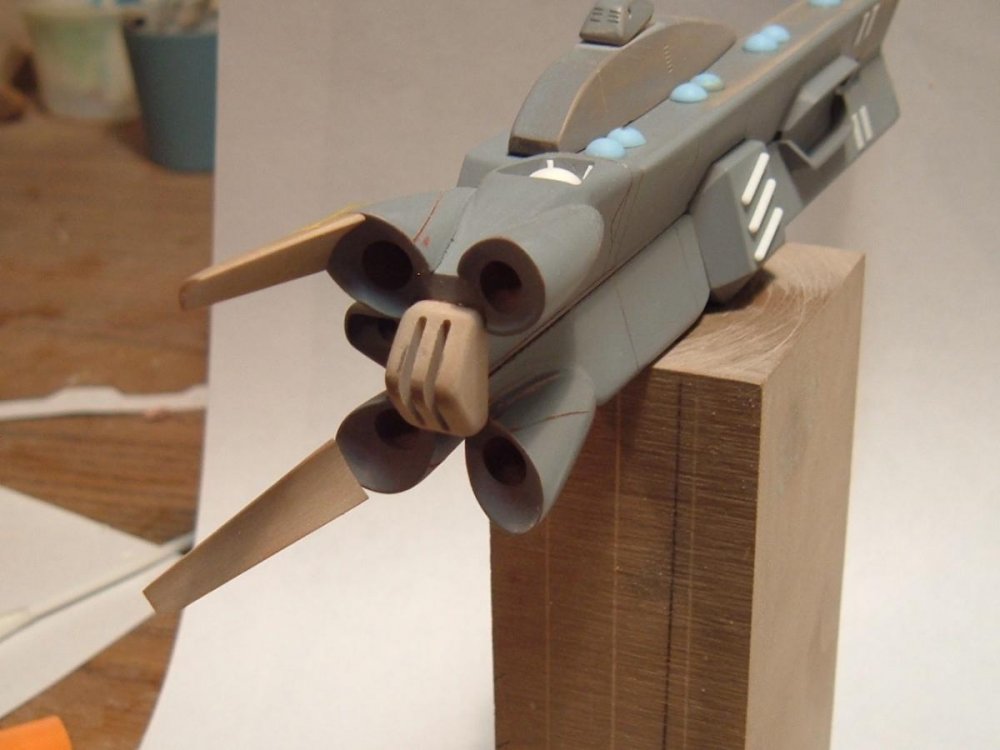
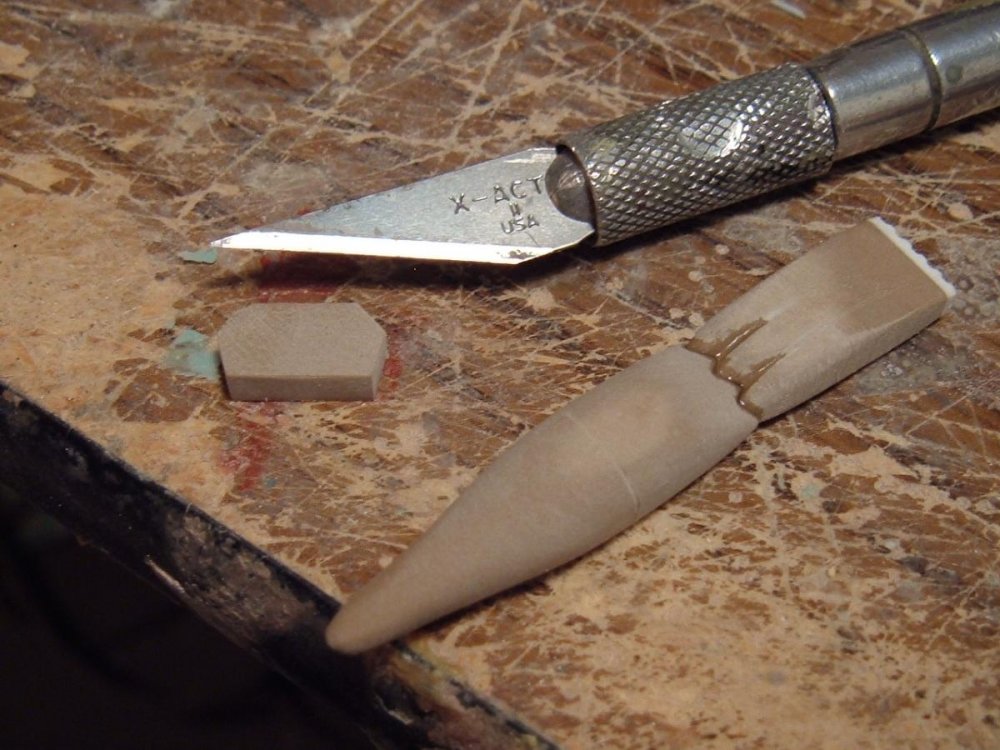
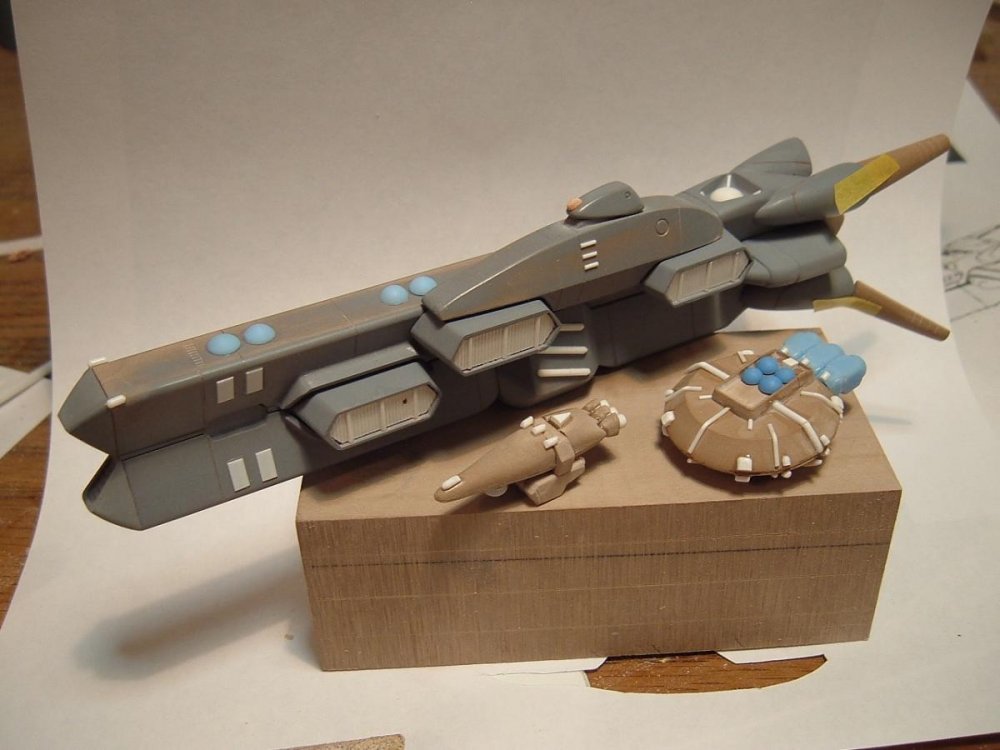
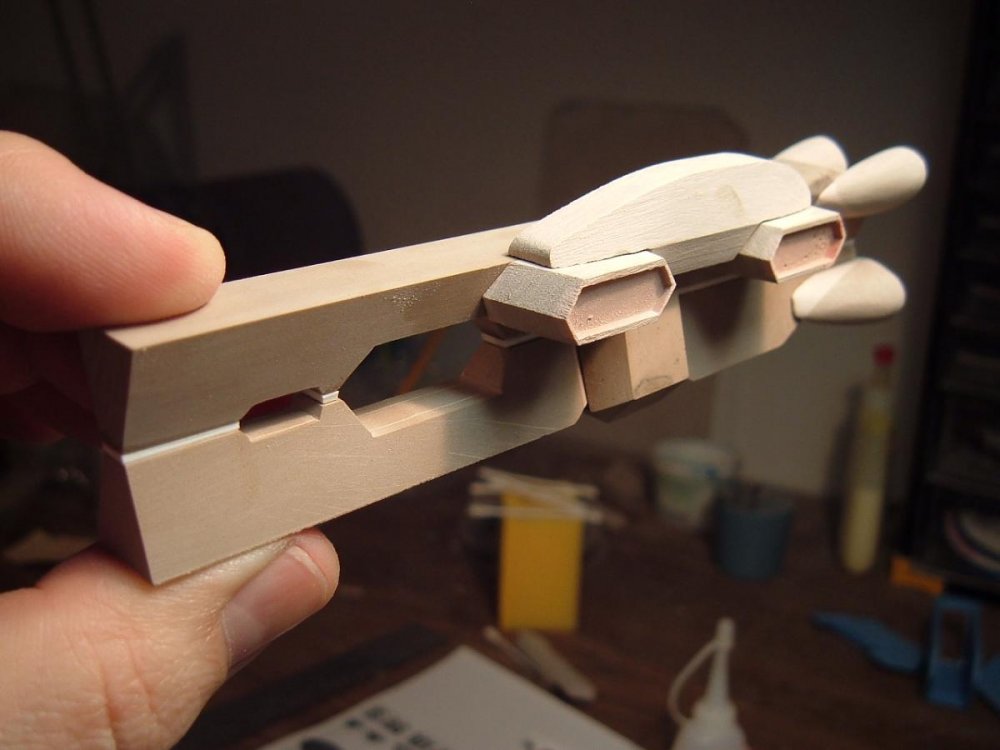
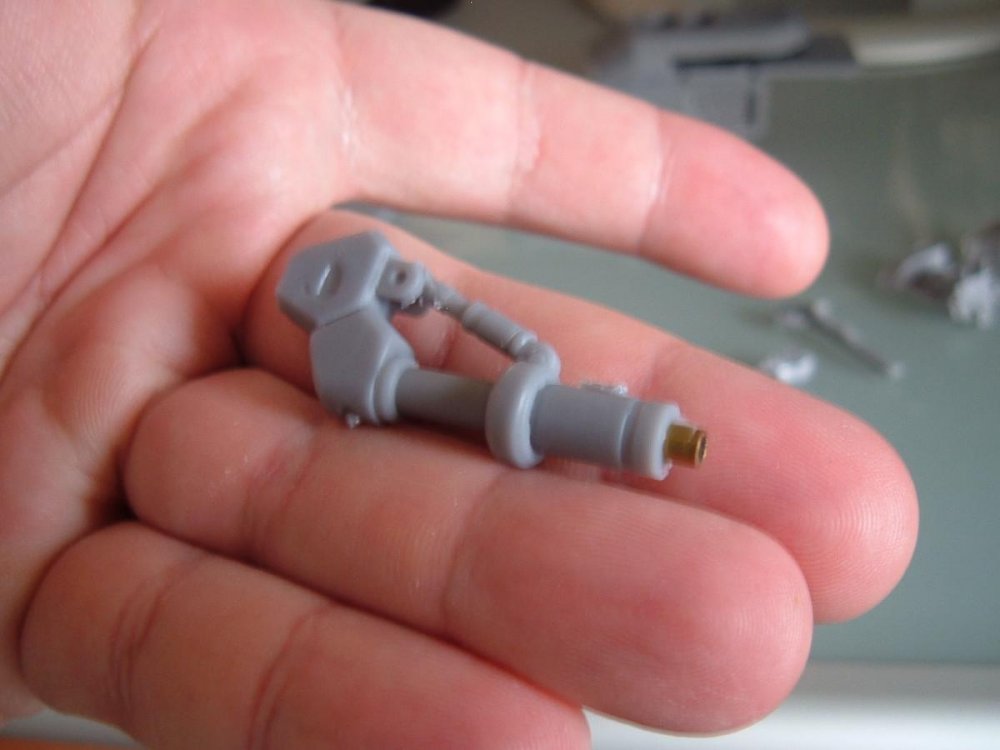
Captain's Log, stardate: Wednesday evening. Almost supper time. Guess what??? I'm just about done! Save for a few little details here and there, the patterns are essentially finished! Pictures 1 through 4 are beauty shots of the masters. The main thrust nozzles are done too, they just wouldn't stay on for the photo shoot… Pics of these a little later... Pics 5-7 are of umm… A teeny little surprise! Since the Ikazuchi is in 1/5000 scale, I figured that it could use a little bit of company, so I started toiling-away on my machines and cracked my knuckles for a little bit of small-scale surgery… And voila! 1/5000 Garsish and Inbit clam! I think that those 2 little ships had me on-edge and cursing more than any project in recent memory, especially the clam: it looks really simple, but it's not! Alas, I will now be starting mold prep on the parts; should be a fairly drama-free procedure, but you never know… Be sure to check-in next week for more of my model-making shenanigans!

-
A Little Mospeada Love!
captain america replied to captain america's topic in Anime or Science Fiction
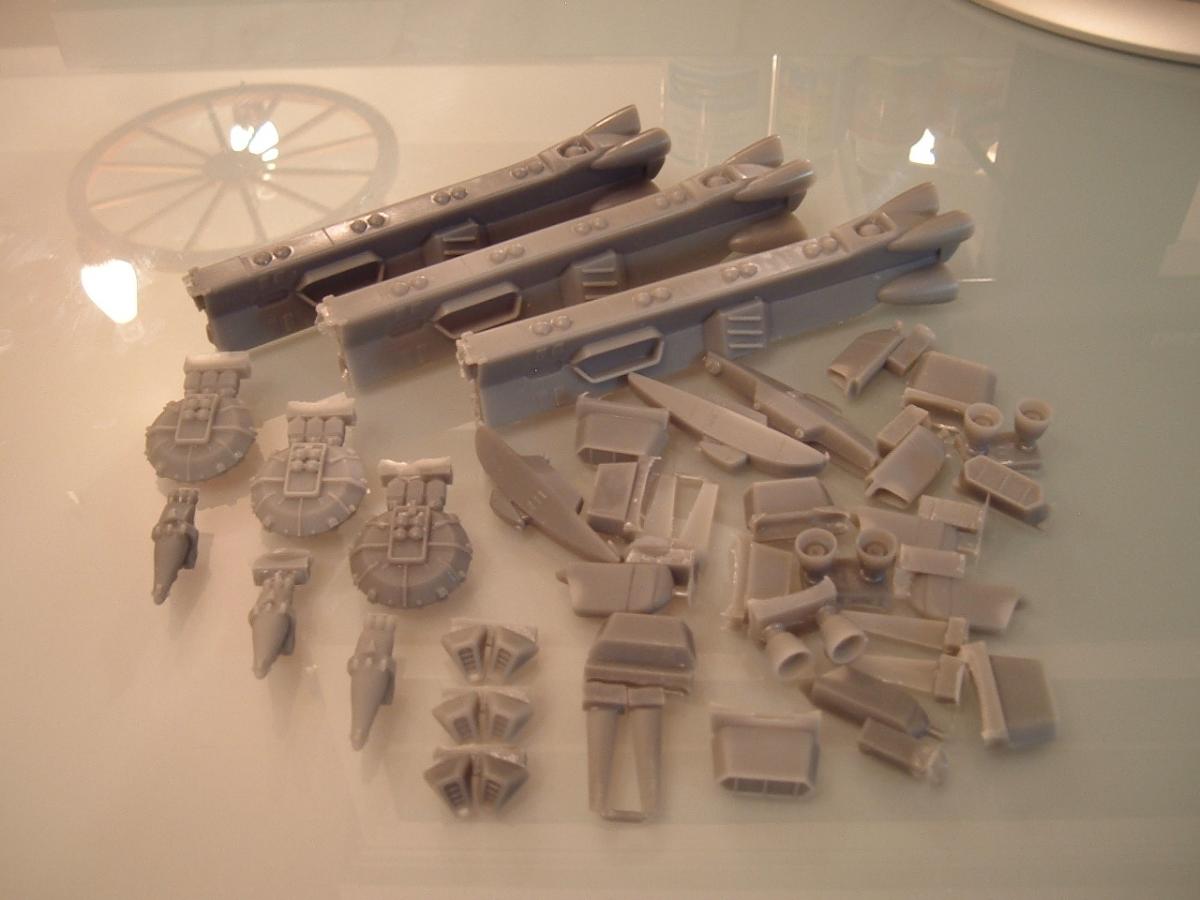
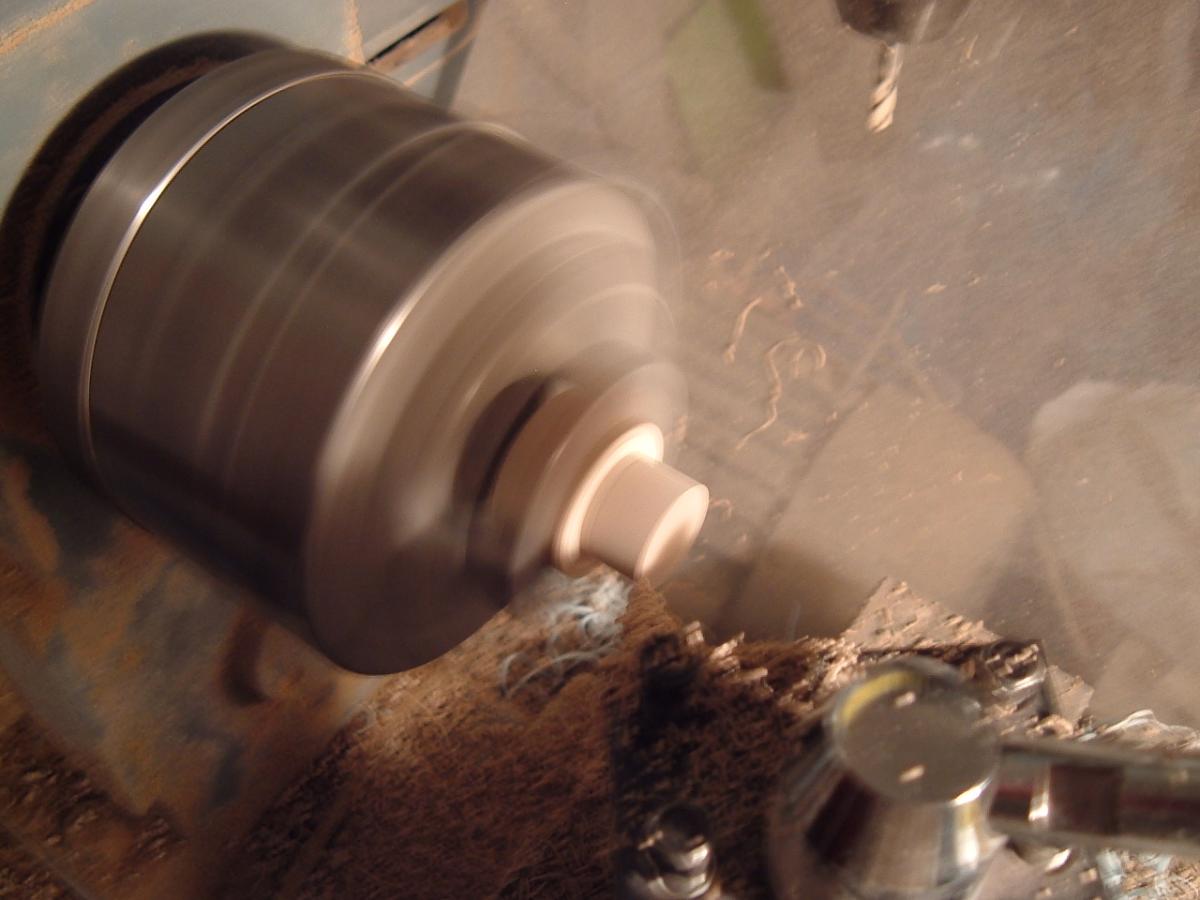
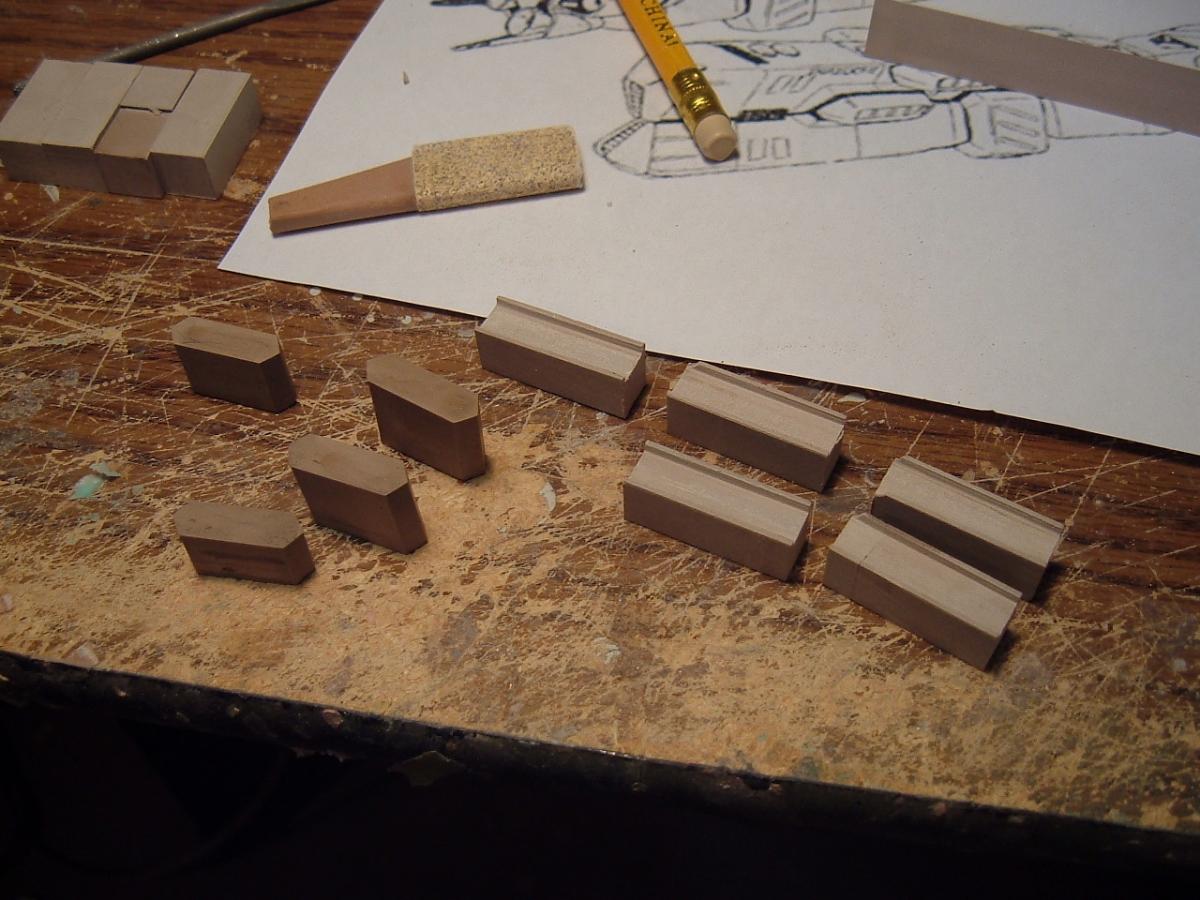
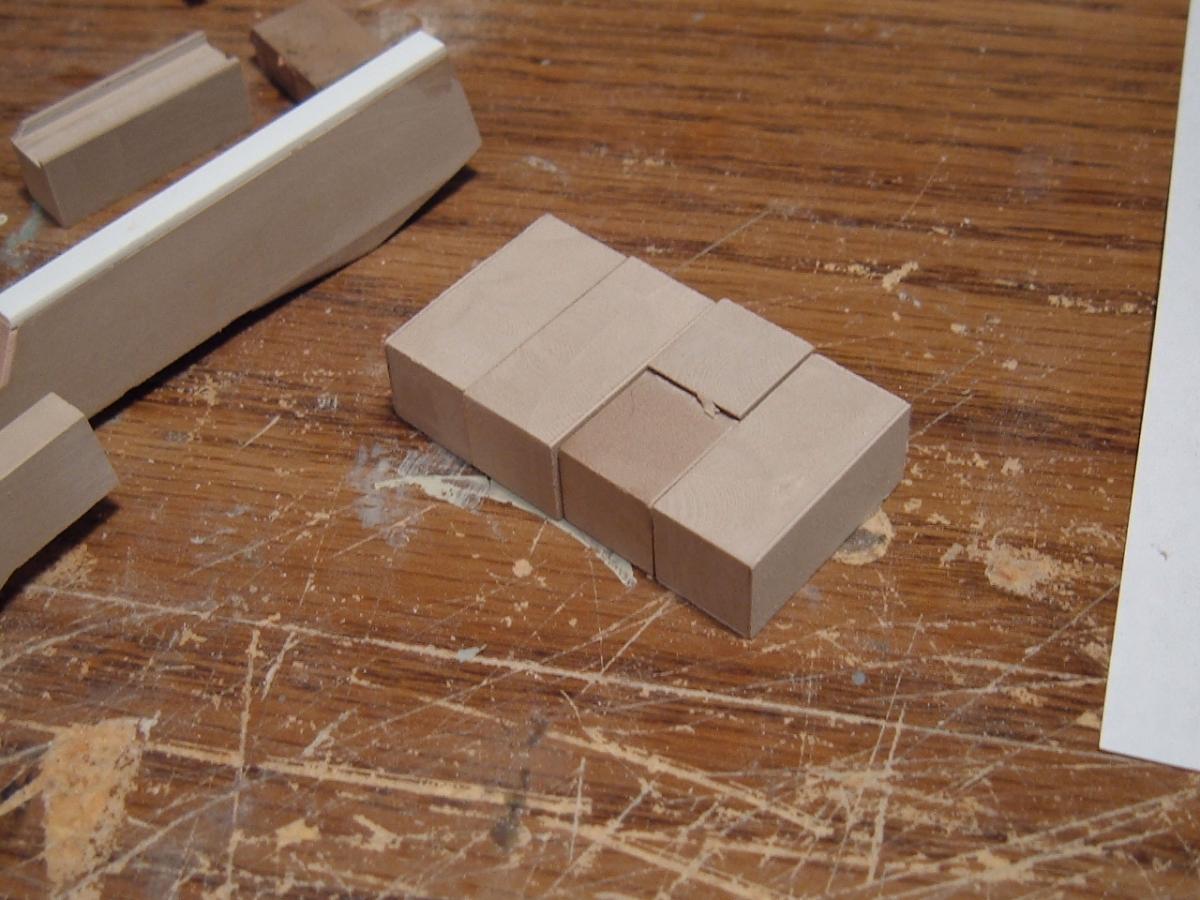
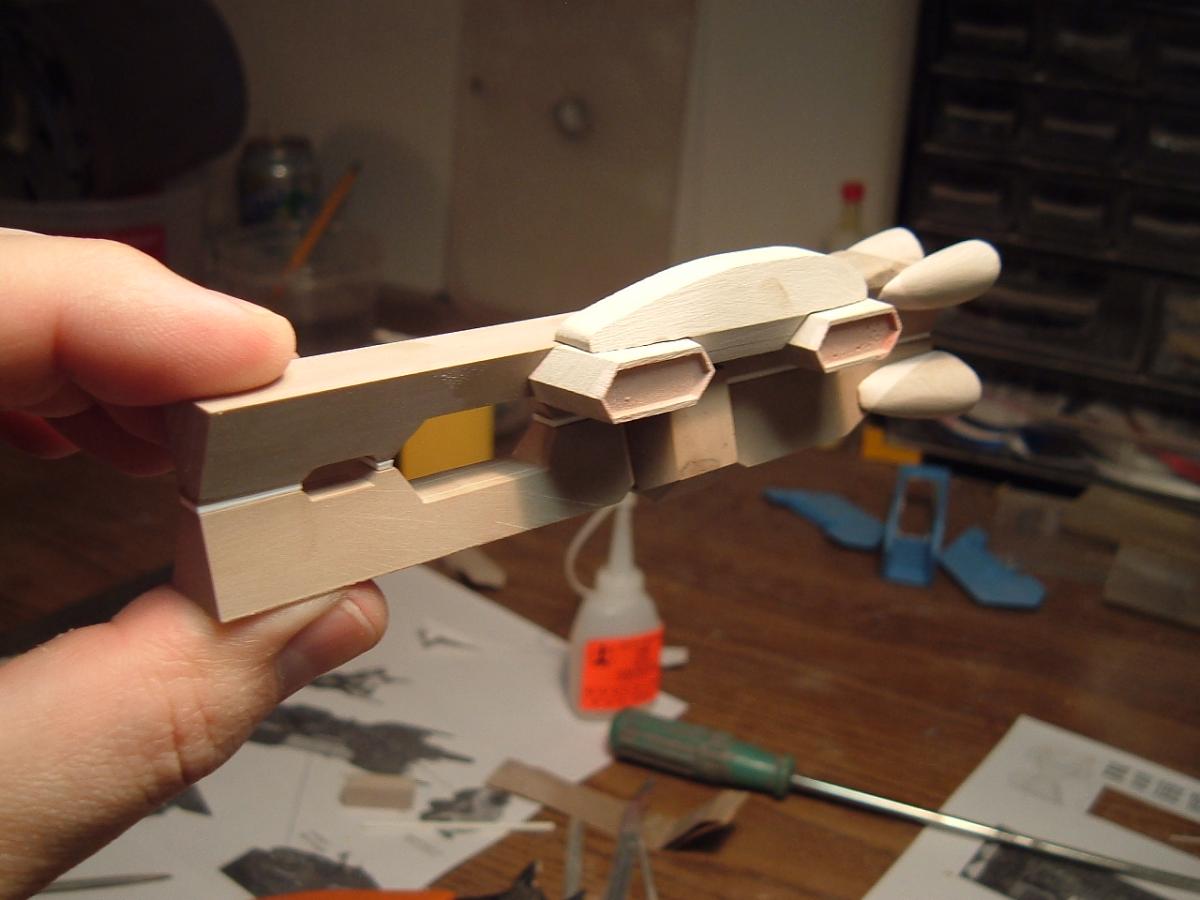
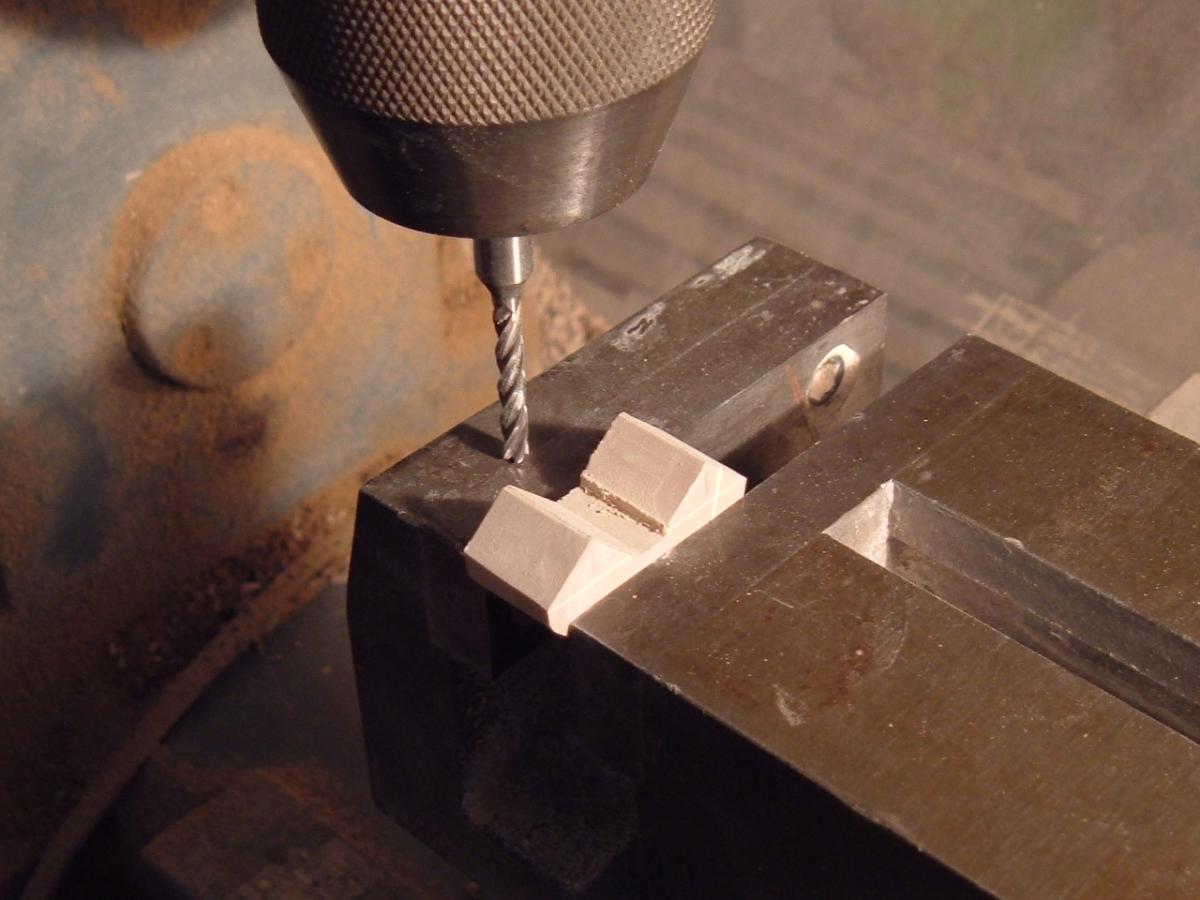
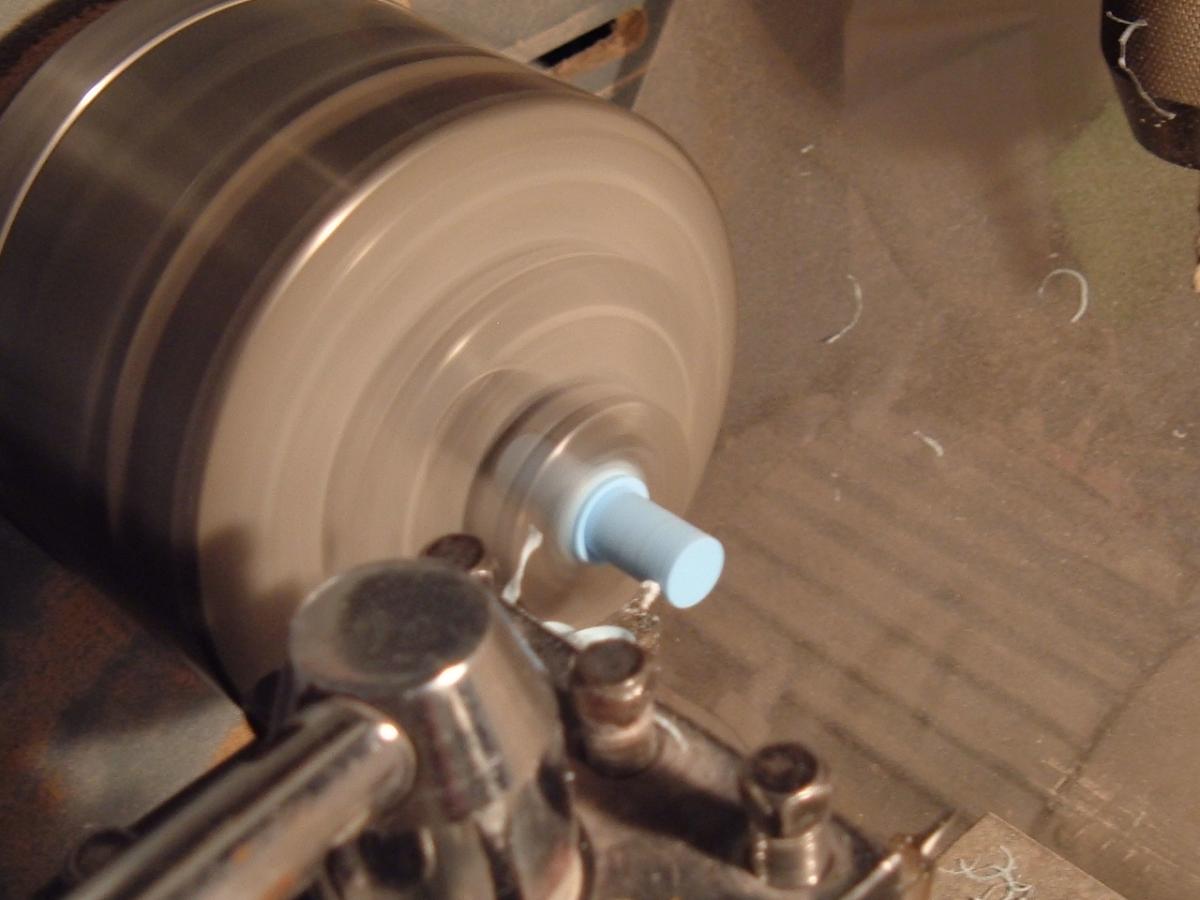
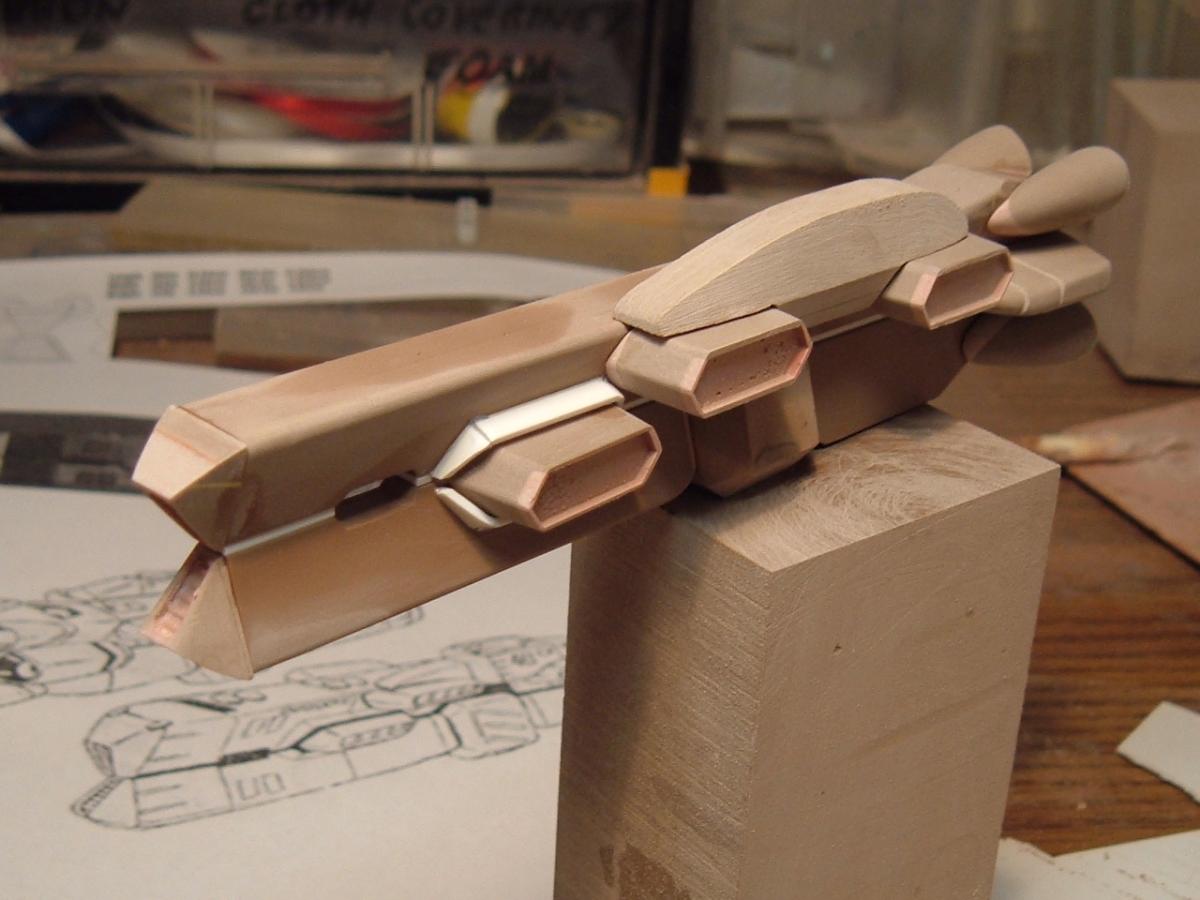
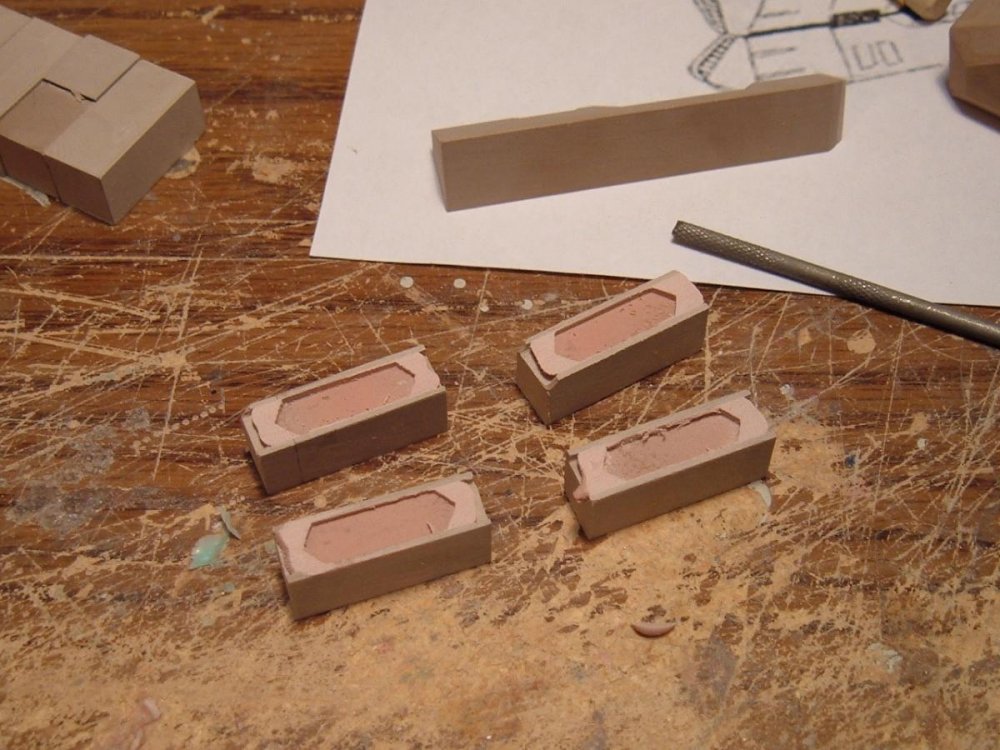
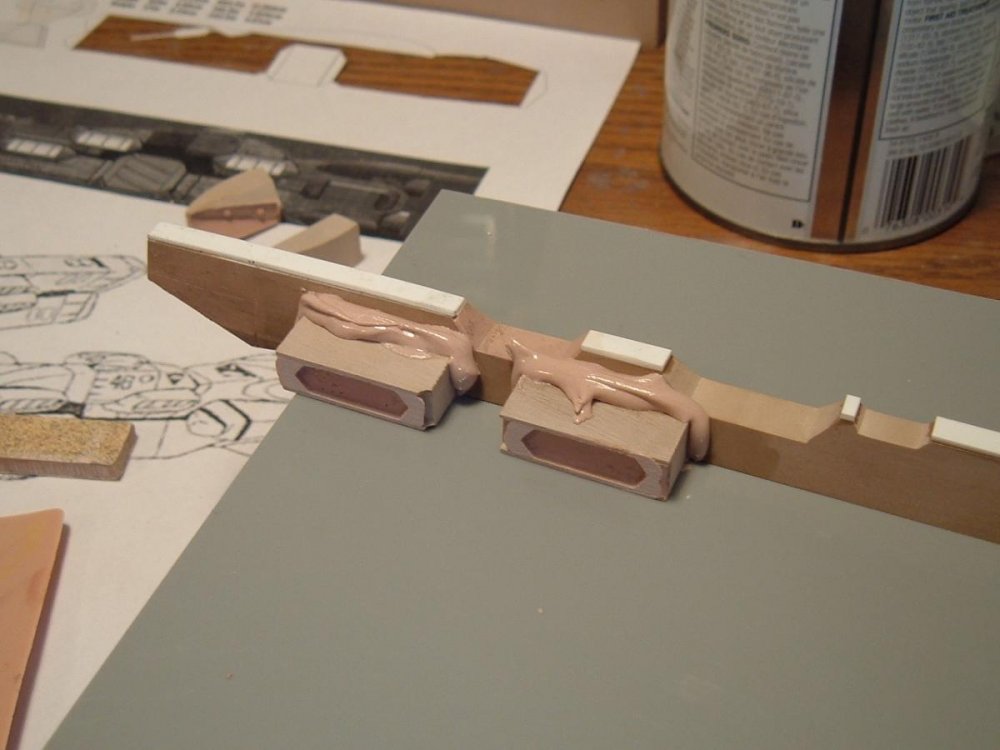
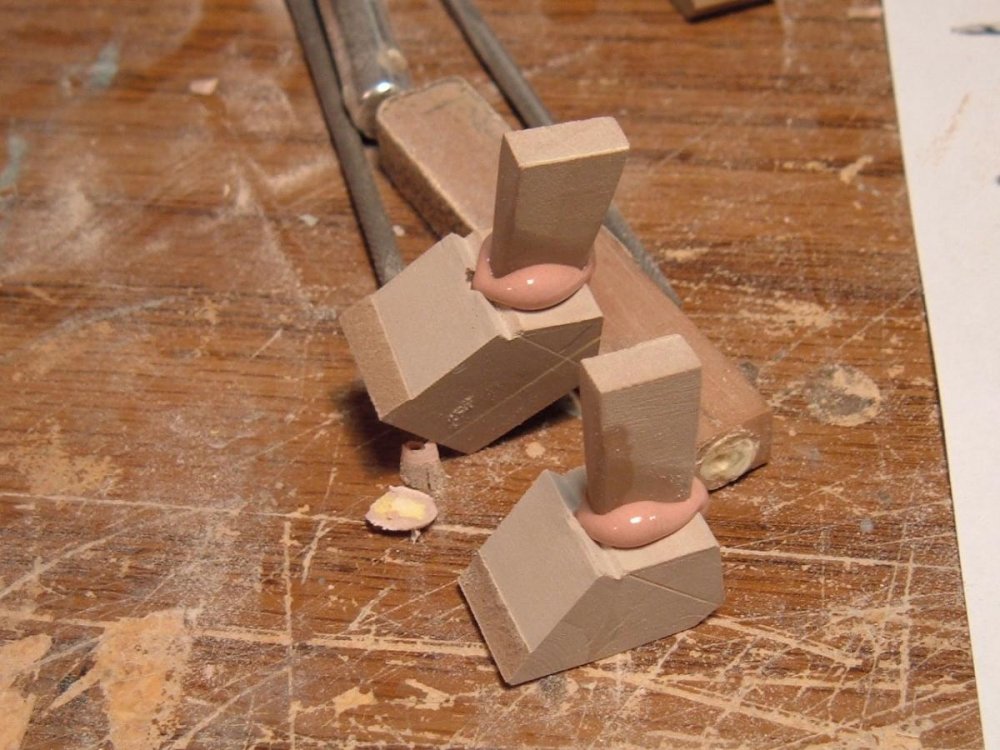
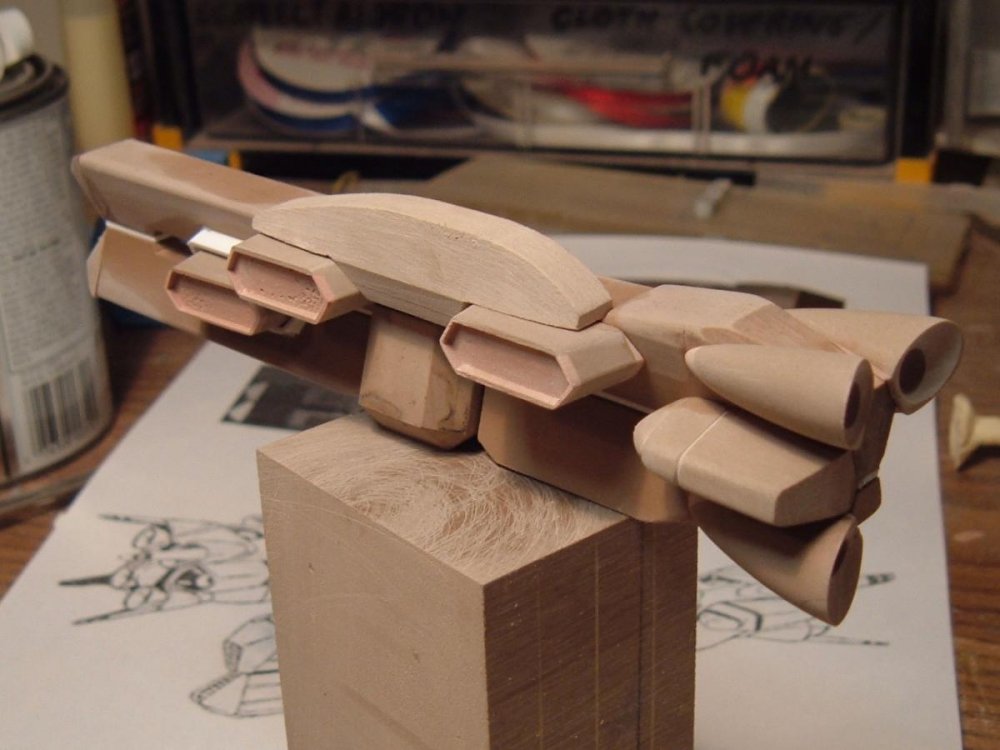
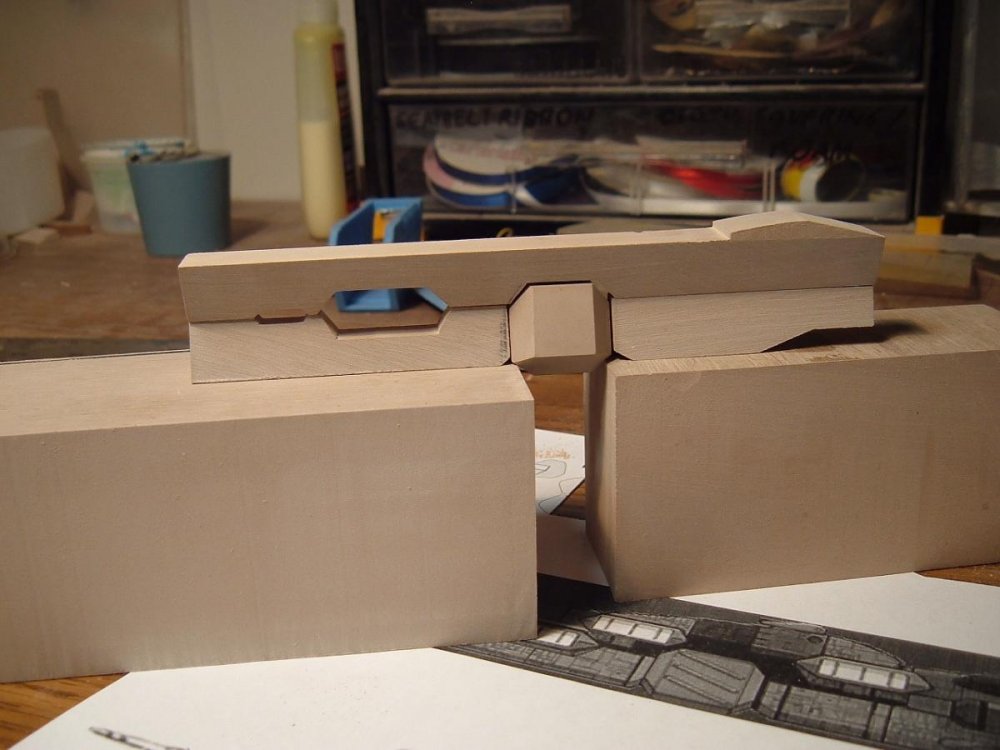
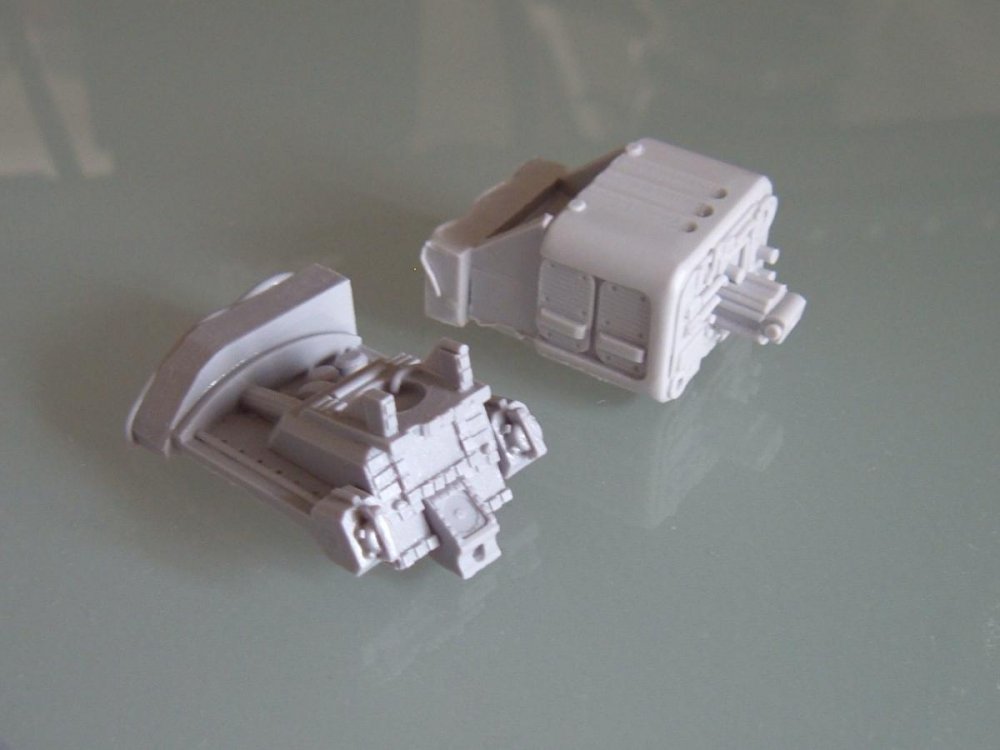
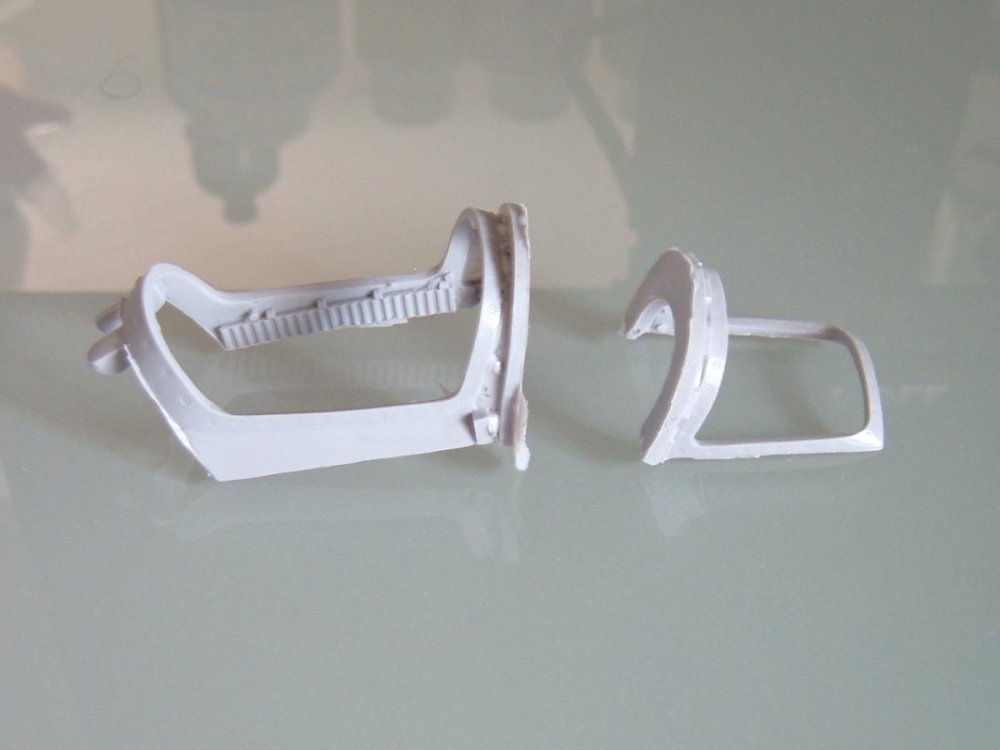
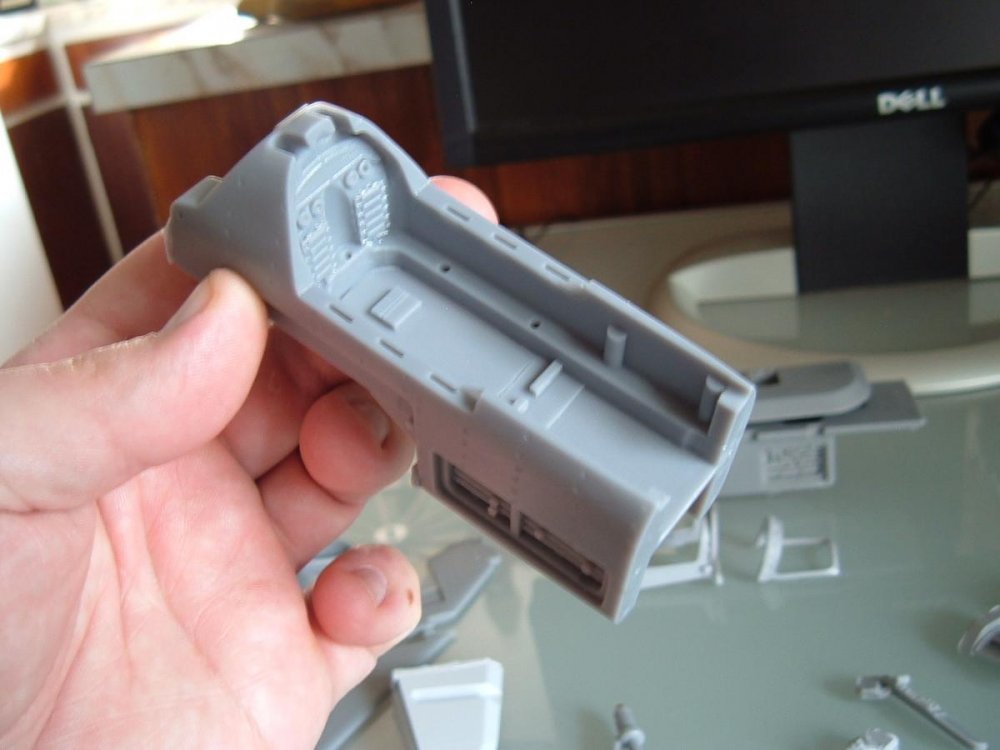
Captain's Log, stardate: Wednesday morning. Out of coffee… I'm happy to report that things are progressing nicely with the ship. In pics 1 and 2, we see the launch bays in their crude form: the parts on the left in pic 1 are the bucks used to obtain the uniform shape of the bay doors, while the parts on the right are the housings. With a little bit of putty, we end up with the parts in pic 2, which will later be reshaped further. Pic 3: these little blocks will form the aft engine nacelles, even though it doesn't show right now. Pic 4: two of those same blocks have been smutted into place with some putty to obtain a glove-like fit on the main hull. Pic 5: the same procedure is used to get the tapered shape of the launch bays against the main hull. It looks messy and imprecise, but I swear by it! Pic 6: the crudely puttied parts are now starting to take shape. The engine nacelles were Dremeled and then manually sanded to their desired curvature; a job requiring anobscene amount of work and attention, I might add. Pic 8: the forward hull "caps" in their infancy. The parts are initially machined to maintain close tolerances… Pic 9: and then the same putty smash technique is employed to get the grilled opening. The positive bucks were hand-shaped and carefully coated with mold release. Pic 10: the engine nozzles taking shape on the lathe. Pics 11 and 12: it's finally starting to look like an Ikazuchi! Much of the hard work is done, and from here my job will consist of refining the shapes and adding the more minute details. The ship masters should be complete by the next update, so stay tuned! Captain's Log, stardate: Wednesday morning. Out of coffee… I'm happy to report that things are progressing nicely with the ship. In pics 1 and 2, we see the launch bays in their crude form: the parts on the left in pic 1 are the bucks used to obtain the uniform shape of the bay doors, while the parts on the right are the housings. With a little bit of putty, we end up with the parts in pic 2, which will later be reshaped further. Pic 3: these little blocks will form the aft engine nacelles, even though it doesn't show right now. Pic 4: two of those same blocks have been smutted into place with some putty to obtain a glove-like fit on the main hull. Pic 5: the same procedure is used to get the tapered shape of the launch bays against the main hull. It looks messy and imprecise, but I swear by it! Pic 6: the crudely puttied parts are now starting to take shape. The engine nacelles were Dremeled and then manually sanded to their desired curvature; a job requiring anobscene amount of work and attention, I might add. Pic 8: the forward hull "caps" in their infancy. The parts are initially machined to maintain close tolerances… Pic 9: and then the same putty smash technique is employed to get the grilled opening. The positive bucks were hand-shaped and carefully coated with mold release. Pic 10: the engine nozzles taking shape on the lathe. Pics 11 and 12: it's finally starting to look like an Ikazuchi! Much of the hard work is done, and from here my job will consist of refining the shapes and adding the more minute details. The ship masters should be complete by the next update, so stay tuned!


-
A Little Mospeada Love!
captain america replied to captain america's topic in Anime or Science Fiction
It's 1/5000, which is roughly 17cm from bow to stern. 1/350 would've been my choice, but there are time constraints and budgets to respect LOL -
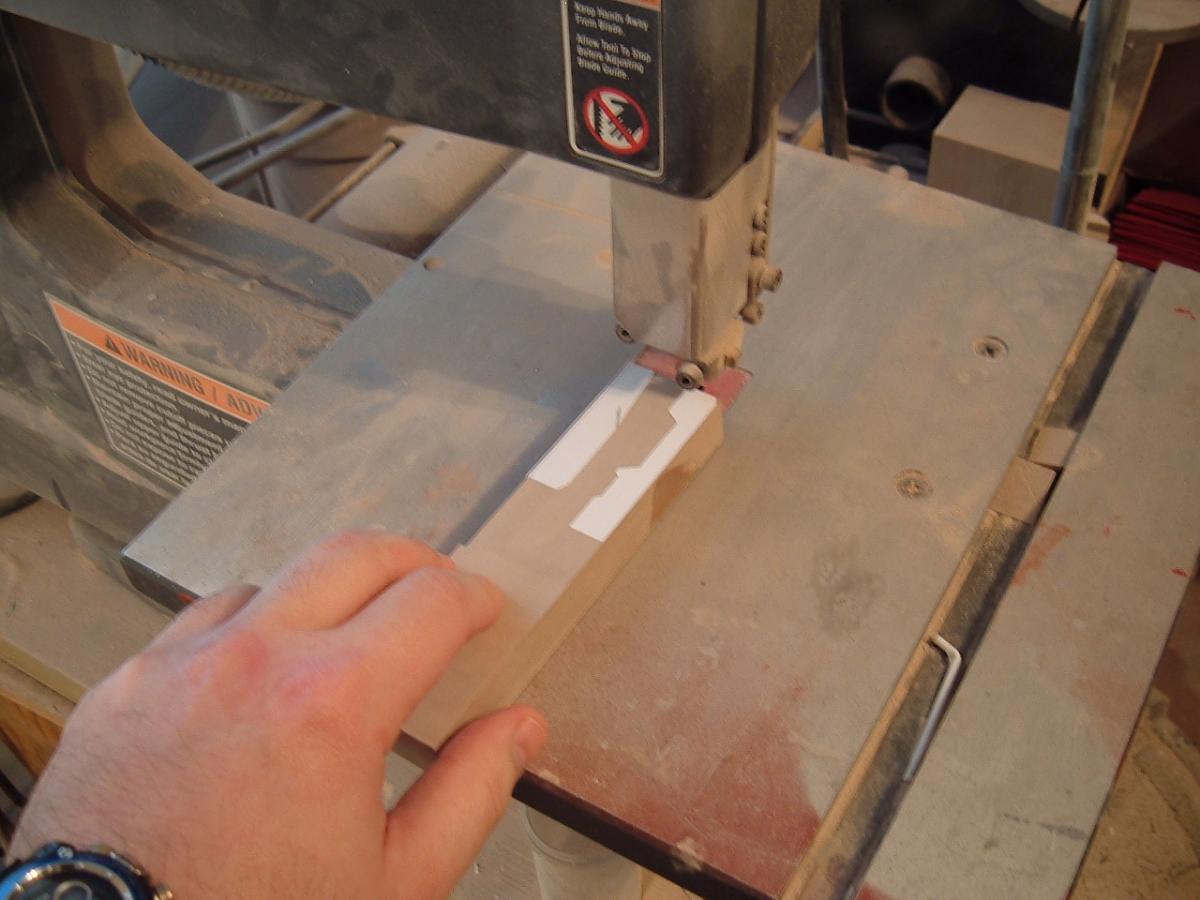
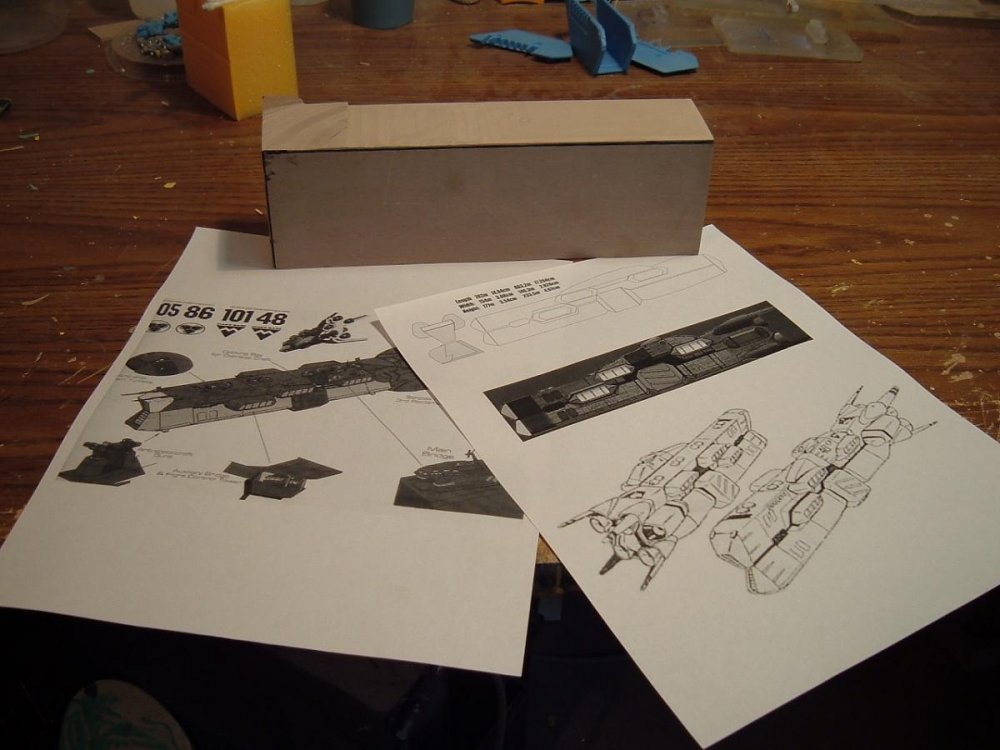
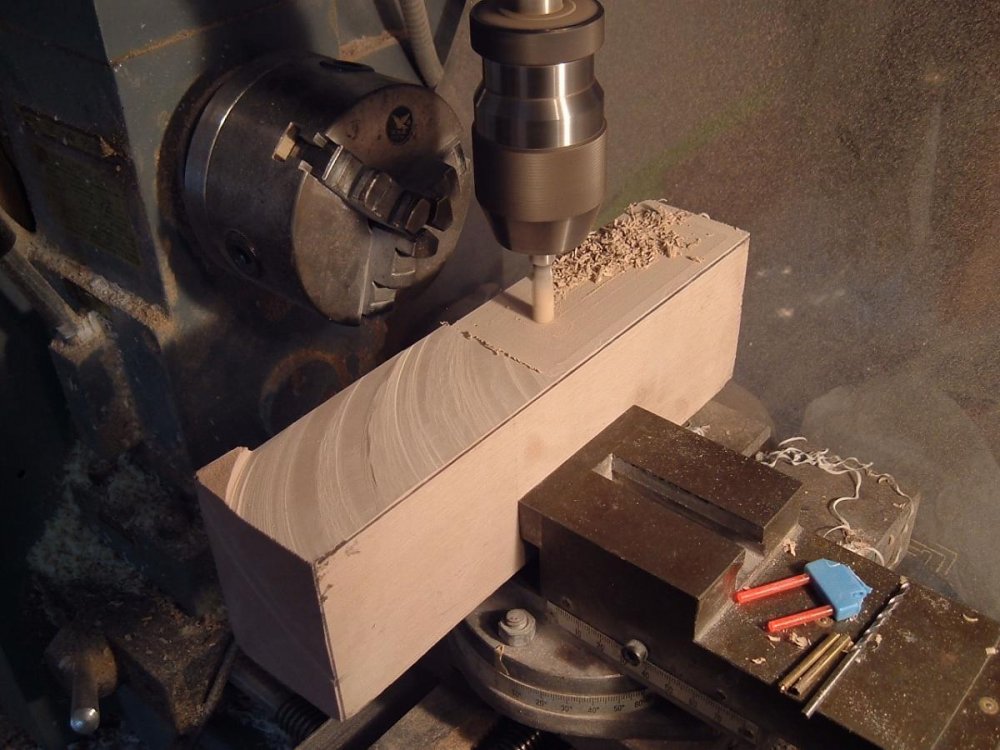
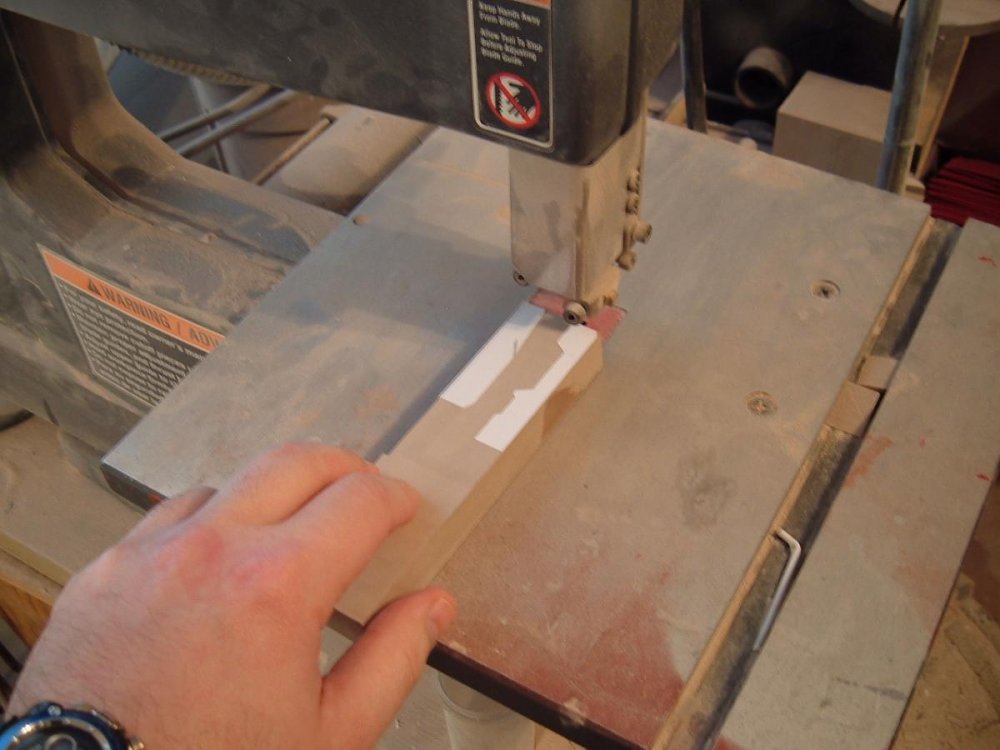
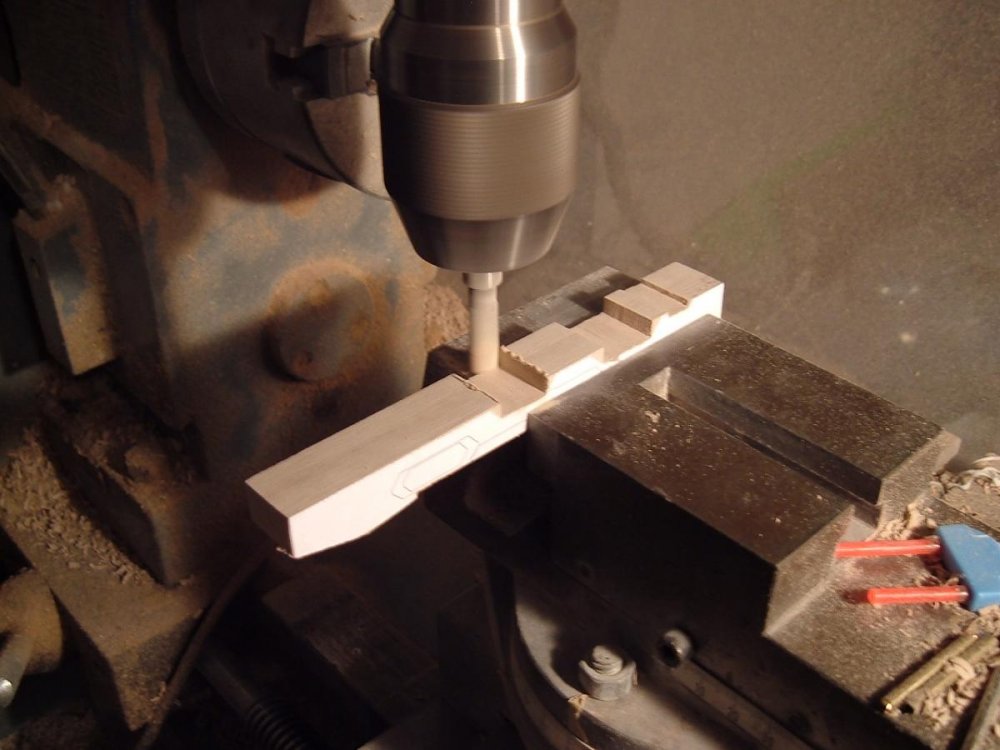
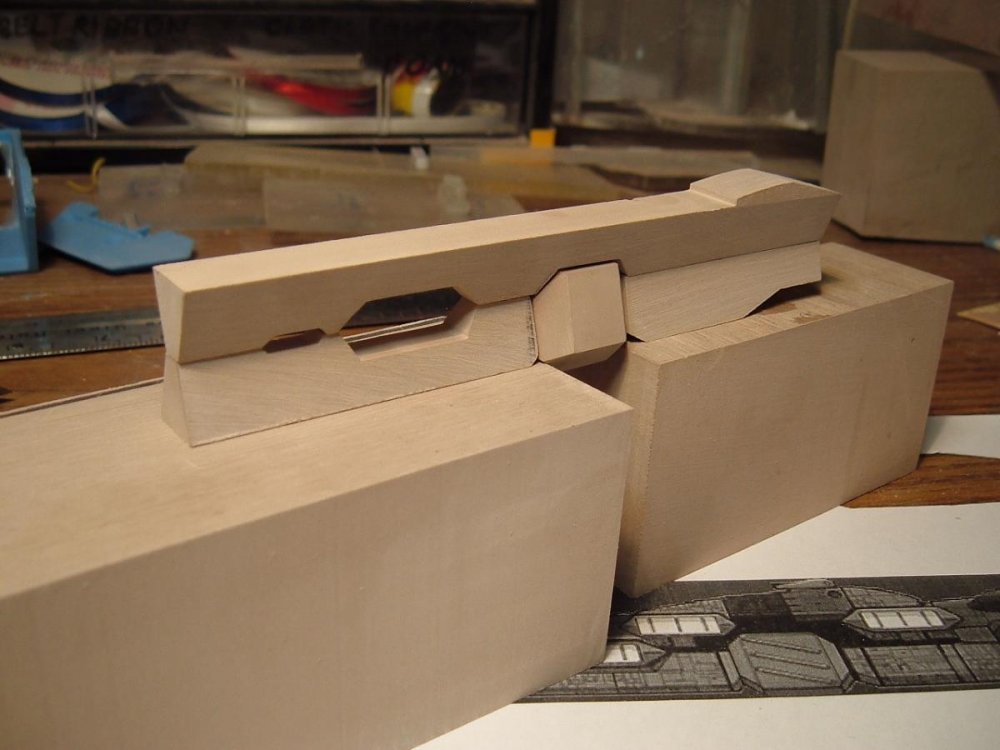
Hi everyone! Well I got kinda bored waiting for the decals and final parts for the Legioss to arrive, so I started working on a 1/5000 Ikazuchi carrier. A kind of scratchbuilding therapy, if there was such a thing! Captain's Log, stardate: Monday morning. The project begins as they all do: as an idea supported by a drive to create. While seemingly simple in design, the Mars expedition's Ikazuchi carrier, like most every other anime design from this era, suffers from a certain lack of consistency in the artwork. While certainly not impossible to overcome, it does make for an interesting challenge to harmonize all of the views and consolidate them with several different given dimensions for the ship. Once these little issues are resolved, I then proceed to draft my own diagrams for the various main structures of the ship and print them out along with a handful of artwork renderings. This way, I can refer to the reference drawings if ever I'm not sure about a particular detail or shape. In pic 1, we see some of the printed reference material along with a chunk of modelling board from which the Ikazuchi will spring. Pic 2: once the diagrams have been cut and placed on the modelling board, the real fun begins as I start to get my hands dirty. In this particular pic, I have to start by evening-out the master block to get the necessary plat planes. Pic 3: some back-and-forth between the mill and the band saw is quite common: the latter allows me to separate and chop off excess material quickly. Pic 4: Back to the mill yet again. This particular part will comprise the upper main hull, and is the single largest part of an otherwise small-scale ship. Pics 5 and 6: the main hull parts crudely assembled. There is obviously still a lot of work left to get it looking like the line-art, but it's progressing nicely and will take shape gradually. More to come in the following week
-
Hi everyone. Once again, my sincerest apologies for the delay in getting the final installment to you: I just checked in with Codam23 and the joints and canopies should be on their way to me shortly. The landing gear is what's really causing me the most headache: I received the metal struts earlier this week and all but 2 sets arrived broken, so these are being re-done and this is the primary cause of the delay. Seriously, some days I could just scream. Or cry...
-
Looking really sweet, Mike! The official stats for the pods are indeed on the small size and don't reflect the proportions of the pilots. Can't wait to see this one finished!
-
Not yet, I'm still waiting on the subcontracted parts to arrive. My castings were done long ago, but there are some things that are out of my control. My sincerest apologies for the delay, guys
-
Hey everyone! I hope that my American friends are slowly recovering from their post-Thanksgiving turkey-induced comas and jet-lag... I on the other hand, had scrambled eggs! Just wanted to put the word out there that as I'm finishing up the castings, I may *MAY* be able to manage 1 or 2 more full kits if anyone's interested. Putting the word out...
-
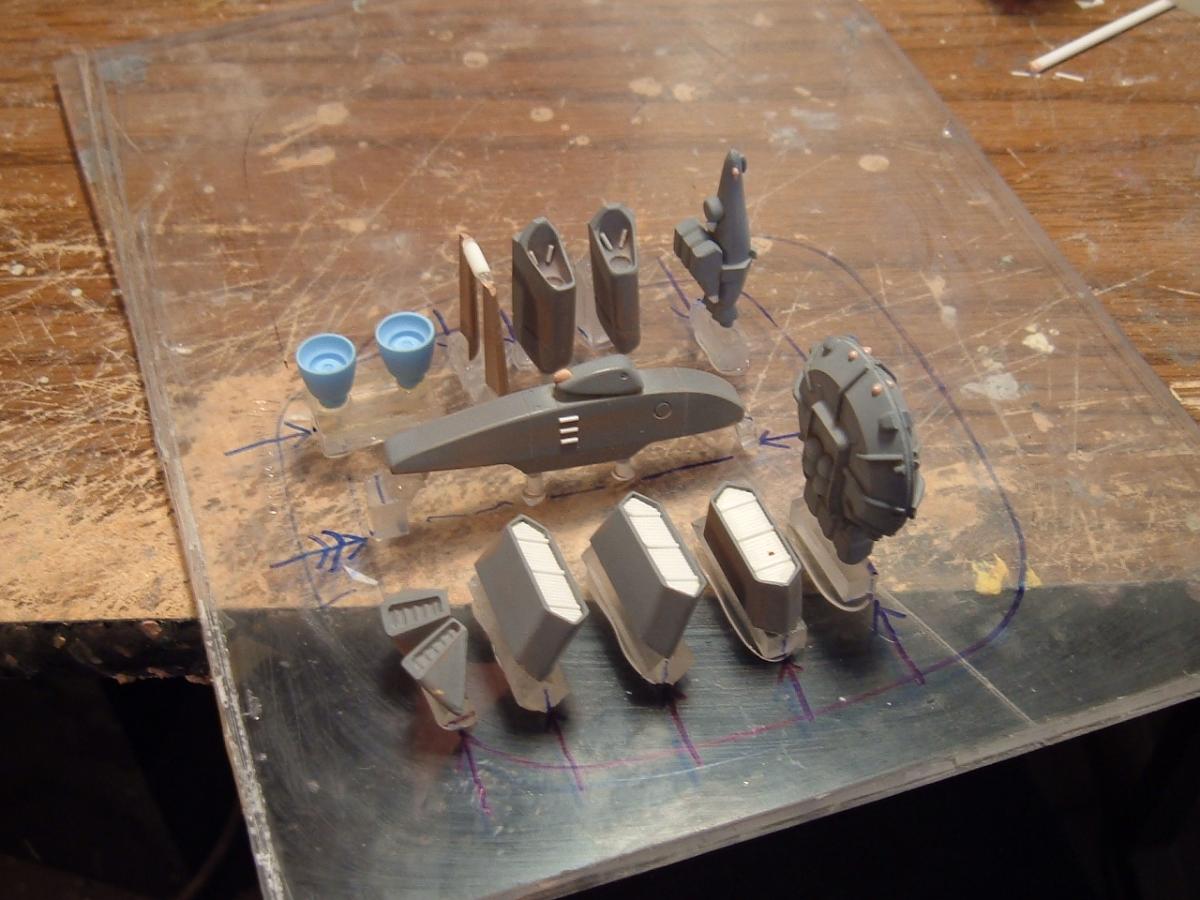
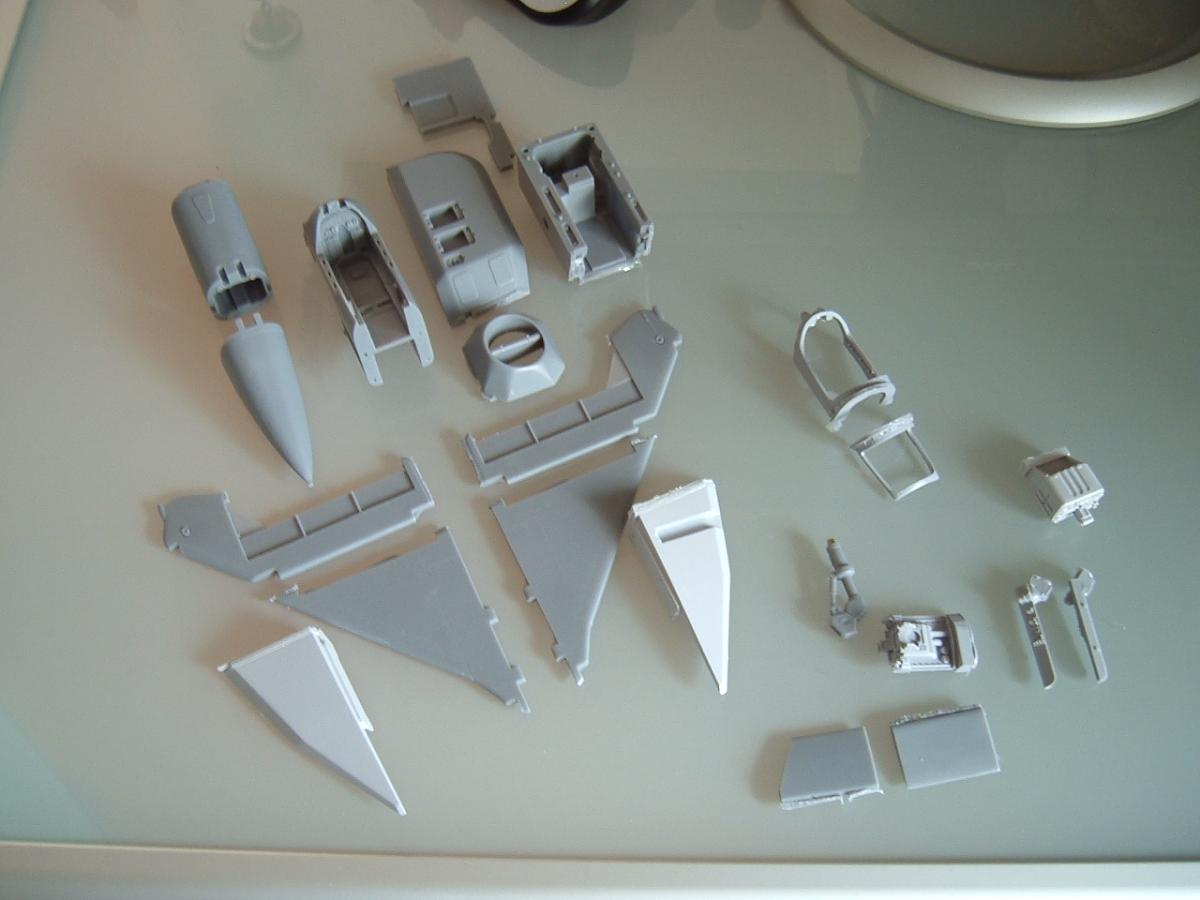
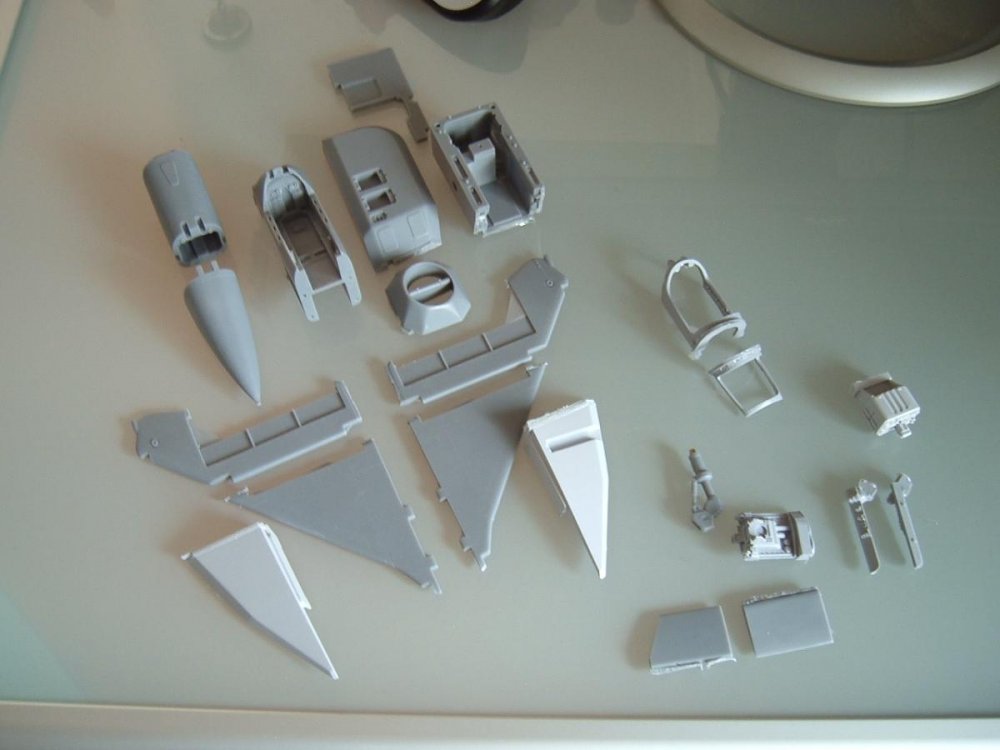
Did I say Friday? I meant Tuesday!! Sorry guys, sometimes I lose track of time. All of the principal molds are done and casting has begun. I actually had parts to show on Friday before the weekend's festivities kinda got in the way but alas, back on track, and the castings are excellent! You'll notice from my pics that my test-shot cockpit consoles (forward and lateral) are in opaque resin, but the production units will be in translucent resin as promised. In fact, since I'm using 3 different resins on this last leg of the project, casting will likely take a bit more time than usual, owing to the fact that I can't pour everything together, due to dissimilar pot life and de-molding time requirements. Also, the composite joints are about 2/3 done, clear canopies and decal artwork has been sent out (processing) and the main metal landing gear... I'm still waiting for info on those. All this to say that while it may take a little extra time for this final installment to reach you, rest assured that it IS coming

-
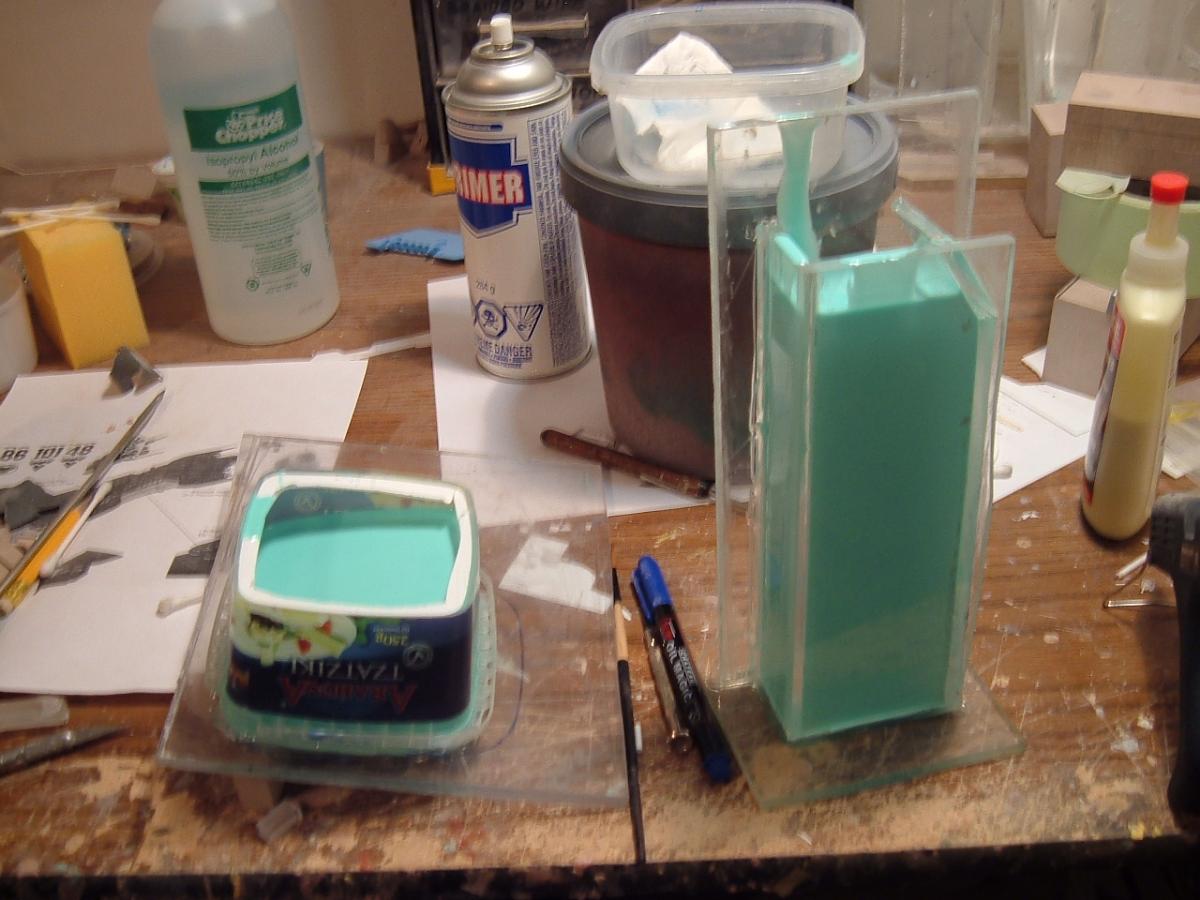
Hi everyone! Please forgive my long silence; I've been busy making the molds for the final installment, and have a resin test-shot brewing as I type this. By Friday, I should have some pics of my castings which will be well underway by week's end. Will also try to provide a coherent status report on the canopy/decals/landing gear by then as well. Fingers crossed!
-
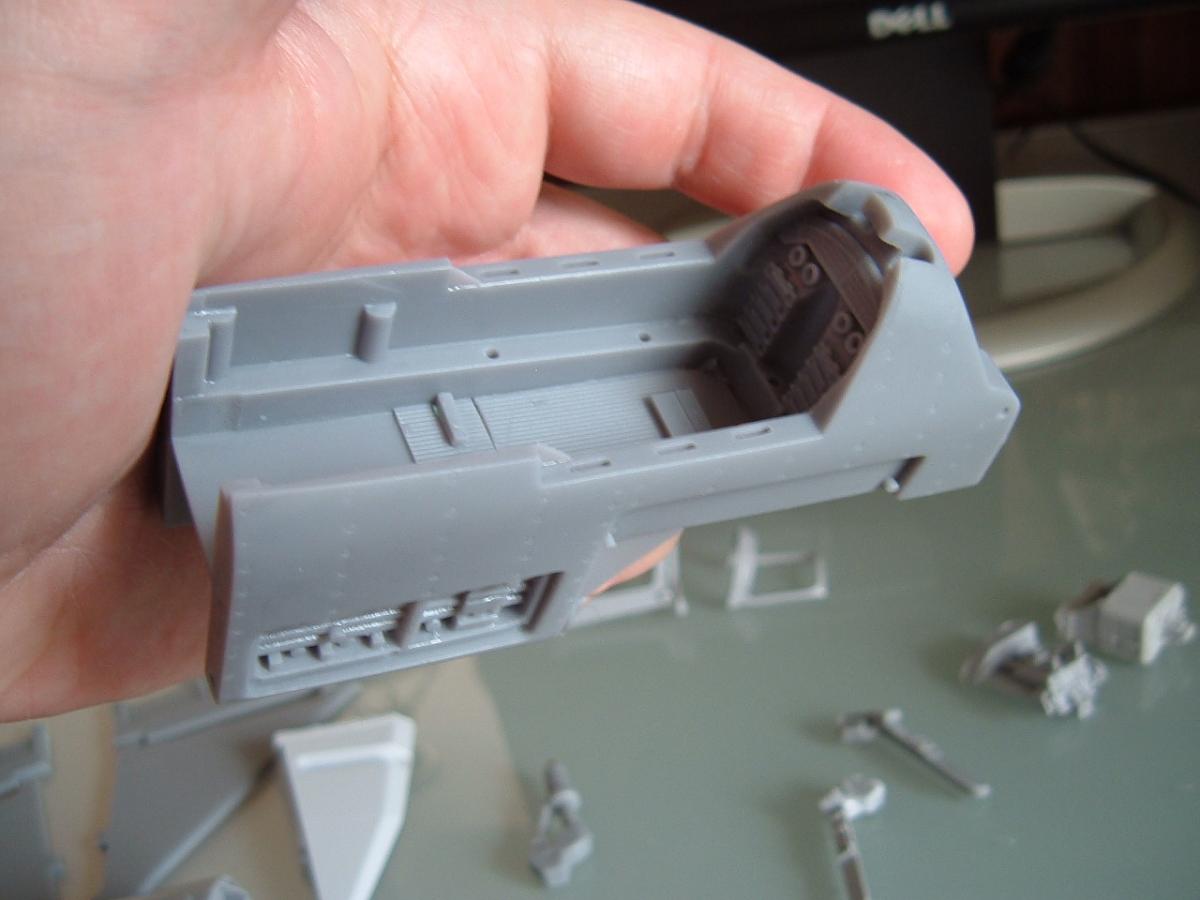
Captain's log, stardate: October 21st, 2011. Lunch time. Well here we go: updates for the nose section are finally done, save for a few little details here and there. Some re-tooling is centred around the cockpit, which has had some parts re-worked and details added, especially in the aft ejection seat area. The most significant update however, is the canopy frame: originally, I was just going to provide some resin hoops to put into the vac-formed shell and that would suffice. But then I had an idea: what if I were to produce a full resin frame and then modellers could just cut out the transparency and mate these to the frame for a more realistic look? It was a bit of a long, delicate PITA to get things going, but in the end I'm glad that I did, as I think it really adds to the look of the kit. The boarding ladder has also been tweaked somewhat and gives a sturdier look. Lastly, the big hurdle was the markings: the original vector file was lost 2 computers ago, so all I had to work with was a small jpeg file… Not an ideal situation. Nonetheless, with a few measurements, I was able to rebuild the whole thing, one marking at a time. I also took the opportunity to update some of the fonts; I figured they'd have access to snazzier printing technology in the 2080s, surpassing the need for crude stencils! A side-by side comparison of the markings is provided for your viewing pleasure. I was able to cram a few extra goodies that weren't in the original. That just about covers it for this update; I will begin principal photography for the destructions next week, and moulding begins immediately after that. Keep your fingers crossed folks, we're in the home stretch! http://imageshack.us/g/692/15374283.jpg/ Uploaded with ImageShack.us
-
Wow, MW looks weird with this configuration... I don't know if I like it, but alas... Been putting the finishing touches on the masters for part 6; canopy frame is almost done and so is the new decal artwork. The latter was a particular PITA, because the original vector file was lost so I had to start all the markings from scratch. Thankfully, by doing so I had the opportunity to use some slightly more modern fonts and improve a few little things here and there. Photo update coming Friday!!
-
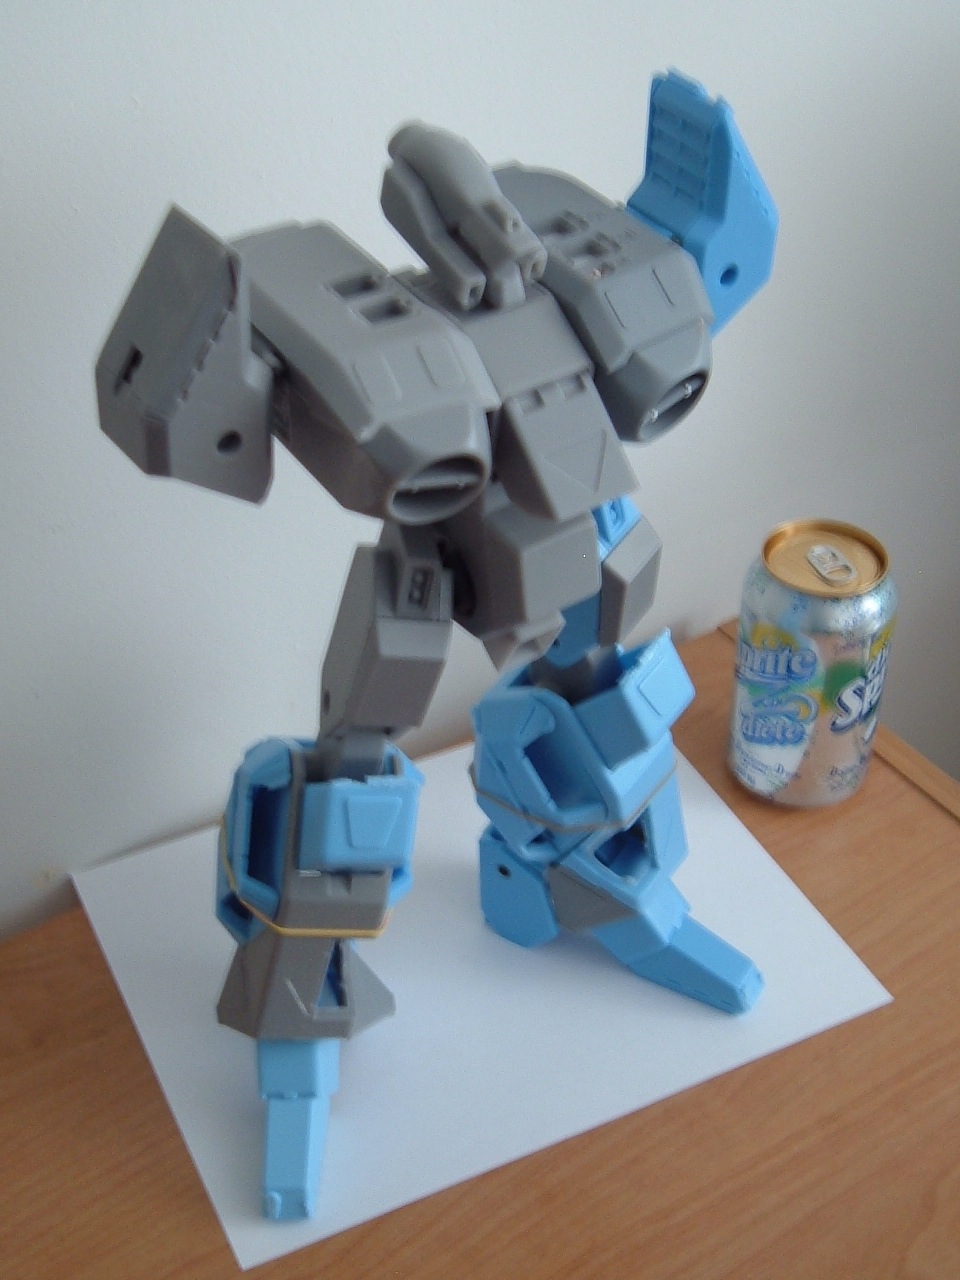
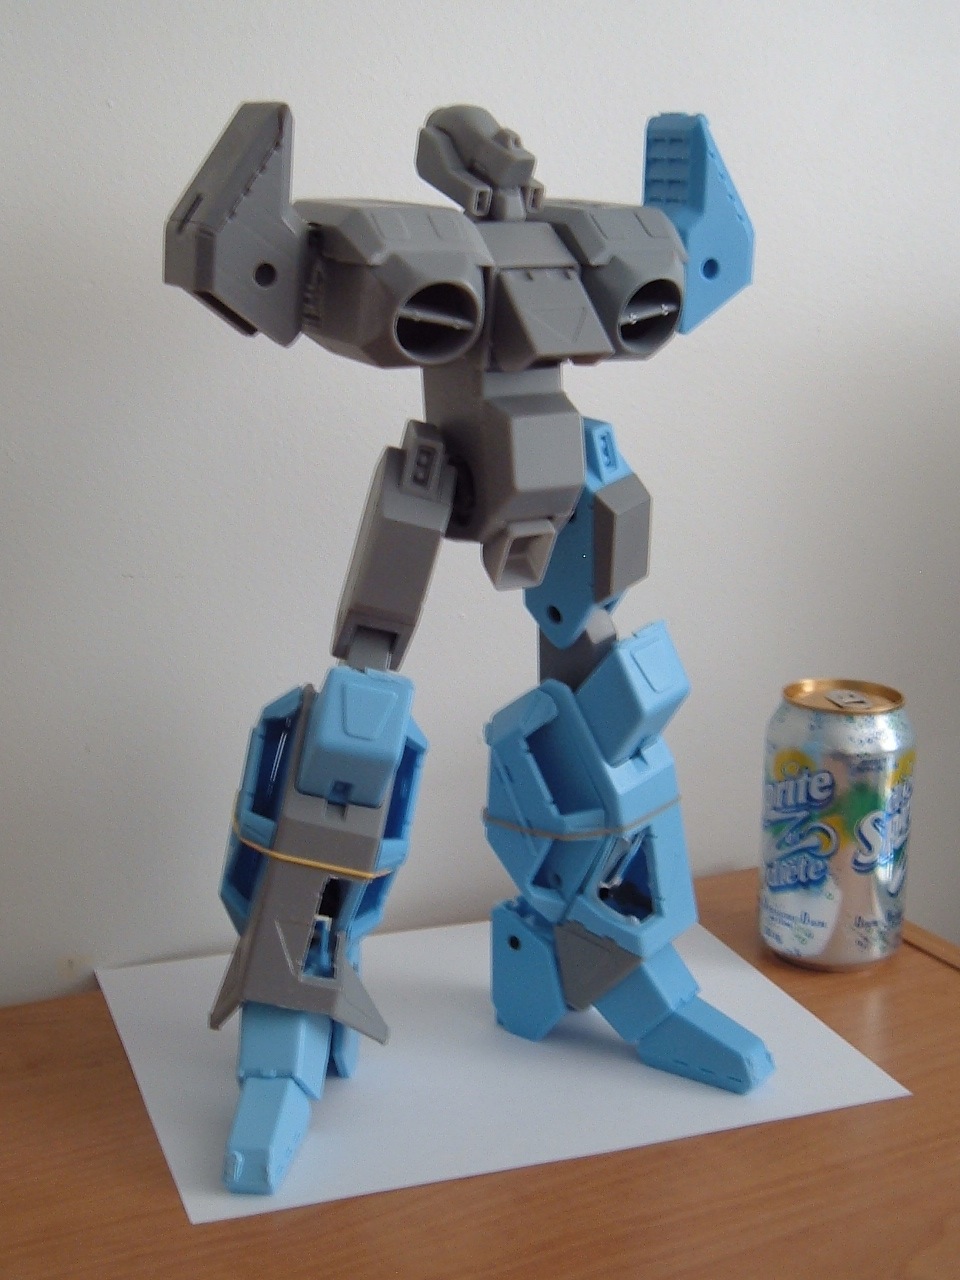
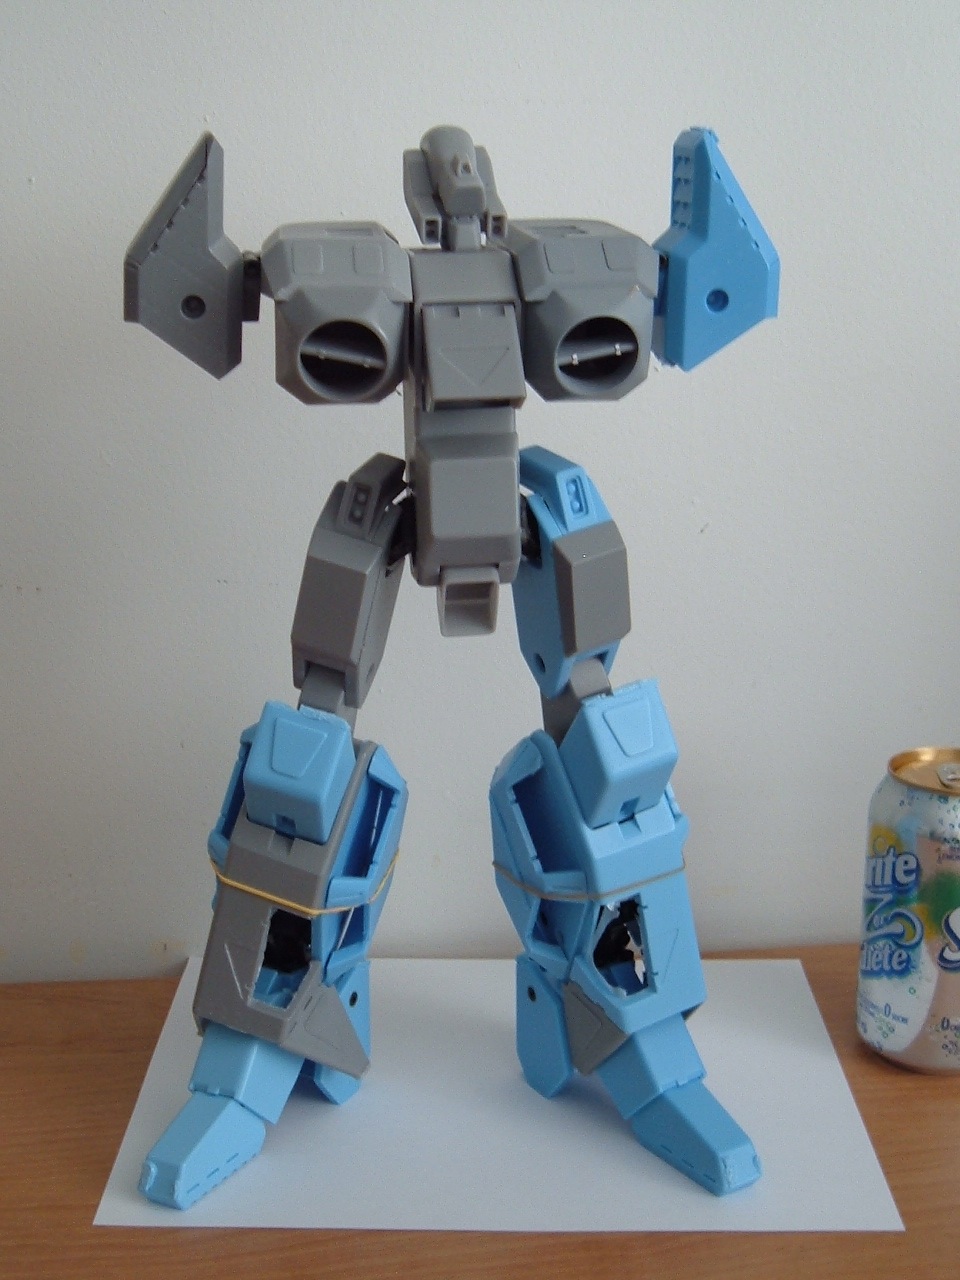
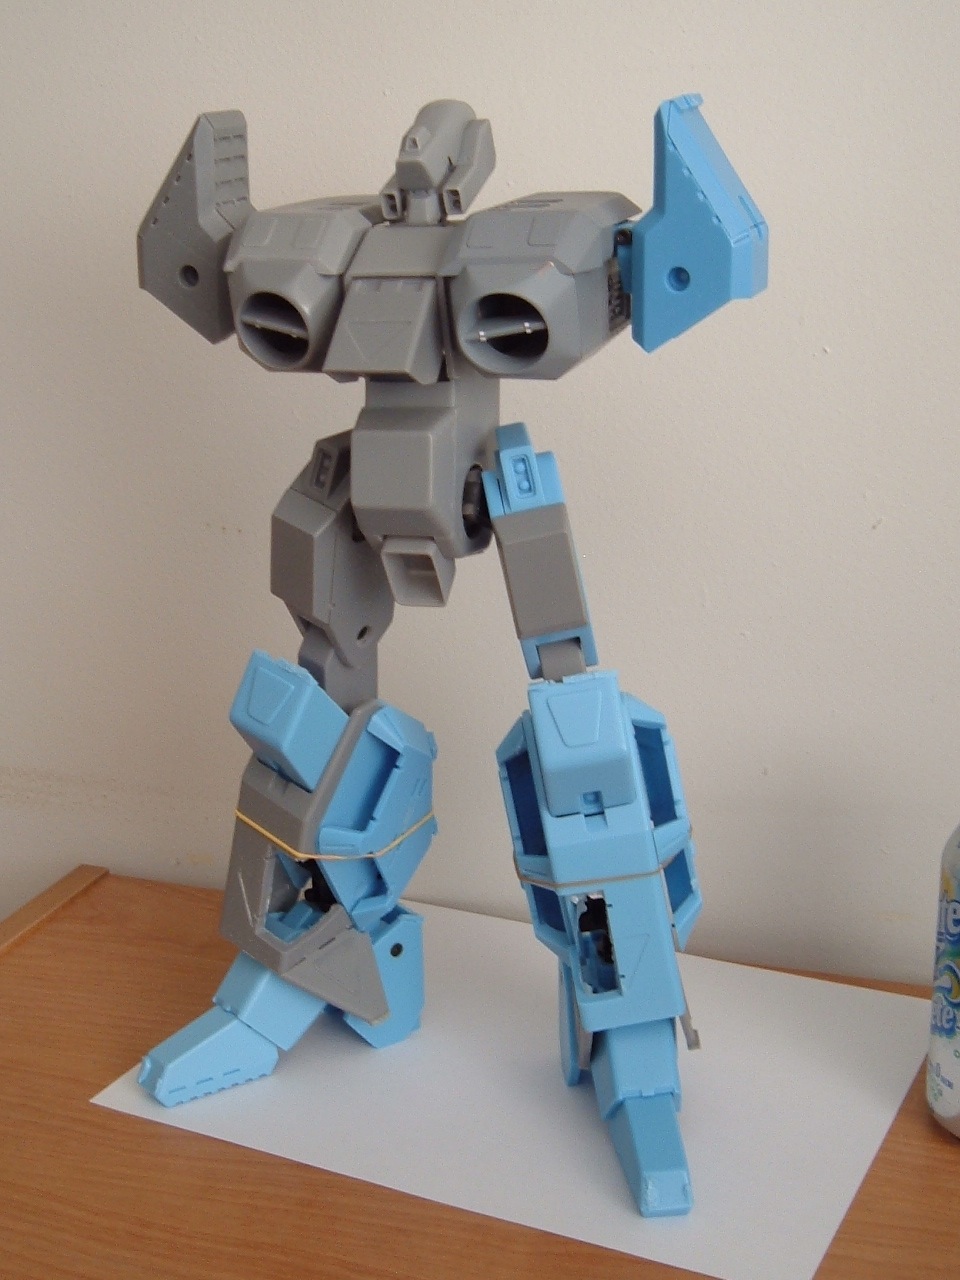
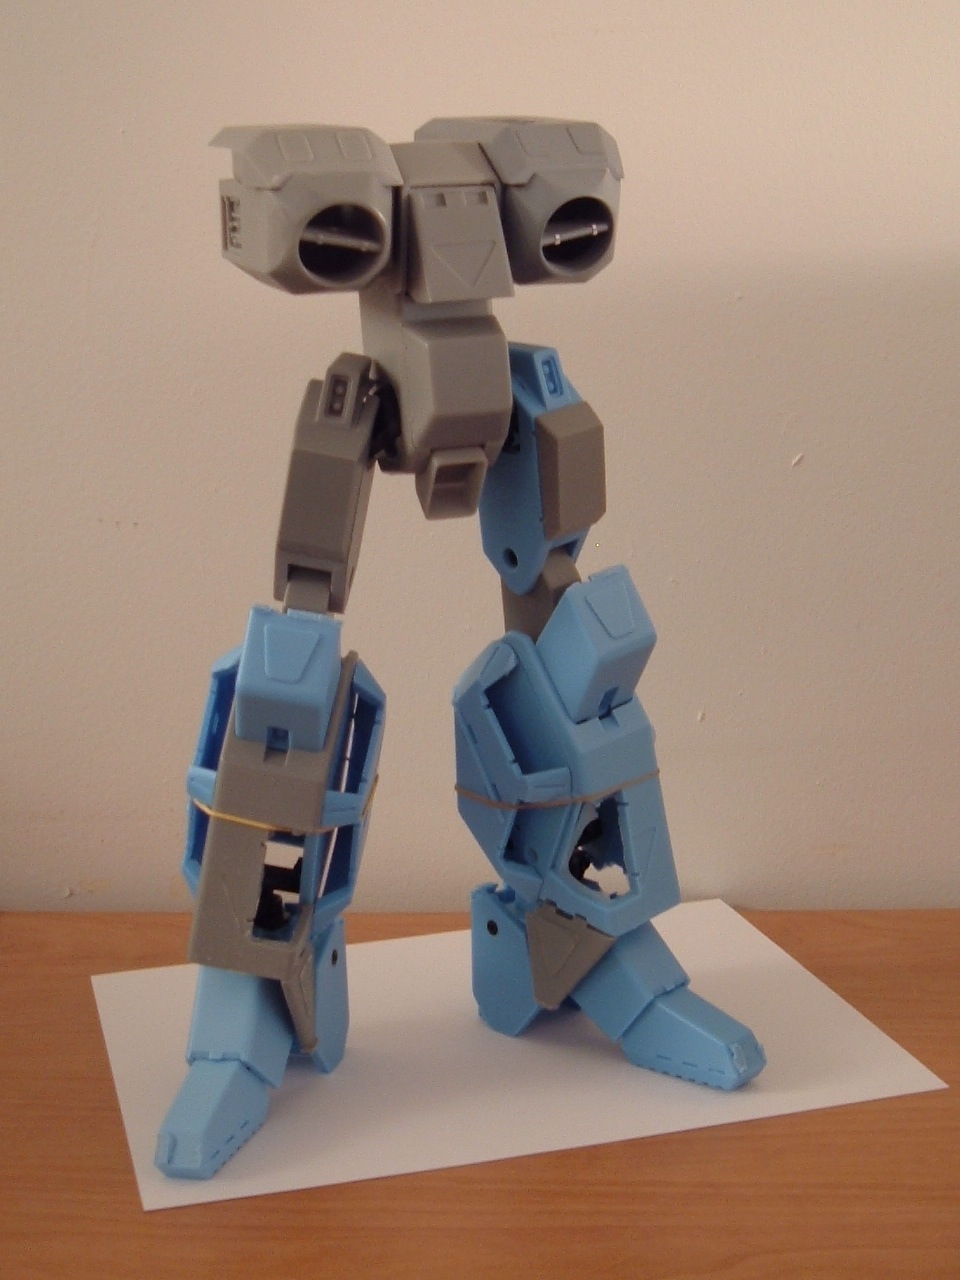
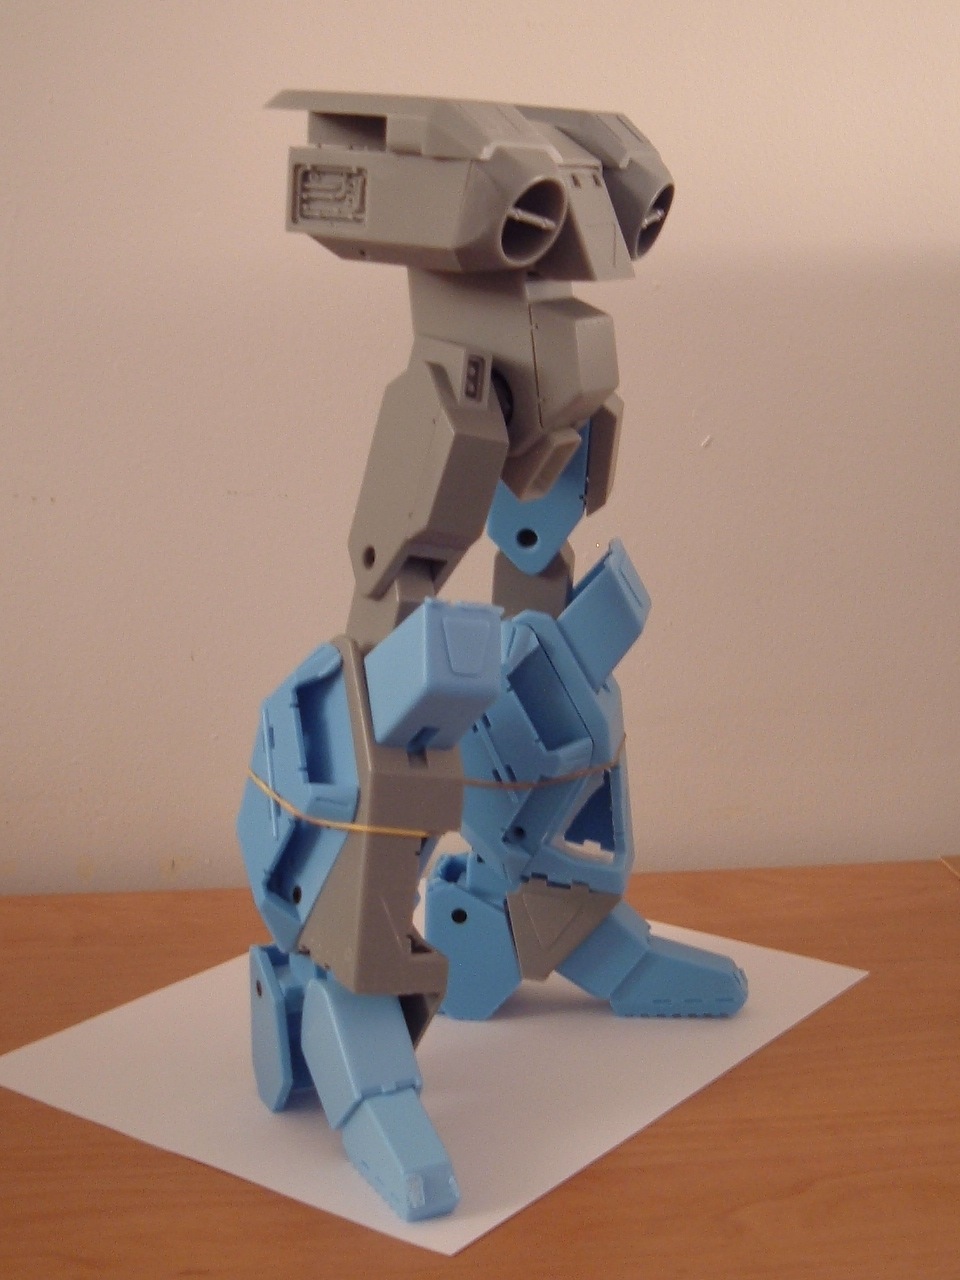
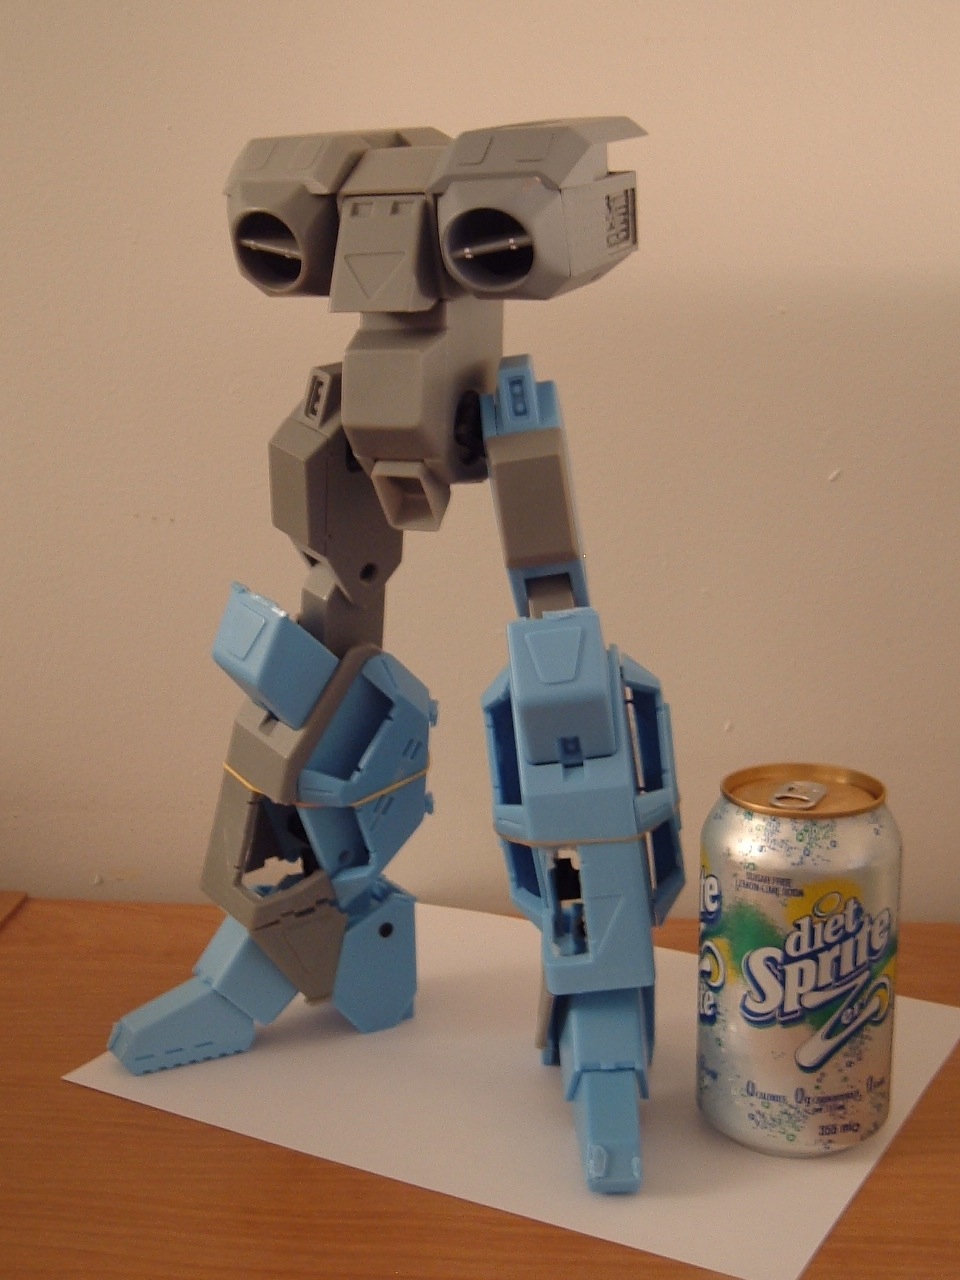
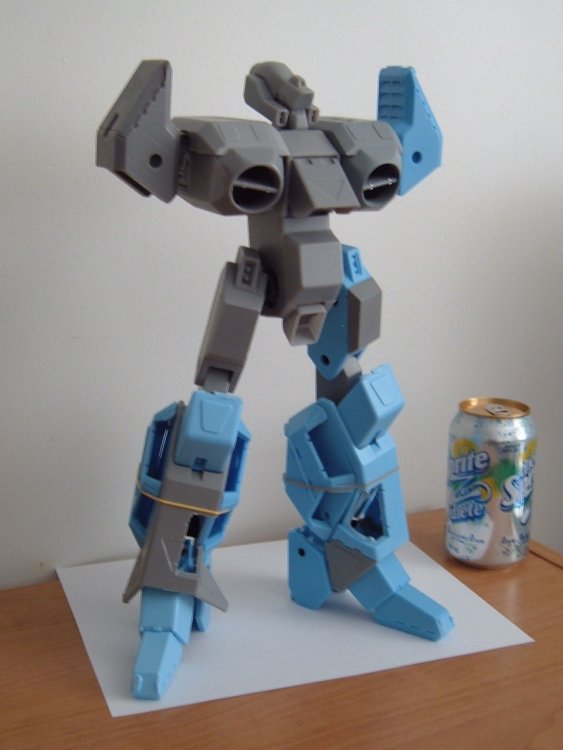
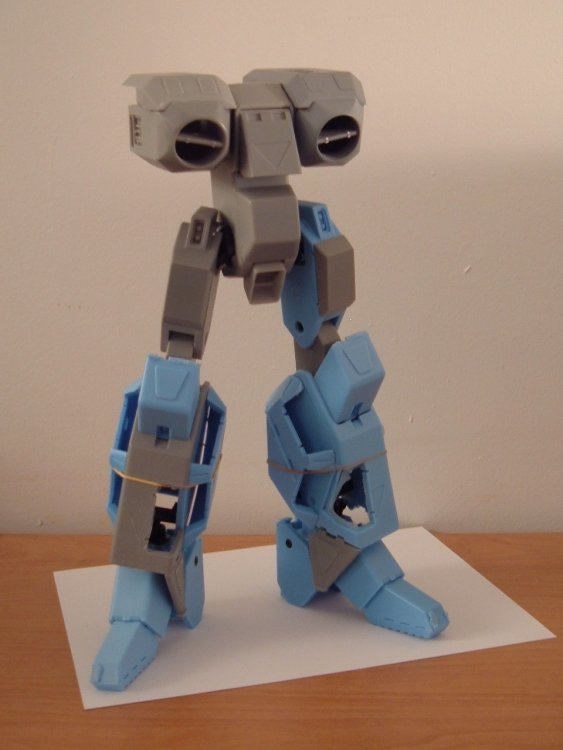
Last pic. That's as far as I can get with prototype joints and without glue
-
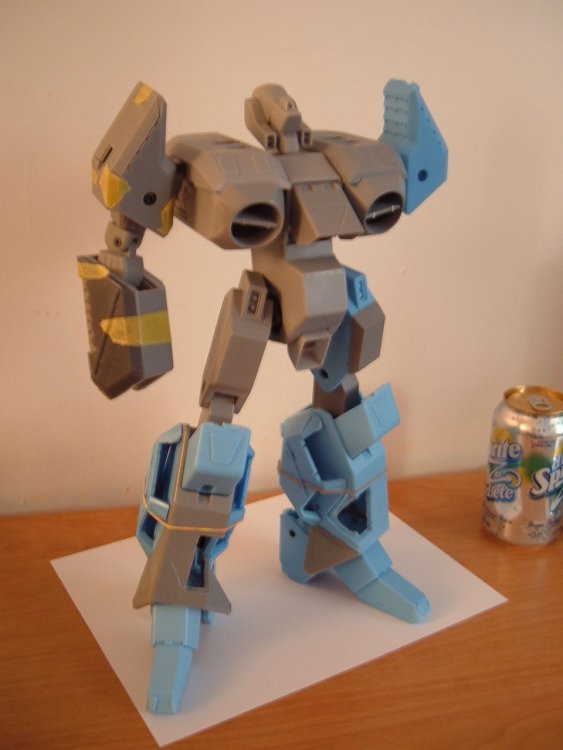
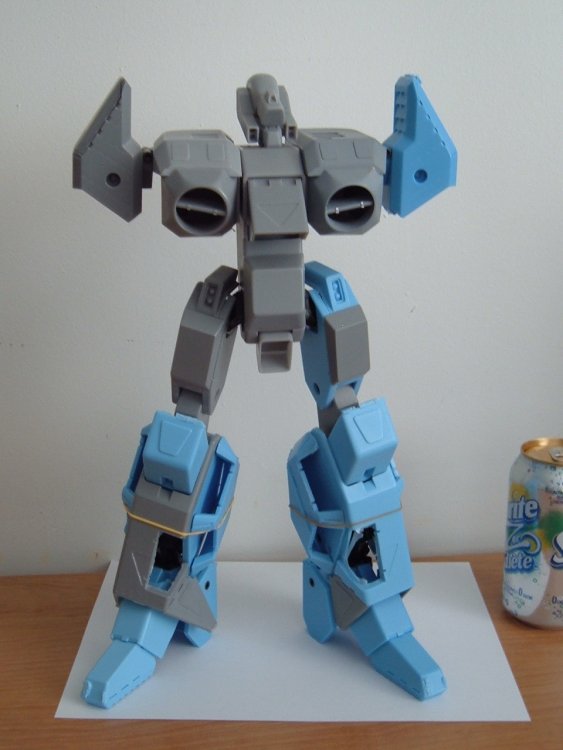
More snaps, this time with the head and shoulders. Apologies for the blurry pics.


-
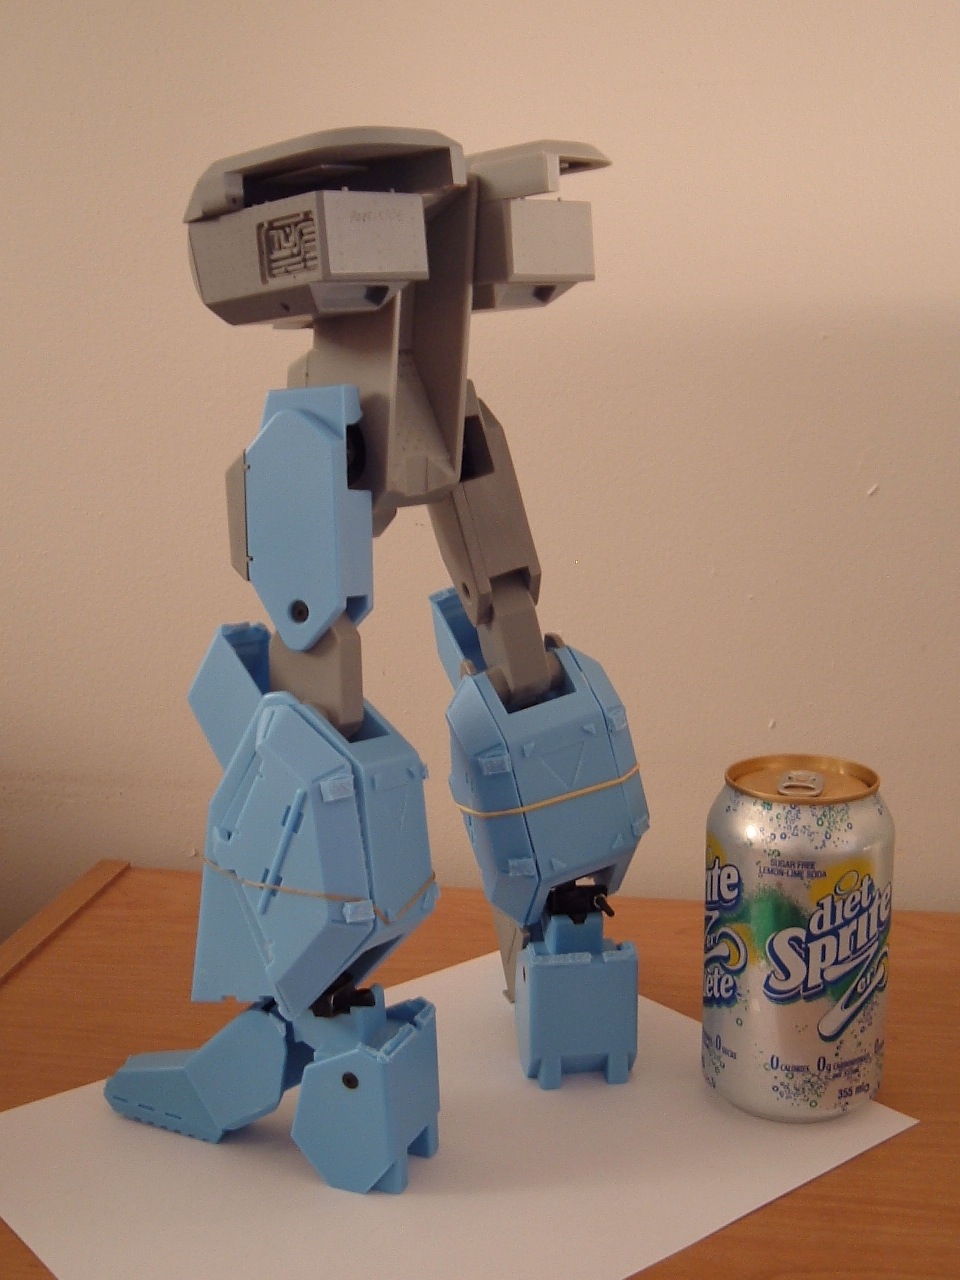
Hi everyone. Just wanted to post a quick update! Holy frack this thing is BIG! 37-38cm tall in Soldier mode!! :blink:


-
Hi Darrin. No beers needed, the simple answer is that I'm not sure yet; there's demand for some smaller-scale MOSPEADA-related stuff in the background, but I think that the MACROSS fans have been high-and-dry for more than a year, so maybe a new Zentradi mecha, or perhaps a re-issue of the Spaltan. All demand-related.
-
I think it kinda helps that you're located relatively close geographically Oh, and I will make the official announcement that payment for the final part (segment 6) is now due. To those who have already paid, you need only sit back and wait patiently. For what it's worth, I've already begun molding some parts that need duplicating for this last installment. I will begin making the final mods for the components, and you can expect an update either on the 7th or the 14th, but the latter is more realistic, as I'm sort of short on time these days. Your patience is greatly appreciated
-
Hi everyone. Just a quick heads-up to let you know that I'm starting to ship kits today. Most will be shipped by Monday or Tuesday, though 1 or 2 people may have their kits delayed as I had to order more screws, minor speedbump. Will be posting again on Monday to announce the commencement of the final segment. Stay tuned!
-
No Beagle Blow Superior... that blows superior...
captain america replied to EXO's topic in Anime or Science Fiction
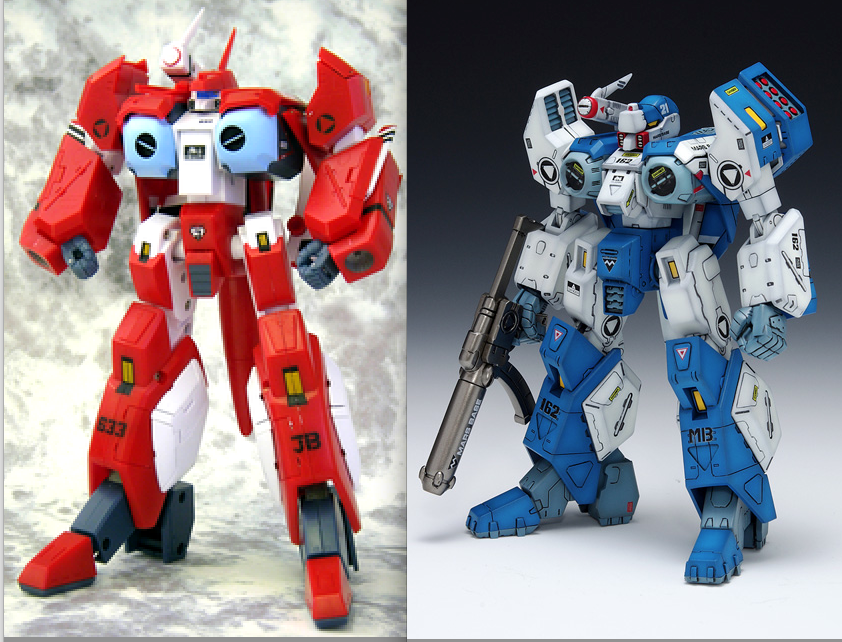
It's all in the proportions. Compared to both the old Imai 1/72 and the CM's 1/48 toy, the Wave kit's proportions are such that it looks stumpy, squat, deformed and un-heroic: head and shoulders are too big for the chest nacelles and body. It's not like any concessions had to be made to accommodate a complex transformation either, which is why I consider it an aesthetic failure, though I have to admit that the gun is a clear improvement and looks awesome. I've included comparison pictures to better illustrate my point.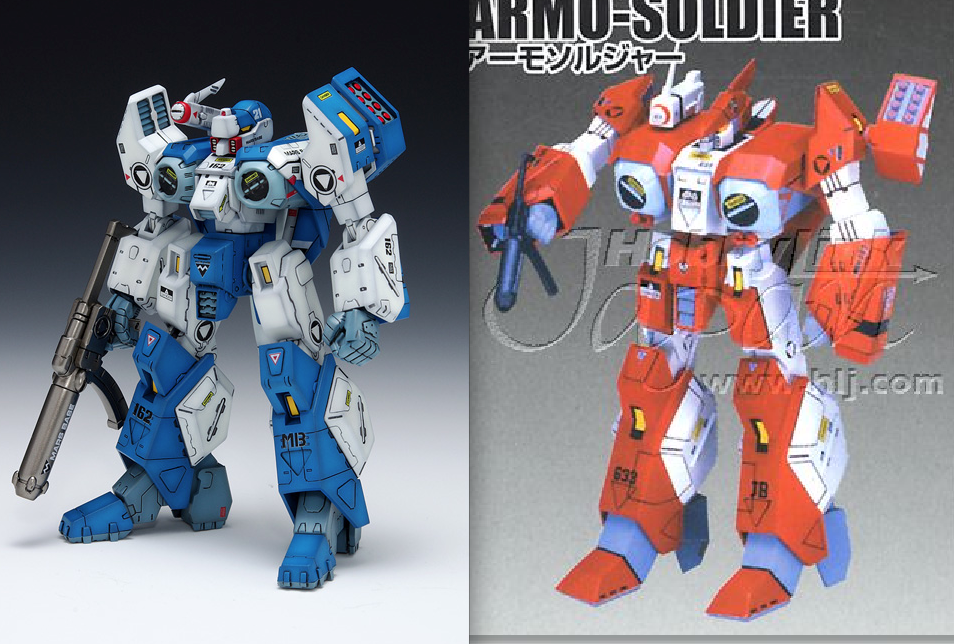
-
No Beagle Blow Superior... that blows superior...
captain america replied to EXO's topic in Anime or Science Fiction
The Wave soldier is just hideous! Considering that it doesn't have to transform, I think they dropped the ball massively. Heck, the 28 year-old Imai soldier looks better than that! -
And the 3 remaining pages!