captain america
-
Posts
3563 -
Joined
-
Last visited
Content Type
Profiles
Forums
Events
Gallery
Everything posted by captain america
-

Mo-Suu-Pii-Dah Inbitoh in 1/48--Part Deux!
captain america replied to captain america's topic in Anime or Science Fiction
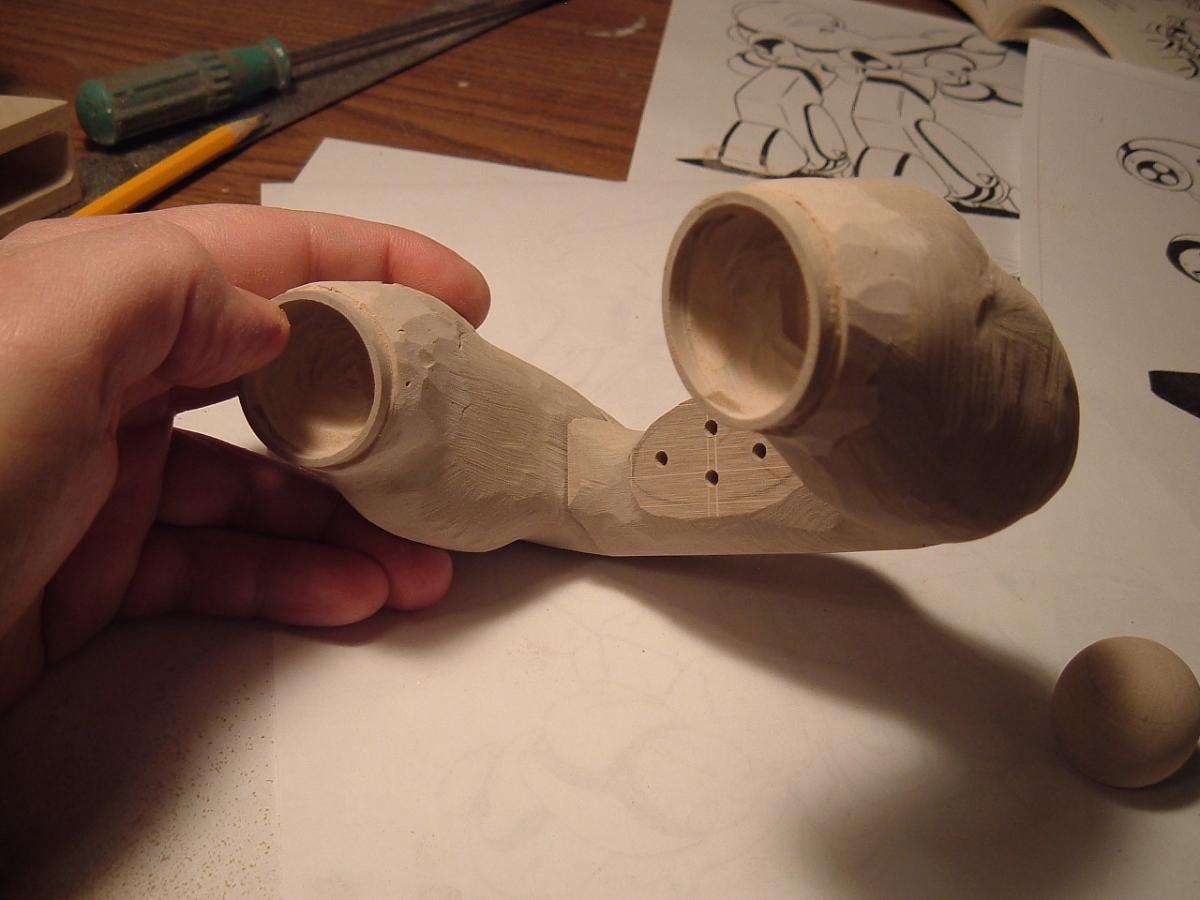
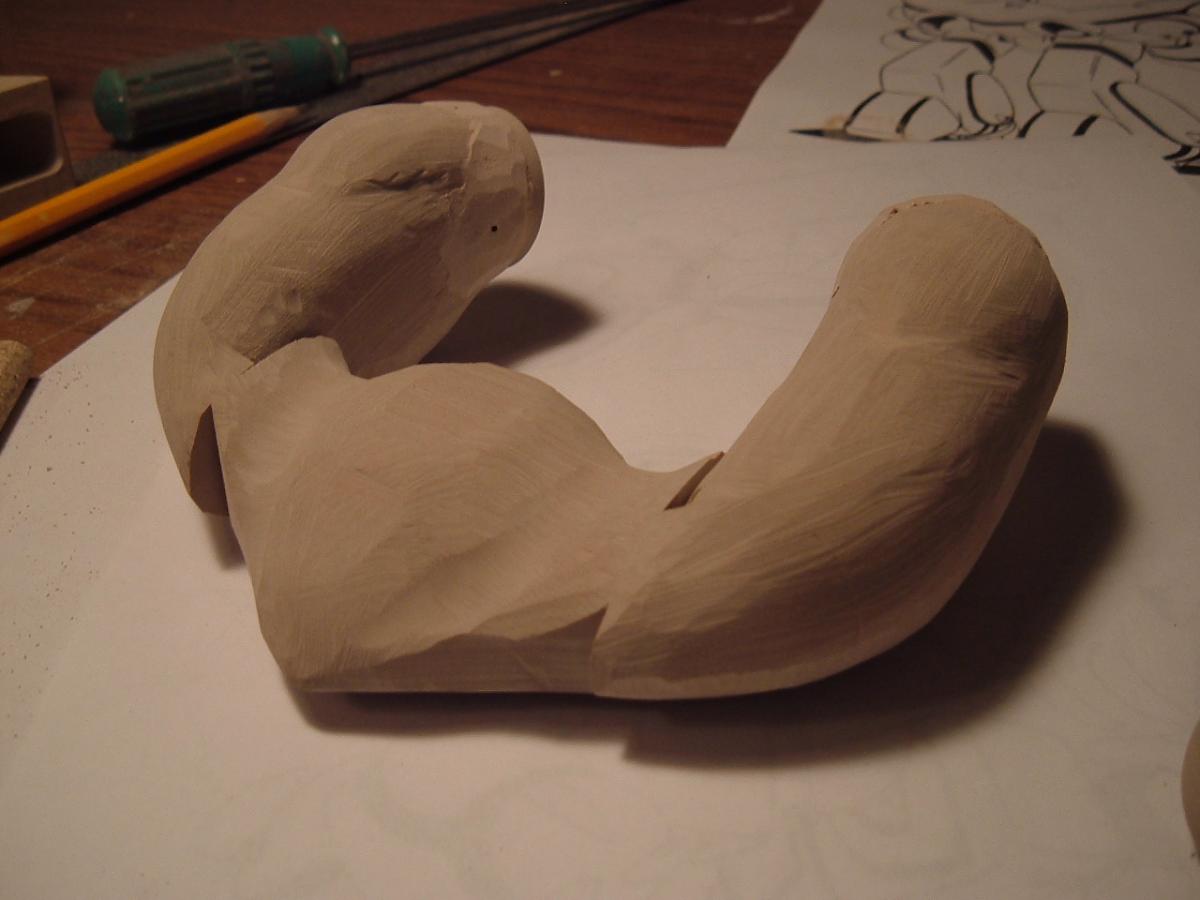
4922: the beam gun housings continued. 4923: and continued… 4924: more of the beam gun croissant. This is the aft portion where the dorsal shell mates to the croissant. In fact, the penciled oval you see is the rough cross-section of the main shell. 4925: after stupid amounts of Dremeling, the croissant is now starting to take shape. 4926: the view from the back. It's still in a VERY rough state at this point. That's all for now, but I'll likely post another update on Monday because I have quite a few pics left to show. The project is taking quite a long time because while the line art looks simple, rendering it in 3D is anything but.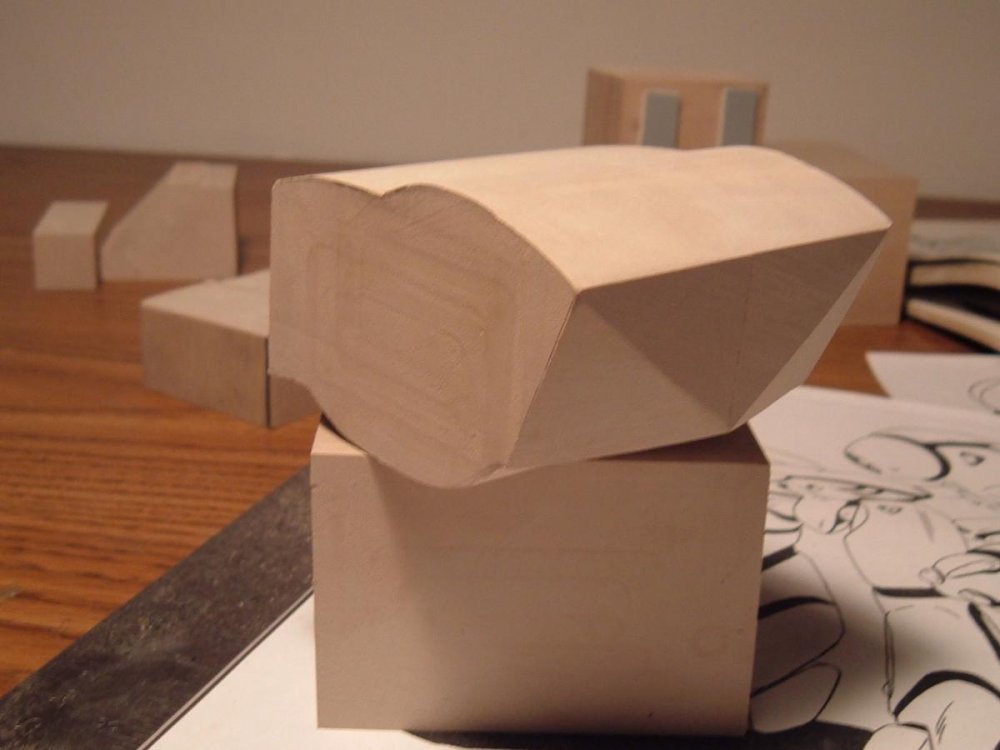


-
Mo-Suu-Pii-Dah Inbitoh in 1/48--Part Deux!
captain america replied to captain america's topic in Anime or Science Fiction
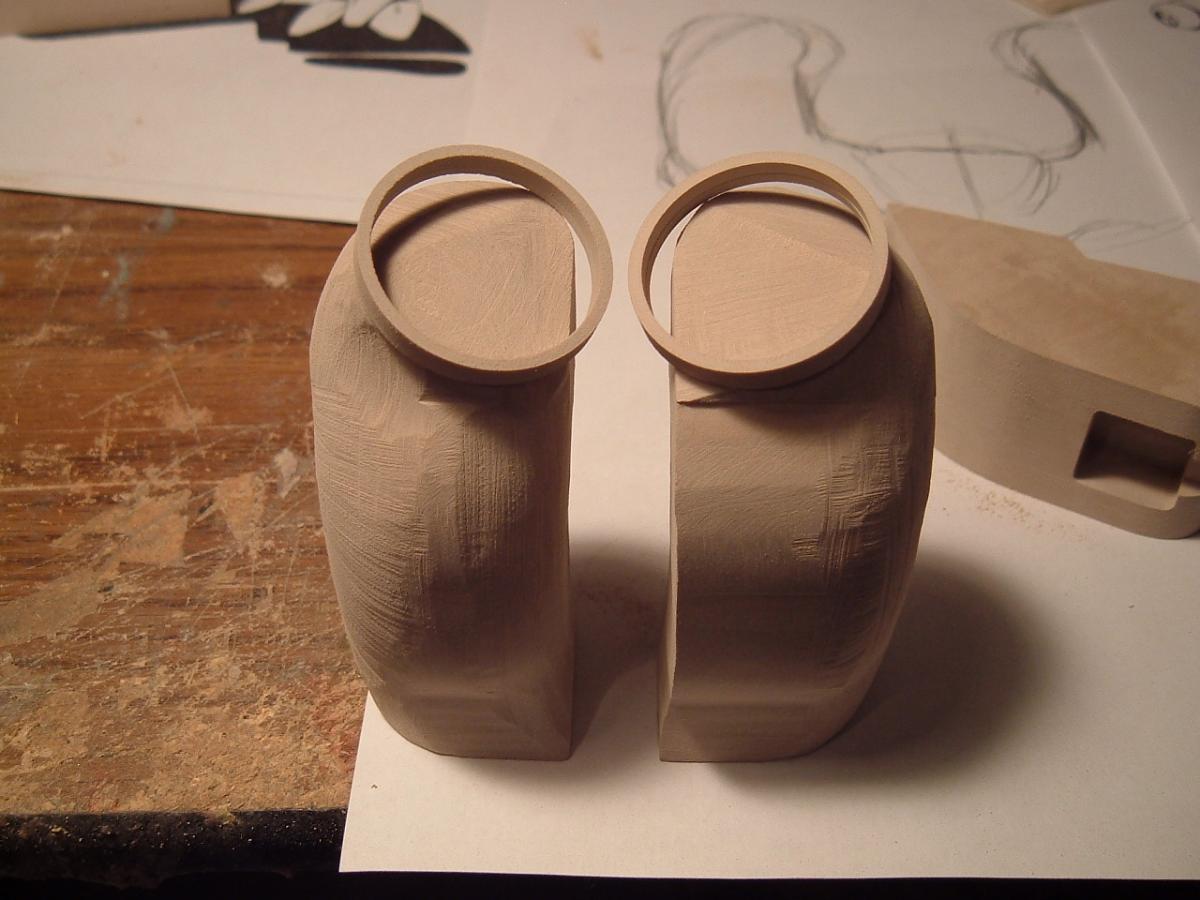
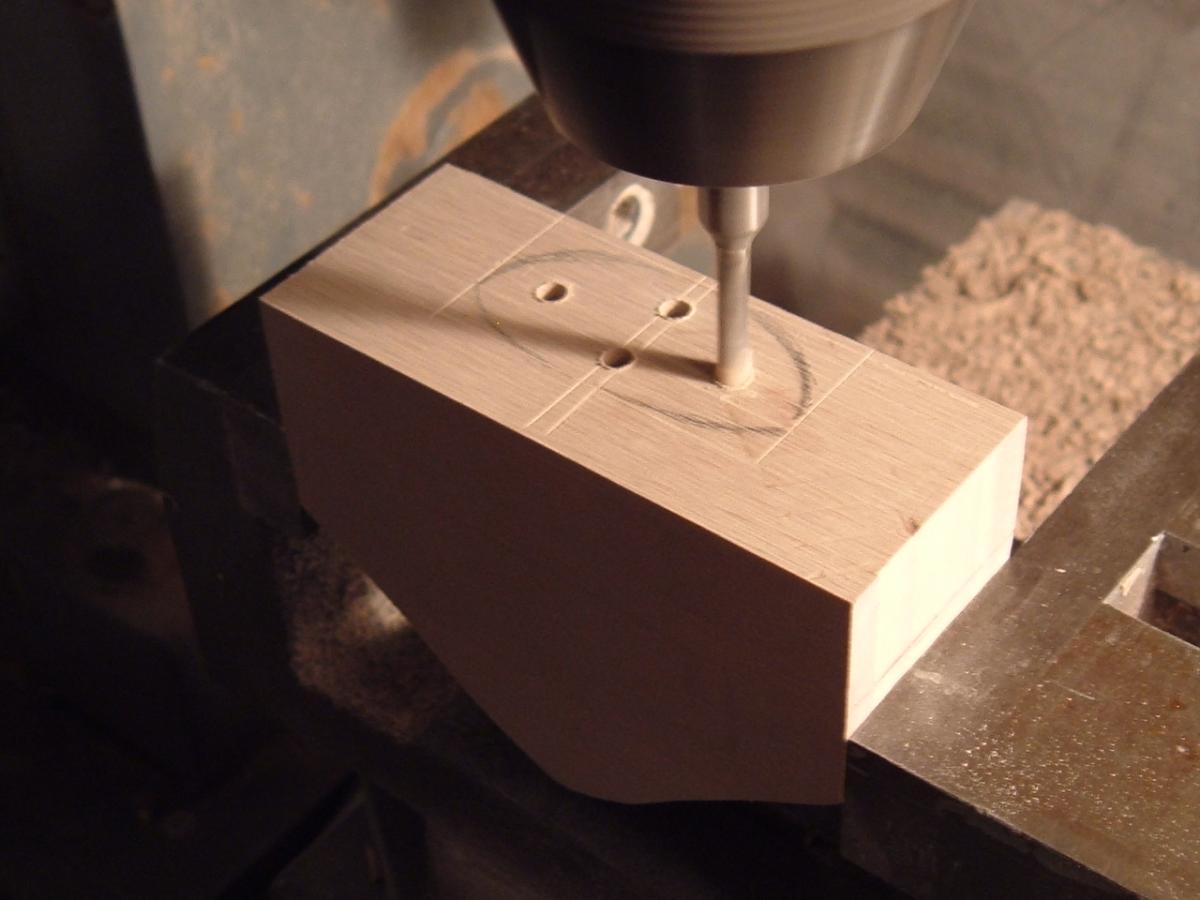
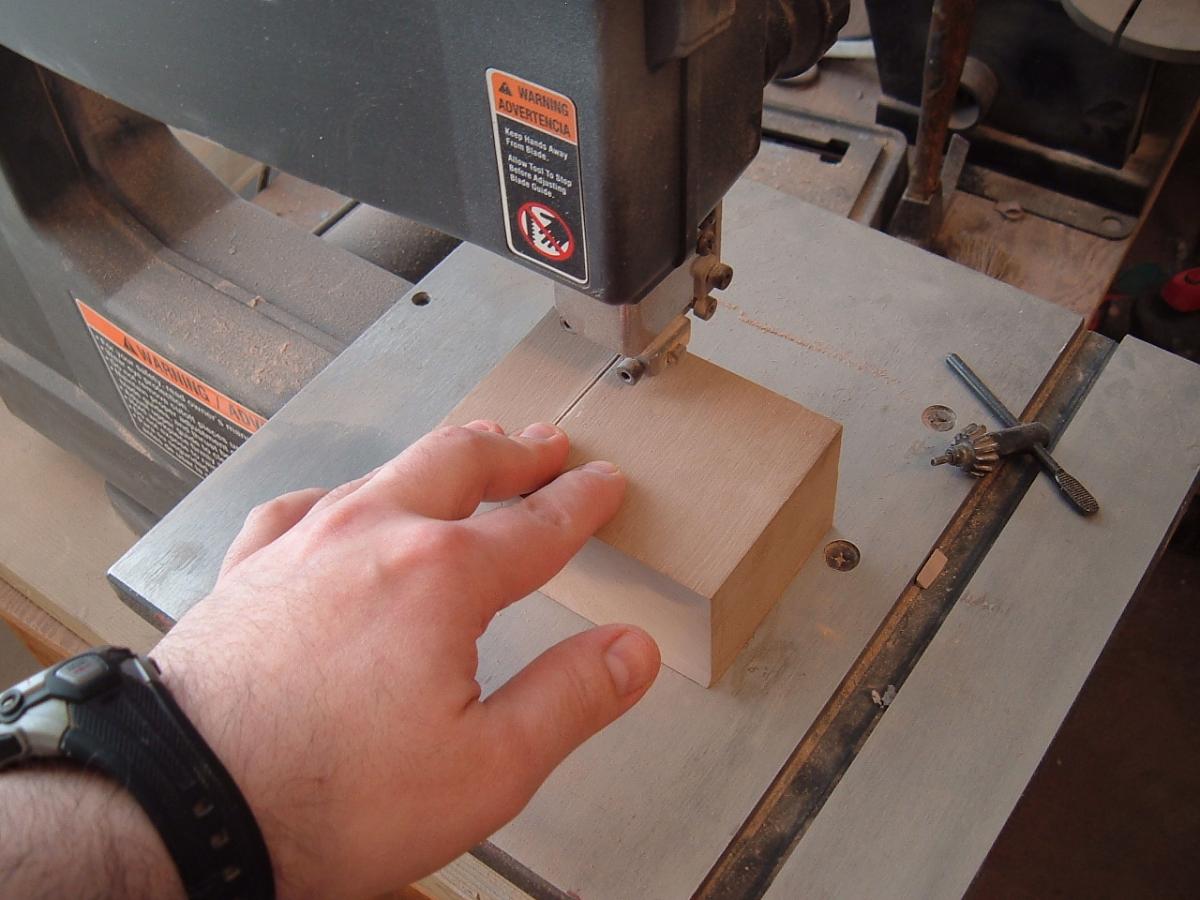
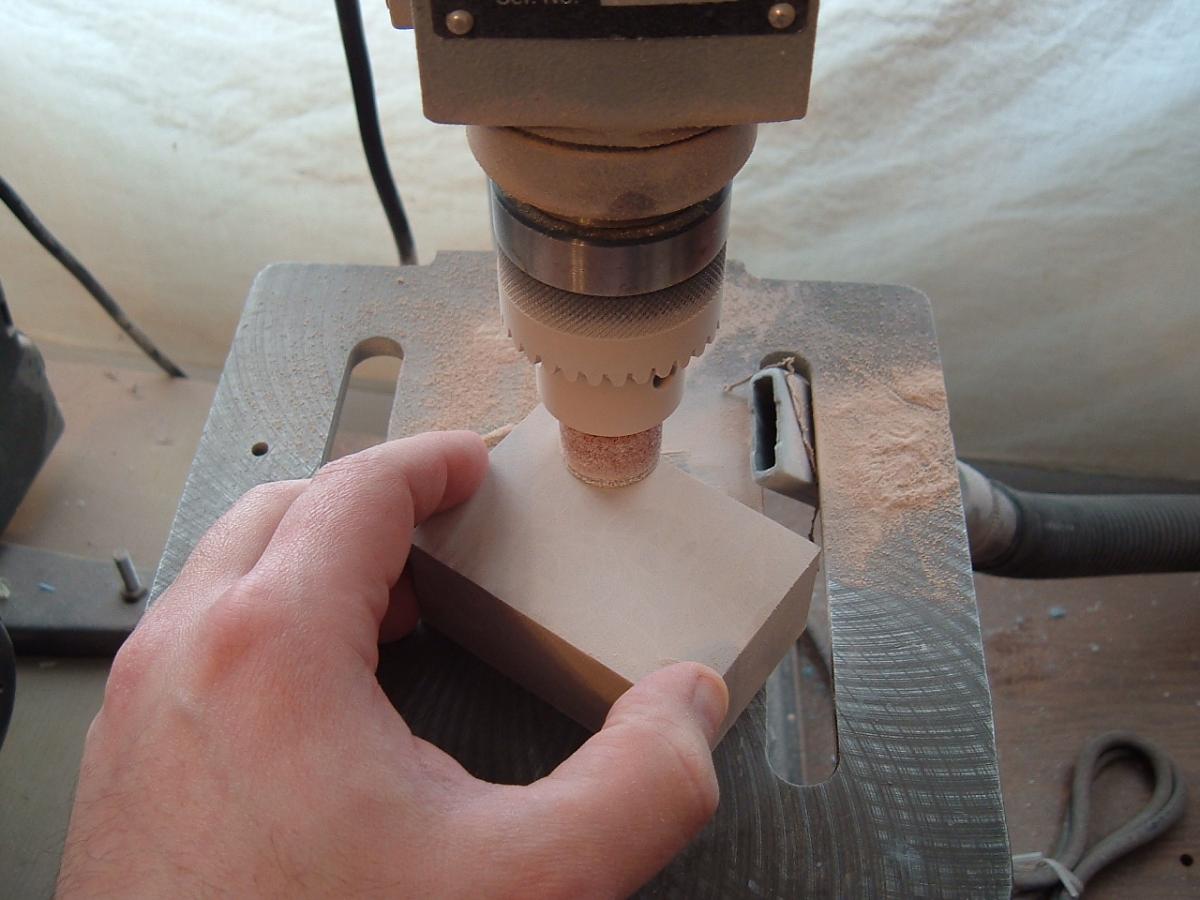
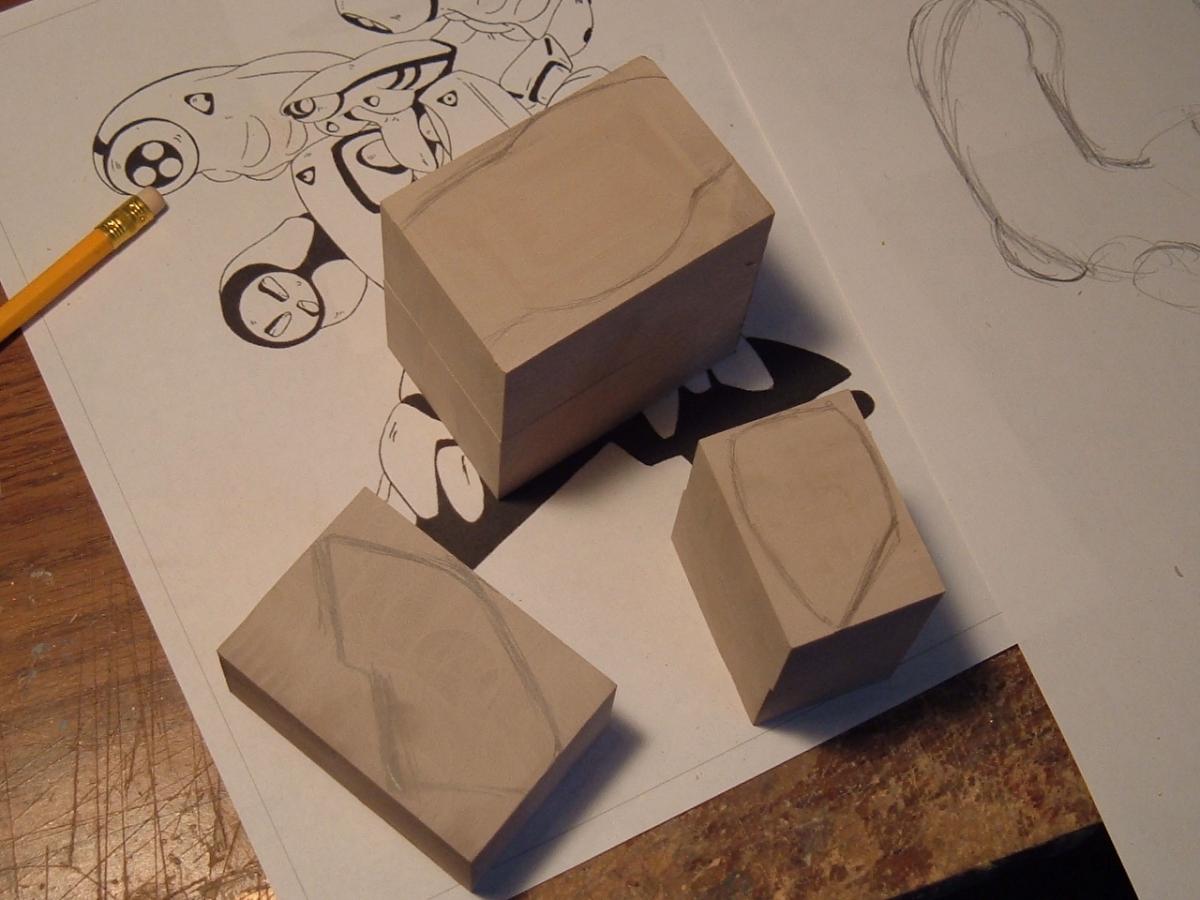
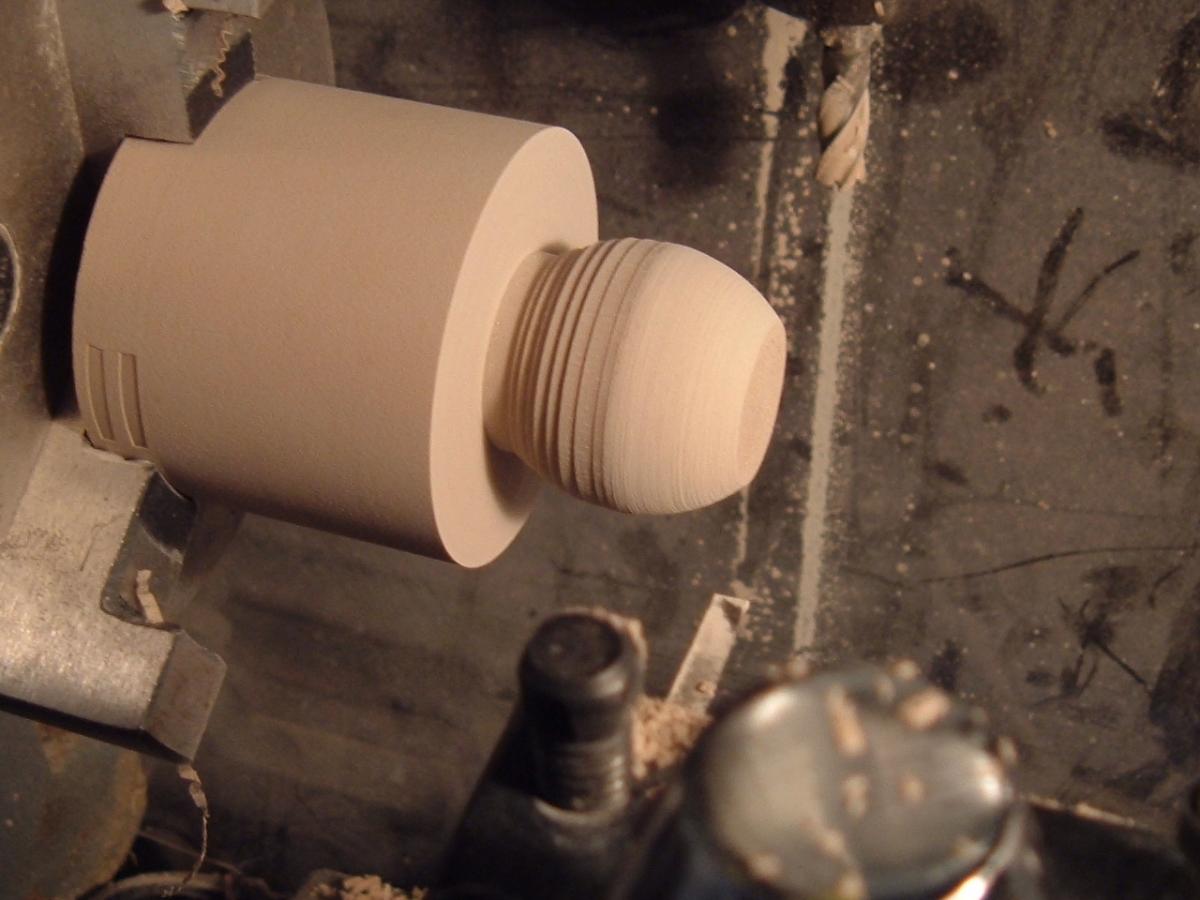
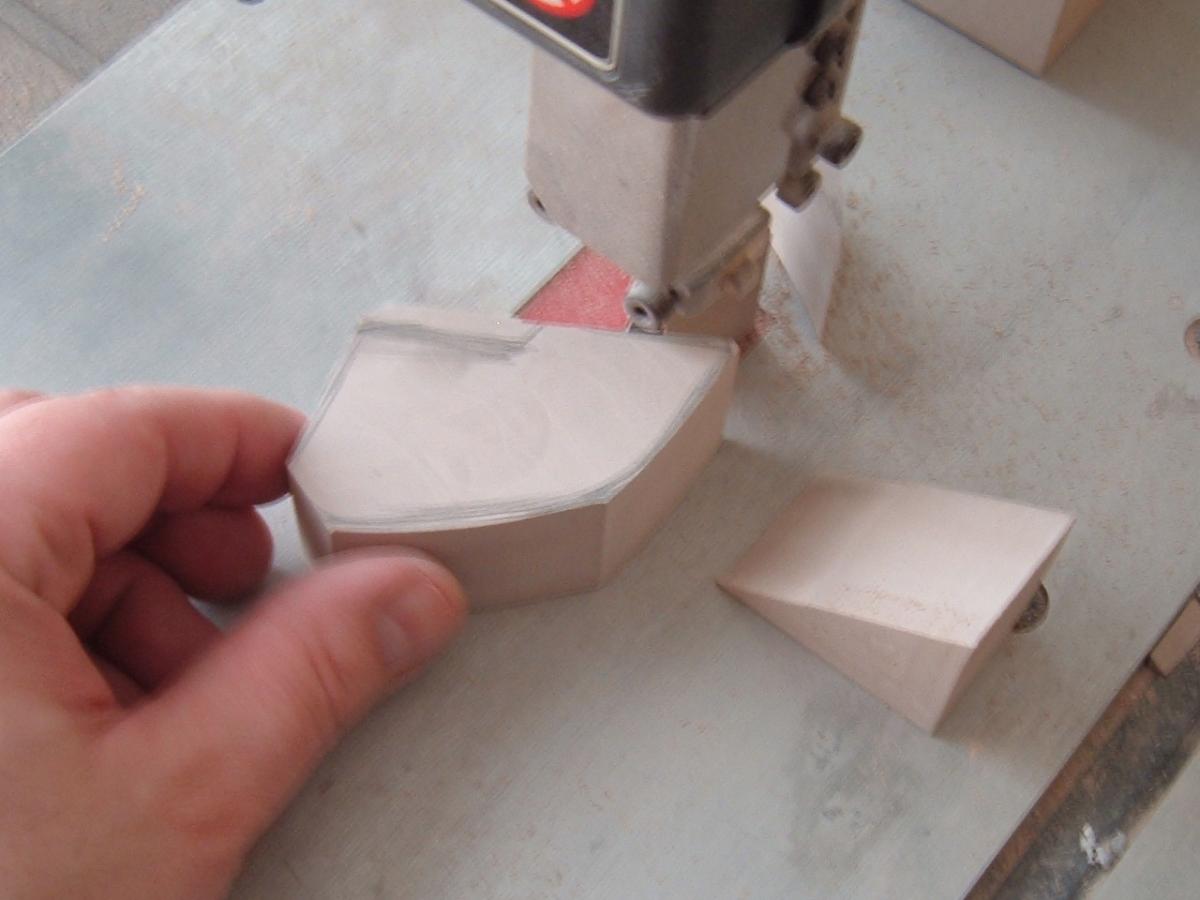
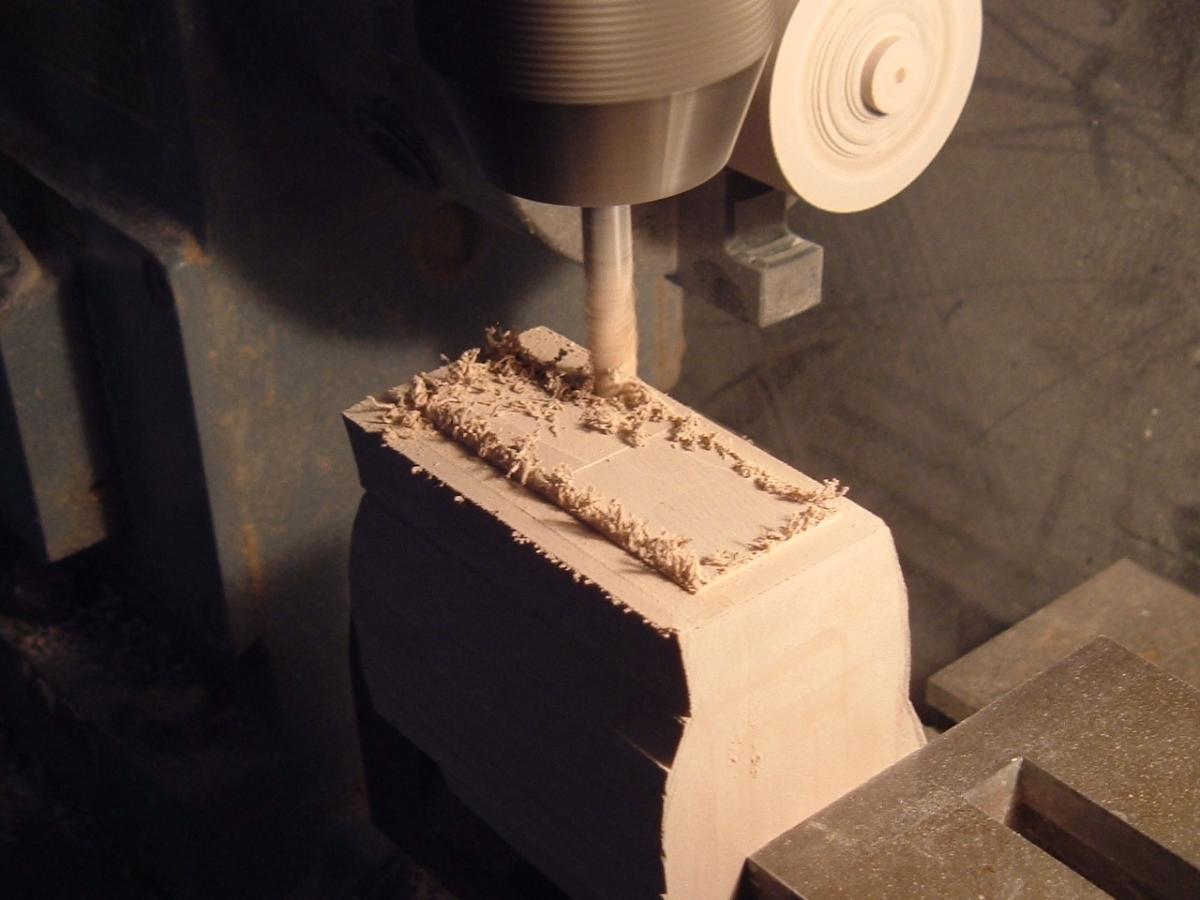
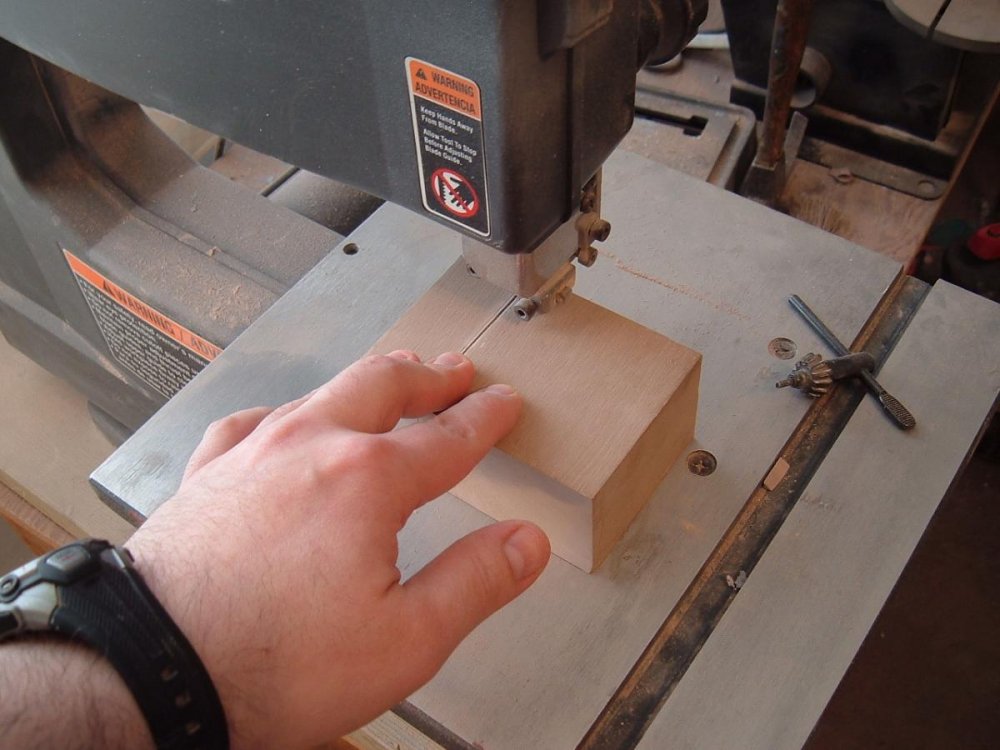
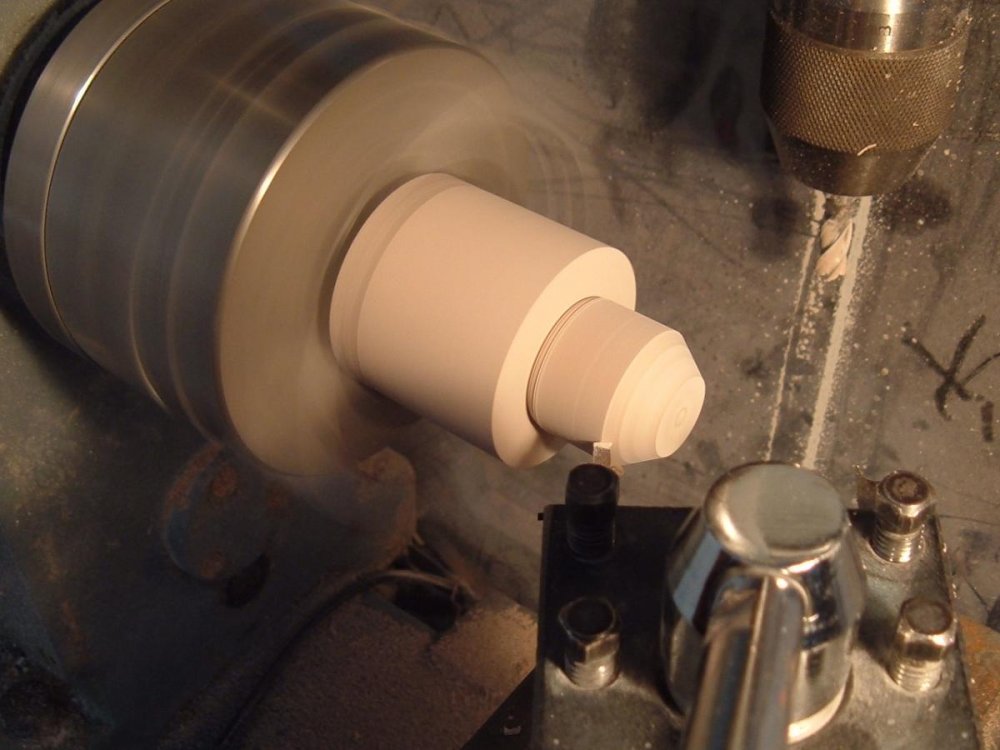
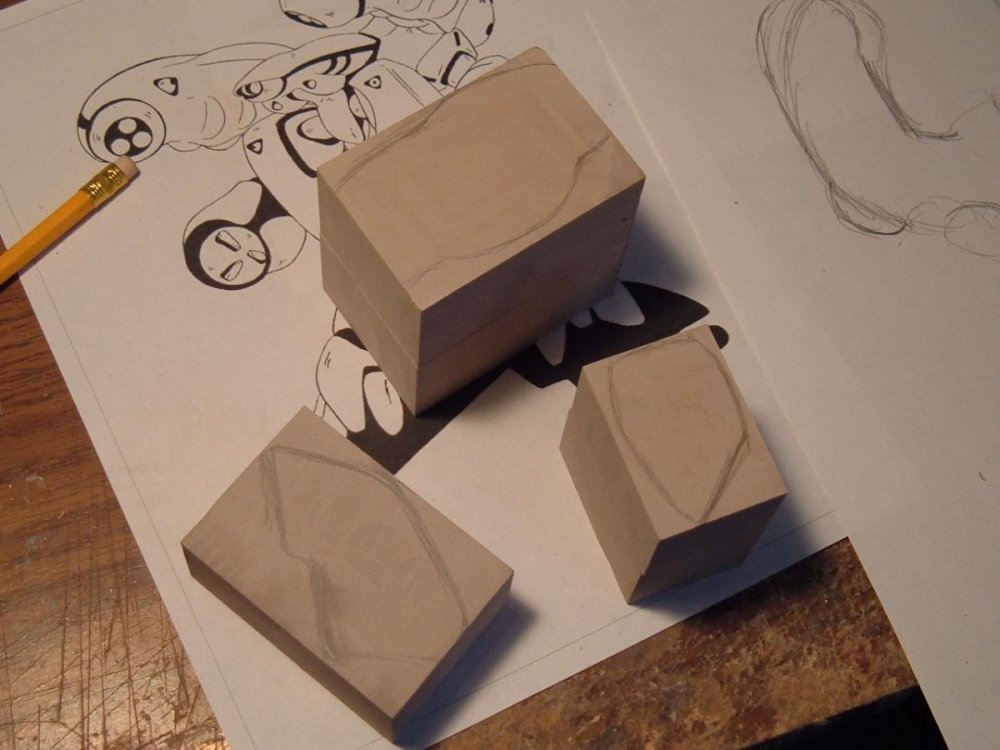
Captain's log, March 21. I'm going to start out by revealing a great secret: I started work on the Gamo a while ago, I was just waiting for the right moment to break the news to everyone! So yeah, let's get this party started! The first pic is, as always, the customary shot of my basic tools and materials in their raw form. For what it's worth, I needed quite a bit more Ren Shape than is pictured, especially for the very large beam gun croissant. 4915: since I needed more modeling board, I started by chopping up some new blocks into smaller, more manageable segments. 4916: I then run the blocks under my drill-press grinder to make sure they're perfectly parallel. 4917: this is a particularly tricky operation, and it involves taking a rectangular block of modeling board and durning it on the lathe in order to make the many round/bubble shapes inherent in the design. I start off using the live center to secure the part, since the knife is jamming into modeling board and air alternatively, and it creates a lot of vibration. By the time this pic was taken, the worst was over. 4918: Now that I have some adequate blocks, I begin sketching the outline of the parts I intend to carve. I will then clean them up using French curves… Very artsy-fartsy! 4919: the beginnings of the sphere that will become the beam gun "eyeball" nozzle. 4920: some quick removal of excess material before lines are cleaned up. 4921: You probably can't tell, but this block will become the main beam gun croissant structure. I remove as much material with the mill as I can to maintain my reference points and ensure symmetry.


-
Mo-Suu-Pii-Dah Inbitoh in 1/48--Part Deux!
captain america replied to captain america's topic in Anime or Science Fiction
No worries, the magic begins next Monday since I'm just waiting on two people. Aaah, blueberry crabs!!! I'm planning to make the "eyes" from the beam cannons both posable and hollow, so that people who want to light the beam guns will be able to. -
Mo-Suu-Pii-Dah Inbitoh in 1/48--Part Deux!
captain america replied to captain america's topic in Anime or Science Fiction
Still waiting on the final payments to come in, should be starting soonly. -
1/350 Scale thread... Mospeada, Southern Cross and more!
captain america replied to EXO's topic in Anime or Science Fiction
Very nice work so far, Exo! This thing will kick butt displayed fully open with all those little buggers launching to attack. And suddenly I'm overcome with the sensation of being attacked by a swarm of bees... -
Mo-Suu-Pii-Dah Inbitoh in 1/48--Part Deux!
captain america replied to captain america's topic in Anime or Science Fiction
A plank of modeling board is 60" by 16" by 2", you may be able to get different formats depending on the vendor. As for techniques that's pretty well laid-out in my build reports. -
Mo-Suu-Pii-Dah Inbitoh in 1/48--Part Deux!
captain america replied to captain america's topic in Anime or Science Fiction
Thank you so much for the references, guys! Rest assured that I scrutinize and study the source material for several hours even before beginning to cut modeling board, and the images of various products as well, just to see how they interpreted certain shapes. Jason: yes, that's why the price jumped slightly, after studying the line art, it quickly became evident that the Gamo, while not the most advanced design, was the biggest in terms of height and girth. As with all the data, some show it to be marginally shorter or taller than a Legioss, so it's a matter of interpretation. First and foremost, I'm going for the look in the 3/4 front view, since I consider it to be the nicest. DarrinG: -
Mo-Suu-Pii-Dah Inbitoh in 1/48--Part Deux!
captain america replied to captain america's topic in Anime or Science Fiction
I've started compiling my source reference for the sculpt and all I can say is: boy, that crazy beam gun boomerang is going to be a real clusterfrack of sculpting hell! -
Mo-Suu-Pii-Dah Inbitoh in 1/48--Part Deux!
captain america replied to captain america's topic in Anime or Science Fiction
I would go somewhere between the Vallejo Turquoise and the color of the book end, but that's me. I'll start sending out PMs for payment, but just the price of the actual kit for now, since I won't know what the shipping will come out to until I'm fairly close to completion. In short: $160 now, and the rest once I can calculate the freight. Also reverting to funds in USD, since it's just easier for most folks. -
Mo-Suu-Pii-Dah Inbitoh in 1/48--Part Deux!
captain america replied to captain america's topic in Anime or Science Fiction
Based on my count, we are green to go... Or should I say blue? I'll start clearing up my workspace and will be shaking you all down for funds come Monday, at which point I will also begin sculpting -
Mo-Suu-Pii-Dah Inbitoh in 1/48--Part Deux!
captain america replied to captain america's topic in Anime or Science Fiction
Are we there yet? -
Mo-Suu-Pii-Dah Inbitoh in 1/48--Part Deux!
captain america replied to captain america's topic in Anime or Science Fiction
That's 29! So berry, berry close... BOO-berry close! -
Mo-Suu-Pii-Dah Inbitoh in 1/48--Part Deux!
captain america replied to captain america's topic in Anime or Science Fiction
Posted in the For Sale section to breathe a little extra life into the project. -
Mo-Suu-Pii-Dah Inbitoh in 1/48--Part Deux!
captain america replied to captain america's topic in Anime or Science Fiction
It makes blue blue rain in my soul!!! -
Mo-Suu-Pii-Dah Inbitoh in 1/48--Part Deux!
captain america replied to captain america's topic in Anime or Science Fiction
Getting close. If need be, I'll put a link in the For Sale thread to get the few remaining spots filled. Looks like I should clean my work table in anticipation for another case of crabs! -
Mo-Suu-Pii-Dah Inbitoh in 1/48--Part Deux!
captain america replied to captain america's topic in Anime or Science Fiction
It depends on how quickly I can get the minimum orders going. Based on my calculations, a week or two for getting the interest up and another week or so for the payments, you should be okay. -
So, here we are. Again. Hot on the heels of the previous 1/48 Pinky Space Crab project, I offer you my next suggested modeling project: the 1/48 Inbit Gamo, or as I like to call him, Blueberry Crabs! The more I look at this thing, the more I realize that it can practically stand toe-to-toe with the Legioss and is probably more significant than the Legioss in terms of actual mass, long story short: it's biiiig. So tentatively, I'm thinking $160 for the 1/48 kit, which will be over 6.5" tall with a parts breakdown similar to the Gurab... So who's in? I need 30 orders minimum to get the ball rolling.

-
Mo-Suu-Pii-Dah Inbitoh in 1/48
captain america replied to captain america's topic in Anime or Science Fiction
I'll start a separate thread on Friday for this new project to see if there's enough interest. I'm leaning toward the larger size, just because I'm more visual and the Gamo looks to be almost as tall as a Legioss with its massive cannons. -
Mo-Suu-Pii-Dah Inbitoh in 1/48
captain america replied to captain america's topic in Anime or Science Fiction
THAT... Is a very sensible question. According to specs it's supposed to be 7.1m tall. Given that info, I'm thinking a price of $140. That having been said, this image makes it look considerably bigger, so if I were to base myself on the image, it would probably be closer to 160 bucks.
-
Mo-Suu-Pii-Dah Inbitoh in 1/48
captain america replied to captain america's topic in Anime or Science Fiction
Soooooo... Are you guys ready for a Gamo? -
If I recall, there were some poor quality black-and-white images of what were allegedly robot modes for the Dinobot toys a while back. I suspect that they will transform.
-
Mo-Suu-Pii-Dah Inbitoh in 1/48
captain america replied to captain america's topic in Anime or Science Fiction
I see that some people are really eager builders! looking very good indeed. ...Aaaaand all Pinky Space Crabs sold! Disappeared like spit on a hot griddle! -
Mo-Suu-Pii-Dah Inbitoh in 1/48
captain america replied to captain america's topic in Anime or Science Fiction
Take your time with it, you're better off Dremeling a very small amount of material at any one time than removing too much and damaging the part. Once you get the parts oriented to your liking, you can set the pegs in place with 5 minute epoxy. 2 kits left up for grabs, all the others are now spoken for. -
This may be rather harsh and judgmental on my part, but I think that the new Optimus design is a fugly POS that, aside from the head, bears NO resemblance whatsoever to the iconic character. I really don't know why they changed his look, he was awesome in the first three films.
-
Mo-Suu-Pii-Dah Inbitoh in 1/48
captain america replied to captain america's topic in Anime or Science Fiction
Washing parts in dishsoap & water right before painting is all that's really necessary, I use a paint-friendly mold release. I'd be reticent to use any kind of harsh solvent on the resin for fear of damaging the surface. dkev: message received and I'll send you the missing parts, no sweat! Resin ordered, and I'll be contacting the members interested in more kits via PM.