captain america
-
Posts
3563 -
Joined
-
Last visited
Content Type
Profiles
Forums
Events
Gallery
Everything posted by captain america
-
It's certainly feasible to make, though I'm curious as to why you chose that oddball scale?
-

Mo-Suu-Pii-Dah Inbitoh in 1/48--Part Deux!
captain america replied to captain america's topic in Anime or Science Fiction
Guess I'll have to, since posting in the thread didn't seem to have caught much attention. -
Mo-Suu-Pii-Dah Inbitoh in 1/48--Part Deux!
captain america replied to captain america's topic in Anime or Science Fiction
I figured I'd give you guys a little teaser poster, just for fun. Enjoy!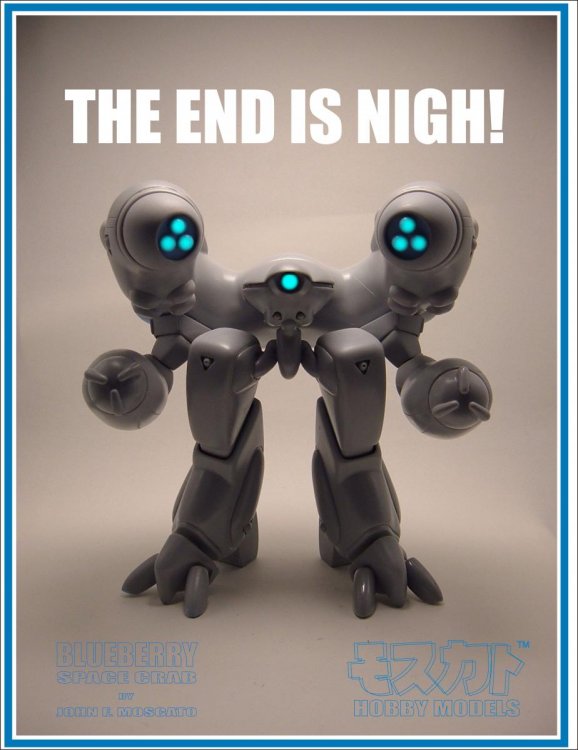
-
Mo-Suu-Pii-Dah Inbitoh in 1/48--Part Deux!
captain america replied to captain america's topic in Anime or Science Fiction
See message 203. I always measure to the highest point (top of the cannons.) You will feel its might (and heft) just as you pick up the box Also, I finally have the shipping numbers, so you'll need this to make your final payments. -Canada/USA: $30.00 USD (up to 2 kits) -International: $55.00 USD (up to 2 kits) Shipping is a tad steep, but then the kit is roughly double the weight of one of my regular kits. For anything else, my PM box is open -
Mo-Suu-Pii-Dah Inbitoh in 1/48--Part Deux!
captain america replied to captain america's topic in Anime or Science Fiction
That'll have to wait. I'm cutting things very close with mold life and orders. Time will tell. -
Mo-Suu-Pii-Dah Inbitoh in 1/48--Part Deux!
captain america replied to captain america's topic in Anime or Science Fiction
My Pinky is packed away, but the Blueberry model is about 17-17.5cm tall at the highest point, depending on if you pose the chest/cannons up or down. -
Mo-Suu-Pii-Dah Inbitoh in 1/48--Part Deux!
captain america replied to captain america's topic in Anime or Science Fiction
Un. Limited. POWERRRRRRR!!!!!!! Casting is almost 1/3 done. Wil have a shipping quote for you guys Monday or Tuesday. Stay tuned!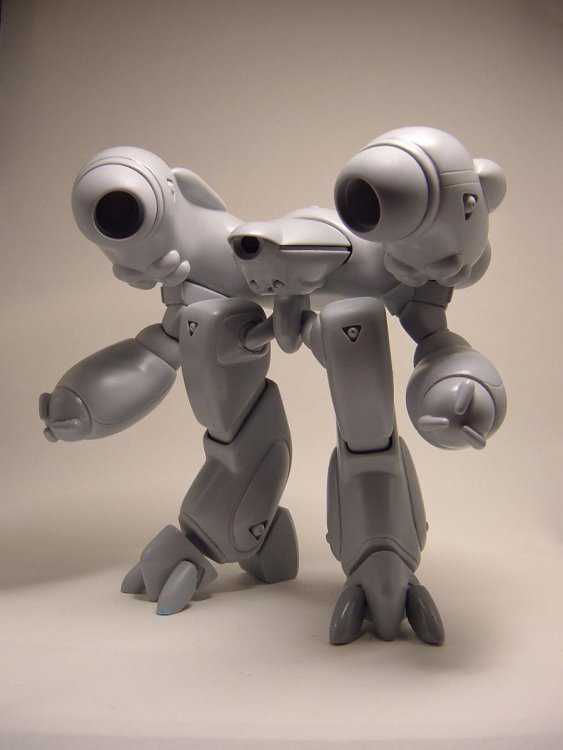
-
Mo-Suu-Pii-Dah Inbitoh in 1/48--Part Deux!
captain america replied to captain america's topic in Anime or Science Fiction
Yes, as well as clear beam gun nozzles. -
Mo-Suu-Pii-Dah Inbitoh in 1/48--Part Deux!
captain america replied to captain america's topic in Anime or Science Fiction
Partially hollow. Just took a Dremel to certain areas. -
Mo-Suu-Pii-Dah Inbitoh in 1/48--Part Deux!
captain america replied to captain america's topic in Anime or Science Fiction
Molds are done, initial castings successful! Over 1lb (620ml) of resin in each crab!!!


-
I thought that it was actually a very clever allegory on what's happening in real life.
-
Why is Godzilla so big?
-
Mo-Suu-Pii-Dah Inbitoh in 1/48--Part Deux!
captain america replied to captain america's topic in Anime or Science Fiction
...And despite my silence, rest assured that I'm working diligently on the molds, which are coming along nicely. Should have first castings by week's end. -
Mo-Suu-Pii-Dah Inbitoh in 1/48
captain america replied to captain america's topic in Anime or Science Fiction
Looking good, Exo! Are you planning to put joints in the lower body as well? -
Mo-Suu-Pii-Dah Inbitoh in 1/48--Part Deux!
captain america replied to captain america's topic in Anime or Science Fiction
In all honesty, it's one of those designs that looks awesome, but is horribly impractical. I don't think that it will need additional supports to stand and I will cast the entire crotch section as a single piece for maximum strength. The croissant has been partially hollowed-out for weight savings. -
Mo-Suu-Pii-Dah Inbitoh in 1/48--Part Deux!
captain america replied to captain america's topic in Anime or Science Fiction
Sadly, they do not. I felt that it wouldn't be right to add insult to injury, what with his claws being almost comical and tiny compared to the "well-endowed" Gurab. -
Mo-Suu-Pii-Dah Inbitoh in 1/48--Part Deux!
captain america replied to captain america's topic in Anime or Science Fiction
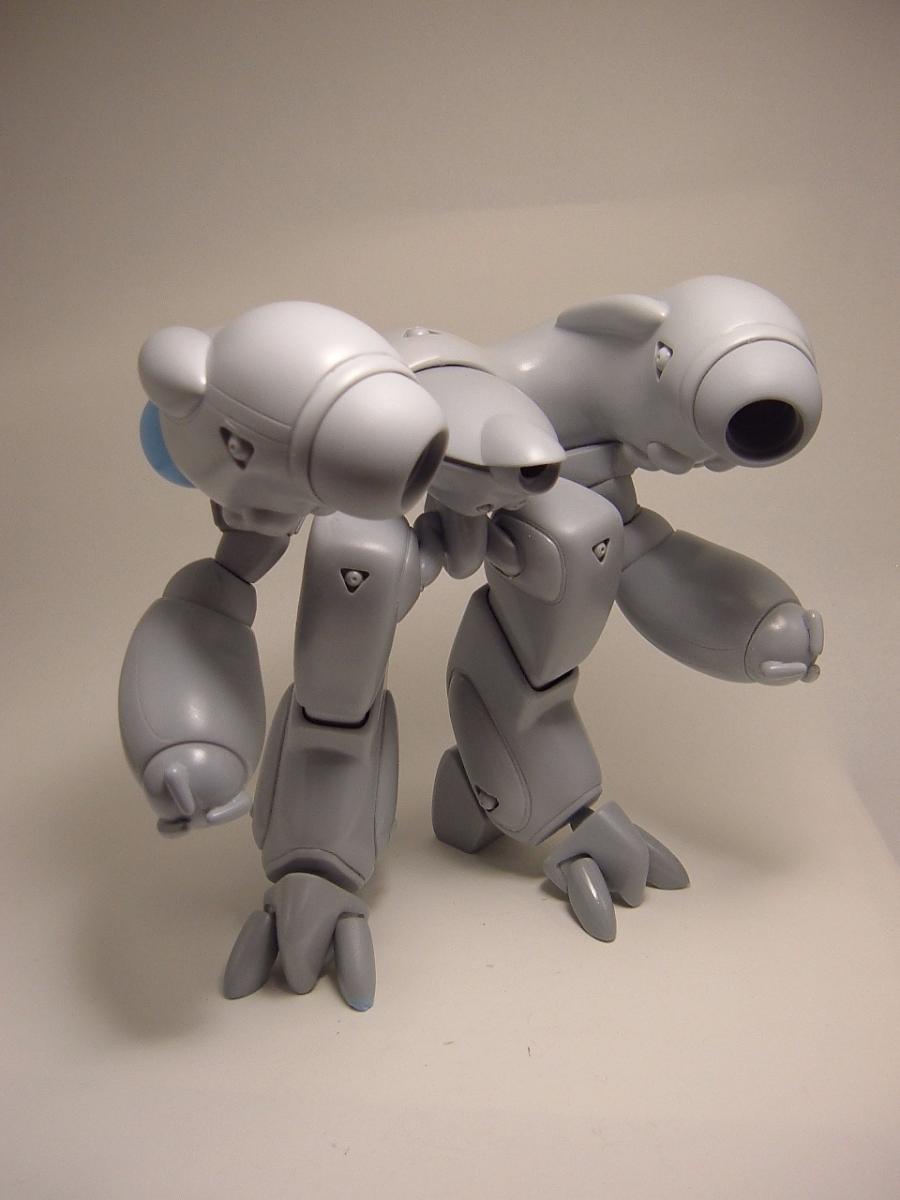
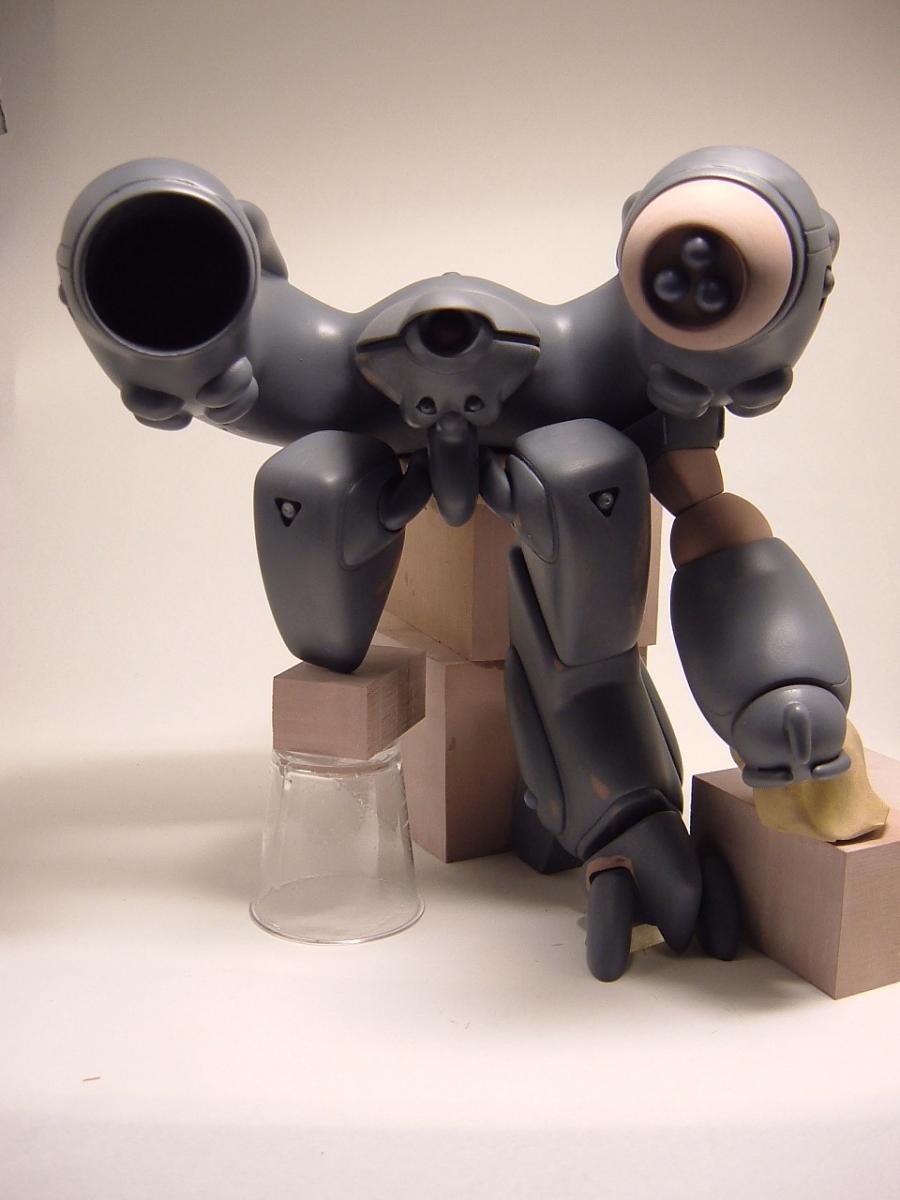
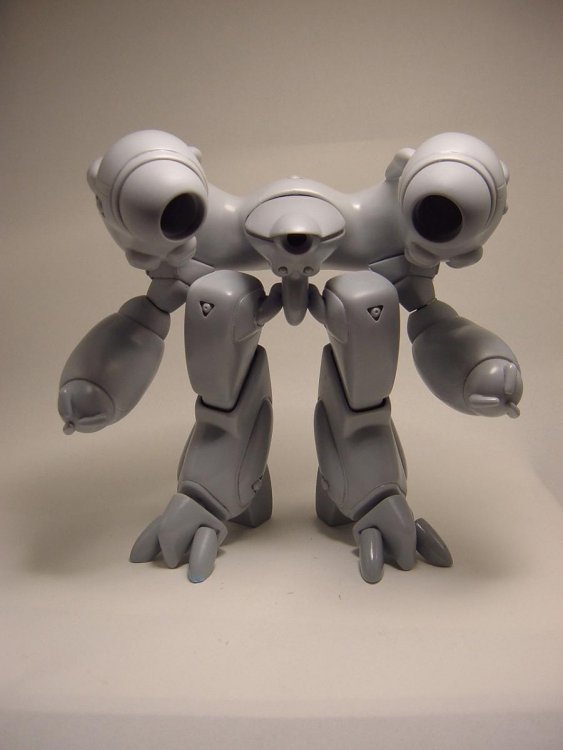
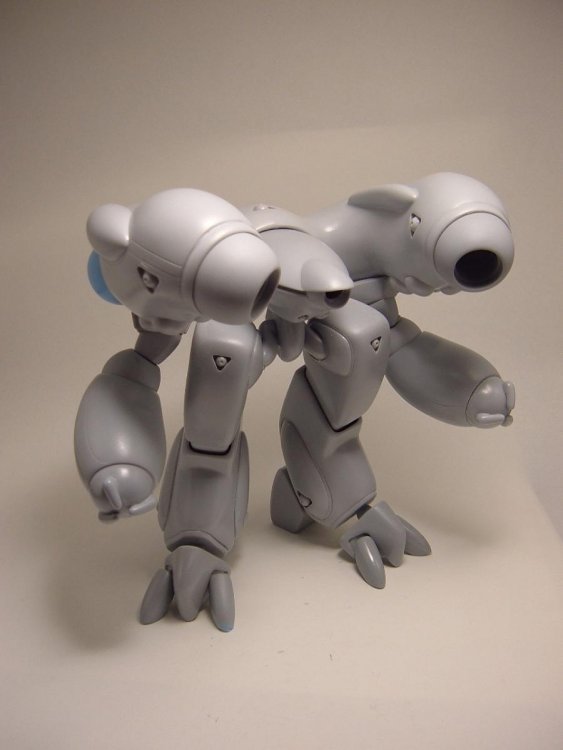
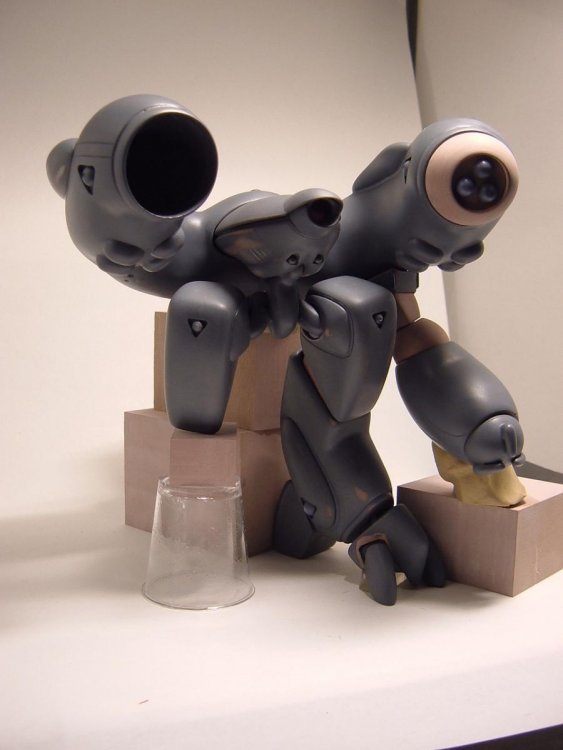
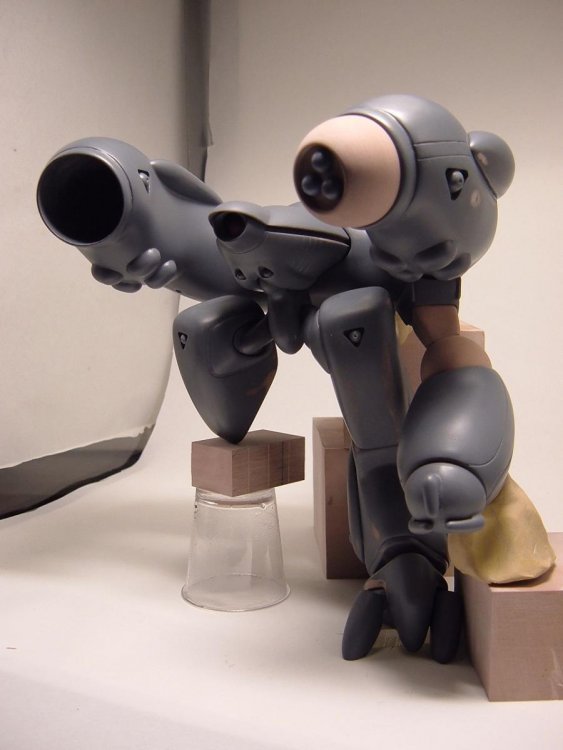
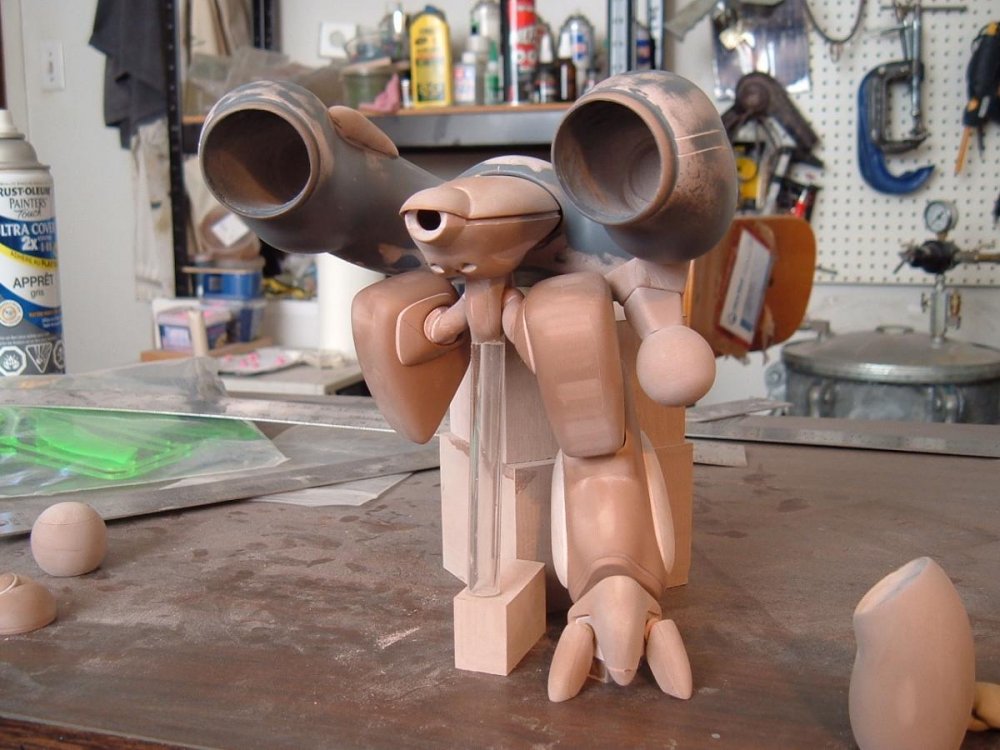
Masters are done! Sorry about the poor pose, the model is very top-heavy and difficult to adjust without brass pins and glue. That said, it's very massive, intimidating and uh... Crabby!

-
Mo-Suu-Pii-Dah Inbitoh in 1/48--Part Deux!
captain america replied to captain america's topic in Anime or Science Fiction
That's exactly what I do. -
Mo-Suu-Pii-Dah Inbitoh in 1/48--Part Deux!
captain america replied to captain america's topic in Anime or Science Fiction
I might very well just create a website where I'll list my current kits and re-issue popular subjects as needed. That way fans can feed their addiction Boo-Berry Crabs almost complete... -
Mo-Suu-Pii-Dah Inbitoh in 1/48--Part Deux!
captain america replied to captain america's topic in Anime or Science Fiction
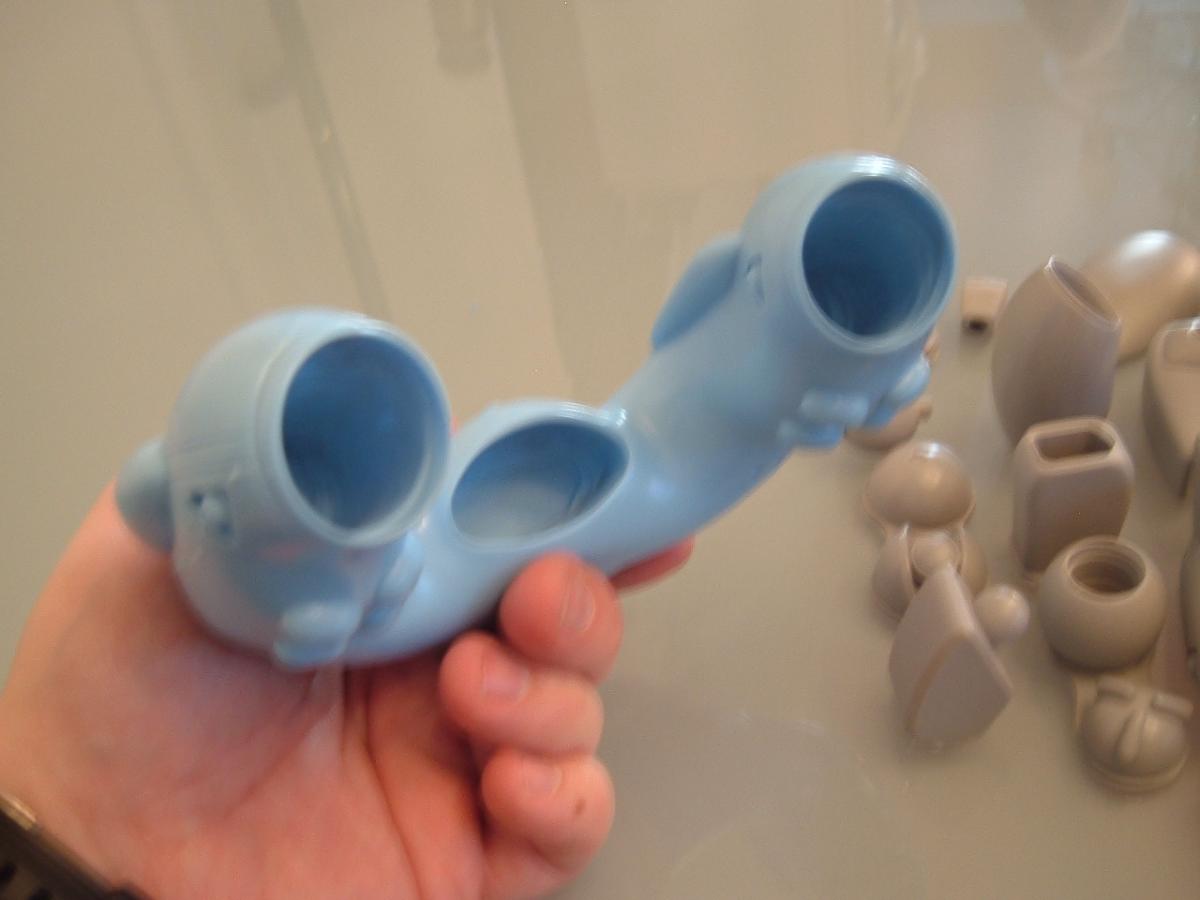
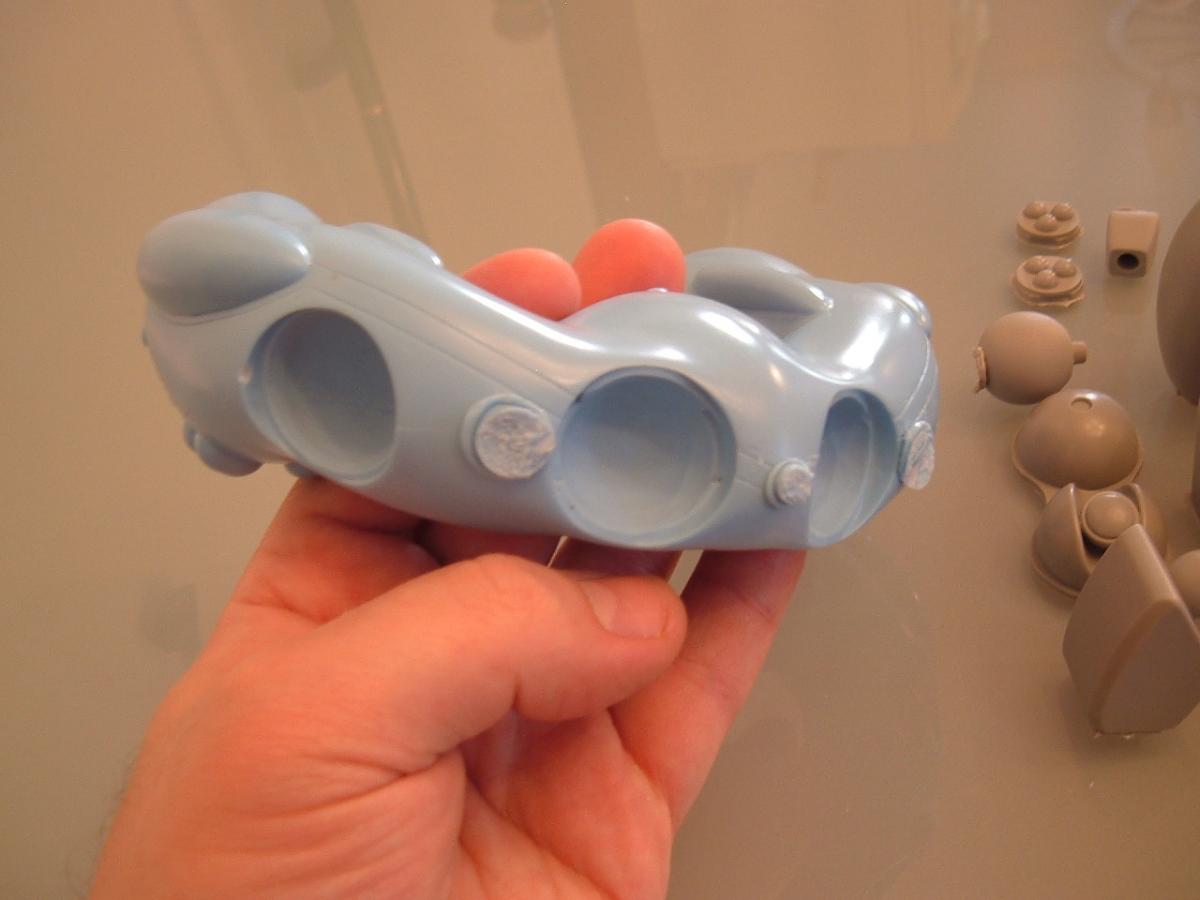
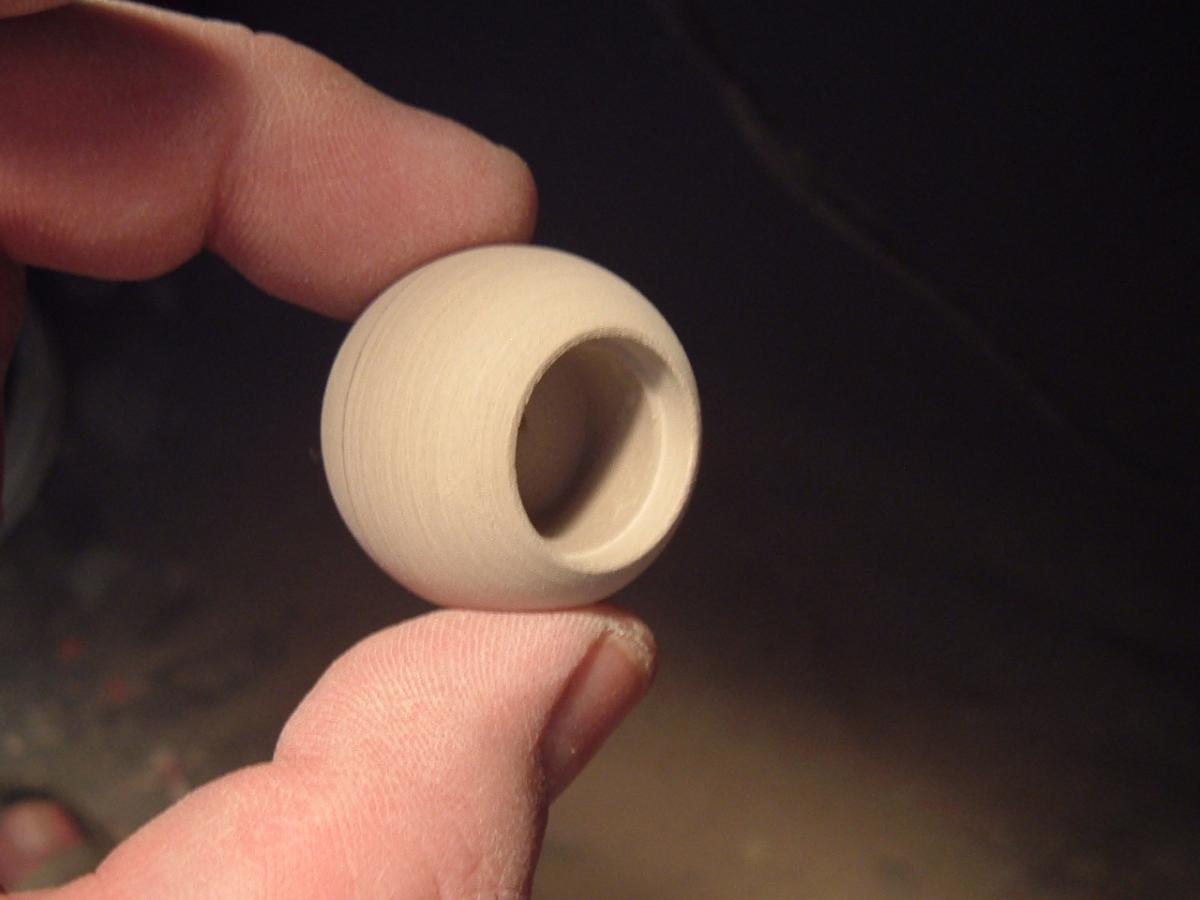
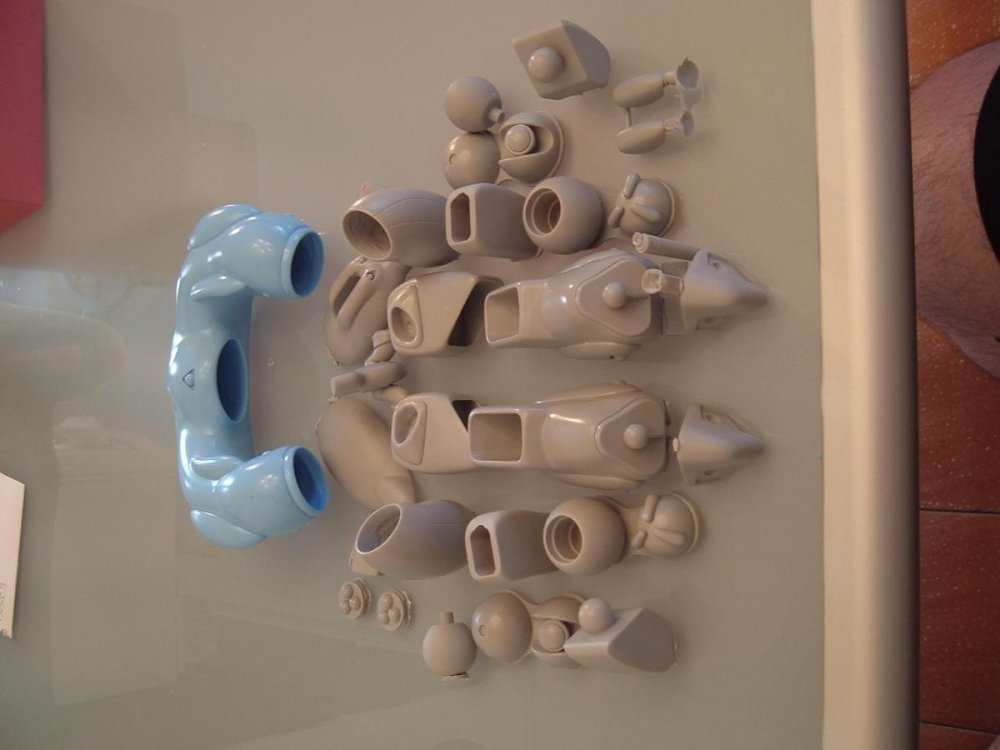
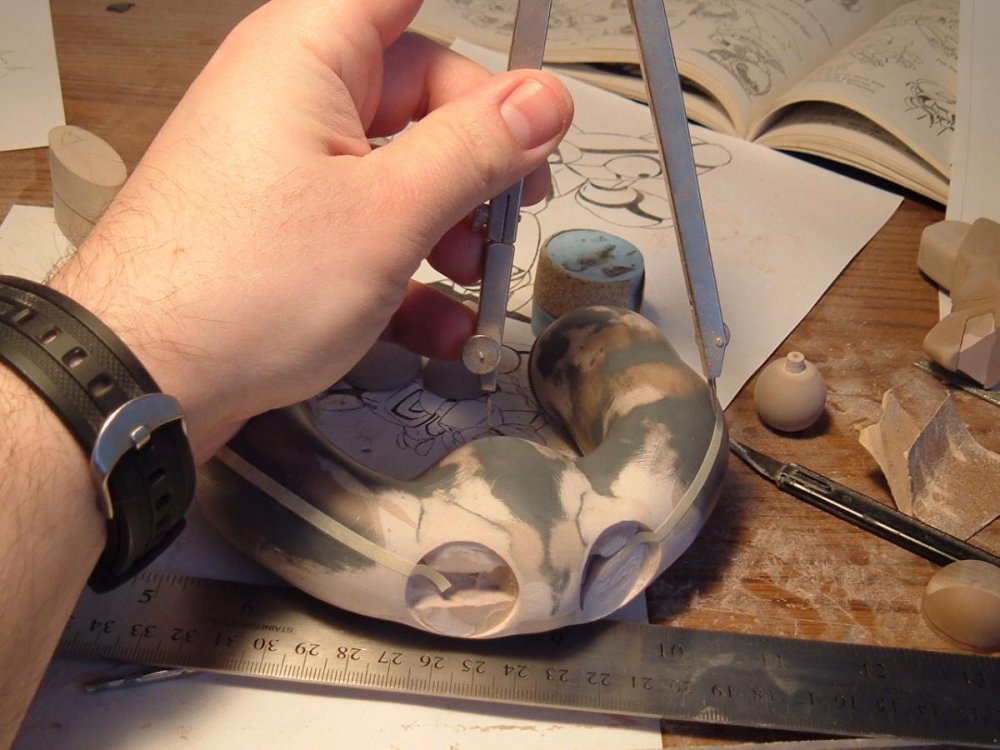
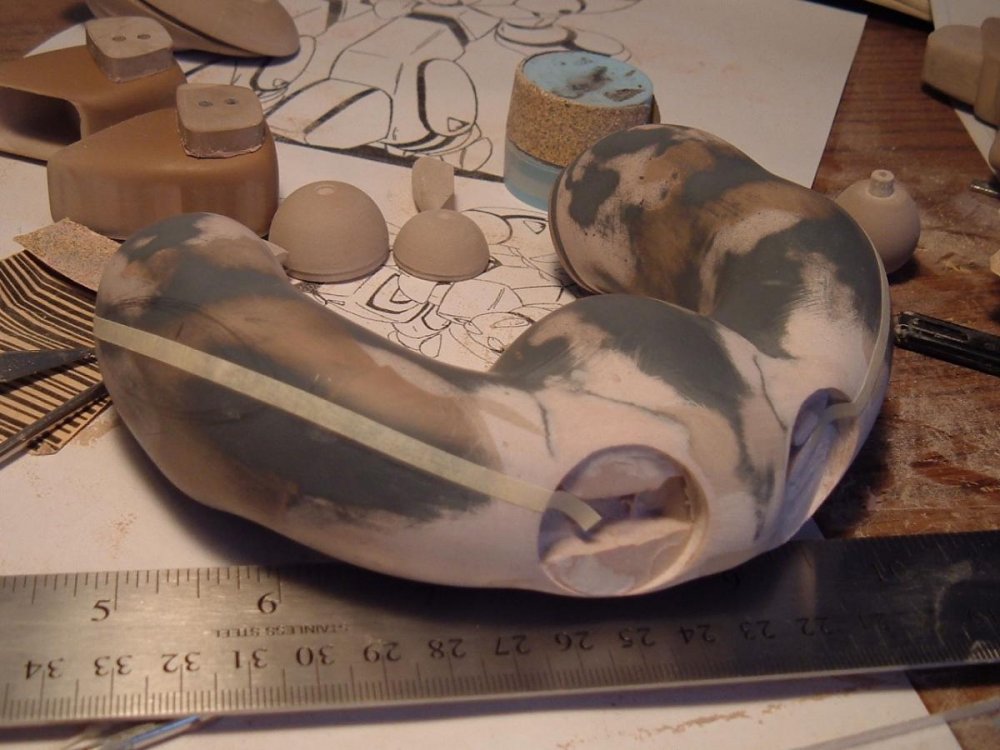
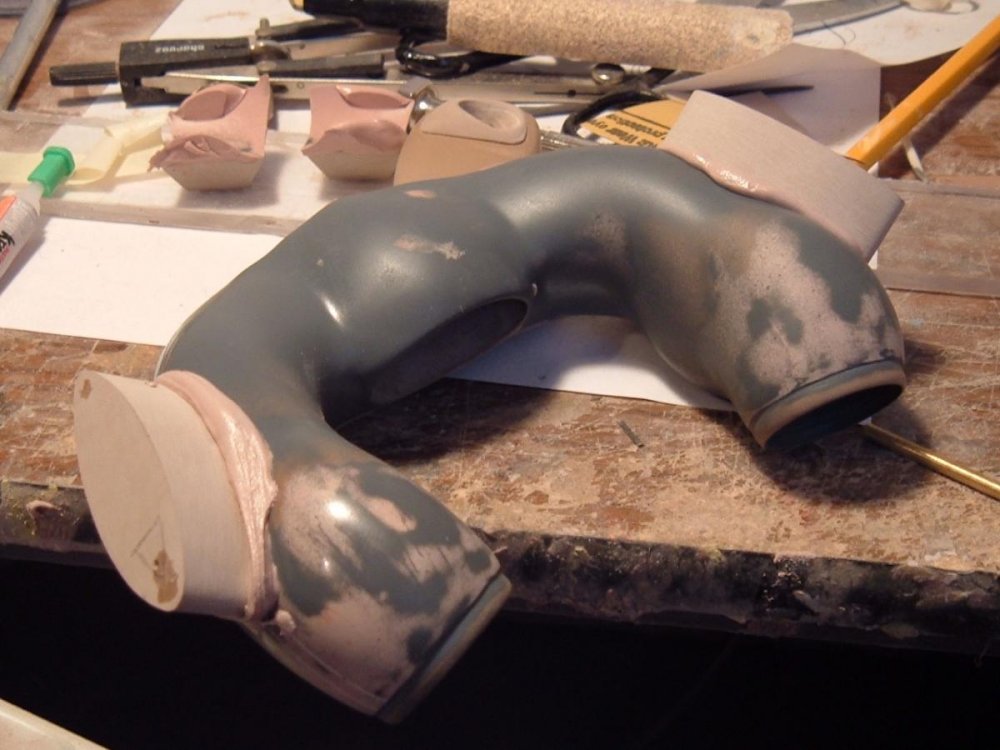
Captain's log, April second. Things are finally coming together on the model after many weeks, and it's looking Gamo-licious! Pic 4939 shows the main body hulls in a semi-finished stage. This part varies so greatly from one illustration to the other that it really left me frustrated for the longest time. Thankfully, a little bit of intuitive Dremeling and sanding took care of that. 4940: this part will become the white "jellybean" on the outside of the beam croissant horns. I need to sculpt two units in mirror symmetry, hence the use of a thick block. 4941 and 4942: owing to the beam croissant's very organic shape, scribing lines into it is a bit of a challenge to say the least. I opted to use some tape as a guide, which follows along some carefully-plotted guide marks so as to ensure that the lines are symmetrical on both sides. Naturally, this would have been nearly impossible had I not maintained my reference points on the sculpt. 4943: once the cross-section of the jellybean parts is optimized ans sliced in two, some more calculations are made to get the positioning just right. After that, I smush the part onto the croissant with putty to get a seamless fit. In the initial stages of curing, the polyester putty becomes rubbery and easy to carve with a knife, so I take advantage of that to remove much of the excess. 4944: the lower leg and foot assembly. I added some ball/socket joints to the design for more precise poseability. It still maintains the right look, and incorporates a little bit of artistic flair. 4945-4950: now that's what I call a severe case of blueberry crabs!! The kit is just about 7" tall, quite massive, and so much nicer than I was expecting it to be. It will also be extremely top-heavy too, so you'll definitely want to invest in some brass rod to pin this kit when you build it. Stay tuned for my next update, since the masters will be finished by then.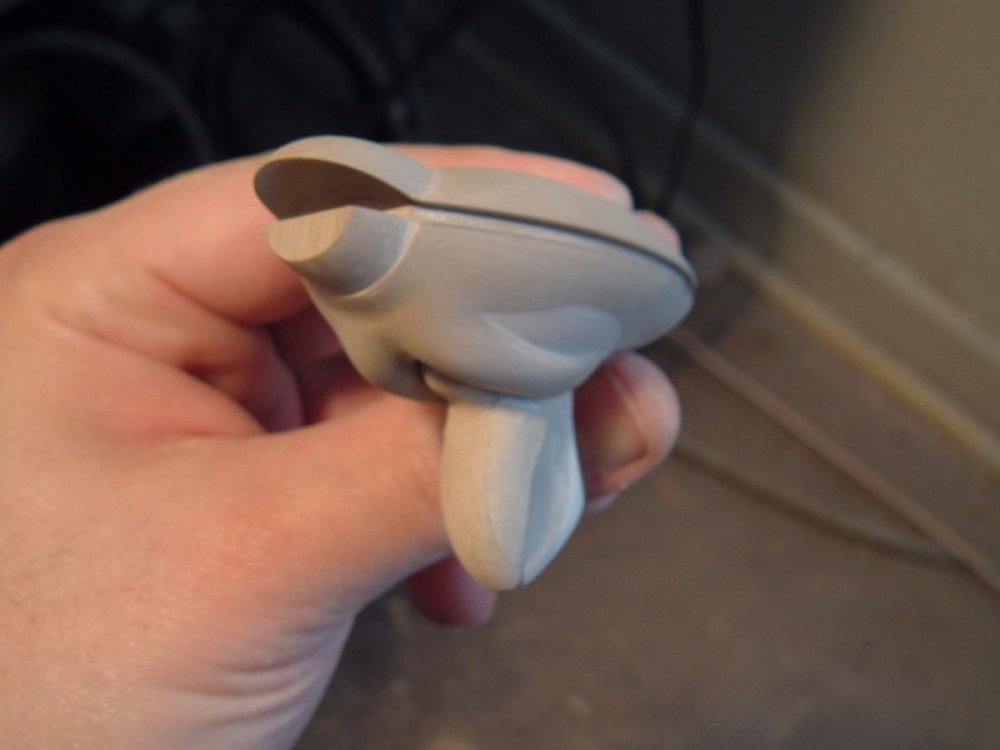


-
1/350 Scale thread... Mospeada, Southern Cross and more!
captain america replied to EXO's topic in Anime or Science Fiction
That thing looks so beautiful that I think it lowers my blood pressure to stare at it. Modeling really is theraputic! -
Mo-Suu-Pii-Dah Inbitoh in 1/48--Part Deux!
captain america replied to captain america's topic in Anime or Science Fiction
No worries, those pictures are staged after the actual work is done and the machine in question turned off. Gotta give me a little credit -
Mo-Suu-Pii-Dah Inbitoh in 1/48--Part Deux!
captain america replied to captain america's topic in Anime or Science Fiction
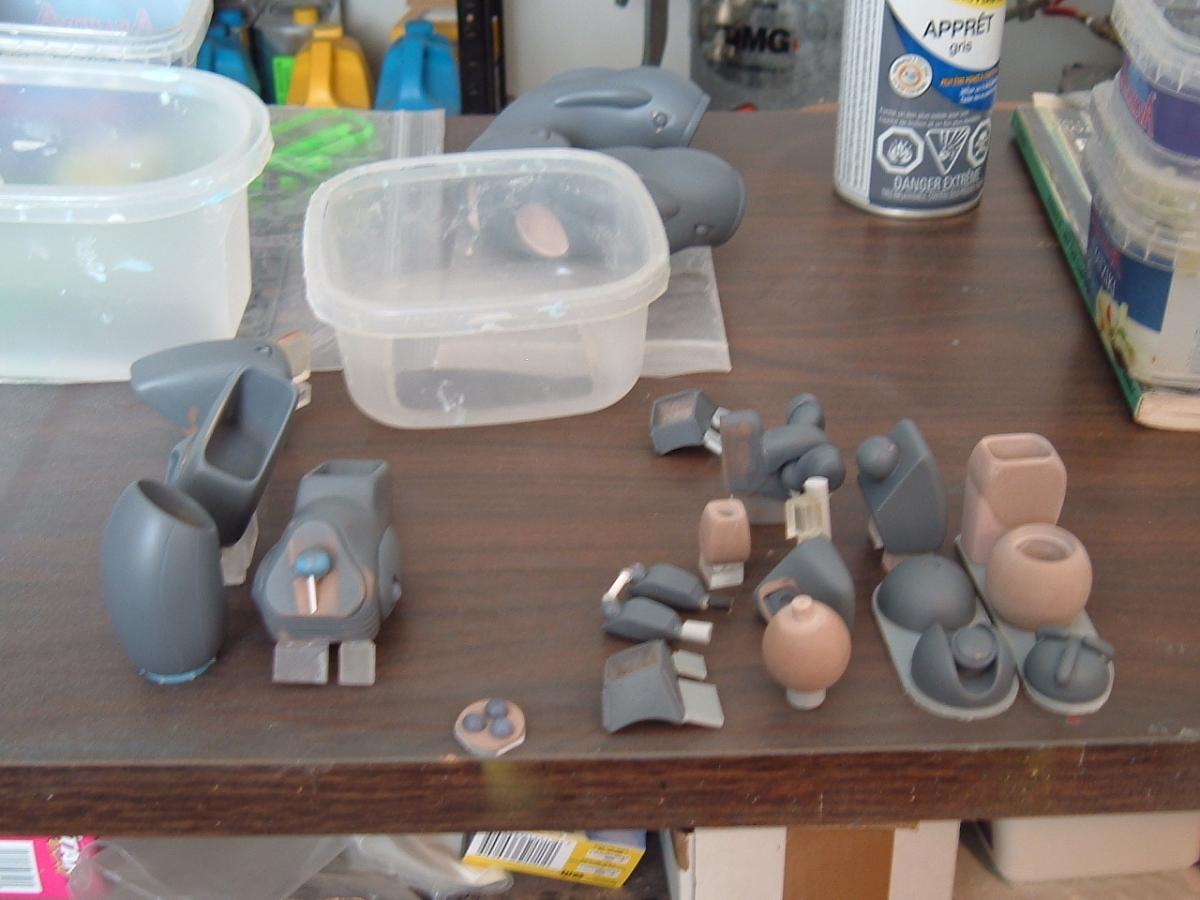
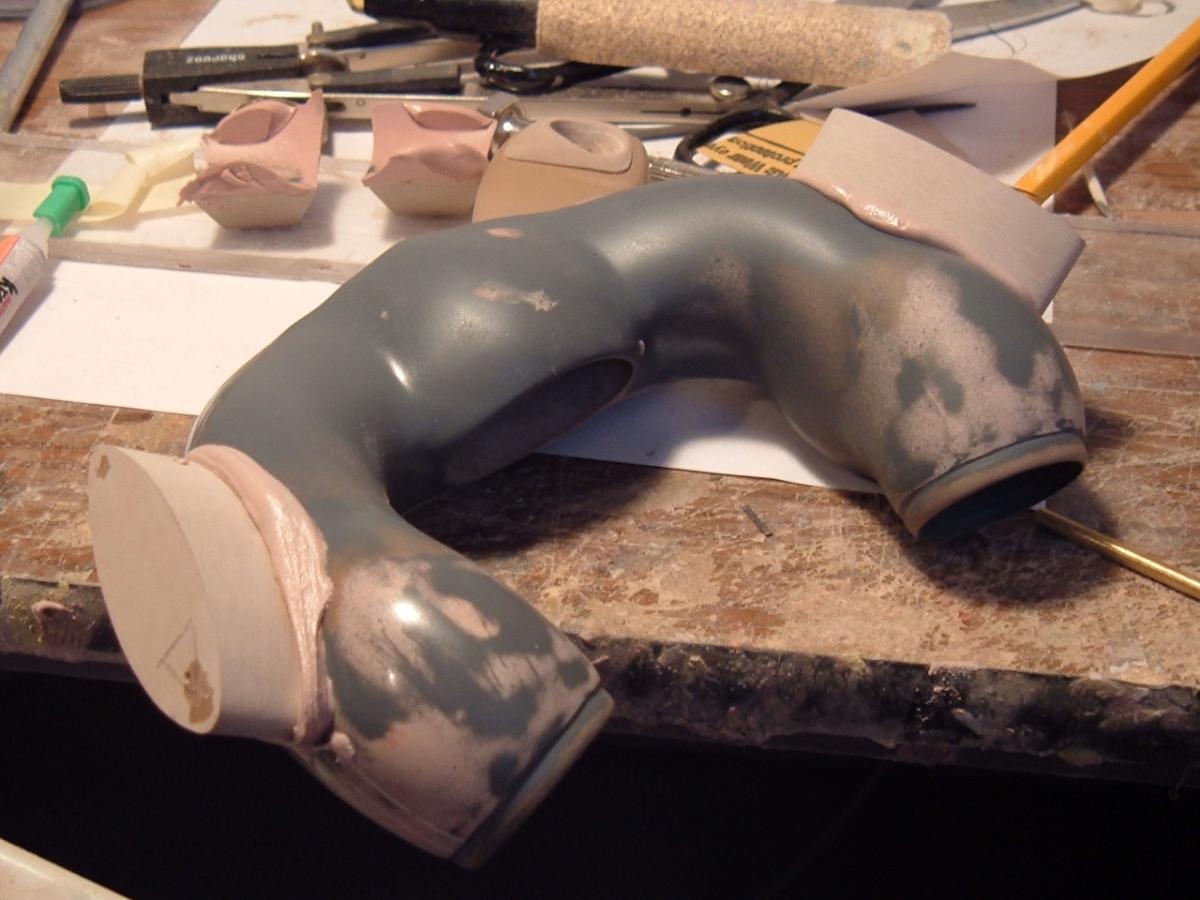
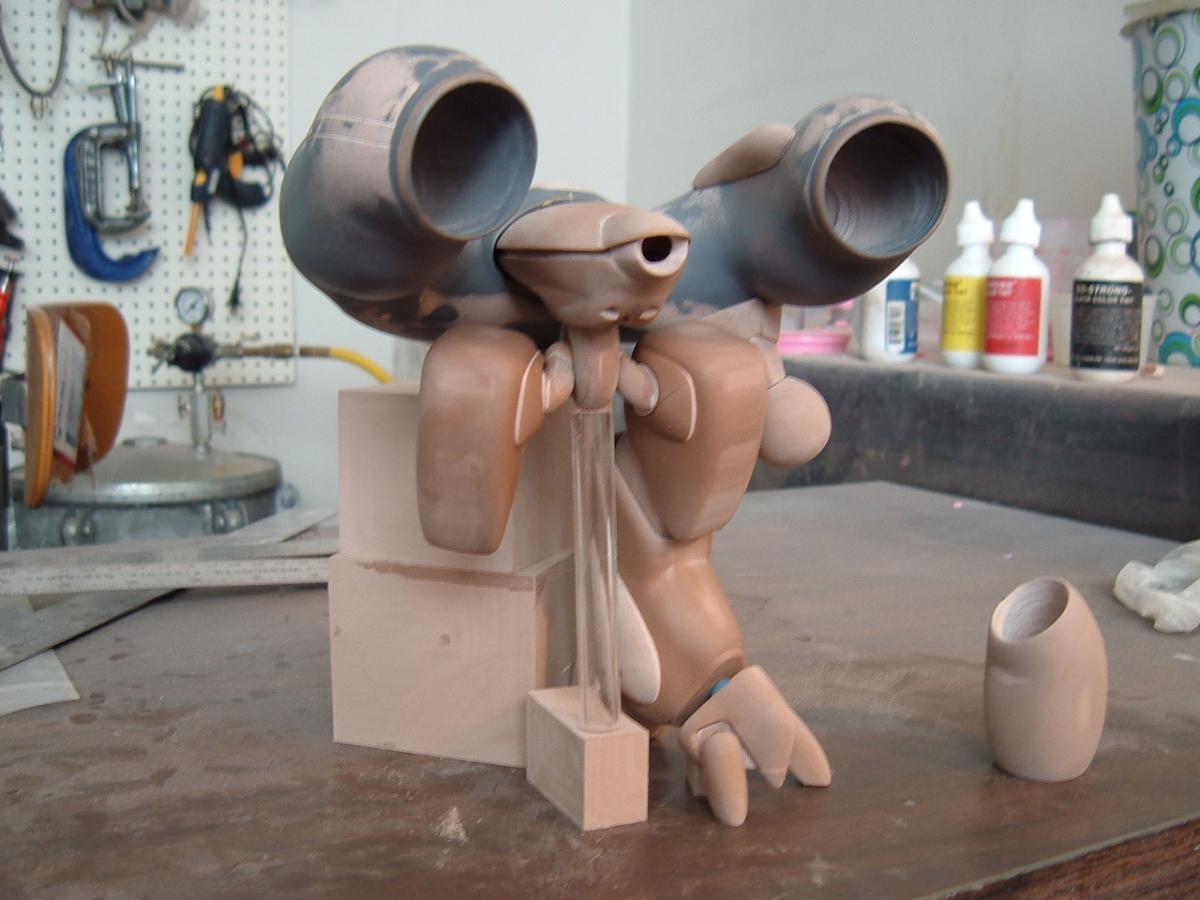
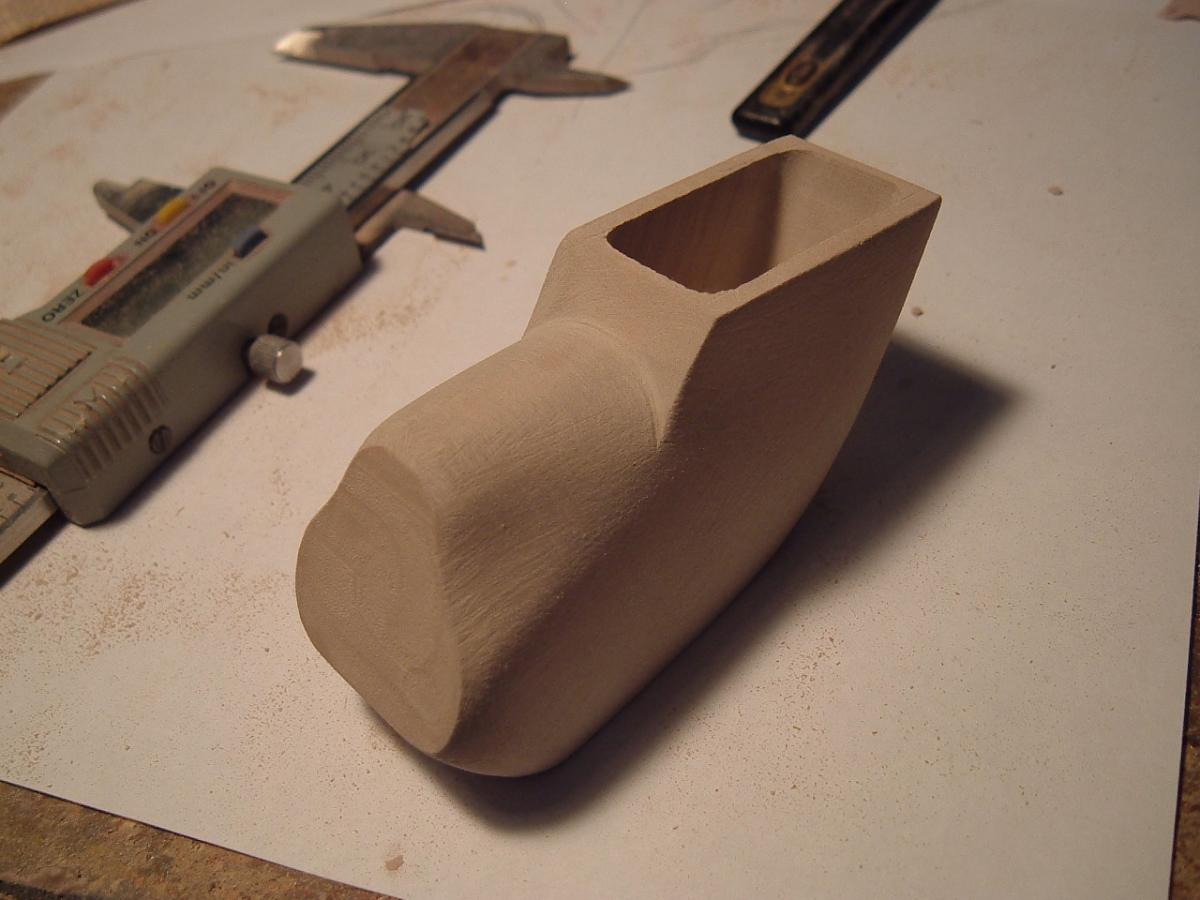
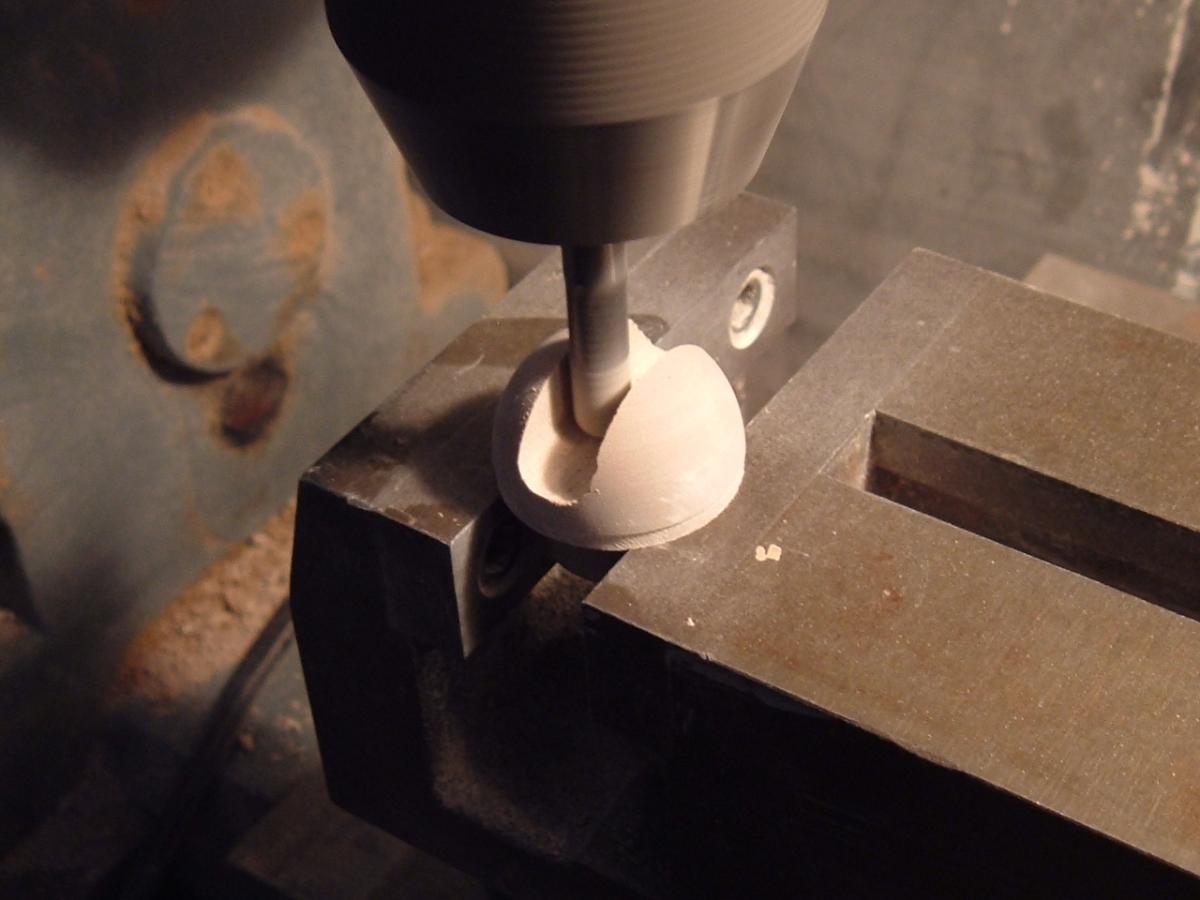
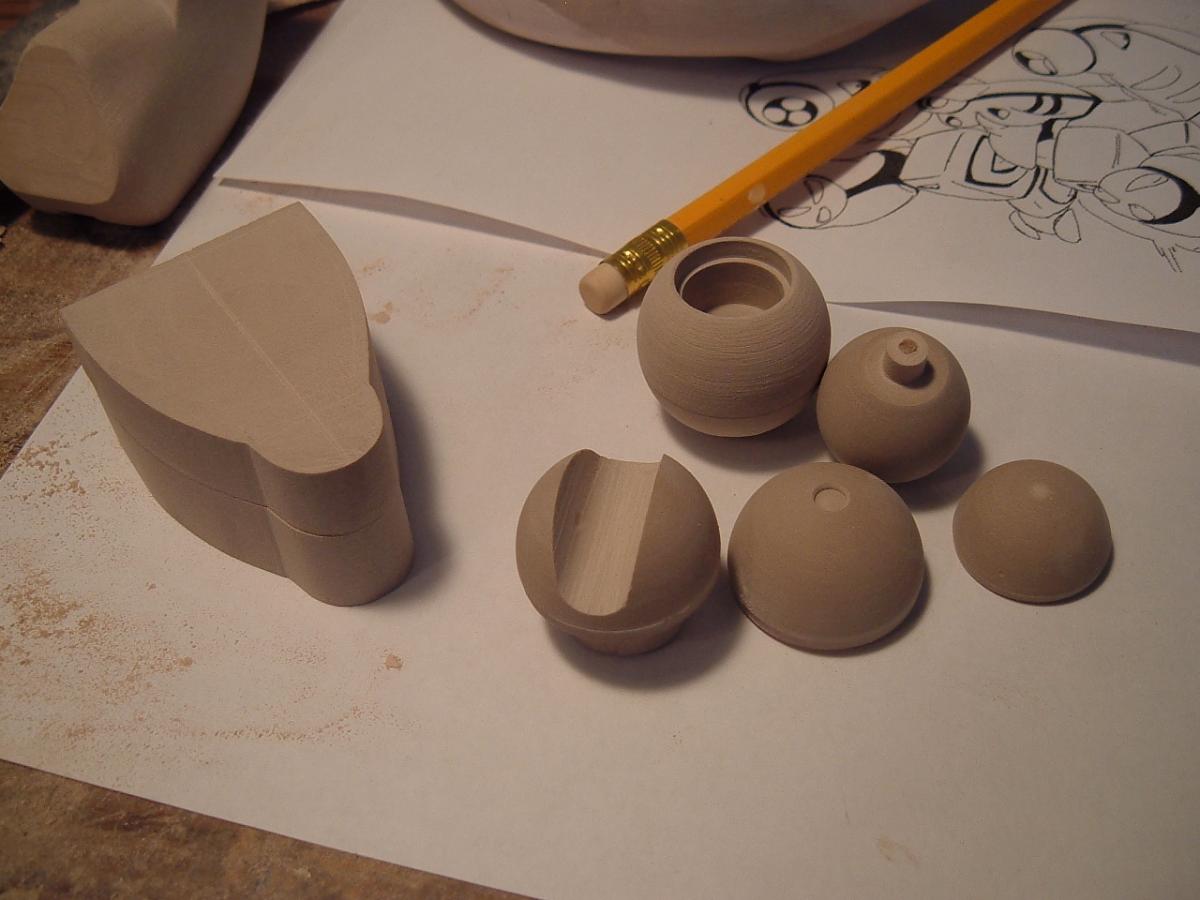
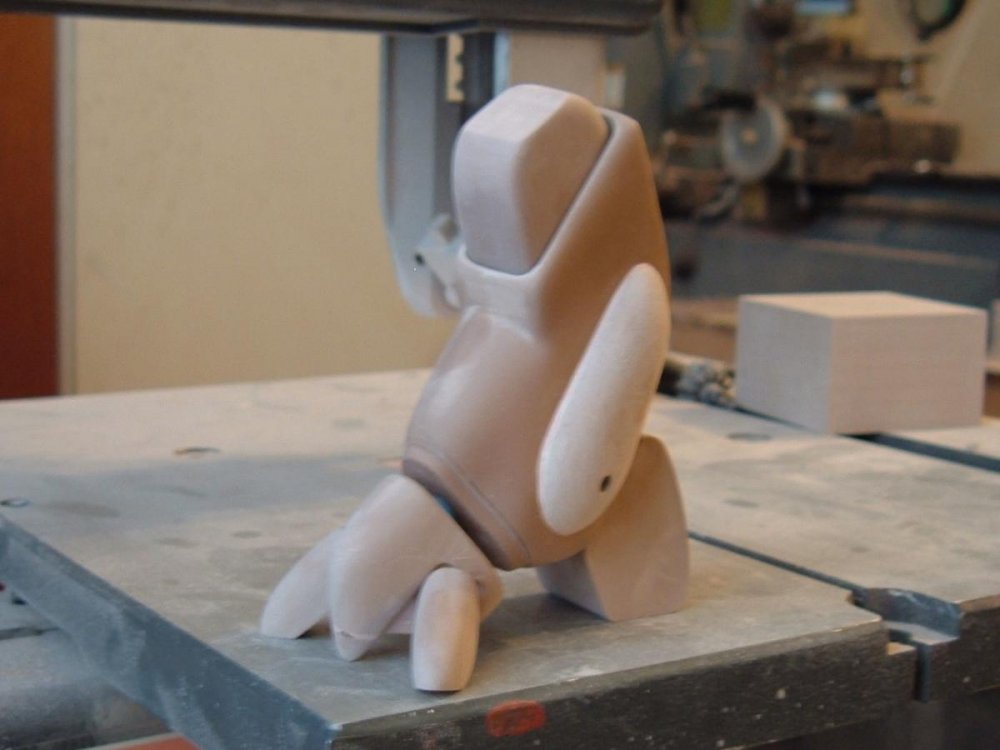
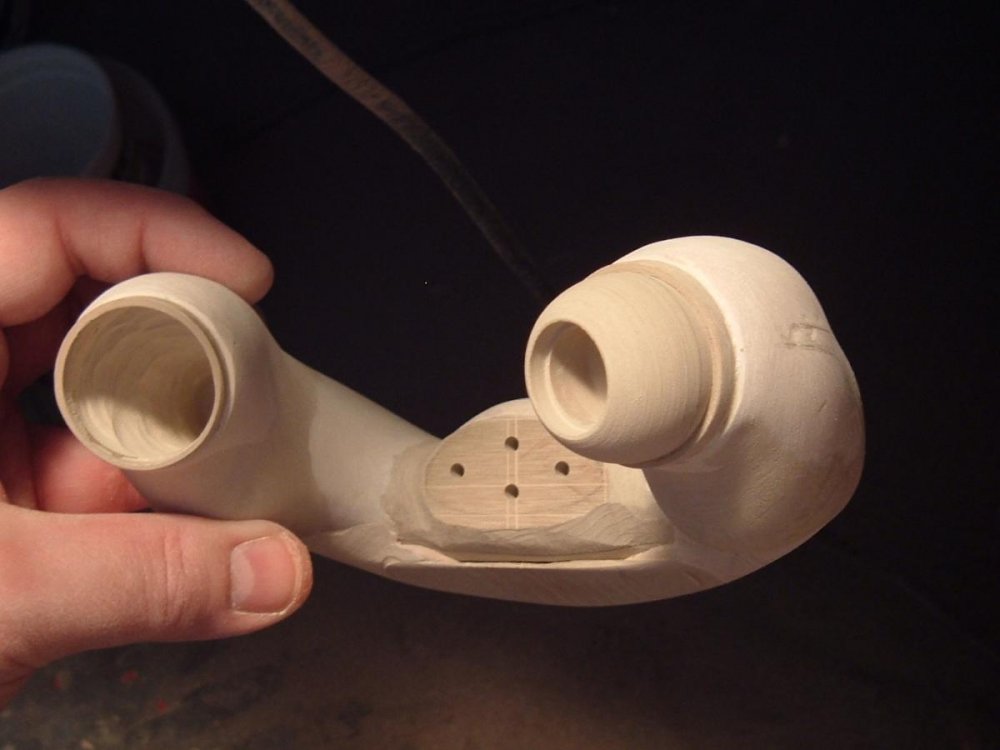
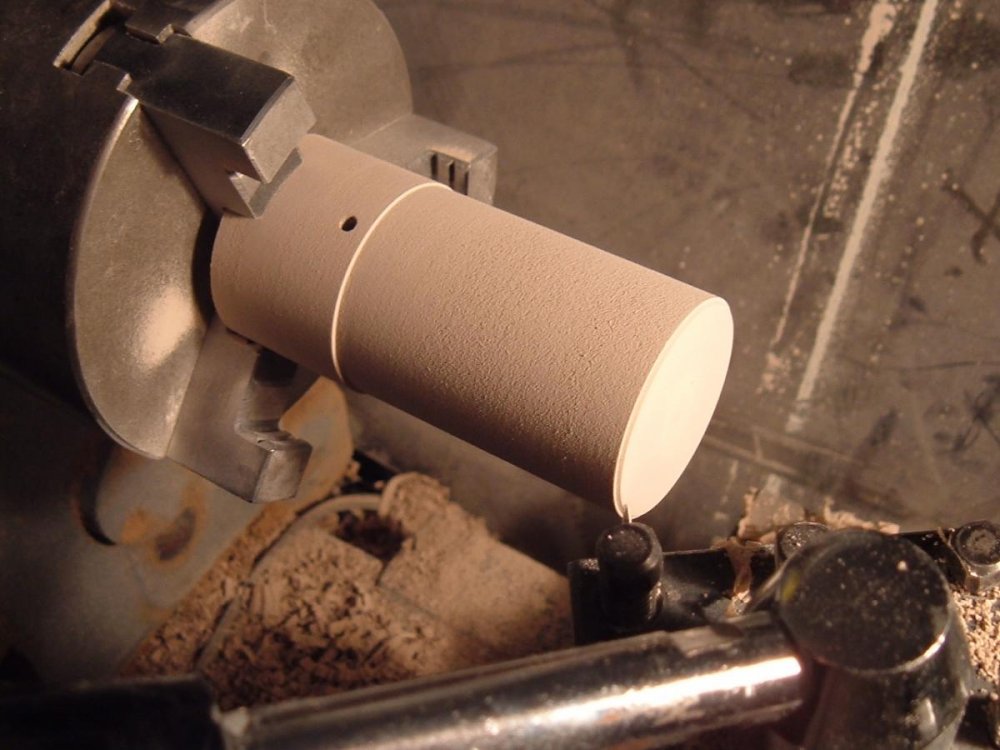
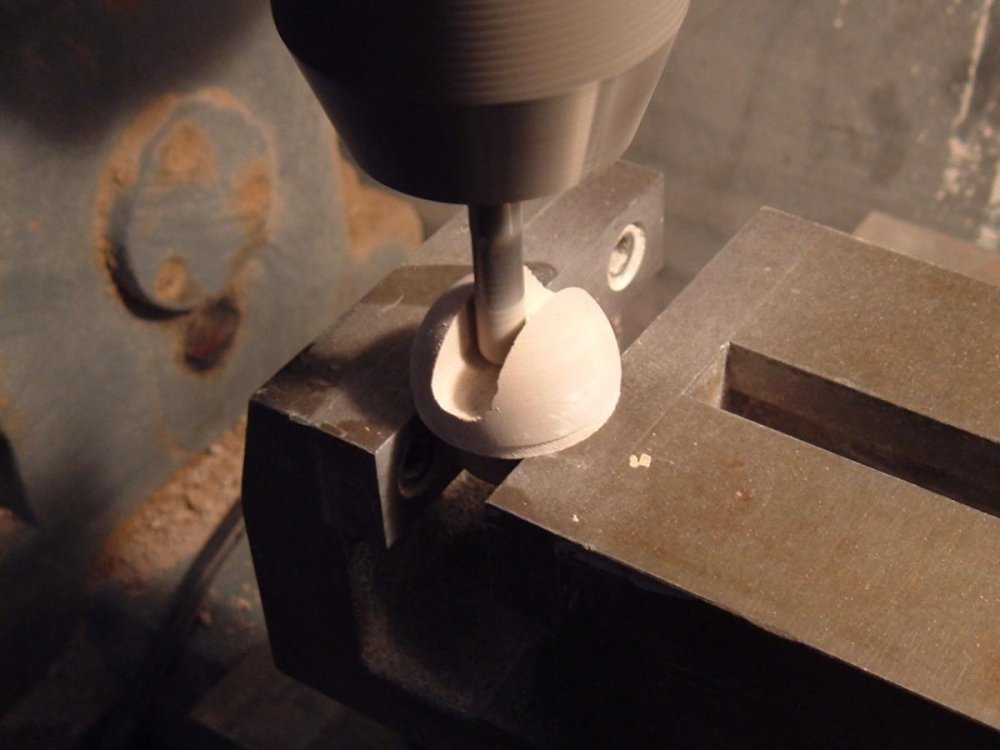
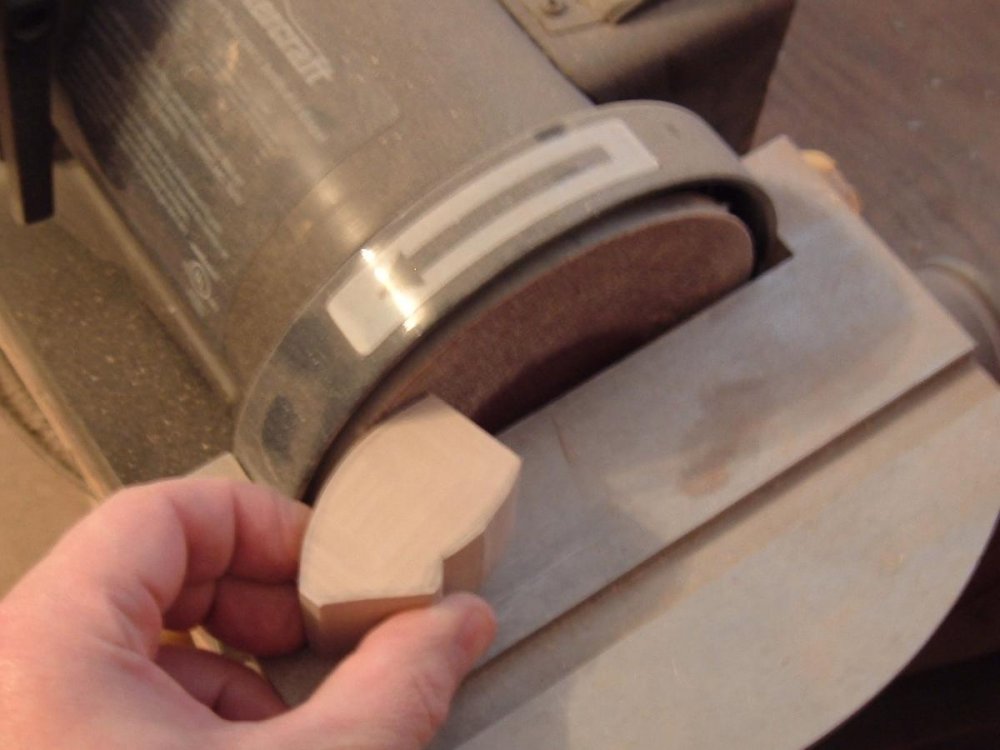
Captain's log: March 26. Wednesday (also BBQ chicken day) As a continuation of my previous update, allow me to jump in right where I left off last time. Pic 4927: the lower leg, which has been milled and shaped on the belt-sander is now being refined with coarse sandpaper. 4928 and 4929: the beam gun croissant, now much further into the shaping stage. As I mentioned previously, the beam "eyeballs" will be separate, free-pose, and may be back-lit if desired. The beam nozzle will be molded translucent, just like the eyeball. 4931: a close-up of the beam gun eyeball. 4932: I tend to jump back and forth a lot, simply because there are so many operations needed, and never in the same sequence. Here I'm turning a block of Ren Shape for what will become the aft thrusters, as well as "Backward Facing Boobies" as seen in the Anime style sheets. I have no idea what they actually do, and I hapen to think that BFB sounds way cooler. 4933: the aft thruster nozzle housing being machined. I had to leave some material attached to the bottom side in order for the vise to hold the part securely. This will be chopped-off later. 4934: holy balls! At right (starting from the top and proceeding clockwise) the beam gun housing, the elbow, the claw palm, BFB, and the aft thruster. The pieces on the left are what will become the main shell top and bottom. 4935: the forearm in an early, rough stage. I'm using the disc sander to get the cross-section to my liking, after which I will proceed to round it out with the Dremel. That's all for now, but next week's update will show a crude mock-up of the standing Gamo. Big AND impressive… Stay tuned!


-
Mo-Suu-Pii-Dah Inbitoh in 1/48--Part Deux!
captain america replied to captain america's topic in Anime or Science Fiction
That would just take more time. Gotta remember that I'm not working from predictable & consistent technical diagrams, so what I see in one view is contradicted by two others, so there is much back & forth going on in an attempt to harmonize disparities. Also, there's no conclusive proof that I ever know what I'm doing. PetarB: J'aimerais un croissant au crabe avec un café aux faisceaux laser. <--Just my opinion here, but that's heartburn waiting to happen! -
Mo-Suu-Pii-Dah Inbitoh in 1/48--Part Deux!
captain america replied to captain america's topic in Anime or Science Fiction
I'd say about 70-75, the greatest amount being to shape the beam gun croissant.