captain america
-
Posts
3561 -
Joined
-
Last visited
Content Type
Profiles
Forums
Events
Gallery
Everything posted by captain america
-

Mo-Suu-Pii-Dah Goh-Suu in 1/48
captain america replied to captain america's topic in Anime or Science Fiction
Hi guys, I've been grinding away on the masters and will have a first update ready tomorrow or Friday. Keep those payments coming -
Mo-Suu-Pii-Dah Goh-Suu in 1/48
captain america replied to captain america's topic in Anime or Science Fiction
Okay guys, today is the official kick-off for the Goh-Suu project so I'll be contacting you via PM with the shipping fee, etc., which is technically the same as for the Blueberry. I may or may not have already started chopping modeling board -
Who's George?
-
That's certainly an idea.
-
Mo-Suu-Pii-Dah Goh-Suu in 1/48
captain america replied to captain america's topic in Anime or Science Fiction
Sure thing, just send me a PM. I will start shaking people down for moolah this coming Friday as I kick-off the project. Prepare your wallets accordingly -
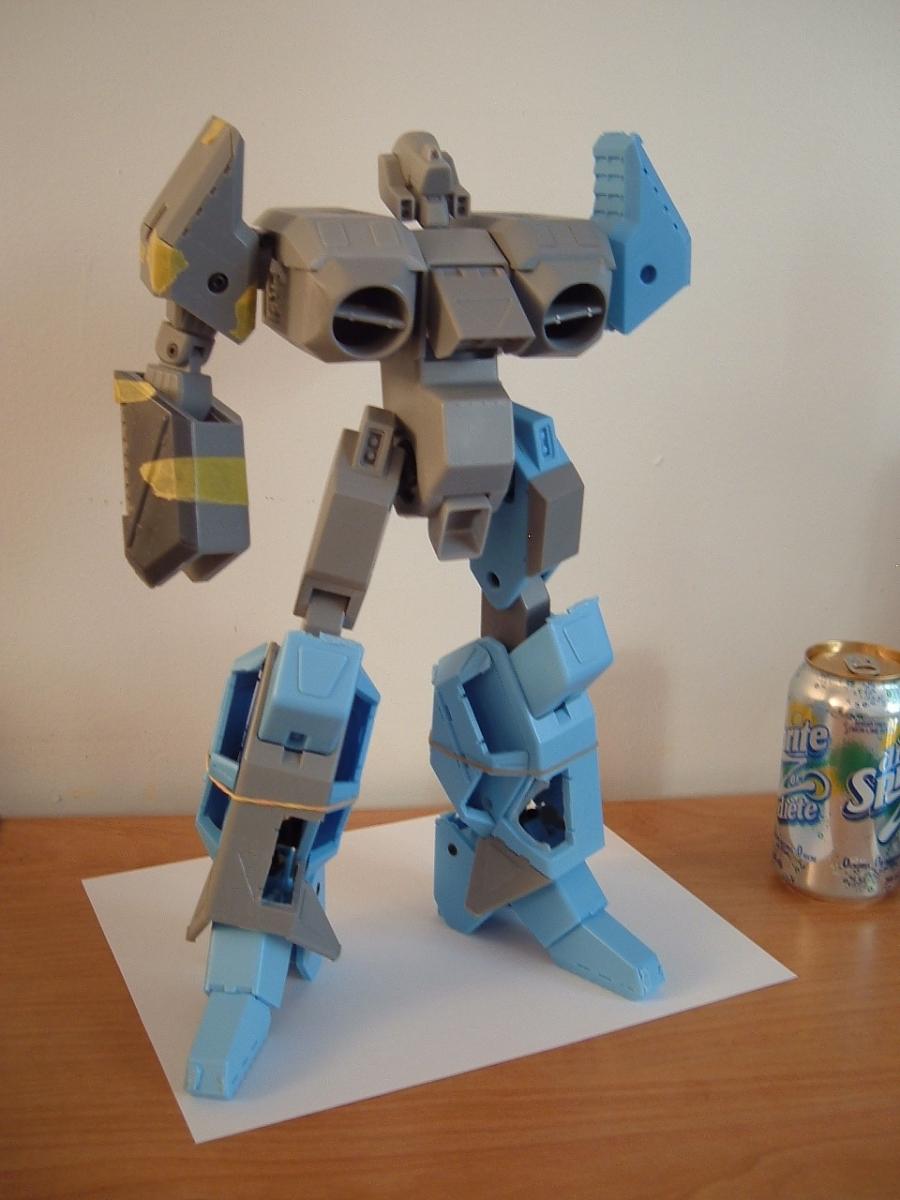
Production went about in stages from late 2010 all through 2011. I had re-worked and added details that weren't there in the original 2001 sculpt, new composite joints, the whole 9 yards! Best. Legioss. Evar!


-
1/10-1/12 Scale Inbit regular purple guy
captain america replied to mslz22's topic in Anime or Science Fiction
Now THAT... Is a major case of crabs!! -
Mo-Suu-Pii-Dah Goh-Suu in 1/48
captain america replied to captain america's topic in Anime or Science Fiction
Sooo I had a bit of time today to work on some preliminary chicken scratchings...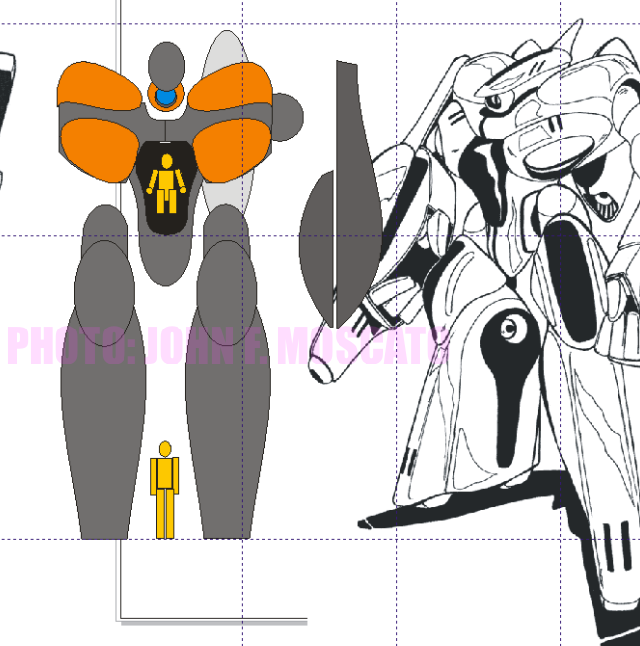
-
I like that blue, but more for an Eta Legioss. For a Gamo I tend to think that a more subdued blue (mixed with a bit of grey and just a drop of green) would be ideal, but that's me.
-
Mo-Suu-Pii-Dah Goh-Suu in 1/48
captain america replied to captain america's topic in Anime or Science Fiction
The door is open, come on in! -
Mo-Suu-Pii-Dah Goh-Suu in 1/48
captain america replied to captain america's topic in Anime or Science Fiction
Oh, most definitely! I'm sticking to my plan to commence operations August 1st. -
Mo-Suu-Pii-Dah Goh-Suu in 1/48
captain america replied to captain america's topic in Anime or Science Fiction
It always depends on the specific mold. I usually limit castings to about 30 per mold for quality purposes, even though I know that they can produce more castings. The Gamo molds were really exceptional in that they survived for 40+ good castings. Smooth-On has definitely improved their rubber, and this combined with a new secret technique of mine helps to extend mold life. The 30 kit threshold is also the minimum limit which allows a new project to break-even. -
Mo-Suu-Pii-Dah Goh-Suu in 1/48
captain america replied to captain america's topic in Anime or Science Fiction
25 orders in such a short time. Should be well-booked by August 1st -
Mo-Suu-Pii-Dah Goh-Suu in 1/48
captain america replied to captain america's topic in Anime or Science Fiction
I'm thinking August 1st so as to give people a bit of breathing room during the vacation season. Yes, payments with shipping up-front. -
Mo-Suu-Pii-Dah Goh-Suu in 1/48
captain america replied to captain america's topic in Anime or Science Fiction
Yes, the stats show that it's about the same size but more detailed and with a more complex parts breakdown, hence the price. -
Mo-Suu-Pii-Dah Goh-Suu in 1/48
captain america replied to captain america's topic in Anime or Science Fiction
Yes, free-pose means no moving parts. At least one member modded my Gurab (Pinky Space Crab) with ball-joints. It's certainly feasible, but I opt not to do this to maintain as much authenticity in the joints as possible despite their often unrealistic design. Also, ball-joints make a resin model more fragile due to the overall weight so I leave that compromise to people who really want it. -
Mo-Suu-Pii-Dah Goh-Suu in 1/48
captain america replied to captain america's topic in Anime or Science Fiction
Well that, plus the fact that there are ZERO prospects on the horizon from any official kit/collectible companies, who probably regard Inbit offerings with as much enthusiasm as an anchor by a drowning man. The very few (garage)kit iterations of this mecha which I've seen have been disappointing to be put mildly. -
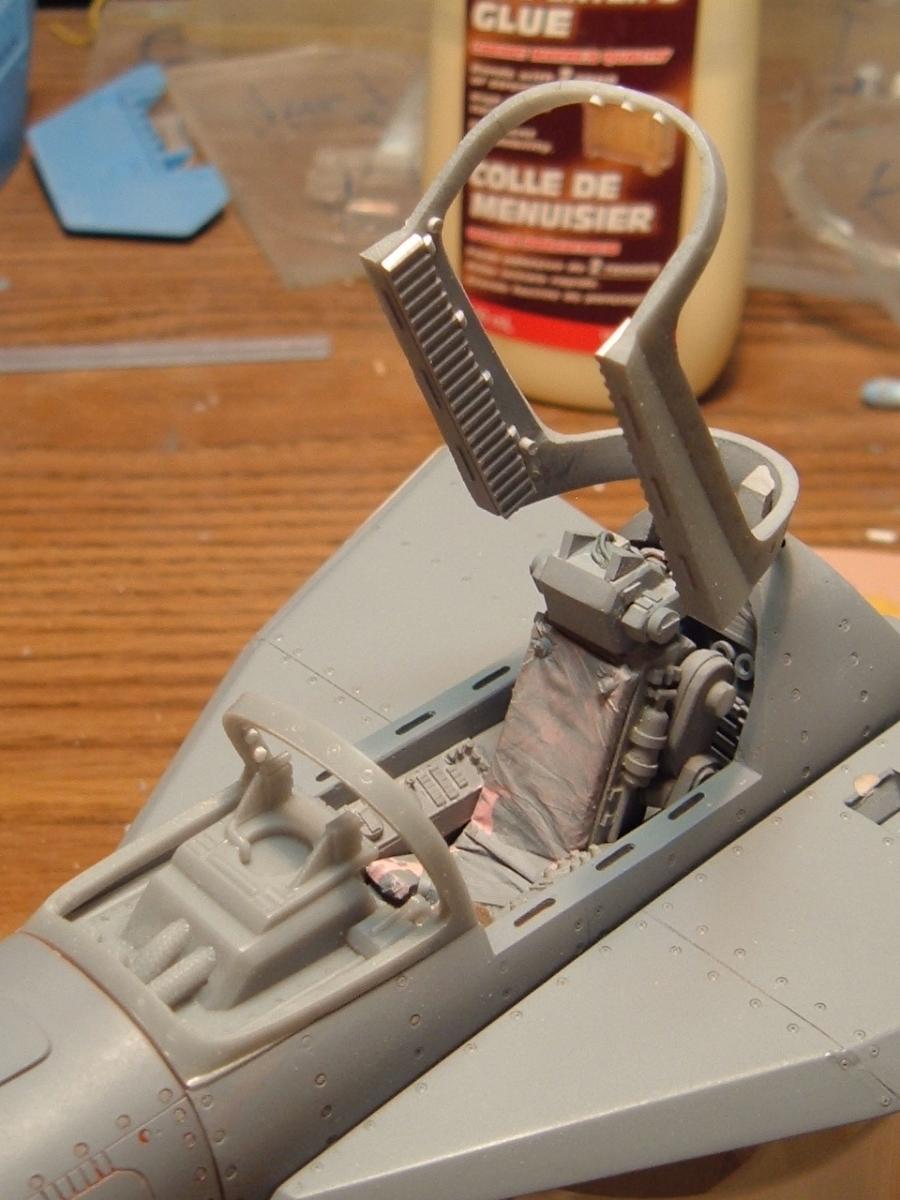
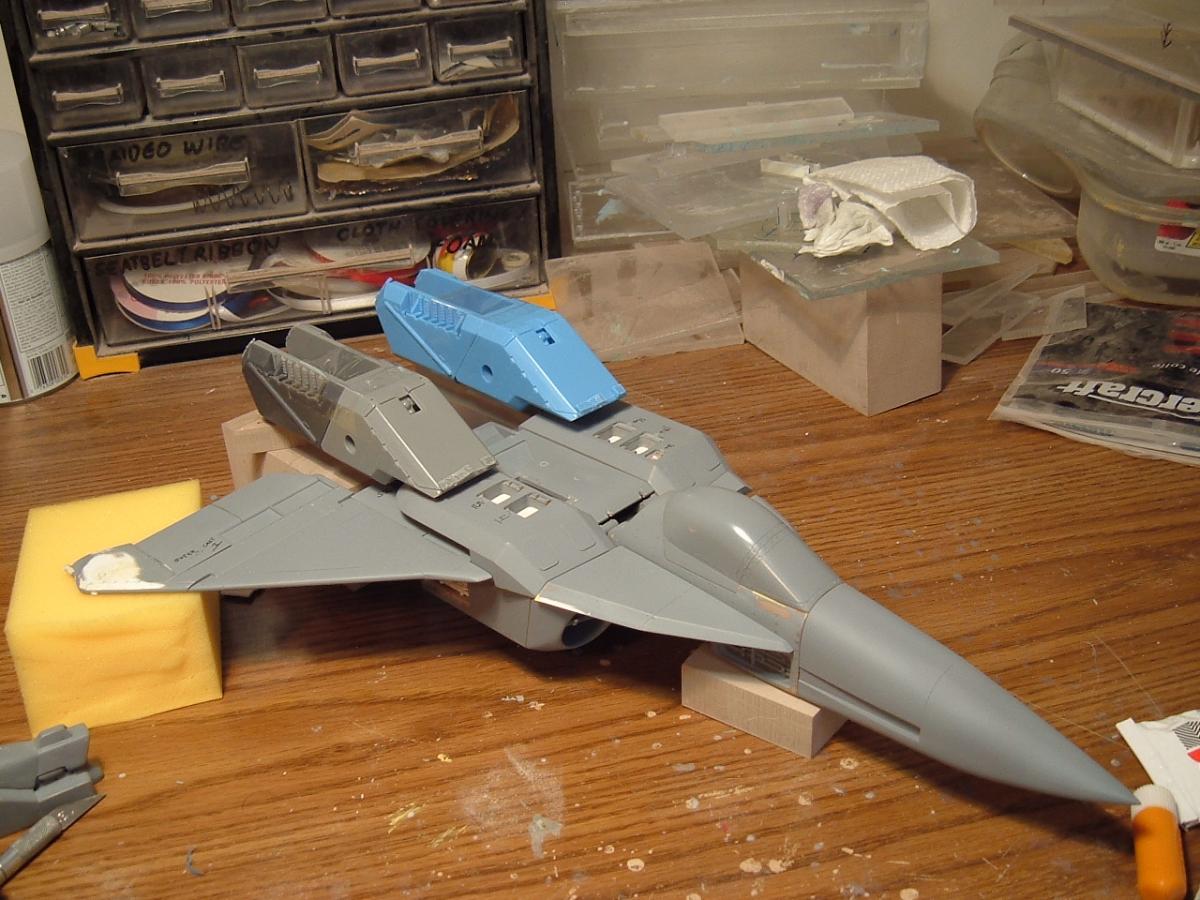
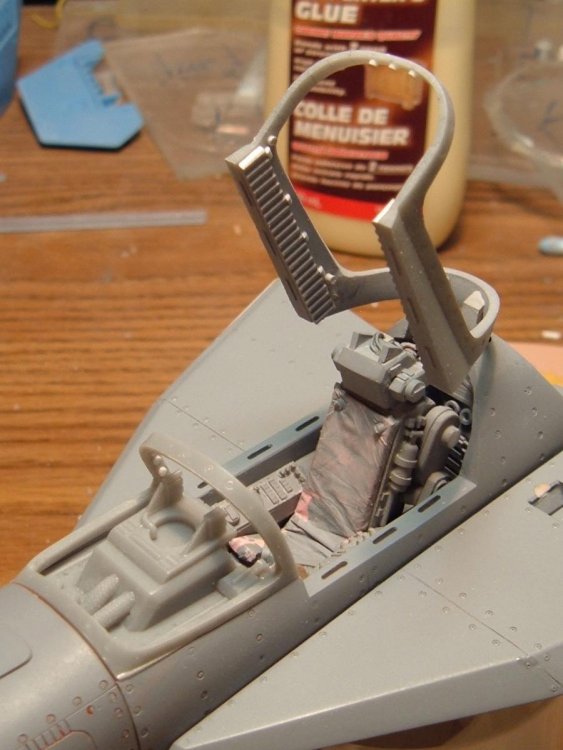
The time has come for the heavy artillery! So here's my proposal: a resin kit in my usual style and quality that will have the following features: -free-pose build (build it in the pose you want), fingers too. -the option of having open or closed missile bays (shoulders) -translucent canopy with detailed cockpit interior (no pilot though) -can be built as the dude or chick model (just sand off the head antenna) I'll also look into making the cockpit hatch open with the seat deploy. Worst case you'll have to choose open or closed build versions if the hinge mechanism is too intrusive/complex. We'd be looking at a price-point of $215 Canadian bucks (about $200 US) and I would need 30 orders to get the ball rolling. Who's with me?? I will also accept payments in Bitcoins for the brave pioneers among you
-
Last call for the Spartan kits. After this week they will be available through eBay only.
-
Mine.
-
Yes
-
Just a heads-up guys, kits will be shipping Wednesday and Thursday!
-
Next will most likely be the 1/48 Gosu, provided that the demand is there.
-
Last of the molds will be poured by day's end. Molds ready by Wednesday-ish
-
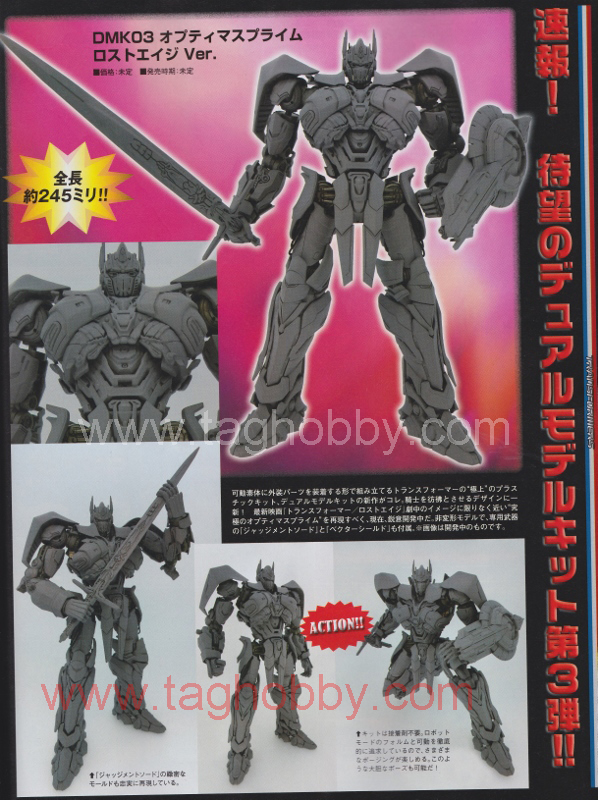
Awesome news: Takara will be producing a new DMK templar Optimus later this year!!!