captain america
-
Posts
3561 -
Joined
-
Last visited
Content Type
Profiles
Forums
Events
Gallery
Everything posted by captain america
-

Moo-Suu-Pii-Dah In-Bii-Toh: the final
captain america replied to captain america's topic in Anime or Science Fiction
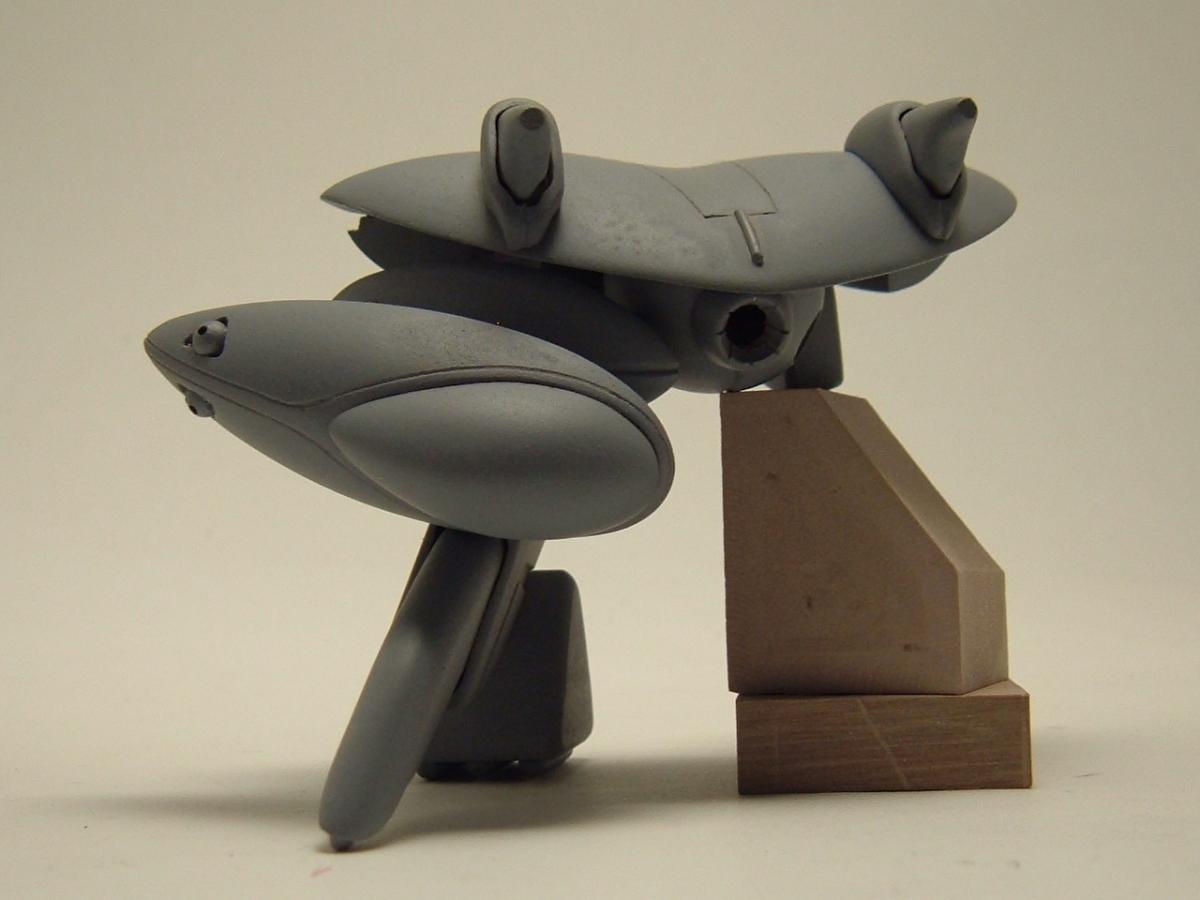
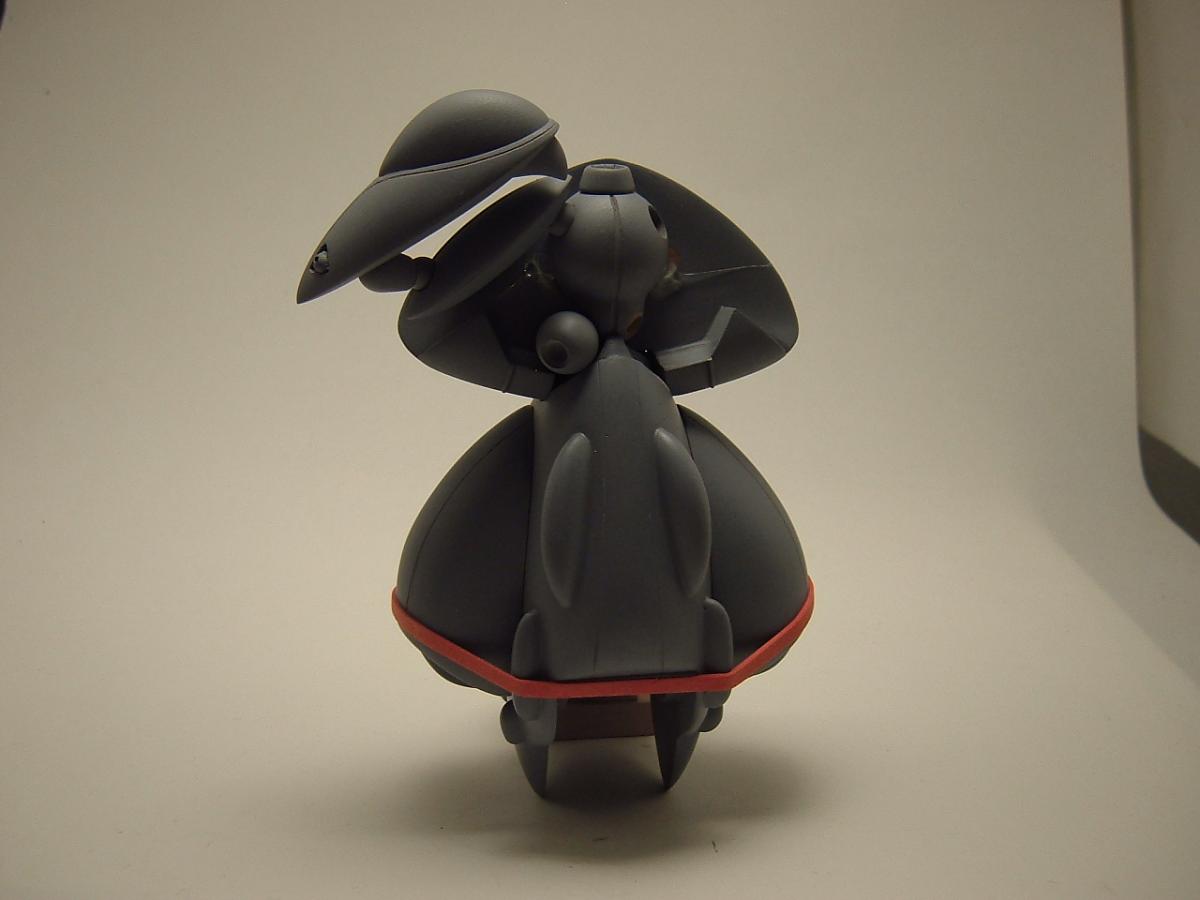
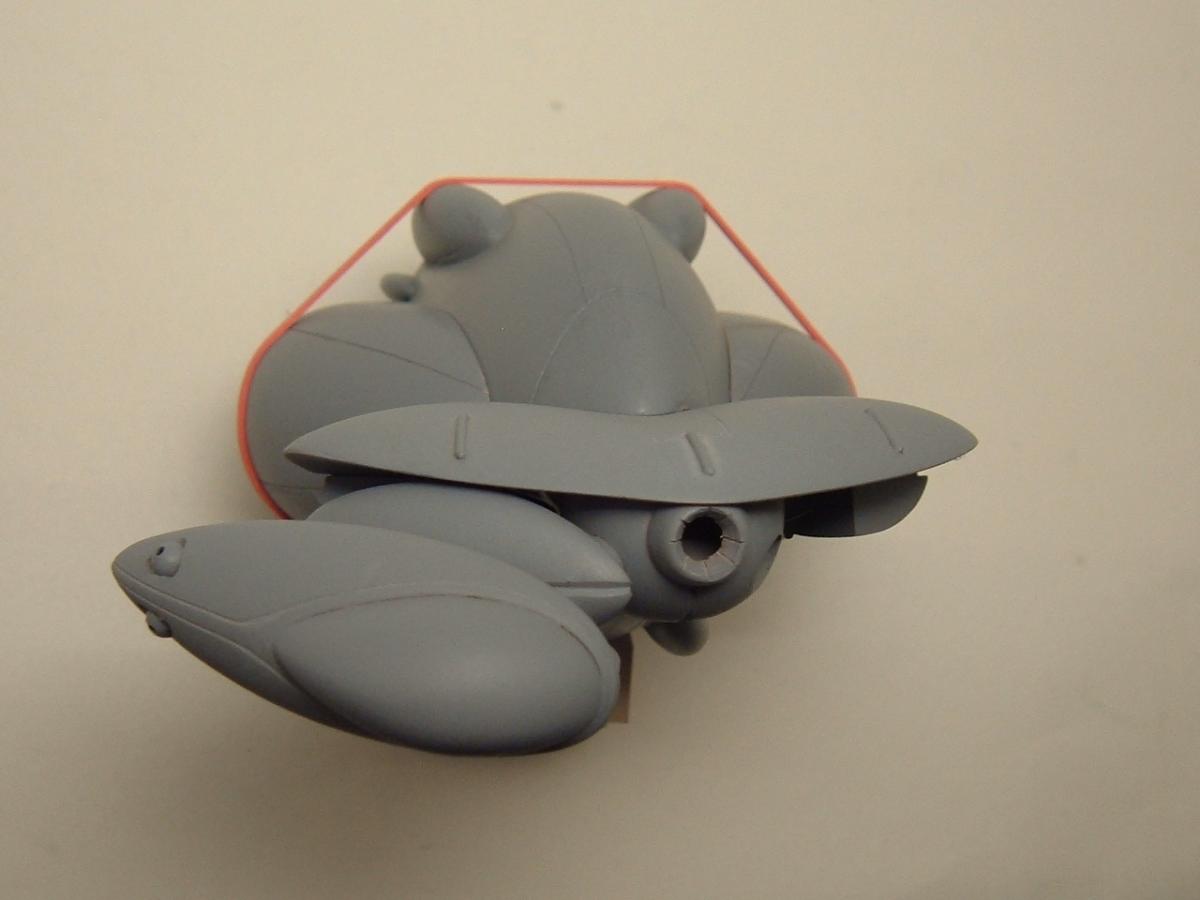
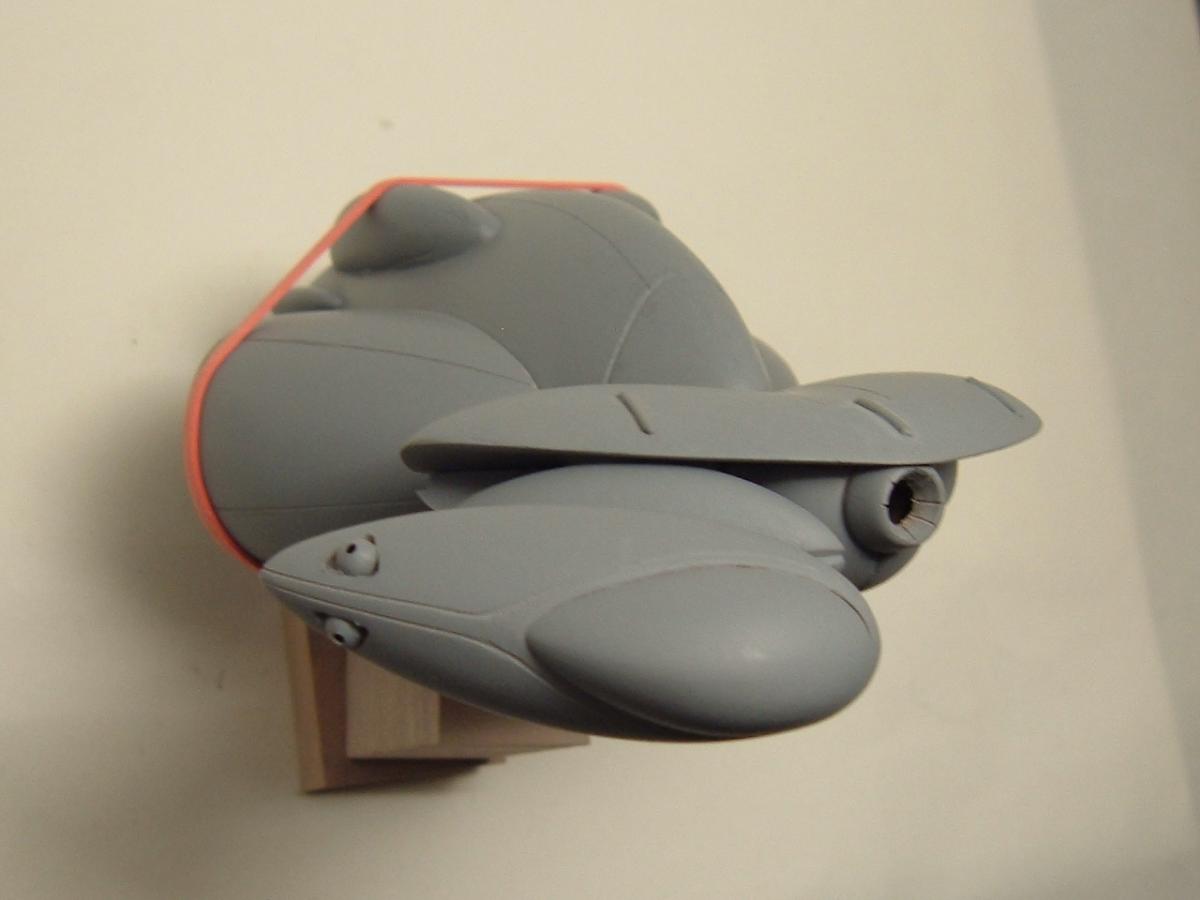
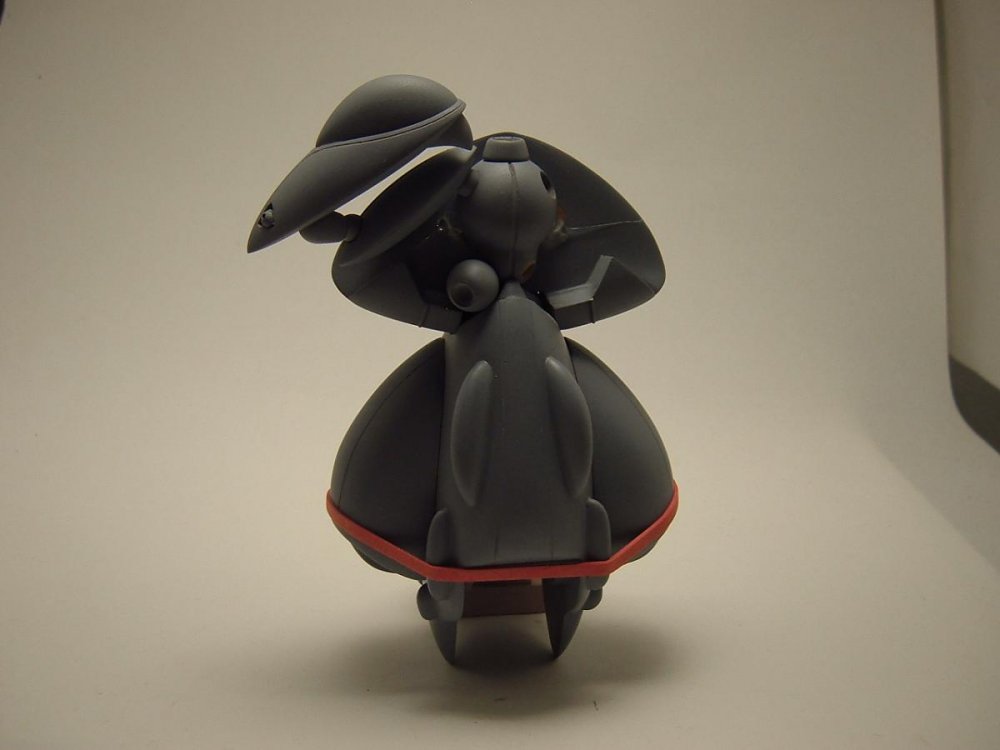
Baby Crabb masters are now officially done! Please forgive the posing: the parts are very small/delicate and I'd like to avoid damaging them, but I think that you'll get the idea

-
Moo-Suu-Pii-Dah In-Bii-Toh: the final
captain america replied to captain america's topic in Anime or Science Fiction
Hell yes!!! I'll have pics of the masters by either tonight or tomorrow... Camera batteries are charging. -
Moo-Suu-Pii-Dah In-Bii-Toh: the final
captain america replied to captain america's topic in Anime or Science Fiction
Hi guys! I was going to post an update today but as I'm in the closing stages of the sculpting, I figured I'd stretch things out to Friday and by then basters should pretty much be done. I think I would have finished a week ago had there not been so many "things" going on behind the scenes but alas, better late than later... Or never -
Moo-Suu-Pii-Dah In-Bii-Toh: the final
captain america replied to captain america's topic in Anime or Science Fiction
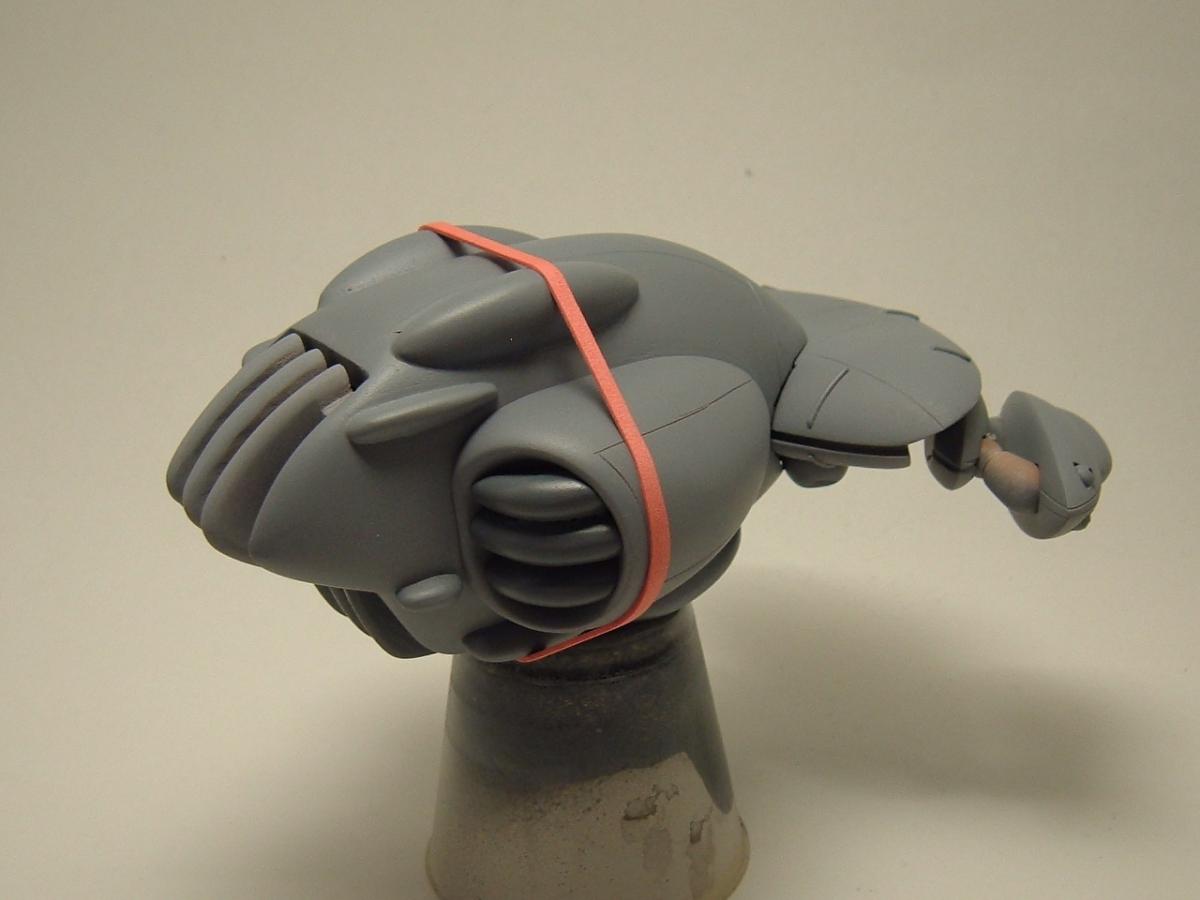
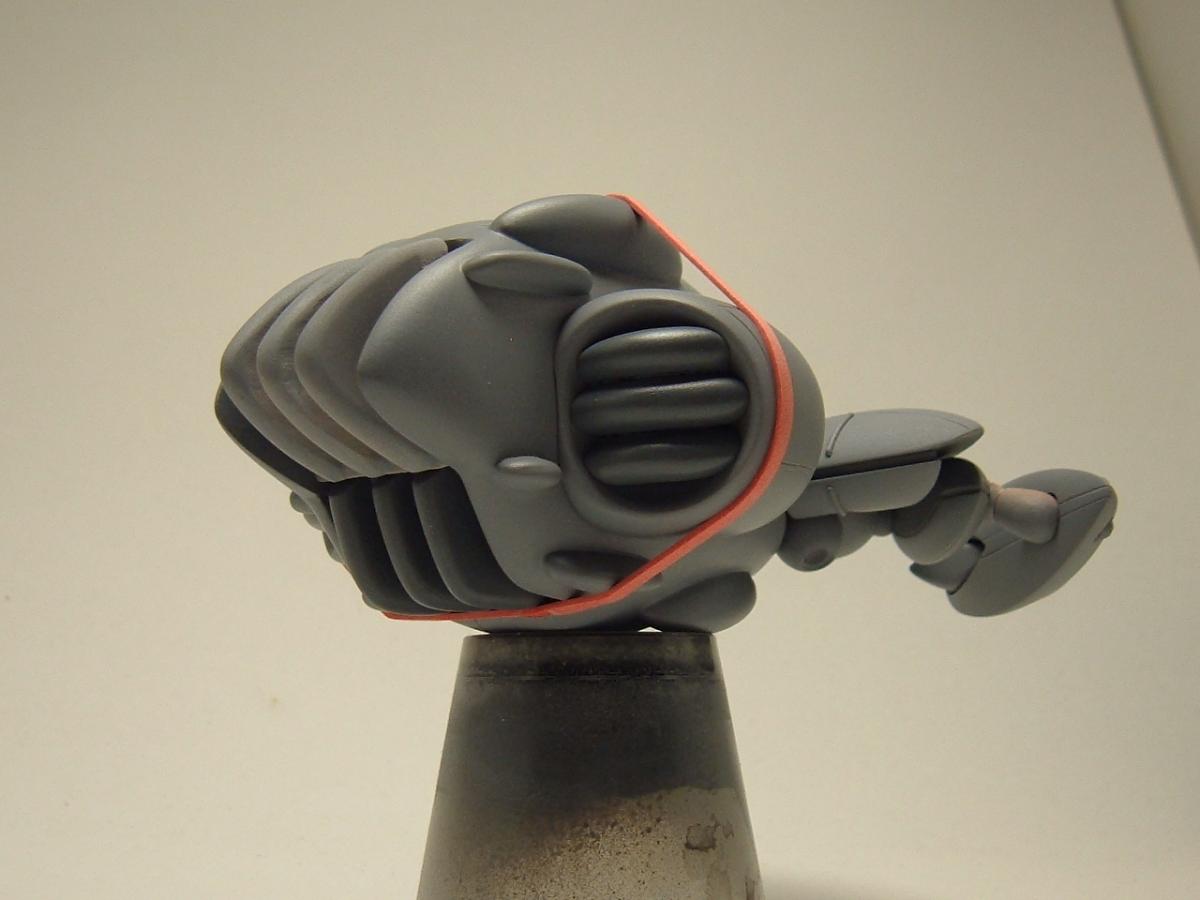
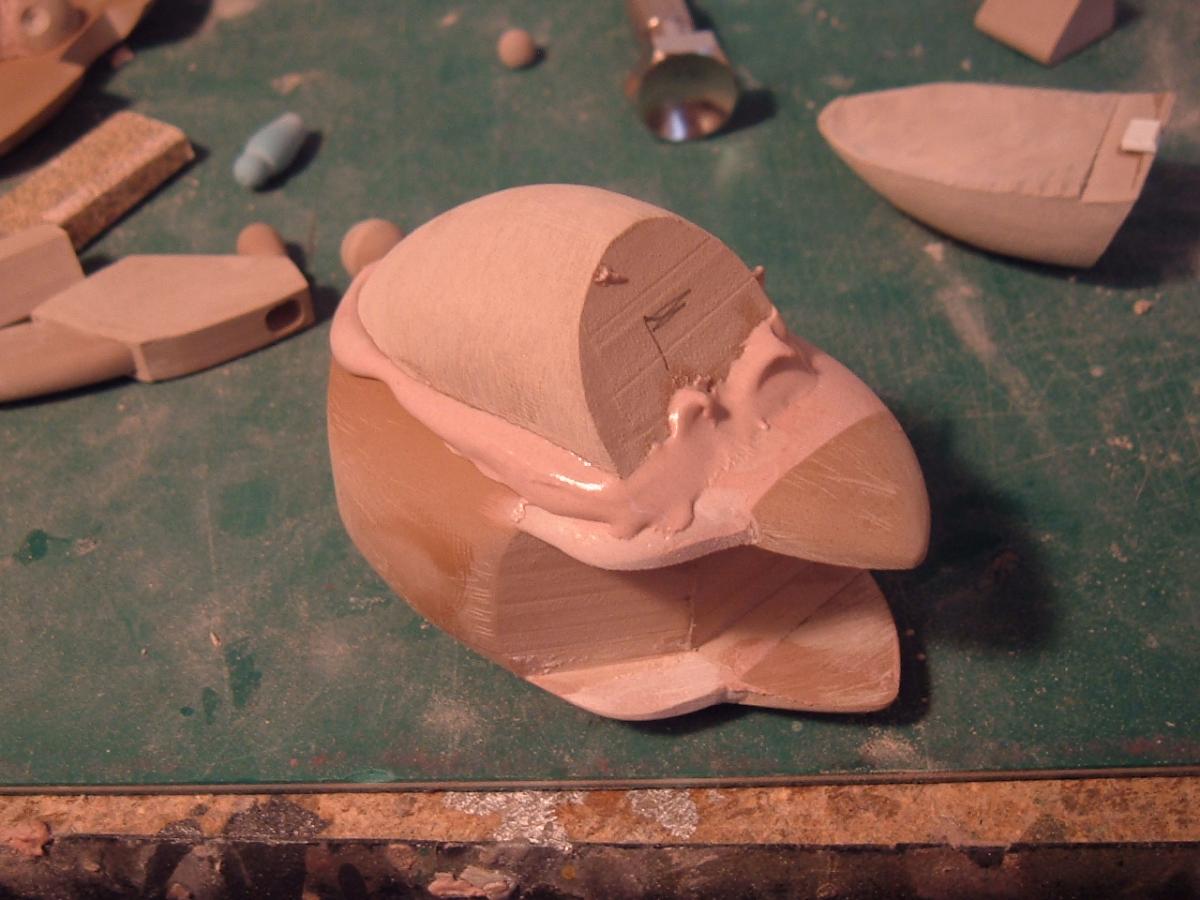
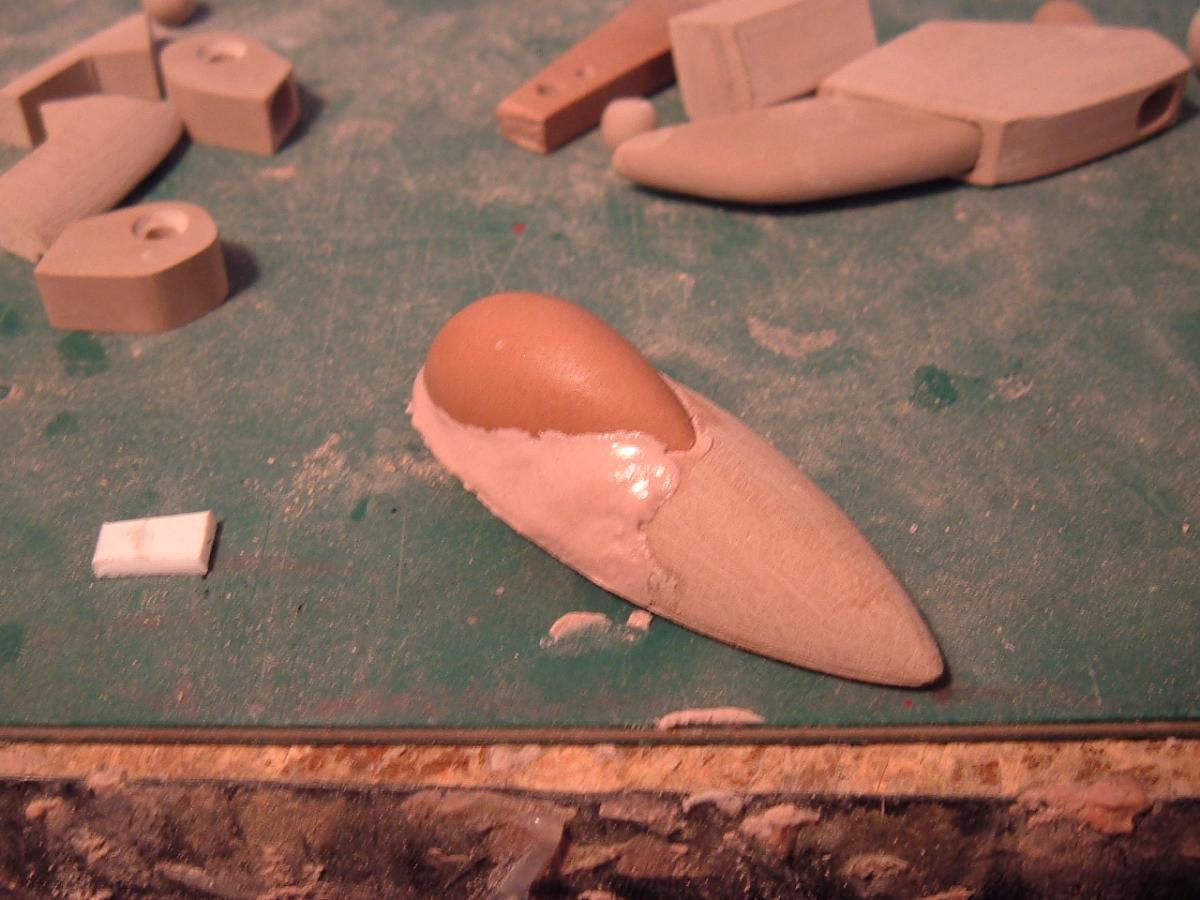
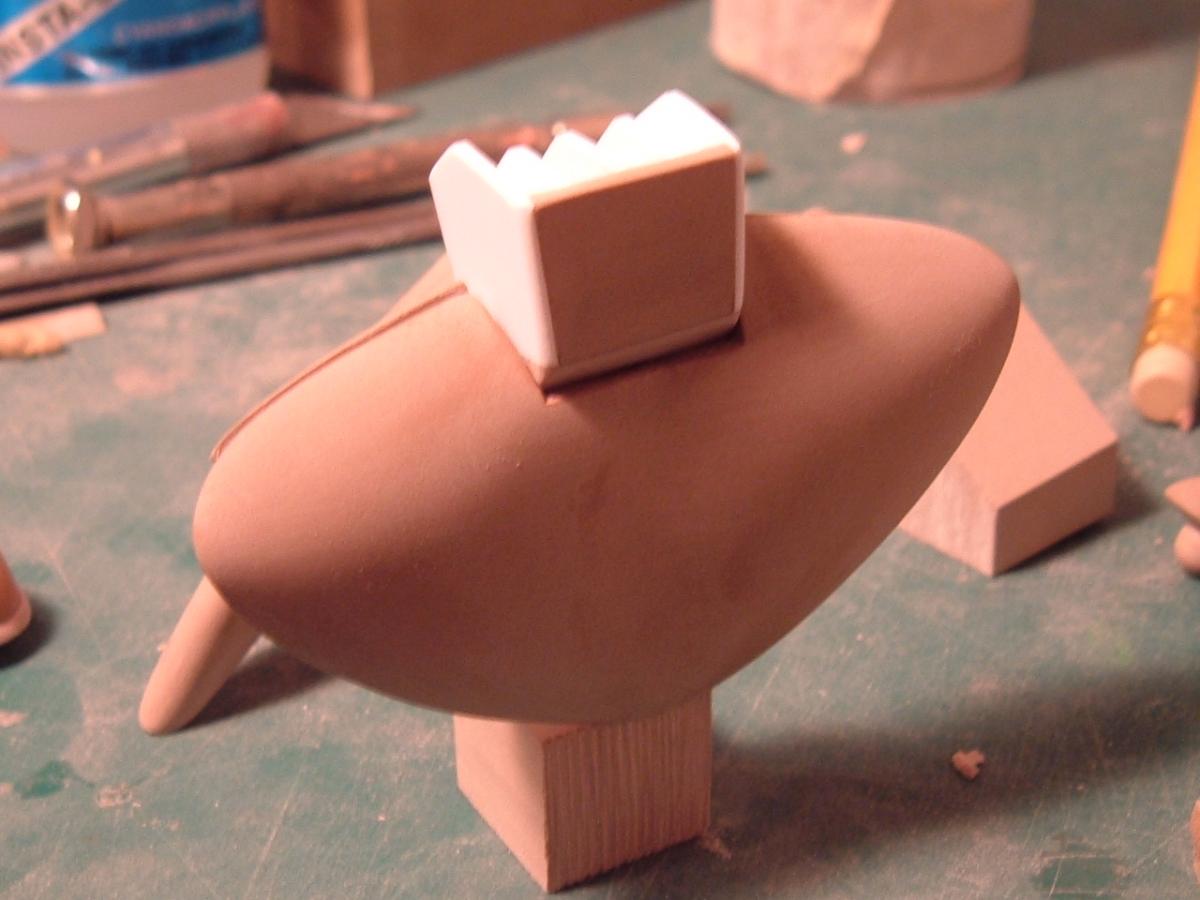
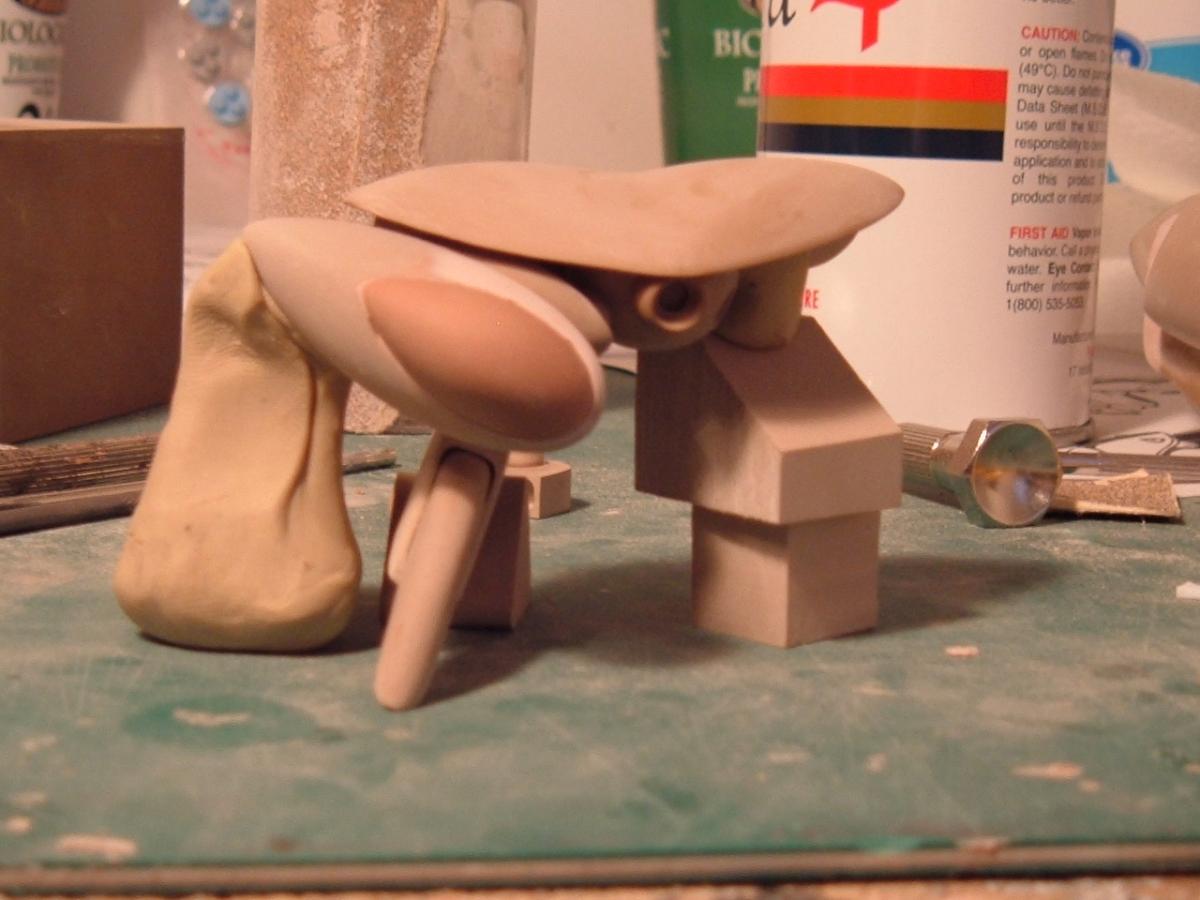
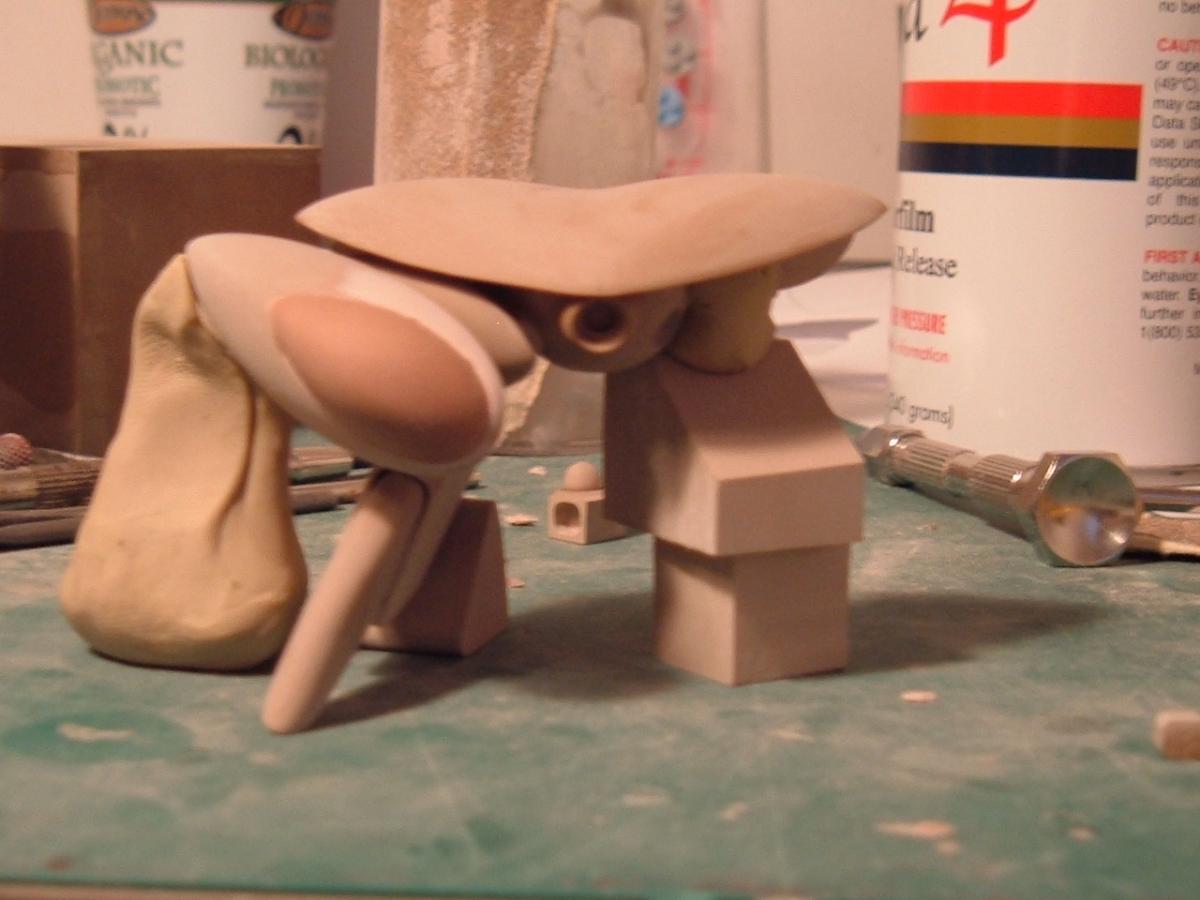
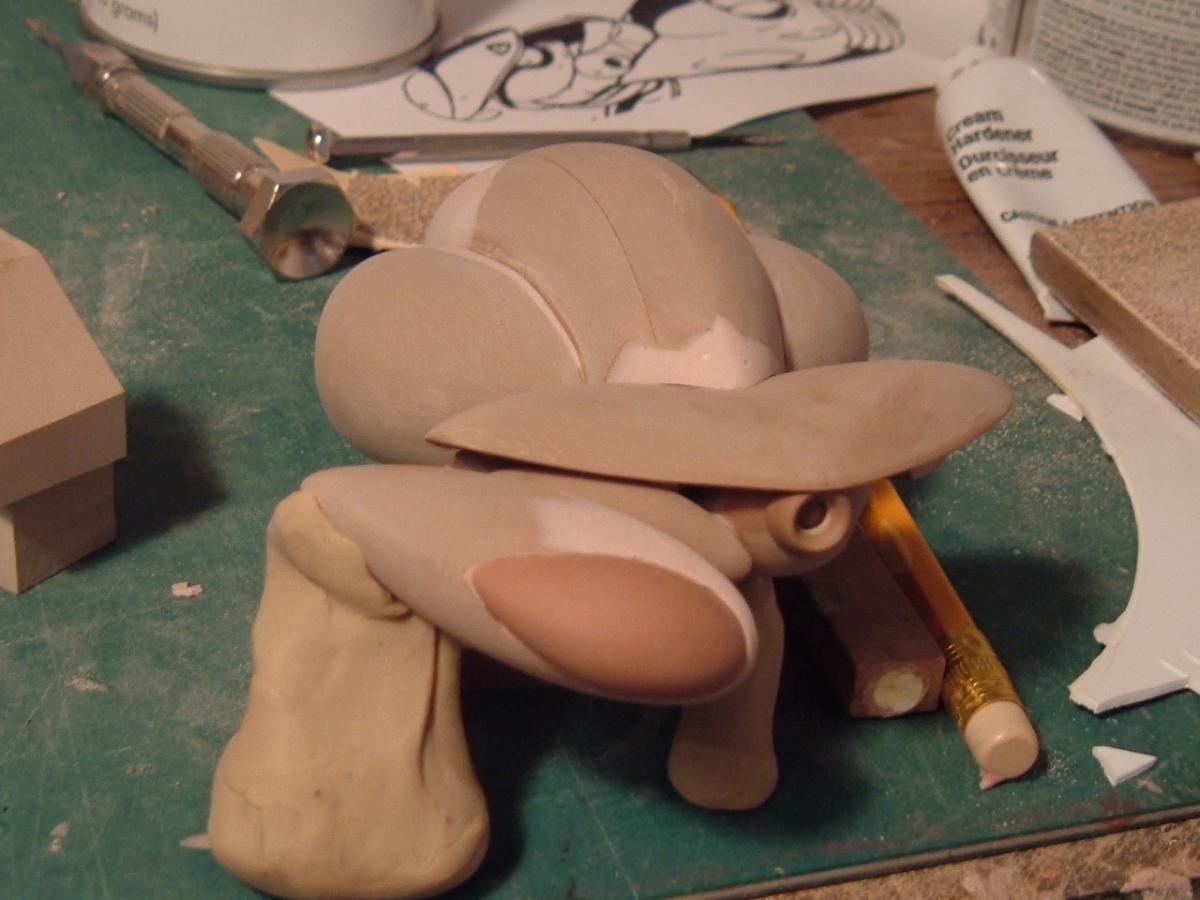
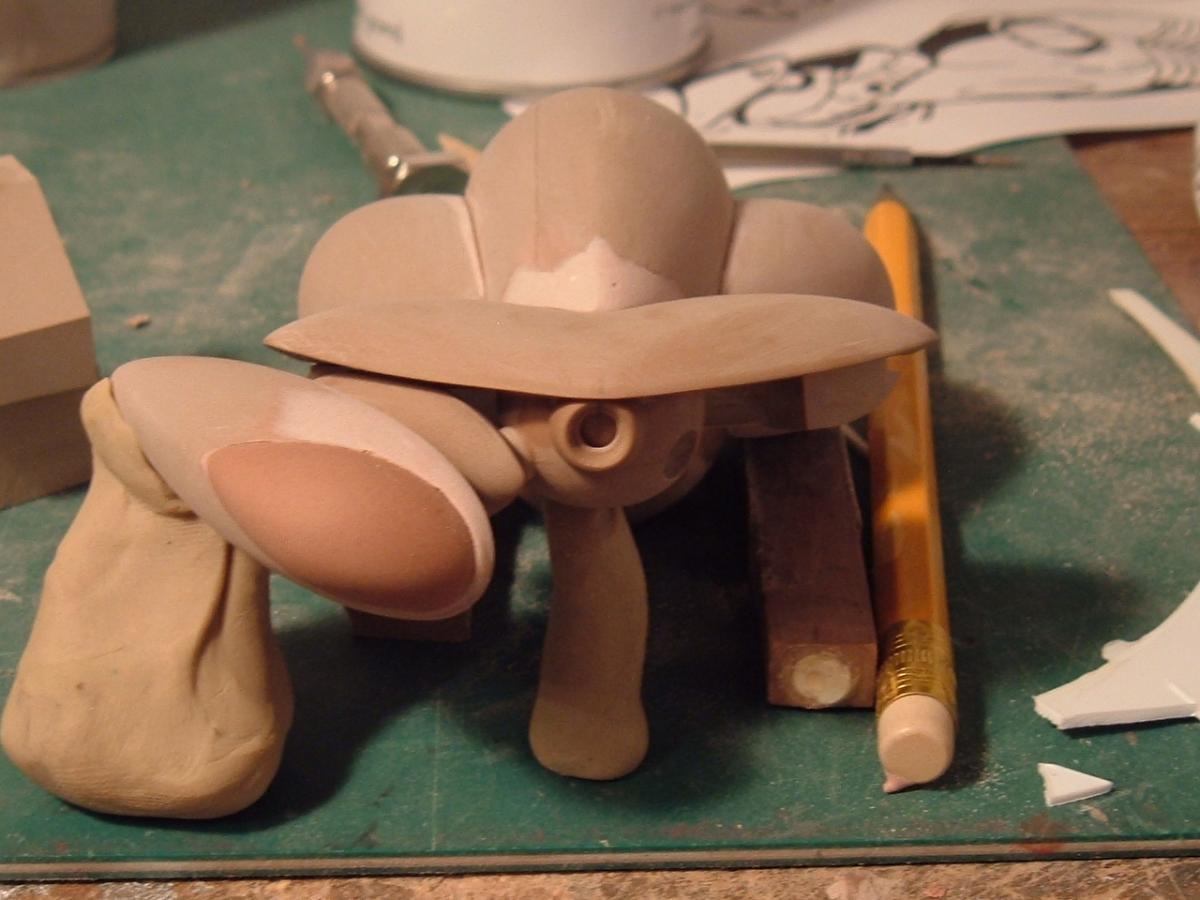
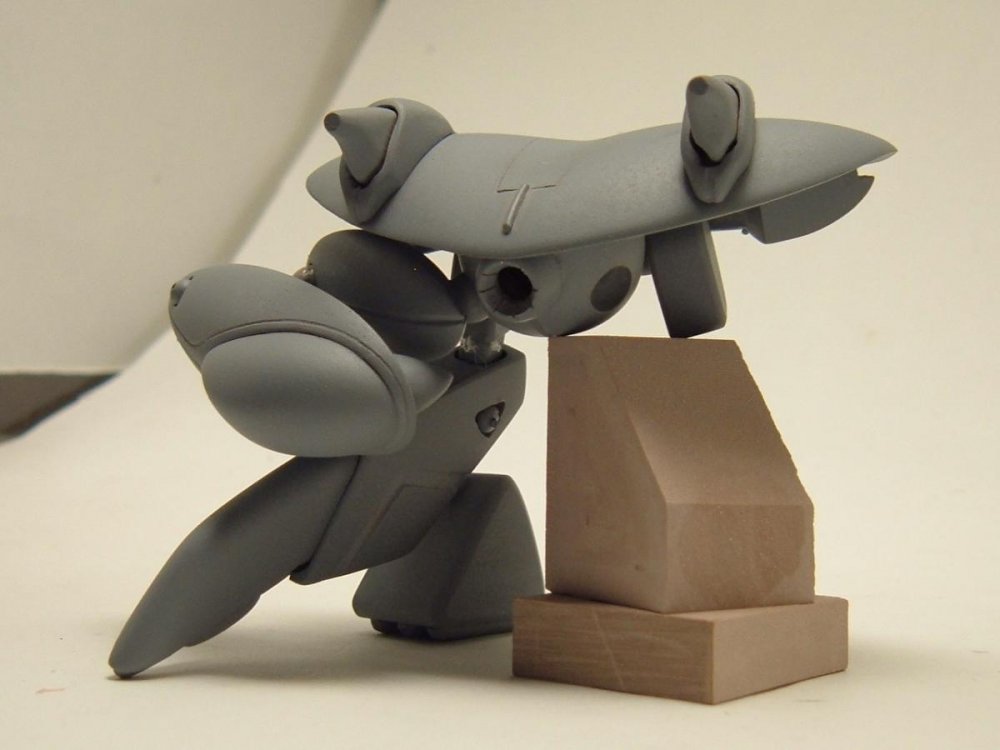
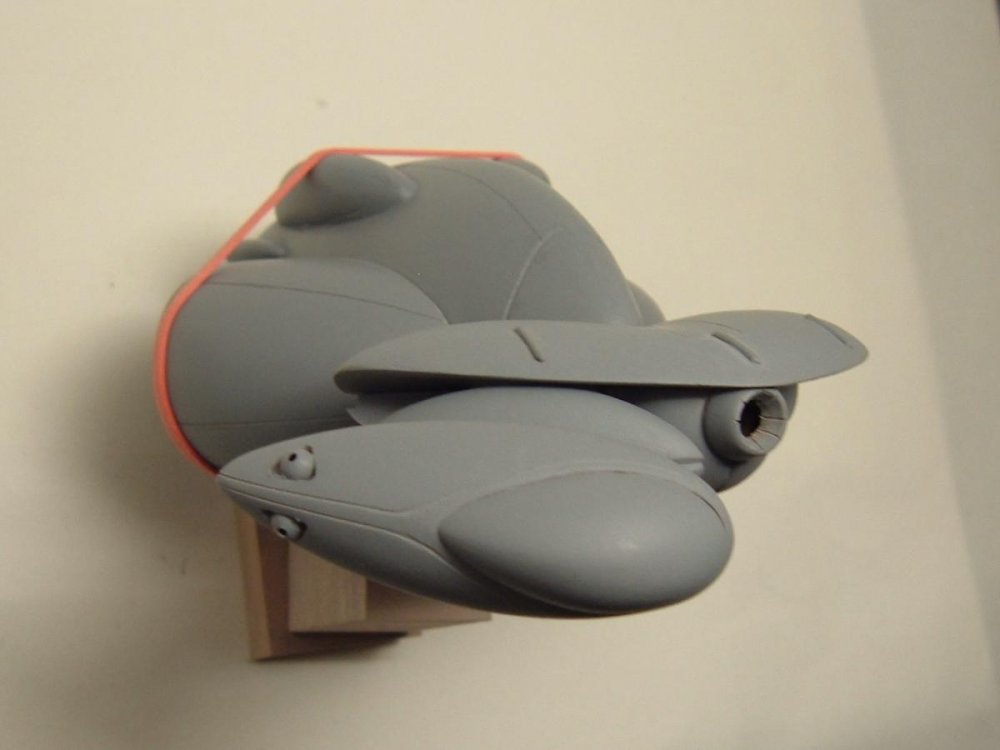
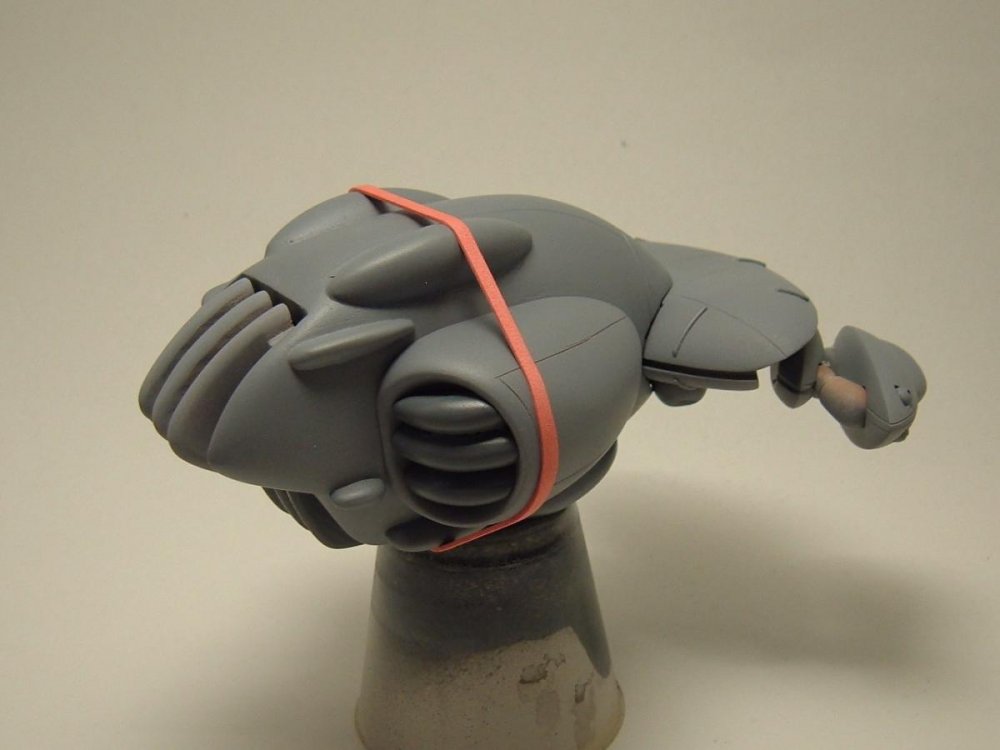
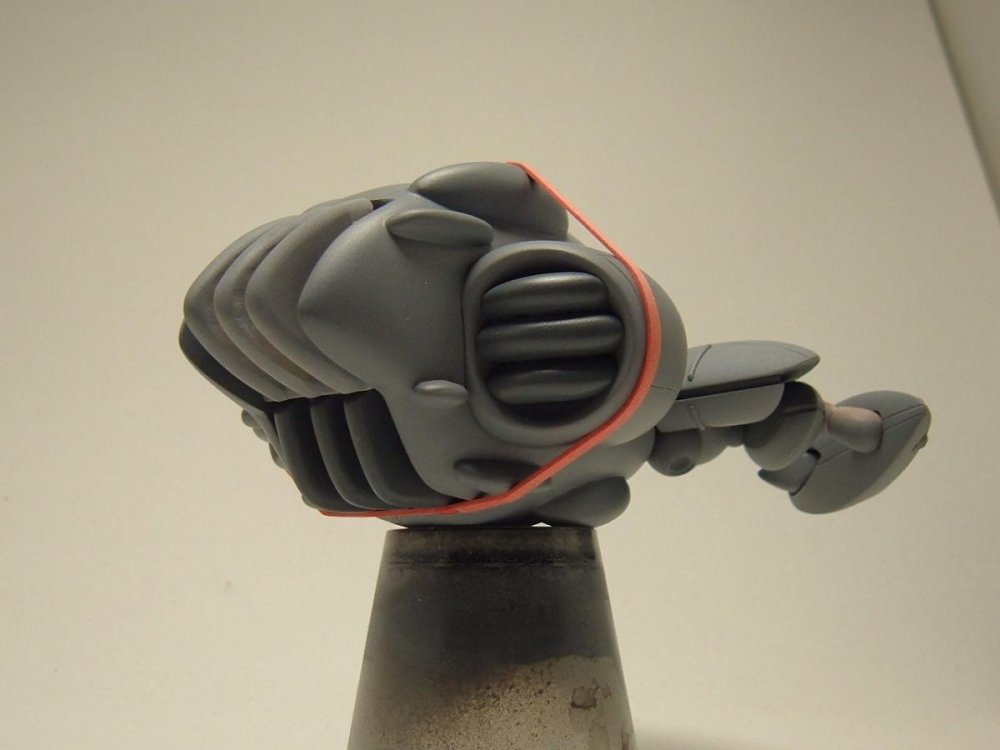
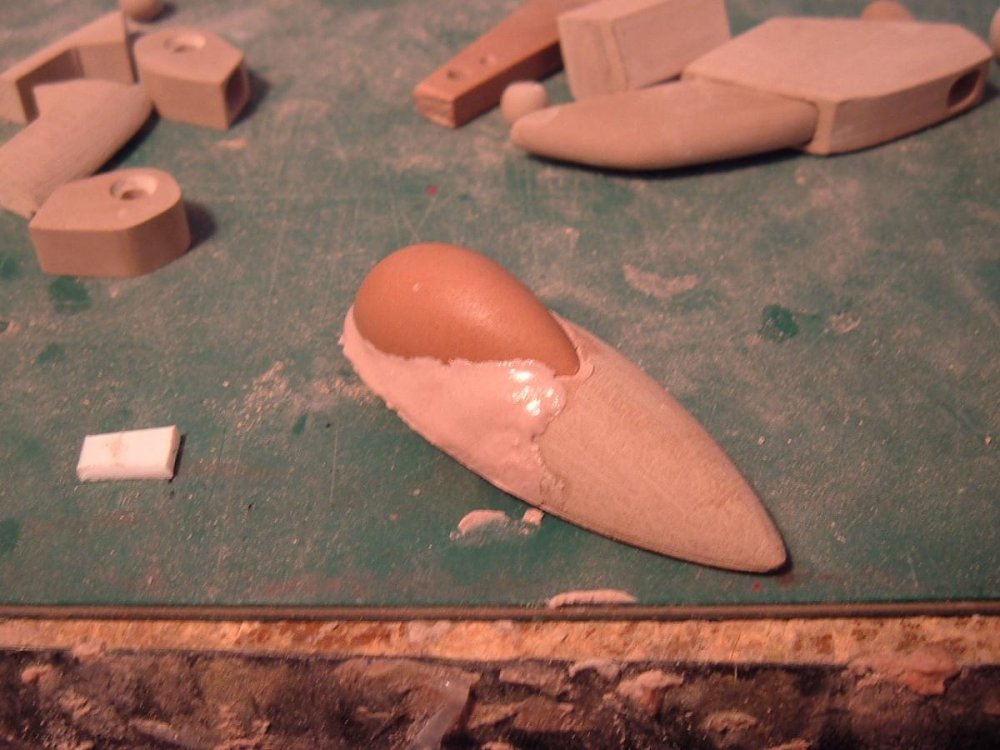
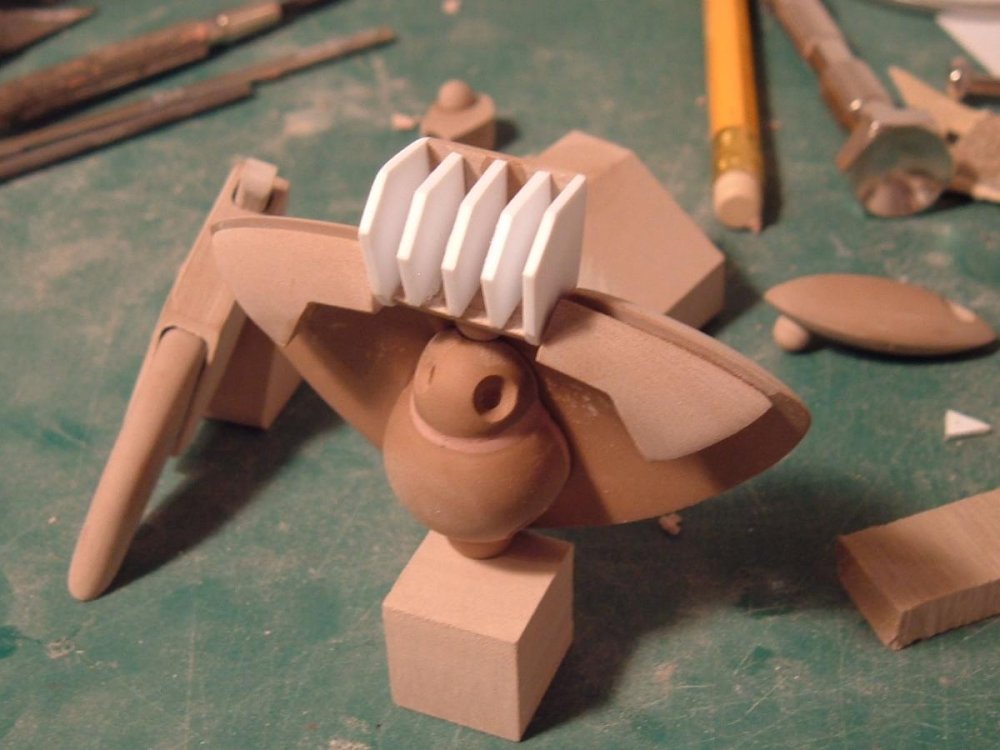
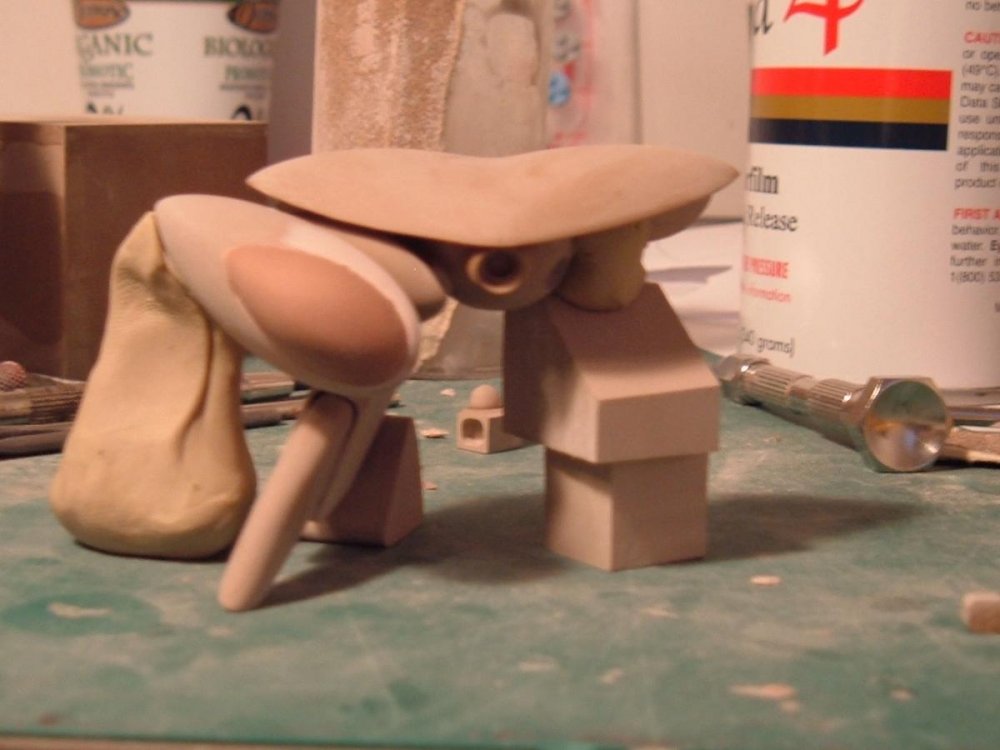
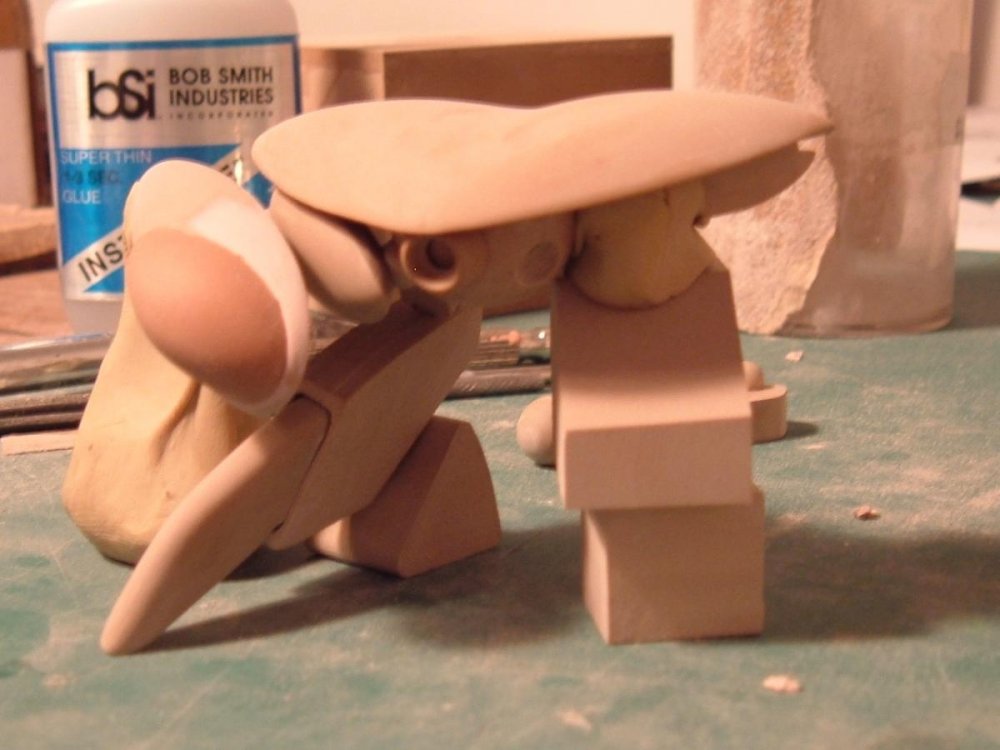
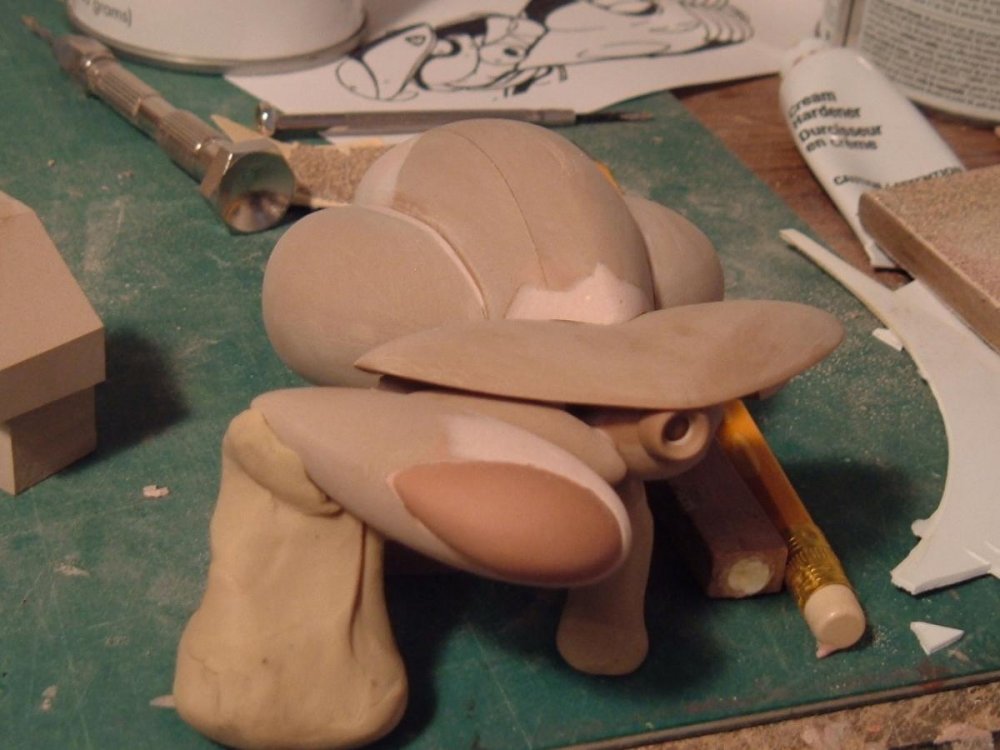
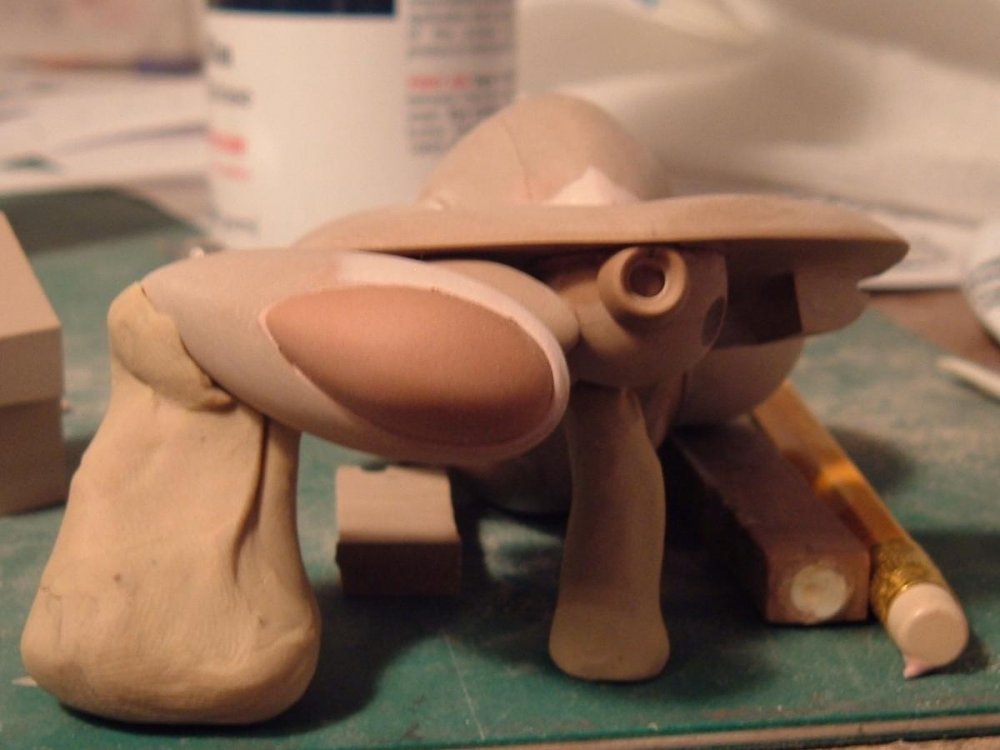
Captain's log: Monday afternoon. I'm cold and hungry. Apologies for the tardiness in my updates: there's been a lot going on behind the scenes, so I'm a little bit slower in my sculpting than I would have liked to be. That being said, let's get the ball rolling! Speaking of balls… In pic 01 we see one of the spherical thrusters that replace the legs in booster mode. I'm shaping it on the lathe along with a number of other ball-joint parts. Pic 2: the ever-faithful putty smash method in use to shape the lateral thrusters on the booster. This is the best way I've found to get truly great fitting parts on complex shapes, just be sure to use a good release agent. Pic 3: the forearm pincer undergoing some fit adjustments. While it was sculpted from two pieces, it will be molded as one, with the claw/finger molded separate. Pic 04: the main crab shell as seen from below. The thruster will be on a ball-joint as with the other appendages. Pic 5 offers a top-view. Pics 6 to 8: the pose is crudely held together, but we can see the Baby Crabb taking shape and the overall proportions look great. Pics 9 to 11: the booster is also coming along quite nicely, despite the part being a tremendous challenge in the proportions department. The line-art makes it look rather elongated, flattened in some views and rounded in others. I was able to get a better grasp on the proportions thanks to my REF Field guide, which had some decent numerical values to accompany the line-art. That's about it for this week, I'll have another salvo of pictures next week, so until then enjoy the pics and stay tuned!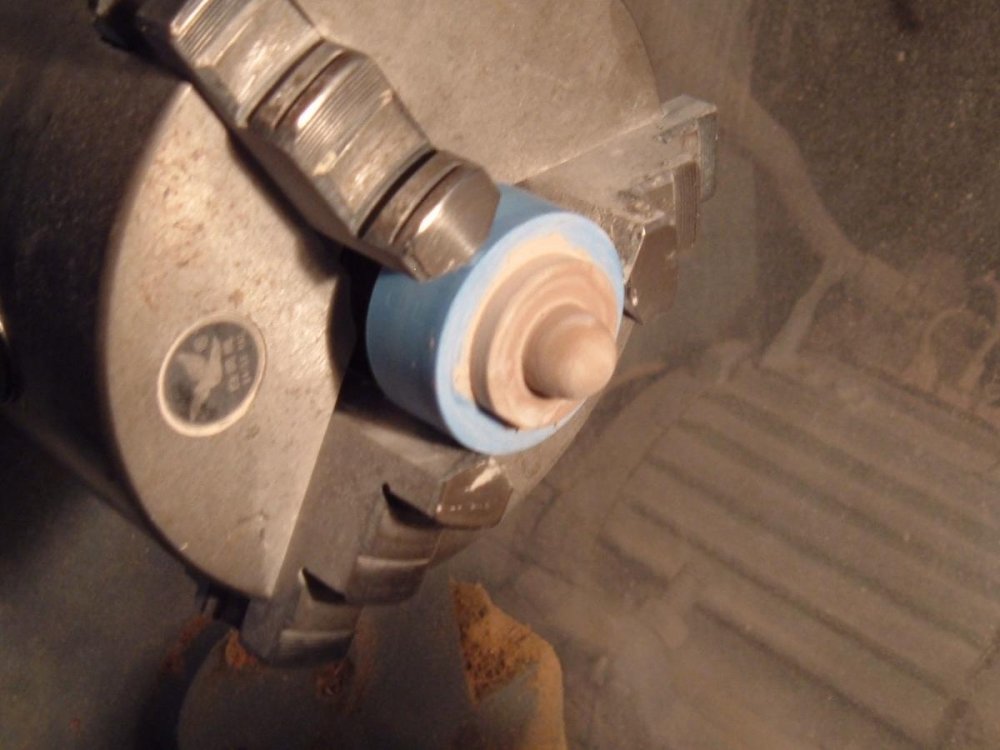


-
Moo-Suu-Pii-Dah In-Bii-Toh: the final
captain america replied to captain america's topic in Anime or Science Fiction
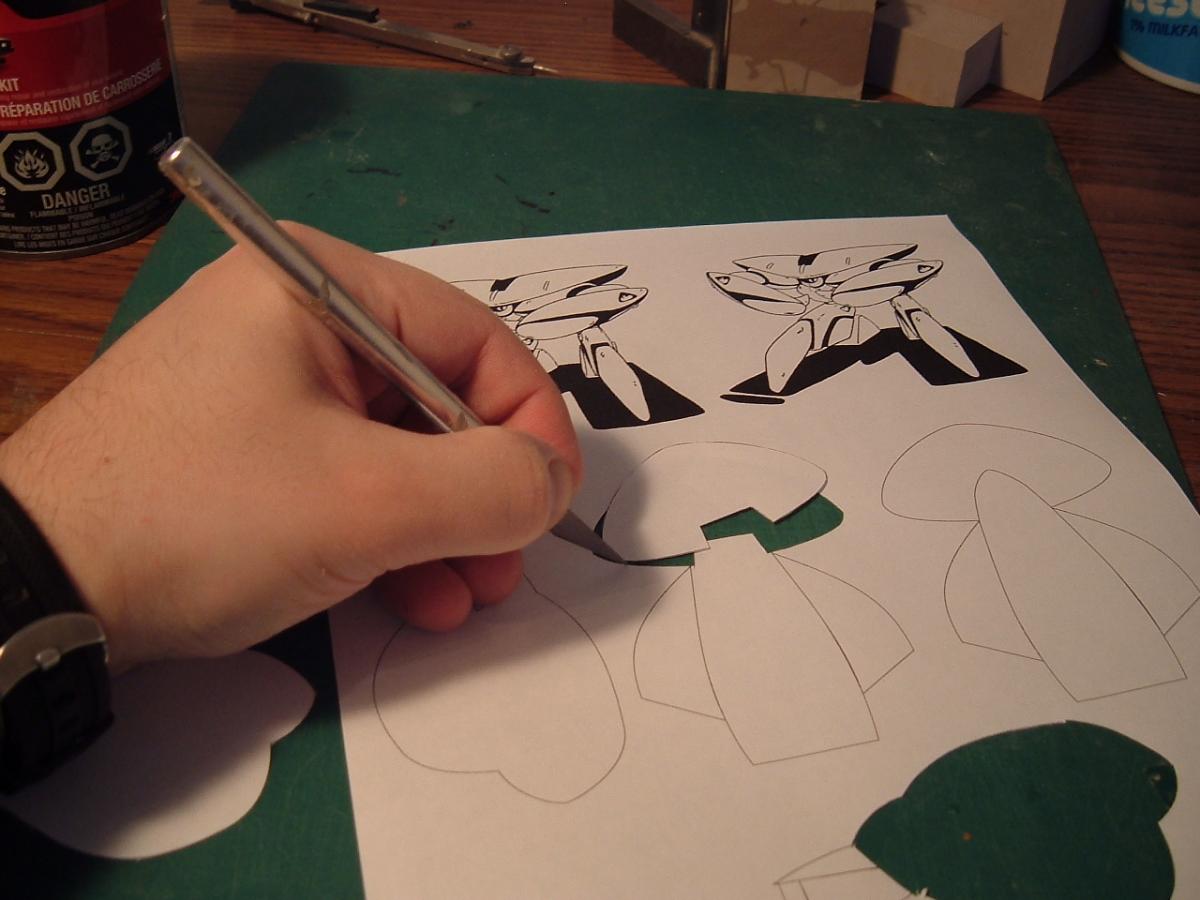
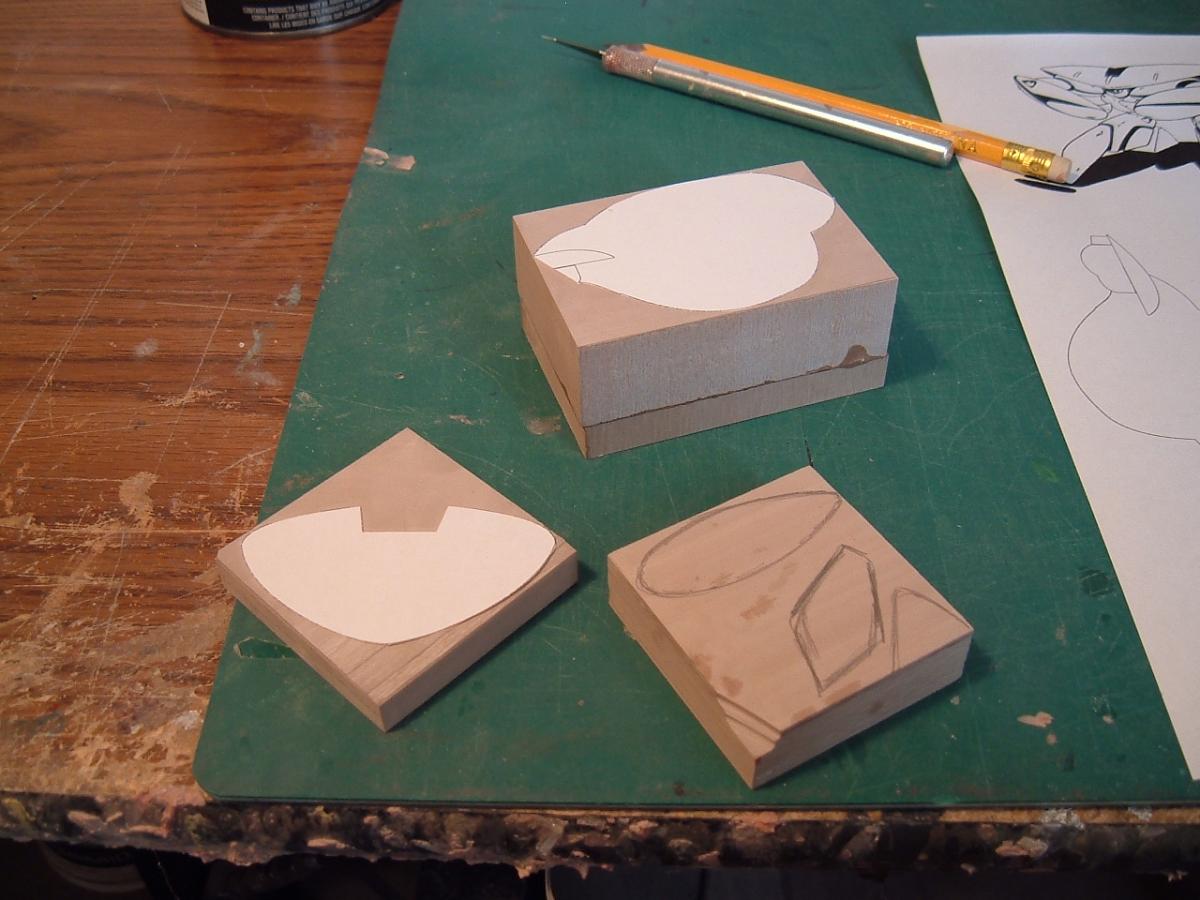
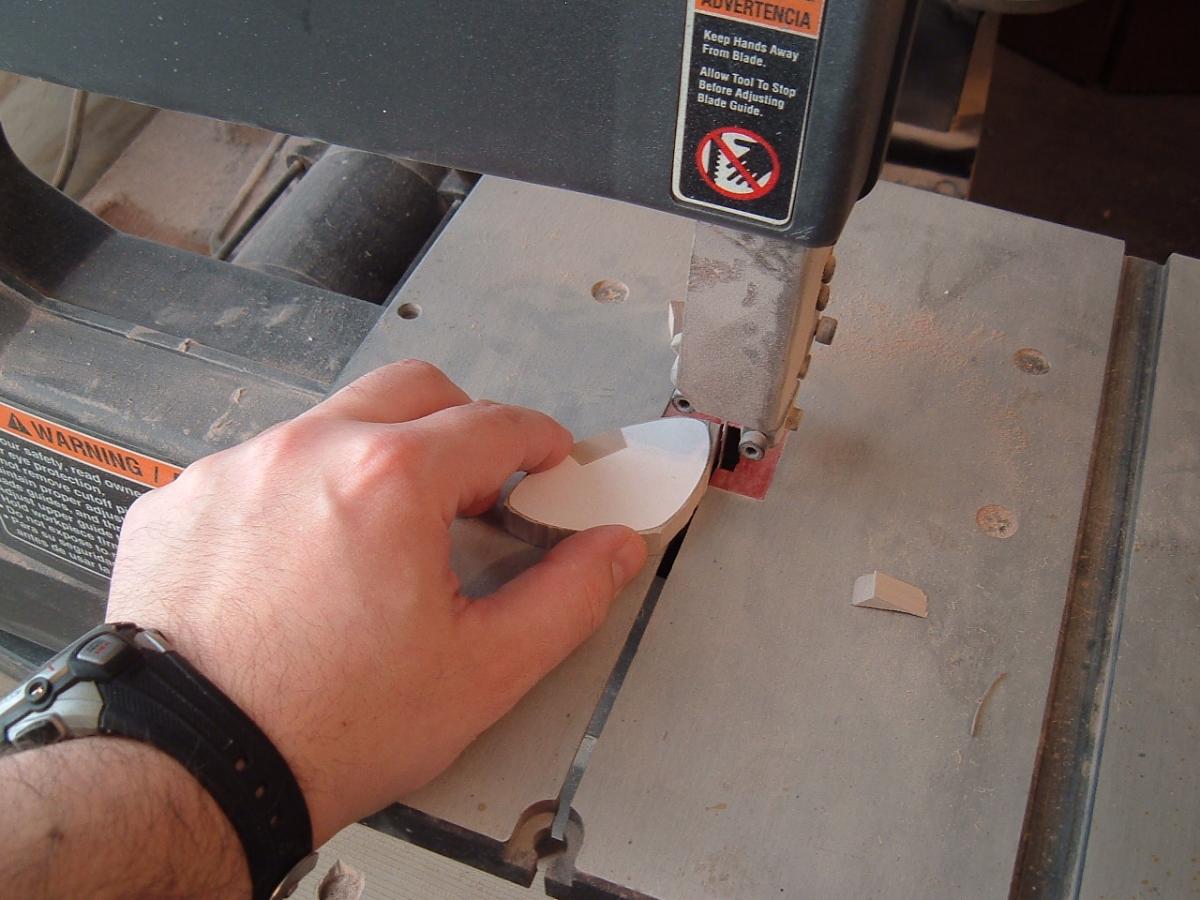
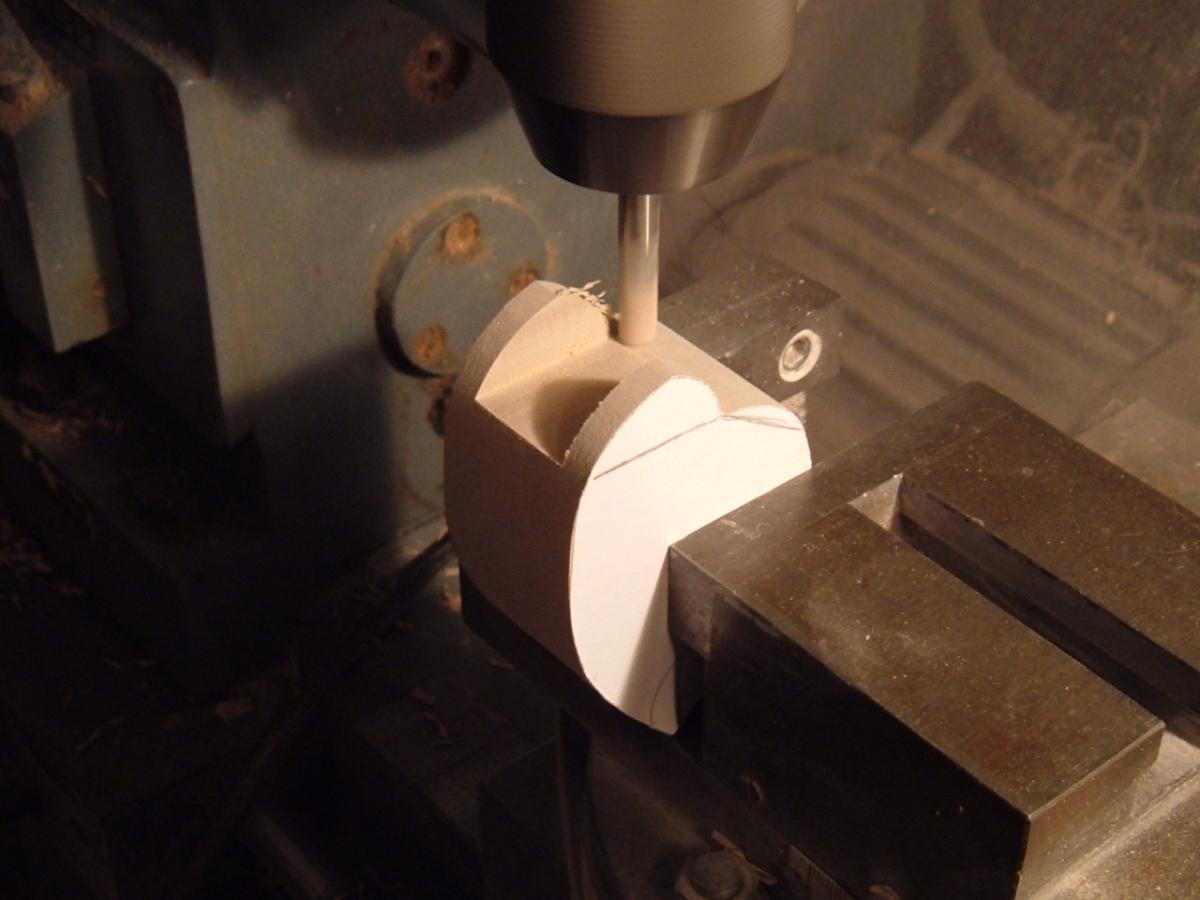
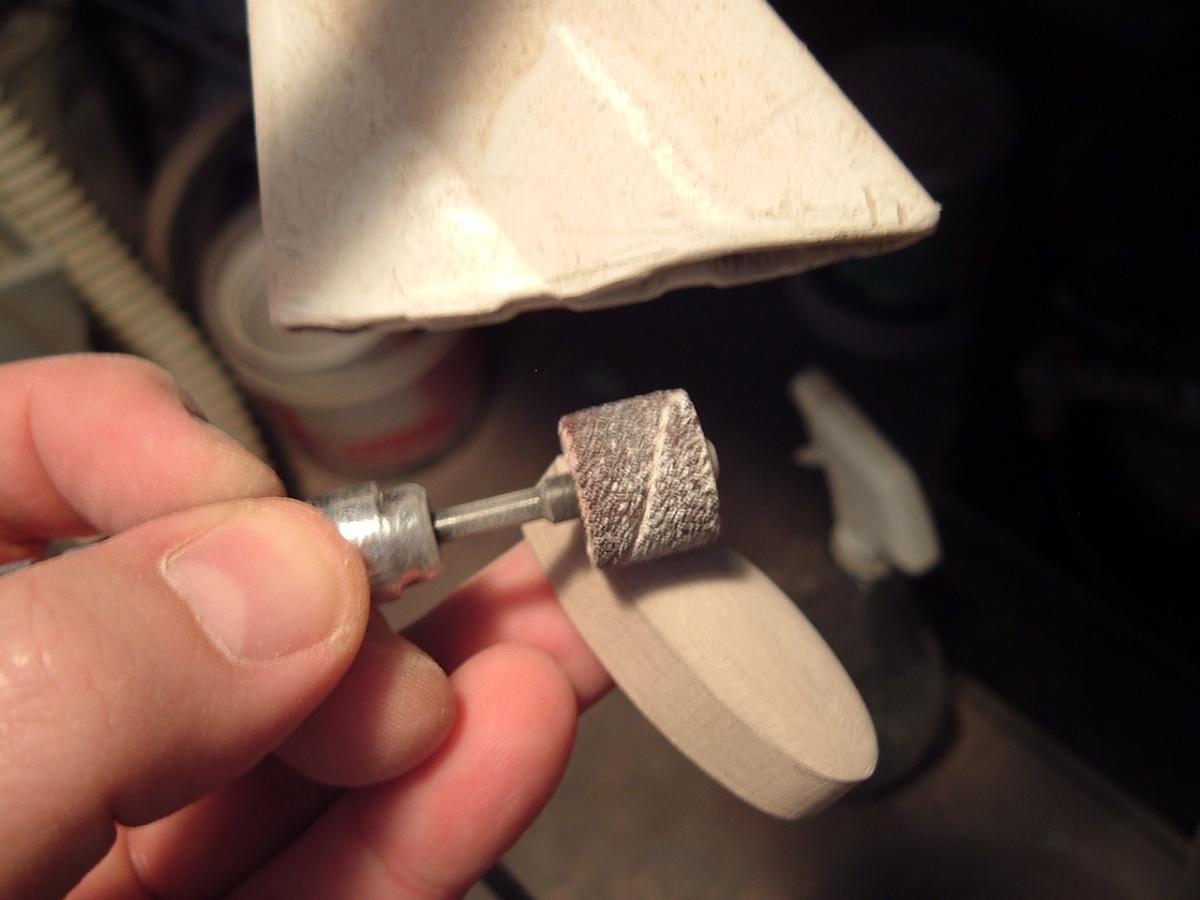
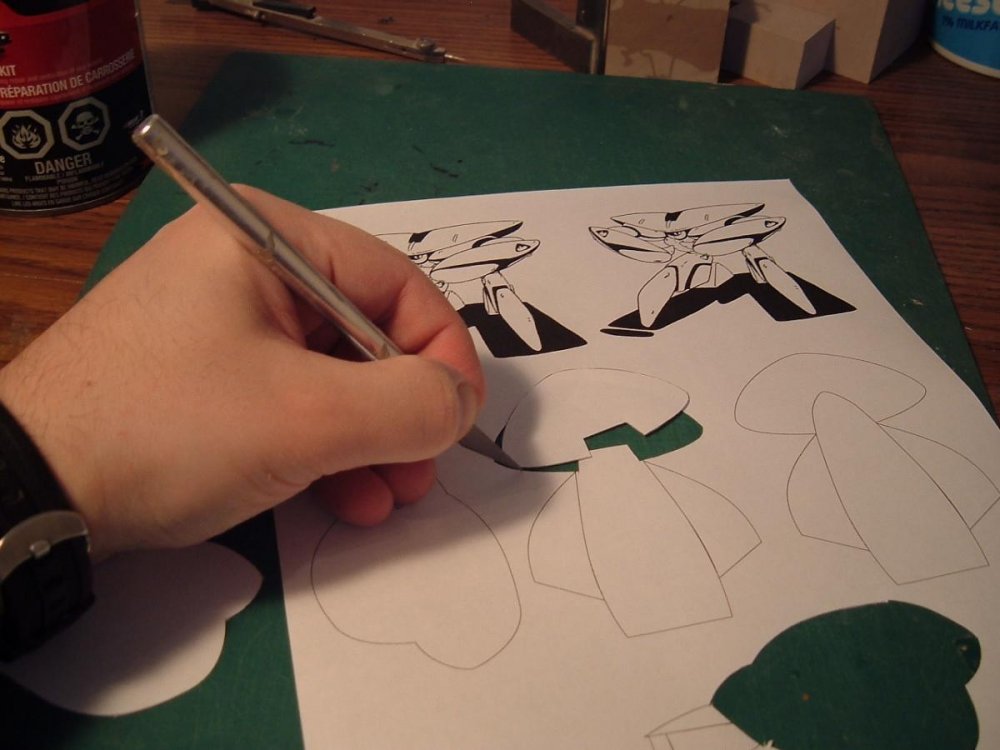
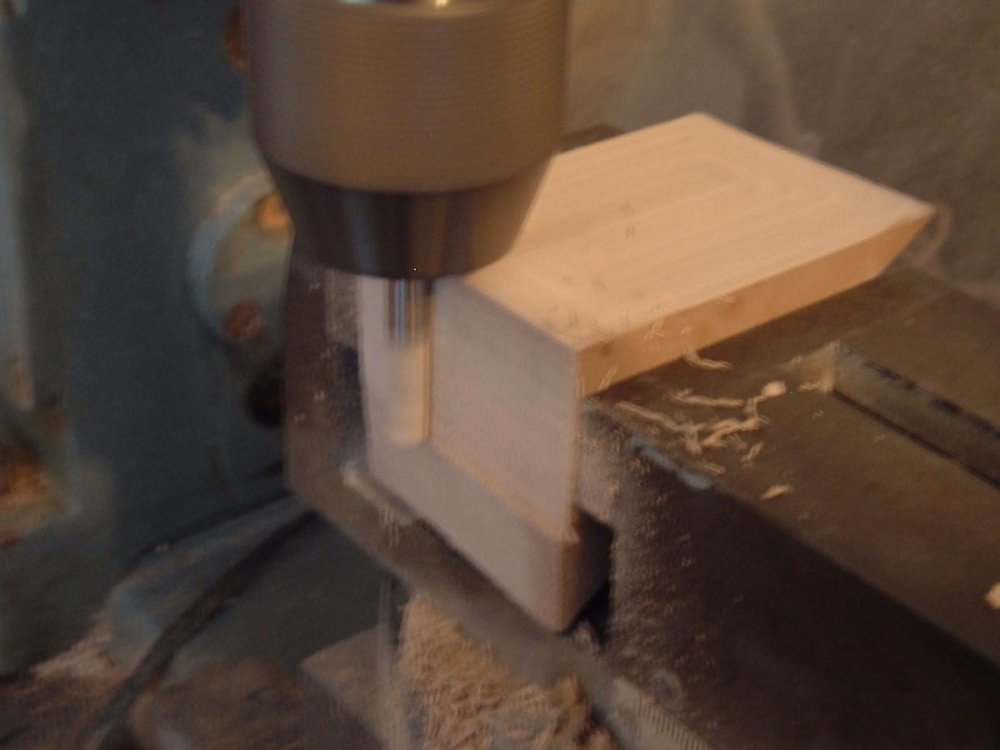
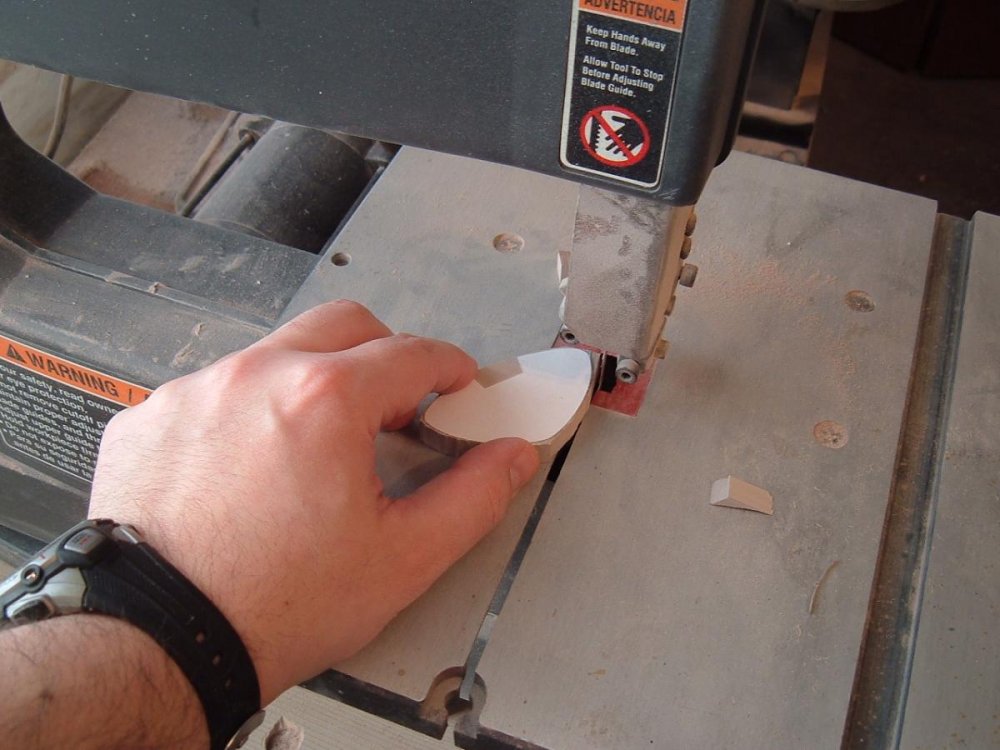
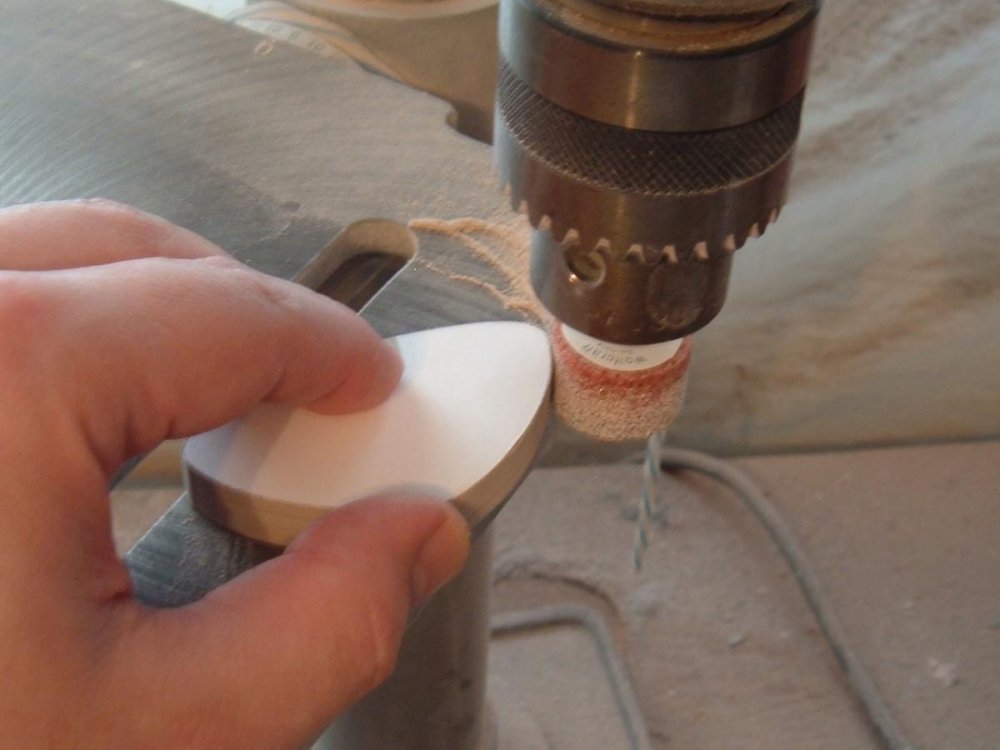
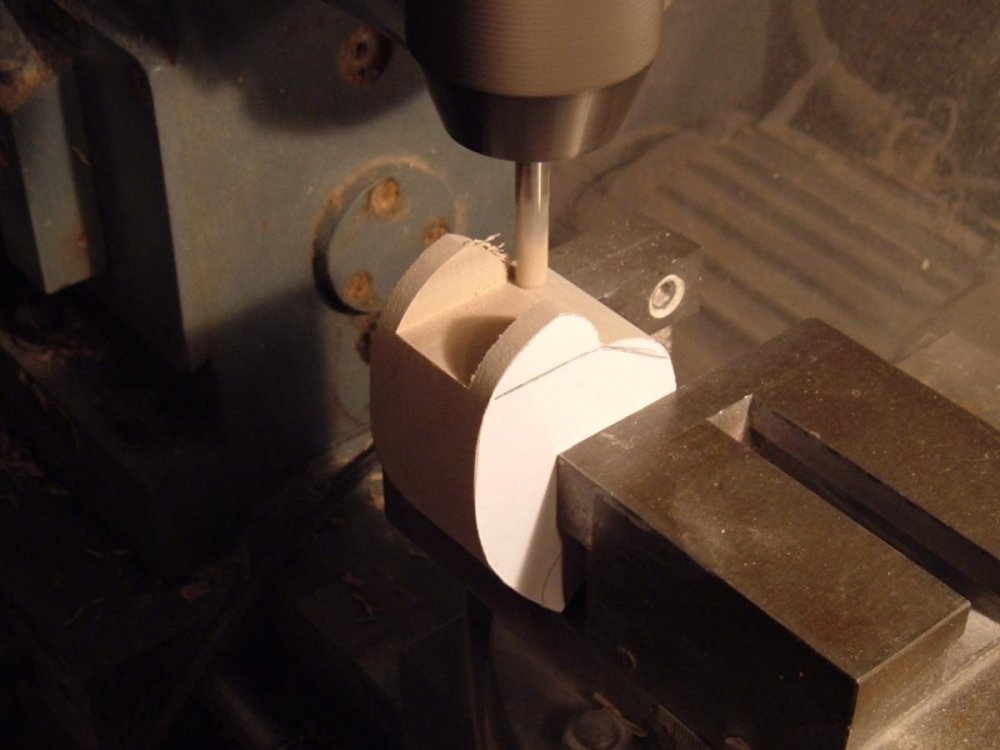
Captain's log: Friday, after lunch. My breath smells like garlic... So here we are once again, at the very beginning of another sculpting project. As per tradition, my very first task was to go and collect as much reference as possible on the Inbit Eager and thanks to teh interwebs, the task is a fairly simple and straightforward one. That being said, I always keep my old Palladium REF Field Guide book handy, as it has a wealth of drawings and sketches, some of which aren't so common online. Very useful indeed! Once that is done, I sit down and draft some rudimentary plans for the larger shapes and components, so as to make construction easier and more precise. Once those have been printed to scale, I can now dive into the fun stuff! DSCF5197: some printed line-art, tools, modeling board and putty: these are the building blocks (much pun intended) from which the itty bitty baby crab will emmerge. DSCF5198: paper stencils are carefully cut and will be glued to modeling board, it just makes my life so much easier. DSCF5200: before I can glue the stencils to the modeling board, I have to machine my various bits of it to properly squared shapes, which is where the mill comes in handy. DSCF5201: so now that some blocks are prepared, the paper stencils are affixed with spray adhesive. You might notice that some blocks are cobbled-together with smaller bits, which I can get away with on certain things thanks to a good CA glue. Planks of modeling board are costly, so I try to waste as little as possible. DSCF5202: using a band saw, I trim away as much excess material from the stencil as possible. I generally leave a little excess as it's easier to remove less at a time than repair a block. DSCF5203: whatever the band saw doesn't remove will be ground-down with a large polishing stone mounted to my drill press. this is great for fine, precise work. DSCF5204: this is what will become the space booster. It has gone from the mill to the band saw to the grinder, to the Dremel and back to the mill. Complex shapes require numerous operations, so this is nothing unusual. DSCF5205: speaking of Dremel, here's where the bulk of the important but thankless work gets done. Even with a vacuum to suck away most of the dust, it's still extremely messy work. DSCF5206: here are some basic parts which are starting to take shape. I've already started shaping the main crab shell with sanding blocks and rough sandpaper, with a few other parts being refined as well. Will have another update next Friday, so stay tuned!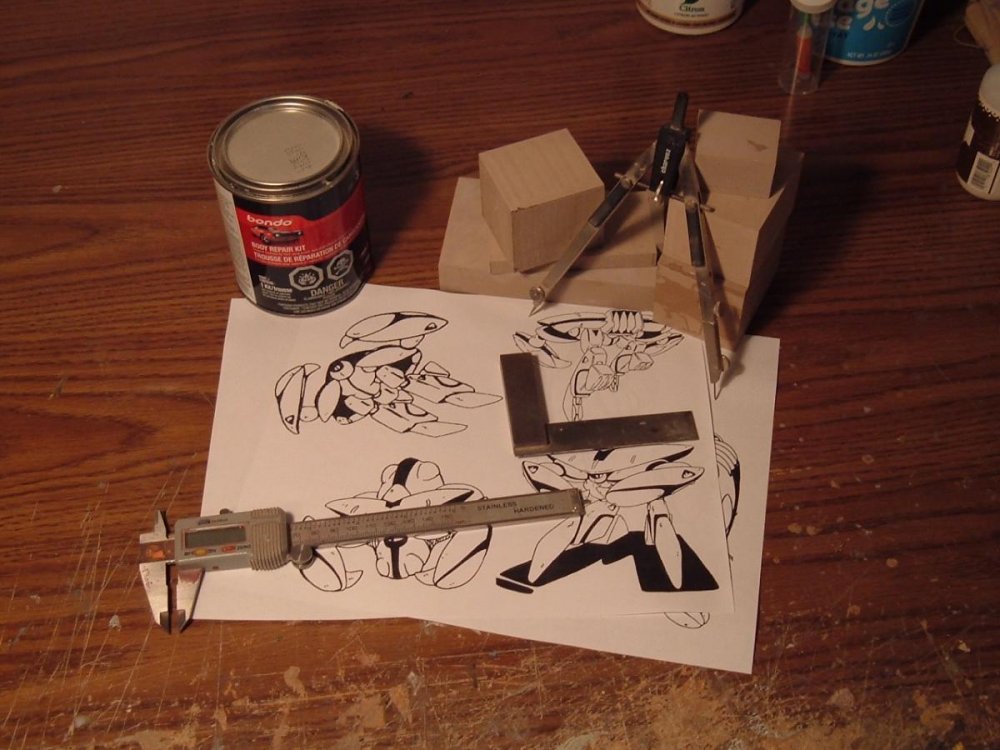


-
Moo-Suu-Pii-Dah In-Bii-Toh: the final
captain america replied to captain america's topic in Anime or Science Fiction
Hi Zach, PM me and I'll shoehorn you in -
Moo-Suu-Pii-Dah In-Bii-Toh: the final
captain america replied to captain america's topic in Anime or Science Fiction
Hi guys! Just wanted to let you know that I've started sculpting despite the crazy last few days. Please don't forget to send in your payments, it'll really help me out -
Moo-Suu-Pii-Dah In-Bii-Toh: the final
captain america replied to captain america's topic in Anime or Science Fiction
Hi guys! I've started the technical drawings and will slowly shift-over to sculpting come Monday. It begins... -
Moo-Suu-Pii-Dah In-Bii-Toh: the final
captain america replied to captain america's topic in Anime or Science Fiction
Hi guys! As promised, here I am to shake you down for funds for the Baby Crabb project. One set: $115.00 Shipping: -Canada/USA: $30.00 CAD (up to 2 sets) -International: $55.00 CAD (up to 2 sets) Kindly note that payments need to be in Canadian dollars (which paypal can convert for you when you make payment.) Paypal ID is the same as before. I'll send out some PMs as well and am happy to field any questions that you might have. Ready... Set... GO! -
Moo-Suu-Pii-Dah In-Bii-Toh: the final
captain america replied to captain america's topic in Anime or Science Fiction
Of course I can. Criteria have been met and I'll start shaking you guys down for cash on Monday the 10th... Sculpting will very likely start on the 15th, if not slightly sooner. Thanks guys!! -
Moo-Suu-Pii-Dah In-Bii-Toh: the final
captain america replied to captain america's topic in Anime or Science Fiction
...And by "later," I meant several days later... Crazy schedule these days. -
Haha! I fell right into that one... Nice build of a classic kit though!
-
Moo-Suu-Pii-Dah In-Bii-Toh: the final
captain america replied to captain america's topic in Anime or Science Fiction
25. Got a PM for a set, so just 5 more! I'll post something in the For Sale section later -
Moo-Suu-Pii-Dah In-Bii-Toh: the final
captain america replied to captain america's topic in Anime or Science Fiction
Looking good, guys! We're almost there -
Moo-Suu-Pii-Dah In-Bii-Toh: the final
captain america replied to captain america's topic in Anime or Science Fiction
Oddly enough, the confusion seems to have started after my edit, so just to clarify, One kit contains: -2 complete baby crabs -1 space booster -
Moo-Suu-Pii-Dah In-Bii-Toh: the final
captain america replied to captain america's topic in Anime or Science Fiction
Yup, that's the one! -
And so, we have come to the final 1/48 Inbit project: the Eager scout, hereinafter The Baby Crab. So here's what I had in mind: one kit would contain two complete Baby Crab kits w/beam cannons, as well as one space sled (booster.*) $115 for the set and I'd need 30 confirmed orders to get the project going. And so now I turn the microphone over to you. Who wants in? *Edited product description
-
A 1/48 Inbit Protector would be tiny and would probably come out better via 3D printing. Perhaps EXO would be willing to tackle that little bugger?
-
Mo-Suu-Pii-Dah Goh-Suu in 1/48
captain america replied to captain america's topic in Anime or Science Fiction
Are people suddenly eager for Eager? I'll start a thread on that early next week. -
Not worth it, the hands are among the worst parts in the kit. Better off taking some round Gundam hands which will be far better quality.
-
I would start off with offering Soldier mode and see what type of demand there is... After the baby crab of course!
-
I'm starting to think that this may very well be needed. Perhaps after the Eager (Baby Space Crab)
-
The Imai kit is actually touted as being 1/48... In a world where a fully-grown adult male is 4 feet tall. I loathed that kit so much when I was a kid: the engineering really fails on so many levels it's not even funny. The non-variable 1/72 kits are not only better but also probably the best plastic Legioss representations.
-
Mo-Suu-Pii-Dah Goh-Suu in 1/48
captain america replied to captain america's topic in Anime or Science Fiction
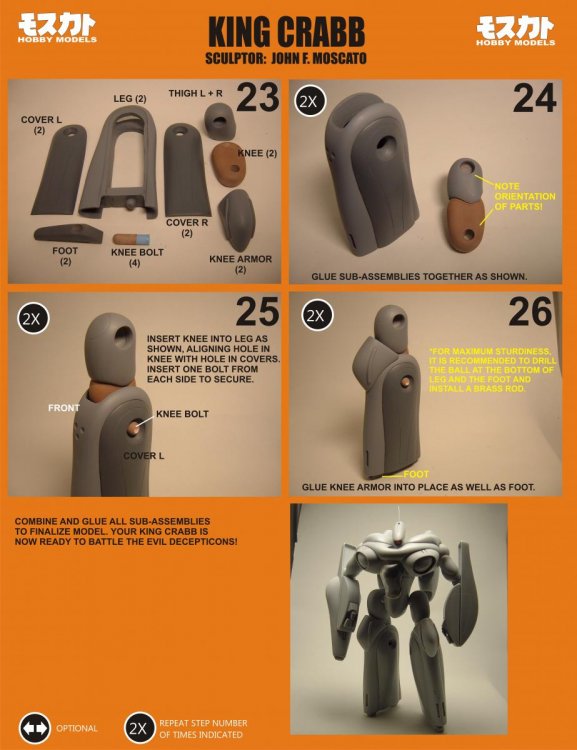
Destructions! Will try to have a couple of completed cockpit shots by week's end. Enjoy

-
Mo-Suu-Pii-Dah Goh-Suu in 1/48
captain america replied to captain america's topic in Anime or Science Fiction
2/3 of kits shipped. Will have destructions ready early next week!