captain america
-
Posts
3563 -
Joined
-
Last visited
Content Type
Profiles
Forums
Events
Gallery
Everything posted by captain america
-

Aircraft Super Thread Mk.VII
captain america replied to David Hingtgen's topic in Anime or Science Fiction
To be fair, it would have to be an all new airframe designed with new systems in mind, utilizing the F-14's outer shape and overall aerodynamics only. I could be wrong, but I think that avionics are a little bit like operating systems in that you start off with an initial system and then as new threats/missions emerge, patches have to be implemented, and with fighters, that means more boxes and widgets which take up weight and space inside the airframe, and sometimes updates are limited because they have to be backwards-compatible with the original system. The older a system is, the more "patches" it requires. That said, if you're starting from a clean slate with all new systems, that can be a huge advantage. I think that the Russians have/had a useful approach when designing the SU-27 in that they felt that the aerodynamic design had to be excellent to start with, and that whatever gimmicks are added (thrust-vectoring, stealth, etc) should only enhance/complement the existing design. That's my mindset, and something I think US designers have strayed away from. It doesn't mean that my ideas are necessarily better, maybe it would be a total flop. I do think the ideas are worth exploring though. -
Aircraft Super Thread Mk.VII
captain america replied to David Hingtgen's topic in Anime or Science Fiction
Duuude! If I had time to build models I'd scratchbuild that sucker in 1/32. It should theoretically be feasible to increase the missile load from 8 to 10 or 11 as well, given the shorter fins of the AMRAAM and weight savings over the AIM-54. -
Aircraft Super Thread Mk.VII
captain america replied to David Hingtgen's topic in Anime or Science Fiction
Maybe, maybe not. The general airframe design was already extremely good to begin with. An all new manufacture with greater use of composites, modern flight control system, radar, F135 engines w/MATV nozzles and updated wing glove could very well produce a scary-agile fighter, not to mention a significant improvement in combat range and supercruise capability. So many of the later designs had to make compromises to house weapons internally (weight penalty) and maintain low-observability. I remember back in the early days of the F-22, someone affiliated with the program said that the F-22 as actually LESS agile than the F-15 if not for its thrust-vectoring nozzles. The F-35 is probably in a similar situation. I can't help wondering if this current line of thinking isn't a déjà-vu of the massive blunder that was the gun-less F-4 back in the Vietnam era. -
Aircraft Super Thread Mk.VII
captain america replied to David Hingtgen's topic in Anime or Science Fiction
I haven't followed aircraft development much in the last 20 years, but I did stumble onto something rather interesting recently with regards to the venerable F-14. I remember even back before it was retired that naysayers would talk-down the capabilities of the AIM-54, saying that it was really only useful for hitting large, slow bombers and that fighters could easily evade the missile. Well it seems that veteran Iranian pilots and researchers have brought some interesting information to that old debate. It certainly surprised me! Also, I found this: http://foxtrotalpha.jalopnik.com/top-gun-day-special-the-super-tomcat-that-was-never-bu-1575814142 This part made me tingle in my special place: "Even without thrust vectoring, the aerodynamic enhancements found on the ASF-14 would allow the jet to reach over 77 degrees of sustained AoA, but thrust vectoring was also to be part of the new design which would have made it the most maneuverable fighter of all time." -
The Transformers Thread (licensed) Next
captain america replied to mikeszekely's topic in Anime or Science Fiction
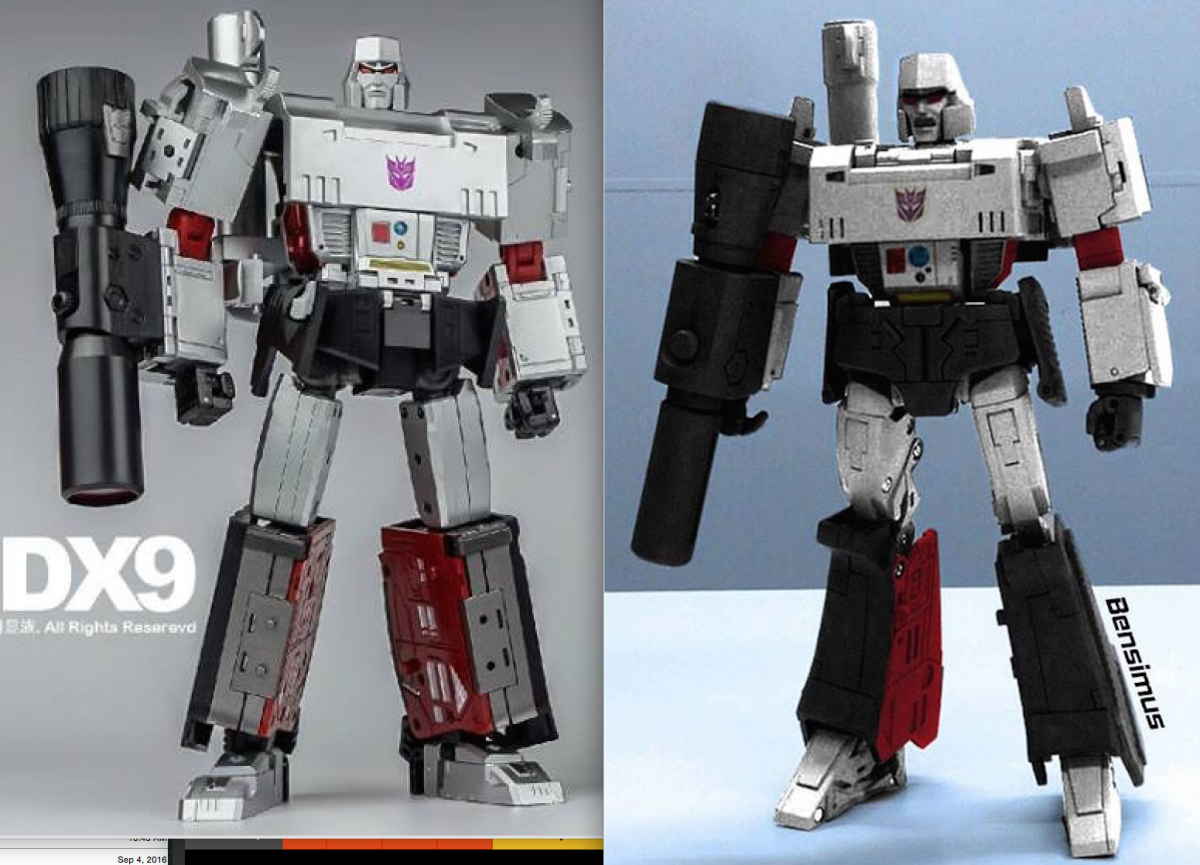
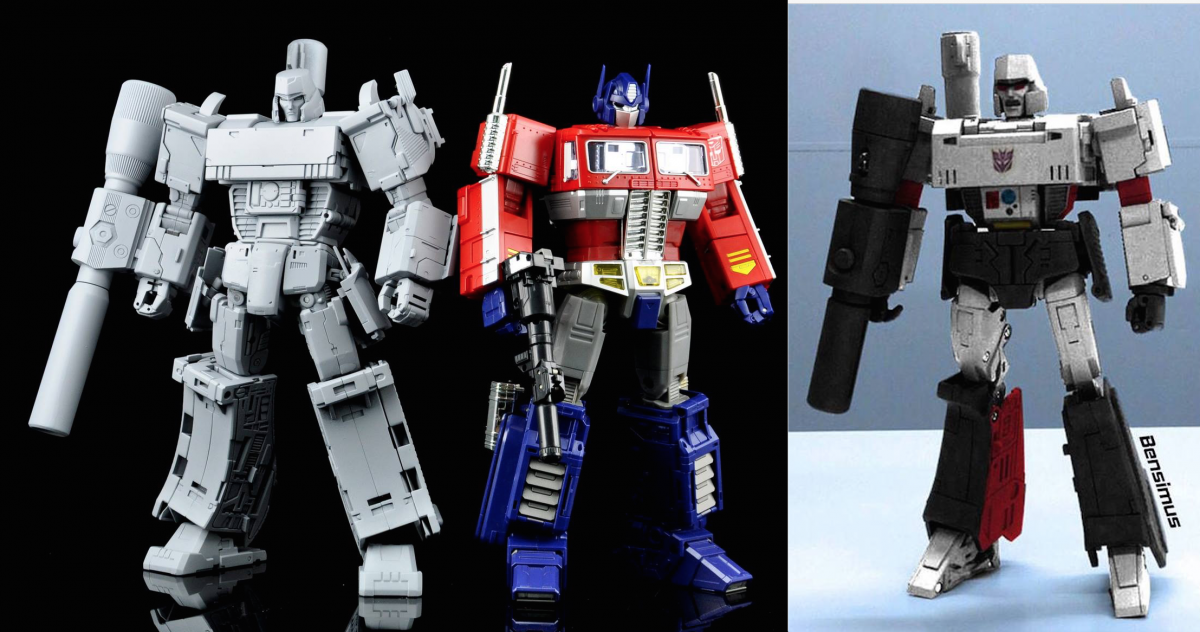
I gotta say, I think Takara is losing ground to third-party manufacturers. I commend them for their efforts, but I think that Mightron and Despotron are actually nicer: they're both beefier than Takara's Megs, and while it could be argued that Mightron's shallow thighs are a bit of a bug, or that Despotron leans more toward the comic's interpretation, they both at least have a menacing presence that Taka's almost scrawny Megs lacks. See for yourselves.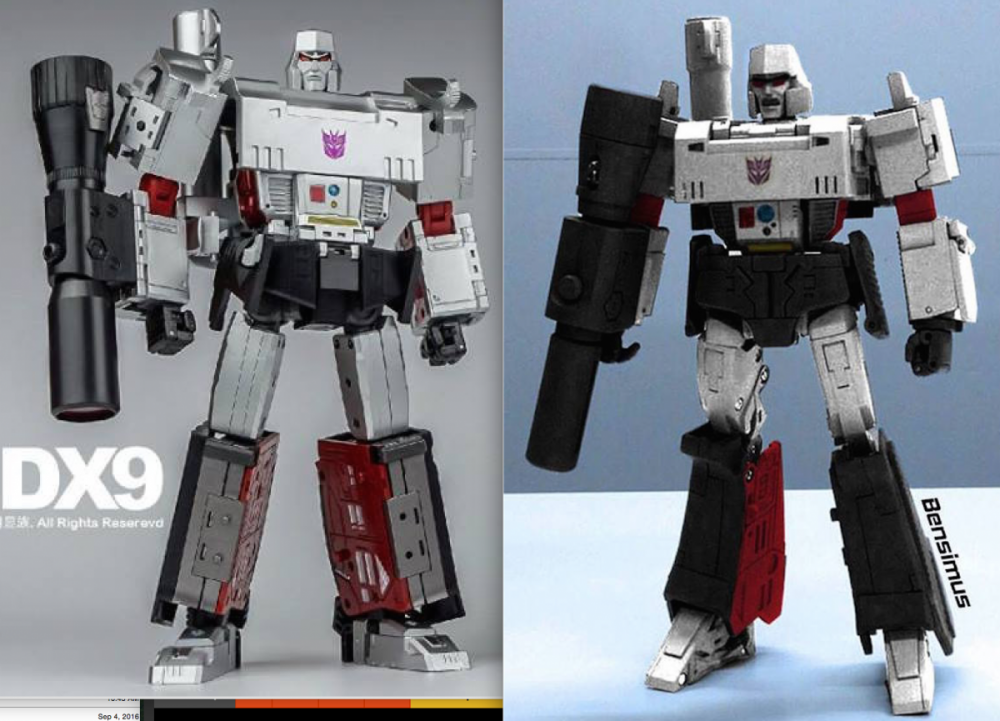

-
Gundam Show Thread - MSG thru GQuuuuuuX
captain america replied to Black Valkyrie's topic in Anime or Science Fiction
I wonder if they'll ever get around do doing an animated version of Gundam Sentinel. Quite sure it would be very polular! -
A beautiful lady leaves a mark on the soul even if you only see her for a fleeting moment.
-
The Unlicensed Third Party Transformers Thread
captain america replied to slaginpit's topic in Anime or Science Fiction
-
Thanks, I do more more supervising and approval now due to the complexity of that project. Cessation orders: they couldn't before either! With research, I had figured-out that there are perfectly legal loopholes to licensing. In short, just avoid using any trademarked names or logos. Robot designs themselves are not patented, it just wouldn't be cost-feasible to do so. Just look at how third-party Transformers toy manufacturers proceed, they understand the game too.
-
My dream is becoming reality!

-
Guillermo Del Toro’s ‘Pacific Rim'
captain america replied to fifbeat's topic in Anime or Science Fiction
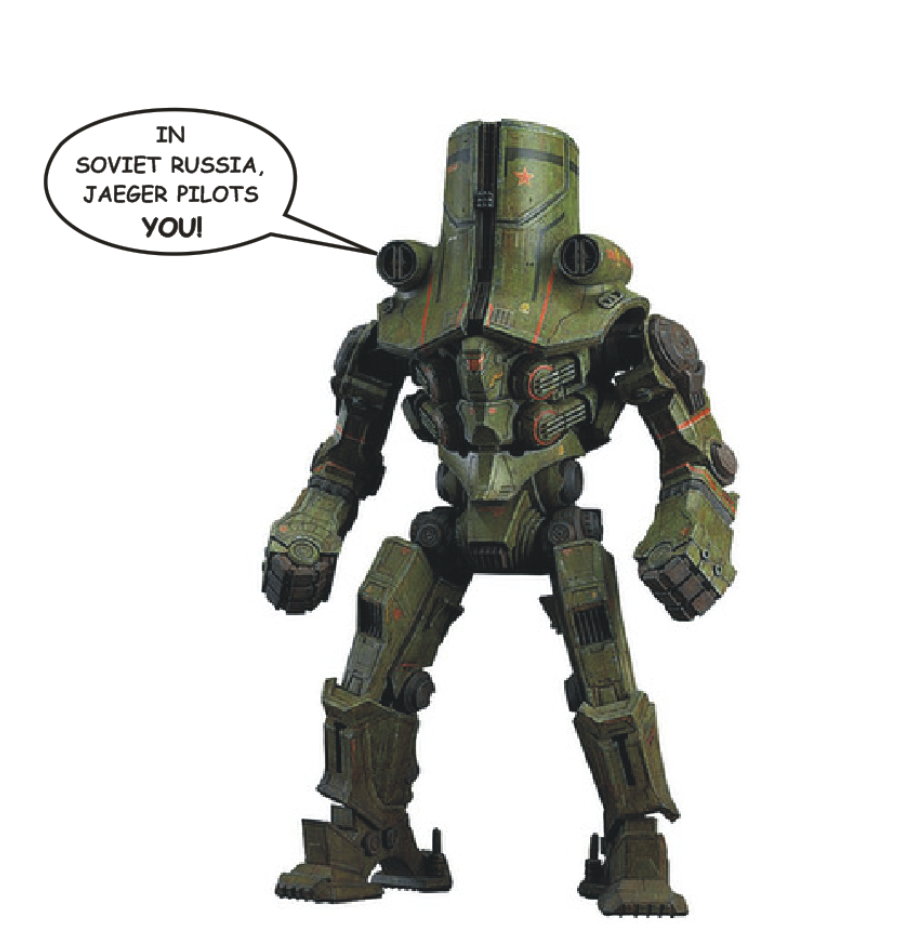
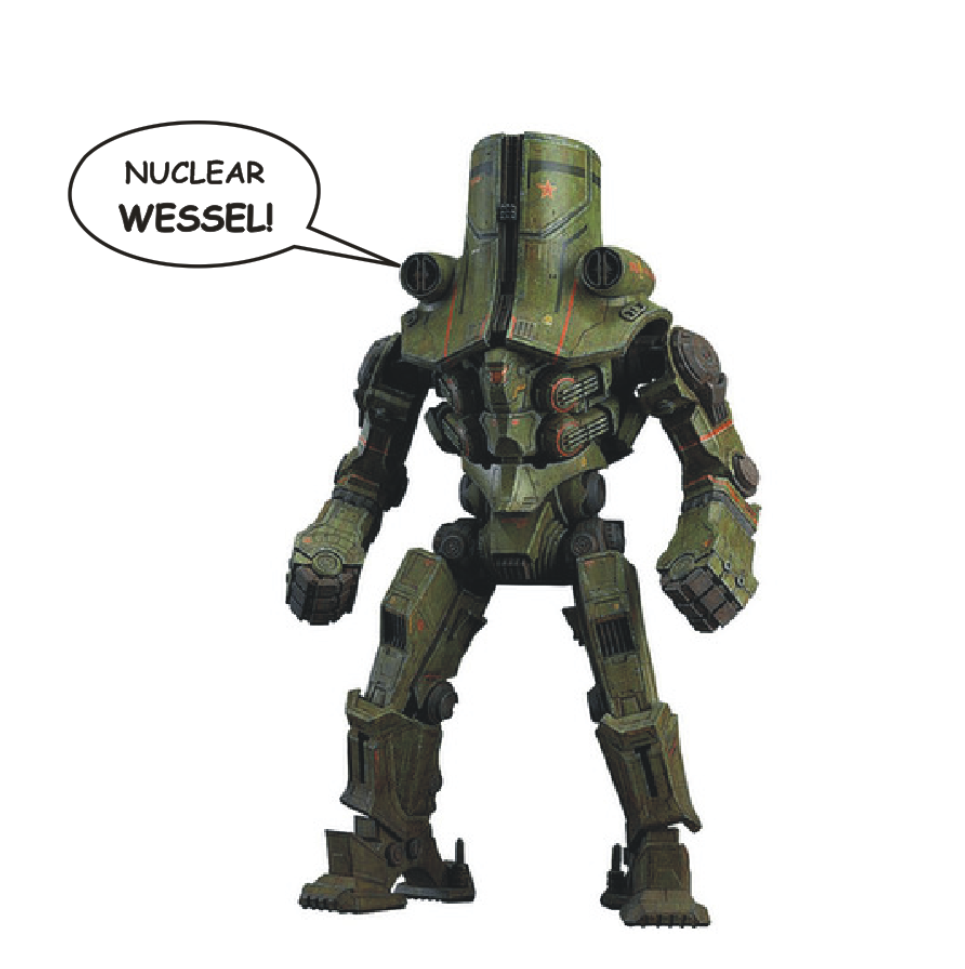
Anyone notice how those horizontal slits near the top of Cherno's head look like eyes, the spotlights like a nose, and that lower horizontal/trapezoid shape like a mouth? I'm going to Kaiju hell and I don't care!

-
Guillermo Del Toro’s ‘Pacific Rim'
captain america replied to fifbeat's topic in Anime or Science Fiction
Chernobyl Alpha up for pre-order!! http://hlj.com/product/max01032/In_Soviet_Russia_robot_pilots_you -
Very nice work so far, congratulations! I'm liking the mods a lot... Just hope that with the new extended tail that it'll still fit in the hangar!!
-
That timeless adage springs to mind: when a deal sounds too good to be true, it probably is.
-
The glue may yellow ever-so-slightly over time, but does not affect or yellow the styrene like cement because it's not a solvent. The translucent armor mounted to the frame is glued from behind with a tiny amount of glue, so shouldn't show. The other advantage is that if you change your mind or want to remove the armor, the glue can be removed with your fingernails, leaving the plastic unblemished.
-
A shameless plug for the die-hard MOSPEADA collector: http://www.macrossworld.com/mwf/index.php?showtopic=44048
-
In a highly humid environment that's possible. Adequate ventilation will allow the cyanide to escape without depositing on the part, and you can also use tape to cover unglued surfaces as a precaution. I only recommend the CA glue for parts like the heels and the fanny anchor on the LED's butt because those parts are load-bearing. All the others pretty much mount on the frame, and that can be done with wood glue. It's possible that some cements like Tamiya extra-thin will yellow the plastic less, but it takes up to a year for discoloration to take effect so it depends on how lucky you're feeling.
-
The armor of the resin LED Mirage kit was cast in clear resin: it looked translucent because it had a slightly rough (satin) surface finish. Therefore, all one had to do was polish the surface and/or add a cleat-coat to make it clear again. The IMS kit is actually molded from milky white plastic, so no amount of polishing will increase its transparency. Also, be cautious when working with the translucent IMS parts, especially when separating them from the sprue: avoid twisting or cutting with pliers too close to the part, or it will leave an opaque white blemish. You may also want to look into using CA or white wood glue on the parts, as regular styrene cement can cause the plastic to turn yellow.
-
TRAN5FORMERS: The Last Knight
captain america replied to areaseven's topic in Anime or Science Fiction
I was skeptical when I first saw Optimus as a long-nose rig with flames, only to be pleasantly surprised with the movie. We don't know if that's an alternate Hotrod paint job or any other details yet. I'll wait and see before tossing the movie under the bus. -
They've really come a long way with the plastic FSS kits, to the point that I consider the plastic versions to be superior in many respects compared to their resin counterparts. The fact that a lot of the Vatshu's armor plates are separate adds an element of detail and realism that the molded-all-in-1-piece resin parts just couldn't convey.
-
I like it!
-
Star Trek Beyond (the not The Search for Spock)
captain america replied to areaseven's topic in Anime or Science Fiction
Just saw the movie and wasn't impressed. At. All. It felt like a drawn-out T.V. episode with slightly better effects. I thoroughly enjoyed the first two films, watched them multiple times in the theatre and at home, but I was constantly staring at my watch for this one, waiting for it to end. Also too many dark + confusing scenes. -
I guess that means that the final film is easily a year away at this rate, assuming that they already have some basic groundwork laid.
-
STAR WARS Merchandise Episode - 2
captain america replied to Black Valkyrie's topic in Anime or Science Fiction
I don't think Dragon can legitimately be considered competition for Bandai at this point, more like comedy relief. Have they actually released ANY Star Wars stuff yet? They really need to get their sh*t together if they want to contend with Bandai, and Revell already occupies the "best of the rest" spot. -
STAR WARS Merchandise Episode - 2
captain america replied to Black Valkyrie's topic in Anime or Science Fiction
More like a poor attempt at a Falcon, closer to what I'd expect from the likes of Revell. I can't help but wonder why licensees expend so much effort and money to cannibalize each others' market. What ever happened to their AT-AT, or Star Destroyer? Hey Dragon, here's an idea: why not offer us some 1/48 T-70s, or Y-wings or B-wings? You know, something that another company hasn't already brought to market 50 times better for roughly the same price?