captain america
-
Posts
3563 -
Joined
-
Last visited
Content Type
Profiles
Forums
Events
Gallery
Everything posted by captain america
-

1/12 INBIT PROJECT PROPOSAL
captain america replied to captain america's topic in Anime or Science Fiction
Hello all! I'm looking to re-issue this kit and so far things are looking good, because in about 24 hours I got 8 serious requests for it. If you'd like to get on-board, send me a private message.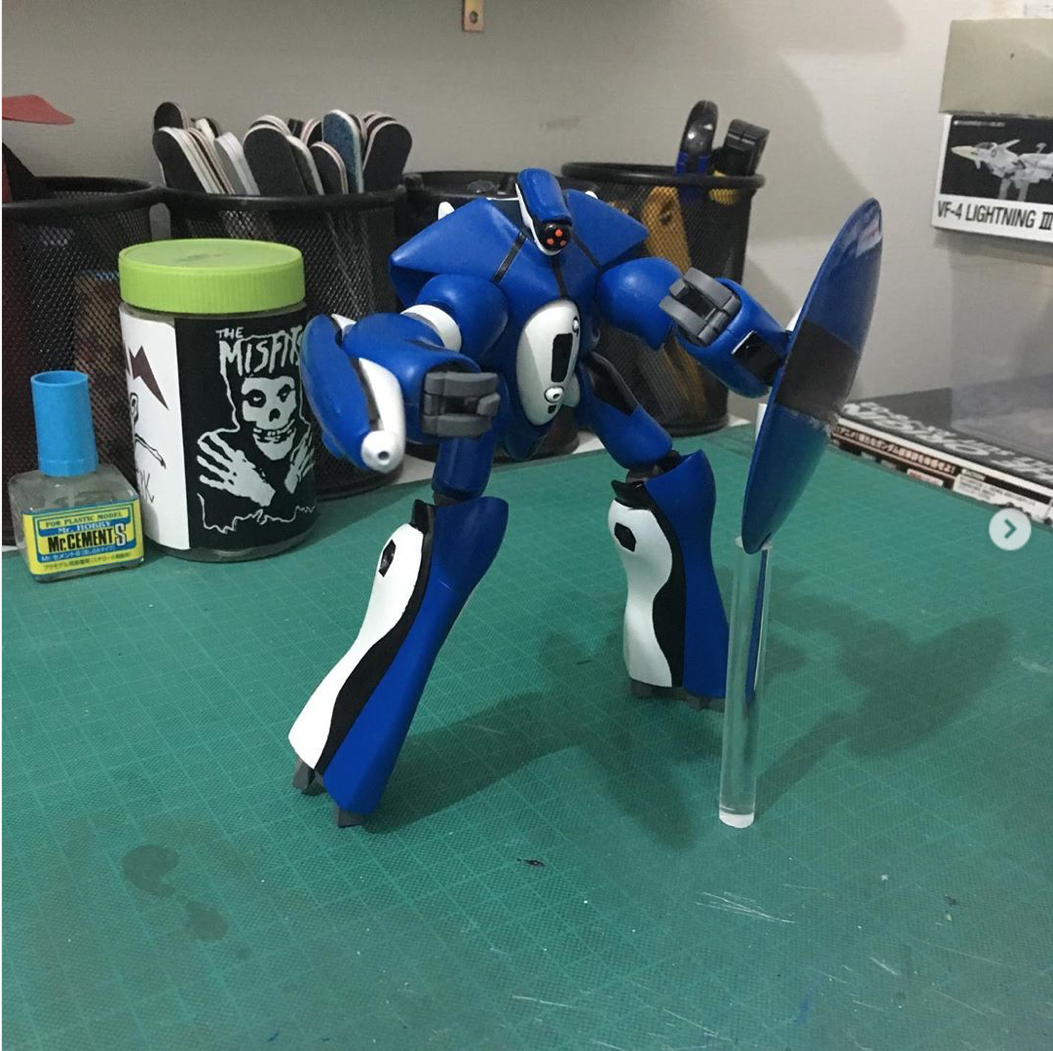
-
Aircraft Super Thread Mk.VII
captain america replied to David Hingtgen's topic in Anime or Science Fiction
-
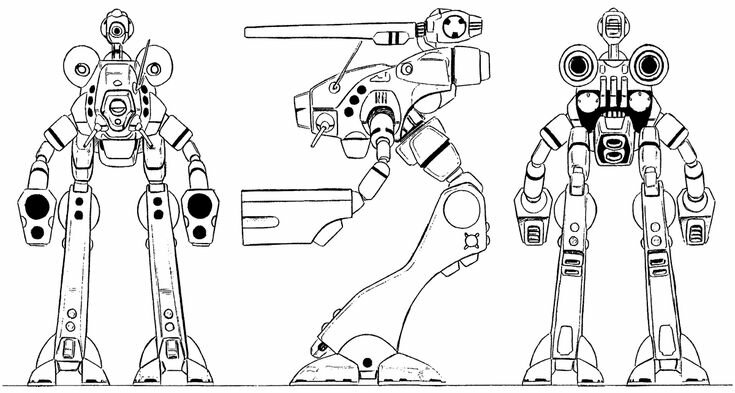
FWIW, my 1/72 Graug proportions were based on this (official) diagram. Hasegawa seem to have just winged it.
-
Aircraft Super Thread Mk.VII
captain america replied to David Hingtgen's topic in Anime or Science Fiction
Upon closer inspection of the footage, I wonder if it isn't simply a high-speed bomber/attack aircraft using similar tech (maybe even engines) as seen in the J-20. The double-bogey main gear would point to a heavy payload capacity, and other pics show three engine nozzles, so most likely a thirsty bird. A little detail most people missed is the blended/jointless control surfaces, which are very interesting!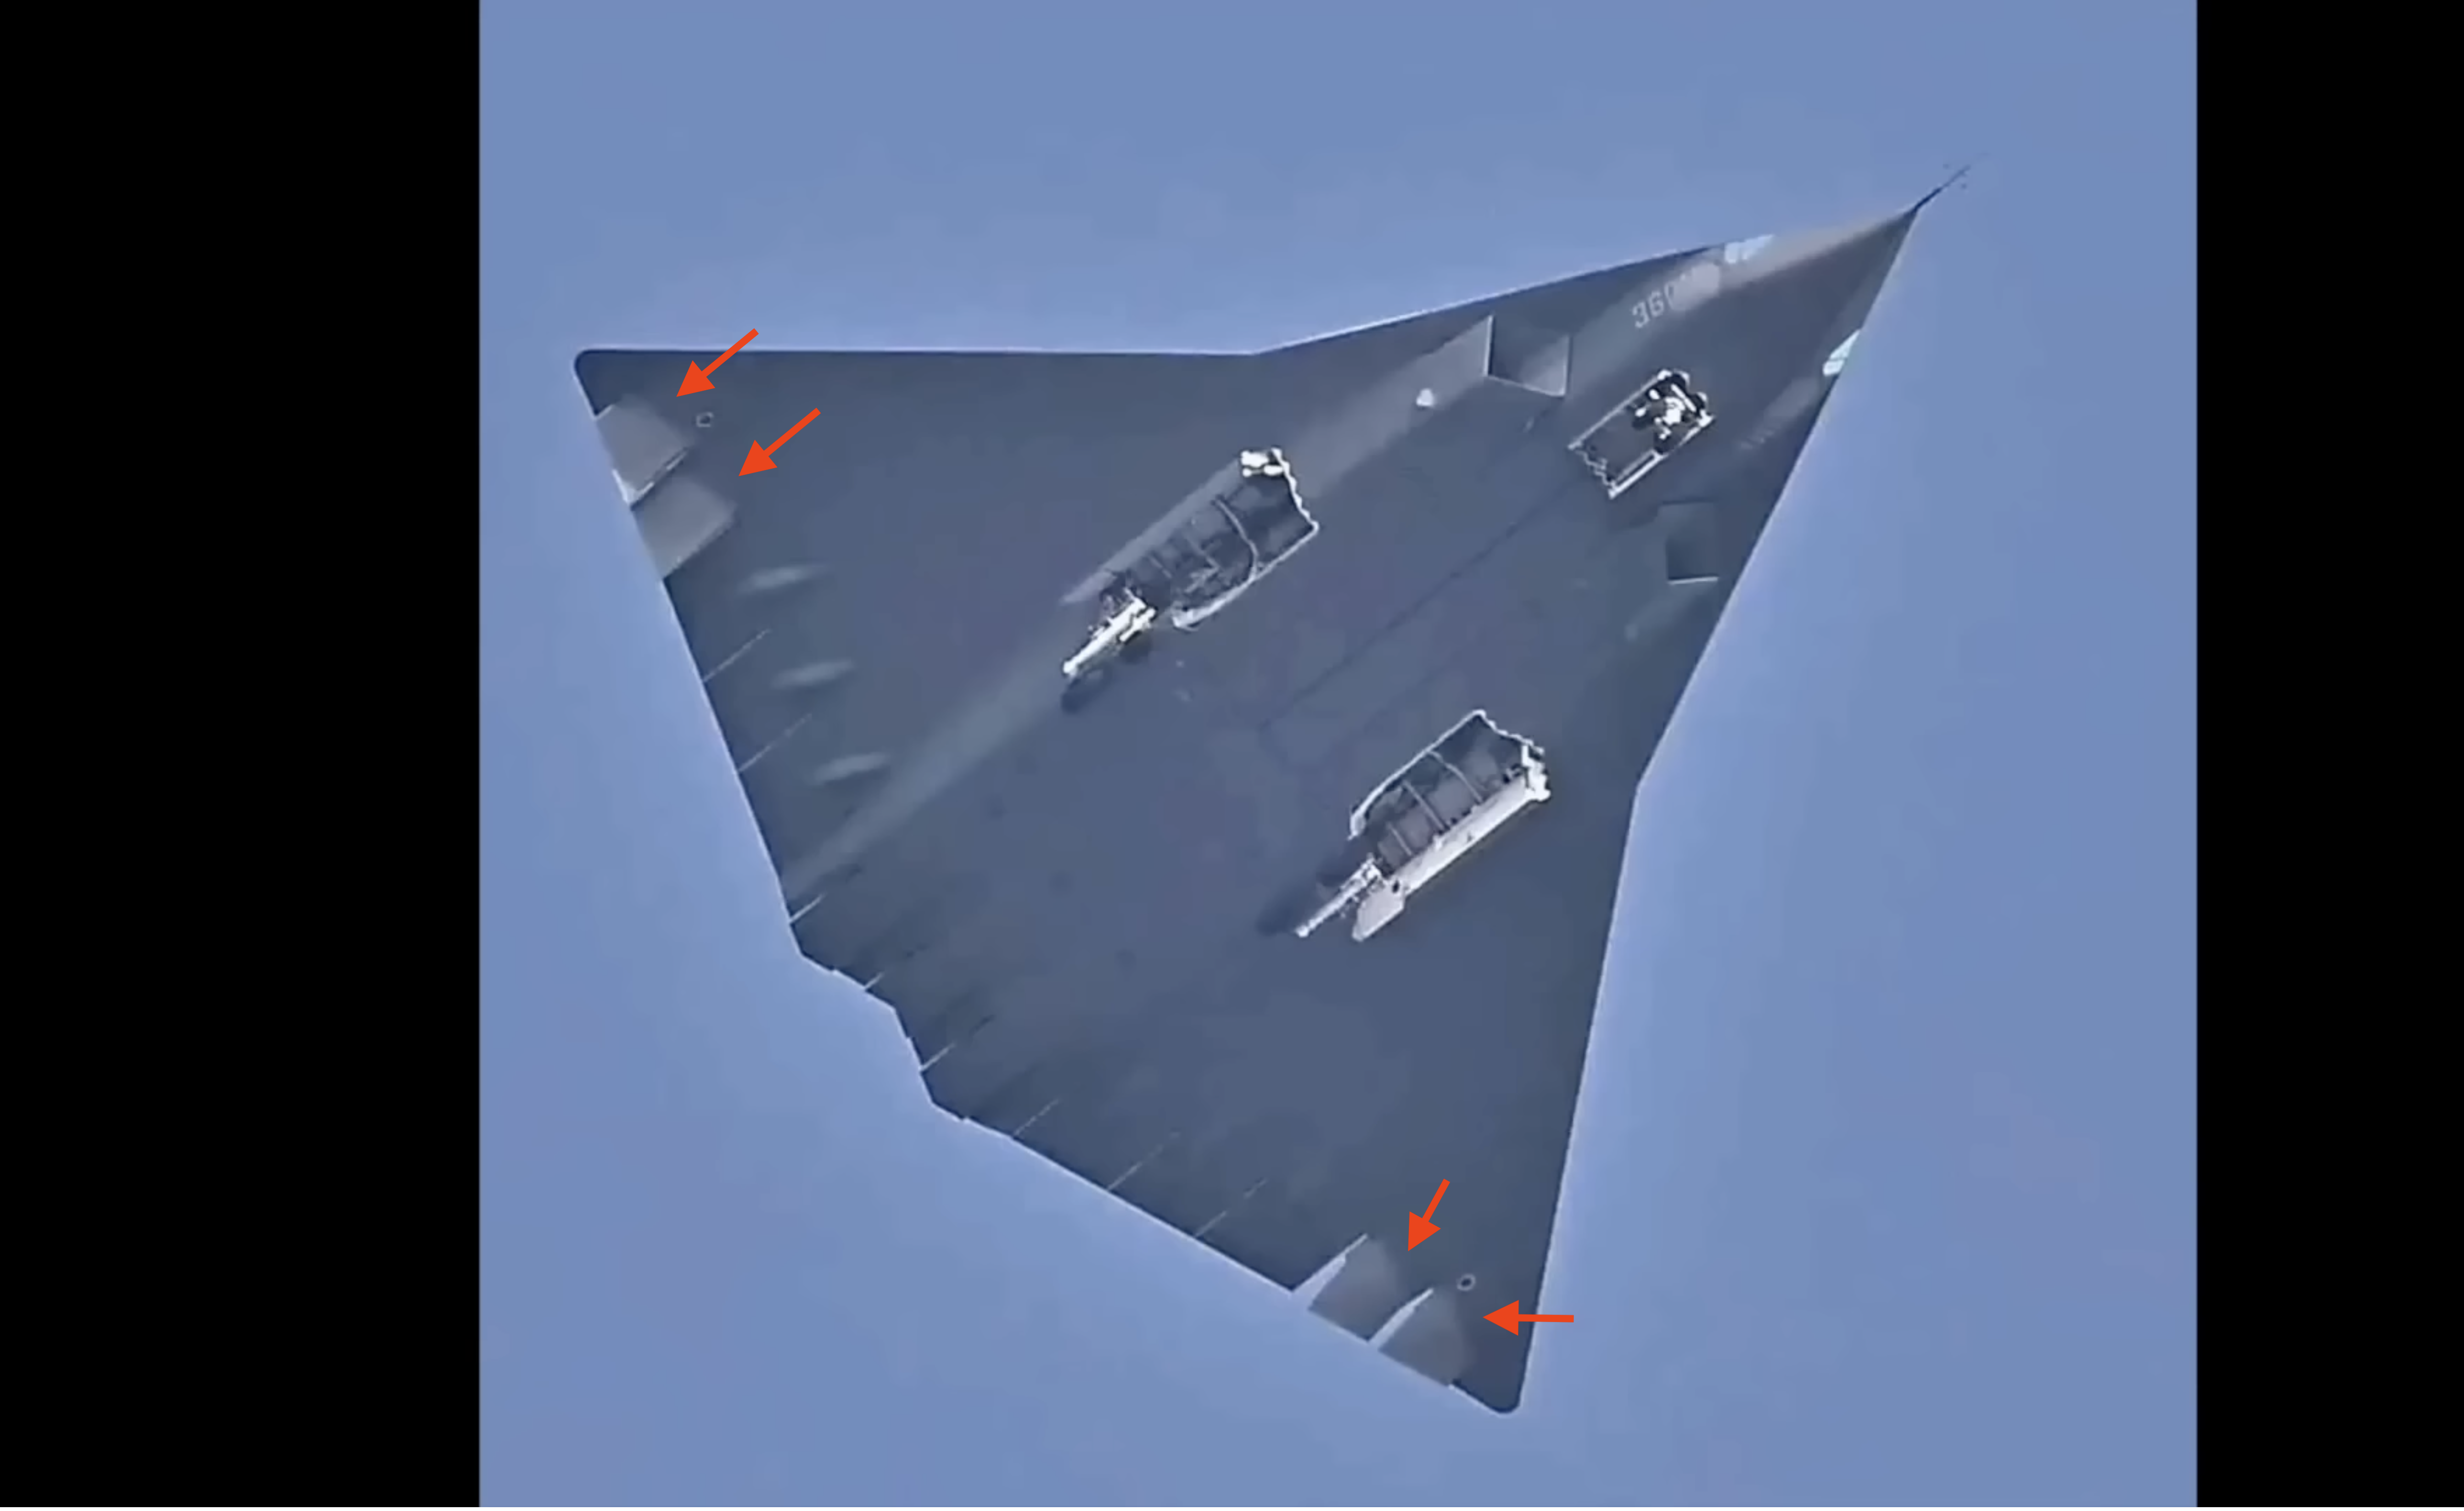
-
You're being generous! The Hasegawa offering is horribly disappointing in most regards: the surface detail is underwhelming in most places, the cockpit is a joke, and the pod shape and proportions are... WTF! I also don't understand where the gun pod molle/cheesegrater detail comes from, but seeing as how they consistently thumb their nose up at the source material on their Zentraedi offerings, this doesn't surprise me. It does have one advantage, though: it will be cheap (in every sense of the word.)
-
No Love for Southern Cross?
captain america replied to blacklotus's topic in Anime or Science Fiction
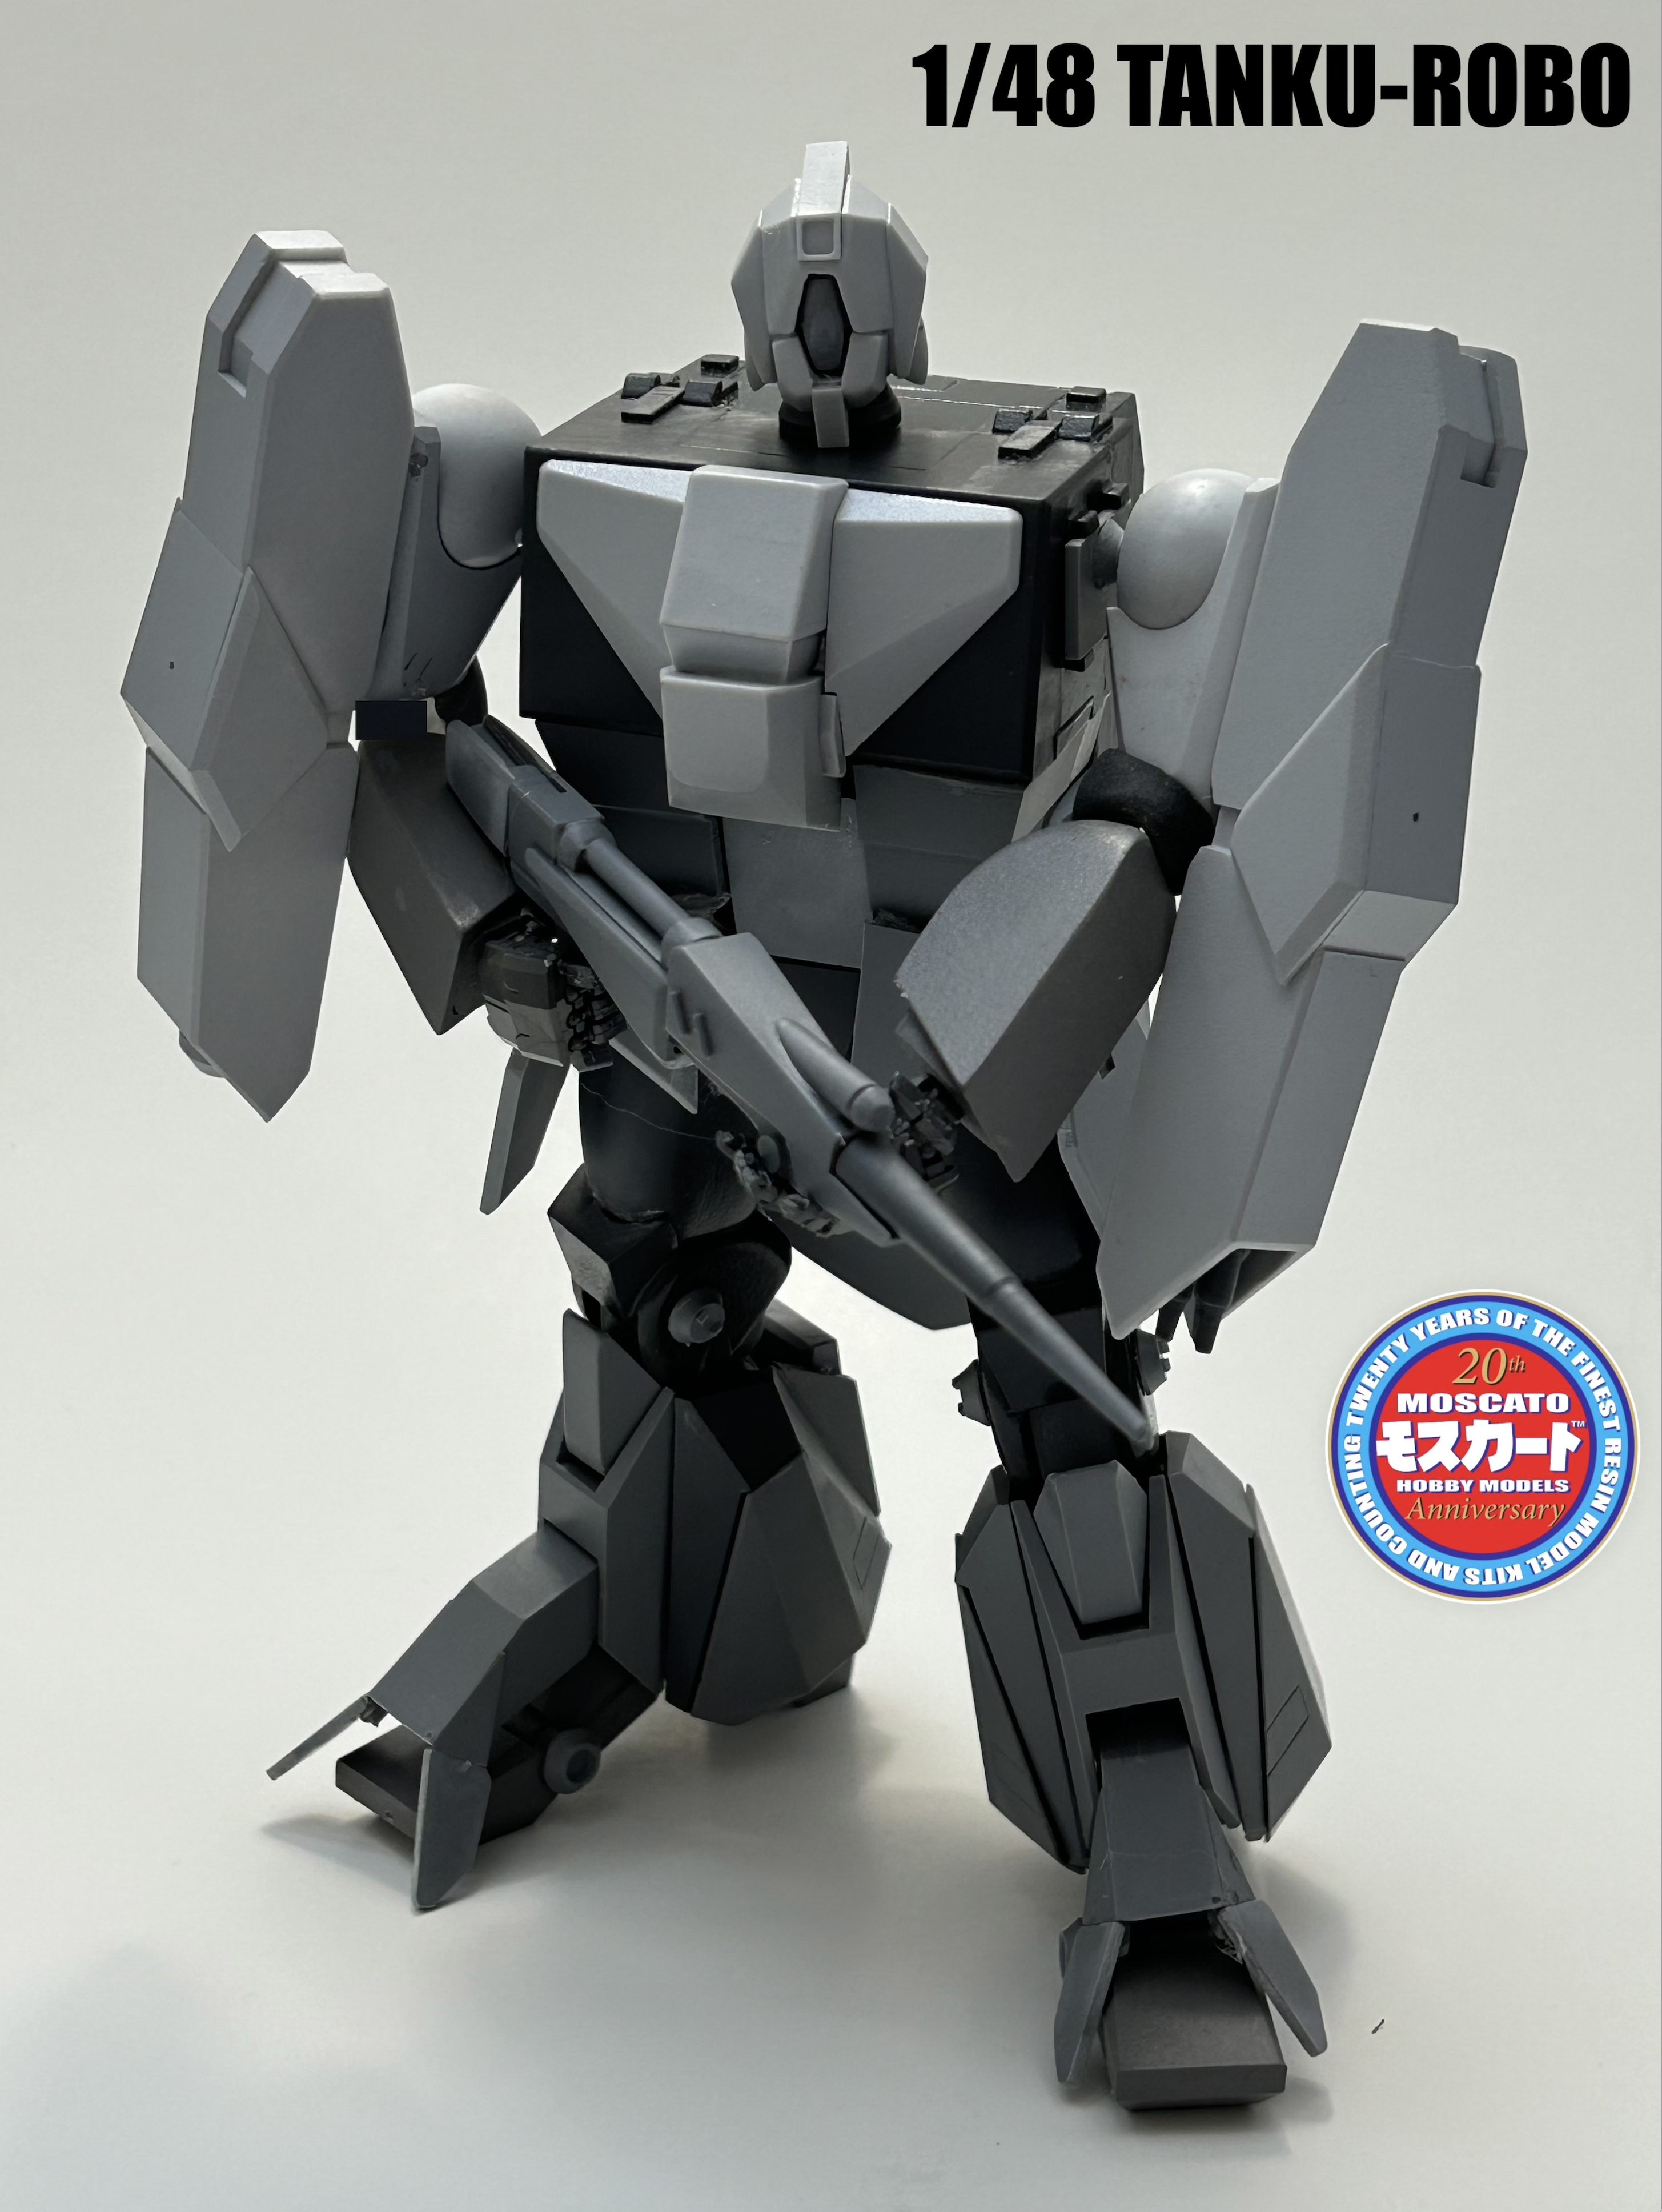
A Southern Cross wet dream come true!! At some point I'll have to update this pic with your lovely Tanku-Robo builds.
-
A Volks 1/100 Blood Temple! Is this SSS or SAV?
-
In the event of a reissue, I would incorporate improvements.
-
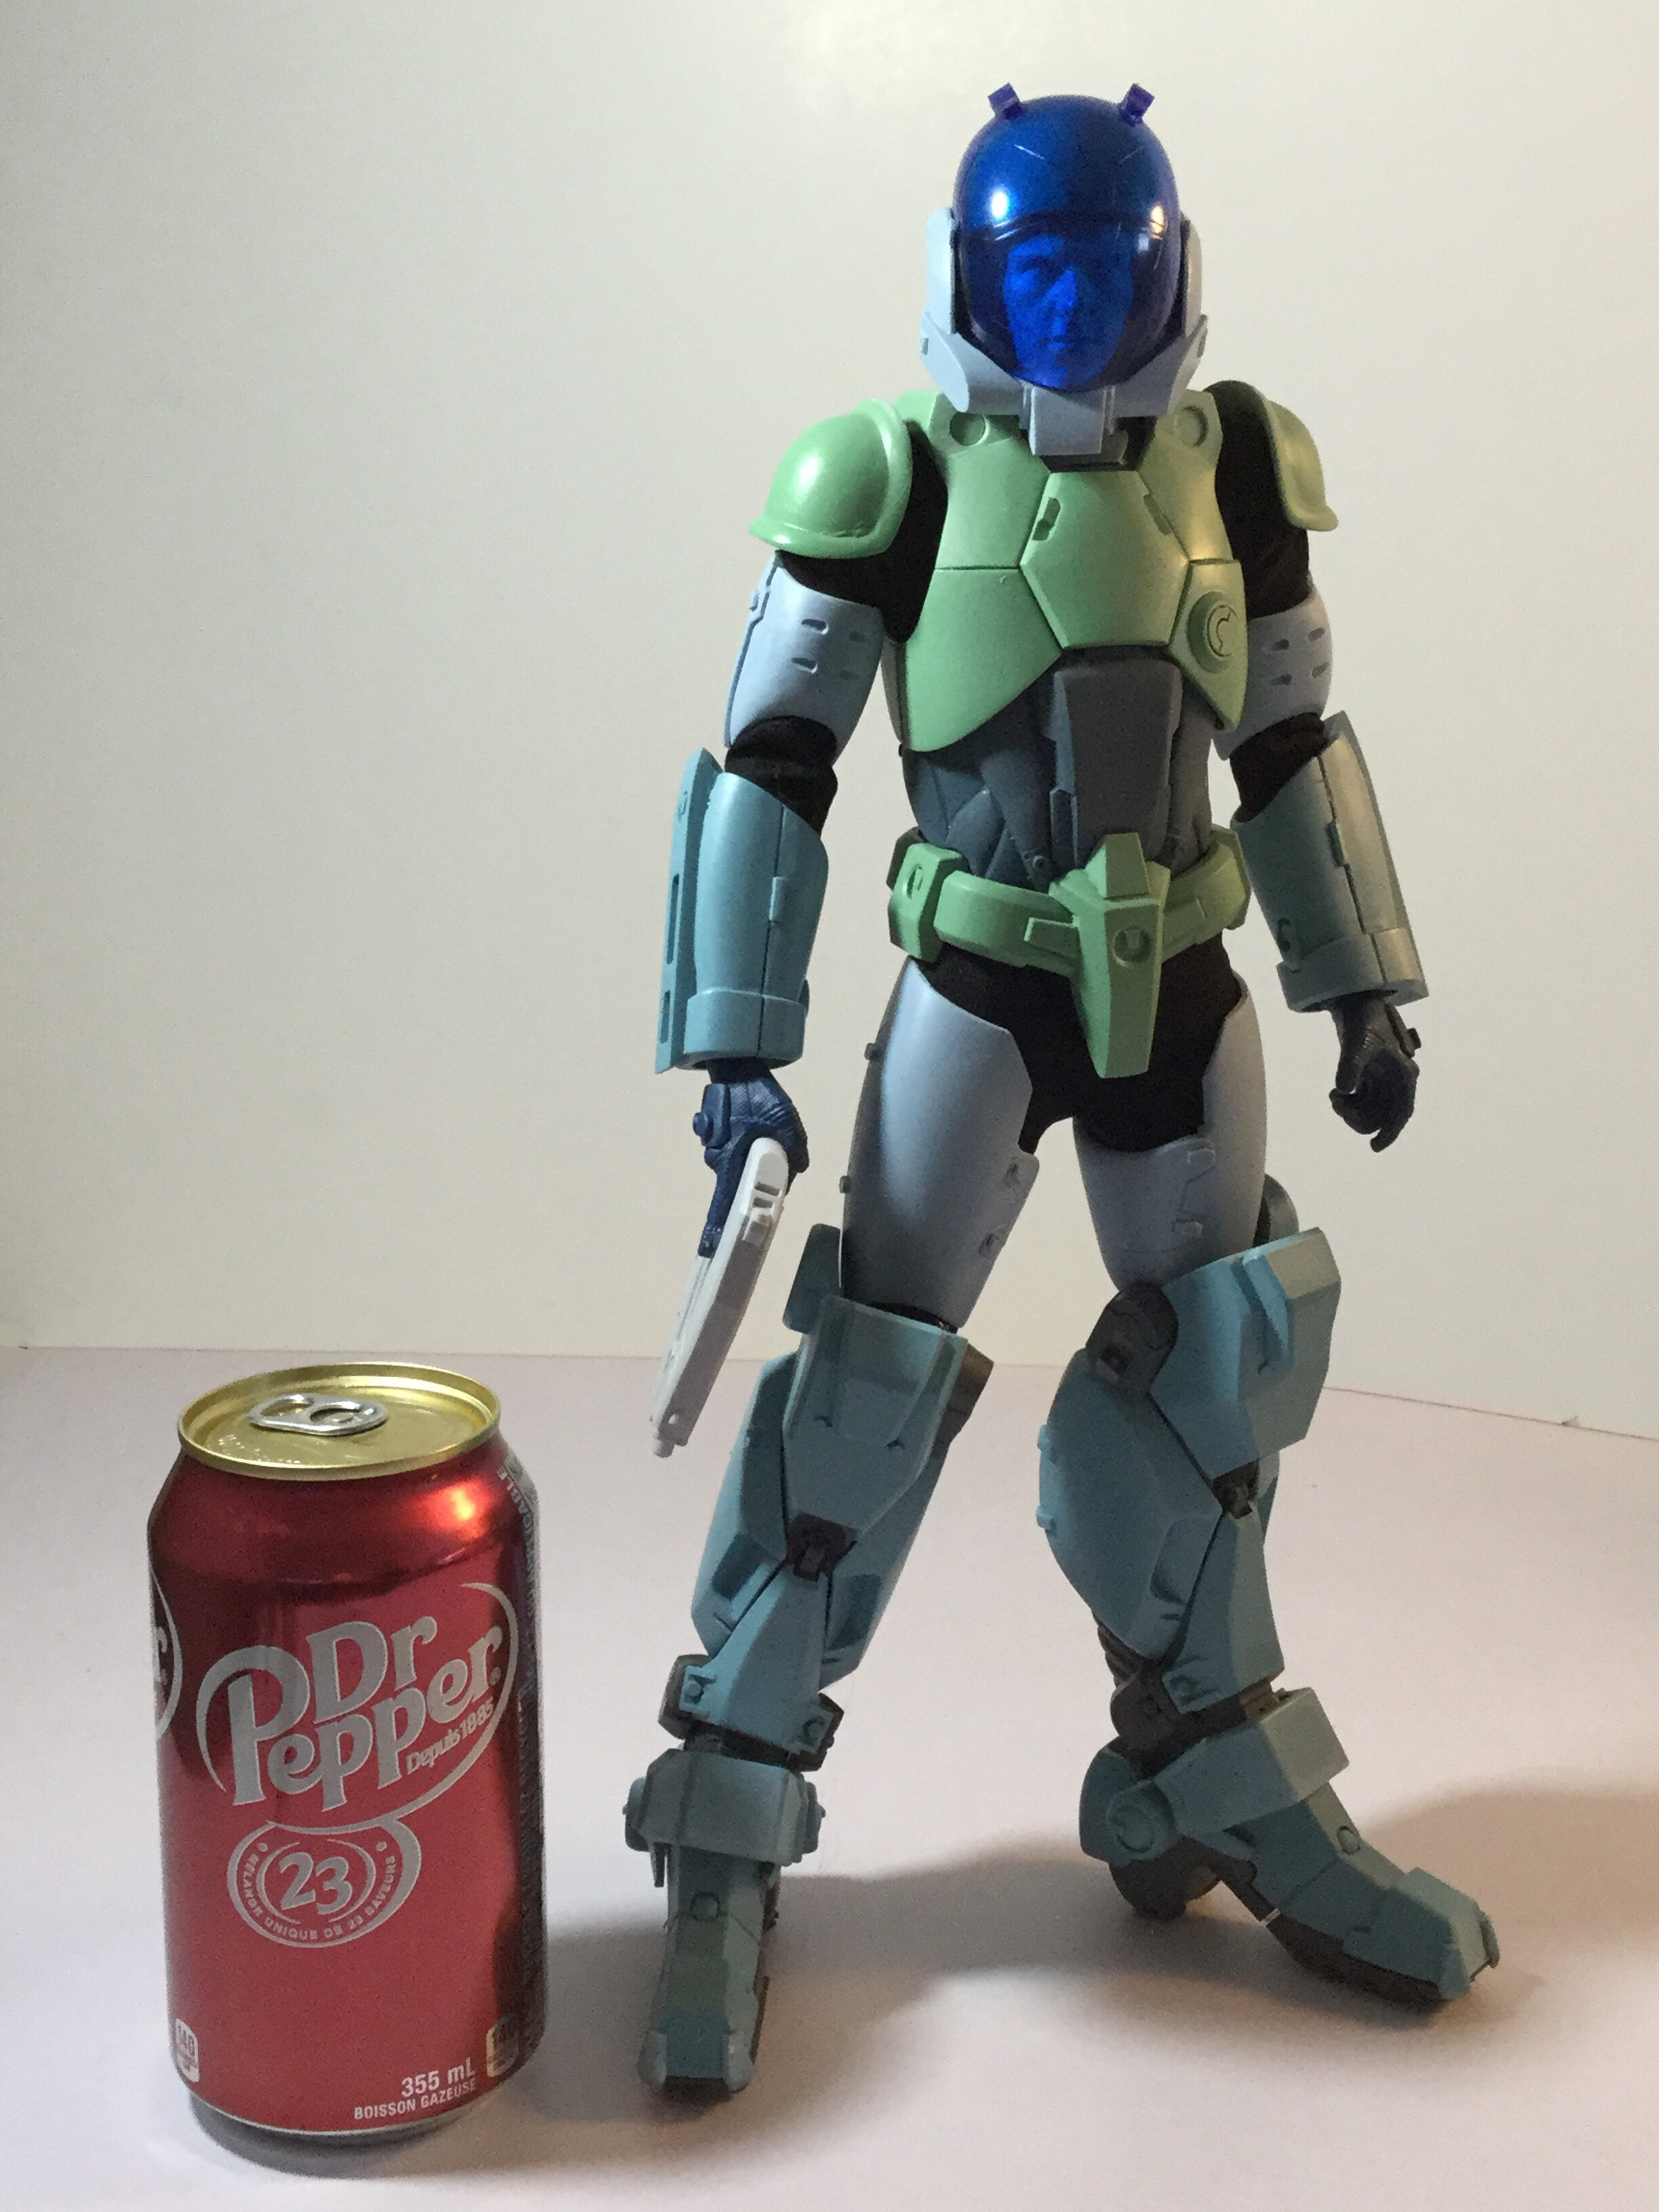
OoOooOoOoOh, I like the sneak-peek!! I think yours is the very first "normal type" Spartas model I've ever seen. Yes, I think you're right about the hands: as much as I wanted to have posable units, fixed, cast round hands just look way better and are more faithful. I see what you did with the elbow and you just gave me a great idea! With a bit of tinkering, I believe I can improve even upon what you did.
-
1/48 SOUTHERN CROSS BIOROID PART II
captain america replied to captain america's topic in Anime or Science Fiction
For those who may be interested...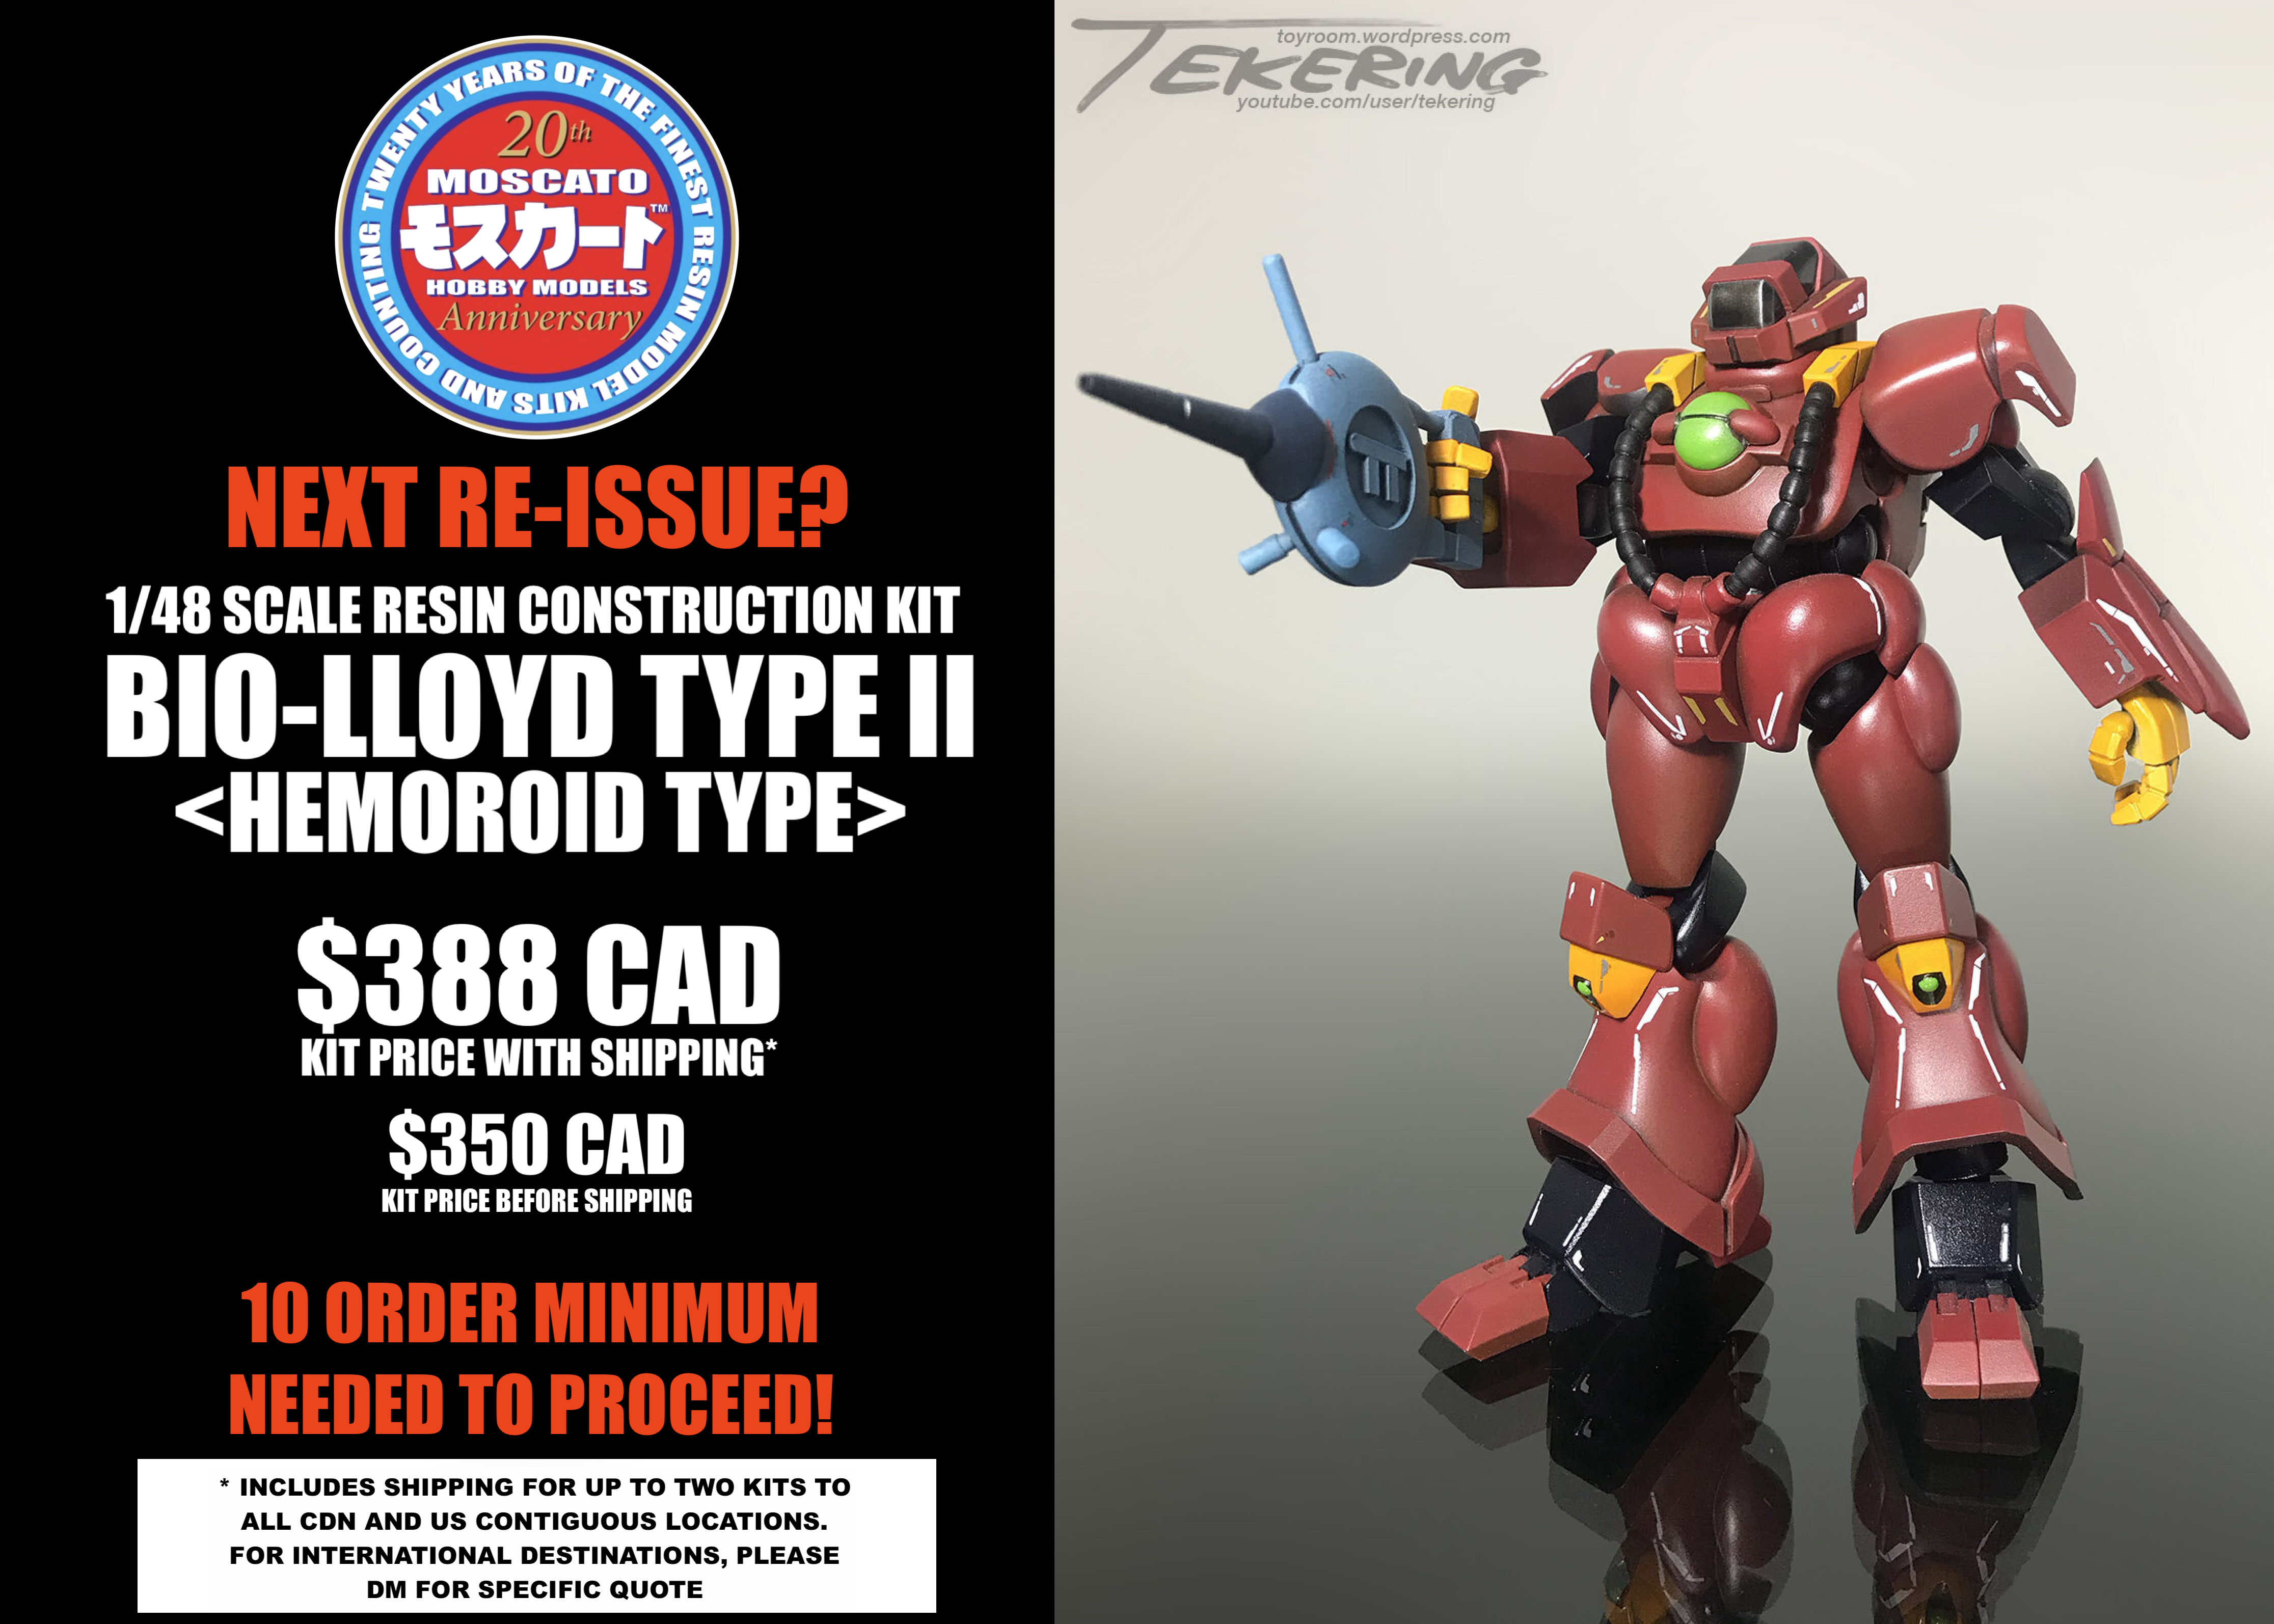
-
*Takes notes* The forearm mod being specific to a given mode would be challenging to implement, as it will increase parts count, overall cost and leave the builder with more unused parts, but the Walker Cannon heel/toe mod and throwing in extra side-skirts is feasible. I will also alter the foot and heel joint to something more user-friendly. I think the best solution is to have two different anchor points for the foot, so the modeller can select the appropriate one for the mode desired. This will allow the robot foot to sit flatter in WC mode as per the line-art. Two things I'd like to pick your brain for are the hands and elbows: despite searching, I wasn't able to find adequate aftermarket round hands, posable or otherwise, and wonder if there's a specific product you would recommend. I also think the kit elbows could be improved and look forward to seeing your solution--as well as the final build pics!
-
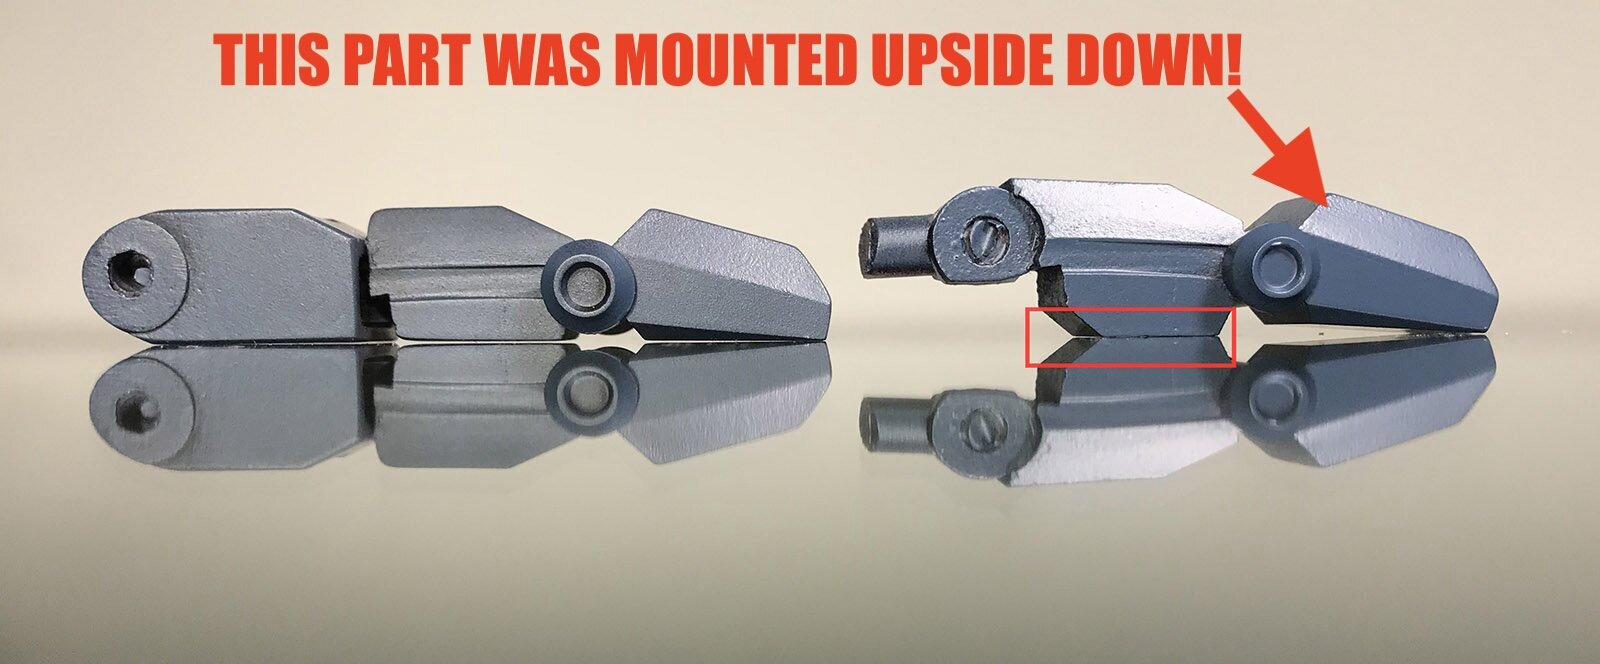
I hate to break it to you, Ted, but the reason you had to remove a chunk of material from the bottom of the foot is That said, know that I'm paying close attention to your mods with the intention of implementing (most of) them on a future re-issue of the kit.
-
That's a cool mod. The heel looks like it was pushed a tad rearward while the Walker Cannon foot has a new pivot at the toe and its anchor joint is located higher on the calf. I'd have to see more to know if it hampers the Battle Sniper knee bend.
-
No Love for Southern Cross?
captain america replied to blacklotus's topic in Anime or Science Fiction
*HEAVY BREATHING INTENSIFIES* -
That's putting it nicely! They managed to take a fantastic Aramaki design and butcher it because they have no sense of aesthetics, to say nothing of the figure's ridiculous child-baring hips! A properly proportioned MOSPEADA rider is completely feasible, and I proved it.
-
1/48 SOUTHERN CROSS BIOROID
captain america replied to captain america's topic in Anime or Science Fiction
Mold-prep is done and molds are poured. Should be ready to go early next week.IMG_1952.HEICIMG_1951.HEIC -
Aircraft Super Thread Mk.VII
captain america replied to David Hingtgen's topic in Anime or Science Fiction
Nice publicity pic, but in reality, I doubt you'll ever see the Superhornet carrying more than two of these at a time in anything other than full-on war. It might be able to take-off with that loading, but it sure can't land with it, especially on a carrier at sea with a pitching deck. -
No Love for Southern Cross?
captain america replied to blacklotus's topic in Anime or Science Fiction
Hi Ted. I see you relied more on the technical schematics than the 3/4 view beauty shots. I originally did that with my 1/72 Destroids, but went the other way for the 1/48 Tomahawk and IMHO came away with a more aesthetically pleasing result. Might be worth considering.- 1505 replies
-
- 1
-

-
- Southern Cross
- anime
- (and 8 more)
-
1/48 SOUTHERN CROSS BIOROID
captain america replied to captain america's topic in Anime or Science Fiction
Can this come back for a limited time? I already have 7 requests.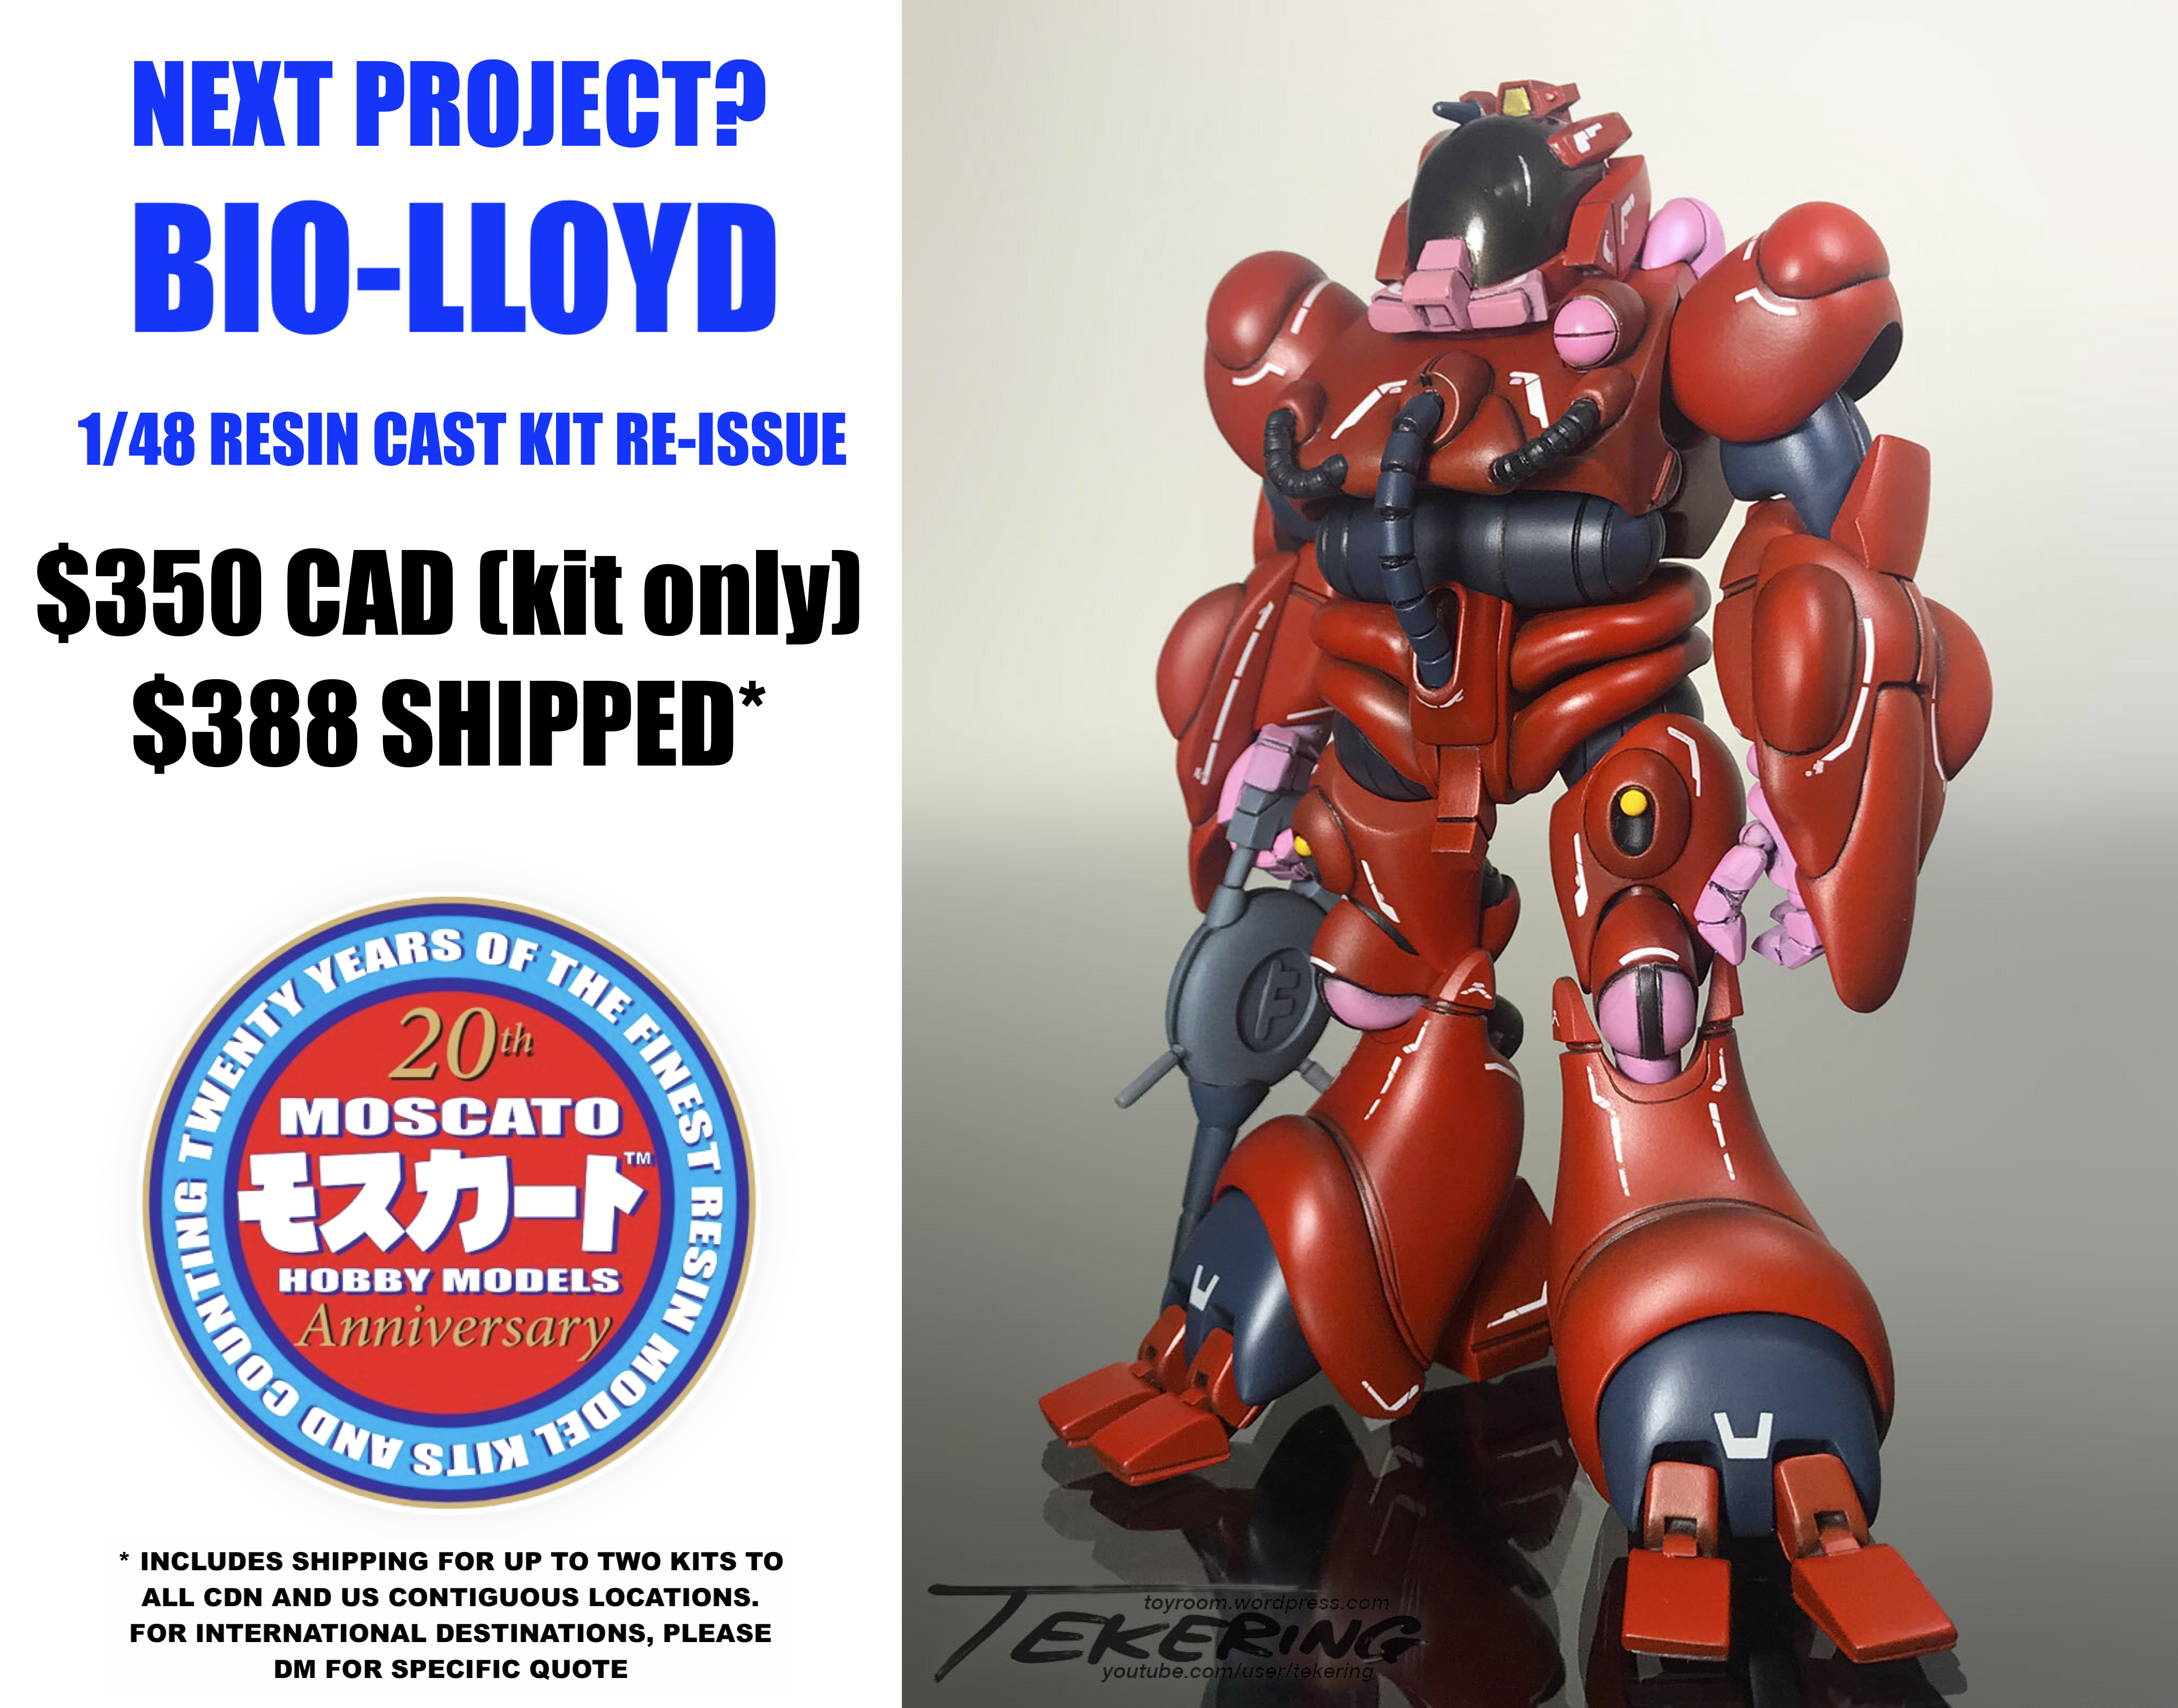
-
Maybe blue is better?

-
No worries, might as well leave them up. That way people have the JPG option if HEICs are troublesome.
-
Hey Shawn! Thanks for the kind words, it's still a work in progress. I actually think it's not a bad thing with the HEIC images not loading, since the instructions need to be downloaded anyway. It's actually wonderful that all the instruction plates can be crammed into one message with this format, as opposed to having to post 5 different times to upload them all in JPG.
-
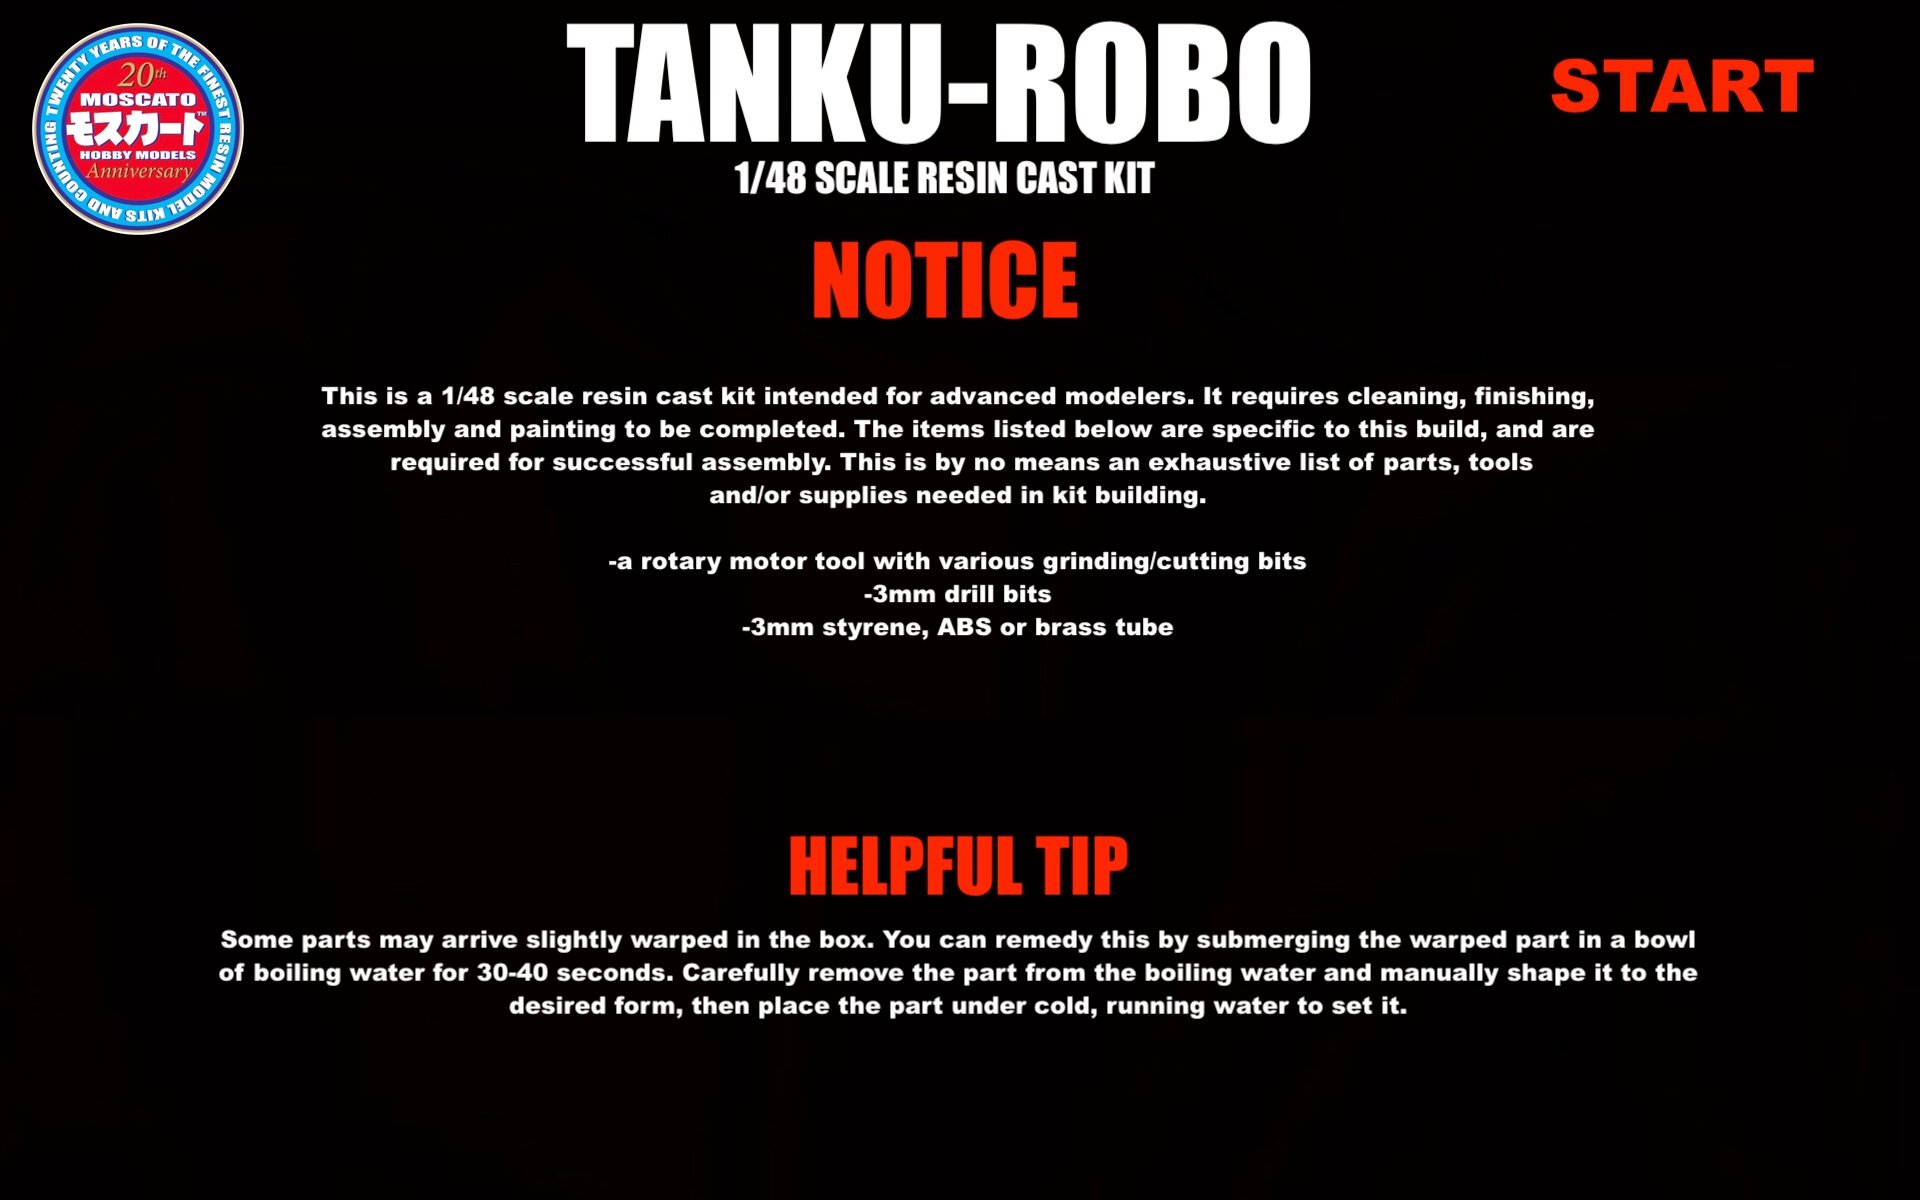
The destructions are ready!! 55 HANDS.HEIC54.HEIC53.HEIC52.HEIC51.HEIC50.HEIC49A.HEIC48.HEIC47.HEIC46.HEIC45.HEIC44.HEIC43.HEIC42.HEIC41.HEIC40.HEIC39.HEIC38.HEIC37.HEIC36.HEIC35.HEIC34A.HEIC33.HEIC32.HEIC31.HEIC30.HEIC29.HEIC28.HEIC27A.HEIC26.HEIC25.HEIC24A.HEIC23.HEIC22.HEIC21.HEIC20.HEIC19.HEIC18.HEIC17.HEIC16.HEIC15.HEIC14.HEIC13.HEIC12.HEIC11.HEIC10.HEIC09.HEIC08.HEIC07.HEIC06.HEIC05.HEIC04.HEIC03.HEIC01.HEIC
-
What could have been.

-
Hey all! For those who are part of the second run, the kits are ready, I'm just waiting on the aftermarket hands to arrive from Asia, which should be in about 2 weeks. Instructions will be ready by late next week, but in the meantime, enjoy these extra beauty shots!