captain america
-
Posts
3553 -
Joined
-
Last visited
Content Type
Profiles
Forums
Events
Gallery
Everything posted by captain america
-

New Moscato Macloss Model Project!!!
captain america replied to captain america's topic in Model kits
Bam!


-
New Moscato Macloss Model Project!!!
captain america replied to captain america's topic in Model kits
Sorry for the long silence. Im not dead, nor disappeared. Just been waiting for the freebe battle pods to arrive so that I can ship. If all goes well, I will have the destructions done and posted tomorrow, or Friday AM at the latest. -
Aircraft Super Thread Mk.VII
captain america replied to David Hingtgen's topic in Anime or Science Fiction
I don't know if this was ever posted, but if not, you've GOT to hear this ex Tomcat pilot. Straight talk, no BS, not politically correct. I was really surprised with what he had to say about the "troublesome" F-14A engines. -
2083 is when the Second Recapture Mission takes place in the original MOSPEADA, so this is likely a reboot. I hope they redesign the Inbit with that more organic look they teased in sketches.
-
New Moscato Macloss Model Project!!!
captain america replied to captain america's topic in Model kits
Casting is going quite well. A quick sample: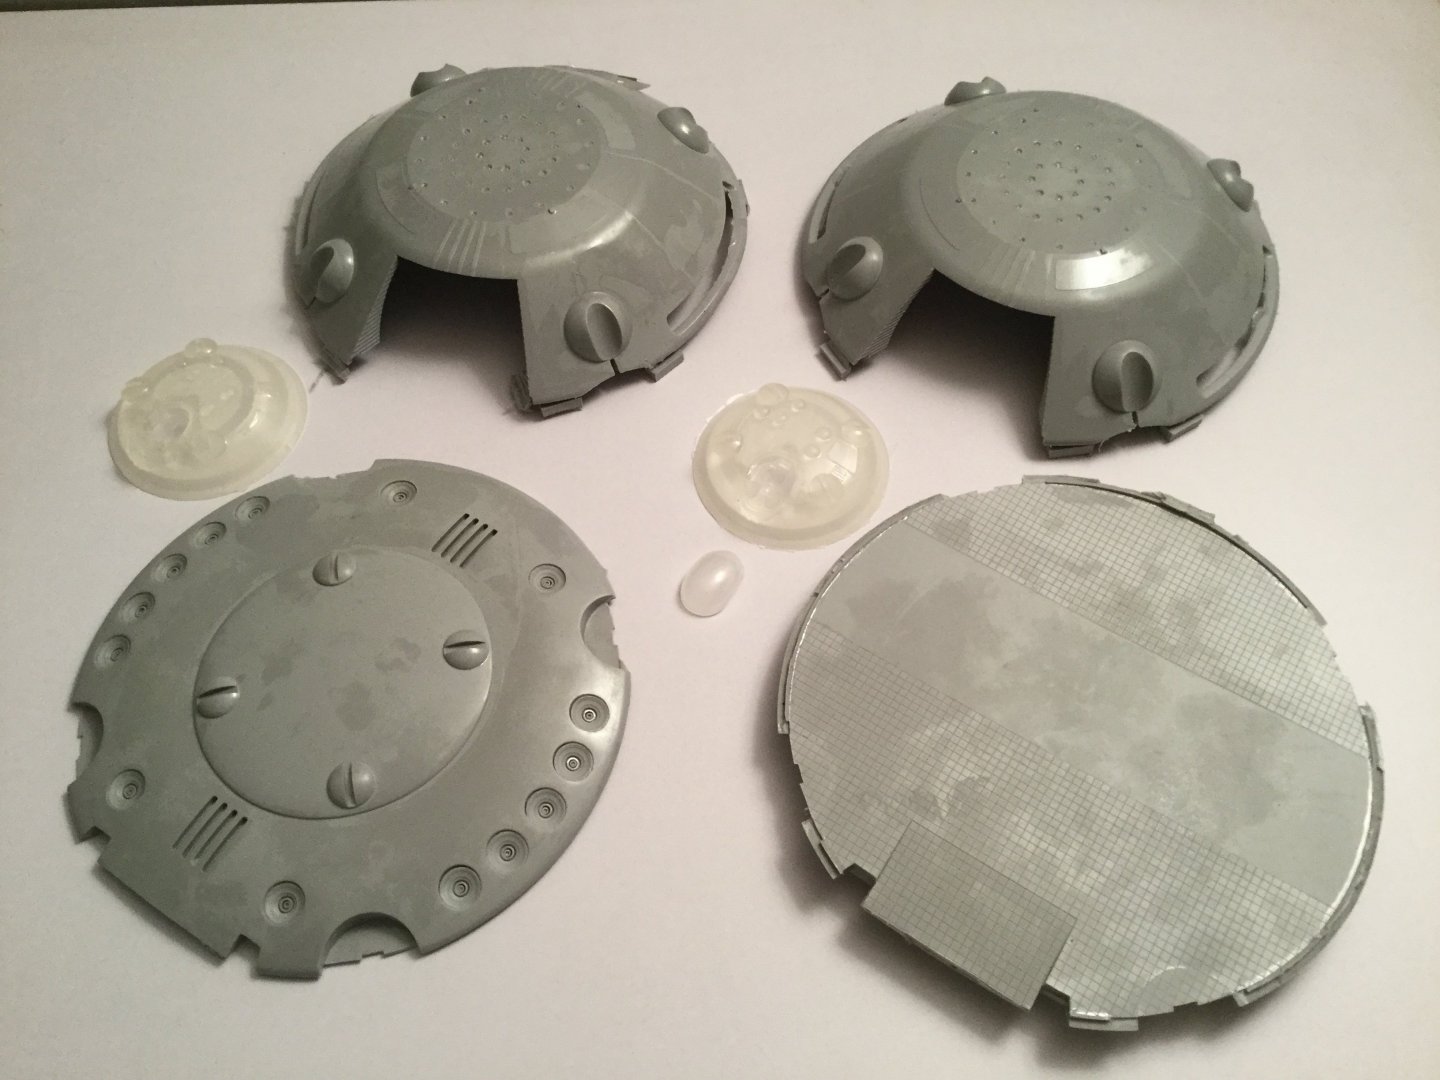
-
The Transformers Thread (licensed) Next
captain america replied to mikeszekely's topic in Anime or Science Fiction
Not based on the most recent pics I've seen. Also, if the Haslab project fails, guess who might very well bear the brunt of a legal smackdown? Seemingly not content to produce much beloved figures of characters that Hasbro/Takara have chosen to ignore, 3P companies are starting to play a dangerous game of chicken. It's not wise to poke the bear. -
The Unlicensed Third Party Transformers Thread
captain america replied to slaginpit's topic in Anime or Science Fiction
Despite the artistic license that Hasbro took with Unicron's chin, I prefer their overall facial aesthetics (and detail) way better than this thing... Assuming it even ever gets completed. Edit: looks like they're actually moving forward with this. The surface detail on these panels doesn't seem to fit with the head pic shown earlier, so color me confused.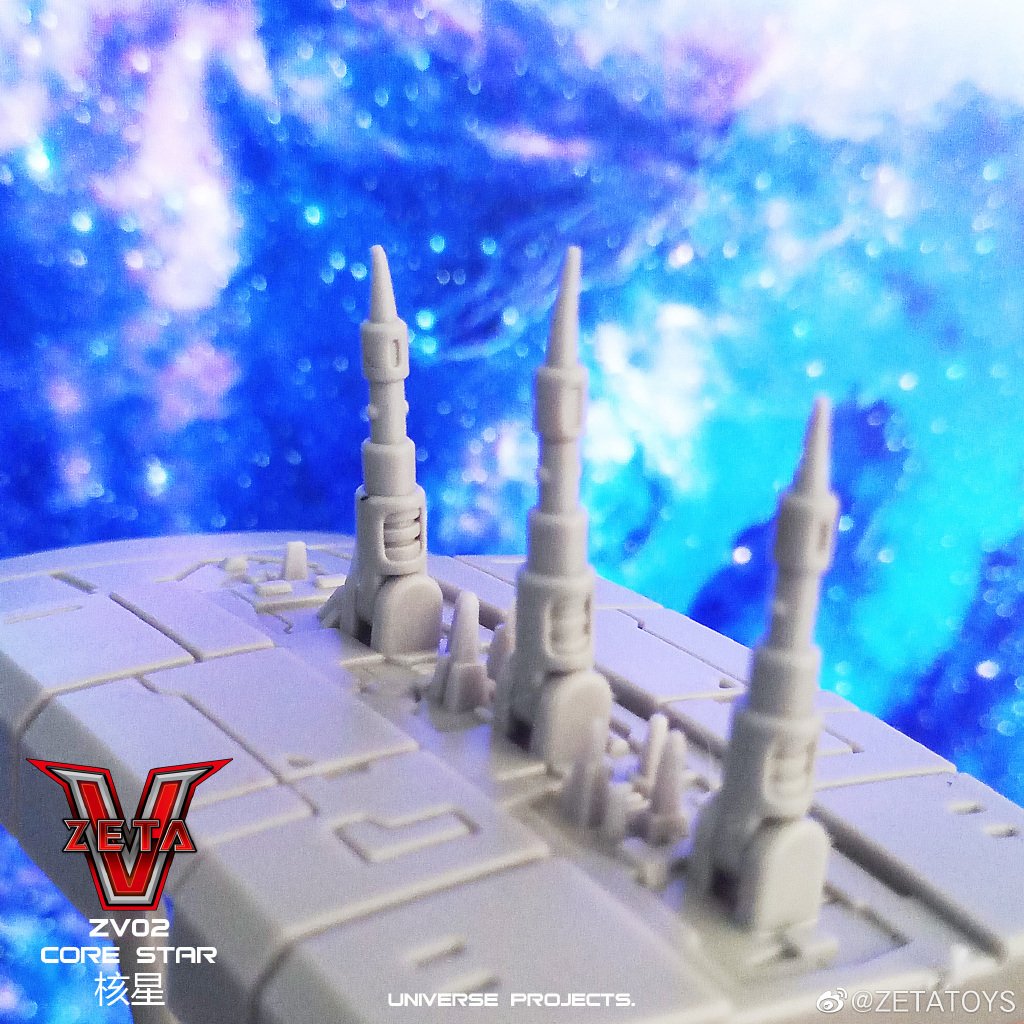
-
The Transformers Thread (licensed) Next
captain america replied to mikeszekely's topic in Anime or Science Fiction
You also know me, and if Hasbro doesn't correct it I won't rule-out making my own proper face/chin sculpt. I'm also thinking they might want to consider changing the silver to light grey, as well as making the body parts a tad more orange. I think those are reasonable and realistically achieved tweaks. -
New Moscato Macloss Model Project!!!
captain america replied to captain america's topic in Model kits
Falsely advertising in my opinion. -
New Moscato Macloss Model Project!!!
captain america replied to captain america's topic in Model kits
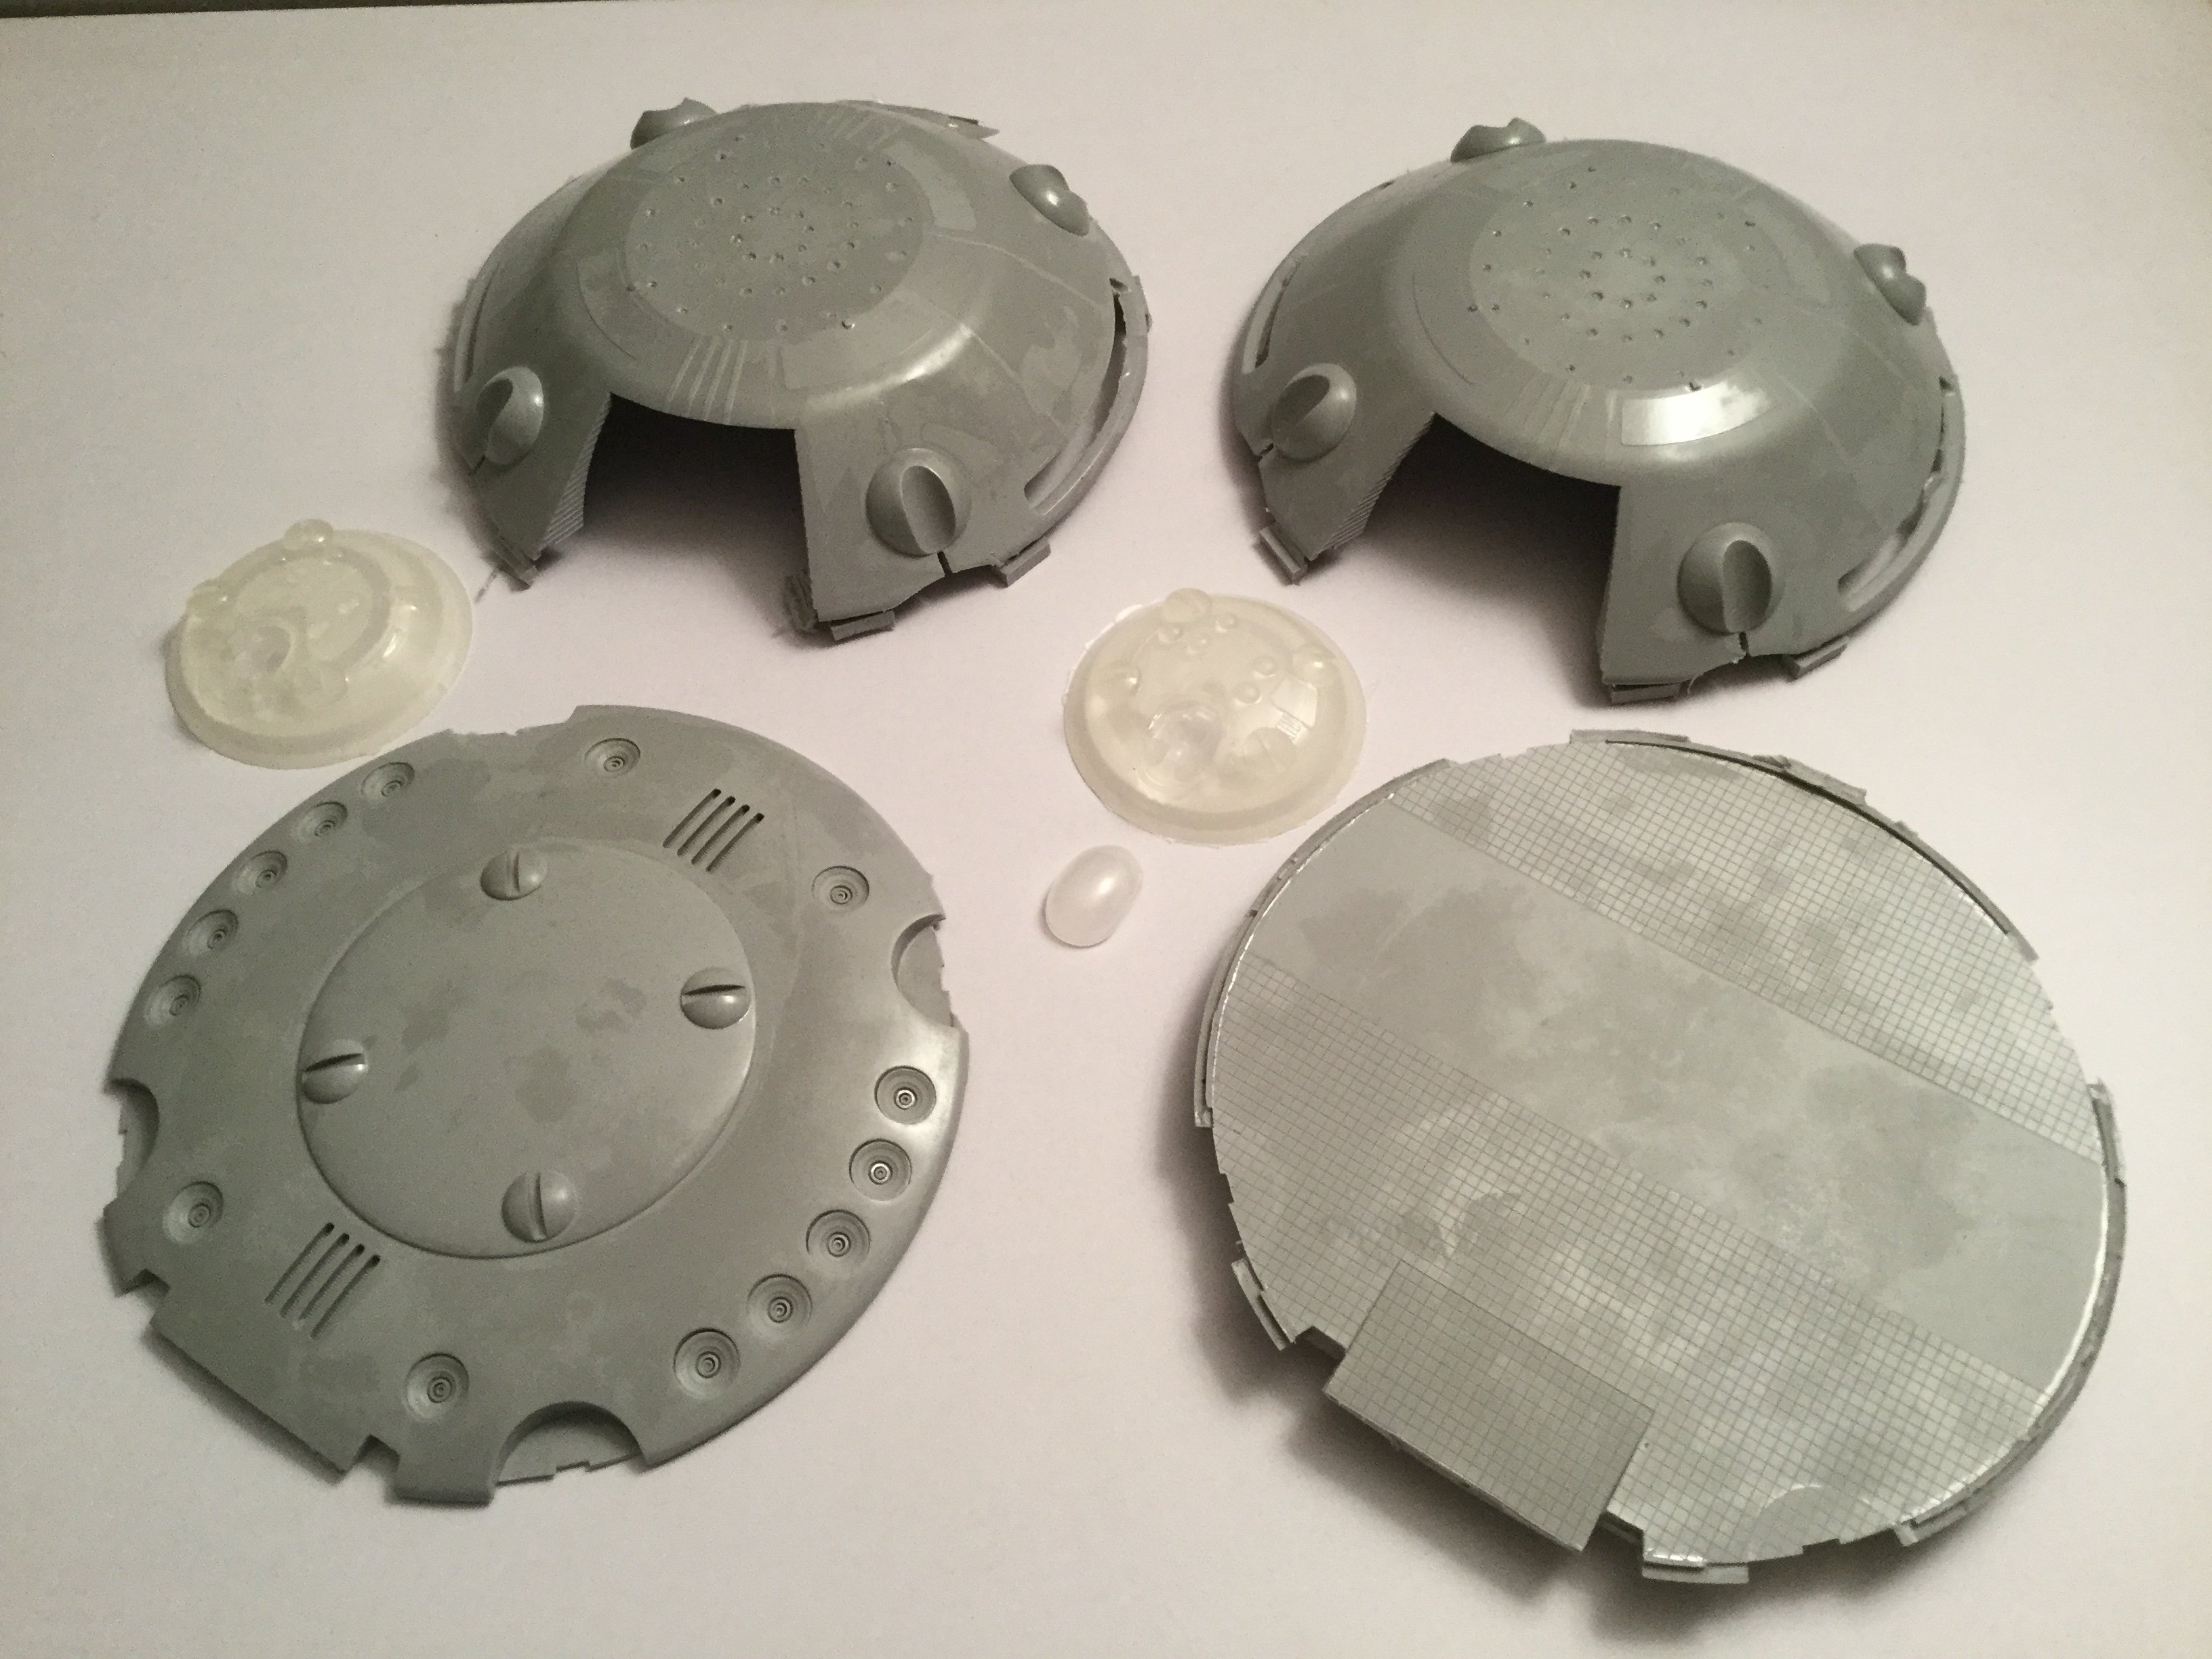
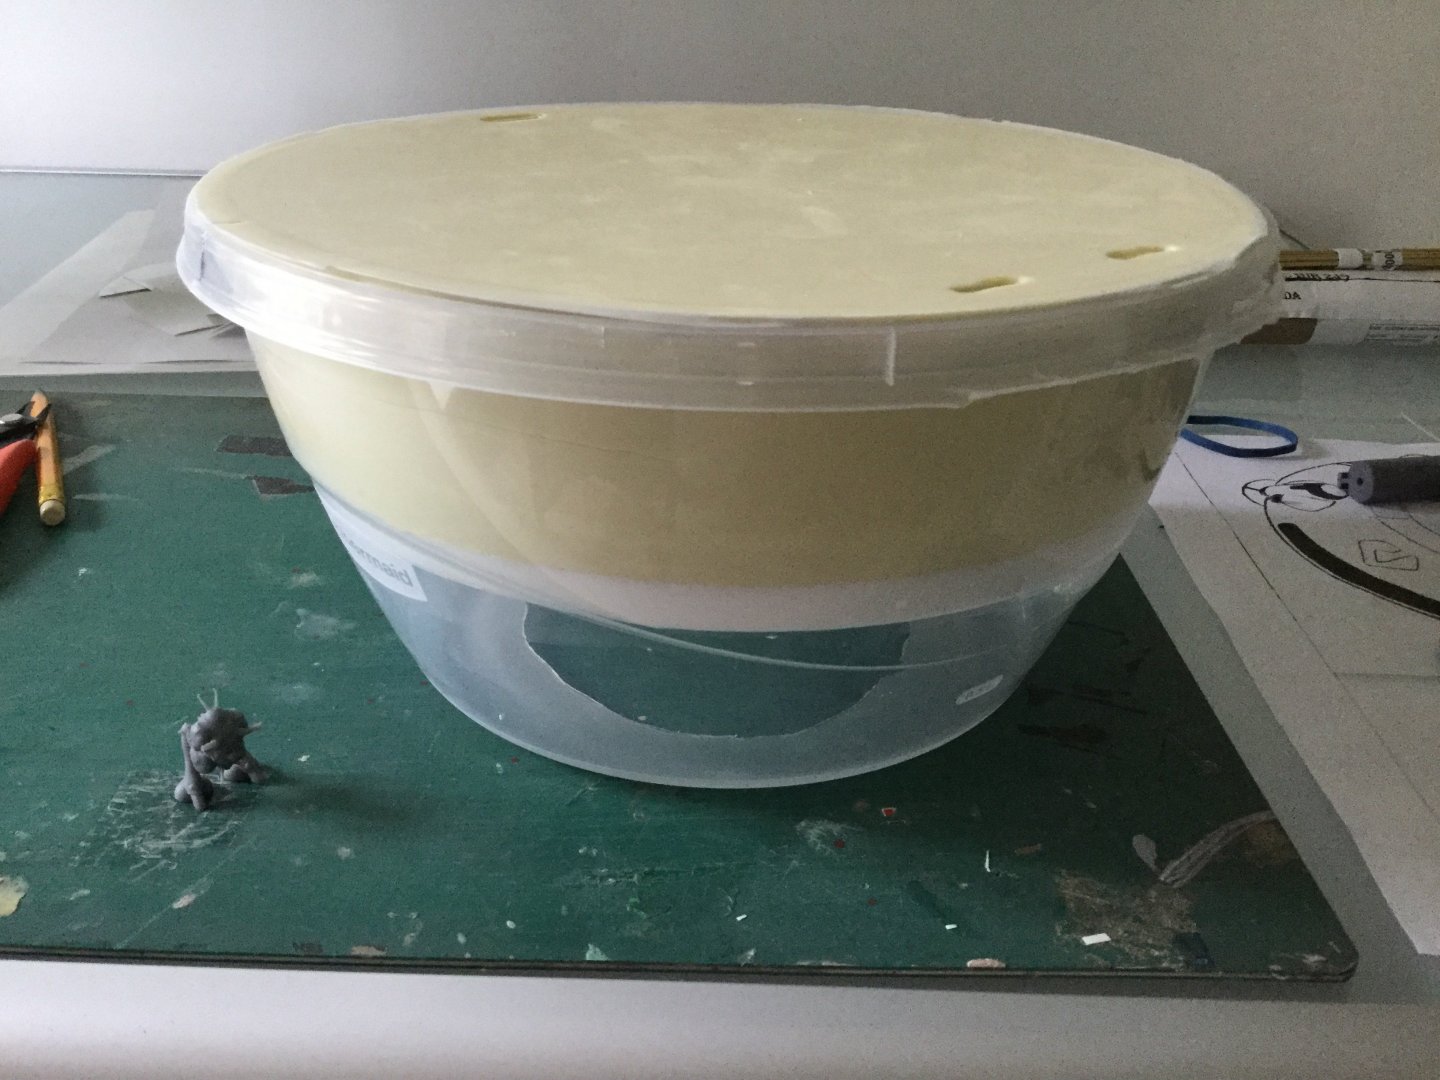
Hi guys! Quick Wednesday update: molds are almost done! I had a little molding mishap, or rather, a new mold product that failed to work as advertised. Consequently, I'm a few days behind where I'd like to be. Nothing that can't be re-molded with time and patience, but I thought I'd use this as a teaching moment. In short, whenever someone tries to sell you a mold-making silicone that doesn't require vacuum-degassing, degas it anyway! Below are pics of identical parts: the ones on the right are molded with degassed silicone rubber (as per my usual procedure), while the ones on the left are not. One half of the hull molds is also complete. Largest single molds I've poured in 15 years!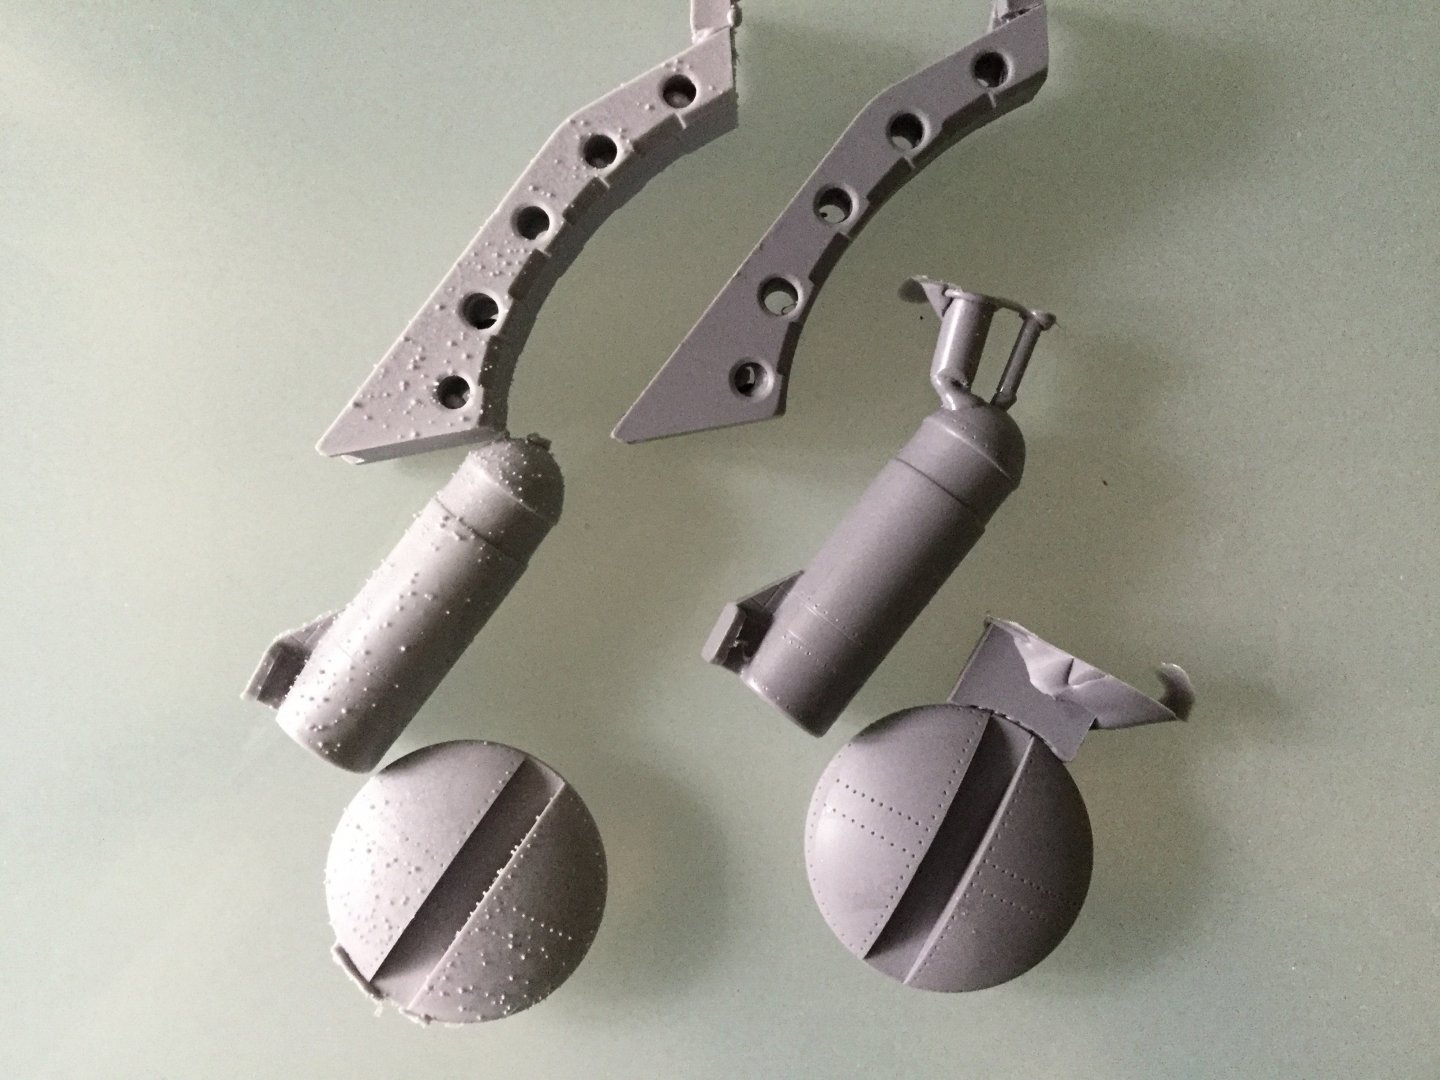
-
The Transformers Thread (licensed) Next
captain america replied to mikeszekely's topic in Anime or Science Fiction
I always wanted my own planet. -
Neon Genesis EVANGELION General Thread
captain america replied to no3Ljm's topic in Anime or Science Fiction
In regards to question 1, the French dub says monsieur petit toutou (mister little teddy bear) so she might be referring to Shinji-kun. -
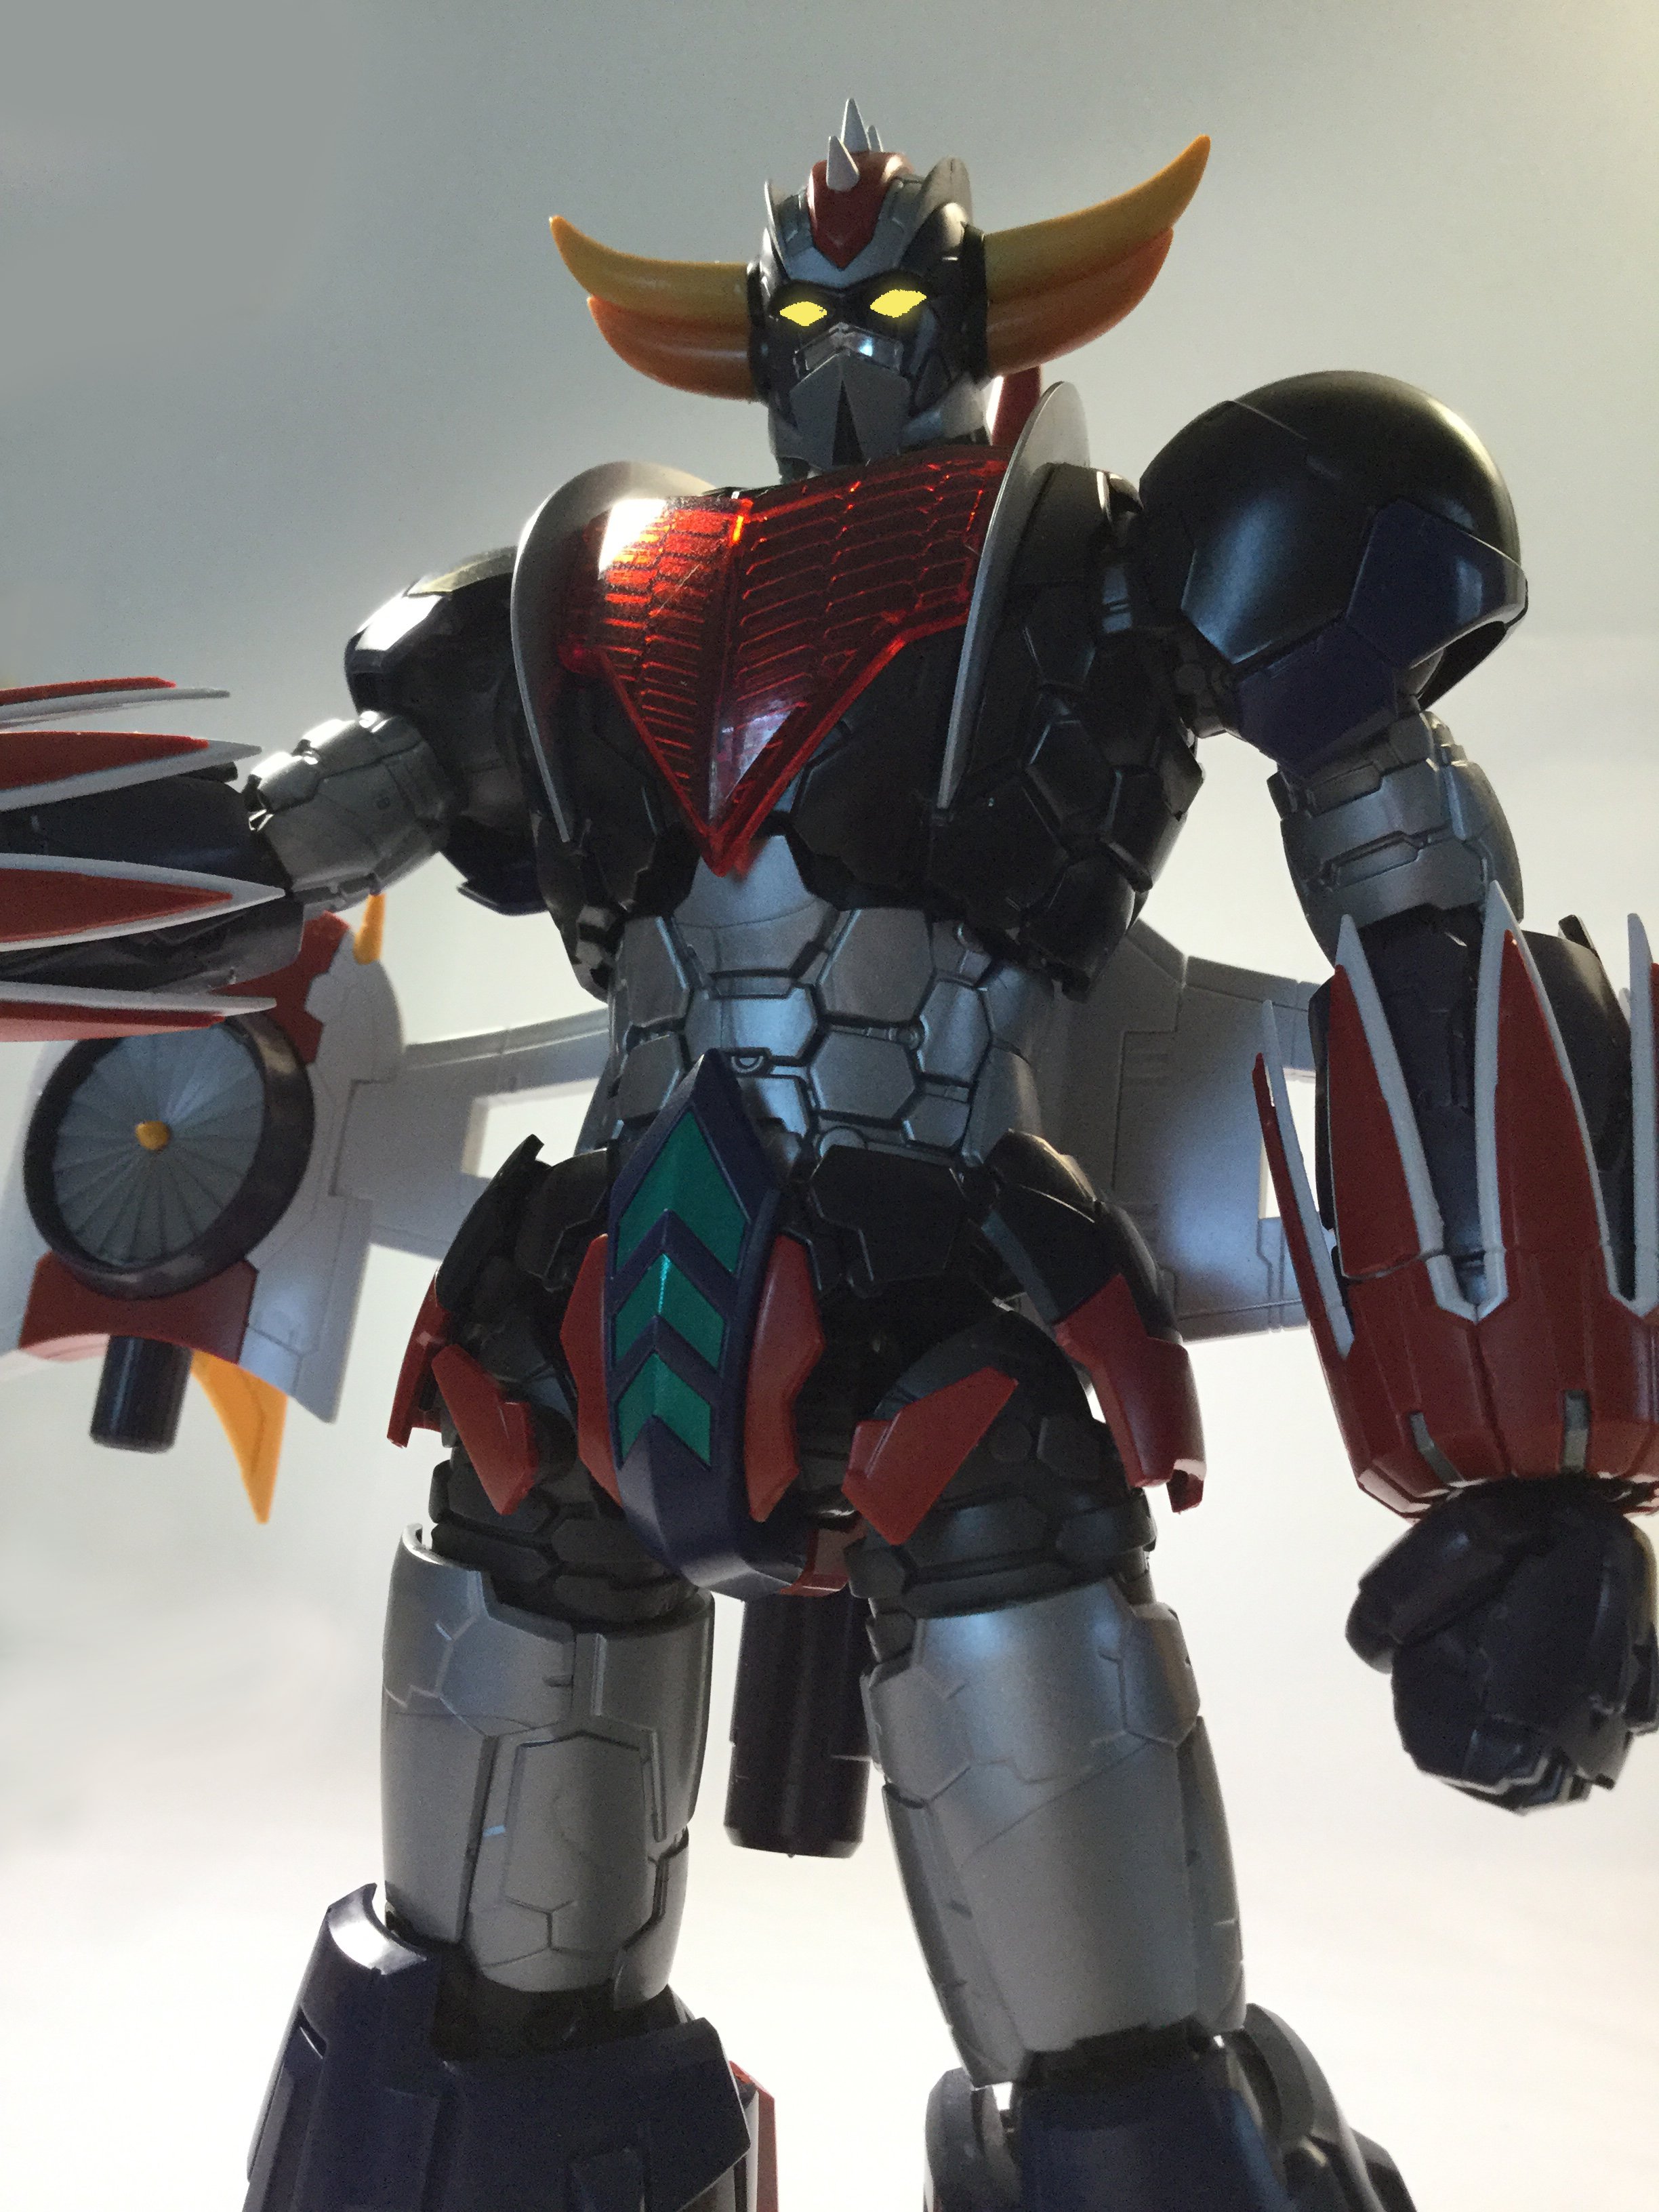
MAZINGER Z INFINITY: in theatres January 2018
captain america replied to captain america's topic in Anime or Science Fiction
I'm surprised that this isn't getting more attention, particularly in lieu of the impressive HG kits that have been released.
-
Just an extra little nugget of info I was able to glean from the old Imai box tops: H and I models use JG-97M engines, Z model has JG-99M engines and is optimized for atmospheric combat.
-
New Moscato Macloss Model Project!!!
captain america replied to captain america's topic in Model kits
Om nom nom
-
Now's the time to grab these because like any garage kit, it's a limited engagement.
-
New Moscato Macloss Model Project!!!
captain america replied to captain america's topic in Model kits
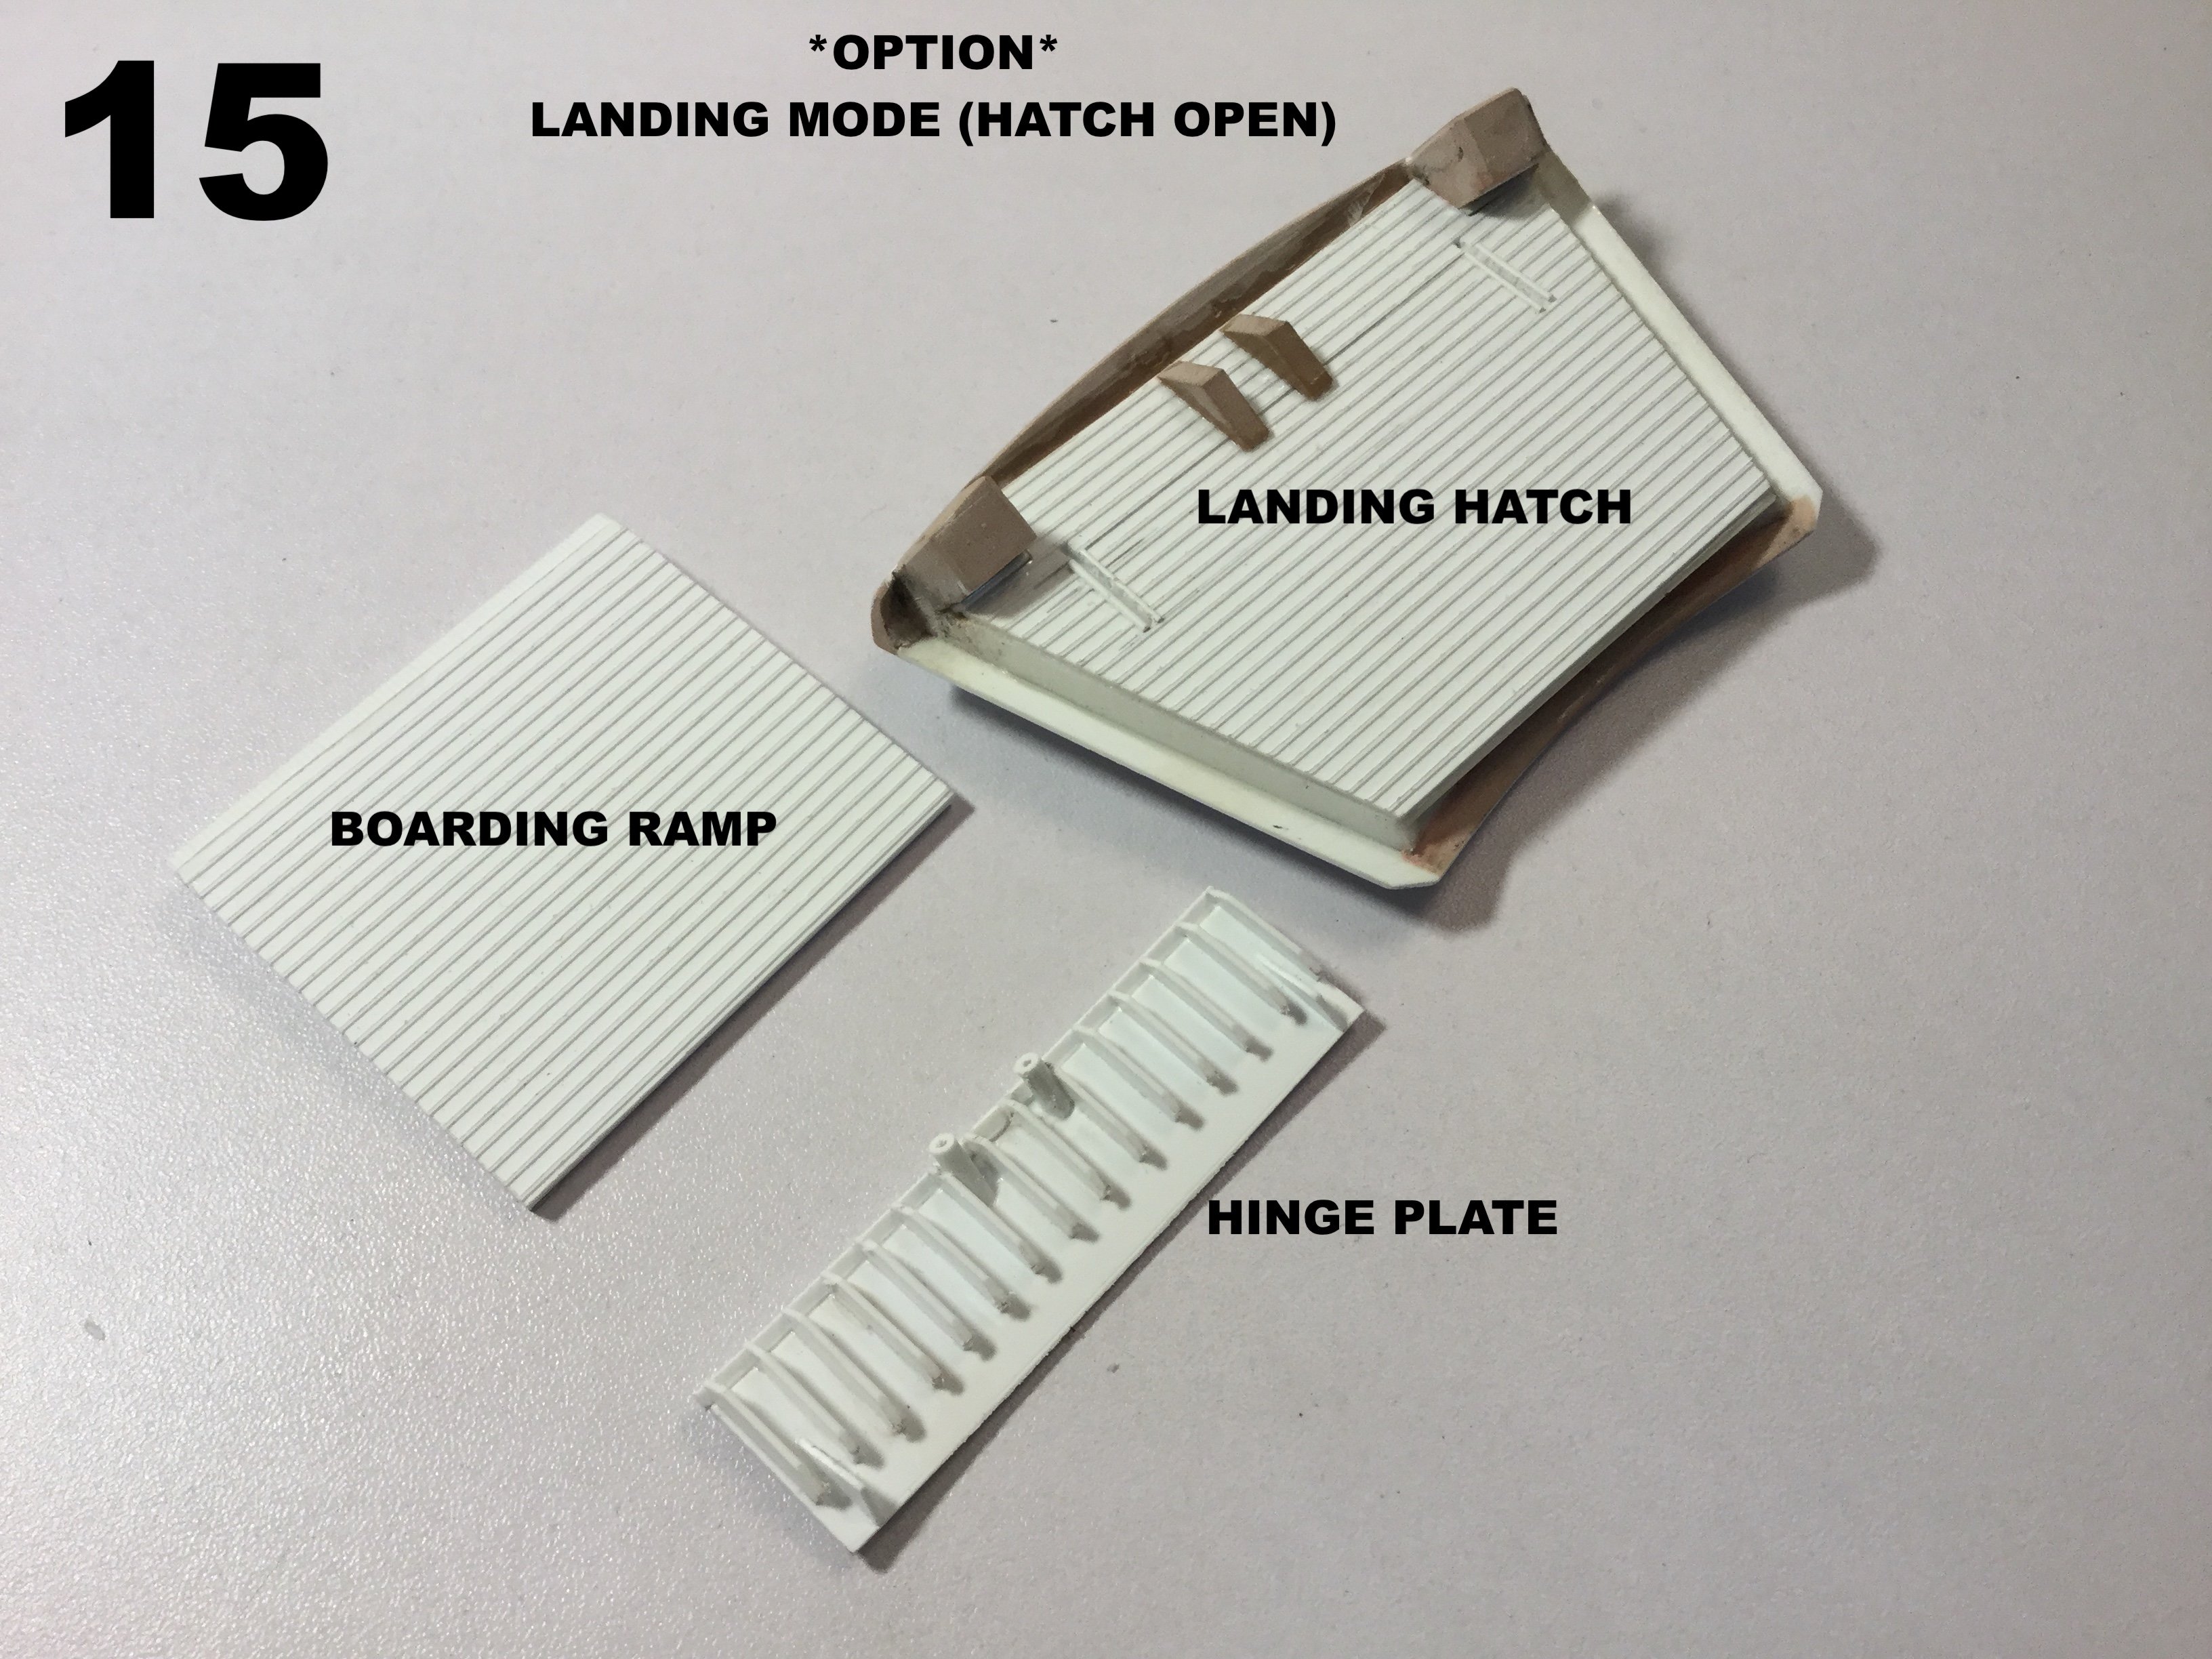
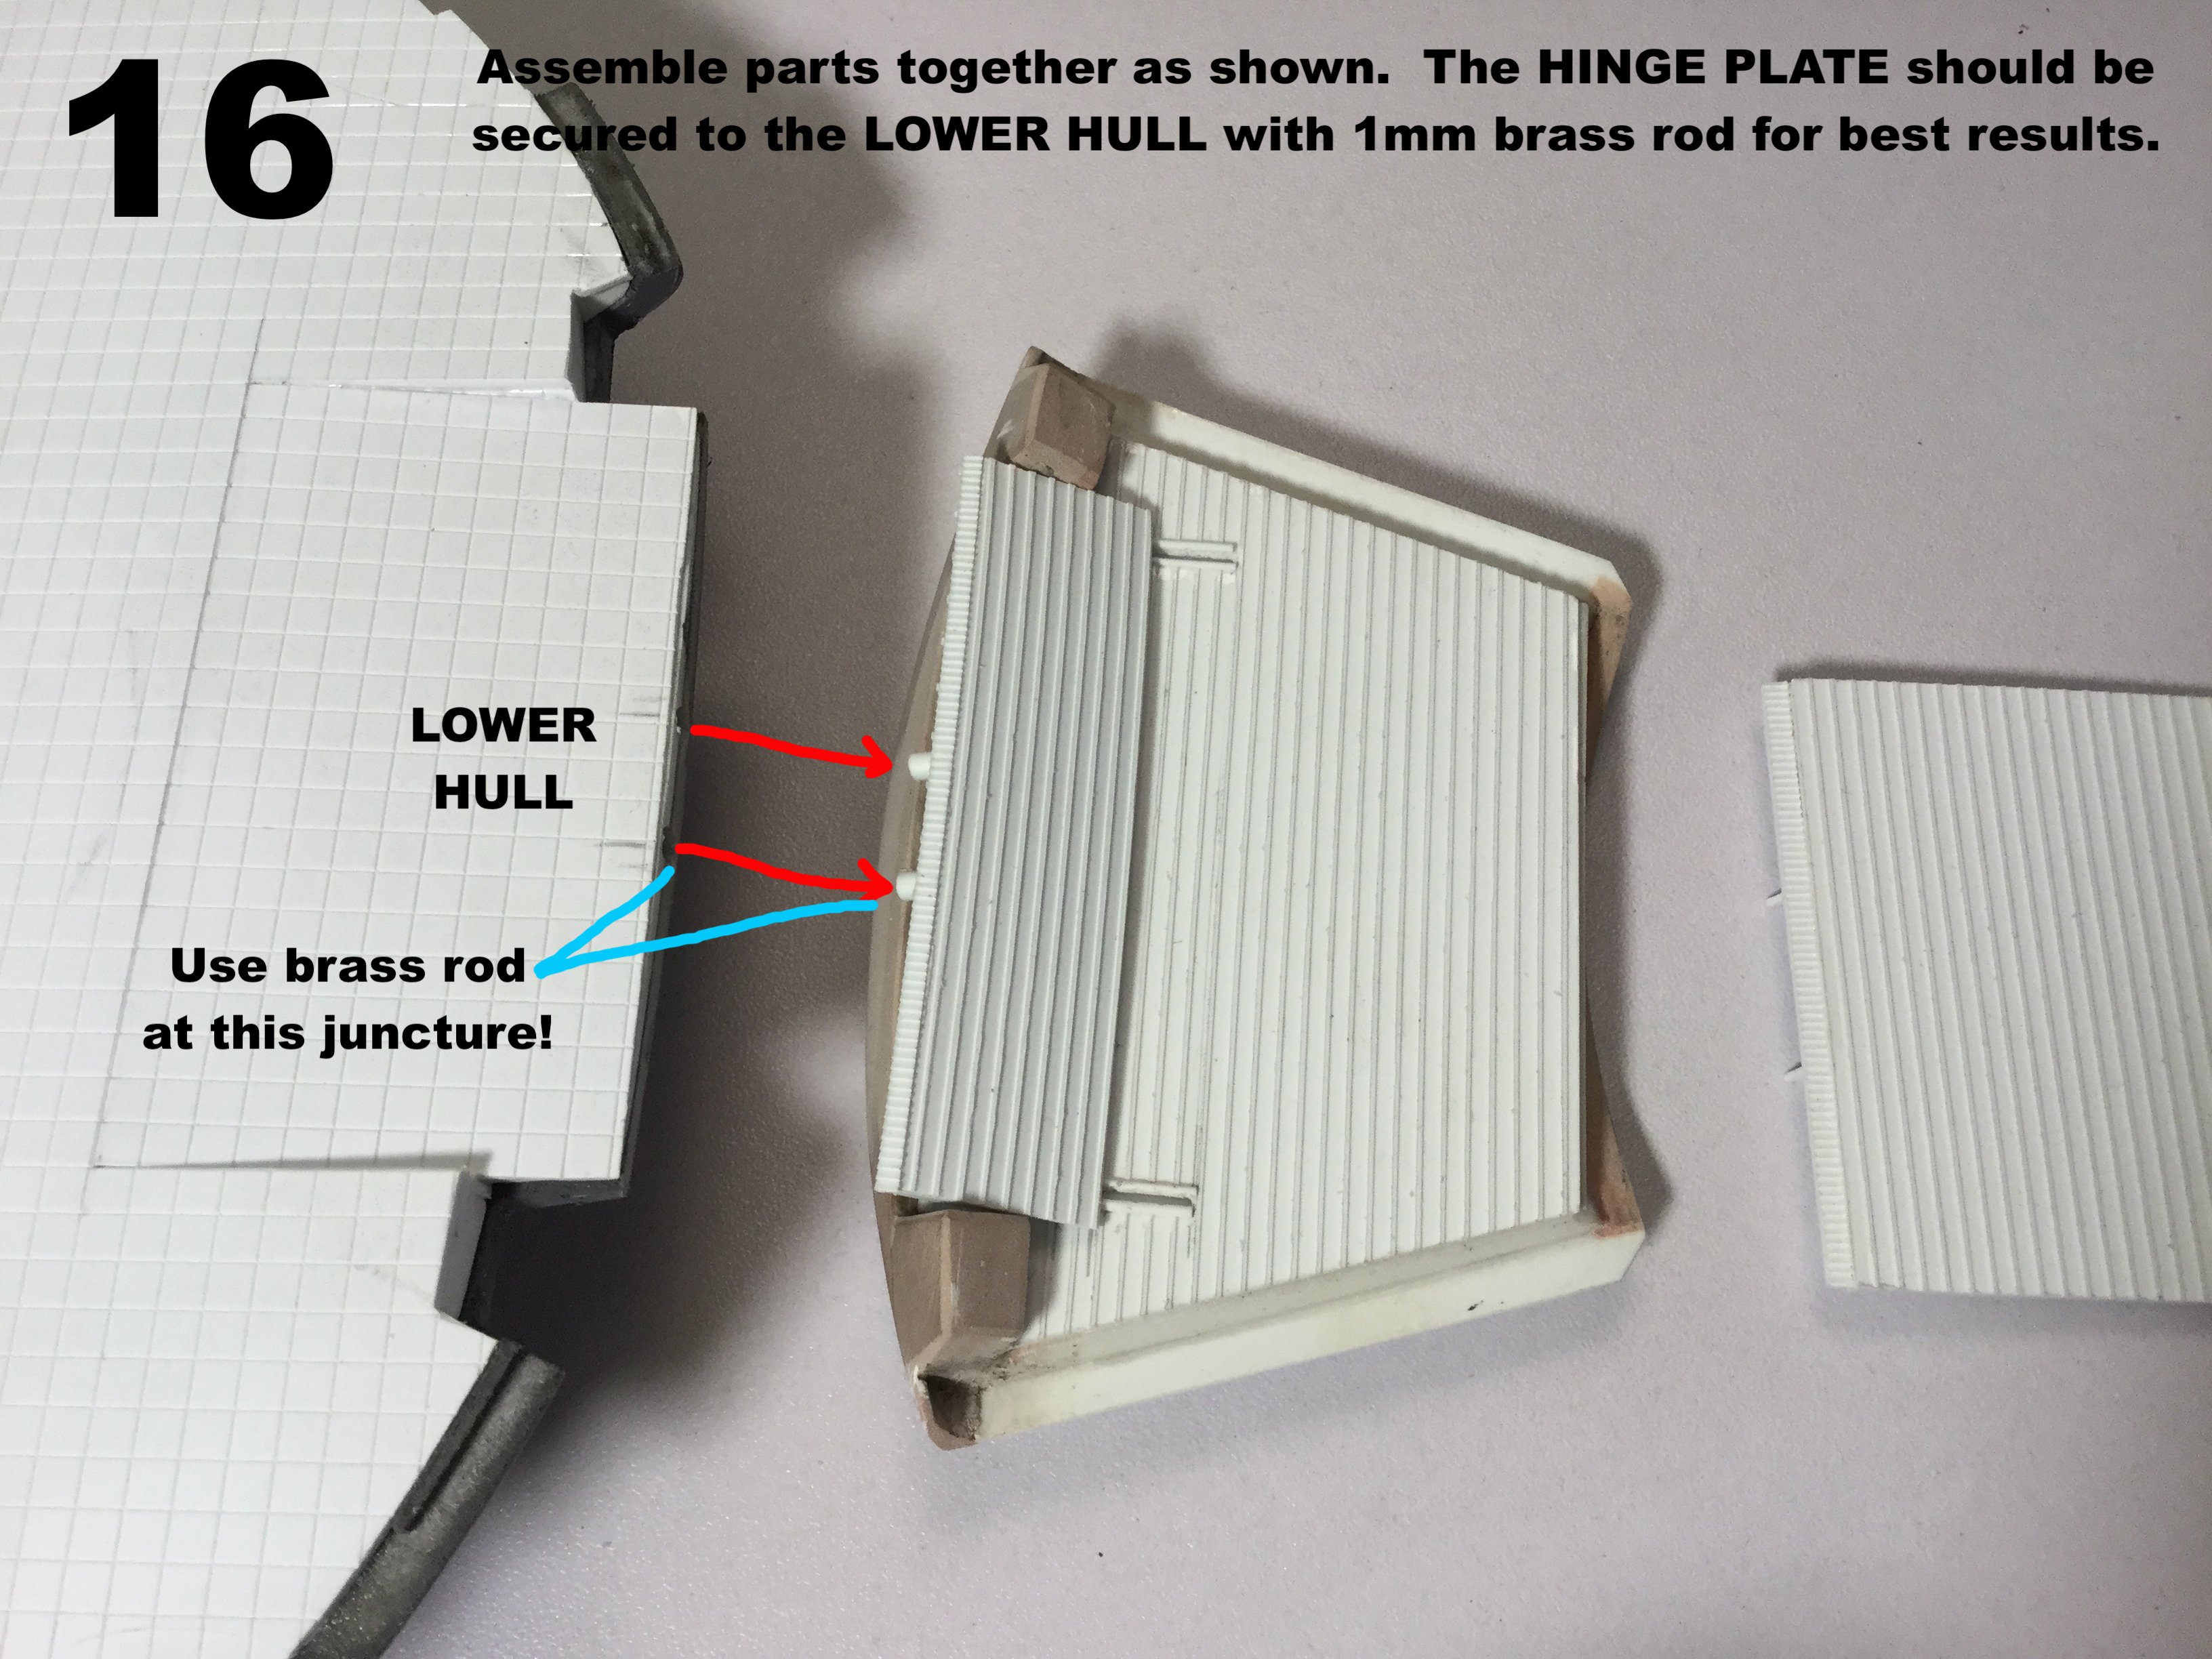
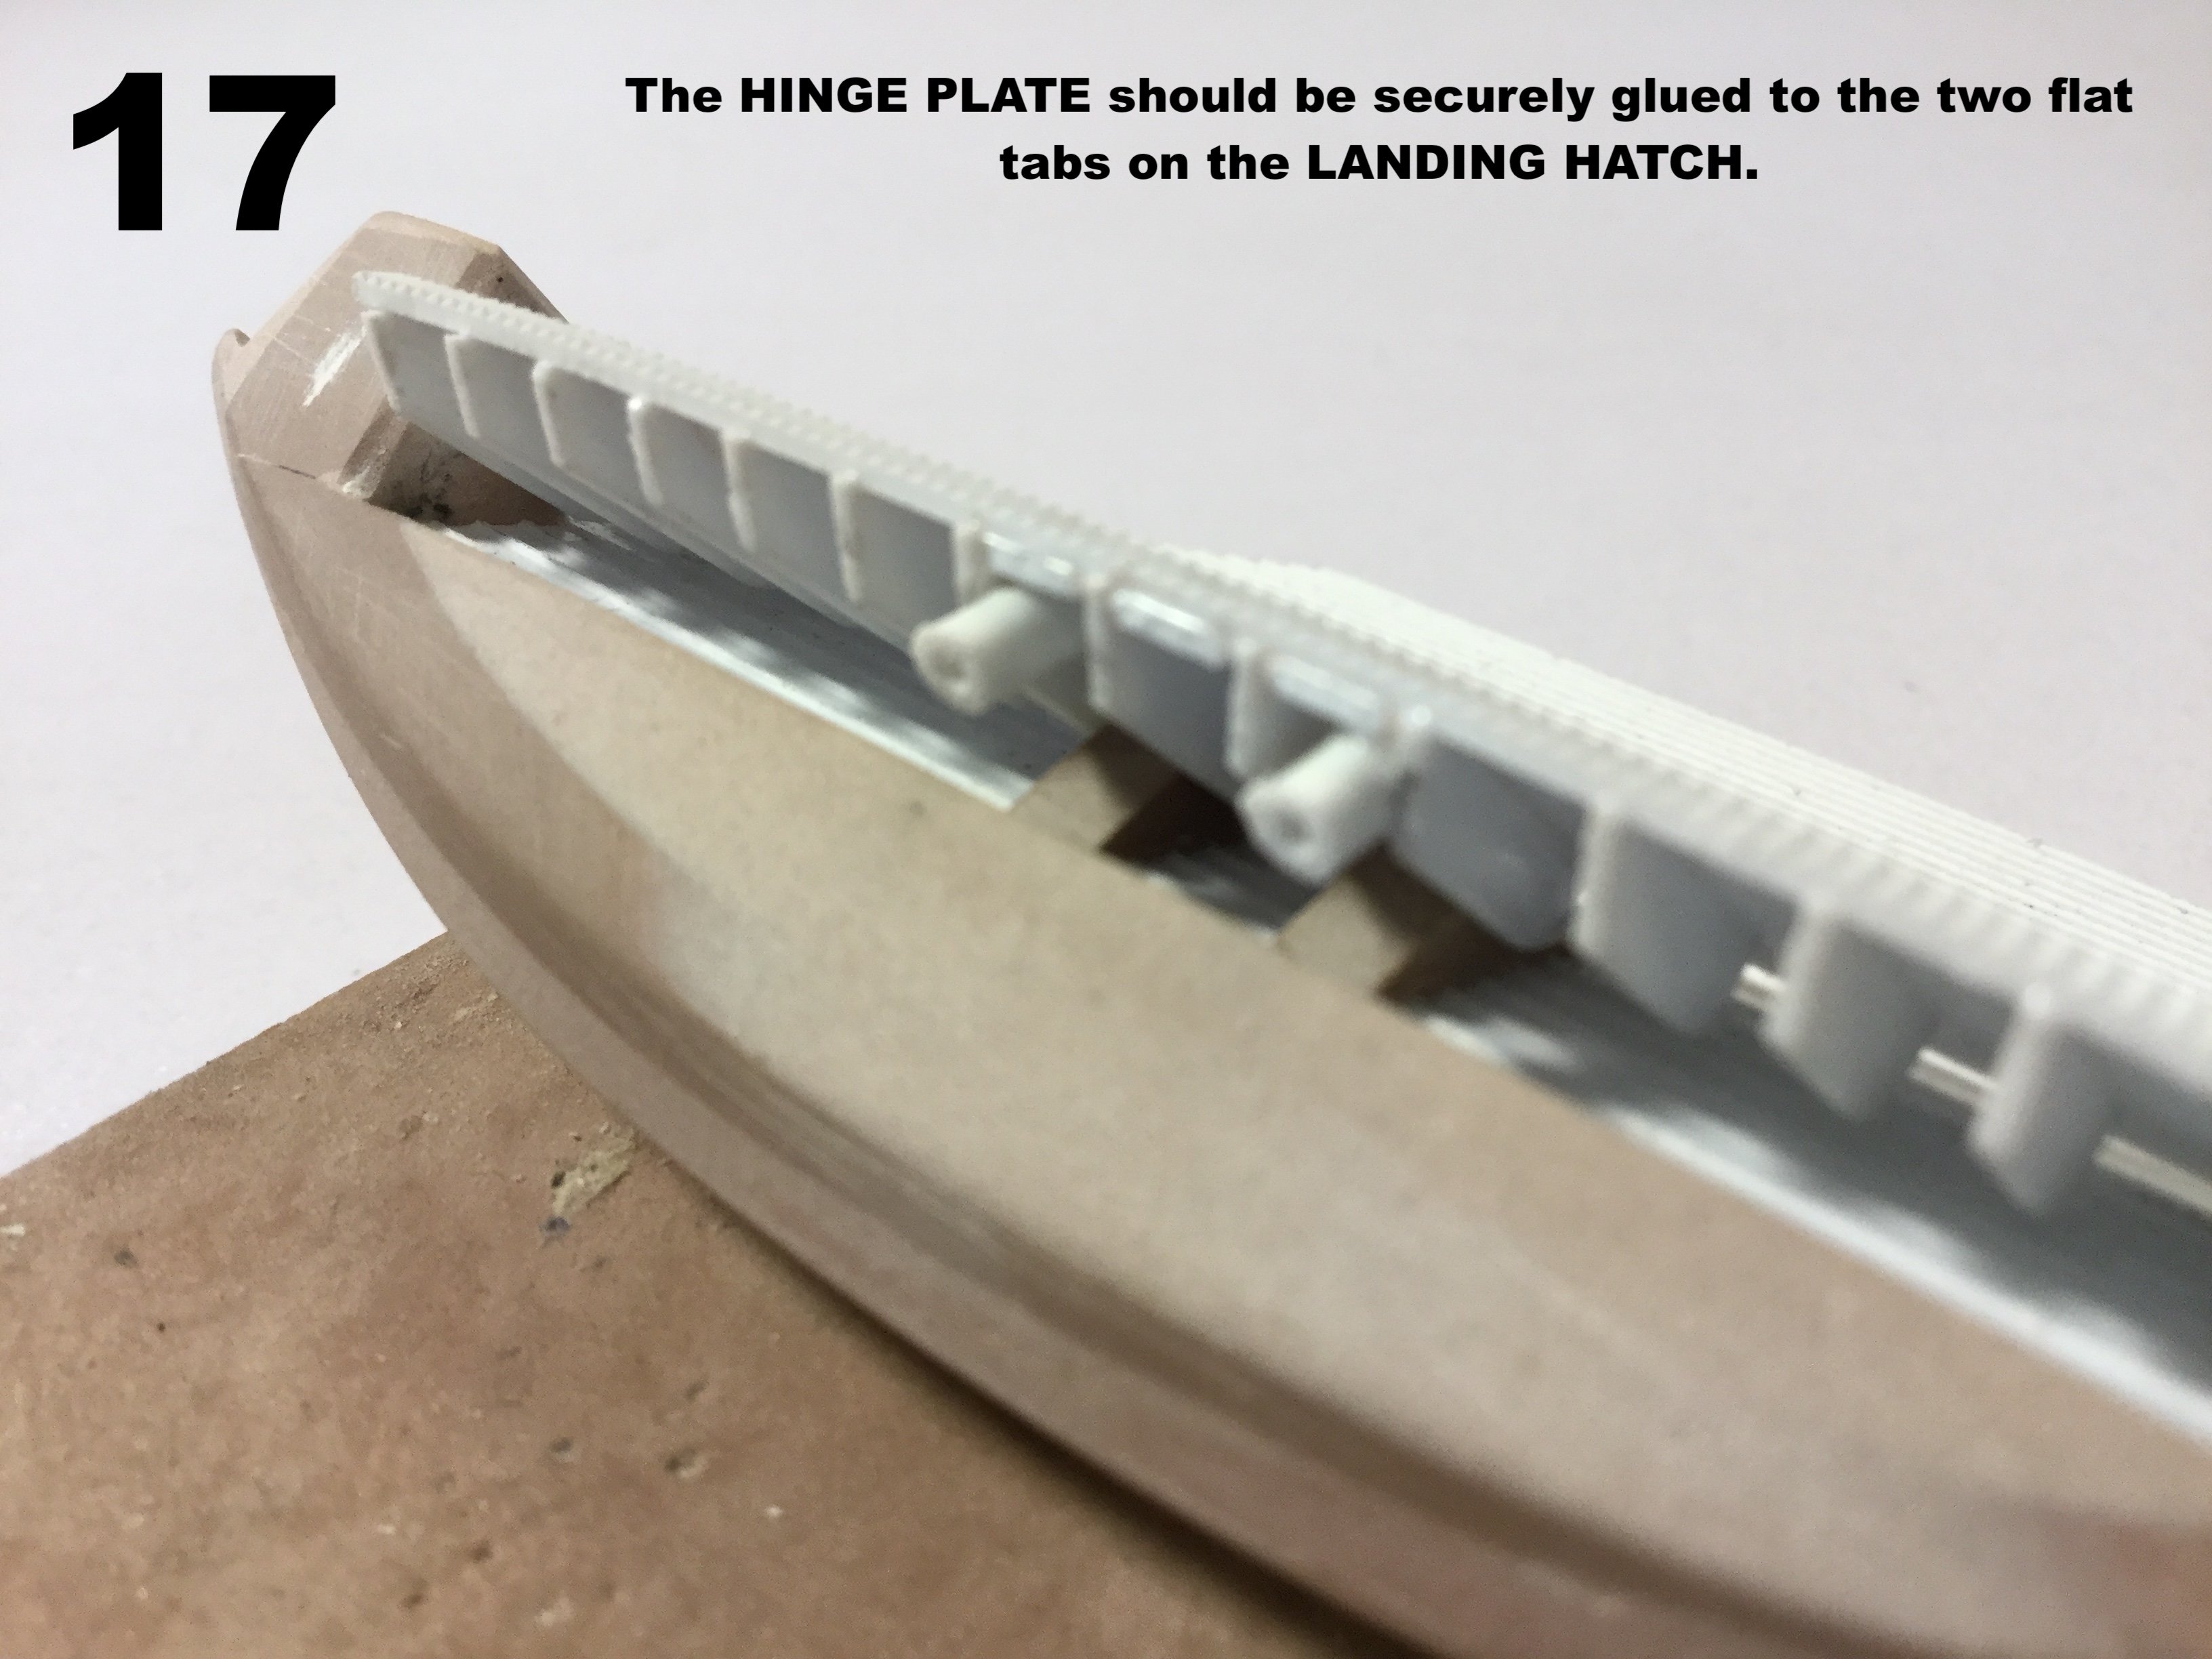
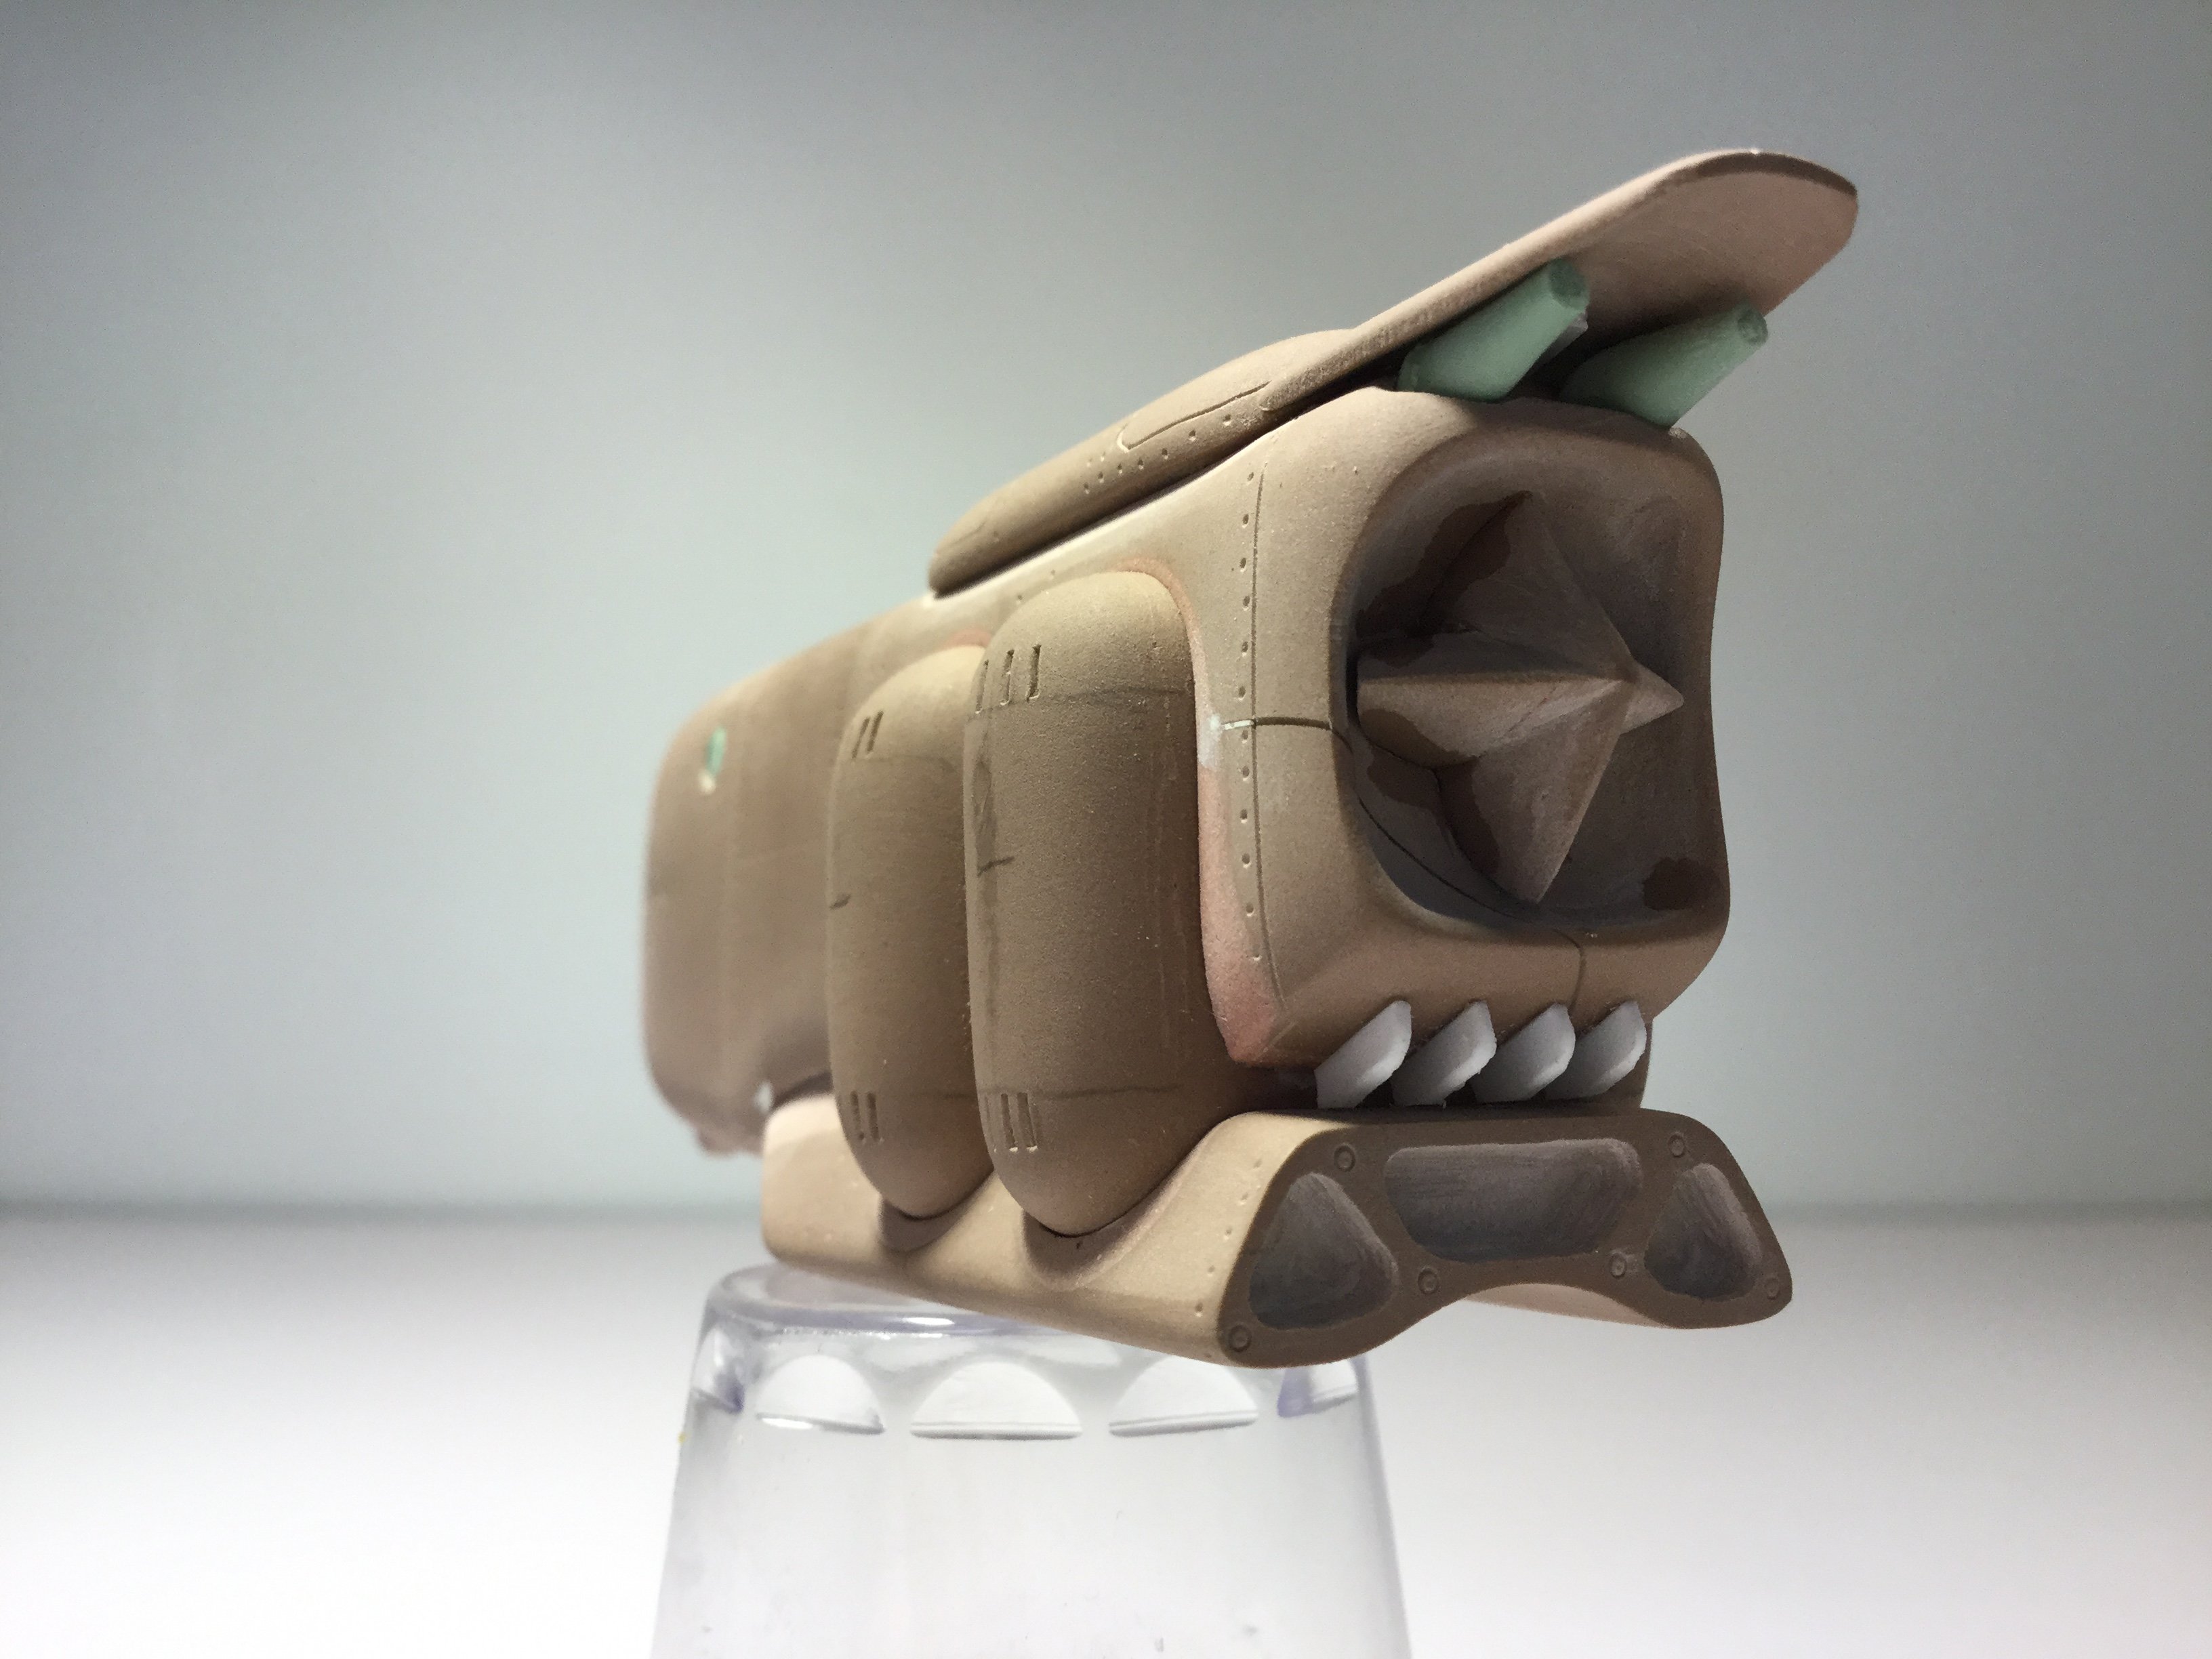
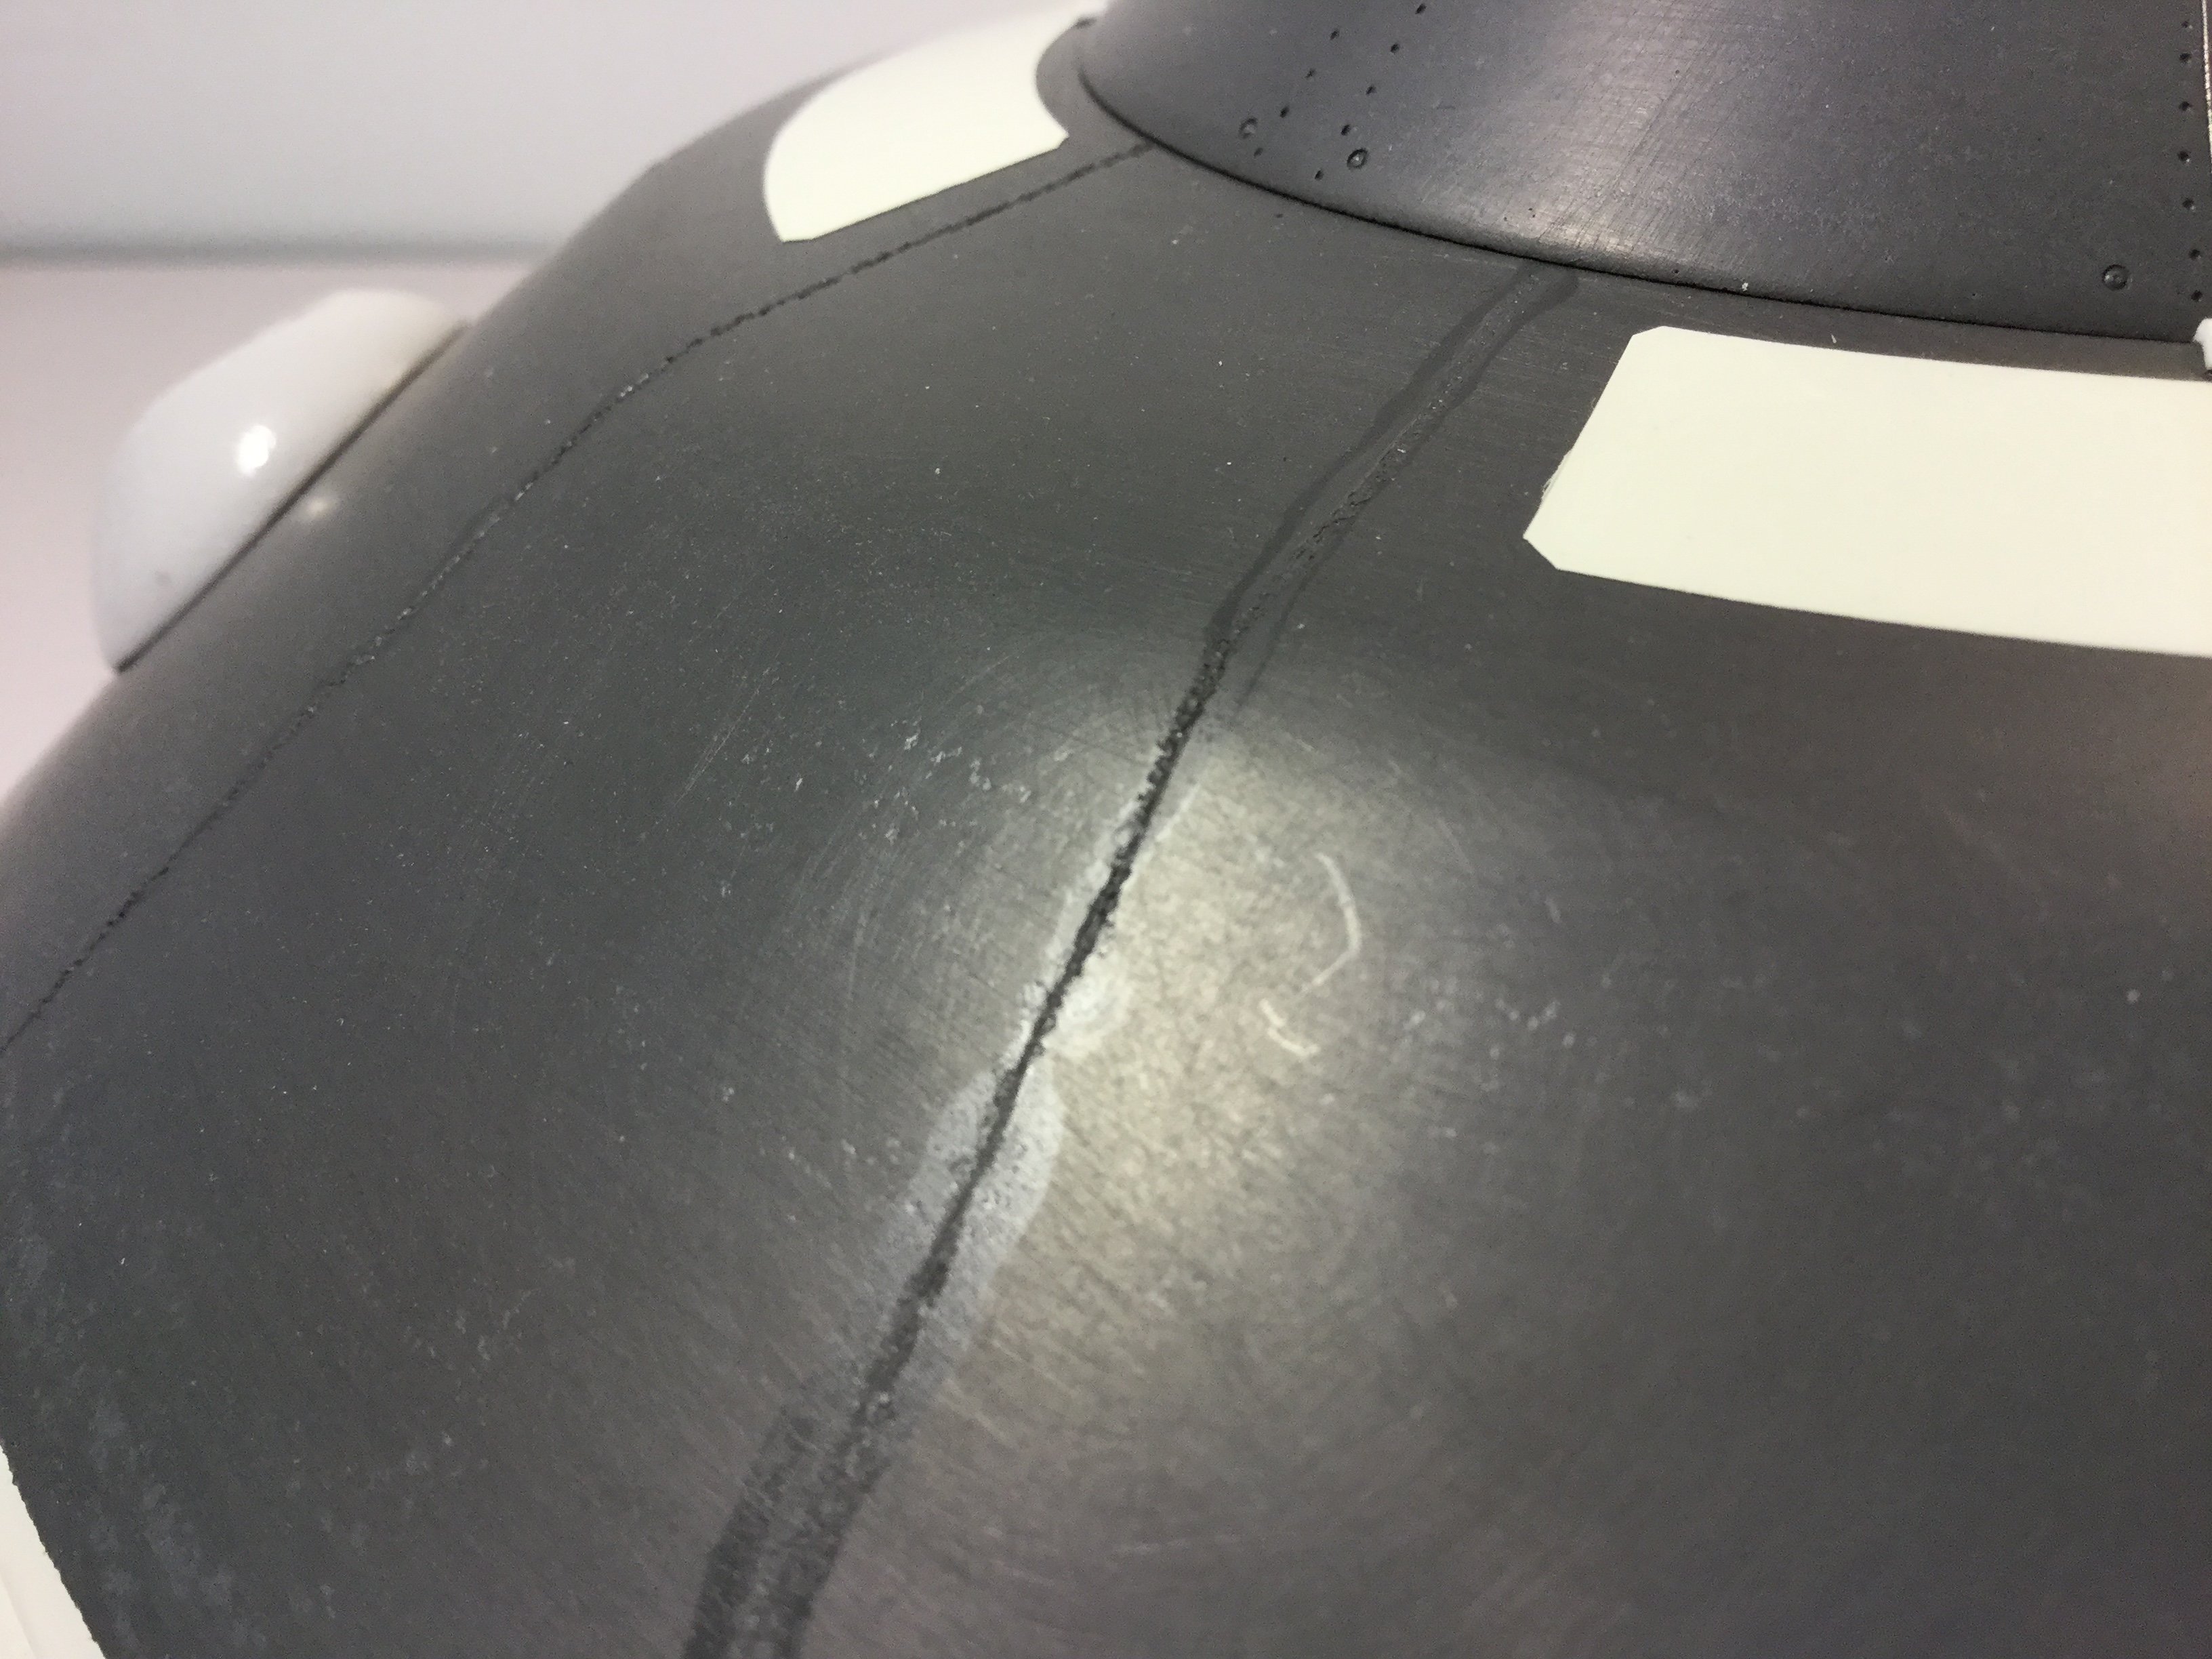
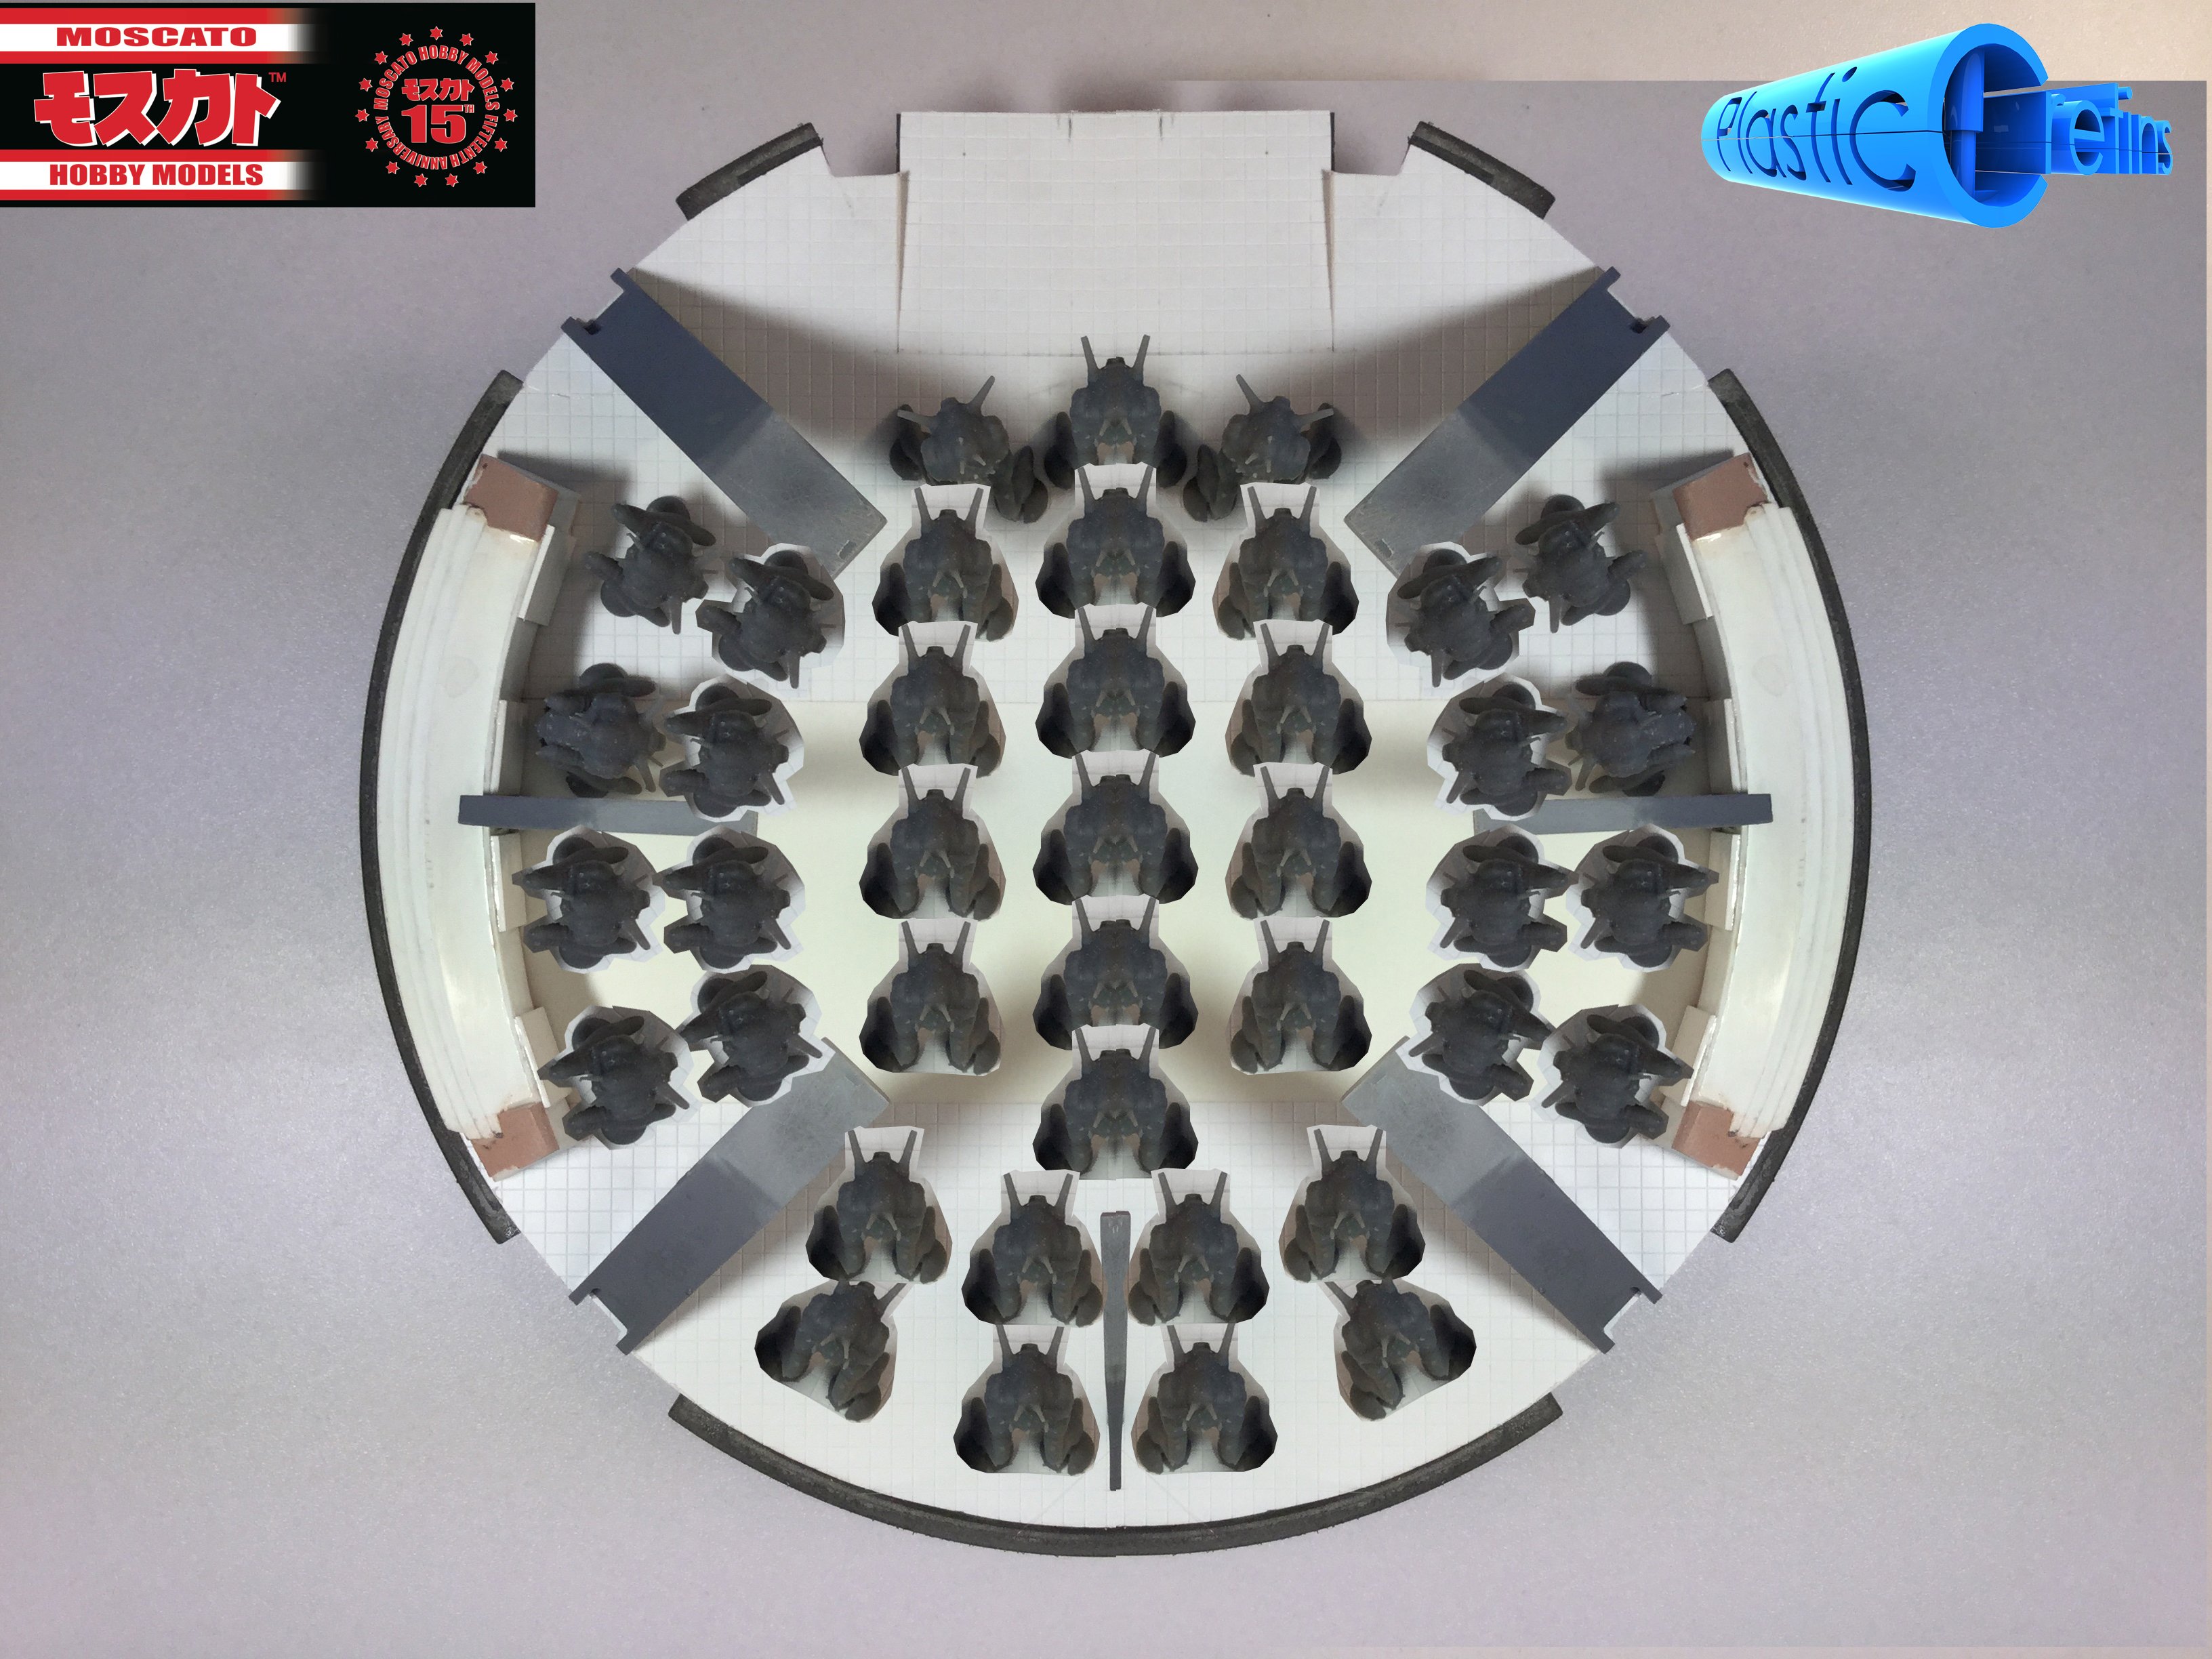
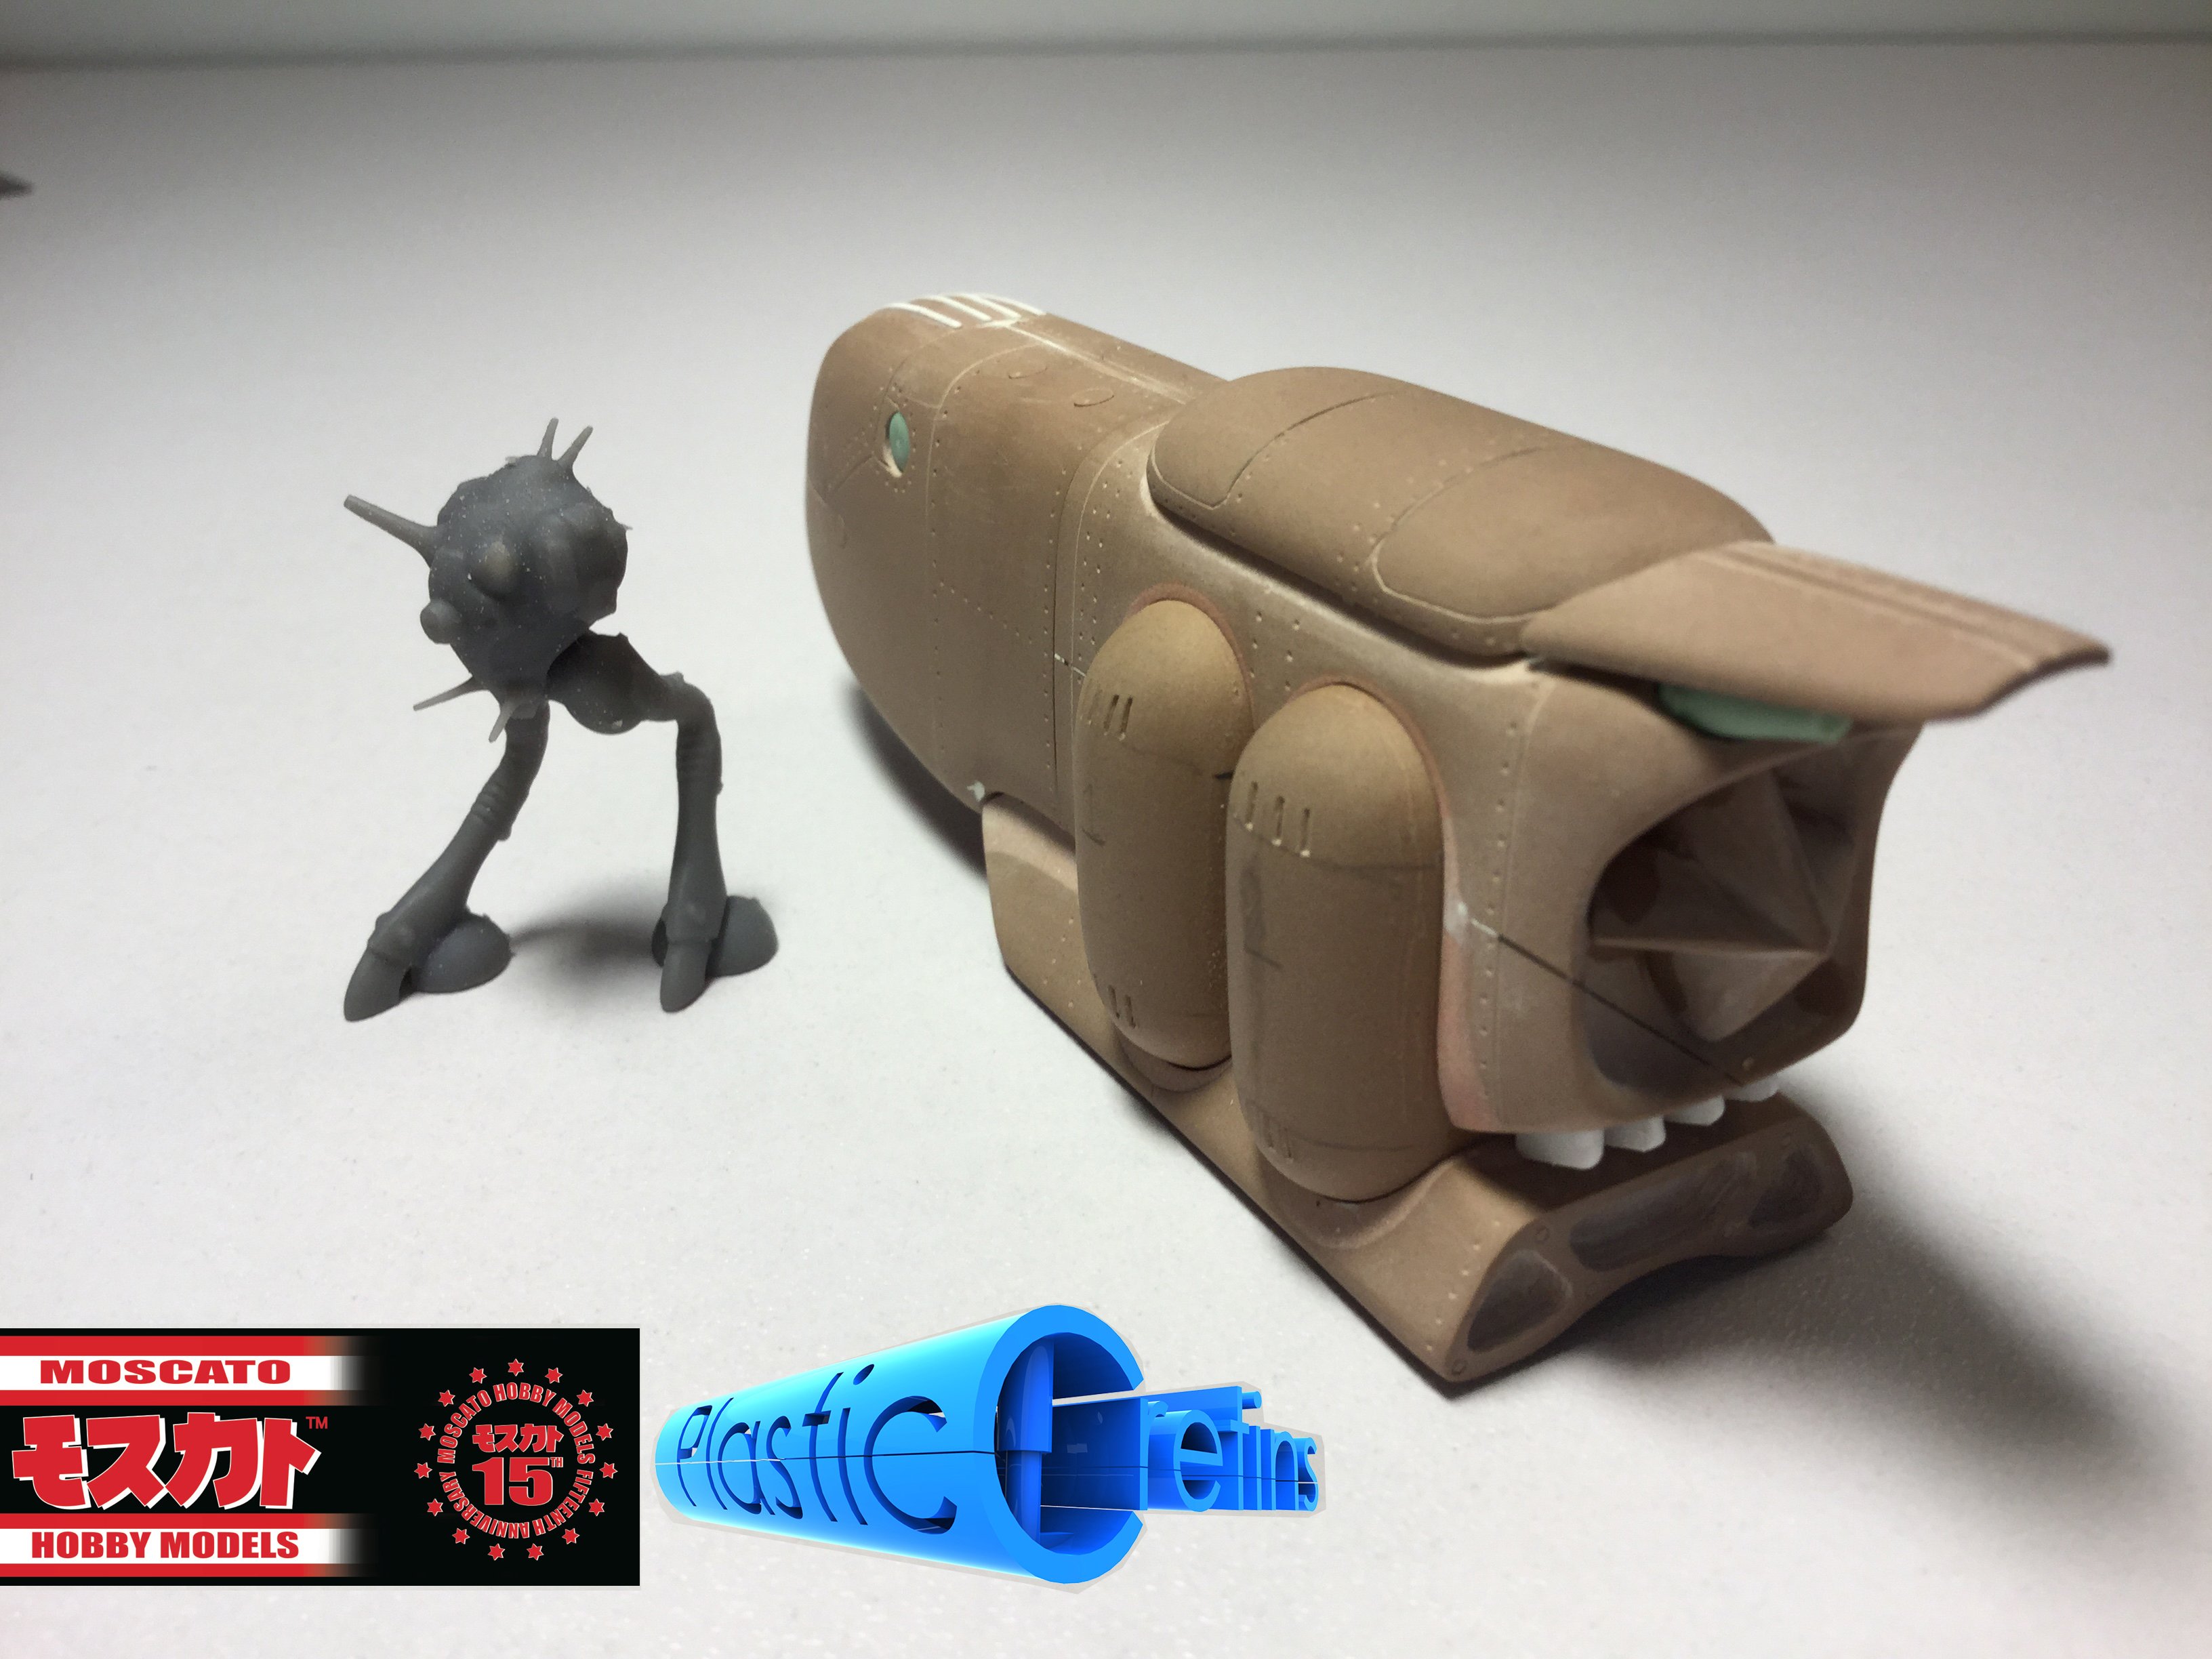
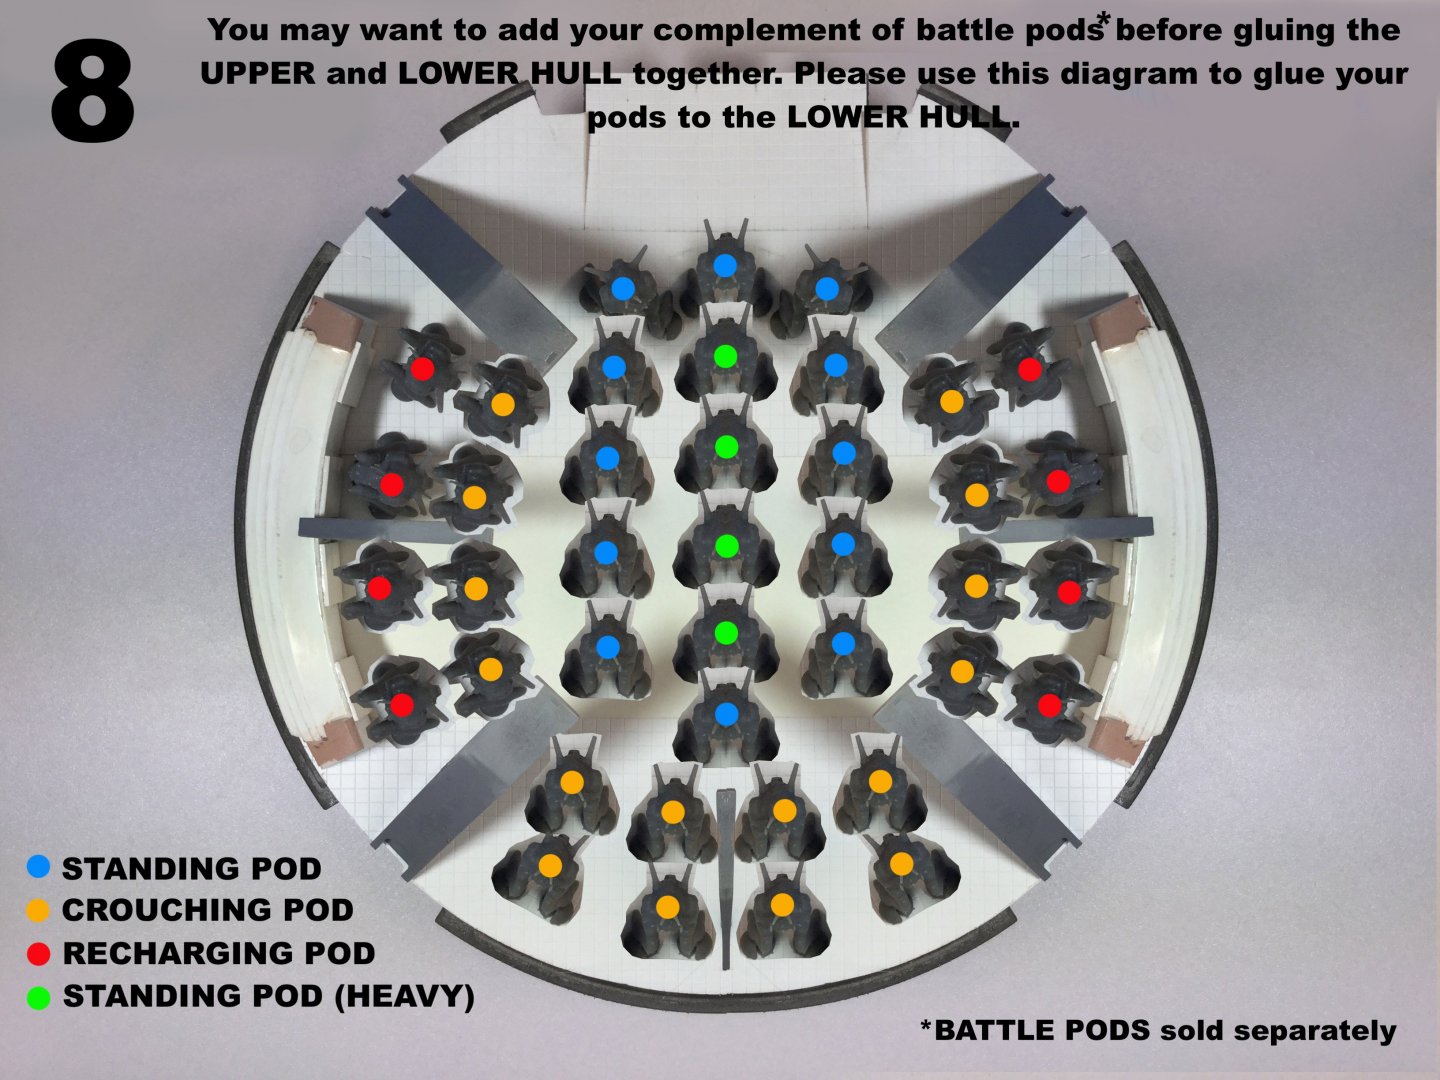
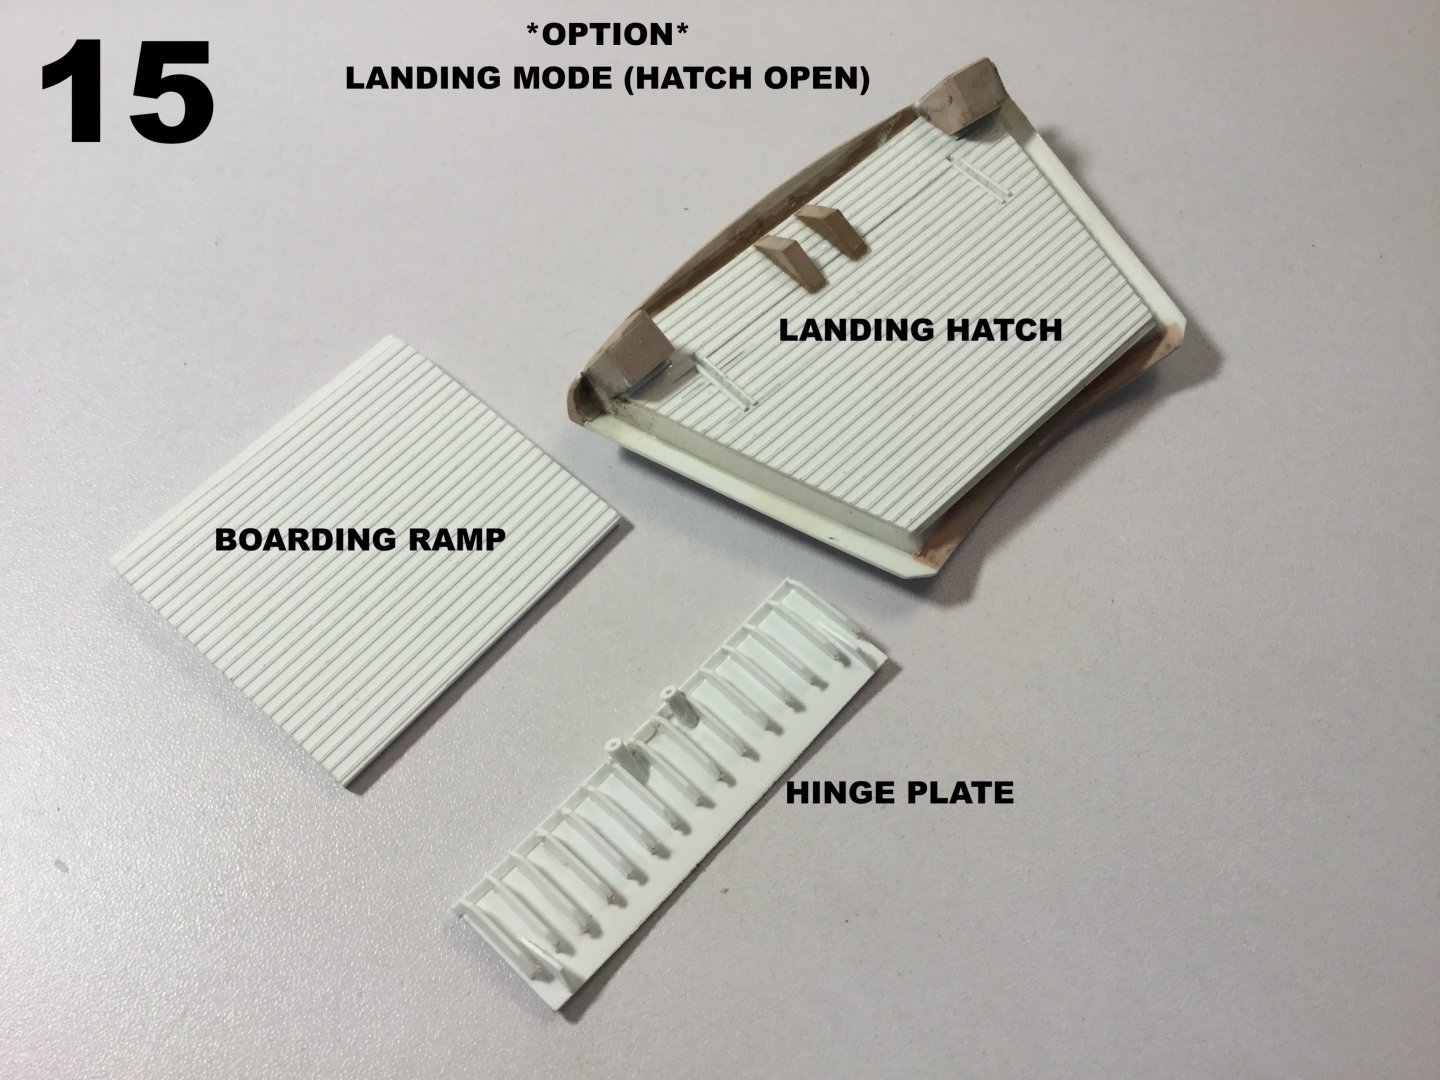
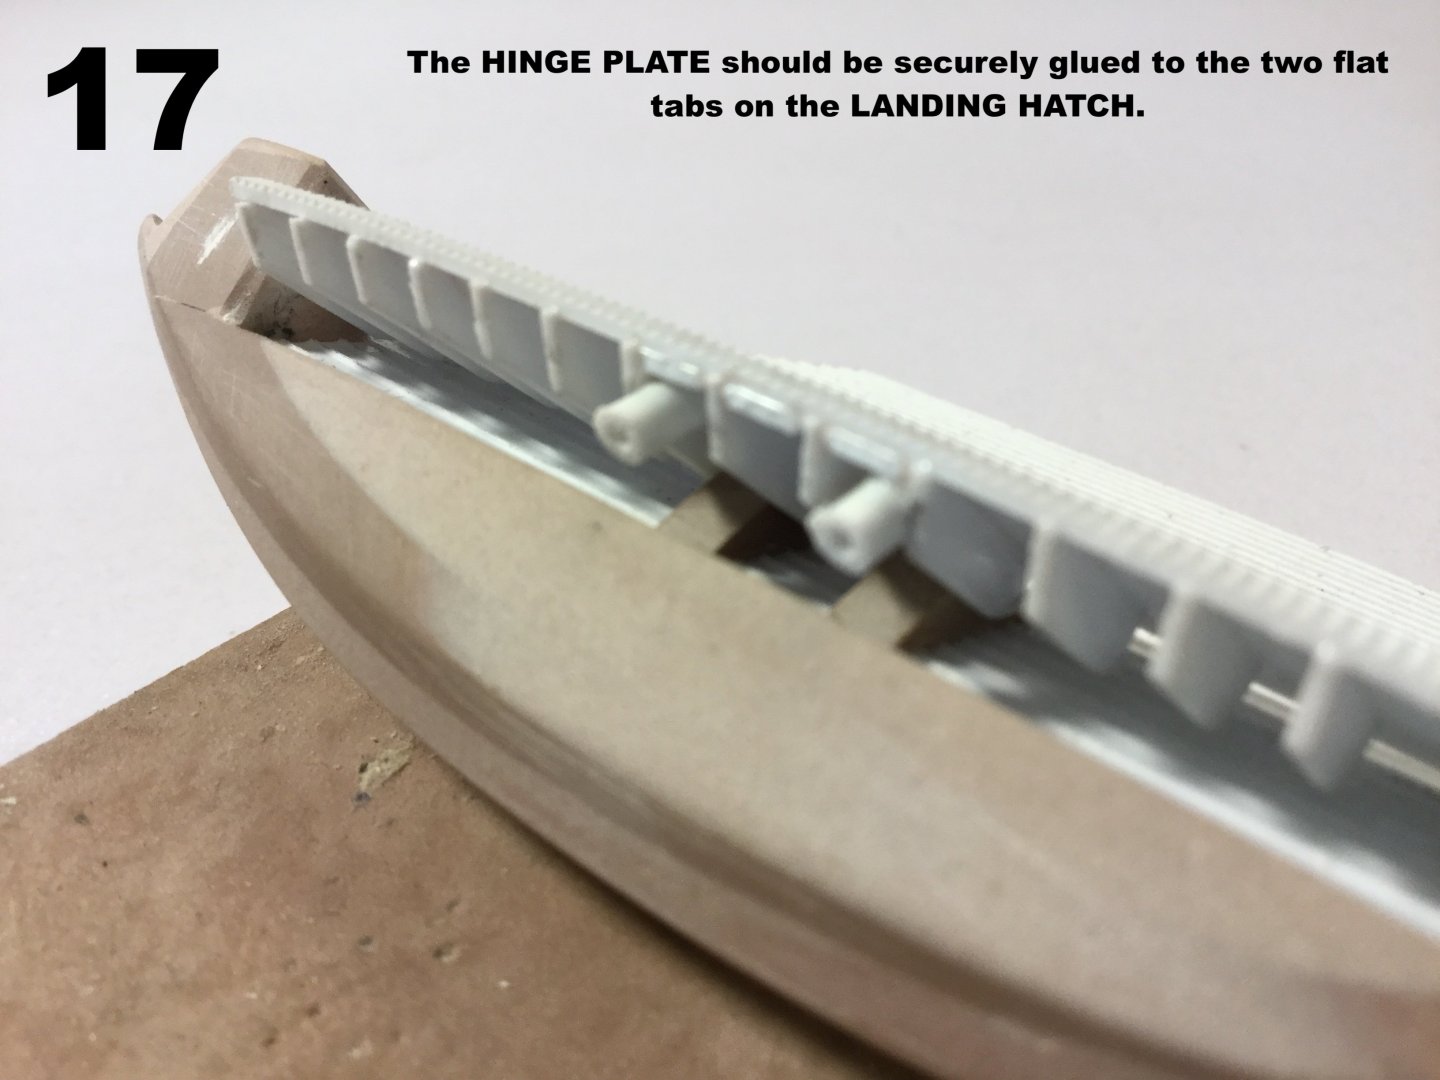
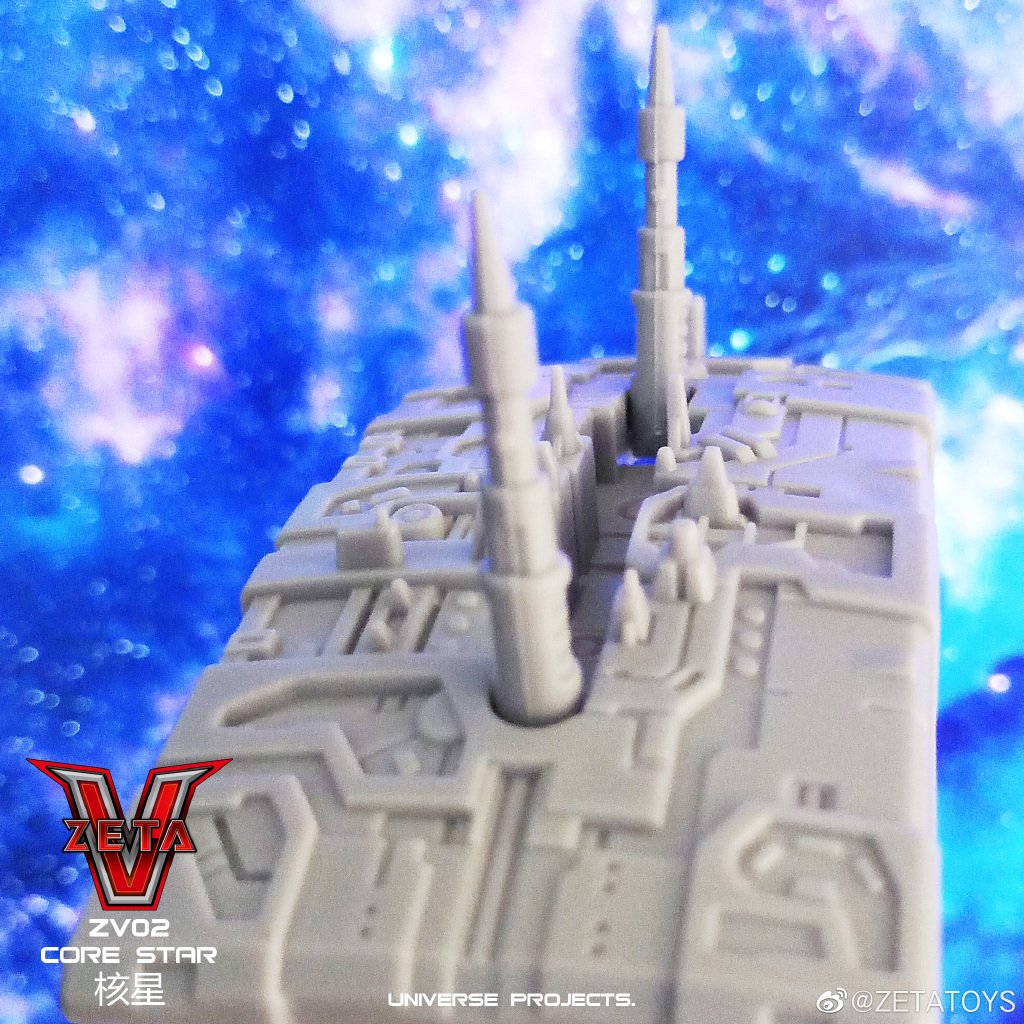
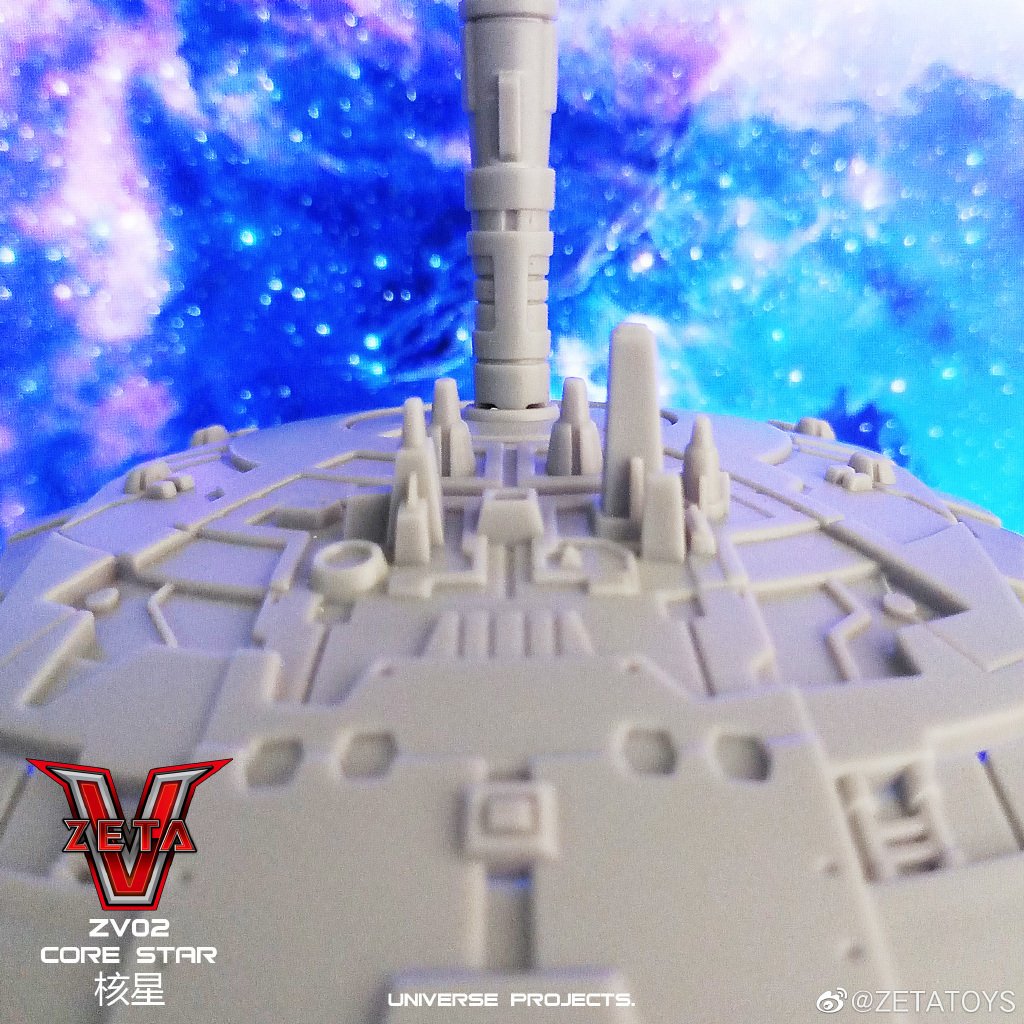
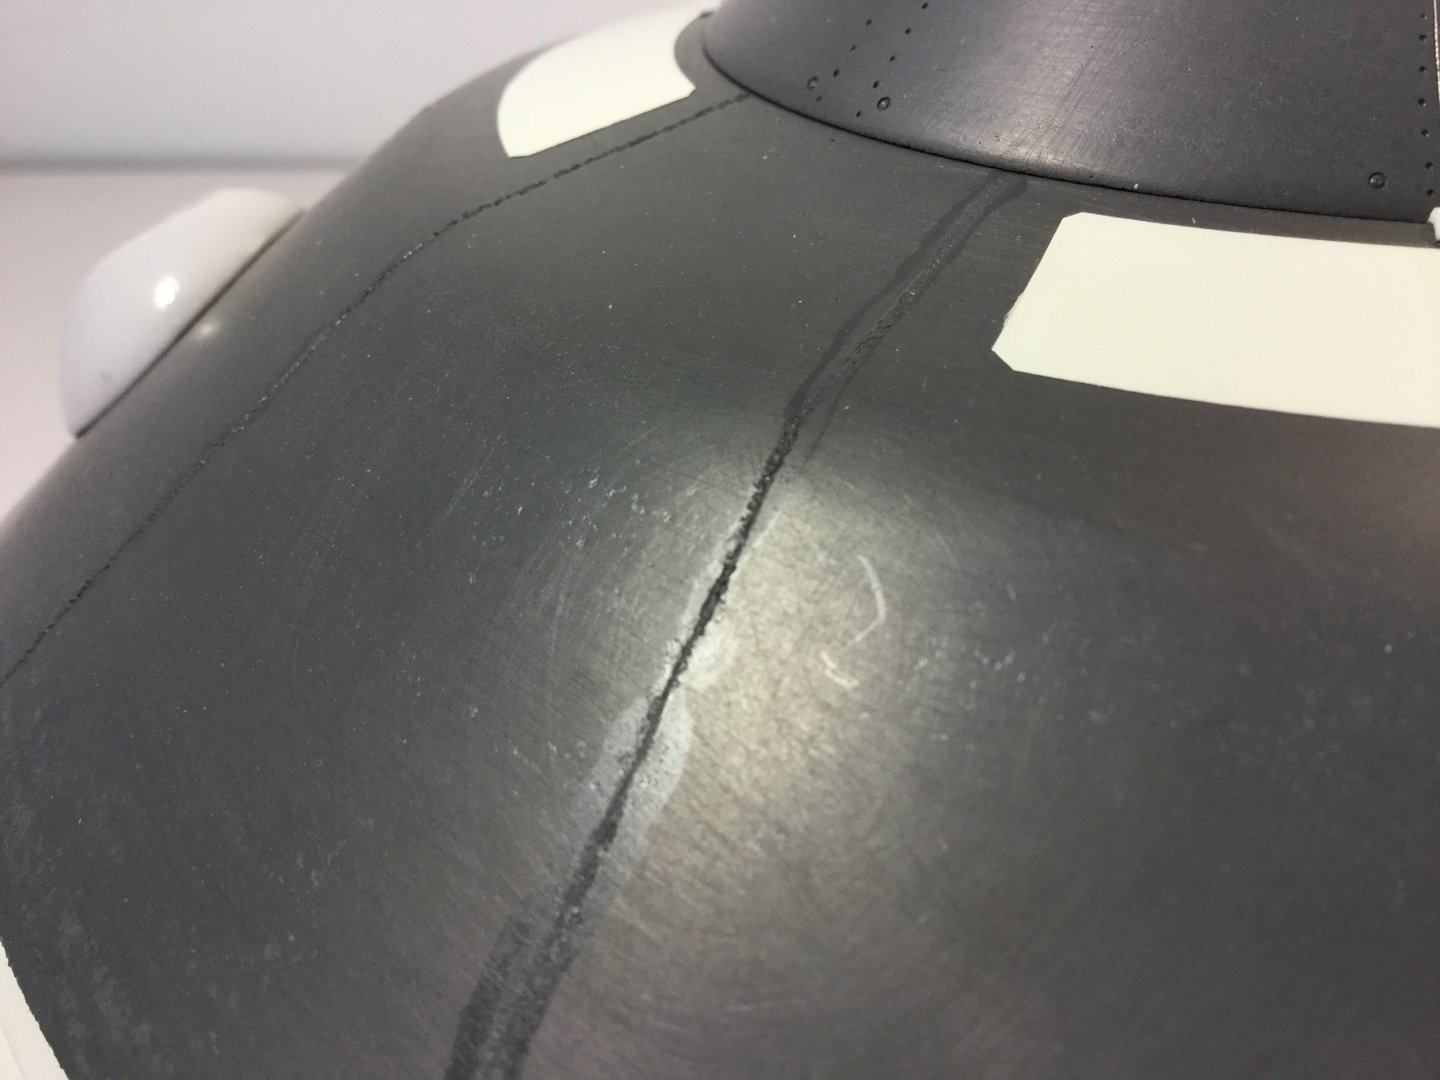
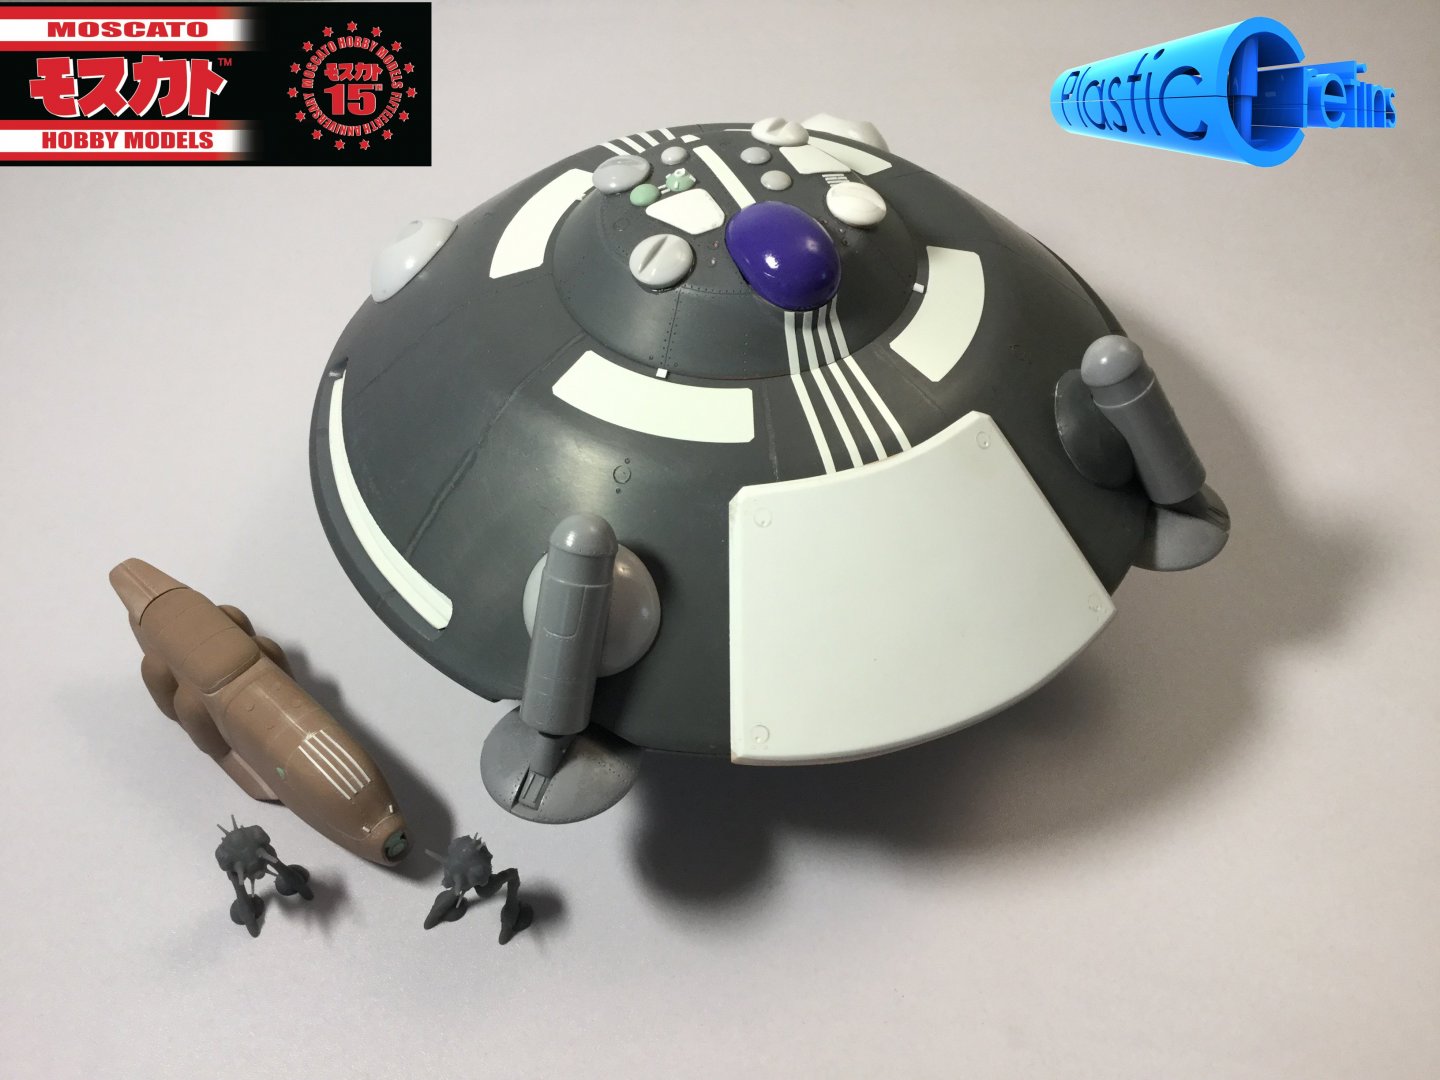
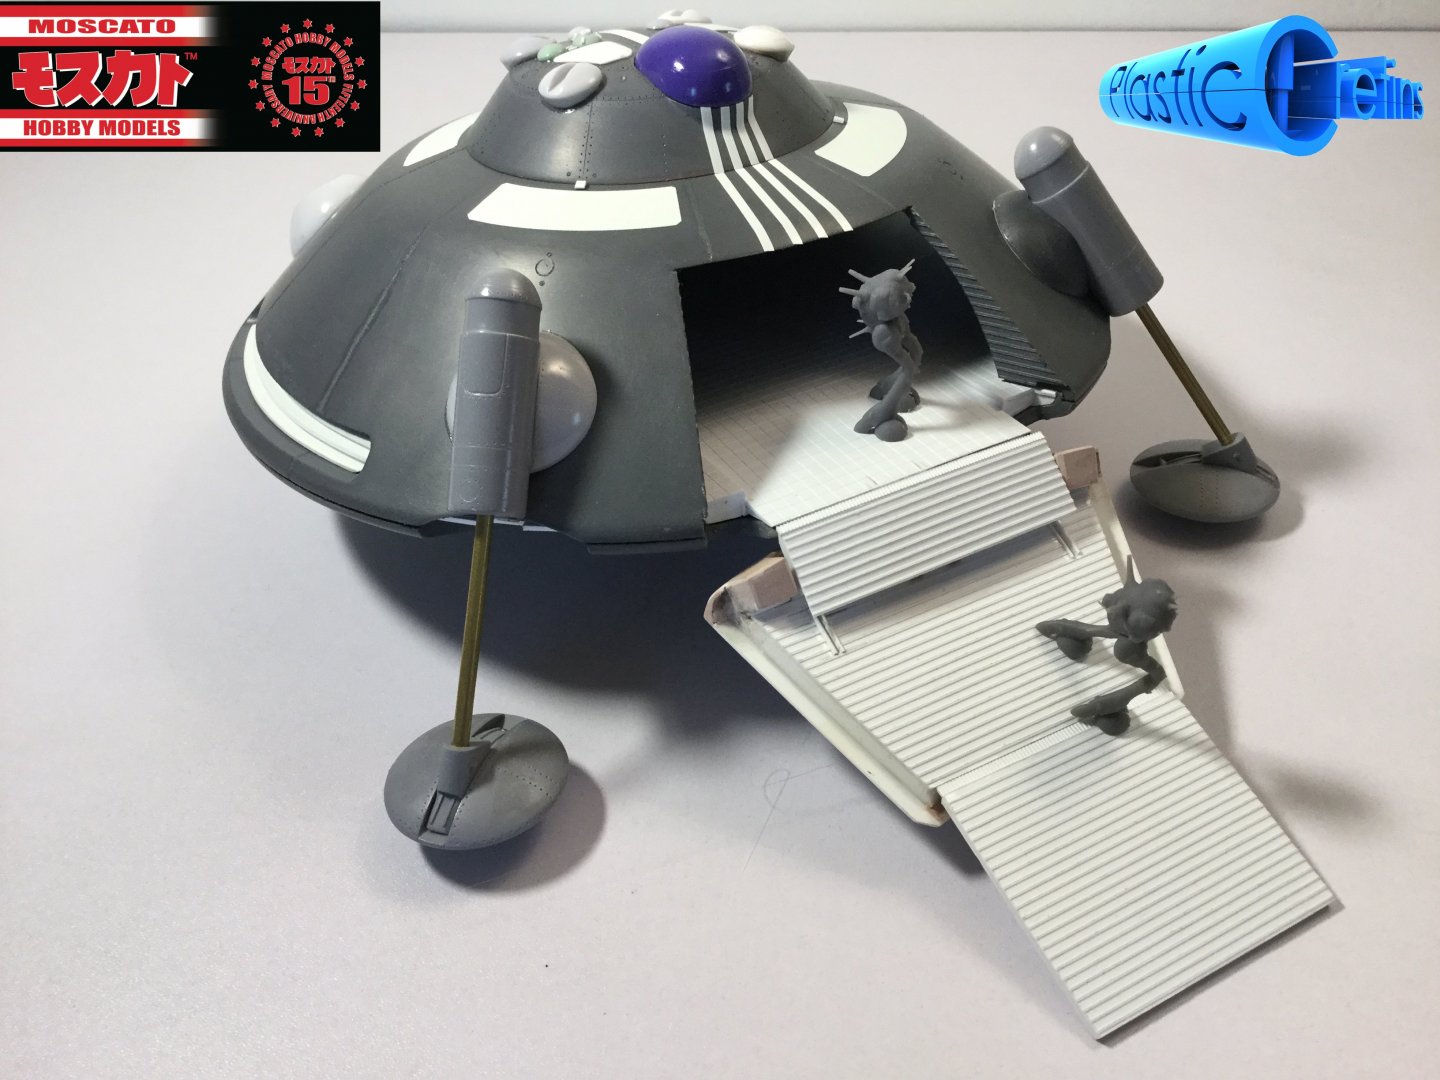
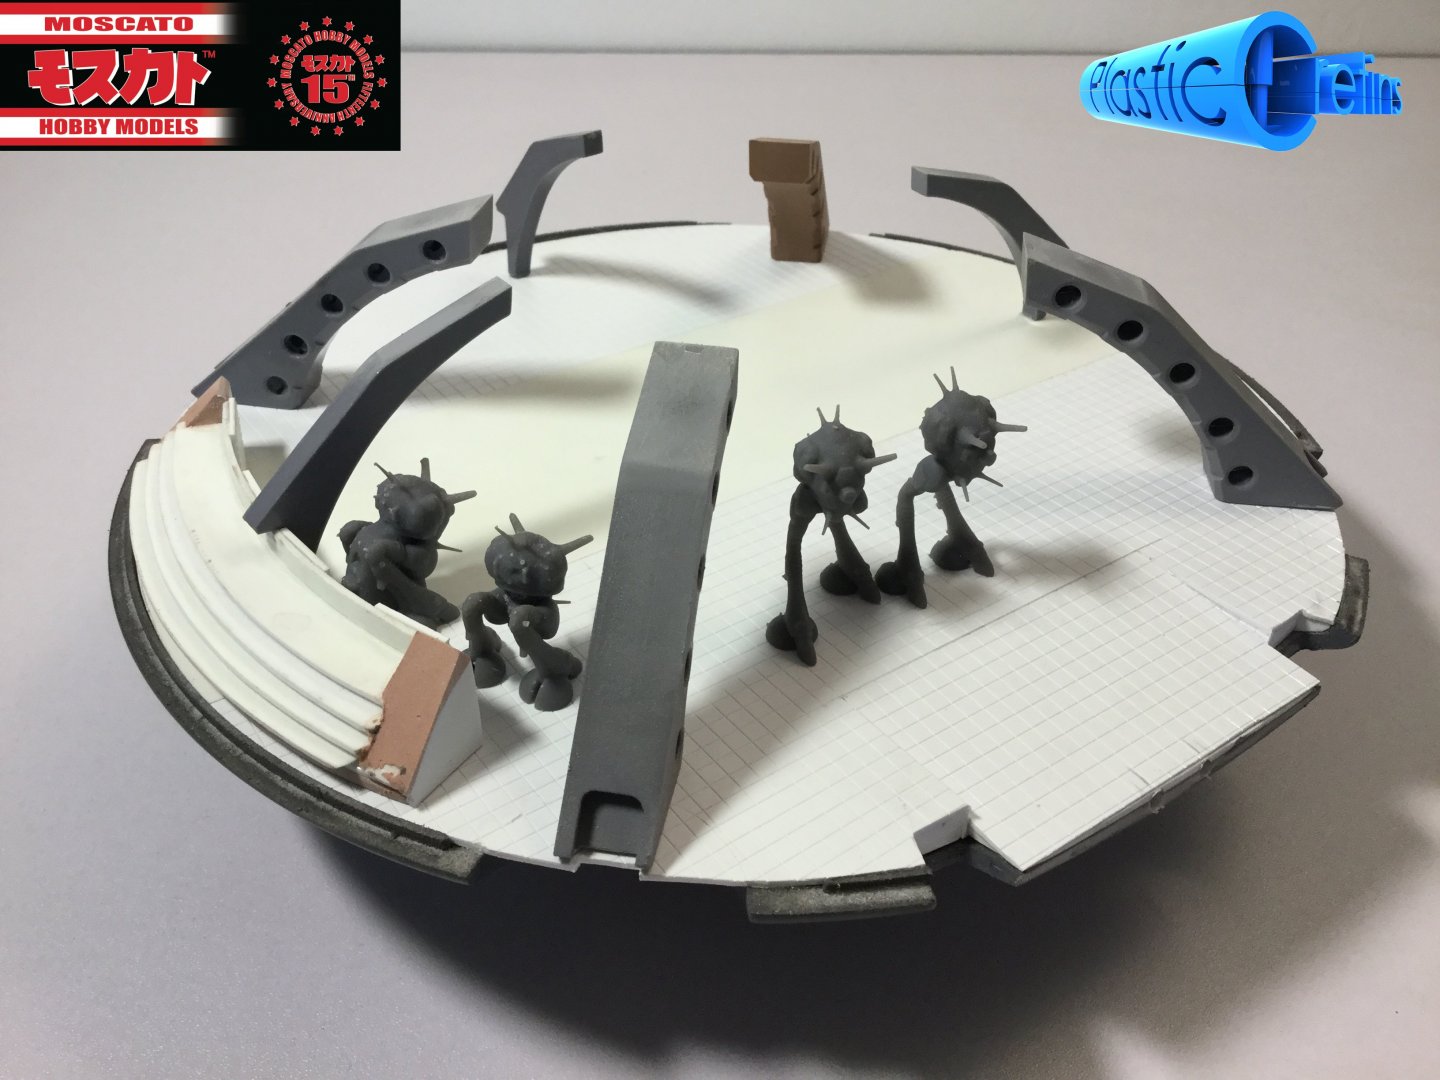
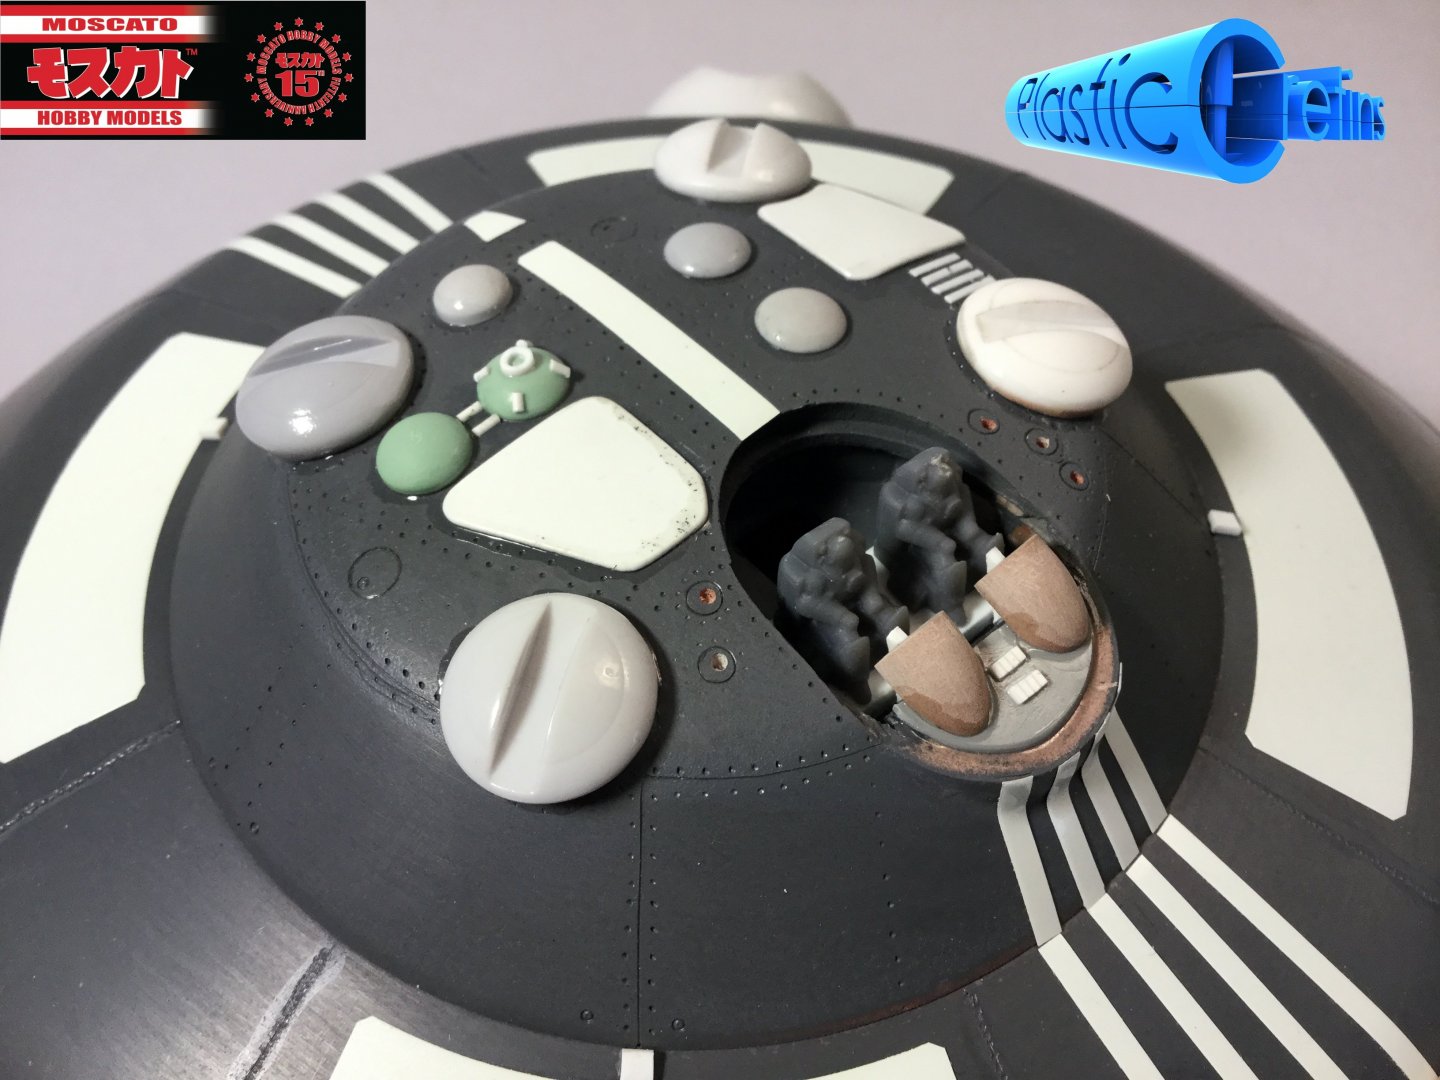
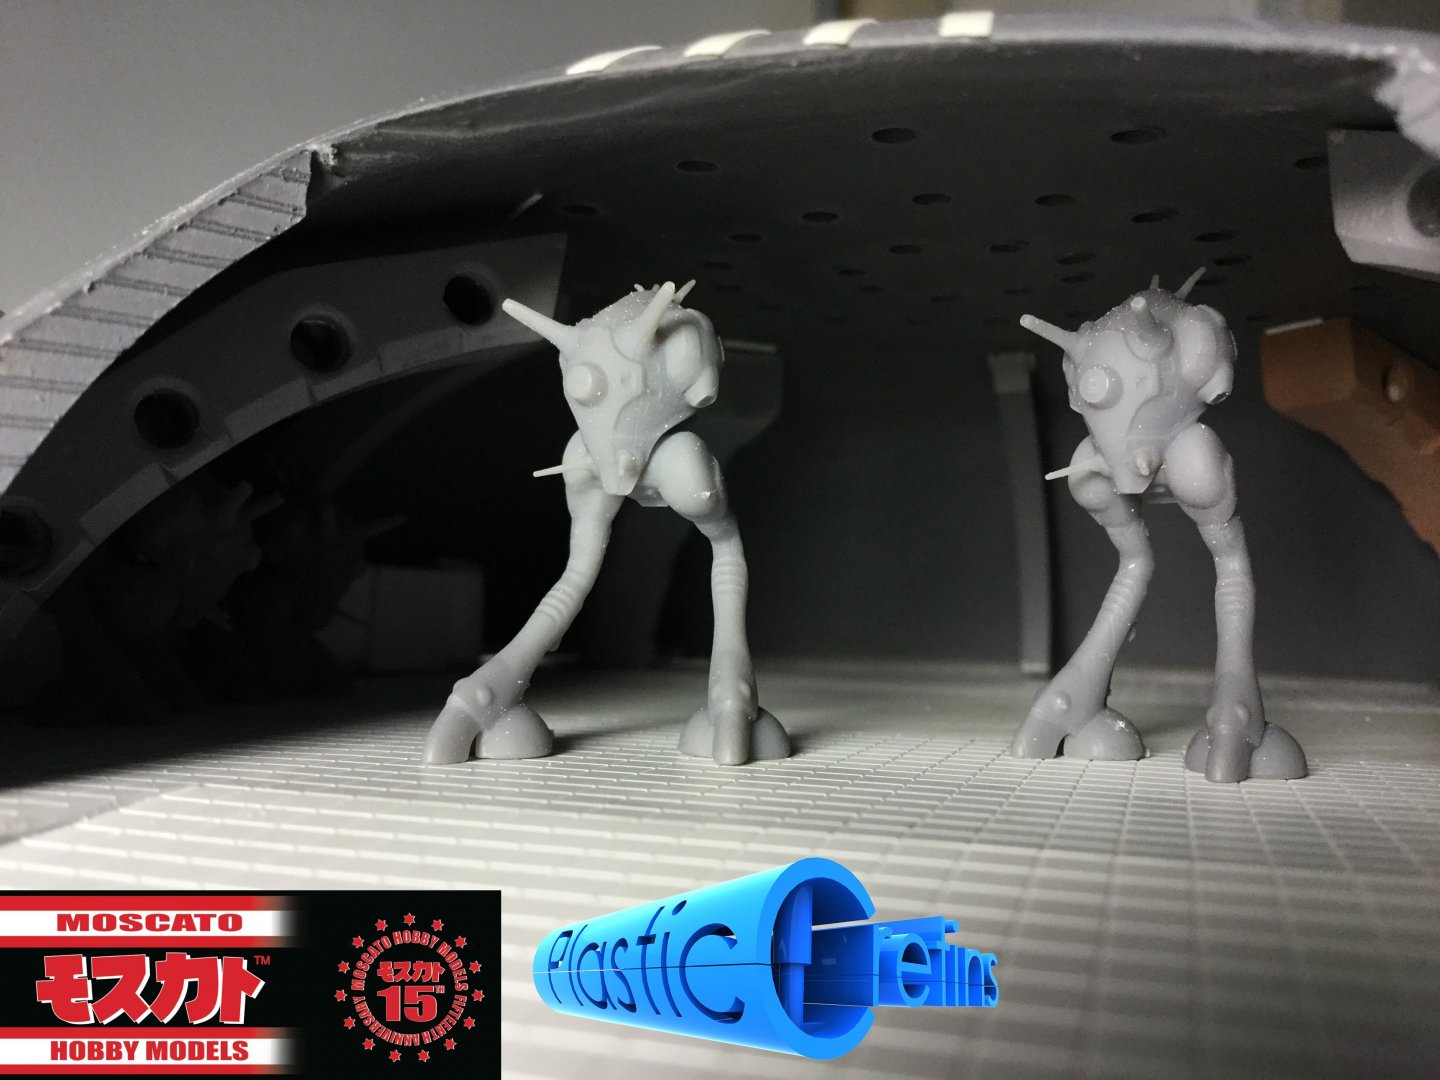
Masters are pretty much done, just a few tiny details left that I'll take care of in mold-prep. I came up with an interesting way to do 1/500-ish Zentradi weld seams in the process. Sorry for the poor photo, but they look really nice when viewed with the naked eye. I also took it upon myself to extend the troop boarding hatch, just so that it would be a more gradual slope, but as a modeler you'll have the option to use the extended plank or not. I happen to think it looks nifty, especially considering the clusterfrack nightmare that the hinge mechanism posed on a curved surface. Some of the parts are not perfectly fit into place, just because I didn't want to damage the masters with glue marks, but they do fit together nicely. All said, the Dropship will be able to carry 40 pods of various configuration. I tried to get good shots of the interior, but the darkness of the primer makes that difficult; definitely needs a light green/grey paint job on the inside, and some orange or red combat lighting. The preordered kits will come with two standing Regults, but if you want the full compliment for the dropship, you'll need to contact Alex over at info@plasticcretins.com to get the set directly from him.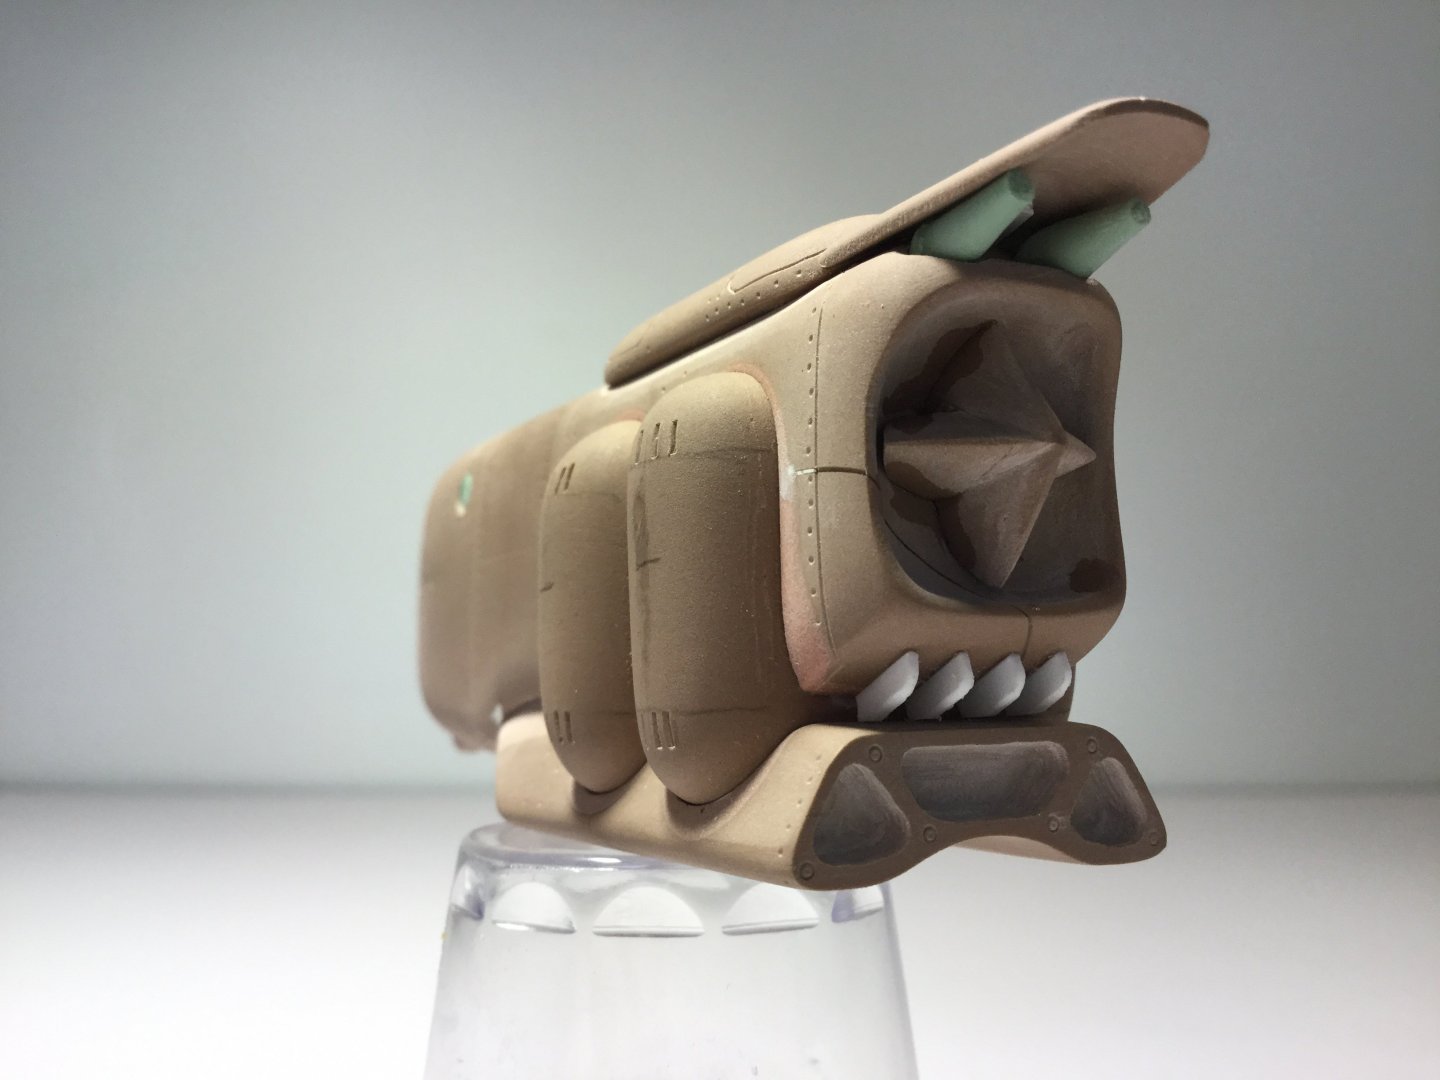


-
New Moscato Macloss Model Project!!!
captain america replied to captain america's topic in Model kits
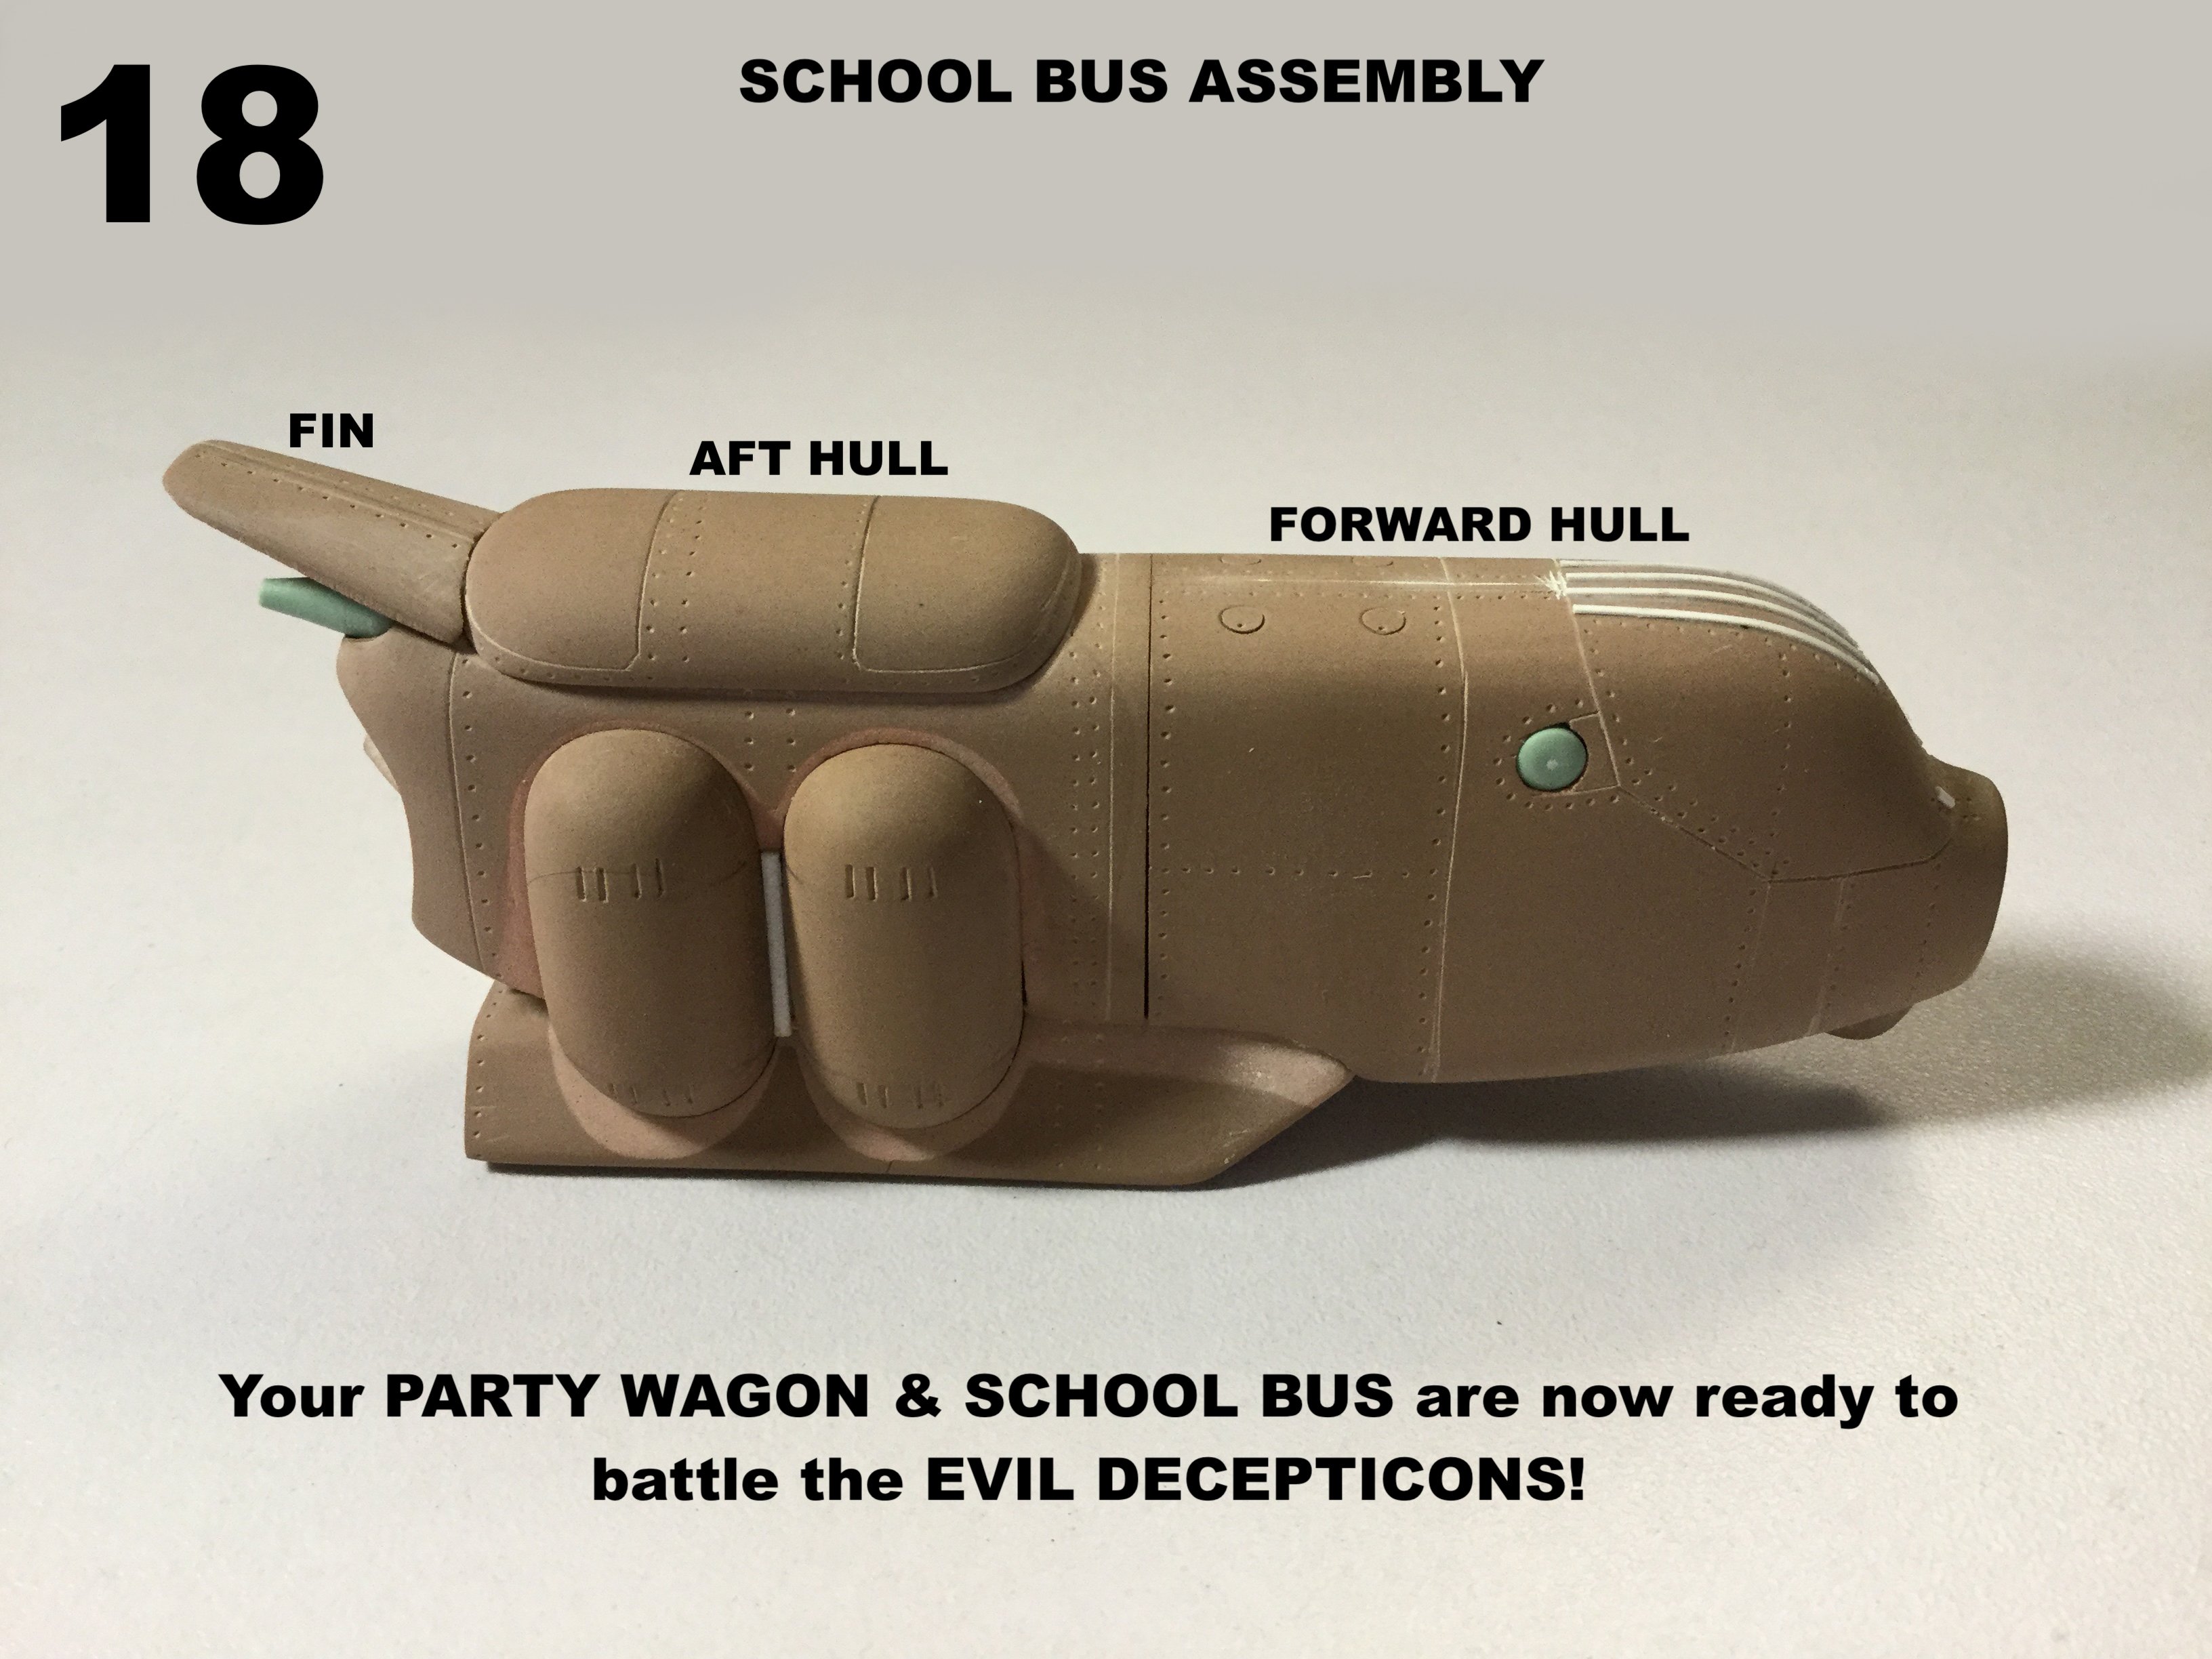
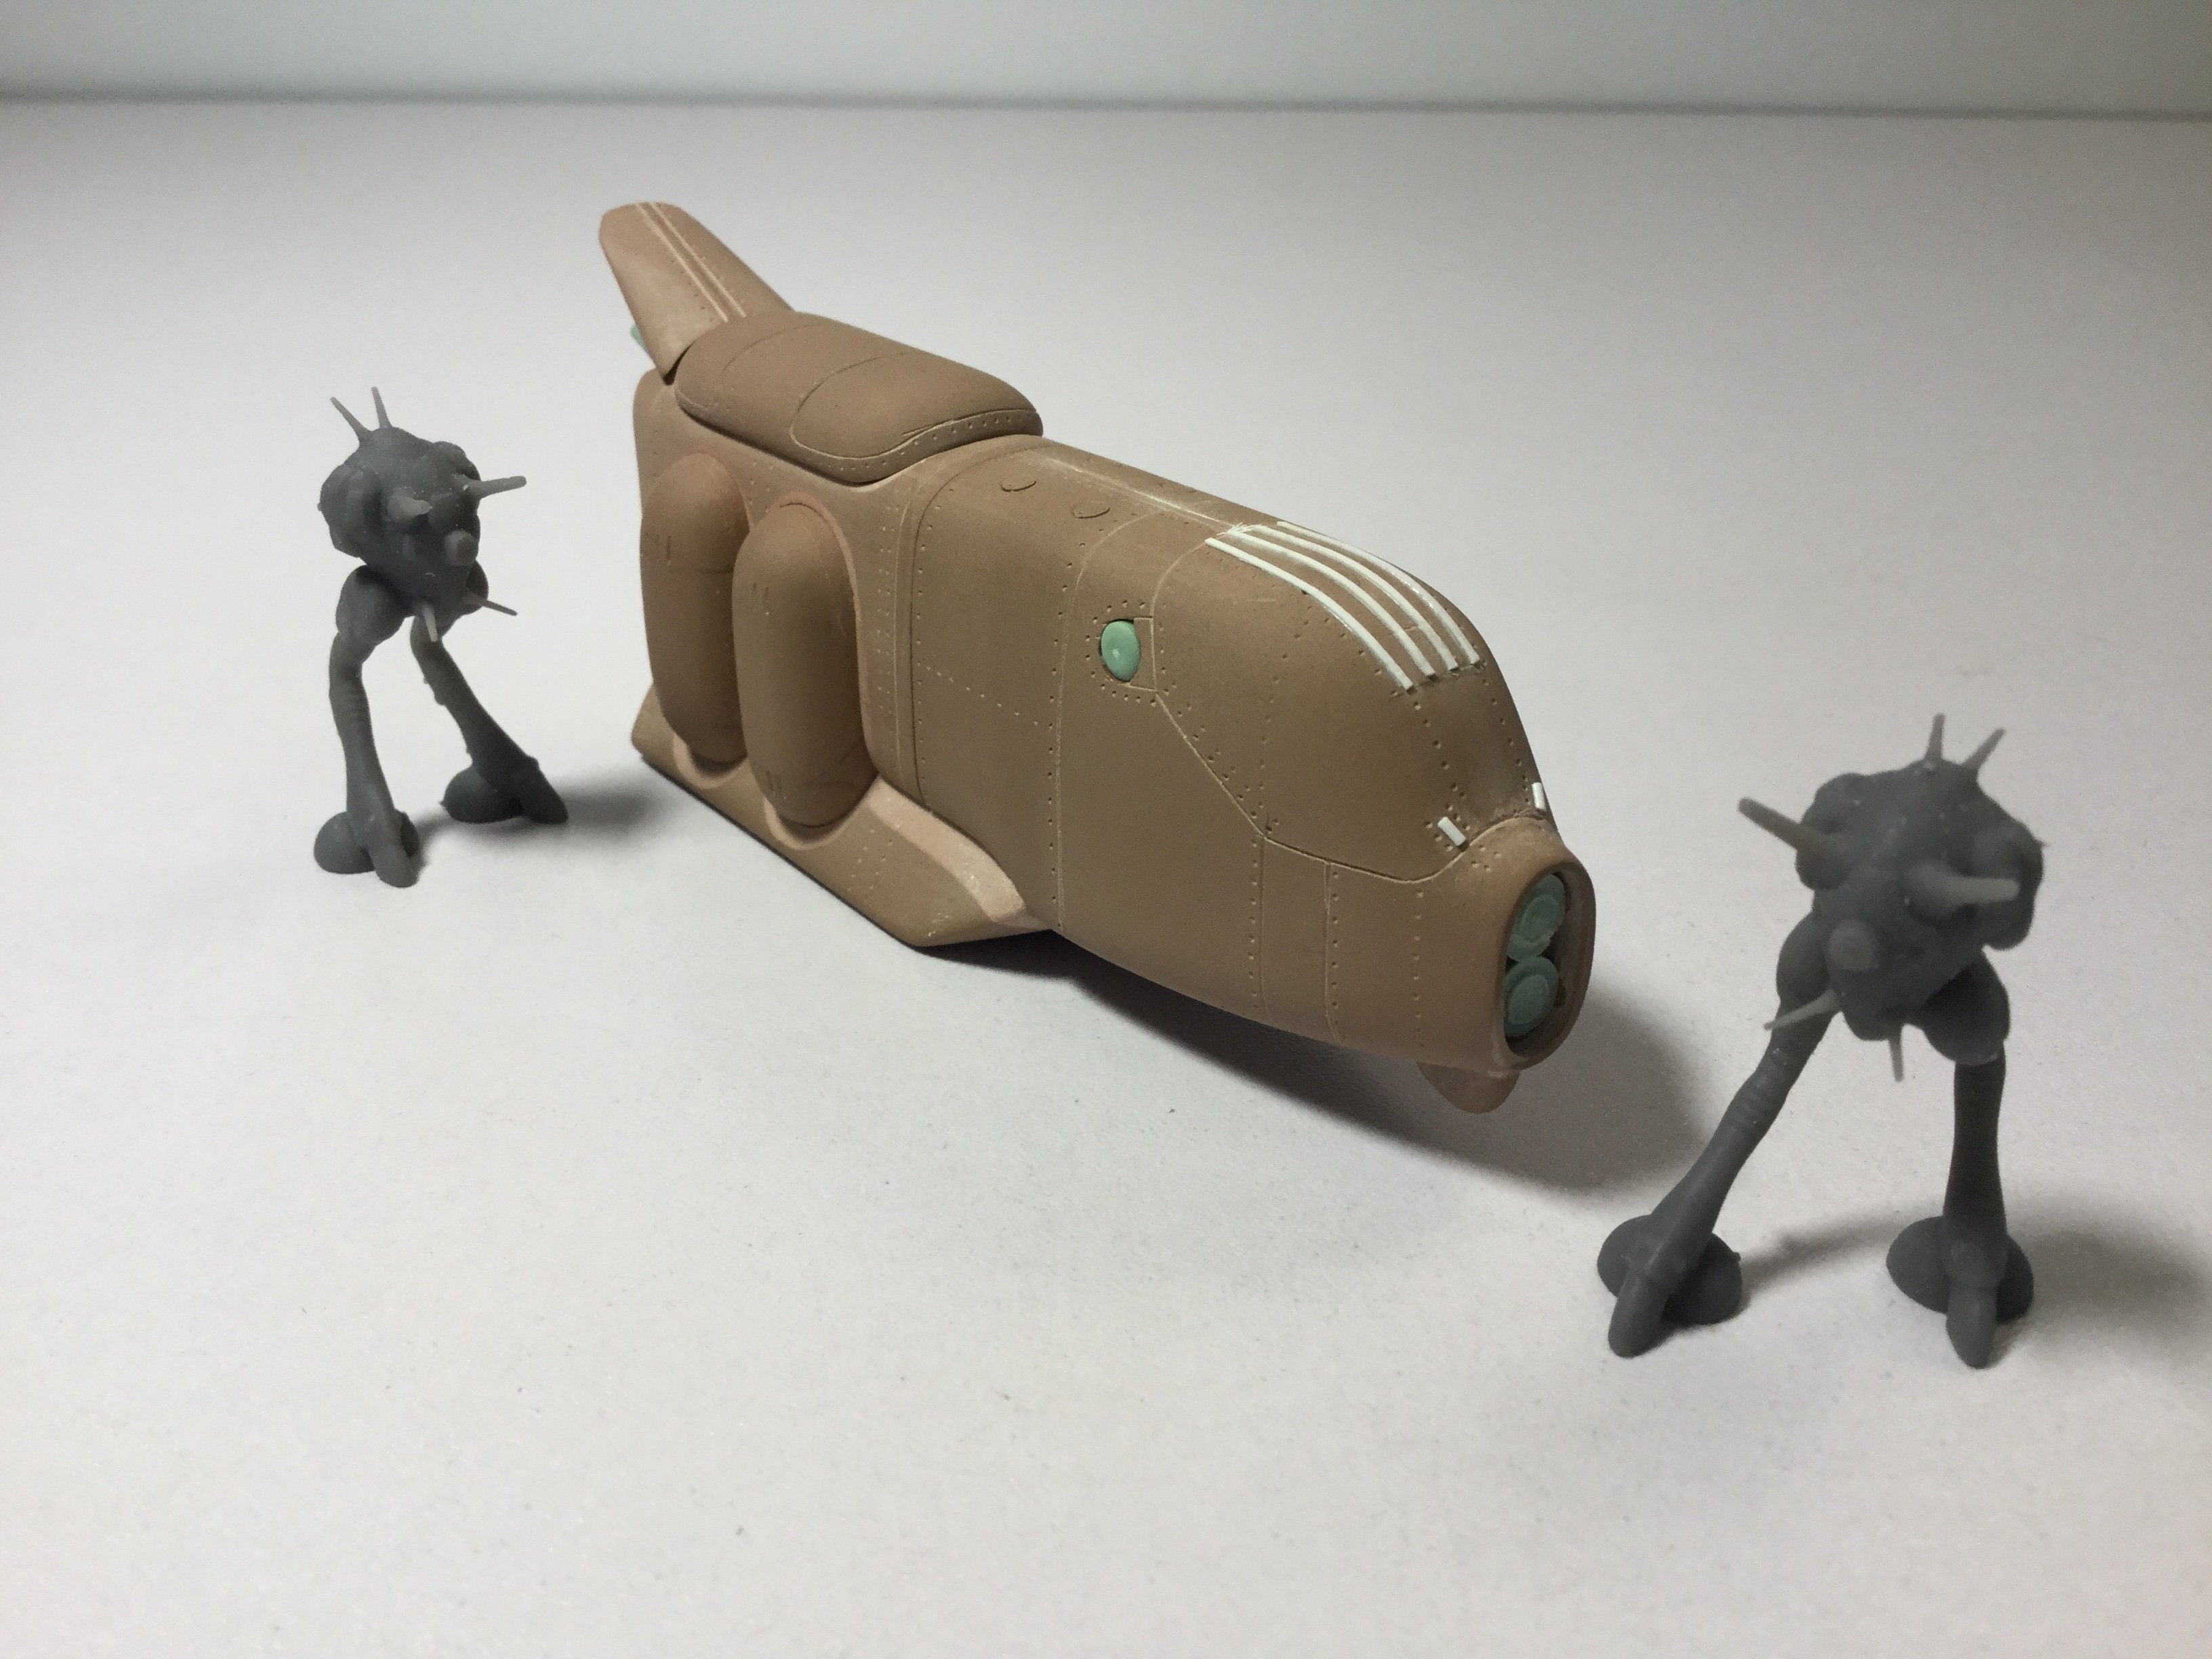
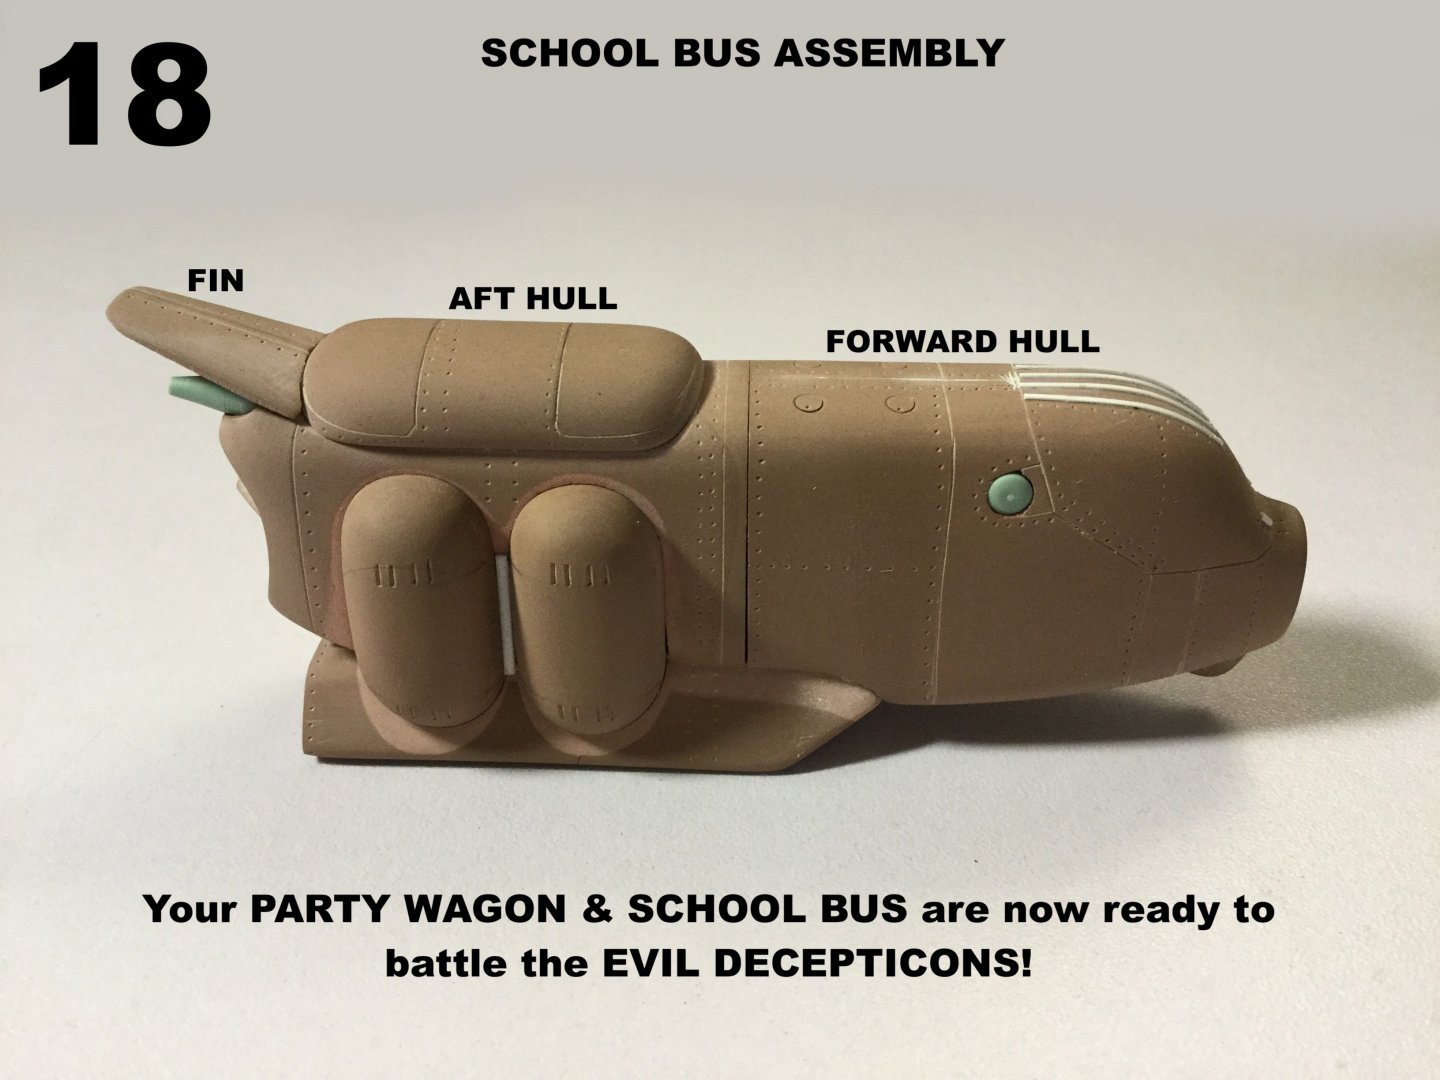
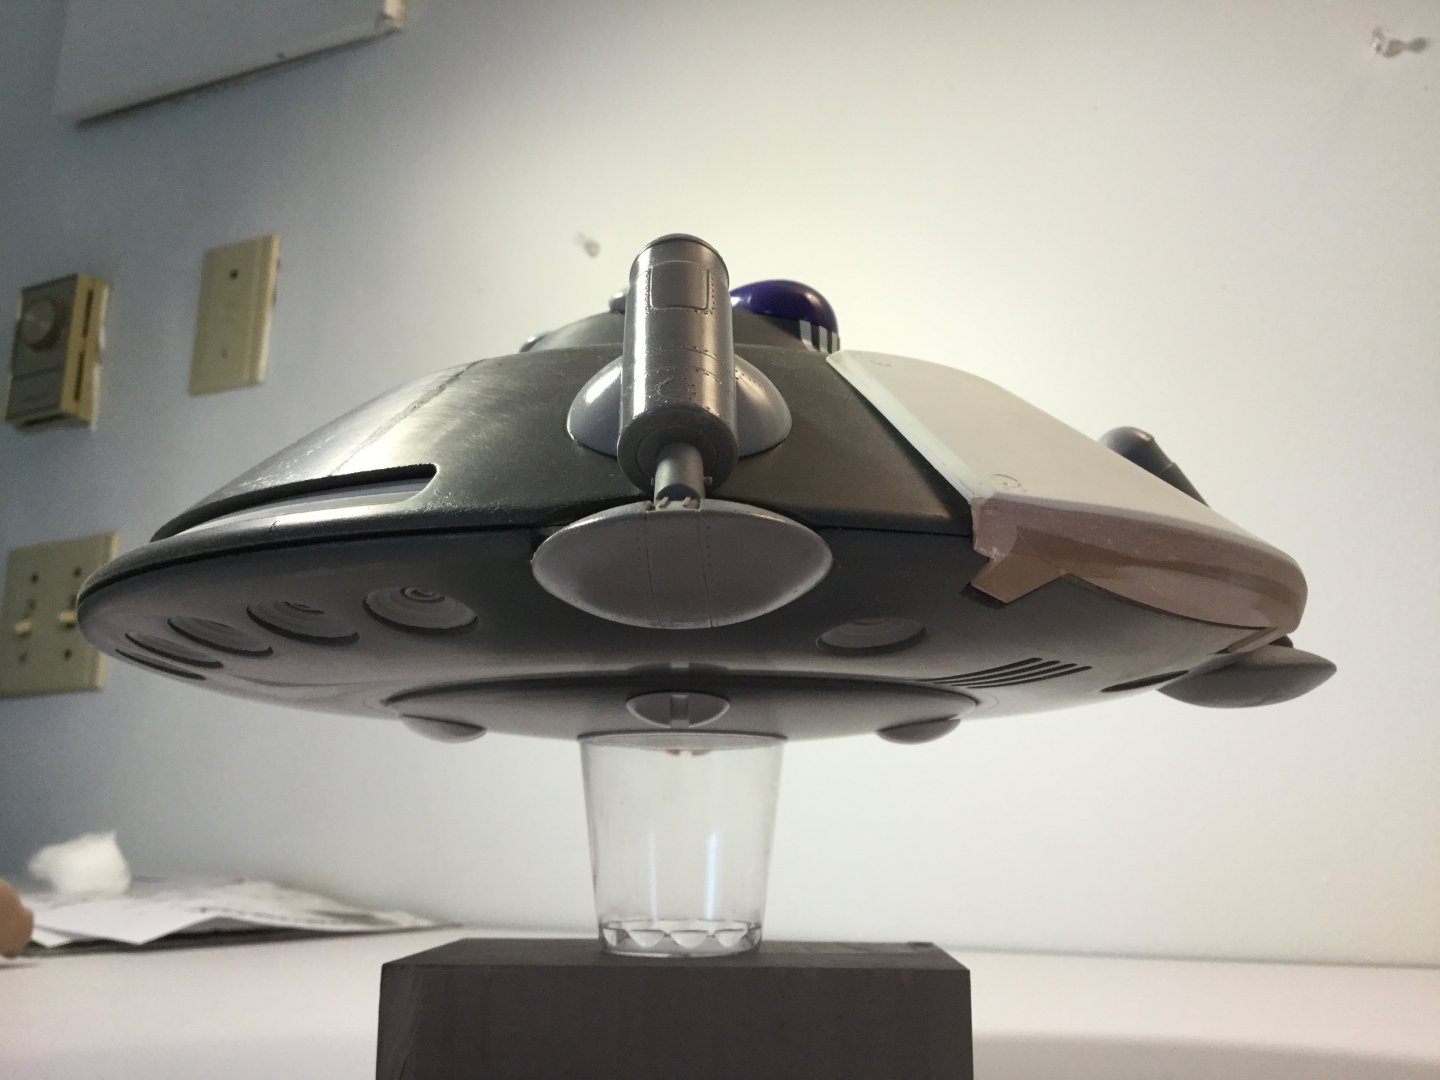
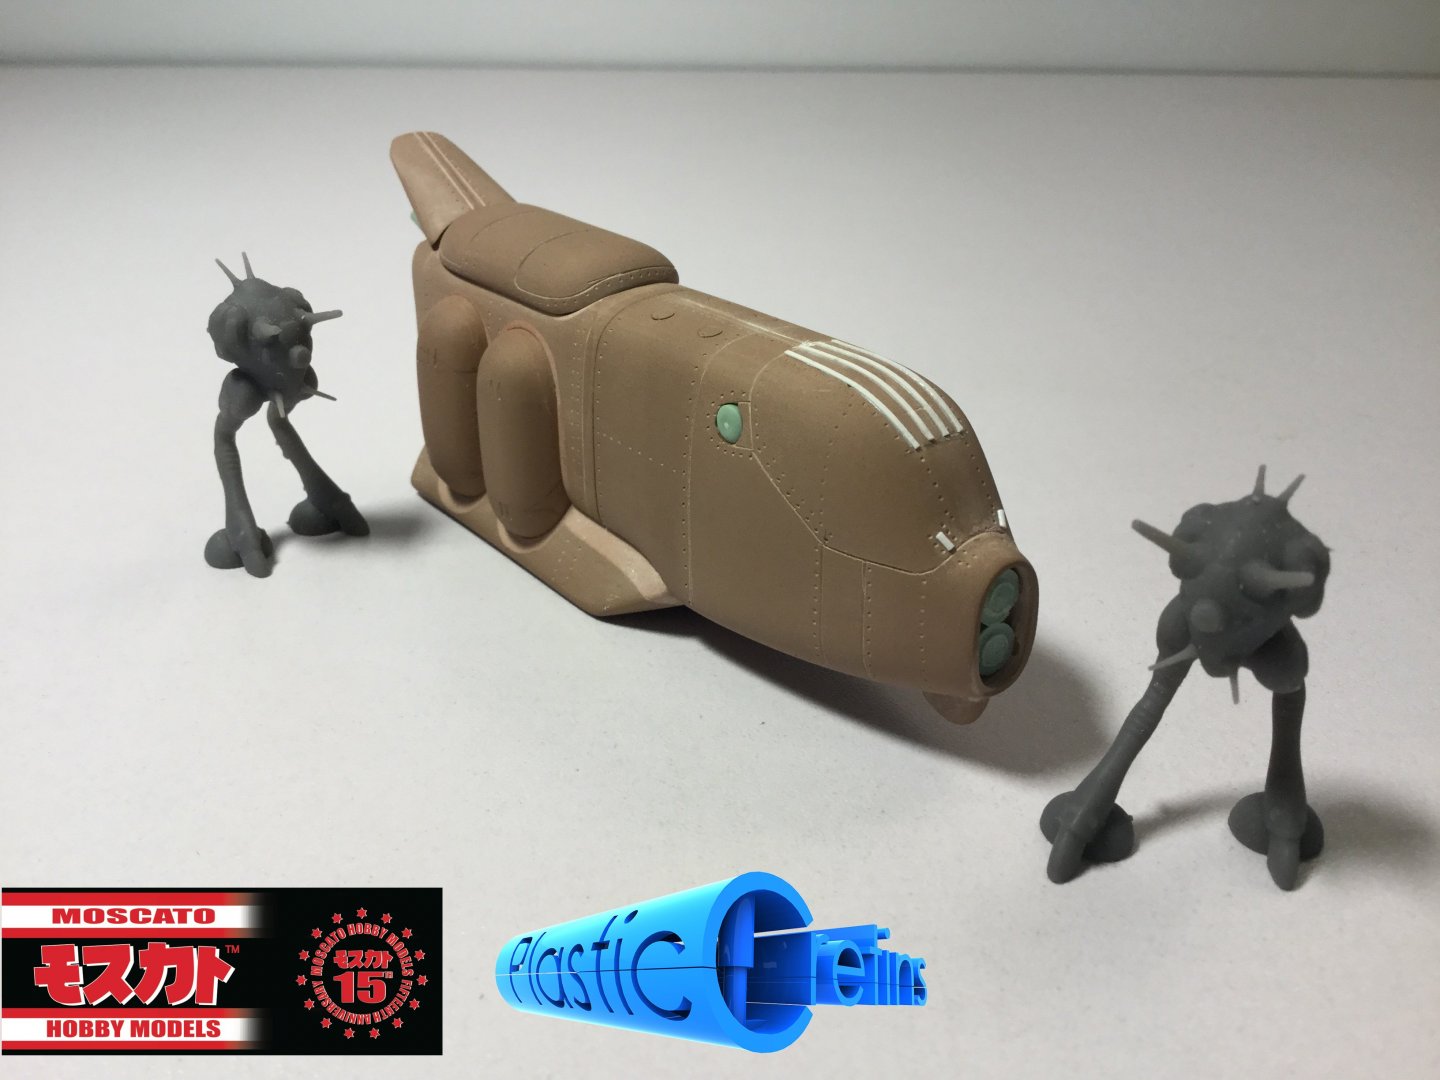
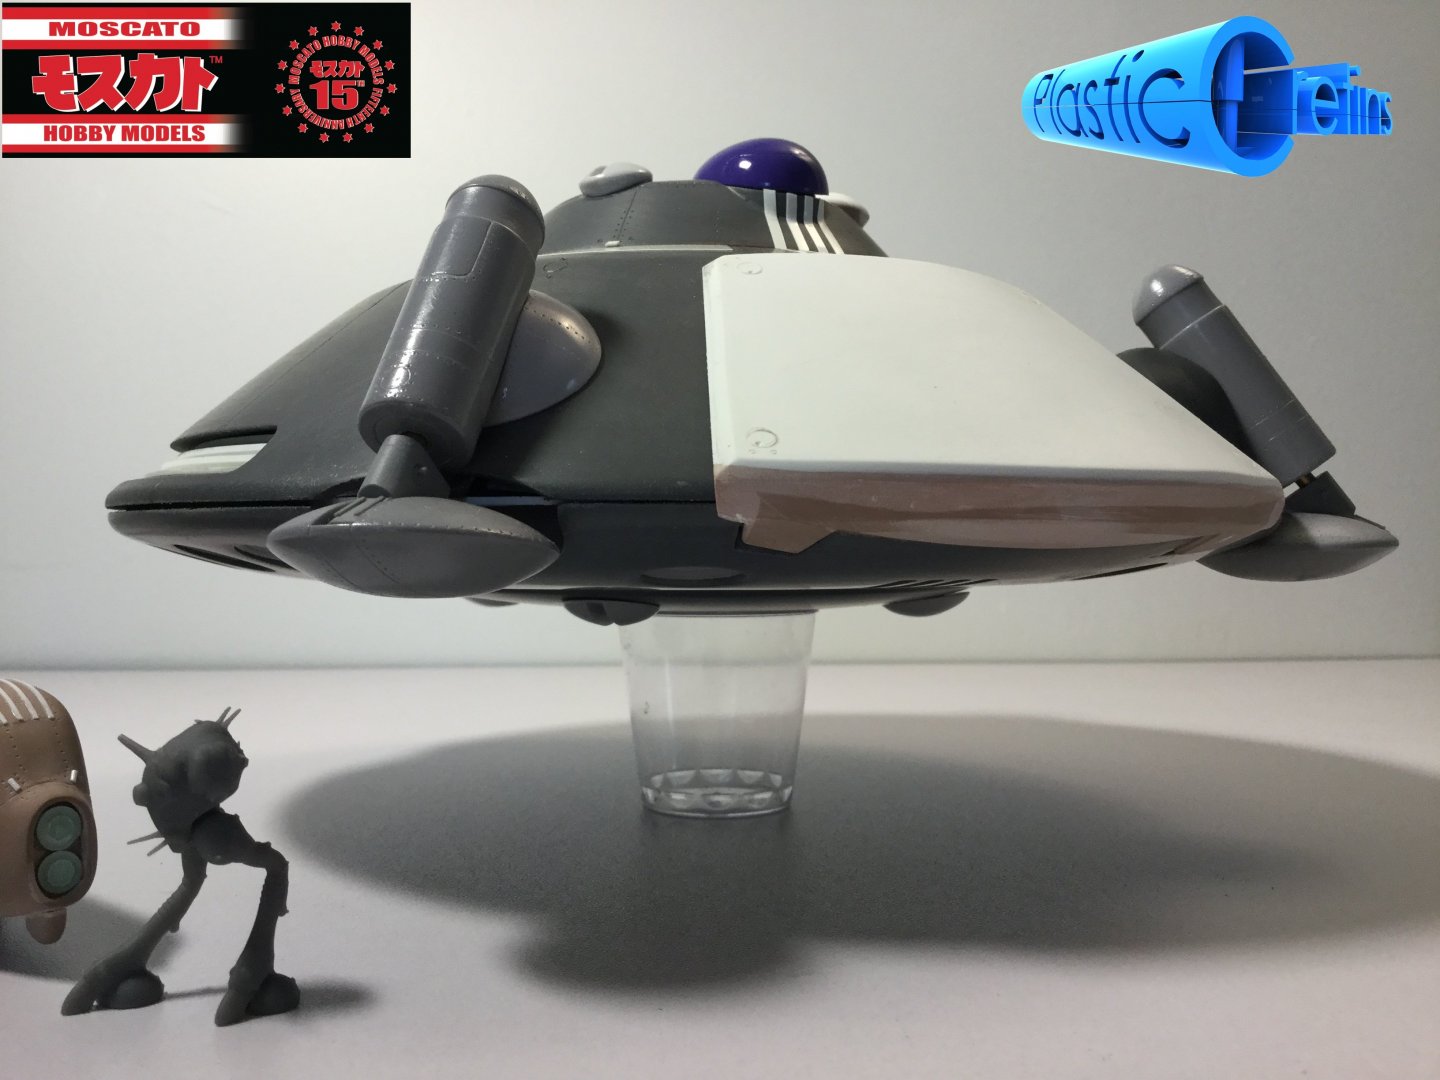
A preview of tomorrow's picfest of completed masters. Here's the Space School Bus along with its 2-pod escort.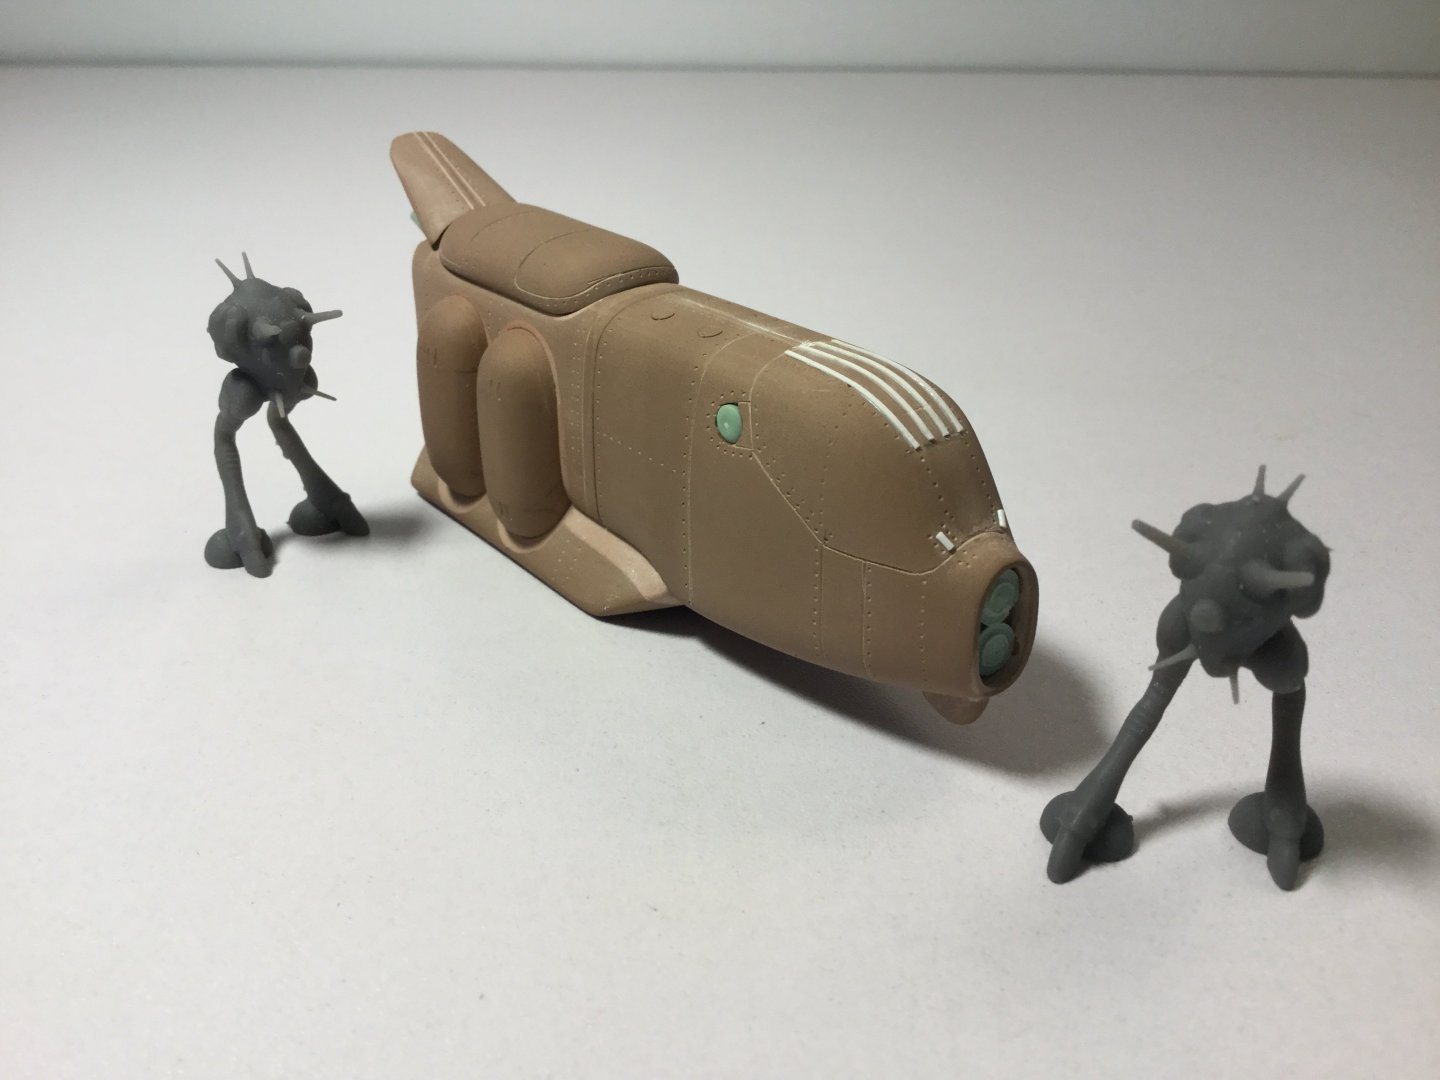
-
New Moscato Macloss Model Project!!!
captain america replied to captain america's topic in Model kits
Hi guys, I'm going to forego tomorrow's customary update so that I can show-off the completed masters early/mid next week. I took my time because I wanted to give this puppy the detail that it deserves, and that's no small task. Stay tuned! -
New Moscato Macloss Model Project!!!
captain america replied to captain america's topic in Model kits
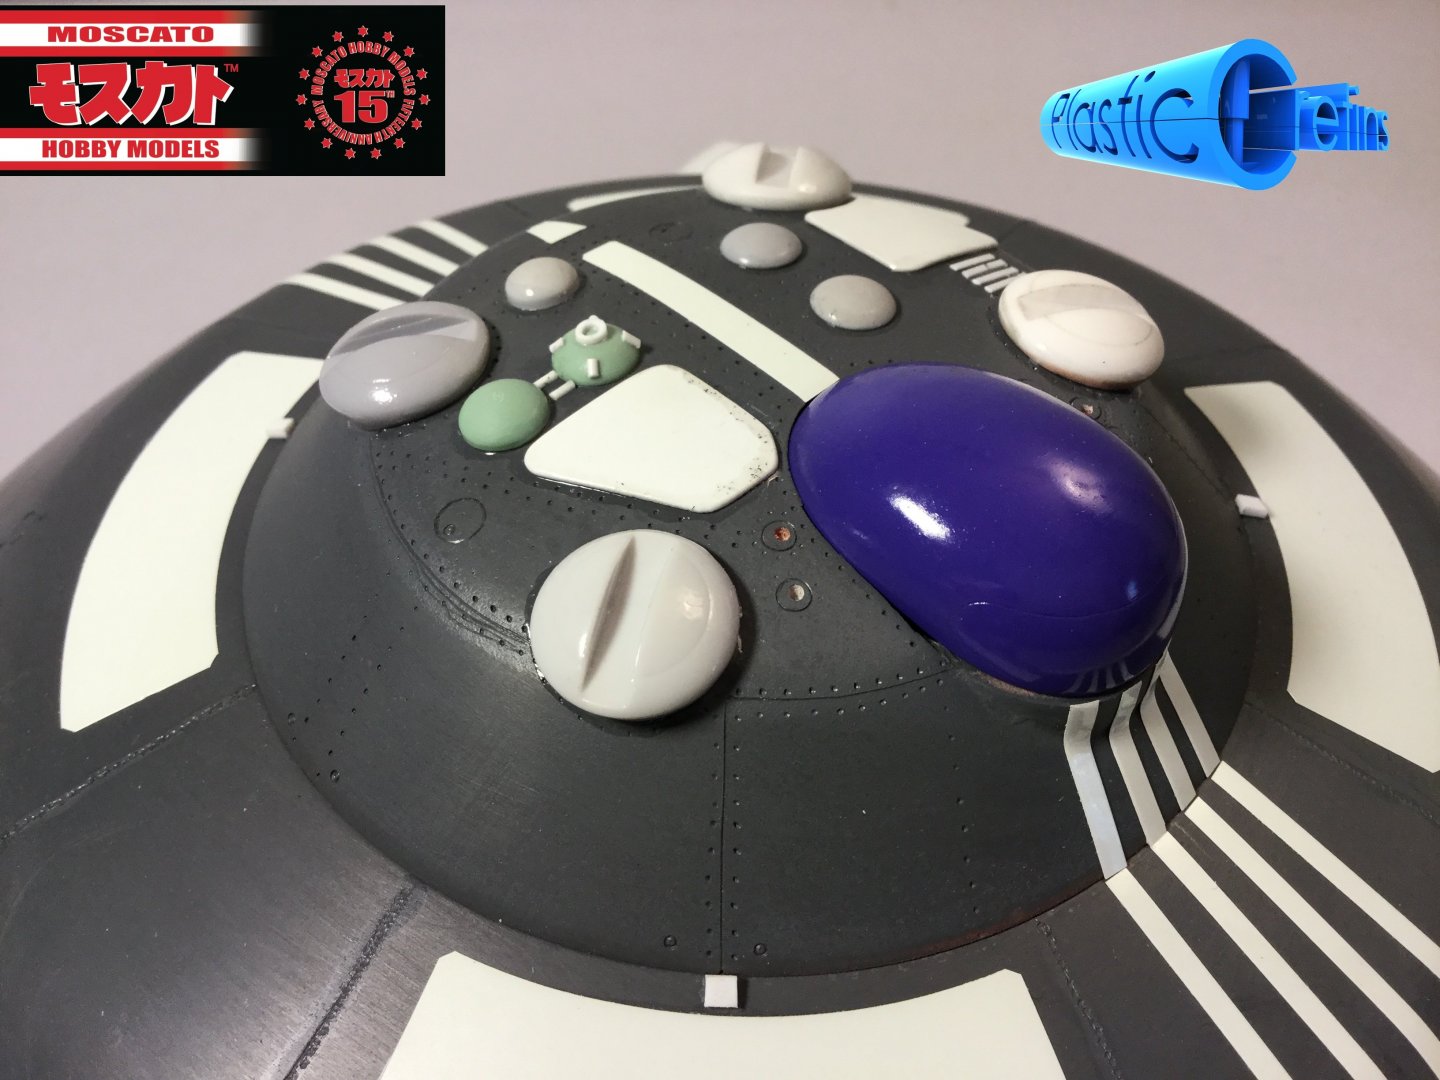
The craft was, but all you can see of the cockpit is a black slit near the top, so all the details are from yours truly. -
New Moscato Macloss Model Project!!!
captain america replied to captain america's topic in Model kits
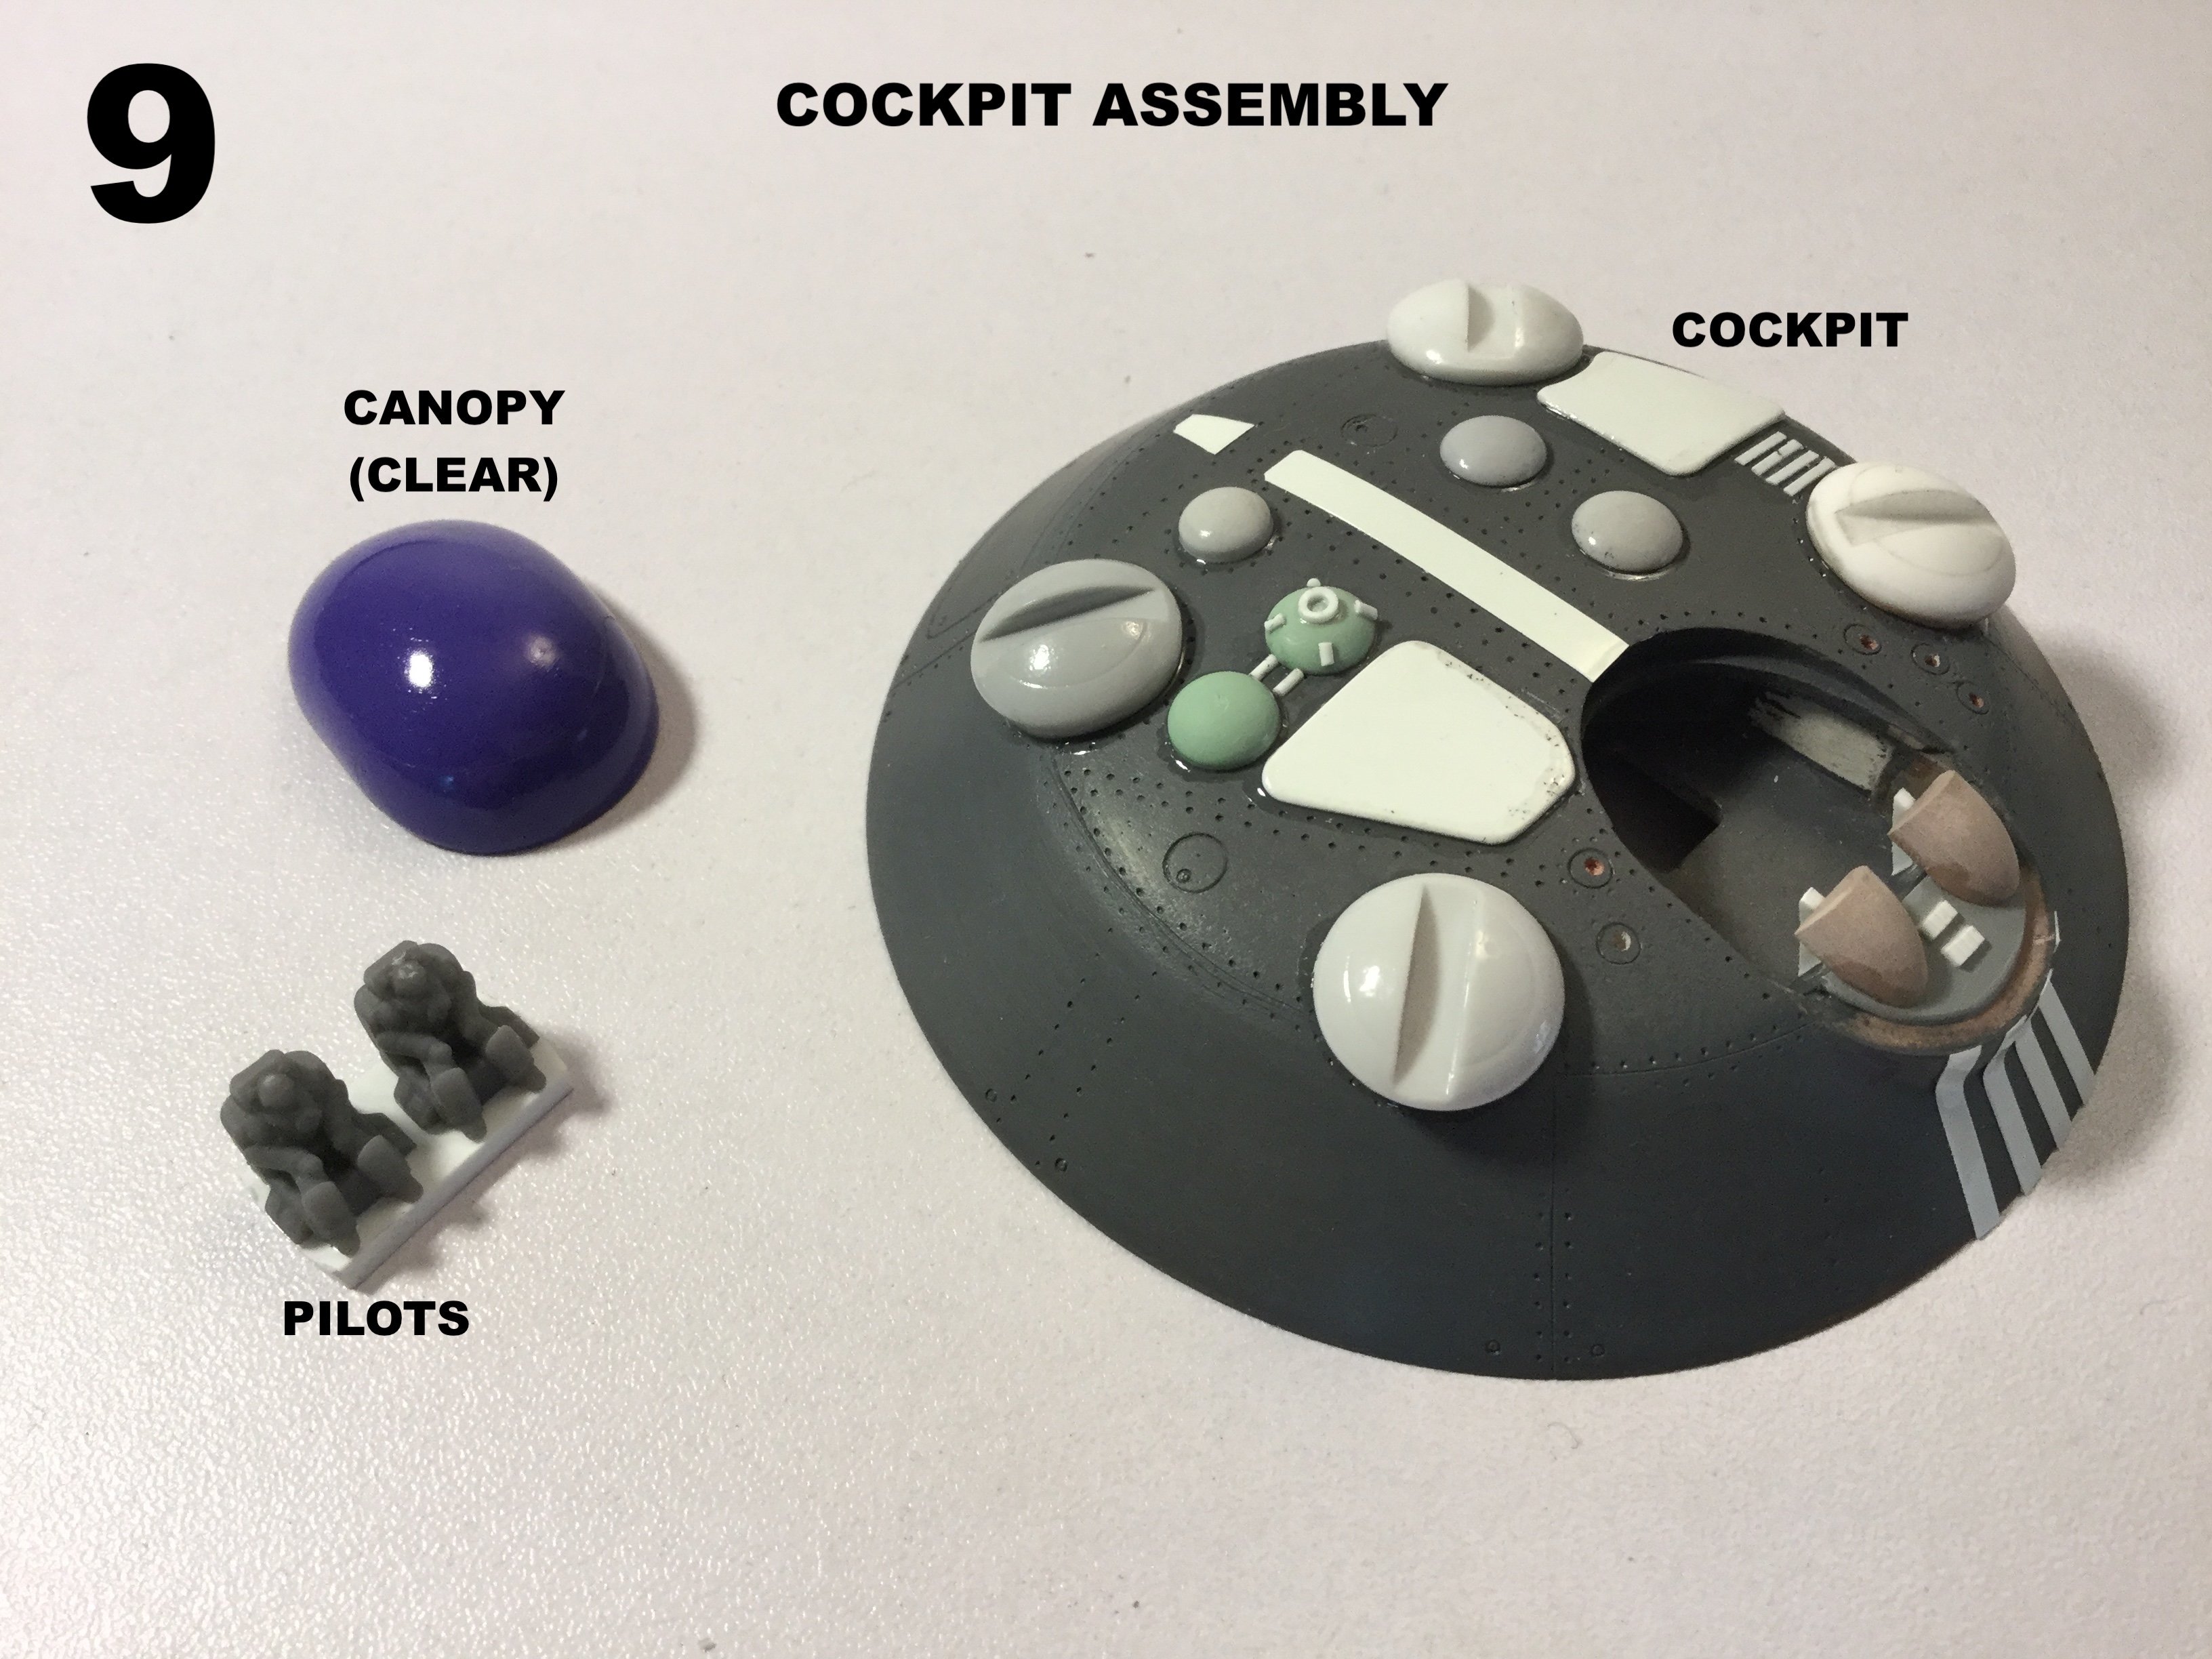
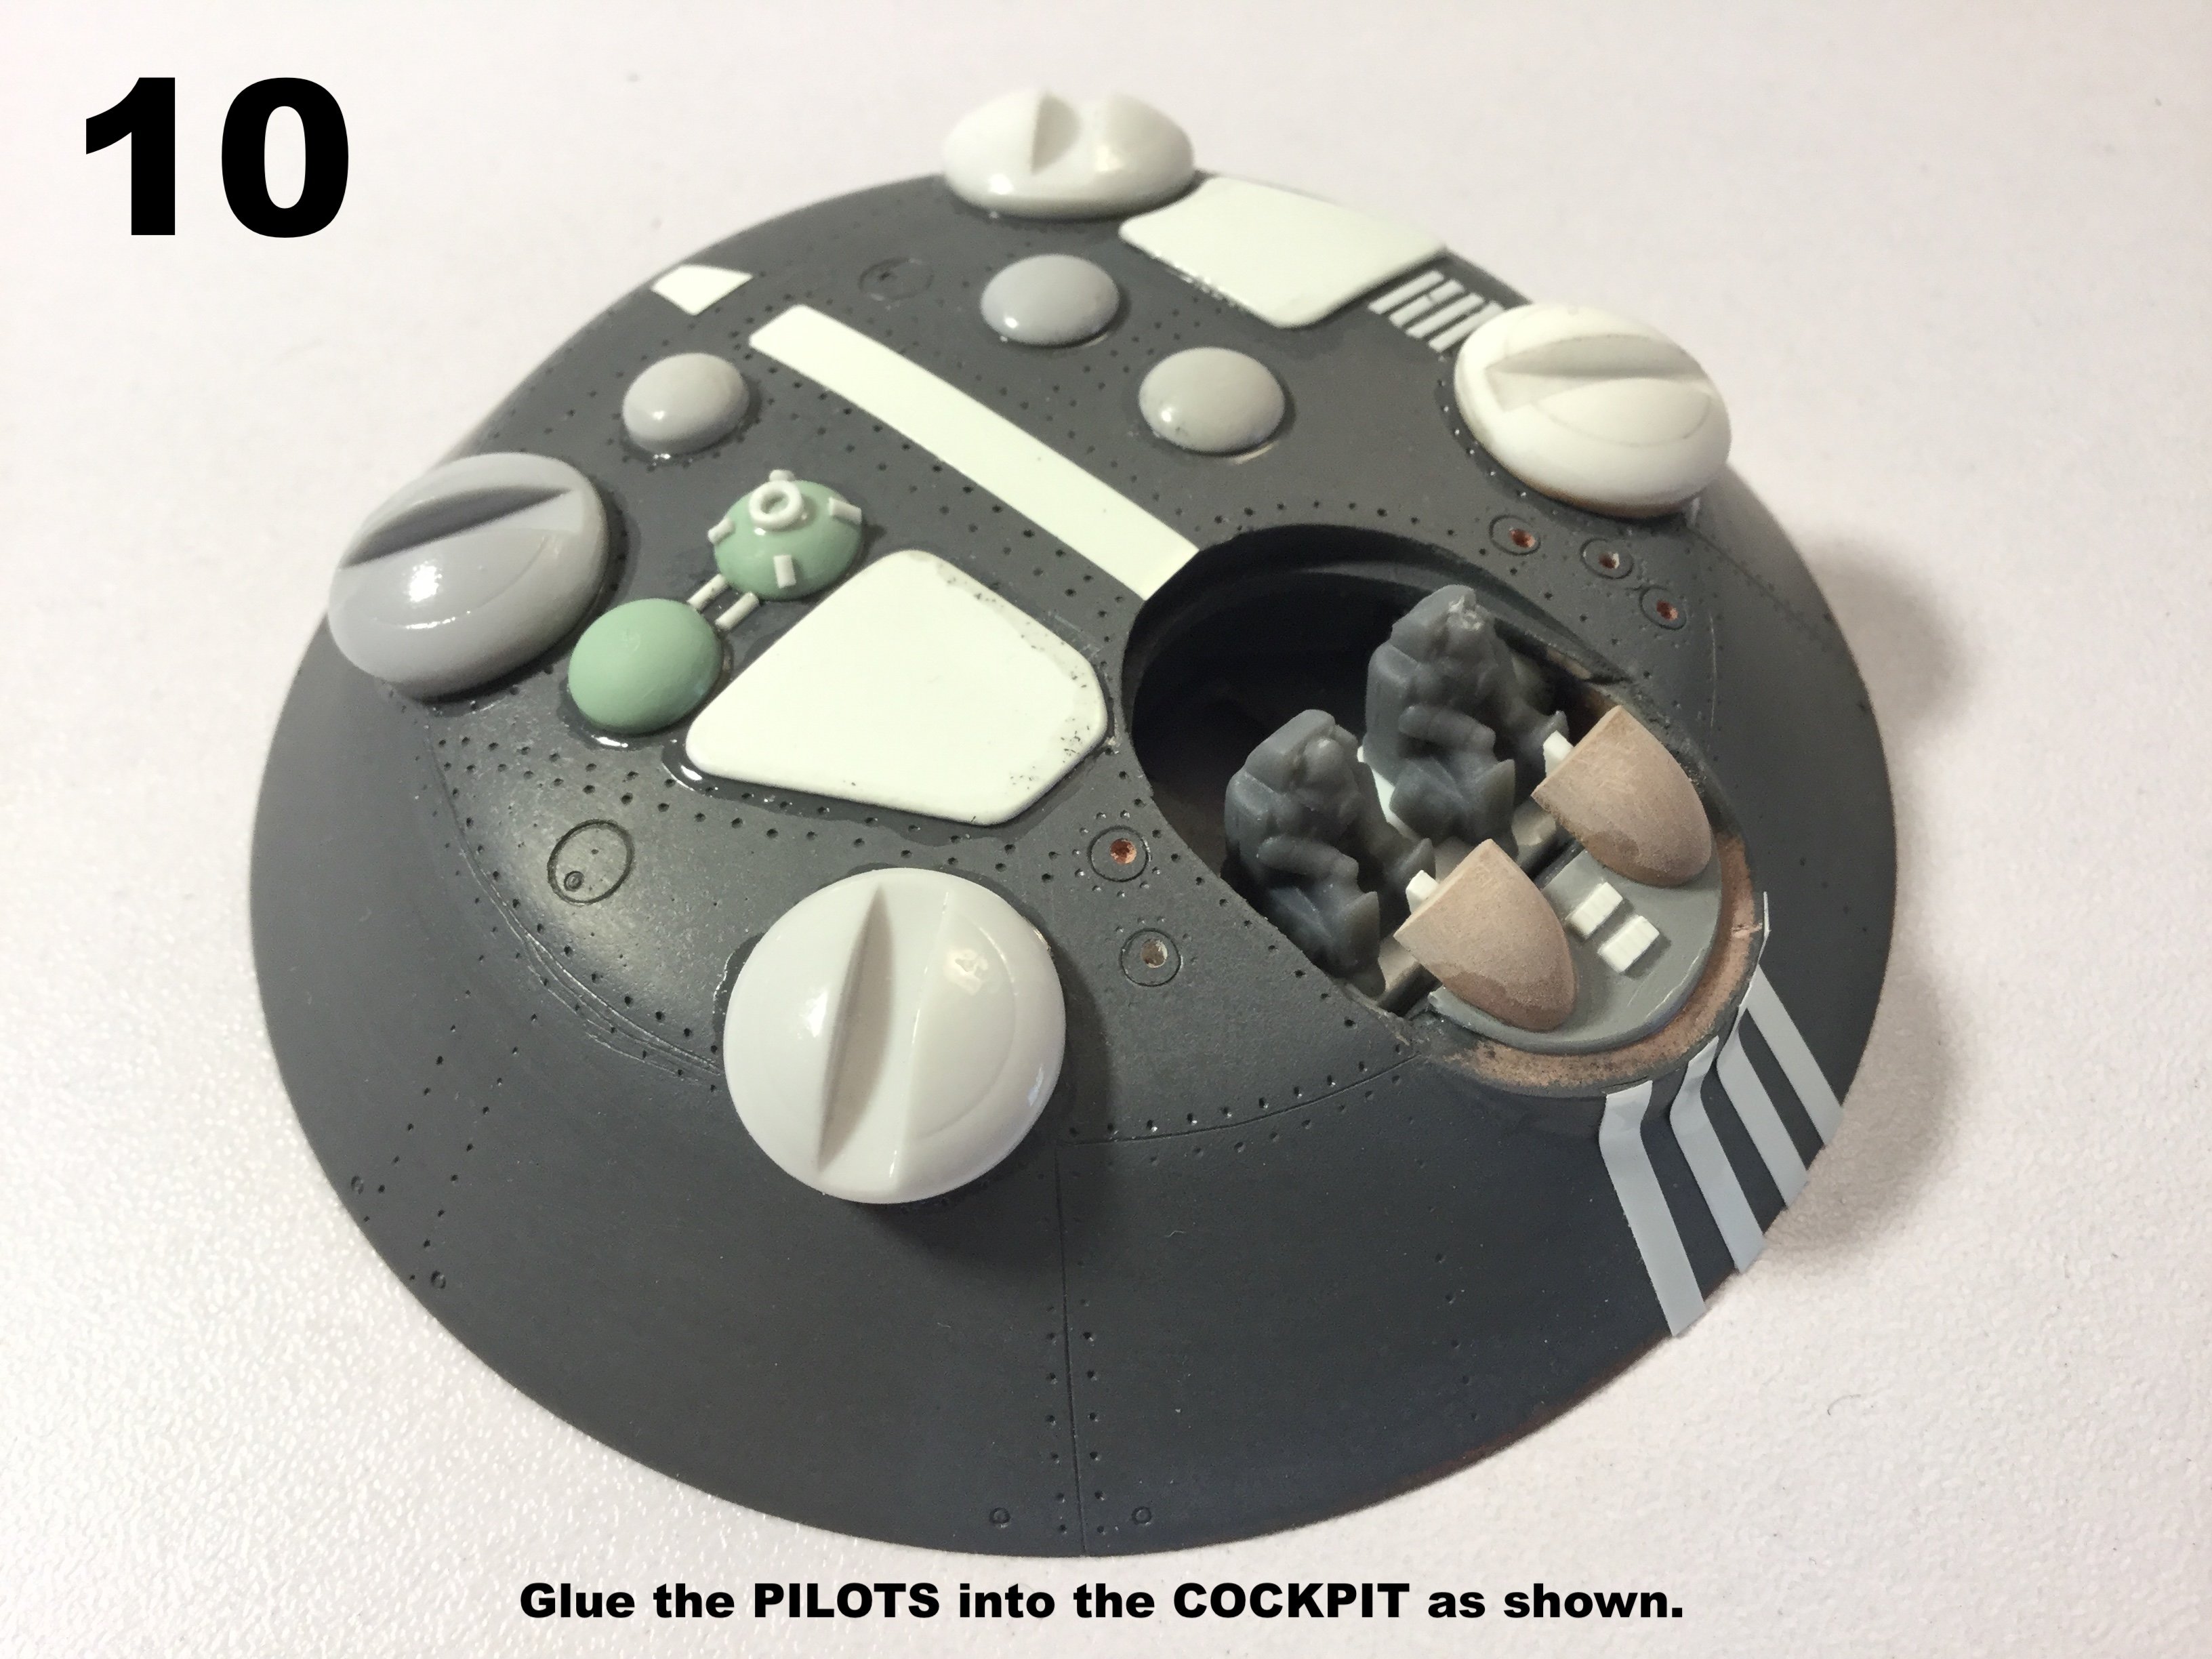
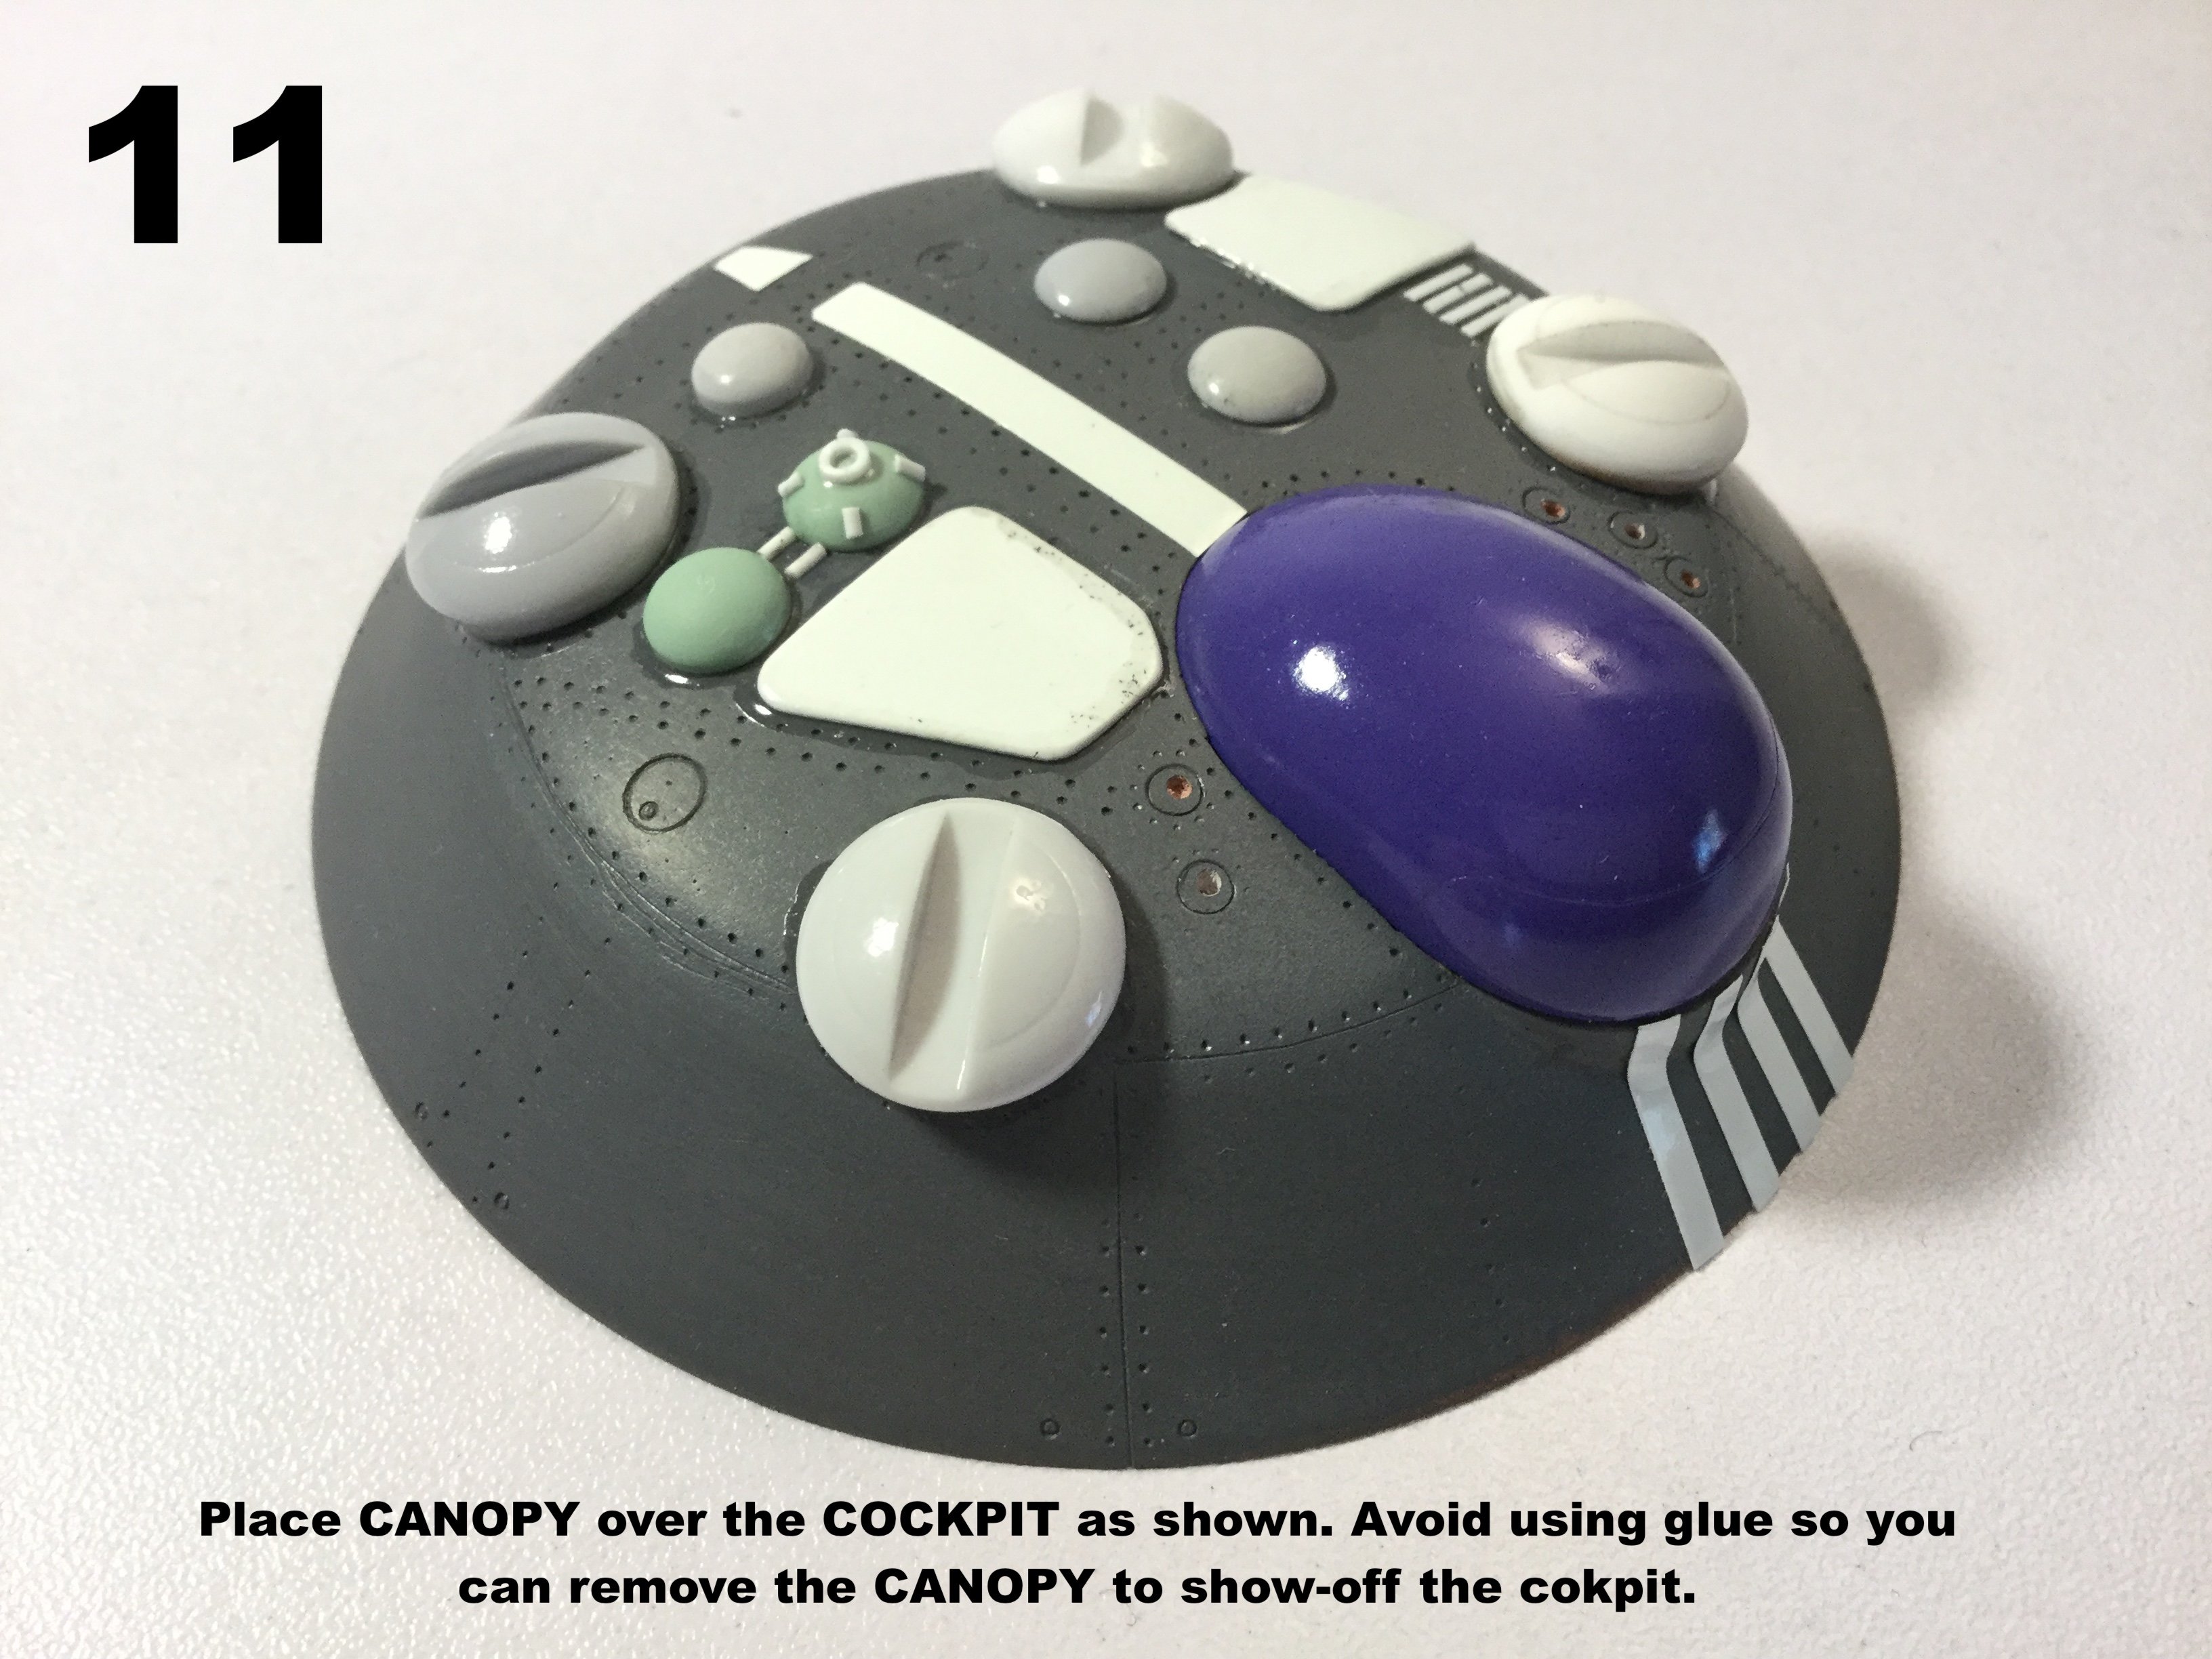
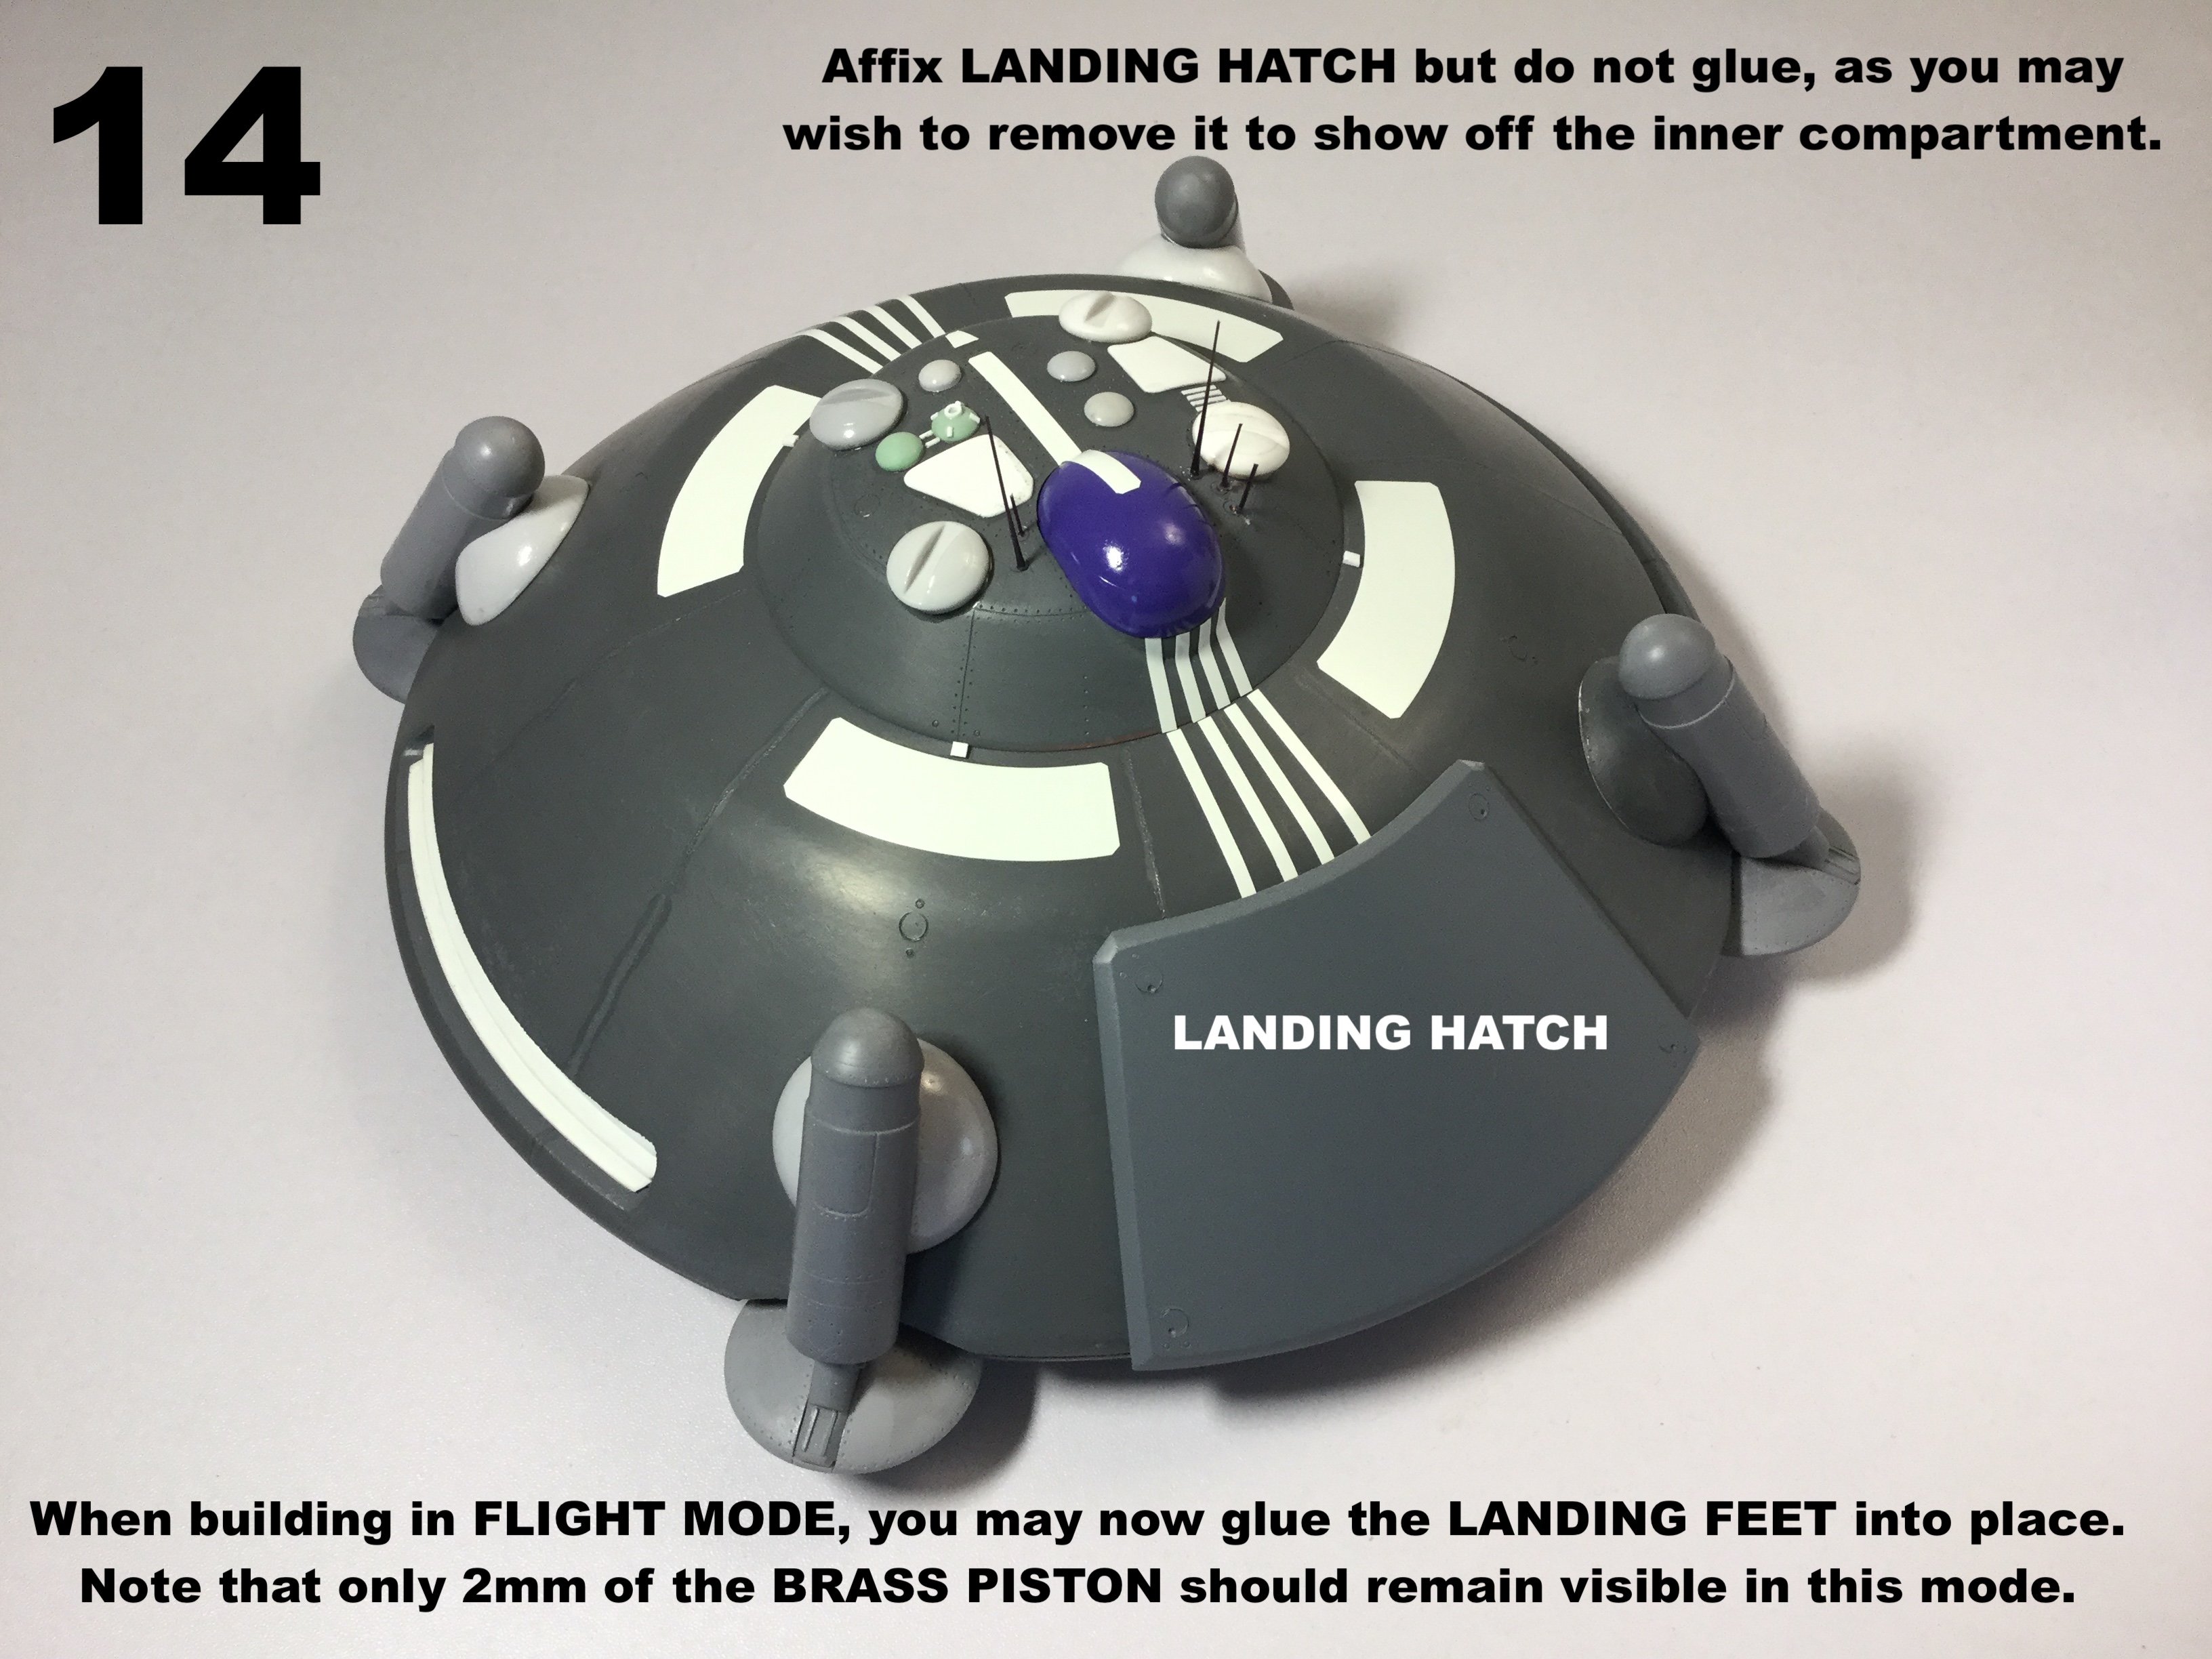
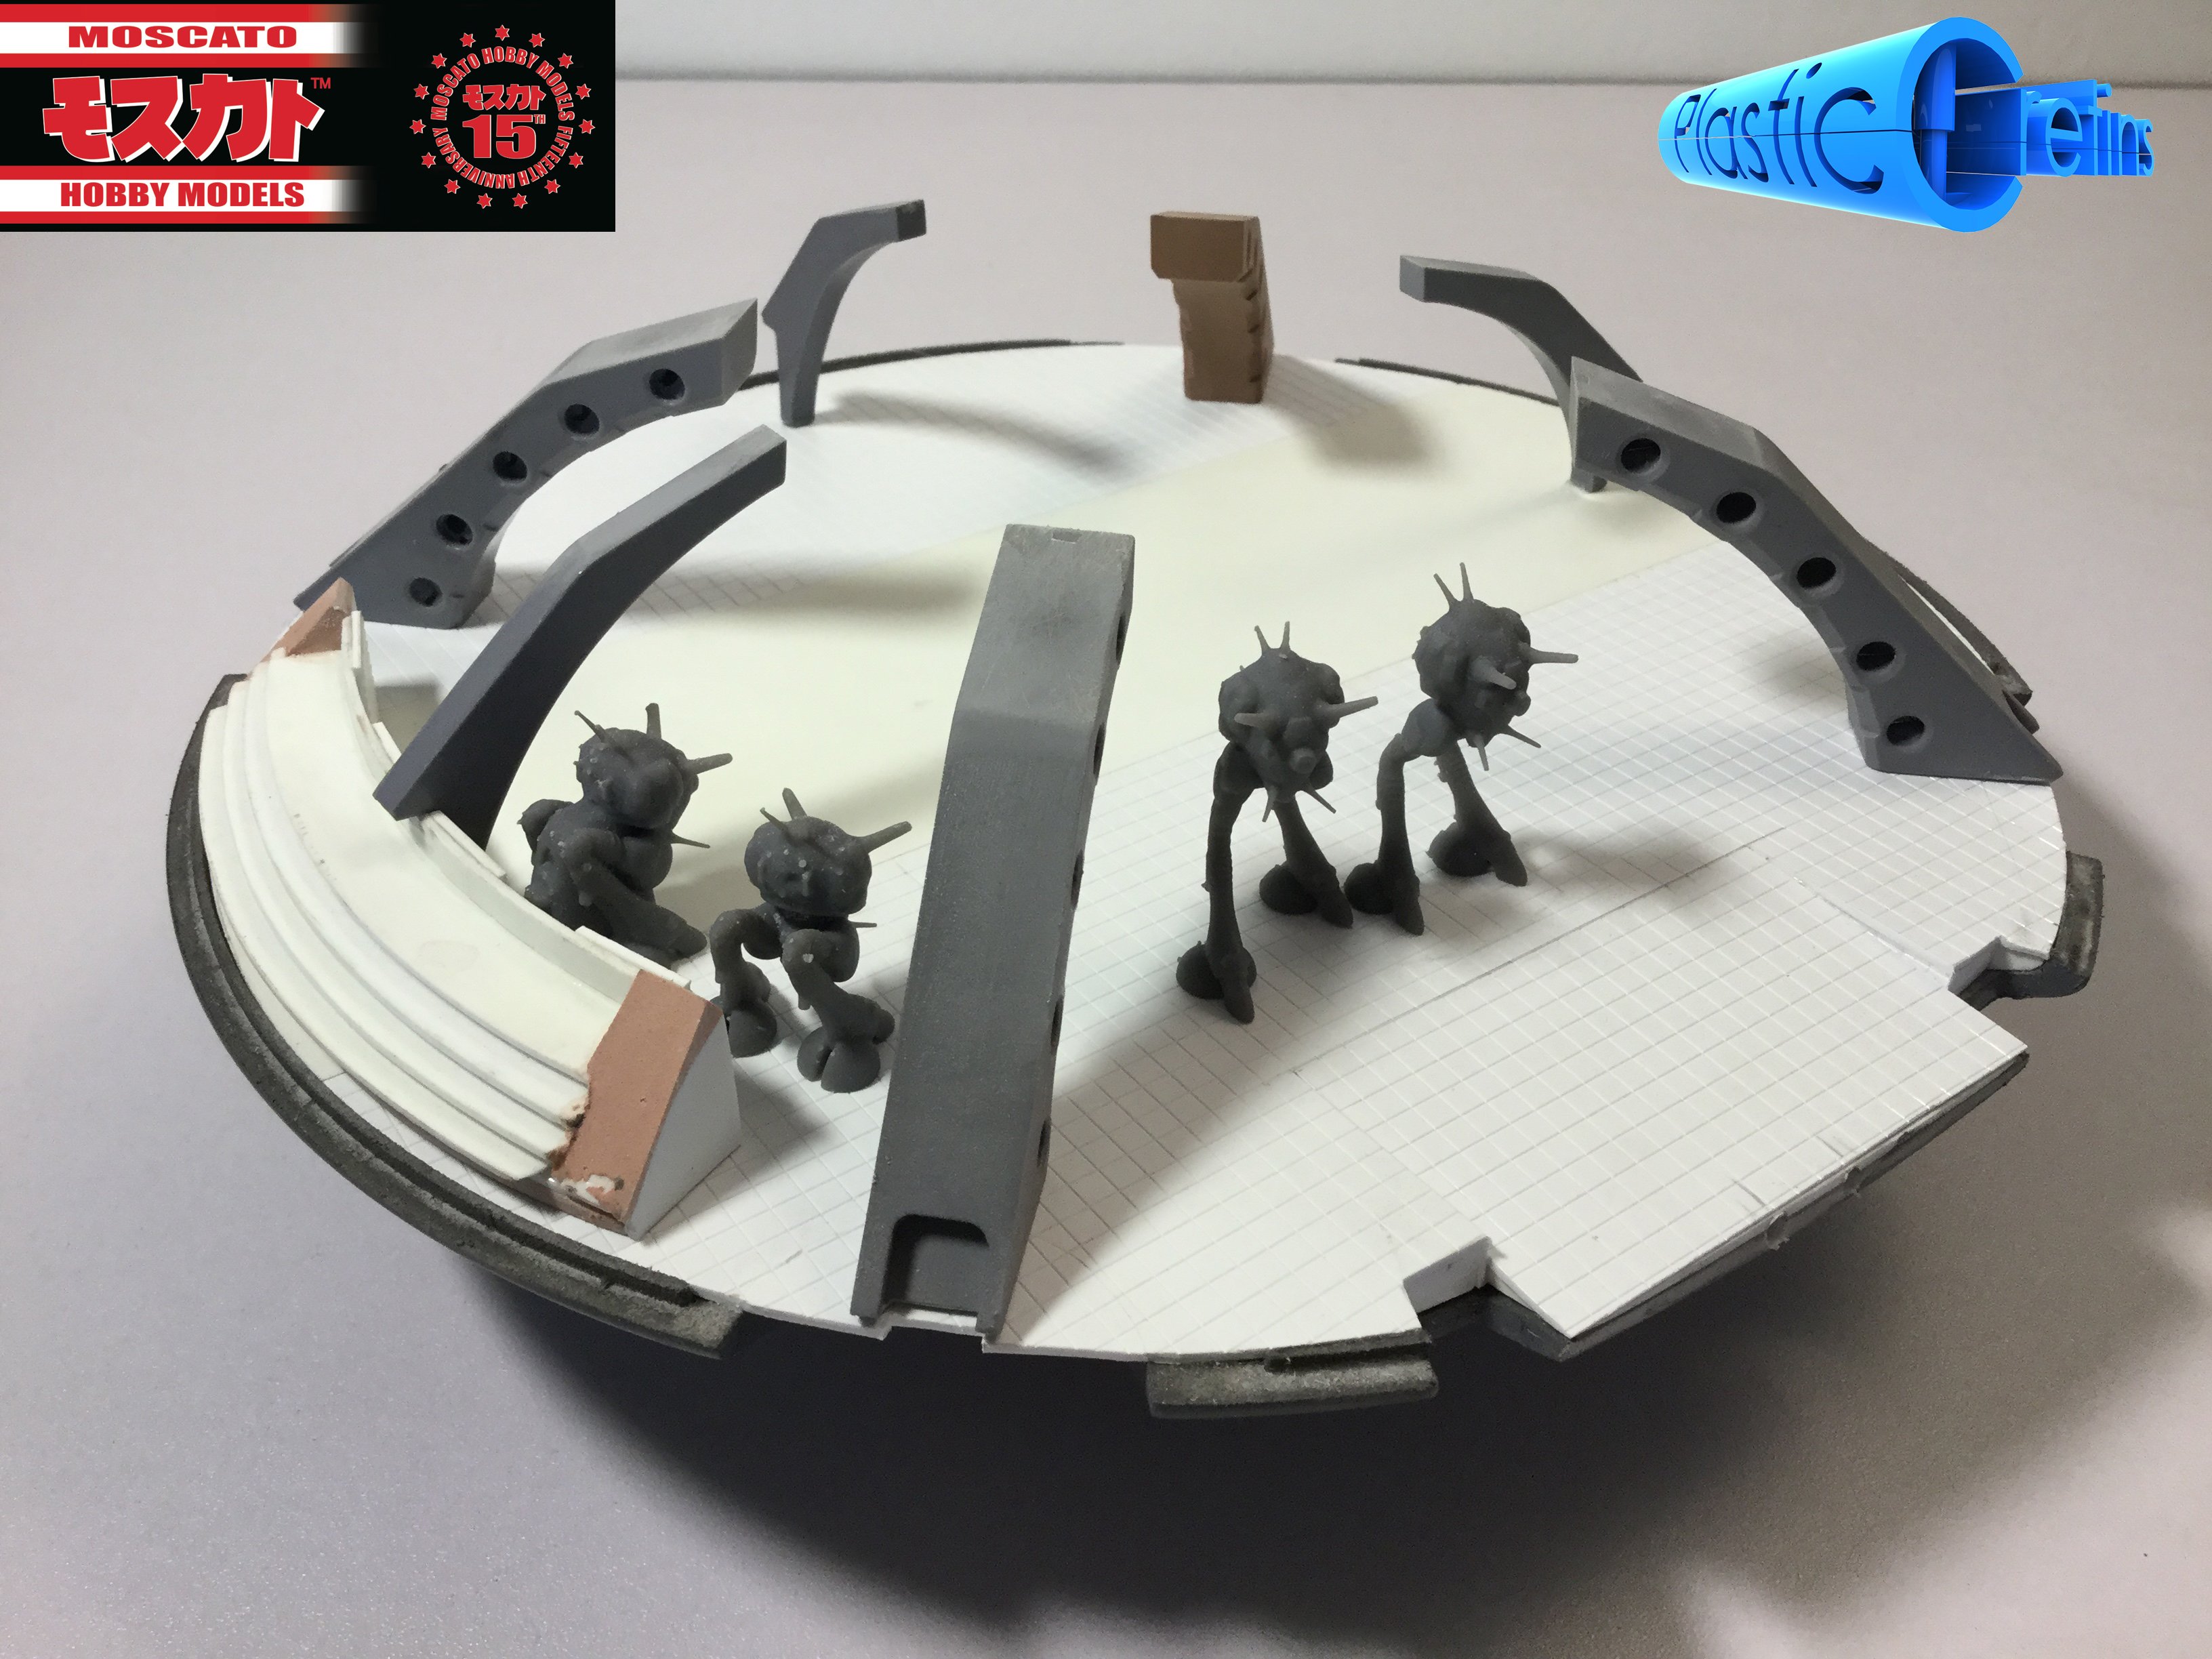
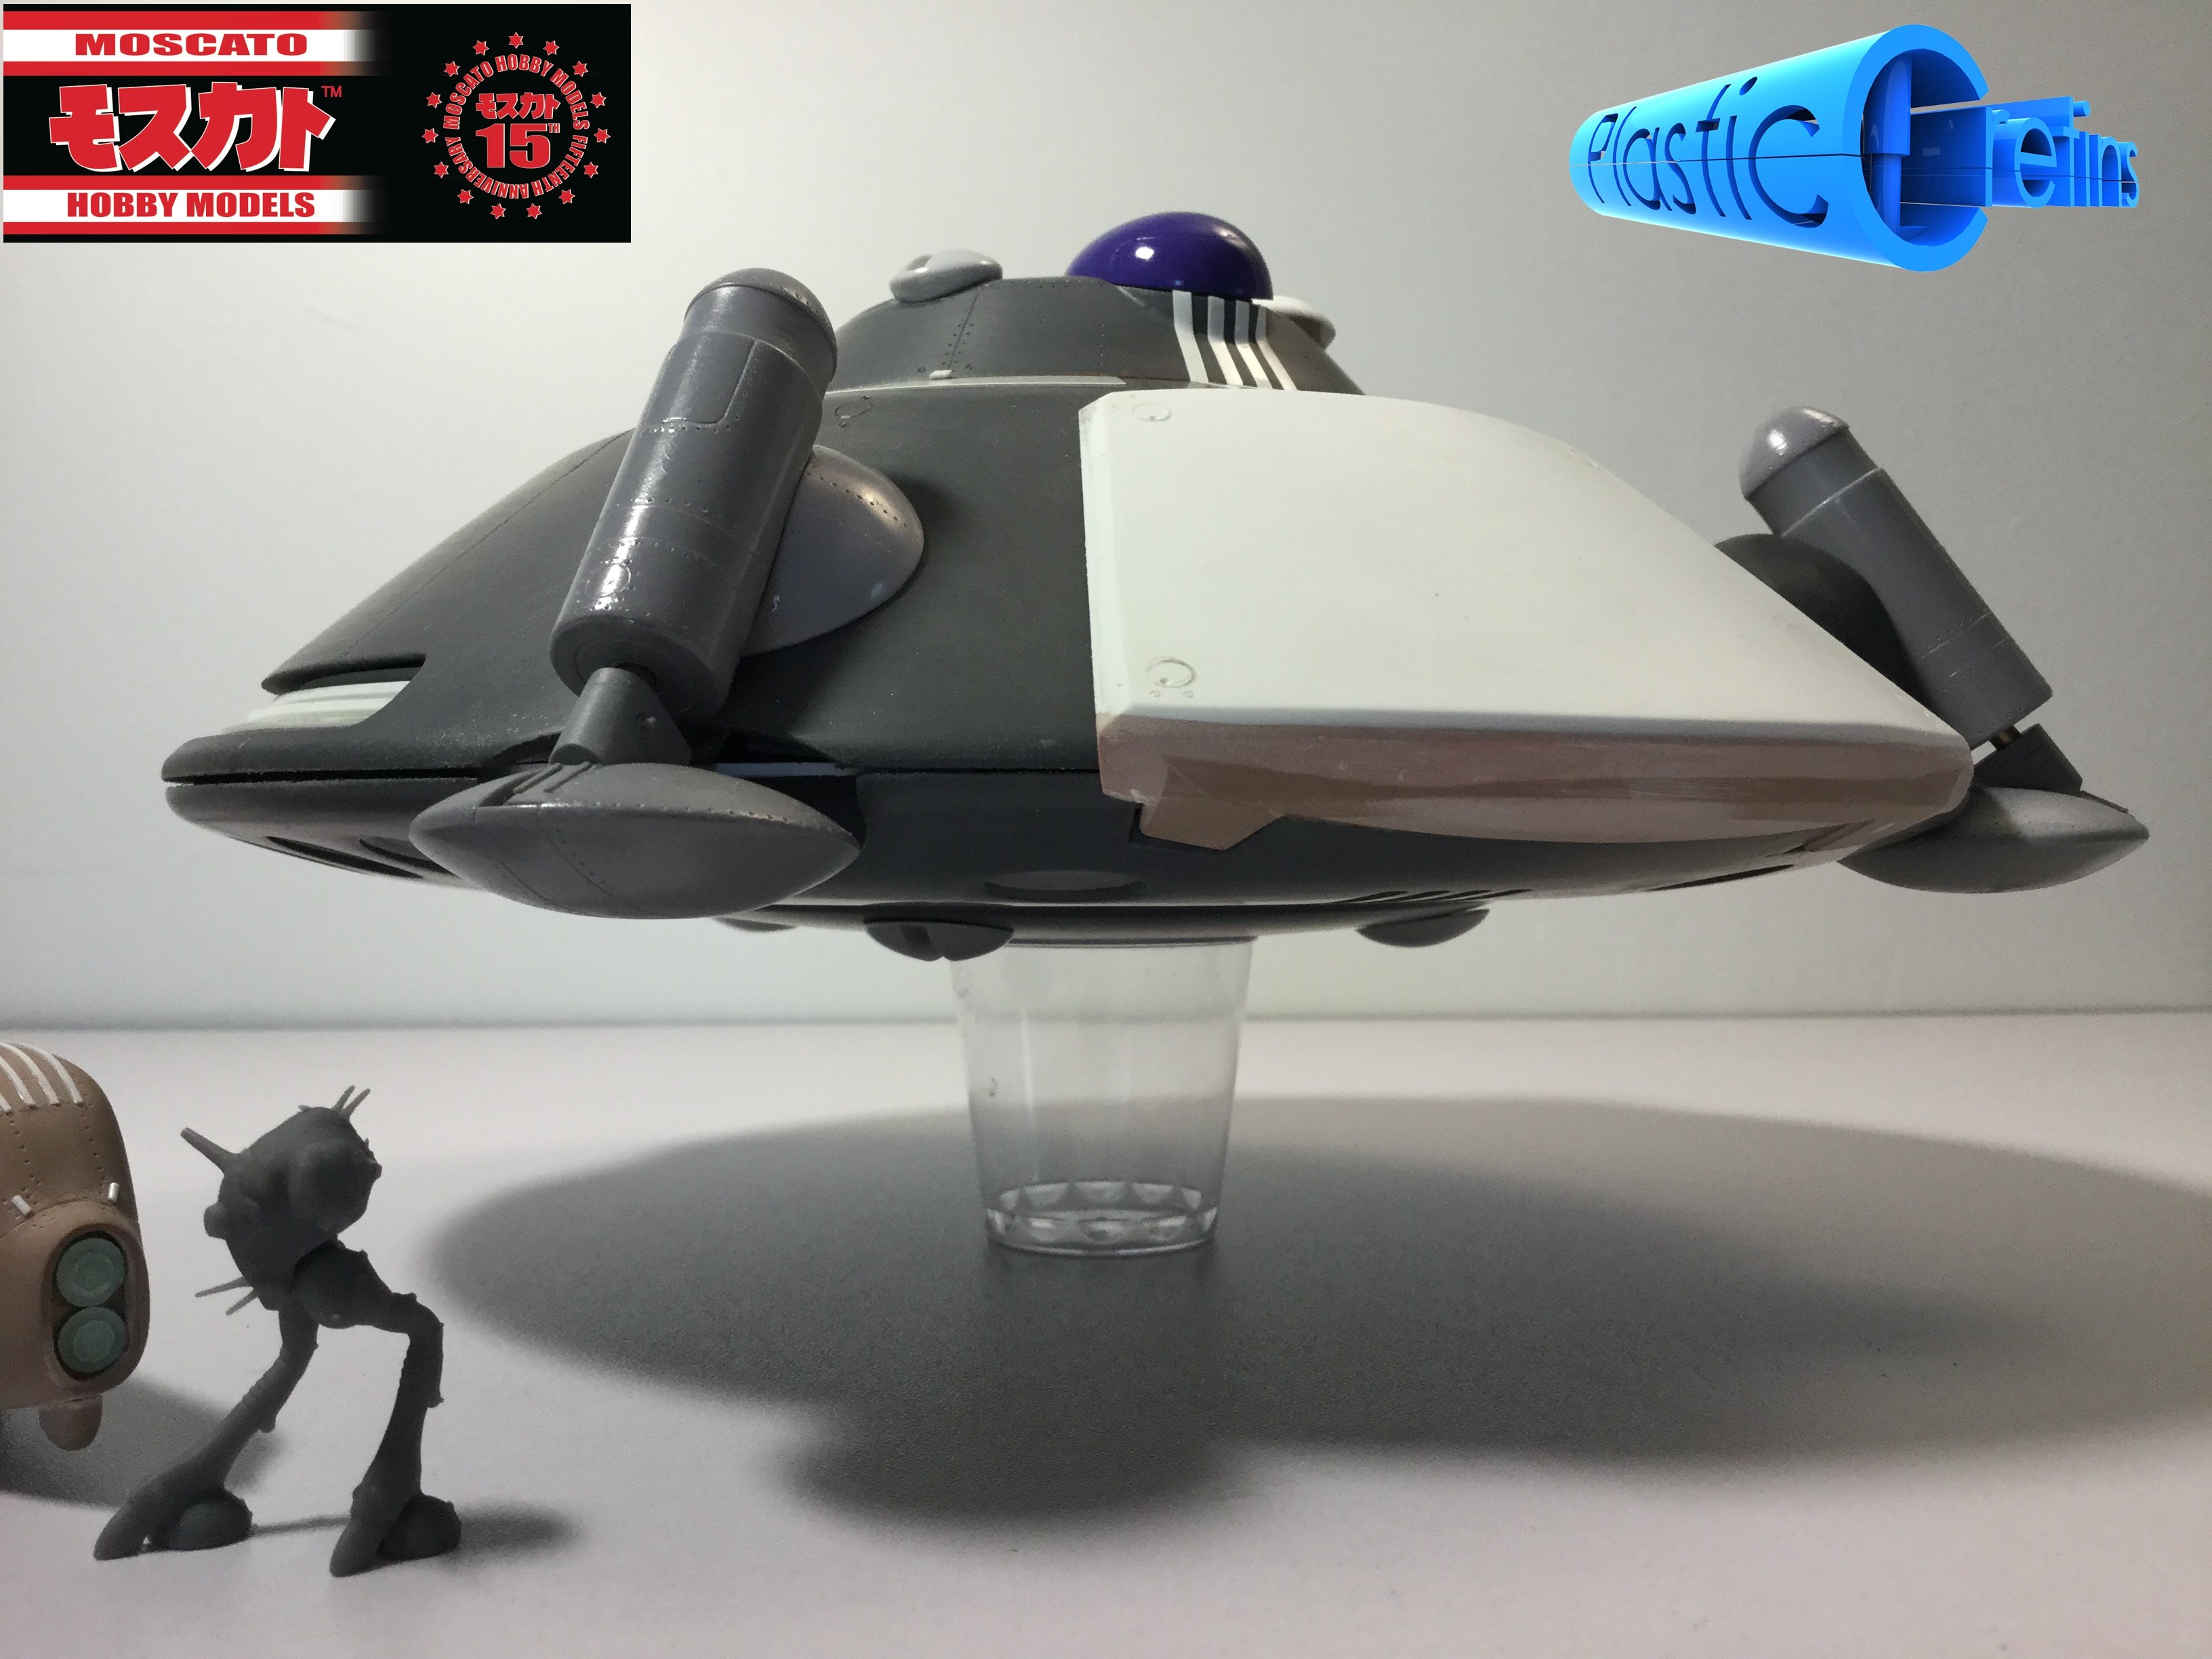
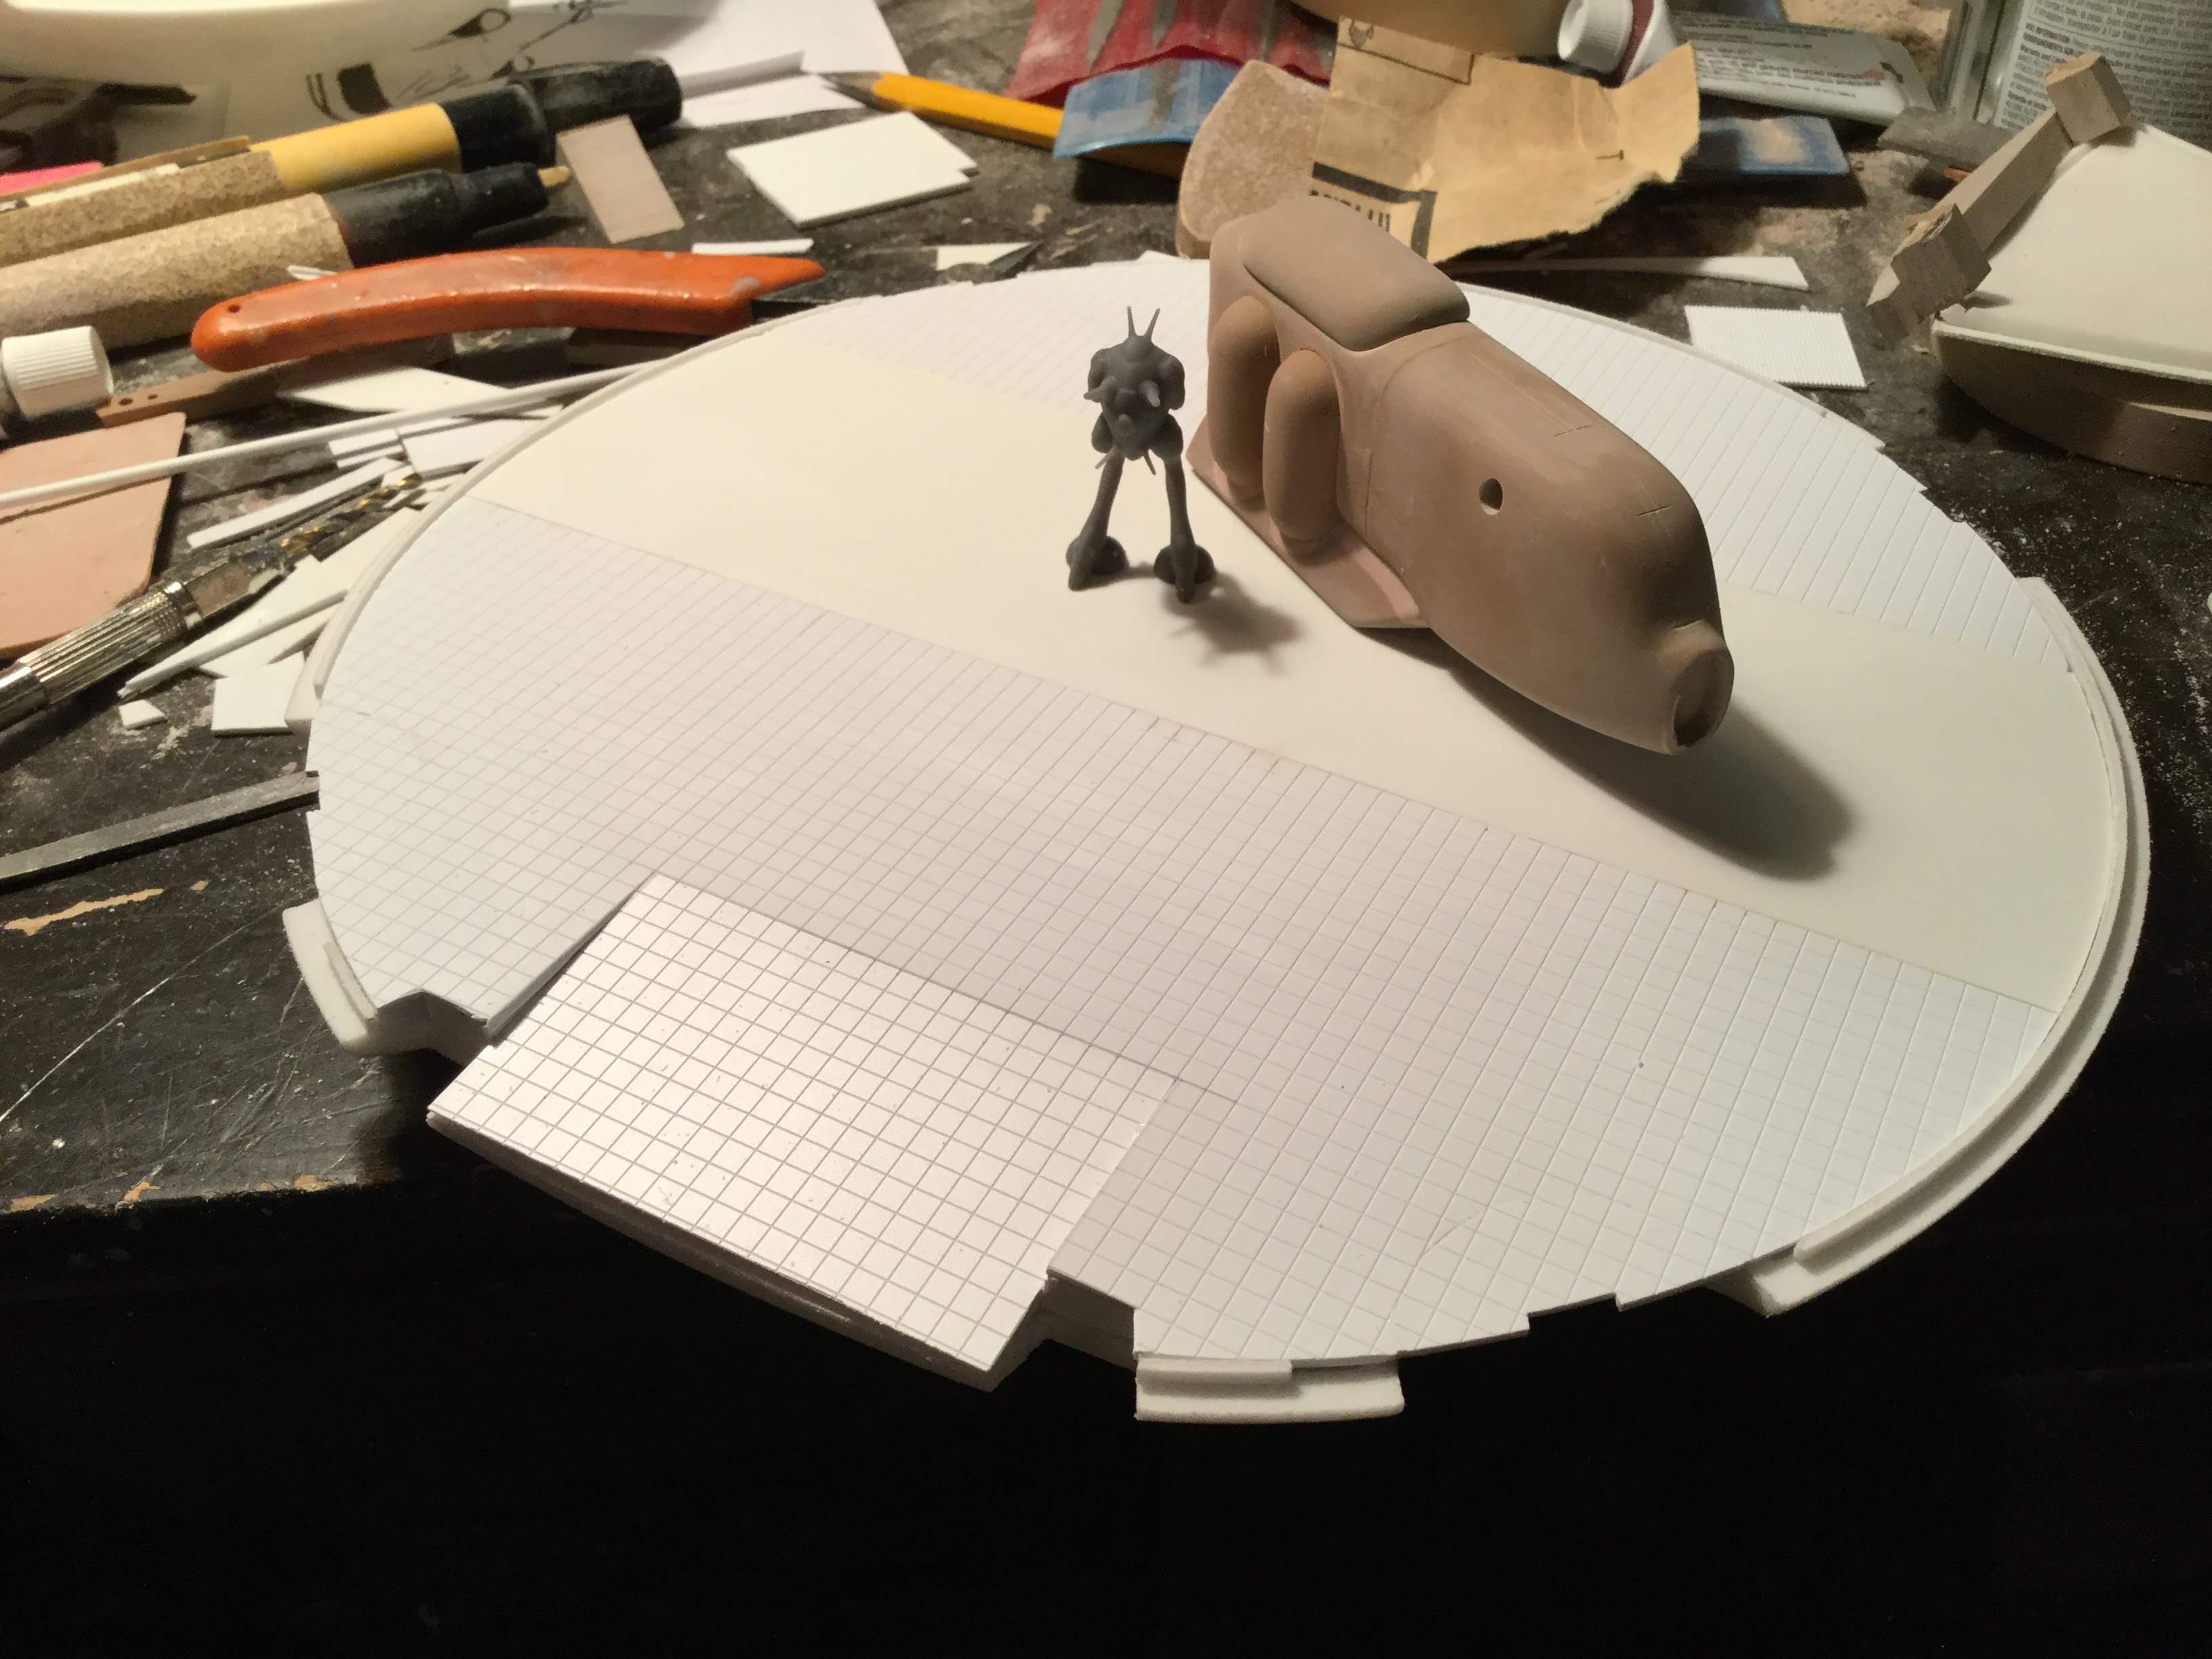
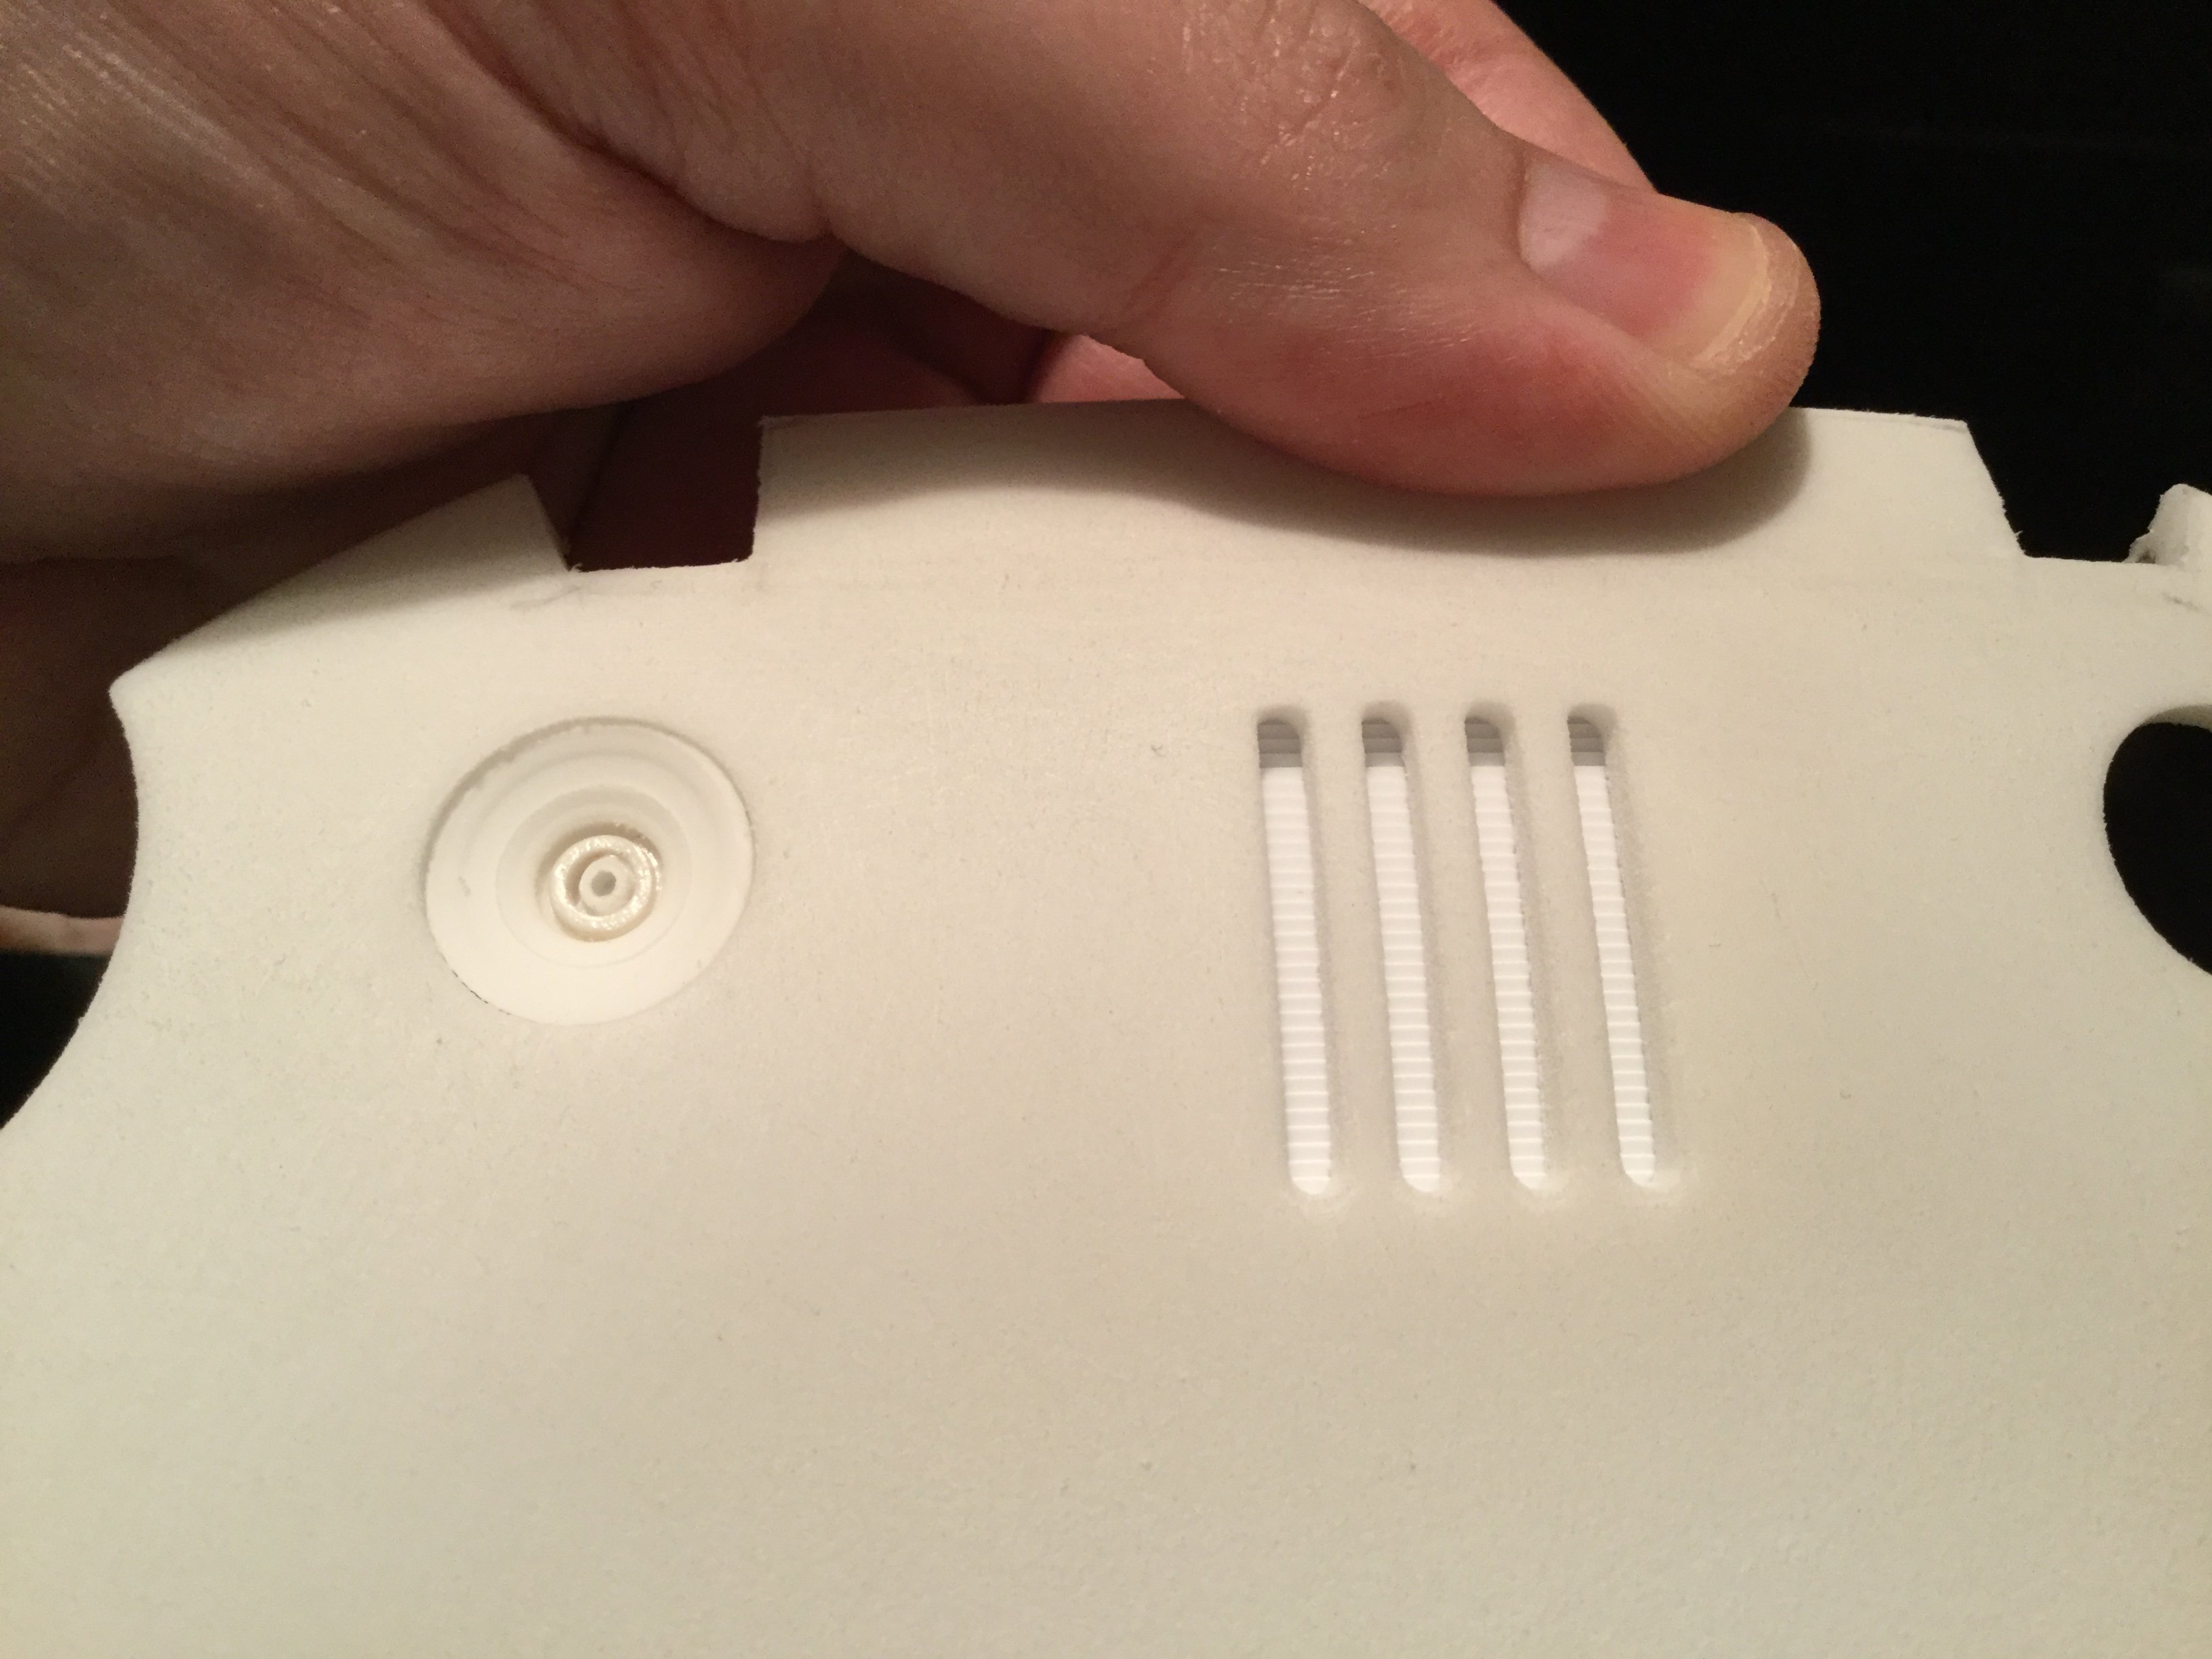
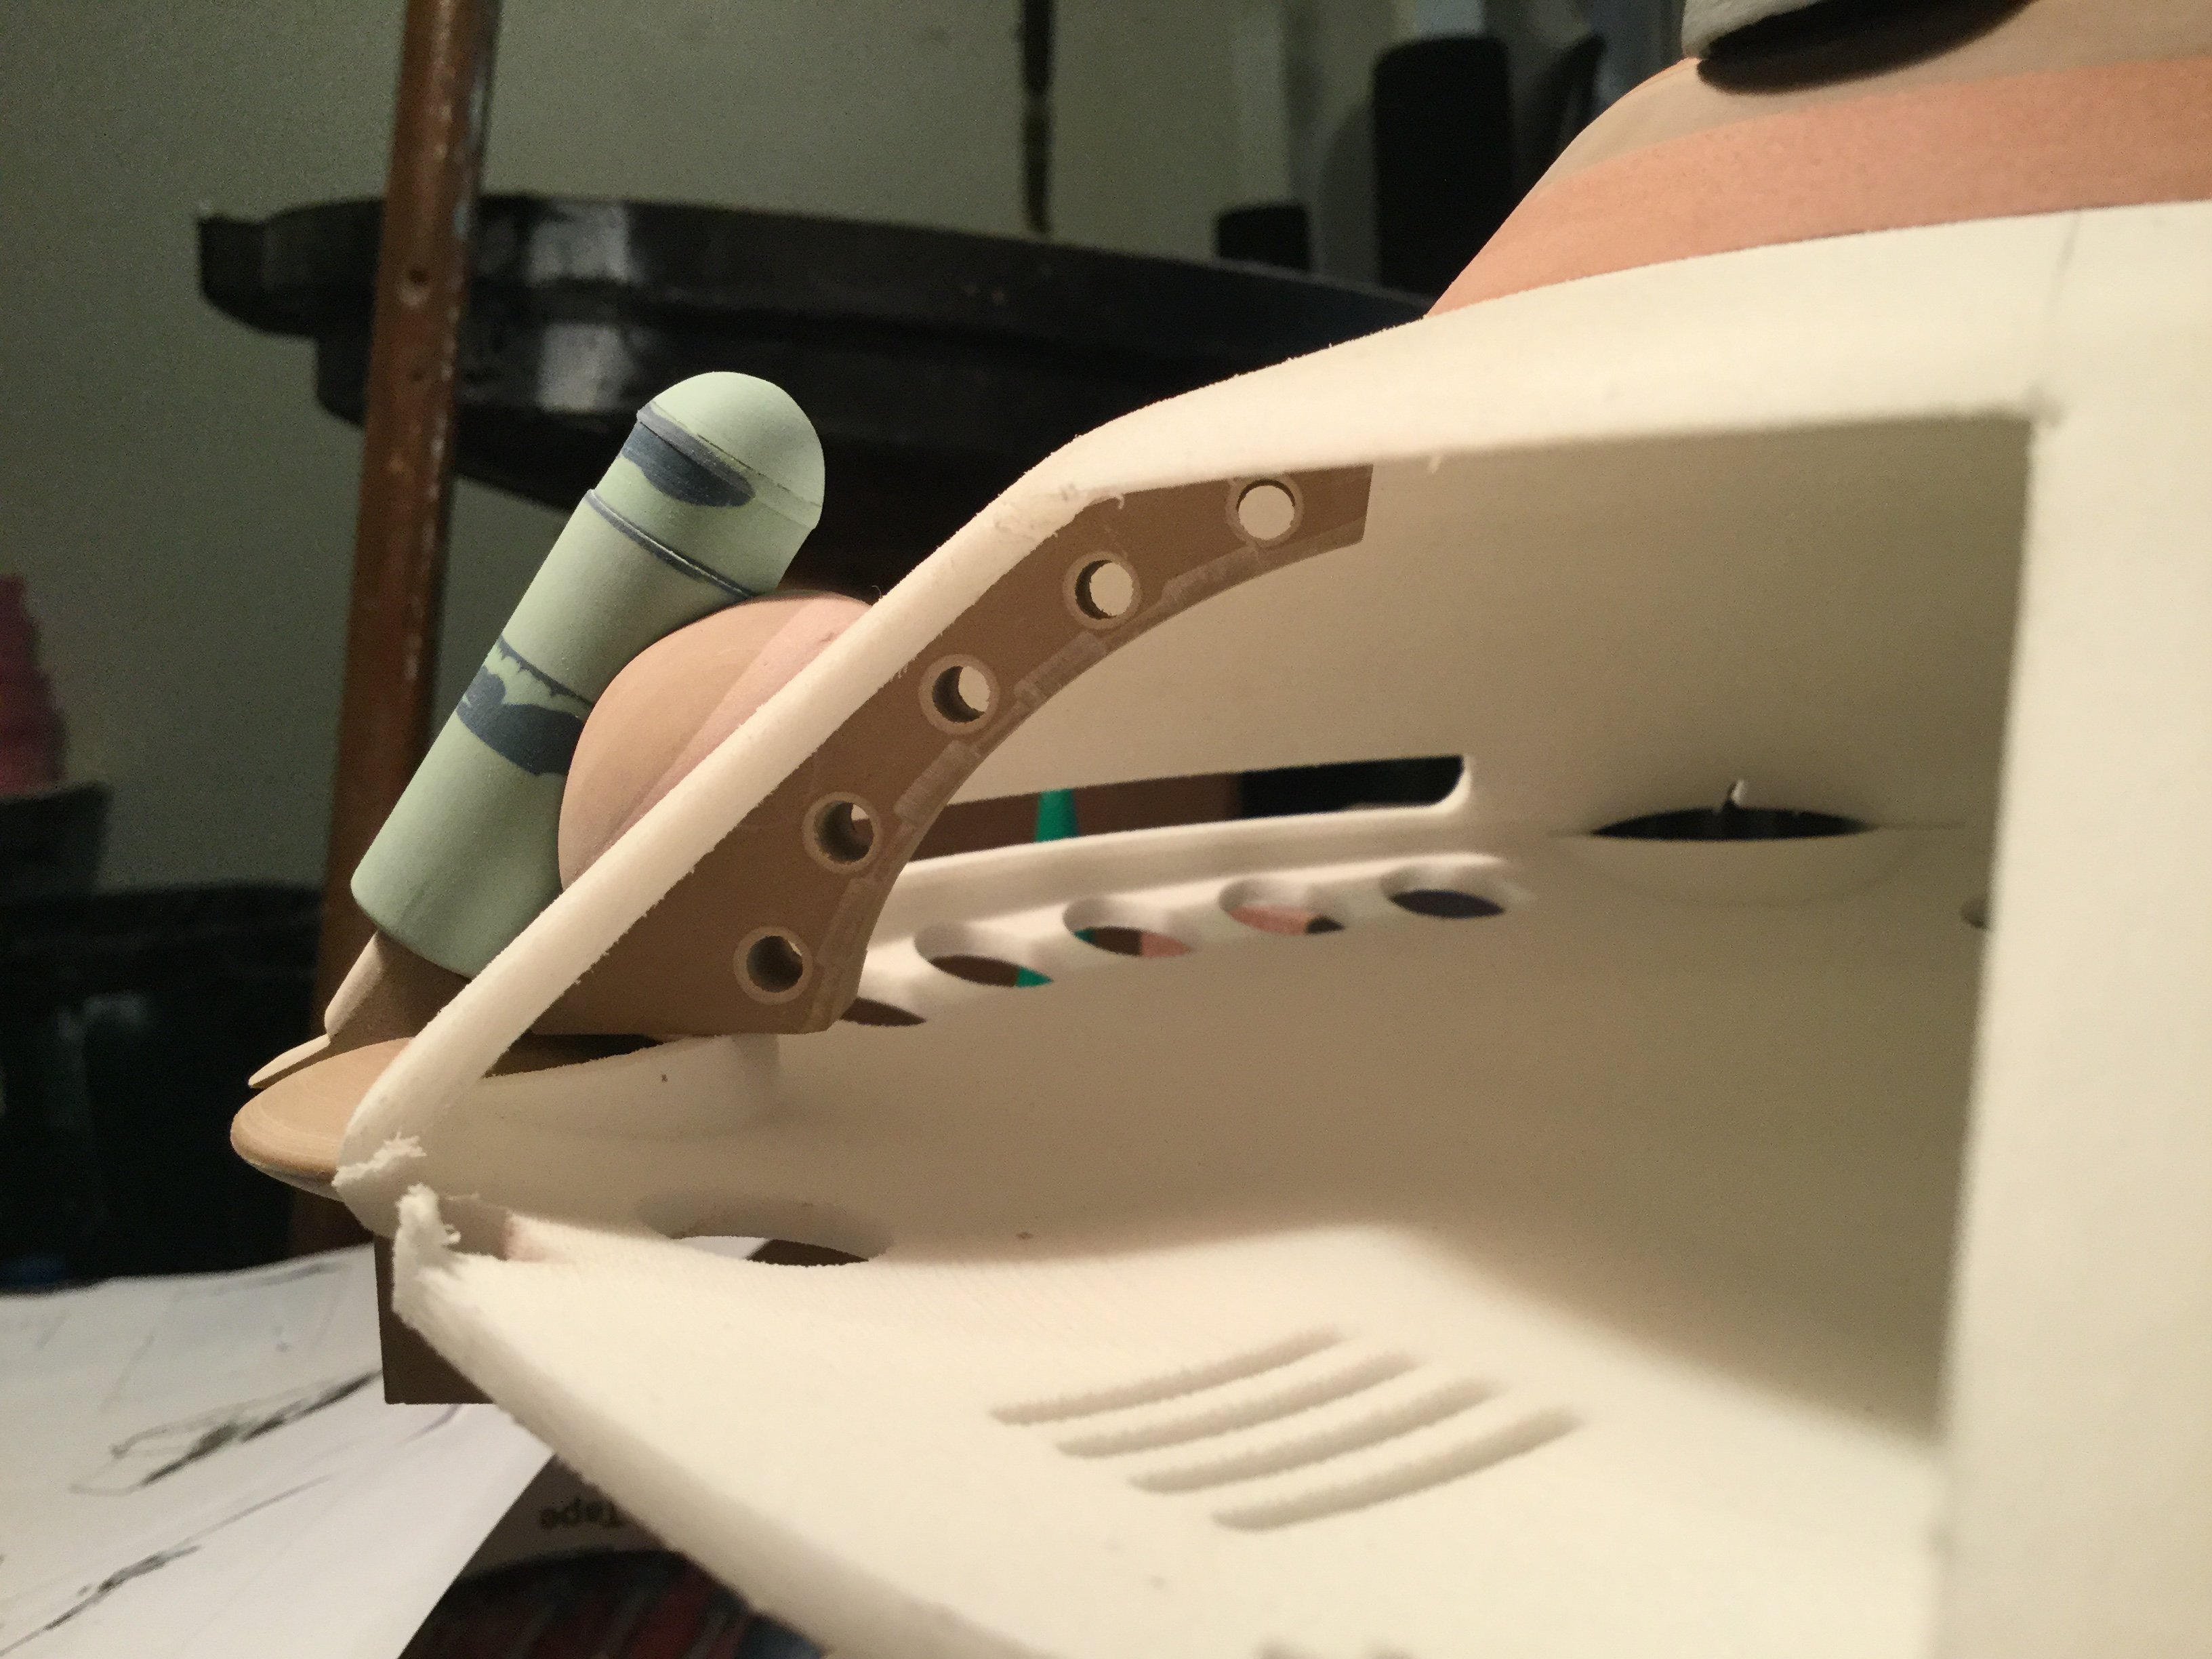
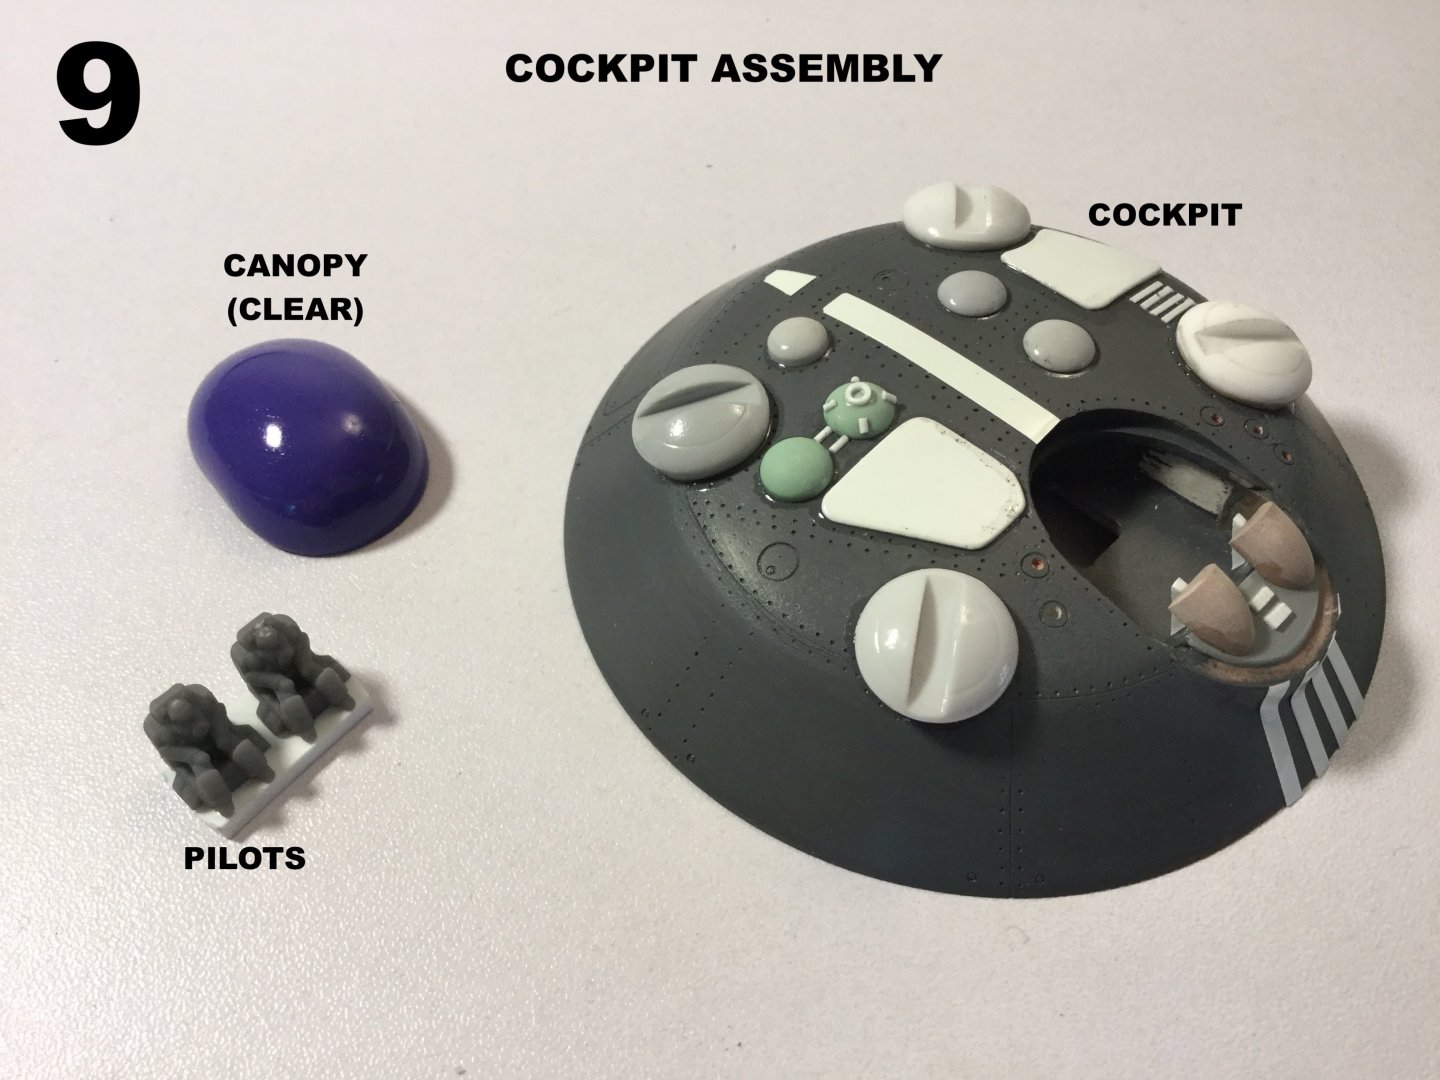
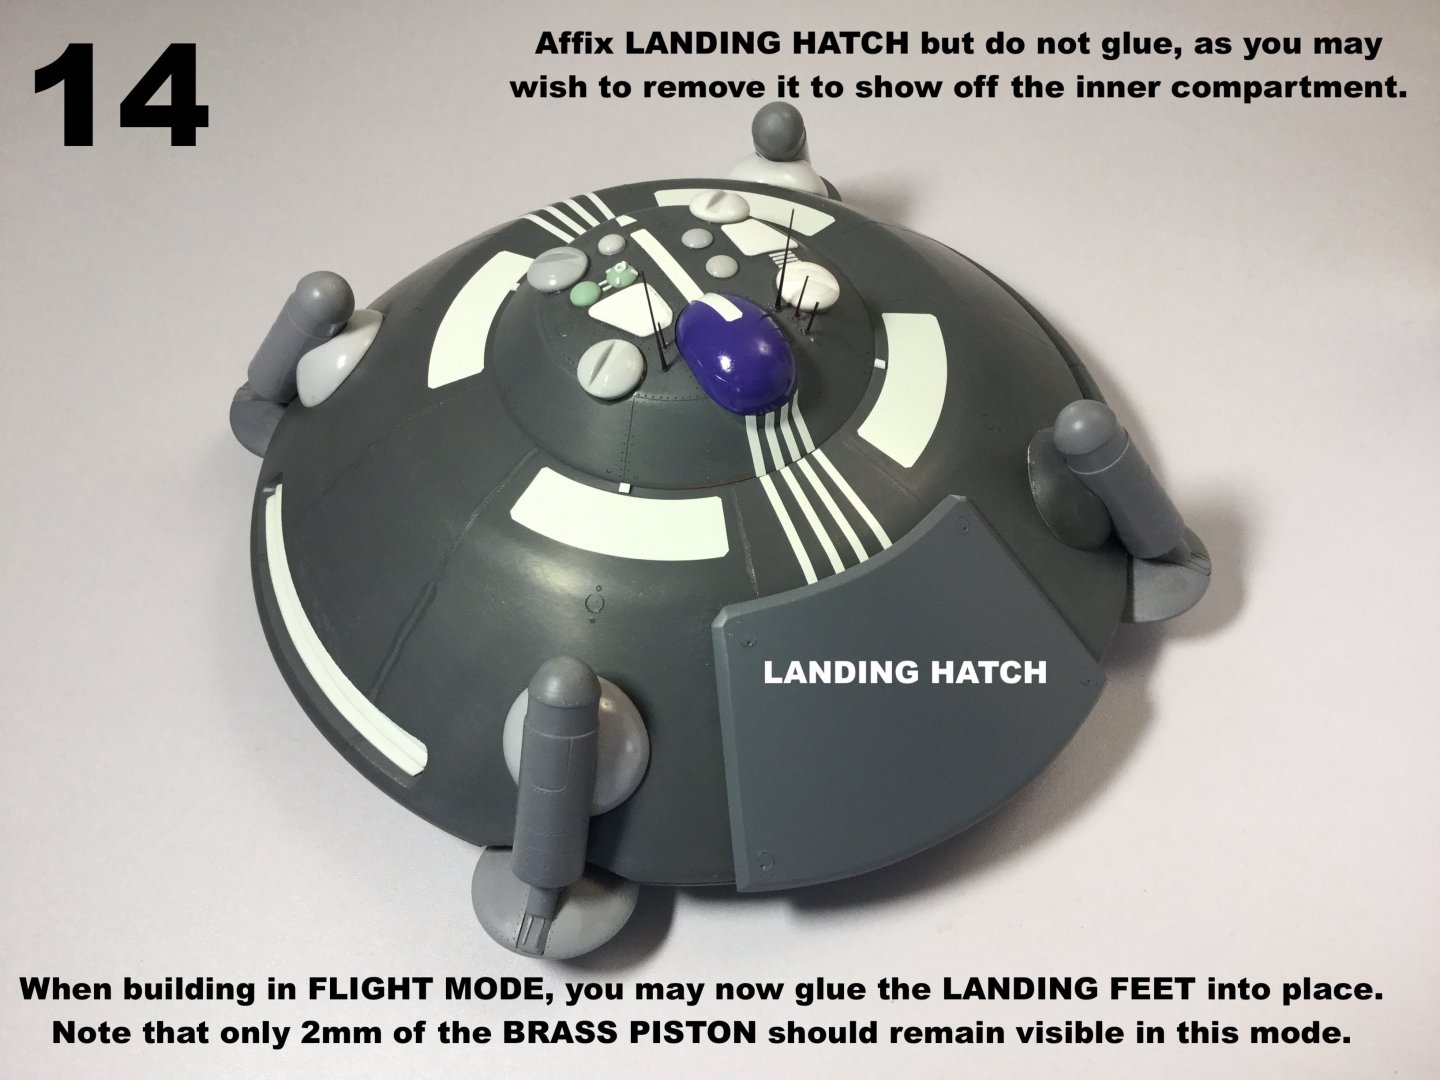
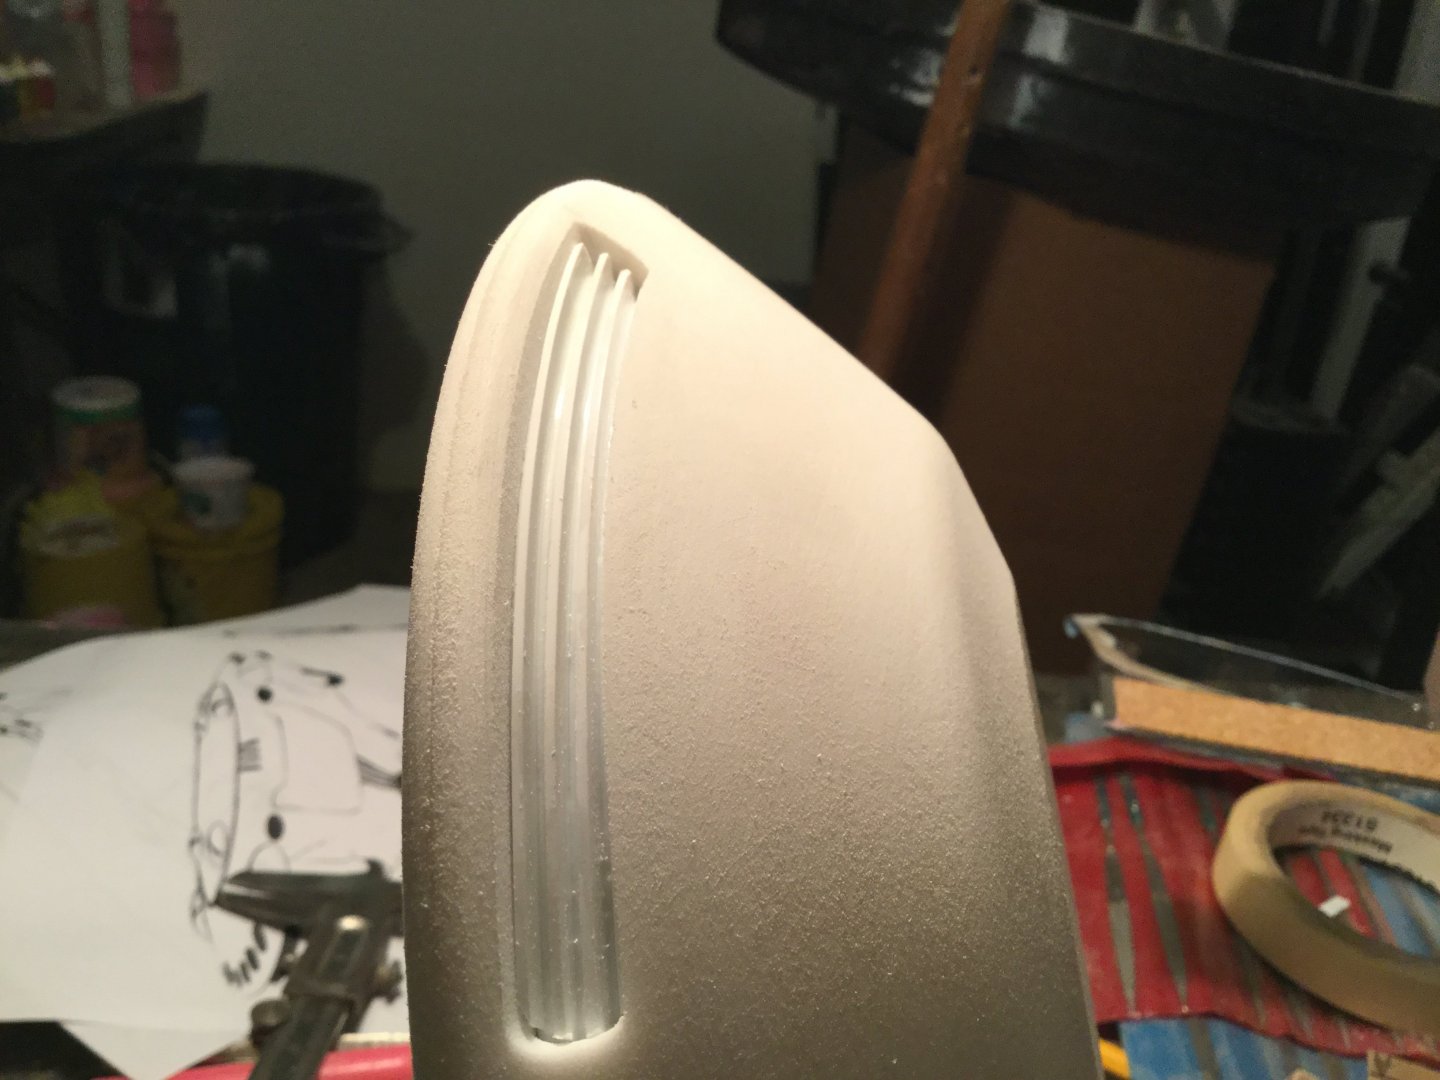
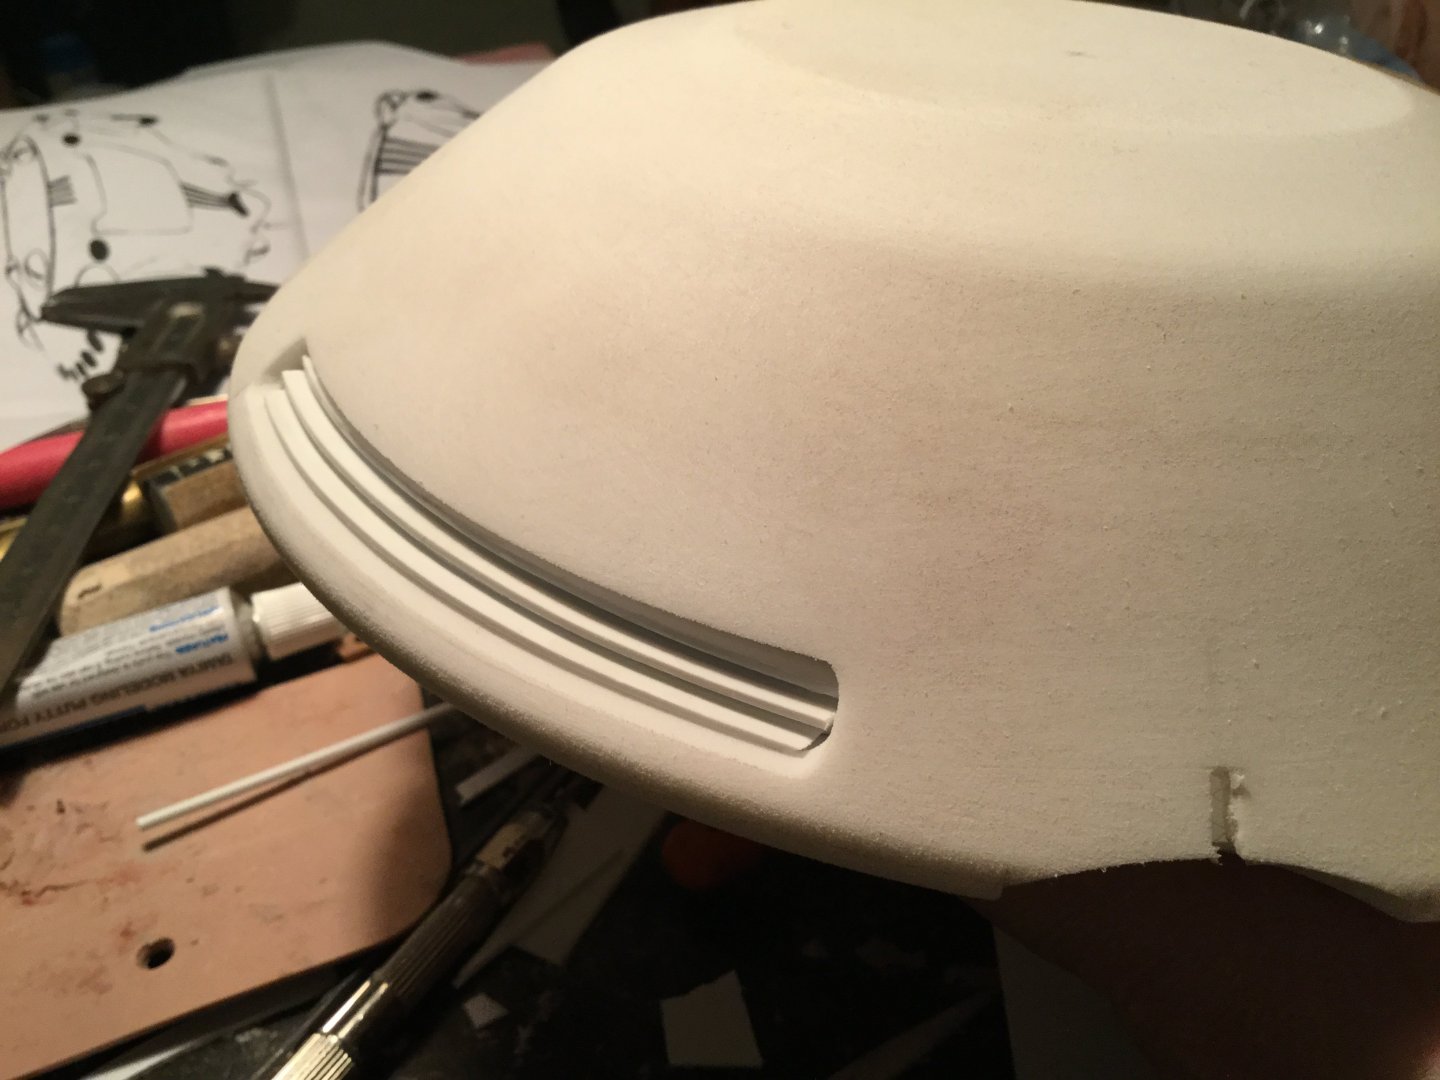
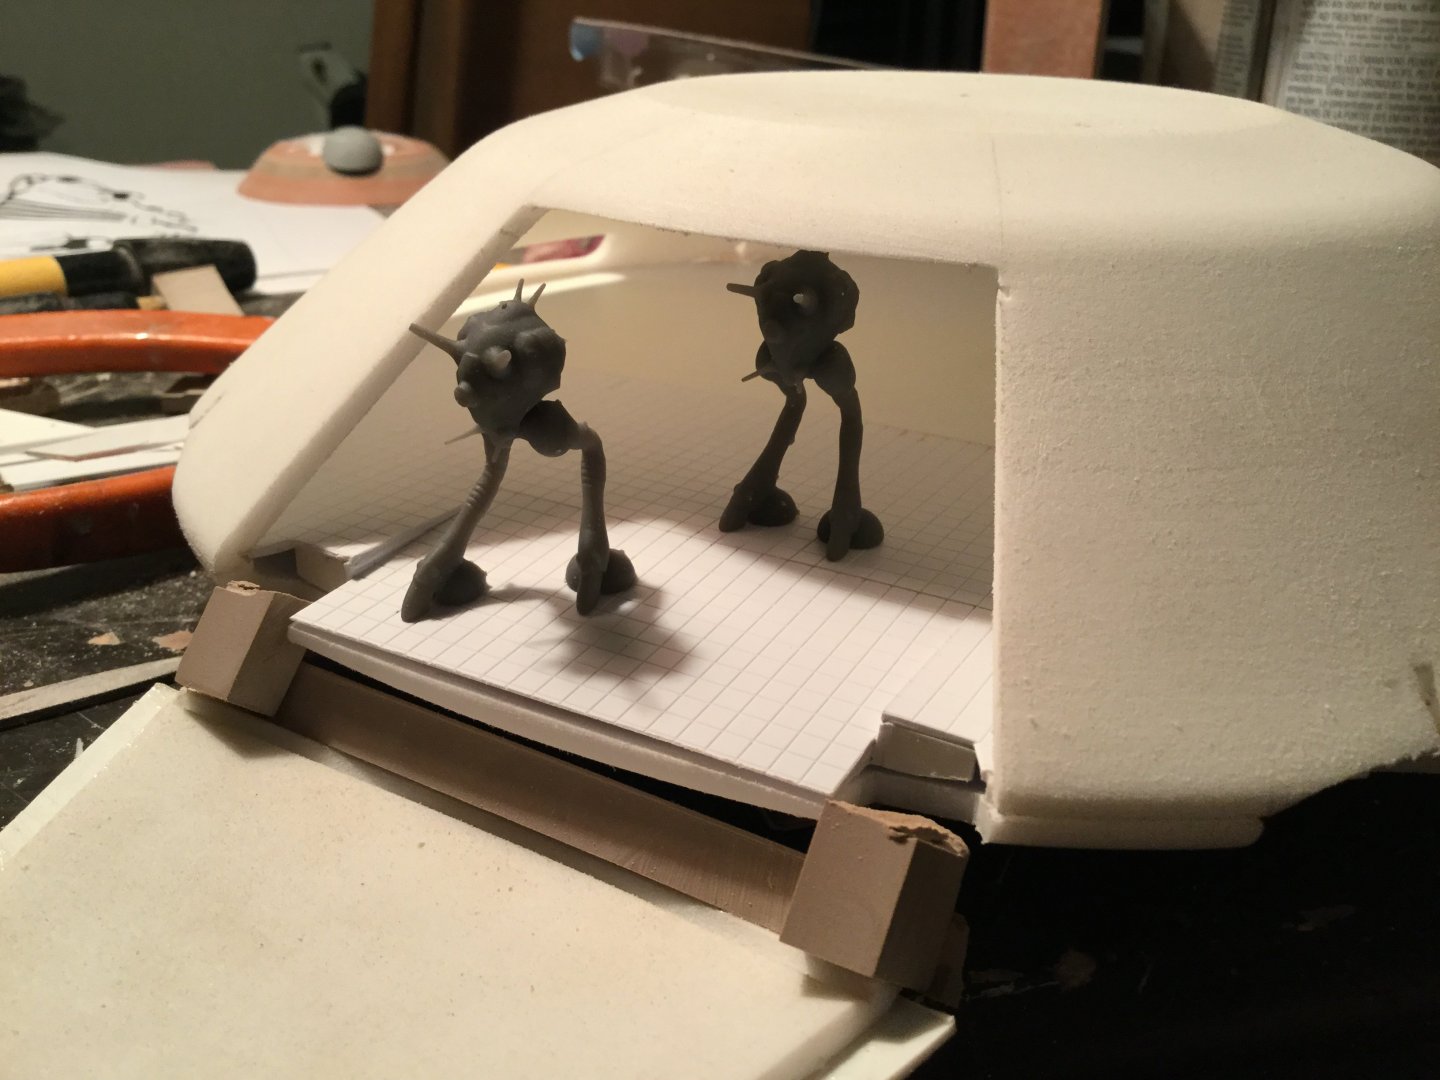
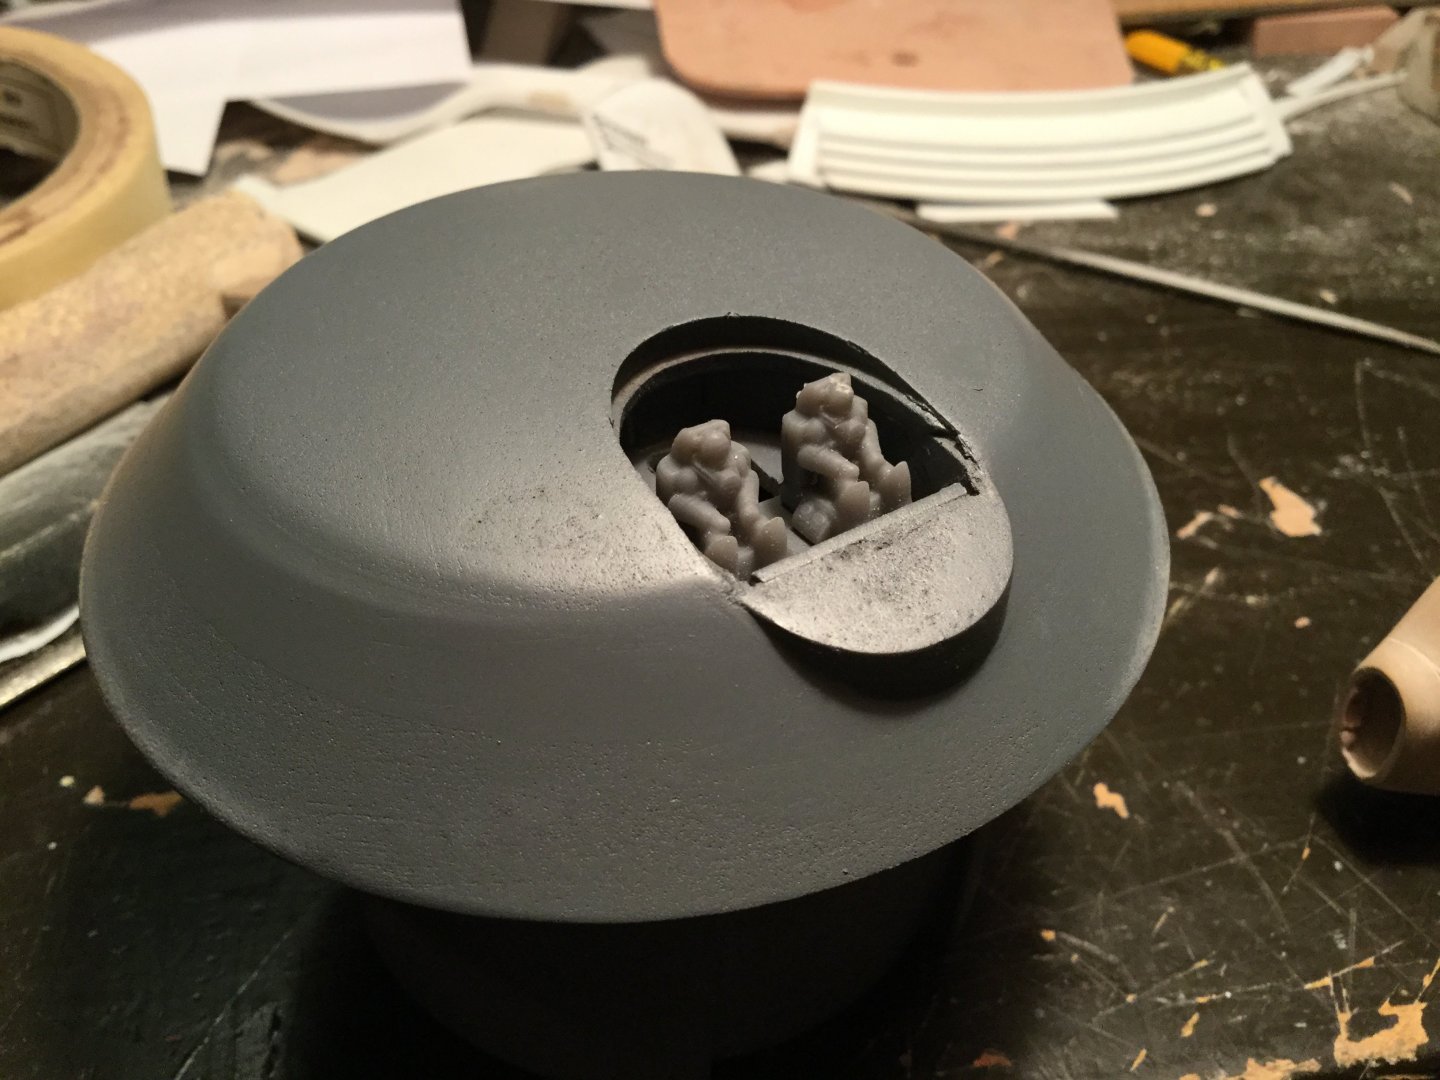
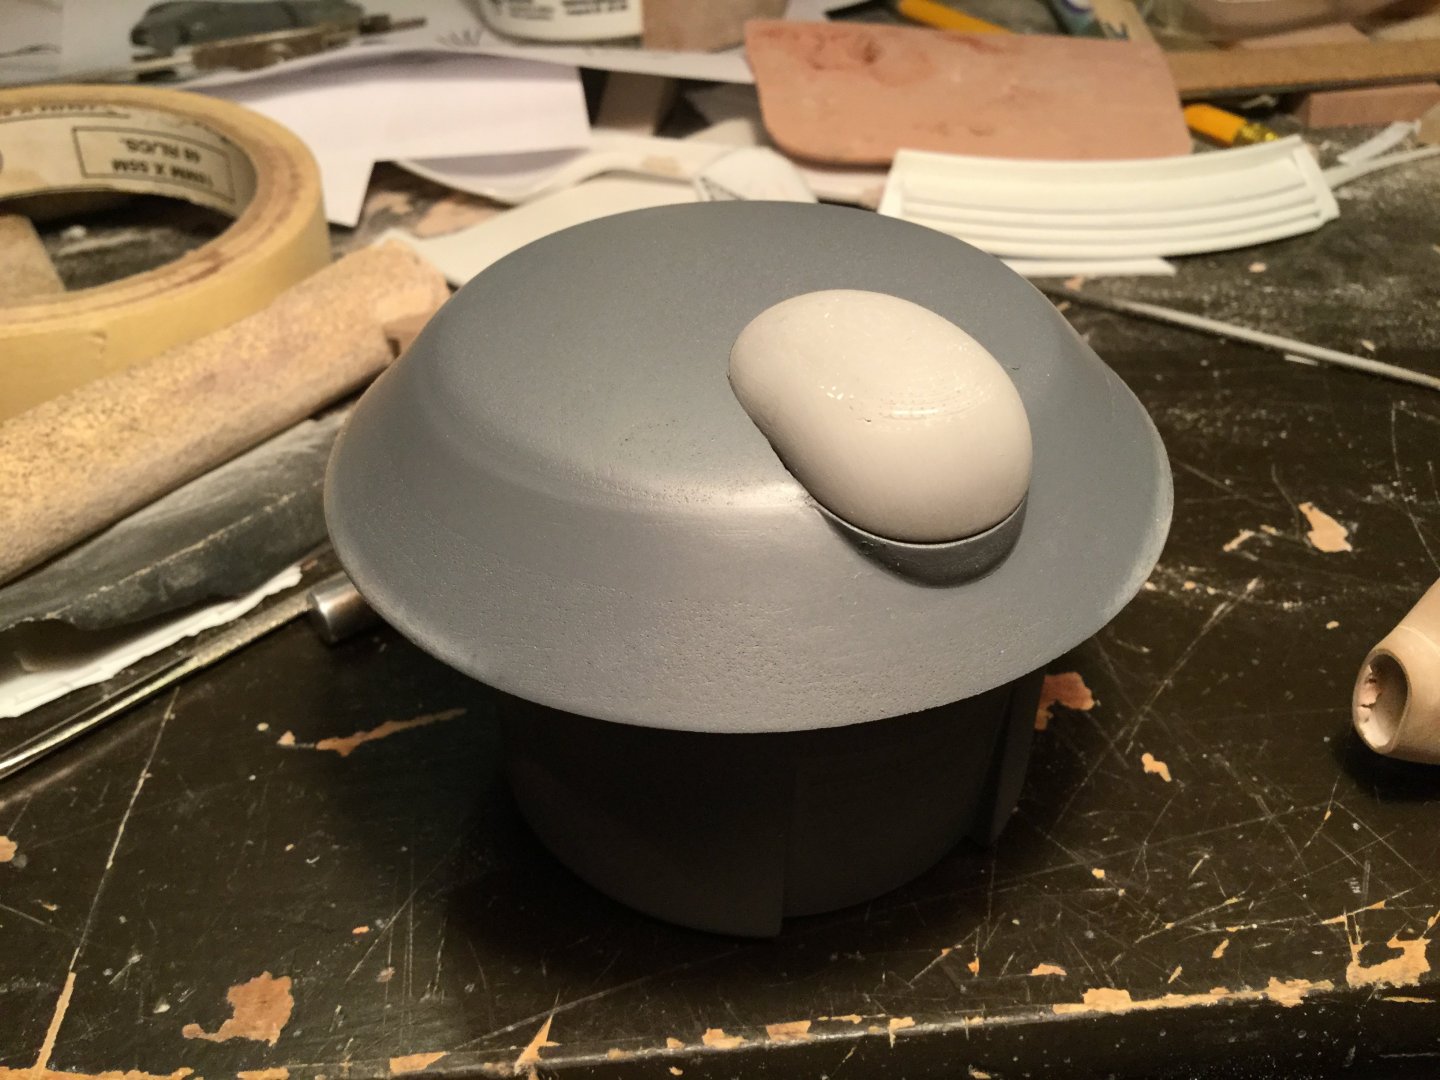
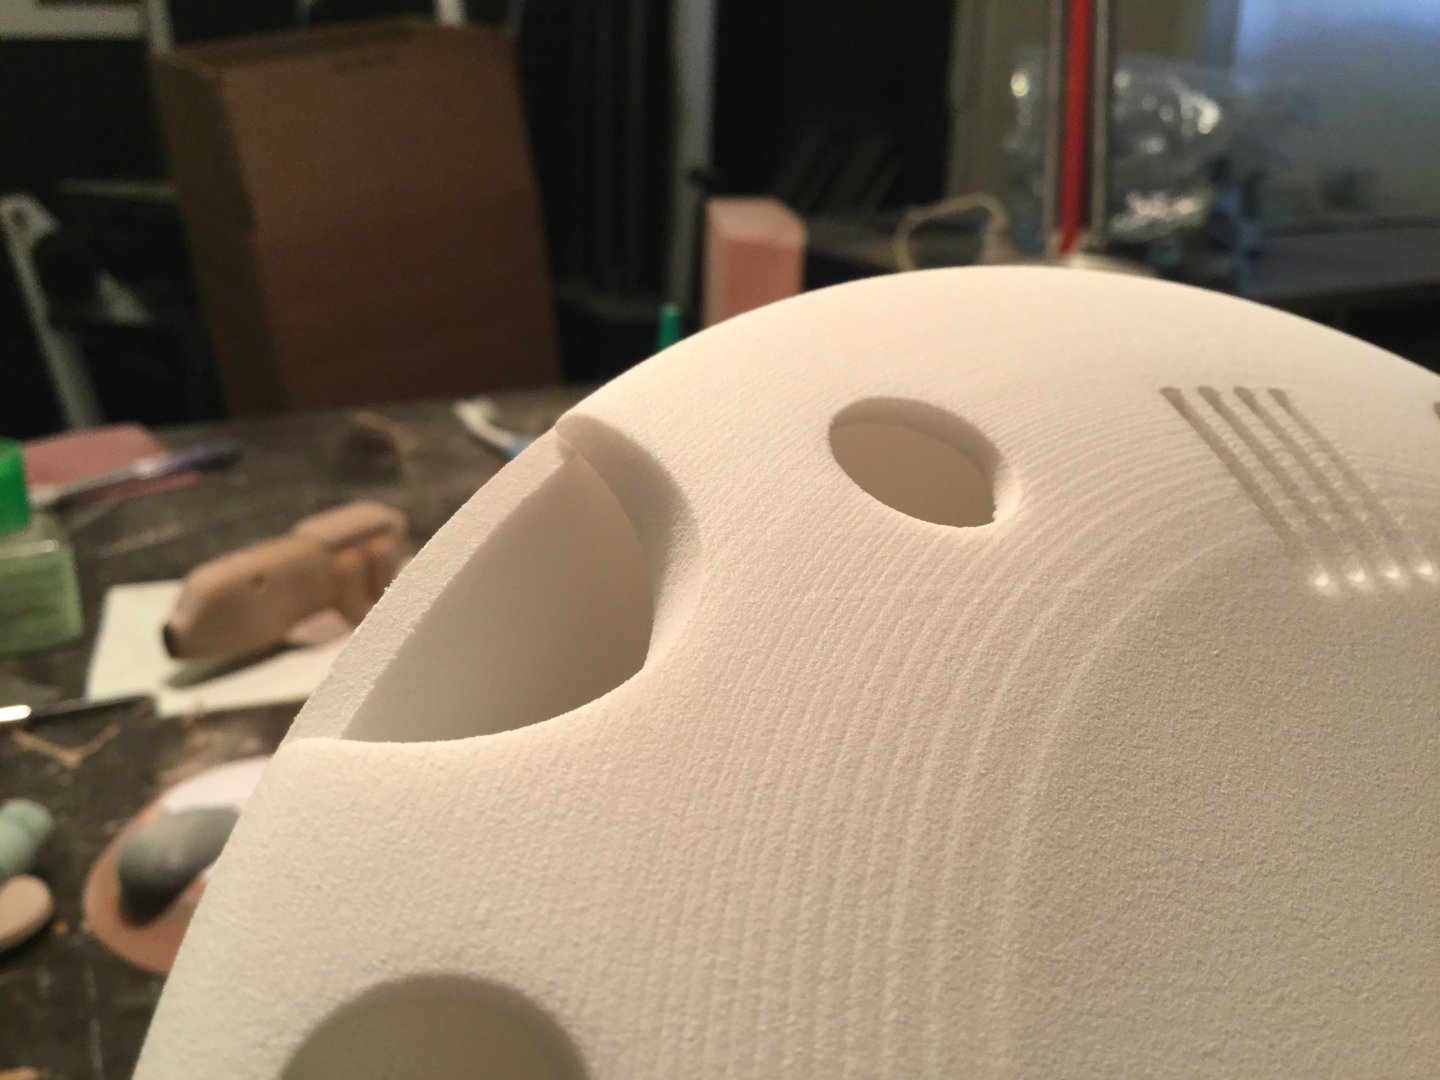
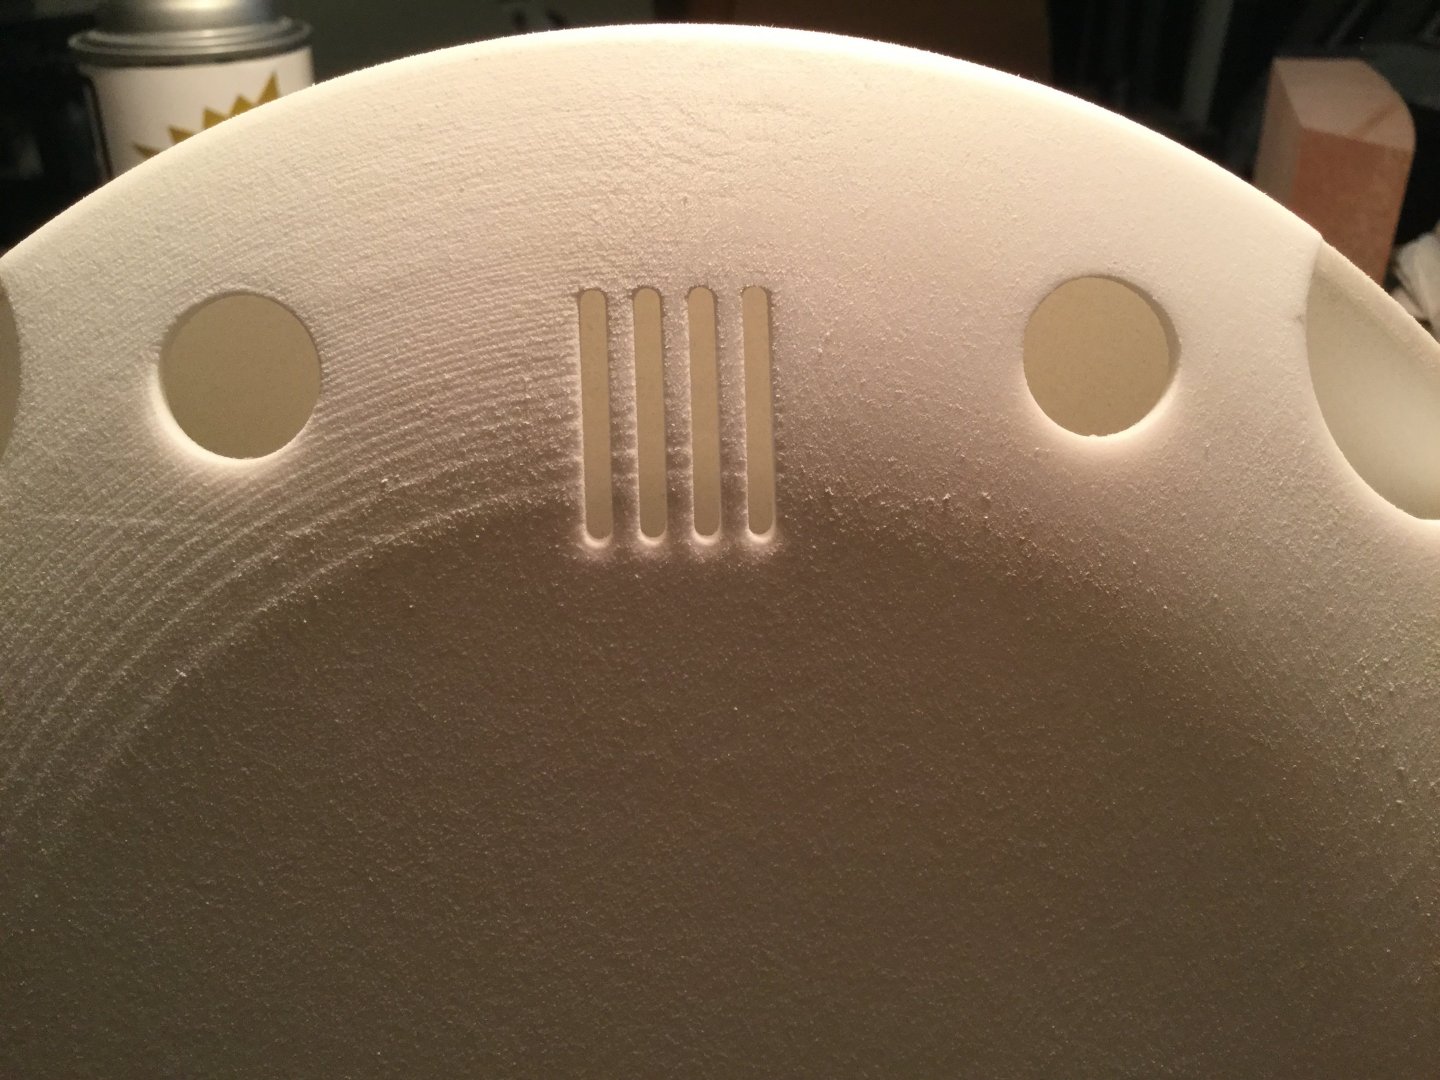
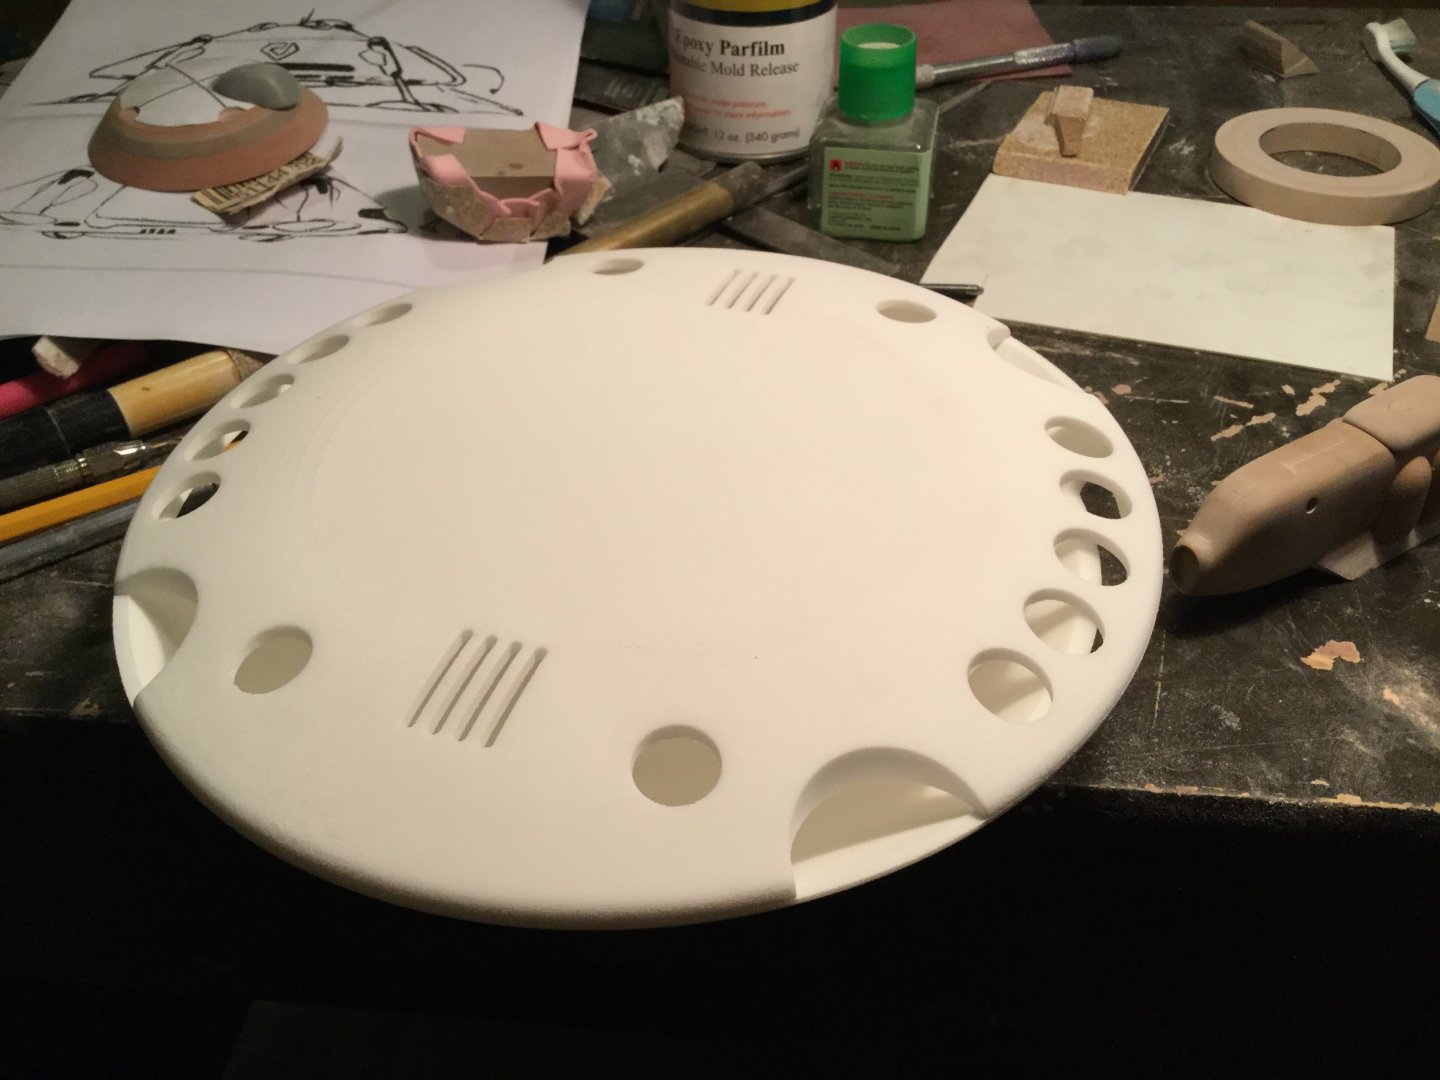
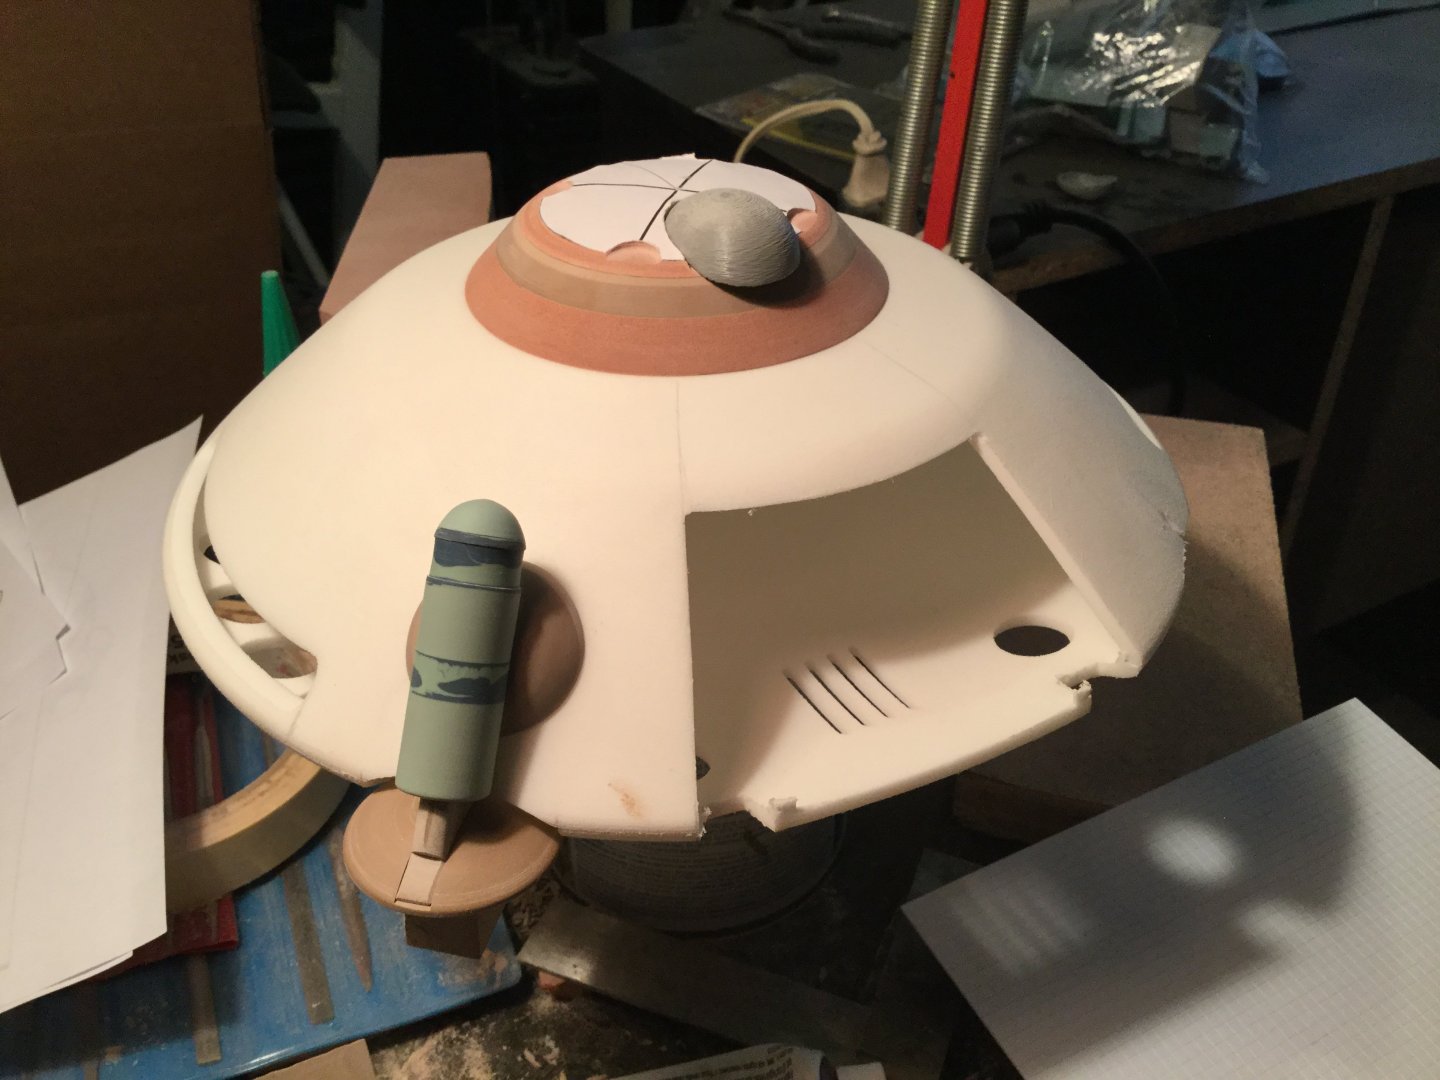
Captain’s Log: Friday, June 21st I’m happy to say that most of the structural work is now done! The only remaining part needing to be finished in the main ramp/door, and I’m more than half way done on that. Also, the test prints arrived from Alex, and they look excellent! pic 001 The main floor of the dropship is done. I decided to make it interesting by having a tiled texture juxtaposed with a plain flat surface. More work that just doing tiles, but also more aesthetically pleasing. pic 002 and 003These are the black slots on the side of the upper hull. No detail is shown in the line-art, so I improvised something that could be part of an environmental control system. T’was a bit of a bear to get the curves just right, but there was no way I was going to cop-out on adding detail wherever I could. Pic 004 you’ll be able to pose the Regults either entering or exiting the craft if desired. In keeping with the theme of bad ergonomics with the Zentradi mecha, I kept the door height such that the pods need to duck ever-so-slightly when exiting to avoid hitting the top of the door. Seemed only right! Pic 005 The thrusters and condensation purge vents on the bottom of the hull. I will need to mold and cast all of these and fit them into the lower hull before finishing the masters. Pic 006 and 007 The cockpit area of the dropship is seen here with the pilot figures. This assembly will be molded in clear: the idea being that you can paint and detail it as needed, then using a sharp knife or drill bit, remove paint from the consoles to create a realistic lighted cockpit if desired. The top deck is mostly hollow, allowing for lights to be added that can both illuminate the cockpit as well as the troop area below. Pic 008 and 009 All the shaping work on the shuttle is now done! While it might not seem that way, most of the structural work is now done for both kits, leaving me with the joyful task of super-detailing, which I should (hopefully) have done for the next update, at which point molding will begin.


-
New Moscato Macloss Model Project!!!
captain america replied to captain america's topic in Model kits
Hey mechaniac, I have no doubt that you could have carved a hatch more quickly on the computer, but I like to leave myself a bit of wiggle-room if only because I frequently design things one way, then hold it approximately at the same angle seen in the line-art and then tweak it to look more faithful to a specific view, even if the geometry is off. It's a necessary concession when working from hand-rendered illustrations. The line-art for the landing feet was all over the place too, so I tweaked it and made it work. I think the Greeks did something similar when they designed the Parthenon: they intentionally warped some angles of the structure which would be discernibly "wrong" when viewed in a CAD program, but it would look correct when viewed from the perspective of a person standing on the site. -
New Moscato Macloss Model Project!!!
captain america replied to captain america's topic in Model kits
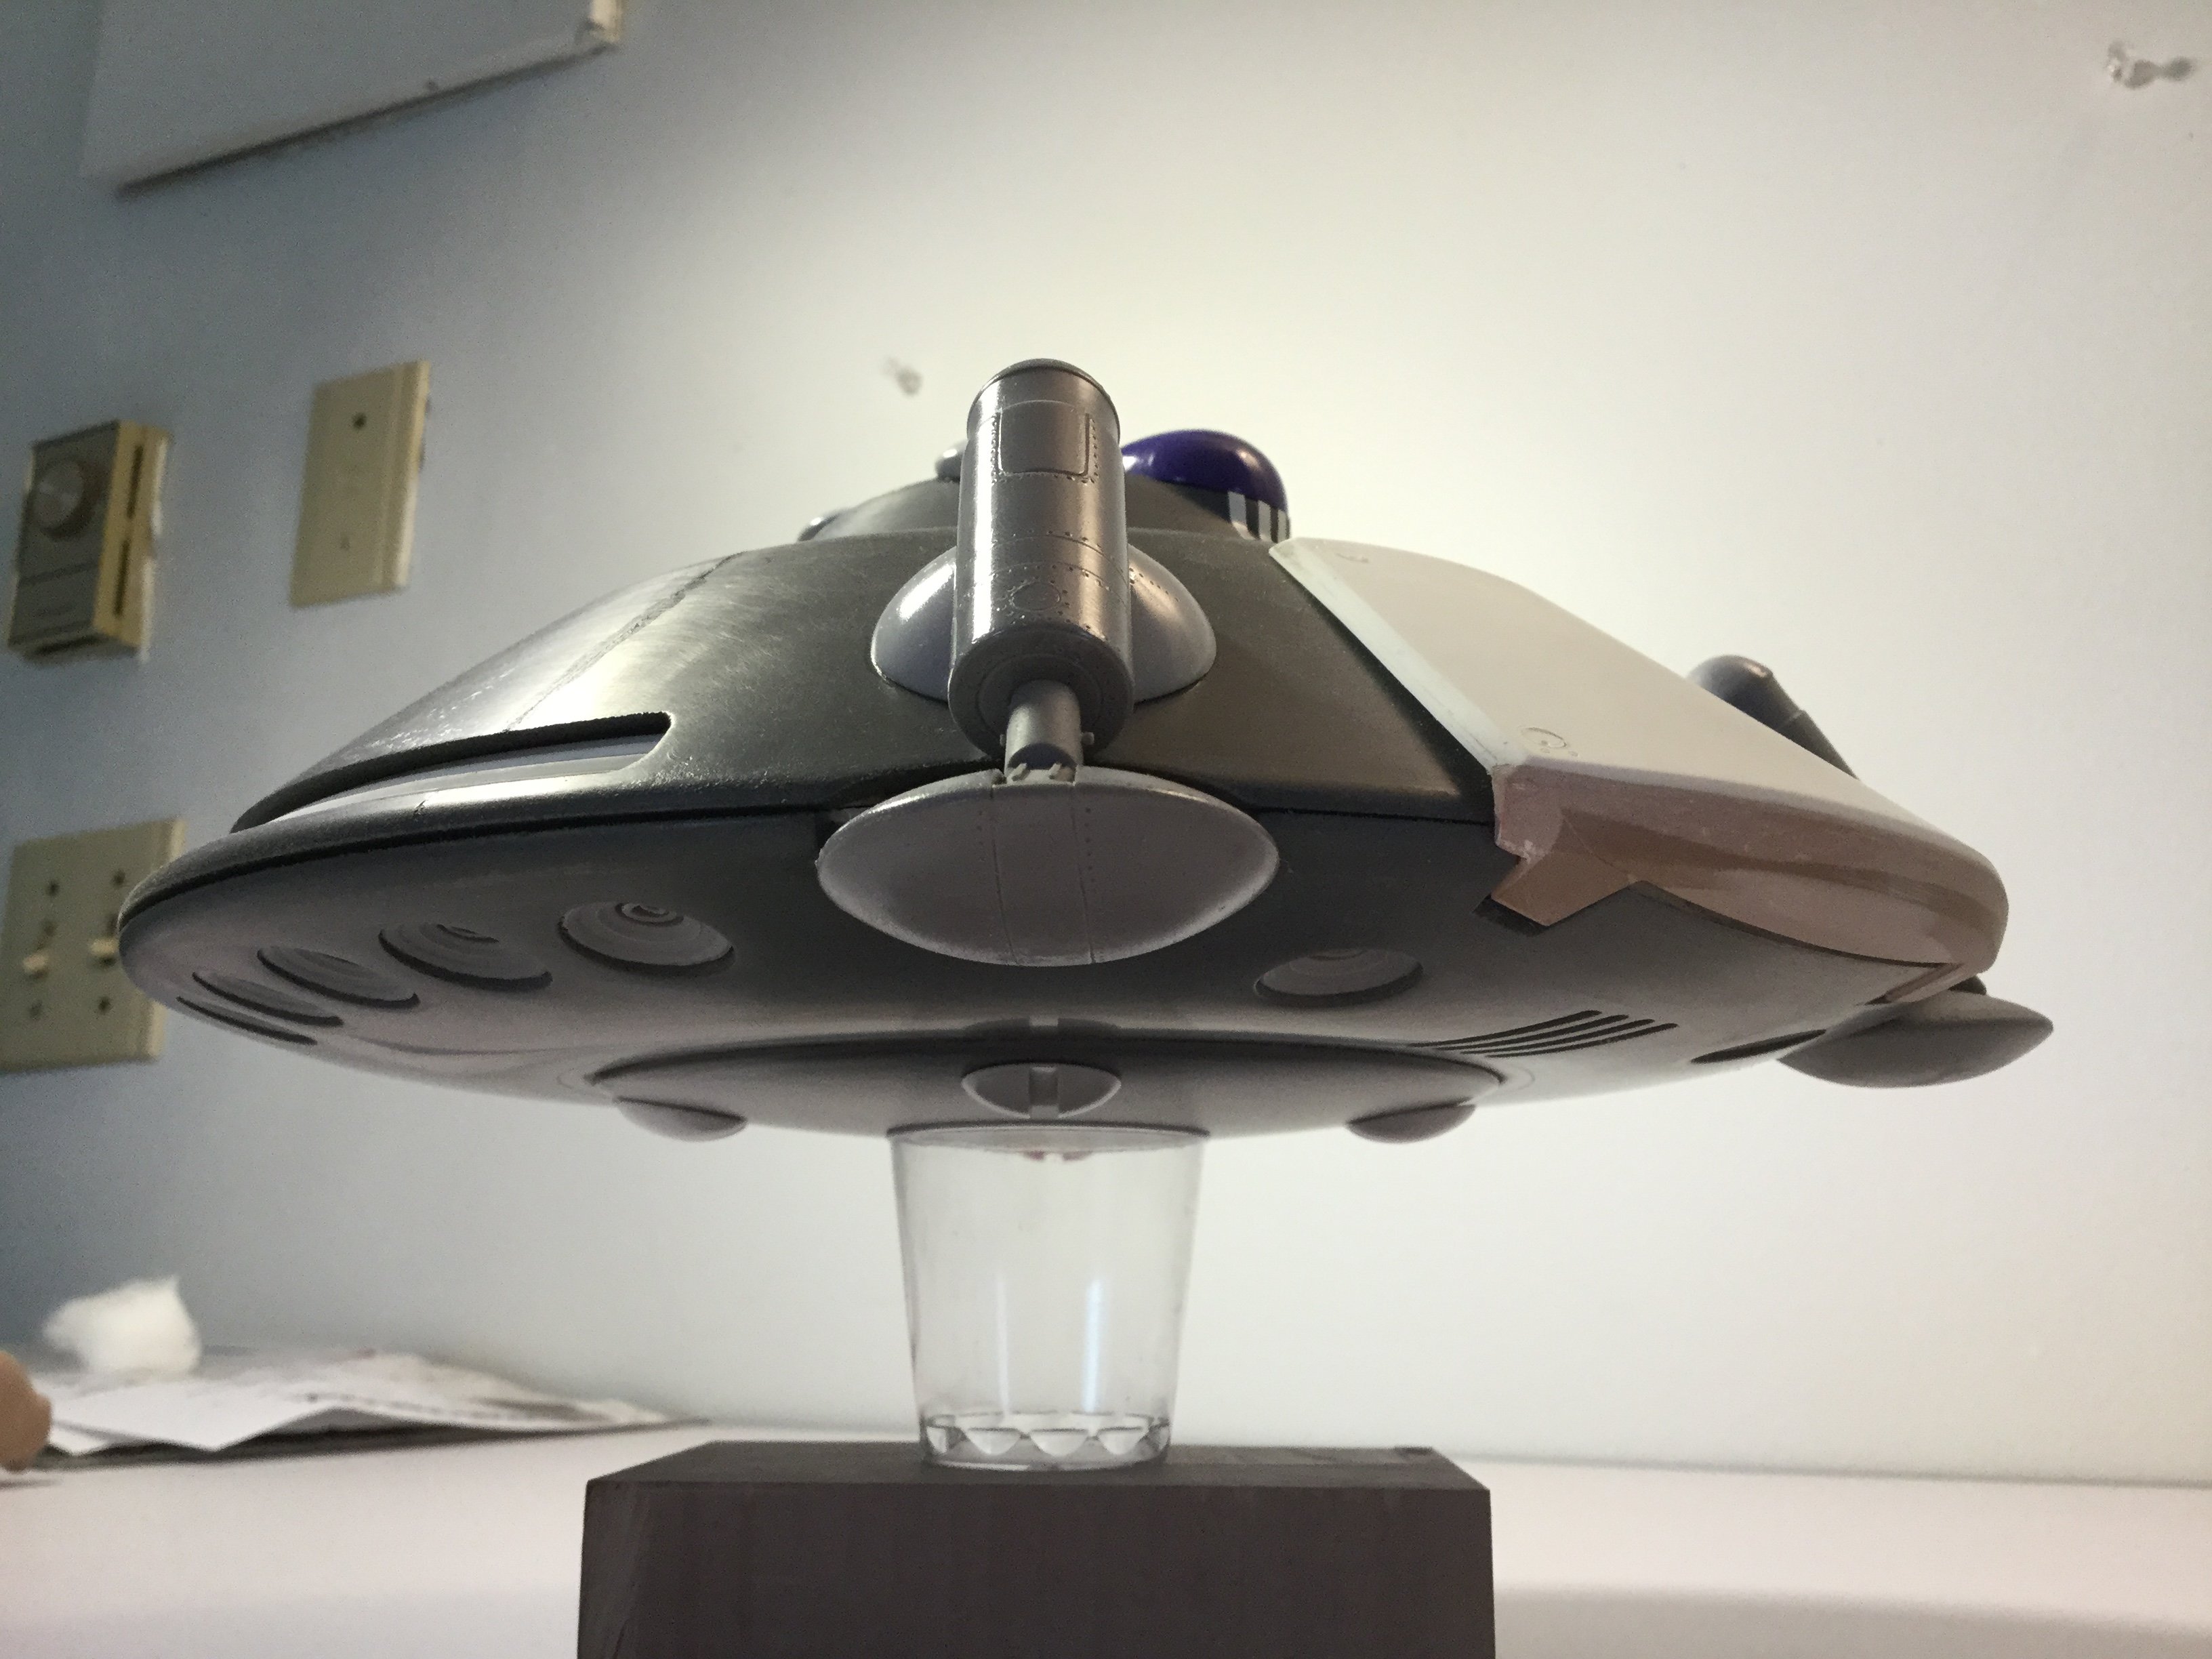
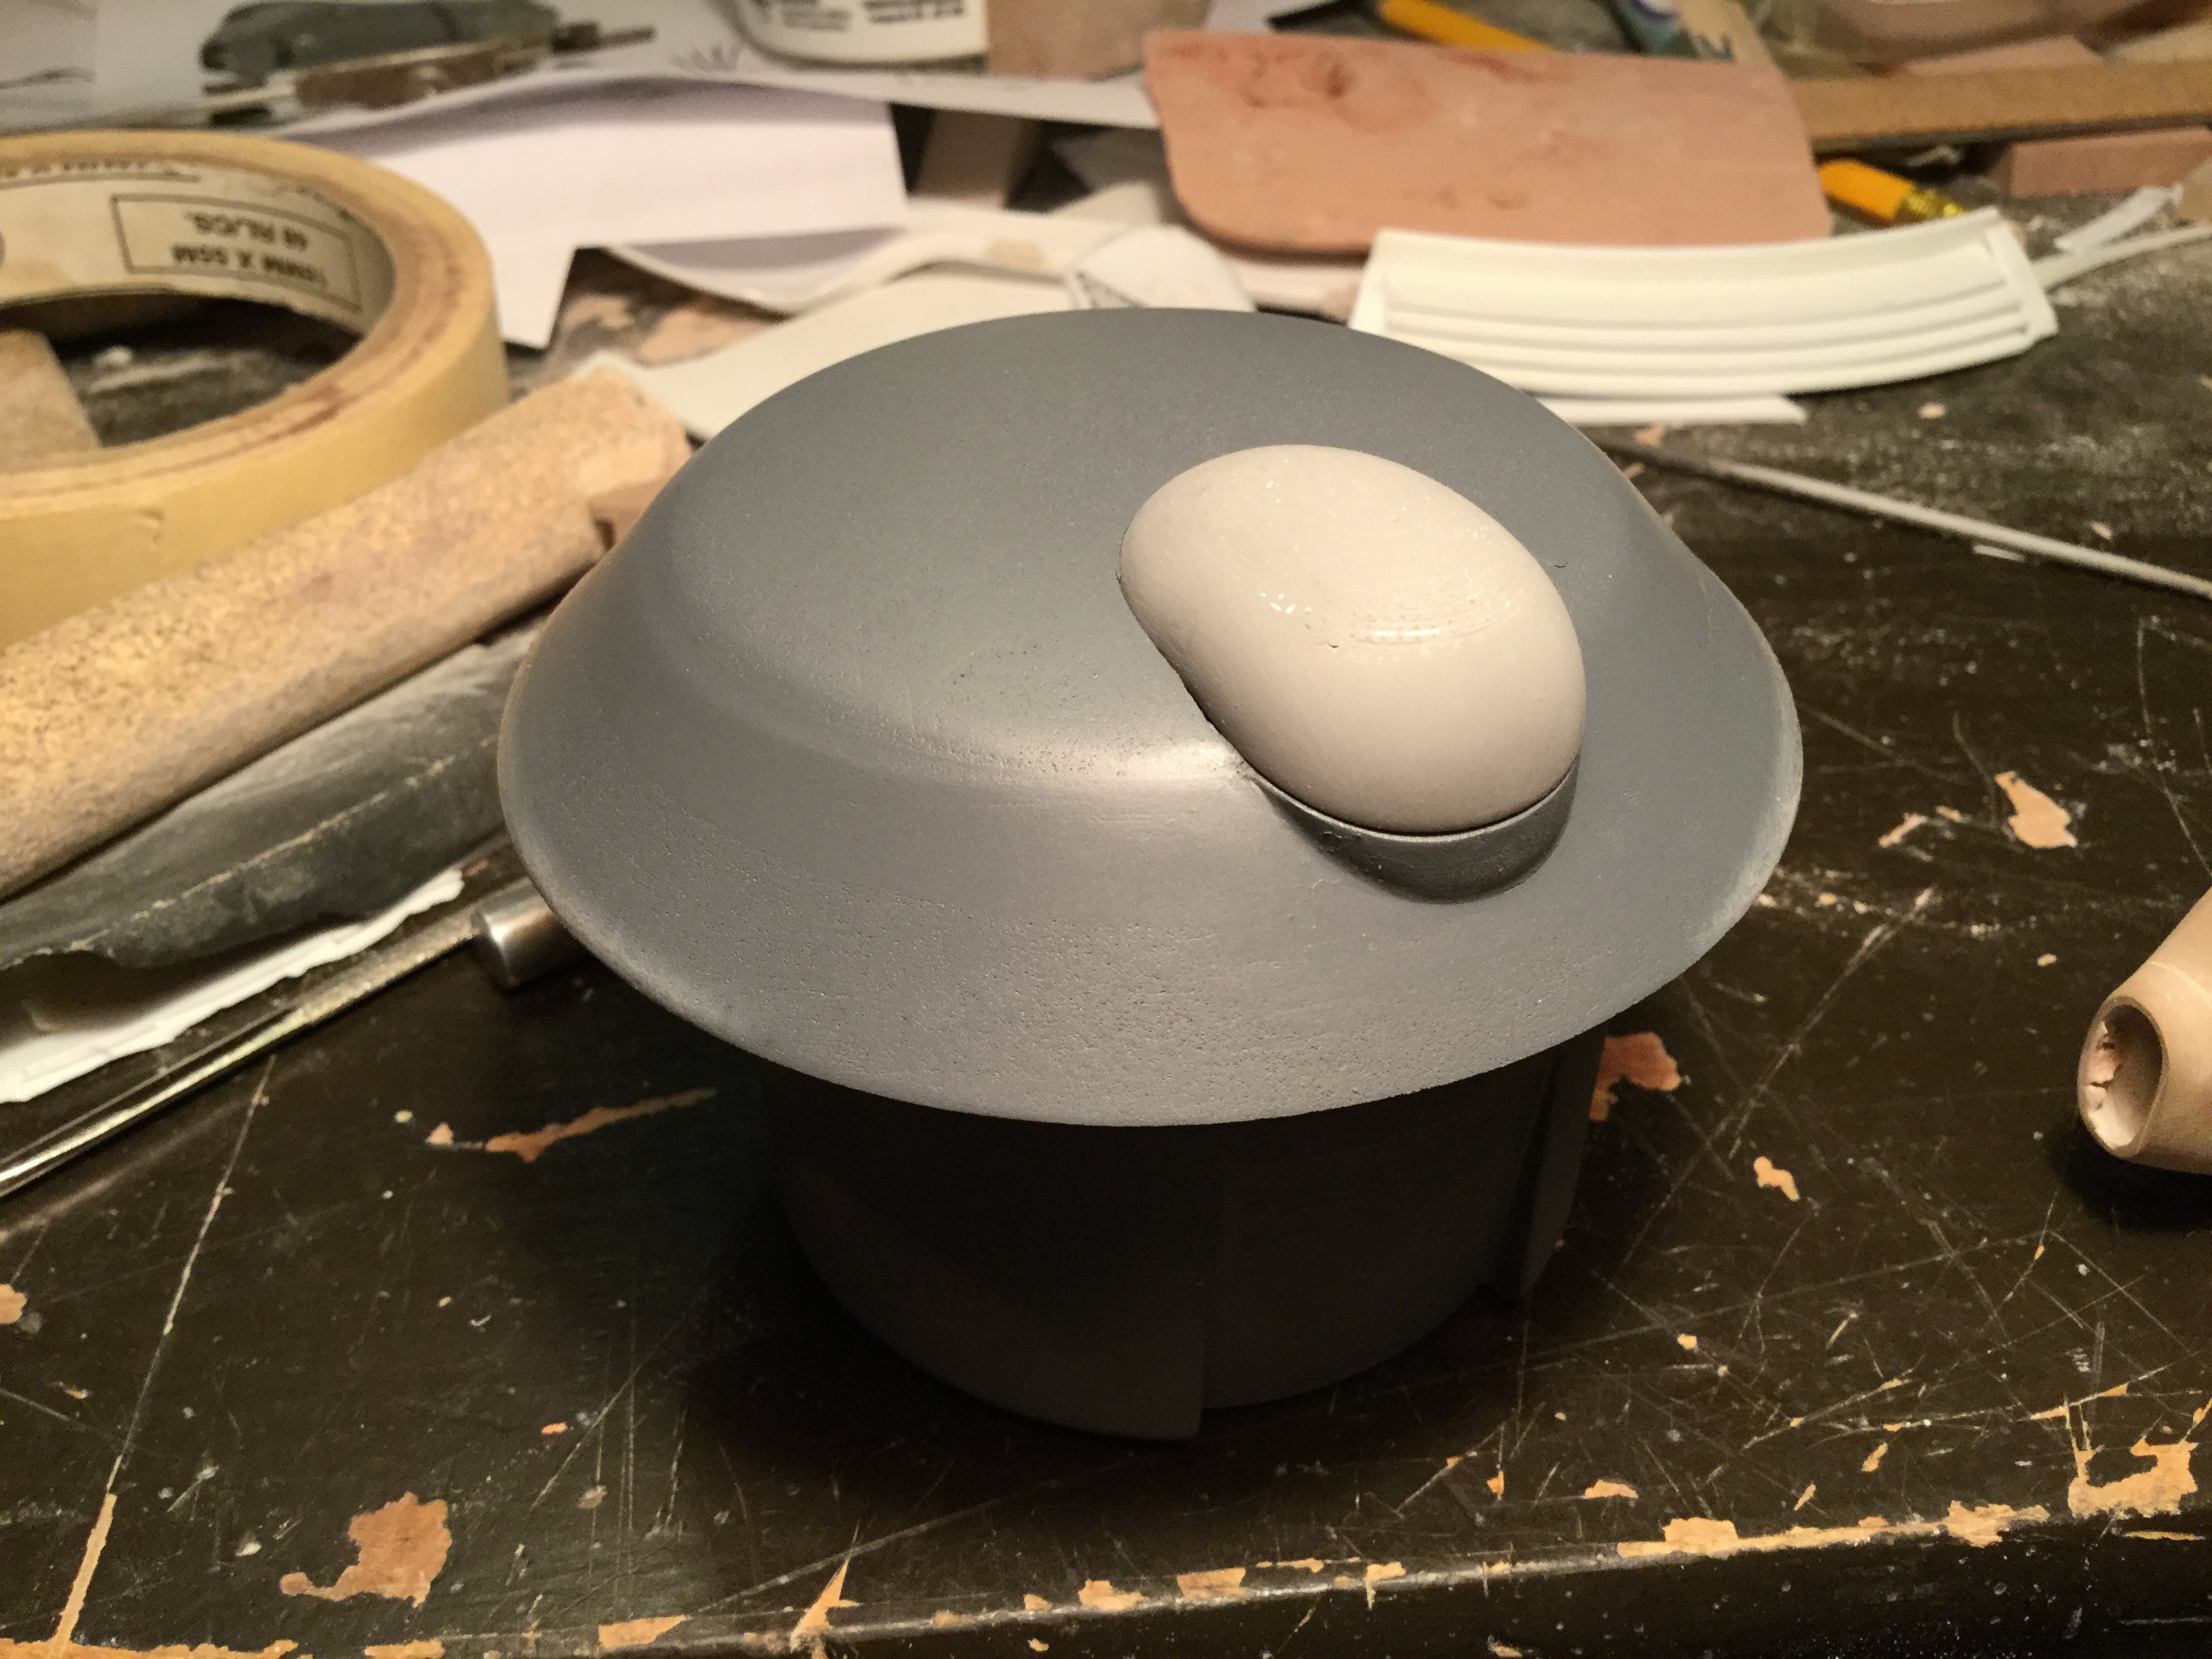
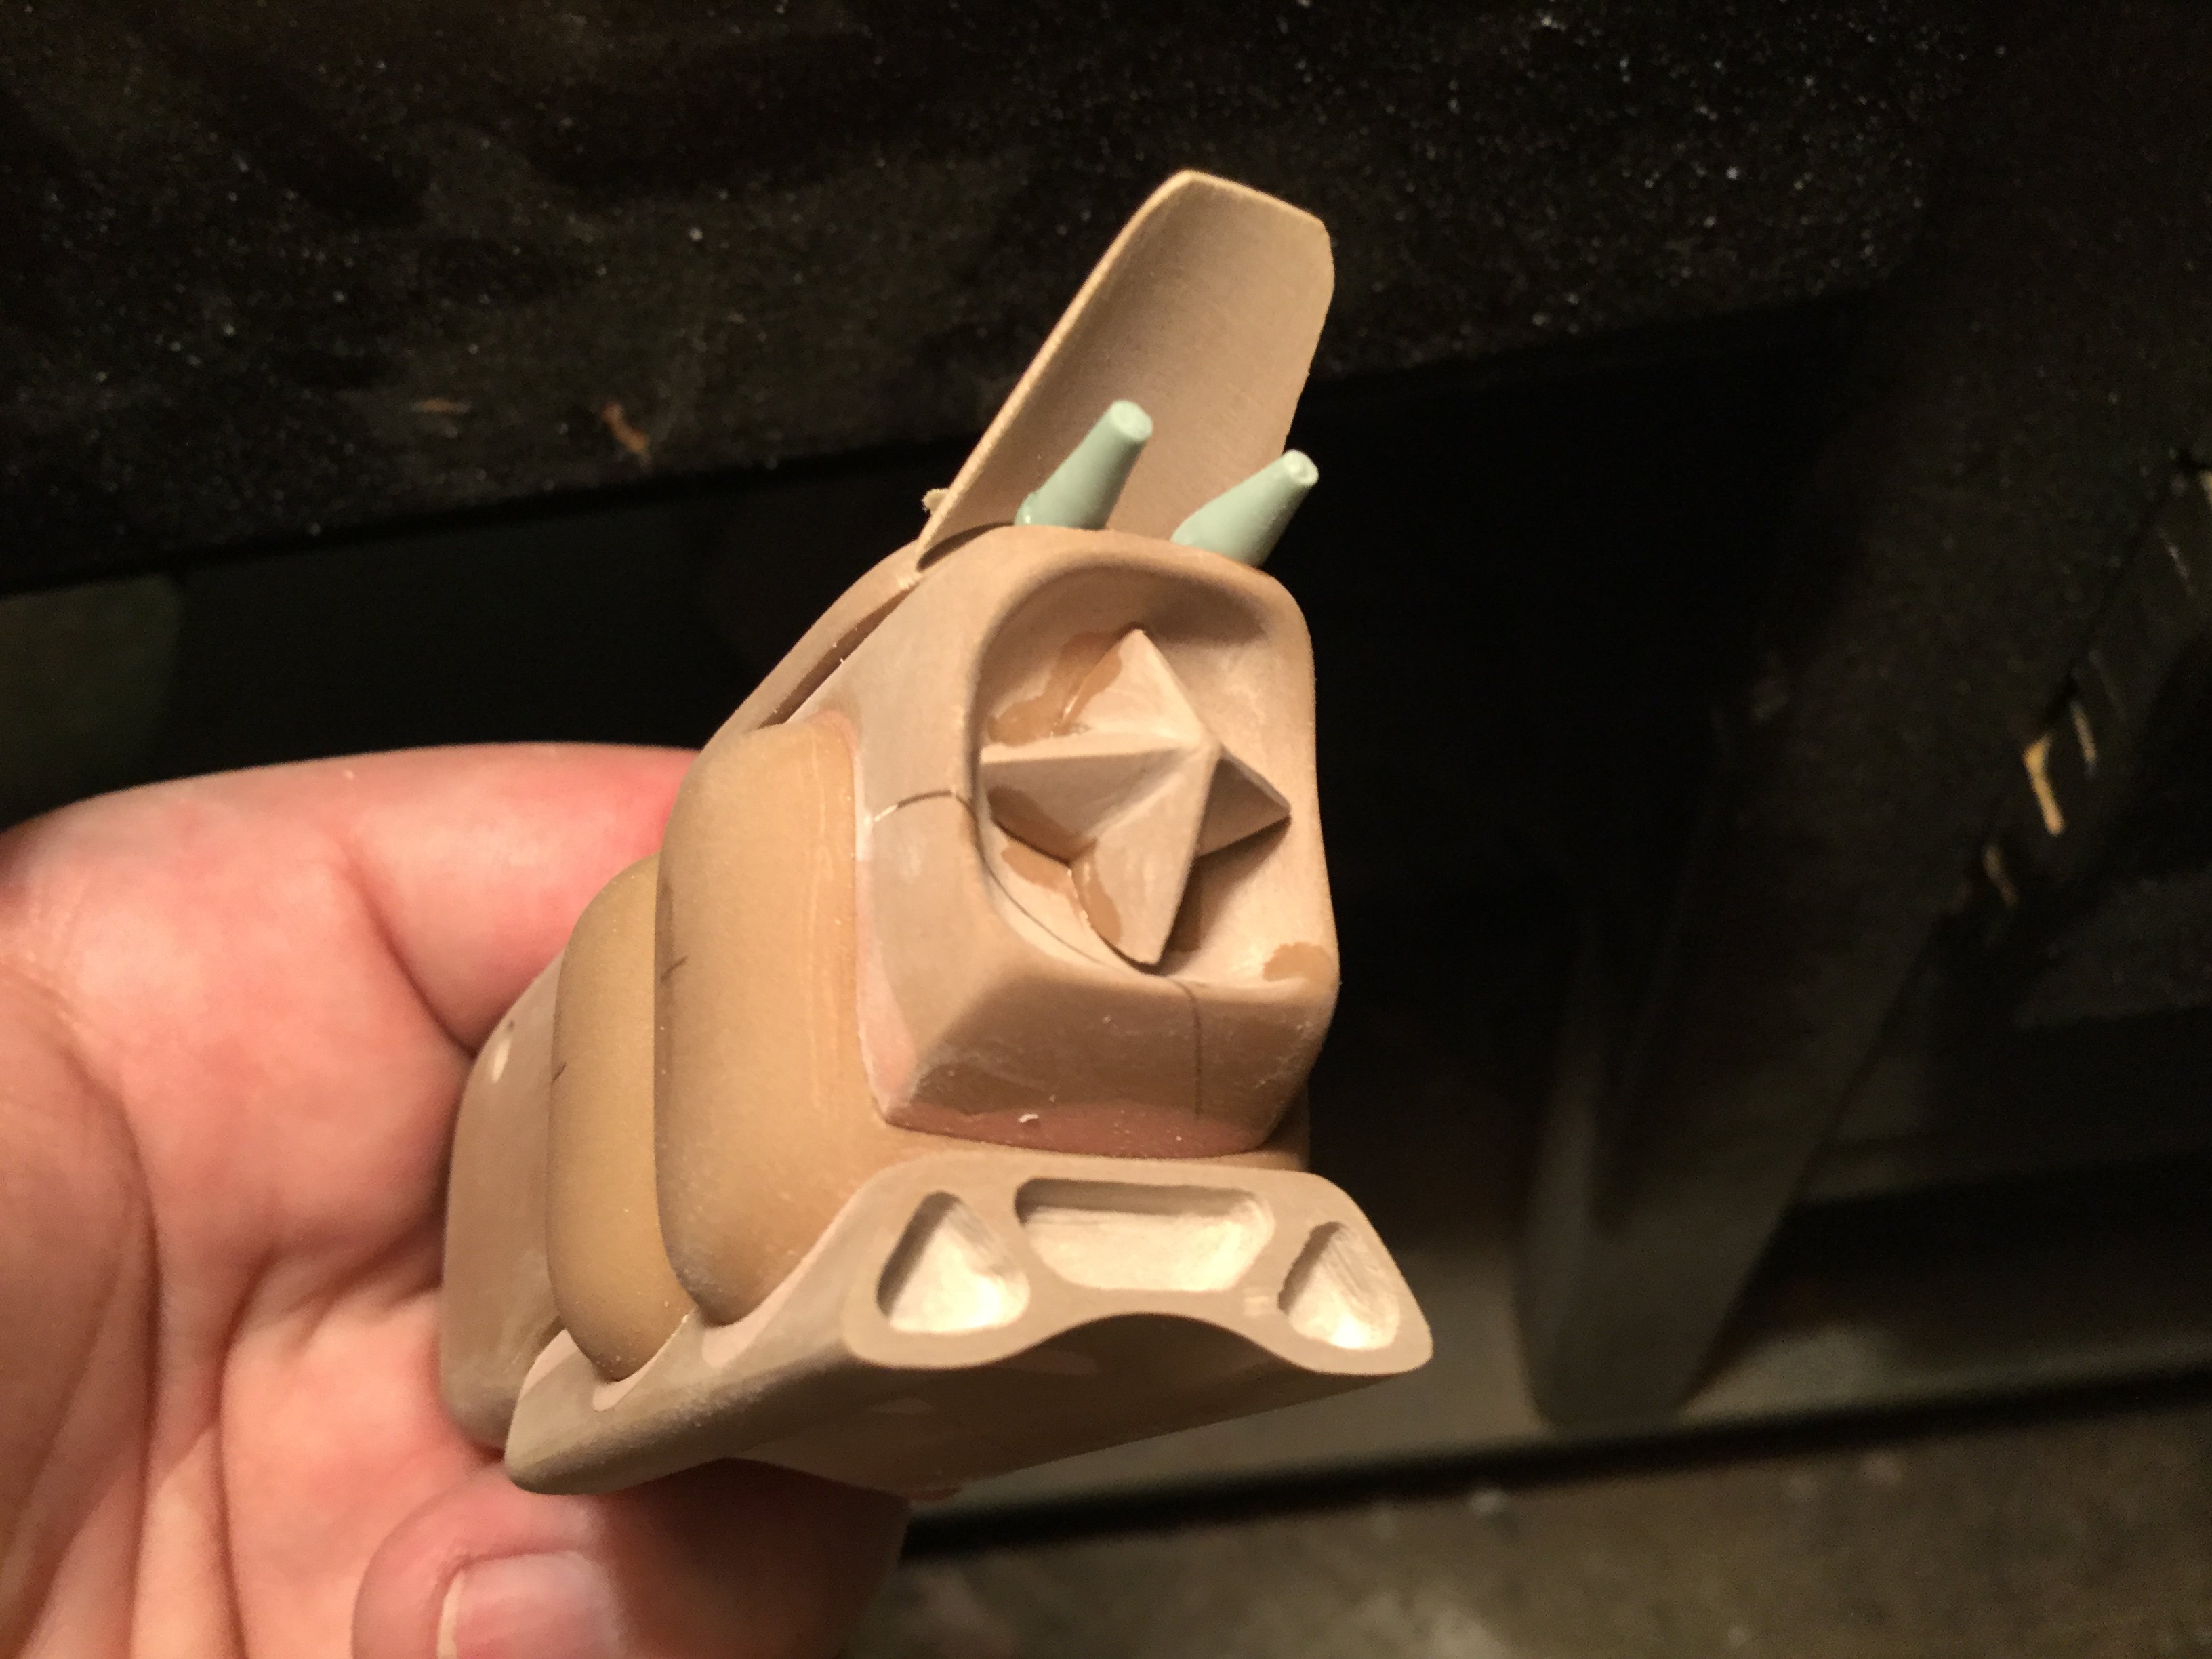
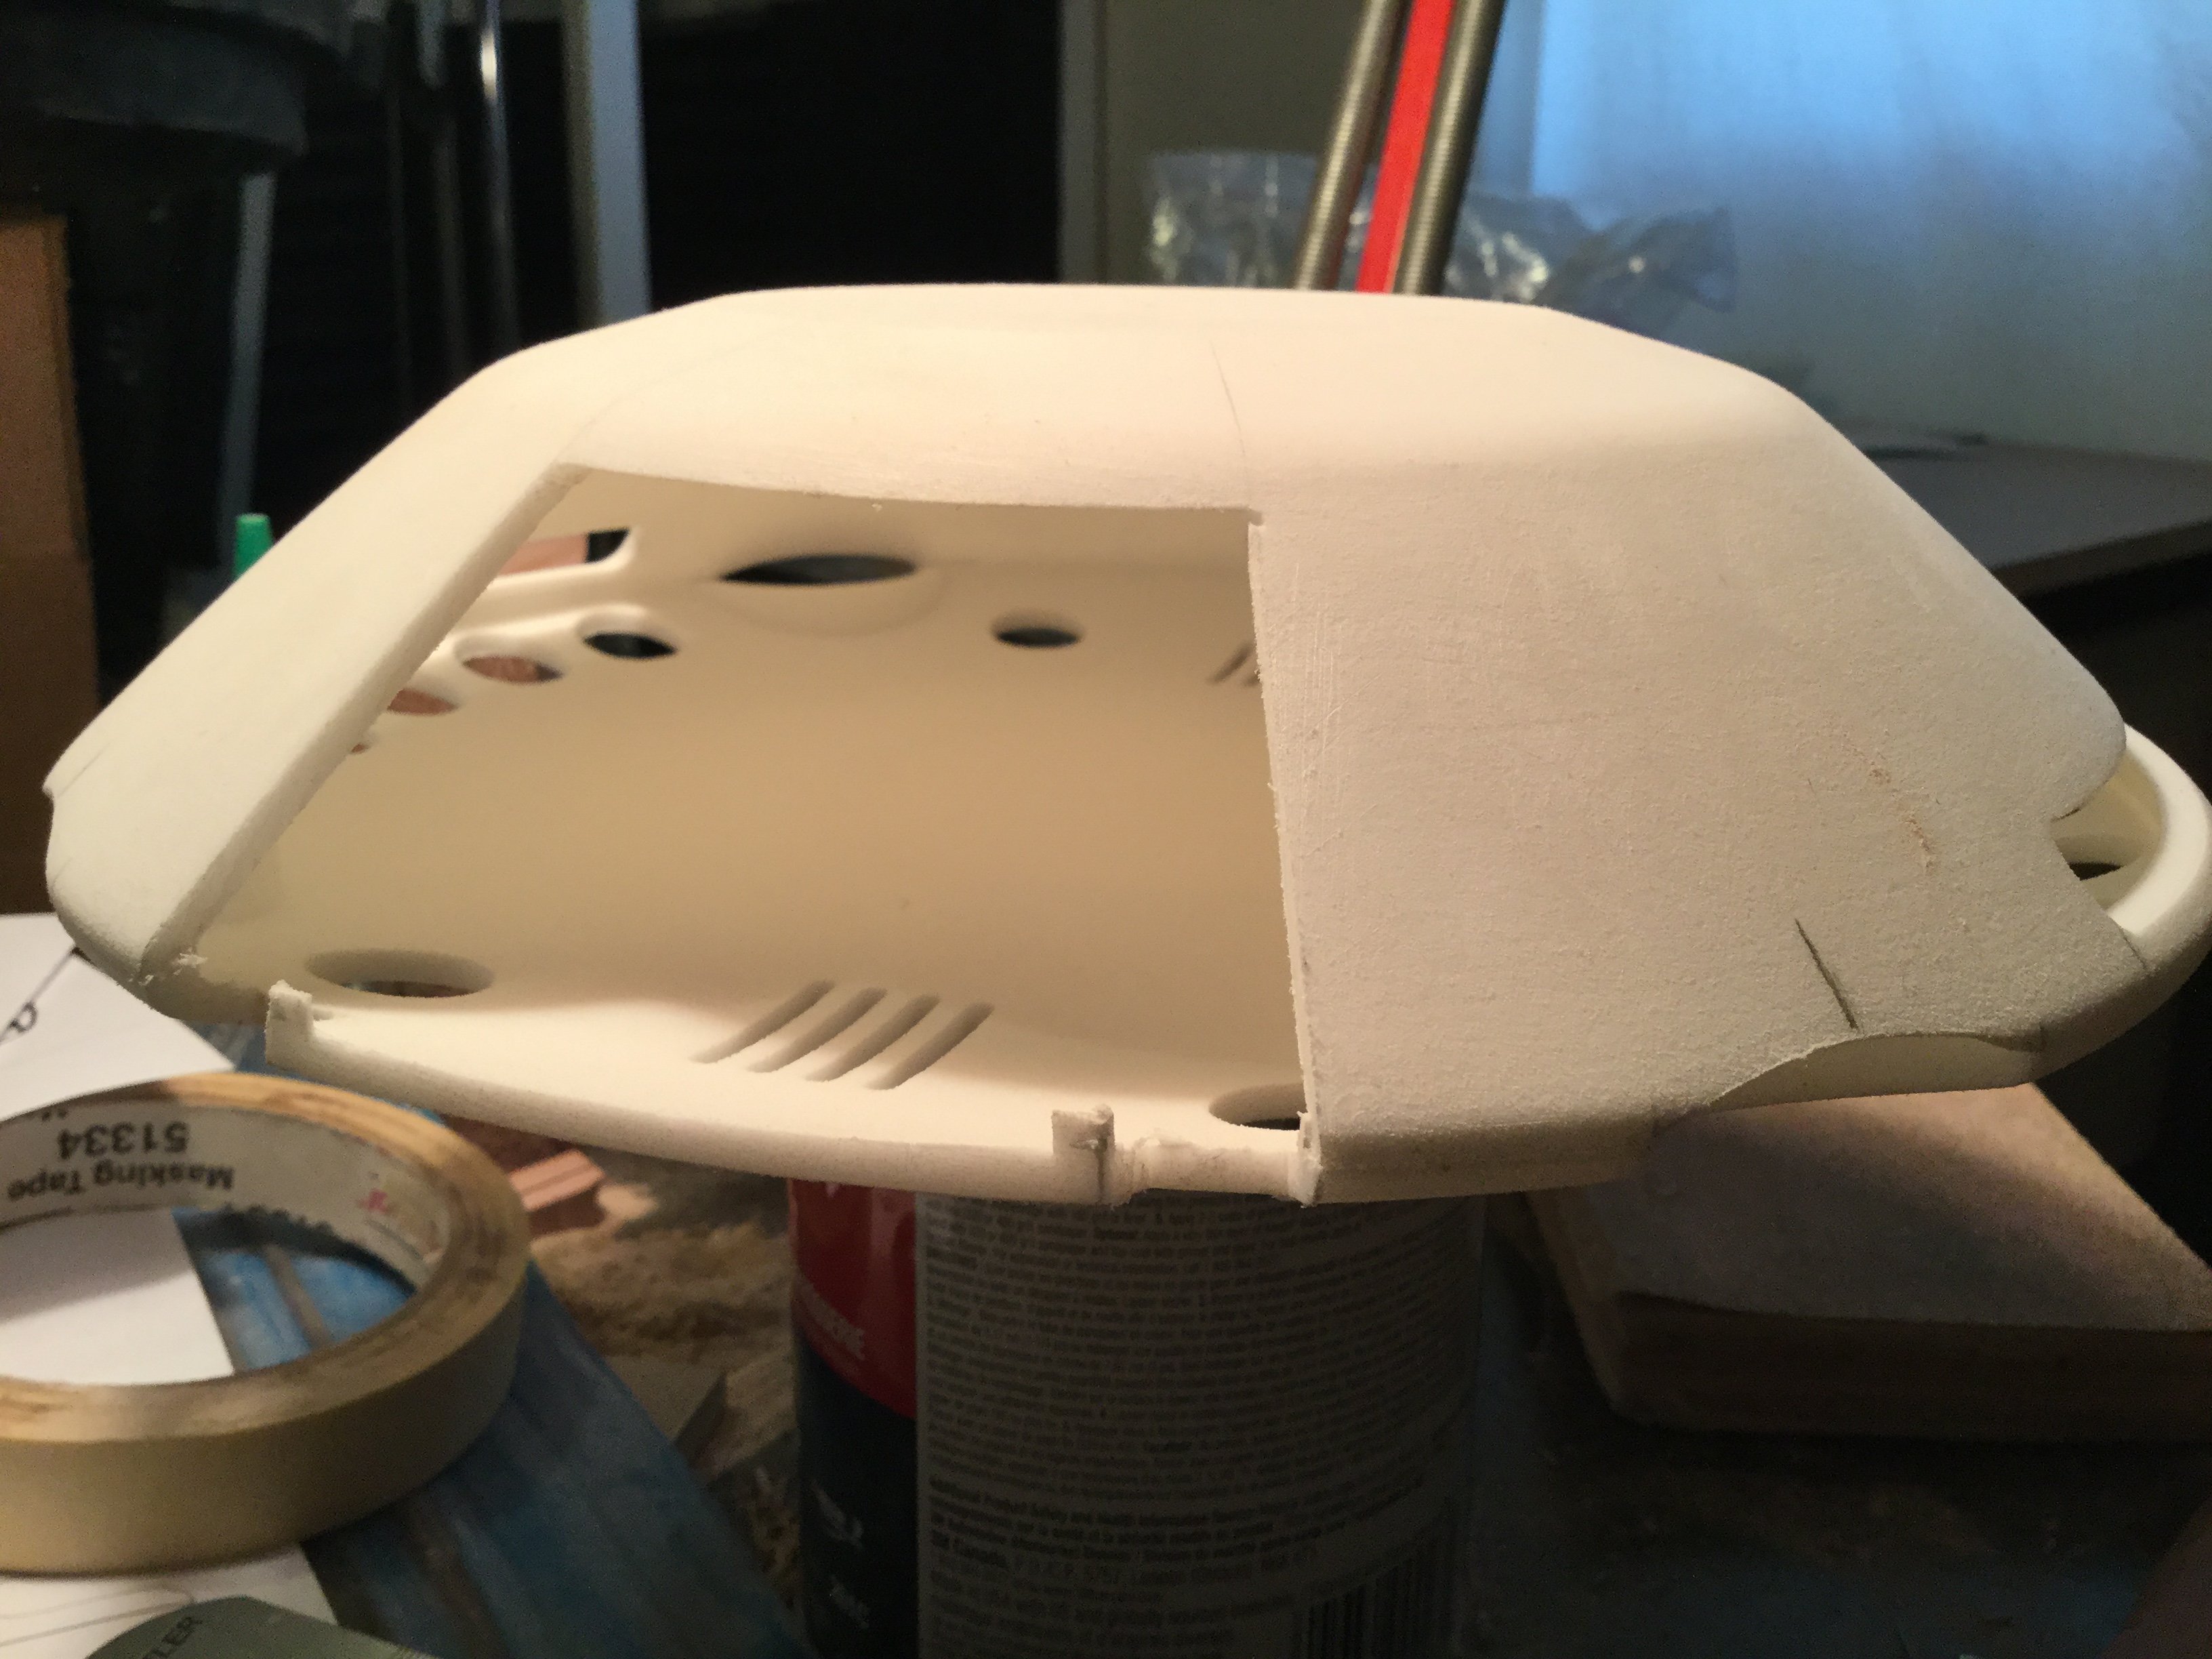
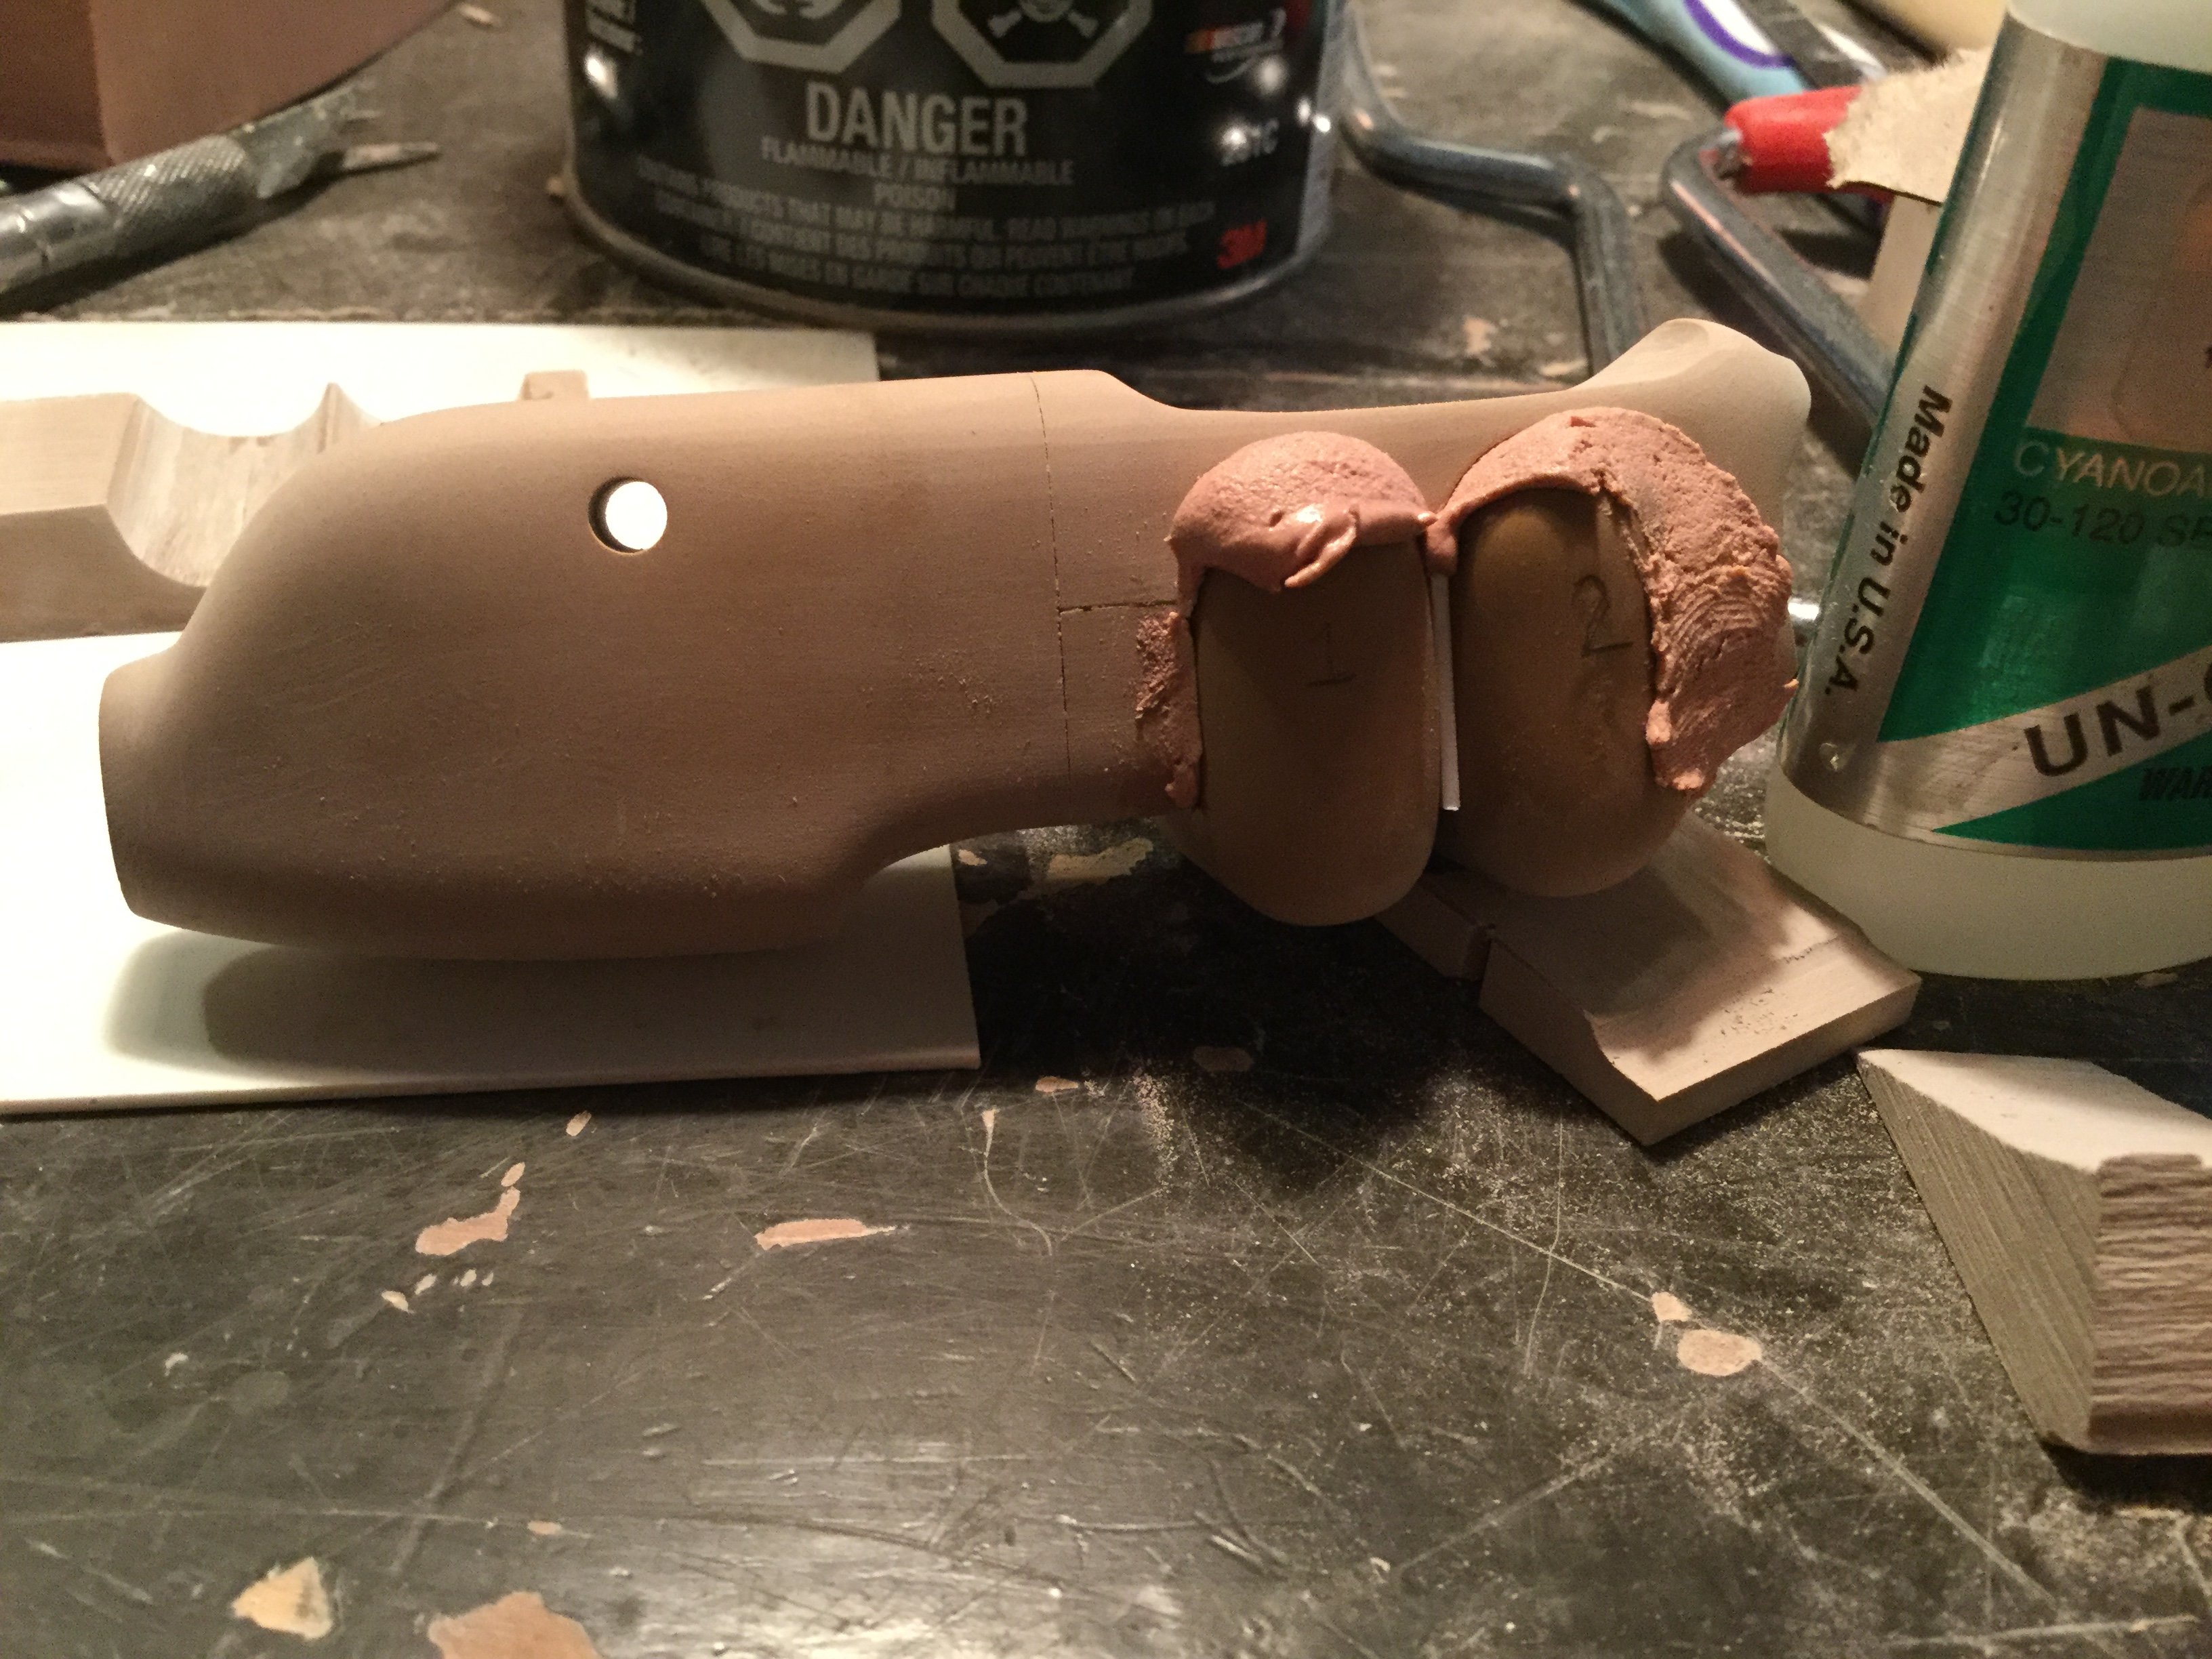
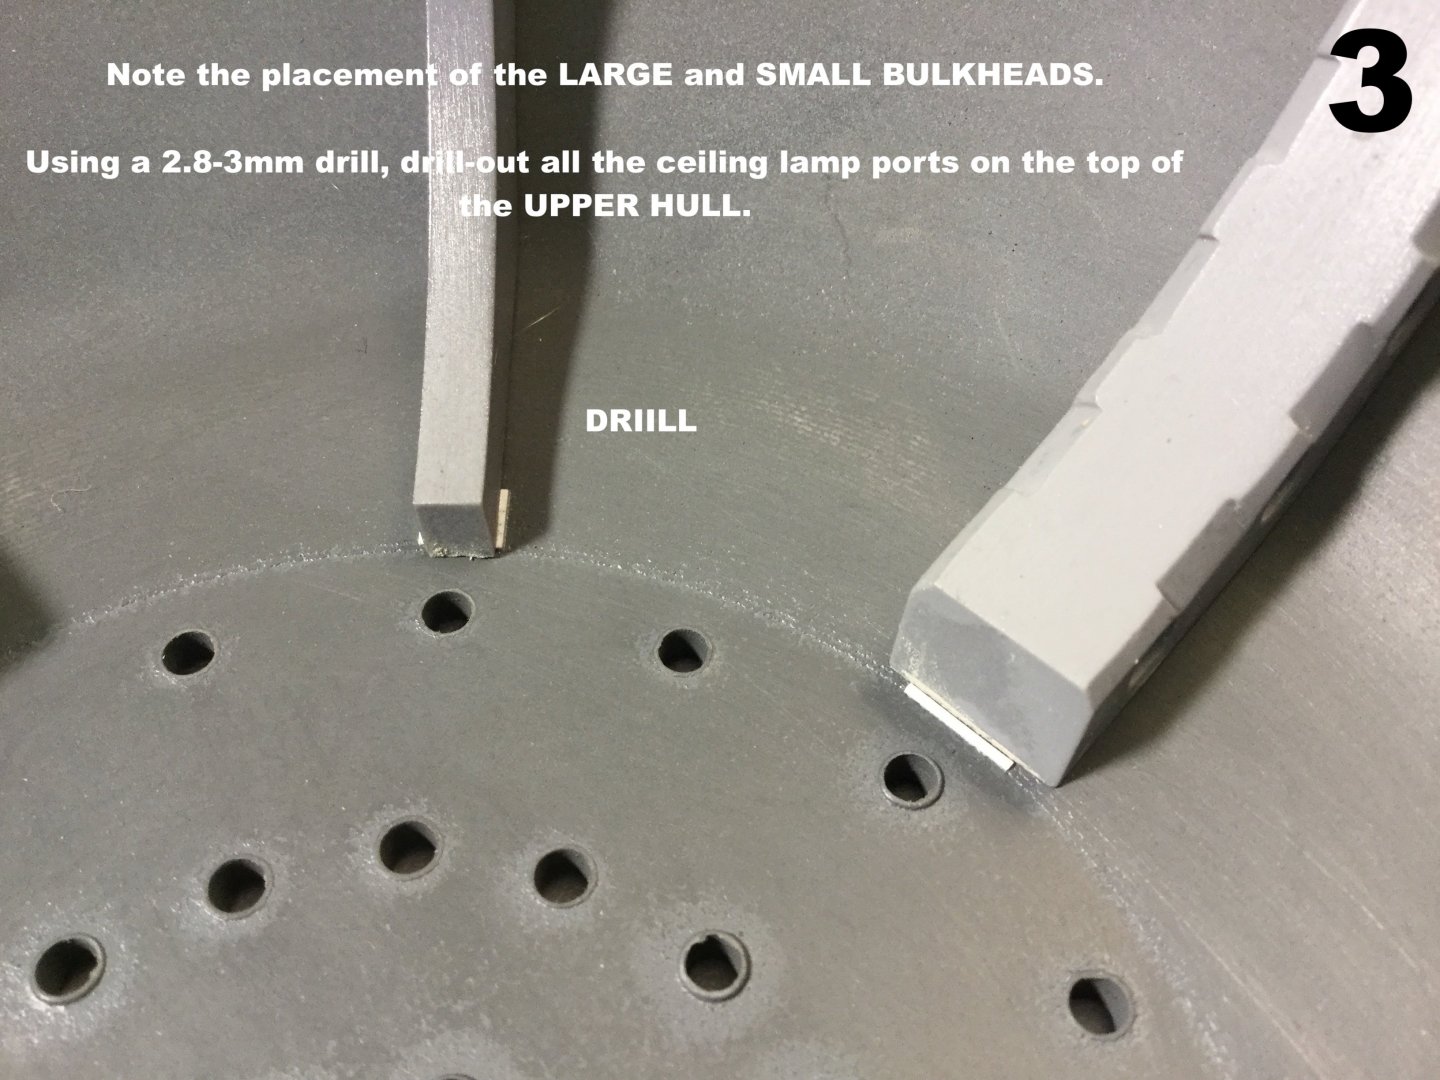
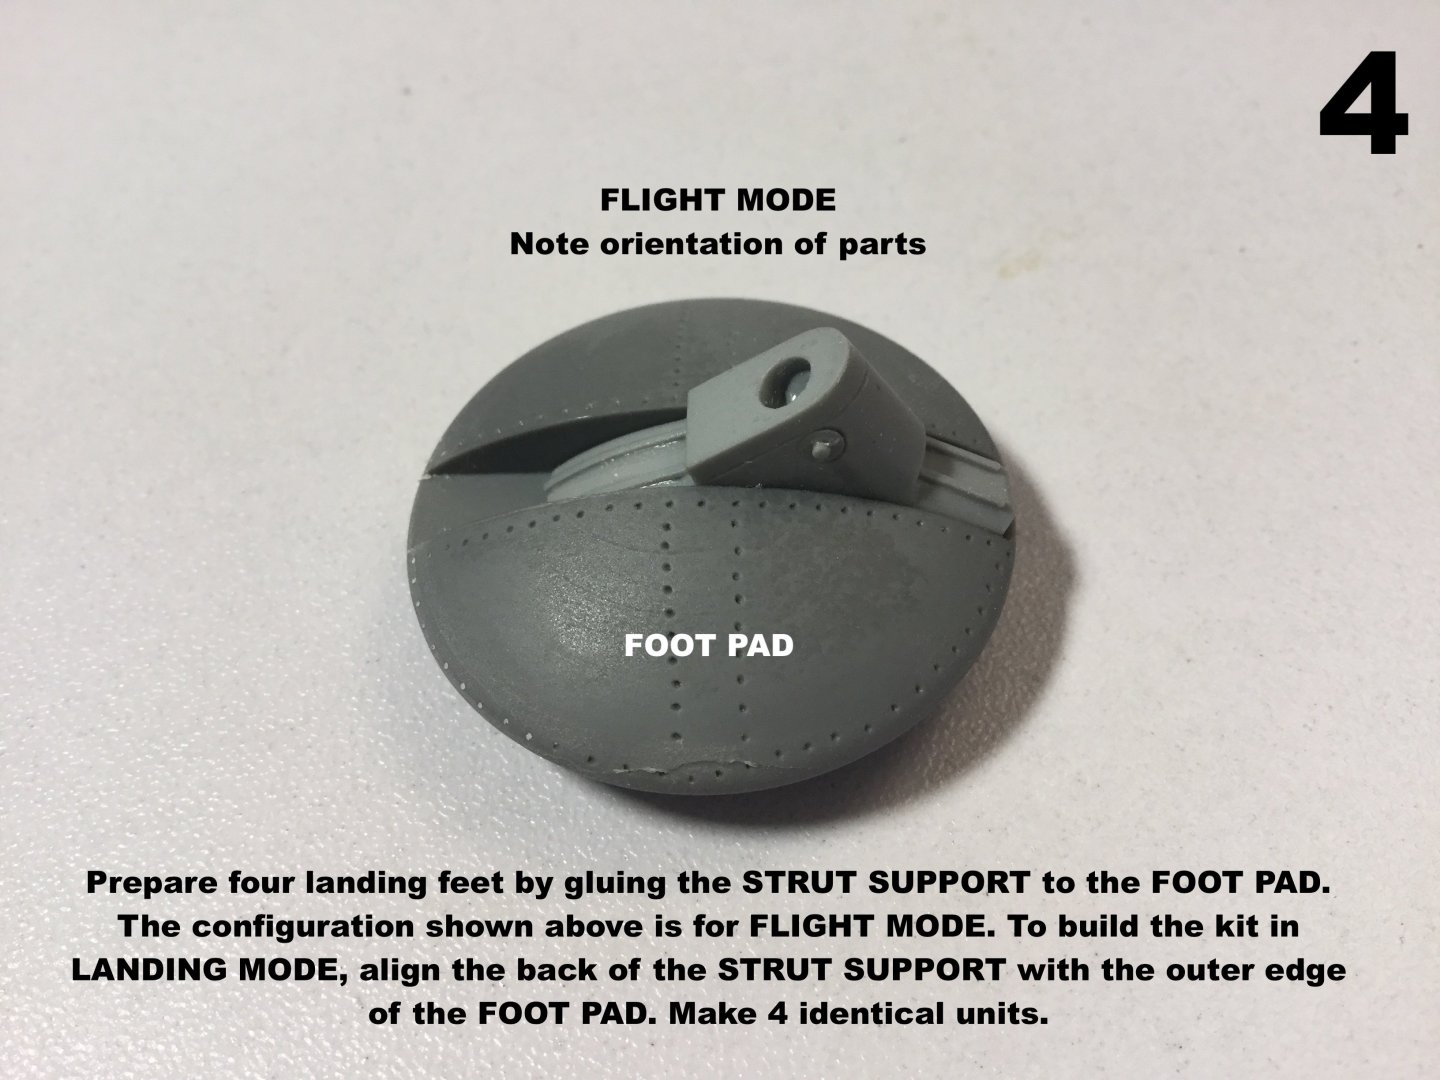
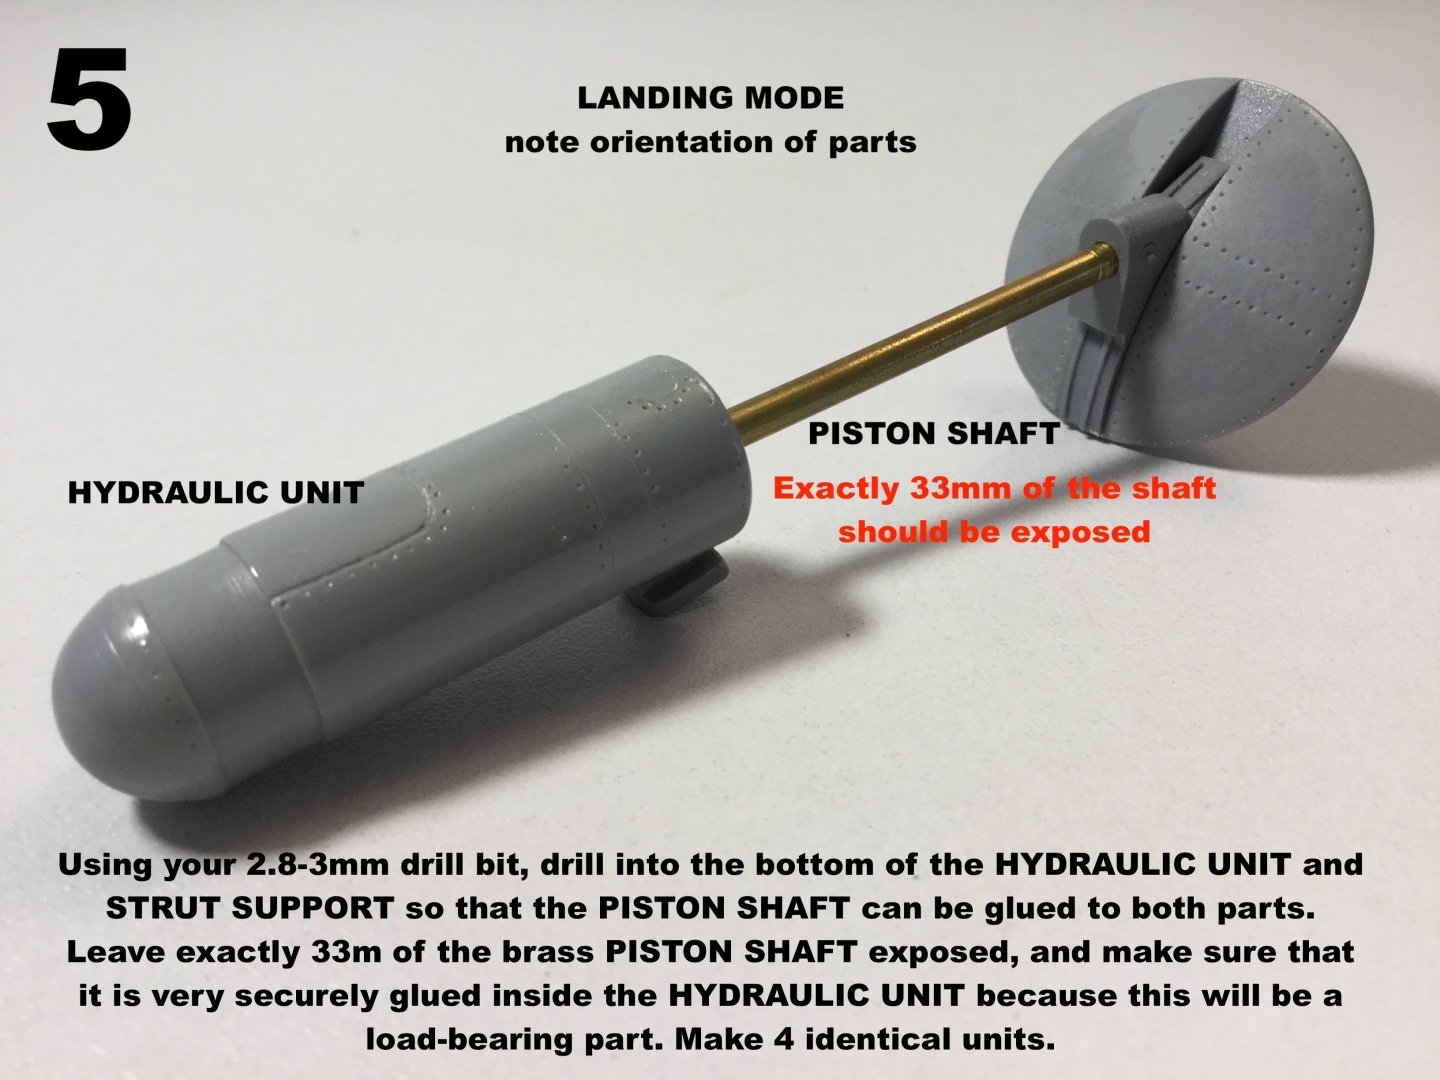
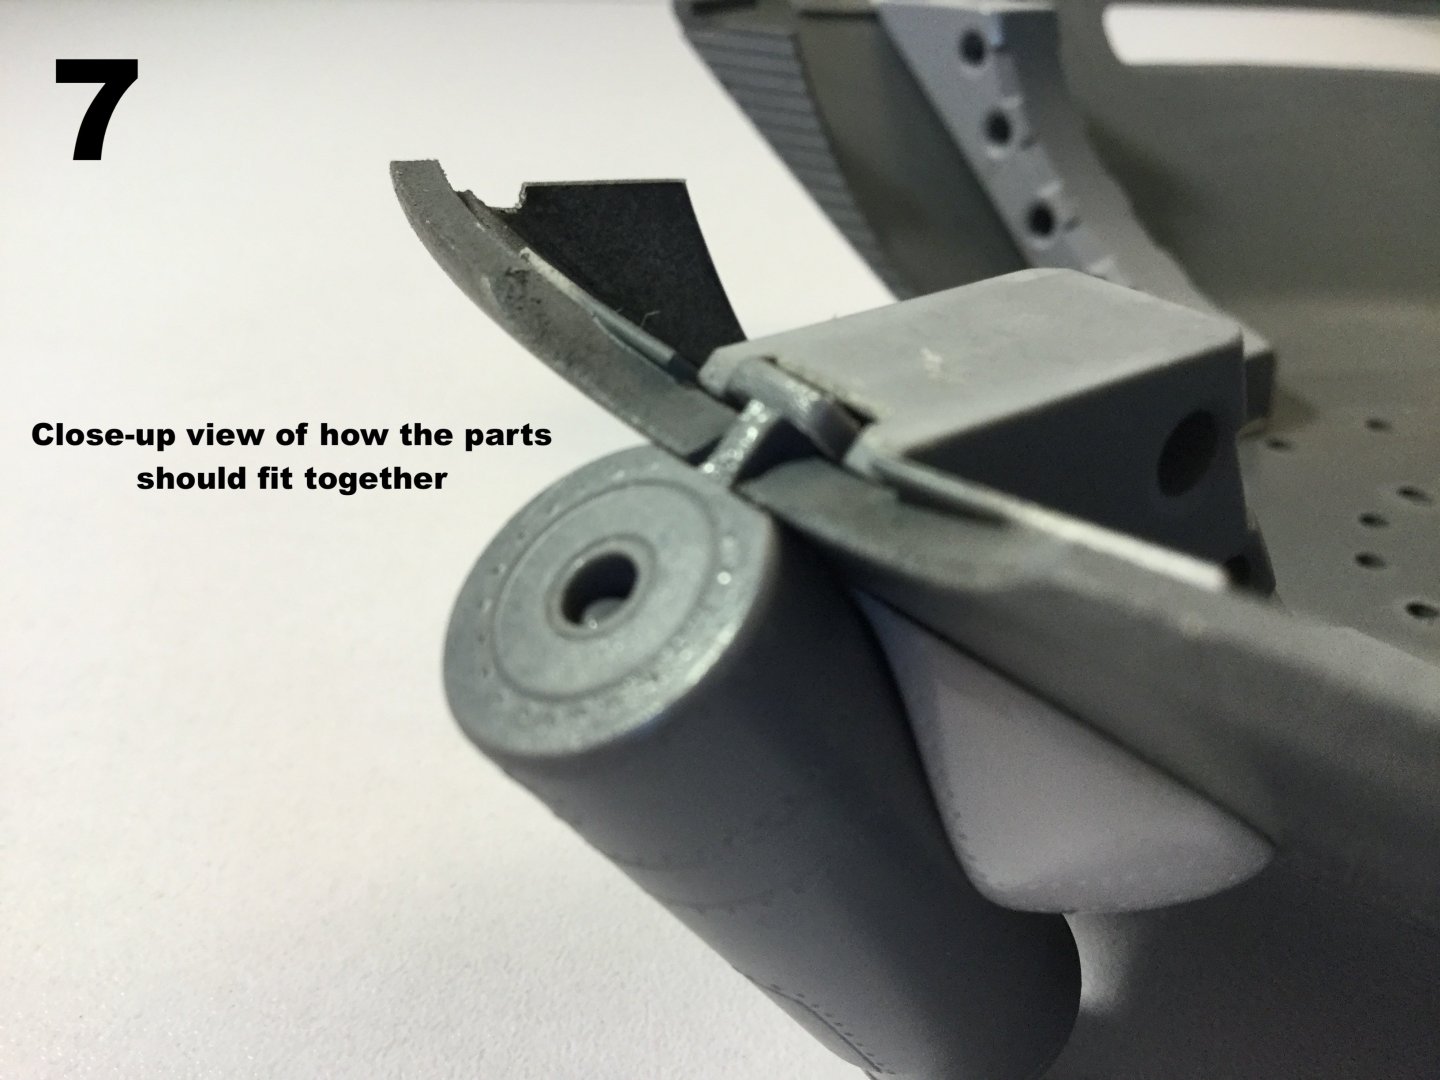
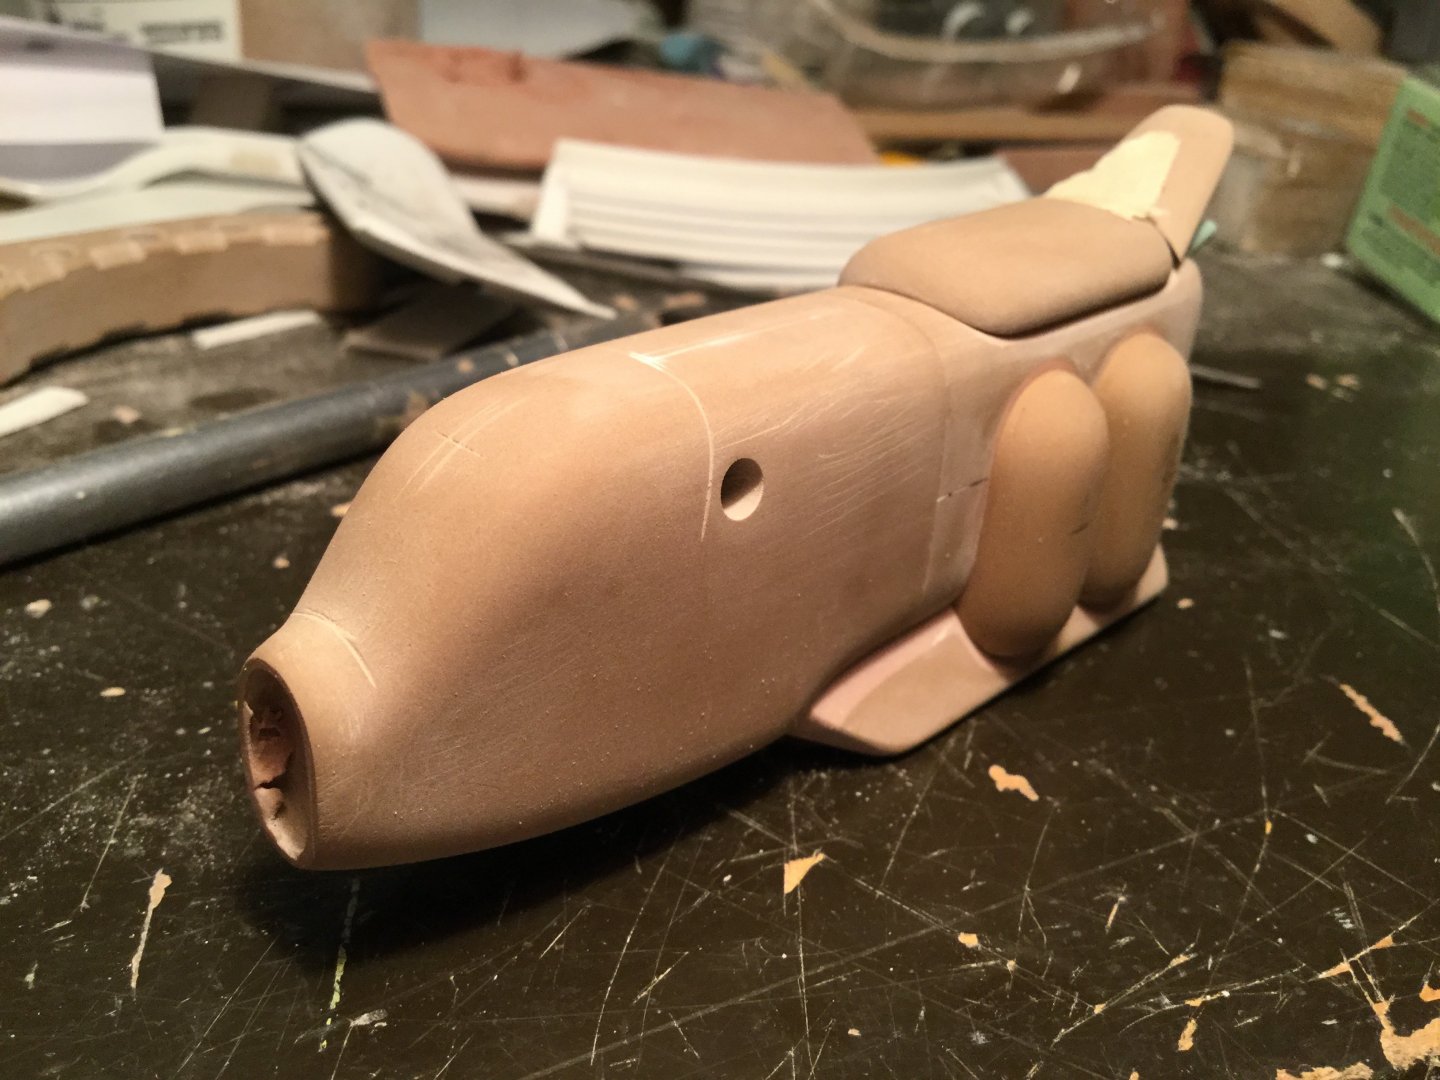
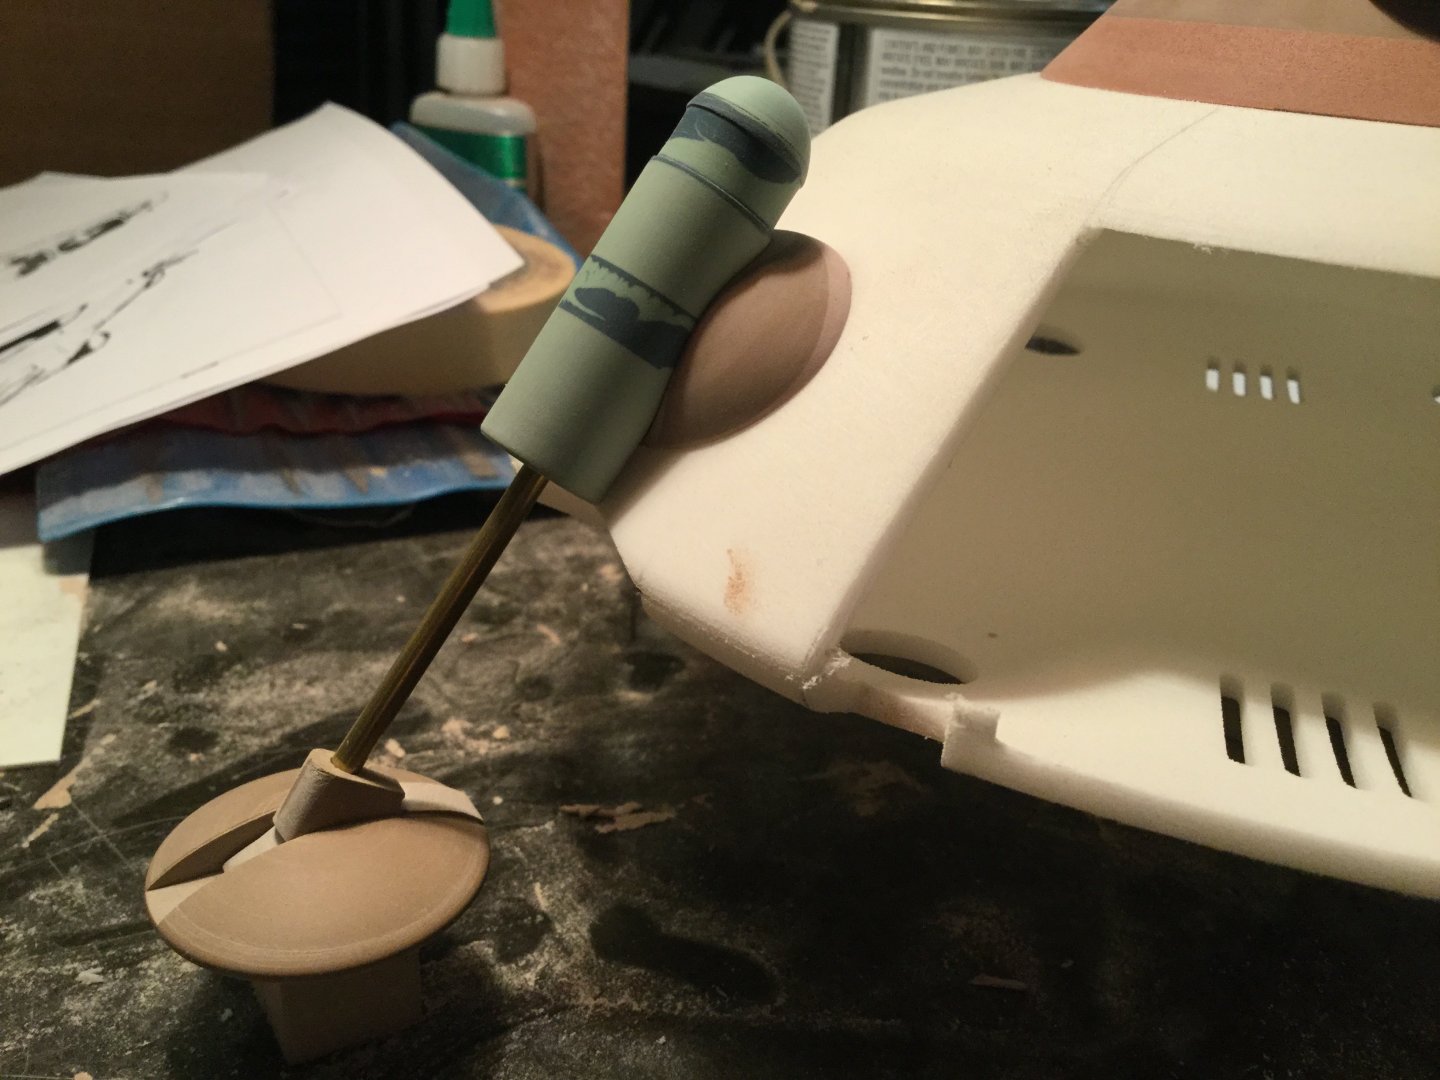
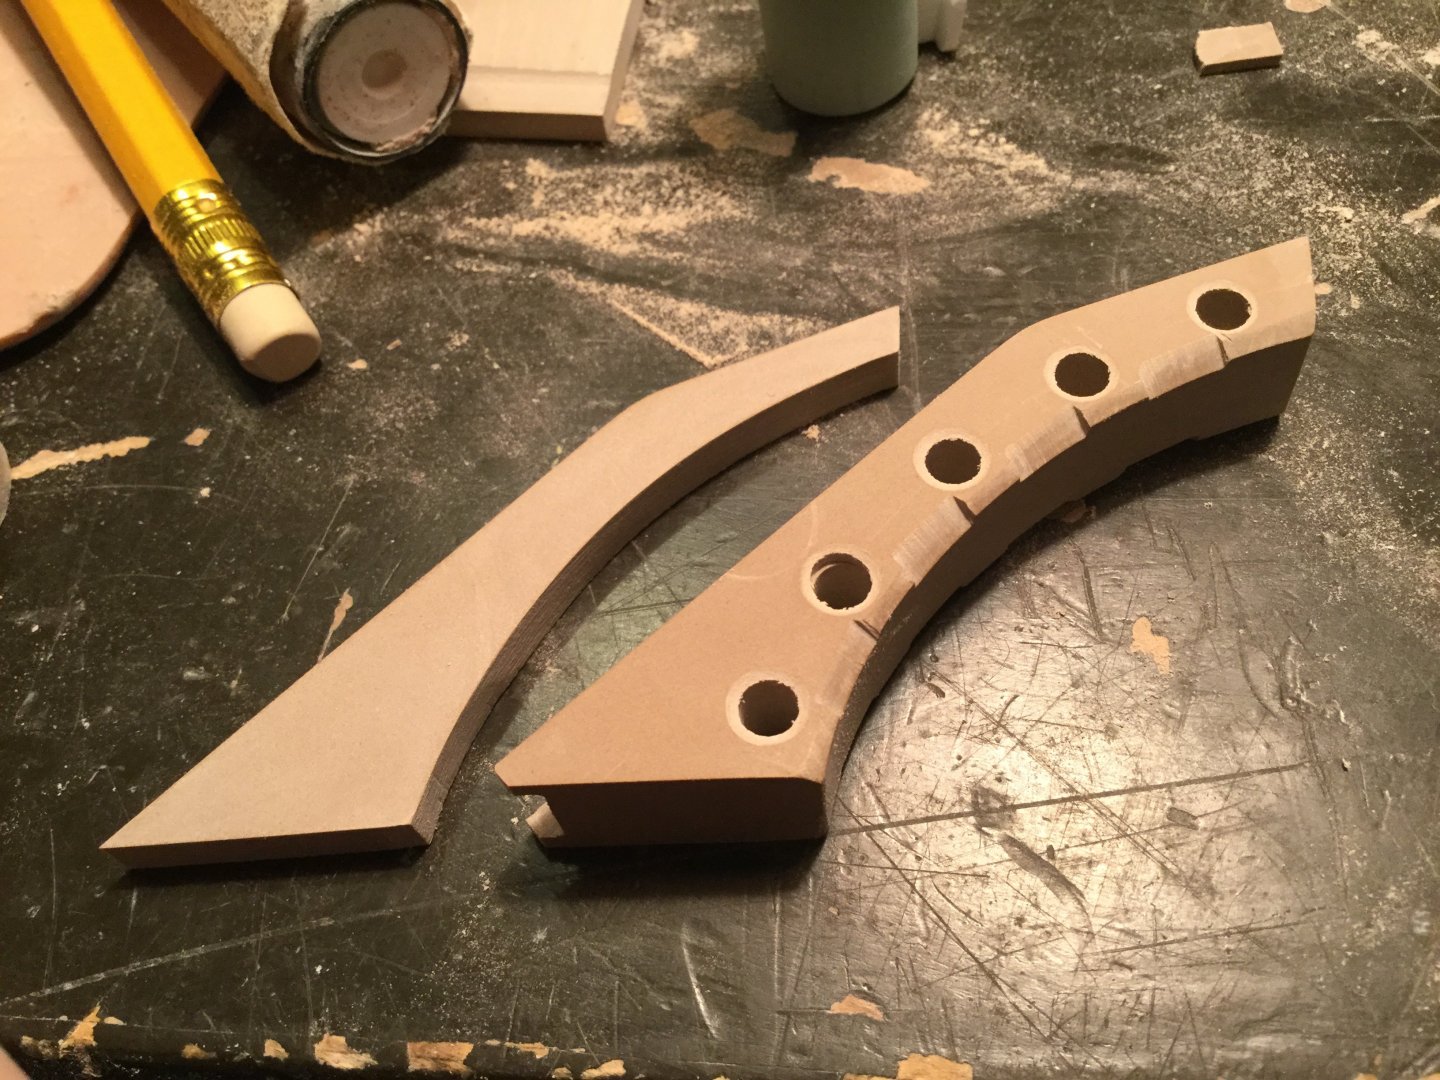
Captain’s Log: Friday, June 14th I've spent the first couple of days by tweaking some of the shapes on the shuttle, which put my mind at ease. While it's a small piece in-hand, I treat it like its own project. I've got the shapes corrected and all the fuselage needs now is a bit of spot putty. pic 001 The 3D printed parts finally arrived from Shapeways! I breathed a sigh of relief upon test-fitting everyhing, as all the parts lign-up and fit perfectly, just as they should. That being said… pic 002 The finish is rough. Very rough! As much as I would have liked something finer, this resolution and material is all that was available at this size. Pic 003 After some very aggressive sanding with 80 grit, I was able to get rid of most of that ugly texture. It feels a lot like ABS, but these are the early stages and hopefully I’ll be able to knock down that texture even further with a few coats of primer. Pic 004 The bottom hull, now fully sanded and smooth. Believe it or not, this was hours of work! Pic 005 The soup-bown (upper hull) needs the customary access hatch, so with a razor saw and some steady nerves, I was successful in creating that opening. All said, the procedure was far less painful than I was anticipating. Pic 006 After much test-fitting and adjustment of the landing gear, I’ve finally got the parts looking and fitting very nicely indeed! Pic 007 For rigidity’s sake, I will reinforce the landing struts with large bulkheads on the interior. Pic 008 Rather than relying simply on glue to hold the landing struts, I came up with a gimmick whereby the hydraulics key into the hull and are held in place by the socket cup. While you might think that’s overkill, the fact that the landing struts splay outward will put a lot of load on the hull, so I rather the kit be overdesigned than underdesigned. I don’t know what the artist was thinking (or smoking) when he designed this thing, but that’s another kettle of fish! Pic 009 The hydraulic strut fully extended. The pistons will be machined brass in the kit to go along with that whole sturdiness theme. Pic 010 These are the bulheads for the interior. The right one is mostly shapen, while the one on the left is still blank, awaiting further detailing. There will be four thick ones, one behind each strut, and at least three of the smaller ones. Hopefully I can start molding the hydraulics and bulkheads next week. From this point on, things will start getting interesting, stay tuned!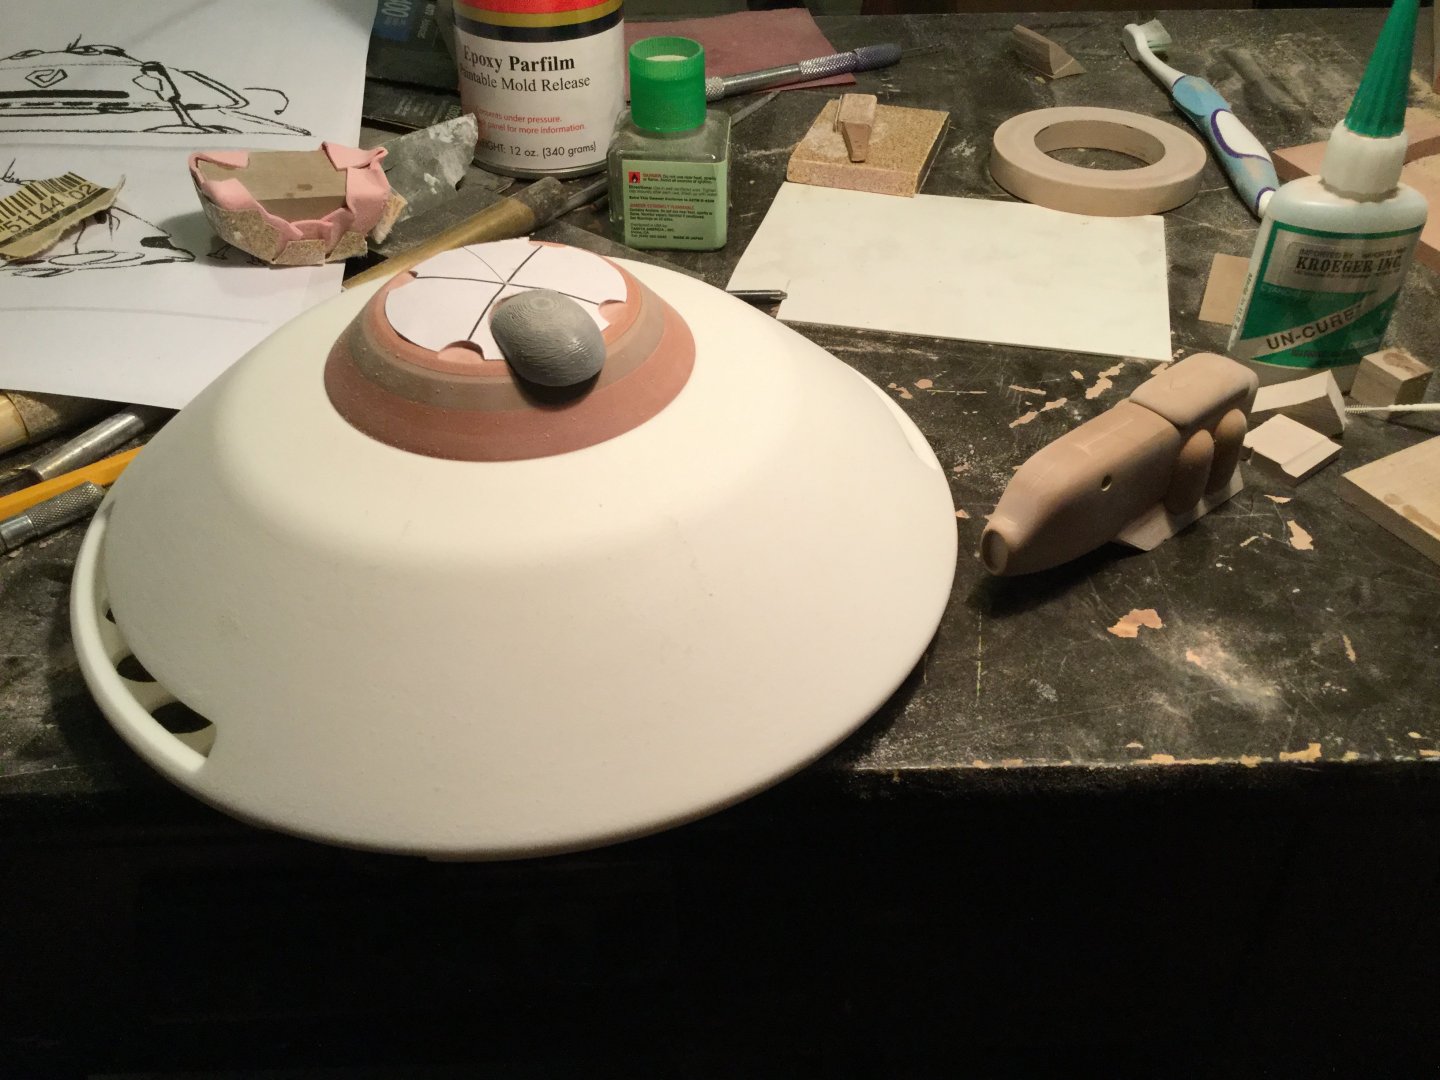


-
In fairness, it's the same deal with most Anime series of that era: pretty much everything was drawn freehand, quick, and just good enough to look right if you don't scrutinize the details. That's also part of what makes it a bit of a clusterfrack to convert line-art into 3D form: numerical values don't correspond to visuals, and the visuals often contradict each other. Converting Anime magic into something tangible really is black art that few can perform gracefully.
-
New Moscato Macloss Model Project!!!
captain america replied to captain america's topic in Model kits
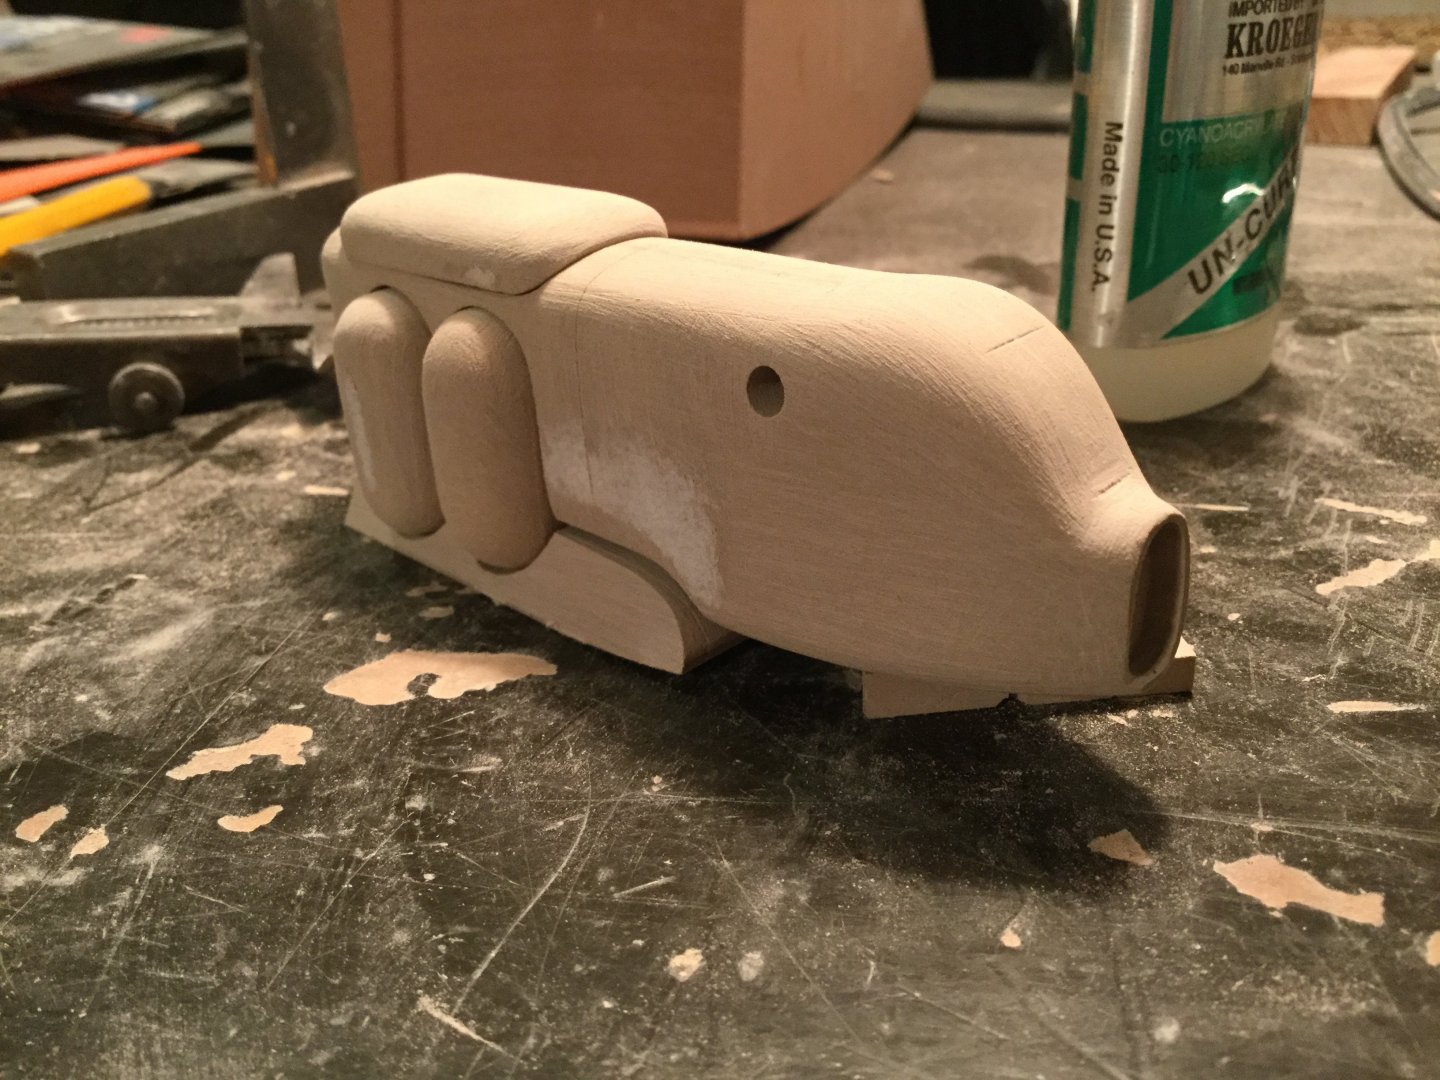
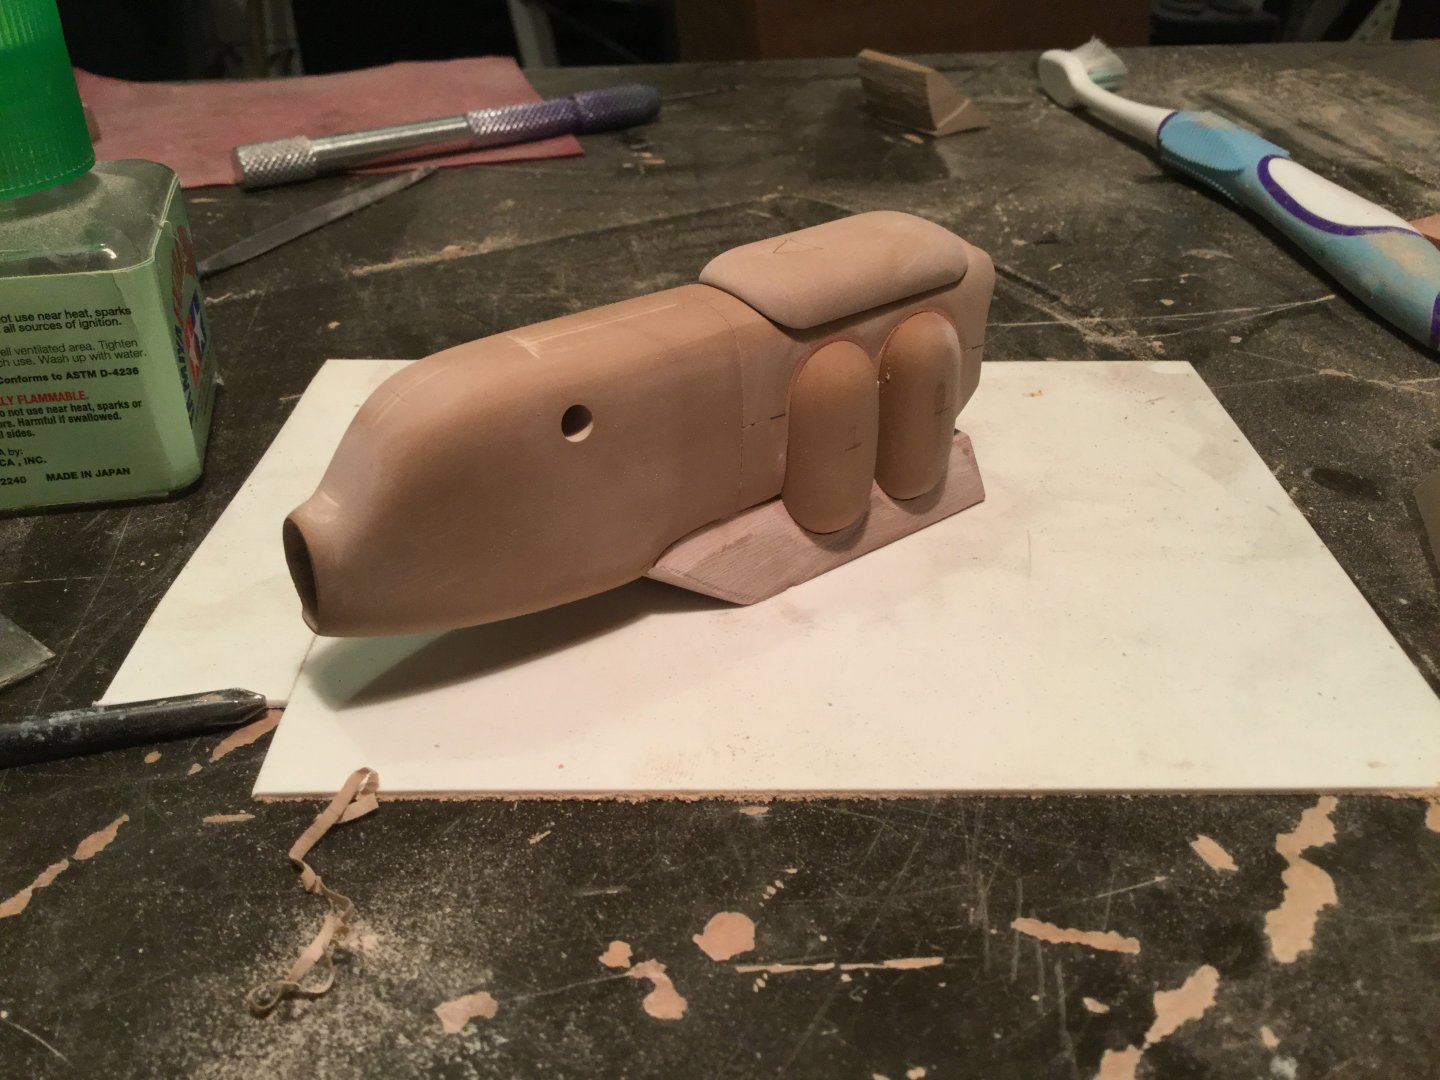
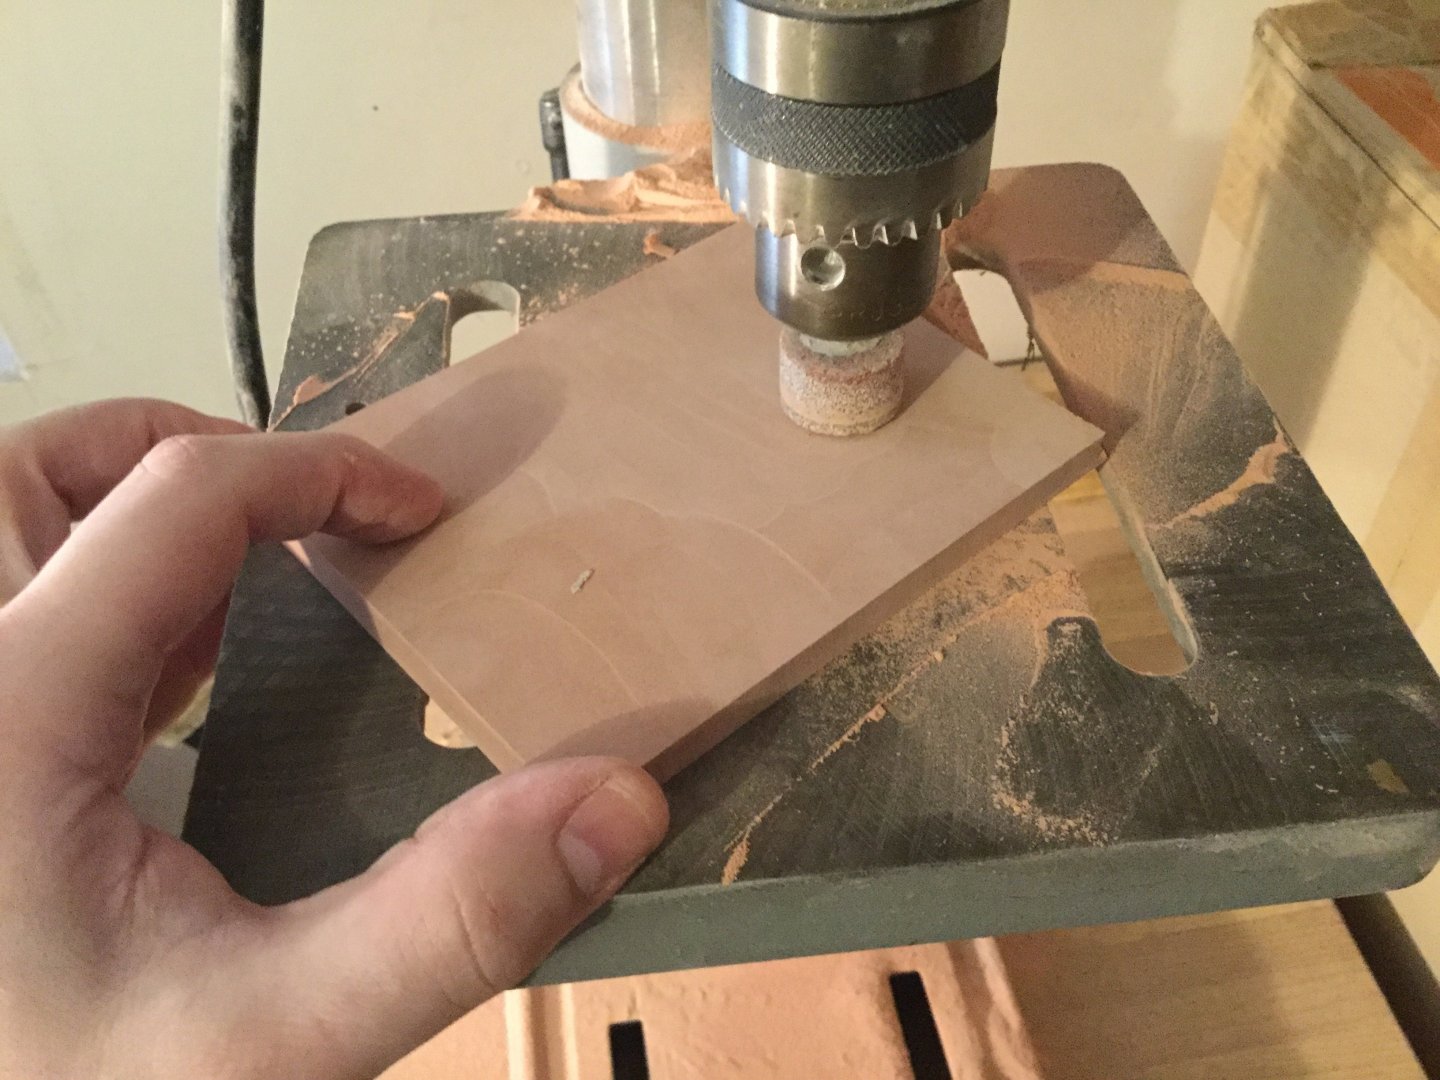
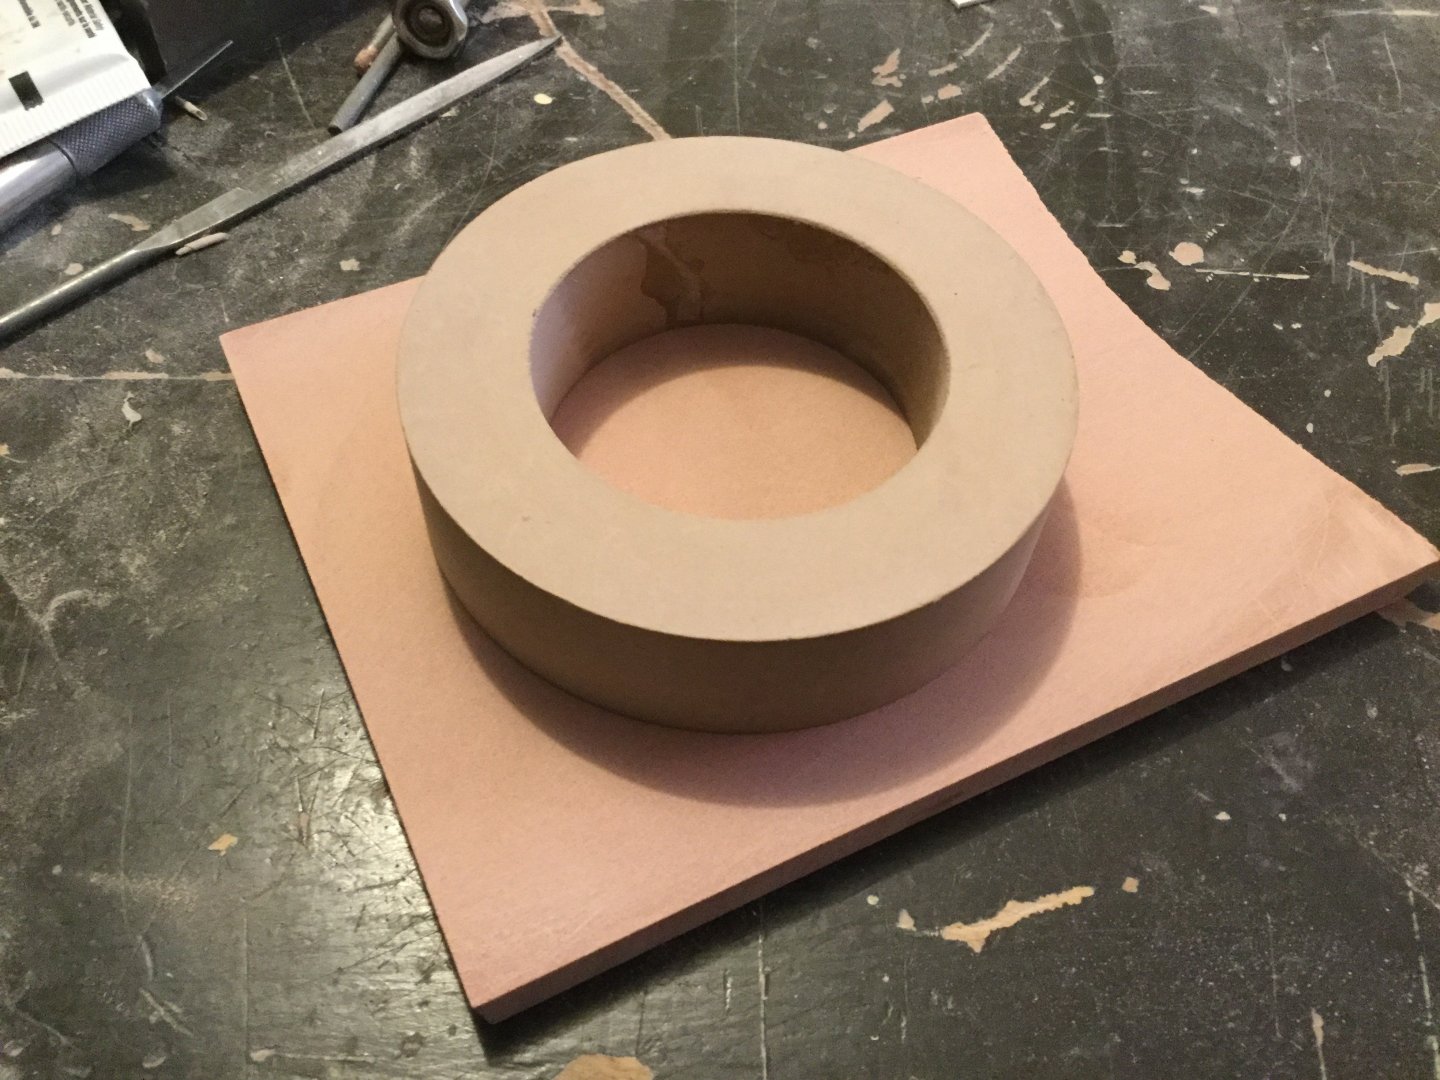
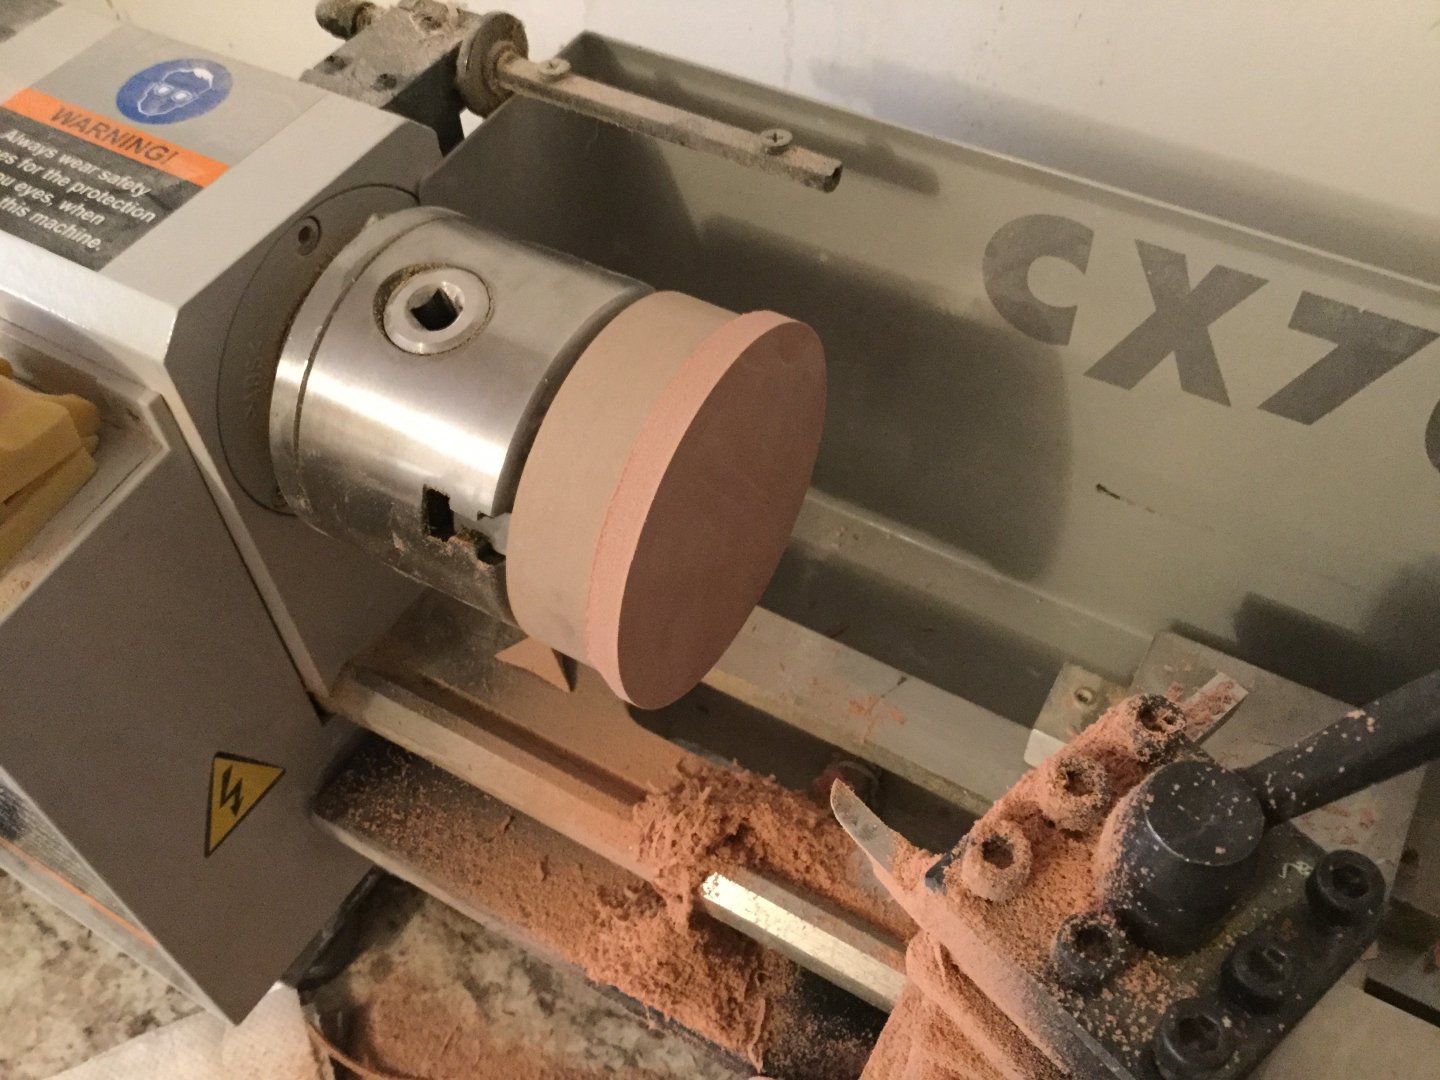
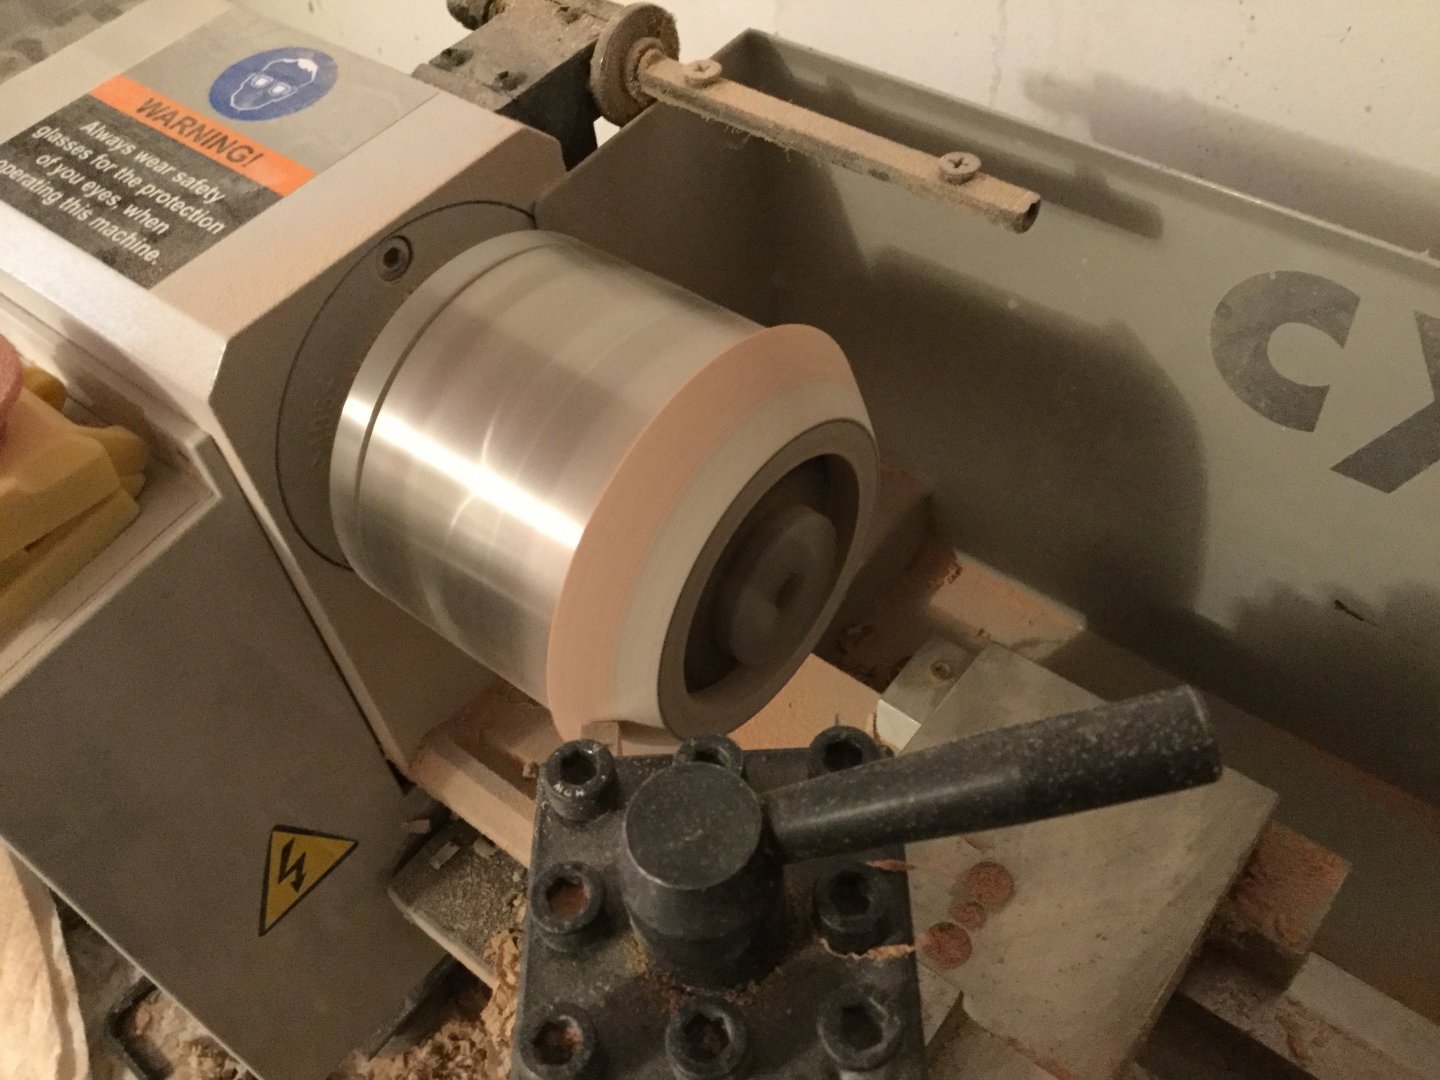
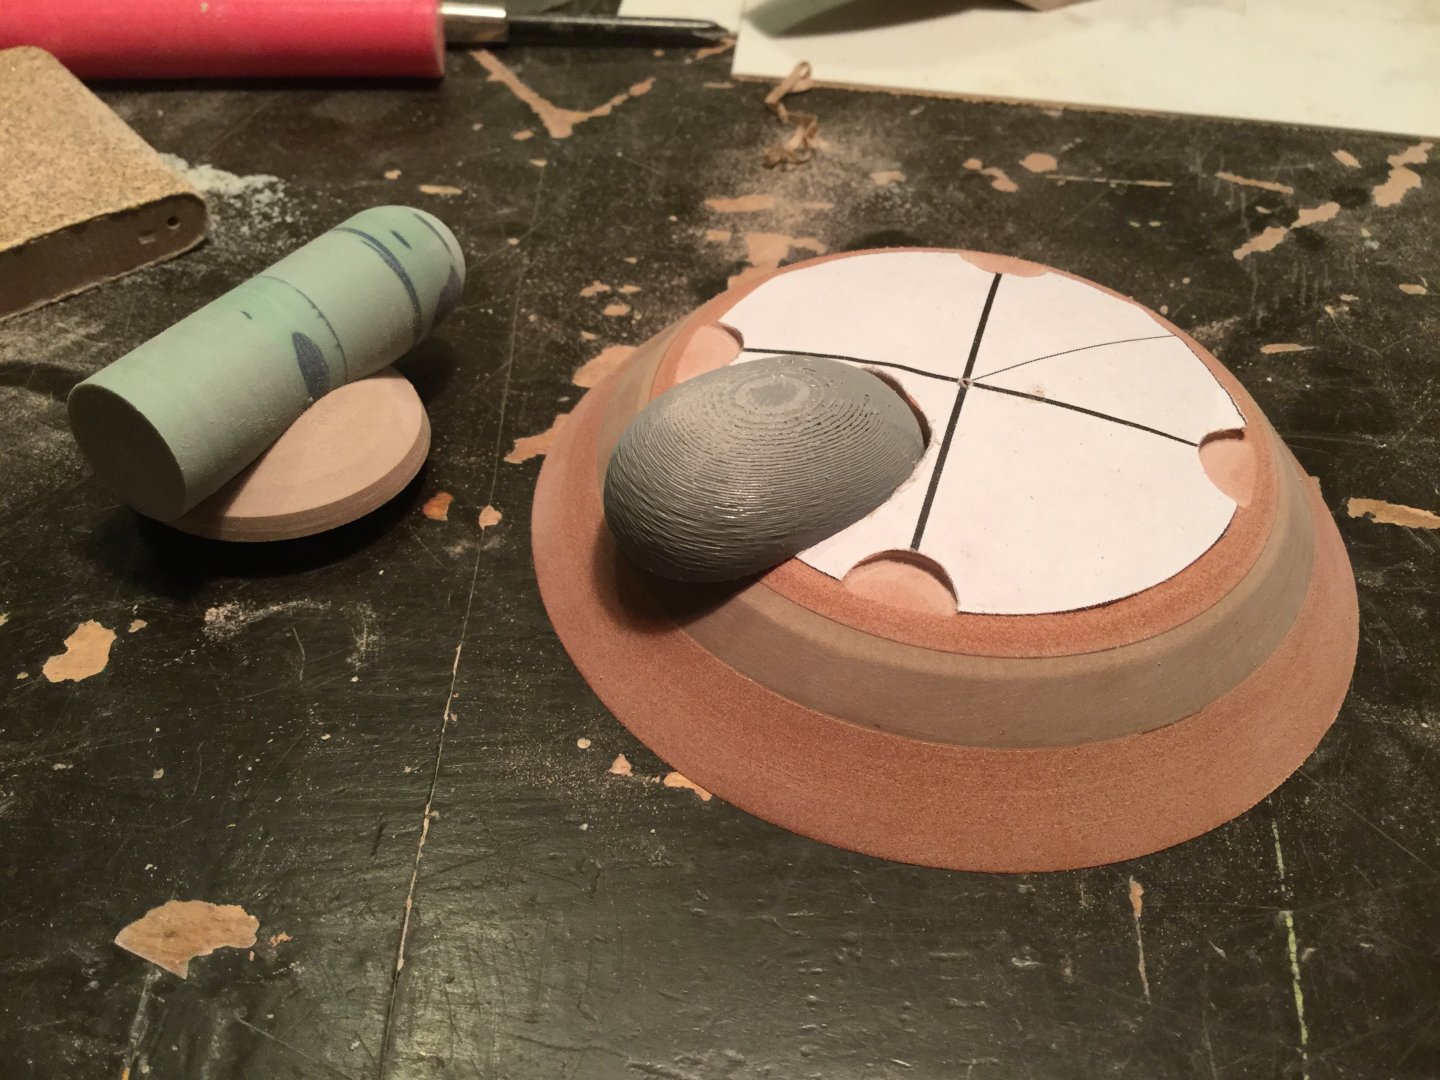
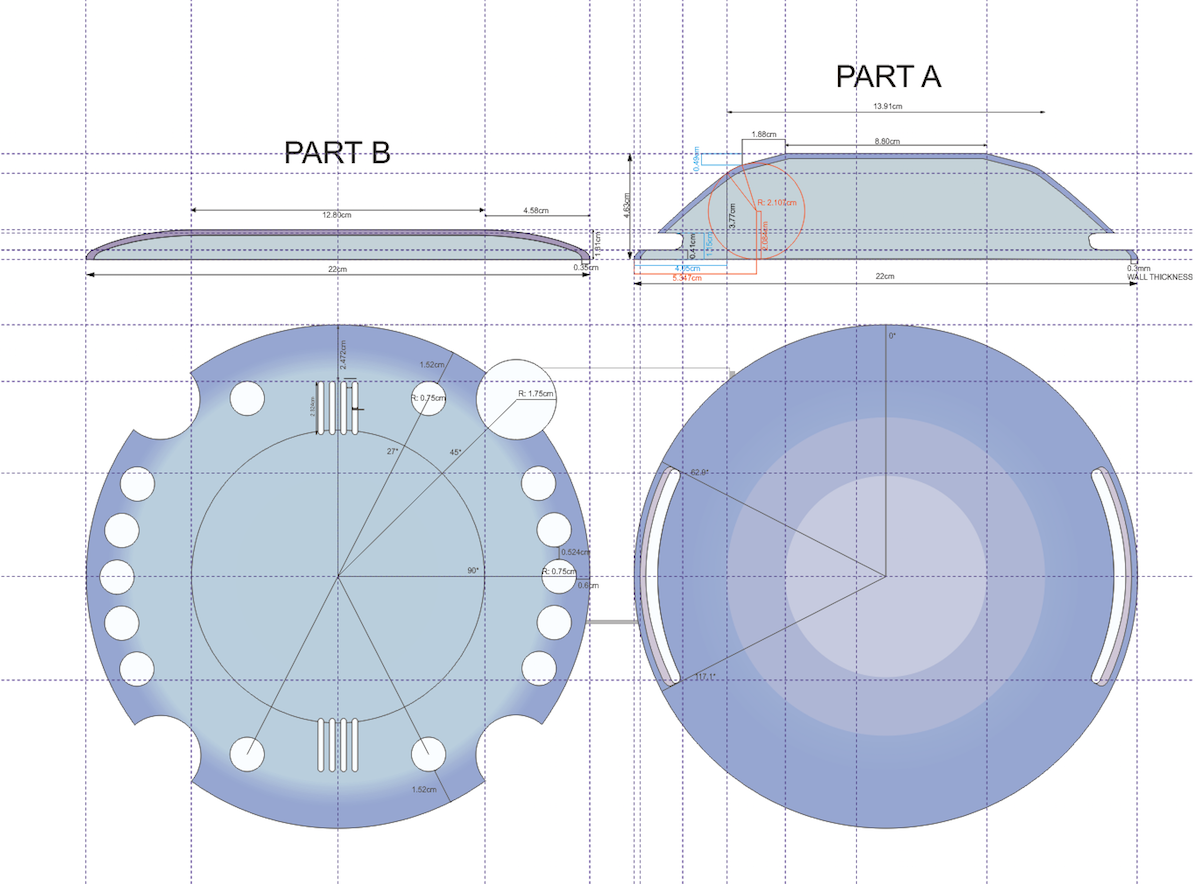
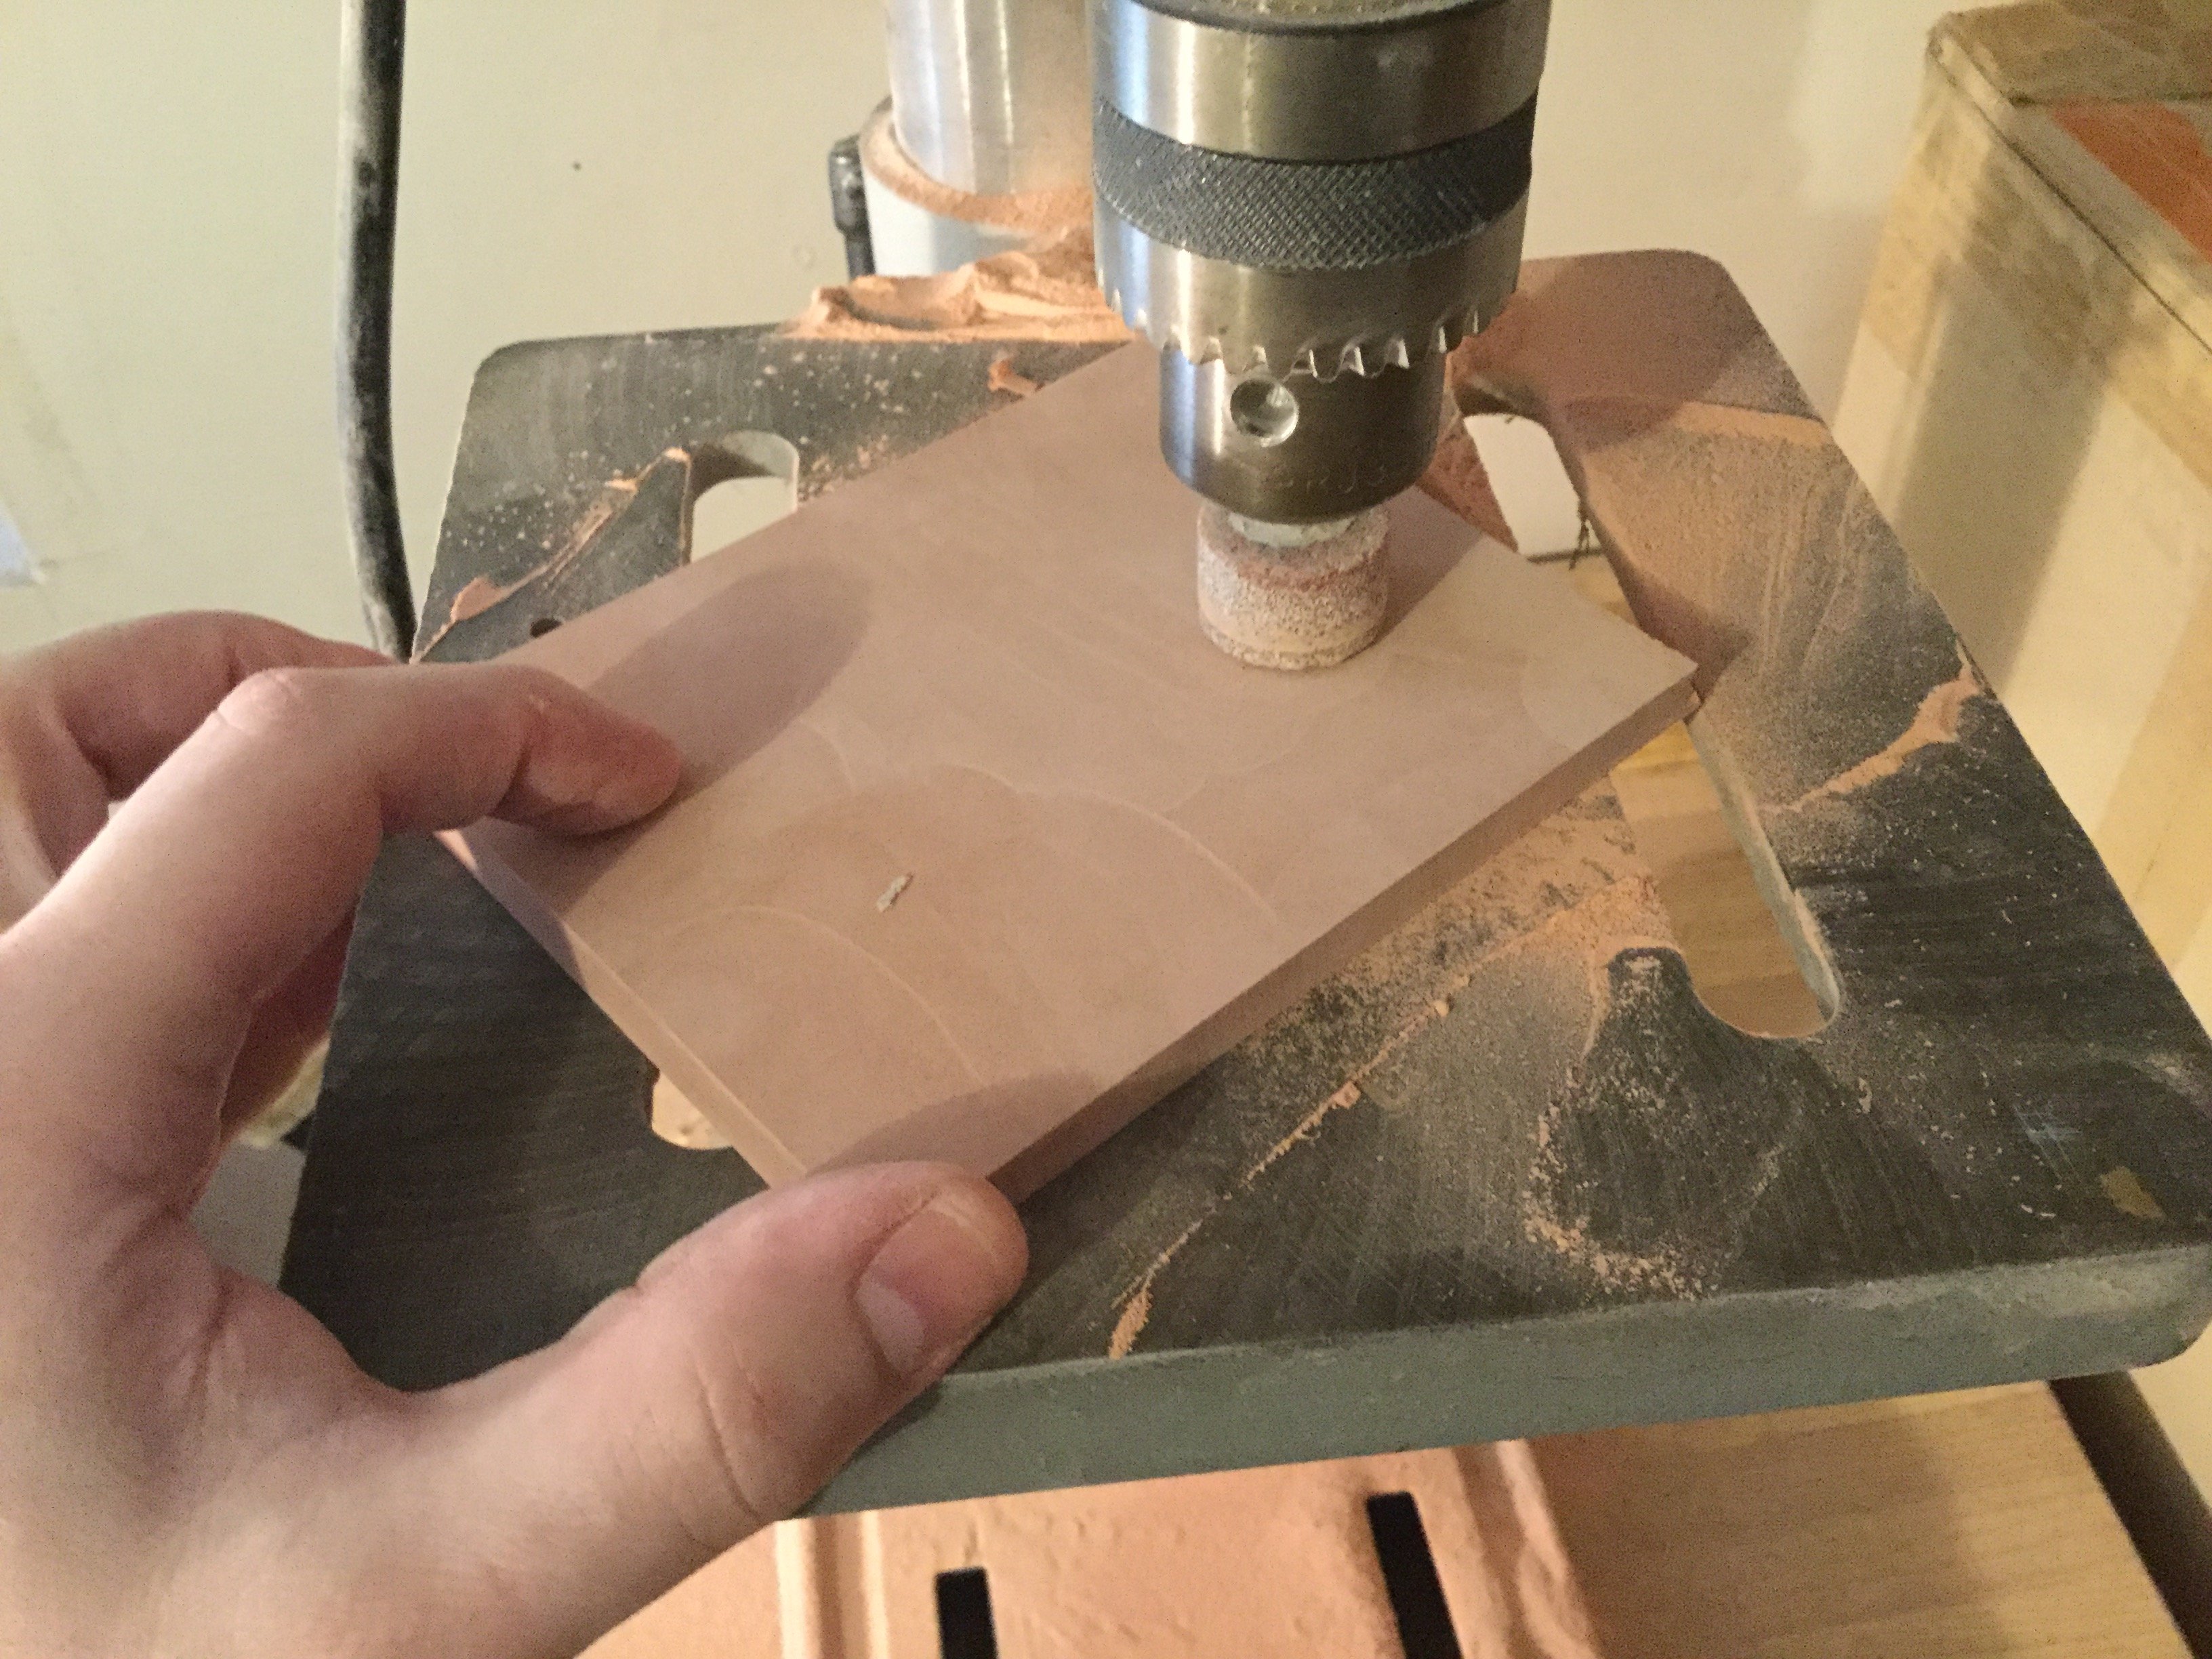
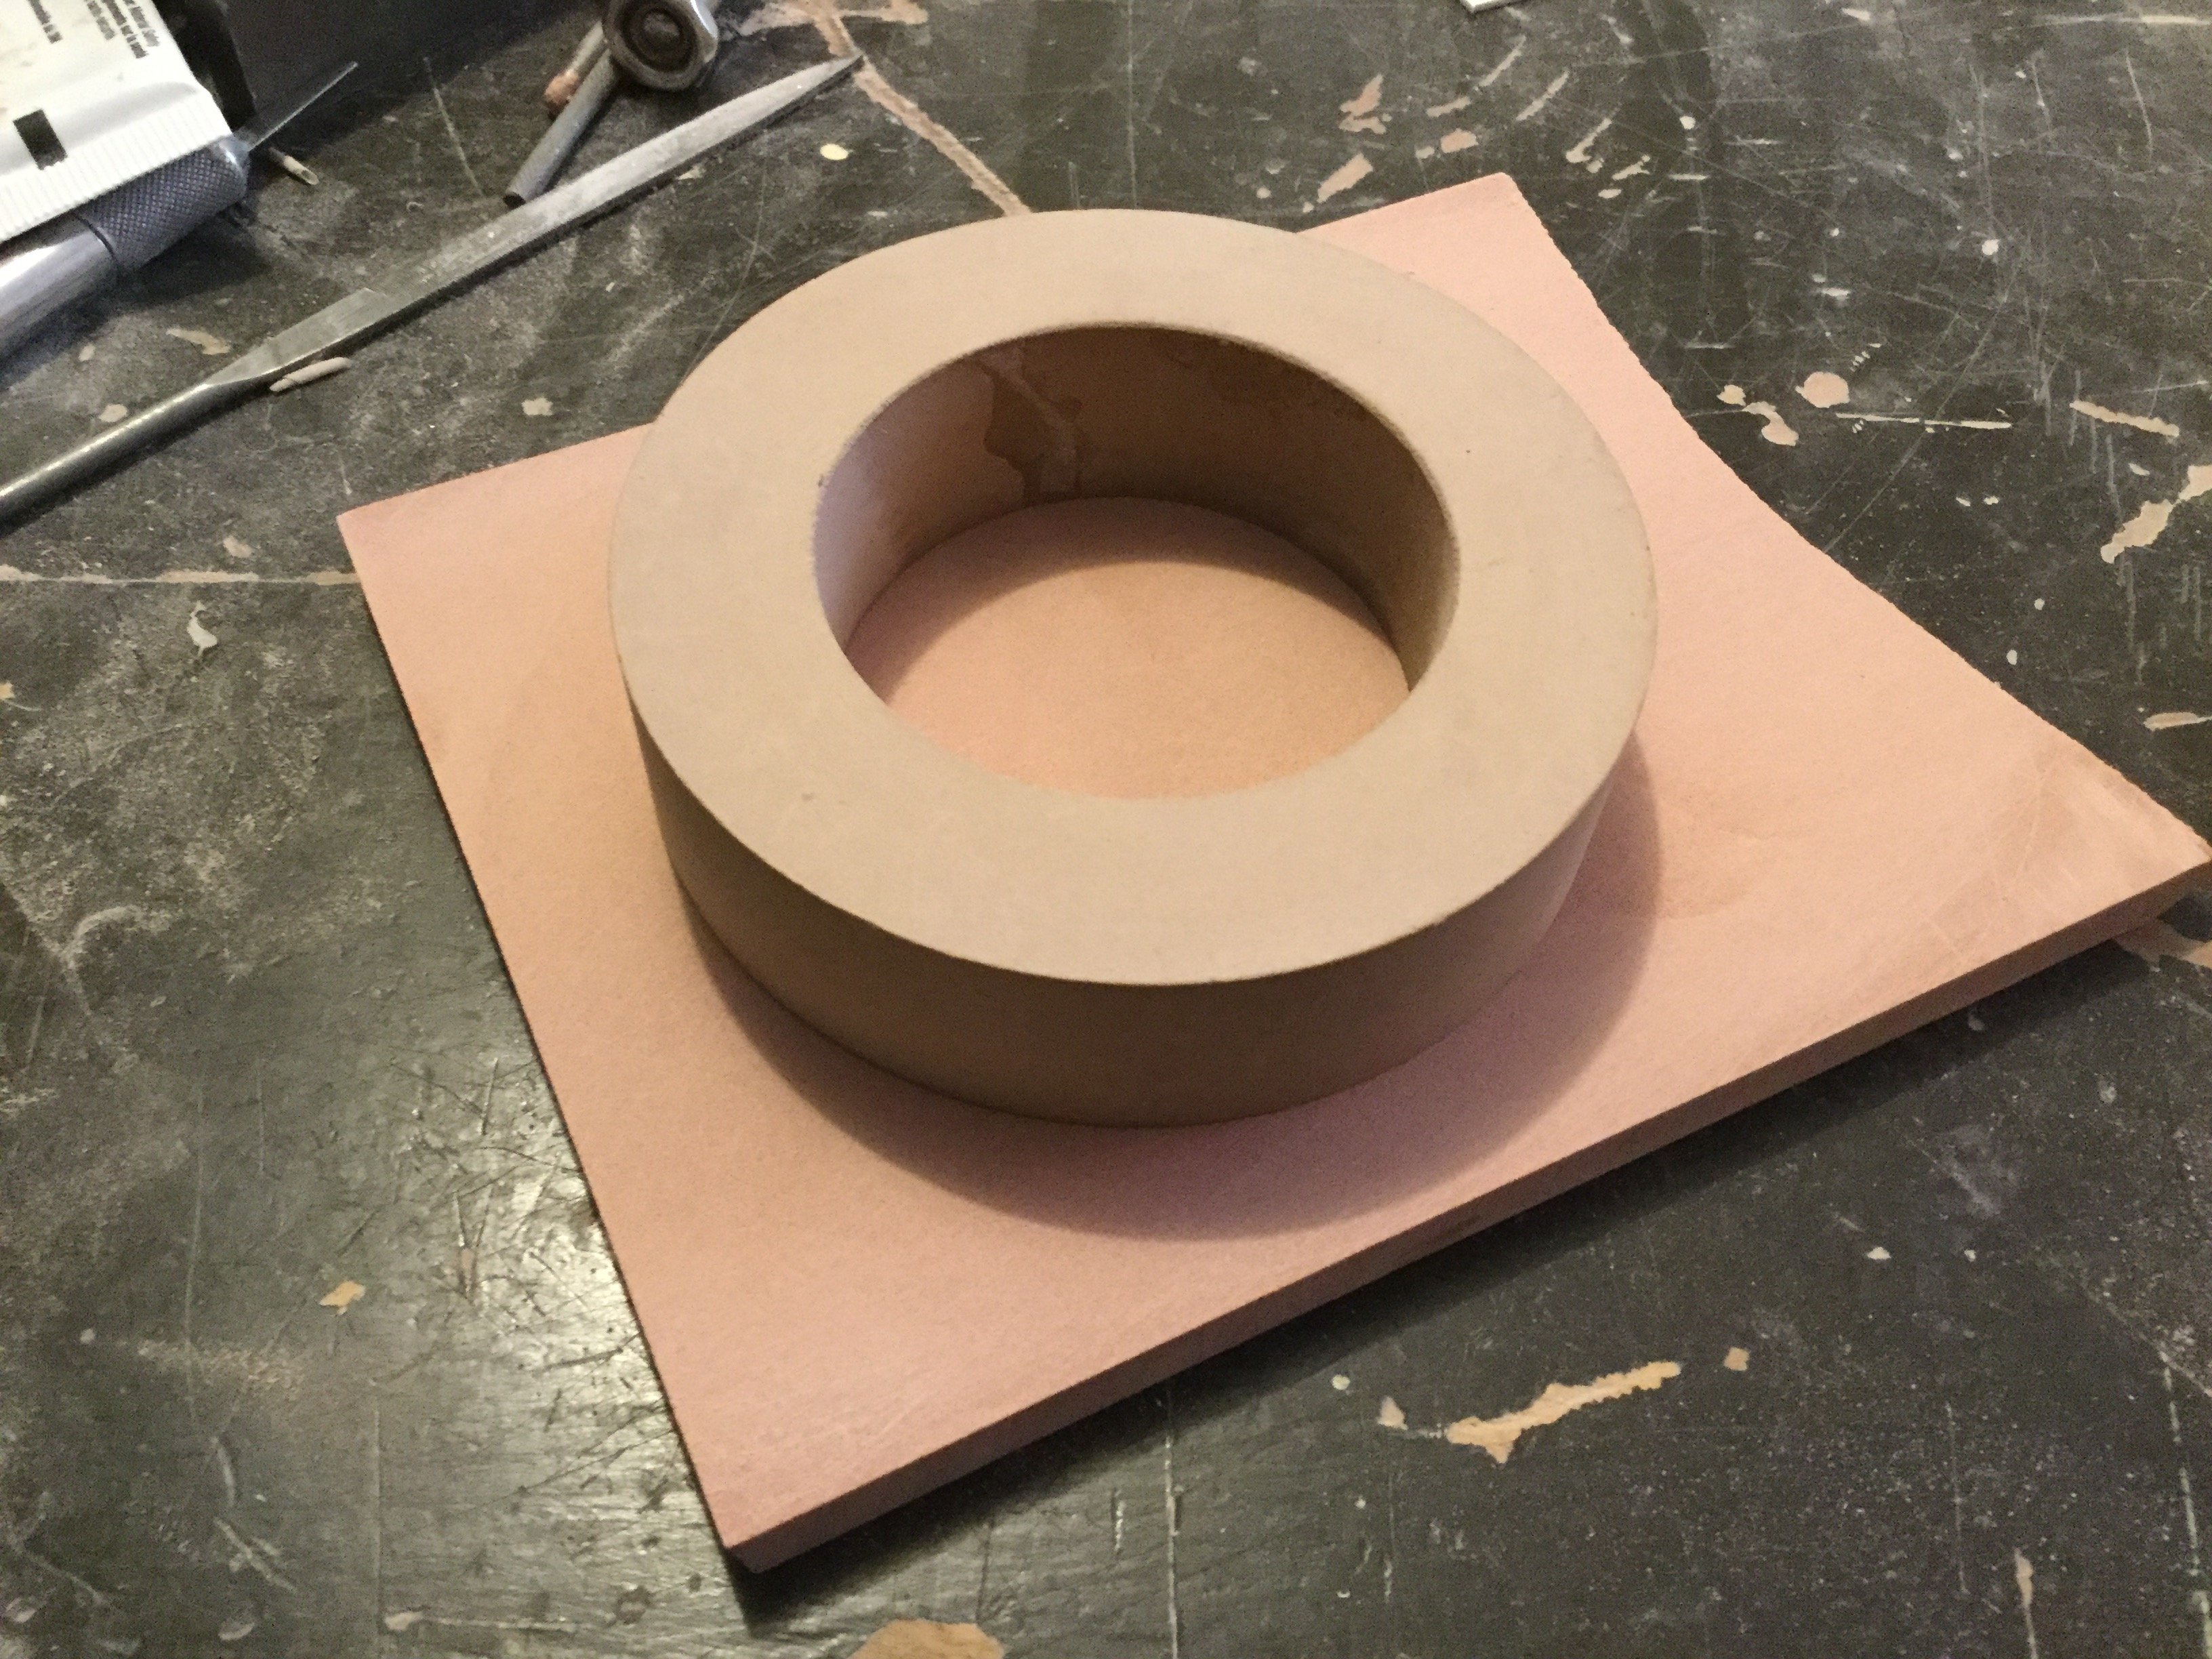
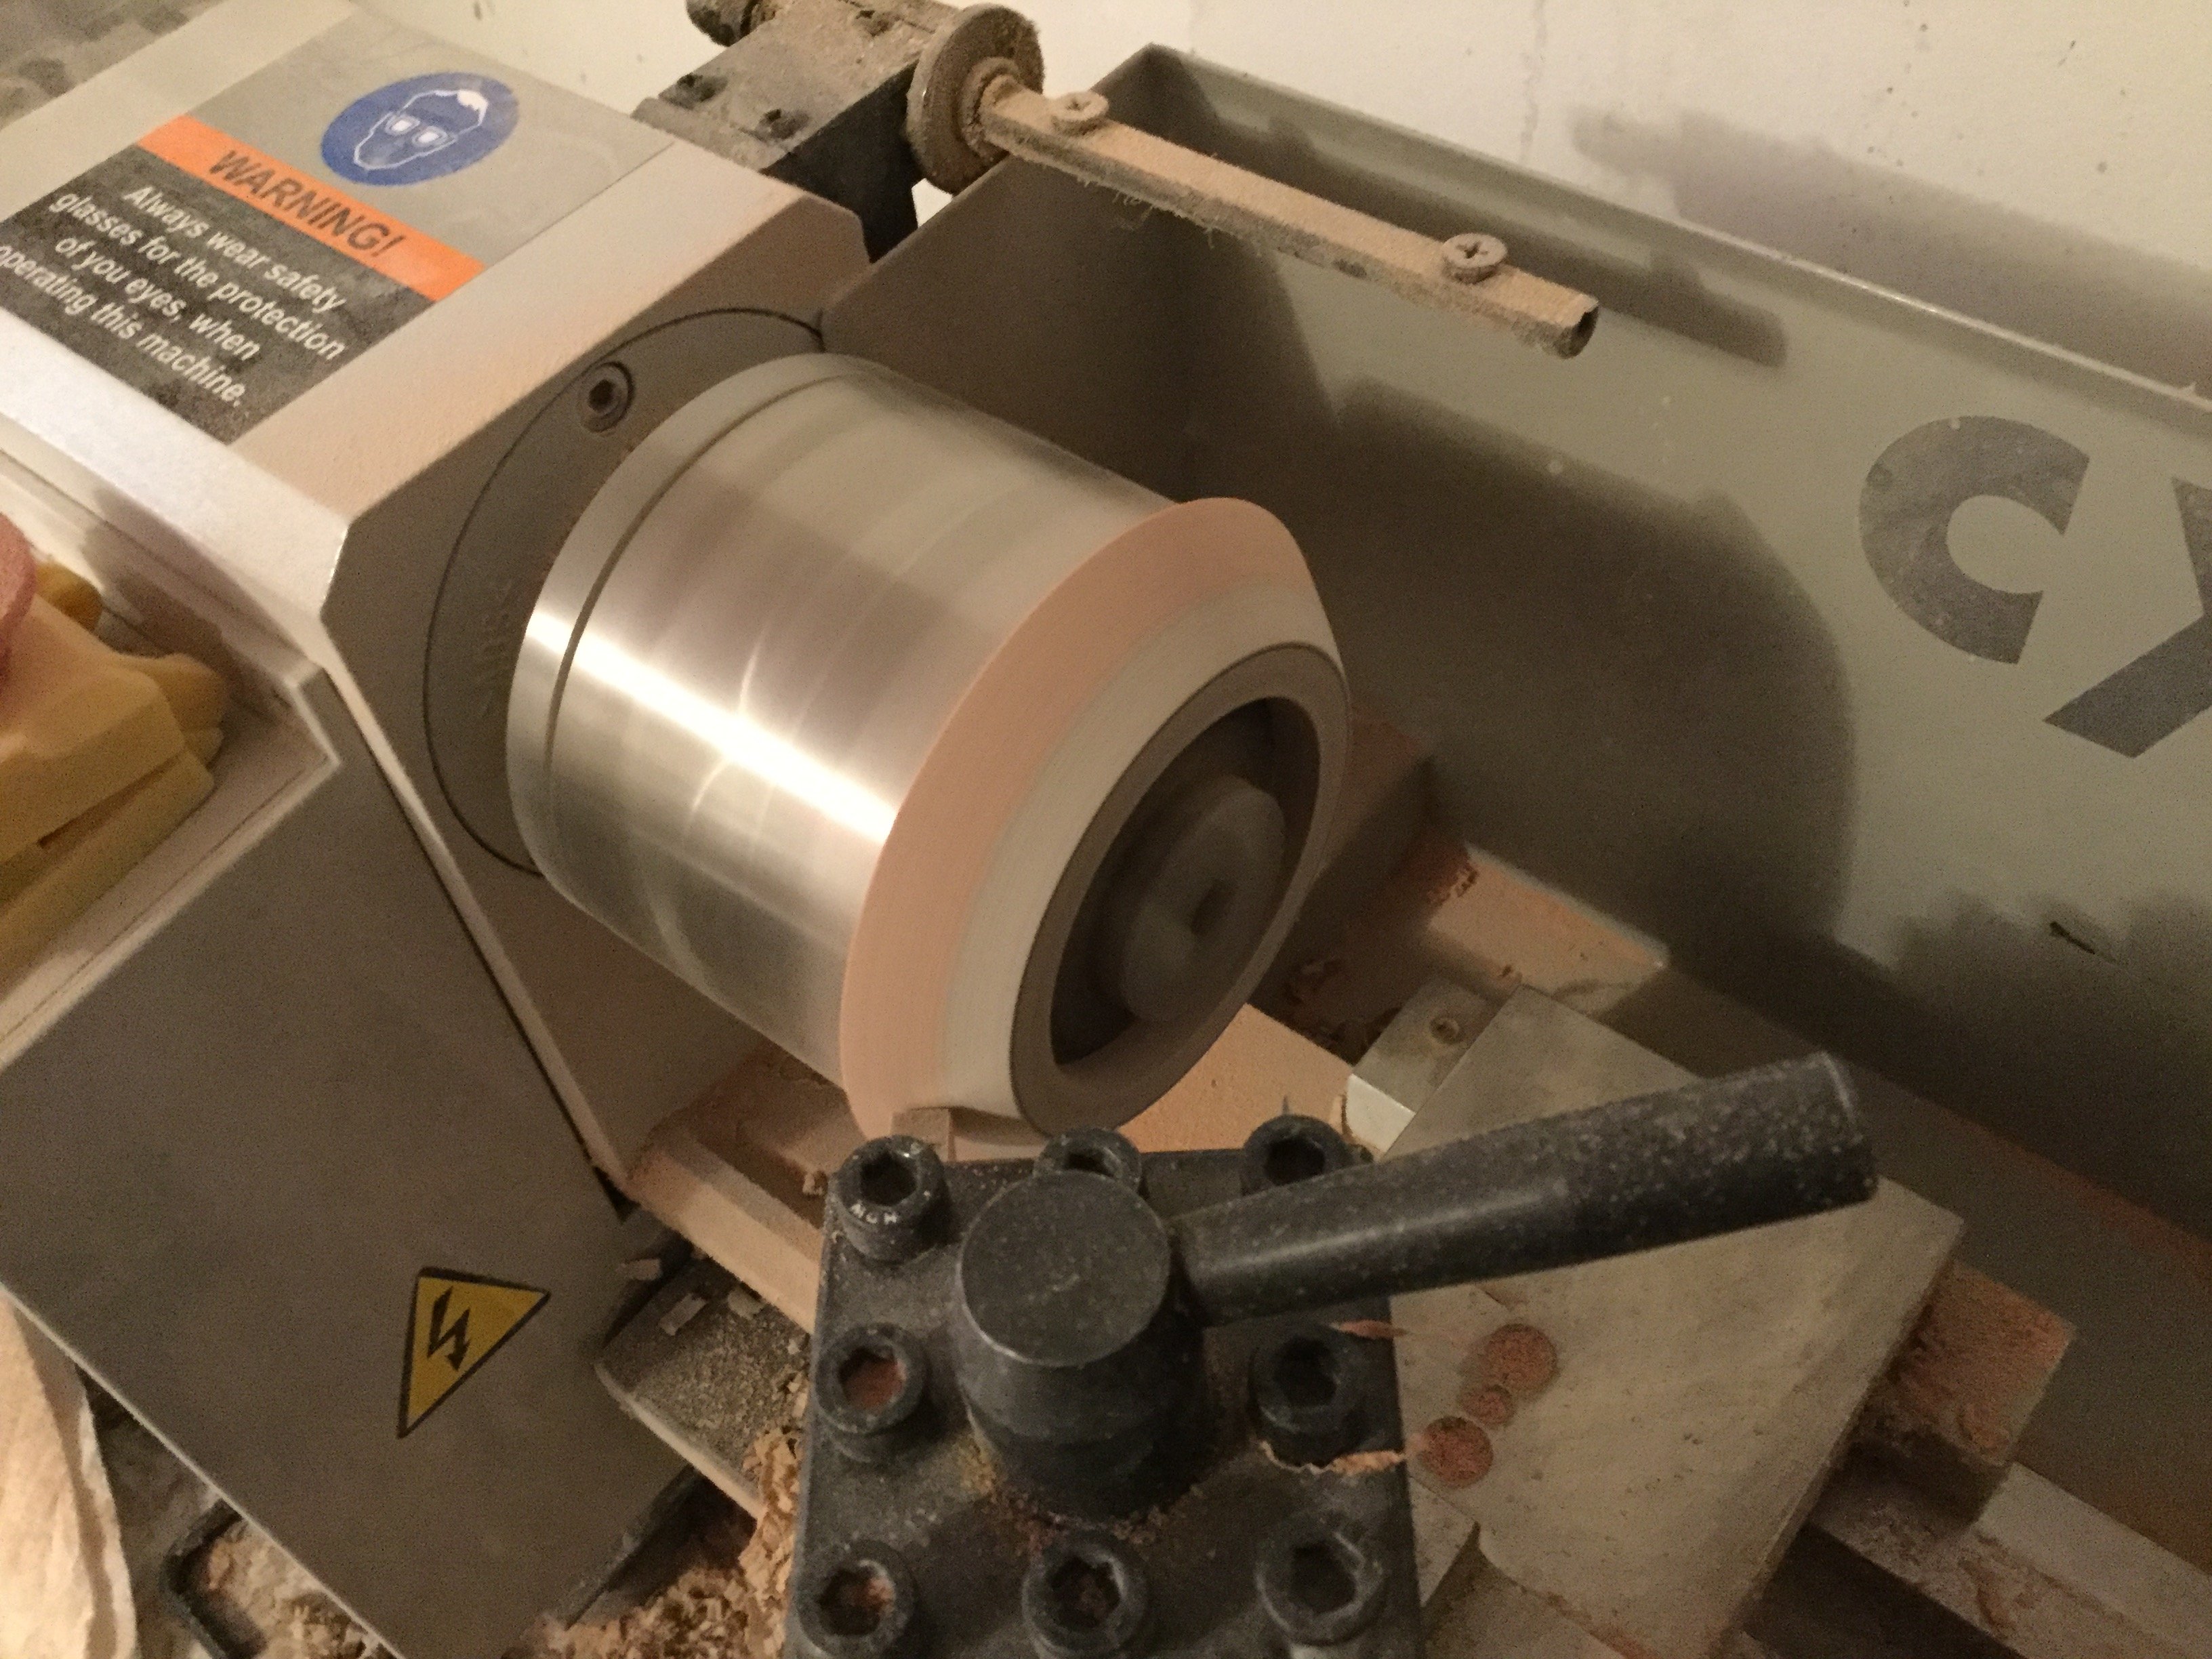
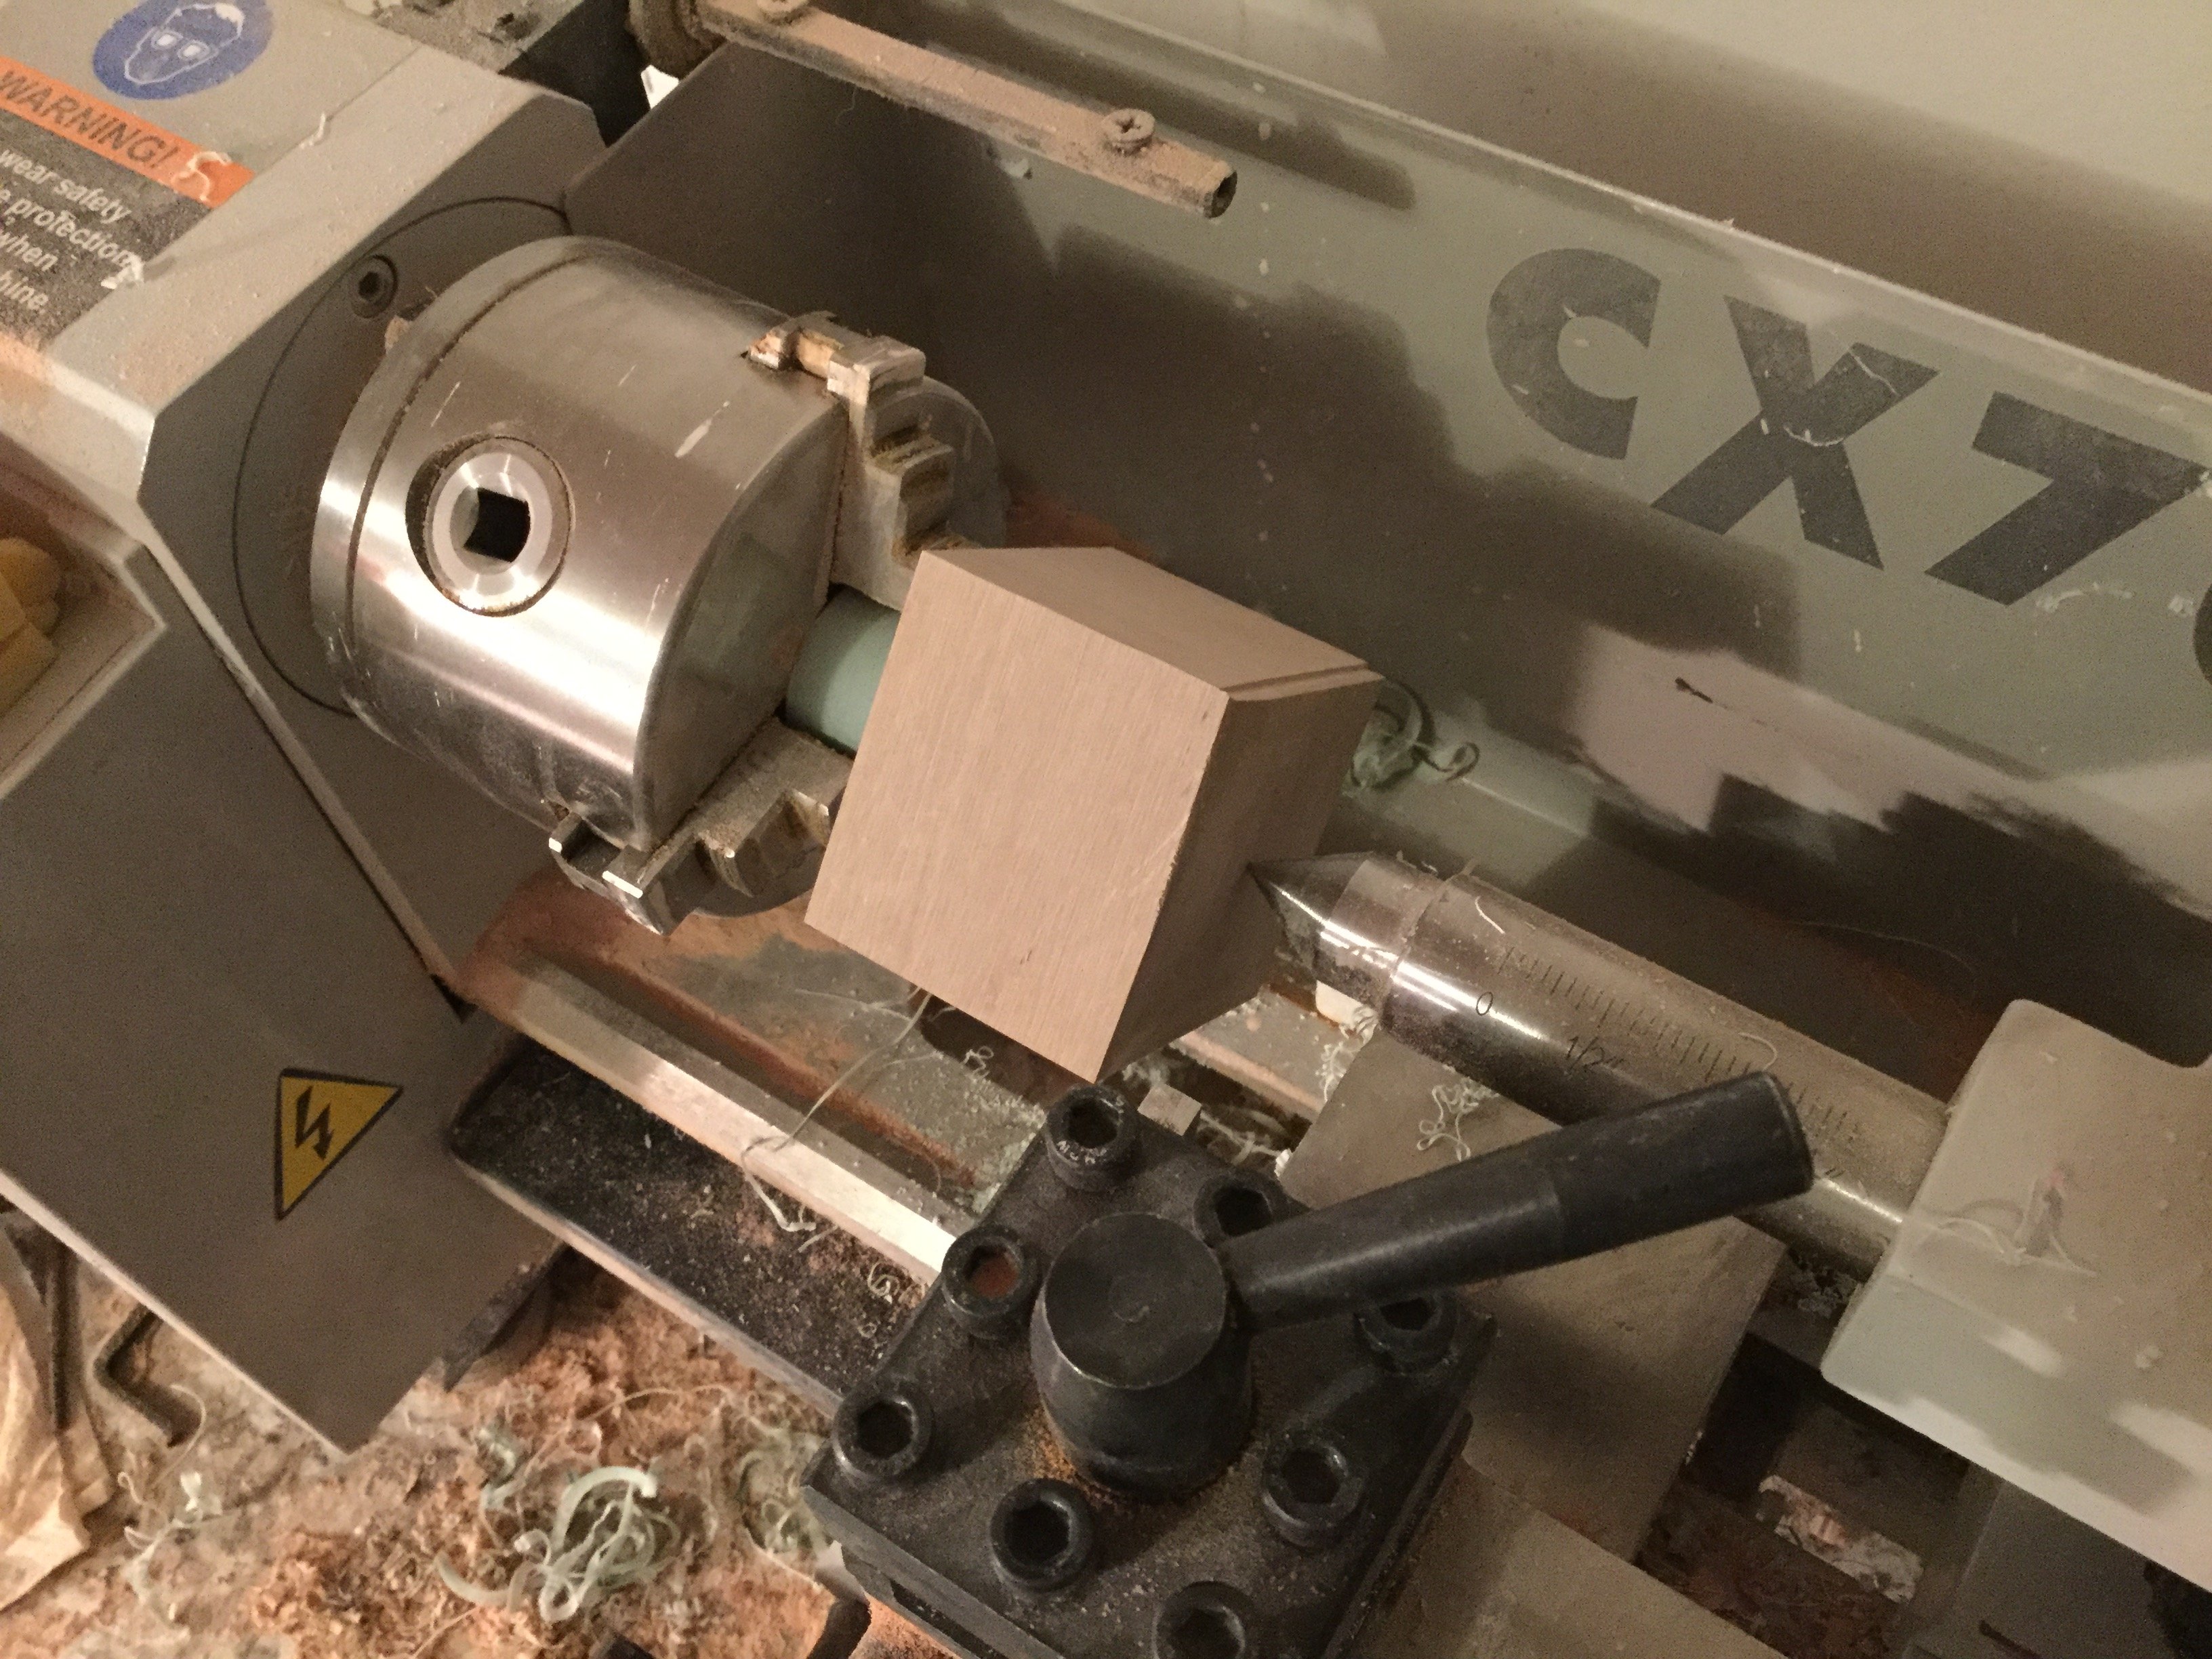
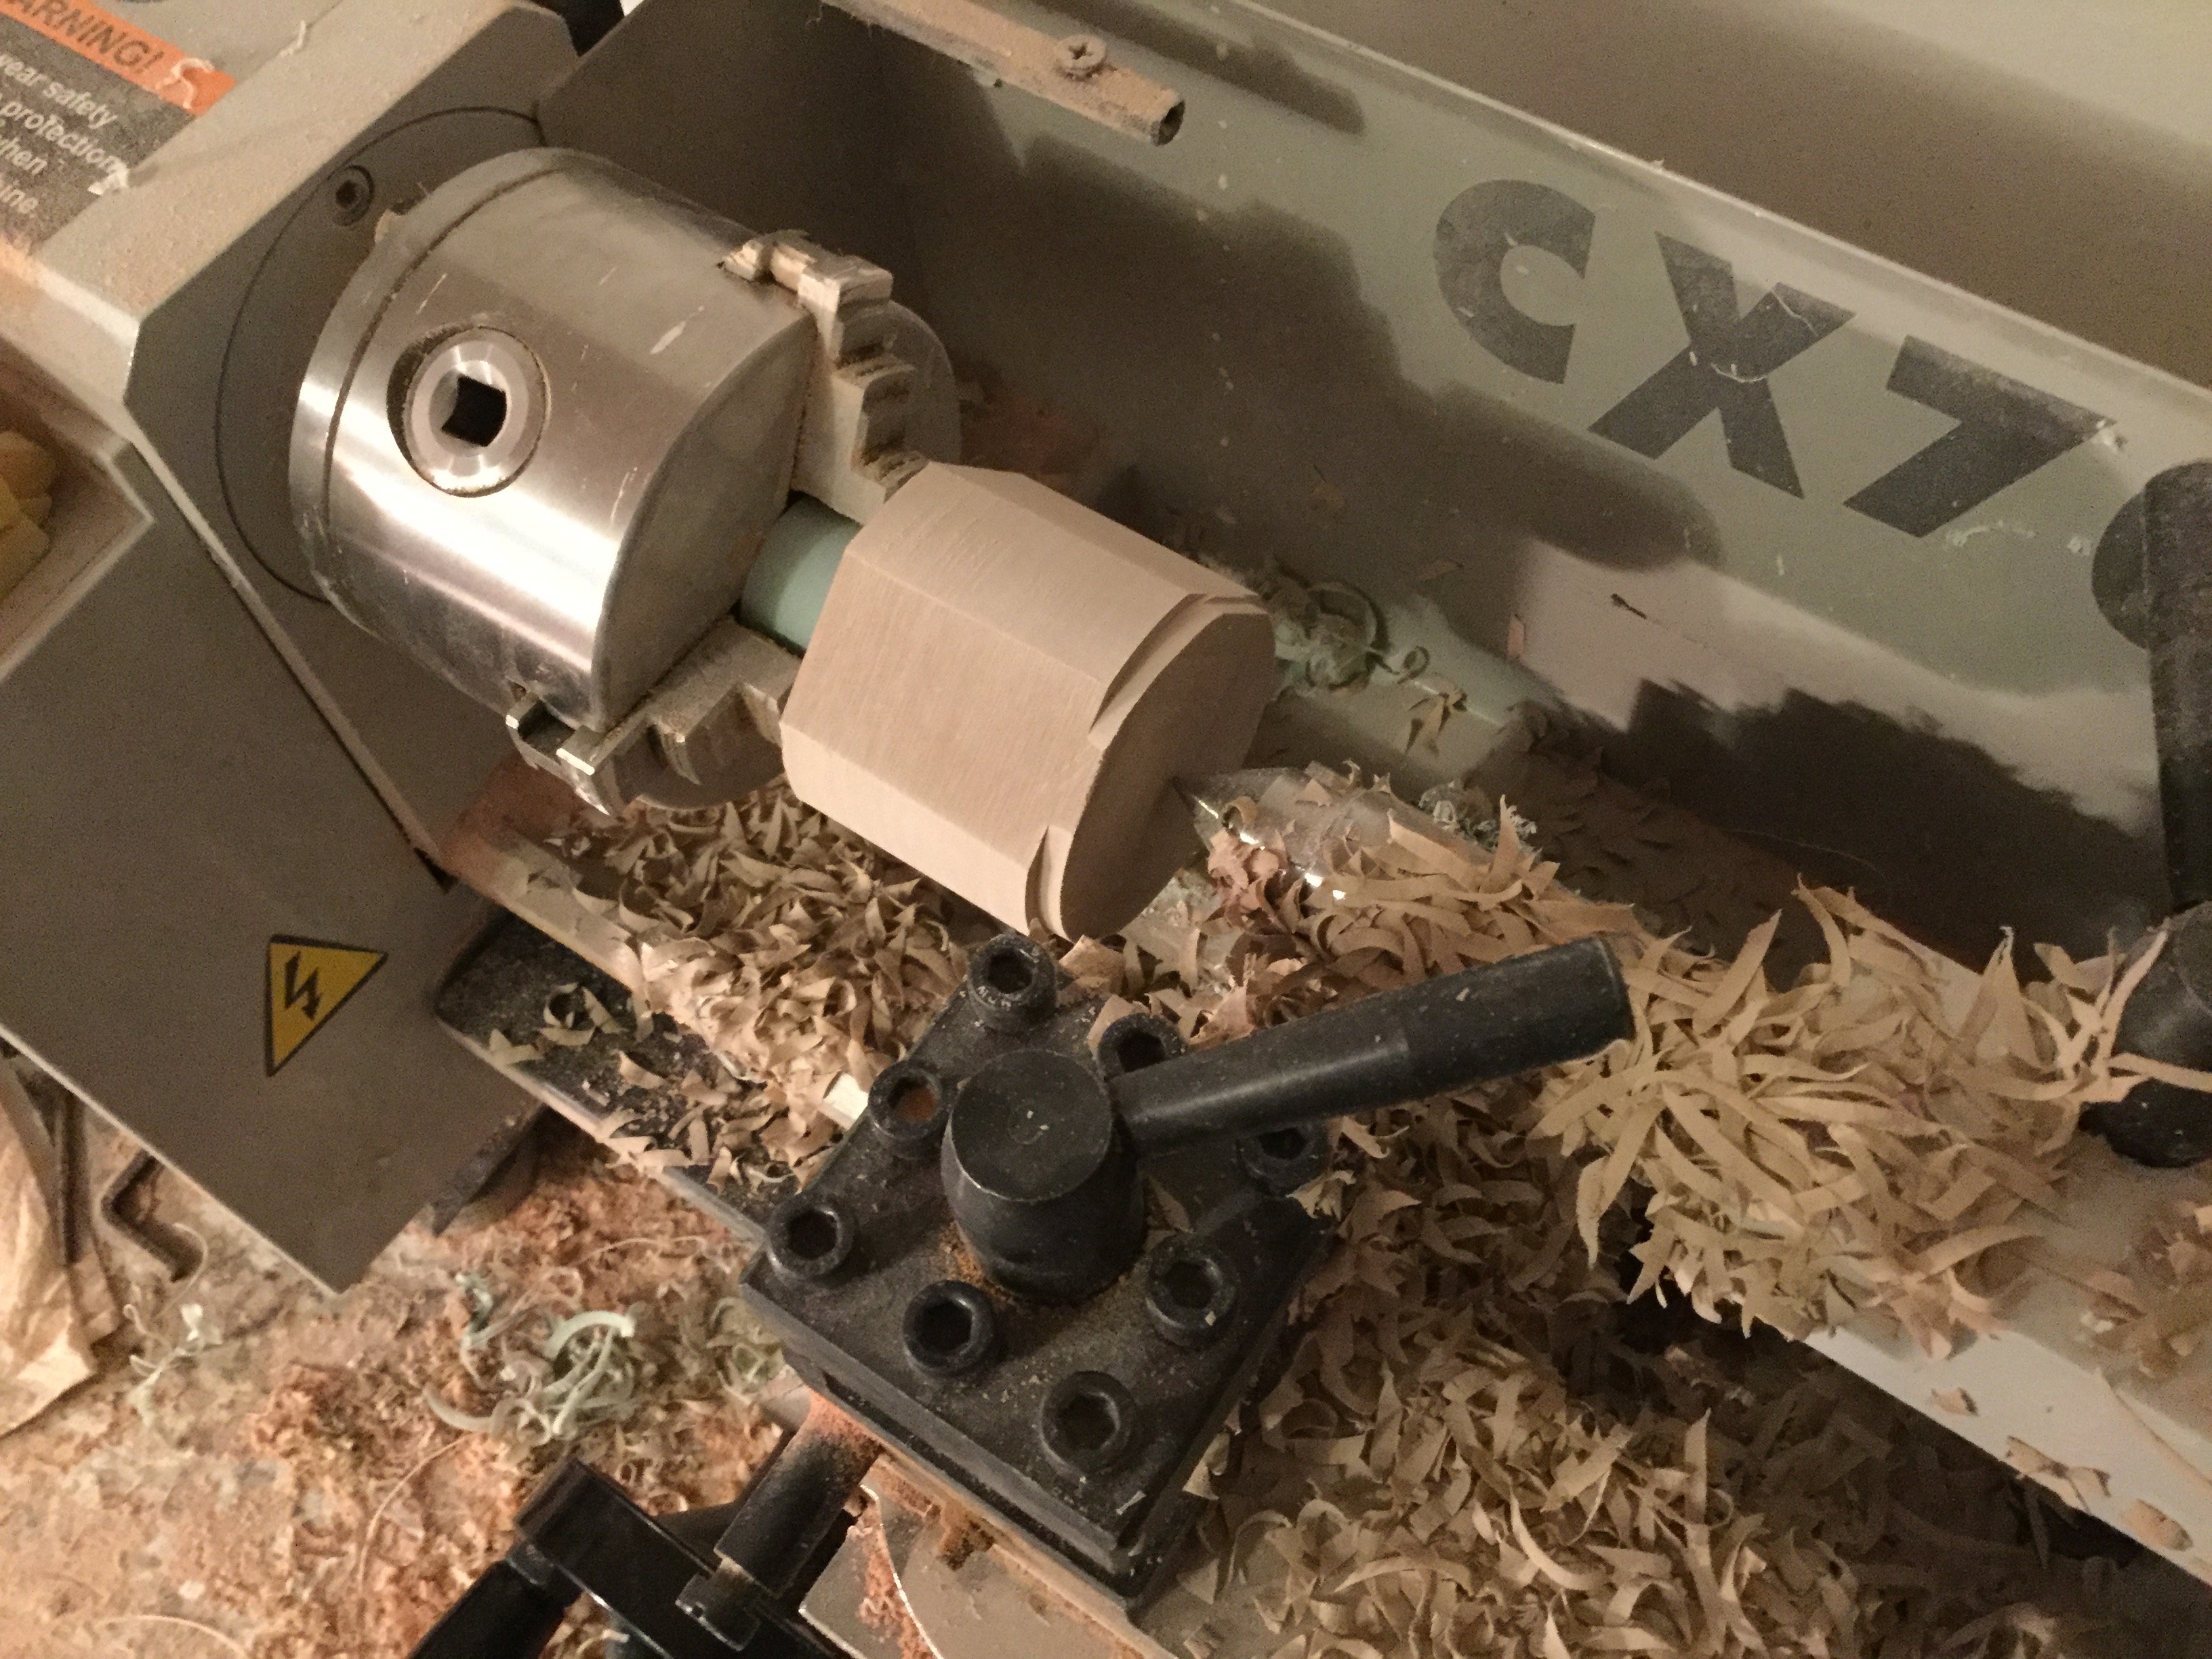
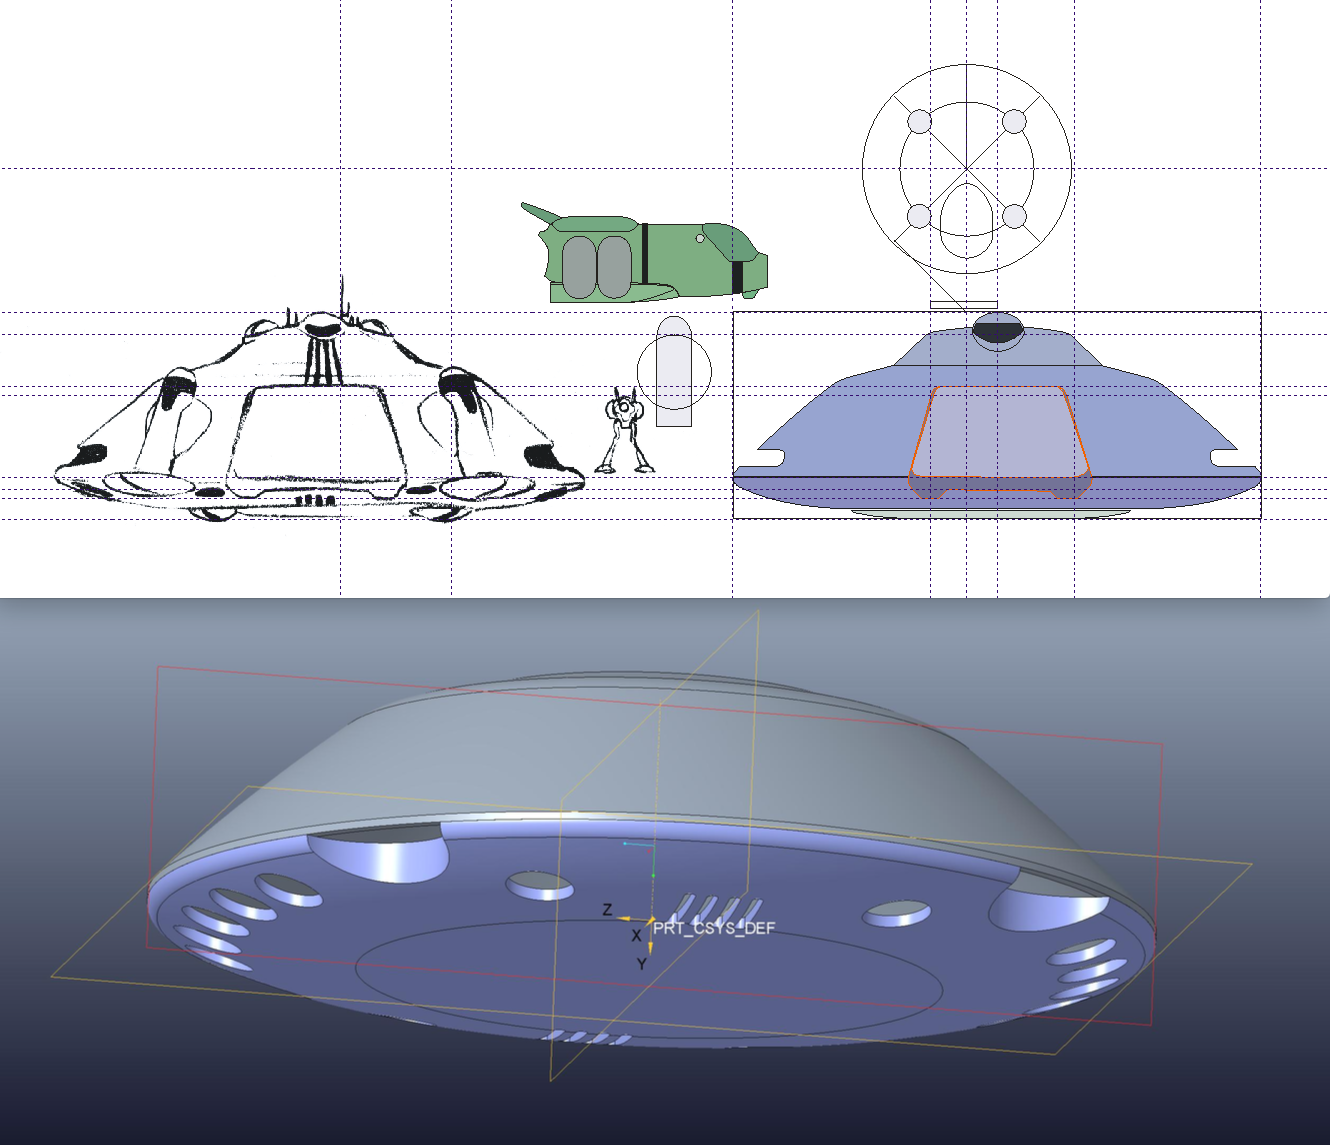
Captain’s Log: Friday, June 7th pic 001 After sone grinding and hand-sanding, the shuttle begins to take shape. pic 002 After still further refinement, it’s time to start taking care of the gaps betwee parts. I do this by spraying mold release on one part, then filling the gap between parts with polyester putty, then smushing them together. After about 3 minutes, the parts can be carefully pulled apart and allowed to harden further before further sanding can be done. Pic 003 The shuttle now much closer to its final form. Still a few little gaps to fill, which is tedious but necessary work. Pic 004 New bandsaw! Much quieter and sturdier than my old rig, and the depth allows me to slice 4 « thick blocks with great precision, as seen here. Pic 005 I need some modeling board planks, so those freshly cut parts go under the grindstone to do final surfacing. Another one of those operations that produce copious amouns of dust. Pic 006 That plank is now being CA-glued to a crude donut shape (a leftover part from a very old project) which jut happens to be the perfect size for the top floor of the dropship! Pic 007 These two freshly mated parts now go onto the lathe so as to produce yet more dust and if I’m lucky, maybe I’ll even get to shape the part. Pic 008 The very same part, now starting to look like the top deck of the dropship. Pic 009 Here’s something I have to do every once in a while: start from a square block and somehow machine it into a cylindrcal part. The block is actually glued to a cylindrical mandrel, which the chuck grabs onto so as to be able to turn it. I have to proceed very slowly here: too much pressure from the knife will break the block off the mandrel and run the part. In this case, working slower is faster! Pic 010 The same part, half-way done. Pic 011 The part on the left is a crude mock-up of the landing gear hydraulic assembly and the part on the right is of course, the top deck of the dropship. The 3D-printed gray part is the penthouse (AKA the cockpit) Pic 012 and 13 Since the main hull is much too large to fabricate on my lathe, I had to get creative and resort to a 3D modeled and printed part. I therefore made some technical drawings which fellow MW member mechaniac was instrumental in converting into files from which I could get something printed. His professionalism and speed are commendable! Once those printed parts arrive from Shapeways, they will be further modified and detailed before being incorporated into the finished masters. In short, everything looks like a mess right now, which is surprisingly normal. Many times, my parts don’t look particularly impresive until they get a coat of primer, but that’s still a ways off.