captain america
-
Posts
3537 -
Joined
-
Last visited
Content Type
Profiles
Forums
Events
Gallery
Everything posted by captain america
-

Aircraft Super Thread Mk.VII
captain america replied to David Hingtgen's topic in Anime or Science Fiction
It's like the Navy blew off a Victoria's Scret runway model to bring a short, fat, dim-witted, greasy-faced date to the prom! I'd be slightly less bitter if there was at least a decent 1/48 or 1/32 kit of that plane. -
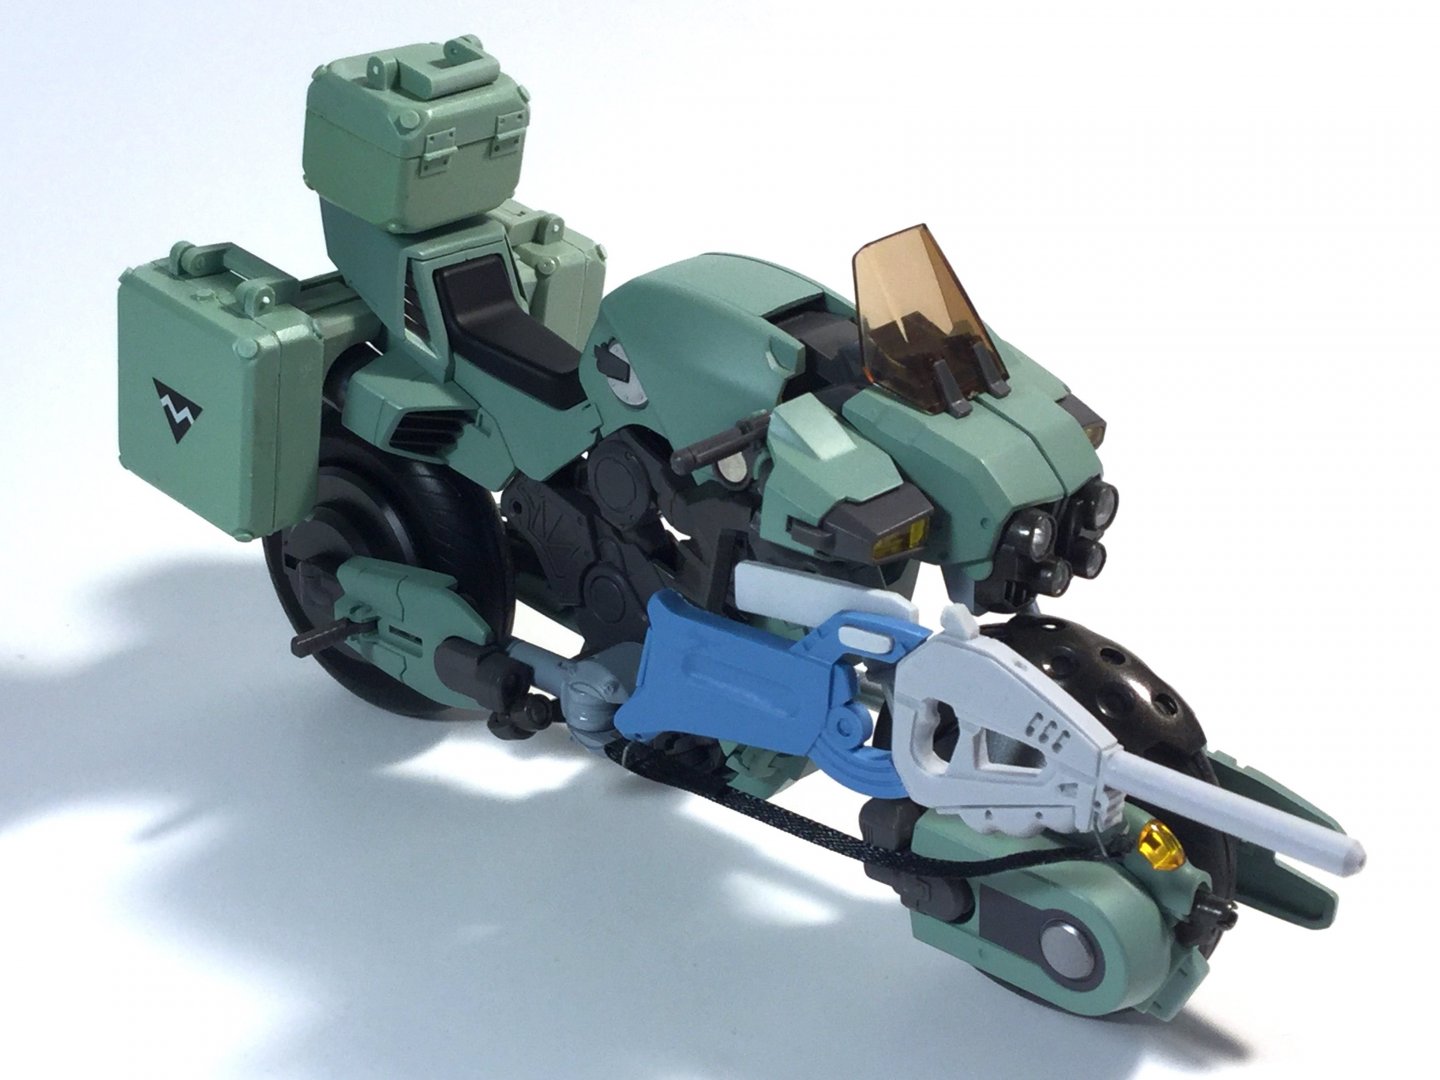
On a related note, the 1/12 Motocycle Freak accessories set is available again for a limited time, in case anyone's interested. Just PM me for info.
-
The Unlicensed Third Party Transformers Thread
captain america replied to slaginpit's topic in Anime or Science Fiction
Disagree. I still like the head, chest and arms on Hasbro's version more, not to mention how the ring looks like gigantic folded bat wings in robot mode and adds to is already ominous presence. Plus the maw on the Zeta offering looks like a sphincter. I dare you to unsee that!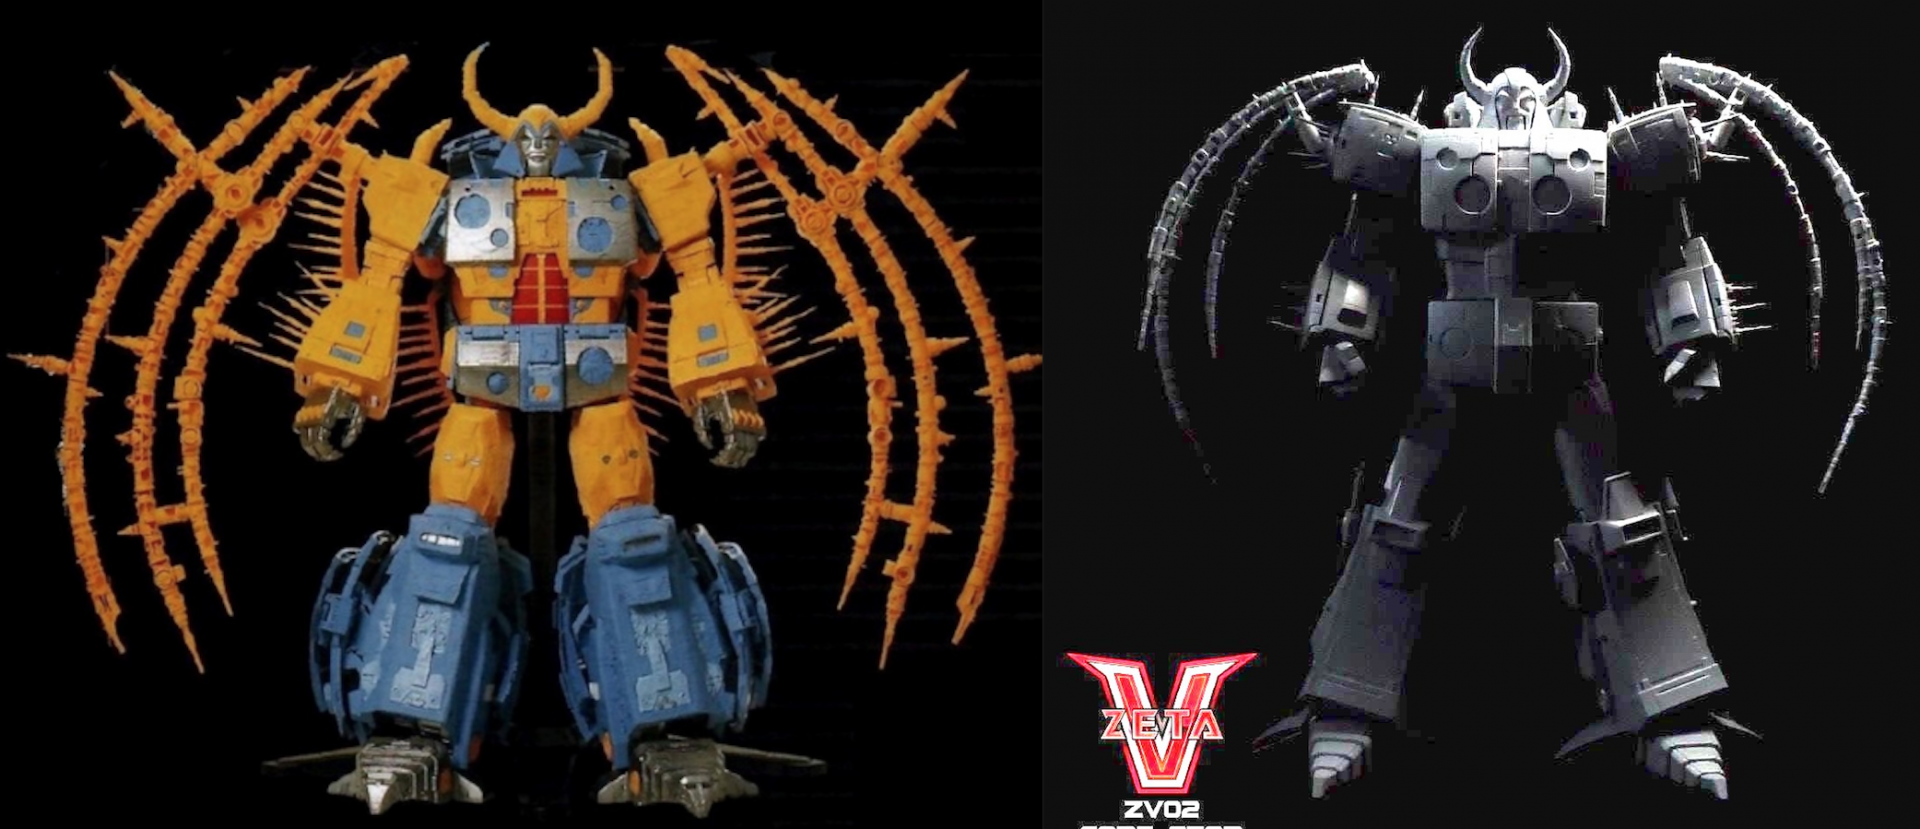
- 9325 replies
-
- 1
-

-
- fans toys
- mastermind creations
- (and 19 more)
-
That. I think the common denominator among the companies that produce the nicest collector toys is that they either have a very effective or longstanding (and maybe both) relationship with their manufactures. One knows what to expect (good and bad) from the other and are capable of resolving the numerous difficulties that arise in the licesnsing/manufacturing process. The talented guys are the most cost efficient/productive and are, in many ways, the glue that keeps the operation from unraveling.
-
No, all that material belongs to the toy company. The point I was trying to make is that you can give a subcontractor EXACTLY what you want (3D sample, blueprints, etc.) and they'll still find a way to f*ck it up. People who know how to do things right seem expensive to the untrained eye, but then when you factor-in multiple re-works and missed shipping windows only to realize that mediocre talent is the most expensive thing you can buy.
-
In fairness to Meptoys, you'd be horrified at just how much liberty a factory can/will take when they tool your designs unless you have people on-site riding the design team like 2$ whore while breathing down their necks and checking on them every 5 minutes. This one time when I was still in the toy business, I had made a sculpt for an original action figure that was then sent to China for sampling. The bloody thing was already sculpted, no guesswork involved or necessary, they just needed to pantograph it... What got back looked nothing like what I'd sent them. It was like going from Arnold Schwarzenegger to Jon Lovitz.
-
People who have crabs are awesome!! While I appreciate what Meptoys is trying to do with their figures, the aesthetic isn't up to the standard of modern collector-grade toys. Depending on what's going on with Genesis Breakers, maybe proper Inbit toys will get a shot. Failing that, I've at least got the kits covered.
-
The Transformers Thread (licensed) Next
captain america replied to mikeszekely's topic in Anime or Science Fiction
I MUST have the soundtrack to that video! Guess we'll discover Unicron's fate in the next few days. -
New Moscato Macloss Model Project!!!
captain america replied to captain america's topic in Model kits
Nope, there's still time, but barely. -
New Moscato Macloss Model Project!!!
captain america replied to captain america's topic in Model kits
Bam!


-
New Moscato Macloss Model Project!!!
captain america replied to captain america's topic in Model kits
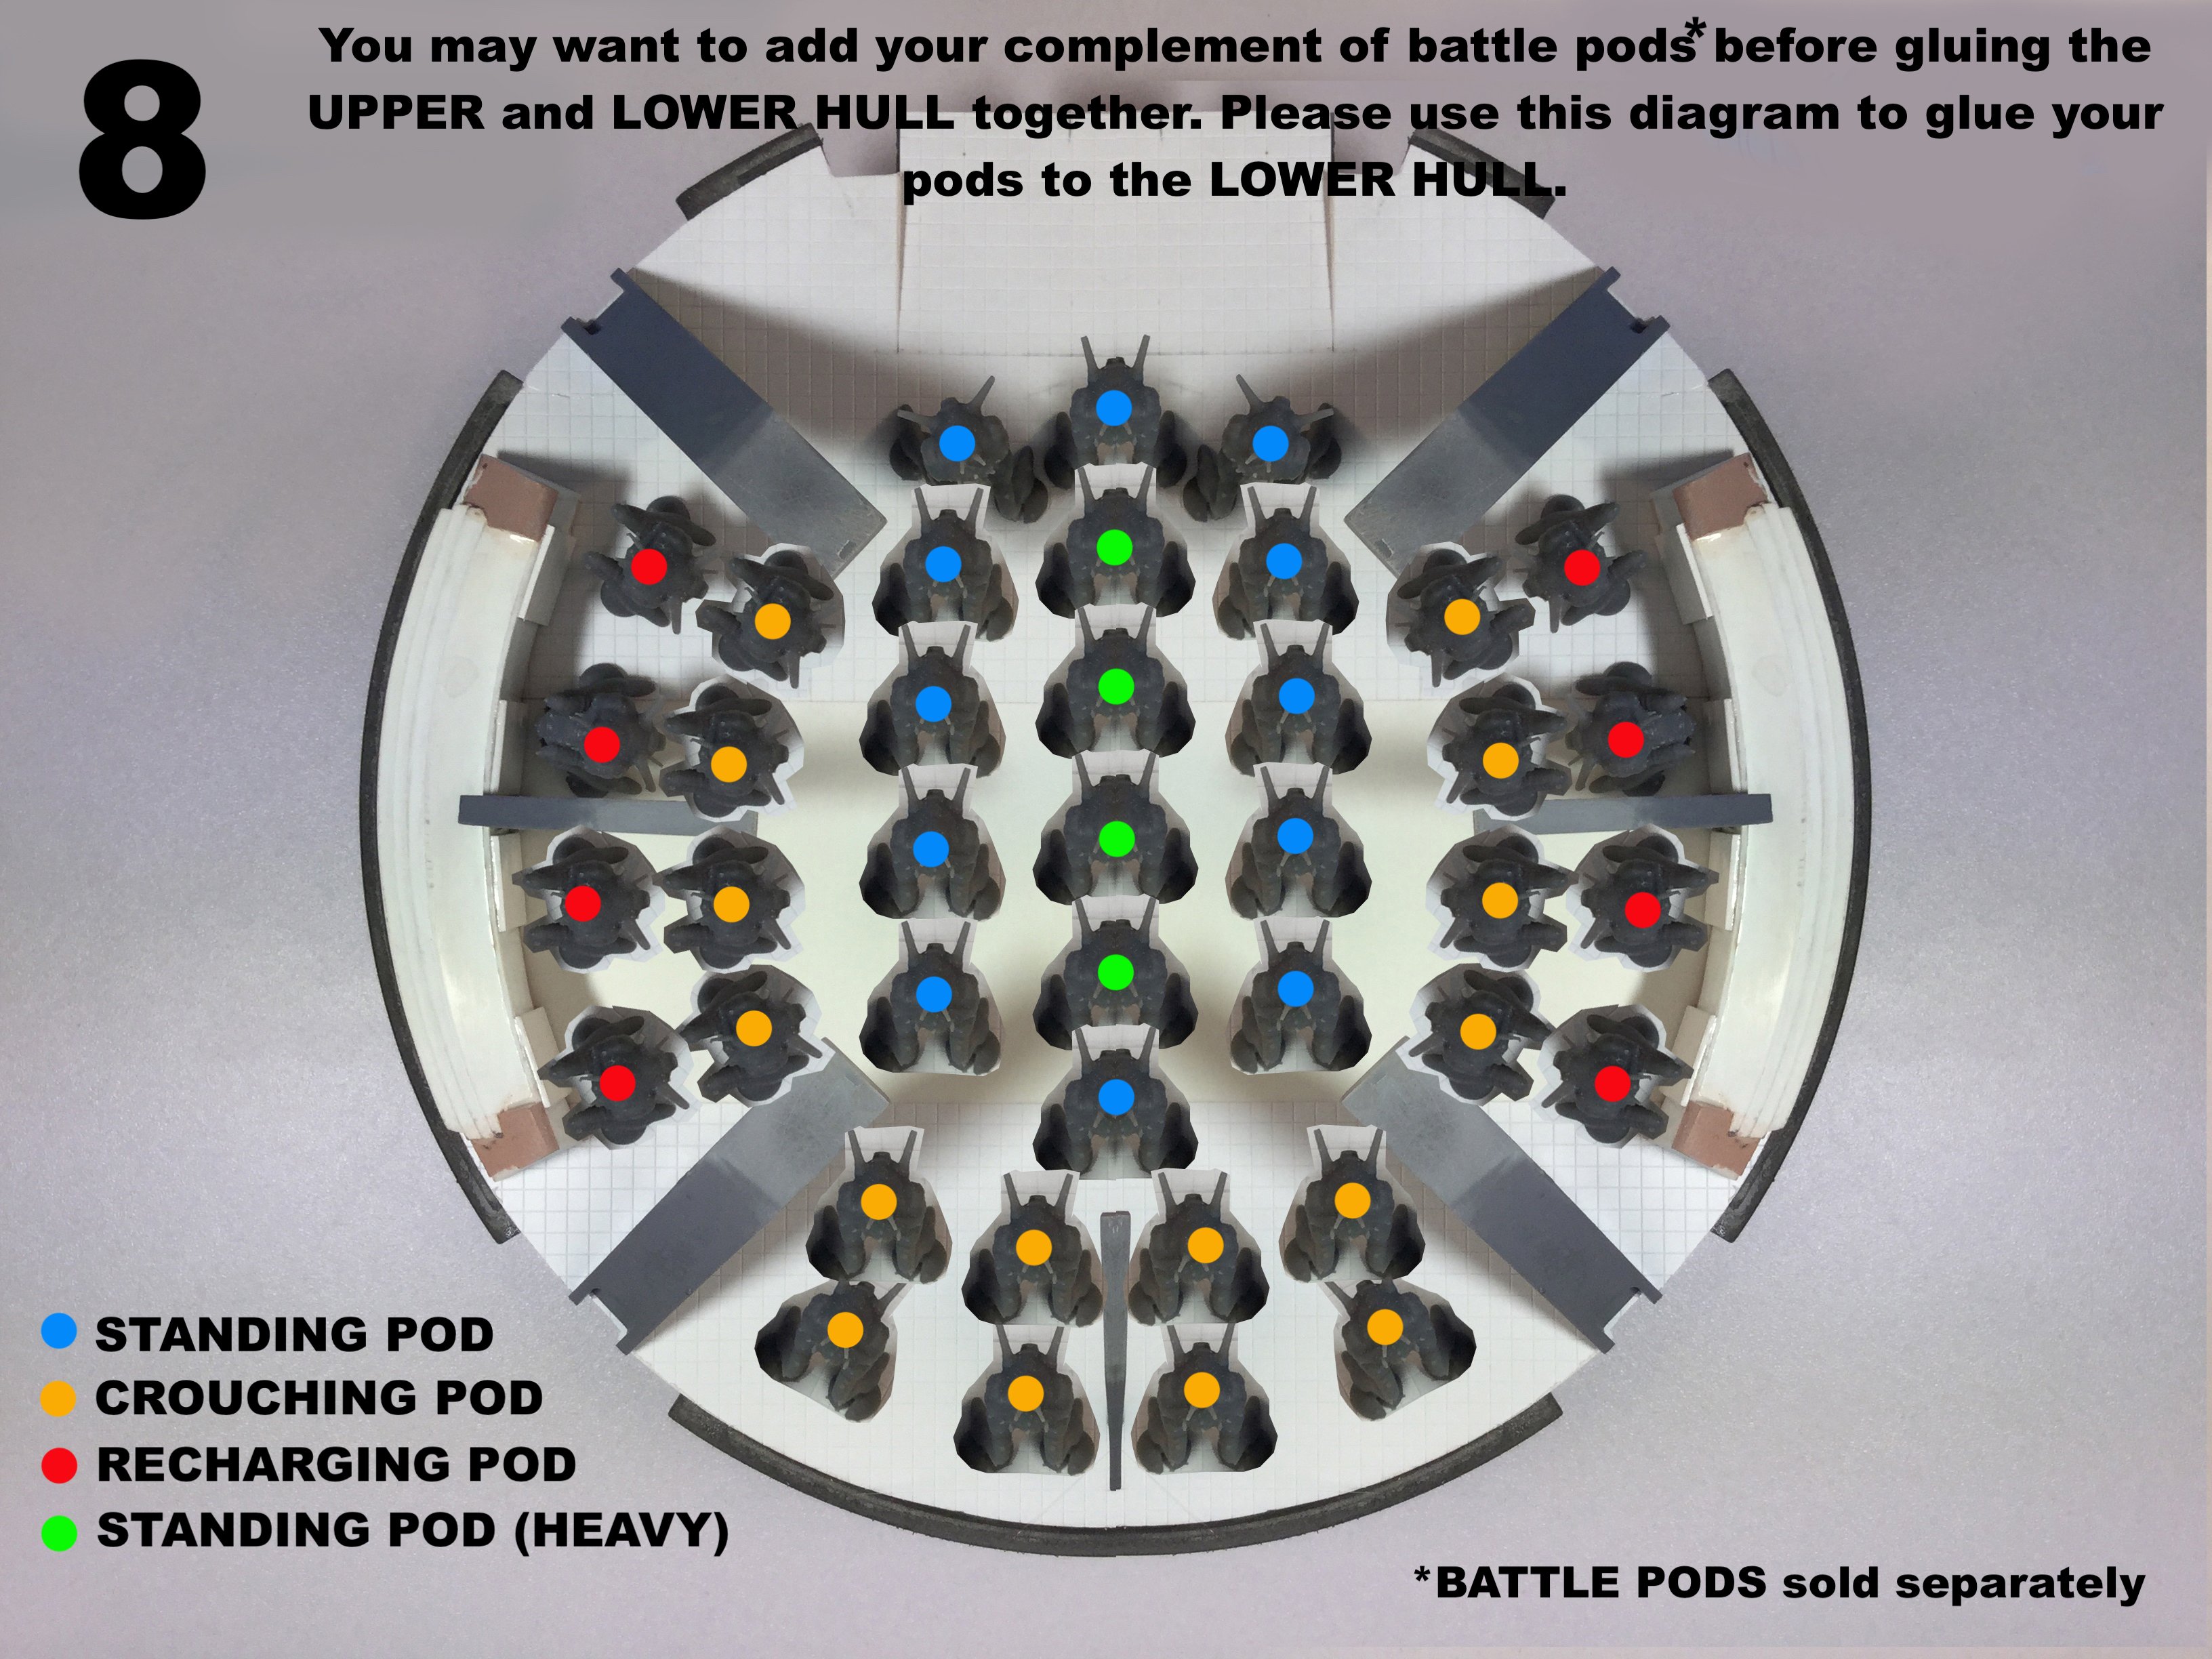
Sorry for the long silence. Im not dead, nor disappeared. Just been waiting for the freebe battle pods to arrive so that I can ship. If all goes well, I will have the destructions done and posted tomorrow, or Friday AM at the latest. -
Aircraft Super Thread Mk.VII
captain america replied to David Hingtgen's topic in Anime or Science Fiction
I don't know if this was ever posted, but if not, you've GOT to hear this ex Tomcat pilot. Straight talk, no BS, not politically correct. I was really surprised with what he had to say about the "troublesome" F-14A engines. -
2083 is when the Second Recapture Mission takes place in the original MOSPEADA, so this is likely a reboot. I hope they redesign the Inbit with that more organic look they teased in sketches.
-
New Moscato Macloss Model Project!!!
captain america replied to captain america's topic in Model kits
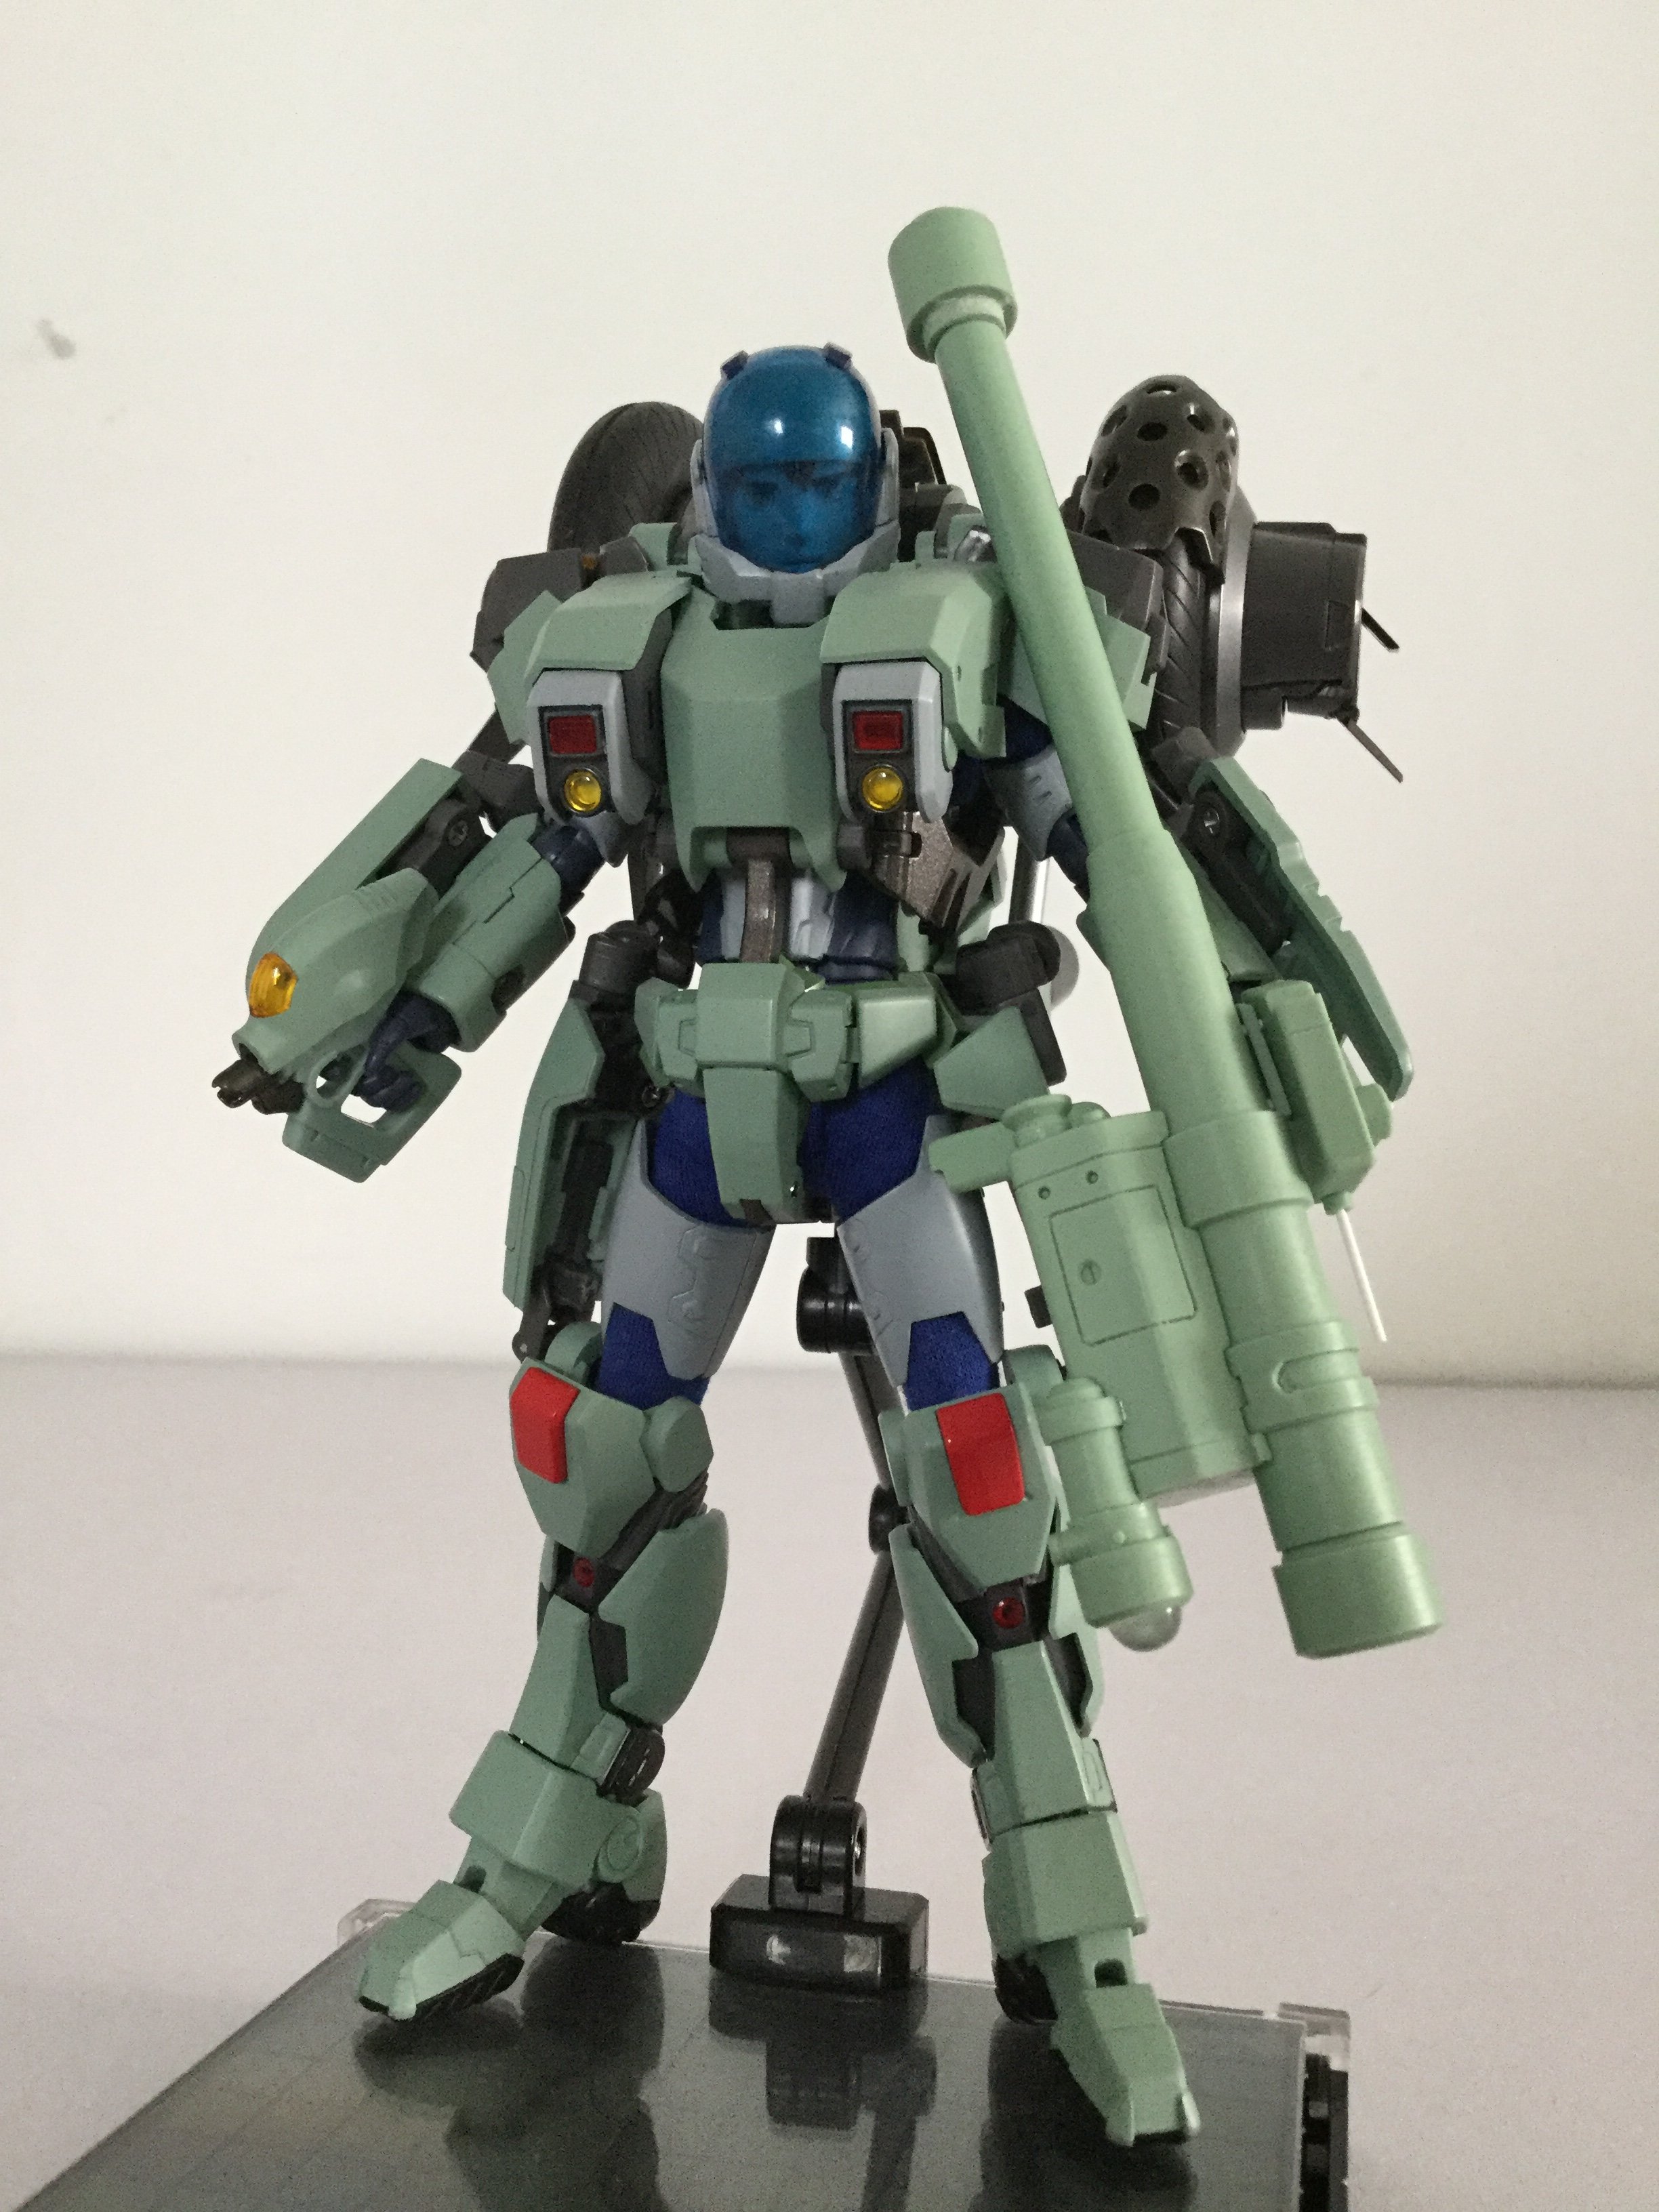
Casting is going quite well. A quick sample: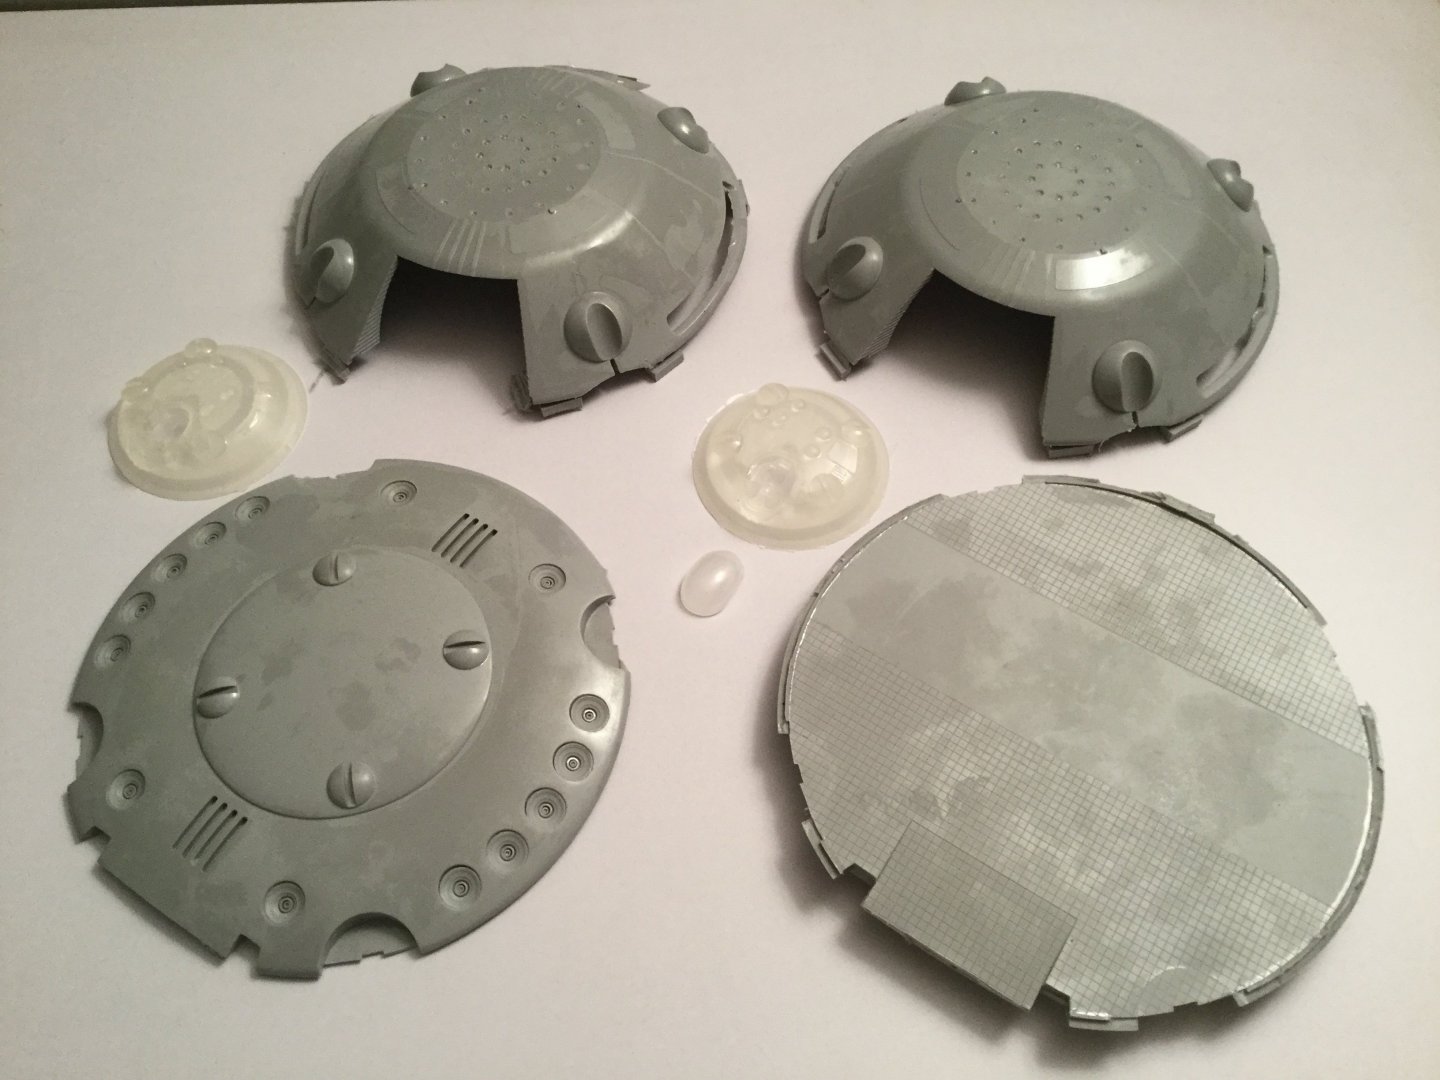
-
The Transformers Thread (licensed) Next
captain america replied to mikeszekely's topic in Anime or Science Fiction
Not based on the most recent pics I've seen. Also, if the Haslab project fails, guess who might very well bear the brunt of a legal smackdown? Seemingly not content to produce much beloved figures of characters that Hasbro/Takara have chosen to ignore, 3P companies are starting to play a dangerous game of chicken. It's not wise to poke the bear. -
The Unlicensed Third Party Transformers Thread
captain america replied to slaginpit's topic in Anime or Science Fiction
Despite the artistic license that Hasbro took with Unicron's chin, I prefer their overall facial aesthetics (and detail) way better than this thing... Assuming it even ever gets completed. Edit: looks like they're actually moving forward with this. The surface detail on these panels doesn't seem to fit with the head pic shown earlier, so color me confused.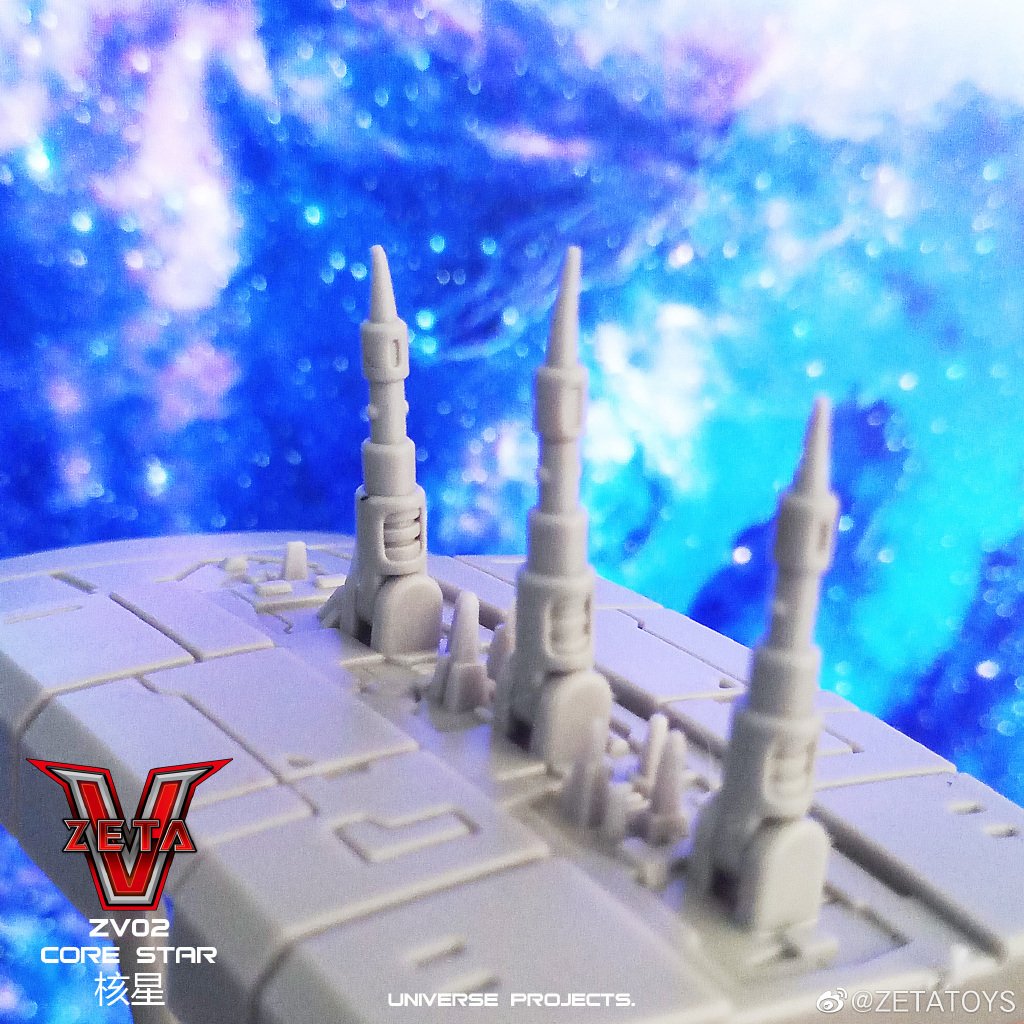
-
The Transformers Thread (licensed) Next
captain america replied to mikeszekely's topic in Anime or Science Fiction
You also know me, and if Hasbro doesn't correct it I won't rule-out making my own proper face/chin sculpt. I'm also thinking they might want to consider changing the silver to light grey, as well as making the body parts a tad more orange. I think those are reasonable and realistically achieved tweaks. -
New Moscato Macloss Model Project!!!
captain america replied to captain america's topic in Model kits
Falsely advertising in my opinion. -
New Moscato Macloss Model Project!!!
captain america replied to captain america's topic in Model kits
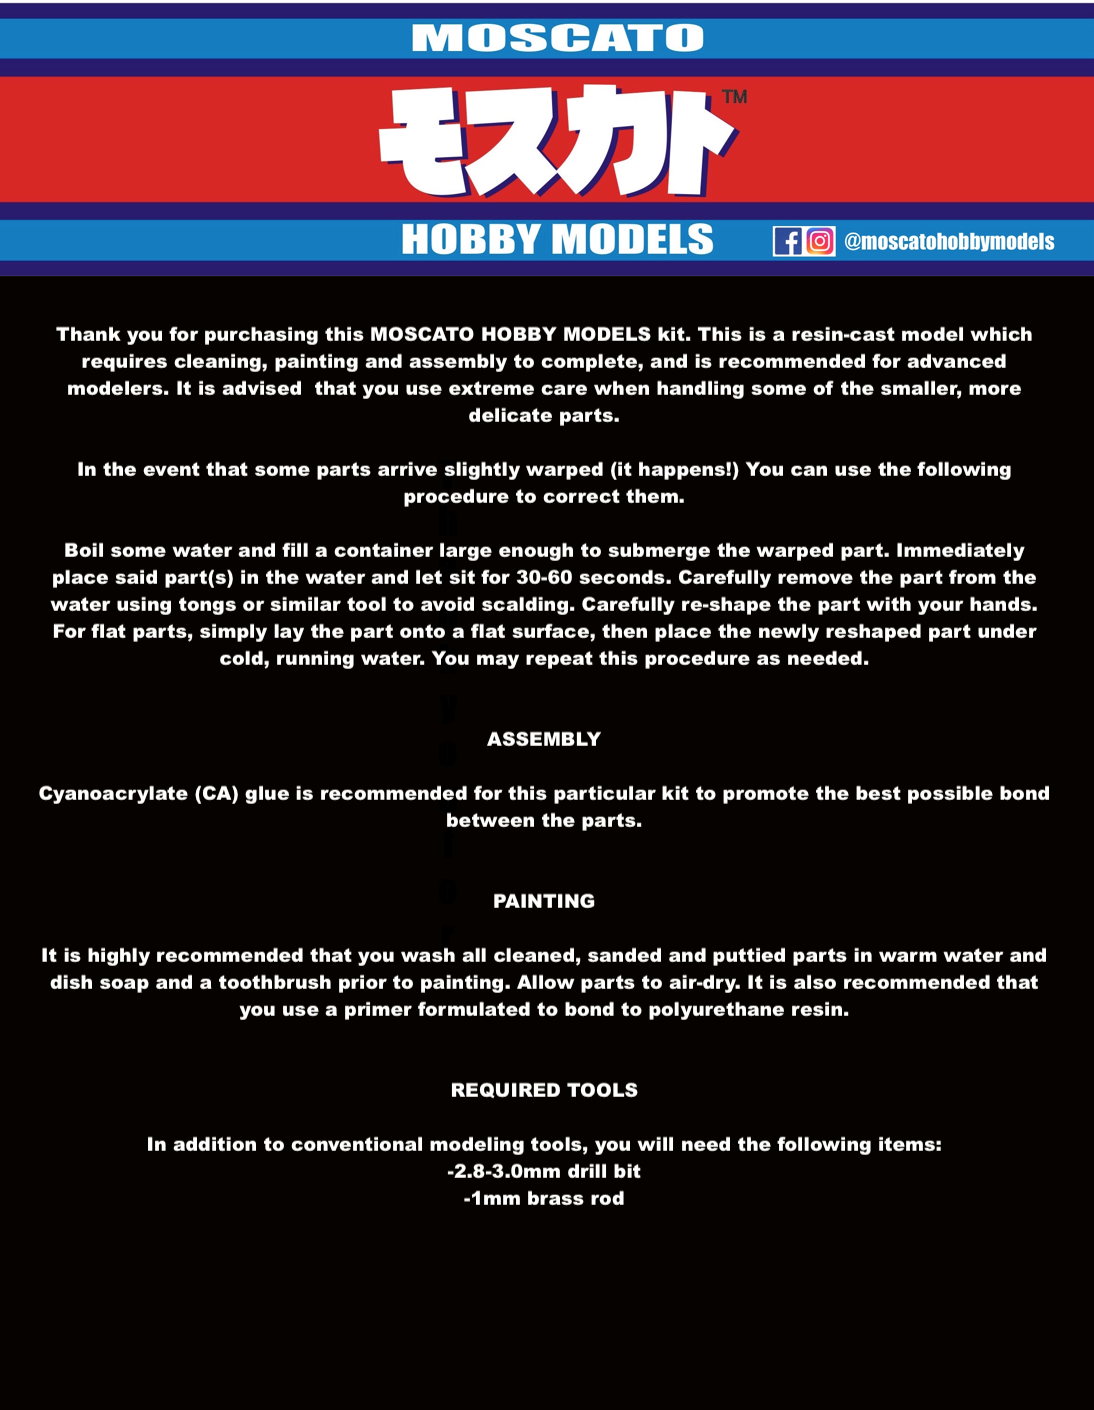
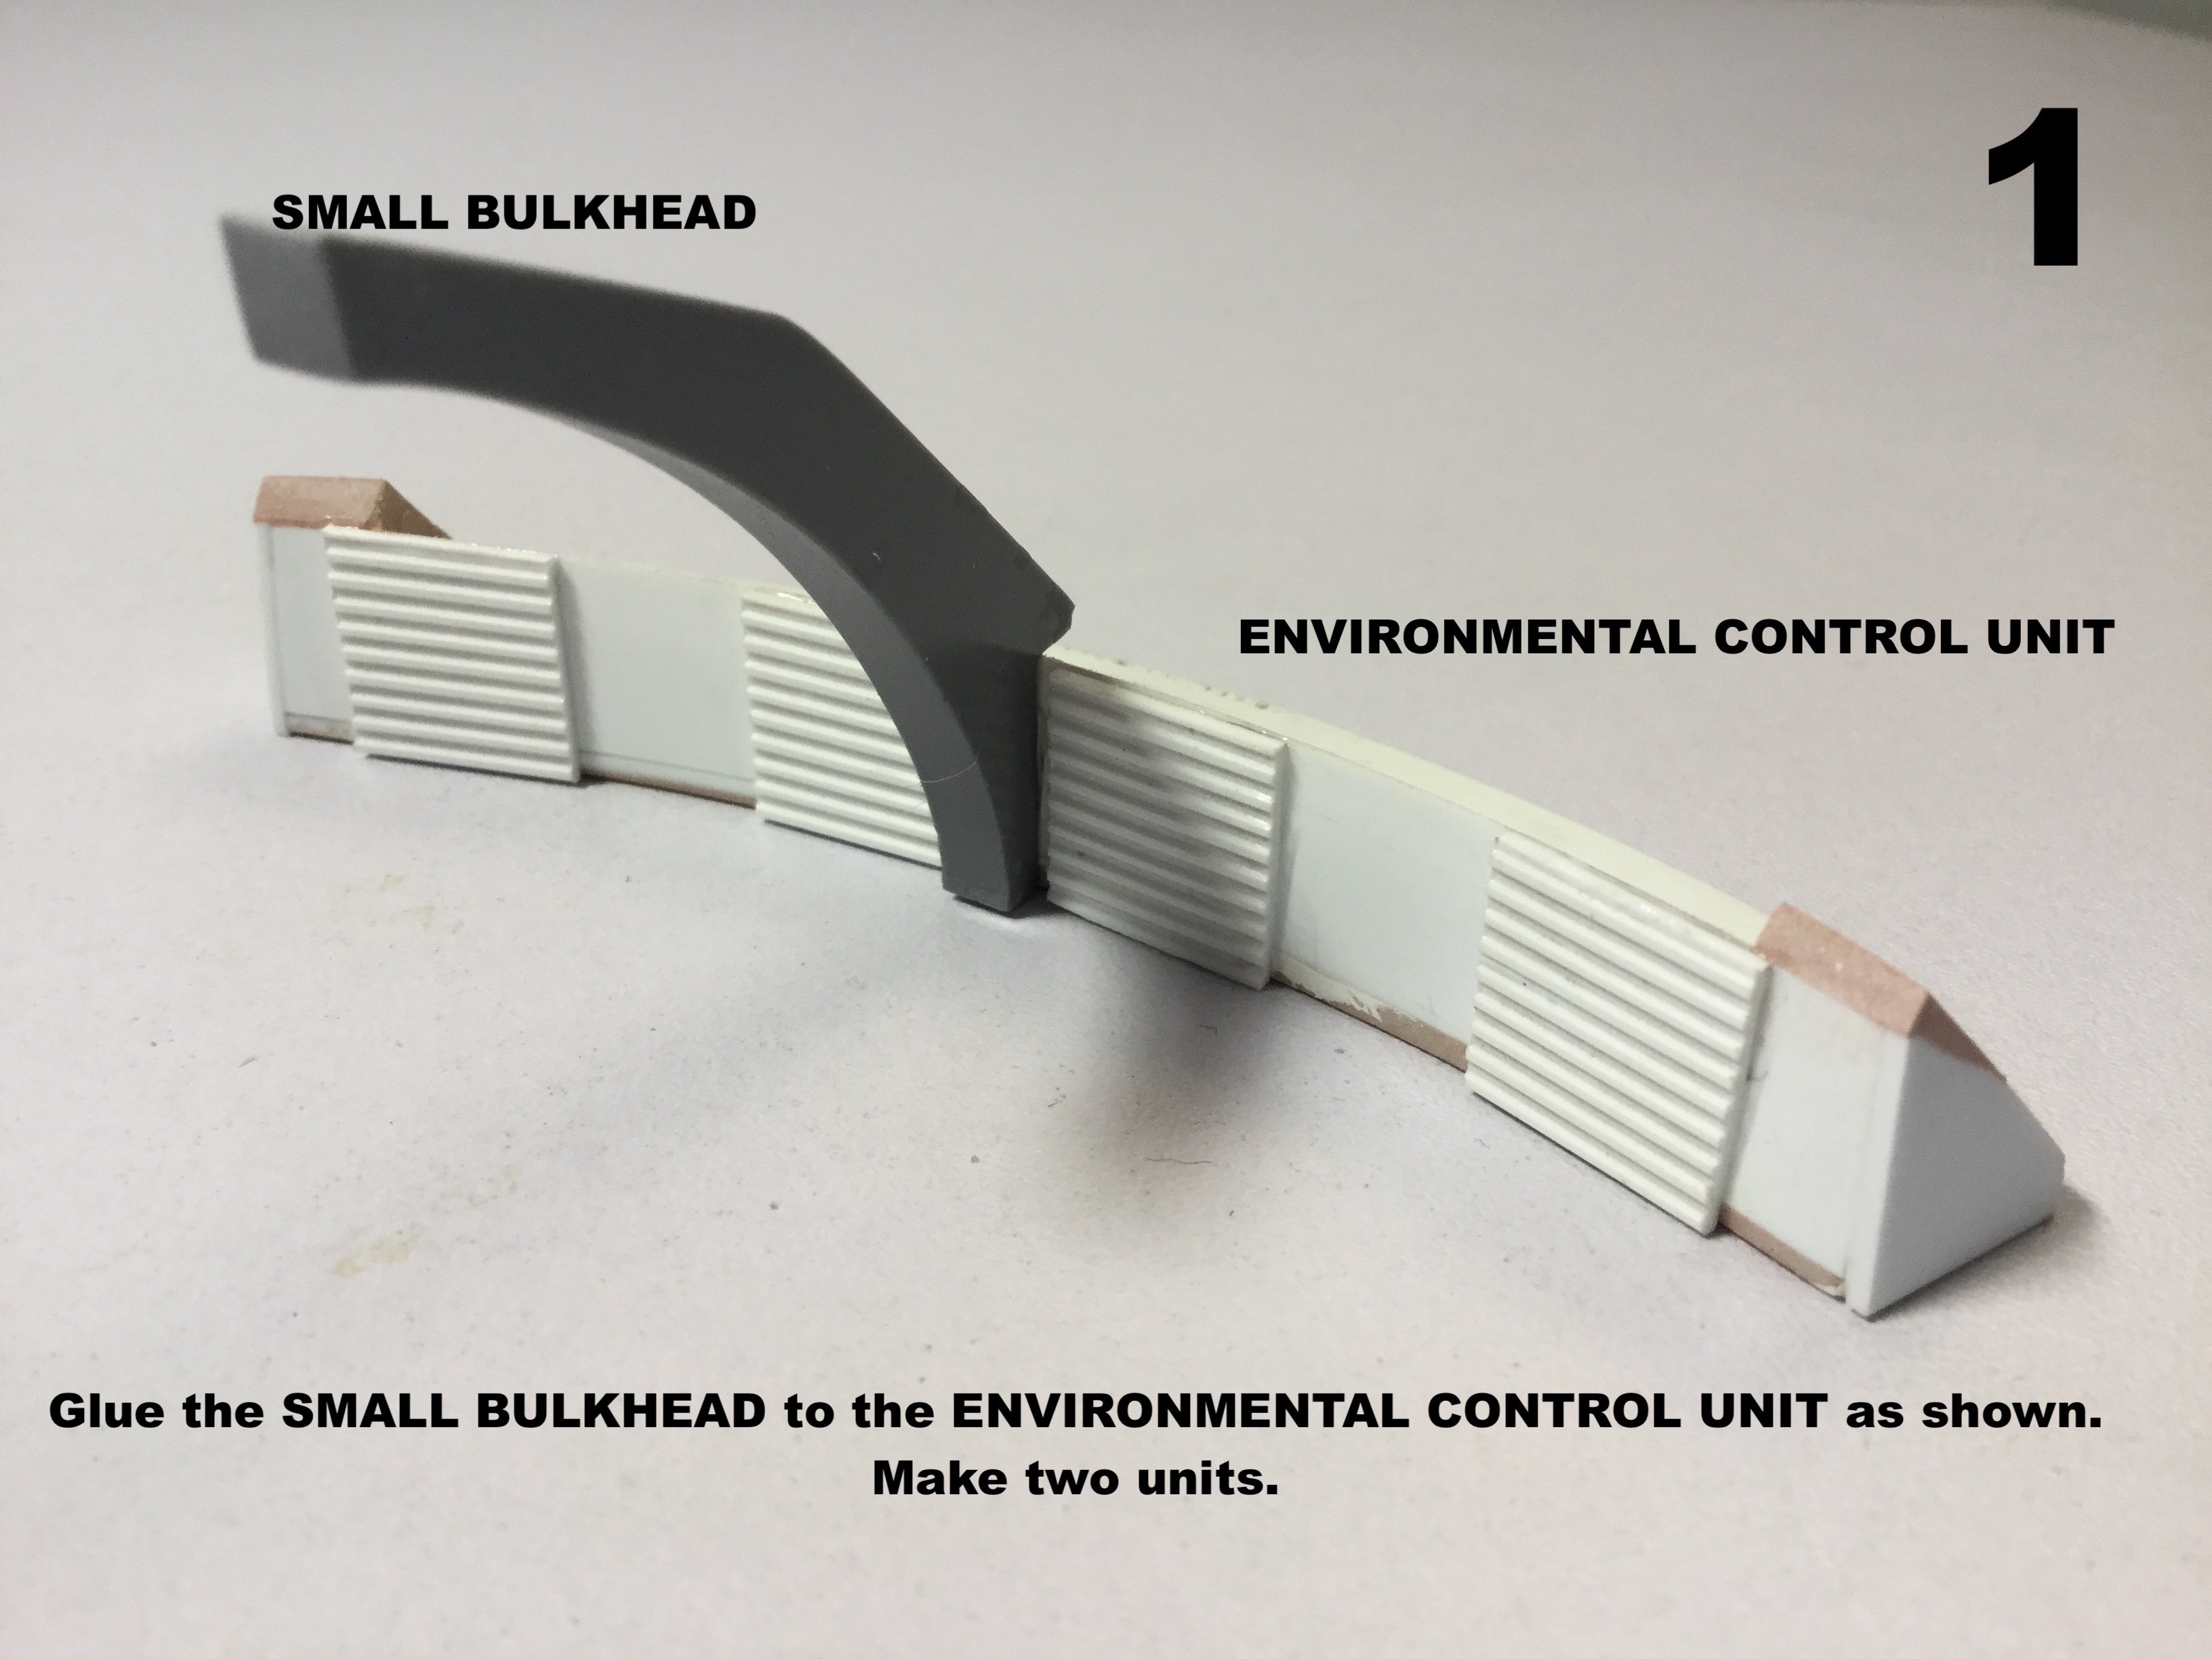
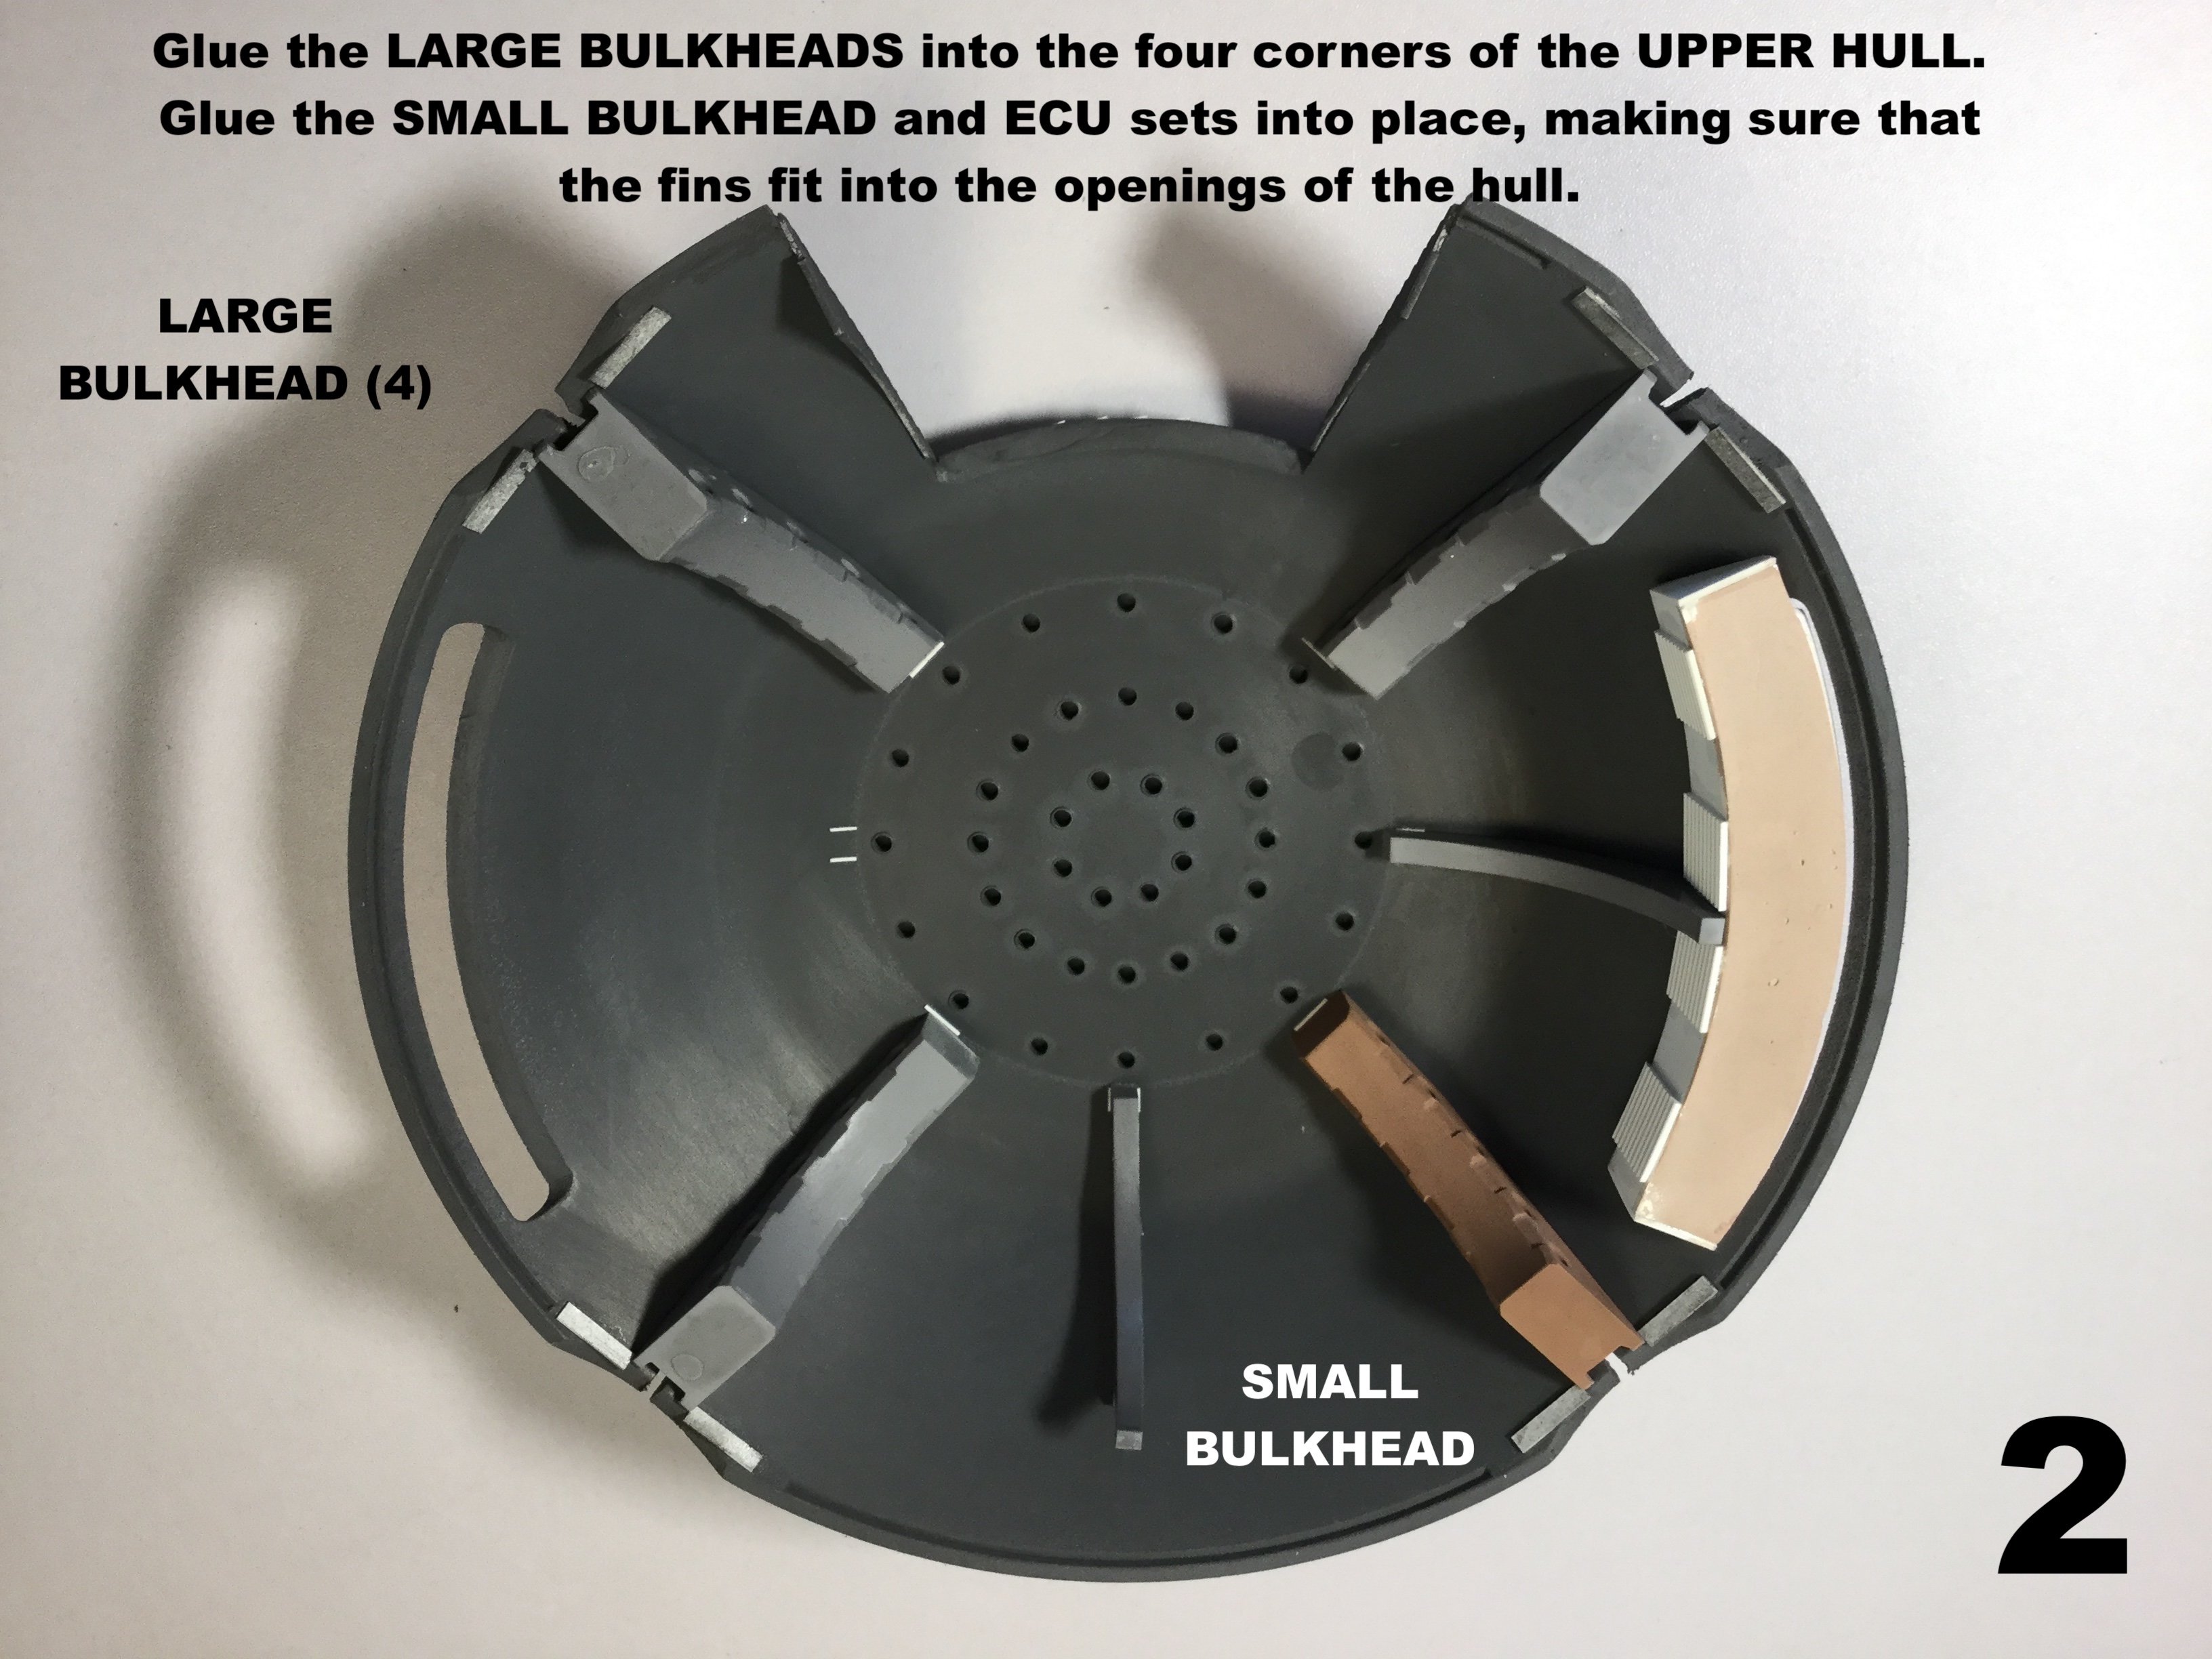
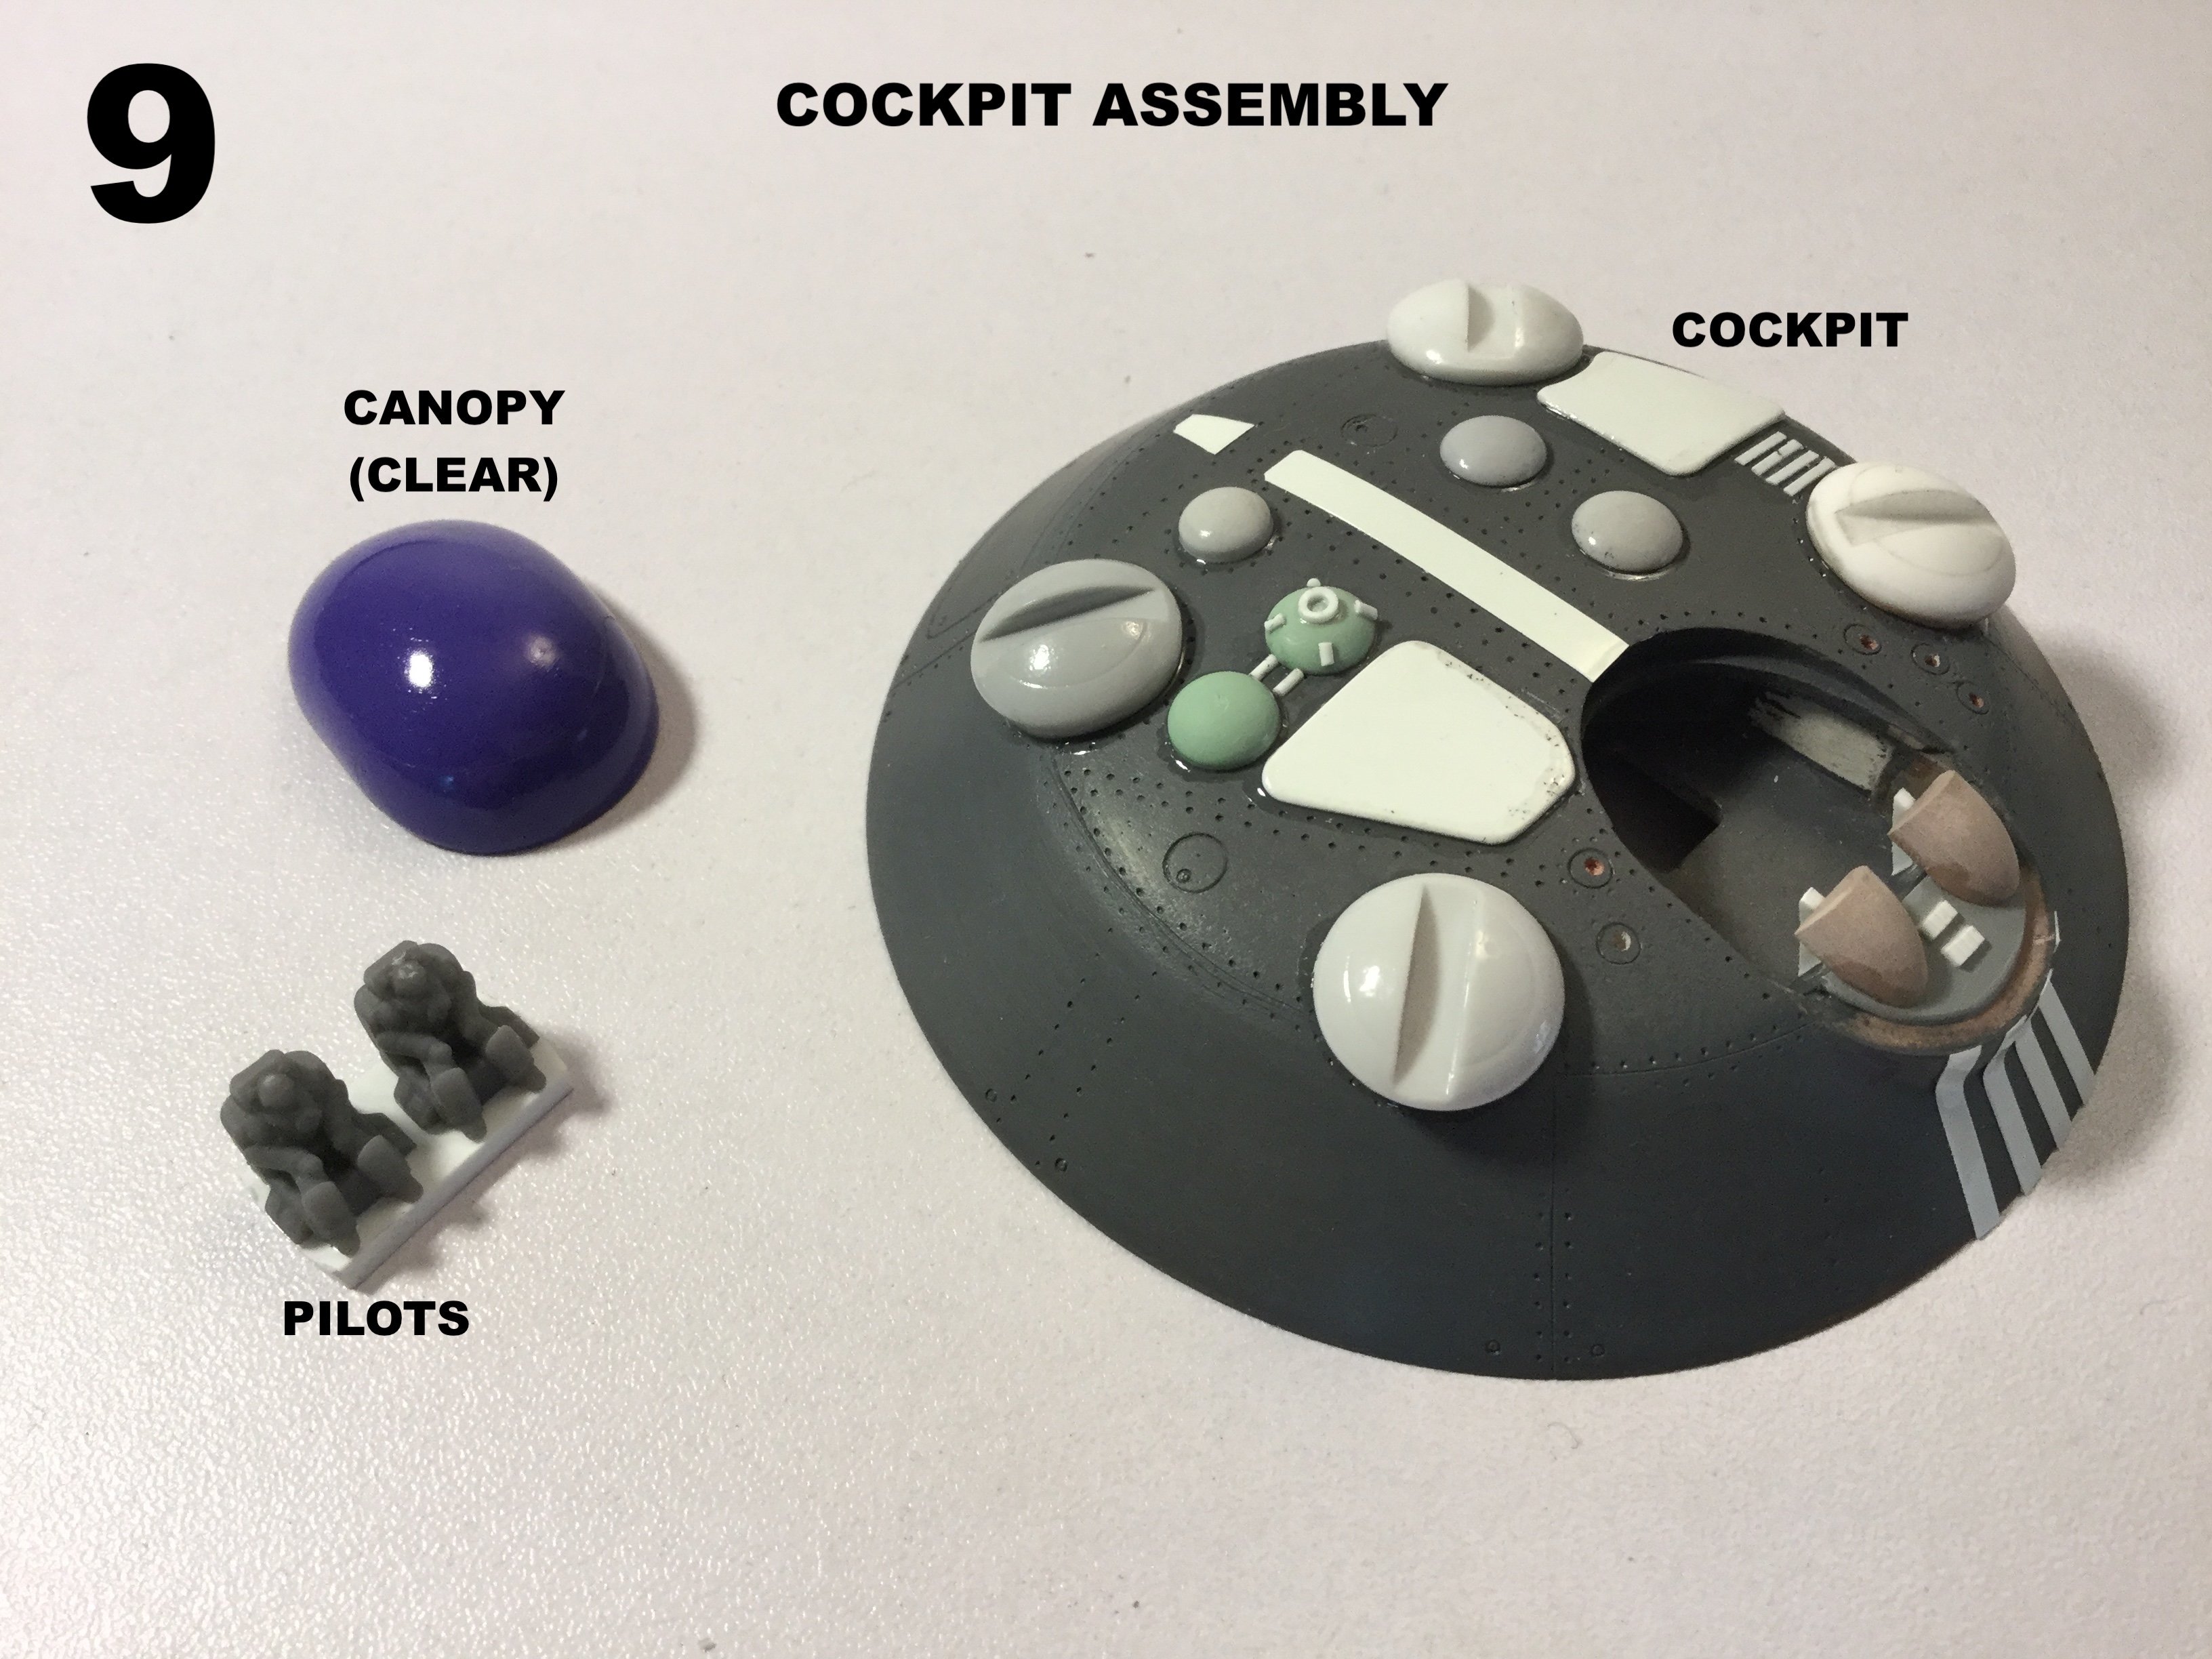
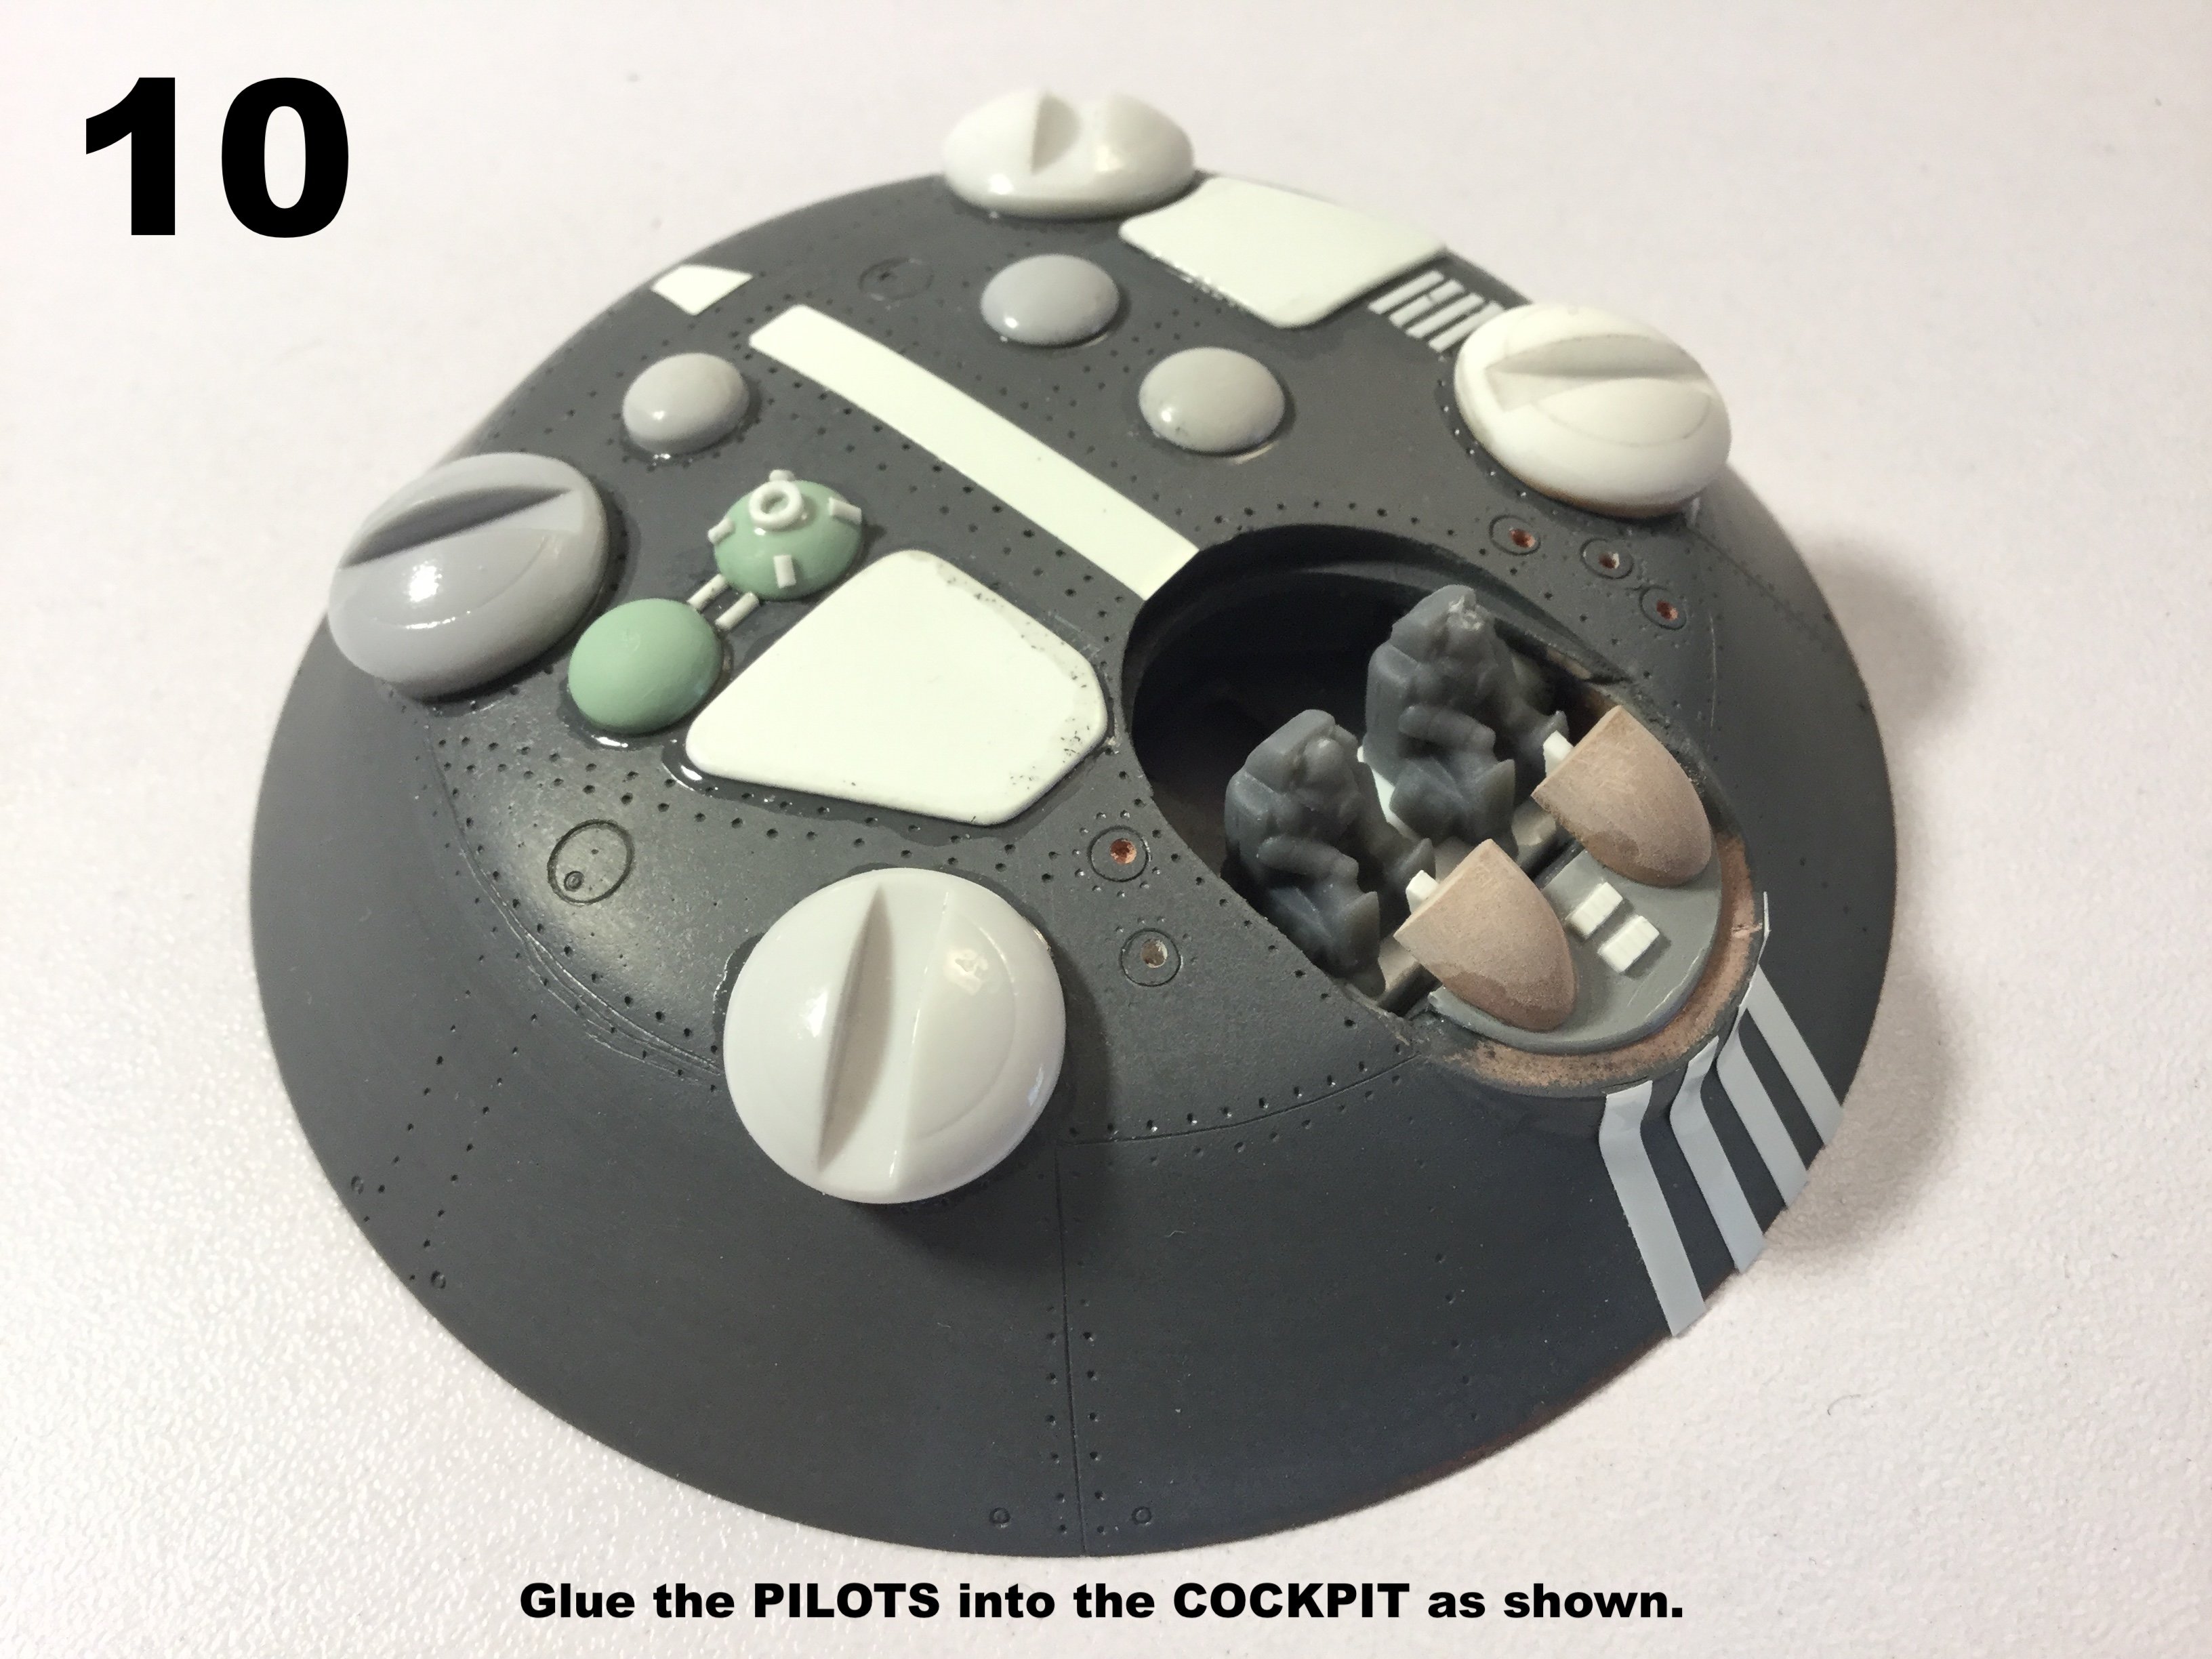
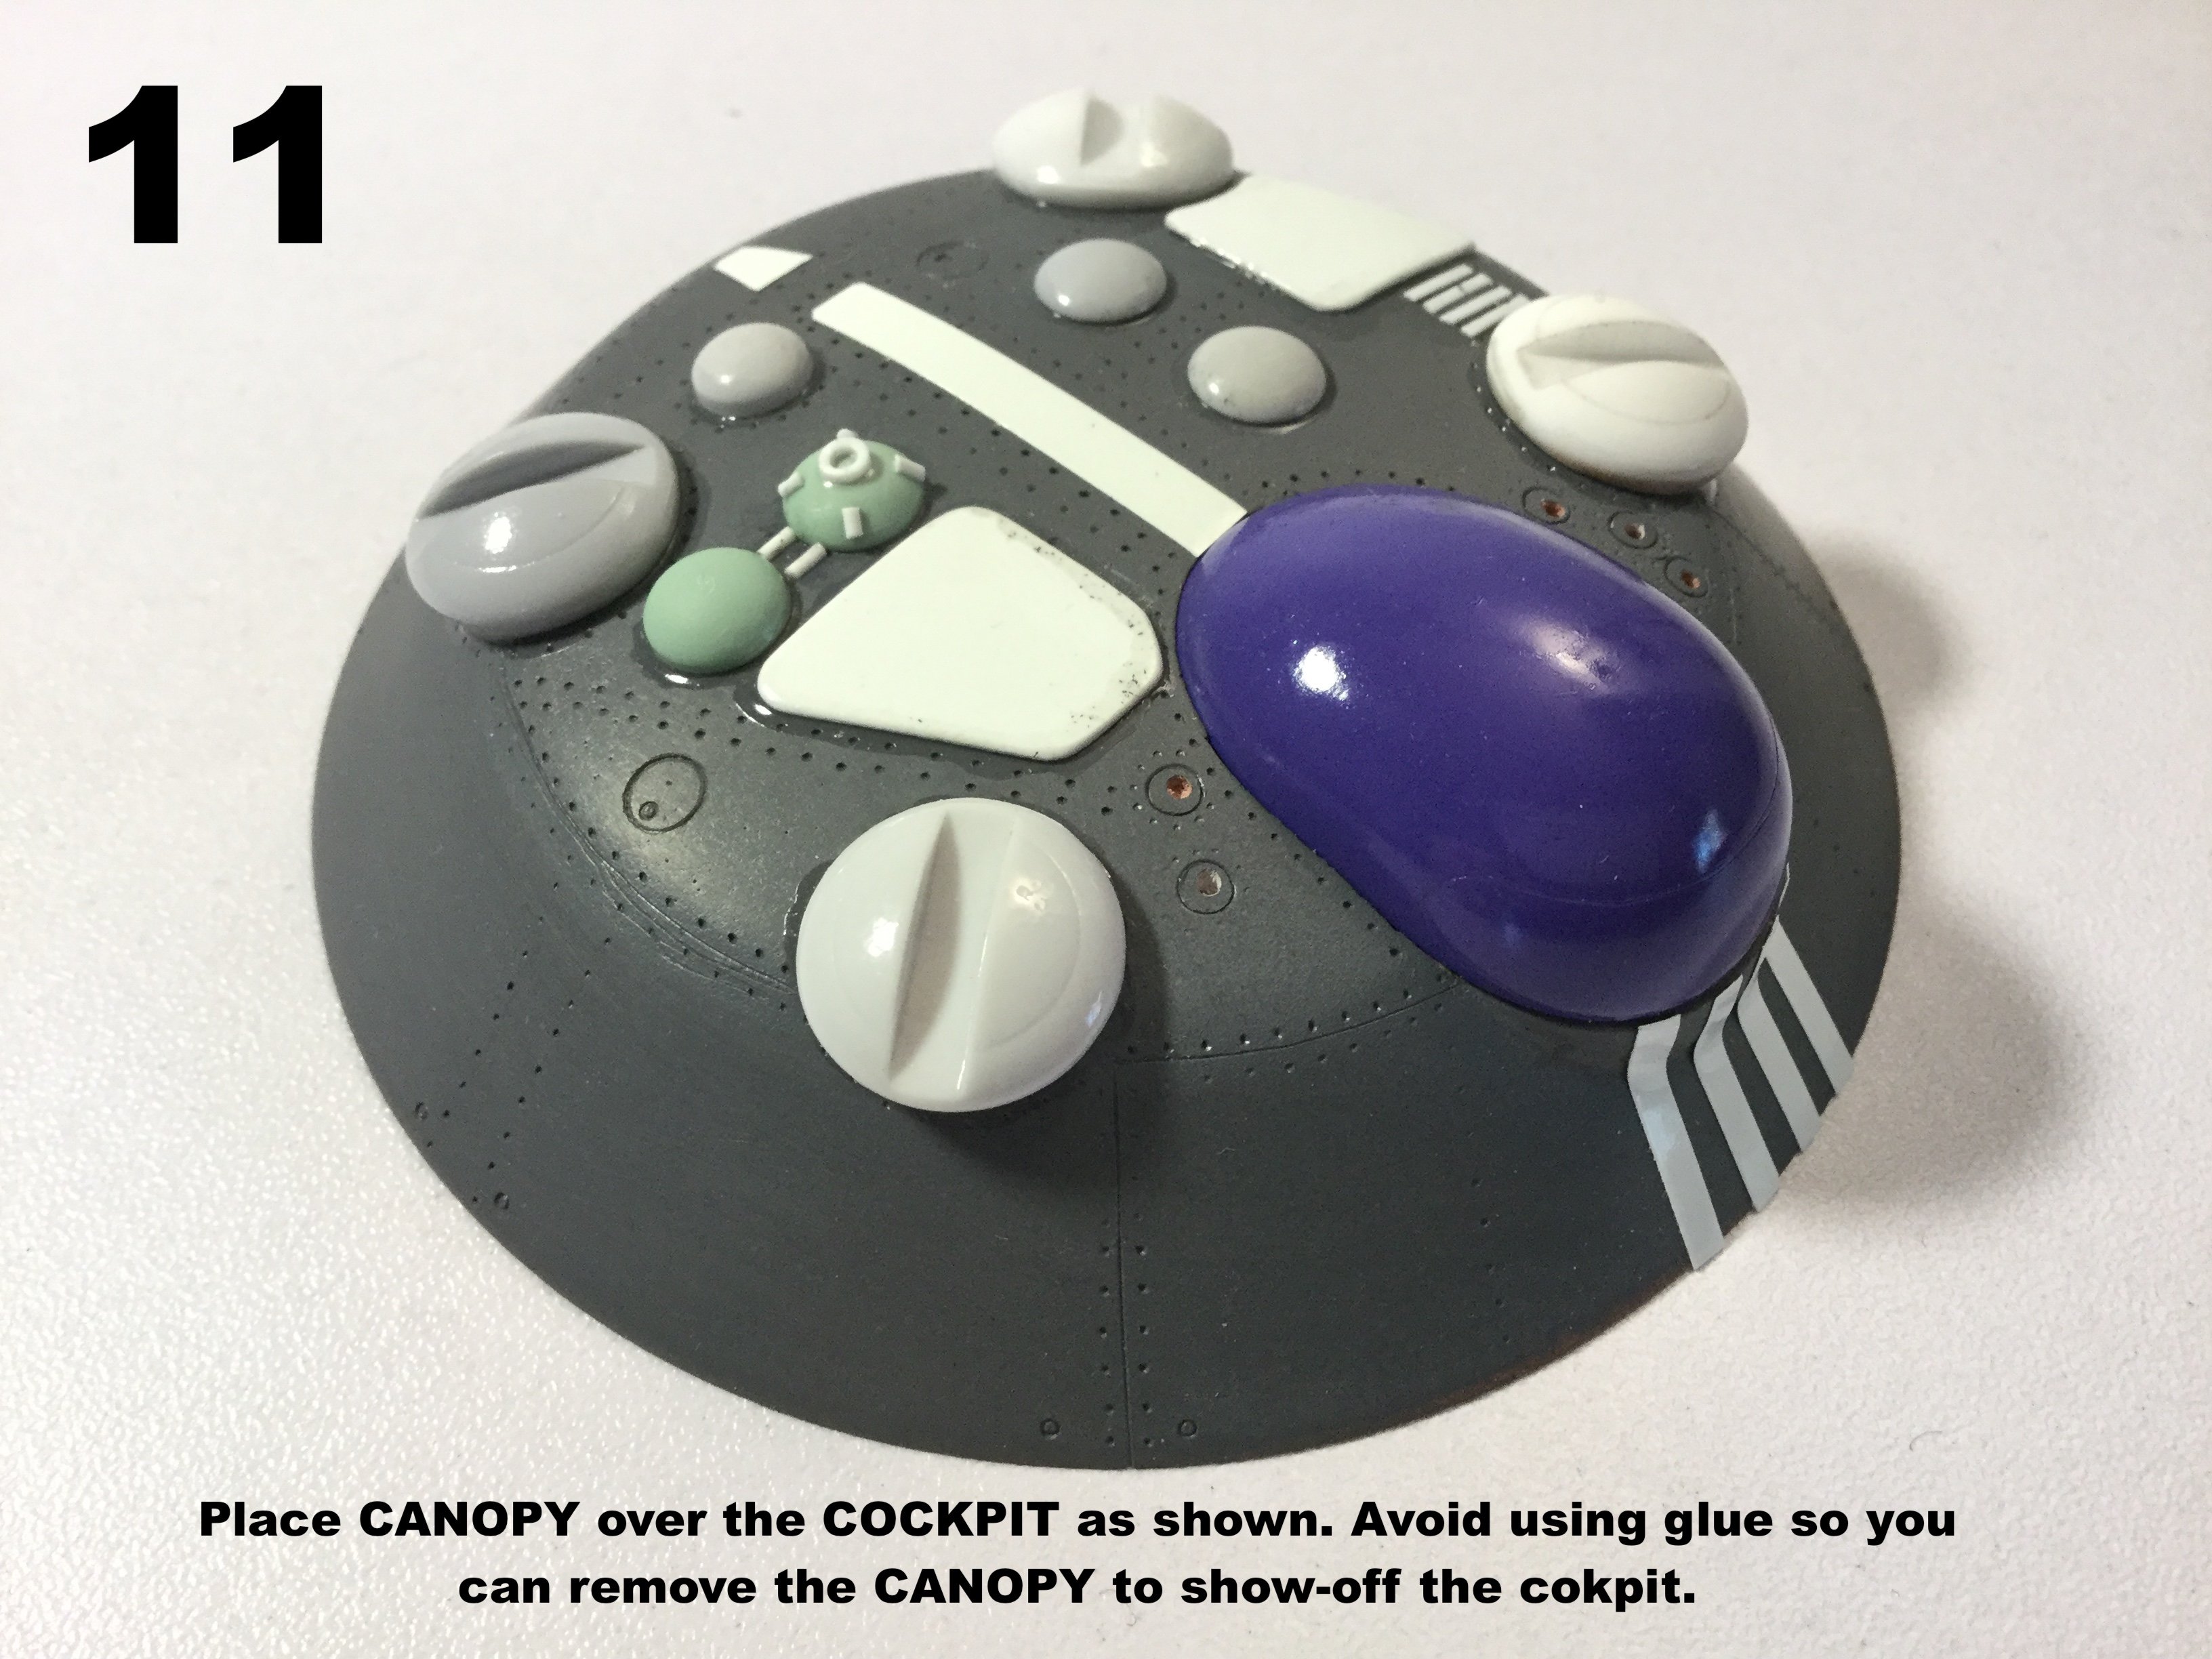
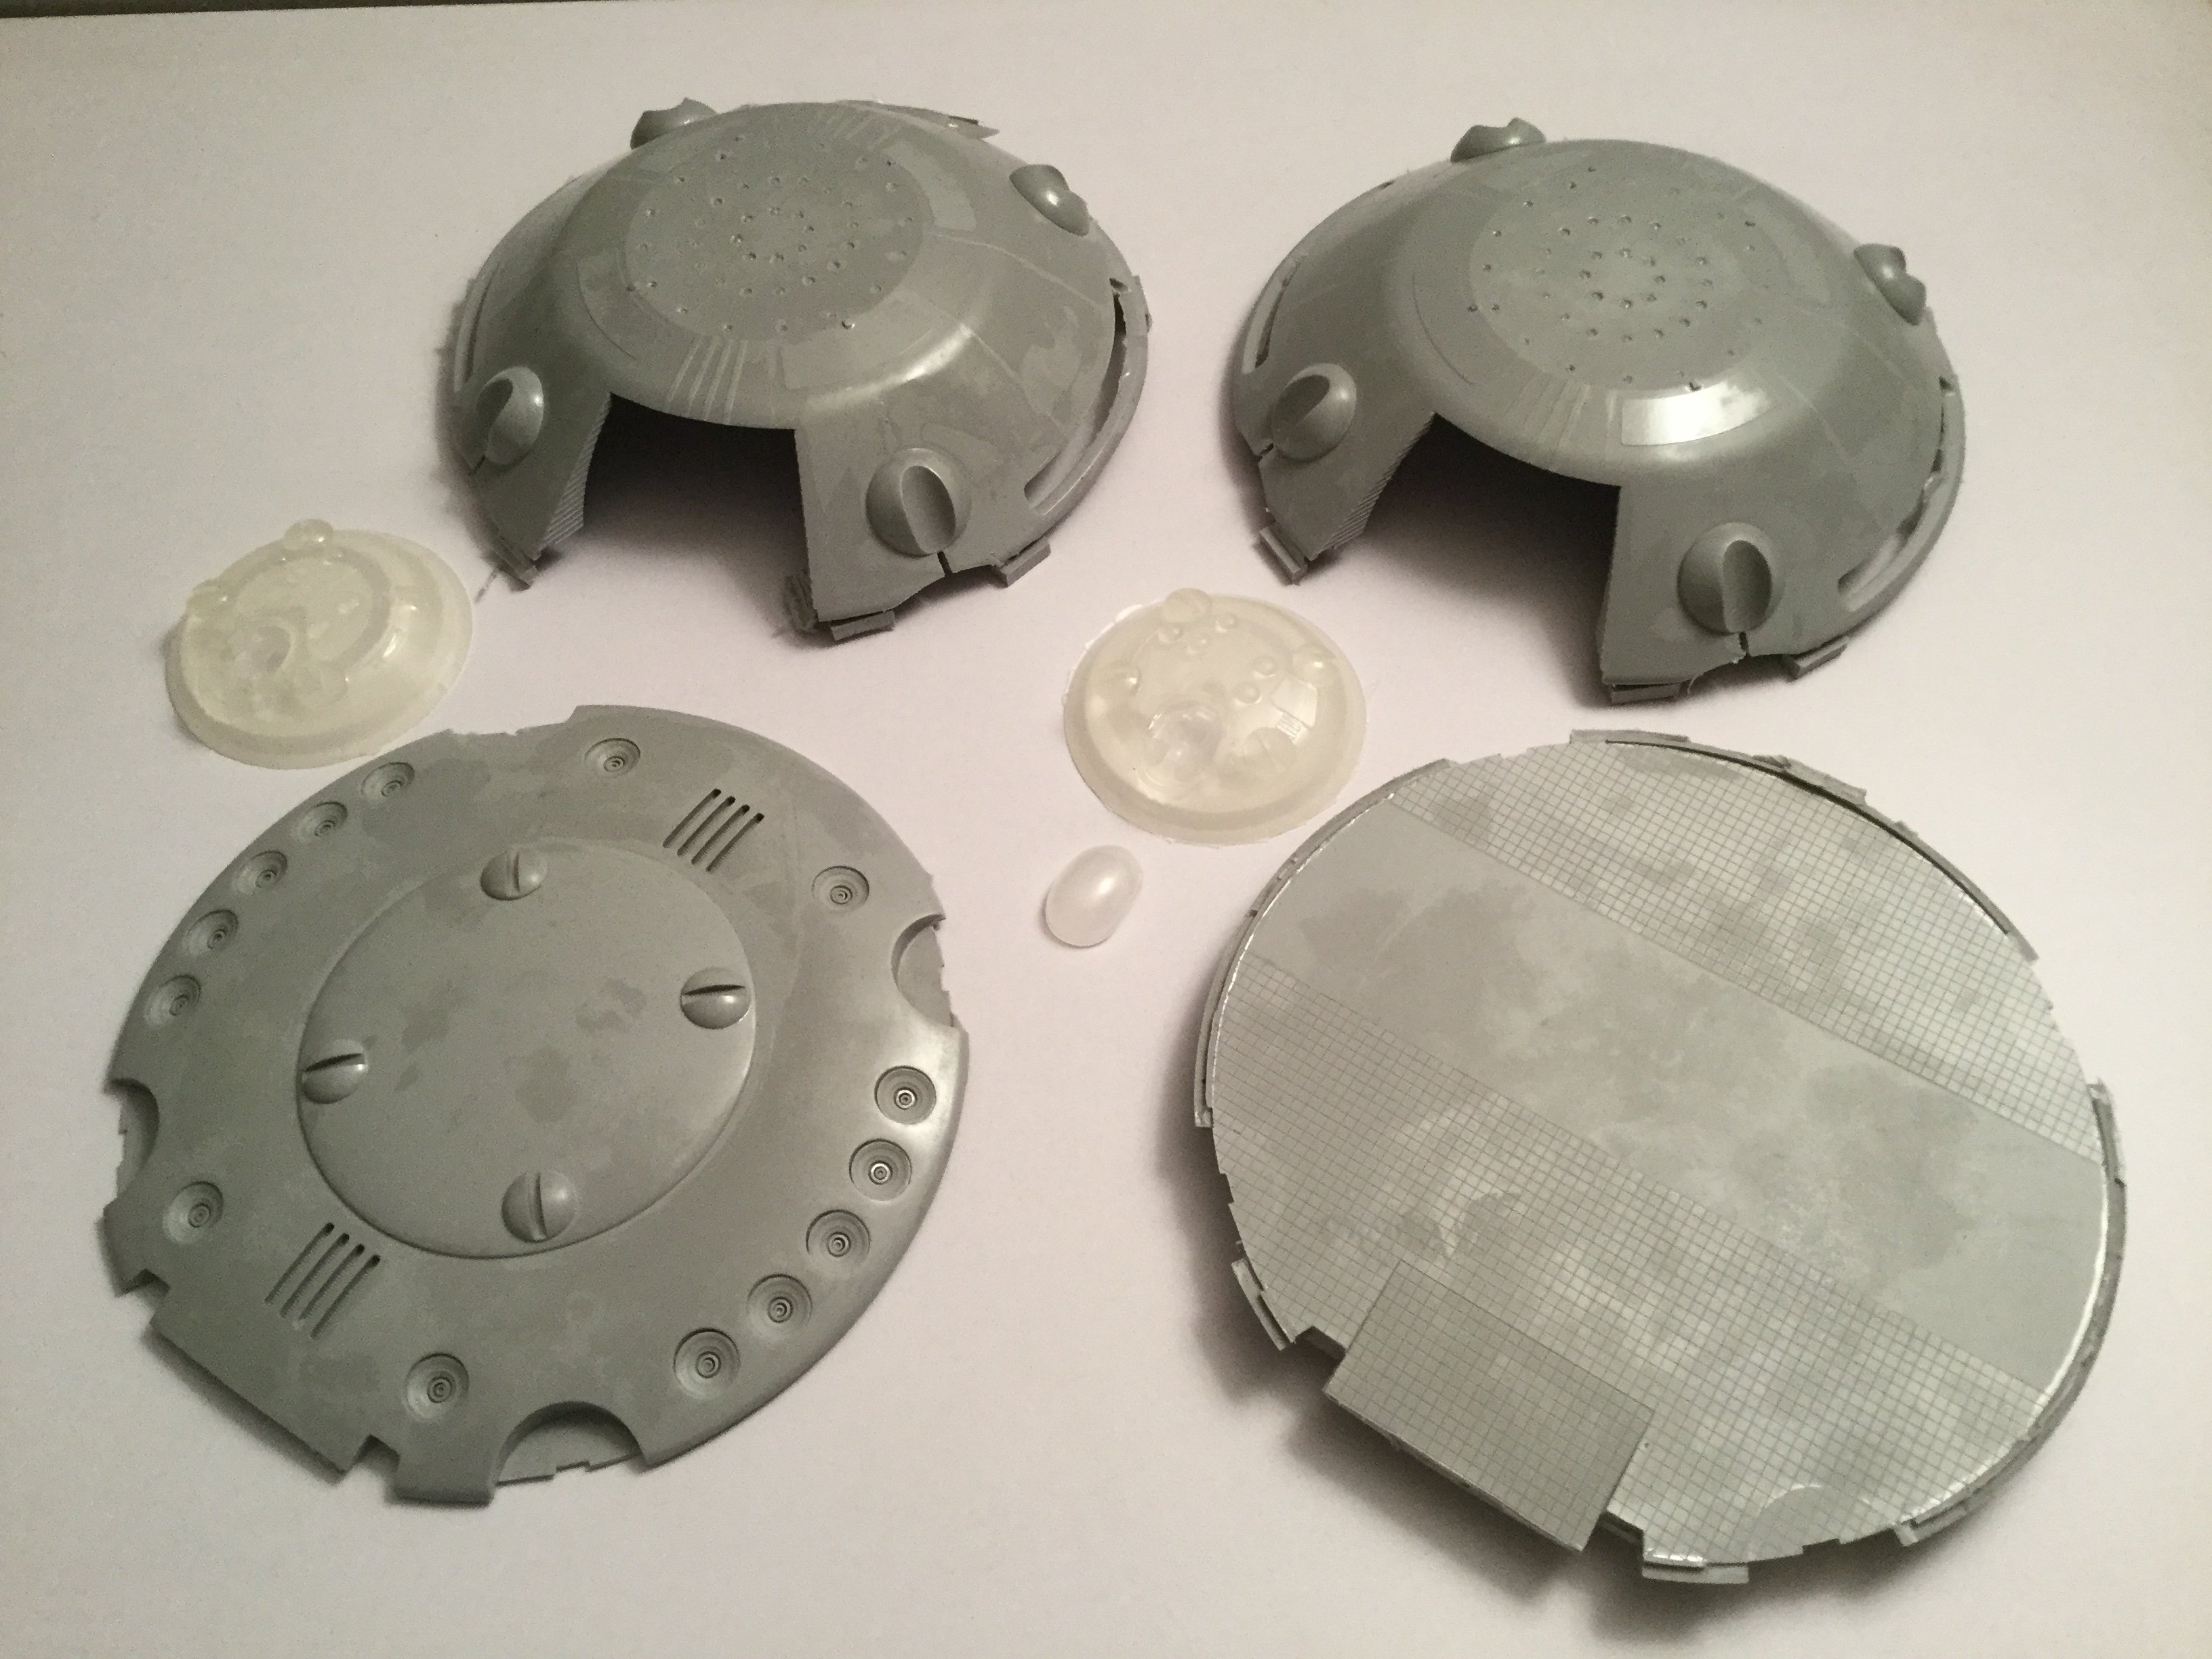
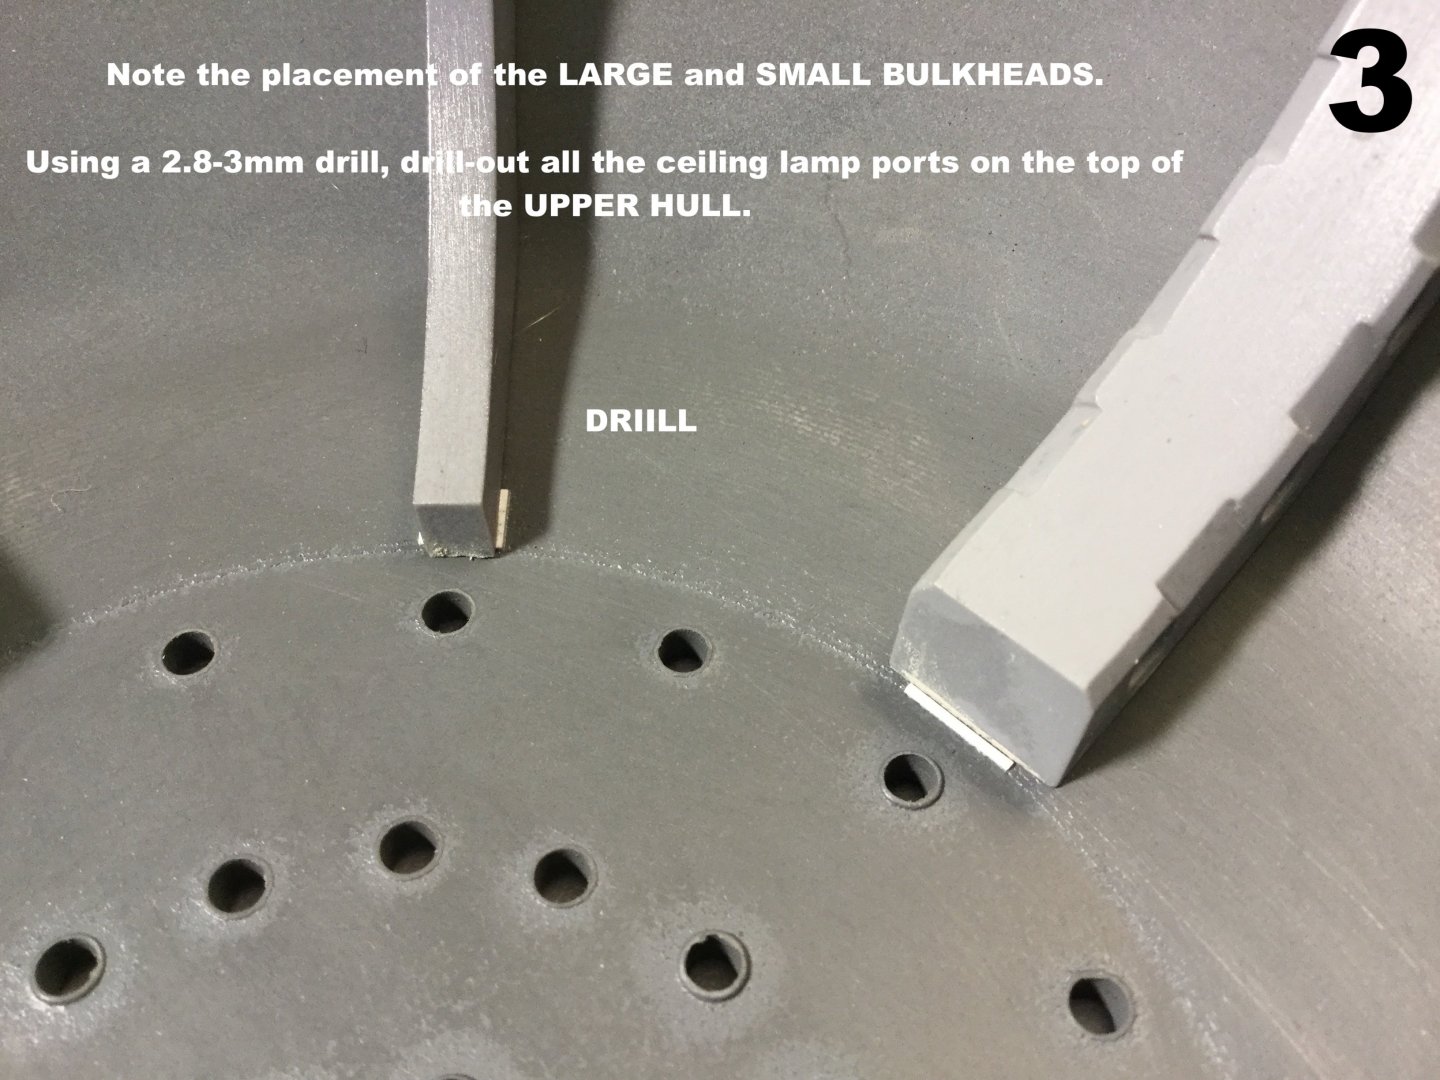
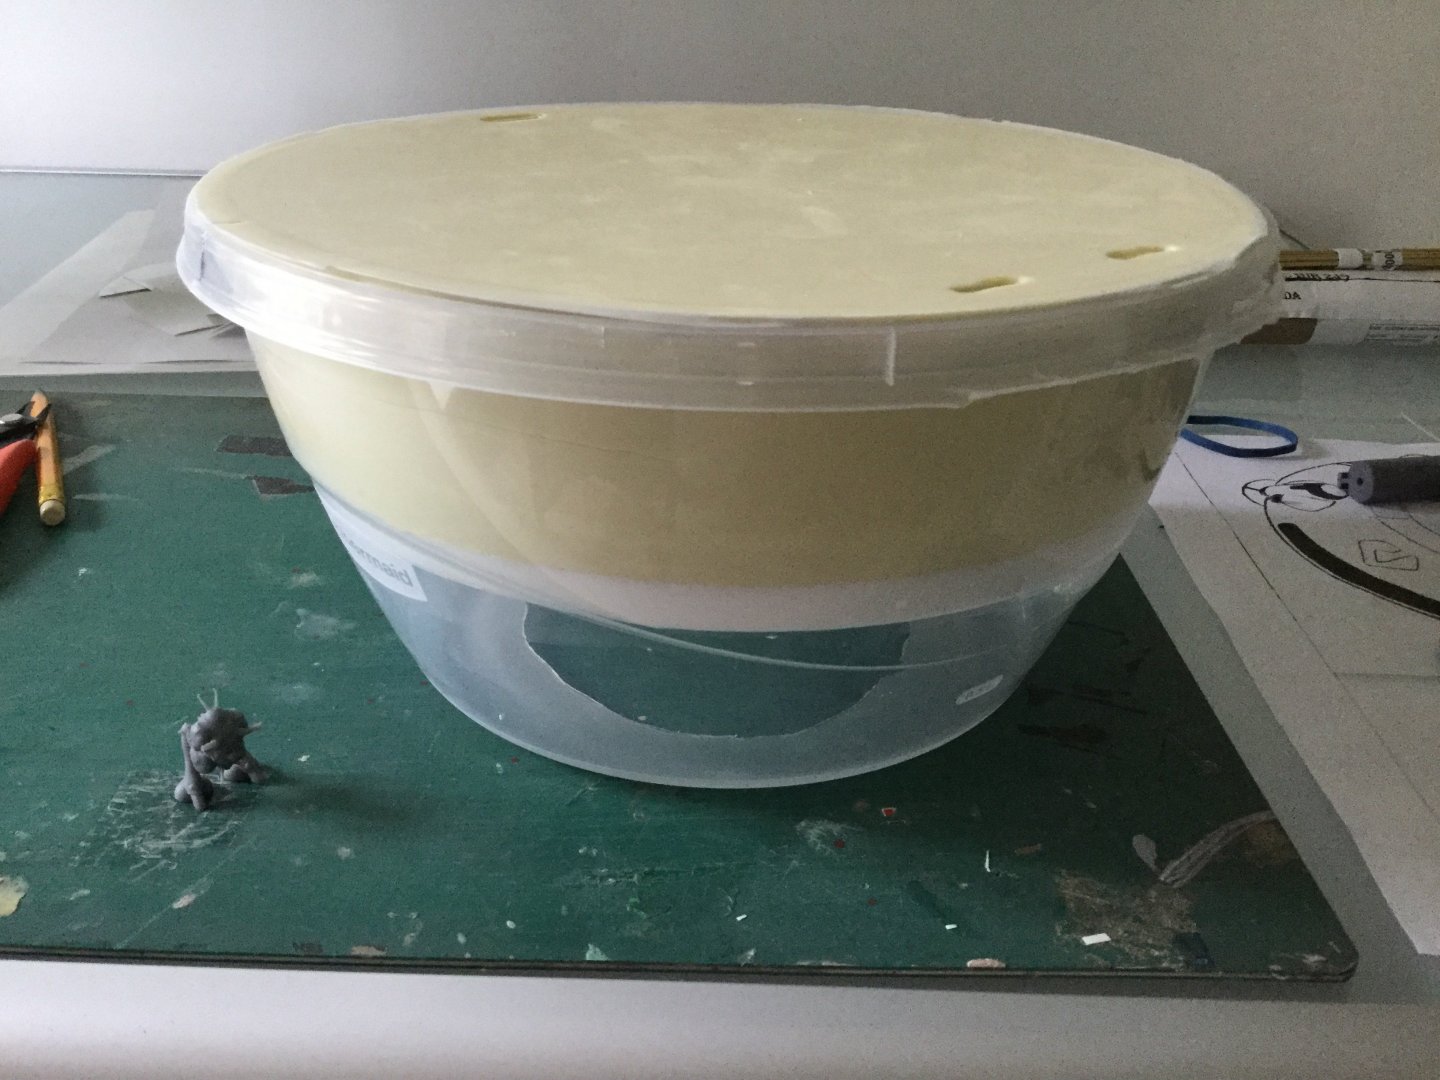
Hi guys! Quick Wednesday update: molds are almost done! I had a little molding mishap, or rather, a new mold product that failed to work as advertised. Consequently, I'm a few days behind where I'd like to be. Nothing that can't be re-molded with time and patience, but I thought I'd use this as a teaching moment. In short, whenever someone tries to sell you a mold-making silicone that doesn't require vacuum-degassing, degas it anyway! Below are pics of identical parts: the ones on the right are molded with degassed silicone rubber (as per my usual procedure), while the ones on the left are not. One half of the hull molds is also complete. Largest single molds I've poured in 15 years!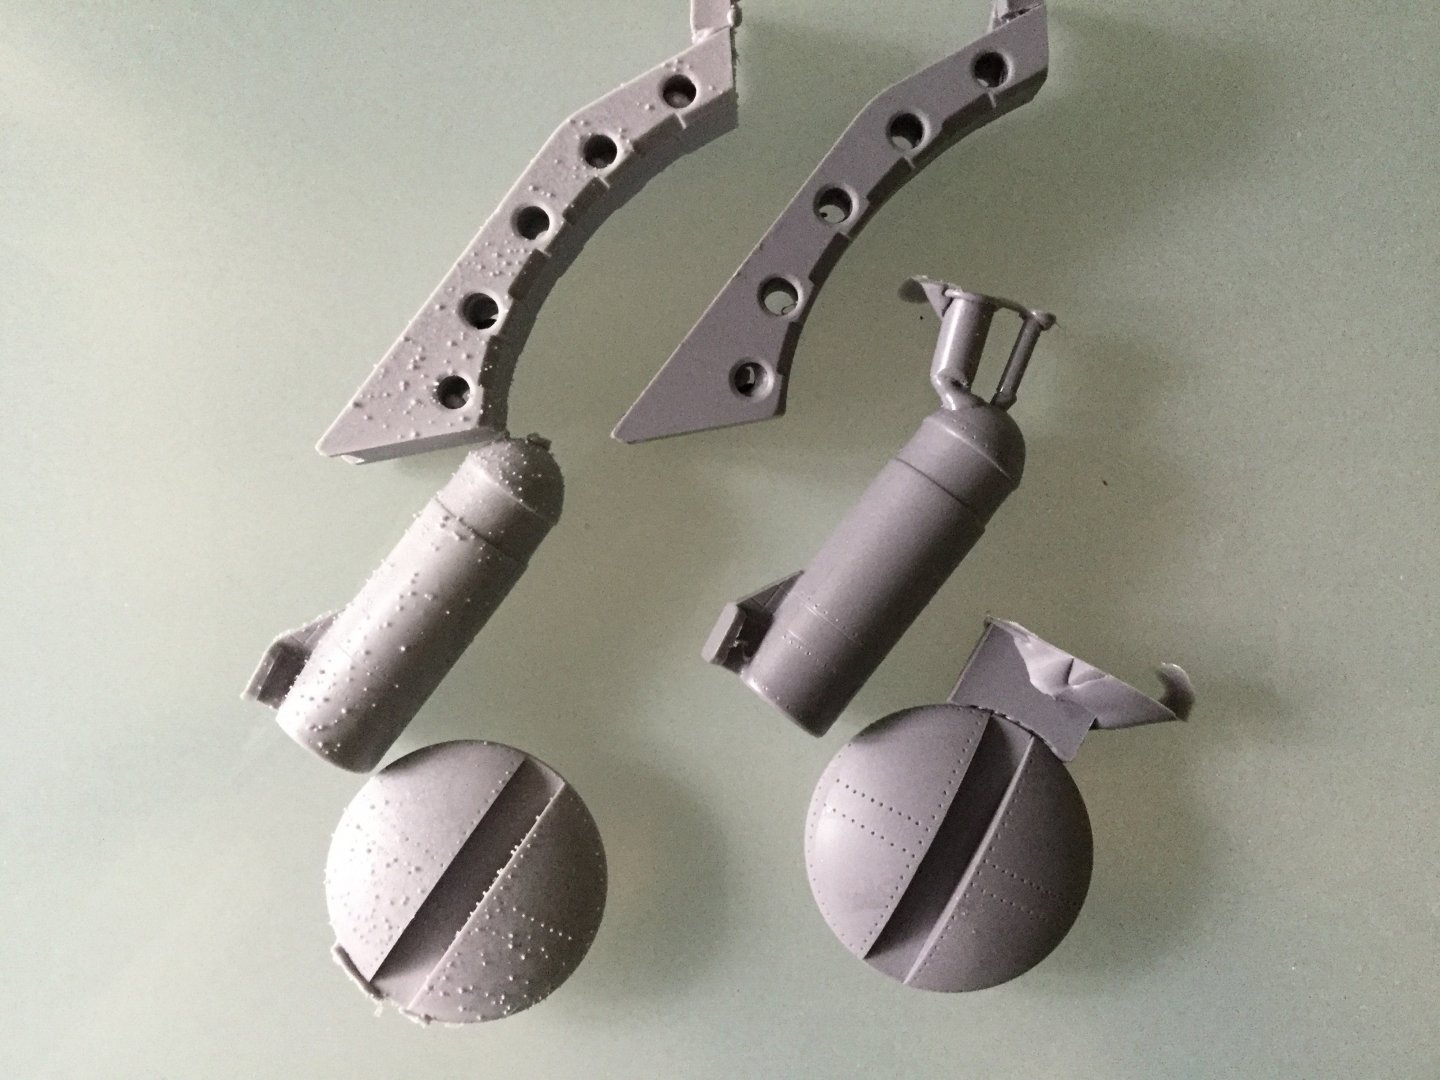
-
The Transformers Thread (licensed) Next
captain america replied to mikeszekely's topic in Anime or Science Fiction
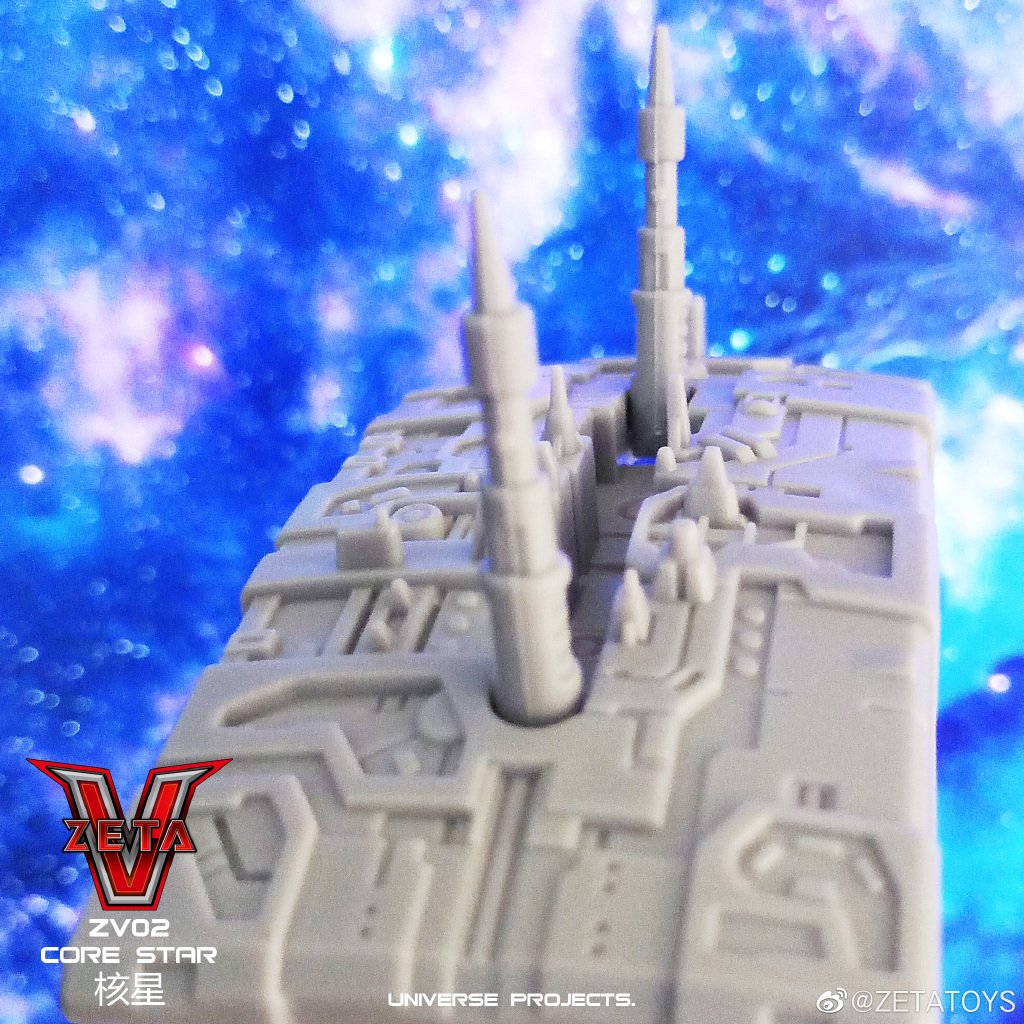
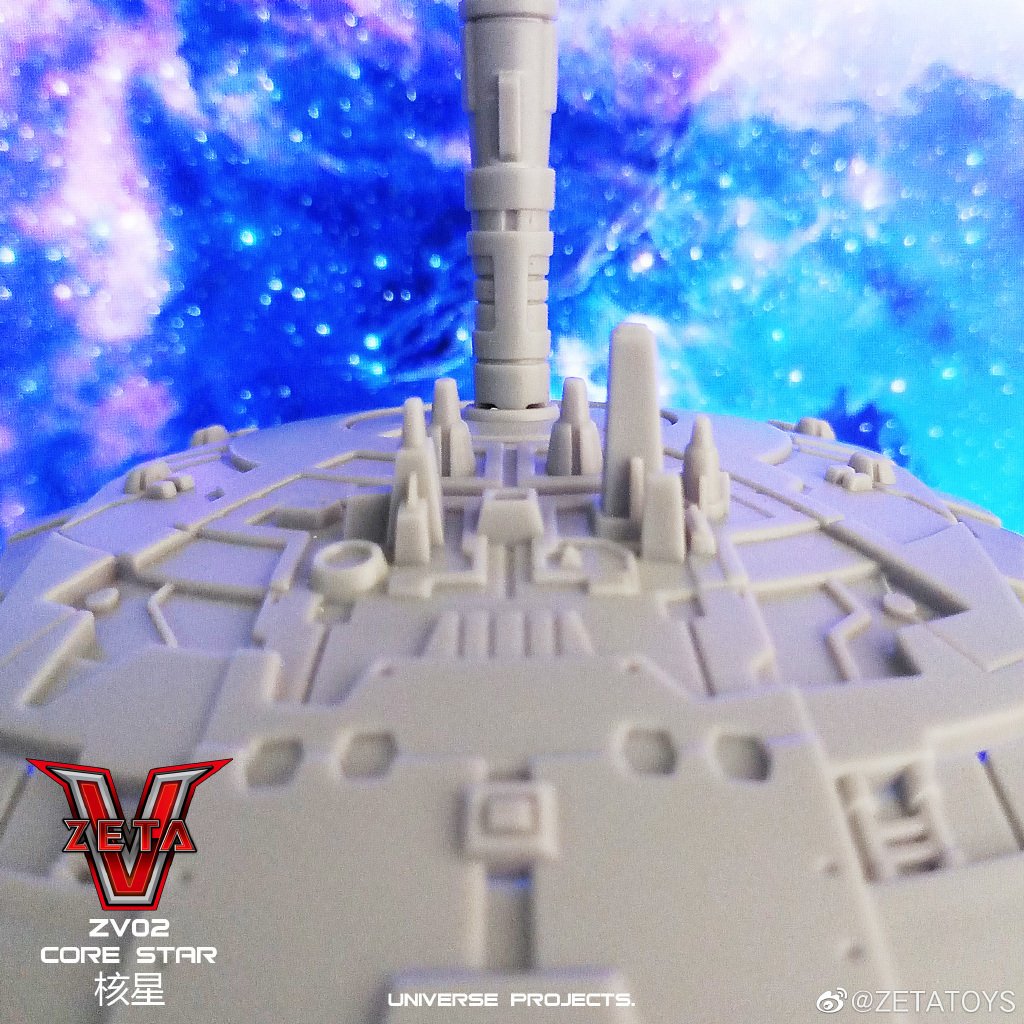
I always wanted my own planet. -
Neon Genesis EVANGELION General Thread
captain america replied to no3Ljm's topic in Anime or Science Fiction
In regards to question 1, the French dub says monsieur petit toutou (mister little teddy bear) so she might be referring to Shinji-kun. -
MAZINGER Z INFINITY: in theatres January 2018
captain america replied to captain america's topic in Anime or Science Fiction
I'm surprised that this isn't getting more attention, particularly in lieu of the impressive HG kits that have been released.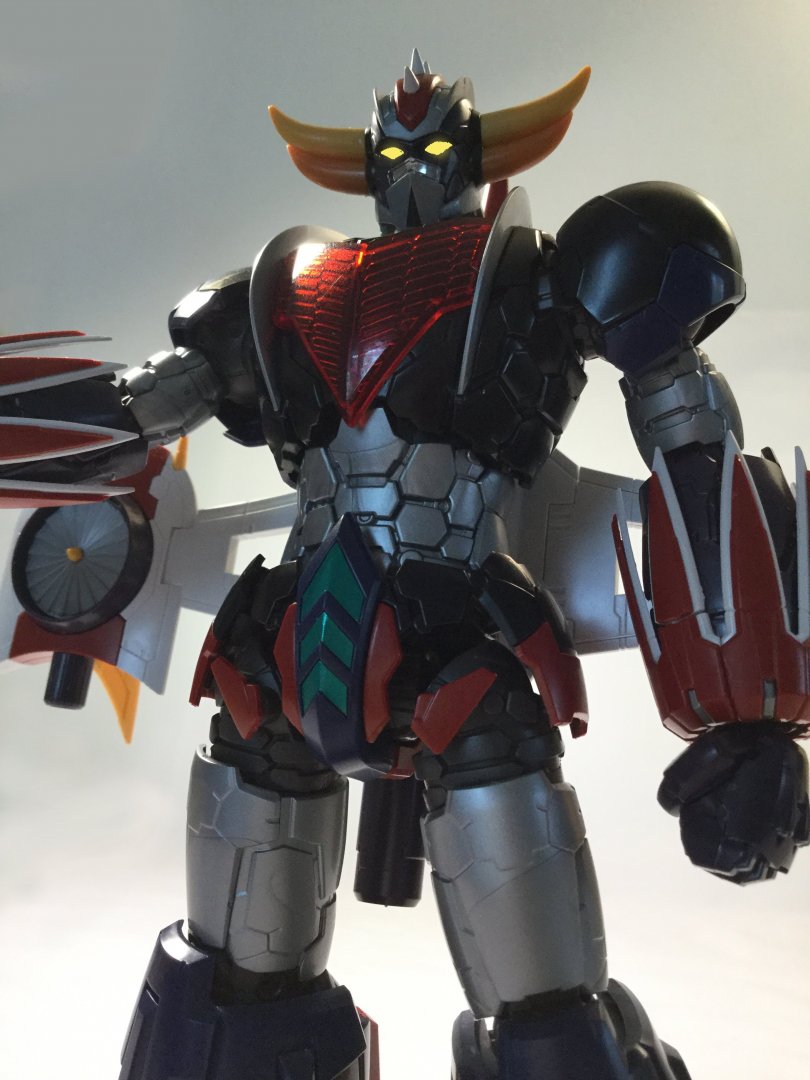
-
Just an extra little nugget of info I was able to glean from the old Imai box tops: H and I models use JG-97M engines, Z model has JG-99M engines and is optimized for atmospheric combat.
-
New Moscato Macloss Model Project!!!
captain america replied to captain america's topic in Model kits
Om nom nom
-
Now's the time to grab these because like any garage kit, it's a limited engagement.