captain america
-
Posts
3527 -
Joined
-
Last visited
Content Type
Profiles
Forums
Events
Gallery
Everything posted by captain america
-
They look almost satirical with those oversized helmets.
-


-
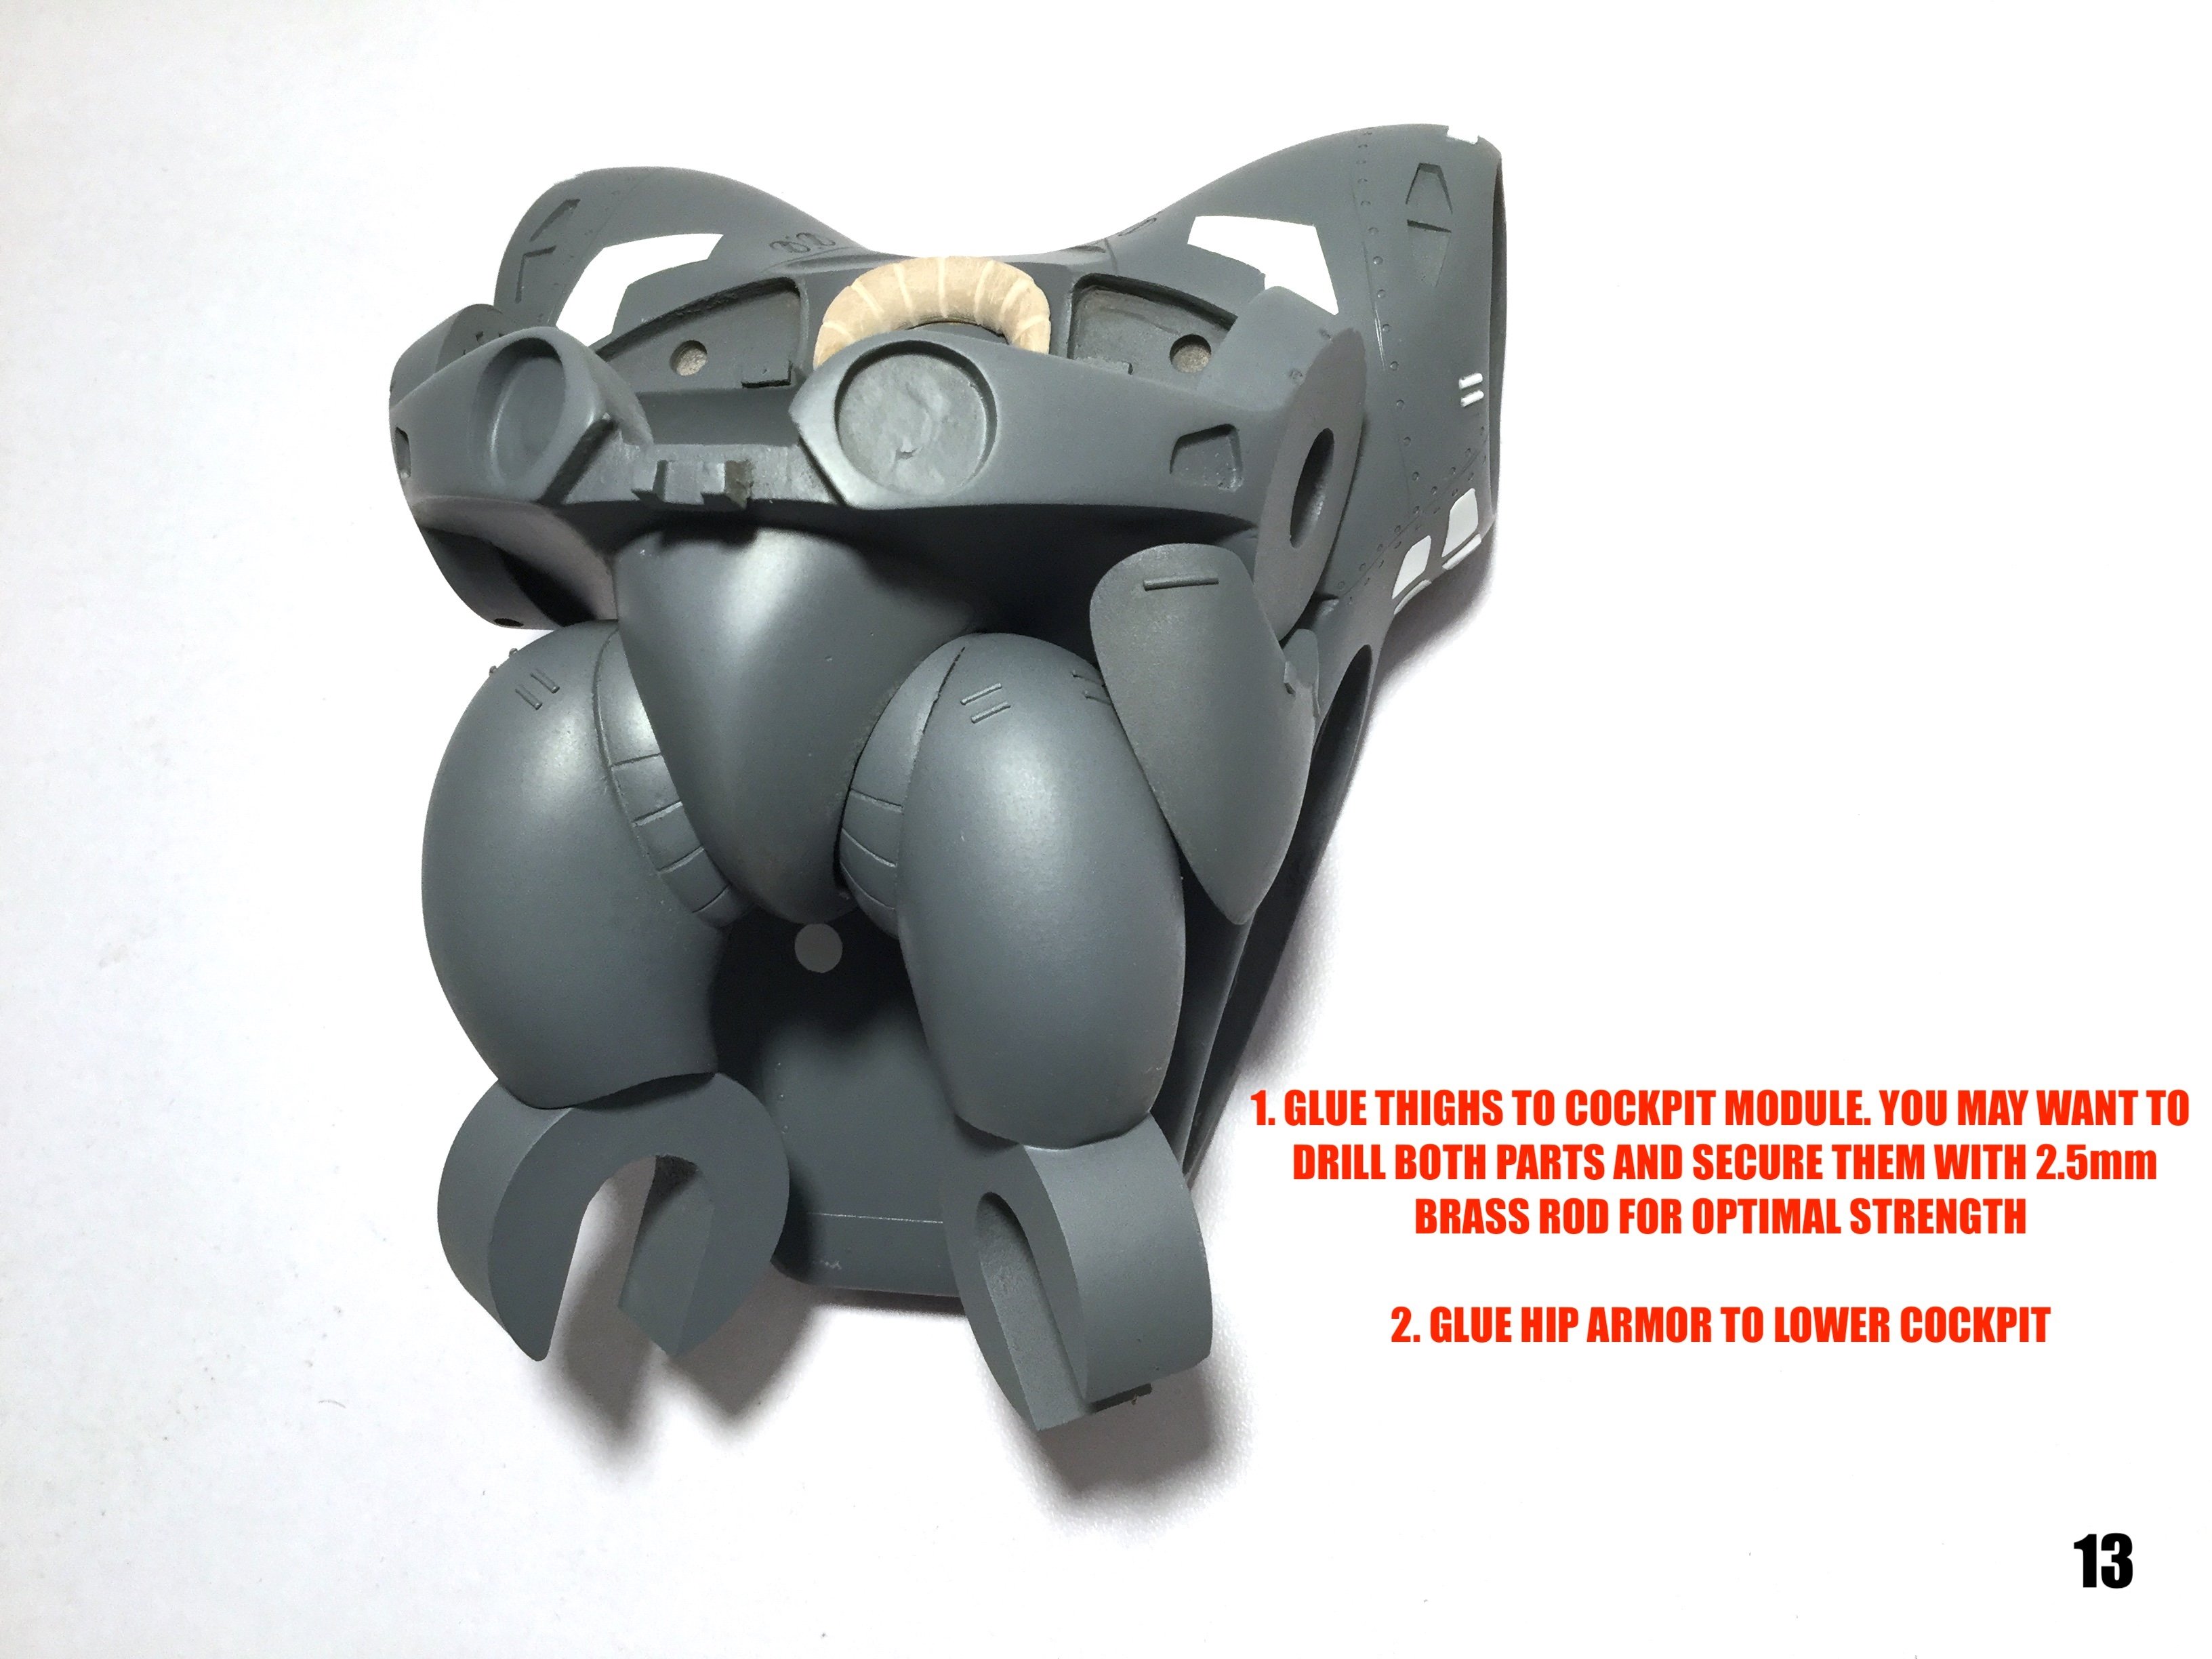
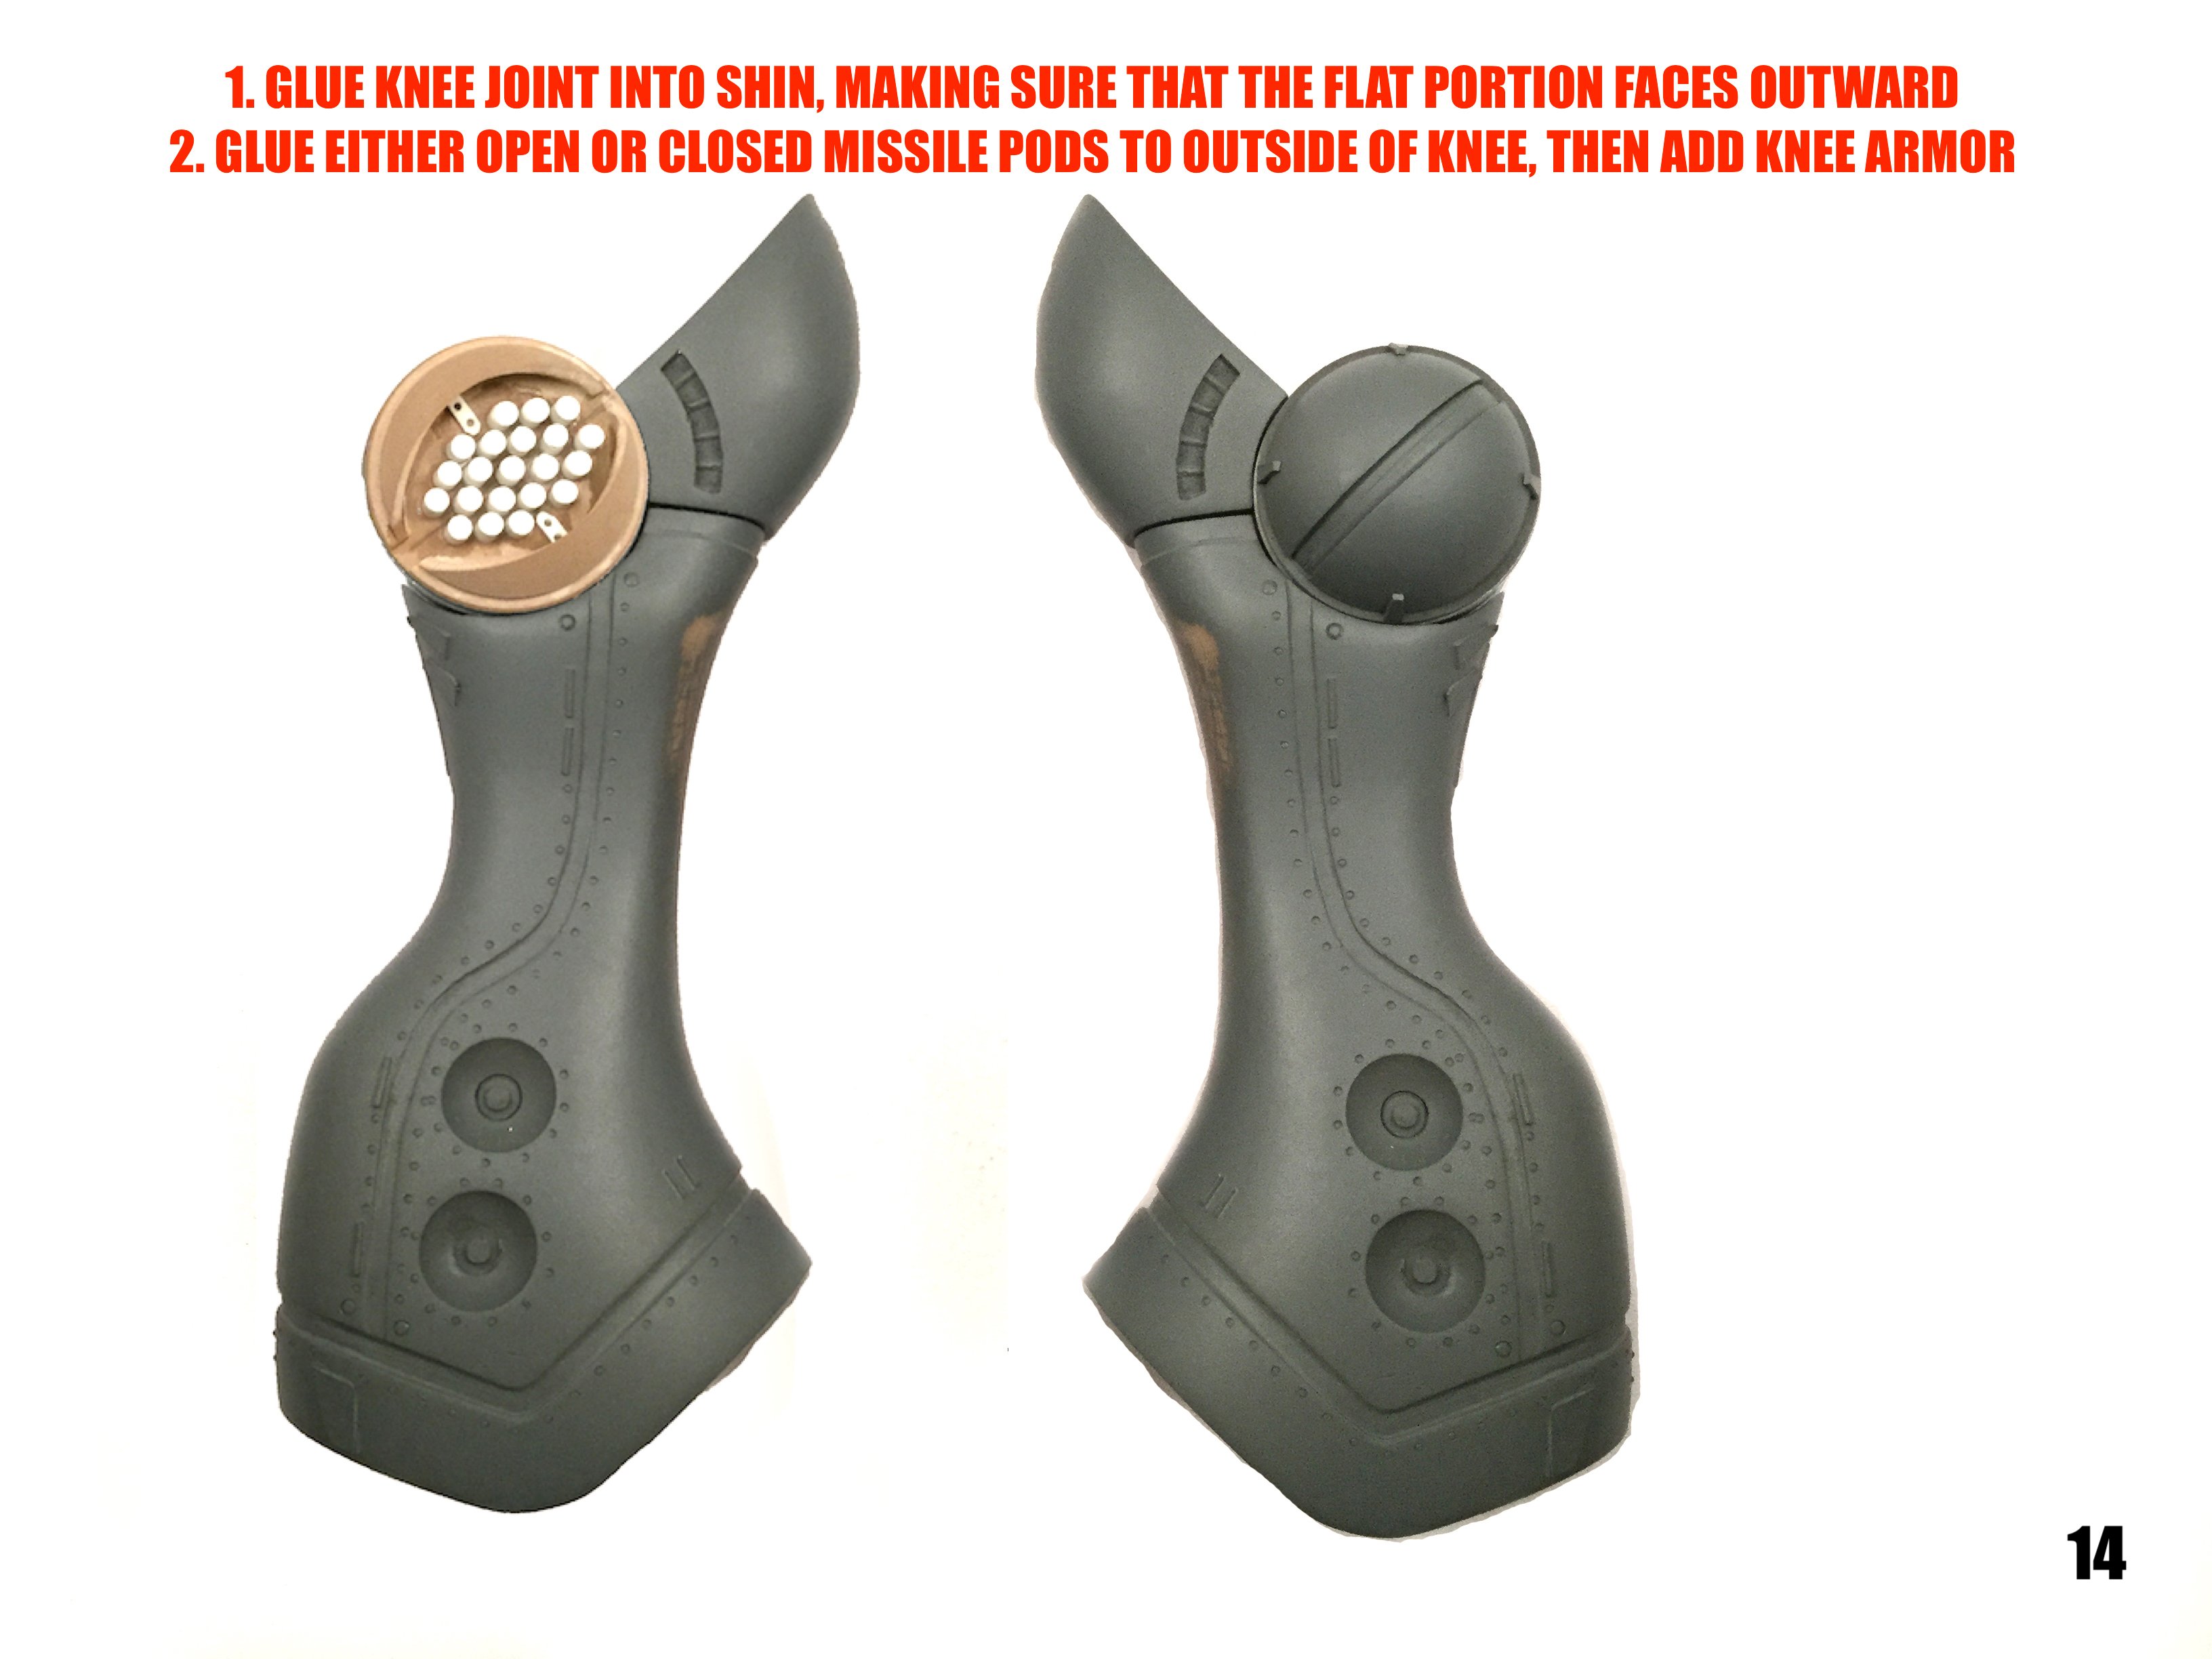
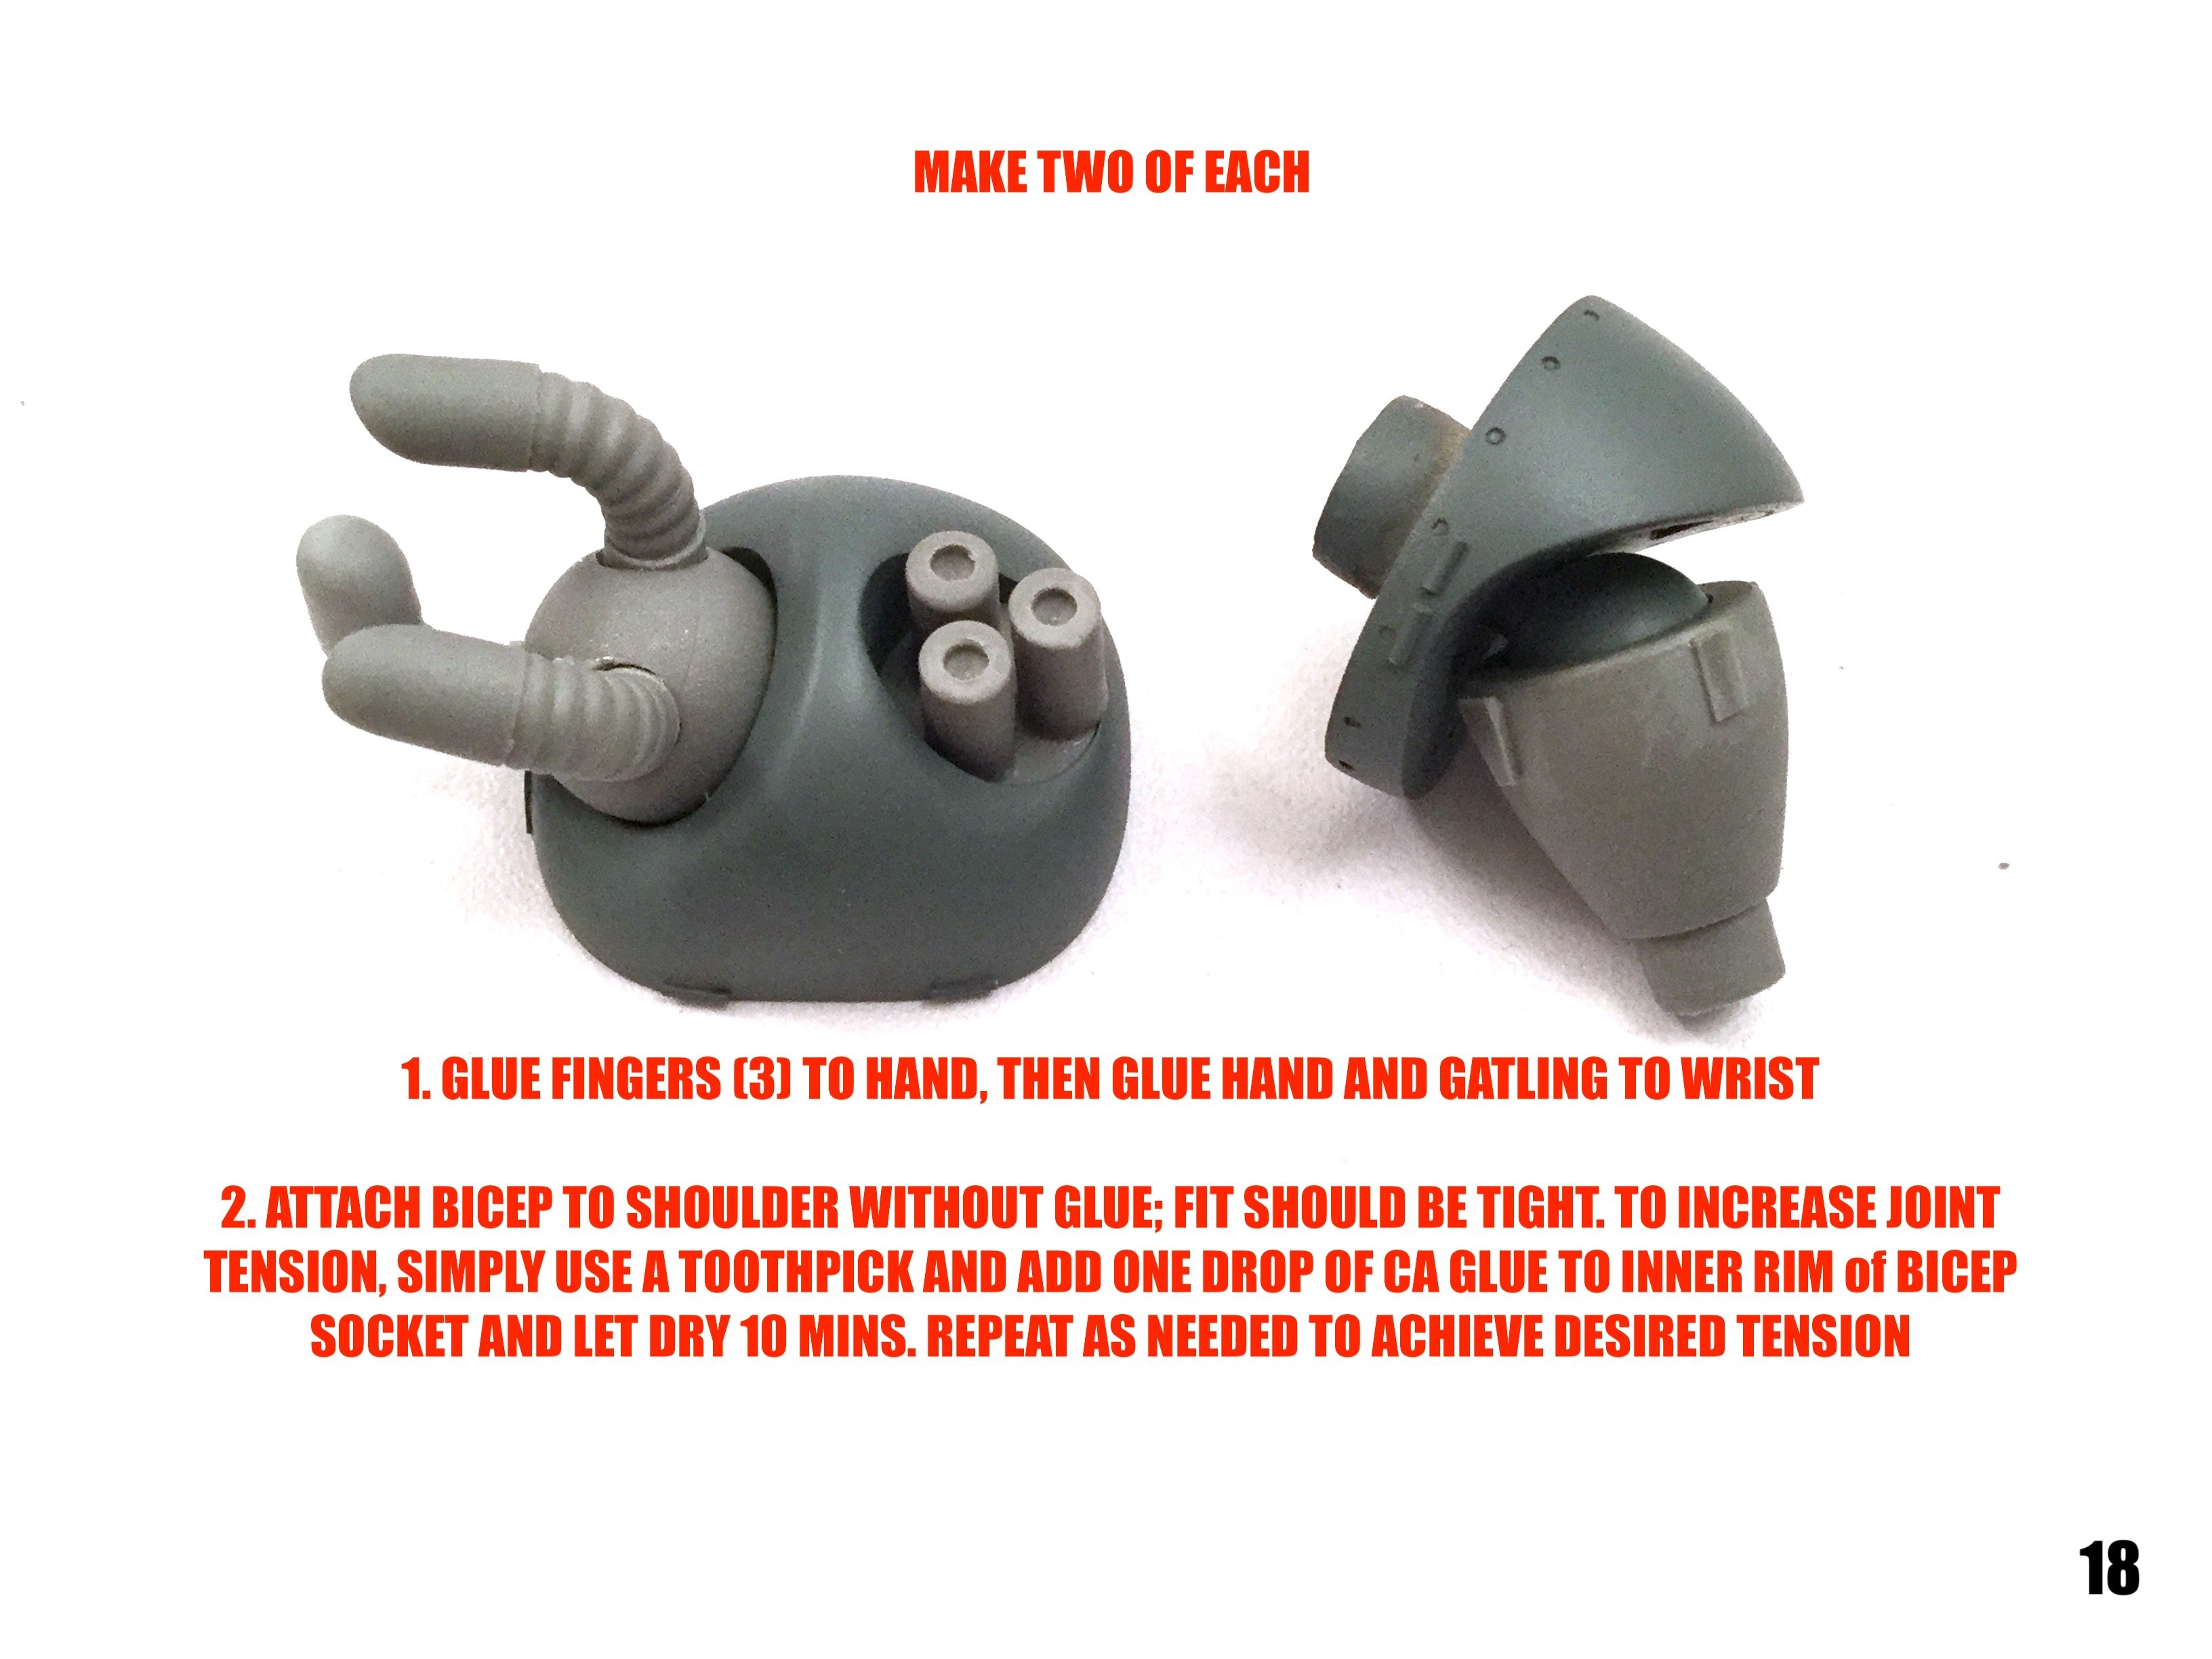
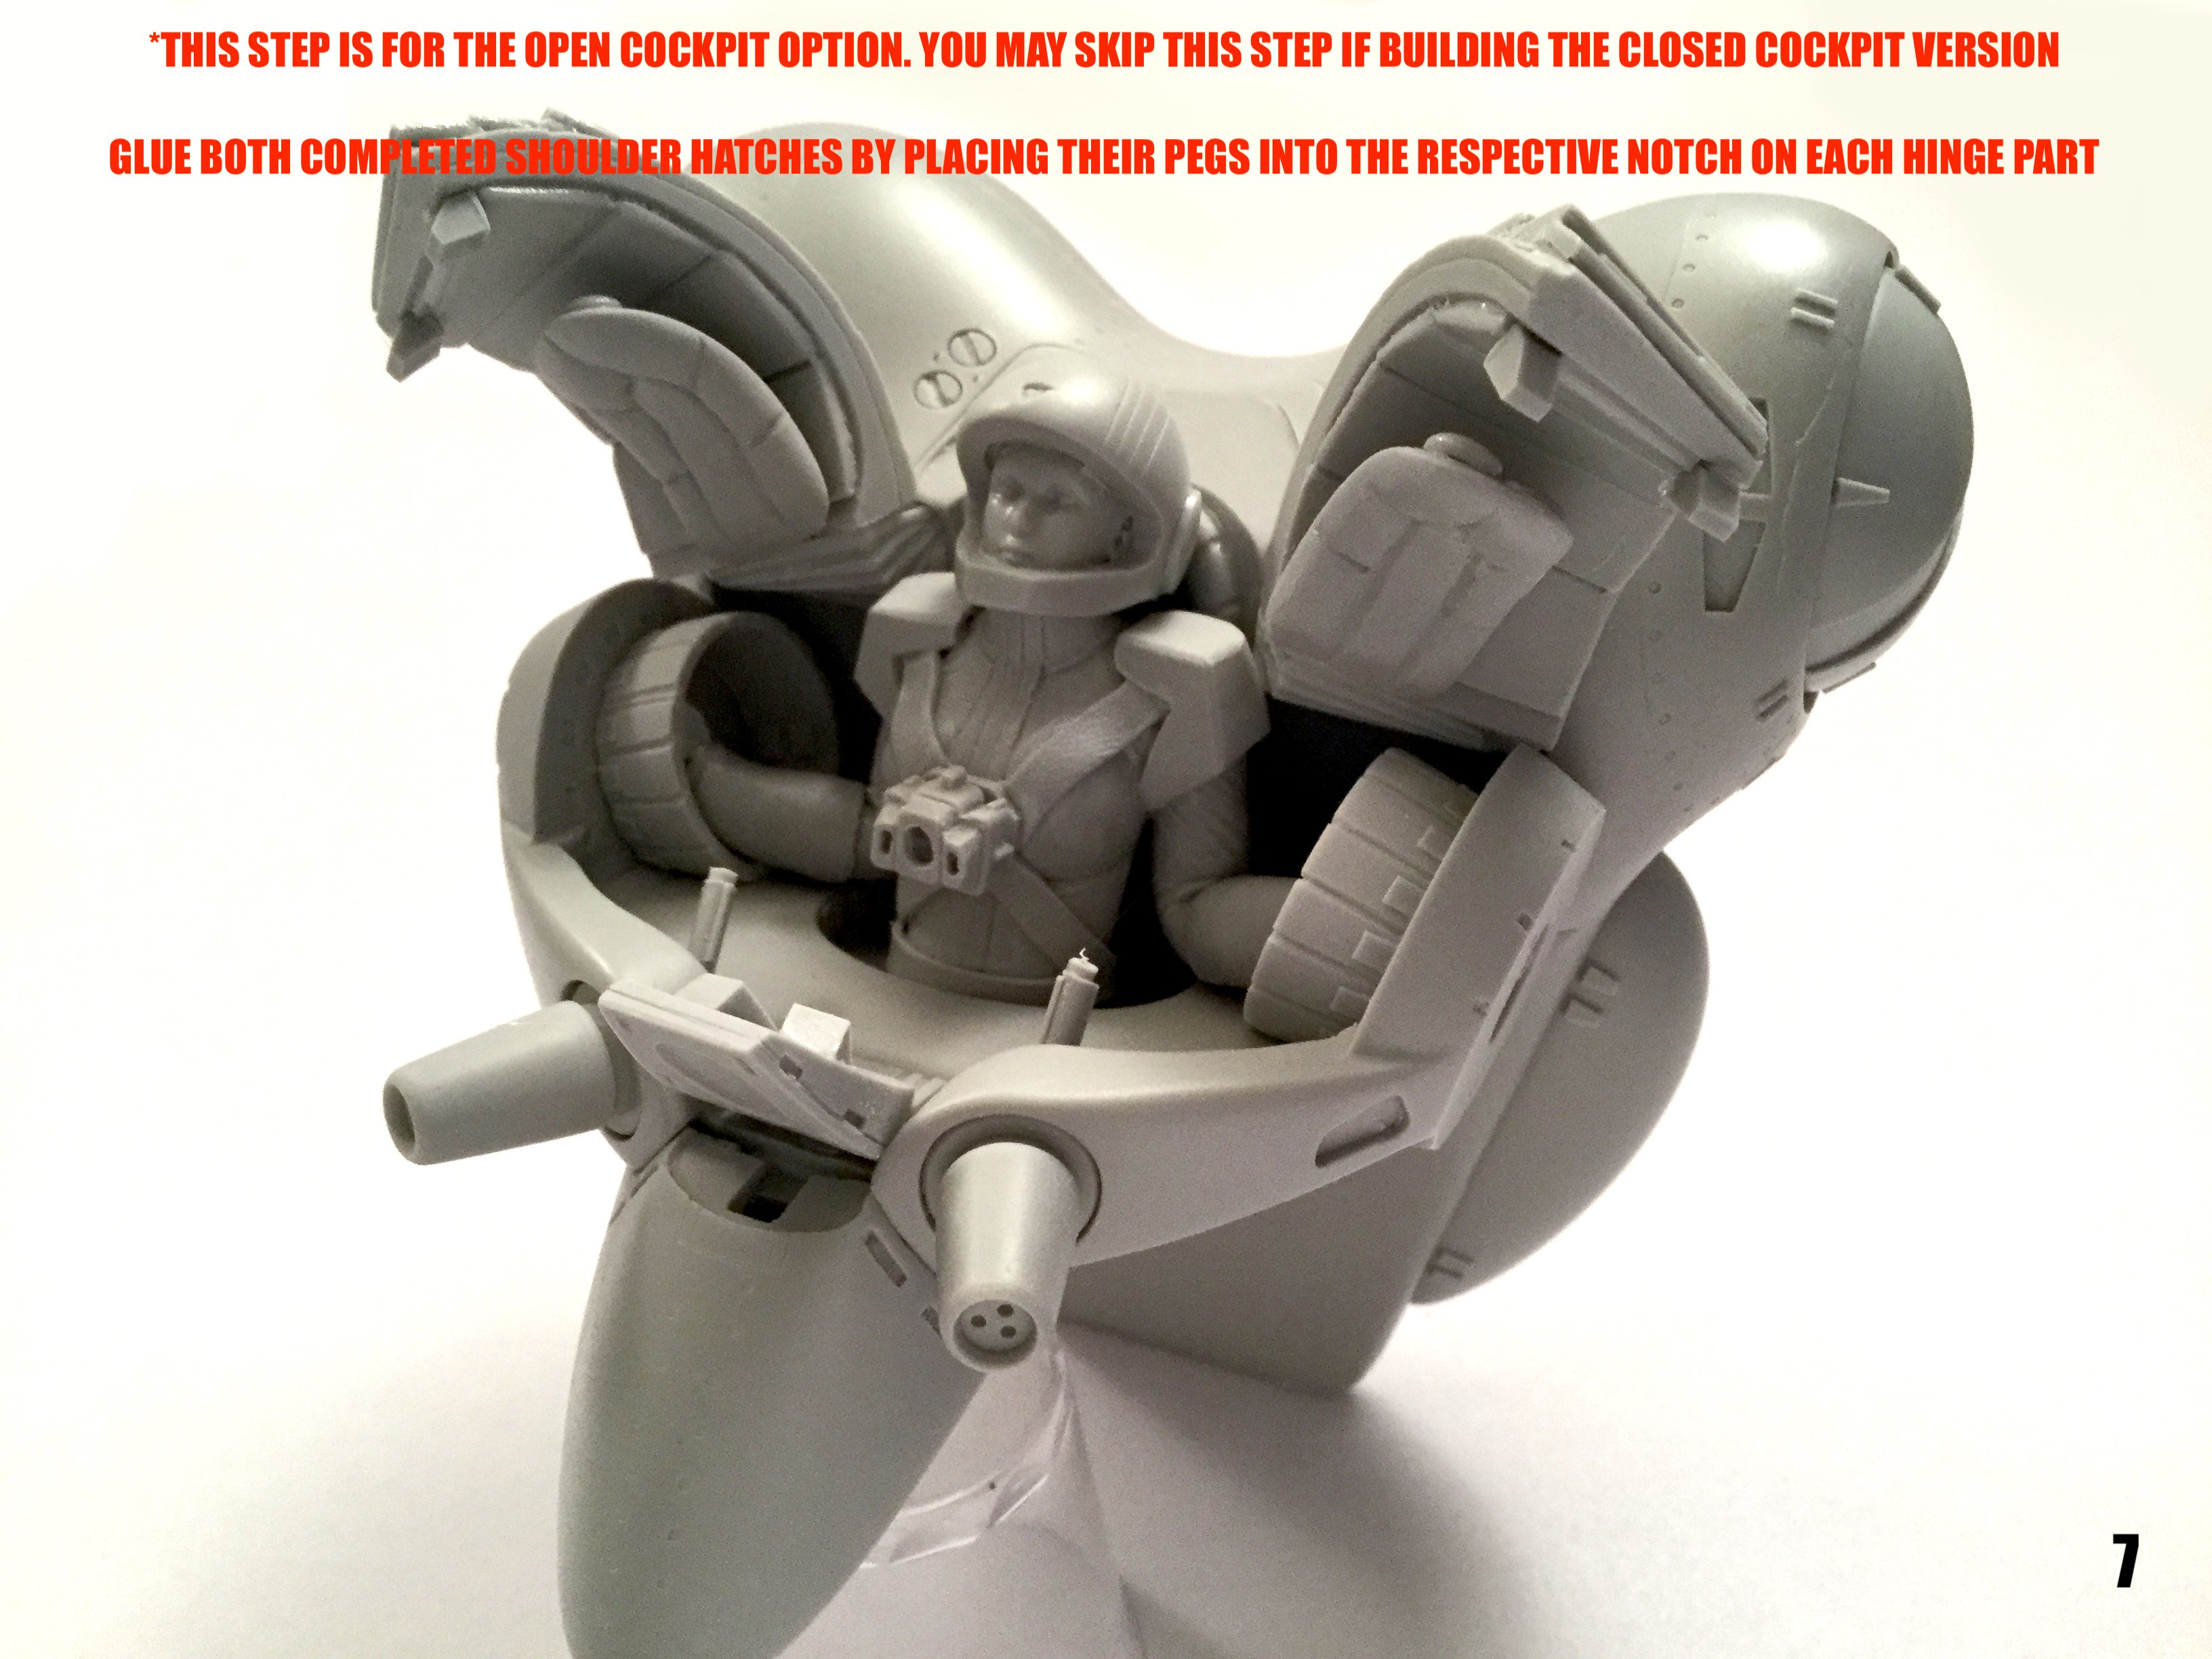
Part 2


-
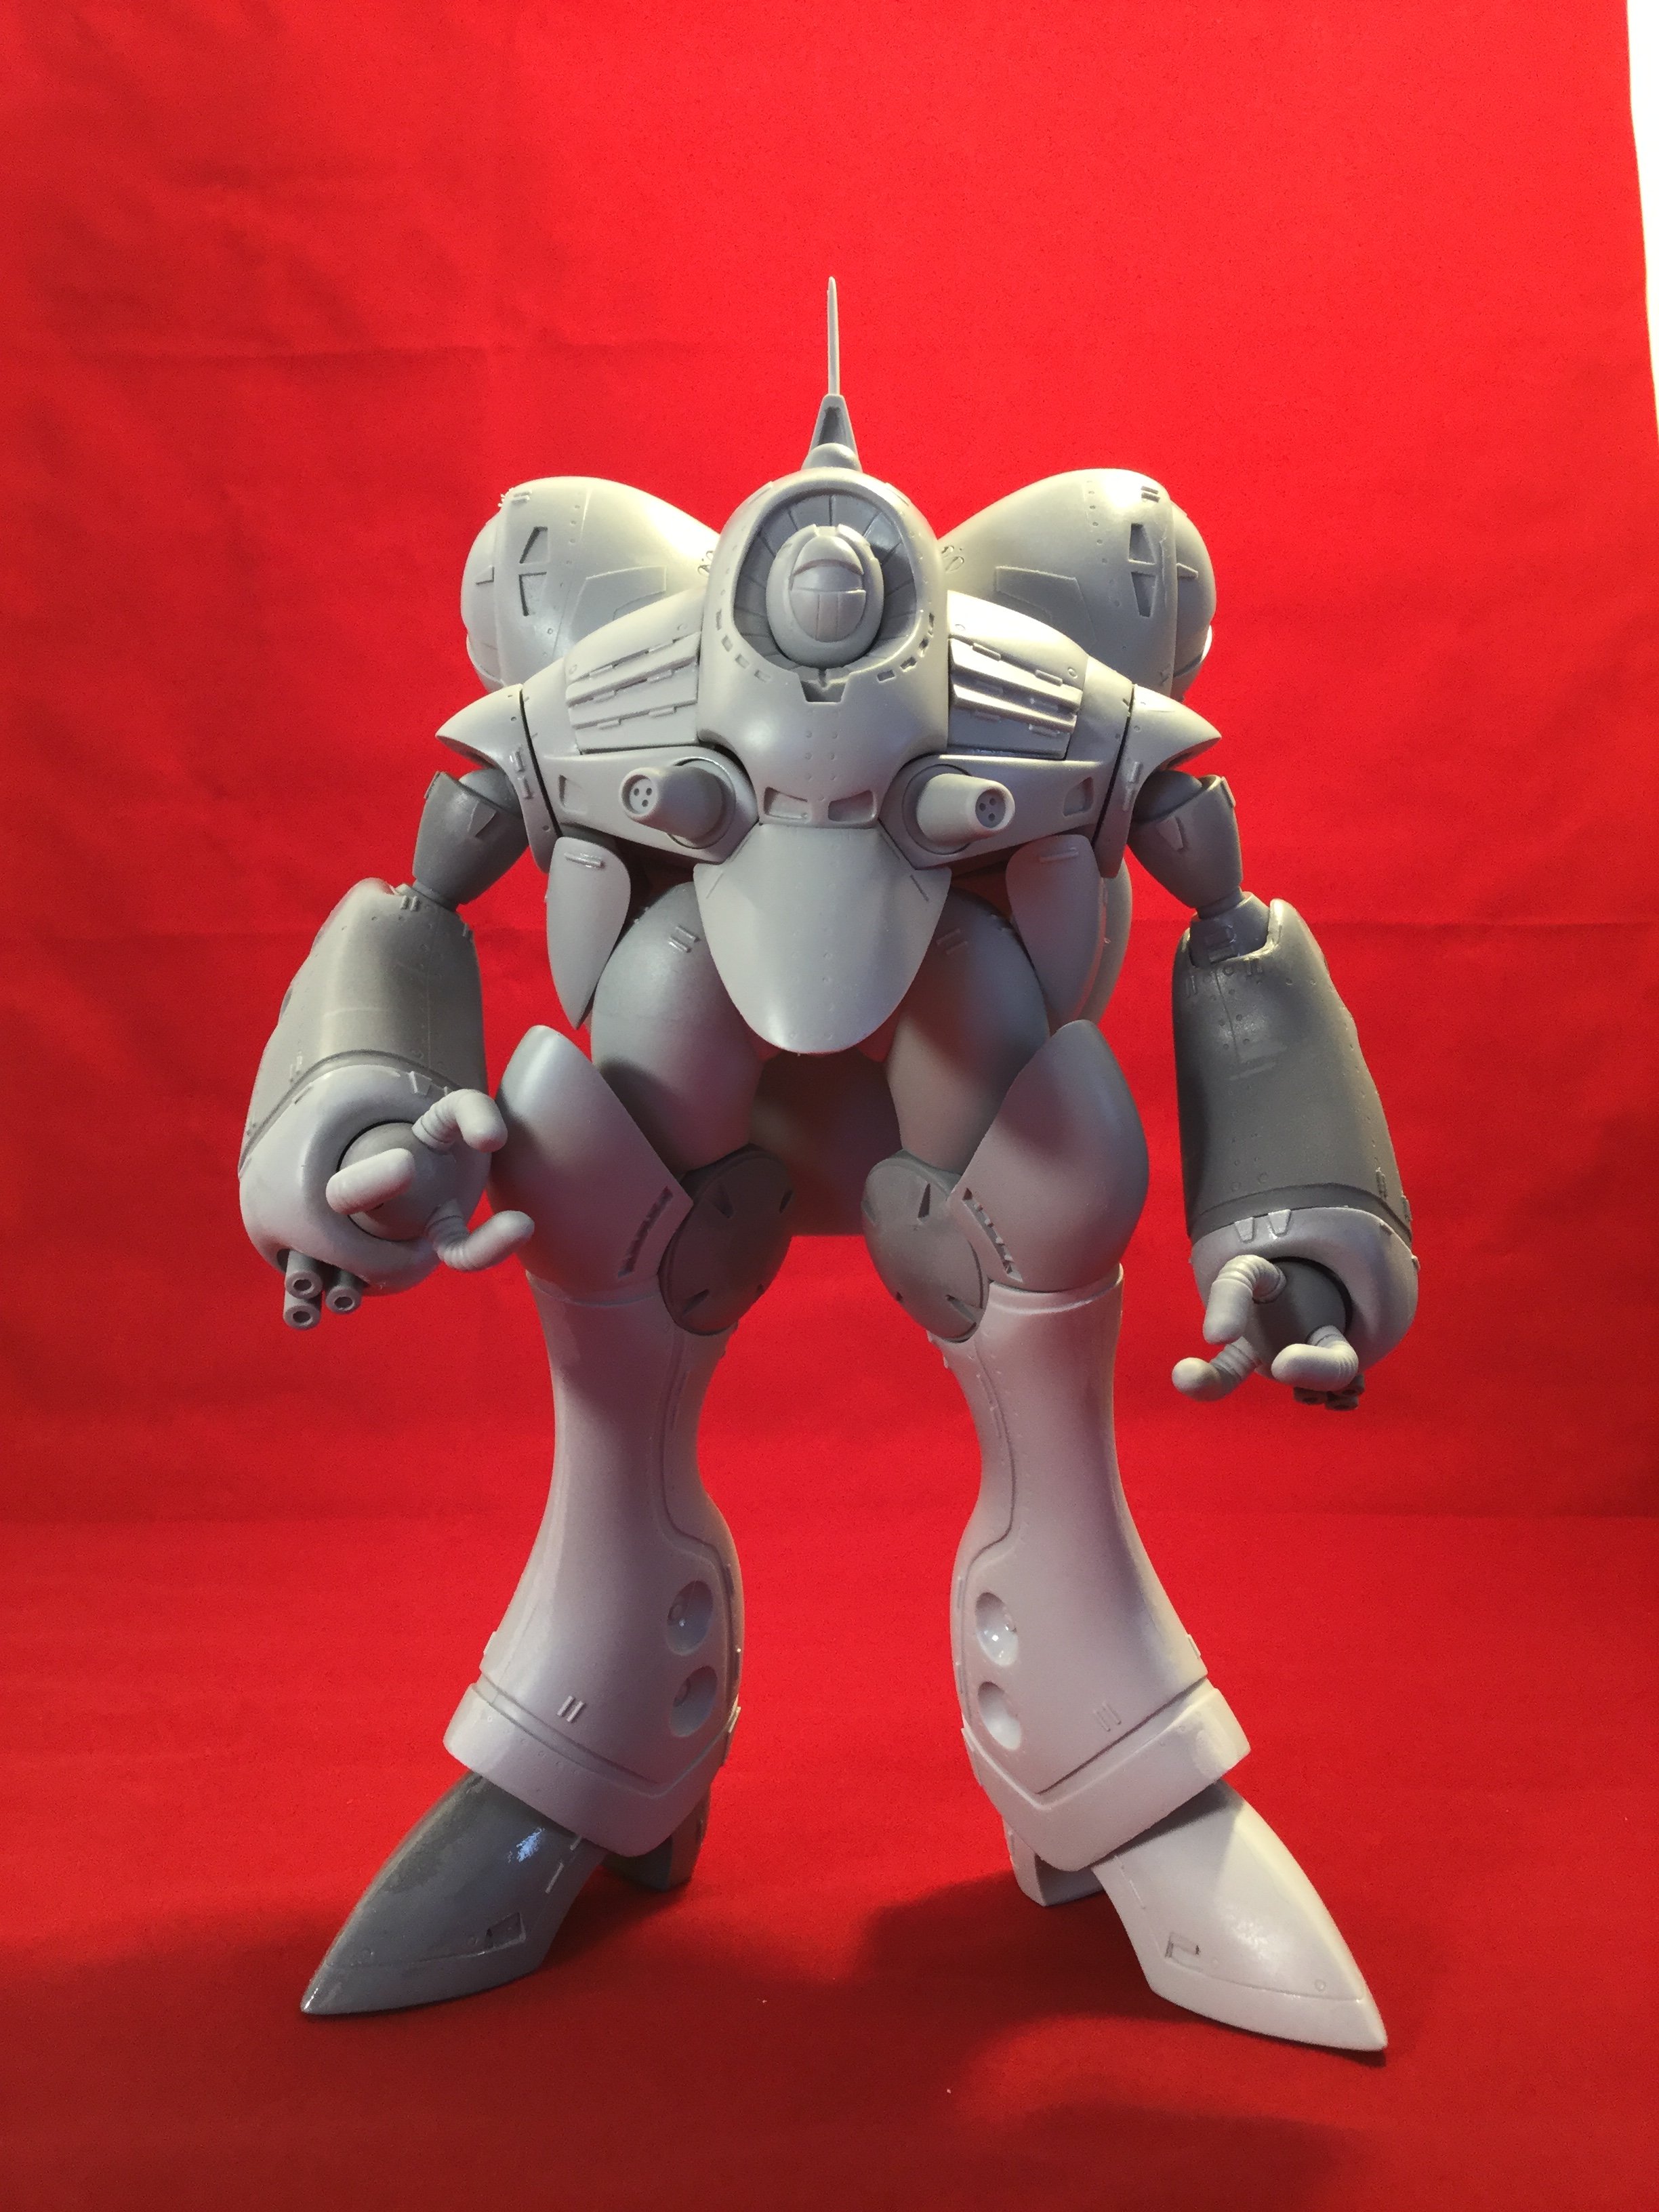
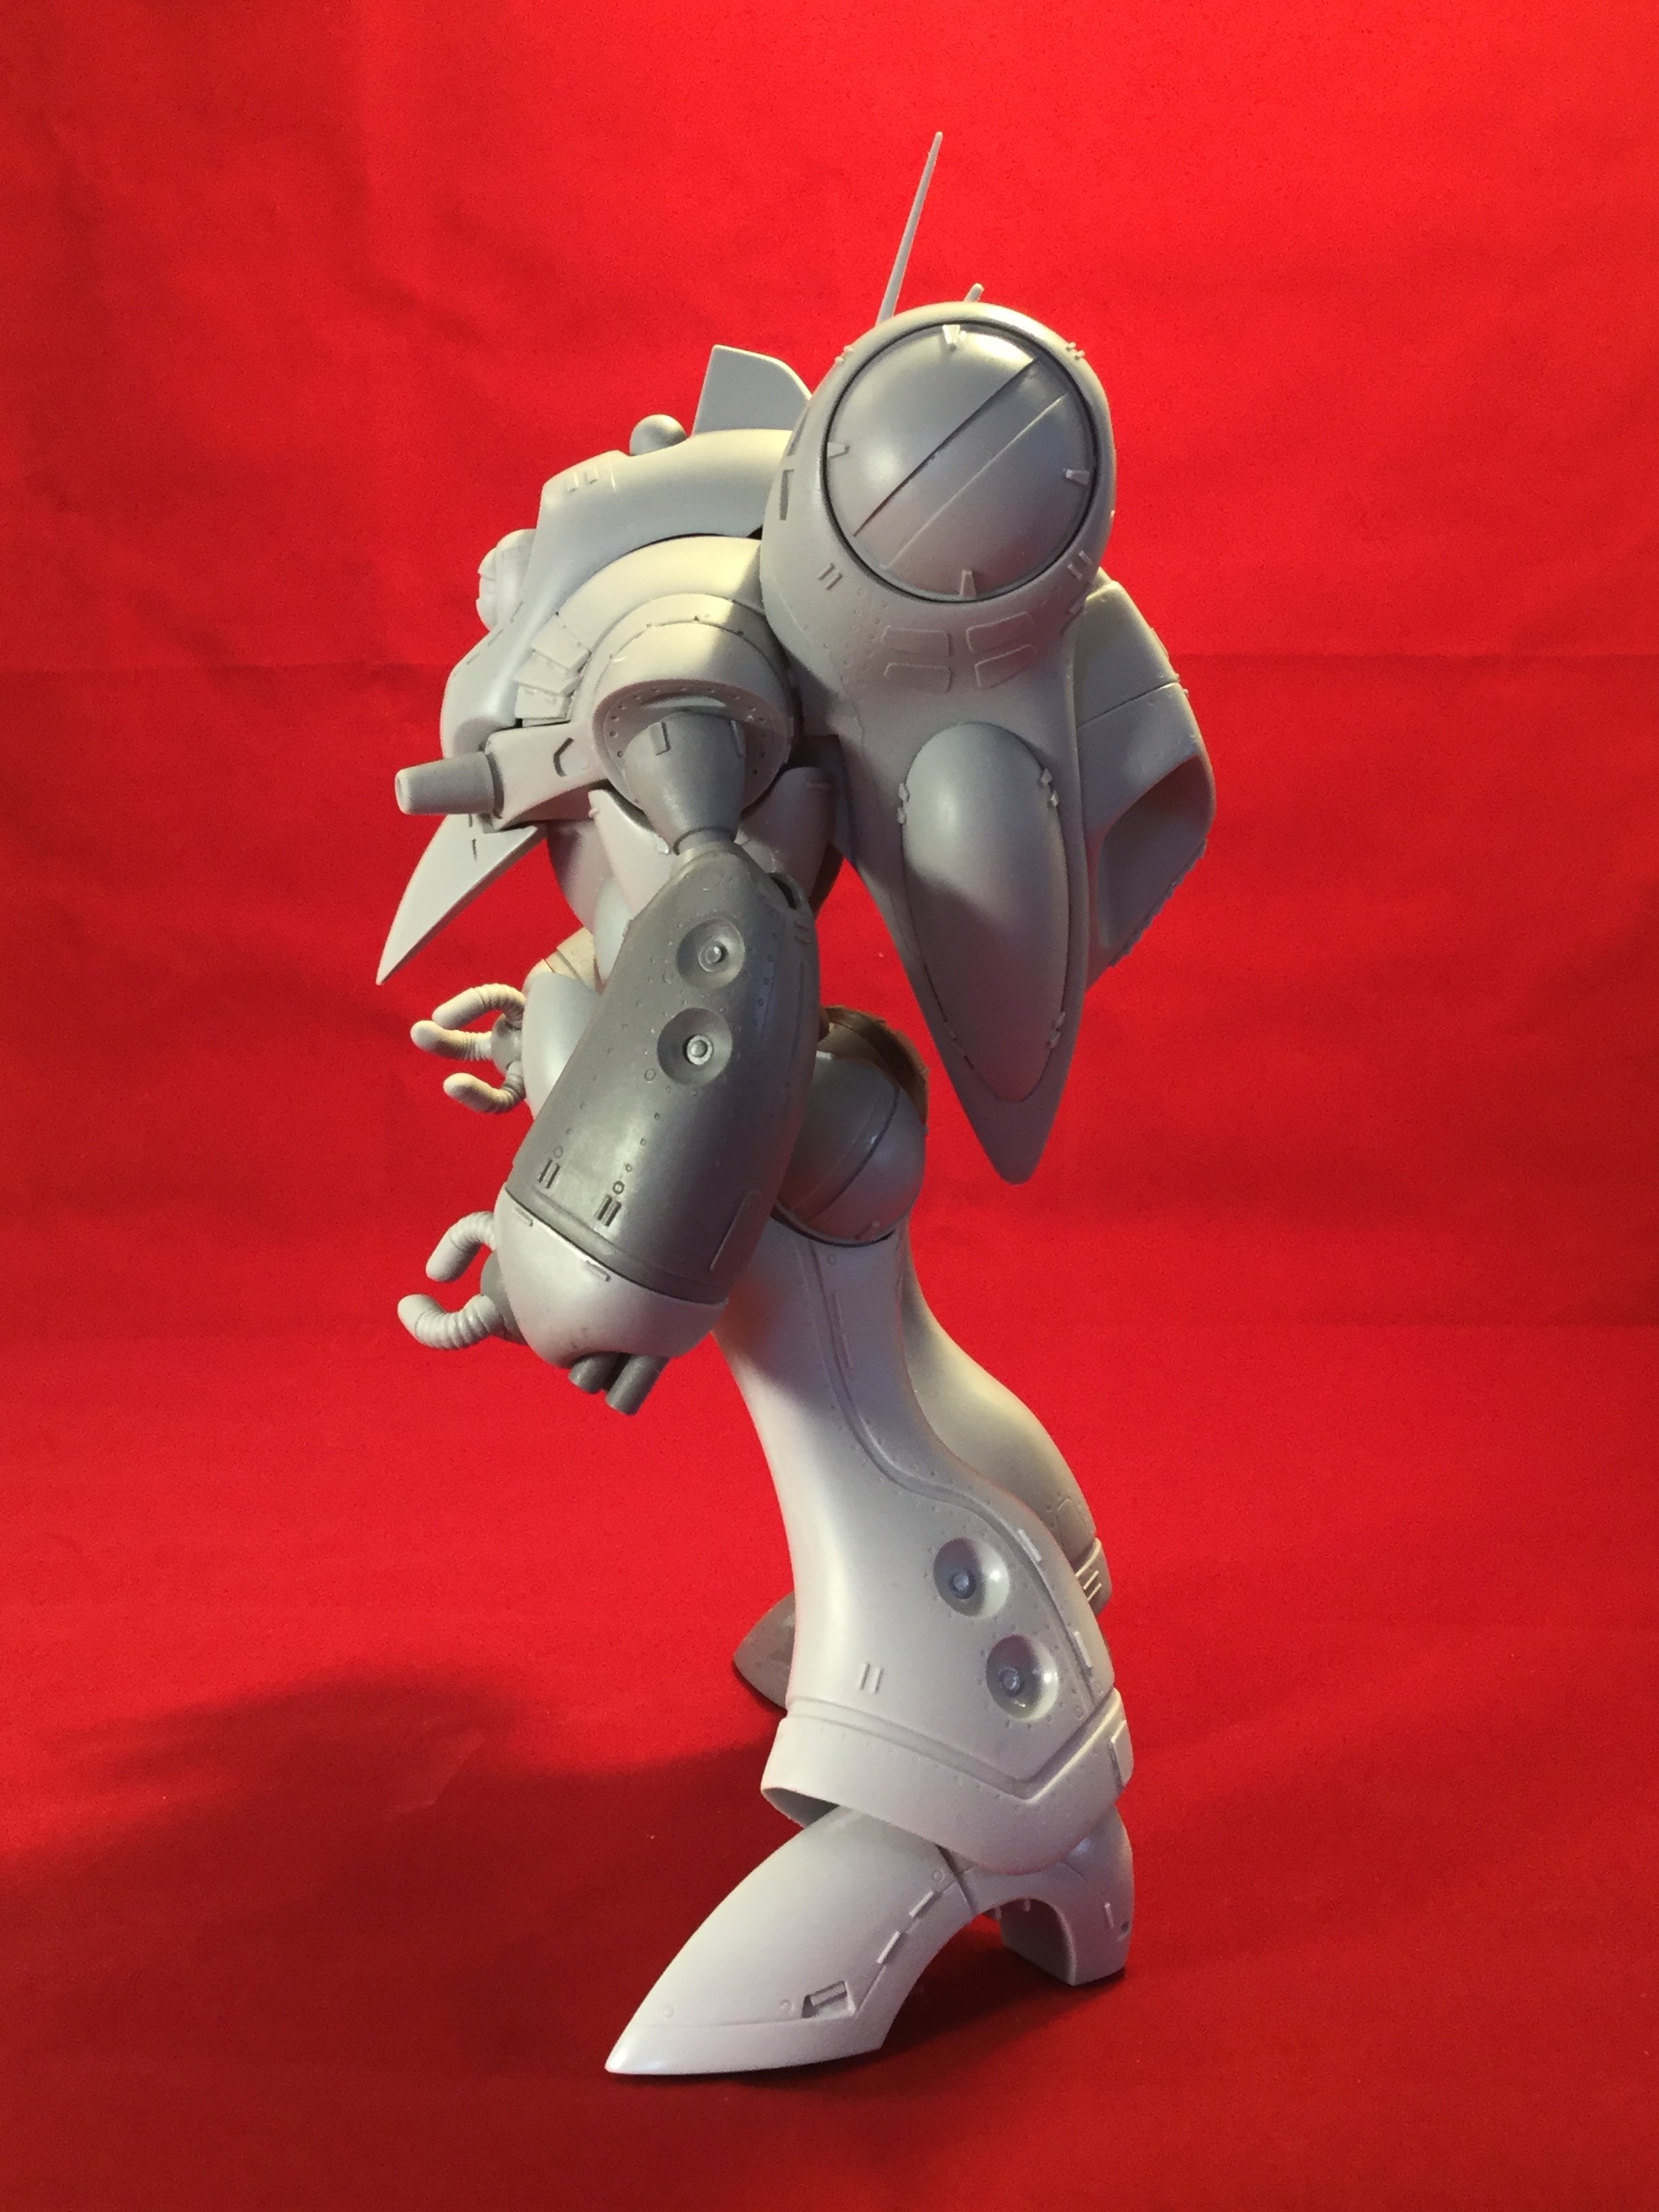
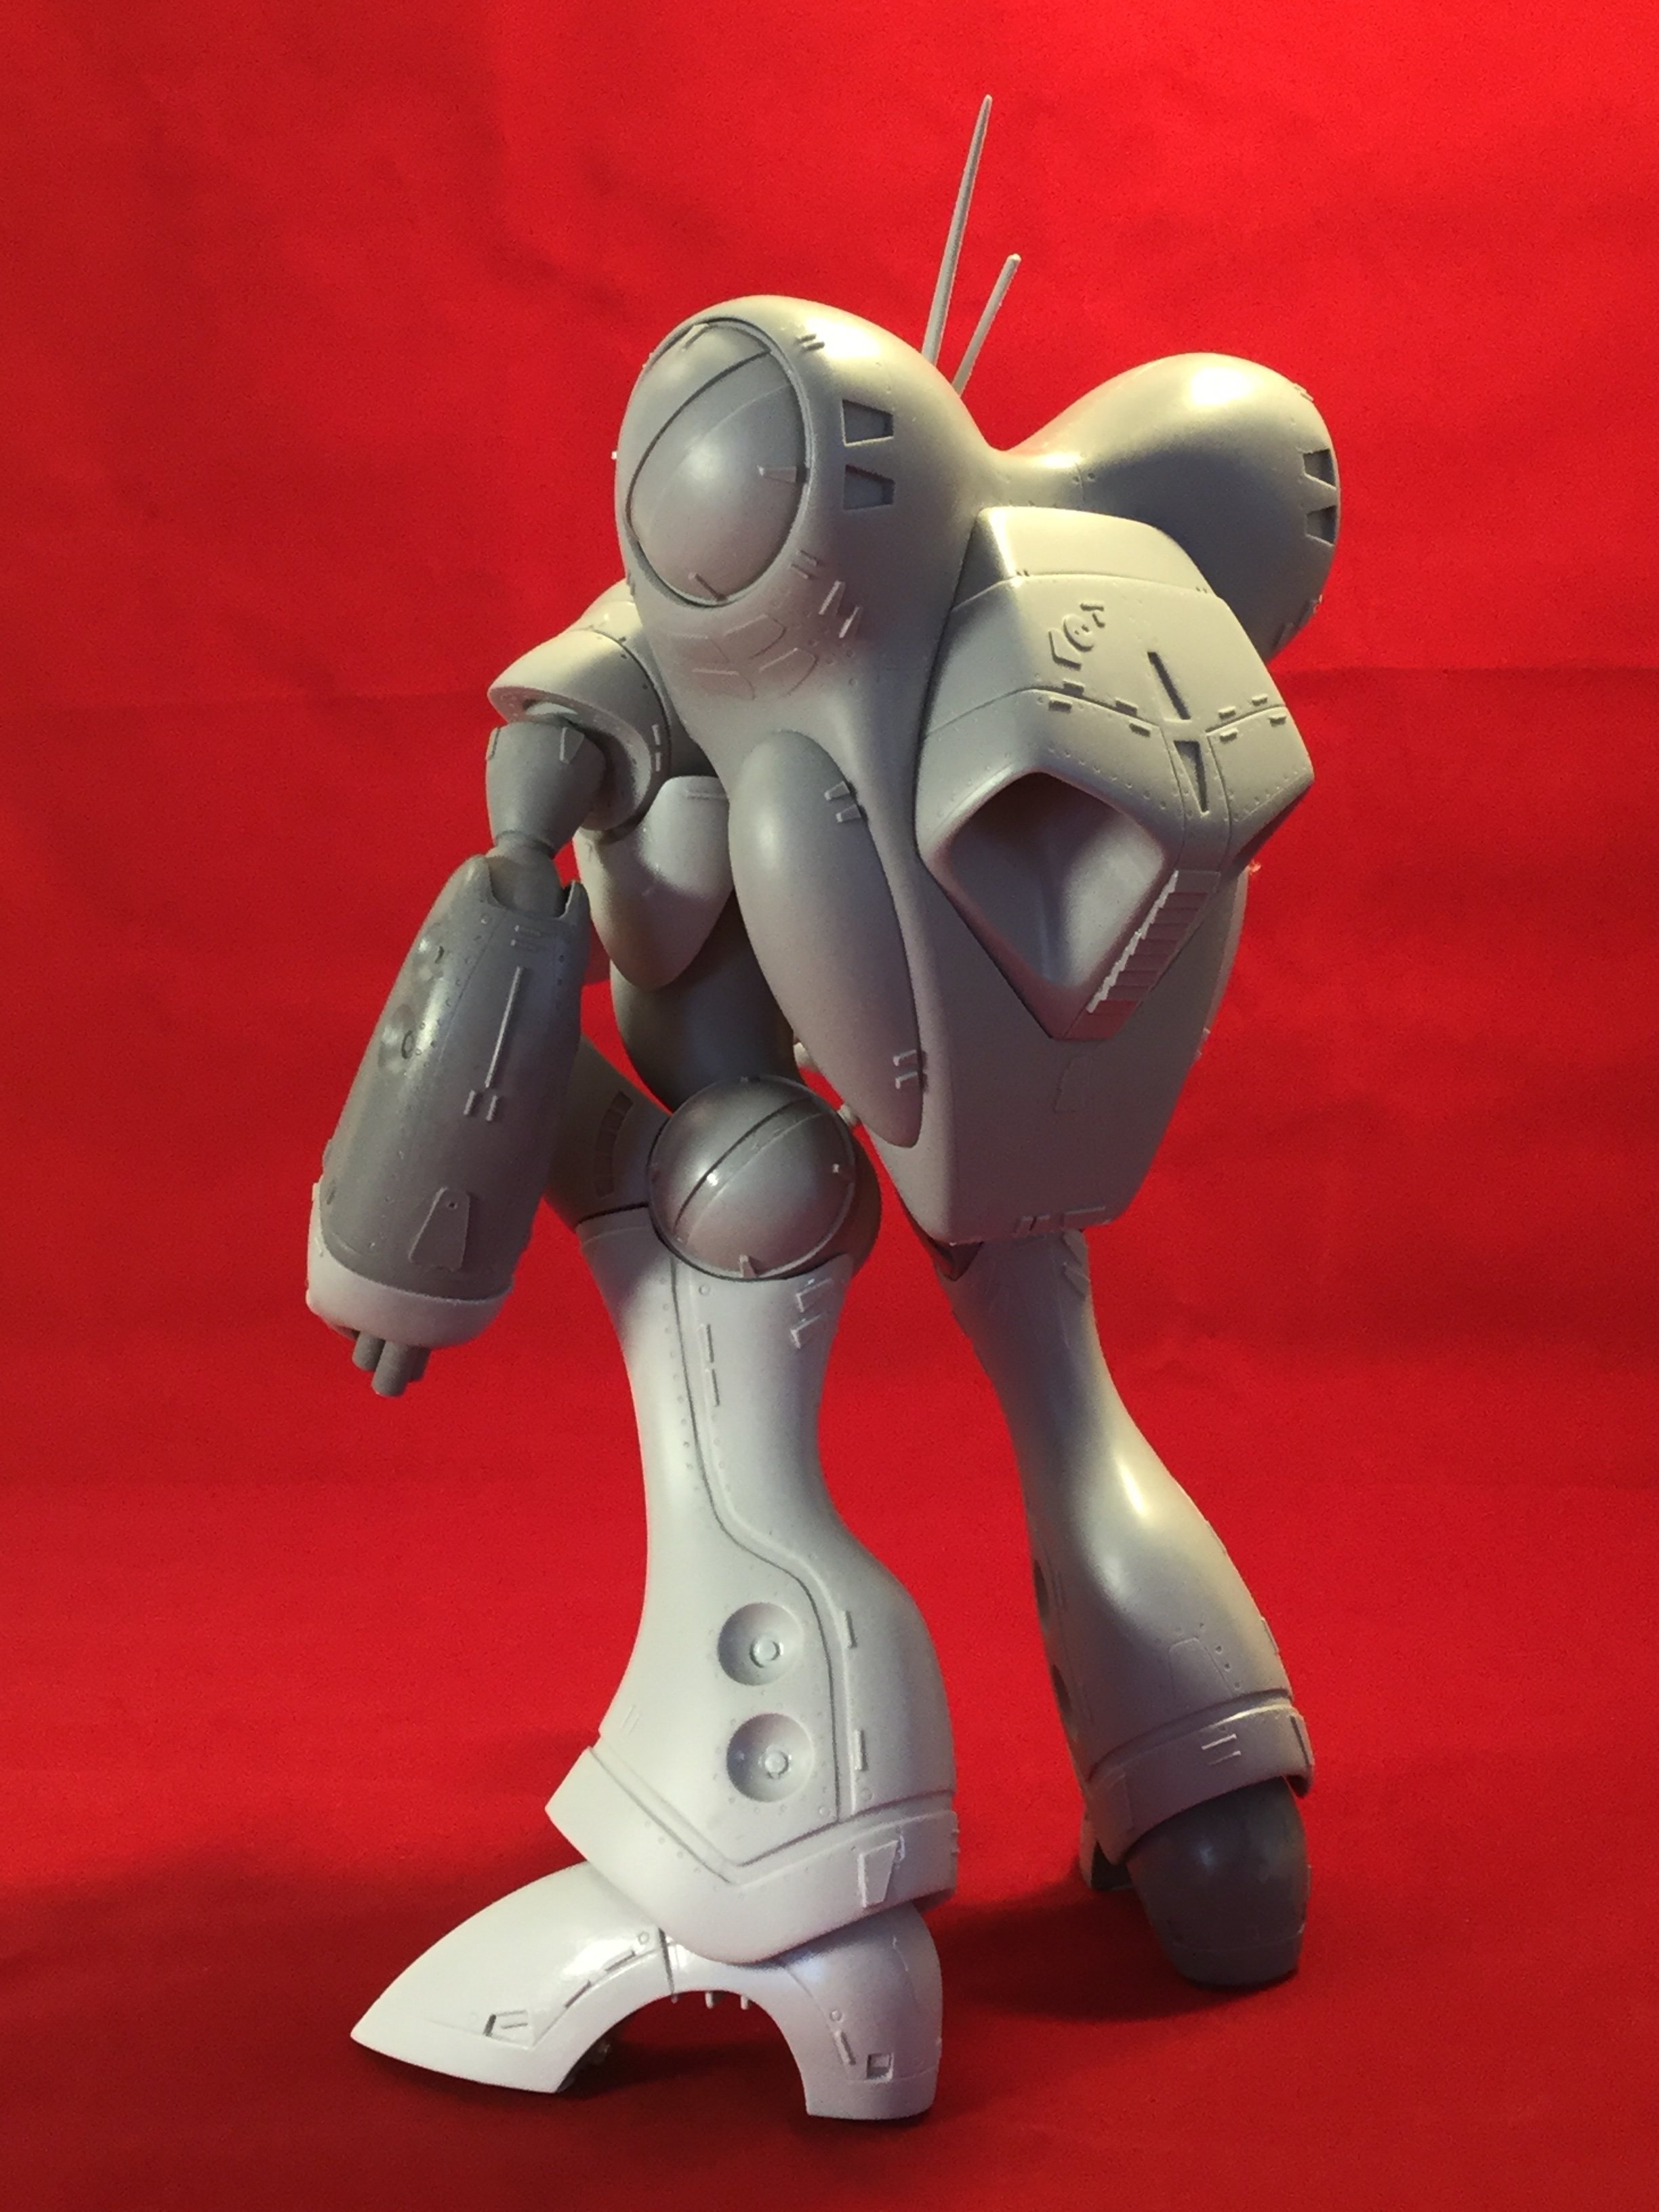
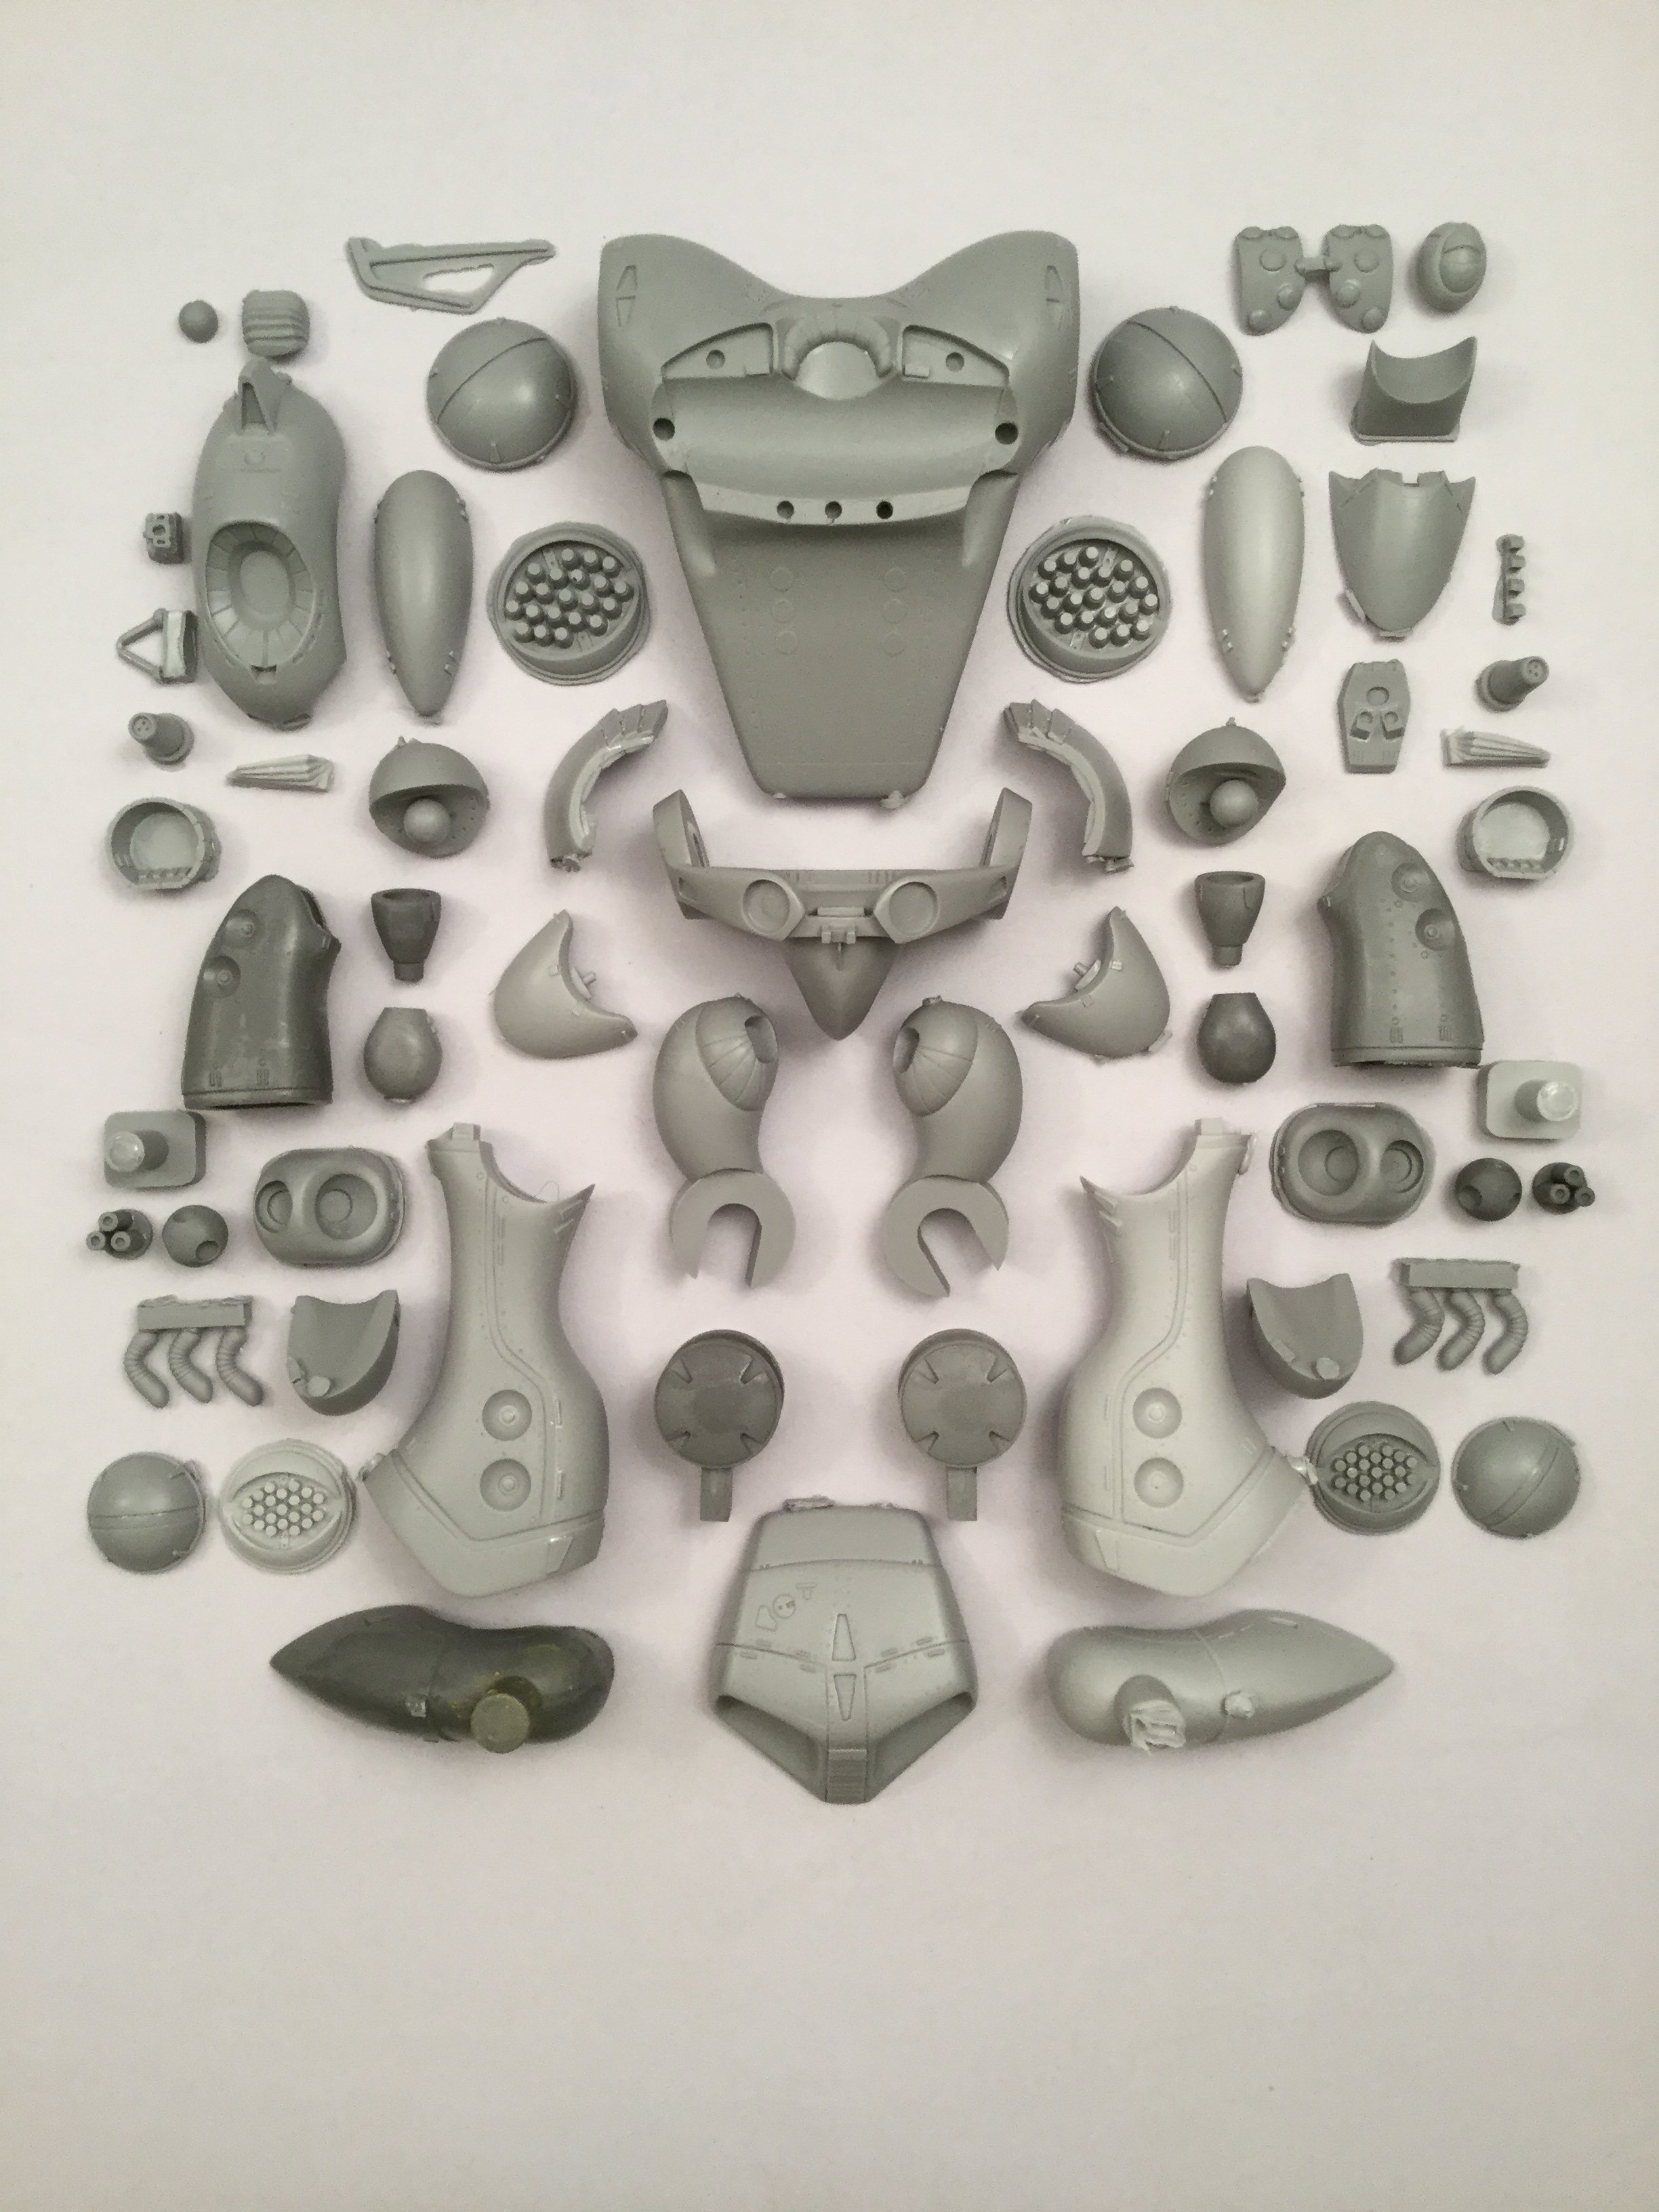
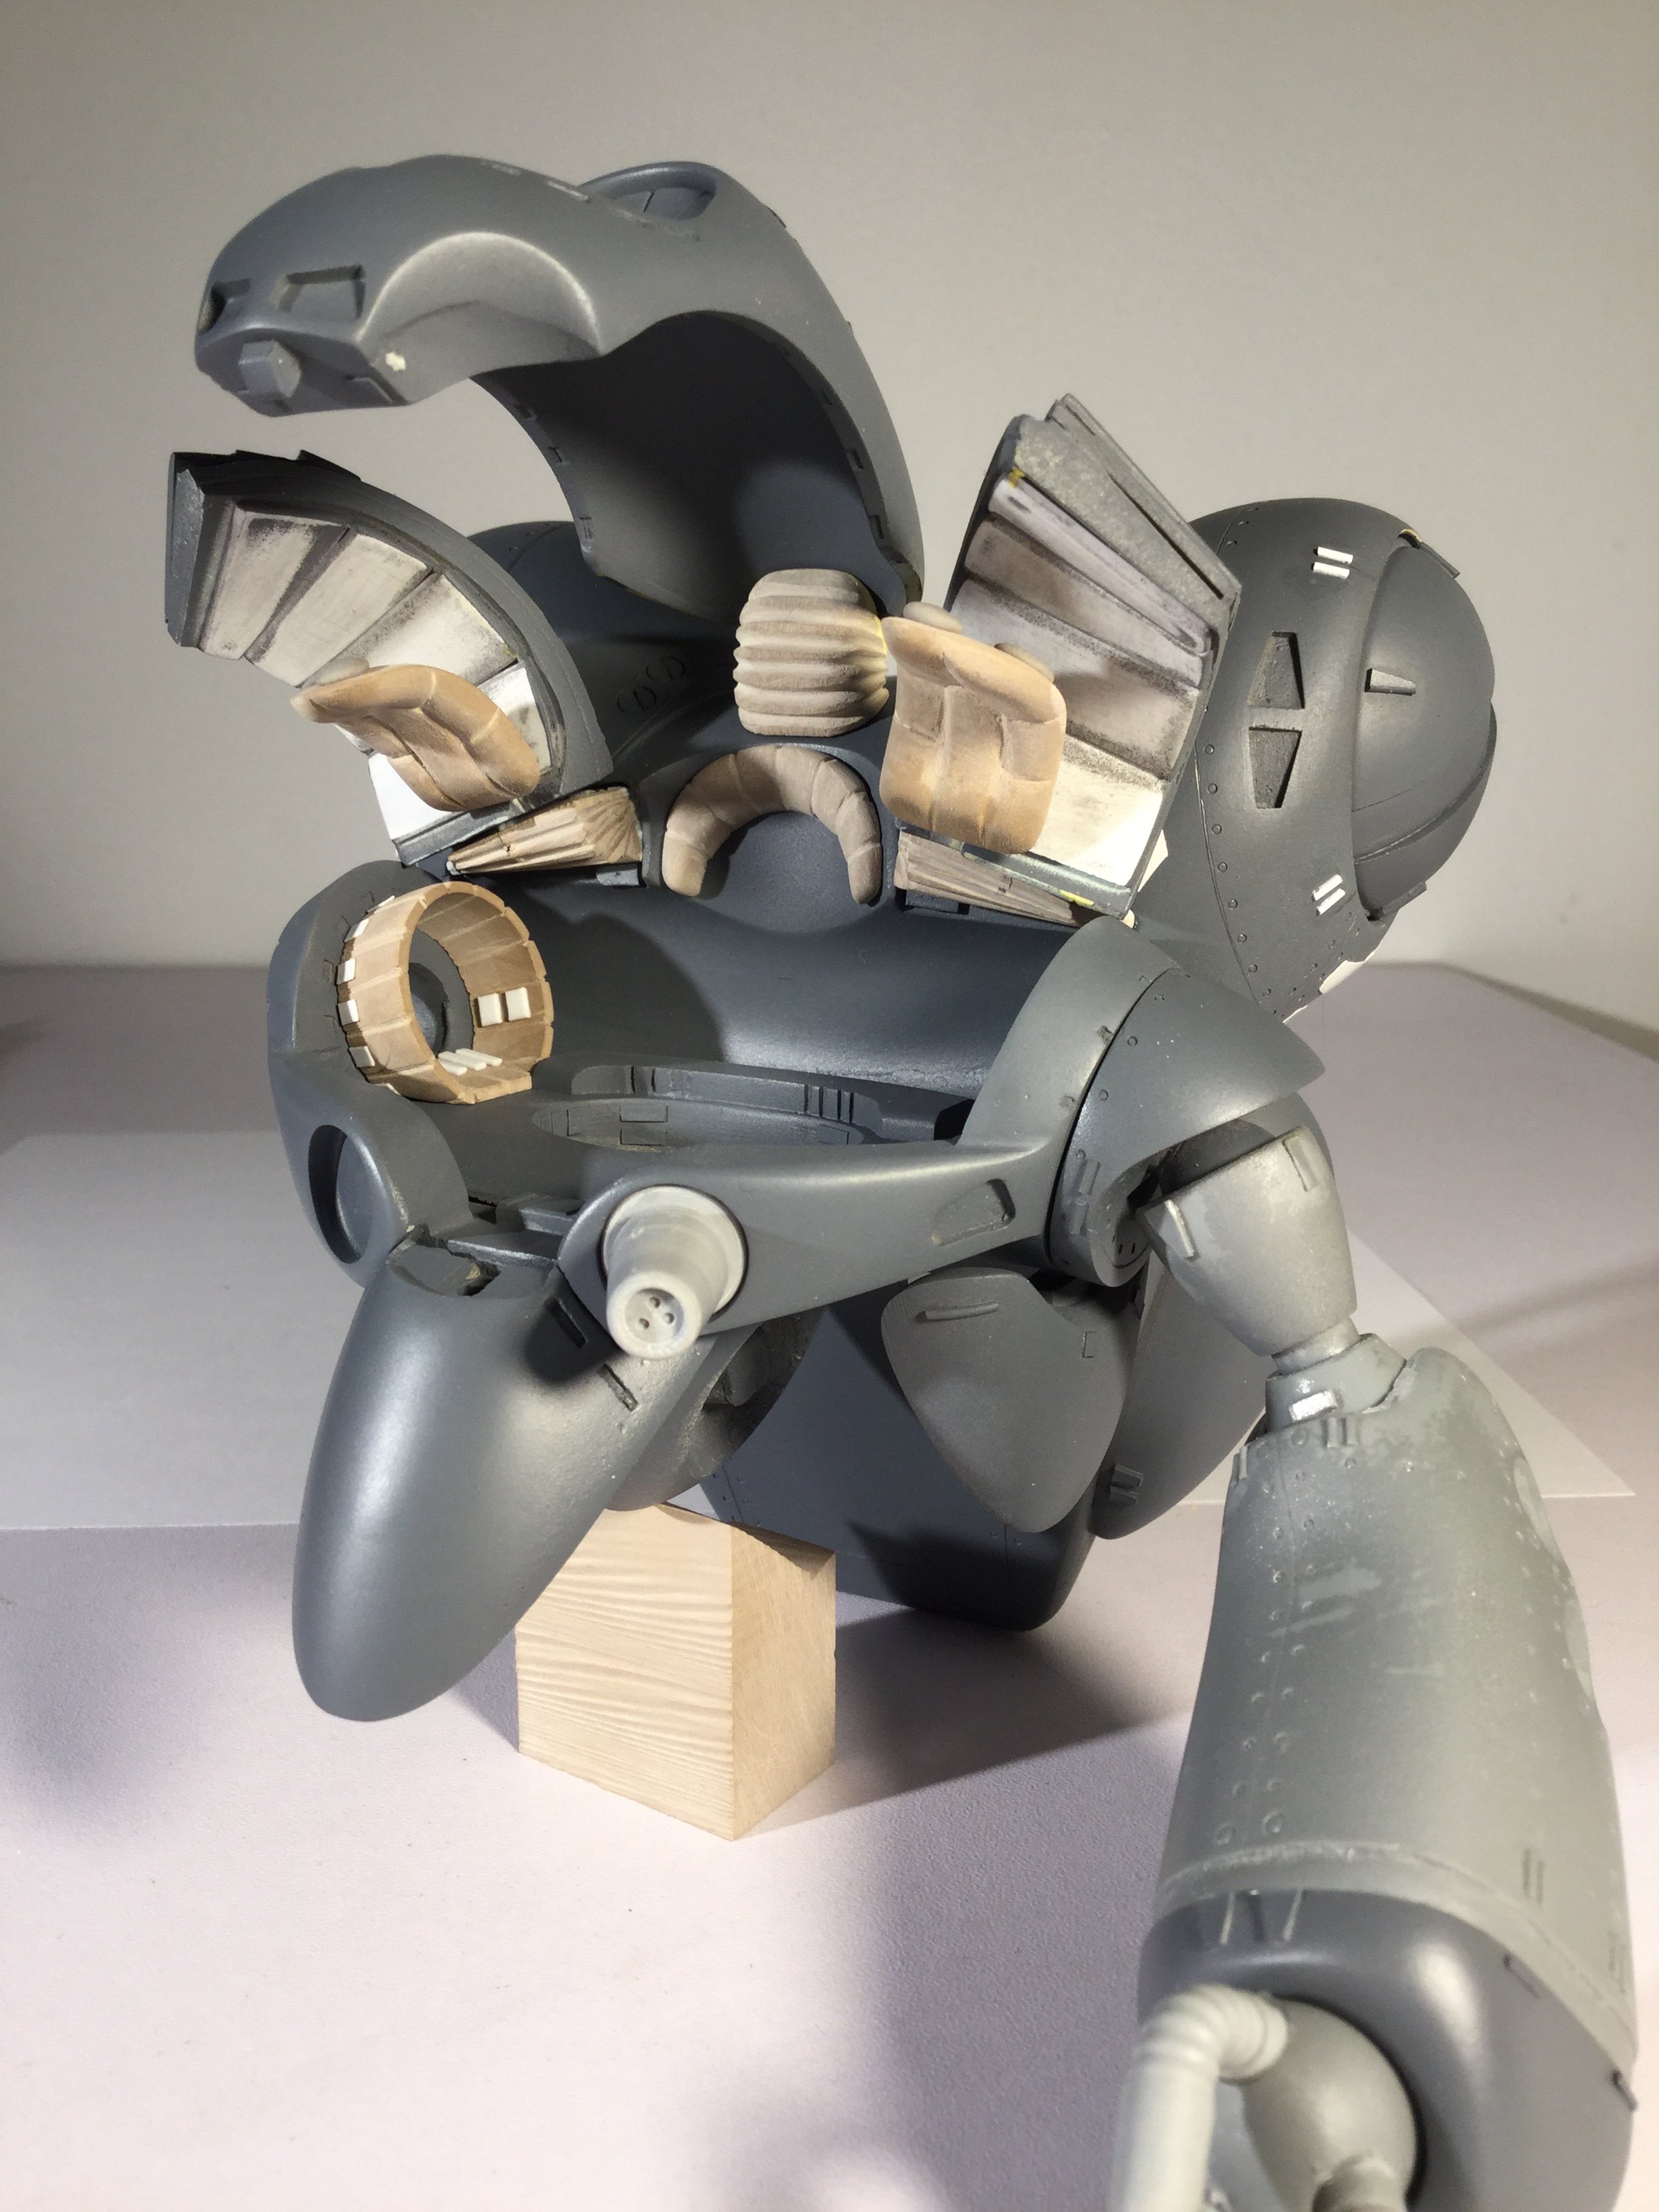
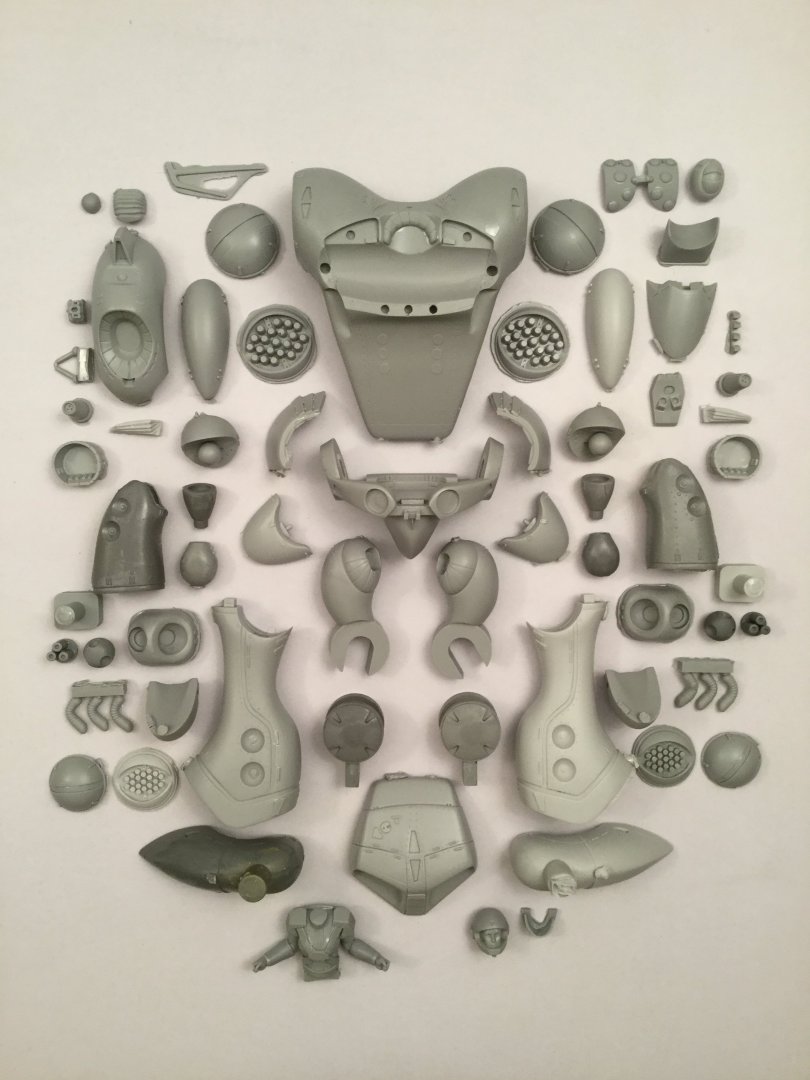
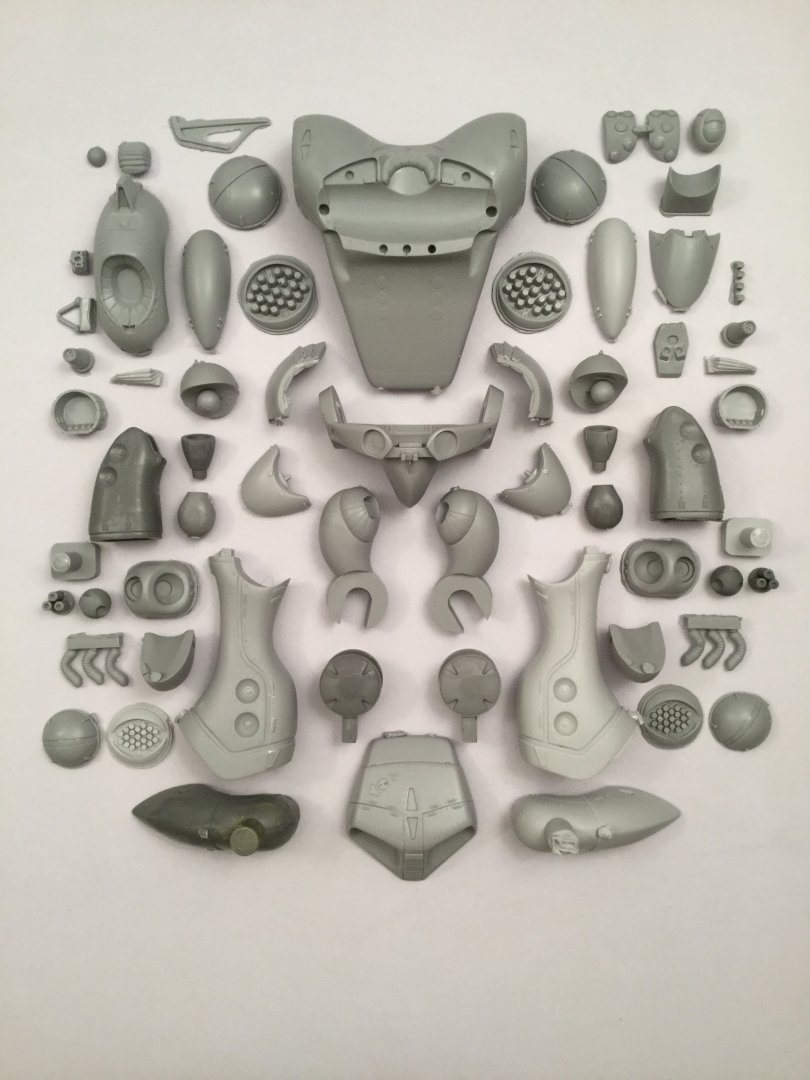
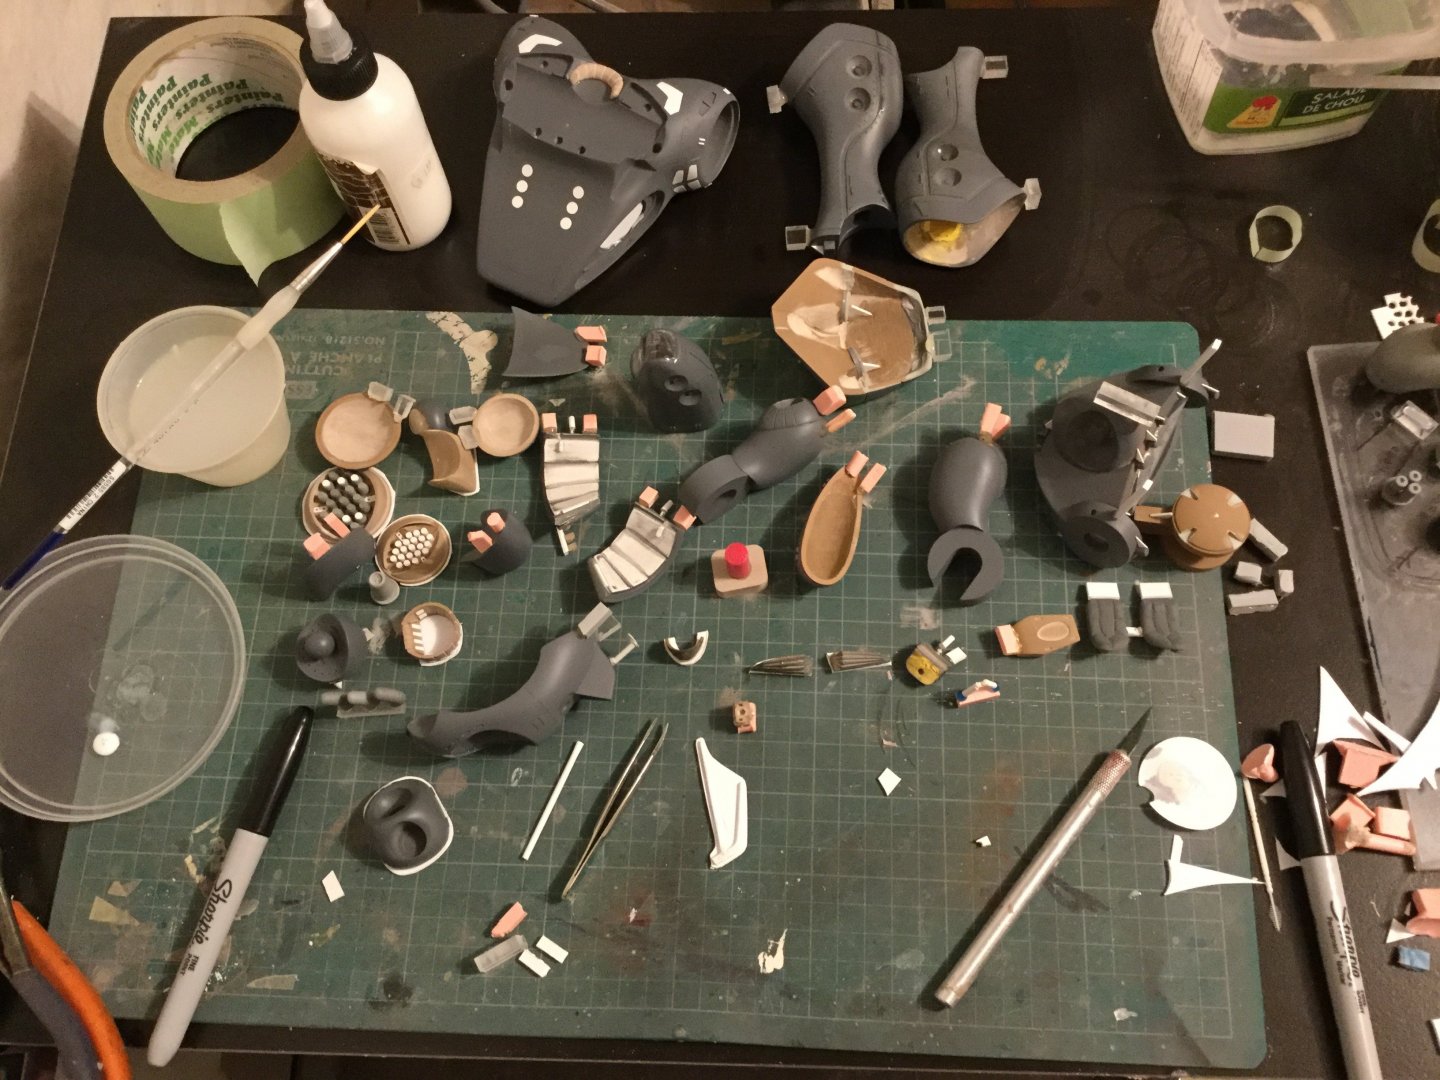
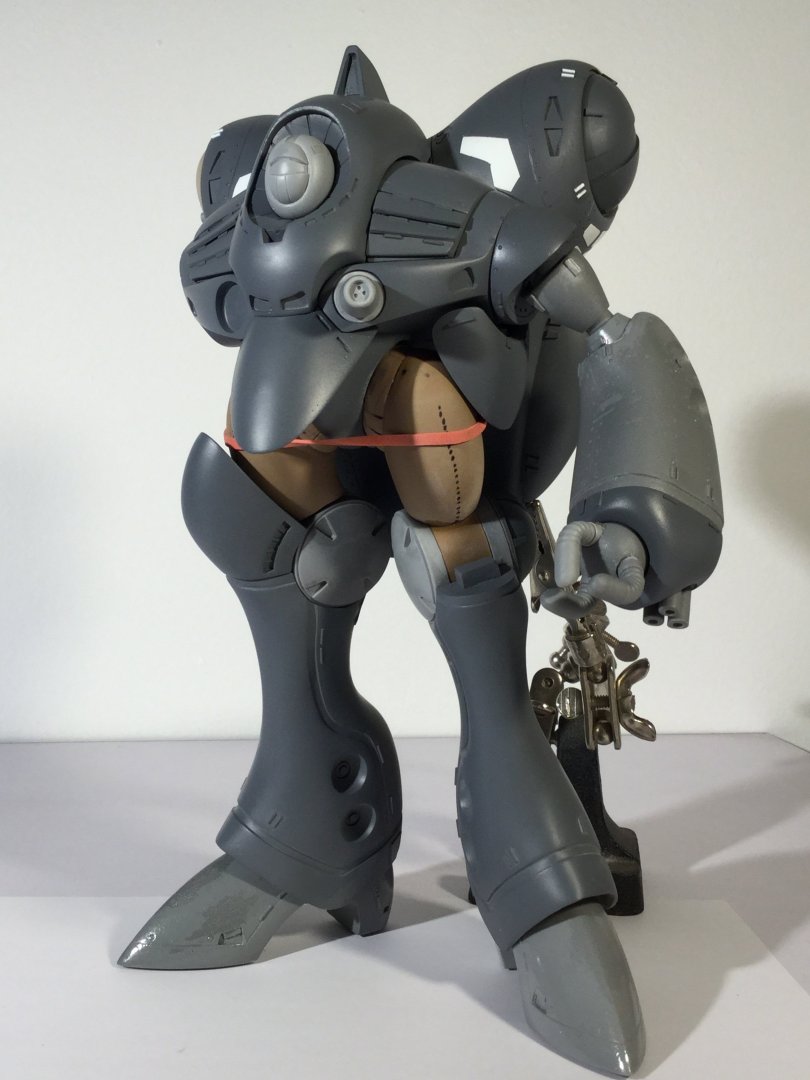
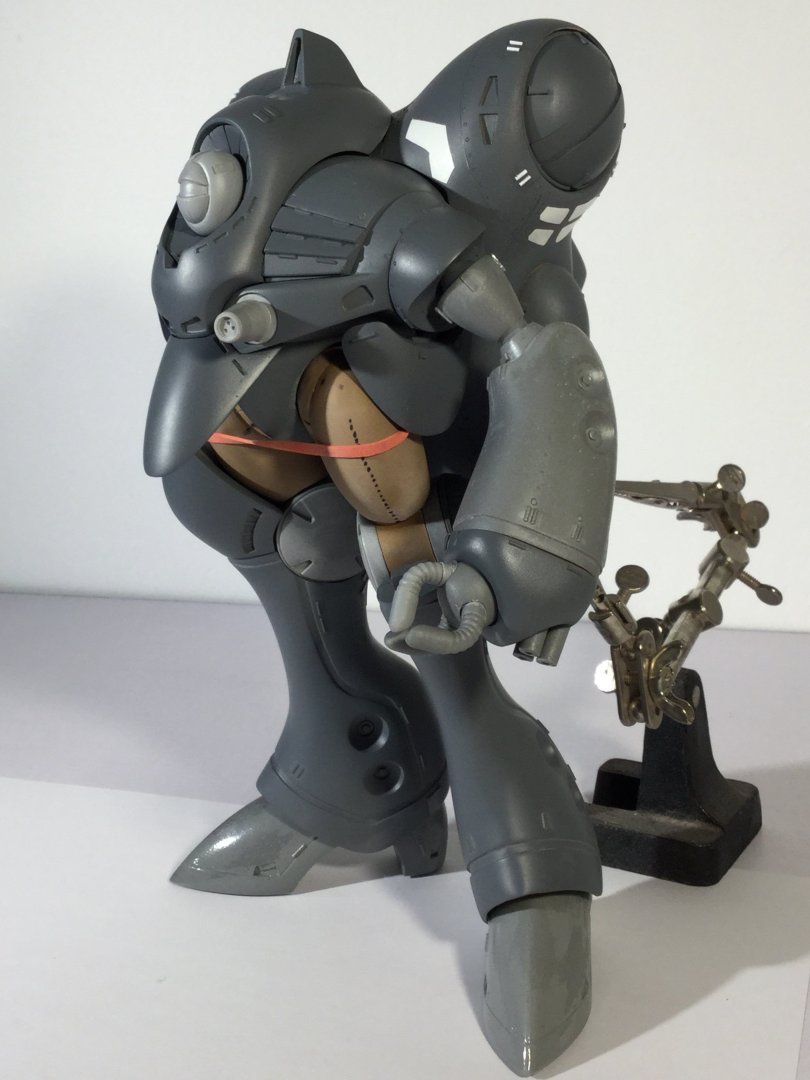
Destructions are done.


-
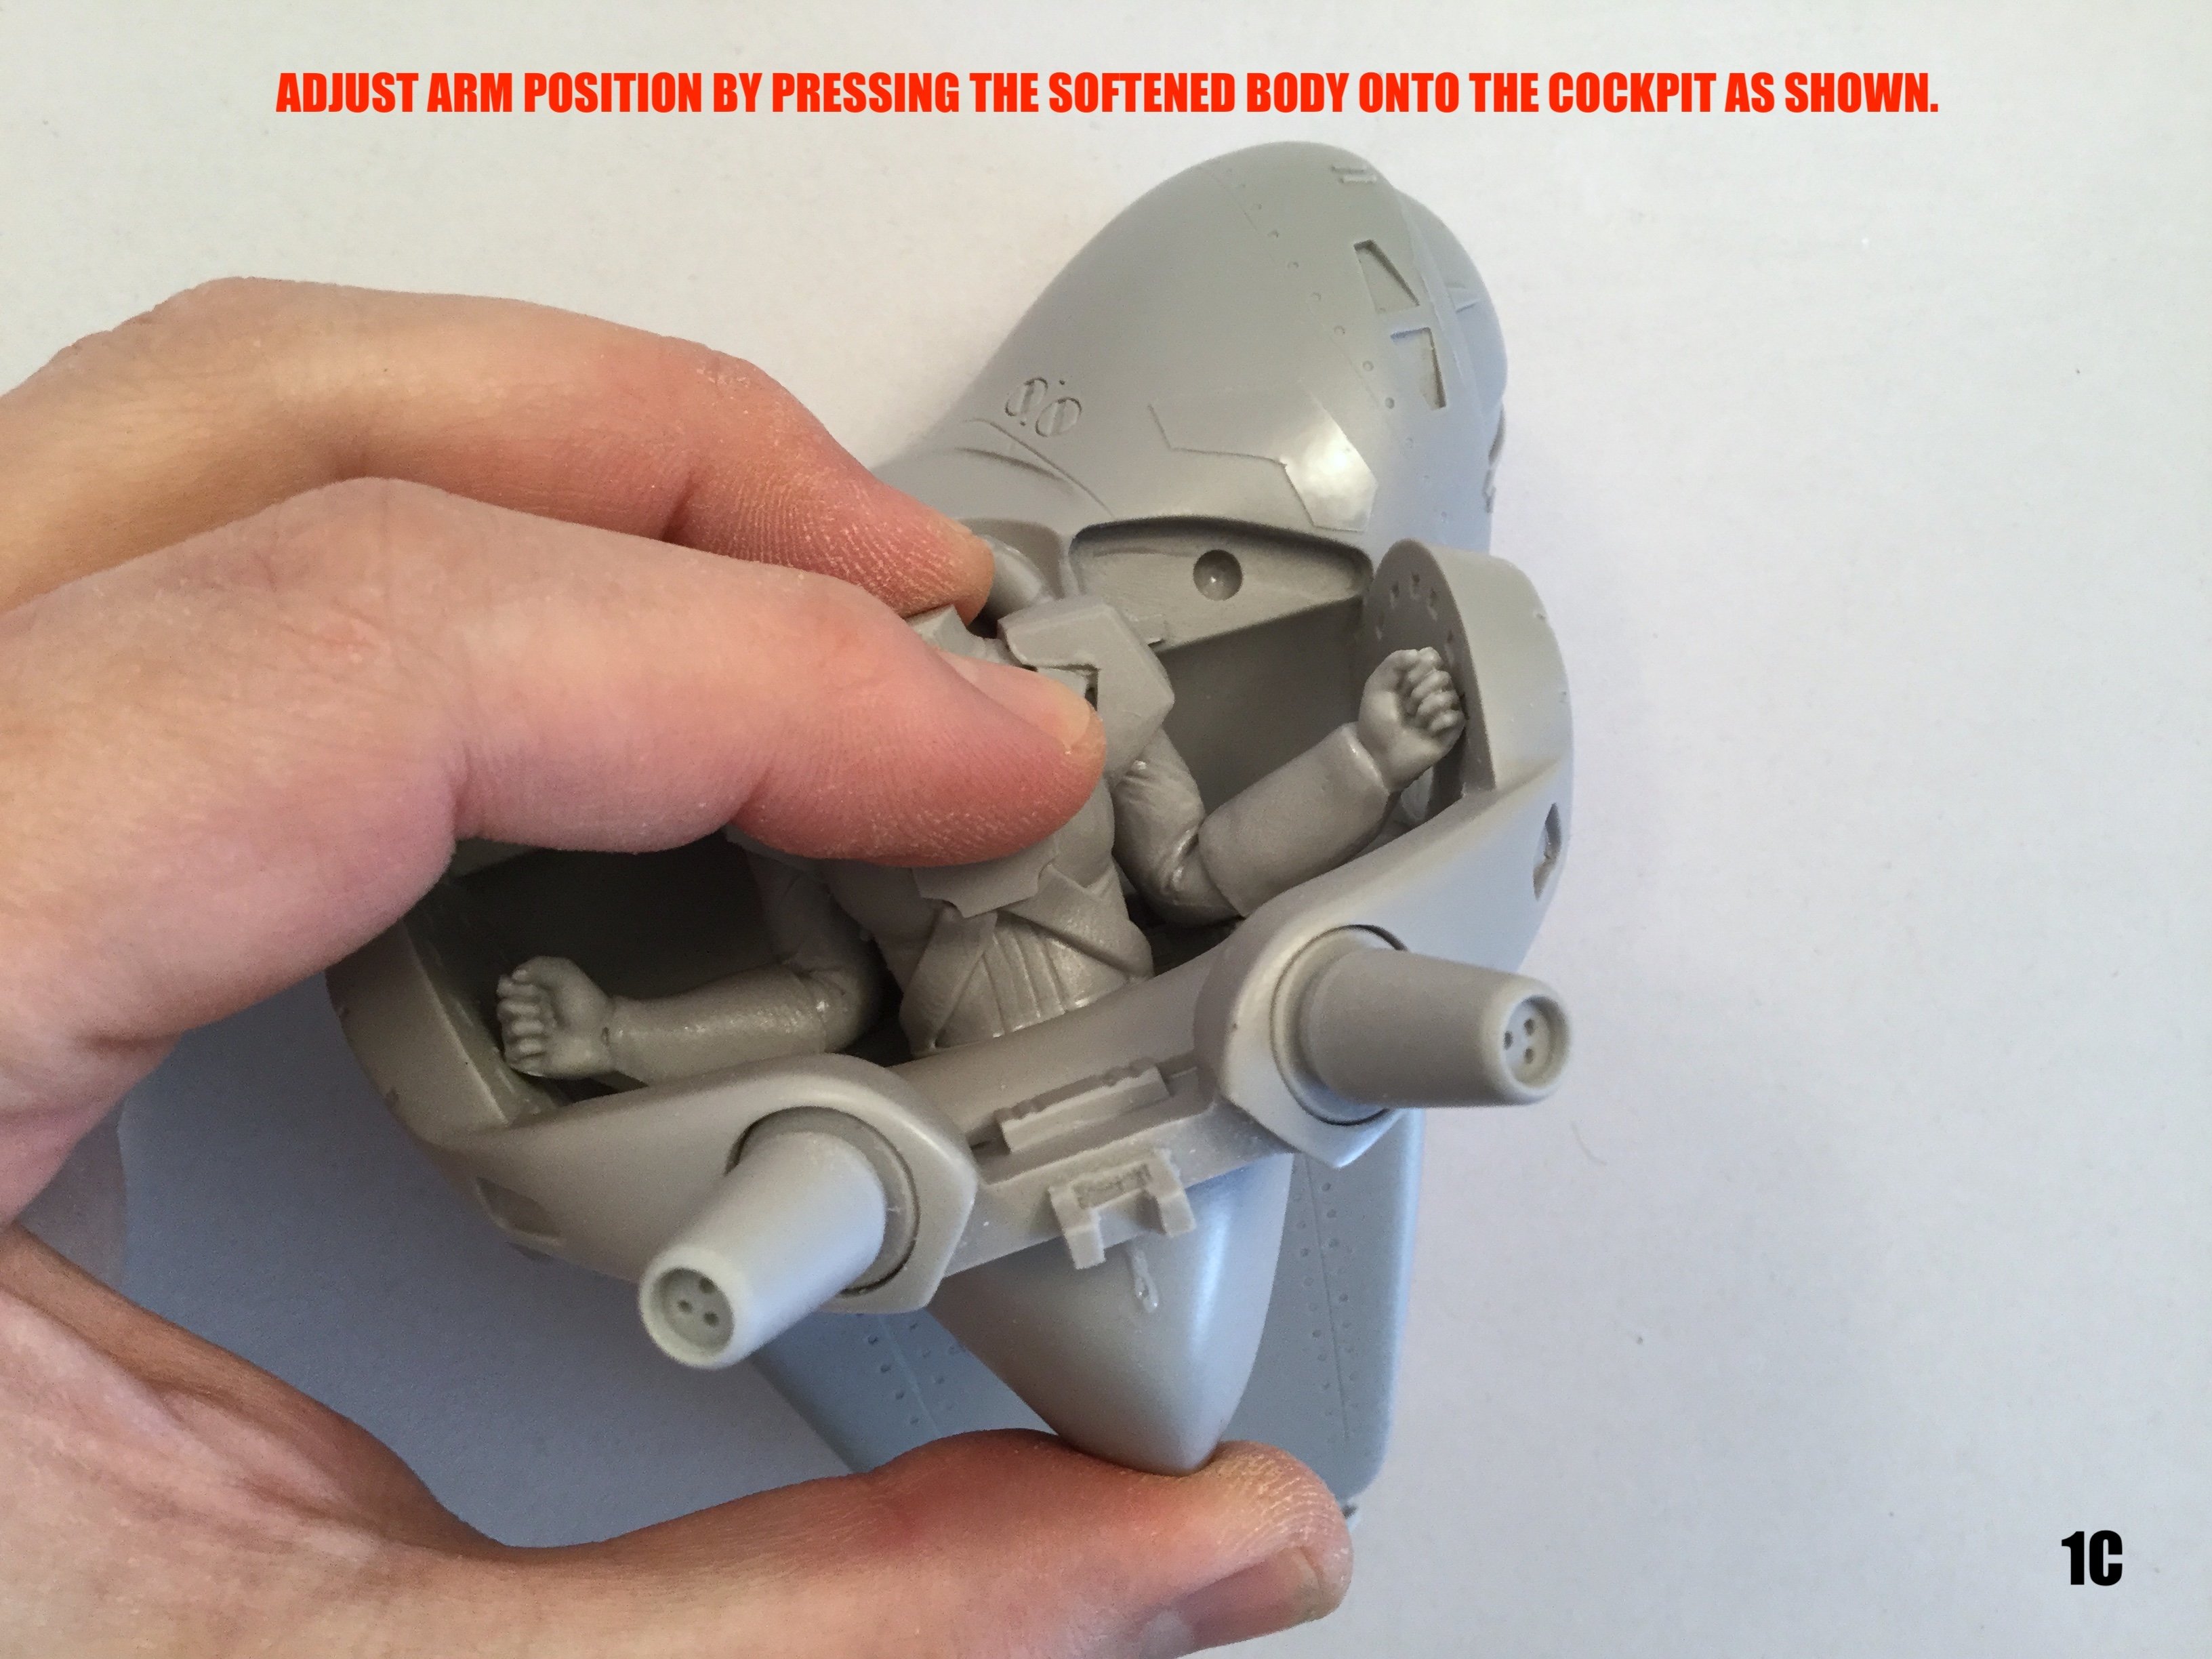
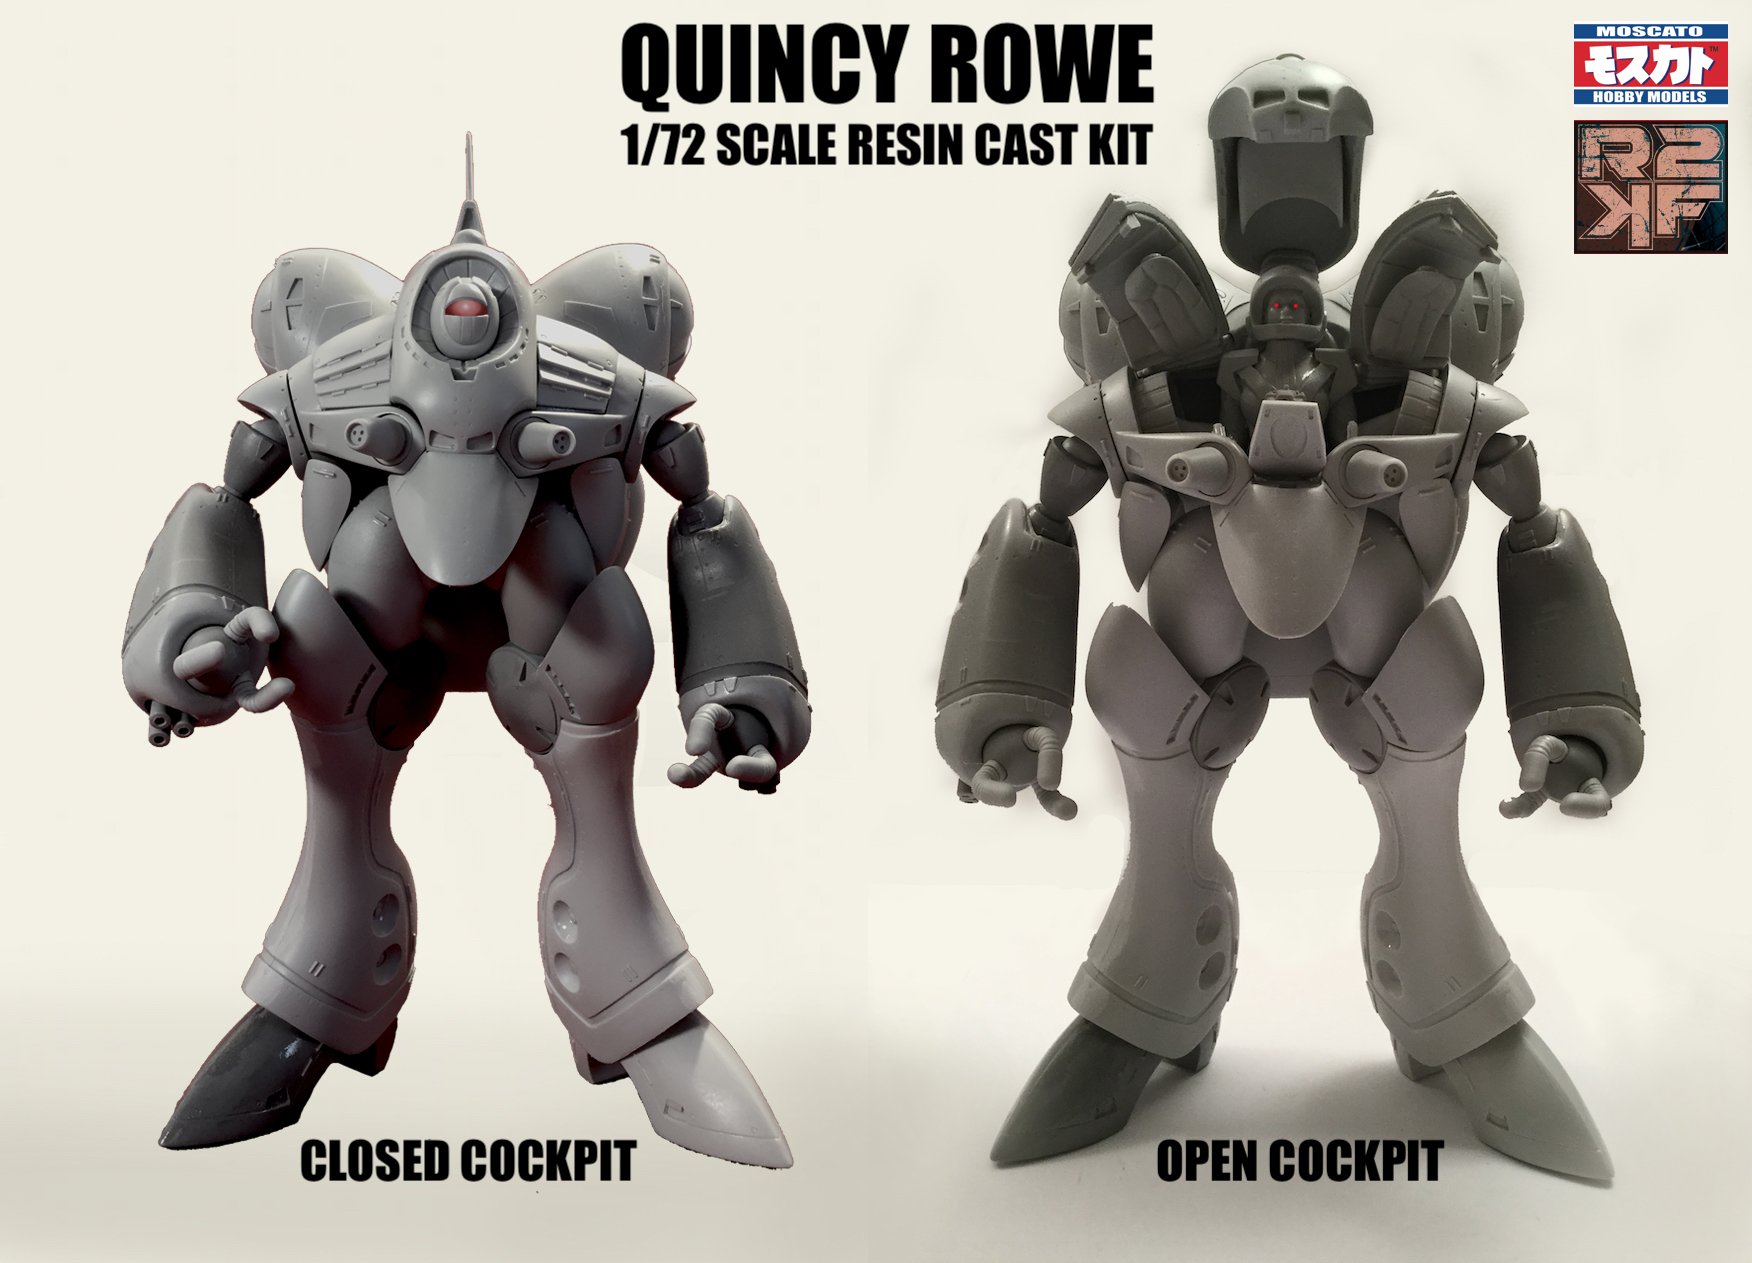
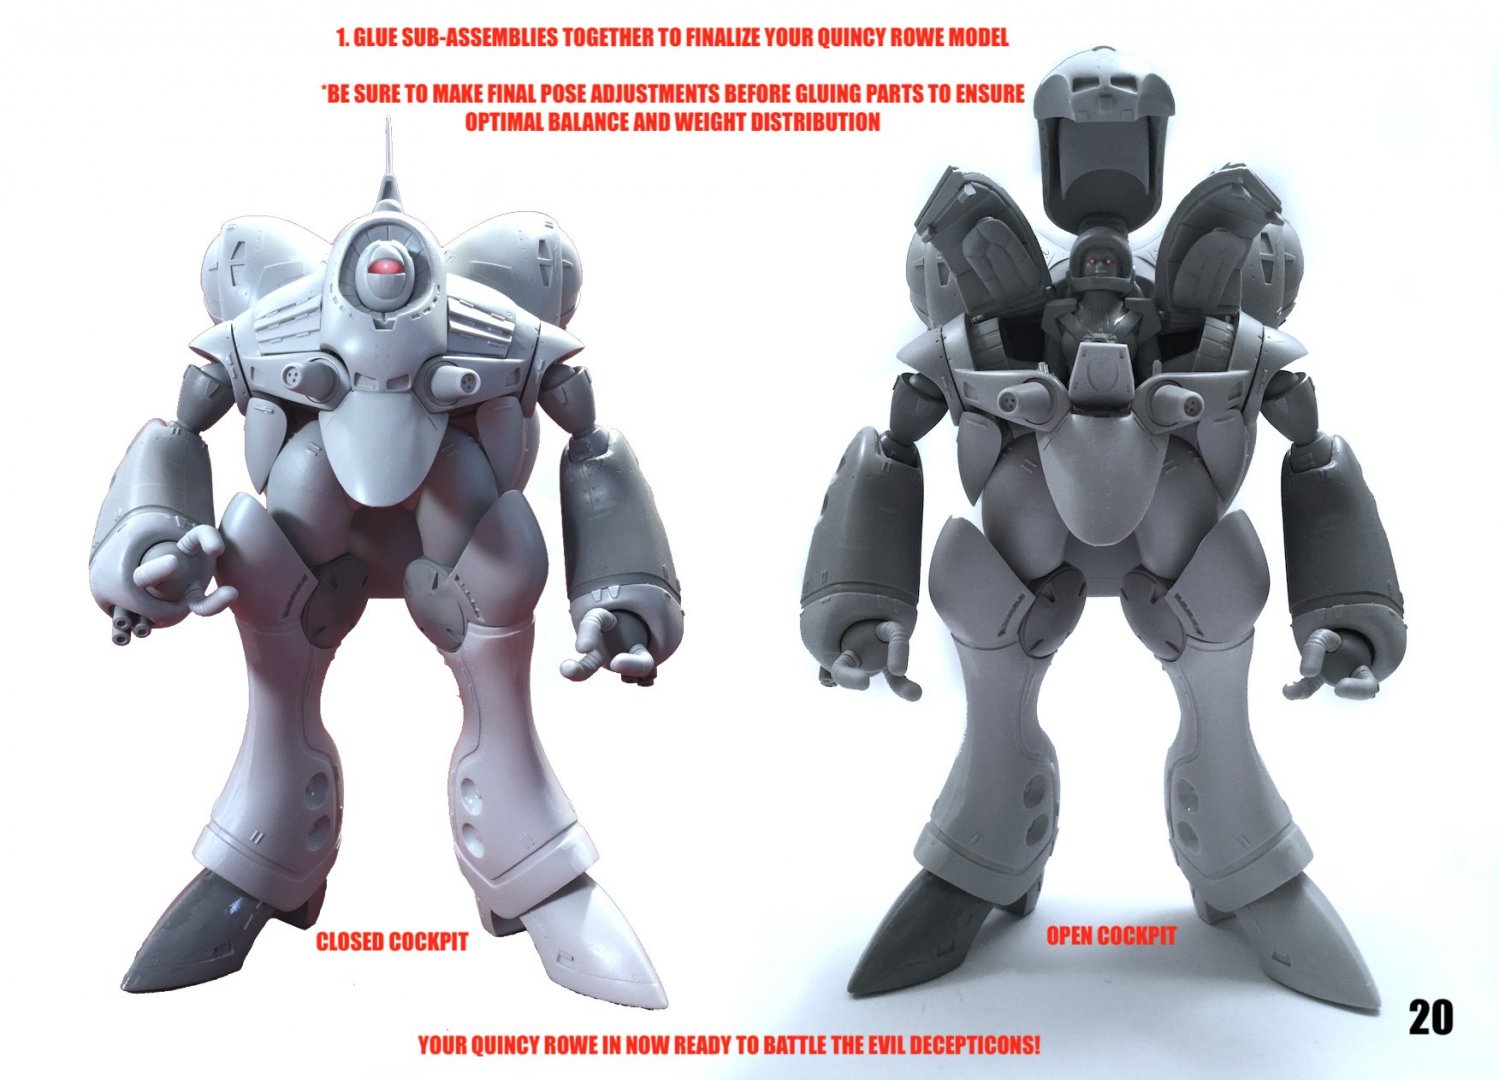
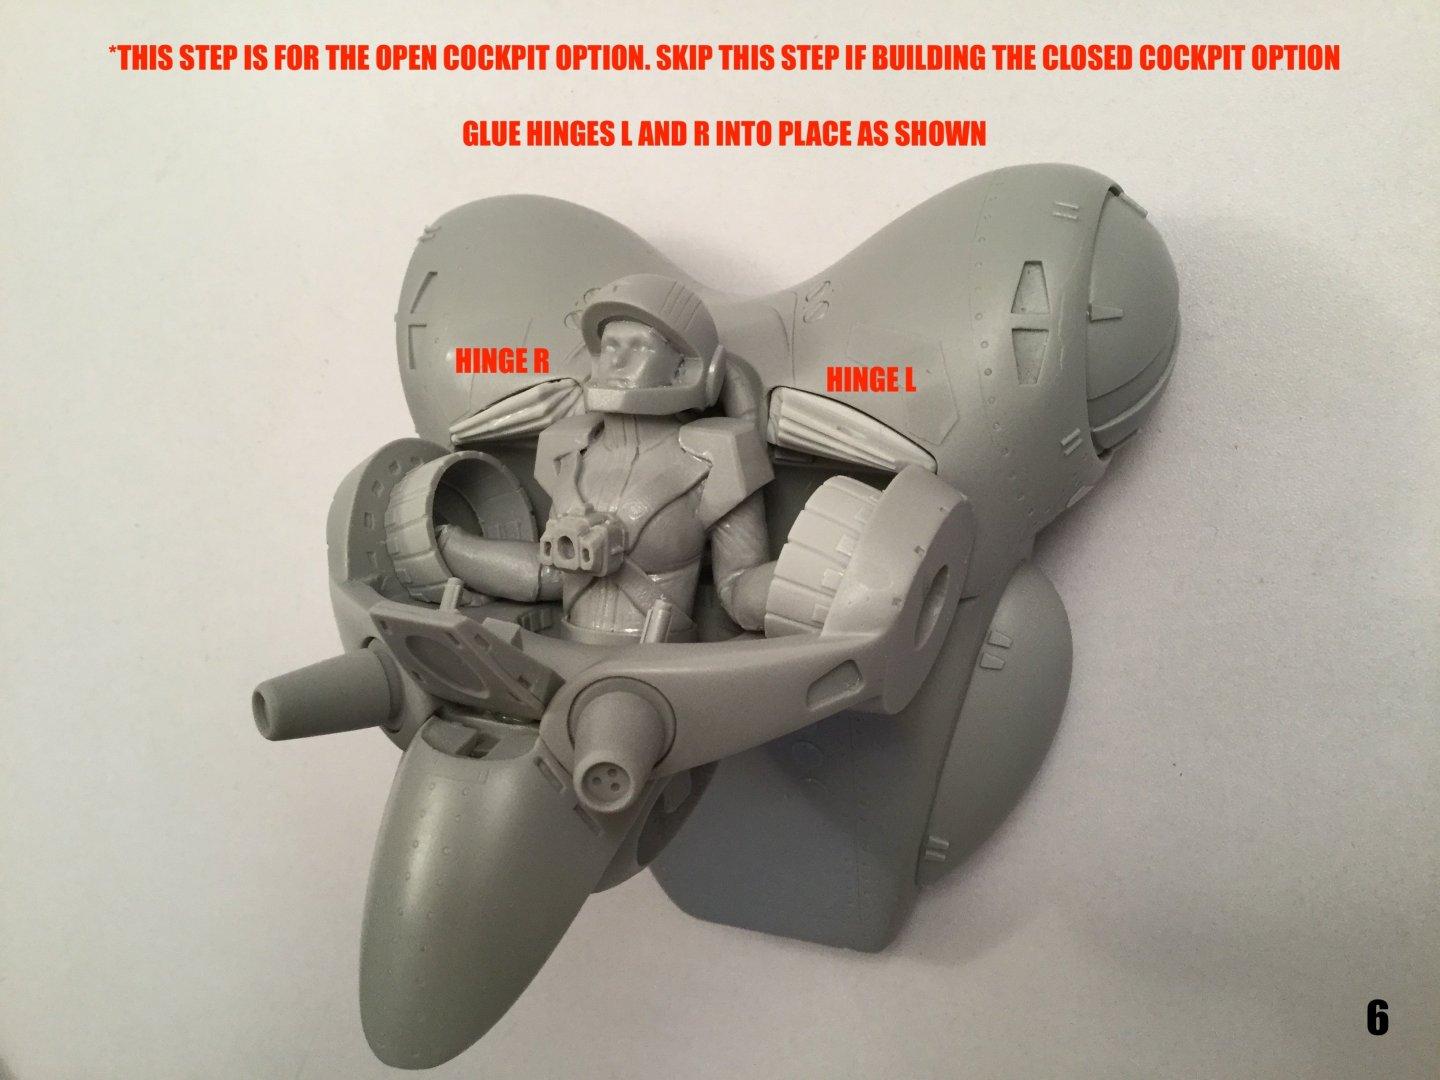
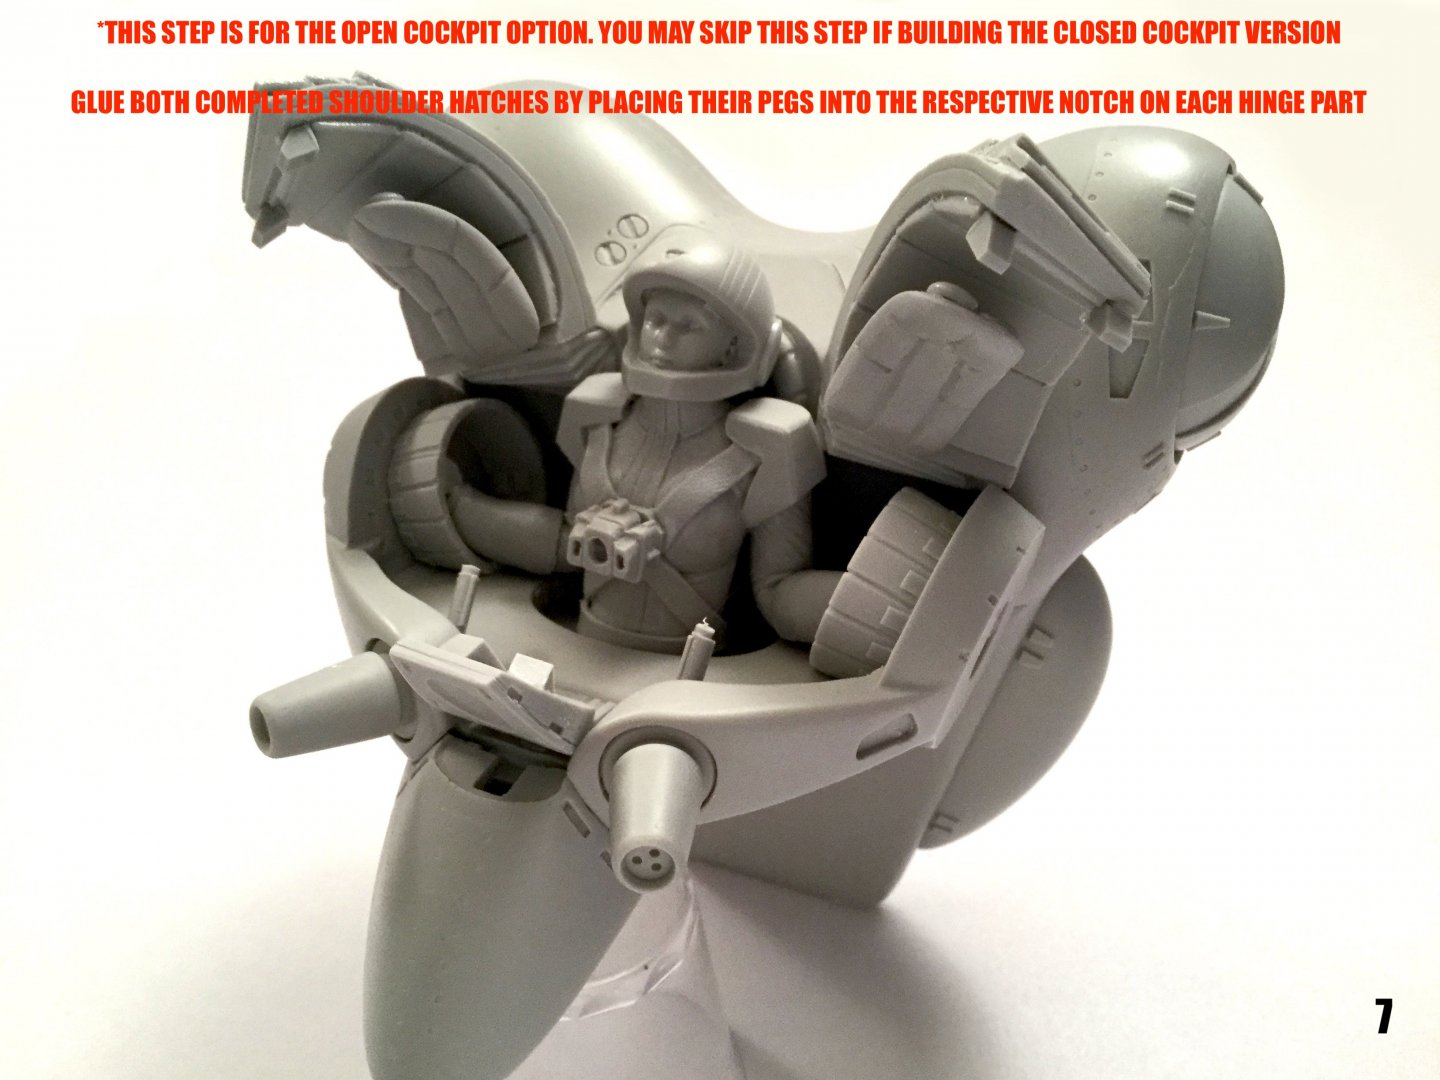
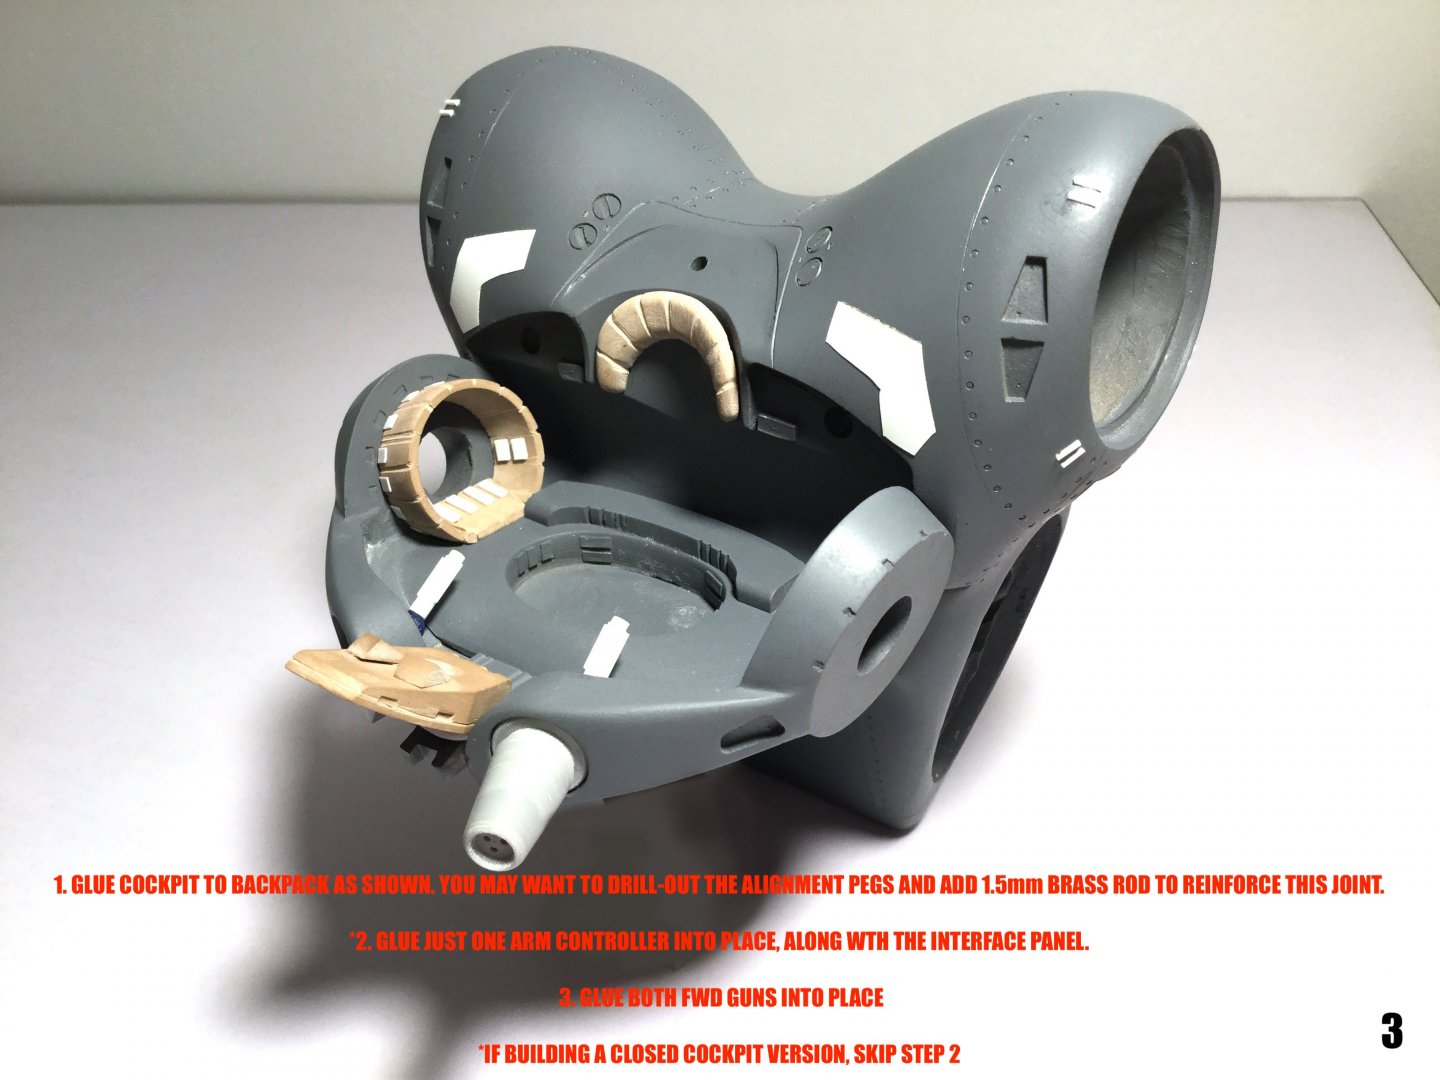
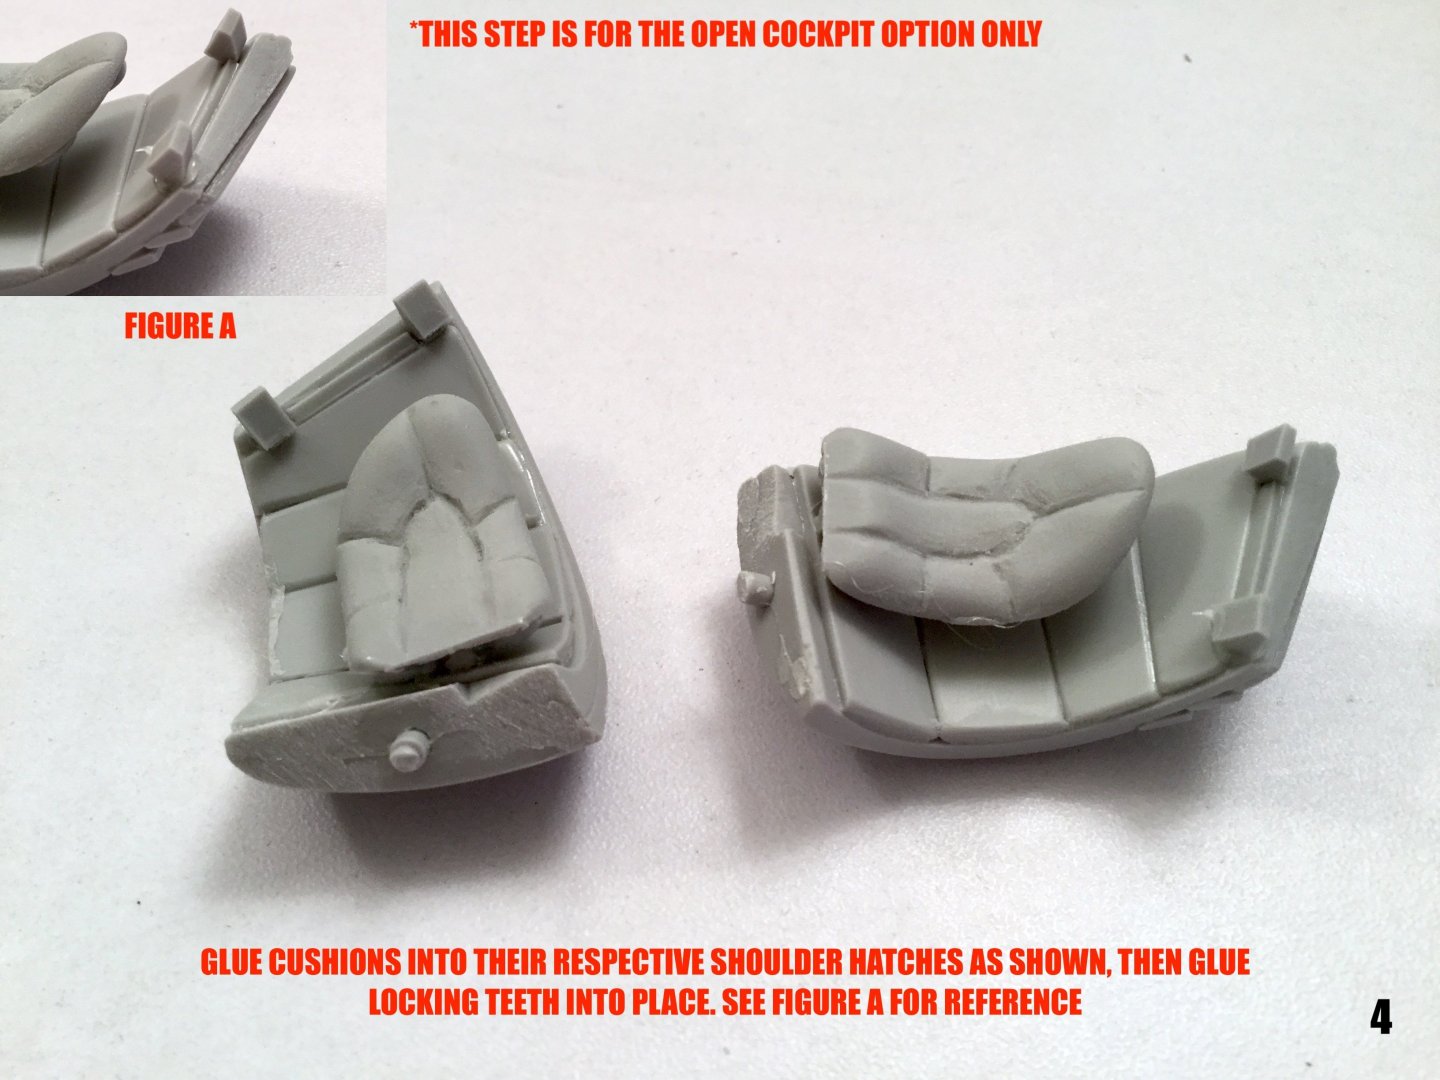
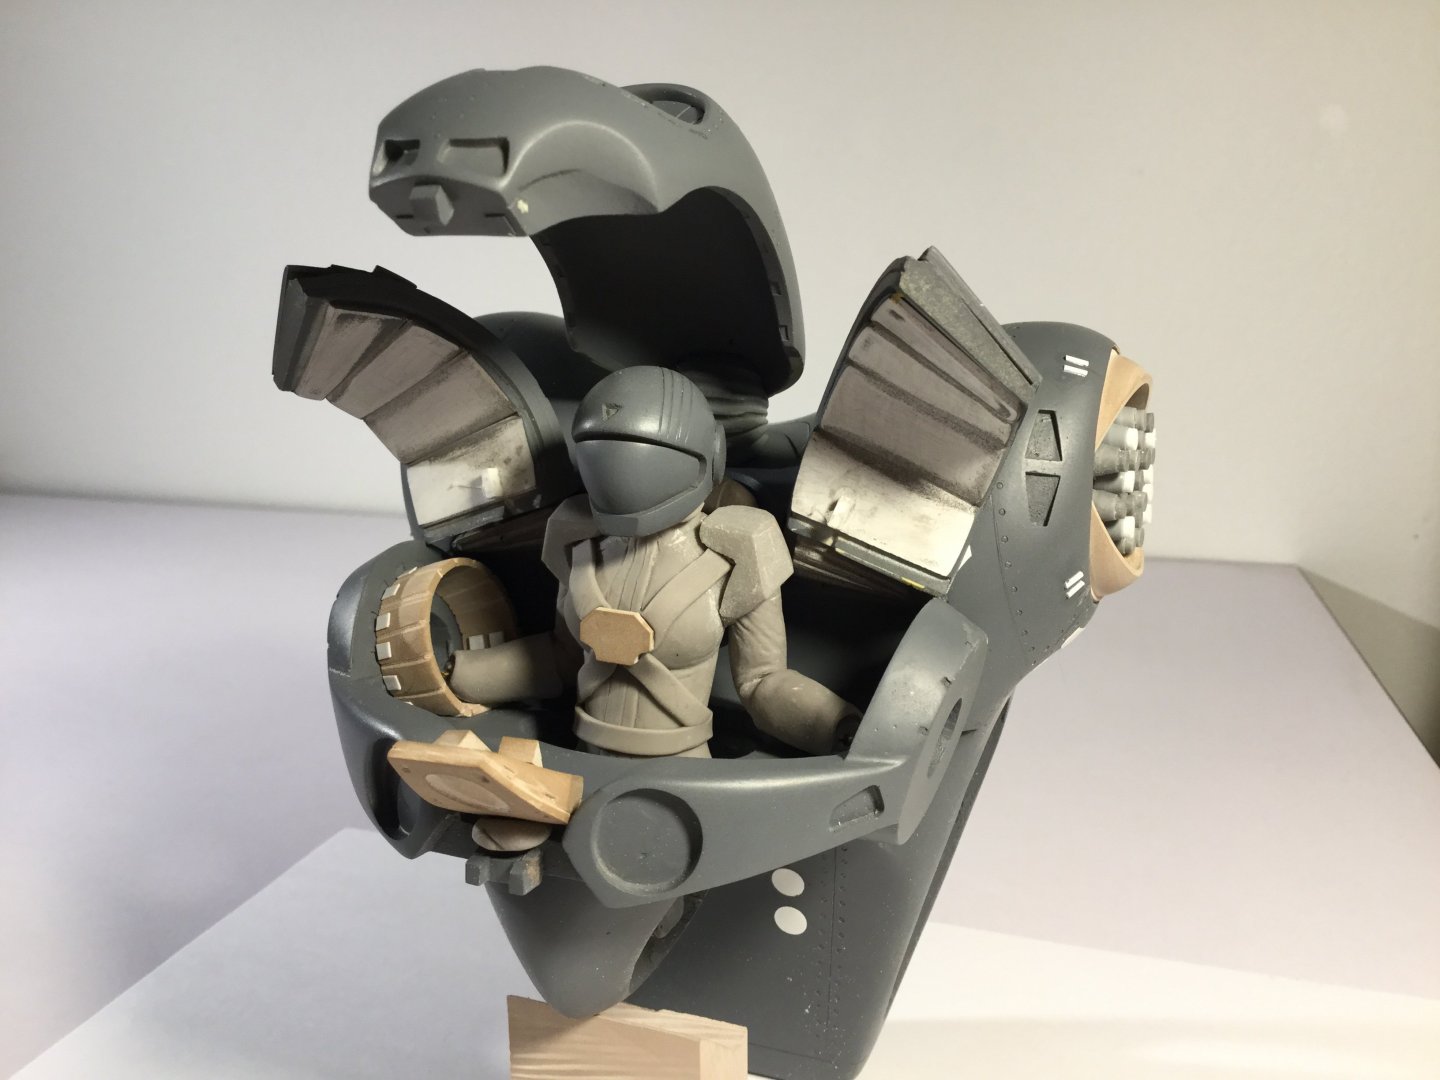
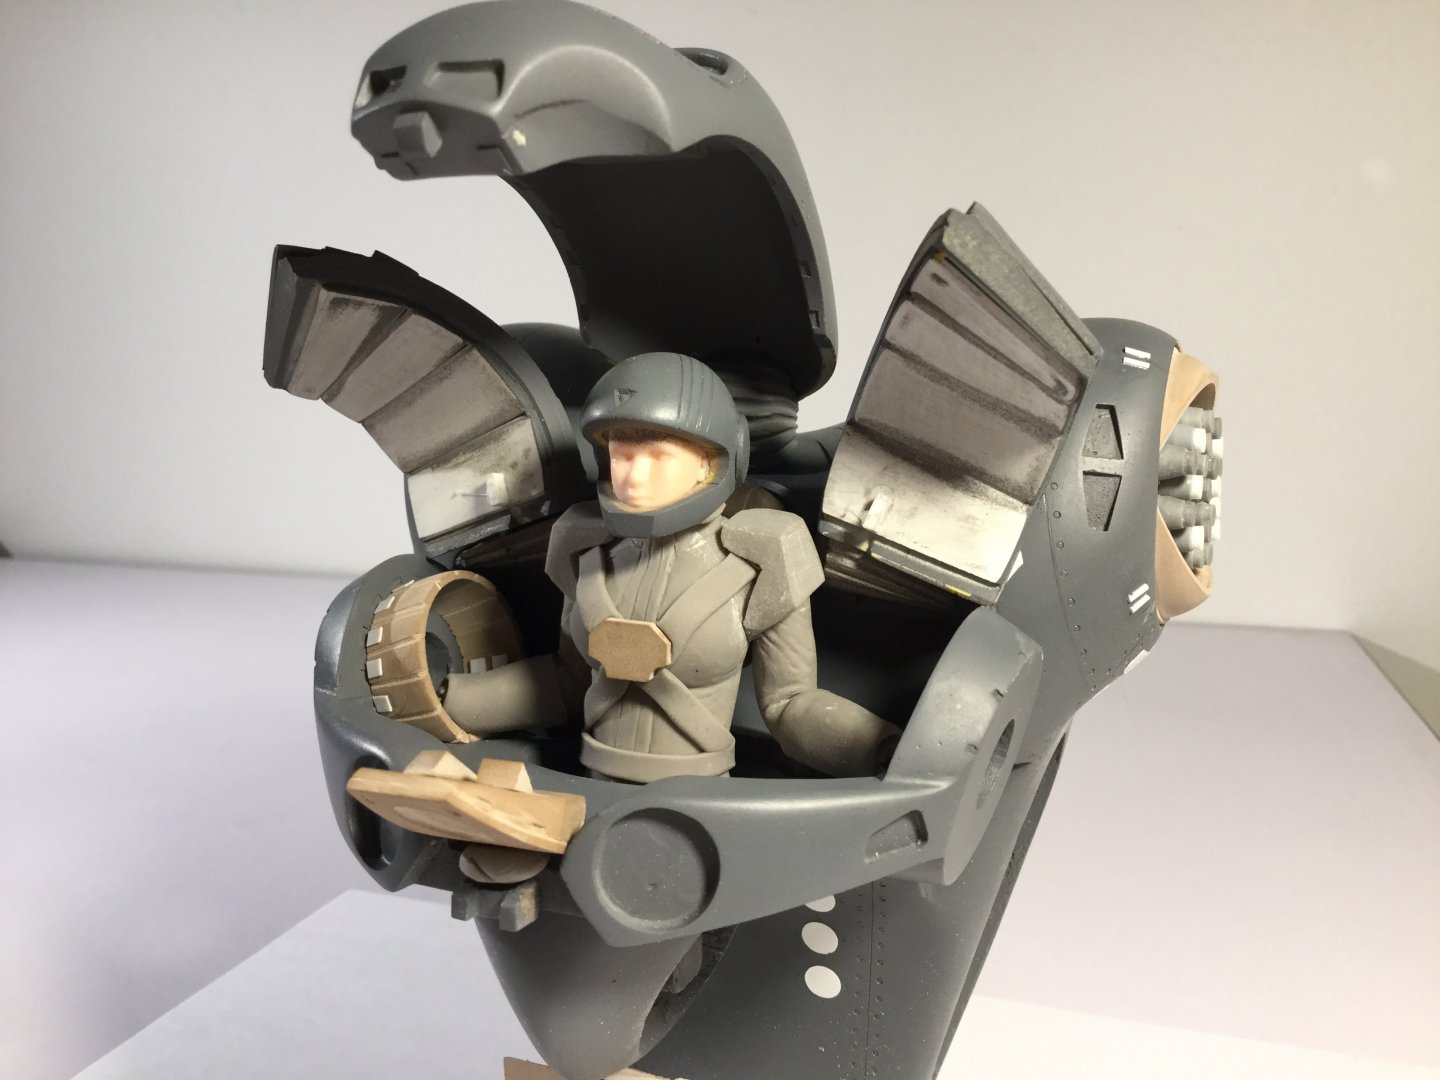
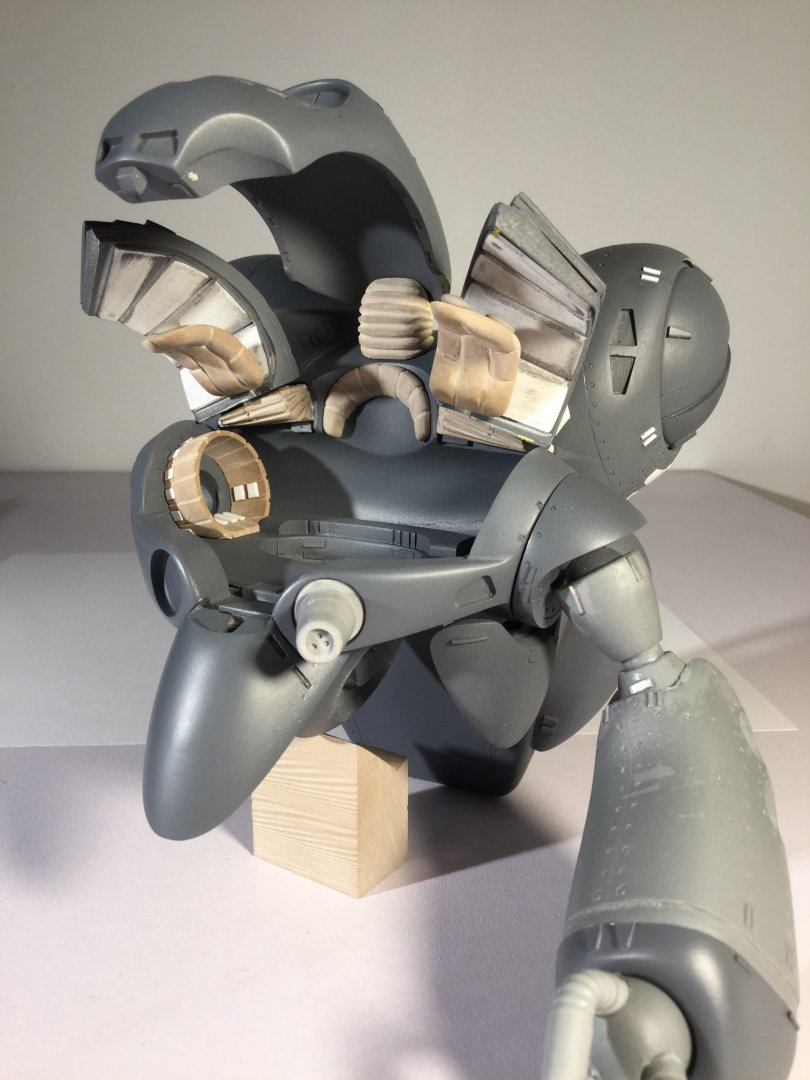
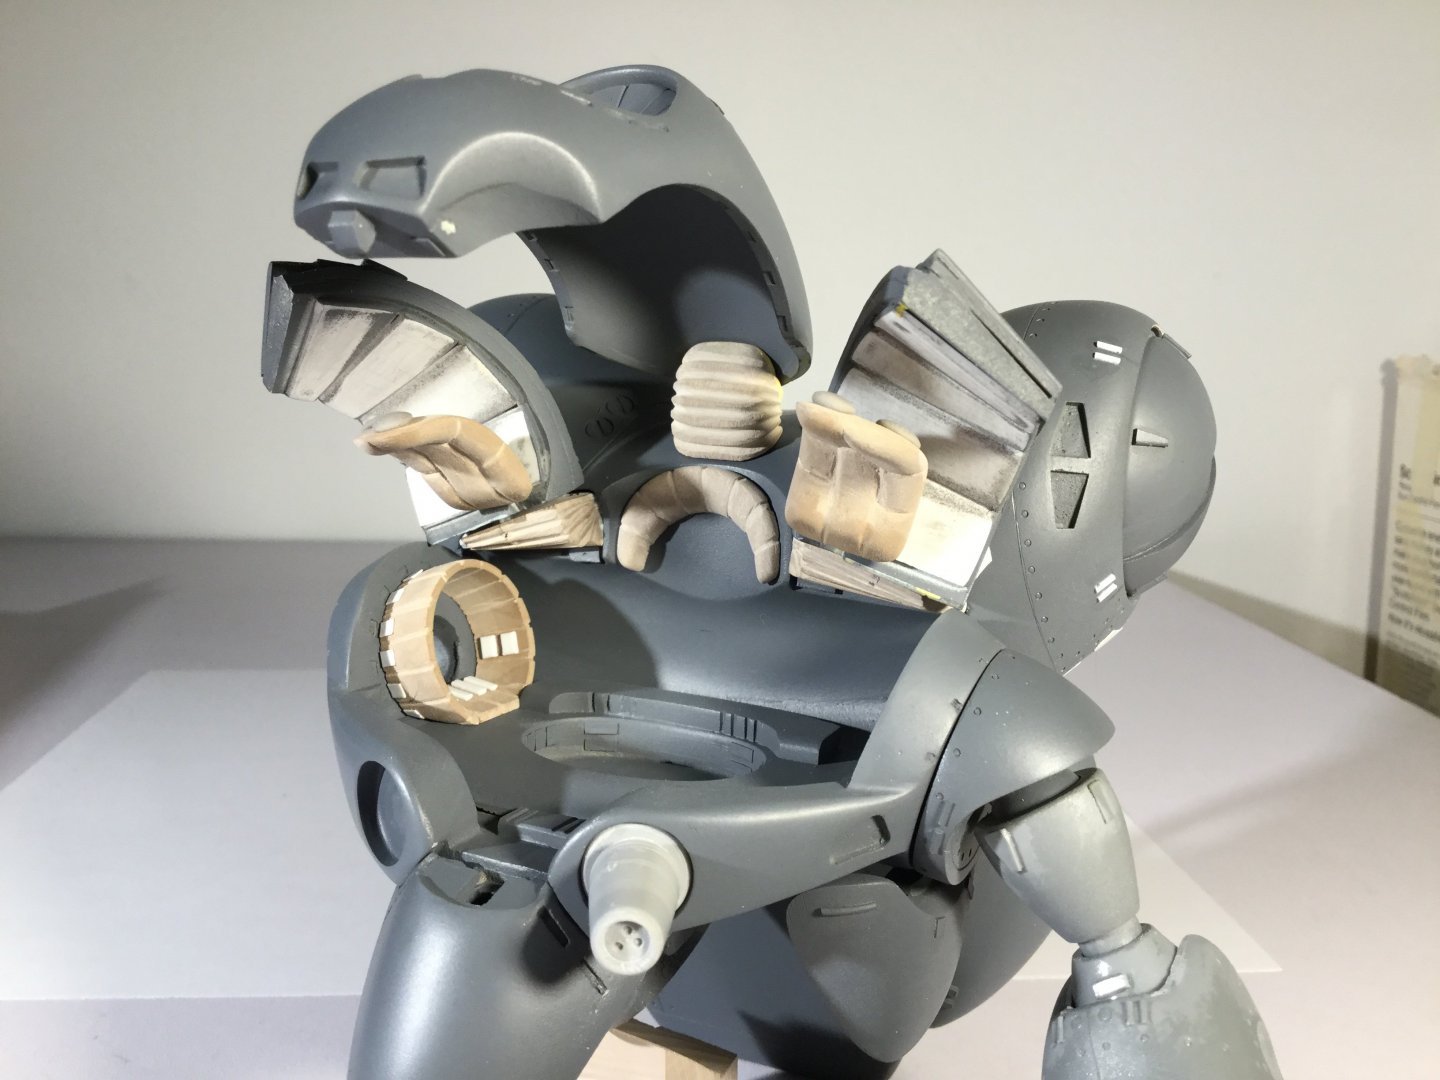
Partly this, partly the fact that the hinges for the cockpit covers aren't movable. Arguably, you could grind the figure or the cockpit in a few strategic places to get the covers to fit over her, but it's easier just to take the pilot out, and combine that with hatch magnets to make a kit that you can display open or closed.
-
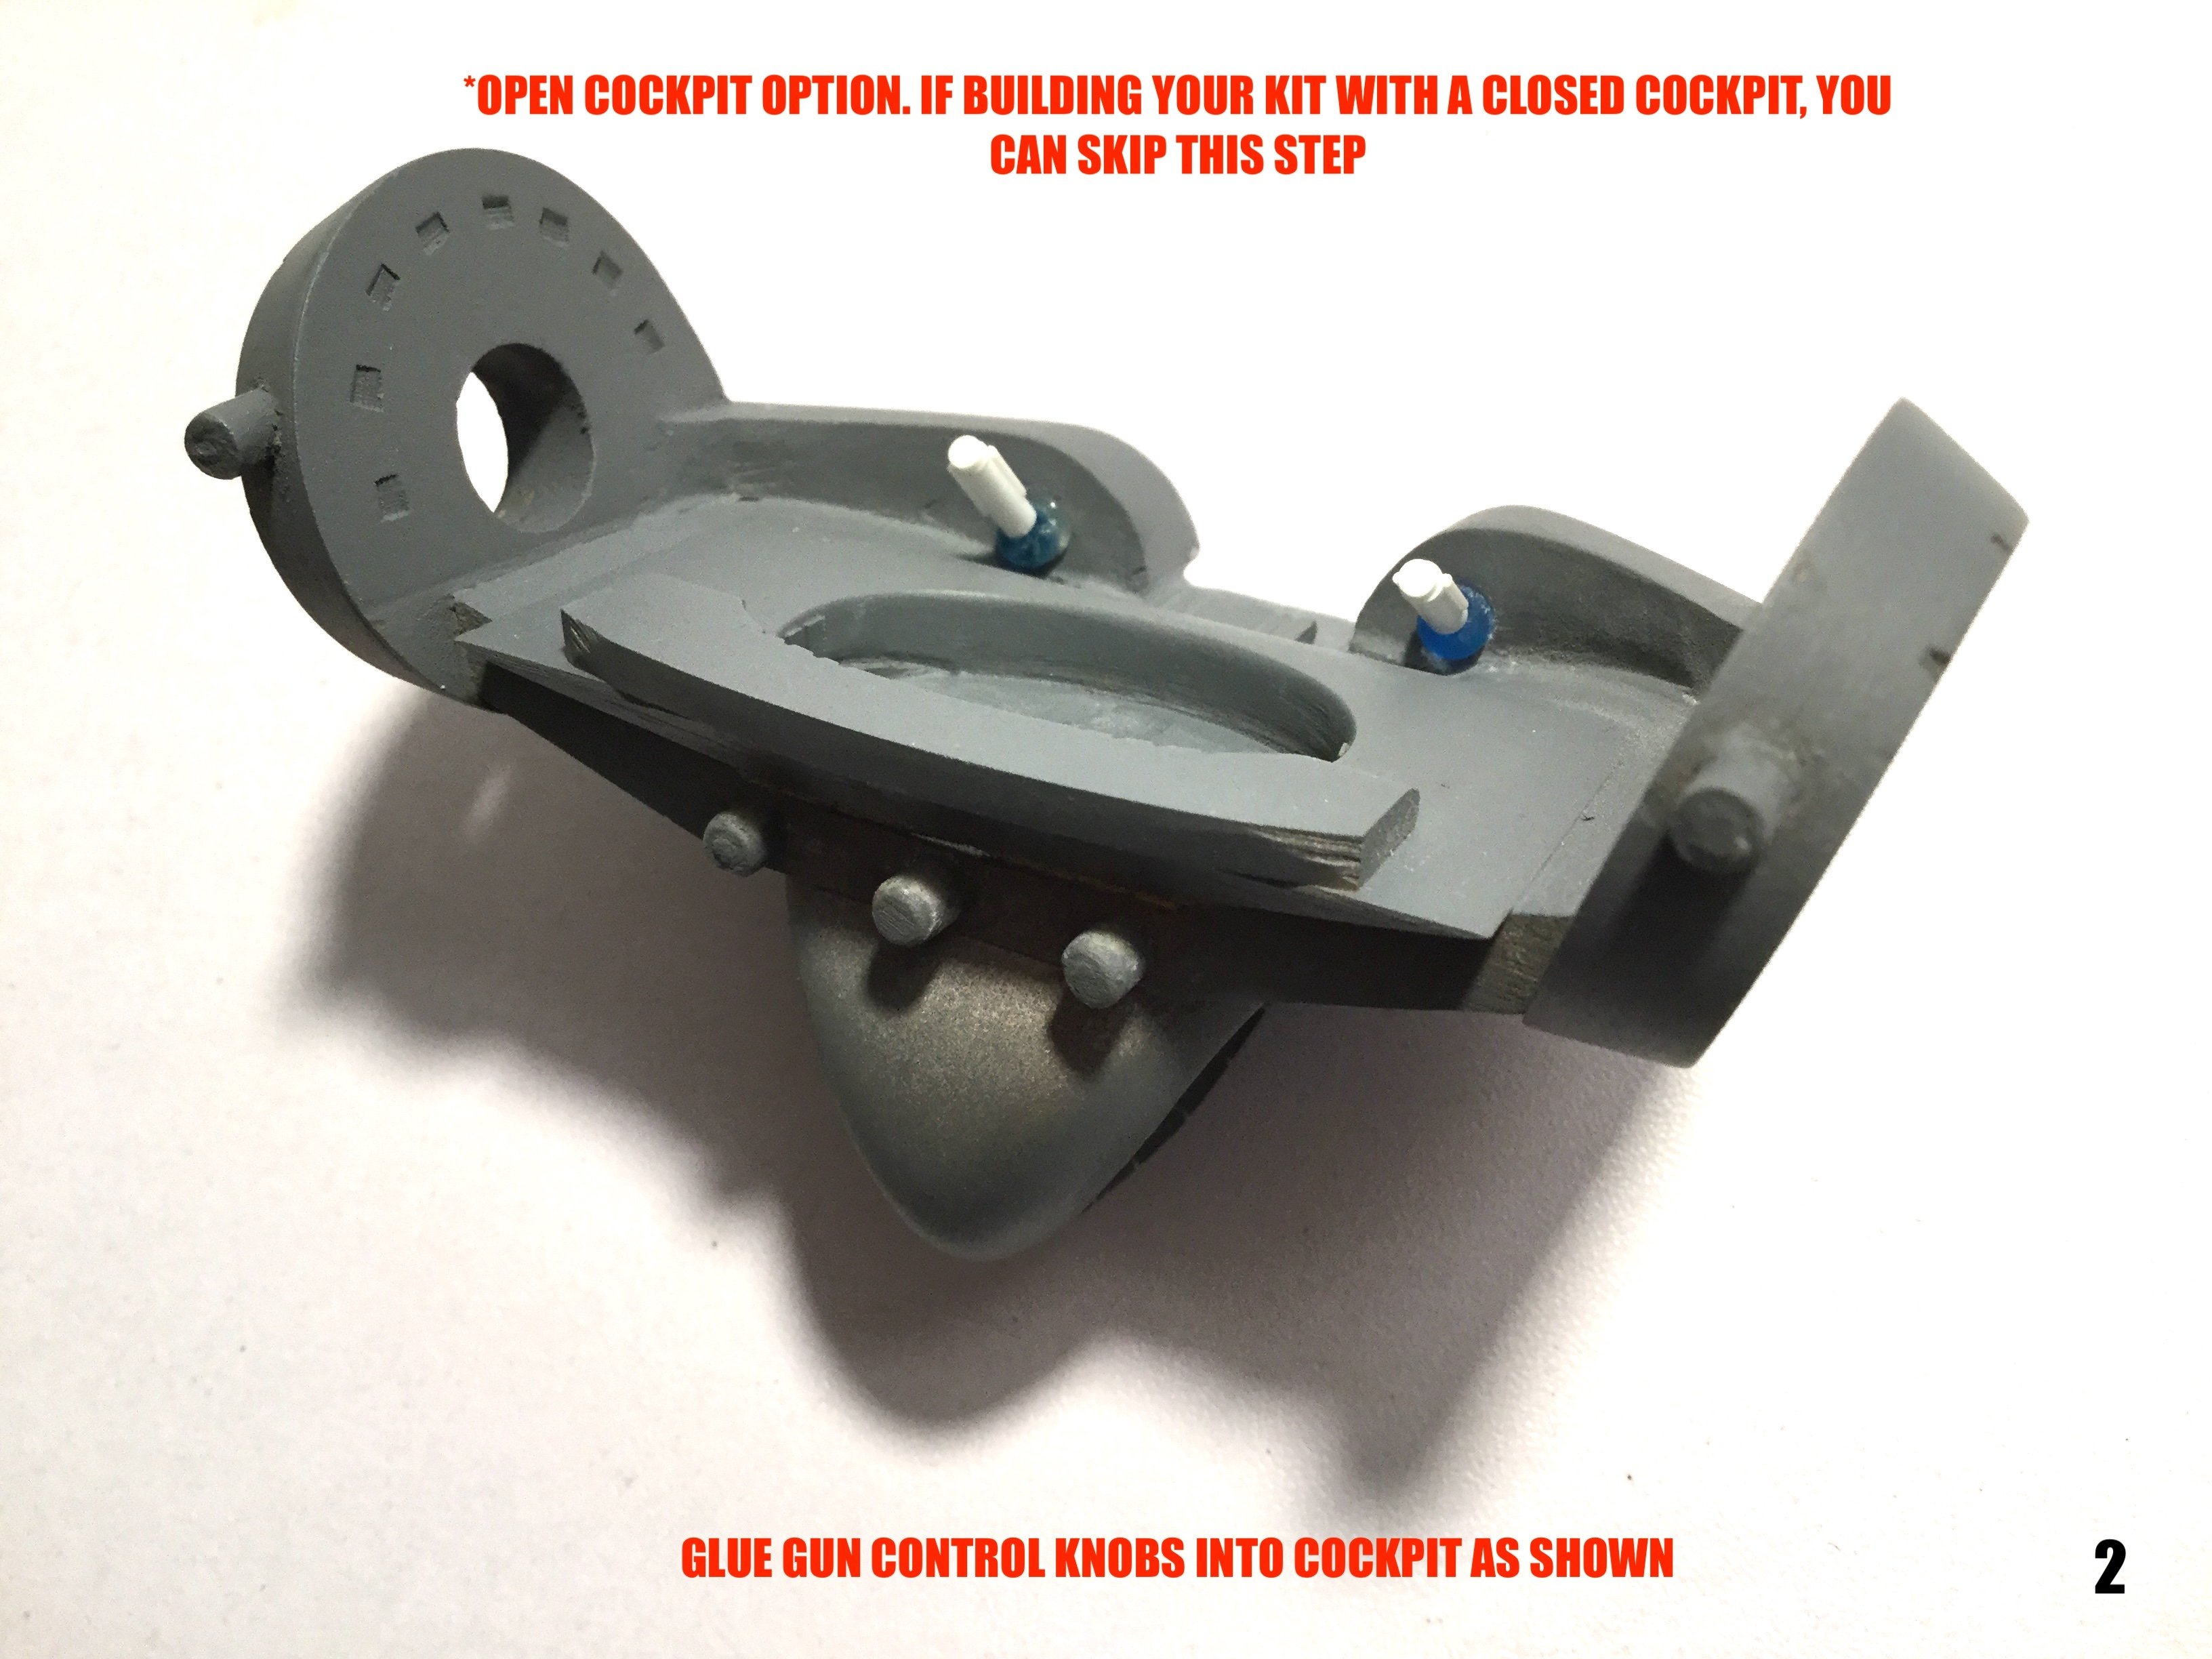
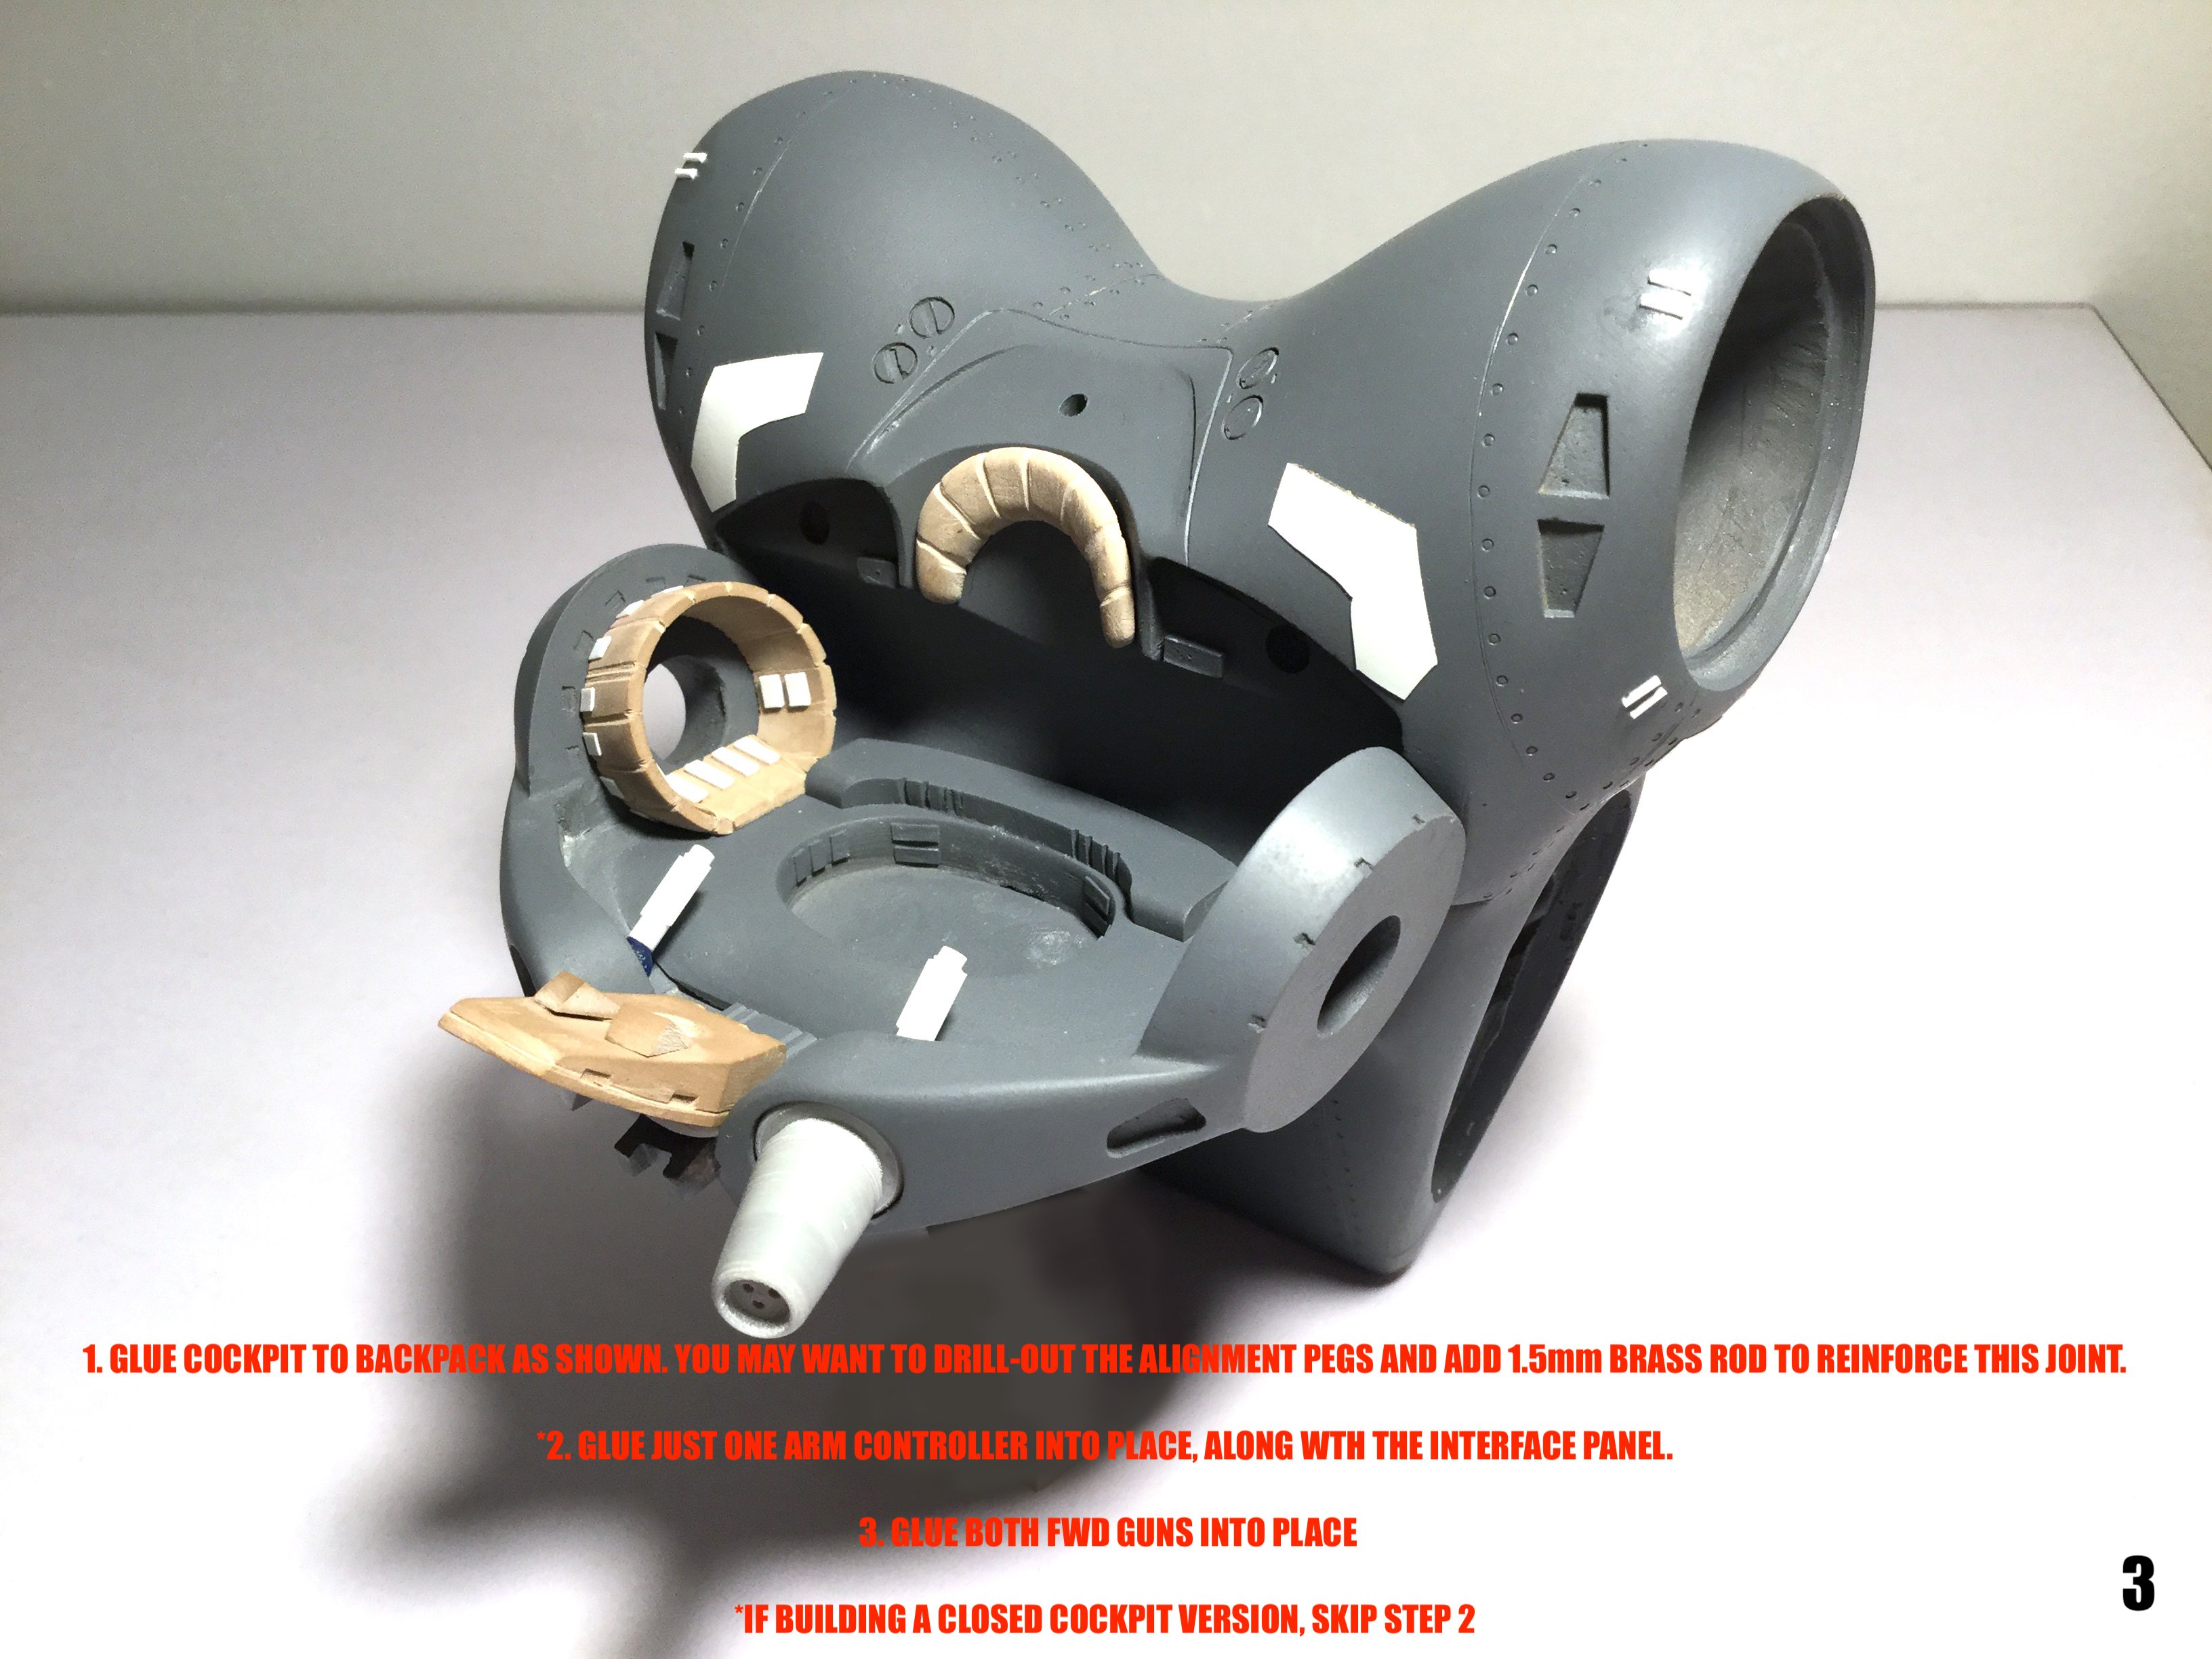
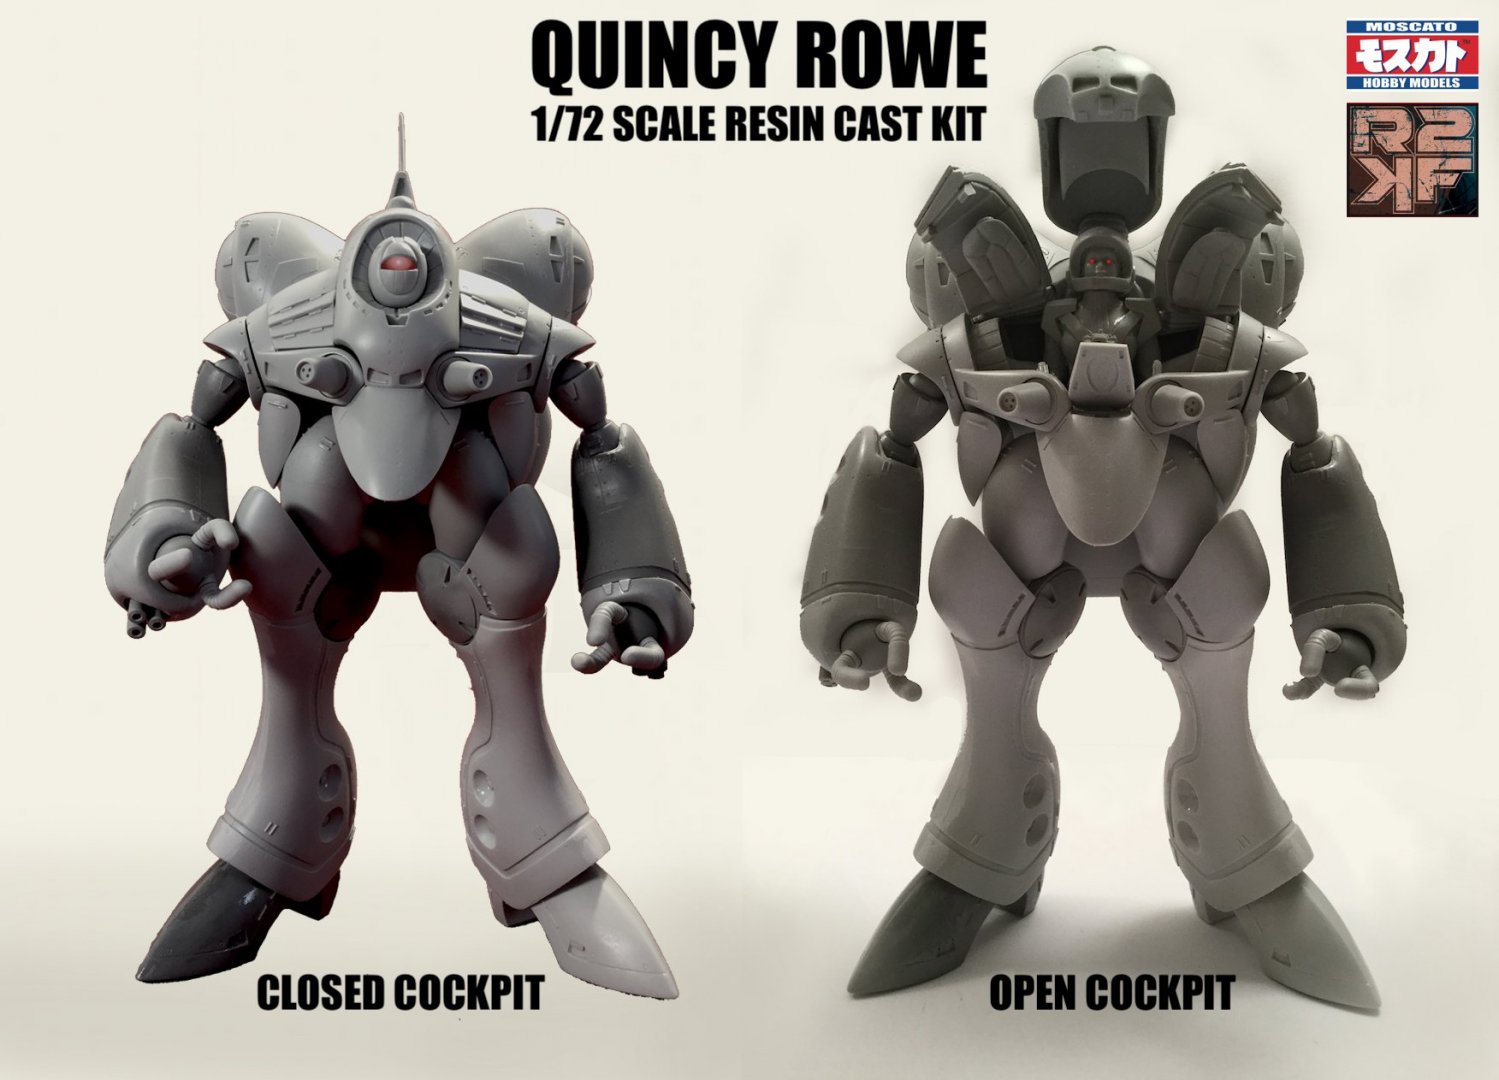
No, you either have to build it open or closed.
-
She's done! Casting is 75% done for current orders, and I'll be posting the destructions later this week.


-

The Official Moscato Hobby Models Thread
captain america replied to captain america's topic in Anime or Science Fiction
Hey guys! If anyone out there is in the US military, preferably Army or Marines, please shoot me a PM: I have a few question with regards to armored troop formations. Thanks in advance! -
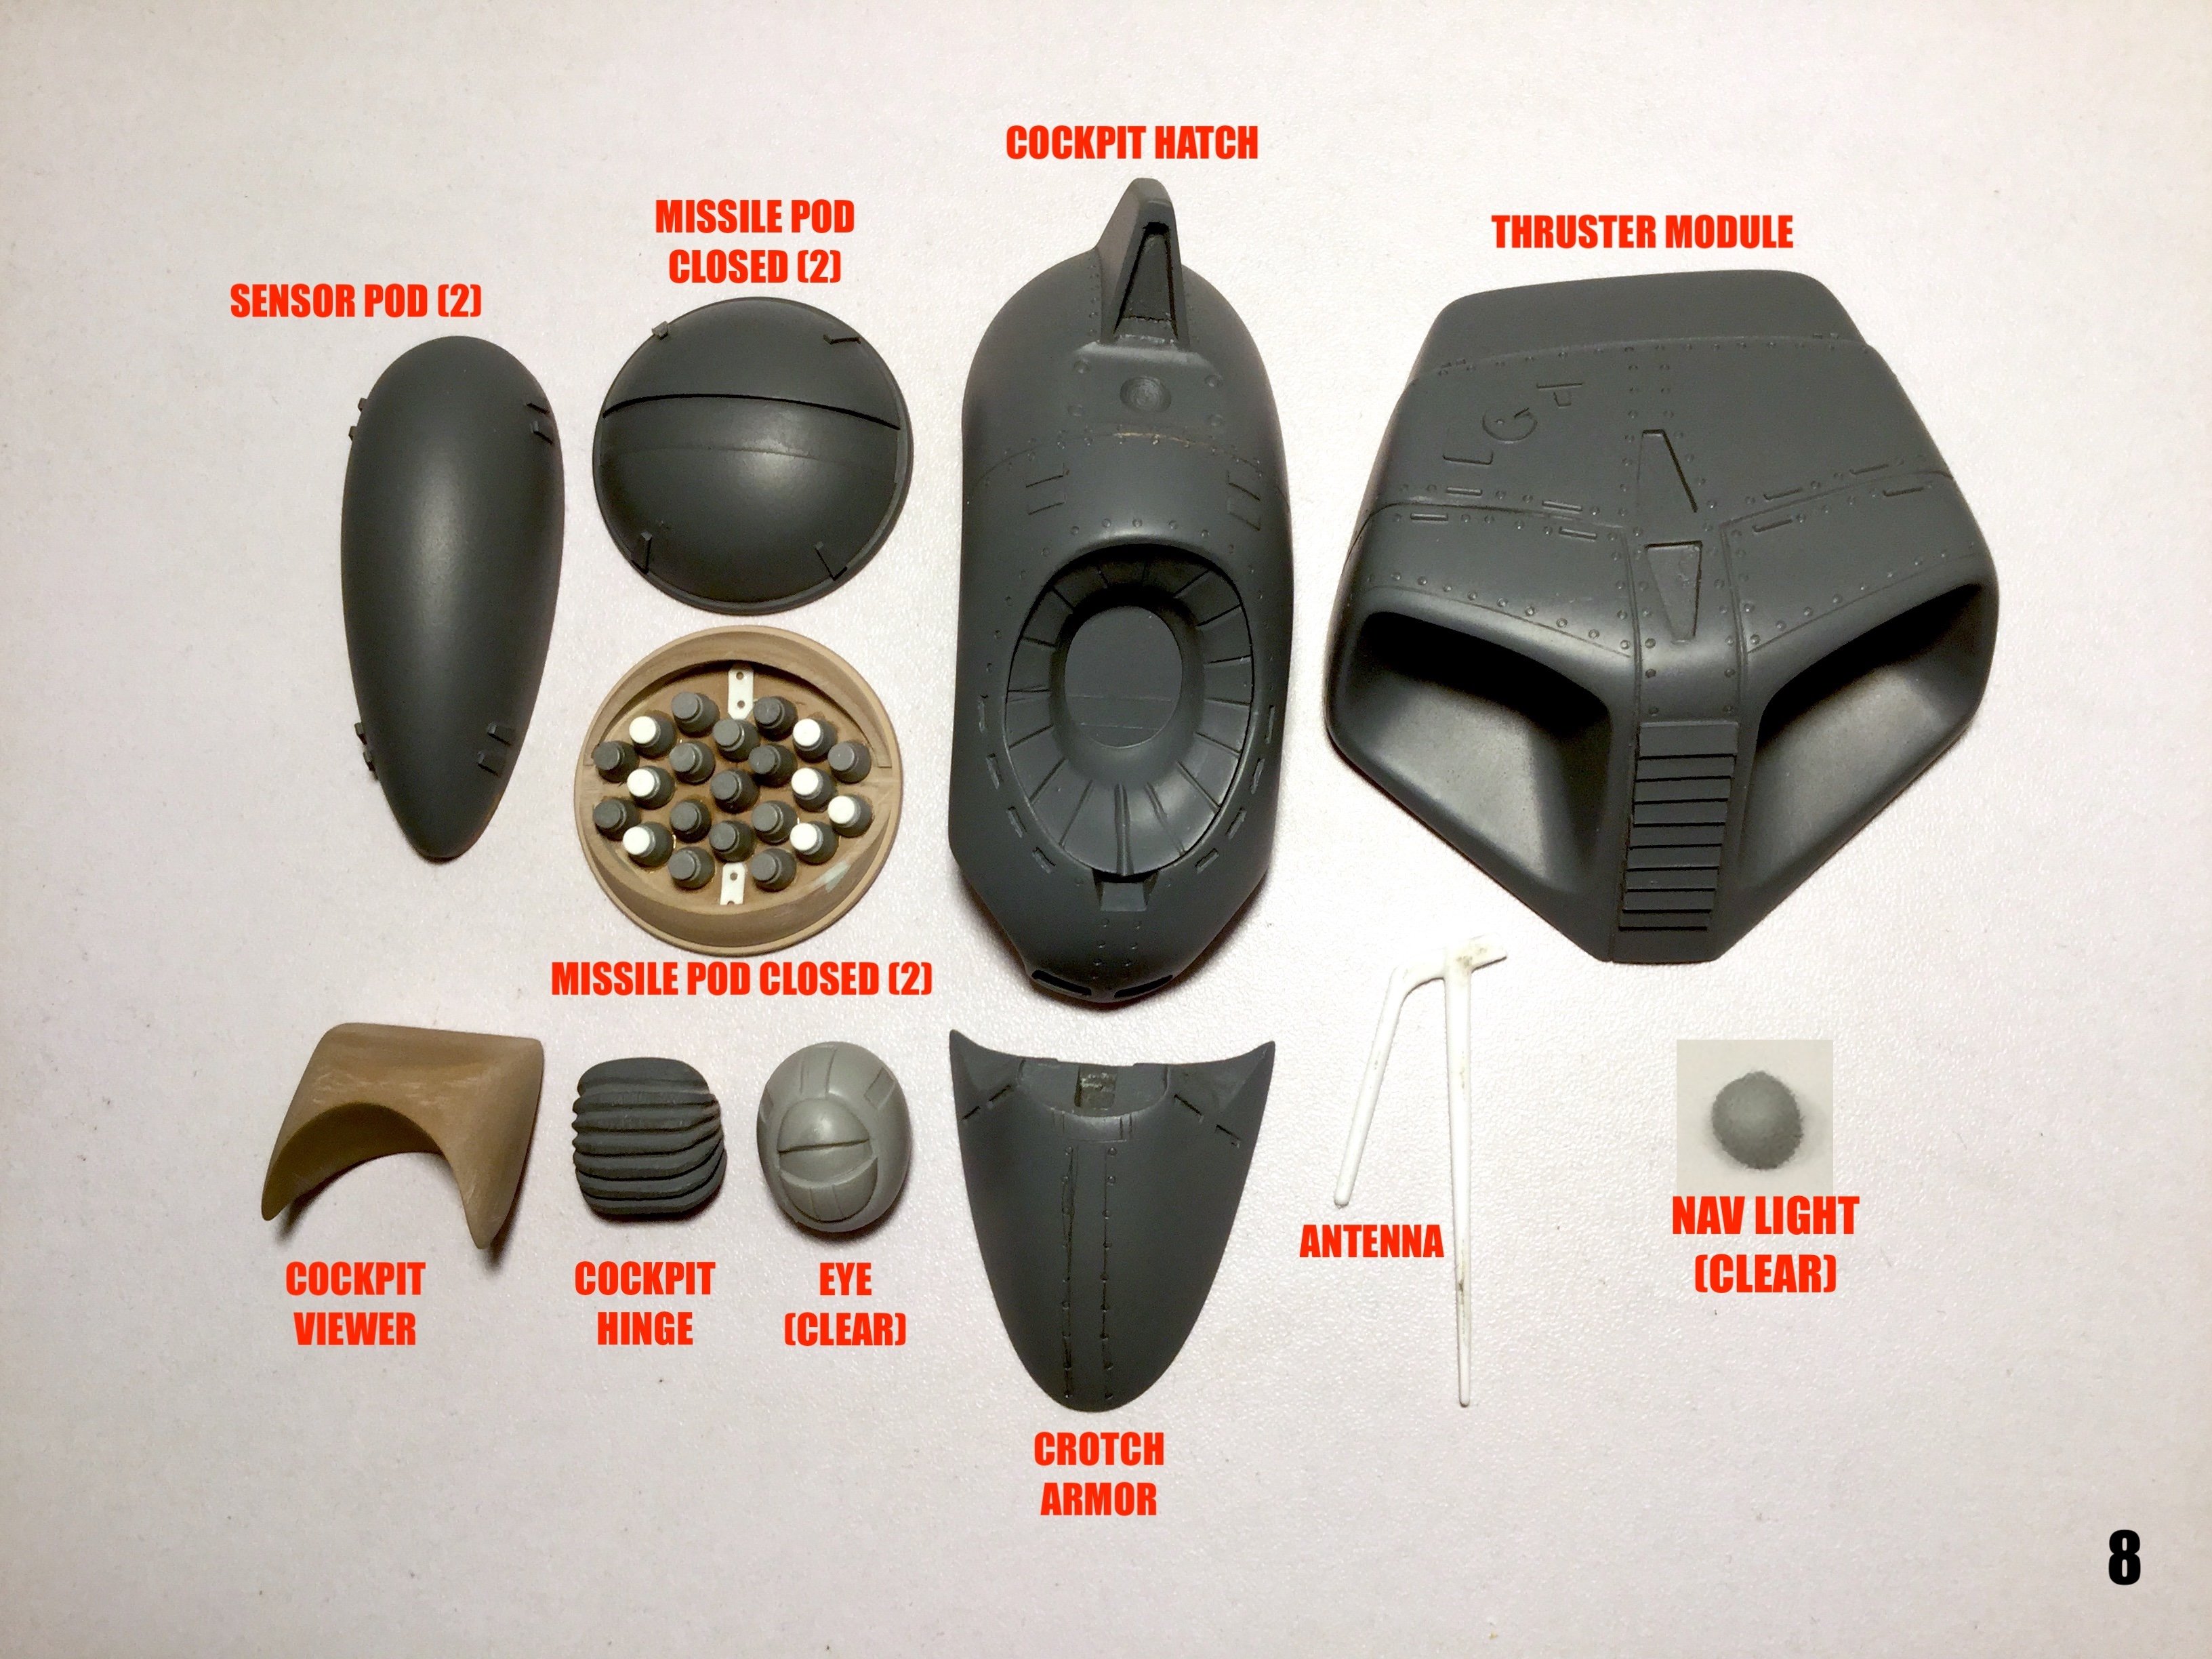
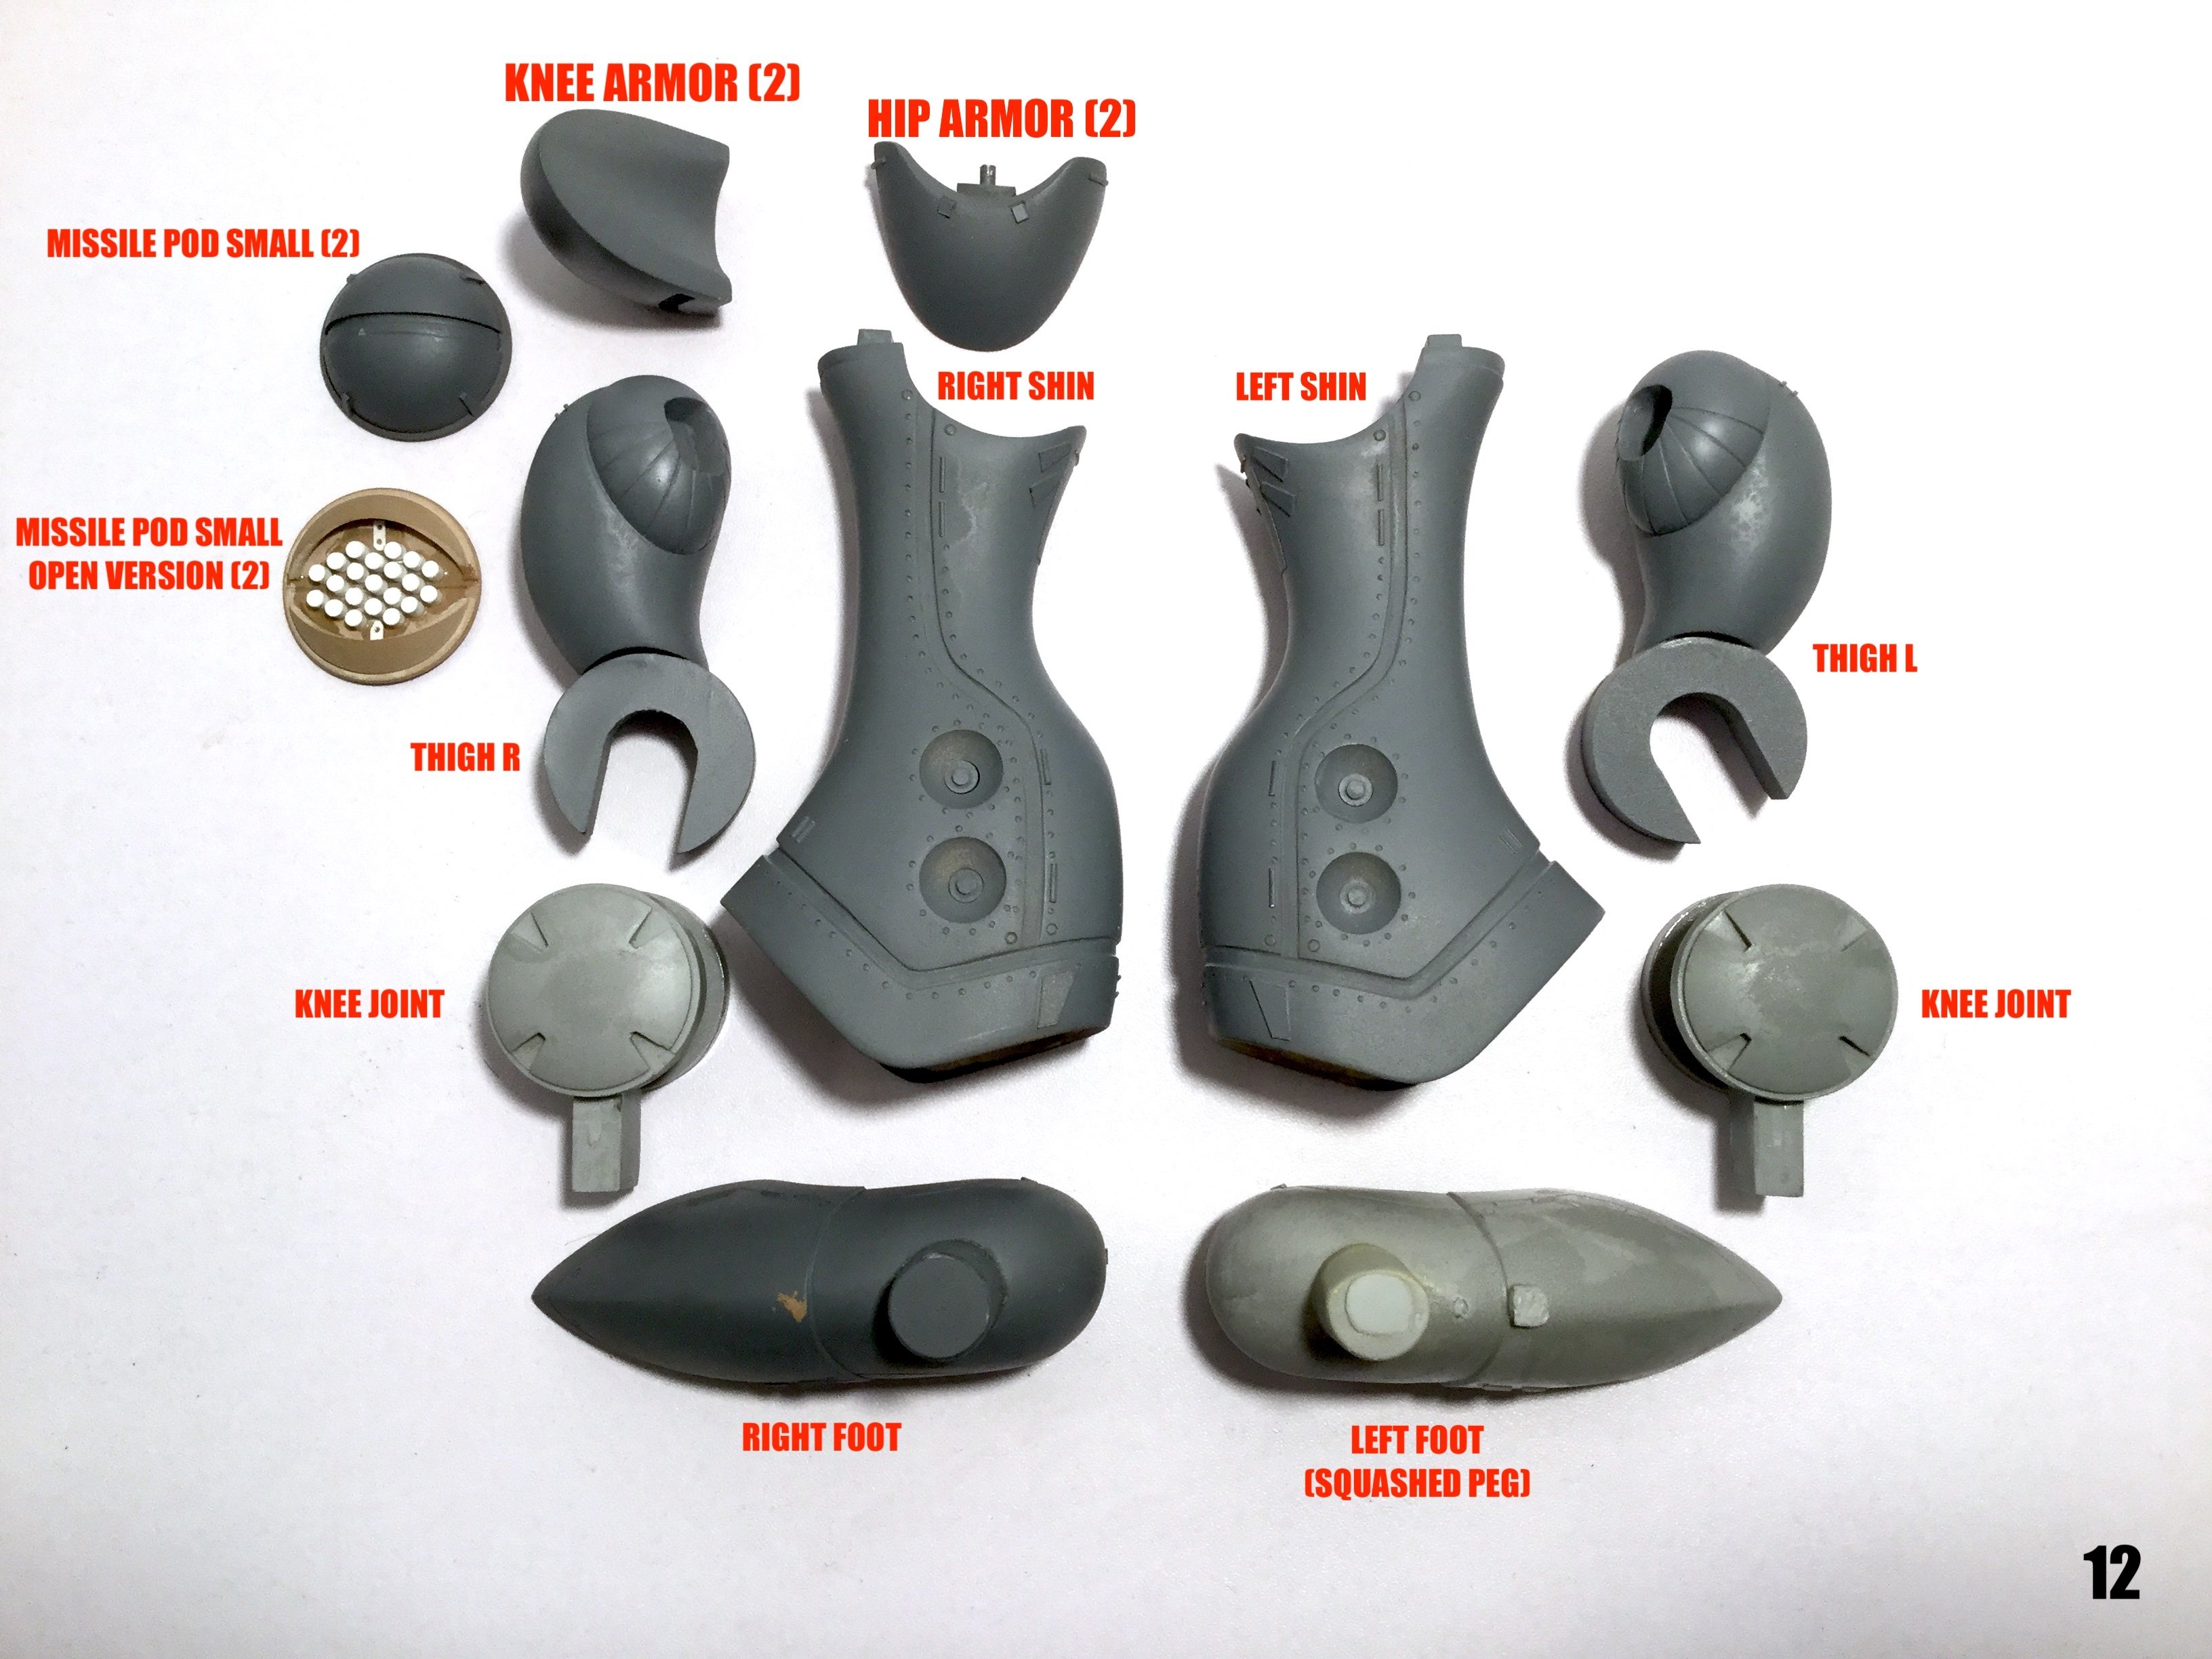
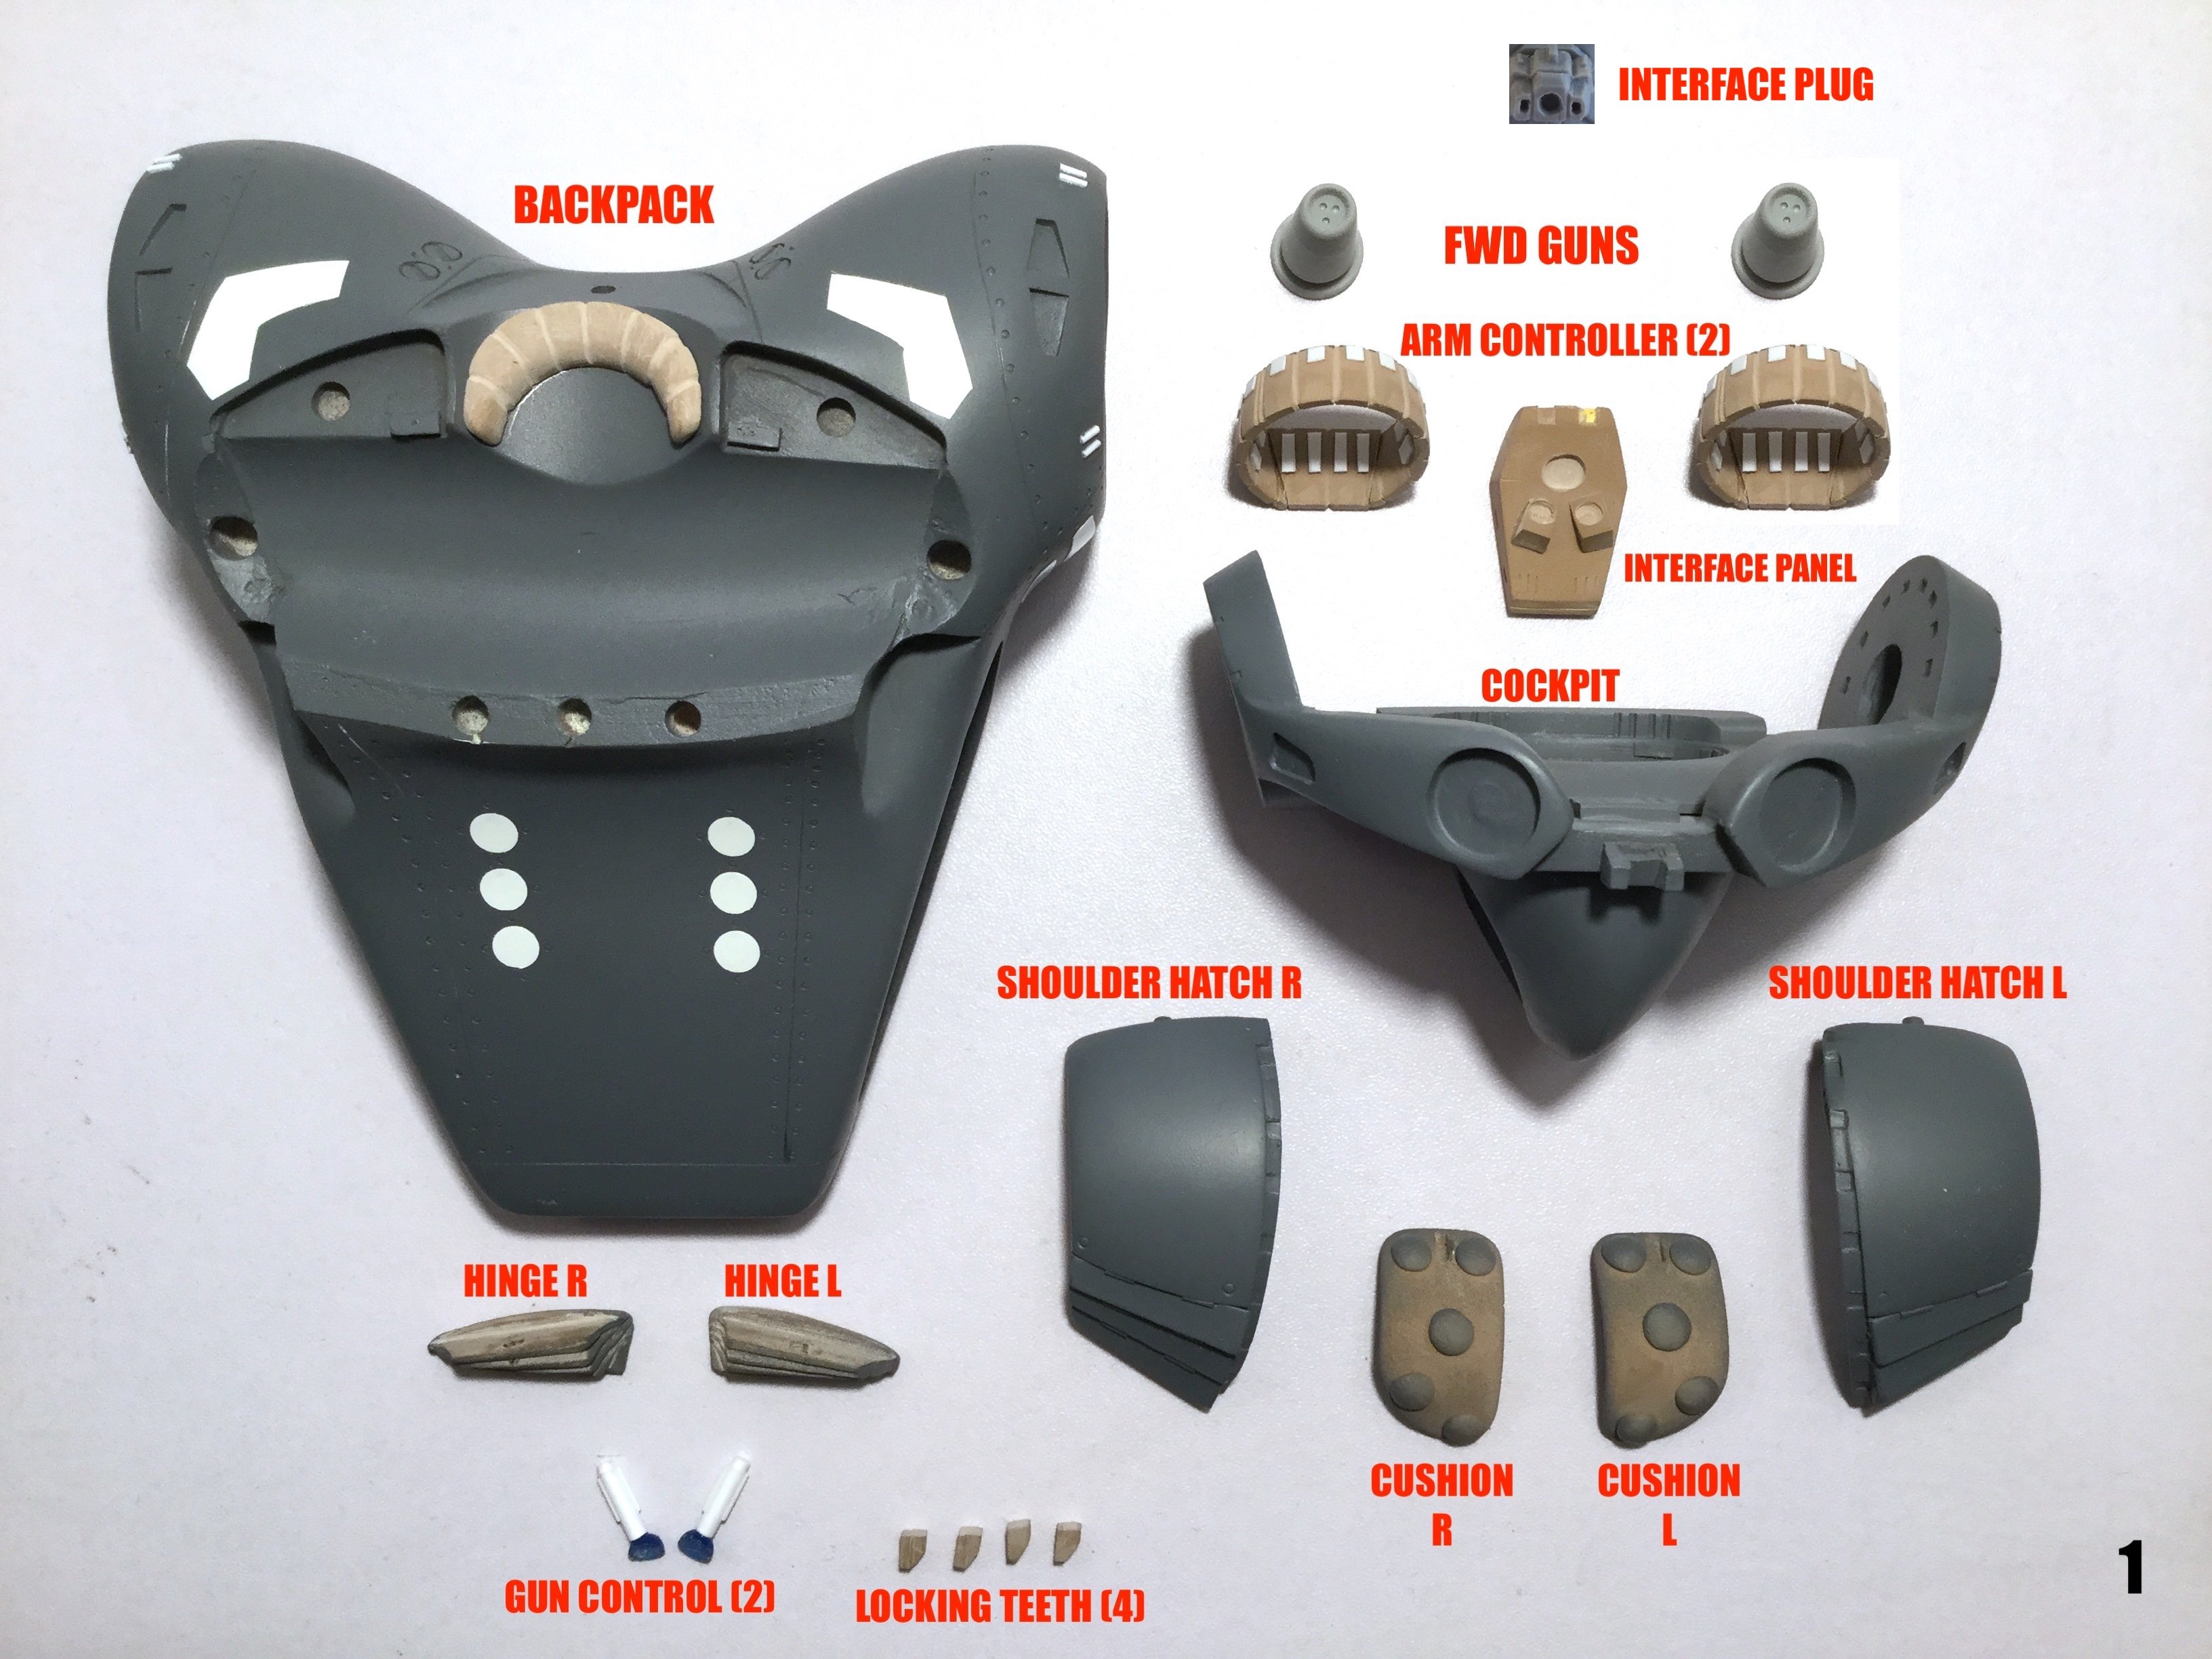
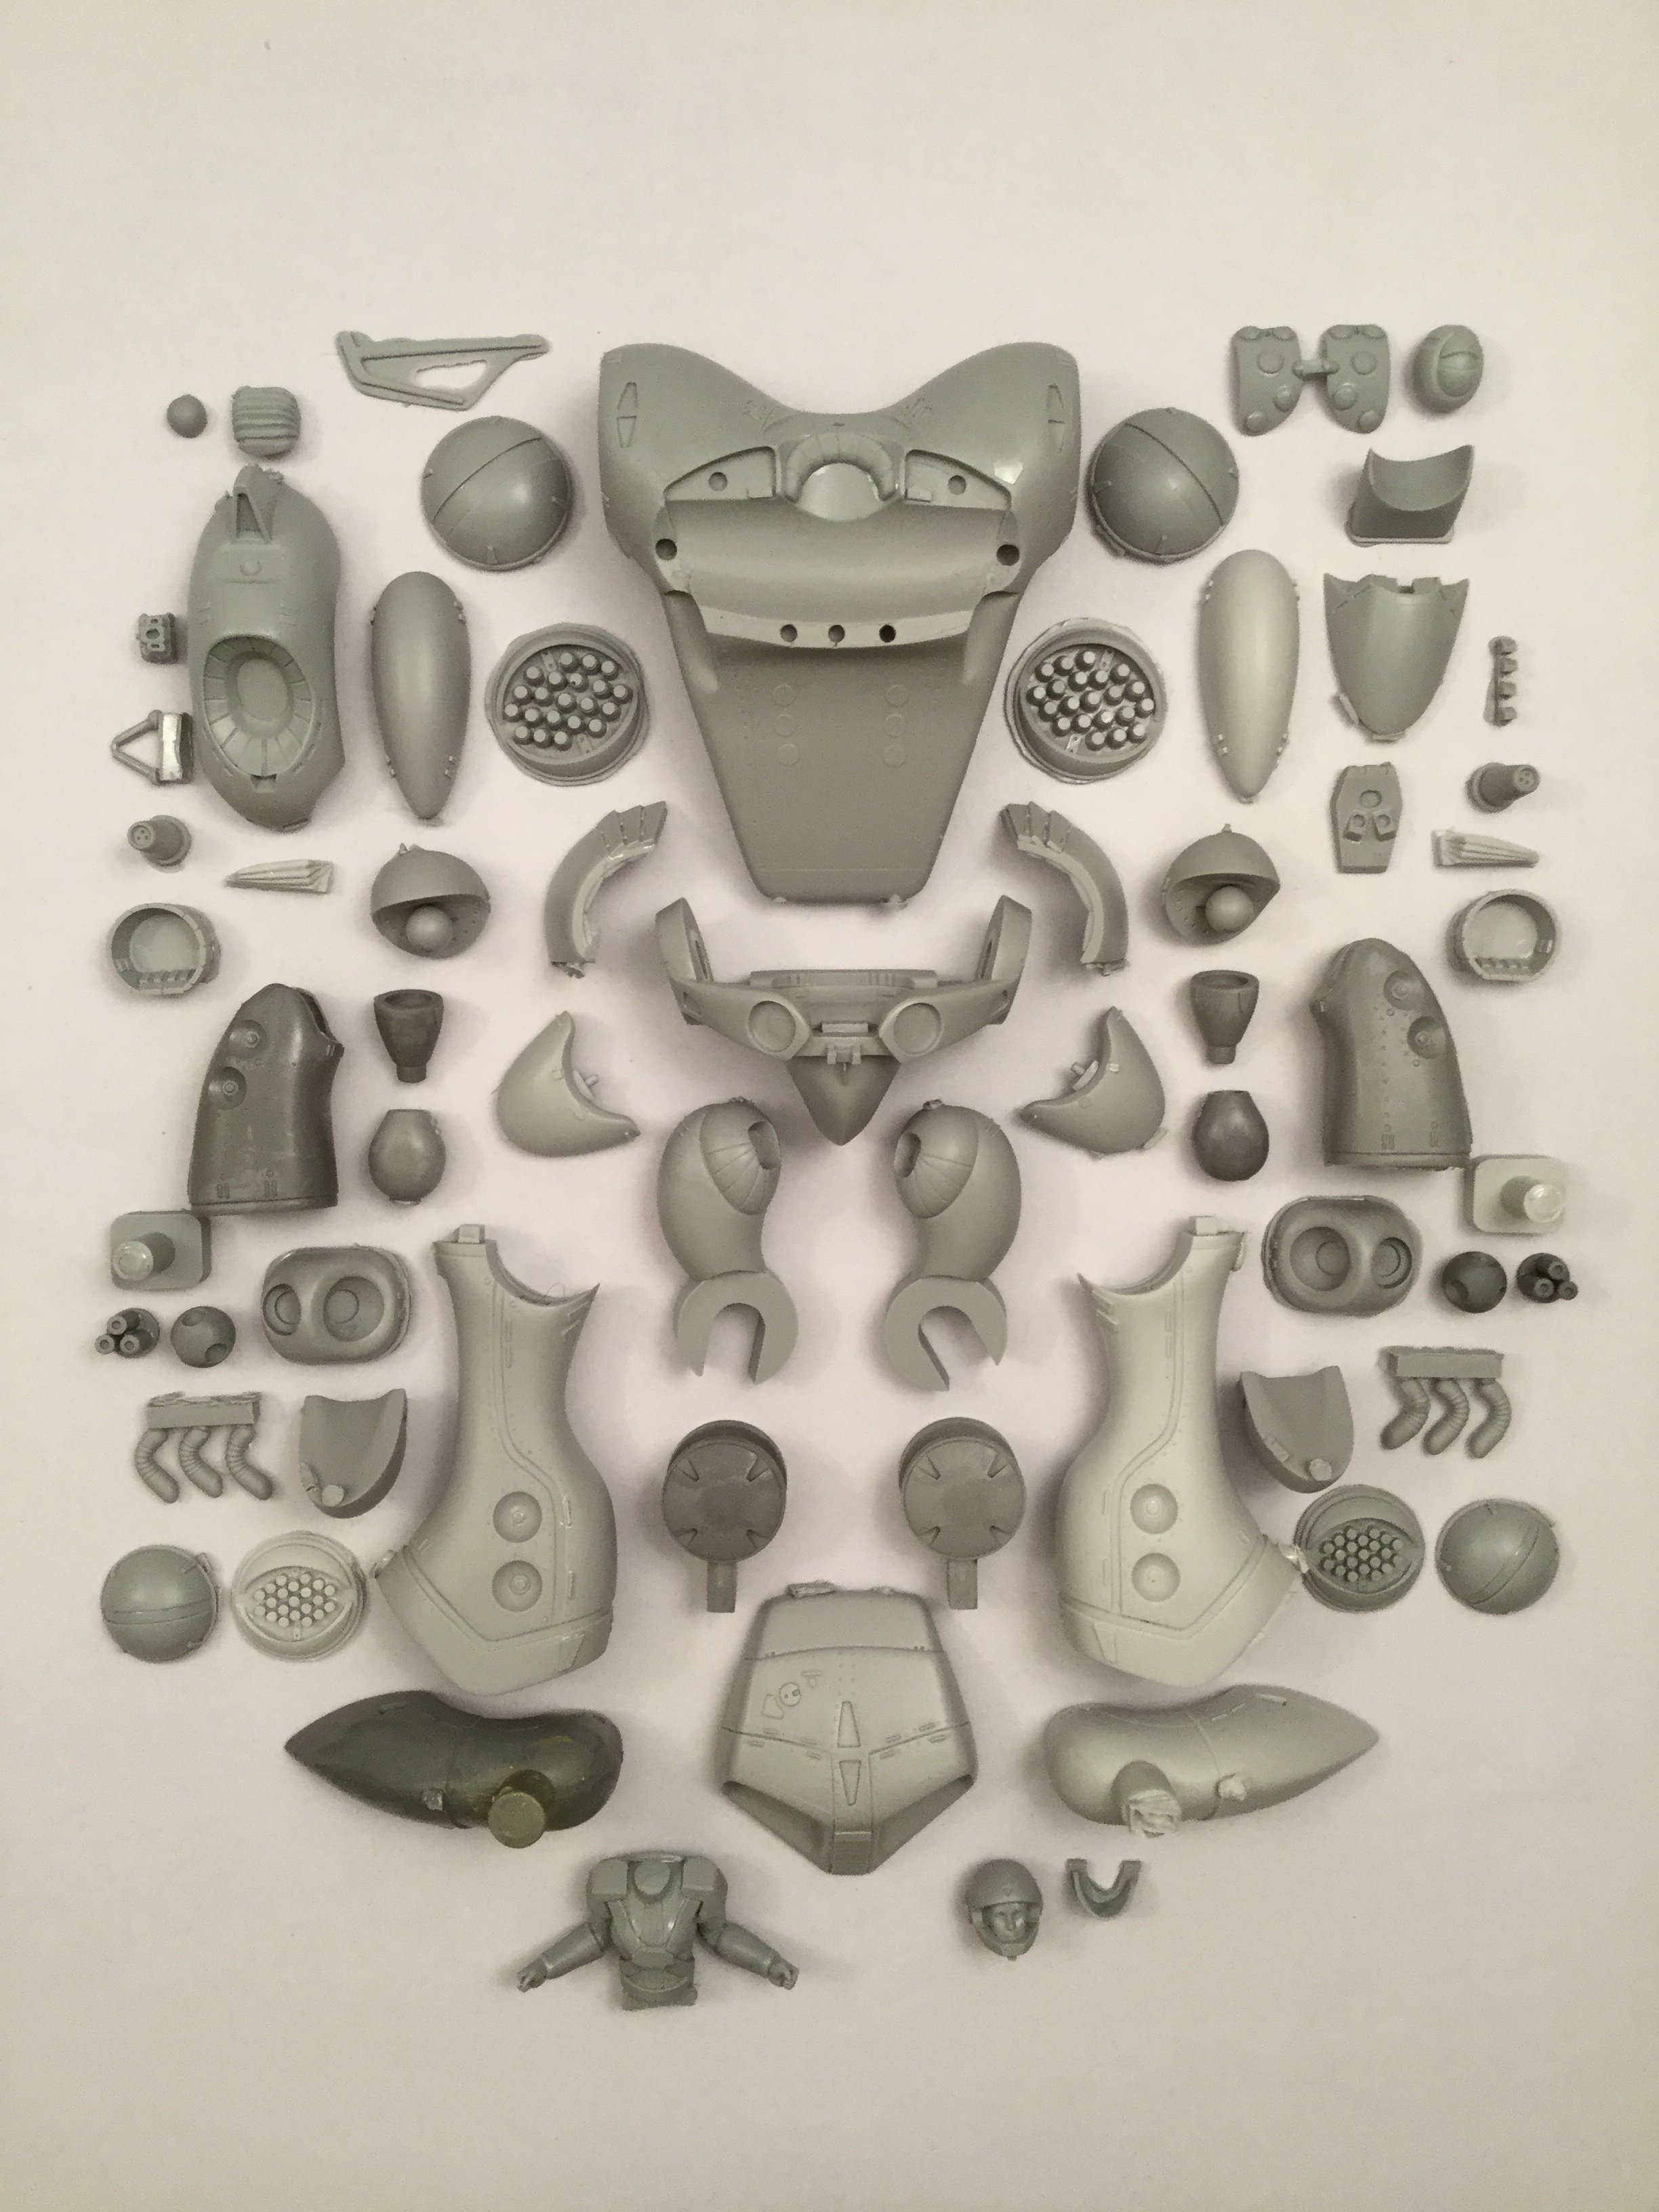
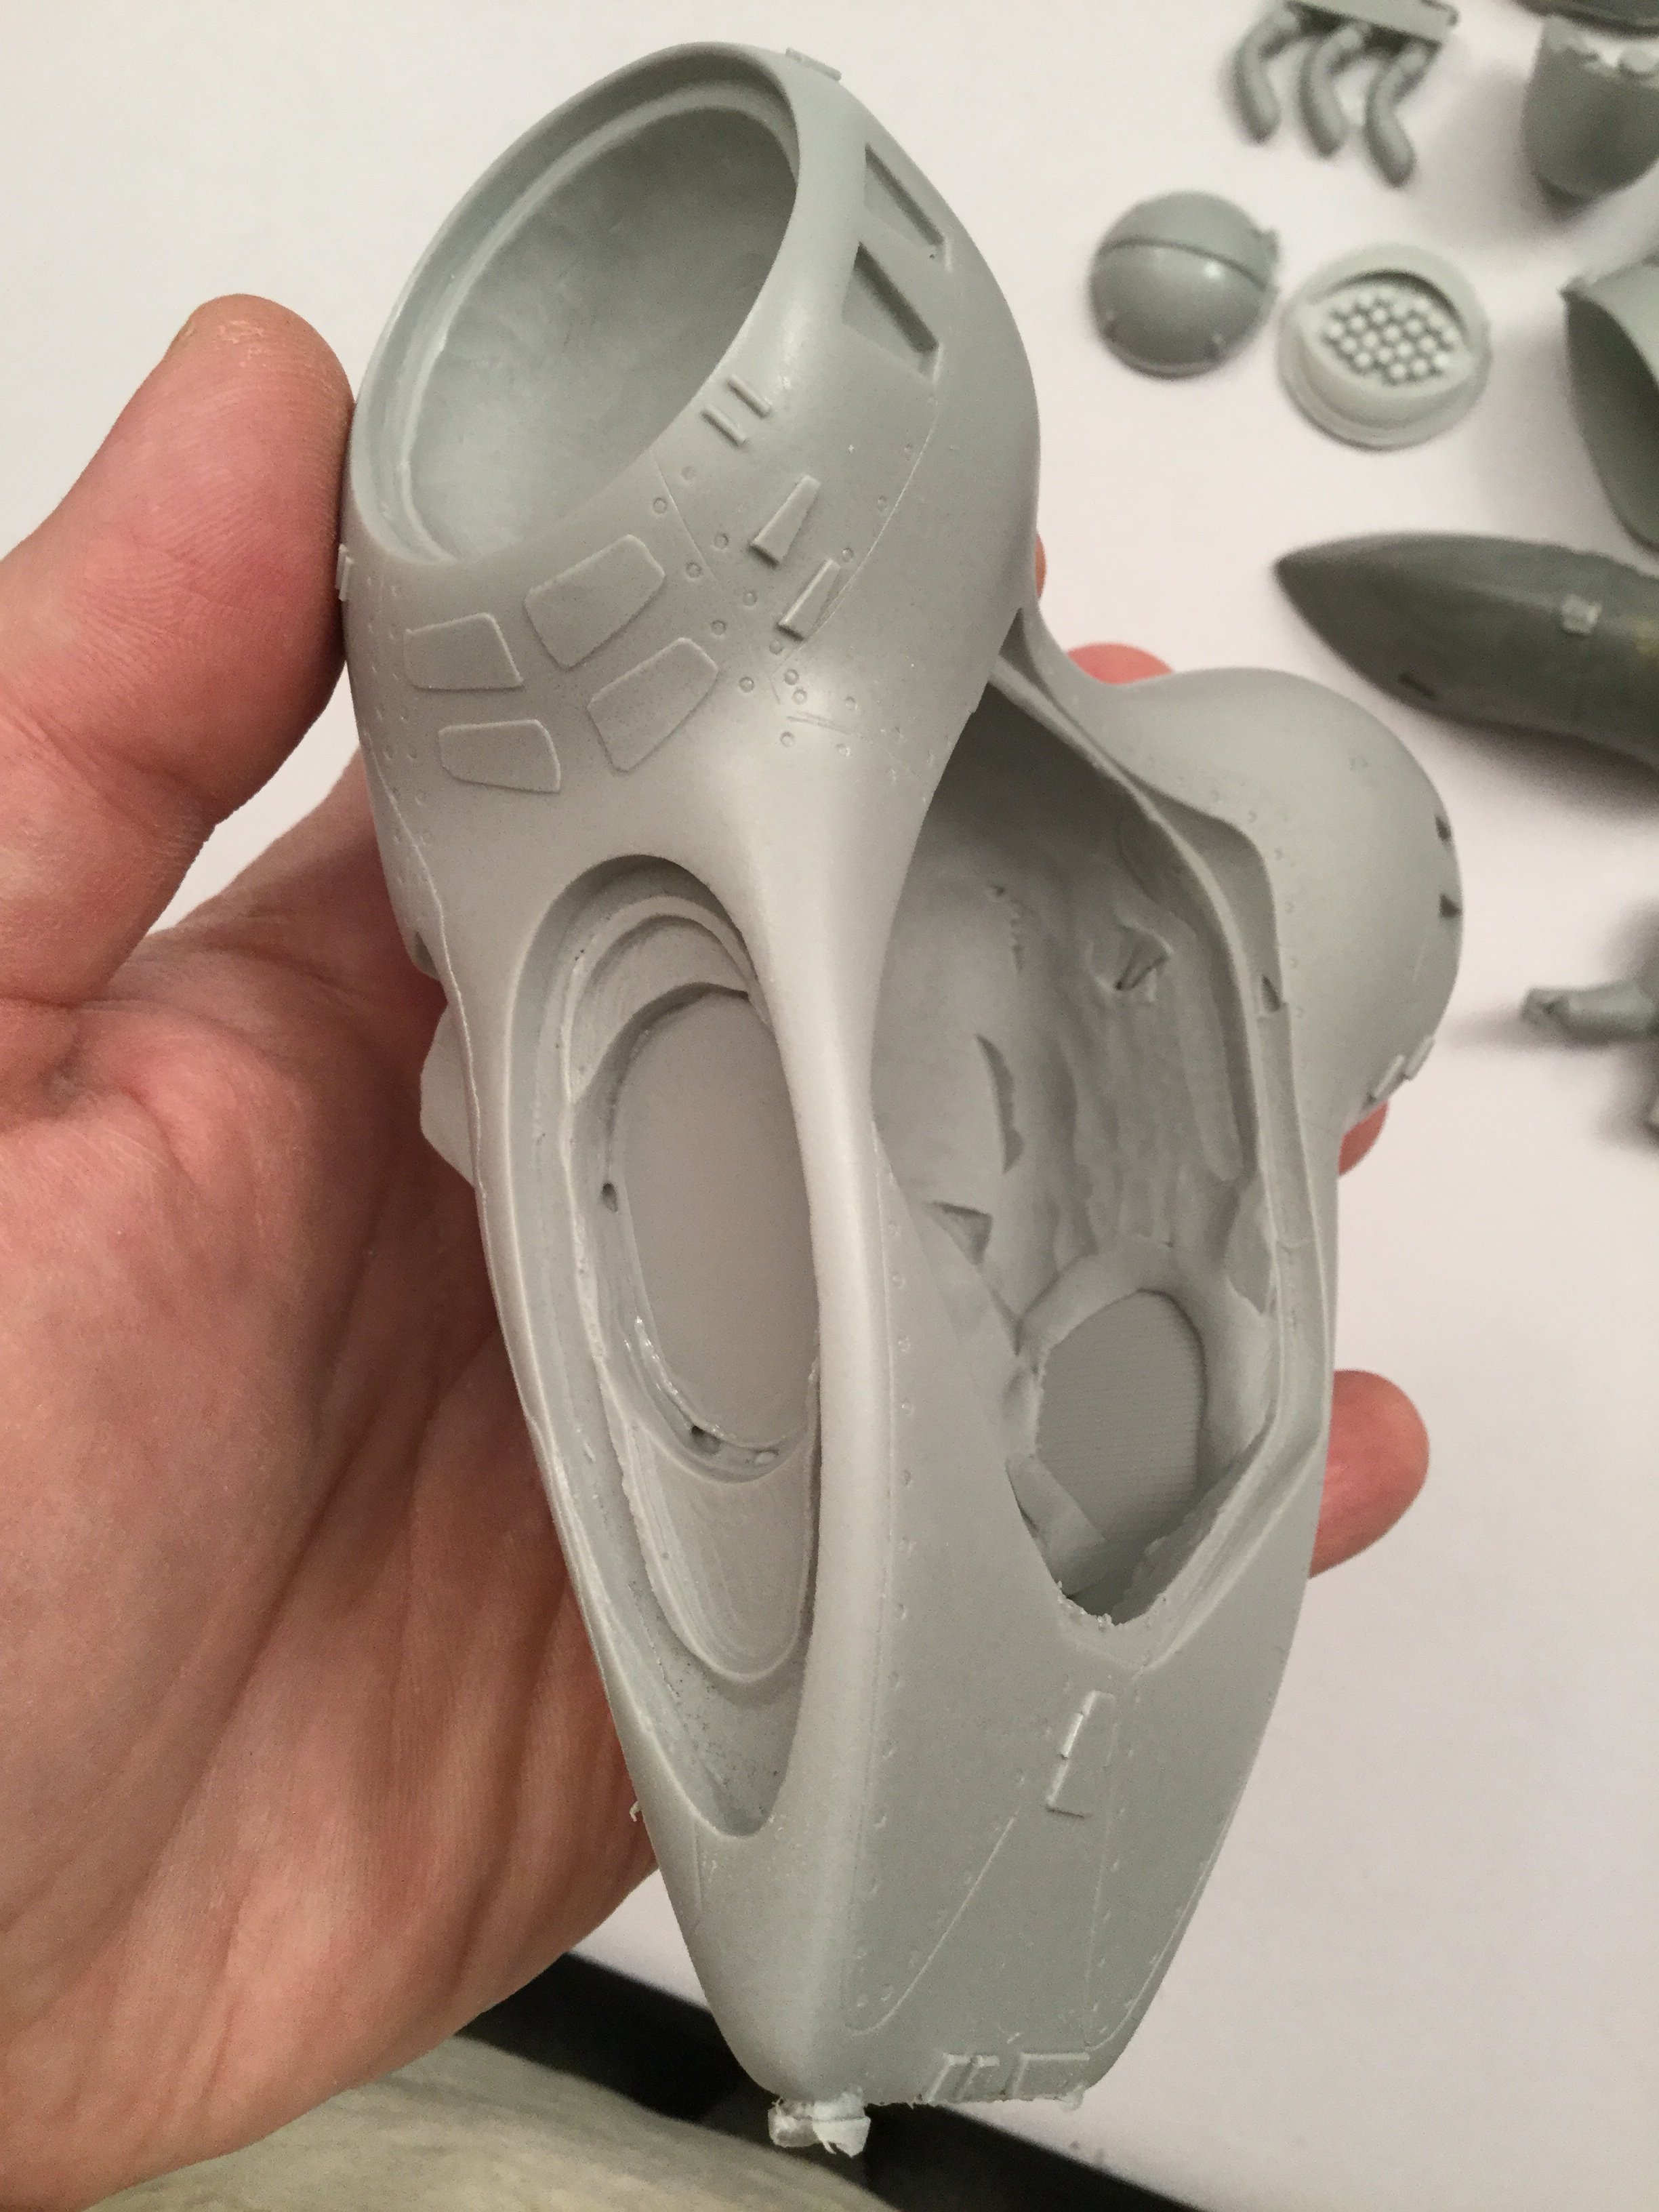
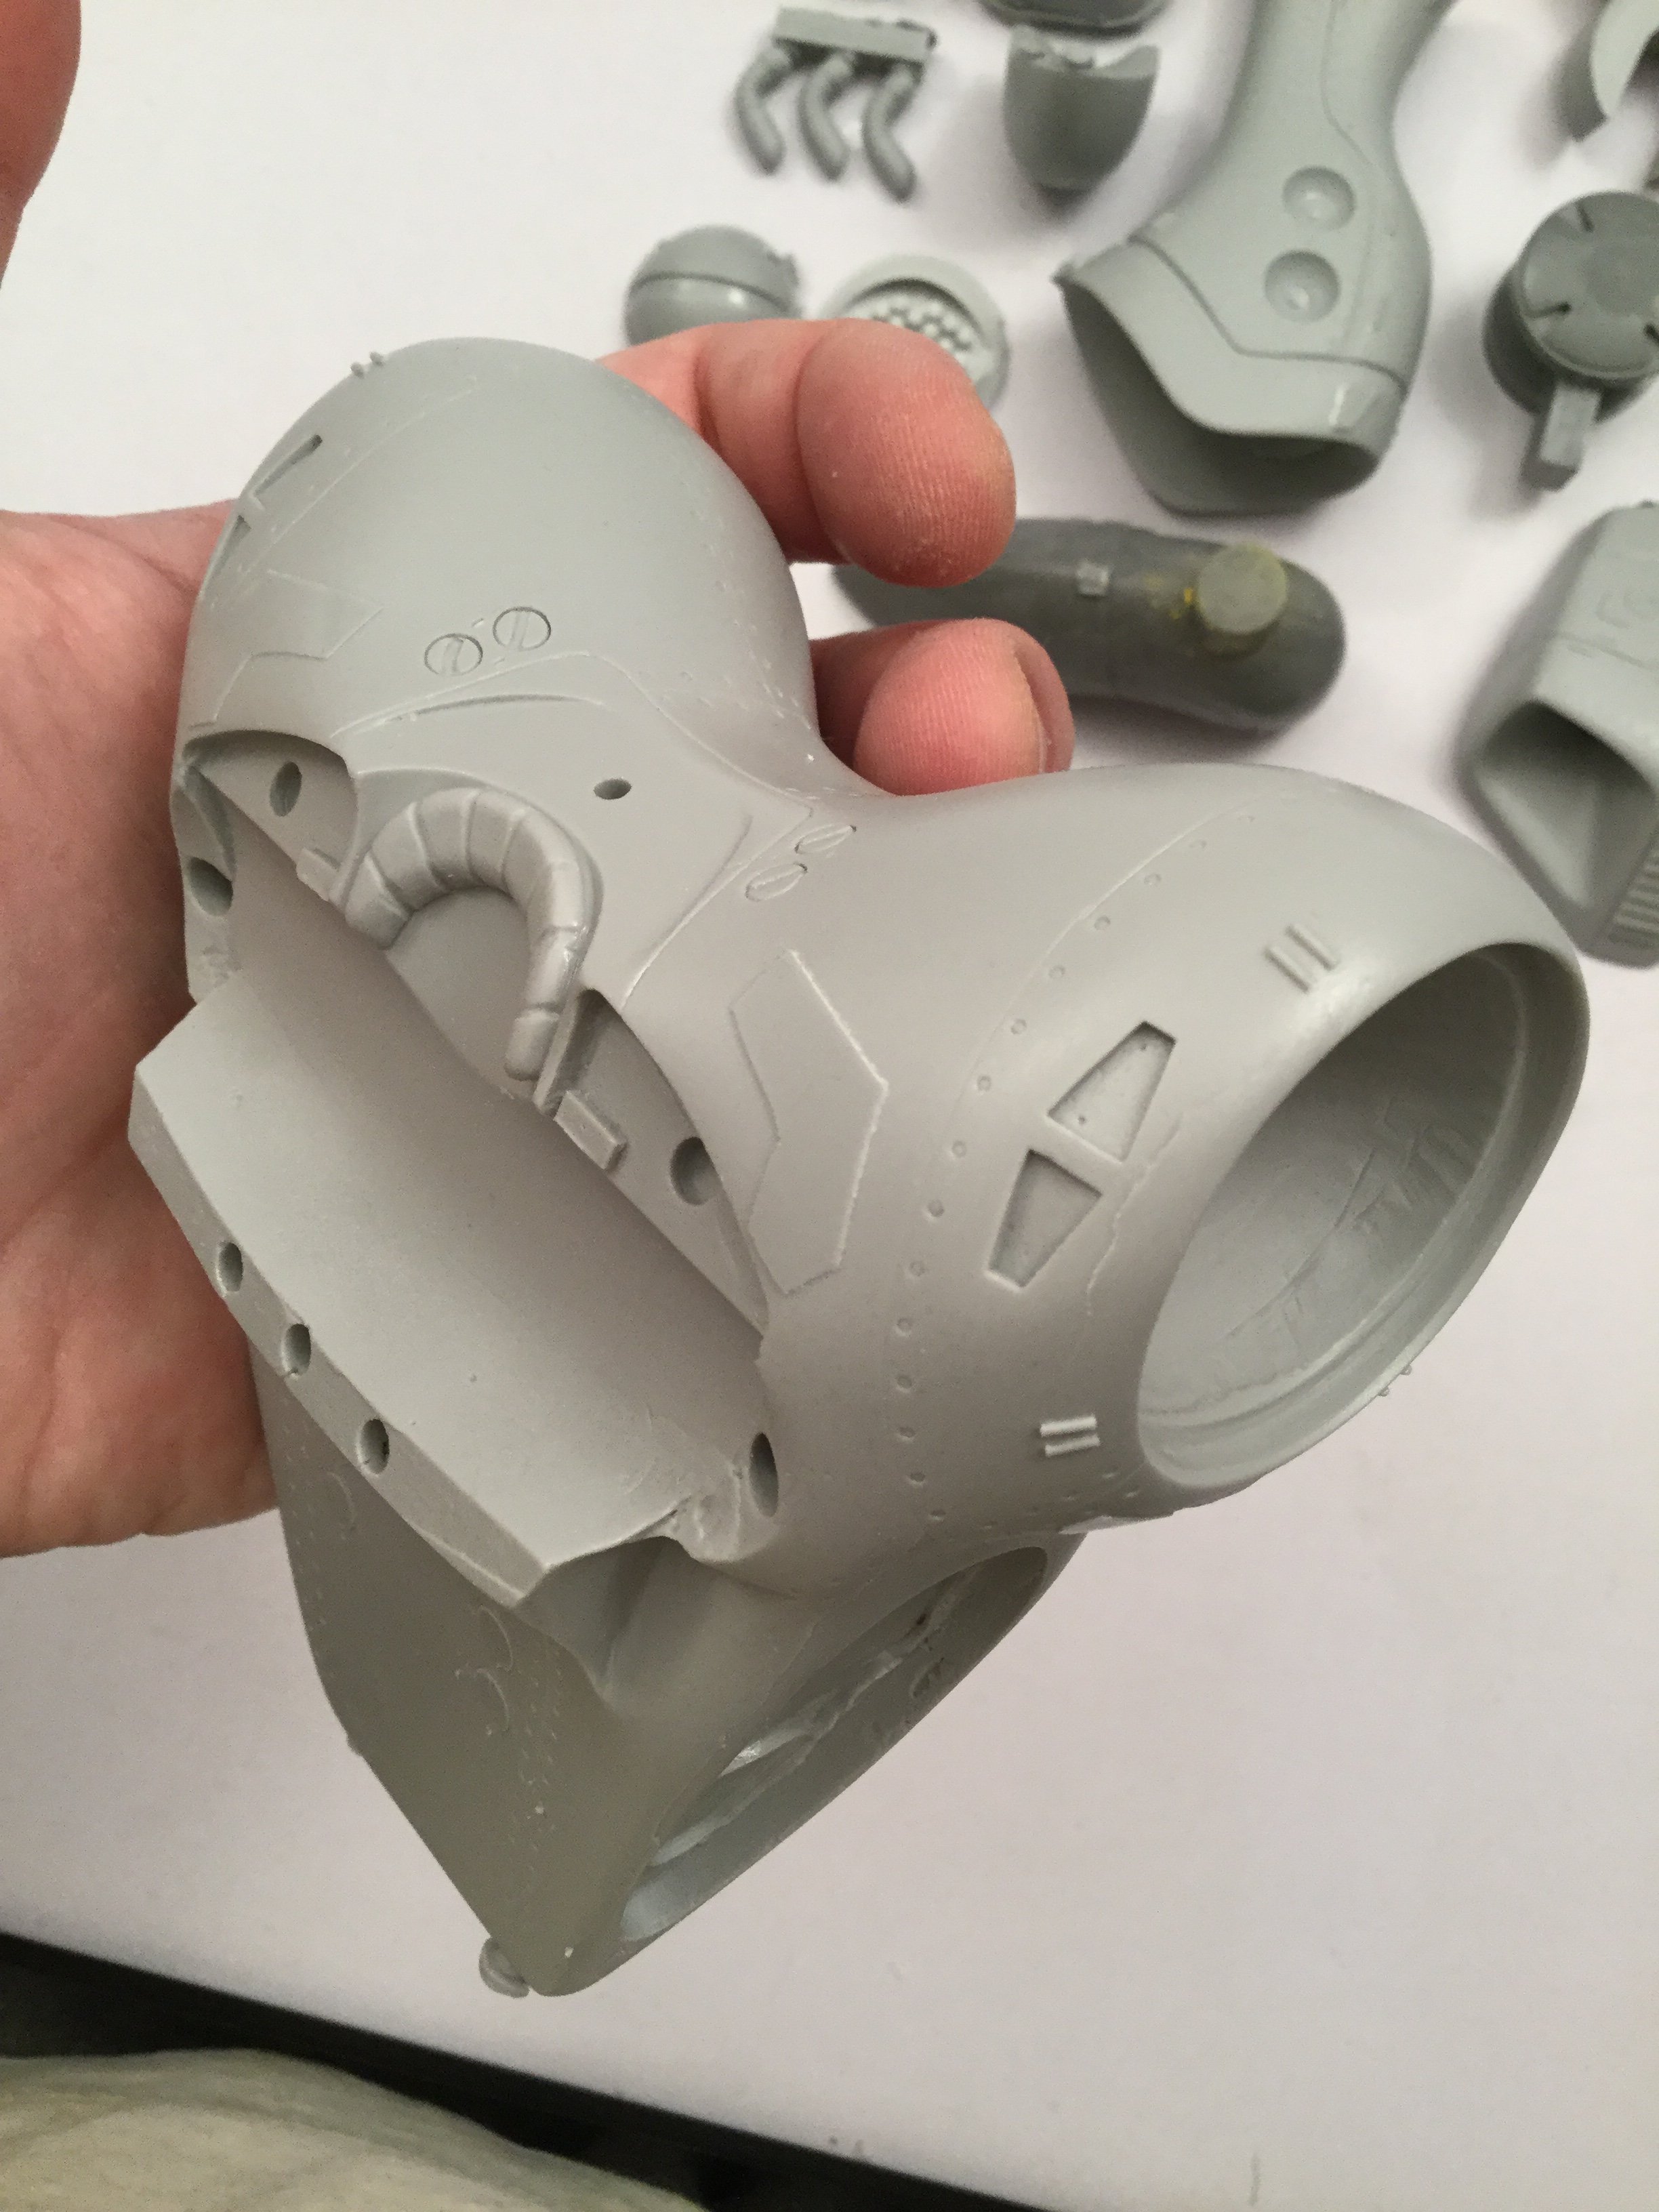
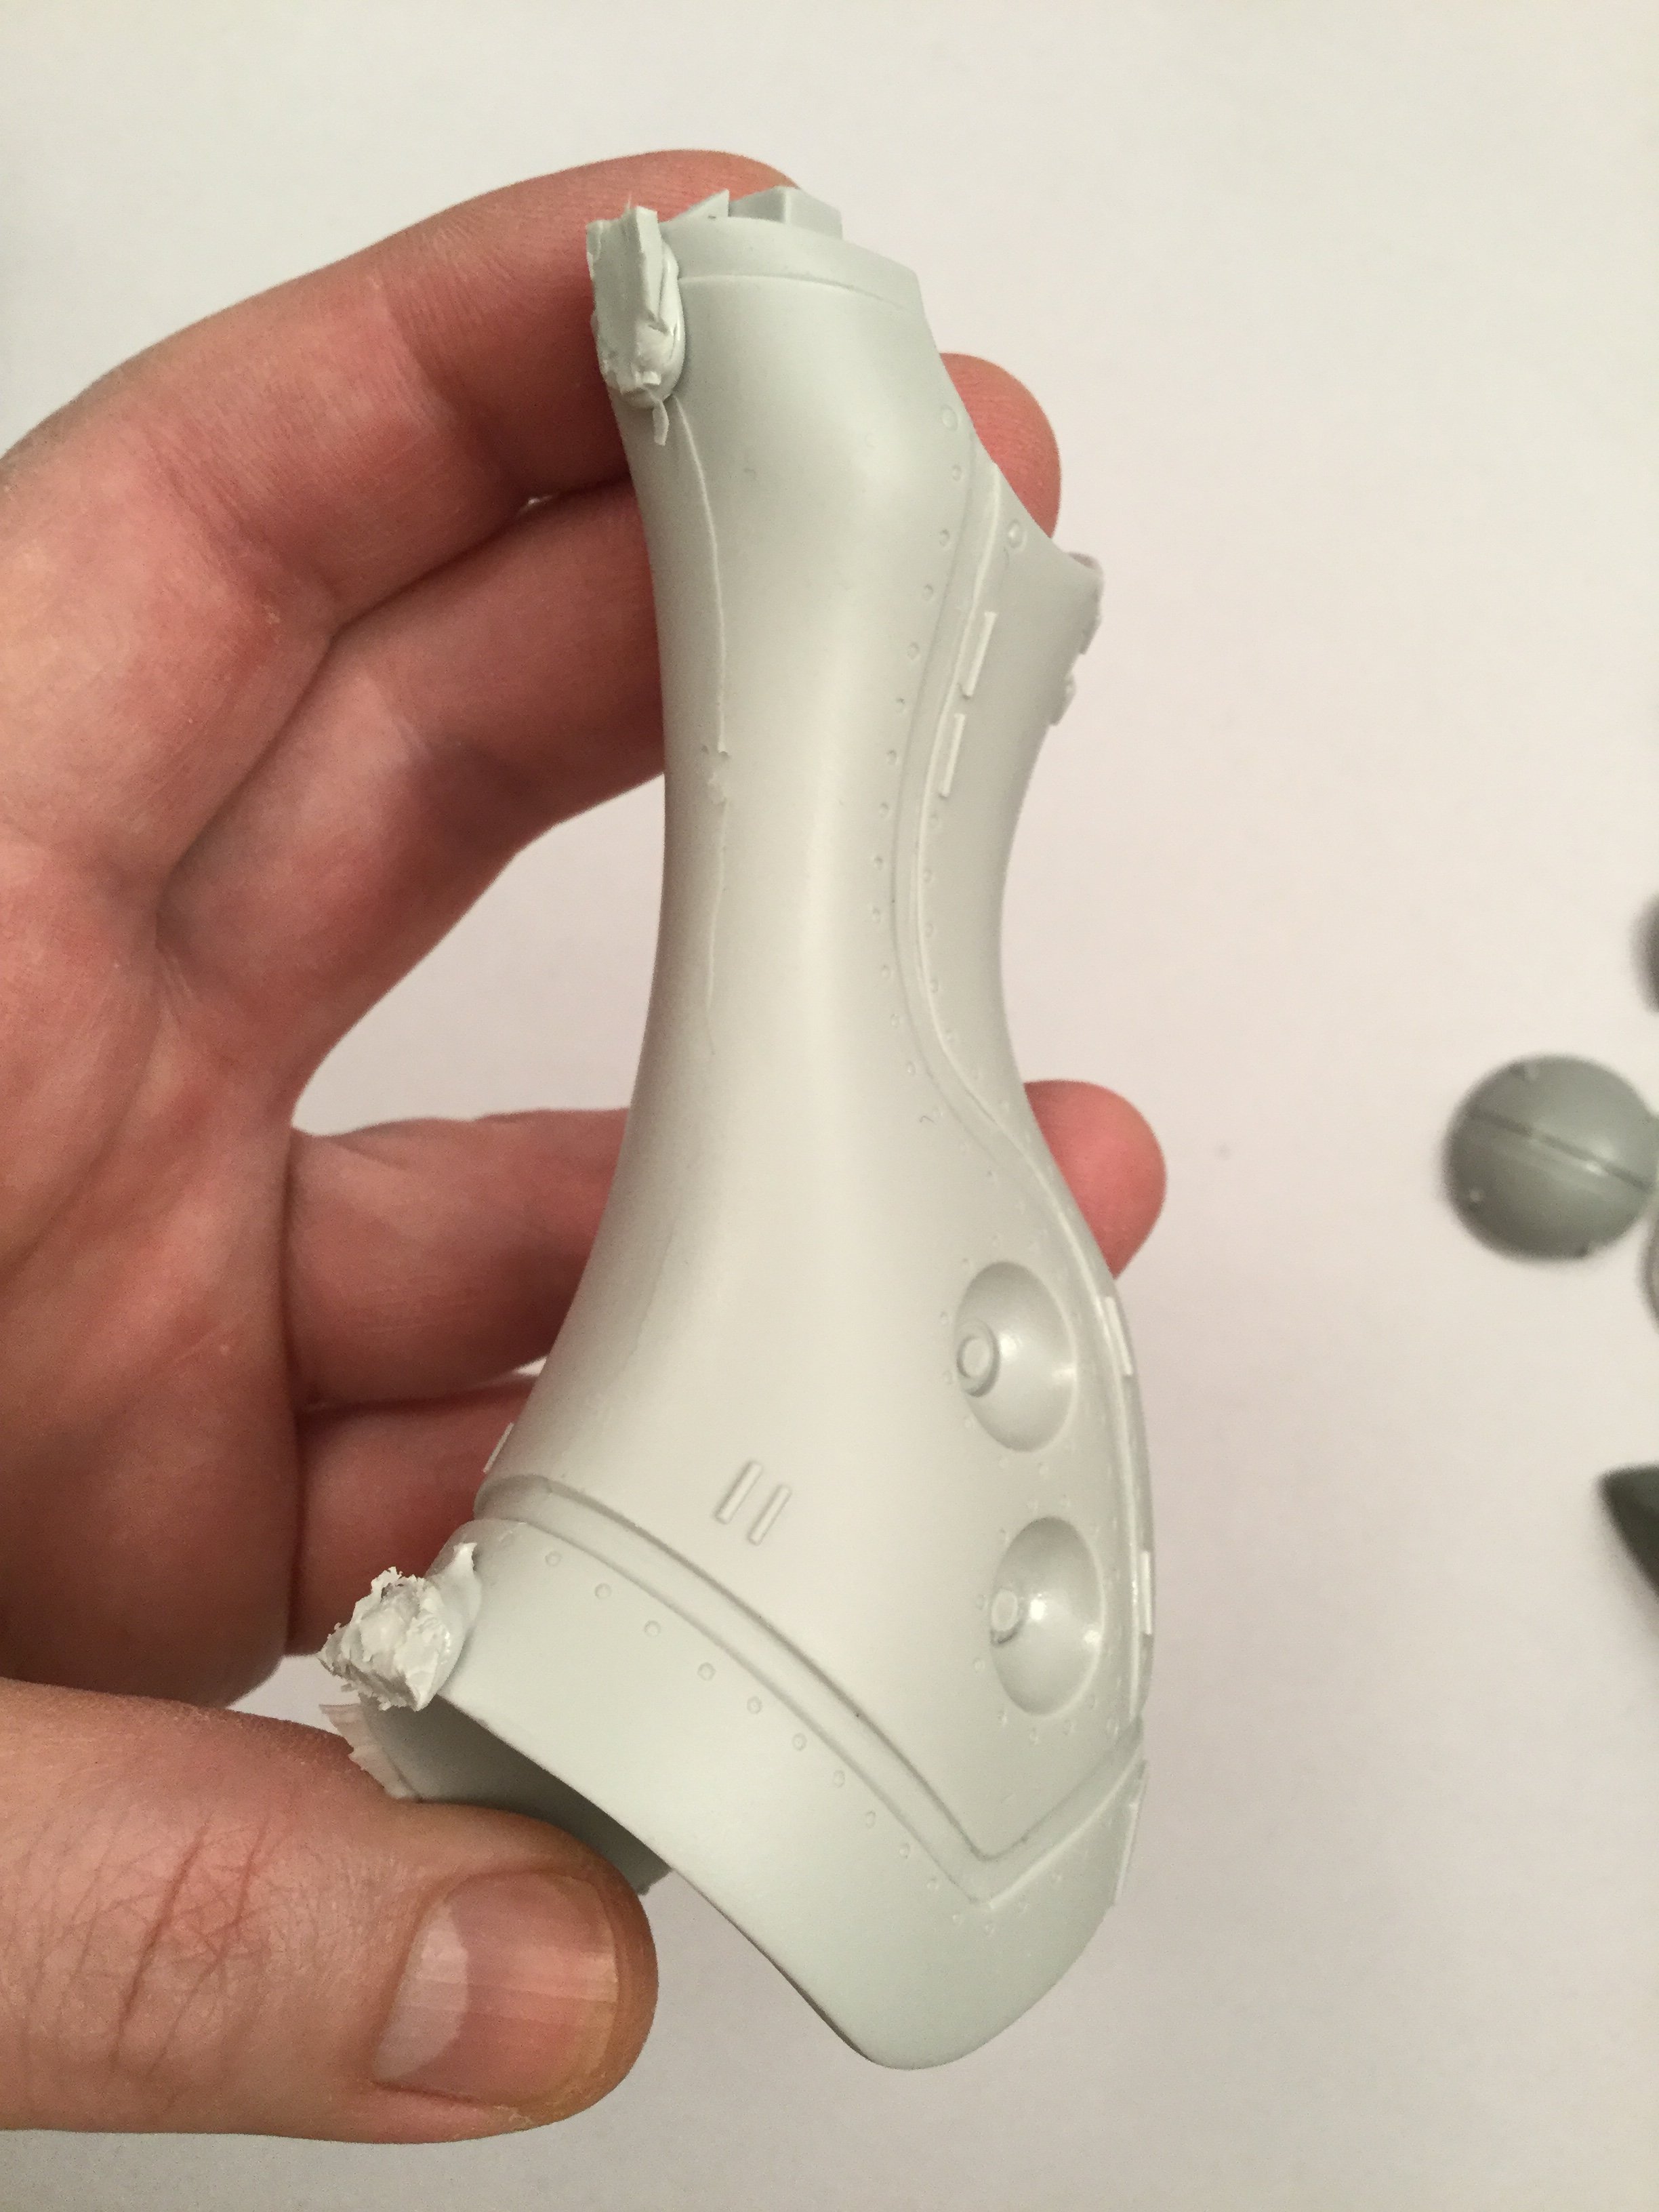
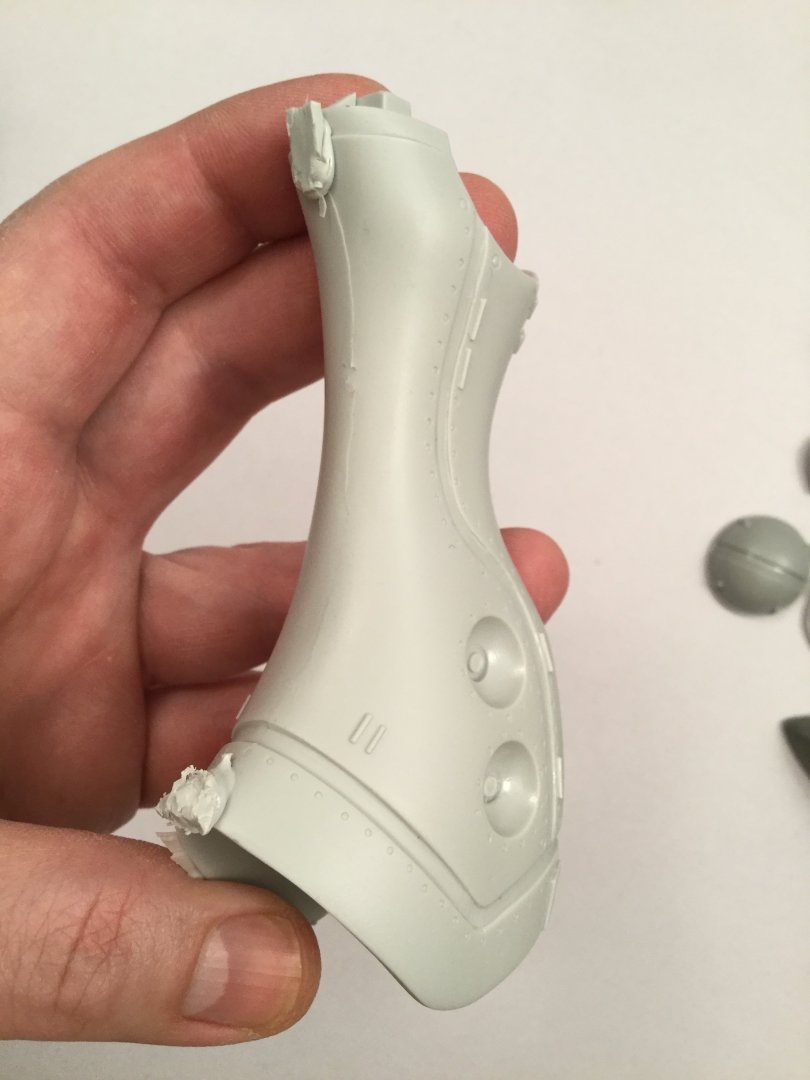
I figured out why the kit took so long to make: it has a buttload of parts! 74 for the pre-order kit and 71pcs for the standard version. Parts came out great, and I've already begun prepping my own kit.


-
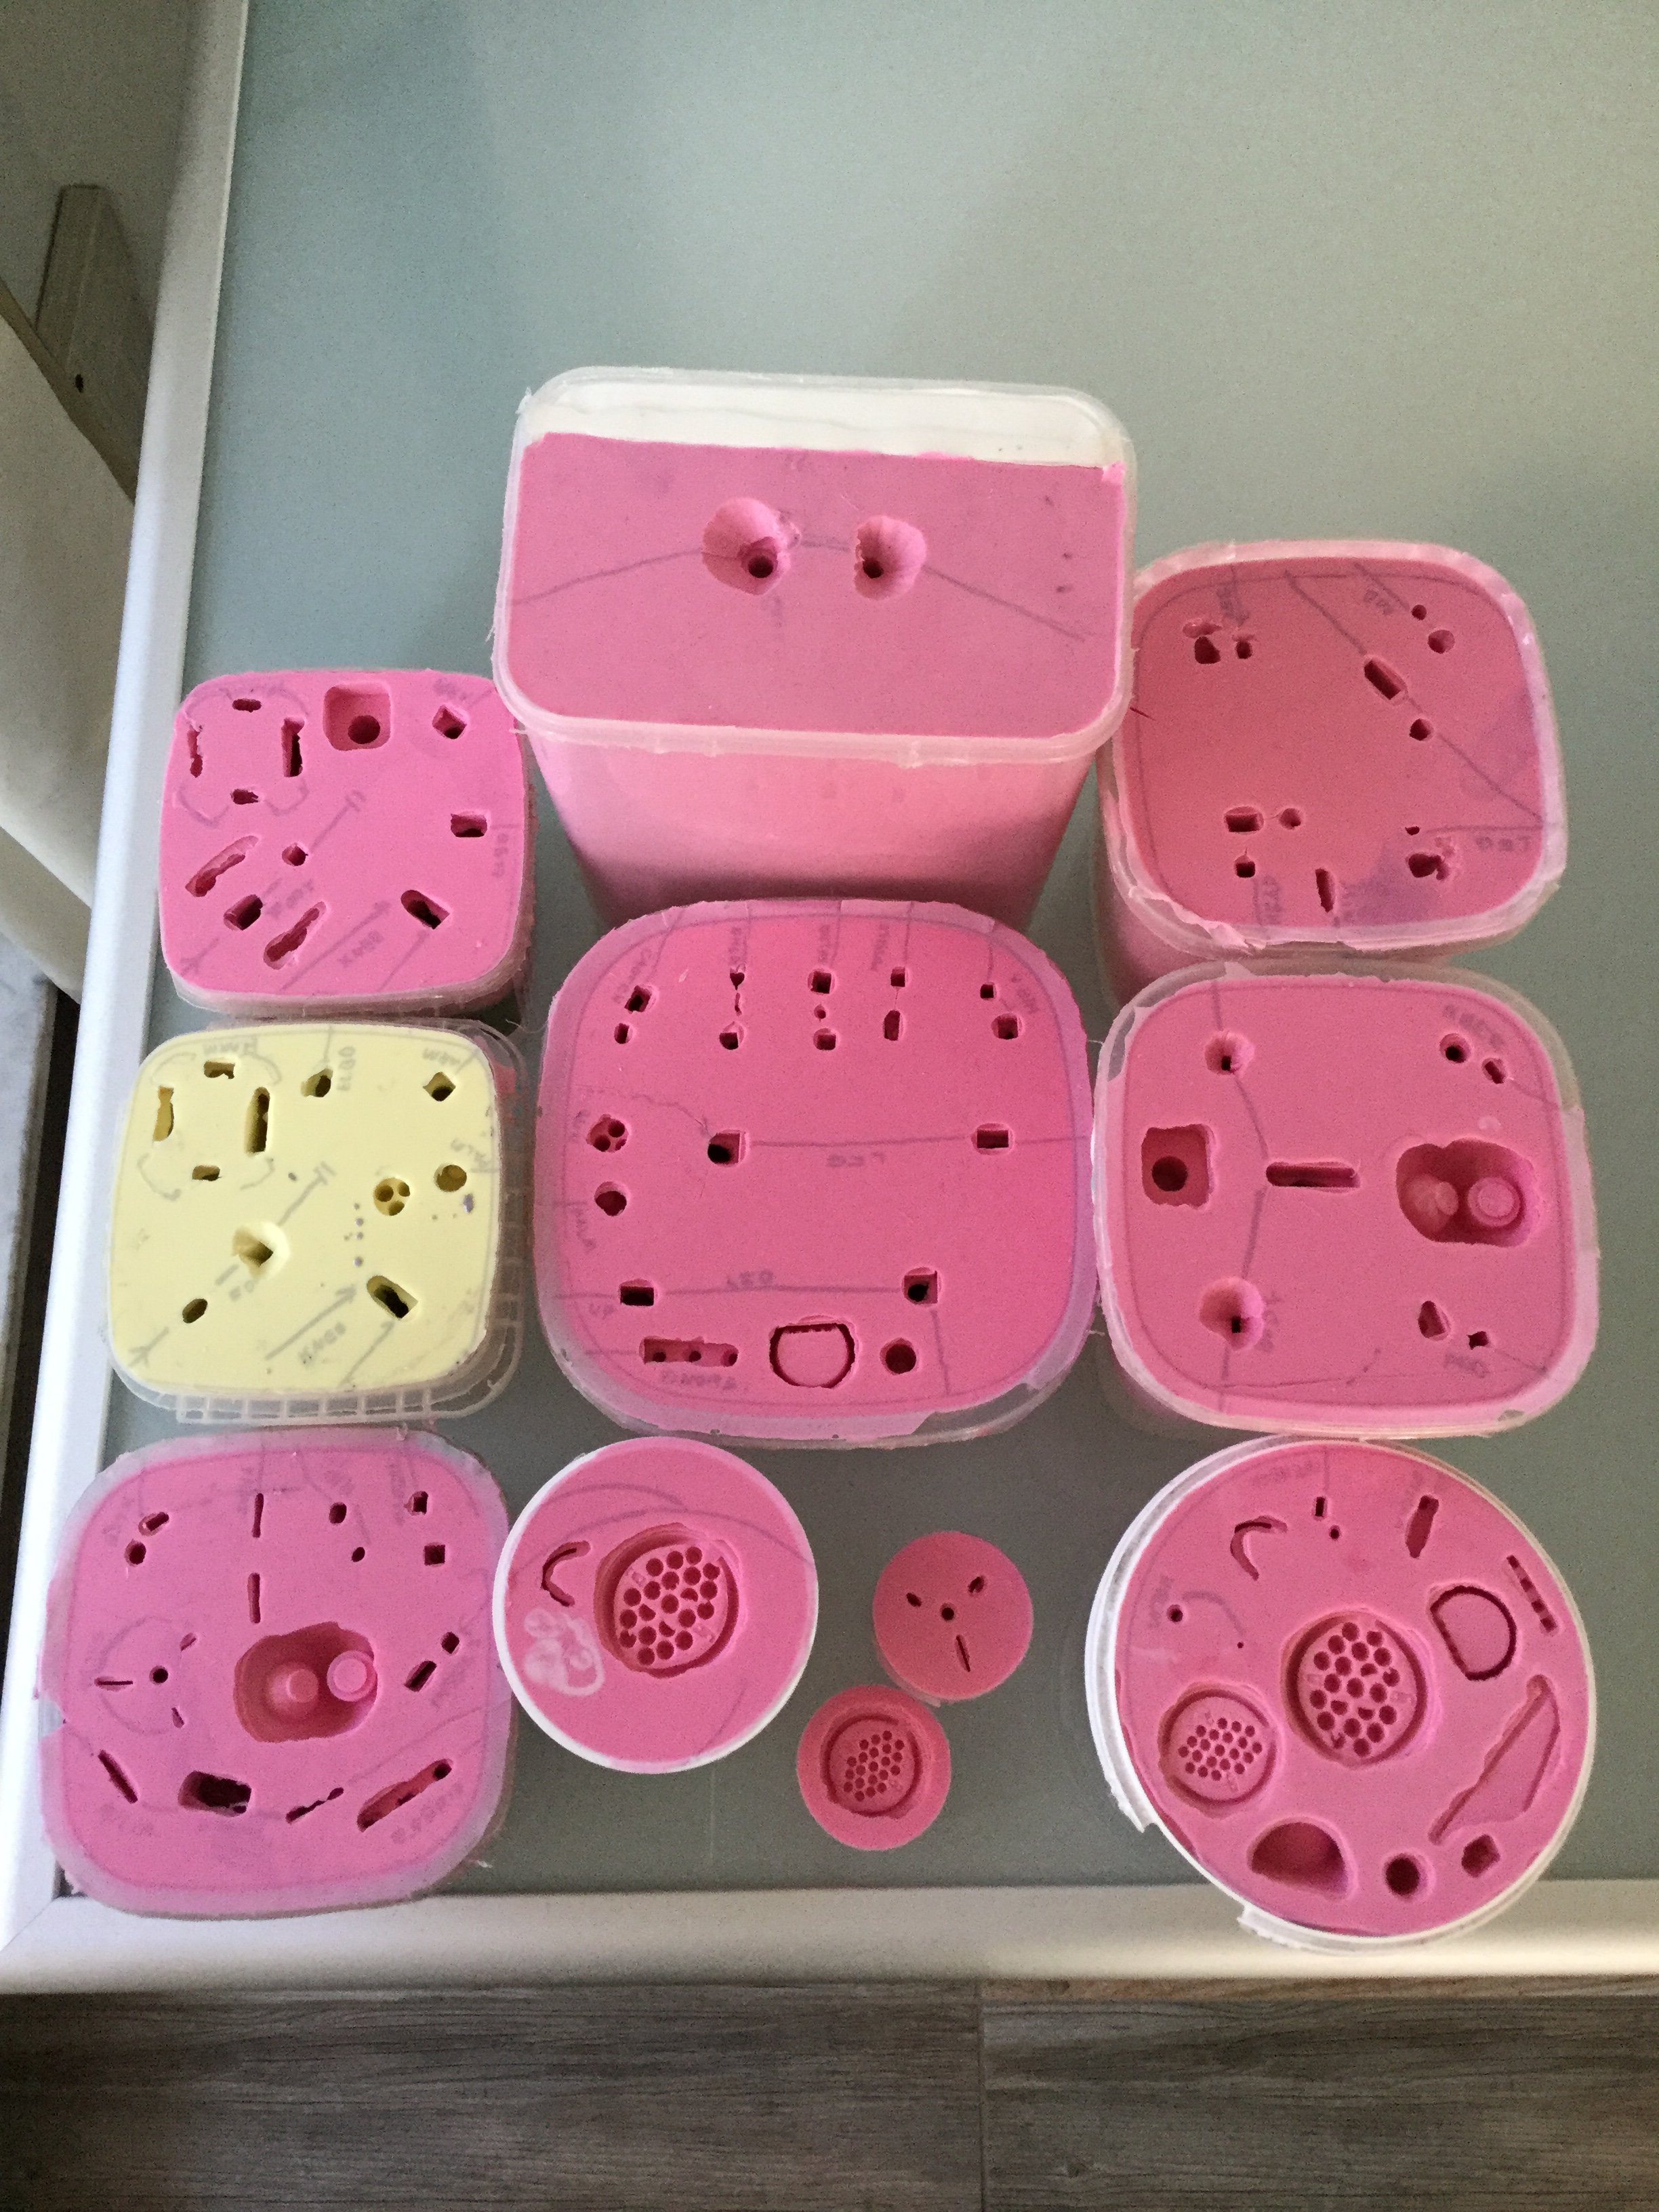
About 30 good castings, if I baby the molds. Technically I can get about 35 pulls, but in my estimation the quality of the last 5 or so doesn't meet quality standards, and I want the last casting to be substantially the same as the first.
-
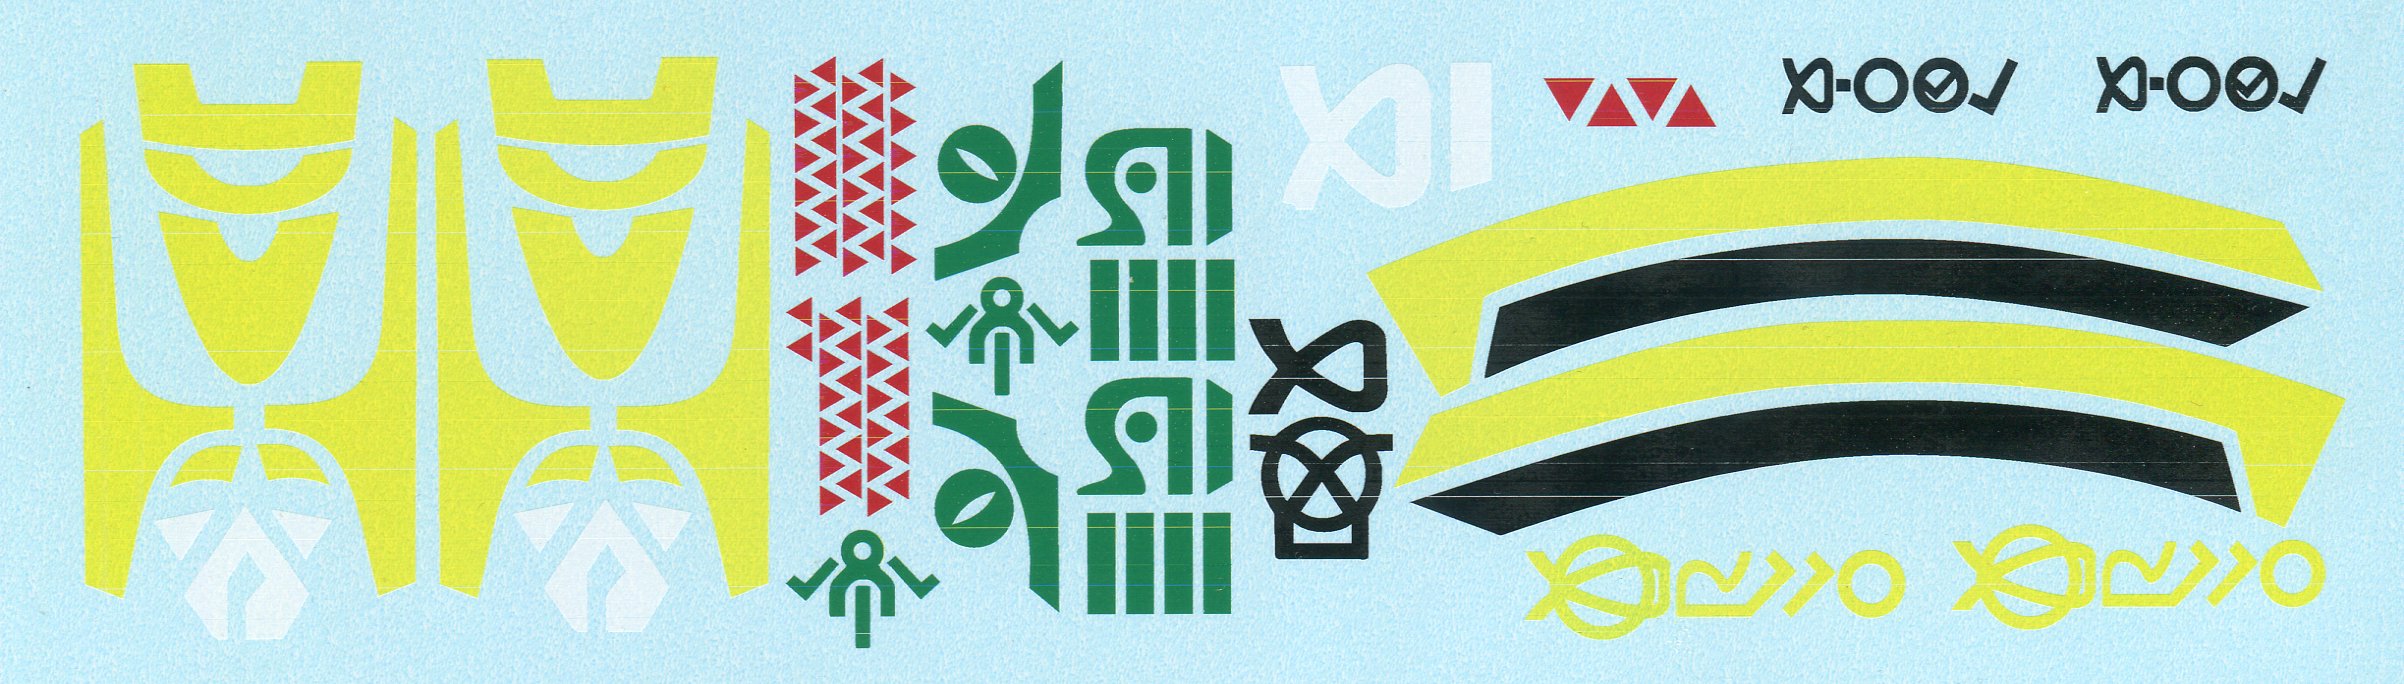
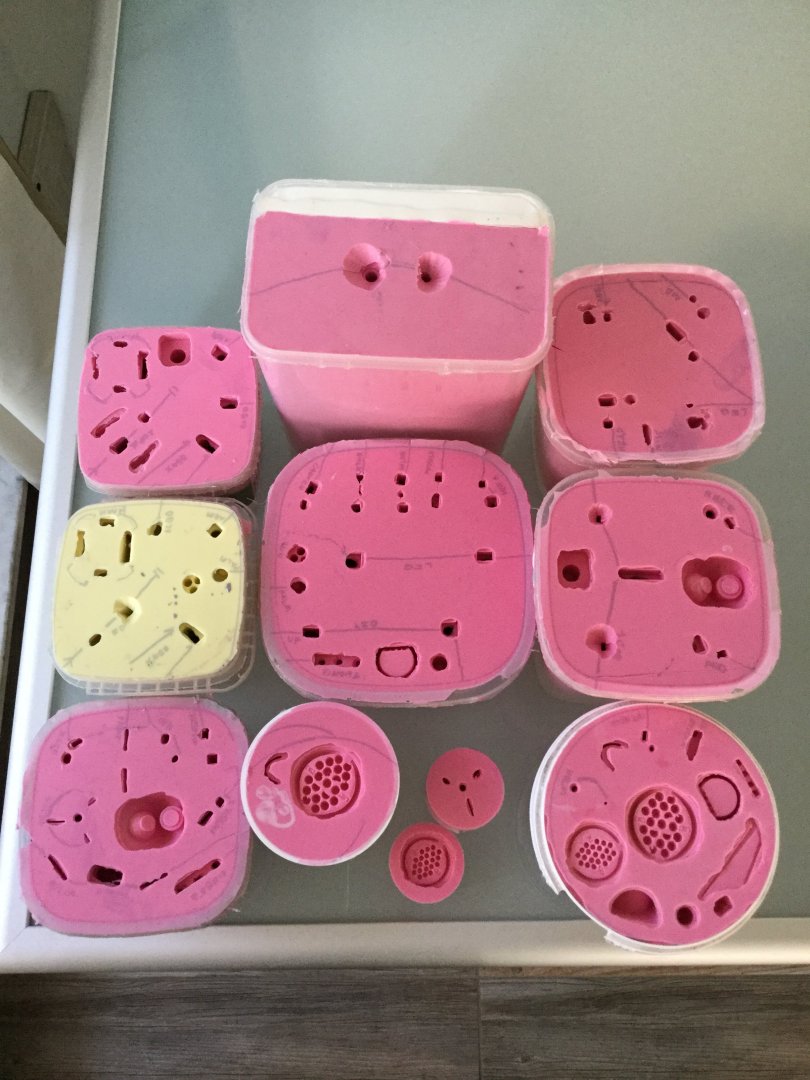
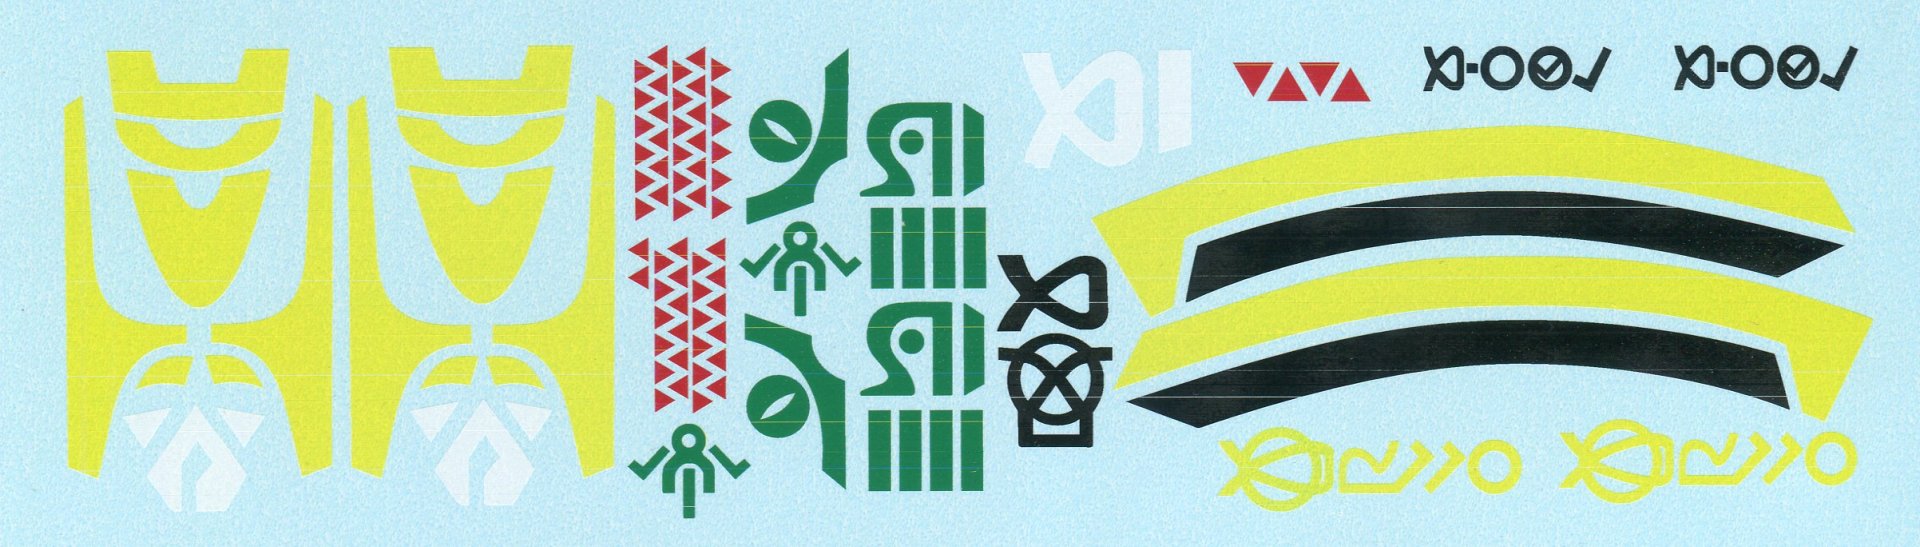
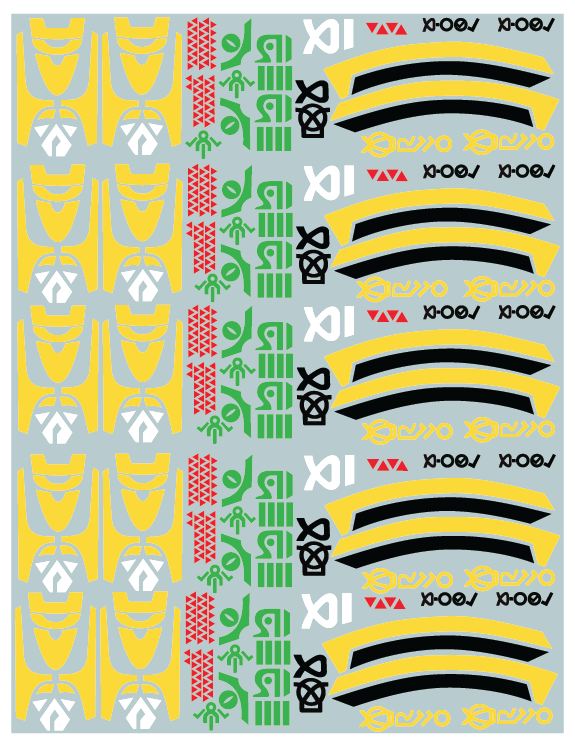
Captain's log: Friday, January 17th. Molds are done! The process went surprisingly well, despite the complexity of certain parts. Seemed like a good use if 15lbs of silicone! Preliminary casting has already begun and the results are excellent. Will have more pics in the next few days. Decals: looking good, despite some teething troubles needing to be massaged.
-
The Official Moscato Hobby Models Thread
captain america replied to captain america's topic in Anime or Science Fiction
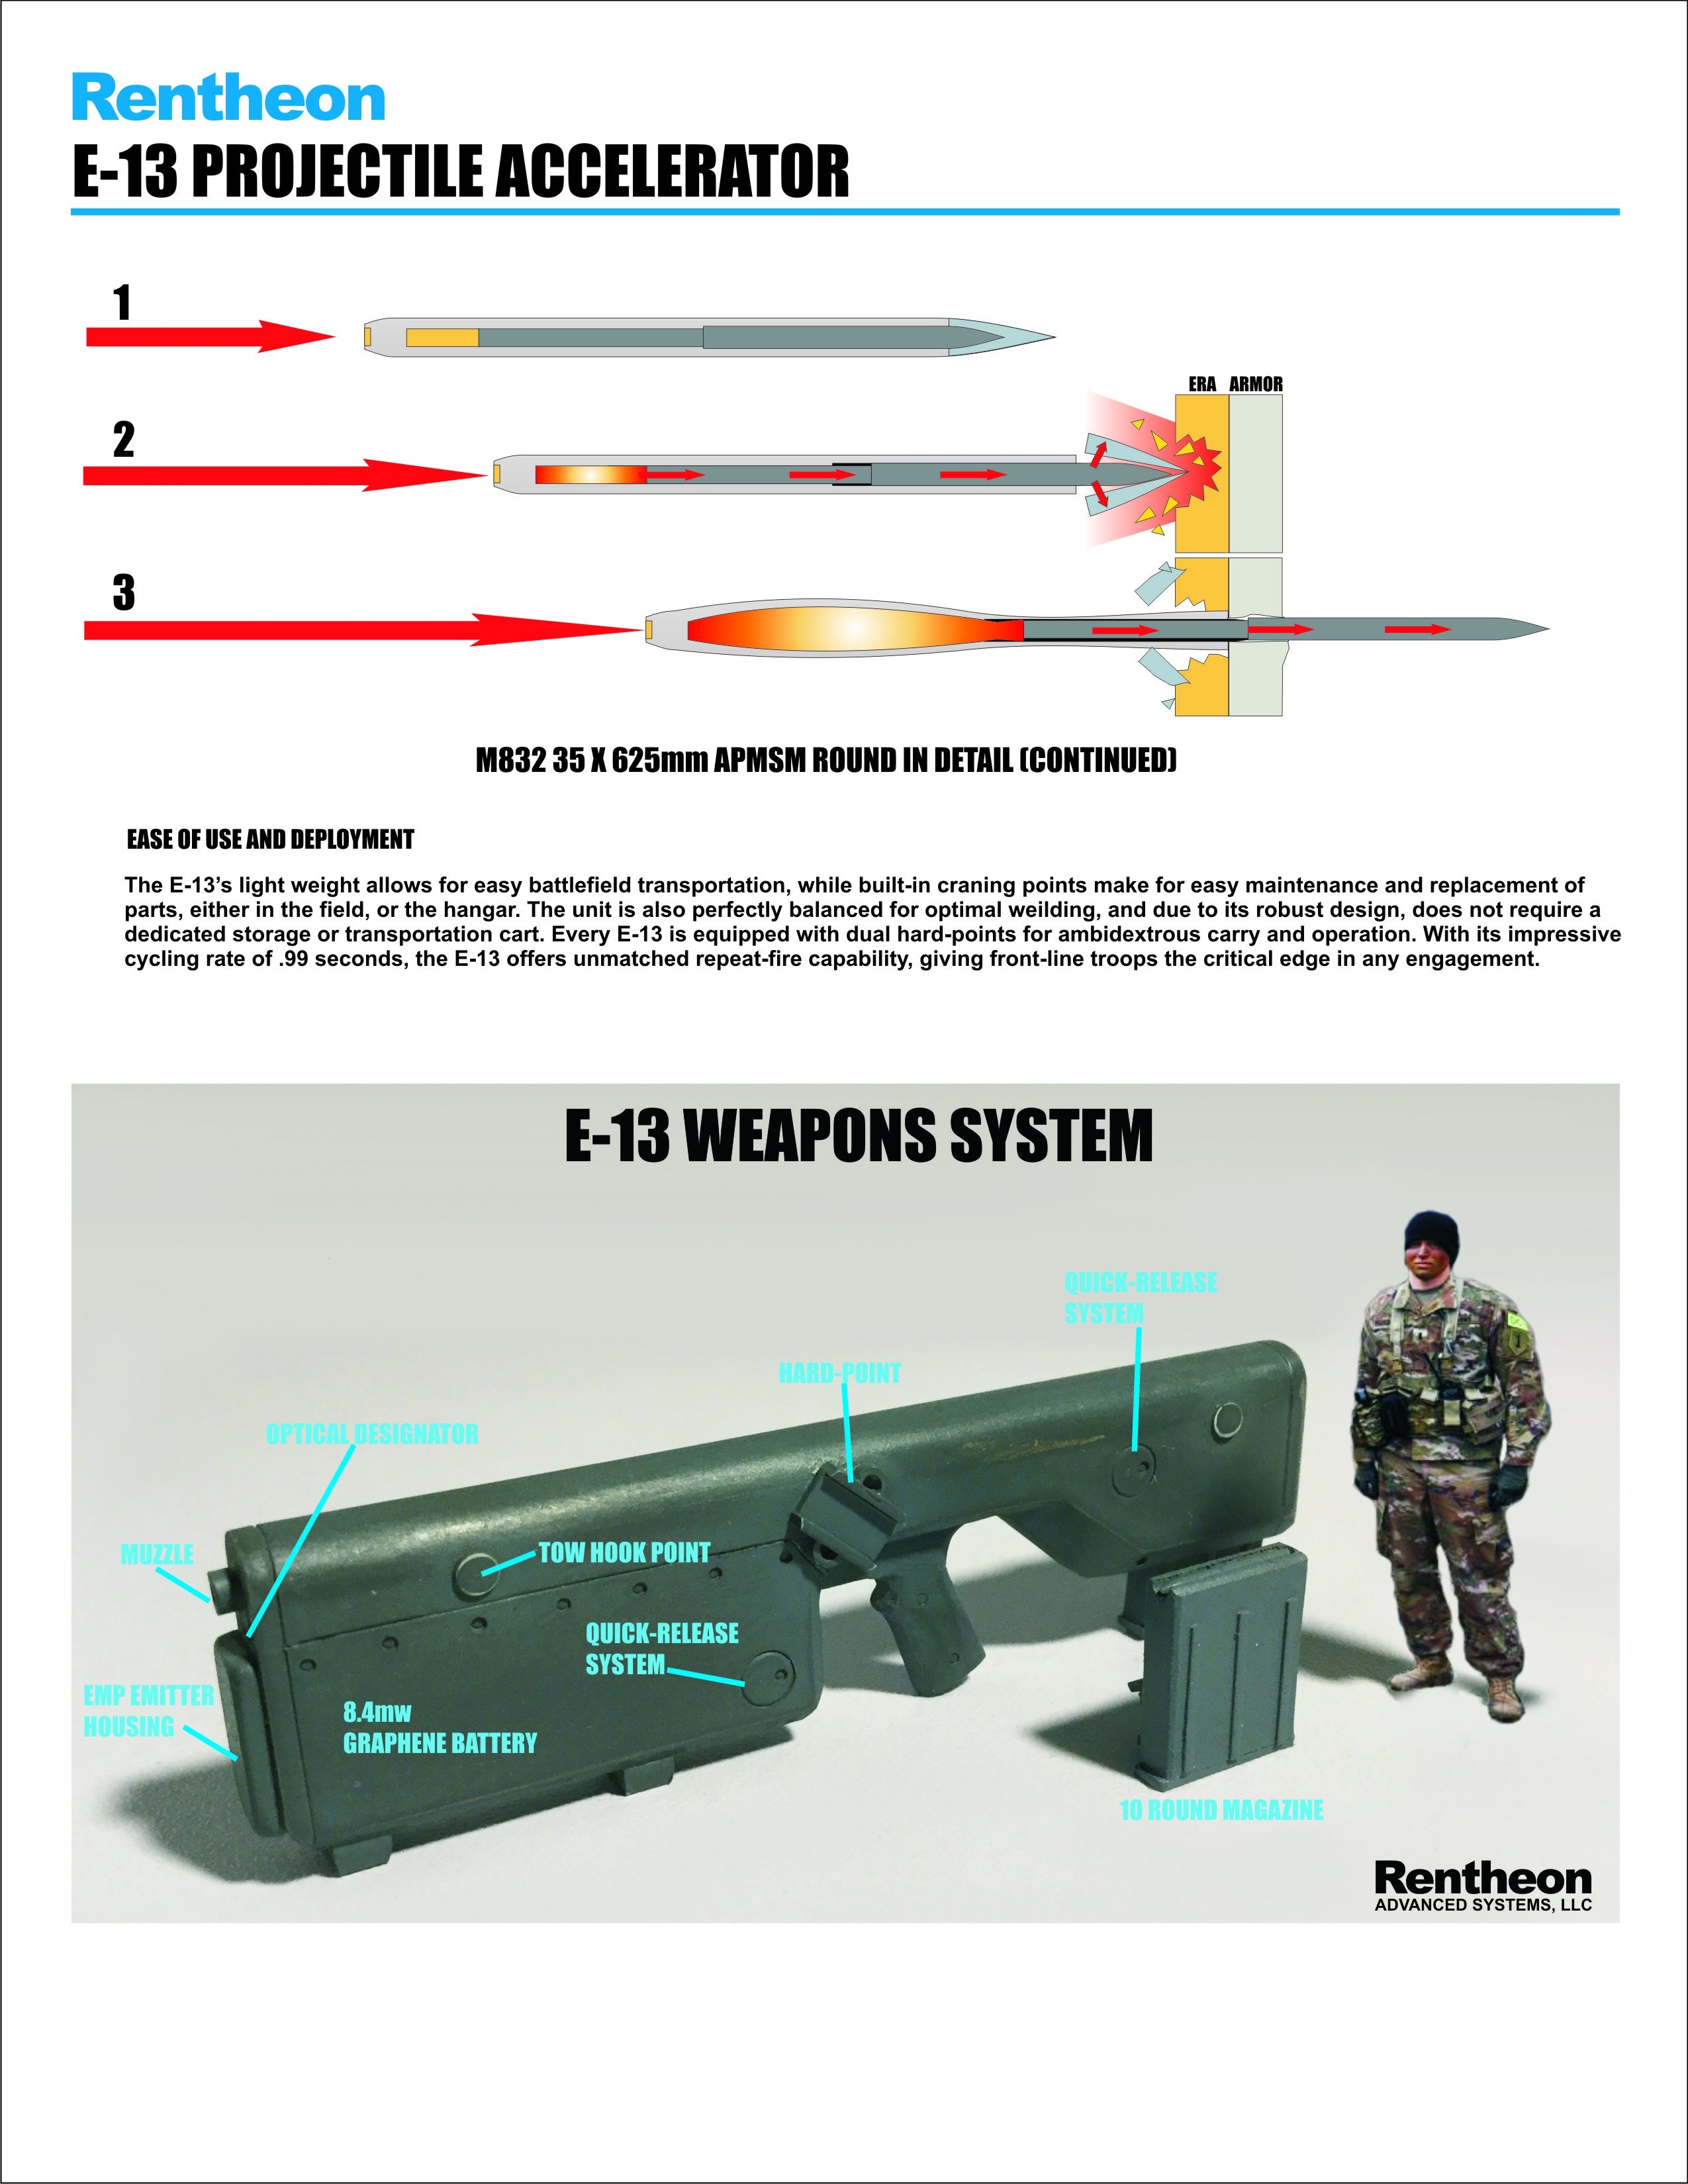
Shhhh! You're blowing my cover, bro. Actually, someone was kind enough to point-out that mW = milliwatts, while MW = megawatts. **Pulls E-13 trigger, watches projectile fall lifelessly out the barrel and lawn-dart into the ground directly below** ...I think I need more power. Directed energy weapons are there too, though they play a slightly different role. -
The Official Moscato Hobby Models Thread
captain america replied to captain america's topic in Anime or Science Fiction
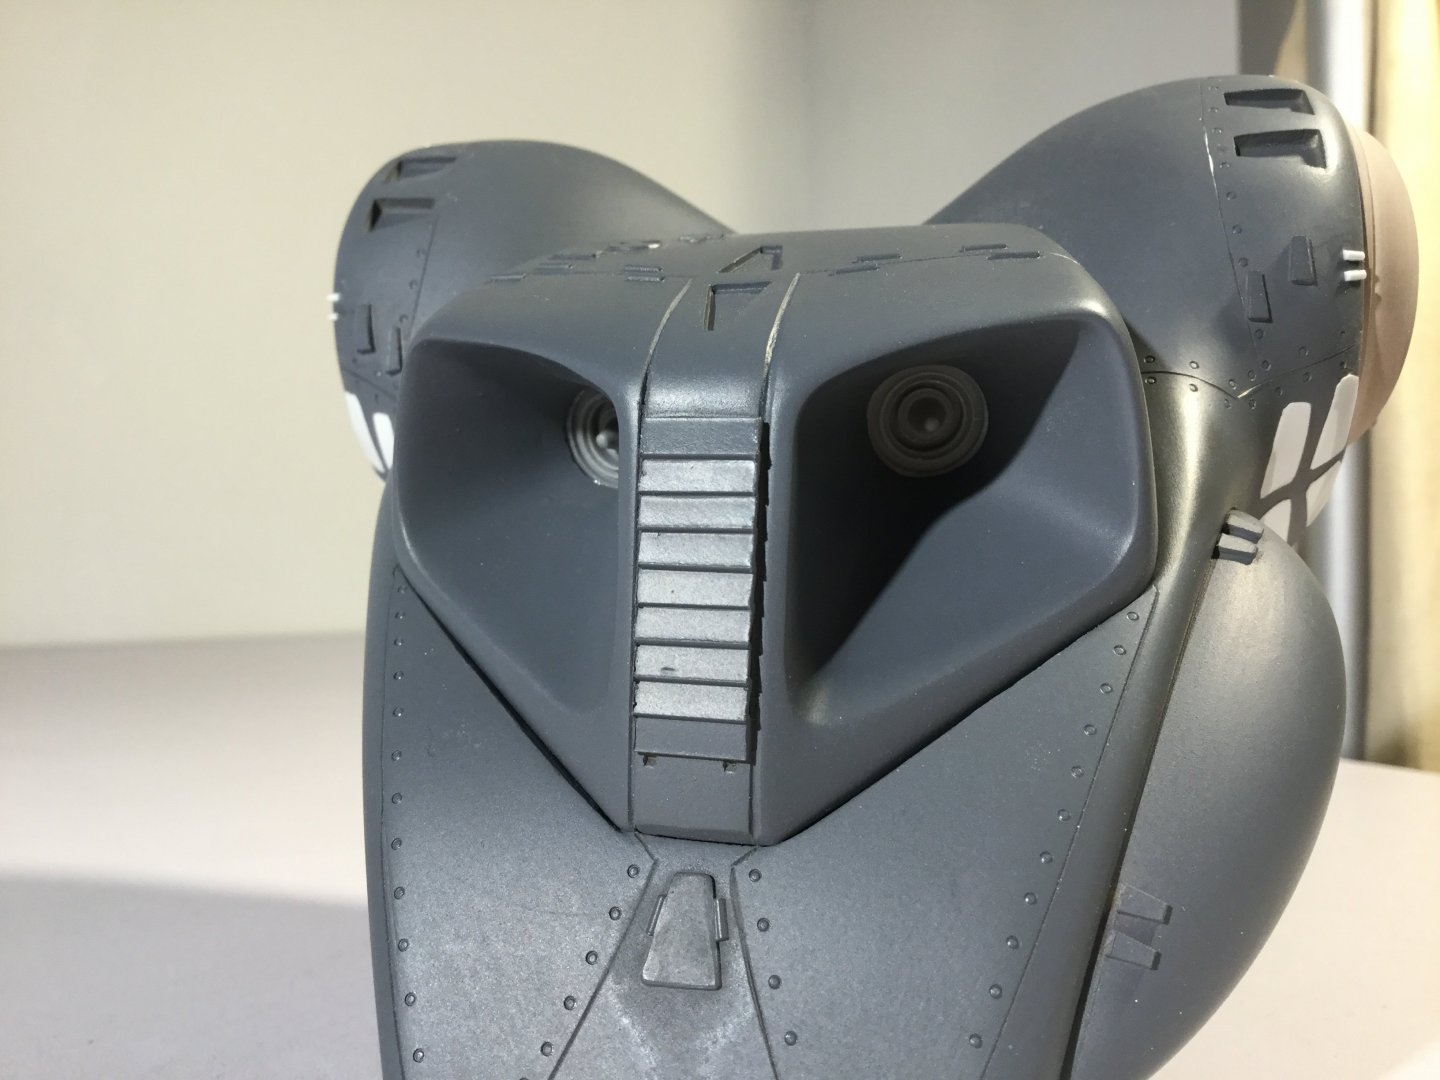
More M-72 Gabriel goodness! I went with the look of a defence contractor's brochure, at least for the initial presentation, to give the mecha and the series a little extra depth. Real-world specs and RHA penetration capabilities will remain 'classified' for the time being... Just like with real-world weapons. Short version: the soldier locks onto the target with the E-13, when the trigger is depressed, the EMP emitter fires a controlled pulse to disable the enemy APS system, and a fraction of a second later, the projectile is fired.

-
Captain's log: Friday, January 10th. Decal artwork is done. Mold-prep is done, and molding will commence in a couple of days. Mold-prep is a surprisingly intensive and tedious process, which consists of two parts: the first is sealing-off all the tiny little gaps, nooks and deep crevices between bonded parts that would cause mold defects and cause damage to the part upon demold. The second part is to examine the piece to be molded, evaluate its potential resin flow characteristics and attach sprues and gates. You want to maximize resin flow into the cavity, and at the same time, not butcher fine detail and somehow make it as easy to extract a cast part from its mold. Sometimes that’s easier said than done. I have a tendency to paint myself into a molding corner with some very odd, complex parts, but I usually manage to wiggle my way out. By this time next week, I’ll have a few castings ready. Are you excited?? Cos I certainly am!!!

-
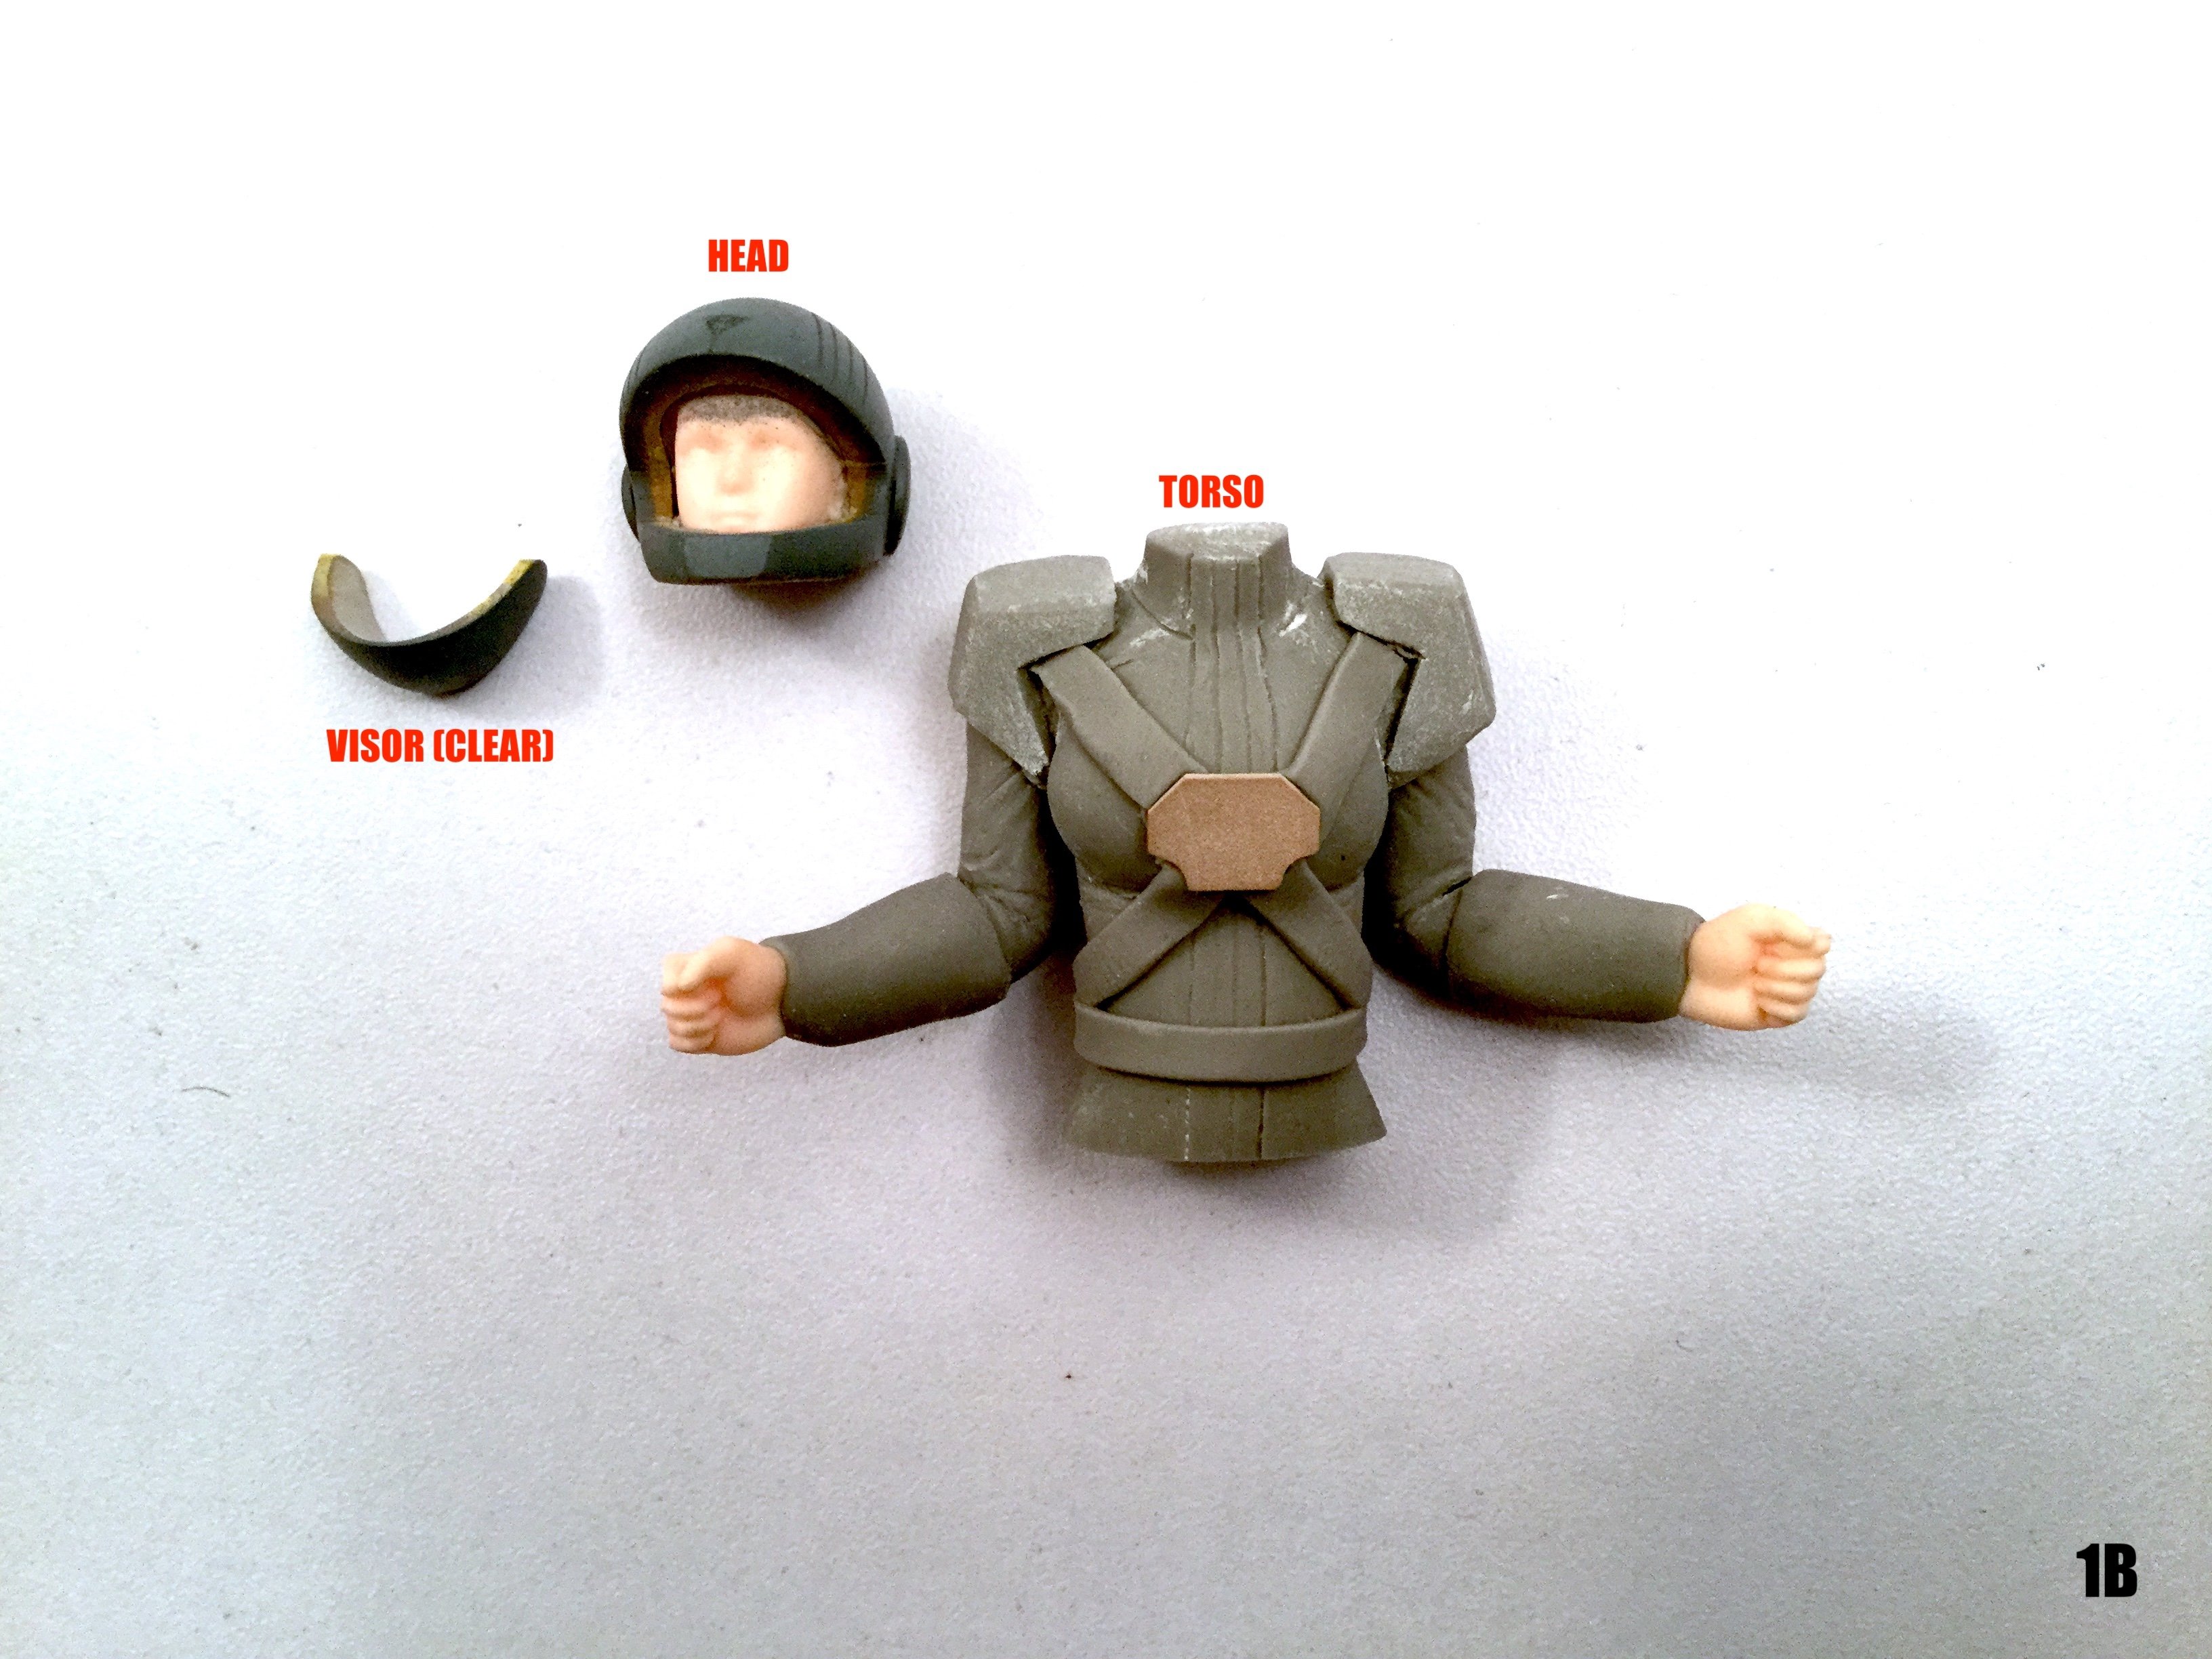
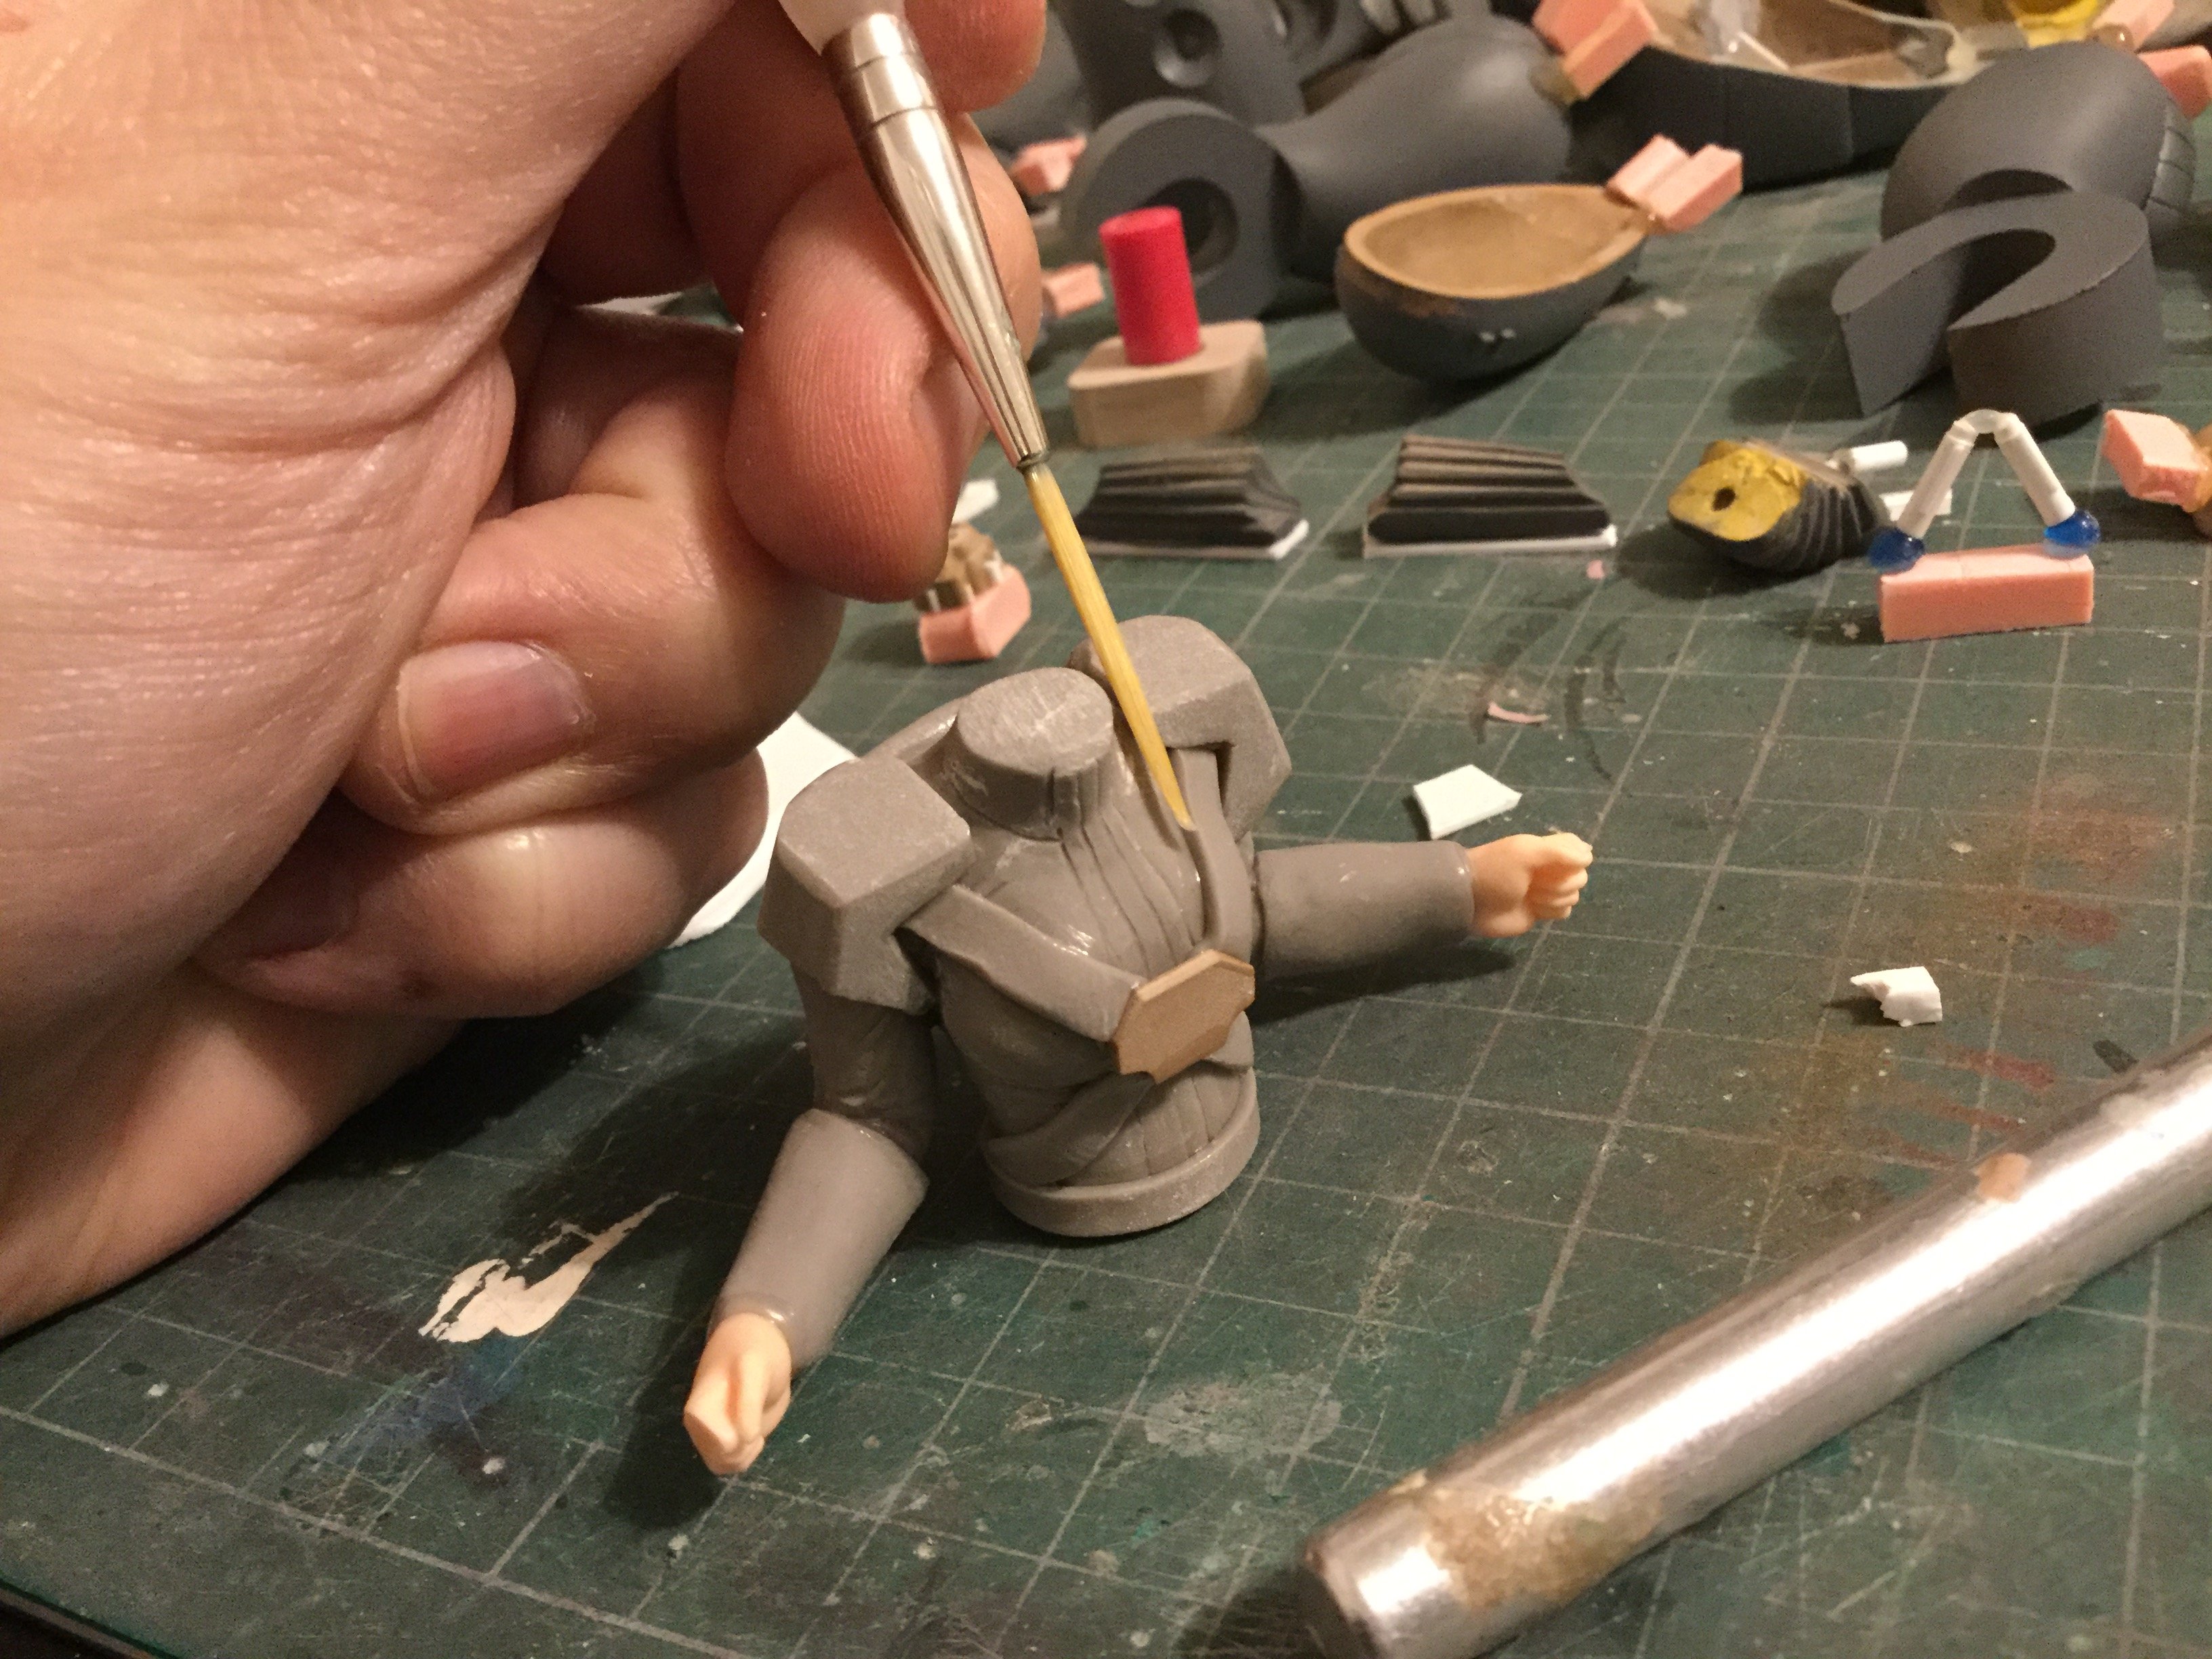
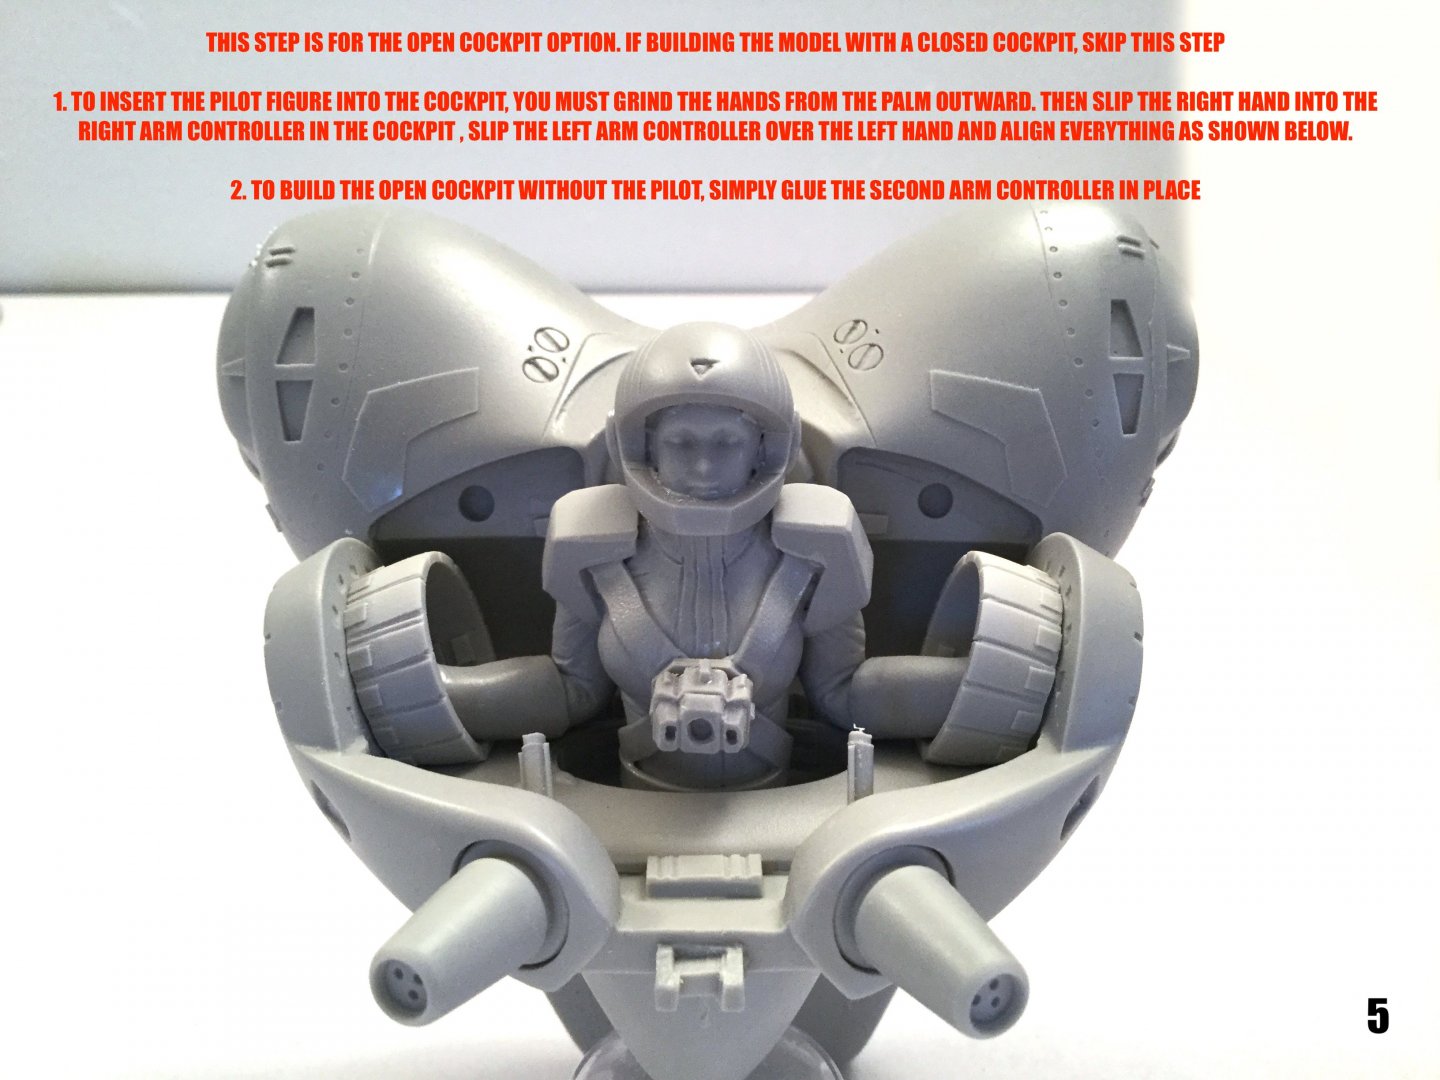
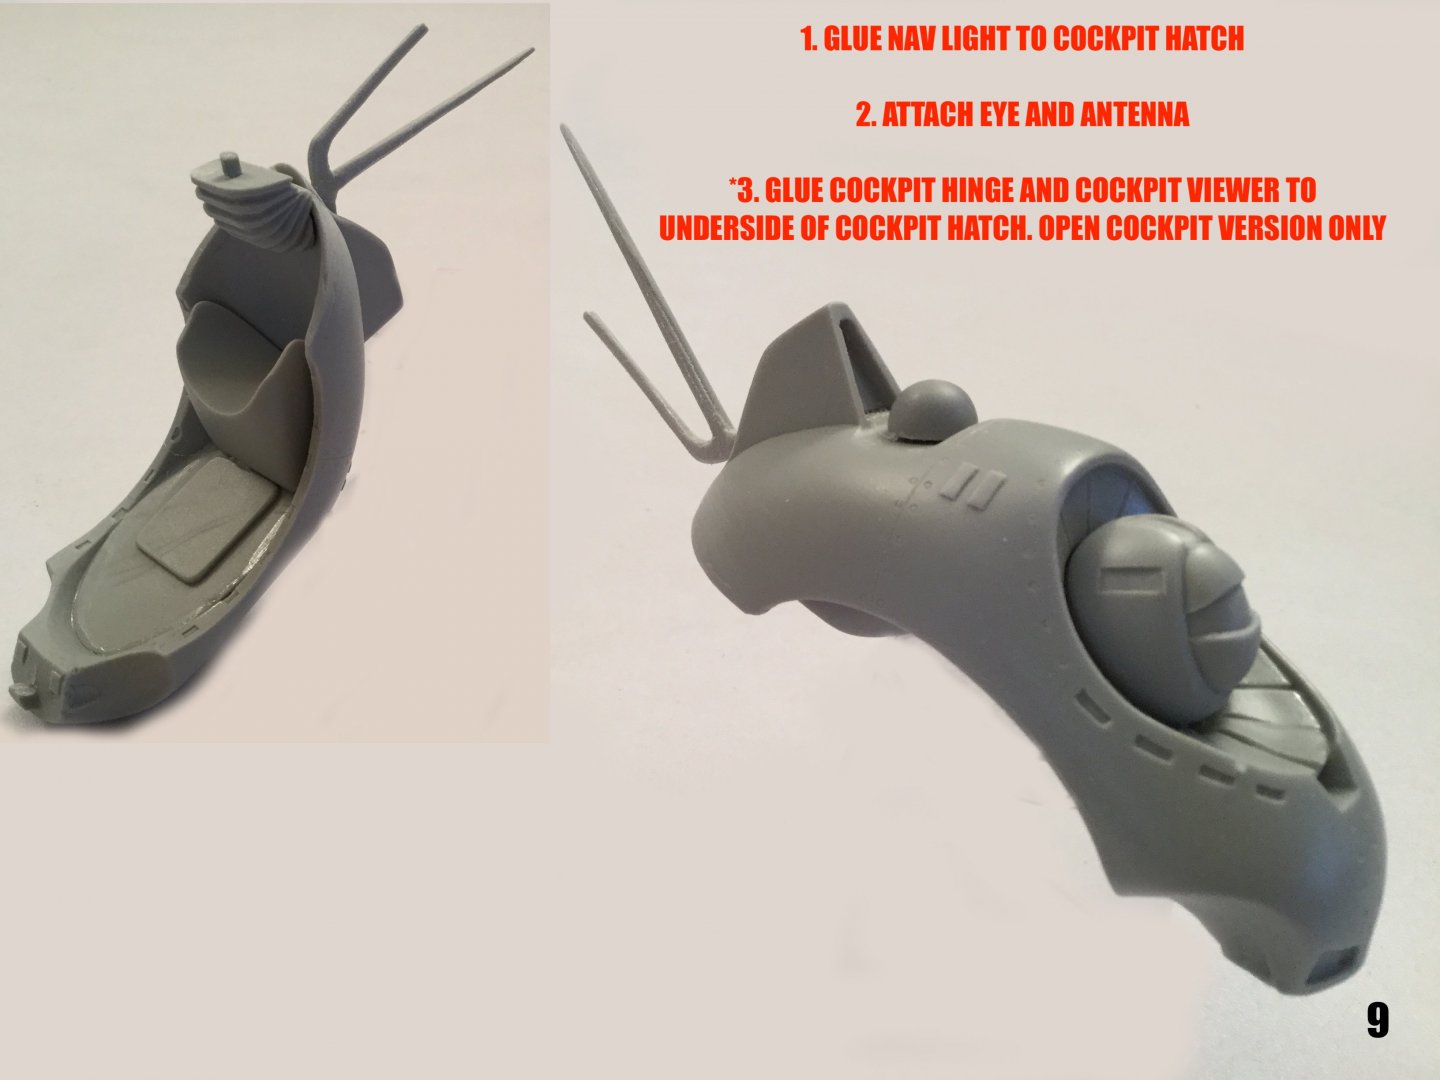
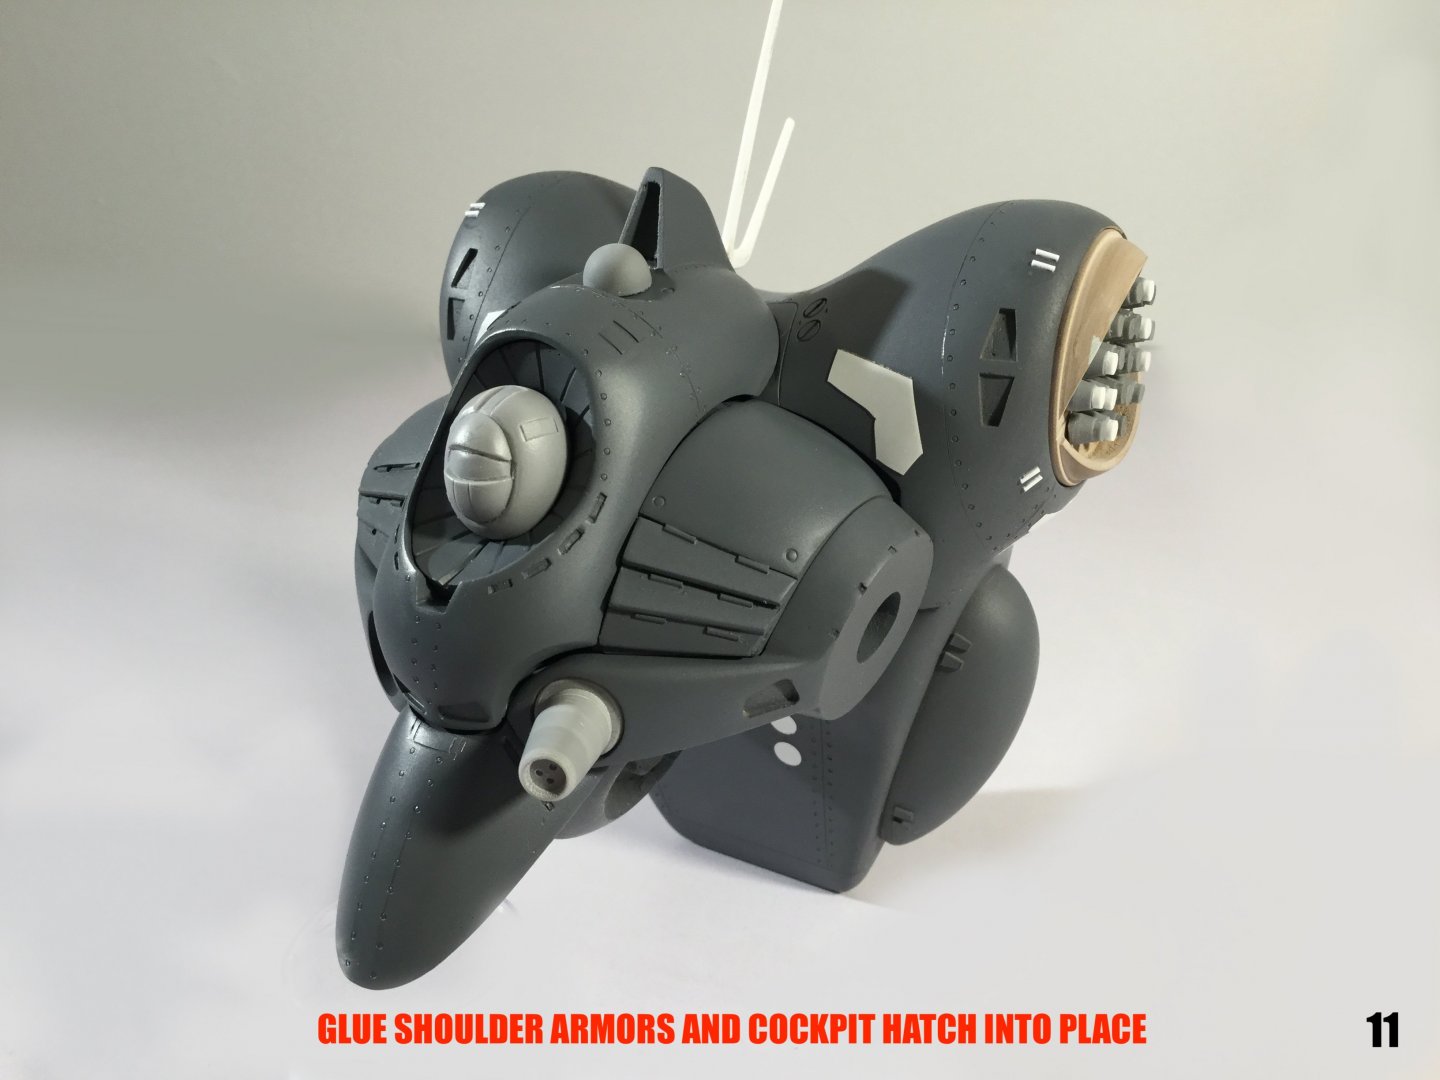
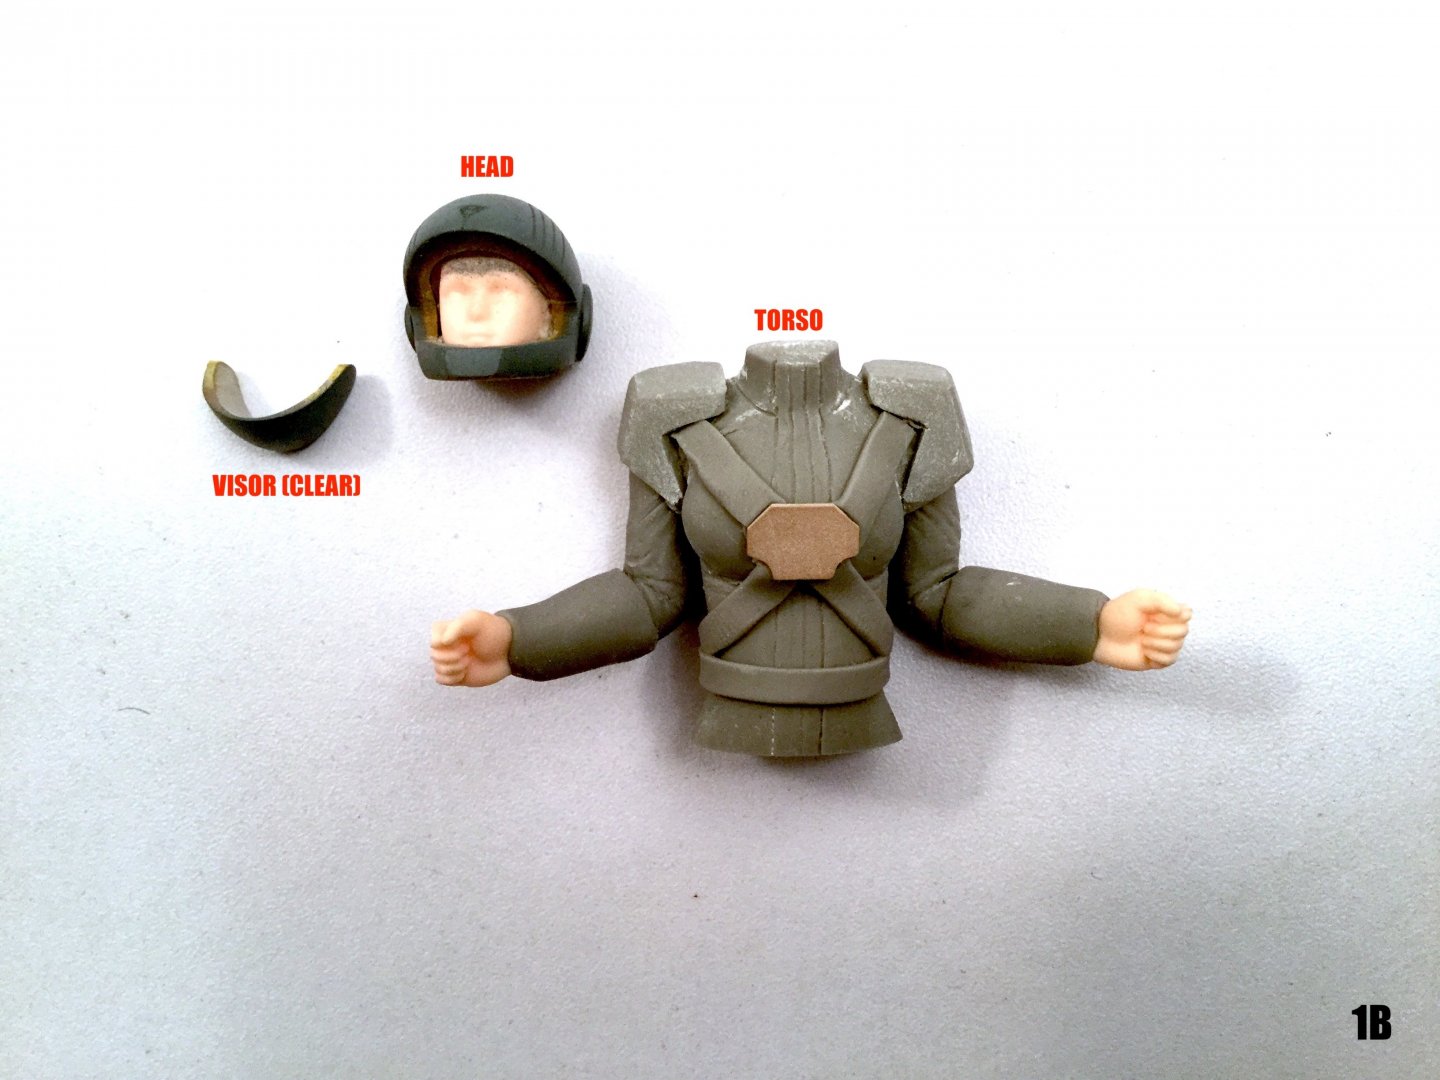
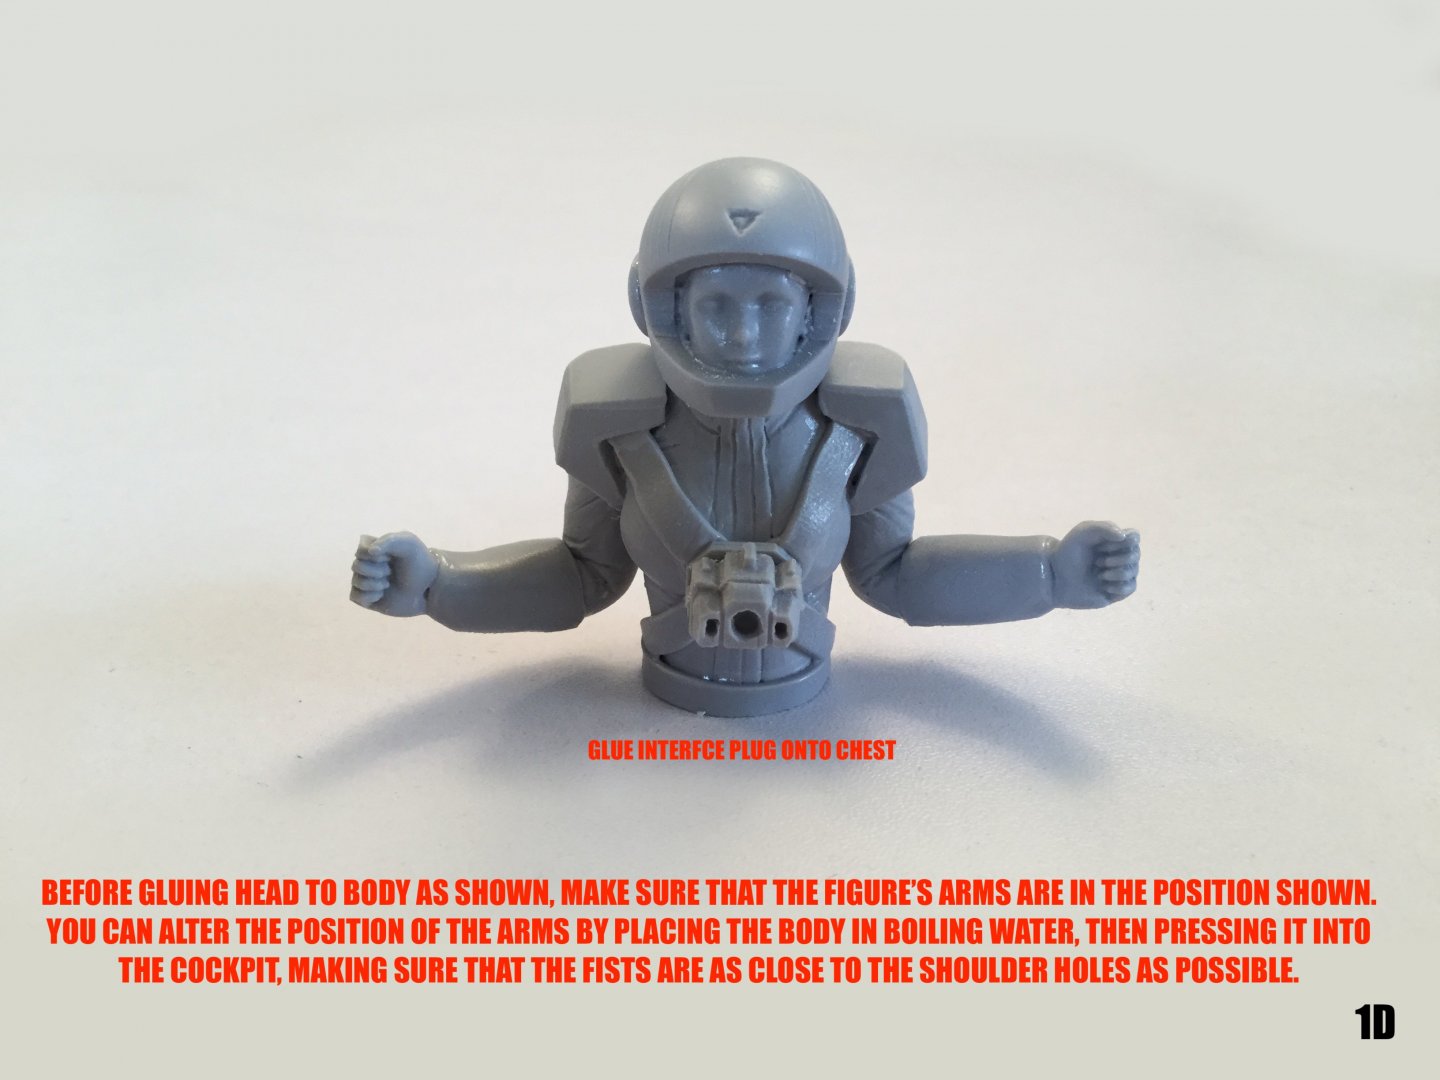
Captain's log: Friday, January 3rd. The Milia bust is done and parts are being readied for the production of instruction plates prior to mold-prep. Yes, the figure will have a clear visor. I didn't assemble the full cockpit for the pic simply because the Super Sculpey bust is extremely fragile and I don't want to risk damaging it prior to molding. I also have to add the mecha interface sockets into her chest plate, but otherwise she's fine. Decals are almost done, just a few adjustments to make to the fit. Longer project than expected, but so very satisfying.

-
Nope
-
Thanks, that means a lot. Admittedly, this is one of the more tedious projects I've worked on in recent memory, hence the longer-than-usual building time. The design of the mecha really does strike me as a succession of blobs: not very practical, but certainly pleasing to the eyes.
-
Captain’s log: Friday, December 27th. The masters are almost done! Milia’s helmet s also done, I just have the Milia bust left to sculpt, and then a few small details left on the battle suit itself. Some molding has already begun—necessary to make the final adjustments to the pose. The decal artwork is also well underway, but I want to do some test-fitting to make sure all the markings fit perfectly. It’s only now that I’ve gotten it almost done that I realize what a lackluster job Club M did with their 1/72 Q-Rau kit all those years ago. Alas, enjoy the pics: I begin molding next week.

-
The Mandalorian - Star Wars webseries from Jon Favreau
captain america replied to SMS007's topic in Anime or Science Fiction
Makes me wonder if the kid hasn't picked up on something the rest of us missed. -
The Official Moscato Hobby Models Thread
captain america replied to captain america's topic in Anime or Science Fiction
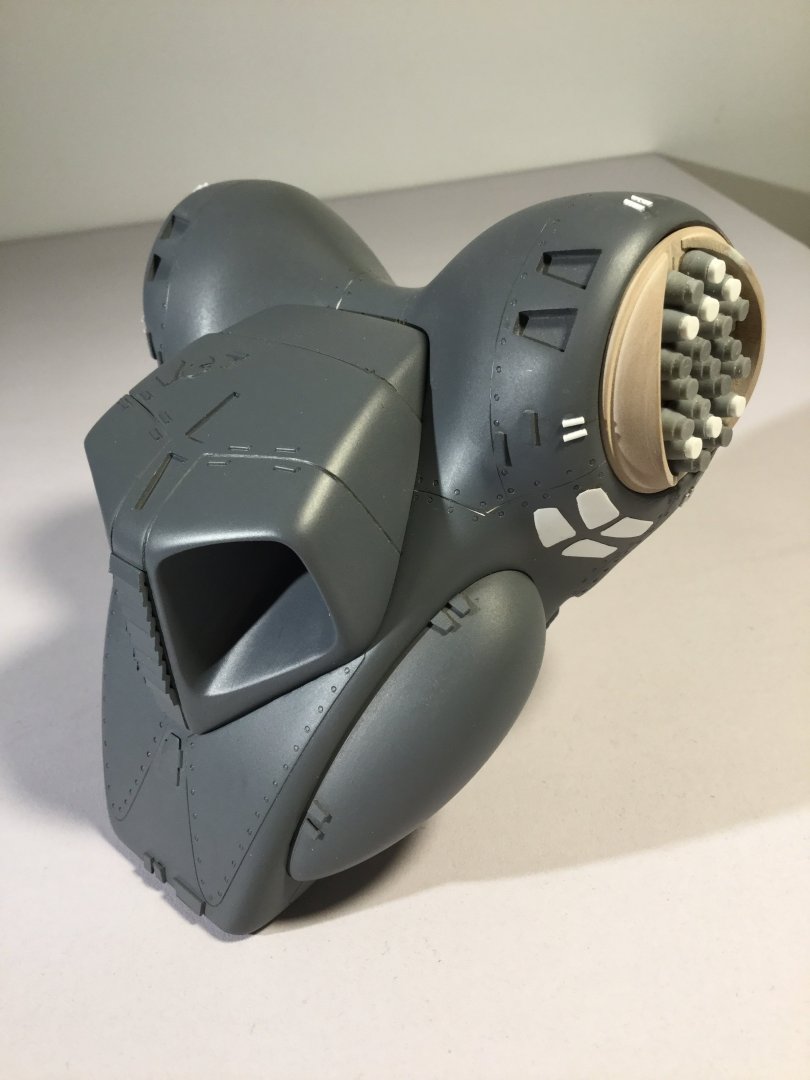
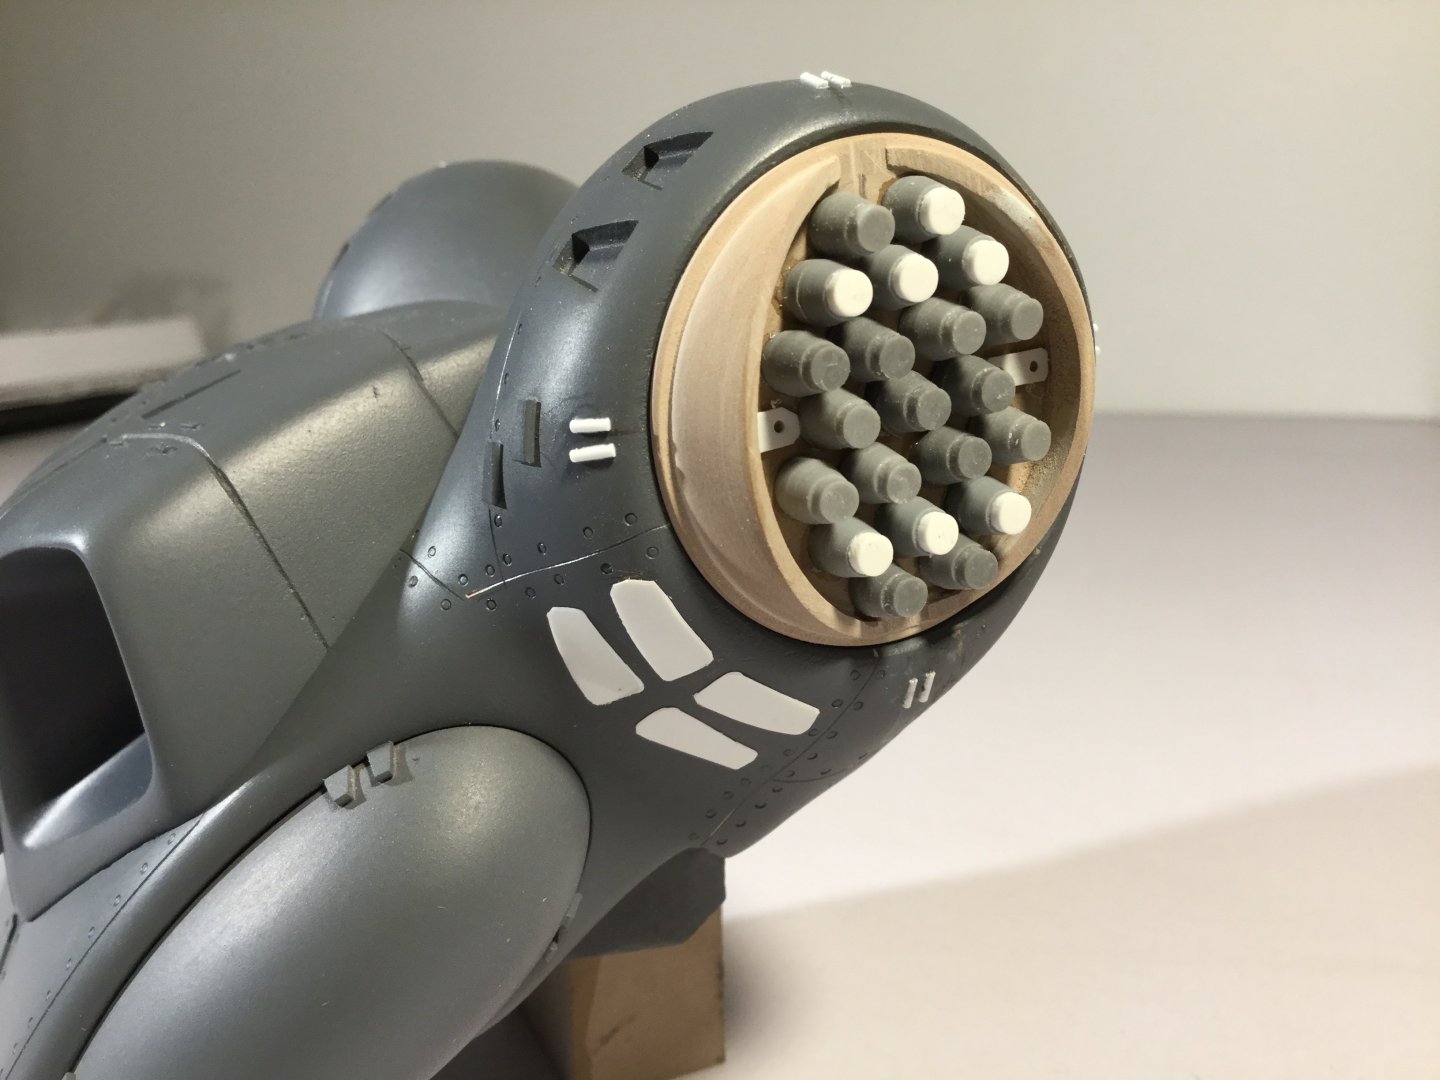
Three of those hard points are usually used for ammo magazines, so with the mag in the rifle it has 40 tank-killer rounds. One hard point is reserved for a directed energy weapon and the two on the back mount the smoke grenade launchers. -
The Official Moscato Hobby Models Thread
captain america replied to captain america's topic in Anime or Science Fiction
After several months of teasing, I'm proud to present my new mecha creation: the M-72 Gabriel Heavy Infantry Armor Unit. It was actually designed all the way back in 1992, and put into cold storage for almost 25 years. Earlier this year, I dusted off my old sketches, dived headlong into research mode and proceeded to update and refine the unit into something more real-world. Beyond being just a concept, it's also a 1/48 resin kit: all the patterns have been created and the molds are done. In the next few months ahead of its March 2020 release, I'll be working on and presenting at least one ( hopefully two) different tactical color schemes/markings for the unit, and unveiling more of its features, weapons systems and battle tactics. This will also mark a new stage for Moscato Hobby Models, with original kit designs that feature more refined product images and packaging. The Gabriel unit shown below is the M-72B Marines version, which is visually identical the Alpha unit used by the Army. Also, since Macrossworld is my spiritual Mecha-mecca, I decided to unveil the project here first.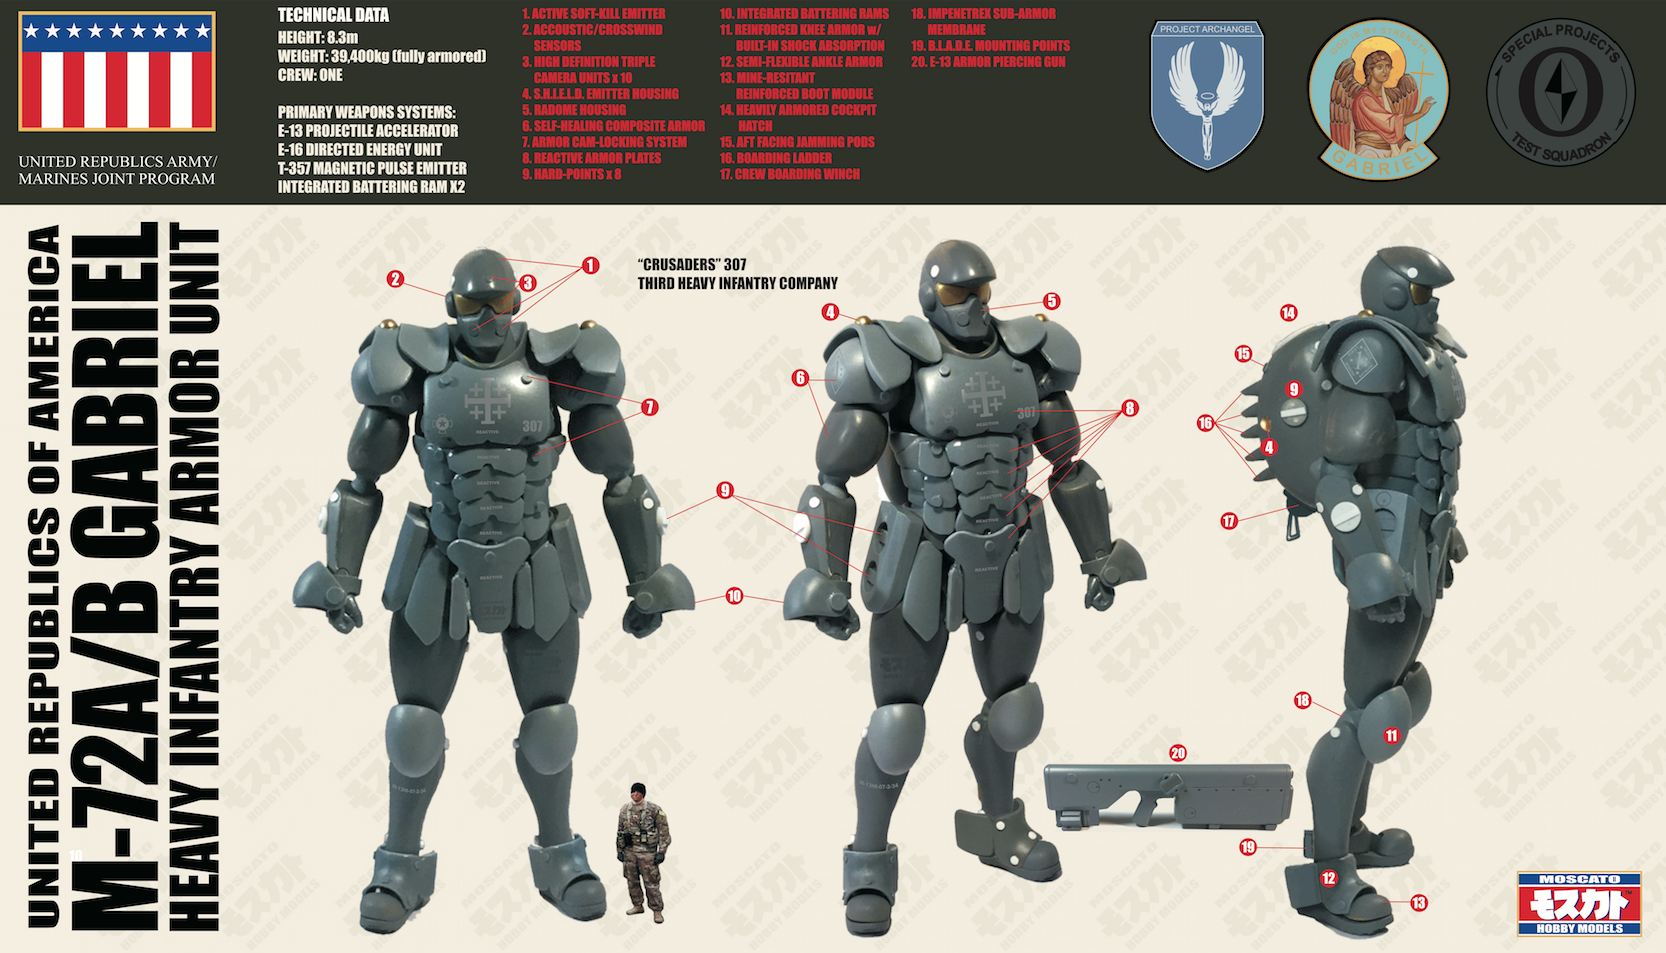
-
Hey guys, I'm going to push back next Friday's update to after Christmas. I have something else to unveil on the 20th.
-
Just a friendly PSA: I have two (2) 1/12 Motocycle Freak accessories sets left. If anyone wants them, just PM me.
-
Top Gun: Maverick (Top Gun 2 is comin)
captain america replied to Ladic's topic in Anime or Science Fiction
Maverick stole my Legioss!! -
The Mandalorian - Star Wars webseries from Jon Favreau
captain america replied to SMS007's topic in Anime or Science Fiction
*Patiently awaits the end-of-season Baby Yoda/Apollo Creed death match*- 1438 replies
-
- 1
-

-
- star wars
- the mandalorian
- (and 10 more)