captain america
-
Posts
3550 -
Joined
-
Last visited
Content Type
Profiles
Forums
Events
Gallery
Everything posted by captain america
-

1/48 SOUTHERN CROSS BIOROID
captain america replied to captain america's topic in Anime or Science Fiction
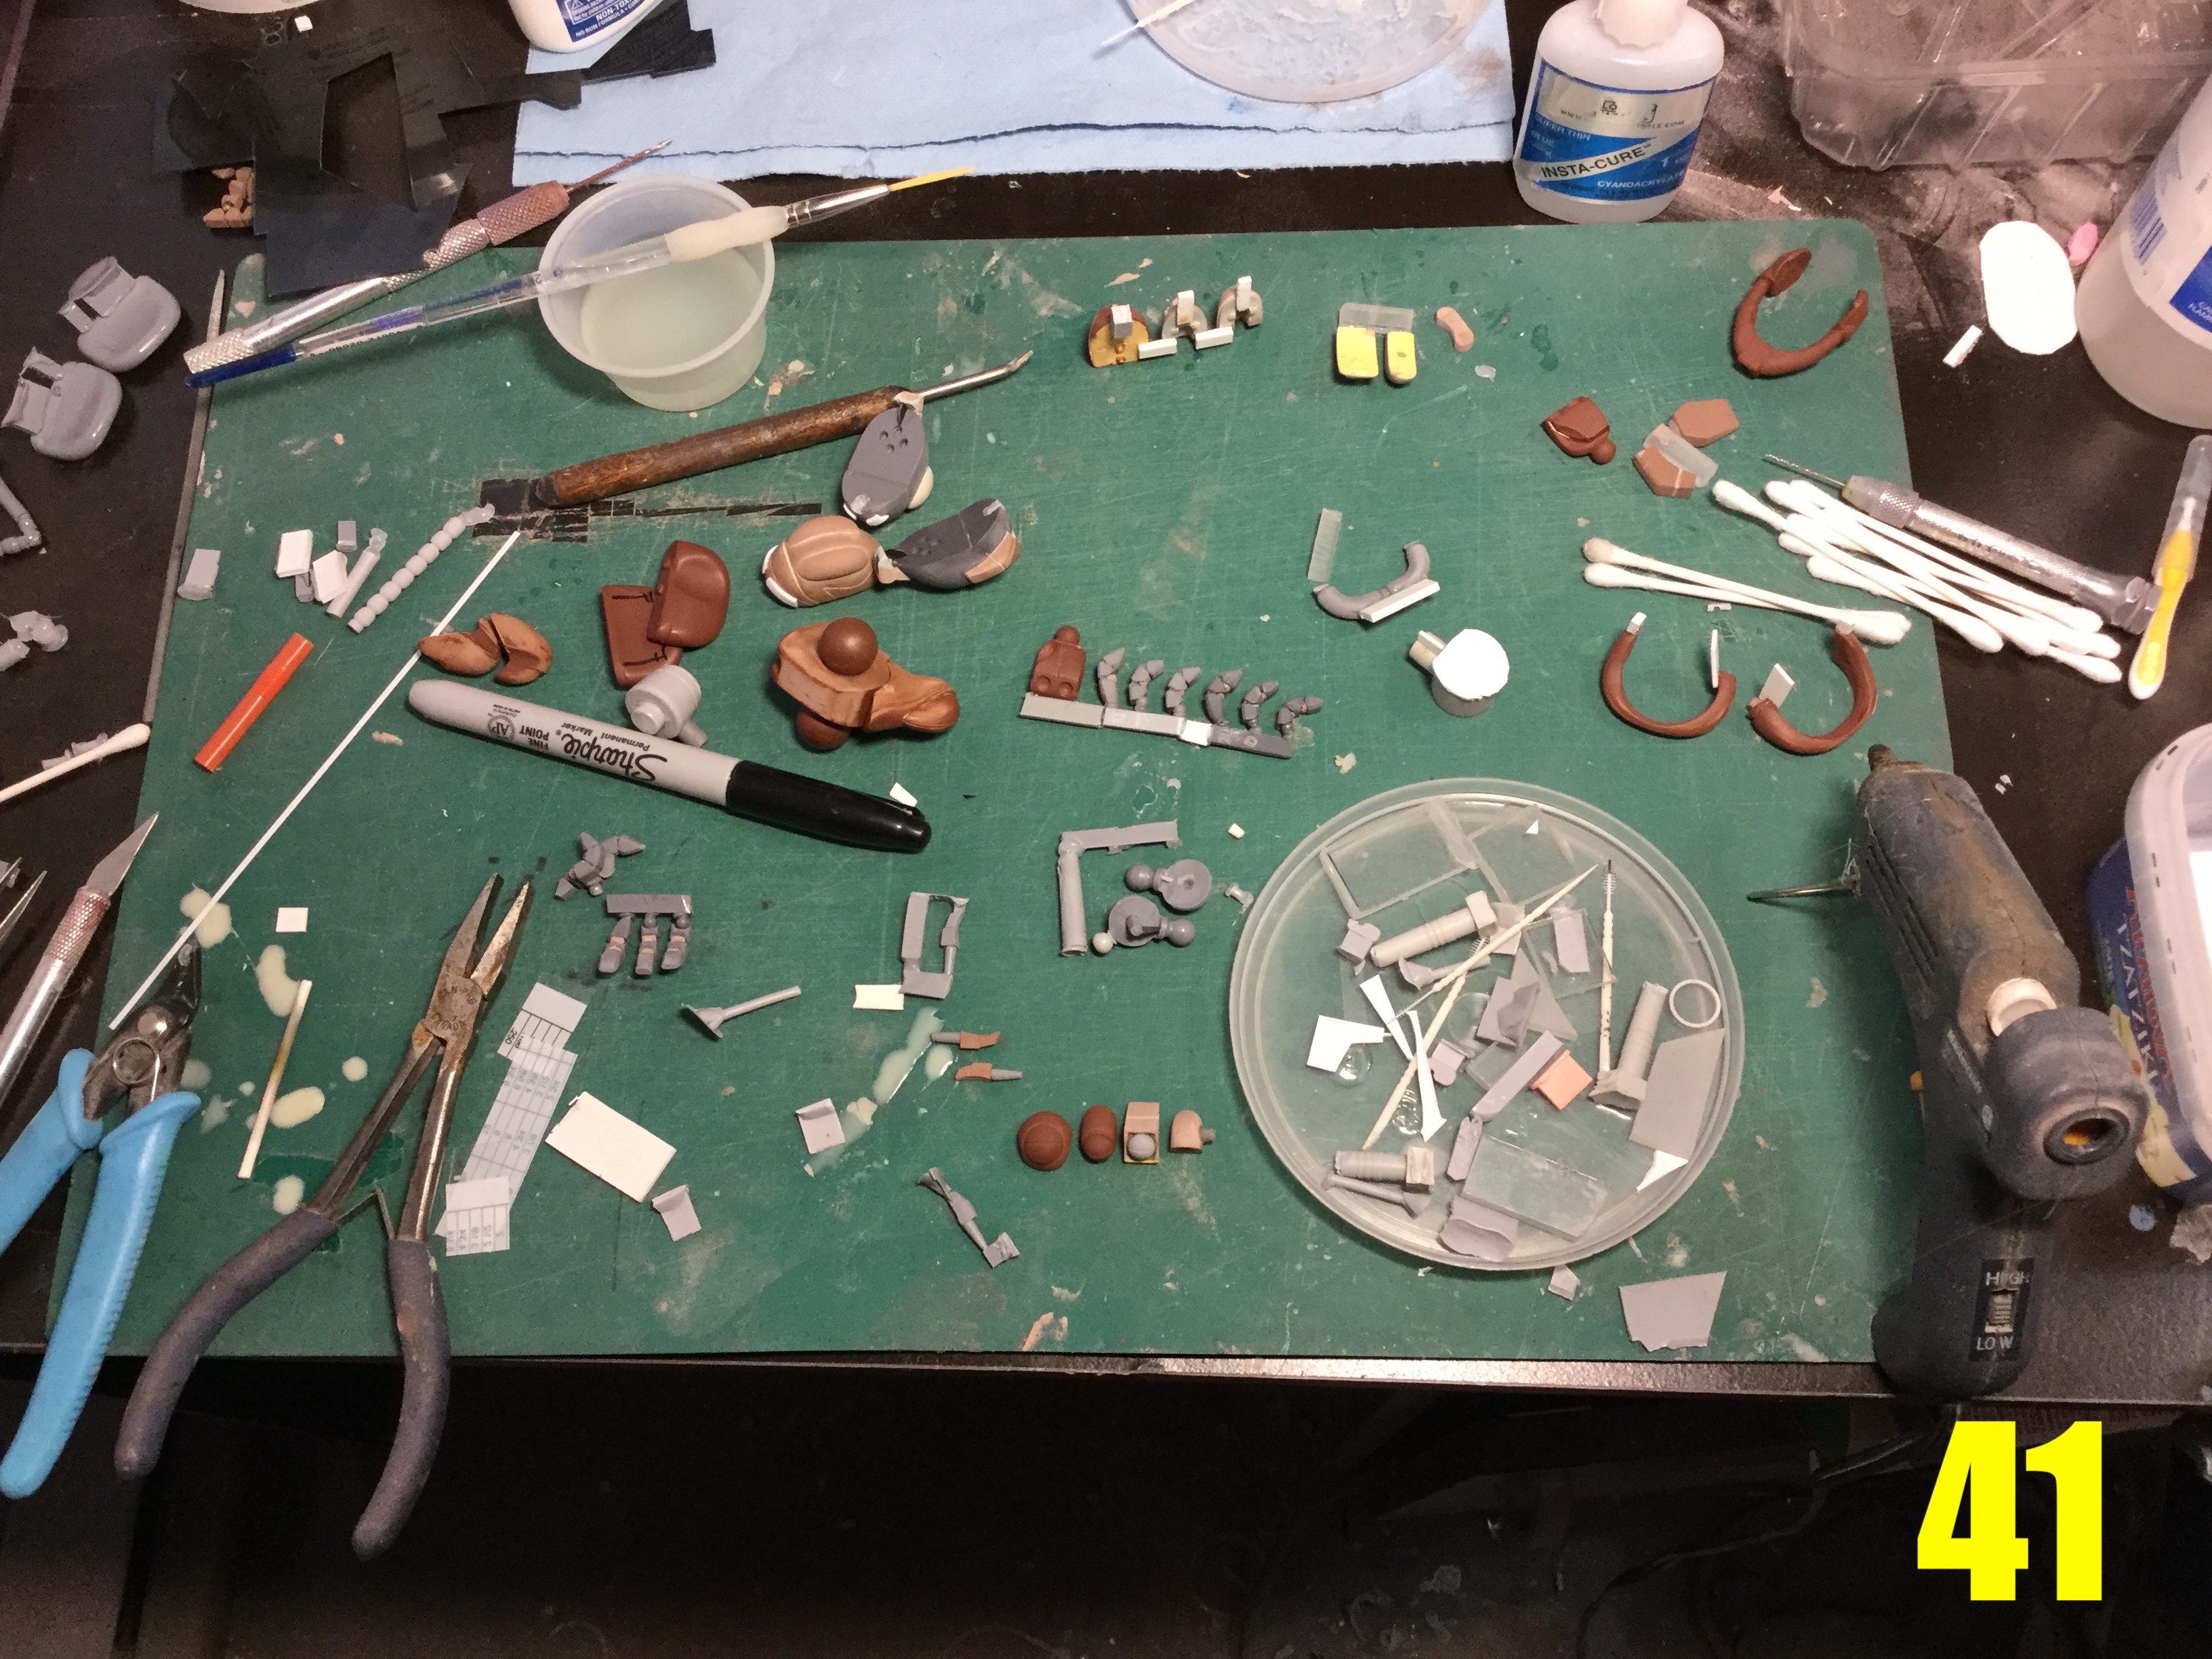
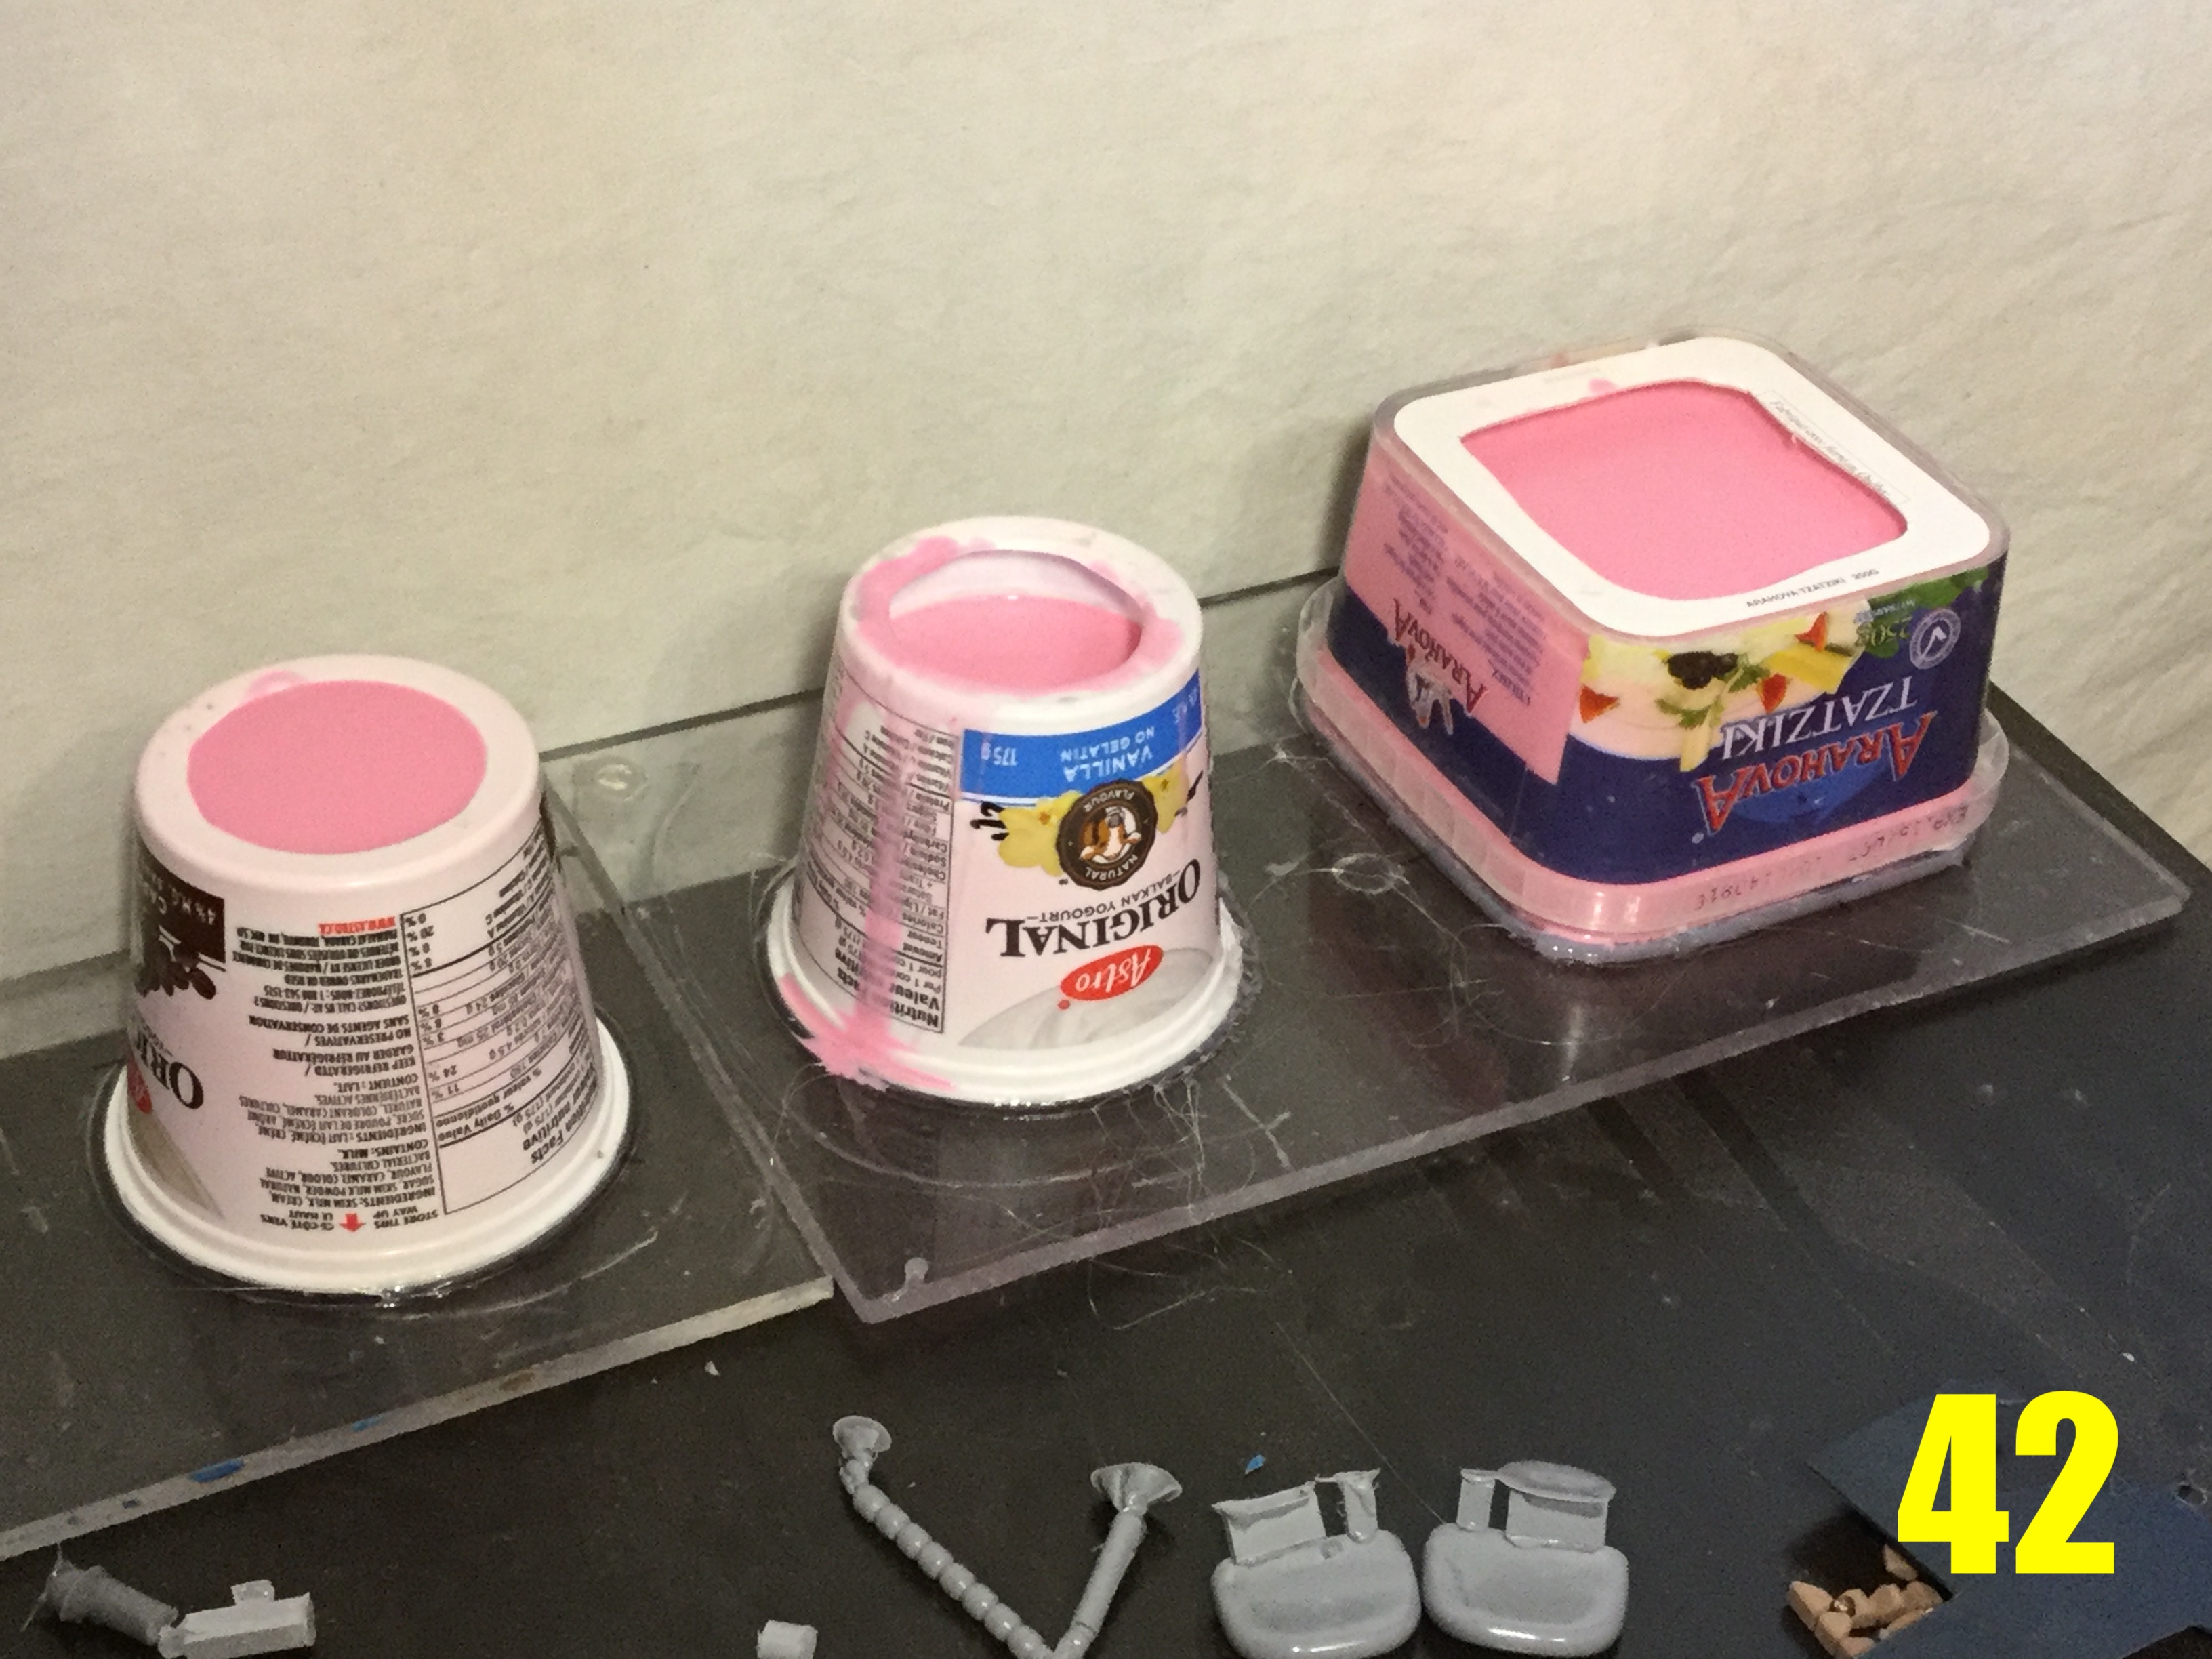
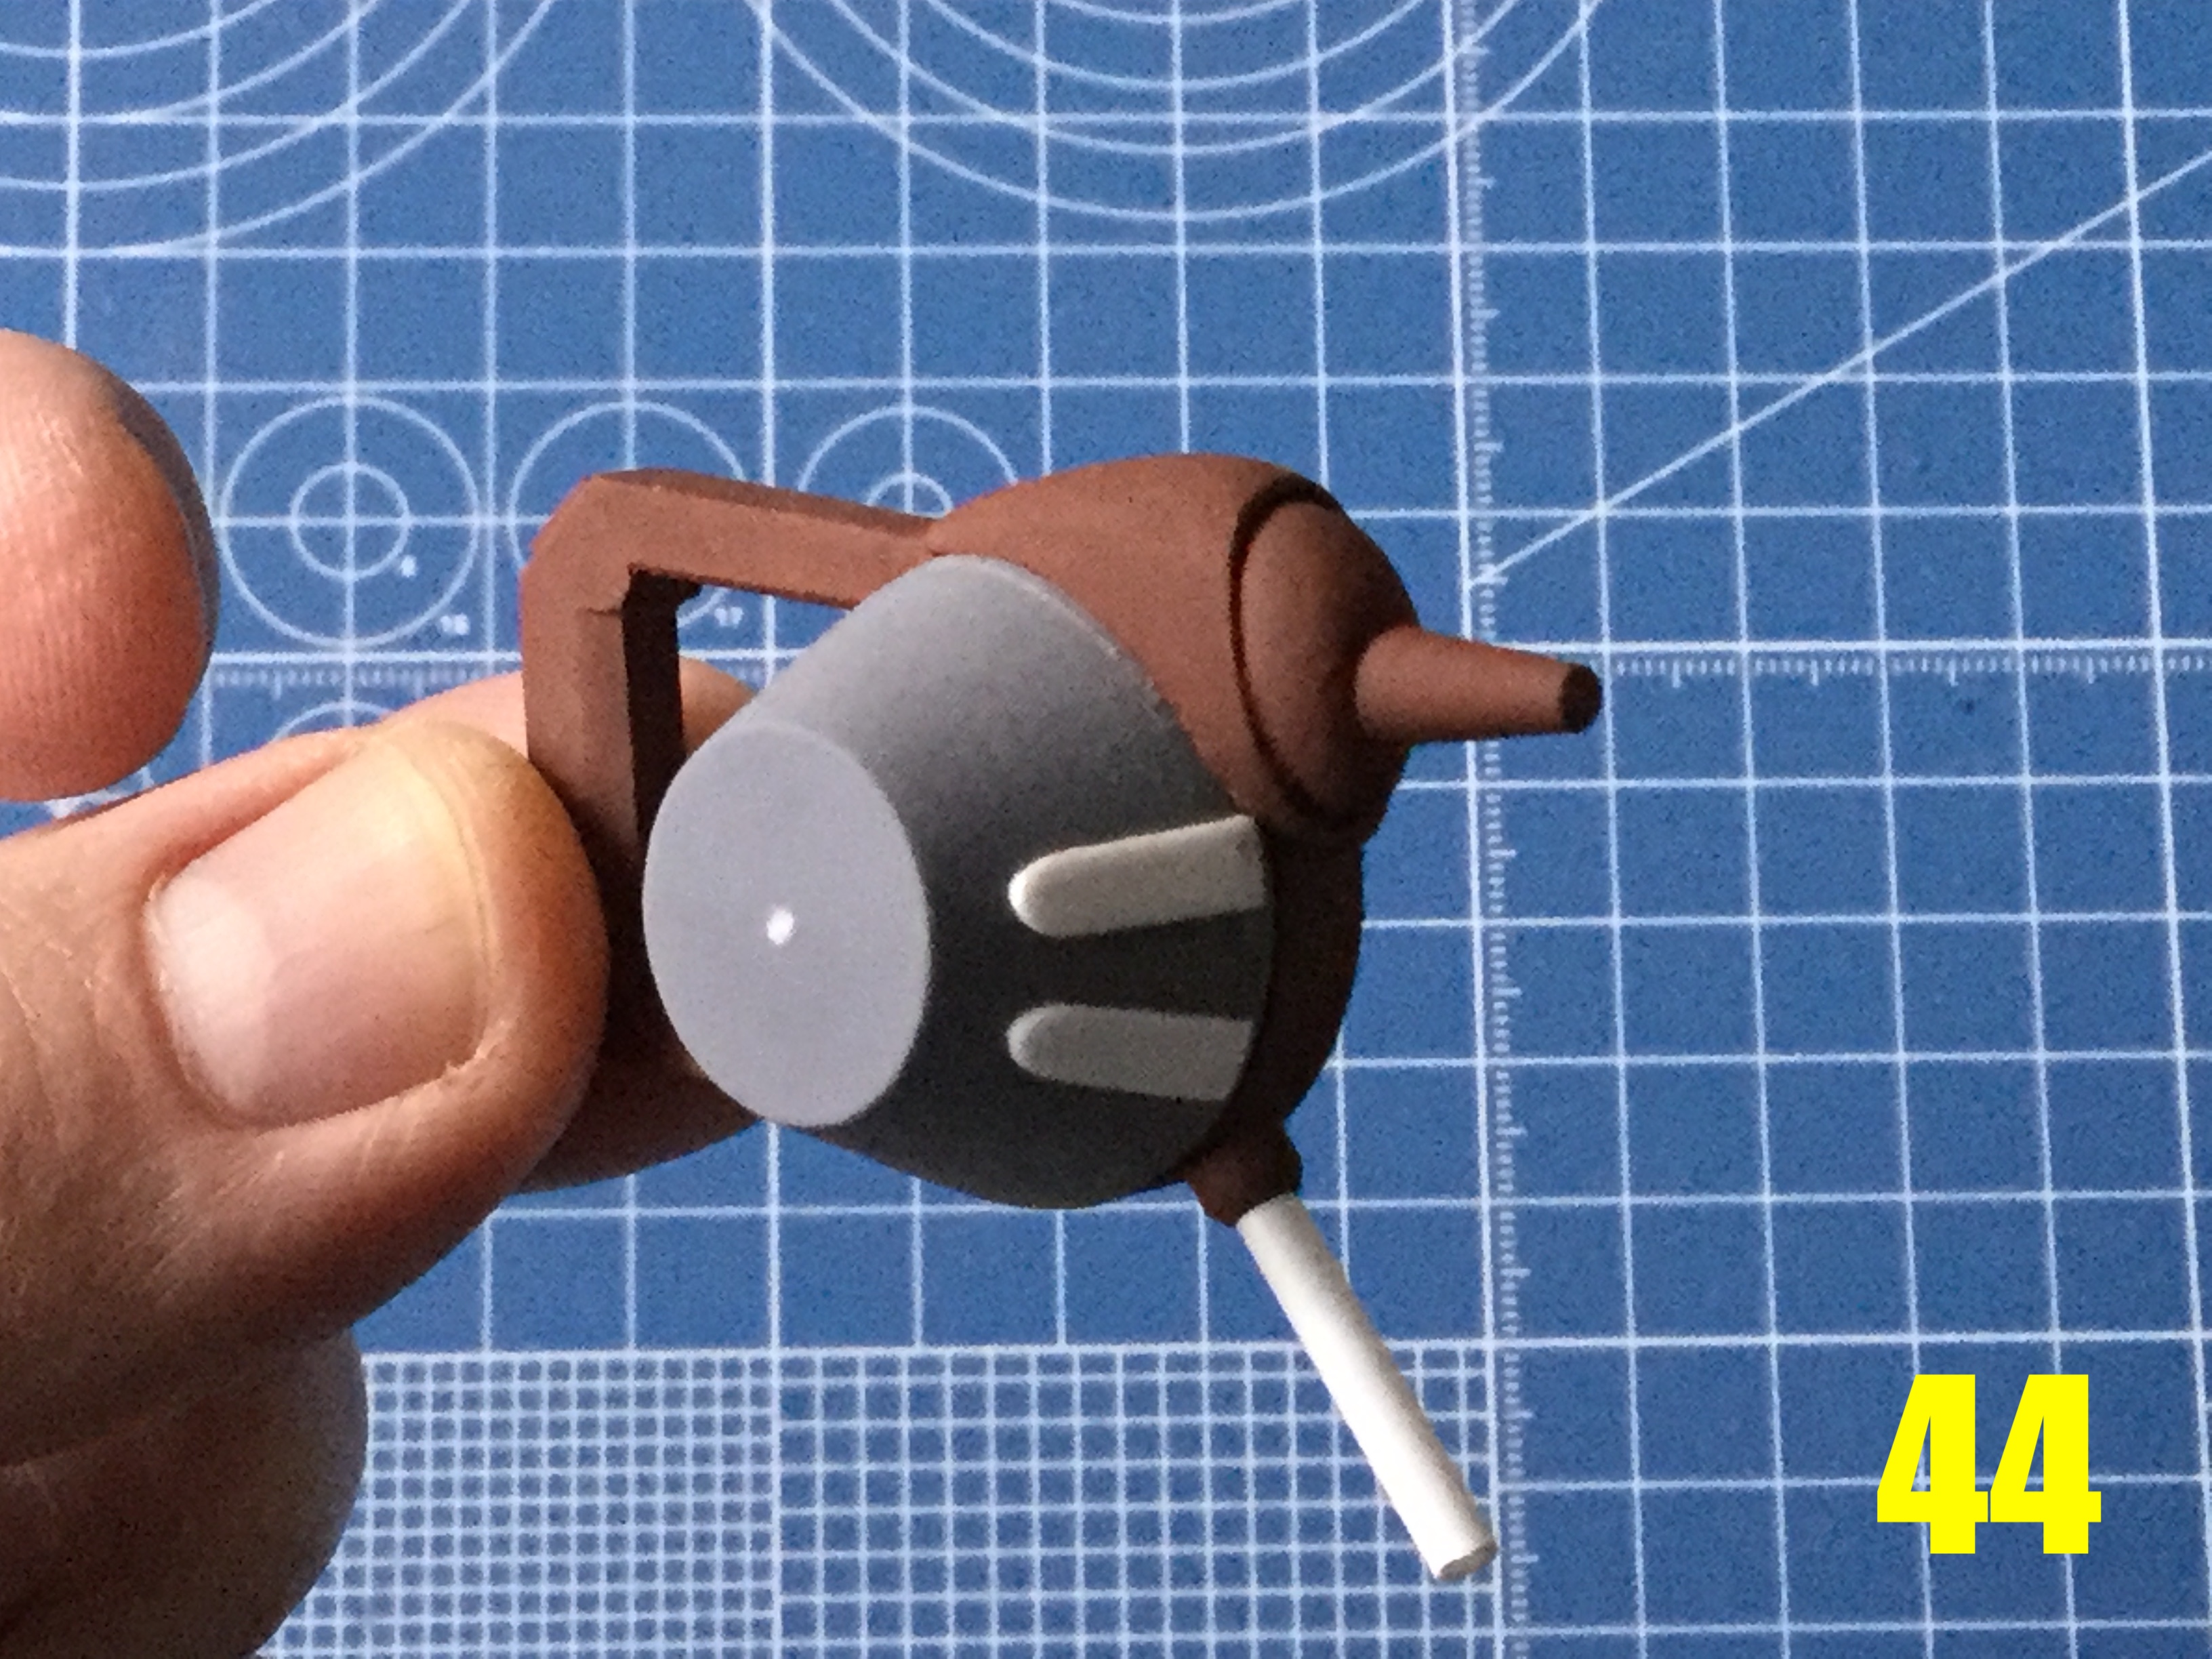
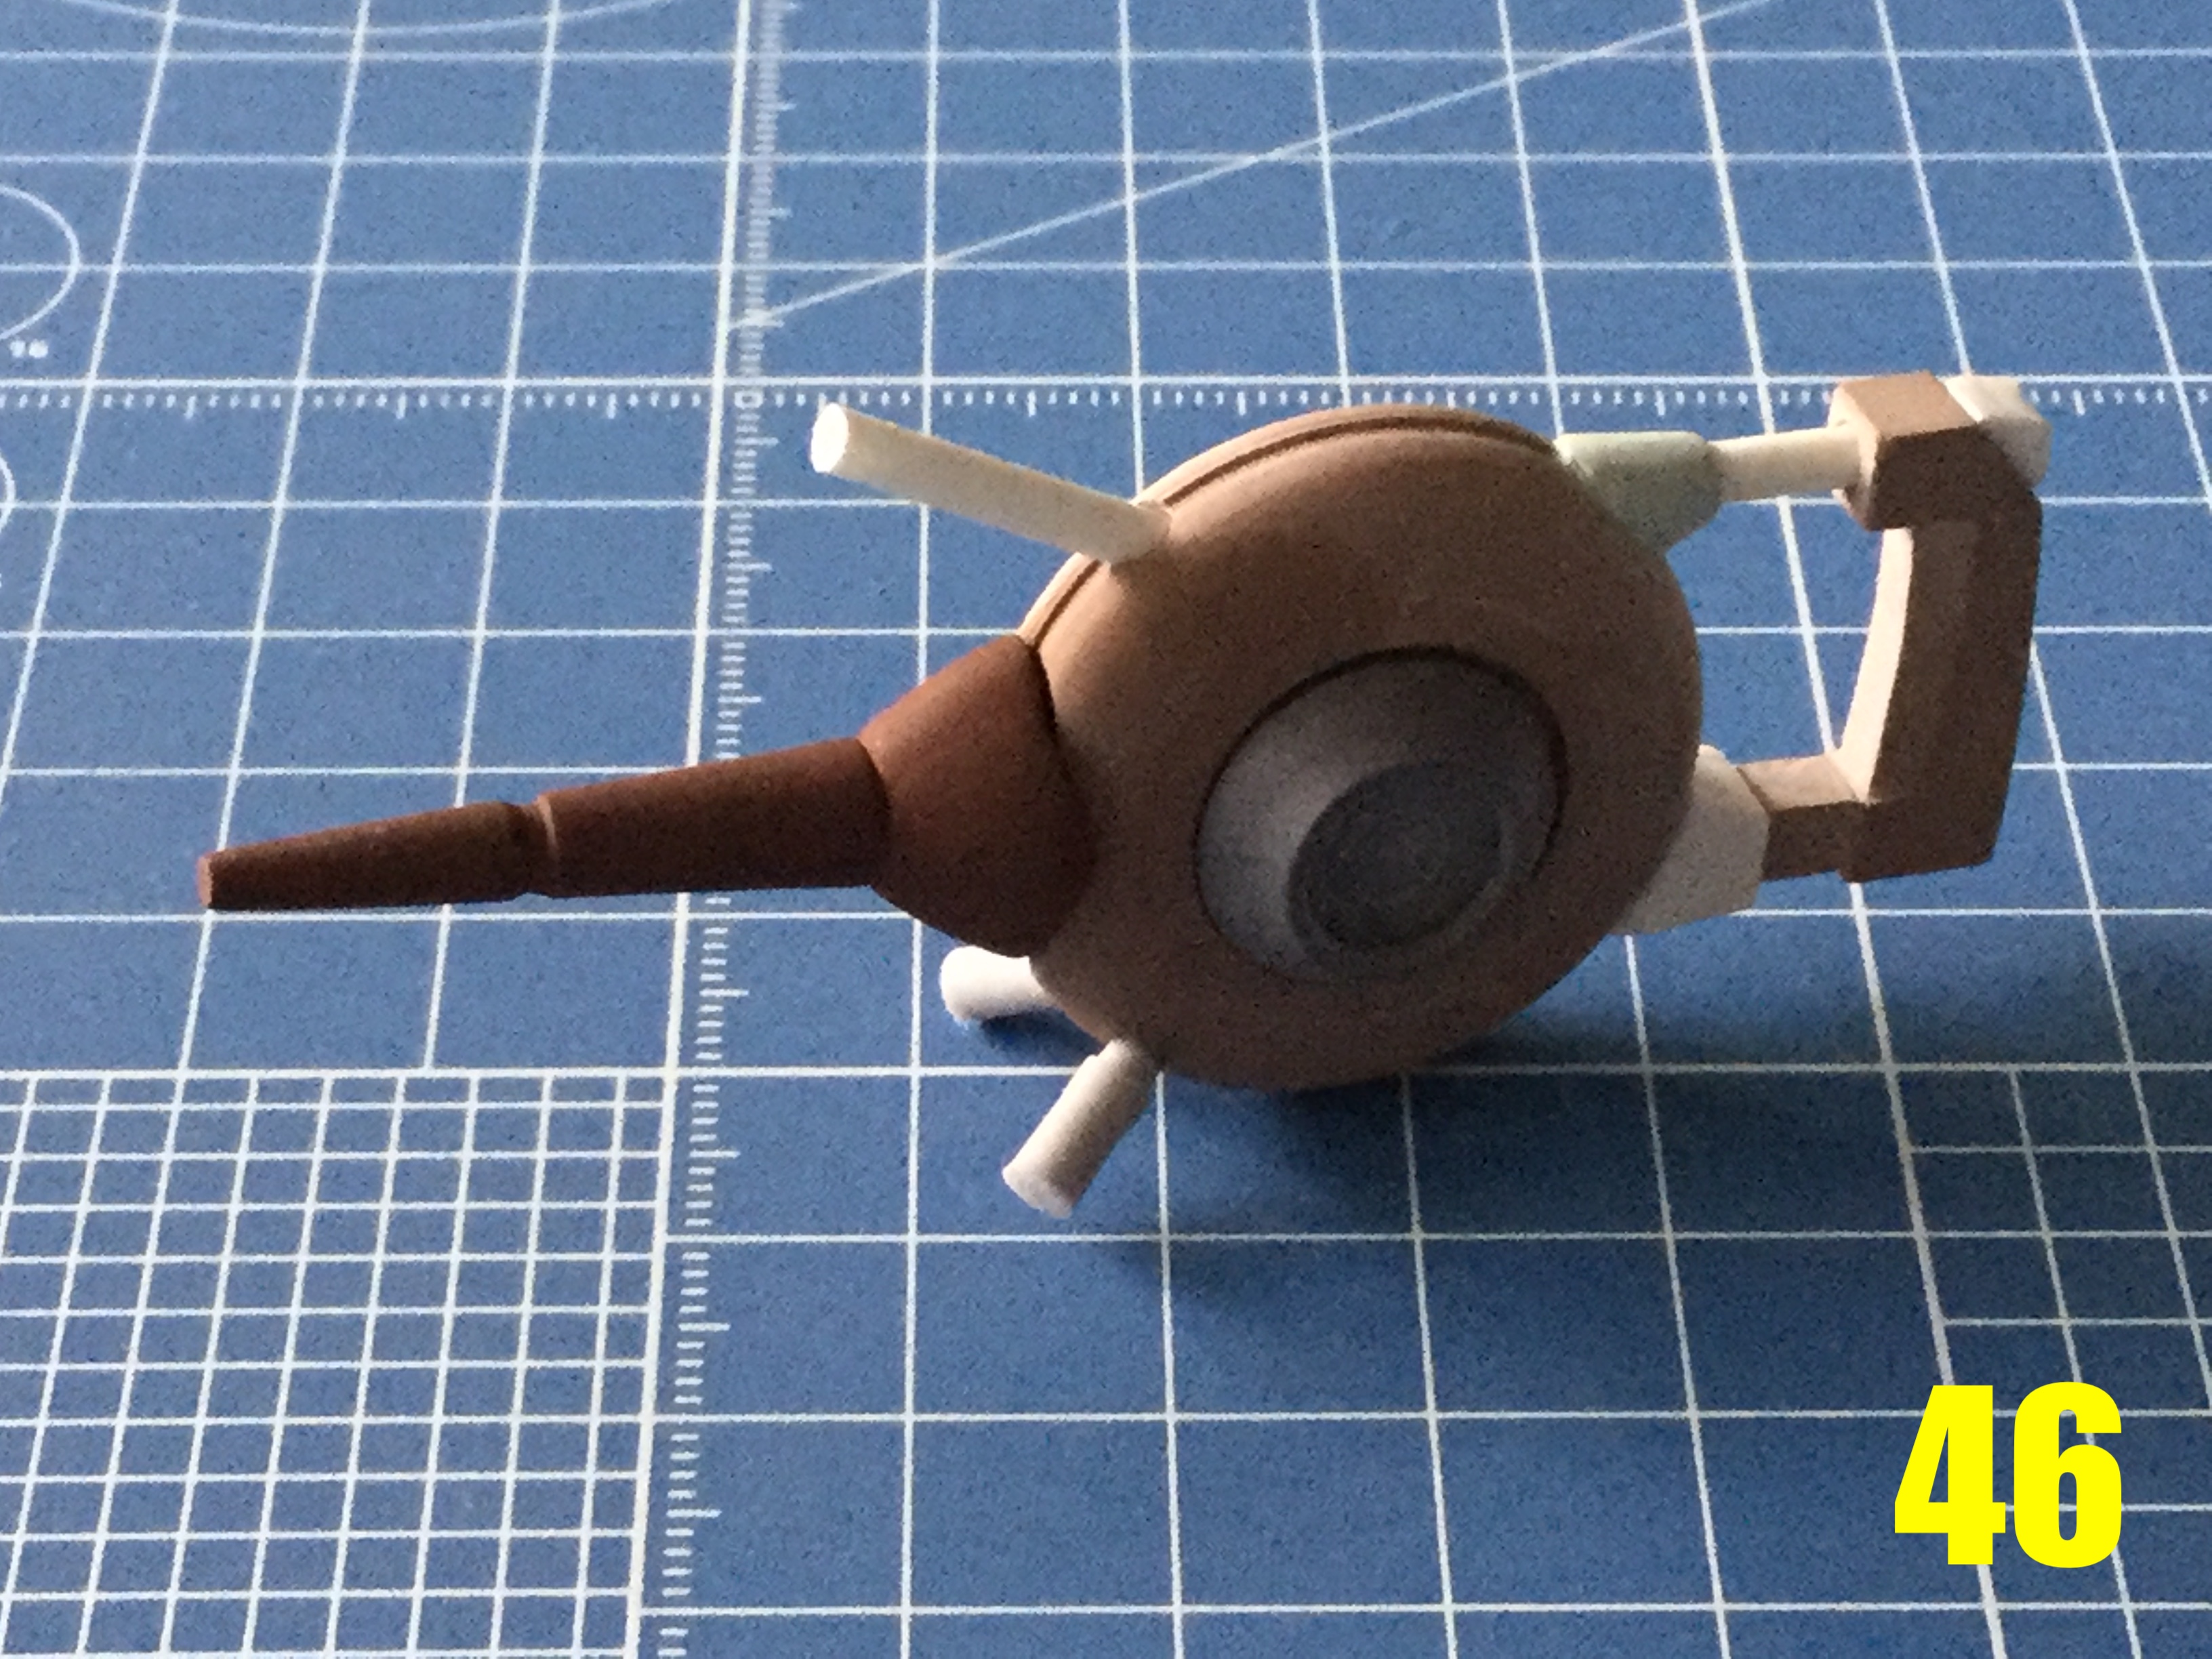
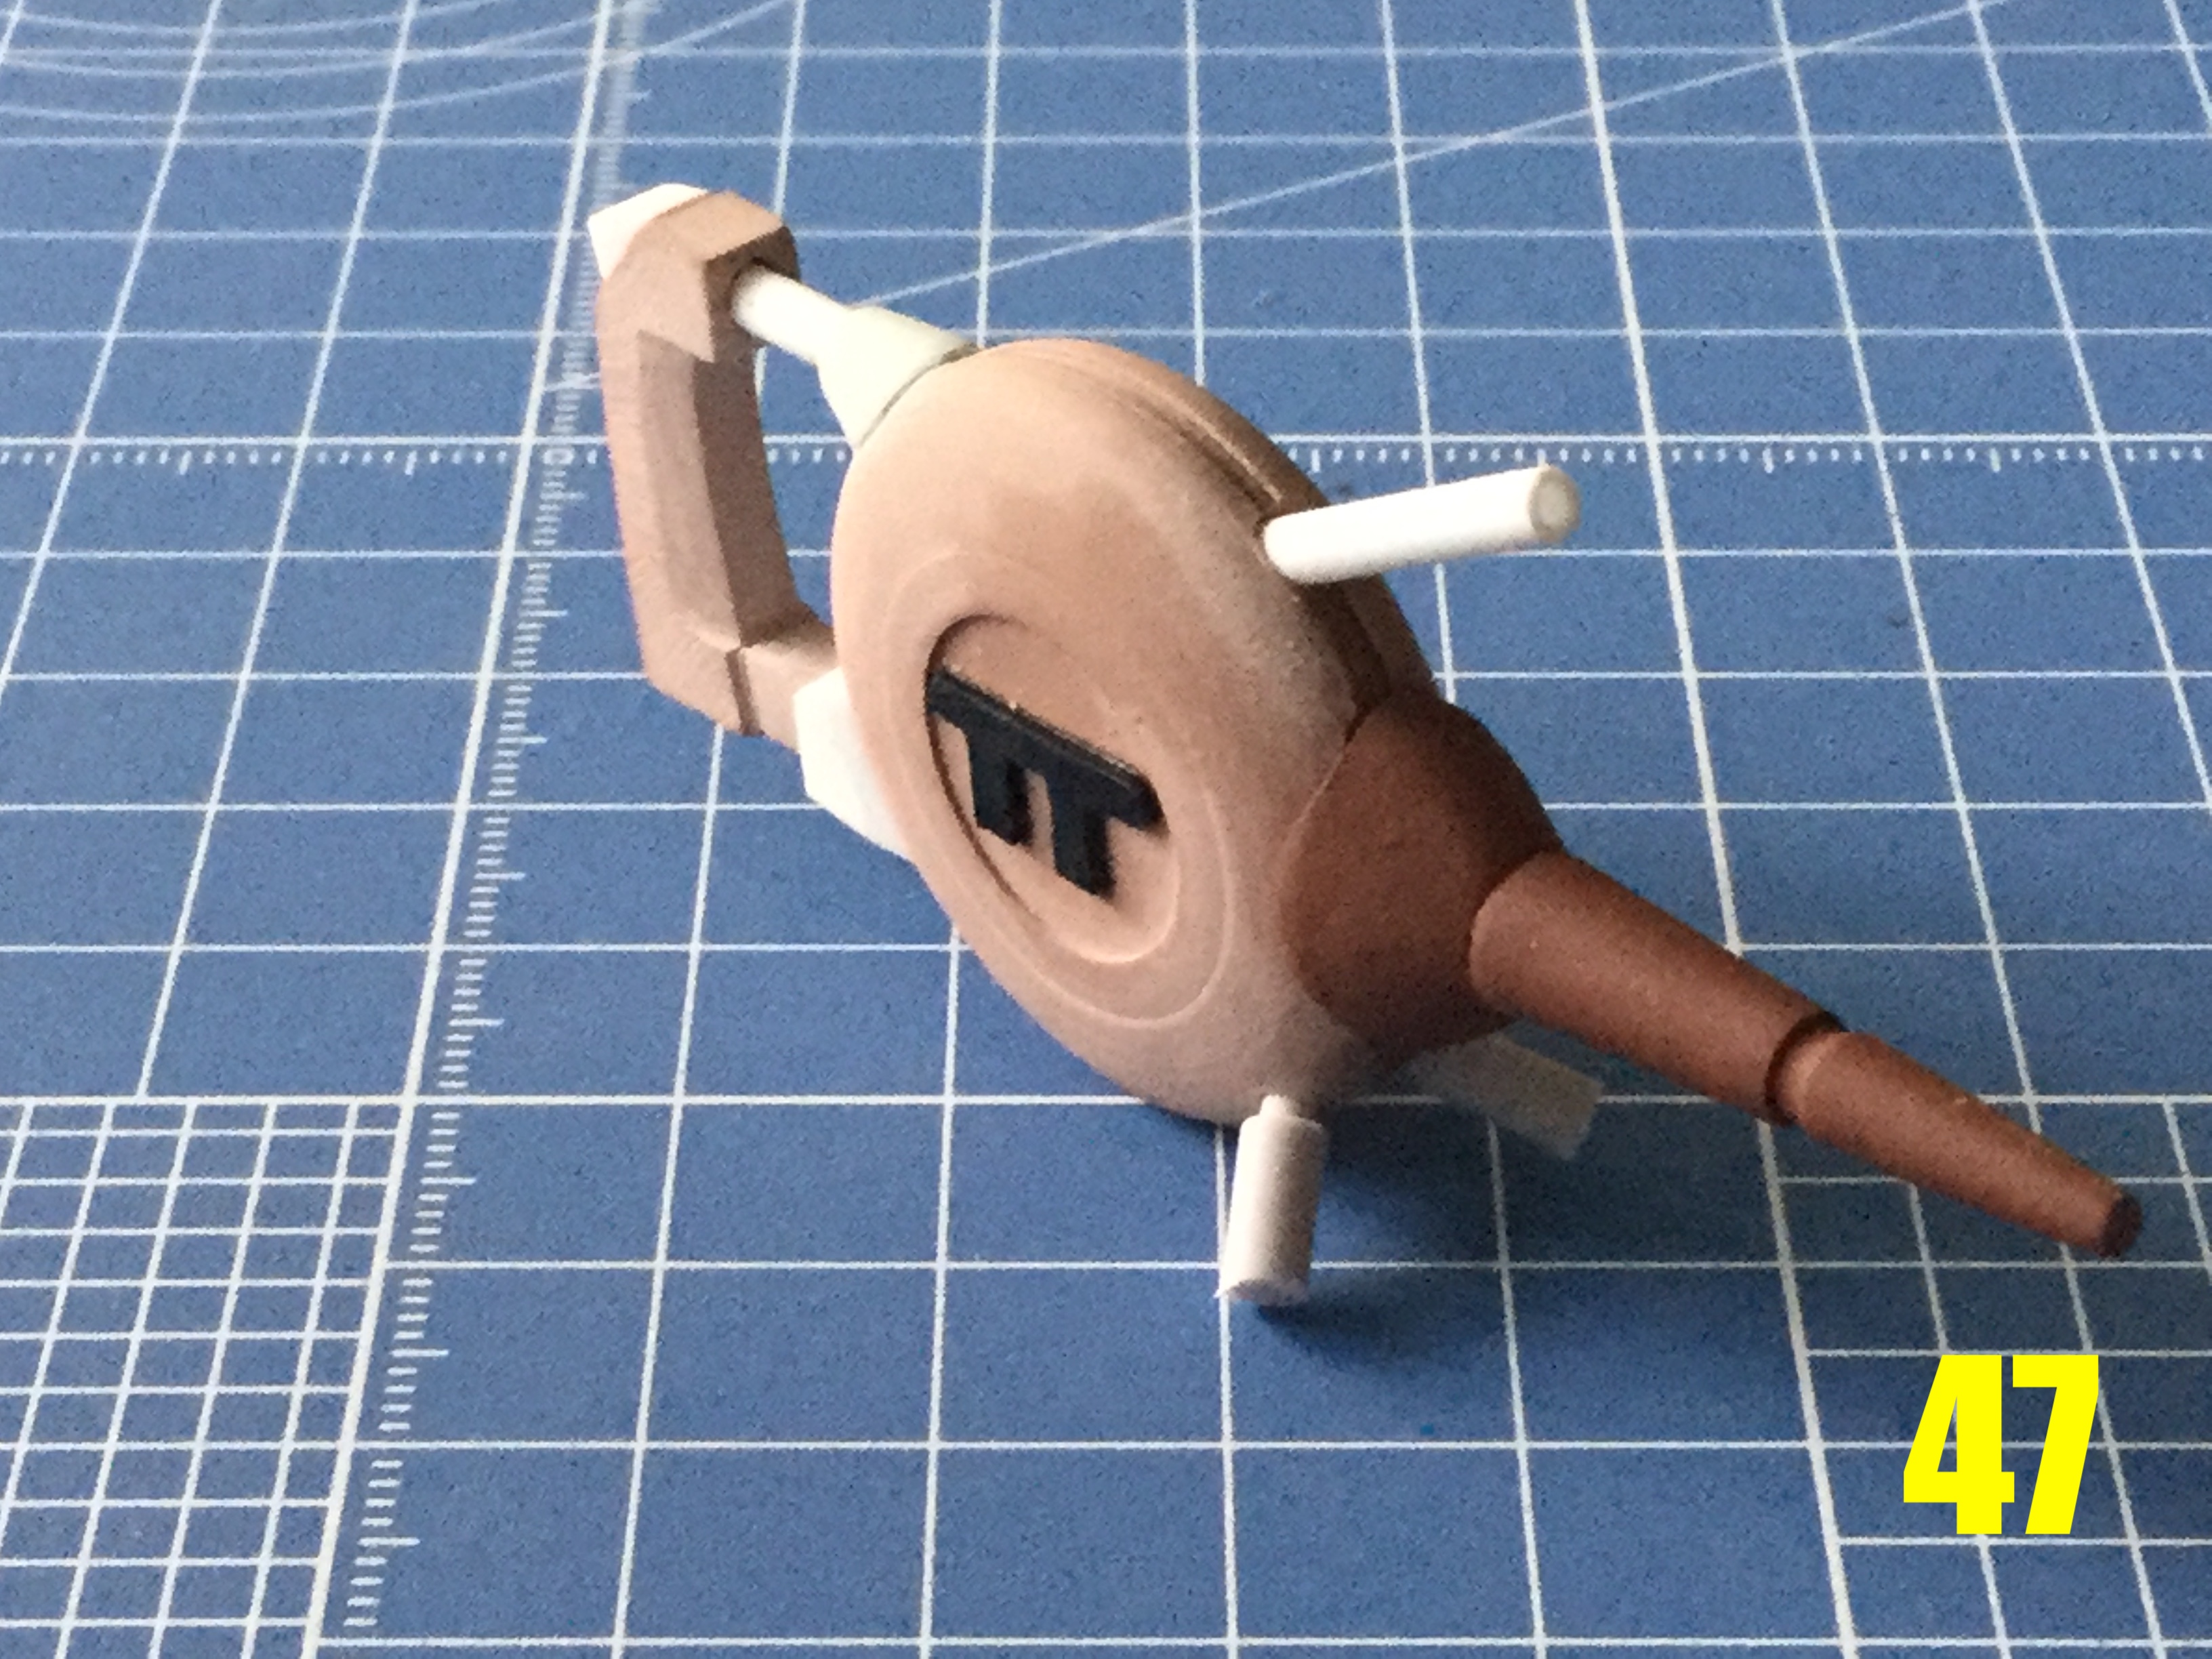
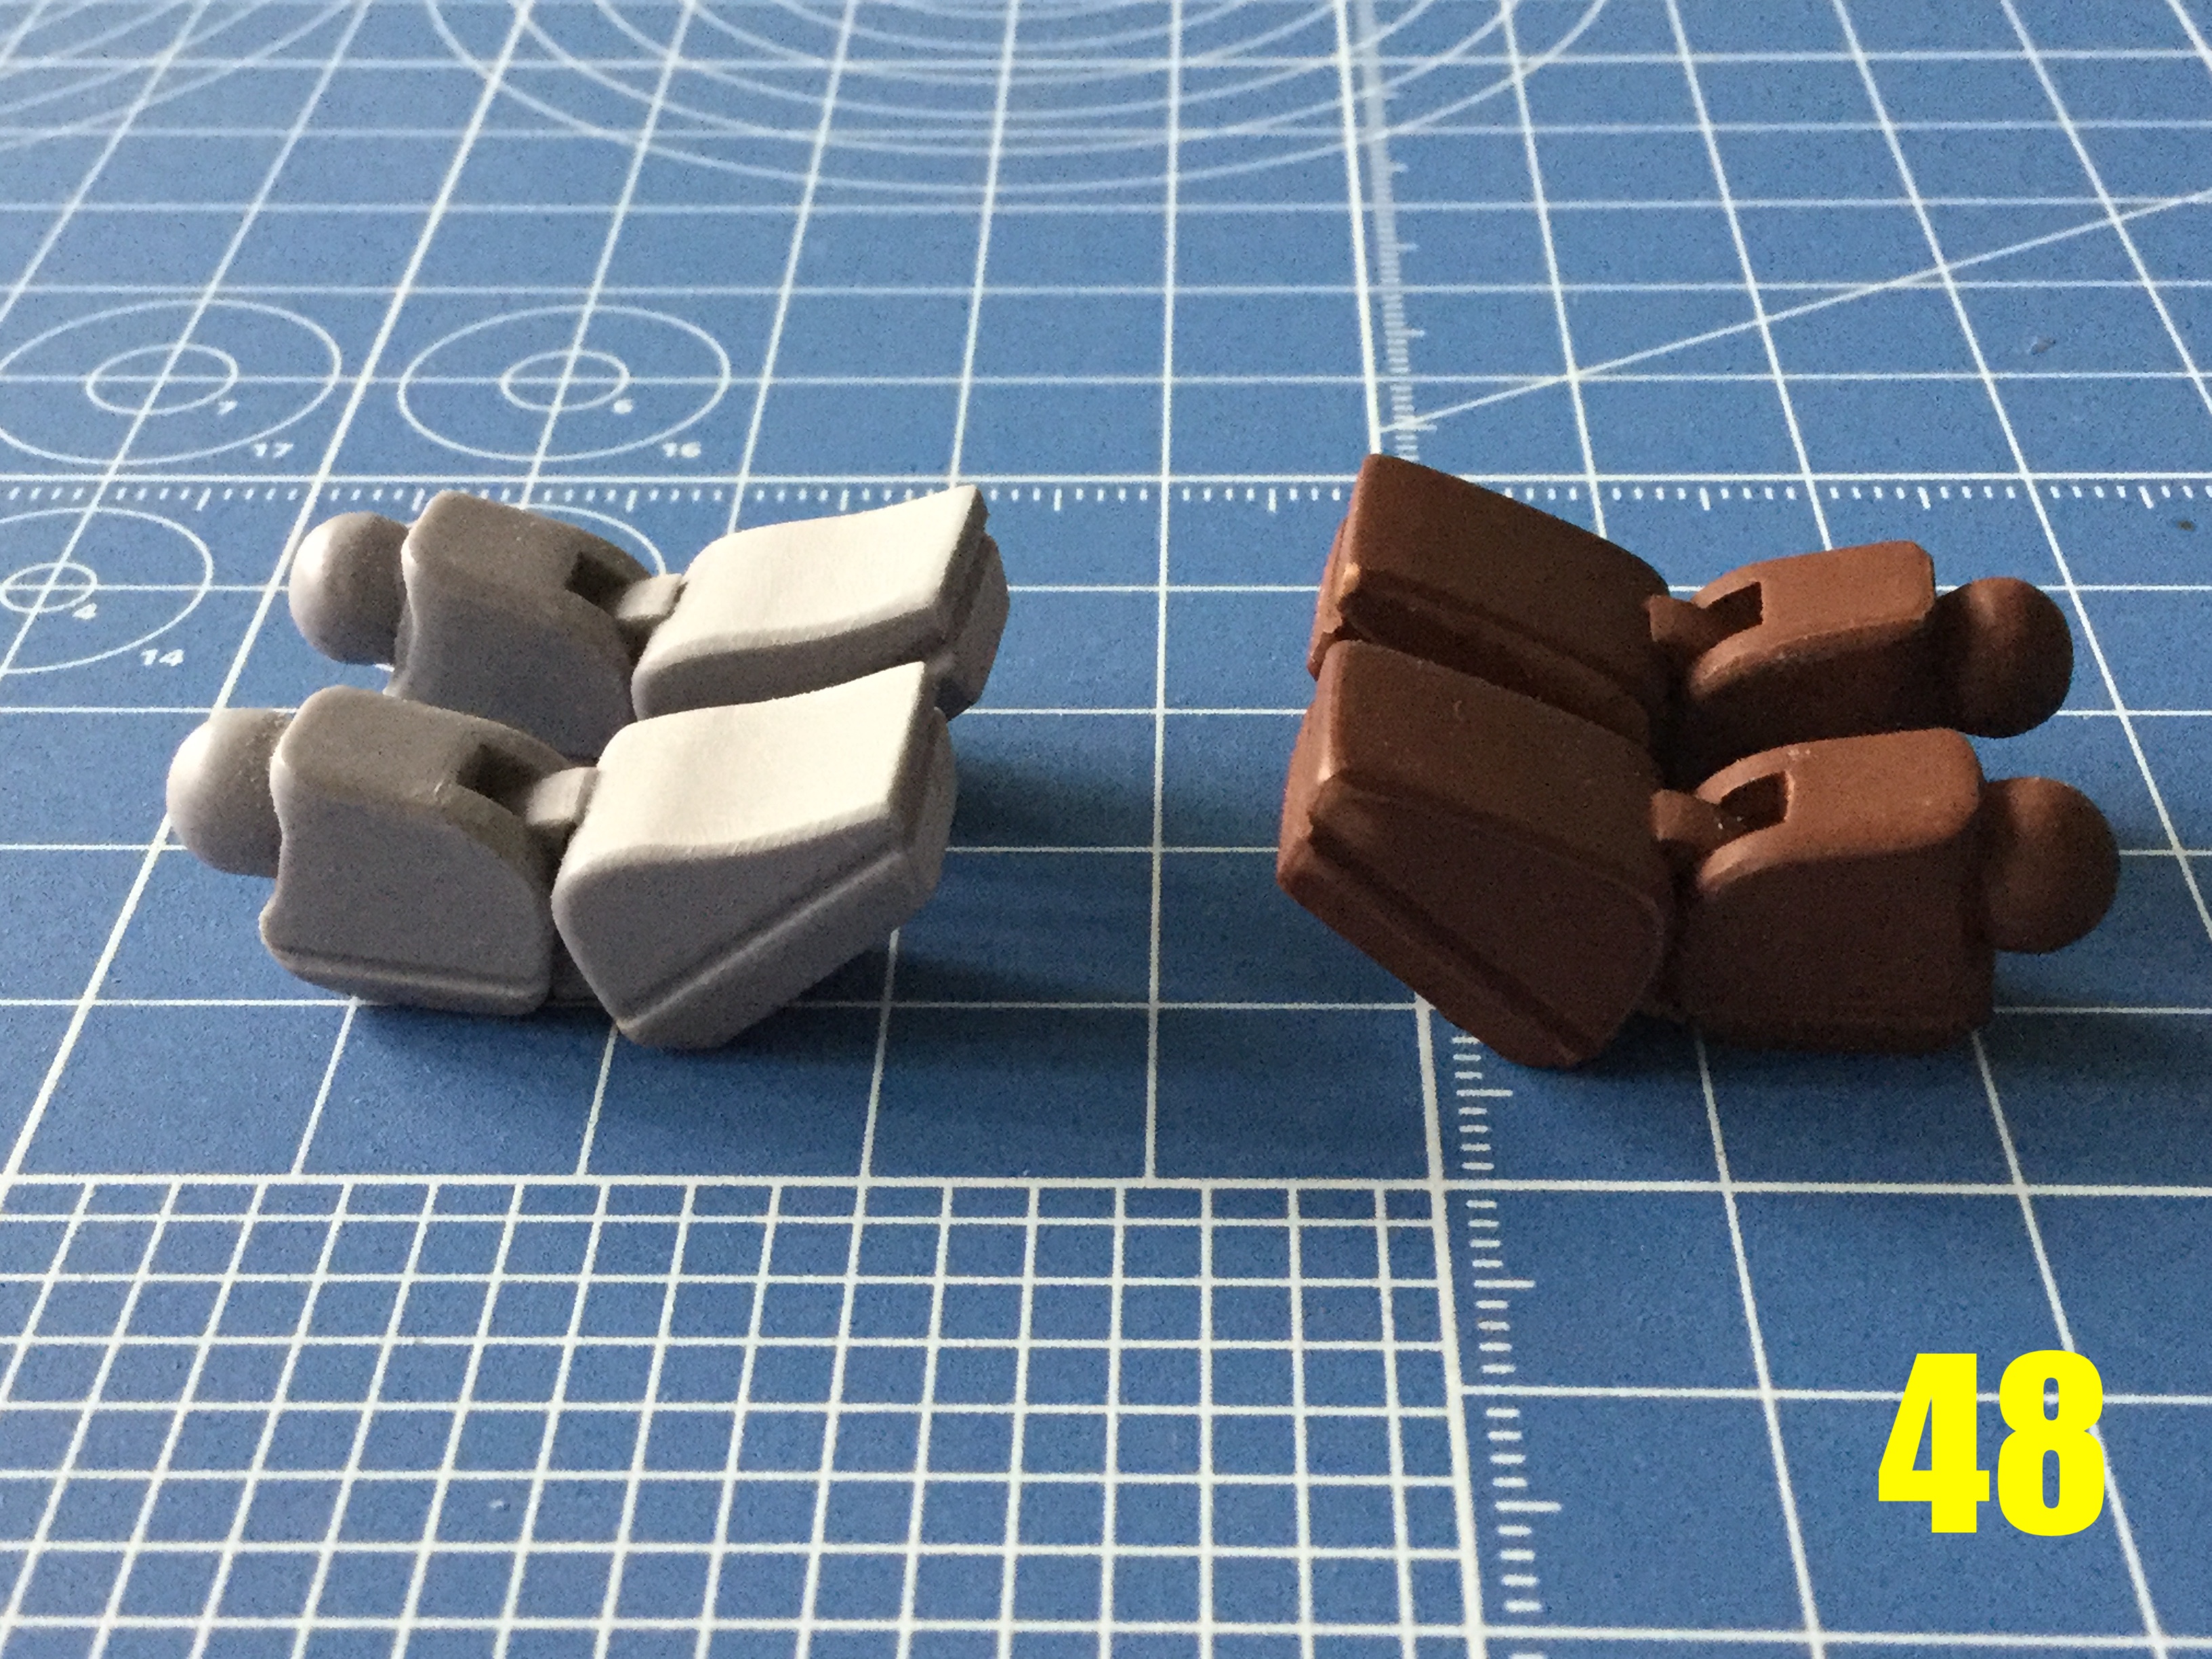
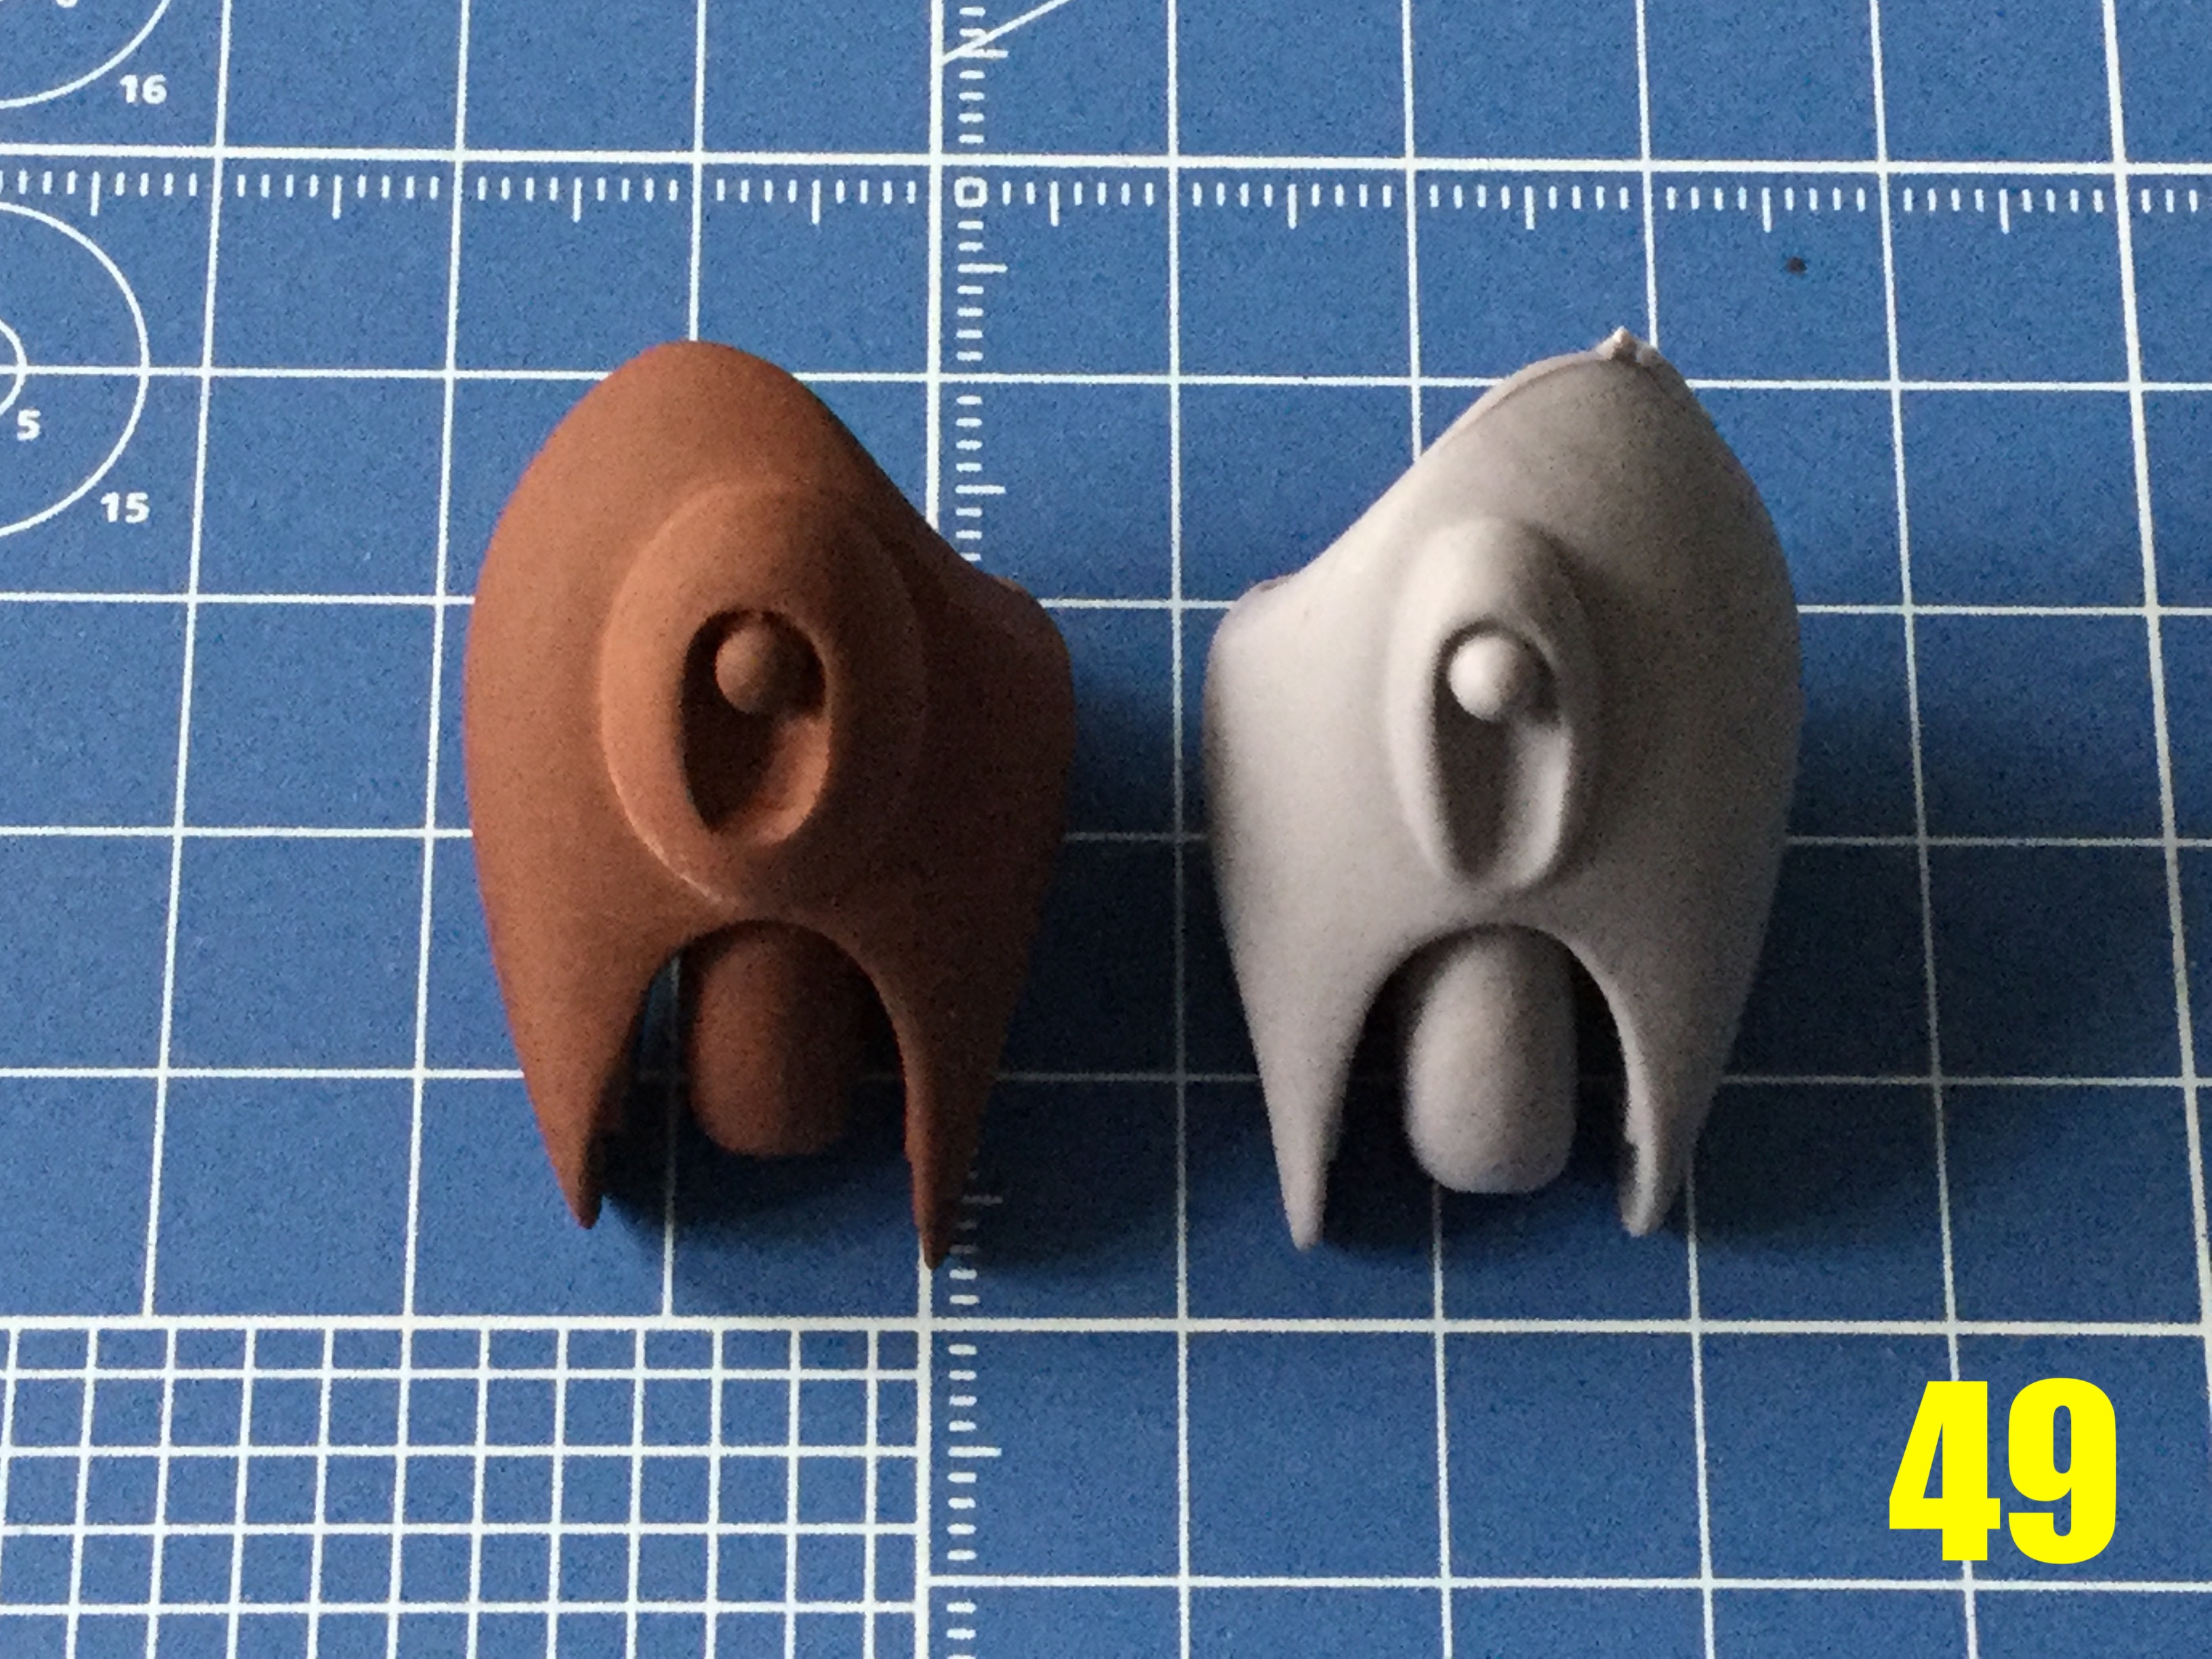
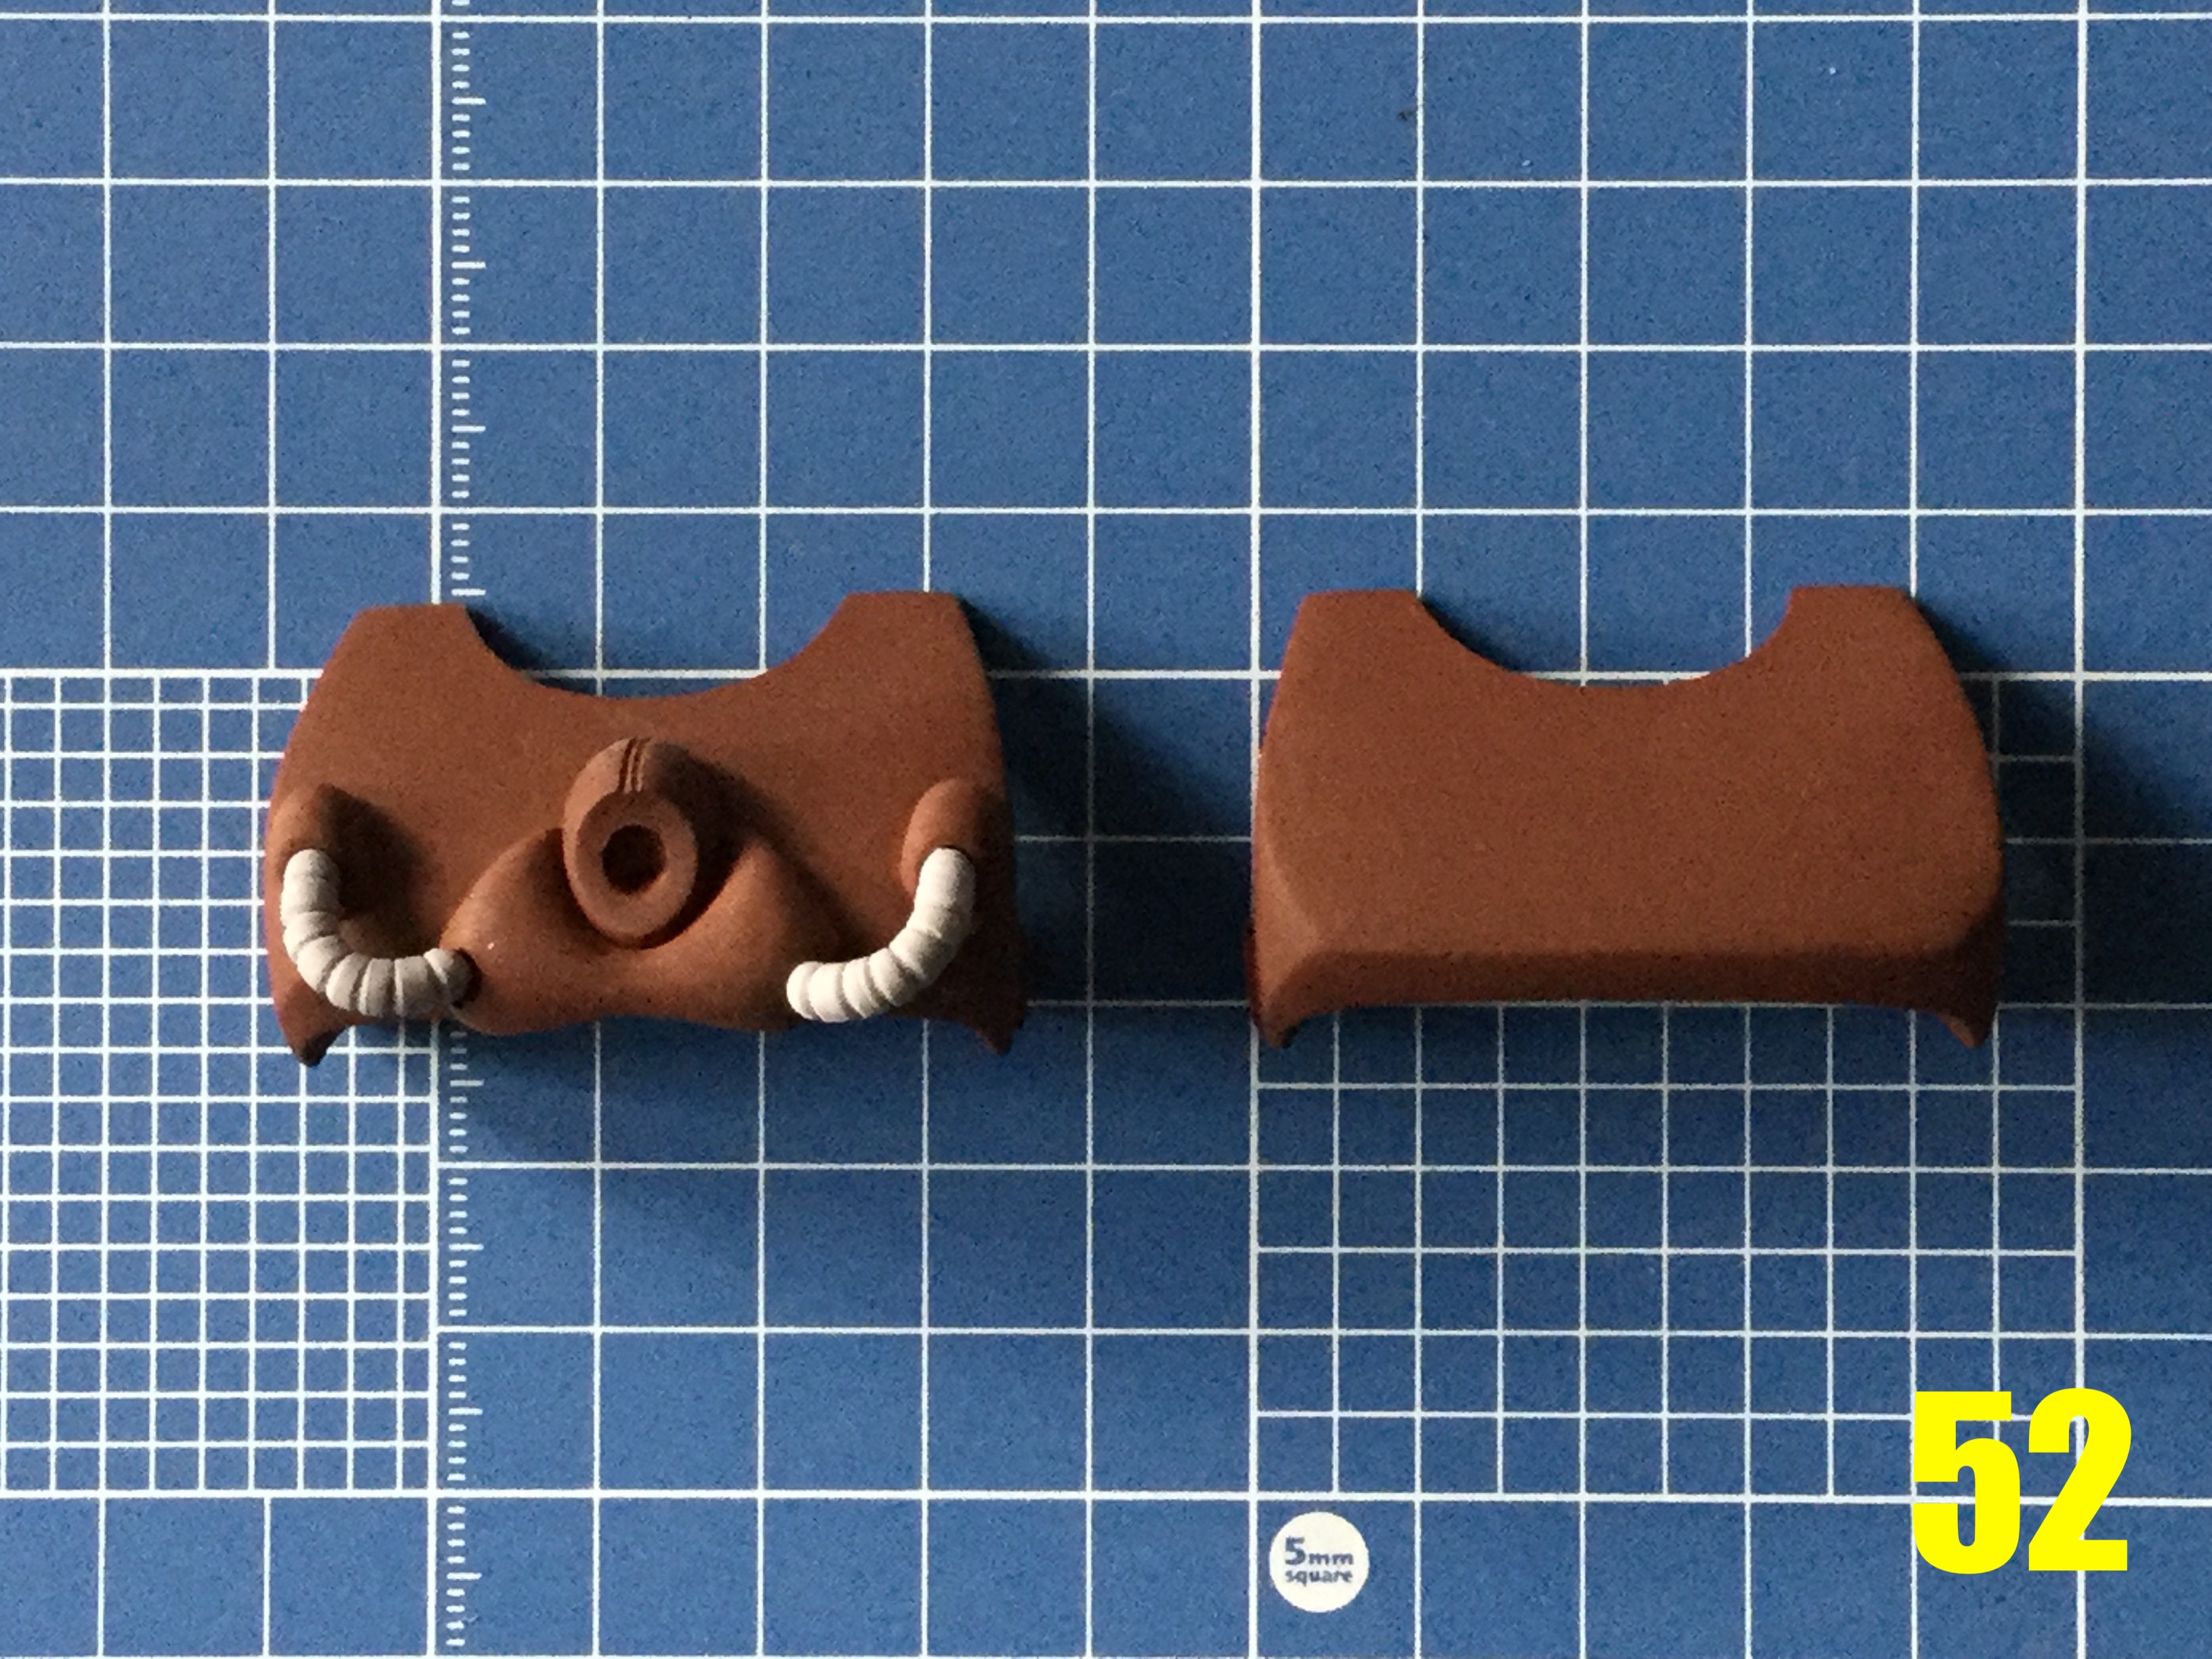
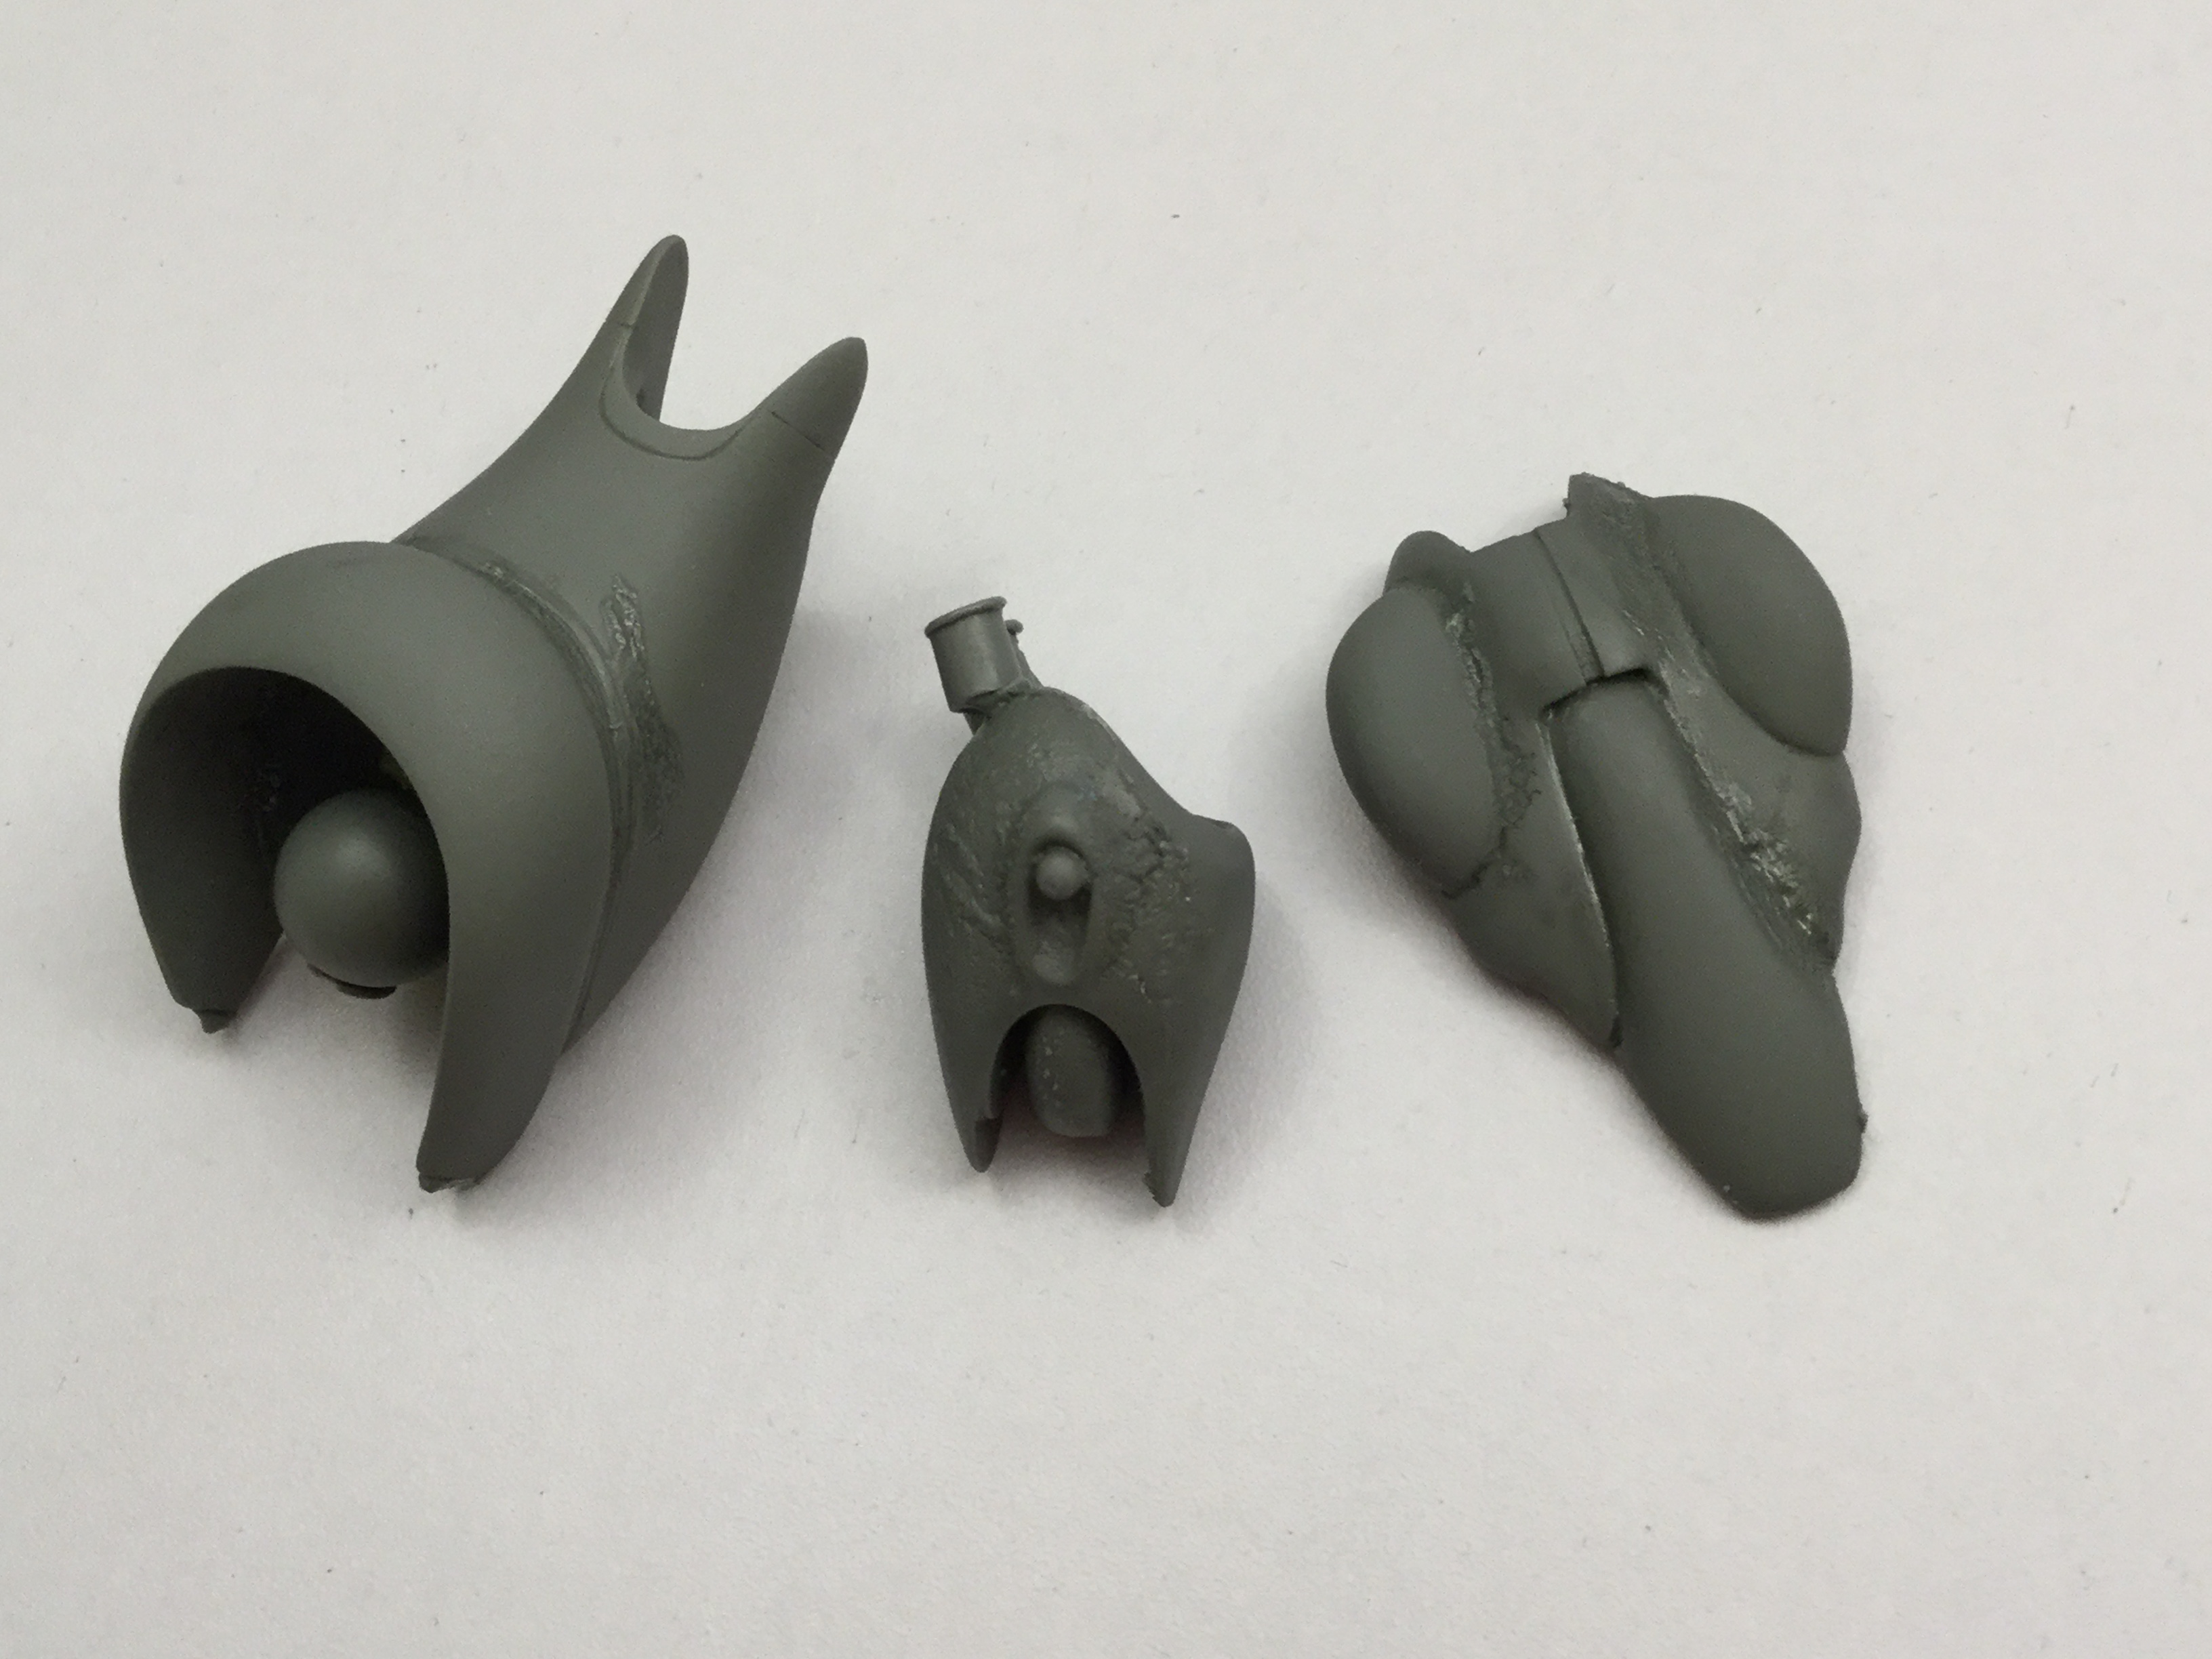
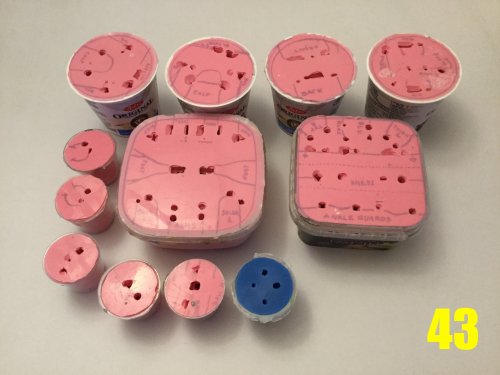
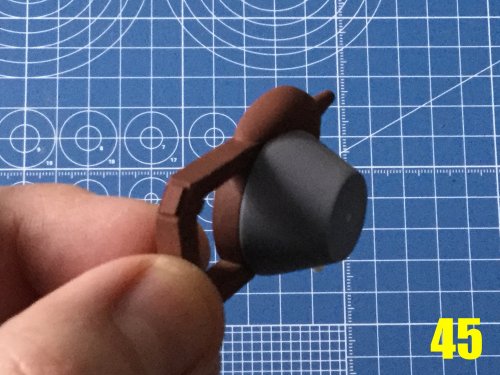
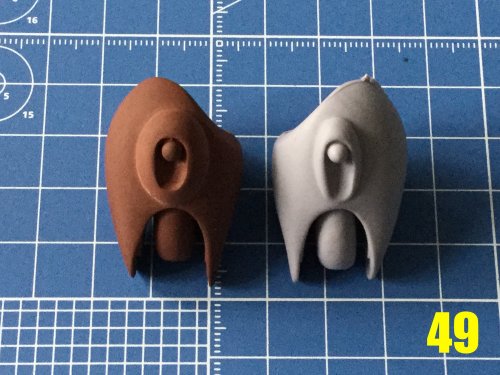
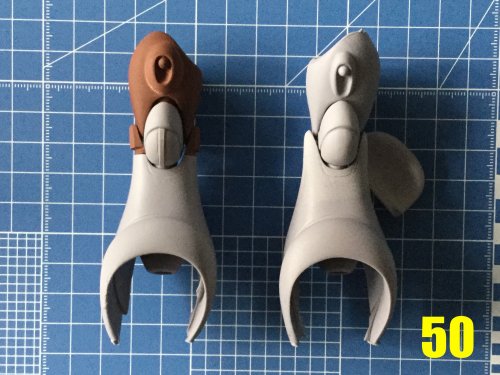
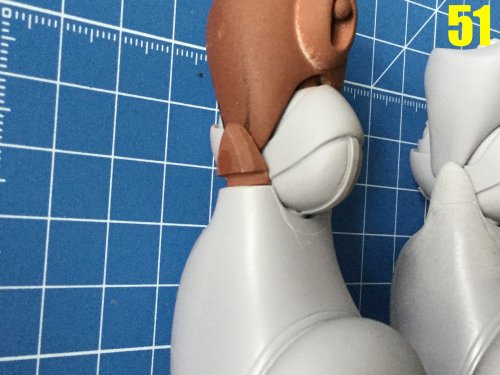
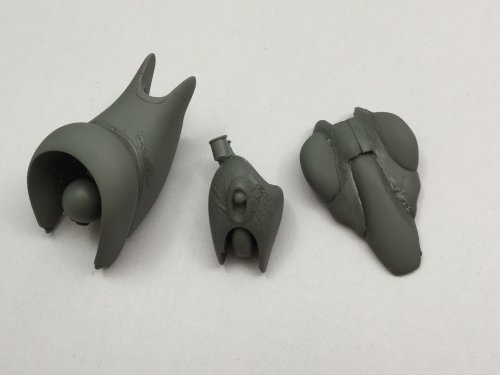
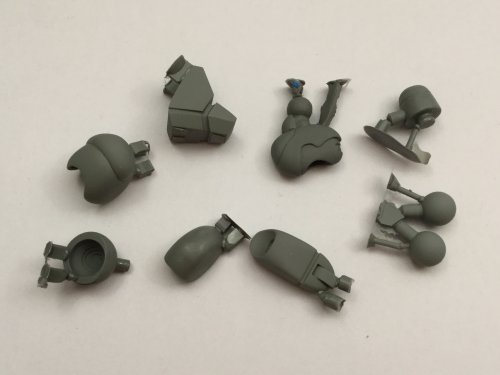
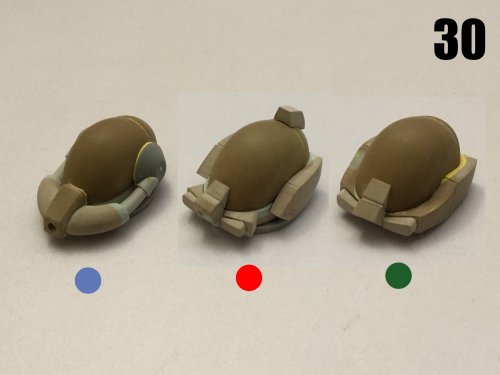
Captain’s Log: March 10th, 2021. After my ‘eventful’ mold-making experience from last week, I’m happy to say that things are now back to normal. Further, all the masters for the BIO-LLOYD figure are now complete, and once I get these next few molds out of the way, I’ll be able to dedicate myself to the completion of the hover-sled. To say that this project is an exercise in tediousness and patience is to state the obvious. Pic 41 shows my molding station, and all the fingers, tiny bloobs, pitot thingies, and other bits that need to be molded. The extra effort comes from not only the addition of all those tiny bits, but then those bits have to be molded, cast, and then modified to suit LLOYD’s different variants, as we will see soon enough. Pic 42: good ol’ trustworthy pink mold silicone is back! Pic 43: believe it or not, this is only about 3/4 of all the molds needed—JUST FOR THE MECHA! Blasters, hands, visor domes and sled parts not included. Speaking of blasters, pics 44 and 45 show the drum weapon masters, while 46 and 47 show the weapon used by Seifreet’s unit (hereafter refered to as SATAN CLAWS.) Now back to the BIO-LLOYD variations, you can see the different toes required in pic 48. Based on the soure material, the toes for the blue unit have a different slope than for the other two versions, so I had to make those. Could I have chalked-up the differences to variations in the penmanship of the illustrator? Probably, but it they looked sufficiently different to me, and I wasn’t about to cut corners. Same goes for the thighs in pic 49. On the left is the SATAN CLAWS version, which has a different blob on it than the other two variants. In pic 50, you can see that the thigh, knee, and even the upper part of the shin armor is different on the SATAN CLAWS variant. For the latter modification, you can simply trim the ‘ears’ on the shin and glue the variant parts as shown in pic 51. The chest module is no exception, as you can see in pic 52. Once again, SATAN CLAWS variant is on the left. The other two variants are simple enough that you need only glue the appropriate blobs in place. You have NO IDEA how utterly tedious and despair-inducing it was to machine those little hoses! For next week, it’s my intention to have one fully cast kit mocked-up so that you can see LLOYD in all his splendor. Wish me luck!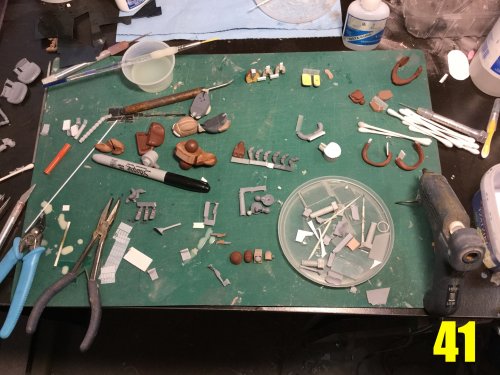


-
No Love for Southern Cross?
captain america replied to blacklotus's topic in Anime or Science Fiction
It's really not such a bad series. I re-watched it to get as many screen references for the Zor mecha as possible, and despite its many truck-sized plot holes, they aren't much worse than what you'd find in other TV serials of the time, including MOSPEADA. As a toy/mecha-crazed kid I didn't care for it so much, but as an adult I find the lack of heavy mecha emphasis more appealing. It's no Dougram, but not nearly as dull as teenager-me remembered it. -
No Love for Southern Cross?
captain america replied to blacklotus's topic in Anime or Science Fiction
Depends on what sort of events may have transpired pre-Gloire. Humanity isn't renown for its long periods of warless tranquility. The newly-colonized planet you're on is a borderline hostile wasteland, your homeworld is faaaaar away and may take a long time to send help if something goes pear-shaped, or may not be able to send help at all, so it actually makes sense to have an important segment of the population be of fighting standard. The pseudo-alien Zor may not have been an anticipated threat, but that doesn't preclude the possibility of other renegade humans/pirates (from earth, Liberté, etc.) coming to the colony and causing trouble. -
No Love for Southern Cross?
captain america replied to blacklotus's topic in Anime or Science Fiction
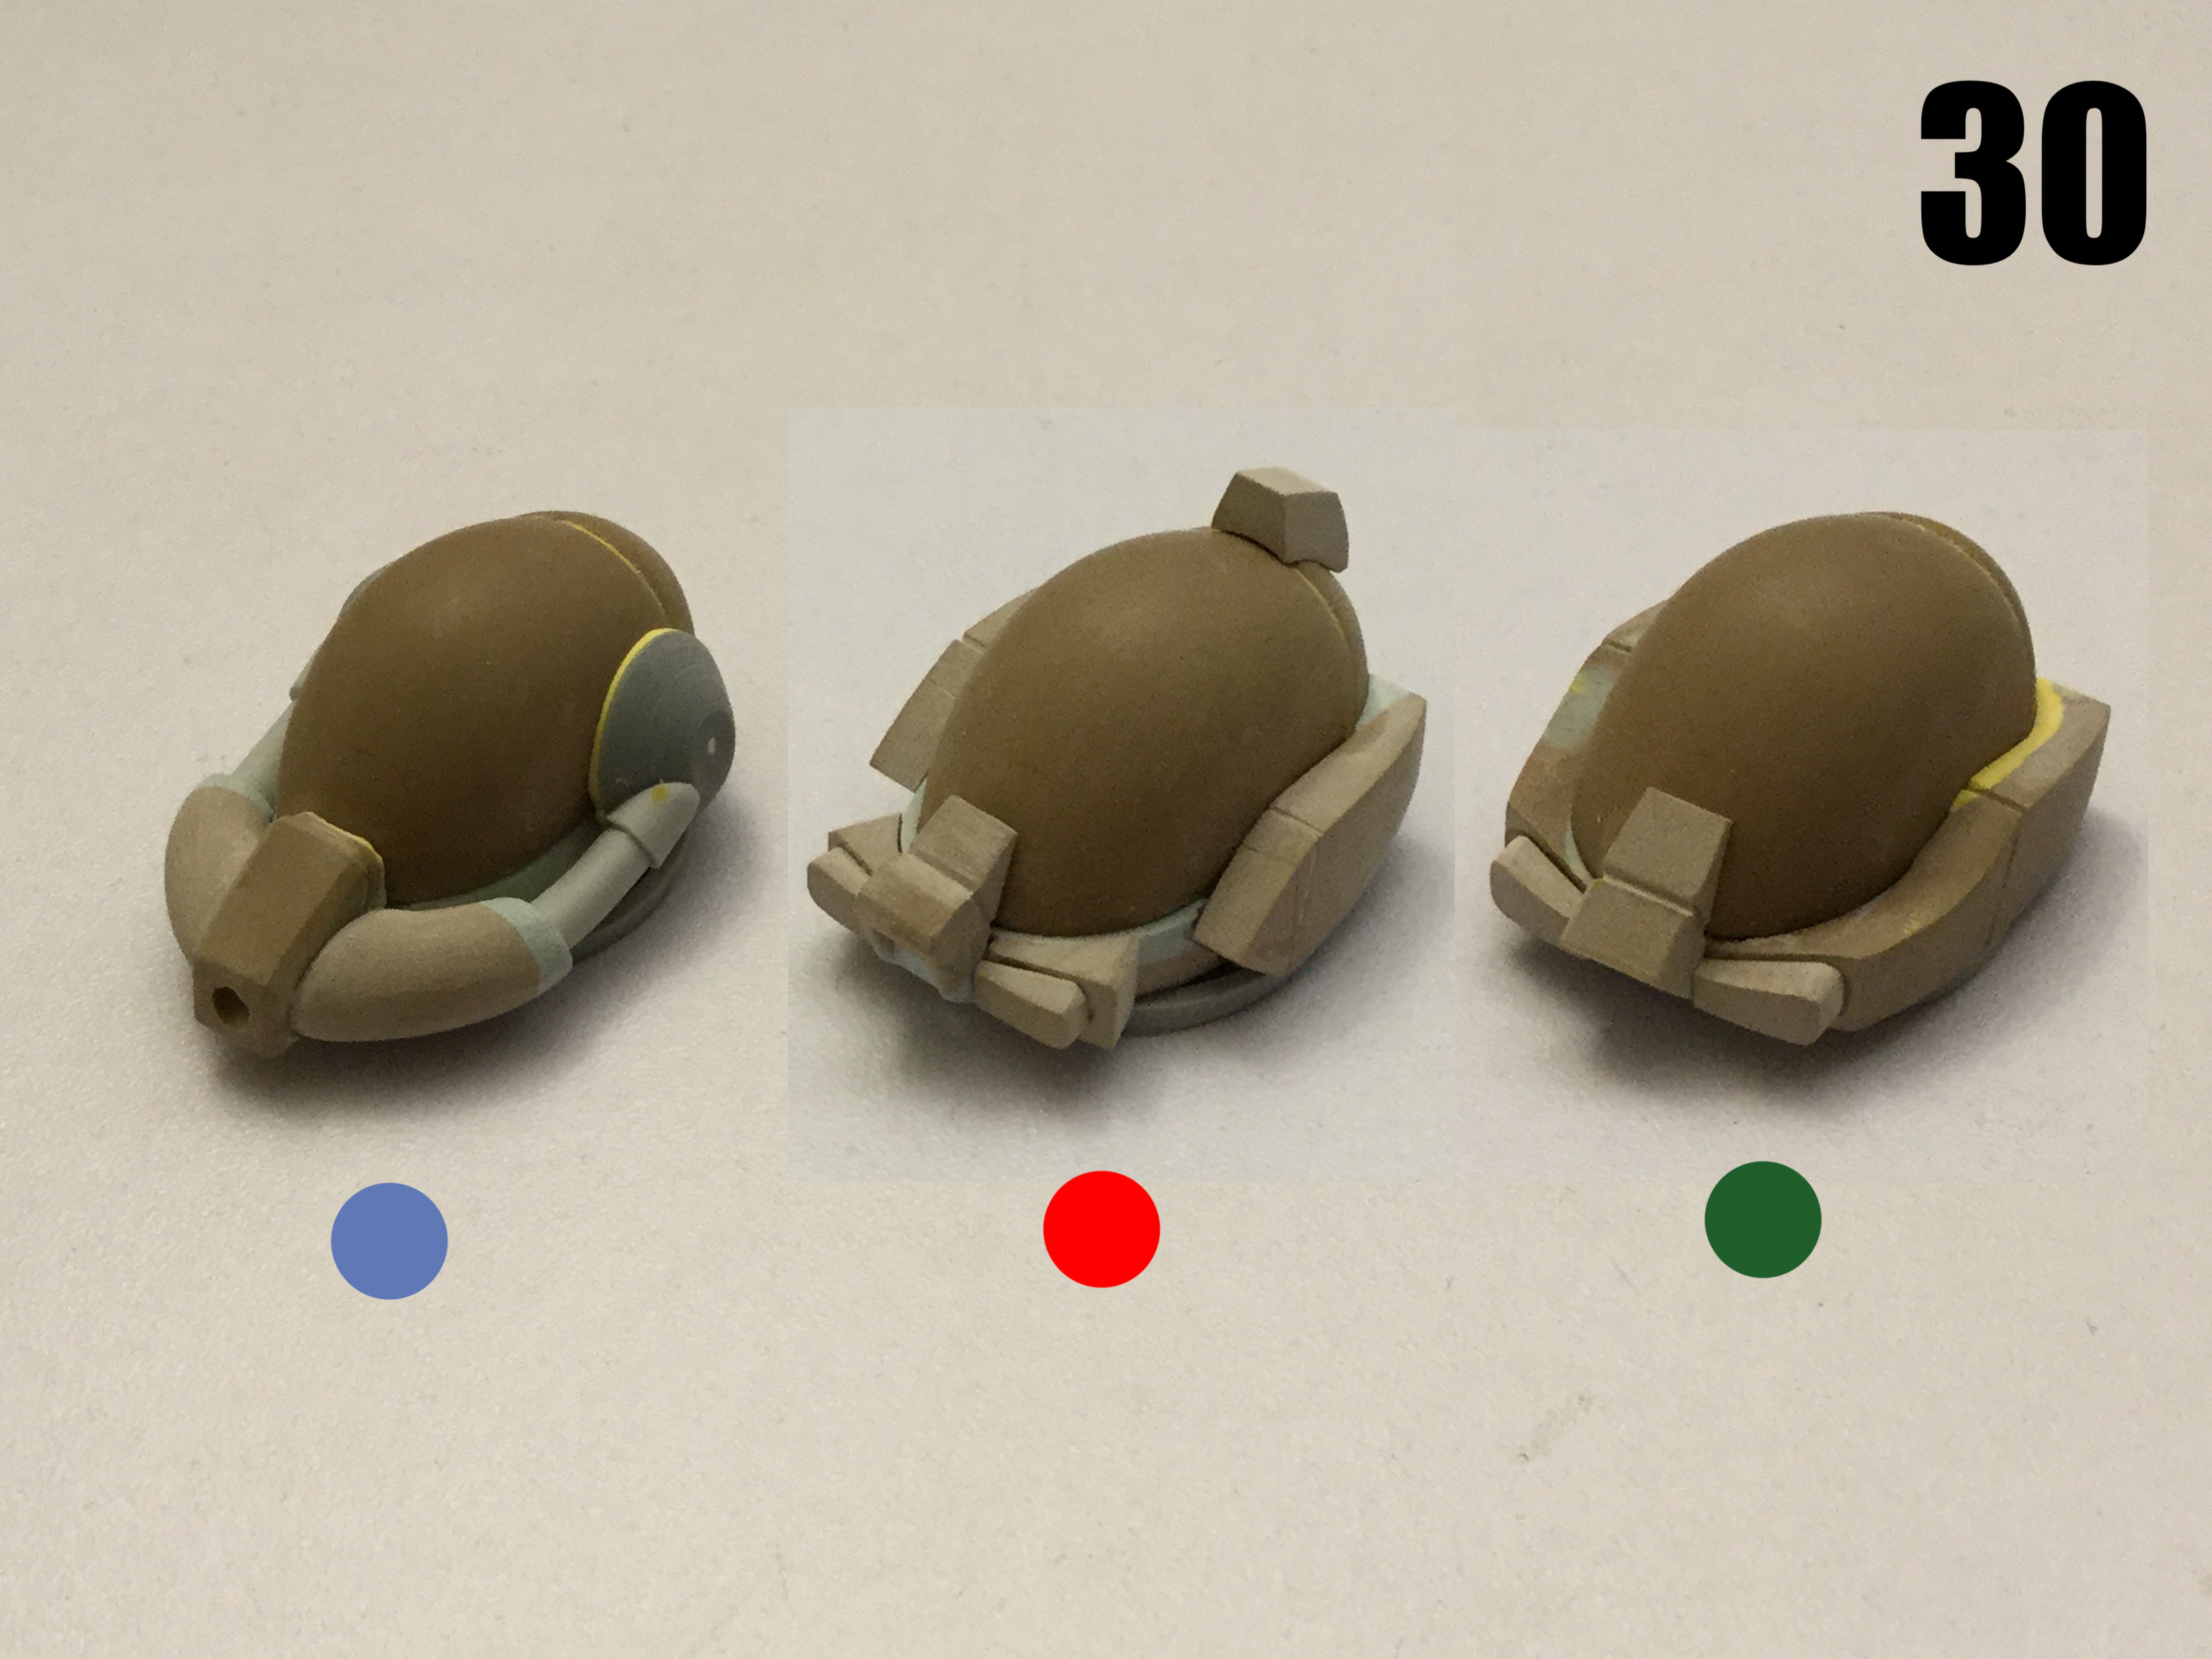
I never understood the "evolution" of the Zor Bioroids. The versions we see earlier in the series (red, blue, green) look more advanced than the later ones. I don't even remember this grape-flavored version from the anime. -
1/48 SOUTHERN CROSS BIOROID
captain america replied to captain america's topic in Anime or Science Fiction
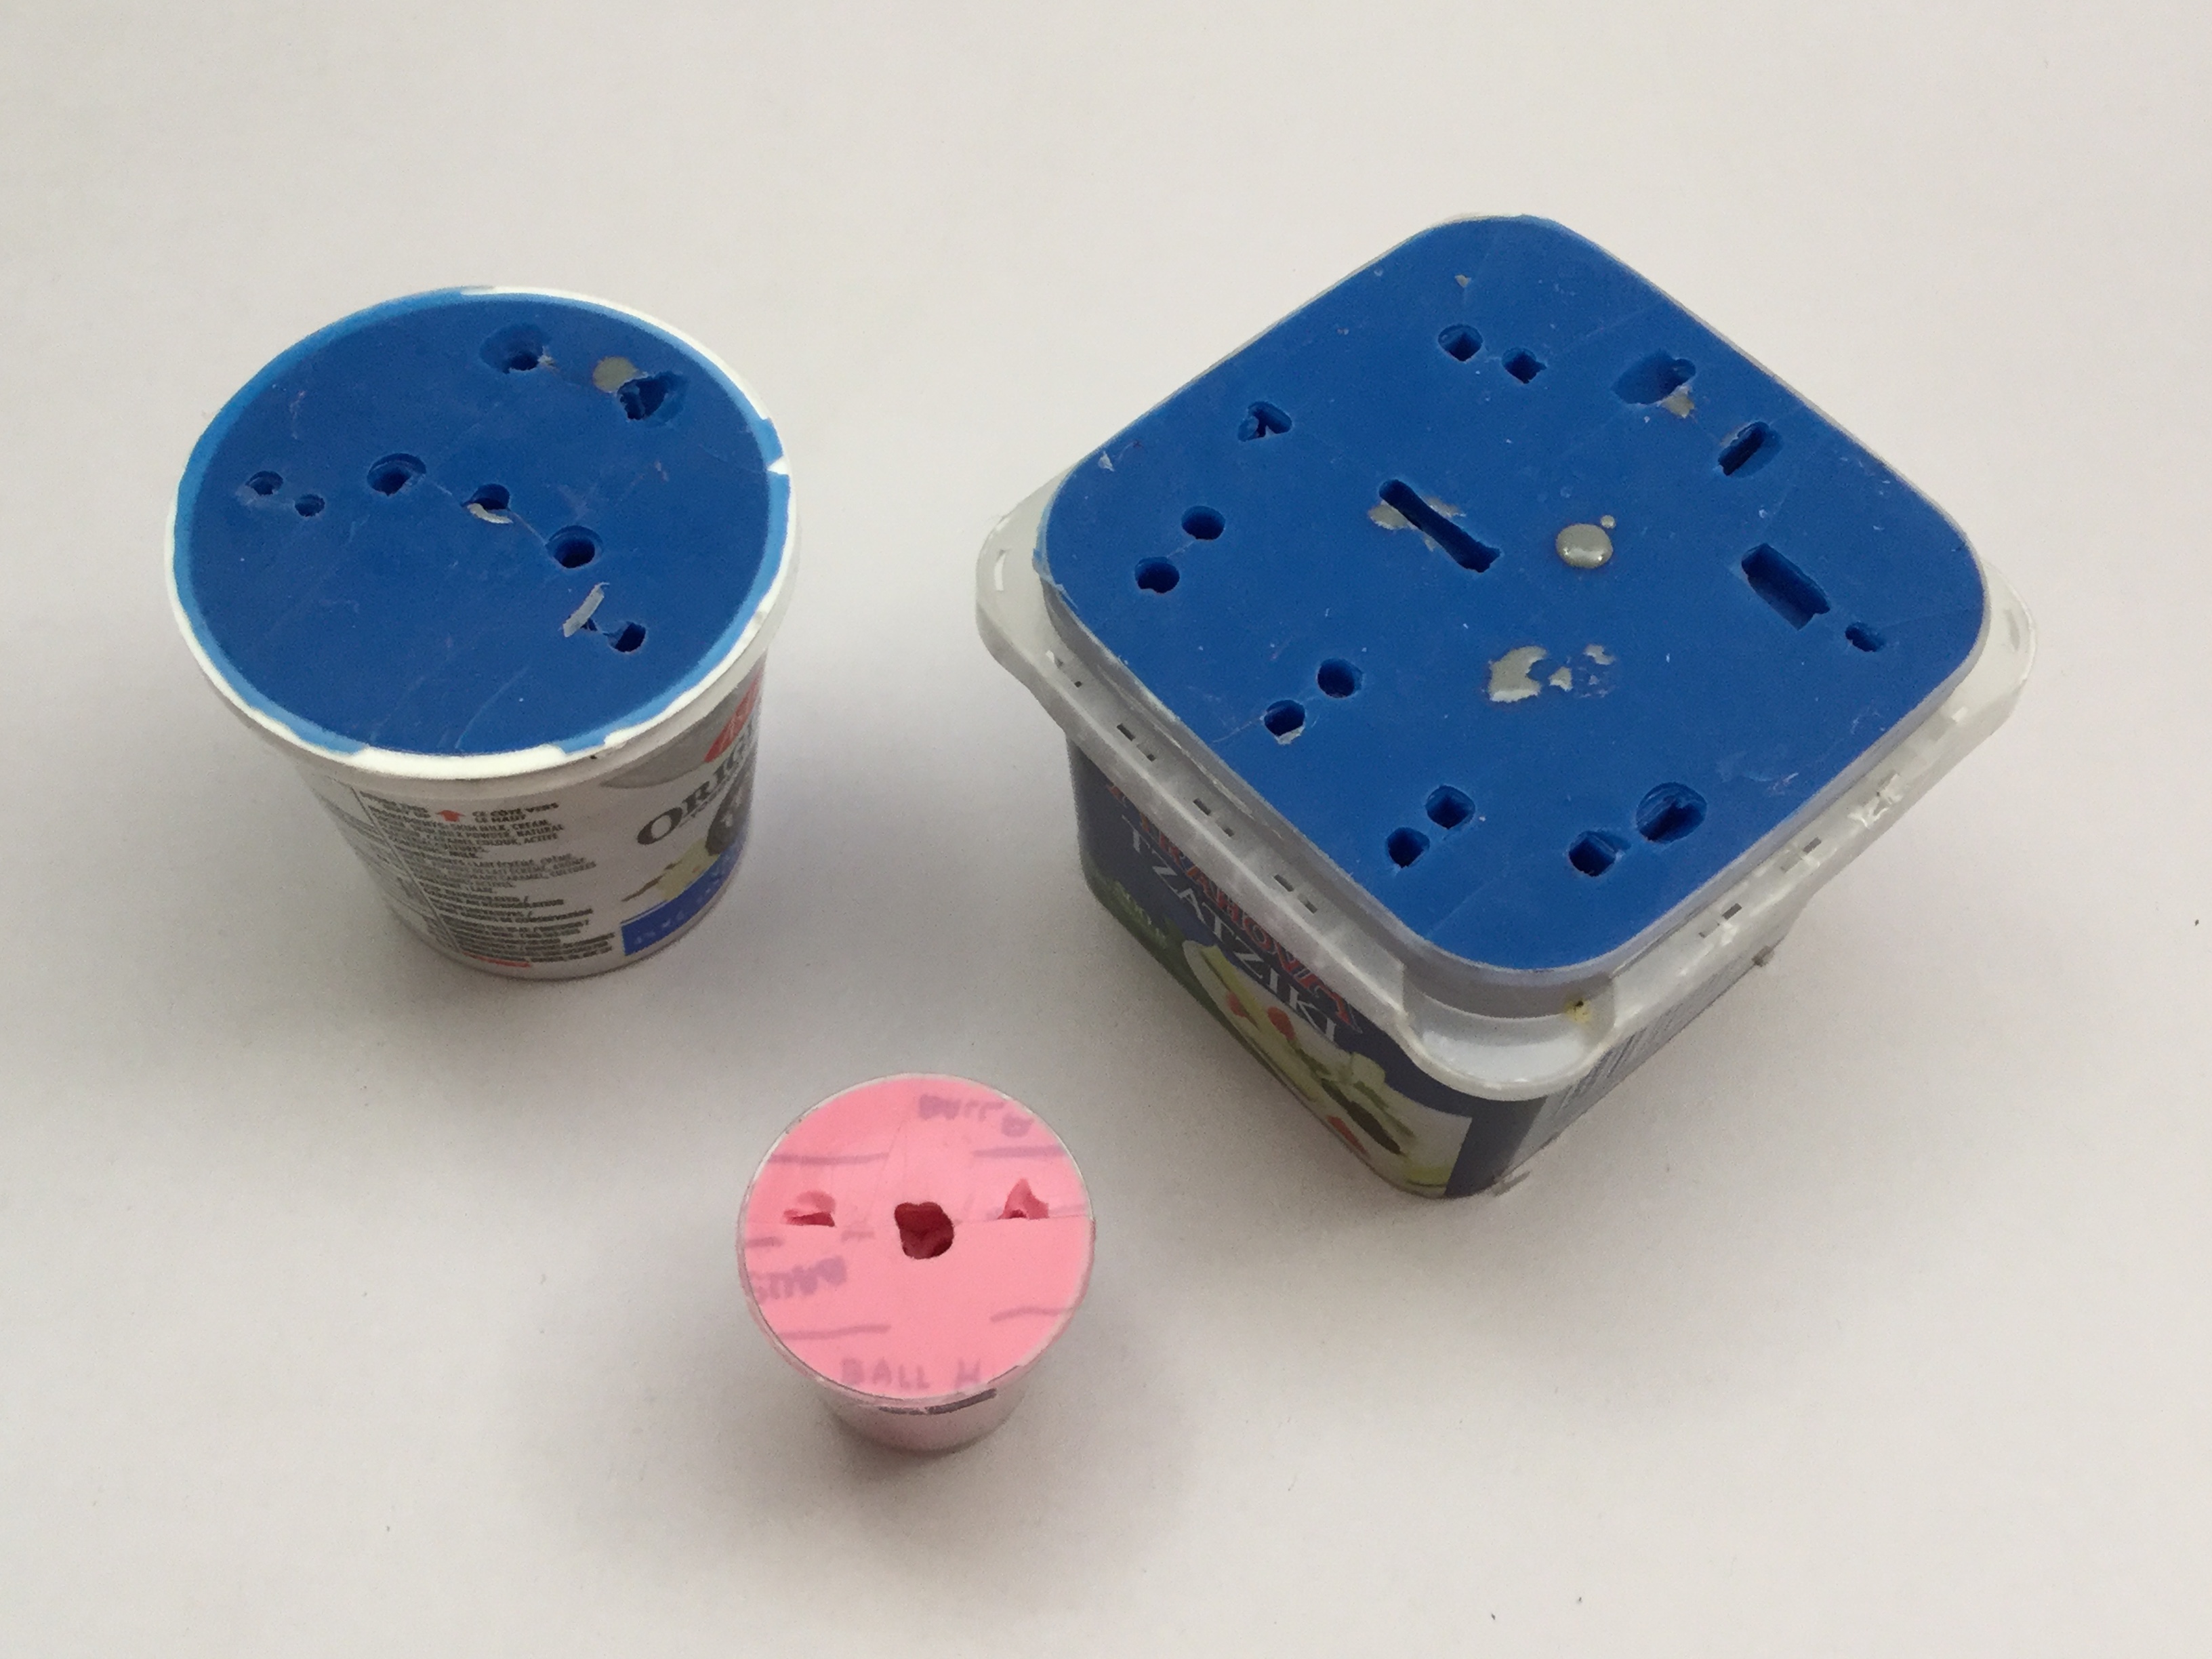
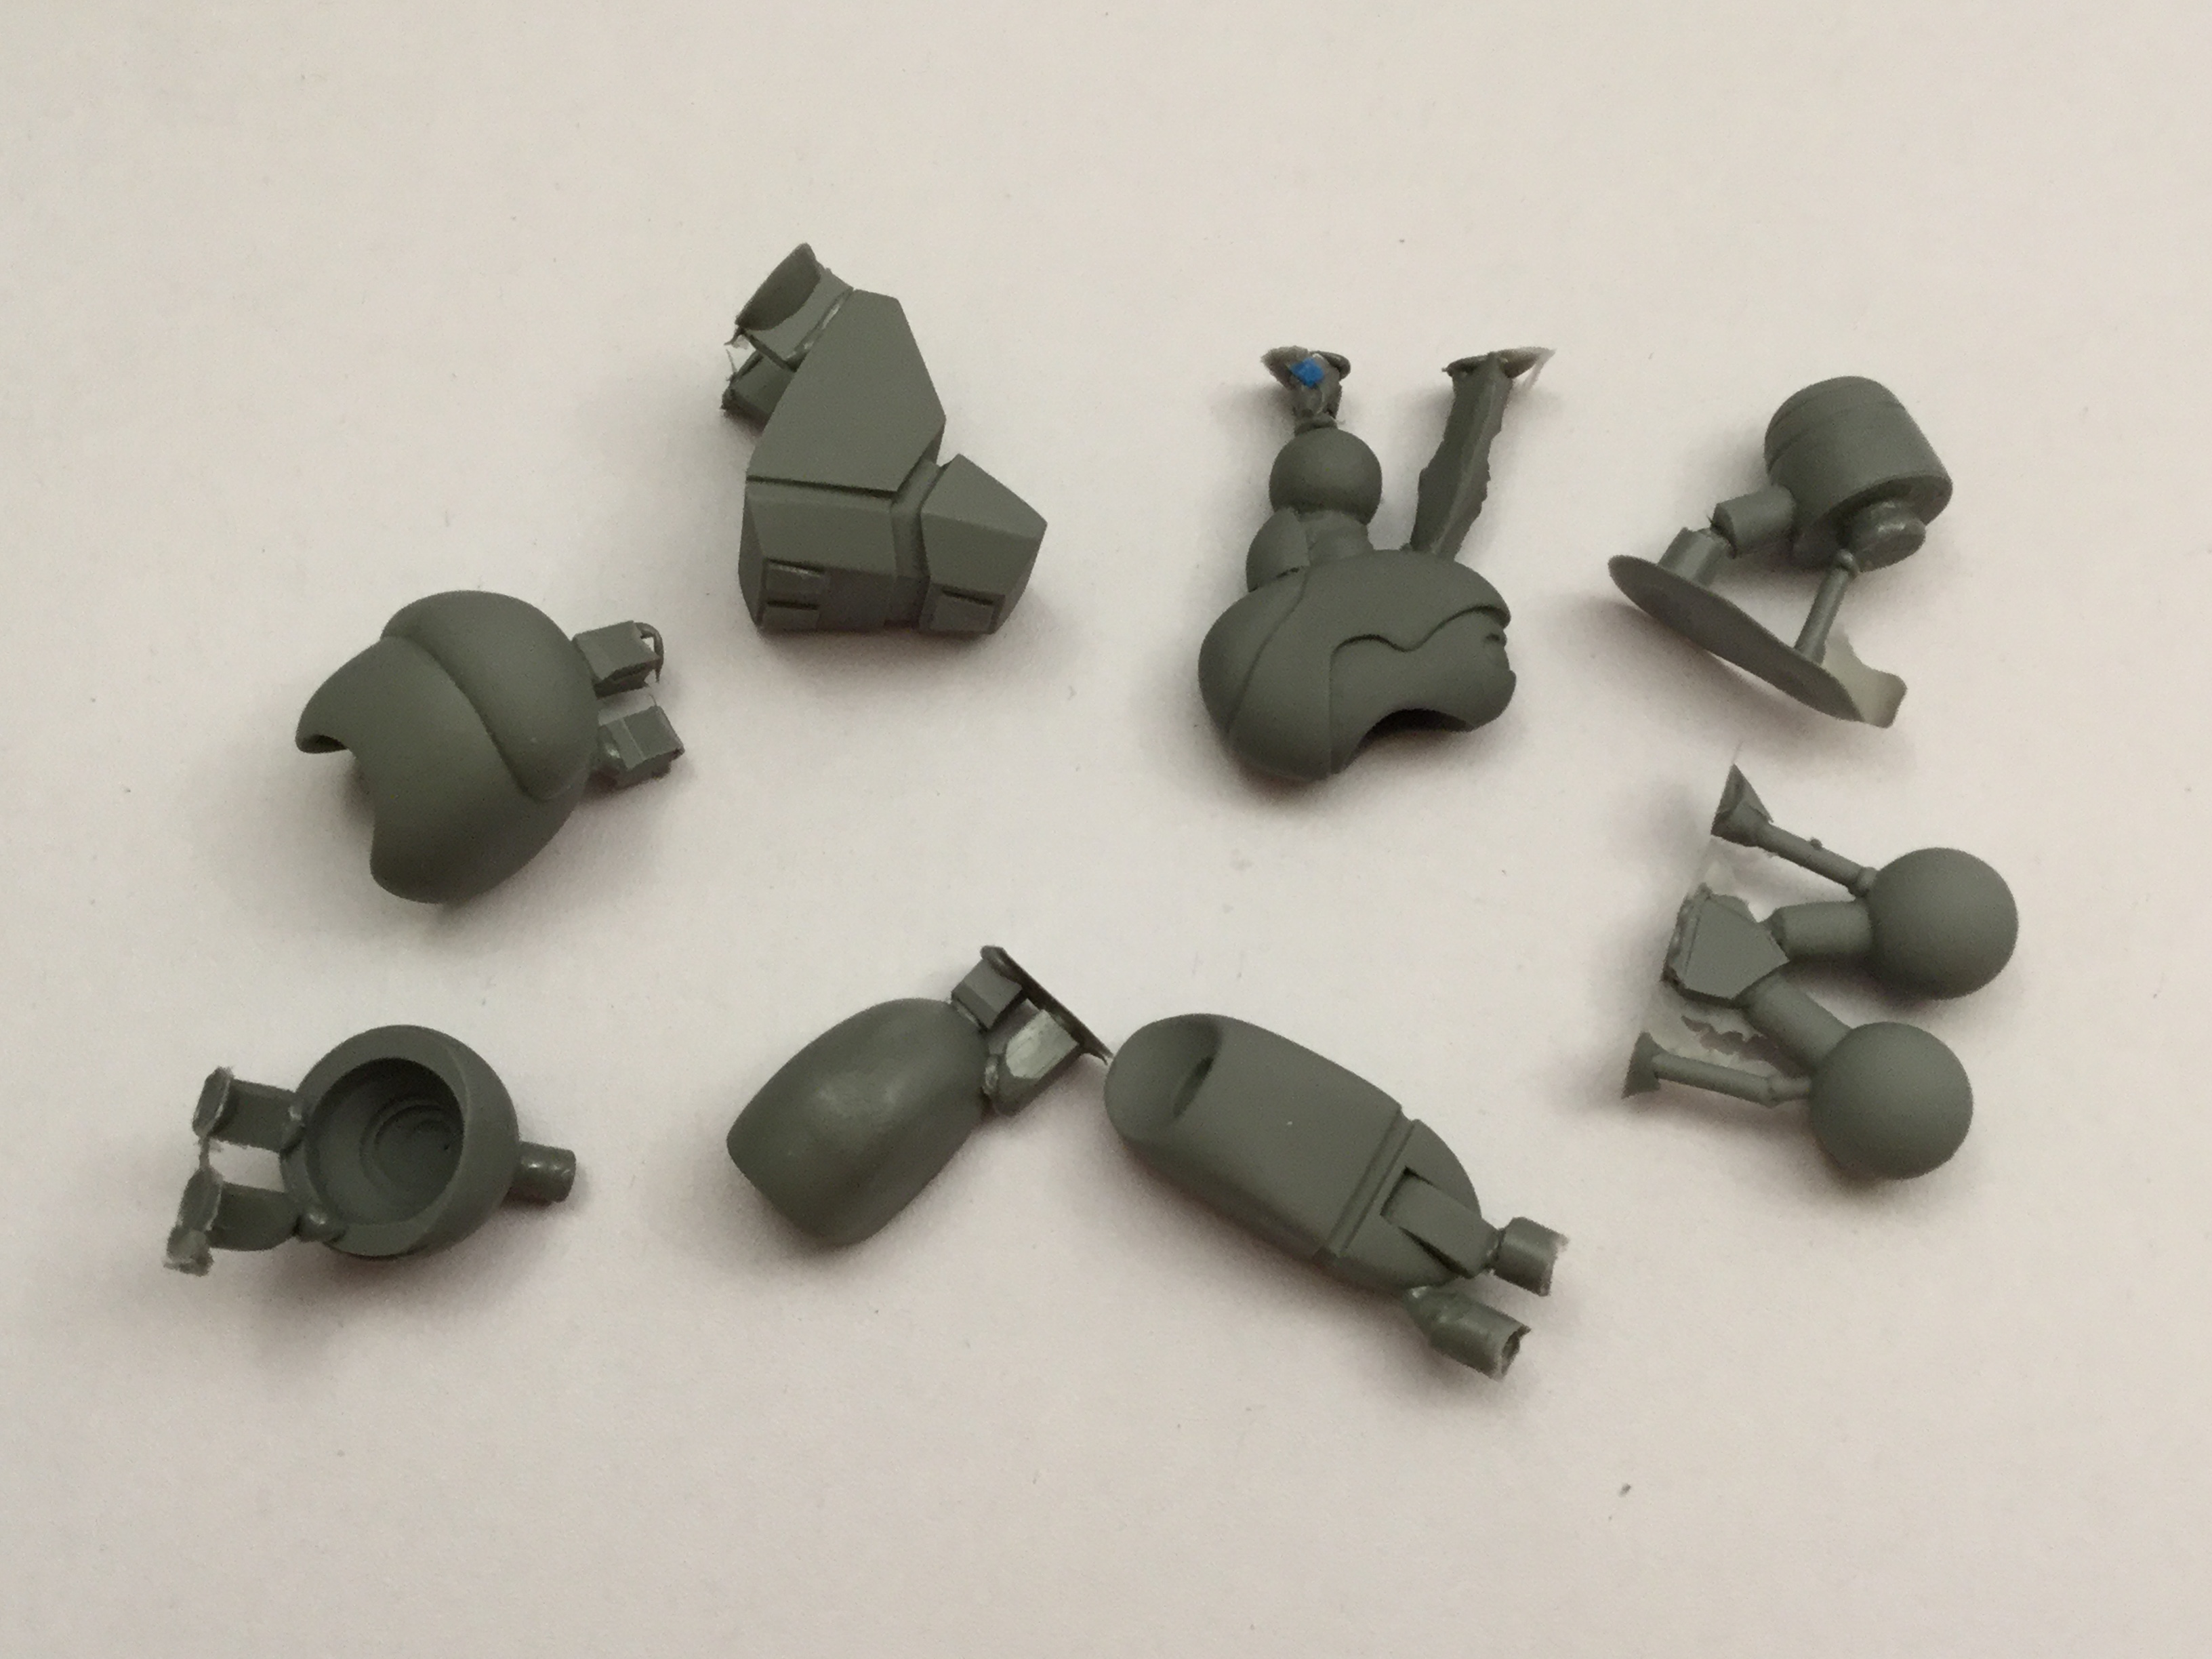
Captain’s log supplemental: March 1st. I was hoping to have a more elaborate update on Wednesday, but a molding accident dashed that hope and put me a few days behind. While no permanent damage was done, it did reveal some interesting shortcomings in the new Mold Star 30 material I employed. In Pic 01, you’ll see the « new » blue Mold Star 30 material, and the pink mold uses the trusty Mold Max 30 compound. With the old pink stuff, I was able to scribble notes and cut guides on the plexiglass, and it would imprint onto the silicone, allowing me to see where I needed to slice the molds open. Pretty useful, right? Well for whatever reason, this does not work with the Mold Star matrix, so de-molding was a, shall we say, rather white-knuckle experience. No sweat, I’m good at improv… But then the ugly side of the material came to light: even though it’s platinum-cured, it still reacts with anything that has sulfer in it. Short version: the mold material reacted to the primer. … THE PRIMER!! ARE YOU F*C#ING SH*TTING ME?!?!?! … It’s OK, I’m calm, I’m calm… So in light of this « interesting » development, I figured I’d share a mold fail for educational purposes. In pic 02, you can see what the failed mold castings look like: interesting effect, but hardly wanted. A thin layer of silicone on the surface of the part remained gooey, creating a burnt/melted surface texture. There are other issues with the cured properties of the silicone that make it a bad choice for this sort of project which I won’t bore you with. As such, I’ll have to postpone some of the molds a couple of days while new material is shipped to me. The good news: none of the masters were damaged, and the other molds were actually successful, and resu lted in some excellent cast parts, which you can see in pic 03. I was hoping to use these castings to show you a full-body mock-up of BIO LLOYD, but that’ll have to wait at least a week. It may end up being for the bast: I’ll use that extra time to work on the pistols so that I can finalize the hands and perfectly taylor them to their respetive weapons. That way, you’ll have even more eye-candy. My sincere apologies for the delay, and thank you once again for your support and continued patience.
-
1/48 SOUTHERN CROSS BIOROID
captain america replied to captain america's topic in Anime or Science Fiction
Aaaaand closed! Thank you all for your support. Mini update coming tomorrow
-
No Love for Southern Cross?
captain america replied to blacklotus's topic in Anime or Science Fiction
Only if you want HG to put an end to my kit-making. -
No Love for Southern Cross?
captain america replied to blacklotus's topic in Anime or Science Fiction
Hahahahahahaha!!!!!! Just kidding. If you want something done from scratch, and done remotely properly, expect to pay mid four figures and upward. -Good and fast won't be cheap -Cheap and fast won't be good -Good and cheap won't be fast- 1465 replies
-
- 1
-

-
- Southern Cross
- anime
- (and 8 more)
-
1/48 SOUTHERN CROSS BIOROID
captain america replied to captain america's topic in Anime or Science Fiction
I see what you mean! The green color probably looks different in different scenes as well. I was watching episode 7 or 8 online where they've got Greenie on an autopsy table, and it looked like a rather deep but bright green, much like the '87 VHS release colors. To be fair, even your Gosu looks like a different shade between the scale comparison pic and the recent ones you just posted, so I guess we'll just have to wing it. -
1/48 SOUTHERN CROSS BIOROID
captain america replied to captain america's topic in Anime or Science Fiction
Hey Ted, what shade of green did you use on the Gosu? It looks perfect for the green Bioroid -
1/48 SOUTHERN CROSS BIOROID
captain america replied to captain america's topic in Anime or Science Fiction
About 17.5cm -
1/48 SOUTHERN CROSS BIOROID
captain america replied to captain america's topic in Anime or Science Fiction
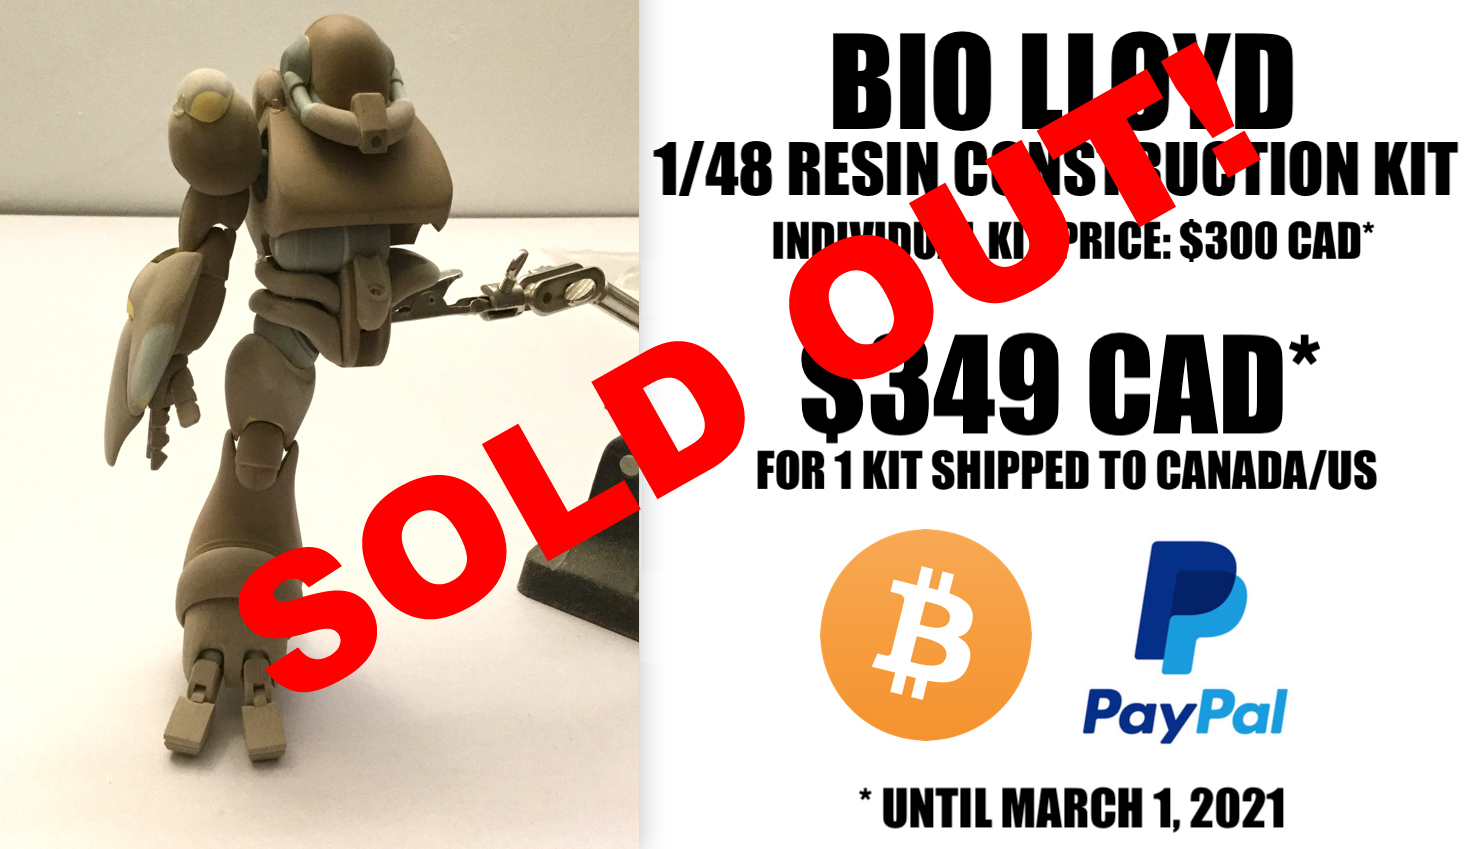
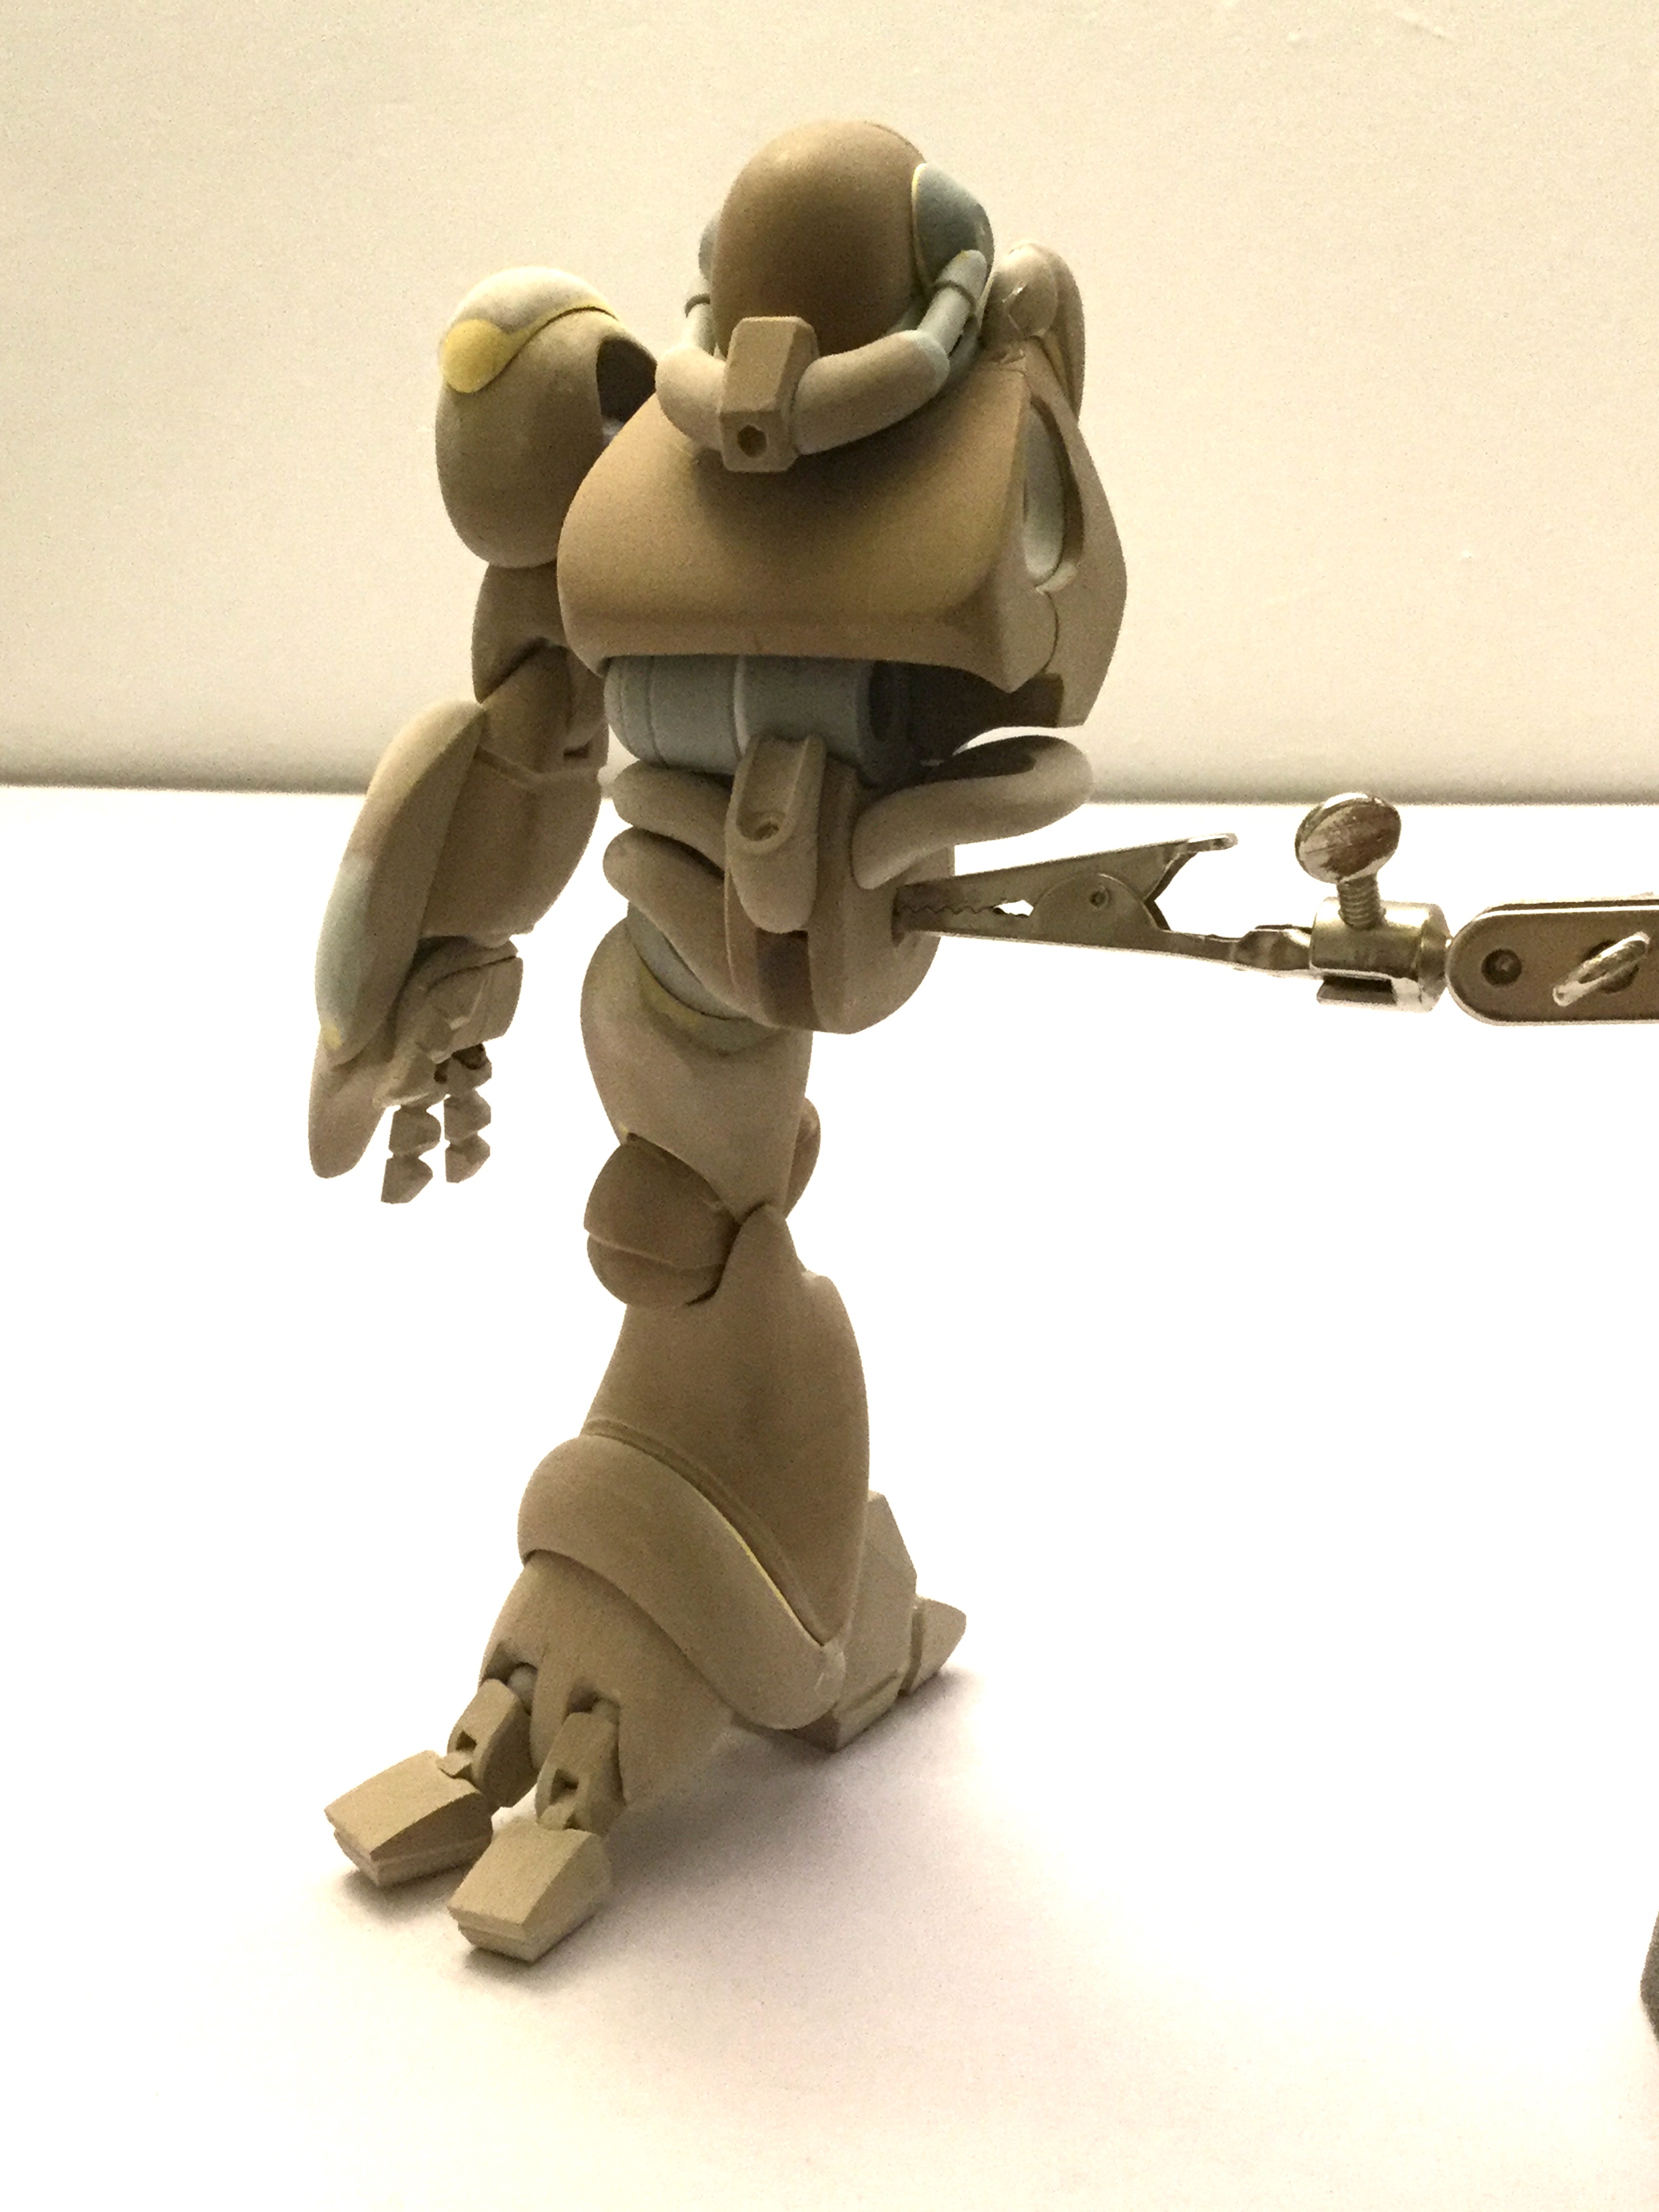
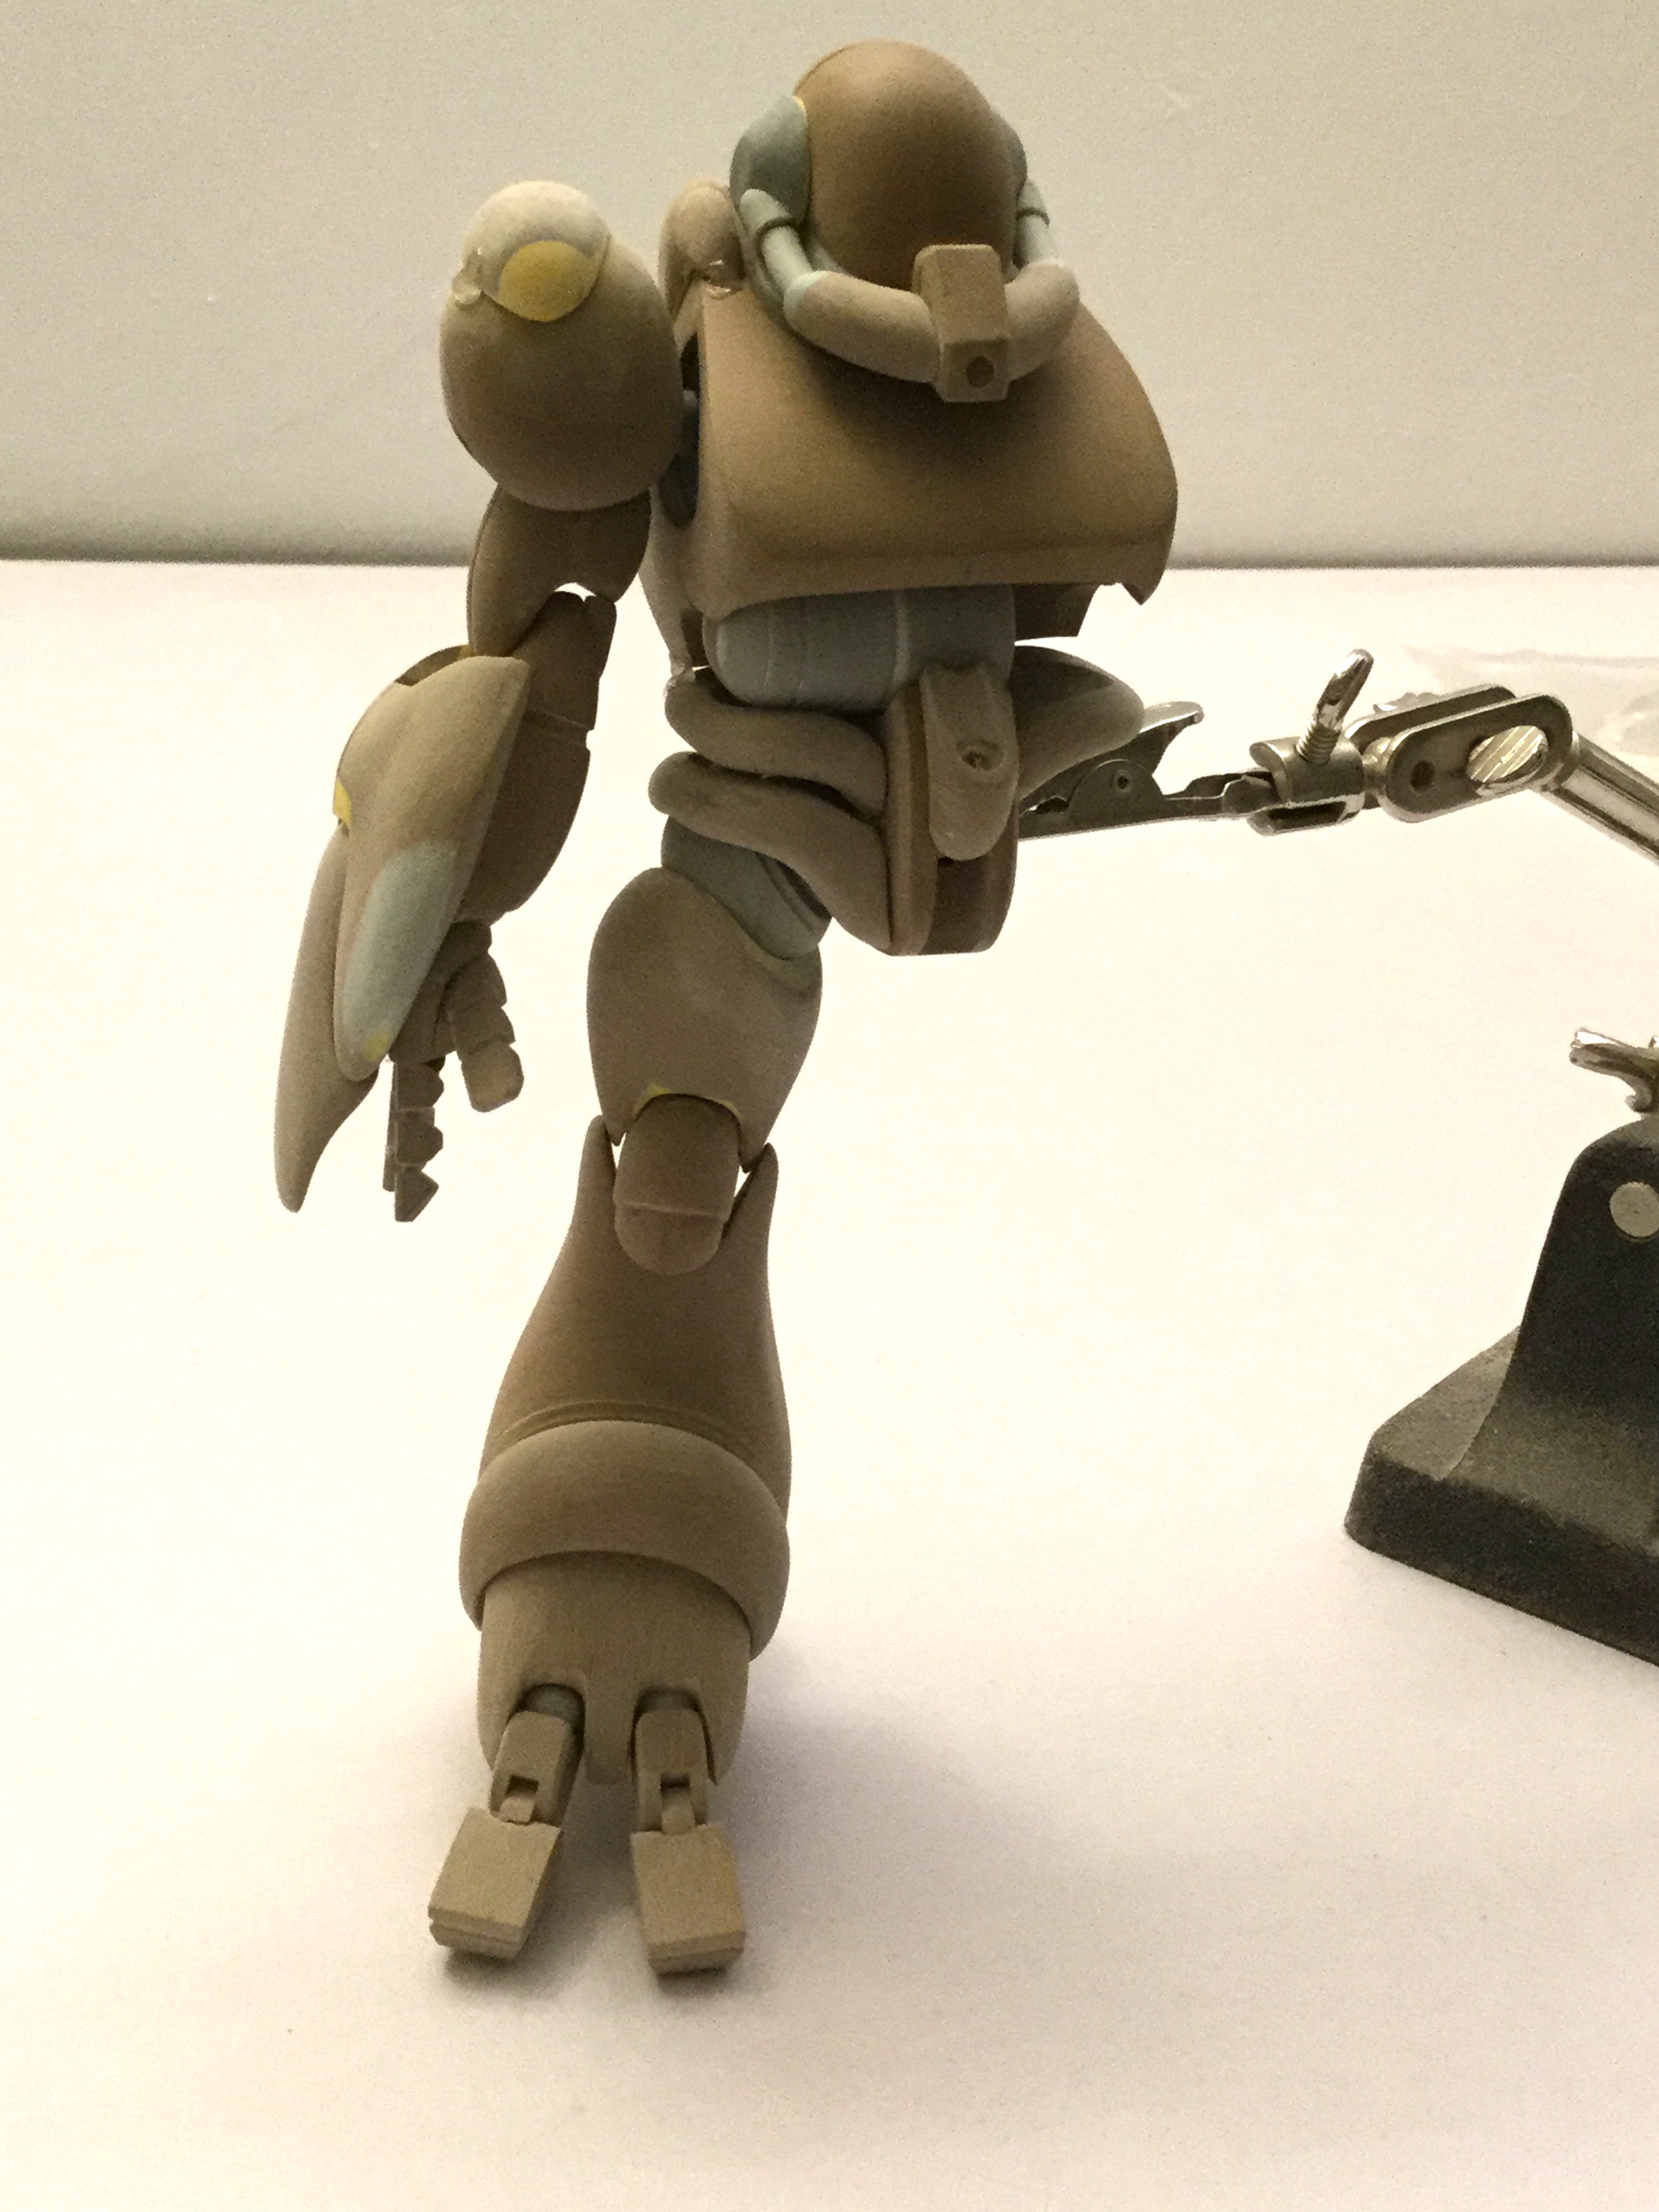
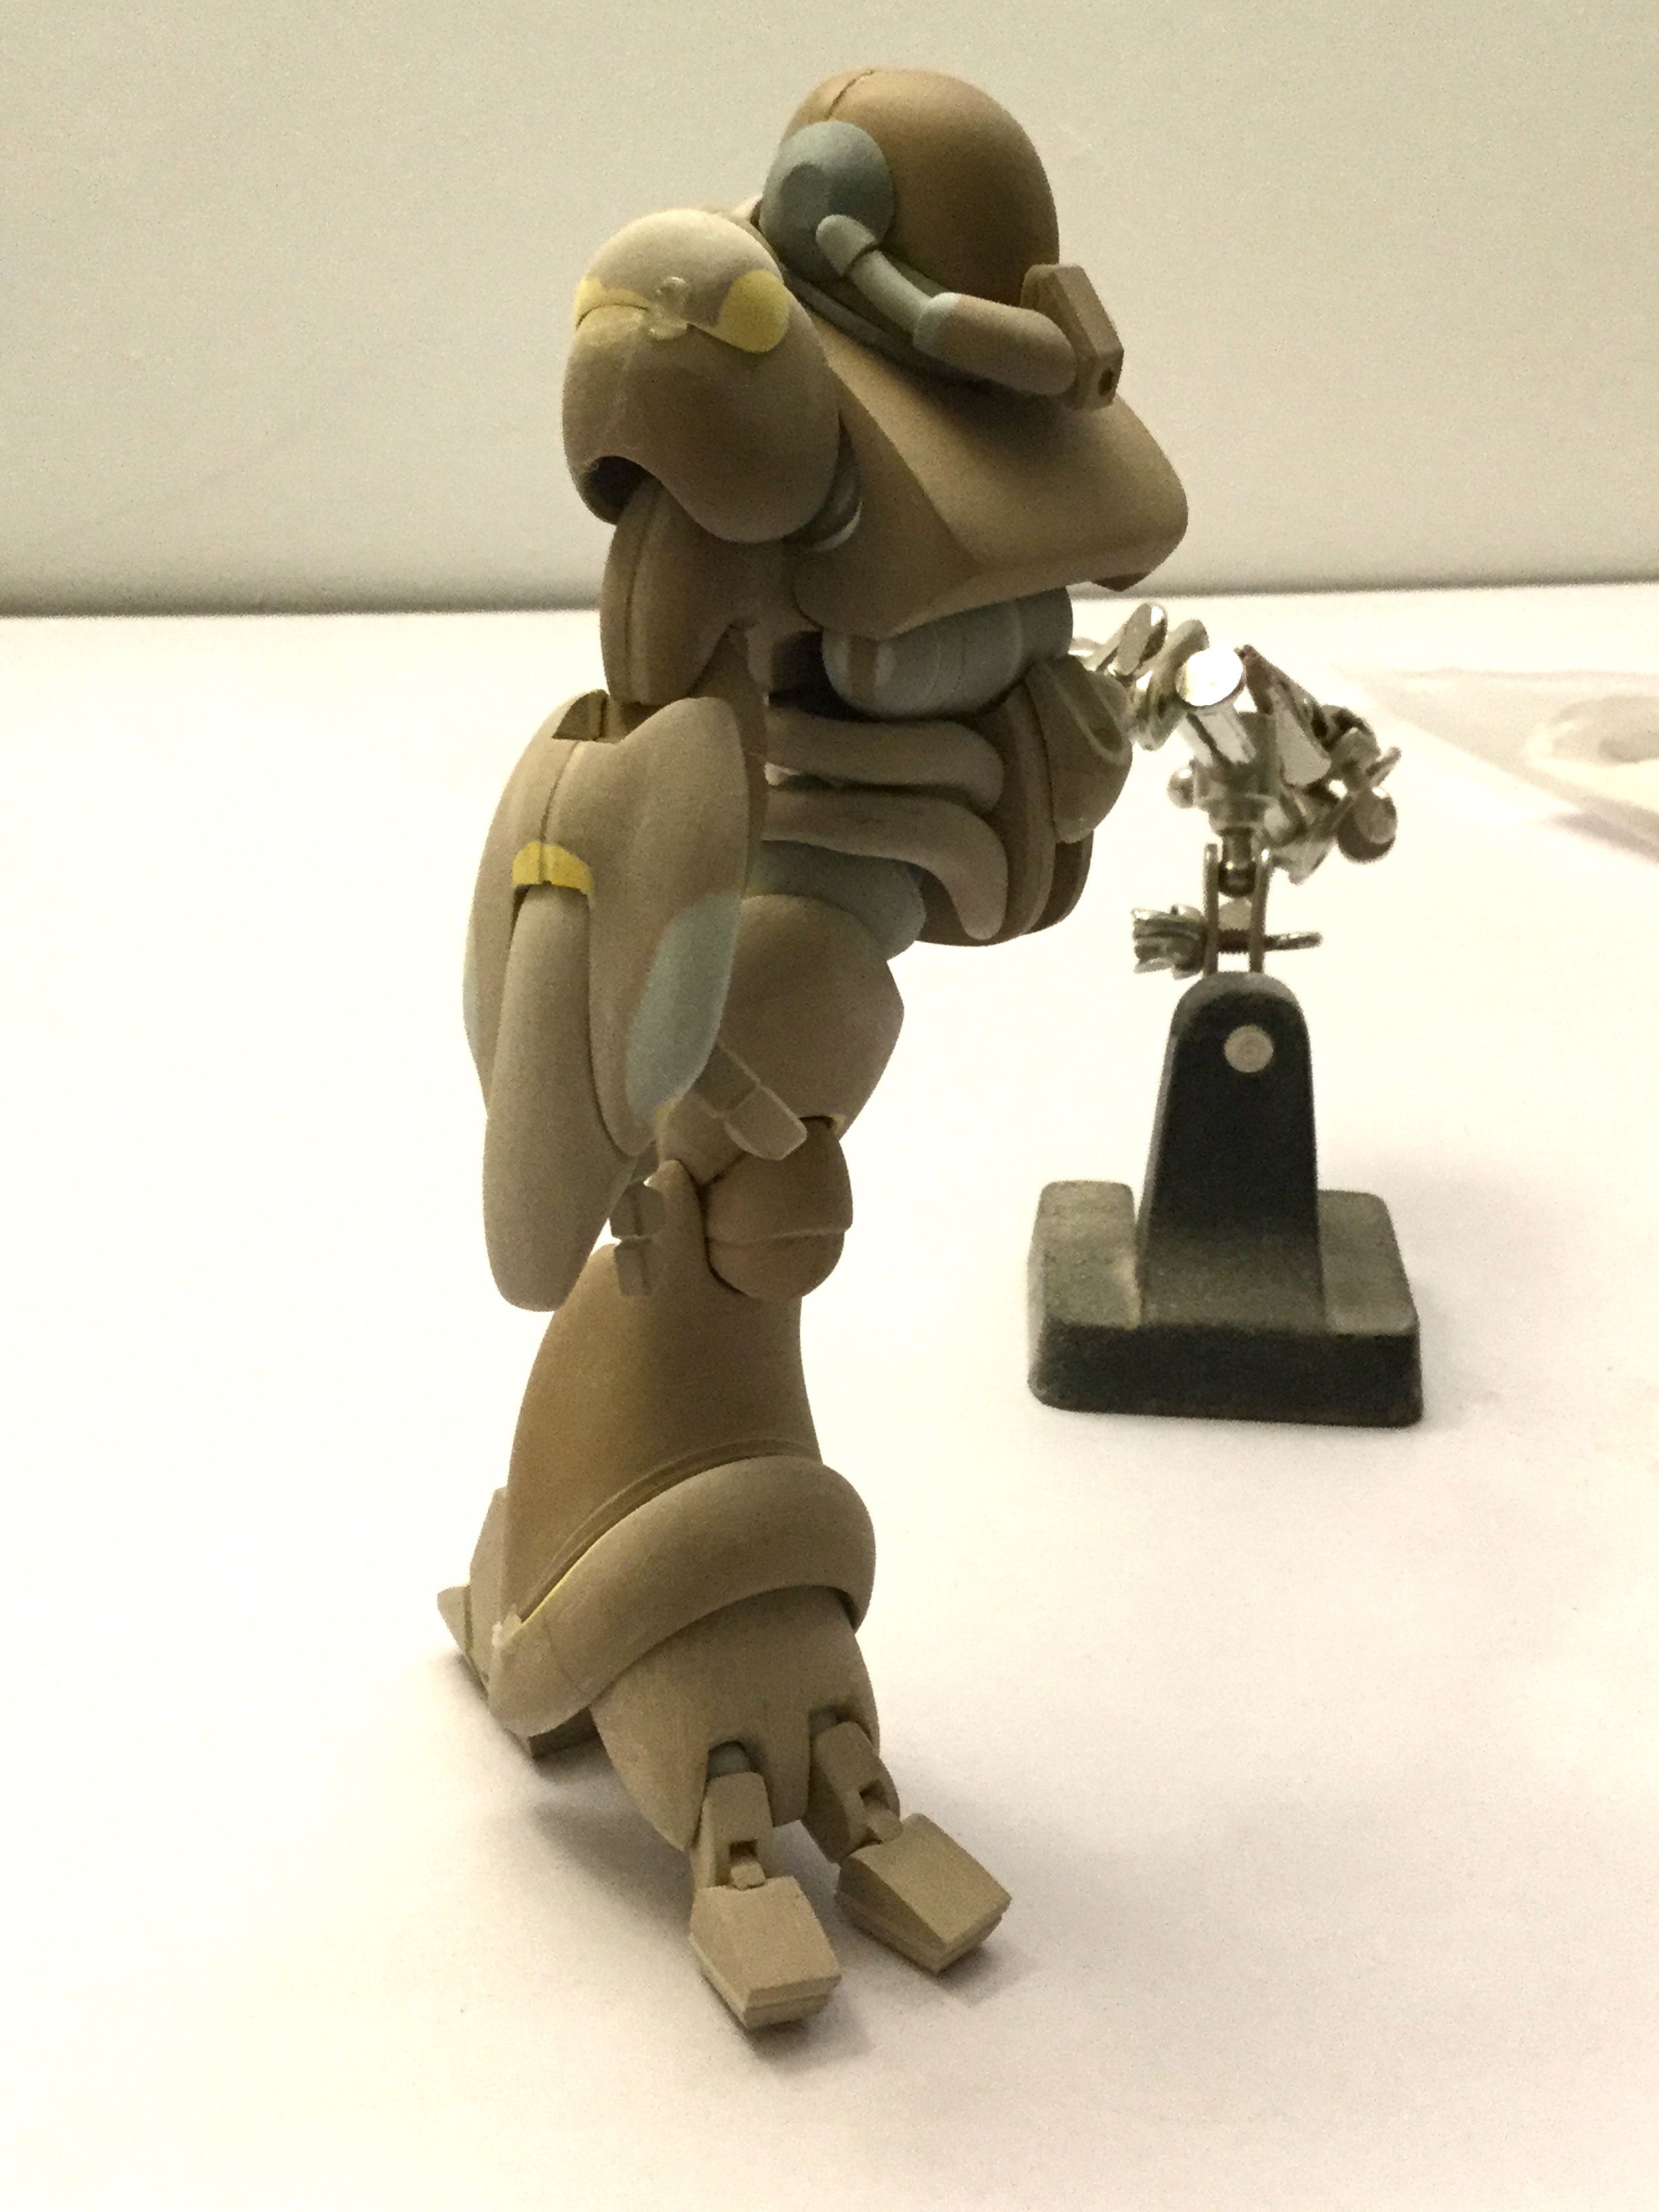
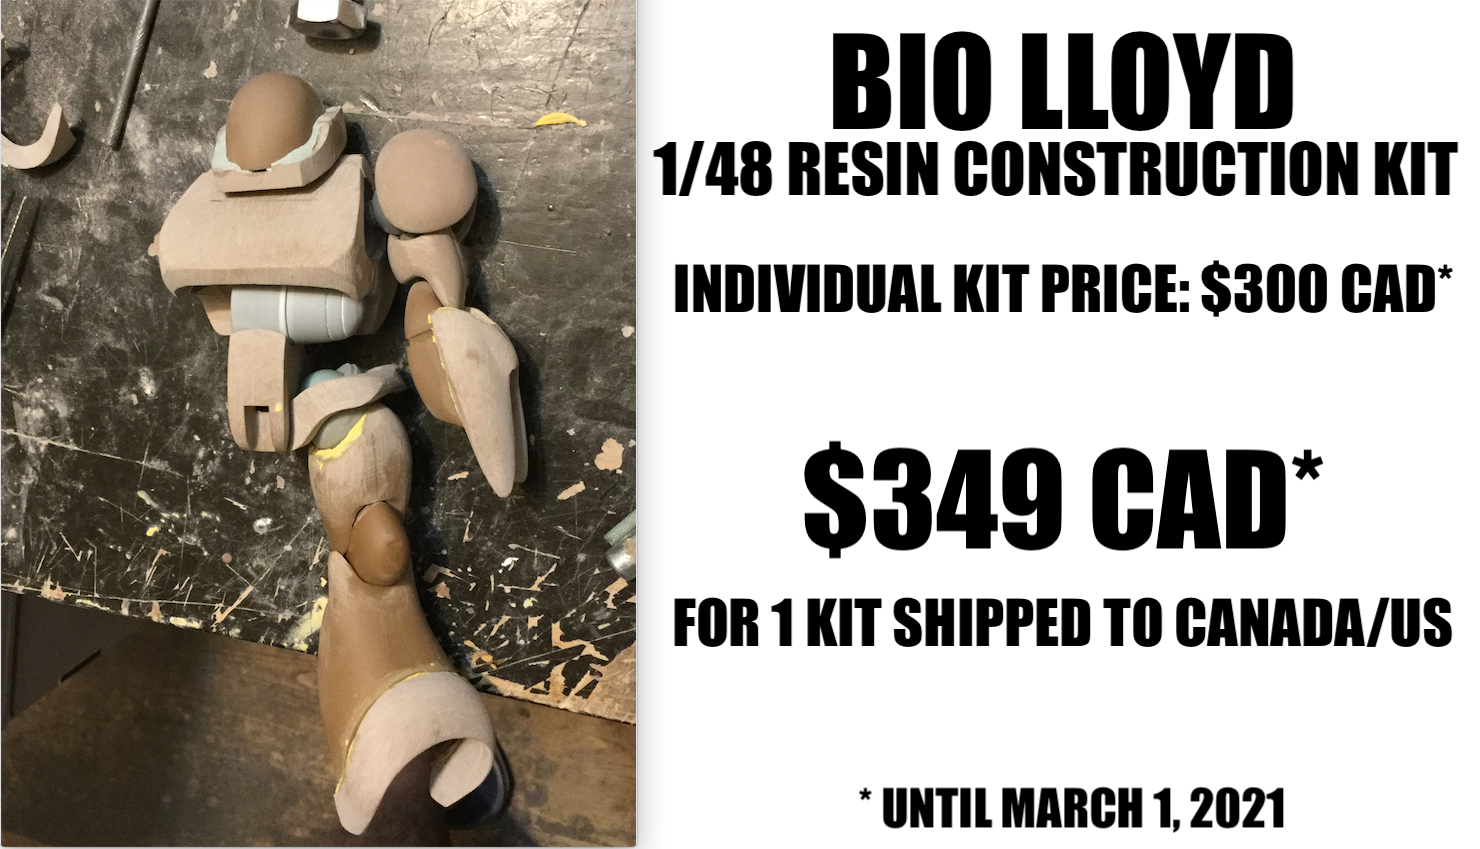
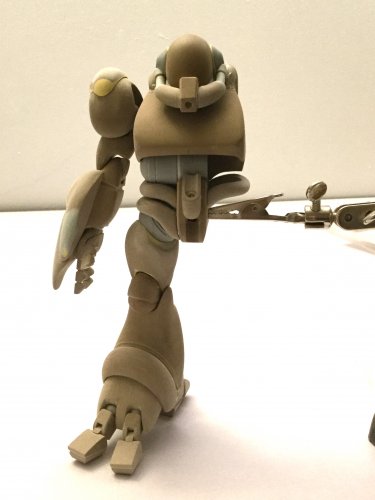
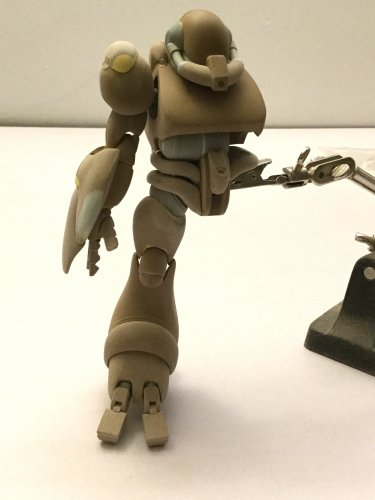
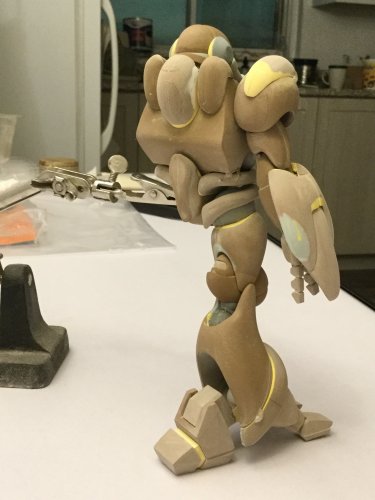
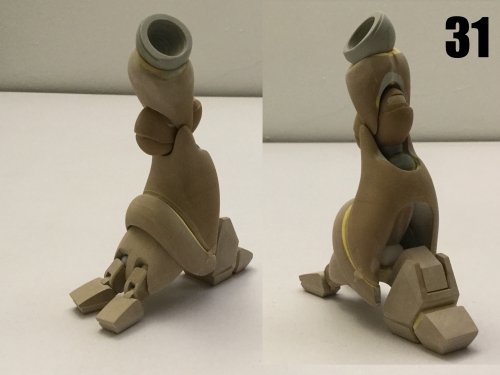
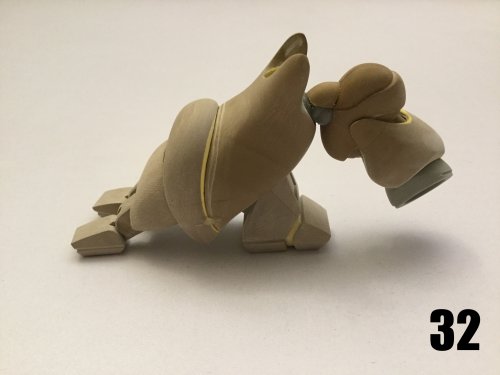
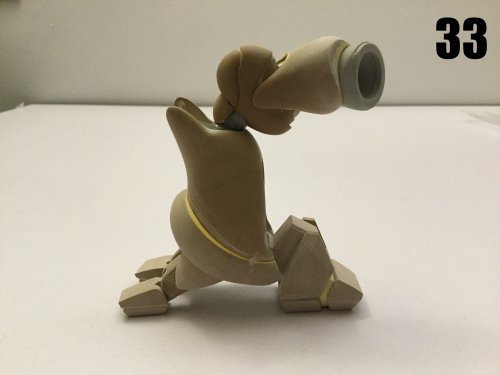
Captain's Log supplemental: February 22nd update I went ahead and bumped-up this week's review in order to mark the one remaining week to take advantage of the pre-order special on the 1/48 BIO-LLOYD kit. This way you can also have a better idea of what you'll be getting, and be able to make an informed decision with regards to your purchase. I've opted to finish the figure before commencing on the sled so as to give me more adjustment possibility and make little fit adjustments for a better overall package. As you can see, Mr. LLOYD is coming right along. Please excuse the slight rickety appearance of the parts: they're mostly just holding with friction and some temporary hot glue. A few of the smaller parts were left off to avoid breakage and are being prepped for molding as I type. The head for Mr. Blueberry was used here, and since the pic was taken, I've slimmed-down the front part of his "beard" to be more faithful to the source material. Several parts like the head, shins and chest plate will have to be completed, molded, cast, then altered and molded again to accomodate all the different variations, thus creating different sets of masters, and that's part of what's taking so long, so your patience and understanding are greatly appreciated. Wait until you see the dinner plate-sized sled this guy rides on!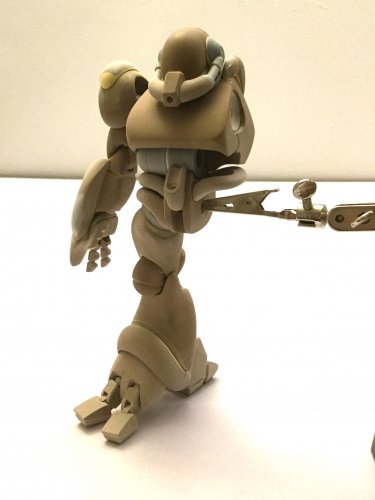

-
1/48 SOUTHERN CROSS BIOROID
captain america replied to captain america's topic in Anime or Science Fiction
The ball-joints will be resin parts in the kit. I tried aftermarket units in the past, but they were always too weak and never the right size, so I make my own. They aren't playable, but are good enough for dry-fitting prior to the final build. You can watch a video I made a while back discussing the joint systems found on my kits. https://odysee.com/@moscatohobbymodels:7/M72-Gabriel-2:d Watch: I always have a watch on me, because it's very easy for me to get lost in my work and lose track of time otherwise. It's nothing special, just a Casio junk beater. Short sleeves are a must when operating machinery, though I do frequently wear overalls when Dremelling, just to avoid getting too much dust on my clothes. -
1/48 SOUTHERN CROSS BIOROID
captain america replied to captain america's topic in Anime or Science Fiction
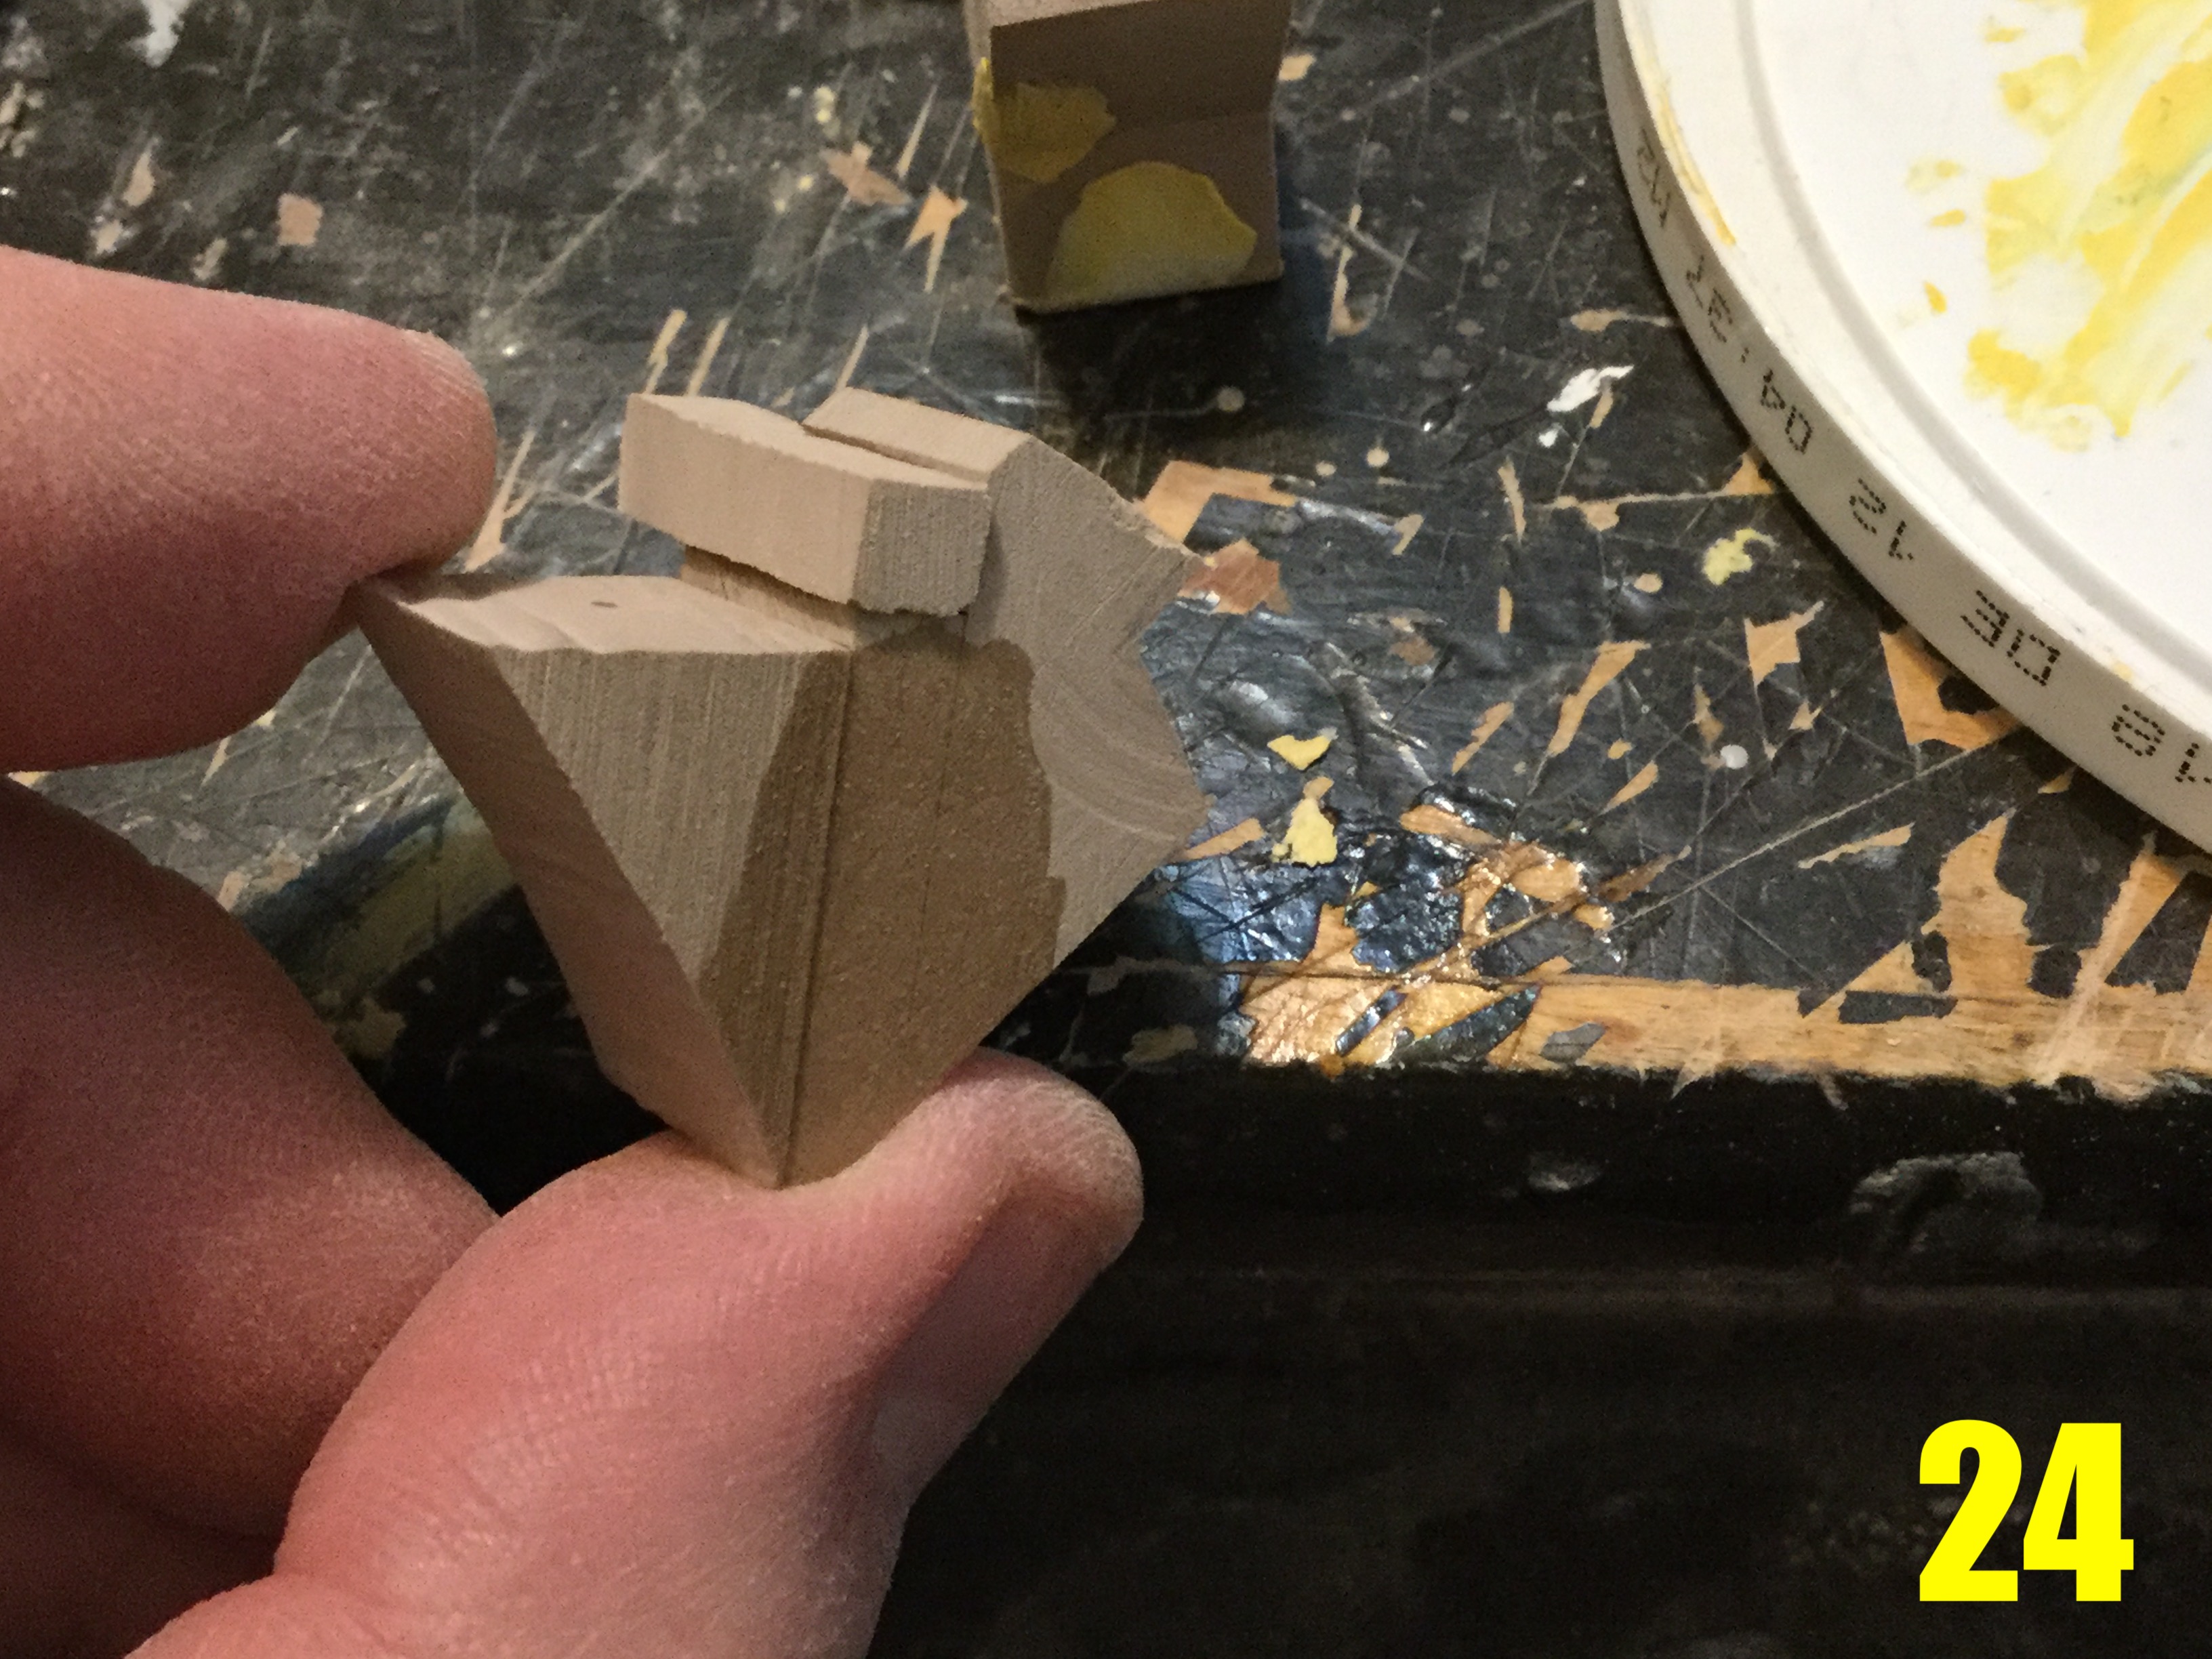
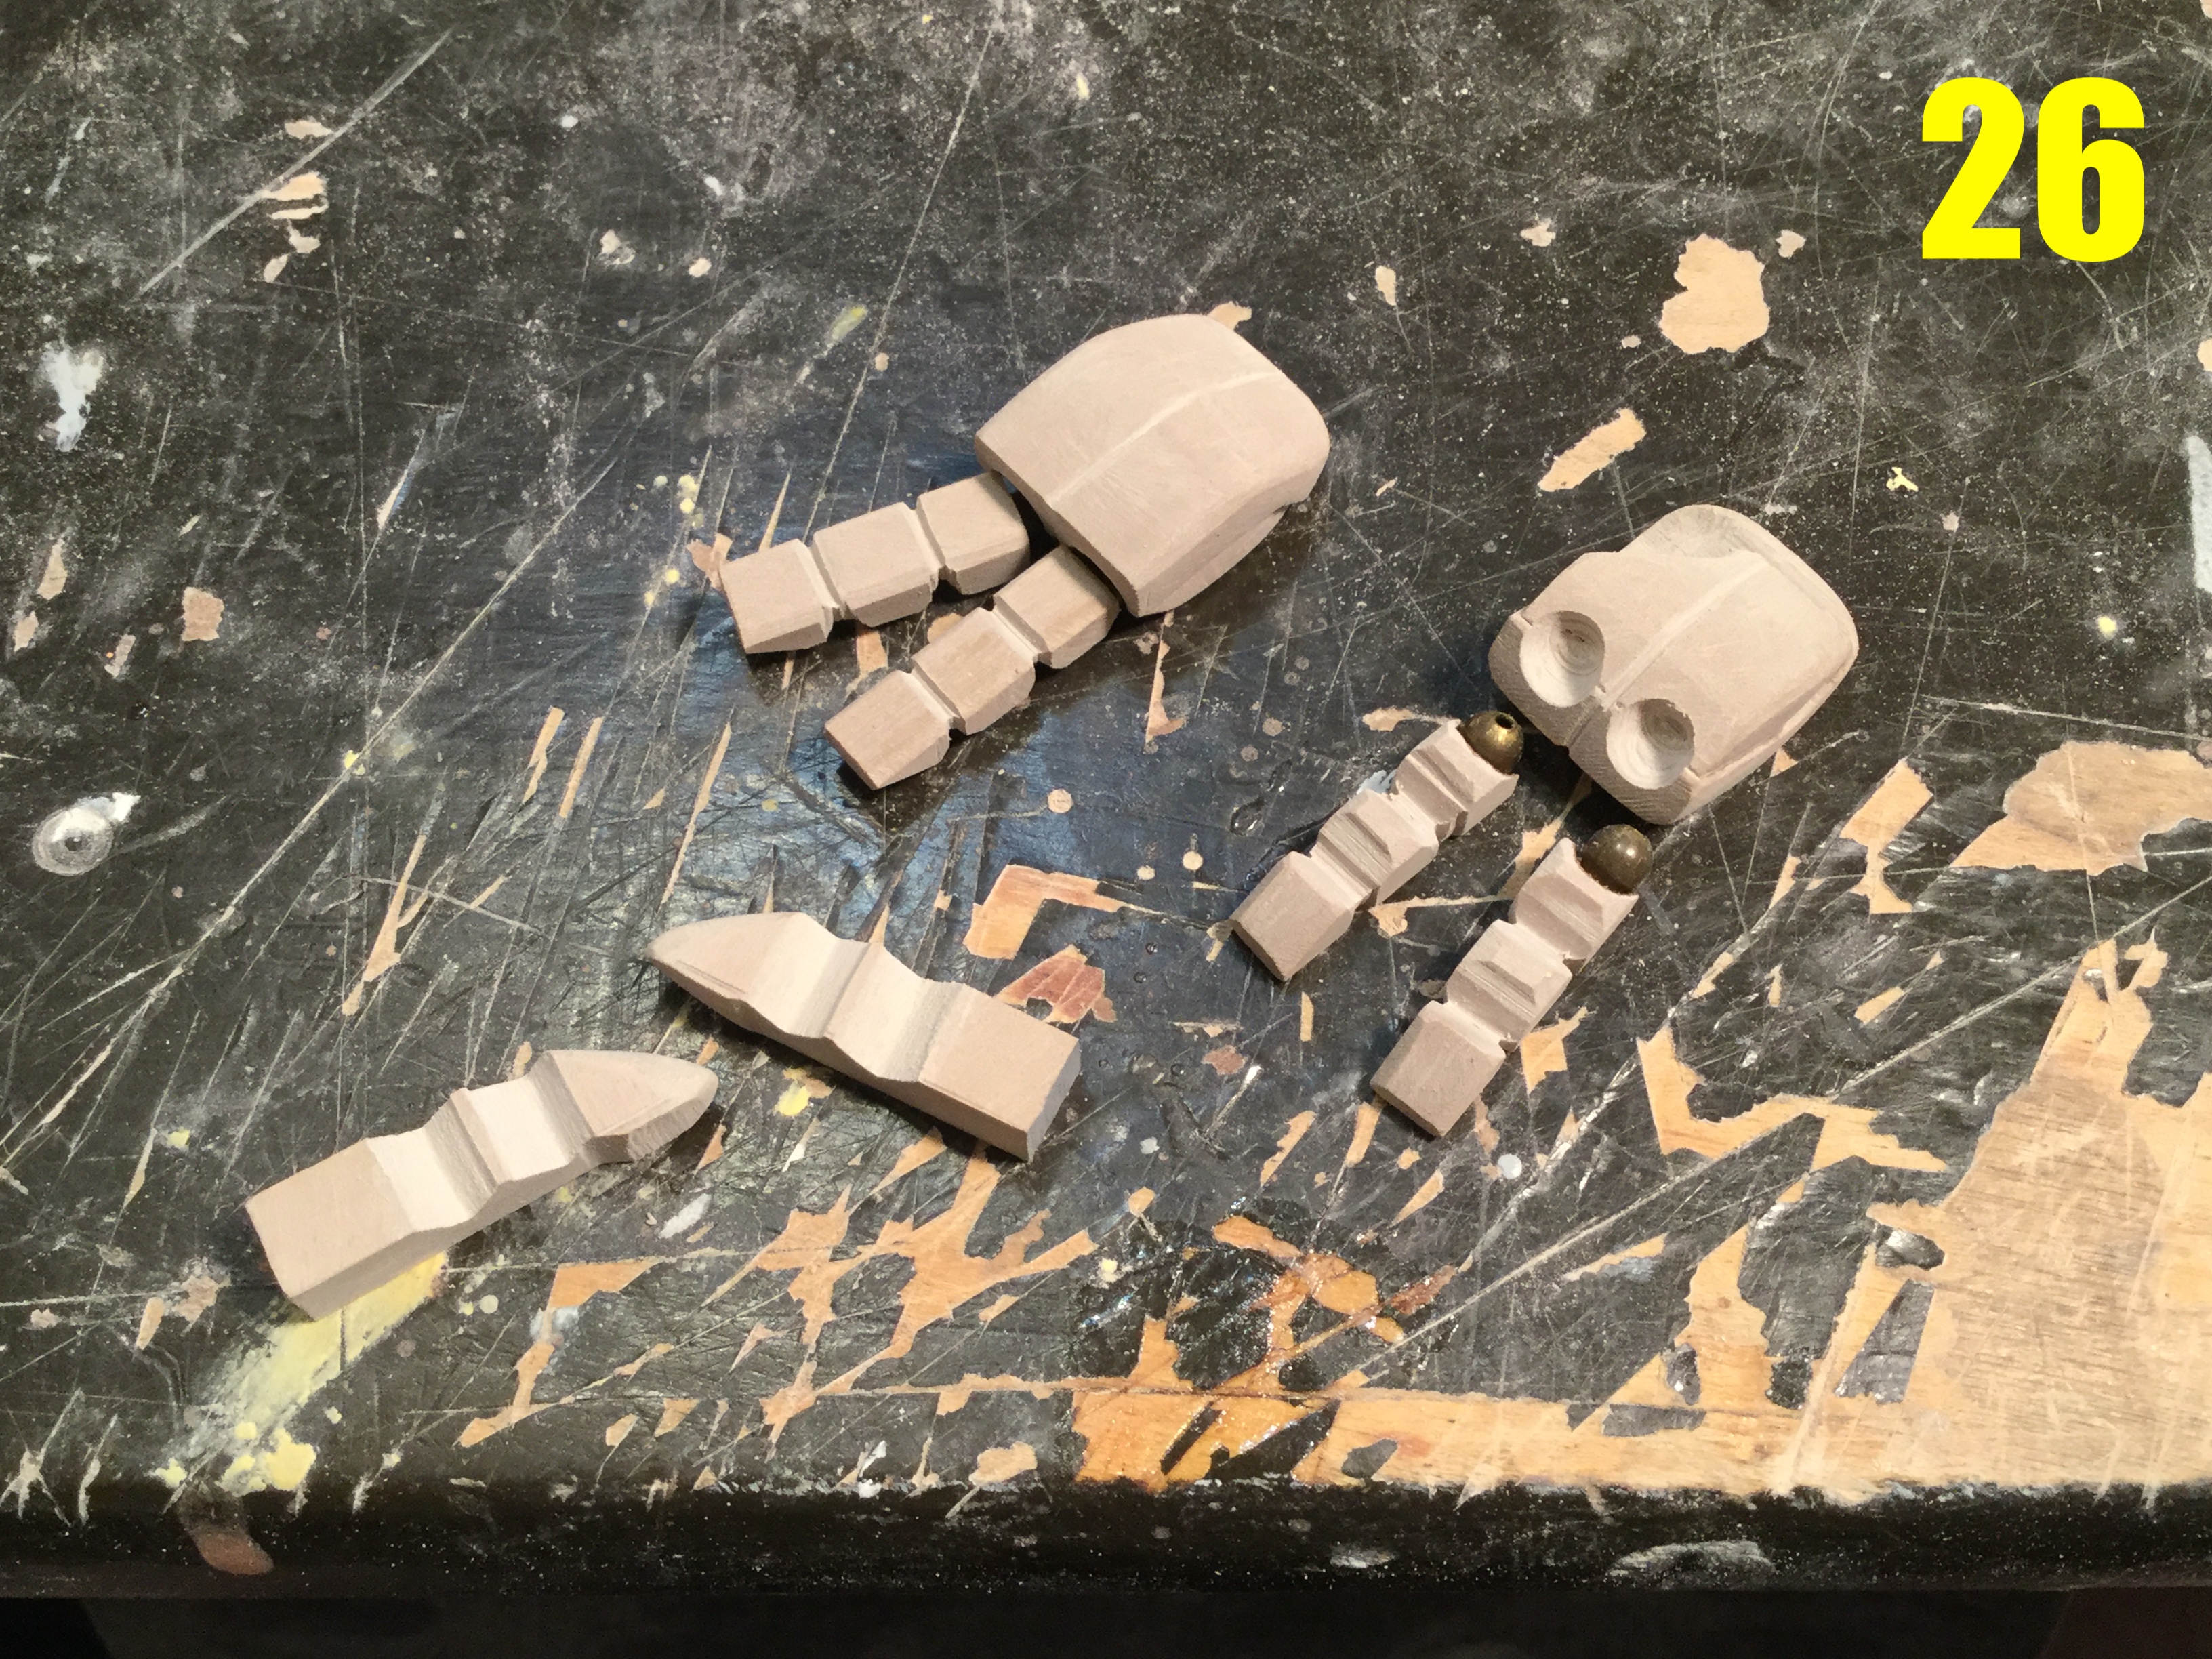
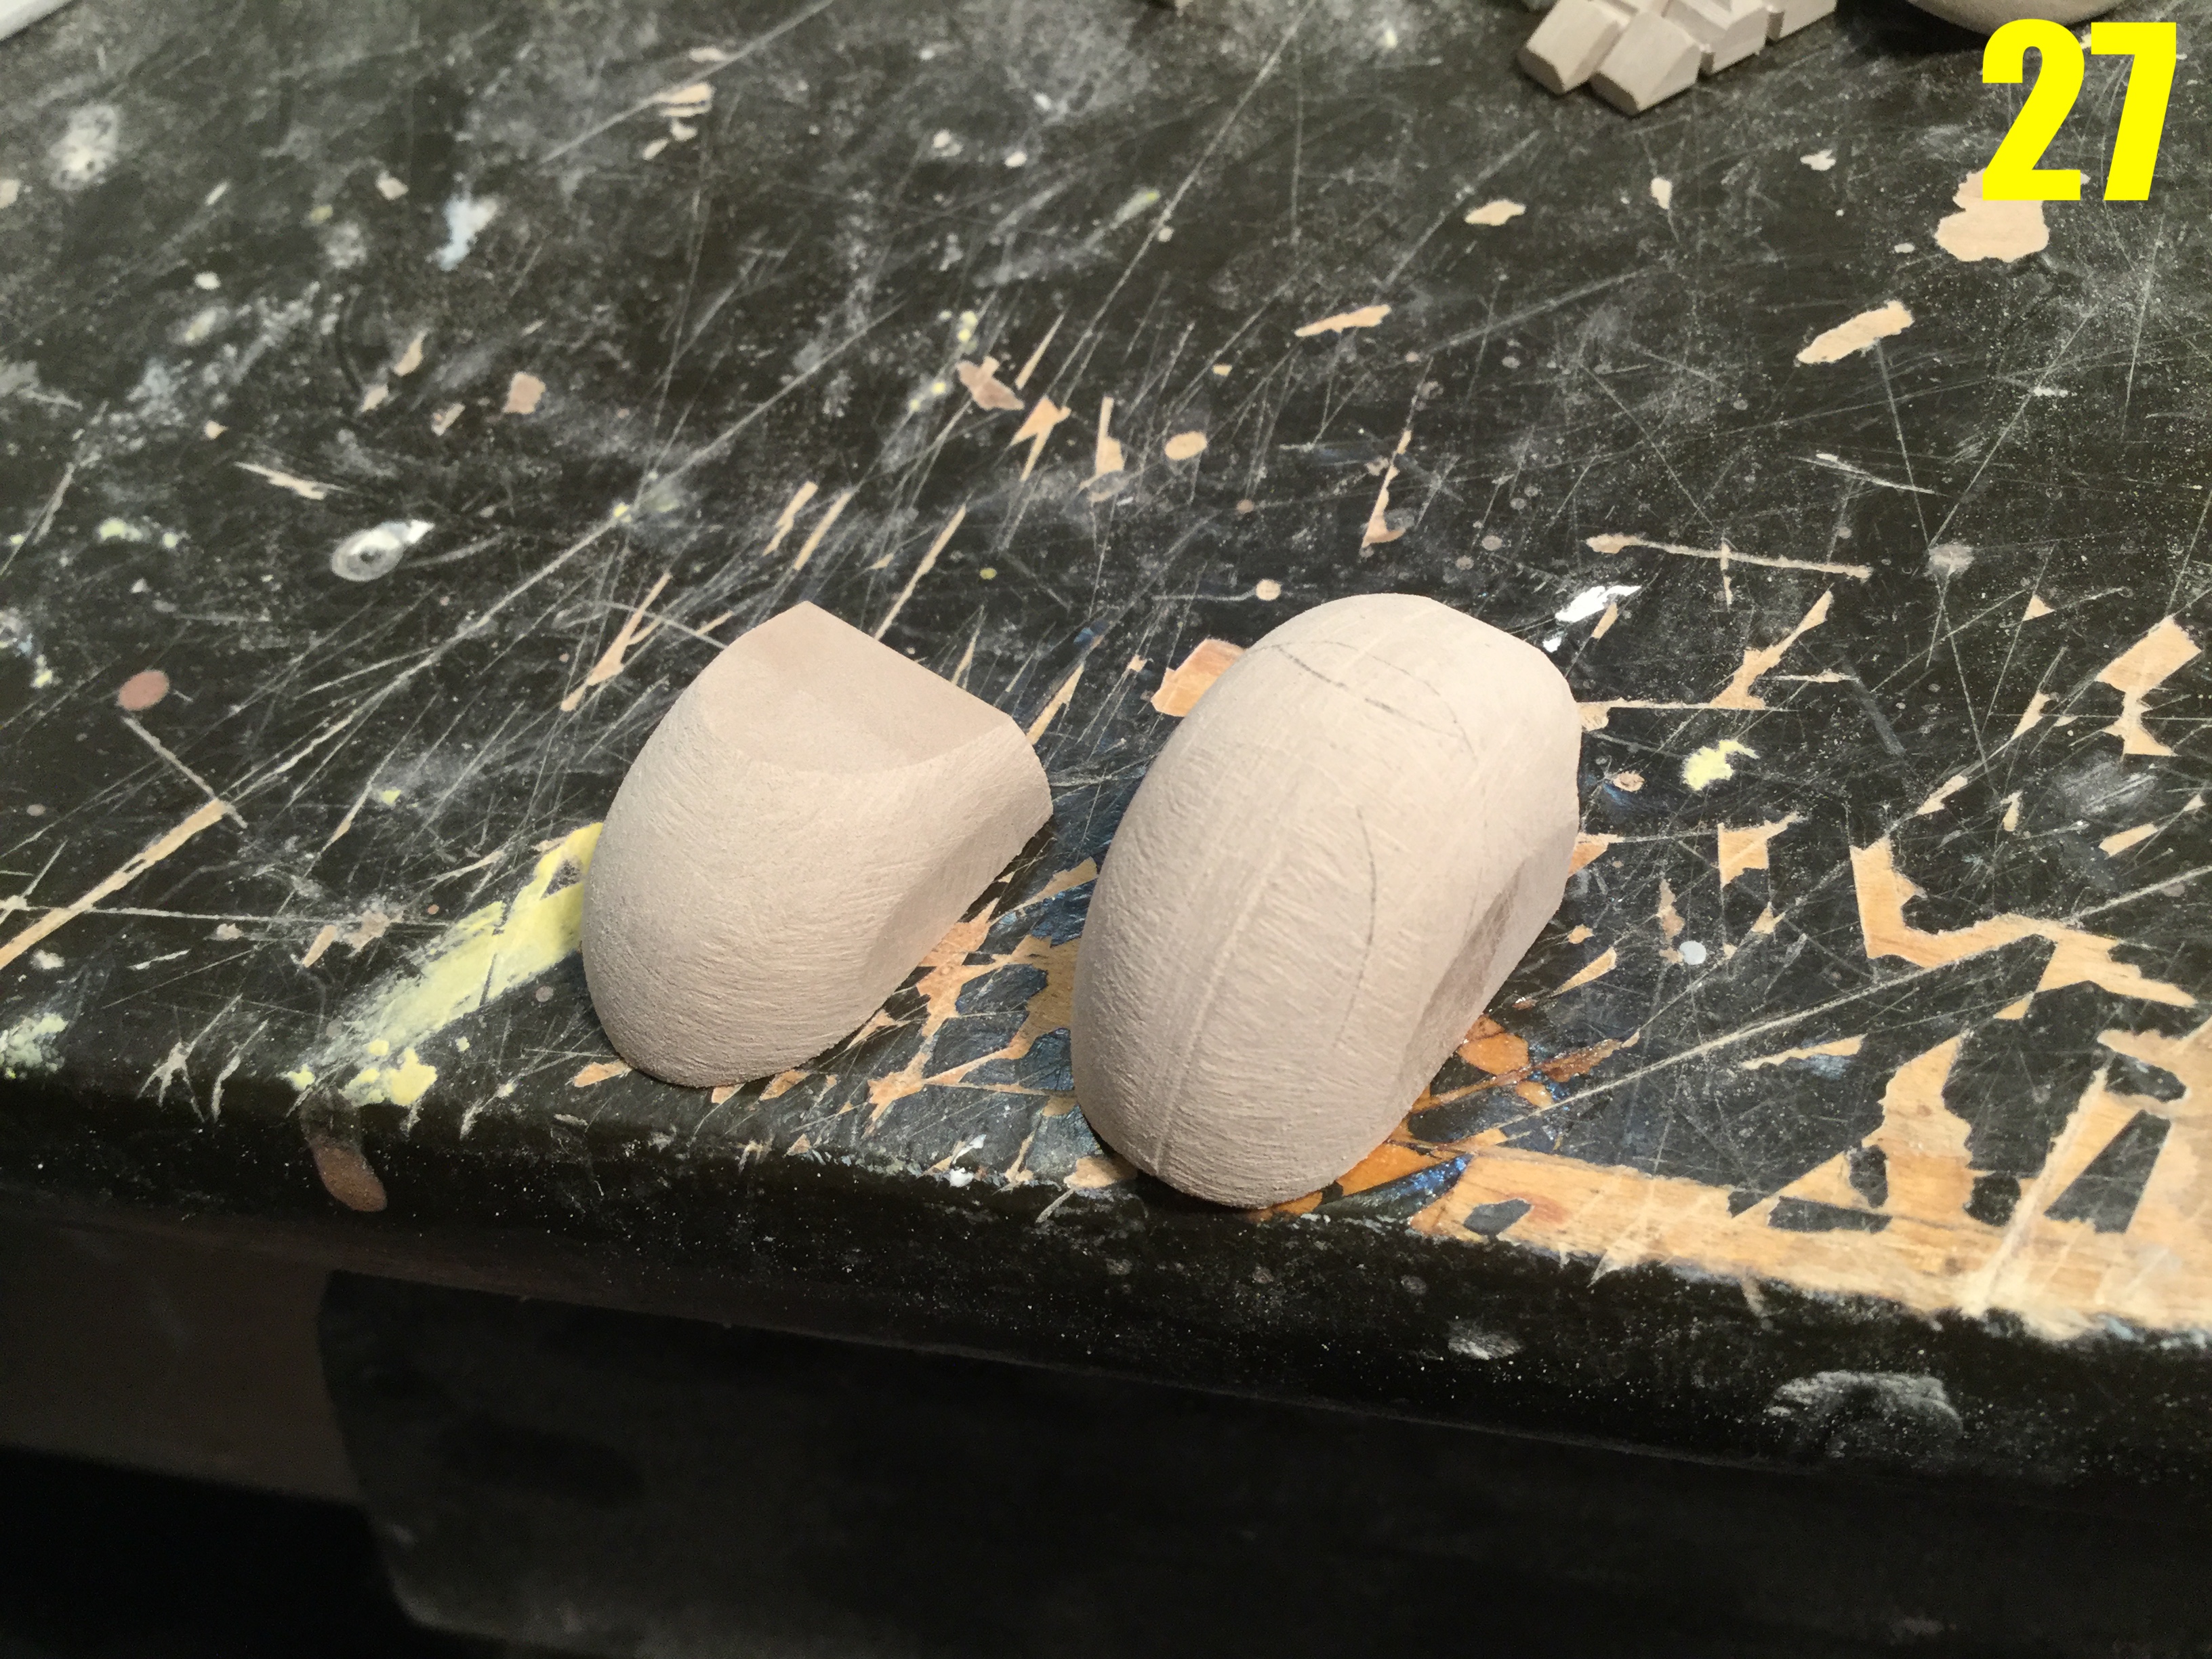
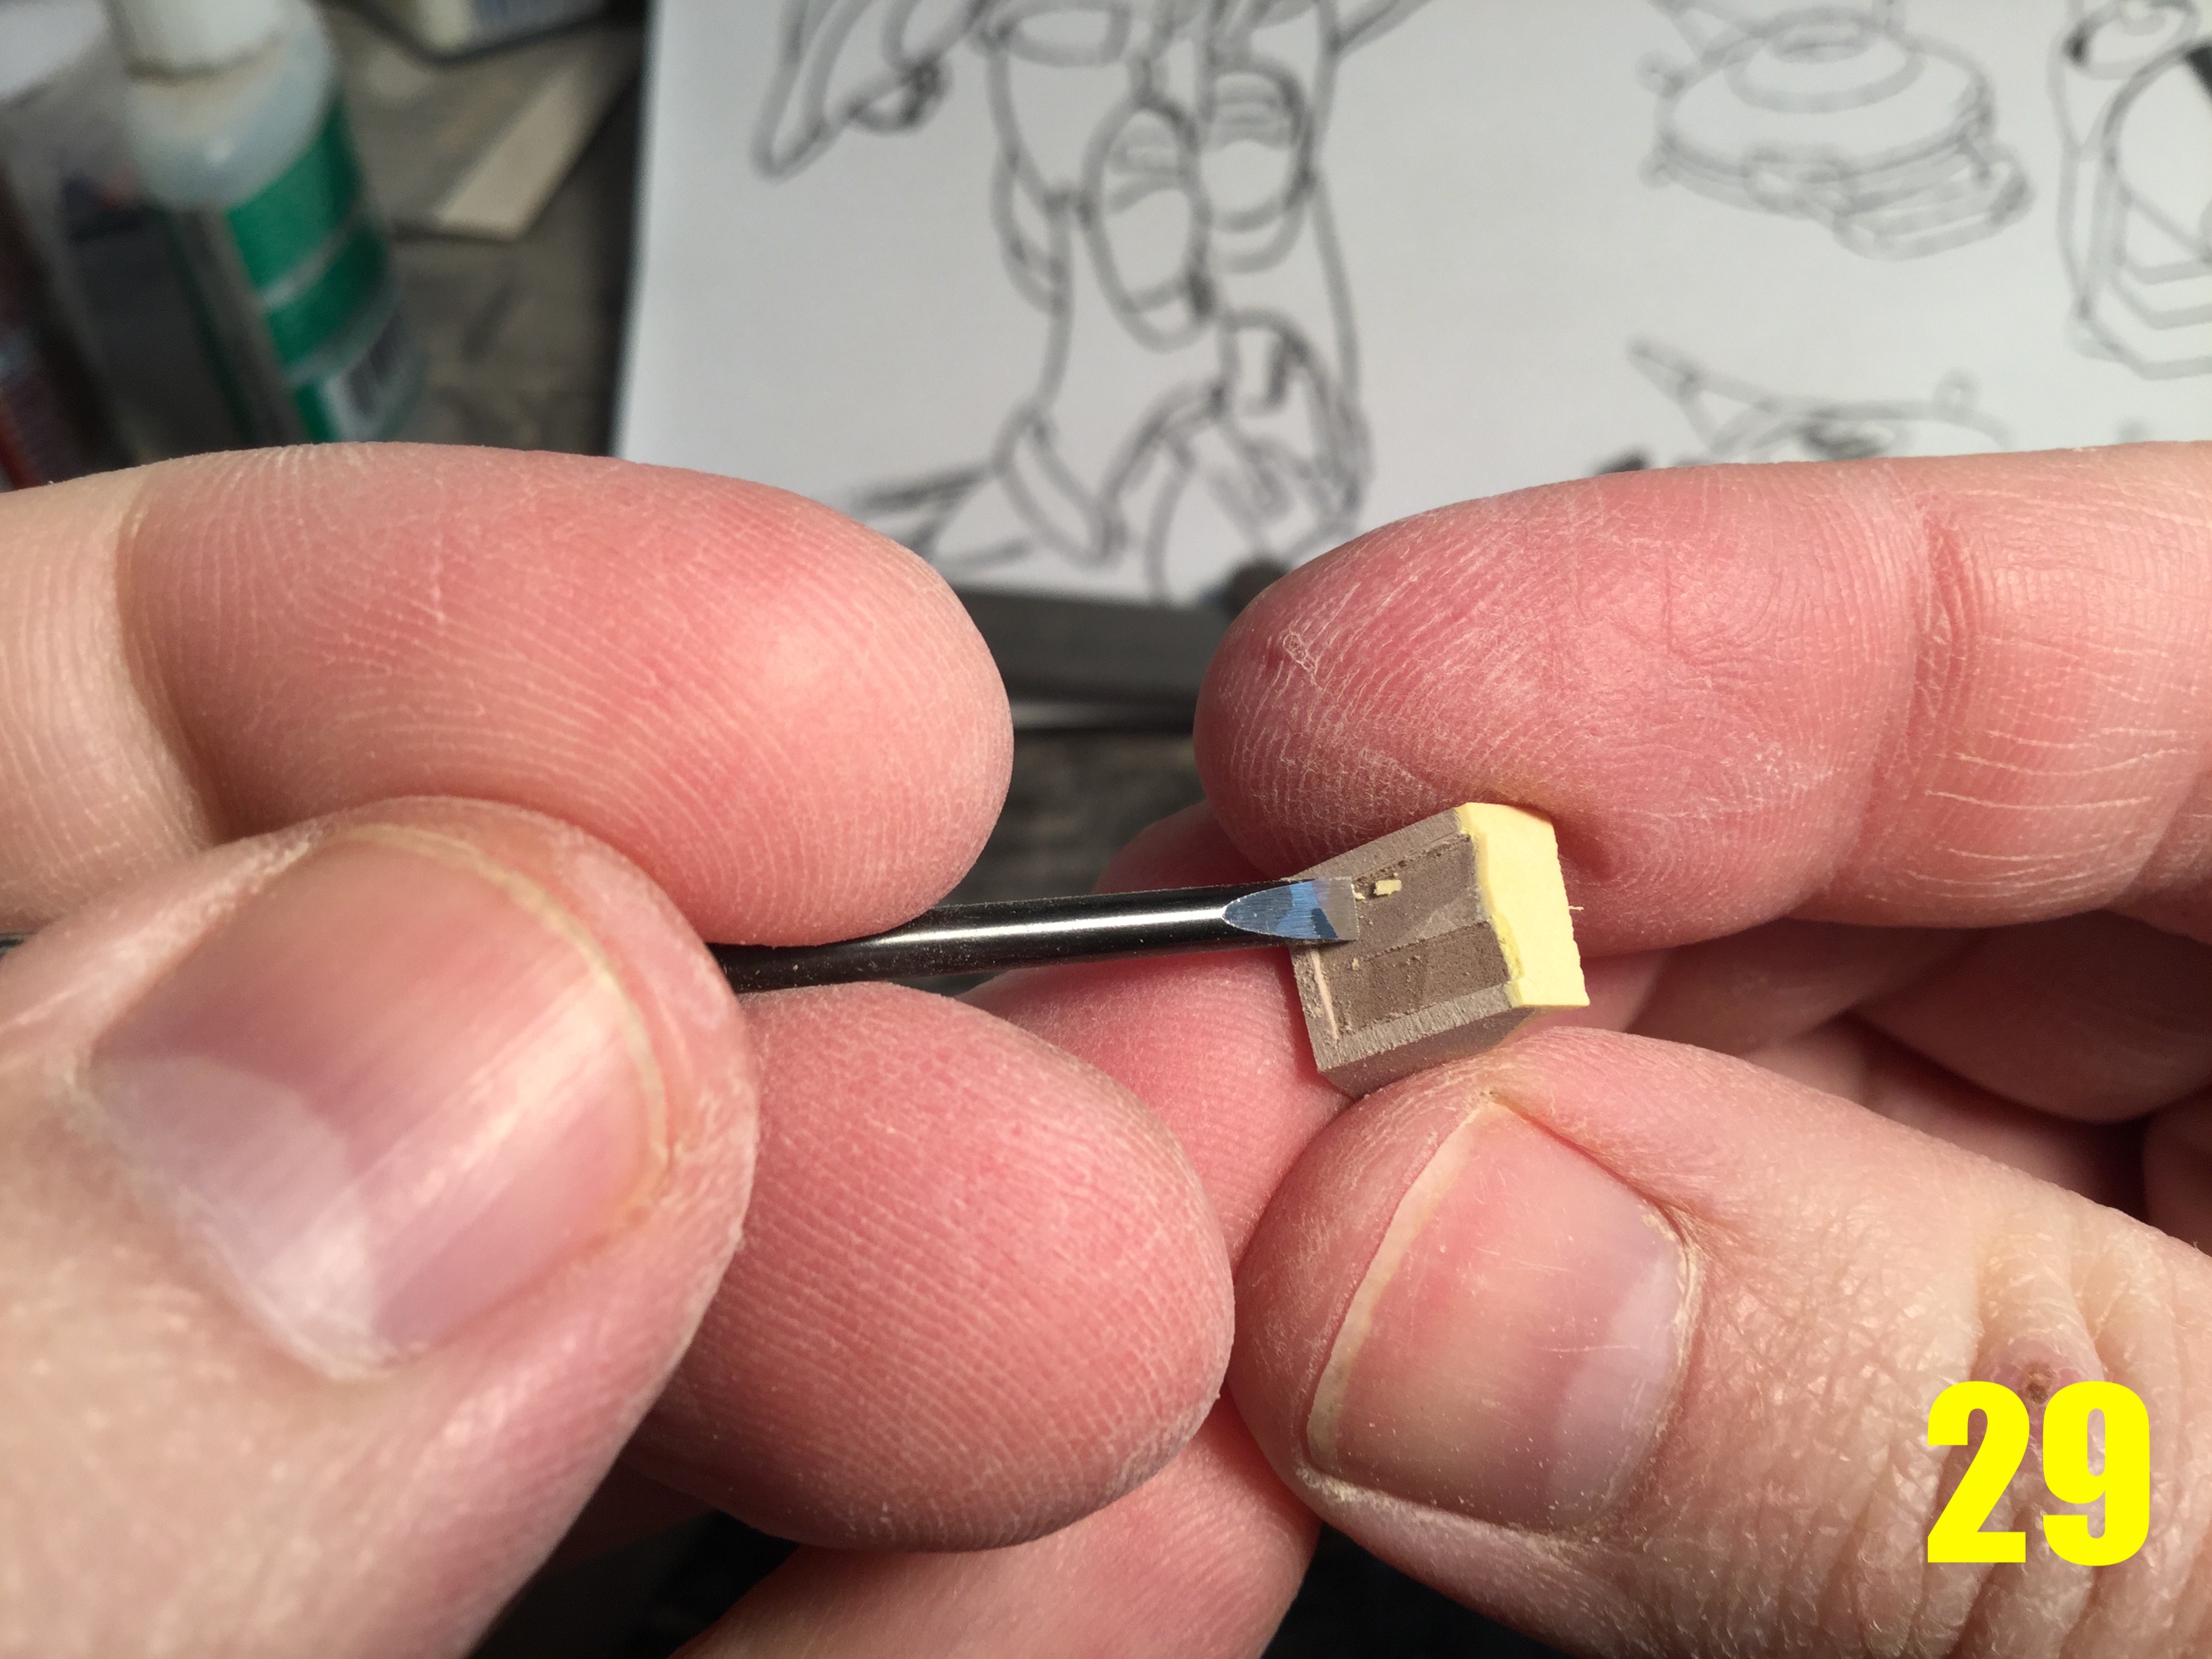
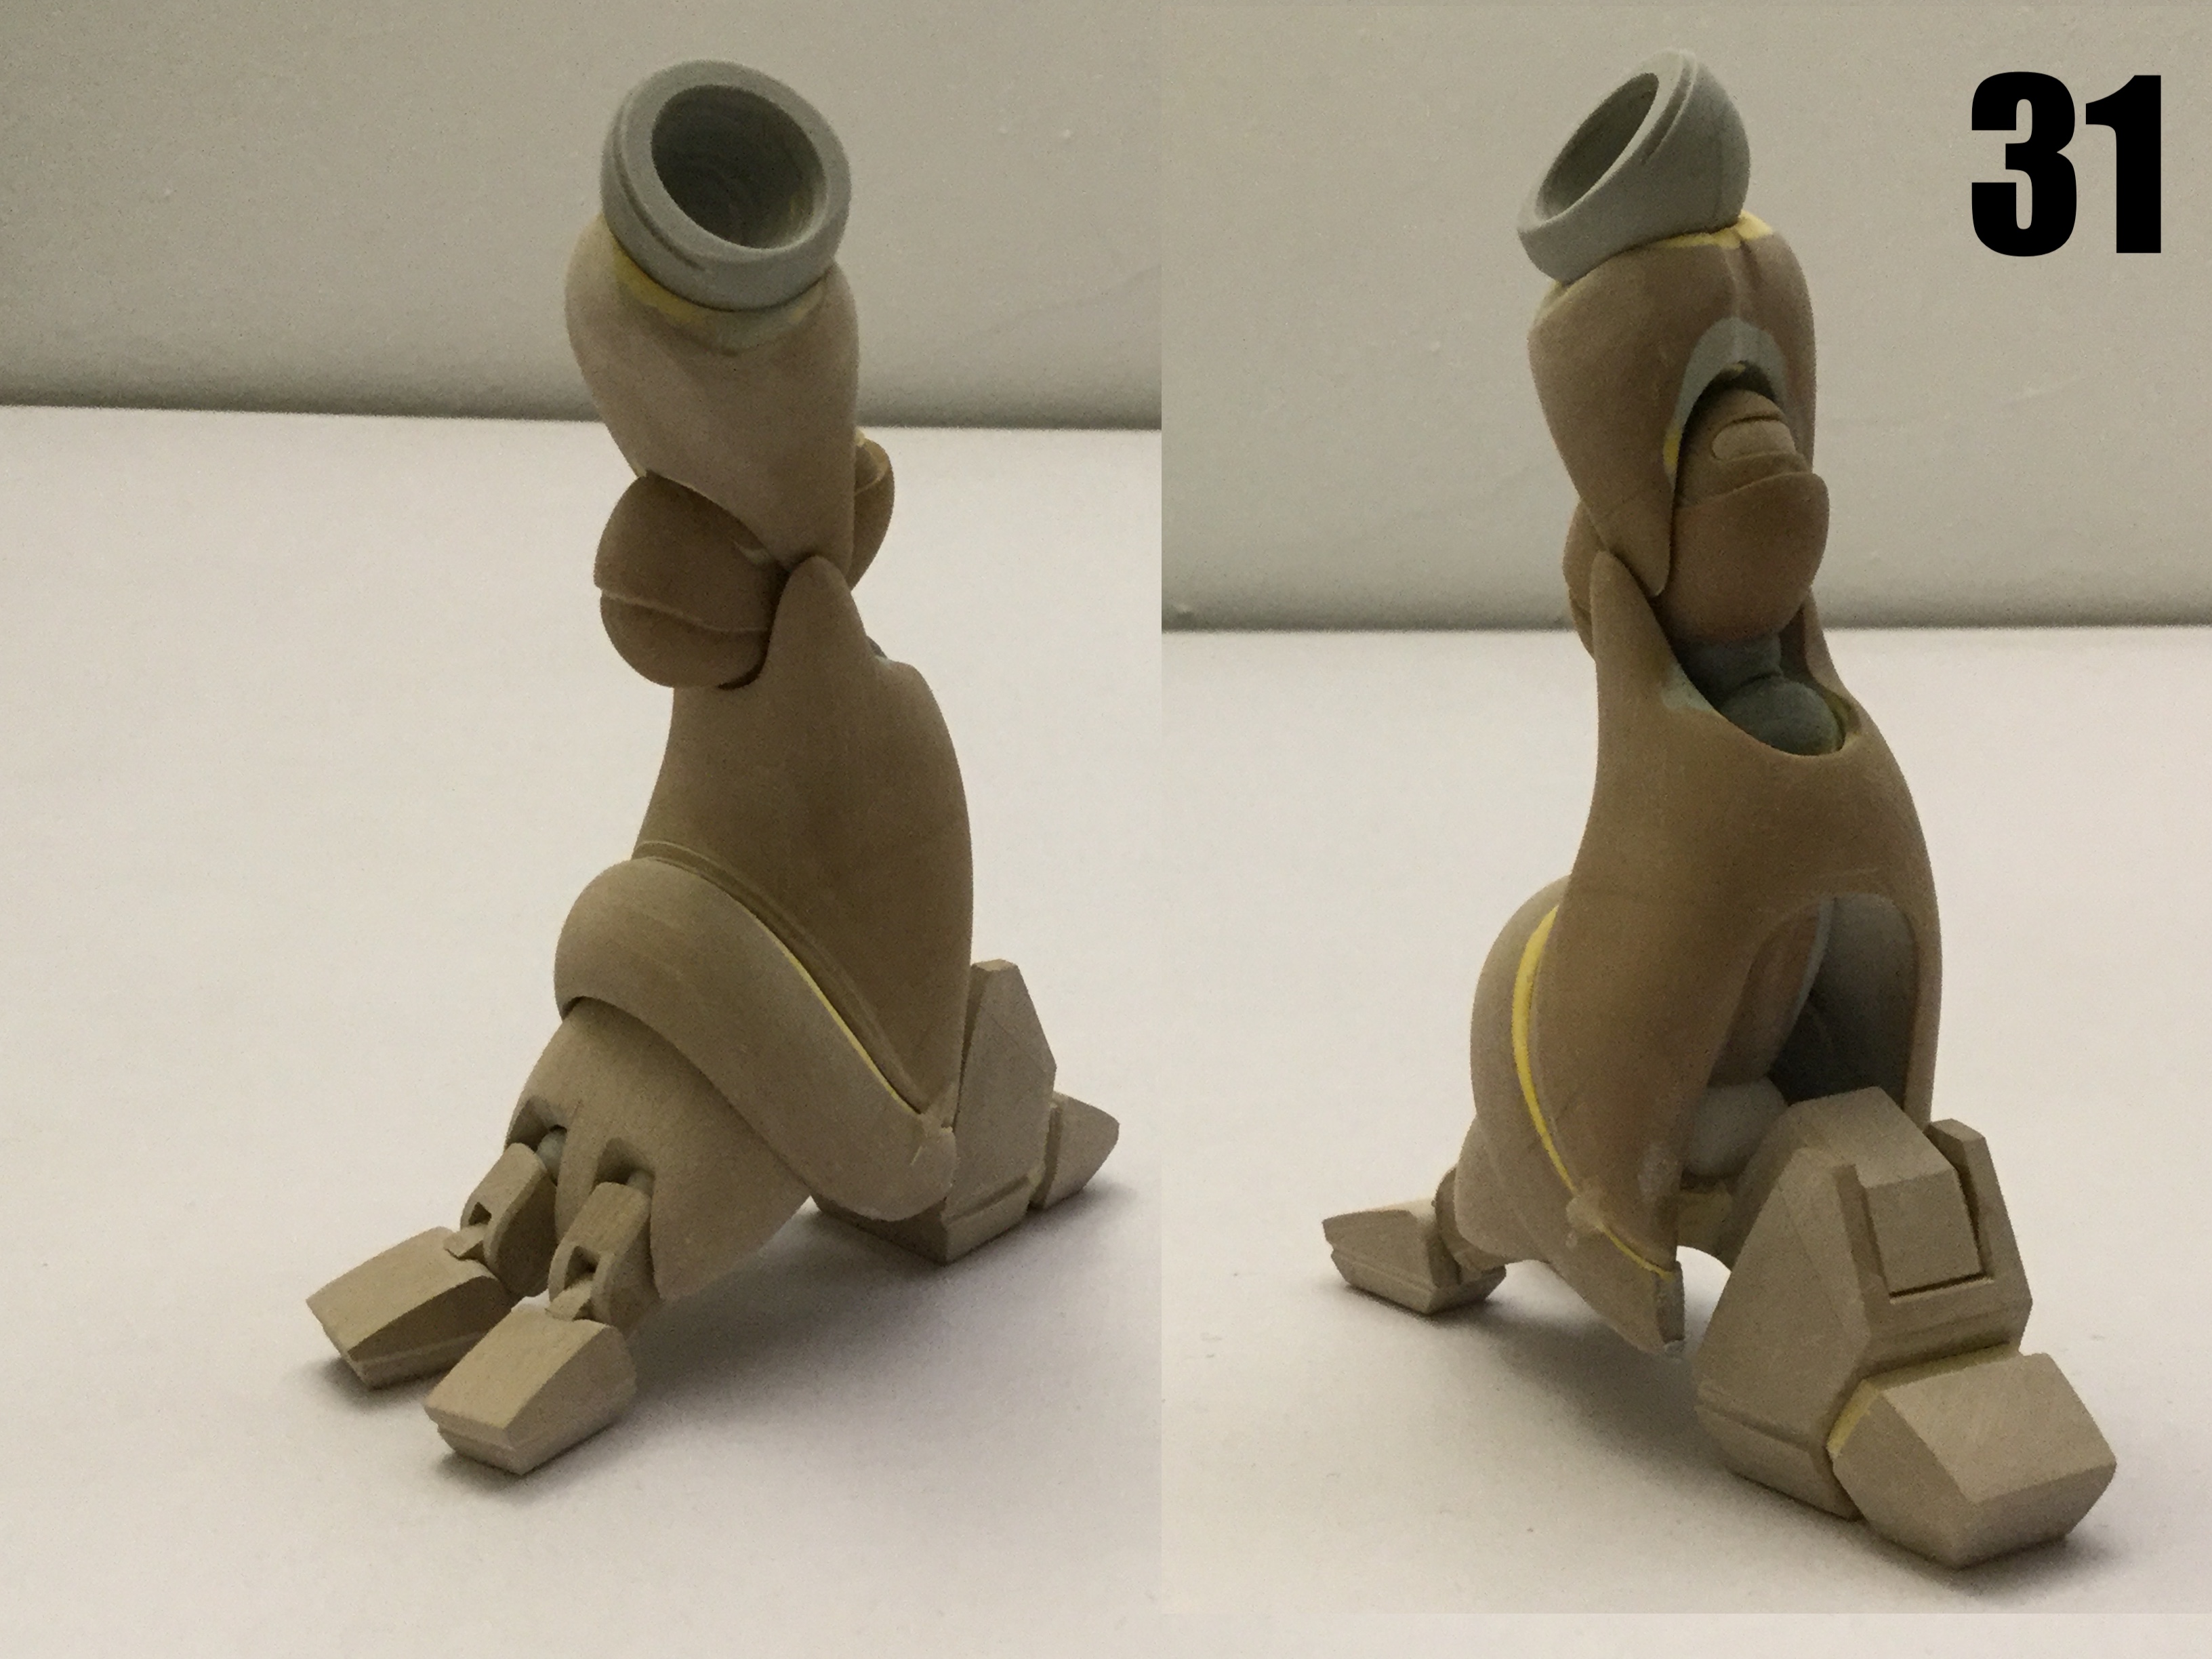
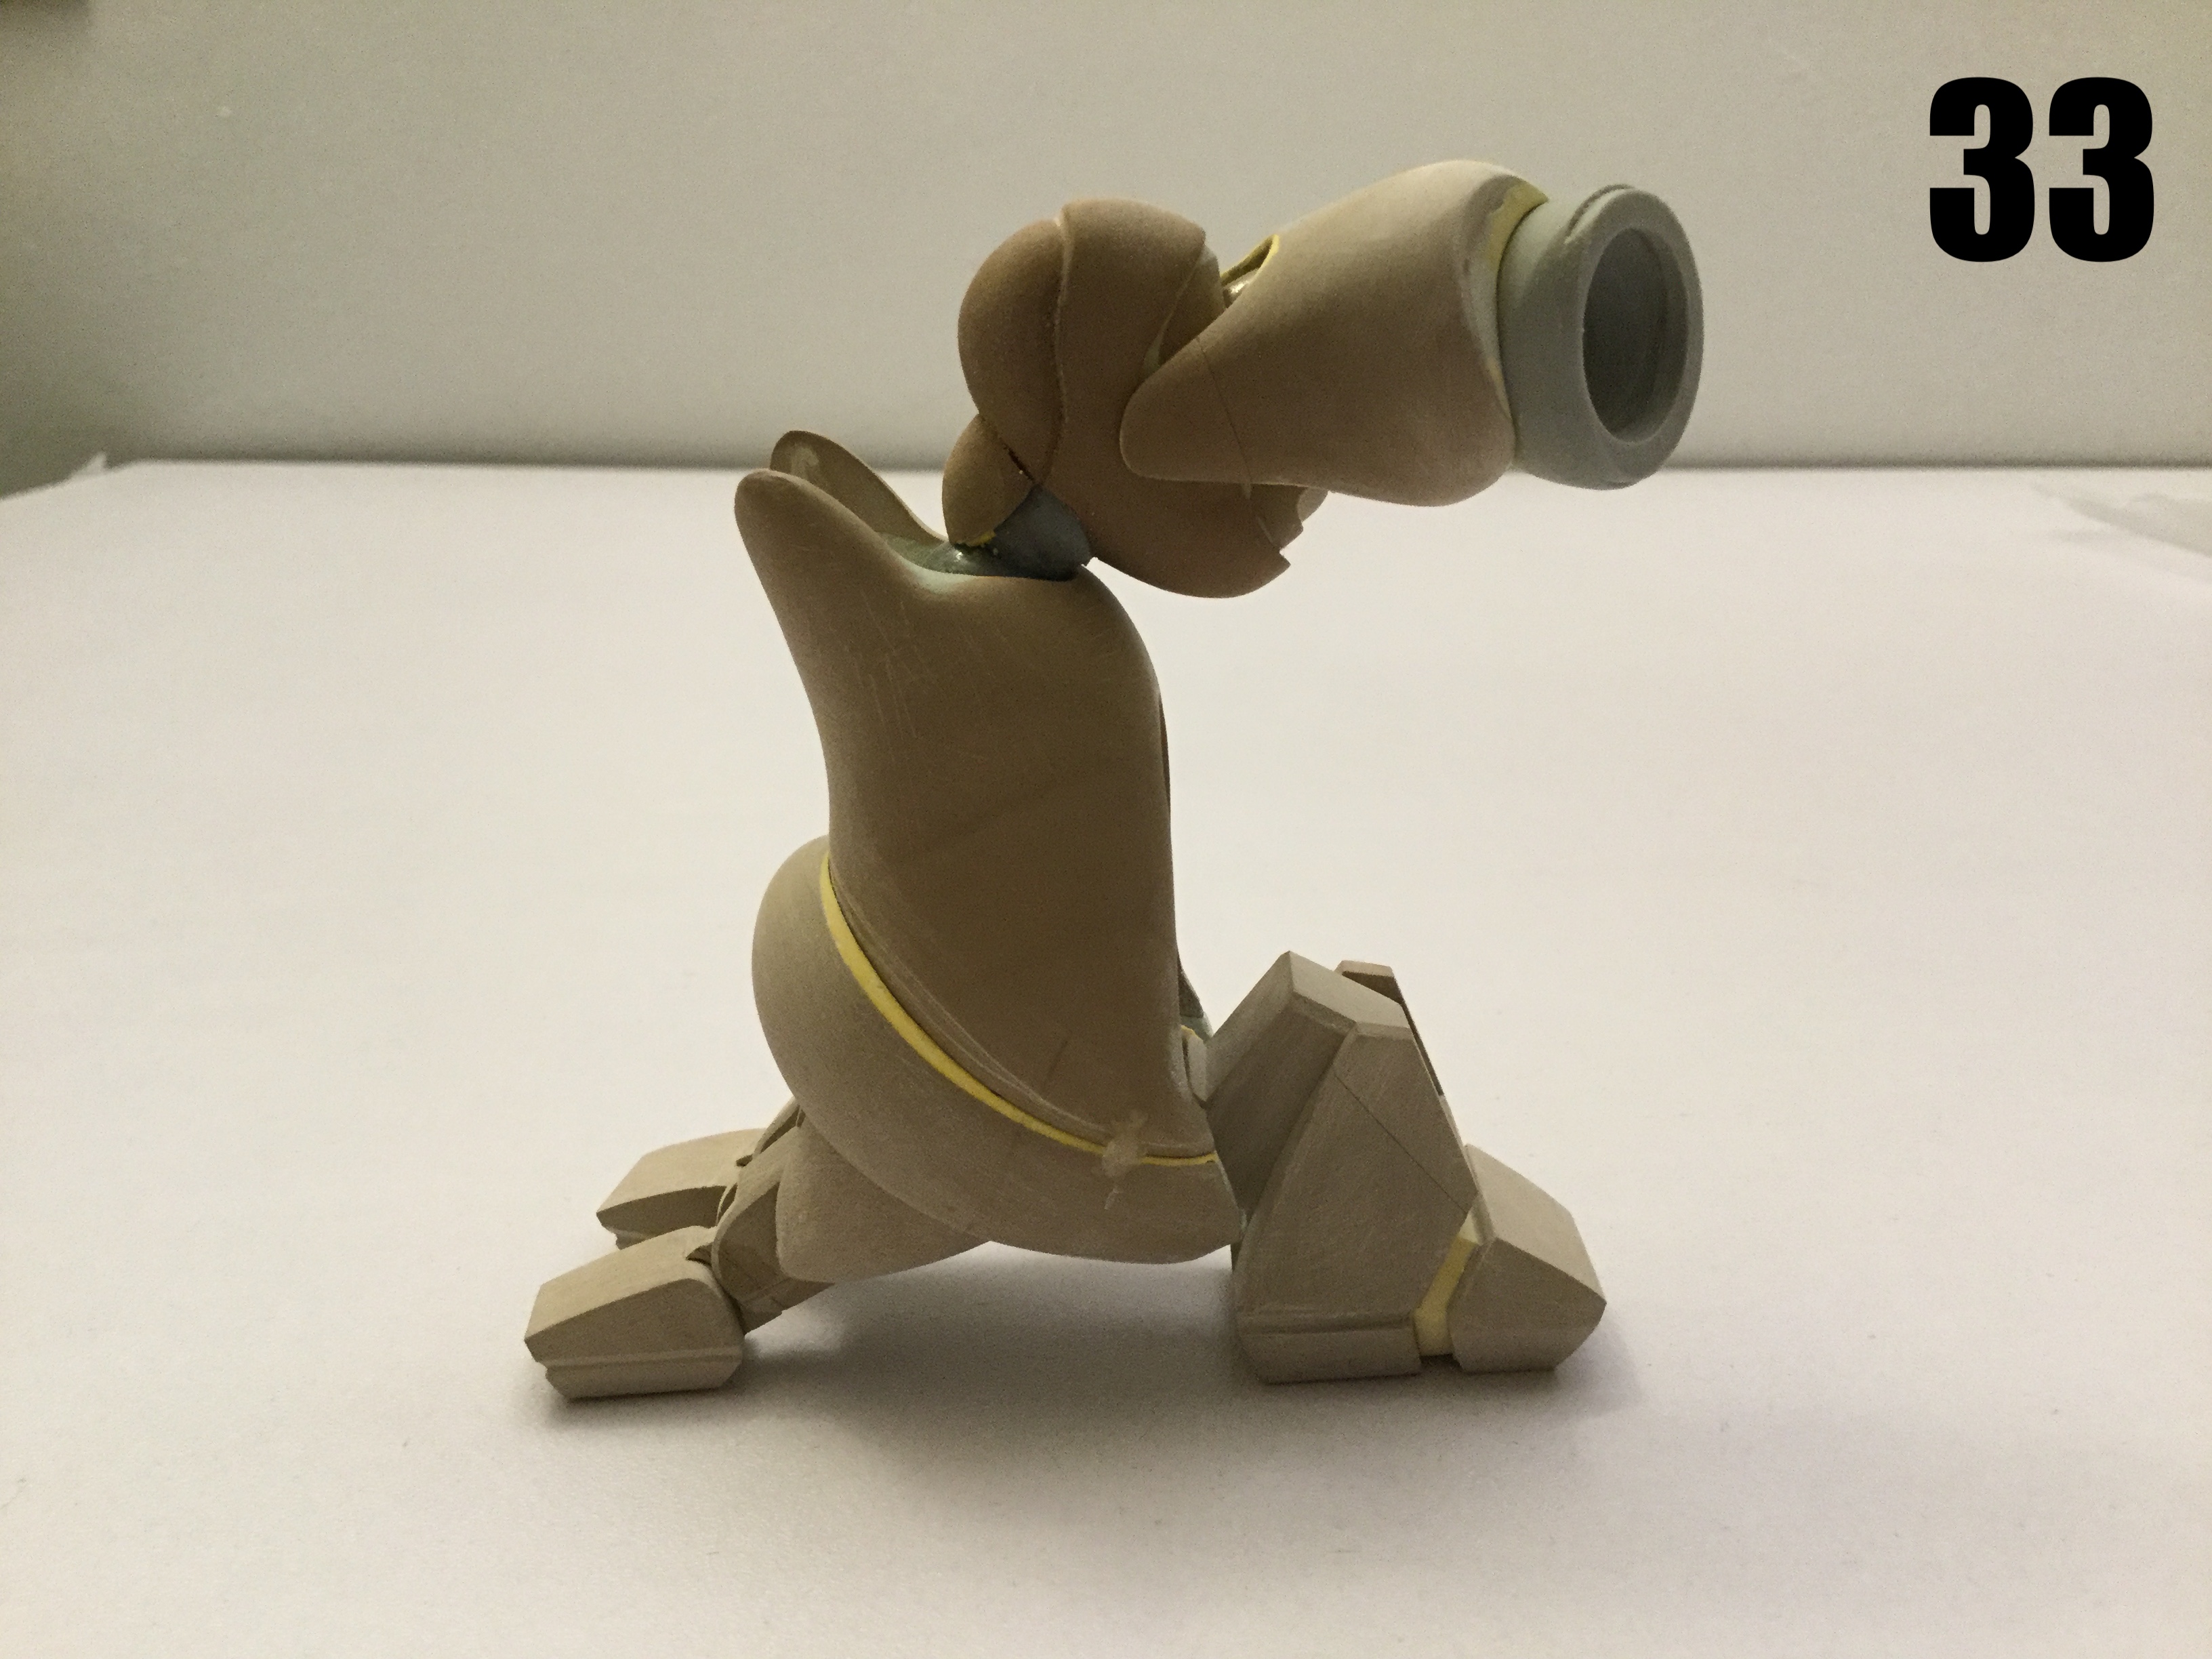
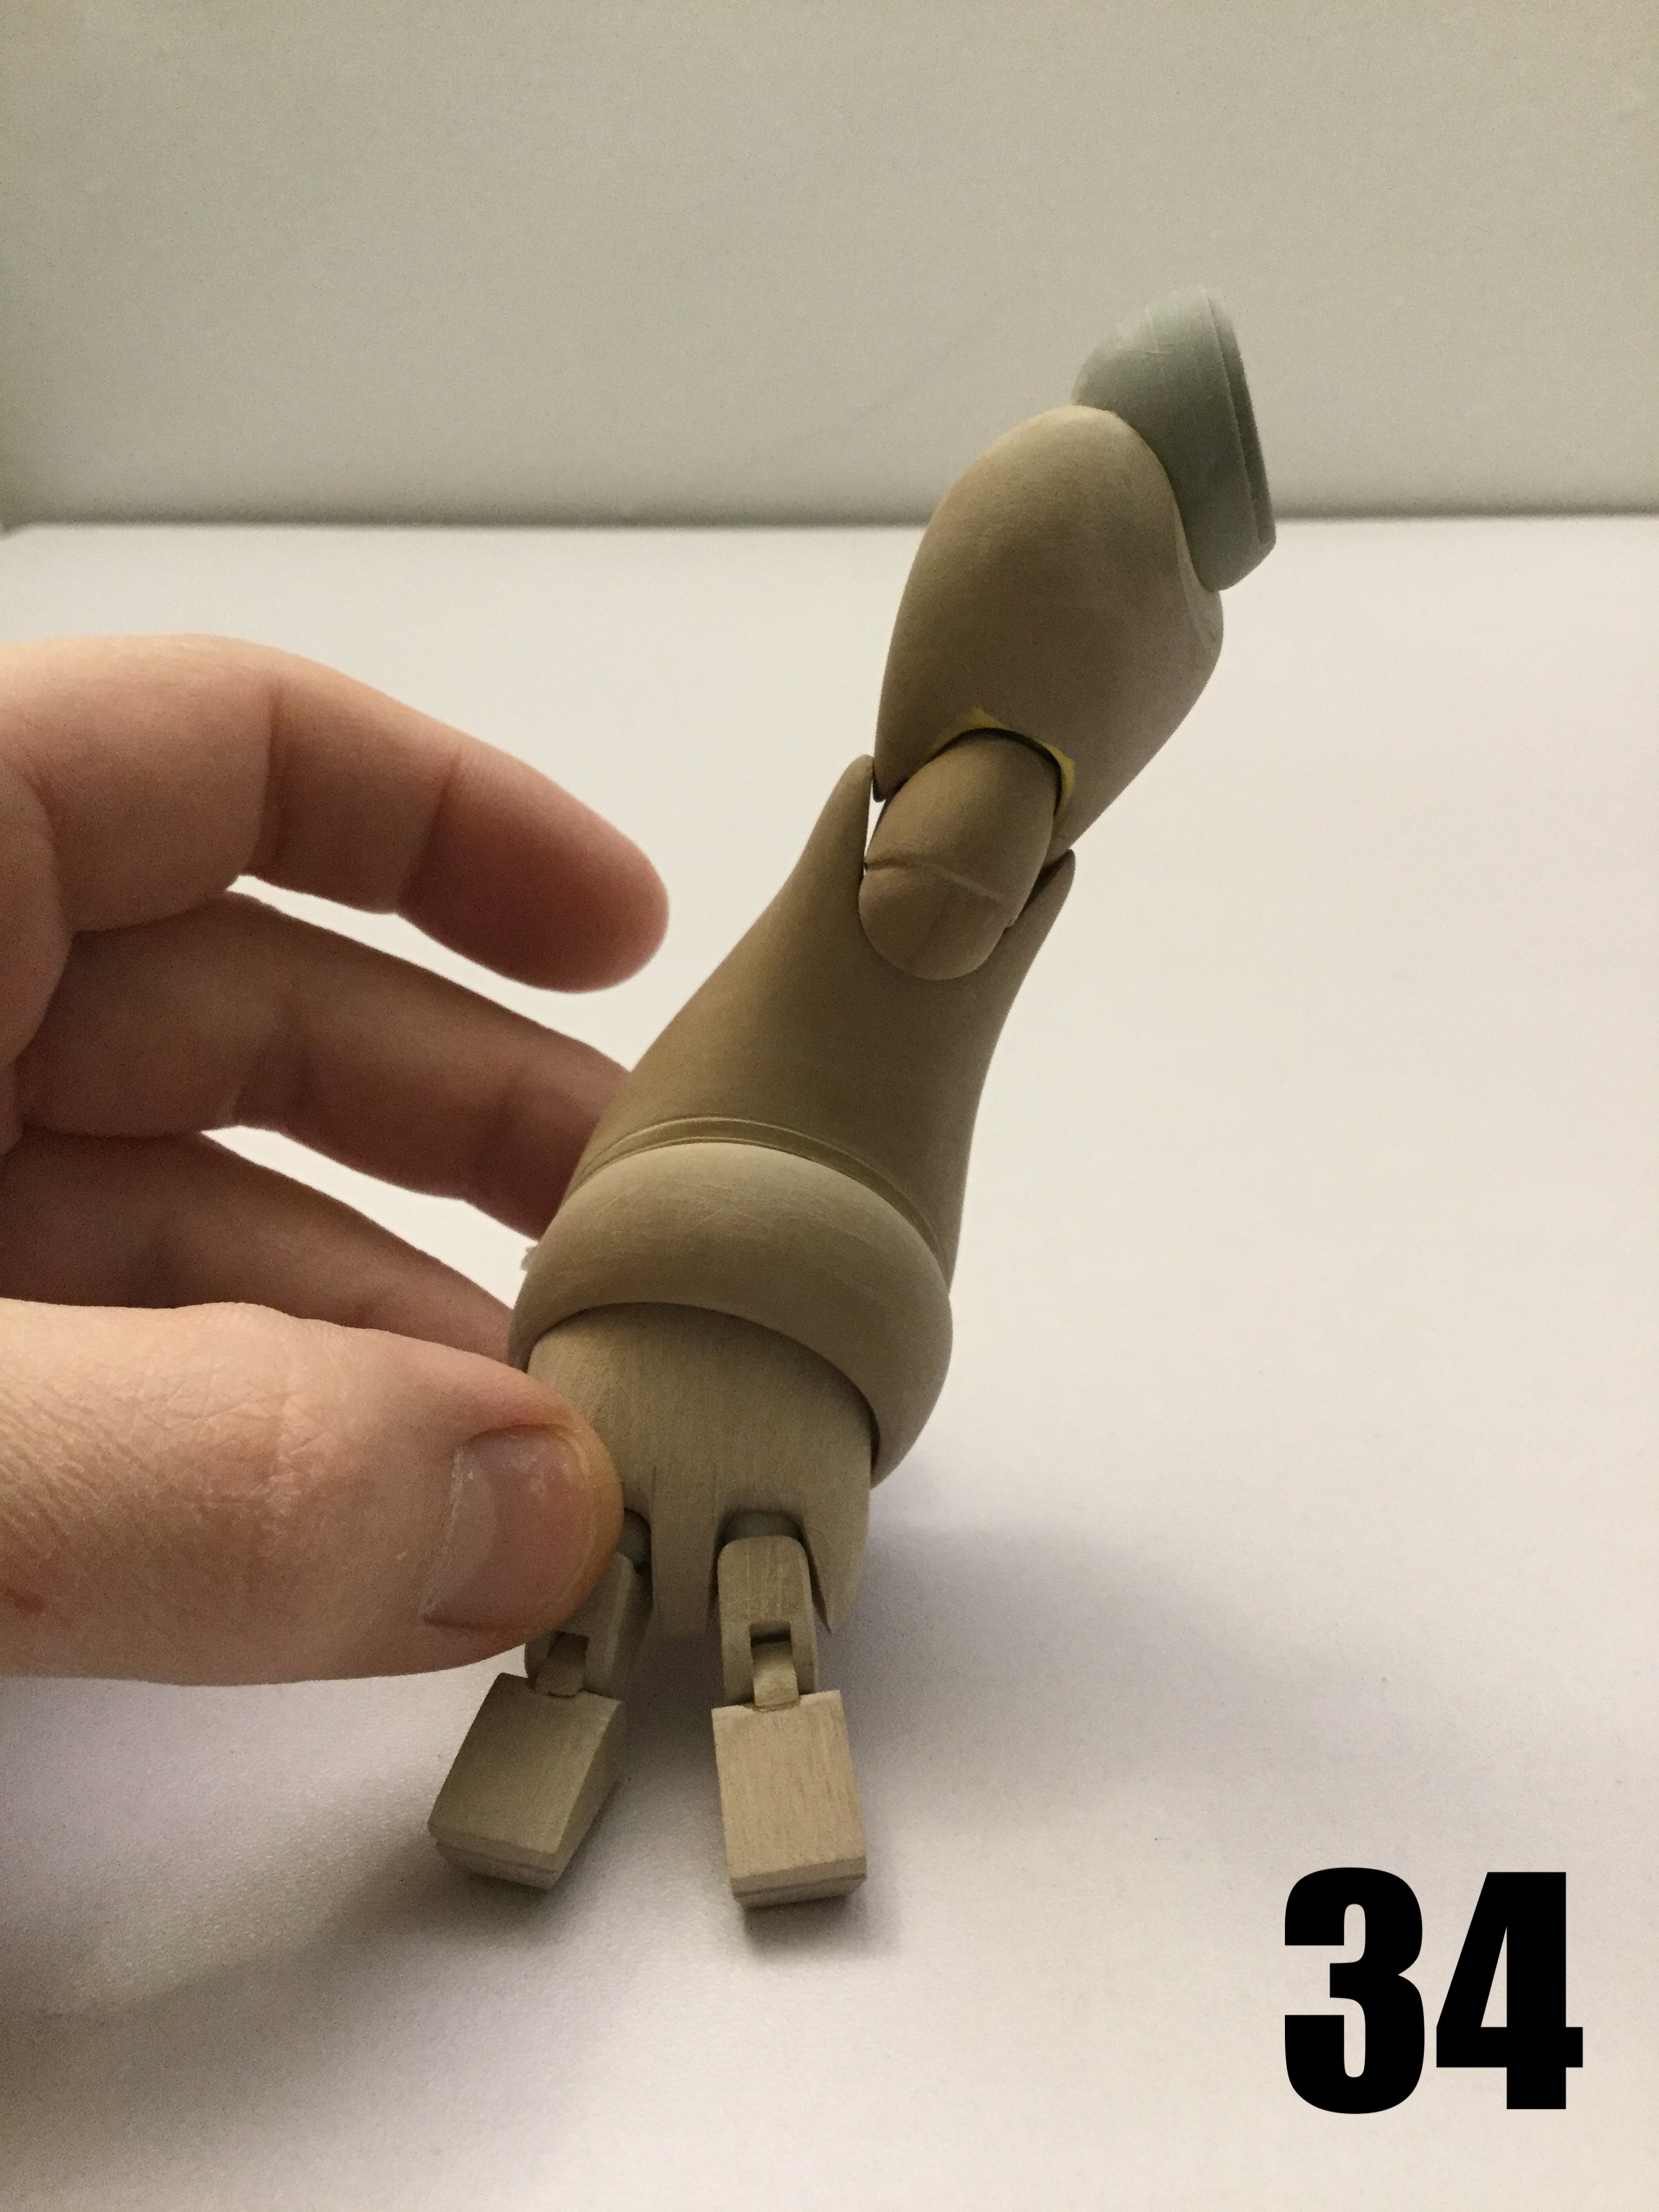
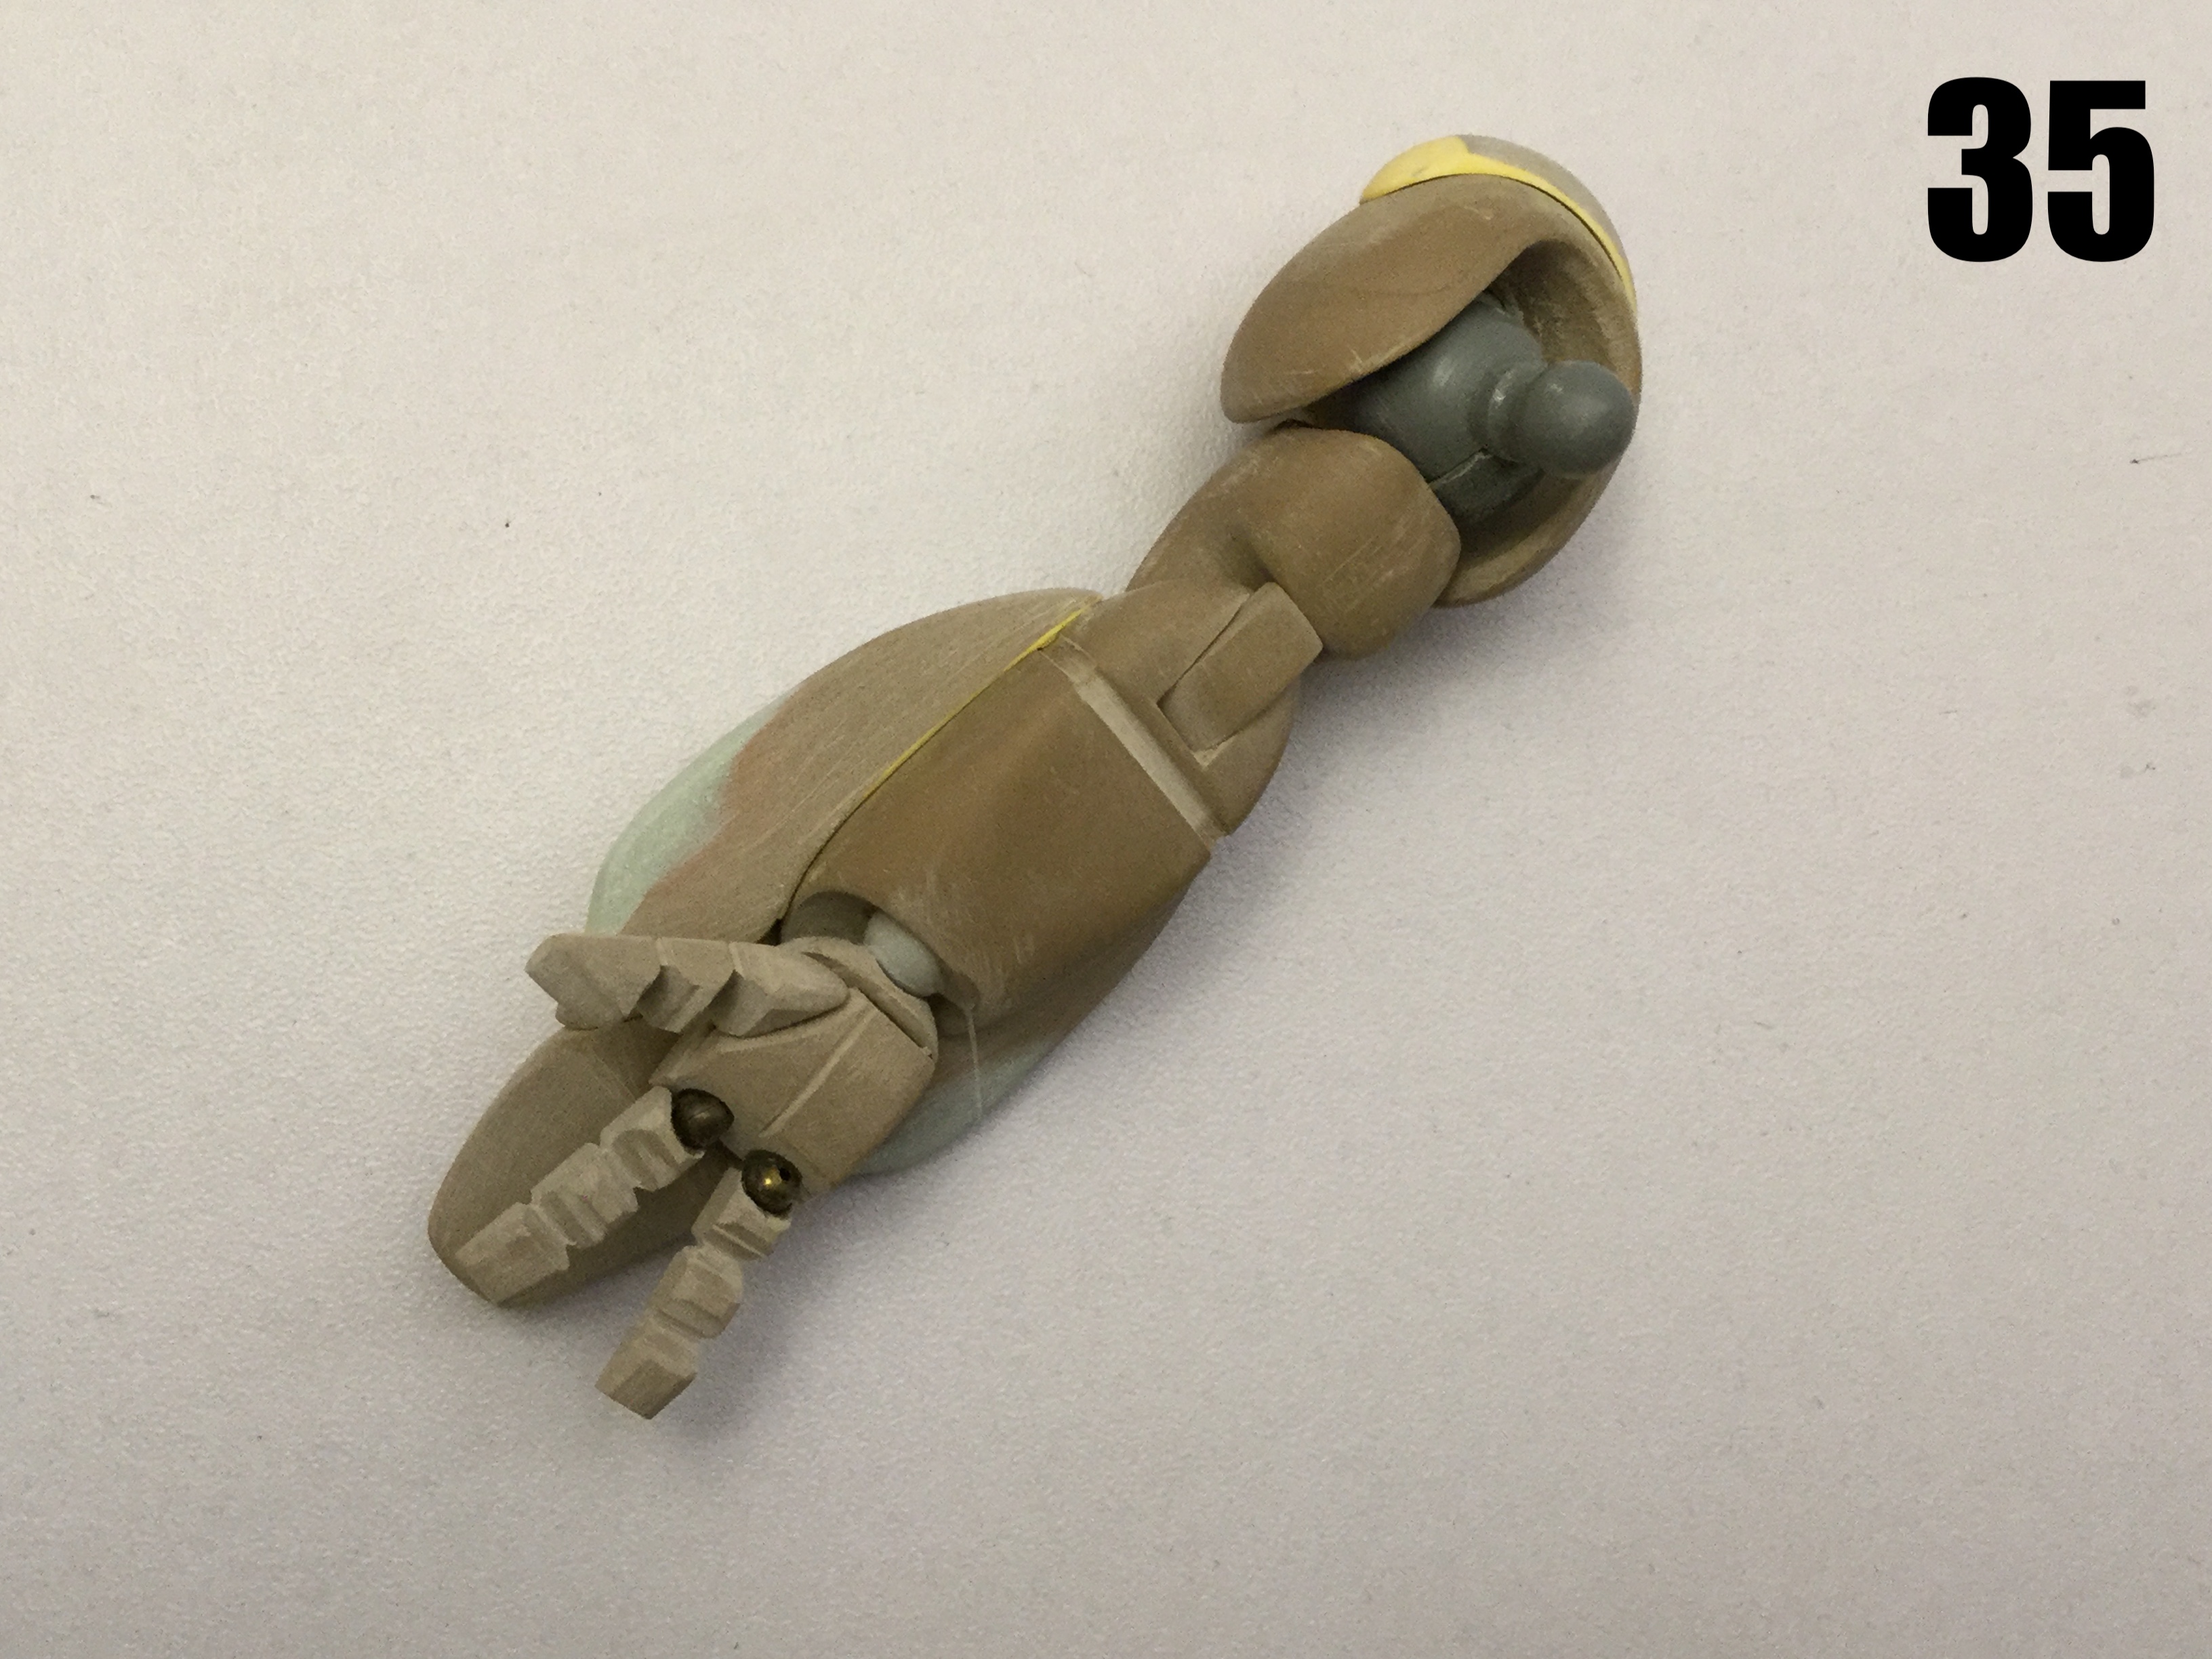
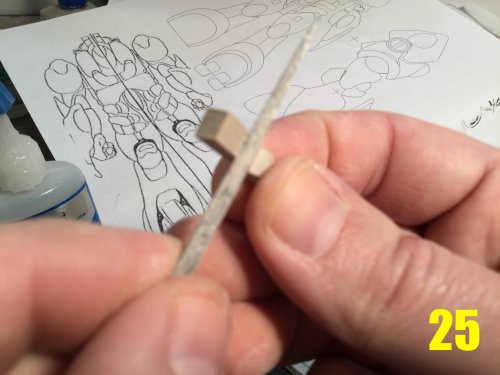
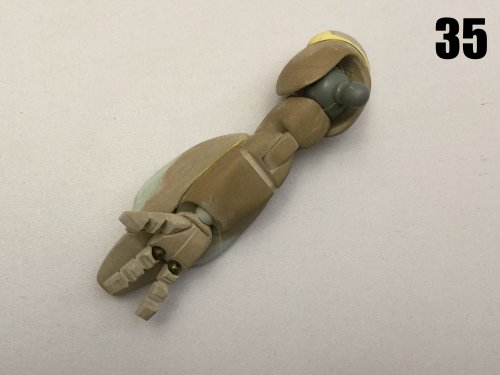
Captain’s log: February 17th, 2021 Even though I try to conserve as much modelling board as possible, I always end up with a huge pile of leftover bits, and that pile grows with every project! Thankfully, beause this project is made-up of numerous smaller blobs, I’ve taken it upon myself to recycle some of my scraps and convert them into useful shapes. Pic 24 is one such instance. Here I’ve cobbled-together threee different parts with some CA glue, and will begin shaping it into one of the blobs on Bio Lloyd’s back. Pic 25: small parts means many slow, delicate operations. Here I’m going in with one of my many files to shape what will become one of the fingers. Pic 26: after many frustrating hours, the hands are getting close to finished. The missing knuckle joints are by design, as I will need to cast multiples of these and bend them into predetermined poses before adding the joints. While it’s certainly possible to scratchbuild all the different fingers directly from modelling board, one thing I’ve learned is to take advantage of the different attributes of various materials. Polyurethane castings will be much easier to cast and shape than carve from scratch, and the fingers will have consistent shapes for both hands. Because these mecha hands will only have three fingers (two and a thumb) the fingers need to be beefier than usual to hold its weapon, especially the drum. Pic 27: remember that cobbled-together scrap in pic 24? That’s it on the right. The different mecha variants have somewhat different back parts, so I’m creating them all modular and separate, which is part of what makes the project so tedious. The advantage is that there will be almost no compromises for the different variations, and even then, I believe that some of those minor differences may be due to a rushed production and rendering schedule than actual differences in shape. Pic 28: more putty forming being done, and much more to come! The part on the left is the chest housing being fitted for a sensor blob for the green variant, while the head parts you see will be for the blue version. Pic 29: it’s nice when my camera actually focuses on the foreground subject like it should! Here I’m chiseling the schnozz for the red variant. The chisel in question is in fact an old flat blade screwdriver which I repurposed. Sometimes it’s just easier to make your own hand tools than bying purpose-designed stuff that just never feels quite right. Pic 30: I decided to use the same visor part as the foundation for all three variants. There are still certain shapes and blobs missing, but that’s because I’ll need to mold the visor first. Those parts will be so small and dainty that it will be safer to mold them as one piece with the head housing. Pics 31-34: the legs are coming along nicely! As you can see, the shapes are stupid authentic to the line art and with a little extra time and effort, I was able to get some impressive range of motion out of them. I even took care to make the inside of the joints look blobby, like the rest of the design. Pic 35 shows the arm and hand assembly. The latter is merely the parts from pic 26 dry-fitted, but they look great together and just like with the leg, the wrist will have excellent range of motion—that will probably be needed for it to properly grasp the handle on its sled. That’s all for this week, don’t forget to tune-in next Wednesday when I’ll have some (semi) full body mock-up shots to show you! Oh, and less than 2 weeks to take advantge of the pre-order pricing. Tick-tock!


-
1/48 SOUTHERN CROSS BIOROID
captain america replied to captain america's topic in Anime or Science Fiction
The paper templates are mostly shape outlines. When I have to deal with more complex forms, the paper templates can only convey so much info, so once I start Dremeling I have to switch over to intuitive mode. Also, there's a lot of stuff I just eyeball, like the knee joint. I had one thing planned in the drafting stage, but once I started cutting, I saw that I could get more range of motion if I ventured beyond the blueprints, which is what I did. That's both the challenge and fun of taking sketches that someone phoned-in and turning them into something usable. I take Paypal & Bitcoin, just PM me for details. -
1/48 SOUTHERN CROSS BIOROID
captain america replied to captain america's topic in Anime or Science Fiction
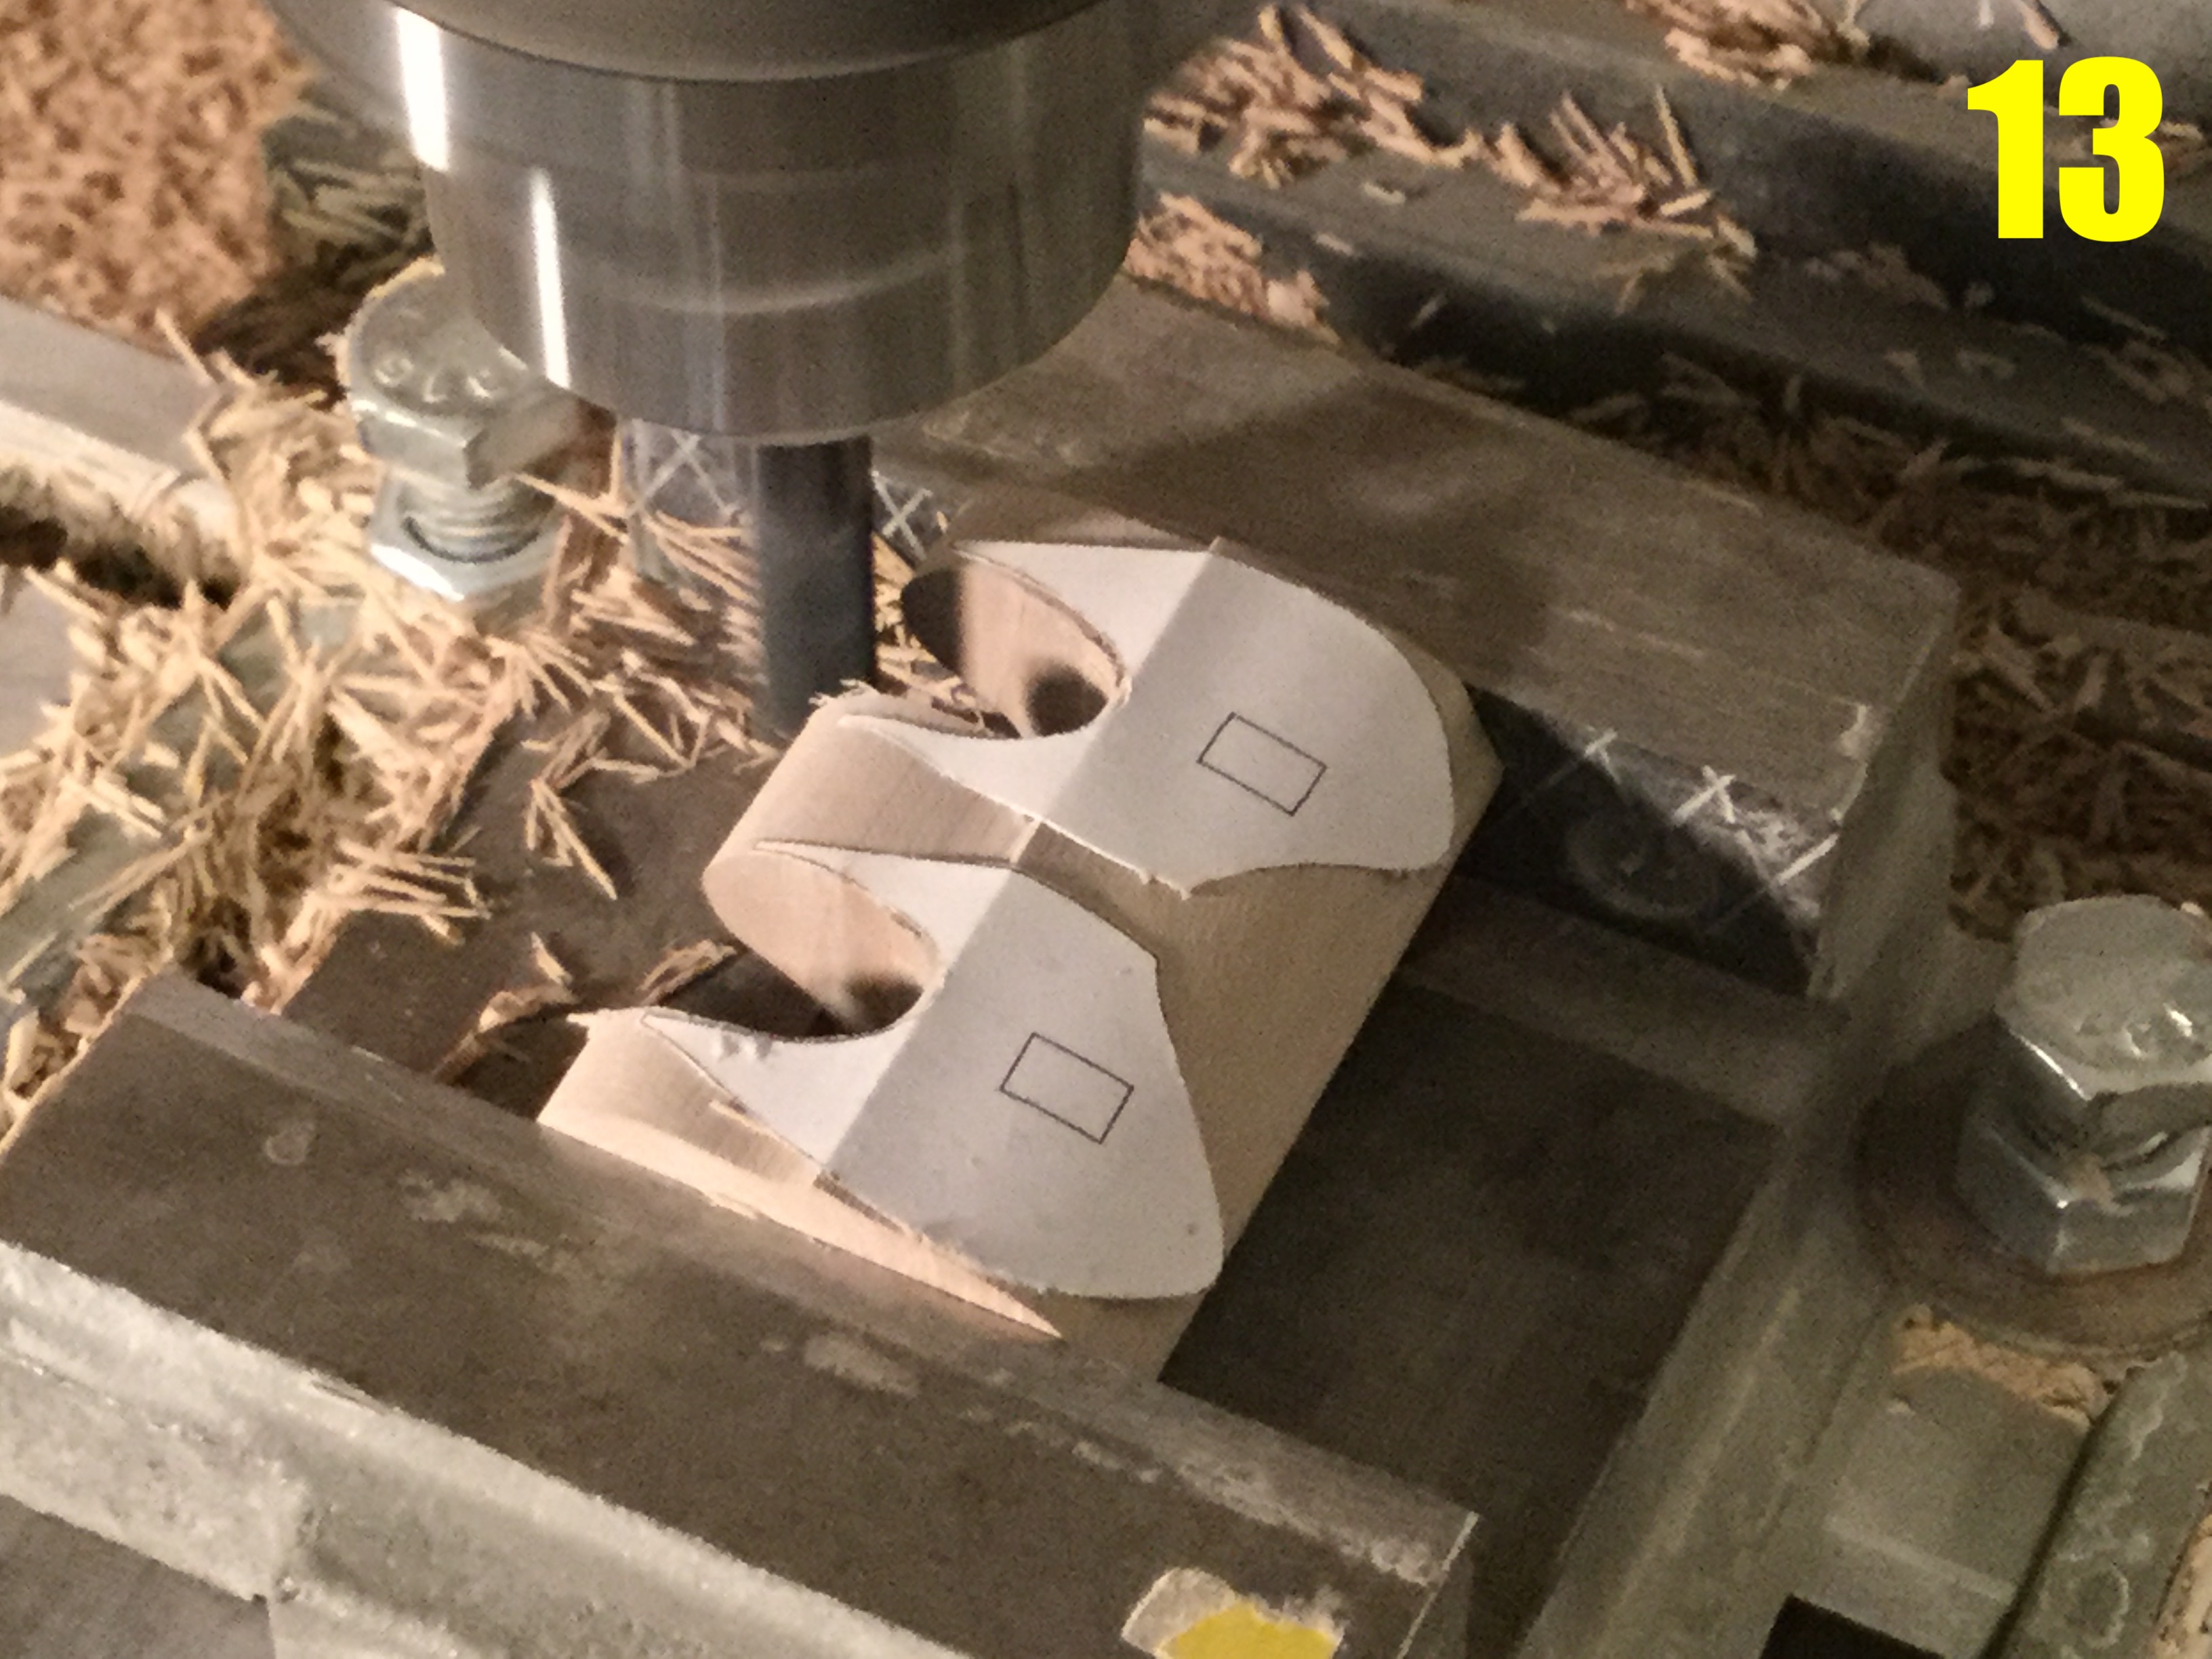
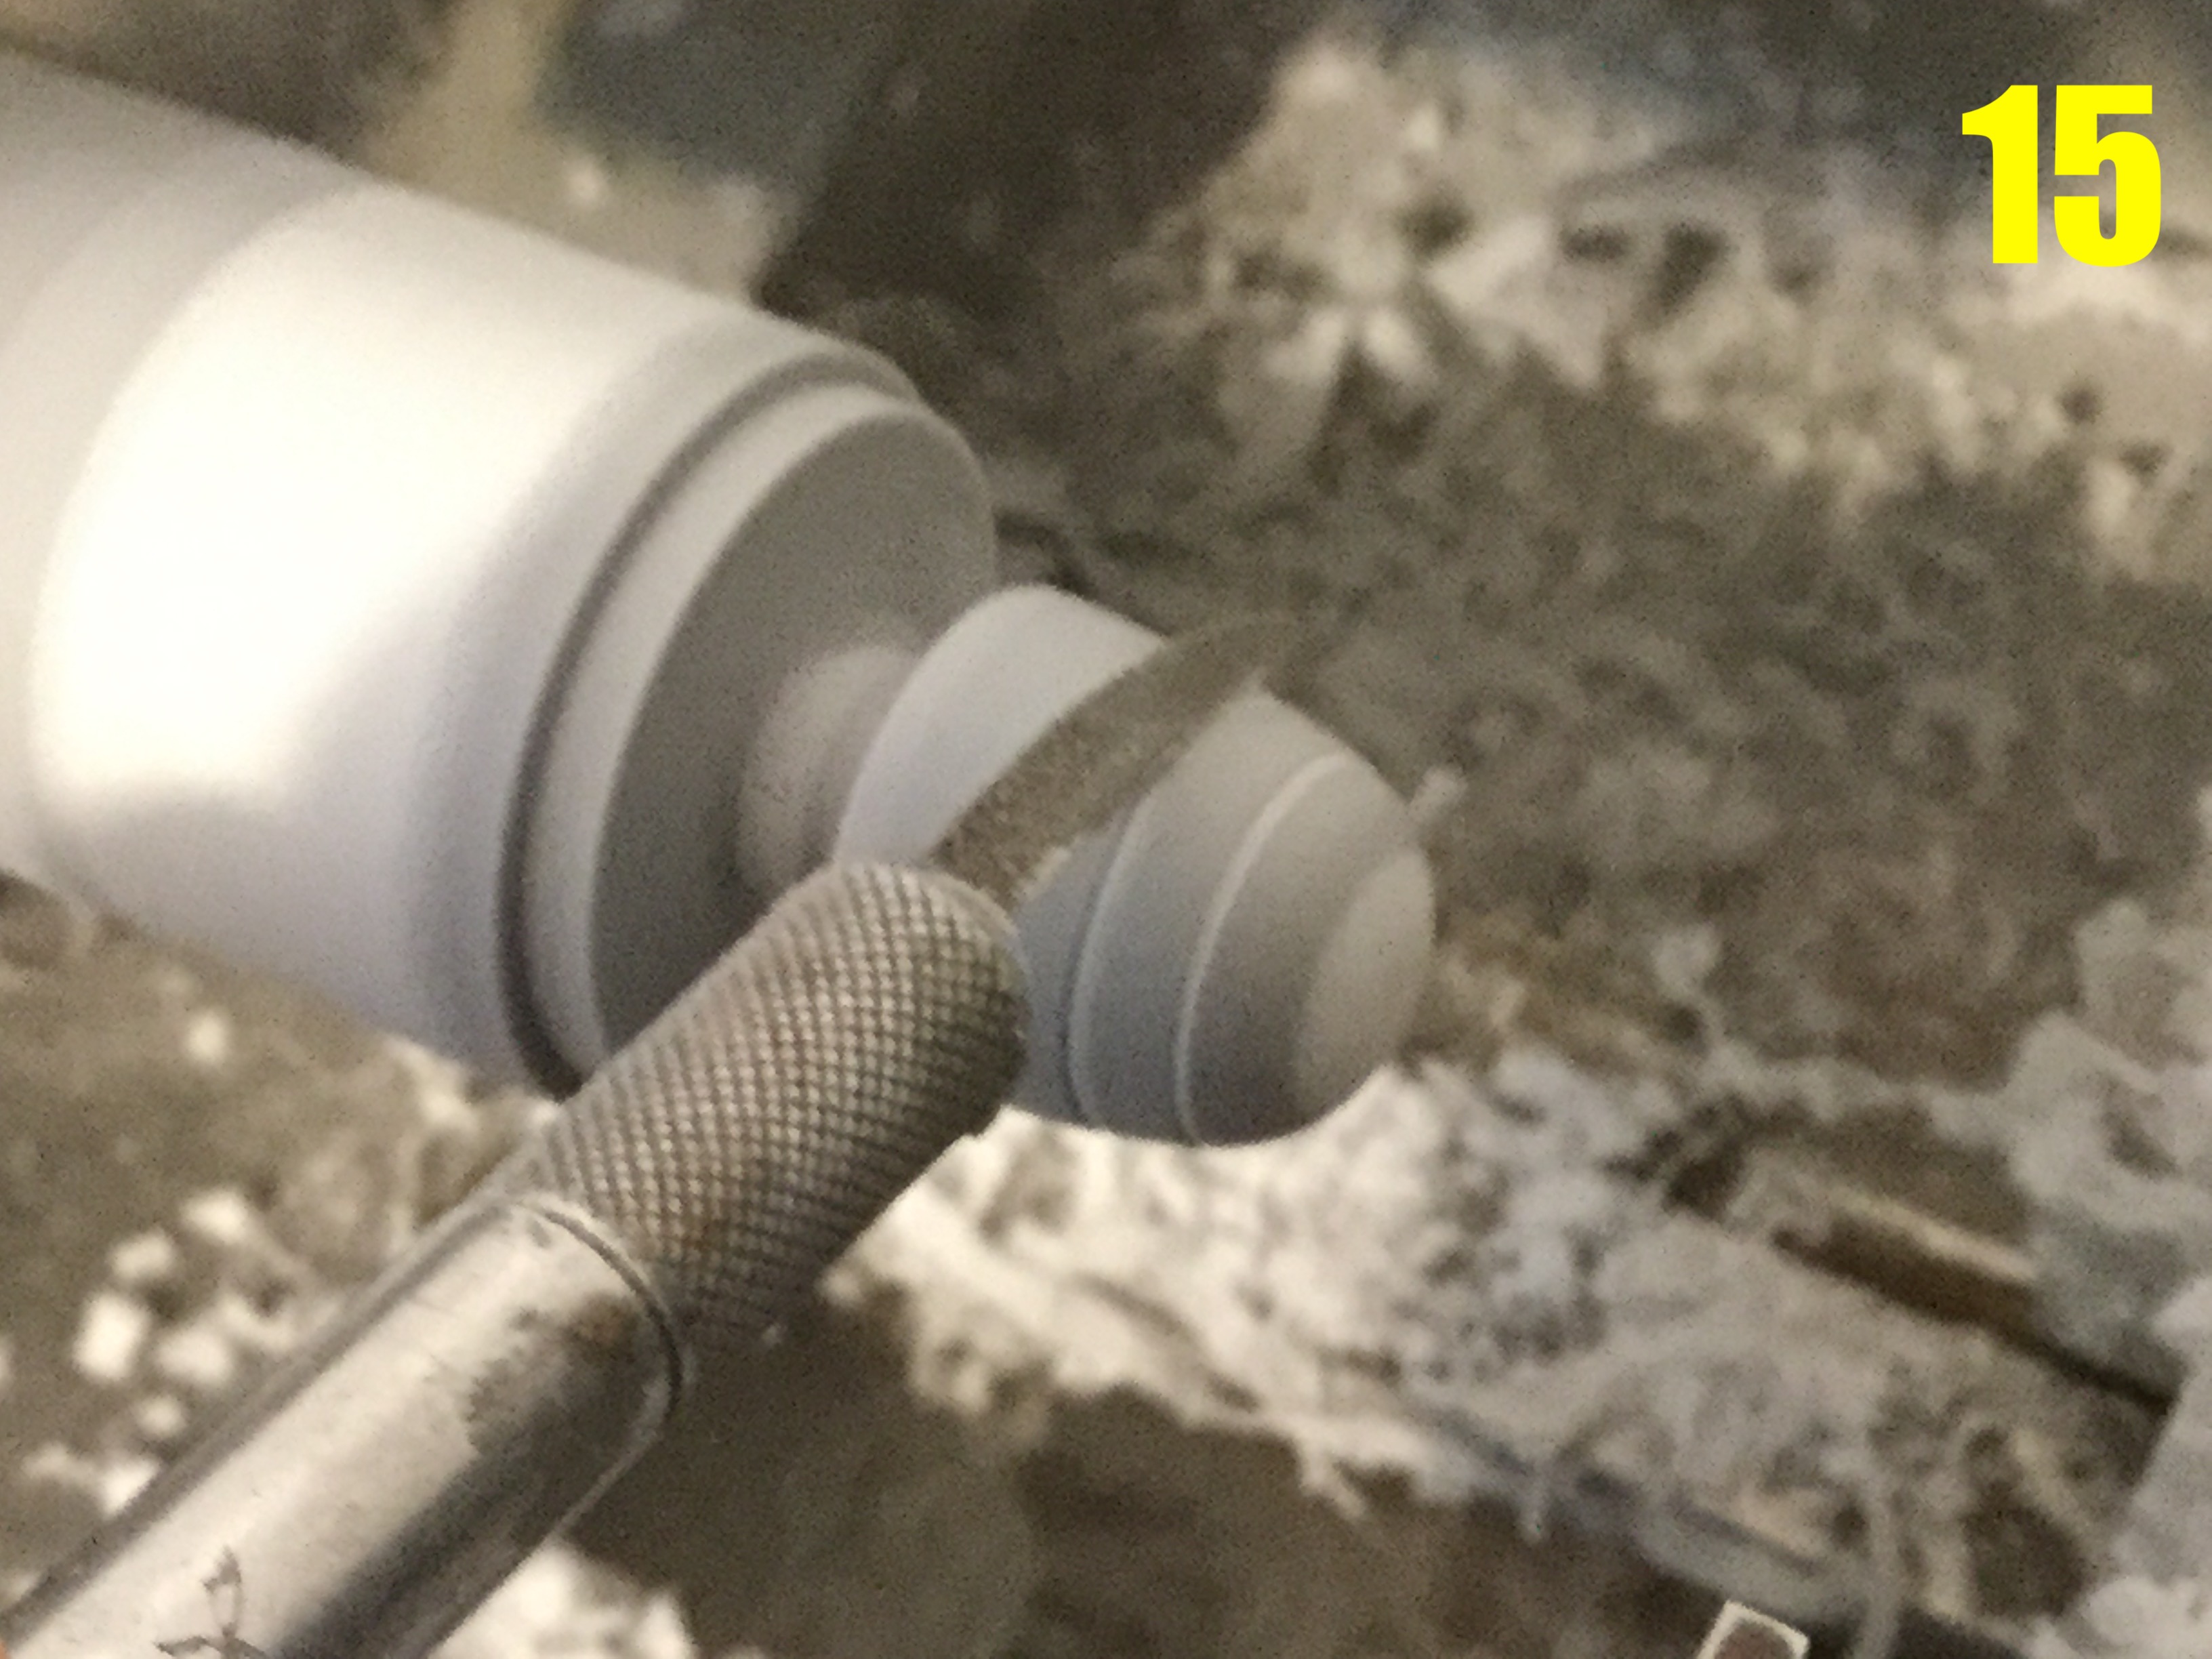
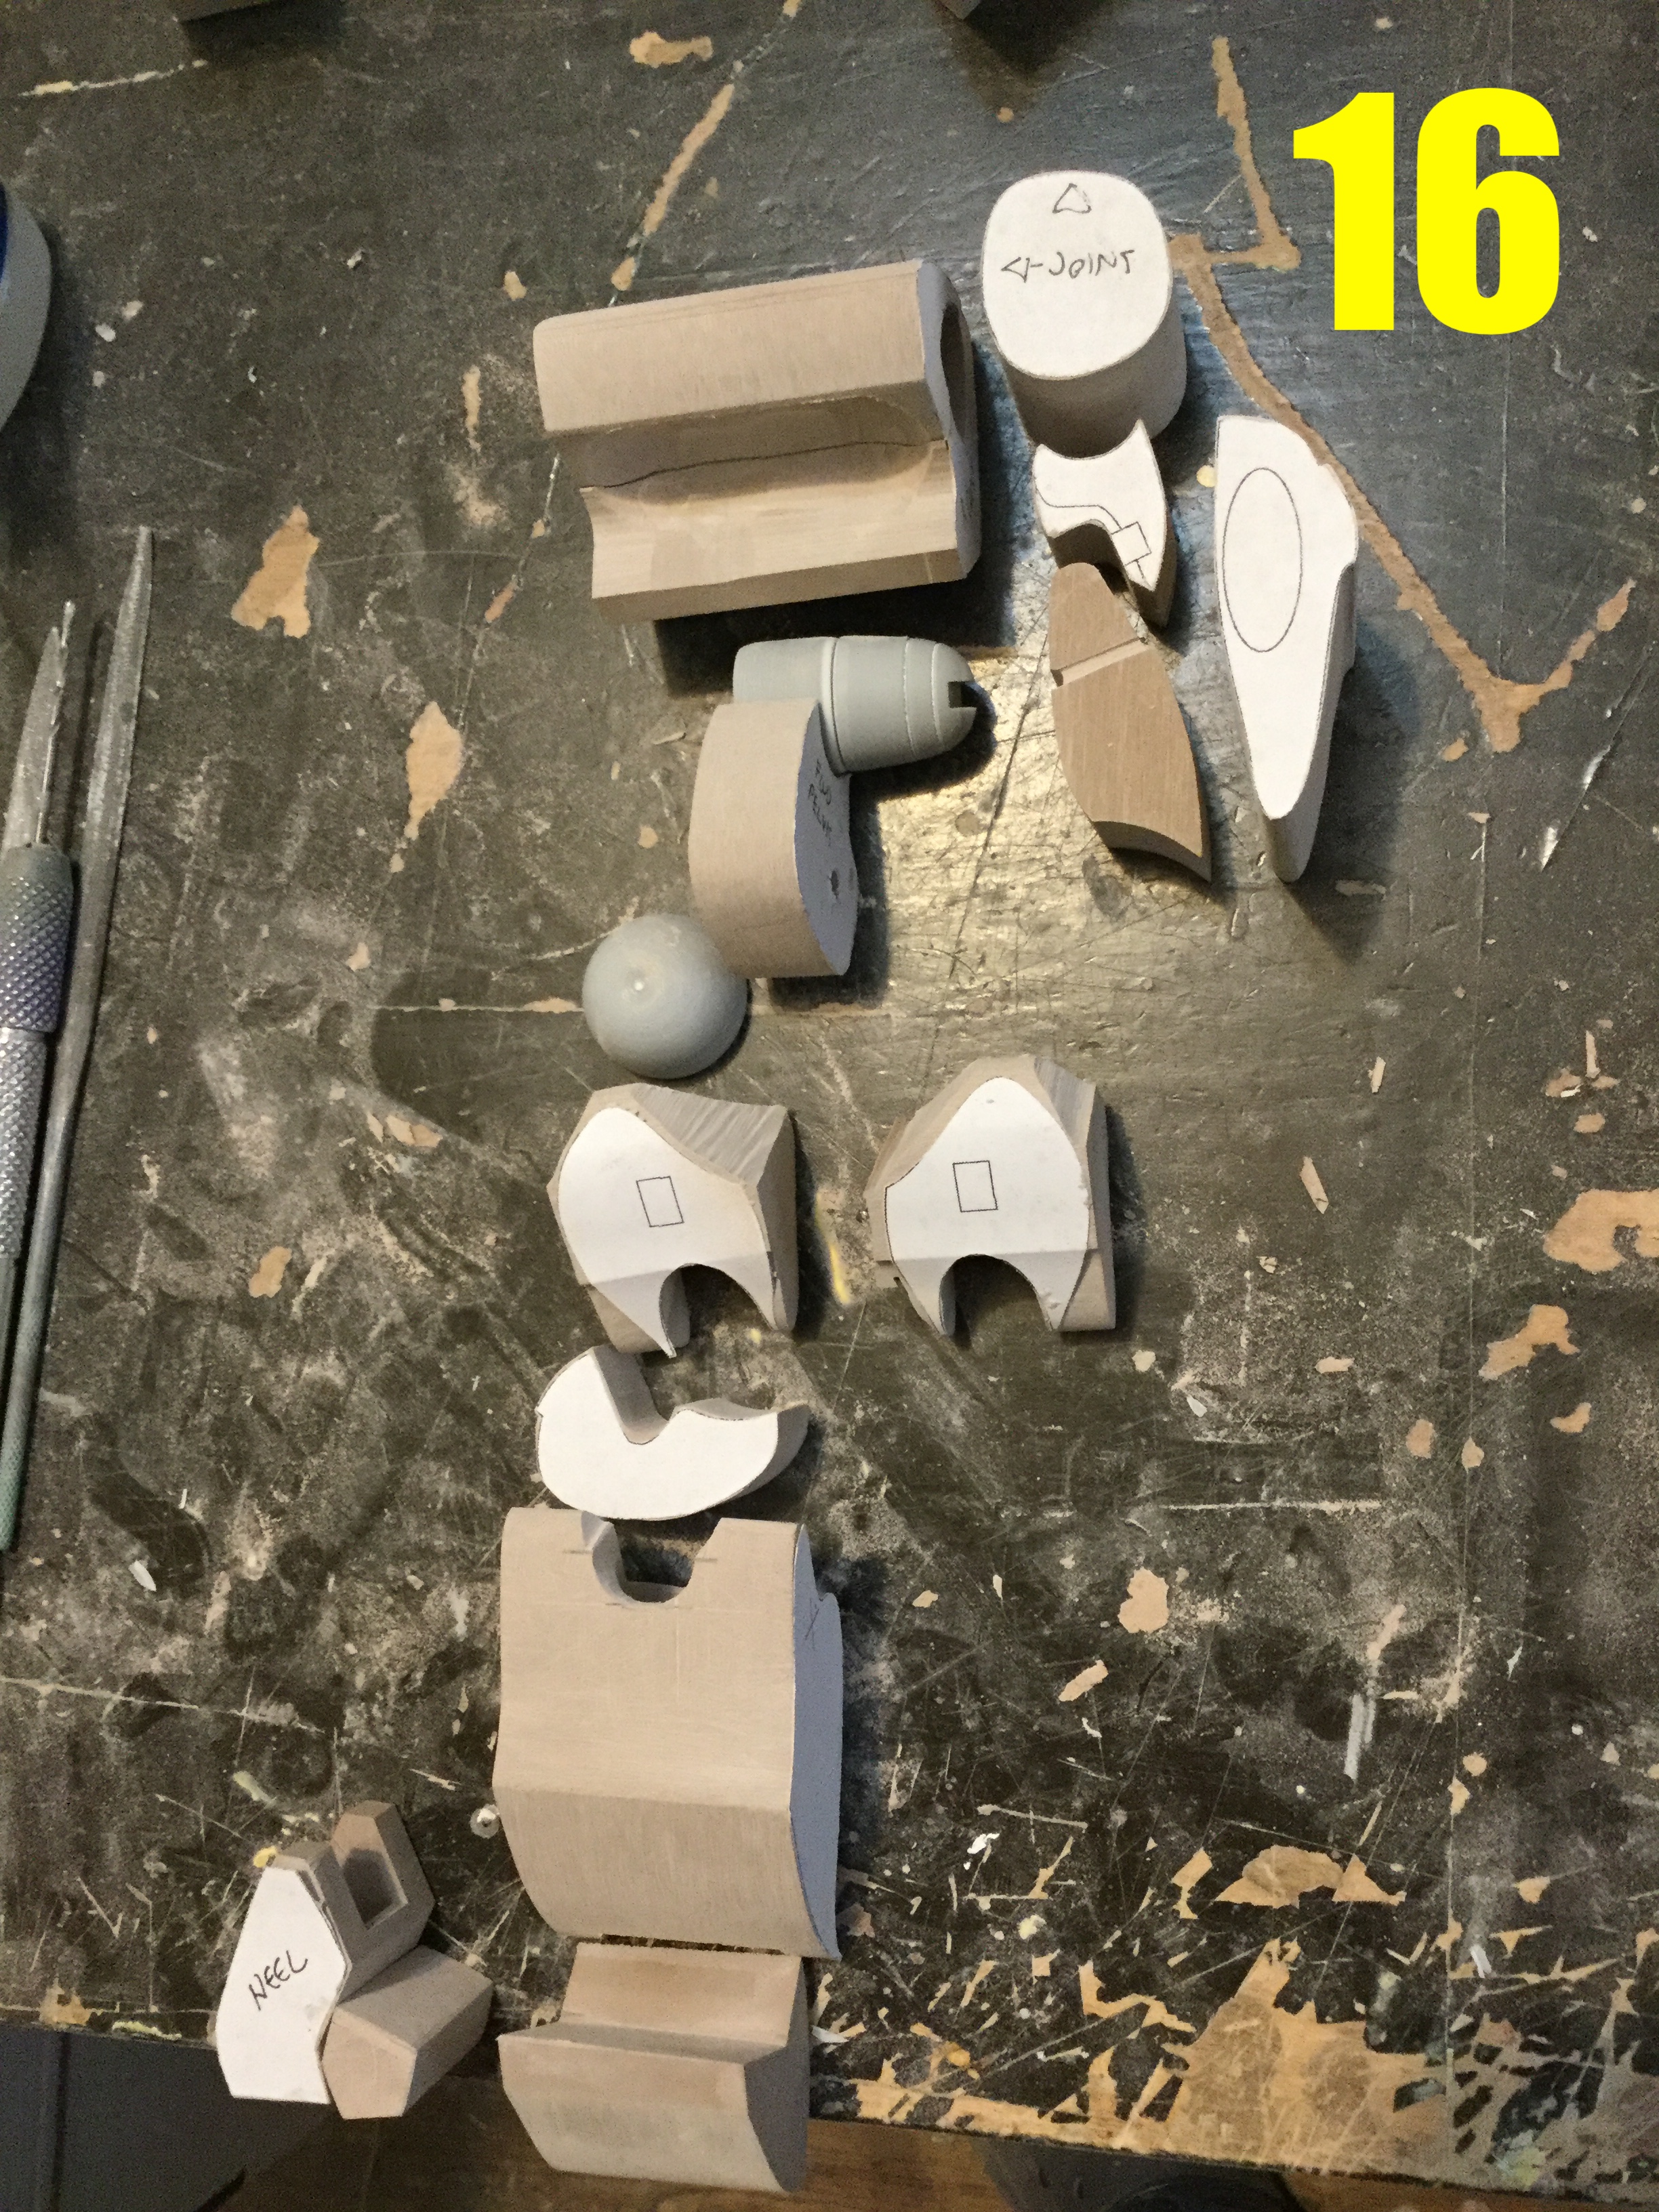
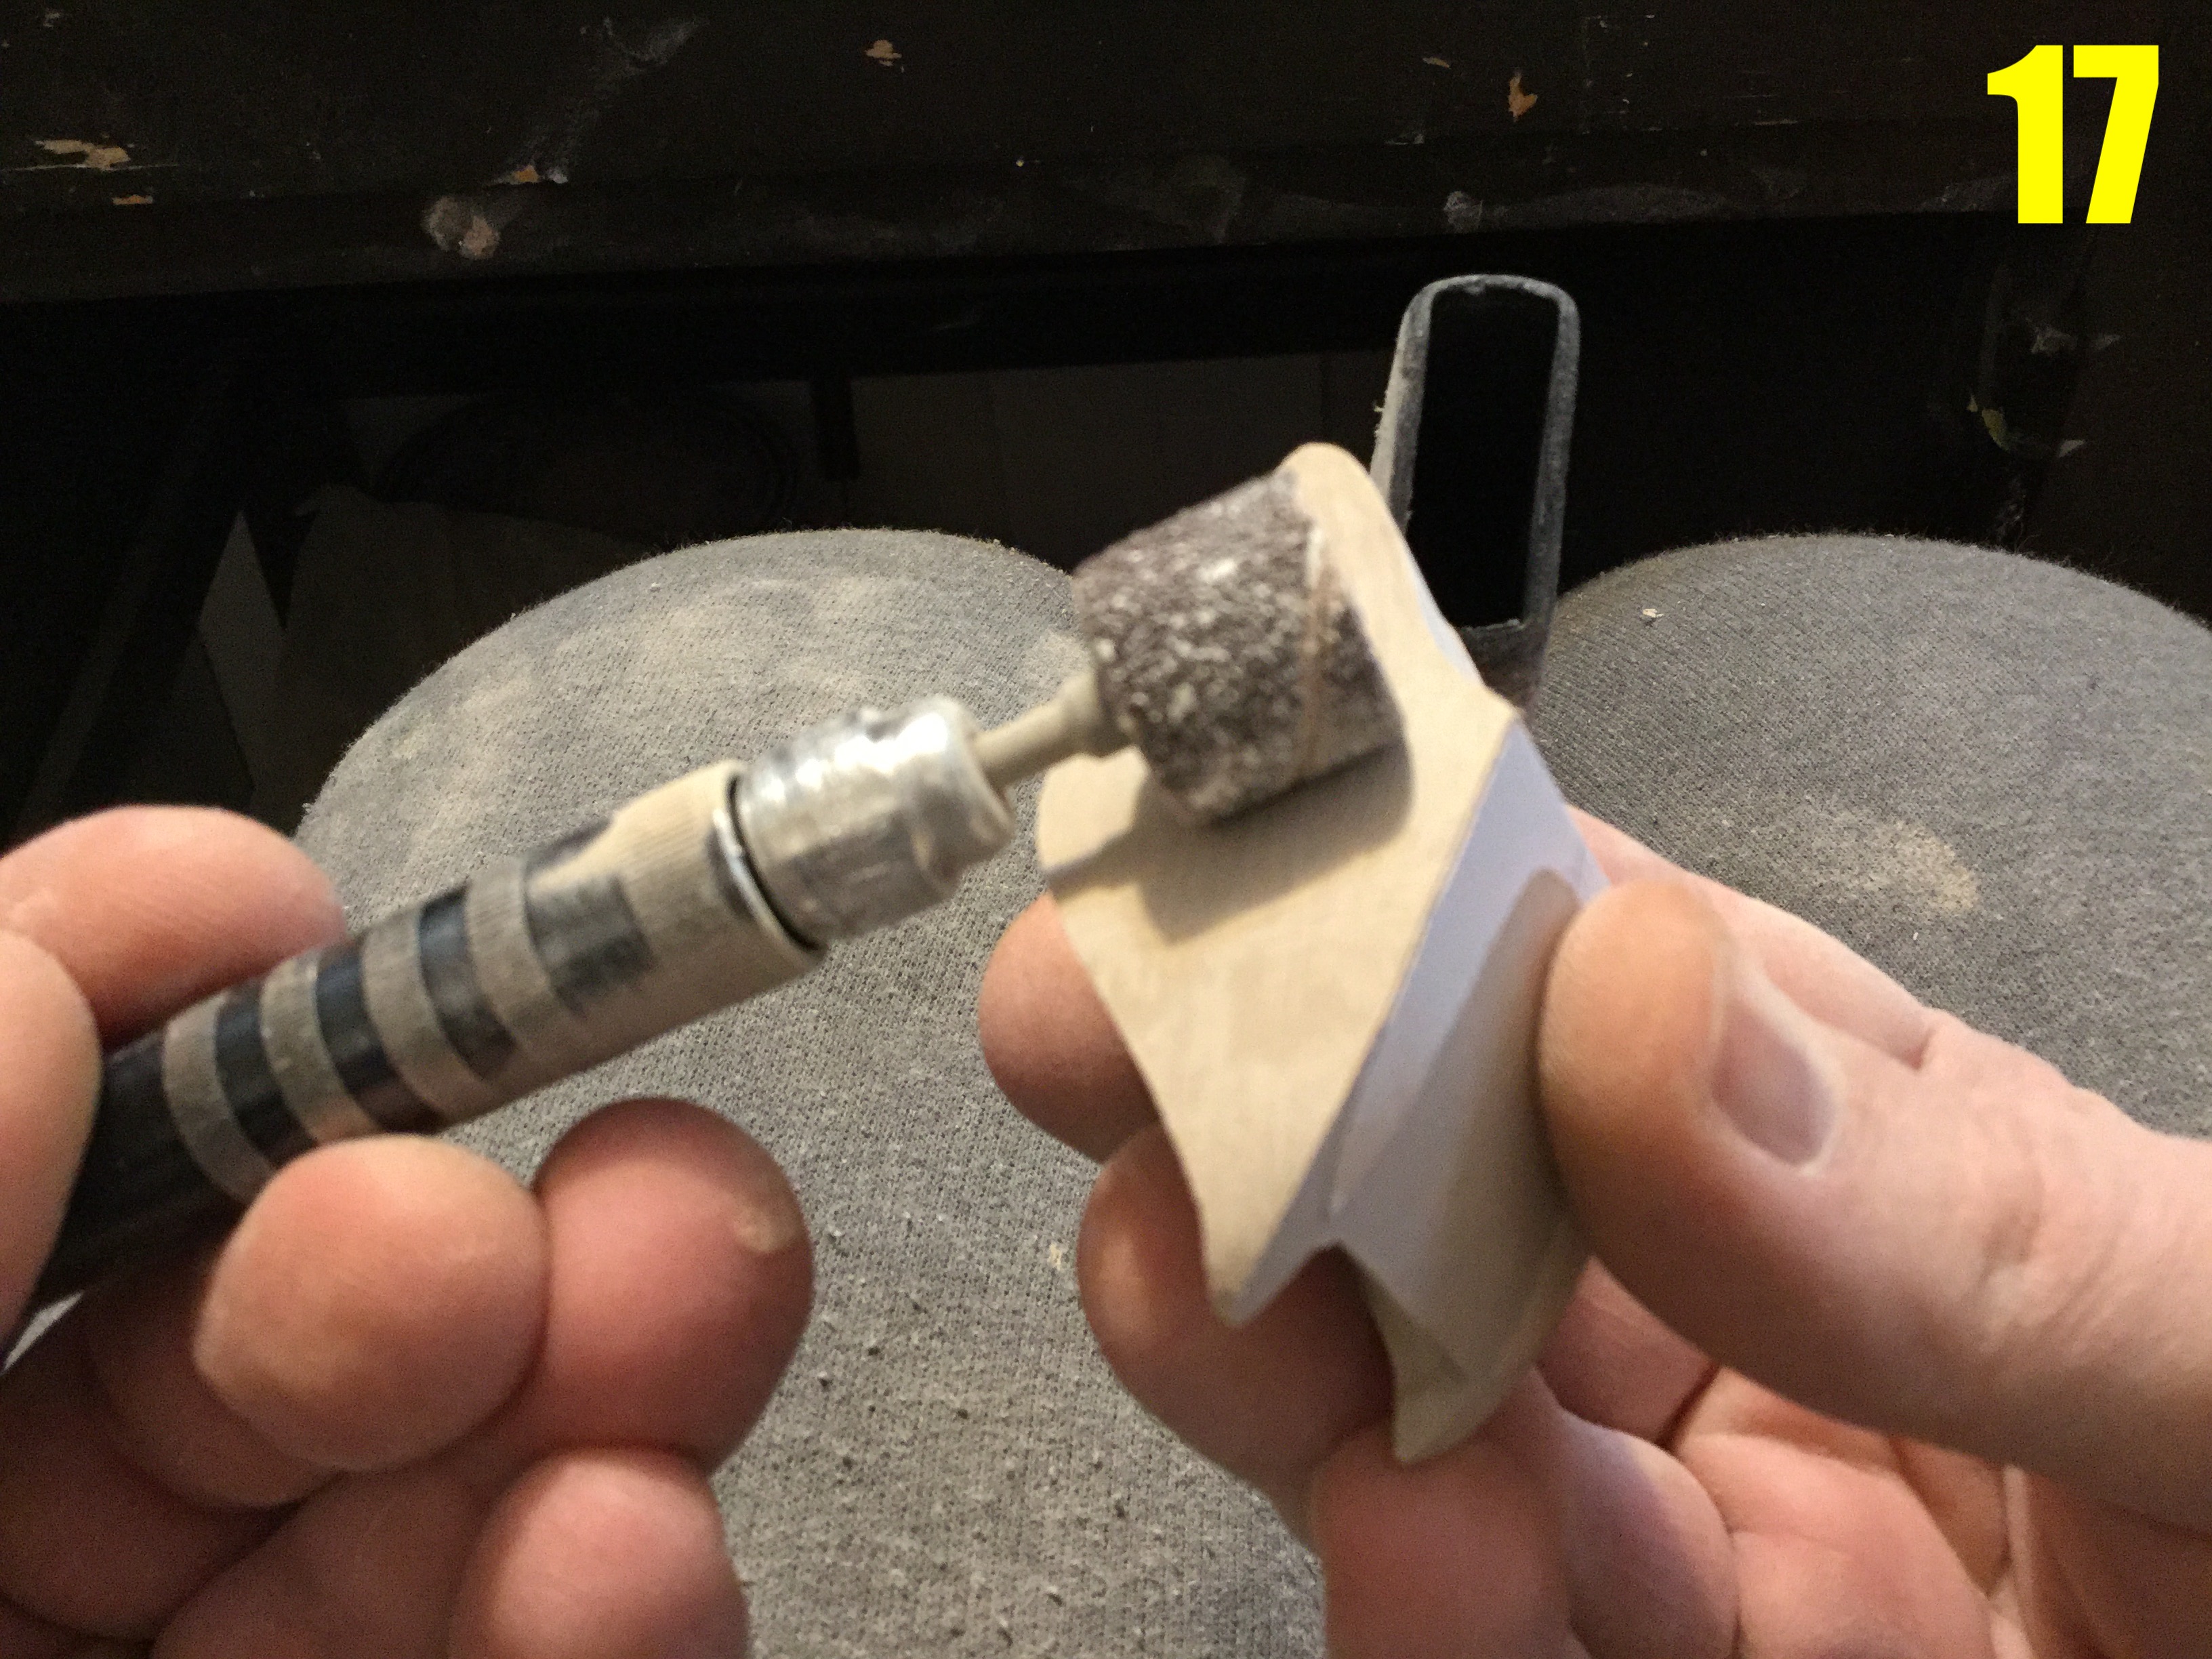
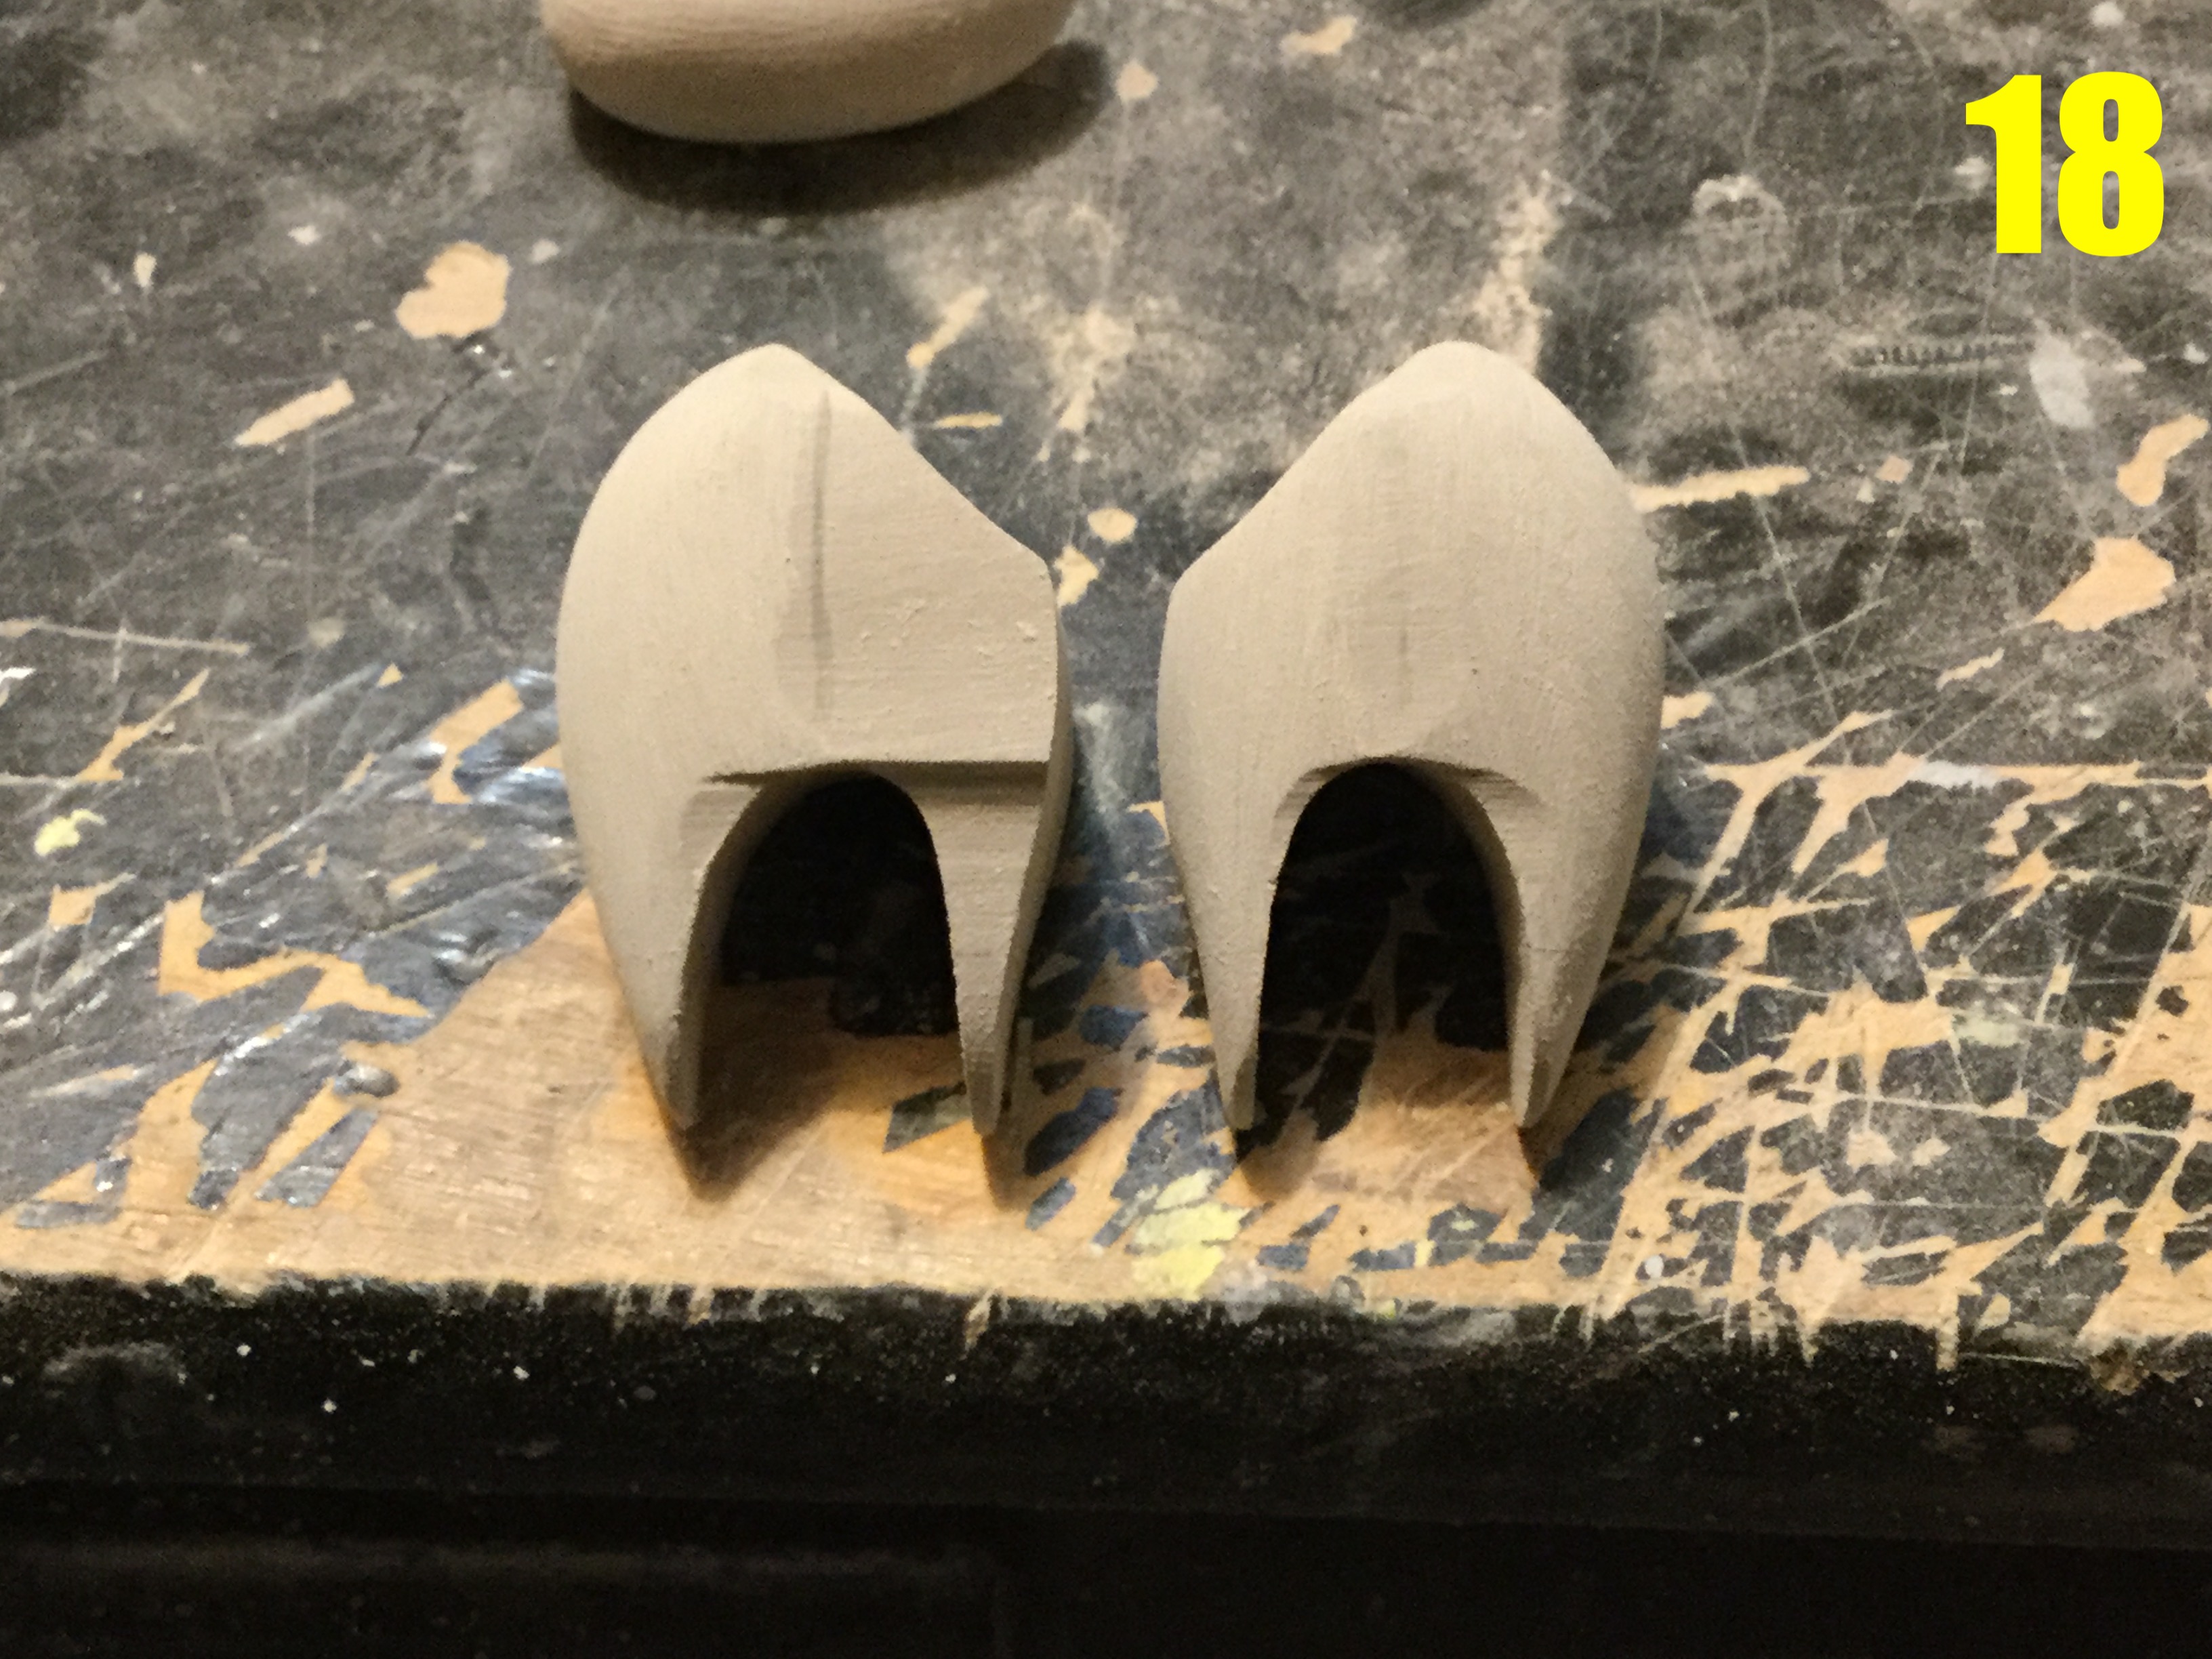
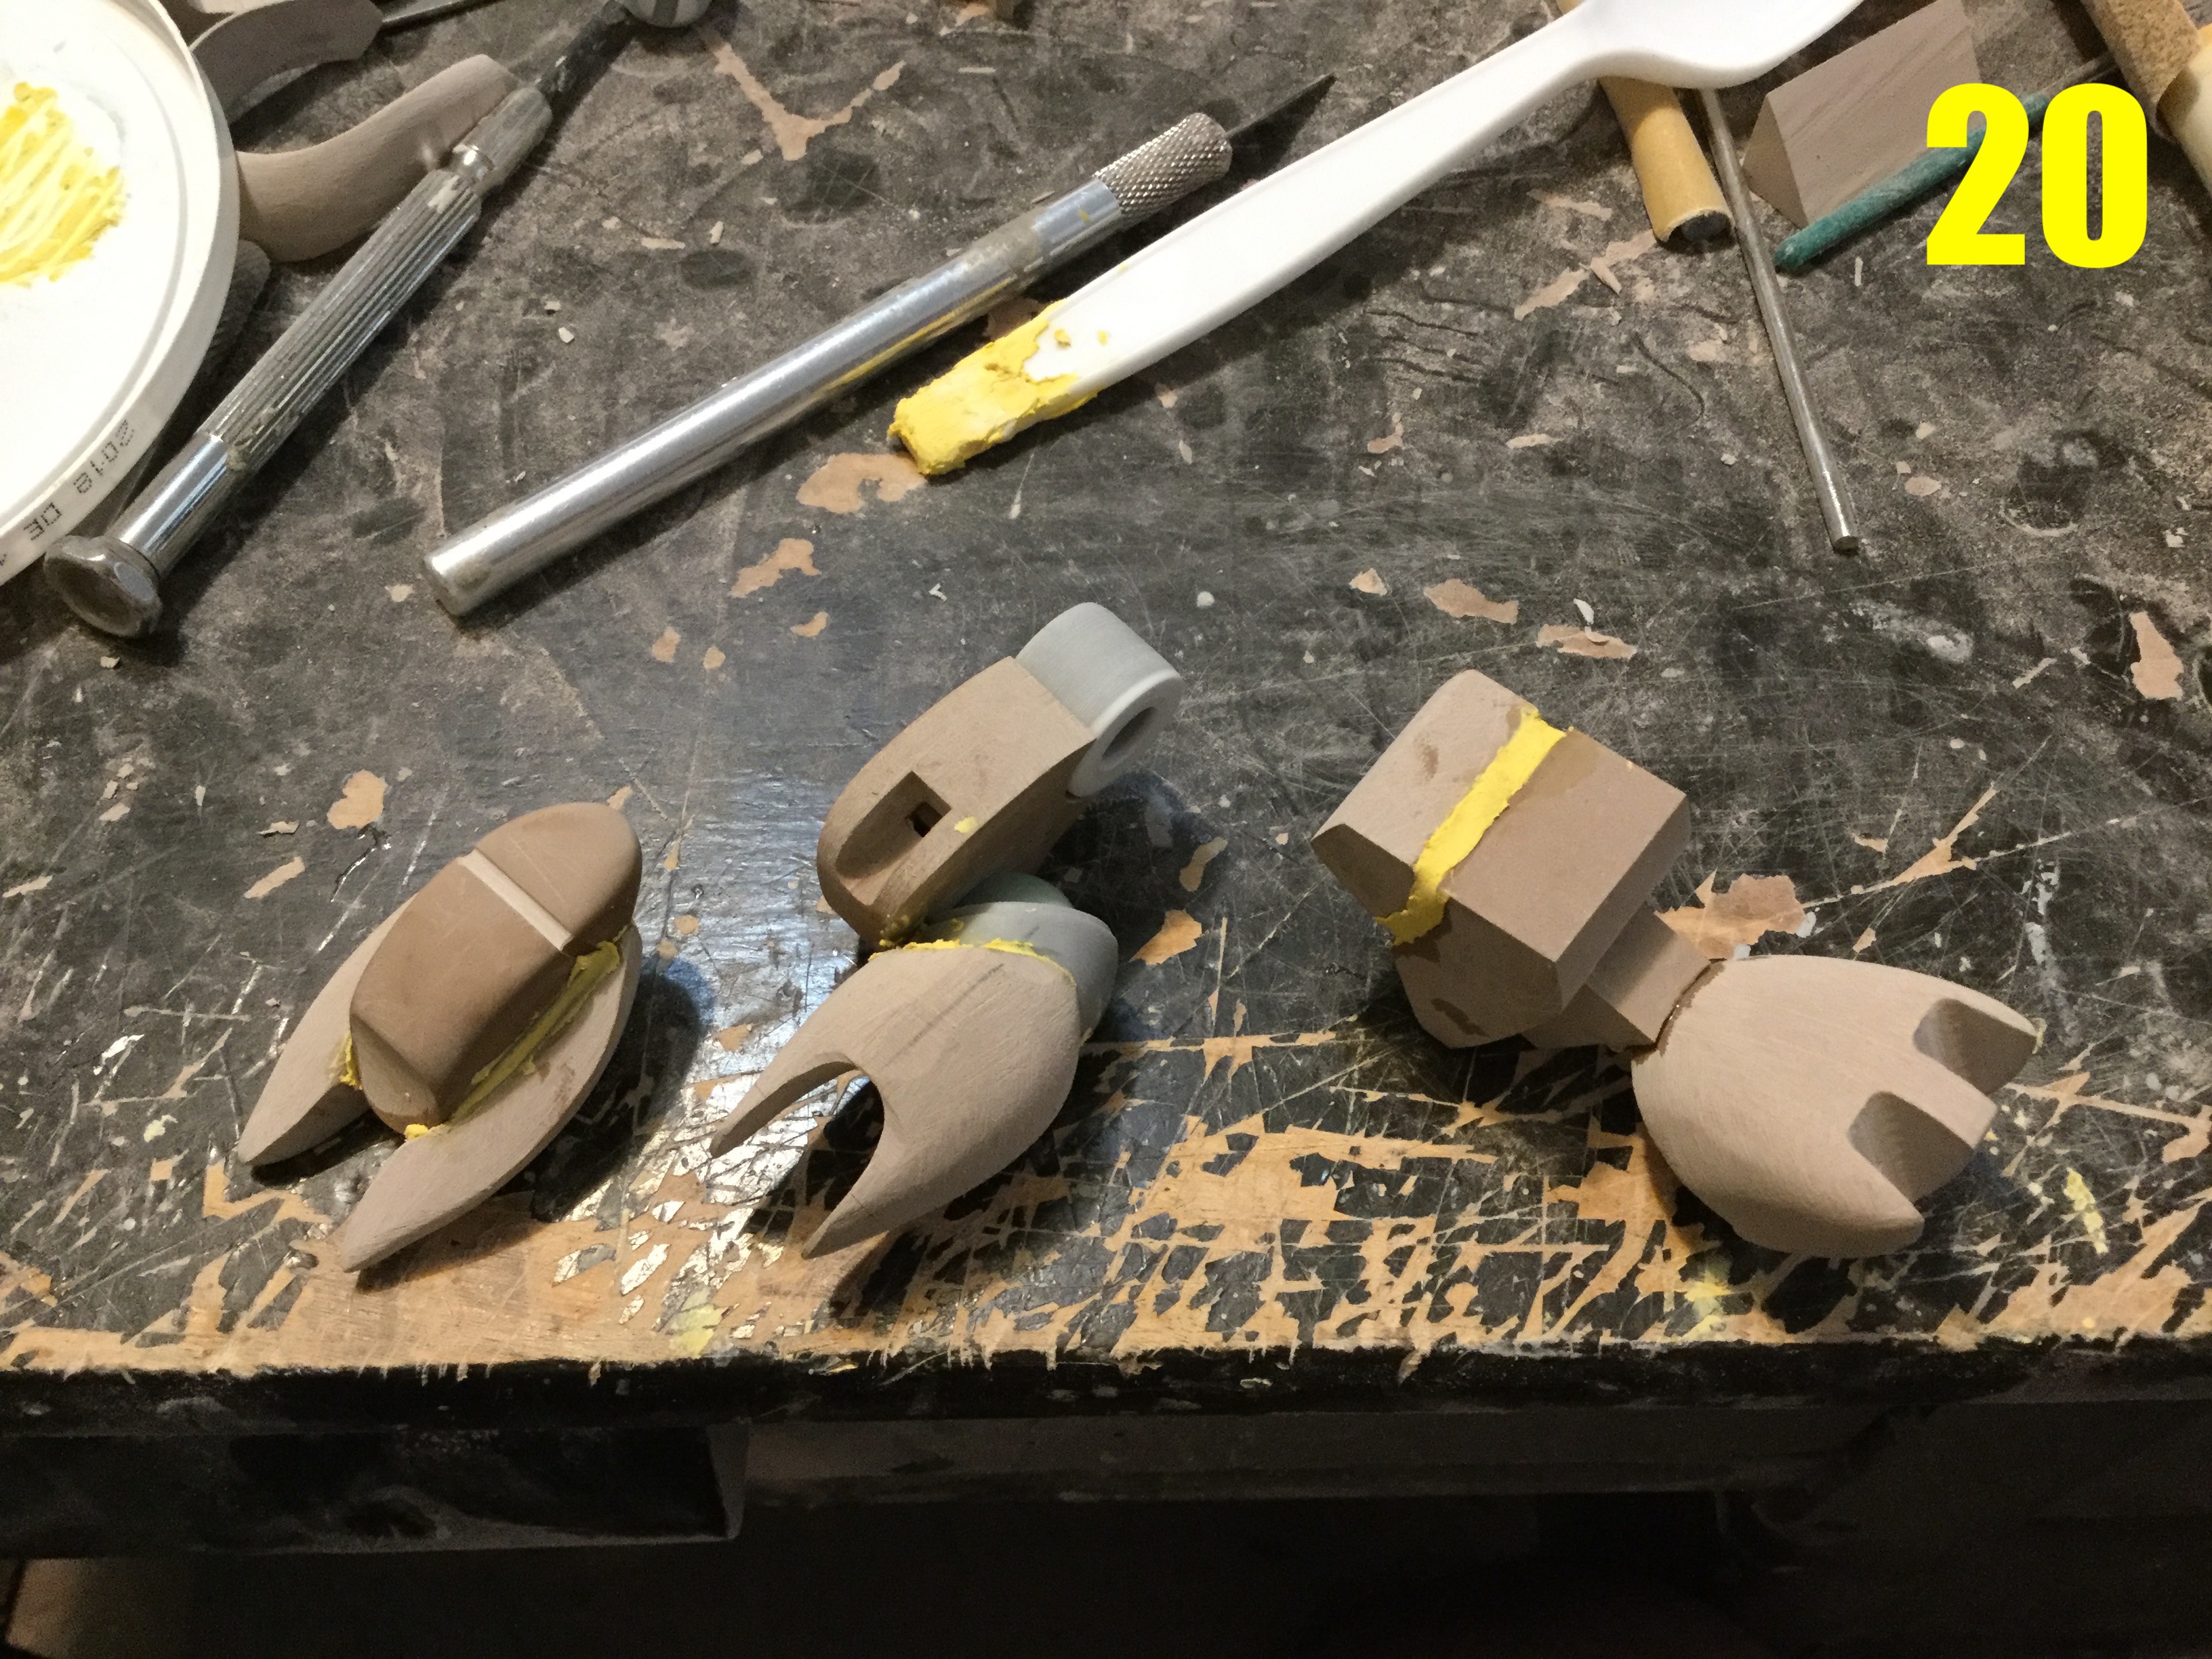
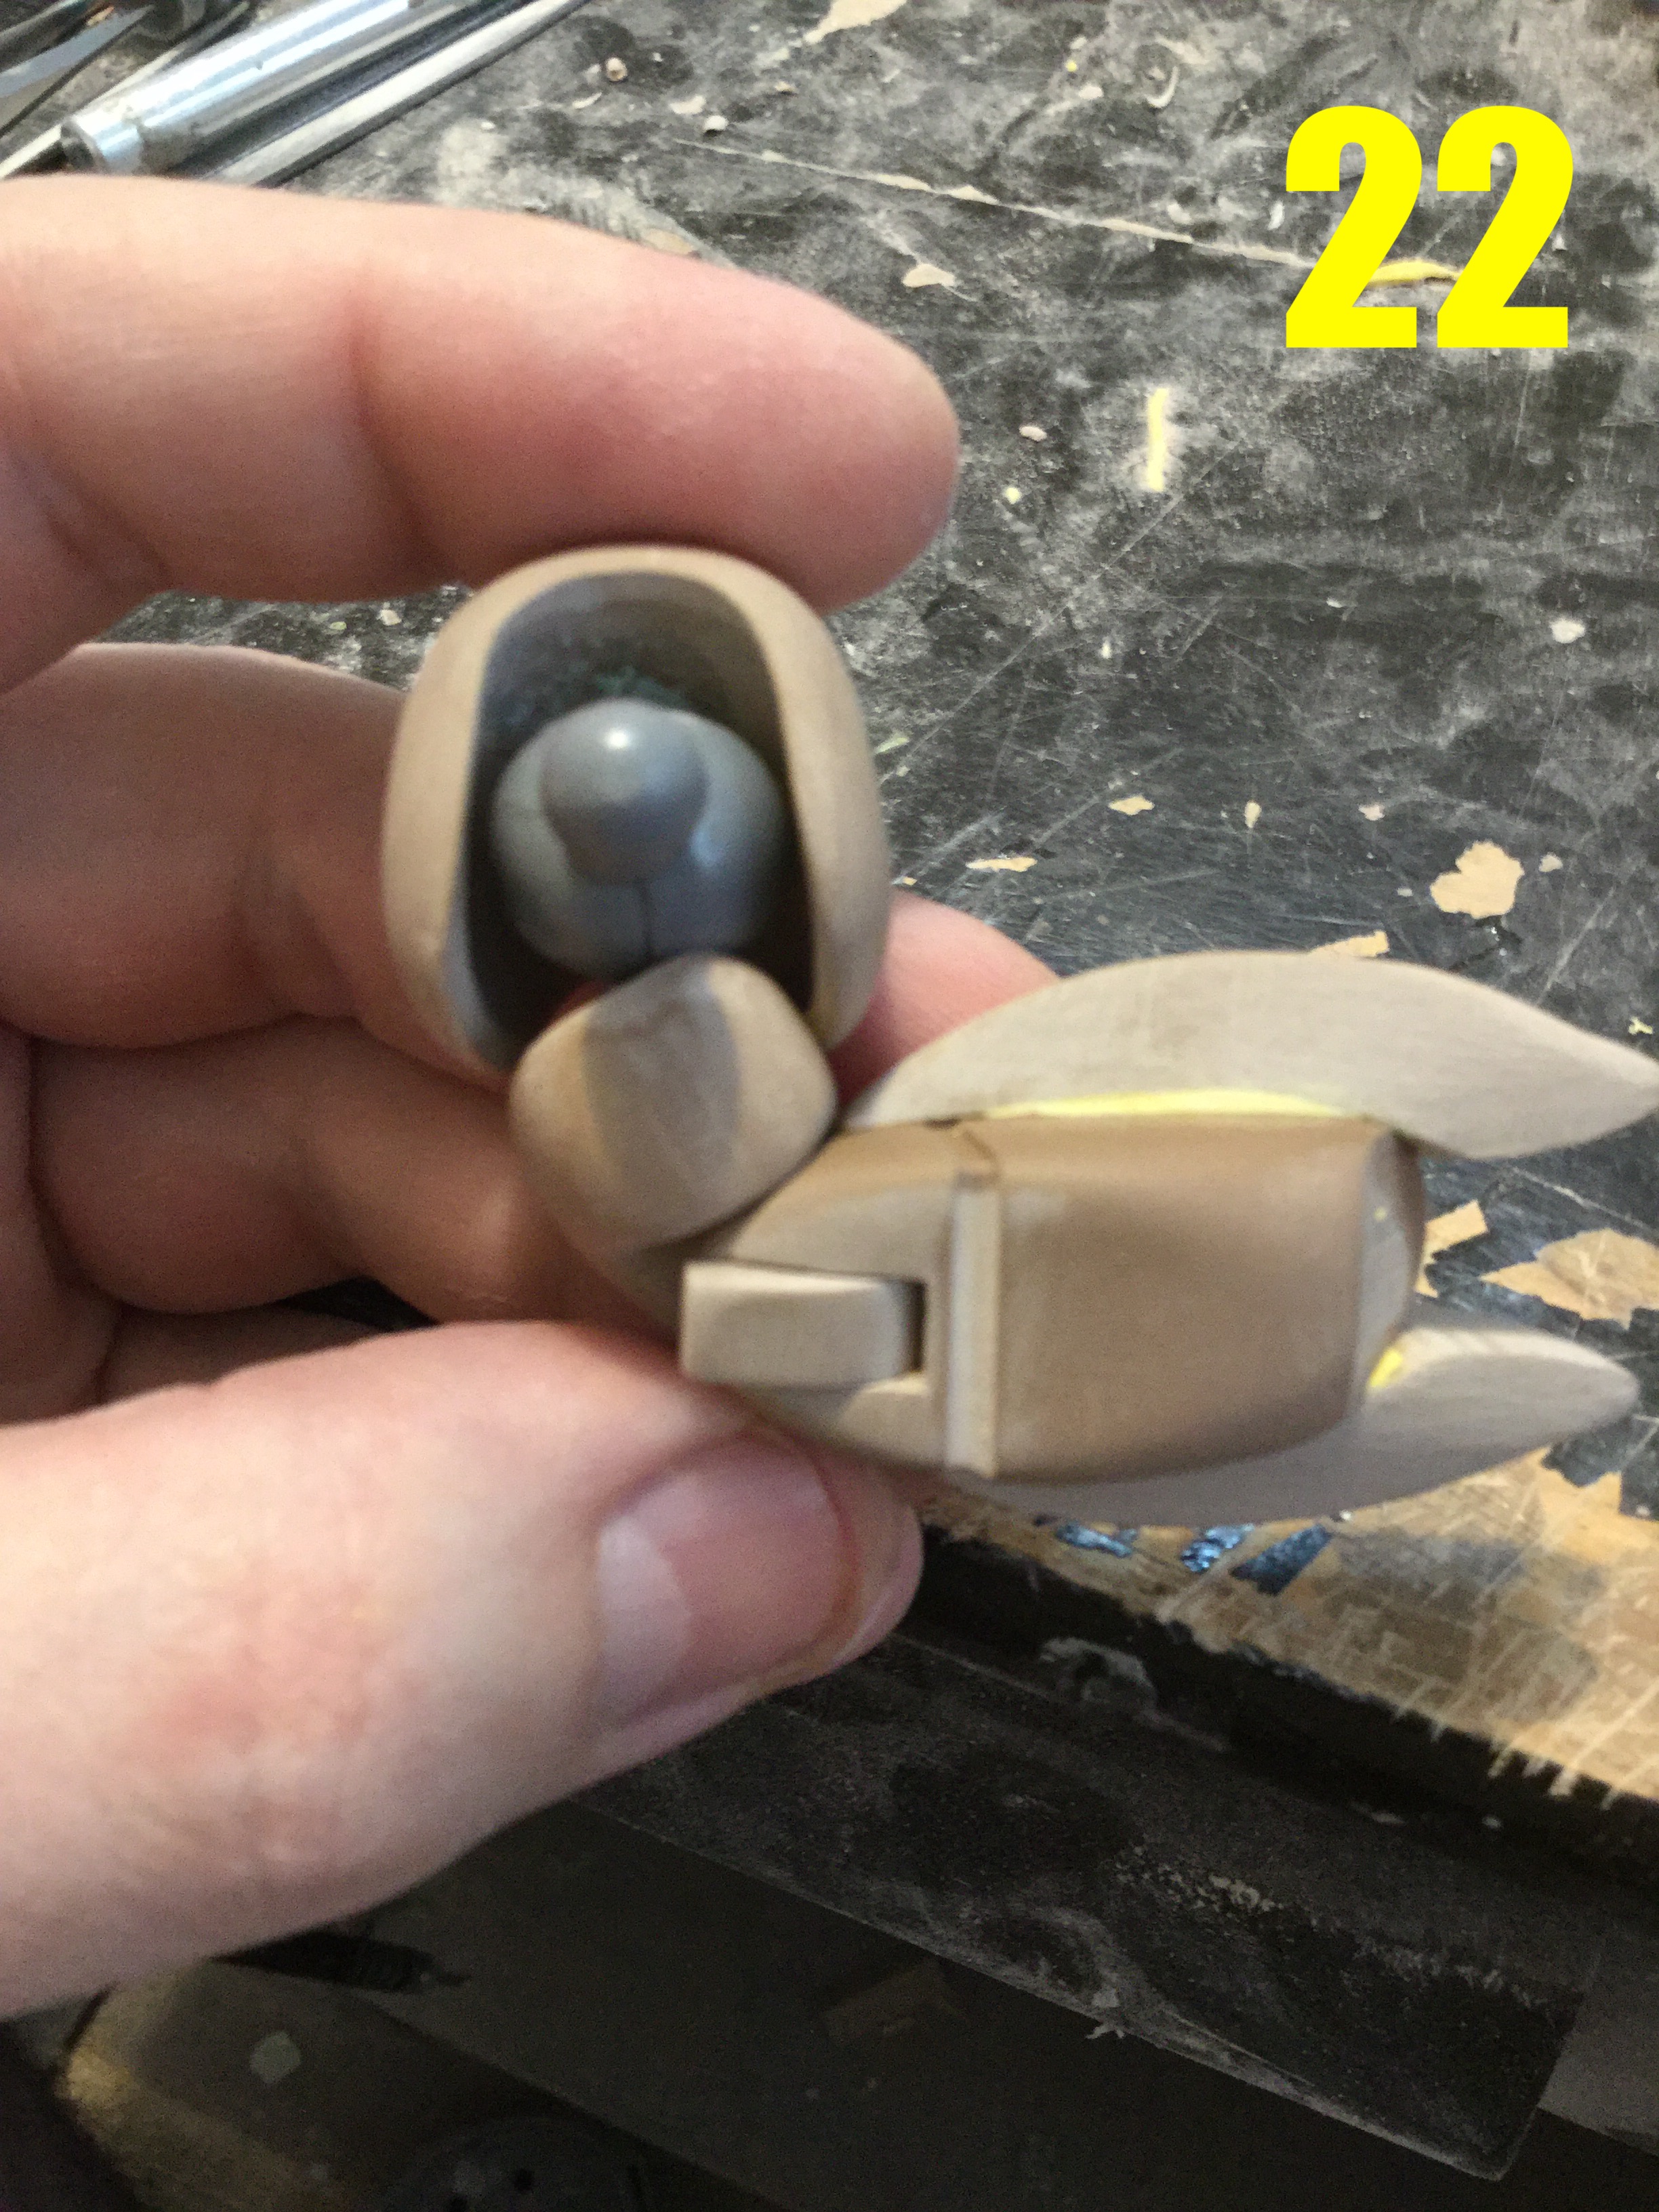
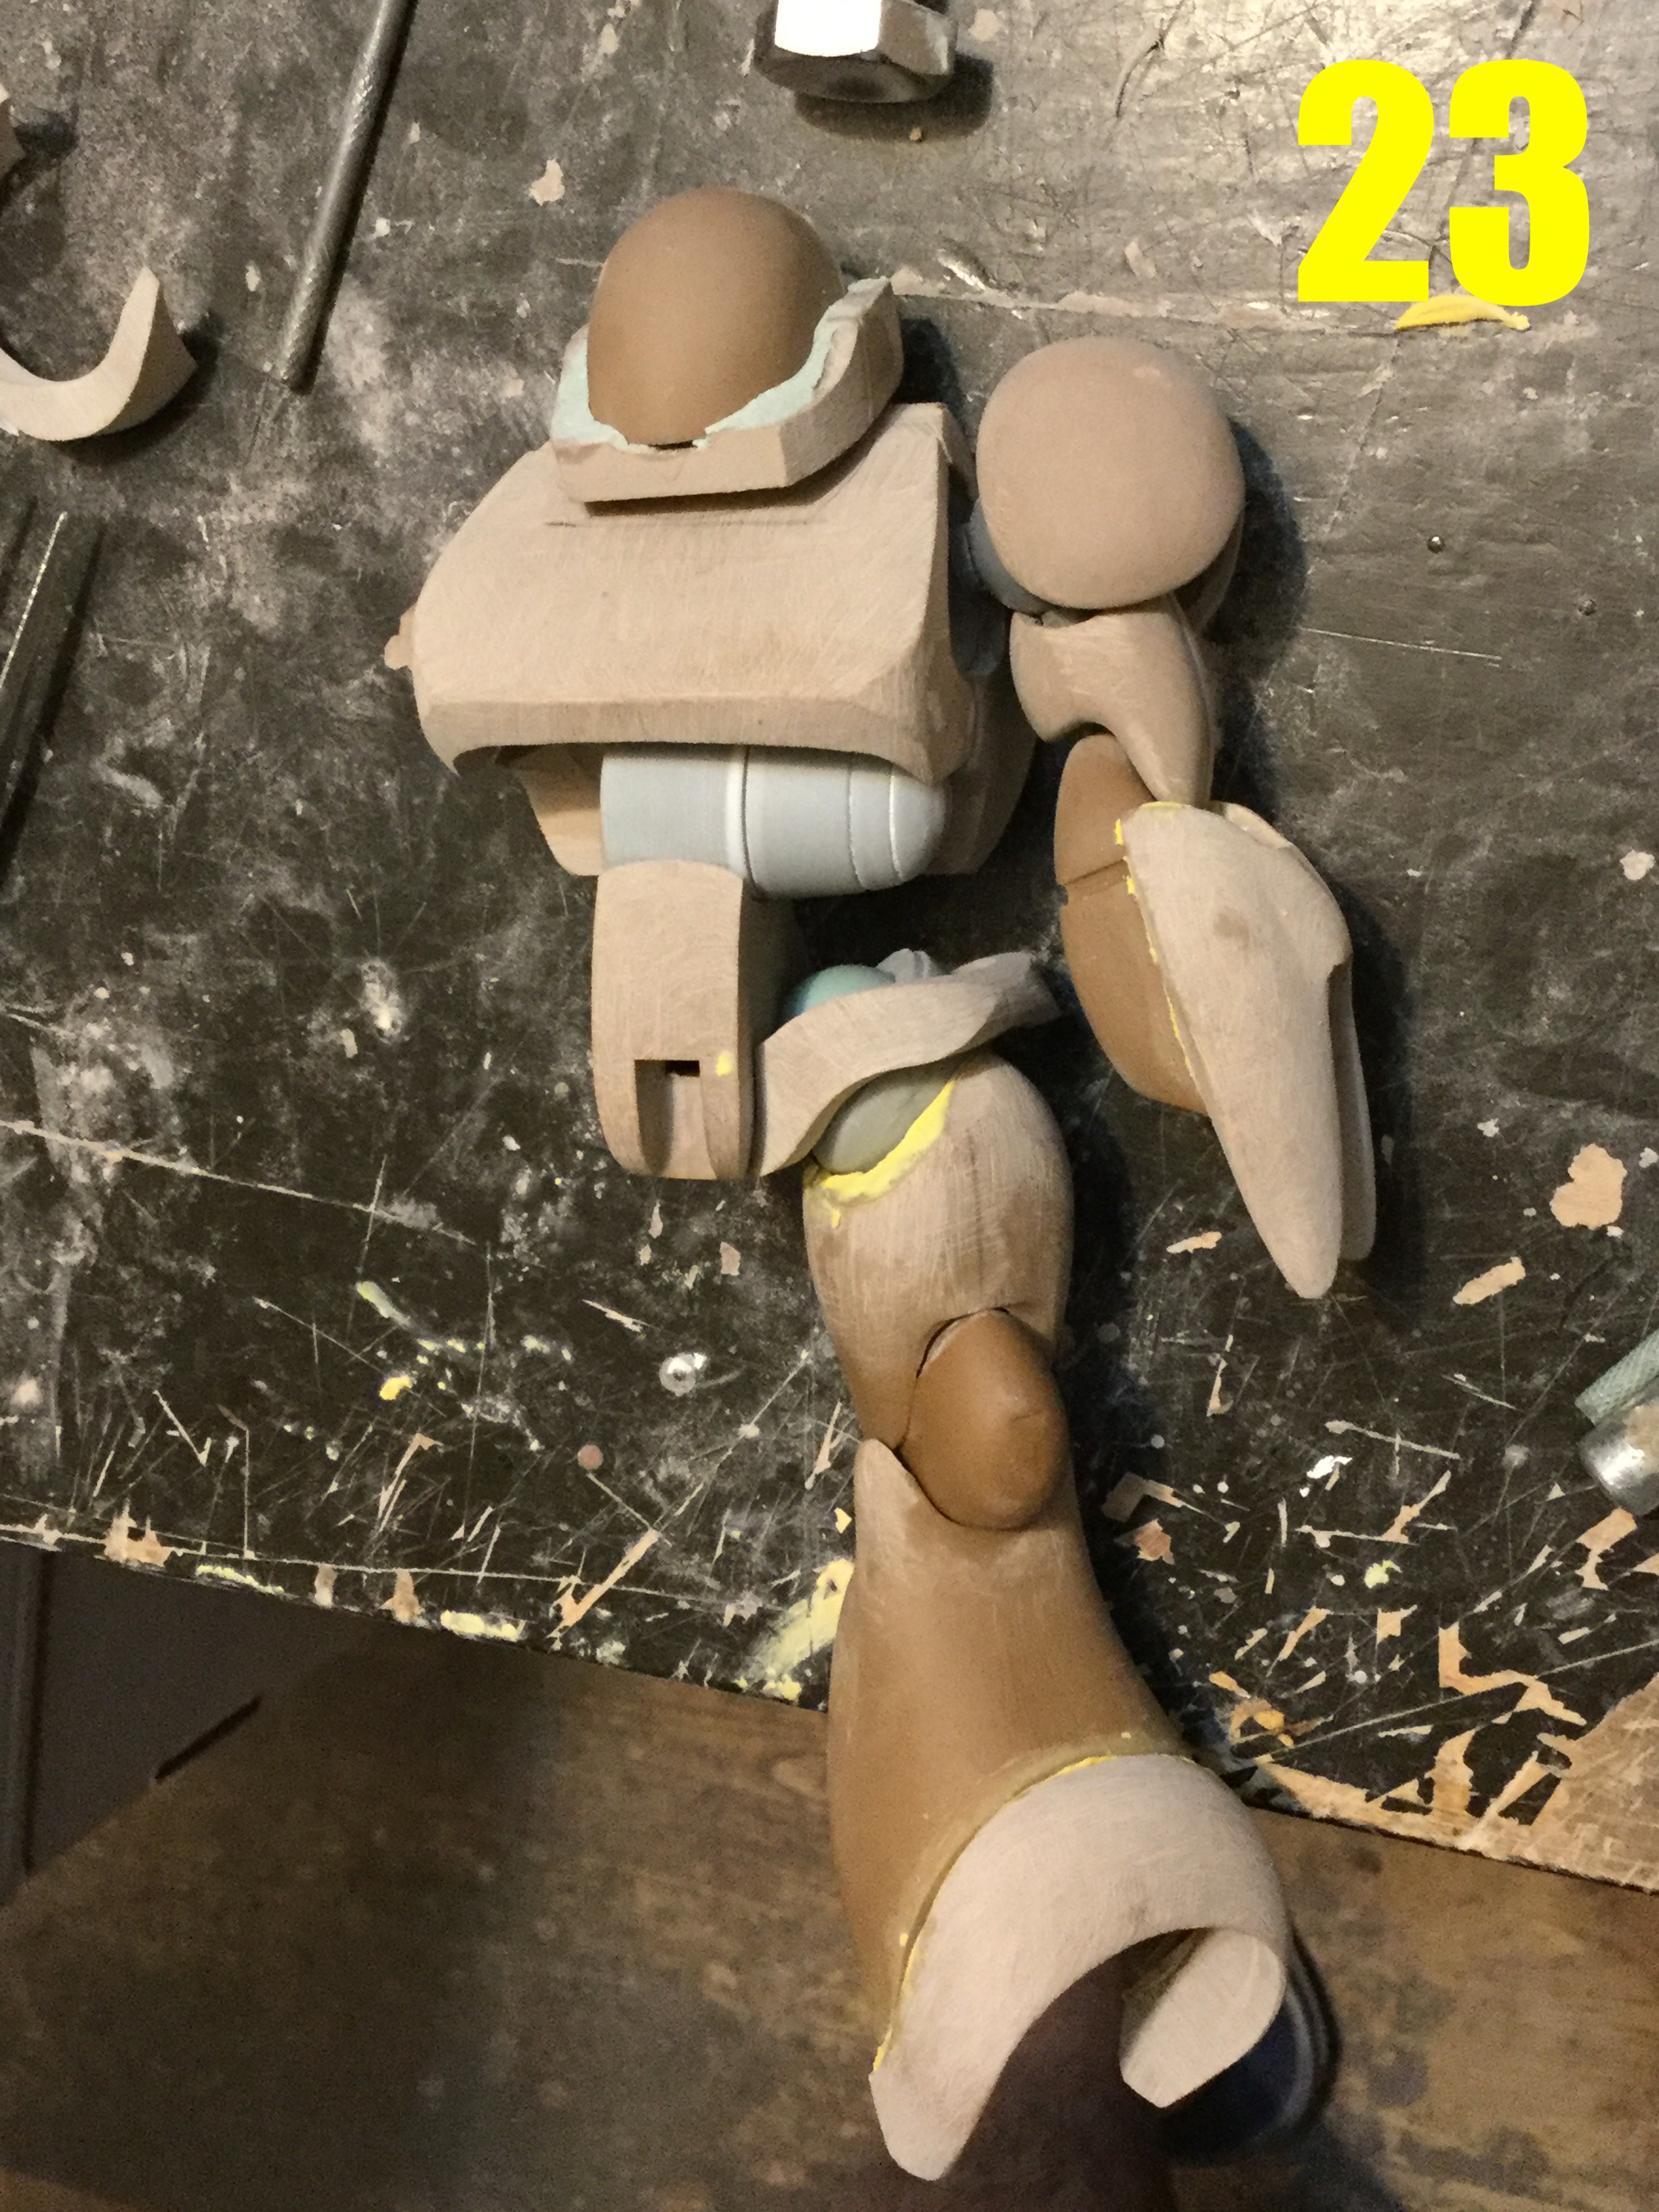
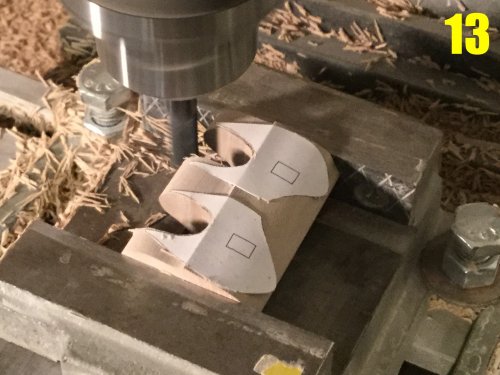
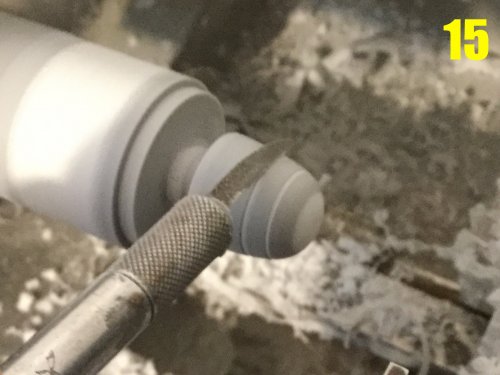
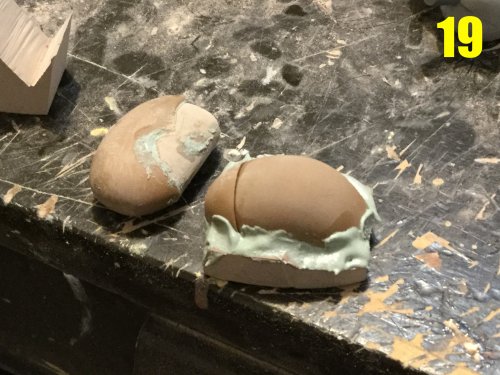
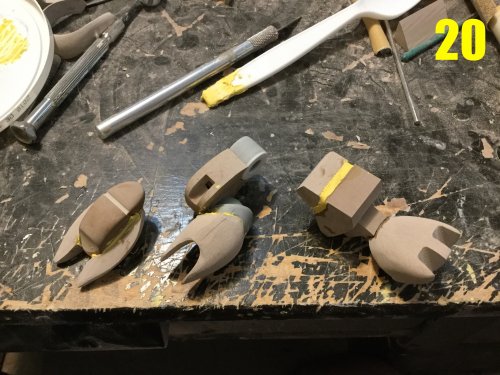
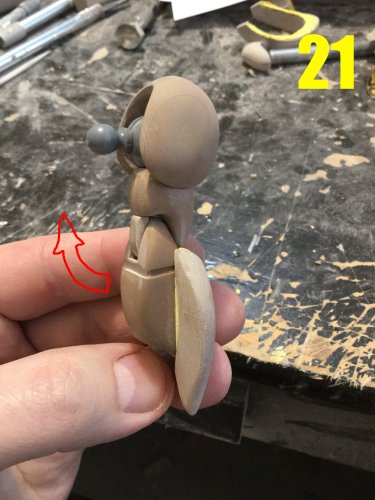
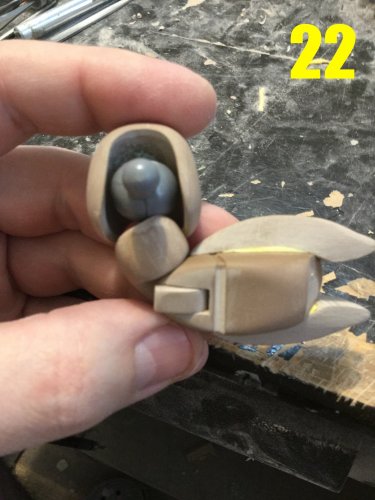
Captain’s log: February 10th, 2021 Pic 12: the adventure continues as I can now begin performing secial operations on designated parts. Here you can see the calf module being hollowed-out for the joint interface. Pic 13: a similar operation being performed on the thighs. Because of the shape of the parts, the paper templates will be slightly distorted by conforming to the block, I’ll have to make some minor pencil marks to adjust the shapes prior to further cutting. Pic 14: now that I have some basic parts taking shape, I’ll need to make some ball-joints. My lathe was perfectly clean just 5 minutes before this pic was taken. Initial operations are done with knives, just like working with metal. Pic 15: unlike with metal, turning resin does offer some advantages, the first being speed of machining. The other is that I can employ hand tools and sanding blocks to sape parts. Here you see me using a photo-etch saw on a part to scribe lines. Pic 16: some crude shapes now beginning to resemble the intended subject. These will be put aside temporarily while I labor on the joints. Pic 17: things get dirty fast when I whip out the rotary tool, but it’s so much fun! The calves are the first to get the shaping treatment. I actually have to stage these shots, because it wouldn’t be safe for me to be grinding the part while holding the camera in my lap… To say nothing of getting dust all over delicate electronic equipment! Pic 18: one of the more challenging parts to make are the thighs. Their overall jellybean shapes need to be perfectly symmetrical, so I operate on both of them in slow sequence, making sure to check my dimensions frequently. It’s a lot of tedious back & forth, and it needs to be done right. Pic 19: to a normie, this would look like a mess, but it’s carefully harnessed chaos. Mold release is applied to one part, while ample putty is applied to the other, then they are both pressed together to achieve perfectly fitting, conformal parts. It’s more an art than a science, because you have a very short window in which to pull the two components apart to get the desired effect: too soon and the putty will crumble and the effect is ruined, too late and the parts will be bonded together! Pic 20: more putty shaping taking place here, this time with Tamiya polyester (yellow) putty. This actually gives a cleaner result than the Bondo (blue) putty, but takes 10 times longer to harden, so there are different putties to be used for various operations. Pic 21: here we see the arm, wich is 60% done. If you study the original line-art, you will see that the elbows are drawn such that they are both facing outward on each side, and the arm bends in the direction shown by the red arrow; basically like an ape. So how do I take this clusterfrack retarded elbow joint and make it bend sensibly while still remaining faithful to the source material? By cleverly repositioning the joint! Pic22: you can see here that the bending point is camouflaged, but through a combination of joints I can get a 90 degree bend. Considering the limitations of the source material, I’d call that a win, and there will be more. Pic 23: I’m not quite sure how, but BIO LLOYD is looking really good, really early into development—an encouraging sign to be sure! As of today, you can begin sending in payment for your kit(s). The details for CAN/US customers is in the pics, while overseas customers can make arrangements with Return2KitForm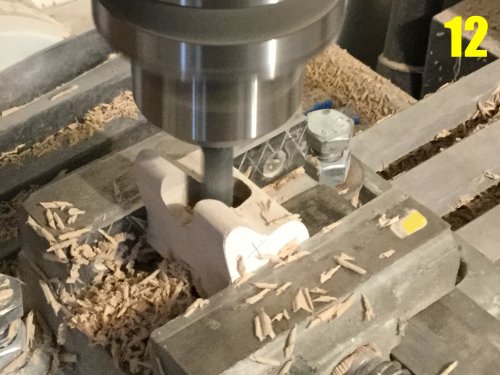


-
1/48 SOUTHERN CROSS BIOROID
captain america replied to captain america's topic in Anime or Science Fiction
It's fun to make, too! I've found quite a few interesting hacks to make the design more posable while still being faithful to the source material. i can't wait to show you more. -
1/48 SOUTHERN CROSS BIOROID
captain america replied to captain america's topic in Anime or Science Fiction
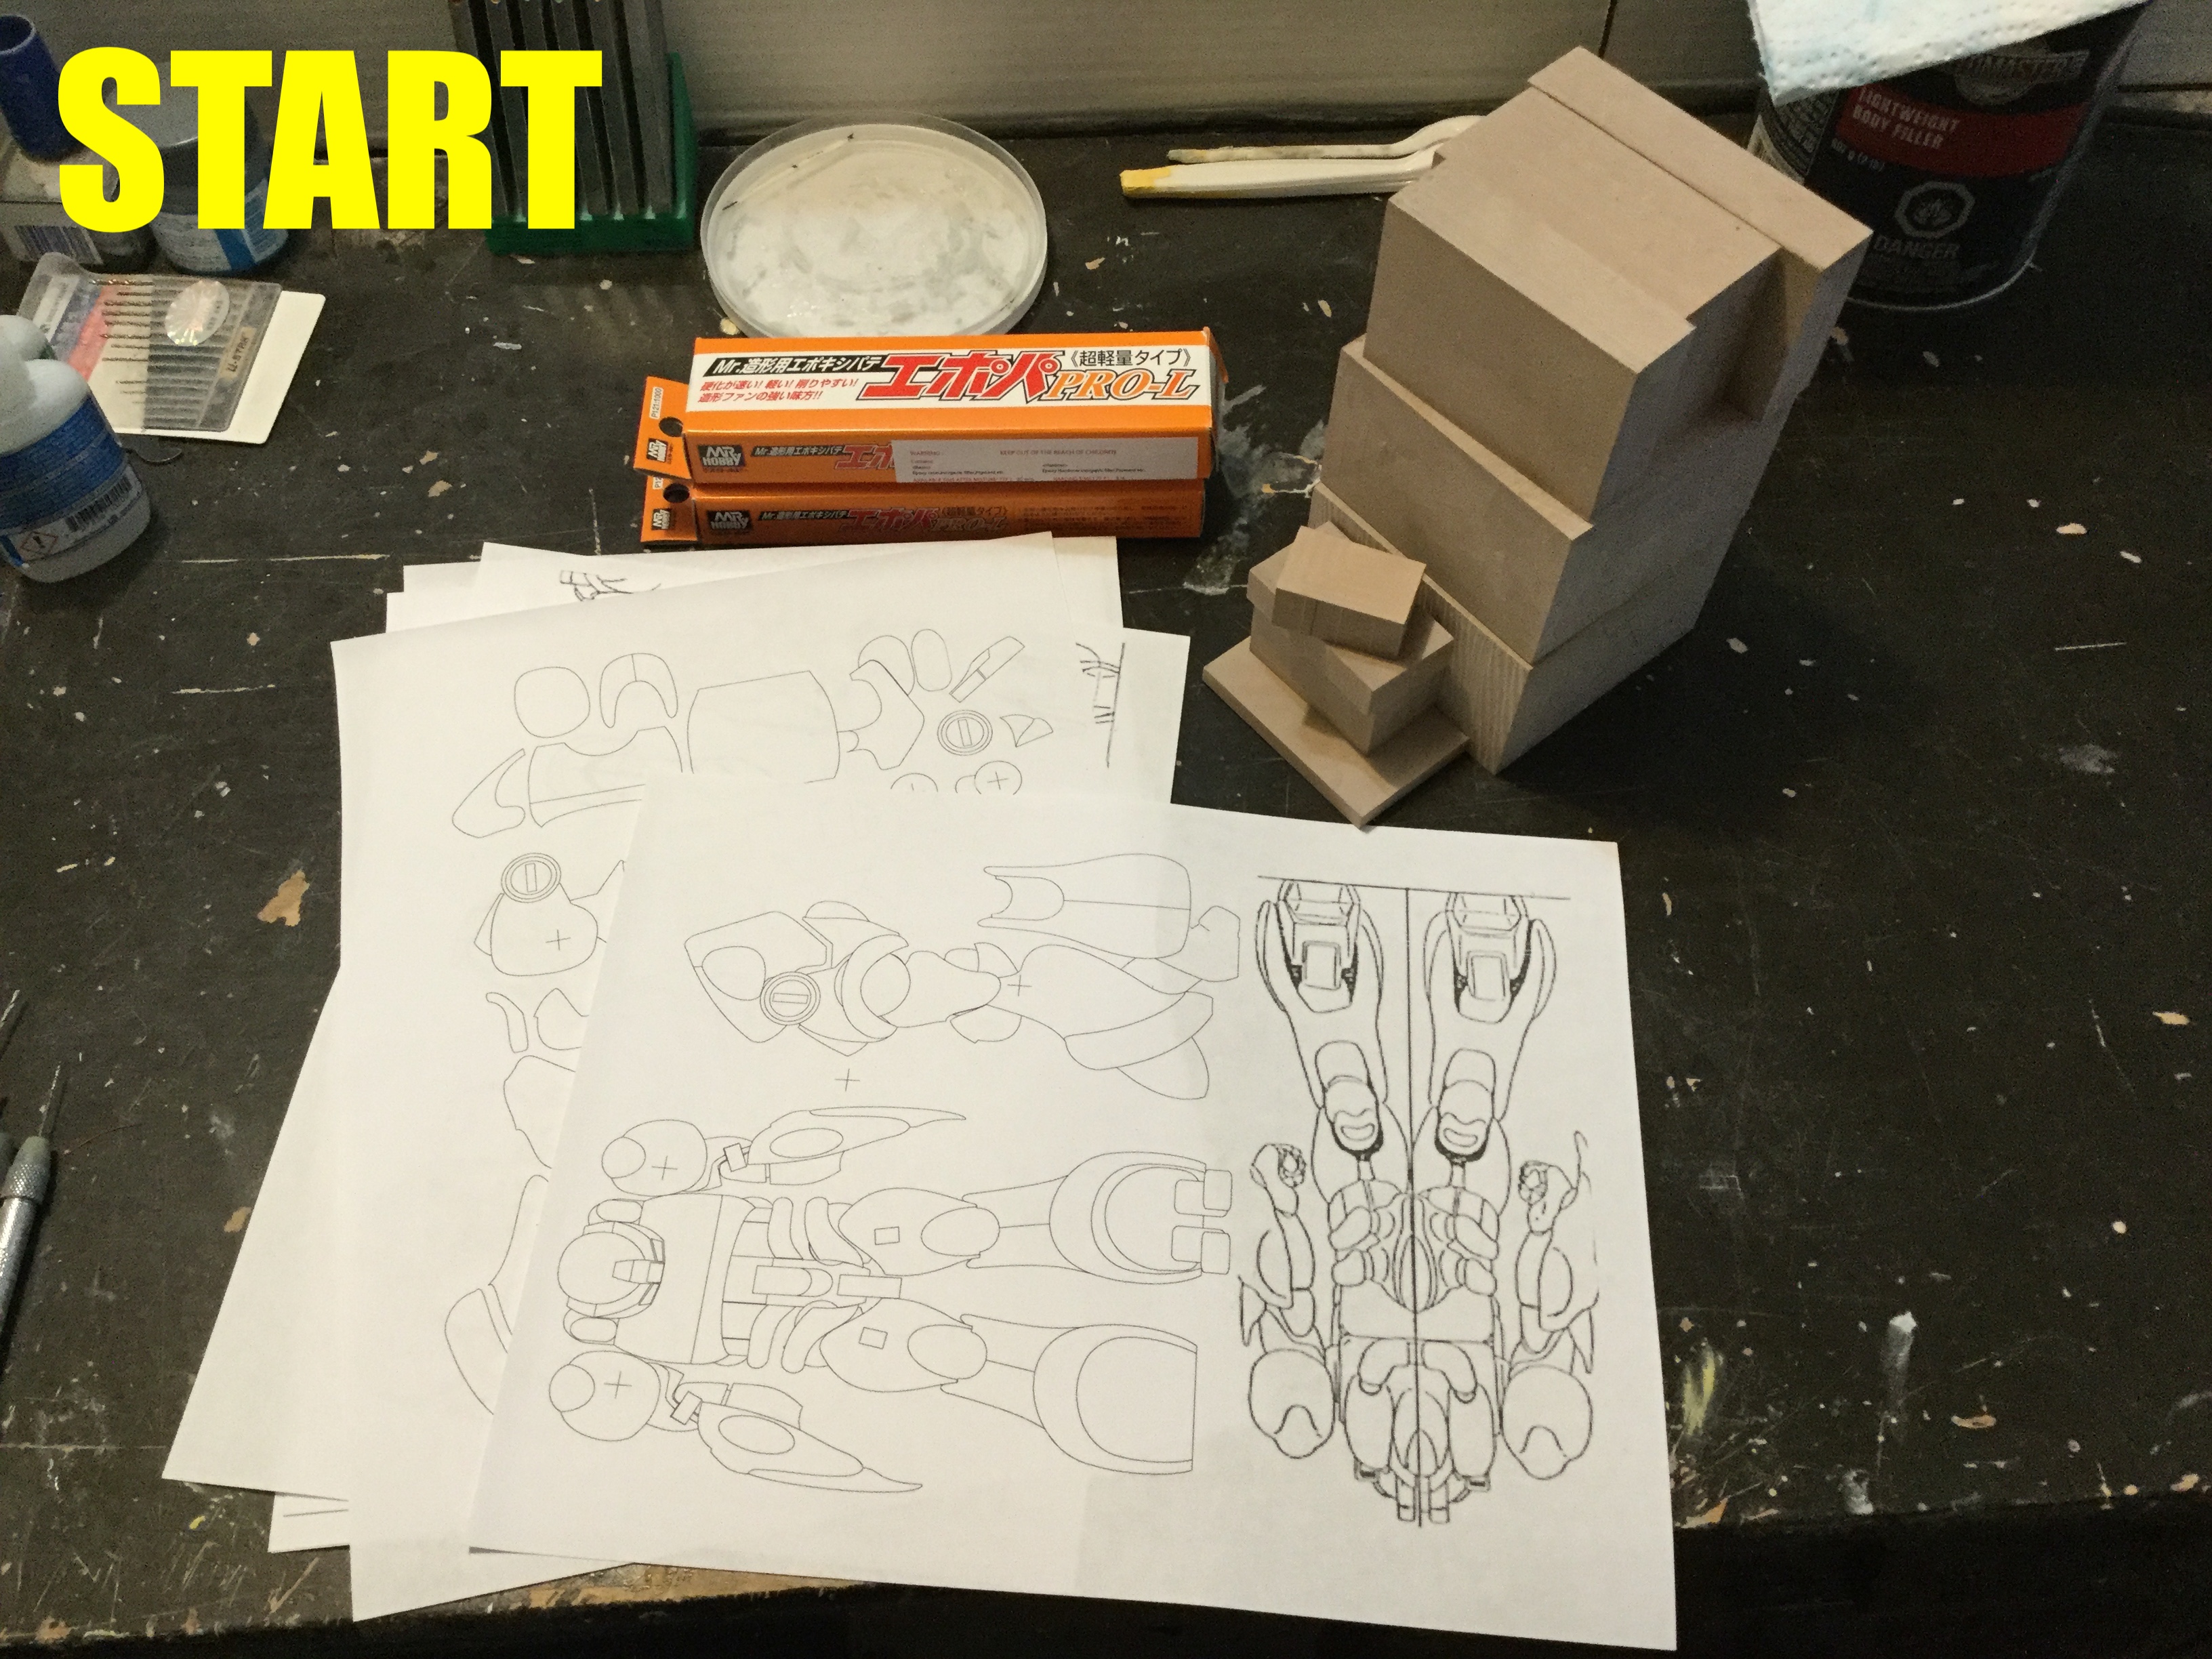
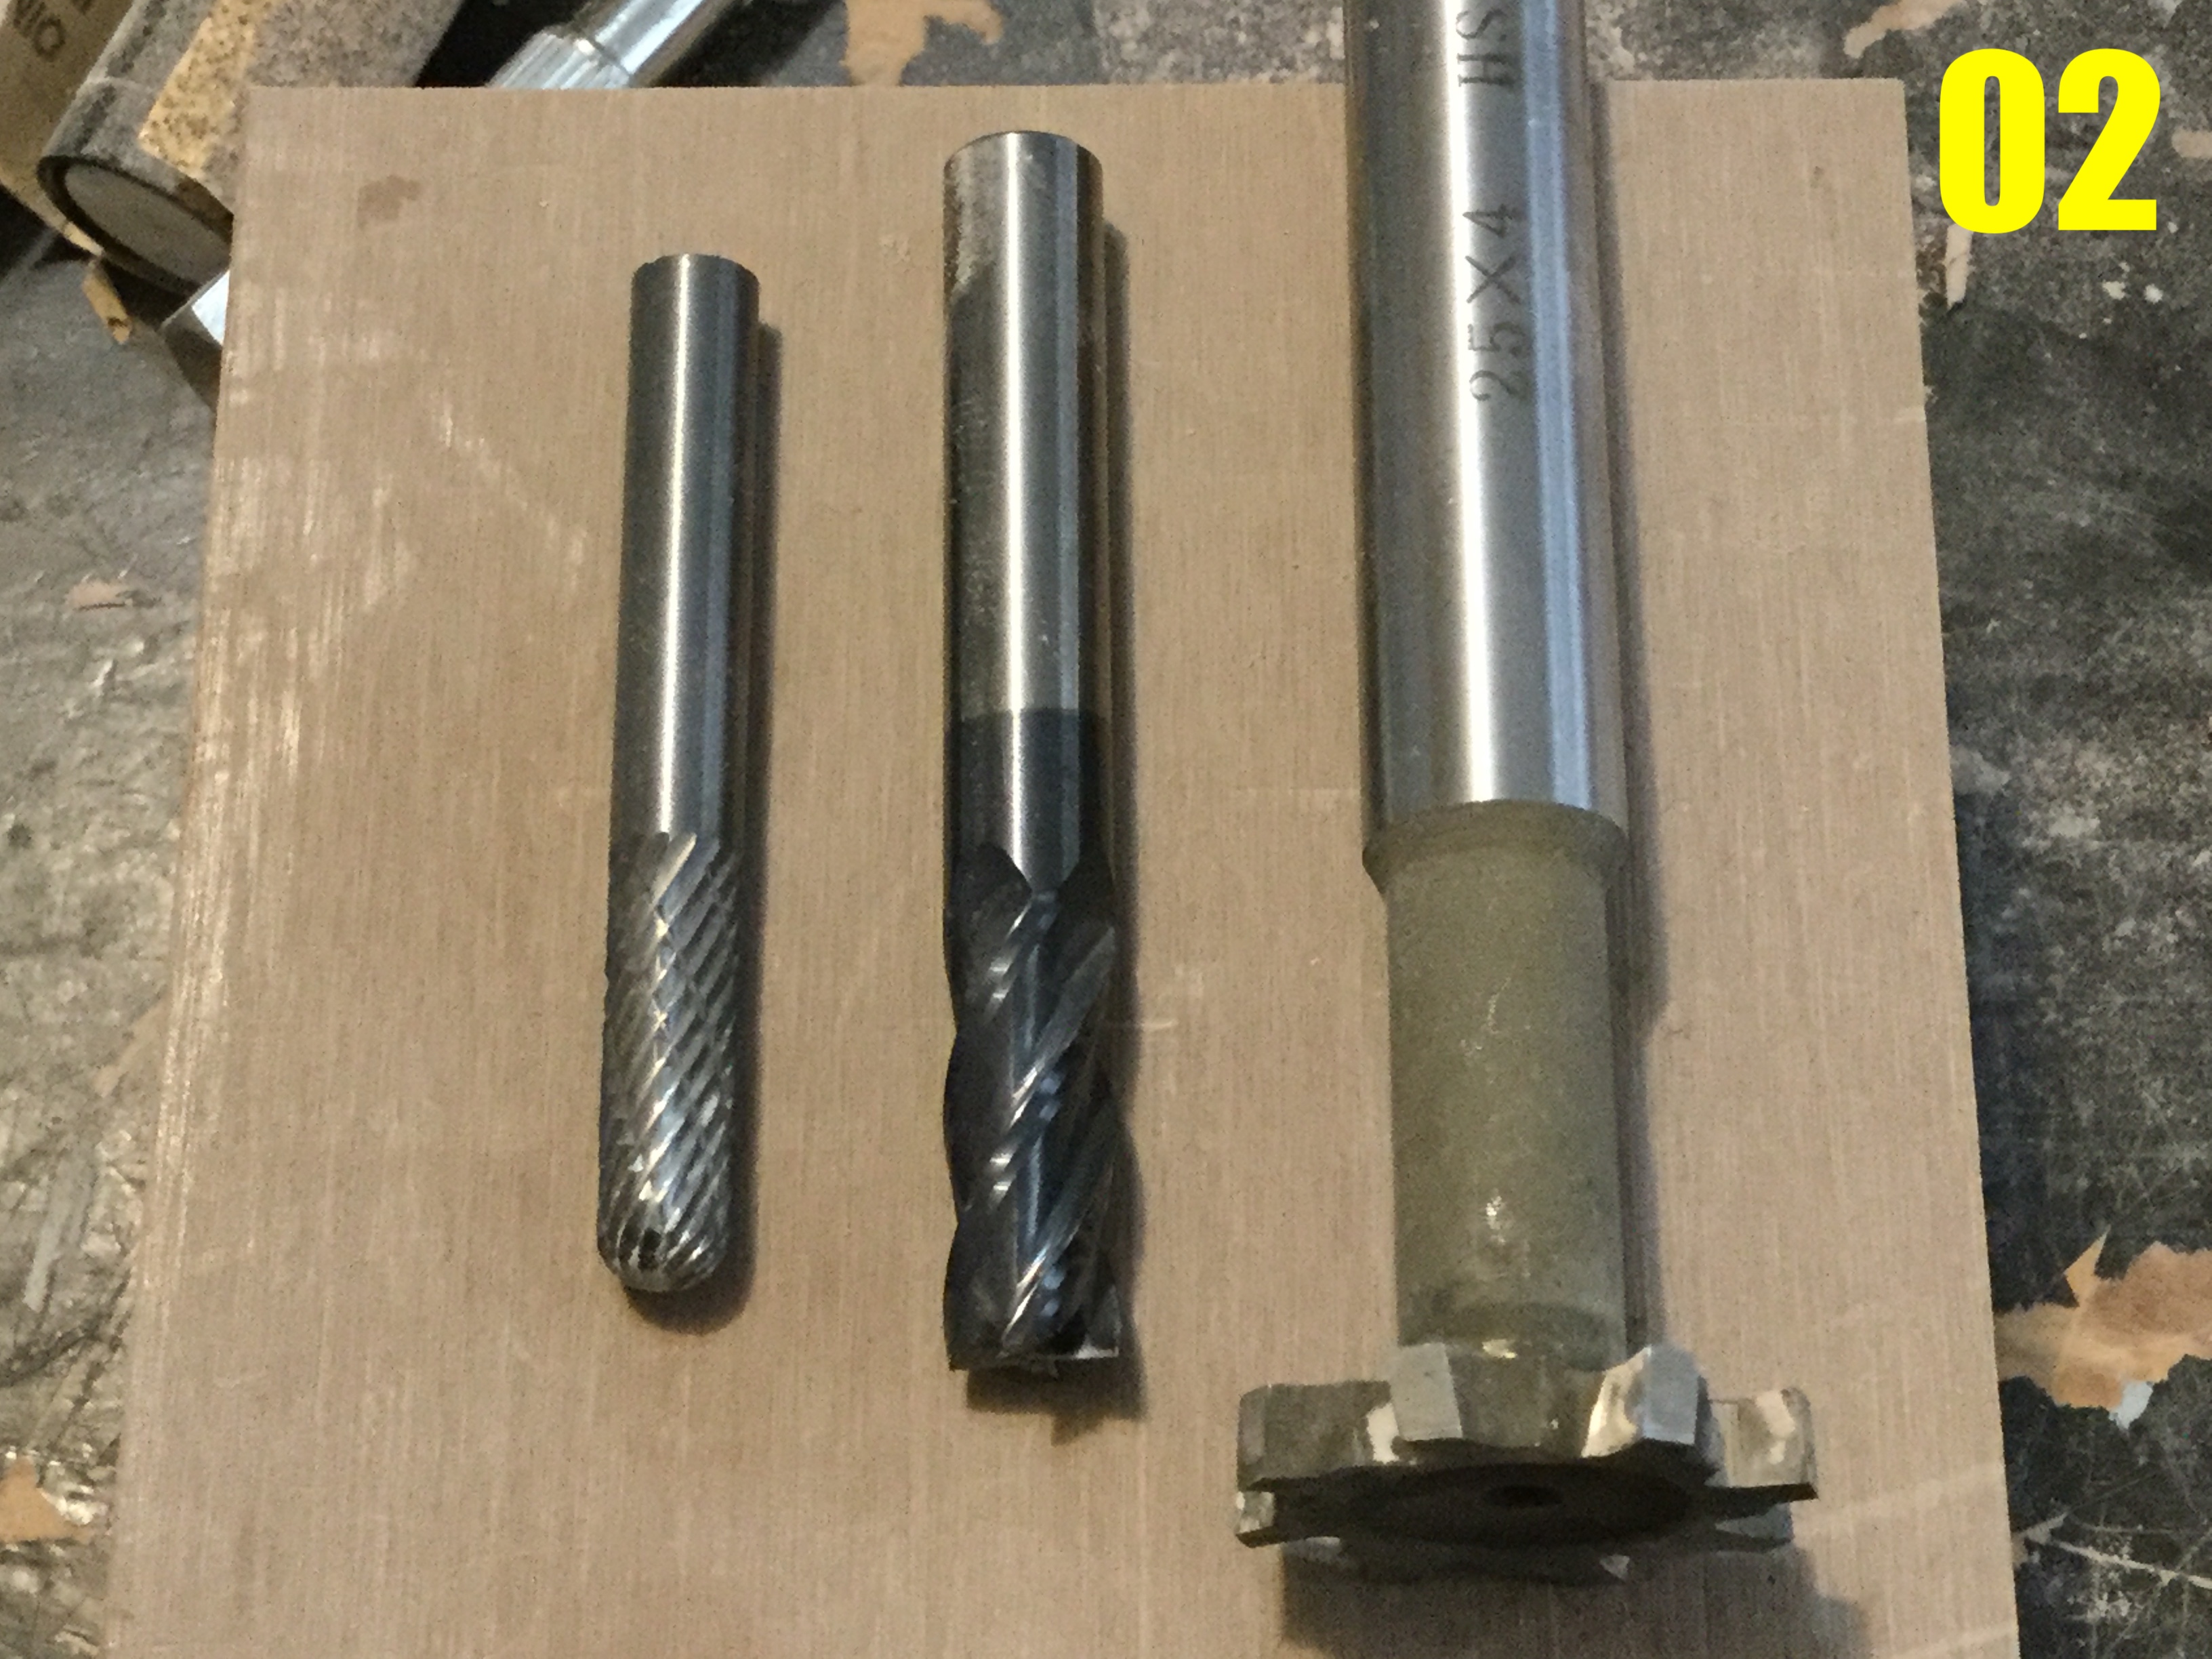
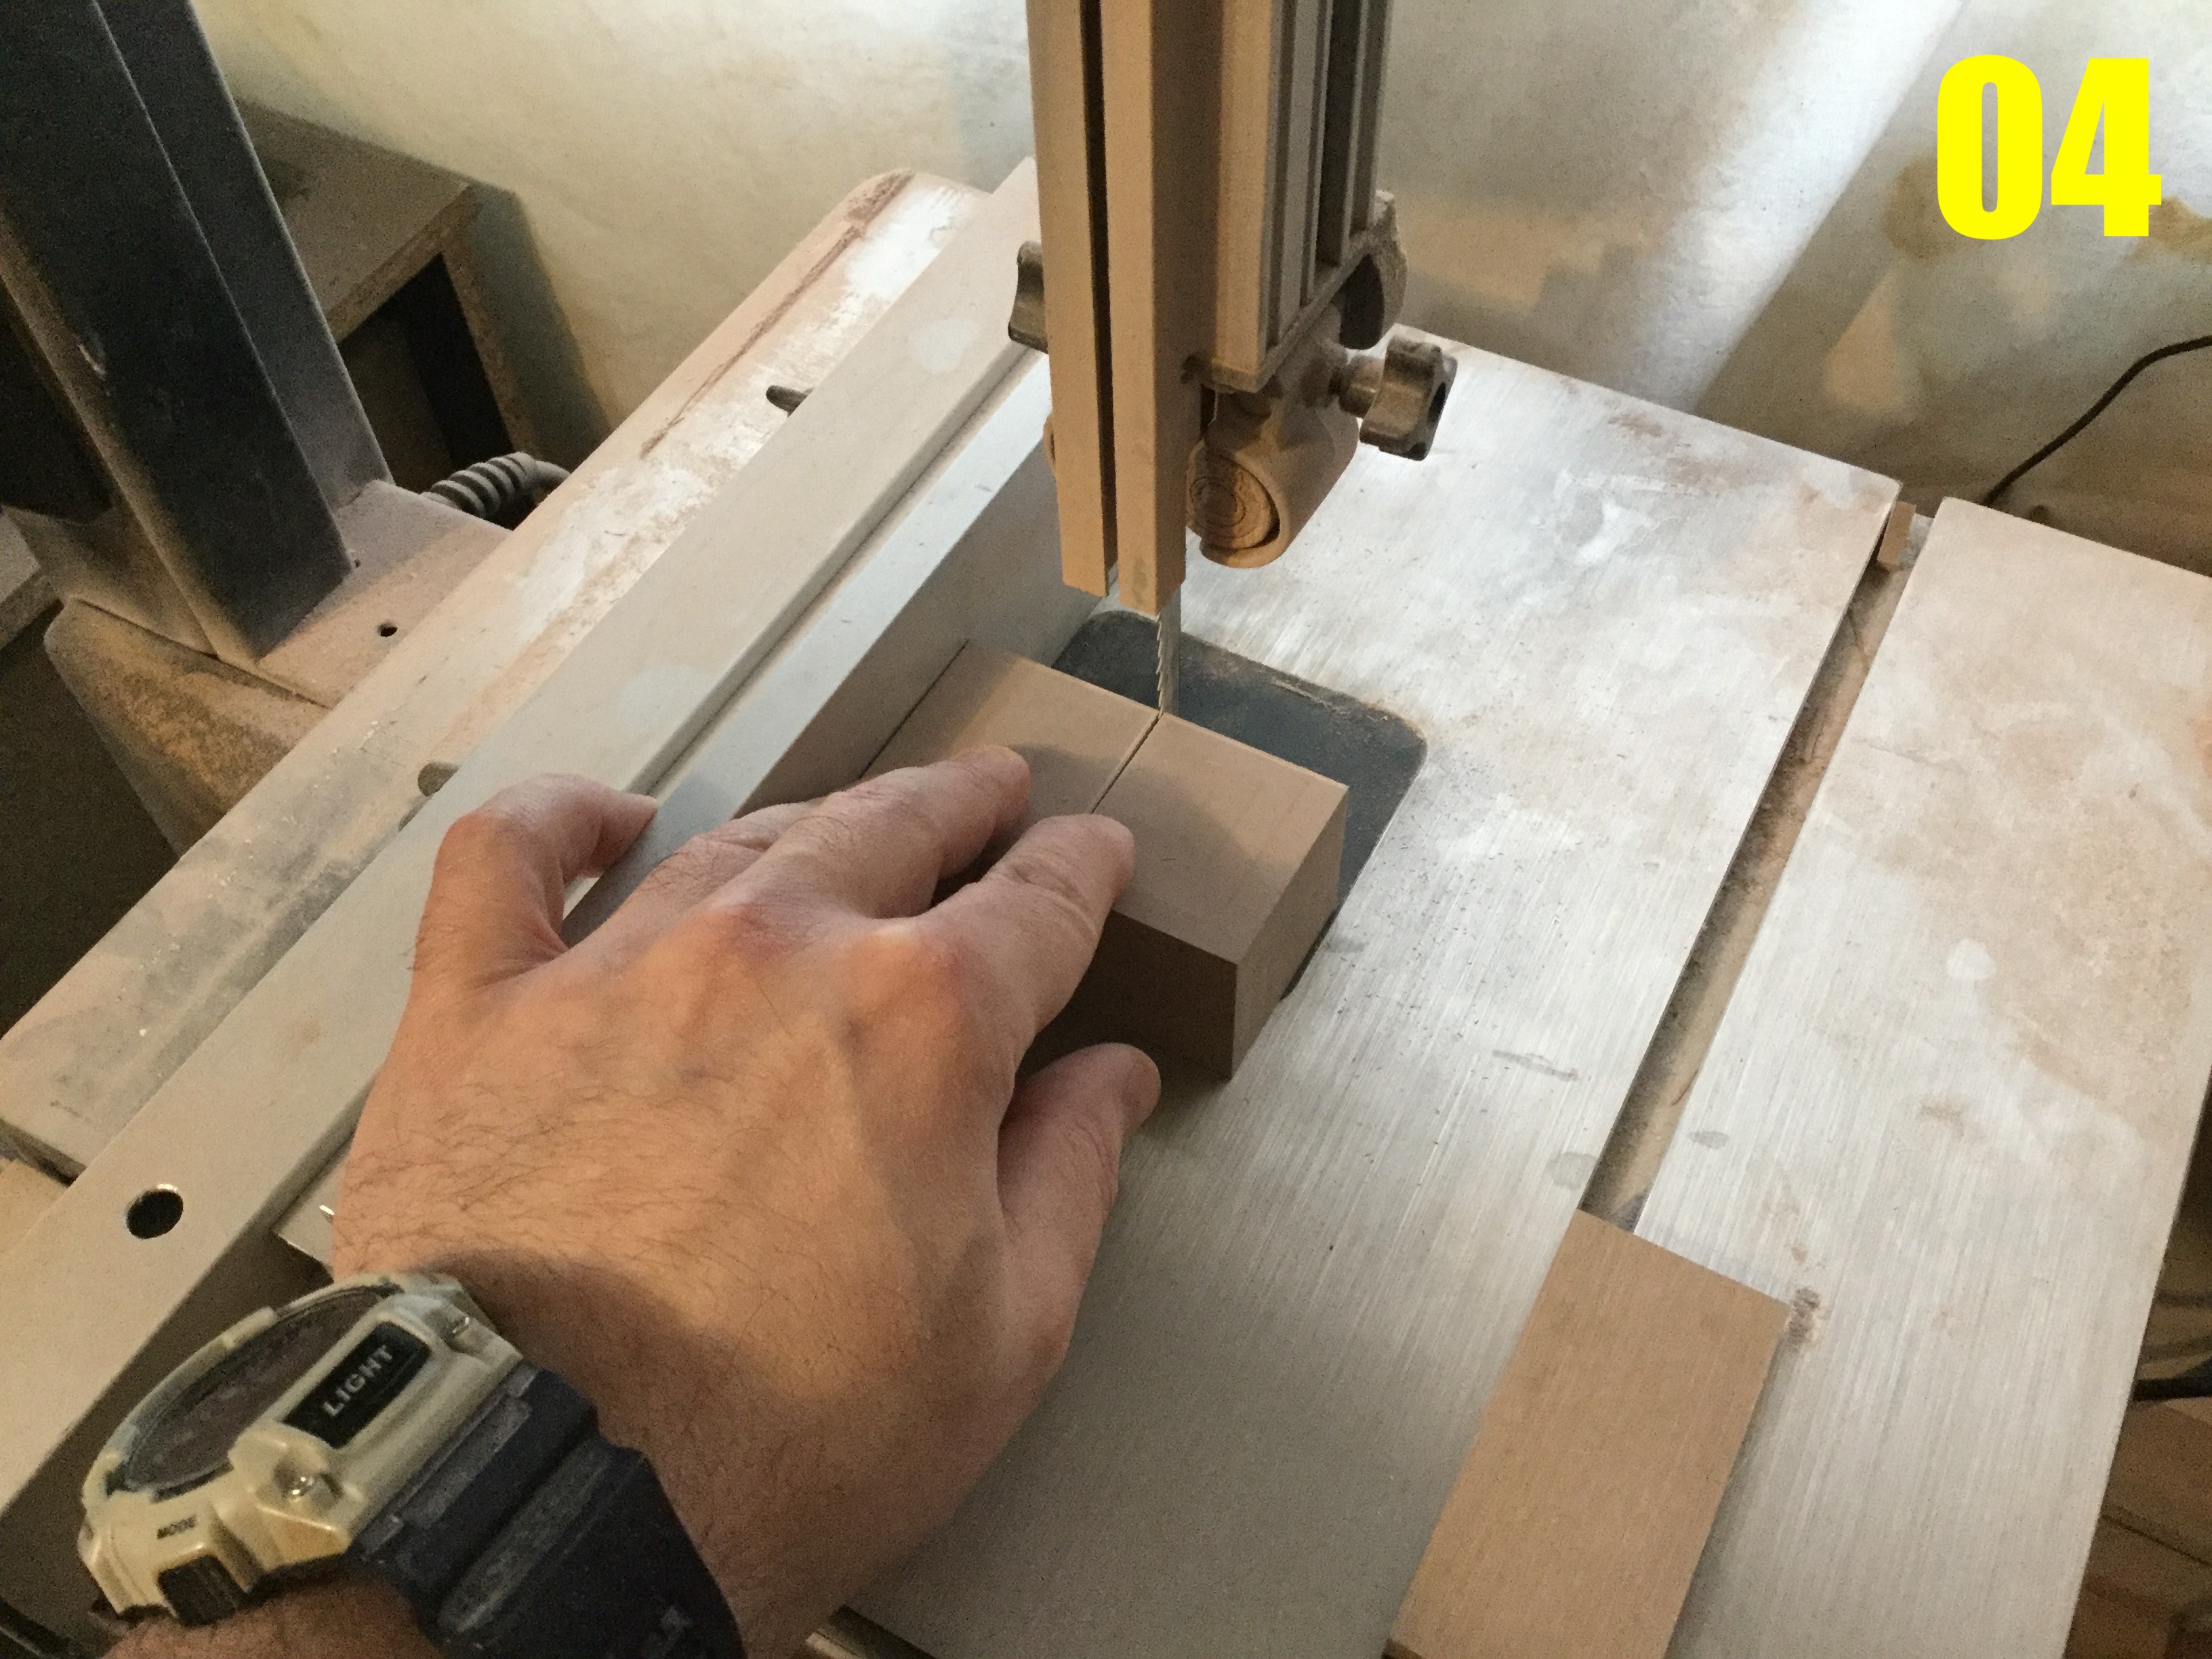
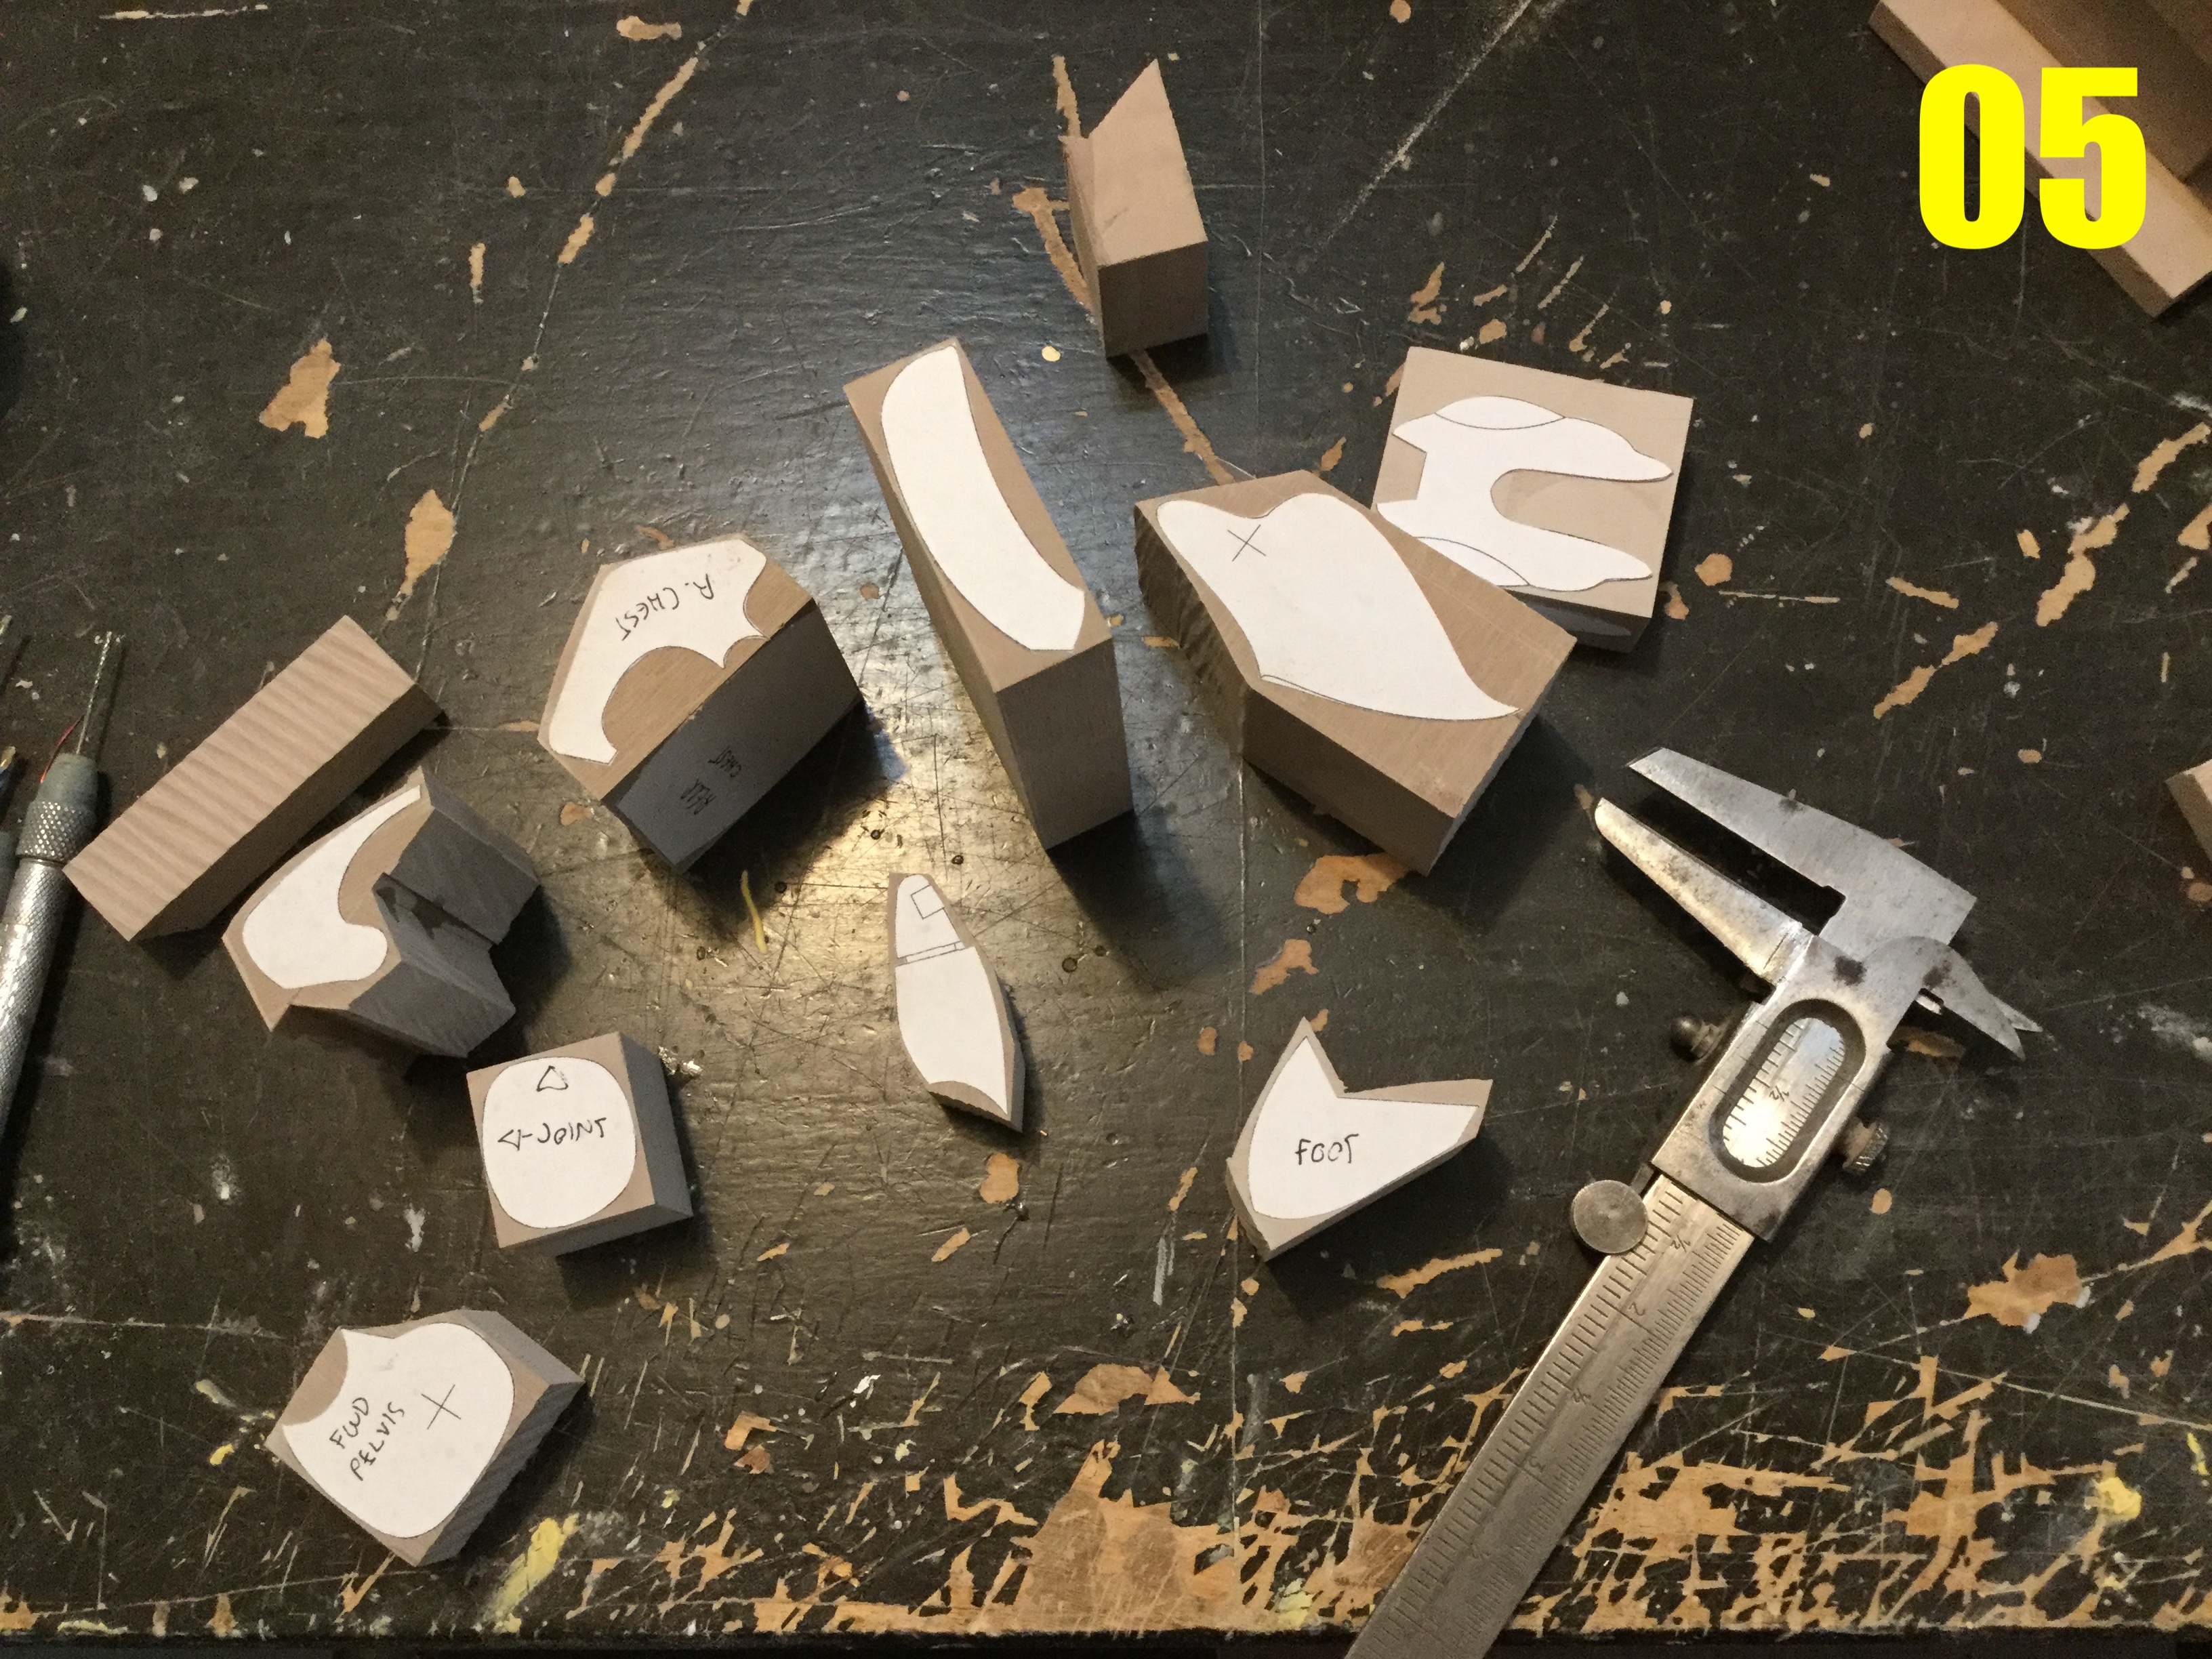
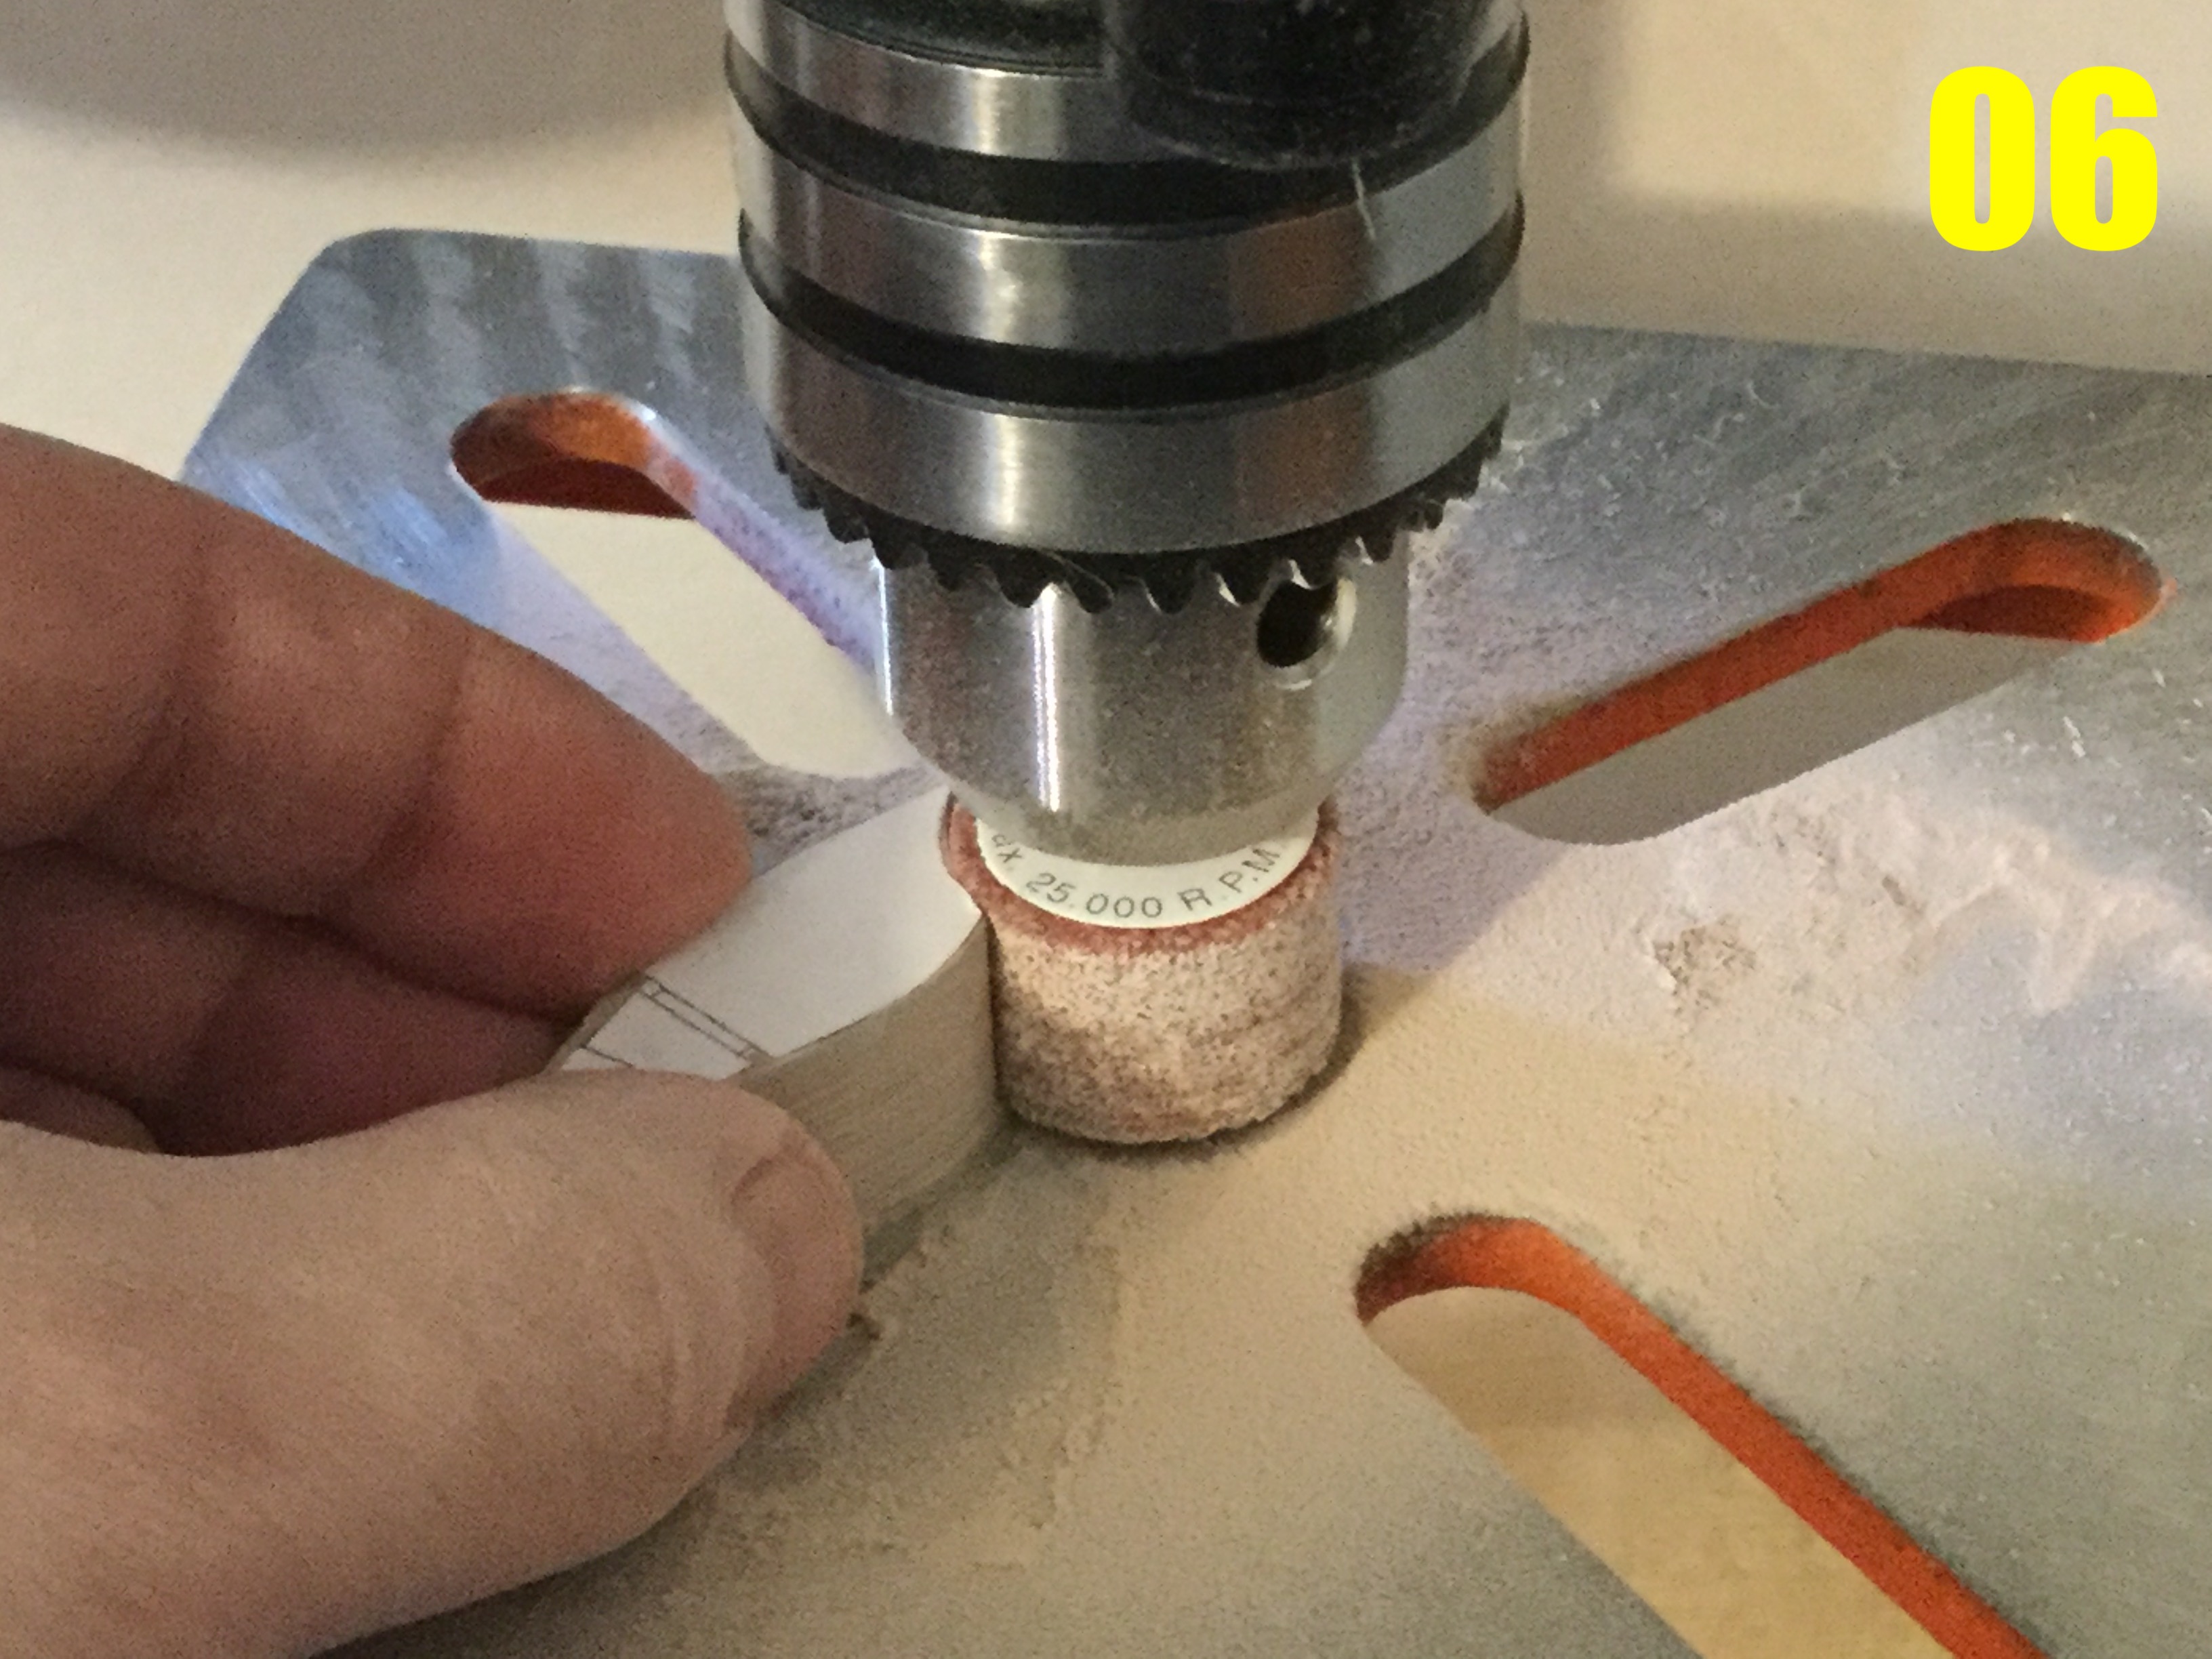
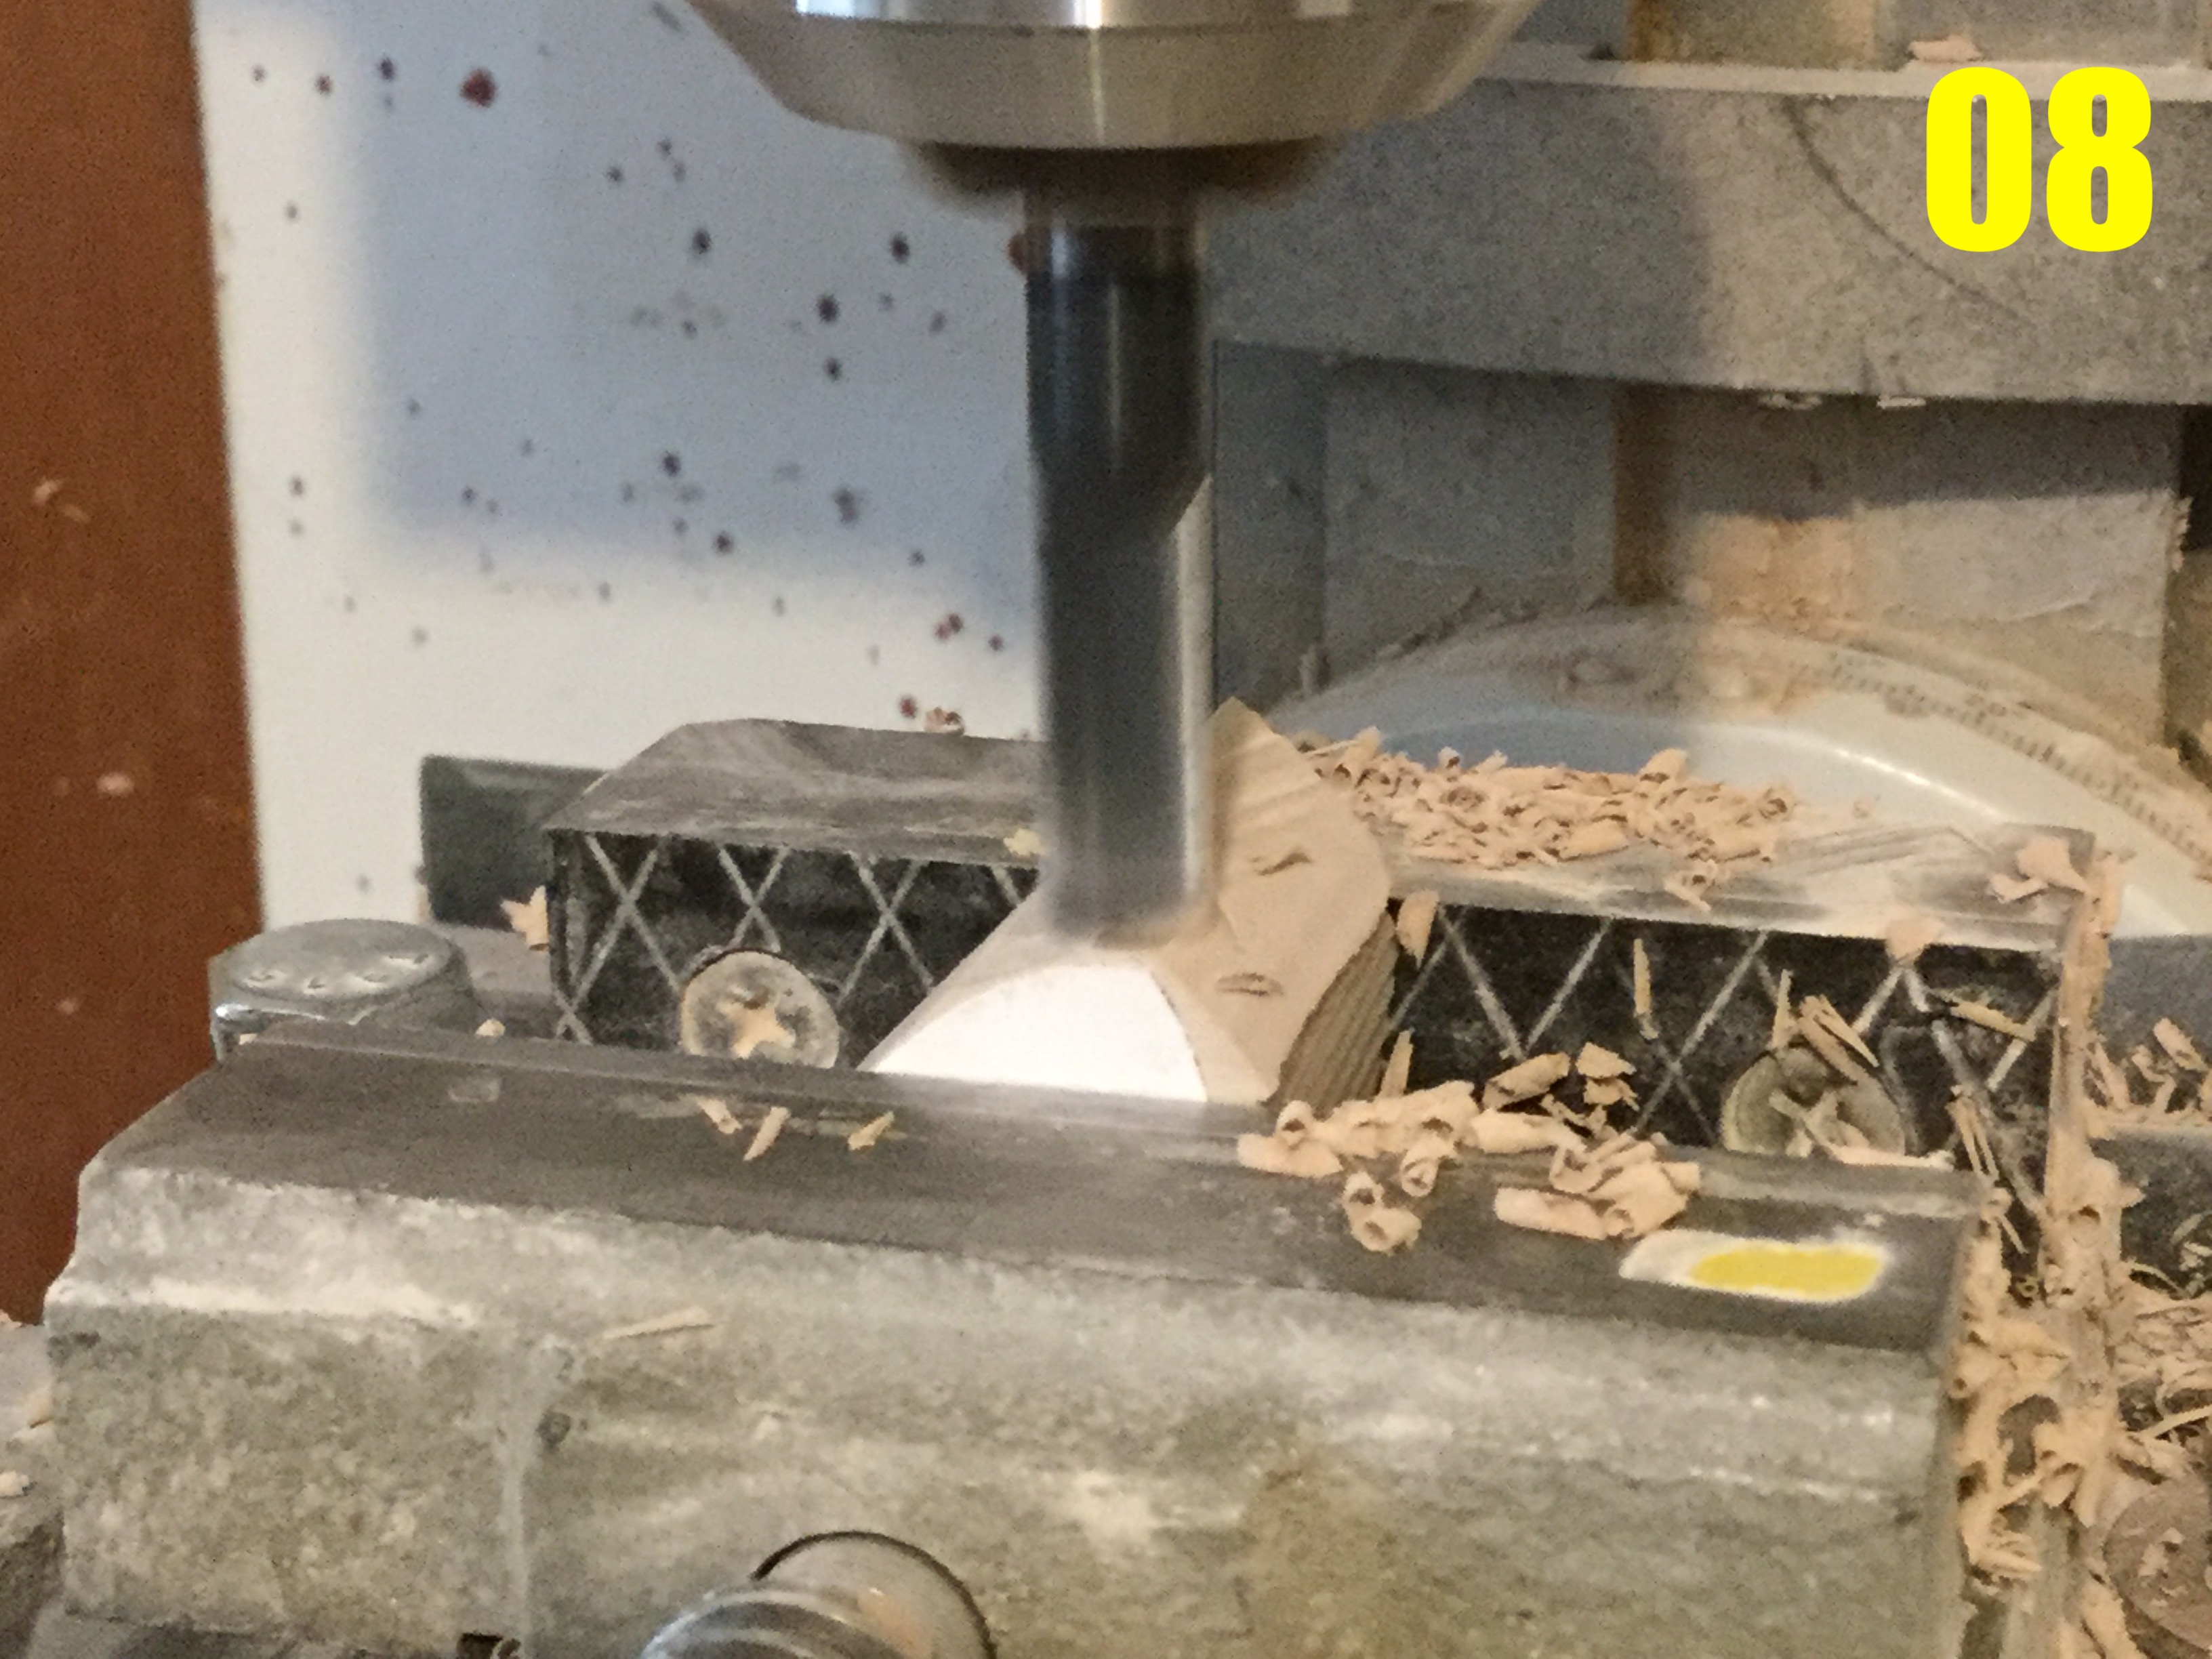
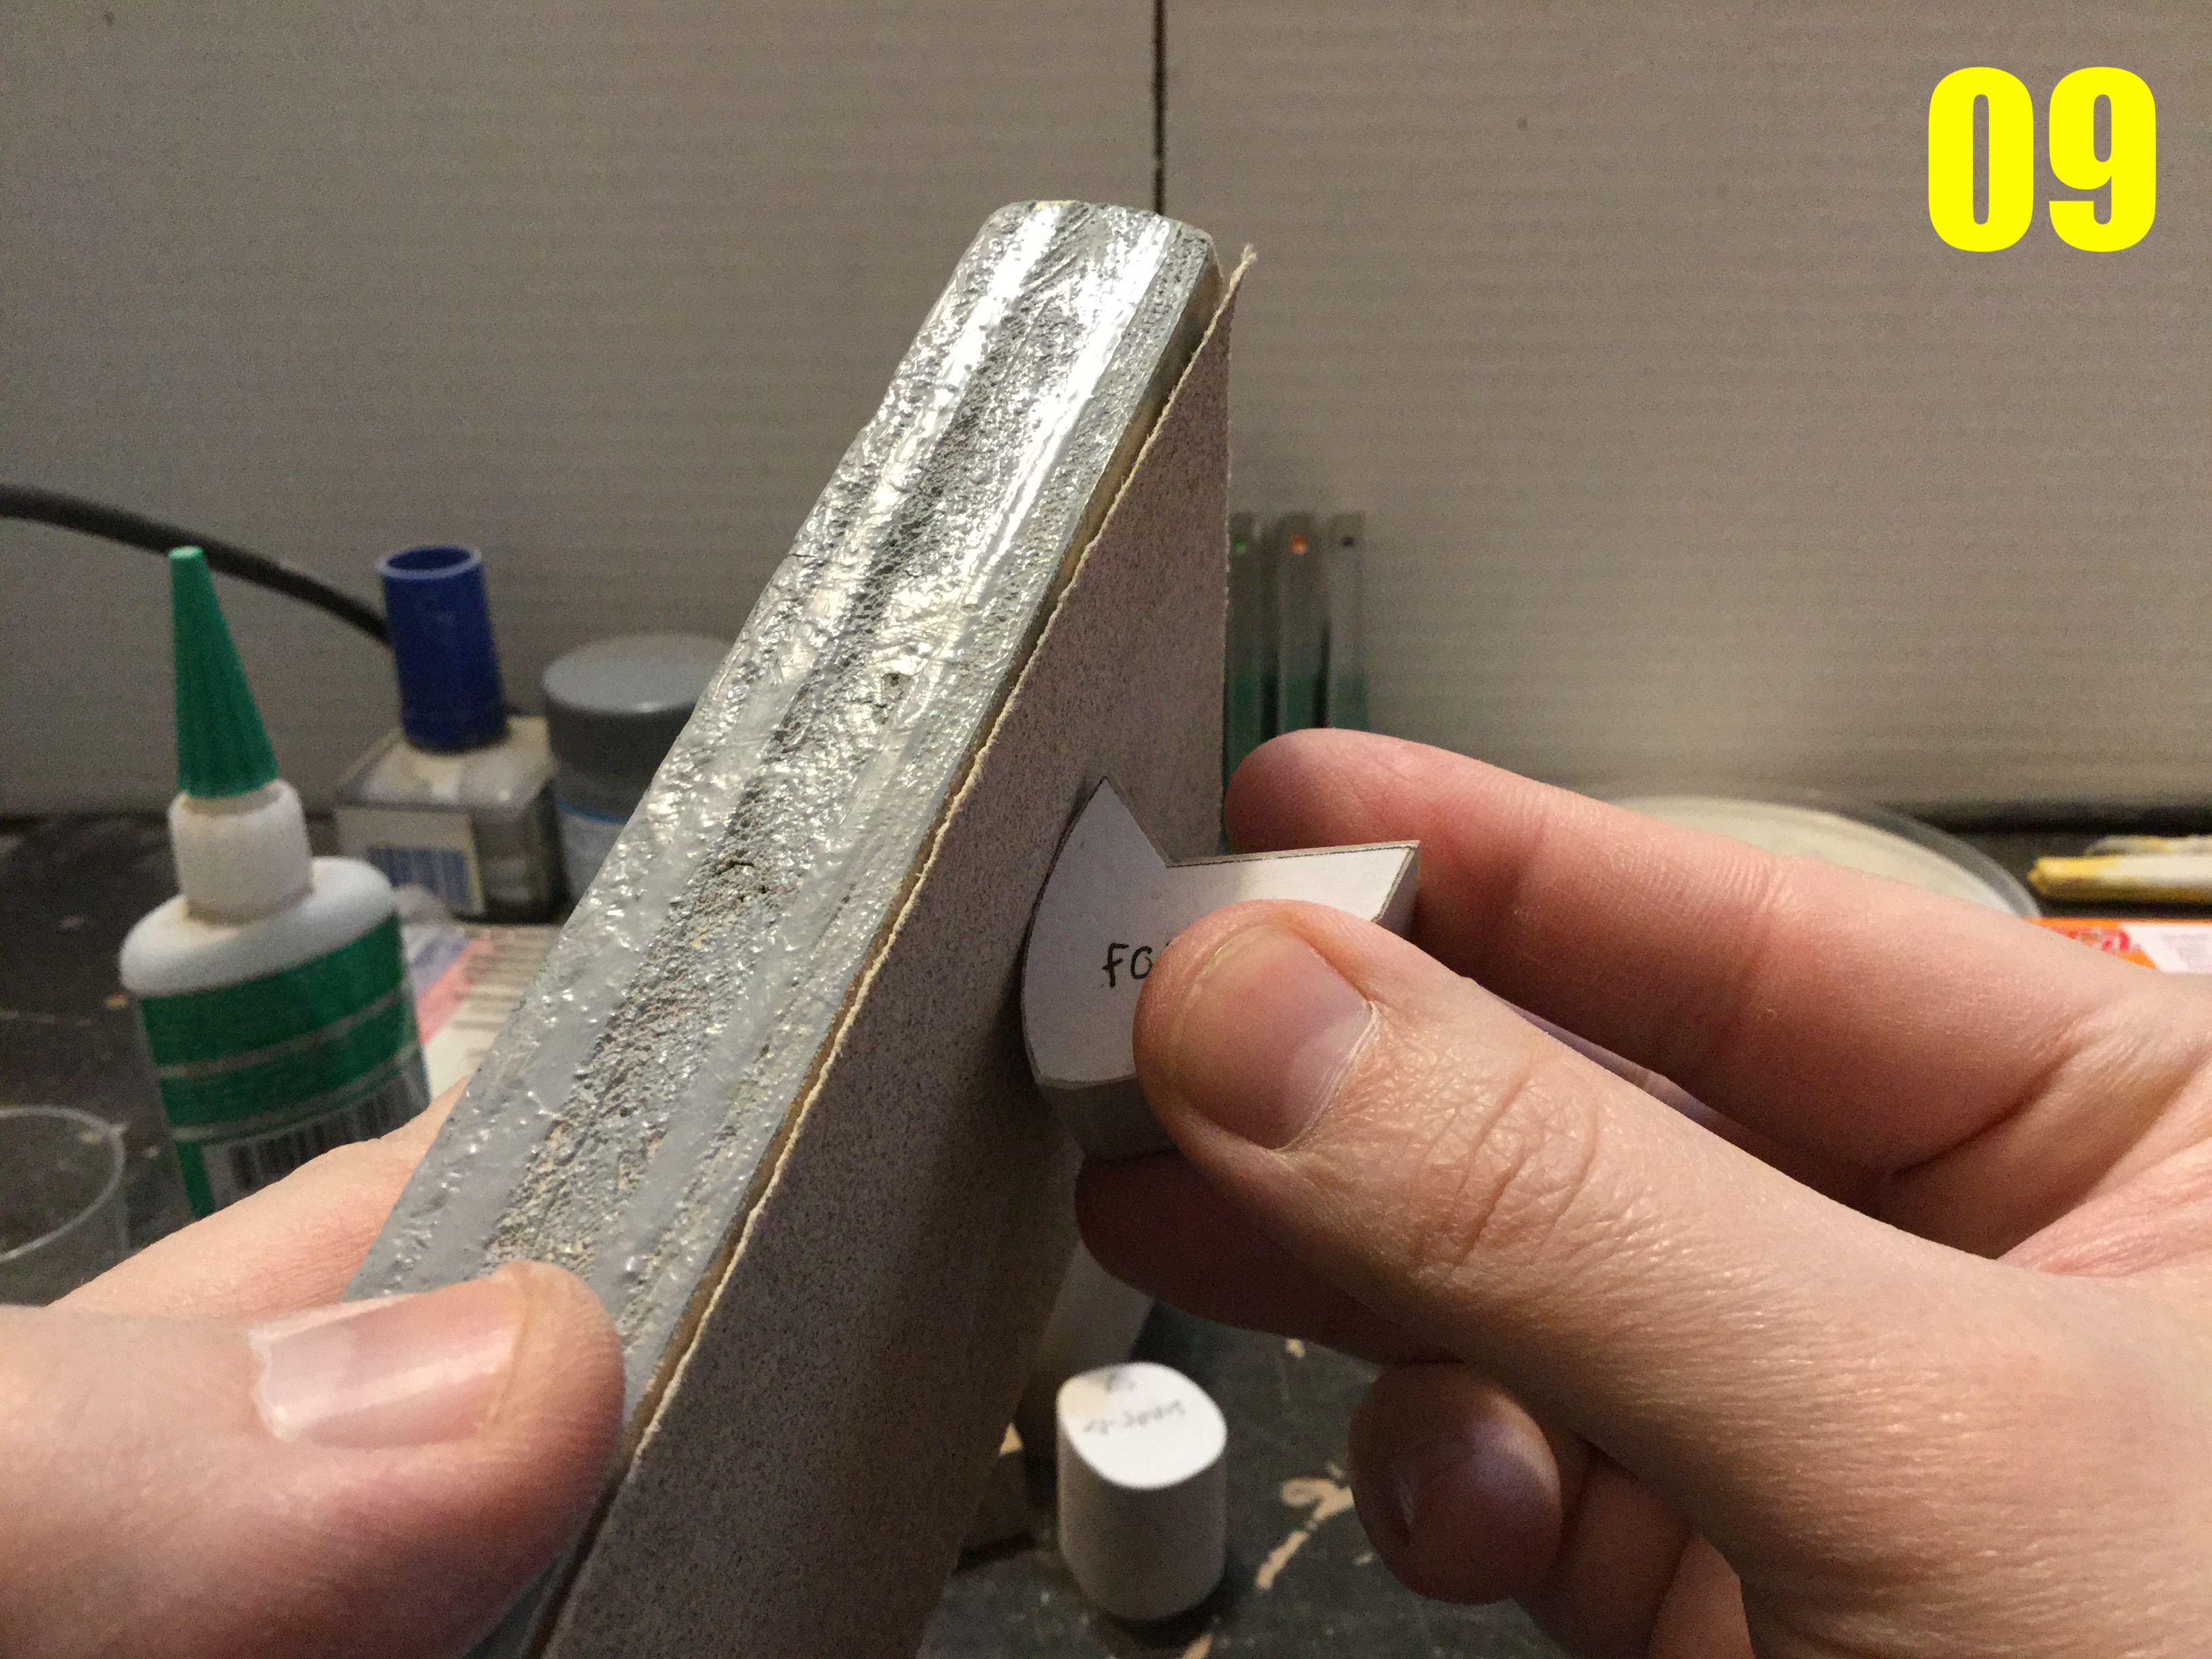
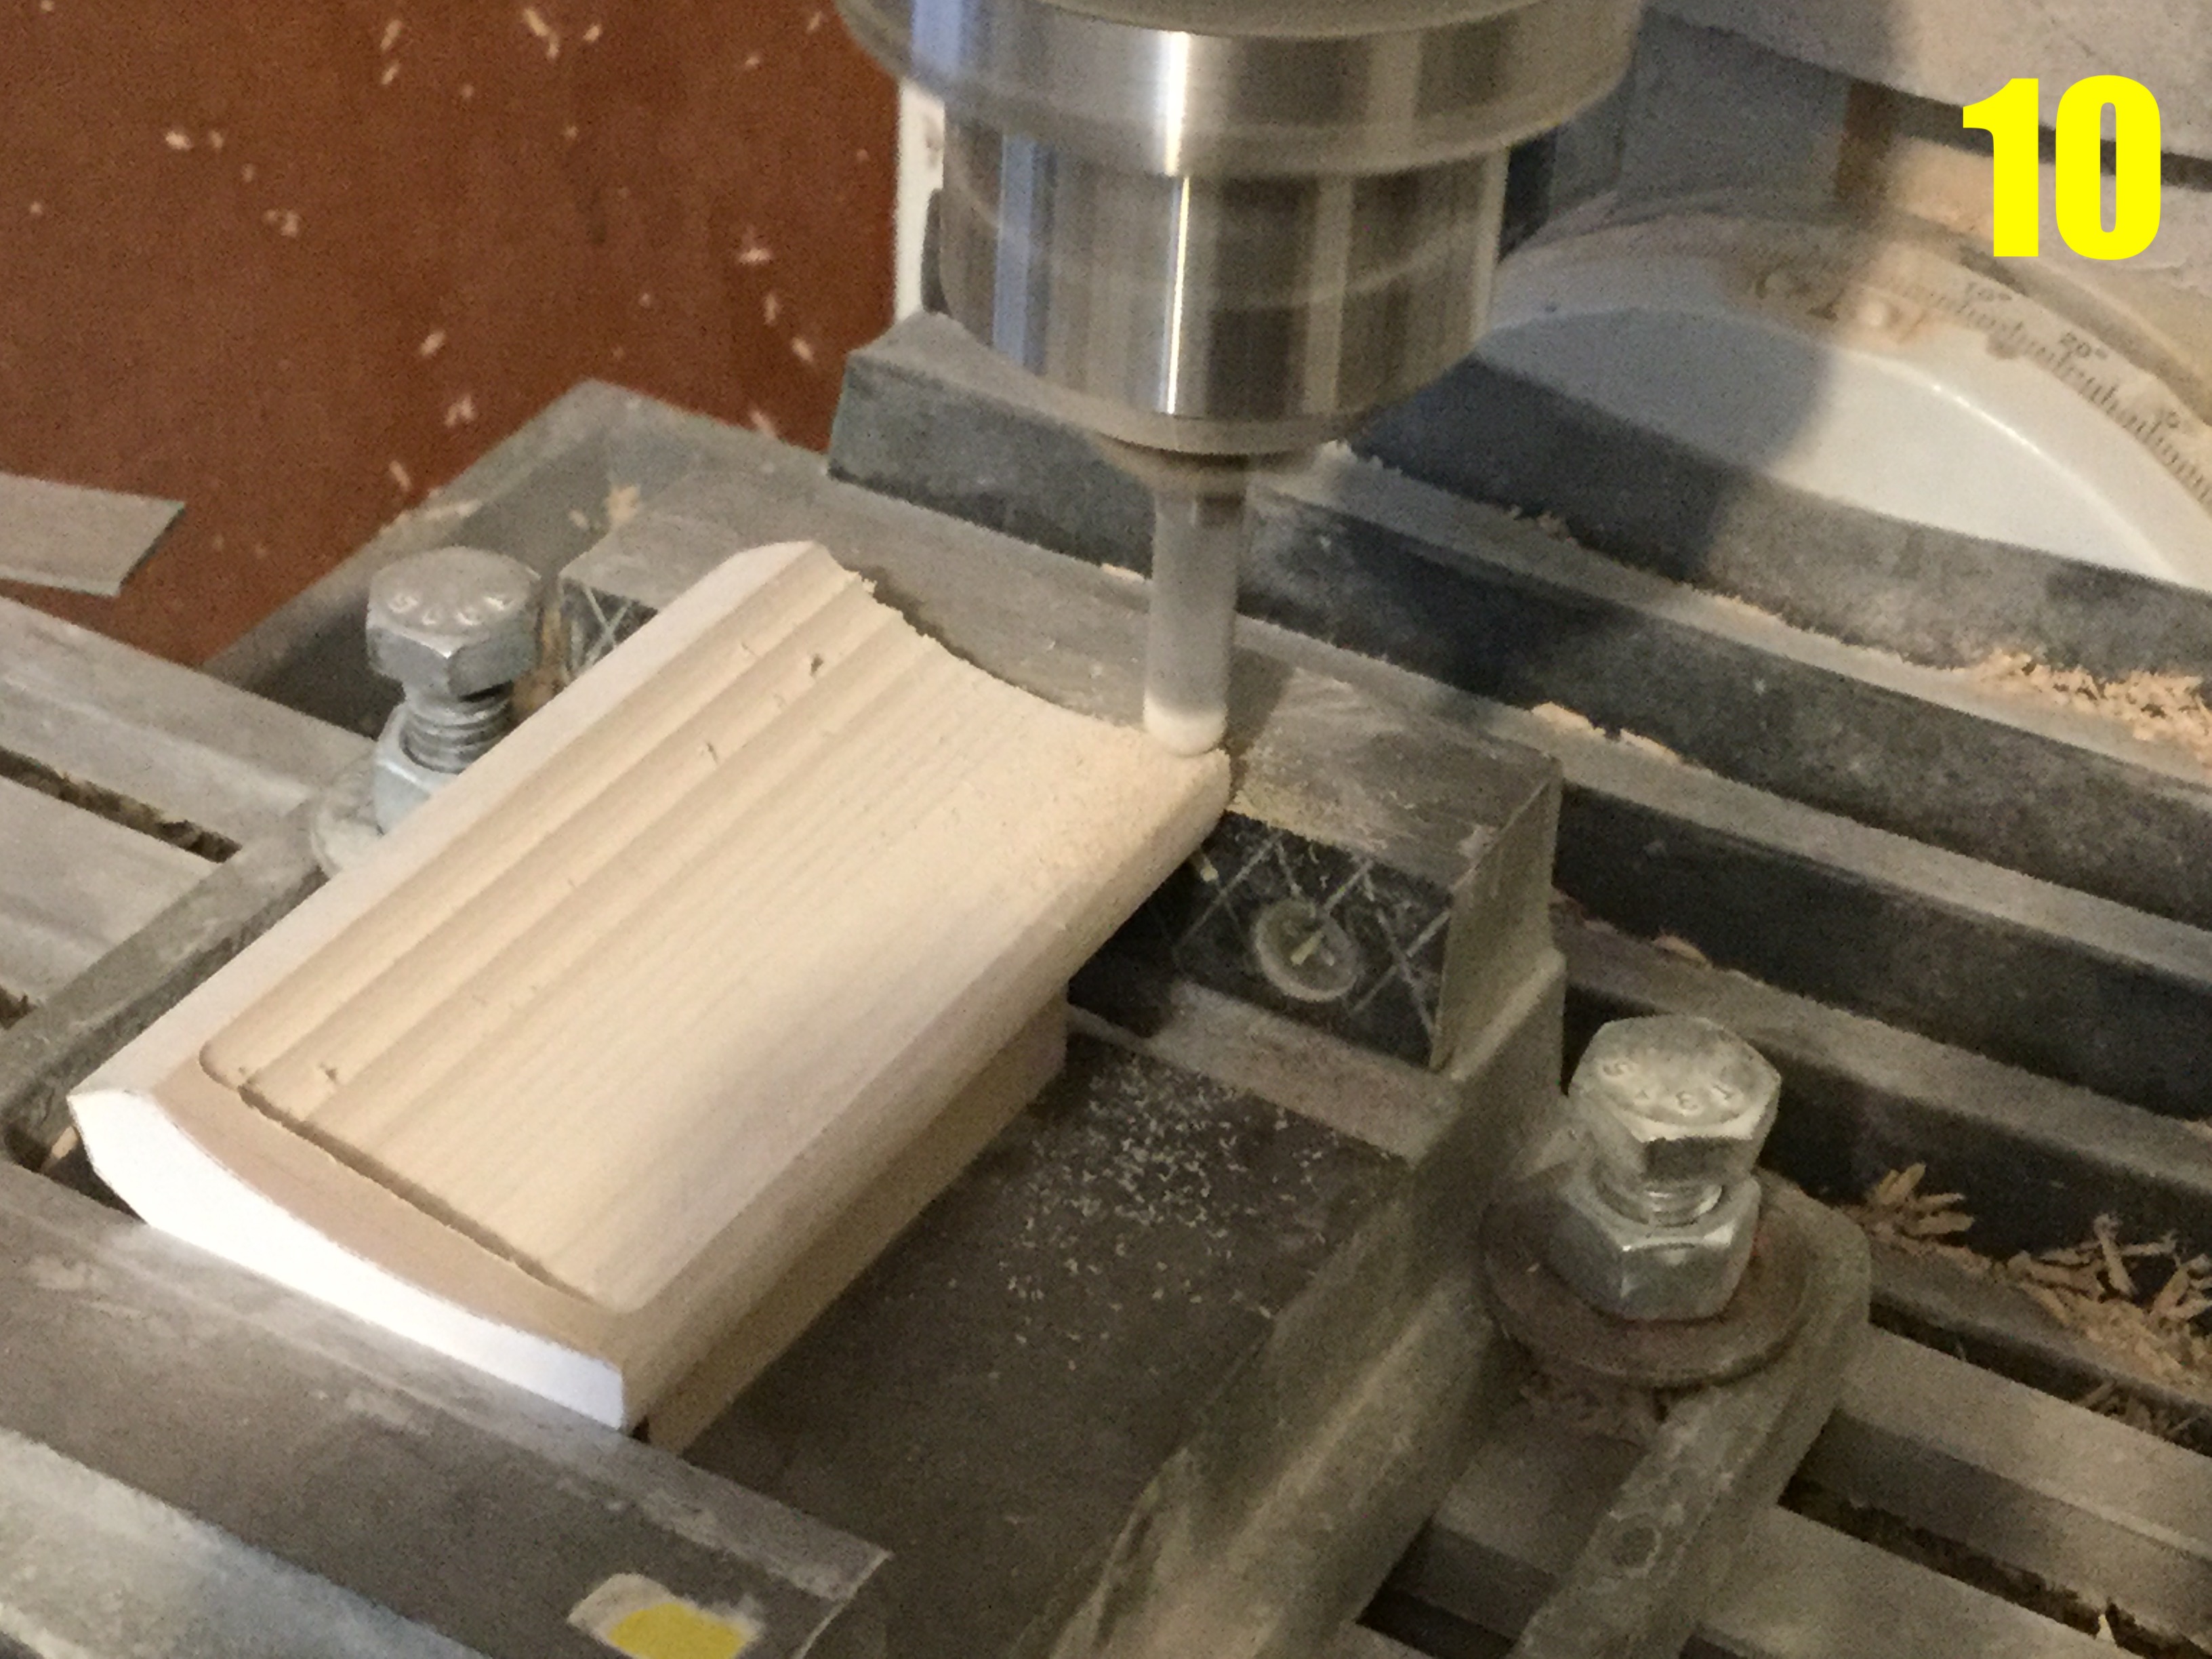
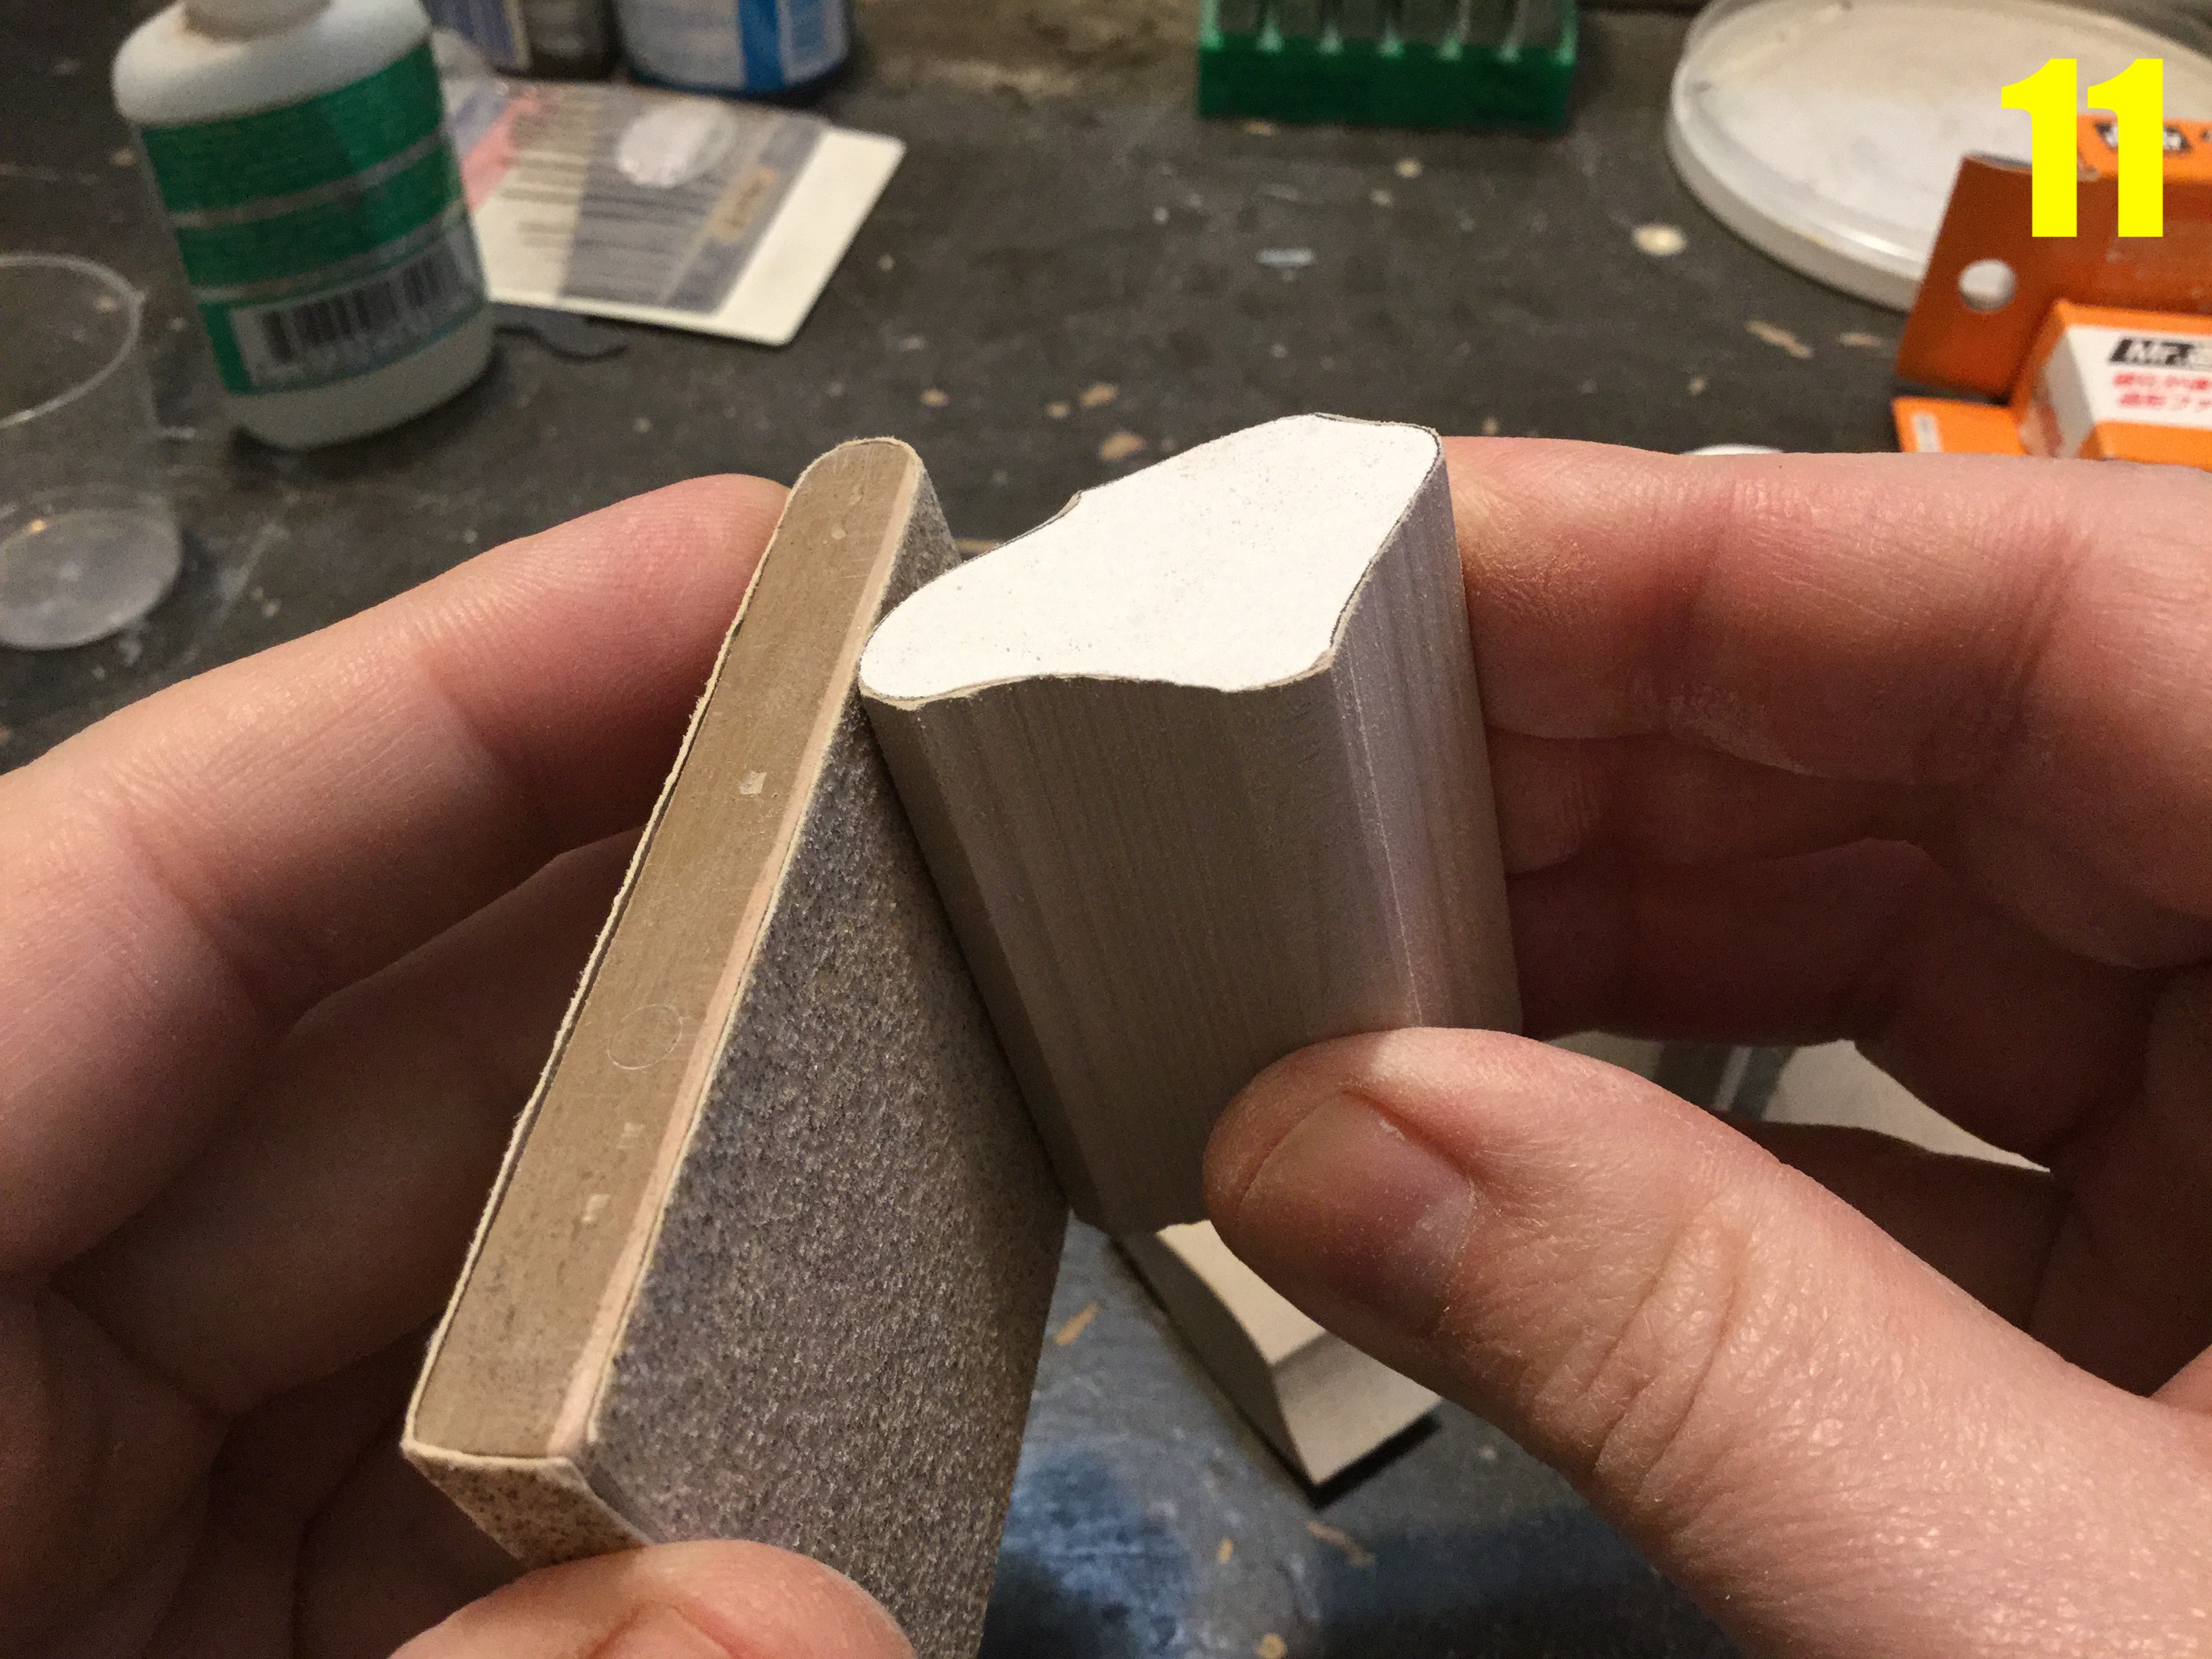
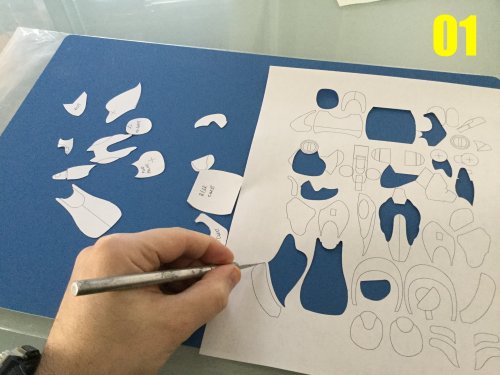
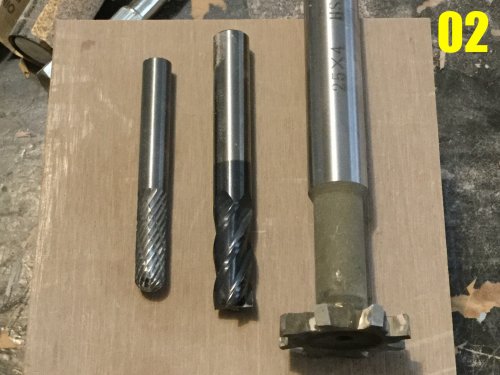
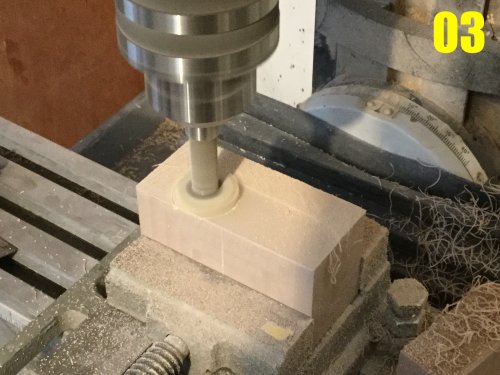
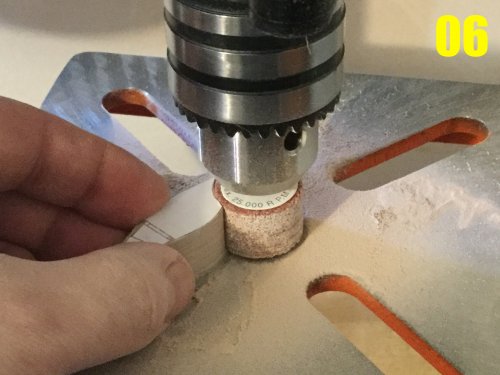
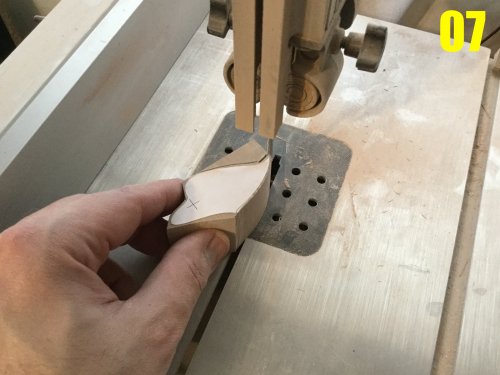
Captain’s log: February 3rd, 2021 It begins! After about a week of studying, tracing, correcting and editing rudimentary technical diagrams, I’m finally ready to start chopping modeling board. The START image shows you all the basics I start my project with: -several print-outs with parts diagrams and line-art references -modelling board blocks of various sizes; some of which were scavenged from other projects -some 2-part expoxy sculpting clay (this will come in handy later) -some thin CA glue Pic 01: the plots are now carefully trimmed-out. Because there are so many generic looking blobby shapes, I’ve made it a point to scribble notes on some of the templates to better keep track of them. Pic 02: because work on the milling machine is critical to the construction of any project, I figured I’d show you some of the cutters I use most. From left to right: a bull-nosed (detail) cutting flute, a 4-blade standard cutter, and finaly a face-end mill. The latter is used for creating perfectly flat surfaces. As a rule of thumb, the fewer cutting blades on the shank, the faster you can carve the material. Pic 03: some initial surfacing going on before I attach the paper templates. I can use this tool for blocks, but when I need to re-surface smaller parts, I will generally resort to the drill press. I use this face-end mill whenever I can, just because it produces less dust. Pic 04: some of the blocks need to be cut down to size, just to avoid wasting excessive material, so the larger pieces are chopped-down on the band saw. Because the saw makes a jagged cut, the block will need to go back to the mill for proper surfacing. Pic 05: only after a considerable amount of block re-sizing can I begin to attach templates to the blocks. Many times I will have both a plan and side template, but cannot attach both at the same time, so I need to add one template, shape the part to that one view, then I can attach the second one. Pic 06: the grinding stone on the drill press being put to good use shaping one of the many curved parts. Pic 07: I’ll use the band saw to do some rough trimming of many parts. Because I can’t do precise cuts with this tool, I always have to leave some extra material and remove it by other, more precise means. Pic 08: one of those more precise means is the mill. Depending on the part, this can be a very tedious process, using many square-cut passes to make a pseud-rounded shape, but it’s precise AF. Pic 09: once the bigger machines clear away most of the excess, I can now get in close with a sanding block and get the shape just right. Pic 10: I loathe parts like this. This long, curved part is actually the cross-section of the ankle armor, which I need to make as left and right pieces. By making the cross-section as one piece, I can more easily ensure that the parts will be mirror images of each other. The concave curvature must be machined one pass at a time. Pic 11: this block represents the cross-section of the thighs, which underwent the same process which you saw in pic 10, and can now be sanded to conform precisely to the template. You can se that there’s still some excess material that the mill didn’t remove, and that’s a judgement call: the mill is precise but slow, and there’s a point beyond which extra milling will not yield extra precision and manual shaping can be done. It all depends on the shape and the part in question. While this probably wasn’t the most exciting update with regards to progress, it’s probably the most critical and informative in terms of laying-out the process by which an idea is turned into an almost-part. More to come next week, so stay tuned!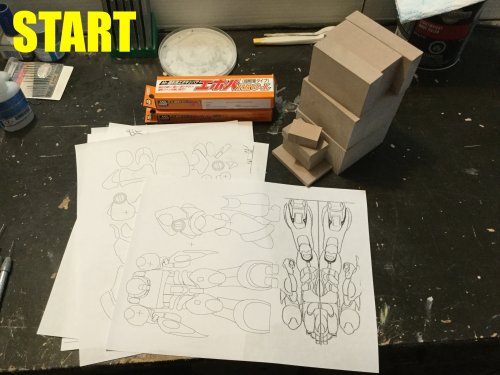


-
1/48 SOUTHERN CROSS BIOROID
captain america replied to captain america's topic in Anime or Science Fiction
This. The BIO LLOYD project was only possible because a devout fan decided to bankroll the tooling of the masters. Due to the complexity of the project and the generally lackluster support for SC, I don't think it would have been possible to purely crowdfund it. Because of their devotion and because I don't think anyone else will ever give this design the treatment it deserves, I'm giving this project the 110% treatment. Expect an update by Thursday at the outset. -
1/48 SOUTHERN CROSS BIOROID
captain america replied to captain america's topic in Anime or Science Fiction
Hi everyone! I'm pushing the first BIO LLOYD pictorial update to next week. Progress is actually going very well, stay tuned! -
1/48 SOUTHERN CROSS BIOROID
captain america replied to captain america's topic in Anime or Science Fiction
In fairness to L&S (not Arii) they could only do as well as technology, budget, and source material allowed them to. Remember that they weren't fans: they answered to accountants and a corporate structure that saw this as just one more franchise to milk for profit and move on. Speaking of that particular kit, have you seen what the originals are going for these days?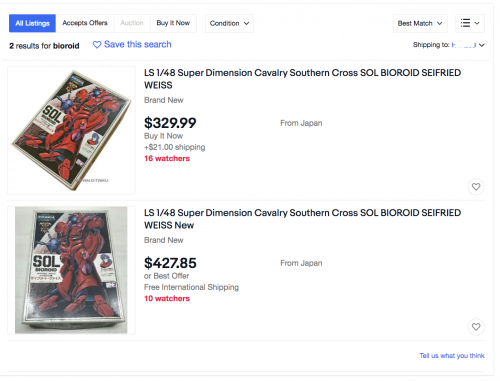
-
1/48 SOUTHERN CROSS BIOROID
captain america replied to captain america's topic in Anime or Science Fiction
Even split into two parts, each half is considerable in size, so the mold box will have to be custom-made regardless. I'm also seriously considering making some parts from flexible resin to offer posability without violating the source material. -
1/48 SOUTHERN CROSS BIOROID
captain america replied to captain america's topic in Anime or Science Fiction
BIO LLOYD will be a little over 17cm tall in 1/48. I always begin with the human pilot and cockpit as a starting point to determine the mecha size. They had created the art for the cockpit ball cutaway, so all I had to do was size it such to fit into the mecha's neck/upper chest area. Of course, the mecha's size contradicts the numerical dimensions, but that's nothing new. The hover-sled will be bigger than the mecha itself: 24 by 18cm. That'll require a massive custom mold box. I only use the animation as reference if nothing else is available because it's so inconsistent. Besides, the line-art is the primary reference that the animators use, so I make that a priority. -
1/48 SOUTHERN CROSS BIOROID
captain america replied to captain america's topic in Anime or Science Fiction
Contact Brett over at R2KF, he'll take care of you and as a fellow Aussie, your shipping will be substantially cheaper. -
1/48 SOUTHERN CROSS BIOROID
captain america replied to captain america's topic in Anime or Science Fiction
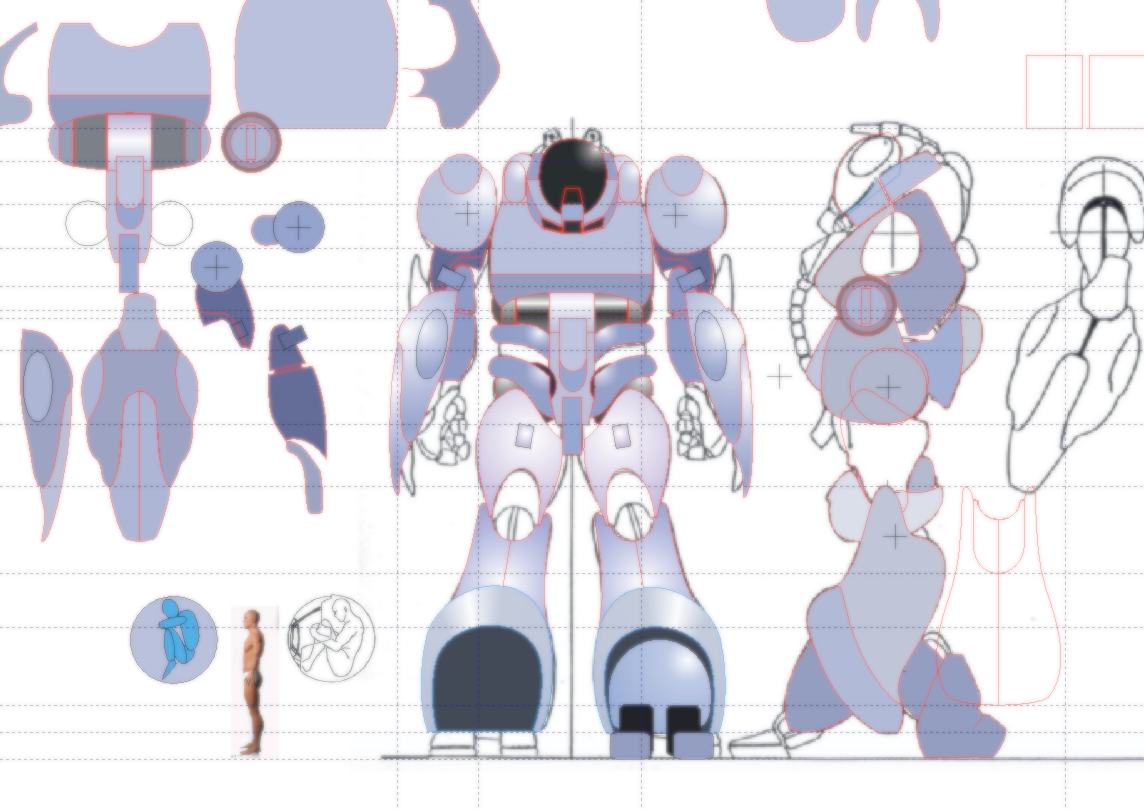
Hey everyone! Just wanted to let you know that BIO LLOYD drafting is progressing well. Or rather, as well as it possibly can, given the nature of the source material. However abstract and disjointed the line-art from previous projects was, this one is its own, special kind of clusterscrew! It's not bad enough that the line-art just looks like a bunch of jellybeans cobbled together, and the multiple views contradict each other, I'm used to that. But the joints on this thing were really just phoned-in, even by Anime standards! As such, I'm performing high-level creative gymnastics to give this thing a reasonable degree of articulation while still keeping true to the source material. As I progress into the sculpting, you will start to understand why this will be a bargain, even at 300 bucks +. A glimpse into my technical drawing madness: