captain america
-
Posts
3550 -
Joined
-
Last visited
Content Type
Profiles
Forums
Events
Gallery
Everything posted by captain america
-

1/48 SOUTHERN CROSS BIOROID
captain america replied to captain america's topic in Anime or Science Fiction
Sometimes, when you have to subcontract some elements of the build, it takes longer just because of the shipping factor. With this one, I saw that the momentum of the orders was good enough that I started the re-tooling early, hence the rapid shipping. -
1/48 SOUTHERN CROSS BIOROID
captain america replied to captain america's topic in Anime or Science Fiction
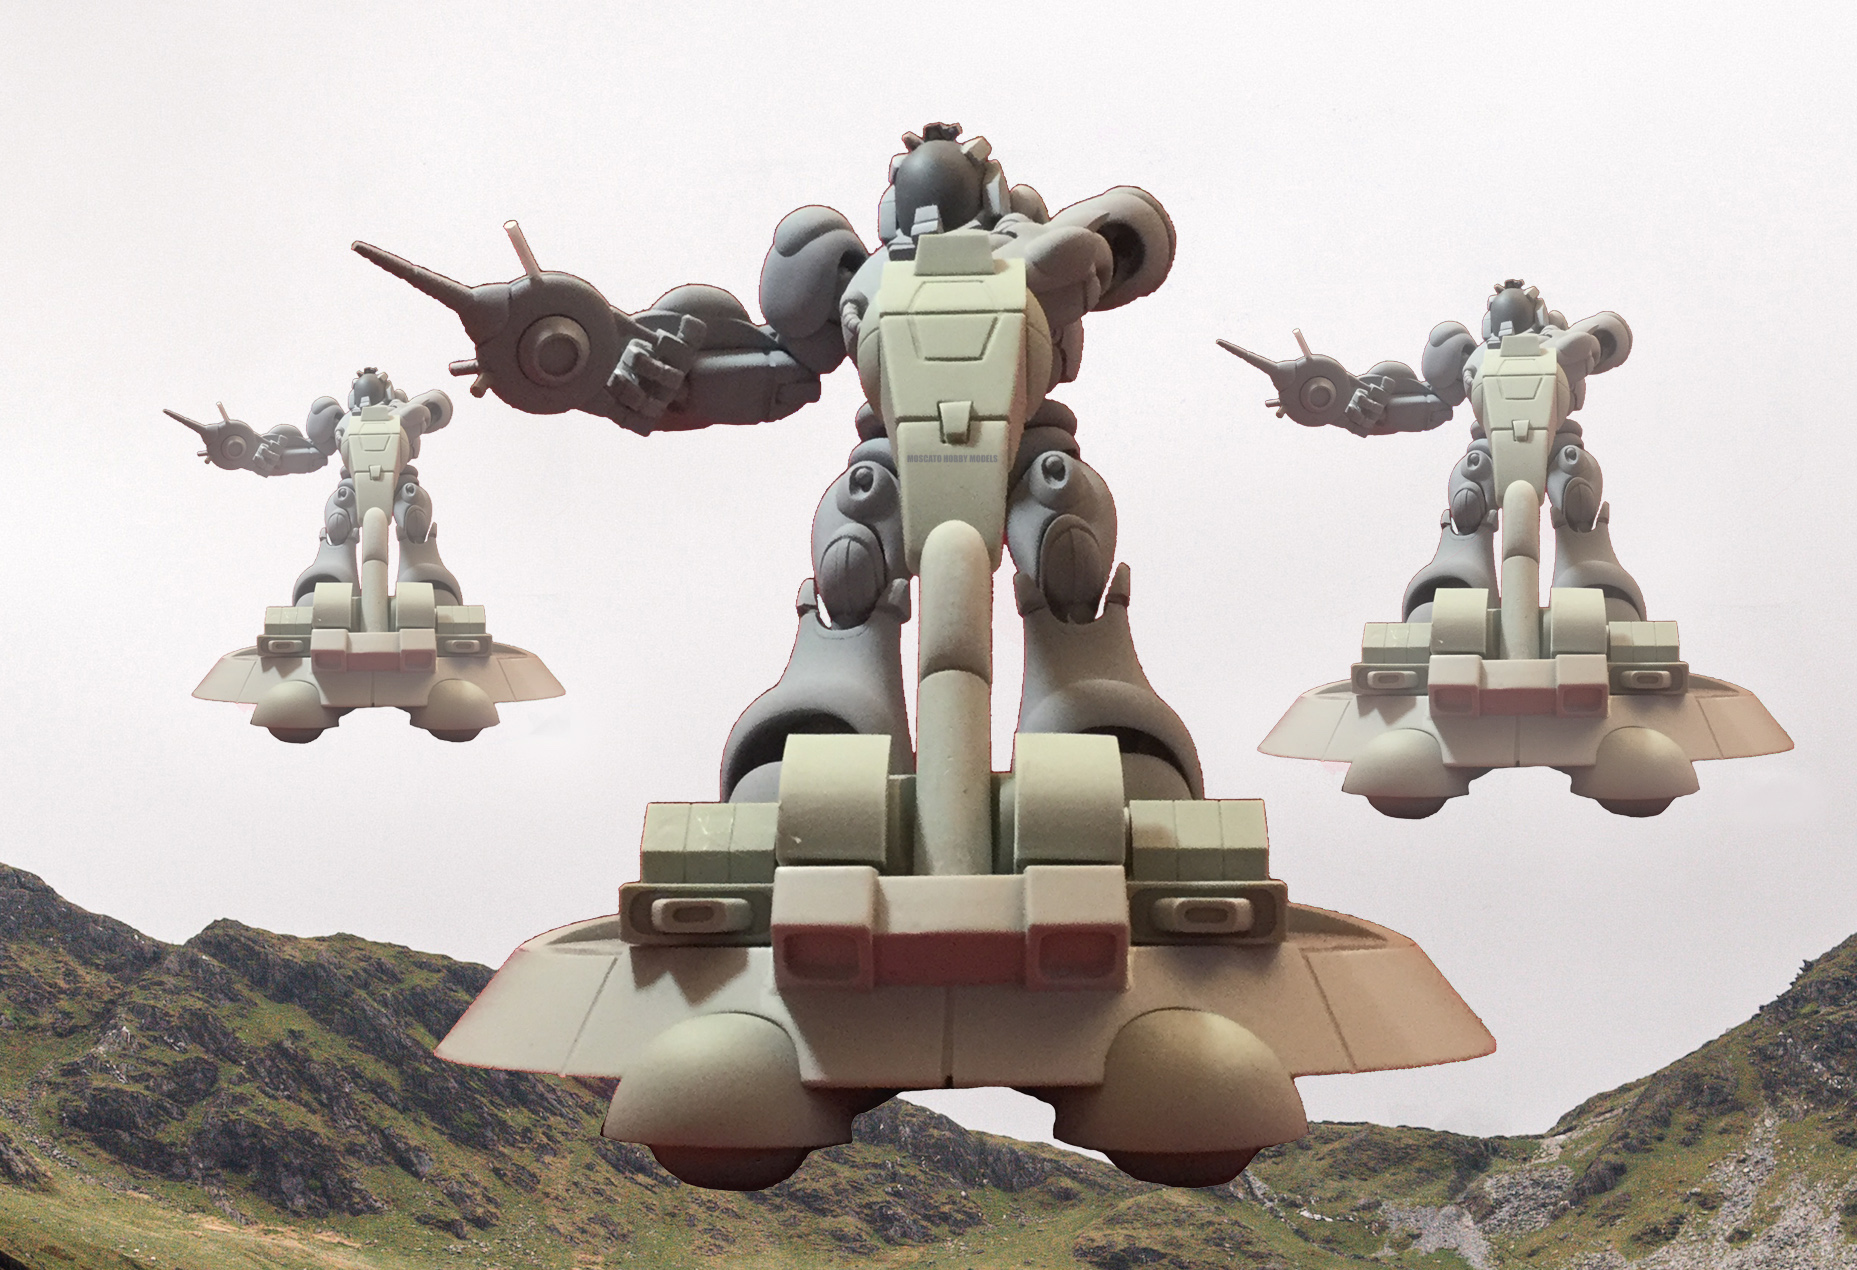
I have to be meticulous in the management of my kits, especially something like this that has so many parts of varying size. The sled hulls are set vertically prior to packing to prevent any bowing/sagging while they fully harden, and yes, they're solid resin. The sled was designed with protruding blobs on the bottom, but I made them such that the biover is stable on a flat surface, so the finished model won't be wobbly. Because of the lower protrusions, the sled does sort of look like it's hovering even when it's not. That said, if you do want to create a flight stand, the safest, simplest and least invasive thing would be to create a clear acrylic 4-sided box that you can simply plop the biover onto. -
1/48 SOUTHERN CROSS BIOROID
captain america replied to captain america's topic in Anime or Science Fiction
Good news! Kits should be ready to ship on Monday the 14th.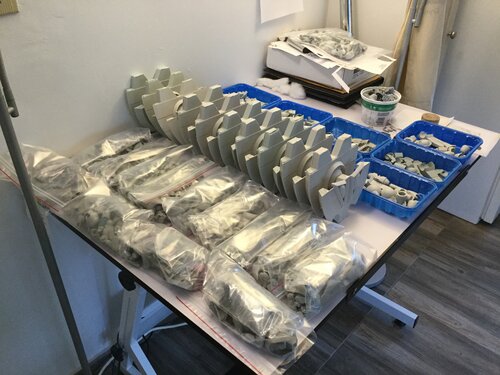
-
1/48 SOUTHERN CROSS BIOROID
captain america replied to captain america's topic in Anime or Science Fiction
Totally worth it! -
1/48 SOUTHERN CROSS BIOROID
captain america replied to captain america's topic in Anime or Science Fiction
We are a go. I repeat, we are a go! Tooling has begun.
-
1/48 SOUTHERN CROSS BIOROID
captain america replied to captain america's topic in Anime or Science Fiction
Less than a week to make this project come true. -
1/48 SOUTHERN CROSS BIOROID
captain america replied to captain america's topic in Anime or Science Fiction
We need another 4 -
1/48 SOUTHERN CROSS BIOROID
captain america replied to captain america's topic in Anime or Science Fiction
A little less than 2 weeks to go. Wanna save $85 CAD on your purchase and learn to use a techology that will become the new gold standard for electronic payments? Pay in Bitcoin.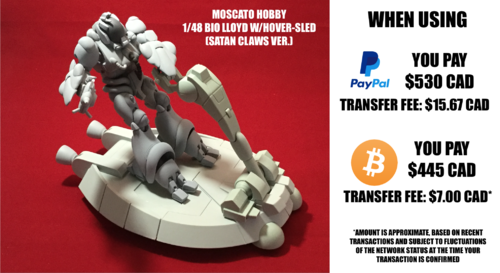
-
1/48 SOUTHERN CROSS BIOROID
captain america replied to captain america's topic in Anime or Science Fiction
You'll also want to get some polyester putty. It works a bit like styrene putty but uses a catalyst, so it doesn't shrink, hardens faster, and you can repair larger defects more easily. It stinks like a mofo, but its worth it. Also, I'll echo Ted's sentiments and suggest you start with a simpler/cheaper kit and do some research on Youtube before diving head-long into a 300 dollar uber-rare kit. -
1/48 SOUTHERN CROSS BIOROID
captain america replied to captain america's topic in Anime or Science Fiction
You don't need my permission to post pics of YOUR kit. Or post reviews, likes, dislikes, rants, etc. -
Fang of the Sun: Dougram
captain america replied to DestroidDefender's topic in Anime or Science Fiction
Not sure if I dig the right-handed clamp thing. Truthfully, I think I could have rendered a more aesthetically-pleasing modernized Dougram but I commend MaxFactory for releasing such an extensive line of kits that does justice to this otherwise neglected anime masterpiece. -
1/48 SOUTHERN CROSS BIOROID
captain america replied to captain america's topic in Anime or Science Fiction
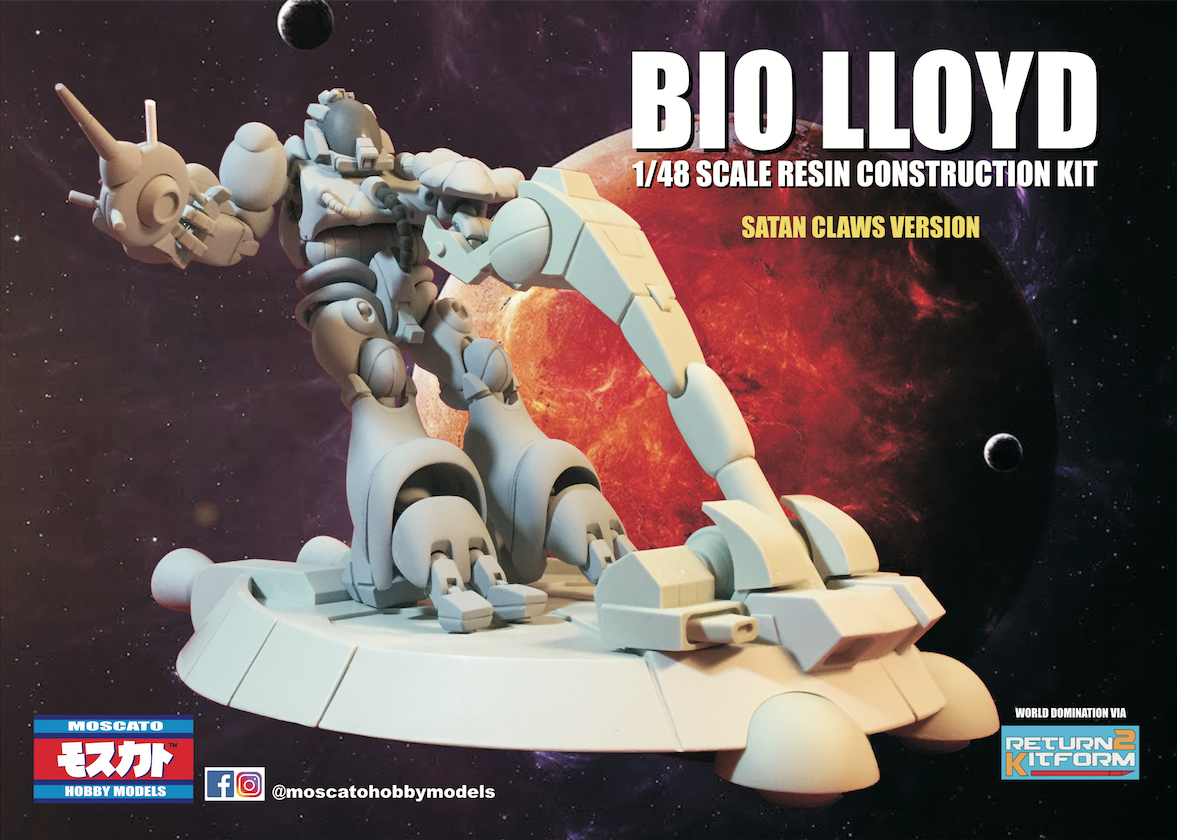
Just a polite bump and reminder that the order window for the 1/48 BIO LLOYD resin kit (SATAN CLAWS version) is and will remain open until June 1st. If you know of anyone that would be interested in this kit, please direct them to this post, or my account on Failbook. 7 slots are currently filled.
-
1/48 SOUTHERN CROSS BIOROID
captain america replied to captain america's topic in Anime or Science Fiction
Yes indeed. I built/painted/finished 4 of my own kits in this last year: 2 in camo, and 2 high-viz. Haven't shared them here on MW because there doesn't seem to be much interest. -
1/48 SOUTHERN CROSS BIOROID
captain america replied to captain america's topic in Anime or Science Fiction
I think this version of "Cap" is more appropriate. The printer is usually pretty good at getting my jobs done in 1-2 days. It's been 9 and the labels still aren't ready...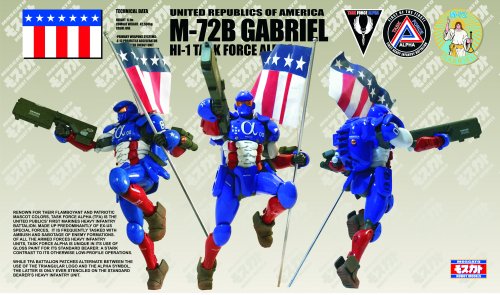
-
1/48 SOUTHERN CROSS BIOROID
captain america replied to captain america's topic in Anime or Science Fiction
Hey y'all, quick update. Kits haven't shipped yet. Everything is packed, but I'm waiting on the printer to finalize the box art; my sincere apologies for the delay. In the meantime, please enjoy this pic of the assembled kit.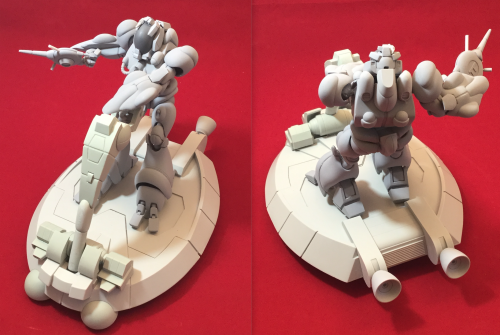
-
1/48 SOUTHERN CROSS BIOROID
captain america replied to captain america's topic in Anime or Science Fiction
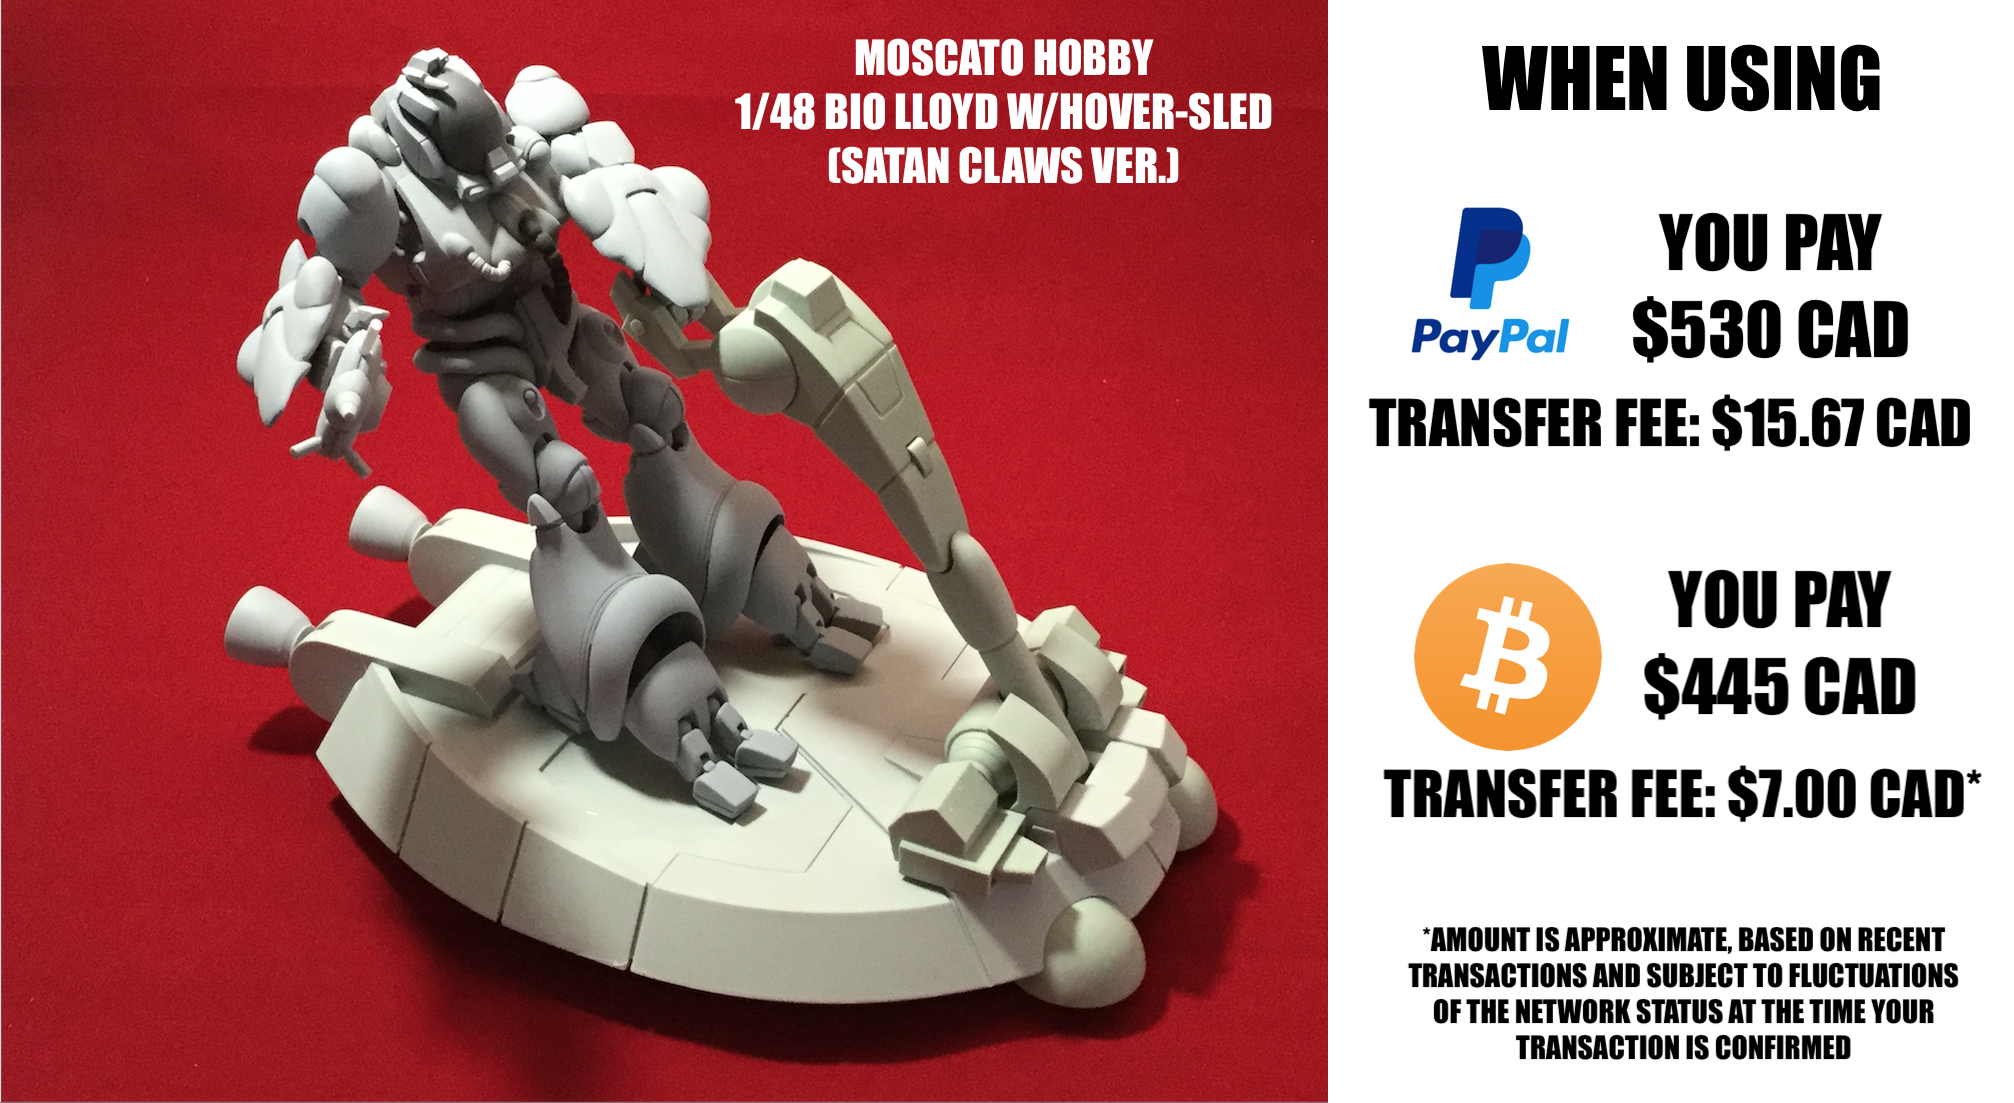
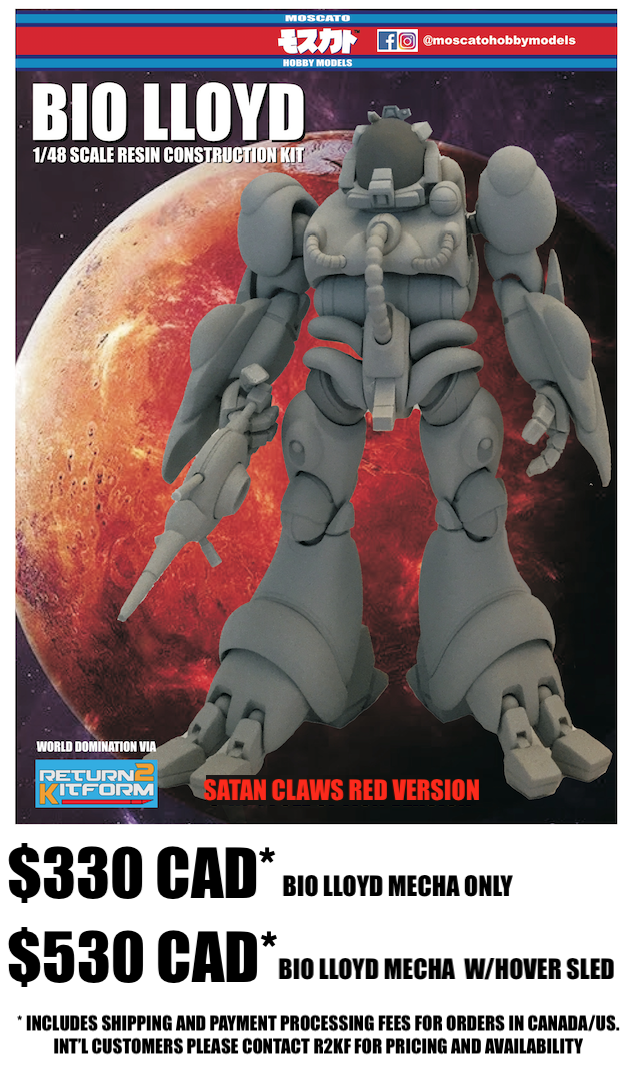
Hey everyone! I’m officially accepting payments for the 1/48 BIO LLOYD re-issue starting today Here’s how things will work, so please read carefully. For customers in Canada/US, I will leave the payment window open until June 1st, so you have a little over a month to get your funds ready and send payment in. If by the end of the day on June 1st I don’t get the 12 minimum orders necessary to cover the re-molding costs, I will simply re-issue everyone that paid a refund. Easy-peasy! Note that you have two different kit options: one that is the BIO LLOYD mecha only, and the other option is the mecha + the hover sled. Kindly note that this re-issue has the parts for the red SATAN CLAWS version only. The prices listed in the accompanying image are for people who choose to pay with Paypal. However, if you pay with Bitcoin, you will have a 15% discount on the kit price, so one BIO LLOYD w/HOVER SLED will only come out to $438 CAD, that’s a $92 savings! Those who opt for Bitcoin payment just send me a private message: I will use the currency conversion rate as it is on the day you send payment, and will provide payment instructions accordingly.
-
1/48 SOUTHERN CROSS BIOROID
captain america replied to captain america's topic in Anime or Science Fiction
Whoops, fixed that little goof-up. Lots of set-up, photography, re-shoots and improvised scripting will inevitably yield a few mistakes. All I can say is that this kit has tremendous shelf presence. -
1/48 SOUTHERN CROSS BIOROID
captain america replied to captain america's topic in Anime or Science Fiction
Aaaand done!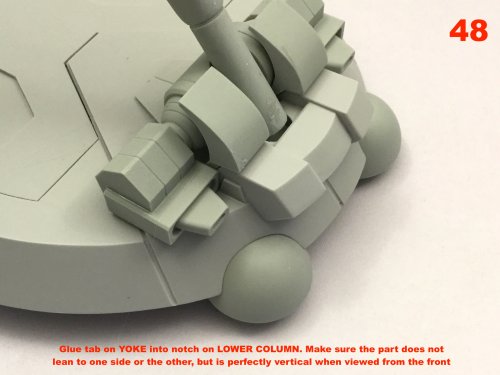


-
1/48 SOUTHERN CROSS BIOROID
captain america replied to captain america's topic in Anime or Science Fiction

-
1/48 SOUTHERN CROSS BIOROID
captain america replied to captain america's topic in Anime or Science Fiction


-
1/48 SOUTHERN CROSS BIOROID
captain america replied to captain america's topic in Anime or Science Fiction


-
1/48 SOUTHERN CROSS BIOROID
captain america replied to captain america's topic in Anime or Science Fiction
Pt 3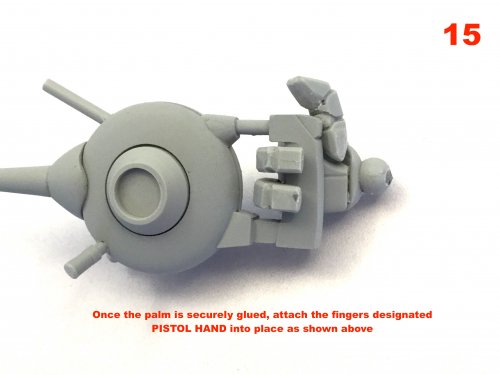


-
1/48 SOUTHERN CROSS BIOROID
captain america replied to captain america's topic in Anime or Science Fiction
Part 2


-
1/48 SOUTHERN CROSS BIOROID
captain america replied to captain america's topic in Anime or Science Fiction
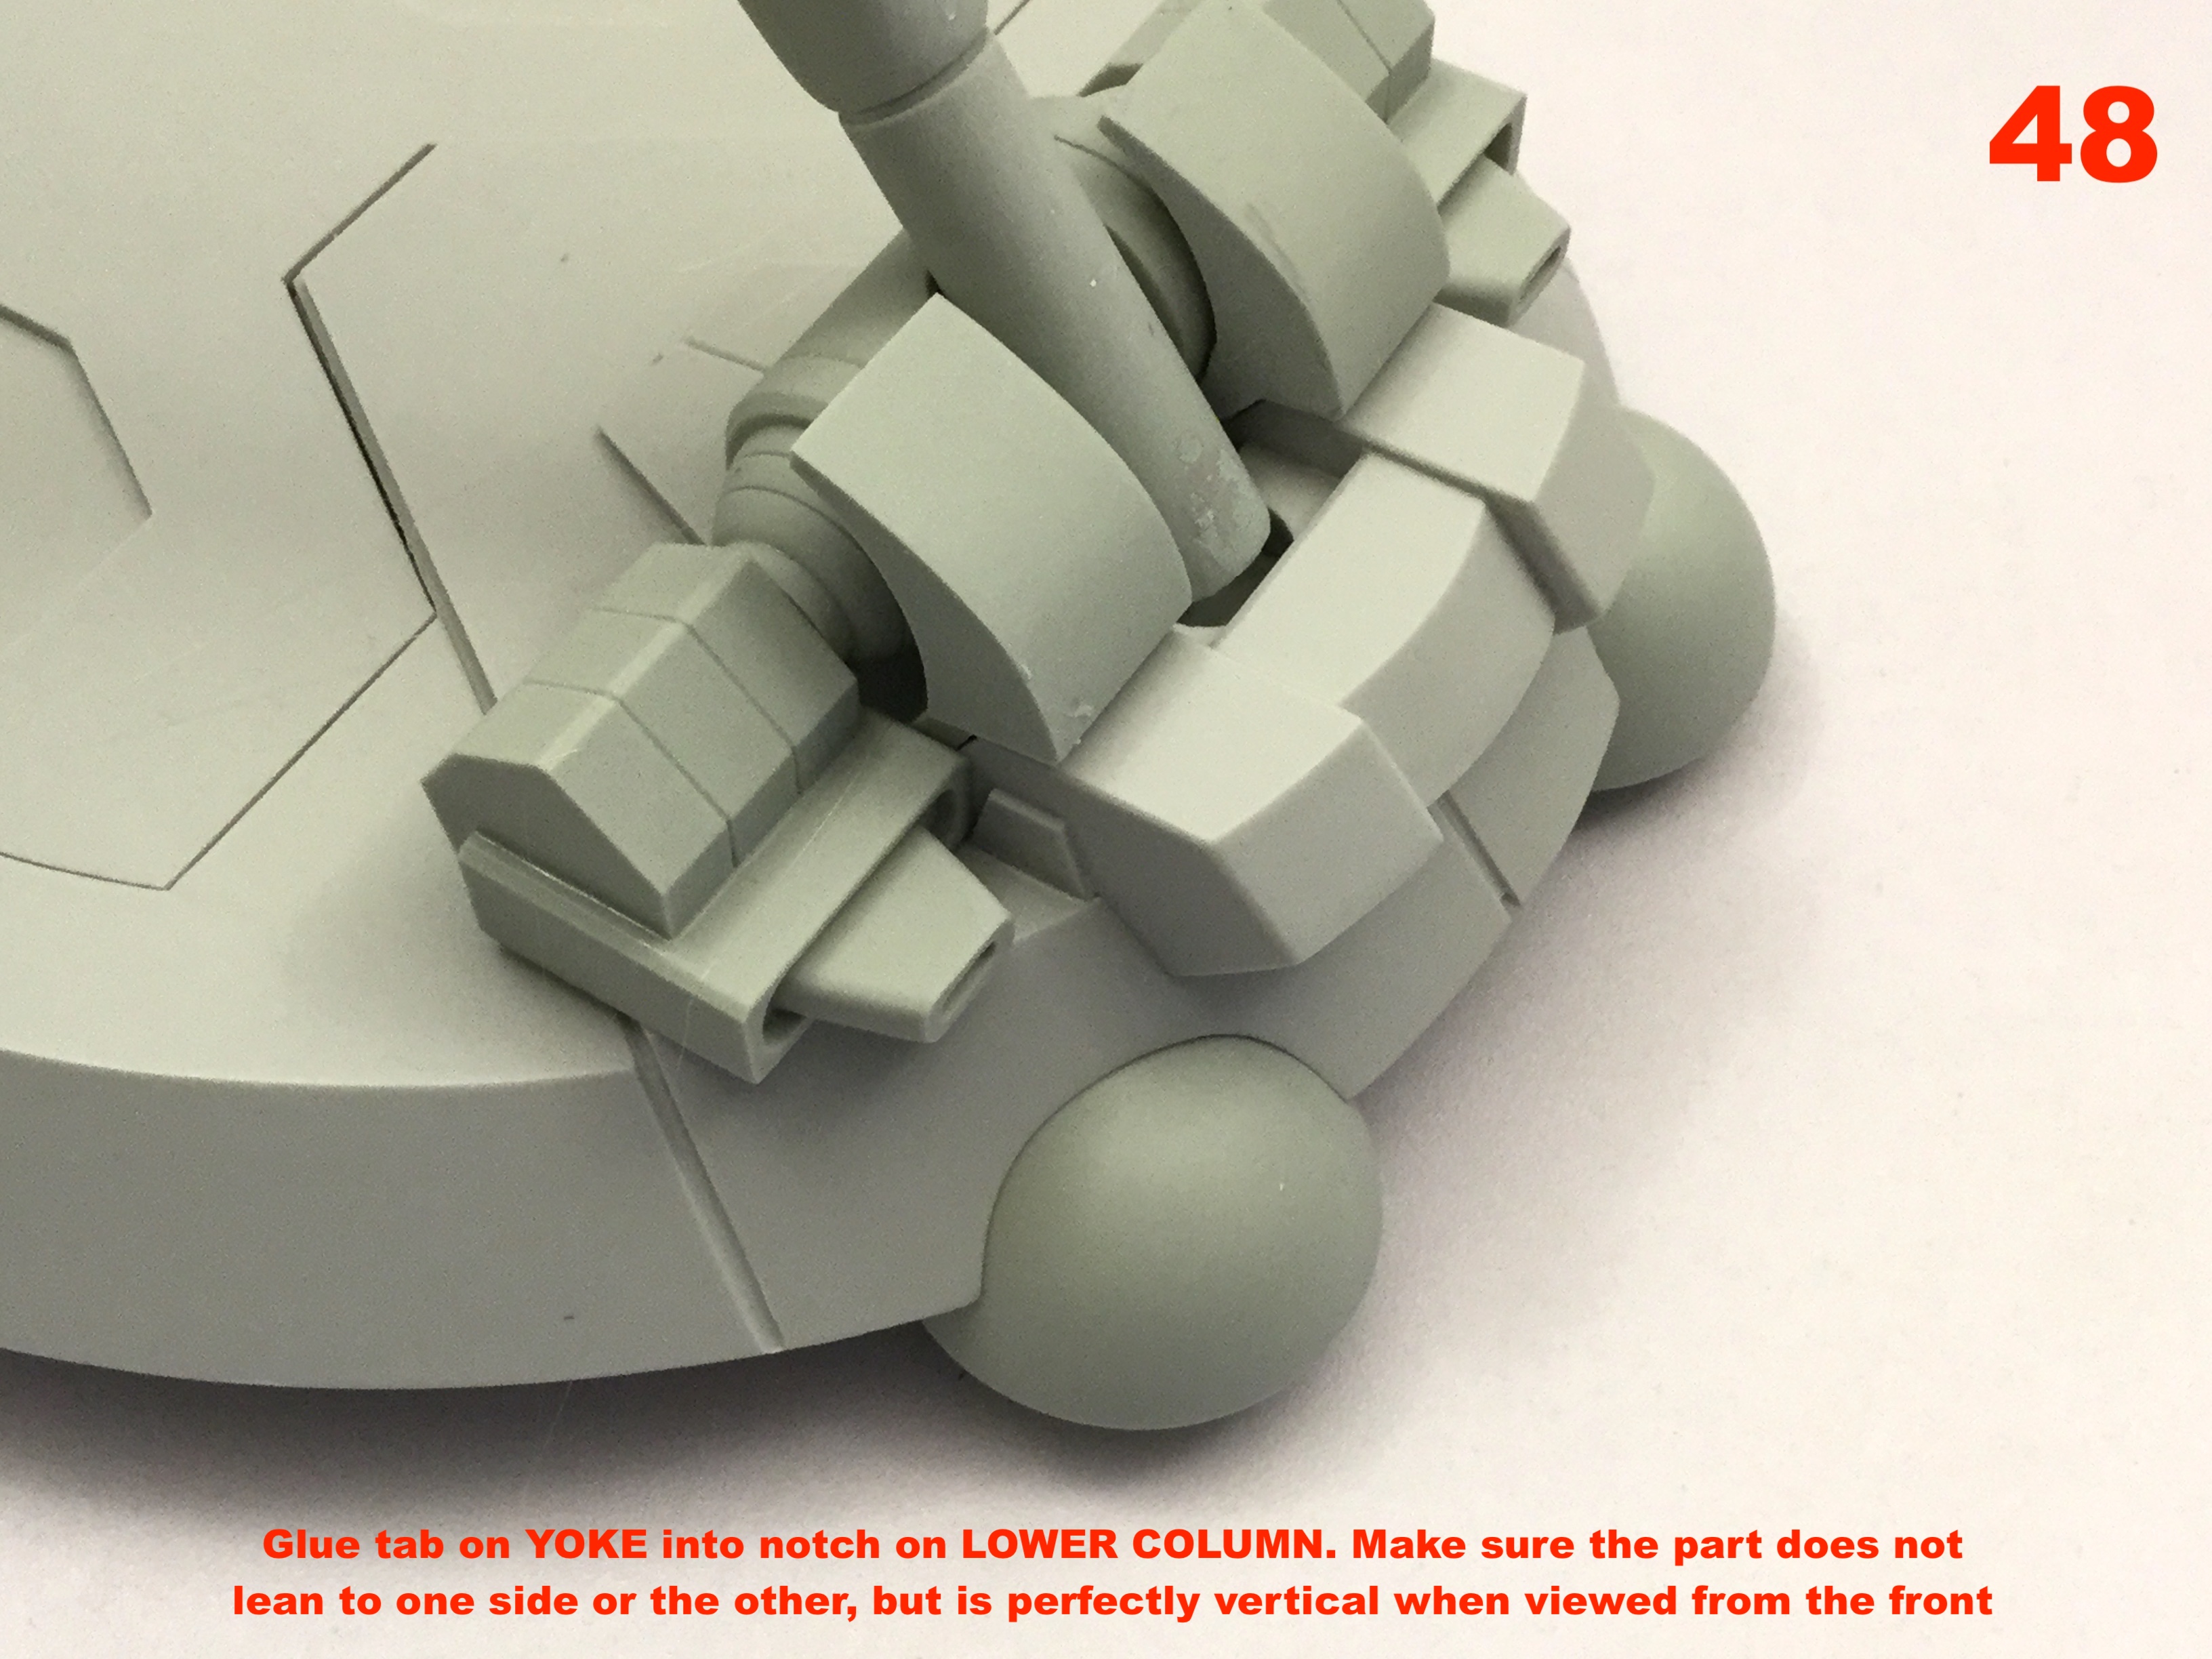
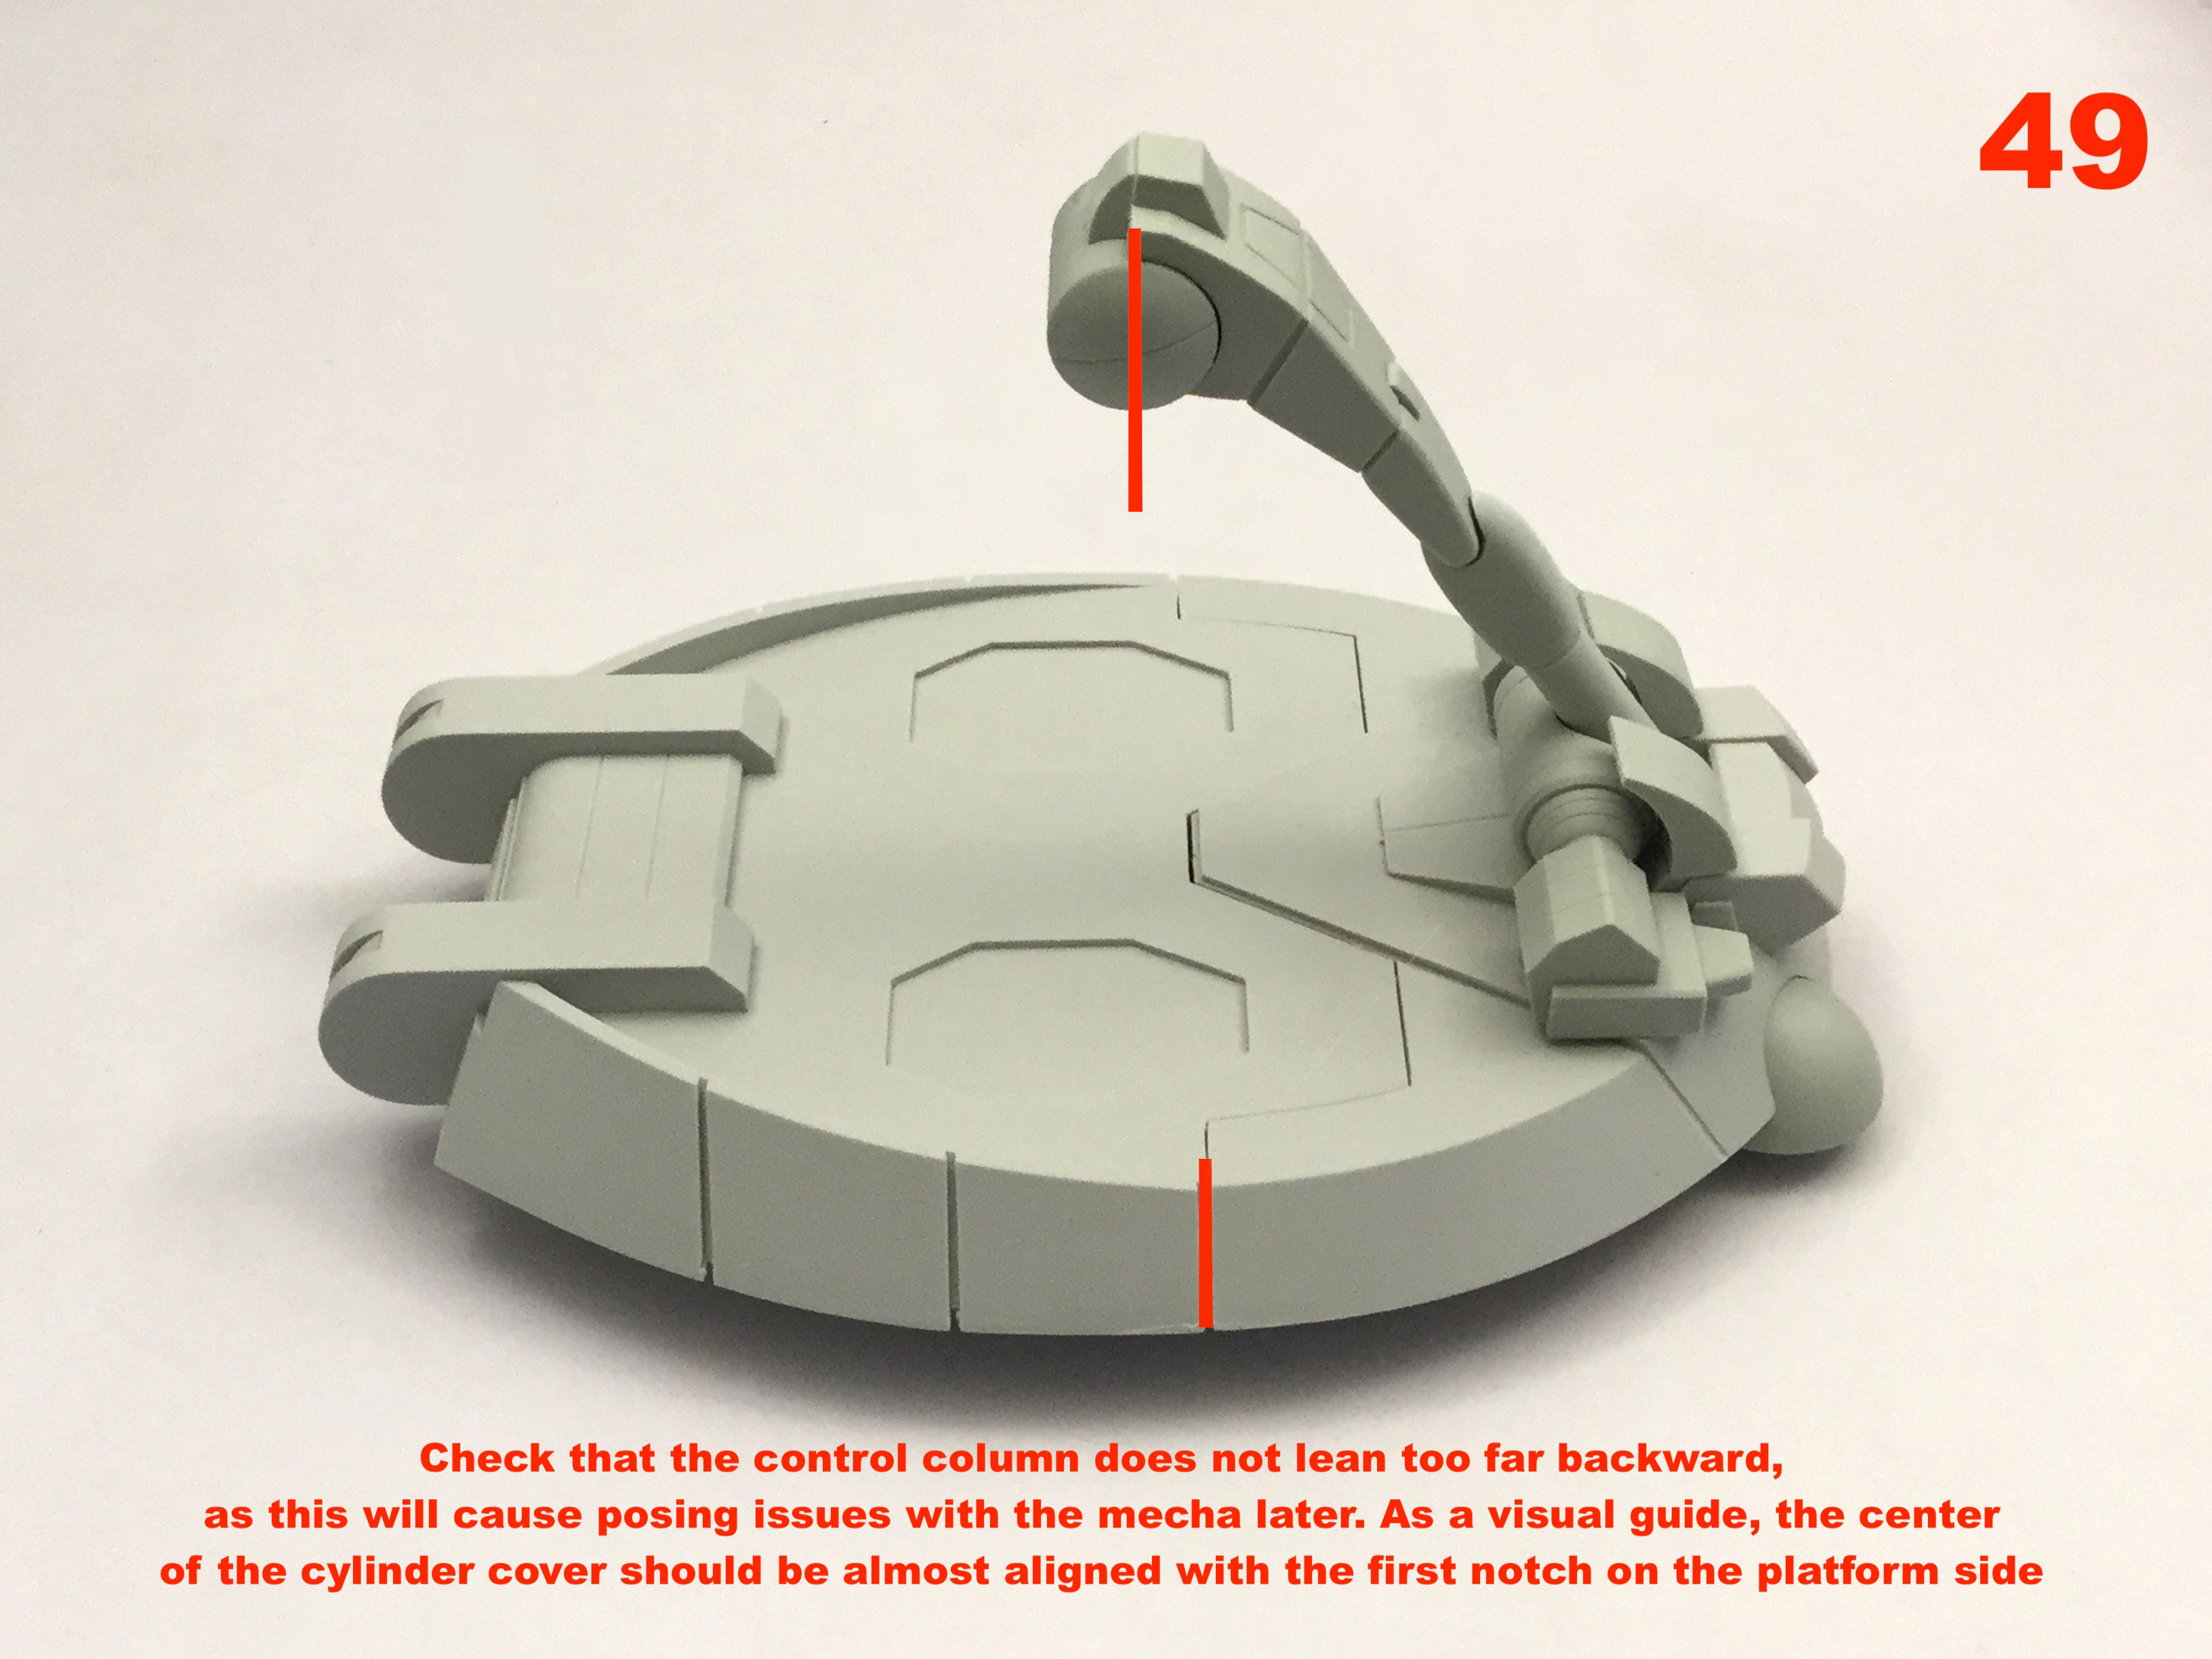
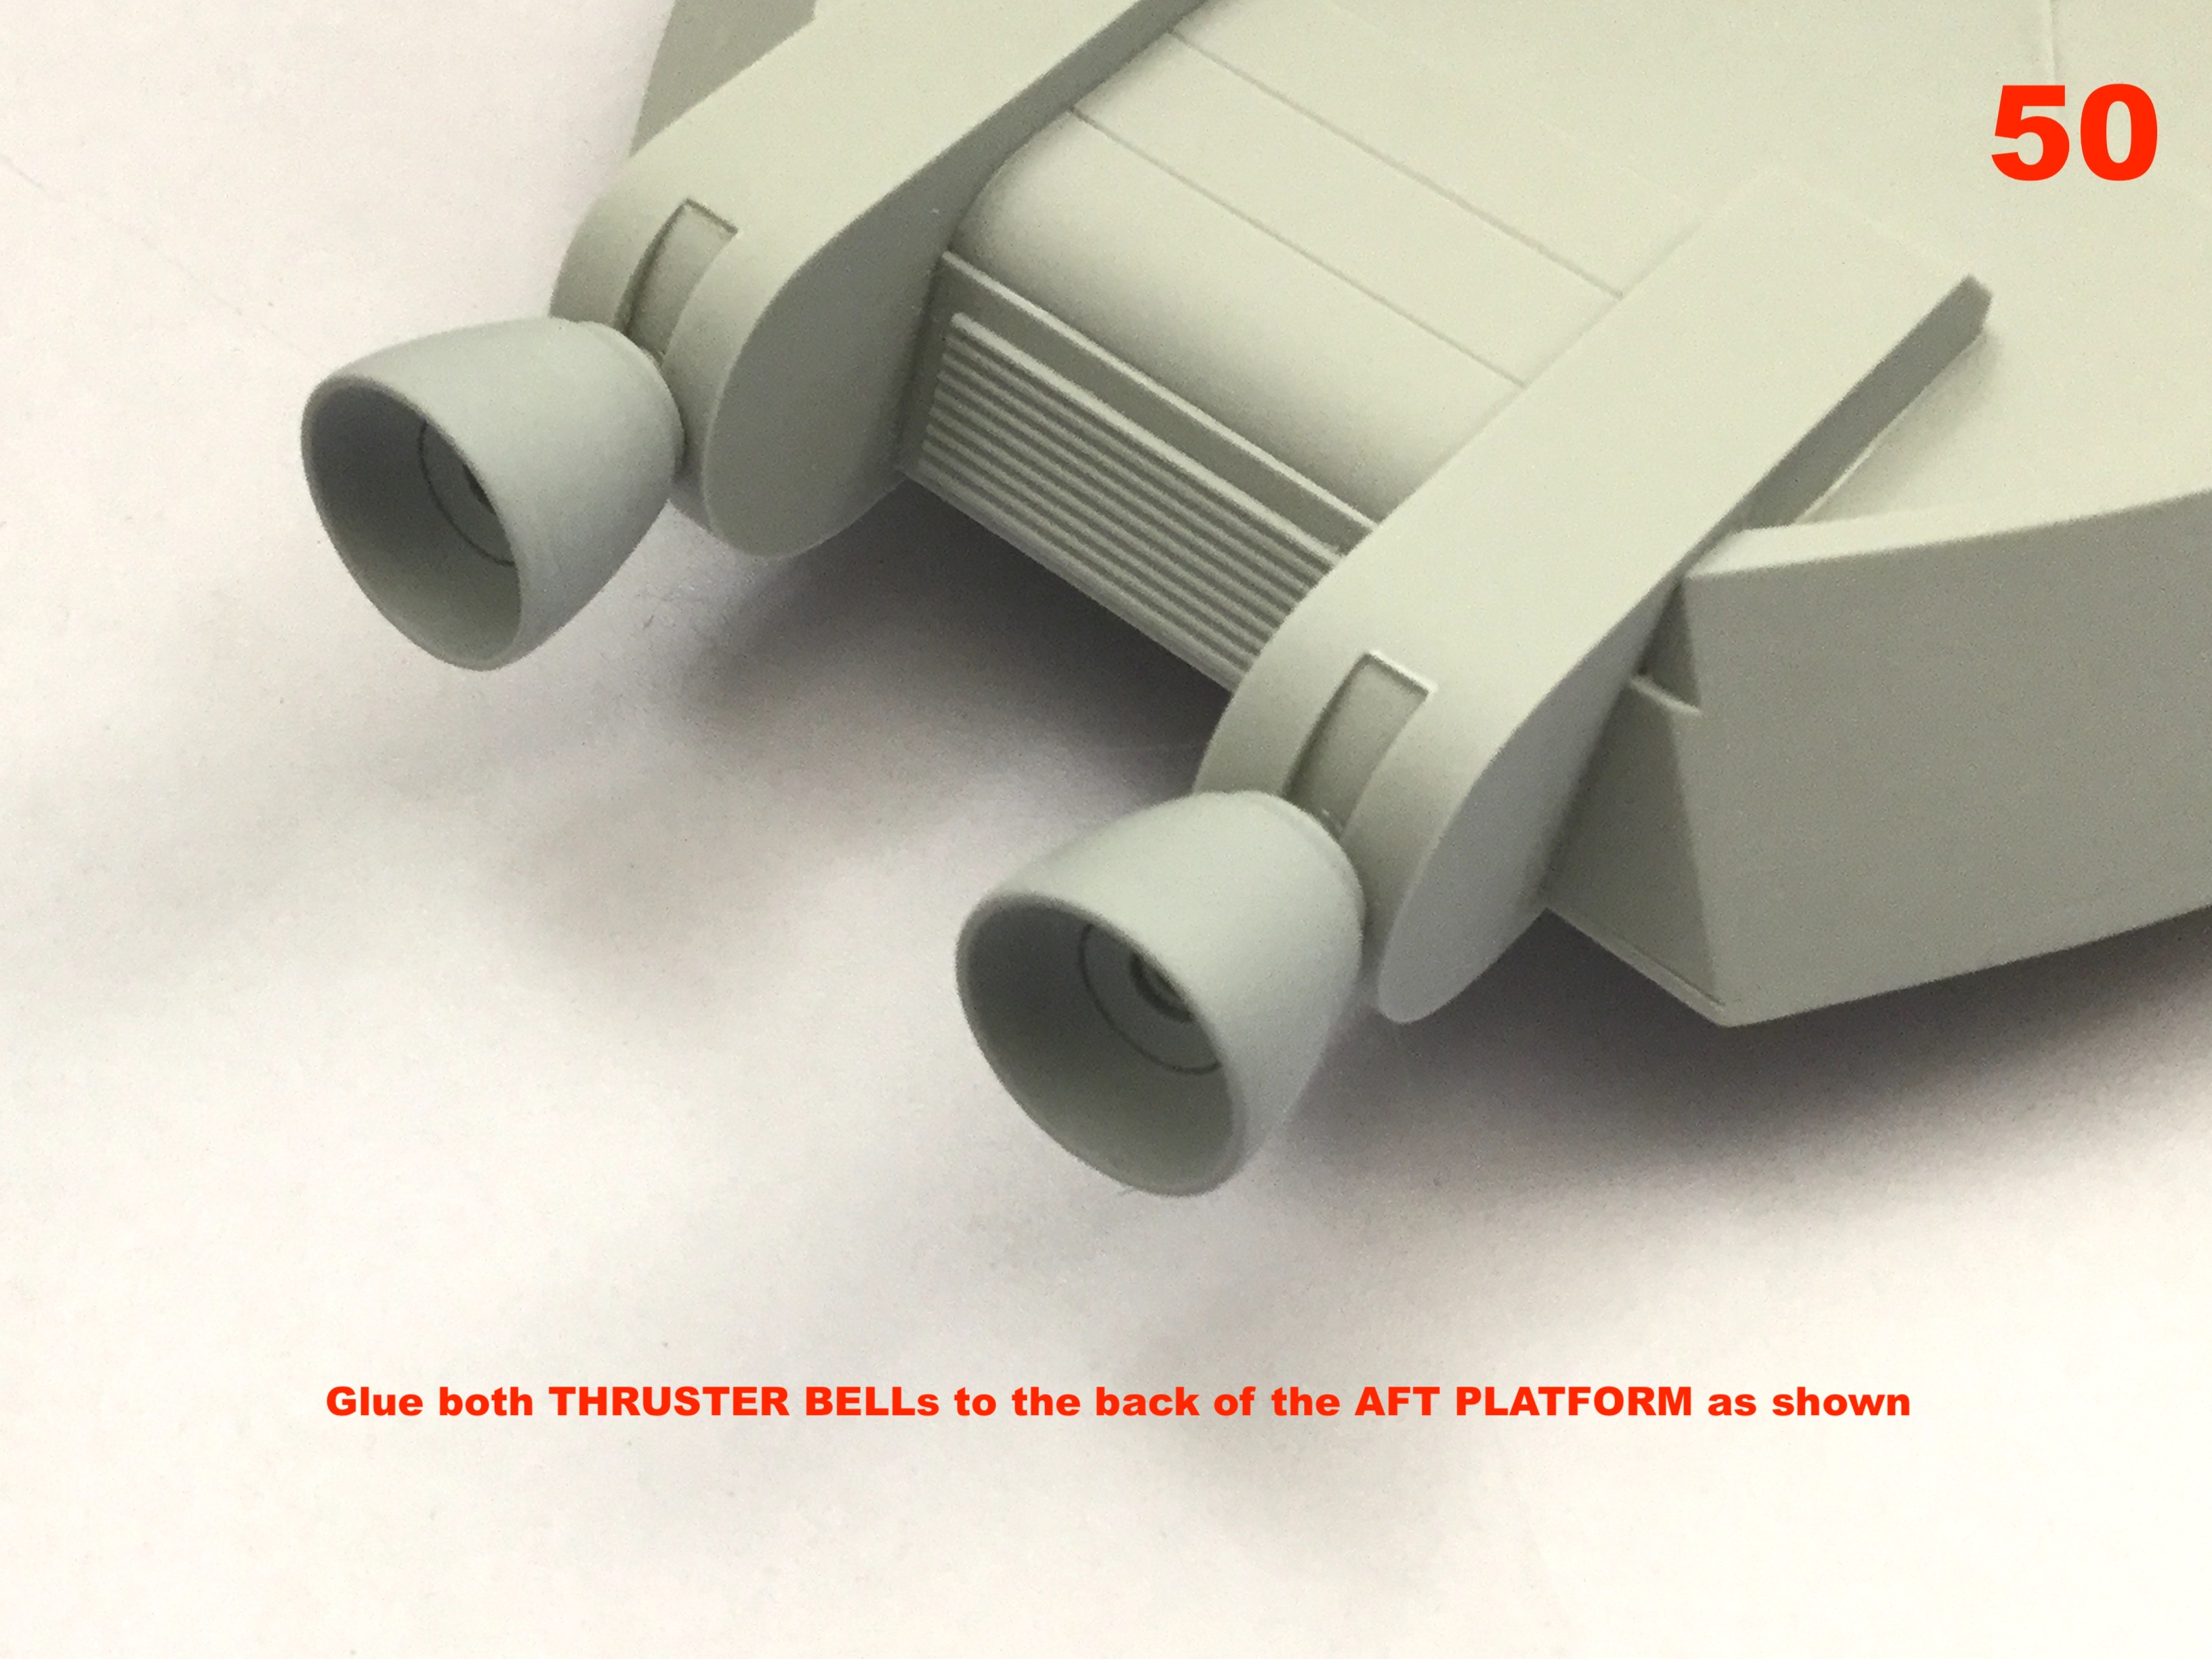
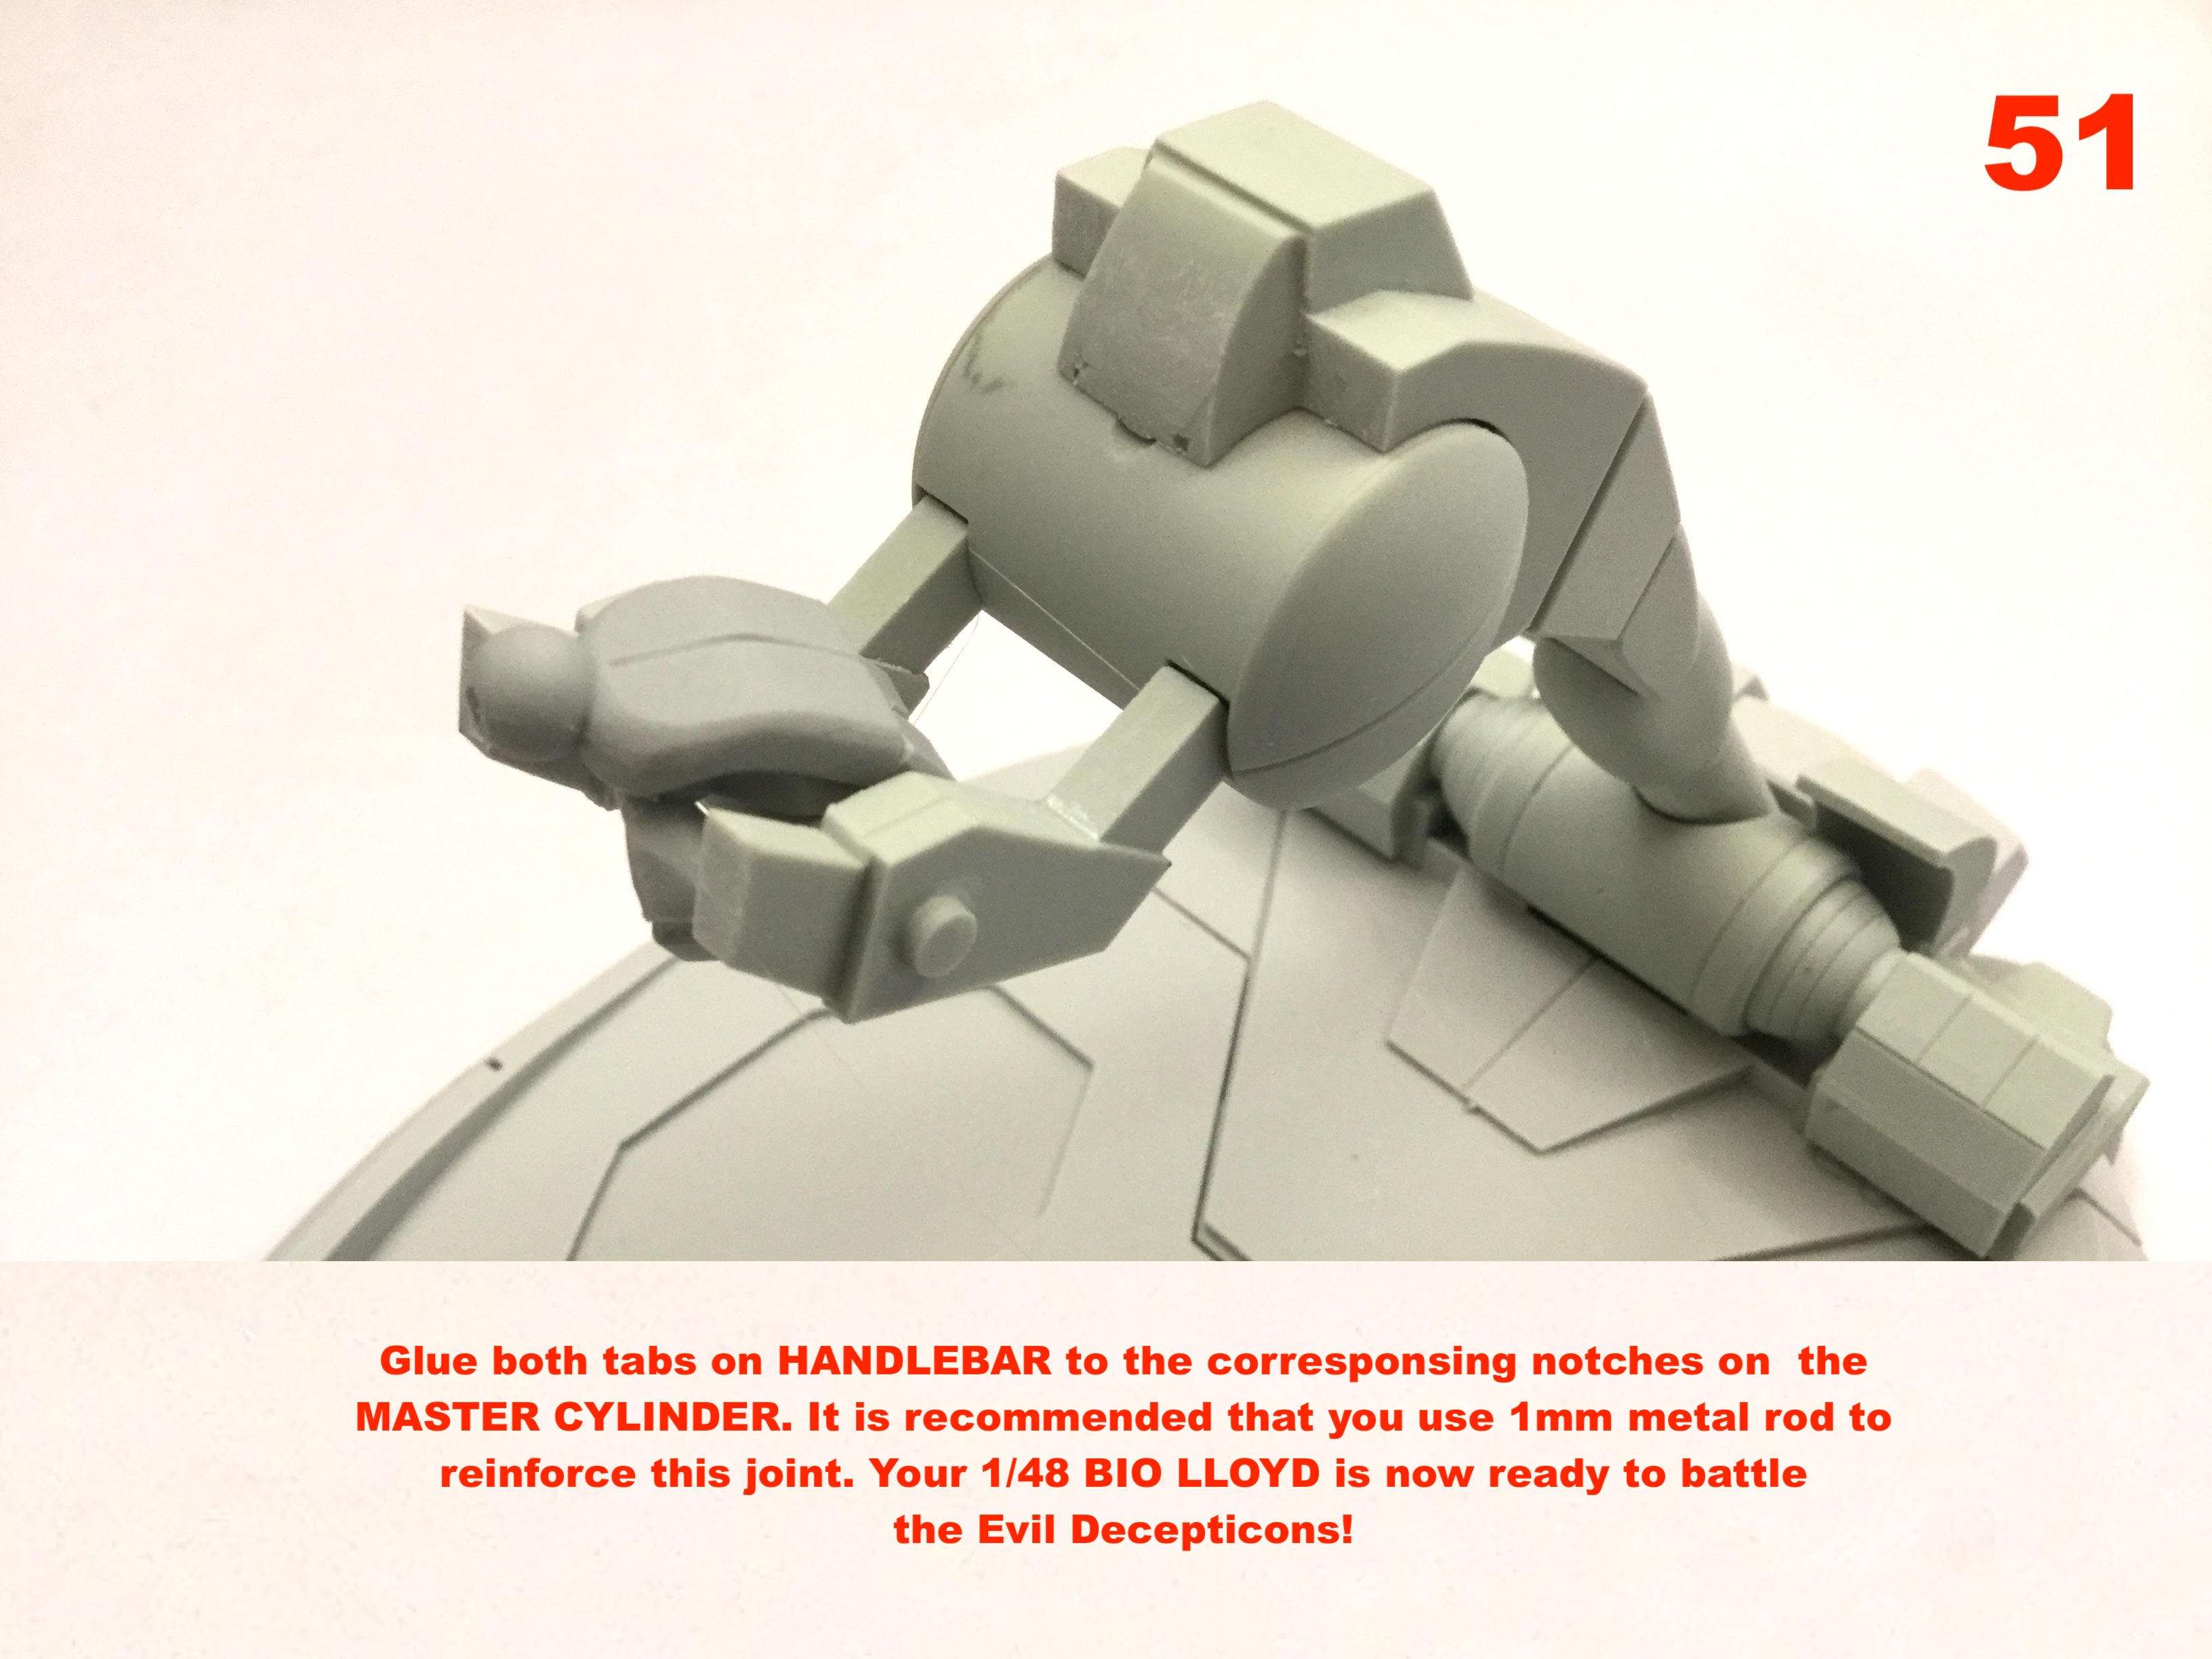
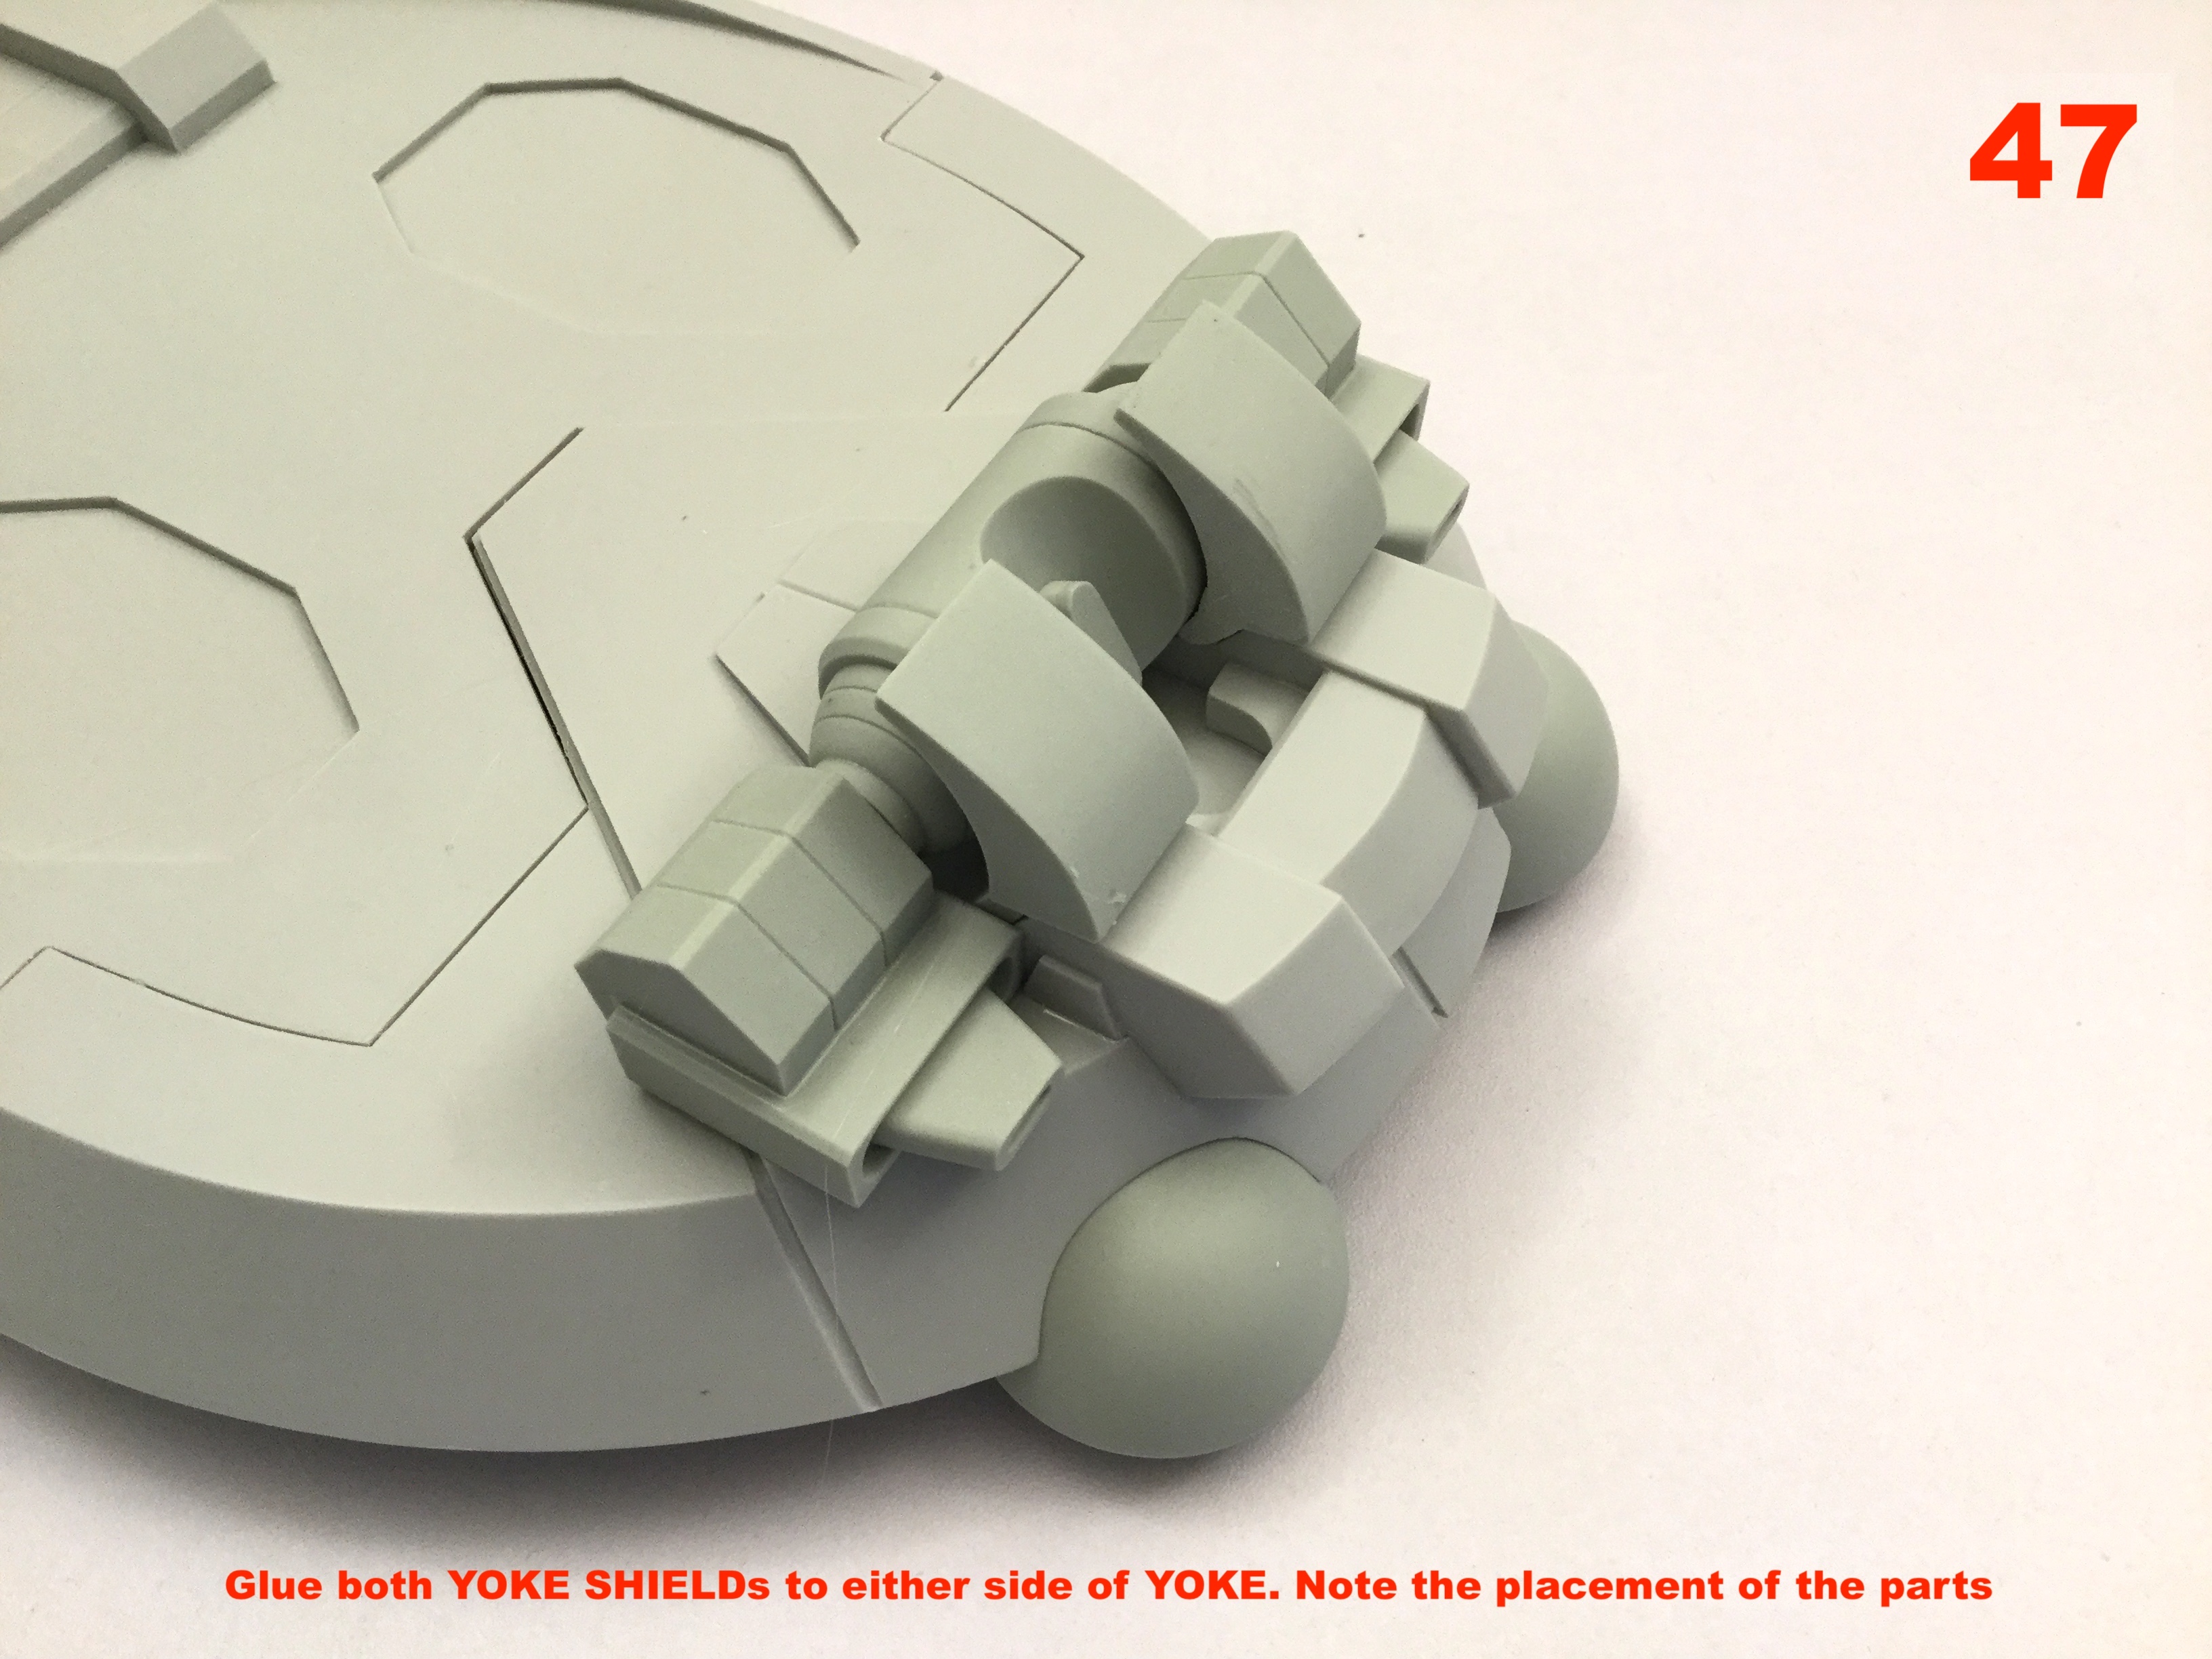
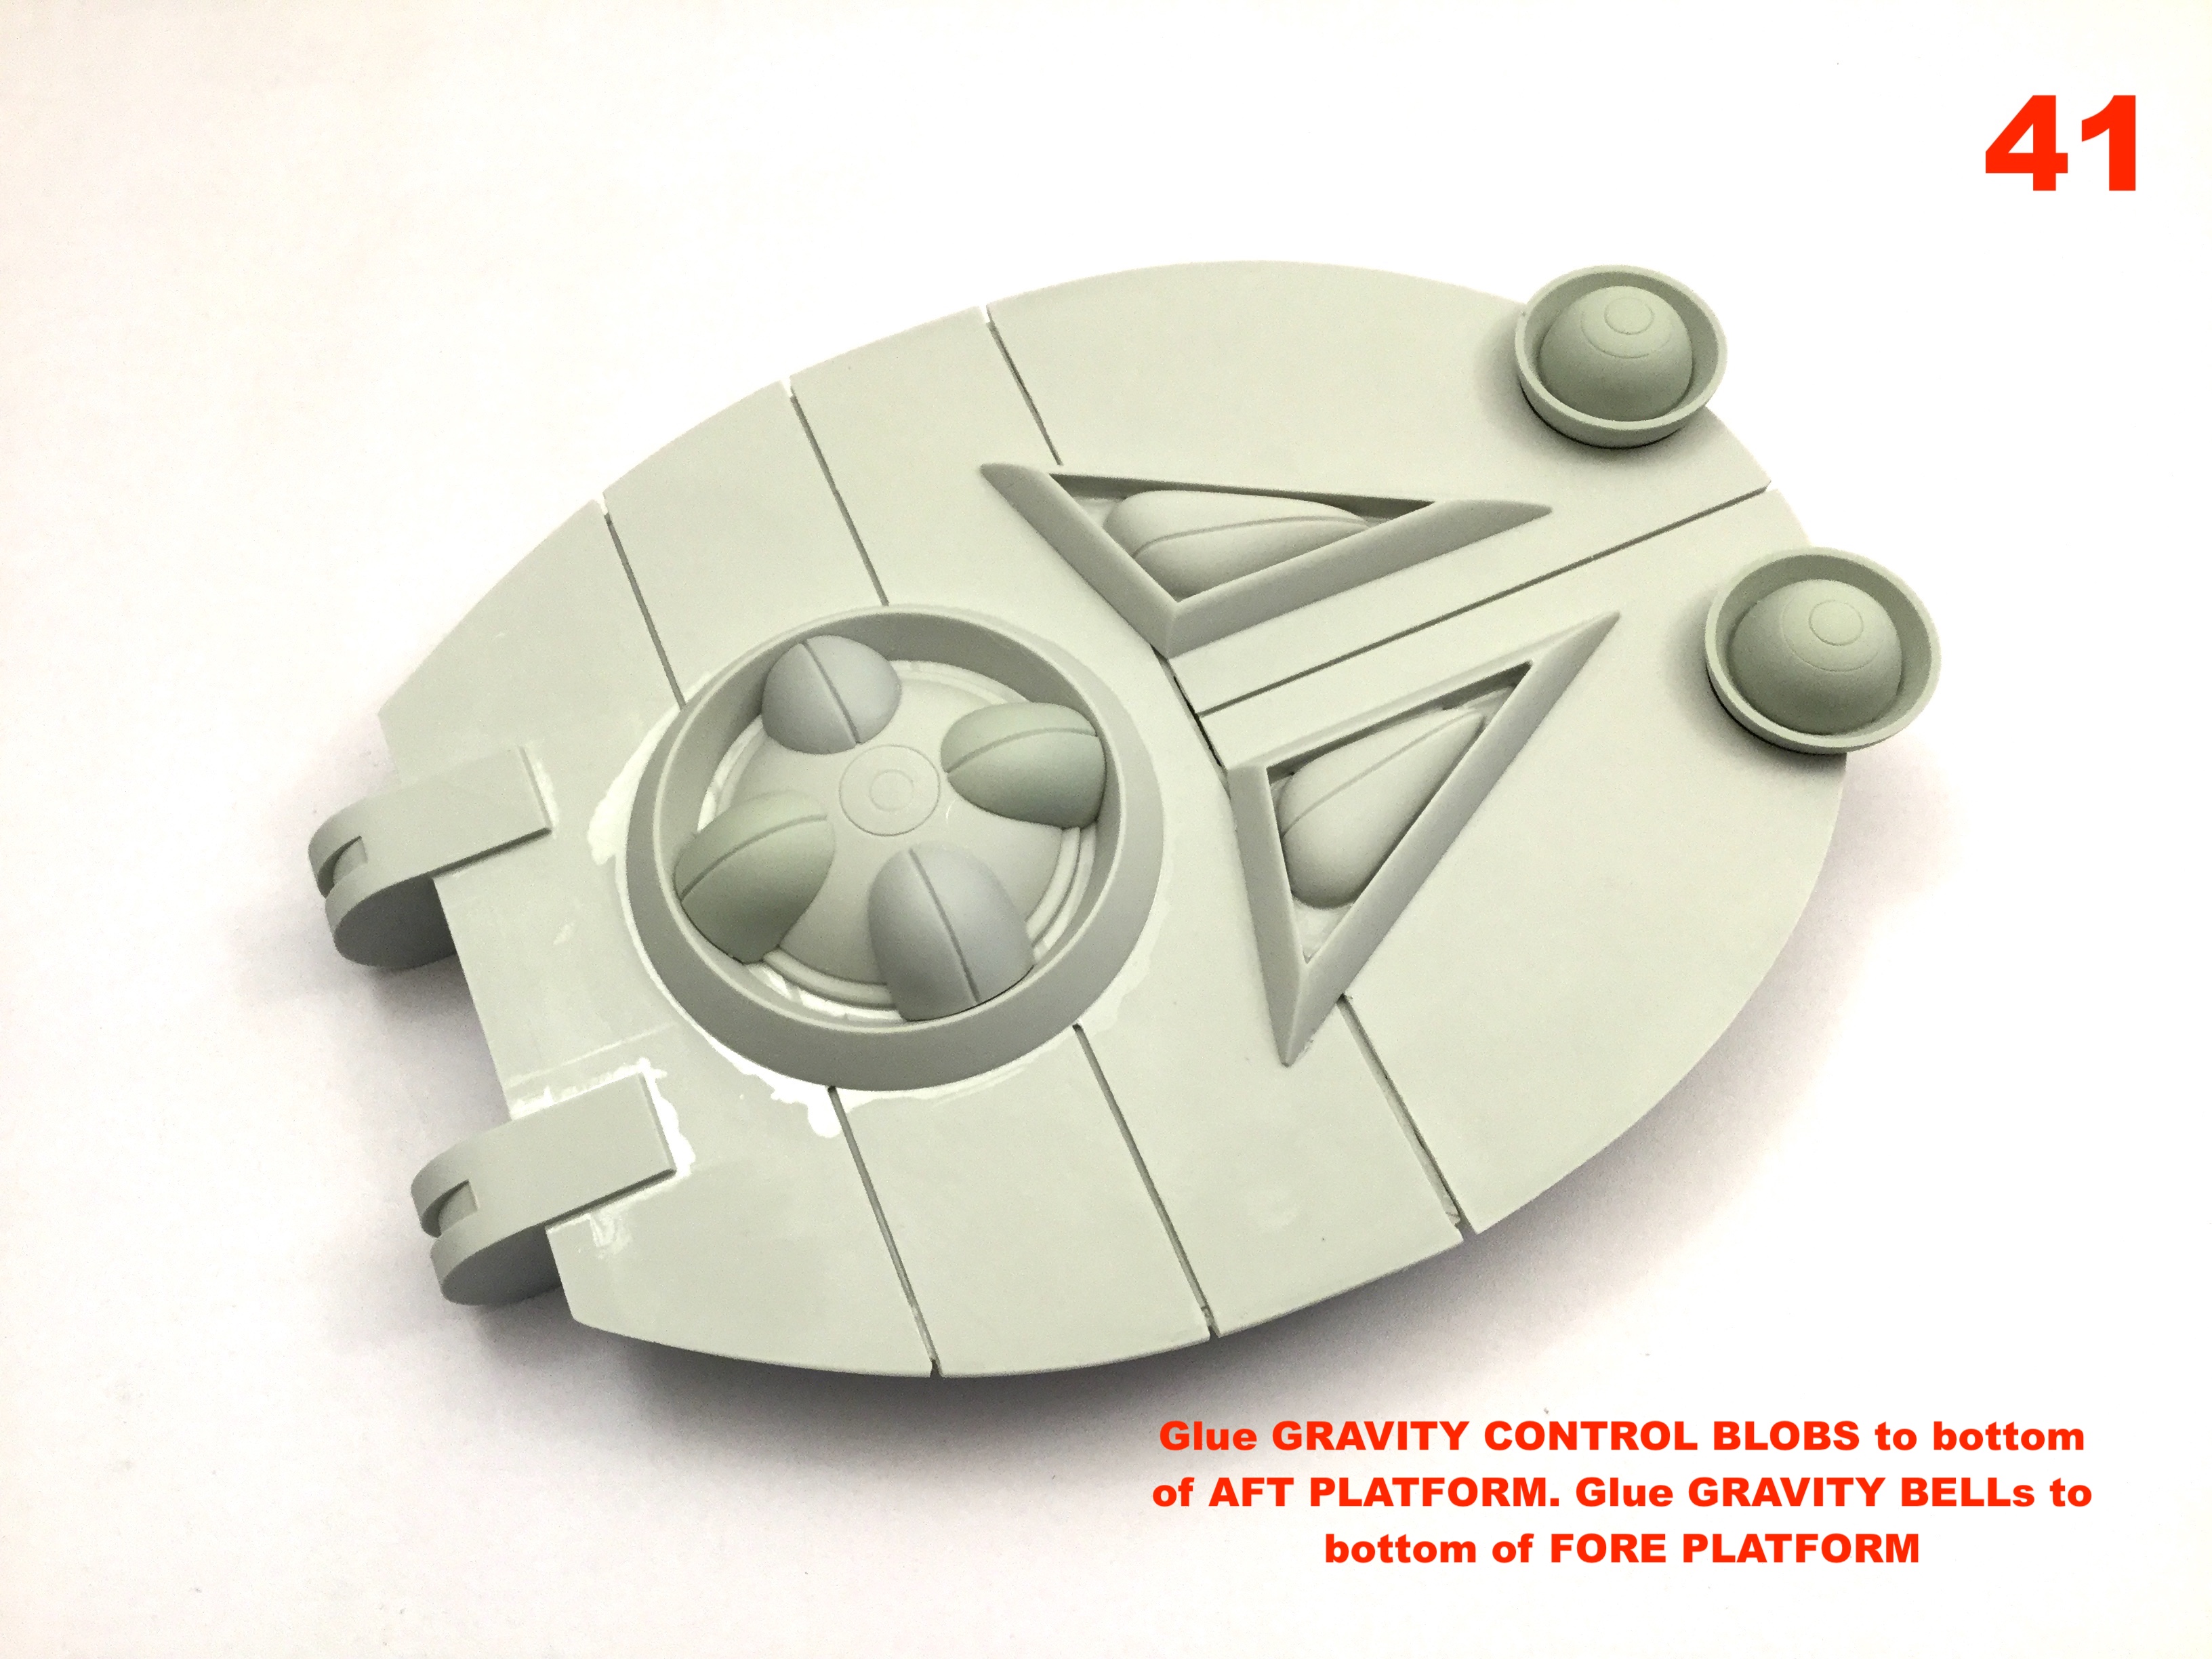
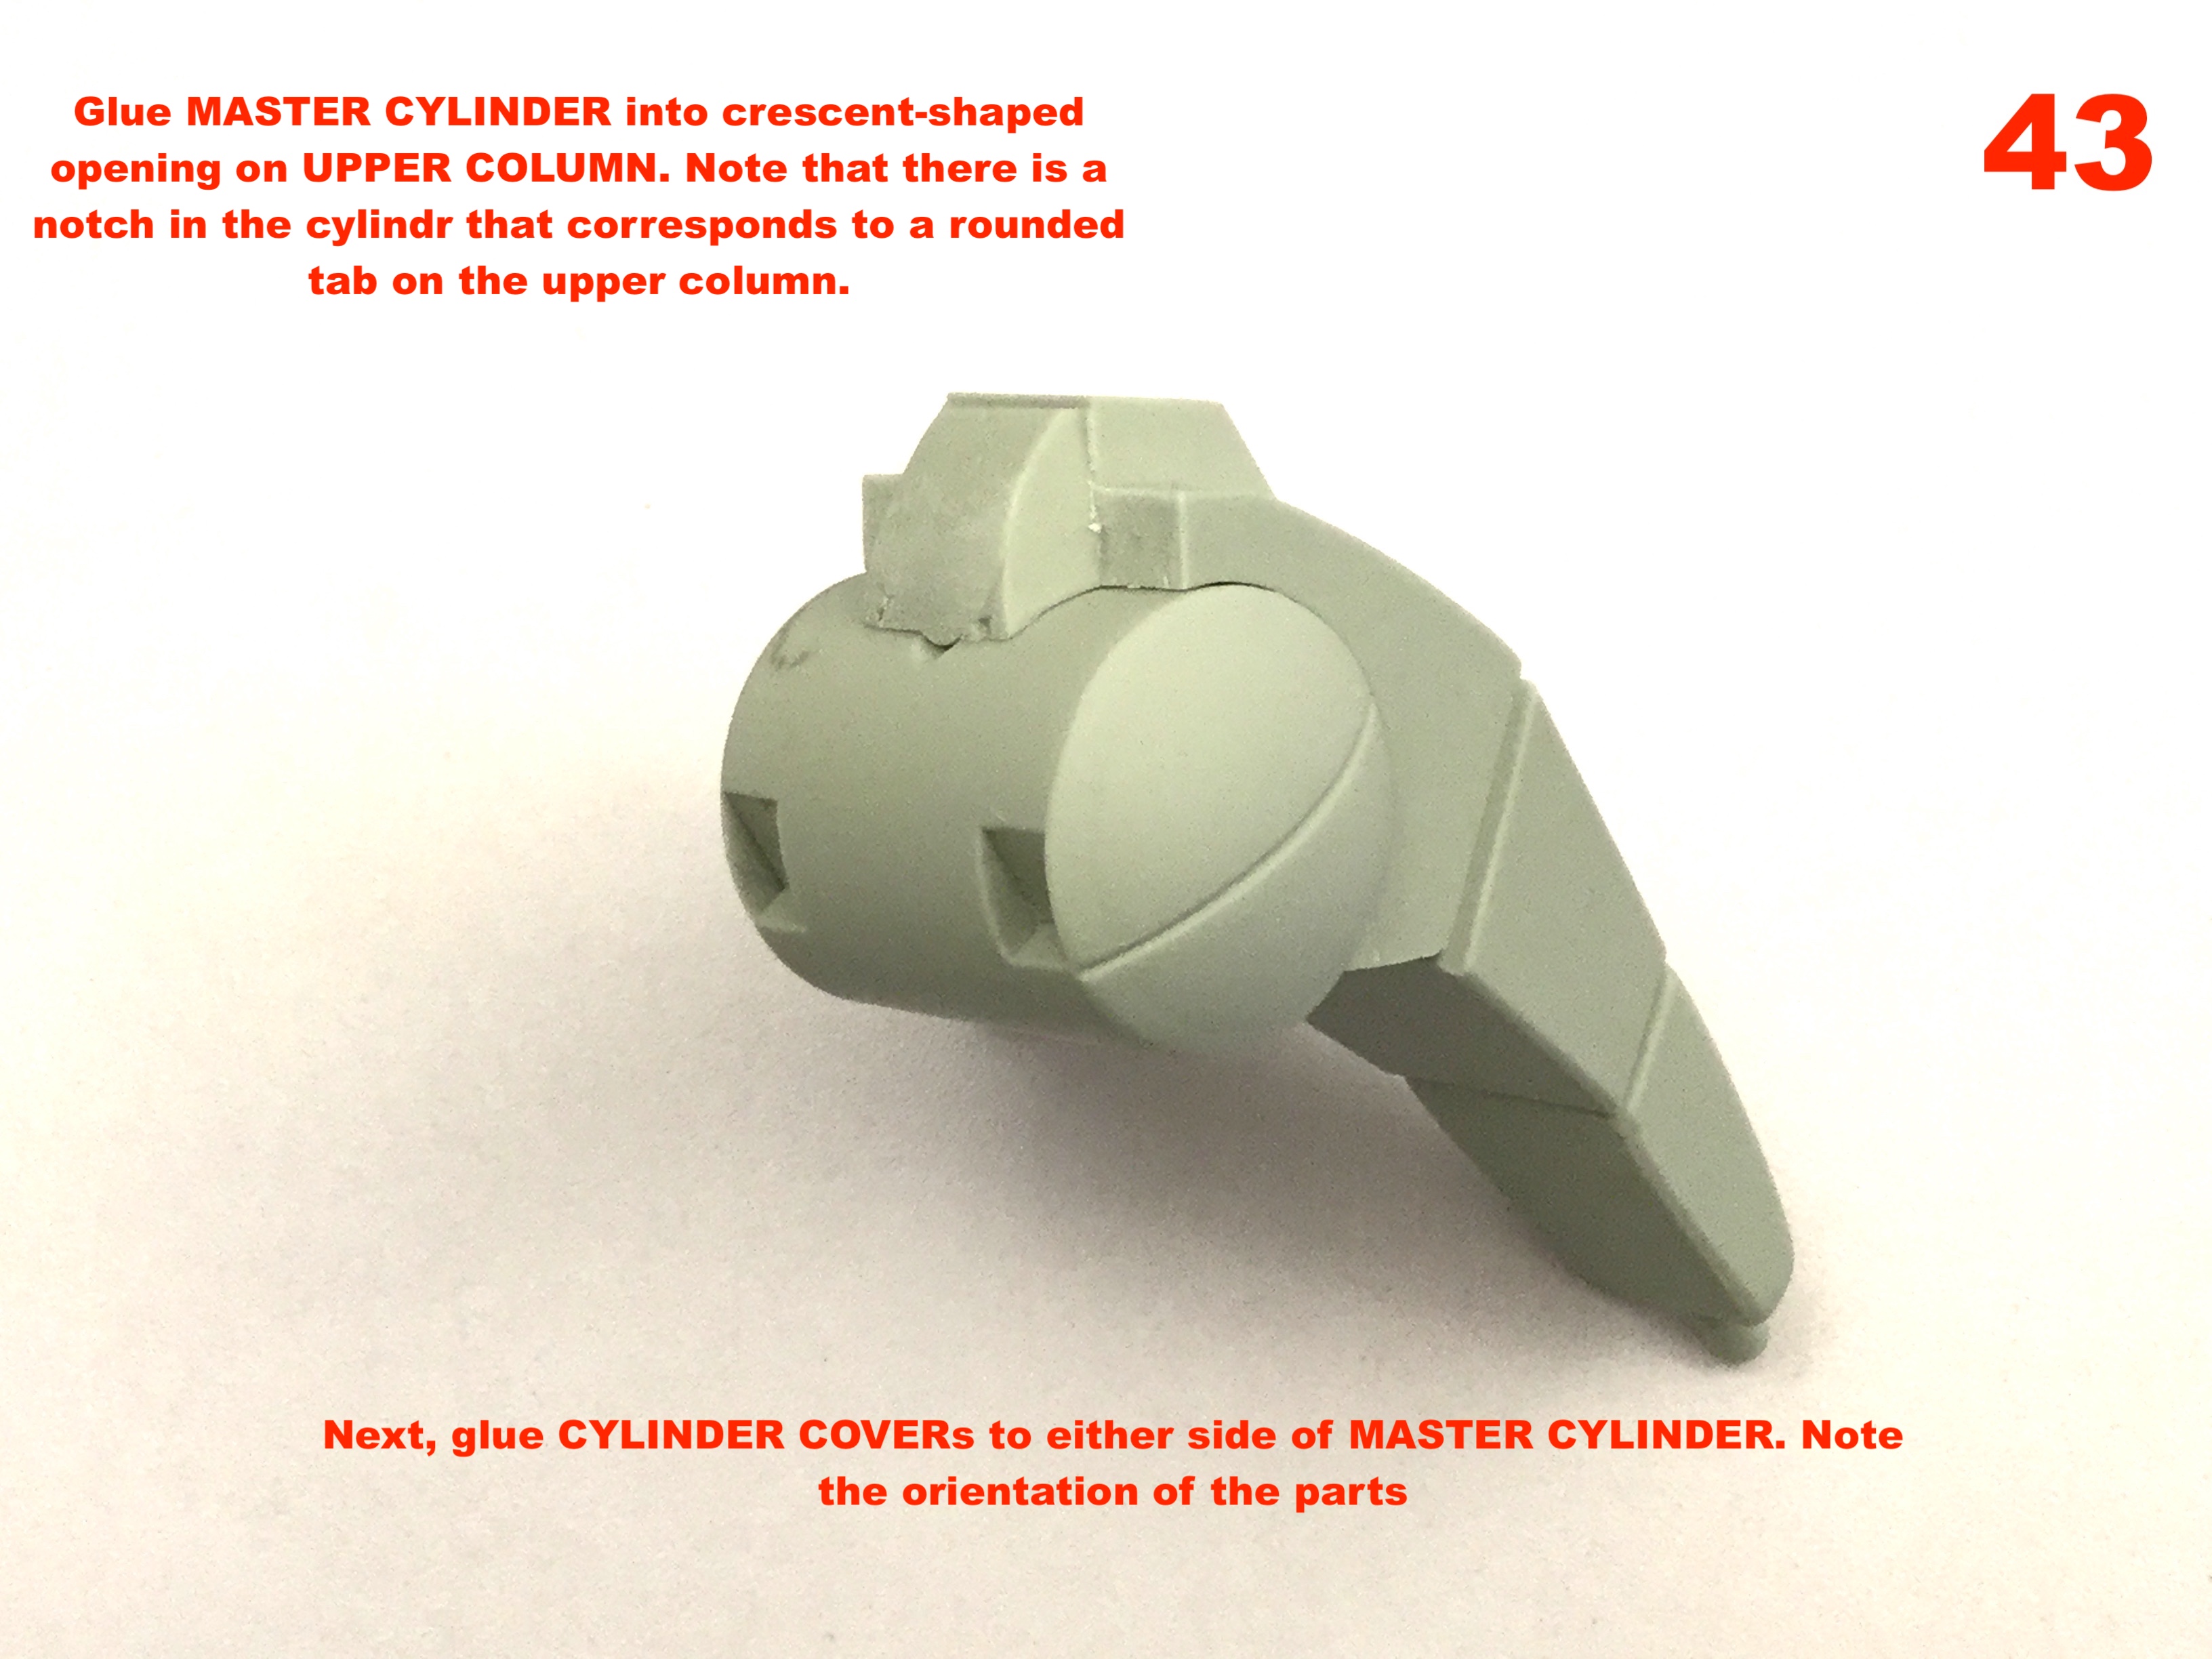
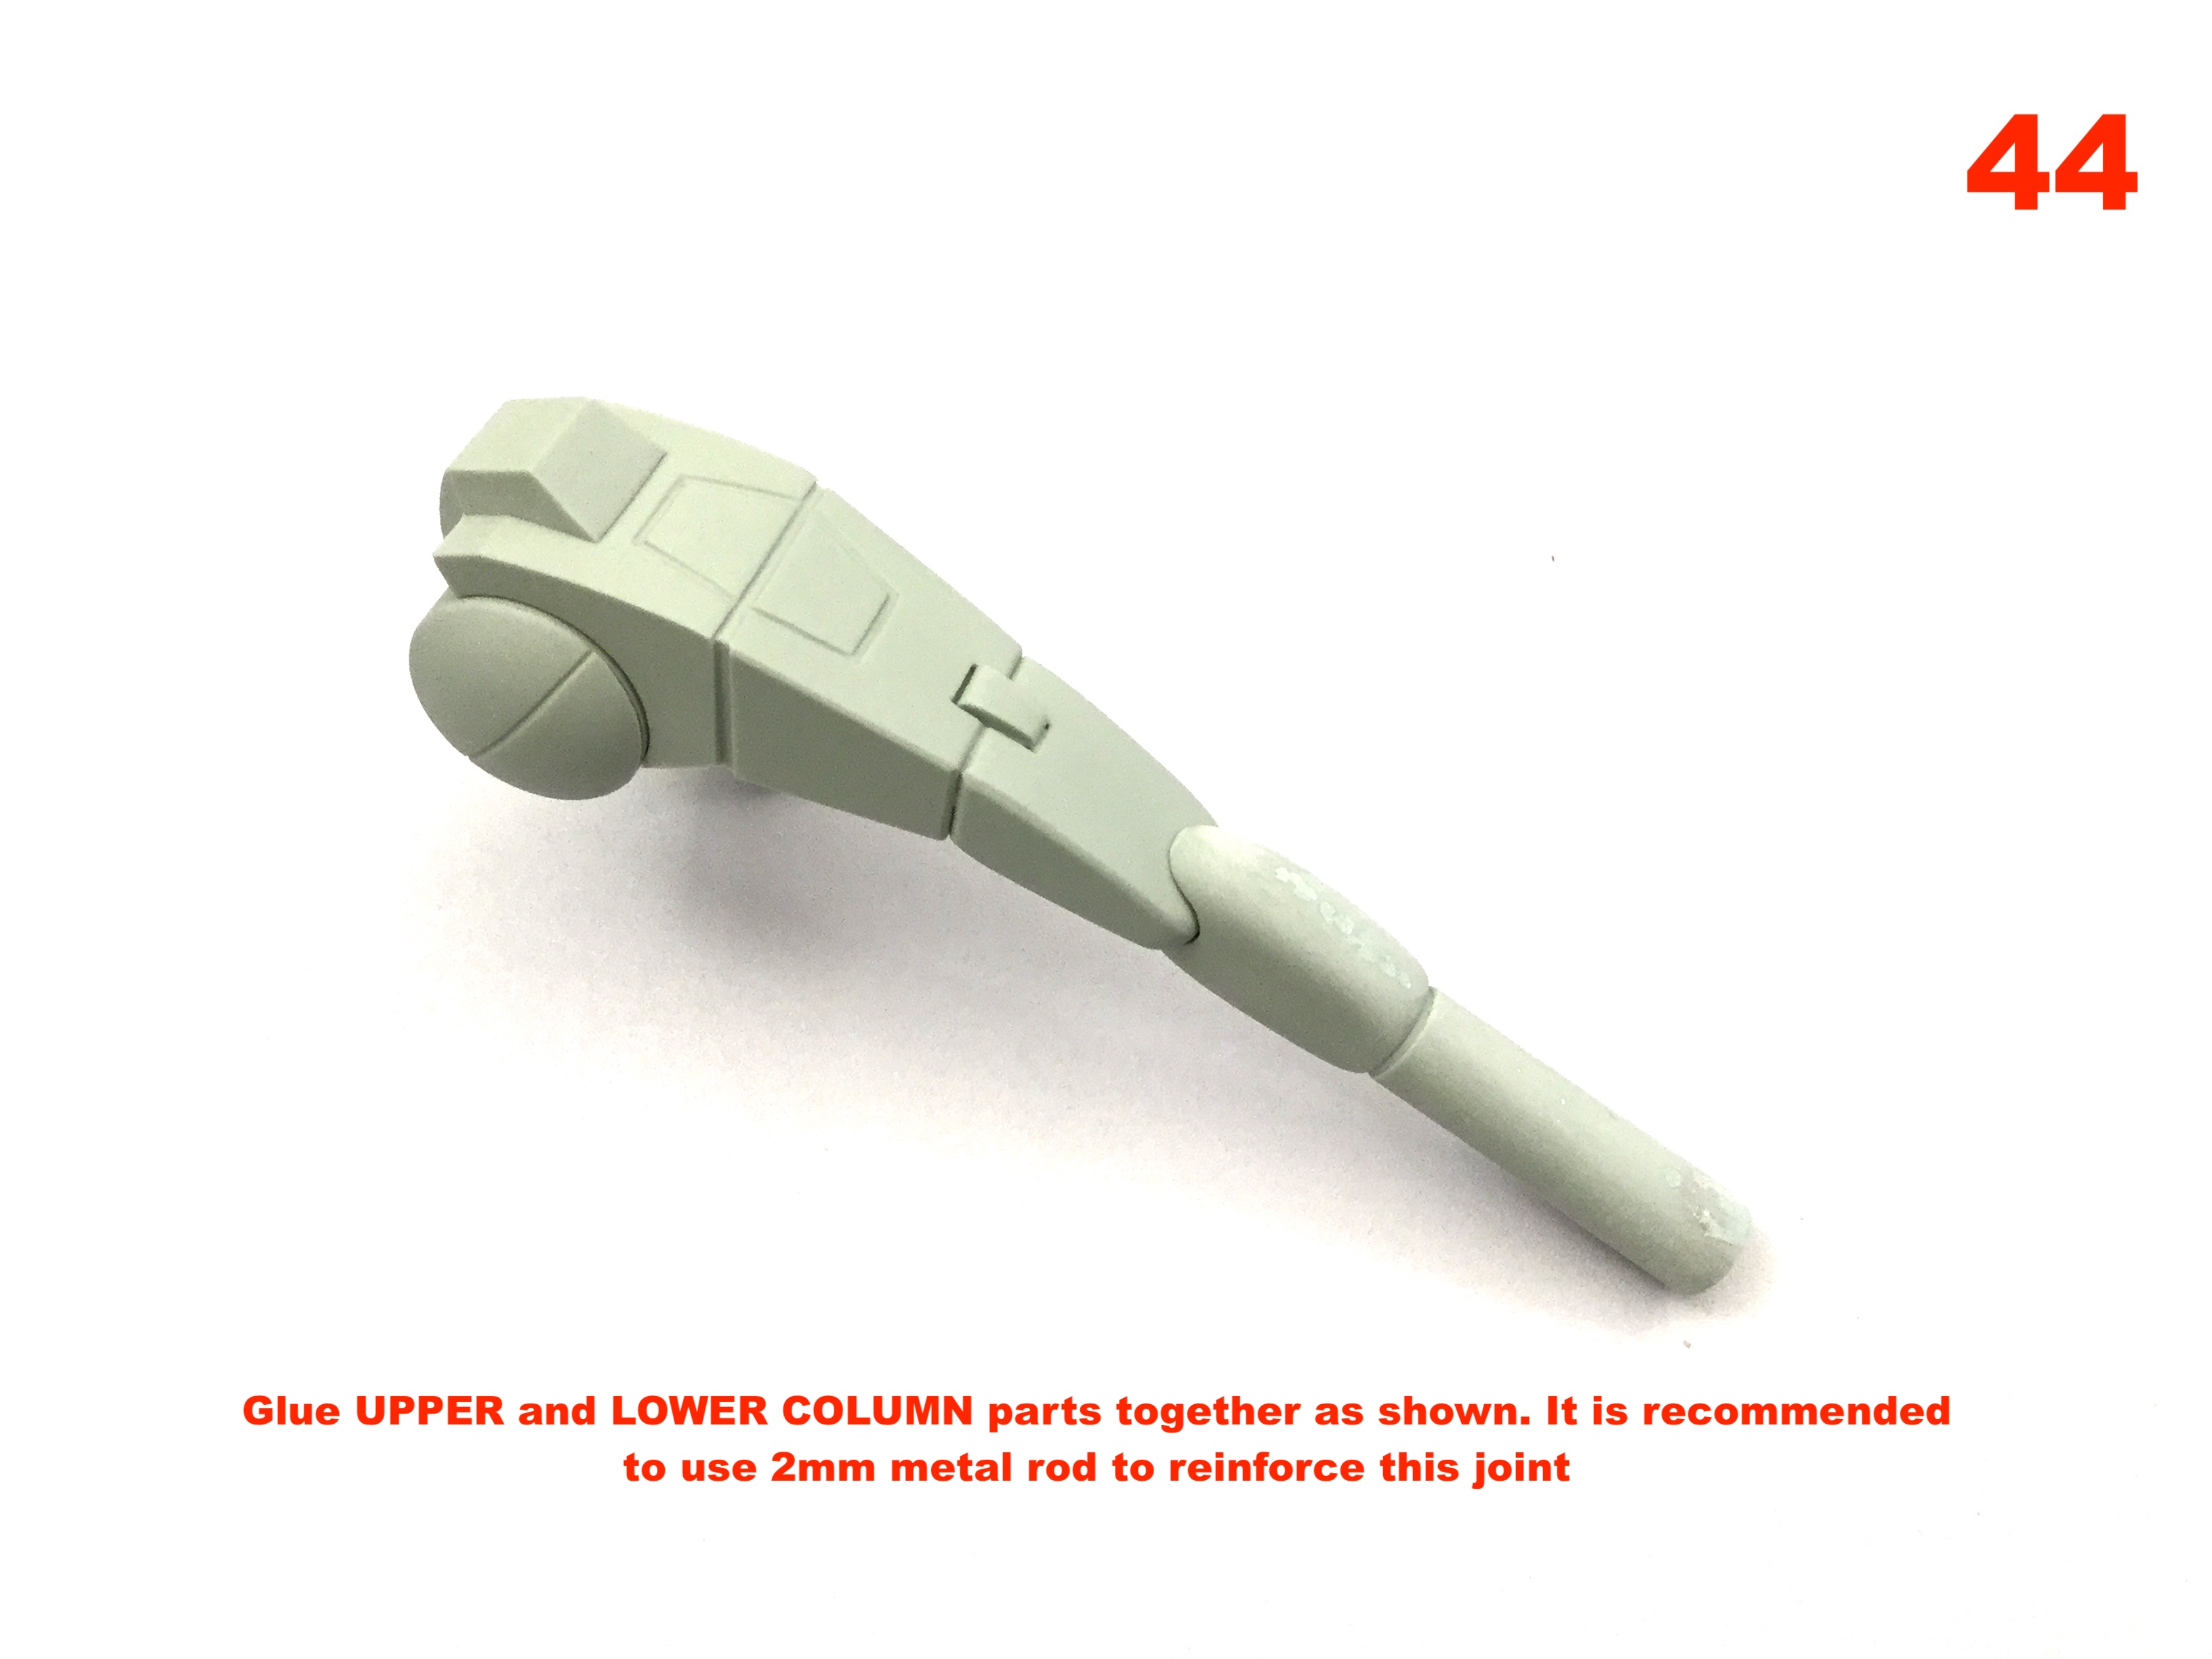
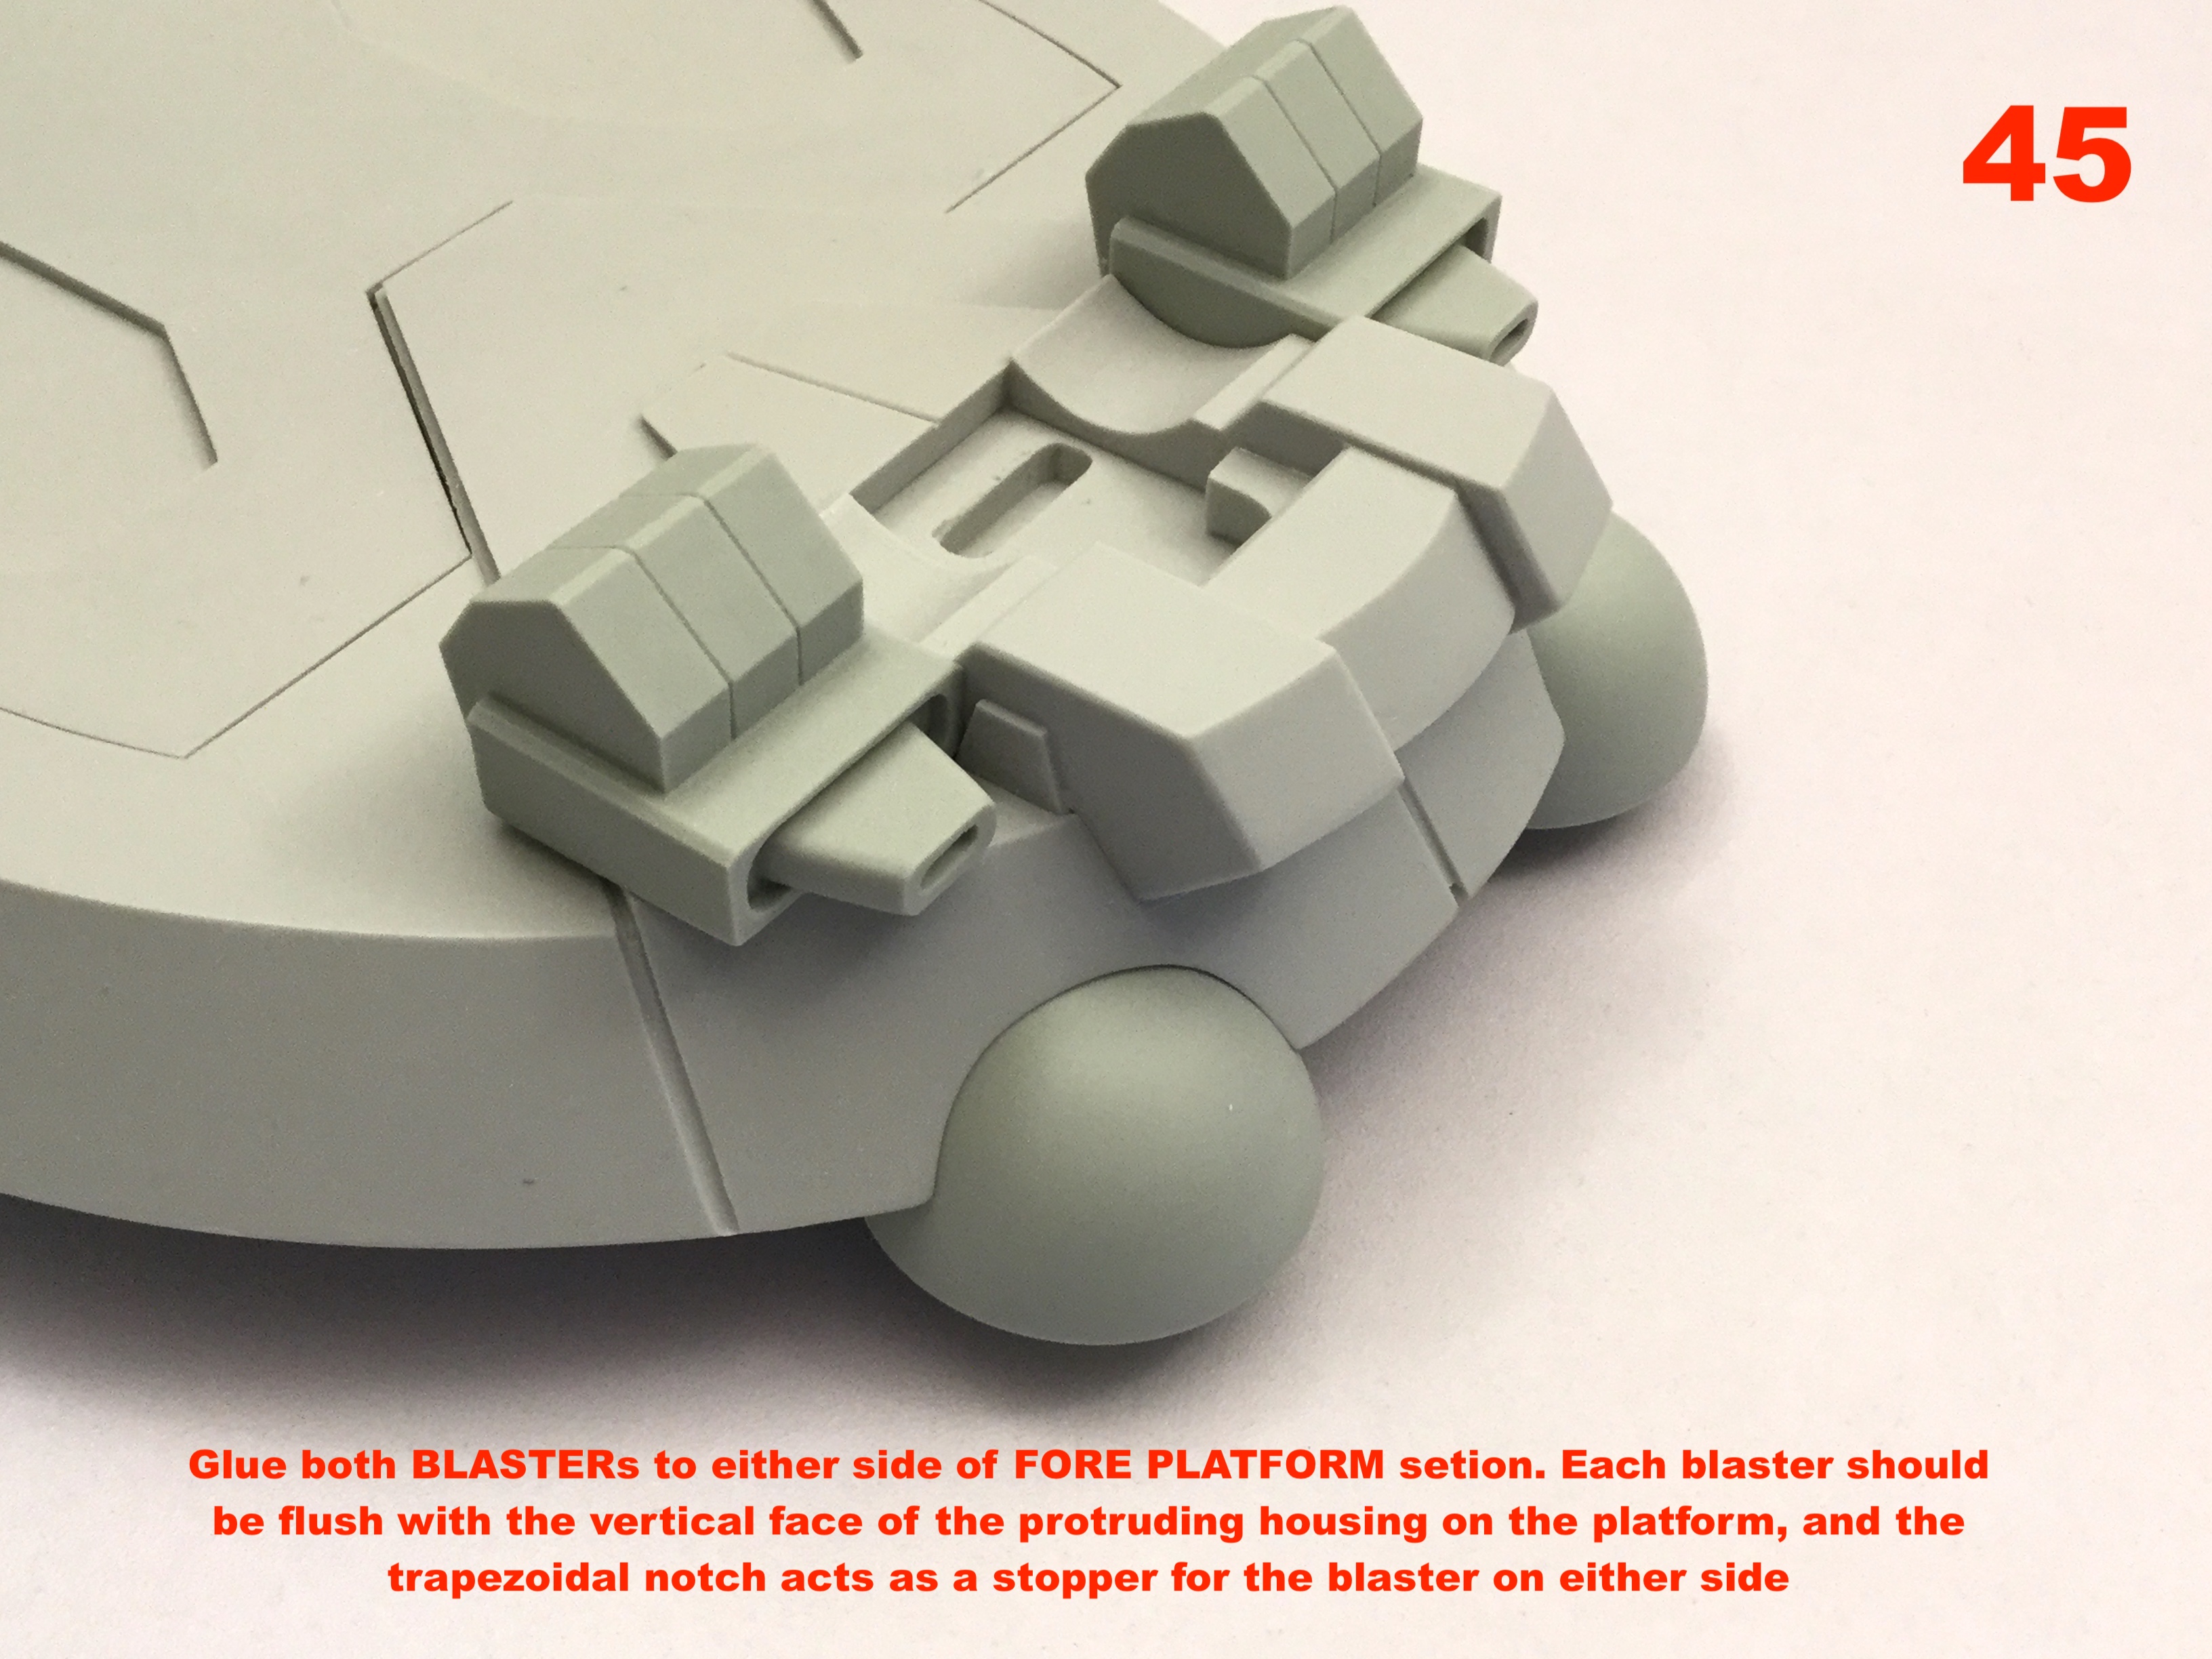
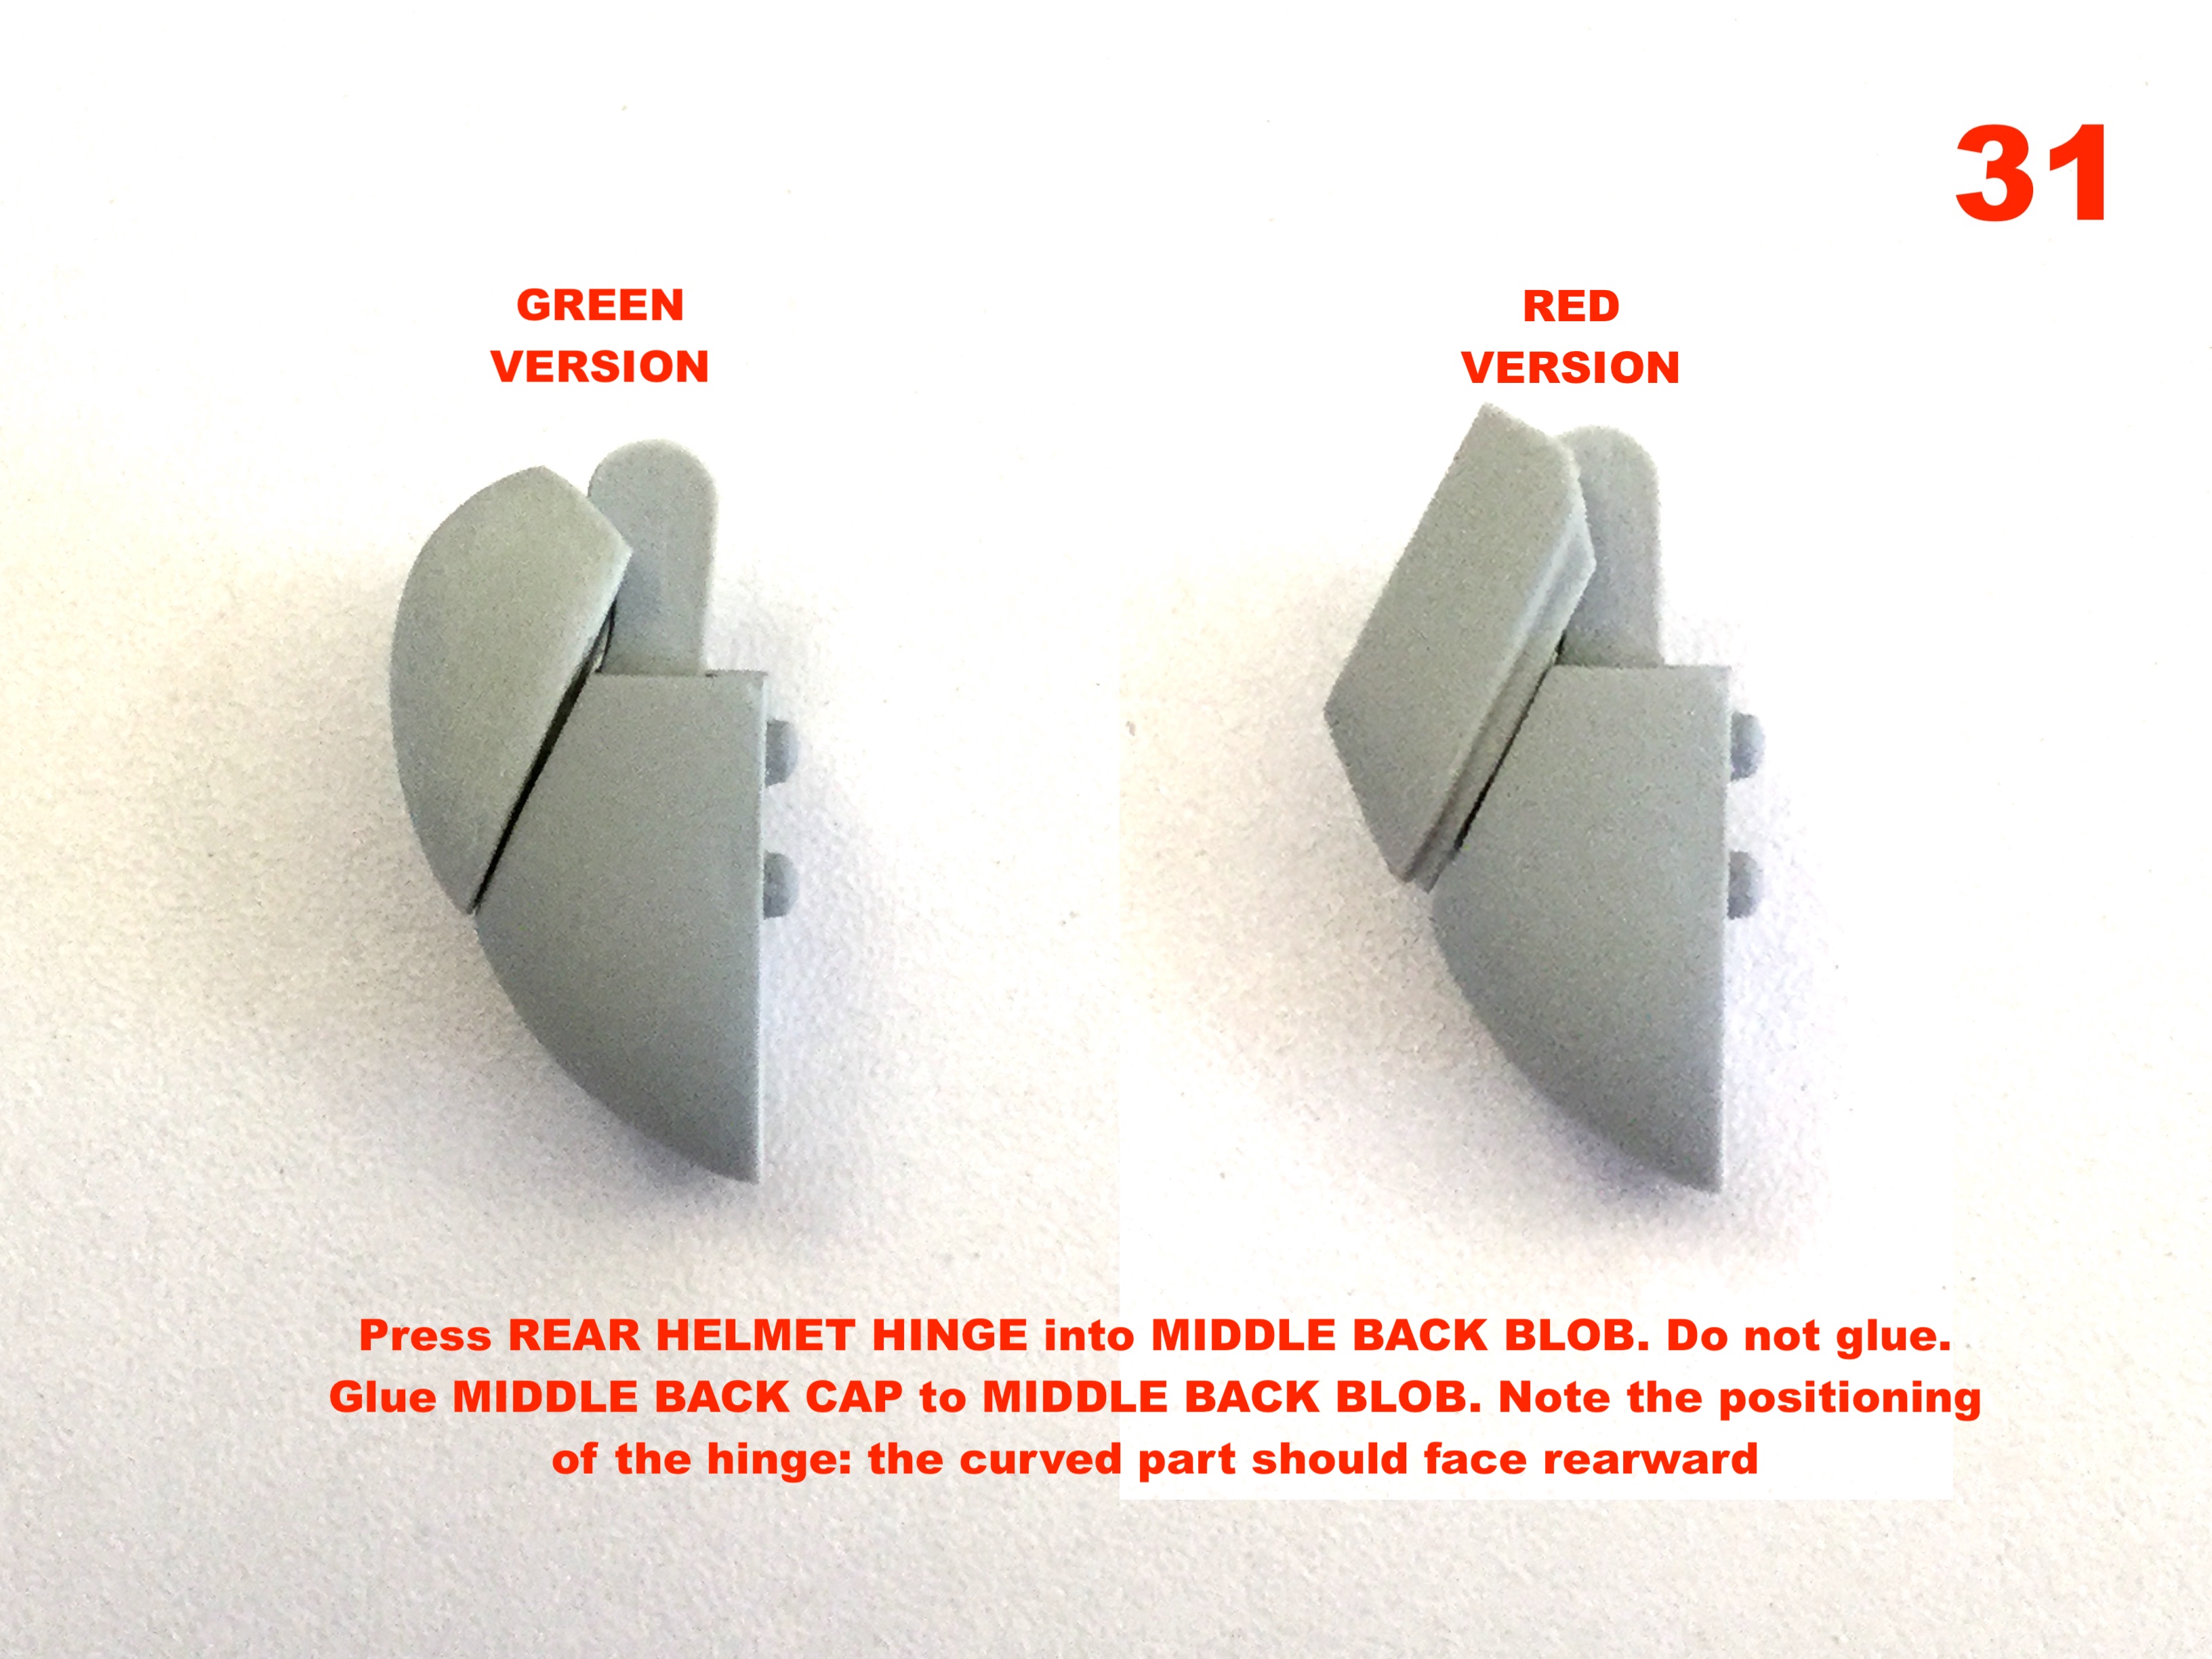
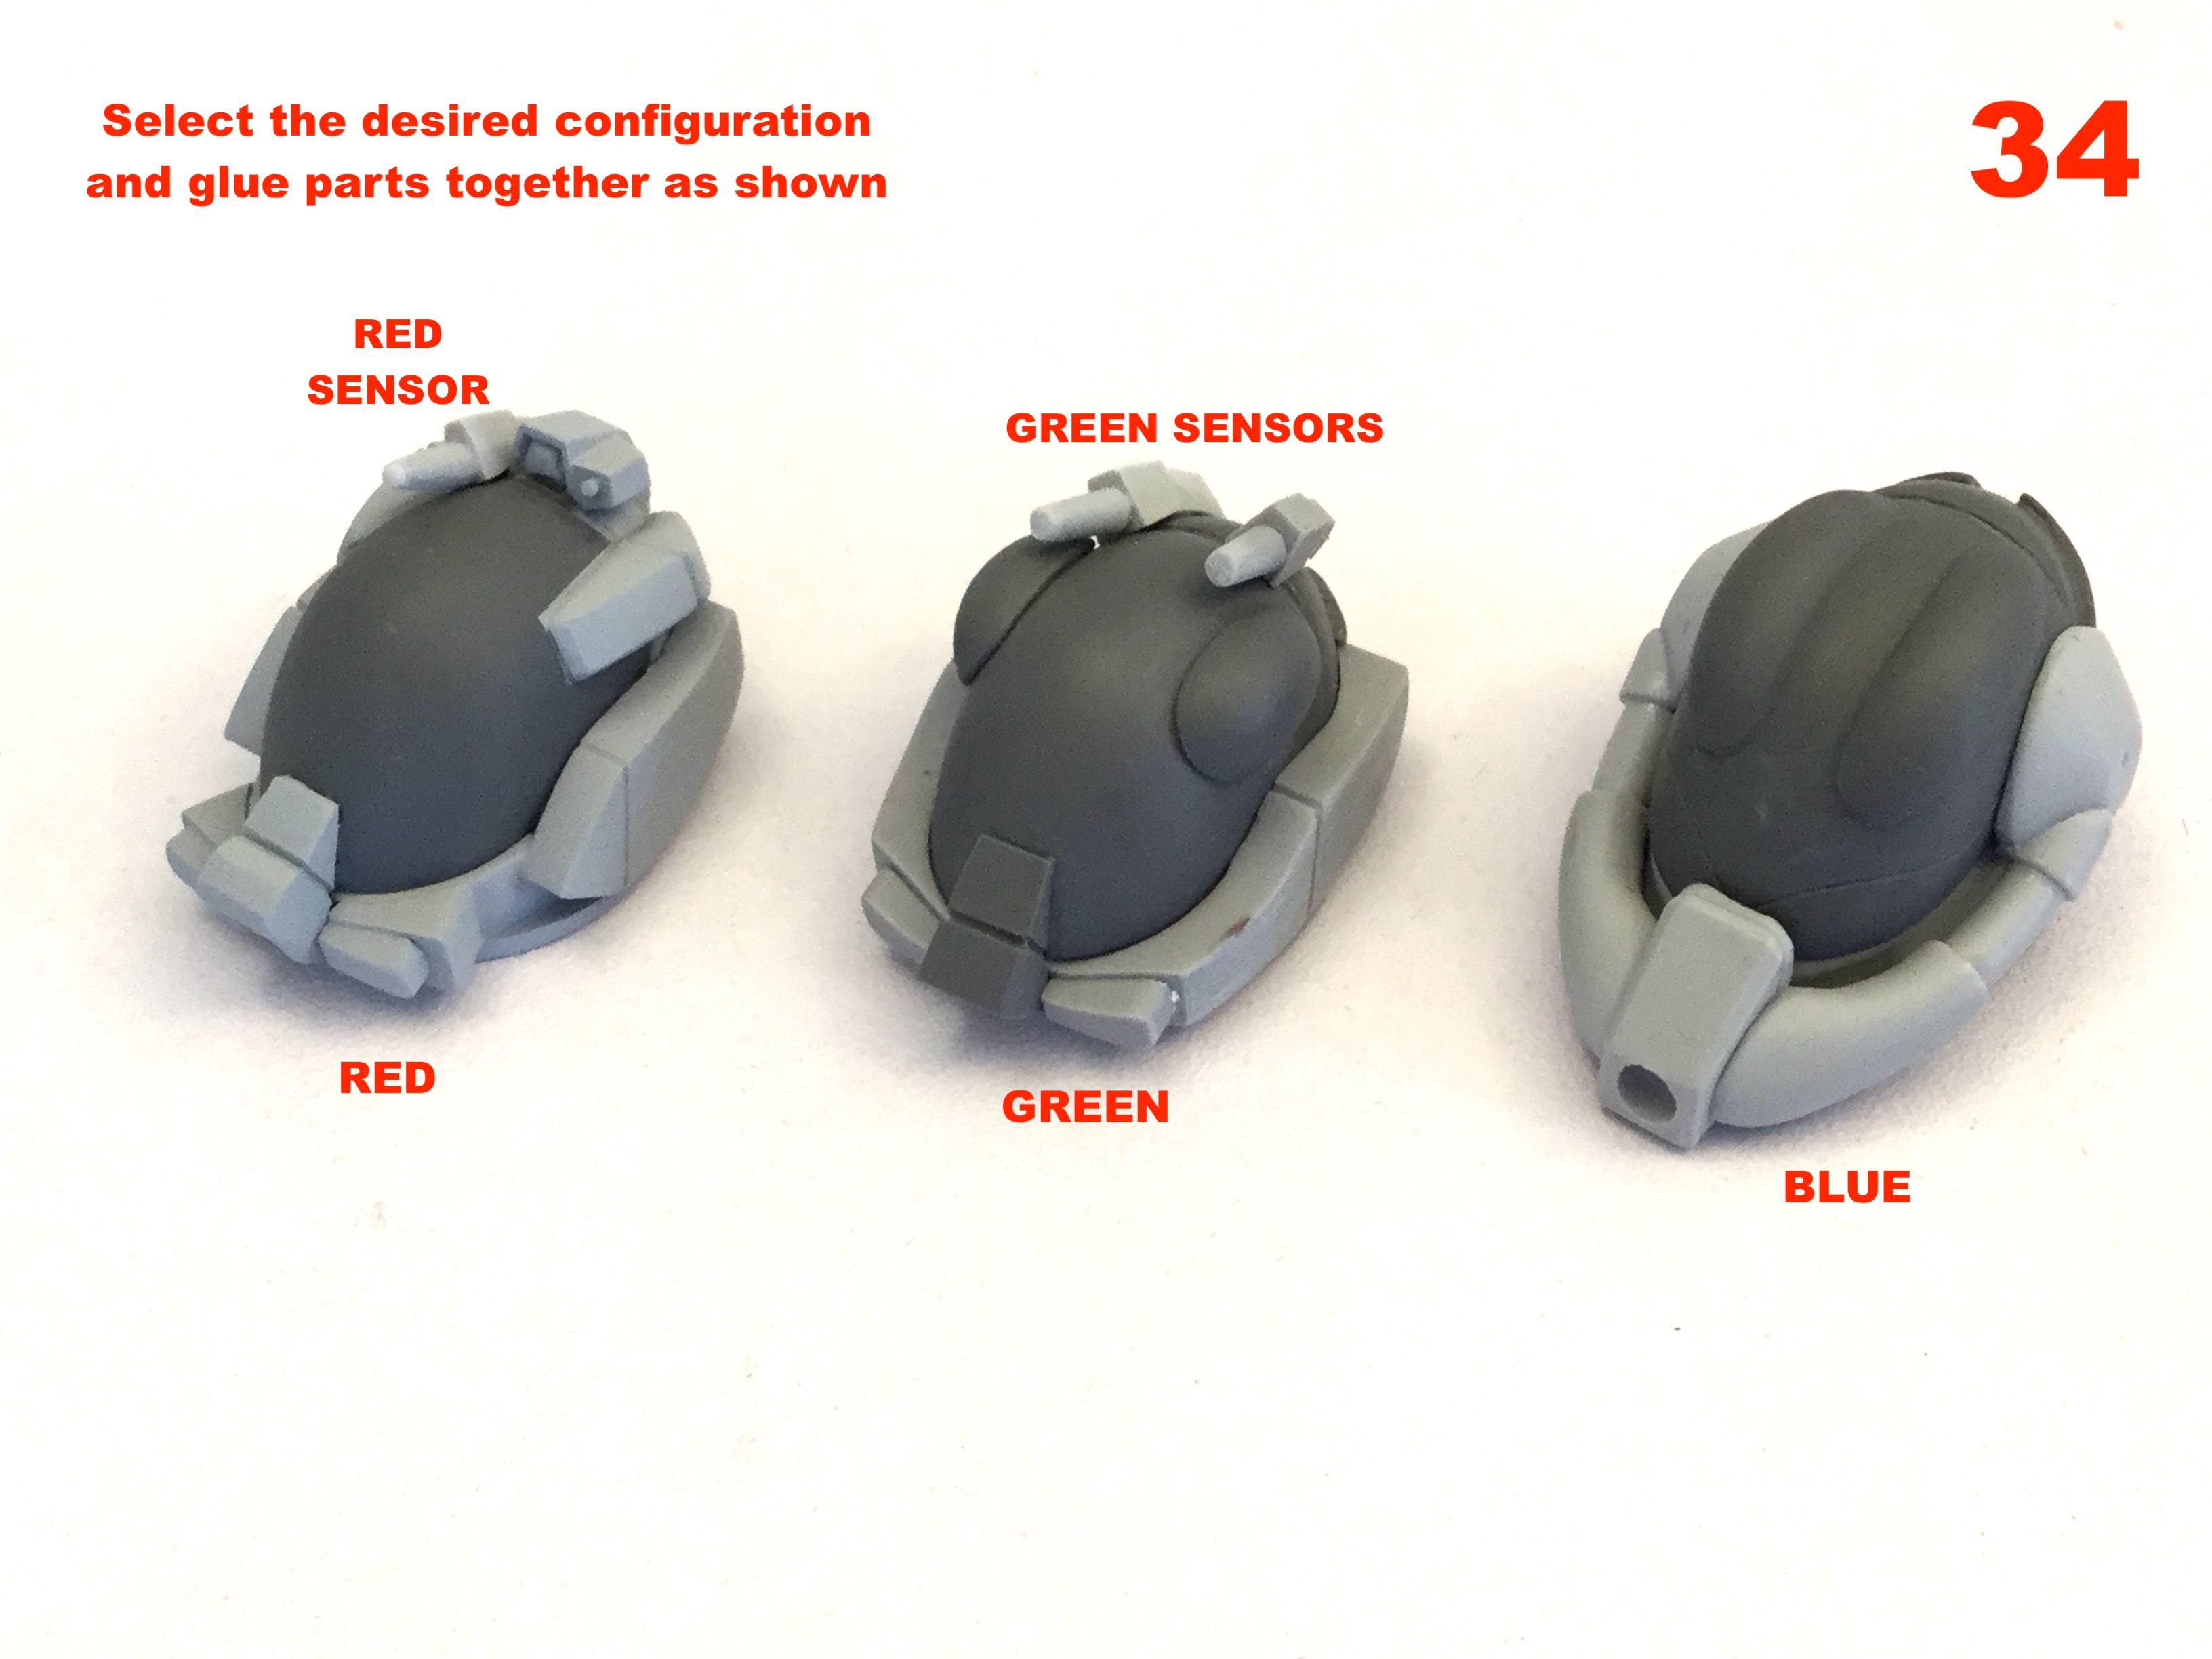
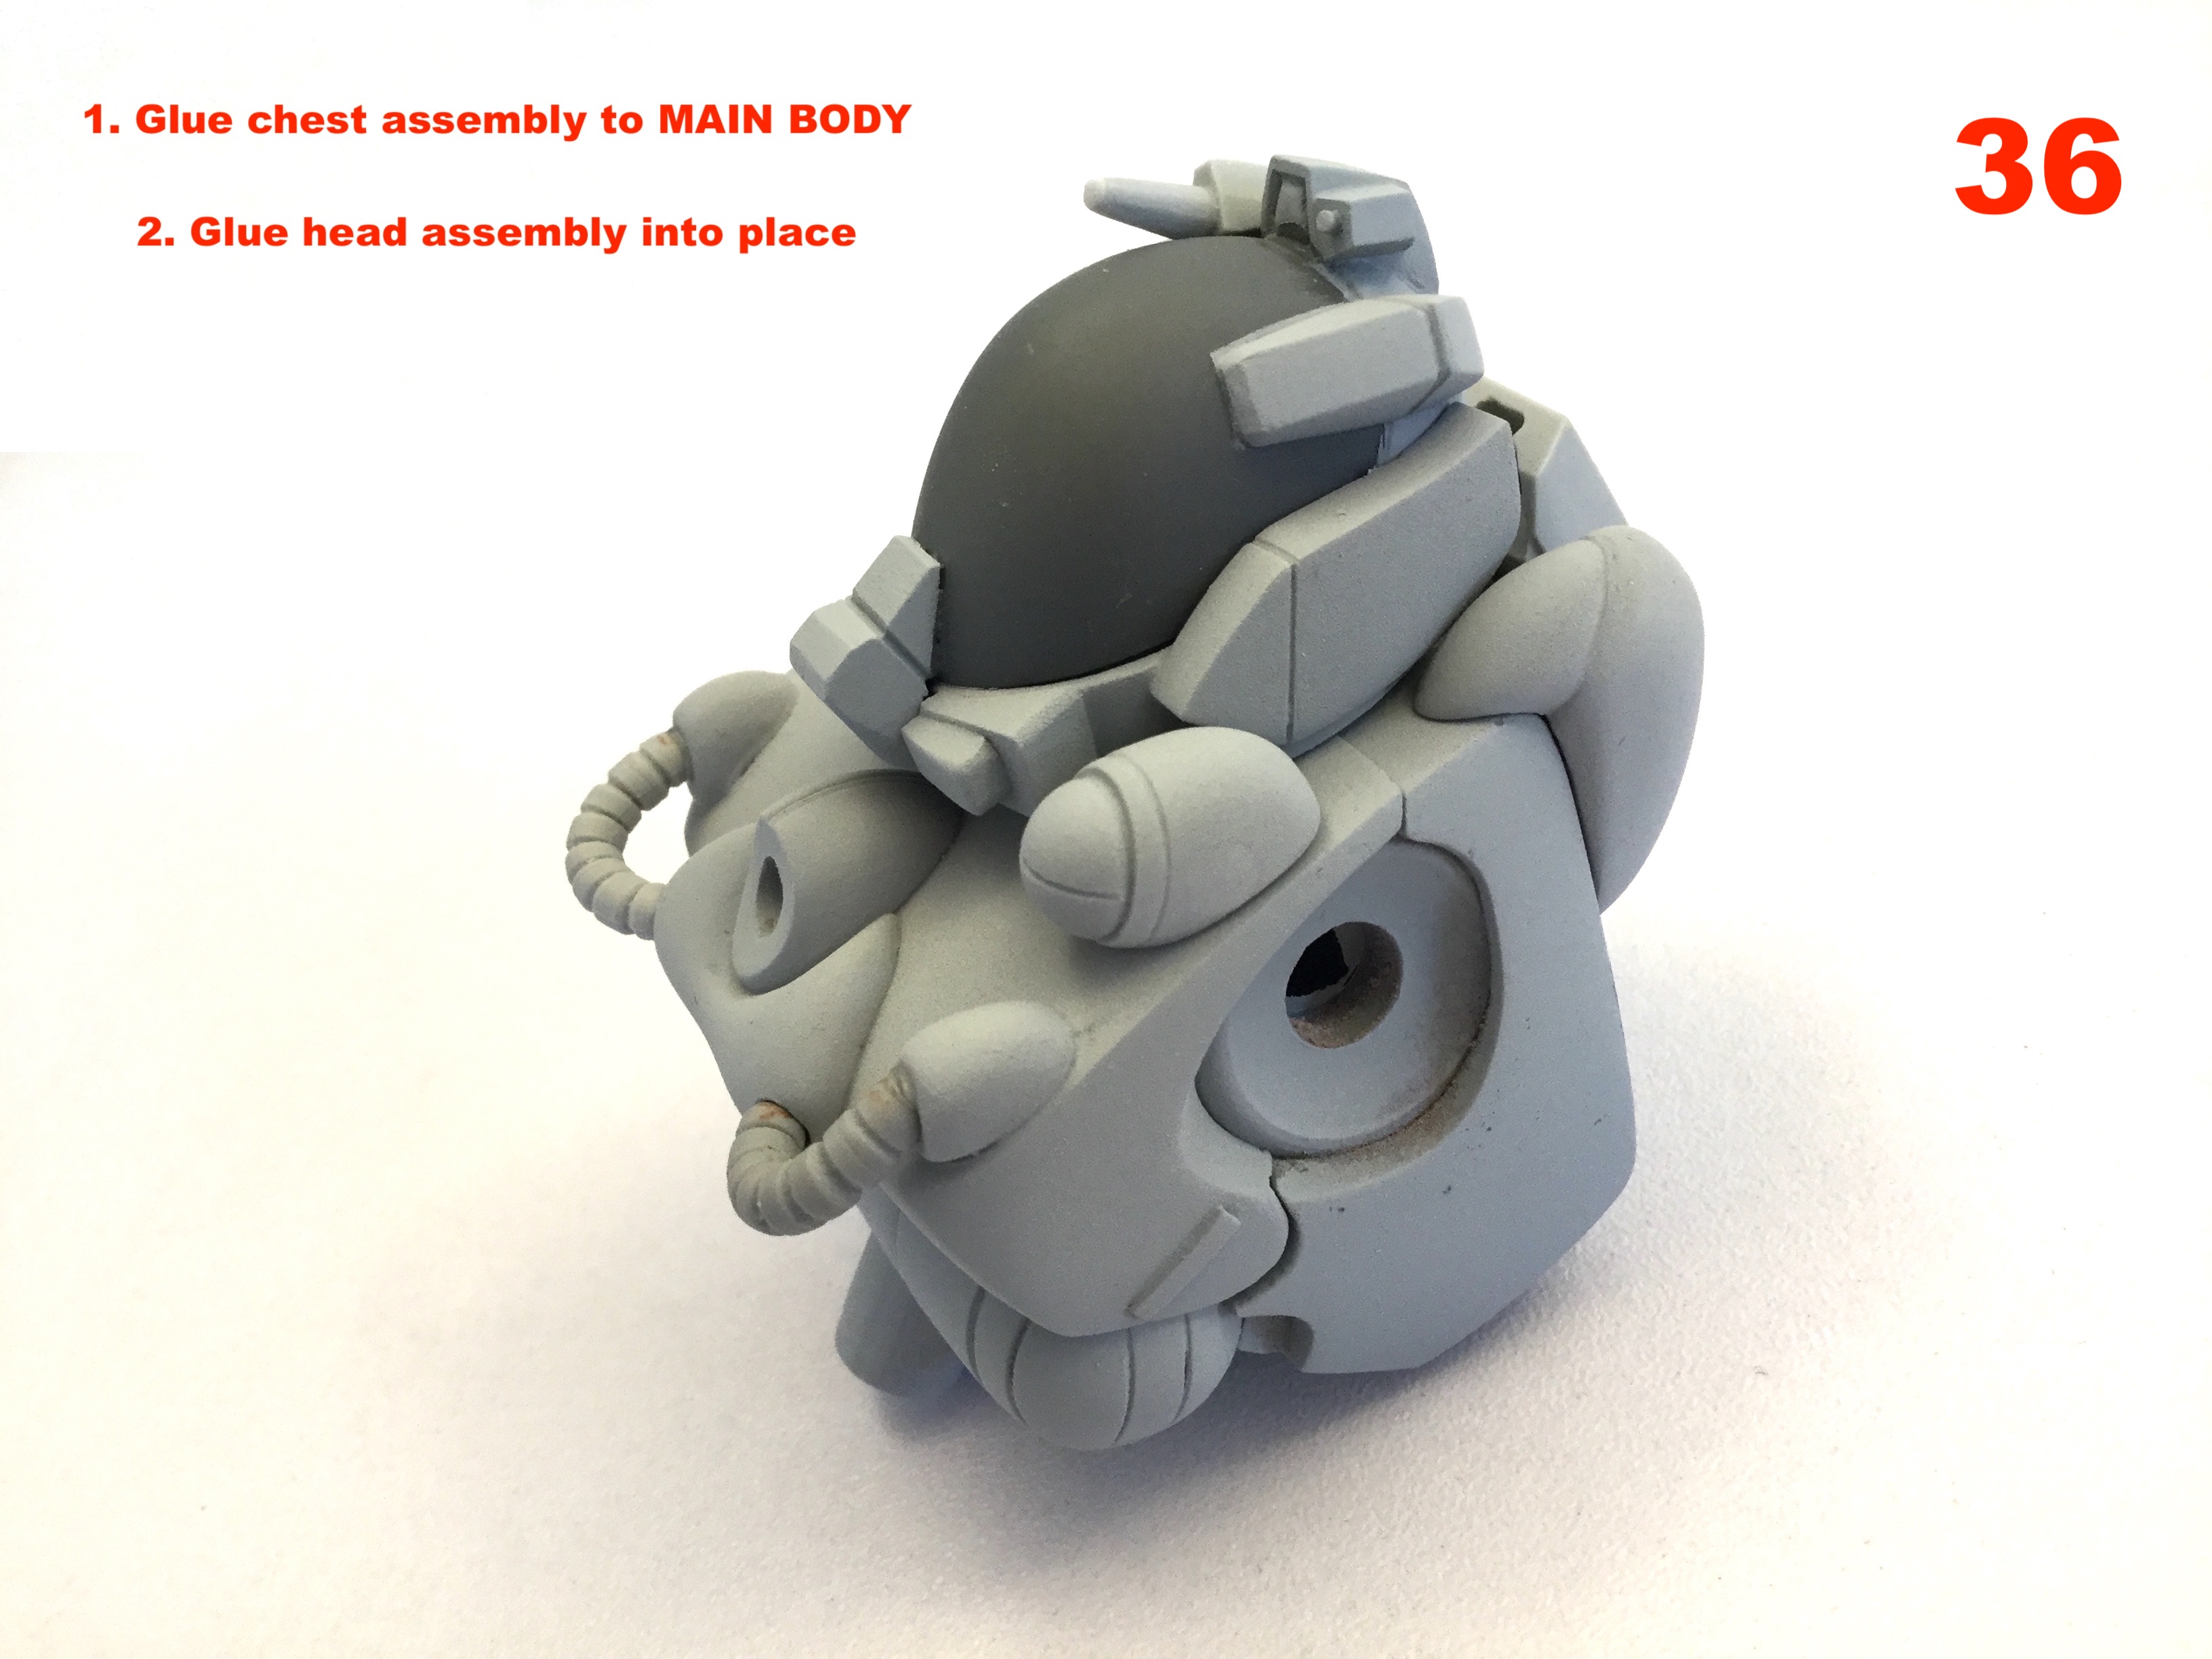
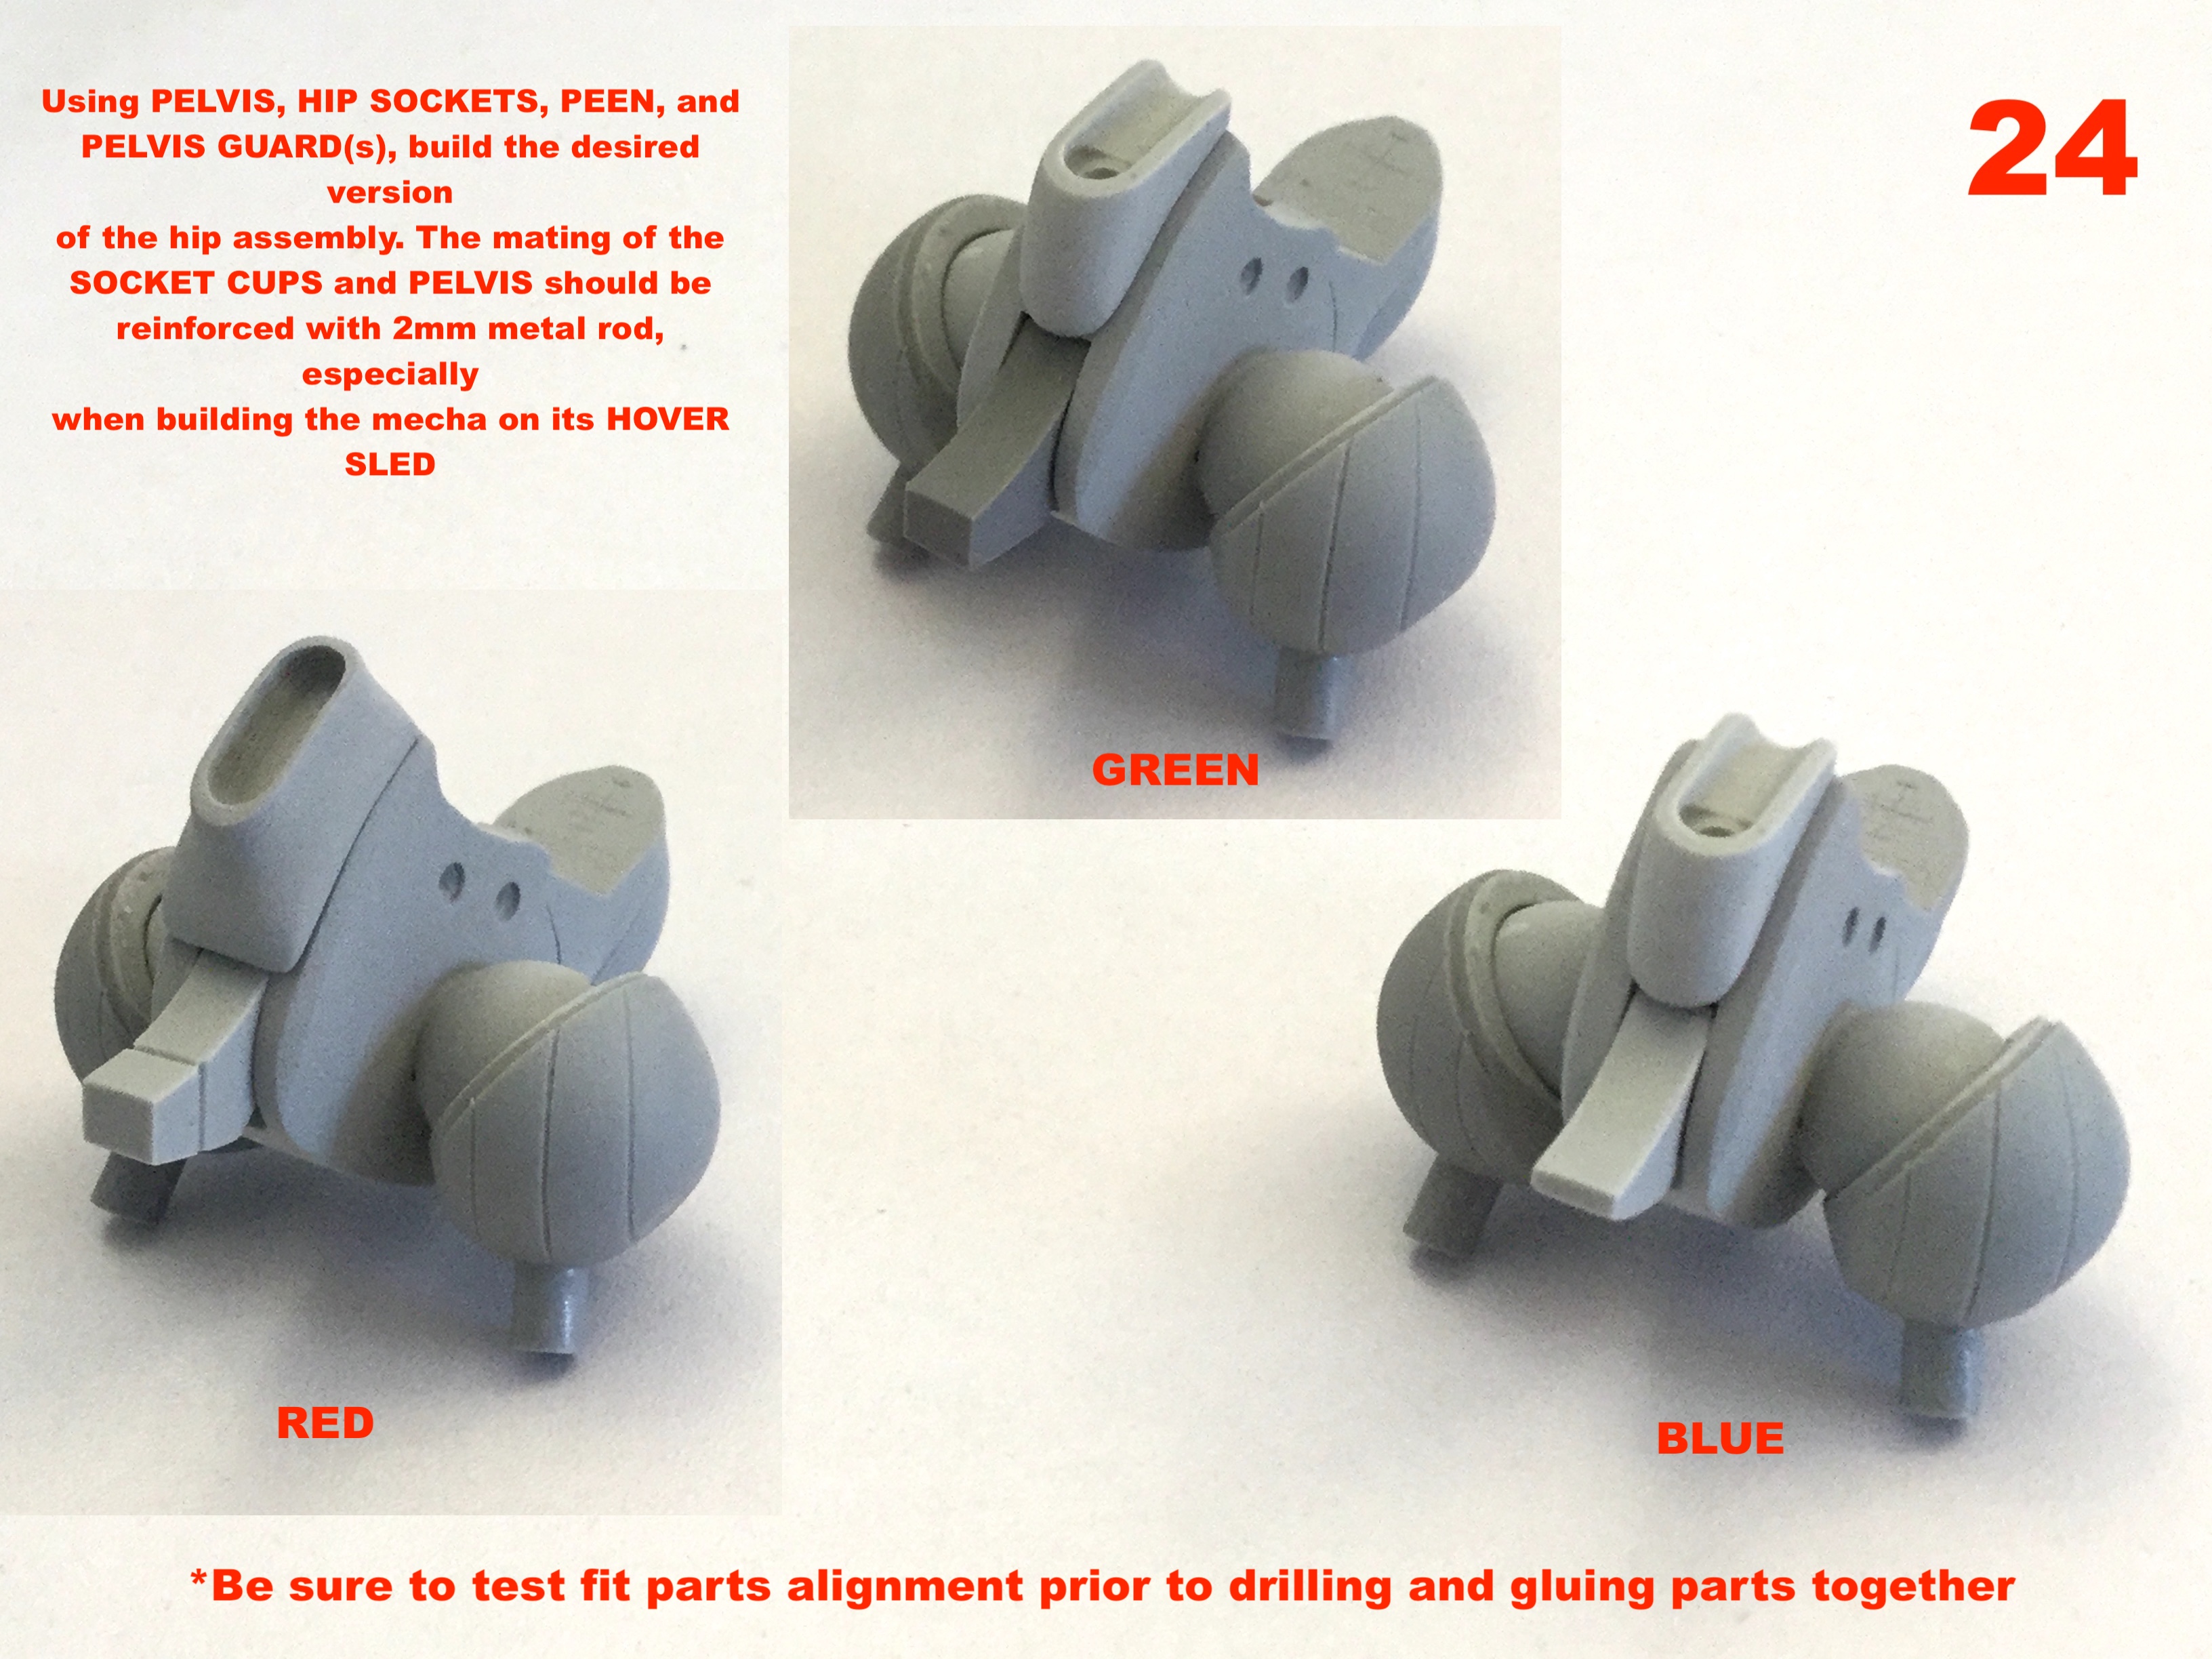
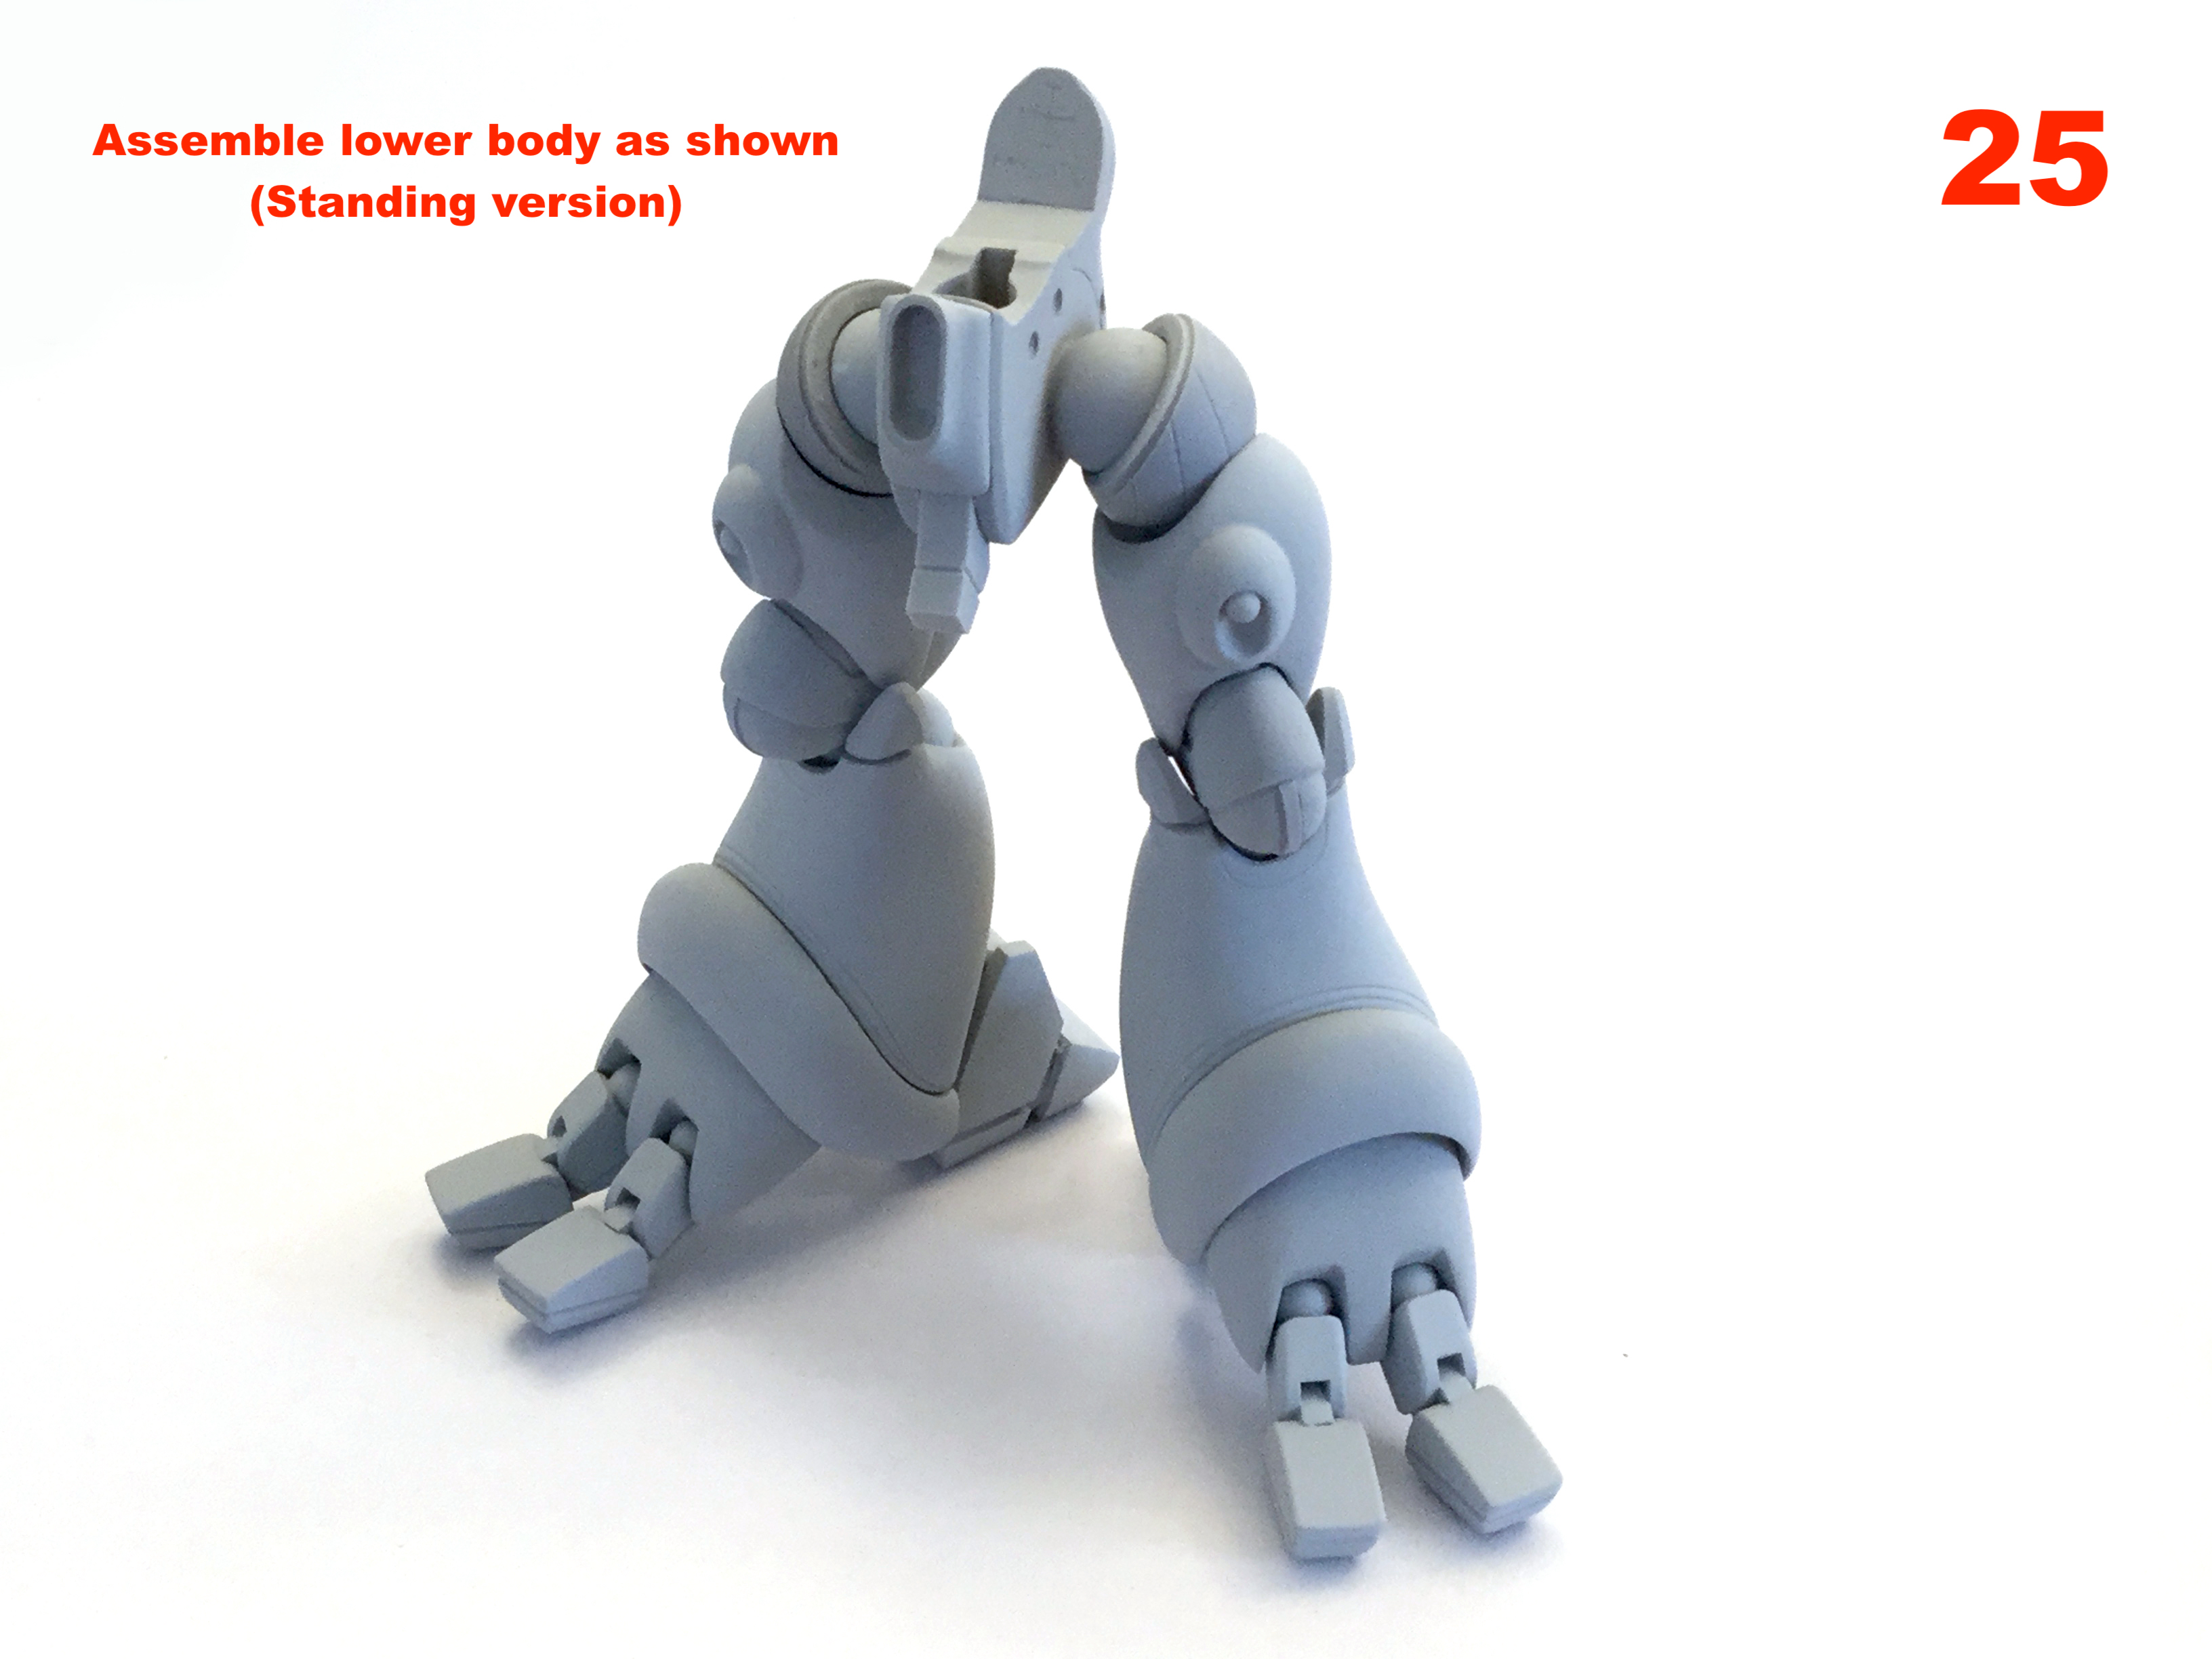
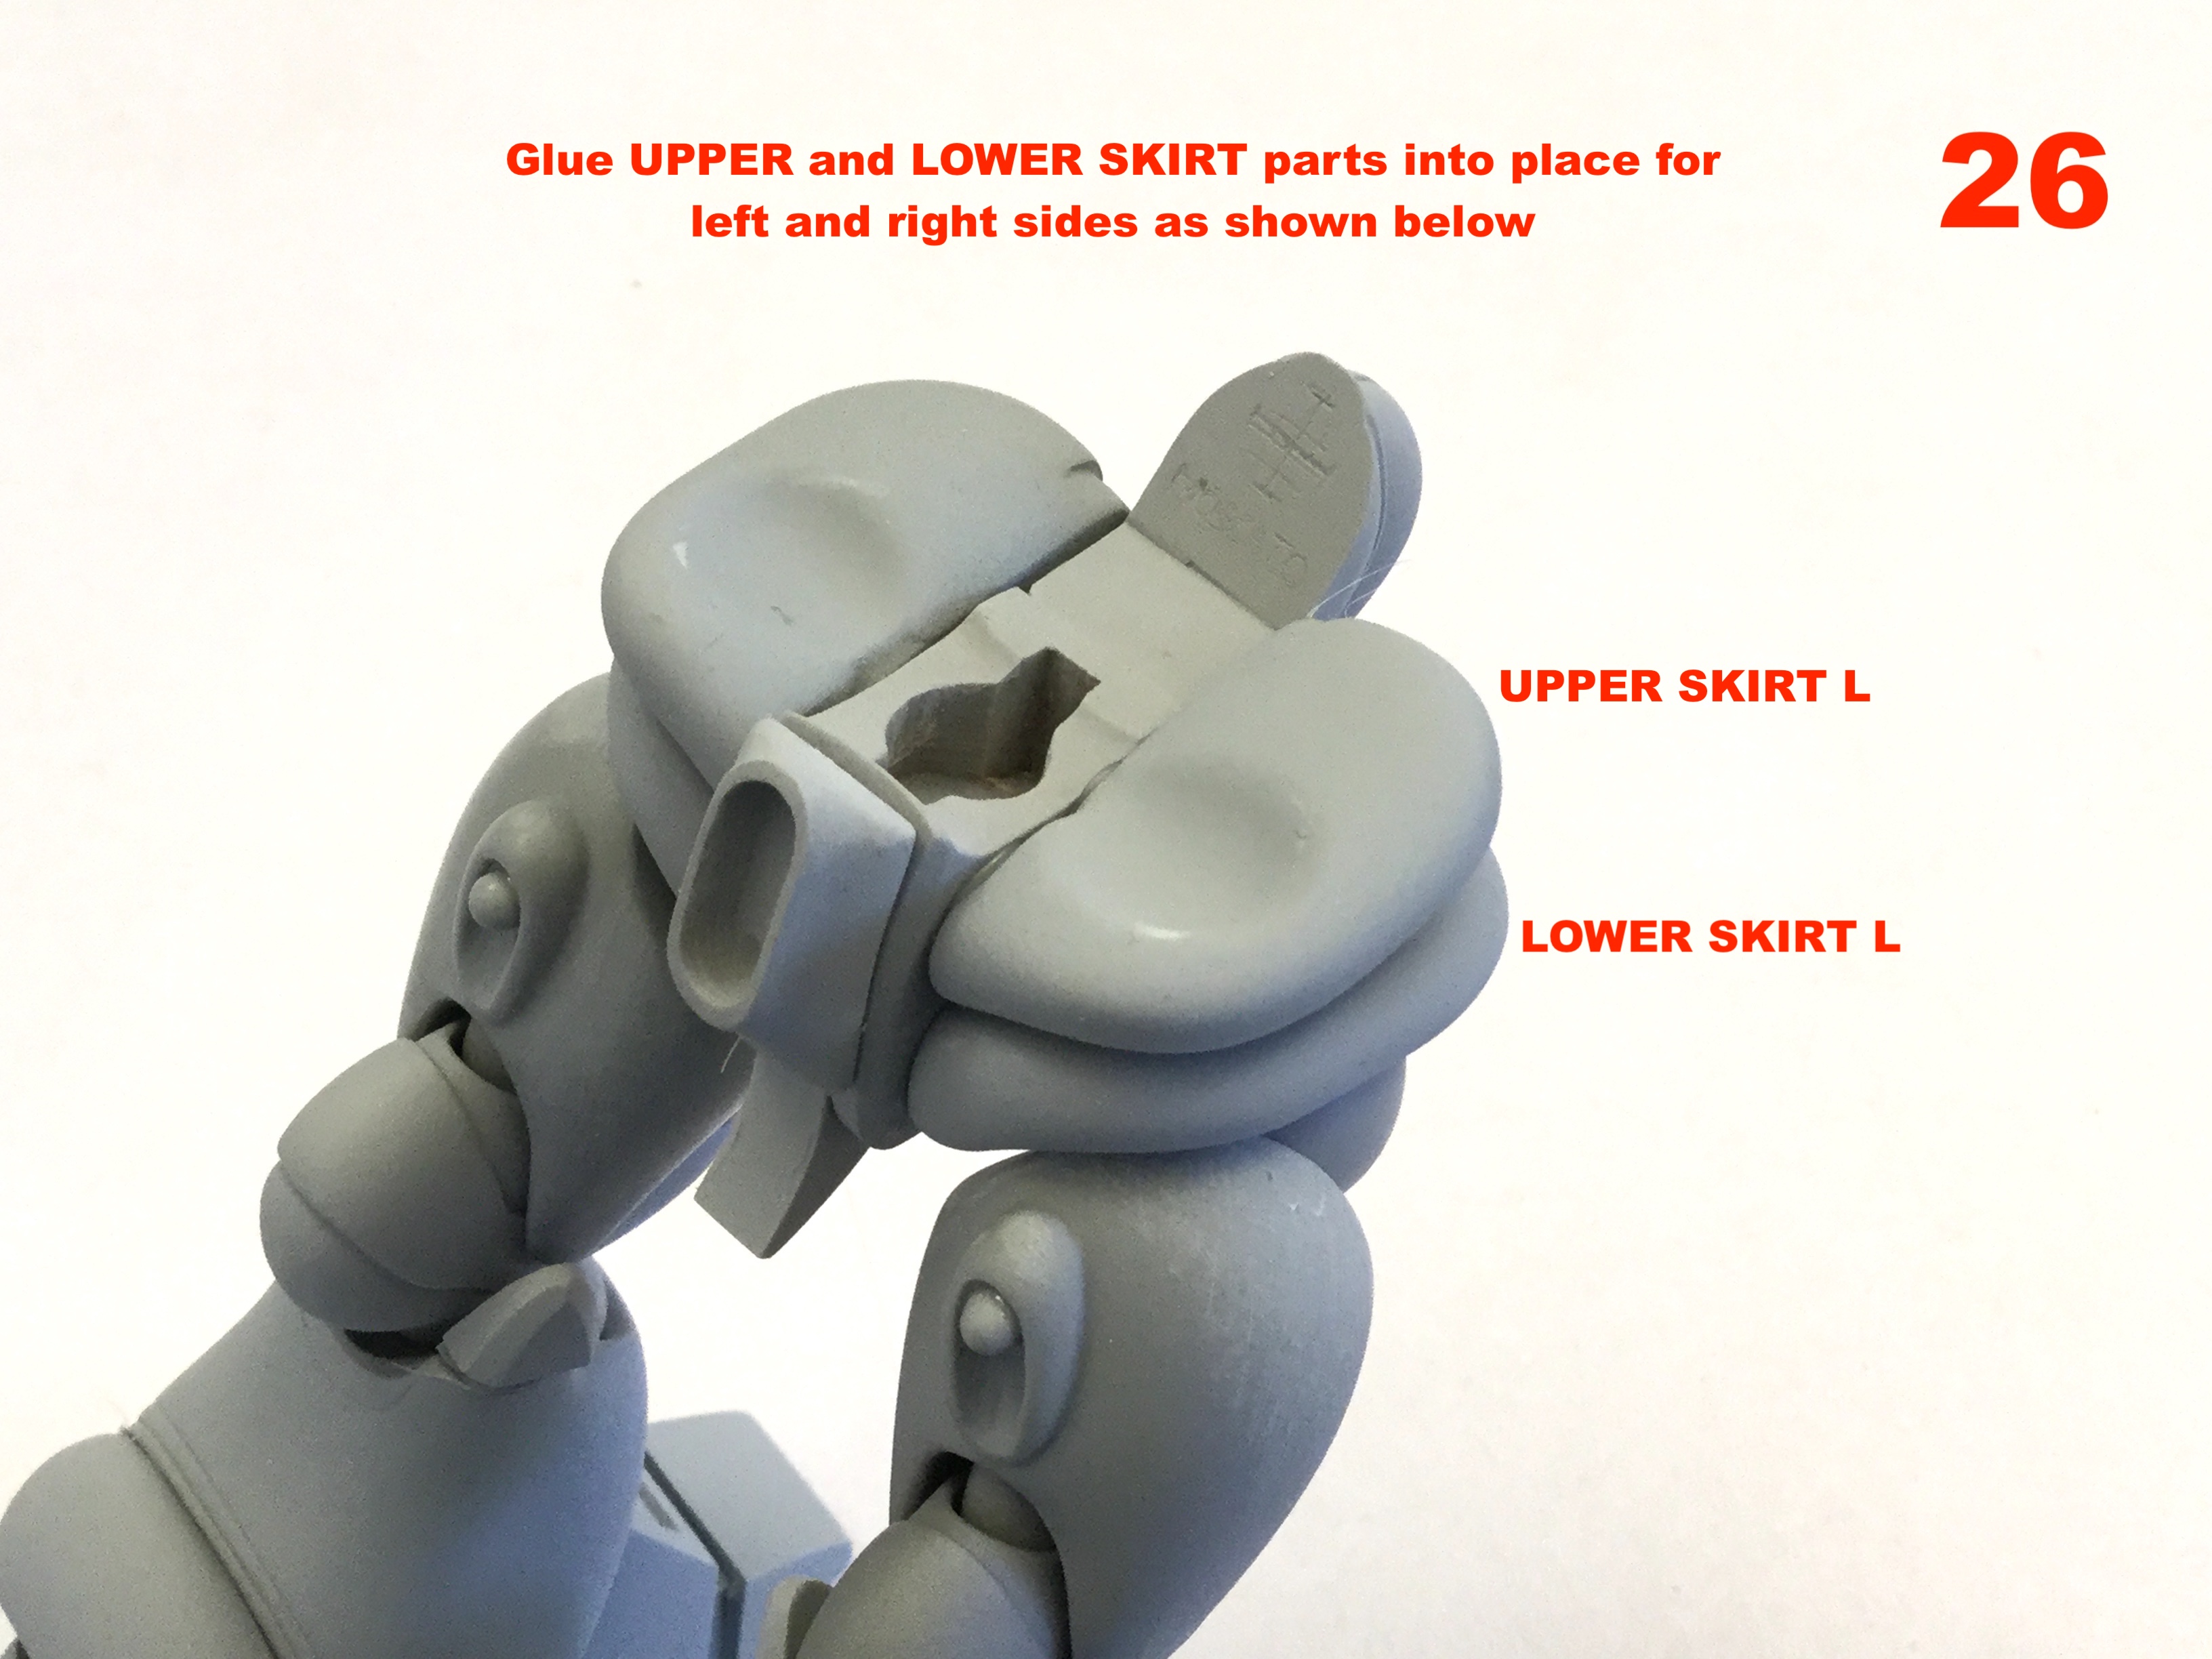
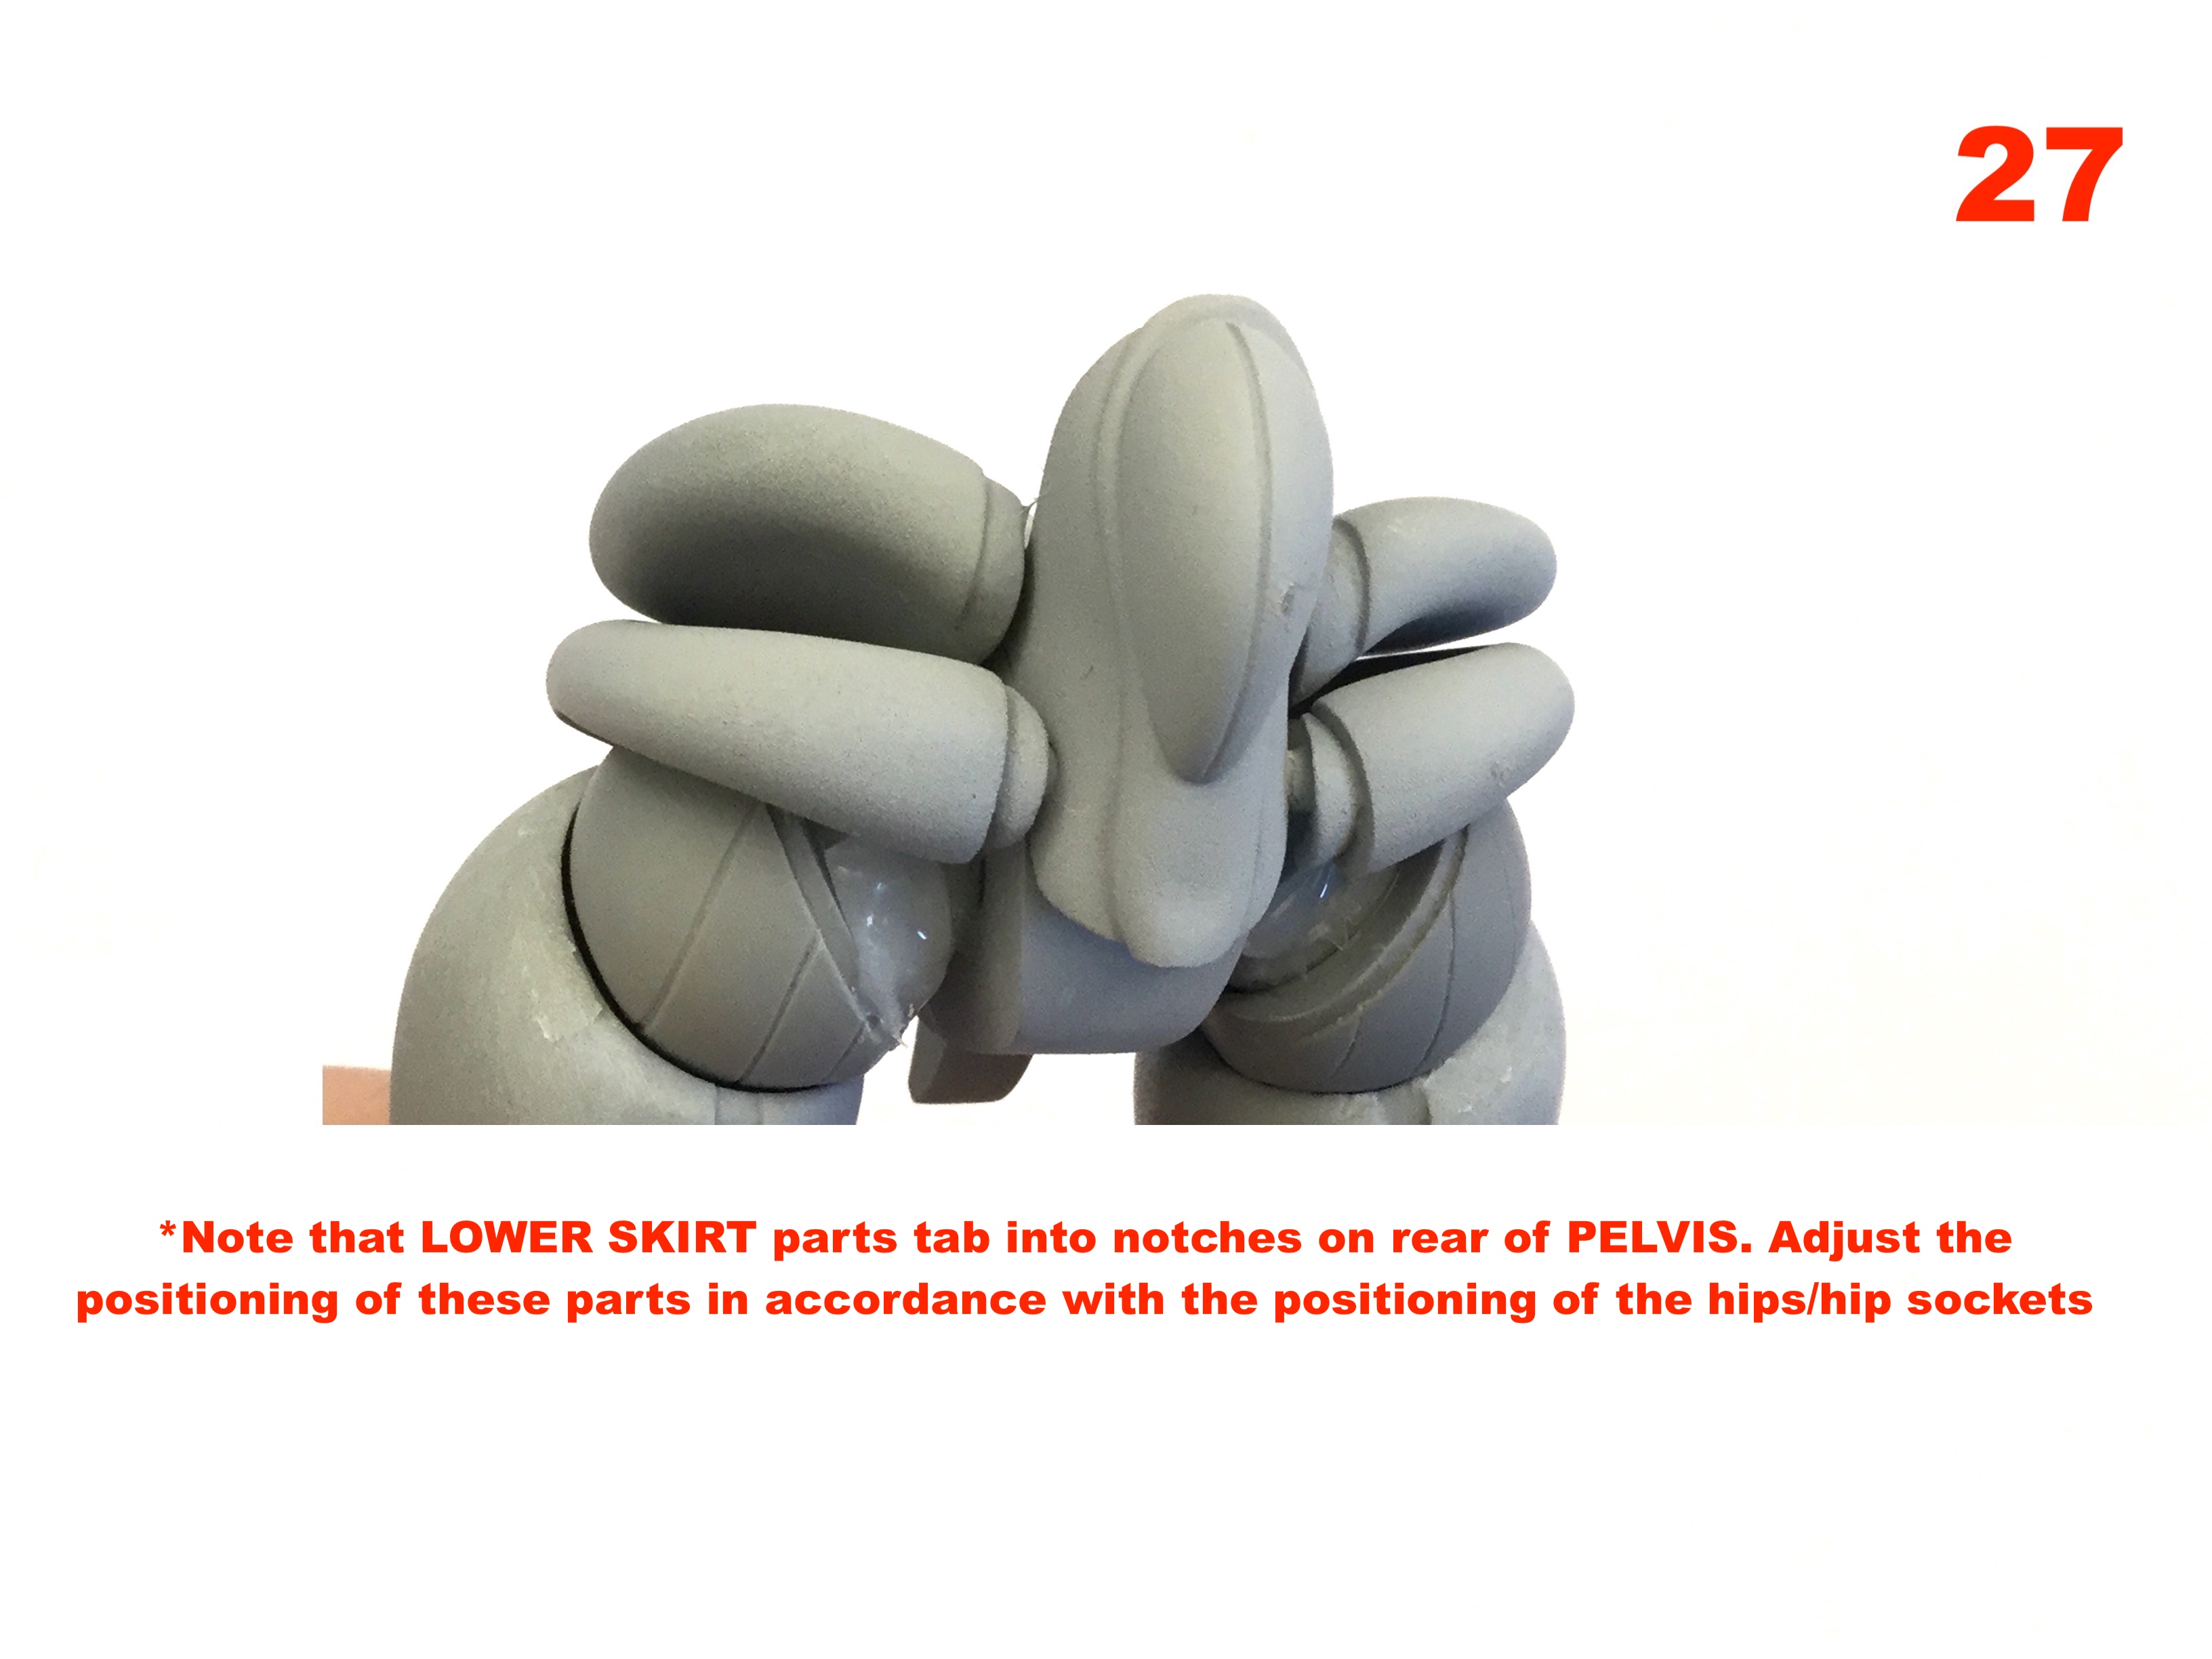
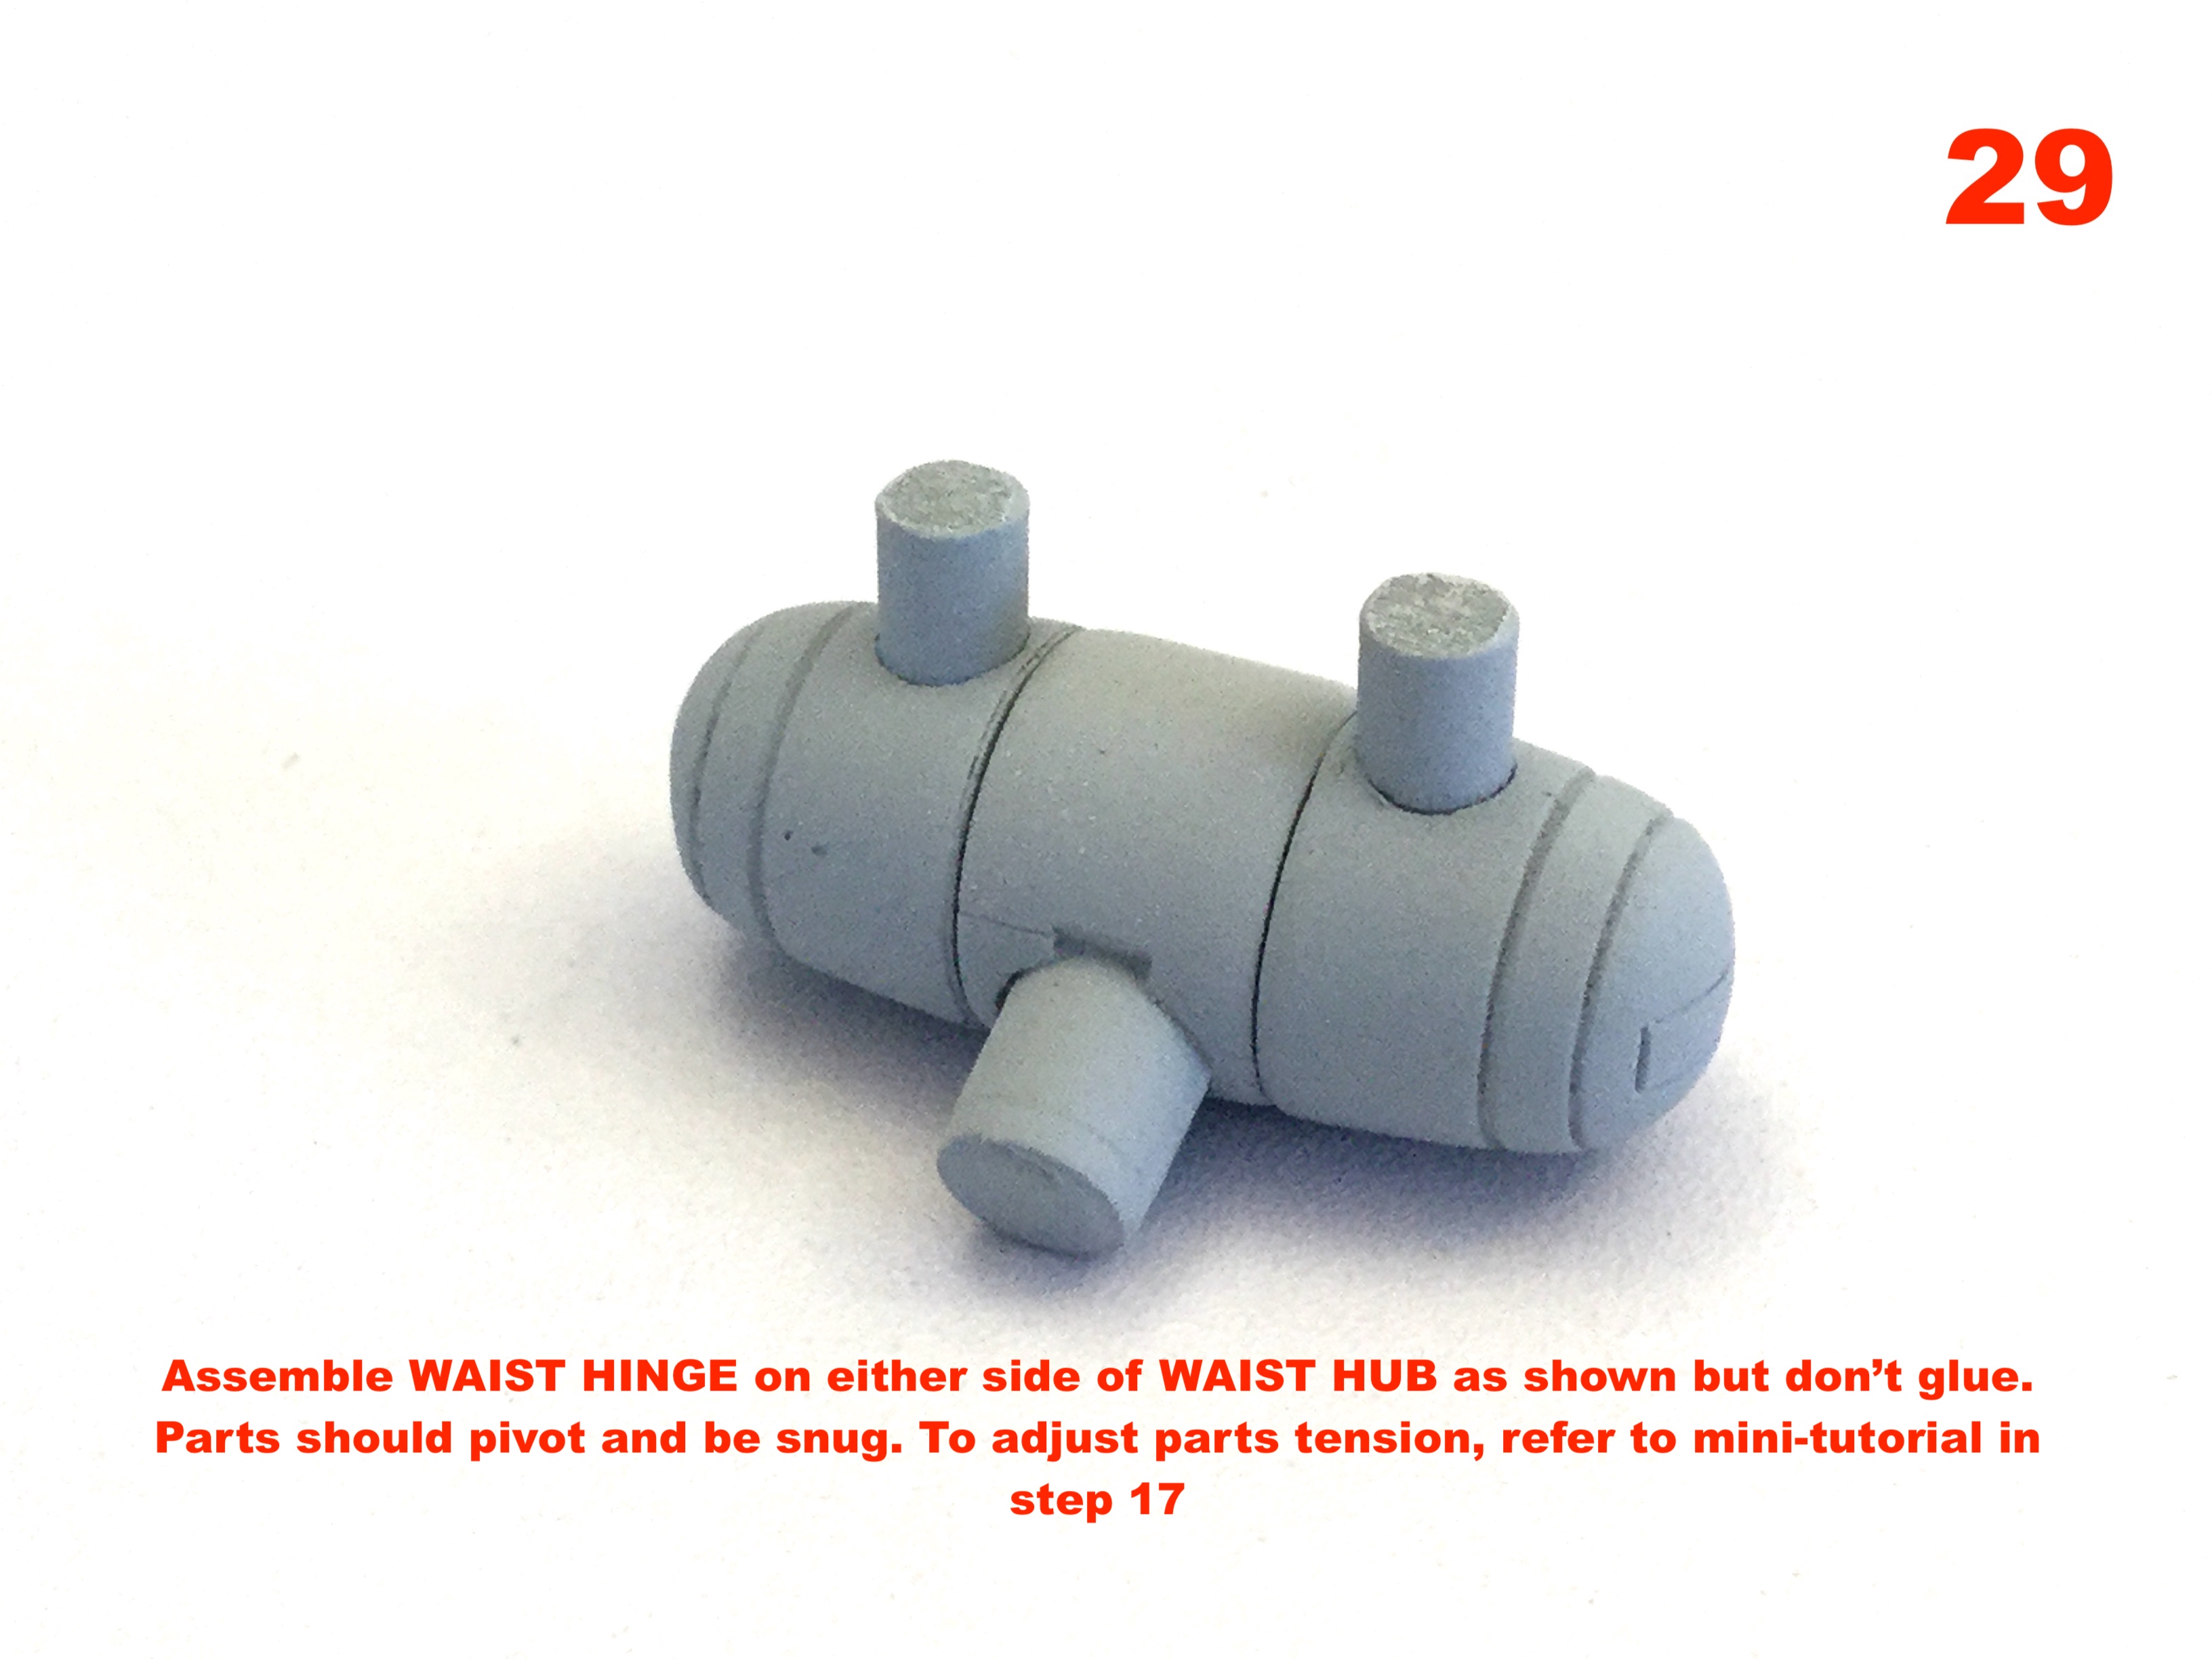
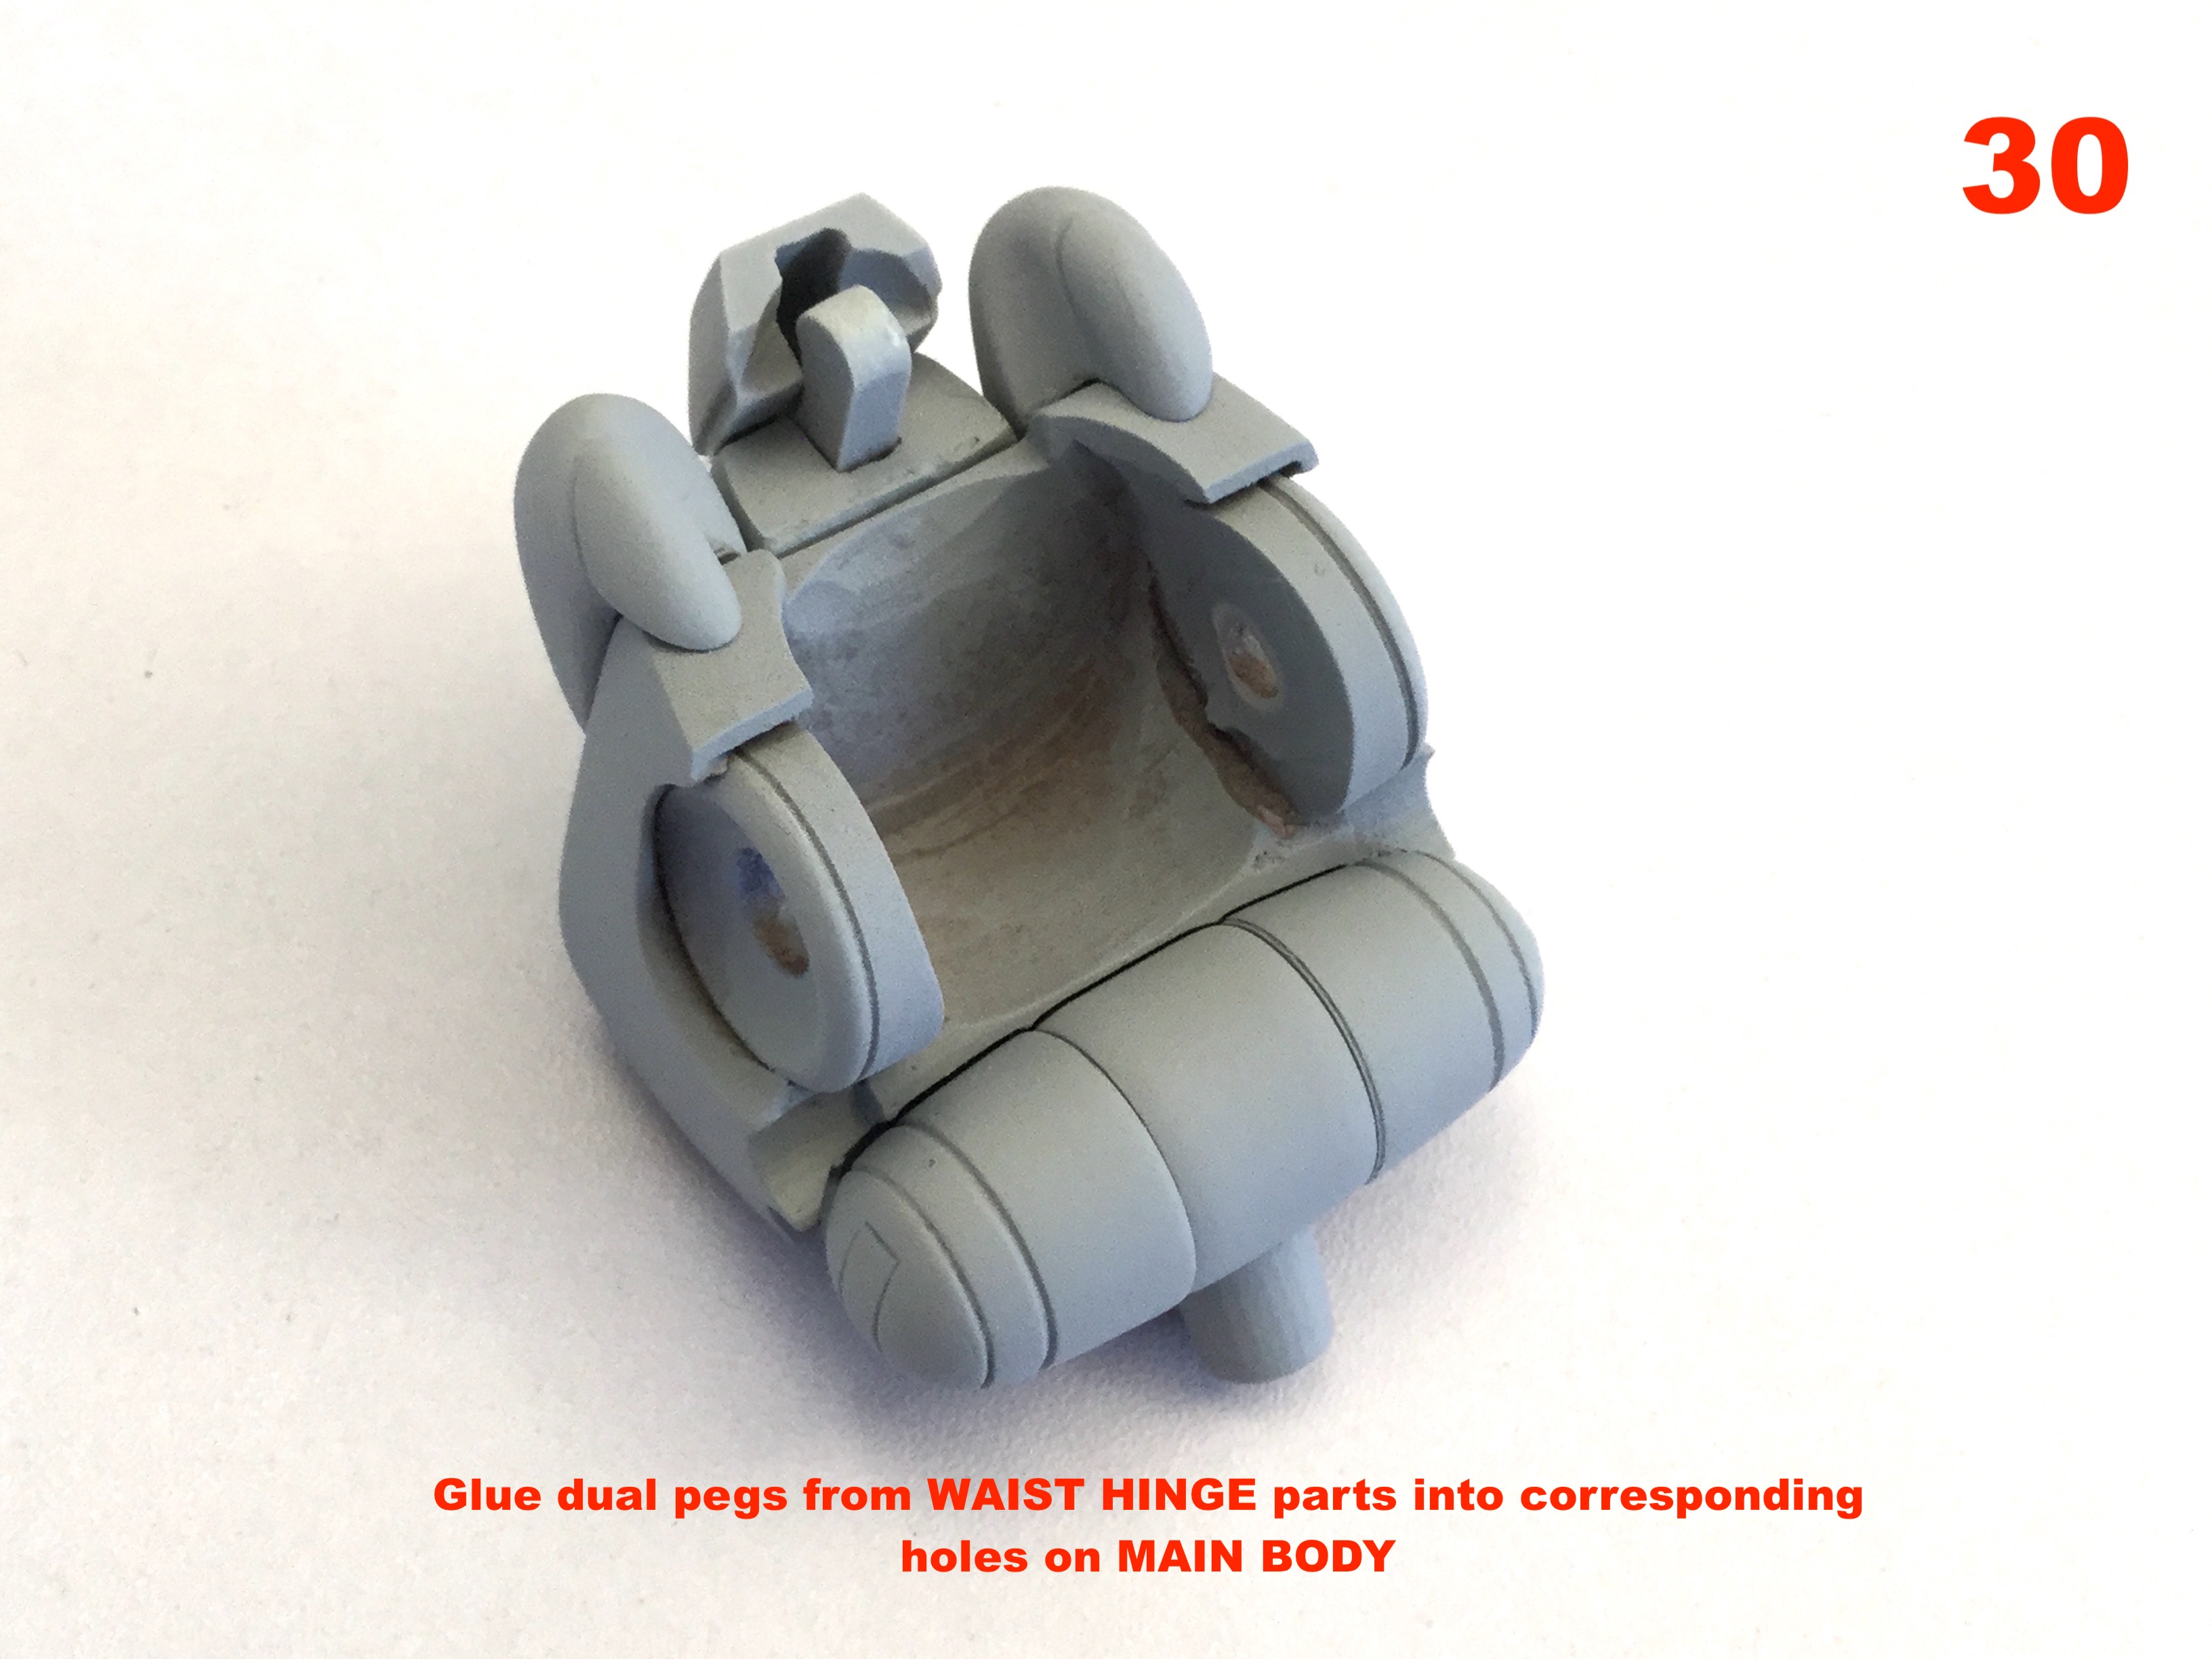
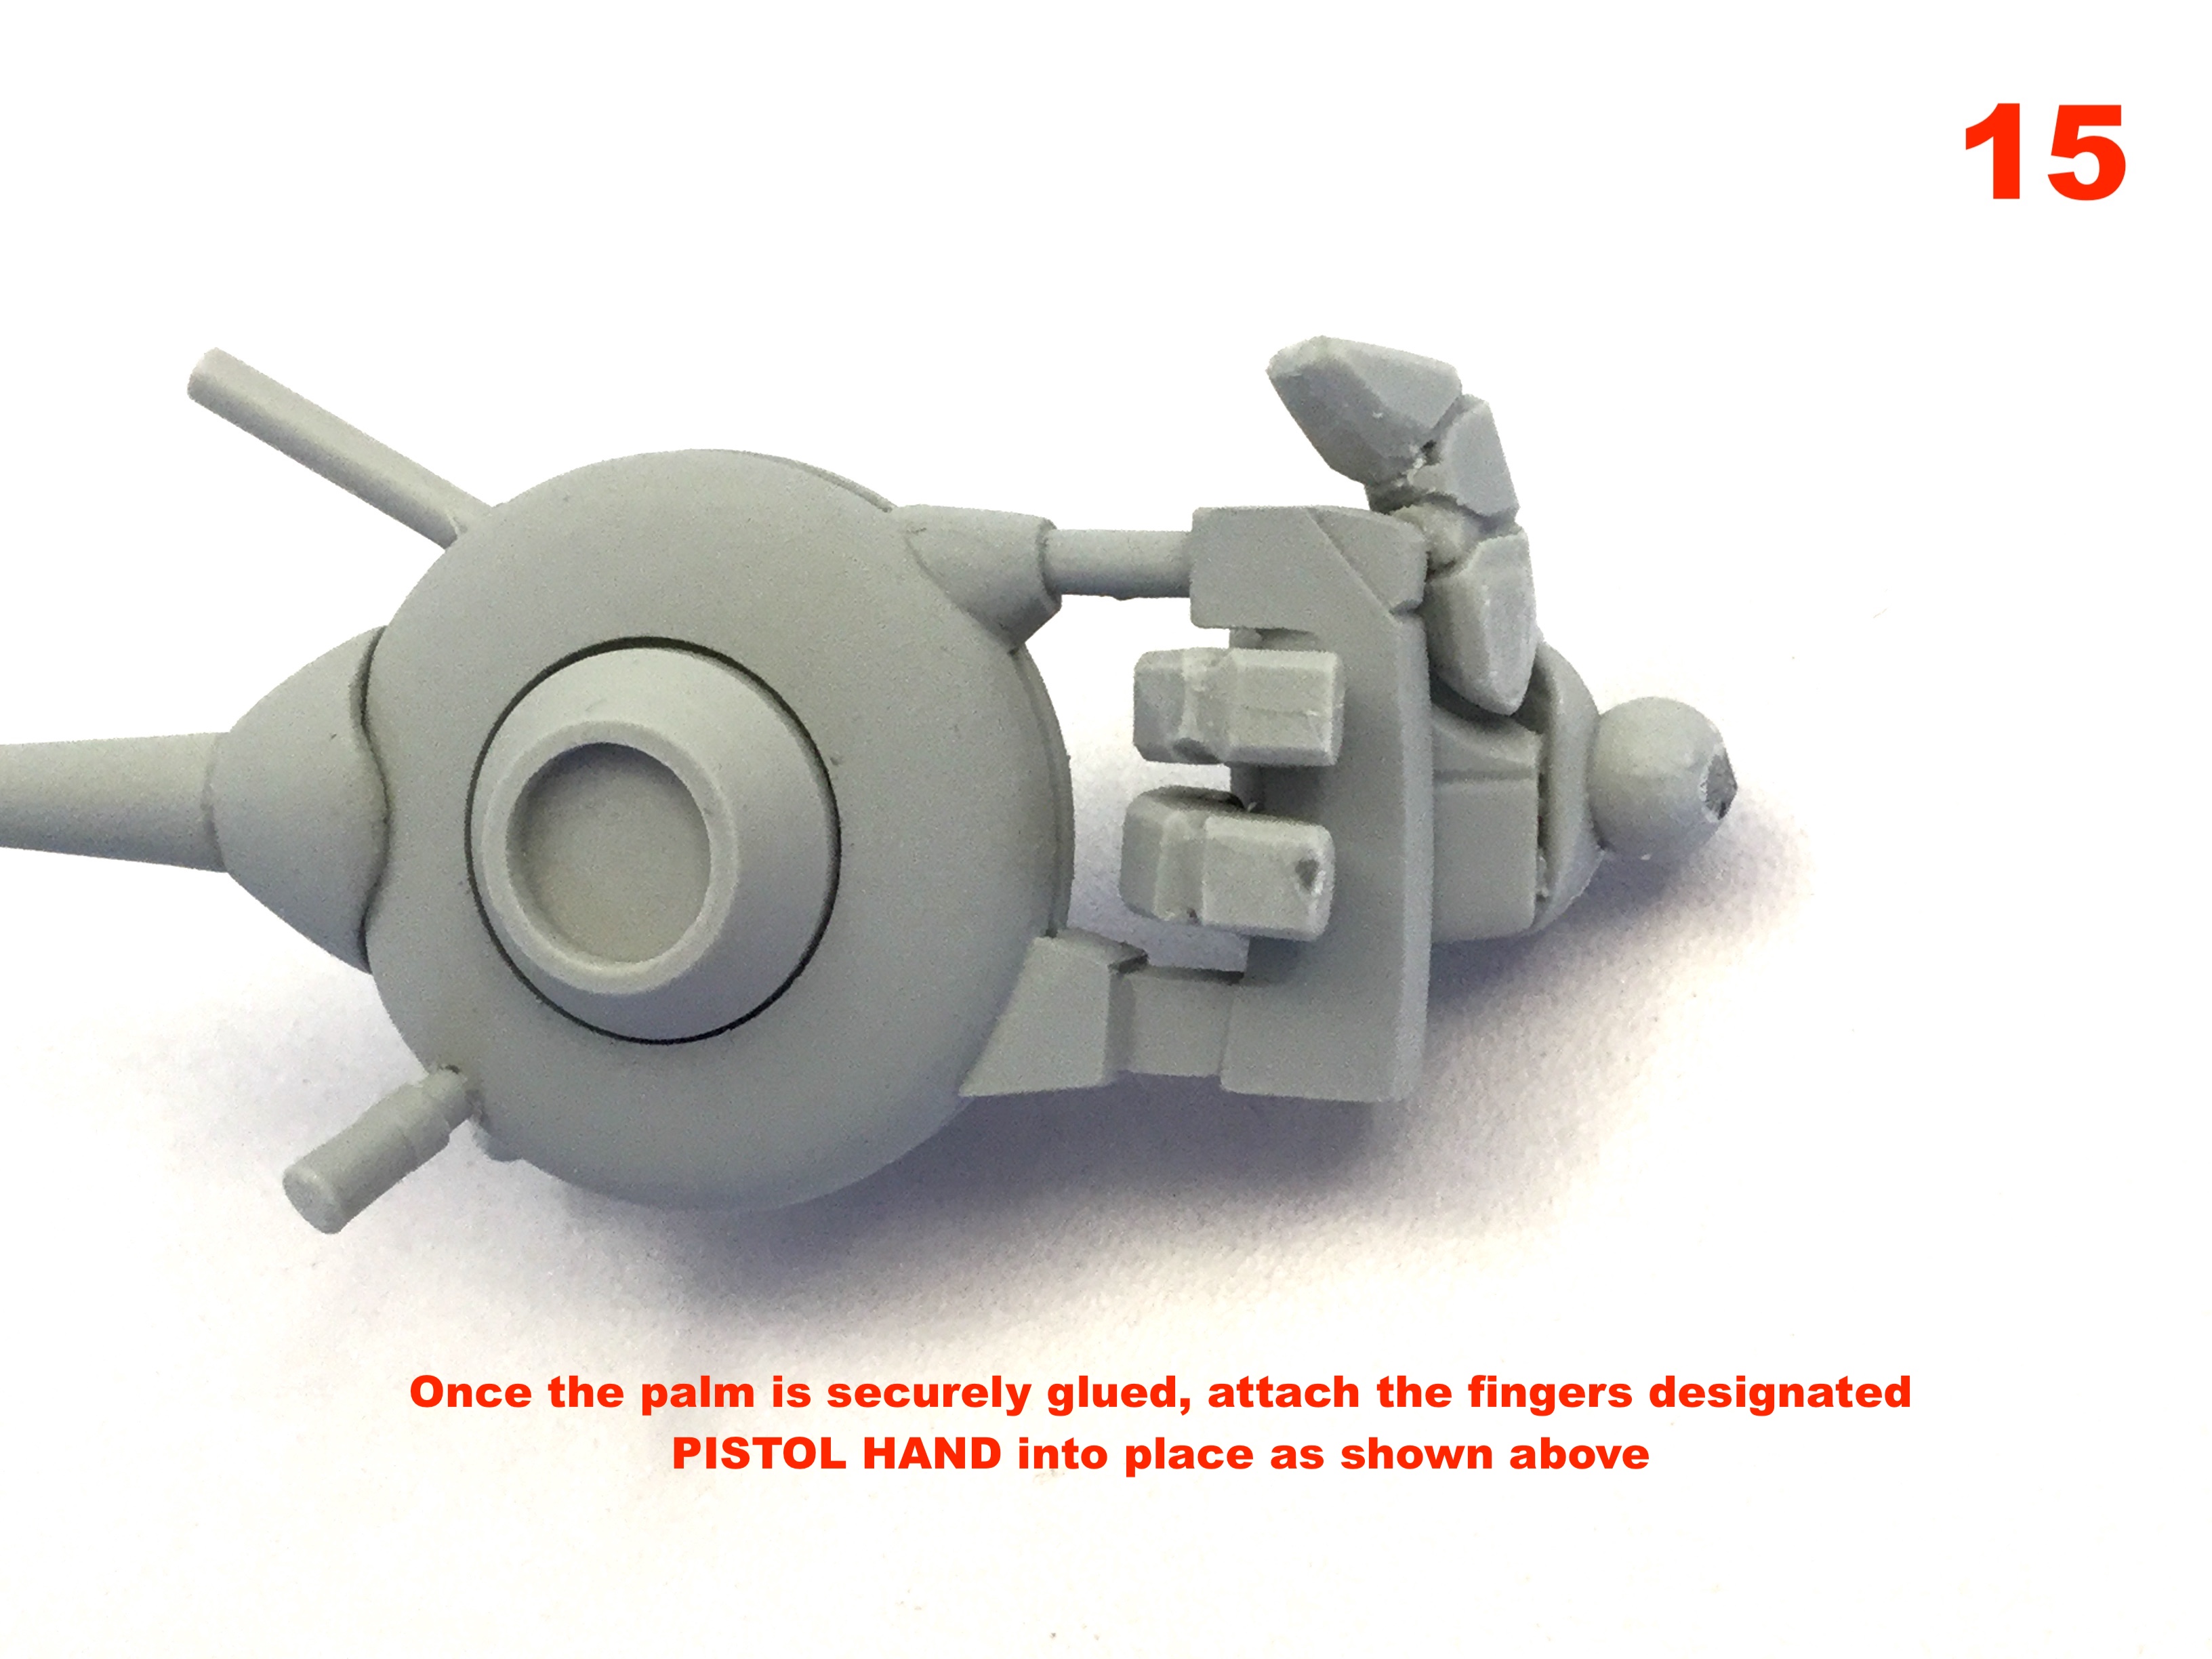
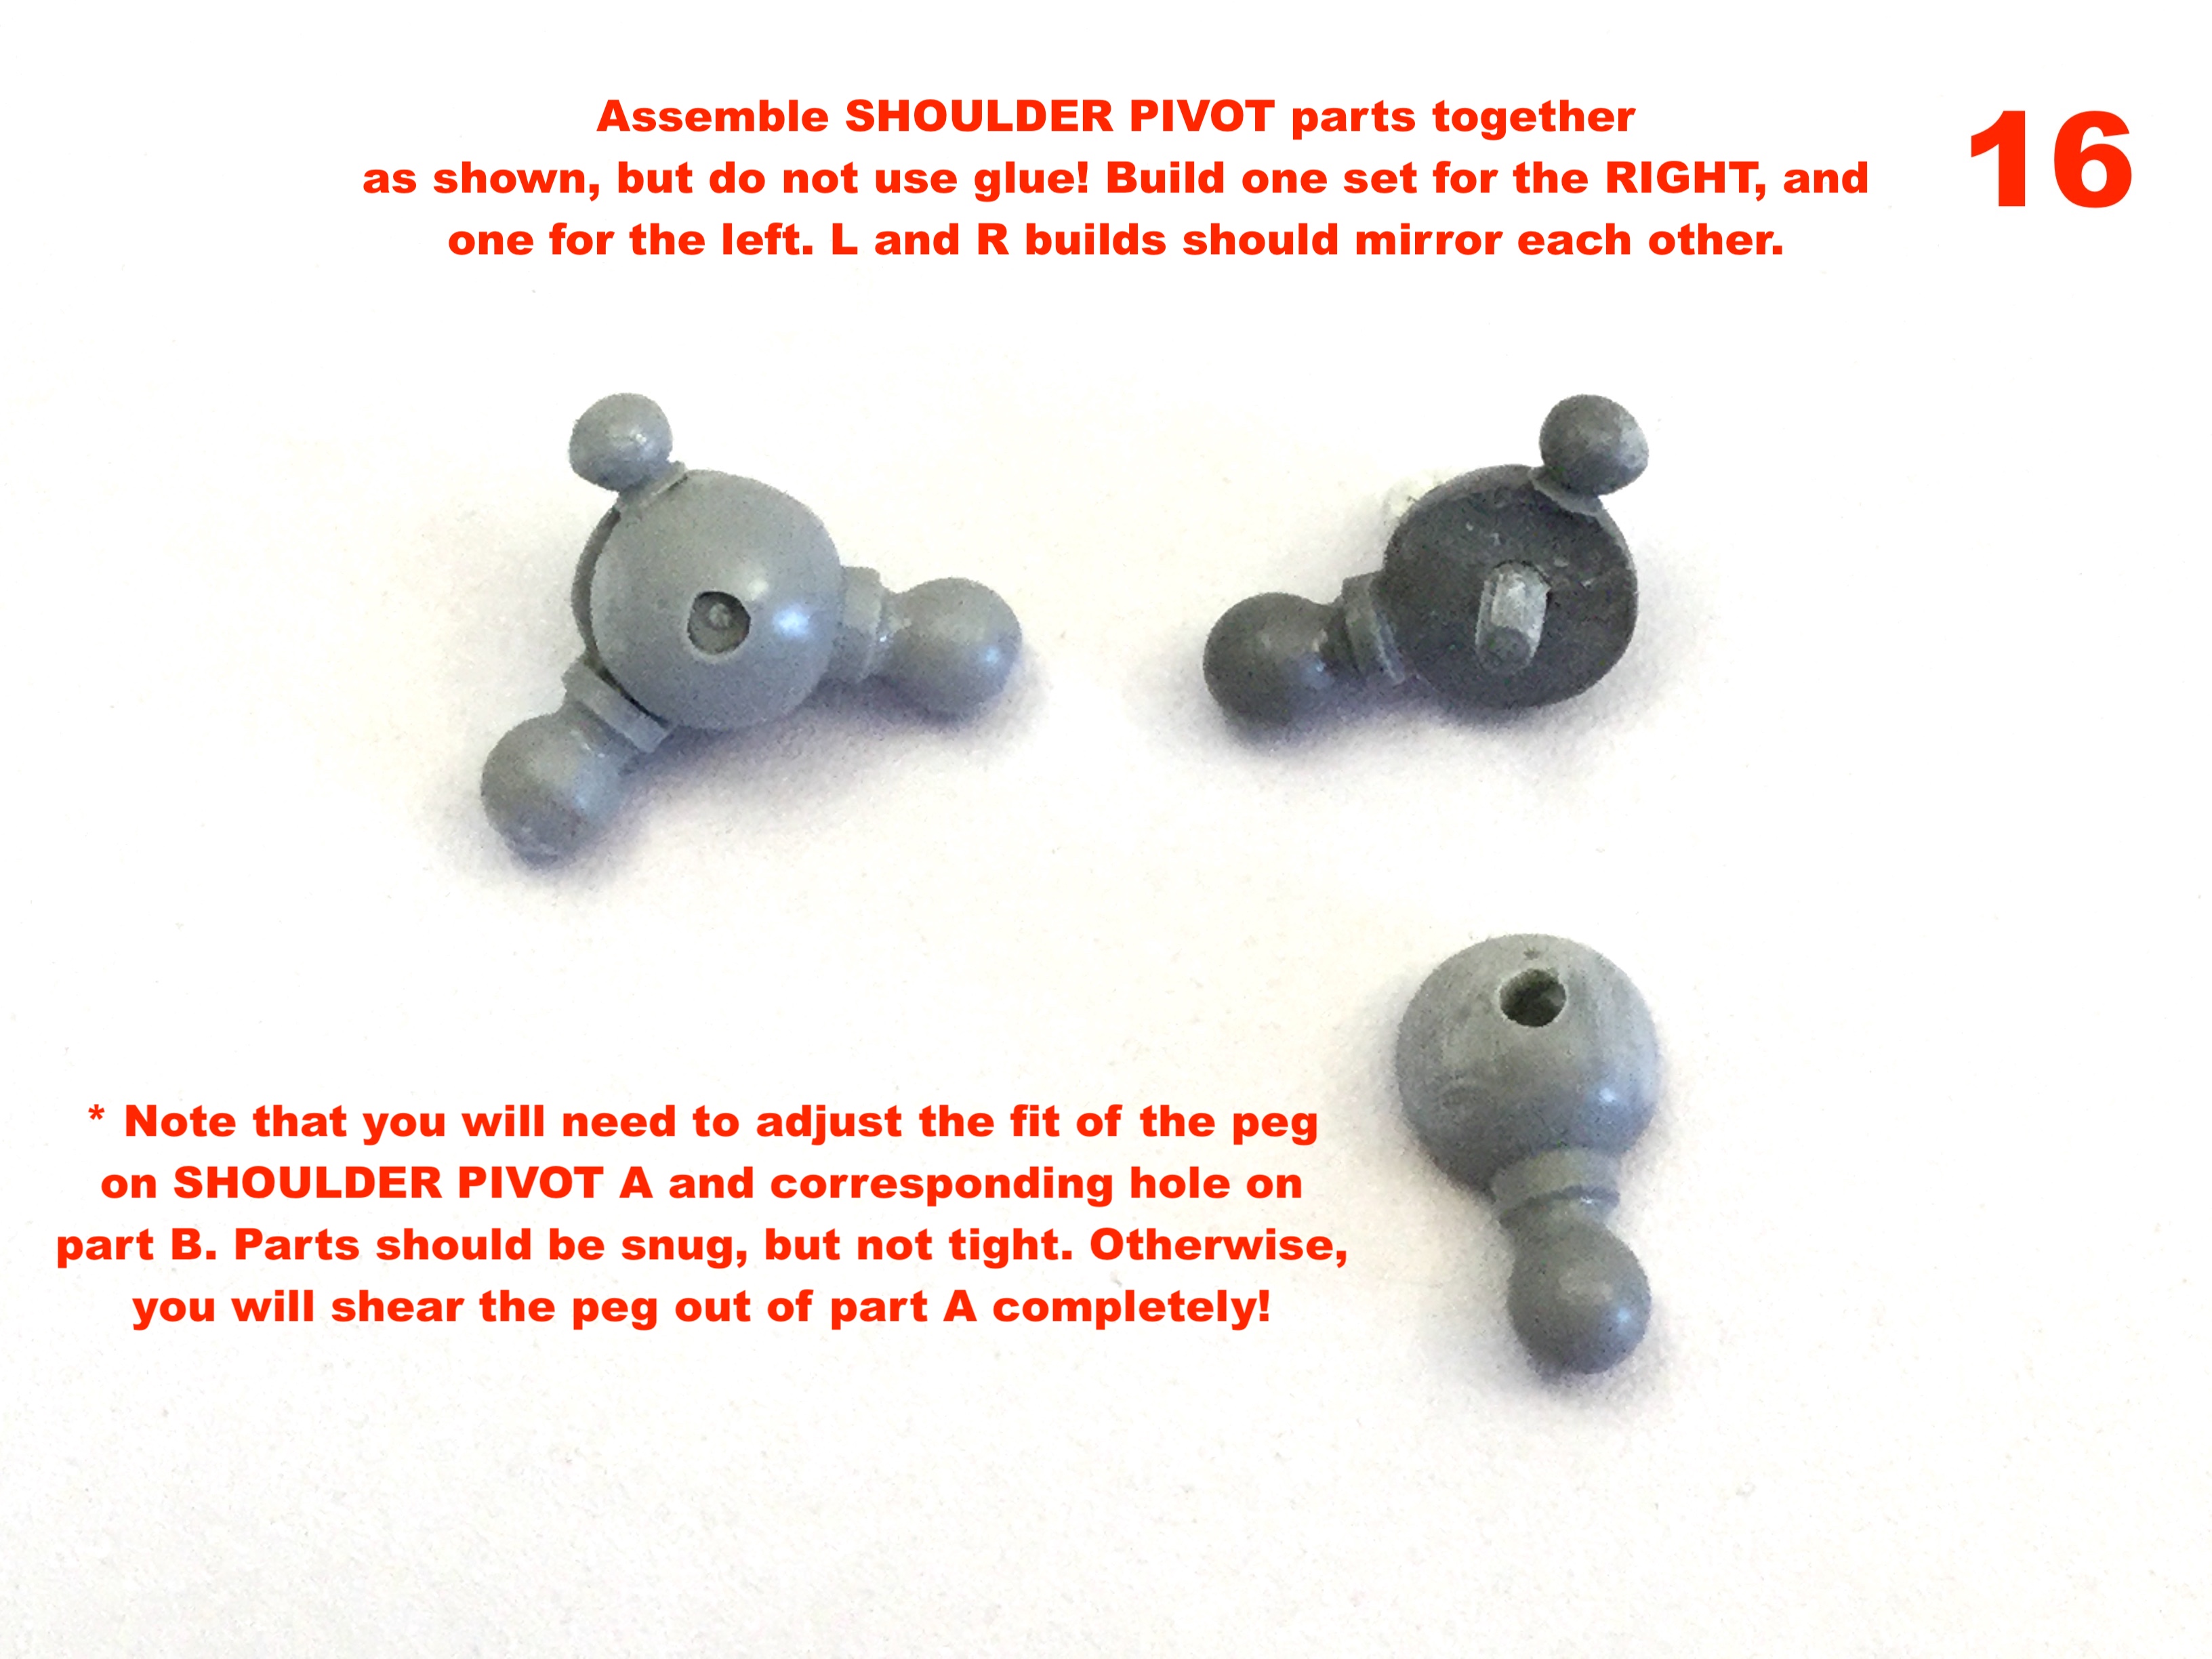
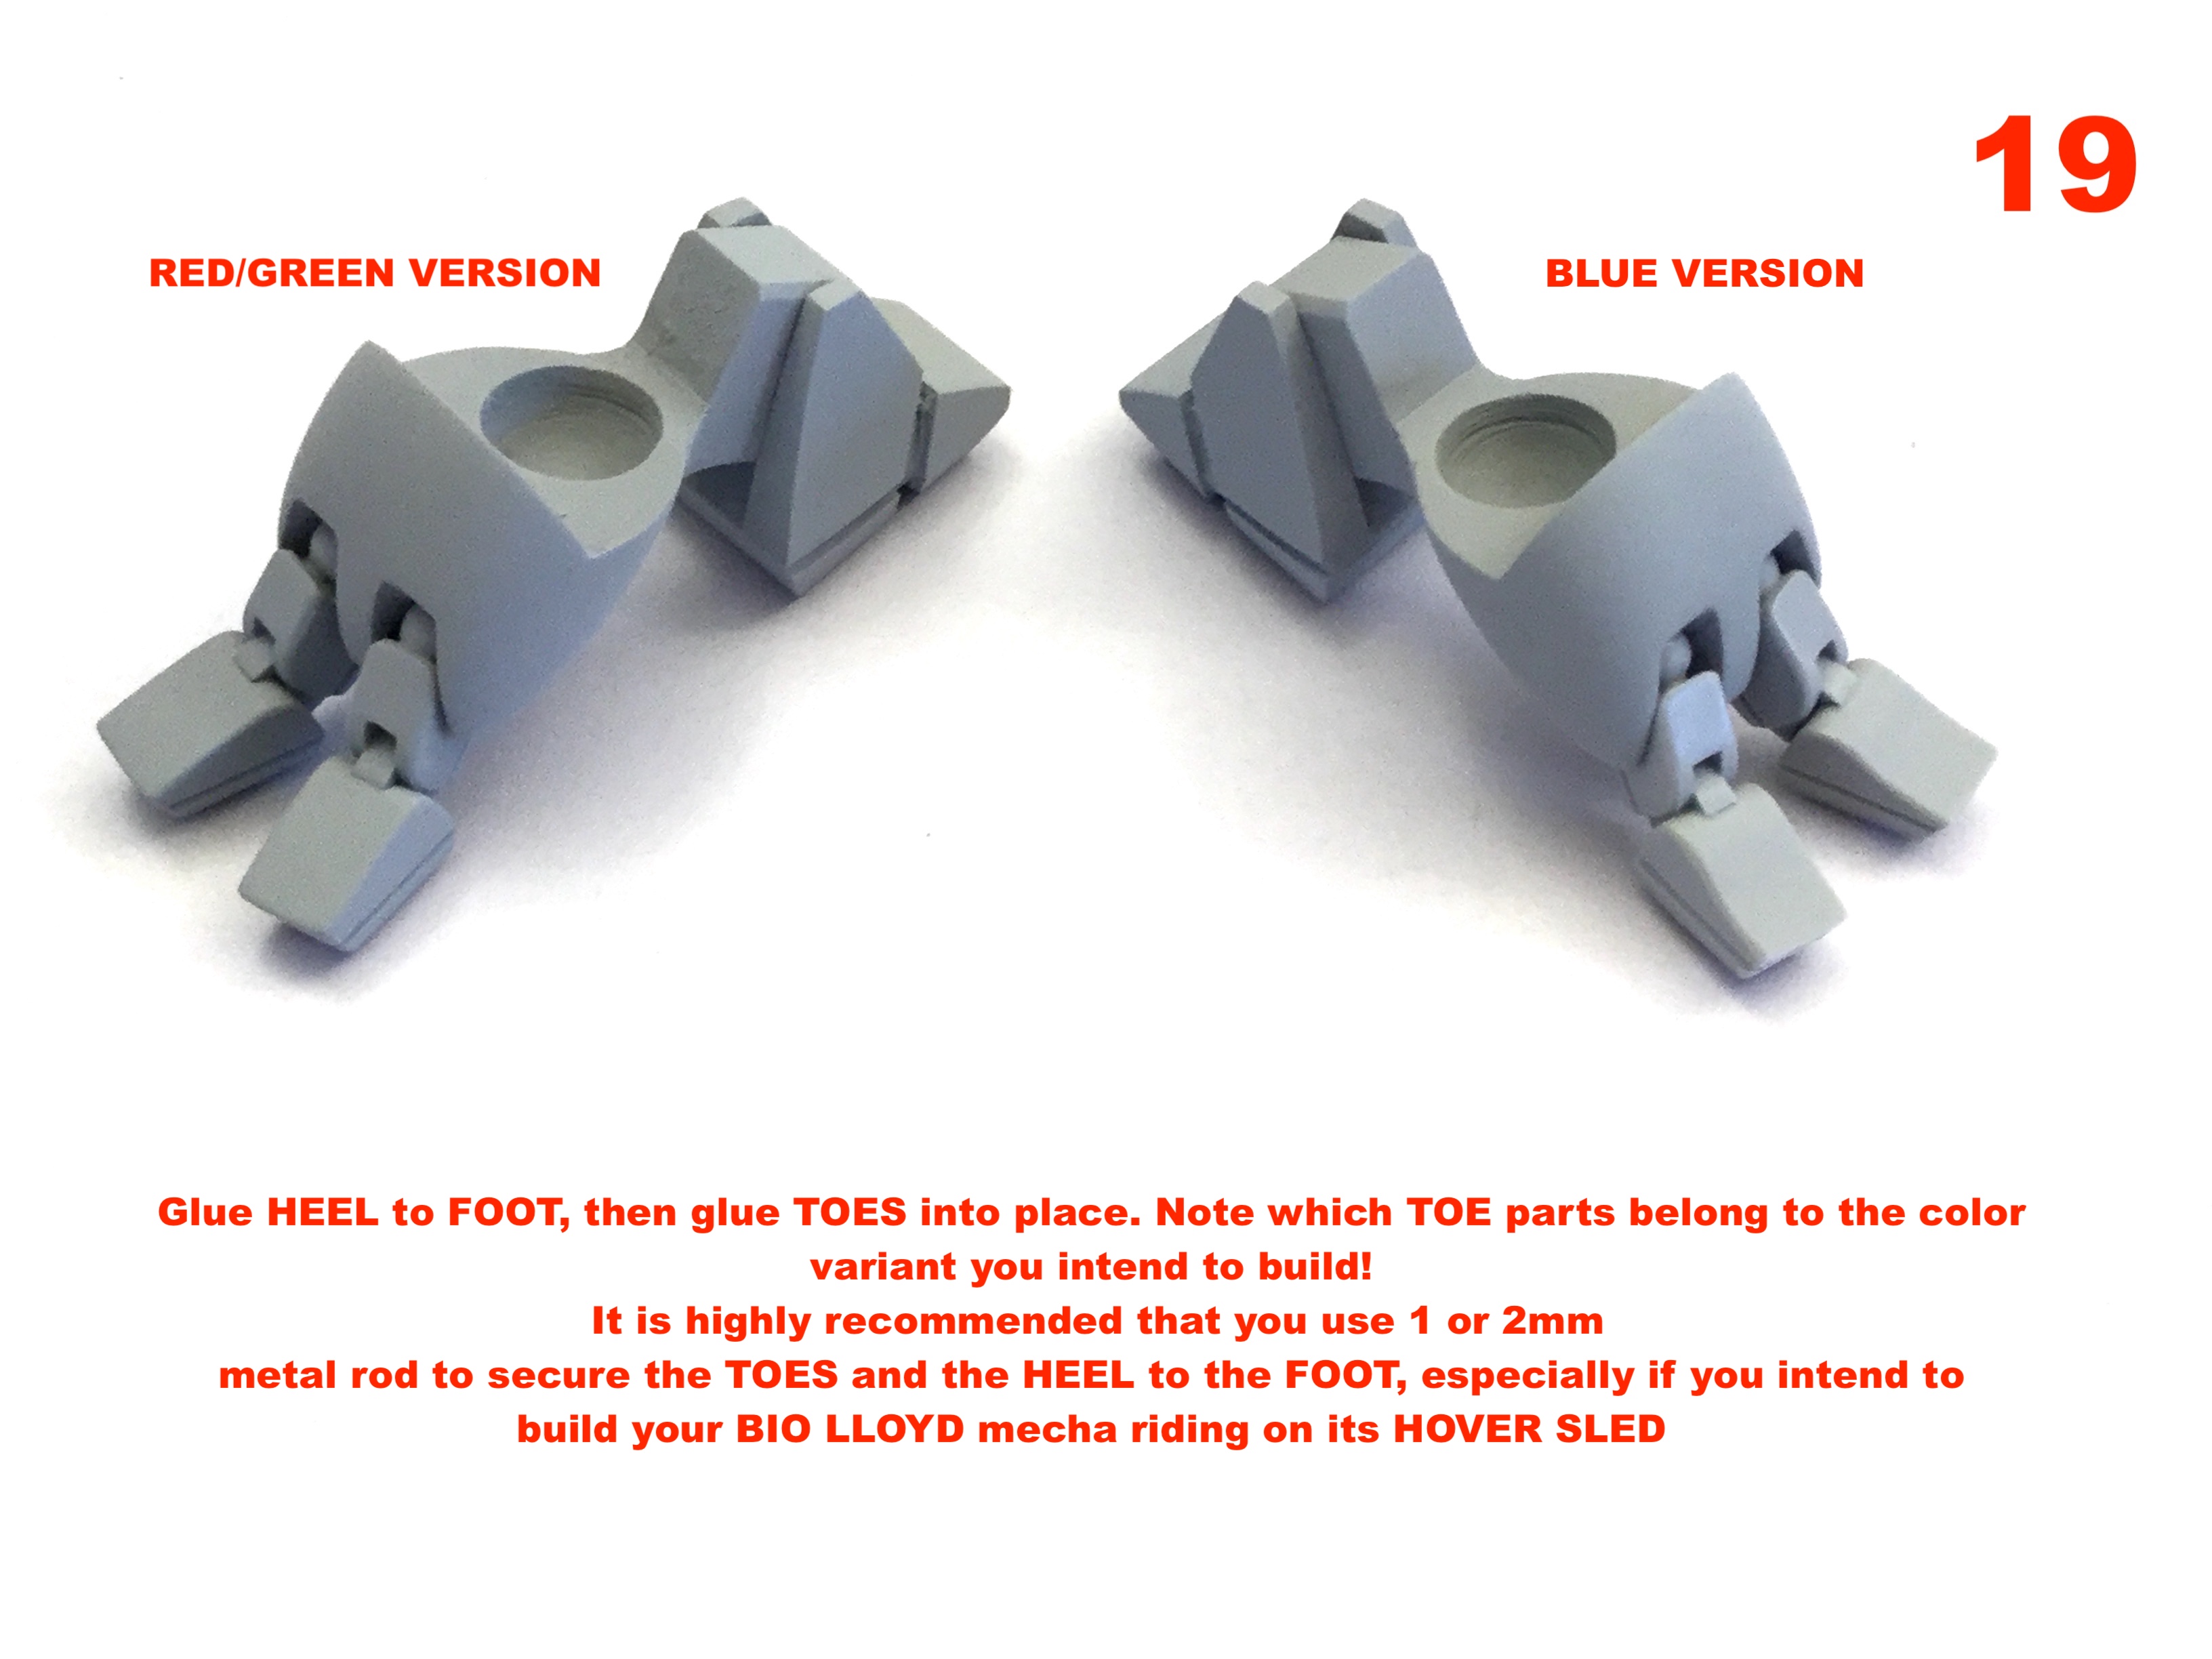
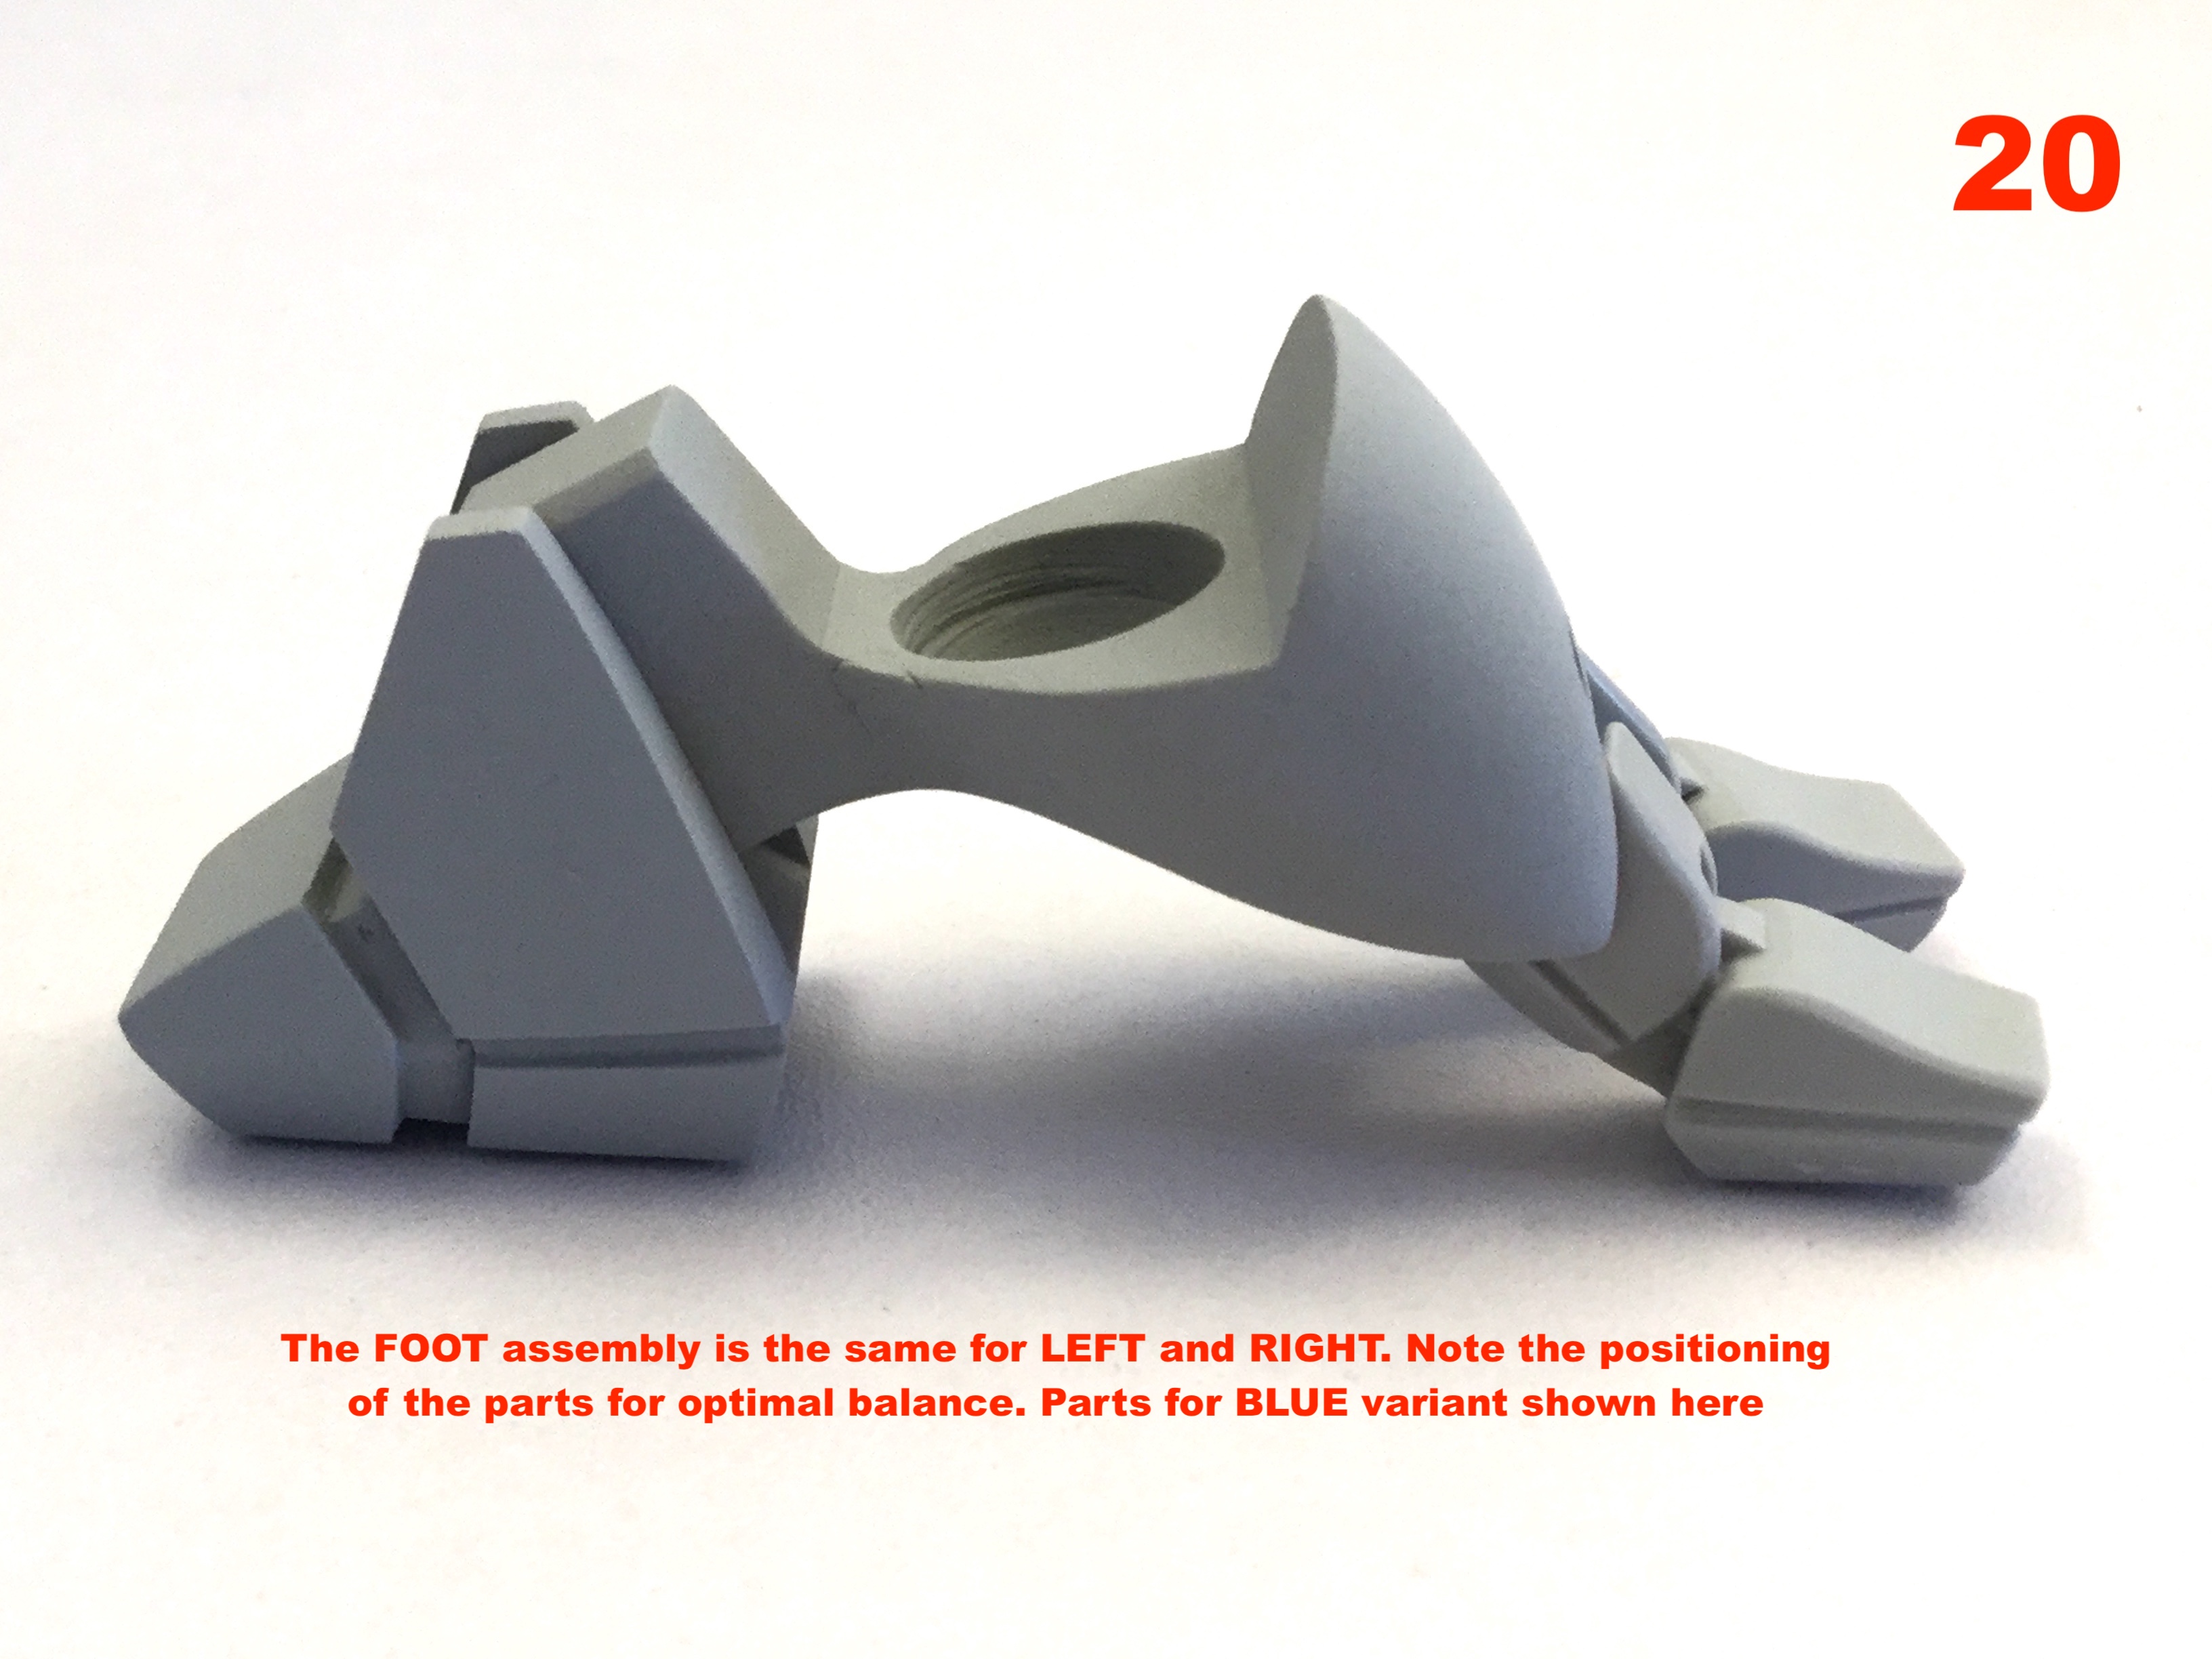
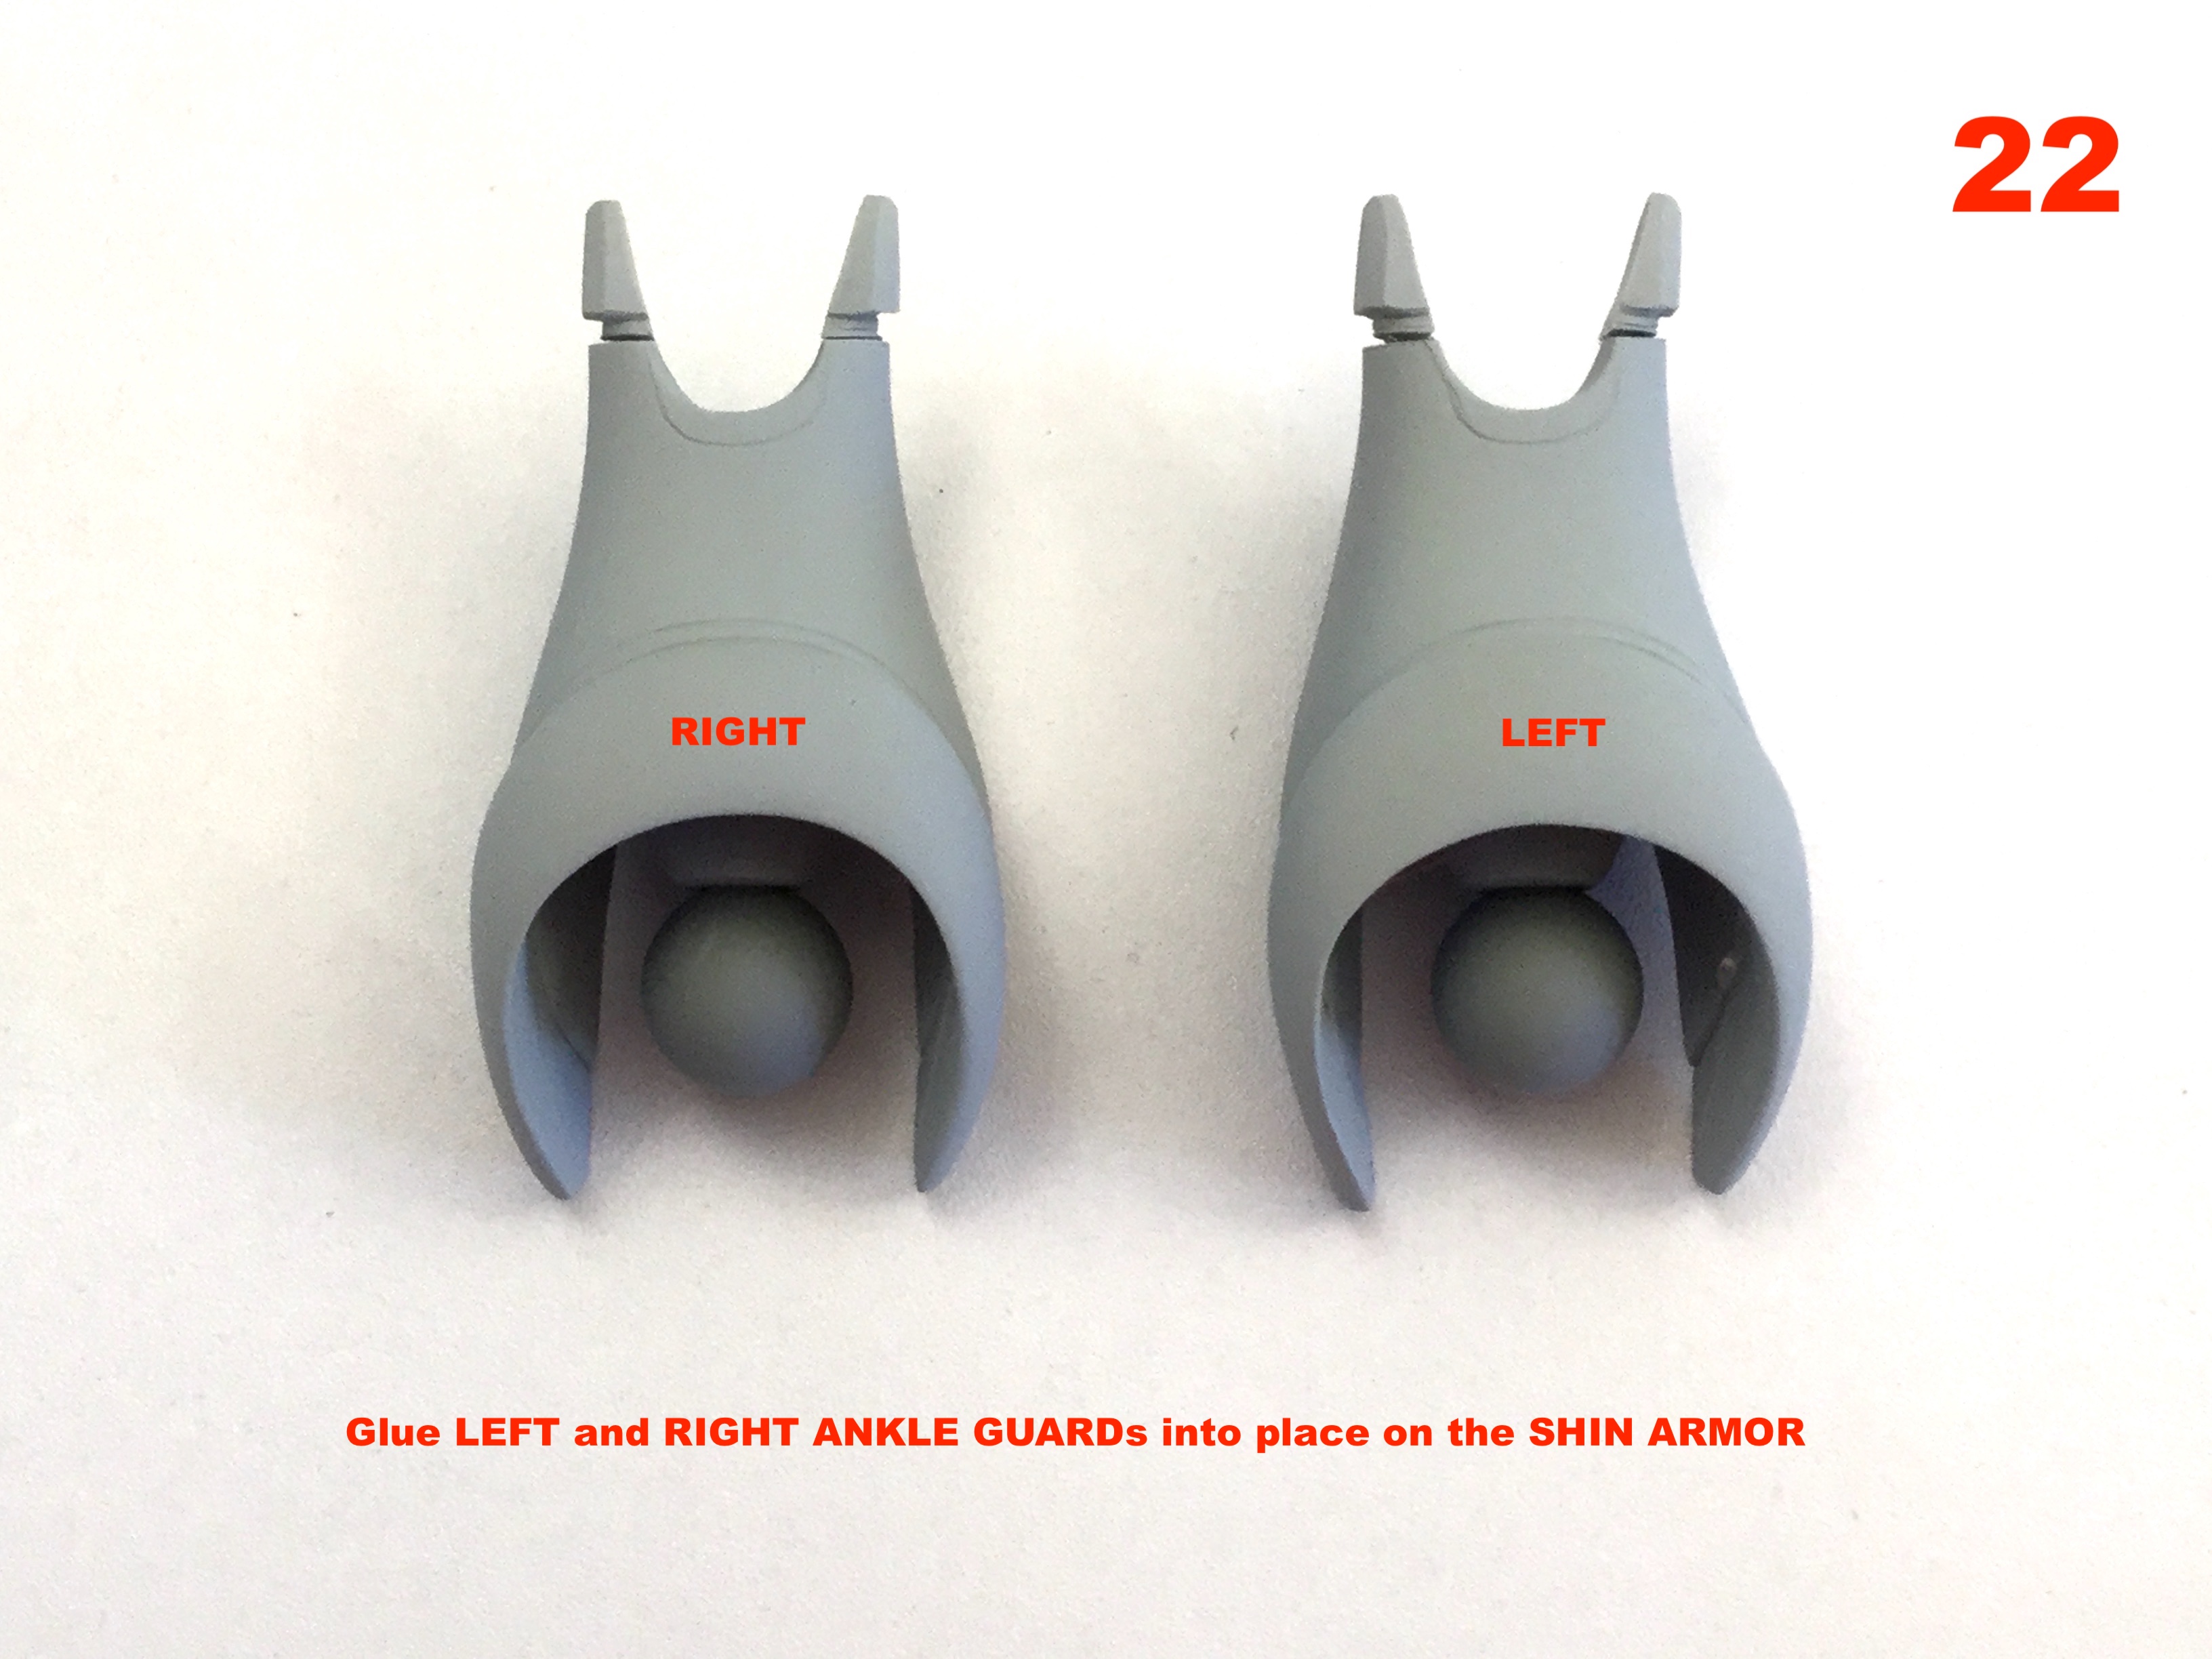
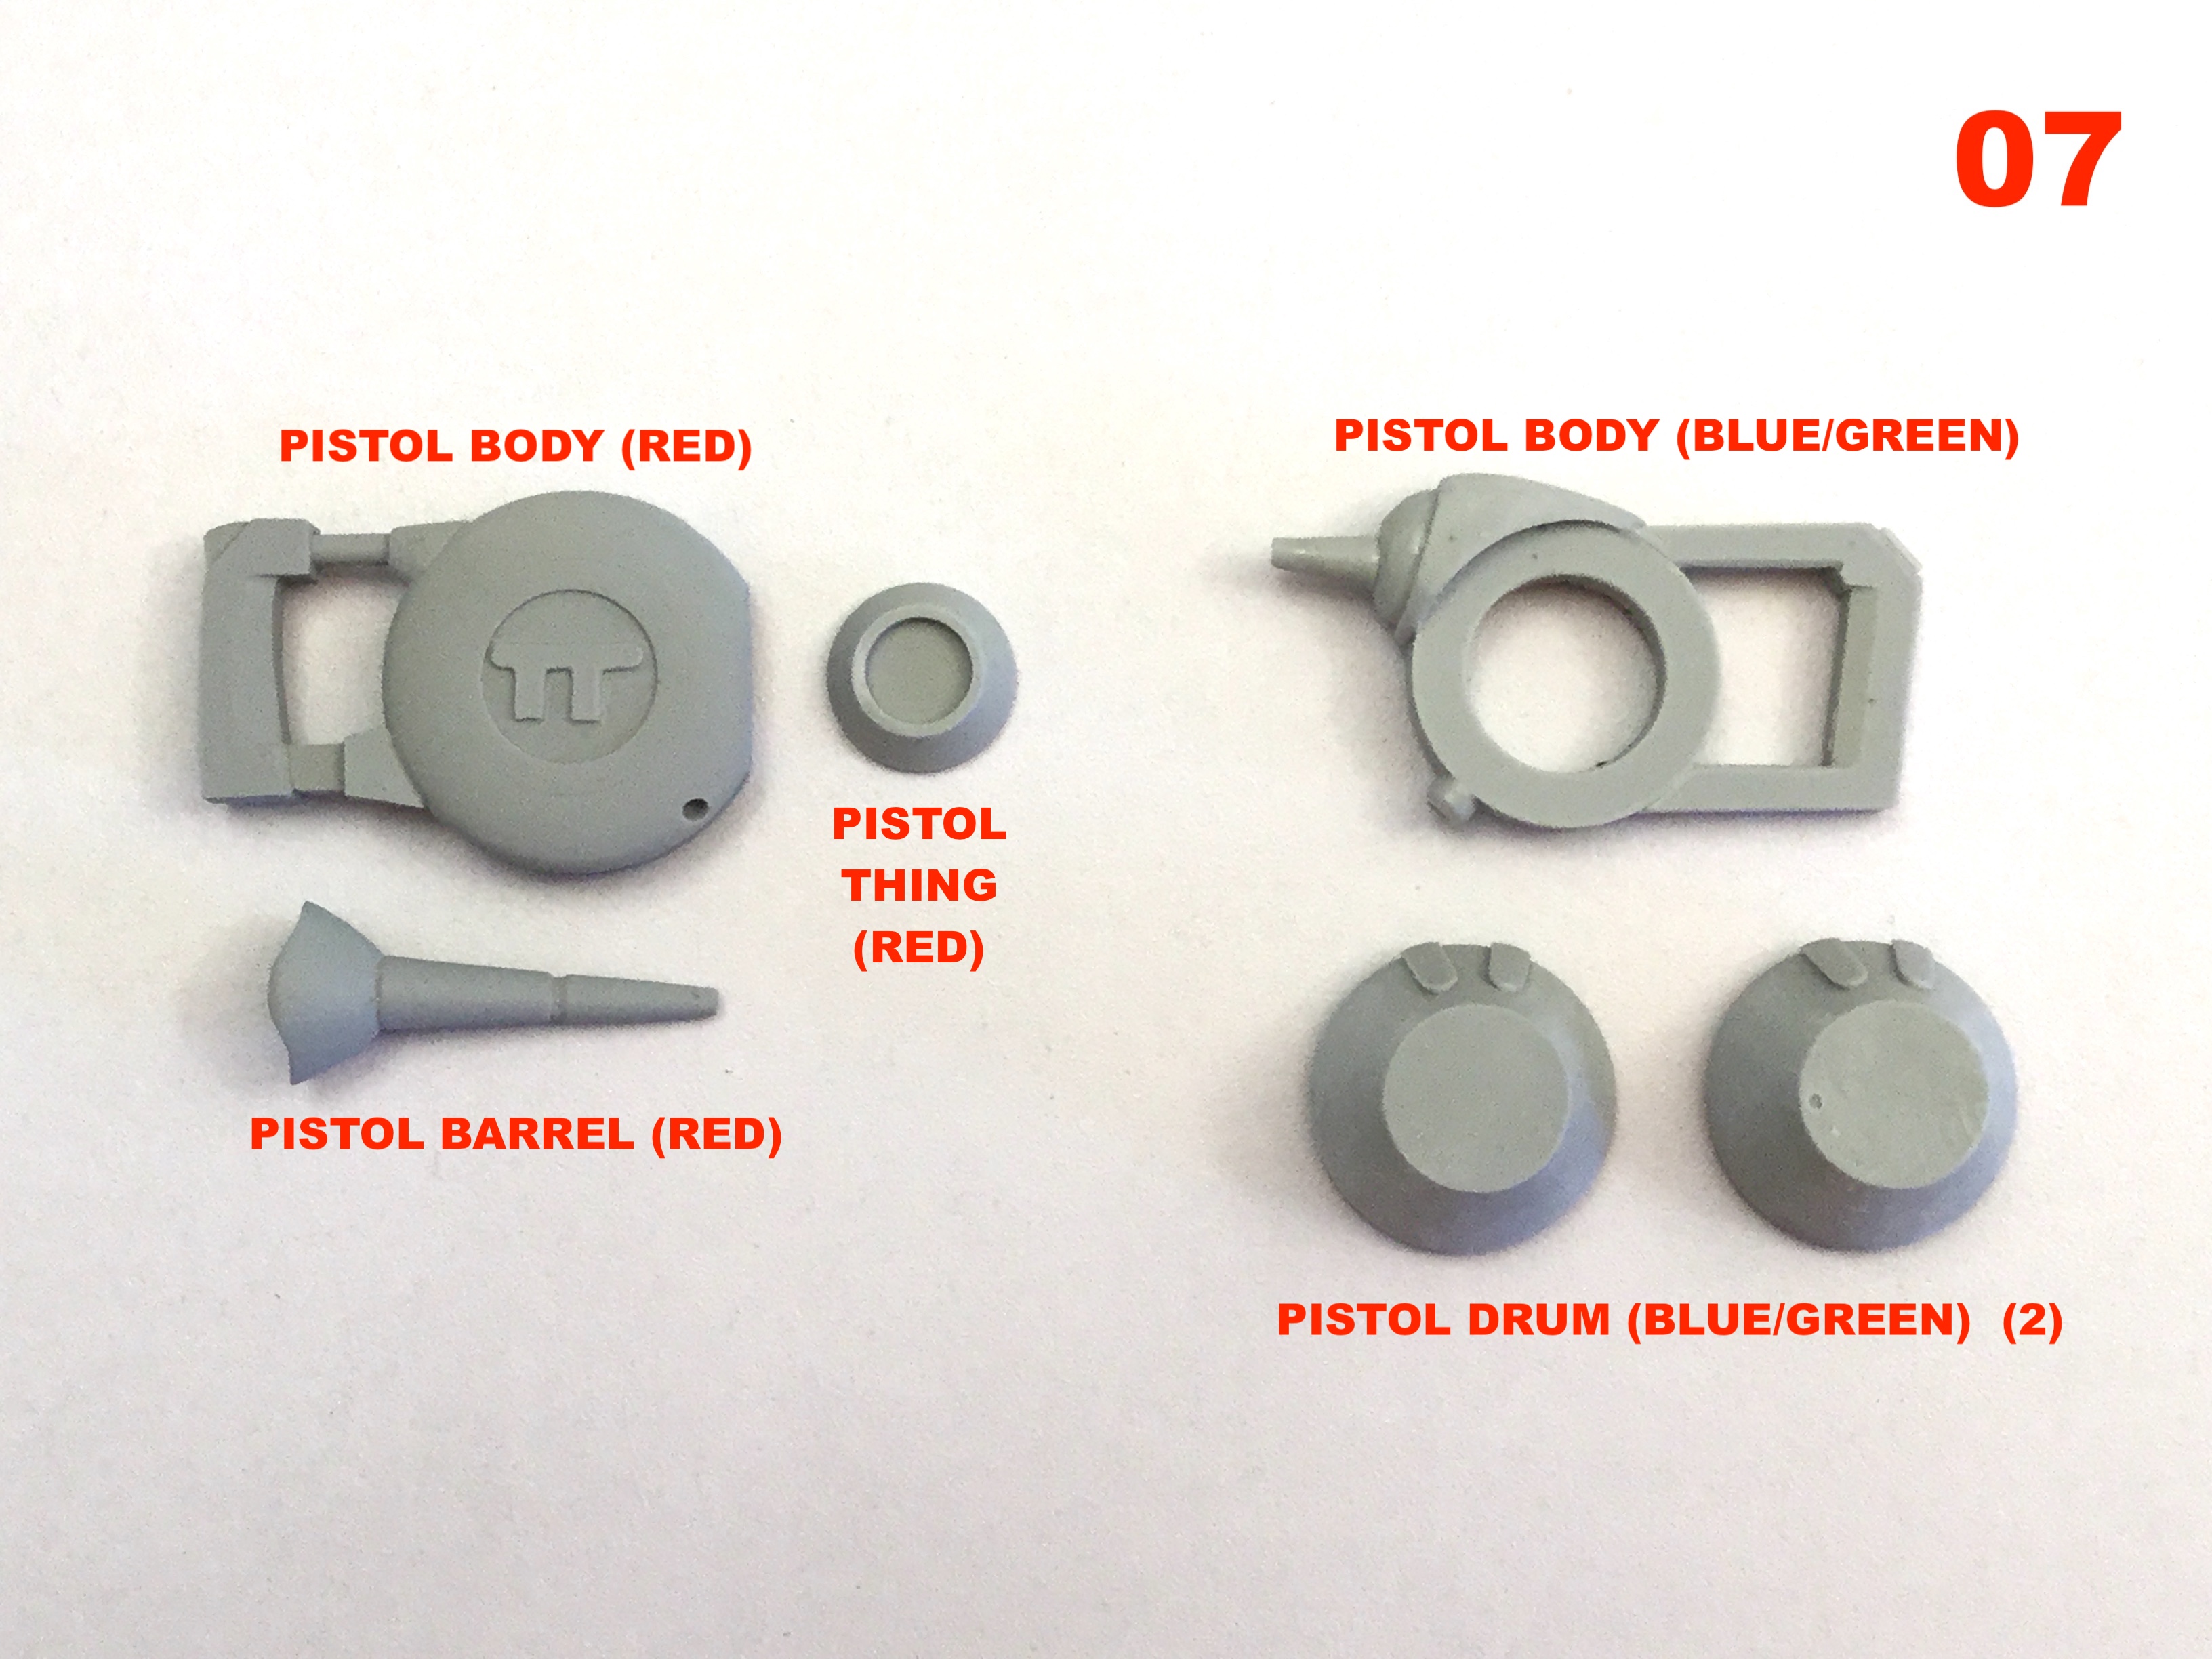
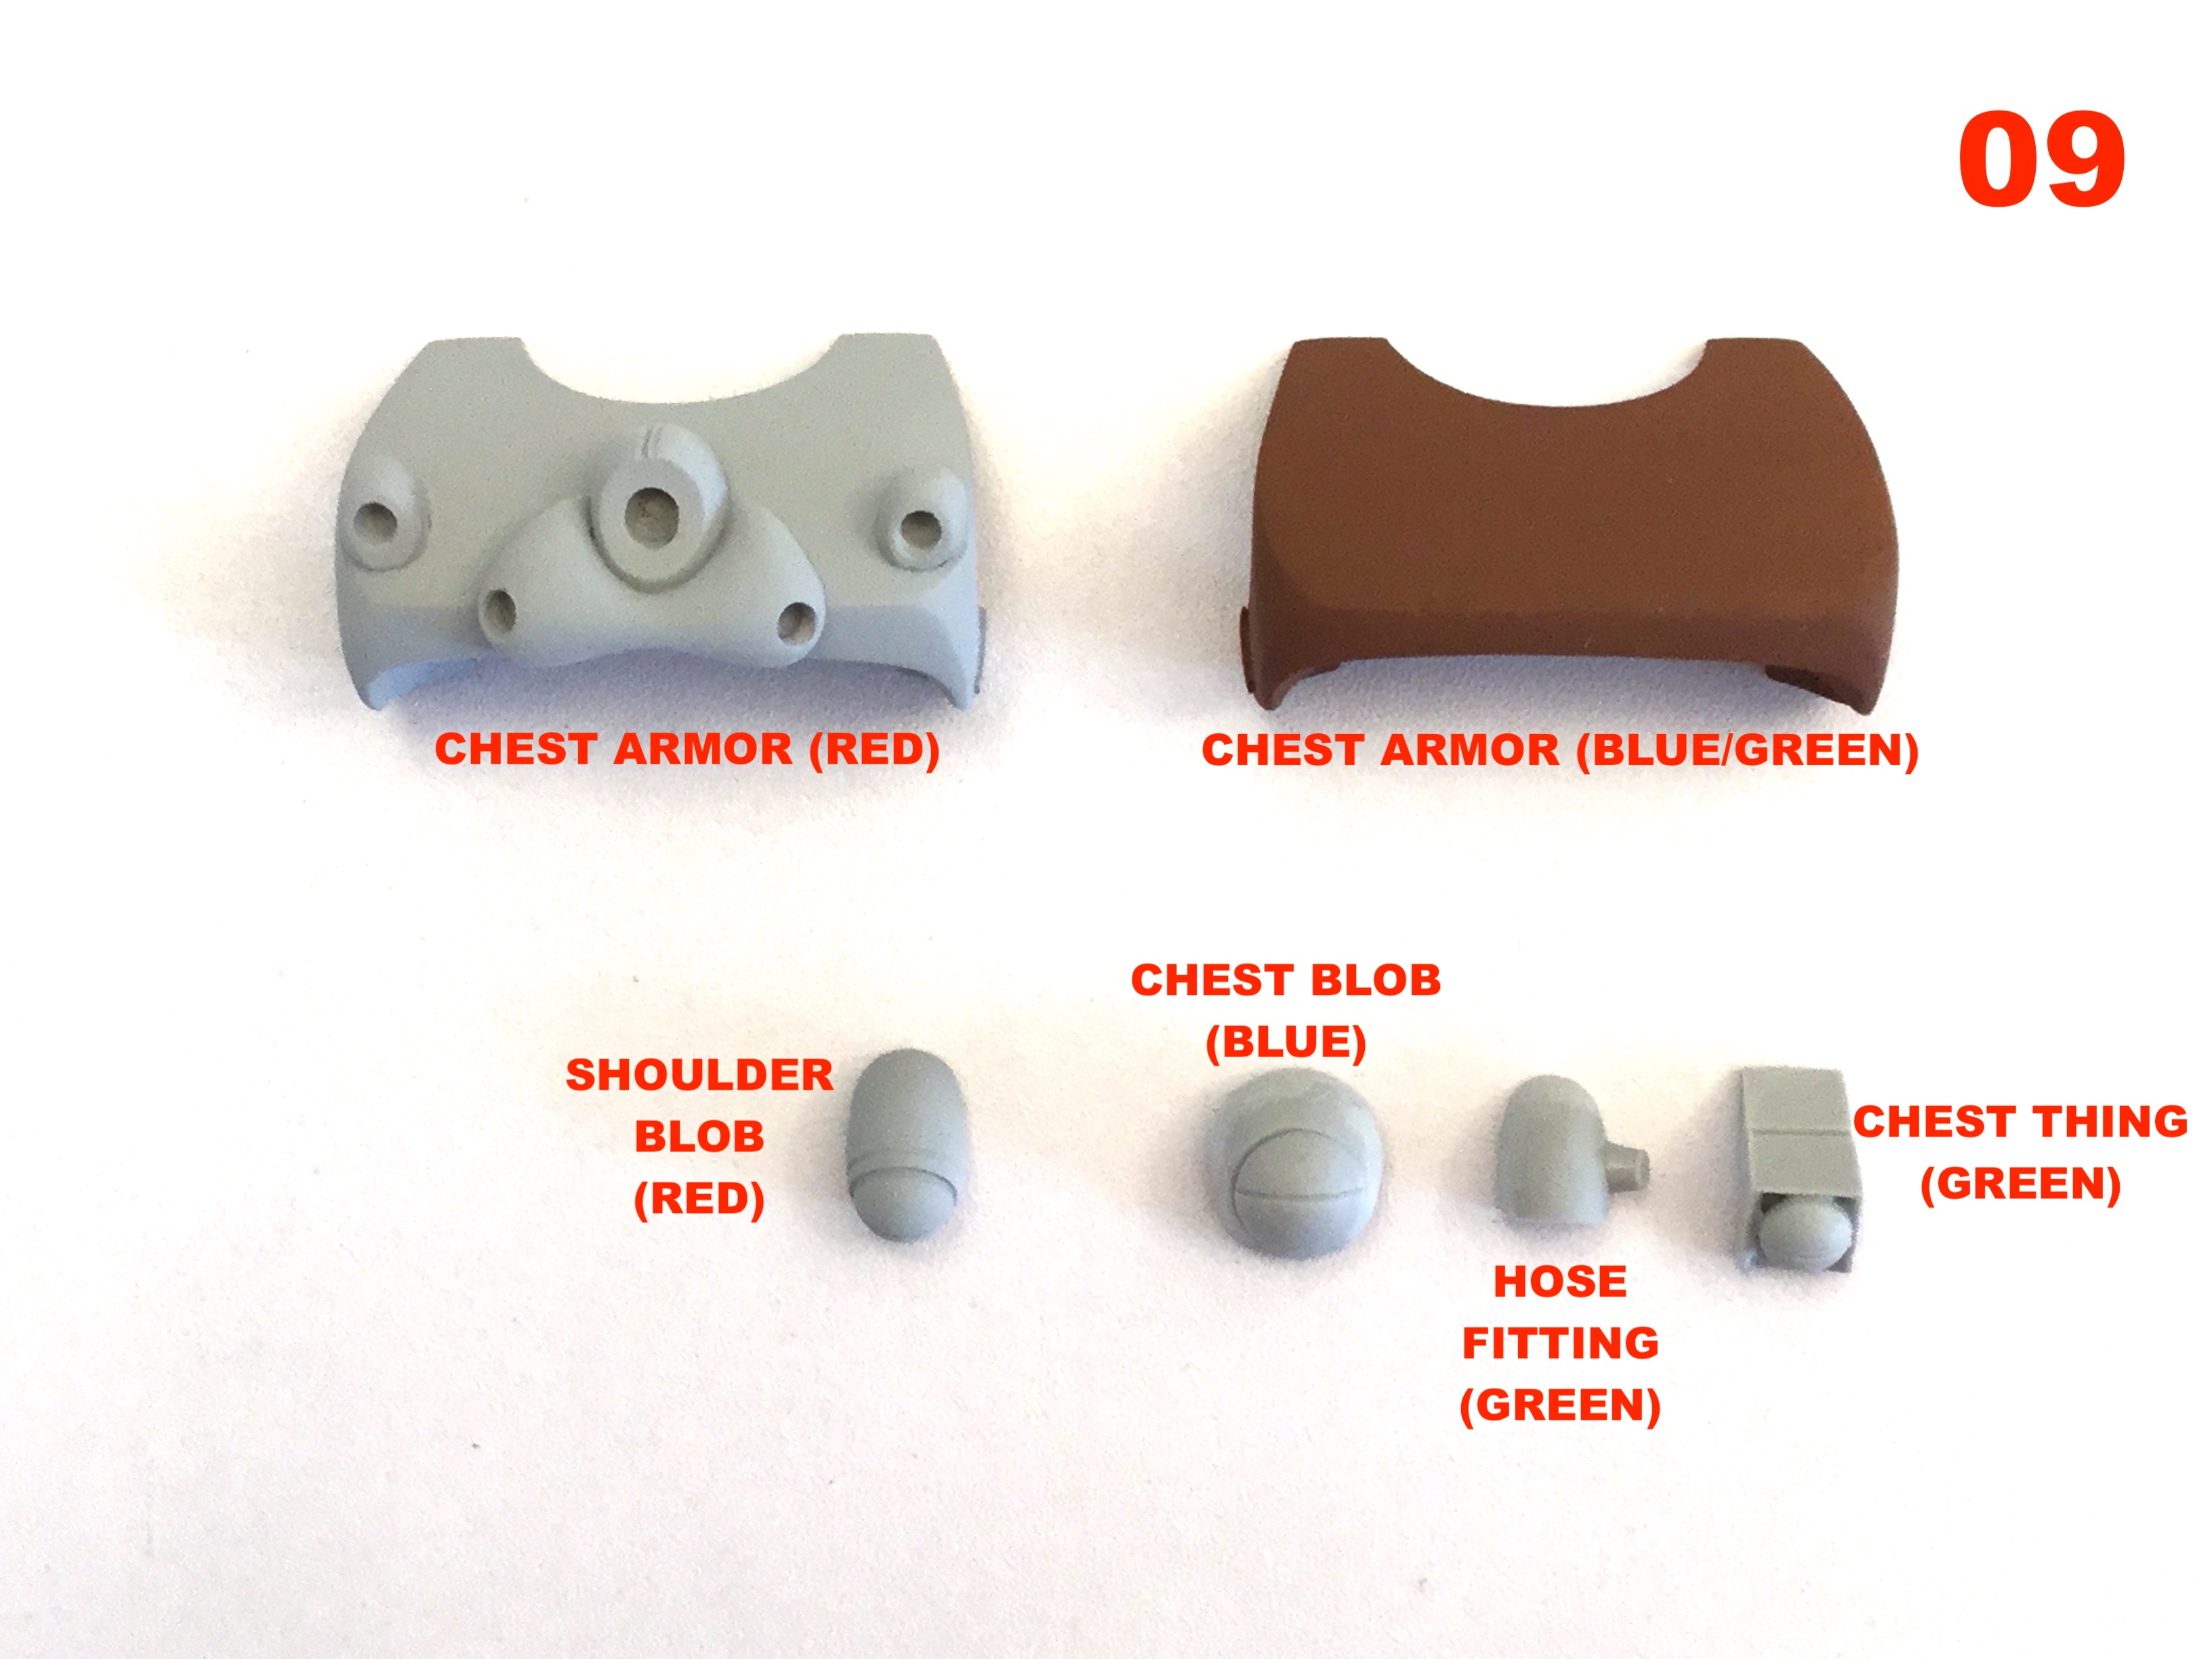
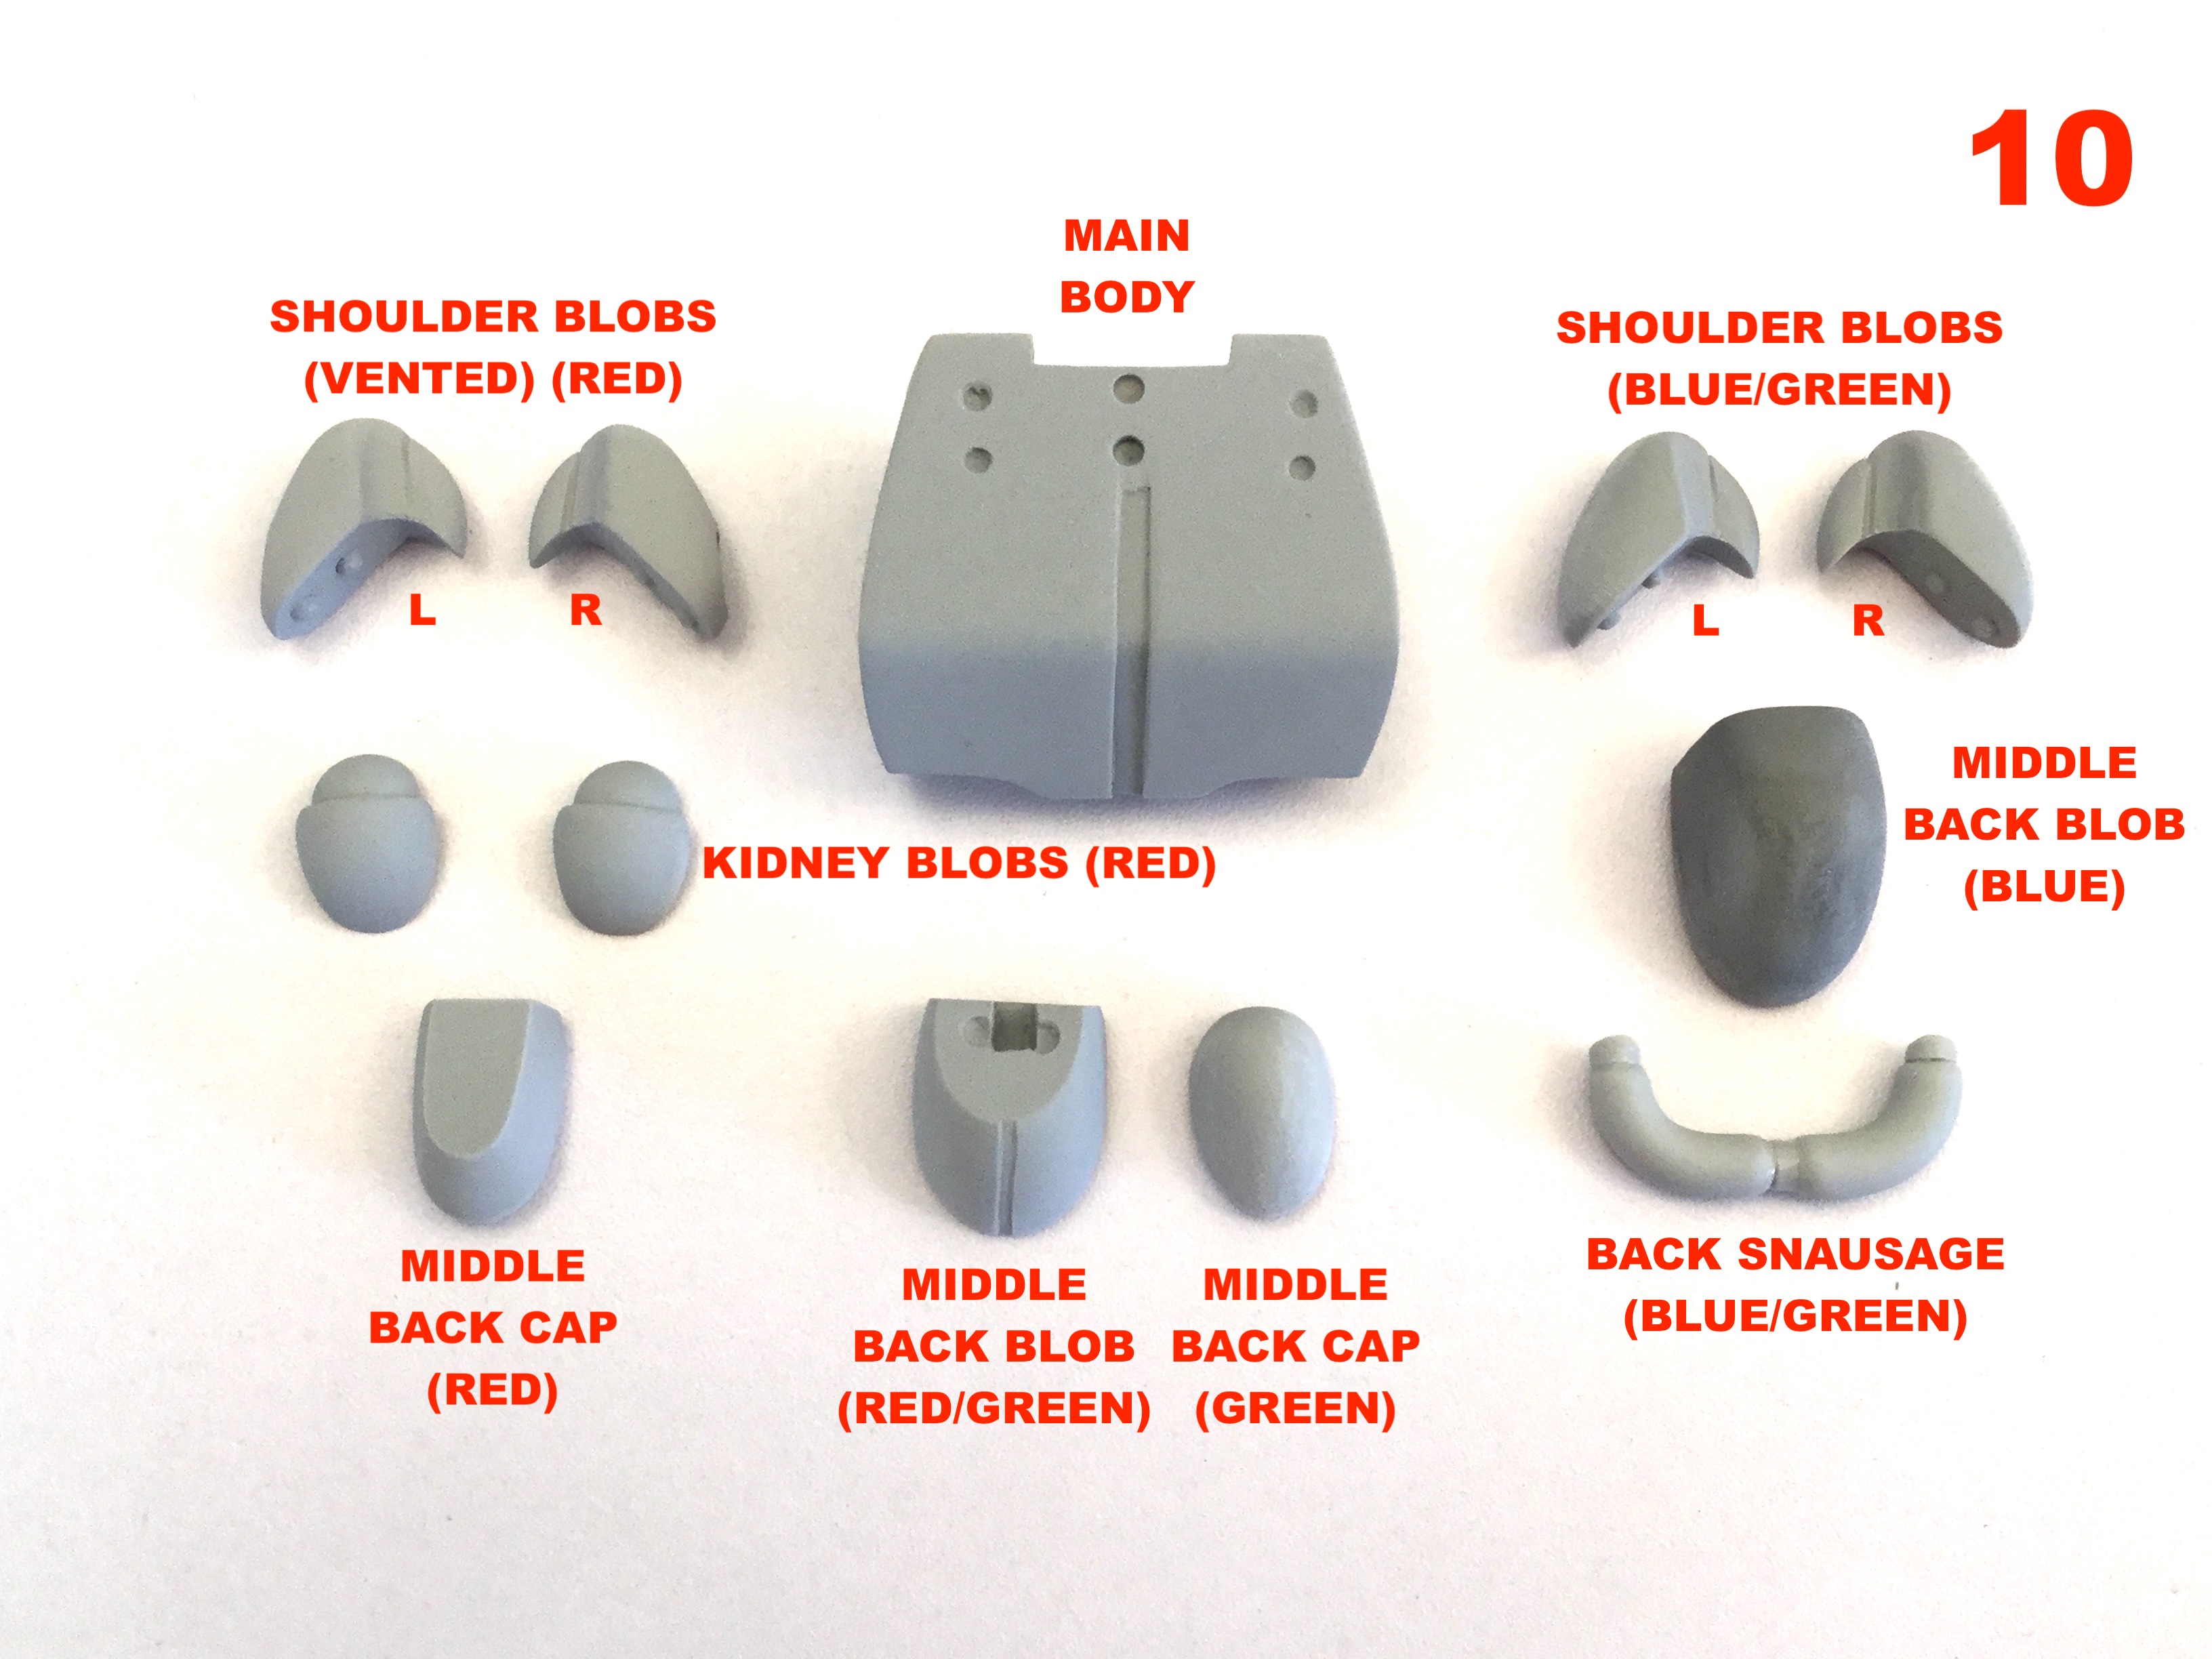
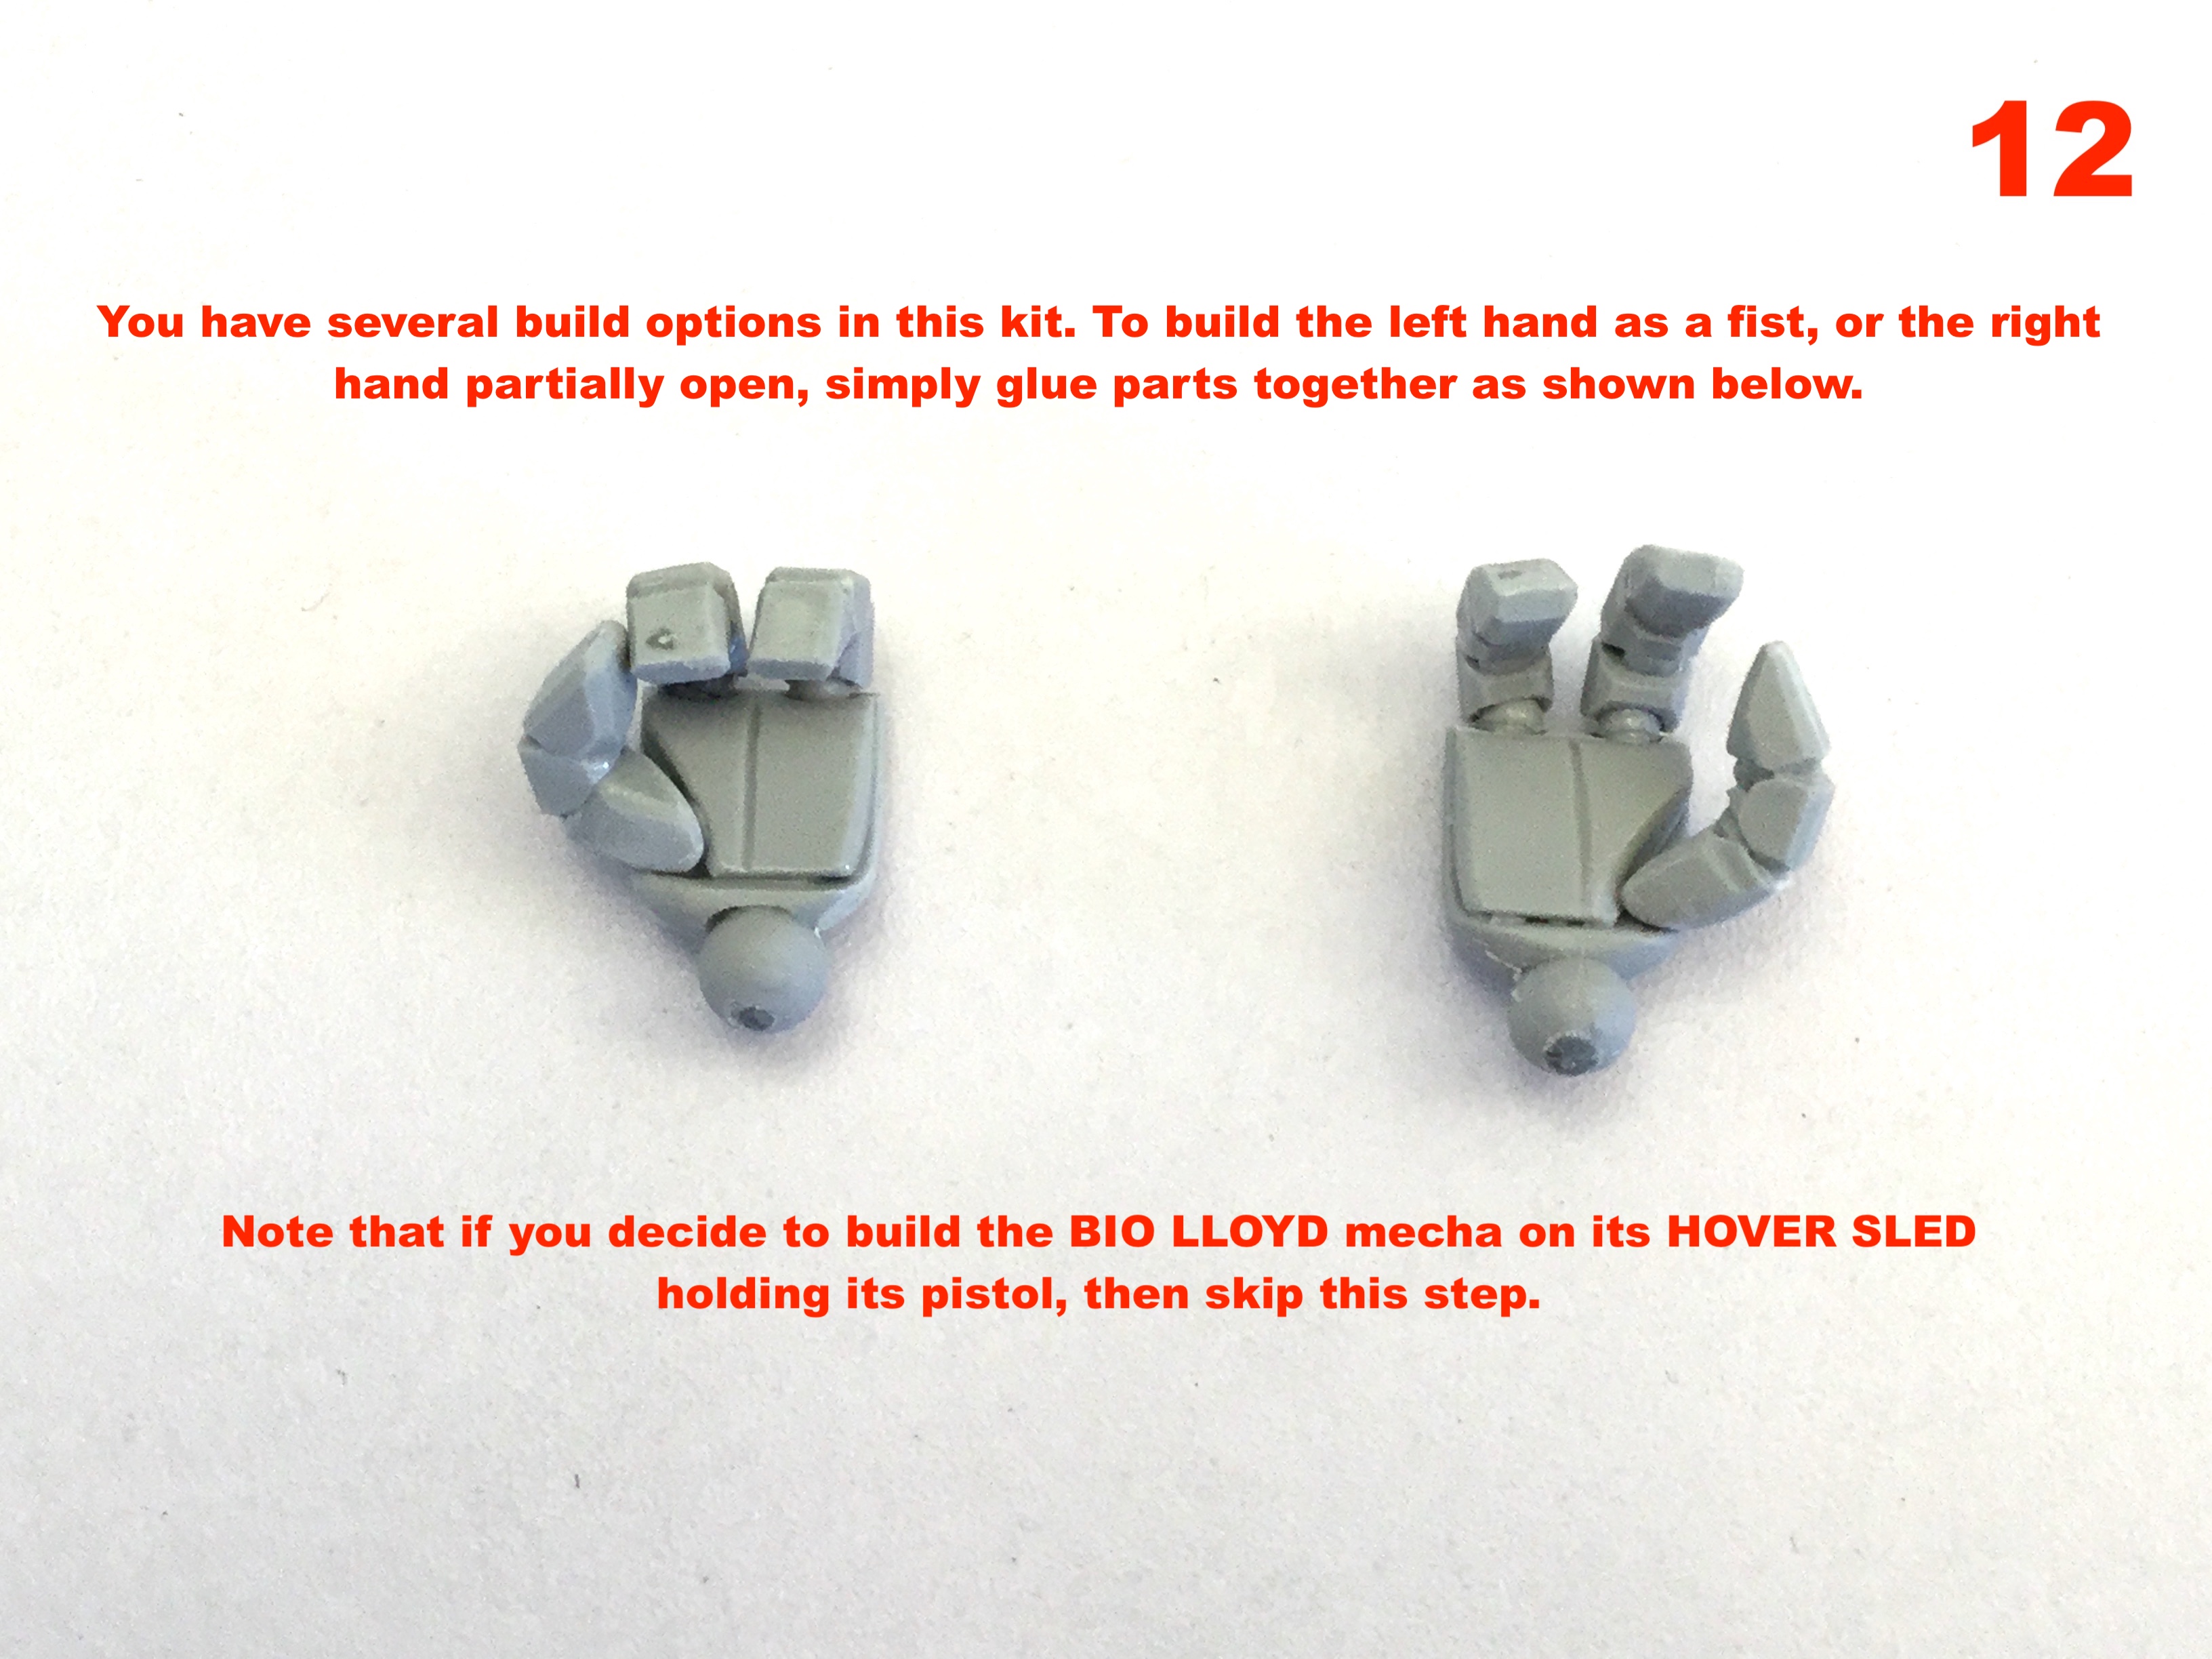
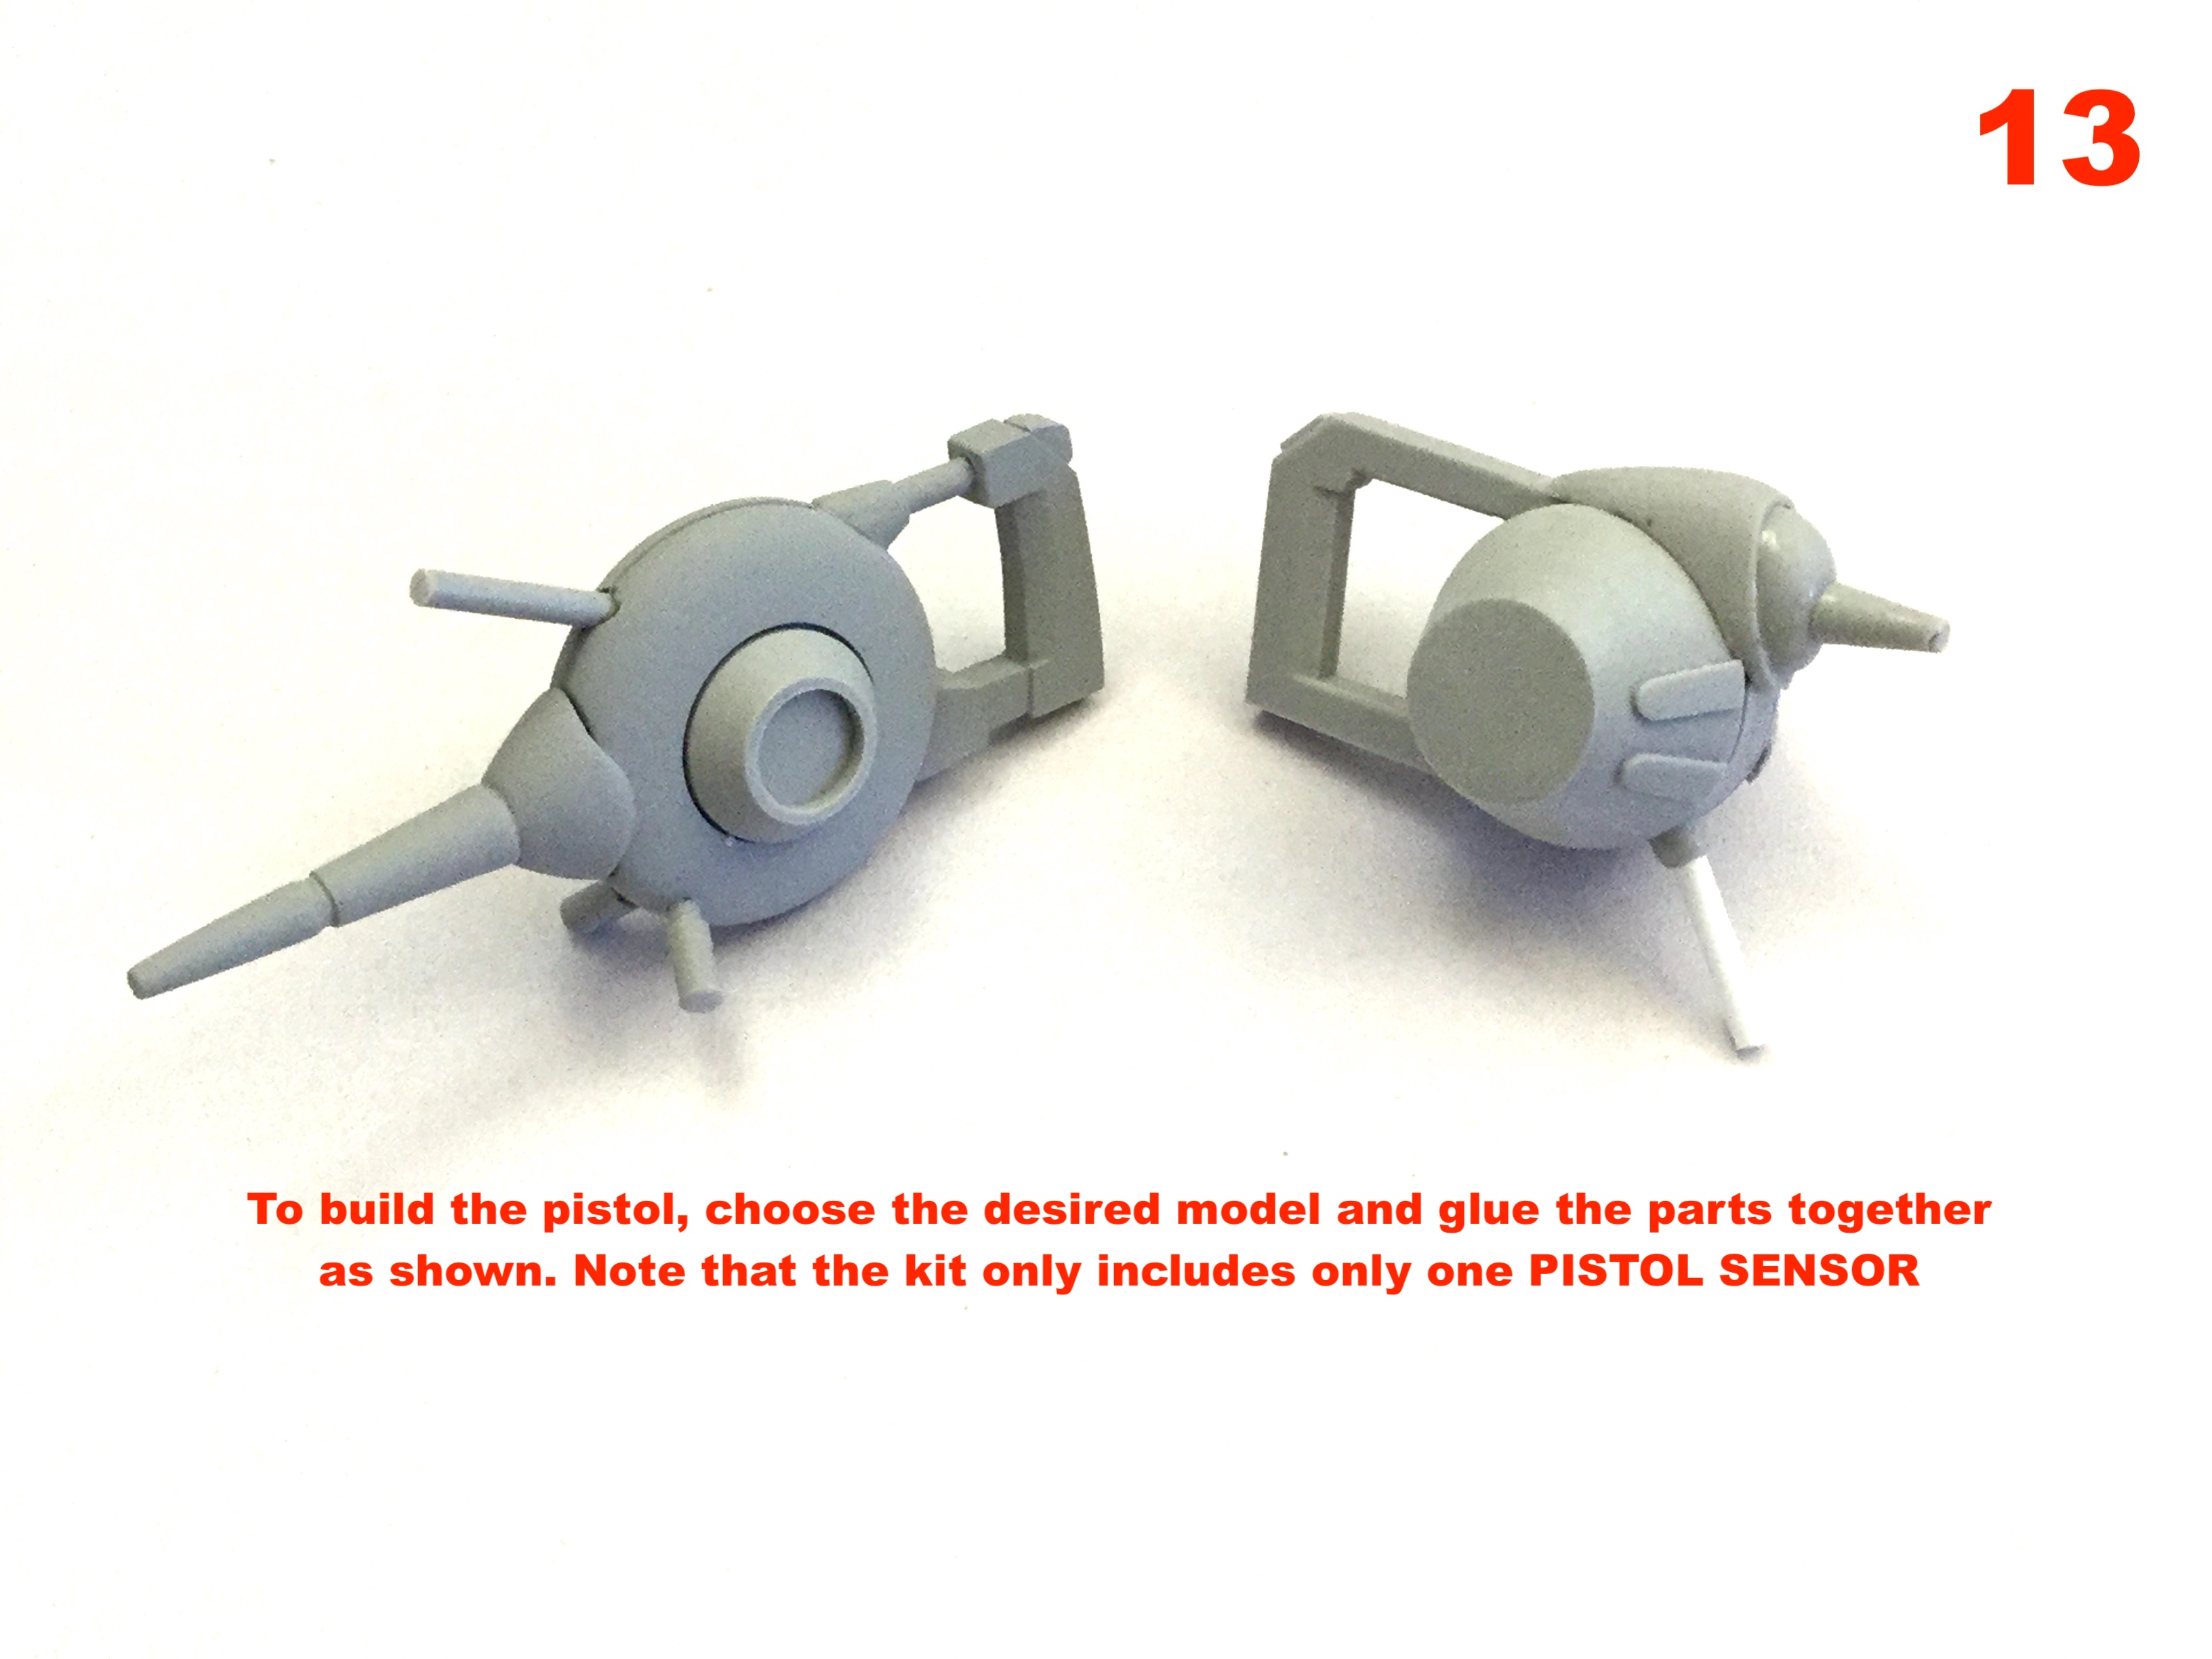
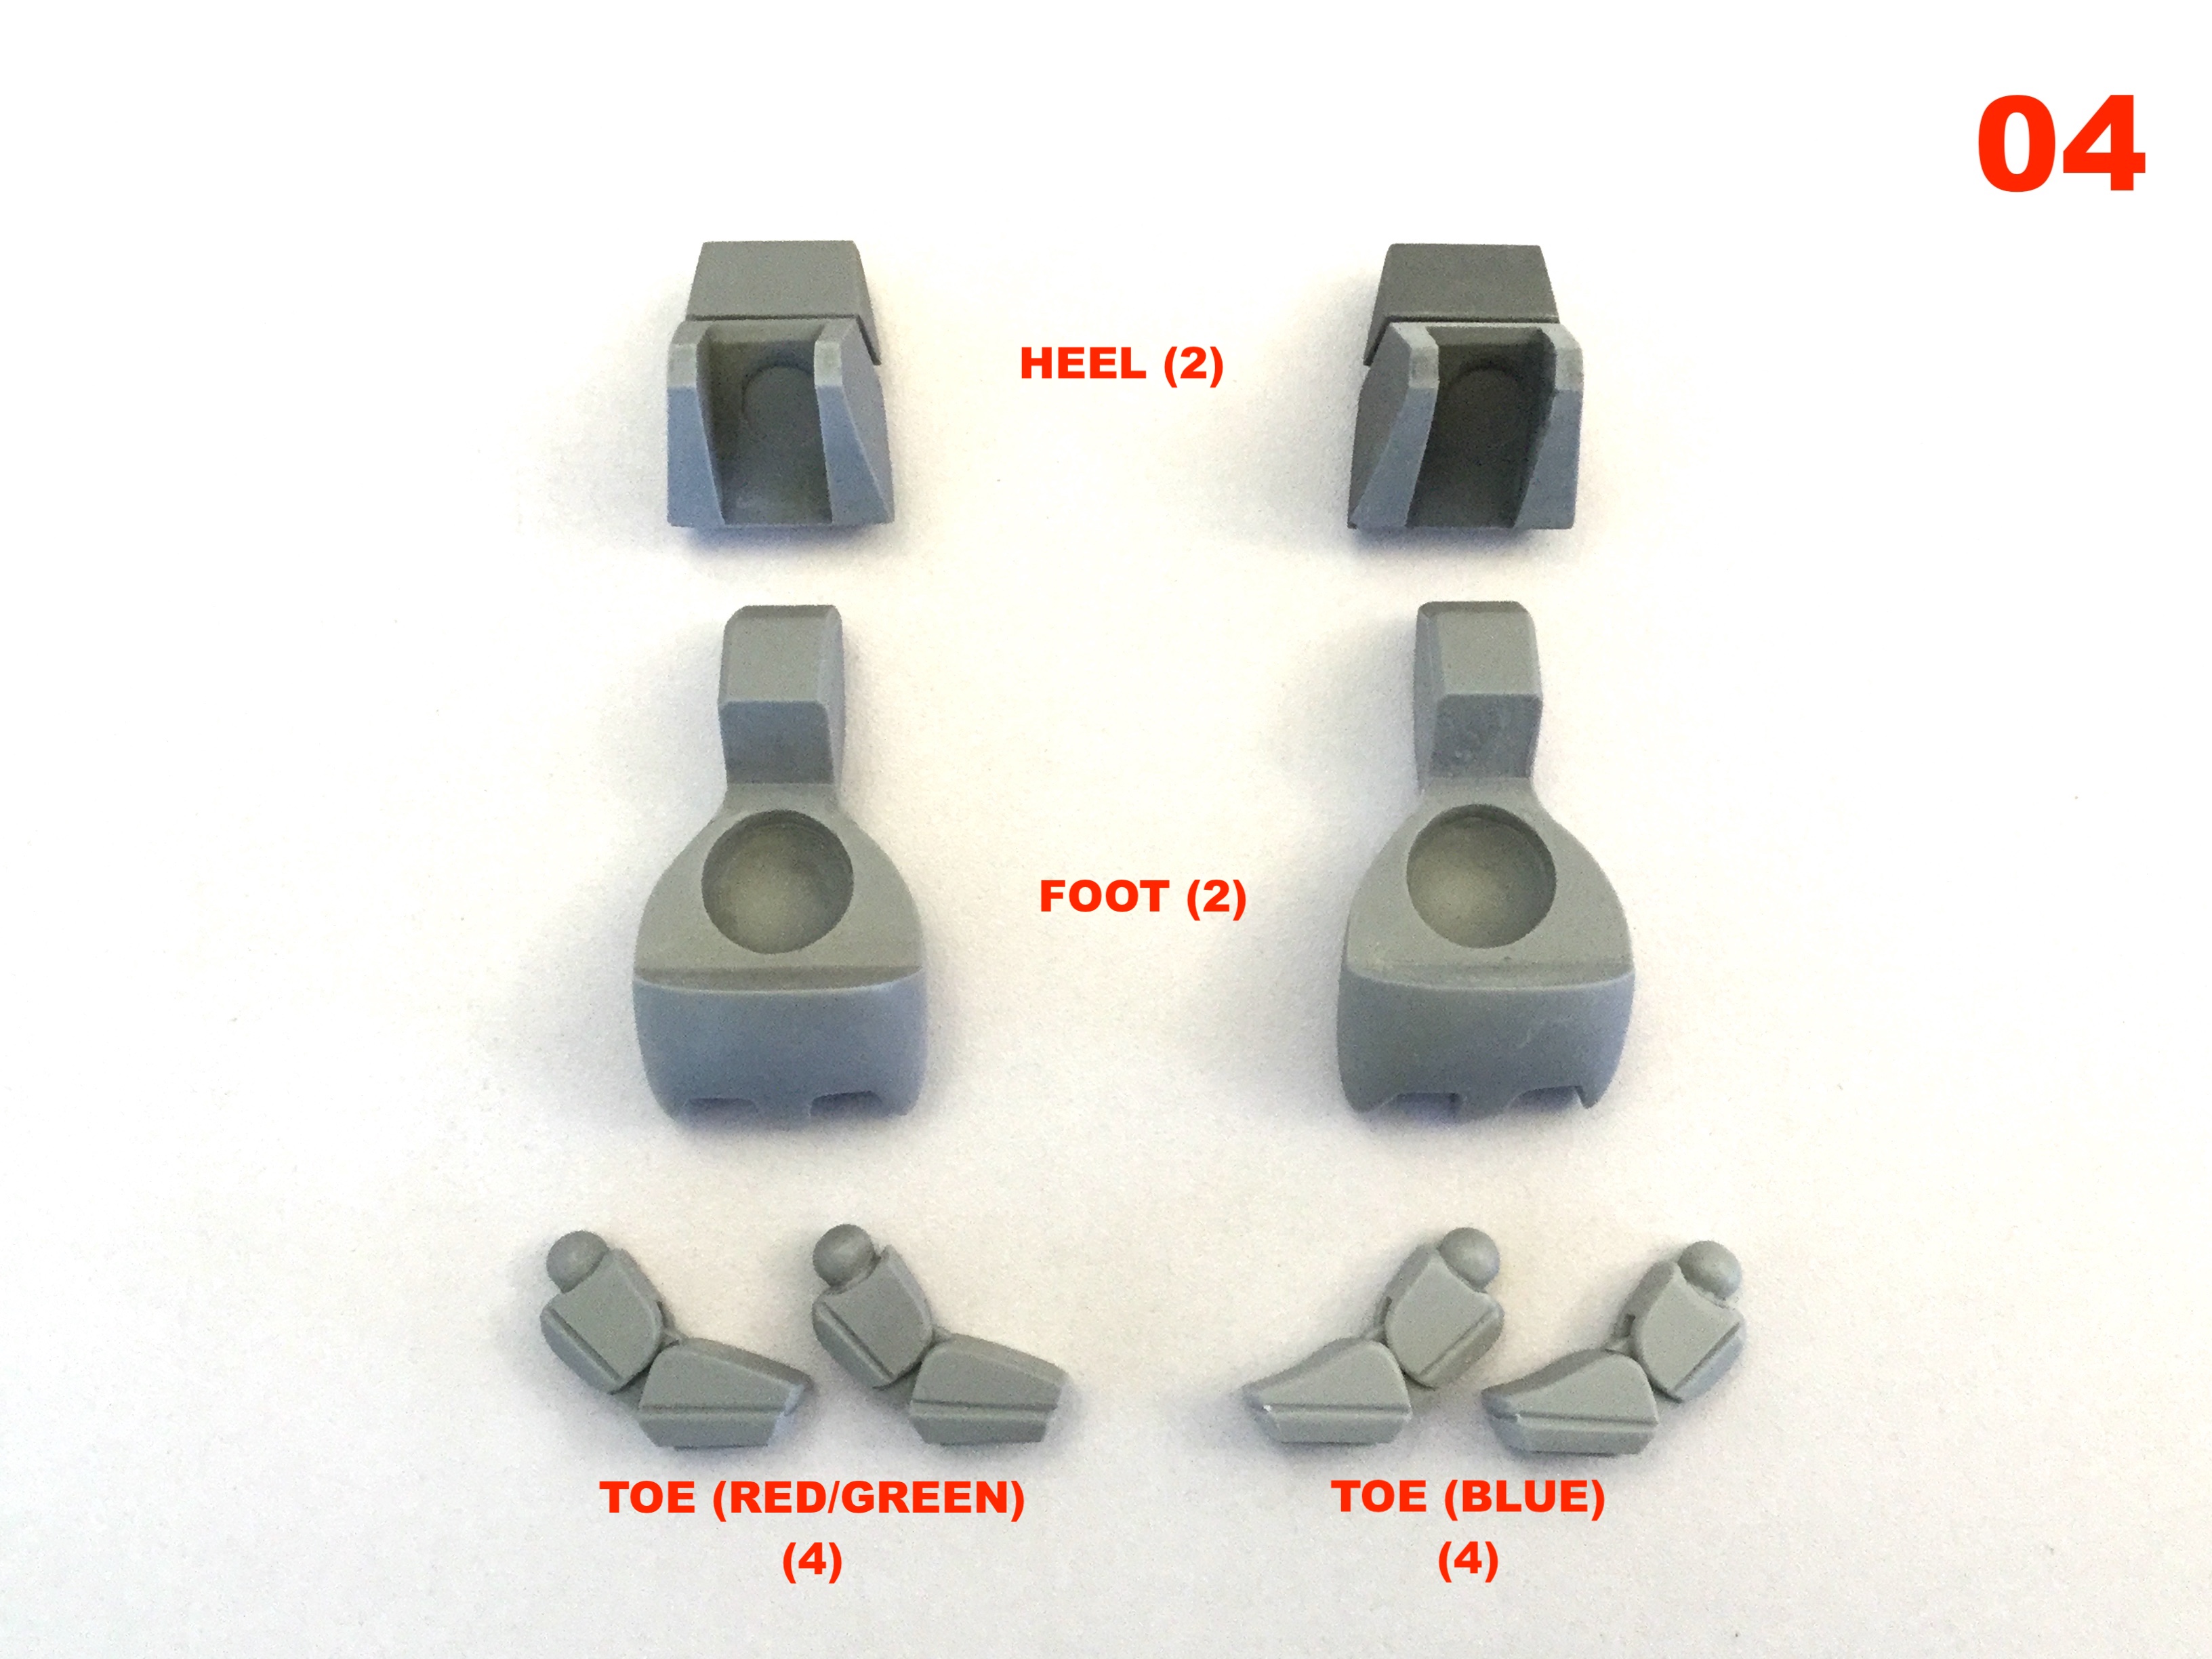
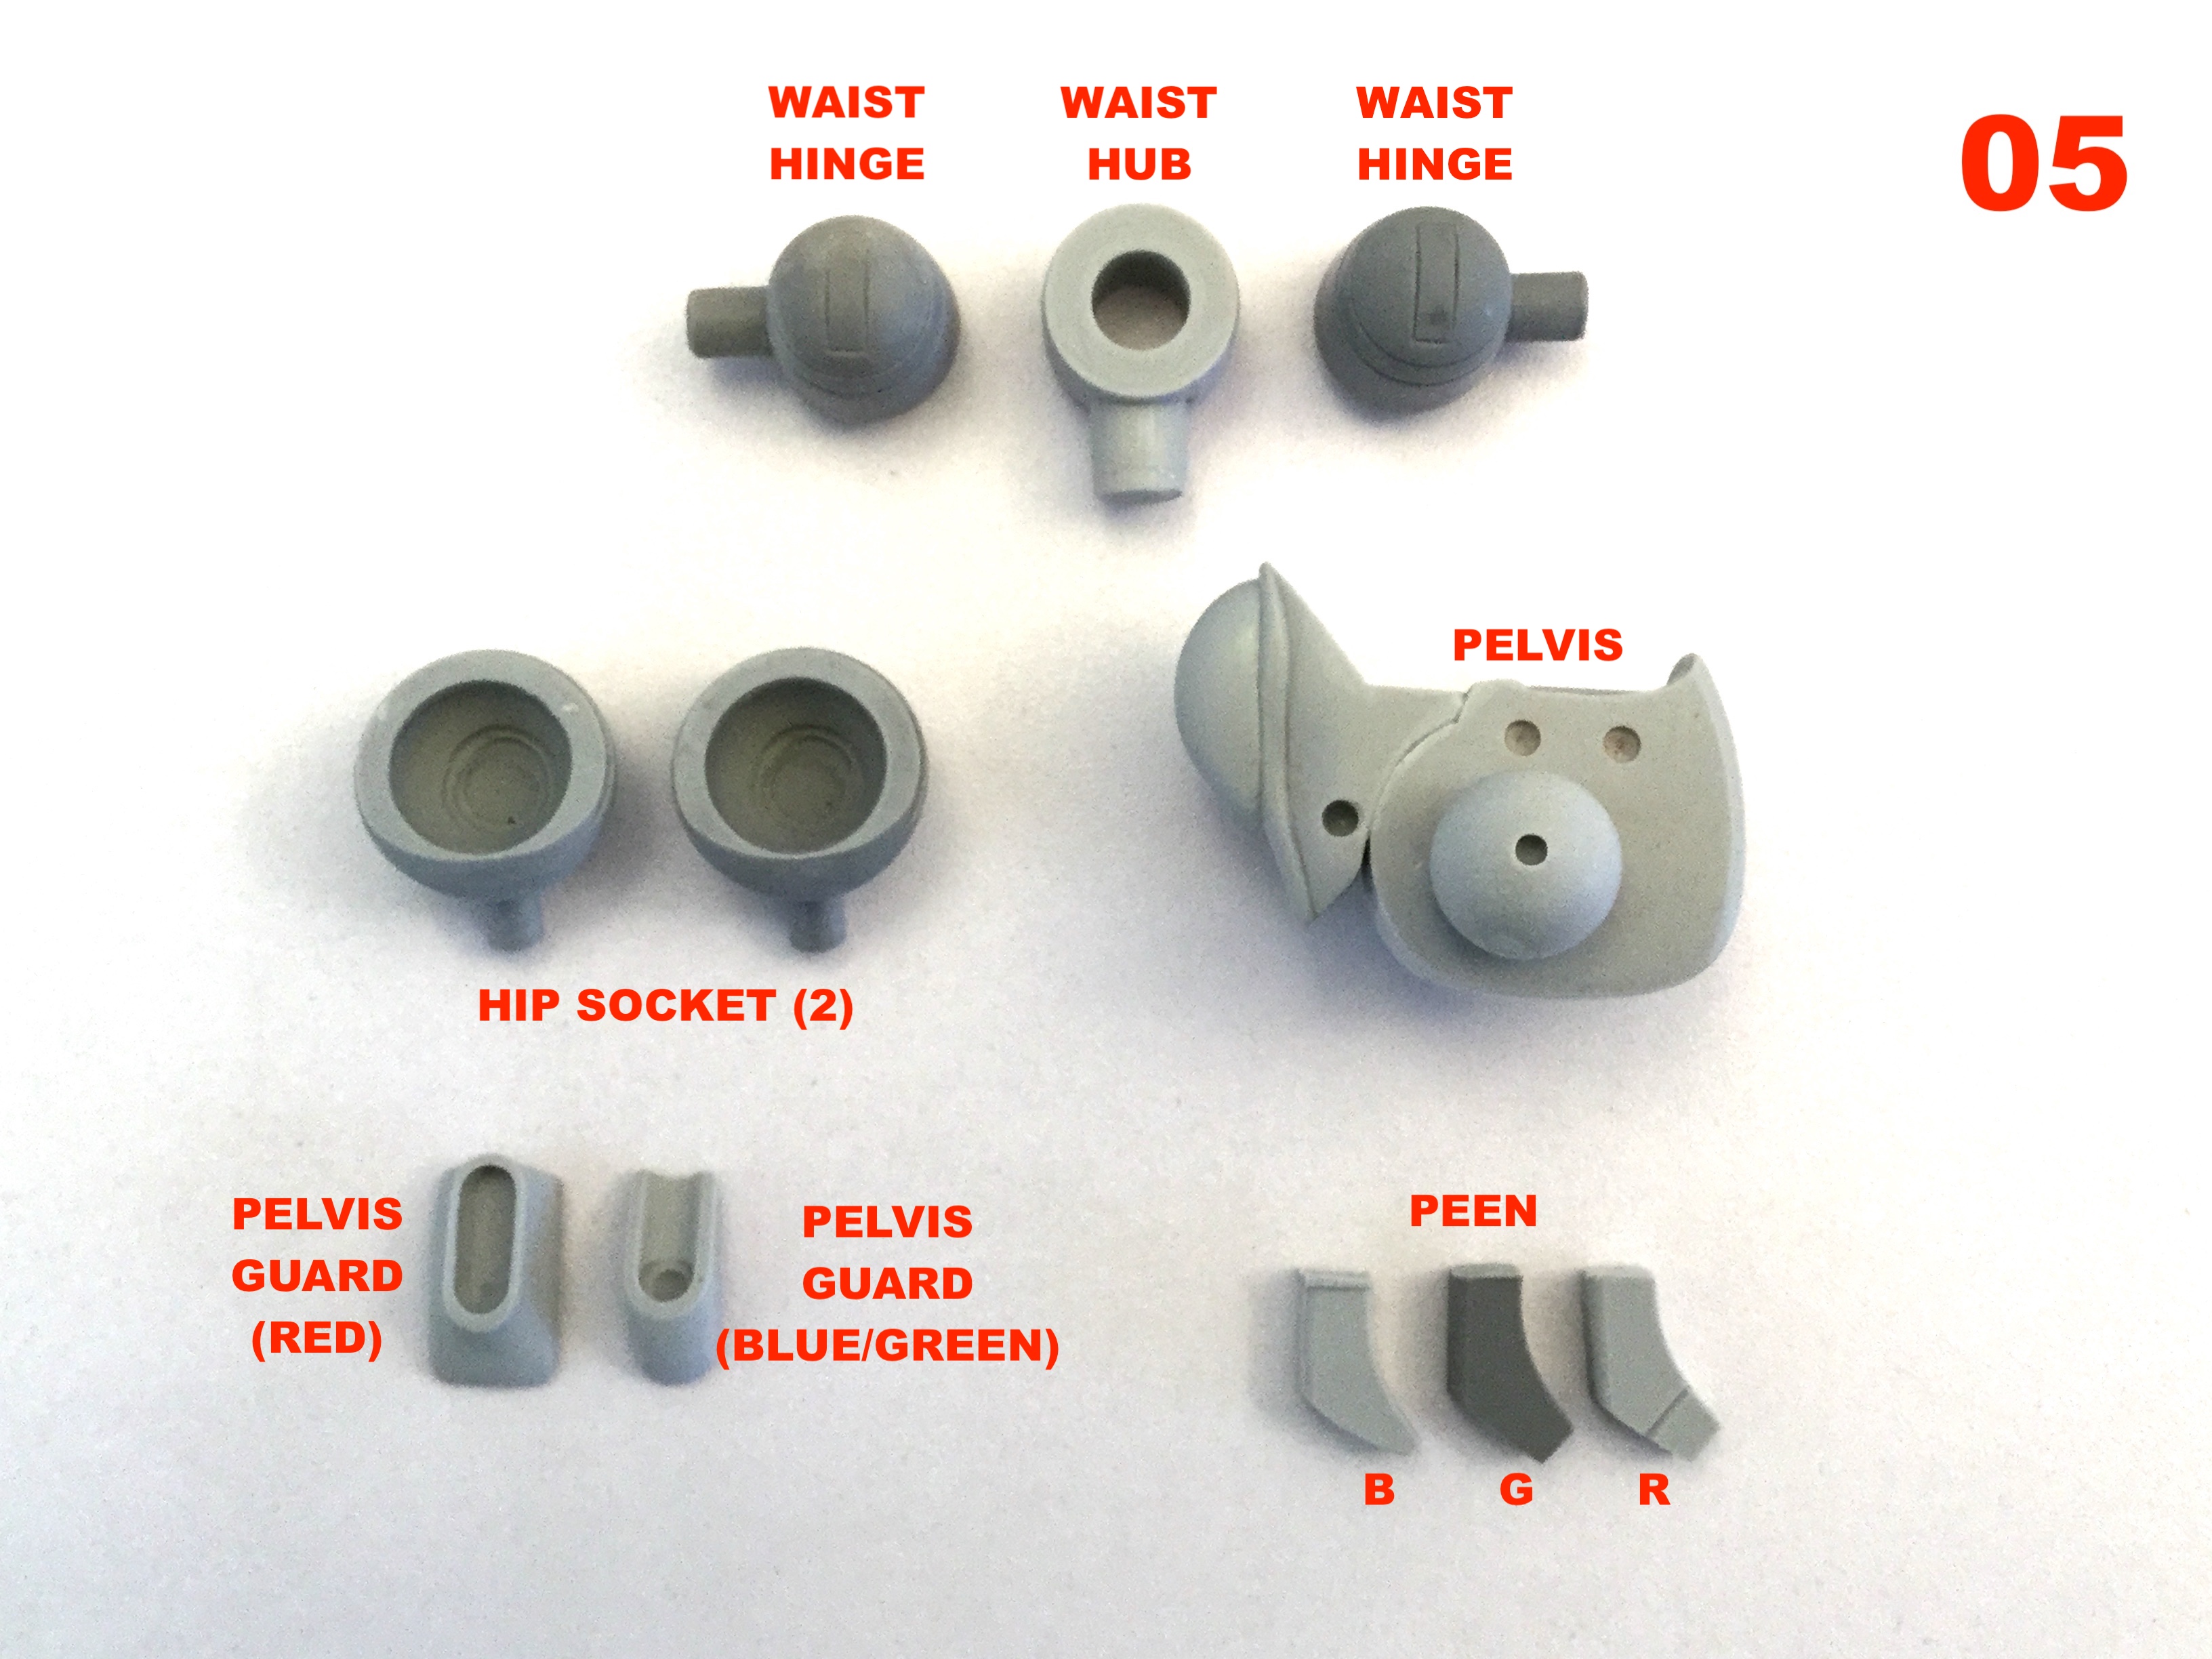
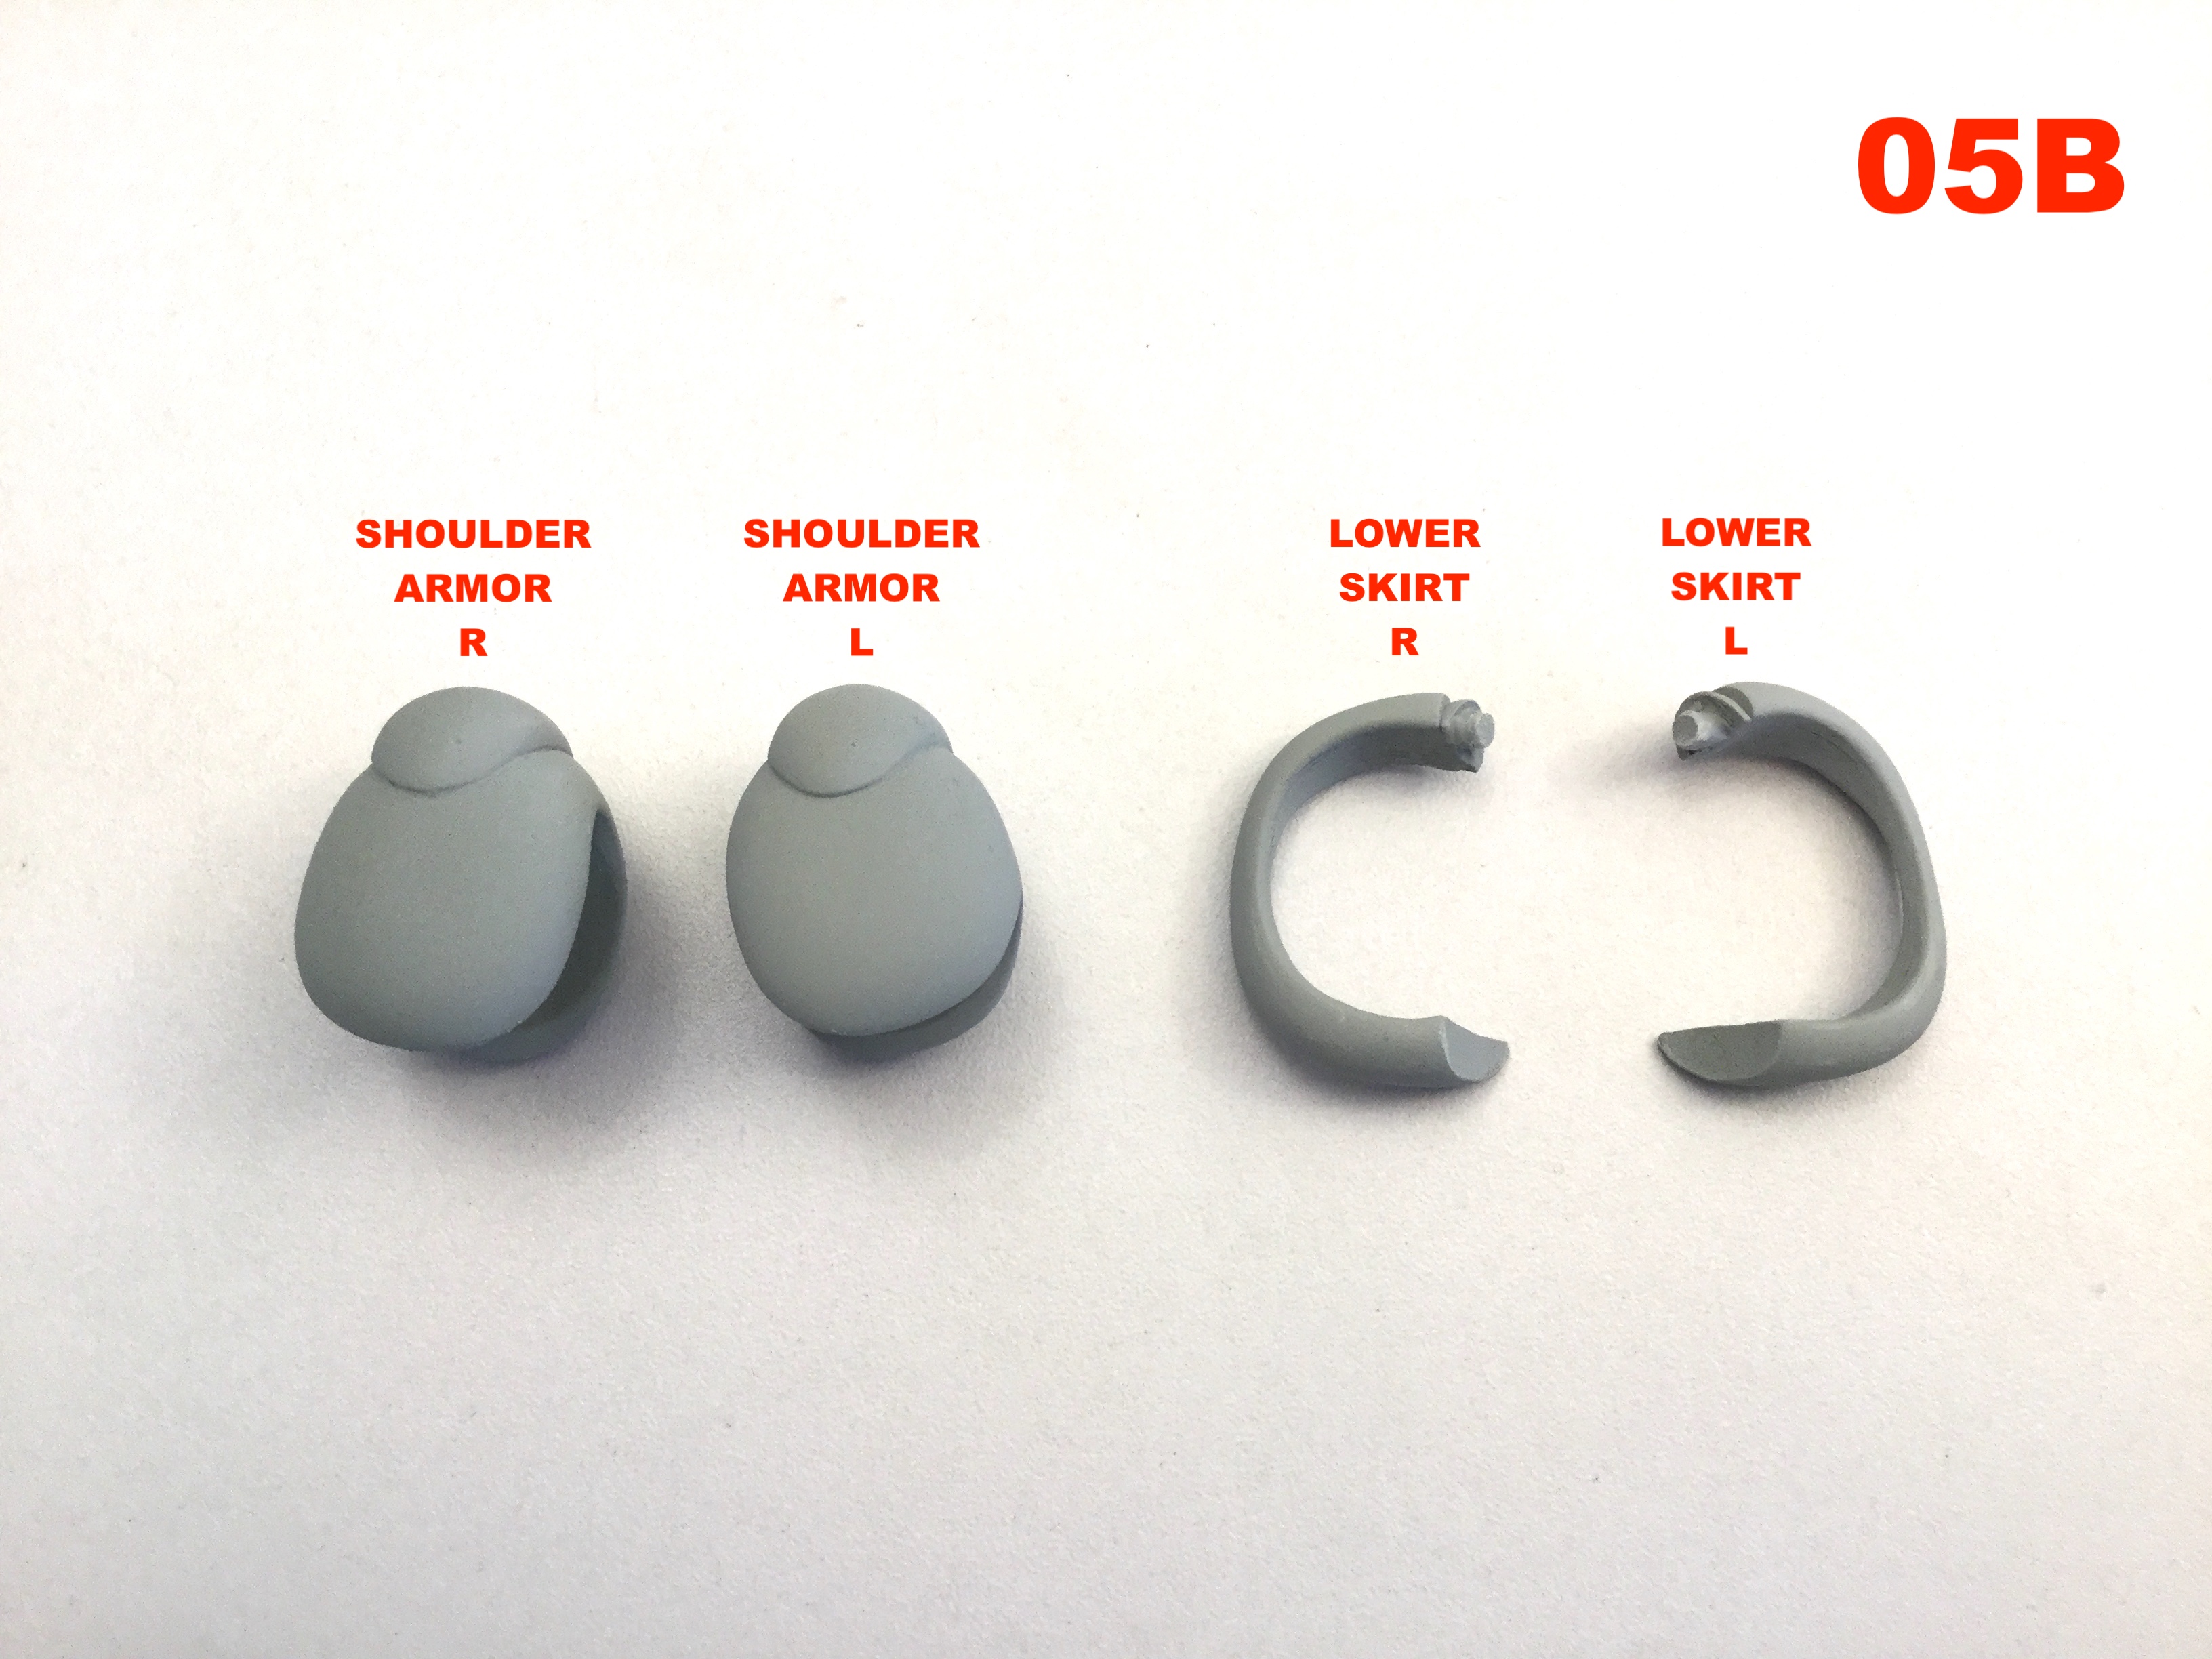
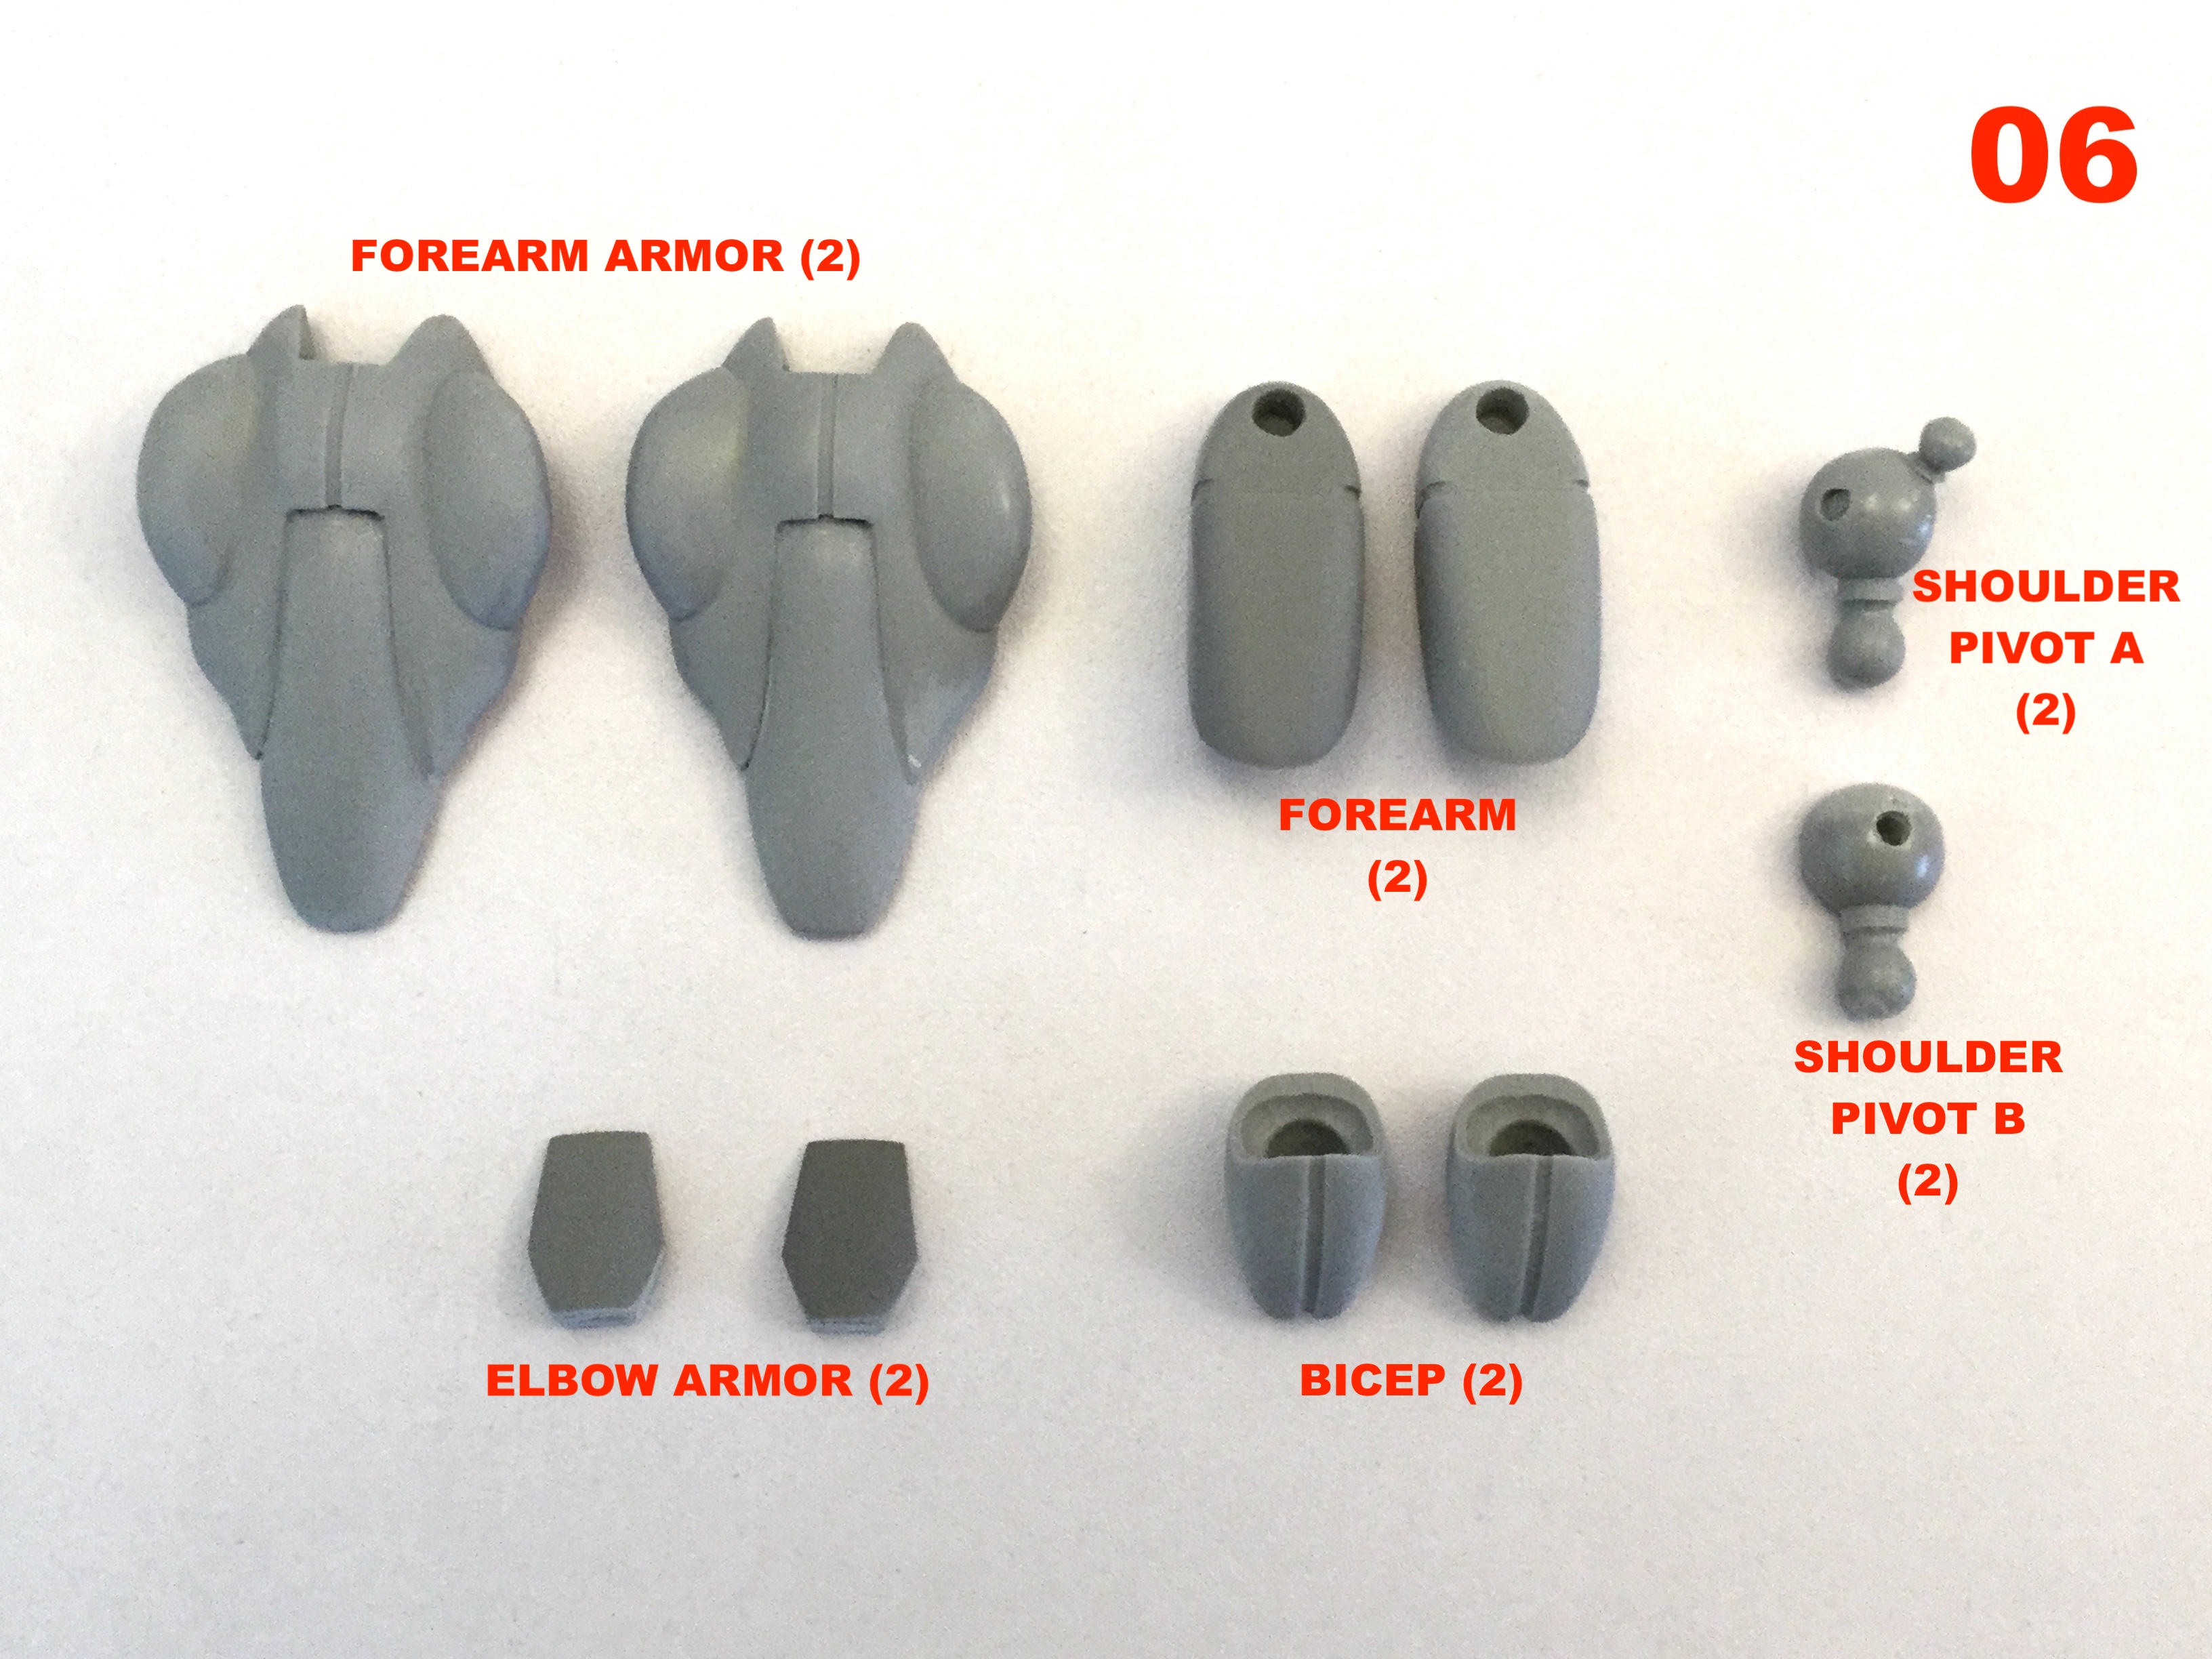
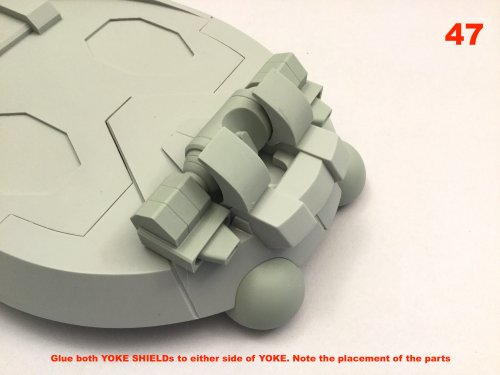
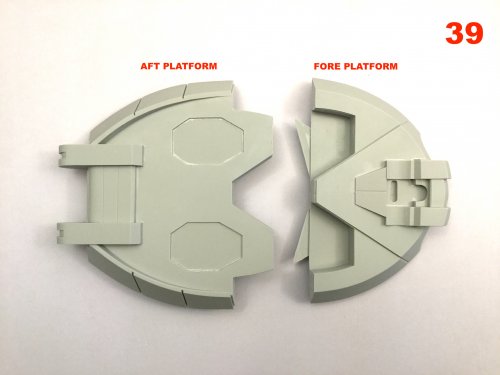
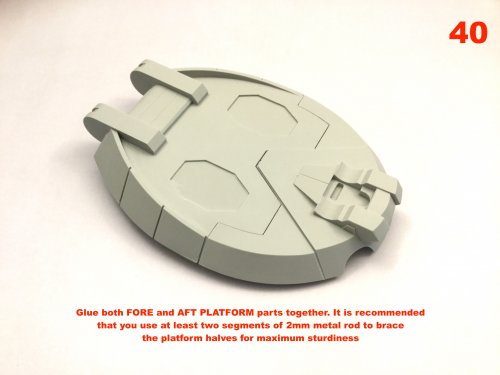
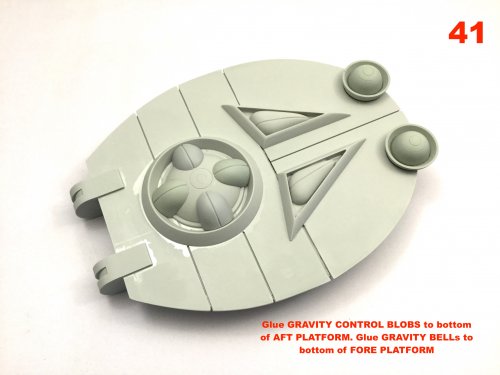
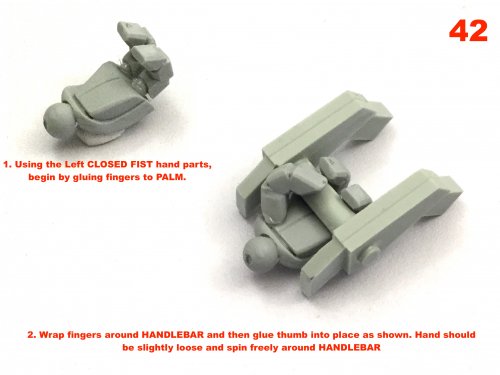
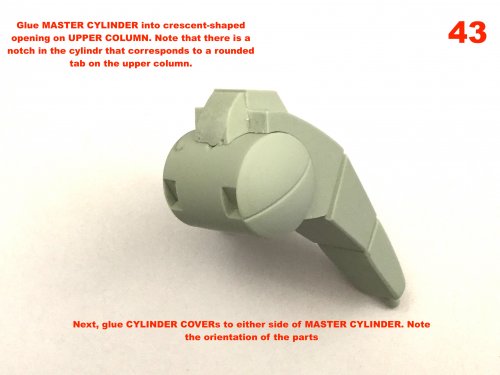
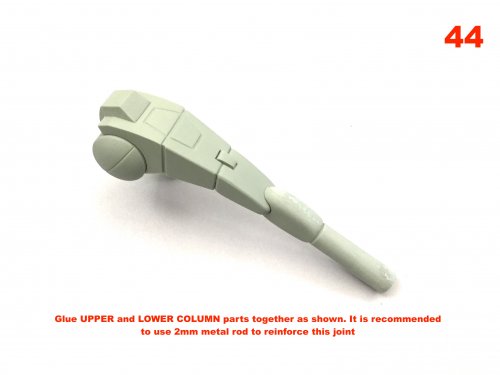
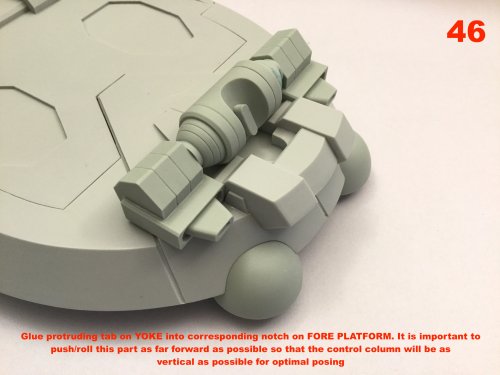
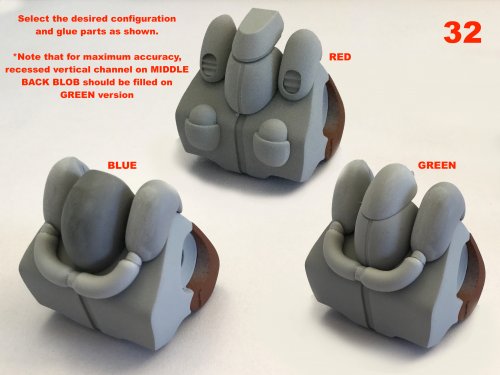
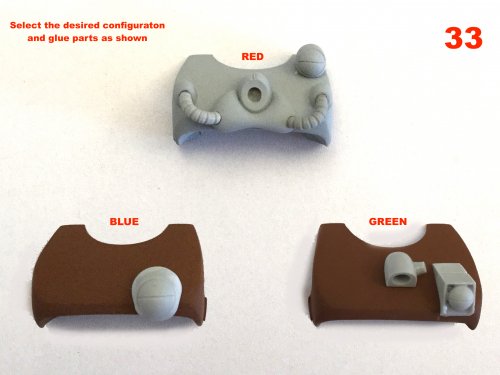
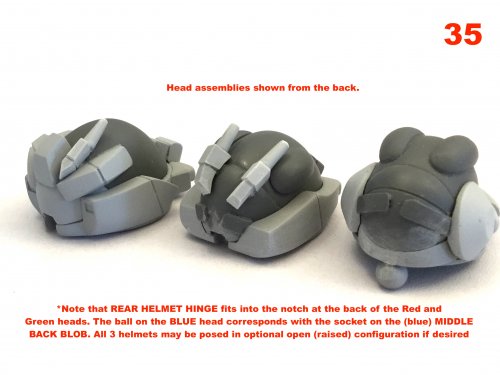
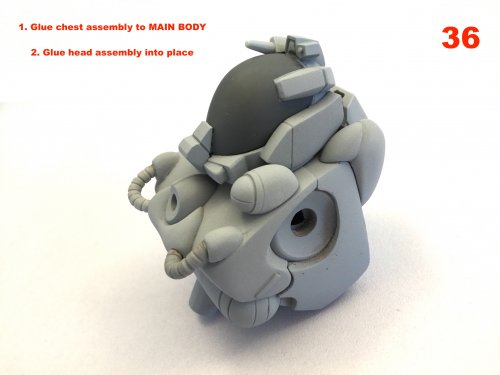
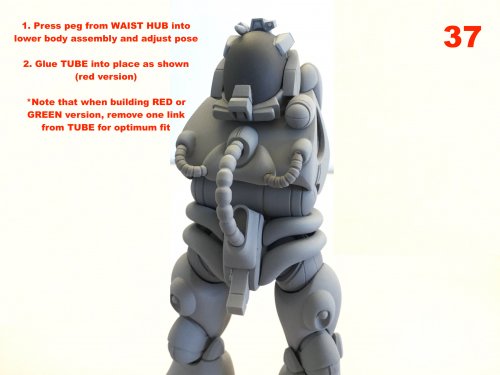
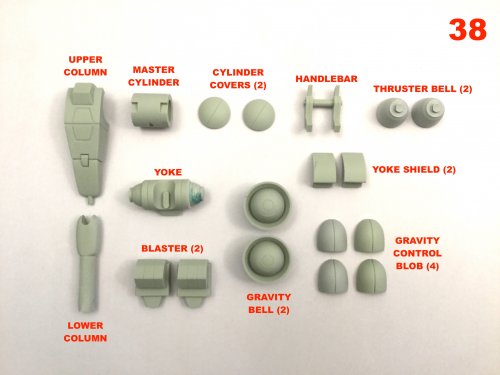
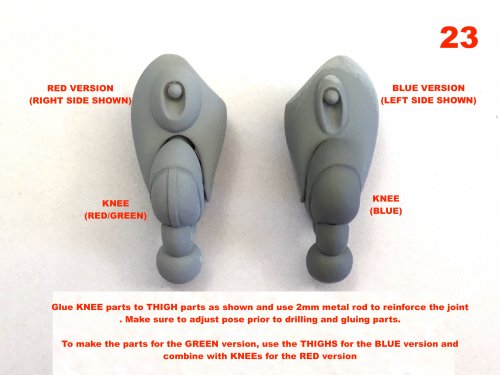
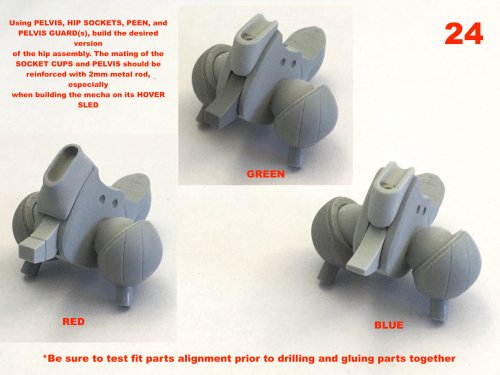
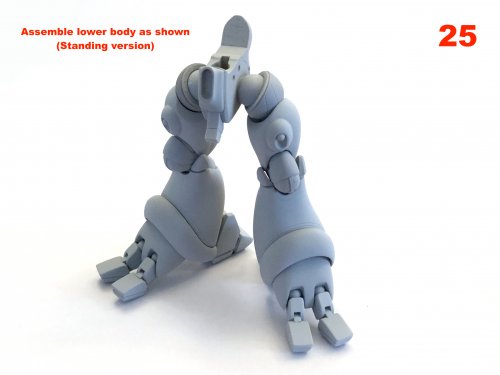
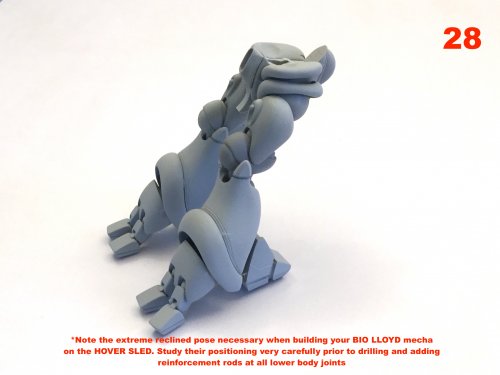
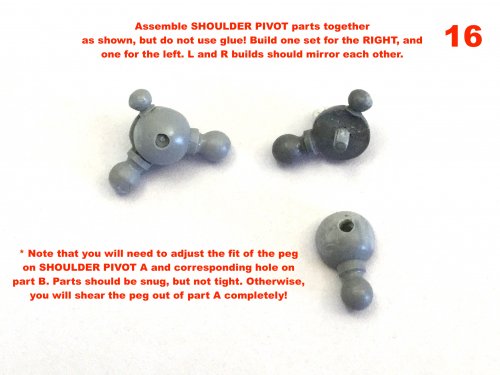
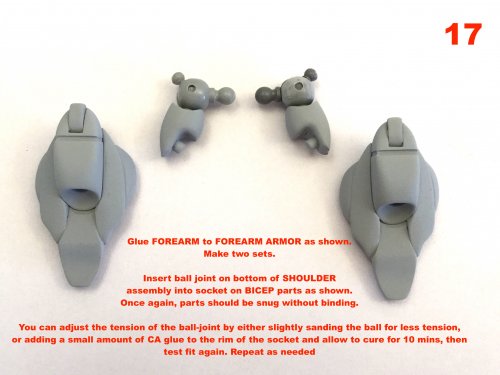
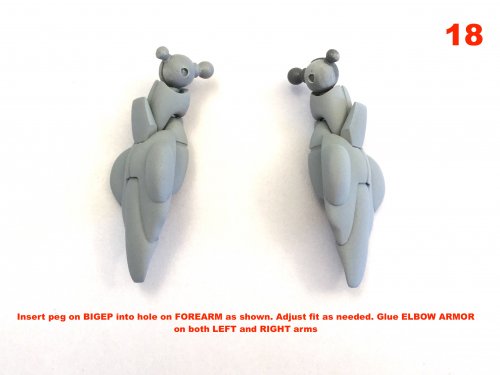
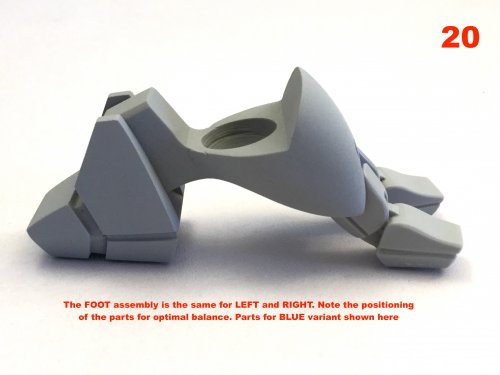
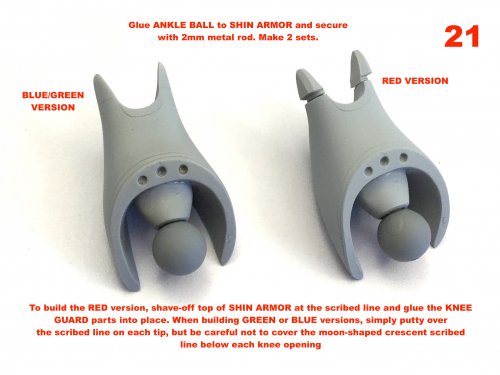
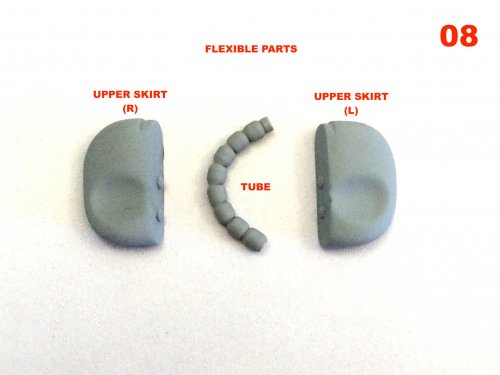
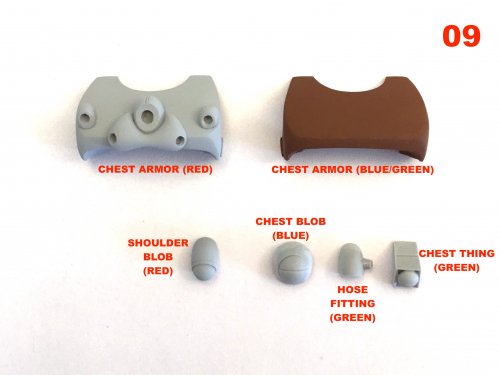
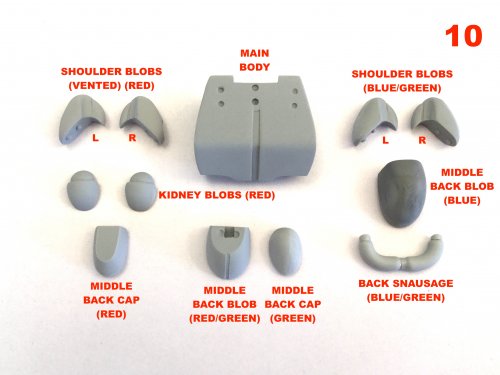
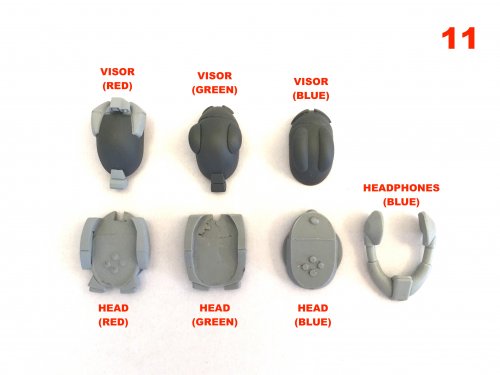
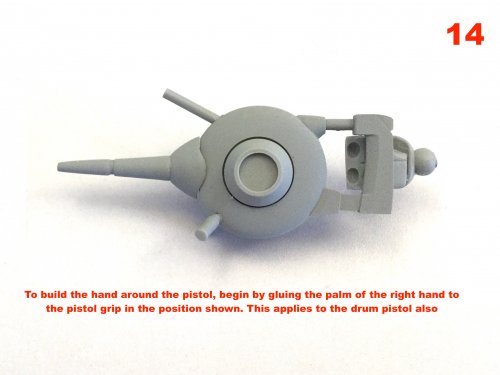
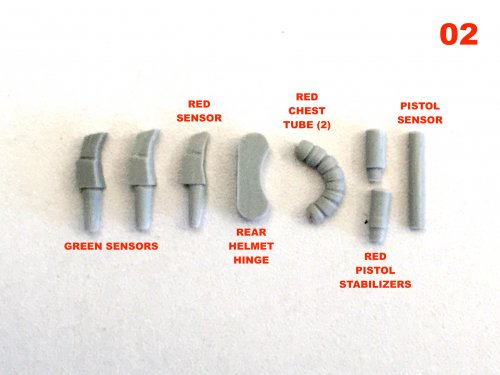
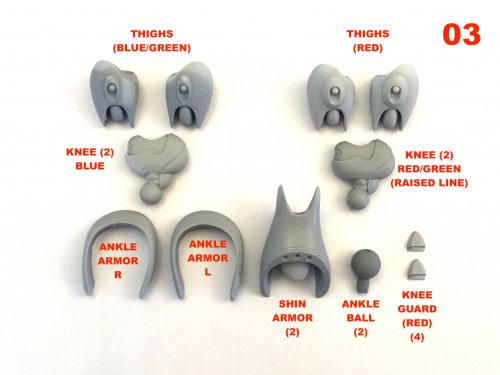
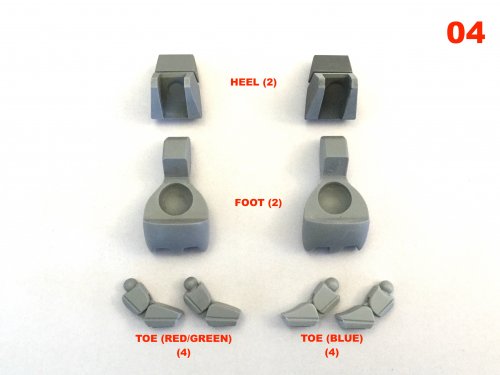
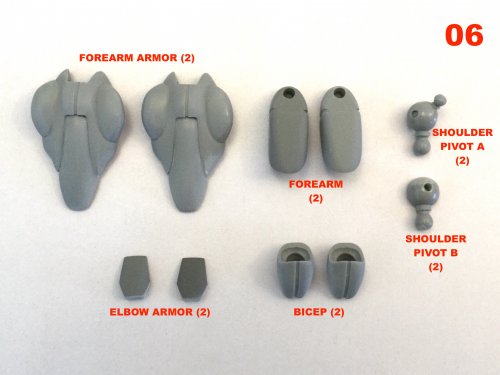
Destructions. Brace yourselves, there are many pages!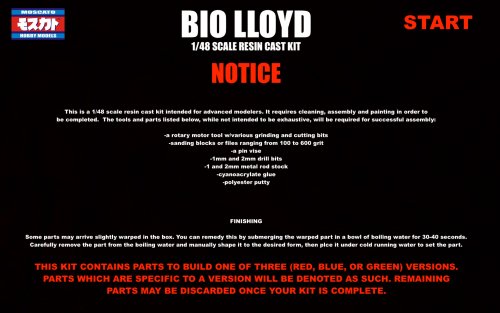
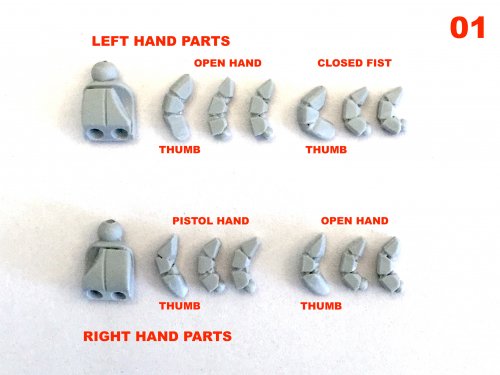


-
1/48 SOUTHERN CROSS BIOROID
captain america replied to captain america's topic in Anime or Science Fiction
I'm probably going to open up the payment channel next week for the second run and leave it open until June 1st. If I get the required orders, I start the new molds. If I don't meet the order threshold, I'll just hit refund on all the Paypal payments. Nice and simple.