

captain america
-
Posts
3563 -
Joined
-
Last visited
Content Type
Profiles
Forums
Events
Gallery
Everything posted by captain america
-

MOSCATO HOBBY MODELLING CONTEST!!
captain america replied to captain america's topic in Anime or Science Fiction
Submitted by Qhris S: my macross Atmospheric booster, made couple's years a go, always amazed me how big the booster rocket, so heavy and always be my favorite macross jets collection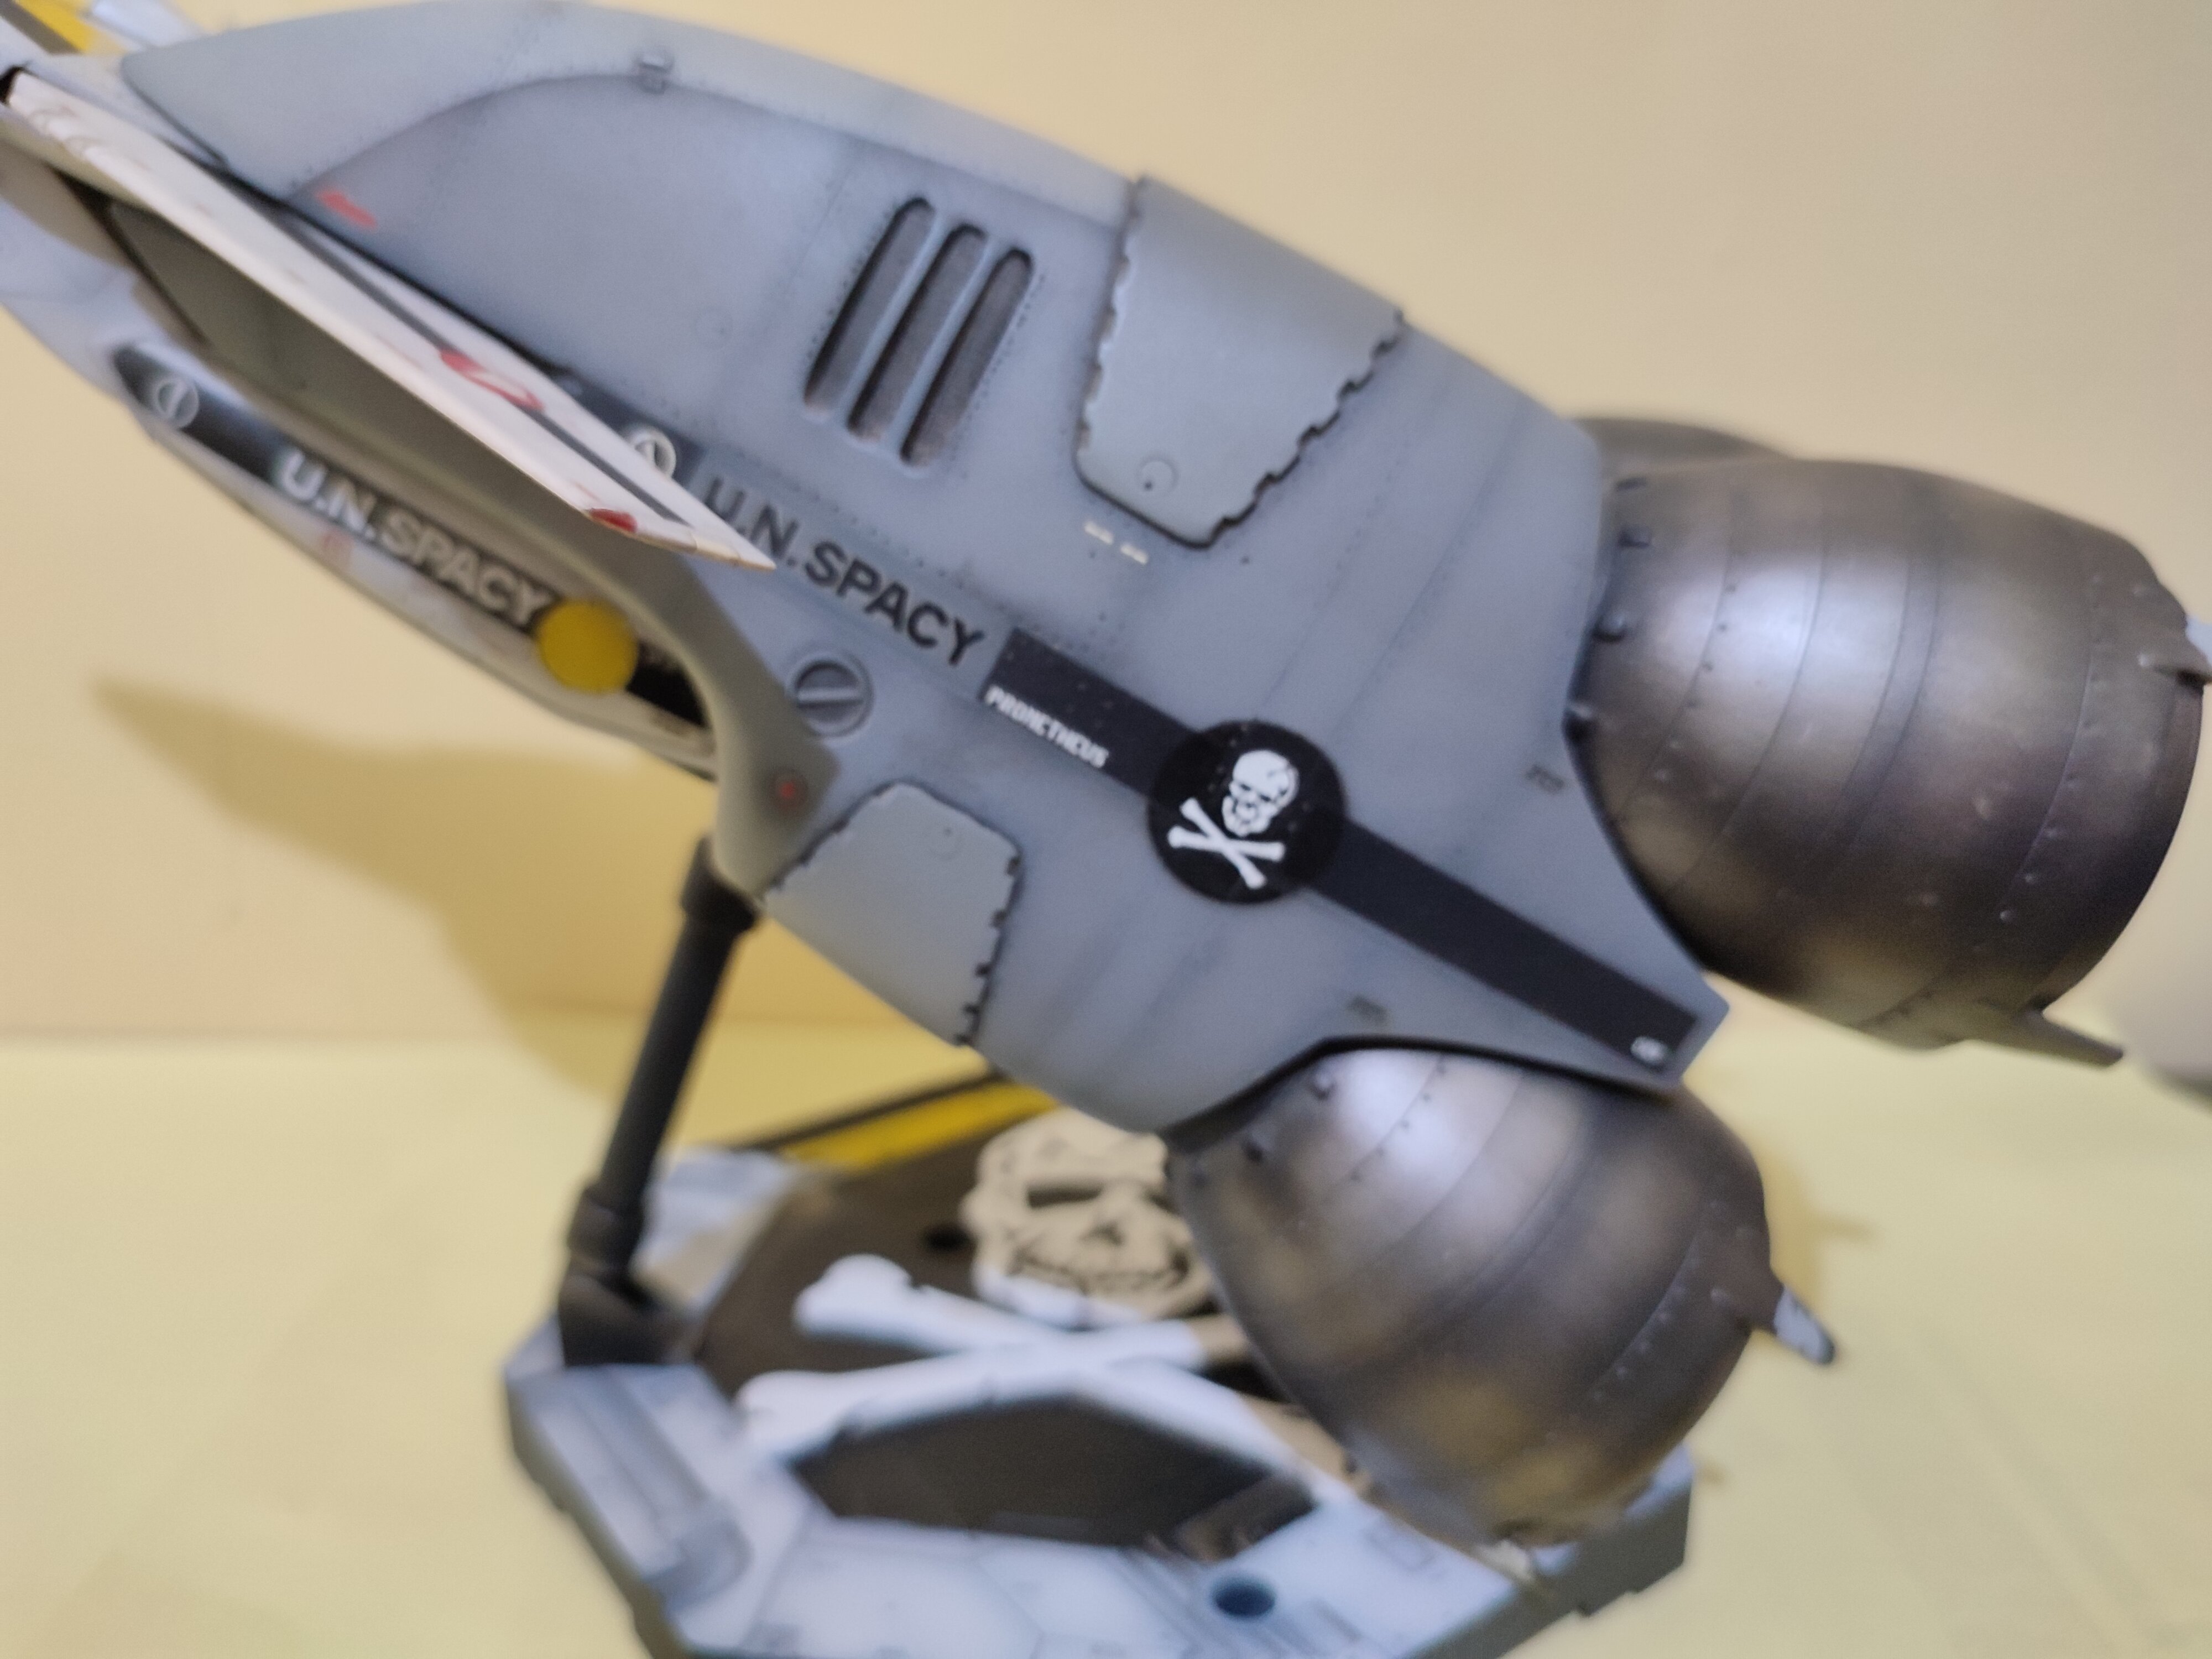


-
MOSCATO HOBBY MODELLING CONTEST!!
captain america replied to captain america's topic in Anime or Science Fiction
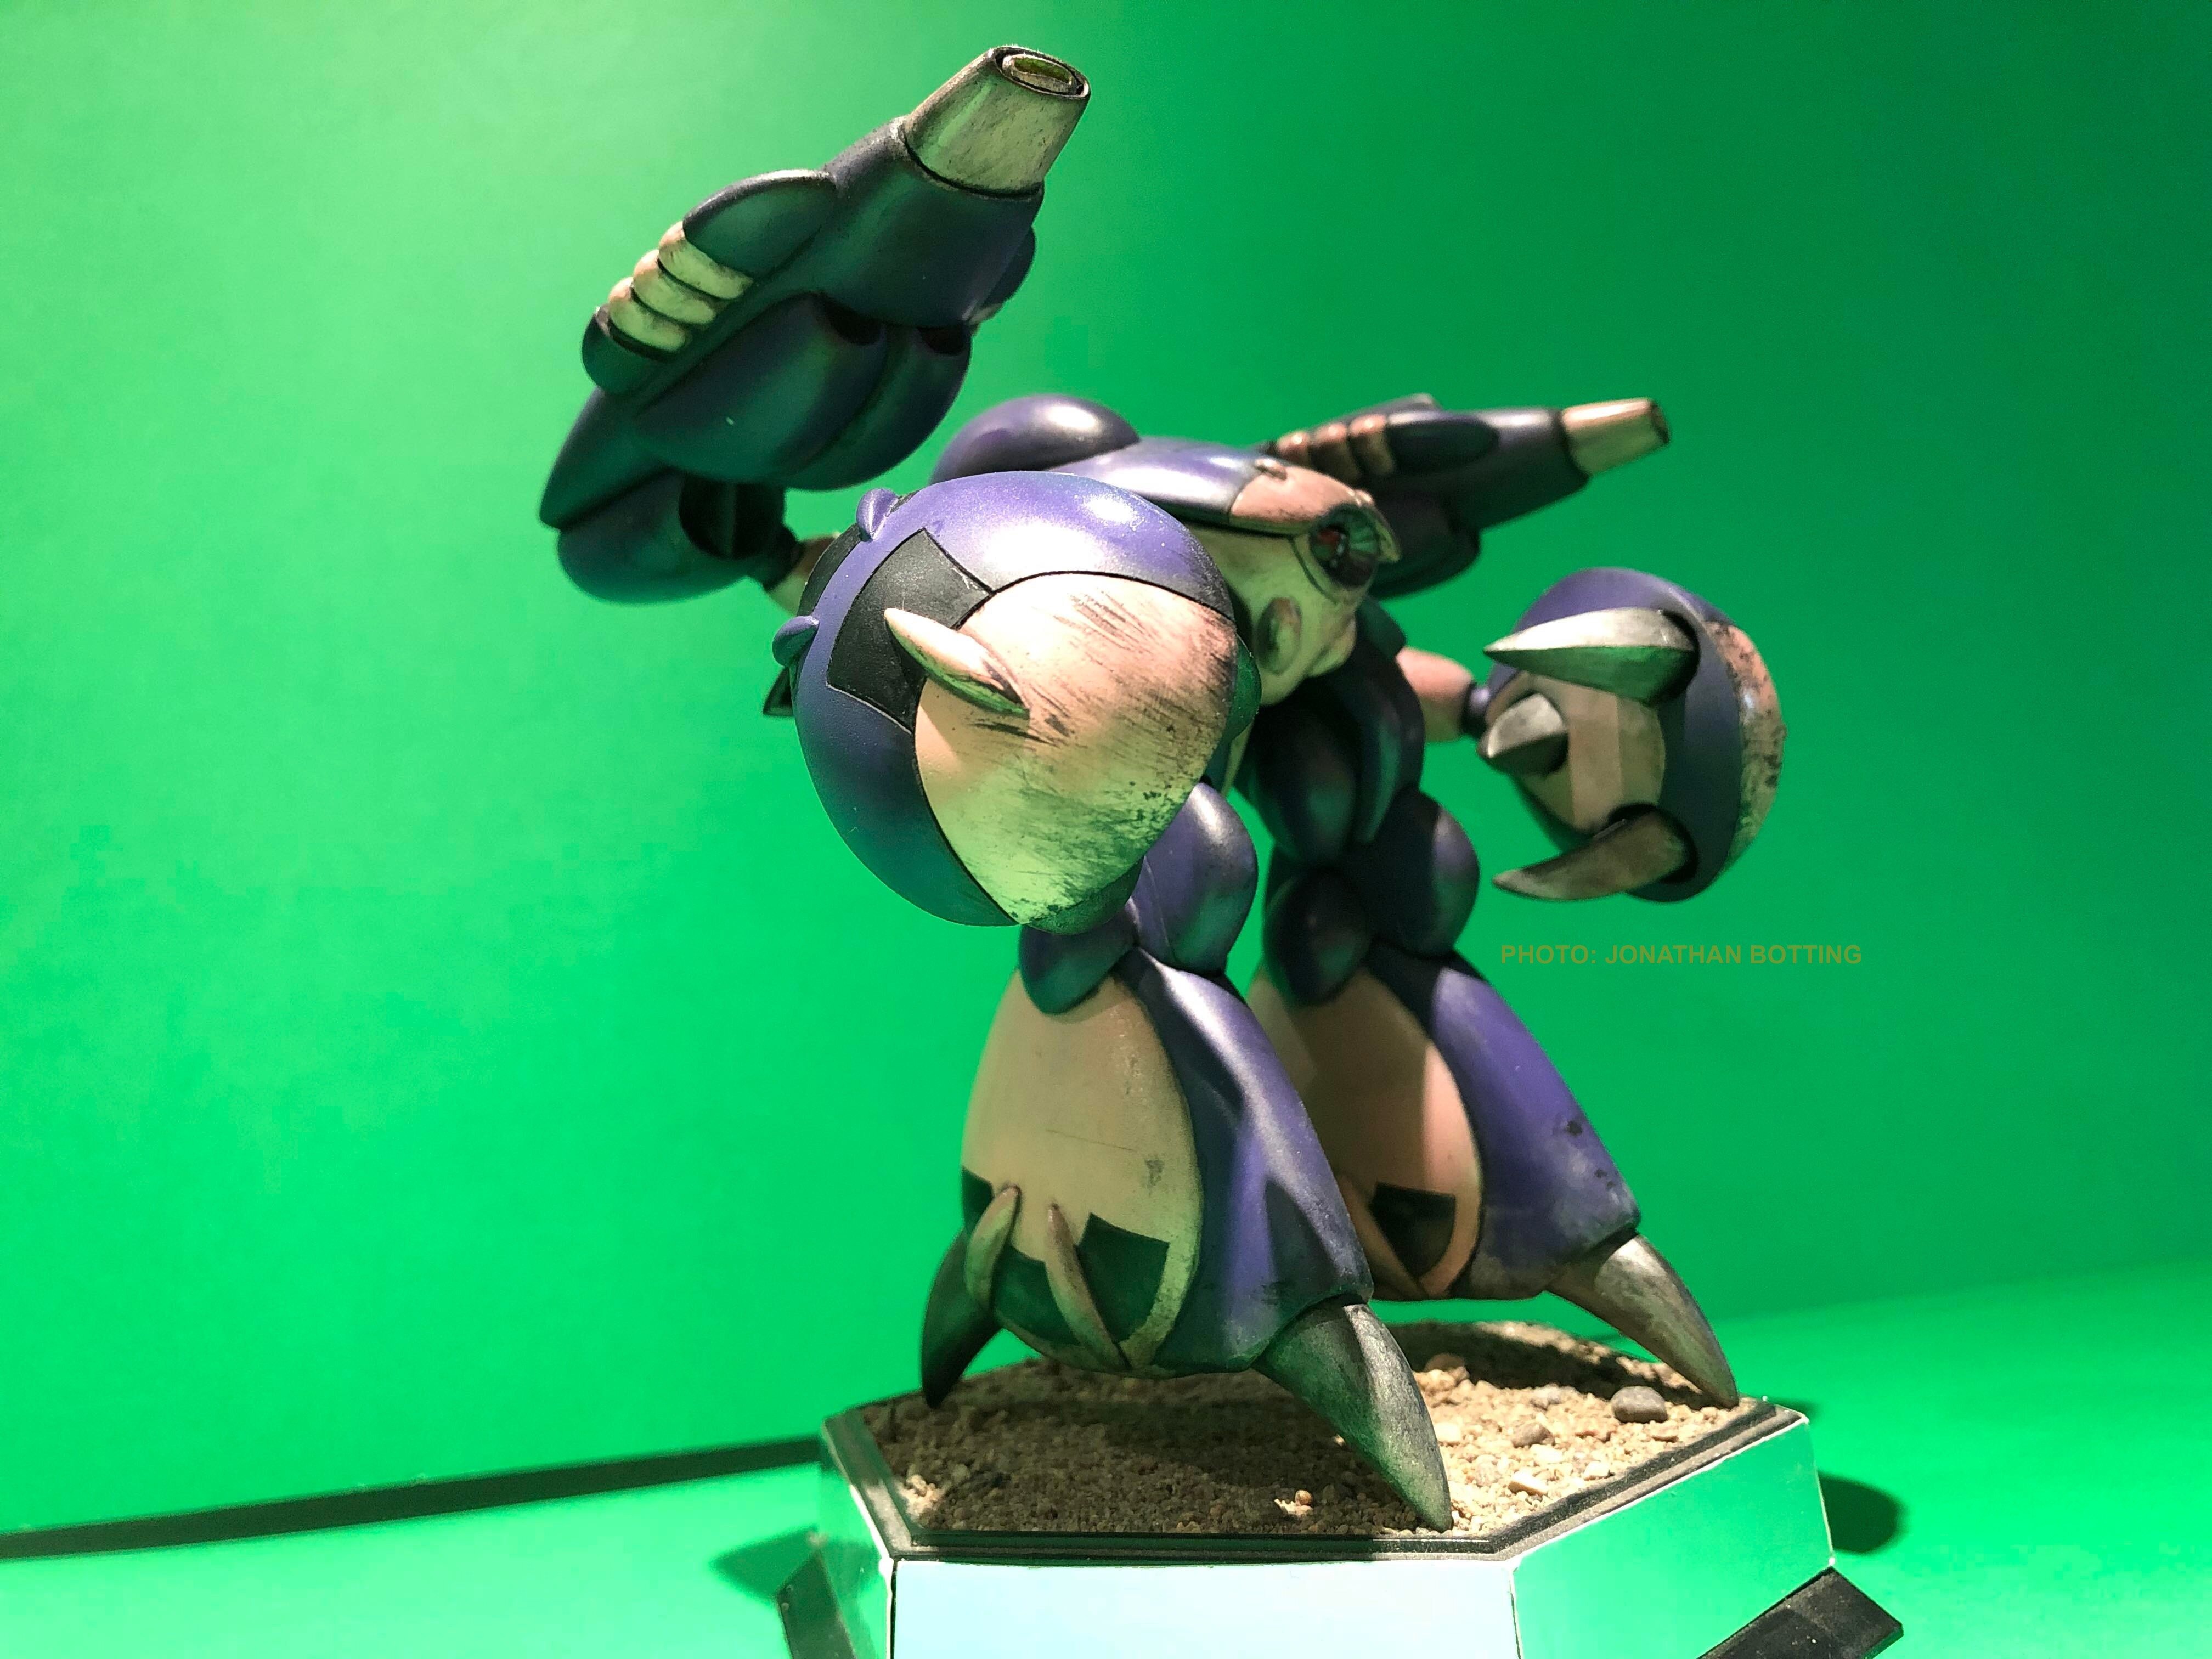
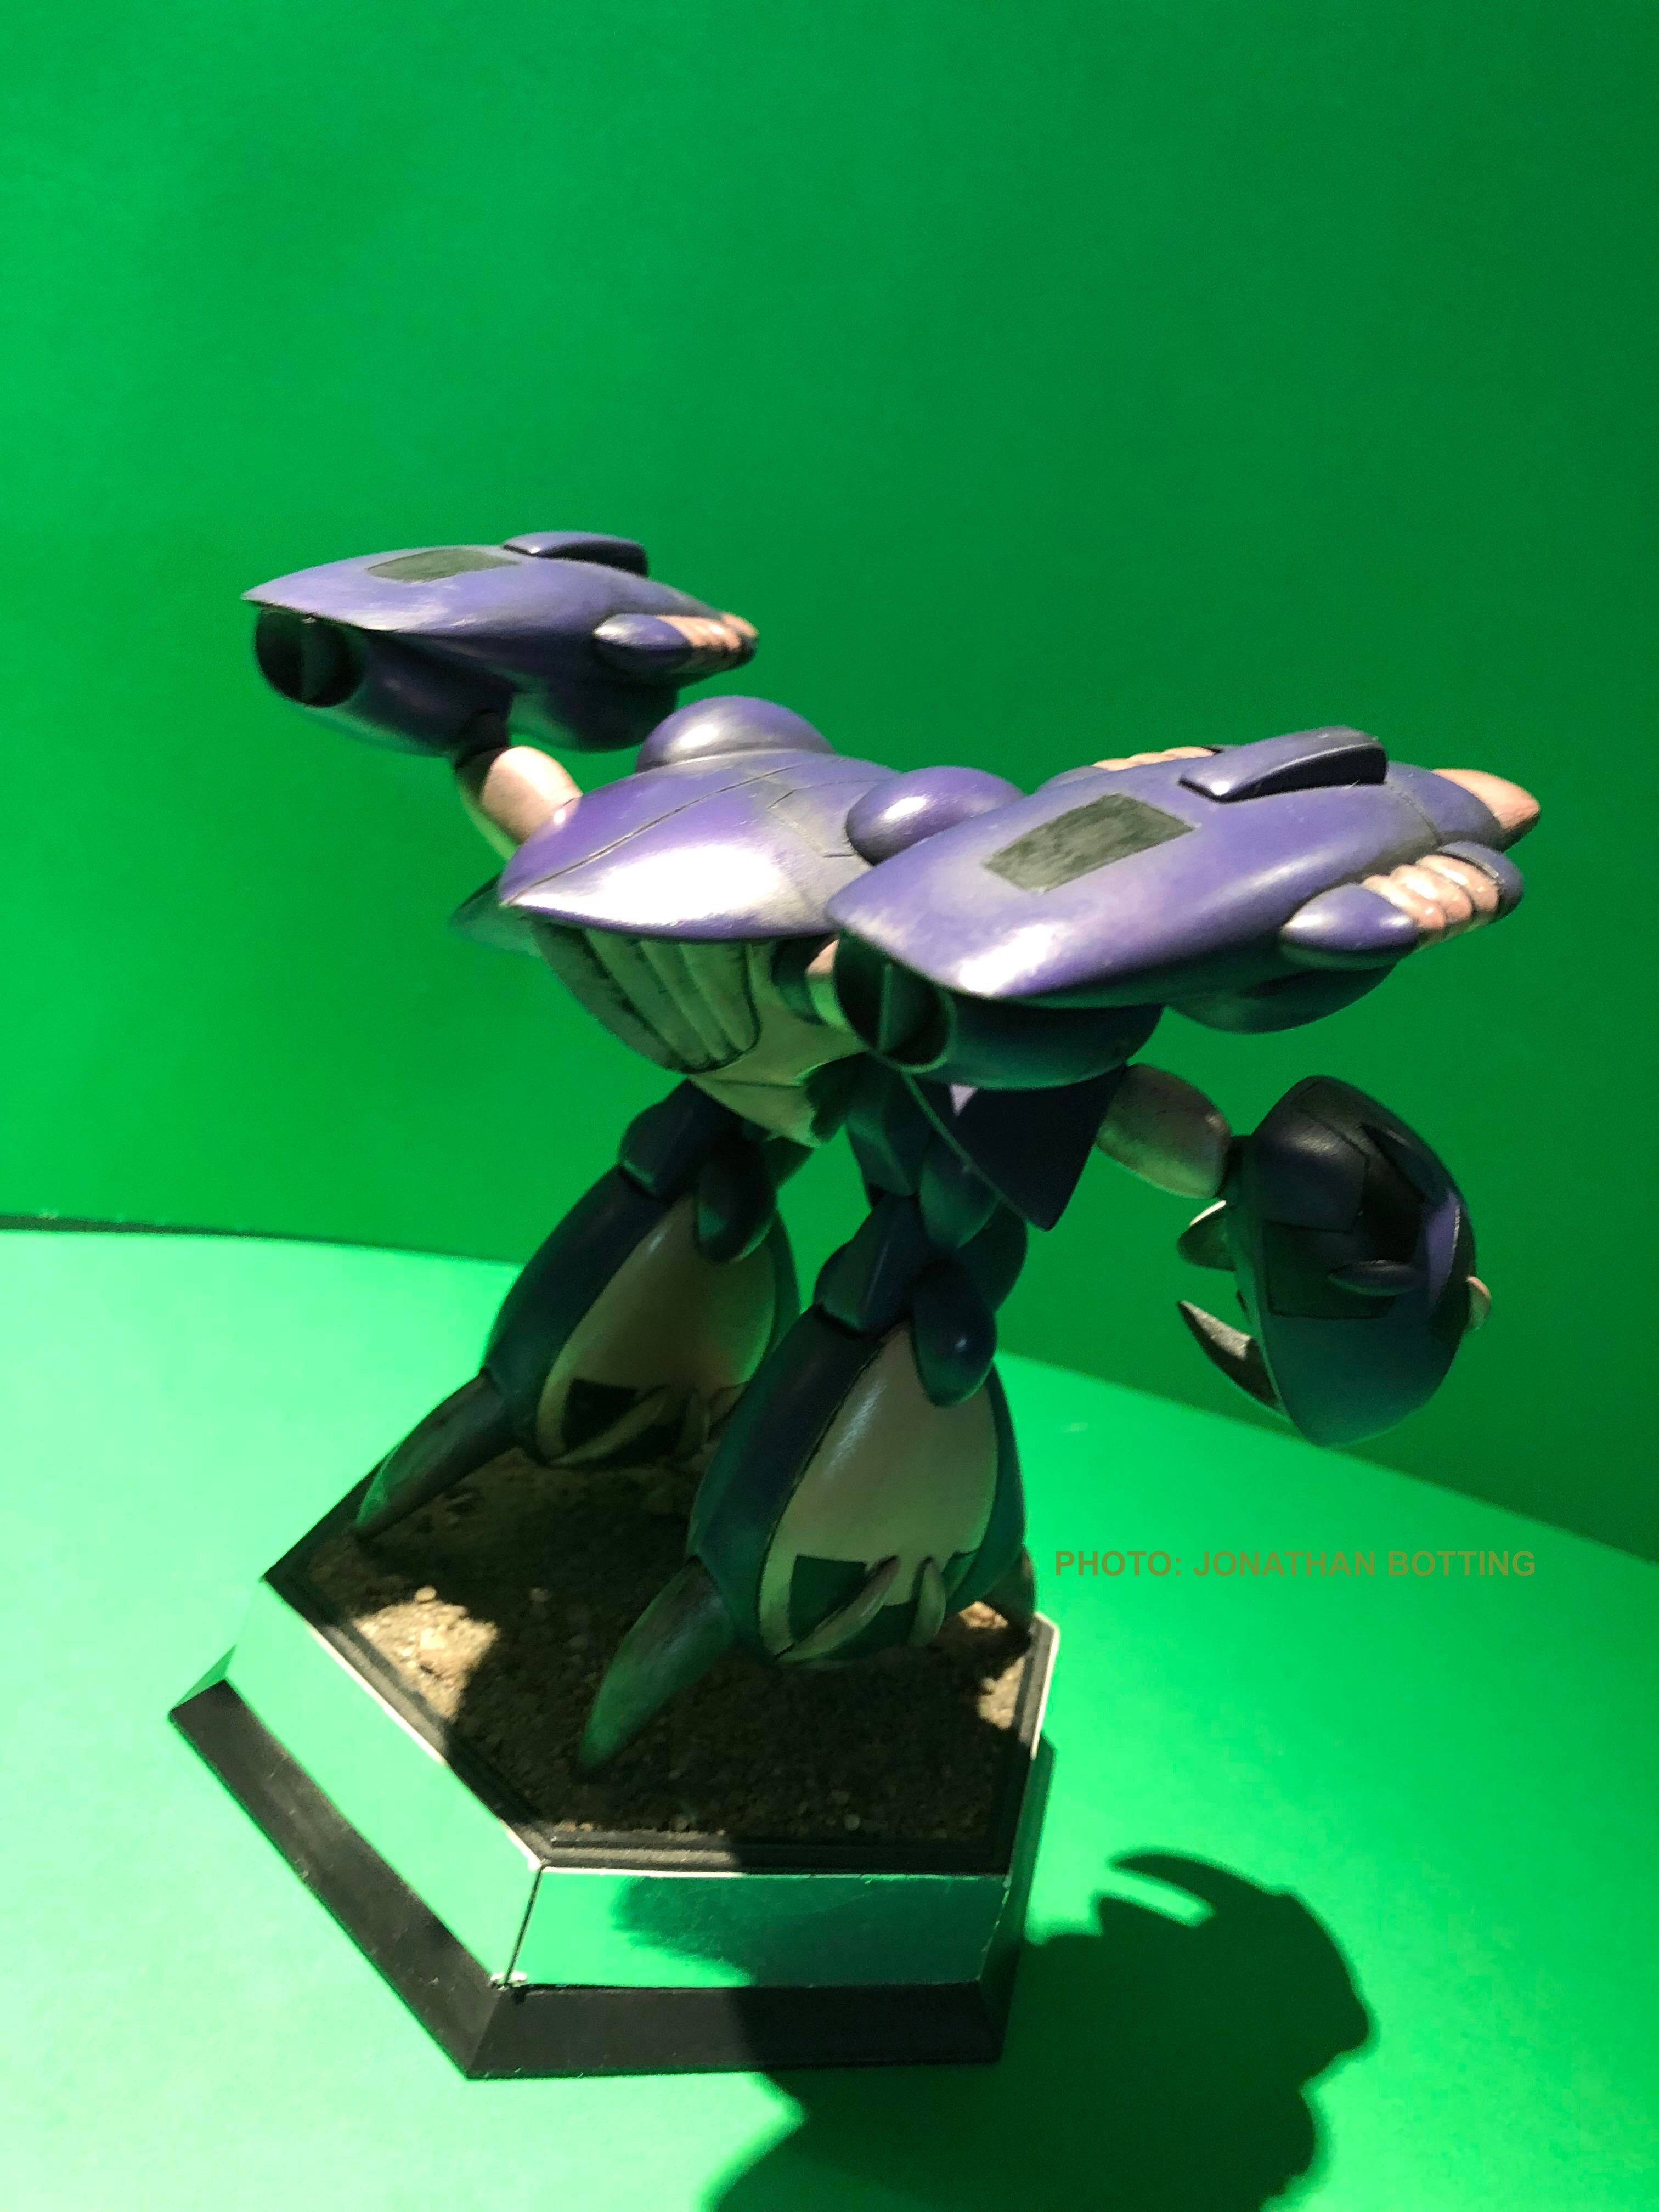
Jonathan Botting 1:48 scale Pinky Crab by MHM. Painted in Tamiya acrylics and weathered with Tamiya’s panel line wash and weathering powders. Base is a re-purposed 1/100 VF-1 stand with yard sand glued on top and silver paper on the sides.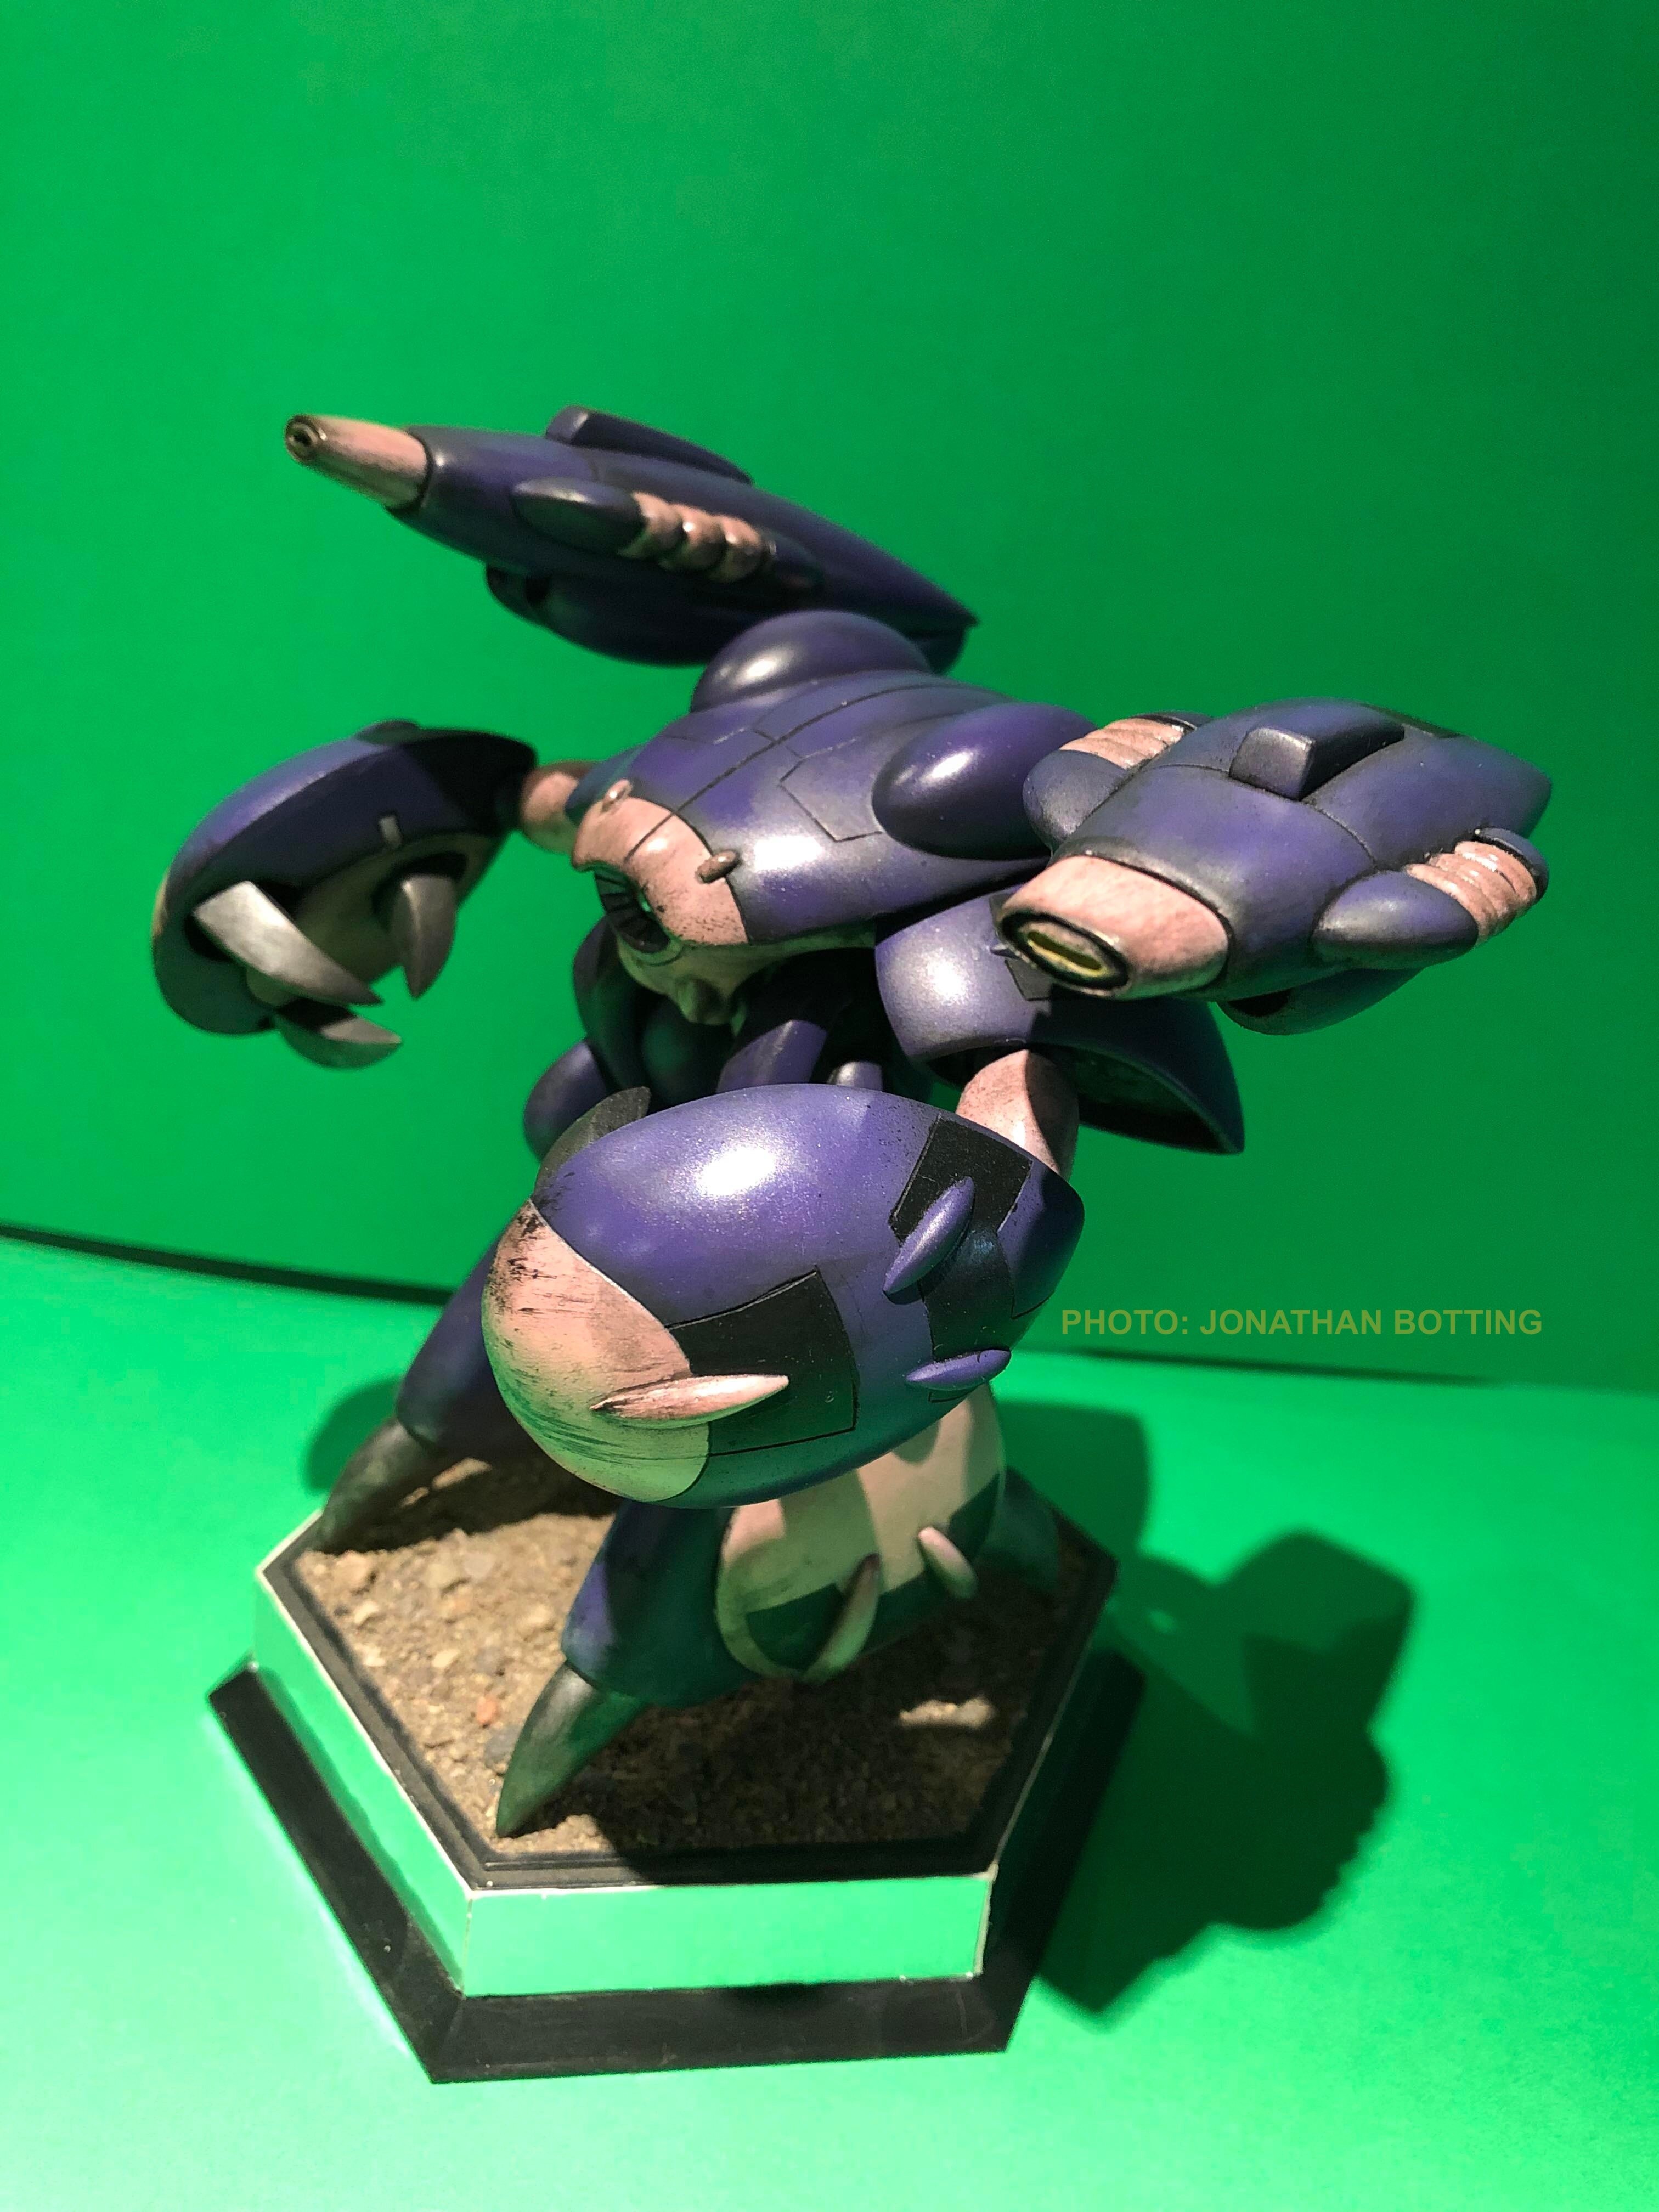
-
MOSCATO HOBBY MODELLING CONTEST!!
captain america replied to captain america's topic in Anime or Science Fiction
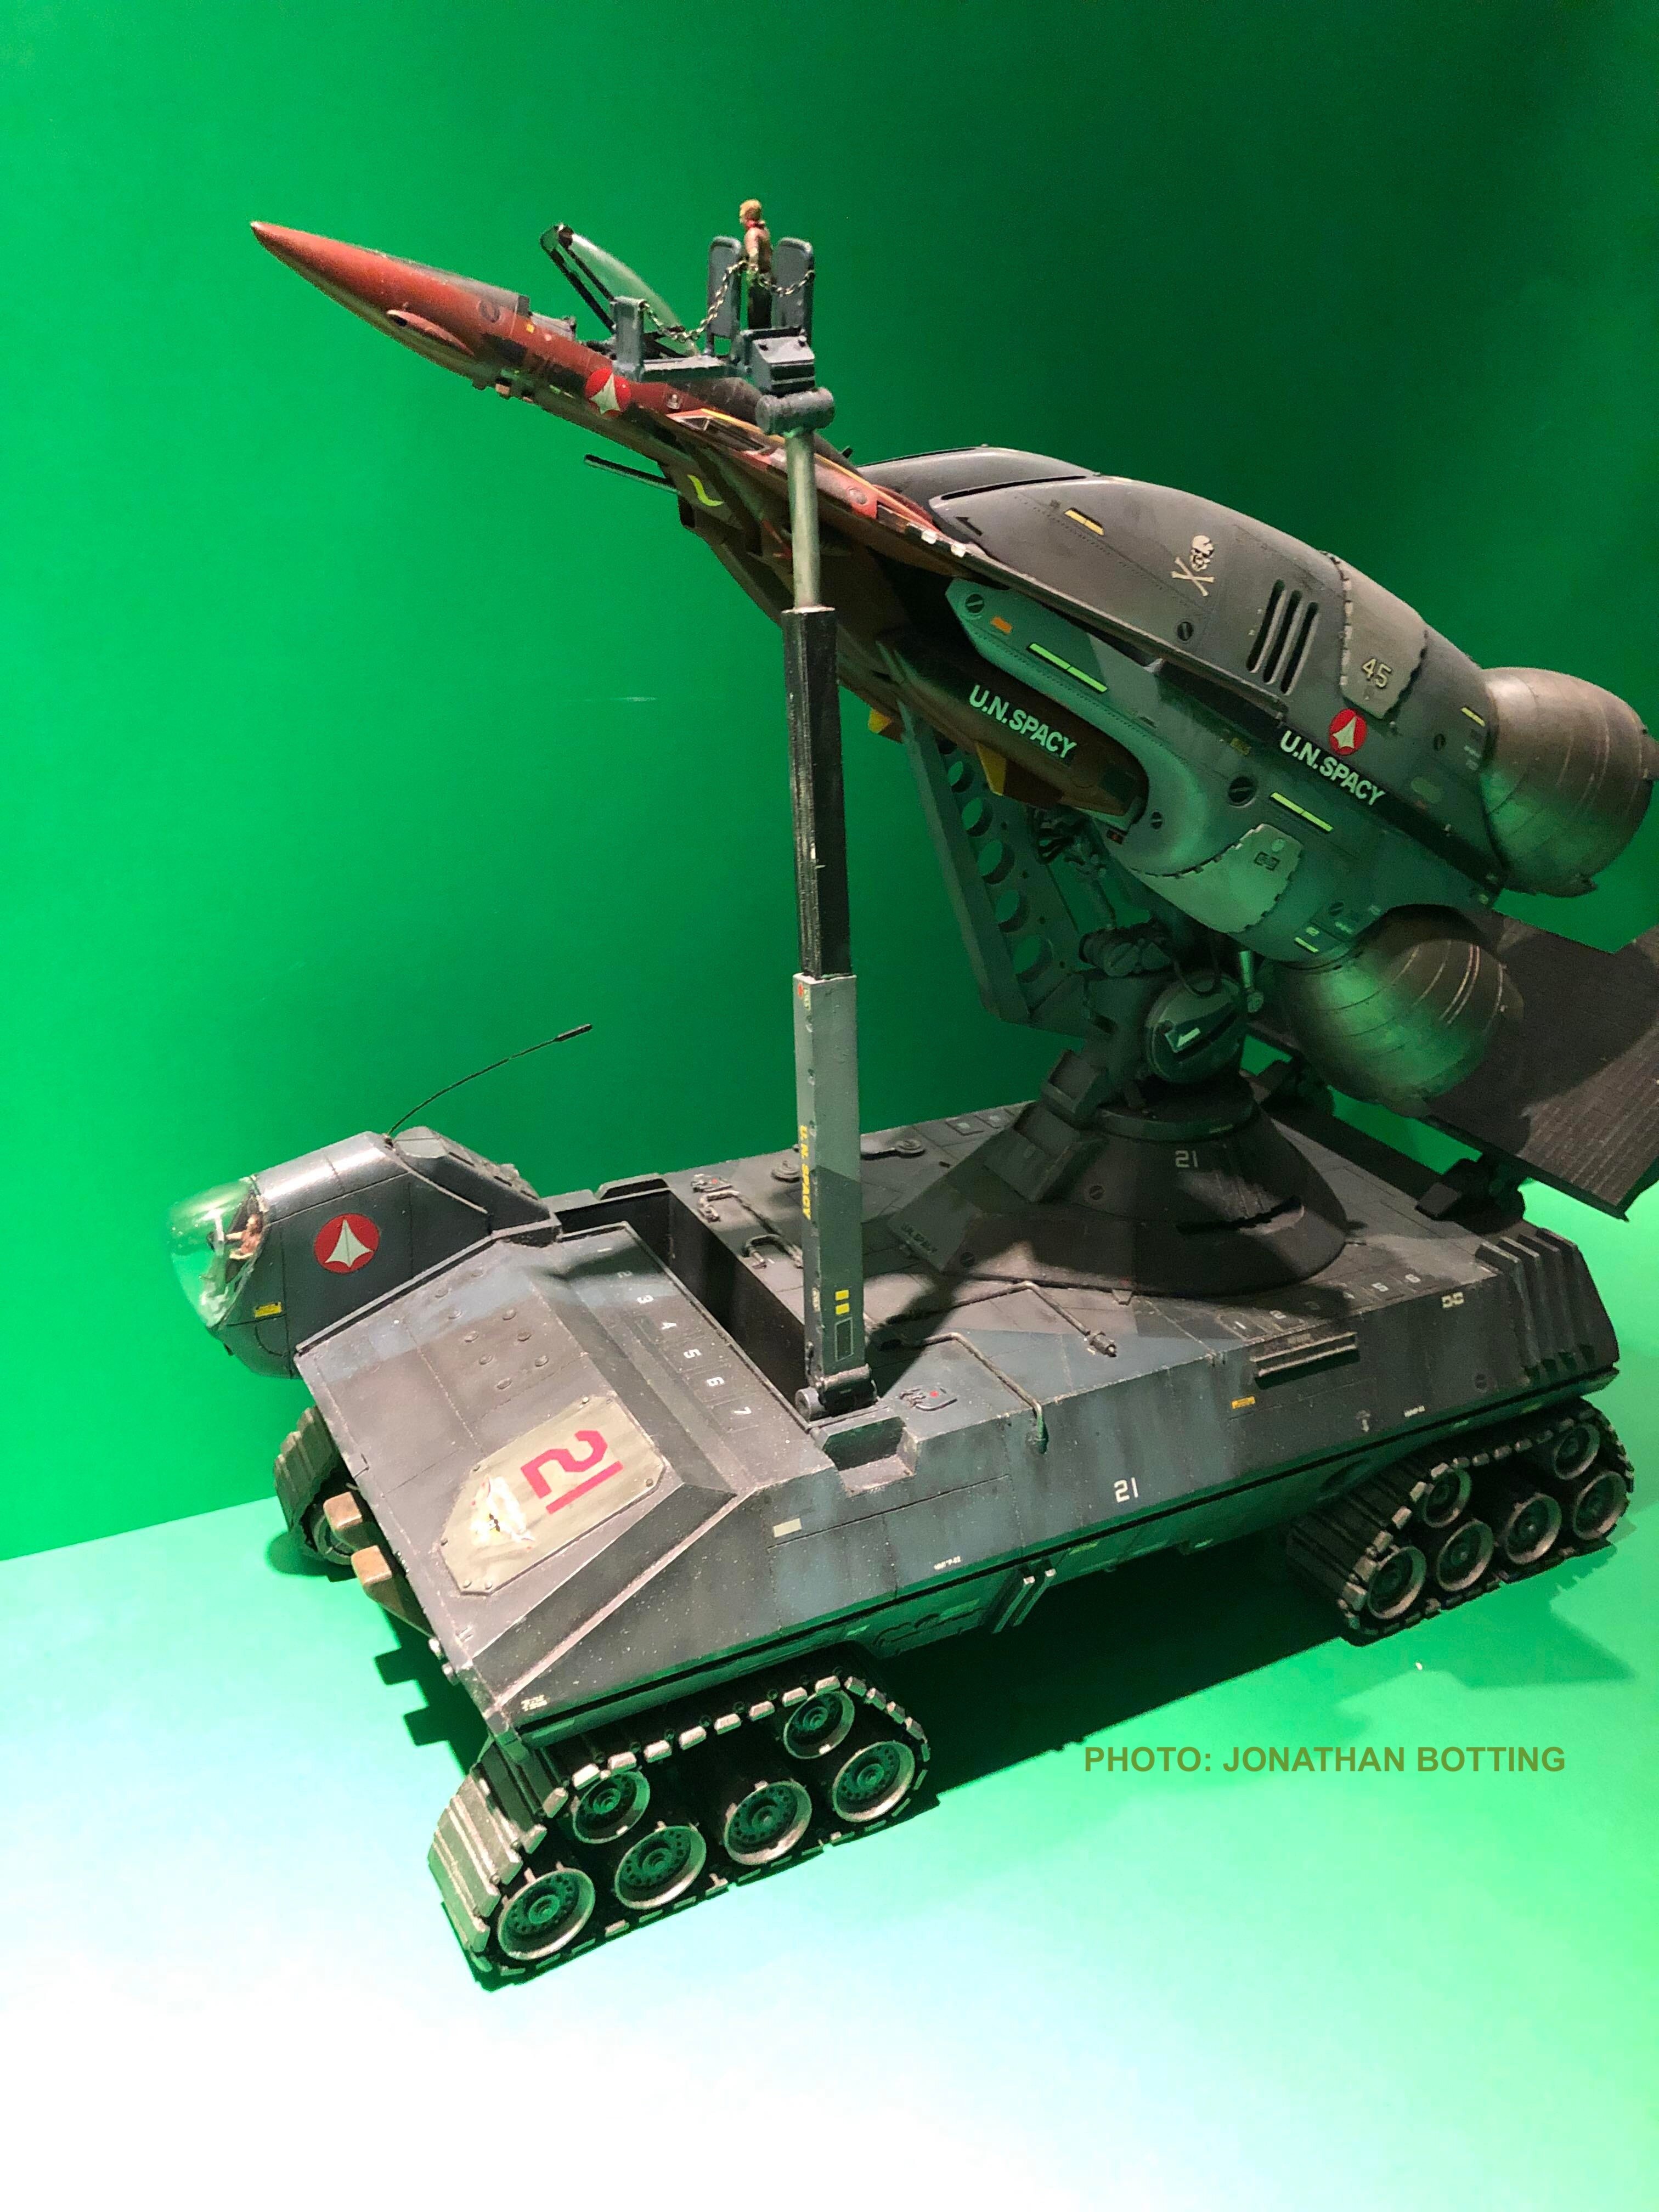
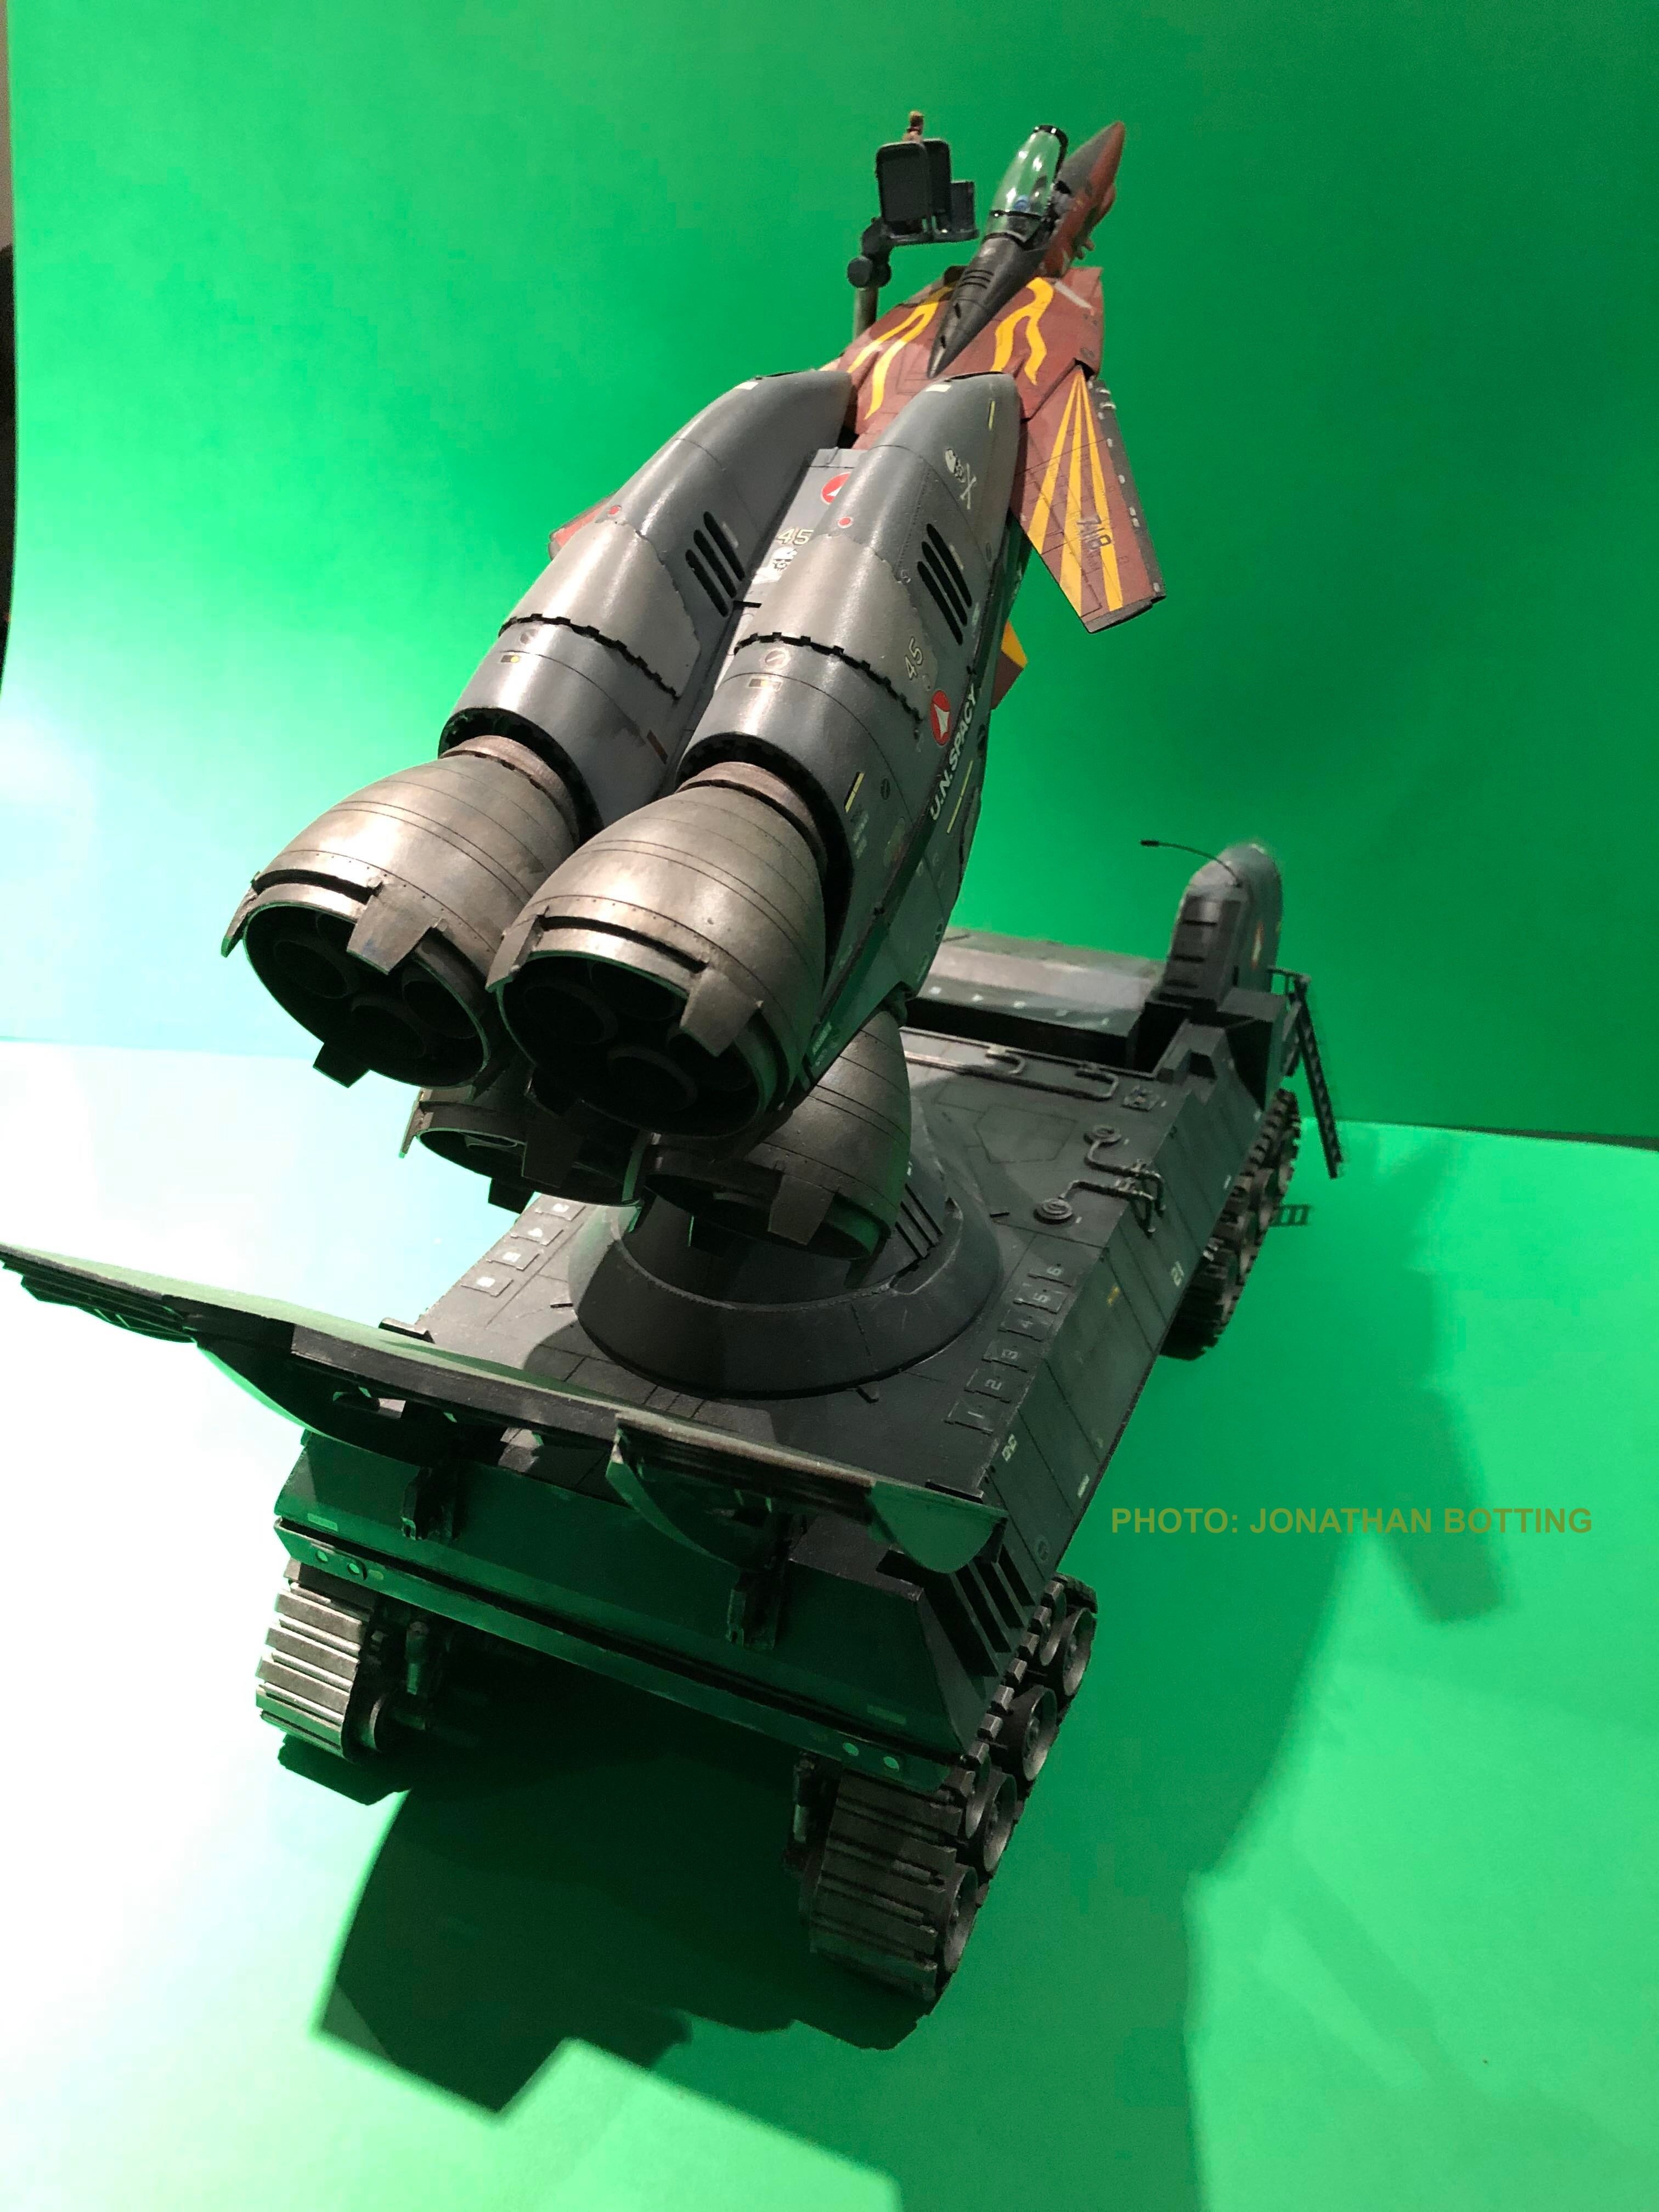
It begins! Jonathan Botting Macross 1/72 Launch Crawler, purchased in three components; launch vehicle, boosters with launch rail and Hasegawa 1/72 VF-1. Airbrushed with Tamiya acrylics and weathered with Tamiya panel line wash and weathering powders. Decals substituted from surplus collection. Custom made ladder, rail, display console and finished with a unique paint scheme.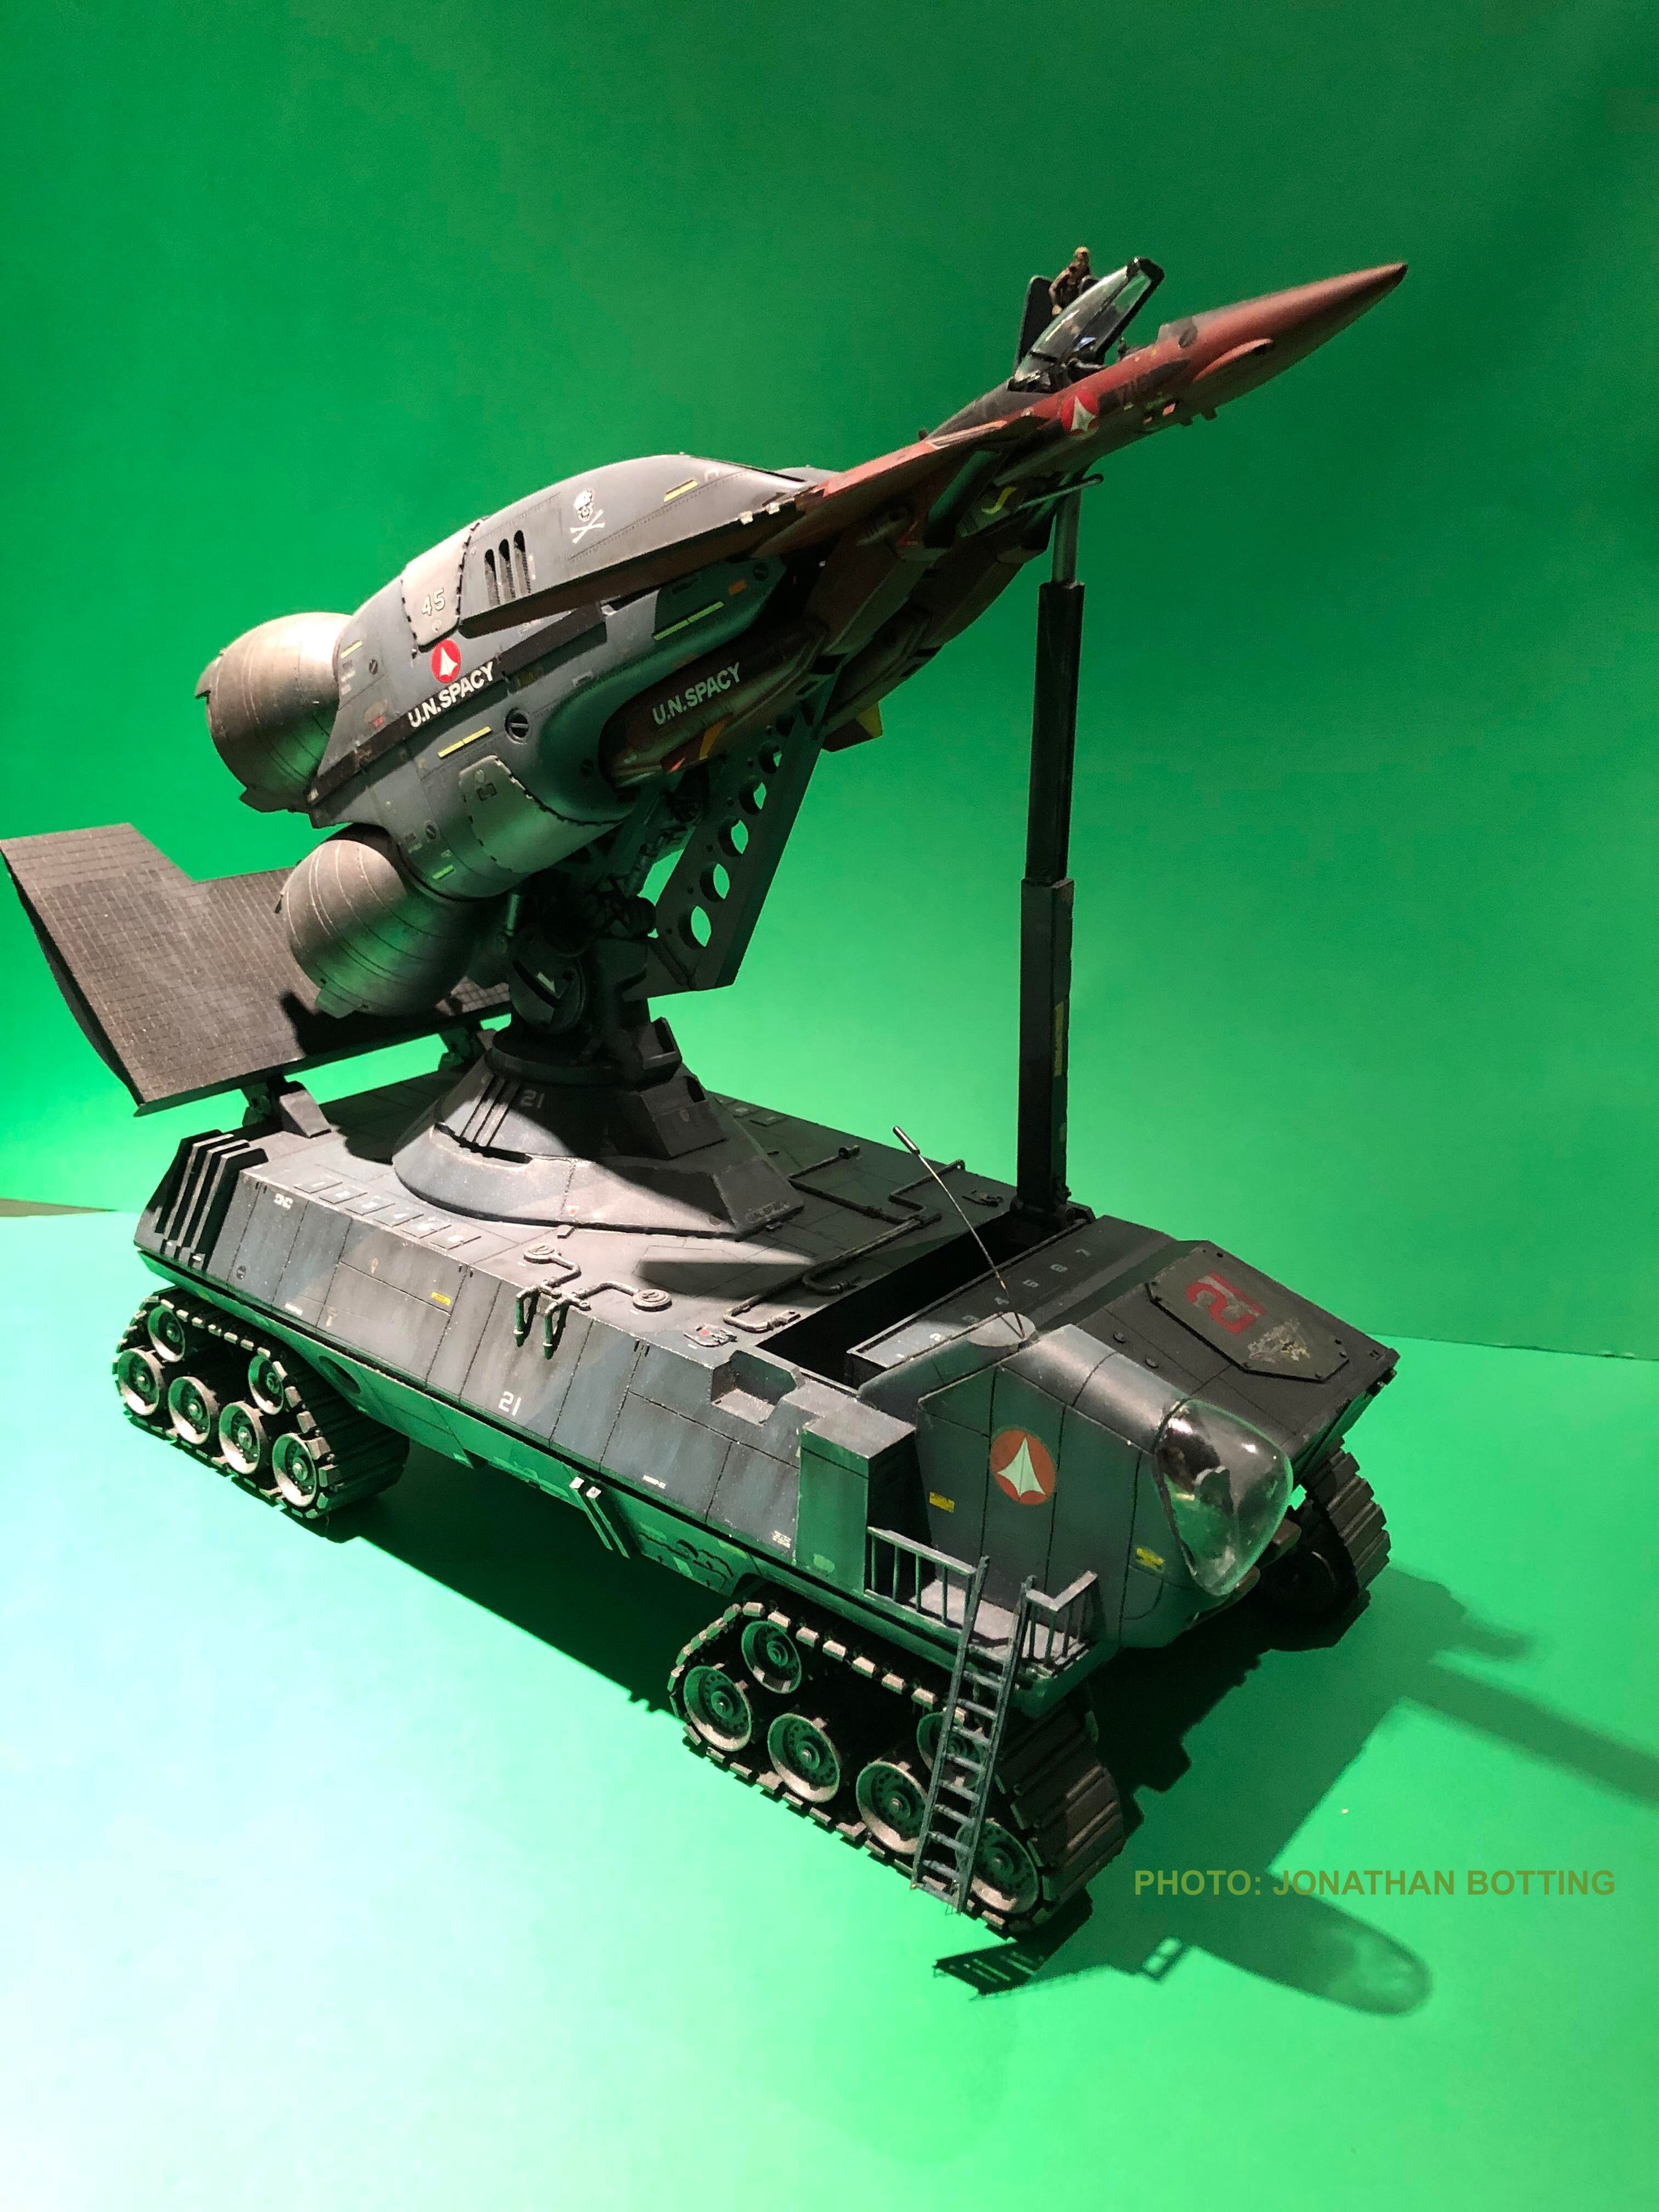
-
MOSCATO HOBBY MODELLING CONTEST!!
captain america replied to captain america's topic in Anime or Science Fiction
Ouch! I feel your pain, man. You know what, ironically, has never let me down? The cheapo store brand automotive primer. I've used lacquers, acrylics, enamels, and even automotive paints over it with no problems. -
Not really. My sculpt comes out to about 26.5cm when I pose the legs the same way. If a Zentradi is anywhere near the size of a battroid, the pod has to be bigger. This is the pitfall of officially licenced kits: you have to do what the licensor approves, and follow their nonsensical numerical values, even when those values violate logic and reason.
-
I really like the tread on the motorcycle tires on the Hoquet sculpt, though admittedly, they would make for a very rough & uncomfortable ride. *Dodges flying tomatoes*
-
22.5cm, apparently.
-
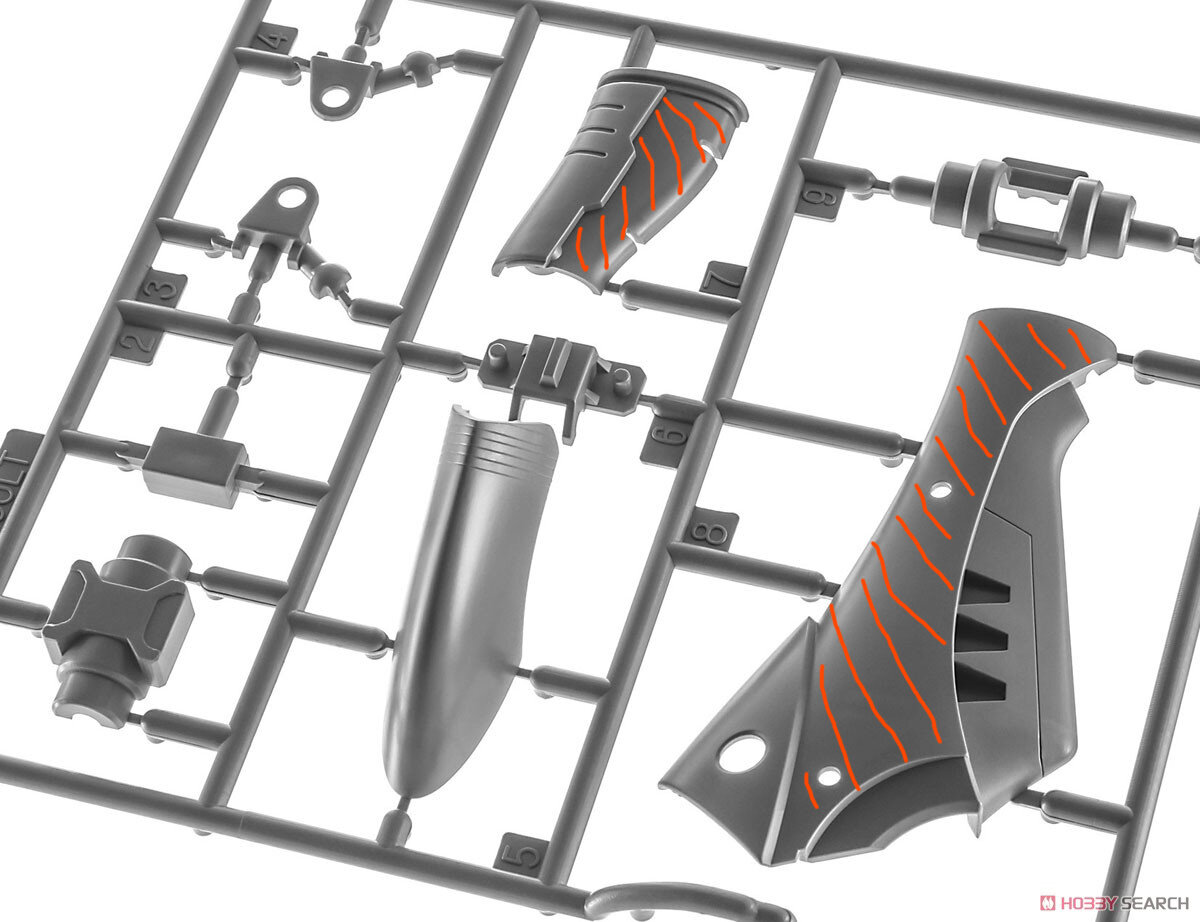
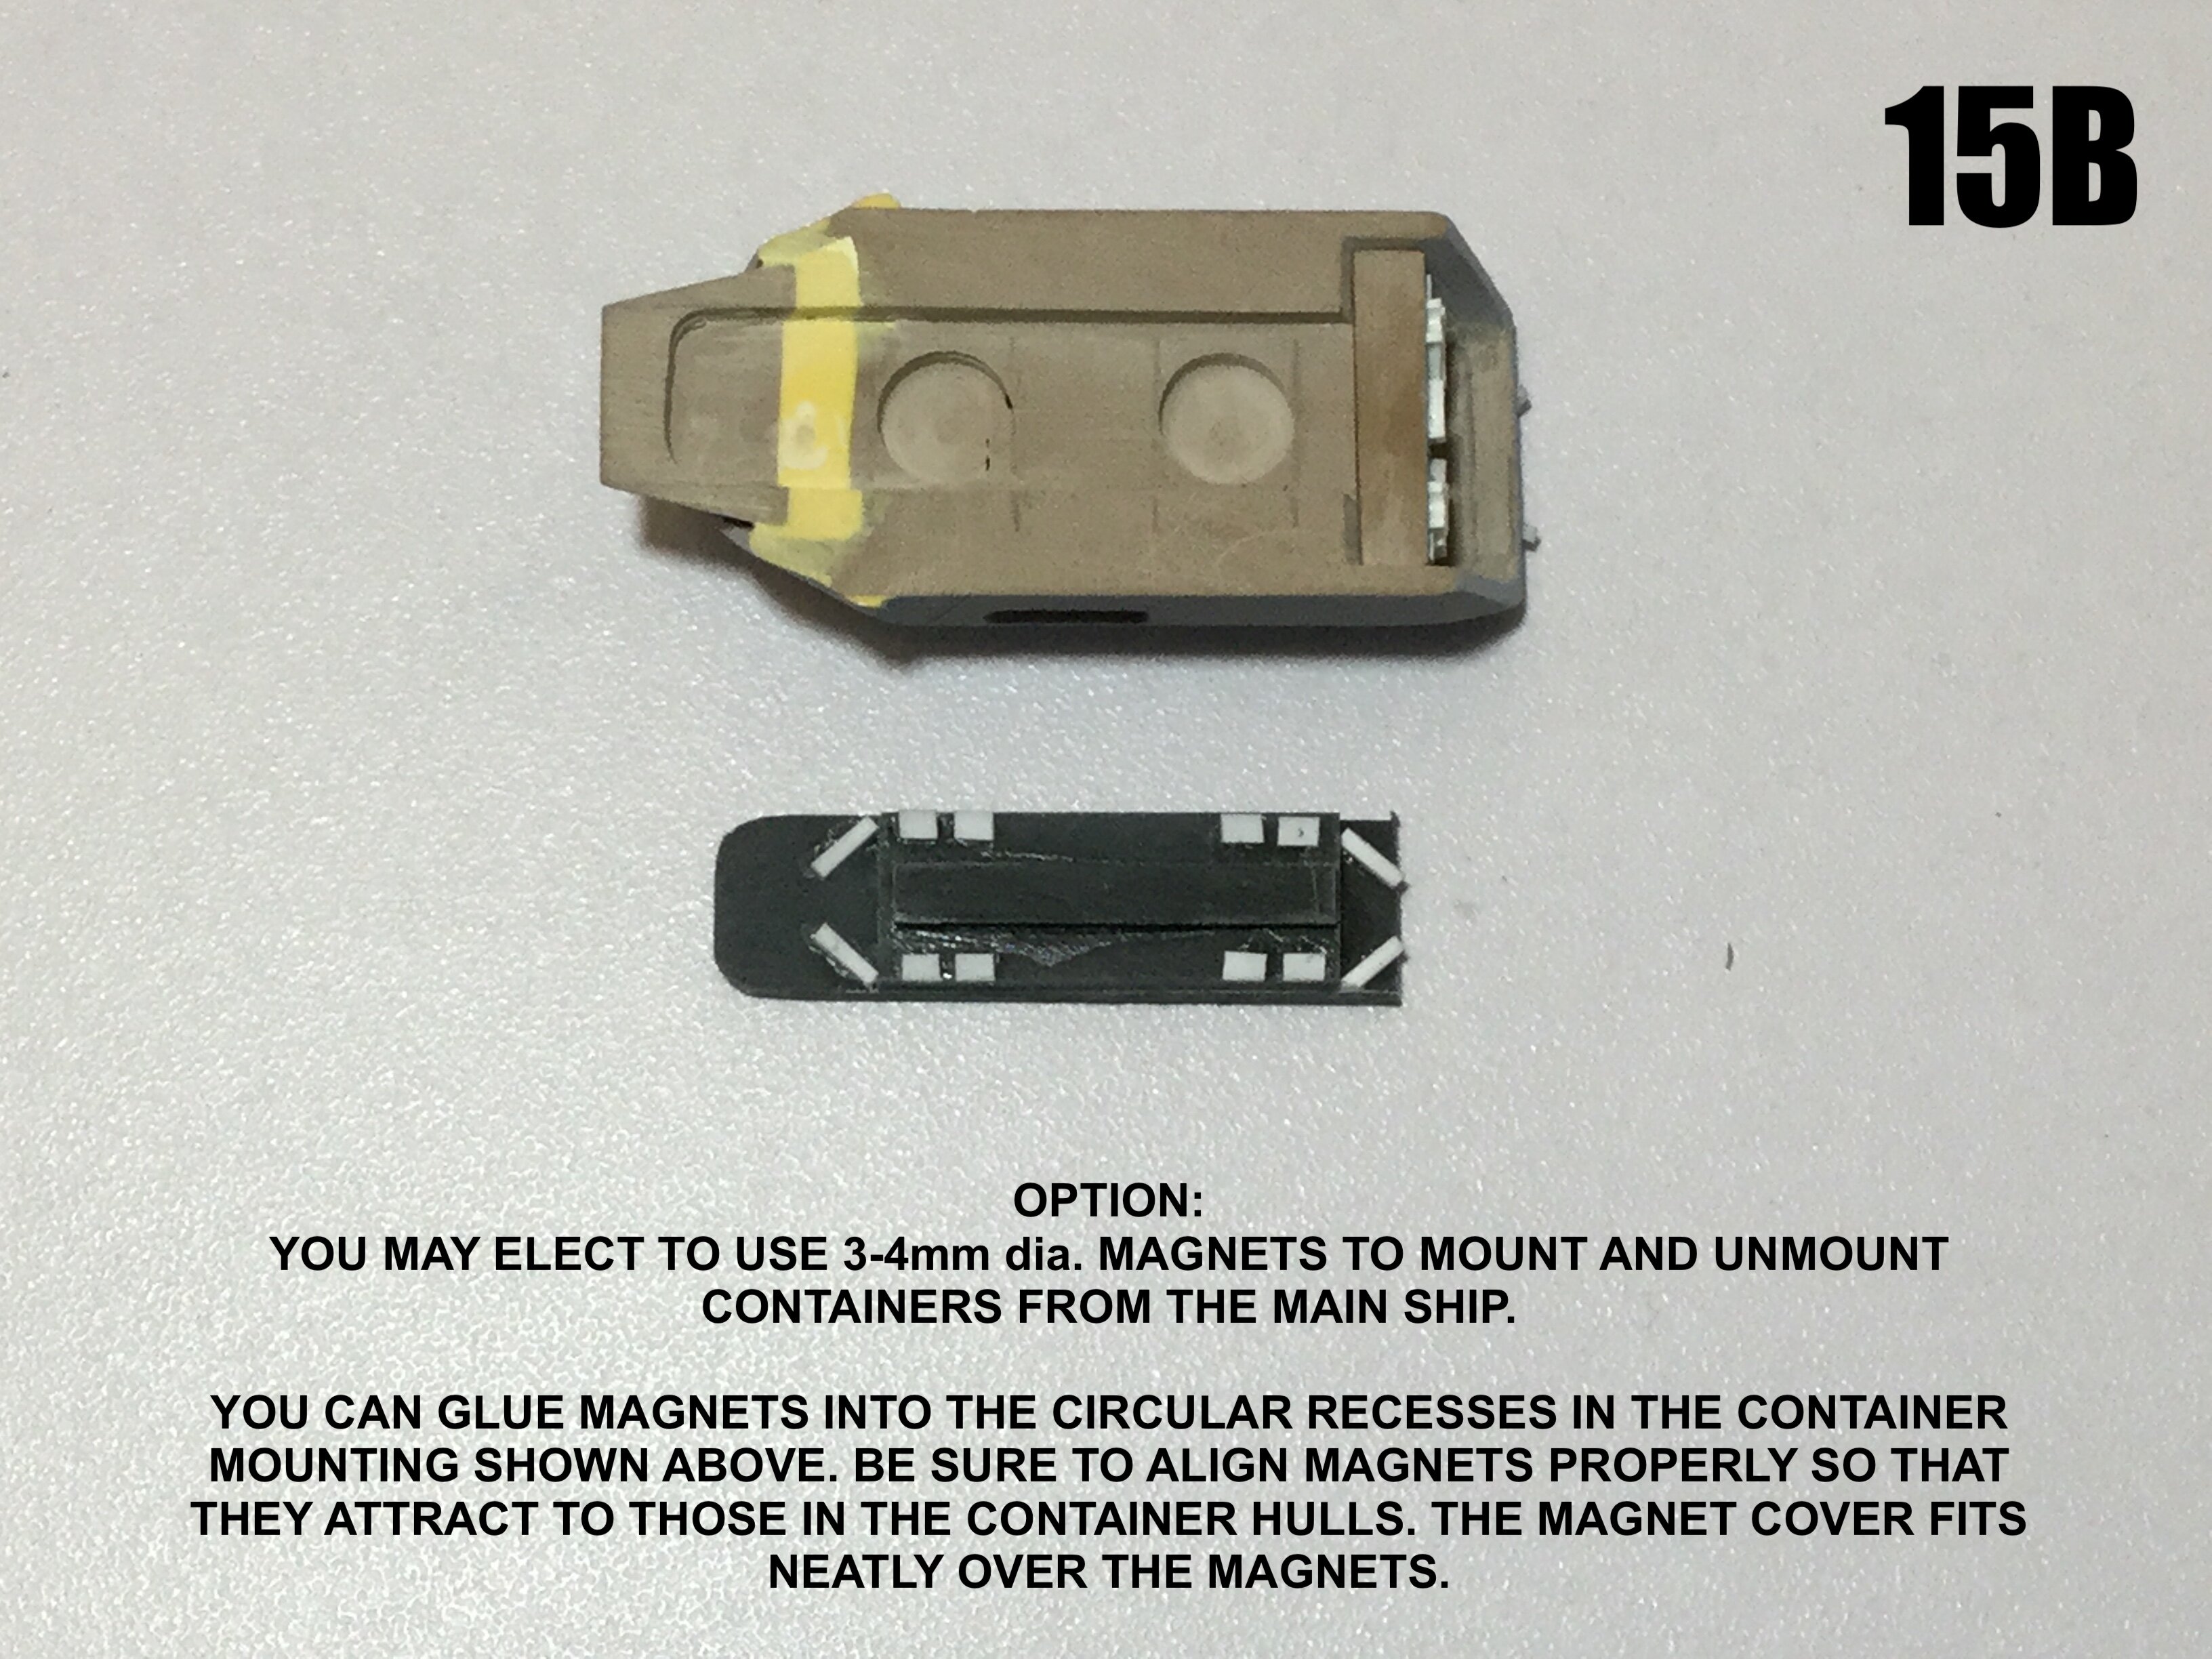
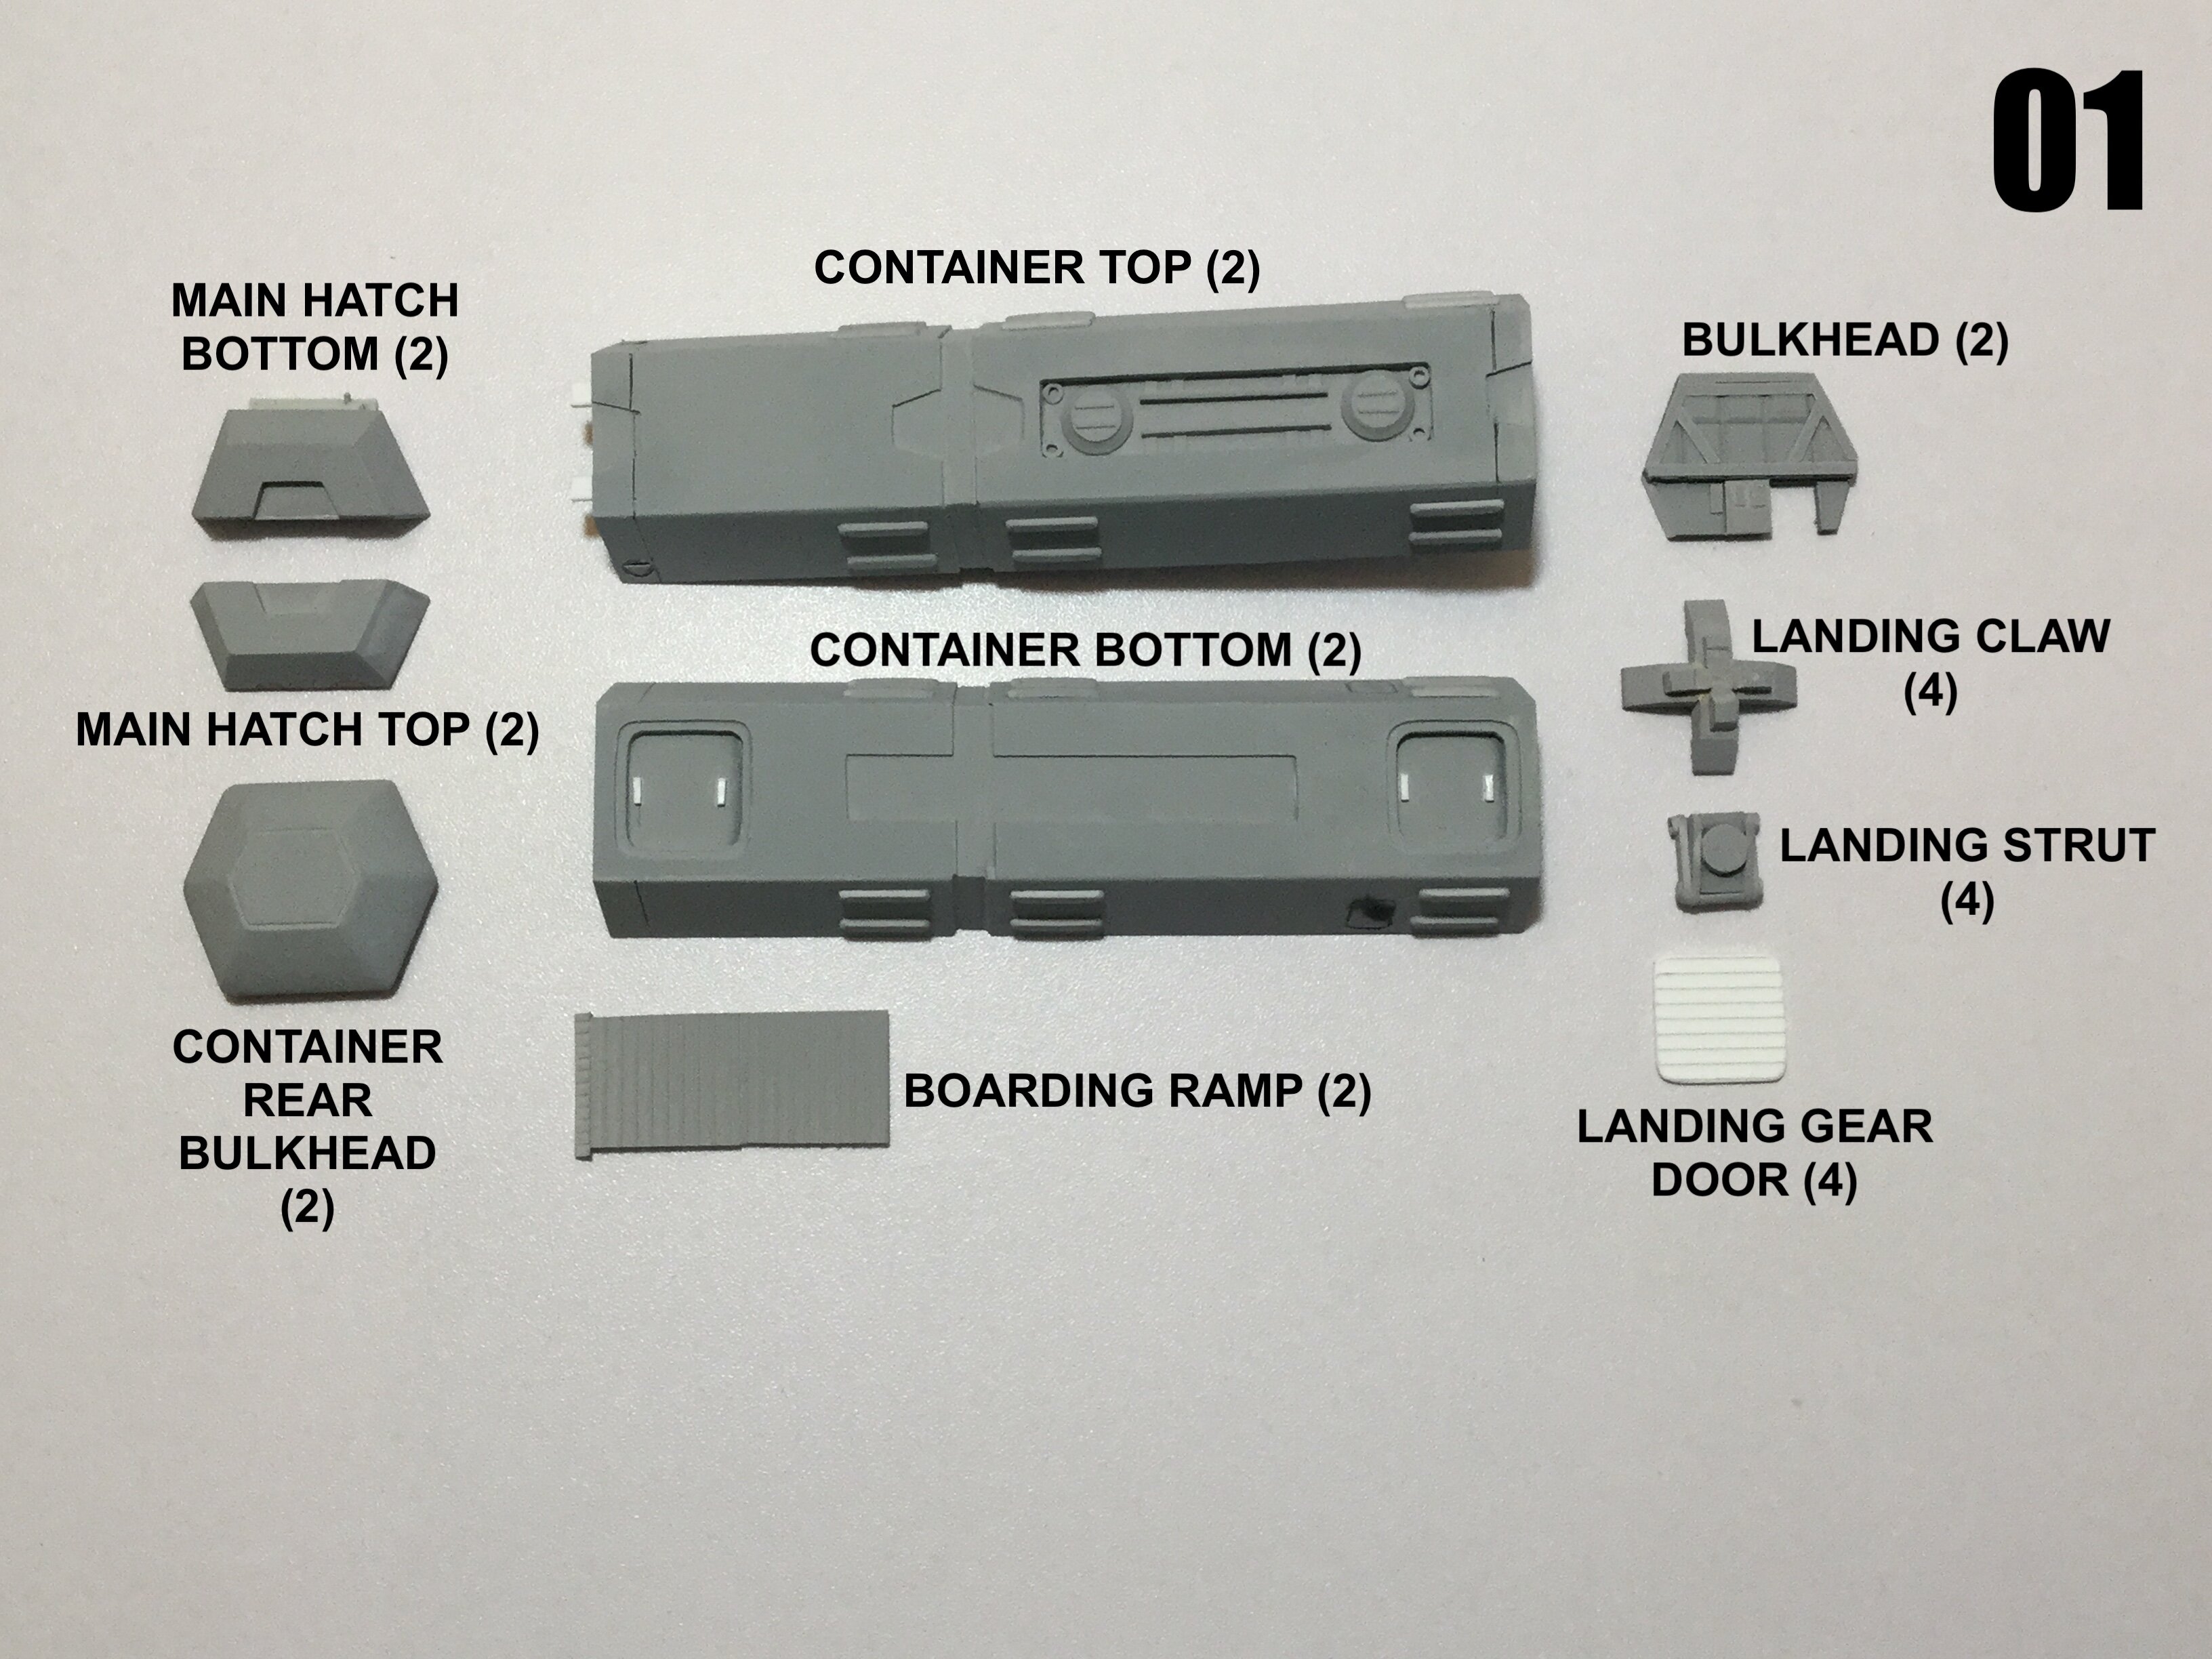
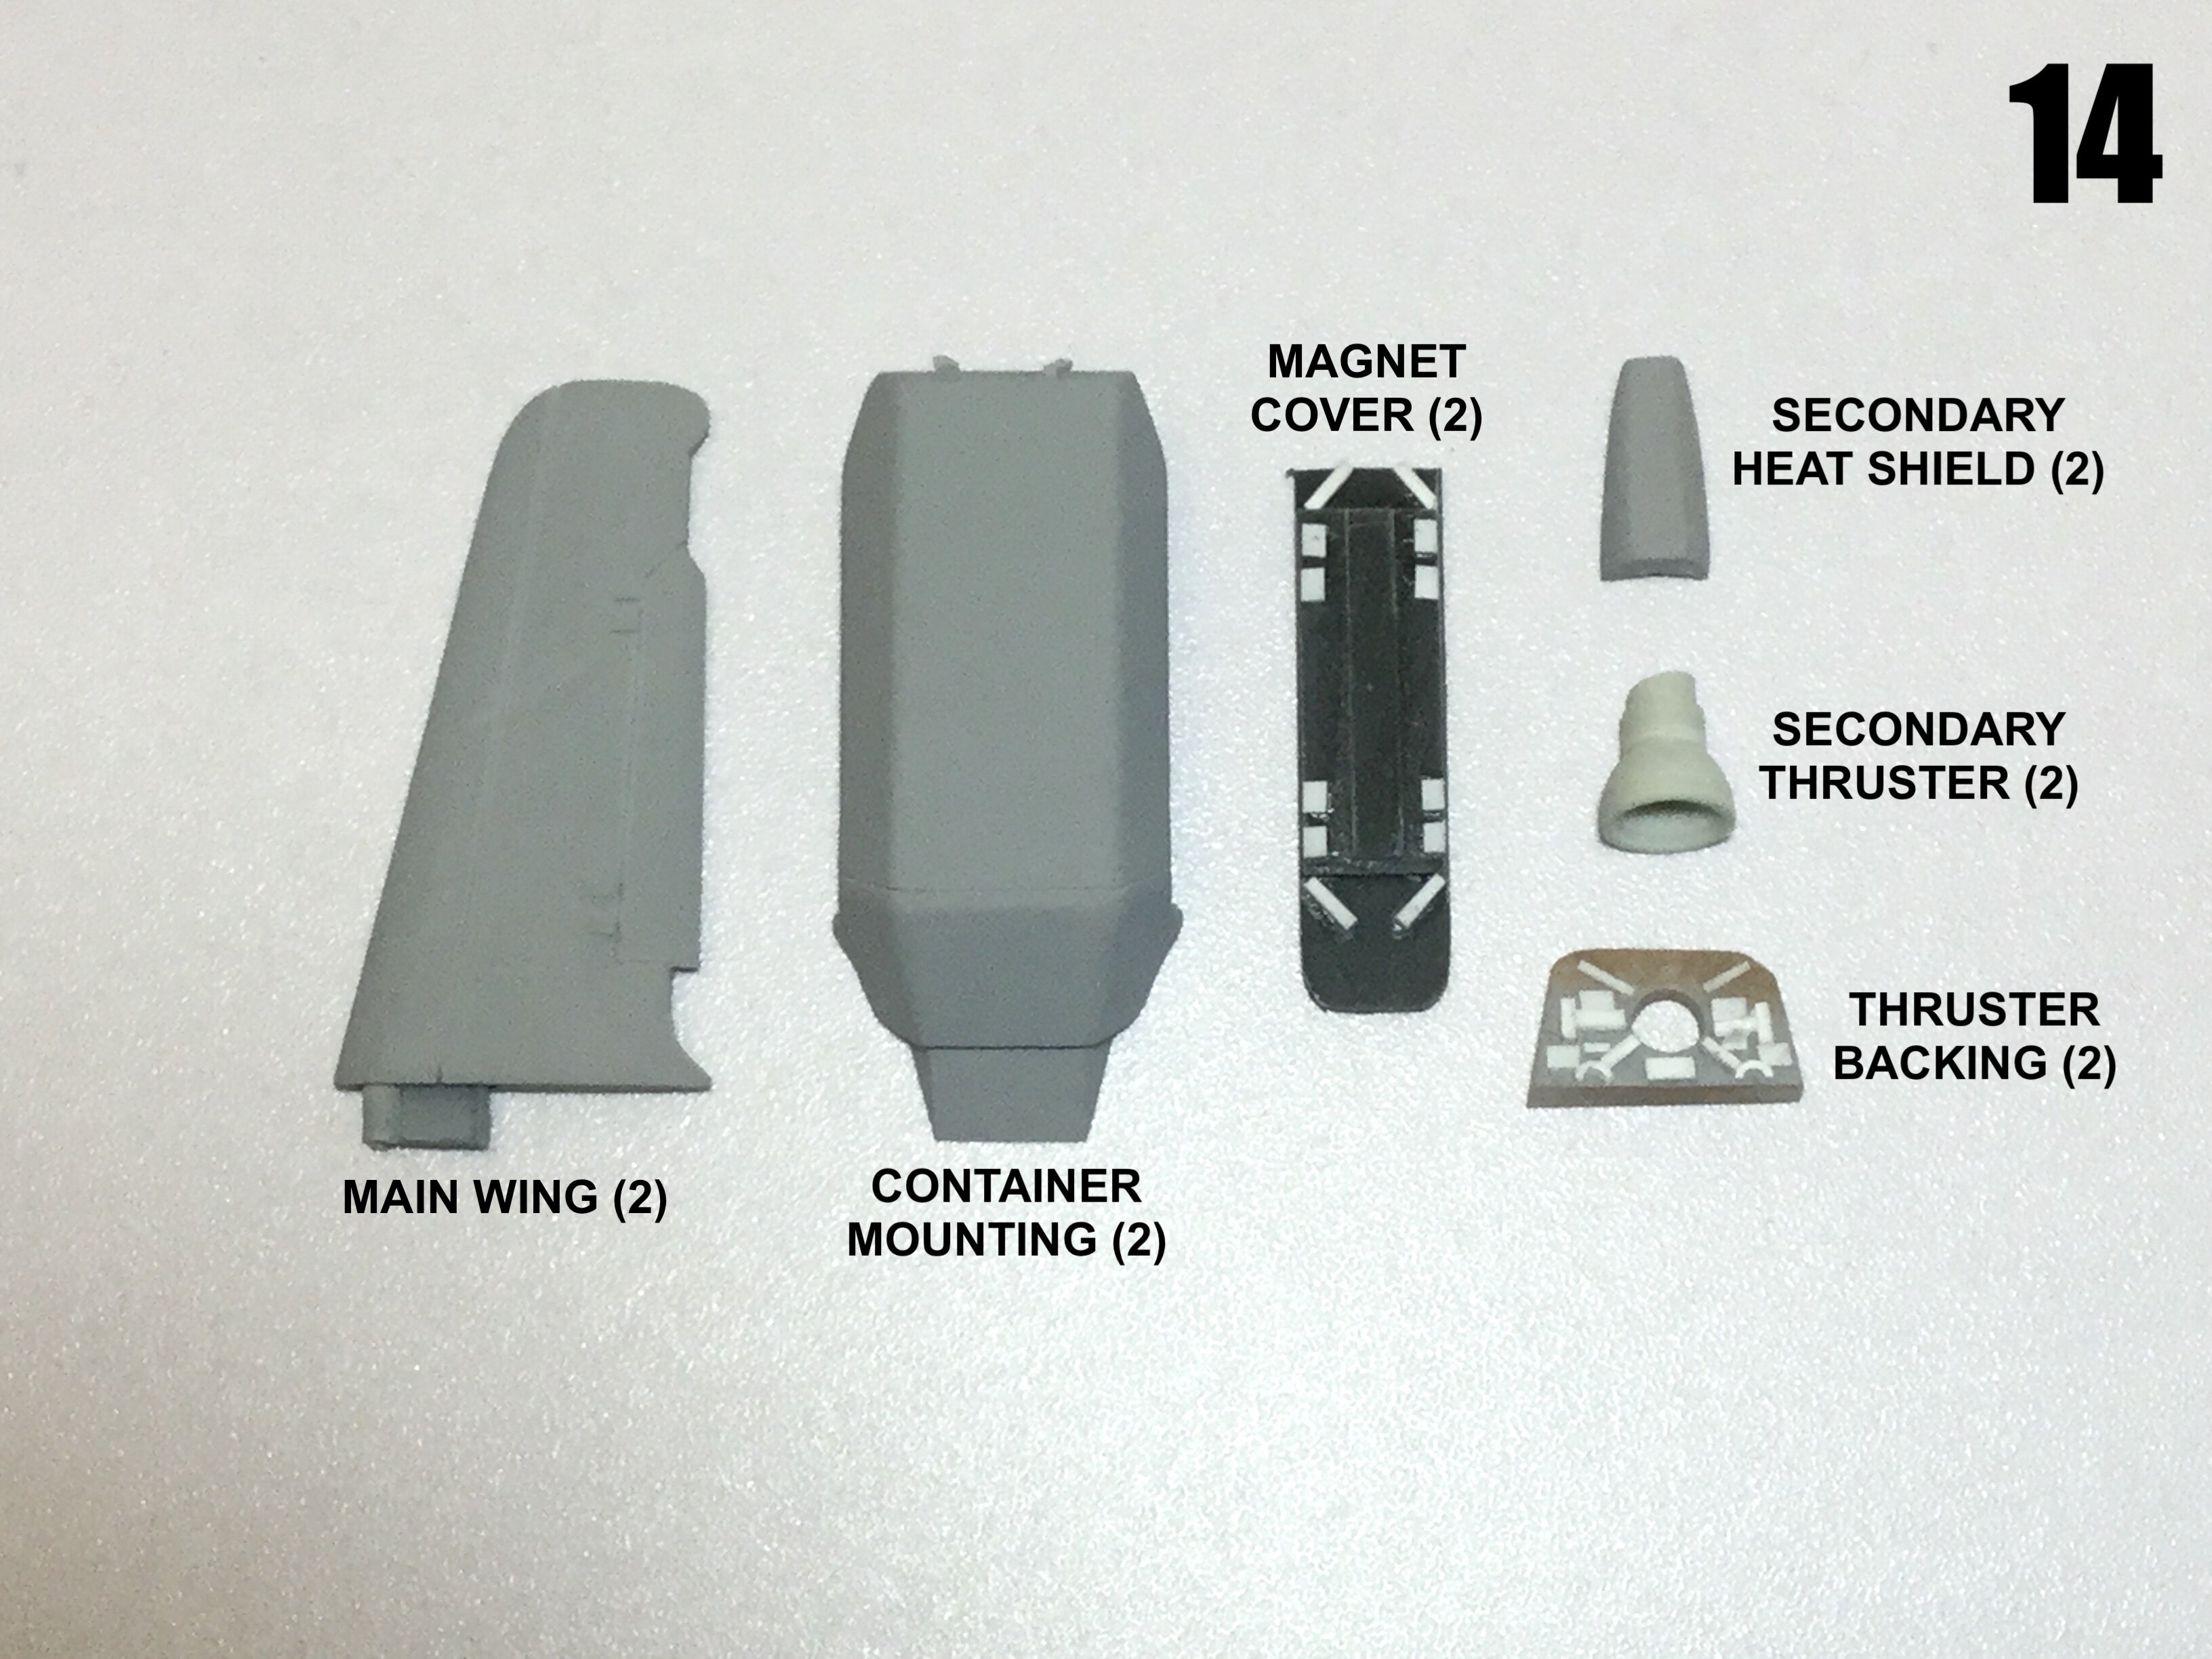
Interesting parts breaknown after a few glances. I believe the sprue shown in the pic below is for the black/dark grey parts. The areas I hatched in red should be light grey, but if you look closely, there's a marked depression, indicating that the light grey armor parts will fit over the top of these.
-
MOSCATO HOBBY MODELLING CONTEST!!
captain america replied to captain america's topic in Anime or Science Fiction
I hope you guys are almost done, cos there's less than 2 weeks to go.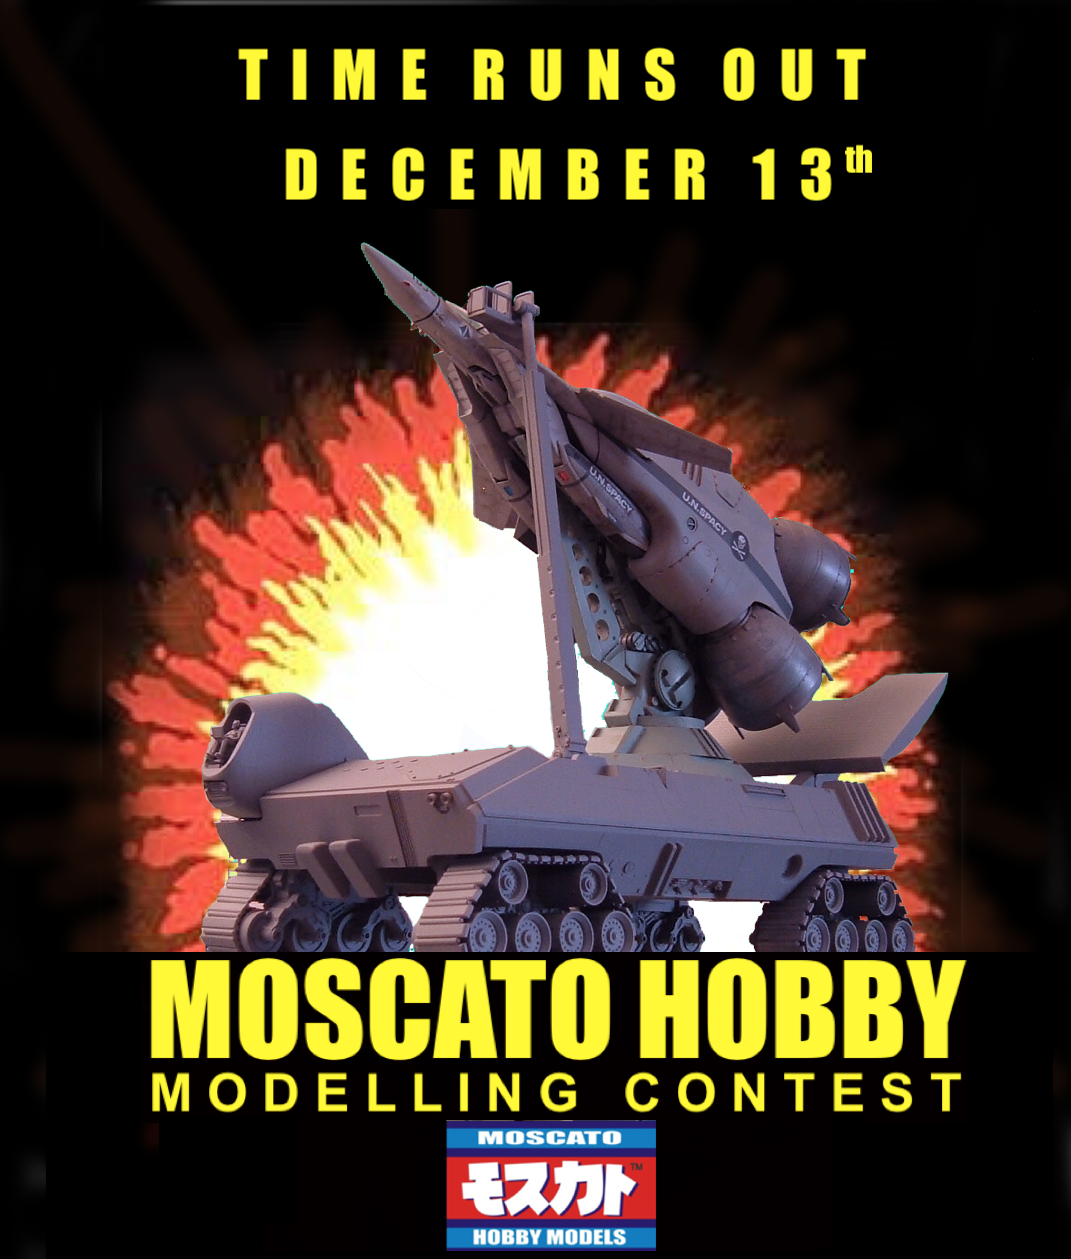
-
Hmm. The pod looks a tad narrow. I'll be curious to see how big it turns out to be, but I suspect it'll be on the small side. Price is good, though.
-
MOSCATO HOBBY MODELLING CONTEST!!
captain america replied to captain america's topic in Anime or Science Fiction
Tick-tock...
-
1/48 SOUTHERN CROSS BIOROID
captain america replied to captain america's topic in Anime or Science Fiction
Those would make great contest pics. -
You may be correct about rendering a broken part in 3D being equally complicated. Assuming the broken part could be successfully removed from the toy and temporarily glued back together with CA glue, a silicone mold of the part could be made and then new parts could be cast in a stronger material. Either way, the cost would likely be prohibitive, and while certain resins are made to reproduce the physical properties of ABS in the short-term, the dirty secret with some resin products is that they will eventually turn brittle themselves over time.
-
That's a challenging fix. If you had the dexterity, a small enough drill bit and same diameter brass/steel rod, you could reinforce the snapped ball-joint, but it would still be very fragile. Ideally, I would push-out the rivet that's still on the fairing, have someone 3D print the broken part in a tougher material and use that as a replacement. At the core, this is a materials problem that Sentinel needs to address, because as you can see from the pressed rivets, the toys aren't made to be disasembled and if someone doesn't have the skills to perform that kind of repair, it will only make the problem worse.
-
Those parts look like ABS or something similar. Putty won't bond to it and it will constantly crack. Ideally the part should be replaced. I think this is something that 3D printing can do well, provided that something tough (nylon?) is used.
-
Or just a different type of plastic, which wouldn't necessitate new tooling and can just as readily solve the issue.
-
MOSCATO HOBBY MODELLING CONTEST!!
captain america replied to captain america's topic in Anime or Science Fiction
A month to go! Put those modelling skills to good use and stand a chance to win a 1/48 Bio LLoyd kit. The parts for the green version were offered only once with the initial run, and will never be re-issued.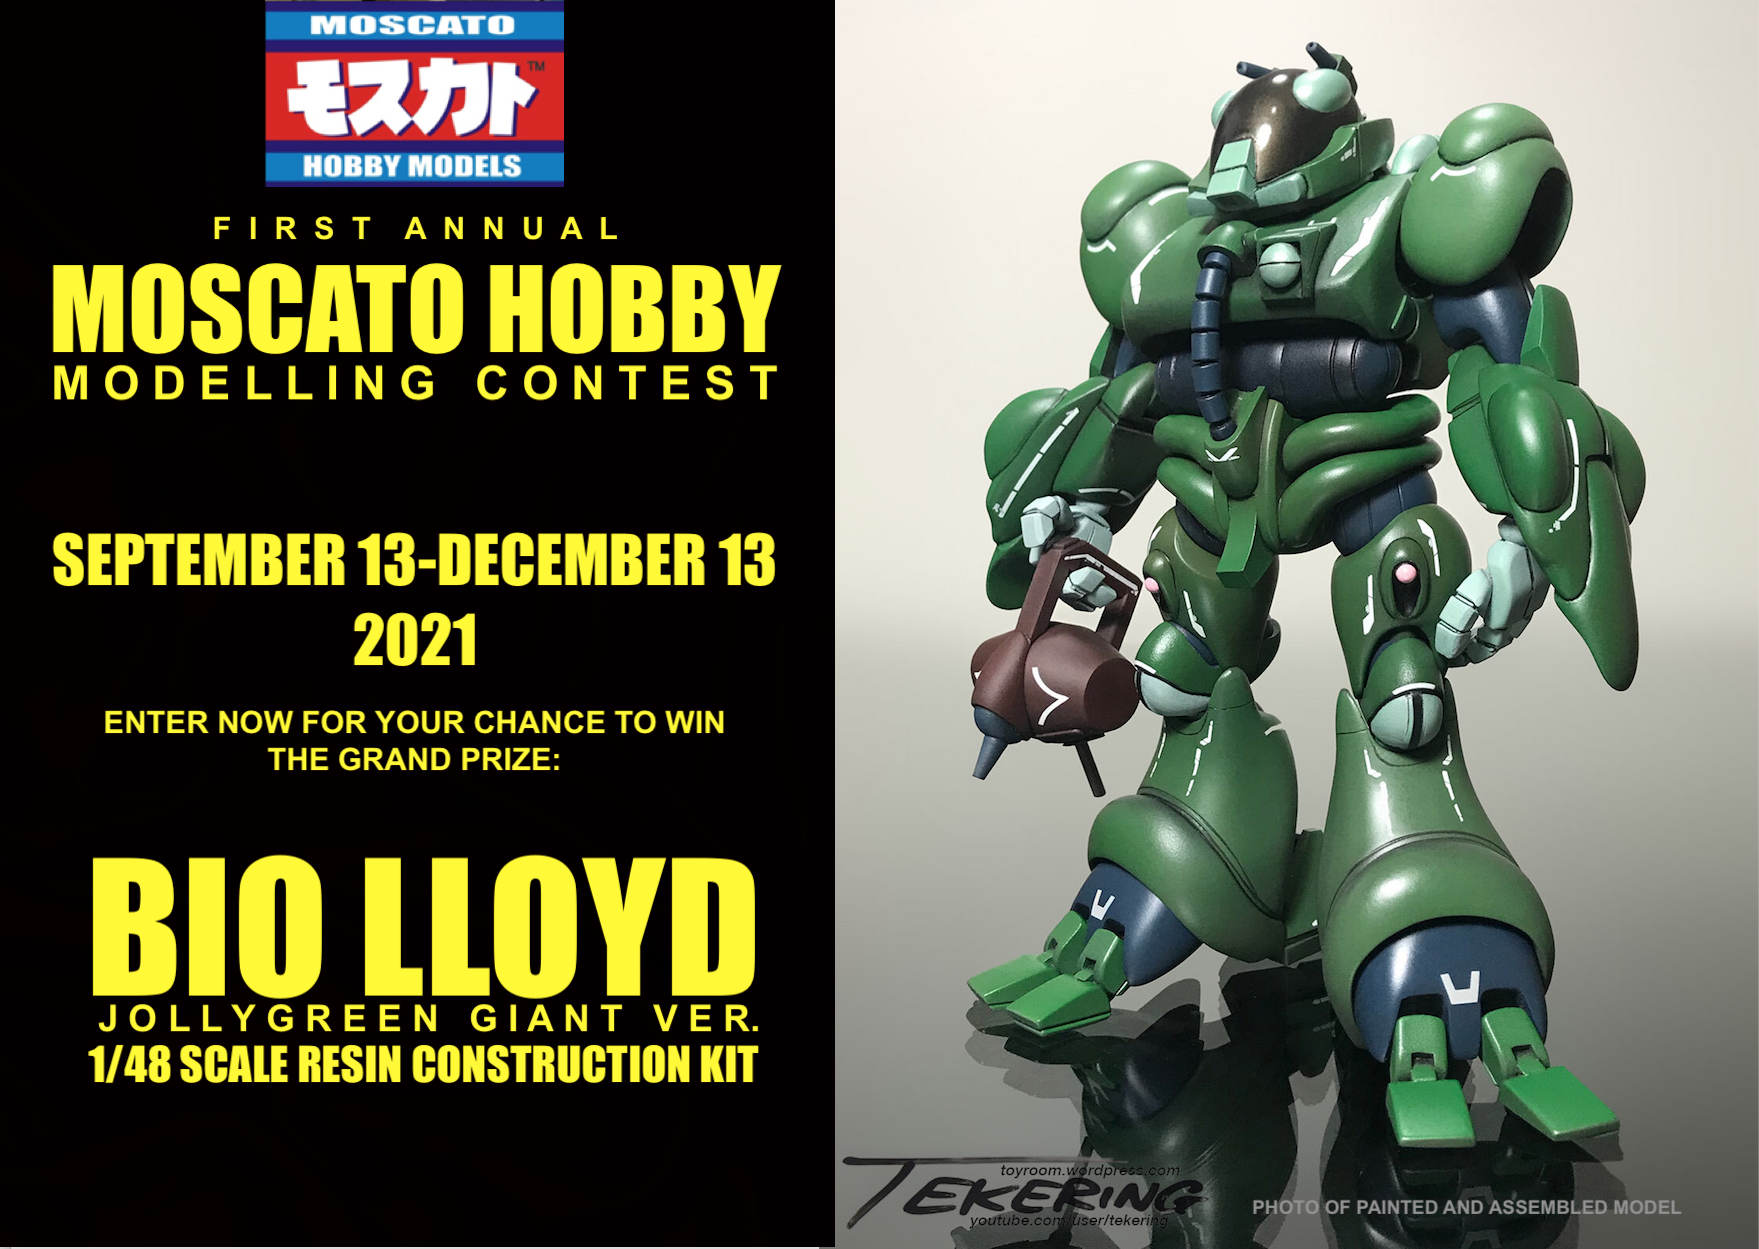
-
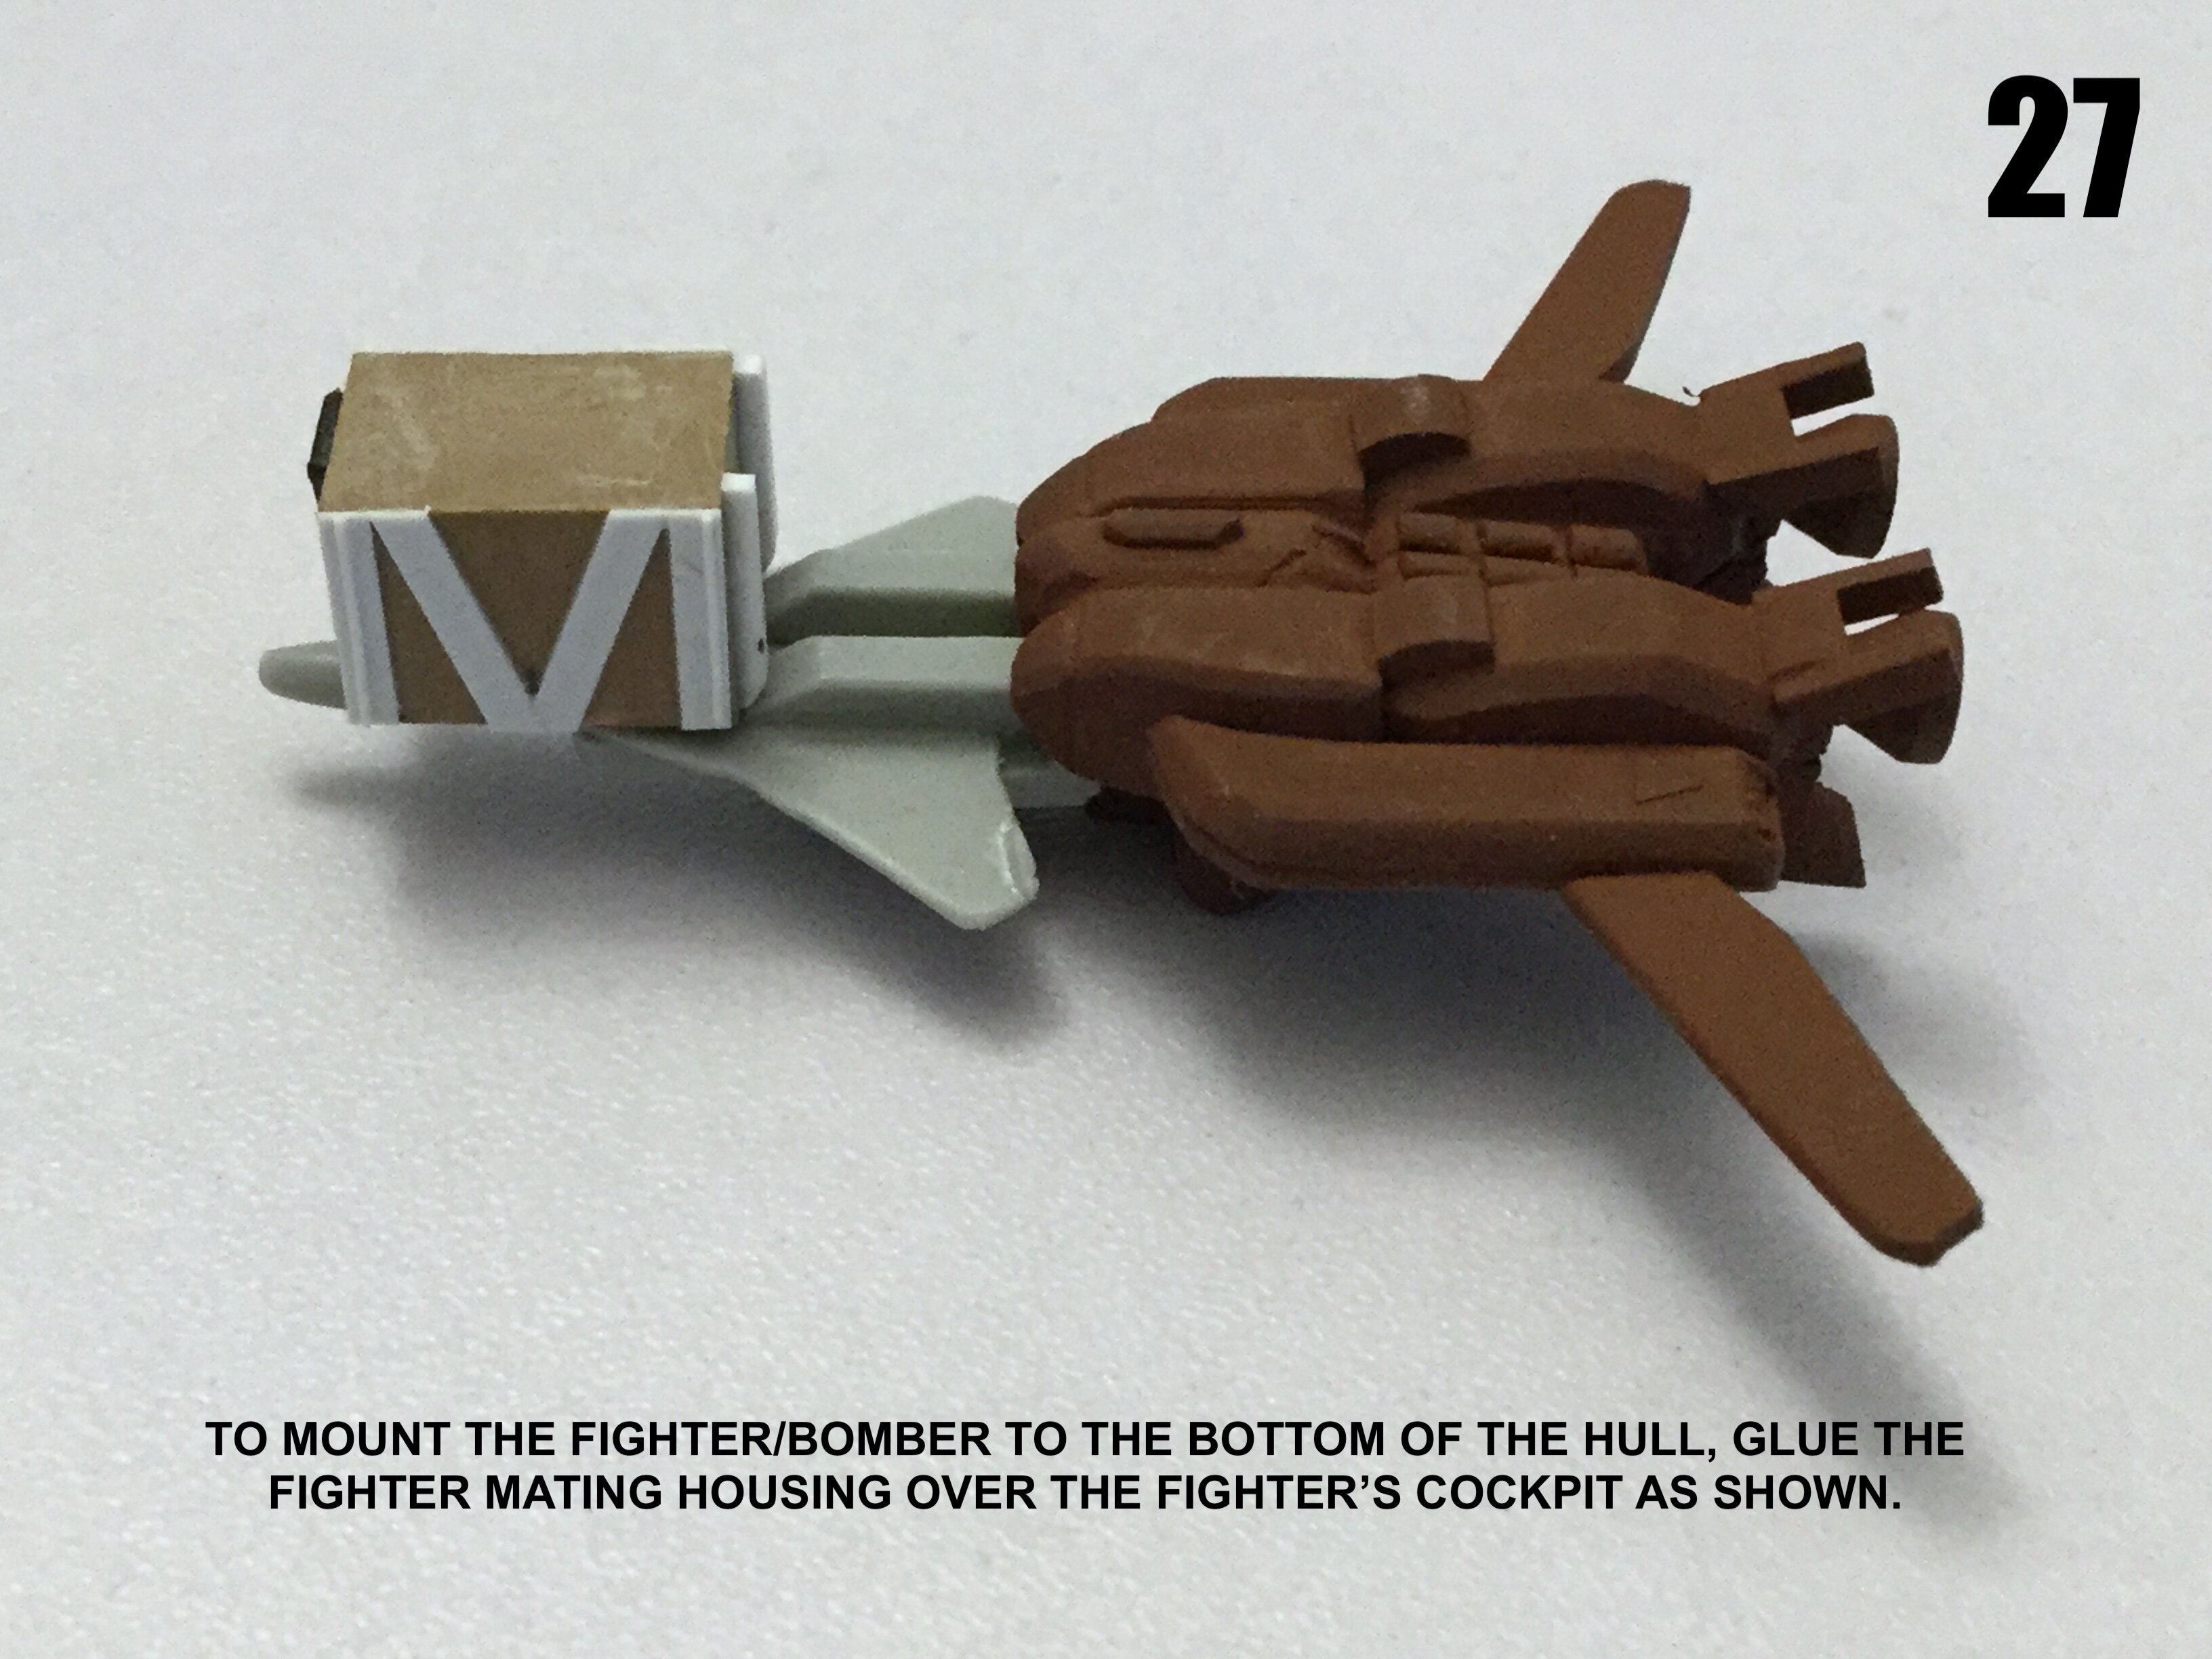
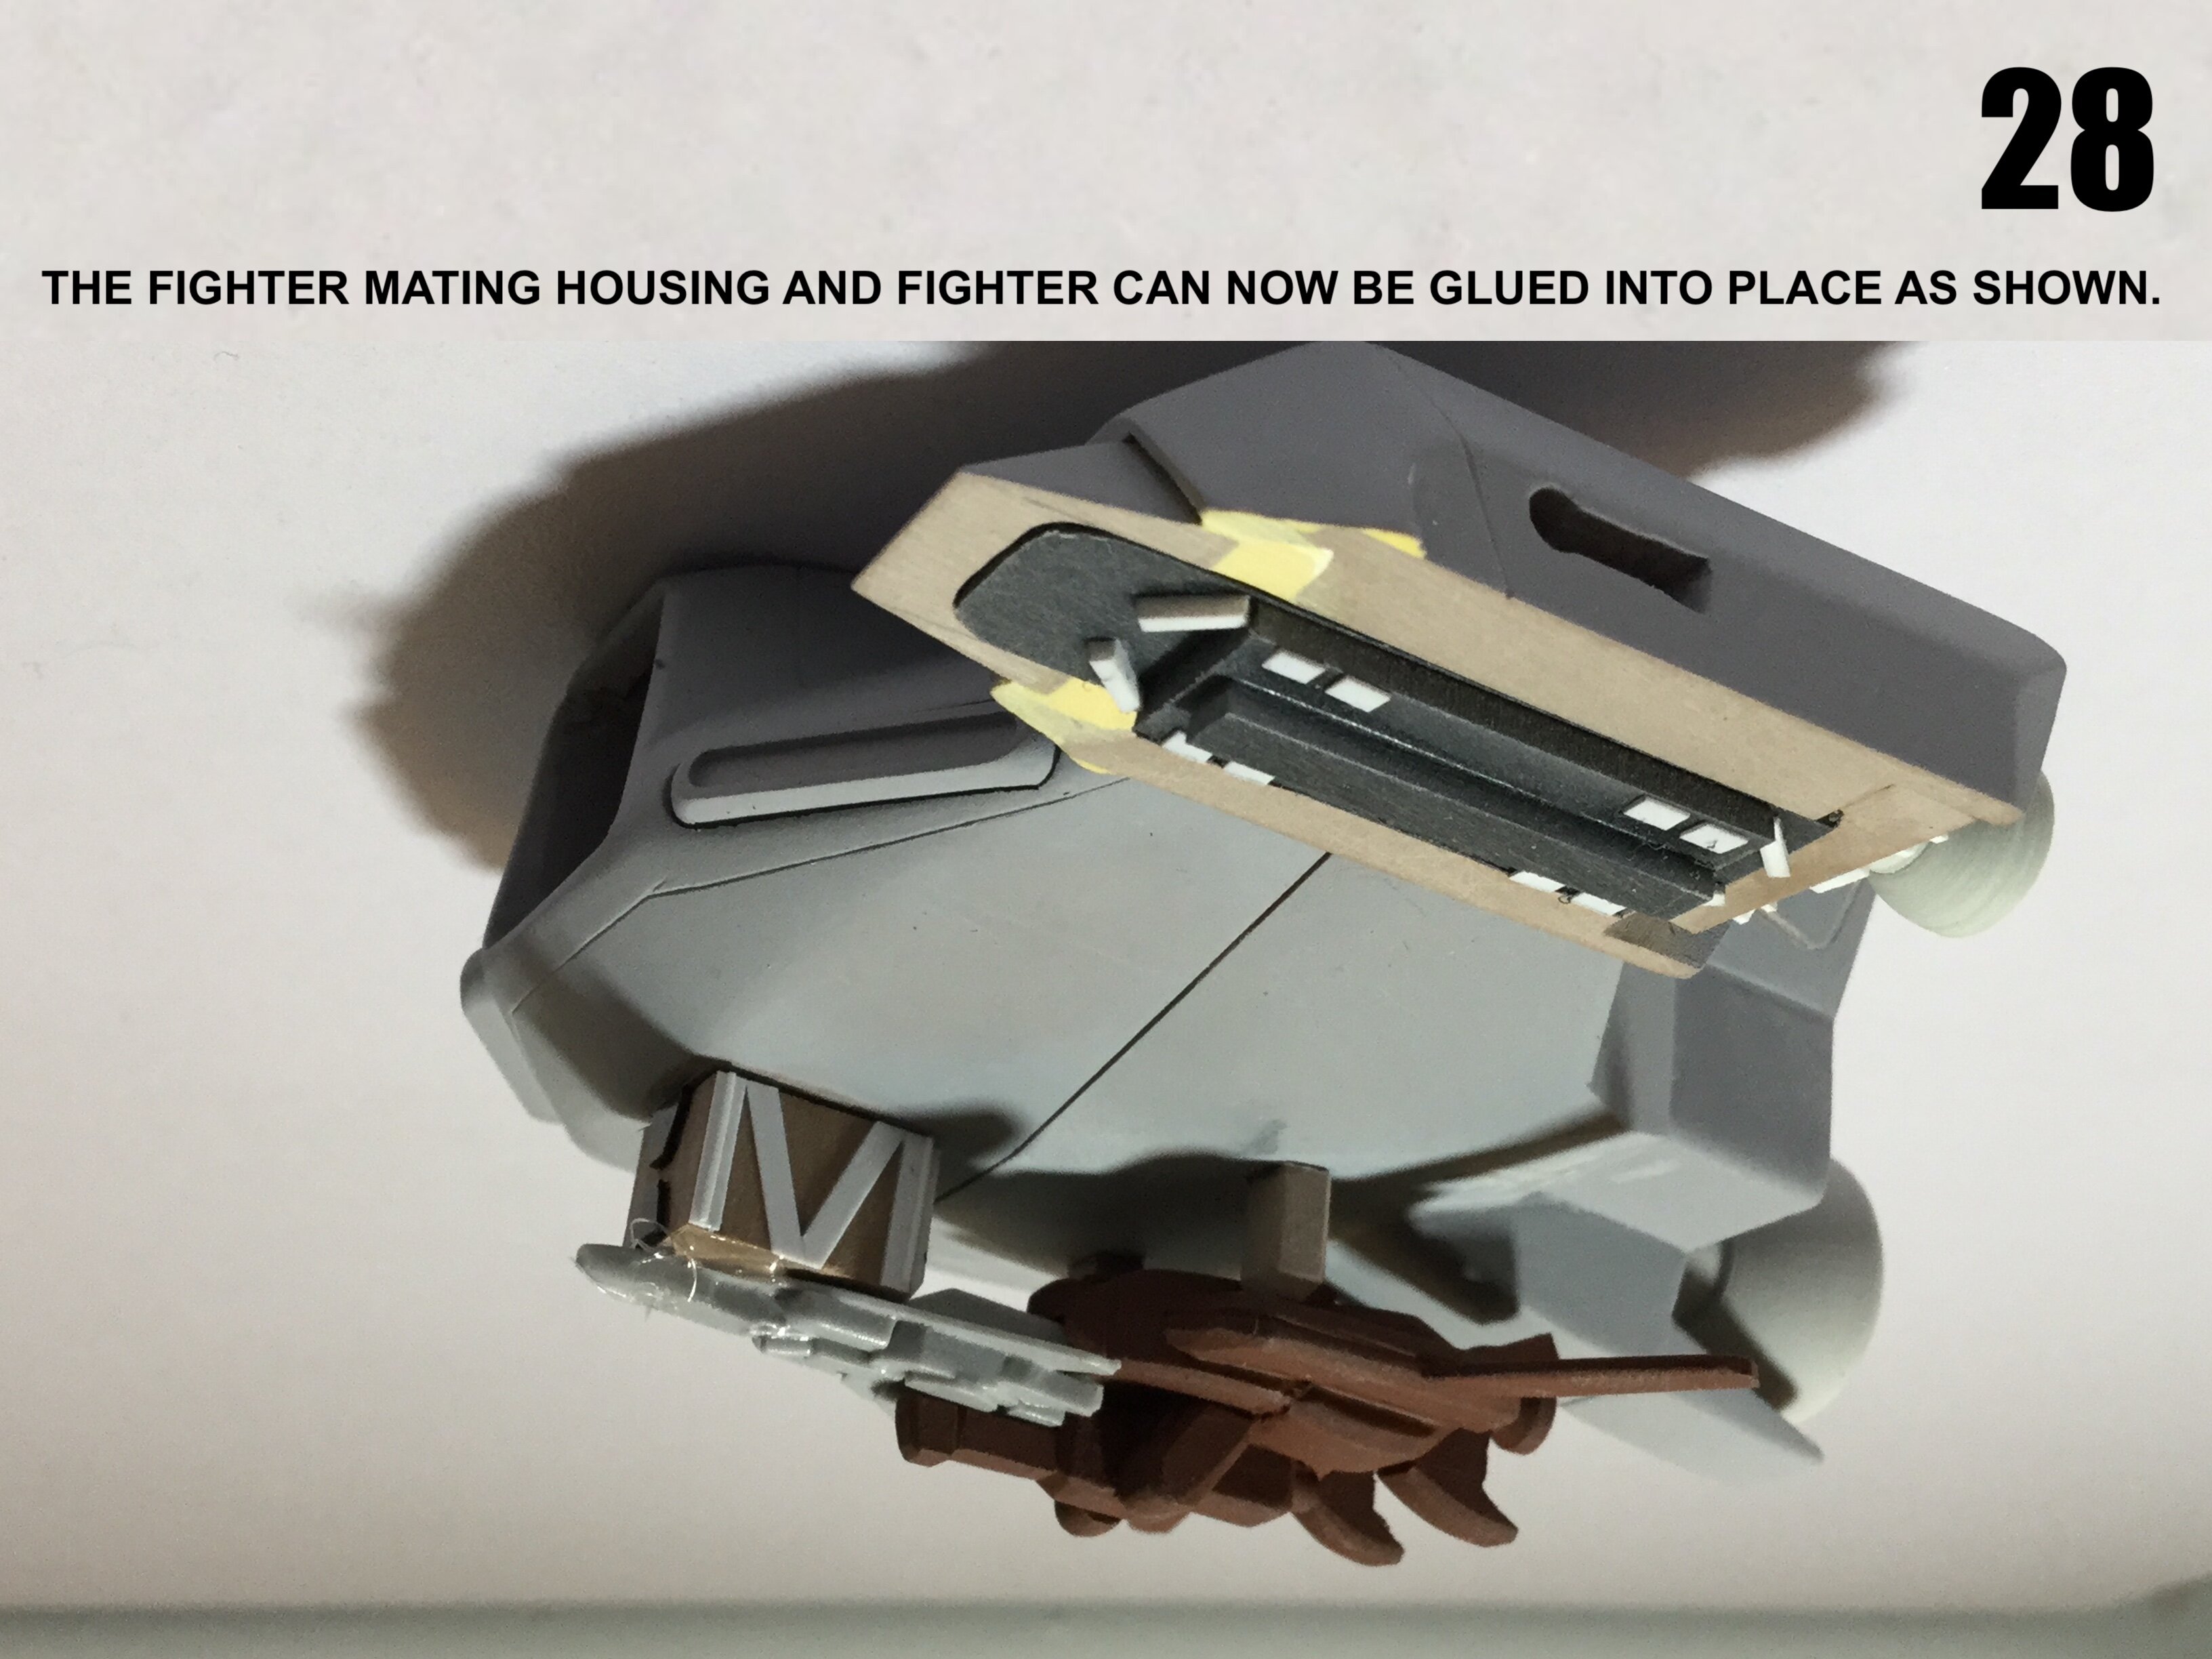
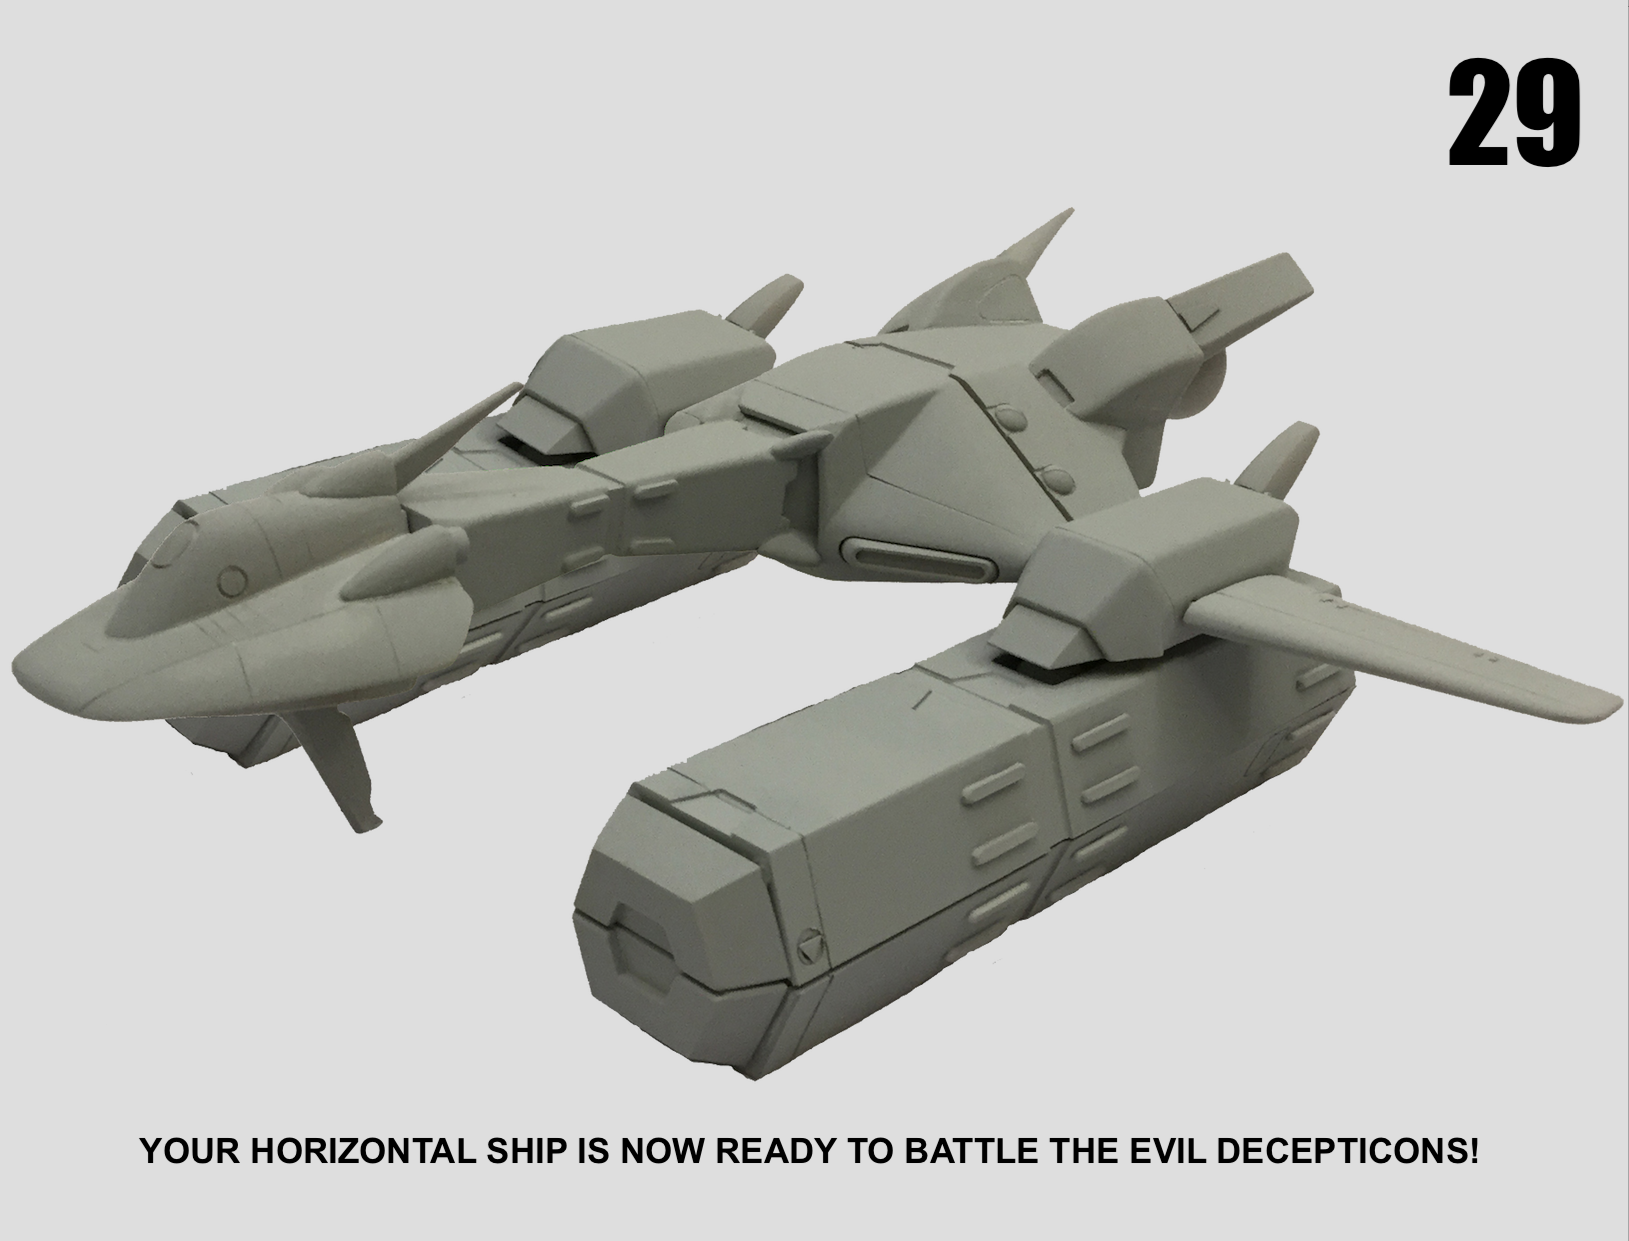
MOSPEADA HORIZONT in 1/350?
captain america replied to captain america's topic in Anime or Science Fiction
Bump! Y'all have until the end of the day on October 31 to make the Horizontal ship re-issue happen. -
MOSPEADA HORIZONT in 1/350?
captain america replied to captain america's topic in Anime or Science Fiction
Part deux.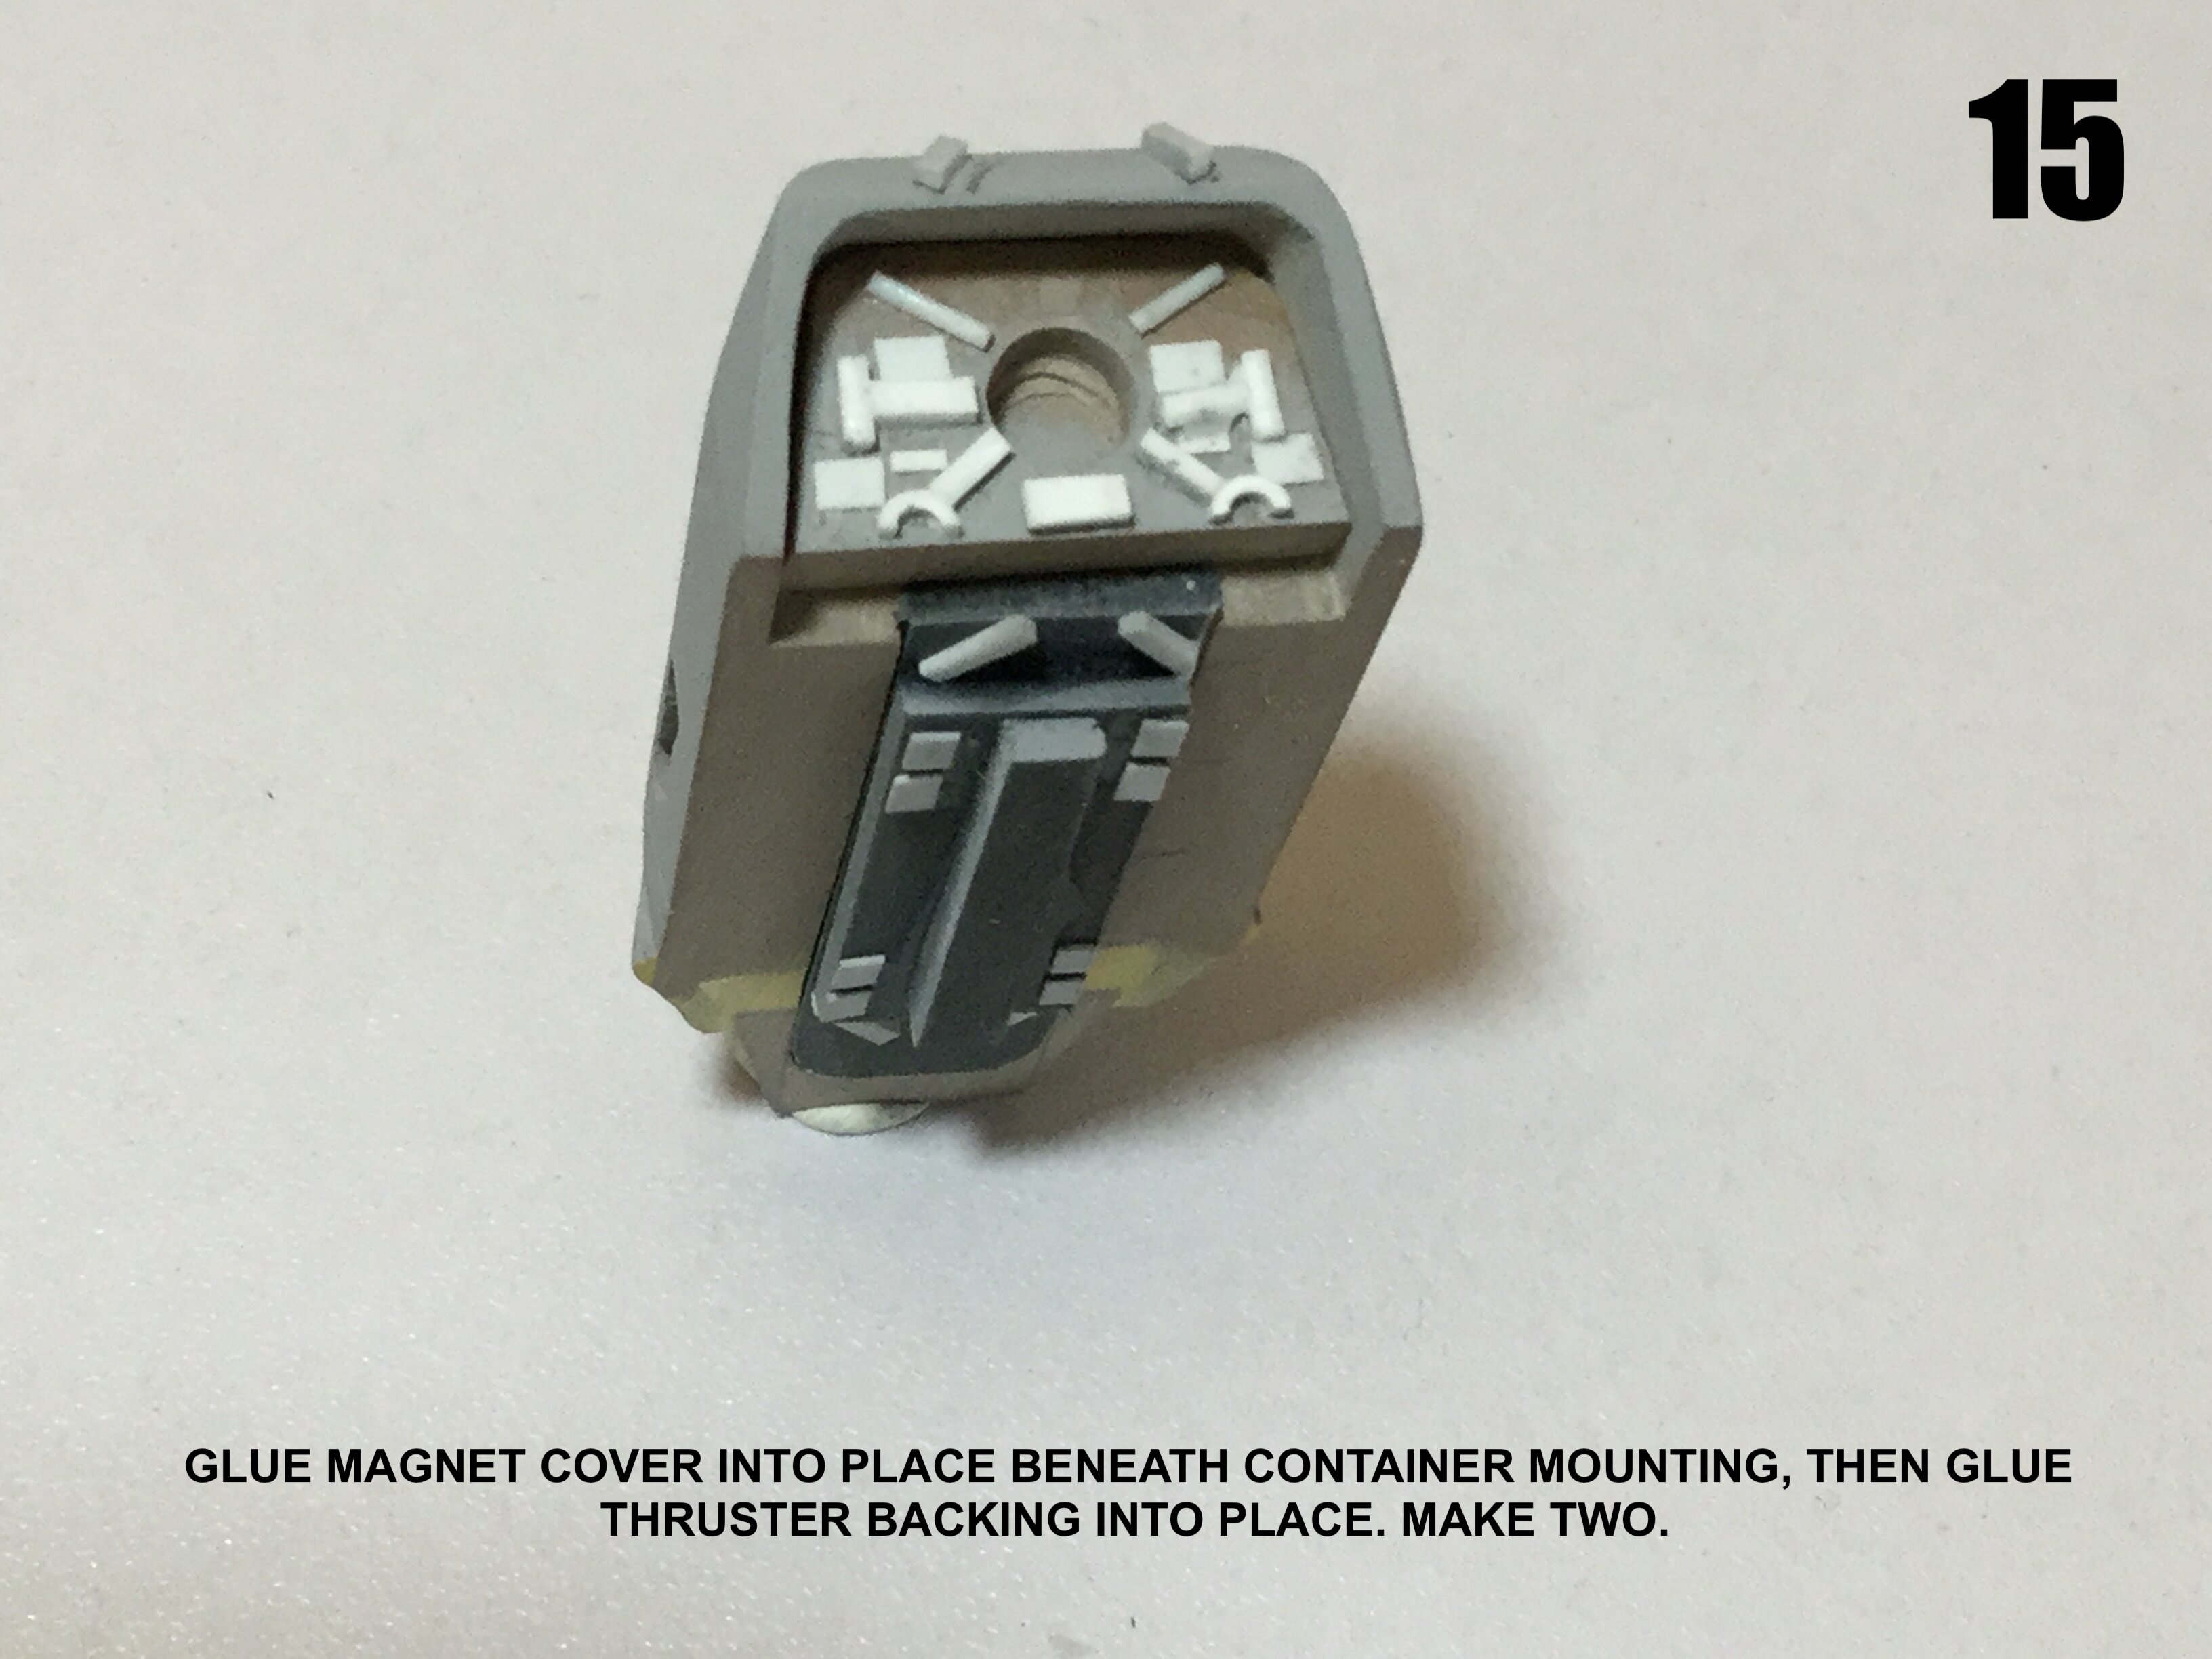
-
MOSPEADA HORIZONT in 1/350?
captain america replied to captain america's topic in Anime or Science Fiction
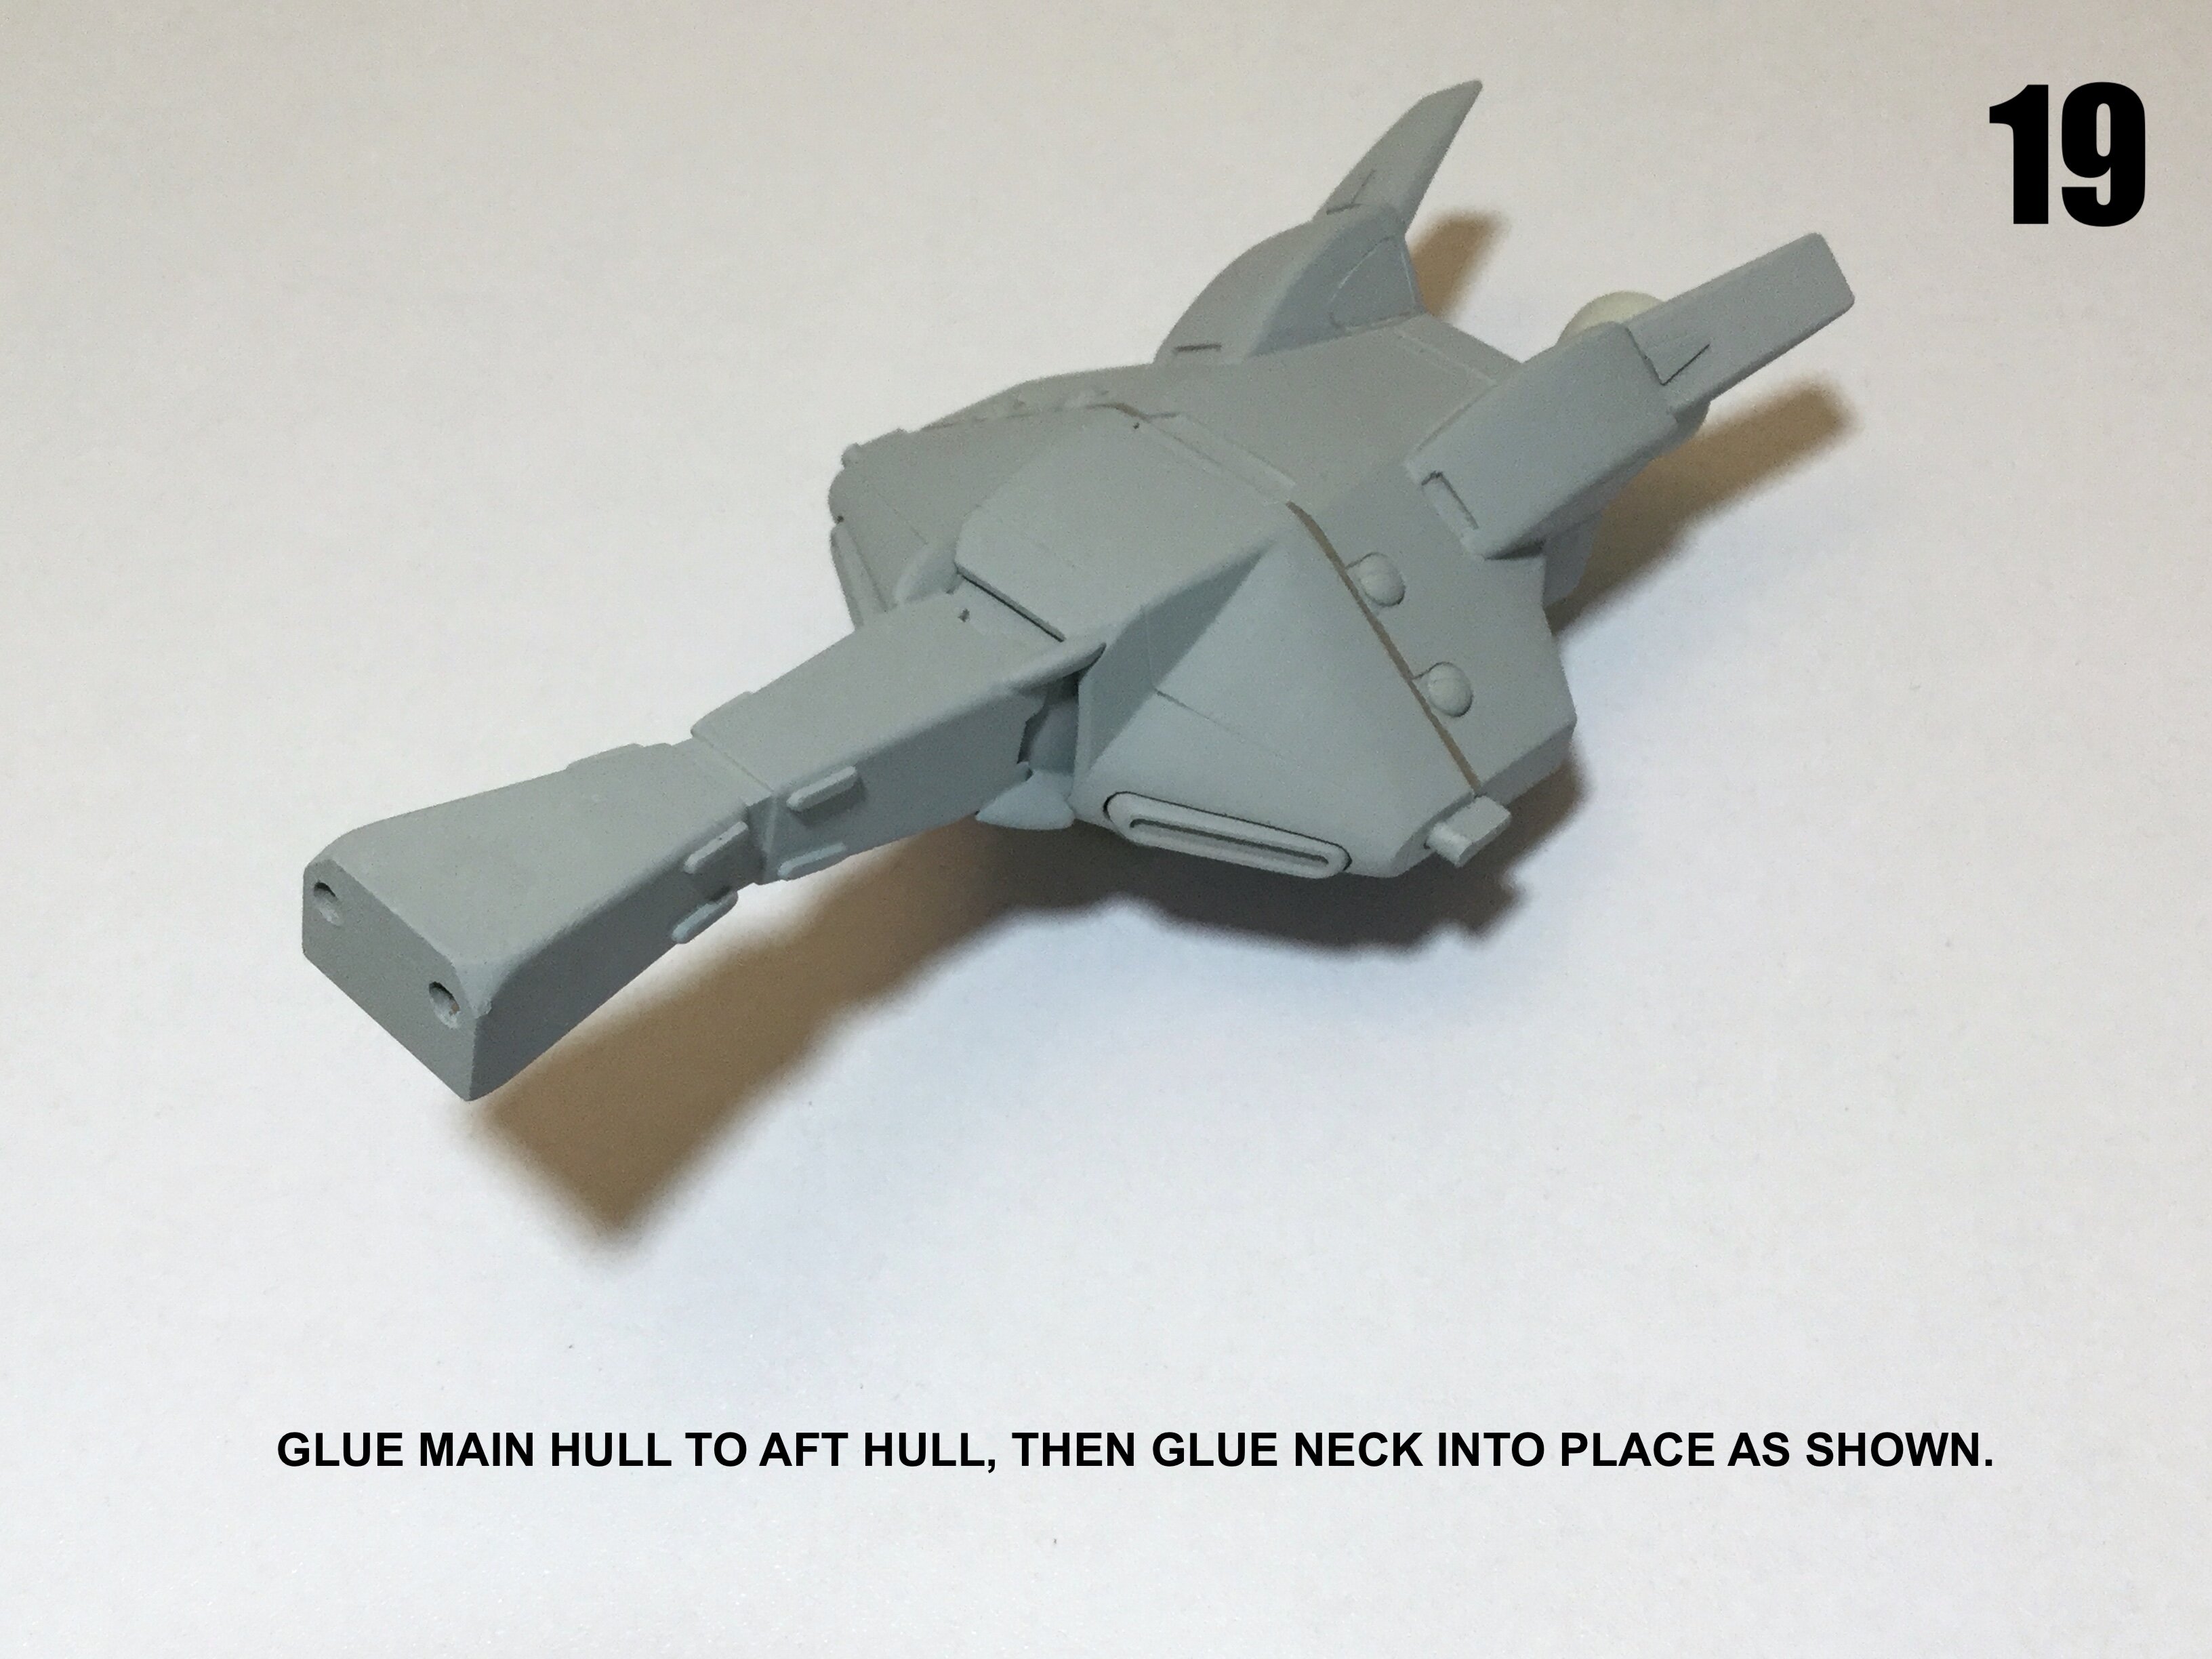
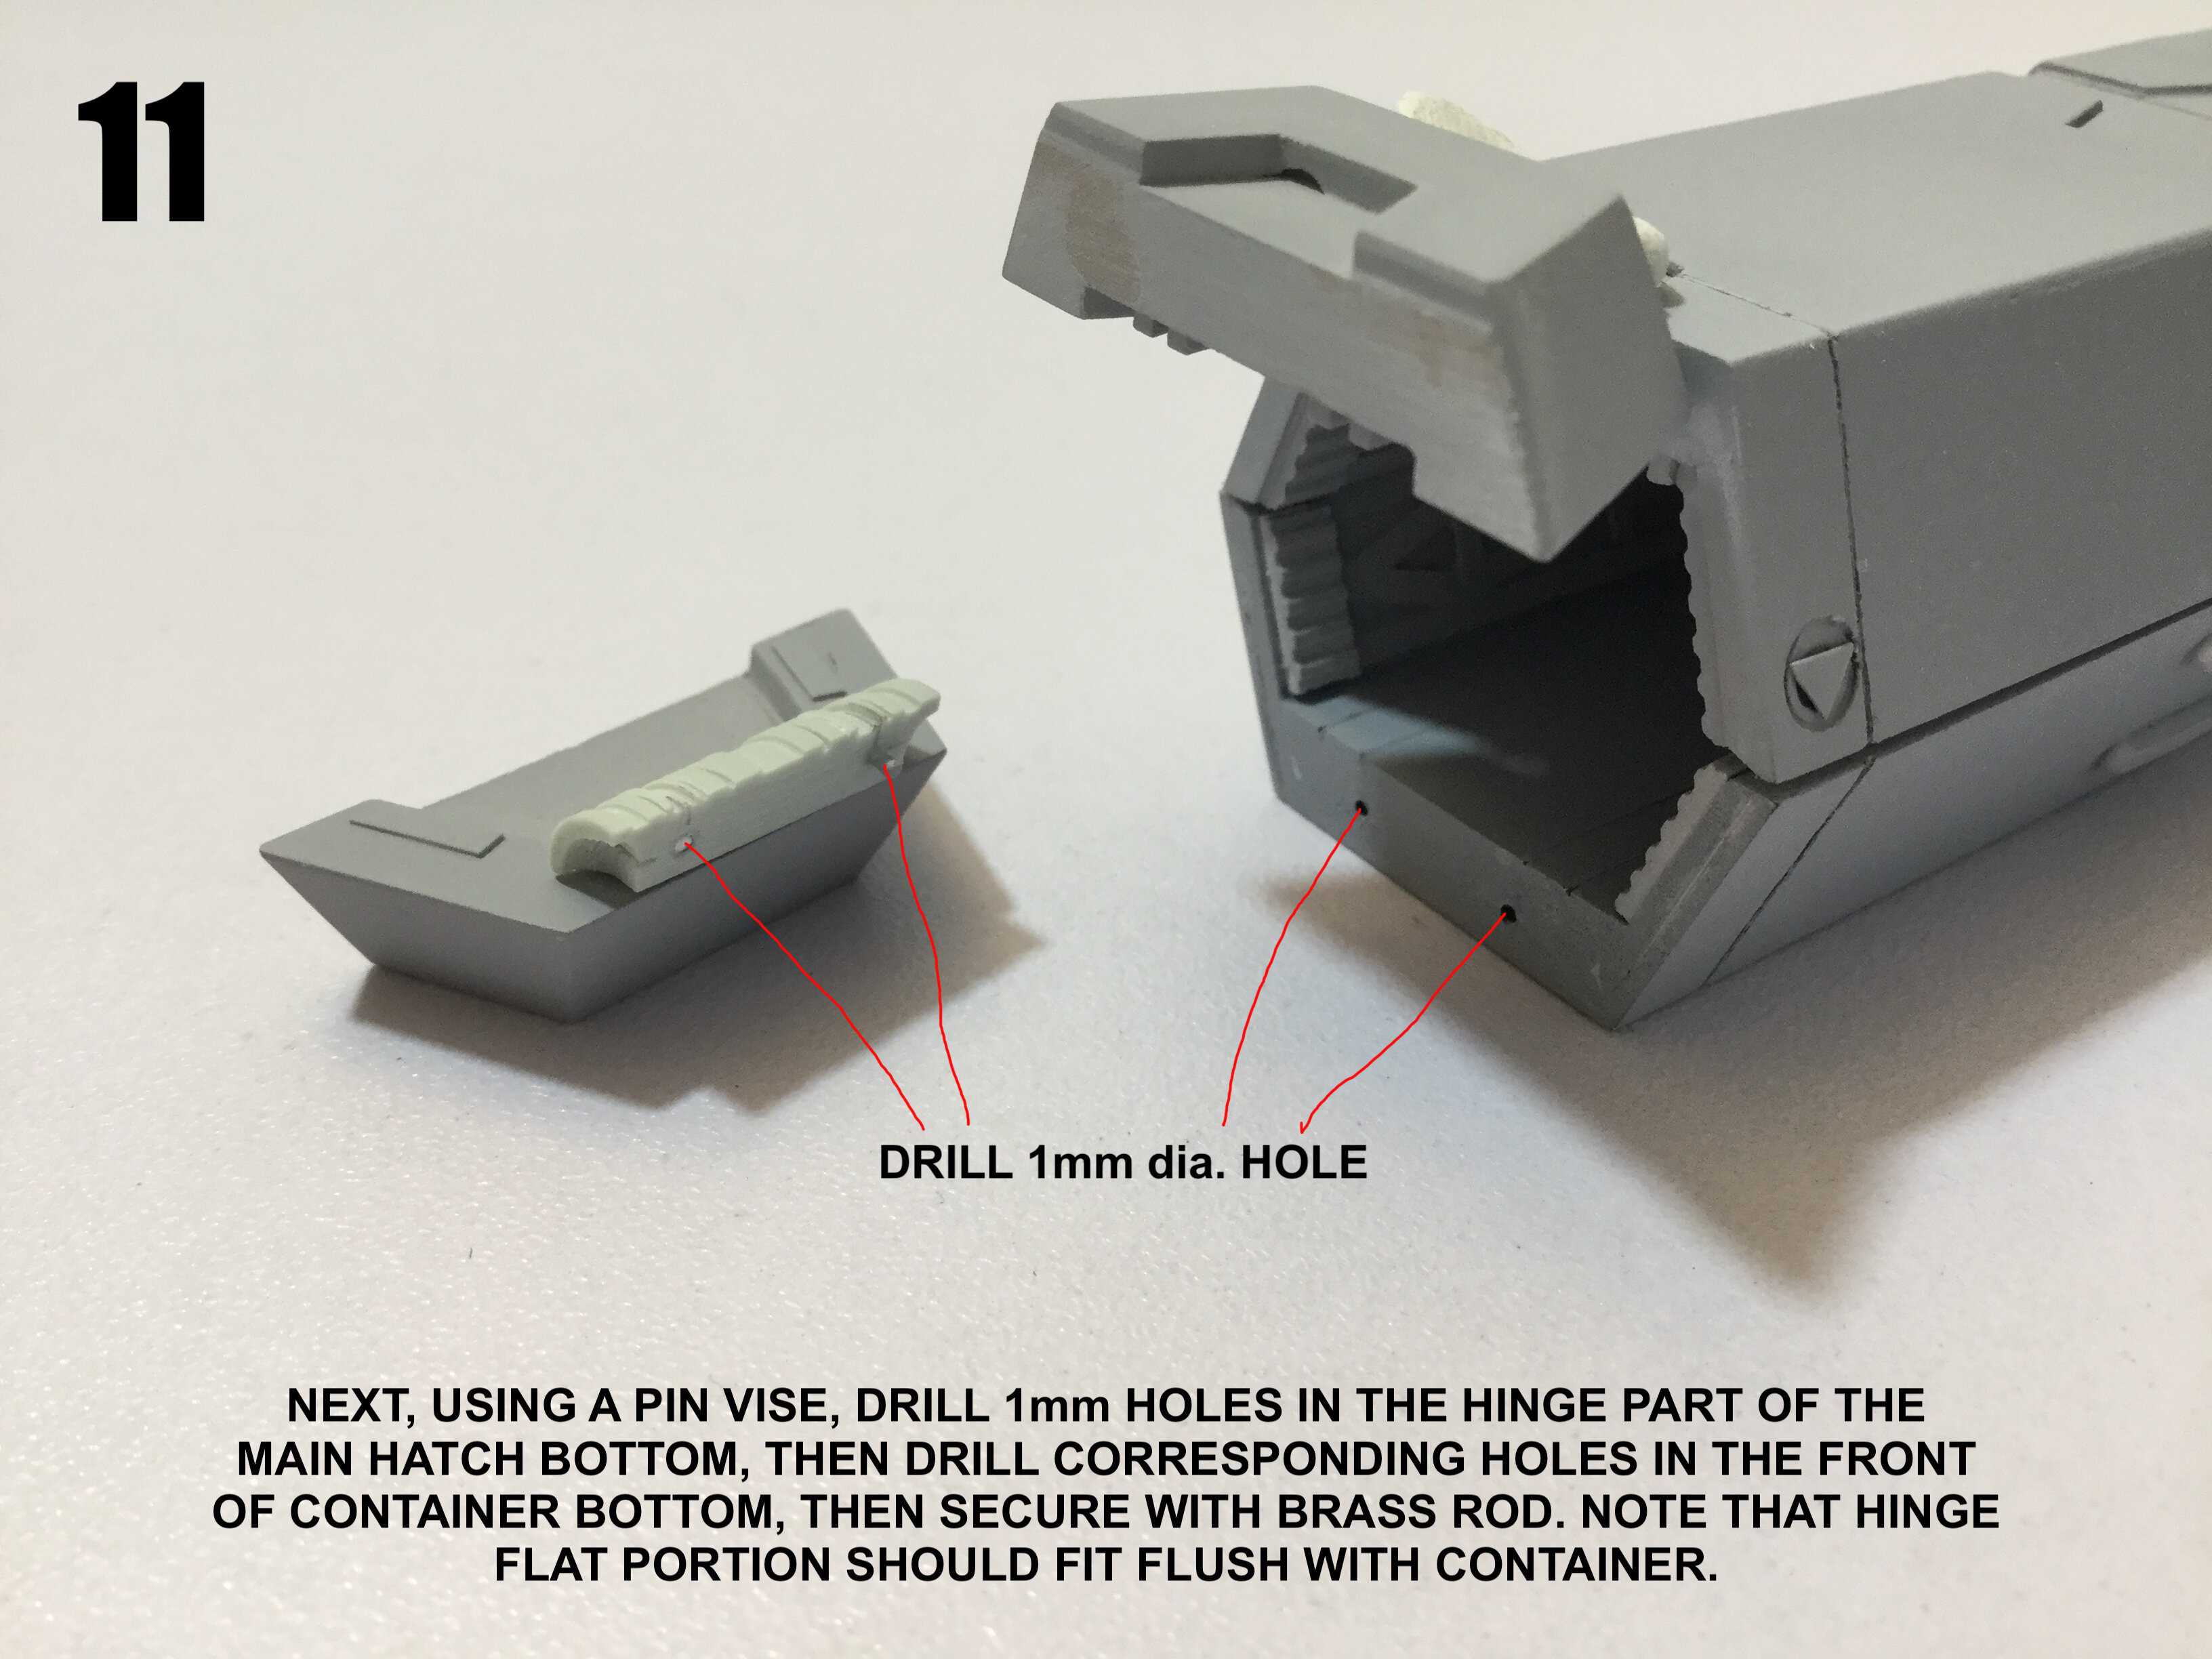
Destructions are ready, and all kits have shipped.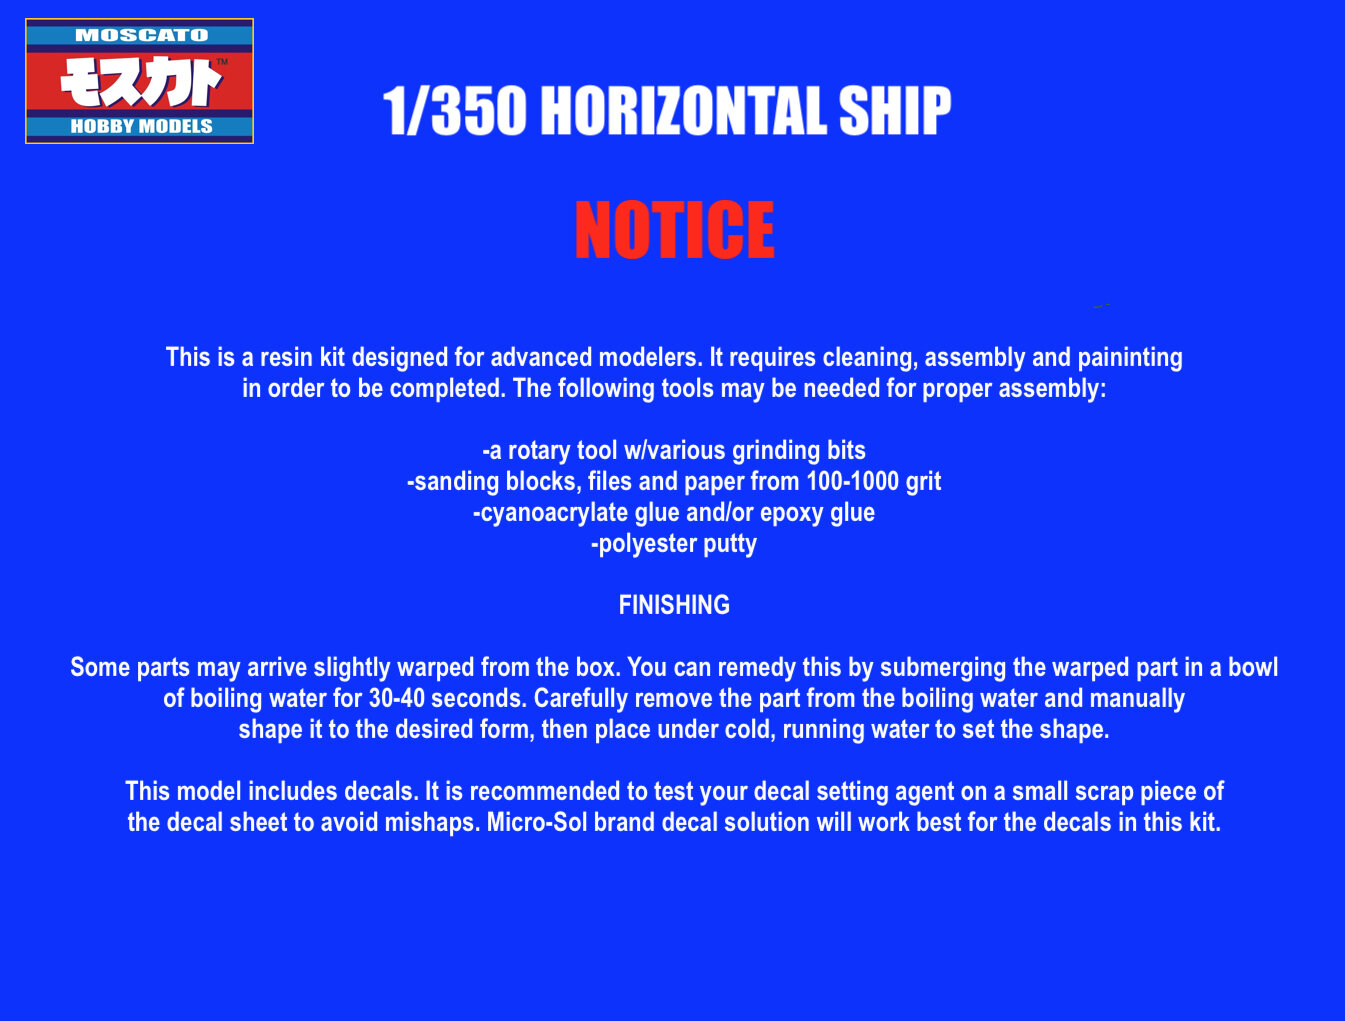

-
Seeing as how it was a pricy and still functional piece of military hardware, it probably made more sense to sell it. That pic of the derelict bodywork is/was part of a studio tour somewhere, IIRC. Fun fact: the modded Gazelle also appeared in a mid 80s dystopian tv miniseries caked Amerika, where they had temporarily painted it black.
- 158 replies
-
- 1
-

-
- Jan-Michael Vincent
- Ernest Borgnine
- (and 2 more)
-
MOSPEADA HORIZONT in 1/350?
captain america replied to captain america's topic in Anime or Science Fiction
For those who may have missed out on the initial run, I'm offering a potential re-issue. I'd need a dozen orders to make this happen.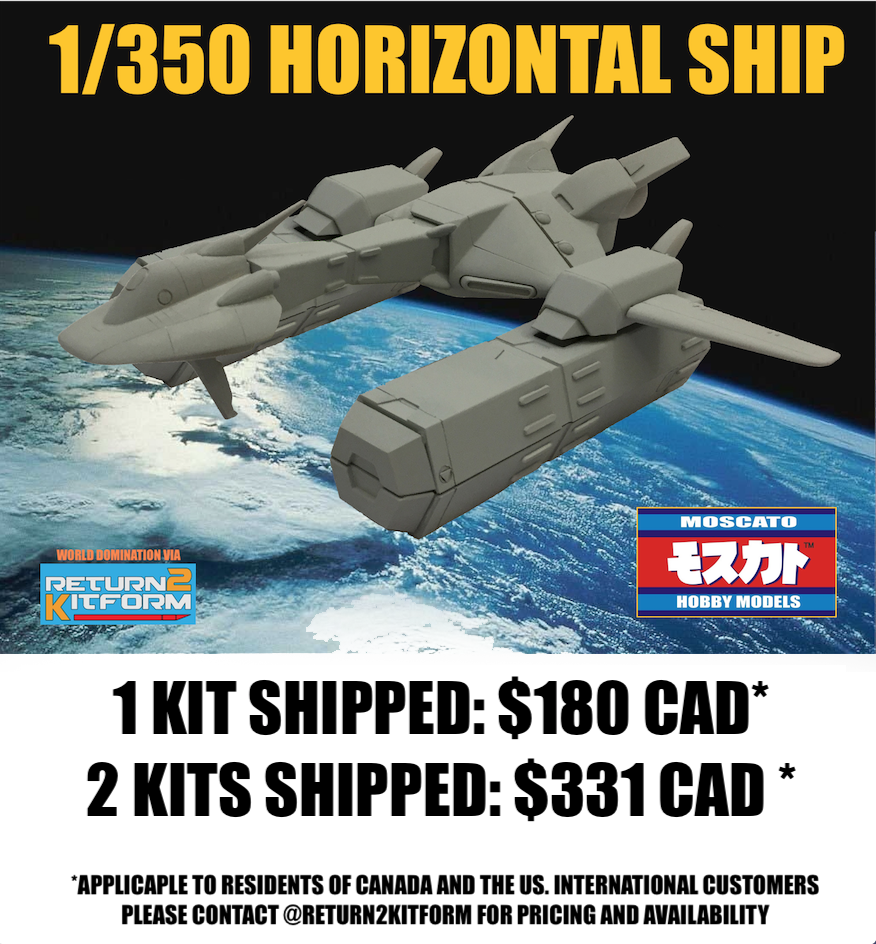
-
MOSPEADA HORIZONT in 1/350?
captain america replied to captain america's topic in Anime or Science Fiction
Quick update: castings are looking excellent. Decals are done and on their way, so I should start shipping in the next 3 weeks.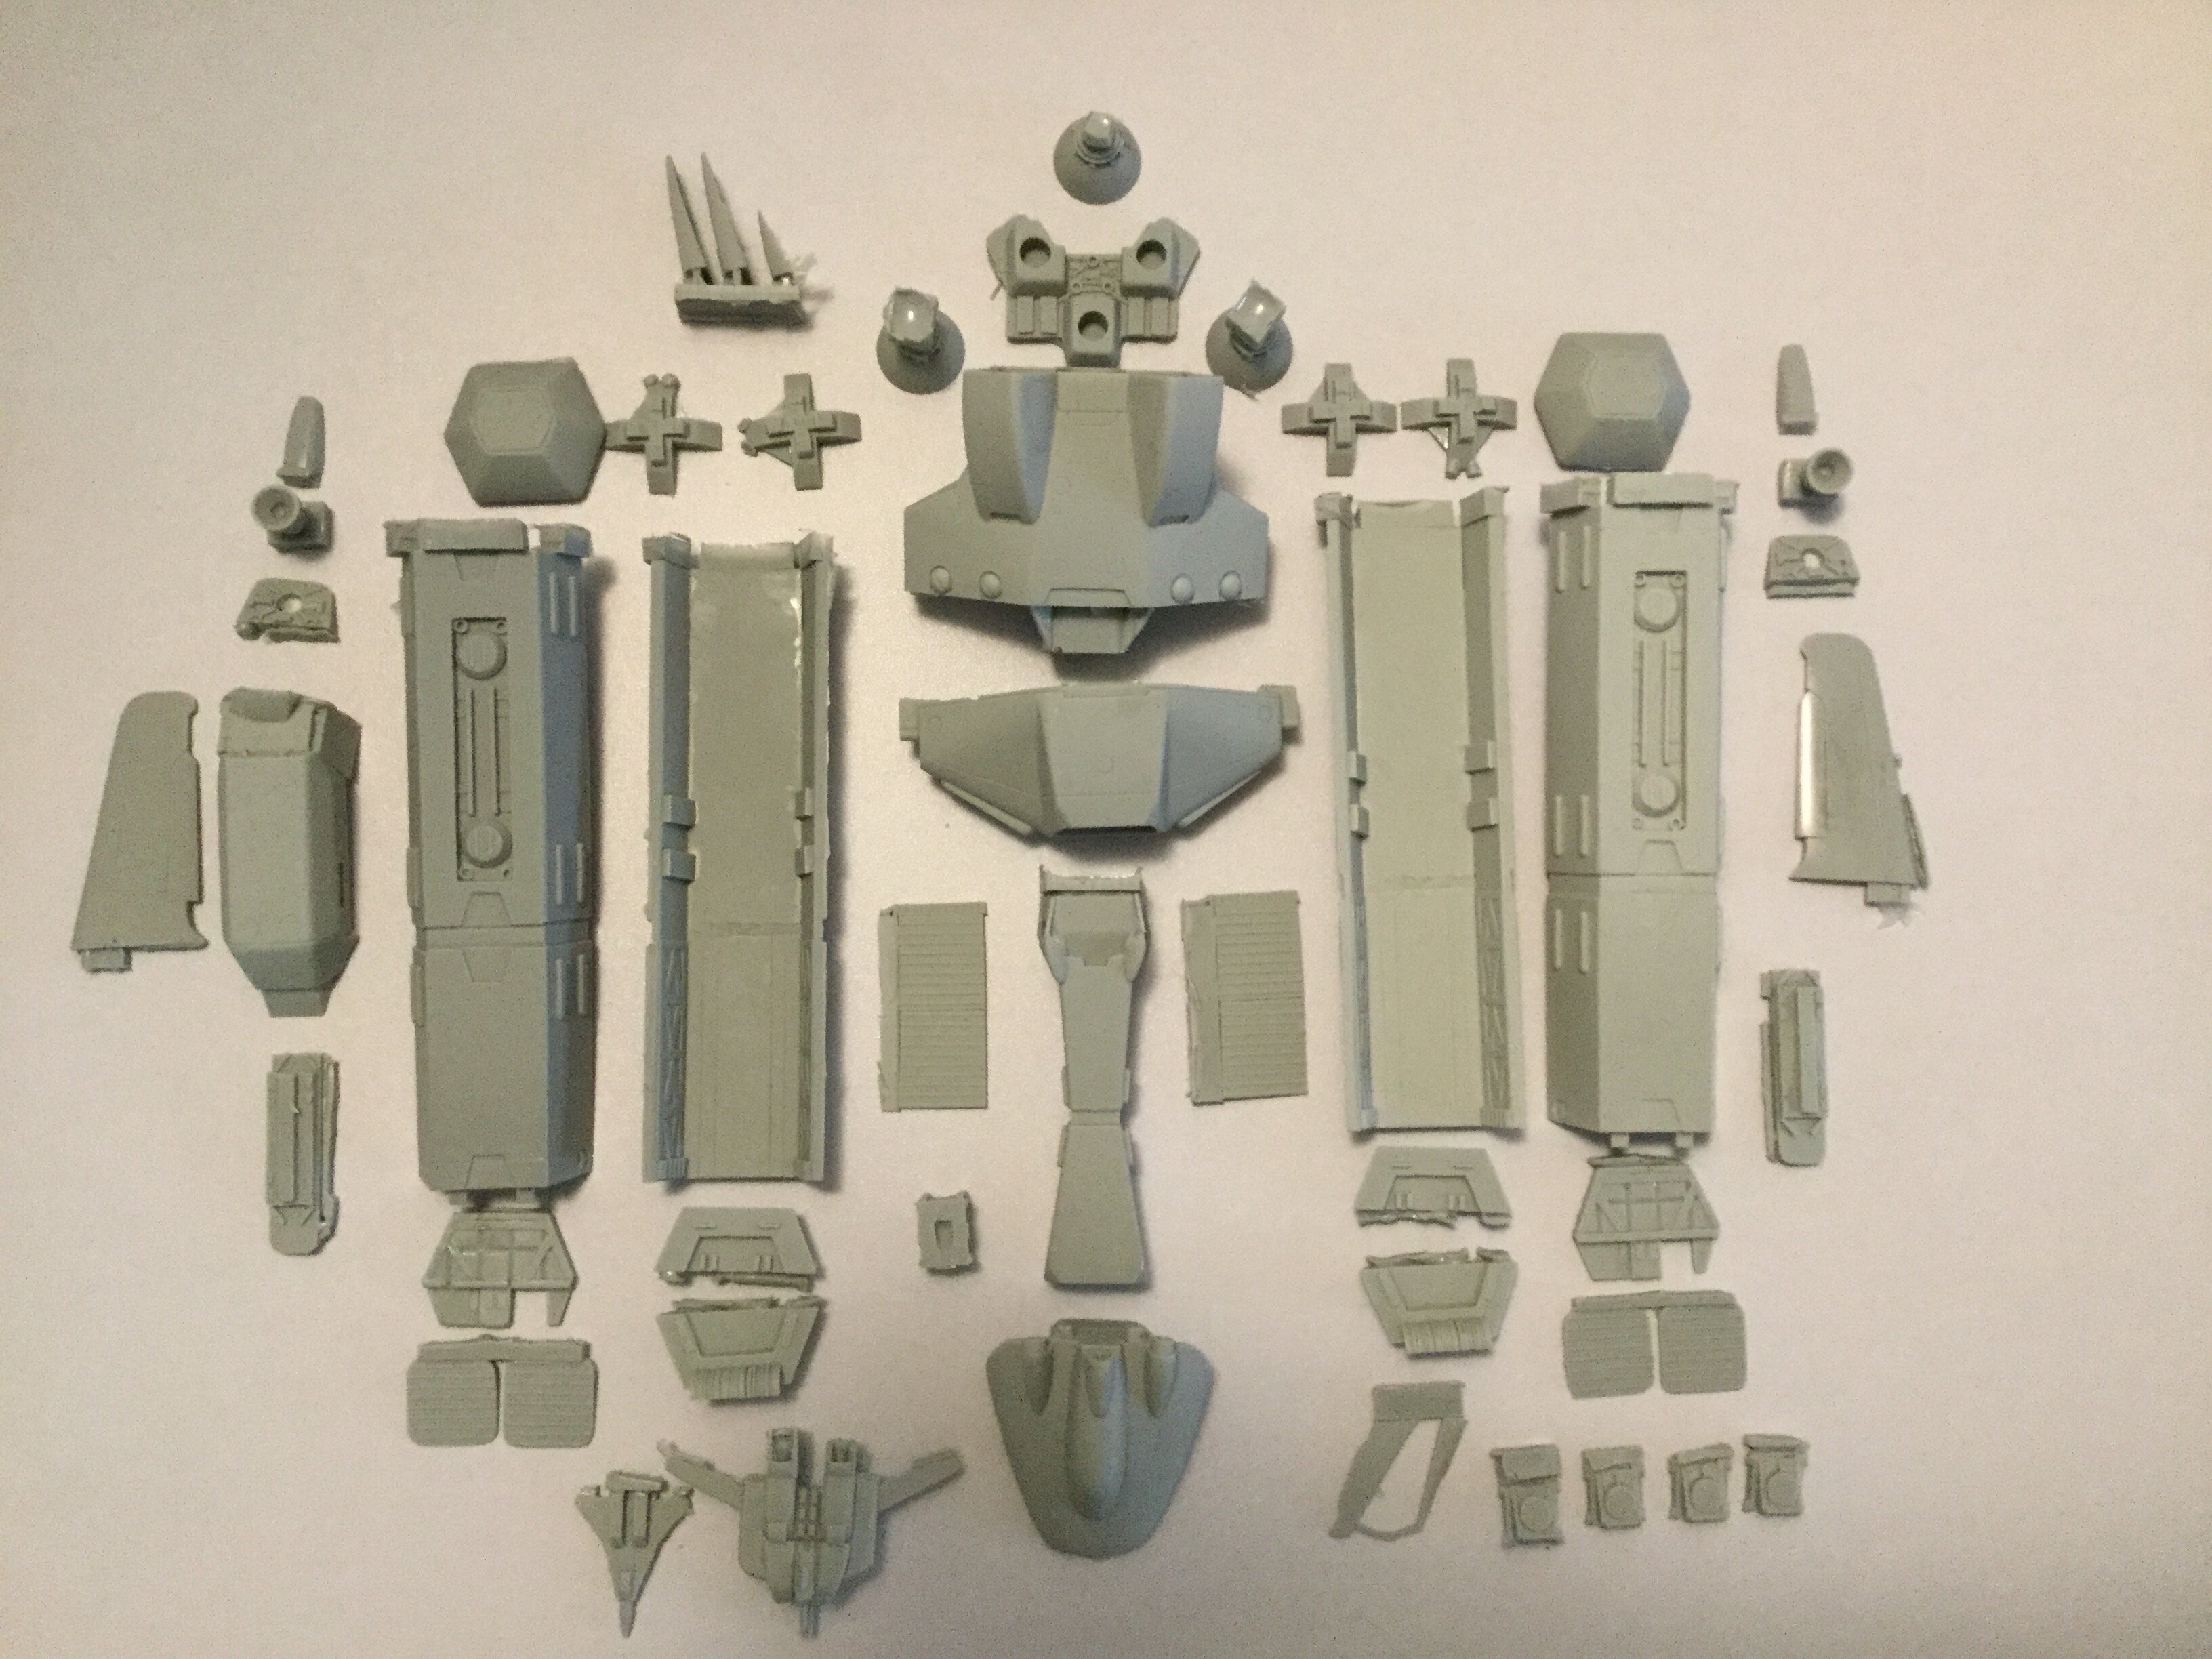

-
No Love for Southern Cross?
captain america replied to blacklotus's topic in Anime or Science Fiction
To be fair, that Japanese line-art sketch is a bit of a detailed trainwreck. Could he have been a bit more faithful in capturing some of the exposed machinery? Yes. Also, those dome shapes look more like chrome hemispheres to me than what he rendered, but that's just my interpretation. The other thing most fans don't understand is that all these illustrations have to abide by what art directors decide and give approval to. To say that you'd be shocked at the lack of competence in some management circles is an understatement. I like the artist's character renderings; that seems to be his strength. His mecha are a bit soft. -
MOSCATO HOBBY MODELLING CONTEST!!
captain america replied to captain america's topic in Anime or Science Fiction
*Heavy breathing intensifies*