captain america
-
Posts
3538 -
Joined
-
Last visited
Content Type
Profiles
Forums
Events
Gallery
Everything posted by captain america
-

Valkyrie 1/72 Booster display model
captain america replied to captain america's topic in Model kits
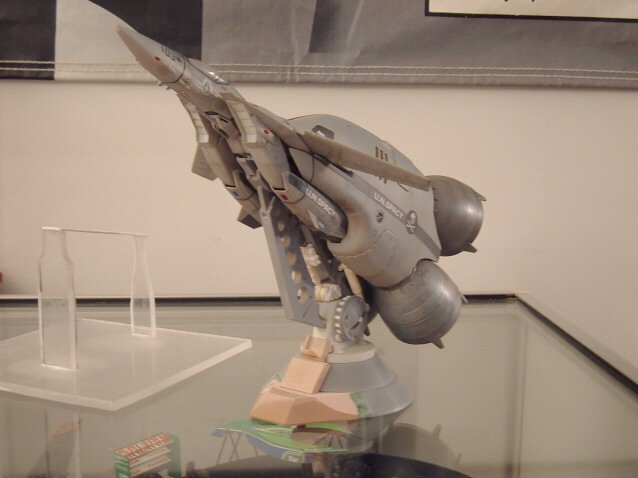
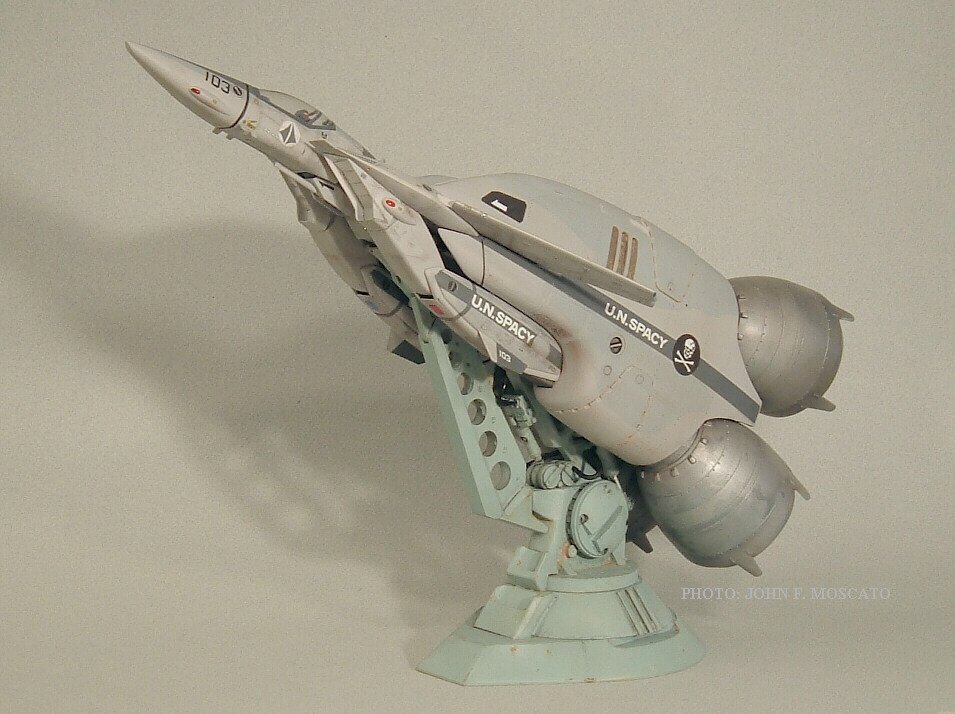
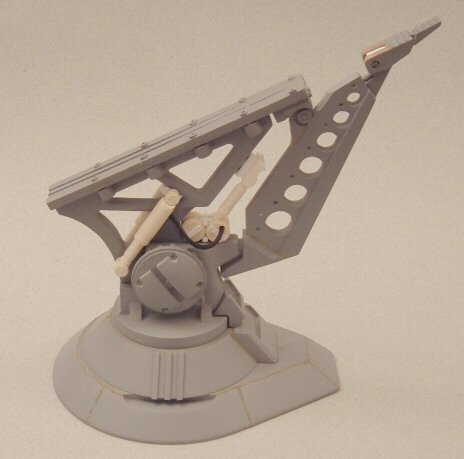
3/4 Rear.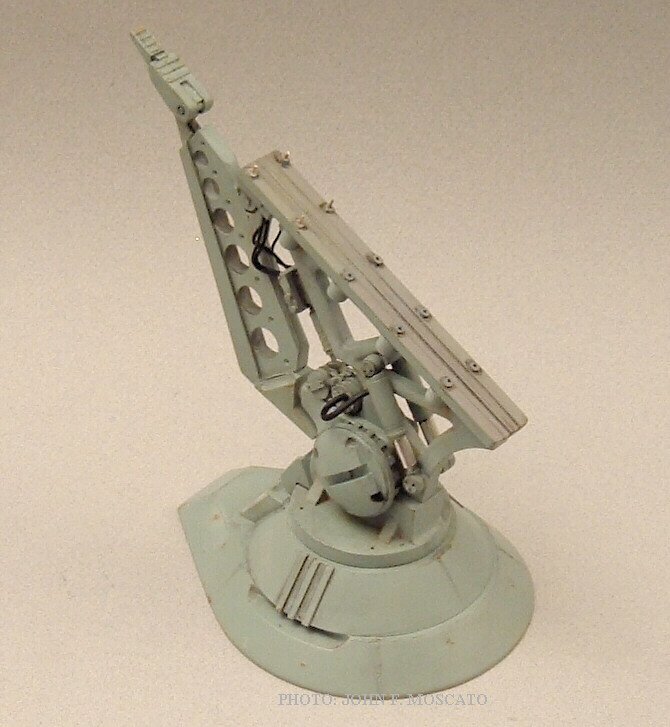
-
Valkyrie 1/72 Booster display model
captain america replied to captain america's topic in Model kits
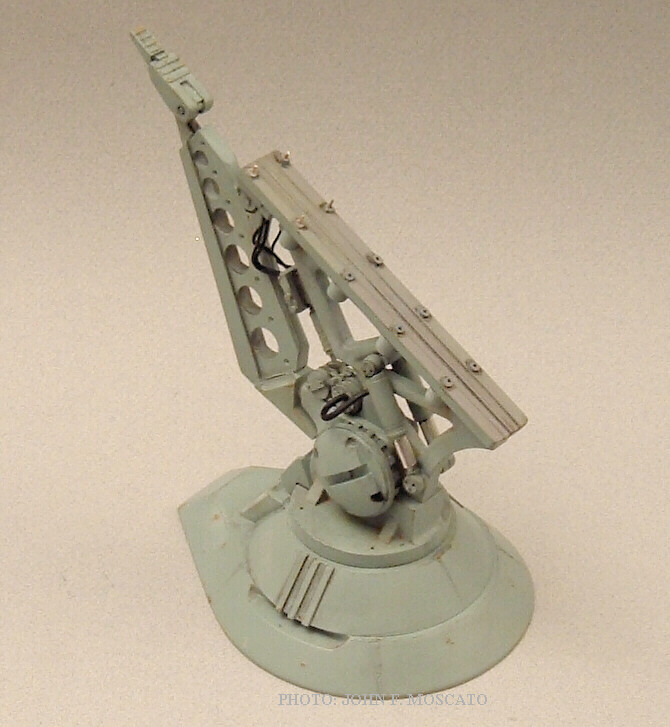
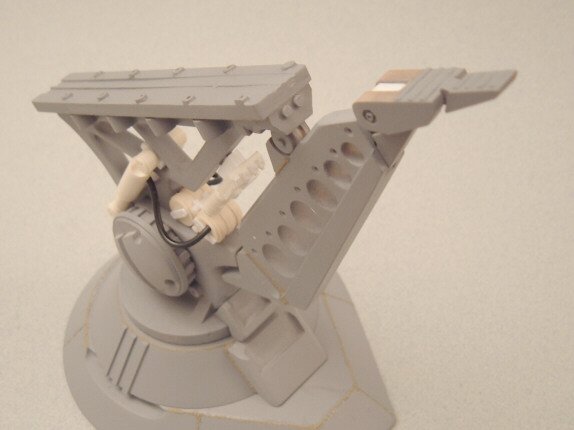
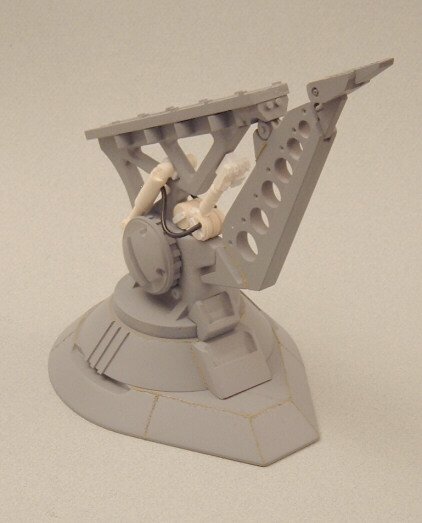
The launch pylon by itself.
-
Valkyrie 1/72 Booster display model
captain america replied to captain america's topic in Model kits
Another...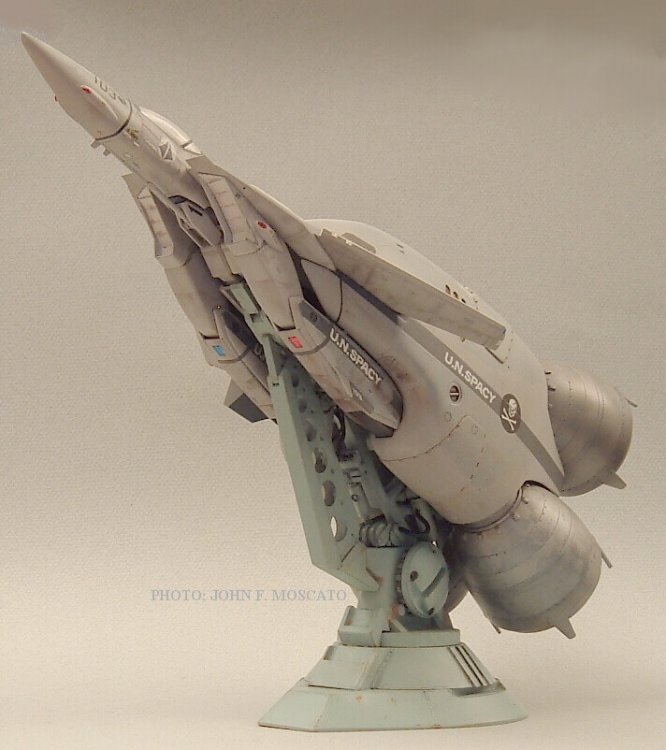
-
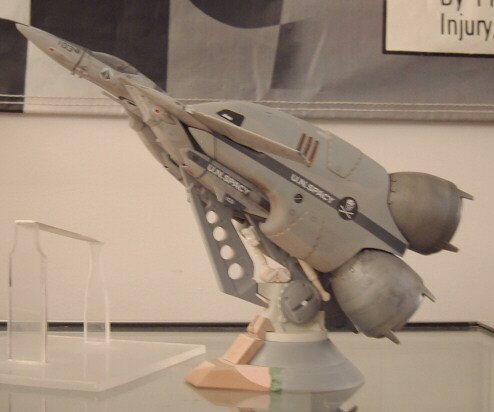
Hi all. I've been relatively quiet of late, but not in vain: I've just finished up some promo pictures of the VF-1 Booster display base, just to give you an idea of what it'll look like fully built & painted. For those of you who would still want to acquire a kit, they are stil available; see the FOR SALE section, or you can order direct: http://www.samurai-monkey.com The one built up in the pics is of the exact same casting quality as the kits you buy... Actually, the kits are a tad better, as I used my somewhat mangled, test-shot parts for the build-up. Initial thoughts upon building it: much better than I'd expected! The high-strength polymer (used for the load-bearing parts) is much tougher than I thought it would be... To the point that I could plop 10lbs onto the mock-up display base without a problem, so it's more than sturdy enough to support the resin booster kit!!! The castings are superbly clean, and all of them fit perfectly and very snugly. The clean-up on the parts is so minimal that I was able to cast, post-cure, clean-up, paint & assemble the launch rail in about a day and a half; not bad at all. Anyway, enough of my heartily biased nonsense, see pics below!
-
NEW Official MPC Thread!!!
captain america replied to FRED THE FRENCH's topic in Anime or Science Fiction
The Gakkens are 20+year-old vintage toys that appeal to the nostalgic fans of the day. Old +rare+fanatc otaku = high unit price. They fetch a lot not because there's a large fan base, but because the tiny fan-base there is are ready to pay big to get them. Competition isn't such a bad thing when there's demand enough to support most of the manufacturers. Besides, Yamato wasn't able to get official distribution to North America, so the little trickle that does get in doesn't make a huge impact: remember, the average Robotech fan doesn't necessarily know about Yamato products to begin with, so Toynami had any competition on their Veritech well under lock & key. As for The New Generation/Mospeada: it's much less popular than the "Macross Saga" to begin with here, and absolutely minuscule in Japan. So even if Toynami have the market all to themselves, the core clientele base is a small one at best, and if they couldn't even move all the Roy 1S, they sure as hell won't move all the Alphas. -
NEW Official MPC Thread!!!
captain america replied to FRED THE FRENCH's topic in Anime or Science Fiction
Repackaged US Alpha returns sold in Japan? HA! The regular, "non-defective" POSs wouldn't even be worthy of going into a japanese recycling bin; their standards for toys are measurably-higer than the US releases. Considering that the New Generation is about 10 times more popular right now than Mospeada is in Japan, there's virtually no chance of getting half-decent sales orders over there. Considering that the "Macross Saga" segment of RT was by far the most popular of the three, and they (Toynami) still couldn't manage to sell-out the 15 000pcs of the uber-popular Roy 1S( which is a VERY small production run for toys, by the way), I think it's safe to say that you'll be lucky to see the rest of the Alphas released, and you can pretty much kiss any hopes of a Beta toy goodbye. -
Nope. The atmospheric Booster only kit is now sold out. The only way you'll be able to get it in the future is as a set with the launch rail... At a revised price.
-
Right. Each of the 3 components was/is/will be available as a stand-alone kit specially for MWers; basically, to break-up the ginormous cost of selling all three together. That way, you can get whichever kit you want, cheap. The combination kits will be even more limited (maybe 15 kits), and will be somewhat more expensive.
-
Correct.
-
Hi guys. What's currently available for order is the launch rail/pylon only (see For Sale section.) The treaded launch vehicle itself hasn't been started yet, and probably won't be available until early in the new year, so as to give people time to save-up for it... And to give me time to work on other stuff. The launch rail ,sold by itself, will be strictly limited to 50, no exceptions. After that, it will only be available as a set with the booster.
-
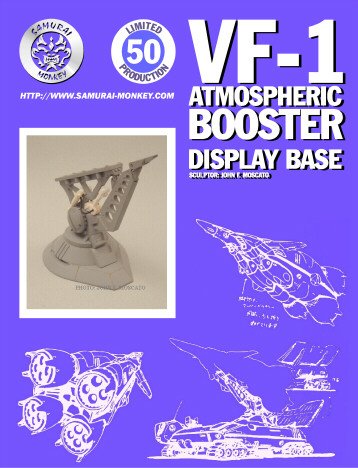
Hi Guys. Just wanted to let everyone know that the first set of molds are finished, and the castings are better than I was expecting. There are still 2 molds left to be done, but that should be pretty quick. The box art is also almost finished; the only difference will be that the pic will be of a properly built/painted launch pylon, not the prototype. Just FYI, if anyone is still thinking of ordering one, I urge you to do so before it sells out: the kits are limited to 50, and won't be available separately when the run is finished.
-
Define "good money"
-
Hi Guys. I think Nightmare was just being sarcastic; no malicious intentions on his part. On my end, I really don't mind the questions, and I'll try to answer them as straight-forewardly as possible. I would never expect someone to plunk-down money for a product sight-unseen. That's partly why Rob never accepts payment for the models until the masters are done & properly photographed.
-
Actually.. The launch vehicle has tank treads, not wheels/tires. Four sets. The cockpit for the LV is actually a bubble-shaped front windscreen, and yes, it would most certainly be clear. The driver module is a sort of pod located on the right-hand front, and hard to make out since there's only one view of the whole vehicle. Nevertheless, I would produce an adequate and detailed cockpit... You guys should know by now that I don't do things half-assed
-
It's an upgrade kit. You get better detailed hands, the leg-holstered gun, a new casting of the leg holster, one of the funnel drones, and a few other menial little bits. Quality is "better" than the original plastic kit parts, but that's not saying much, because that kit was uper-crappy to begin with. The update kit was $40-ish way back when it came out. Typically B-Club: way overpriced model with so-so quality. If you can put your hands on it for $20 or less, you won't feel TOO violated, but my own suggestion would just be to scratchbuild/kitbash your own.
-
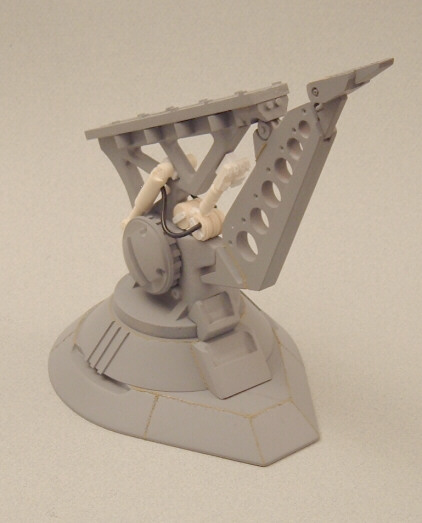
Bird's eye view. I think it's safe for Rob to begin the pre-ordering process... Keep an eye on the FOR SALE section for news from Samurai Monkey Models.
-
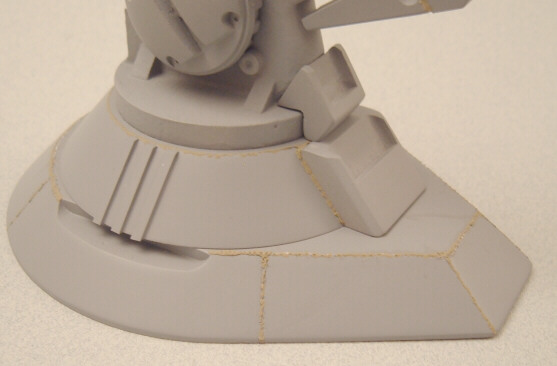
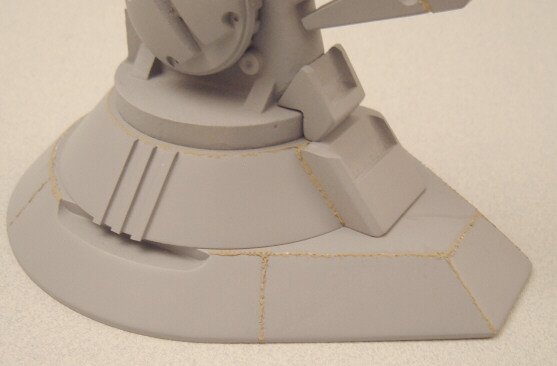
Look ma! Welds!
-
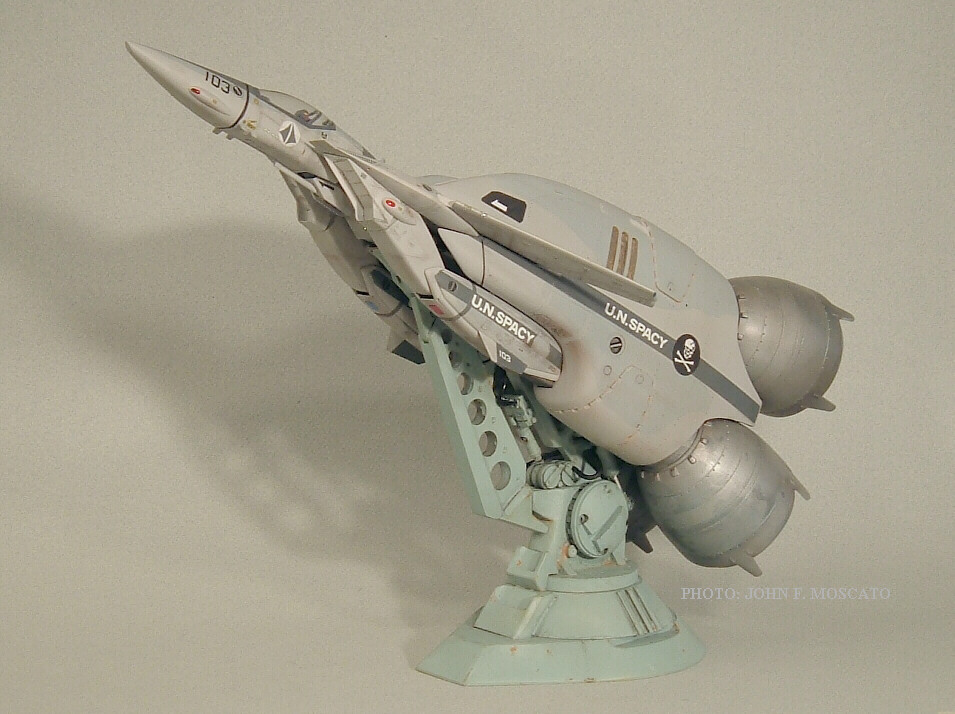
Side view.
-
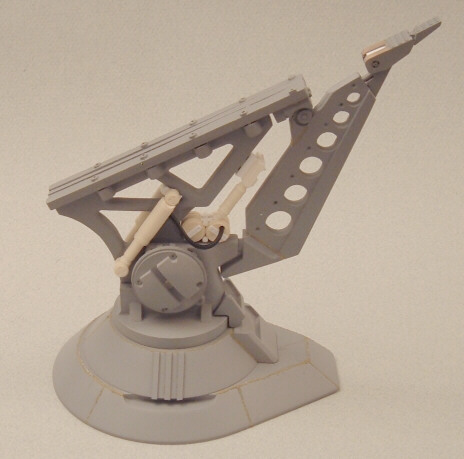
Hi Thor. You actually don't need a roto-casting machine, you can accomplish the same process by "tumbling" the mold manually (for a LOT cheaper, I might add). Problem is, you get uneven wall thickness, which is ok for something purely aesthetic, but definitely not good for something that you're going to plop 2lbs of resin on. Just not a suitable process for this specific model. At any rate, the masters for the launch rail are done--TA-DA!
-
Hi Agass. I've considered loading the resin with some sort of filler, but it wouldn't really work: the cost-effective fillers, like microballoons, will actually compromise the strength of the plastic. Reinforcement fillers like aluminium or carbon fiber millings would cost as much or more than the resin itself. On the other end, I can always make the launch vehicle hulls out of fiberglass, but even with that, whatever I save on pure materials cost I lose out on layup time and longer cure time. Basically, no matter how you look at it, it's going to end up being pricy one way or another. As for being able to get yourself a booster kit, you can simply contact Rob (Monkey-N) via PM to enquire on availability. In addition, you can also visit the Samurai Monkey Website at http://www.samurai-monkey.com/
-
Hi guys. With regards to the launch vehicle, there's pretty much no way to make it at a $100 price point; it's just too big. It'll probably be closer to but still under the $200 mark. Mind you, I haven't started tackling that yet, and I'm quite confident that I'll be able to find a way to keep the price under control.
-
Hi Thor. If you're refering to the treaded launch vehicle itself, it's quite large... About 14" long and about 5.75" wide. The flat-top portion of the vehicle where the launch pylon anchors is about 3.1" off the ground.
-
It suuuure is! Actually, I'm only holding on to your model until I get the pilot figure installed, and I can snap a few pictures with the launch rail. After that, it's going straight to you; sorry for the delay.
-
Another pic.
-
Hi Super O. Actually, the whole point of the launch rail/base is that it MUST be strong enough to support the weight of the finished booster, and it will--> see pics below. Regular resin would've been too brittle and insufficiently strong to do the job, so I switched to a high-impact, high strength polymer in which to cast the base and part of the support pylon. The down side of this is that this material is more expensive than regular resin, but it sands/putties/machines every bit as nicely. The central column part (with the 3 triangular openings) is set to be cast in metal for oprimal strength, but I'm still going to experiment with the new polymer; the stuff is so tough that it might very well be strong enough to cast the main support in as well.