captain america
-
Posts
3550 -
Joined
-
Last visited
Content Type
Profiles
Forums
Events
Gallery
Everything posted by captain america
-
Just a quick progress pic for everyone: these are the "pumpkin flavored" 1D kits being prepped for the baking process. They go into the oven at 150 F for about 4 hours to cure the plastic. I have 10 castings done, and a helluvalot more to go.
-
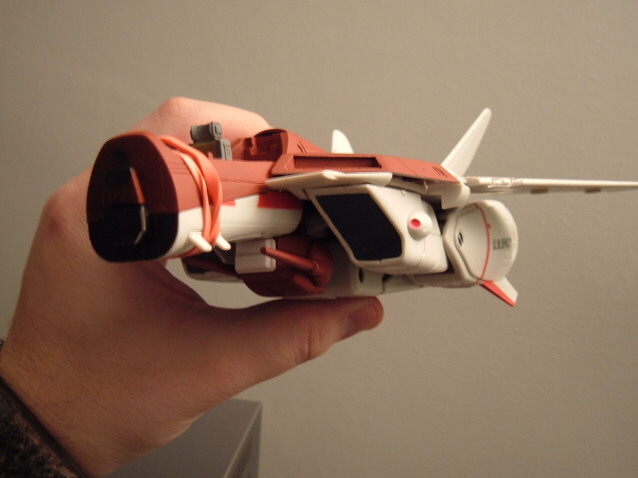
Yeah all good with passenger Cap? And EXO where's my Minmay? 336195[/snapback] The rear seat size is nearly identical to that of the front, with some slight modification to the bottom, as there's still a screw collar in the footwell( a vestige from the 1J). A pilot figure should fit without too many problems. If anything, the backseater's feet may need to be trimmed a tad.
-
Update. I'm running low on TASK (high-strength polymer, which means there will be a delay of about 2 weeks in production. I think I may have enough to fill current paid orders, but as a word of caution, things will be going slowly for a while.
-
Well, that was assumed in my post Though, shouldn't all the kits come with a green tinted eyepiece? 336099[/snapback] The Vanilla kits come with just a clear eye-piece. It's a relatively easy part to paint, and allows for different color variations for those who may want to customize their 1D beyone the regular green.
-
Hi Fulcy. Actually, both versions come with a clear canopy; that's simply a must. The difference is actually as follows: -Vanilla kit: canopy and eye lens molded clear; all other parts in white. -Color kit: clear canopy, clear green eyepiece, body parts molded in beige, orange, and brown.
-
Close-up of the canopy. It's relatively clear when I cast without a release-agent, but a bit soft, and needs to be post-cured just like the high-strength polymer. This is the part that's slowing me down the most, as I'm going to be redoing the canopy molds relatively often. However, I WILL post here in this thread the names of those whose orders have shipped. The first salvo will be going out by late next week. Stay tuned.

-
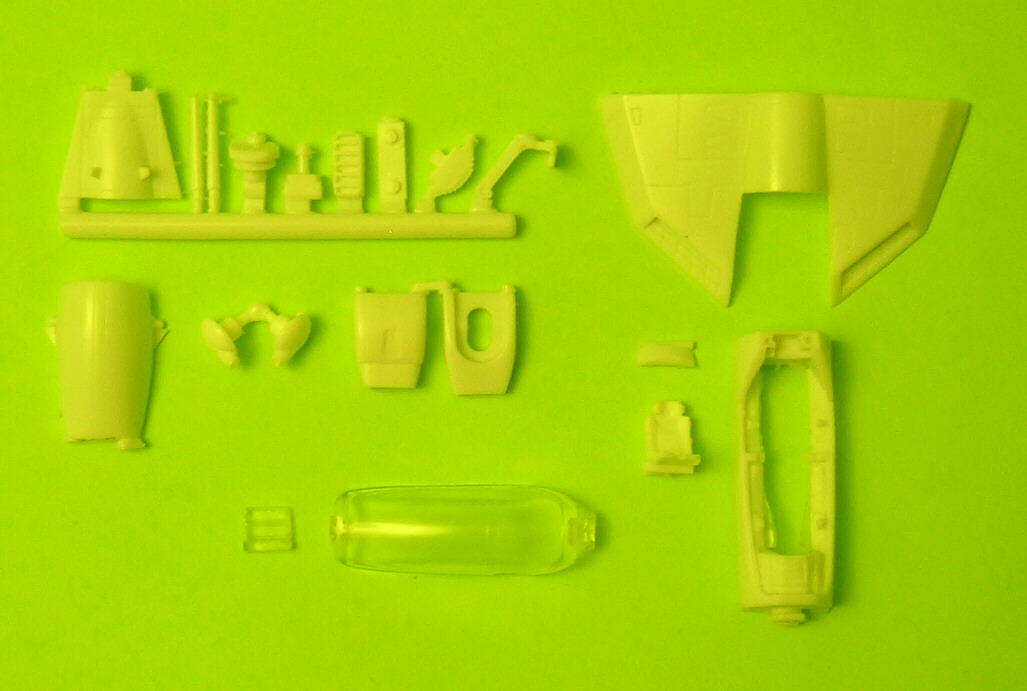
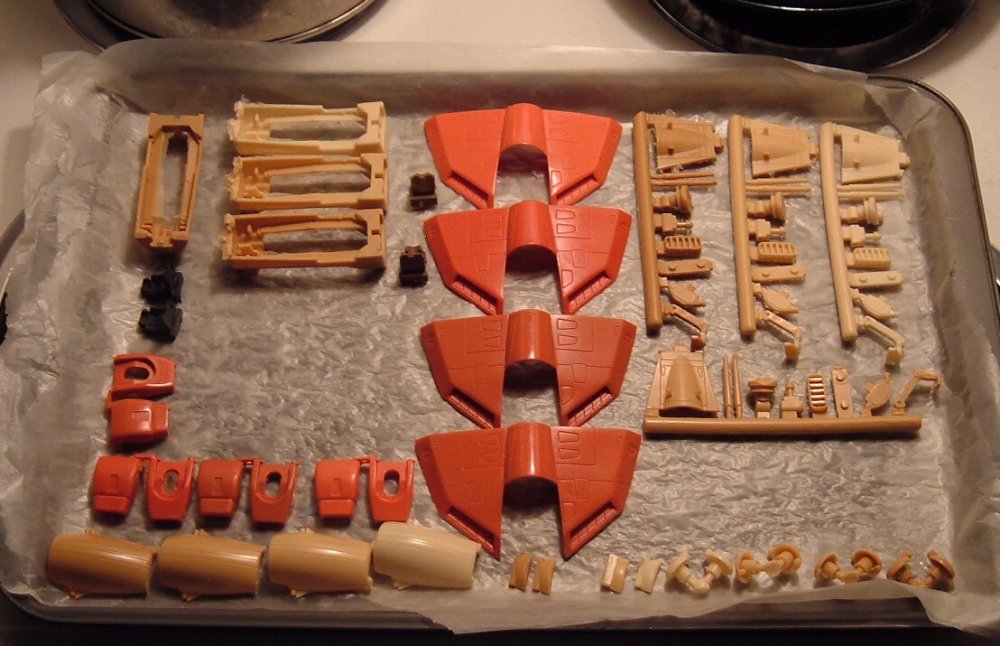
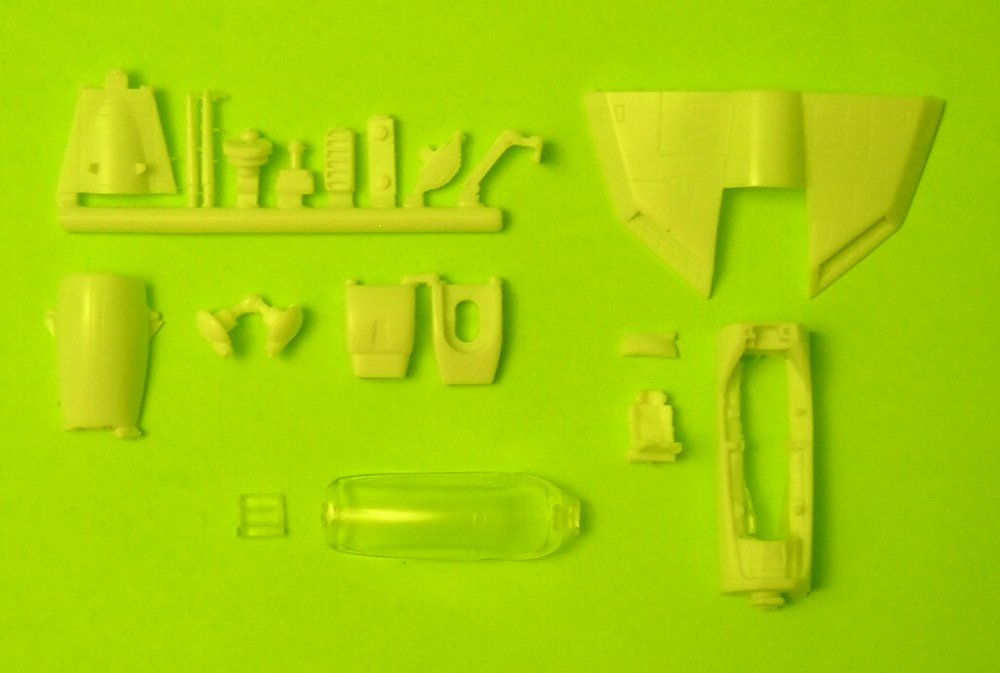
Ask and ye shall recieve... Here's the parts breakdown. 18 white resin, 2 clear. Sorry about the greenish tinge; that's just from the walls. The parts are indeed white.
-
Hi Guys. The VF-1D conversion is now fully molded and ready for production. I've updated the very first post of this thread with instructions.
-
That would be kinda hard, considering that there are no castings of the parts in existence yet. The pics at the very beginning of this thread show what the conversion will look like, since they are of the master-patterns. The neck parts have been refined very slightly, as has the back of the head. Otherwise, everything else is the same.
-
Hi Haterist. Donations are welcome anytime!! Seriously though, I'll be ready to accept payment by friday. I'll be editing the first post of this thread with instructions on how to make payment & where... I just wanted to have the molds done first, so as to minimize lag time as much as possible.
-
Hi Andy. No real change in the appearance of the parts, except for the head that was lengthened ever-so-slightly at the back/radiator area. Otherwise, everything is as was shown in the last pictures.
-
Hi all. A quick update: I've poured the first mold, with the rest to be done by week's end. I've made a few (tiny) improvements to the kit in a few places too... Just to improve fit. Re: head sold separately. The kit molds were broken-down based on the color of the parts. In such, to mold just head parts, I would still end up having to mold everything else, because parts are interconnected via sprues. In short, the 1D conversion will be available as a whole kit only, I'm afraid.
-
18-20 pcs
-
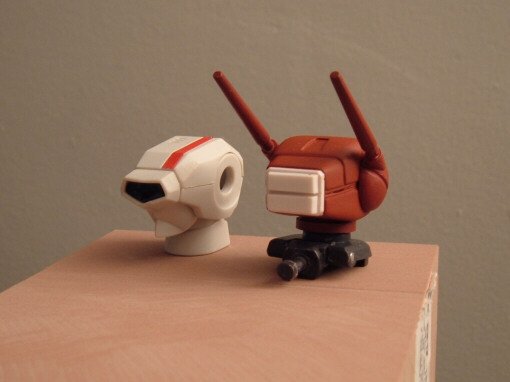
Actually... The head tucks-in to about this point (see below.) Indeed, the shoulders protrude as a result of the hinges, and the head comes in just below the arms, so while the 1D head doesn't tuck-in quite as well as the others, it also doesn't protrude in an unsightly way... Necessary compromises.

-
The head/neck joint revised. The head now sits in about the same position as the 1J.
-
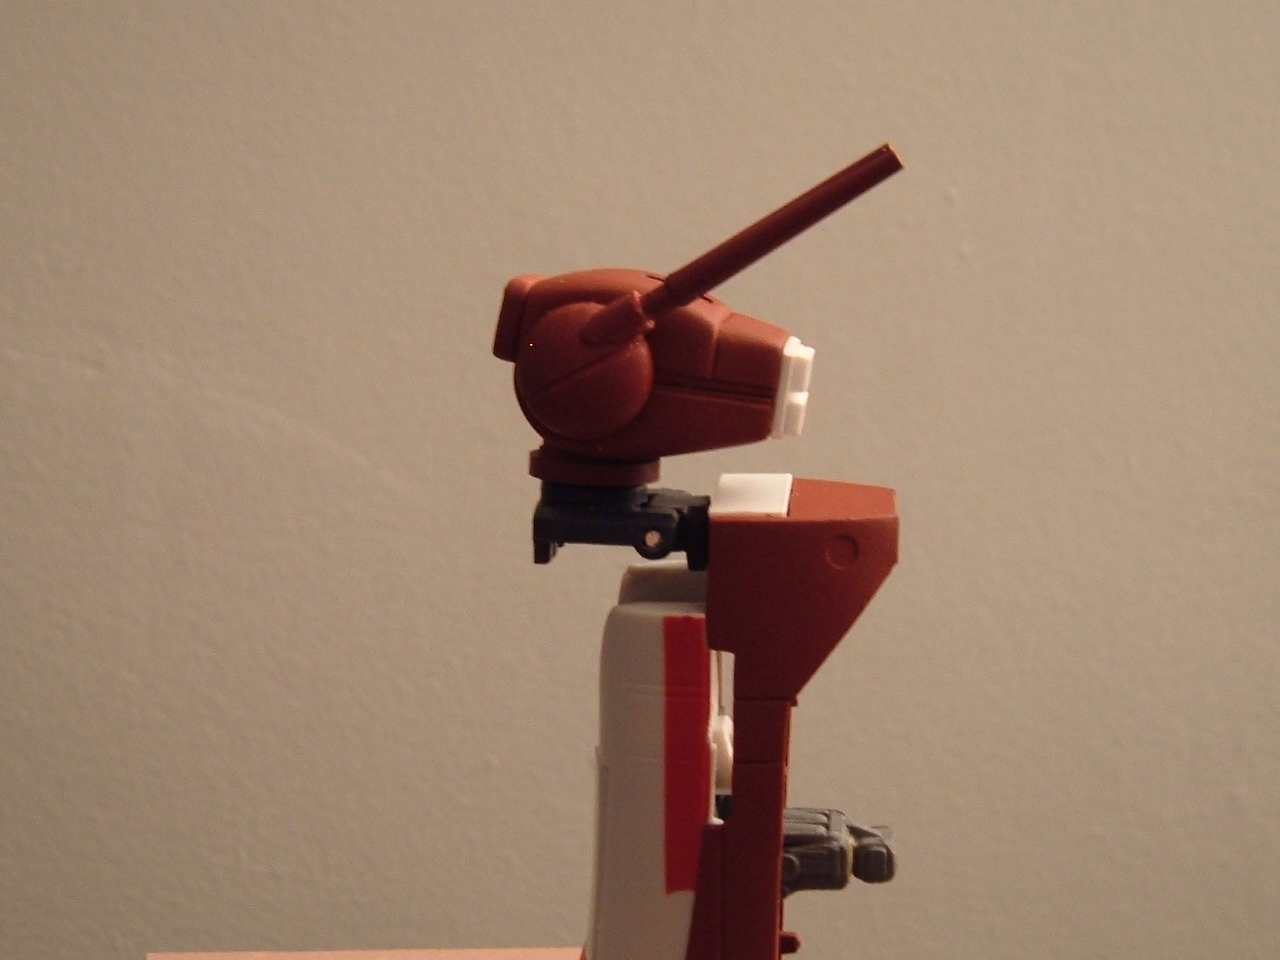
The head in fighter mode. I'm tweaking the neck to help it tuck-in a little bit more.
-
The head with its new pivot.
-
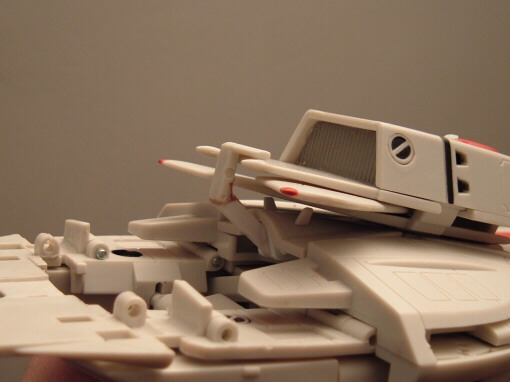
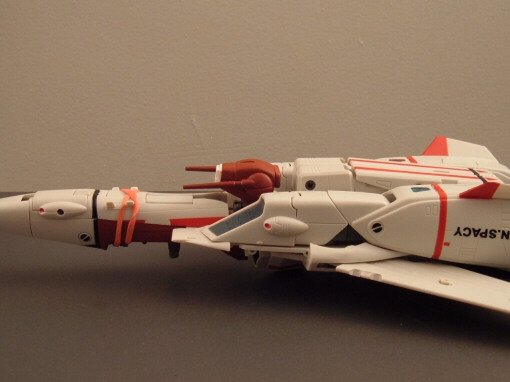
The backpack hinge is now done, and rotates effortlessly into the fuselage in fighter mode.

-
No 2 sculpt have the same proportions: the hasegawa model below has minimized the trapezoid panels yet further. I simply opted for something in the "middle-ground".
-
Hi Guys. Thanks for the feedback. This kind of critiquing is actually very beneficial to me, and is being put to good use. Blade antennas: will only be added before molding; they would have broken off too easily otherwise. Head mount: I agree totally, so I completely re-worked the head mount. The head now sits more central in battroid mode, about the same in fighter mode, and no more drilling required. Stay tuned for pics tonight.
-
Hi Knight26. For the most part, the conversion will be a straight-out swap, with a few little exceptions: 4 holes will have to be drilled to accomodate the new neck-pivoting mechanism, but these will be clearly marked AND pre-indented so as to be almost fool-proof. There are also 2 areas that will need MINOR filing; very easy, straight stuff. Beyond that, the conversion kit is designed to be VERY user-friendly.
-
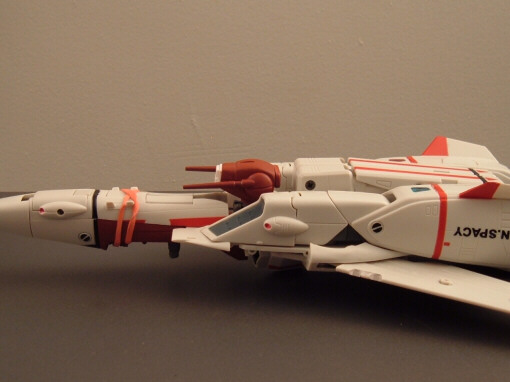
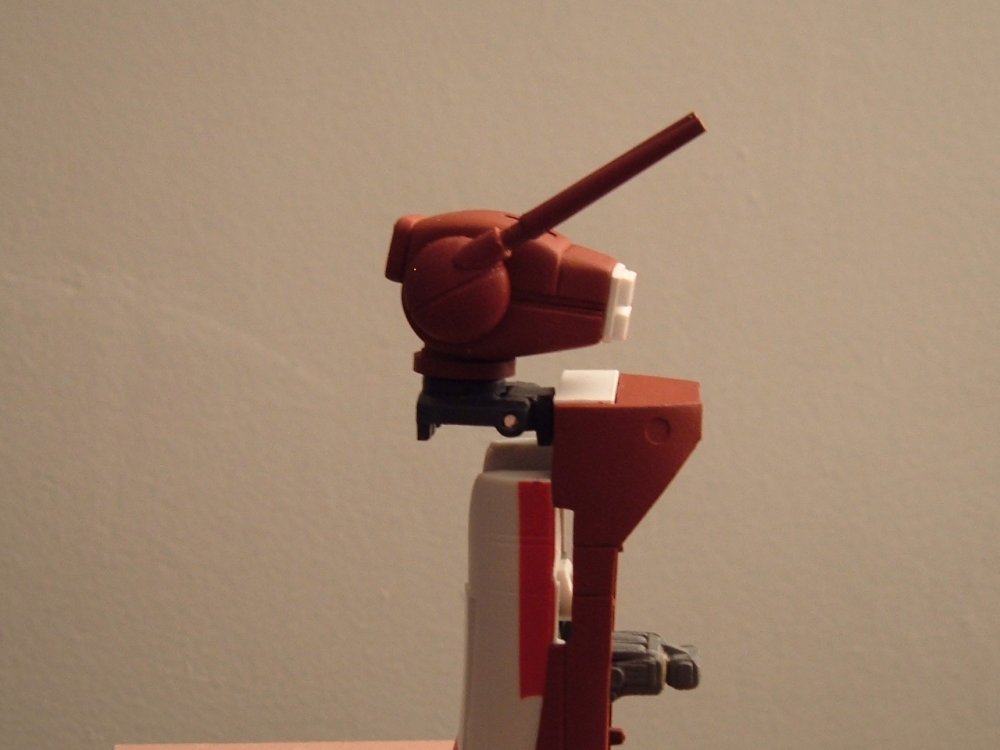
The heatshield is removeable. The backpack locking mechanism is what I'm referring to: it's a small, plow-shaped part that pivots out from the hatch where the head goes trough during transformation. It locks the backpack in place to keep it from flopping about. This part may also have to be removeable. For all the 1/48 VF-1's brilliance, its only real drawback is that the design doesn't lend itself terribly well to modification; particularly in the mid-fuselage area where the cockpit/heatshield intersect. These shortcomings can be overcome, but only by significantly-modifying a lot of the surrounding components... Probably why Yamato never released a 2-seater.
-
To all those of you on the reserve list, I will post an update in this thread next week to instruct you on how to make payments; the molds should be underway by then, and I'll give proper shipping information (time/cost), as well as doing up the instructions.
-
Here are the masters for the 1/48 VF-1D conversion set. The only part I have to mock-up tomorrow is the arm that holds the backpack in place during battroid mode. This will either be removeable or pivoting, depending on whether there's enough clearance inside the Valk for it to pivot. I was contemplating something double-hinged, but that just wouldn't be strong enough.
-

1/72 Hasegawa VF-1 + Booster step-by-step...
captain america replied to wm cheng's topic in The Workshop!
Great flurking shnit! Soft resin is one thing, but that nozzle is just a nightmare! Will, PM me with your address; I'll send you another nozzle.