captain america
-
Posts
3563 -
Joined
-
Last visited
Content Type
Profiles
Forums
Events
Gallery
Everything posted by captain america
-
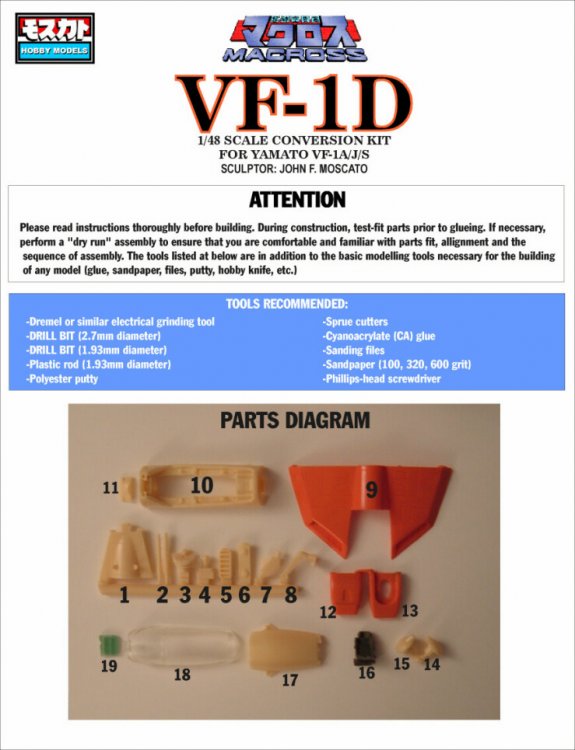
I'm sorry if you feel that my VF-1D kit is substandard. I've attempted to make it as user-friendly as humanly-possible, but I'm afraid that there are limitations to what I can do with even the best urethane resins and silicone molds.
-
*sigh* The canopy can be "unwarped" like any other resin: by placing it in warm water til it becomes a bit soft, then take it out, place it against the piece it needs to fit onto, and then, holding both parts together, run them under cold water to set the part.
-
Hi Roy. Yup, that's my auction. I didn't bother linking in the Auction section since pretty much any MWer will know to buy from me directly; I'm just using E-Bay to reach the fans that don't frequent the forums here.
-
As of Saturday morning, all paid orders will have been shipped. If anyone else wants a conversion kit, now's the time.
-
Hi Godzilla. Actually, the gummy canopy issue was resolved early-on into the project, so no more cooking of parts is necessary.
-
You're not?
-
There's a fine line between thorough, and just plain outright stupidity.... As can be seen in the pics aaajin posted. This whole thing just smacks of incompetence! As mentioned above, the box has flaps for christ's sake; all they had to do was open it in a NORMAL manner. They would have seen what they needed to see, and still be able to close-up the box good as new for the awaiting recipient--immagine that. I'm really starting to think that US customs are where the untrained monkeys who couldn't get hired by UPS go to flourish: about 4 years ago, I had shipped a hand-made model (worth about 10 grand, by the way) to a customer in California. The troglodites managed to somehow haul the model out of the custom-made crate, and then bash it good before repackaging it... Not quite good-as-new. Long story short, I had to fly out to Ca to fix the model myself.
-
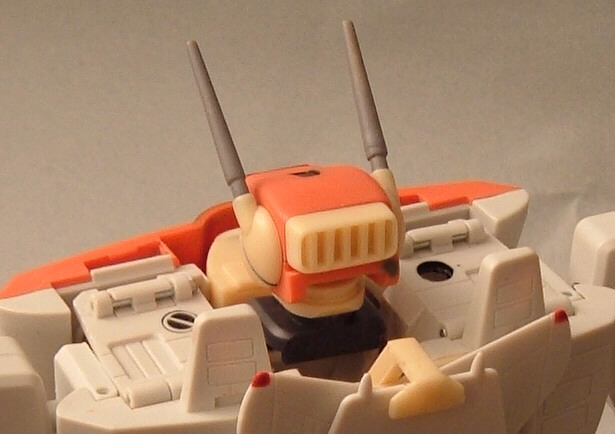
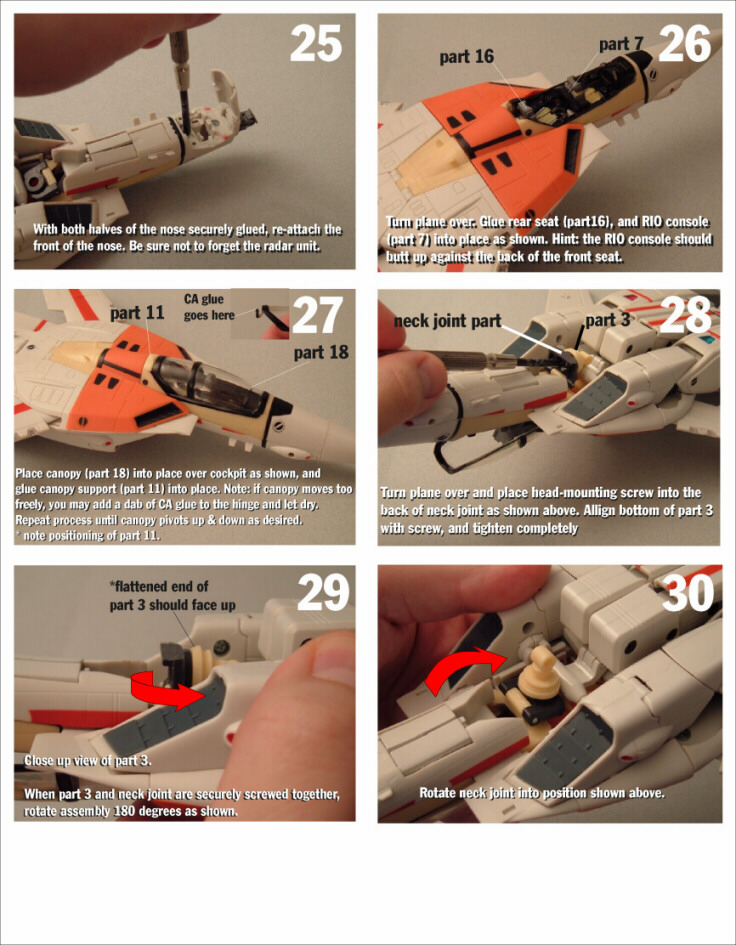
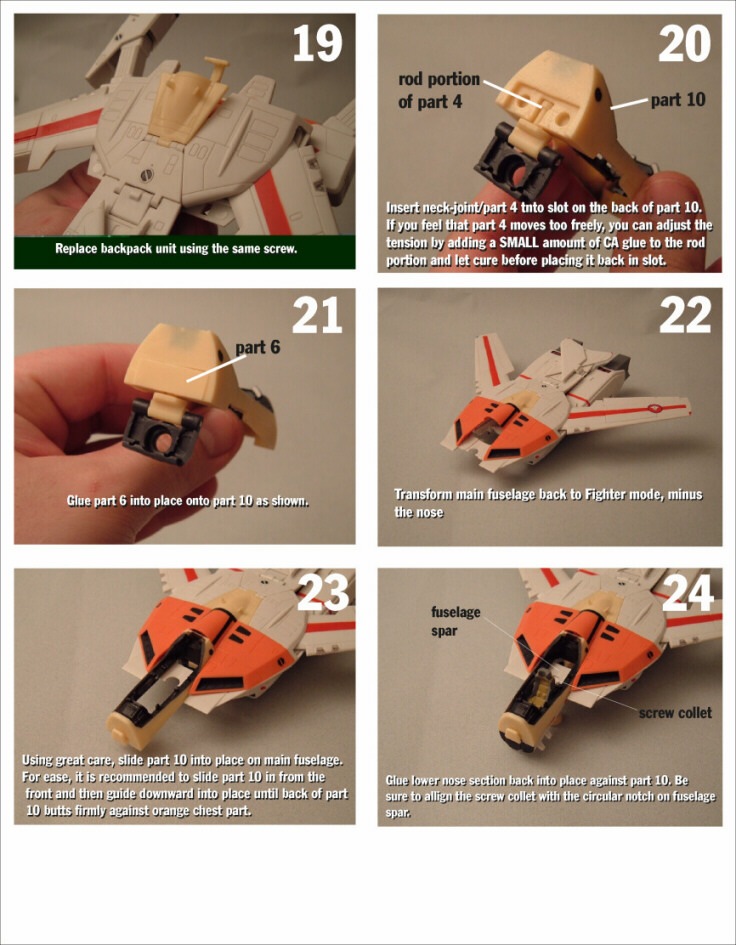
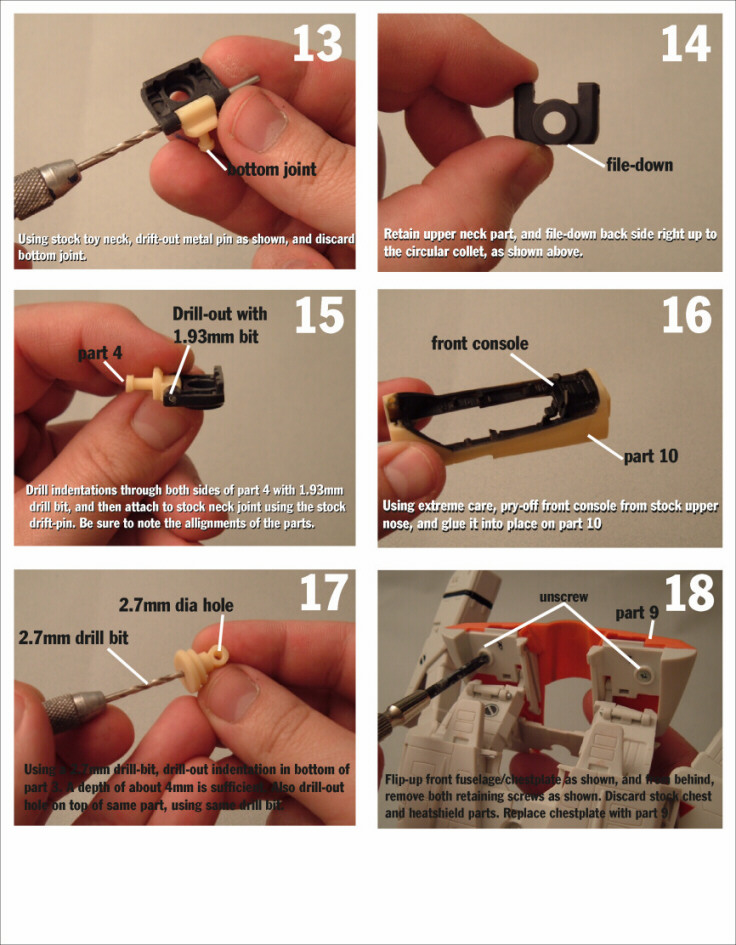
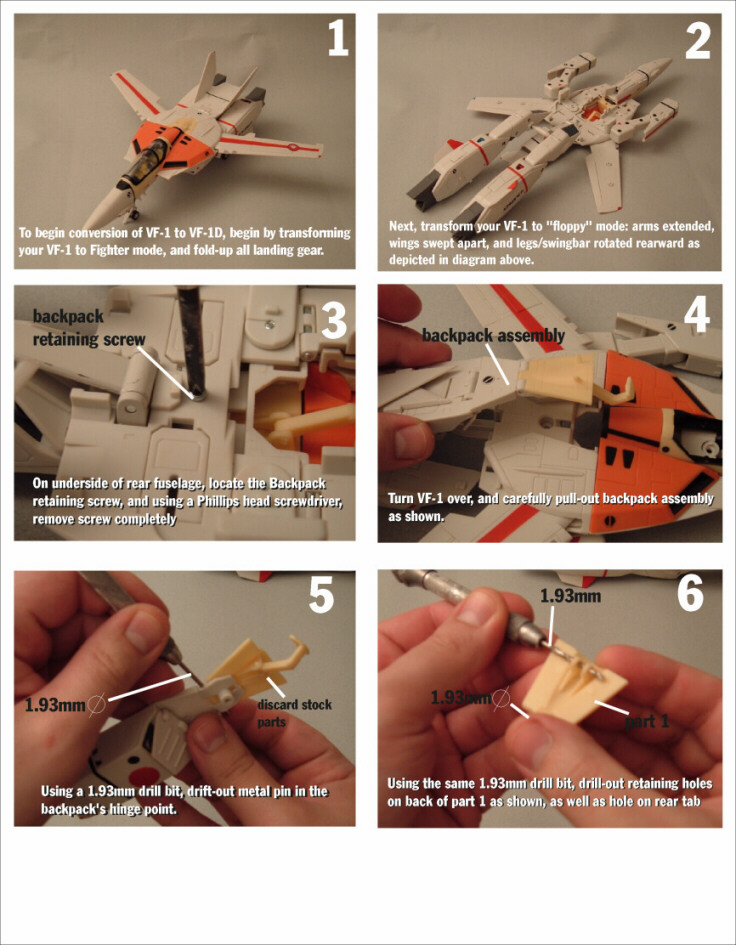
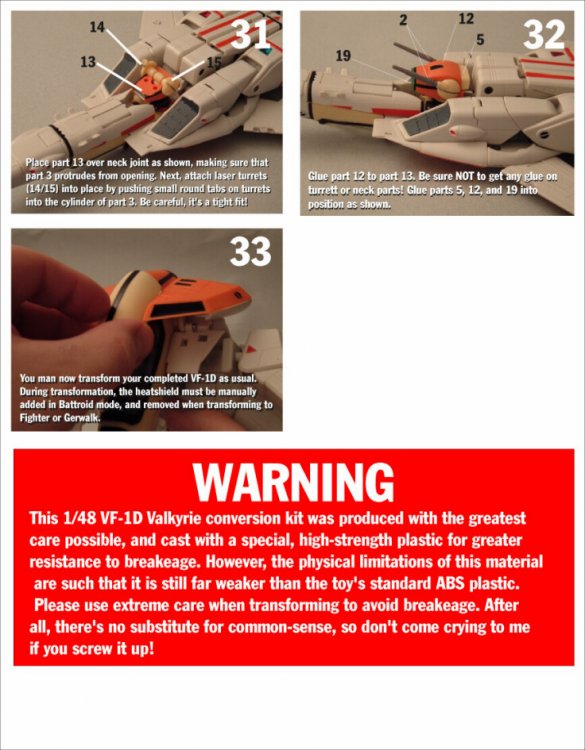
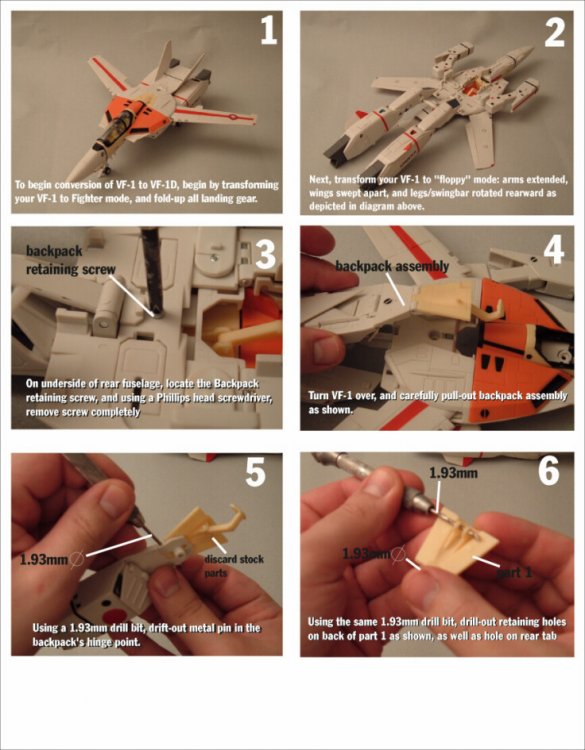
True, the head has no locking mechanism in Fighter mode... Or Battroid, for that matter. The solution to this is actually rather simple, even if it's perhaps imperfect in the grand scheme of things: as mentioned in the instructions, you can (and should) use a small amount of CA glue on the neck joint parts: placing a dab on all the areas that have friction or rub against each other. When the CA glue dries, it is both hard, and slightly increases the volume of the contact area, thus increasing "tightness" and thus prevents the parts from flopping-around. As you can see in the pic below, the head litteraly "hangs" over nothingness. Without the tightness in the joints, the head would just flop backwards into the chasm below. Tightness is the key.

-
-
This is how it looks overall.

-
Time to file a complaint with customs and get those dumb-asses pay for a new set of FAST packs!
-
Last page.
-
page 6

-
page 5

-
page 4

-
page 3
-
page 2
-
page 1
-
Hi Kurt. Yes, the clear resin has a tendancy to be quite tempermental, and I've had words with Smooth-On over this very issue. You can cook the canopy in the oven at 150f (not higher!) for about 4 hours and let cool. This helps to harden the resin and increase it's physical properties. According to Smooth On, even when the parts come out soft like that, they WILL eventually firm up, but because the material is very fickle when mixing, some batches will simply take longer to harden. 341013[/snapback] Captain, The canopy in the one sent for fearyaks is gummy as well. I will place it in the oven to try and cure it. While in the oven, will it soften even more? Should I support it while it is baking? Thanks. 341579[/snapback] Yes it will. You'll need to place the part on a cookie tray, and preferably a sheet of wax paper between them. I cannot stress how important temperature control is in this instance. The oven should be set to exactly 150f, not higher. For what it's worth, this technique does work in the long-term: I have a clear cockpit half from my Regult kit which I had never shipped-out, because it suffered from Gummy syndrome, so I baked it for 4 hours as suggested by Smooth On. THe effect was not immediate honestly, it took about 2 months, but the part is now completely cured and as stiff as it should be. This is the only reason I shipped-out the first few models with soft canopies: I knew that they'd harden with time, otherwise I would have simply replaced the parts before shipping 'em.
-
Yes. They'll be done tomorrow as promised.
-
Update. The following orders have shipped: -Zeta Otaku -The French One -Sephiroth -UN Spacy -JoLe727 Shipping next Thursday: -datterboy -Roy's Blues -wickedpr1nce -Xstoys -Exo
-
Hi Sean. I'd give it til the end of the week; I've found that there can be quite a bit of fluctuation in how quickly parcels are delivered; even within the same state. The fact that some from the first batch arrived litterally 4 days after I'd mailed them is honestly a fluke; the norm is 10 business days. If by the end of this week you haven't recieved it, just PM me.
-
Hi Kurt. Yes, the clear resin has a tendancy to be quite tempermental, and I've had words with Smooth-On over this very issue. You can cook the canopy in the oven at 150f (not higher!) for about 4 hours and let cool. This helps to harden the resin and increase it's physical properties. According to Smooth On, even when the parts come out soft like that, they WILL eventually firm up, but because the material is very fickle when mixing, some batches will simply take longer to harden.
-
Hi Datterboy. The Vanilla kits are really quite... Vanilla! Natural resin color, which is a slightly translucent white. Color-matching the Valks would have been possible with a neutral (clear or amber) resin, but since this stuff is already white from the get-go, that would mean adding an absolutely-strict amount of pigment per casting, which is near impossible for such a small mixing quantity. Heck, the Battroid head lenses were the worst: you could take 2 dabs of green paste which look absolutely identical, and one would give the resin just the right tint of green, while the other would turn the stuff pure opaque green; that's how potent the pigments are
-
Wow Gene, you're fast!! Got your 1D built-up before I did I'm prepping my parts as we speak, and I should have the instructions all done by wednesday.