captain america
-
Posts
3561 -
Joined
-
Last visited
Content Type
Profiles
Forums
Events
Gallery
Everything posted by captain america
-
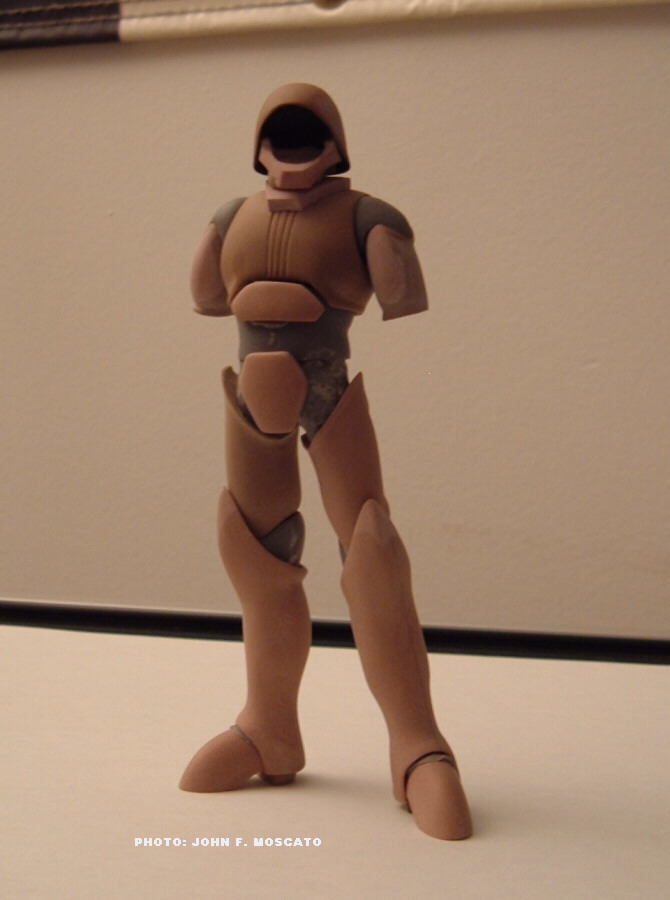
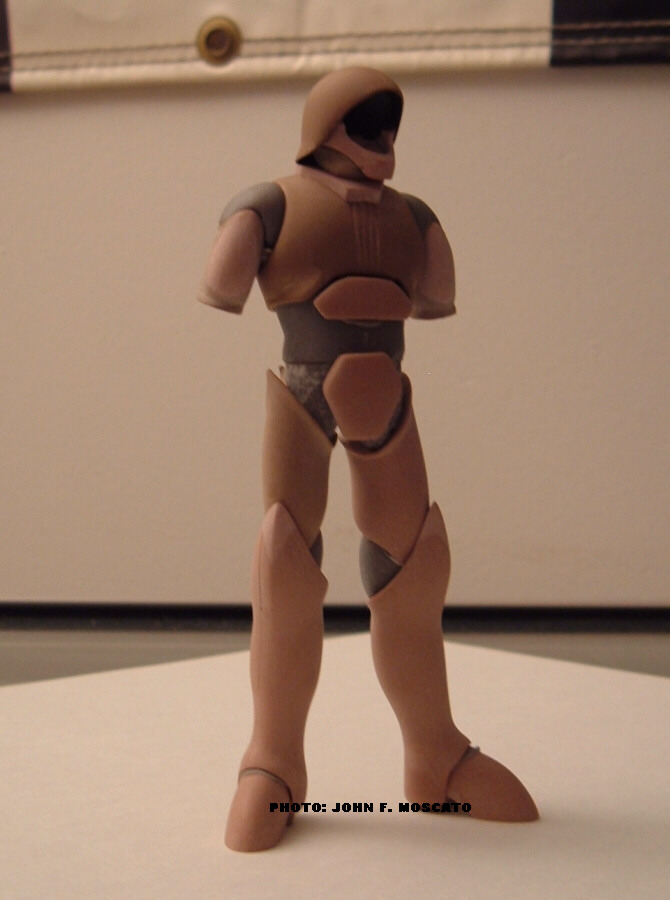
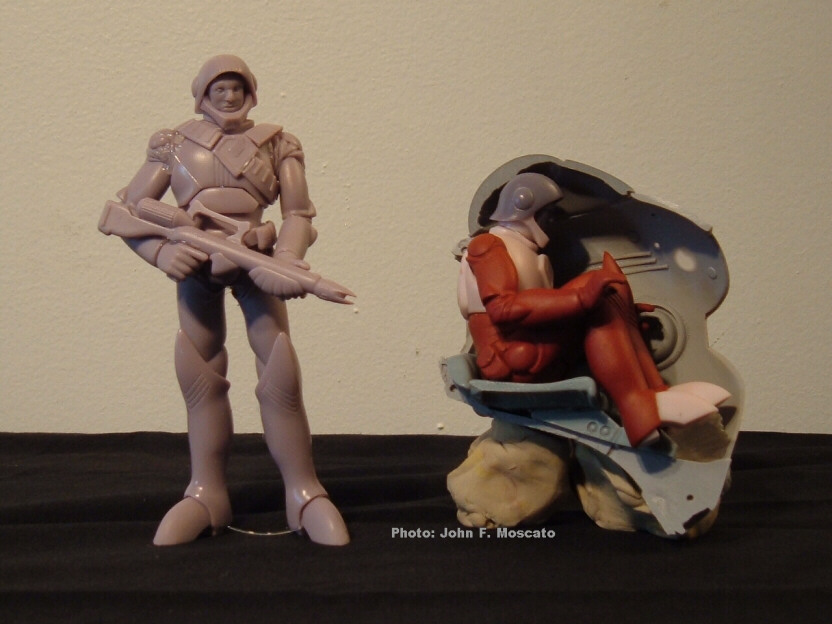
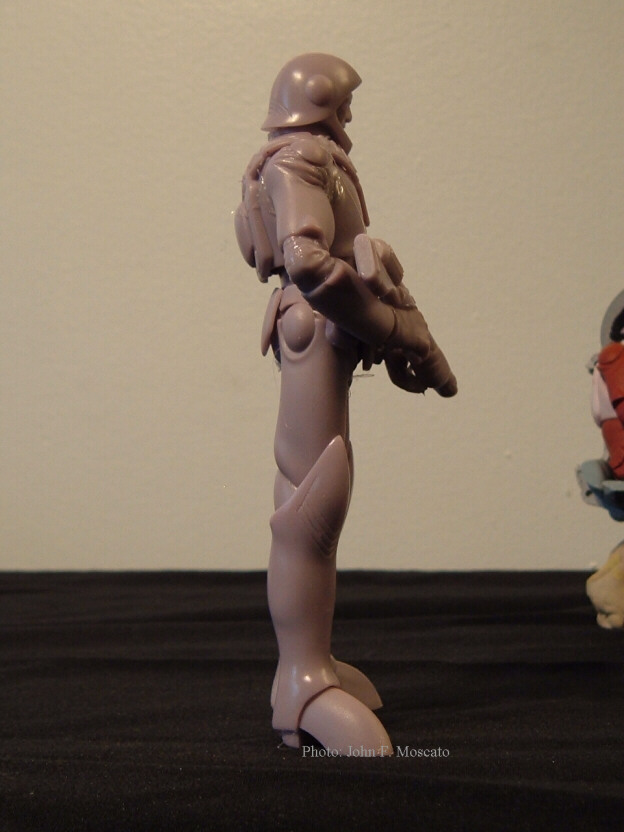
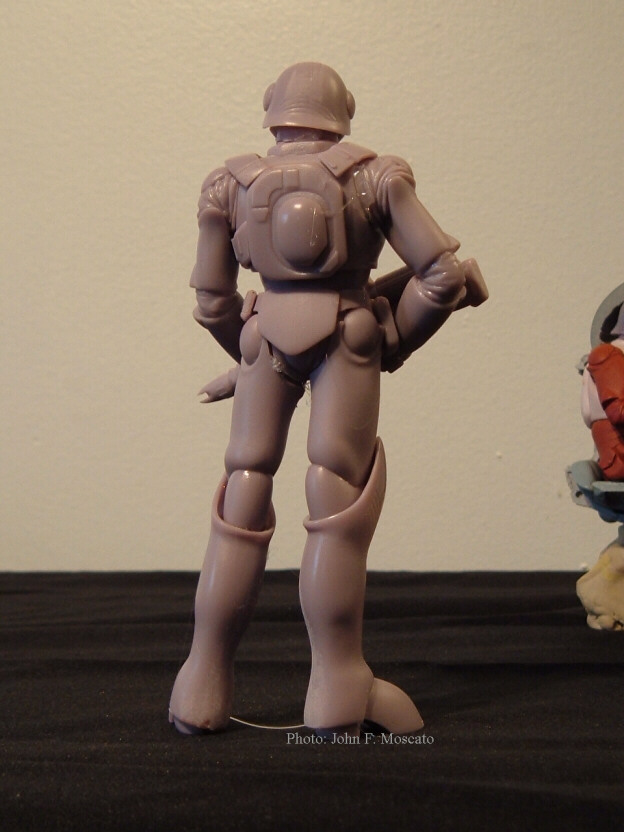
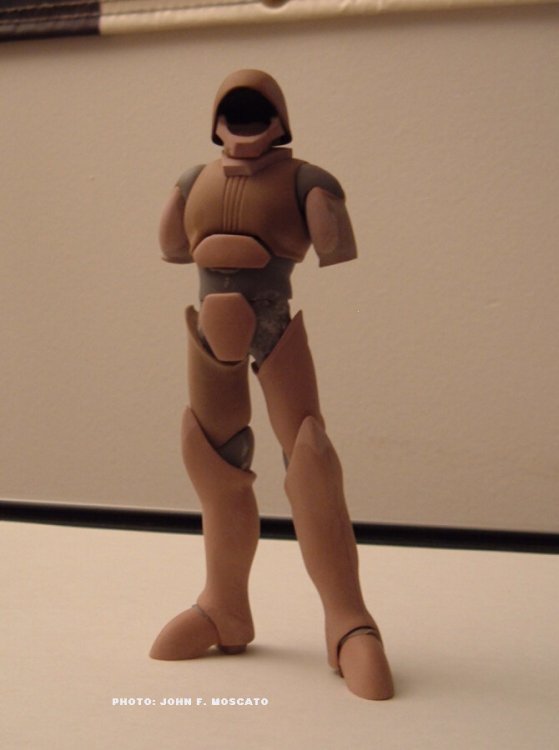
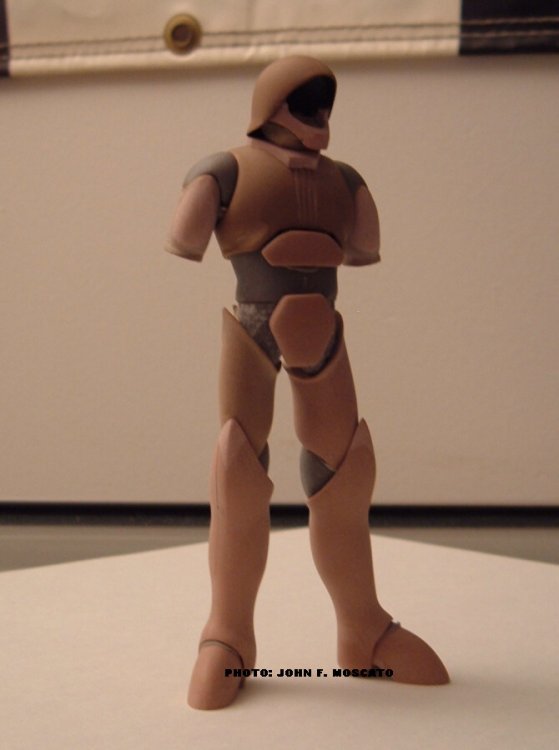
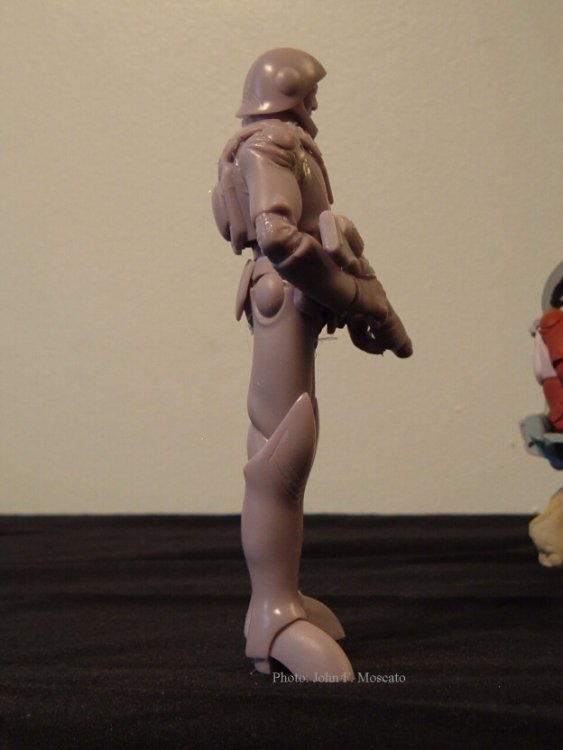
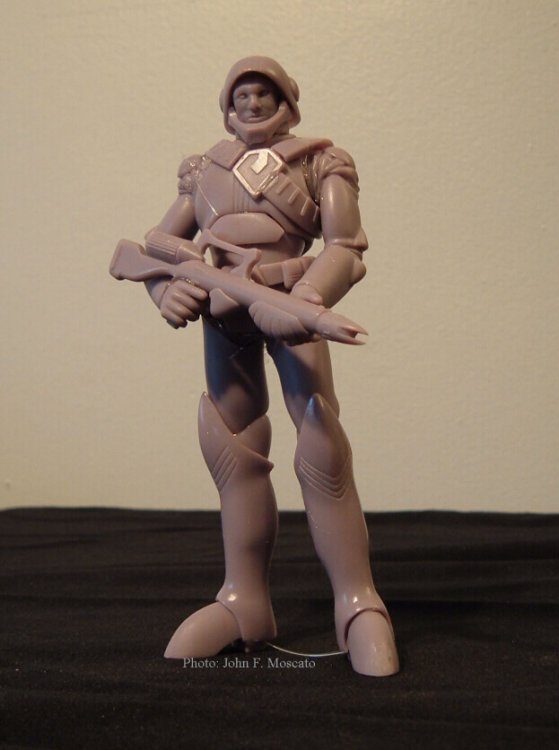
January 12th update. The figure is coming along extremely well thus far. Though the figures will be pre-posed, I'm breaking down the parts in such a way as to make them "modification-friendly" to anyone who would want to change the pose from the standard ponderation and seated configurations.
-
In so much as the figures are not physically large, it may be possible to ship 2 sets for the price of 1.
-
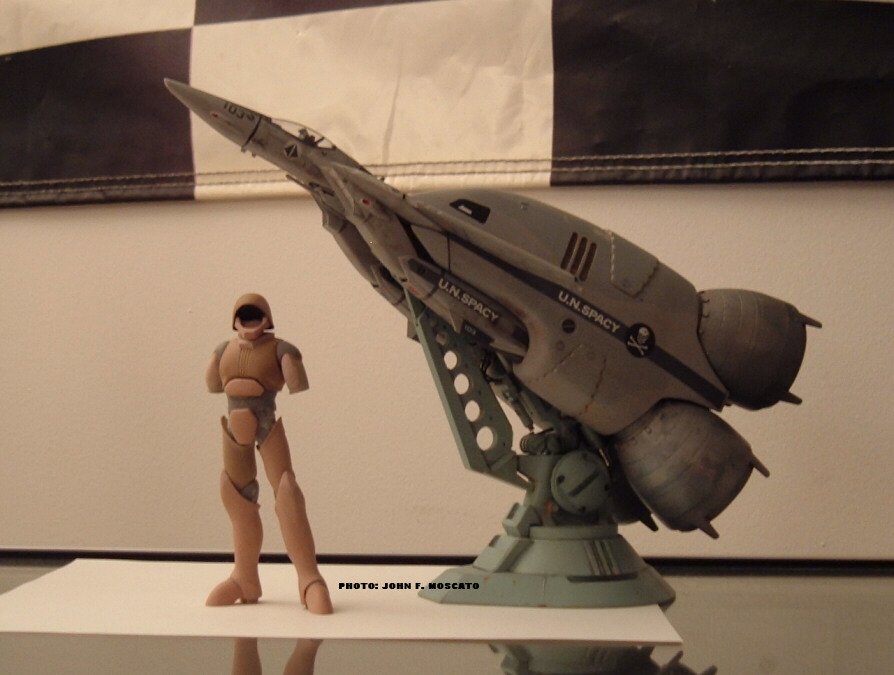
Are these going to modeled in static position? Or will this kit be able to use ball joints for articulation? Will a weapon be provided for the standing soldier? ***Just thinking diorama, that's all. 359324[/snapback] Both figures will be static for optimum realism. I'll most likely include a weapon for the standing pilot, seems only right.
-
Hi all. The 172 Zentradi soldiers are now complete. If you'd like to know more about it, simply click on my screen name at left. When it takes you to my profile, select SEND AN EMAIL in the COMMUNICATE menu. In your email, please use the title "1/72 Zentradi." You will need to leave me your full name and address, as well as your MW screen name.


-
Hi Big F. The science of molding/casting isn't quite as difficult as some might believe, but it does, however, require a lot of preparation and precision when mixing components. The air bubbles you speak of are created upon mixing of the silicone/catalyst; happens even with a mechanical mixer. This issue is rectified by de-gassing the silicone in an appropriate vacuum chamber. This takes about 15 minutes. I do this, and my molds are pretty much flawless. Short pot life: generally, the specs in the product data sheet are pretty good. However, this depends primarily on the amount of material mixed, as well as the exactitude of the catalyst added; too much can cause the material to cure too quicky, etc. The best thing would be to check the PDS and if possible, cross-reference that info with a technician from the manufacturer.
-
For what it's worth, I advise extreme caution using urethane rubbers to make molds with. The stuff is easy to use and cheap, but if your master isn't PERFECTLY sealed with mold-release, the rubber will stick to it. With silicone molds, you get better detail capture and no release agent is necessary. Then there are the castings. Without an effective release agent, your casting will essentially fuse itself to the mold, so you *MUST* apply a release agent every time, and on *every* nook & cranny of the mold. What's more, urethane-to-urethane release agents (or at least none that I've ever seen) weren't designed with post-cast painting in mind. So while you may end up with good looking castings, you may also find that no paint will stick to them no matter how much you scrub or clean them. This is why, to my knowledge, all the big GK manufacturers use silicone molds.
-
The means is not the problem. The completed booster/pylon weighs-in at almost 1lb 9 ounces (0.69kg) by itself. Problem 1: Rotocast parts, while light, are not as sturdy as either full-cast components, or glass/epoxy laminate structures. While the weight of the booster/pylon may not be an issue *right now*, I have observed that many different urethane resins, when placed under load for long periods of time, tend to sag or deform. The hollowed structures can, of course, be reinforced from within (urethane foam, resin pylon, metal armature, etc.) however, this leads to greater complexity, more manual work/tooling time, and thus, the few dollars that are saved by using less material are compensated with higher labor costs. Problem 2: like any project, the more contractors are involved in the production of A given item, particularly a very short-run item like this one), the higher the end price will invariably be. Farming-out the casting was an option I had looked-at on many different occasions, but most all of the prices quoted to me (the most competitive ones anyway) were pretty much what I was able to do the parts for myself. Hence, when you add the need to ship patterns and test-shots back & forth, lag time, duty fees, you end up with yet another cost penalty. Plus, in order to get an accurate casting quote, you first have to produce the masters from which to get the costing done from, which means spending the month or so to sculpt them. If the molding/casting quotes end-up exceeding projected costs, you've just alienated a number of customers for which the price is just too rich, thus potentially lowering total sales, and if there aren't enough preorders to keep it afloat, you end up with a very nice, and very expensive paperweight that cost you a month (or *MANY* months' wages.)... 1/32 Legioss anyone? The short & skinny: sometimes when you want a very limited, hand-made model/piece of art, it's invariably going to be pricy, no matter how you cut-up the proverbial pie.
-
Hi guys. The price estimate for the LV was in the area of $250-300.00, depending on whether I'd be able to sell 20-30 units. The problem was that on both attempts, I hadn't even been able to get to the 20-mark. Will: yup, the main mass of the vehicle would indeed be in the area of 12" long, and closer to 14 with the overhang from the other components. I had contemplated somehow making the main body hollow to save on material, but this would only mean more manual layup time (hence higher $$) and above all, I felt that hollowing it out might seriously affect its sturdiness, which was simply not an option. So in short, you'd have something like 3-4 lbs of resin for the vehicle, which is massive by almost any standards, and the exotherm created during the casting of these components would literally cook the molds into an unusable state very quickly... Mold life would most probably be reduced to 20-25 castings for the main body components. In a nutshell, I never gave up on it; I just need the math to add-up. Win-win situation or bust.
-
I feel that I must remind everyone that I had attempted on two different occasions to kick-start the Launch-vehicle preorders, but that on both occasions, the interest level had come up short. This vehicle would be the largest, most labour and materials-intensive project among all my previous releases. Knowing that, and knowing that for every project I took preorders for in the past, roughly 10% of preorders fail to translate into sales (what I call the flake-factor.) Had I undertaken the project without reaching a minimum-safe number of preorders, I would most likely have lost money. Though many times I don't mind going the extra mile to offer a project that I love, even if it isn't very lucrative, there are limits to what I can do; particularly when bills need to be paid.
-
The neck is the standard conversion kit; all the panel lines are also stock.
-
Well good luck with that one. Interesting project, but I wouldn't do it.
-
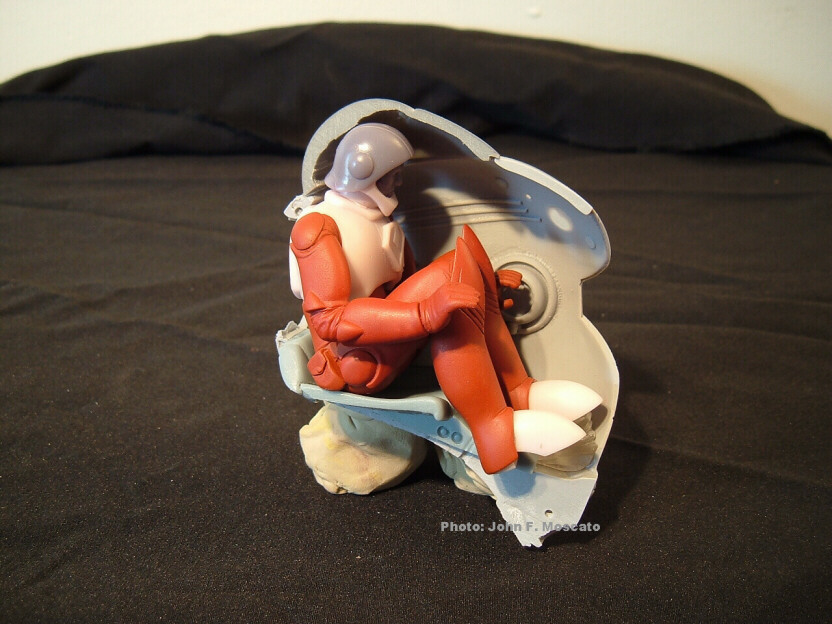
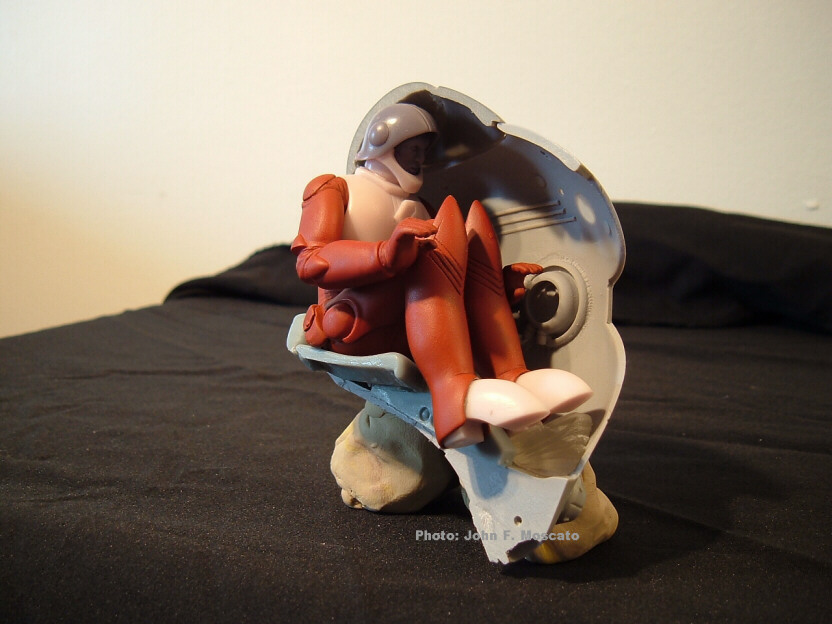
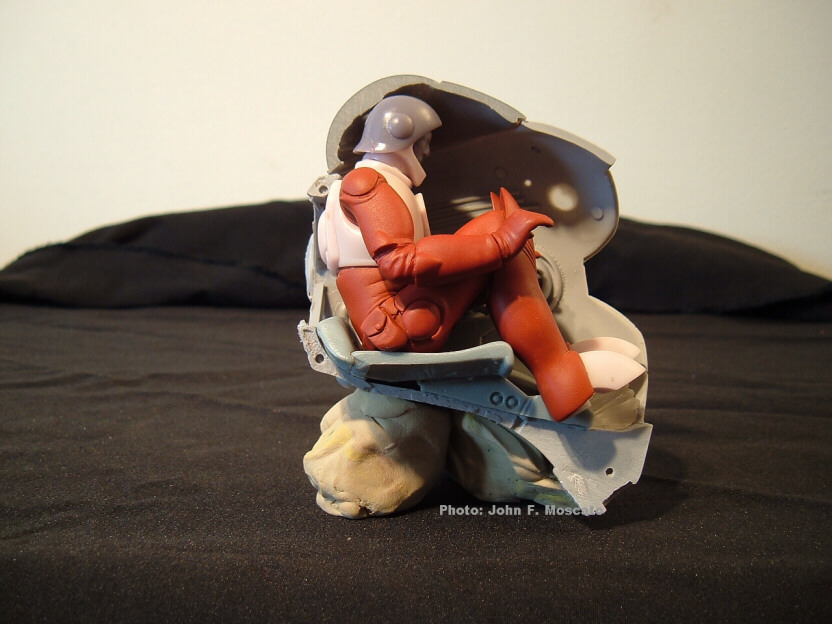
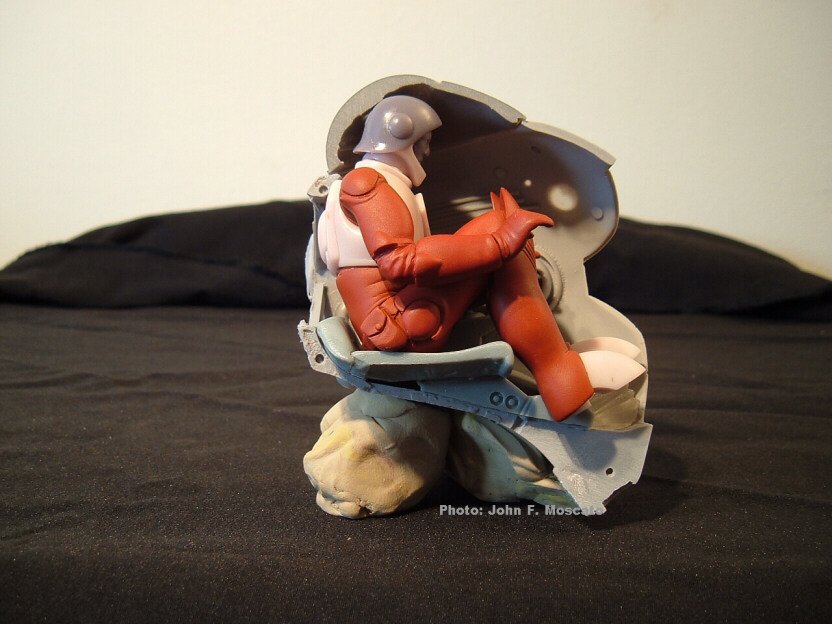
Just to be clear, there will no longer be any kits under the "Samurai Monkey" banner. The legacy has been taken up by a company called "moh-suu-kaa-toh" Hobby Models, which produced the Regult 1/72 kit. The next release is to be a 1/72 Zentradi soldier 2-figure set. One standing, and one in a pre-seated position to fit inside the 1/72 Regult.
-
Dat, all I can say is... WOW!!! I was simply going to leave my 1D set on my regular 1J chassis, but seeing all the potential you brought out on yours makes me want to finish mine in full 1D colors
-

Animeigo Macross Dvd Collection.
captain america replied to captain america's topic in Movies and TV Series
Thanks for the info guys. The prices really seem to have plummeted; I recall seeing the box-set for about 300 bucks a couple years ago. Damn glad I waited -
Hi all. I was just wondering what the complete 36-episode Macross DVD set from Animeigo is going for these days. I realise that it's now discontinued but... Is it hard to find?
-
Hi all. Like the title says, I'm enquiring about the supposedly new Guyver series that's supposed to be airing in Japan at the moment. Has anyone seen it, and more importantly, is it available on DVD yet? I ask this because I'e seen one seller on E-Bay offering the first 12 or so episodes subtitled. I would've loved to get it, but he didn't take Paypal. Any comments from people in the know?
-
For any of my kits, the only thingyou'll need to do to clean the release agent off the parts is scrub them with an old toothbrush and dish soap in lukewarm water. I specifically use a mold release that is designed so the castings are paintable with minimal clean-up.
-
Hi Matthieu. Too late; I think I already shipped-out a new dashboard to you As for the little nub/hinge on the canopy, that can easily be fixed by gluing a small piece of styrene rod where the nub should be; I did that on my demo kit and it worked like a charm.
-
Cyanoacrylate (Ca) glue. Available from any good hobby shop or hardware store.
-
**IMPORTANT** I just yesterday discovered that I forgot to include the RIO console (part 7) in about 20 of the conversion kits which I mailed-out. According to my logs, the following people should have part 7 missing from their kits: -Zeta Otaku -Darkon -aaajin -TheFrenchOne -Gabe Q -min -Mech Gojira -Roy's Blues -Sundown There may be others as well. Please check your kits to see if you have this piece. If indeed it is missing, please post here in the thread, and I will begin mailing-out consoles starting Tuesday to all those affected. My sincerest appologies for my ineptitude in this matter.
-
Hi Andy. Looking sweet! When I was doing the masters, I had the impression that the backseater's feet would end up resting more or less on the tires of the landing gear. My ideal solution was to remove that backseat screw nub completely, but I figured that might be a bit too much 'surgery' for most builders, and wouldn't necessarily interfere with the pilot's legs anyway.
-
No problem. I admit that when you do this kind of stuff 9-14 hours a day, you tend to take even the simplest techniques for granted, and I sometimes have to put myself in the shoes of someone who only does these kits as a hobby, and things that may seem quite pedestriant for one modeler may be a daunting task for another.
-
The reason why I didn't offer to replace your canopy is that the missing 0.6mm "nub" at the back-end is easily fixed by sanding the area of the missing nub flat, then simply gluing the equivalent length of styrene rod in its place... Takes all of 96 seconds. I can show you some parts I have on japanese-made kits that cost upwards of **wait for it** -->$600.00<-- that have issues far worse than what you got in my conversion kit, but I don't gripe about them: garage kits are hand-made crafts, occasional flaws are common to EVERY gk, big or small, cheap or expensive. Had there been a serious defect in the pane (main transparency) of the canopy (crack, air bubble, etc) it would either have been rejected during packing, or replaced completely. On that same note, if you were so disappointed with the model when you recieved it, you could simply have e-mailed me prior to starting to work on it and I could have issued you a refund.
-
I'm sorry if you feel that my VF-1D kit is substandard. I've attempted to make it as user-friendly as humanly-possible, but I'm afraid that there are limitations to what I can do with even the best urethane resins and silicone molds.
-
*sigh* The canopy can be "unwarped" like any other resin: by placing it in warm water til it becomes a bit soft, then take it out, place it against the piece it needs to fit onto, and then, holding both parts together, run them under cold water to set the part.