
Jasonc
-
Posts
6295 -
Joined
-
Last visited
Content Type
Profiles
Forums
Events
Gallery
Everything posted by Jasonc
-
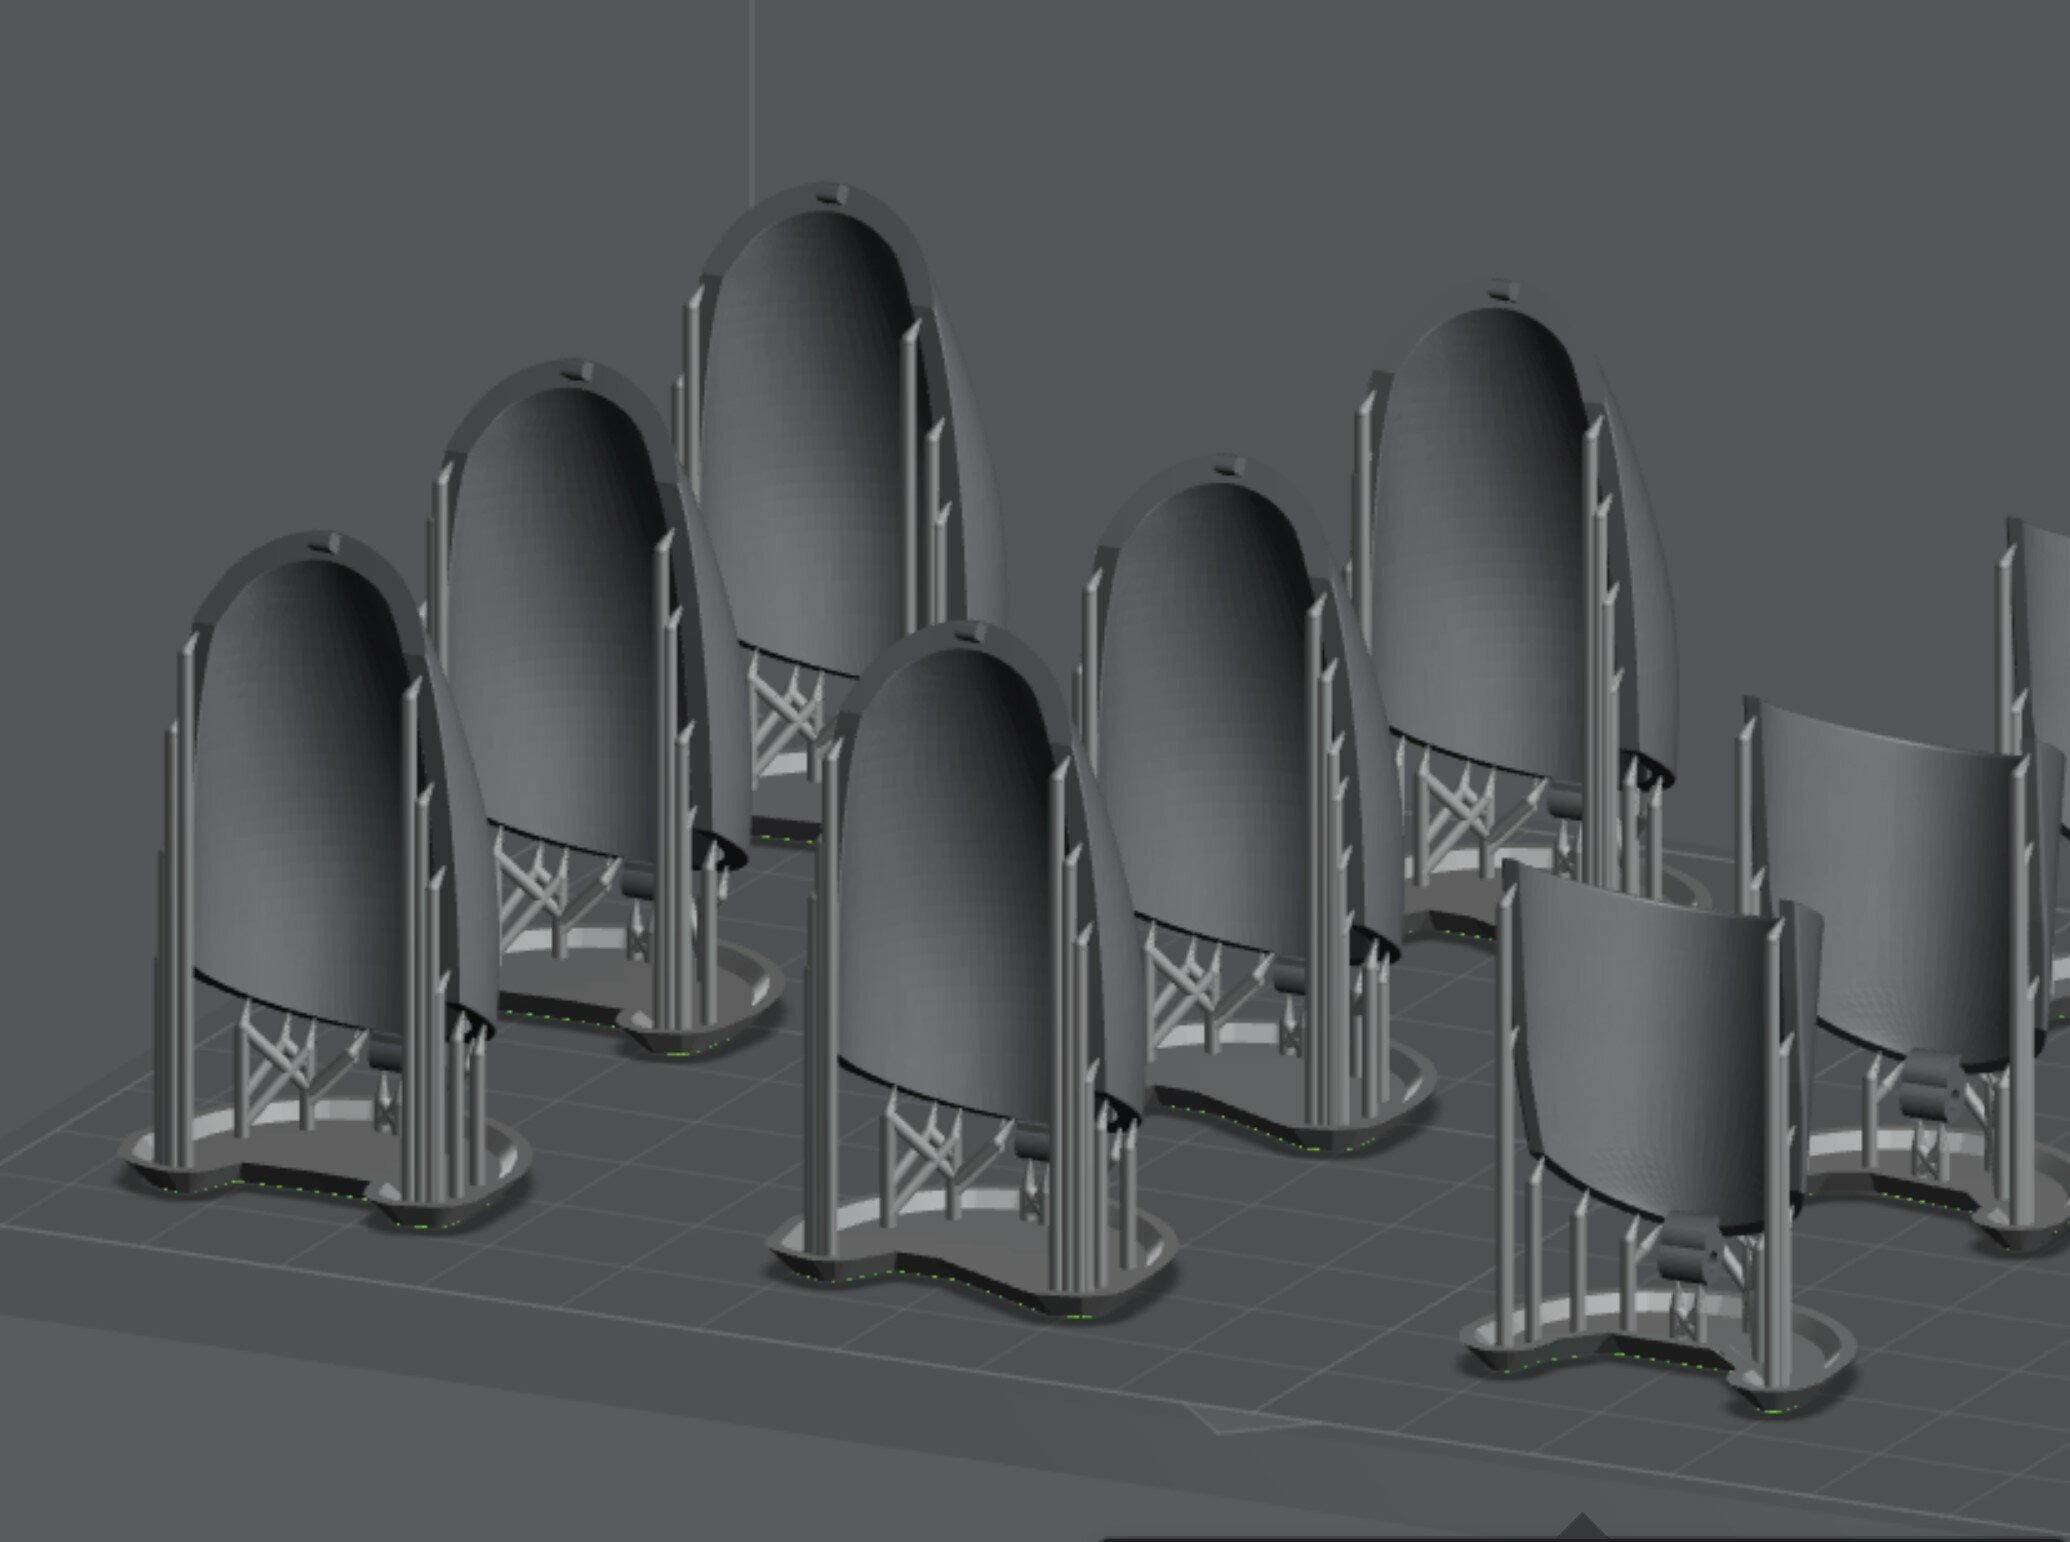
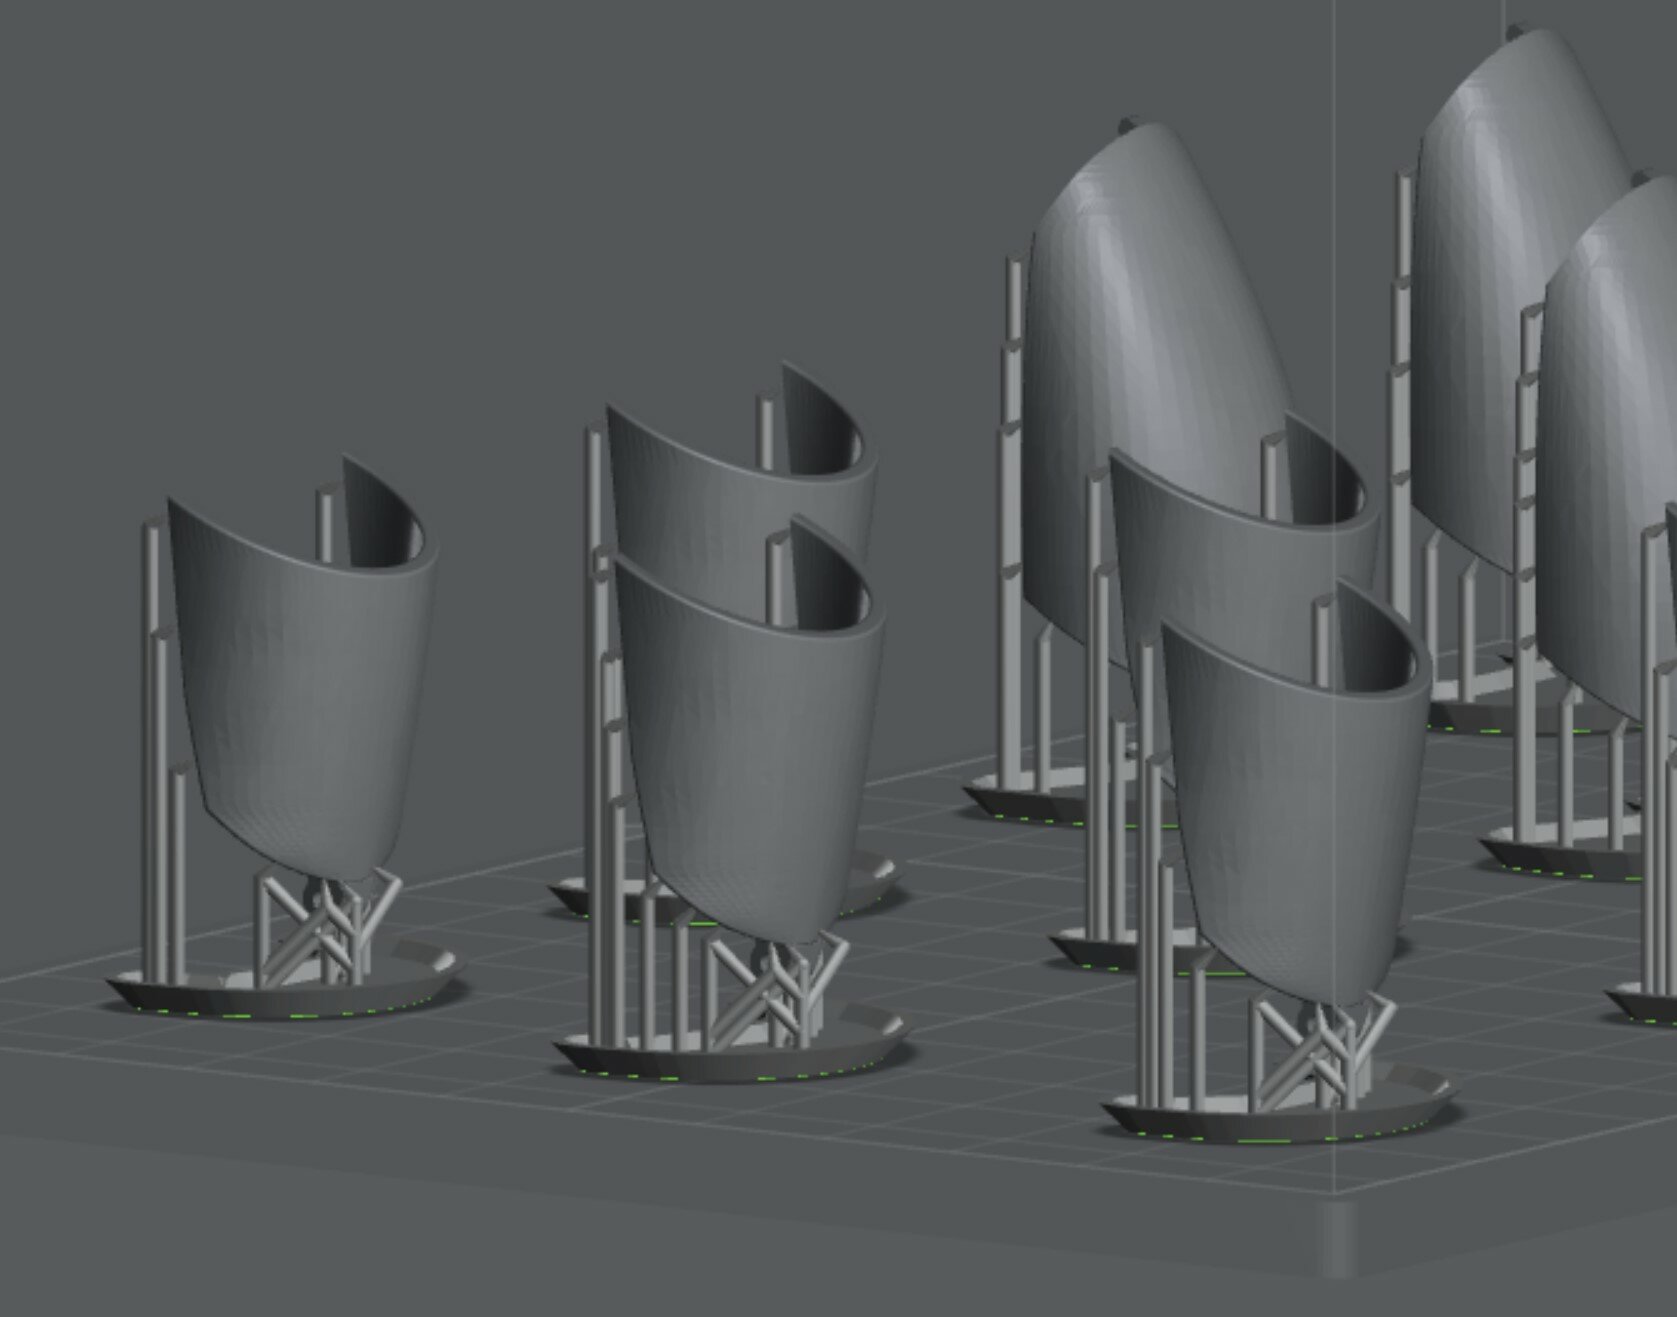
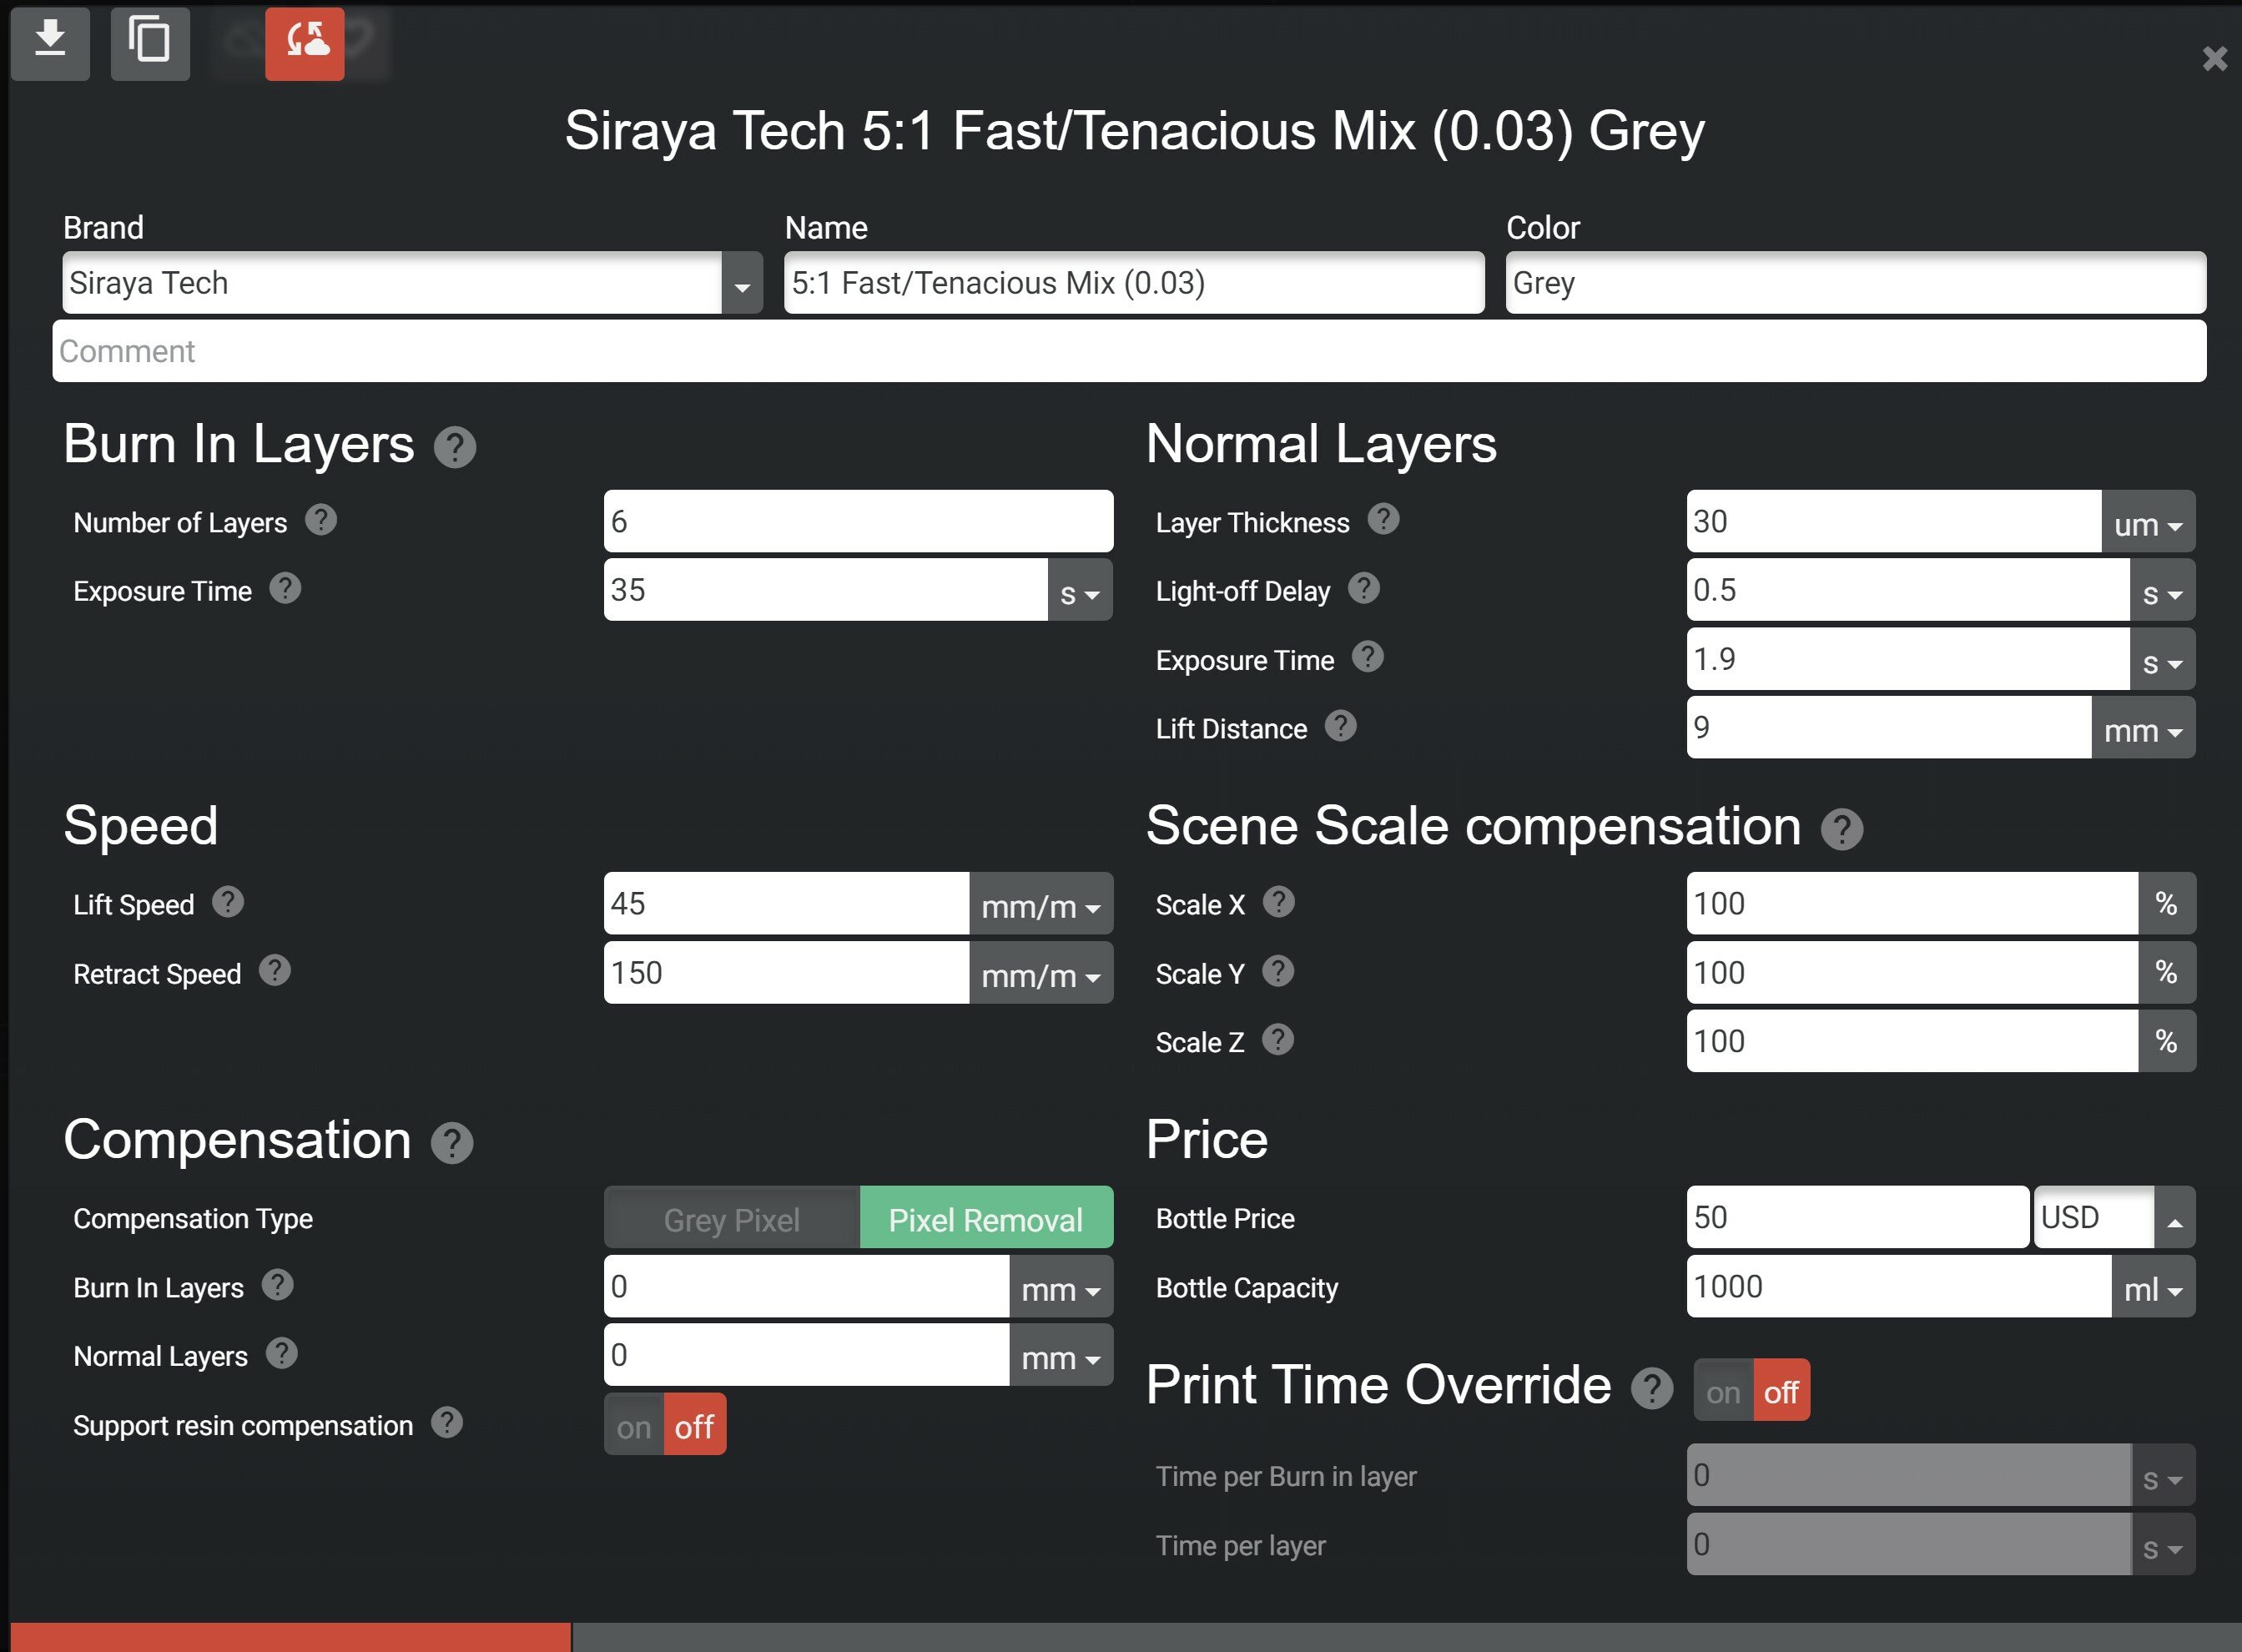
Yes, canopies were printed. I still need to polish them more, but they are coming out pretty clear. here's a few images of my settings for printing them.
-
It looks great so far. Although it's not the feet I look at first, it looks promising.
-
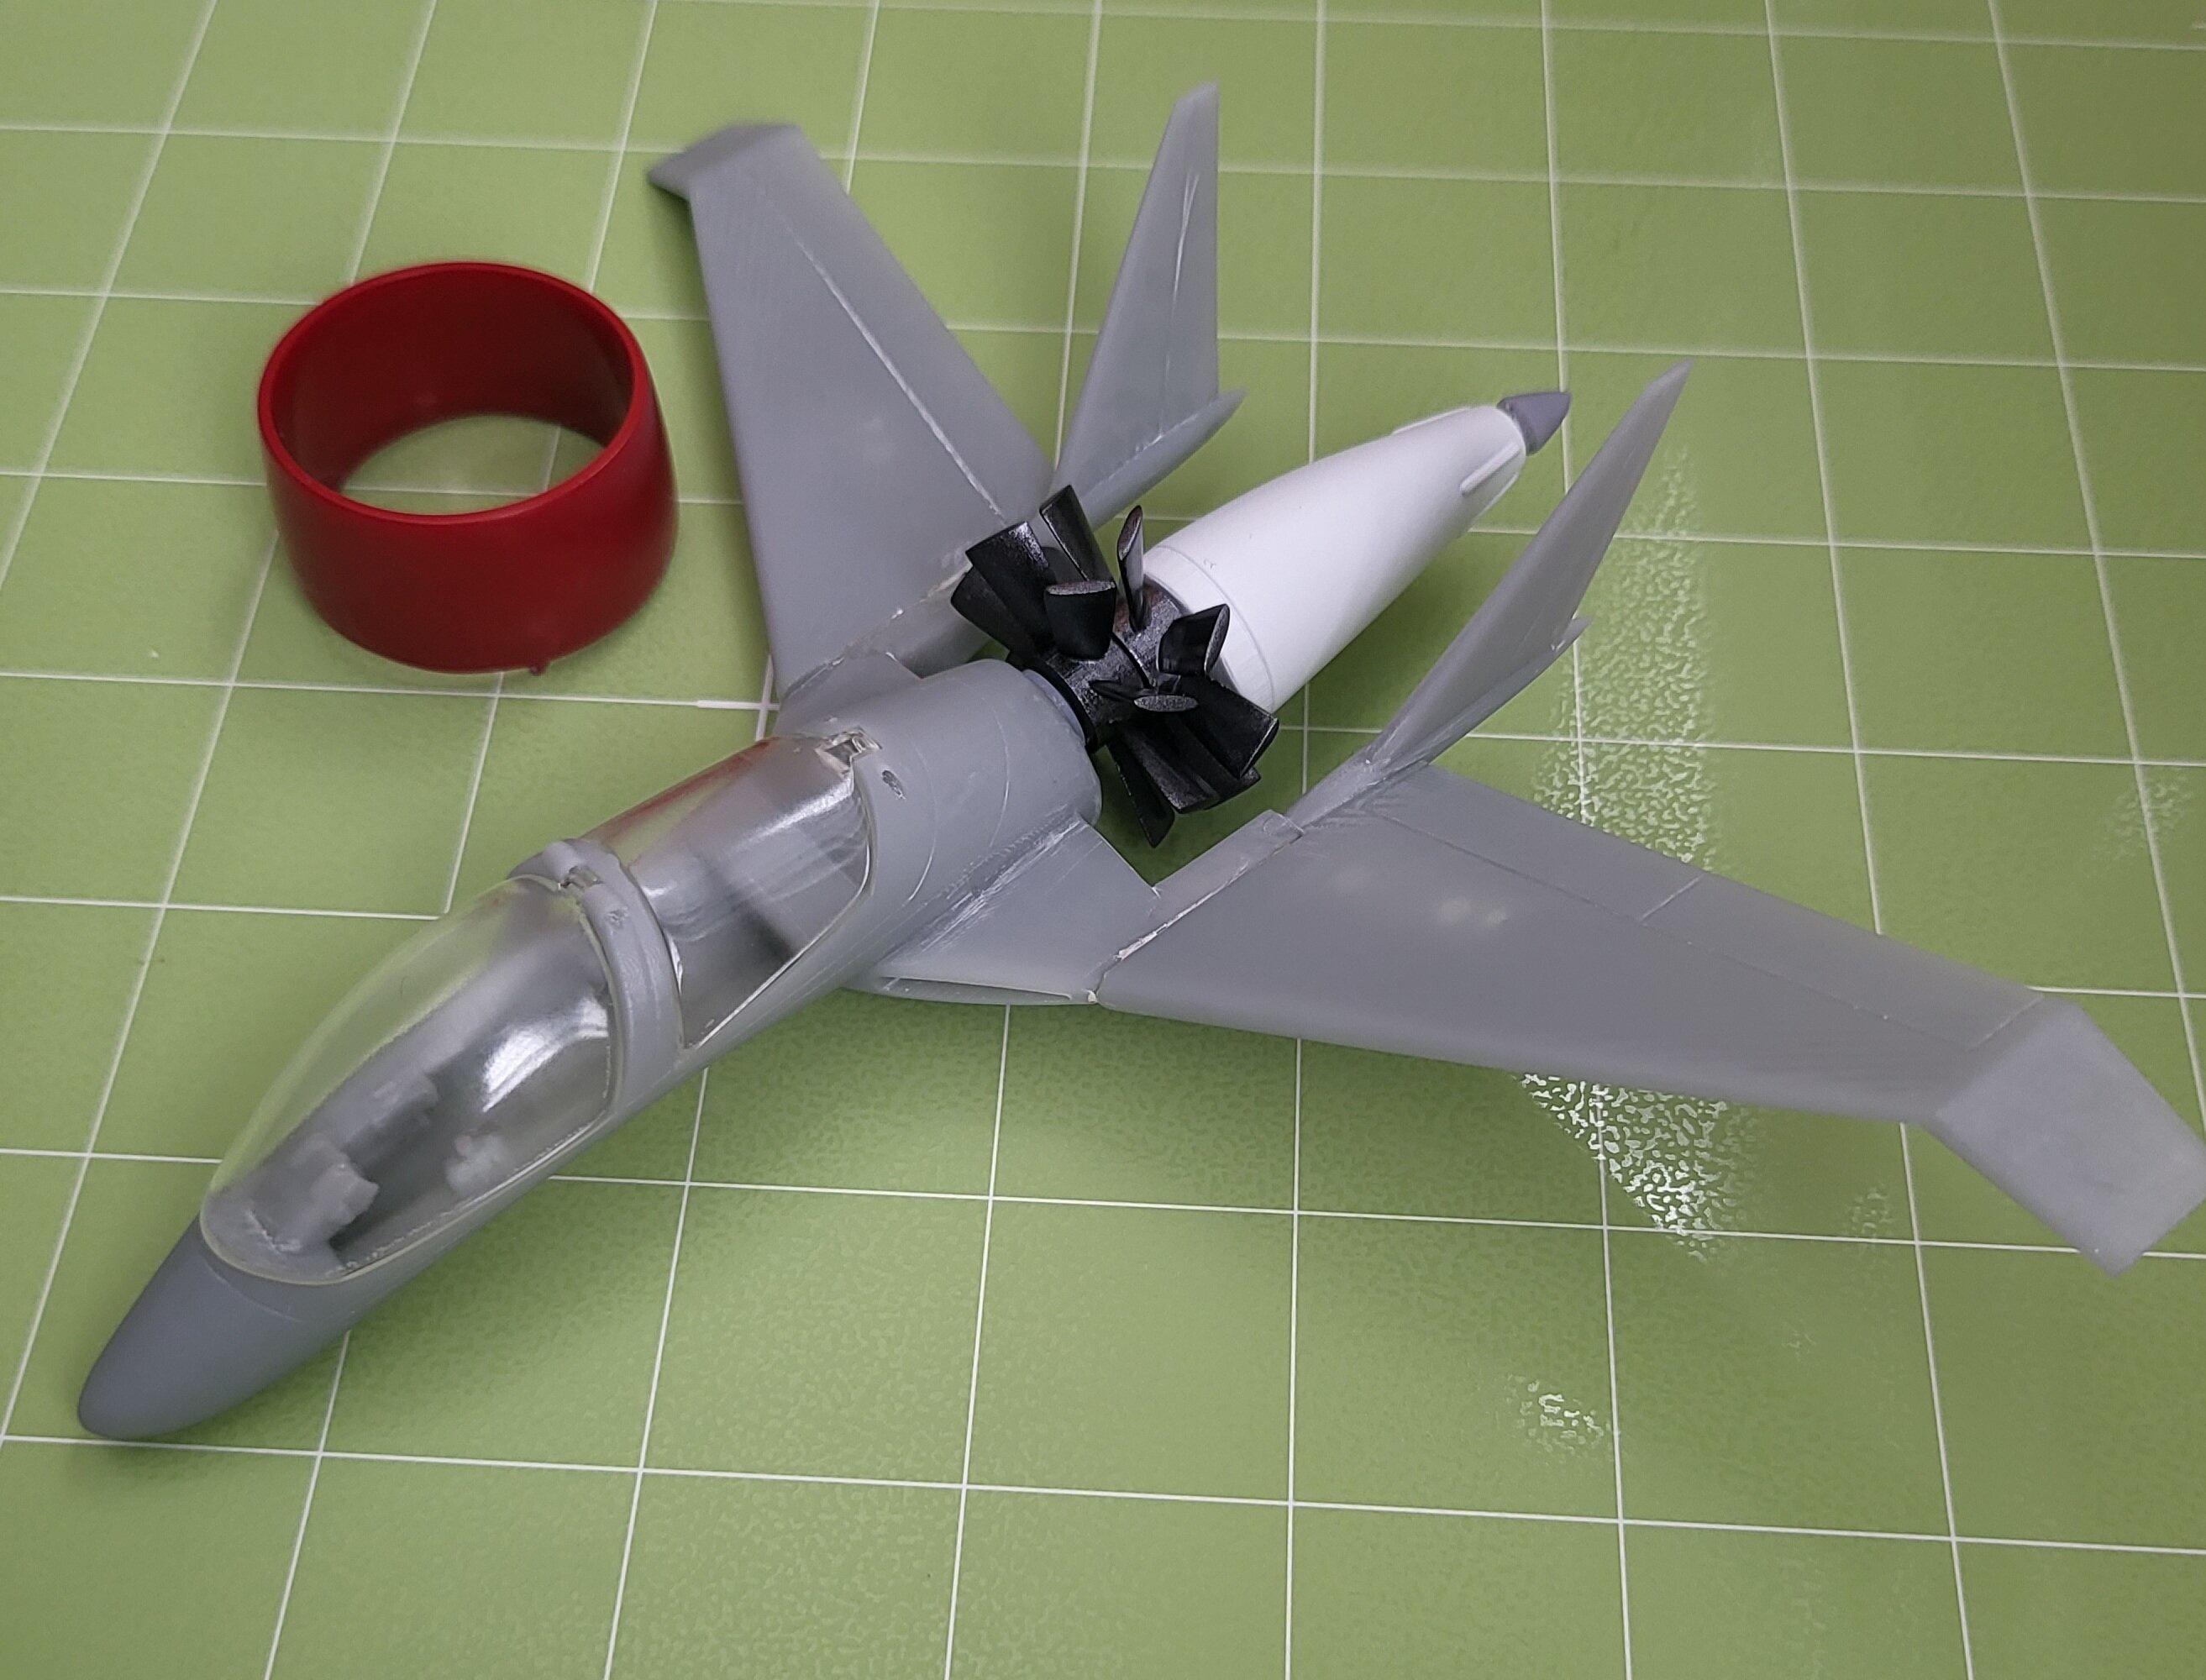
Here's a couple pics of parts printed after a good number of tweaks. Today I'll be adding the magnets to the landing gear sections


-
I should be seeing the Nora SV-51 in about 2 days. I am looking forward to it.
-
I've been redesigning the canopies (now on my 4th run I believe). The angle of the bar that separates the 2 is a bit tricky, and I don't want to put the pin in an unsightly place. That said, I just printed, new set of the main body and canopies, and it seems to work quite well. I could redo the back canopy and really design it to where it's guaranteed to work, but TBH, if this works, I'm just sticking to what I have already. I also changed the wings and they look much better. I managed to slice this file to where each piece prints out with very little work needed for cleanup, so I am happy with that. I keep saying it to people, but pics coming soon of the actual print.
-
I bought a flex plate that is waiting for the Elegoo Jupiter to show up. Luckily, the latest prints have bee just fine, so they haven't been too much trouble. I will have to try this out. Luckily, the prints have been coming out OK. Once I started looking at these as a recast mold, it helped me to custom the supports, and they've been doing pretty well. the main issue, is that some of these parts are a little thin. Not too thin, where they won't work, but if so, I can always do some redesign and fix the issues.
-
Those came out quite well. Excellent job on them.
-
I finally got my first printer, which is an Anycubic Photon Mono X (4K "ish"). I just now got it set up, and will be doing a test run of settings to get the best print with various support settings. The first run already came out, but I wasn't happy with how I set up the parts for print (kinda just starting out). I do have some pieces that I can cure and save for building, so that is always a good thing. I hope to have parts ready to go for my first dry fitting.
-
ALLLLLLLLLLL!!!
-
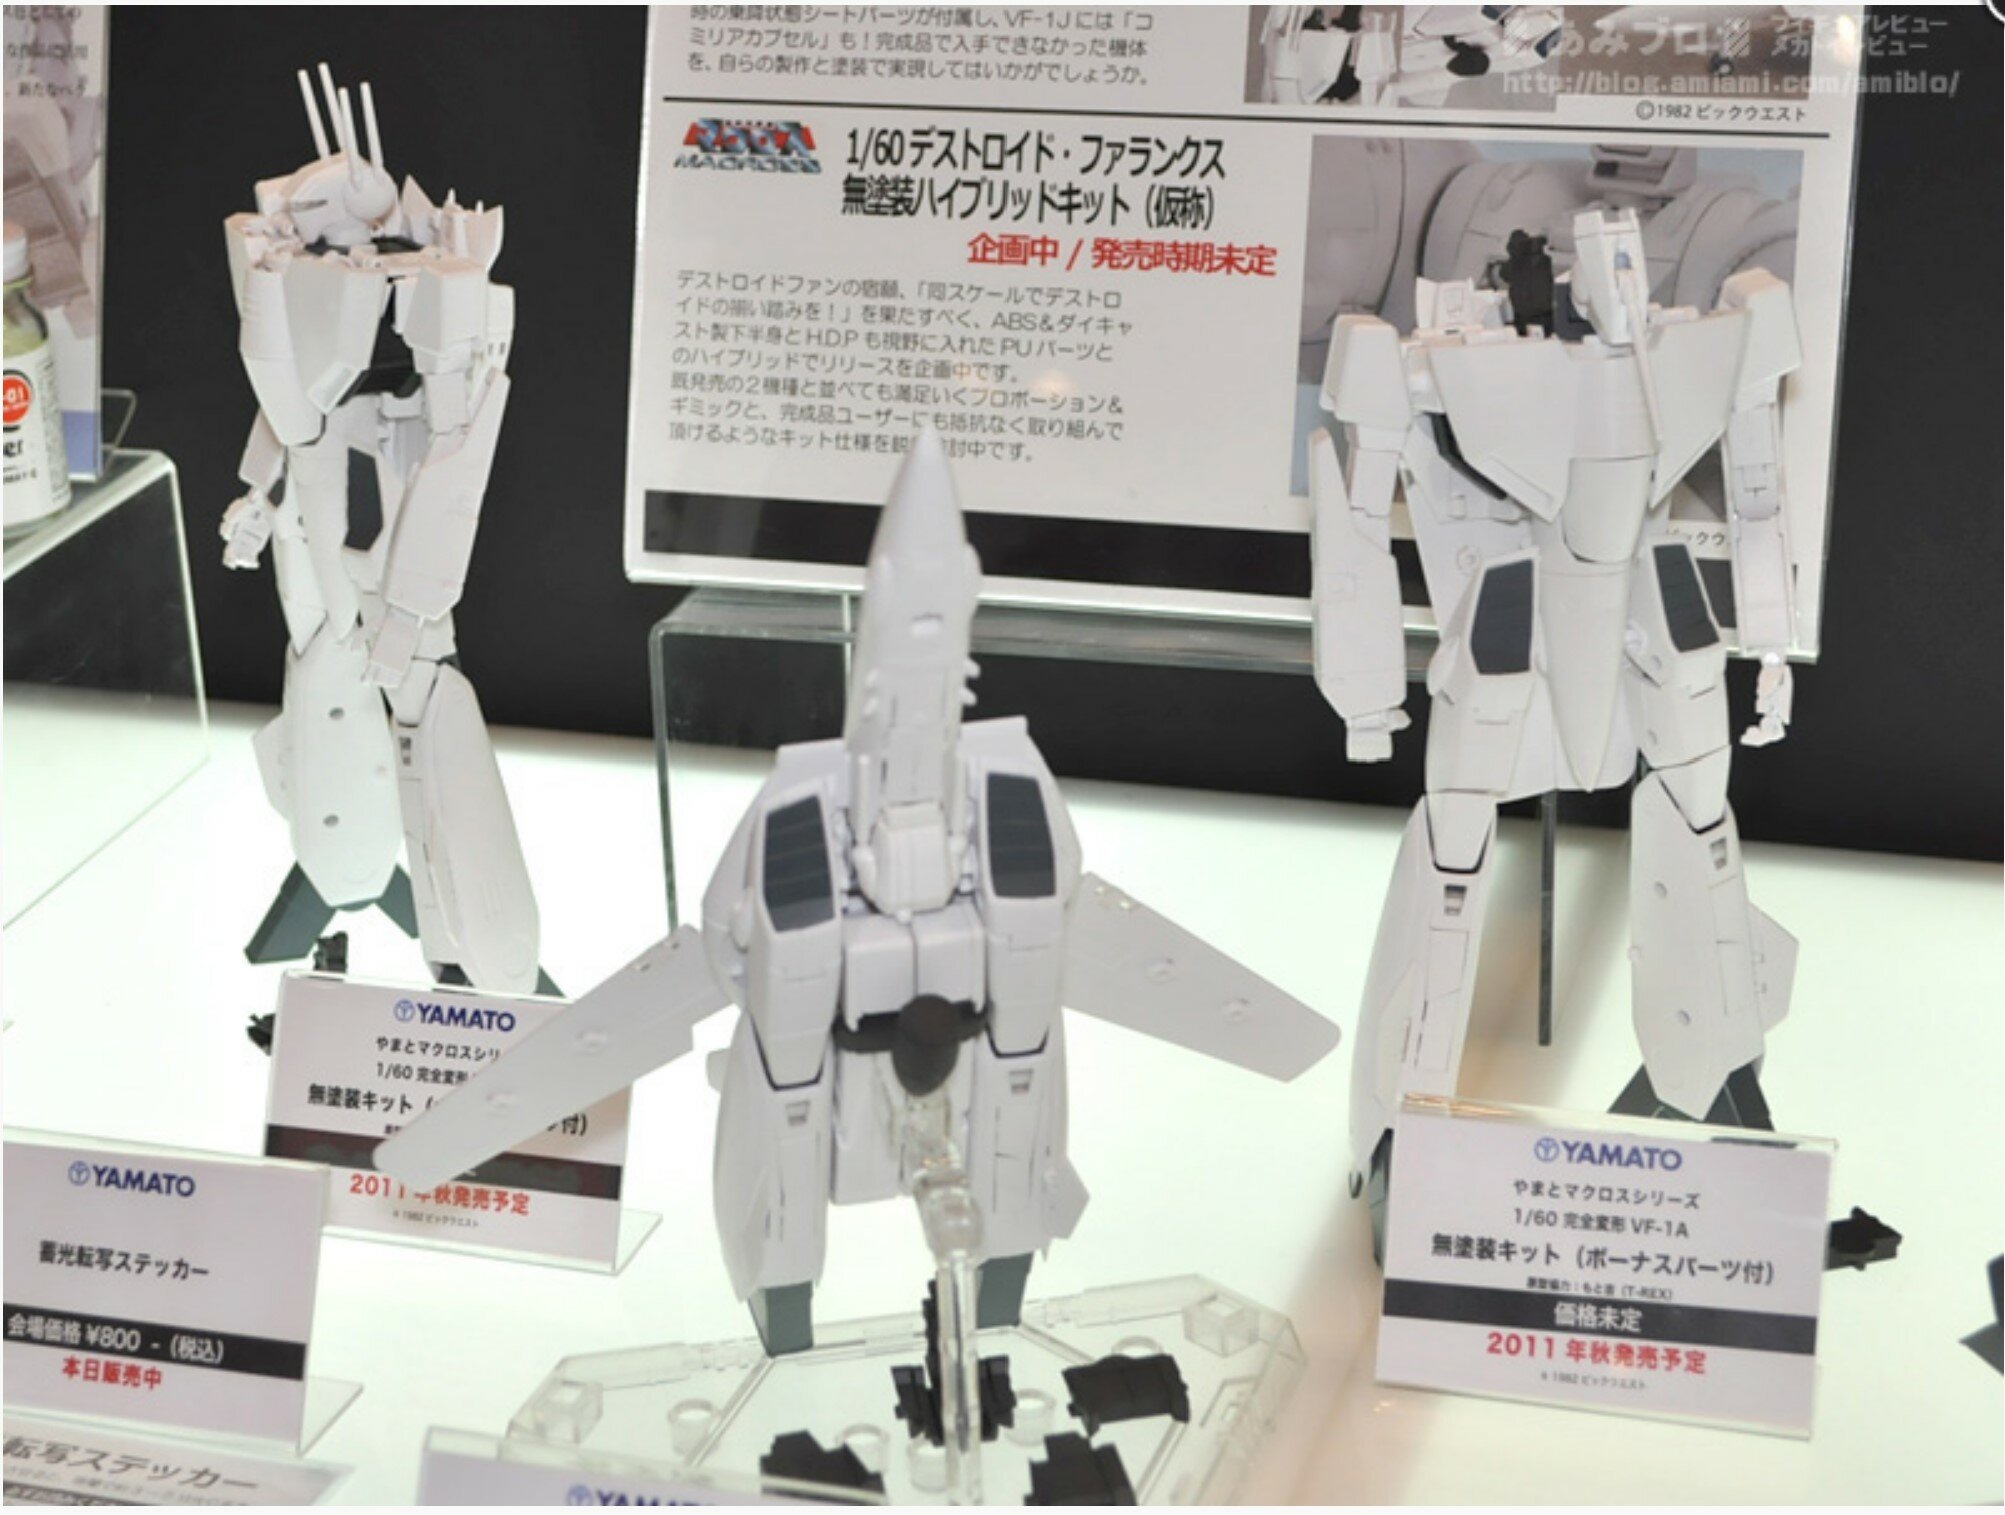
I should also add that image that Yamato was teasing years ago...
-
With some of the fixes incoming for this toy, I'm very excited to get a new one. I hope Arcadia is hinting at making the Phalanx, since it does share the bulk of the bottom half with the other 2 releases, and would require minimal design because of that. Also, I remember seeing some hints that it was in design already, so if Arcadia got those, then it wouldn't be too much work to get it done. I'd love to see a 1/60 Spartan, as well as the Cheyenne, but TBH, Xigfrid's Cheyenne design was really good. JUST MAKE ALL OF IT, ARCADIA!!! (I know, it's not realistic)
-
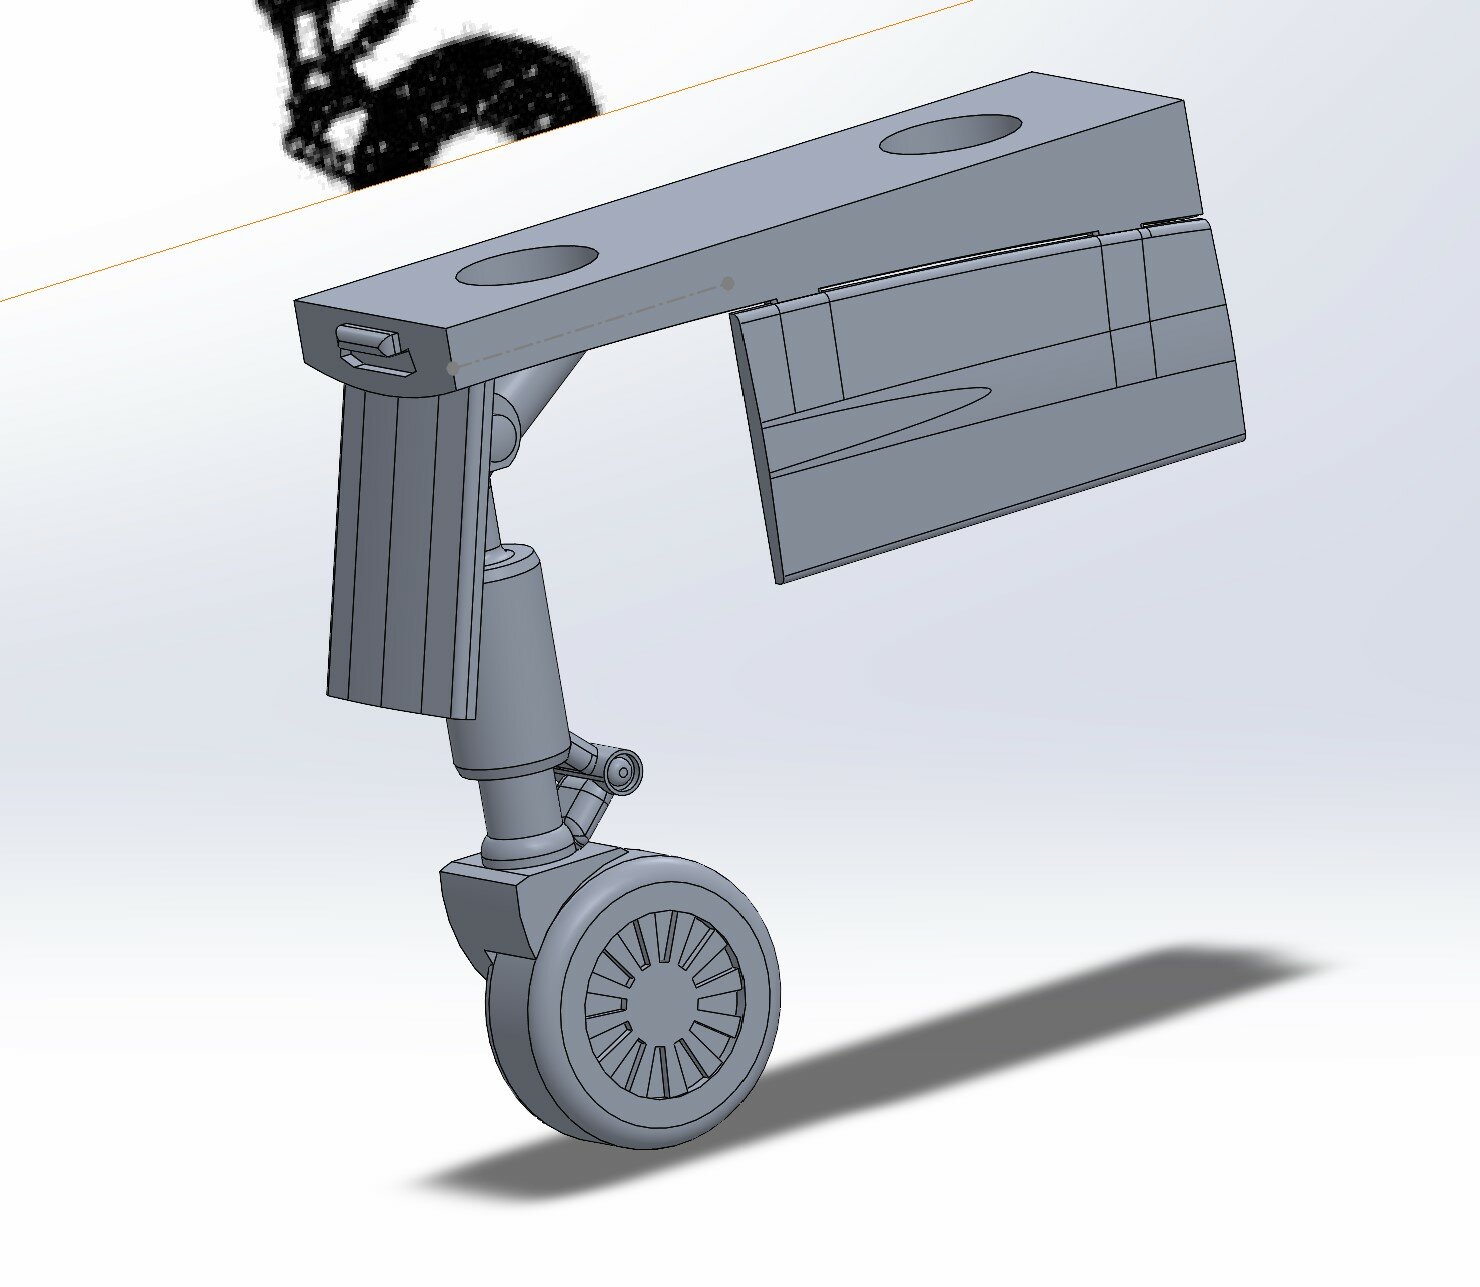
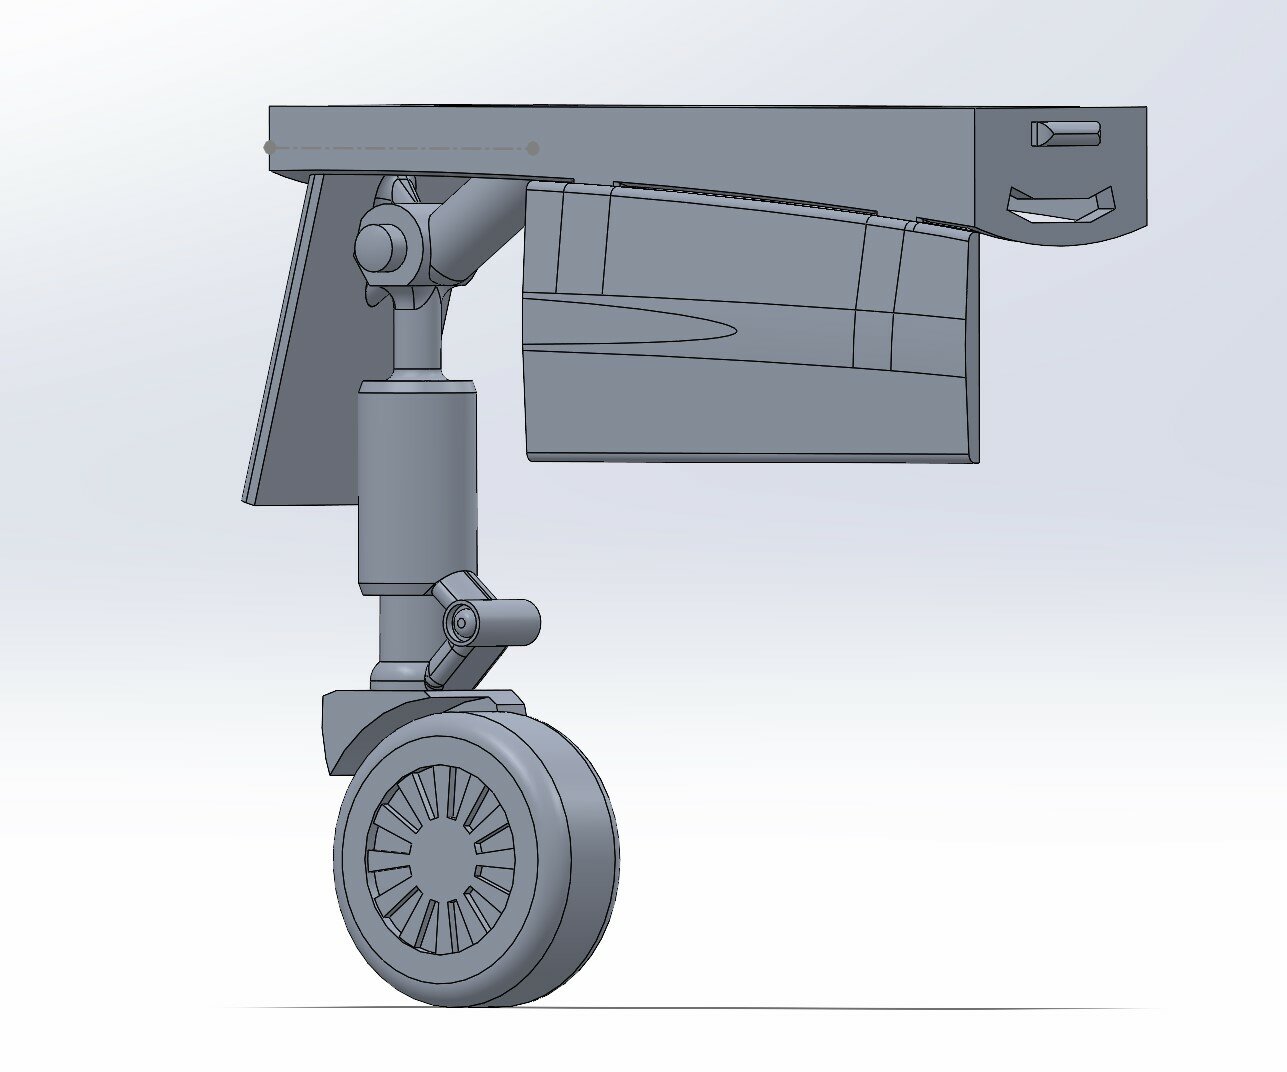
Thanks. Since I've been at home recovering from a car accident, I had some time to wrap it up late last night. At this point, I won't know what tweaks it needs until I start printing, and with a good 3D printer en route, it's just a waiting game at this point. So, the detail of the rear landing gear are done. These will work the same as the front landing gear options, as there just isn't a lot of room at 1/60 to make functioning landing gear with this material. Nevertheless, they should fit quite well, and HOPEFULLY, the pins in the gear parts will work well for the grounded option. I'm tempted to upload the files and pay to get it printed, but that's just my anticipation more than anything. I may start on the F203 Dragon II.
-
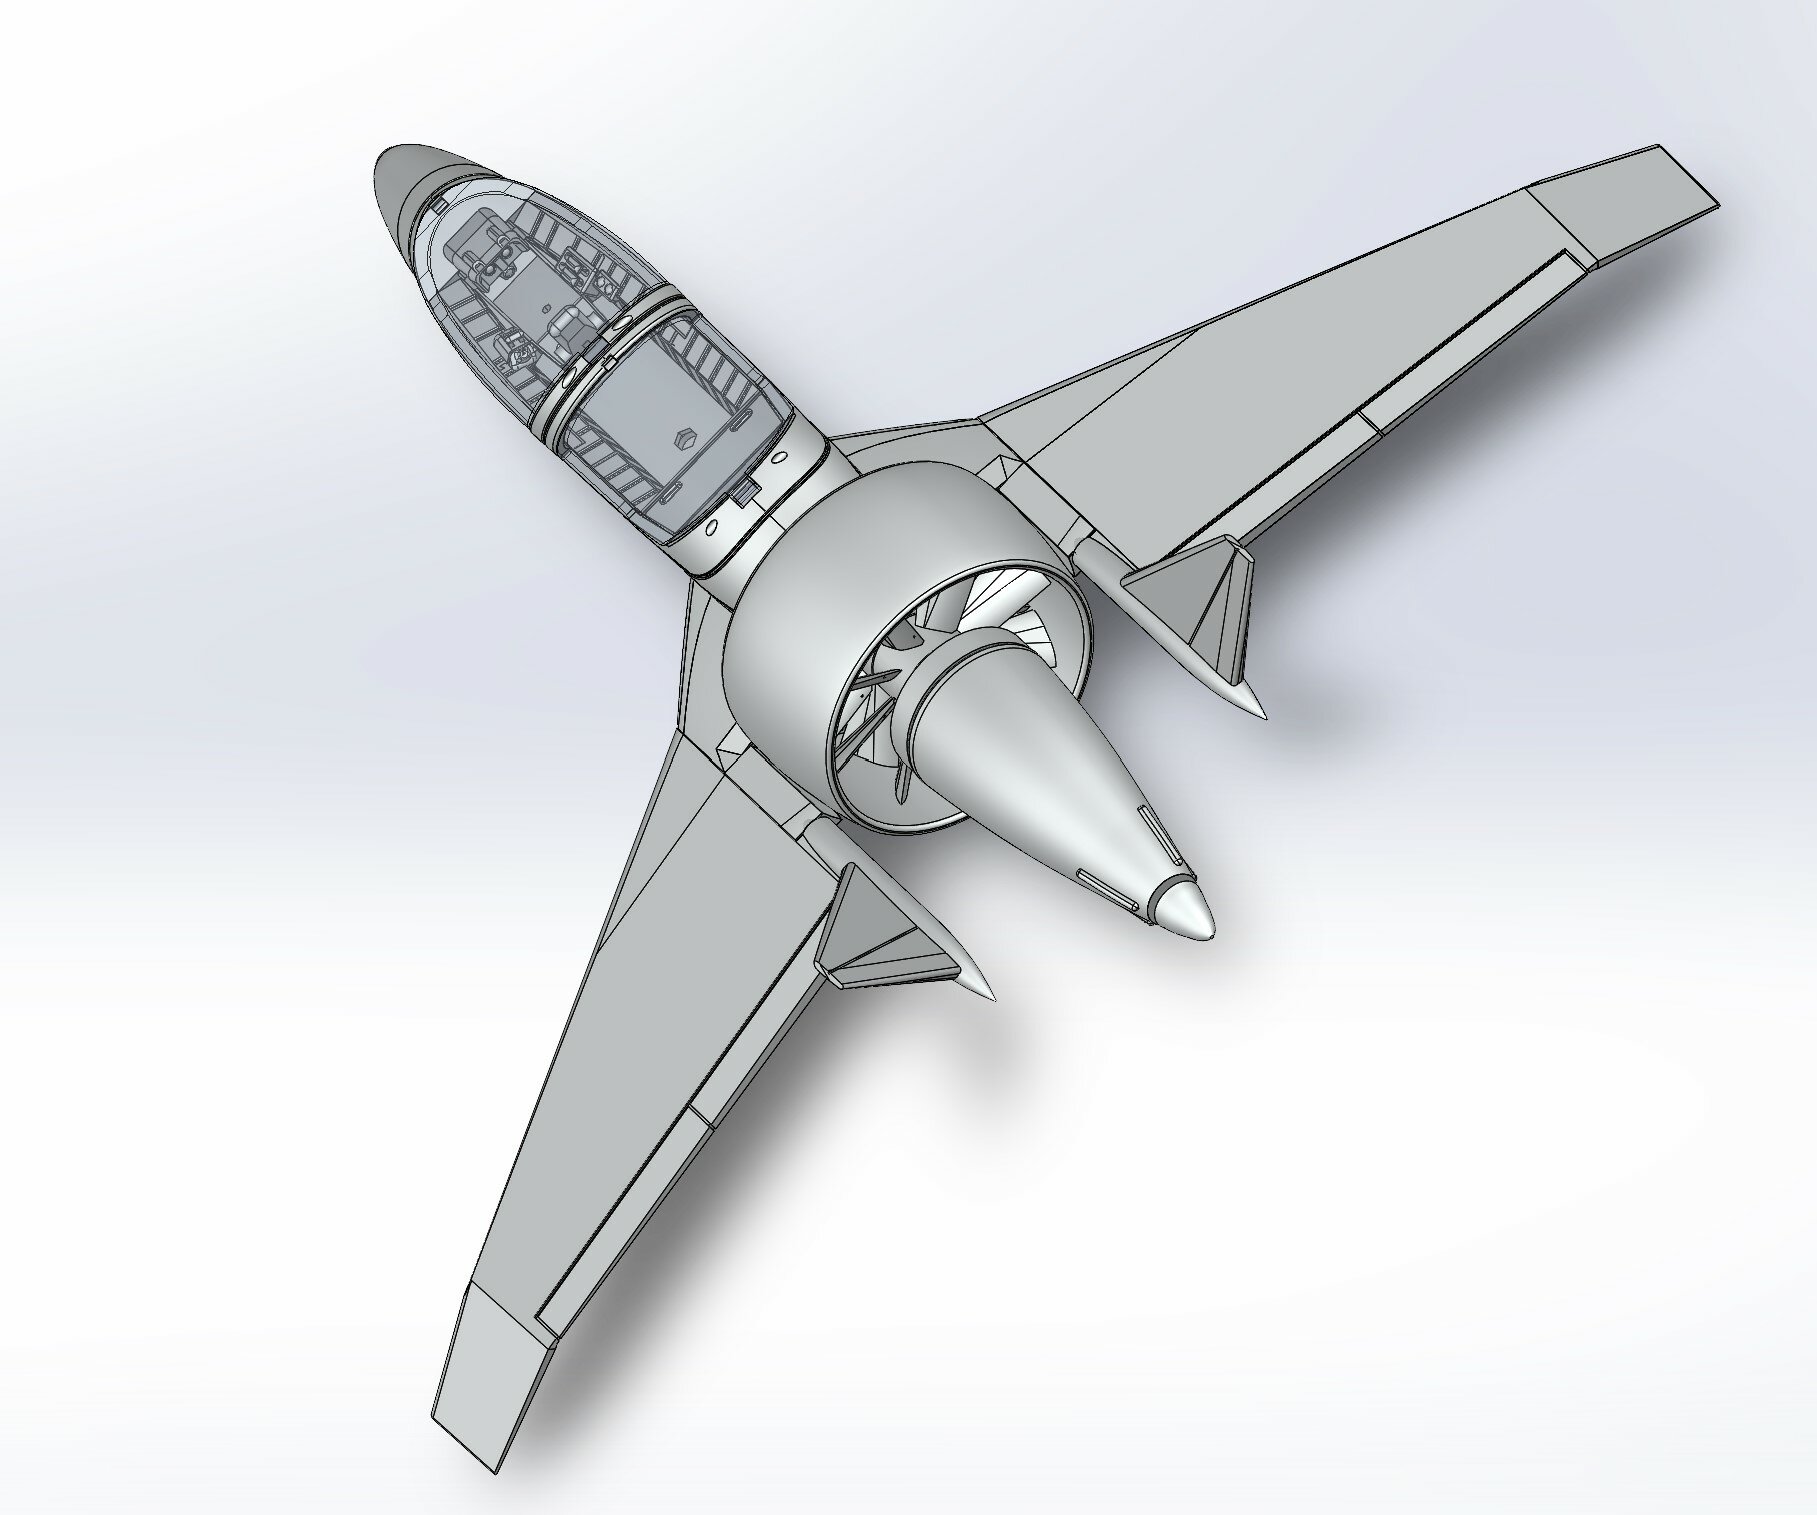
At this point, I'm just about done. I just need to see what I can do about the wing landing gear, but making a functional working version isn't looking too promising. I still need to create the landing gear drop outs for the landed an flight options, but other than that, it is pretty much done. I still need some small aeshtetic items elsewhere to fix up, but other than that, I'm quite happy with it. I basically used every aspect of the line art I could find, and with some of the inconsistencies, I had to do a few educated guesses. In any case, I'll be creating .stl files of the finished parts. It took a long time, as I'm still learning the software, but I'm quite happy with the result.
-
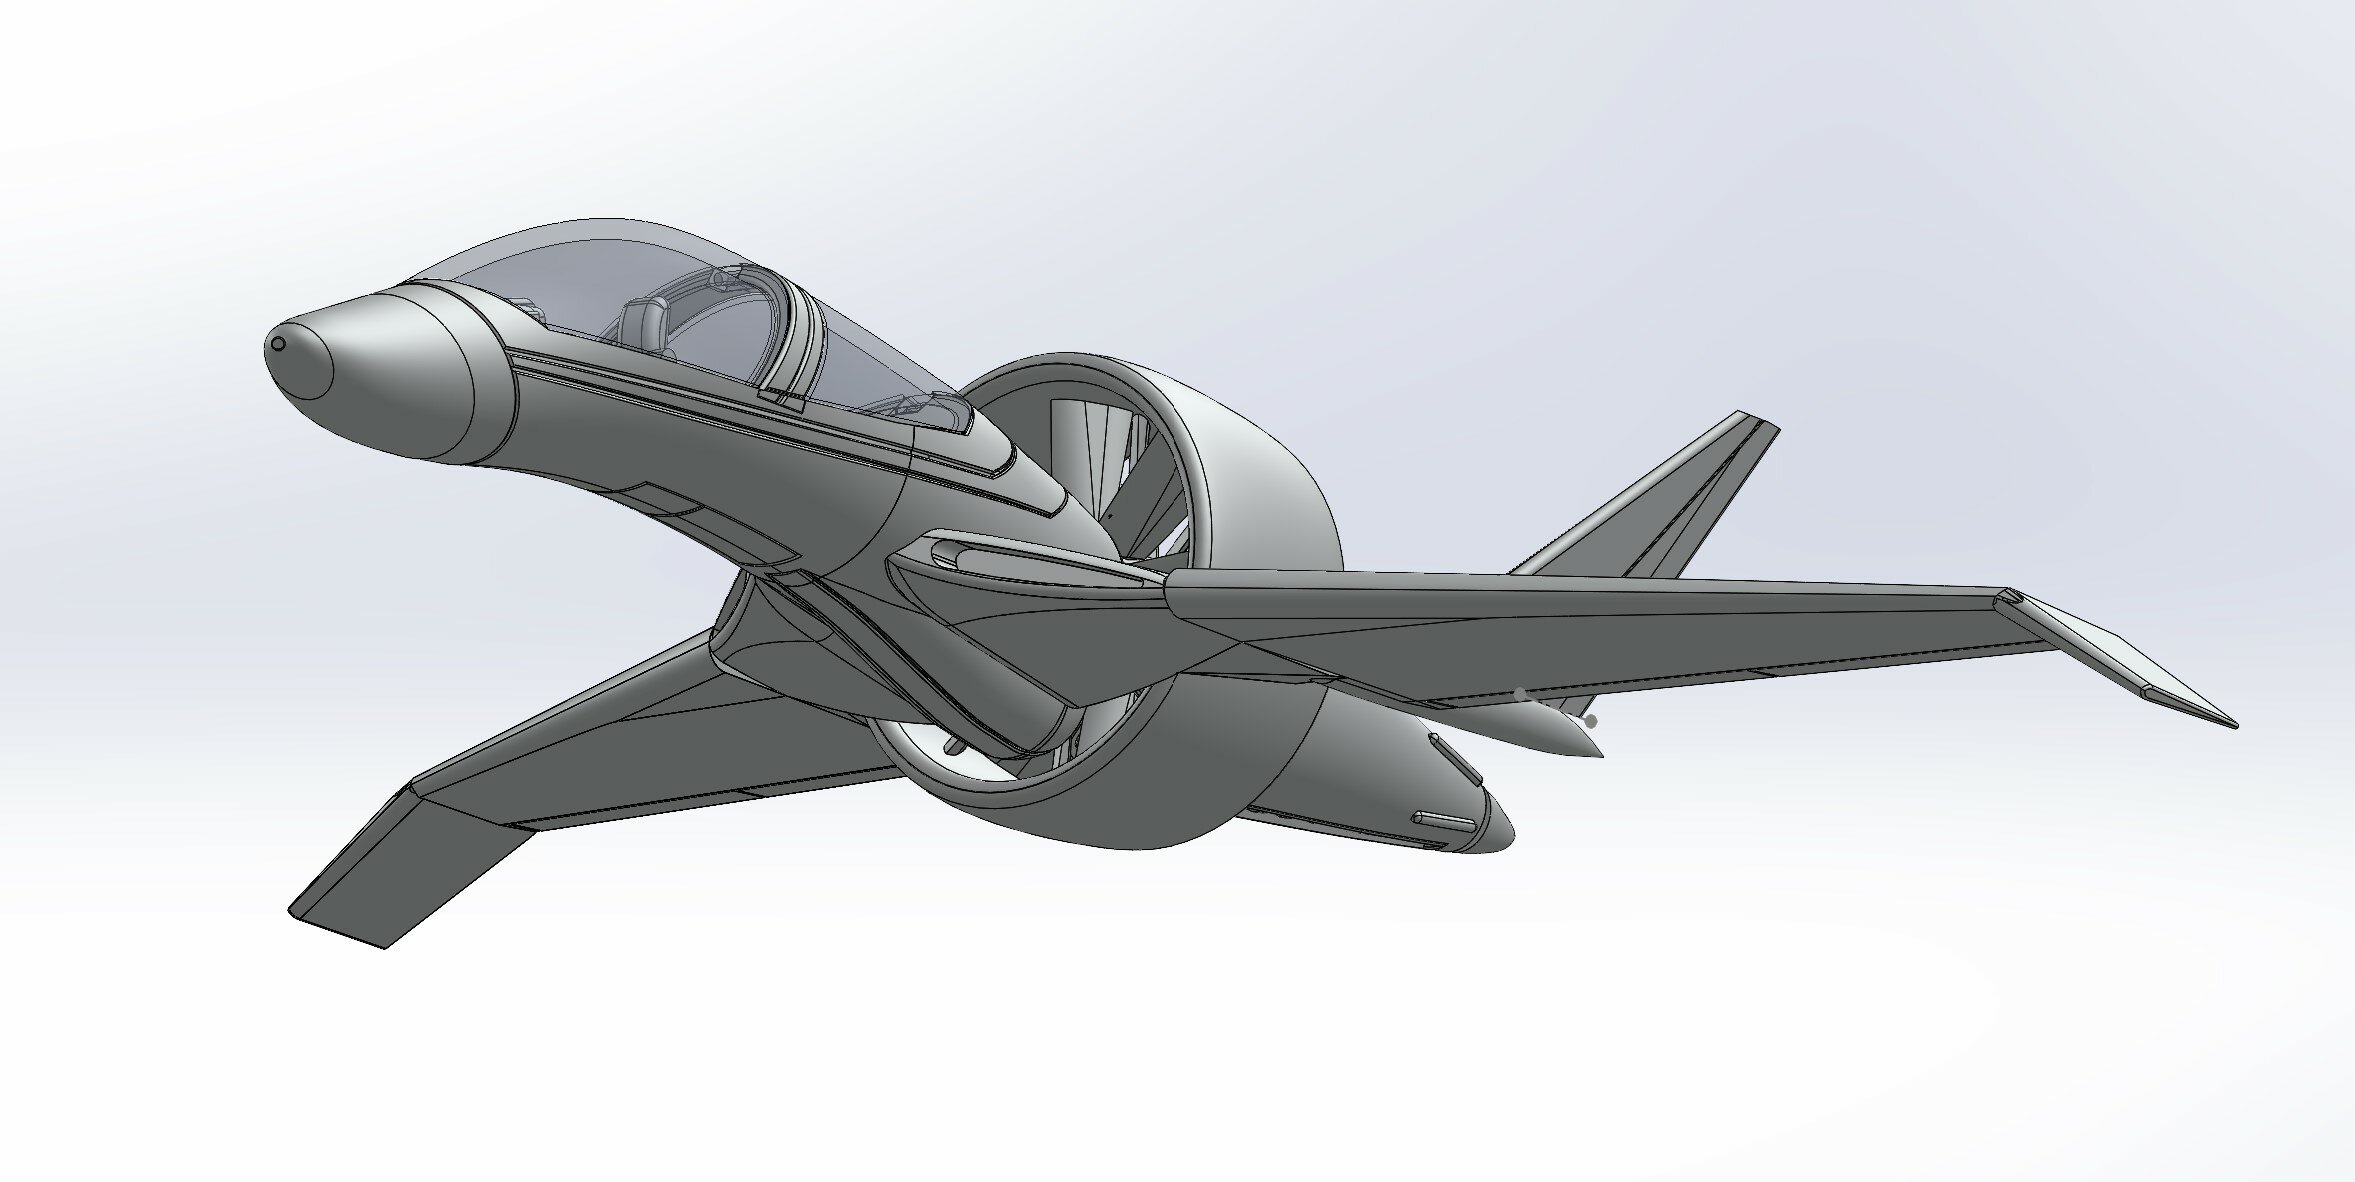
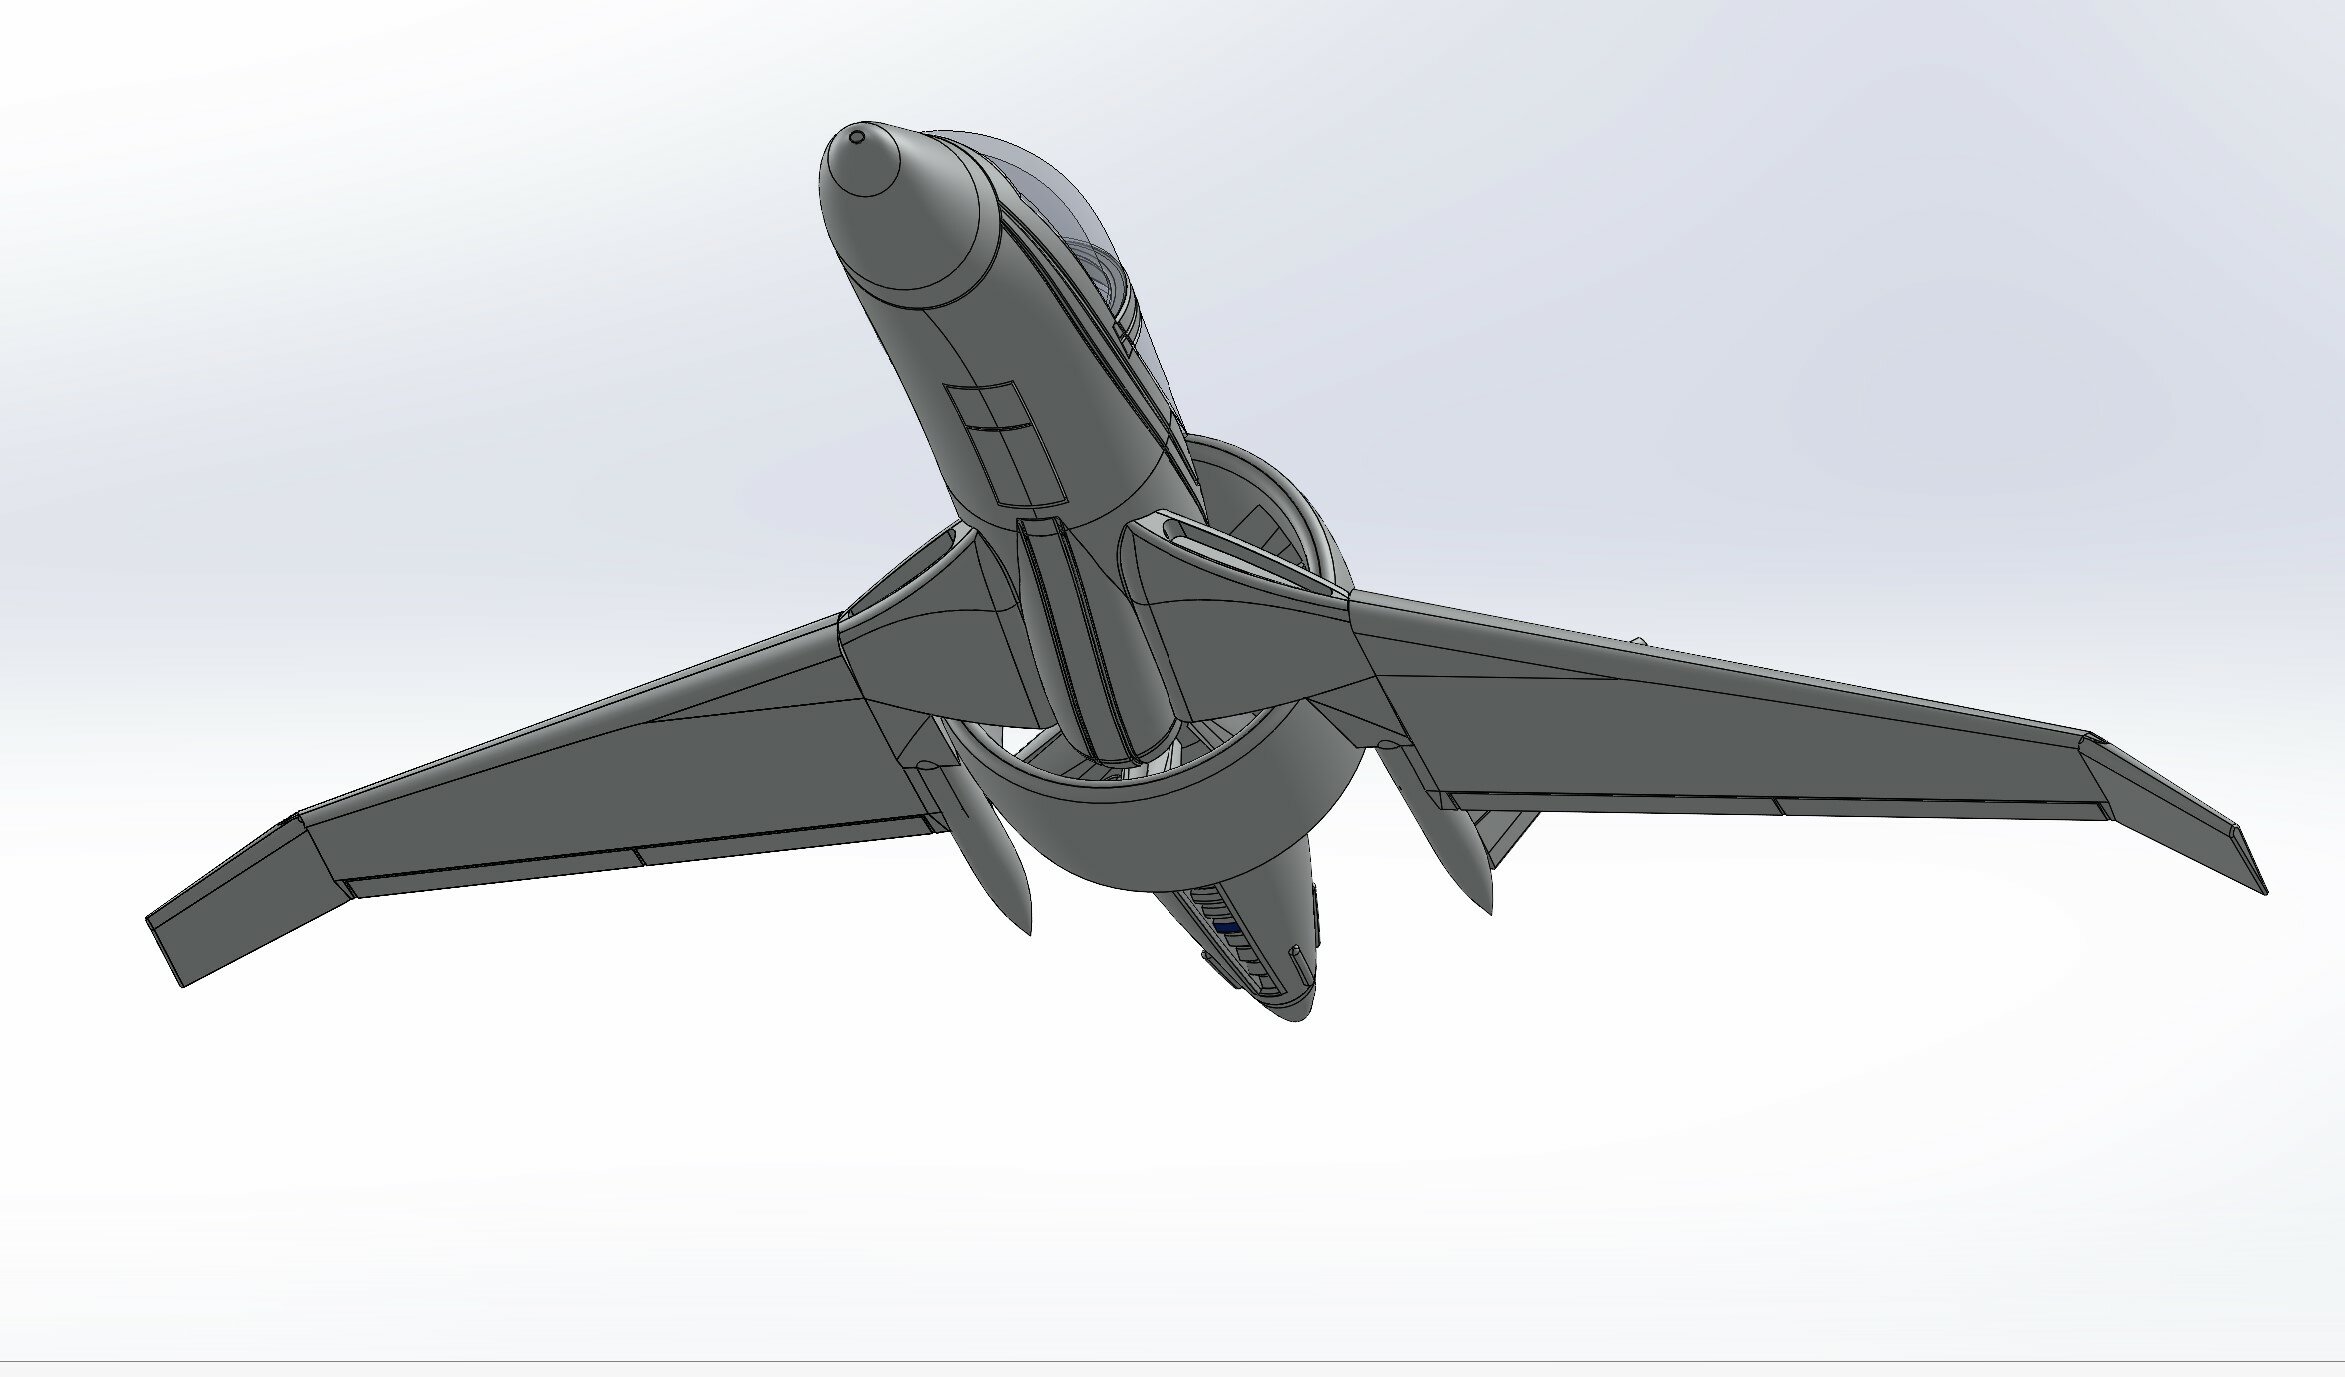
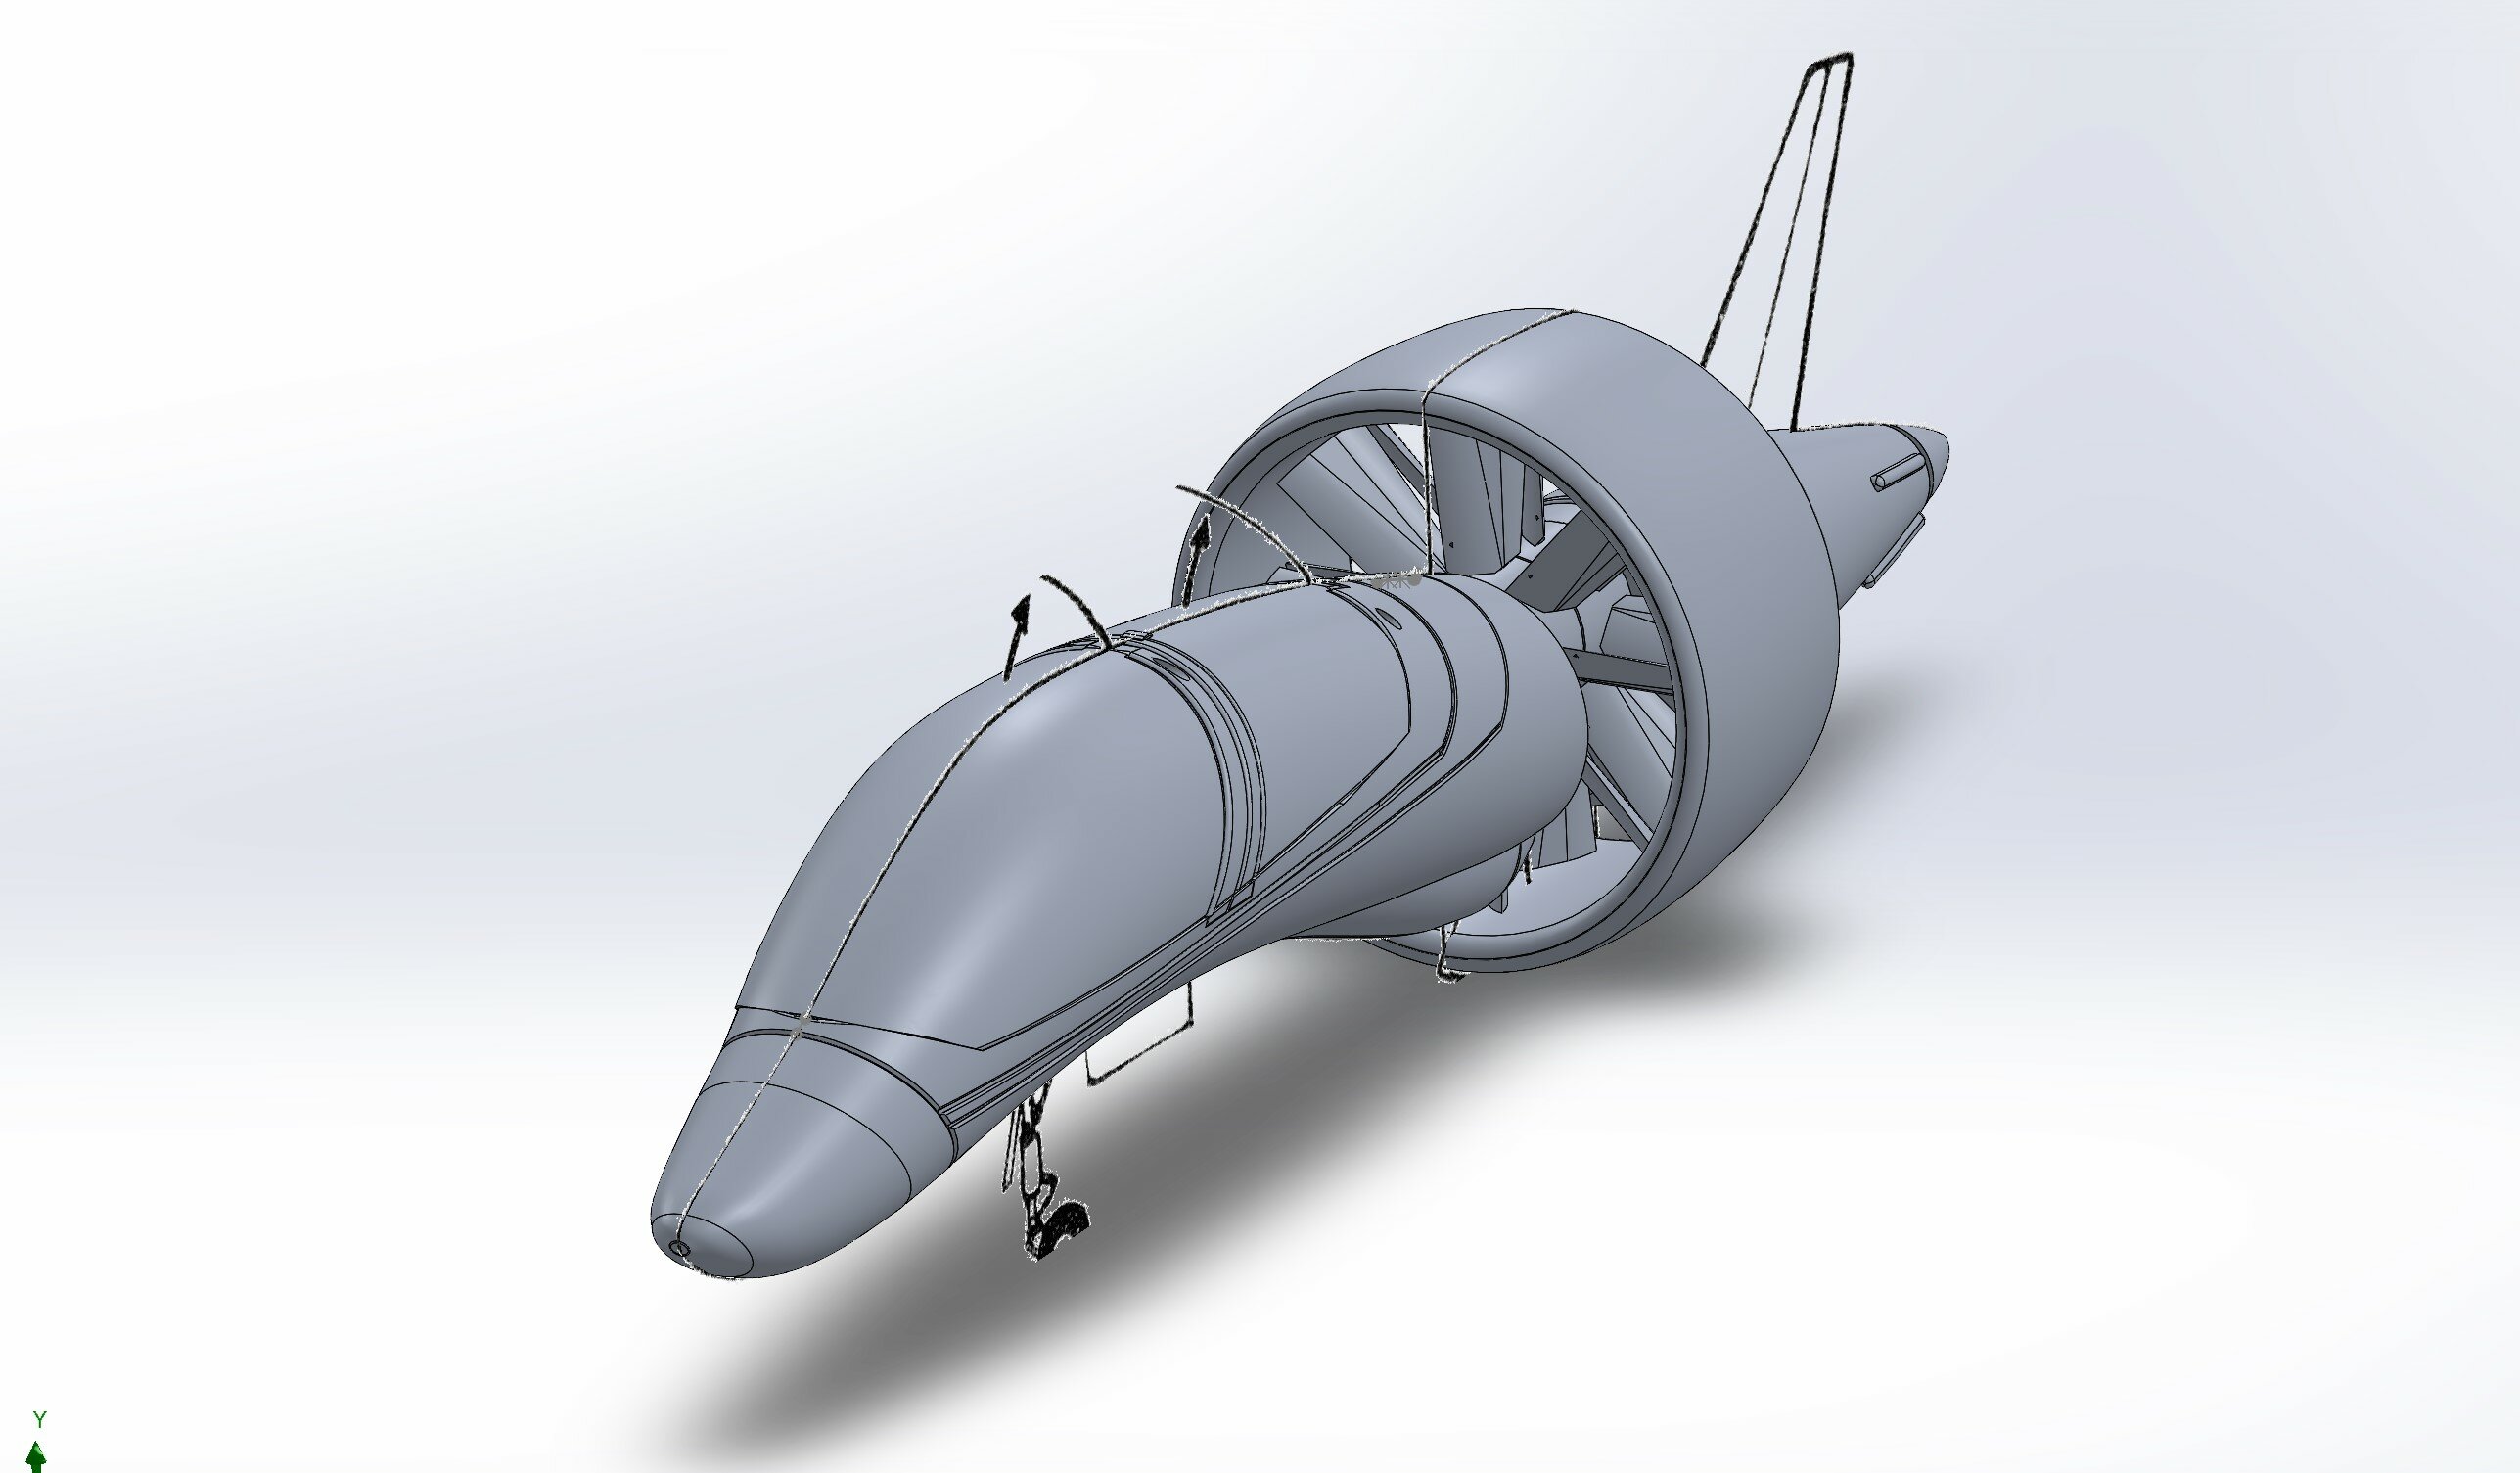
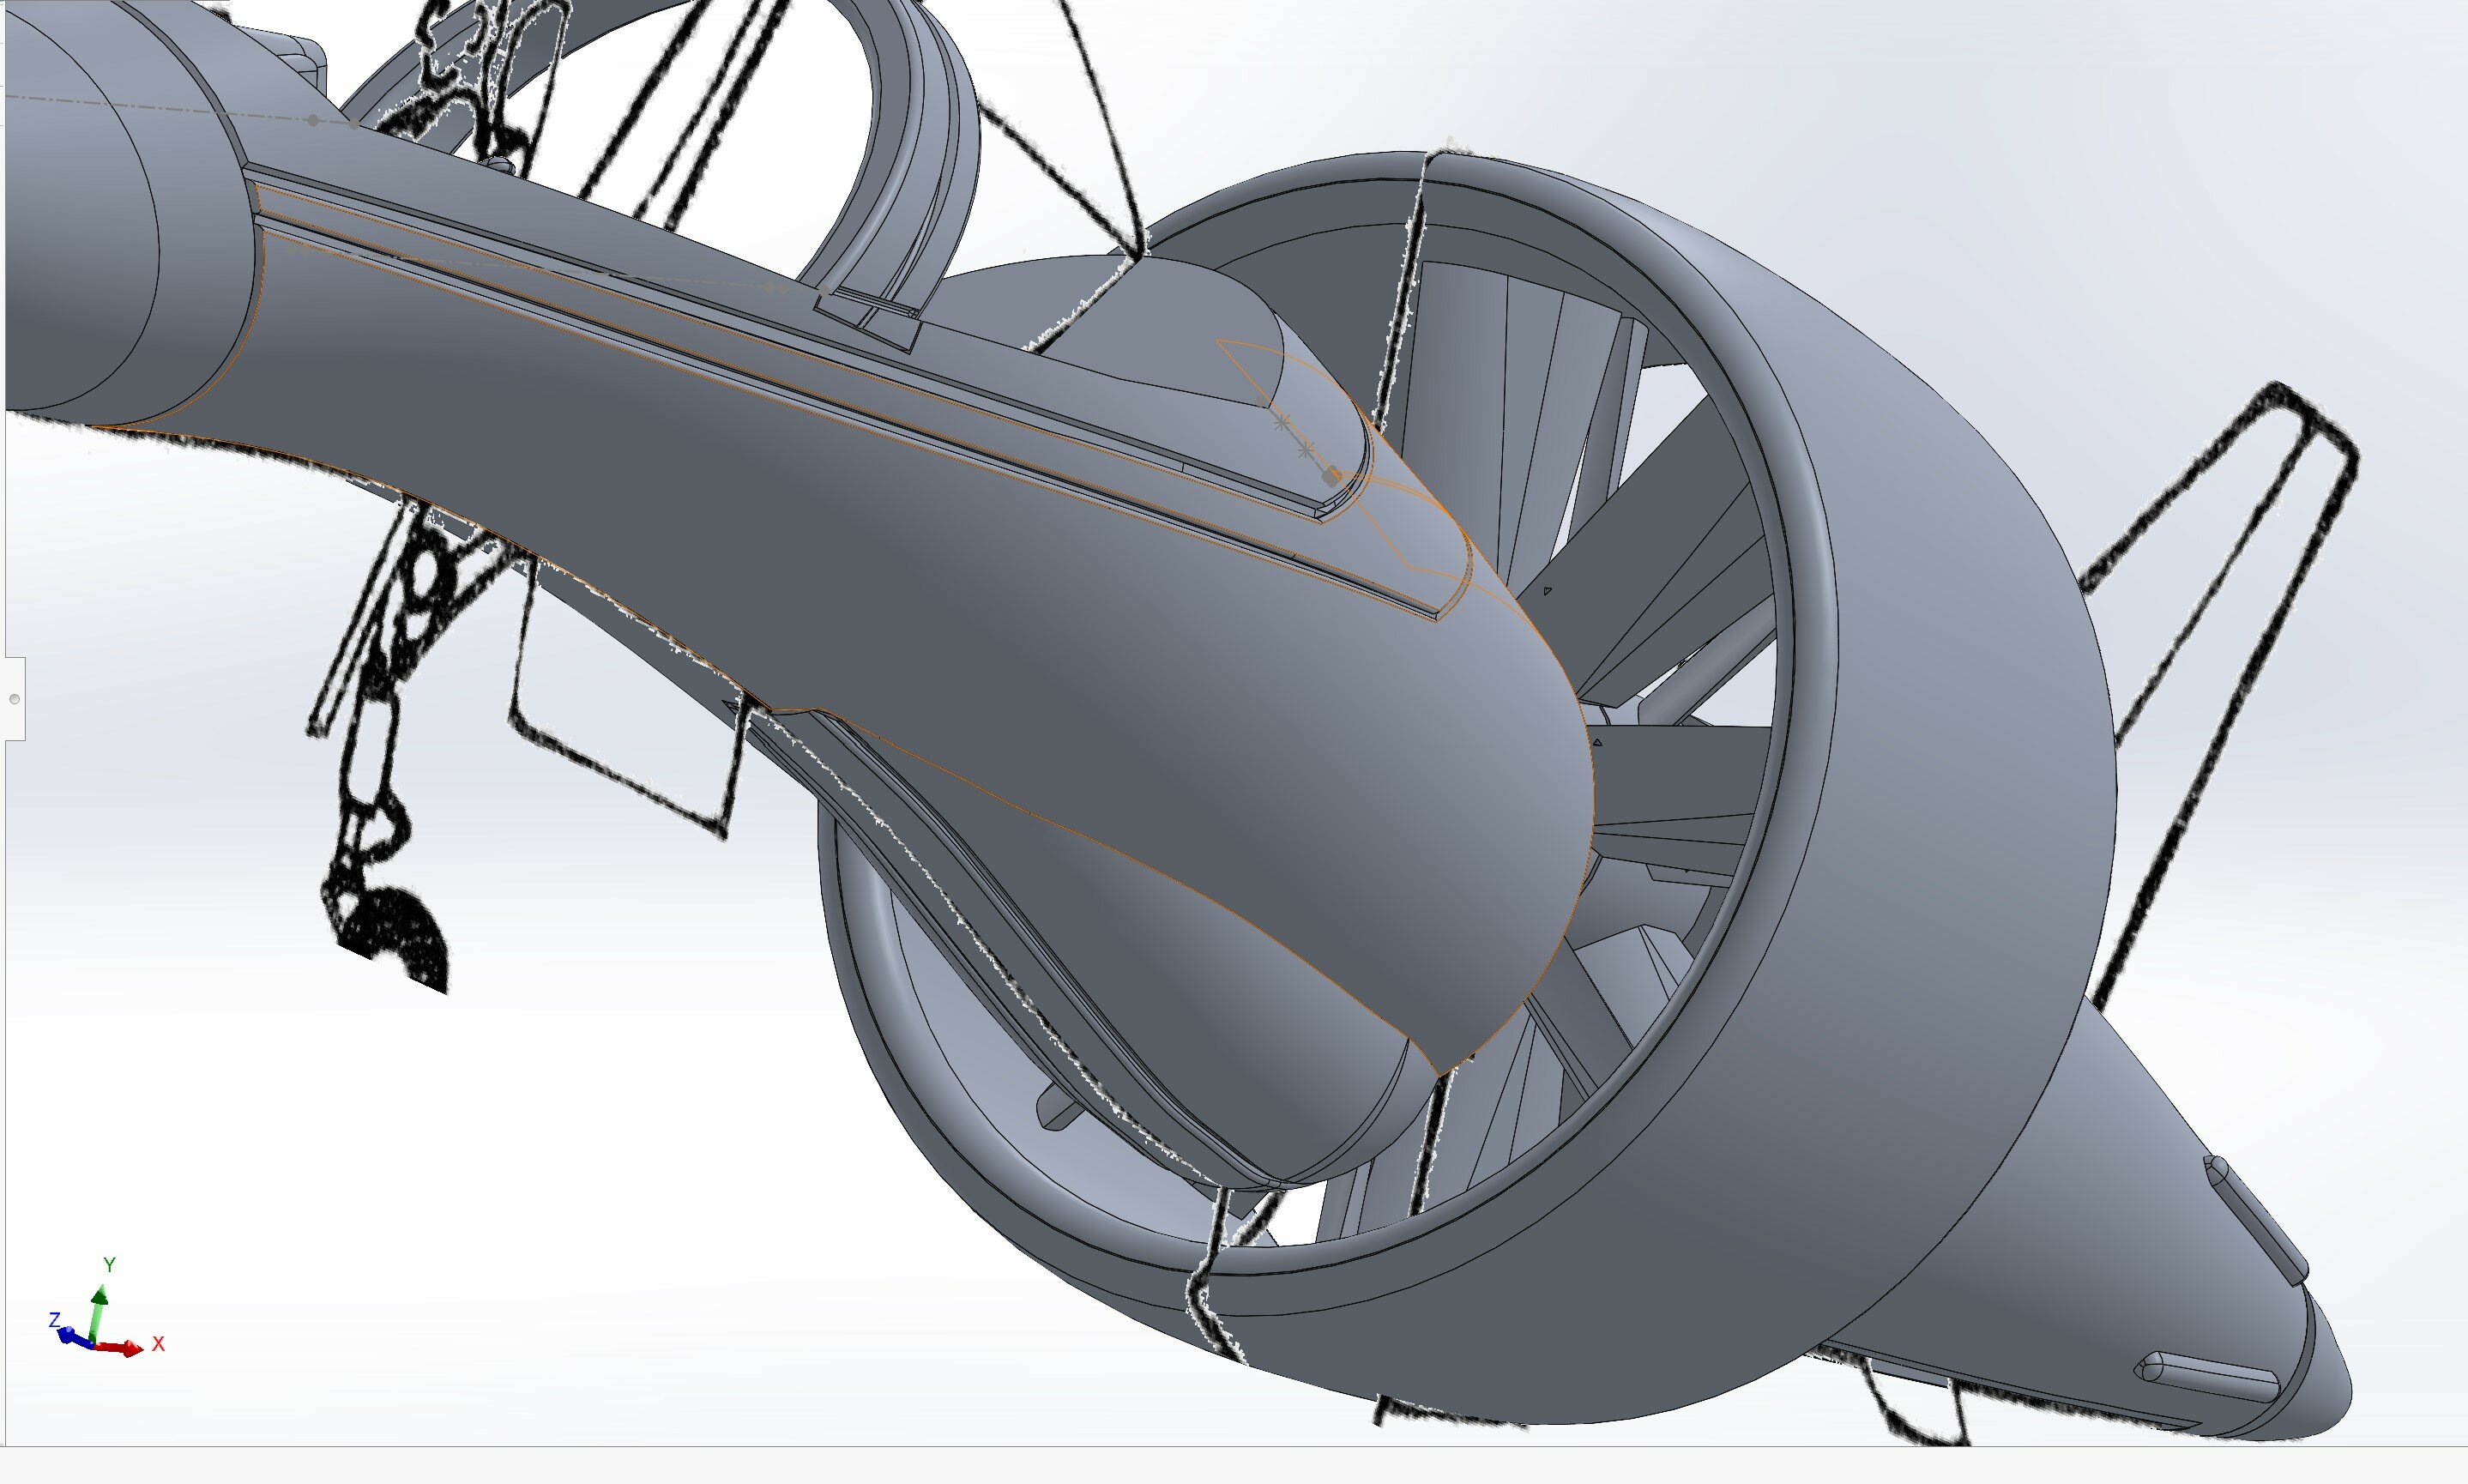
I finally started on the wing sections. It was a little tricky working off of a rounded and curved, but I was able to get them looking pretty good. I'll need to do a test run to see how it looks printed, but so far, it looks alright. I have the little flight stick ready to go as well. The flight stick doesn't have a lot of detail, but once printed and painted, one won't see it anyways. I gotta think of a way to connect the tail fin bars to the fan housing, and I may do that by making pegs that connect them both. In any case, I'll create good long slots for the wings, and see about the landing gear. Anyways, here's the update.
-
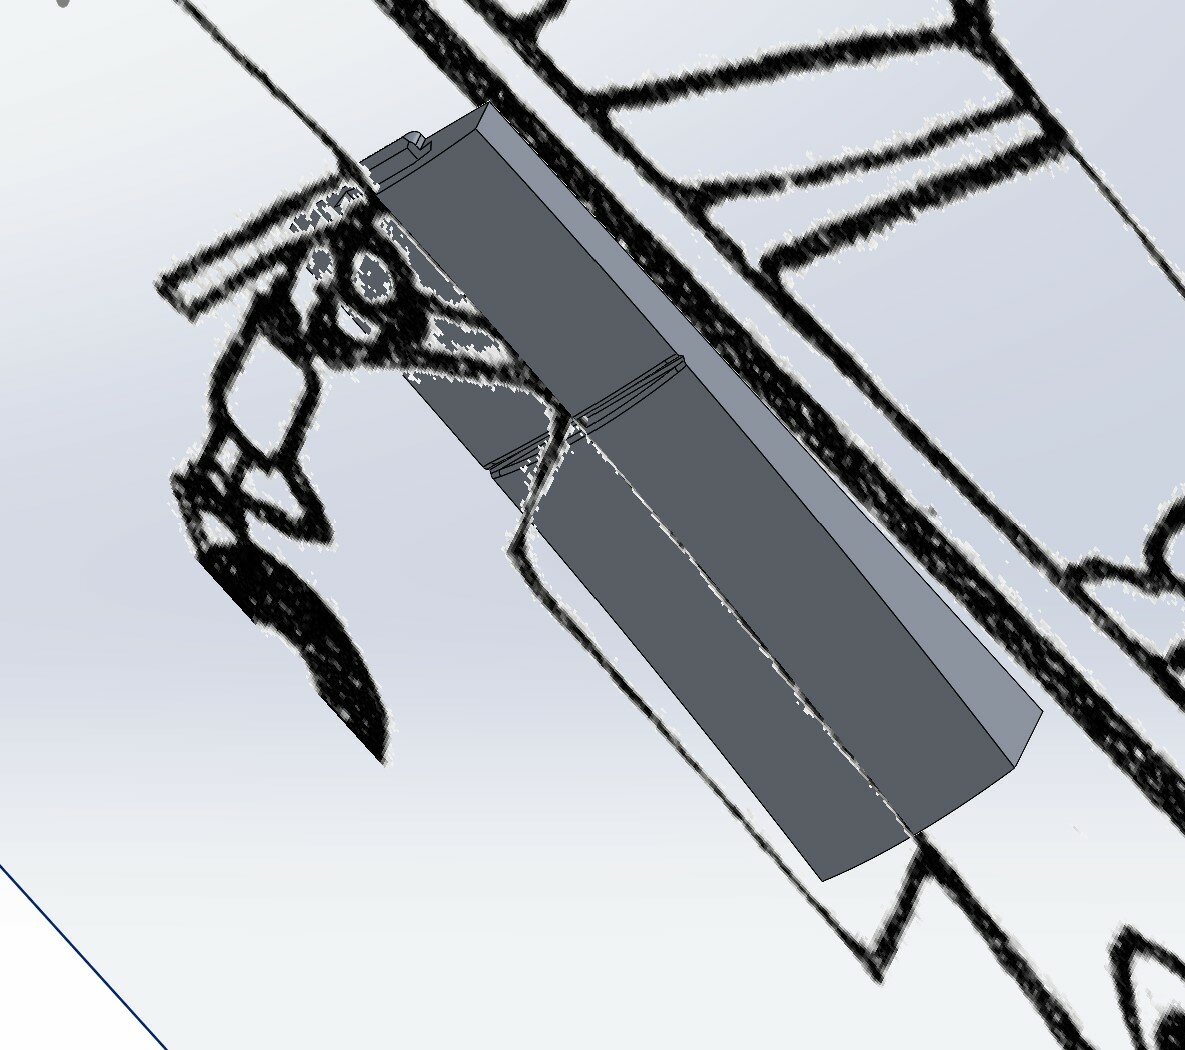
I tried again to make it work, and while I technically could, you are exactly right in that the resin would not hold up well to the task. Even mixing resin with some that have other properties isn't ideal in this case. I agree. They aren't the worst thing, and the fact that neither Yamato, nor Bandai put landing gear on the Fan Racer, it leads me to believe they came up with the same conclusion. I'd love to make it work, and if I upscaled it, I probably could make it work well, but as stated above, I'm sure this is why neither Yamato nor Bandai made retractable landing gear for their fan racers respectively. Nevertheless, I have a good solution as shown below... So, I feel like I am now done with inside the cockpit. While I could go on for a long time making it look much more detailed, I have to keep telling myself that this is going to be a kit to build, and extra detail beyond a certain point ends up being problematic. That said, I am now working on the flight stick, and that will be a piece that simply will get glued into the cockpit. As stated in my previous post, I cannot make the front landing gear come down, and work well, with a lot of structural integrity issues, so I decided to make replaceable connectors that can be put in to keep it in flight, or landed options. I have made these, to where each option will have 2 1mm x 3mm magnets lined up to the main body. Aside from a couple of nubs on both that will help the pieces to stay inserted, the magnets will ensure that the pieces don't fall out, and between both aspects, should make it secure. This actually concludes the main body, and I will now start on the wing/tail assembly. I hope you all like it.
-
Yes, I have seen that version. I printed a version of it, and it is way too thin even when enlarging it to 1/60 scale. I'm also not big on the design of the main body, but for a free design, if anyone wanted to print it, it'll do the job. I'm not advanced at all, but the software I'm using is Solidworks 2022 version. I can't really take any credit for any of the design aspect, as I'm basically tracing and projecting. Of course, I do have to take some liberties in some areas, but that is due to the fact that even in some of this line art that I'm using, there is some "anime magic" that is present, and it doesn't work so well. That said, I am going to do away with the collapsible landing gear in the front. Unfortunately, There is no way to get the wheel and tires in there, unless I make it to where the tire is able to rotate 45 degrees to fit in there. I can print that to work, but the problem is that resin printers aren't that strong. There are a few resins that have some ABS qualities, but in general, the parts would still be very thin, and I'd have to redesign it from how it looks on the line art. I'm not sure what I want to do with it yet, but one of the options is to have a part of the bottom pull out, and be able to just plug in the landing gear. I'm definitely open to any ideas if anybody wants to put in any. It shouldn't be a problem to make it work for the wings, but until I get there, I won't know for certain. I'll have some updates this weekend, but most of them are very minimal.
-
Not crazy if you take it out for walks. All kidding aside, there was an old prototype of one early on. It was glorious.
-
I hope another me is in it, and enjoying them all.
-
Actually, in looking at the canopy, I'll probably edit it out, as I'm not liking the front view. I think it'll pretty easy to do, but I'm going to come back to it later.
-
With some improvements coming for this, I'm kinda excited to buy another one. I already have the OD green, a regular colored version, and now I'll have a second standard color version. I hope it really does sell well, not only to spur the design of the missing versions, but also so that it'll spur the HMR line as well. While I don't collect the HMR line at all, I did get the Spartan and I do like that.
-
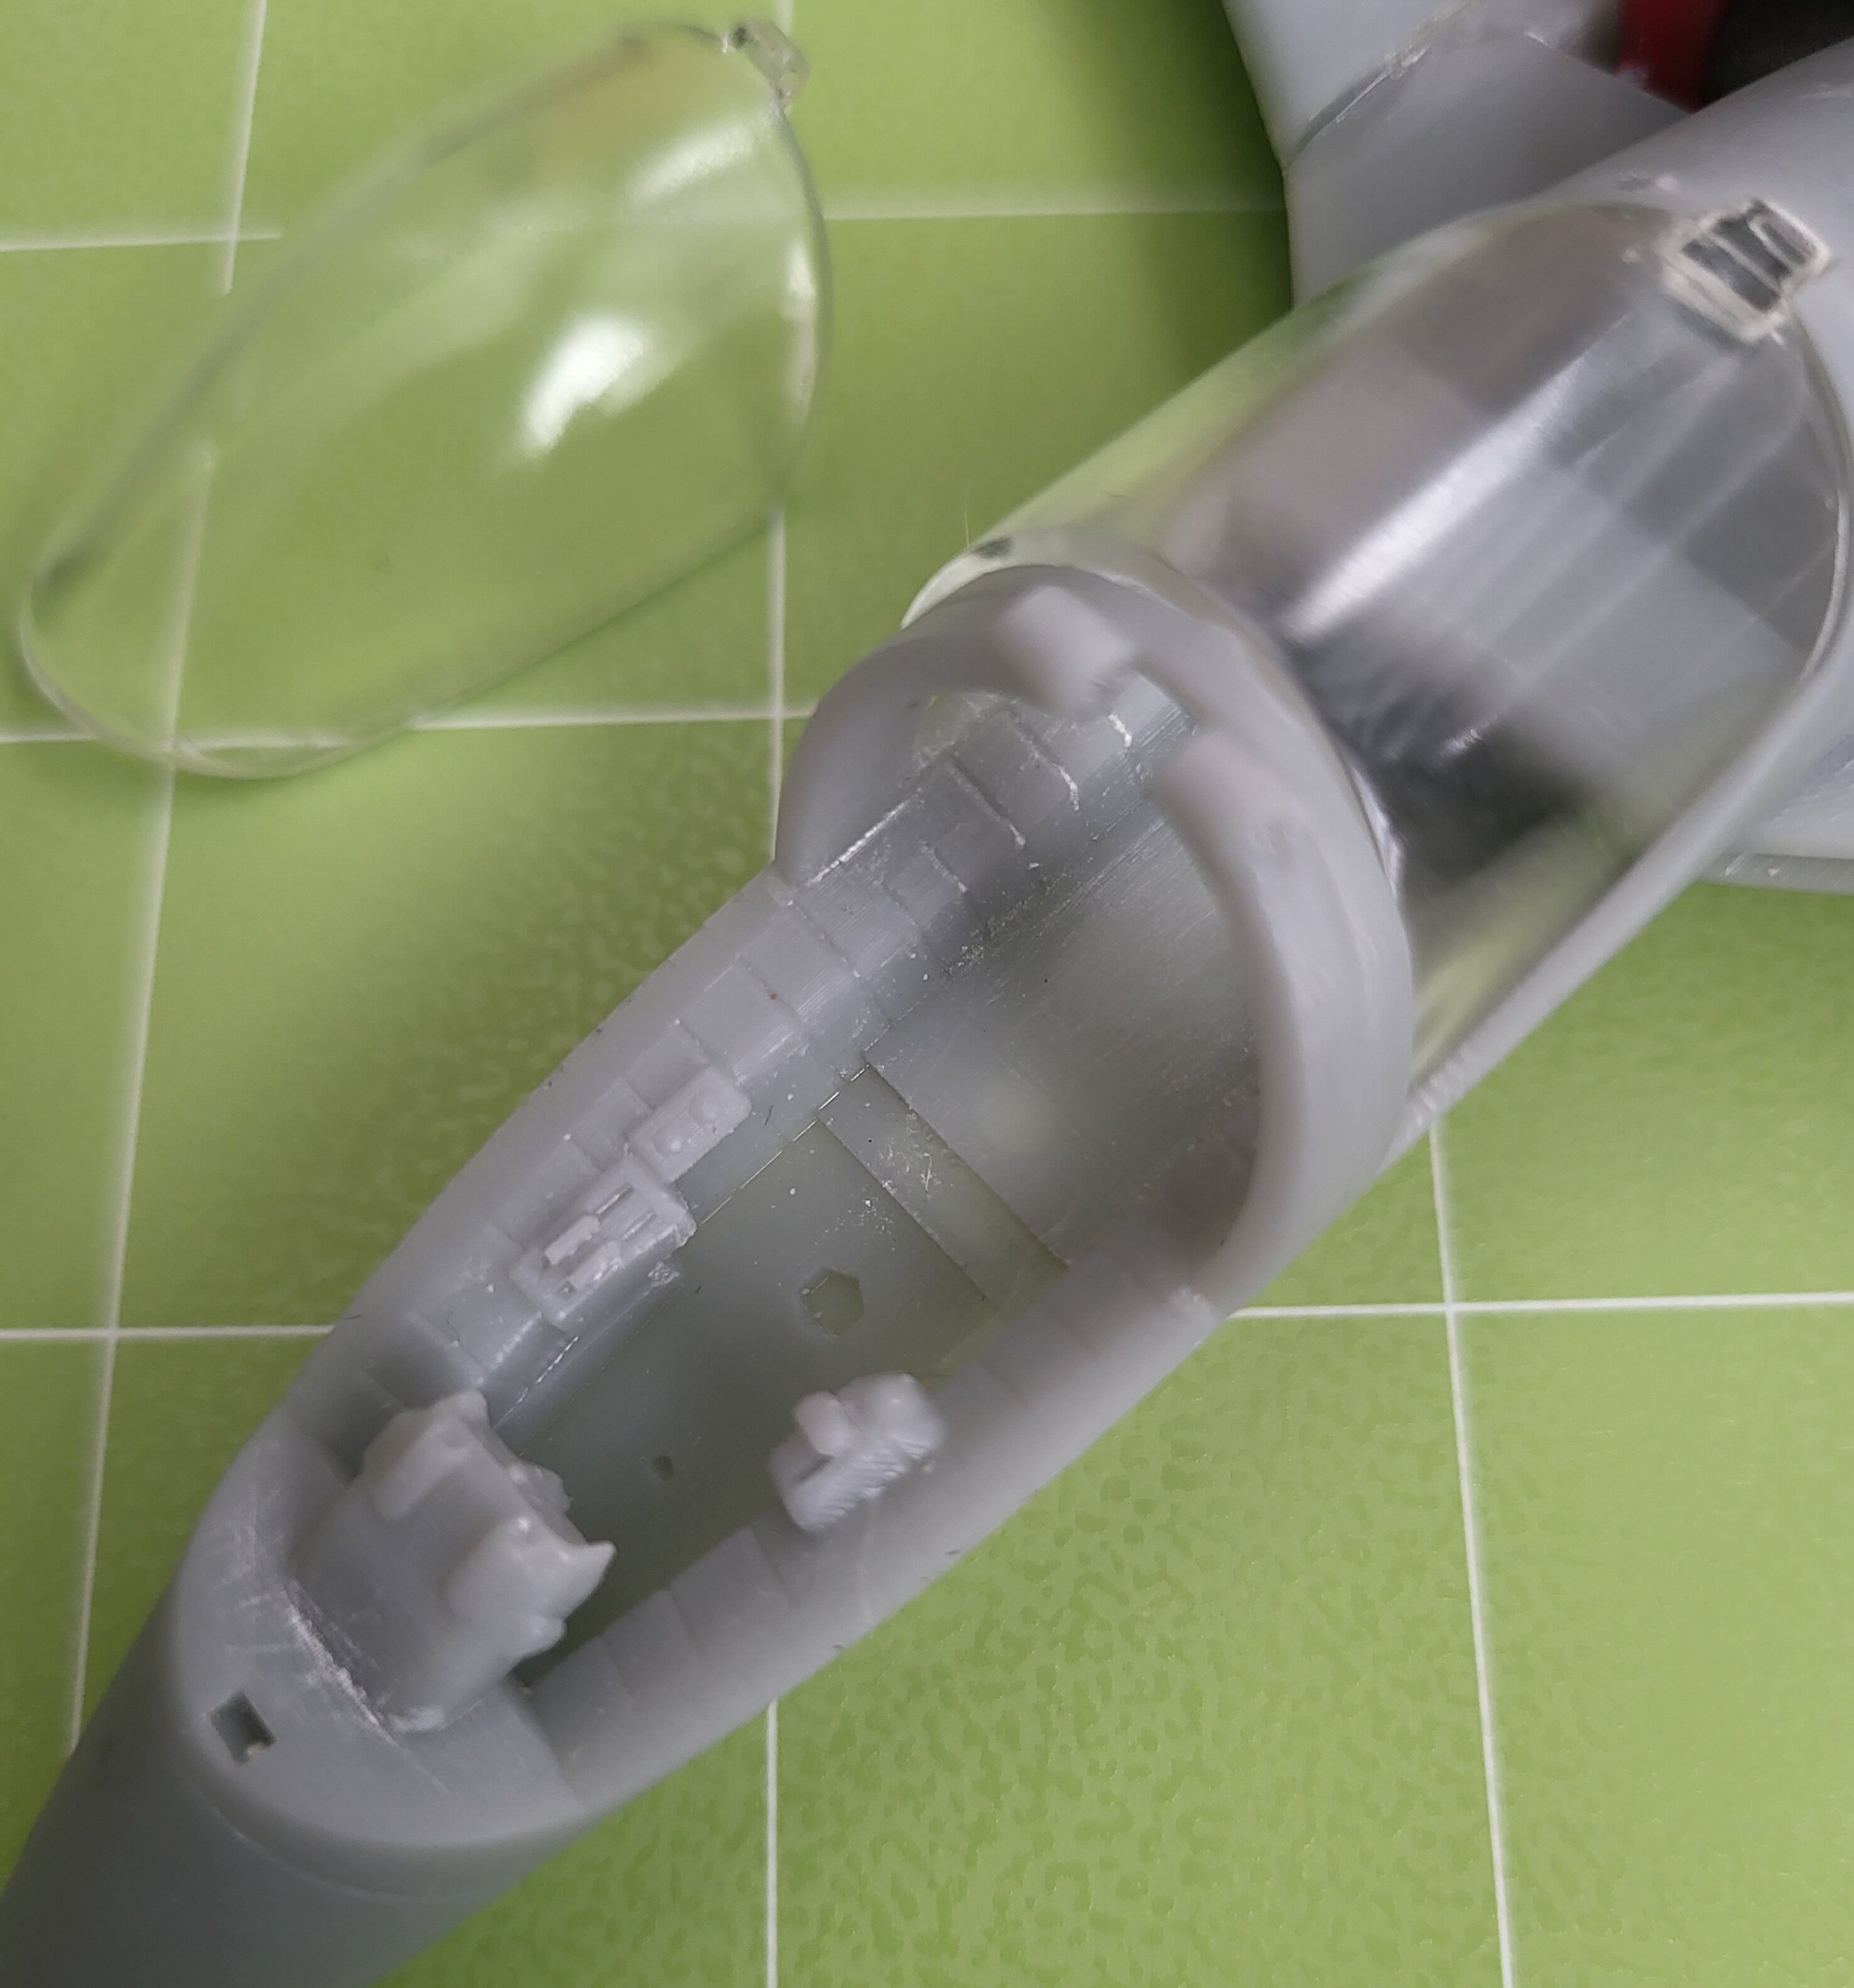
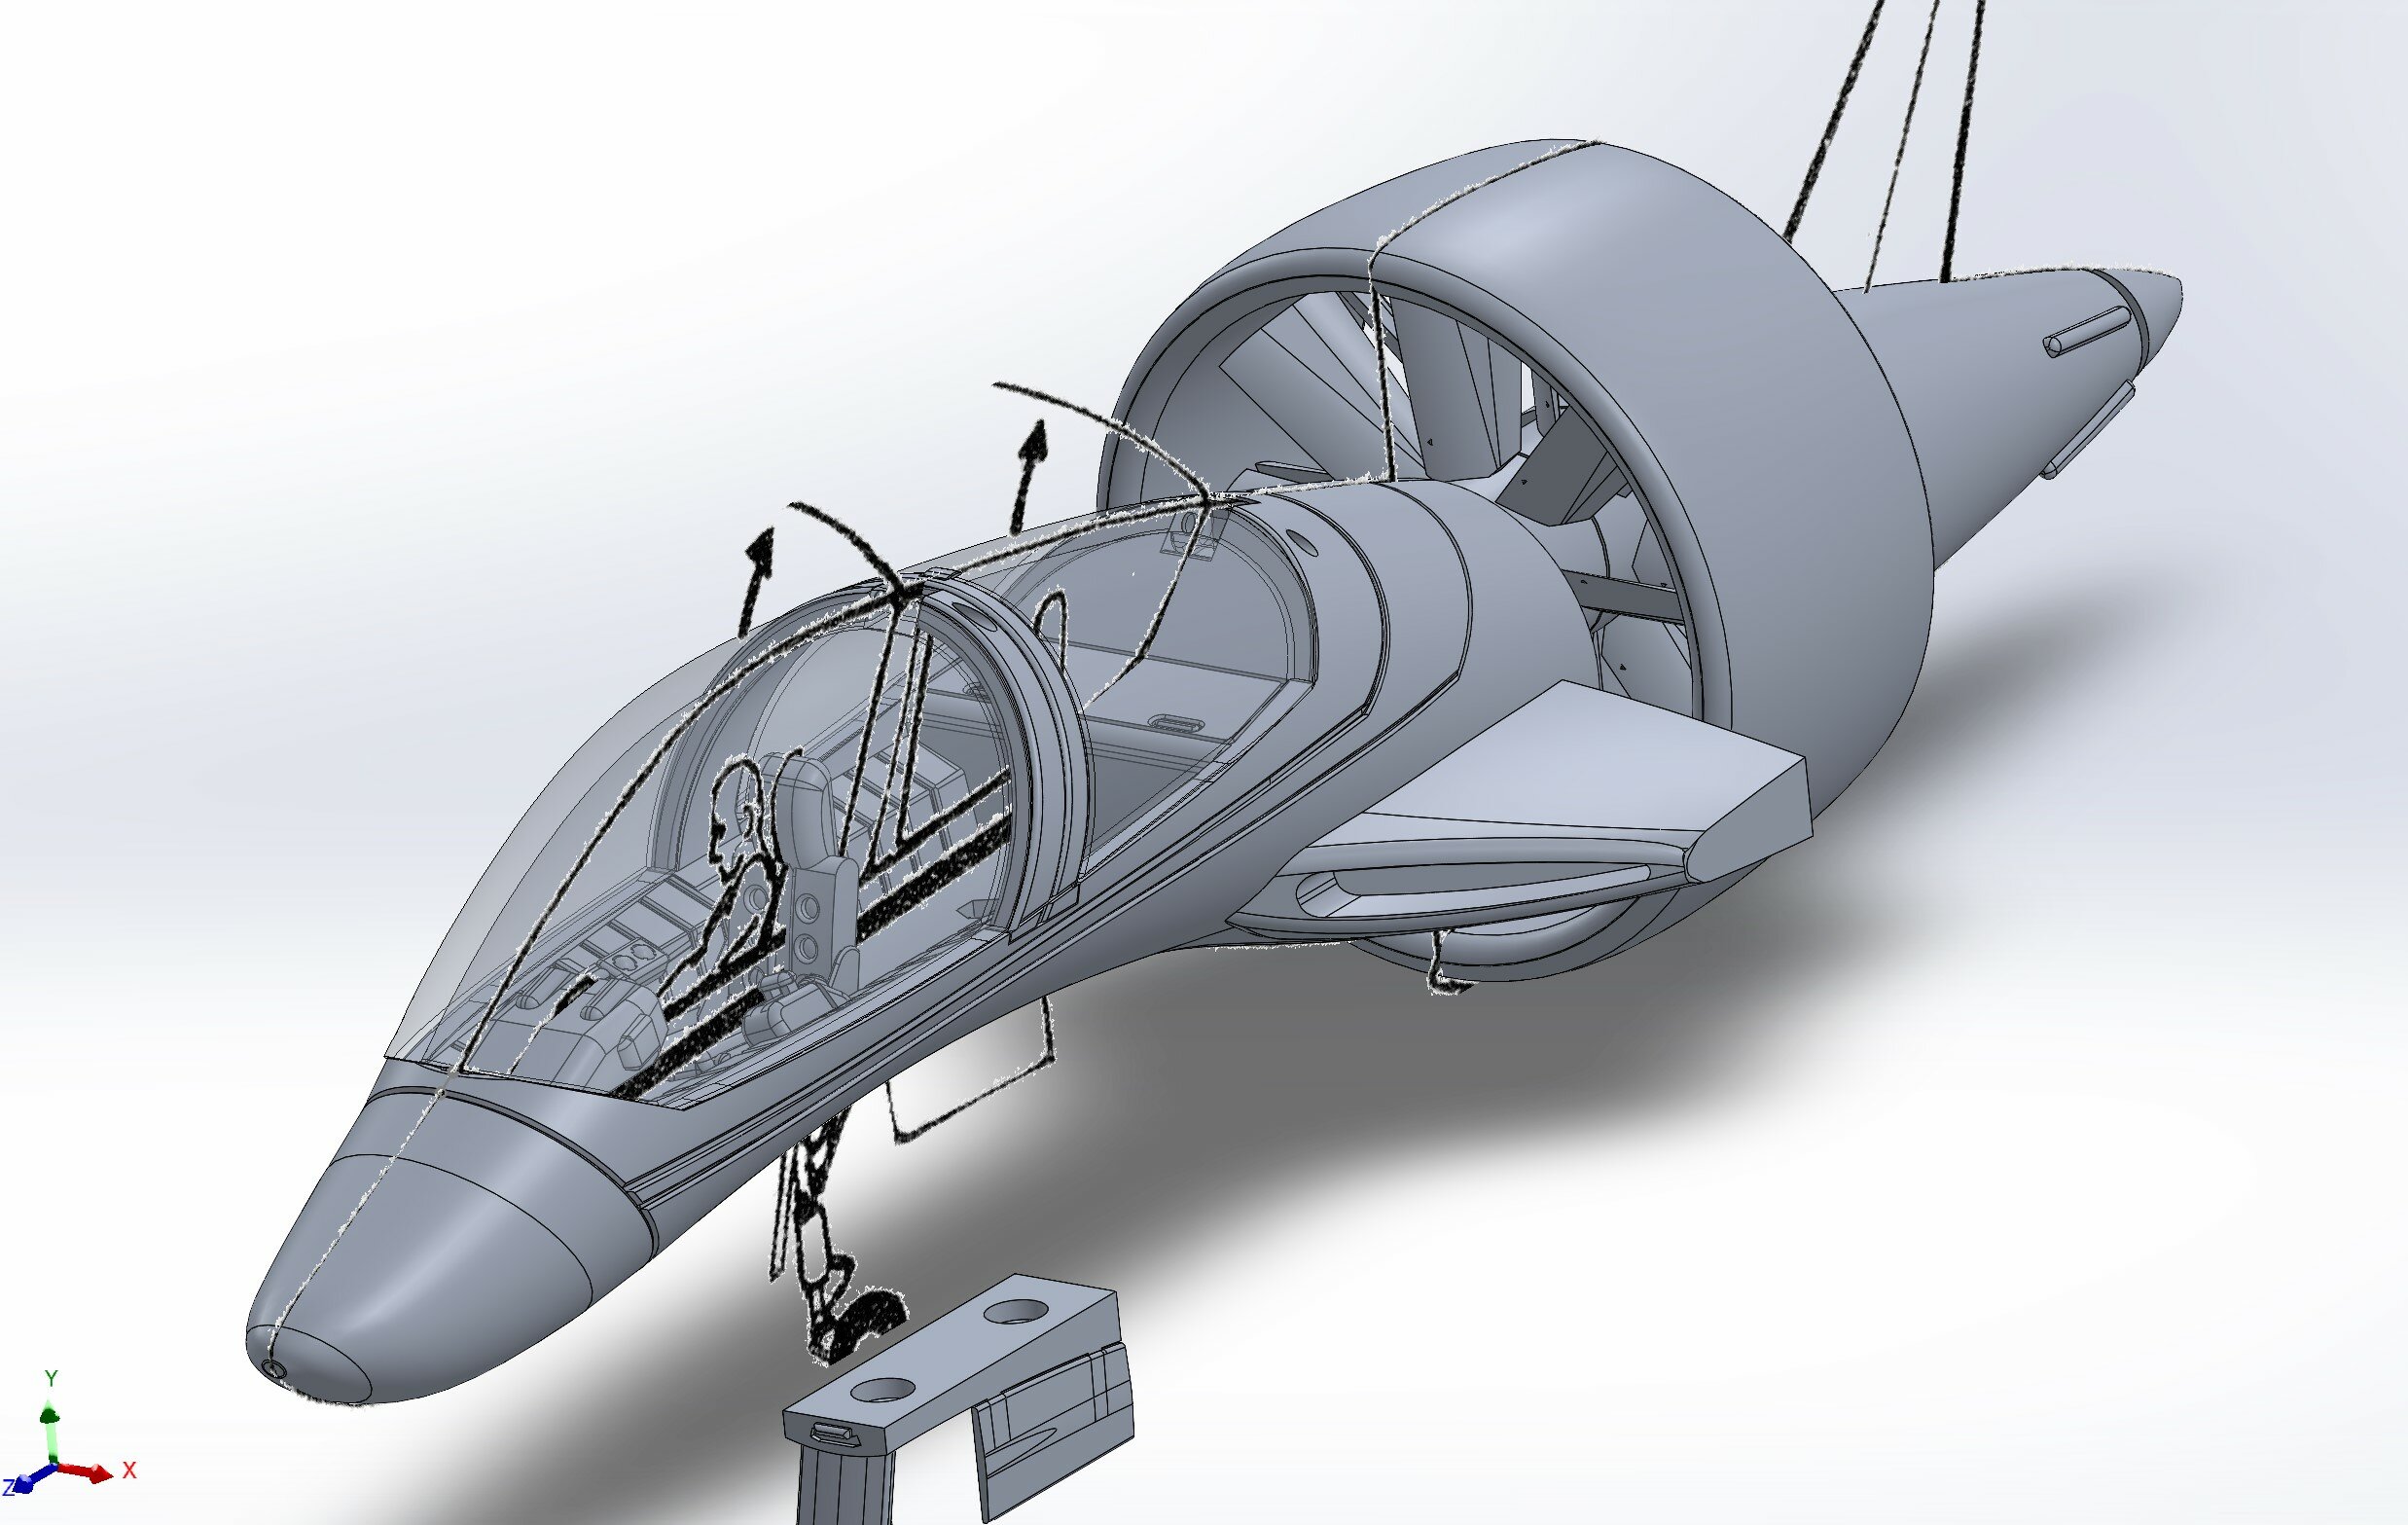
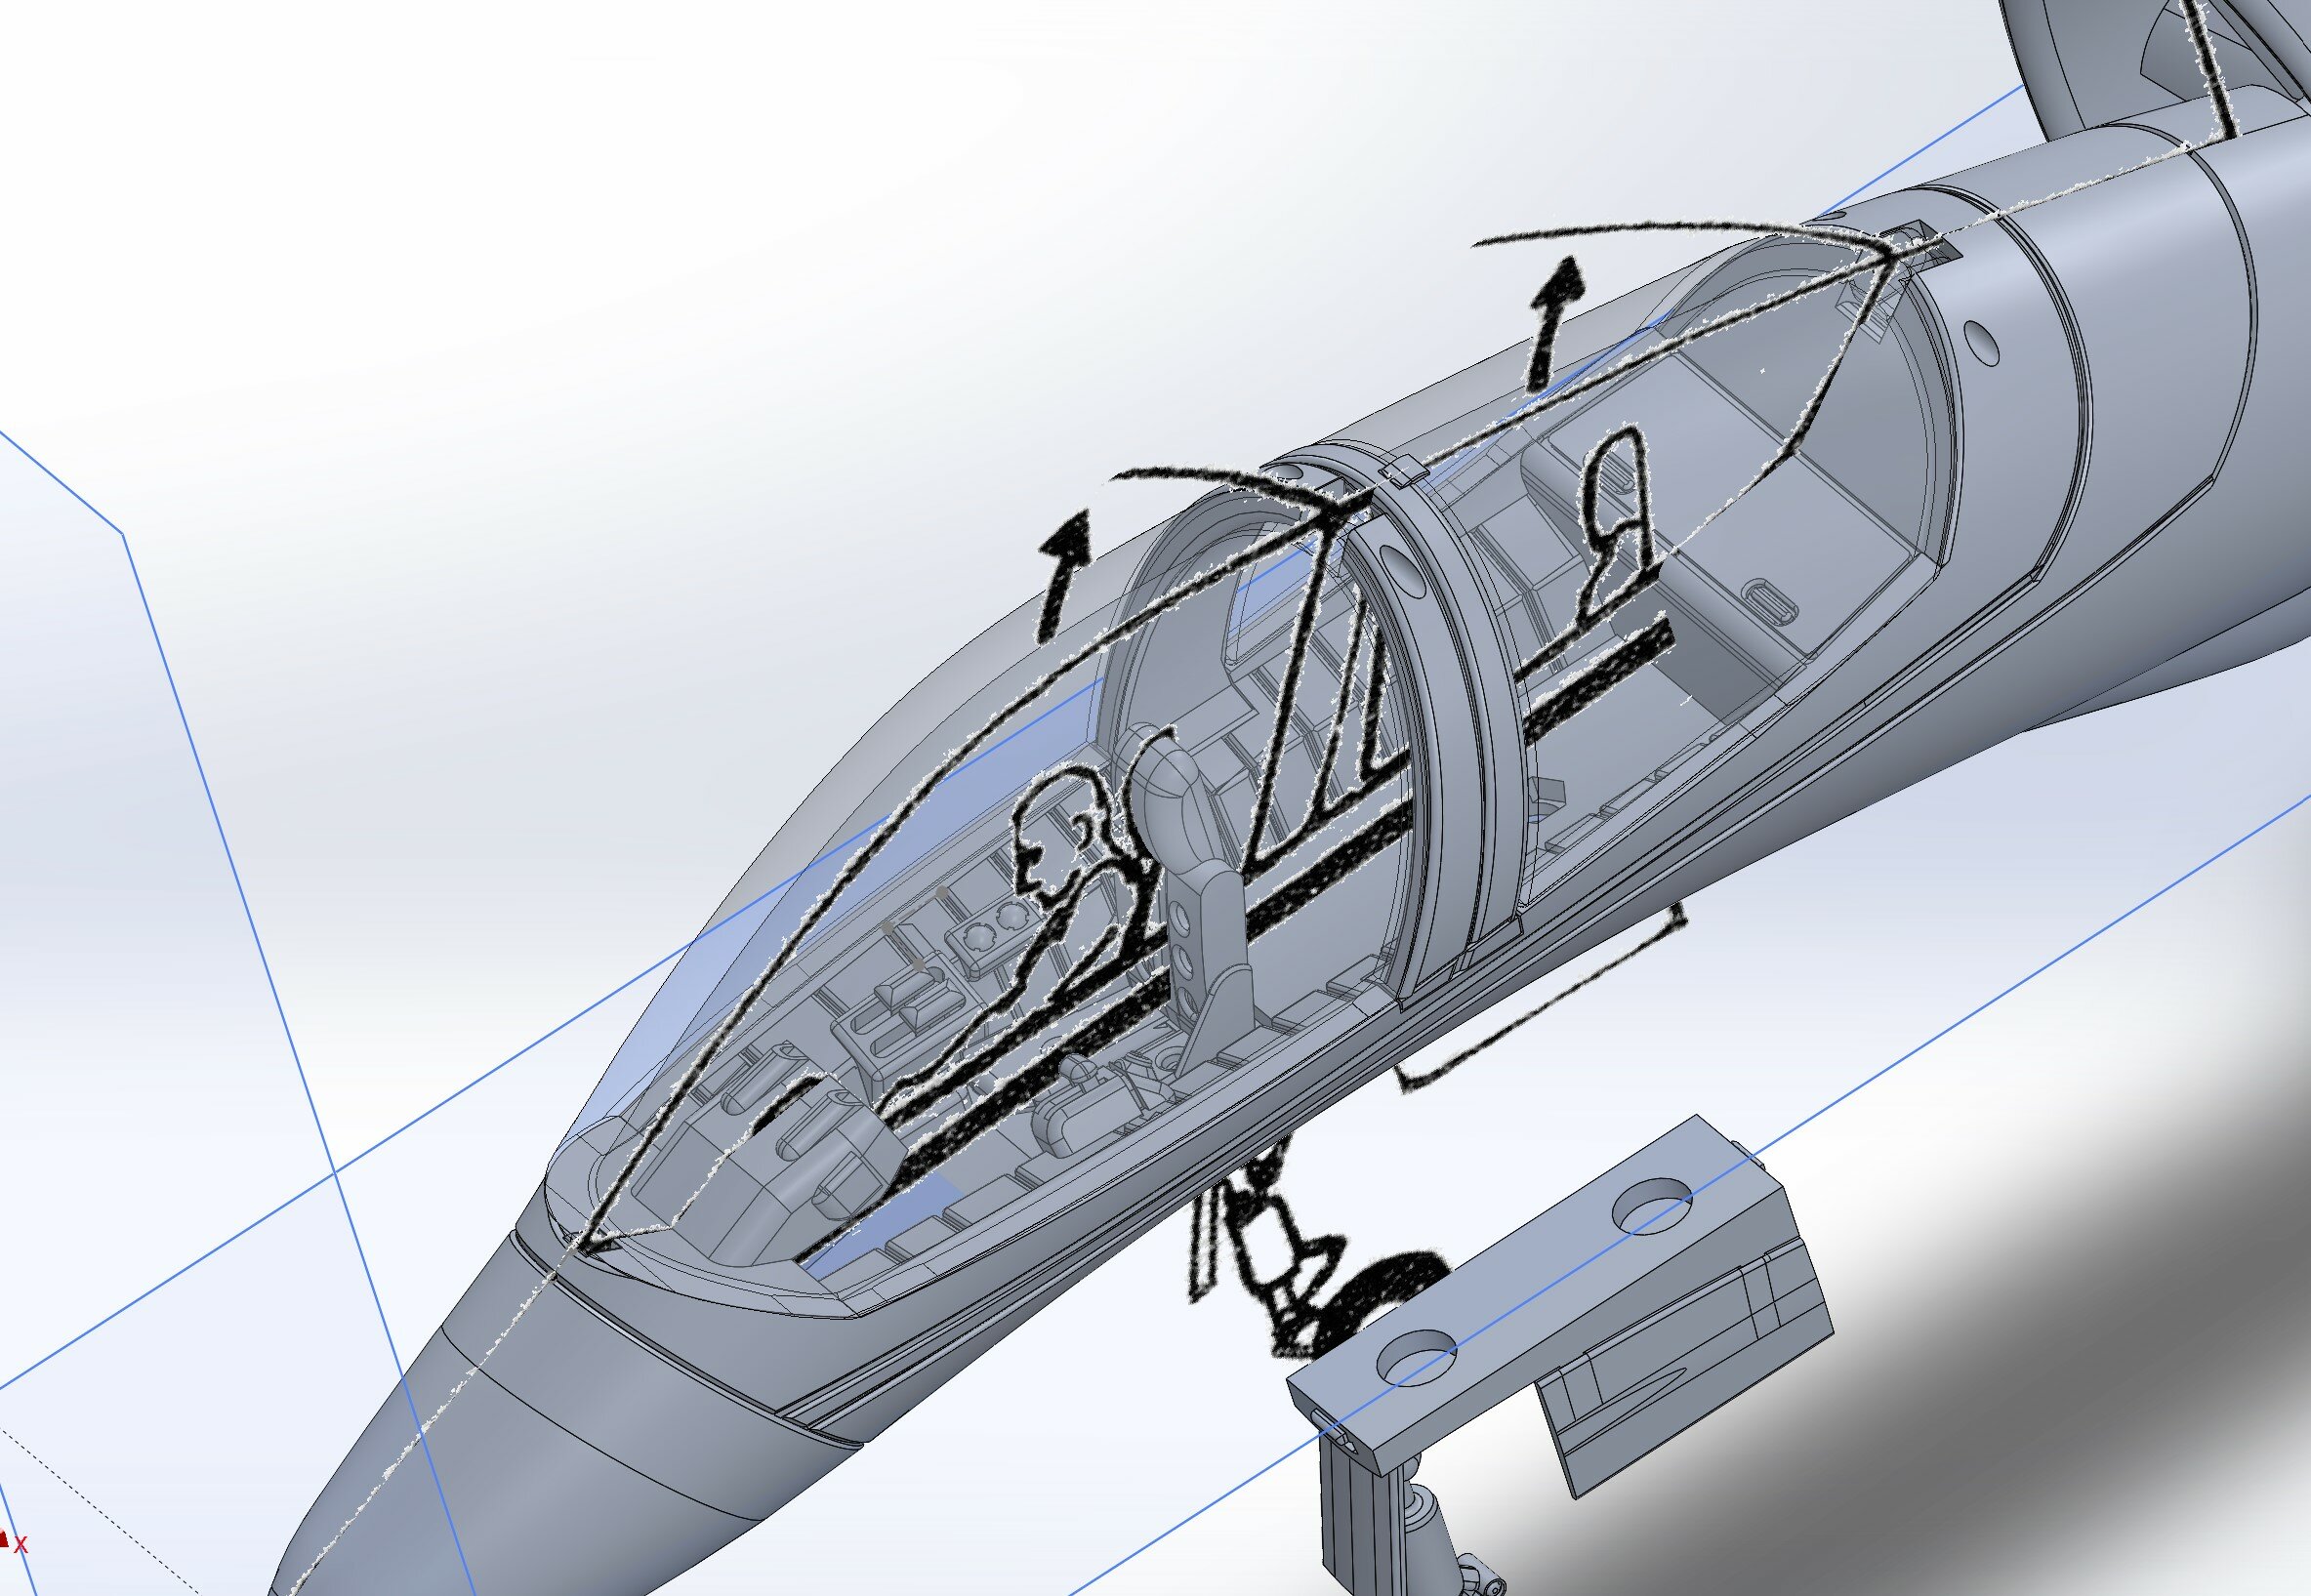
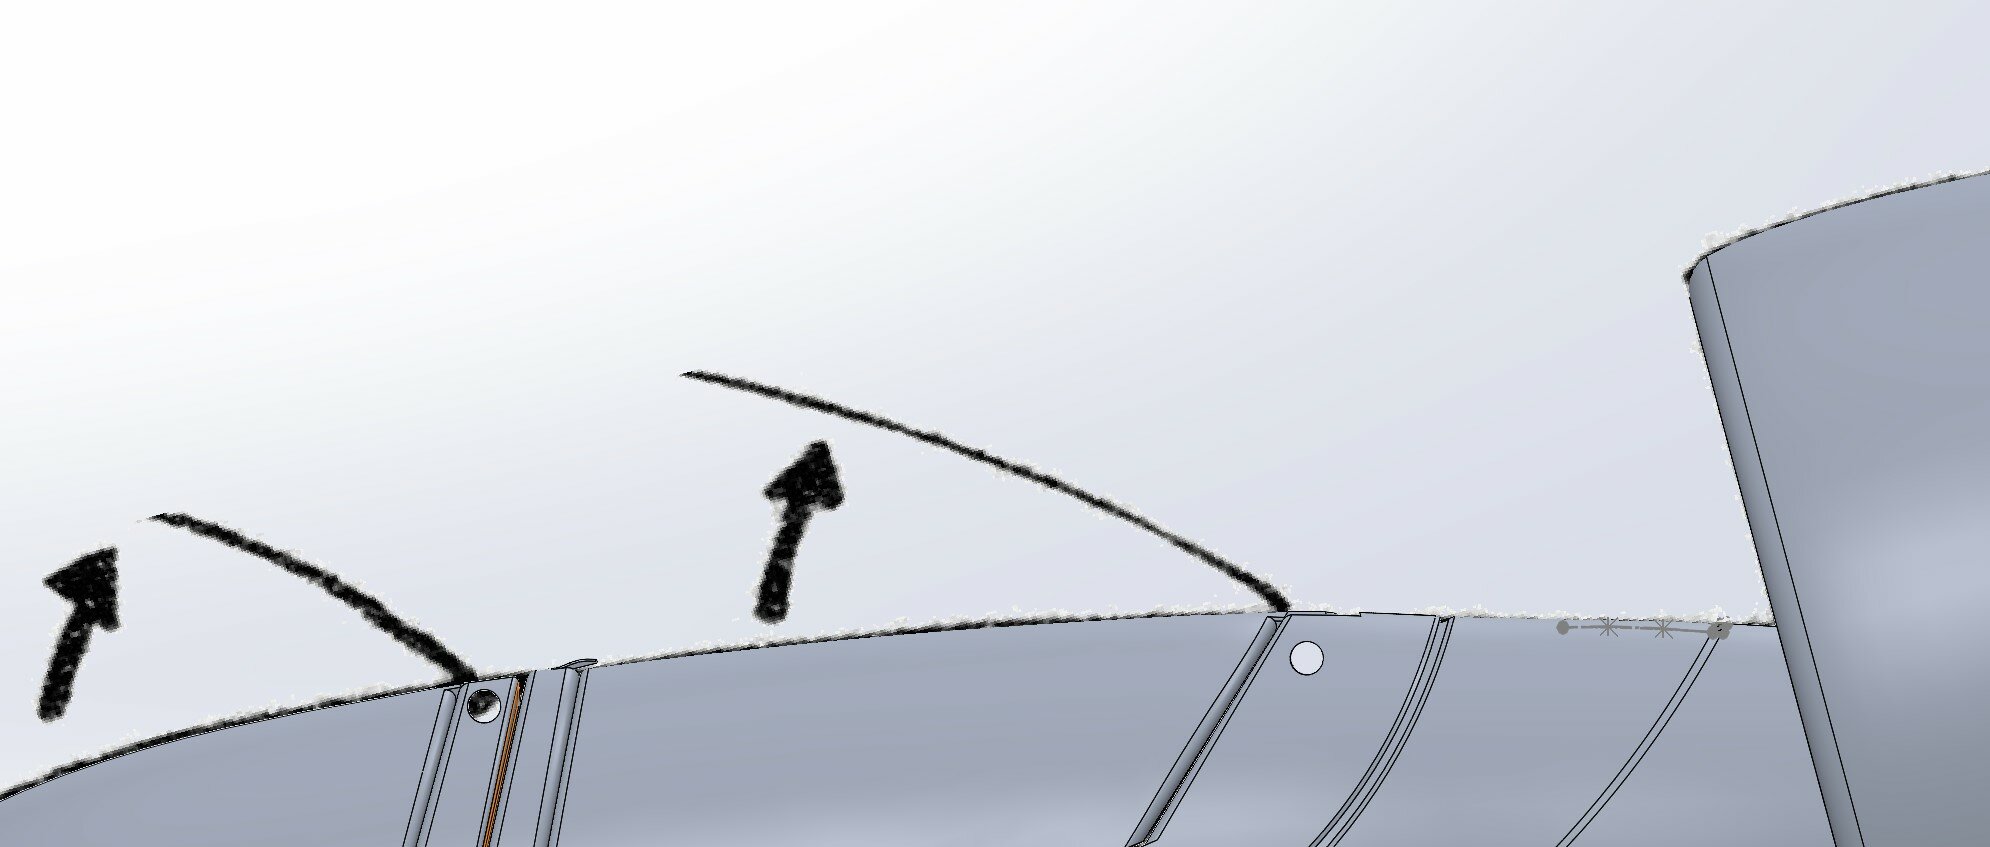
I finally have both of the canopy glass done, as well as a couple other things I'm going to try on the project. for the front glass, you can't see it, but there will be a slot on the main body for the front canopy to fit in. It is angled, so once it is in, it should stay locked until a fingernail gets under to open it. On the rear glass, there is a small tab overhang (shown) that the rear canopy should fit under to keep it locked in place. The next step is to start working on the front landing gear, before I start on the wings/tail. I have it calculated out, so I can begin on that probably Friday, as I have a lot of homework for a class I'm taking. In the modeling, I can see some imperfections with the shape of the glass, but they are literally 100ths of mm off, and a light 600 grit sandpaper or even lighter will fix them. I could go back and fix them, but I'd have to roll back hours and hours of work. Anyways, hope you like it so far. The final product is what will really tell in the end, but calculations show the front and rear canopies should work just fine with extra space.

-
Yeah, that, I think works better. It'll hide and ease a lot of work.
-
Yeah, I took measurements of both and the Bandai is actually shorter in length. I don't think there's any real measurements of the line art, so all anyone can really do, is take a guess based on what there is. Unfortunately in Macross Chronicle #58, there's a picture of it next to the VF-1, which doesn't seem realistic based on the fact that it seats two, and by other images that show the room available in the line art. I am basing this on the figure of the 1/60 figure for the Yamato fan racer, but in looking at the Bandai figure (which is the same size roughly, I'm hoping I can make both figures fit smoothly and have some space in it that will secure the both of them. Here's where I'm at as of today. I have started working on the front canopy, and will be using a 1mm pin for securing it in place. If it loosens over time, the pin can always be popped out and the canopy can be thickened by whatever method you prefer. If I have it just snap into a bar, with the material, I don't think it will look as well, and may not hold up as well in the long run. I also did the lower curve of the main air frame. Of course, once I get these done, I am looking at cutting the main air frame in half, to that I can try to engineer landing gear. There are worries about it, but it may be possible, and I at least want to give it a good honest try. Same will go for the landing gear on the wings.
-
Yeah, I'm aware of that. I haven't thinned it out yet on the inside, but it does need some extra thickness, as the front part of it will need to hook the "glass" canopy. It is also a bit offset in thickness from the front and back. Once I get to that part, the fine details and engineering will go into it.
-
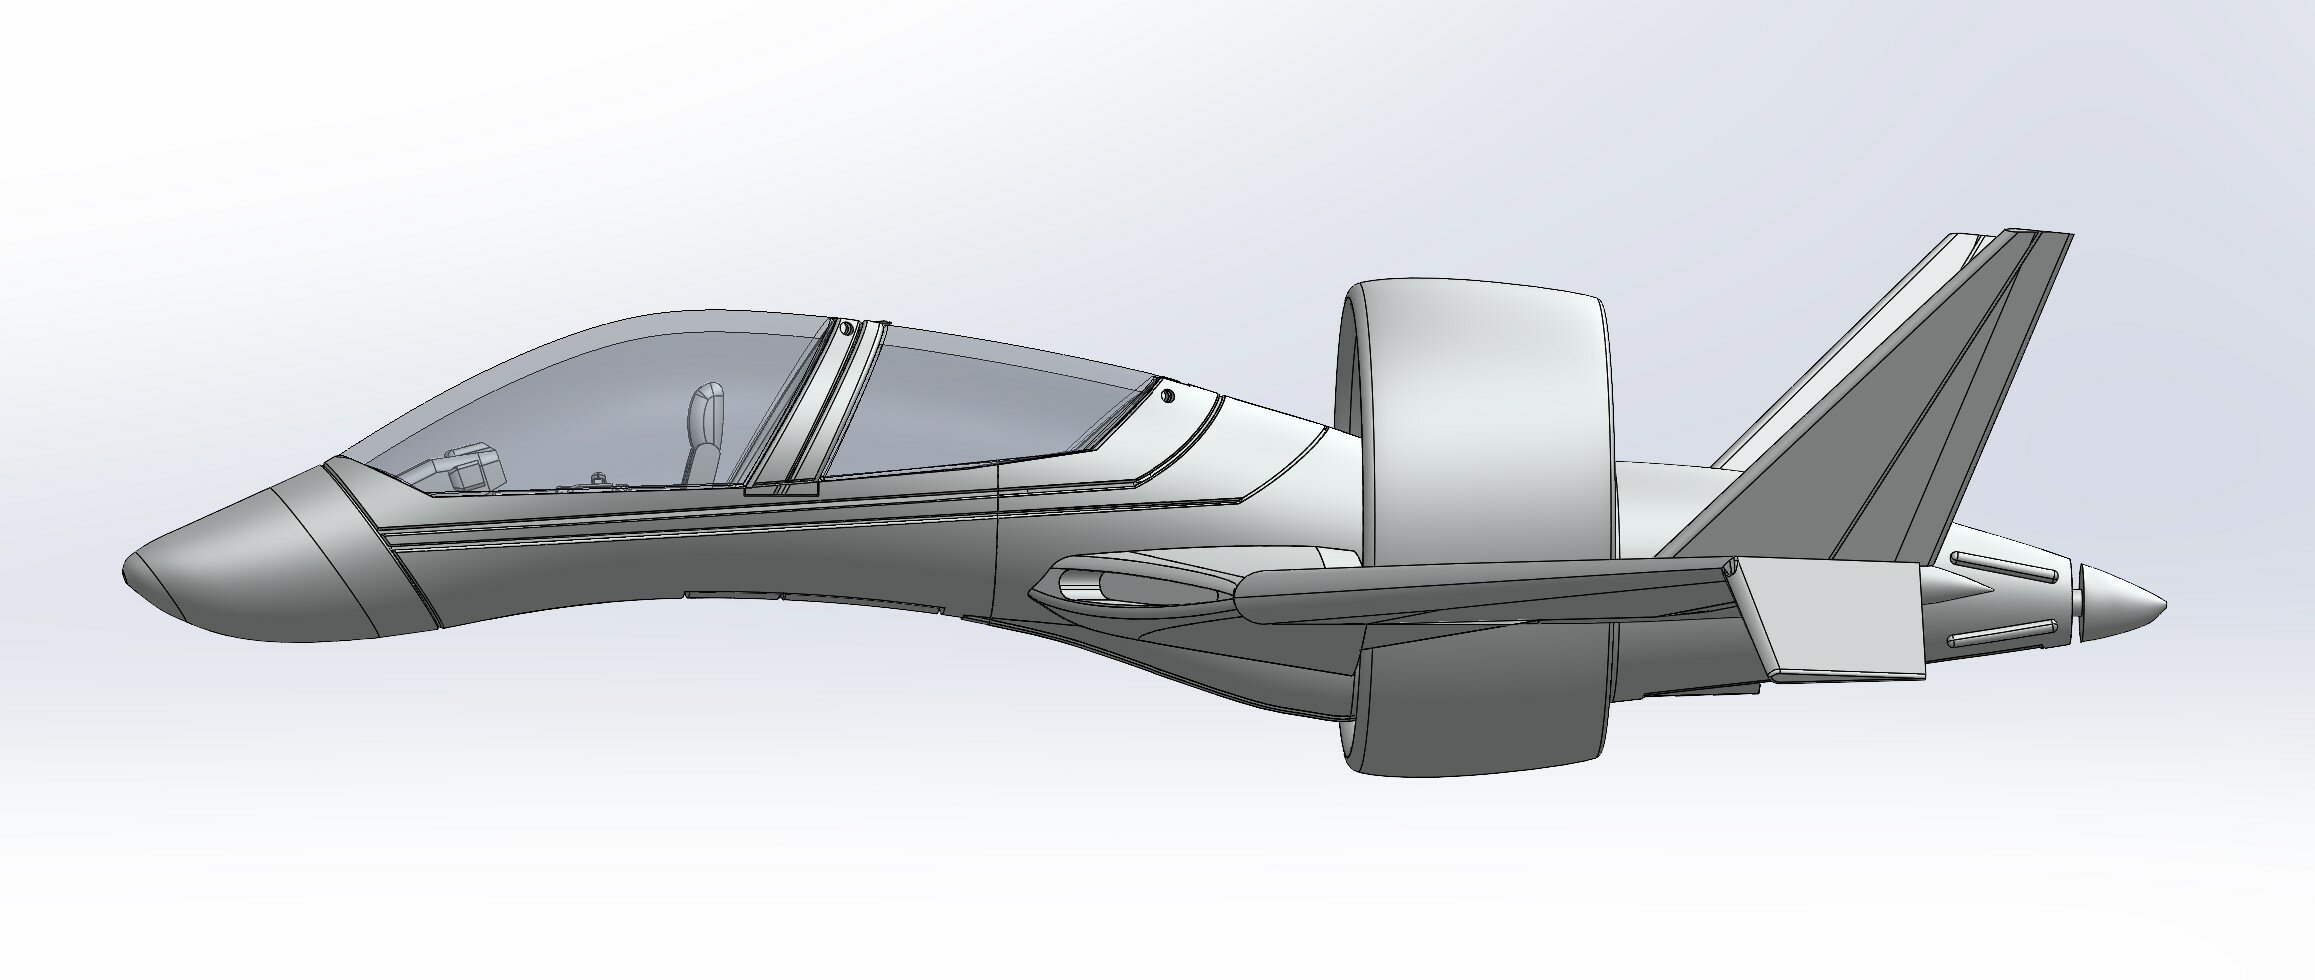
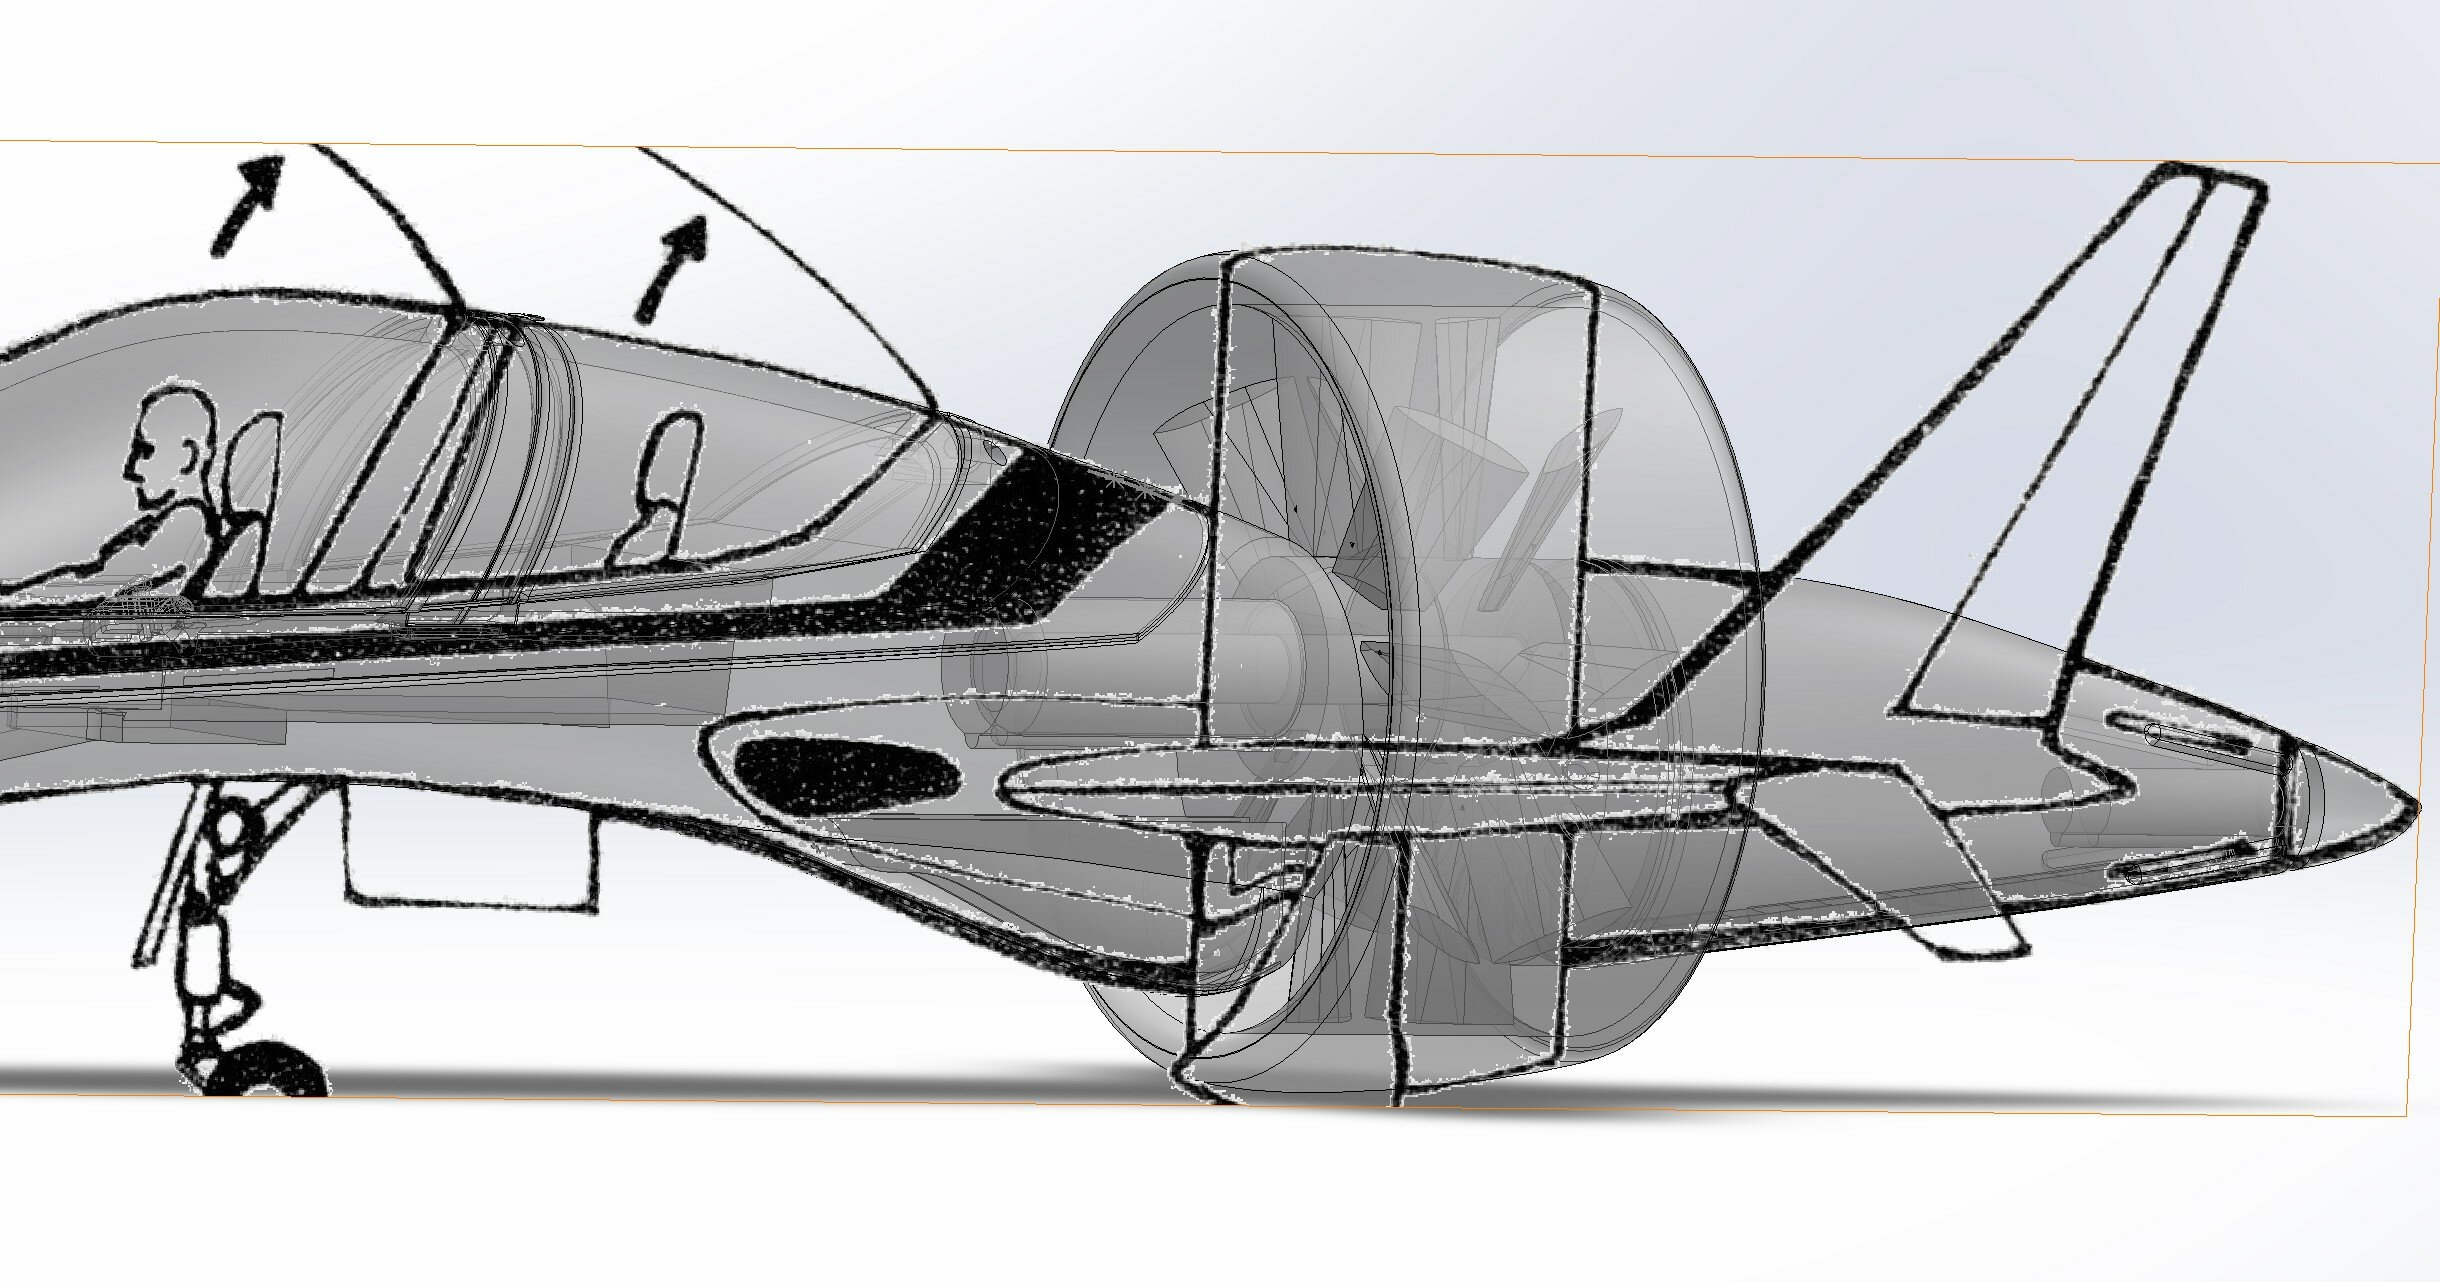
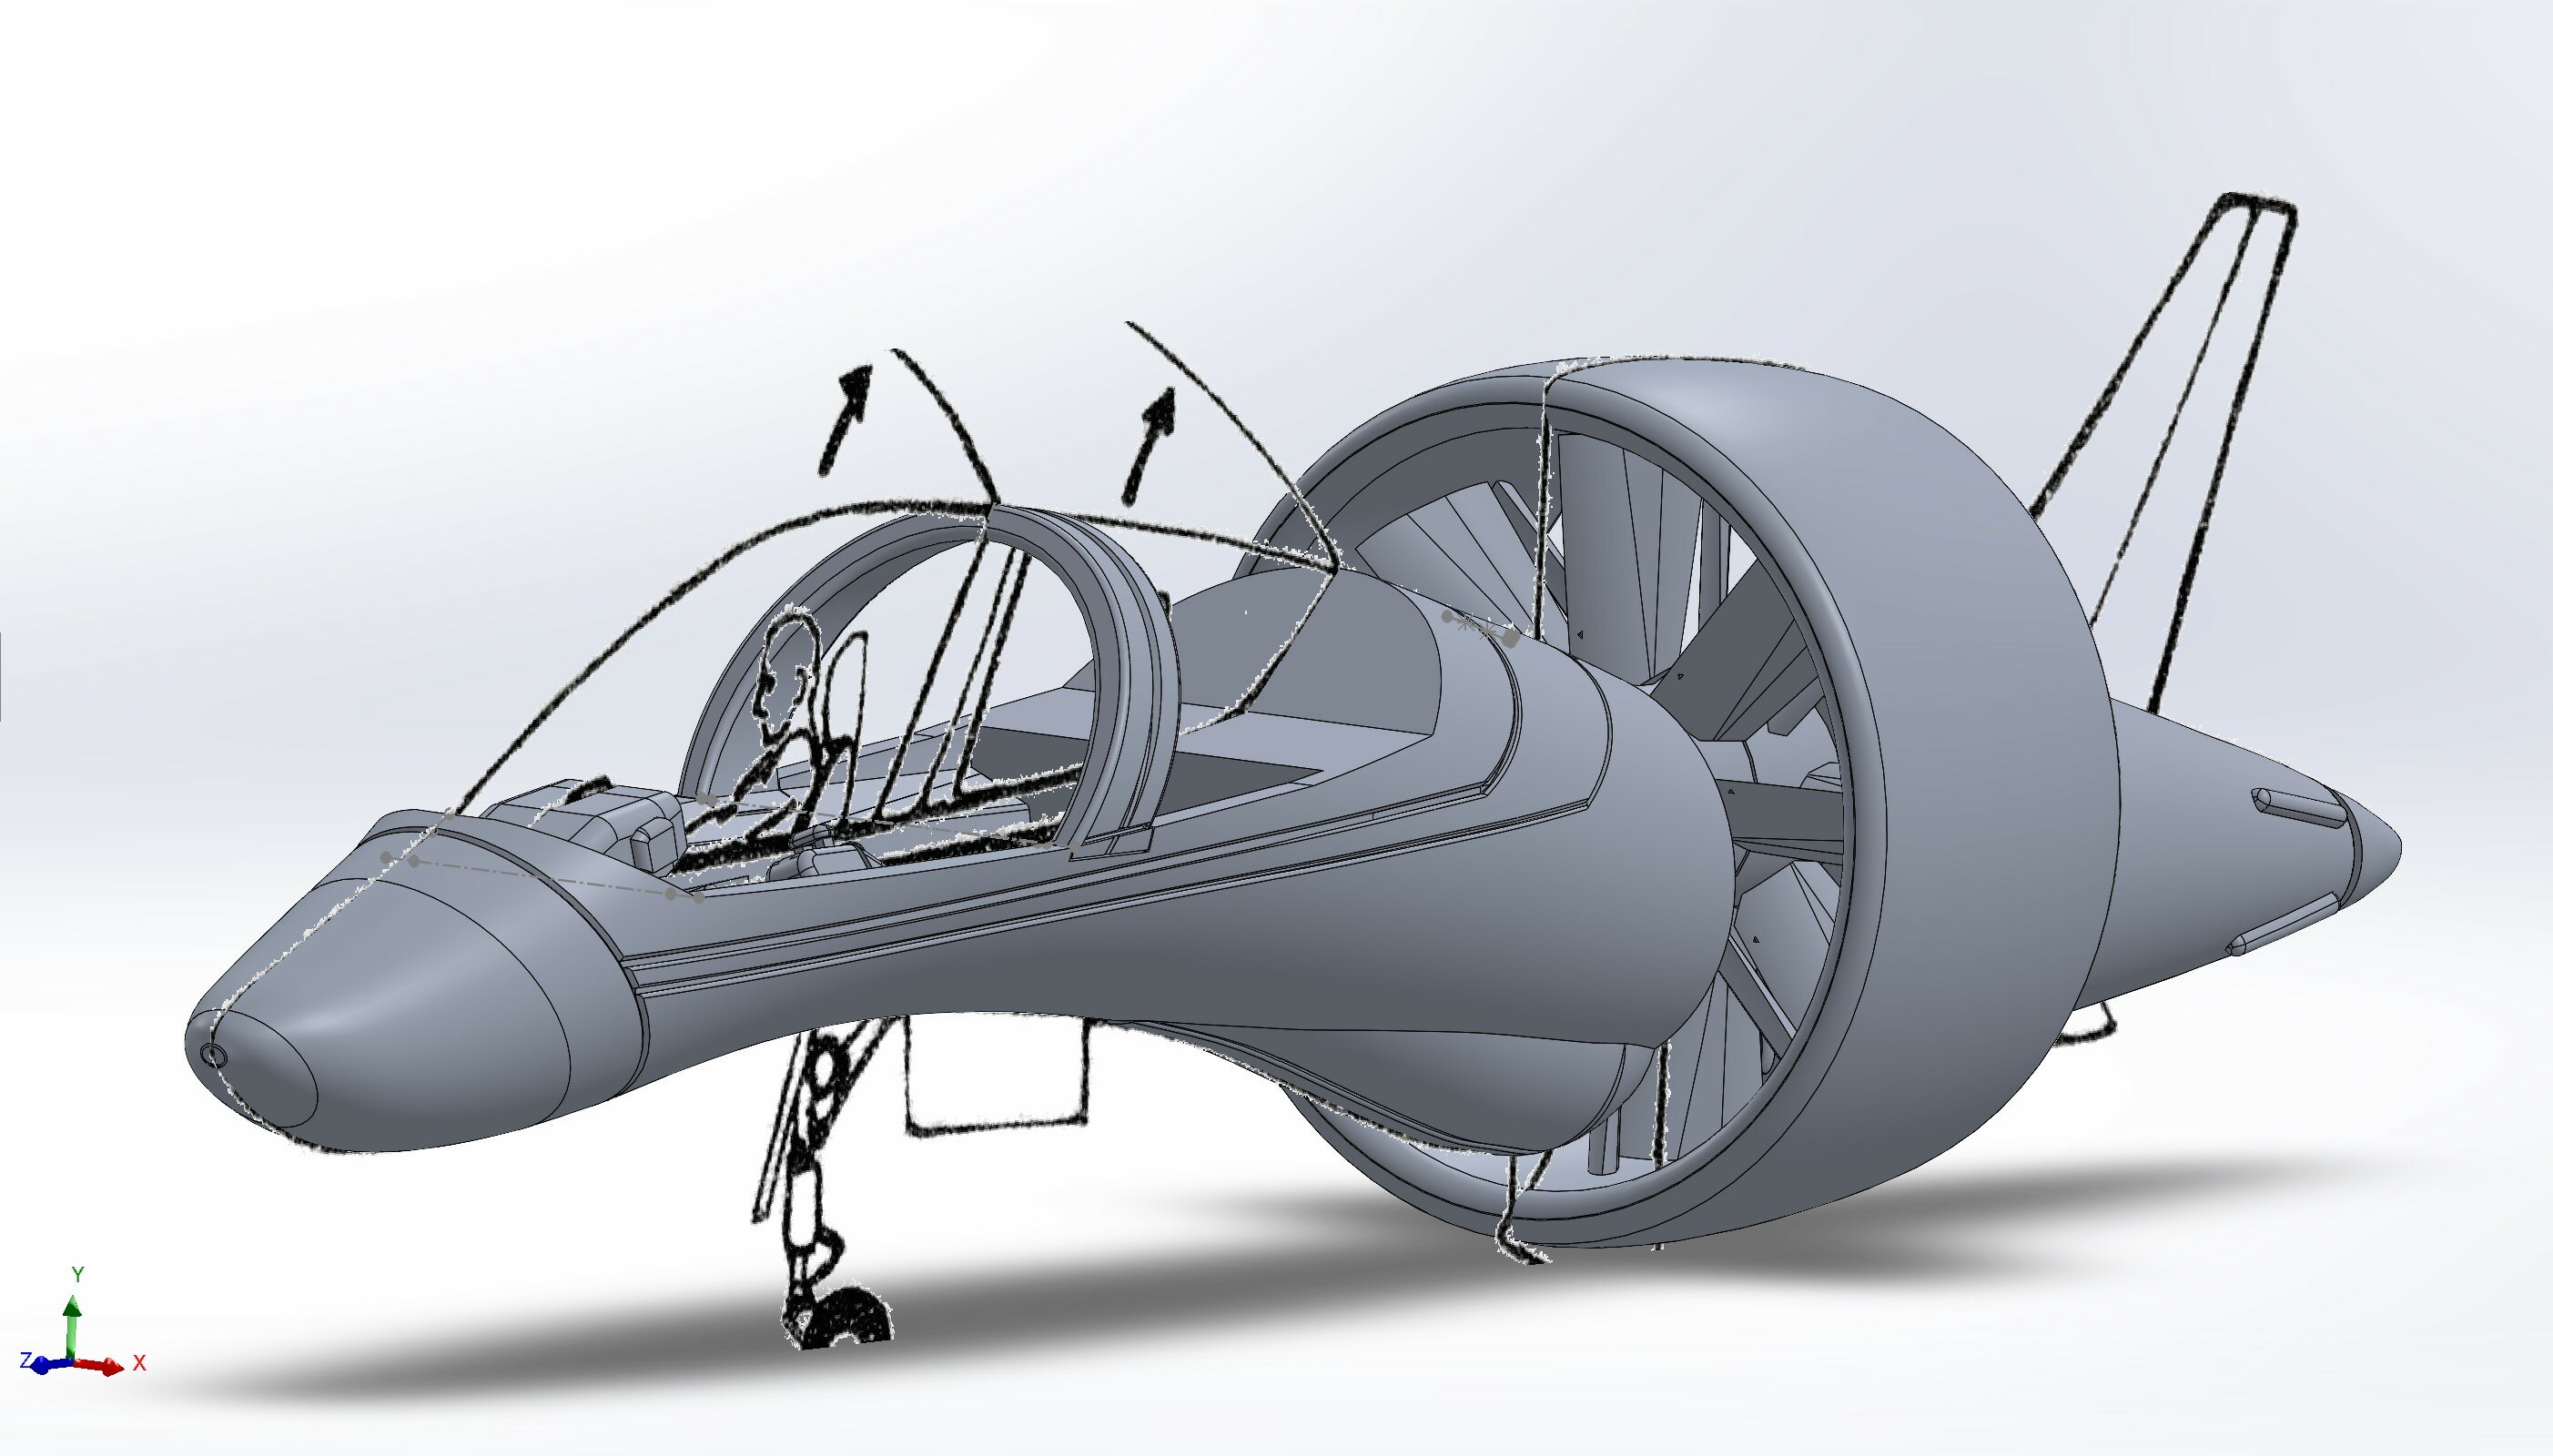
Thanks everyone. So here's a bit of an update. I've been doing a lot of measurement based on the line art versus the size comparison to the Macross Chronicle, and it looks like the Chronicle book has it way off from what a real world size for a 2 seat jet of this design would actually be. That said, I'm also measuring it to the size of the Hikaru Fan racer pilot, and I think I have it right (maybe a couple 100s off if anything). In any case, most of the cockpit detail is done, save for some small cleanup, but next I will be working on some detail for the rear seat area, as well as doing the loft for the bottom curvature. You can't see it, but the nose cone is a separate piece so that I can cut the main body in half to allow for landing gear and canopy hinges. It's coming along, but it is going to take some time, as I have a lot of things coming up the next couple weeks, but I'll keep updating as I get things done. I'm hoping I won't have to scrap the idea of being able to open and close landing gear. I may need to play with some of the line art to make it functional, but I know for the front landing gear, the wheel will have to rotate 90 degrees to leave enough space for it to fit. I'm still not great at Solidworks, but I've gotten good enough to make this project, so I'm looking forward to having this be my first project I can print on the new giant 6K printer. Both fans will also turn as well, so it's looking like it'll work quite well so far.