Tage
-
Posts
194 -
Joined
-
Last visited
Content Type
Profiles
Forums
Events
Gallery
Everything posted by Tage
-
Ah nice man! looking cleaner and cleaner!
-
Nice work Valhary! It's really coming along! This may be because you're still assembling him... but noticing a few gaps between a few parts and this it was a little tighter on mine... just wondering if a couple things need an extra sand down just to allow the space for a few things to fit more snuggly?
-
Ah it's really coming along! Shame about the colour being slightly off. But looks like it's really coming along!
-
Amazing Xigfrid! Just looks so so good! Will be ordering one of these for sure!
-
Looks great! The background adds loads of drama too.
-
The foil is a great idea! I'll remember that one! Clean painting work too.
-
Wow, amazing how a bit of primer really makes the details pop. Nice work GMK
-
So cool! Valhary - What paint did you use to get those colours? or did you dye the parts? Has a really nice matte look to them.
-
Looks good! do you know what colour scheme you're going to do it in yet?
-
Amazing! Keep up the great work. I've always got a soft spot for this Valk.
-
Awesome work fella - can't wait to see it it colour. So glad you kept going on this one.
-
oh wow yeah this is amazing. Looks like he really can move too!
-
Wow had no idea about that dye technique. Would just need a clear top coat afterwards. Especially on those black parts... that guy really should have been wearing gloves lol. Looks really good though.
-
Oh! Hey good lookin'
-
All good mate, I get a bit nervous even with mass produced kits, let alone bespoke ones like this! Amazing photos! So surreal to see someone else putting him together!
-
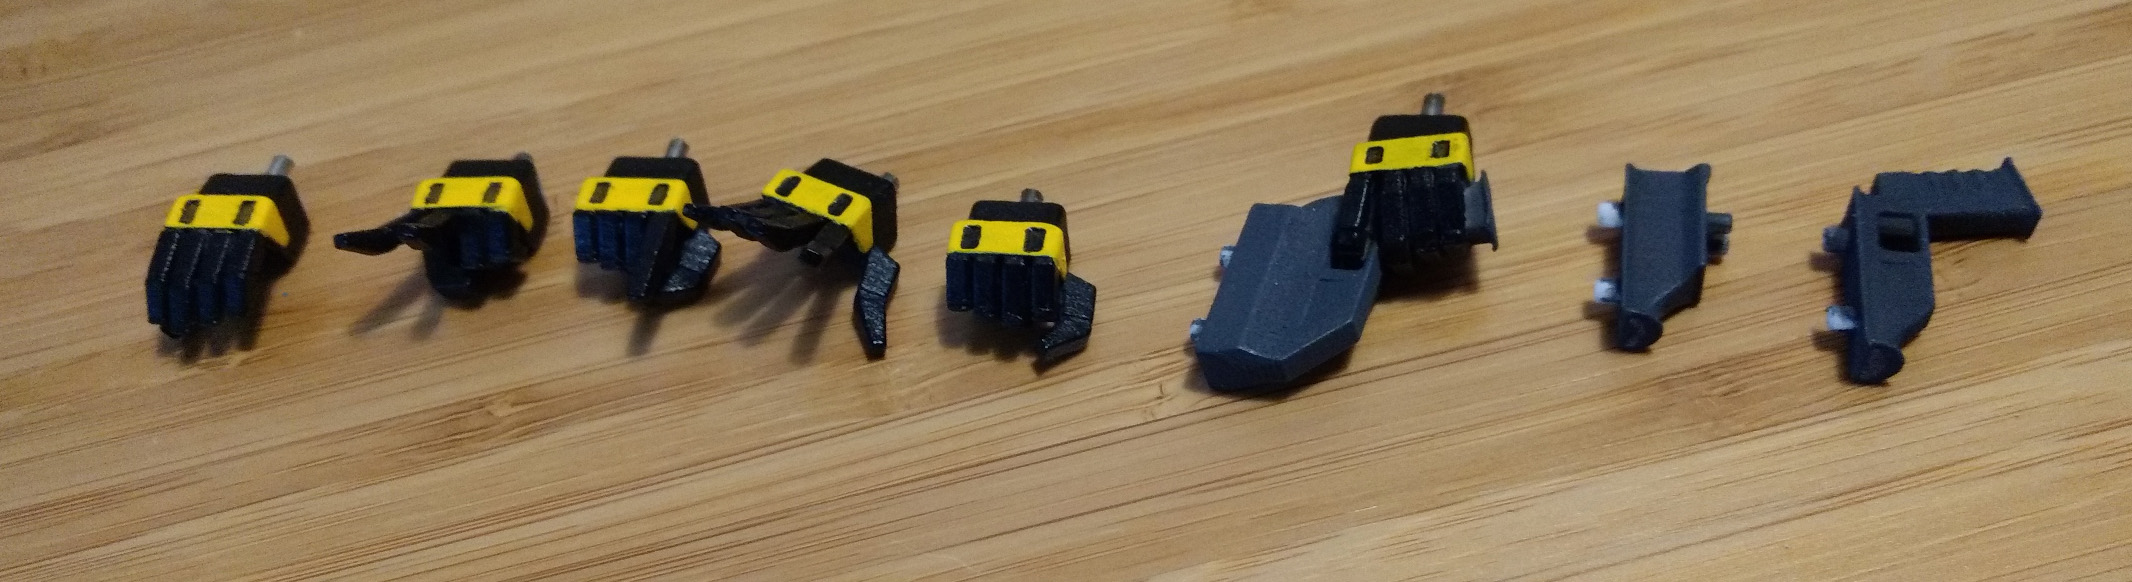
Hey man. Ah yeah you're totally correct with all those parts. For you guys, I gave an option for either an empty seat, or one with the pilot. In the same 'A' baggie. The pilot is already in the seat. So just pick which one. If you go no pilot option, I'd cut back those side nubs. They are just connectors to the rest of the parts. That top F part. There are 2 of them, again with a little connector between them. Separate them, and the instructions are always '#-R' meaning the robot's right side. So just match the correct one by looking at the instructions and piece at the same angle to figure it out. And that last part yes you're correct again. I don't think it matters too much with that piece which one goes where. (left or right side) Just give it a quick placement check with that wrist part to see if the hole where the hands will go is centre enough. Hope that makes sense.
-
Fantastic! Thanks guys. Honestly if you have any worries give me a yell. Glad they arrived safe and sound.
-
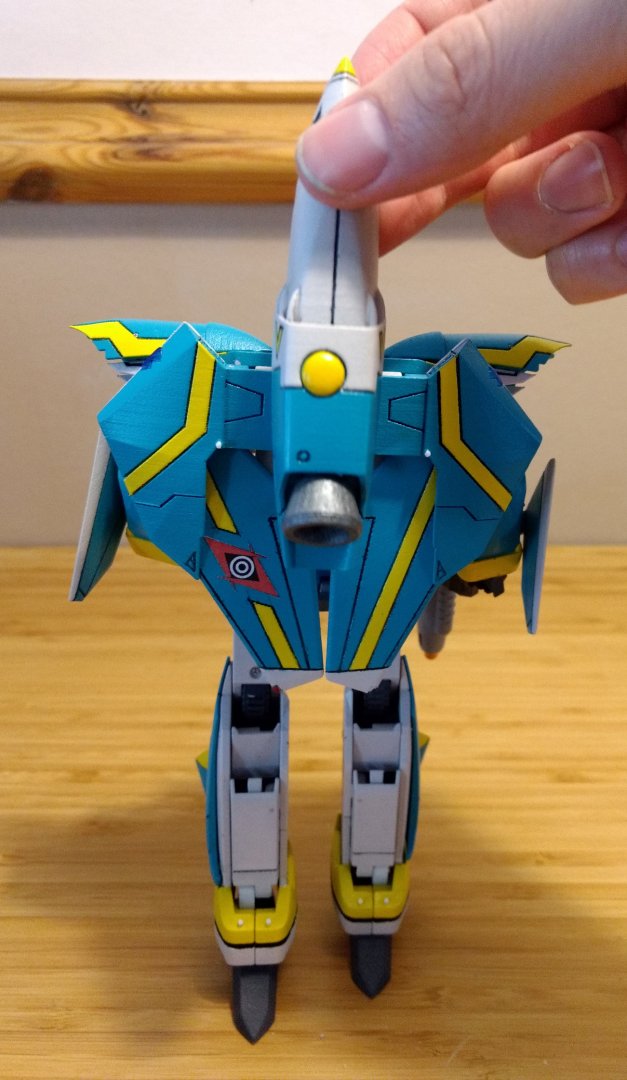
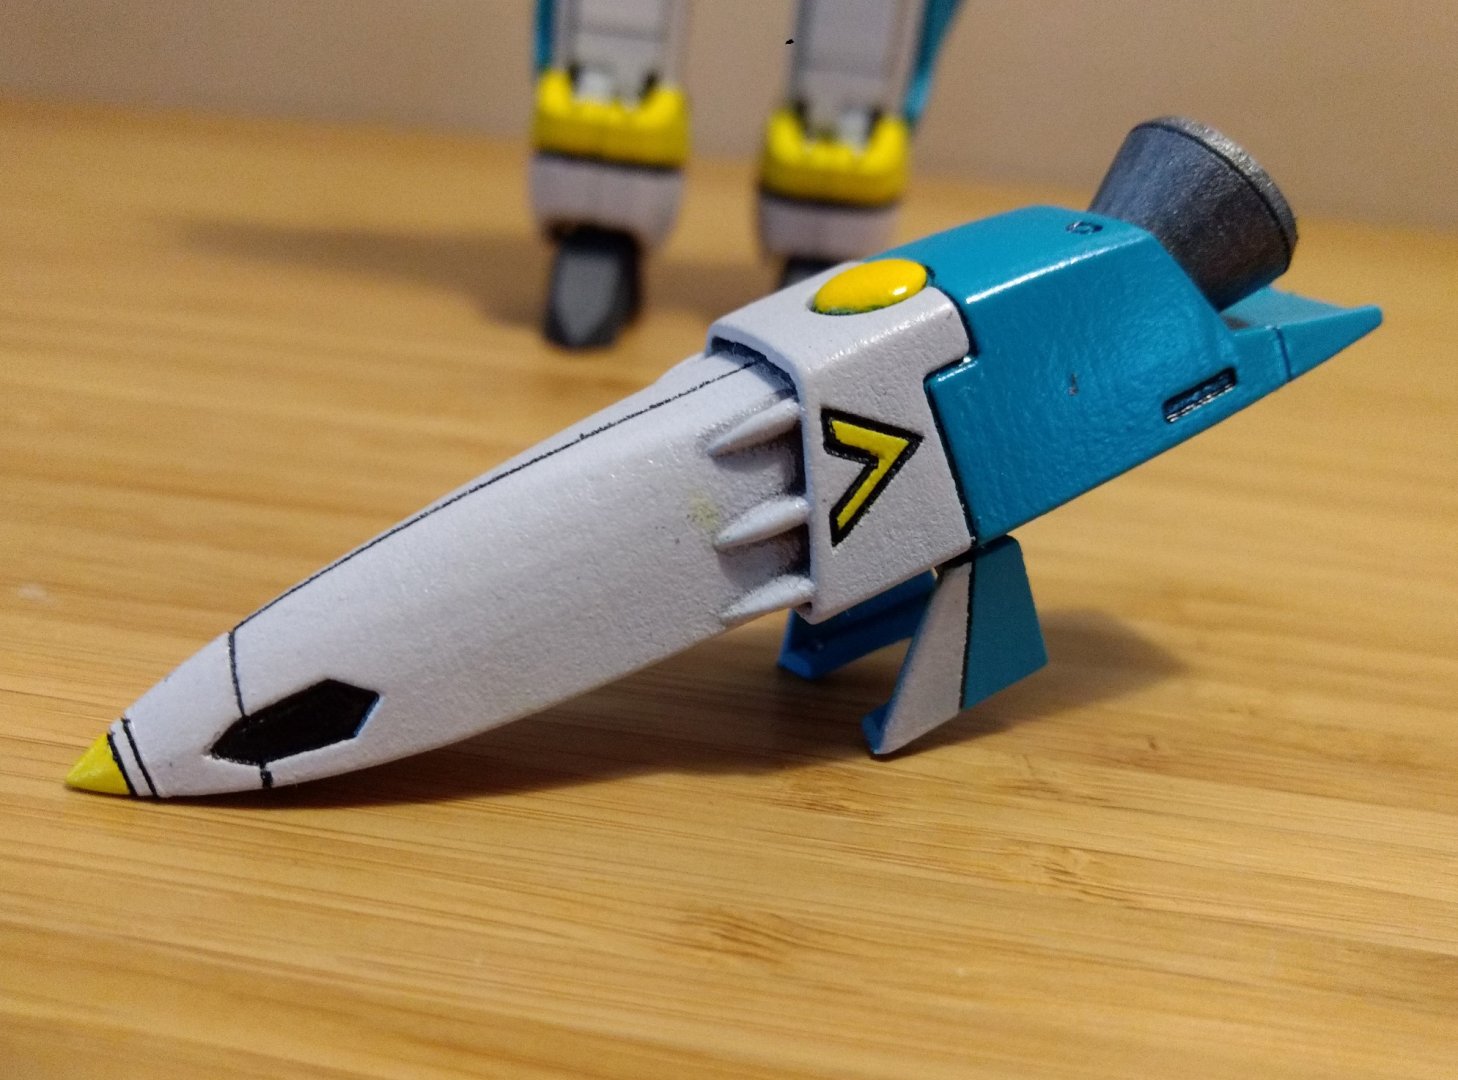
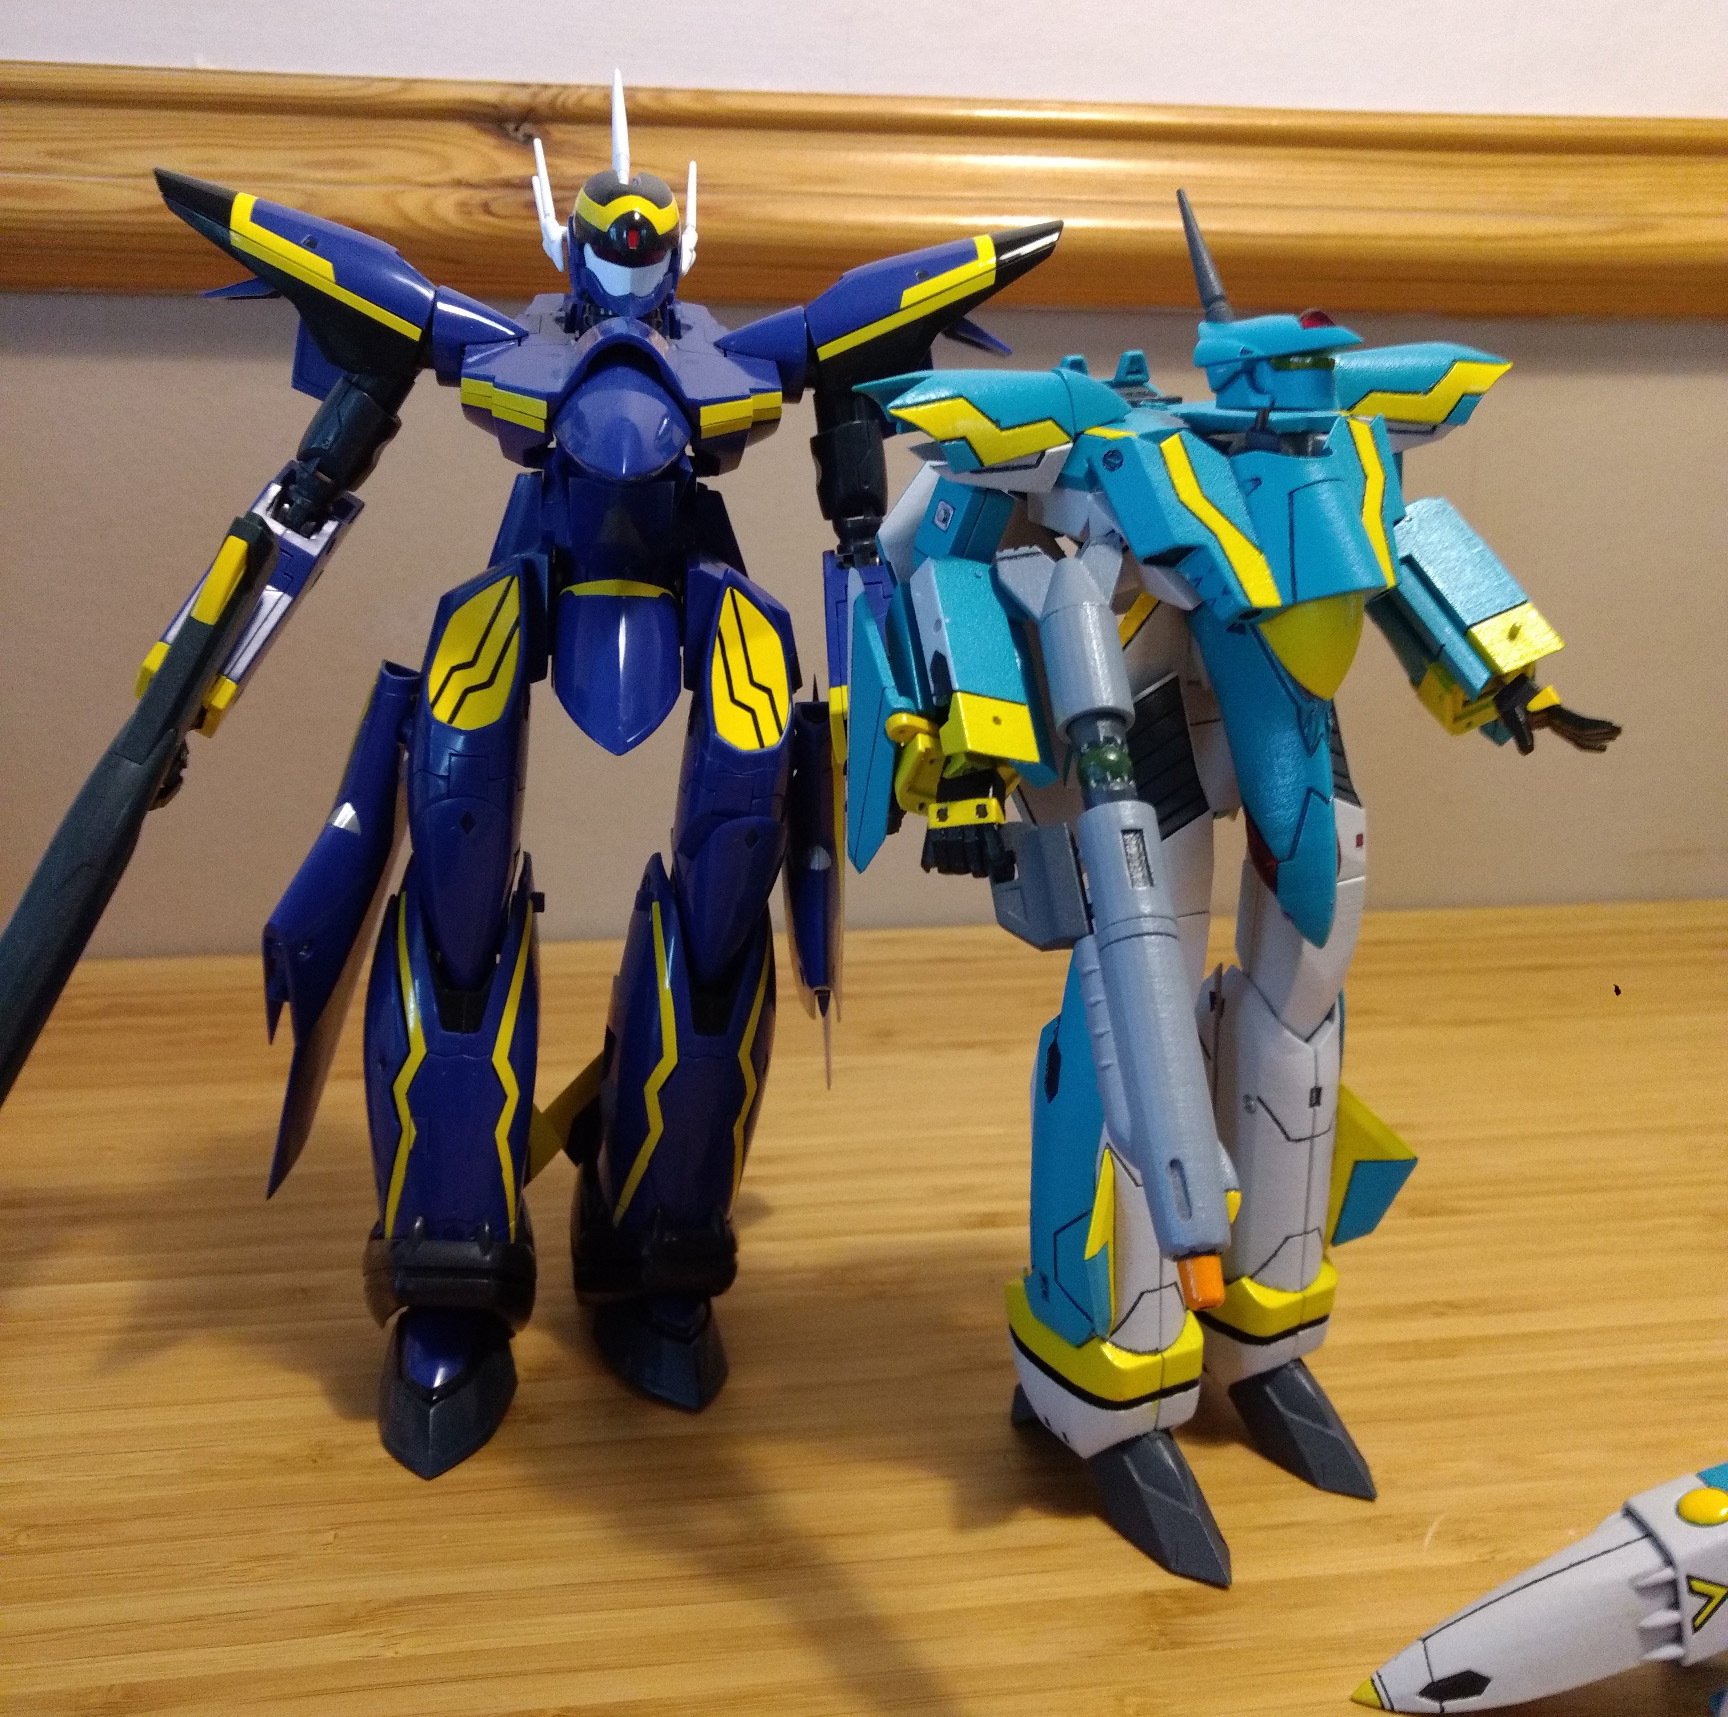
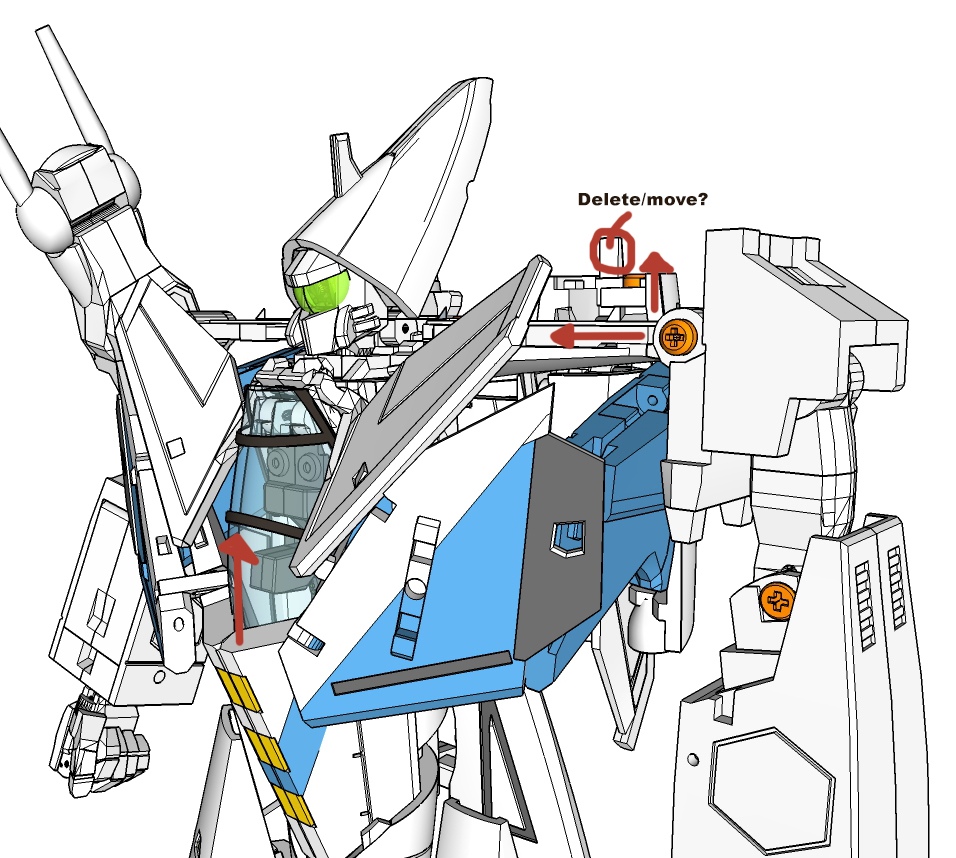
Xigfrid, honestly this is so so good though. I remember comparing the newer 1/60 VF-1 toys when i got them right next to the YF-19 (my fave) and thinking the VF-1 was so small. Then with the first round of the VF-5000 print comparing to the VF-1 and thinking, 'Oh no this is so so small' But honestly I think your scale is spot on. Plus your other models have been larger even as a 1/60 scale. Don't fret! The only few finesse things i can see/think of would be... (that i'm sure you're aware of and have been mentioned all ready really): Nose - yeah if there is a way to make it smaller/skinnier that would be amazing. But understand you have a lot of inner working stuff going on. So maybe it's even just the shape that could change slightly... just a bit more thinner under the cockpit area. Also, and if you could find a compromise for the size of the end of the nose so it's a would appear a bit smaller in robot mode that would be great. Shoulders - Not too sure how the join to the body works and how much space you have to play... But one way to reduce the gap could be turning it into a sliding and lock mechanism on that top bar so the shoulder screw is actually closer to the body? I don't know maybe there is an easier way as you've already mentioned everything is so fiddly. As someone else mentioned maybe it's making the wings bigger to cover it up... I feel like just making the shoulder joint closer to the body will just help. Top Air intakes - By top air intakes i'm talking about that whole tail fin section. I think in robot mode the need to protrude up a little more. It's such a loverly detail that comes with most VF's that normally from their 'backpack' part. You gotta show them off. Also is there a way you could get rid of the plastic pin in that part? Is it for stability in Plane mode? Just wondering if there is another way to keep things together while flattening out that area. Legs - If they could go a bit bulkier, that may match the artwork a little more. But that really is a personal aesthetic thing at this stage. I just prefer the bulkier valk styles like the YF-19 compared to the VF-25 or even the VF-31. But i do feel compared to the bulk of the arms, the legs feel a little skinnier comparatively. Heat shield - Honestly don't know the best way to fix this as it would probably impact the wing size too much... but if you could think of a way to add just a bit more height to the heat shield area just so it can be a bit more in line with that next 'module' of the canopy. Want a better word that 'module' Hopefully the pic below helps a bit more with explaining most of the above. But honestly man, it's great! With the feedback, you'd know what you want to do with it really. And honestly i'd pick this up in a heartbeat as is! Any improvement from here is pure polish! Chat soon man.
-
Oh dear. That as a 1/72 model and Xigfrid's 1/60 to go please. Take my money.
-
Yeah i'm properly loving this. Can't wait for the photos Xigfrid! :-)
-
Xigfrid Yay! This looks amazing as per the rest of your work. Can't wait to see a print of this. Will certainly pick one (possibly two) up myself. :-)
-
Ah thanks M'Kuun! That's really made my day! There was a couple points in the process where i was honestly was thinking I should really just make this a non-transforming plane model and leave it at that. But actually trying to keep semi-weekly updates on here really helped the process i found. Like a Diary of sorts. Plus getting loads of help when things went wrong (you know who you are) And man yeah i really do love the Variable Glaug. It's just so unique but still has a very old school/original Macross vibe in its Glaug-i-ness if you know what i mean. But yeah that would be a real challenge. I'd love to see your lego work. I saw that guy's work that did the lego YF-21 recently. Almost Super Deformed in proportions but not quite, but still was really just amazing. The rest of that person's work on their Tumblr or Flicr (can't remember where the deep dive internet search took me) was properly good. Thanks again, chat soon.
-
oh man... Getting the initial S.H.E. Kit... another 1/144 VF-5000 kit that actually had a fast pack i could reference more easily... about 3 and a half test prints as this being my first one of these sort of things... paint... bought a new air brush and extractor fan (probably doesn't count, but still sorta does) I'm probably looking at bordering £1000 if i'm tallying it up properly if i'm being honest. Some where around there I reckon. Of course would have been less if i wasn't such a newb learning on the go and didn't mess up certain things on my first few test prints. But it's all part of it.
-
Thanks Guys! glad you like! And hah @arbit yeah I think i have lost most of my accent. Some end of sentences still go up at the end sometimes though haha. And also I think i'm generally unreasonably passionate about Macross in general hahaha. Right, on to the next project then. :-)
-
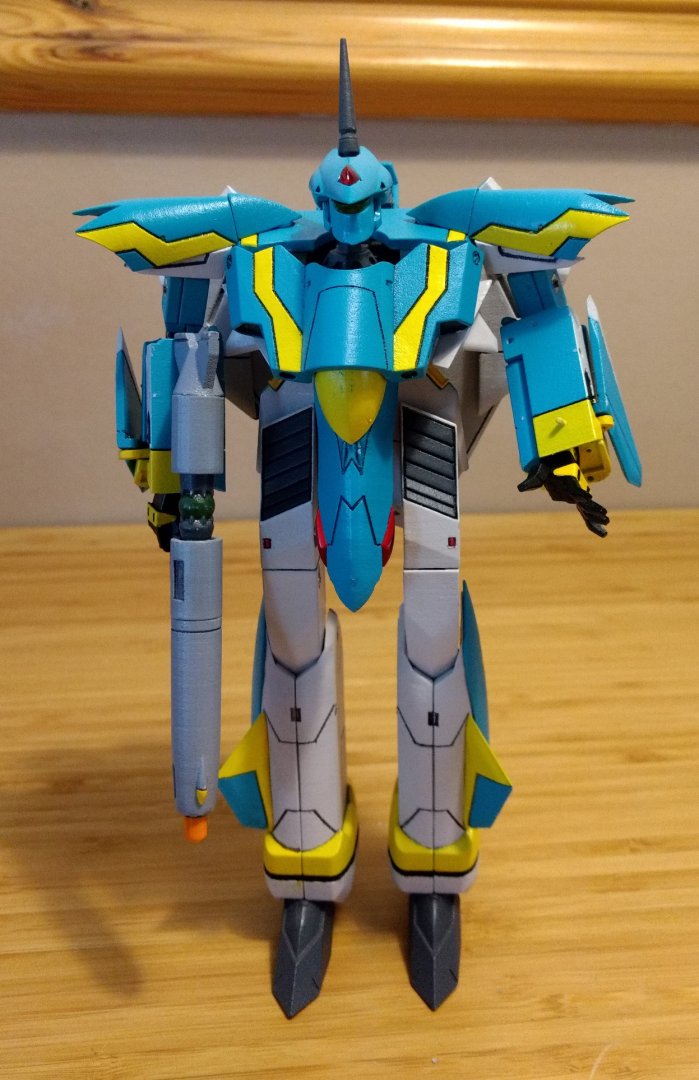
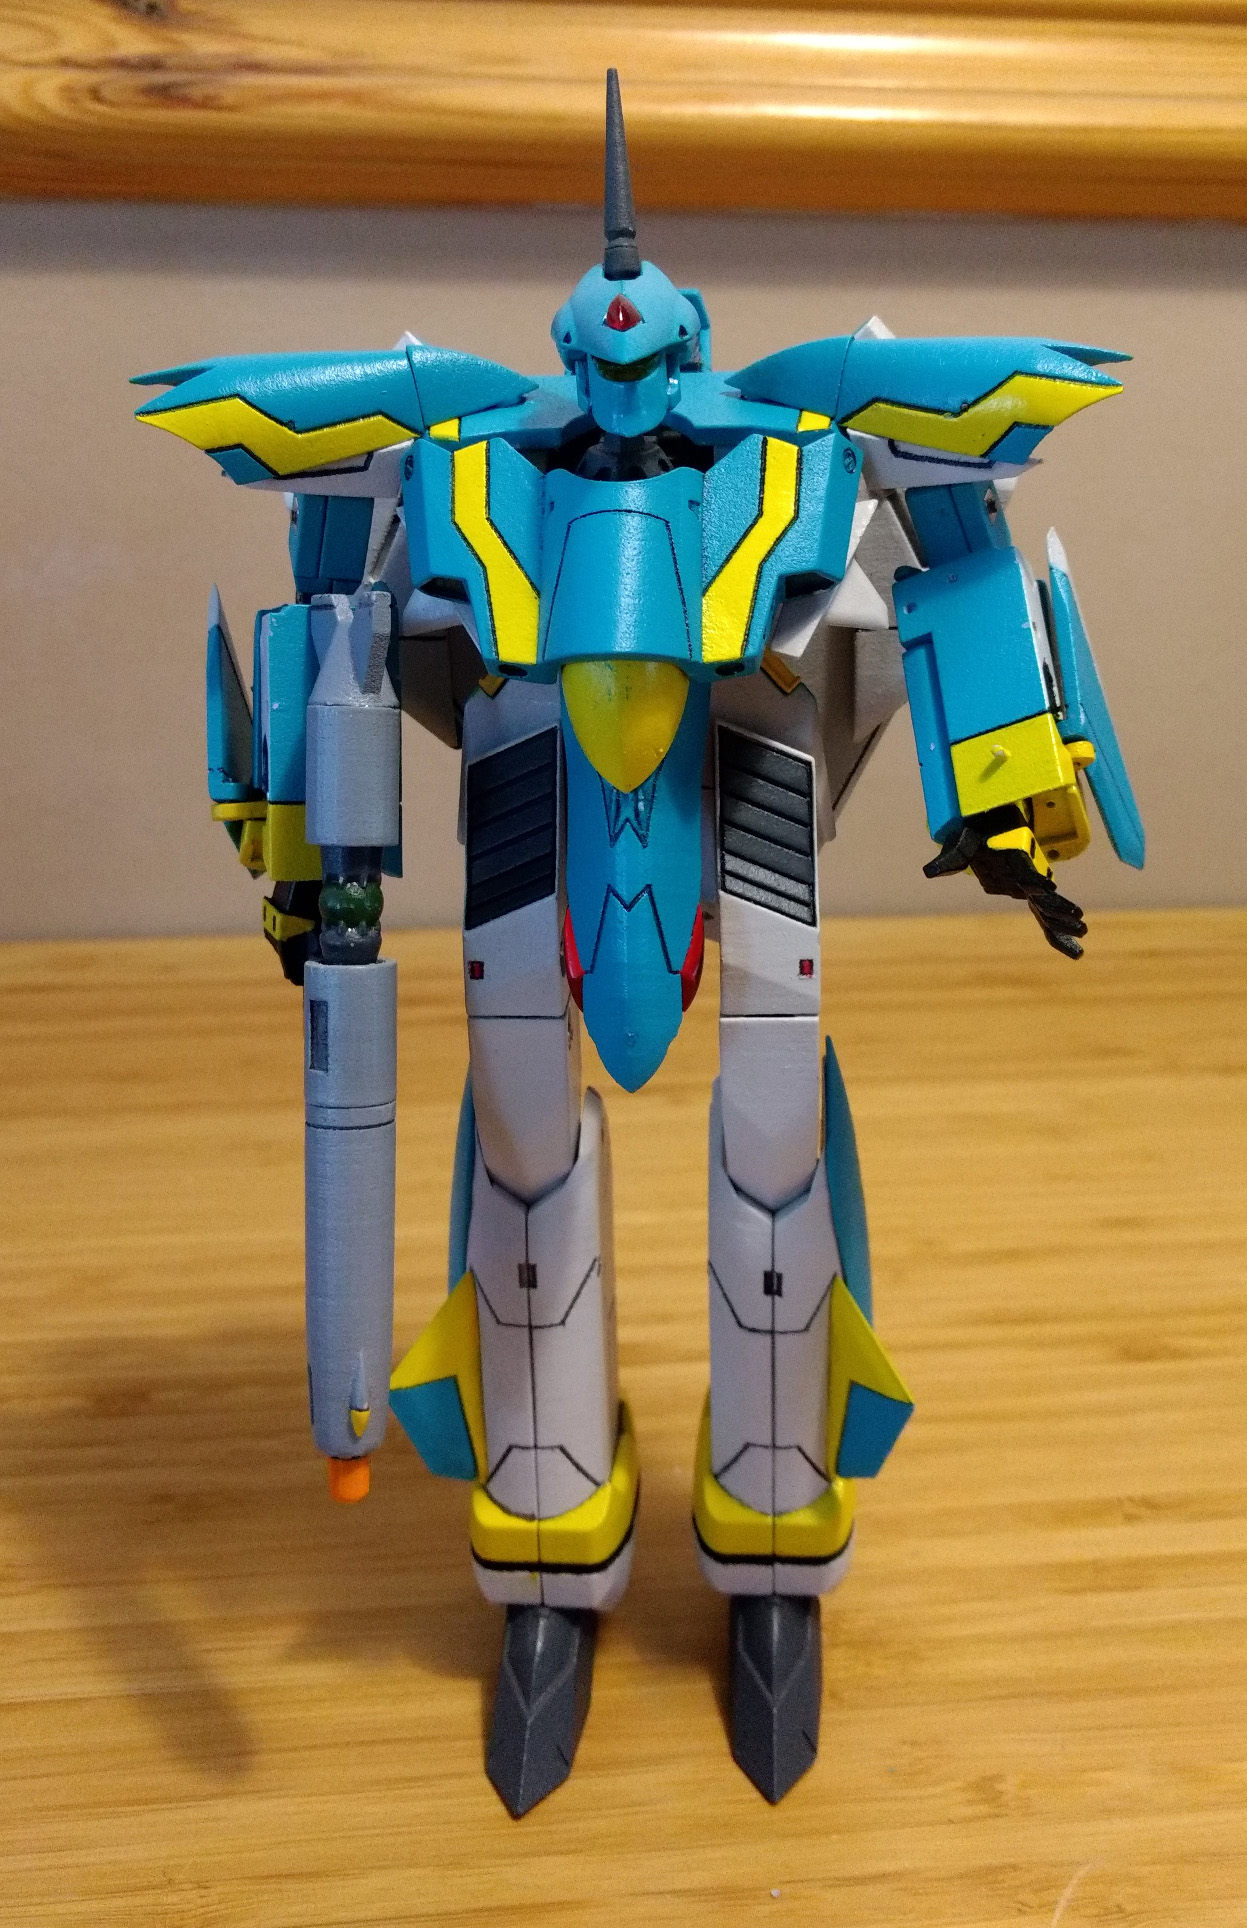
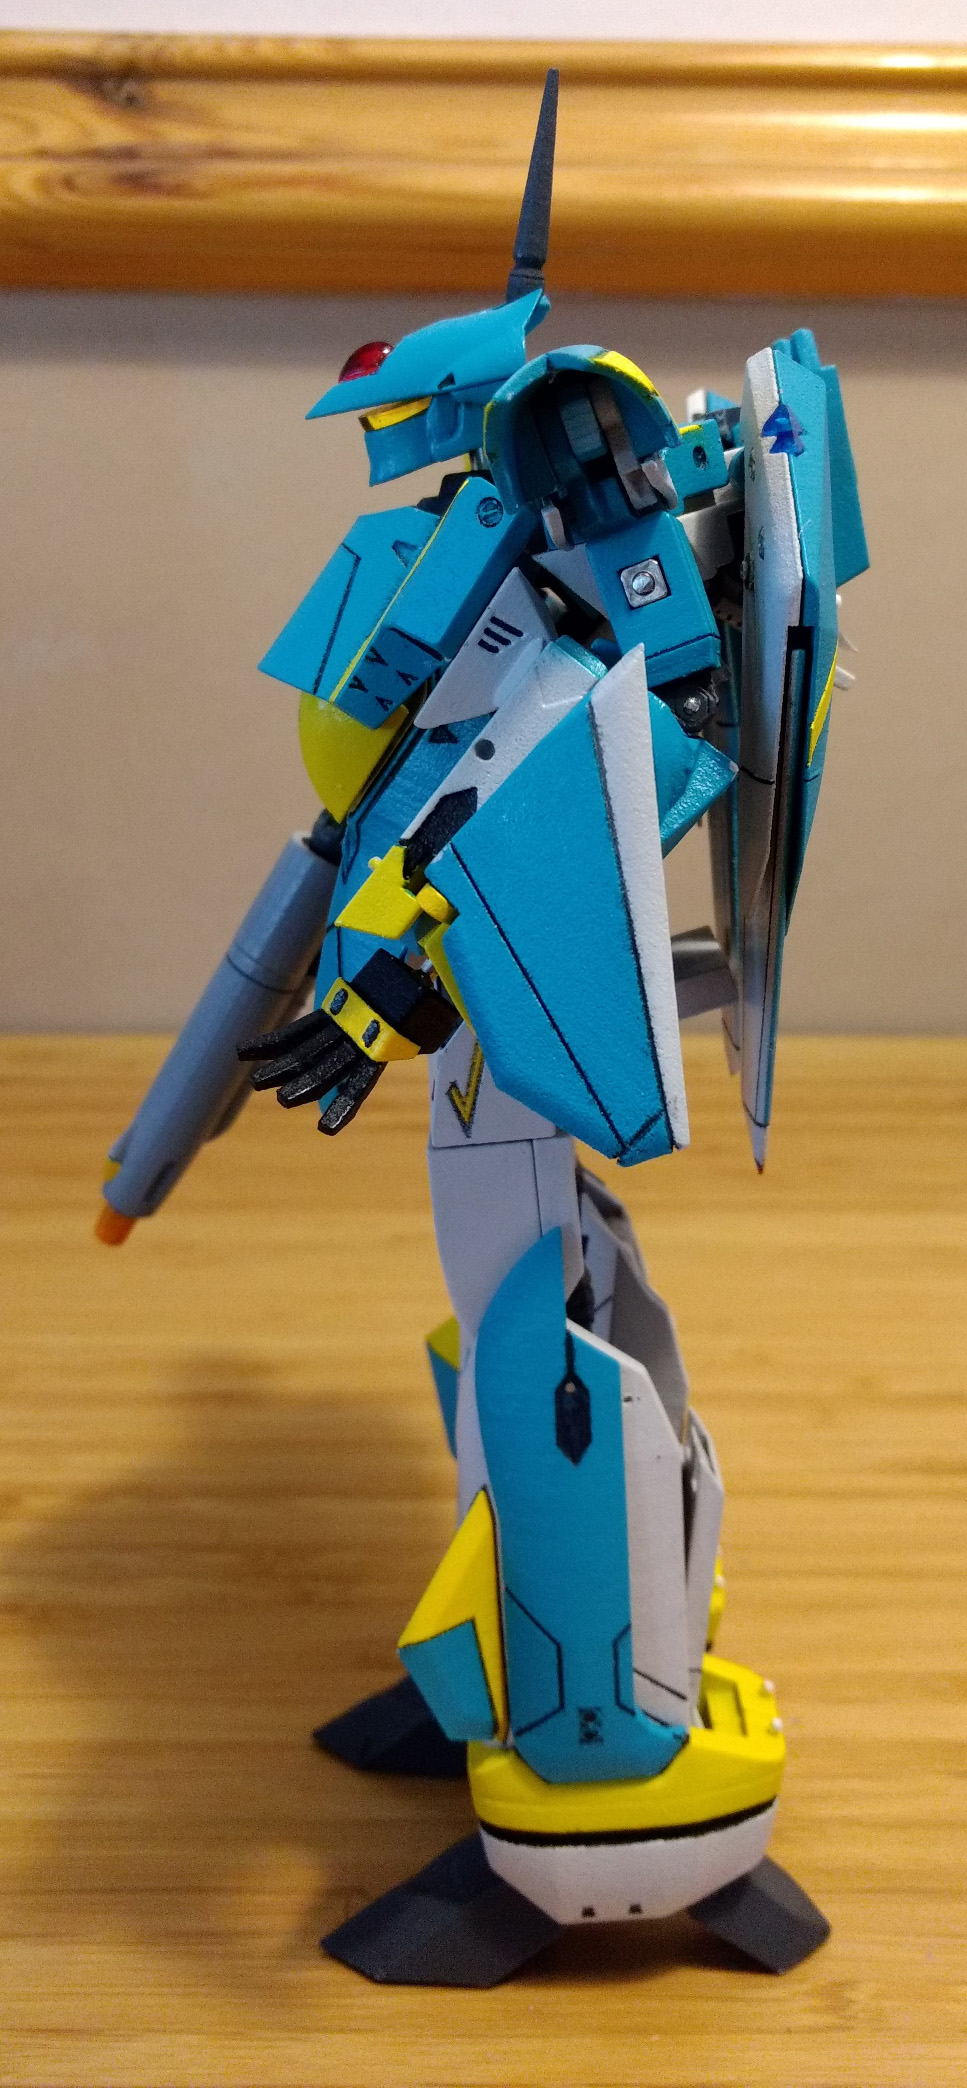
Hey Team, Guess what? It's all done! Review/transformation video here: Please excuse my weird English/Kiwi accent, and a couple things falling off part way through haha (including his fast-pack). They fell off mainly due to the over-poking and prodding i've done to this kit. Also I had completely the wrong lens on for this sort of thing so the focus gets a bit tight sometimes. Looking back at it too, i'm quite sarcastic the whole time, so don't take me too seriously hah. Overall it's been super fun. Thanks for all the support and following along over the last 2 years or so, really really didn't expect it to take that long. But meh - life... Here's a few final pics of the kit. Quite like the size actually, as he is meant to be smaller than the beast that is the VF-19.