
Kurt
Members-
Posts
735 -
Joined
-
Last visited
Content Type
Profiles
Forums
Events
Gallery
Everything posted by Kurt
-
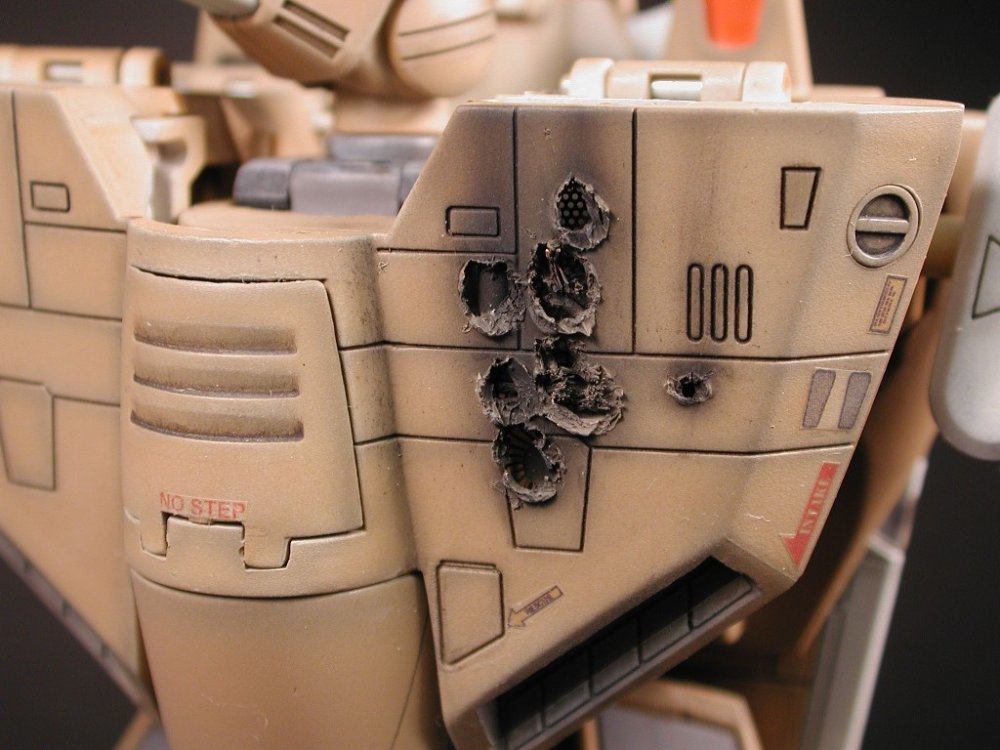
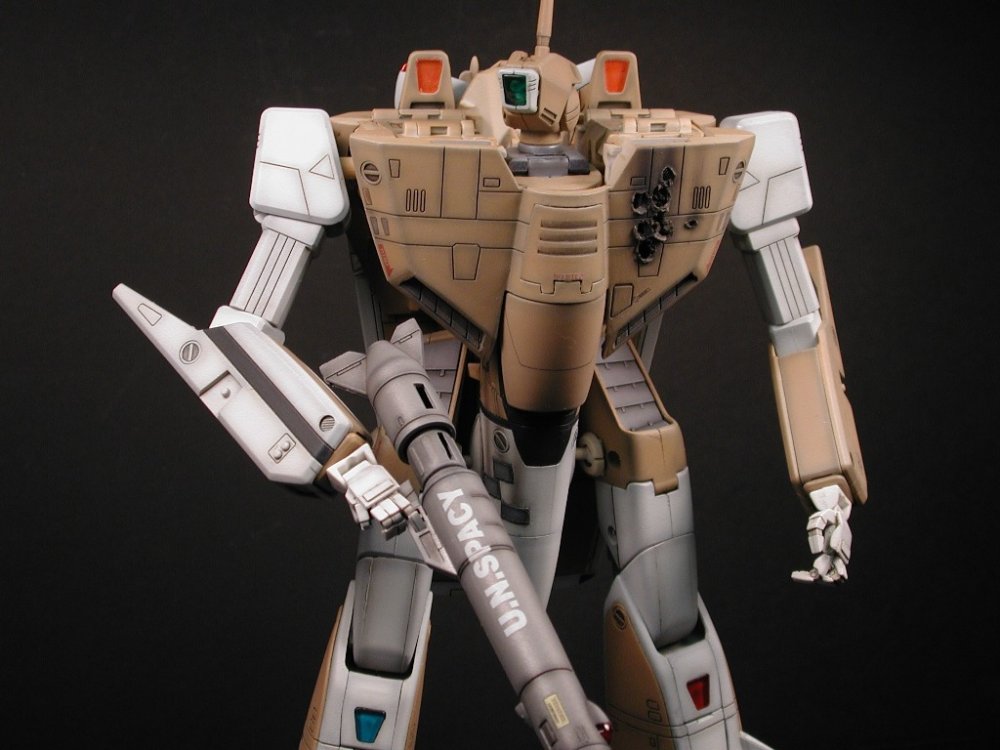
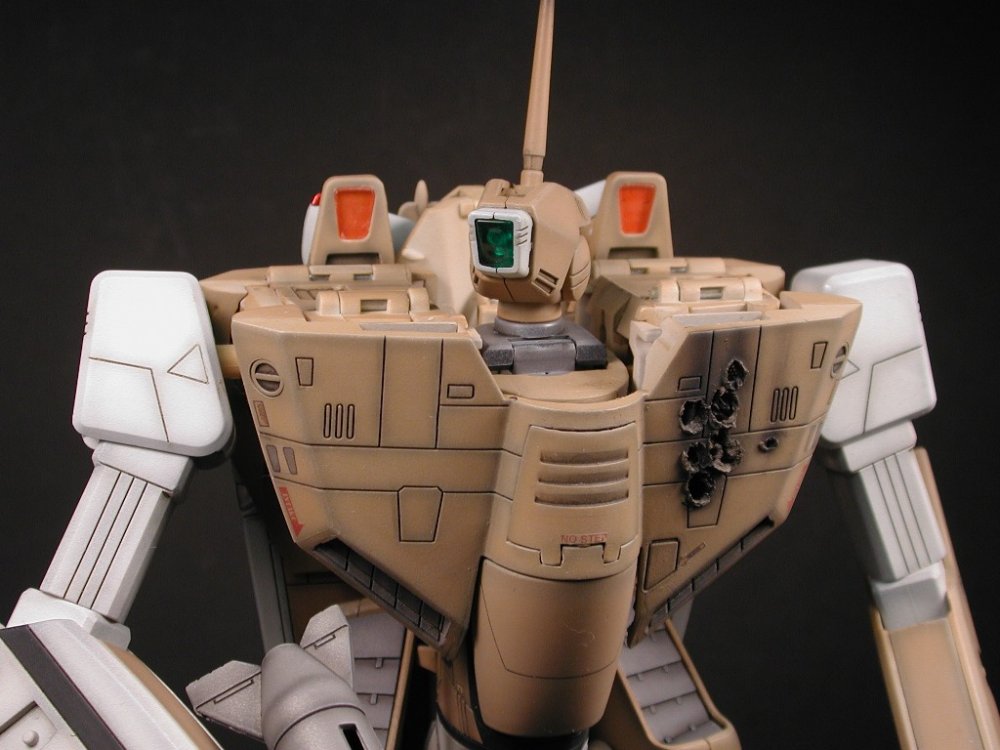
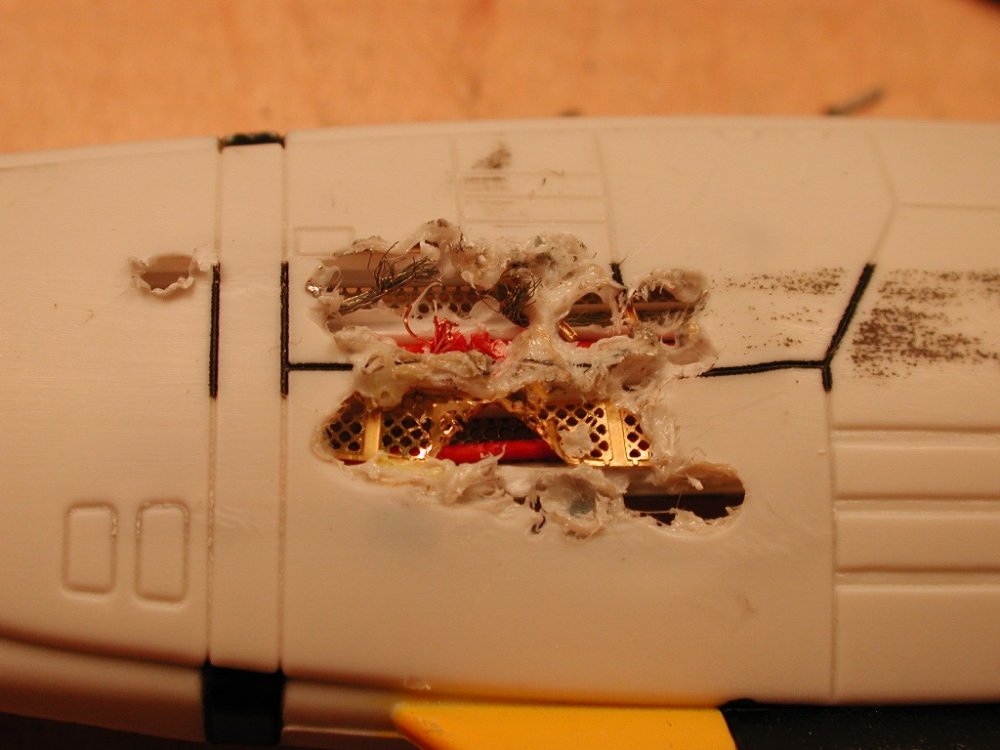
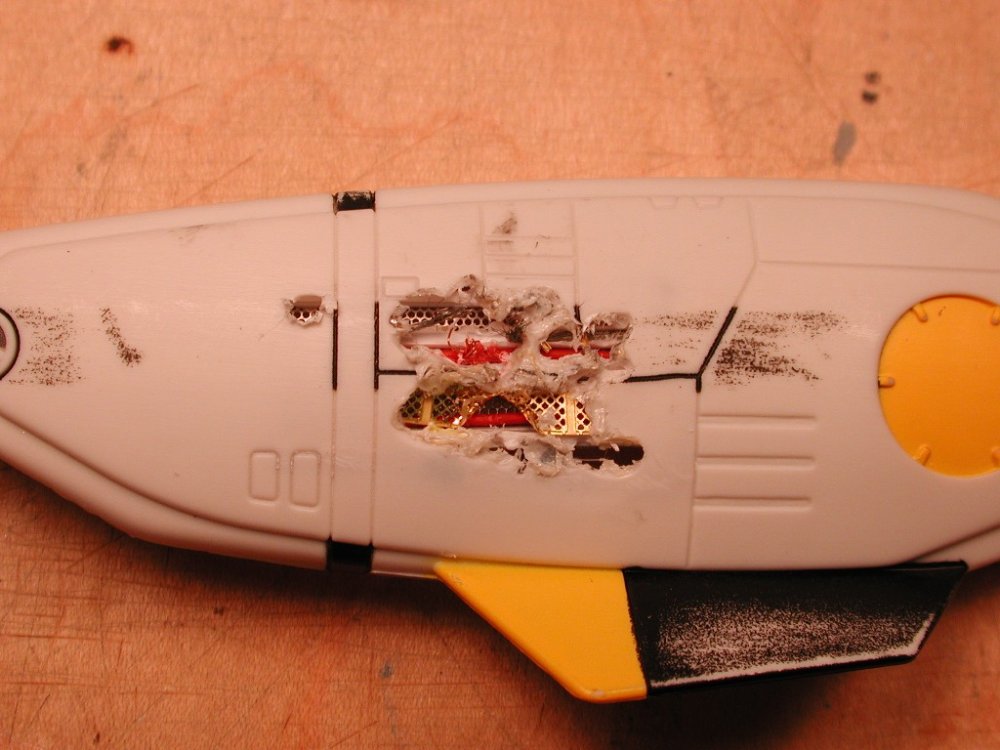
Hey everyone. Here is the damaged Cannon Fodder that I was working on. I was delayed when I realised I had the wrong shoulder. Thanks to Haterist for the parts he recently sold. Your timing could not have been better. This is not a customers valk, just a left over I had laying around. However it is up for sale, sorry for the off forum mention. I will consider reasonable offers and then Ebay if I need to. Either way let me know what you think of it. Thanks everyone.
-
I need an R-A1, right shoulder. Can be off of any valk.
-
I need help guys! Please see the trade section....
-
I recently finished one for a customer. One leg was twisted slightly. I had to shim it with some sytrene strip to even things out.
-
-
-
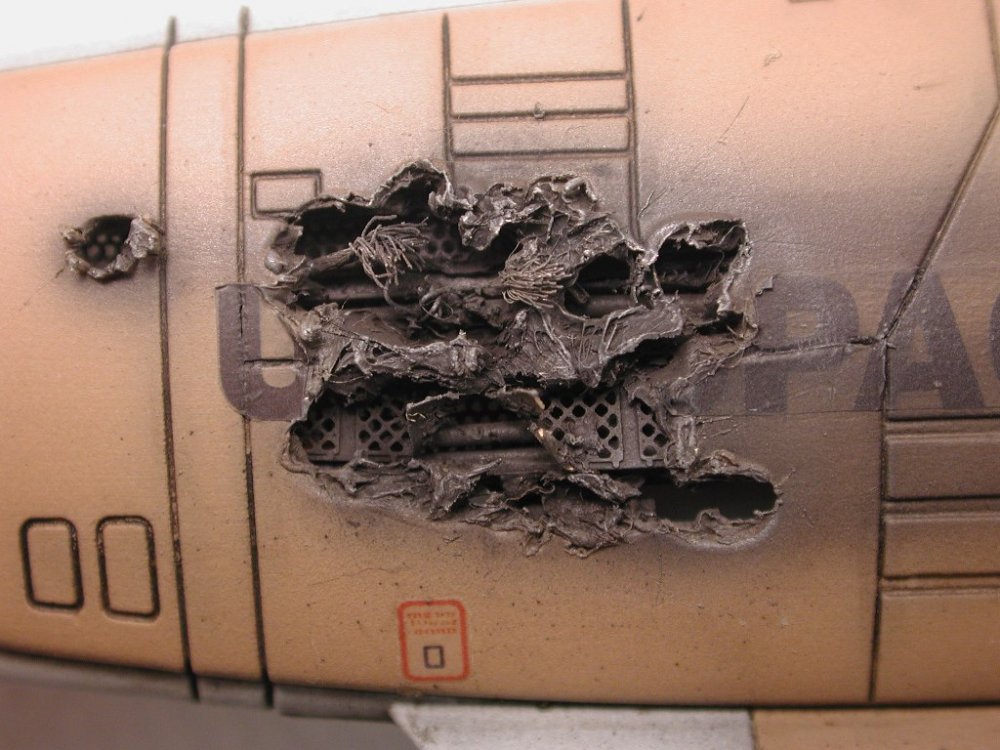
I agree, there are many references for real life battle damage. But would those really apply to this? I still think it is way open for intrepretation. I had intially wanted to do the detail of the damage look more delicate, with thinner pieces of material. However I had to keep in mind that this valk still needed to handled and transformed. As for the "bubbling effect", I actually did not think of that. I will have to try that next time. It is hard to see in the images, but due to the curve in the leg and thinning the plastic behind it caused it to sink in a bit. I think this adds to effect. This valk should be finished this weekend, be on the look out.
-
Thanks guys for your very detailed opions on the damage. I appreciate it, I really do and if I do damage again in the future I will take your comments into account. Don't take this the wrong way, but you guys are describing your opinions like anyone really knows what this type of damage would look like. If you could show me images of a real valk damaged with real laser and beam weapons I would be very tempted to re-do my work. However since all of this is completely open to interpretation, I am happy with my results. I am not offened in anyway, just don't over analyze everything. Thanks again!
-
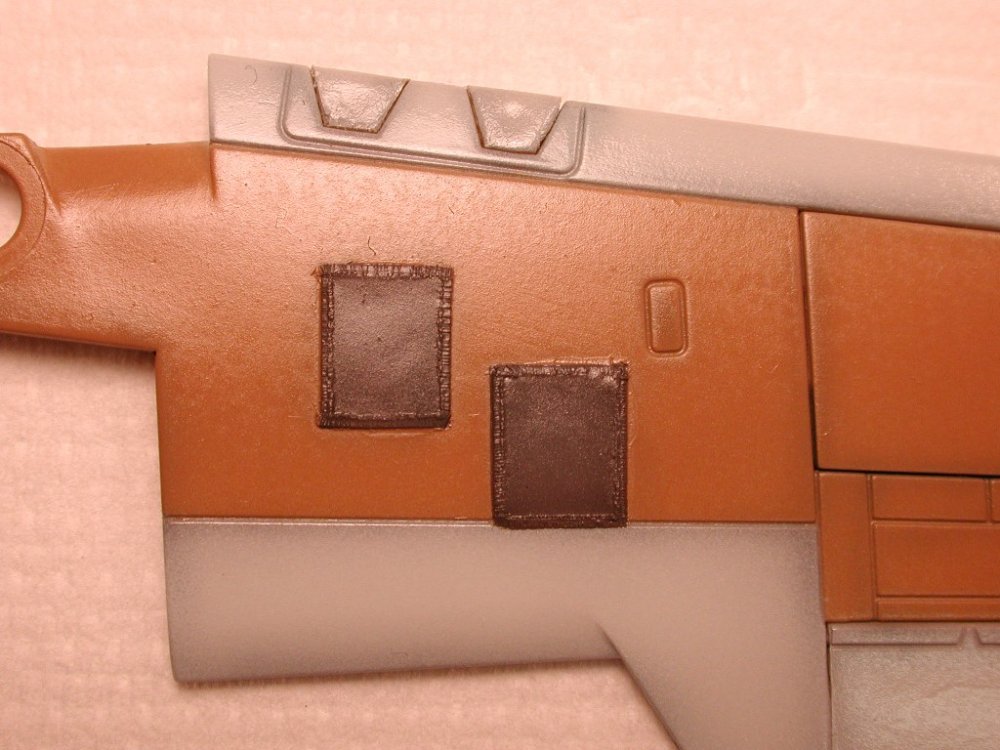
I am also going to show where old battle damage has been patched. I used lead foil for the plates and styrene strip to represent the weld beads.
-
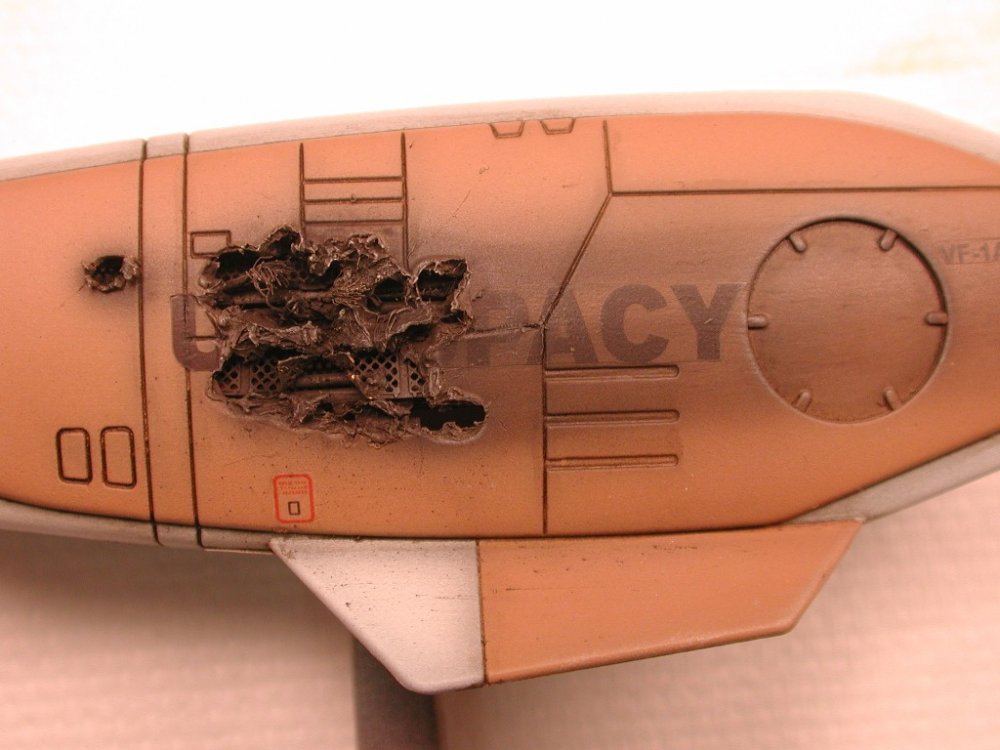
A quick update. I have painted and Futured in prep for decals and weathering. I think it looks better already. I understand what you guys are saying about it looking melted, that is just my interpretation of what would happen. As far as the blast looking like it came from the inside, I wanted to represent both. I figured that being hit like that is bound to cause internal components to be forced out. That is why in some areas the damage looks like it came from the inside. Keep in mind that I still have alot of weathering to do, so this is not what the final product will look like. Thanks for the feedback.
-
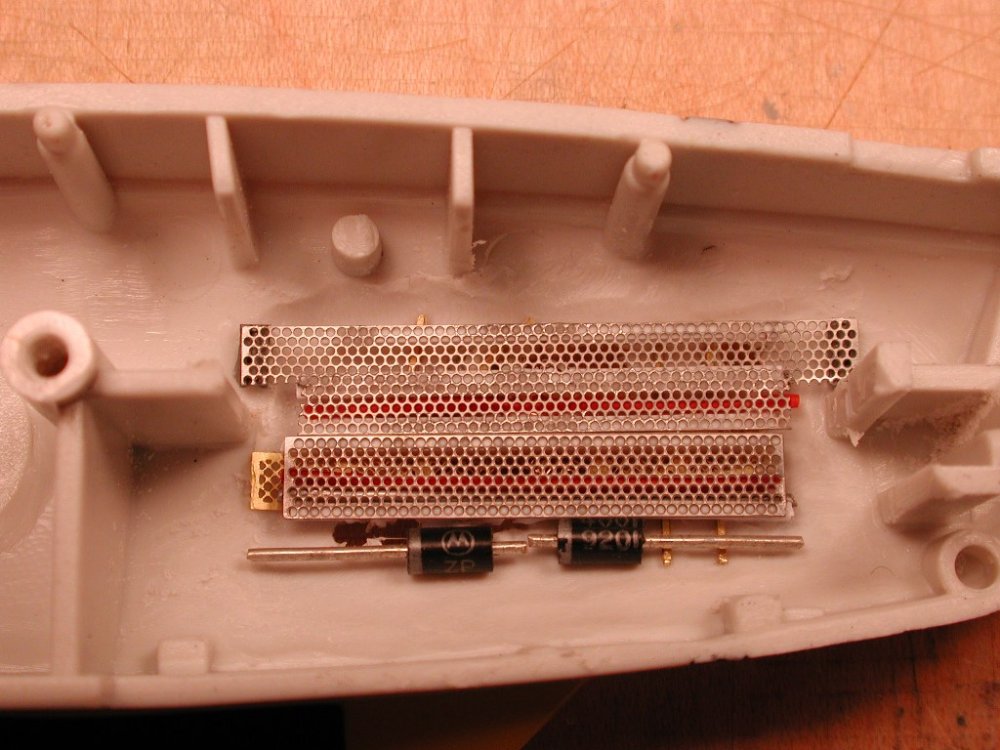
The plastic was thinned.......
-
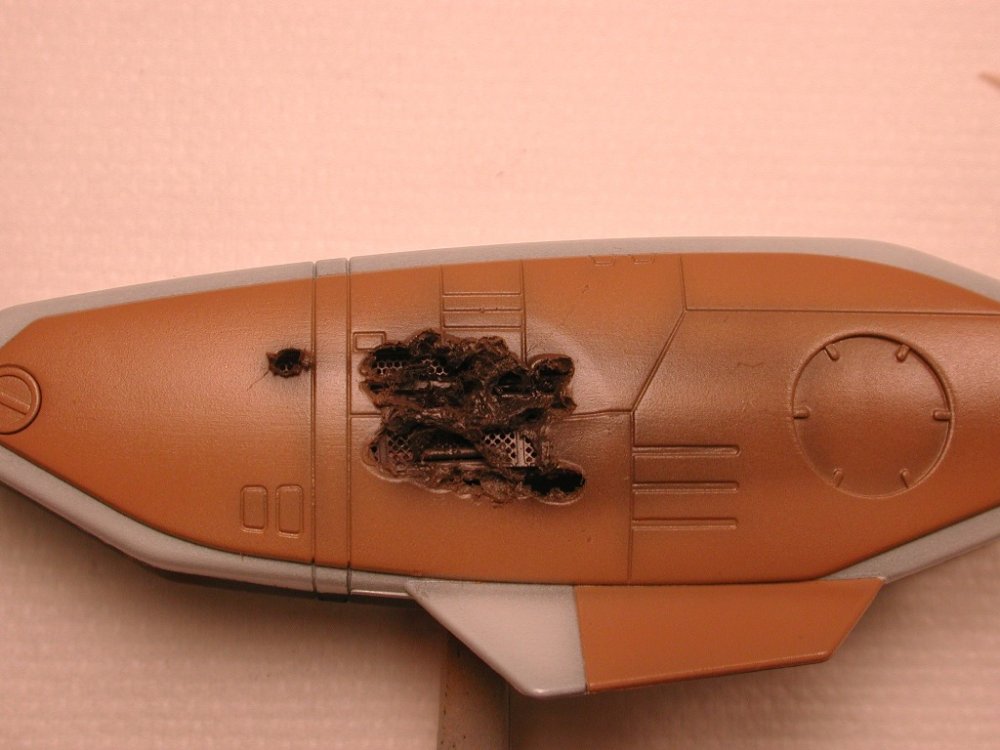
Thanks for the feedback everyone. I was also a bit unsure of the look of the melted plastic. However I thought that melted metal by a laser or plasma weapon might not look that much different. Painting and weathering will help hide some of the plastic look. I have already primed and pre-shaded, it is already looking better. Keep a look out in the toy section for the completed valk. By the way, this is not a commission job. However if you are interested I may Ebay it when I am done.
-
-
-
Hey everyone, I am in the process of another custom 1/48. This is going to be a plain Cannon Fodder that has seen it's share of tough battles. I wanted get your opinion on the battle damage I have done. This is just of the damage on the leg. I am also going to add some damage to the chest and back plates. I will also add plates that have been welded on to cover previous damage. For those that are interested in how I did this. Just thin the plastic from behind with a rotary tool. For detail I used styrene structual shapes like I-beams and channels to represent inner structure. Then add any details that you think would look correct. I used photo etched model railroad items and wire. I also used braided steel line made for modeling brake lines. Once everything is in carefully melt through the thin plastic with a soldering iron. Just keep working it till it looks right. Let me know what you think. Thanks.
-
I don't specifically recall having that issue. How much of a difference is there?
-
During DYRL or the series, other than the brown "cannon fodder", was there any other paint schemes that had multiples? Were there more than one 1J in Hikaru's TV scheme? Did every squadron have a white 1S leading it? I am doing a 1/48 custom with battle damage and was think of the possibility of have replacement parts form other valks in different schemes. This would be difficult if there was just one in a particular paint scheme. Thanks for any insight.
-
I look forward to reading about your progress. Did you have a lot of bubbles in the castings? The YF-19 I just finished was covered in voids from bubbles during casting. I hope you were luckier than I.
-
I just finished this and the YF-19. Do yourself and your lungs a big favor, were a surgical mask or respirator of some sort. Don't mess around resin dust. Enjoy the kit and I look forward build up. I will pop in if I have any advice.
-
Sorry, I have already packed it up for shipment to it's owner. I did not think to take images of the under side.
-
I was not sure about this. My reference material was not that good. And the images I found were not clear. I thought it best to not guess.
-
Sorry, I have already packed these up for shipment.
-
You must use lacquer thinner with Mr. Surfacer. Lacquer thinner will melt plastic. However mixed with Mr. Sufacer it will not destroy anything. After all you want your primer to have nice bite on the surface. Just make sure you thin it enough, or it will be like shooting spider webs.
