PetarB
-
Posts
1573 -
Joined
-
Last visited
Content Type
Profiles
Forums
Events
Gallery
Everything posted by PetarB
-
All finished pics can be found in >>this thread<< in the 'Models' section.
-
Macross Frontier Episode 4 Talkback Thread *READ 1st Post*
PetarB replied to azrael's topic in Movies and TV Series
I am really enjoying this series. However I was very spoilt with all the other series... the first time I saw them was on tape, and I watched many episodes in one sitting. So its a very different experience watching this is serial format again! Looking forwards to more space dogfights, boob jokes, and melodrama! -
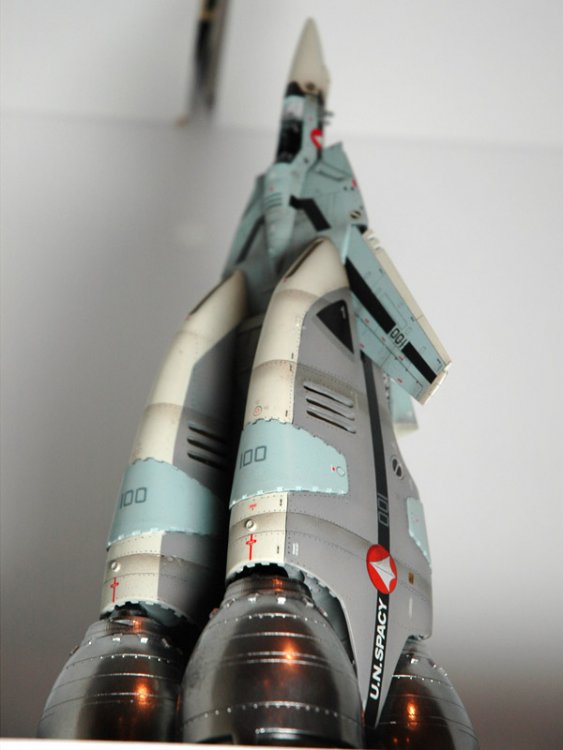
This old girl is finished for now. A lot more pics can been seen in this thread here http://macrossworld.com/mwf/index.php?showtopic=25896
-
With some nice weather, it was time to take some semi-finished pics. I probably do some more drybrushing etc when I get the pedestal, but for now, it's on the shelf and... 'finished'!
-
"Angry Monkey Models" = looks like Rob's original production of this subject, from a long time ago. I think this was the only kit of this subject to date? The Captain's version will be phenomenally better, due to size and detailing, as we can already see.
-
Love this thread. Great work there, and those final pics kick ass!
-
Any plans for the Fighter mode?
-
Well Klam, if you're going to hold Hobbyfan to account for their 'dates', I predict this will be a very long thread....
-
Very nice. I think this is only one of two build-ups I've seen of this kit. It never fails to surprise me what you have in your stash...!
-
I must admit, I've been using small amounts of Windex as a thinner for certain applications of Tamiya paints for many years, and have not found any issues to date. Time will tell though...! I hope there are no longer term effects that are only obvious later on...
-
Never heard of the stuff. Looks interesting though! Keep us informed on how you go. The benefits of resin is that if you've got the right stuff - it should pour like water - and picks up every single tiny detail from the mould. The problem with this material is that it might not be so good for detail. But keep us updated.
-
Yes. I used Windex because for me, the alcoholic thinner sometimes speeds the drying time so much that I cannot airbrush as finely as I would like too. Windex does a decent job of thinning and seems to retard drying times - which is good for certain applications. I find alcohol thinners speed up drying times dramatically, which is great for flat finishes, but not so good for gloss and clear finishes - for me, at any rate.
-
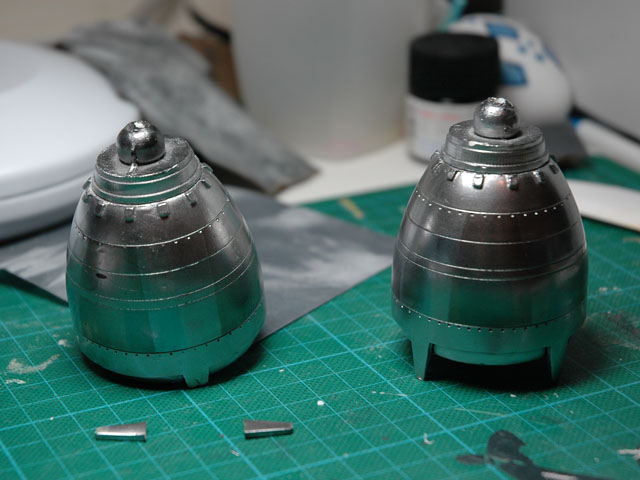
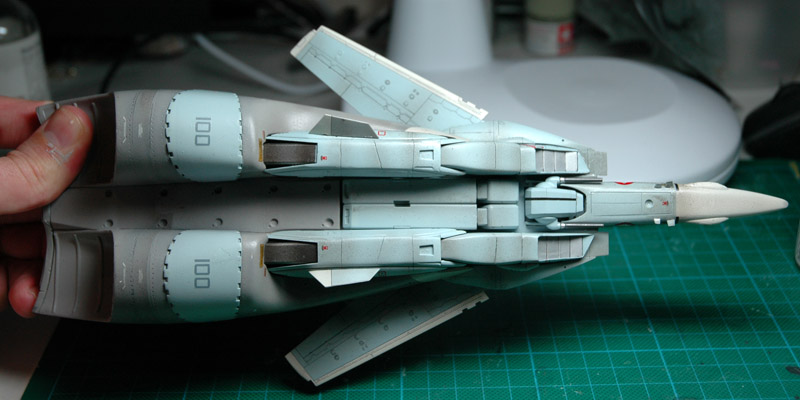
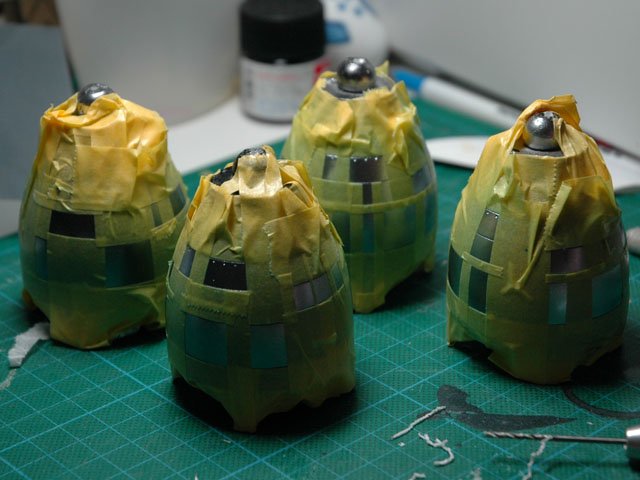
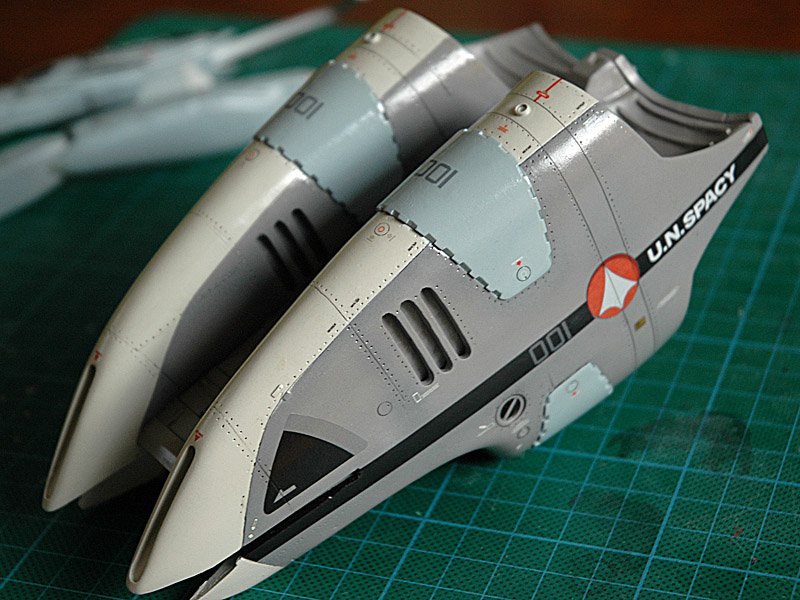
Not much of an update, except to report a minor disaster.... I decided to emulate MWChengs booster treatment in airbushing panels on to the engine bells - looked good to me. After coating Alclad in Future, which did not change the finish too much, I did a lot of masking. Next I put a mix of Tamiya Clear Blue and Windex, which seemed to work well. Quite hard to photograph though, due to reflections from the green cutting mat their on. Final pics on a white background should show it up better later. I wasn't quite satisfied with this, but I didn't want to put any yellow or orange dusting on yet... wasn't sure how well it would tie in with the booster. So I sealed the blue with Future and re-masked. This time I used a mix of Smoke and a few other bits and pieces, and once done, I put them down. CLUMSY FINGERS! I dropped one a centimeter away from the surface. Three of the 'fins' snapped off, it rolled into another and broke a fin off that one. ARRRGH! Anyway, glueing them on at the moment, although one is lost. I think the original mould of these bells had these all integral to one mould. In the casting I got, they were seperate, and putting them all on... wasn't the most fun thing, and also hasn't really made them very strong. If I ever built one of these again, I would probably go to the effort of pinning each and every one of these (16). They shouldn't have broken off so easily. These pics really dont show the subtle blue and smoky panels well - probably due to the different finishes. Another coat of Future, and an oil wash should bind them together better. Sorry for the small update. Next weekend should be centrefold spread time, I hope!
-
RE: 1/72 Macross ll Super Valkyrie 04/09 Just got an email from Henry, telling me this kit is available and requesting payment. Better late than never....!
-
Cut the Dymo tape width down. You really only need a little width, just as long as it sticks - this should allow you to conform it to the taper a little better. Worked for me, YMMV.
-
Fantastic work. Love the details picked out in metal. Edit: Just went and purchased this from Starship Modeler. $100 later.... sigh.
-
Oh wow... some of these models, I've never seen build-ups of, anywhere. I'm glad you took the time to finish them and post pics! Thank you!
-
Well done, and thanks for posting the build up.
-
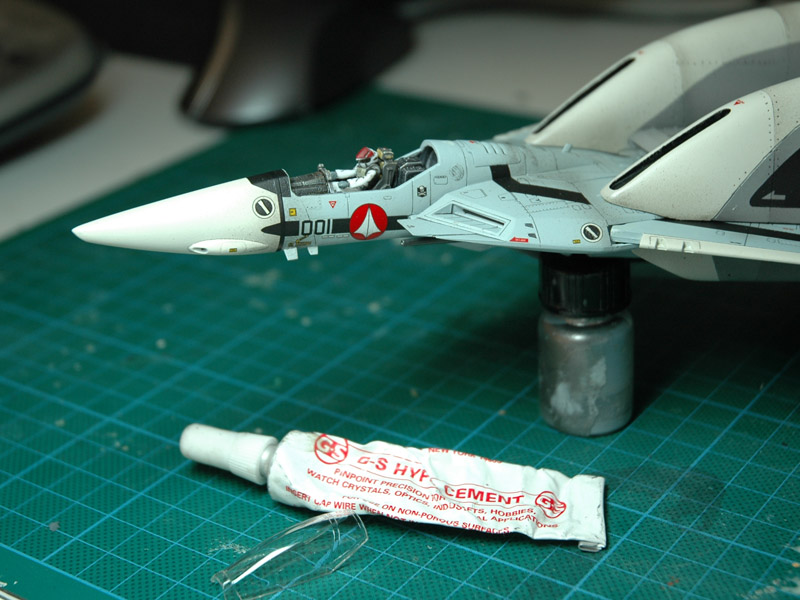
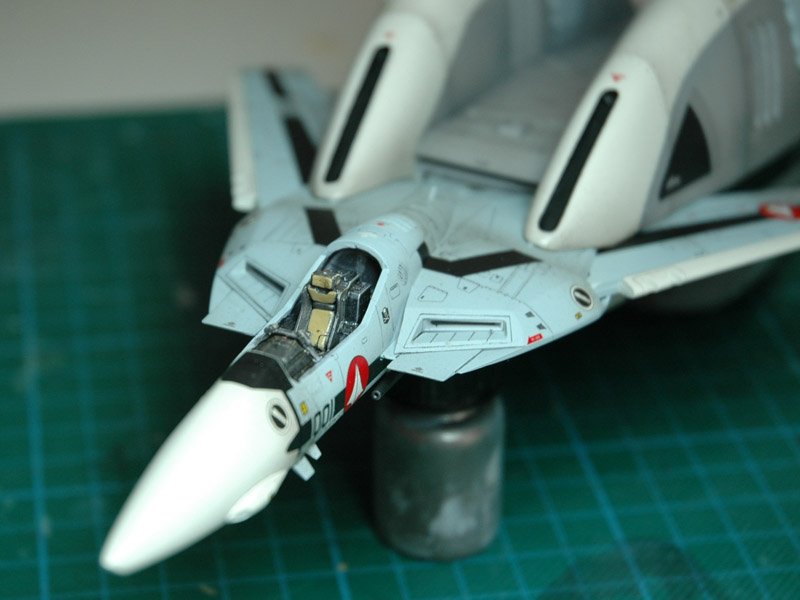
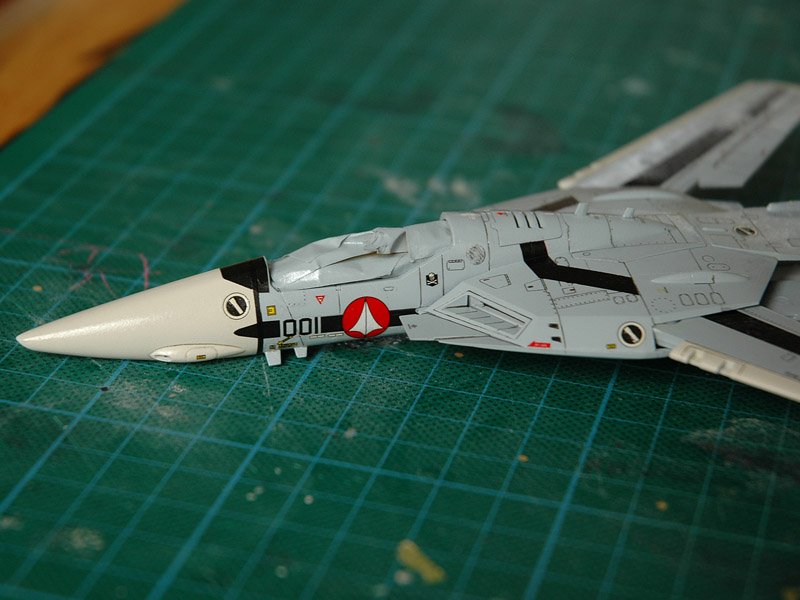
Canopy time! After removing the seam with sandpaper and polish, it was dunked in Future and left overnight. But before I could put it on, I needed to finish the seat and pilot. The glue shown in the second pic is G-S Hypo Cement. Its a relatively recent invention but and it works superbly for canopies - no residue, invisible, and a fast tight bond. Jewellers use it for setting stones and such. I was very happy to be able to find it at a hobby shop a few years ago, but I have not seen it anywhere since. No pics of the canopy and trim on as yet, I may get to progress a little more later tonight...


-
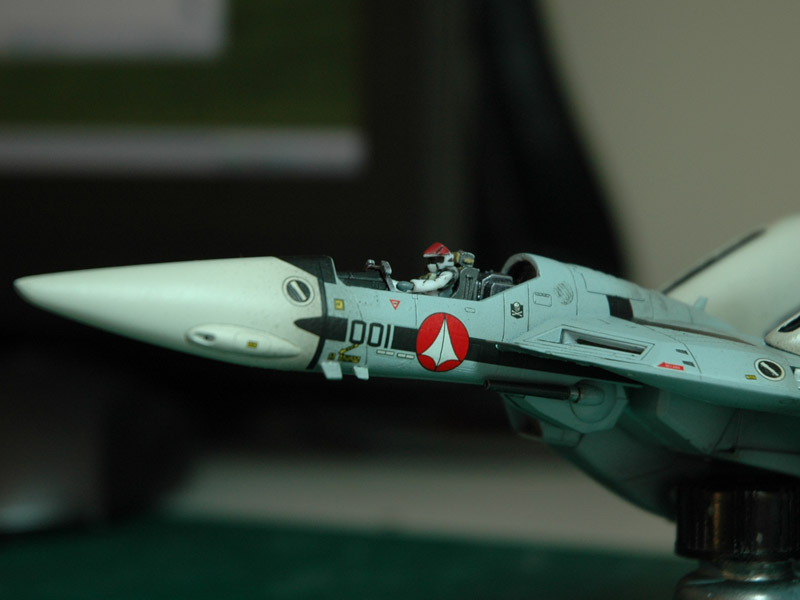
A few drops of Tamiya XF-55 Desert (or Deck?) Tan was mixed with a few mL of XF-2 Flat White. The gloss was provided by an overcoat of 'Pledge One-Go' here in Australia, or 'Future' in USA.
-
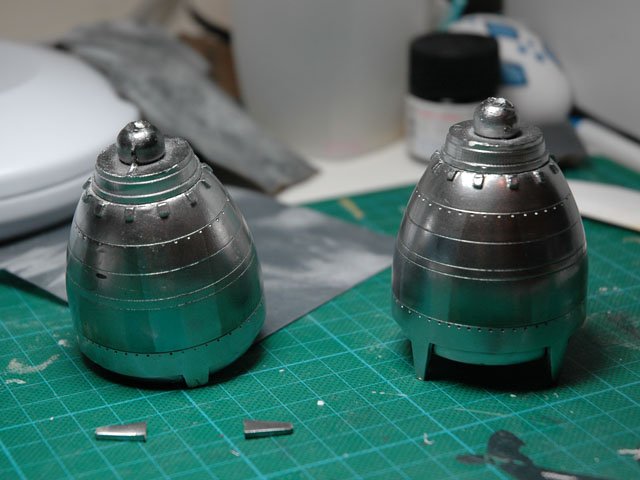
I took another look at the booster this morning in daylight. I'm going to tone down the smoke a bit in the next airbrushing session I do, it's a bit too much at the moment. It should blend it back nicely. As for the engine bells, I love the clean aluminium look to them, but I am going to be airbrushing them a little and putting an oil wash on... let's see what happens!
-
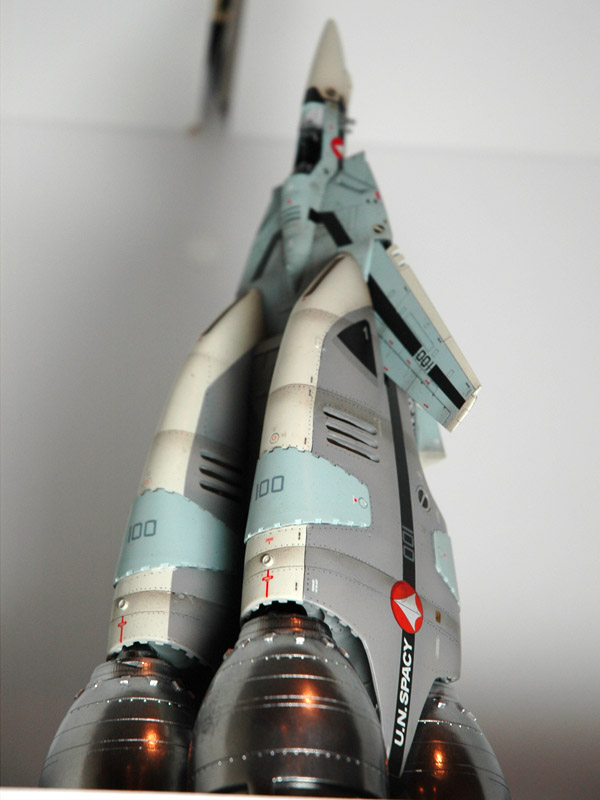
Some further reflections - Firstly, Im really happy because I can now see the light at the end of the tunnel on this one - I should be able to finish it next weekend. I need to because I have to start the masters of a couple of pilot sets before I go on holiday for a couple of weeks, so they are ready for production. I will use the pilot I'm about to paint up as an opportunity to study and see if it's worth putting together a Macross set. Secondly, I think I will have to purchase the stand that John Moscato sculpted to mount this on. Basically there's no way to display this with any justice other than tilting up, aiming at the sky. The whole shape of the Booster + Valkyrie just screams 'upward and onward.' Oh well, there goes my modelling budget for the next couple of months... Finally, thanks for everyone's comments so far. It's fun to be able to show off you work, I wish more people would. I love coming here and seeing new spins on old favourites, and new models too. I can't wait for Bandai's new VF-25...
-
Okay, back from the airbrushing session. I have three small children, and allocating an hour or so in the daytime for airbrushing on the weekends can be quite a challenge. But I put my new needles in, and got busy with tamiya 'smoke' and gunze 'oil' and started post shading and outlining panel-lines. I overdid it a bit on the booster's cream areas. I may knock them back, but as it's night time now, it's hard to judge. Excuse the quality of these pics too, I won't get a chance to do any photography in daylight until next weekend. After pulling of some masking tape, I simply had to put the valk and the booster together - and then there was nowhere to put them except 'sit' them on the exhaust bells...

-
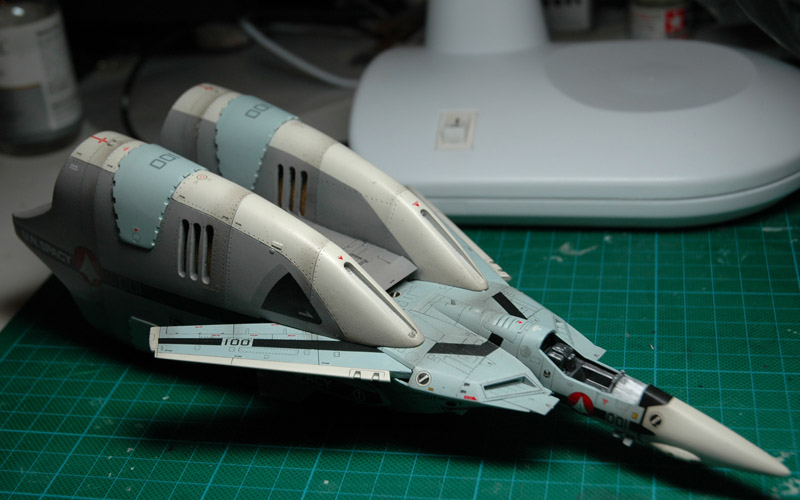
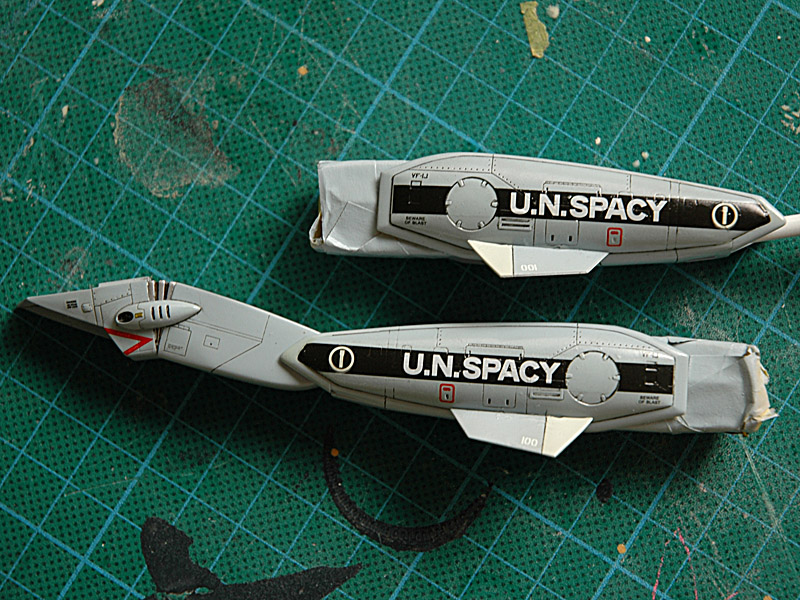
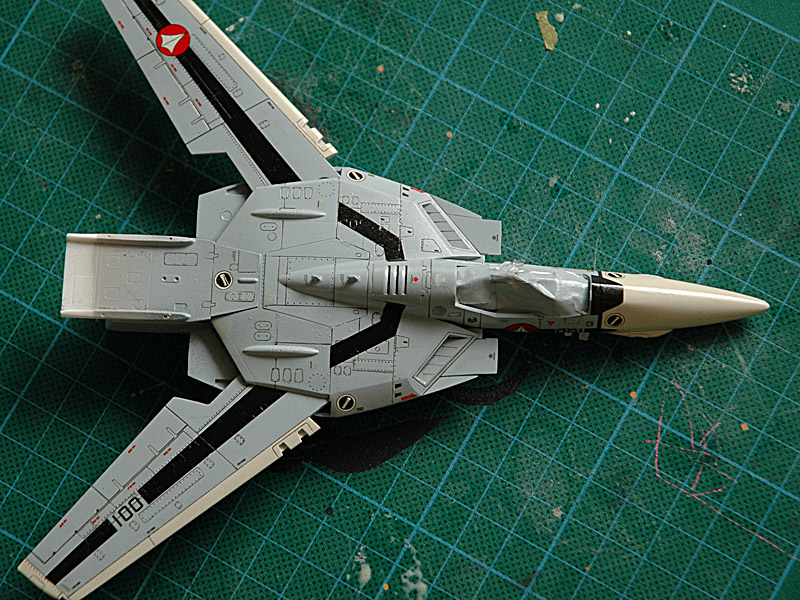
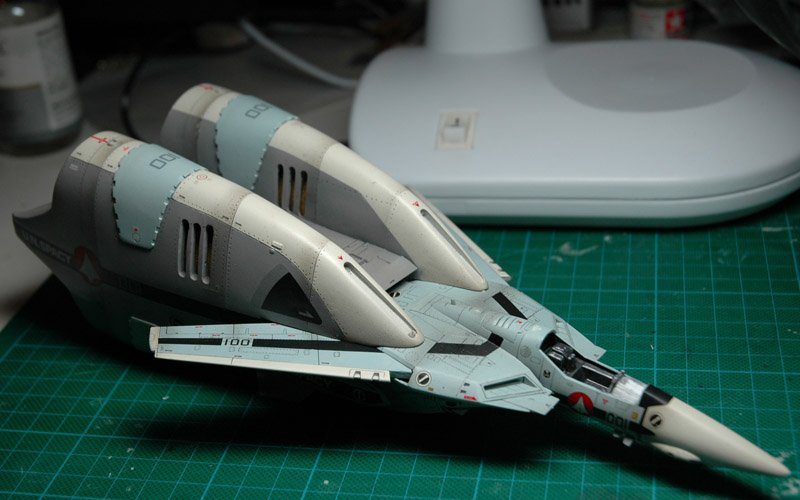
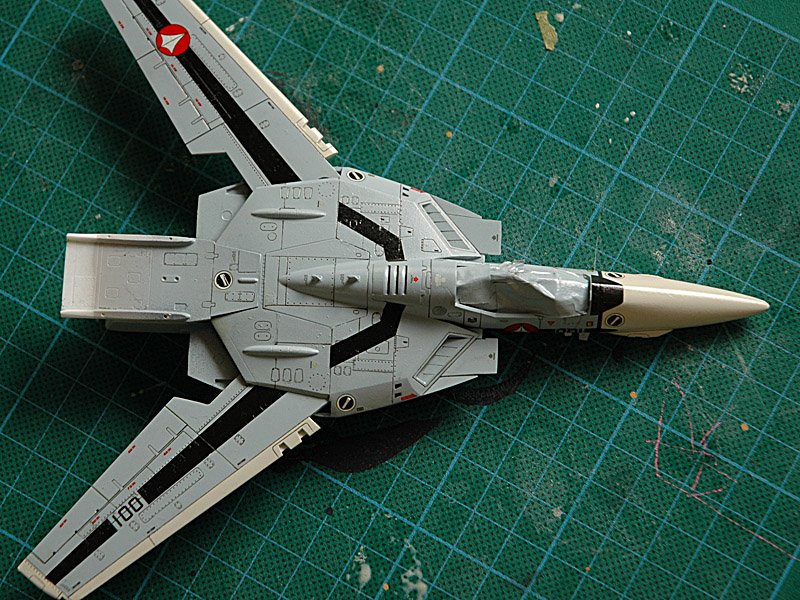
Well I spent quite a bit of time panel-lining. Sometimes I use good old odourless solvent + oil wash, but for a lot of this one, I use a technique which I call 'ink & russian roulette'. Basically I use a pigment-marker pen with a tiny nib (very hard to find for me) to line in the panels, and as I go, I have a microfibre cloth which I use a lot. For the type of ink I use, you have around 60 seconds before it sets and is impossible to wipe off. So you mark generously in the panel - like a 'wash' with ink - then wipe off the excess with the microfibre cloth. If you let it set too long you're screwed, so I try and make sure I am not interrupted when I do this. It's the reverse of an oil wash, where you leave it to set for a day (at least I do) before removing the excess. I put grey ink on the white decals, but this hasn't photographed well. This technique has some good applications, but I wont use it on the exhaust bells, for instance. That needs oils for a certain 'look'. Anyway, I just thought I'd post these pics before the next stage - some post shading, mainly on the boosters. The Valkyrie is shortly getting a matte coat and pastels. Hopefully I can post more pics of the results of my airbrushing later today.

-
Looking forwards to more progress on this!