Fly4victory
-
Posts
1646 -
Joined
-
Last visited
Content Type
Profiles
Forums
Events
Gallery
Everything posted by Fly4victory
-
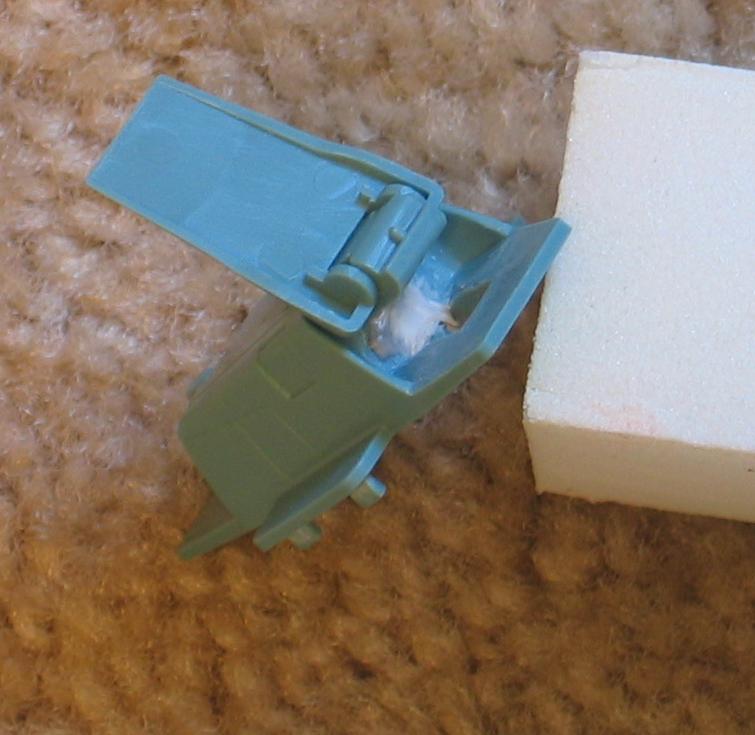
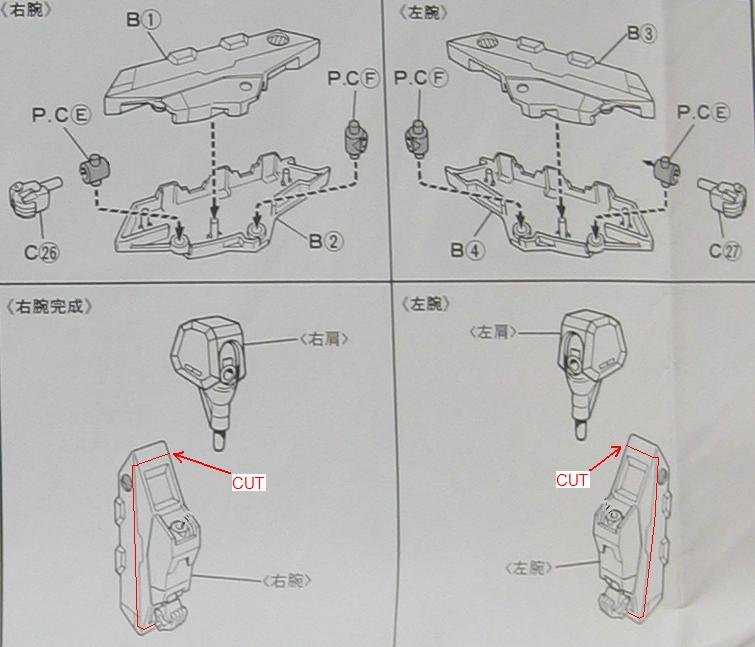
Cut two rectangles the size of the opening in the top of the forearms. The aft interior will need to be sloped to fit. File the front center with a semi-round file to create a channel for PC E to rotate. You can also cut a small amount from the back of PC E. The rectangle should fit flush at the top and tight at the edges. Glue and fill the seams.
-
Jenius when inquiring if there is to be a future general release please ask for the Tread combo. Thanks.
-
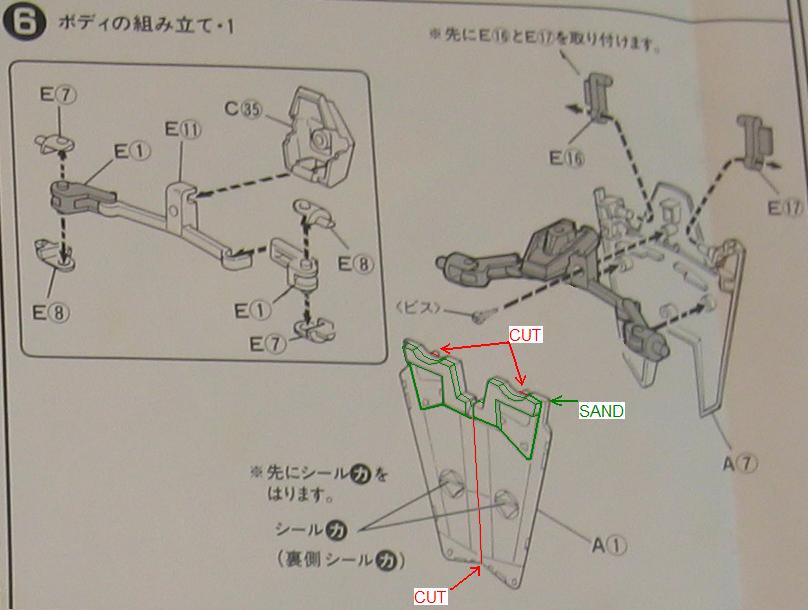
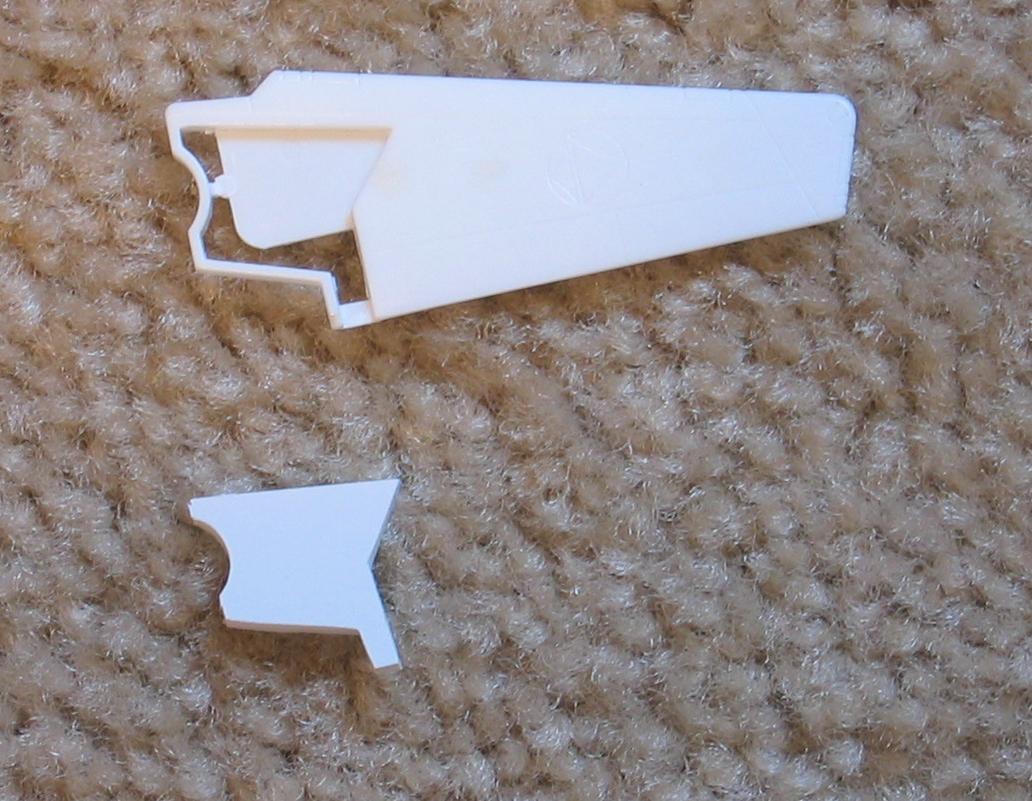
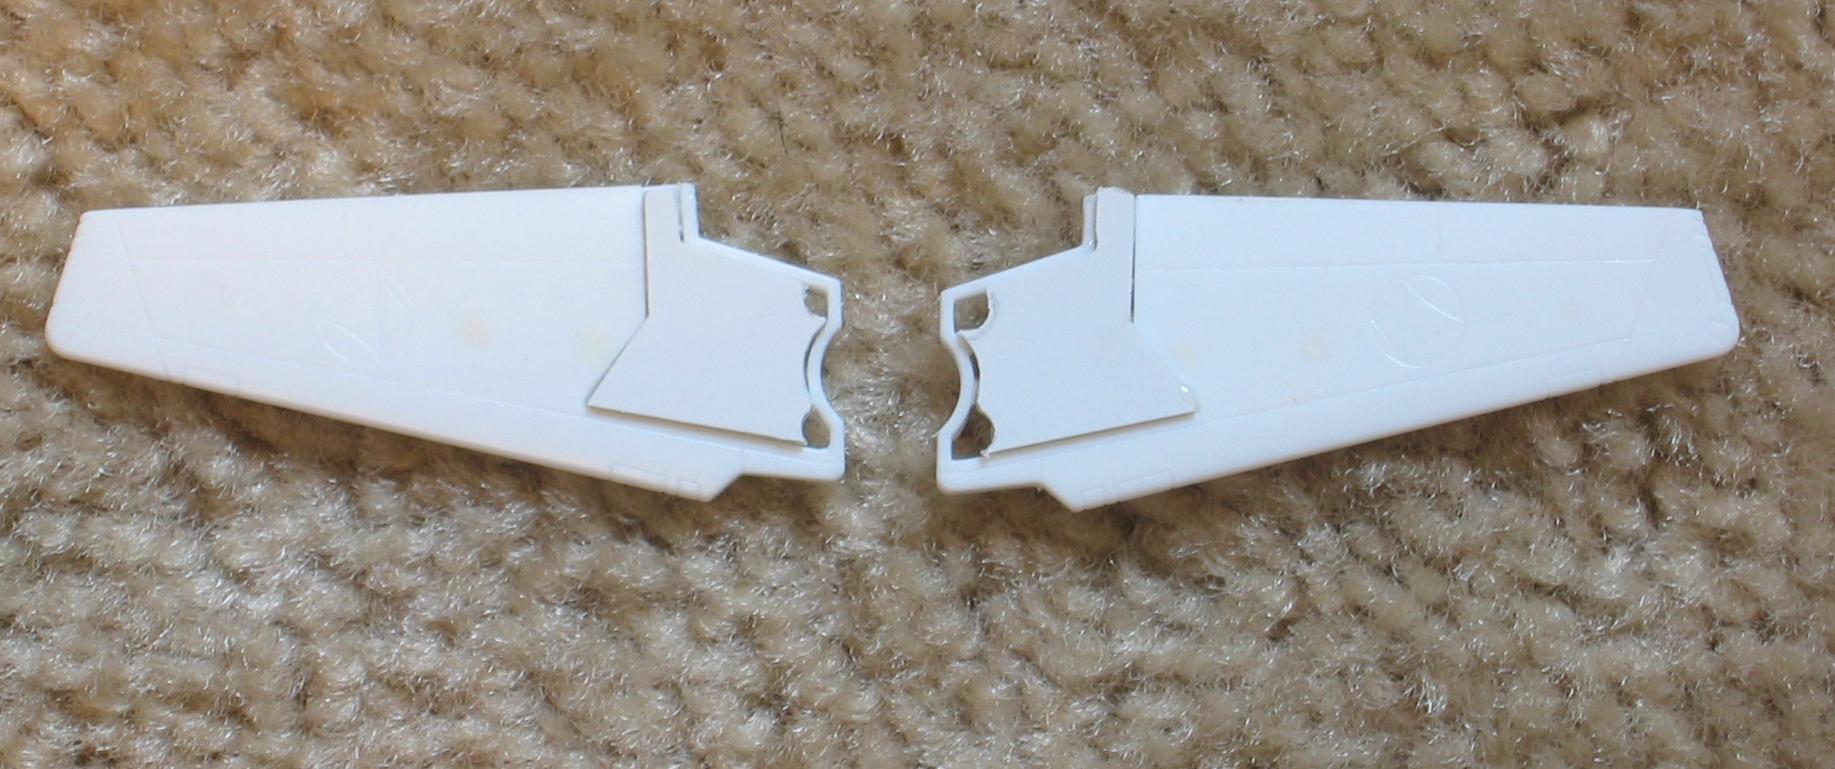
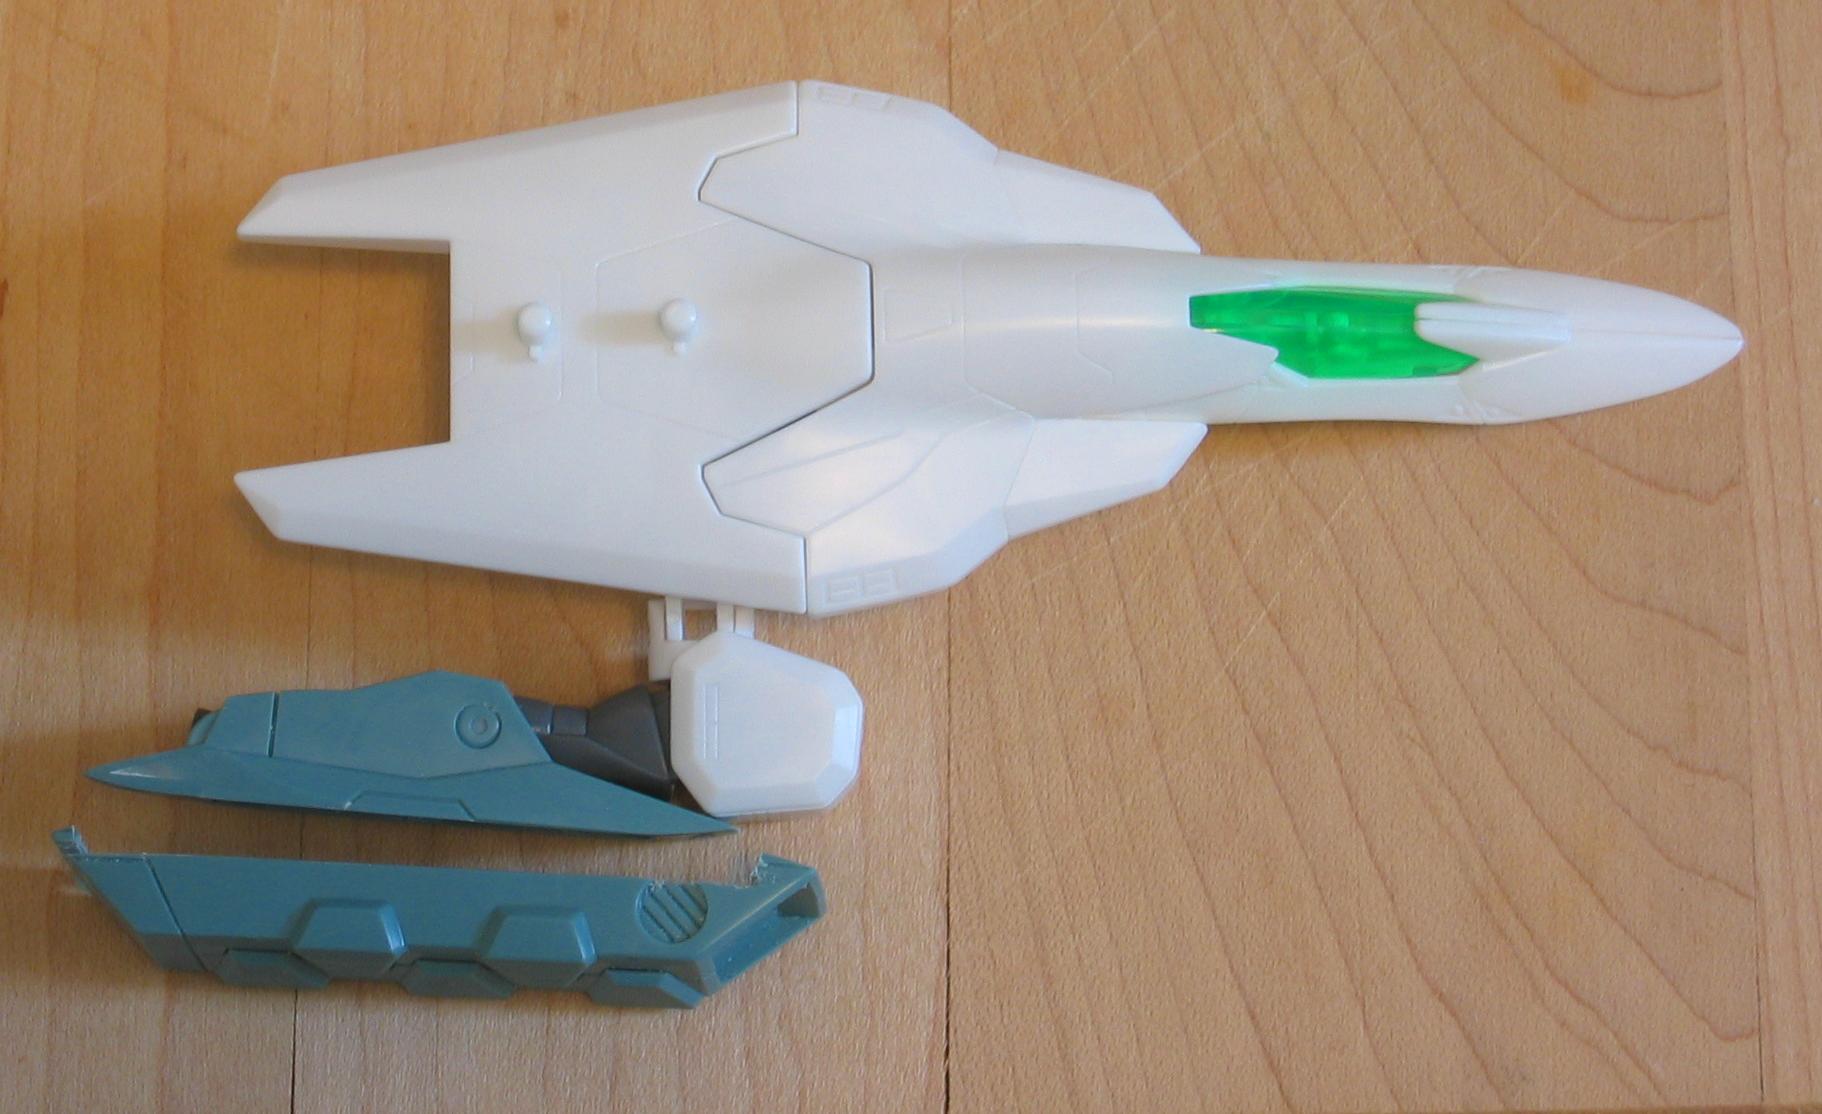
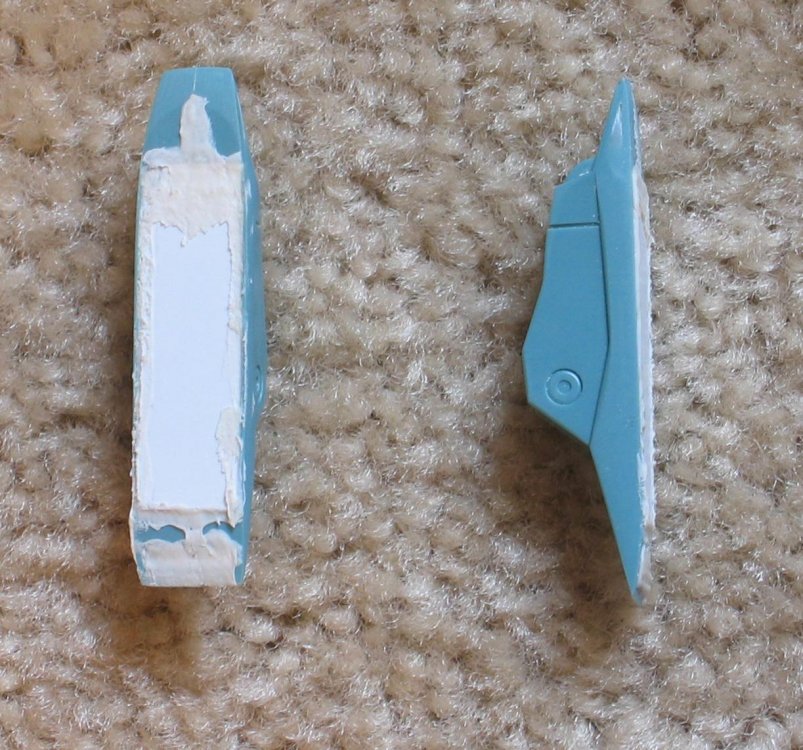
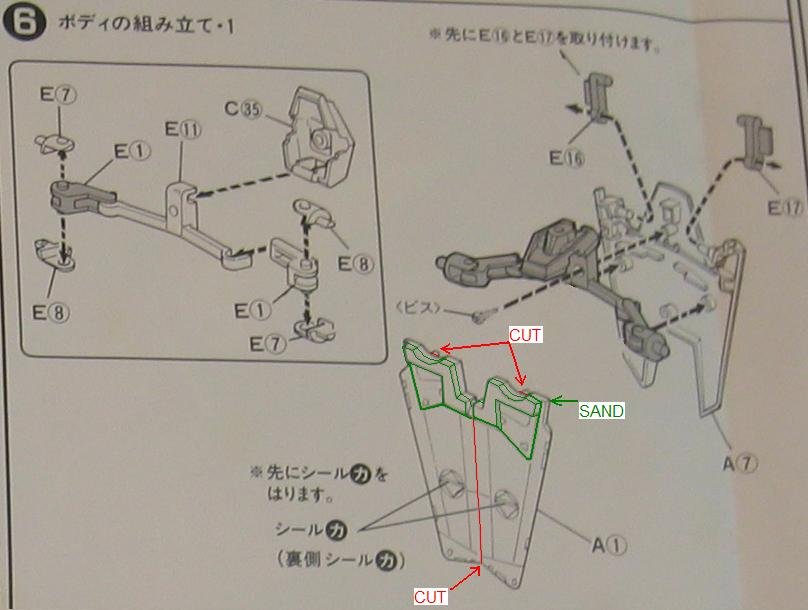
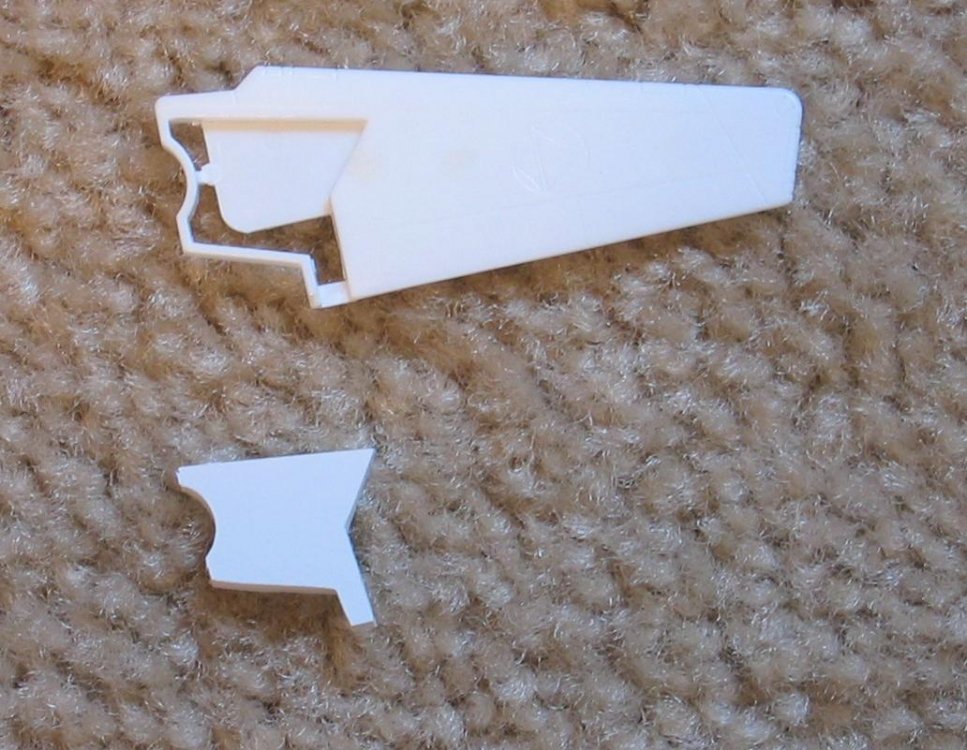
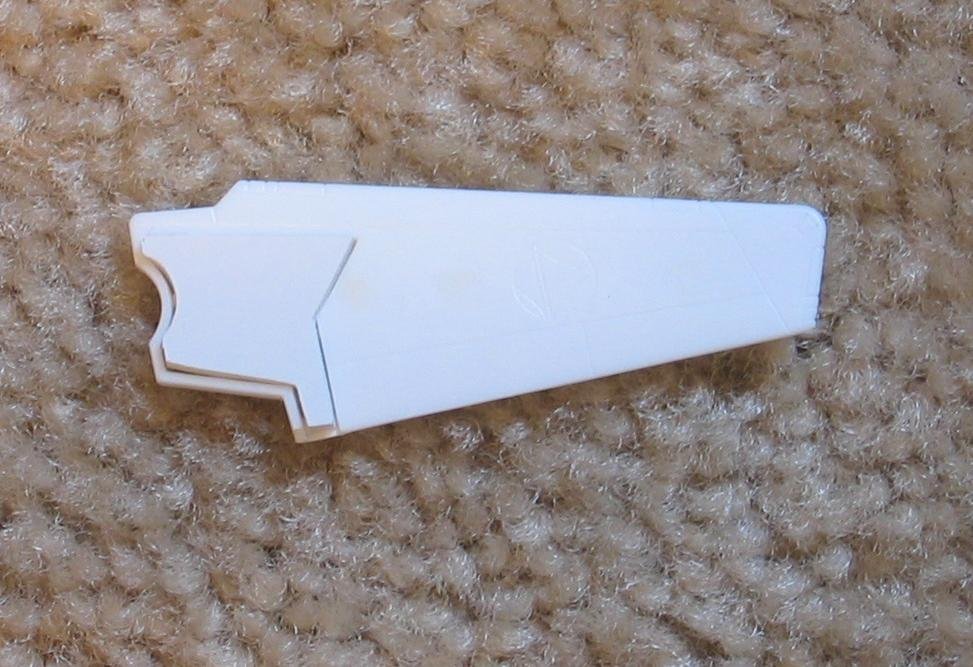
Now the fun finally begins. Time to start building and not just assembling. Part A1 is almost but not quite since it is both wings and a locking plate for Battroid and annoyingly hollow behind the locking plate. Cut off the three mounting pins from the back of A1. Use a hobby knife and split the wings and locking plate down the center. Use a file and sand down the locking plate to the contour of the wing. Use sheet styrene .08 and manufacture the part to insert into each wing. Rough cut the parts large and then file to fit. Once fitted glue the manufactured parts inside each wing. When the glue is dry, fill and sand to match the contour of the wing.

-
I'd end up the winner in a trade with you. But, Yeah if I had talent I'd build my own aircraft carrier but that thing would never touch the water. It would end up as a museum display piece.
-
Has anyone seen the limited Milia VF-1J other than magazine photos?
-
Macross Ace Frontier for the PSP.
Fly4victory replied to UN Spacy's topic in Hall Of The Super Topics
Highjack!!! 'ruskiiVFaussie' I use PDA protective film that I got at OfficeMax. Goes on perfect equally easy to remove without mess. More sheets for less cost. Hope that there is OfficeMax and not just Mad Max down under. We now return to the regularly scheduled PSP love. The screen shots of the Red VF-22 look awesome. The Macross F game needs to have a very healthy toy franchise along with it. -
Macross variable fighter/mecha pose thread
Fly4victory replied to Wicked Ace's topic in Hall Of The Super Topics
Good thing that isn't Roy or the hand would be a little lower. -
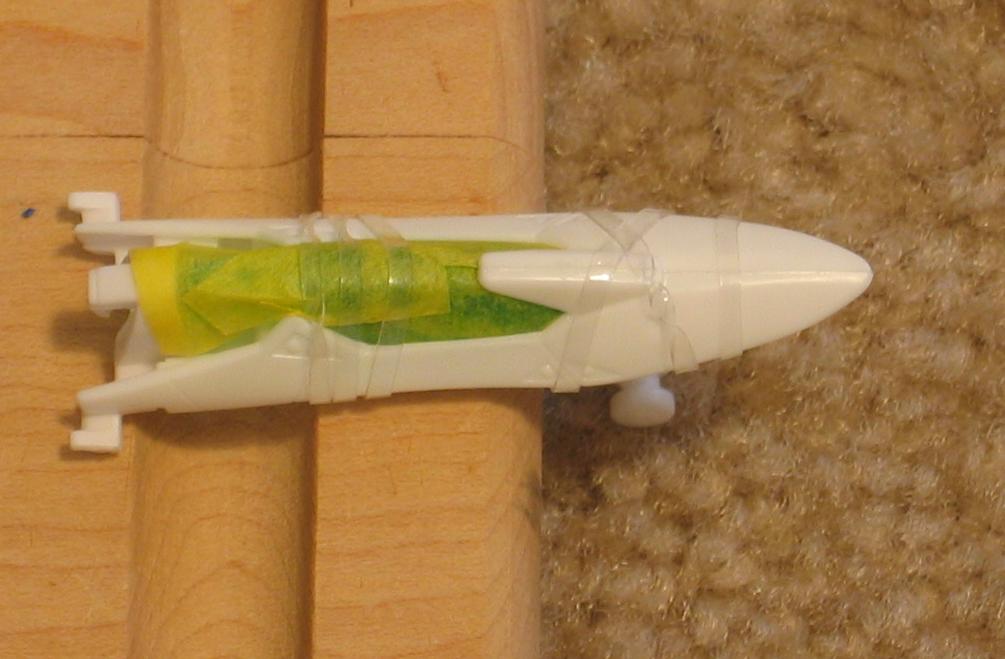
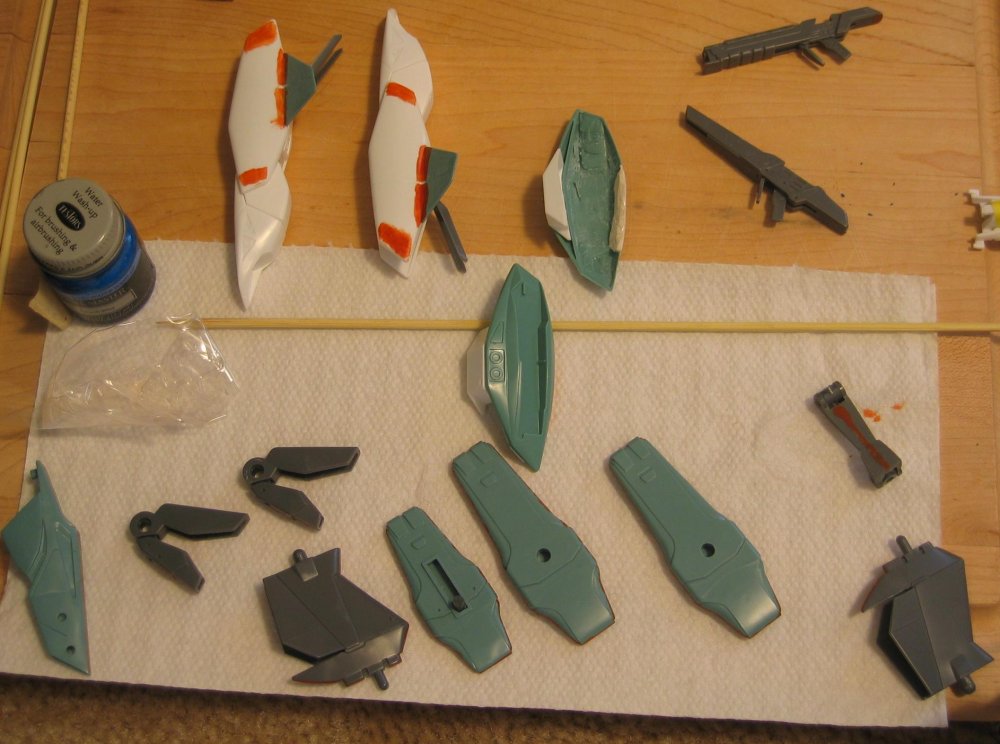
Filled the exterior of each leg with white putty, sanded, and then re-coated again with thinned red putty. Painted the seams on the parts shown with the thinned red putty. The thinned red putty shows surface imperfections just like primer and is a helpful step before priming. The multi-layer coloring is also useful as a gauge when sanding after putty and primer. Edit: Fixed photo. Also was over-zealous cutting the channels on the leg armor to fit around the fins when mounted to the legs.
-
Paint the interior cockpit A24 and pilot A25 and assemble them as shown in the first sequence of Step 5. Mask the clear green canopy D1 after installing A24, A25 and E10. Install but do not glue the nose wheel into E15. Insert the nose wheel assembly and cockpit assembly into A17. Test fit A16 and then remove A16. Glue A16 to A17. You can use the landing gear as a handle.

-
Mech Tech and Valk Addict want to trade projects? The stuff you guys are doing looks more interesting.
-
I can only imagine what you are going to do for 1/200 grip stop decking. Each little part is amazing and that is before the realization that everything is custom made from scratch.
-
Kaiyodo needs to give Valkyrie Addict a contract when this project is done. This is a brilliant idea. Wonder how many SHE kits (minus the polycaps) will follow in its wake. Are you going to use the leftover Revoltech parts for a Valk girl or glue them up to make a joke machine fighter?
-
VF-22S Conversion Parts for 1/60 Yamato YF-21
Fly4victory replied to PsYcHoDyNaMiX's topic in The Workshop!
Dig that grove, BABY!!!! I see another YF-21 will be purchased in the future. Clear Visor sounds interesting. -
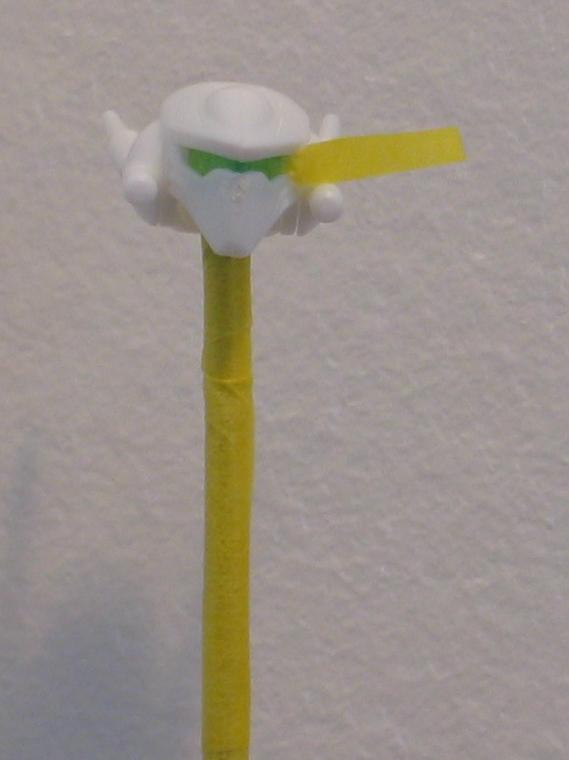
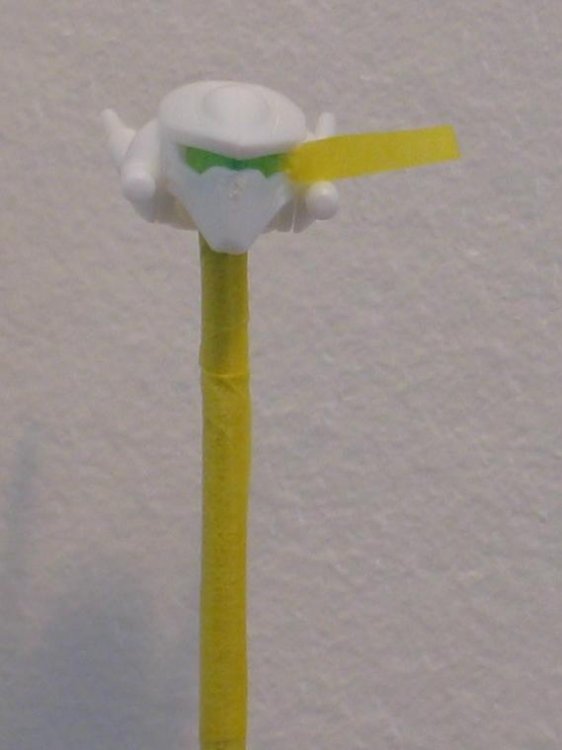
Before assembling the head, mask the clear green lens D2. Leave a pull tab so you can remove the tape later. Glue A30 and A31 as shown in step 8 and putty the seam. Wrap masking tape around the base of PC G and the top of a bamboo skewer. Once sanded the head will be ready for priming and painting. The skewer just makes it easier to work with the head when painting.
-
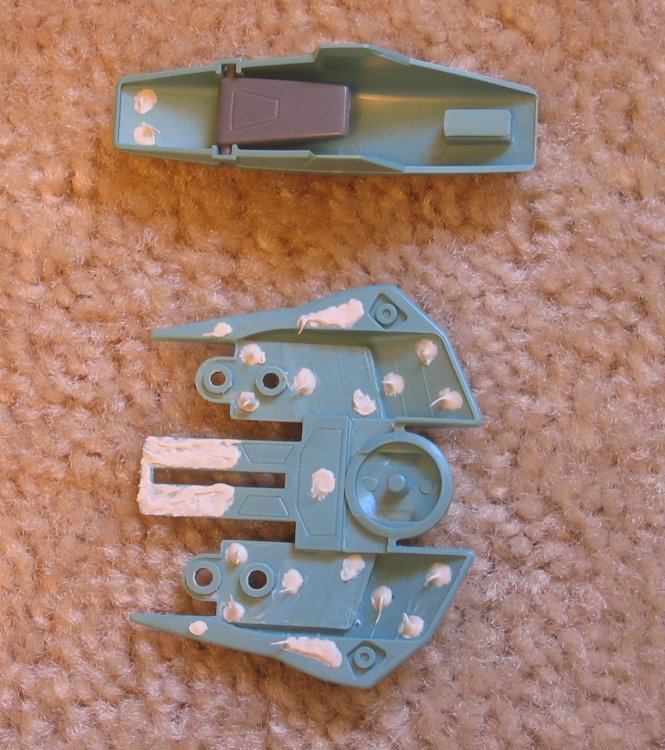
The bottom of B12 and B17 have mold marks that need to be filled. On B17 the two circles just forward of C8. On B12 there are raised diagonal lines that must remain but the little circles need to removed. Fill holes with putty. Use a hobby knife to cut the two raised circles down and contour the panel line. Edit: fixed instructions.
-
Part B22 is square under the attaching point of B23. Use a hobby knife and flat file to remove the excess plastic creating a tab for B23. Use the file to round the bottom edge under B23. Fill with putty the small gap between the inside edge and the mounting post. Smooth the putty with a stick from the square hole in the bottom of B22. Once the putty is dry and sanded flush the bottom square hole will be filled.


-
Thanks. For the time it was a good kit but have been spoiled by some of Bandai recent releases. Would have been perfect with a few different pieces and more parts molded in color. I hope that since Bandai is back in the Macross business again we will see a larger improved VF-2SS and VF-17.
-
Wow an exclusive that I am happy to leave exclusive. Other than the little skull symbol these will be easy to reproduce. :lol:
-
Macross Ace Frontier for the PSP.
Fly4victory replied to UN Spacy's topic in Hall Of The Super Topics
Those Destroids look great. Made me think of the Robotech game for GameBoy Color. The side scrolling screen for all the VF-1s let lots to be desired but the two levels where you were able to pick a Destroid and run around a 3D landscape were fun. This will be my first Macross Game that I will actually be able to play. Edit: Added photo.
-
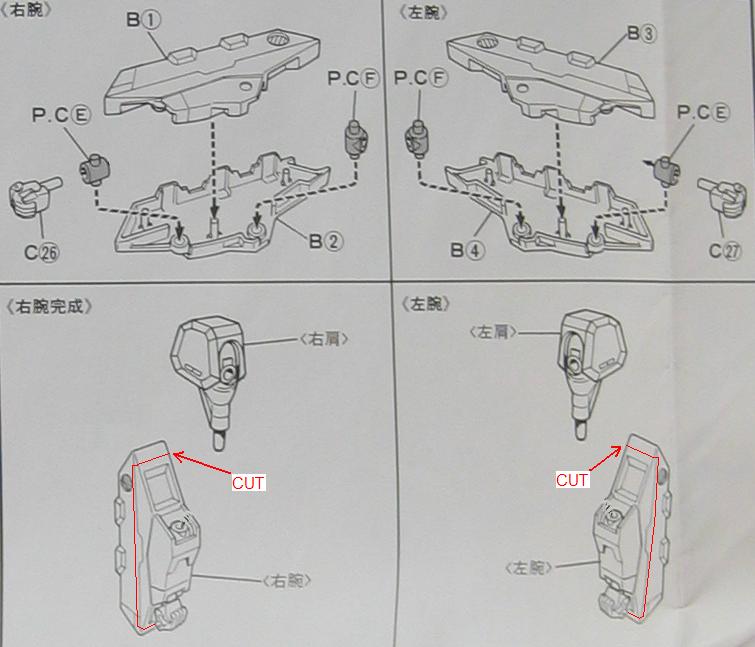
Glue the forearms together, B1 B2 and B3 B4 with the PC parts installed. Once the glue is dry cut the SAP armor away from the forearms parallel to the panel line. It will take four cuts one for each side and two from the top please review the modified instructions.

-
RuskiiVFaussie, did you steal the head from a Hikaru VF-1S? Looks nice!
-
Bandai 1/72 Scale Macross Frontier Plastic Models
Fly4victory replied to Graham's topic in Hall Of The Super Topics
Wow that VF-27 looks like Nora's SV-51. -
Found the old thread: http://macrossworld.com/mwf/index.php?show...t=0&start=0
-
Yeah!!!!!!!!! How did you miss this. :lol: I think the remote control SV-51 made its first flight back then or the new YF-19 had been released. Something big came along. Too bad it wasn't the 1/60 monster.
-
Valkyrie addict, The topic seems to have disappeared but when Anasazi37 stopped making decals a few others started to work on that problem. First you need a scanner or can use the decal scans in the model section. I use a Epson 1670 flat bed. For a printer I have a Canon 520 Bubble Jet. Yes it is old and Bubble Jets suck when it comes to water slide decals. CAN"T DO WHITE For the paper and sealing spray I got a kit made by Super Cal. The have kits for both Bubble Jet and Laser. You will also need a computer program to clean up and resize your scans. I use MS paint. This is not the program to use since the edges are very pixelated and changing the size of the images really distorts tings. When it is time to print I run a plain sheet of paper to check the size and color. Then I print the decal sheet. The printed decal sheet must be completely dry. Do not set anything on it or touch it. Once dry use the sealing spray. You now have a sheet of decals. When I use the decals I cut them out and then spray them again to ensure they are sealed. If water gets under the seal they will be ruined. They are very fragile and a little thick. I use a clean paint brush to slide the decals into place and then seal with a coat of Future. I have never tried any of the setting solutions so I don't know how my homemade decals would work. I just use very hot water. Here is a link to the VF-0 that I did as a test run. http://www.macrossworld.com/macross/toys/m...ms/IMG_1274.jpg I used a scan of the M0 F-14 as the basis. Edit: Don't type cross eyed.