Fly4victory
-
Posts
1646 -
Joined
-
Last visited
Content Type
Profiles
Forums
Events
Gallery
Everything posted by Fly4victory
-
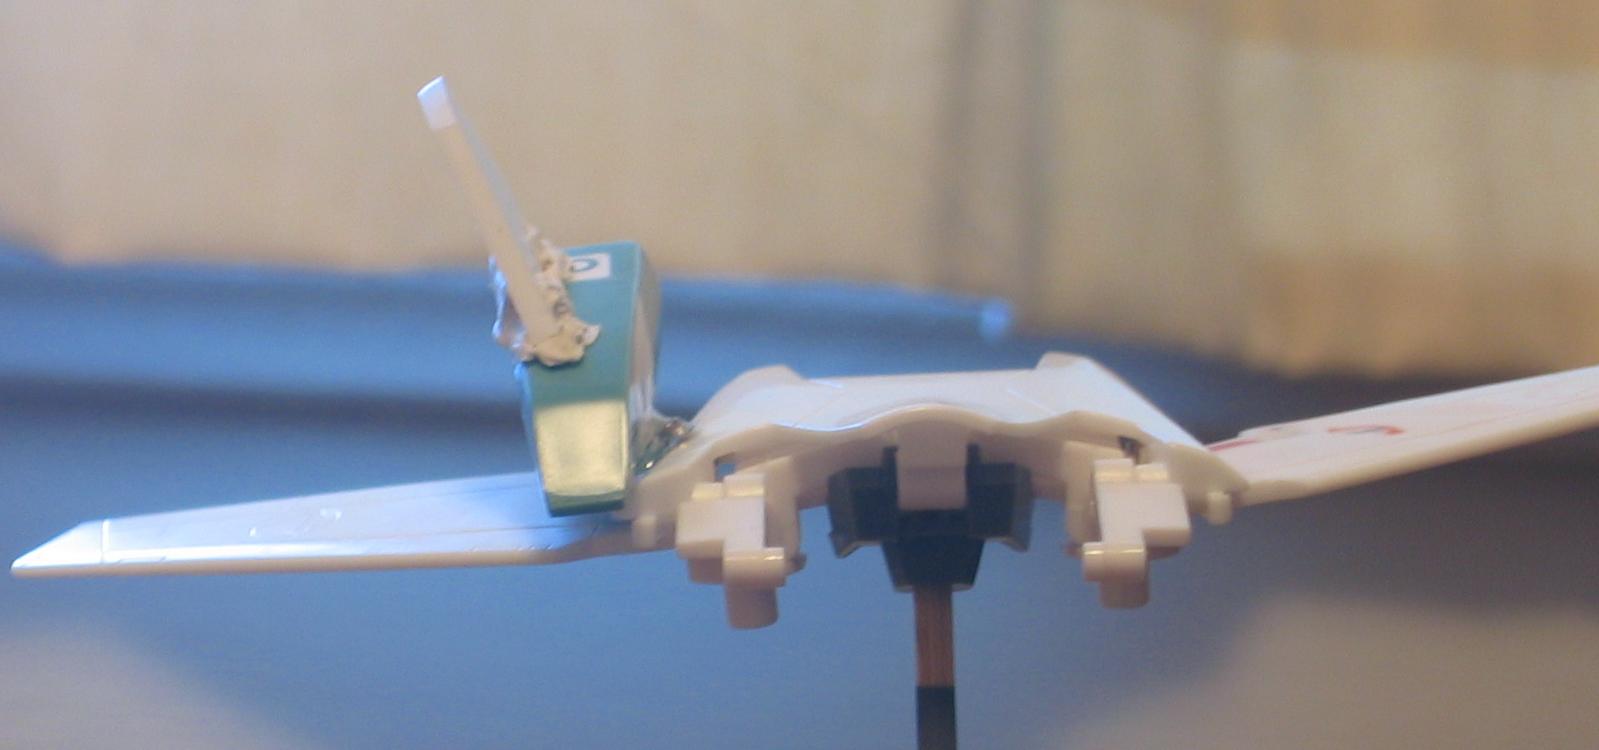
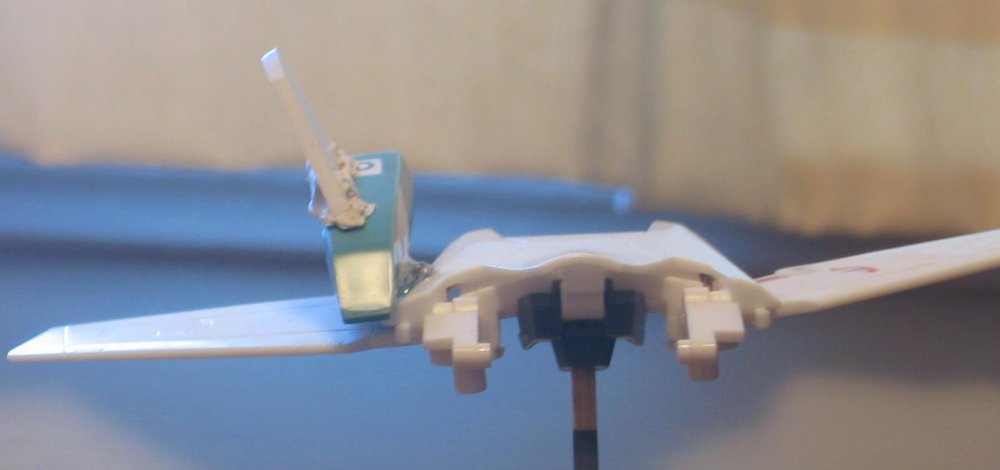
The vertical fins are mounted on the engine nacelles with the side panels filled. Edit: Forgot the photo.

-
Thanks Type J9. Did you build it? Like how it is VF-1 + VF-25ish. That is an inventive little custom... doesn't need any part swapping for the vertical fins and the nacelle engines during transformation.
-
The Revoltech Millia VF-1J topic has disappeared from samurai-monkey. Does anyone have any updates if thing was even released? And if anyone got it? EDIT: Samurai-monkey was hacked and really F-ed up the site. Not Cool.
-
it could be possible new toys with 25 anniversary scheme?
Fly4victory replied to valhary's topic in Toys
Those "Blue Angel" SV-51 look great. While I want them have to wonder if Yamato would release them since the CF SV-51 didn't seem to sell very well. So what is the source of these pictures? -
NOOOO!!!!! It is a great custom but I want the production model....Both GNU and 1/60.
-
You're avatar is still as entertaining as the first time. The VF-11 is a little work of perfection. The VF-4 and VF-22s look great also.
-
Official Releases of DVD & Blue-Ray.
Fly4victory replied to ruskiiVFaussie's topic in Movies and TV Series
The Macross Zero DVD's that Valk Exchange sold had sub-titles but I don't know about the new releases. -
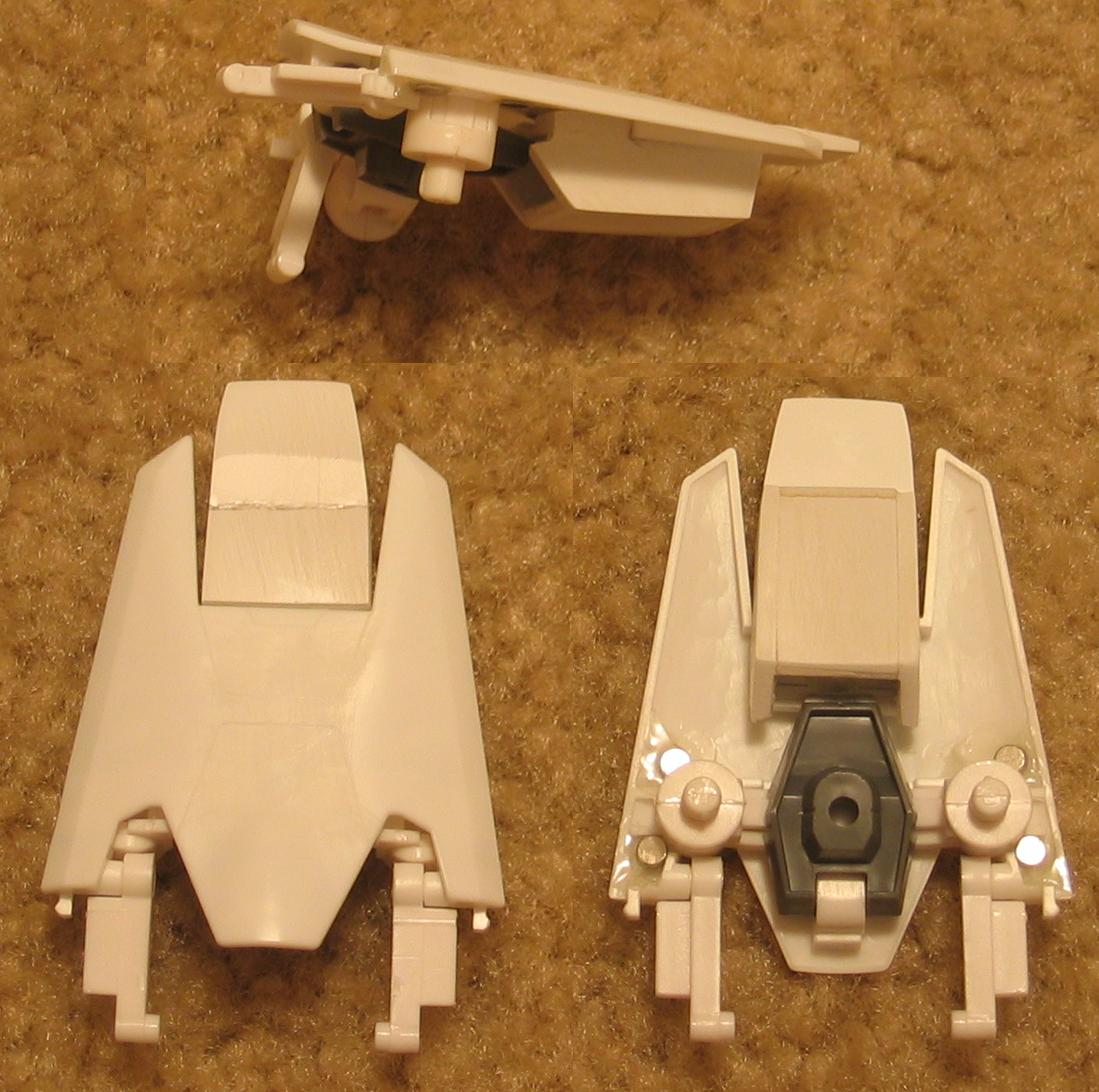
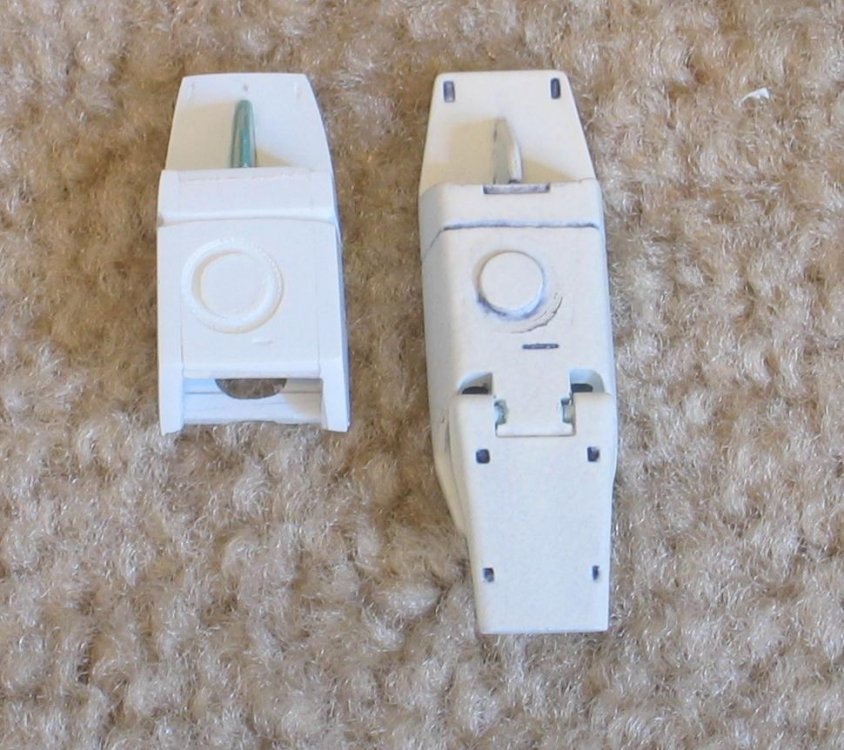
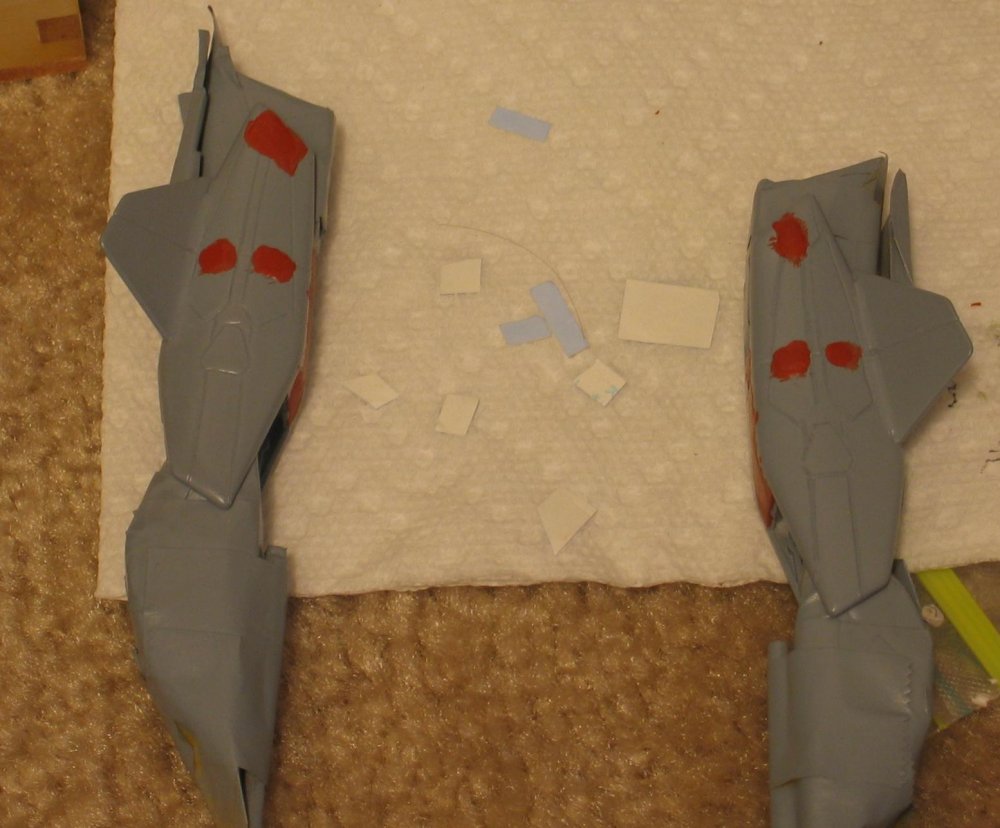
The panel lines have been cut into the fighter backpack. You can see what was removed when compared to the Battroid backpack.
-
The fighter backpack cut down and clicked in place. It still needs some detail, final sanded and panel lined.

-
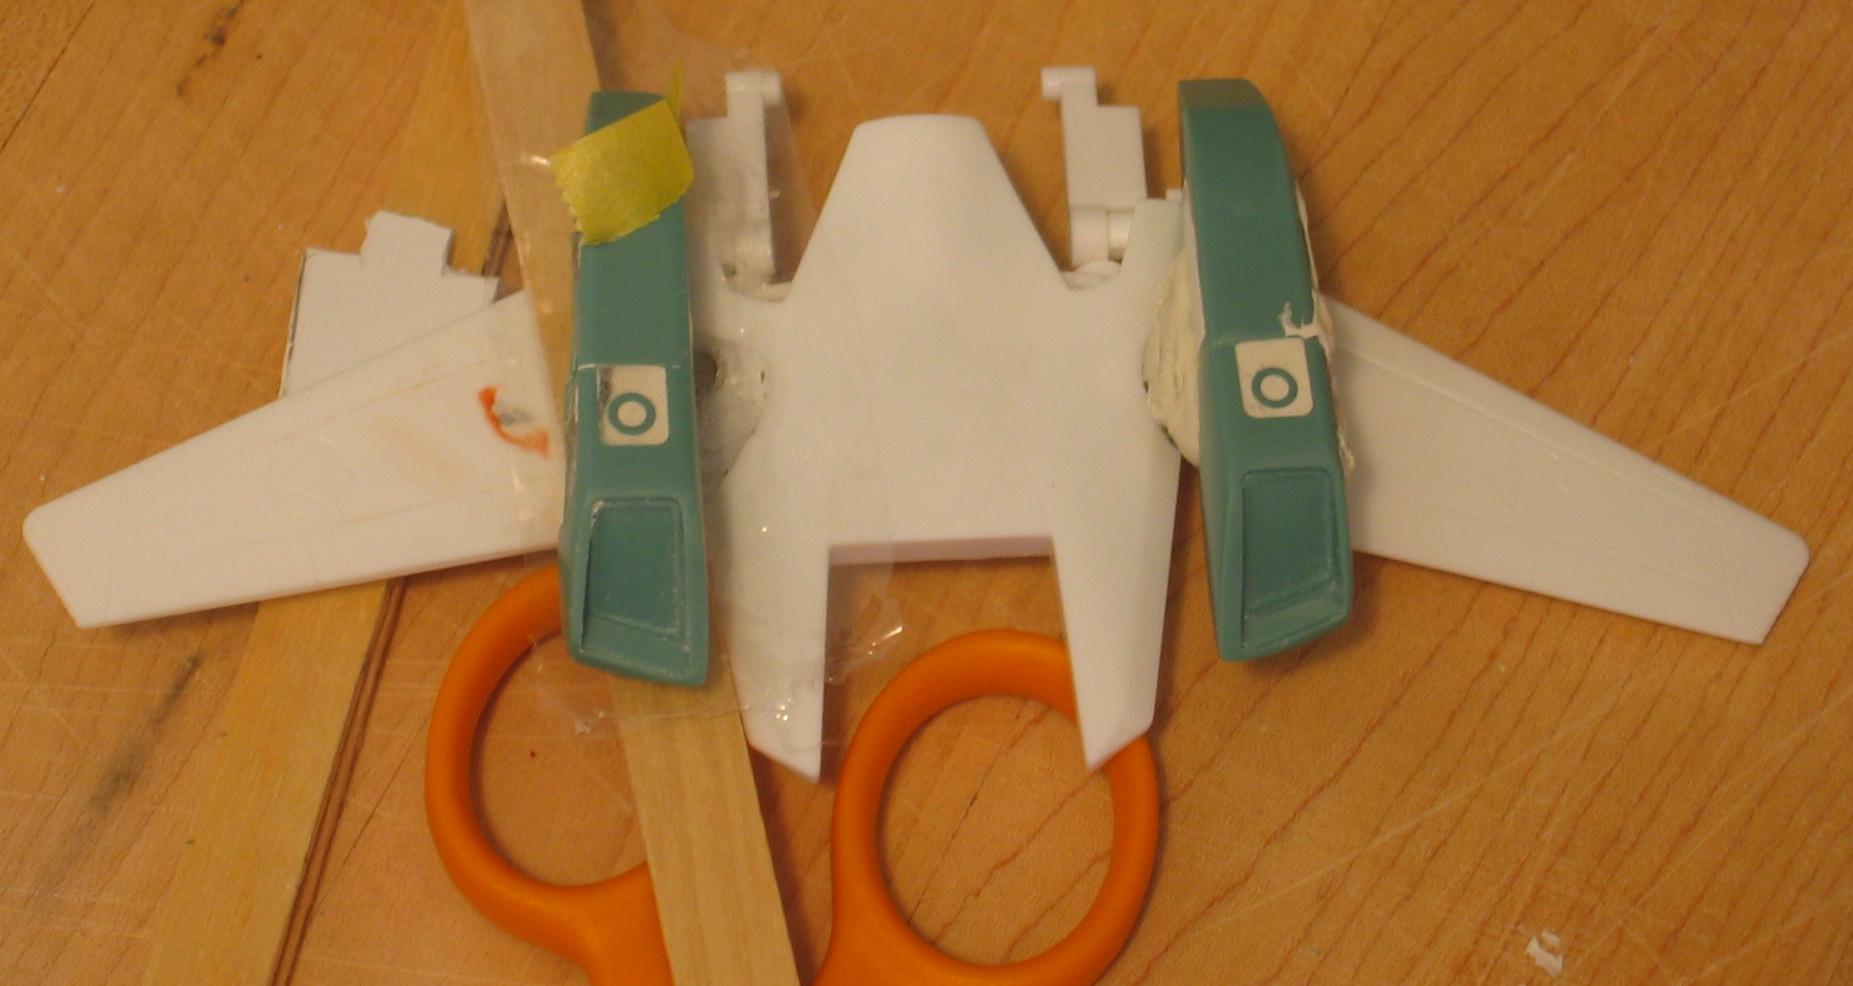
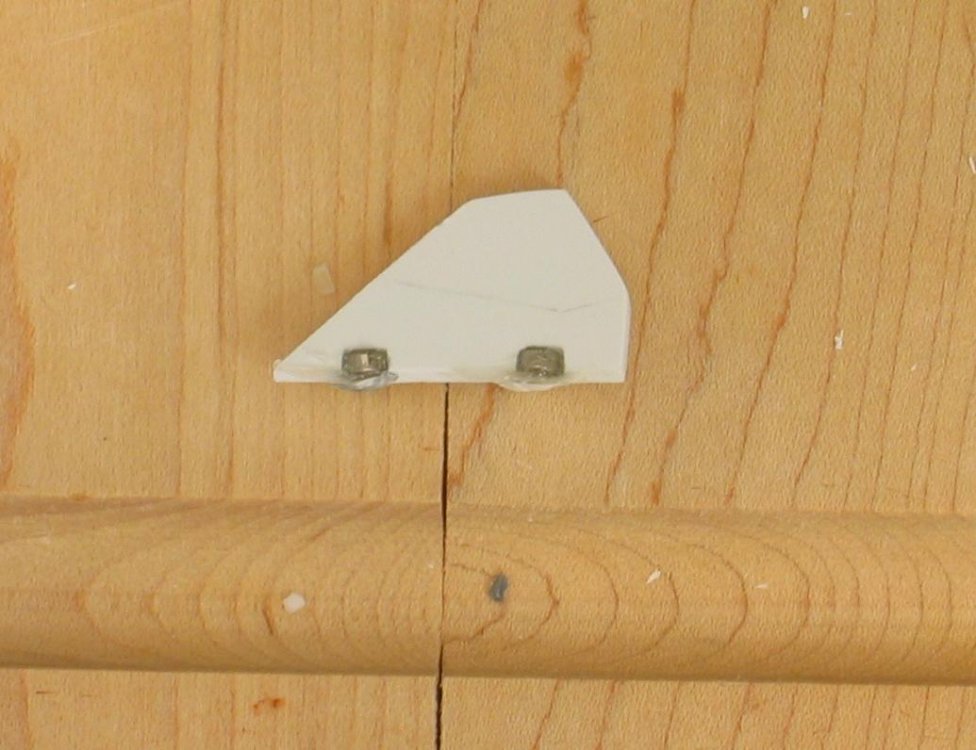
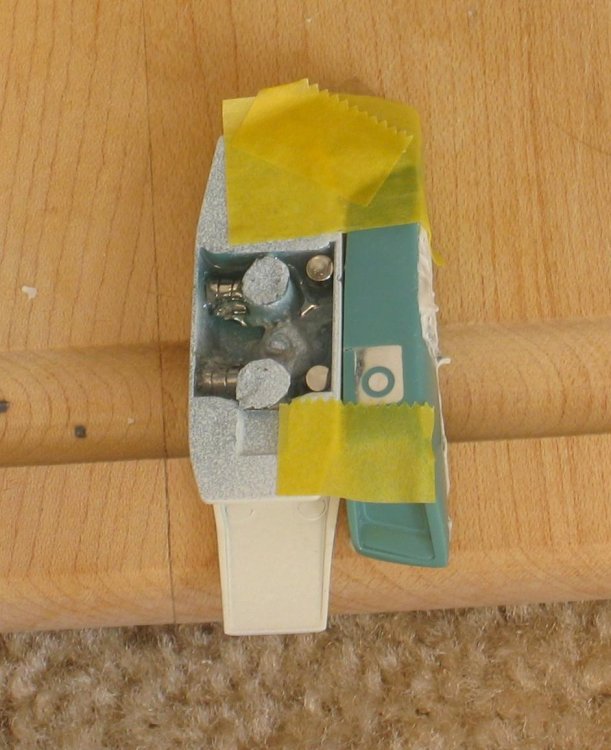
For the vertical fin, cut the piece from a sheet of styrene. Cut two slots in the bottom for two magnets and glue with epoxy. After the epoxy on the fin is dry, install two magnets inside the engine nacelle. To insure the correct polarity use the fin, hold the magnets in position with masking tape and glue with epoxy. If you are worried about gluing the fins to the engine use plastic wrap to separate the fin from the masking tape and magnets. Once the epoxy inside the nacelle has dried, tape the nacelle to the side of the non-SAP backpack and install an additional set of magnets to hold the engines when in Battroid. Glue with epoxy. The magnets already installed will make this interesting. To mount the nacelle to the fuselage during fighter mode, place a piece of plastic wrap then a single magnet on the back of the fuselage, align the engine next to the magnet and glue with epoxy. I held the engine above the wing with one tongue depressor.

-
I know that I am calling in fire on myself, but I find the Hasegawa models easier than the old Bandai models. Those old Bandai models require a lot of work.
-
Window tint film? Should be able to get scraps from a car detailer.
-
So how long before we see the 1/5000 Daedalus and Prometheus for sale. Wonder if this will be the next Macross repaint for release? They do need to milk the mold!
-
VF-22S Conversion Parts for 1/60 Yamato YF-21
Fly4victory replied to PsYcHoDyNaMiX's topic in The Workshop!
Valkyrie addict avatar looks great. :lol: -
Sorry Fifbeat but the helmet less doesn't fit in armor mode. His hair is too long. You need to give him a haircut. Spedfish, that is a great modification.
-
I will try the helmet less head tonight. There was no additional sticker sheet. I was hoping that we would get one but no such luck. Megahouse may hold out giving additional weapons and stickers to include them with non-canon releases to off set possible unpopular toys.
-
Bandai 1/72 Scale Macross Frontier Plastic Models
Fly4victory replied to Graham's topic in Hall Of The Super Topics
David, You are not alone. A Hasegawa pure fighter would be so welcome. I ordered one kit to see what it was like and if budget supports will buy one for each mode if I like the kit. The Bandai VF-19 Kia I have has never left Battroid mode and the only Bandai I envision playing with is the VF-2SS. -
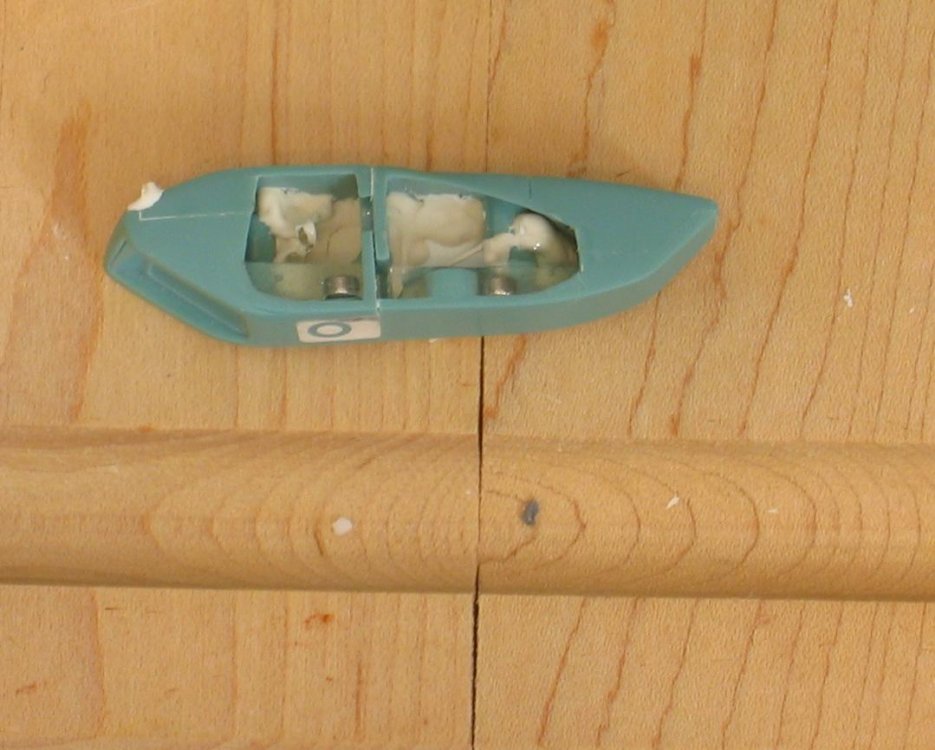
It looks very boilerplate but one engine (non-SAP) and vertical fin are installed. Both are removable. Re-puttied the back of the engines and will recut some of the panel lines.
-
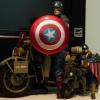
The purple plastic will show stress marks more than the green. Can easily see where the parts were cut from the mold tree. The windshield/instrument cluster was very tight to swing back. The swing bar for the wheels popped off and I reattached them after mounting the bike to the figure. The three part (each side) slider for the chest popped apart. Both these things happened to Stick. The elbow joint has been redesigned. I could not remove the engine like I could on Stick. The figure is tighter but it could have been a better day on the factory floor. Edit: It is a different helmet, no mouth piece, but the visor goes all the way down. Stick's does not sit flush on the mouth piece.
-
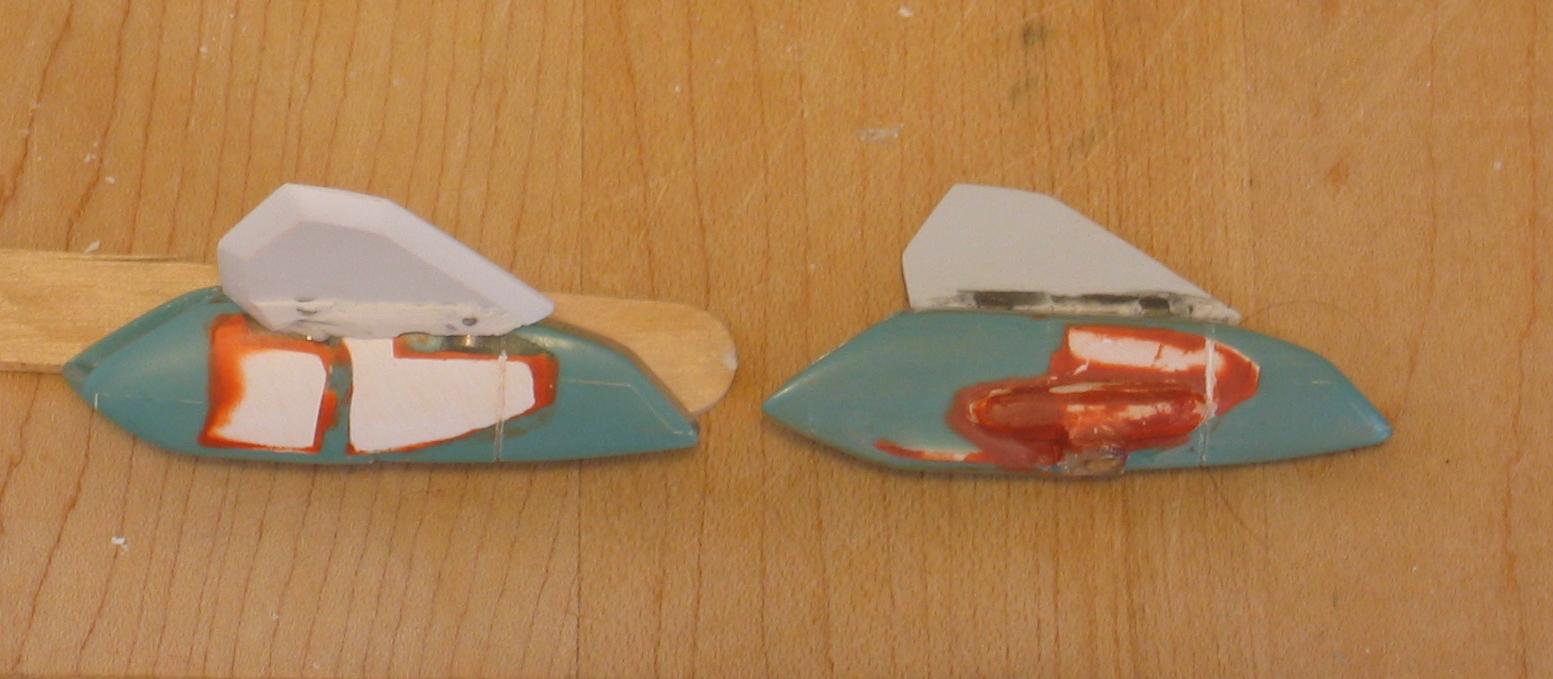
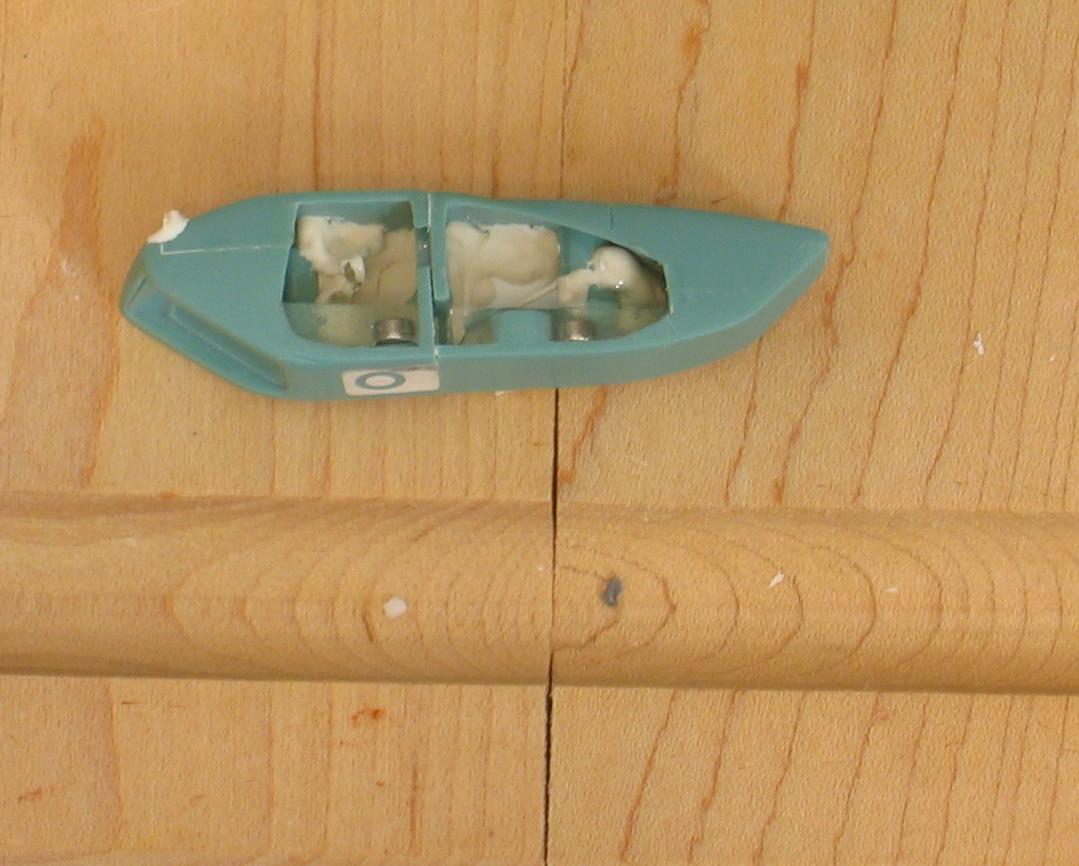
That is Master WC's version of the VF-2SS. He used the 1/72 resin kit and all the parts are removable. Mine may have similar colors but will not look anywhere near as nice. The lines of the cockpit are much nicer on his model compared to the Bandai. Plus his paint jobs are amazing. That is the way the SAP should look and my modified Bandai will still look clunky around the wing engine mounts when compared. I see that the leading edges on the SAP wings are green and so is that "sensor/missile" thing on top. The anime colors are a funny teal same as the plastic is molded in. Kept the white of the sensor but used medium green and Nato gray on the SAP, weathered with rust, silver, and gunmetal. The cannon is metallic platinum weathered with gunmetal. I would love to have a 1/60 variable version of that VF-2SS. Edit: Spelling
-
As you can see from above the scans would be in 1/72 and will need cleaning up using a vector program. I could even scan the Yamato 1/48 decals but they also would need to be cleaned up. They are not a usable product, at least not on par with what was produced in the past, but they are better than starting from scratch.
-
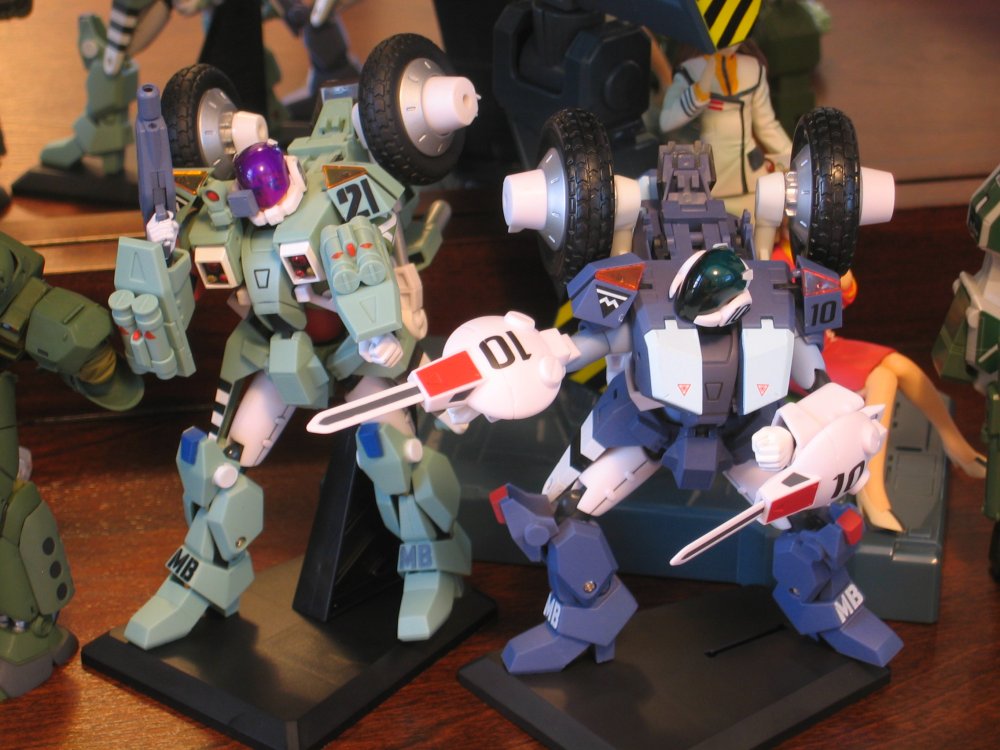
Yellow's bike has larger tires than Stick. The tires are also glossy. Now if Megahouse can use the less glossy rubber but with the larger tires. The launching missiles are on a parts tree. They are molded in gray and then painted dark red????. The normal stowed missiles are under the front covers. The monocle sight can be installed inside the right missile bay when the doors are open. The little pistol is nicely detailed. The silencer and stock are not removable. The new joints are great. You can see Yellow is just on the base. Stick is stuck on the stand. This is even after I removed the engine from Stick's bike. He still would not stand. Yellow's bike still has the engine and can hold the pose. The only grip is the peg mount for the top of the stand cannot support the weight of Yellow and the bike. It either pitches forward or back but will not stay in an attractive position.
-
If anyone needs source scans for decal production, I used the Hasegawa Decals as a basis. Some of the scans are available in the model section. If you cannot use them just let me know and I will try to post better.
-
MH yellow was delivered today but have to wait until after work before I can play.
-
Those additions are excellent. Hope revoltech gets the message and quickly makes a large VF-11. Recast will trash your paint which sucks. I hate waiting on supplies also. Guess you will need build do a second one. That one will be the production model for fielding, this one the test version.