Papa Rat
-
Posts
149 -
Joined
-
Last visited
Content Type
Profiles
Forums
Events
Gallery
Everything posted by Papa Rat
-
Thanks for the insight and link. I’ll check out your channel right away. I am super late to this hobby but I’m already loving it. It’s such a great way to unwind from a busy work and family life. My moment of zen, my plastic therapist. lol
-
Thanks. Masking it out sounds like a great idea. I was also thinking about using a toothpick. Don’t know what difference it would make, but do you have any thoughts on using super glue?
-
Making progress. It was prime day today and I can see I have a lot of work to do. There are plenty of mold lines and some minor nub marks to putty, smooth. All and all there hasn’t been any headaches with this kit. Doing the test build gave me insight in how many of the connection points are sort of loose but no major issues at all. I can’t wait to paint! (= Going to be a bit of masking but no more than the Bang kit. Mostly inside the skirt armor and tiny details on ankle armor etc… There is going to be a lot of gluing post paint. Basically all the armor pieces are going on post painting including the skirt armor plates and there are many. Any advice besides being super careful when it comes to gluing together painted parts?
-
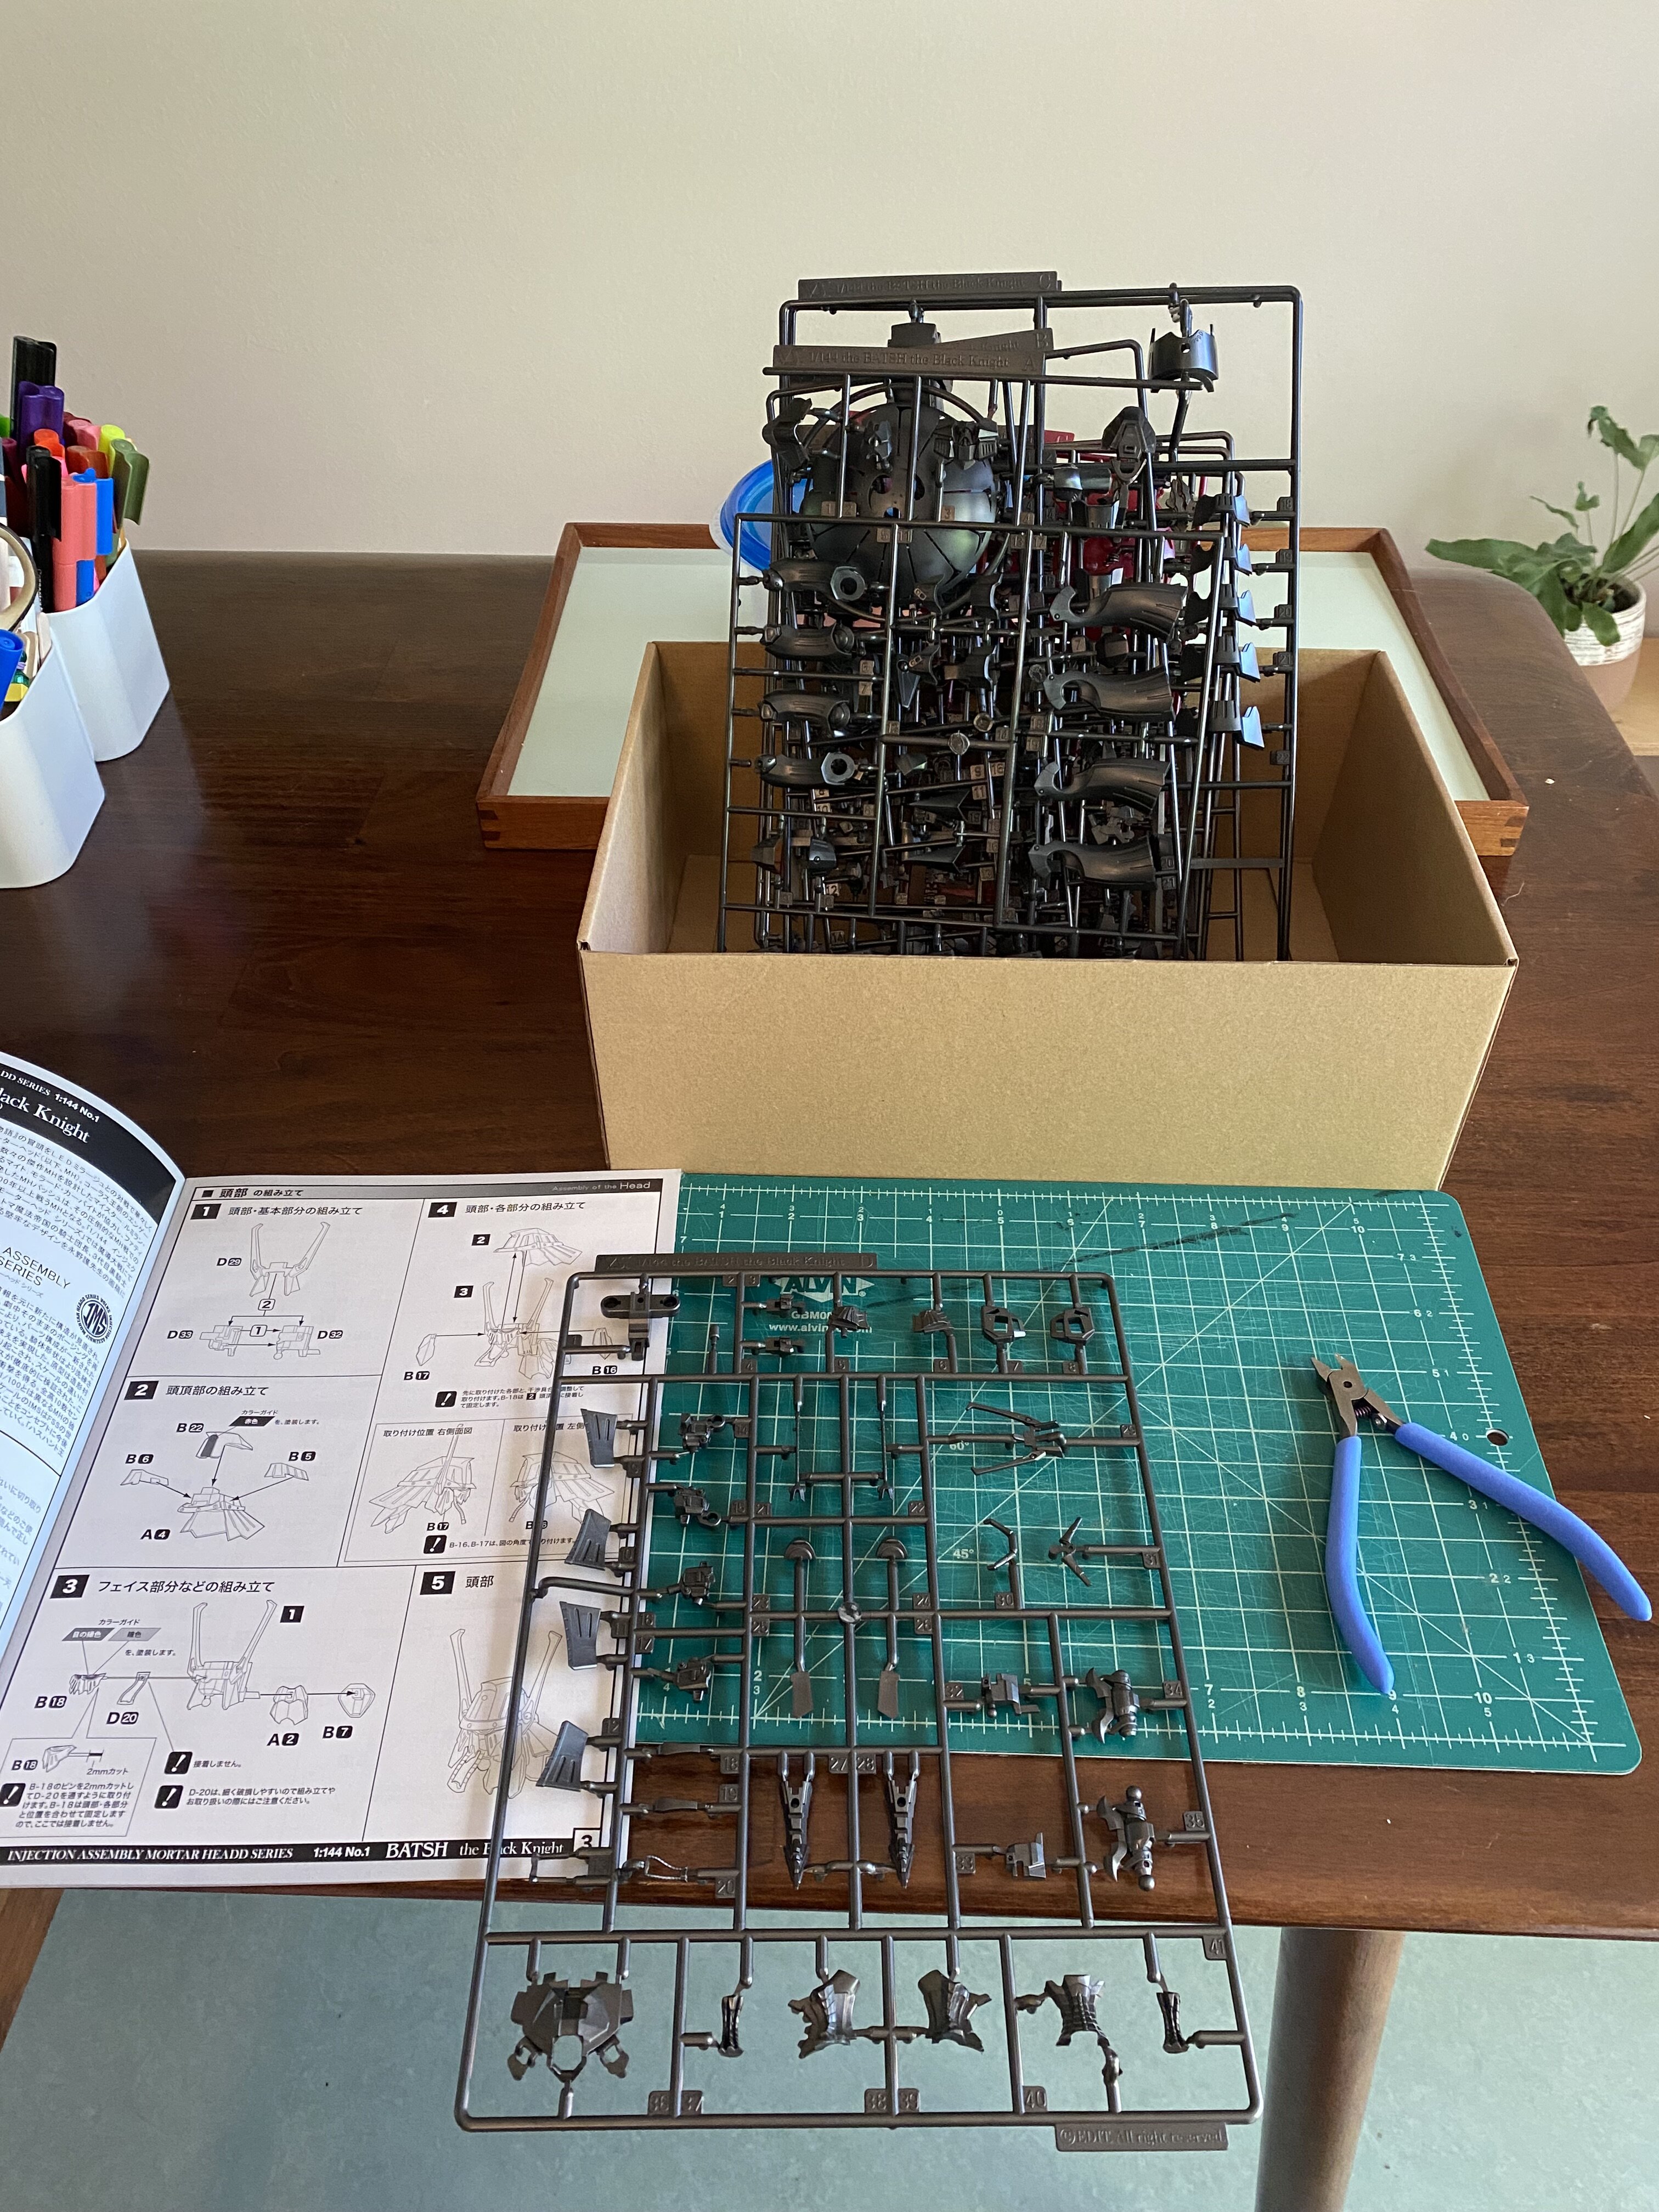
Next project is starting. By my kids request I opened up the 144 scale Batsh FSS Volks kit. Life is very busy right now so this is going to take awhile, but I’m very excited to dig in, I will do my best to document this build for articulation, seam issues and fit etc… right away I see there is some nice color separation and a straight build could be an option. I look forward to doing custom paint on this with some sort of clear/color shimmering on the black armor parts. I’m excited to have fun with this one
-
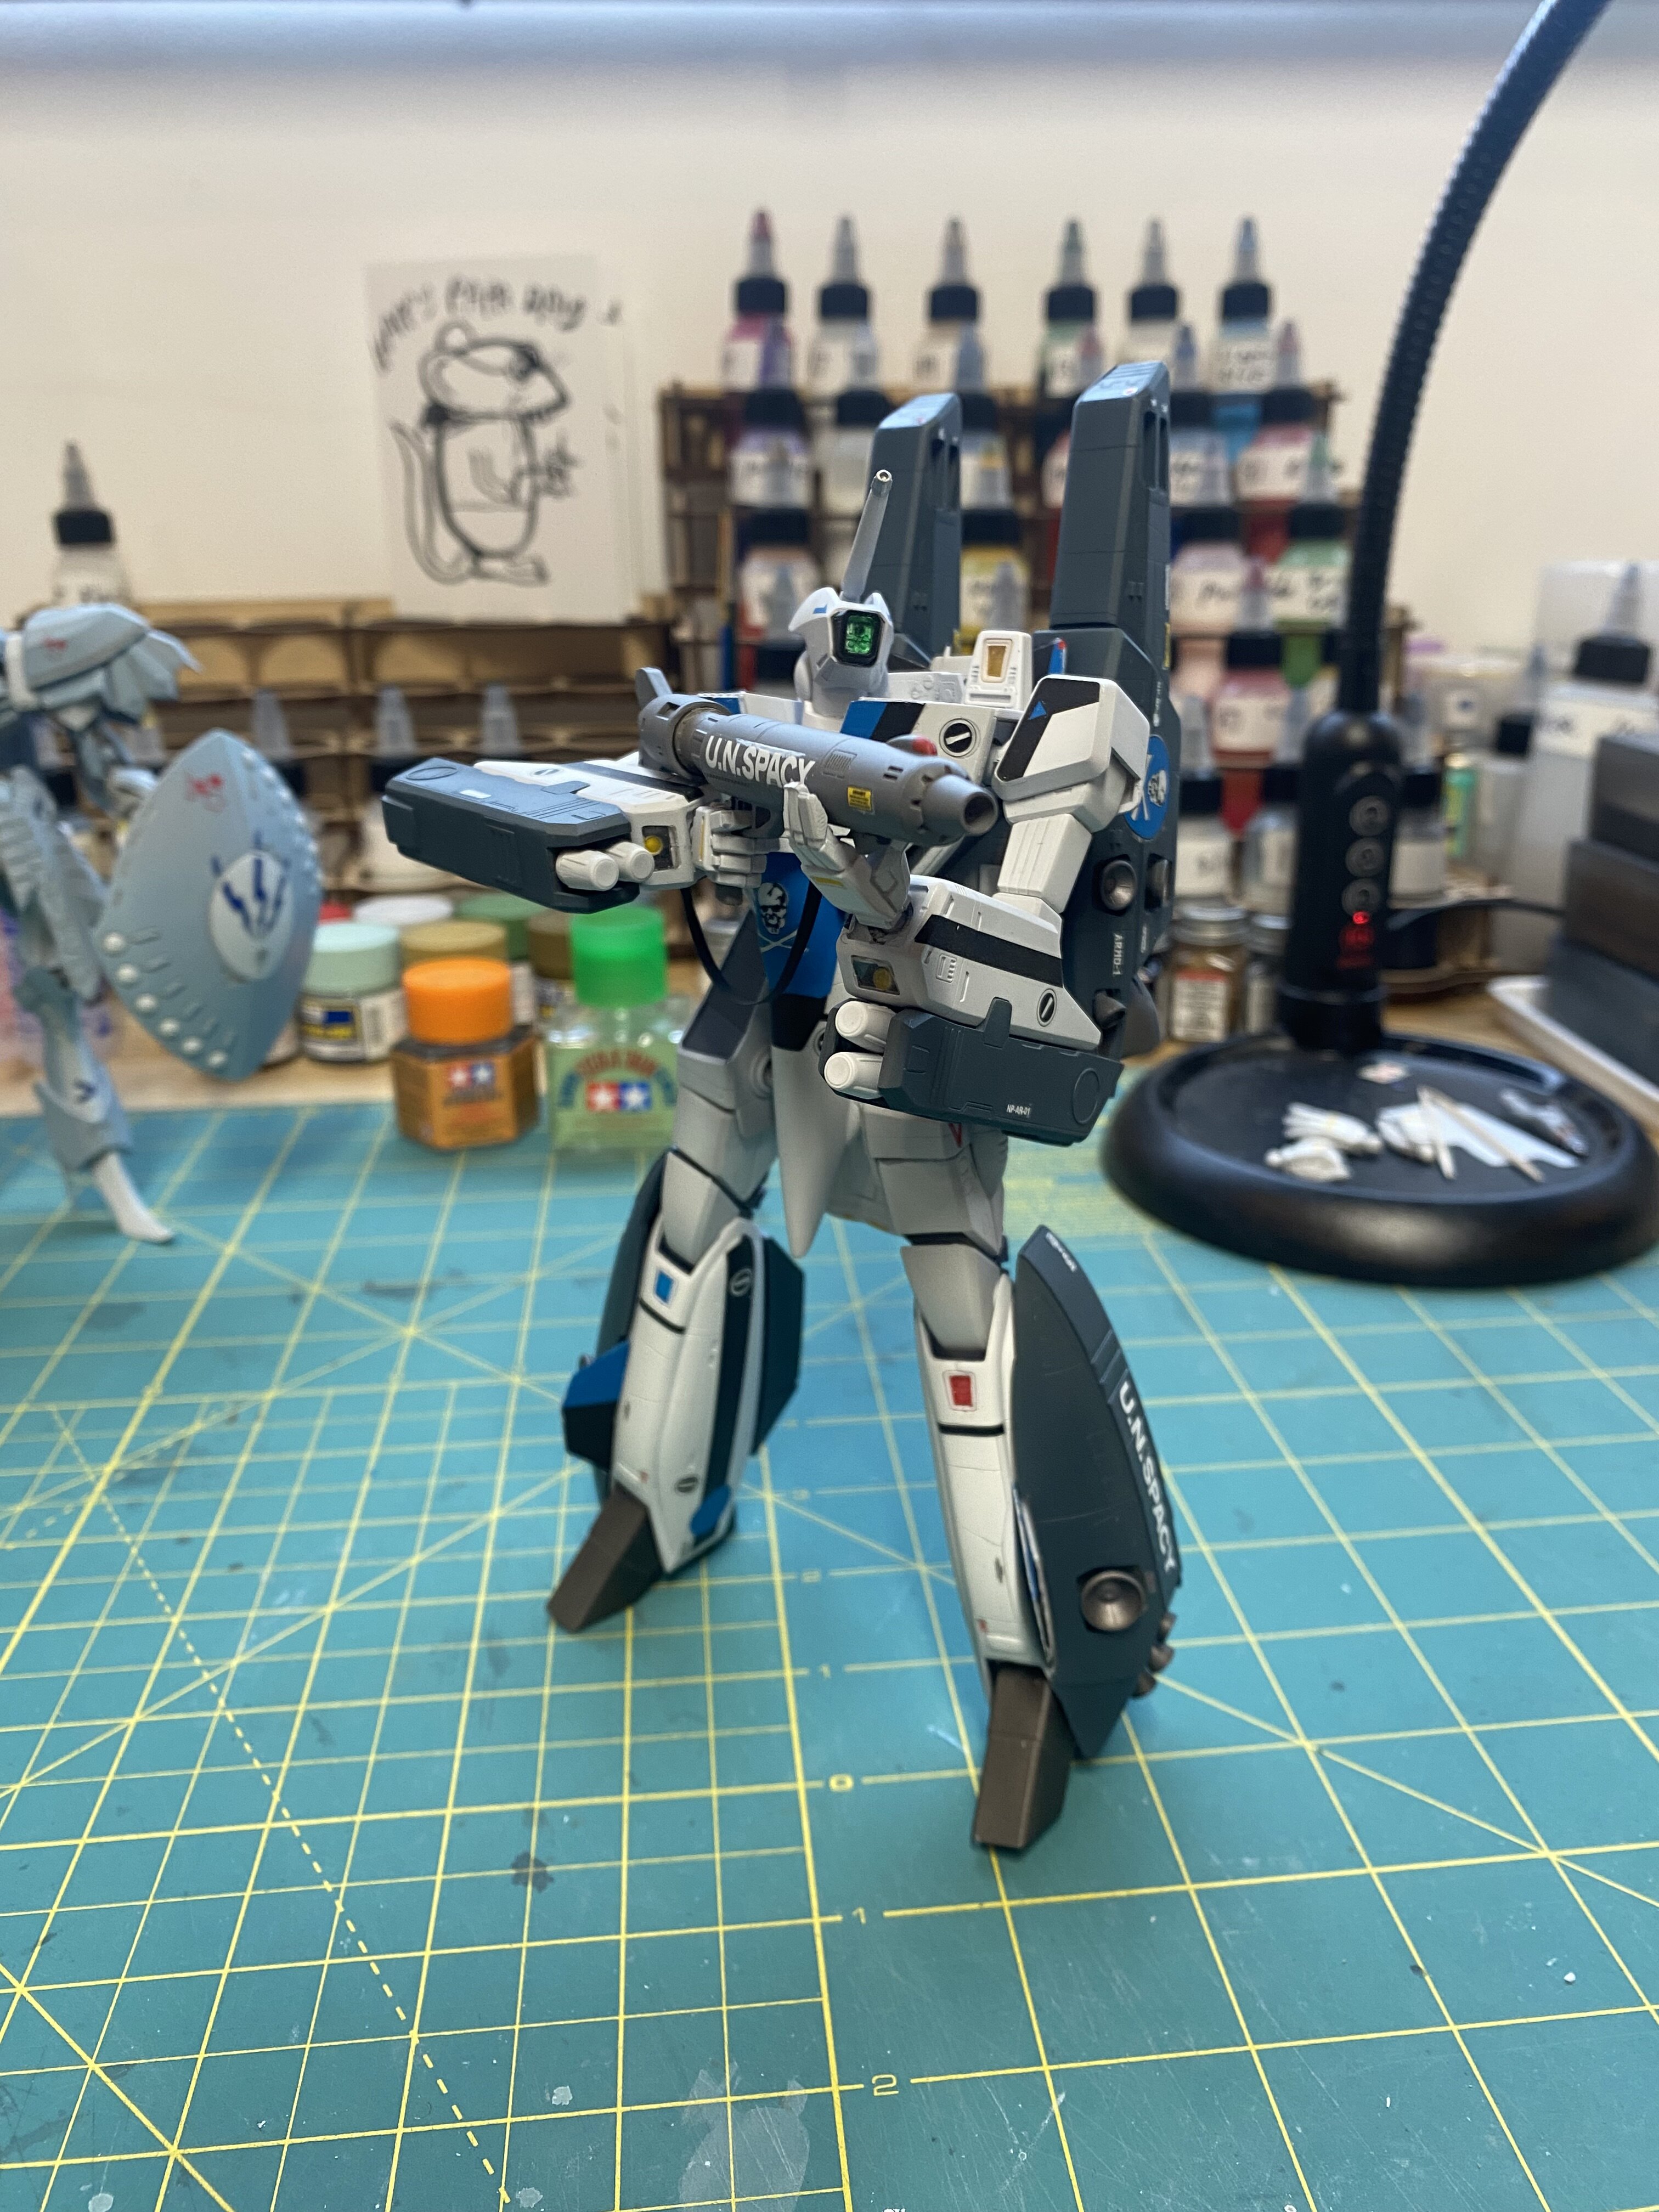
So here’s my 4th build and it’s the Hasegawa VF-1A Super Battroid Valkyrie. It was a fun one and it turned out OK I suppose. It was a nice way to learn more about seam removal and making misaligned elements work. I also had to scribe a bunch of panel lines which turned out rather bad. I need a lot of practice with technique. Lol. I went with the decals for most of the color correcting which I feel was a mistake. It was the least enjoyable part of this experience for me. I would 100% mask and paint all those elements next time no question. I also think I should have panel lined a little darker. I used a light gray and would have preferred a dark gray one it was all done. I have a couple other versions of this kit and am excited to revisit this again down the road and now have a better idea what I will be facing.

-
Will do. Sort of treating this thread like a journal as I start this hobby. I’ll post updates as I reach benchmarks. I’ll focus on Macross but am so excited about these FSS kits.
-
Still wrapping up my first Battroid VF-1A Max color-way and will post the final build soon-ish…but wanted to do a quick little show and tell. Today is my bday and my wonderful wife and kiddo got me a couple more kits for my backlog which is starting to form. Soooo grateful and excited.

-
Thanks for the recommendation. I’ll have to look into it. For my first two builds I just started my sanding at 400 and finish up with 800. I was just curious about using a metal file so this Battroid is a test for that approach. In the end I went back to using 400/800 sand papers
-
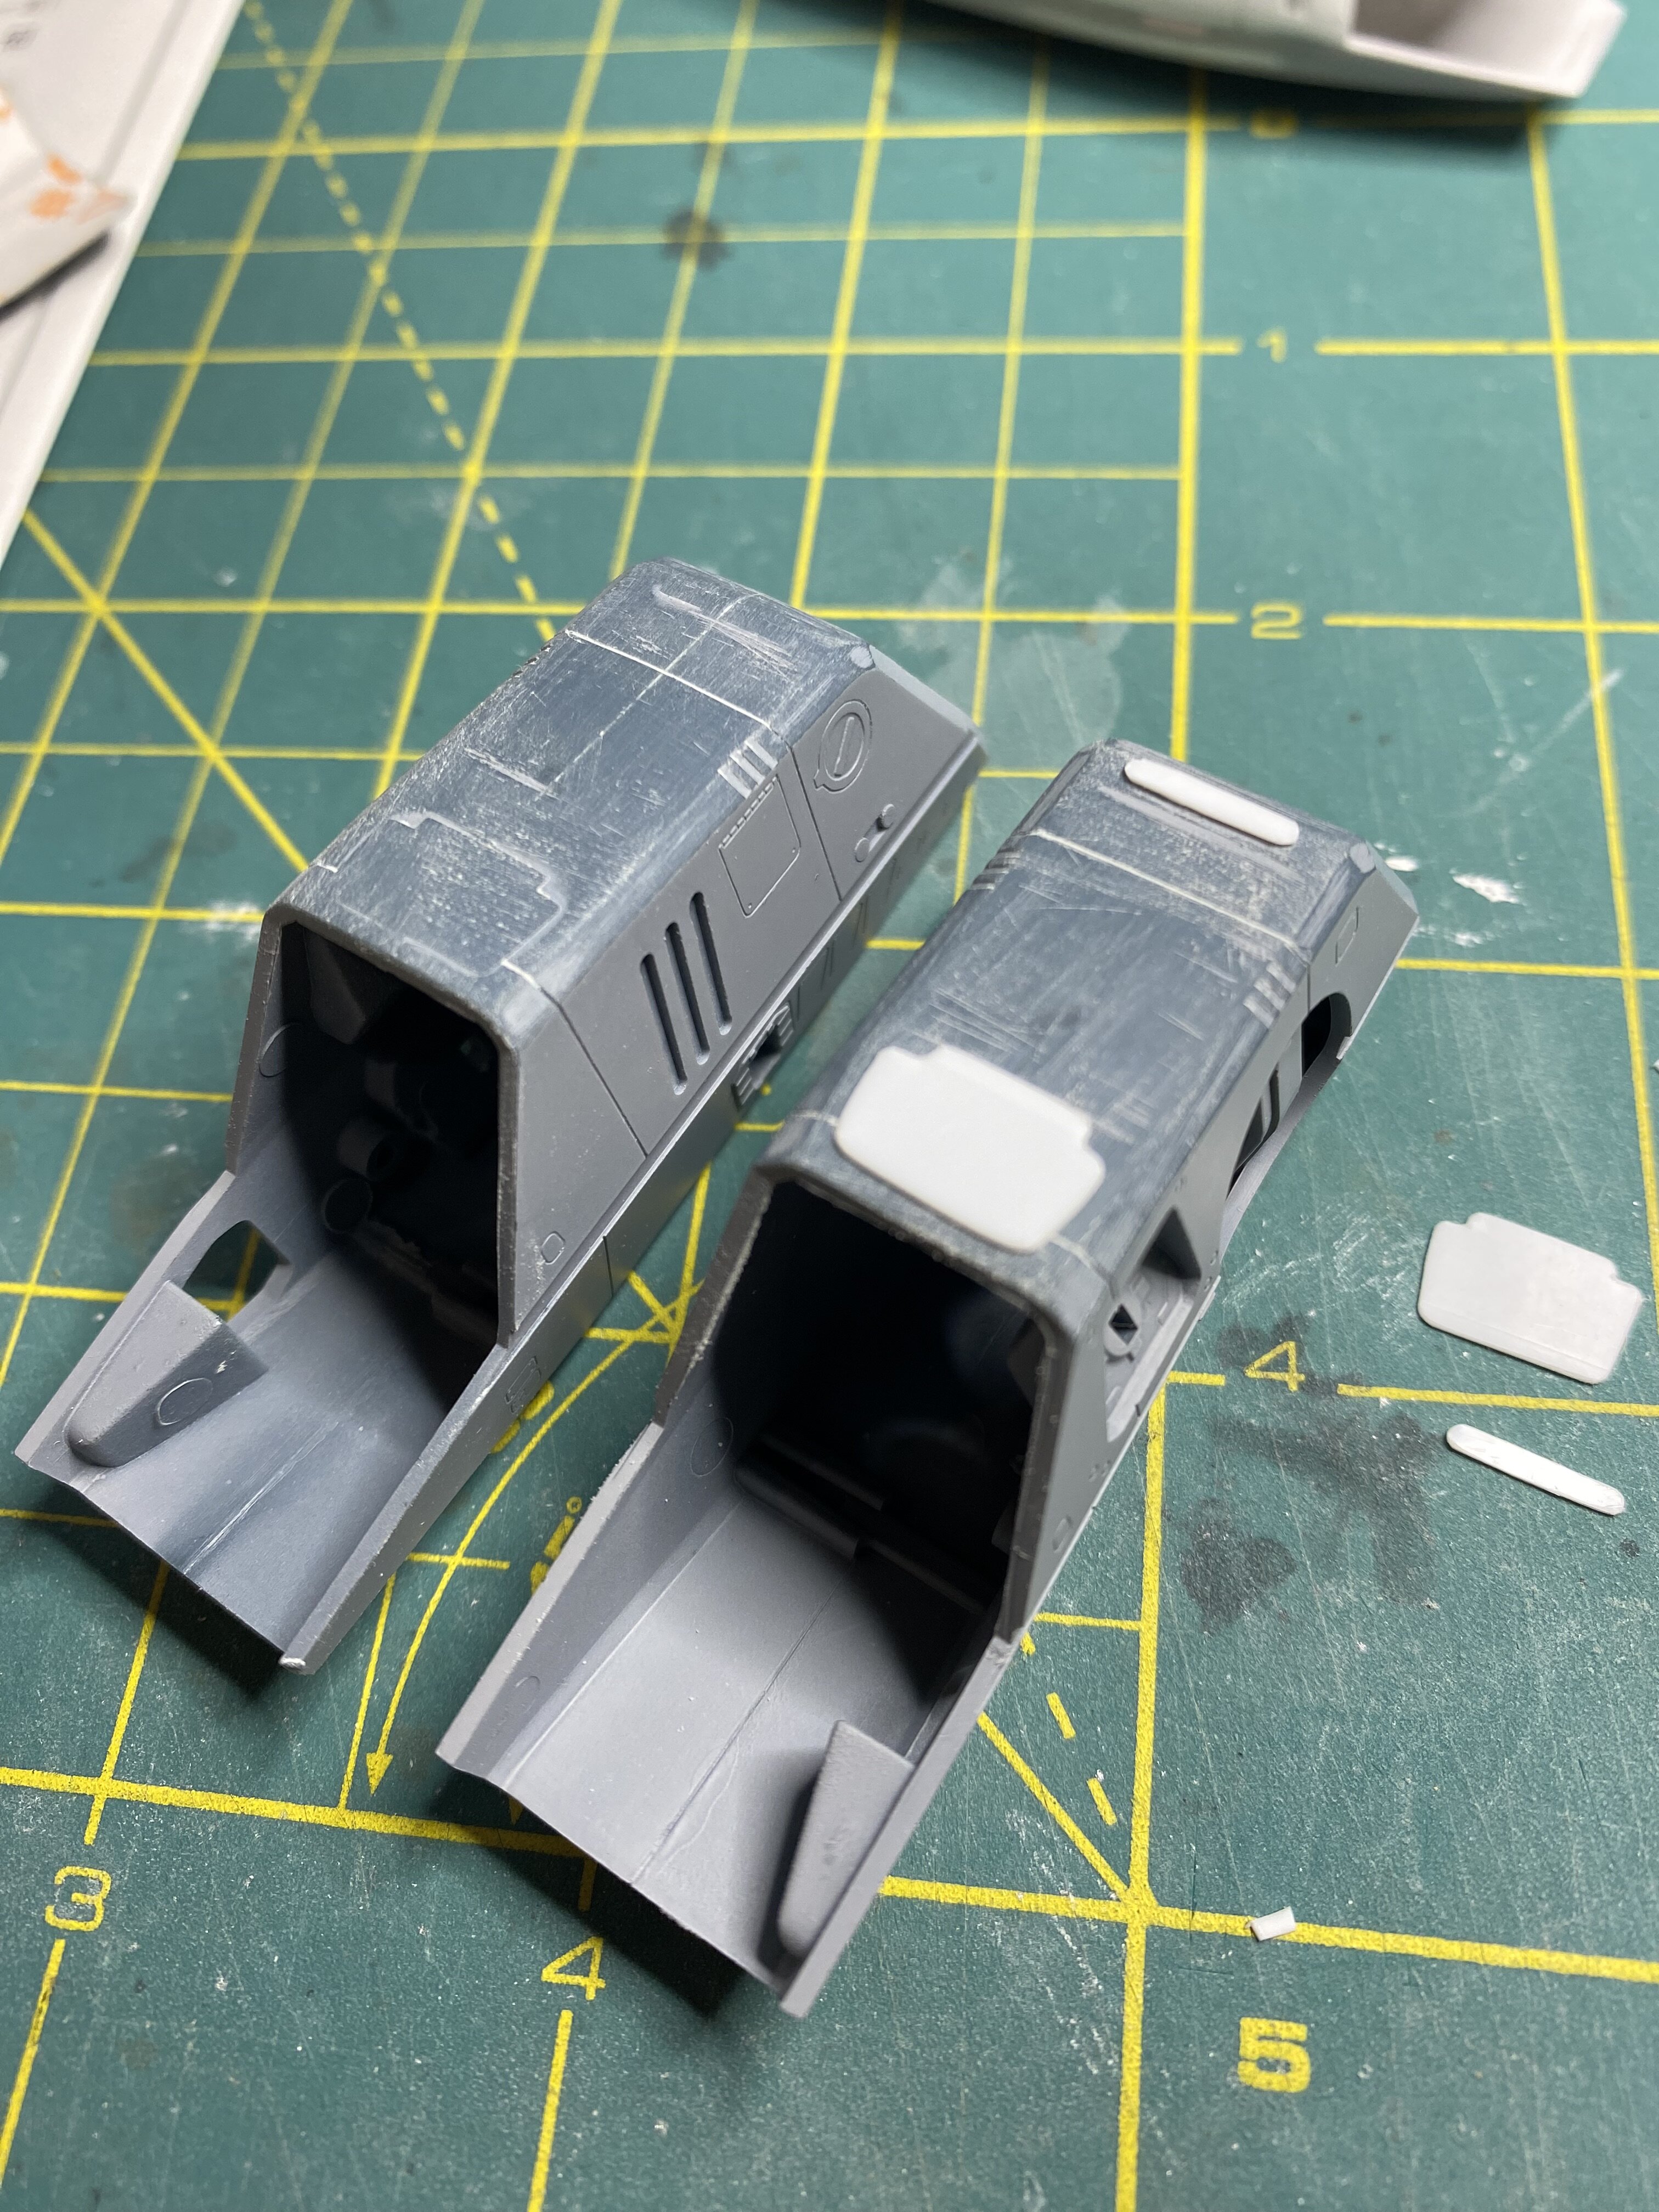
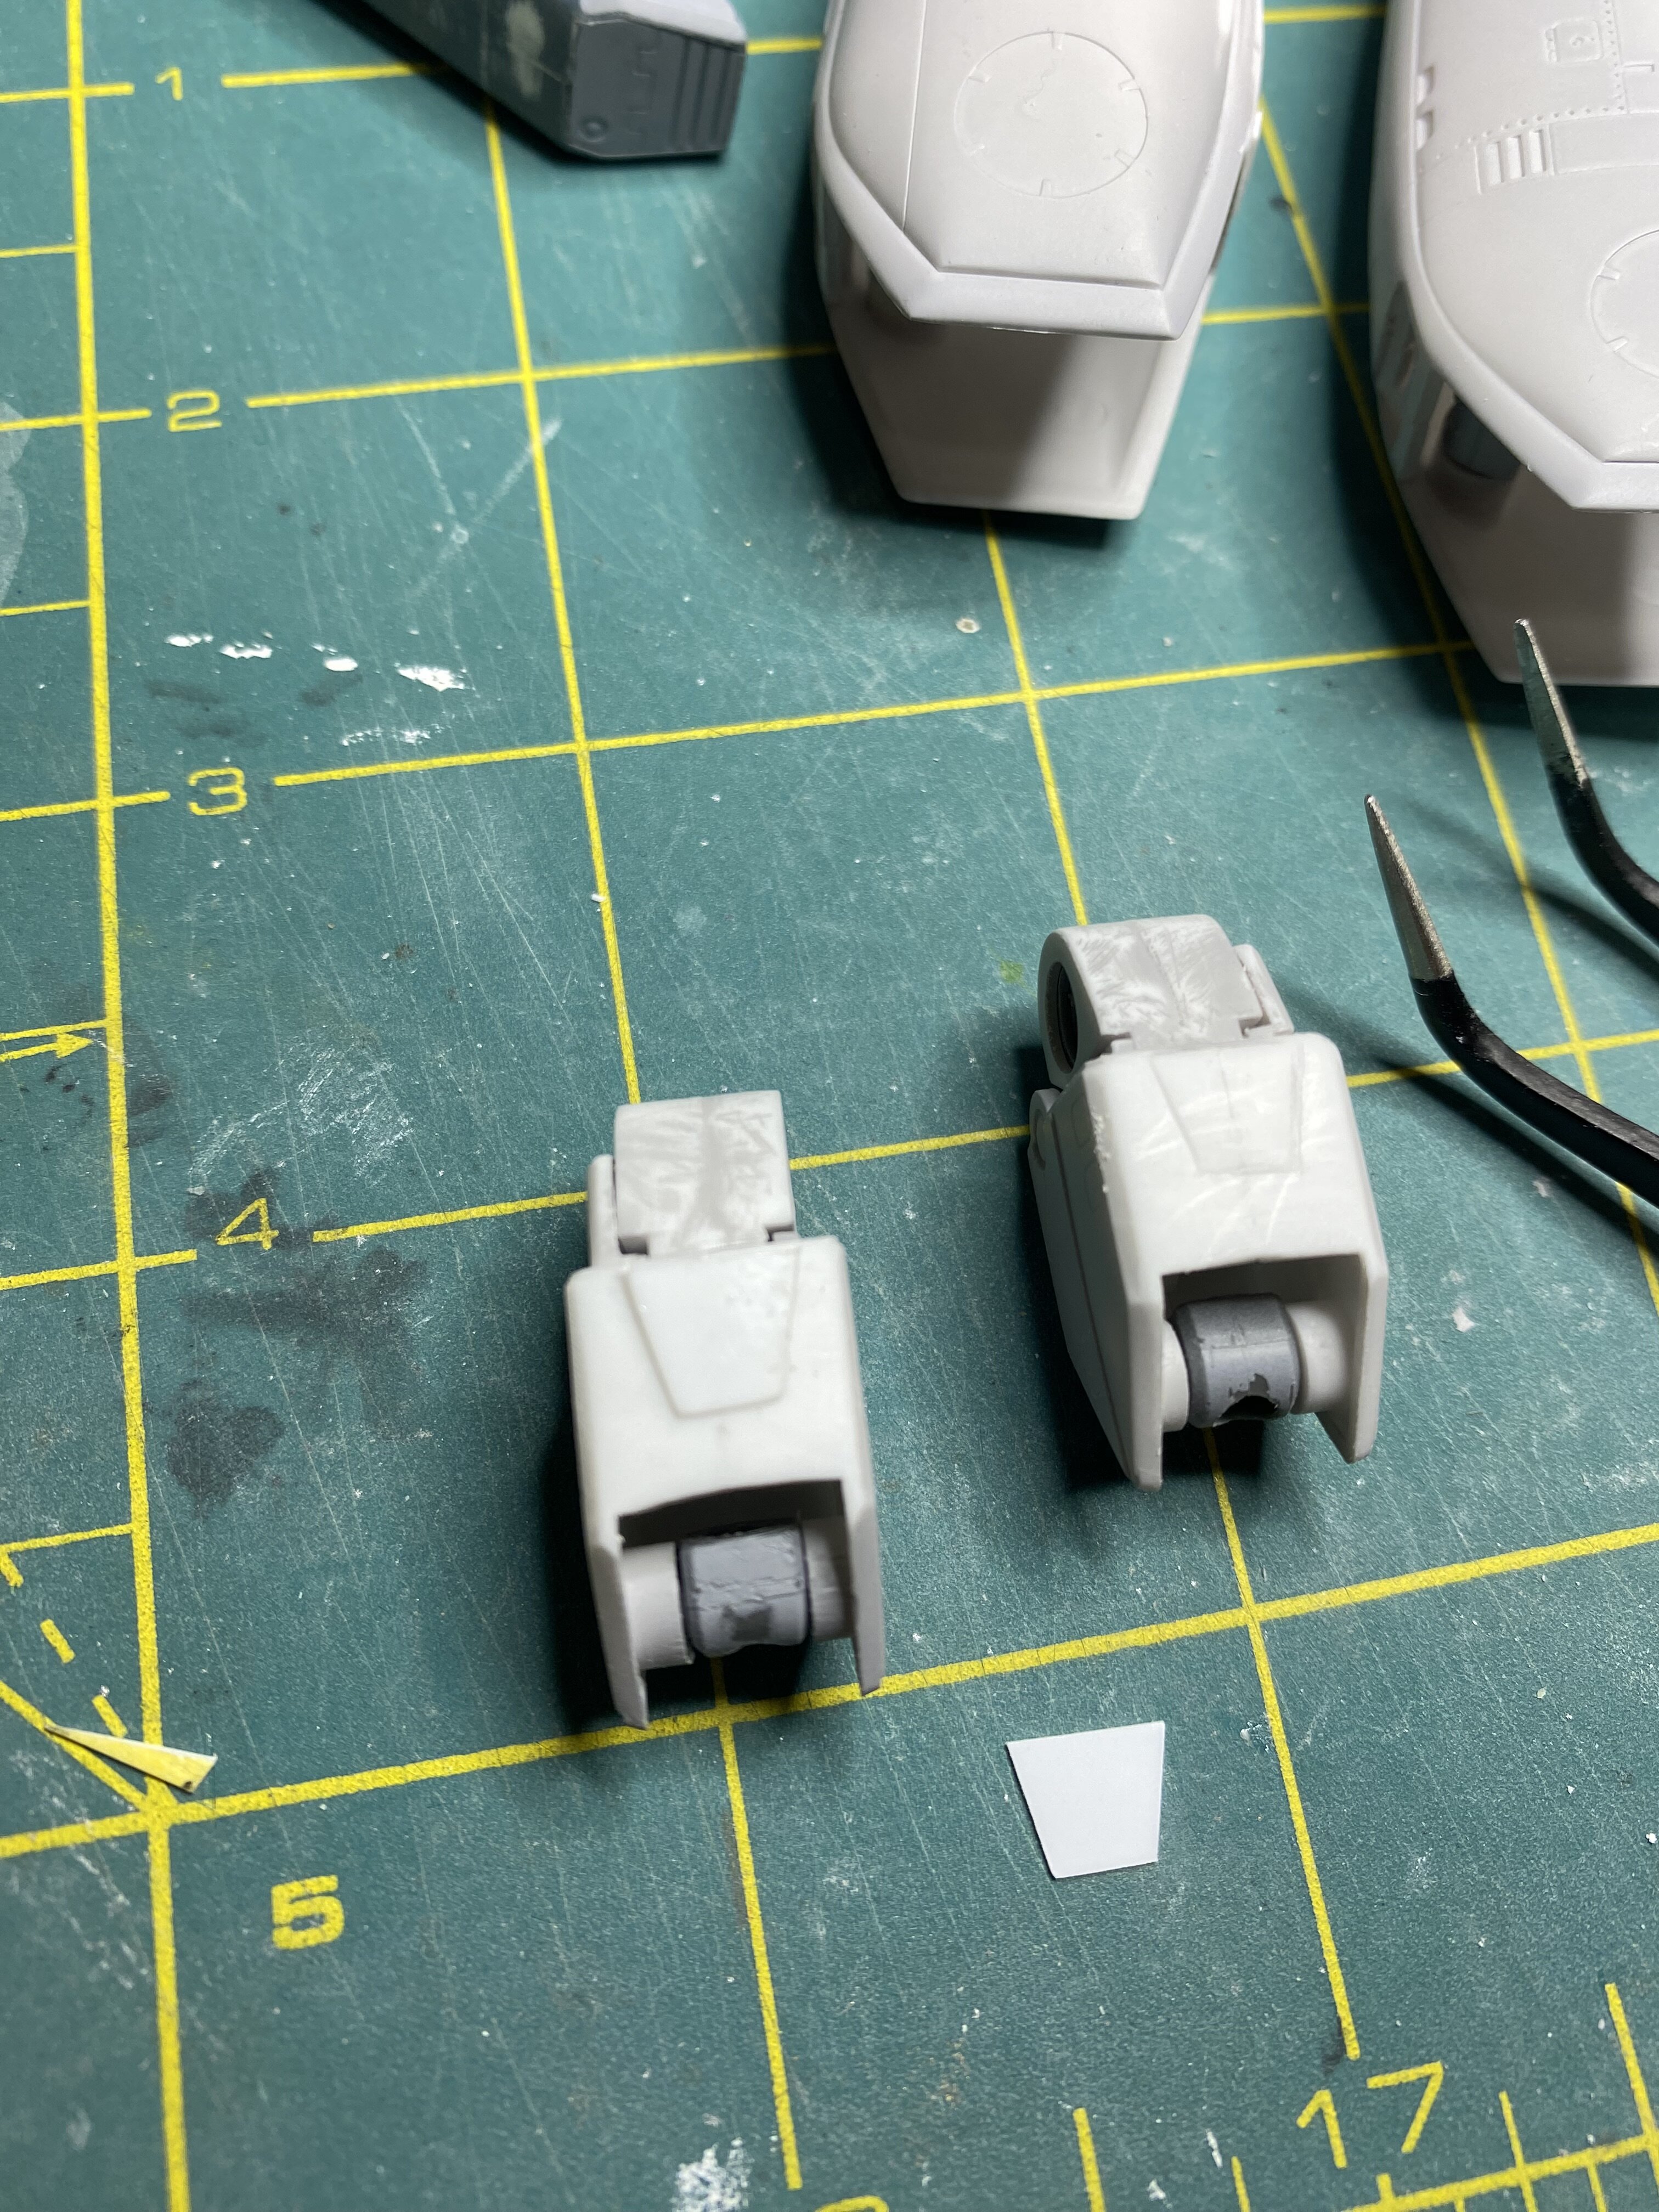
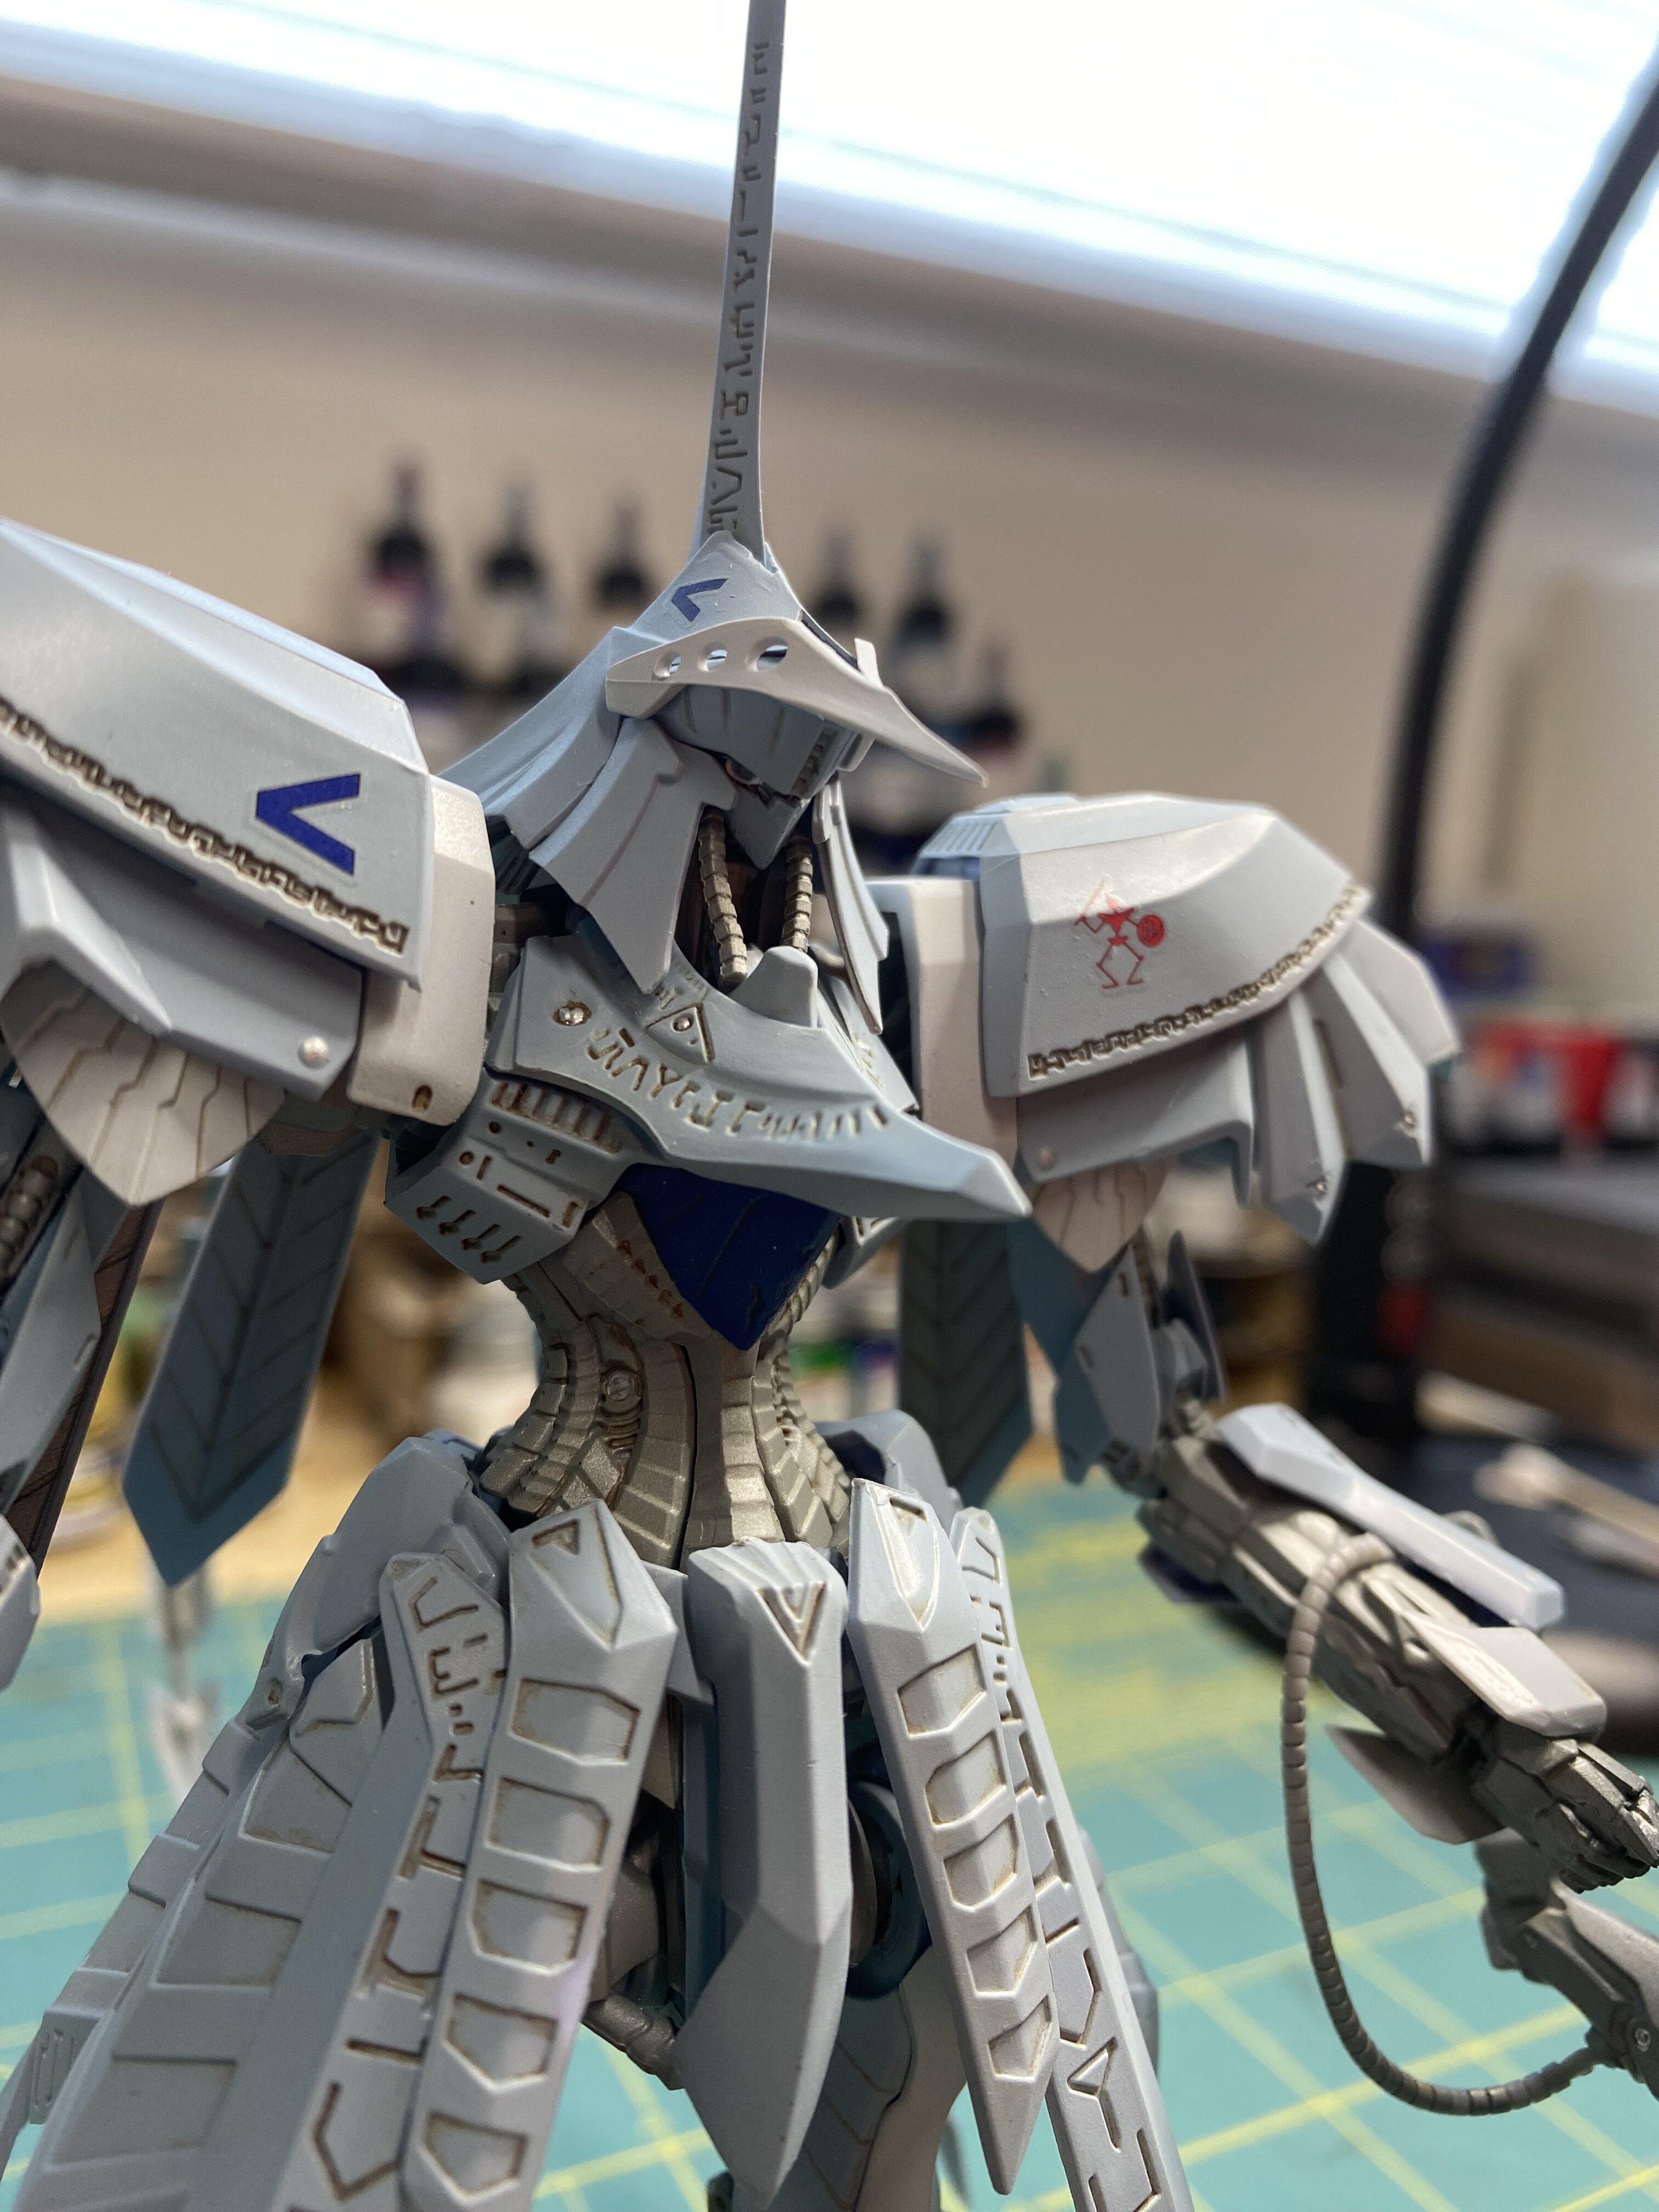
I tried out a new metal file on this kit for seam removal which left a very rough scratchy surface that needs a lot of attention. I was surprised by the surfacer 1000 I used and its ability to sort of smooth out the surface to a decent degree. I’m currently in the process of filling with putty, priming, sanded and more to go. I figured it would be easiest to just make custom details out of plate material since those seam lines were causing some alignment problem. Fingers crossed it doesn’t look horrible. Also in the process of scribing panel lines that were sanded off.
-
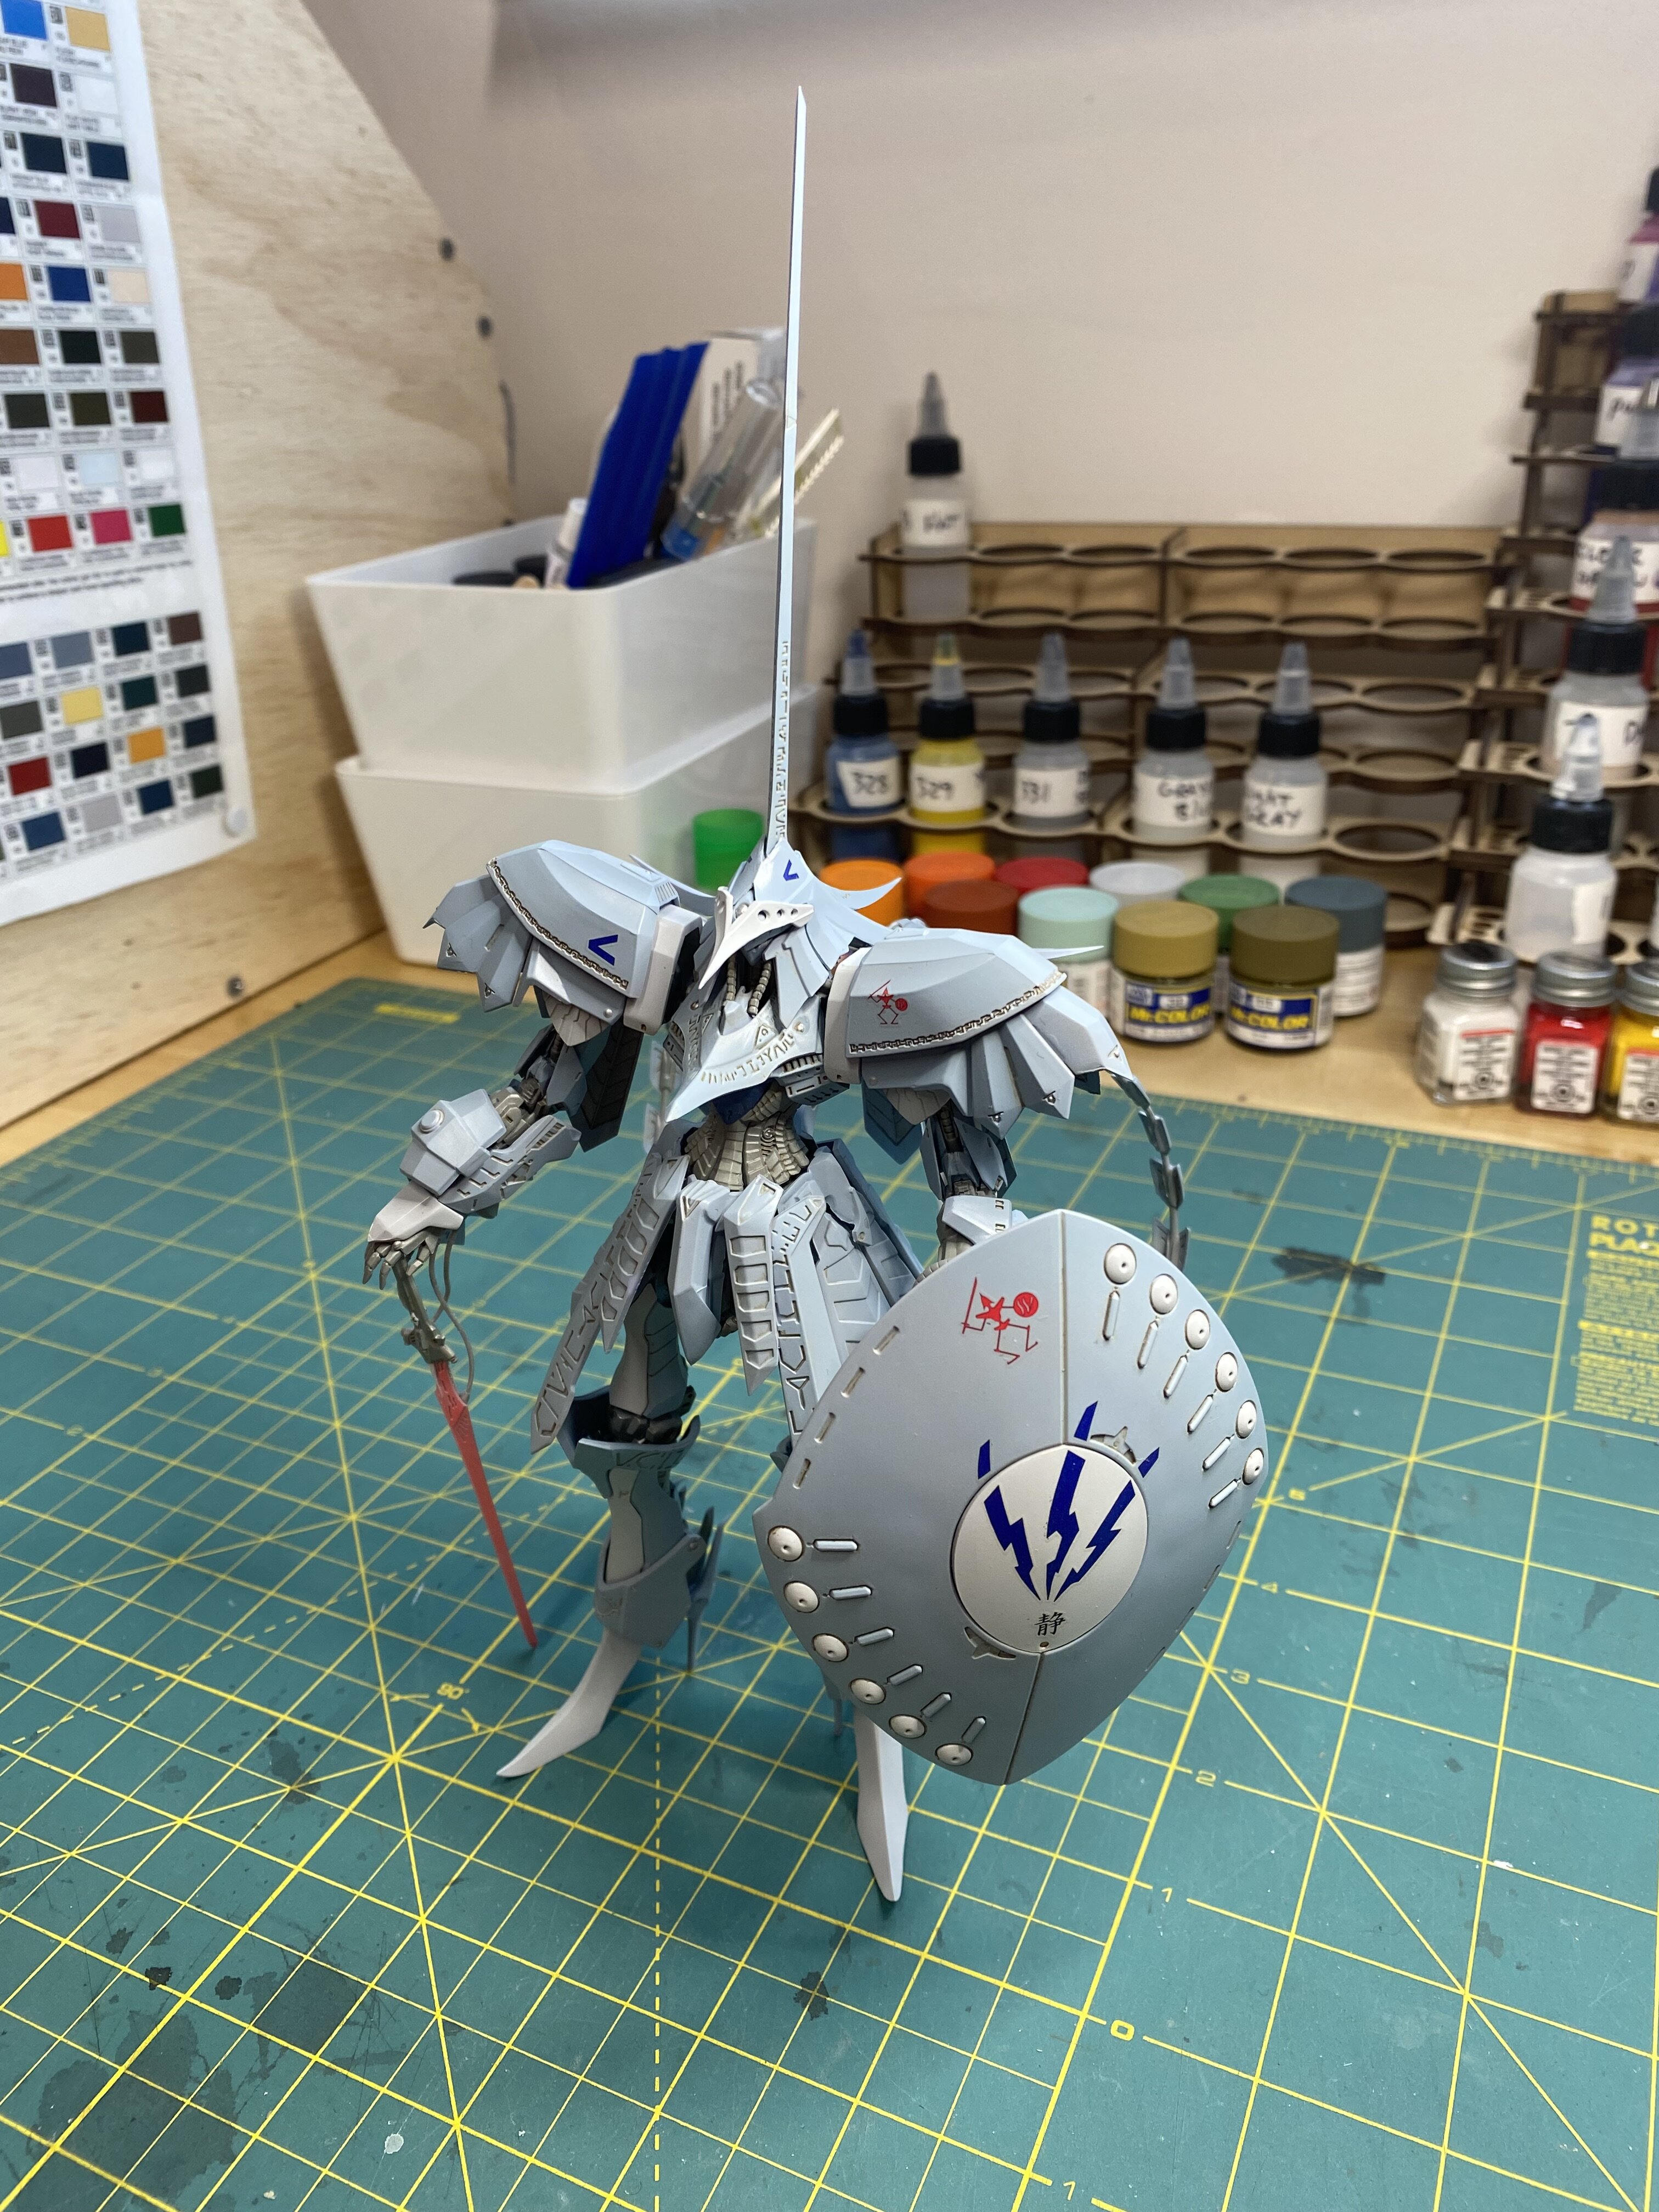
Total height is 10 inch complete. As far as articulation, the PC’s are very tight and I have no problem posing and not having it fall over or sag with shield extended if that makes sense. Hip sockets and ankles are very tight and strong in a good way. I would highly suggest attaching legs before skirt is glued in place since I don’t think you’ll have room without a chance of breaking something. Space is very limited. Oh one more thing to mention. The cables/power cords details are made of the PC material and I am having issues with paint simply flaking off of those parts and I think it looks messy. I’d avoid painting those all together if I get another kit with similar details/material usage. Just a heads up.
-
Thanks. I hope to build a LED Mirage once I dig into these macross kits.
-
Dang! I should have documented it. Anyway, most of the seams are well placed behind elements so clean up was very minimal. There are a few dips in some spots especially the shield, but I left them since it didn’t bother me much. There is thin plastic on edges of parts that need to be sanded off and a few mold lines here and there. Nothing major I’d say. Overall it was a super fun build for me. For context the Hasegawa VF-1A Super Battroid I started lastnight is going to take 1000% more work to look decent. Almost every major part has a seam line down its center. Putty and rescribe time for the foreseeable future. 😄 I’m so excited to take this kit apart and get to work.

-
Ahhhh, I see. Thanks. I’m new to that series. Read the manga online over the past week. The mecha design is awesome, but that’s just my opinion. Lol
-
HLJ order came and now it’s time to get busy. Which kit should I start with? Hmmmm… I’m thinking the Super Battroid, Max color-way While I was waiting I grabbed a 1/144 FSS Bang kit from Volks. Finished it up today. I had read a bunch of negative reviews on this kit, but I really enjoyed my time with it. I’ll have to do more of these FSS kits. I also got to use my airbrush for the first time. I went with Mr Color Lacquer paints and had a blast. It’s not perfect; not even close, but I had so much fun. I have lots to learn. Just need to build/paint more kits.
-
That’s exactly what this is. I have a 6 year old and this one was for him. Had to customized it with their first initial and birth age. He’s so pumped!!! He just told me I need to add damage to it so I got to get back to work on this hahahaha I’ll post more Macross once my giant box from HLJ full of Hasegawa kits gets here and I get busy with it. Until then happy building everyone. I’m already hooked. Going to need some new glasses. ✌️
-
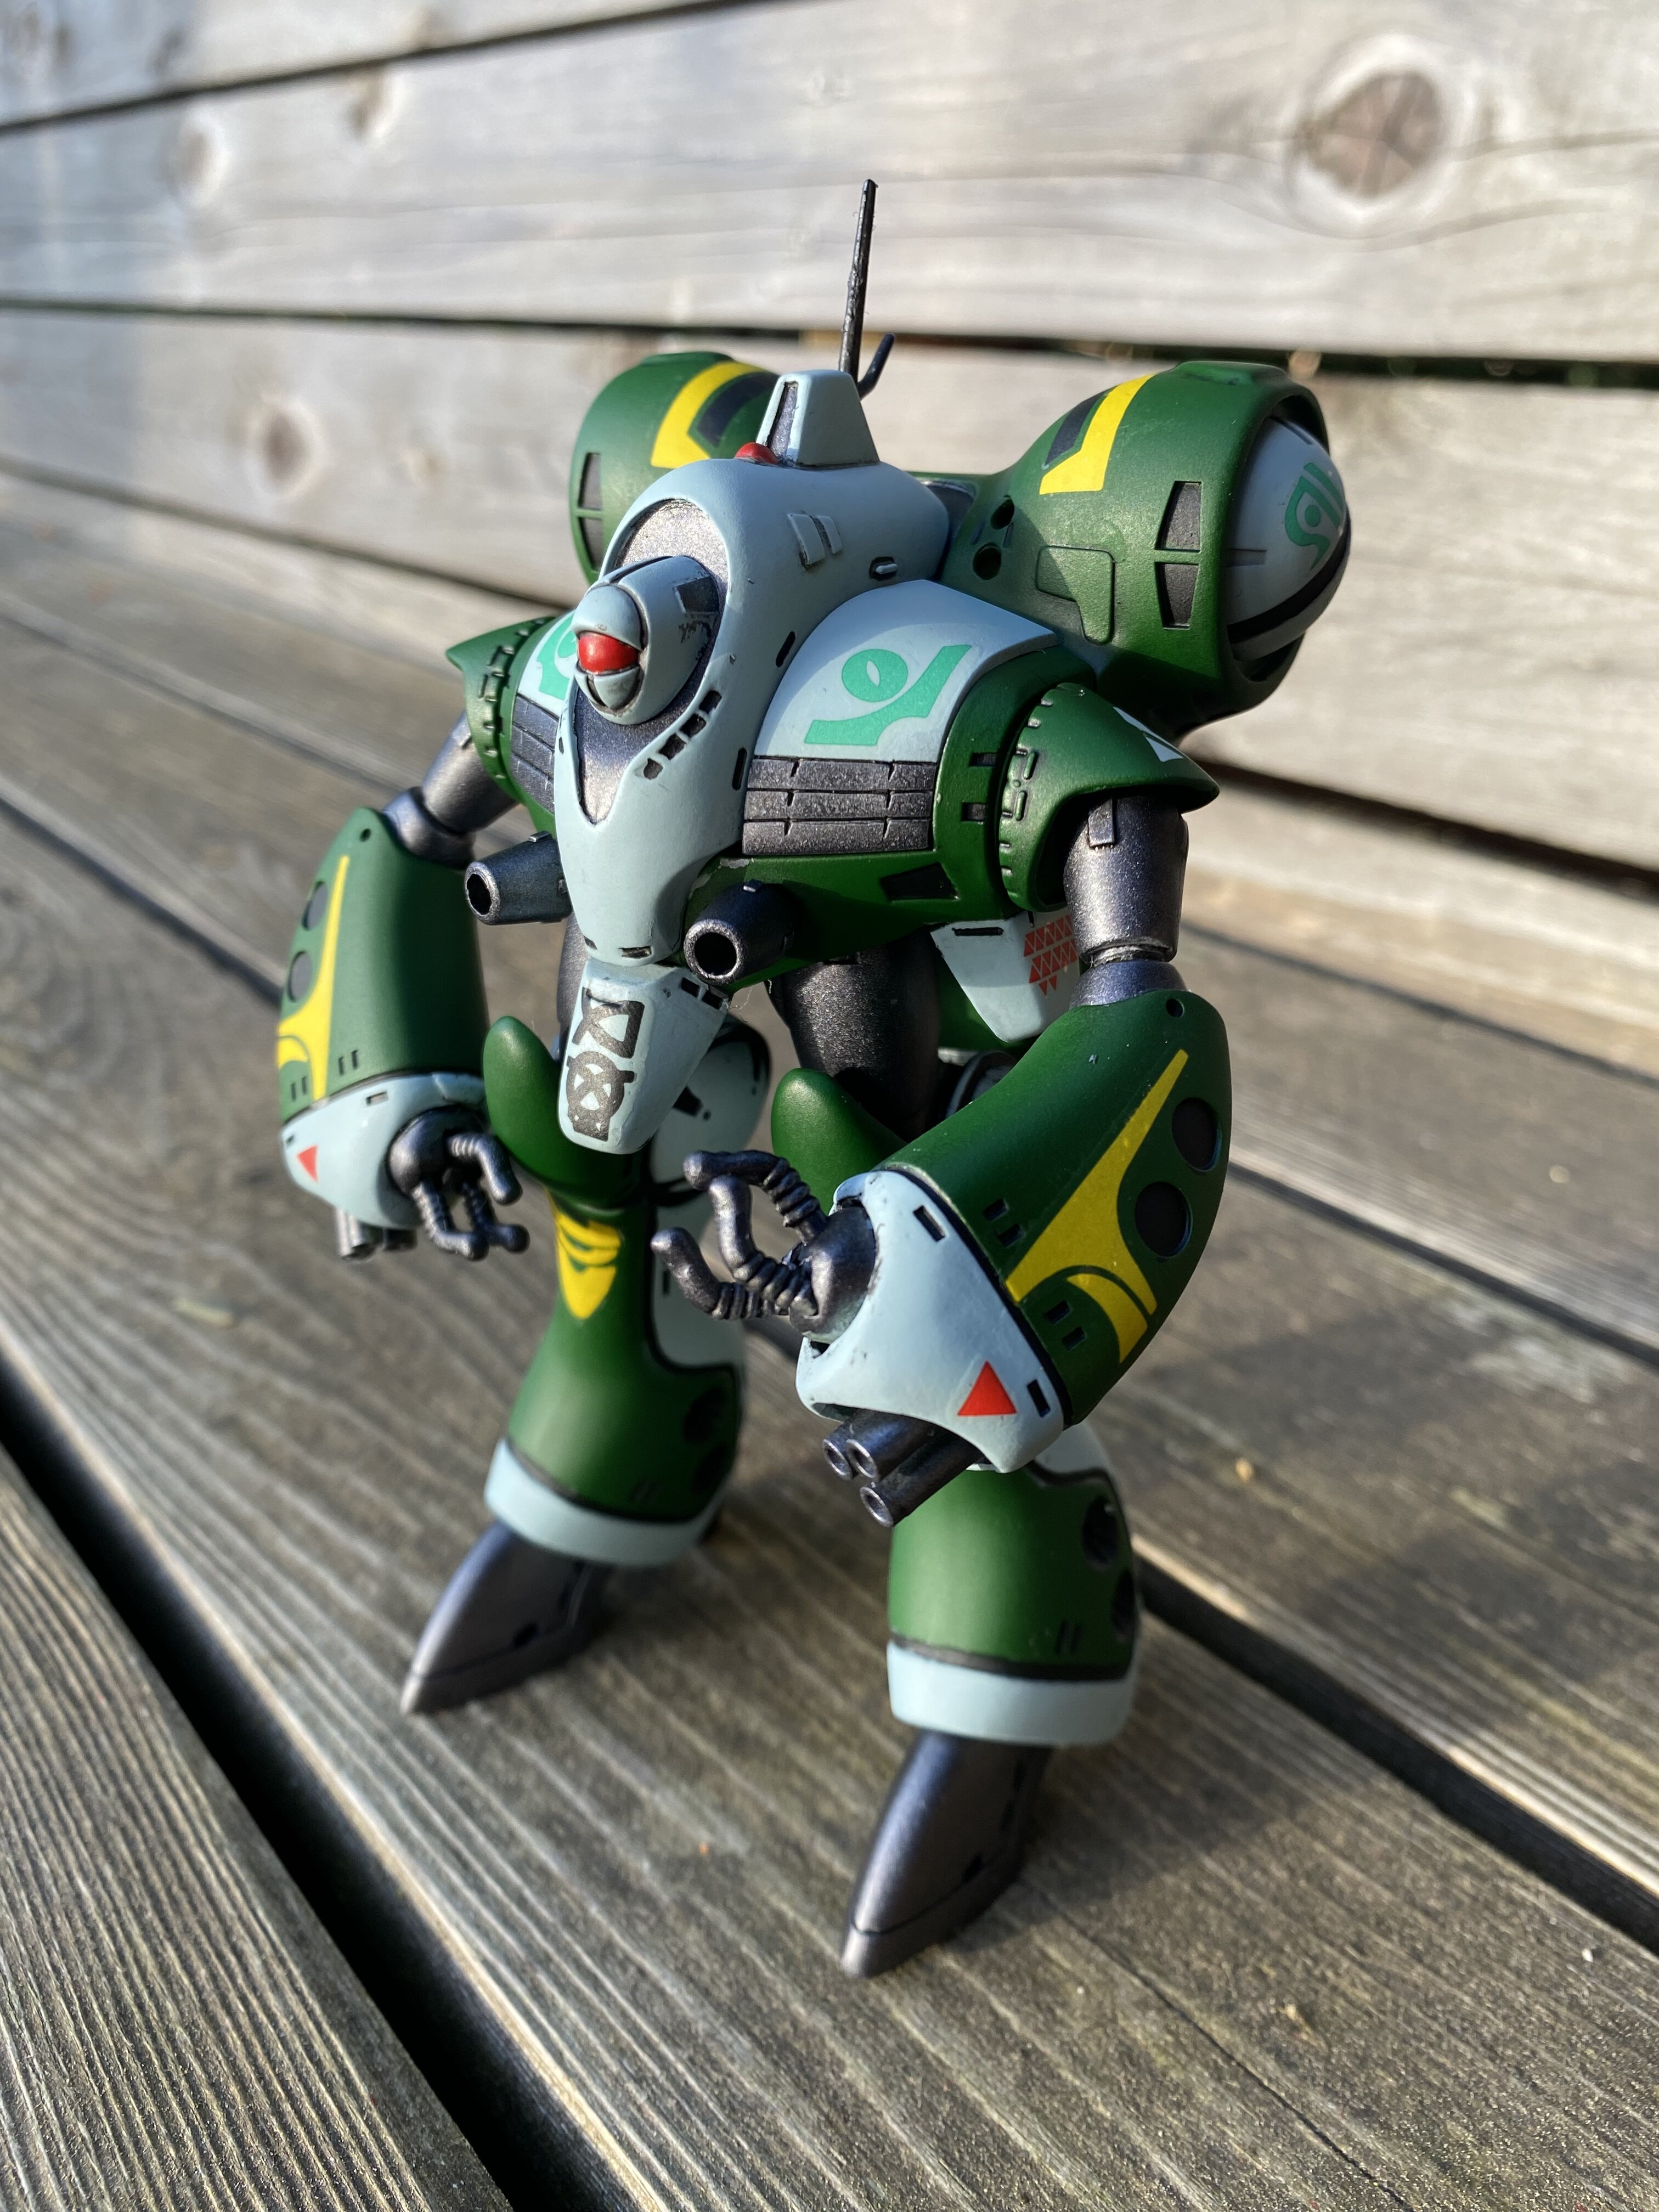
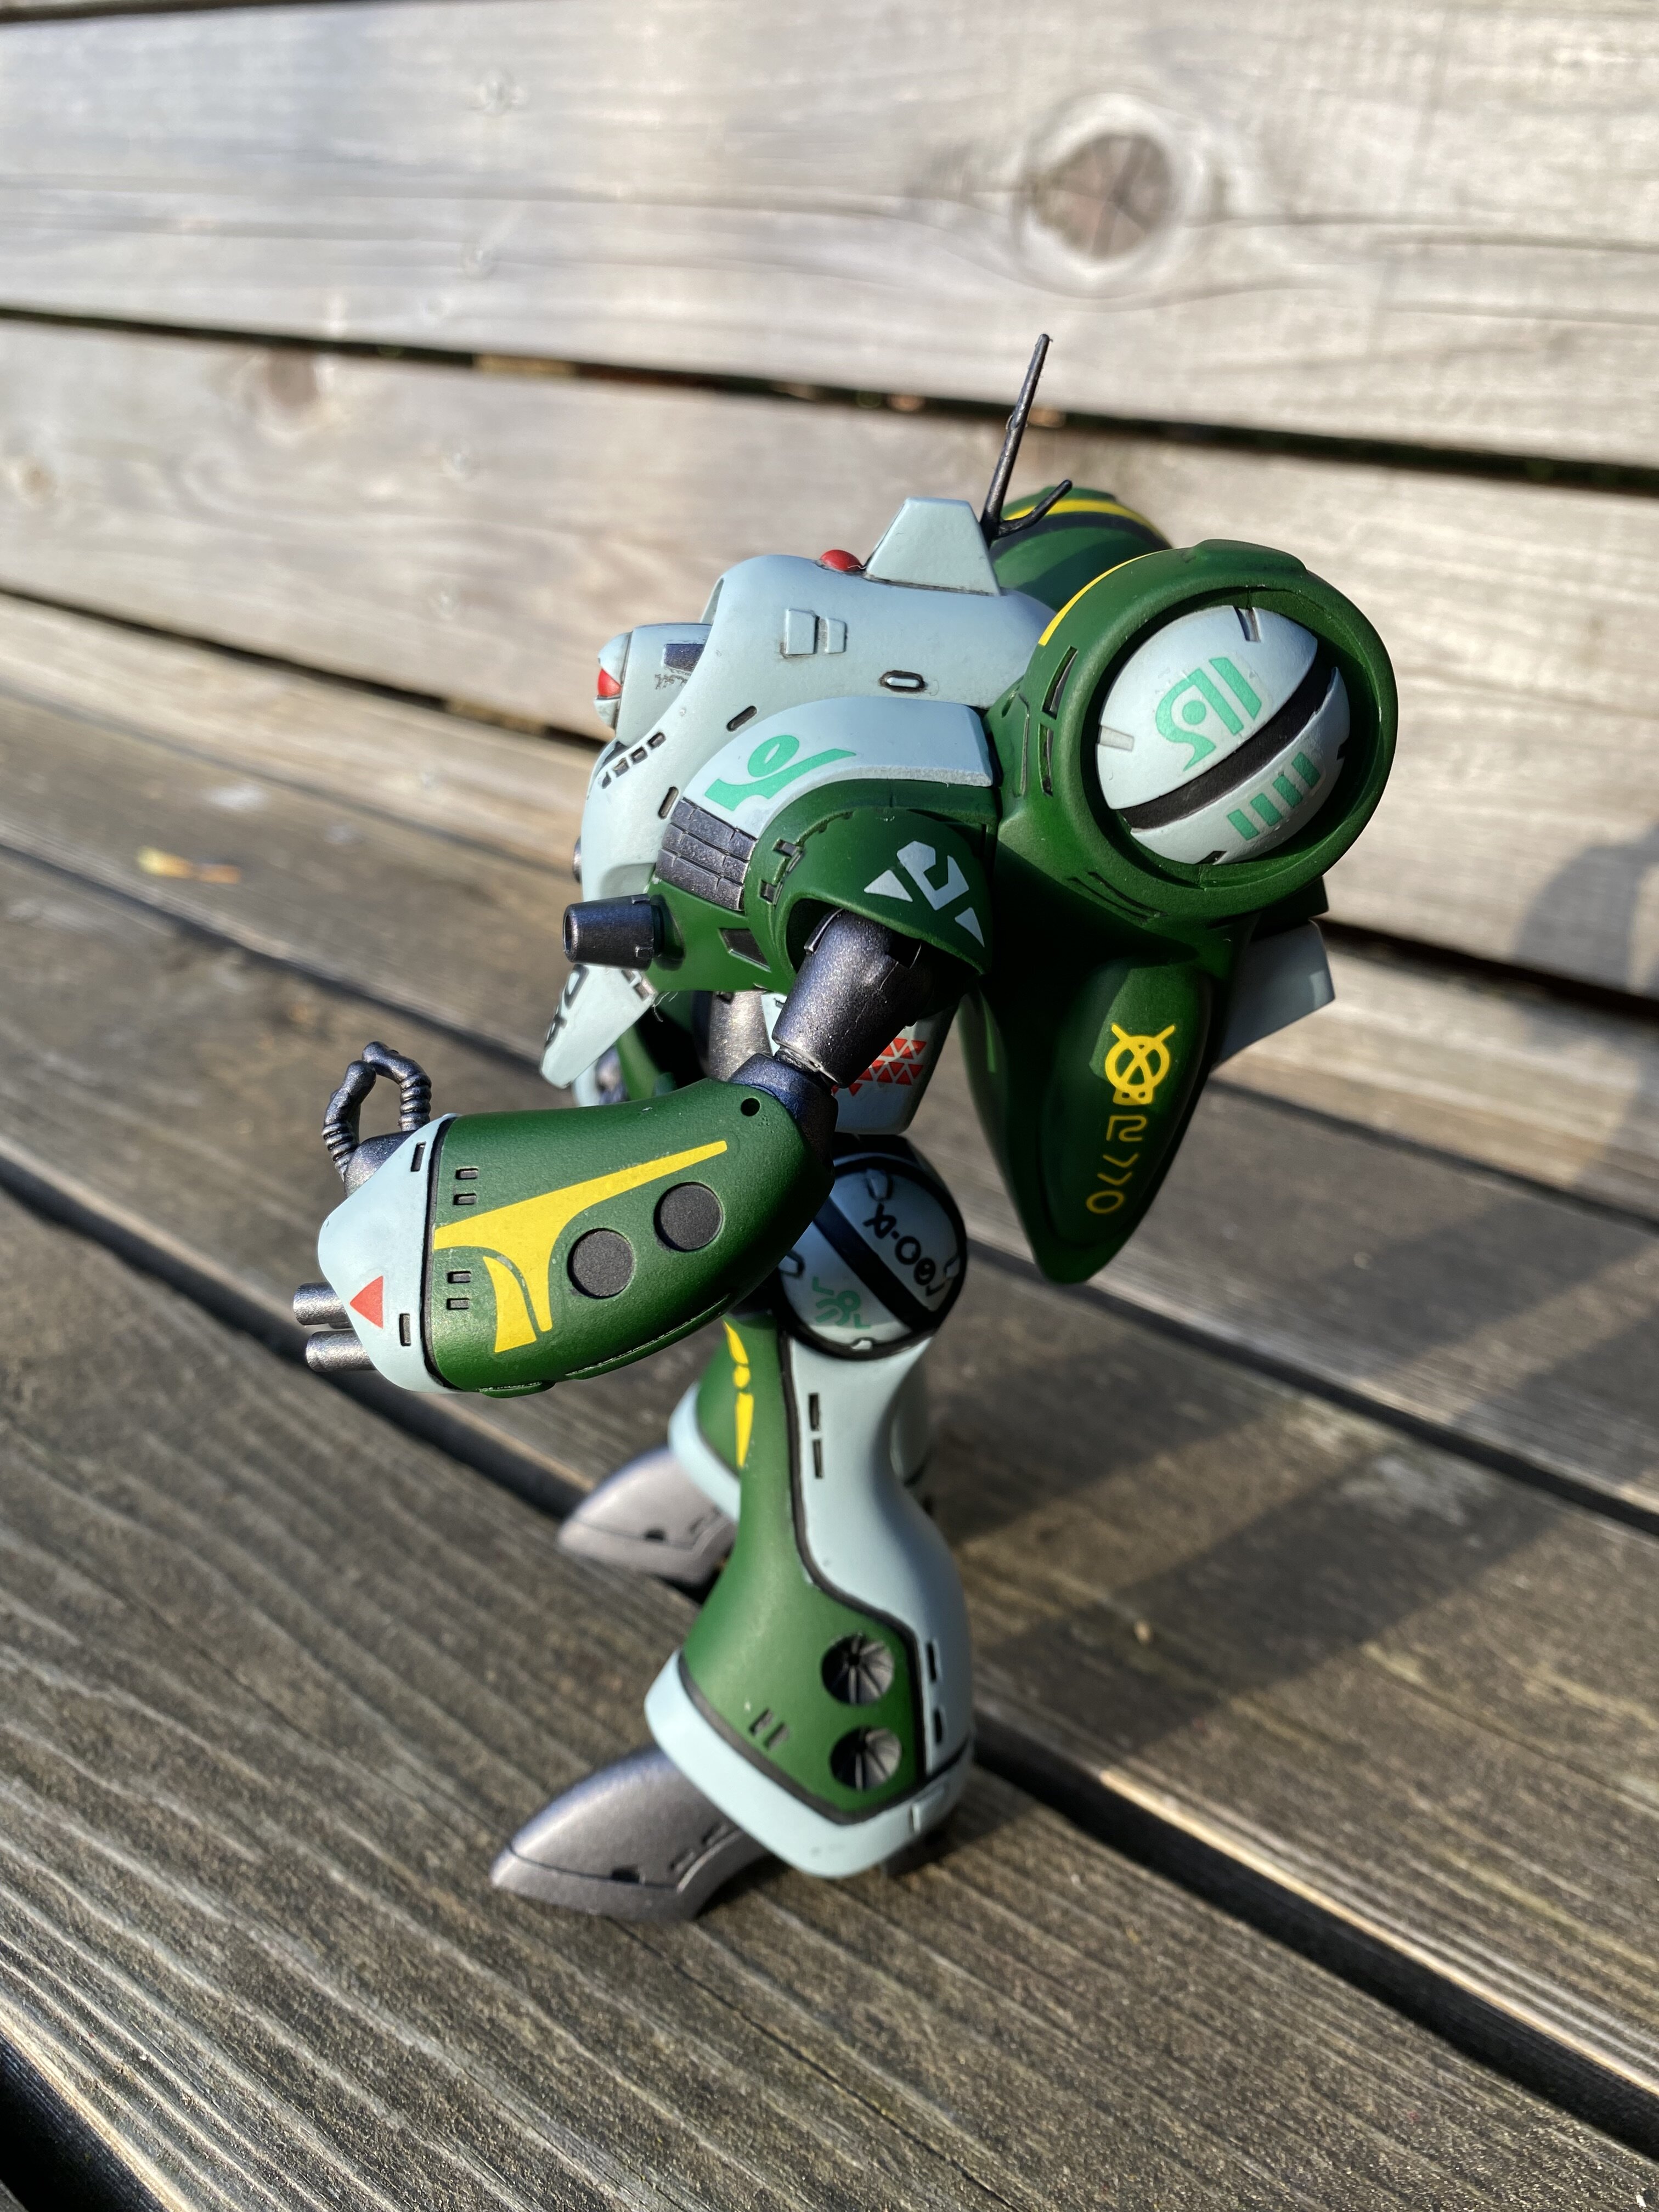
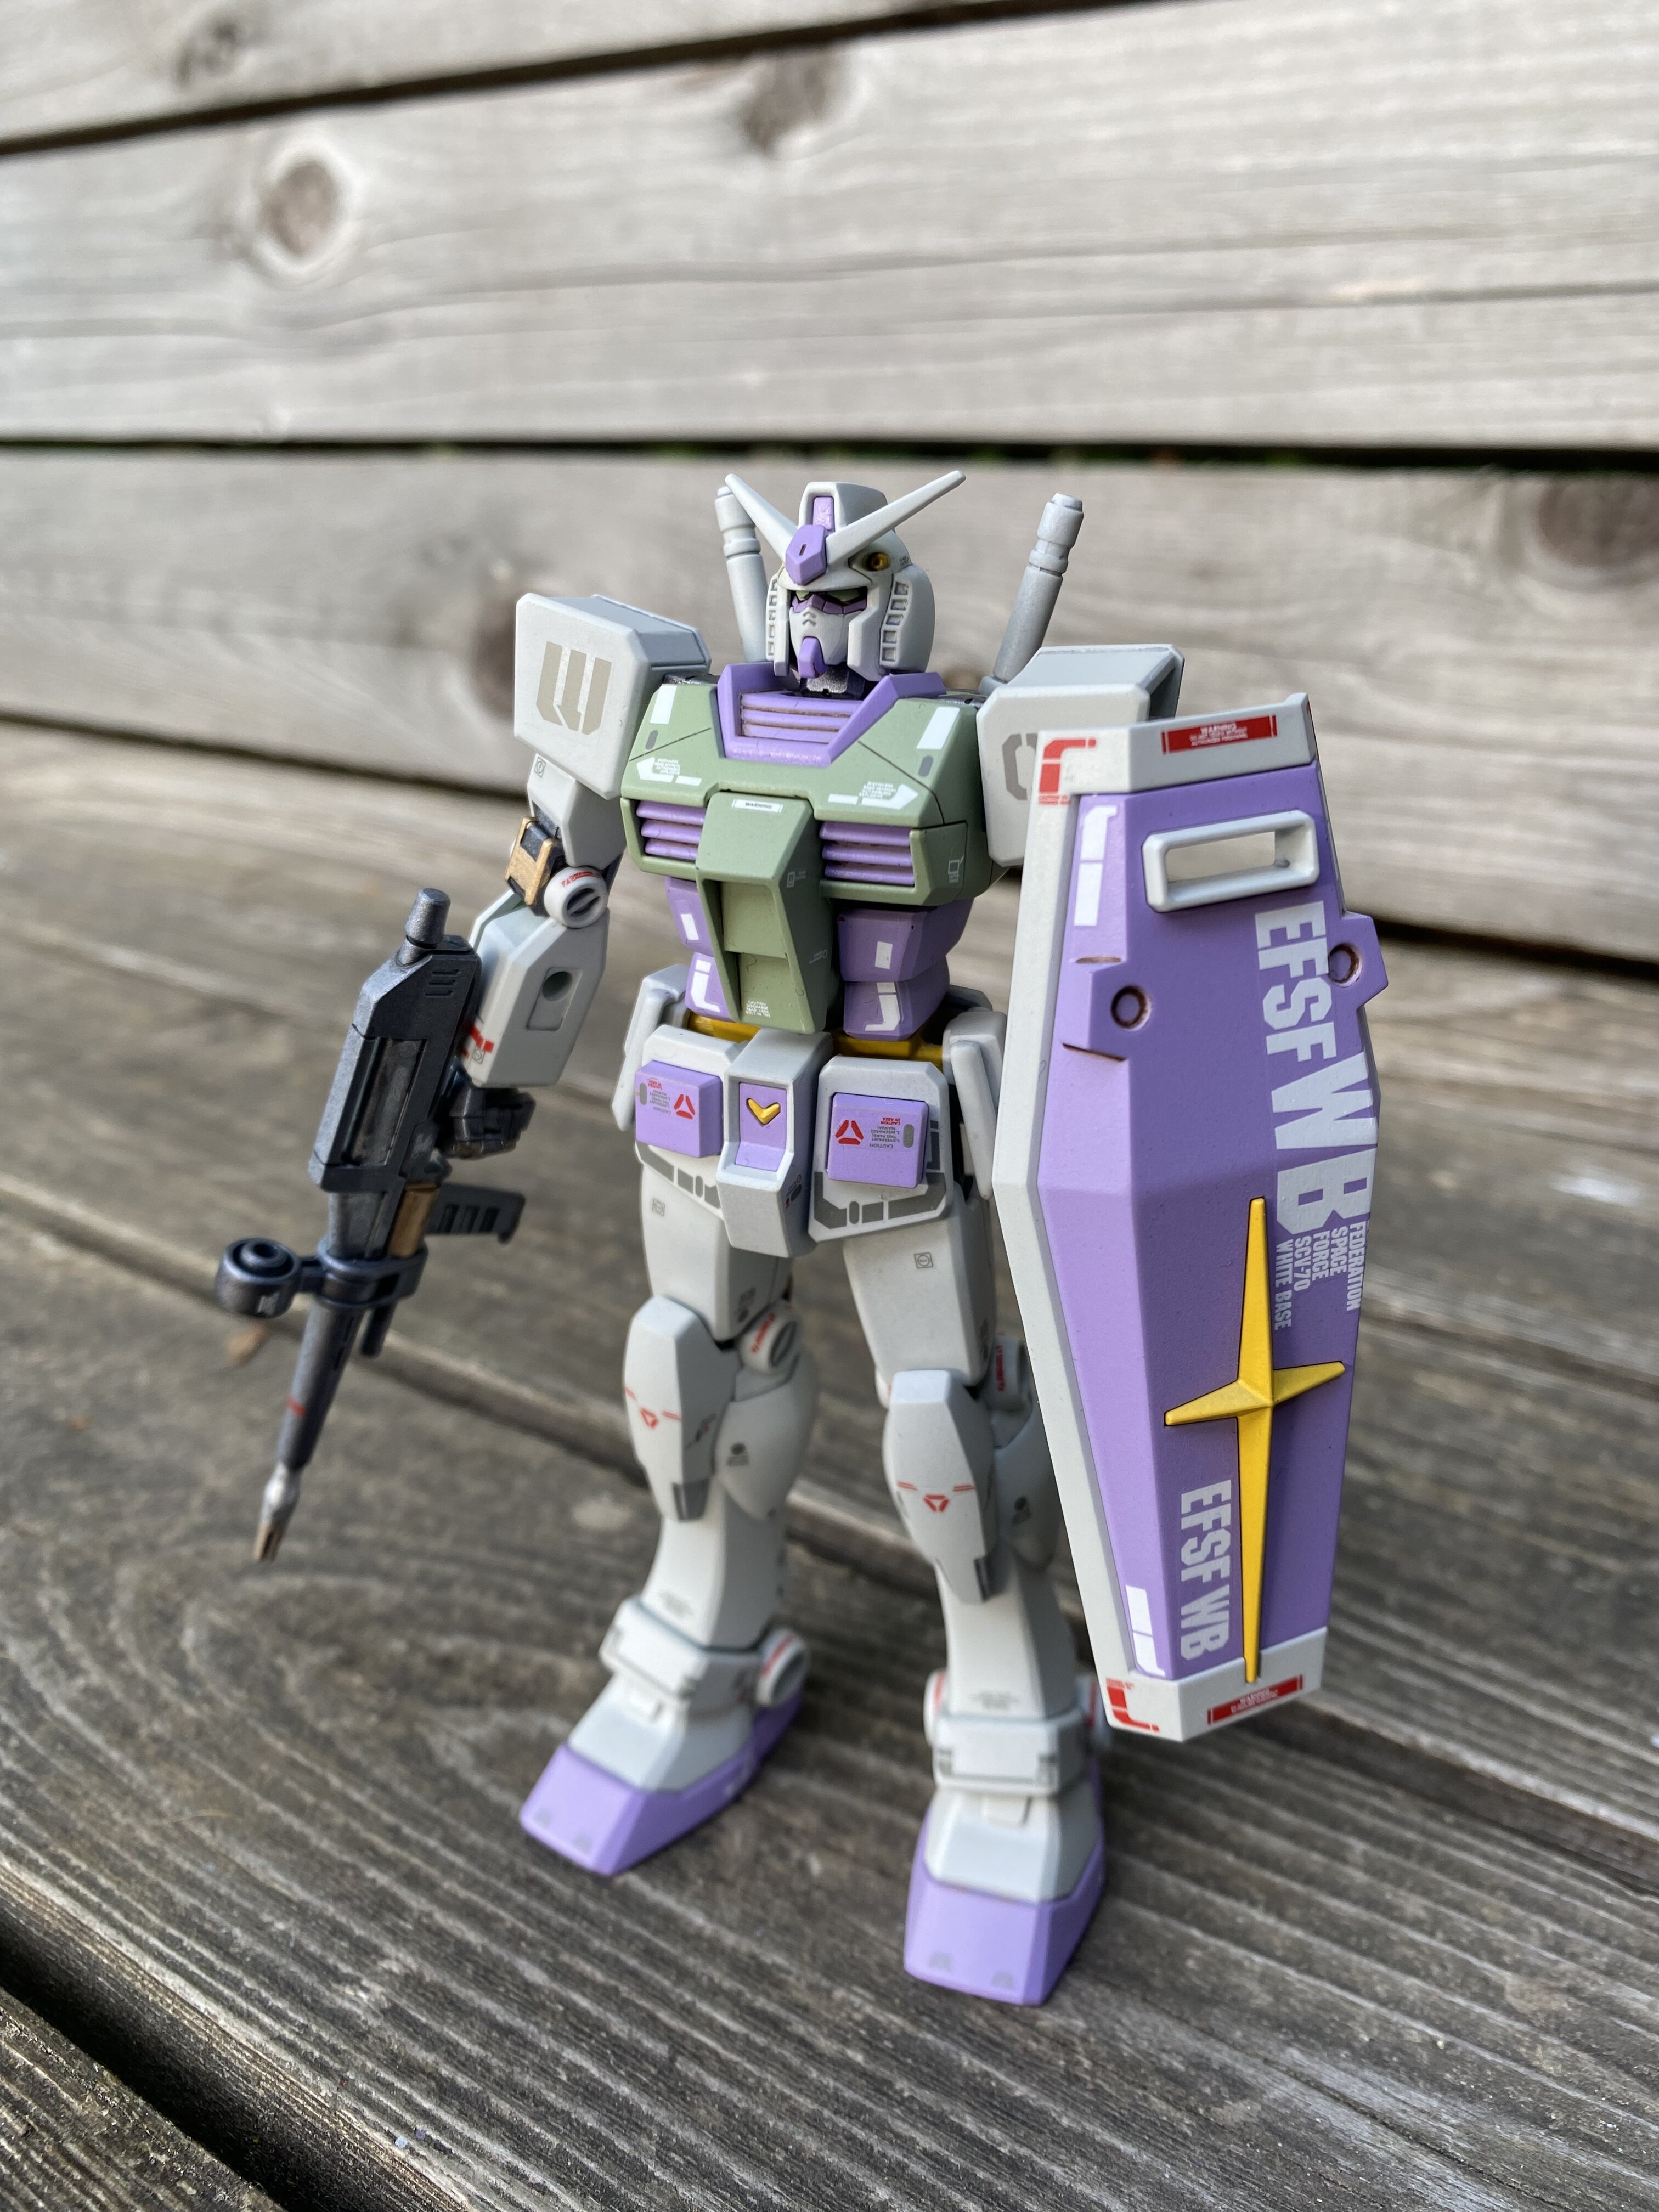
Yeah so I went out to get one of the Bandai gundam kits. You were not joking when you said they practically build themselves. lol. Hope I’m not breaking the rules posting this non Macross kit here. 🙃 I found out we have a rad Japanese bookstore out here that also carries model supplies. They didn’t have any macross but were full of gundam kits, paints and supplies. I went with the $9 entry grade RX-78. I recognize it as the iconic Gundam but went rogue on the color scheme and gave it some love. I also grabbed some water slide numbers/letters and one for the RX-78. Yesterday I found out I got the wrong scale decals but used them anyways. Oh well regardless It was such a chill experience. Complete opposite of the Queadlunn-Rau I can see why it’s so popular.

-
Nice, I look forward to moving into the larger 1/72 scale. I think all the Hasegawa kits I have on order are the same scale. It will be nice to see them all together. I can’t wait to dig in. However my model time is rather limited in my life; having a fam and 6 year old but many late nights will see it through. Now I'm really intrigued about that monster kit…I guess it’s time to invest in some putty(s)
-
Thanks so much. I was nervous sharing it since there are so many amazing builds on this forum. The path to completion was a disaster but a good one. Haha. I’m a sucker for a challenge and will be doing more 80’s kits down the road. “Looking at you Monster” I just ordered the big sister kit along with a preorder for the Max version even though I think they are identical. lol I imagine the Hasegawa kits are more user friendly?
-
Hahahaha. Guilty as charged.
-
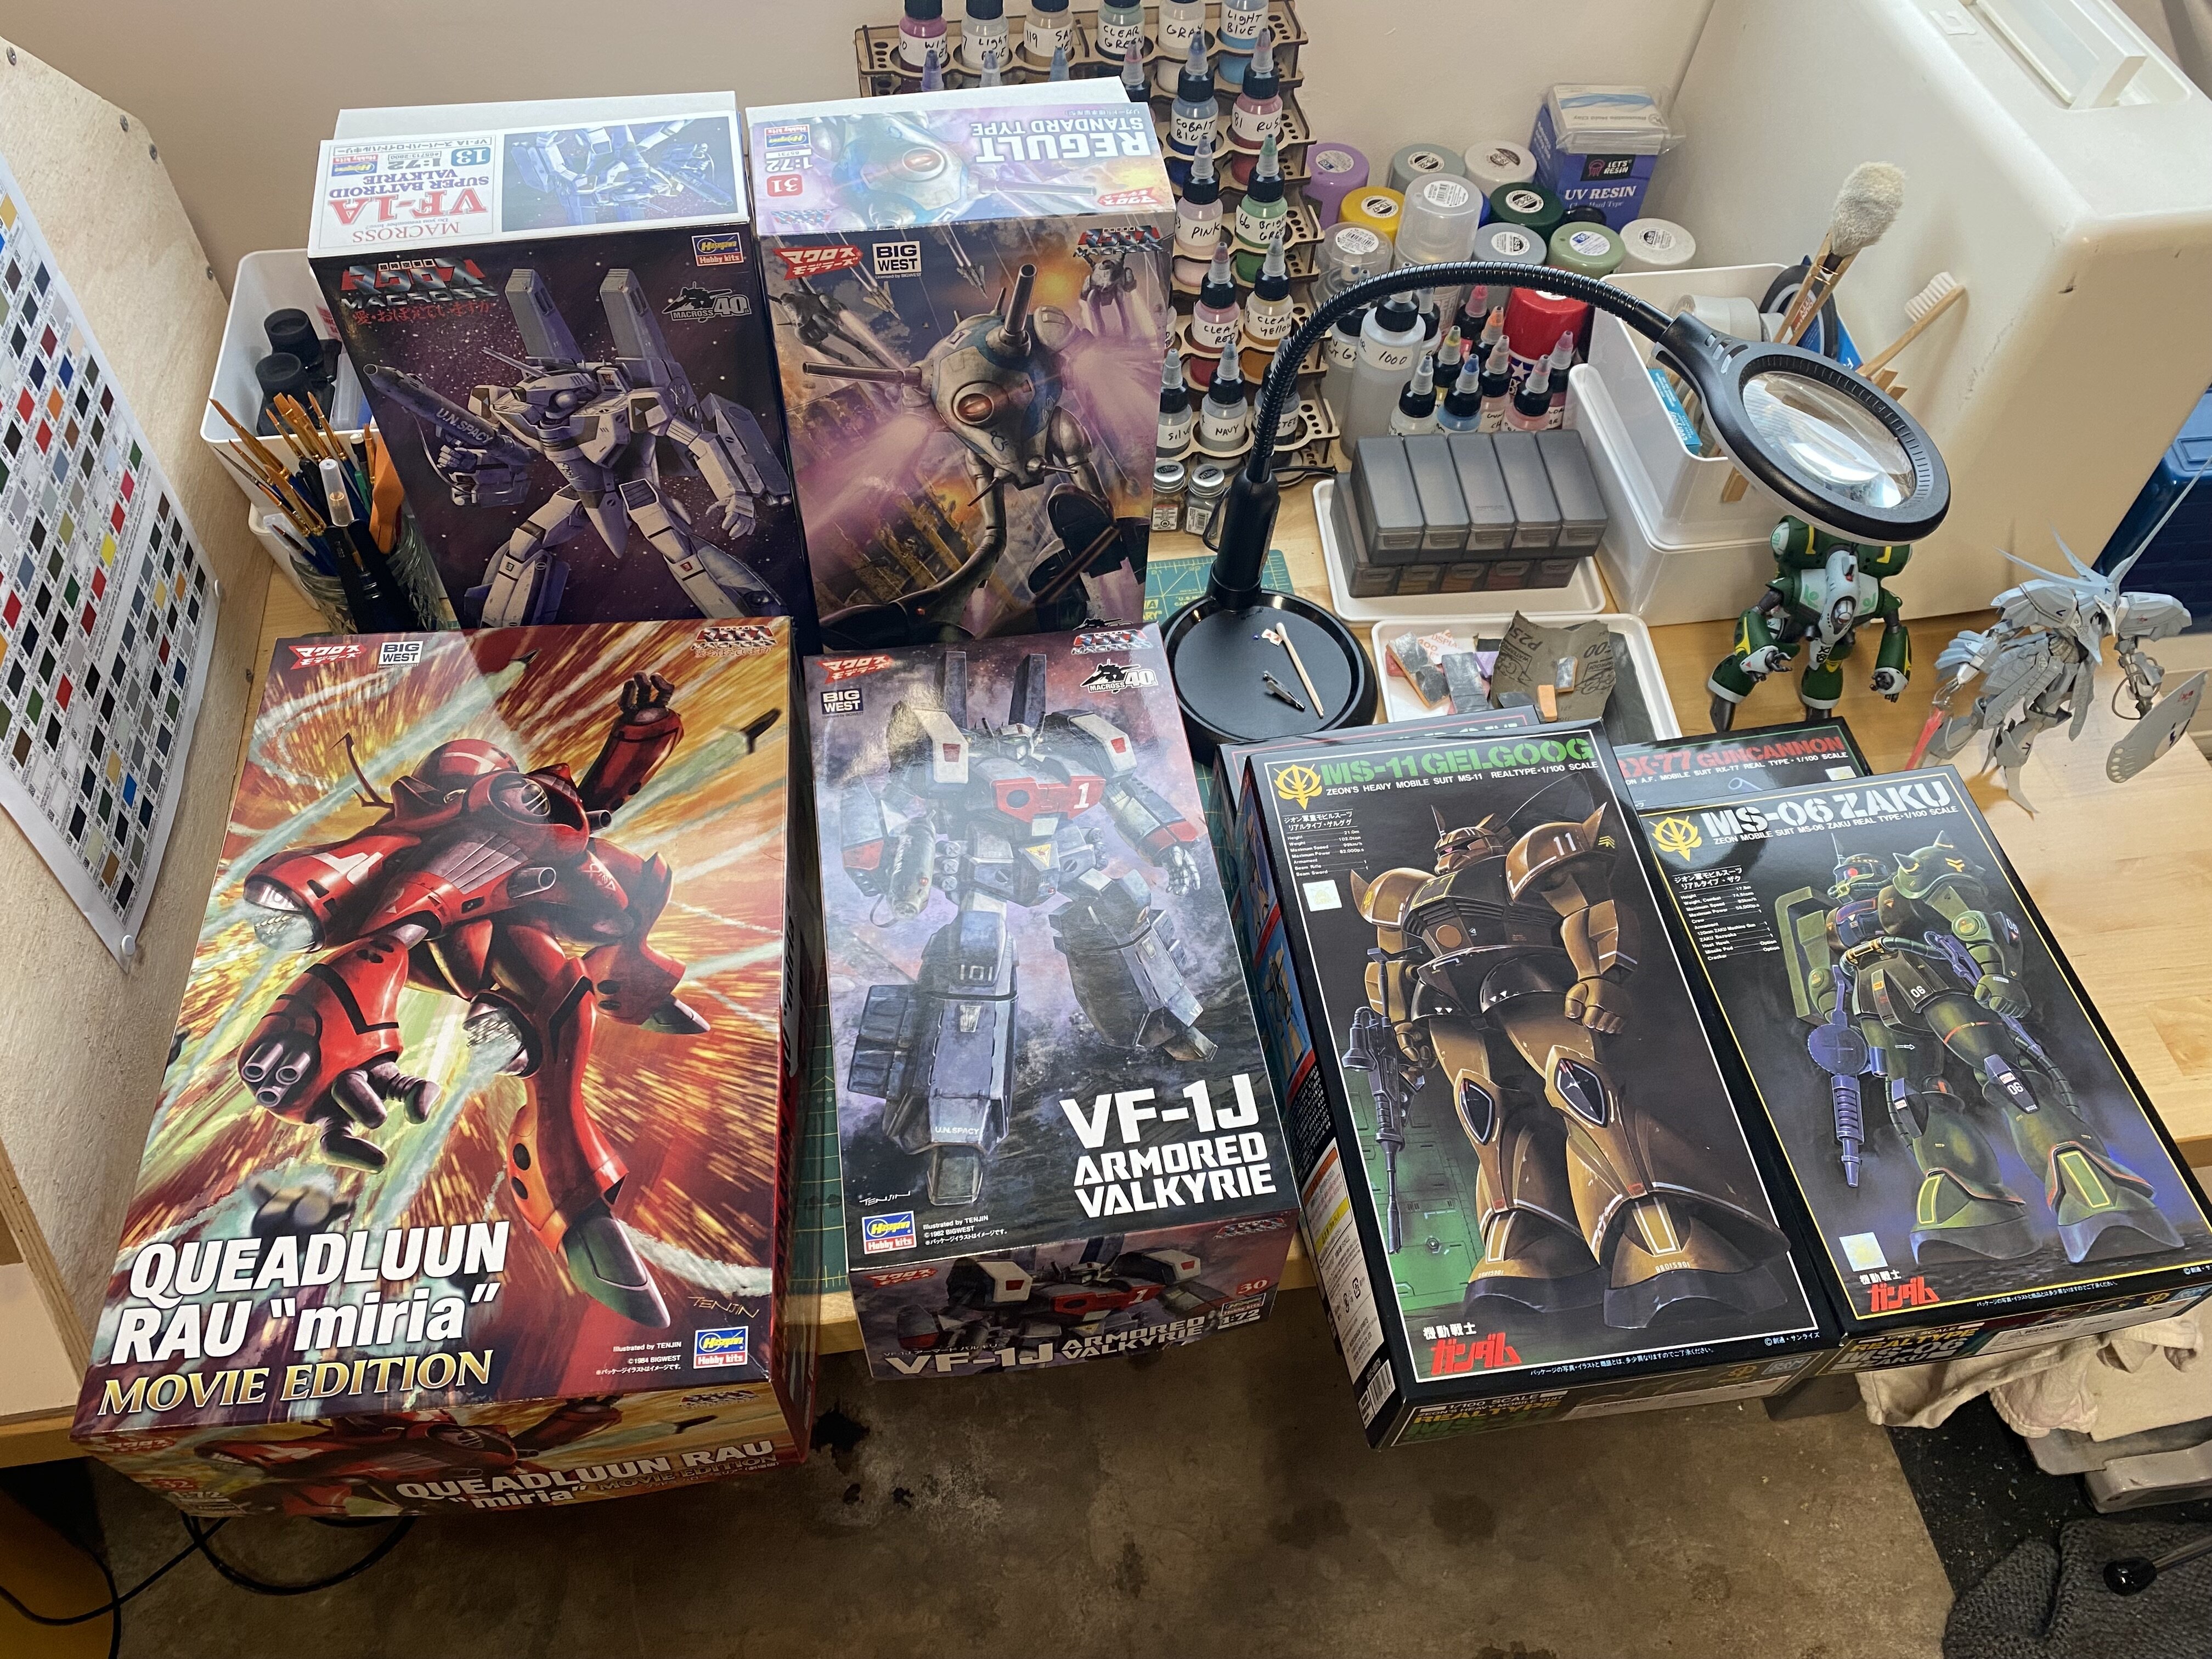
This is bananas!!! That warehouse is stacked. 😳
-
Oh shucks, thanks. 😃
-
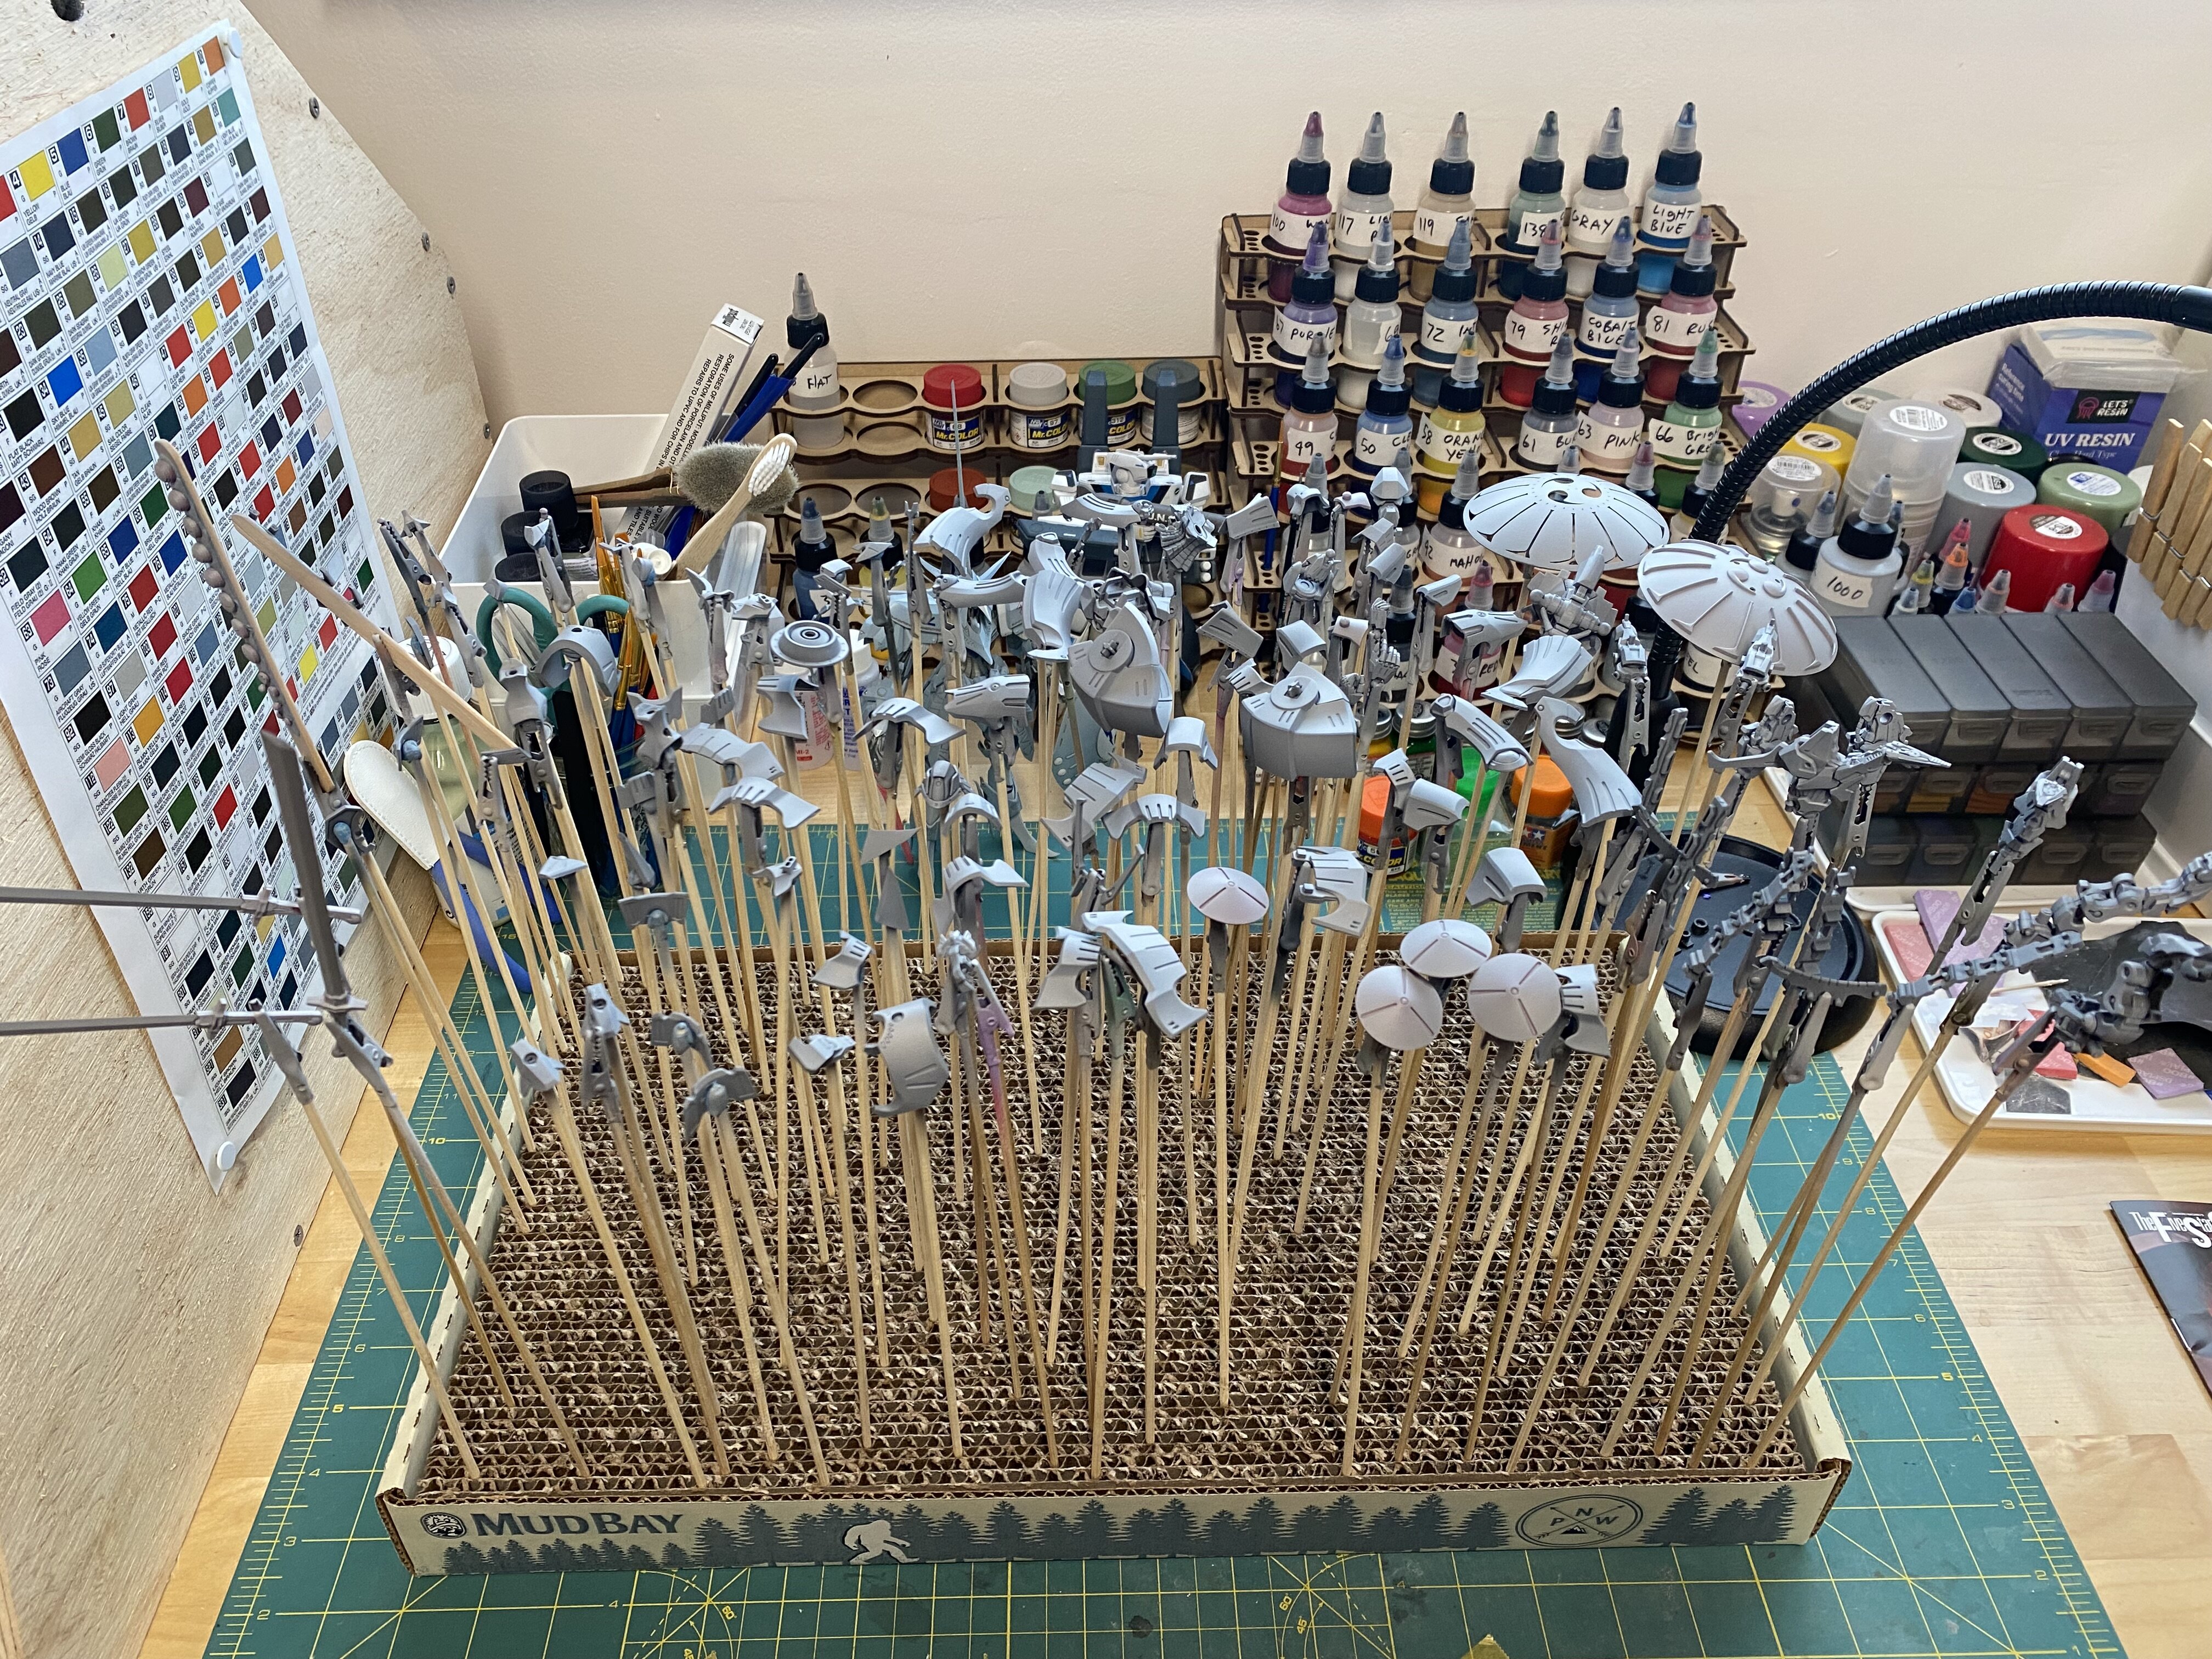
I’m still in the process of getting the fun tools of the trade. Last week I acquired an Iwata Eclipse airbrush and compressor my work had sitting in storage, collecting dust. I look forward to using it soon. I also decided to build a spray booth with an appropriate blower “used Vent Works plans”. I just need to get the courage to drill a hole for venting out of the garage wall.

-
Thanks so much. I have lots to learn and can’t wait to tackle some of those larger 1/72 kits. I discovered HLJ recently and have a basic Regult and a few Battroids on their way.! I’m super excited. Working my way up to a Monster and Tomahawk build some day. 🙃
-
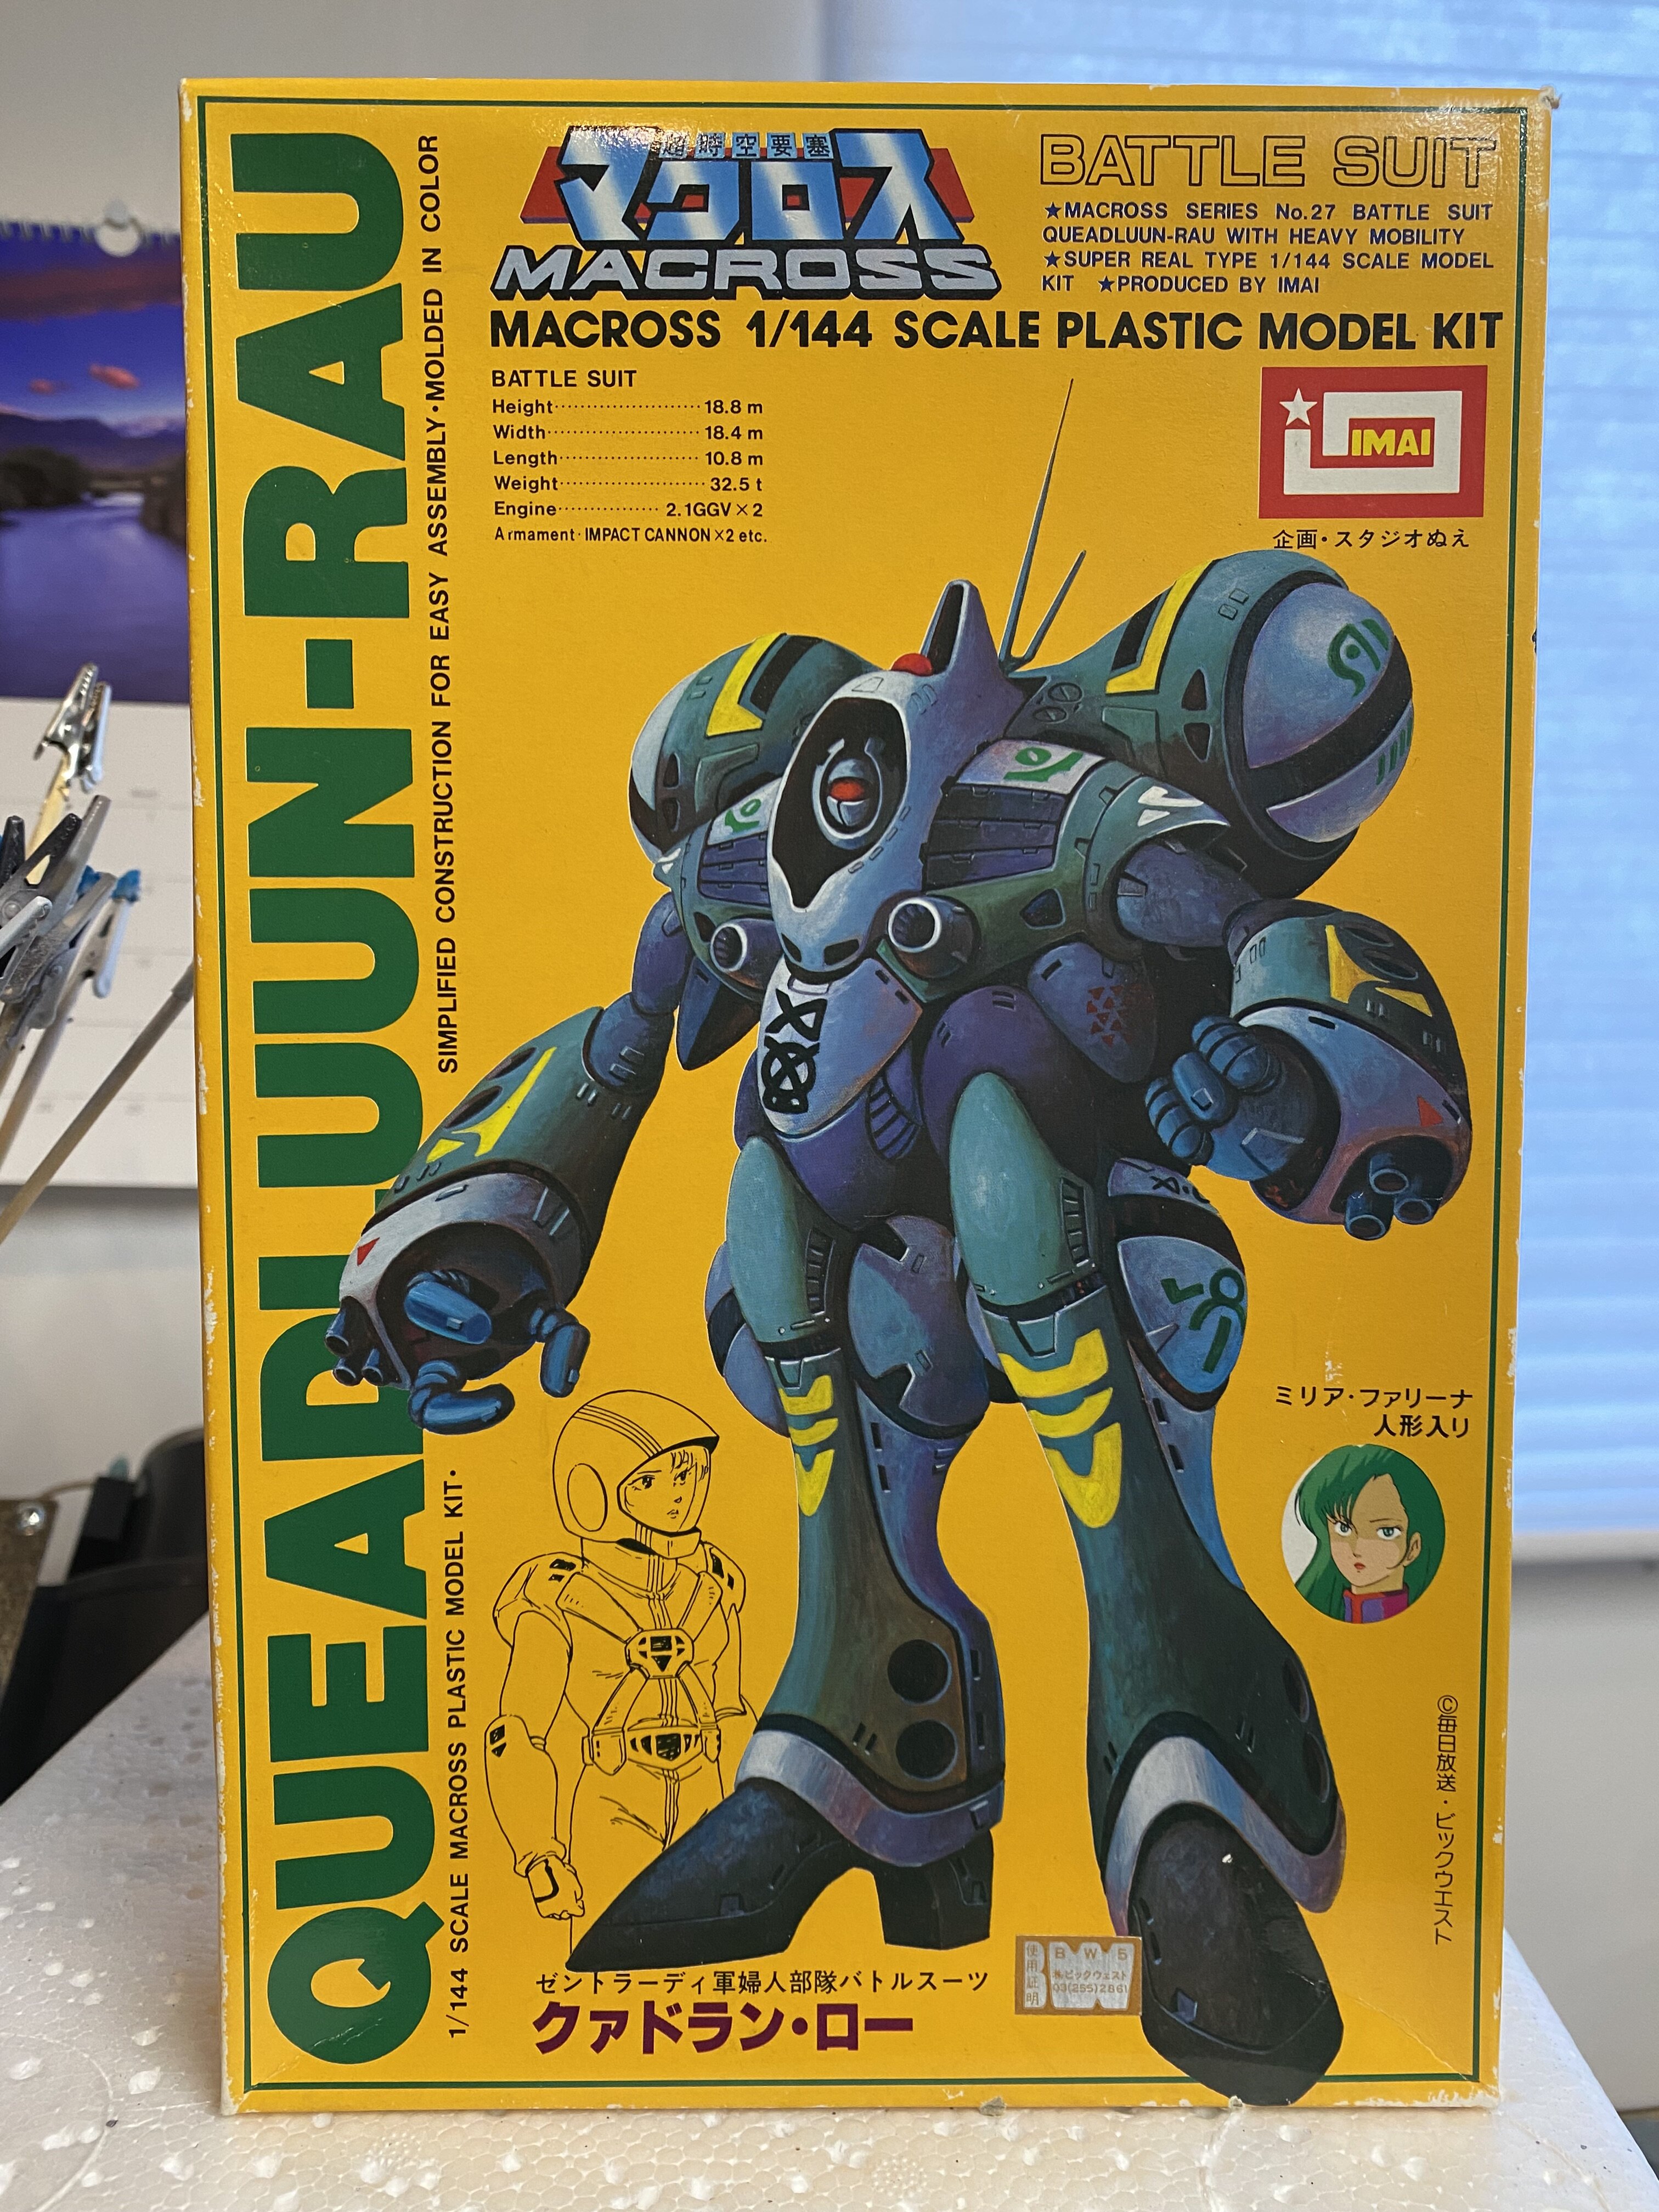
Hi everybody! I’m new here and thought I’d show my entry into model building. I had this kit in the garage for decades and ultimately forgot about it until recently. I have zero experience with model building but after digging into this kit I’m hooked. I loved dealing with all the seam lines, dips and funky misaligned parts. I figure no better way to bust my modeling chops than to build an older kit from my childhood. “Kid of the 80’s” My build is riddled with errors and ultimately such a great stepping stone to learn from. I opted to use spray cans, enamels, a pin vise, pla plate, chisels, and whatever else I could try out to see what worked, failed, or inspired further exploration. I did learn that flooding areas with enamel washes for panel lining was a big mistake. Live and learn as parts literally crumbled and had to be rebuilt. lol. I love the hot mess this experience was and look forward to more. I have a bunch of Hasegawa kits on their way. Can’t wait. (= Anyway, here are a couple pice of the final build complete with finger prints and other sloppy play.