

Papa Rat
-
Posts
1039 -
Joined
-
Last visited
Content Type
Profiles
Forums
Events
Gallery
Everything posted by Papa Rat
-
Thanks to y'all for your takes on the “new” BSG. I’m so onboard for a good series to veg out to. @505thAirborne Wow those builds are wonderful. 👍
-
@Thom Hey thanks. @tekering Wow. That’s wild! That’s a ton of amazing work right there. 🎉 I have only been to Japan once and most of the places I stayed in had very limited space. Well, at least the spots in the heart of the cities I visited anyways. Very cool internal detail. Is that located in the chest area? Man I love that blue. Excited to see this all finished.
-
Wow those are very cool mecha. Thinning 1-5 is wild. I’m about to use their star bright gold with rapid thinner on the next build which. Maybe I’ll snoop around for metallic thinning ratios. A chromed out gold would be wonderful!
-
@electric indigoThanks. Tried out a new Gaia notes paint for this as an experiment. It has a nice amount of depth to it. Some shimmery blue will show up in the correct light that resembles a crushed velvet look/texture. @tekering Thanks so much. Creepy eyes for sure. Also look at your BSG along with so many others. Damn you have a museum of beautiful models right there. Is all of this at your home? Incredible! I will make sure I don’t miss on the BSG reboot. And sad to say I haven’t started Andor yet. 🙃 @Big s thanks so much. I mentioned it before but that Gaia lacquer paint was really nice. It sprays great at a ratio of 1-2.5 so you get a lot in a small jar. It also feels highly durable. More so than Mr Color but I may be mistaken. I also bought some of their surfacer and a metallic. I will try those out on the next build which is all gold. Very excited for that.
-
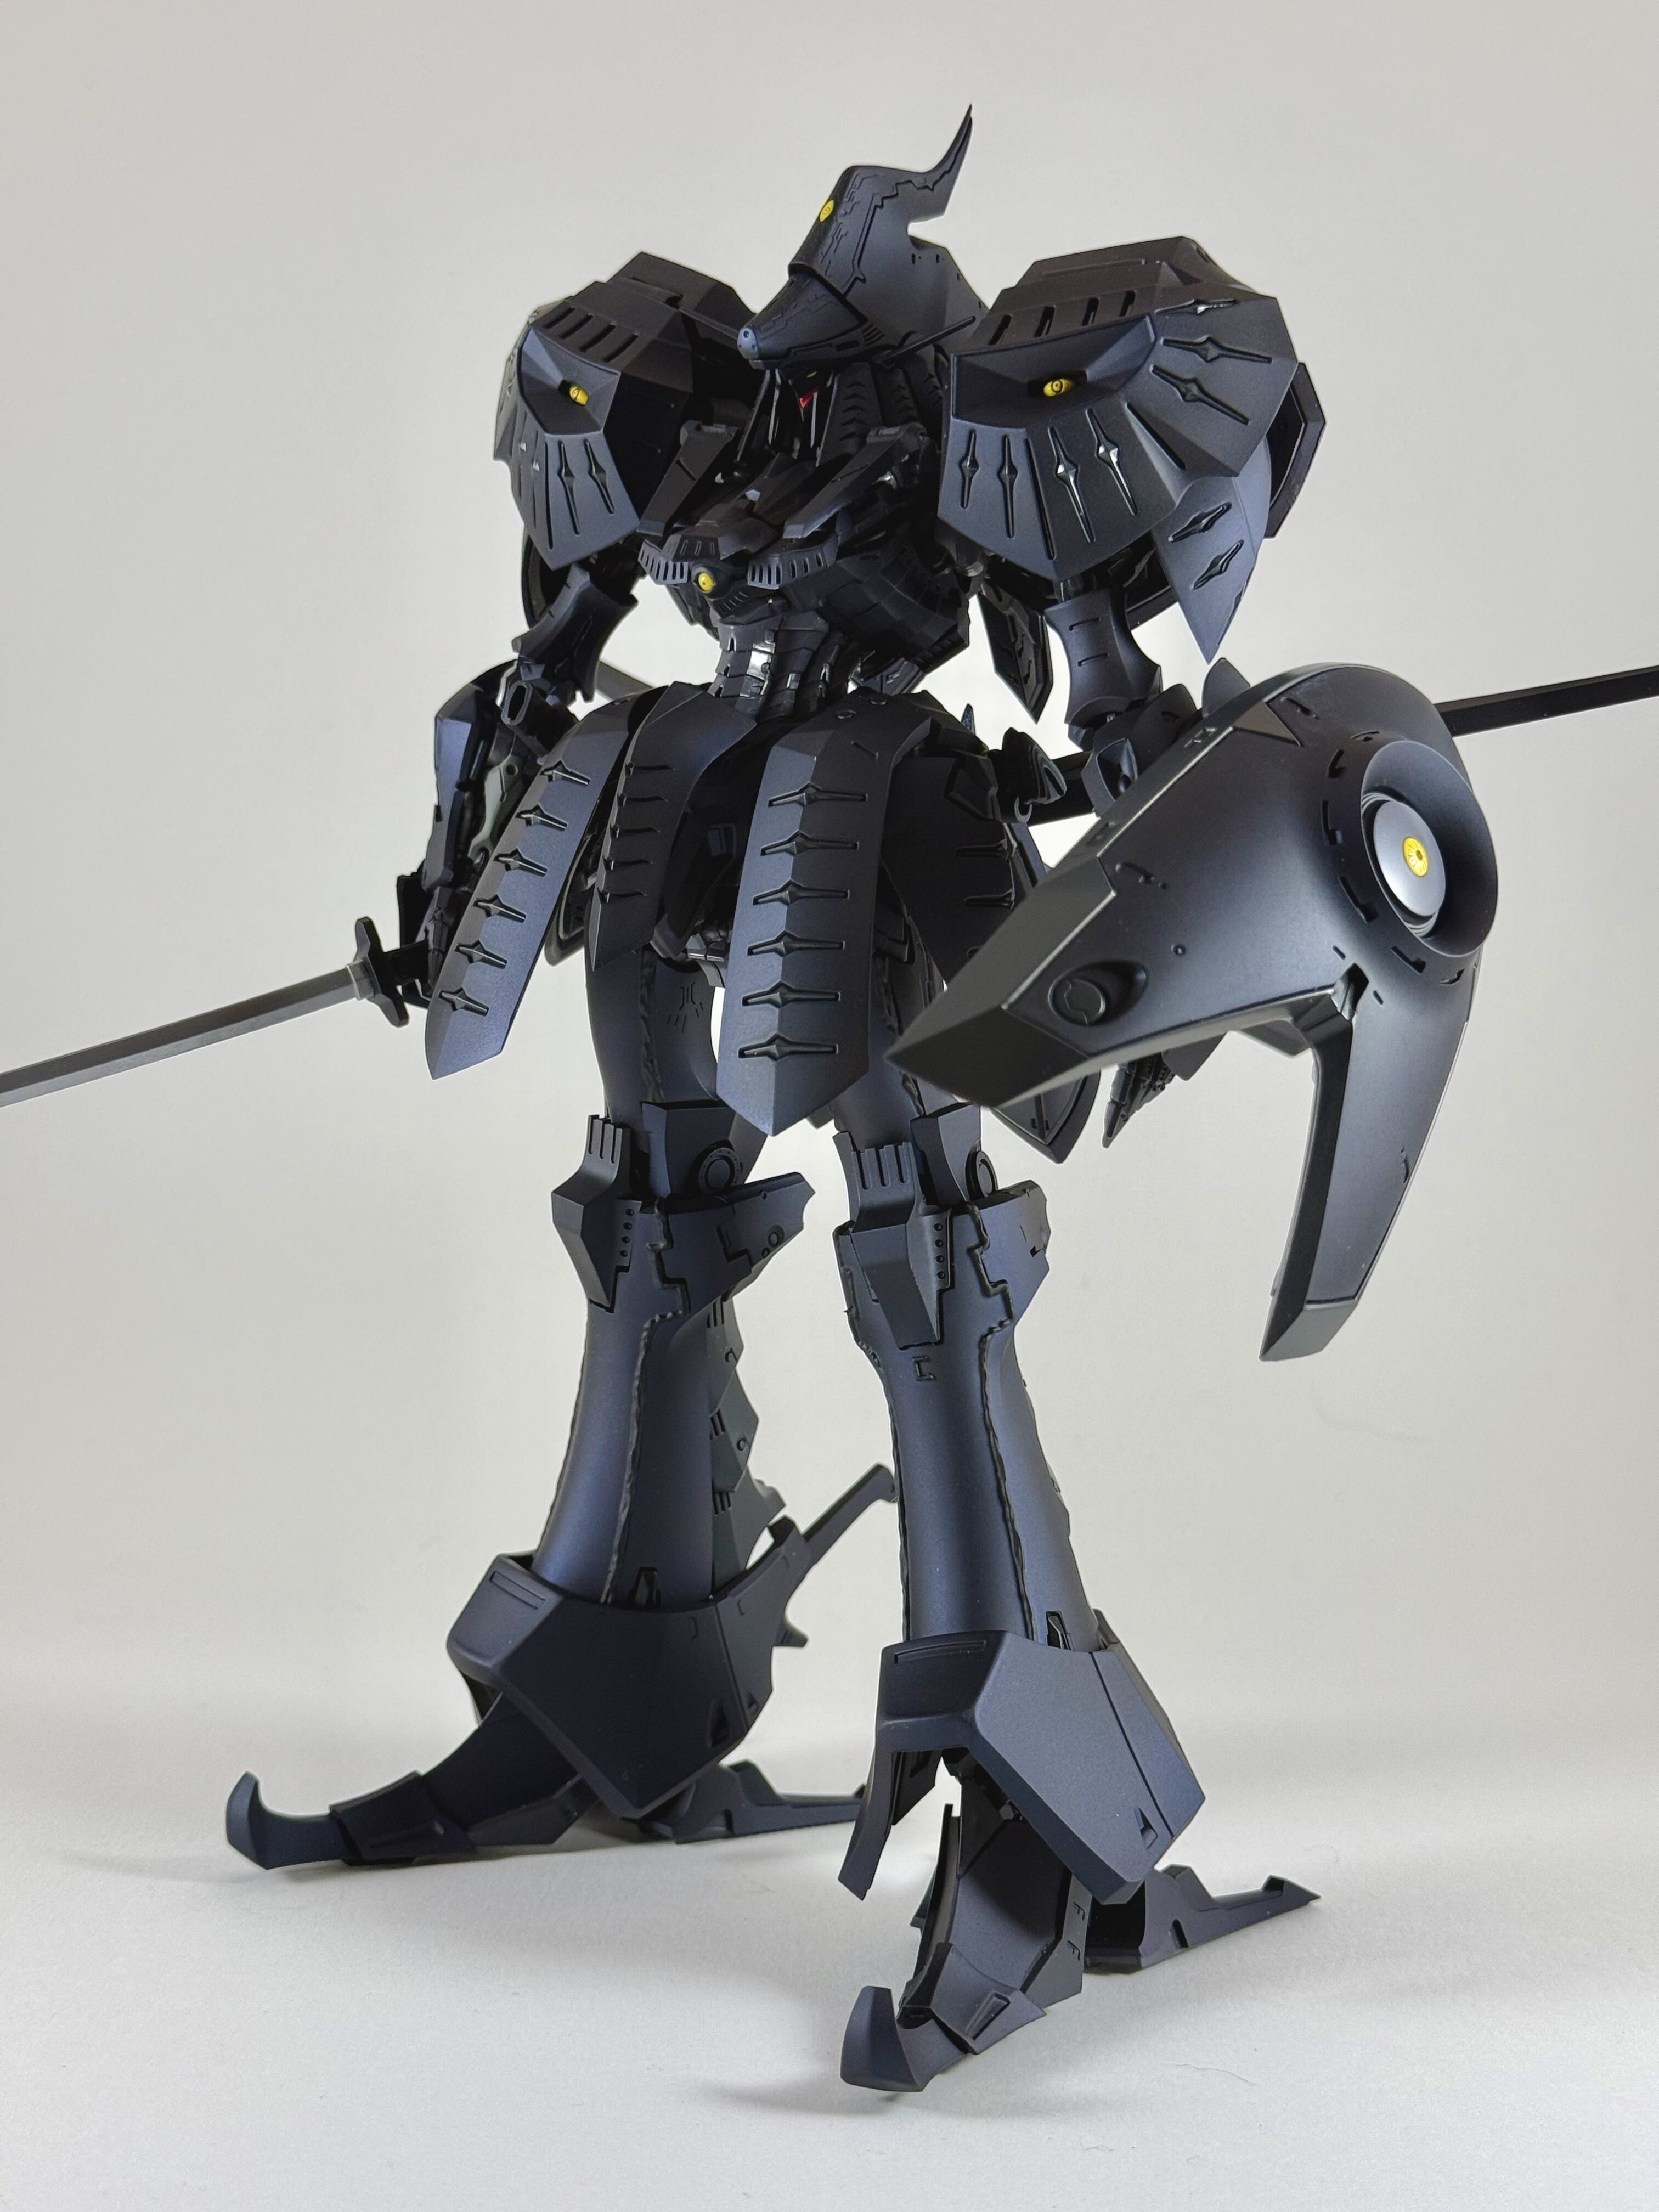
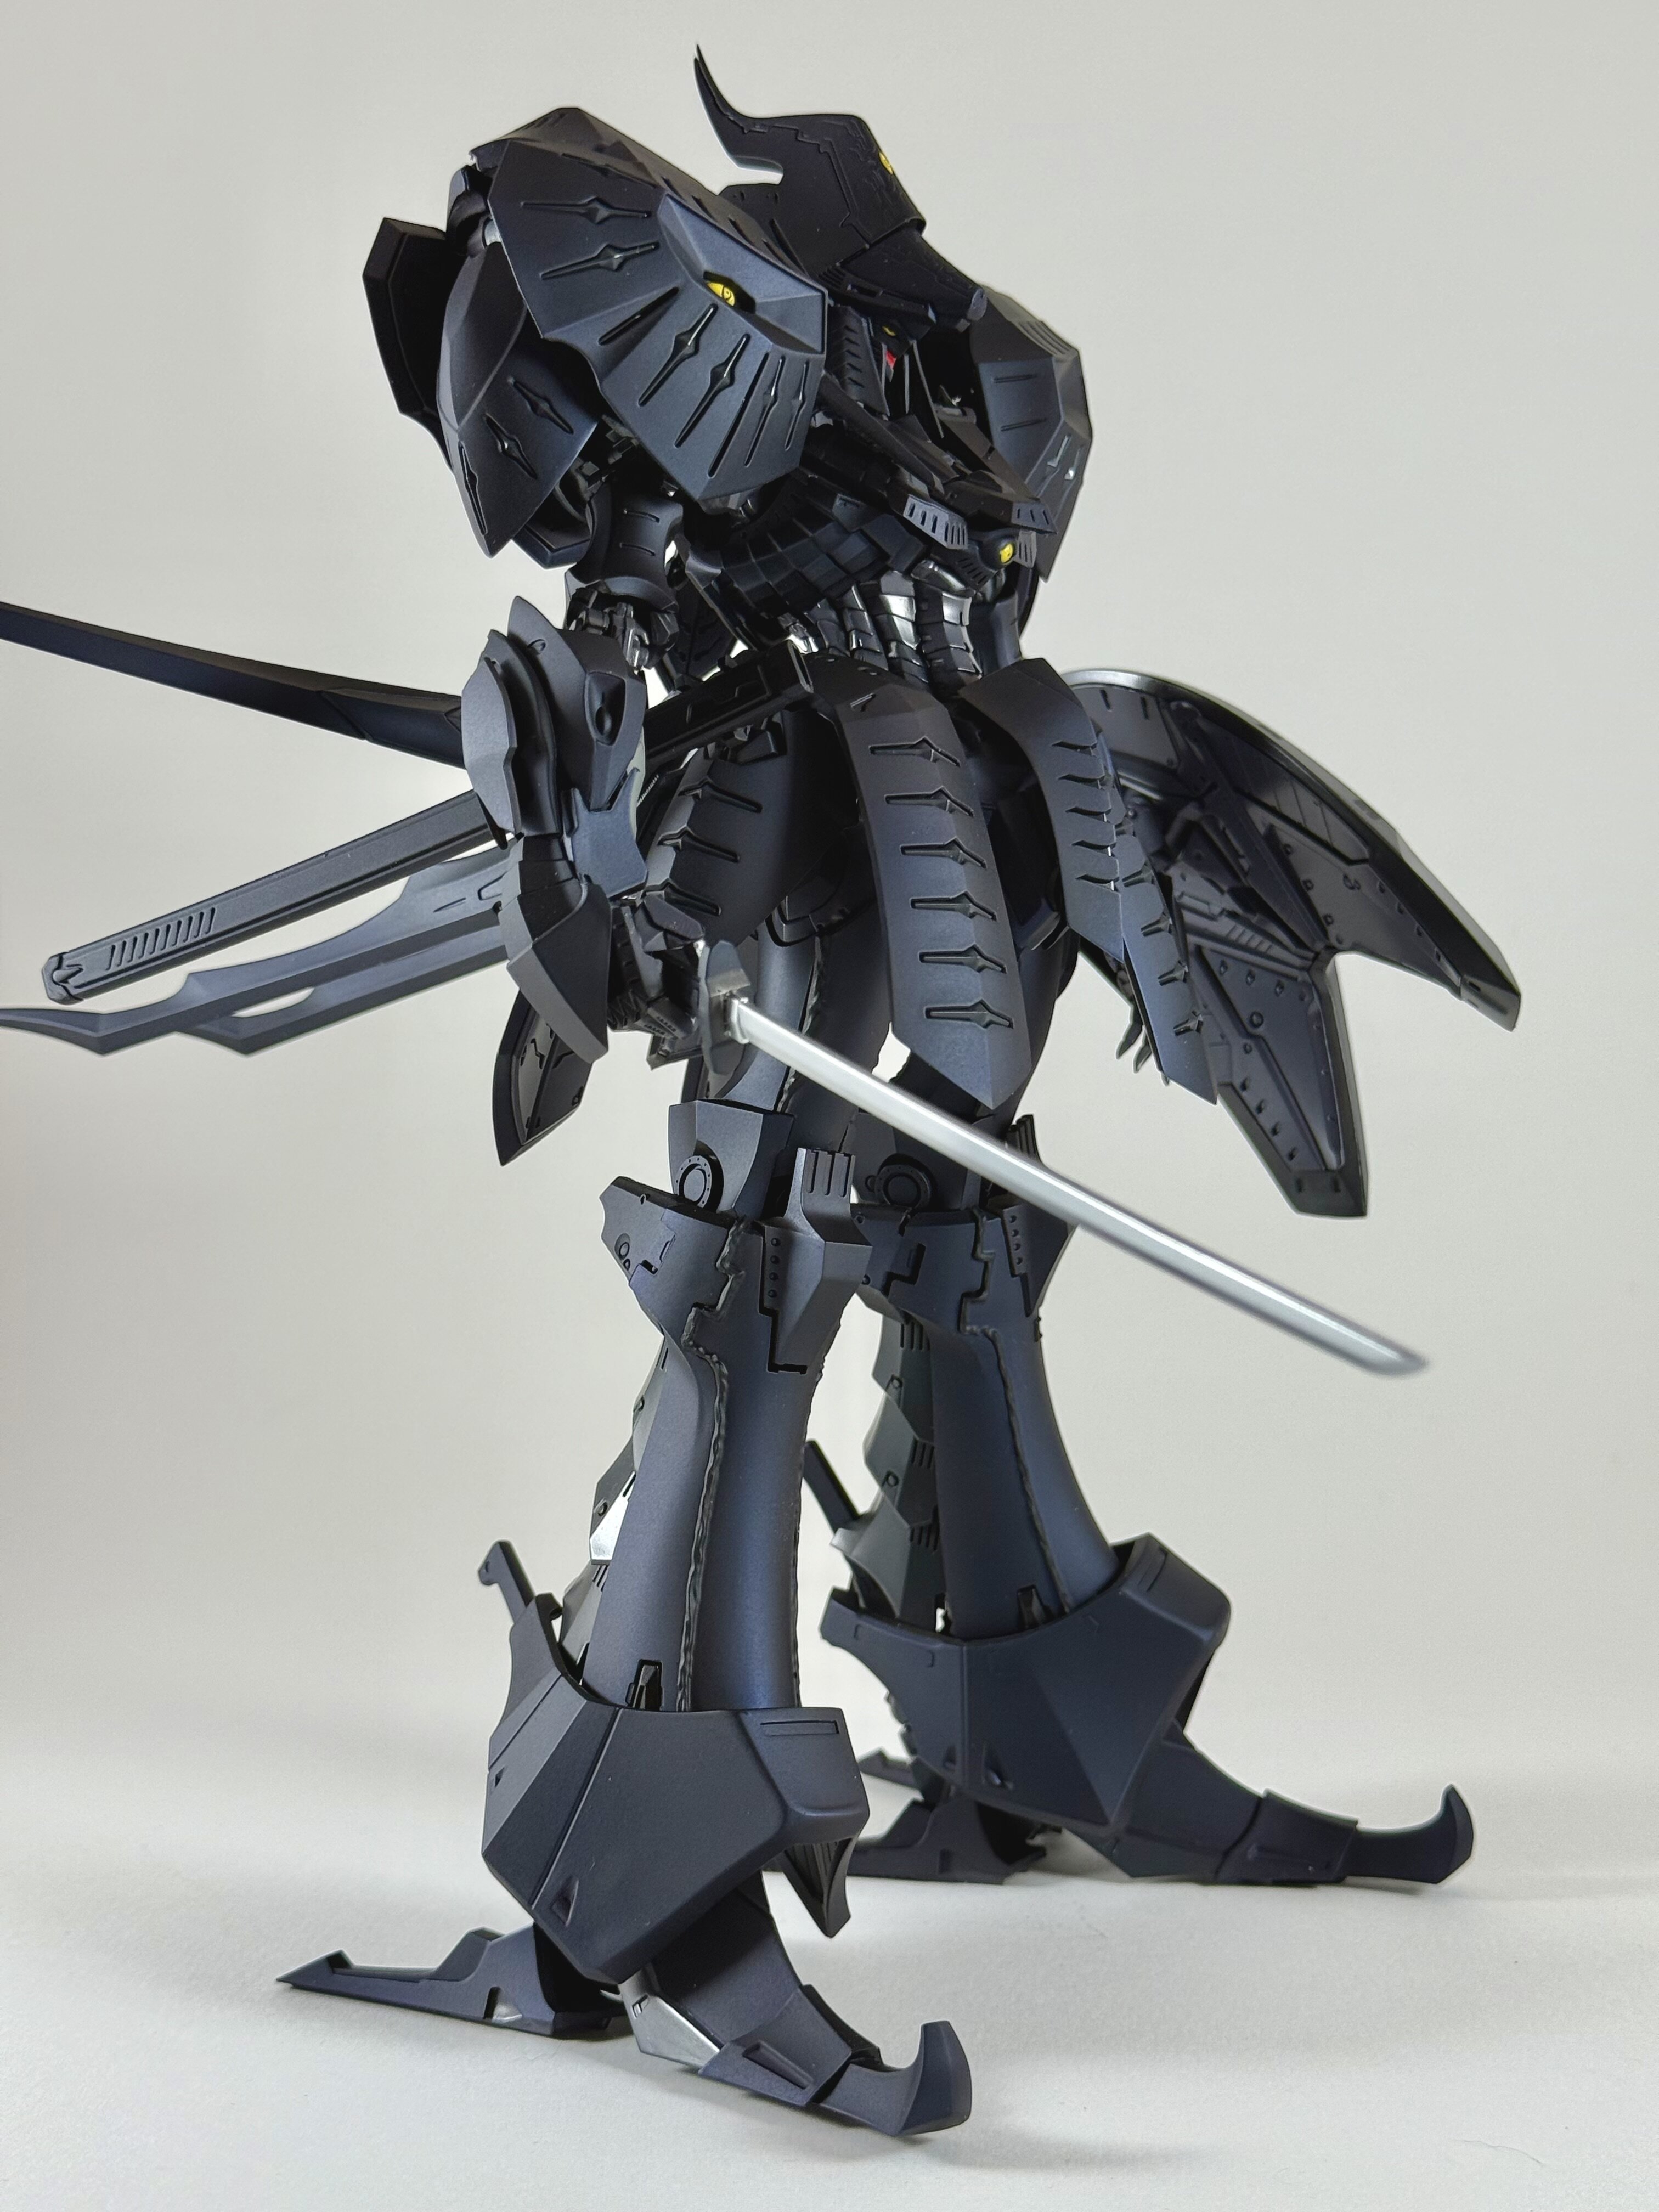
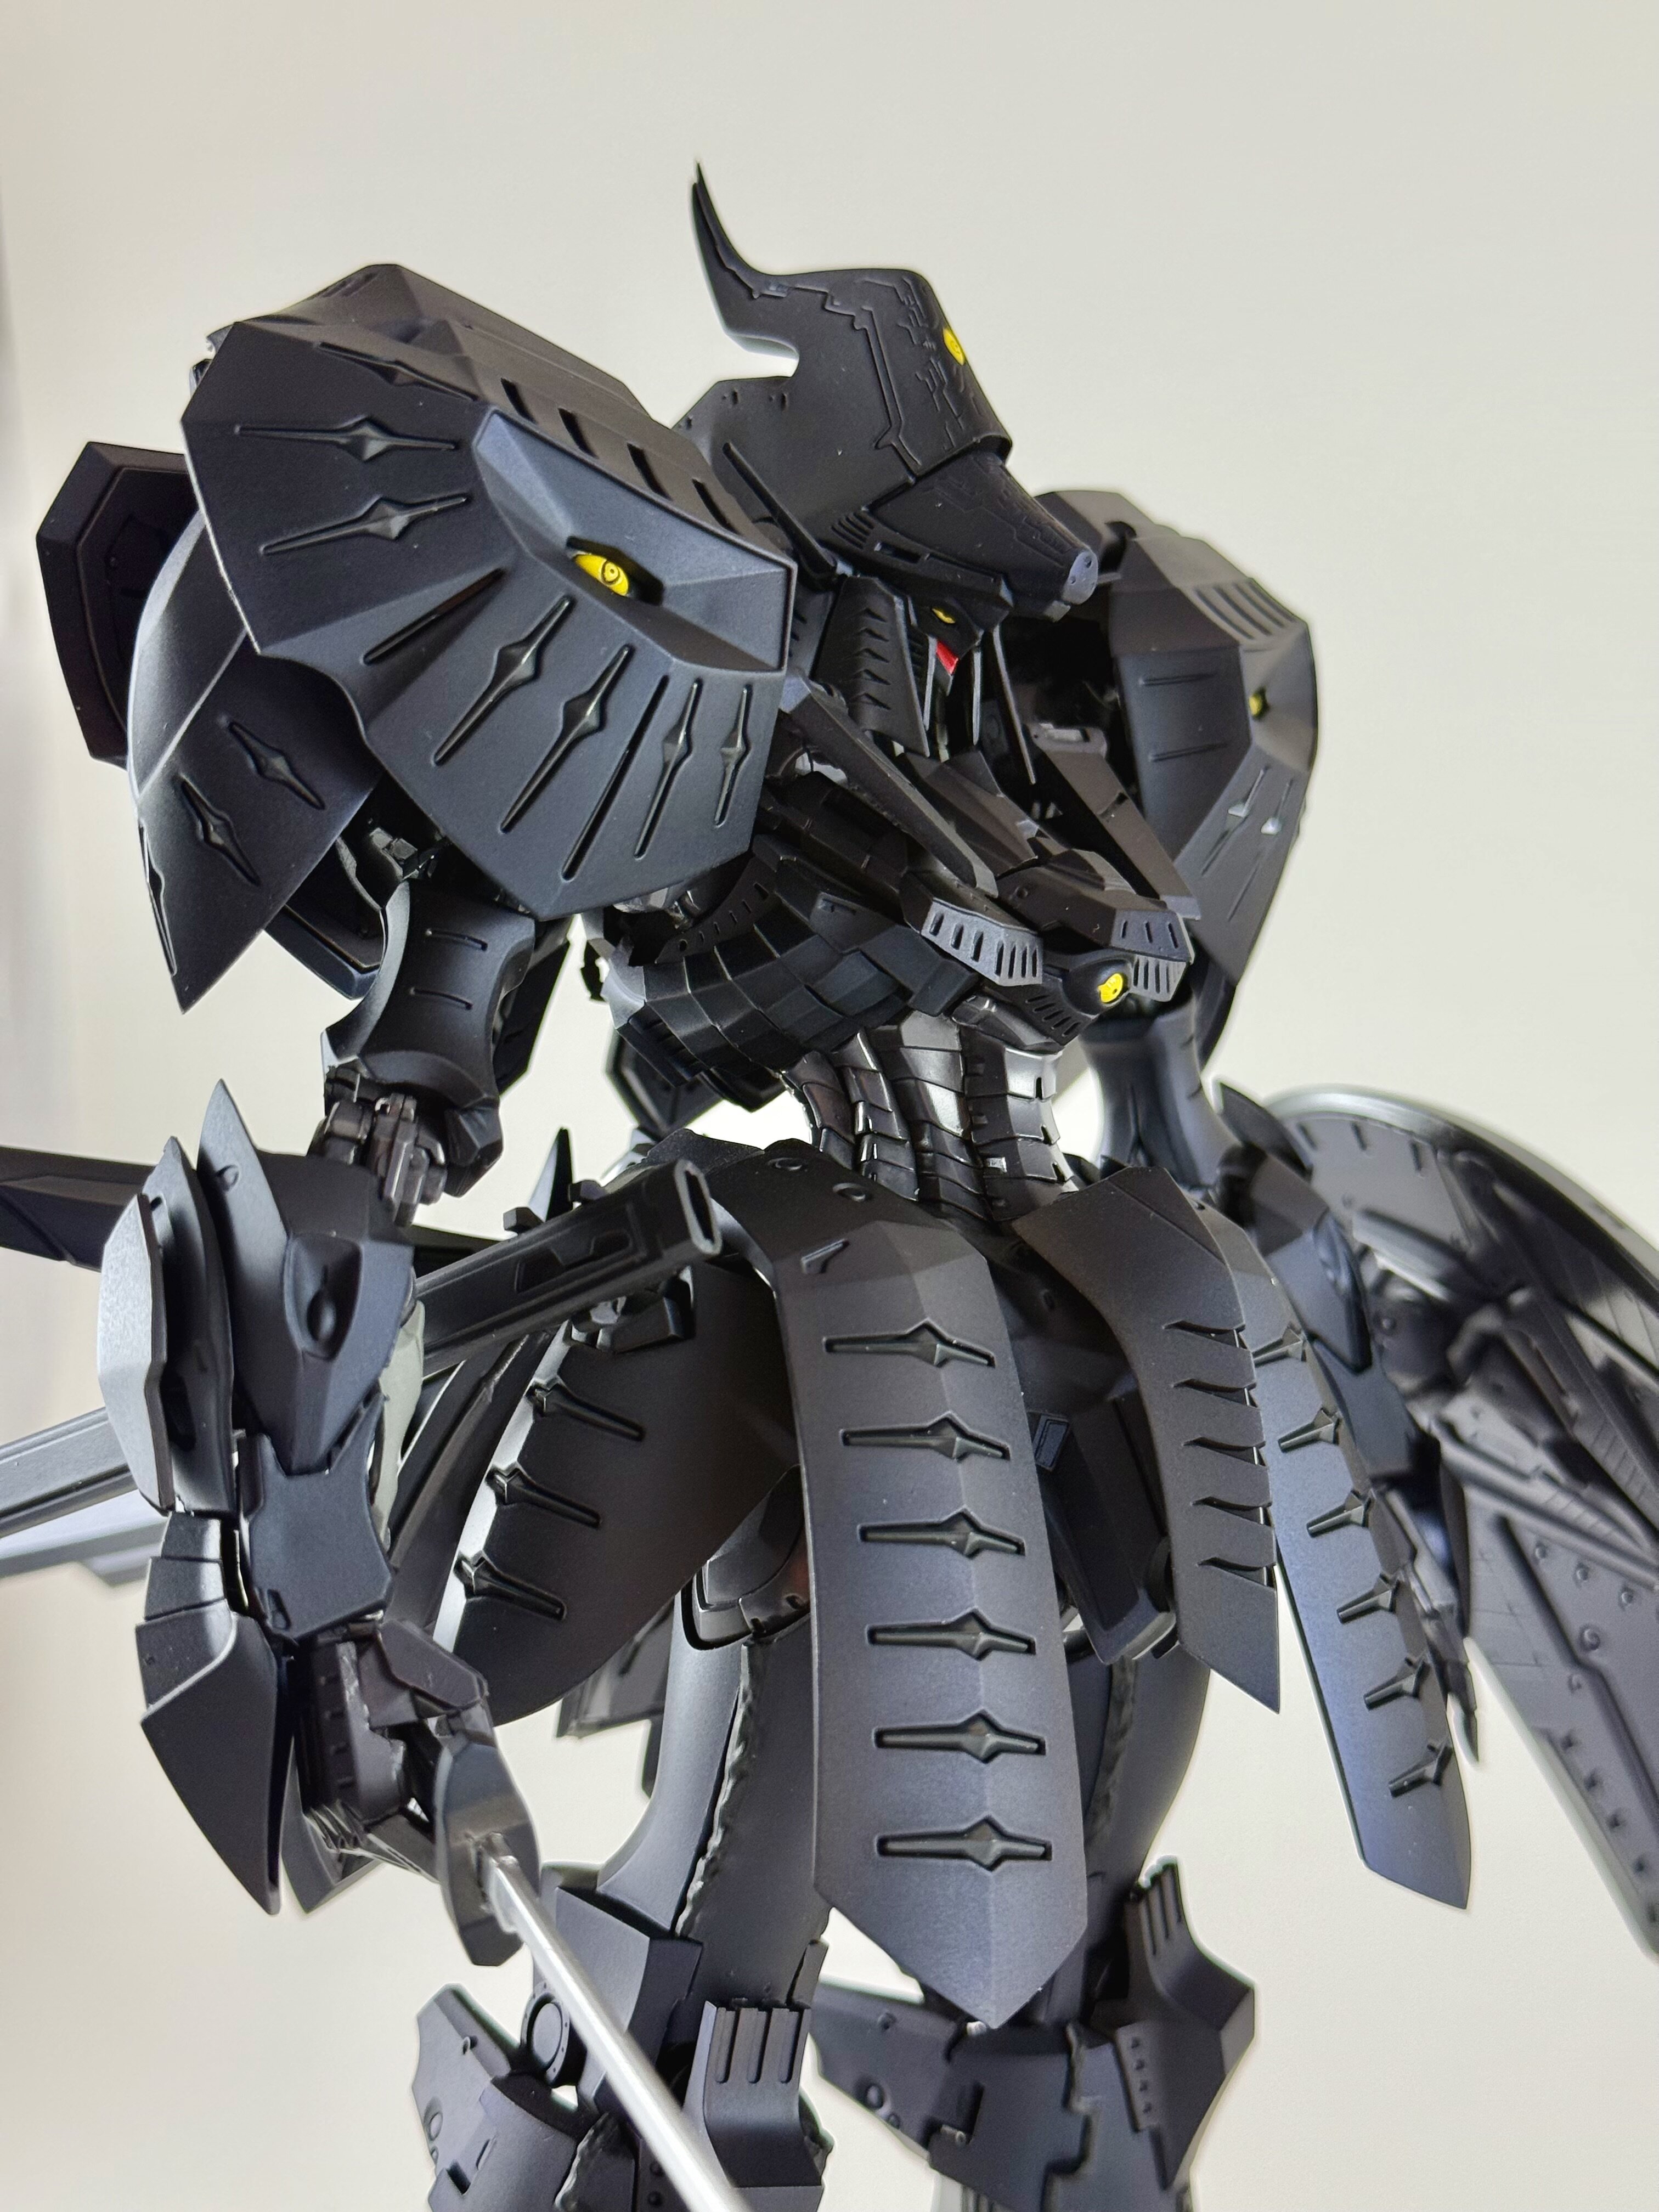
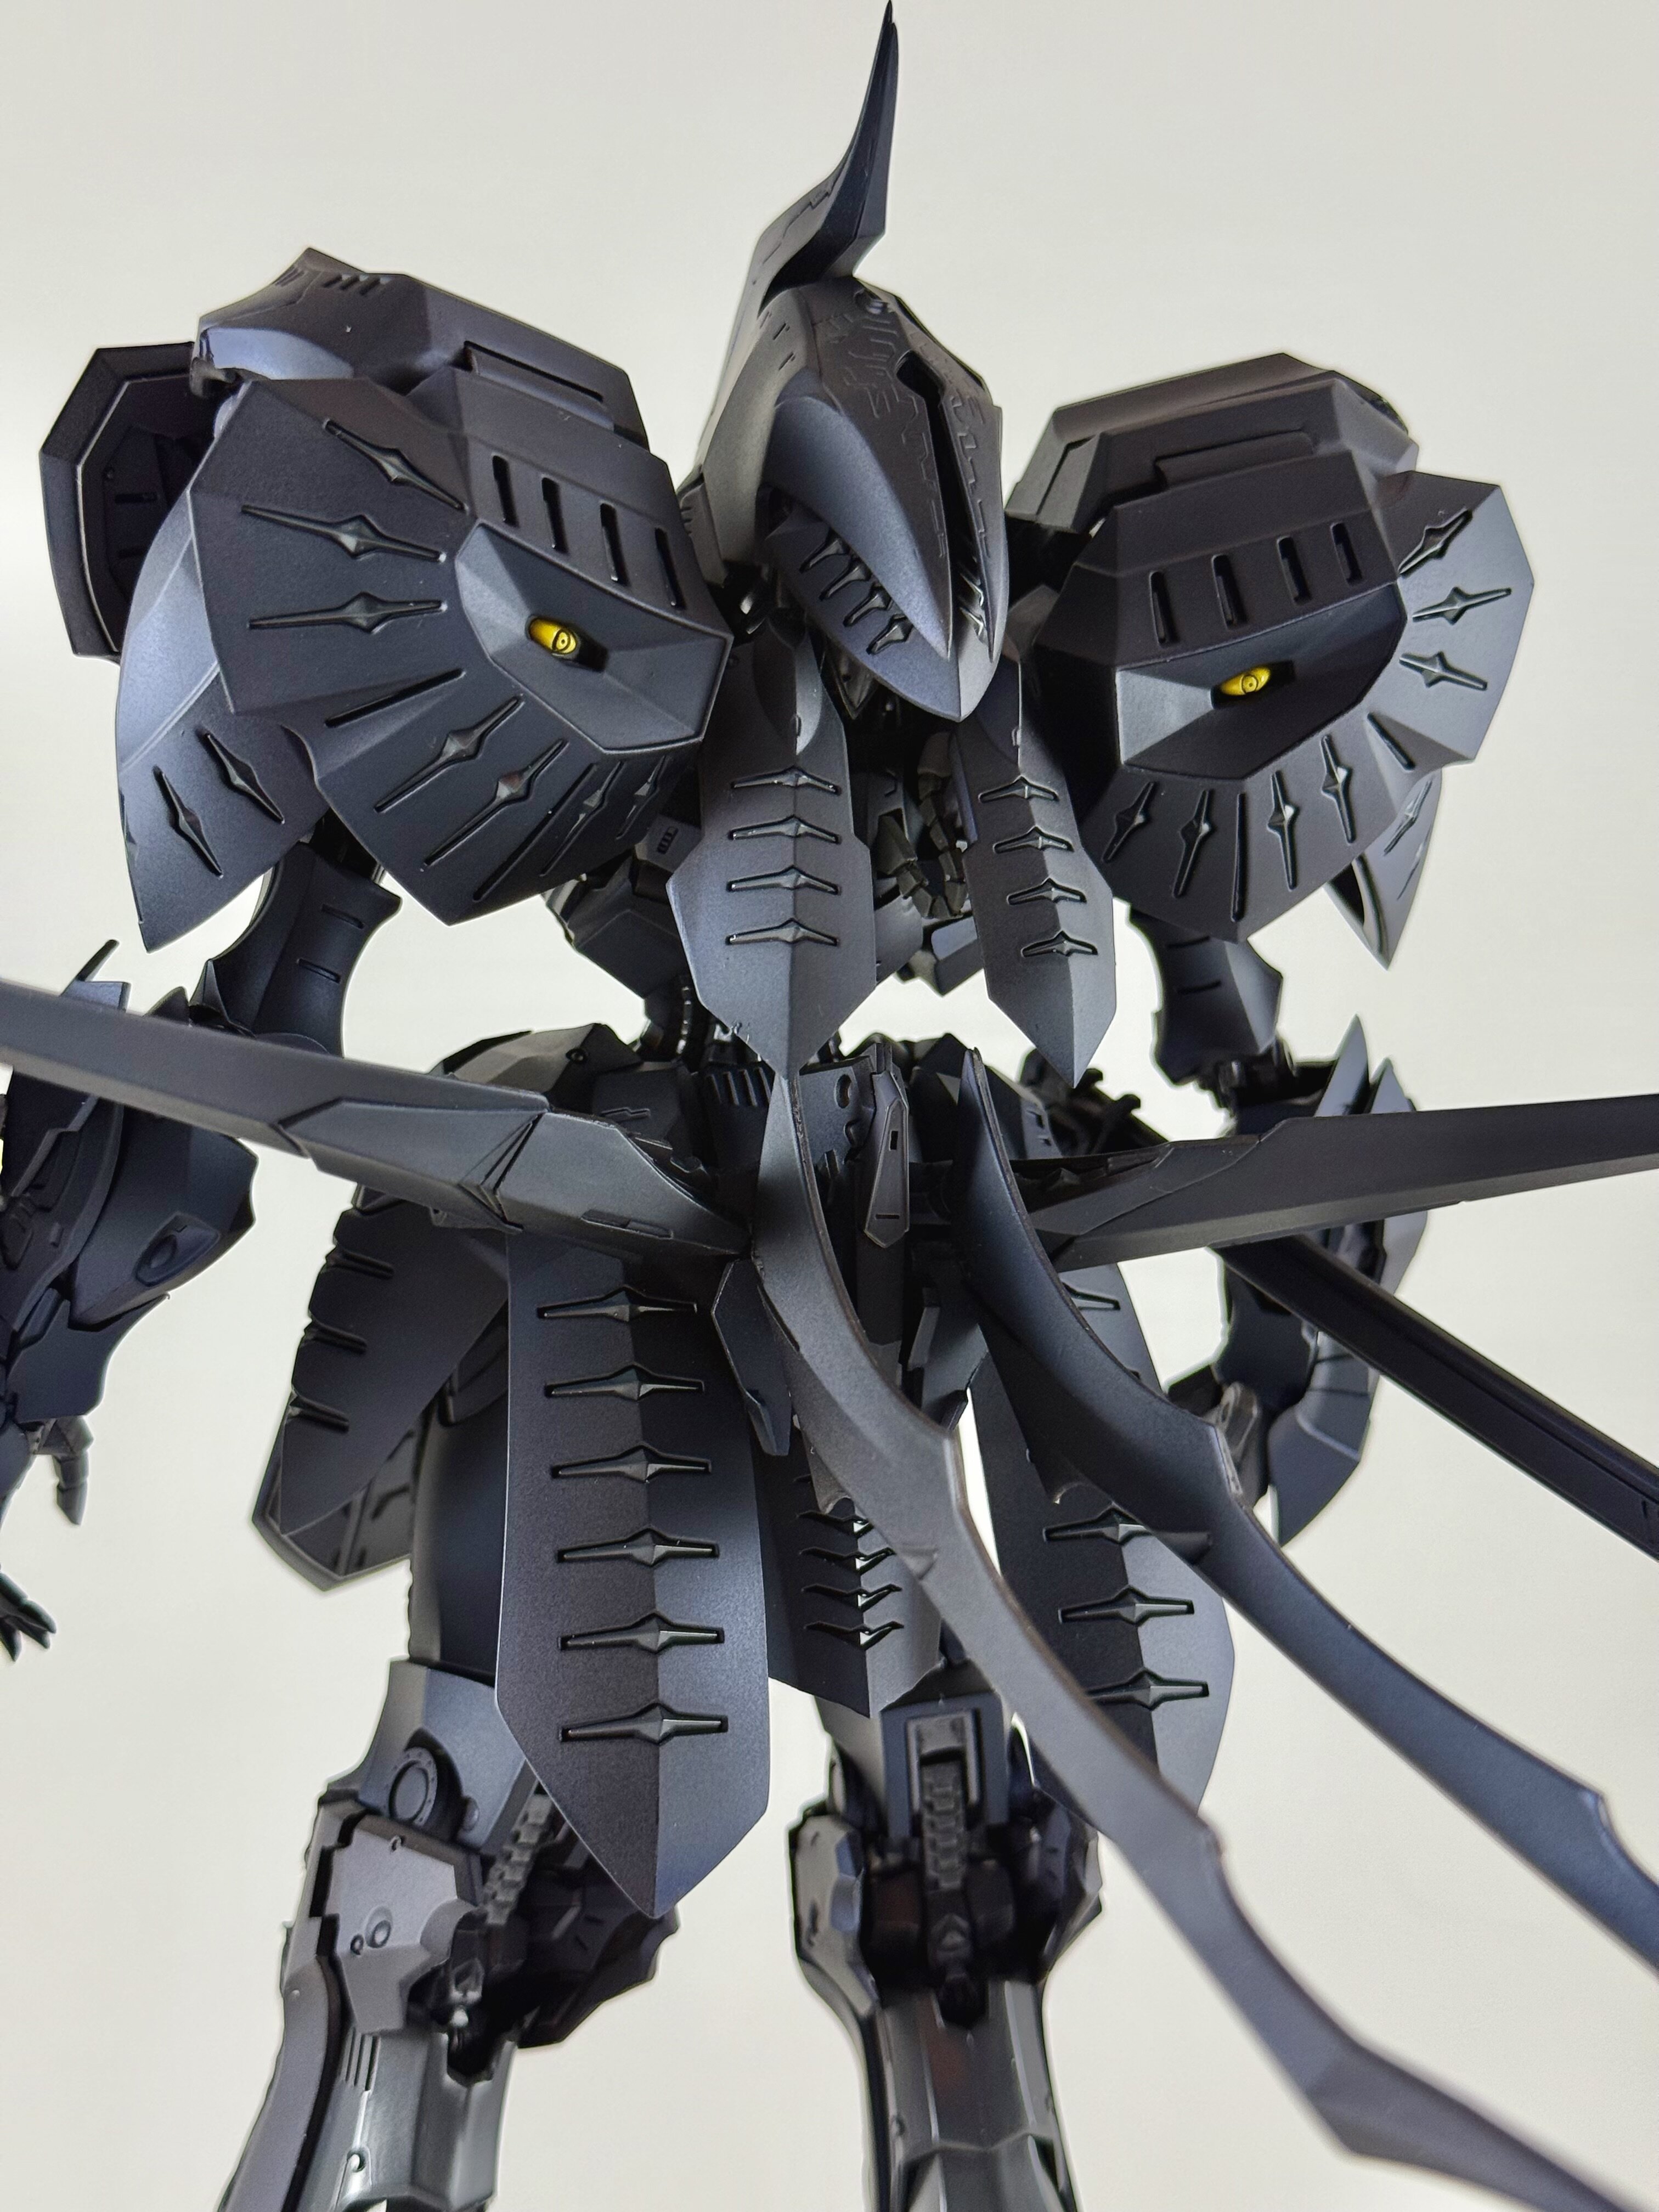
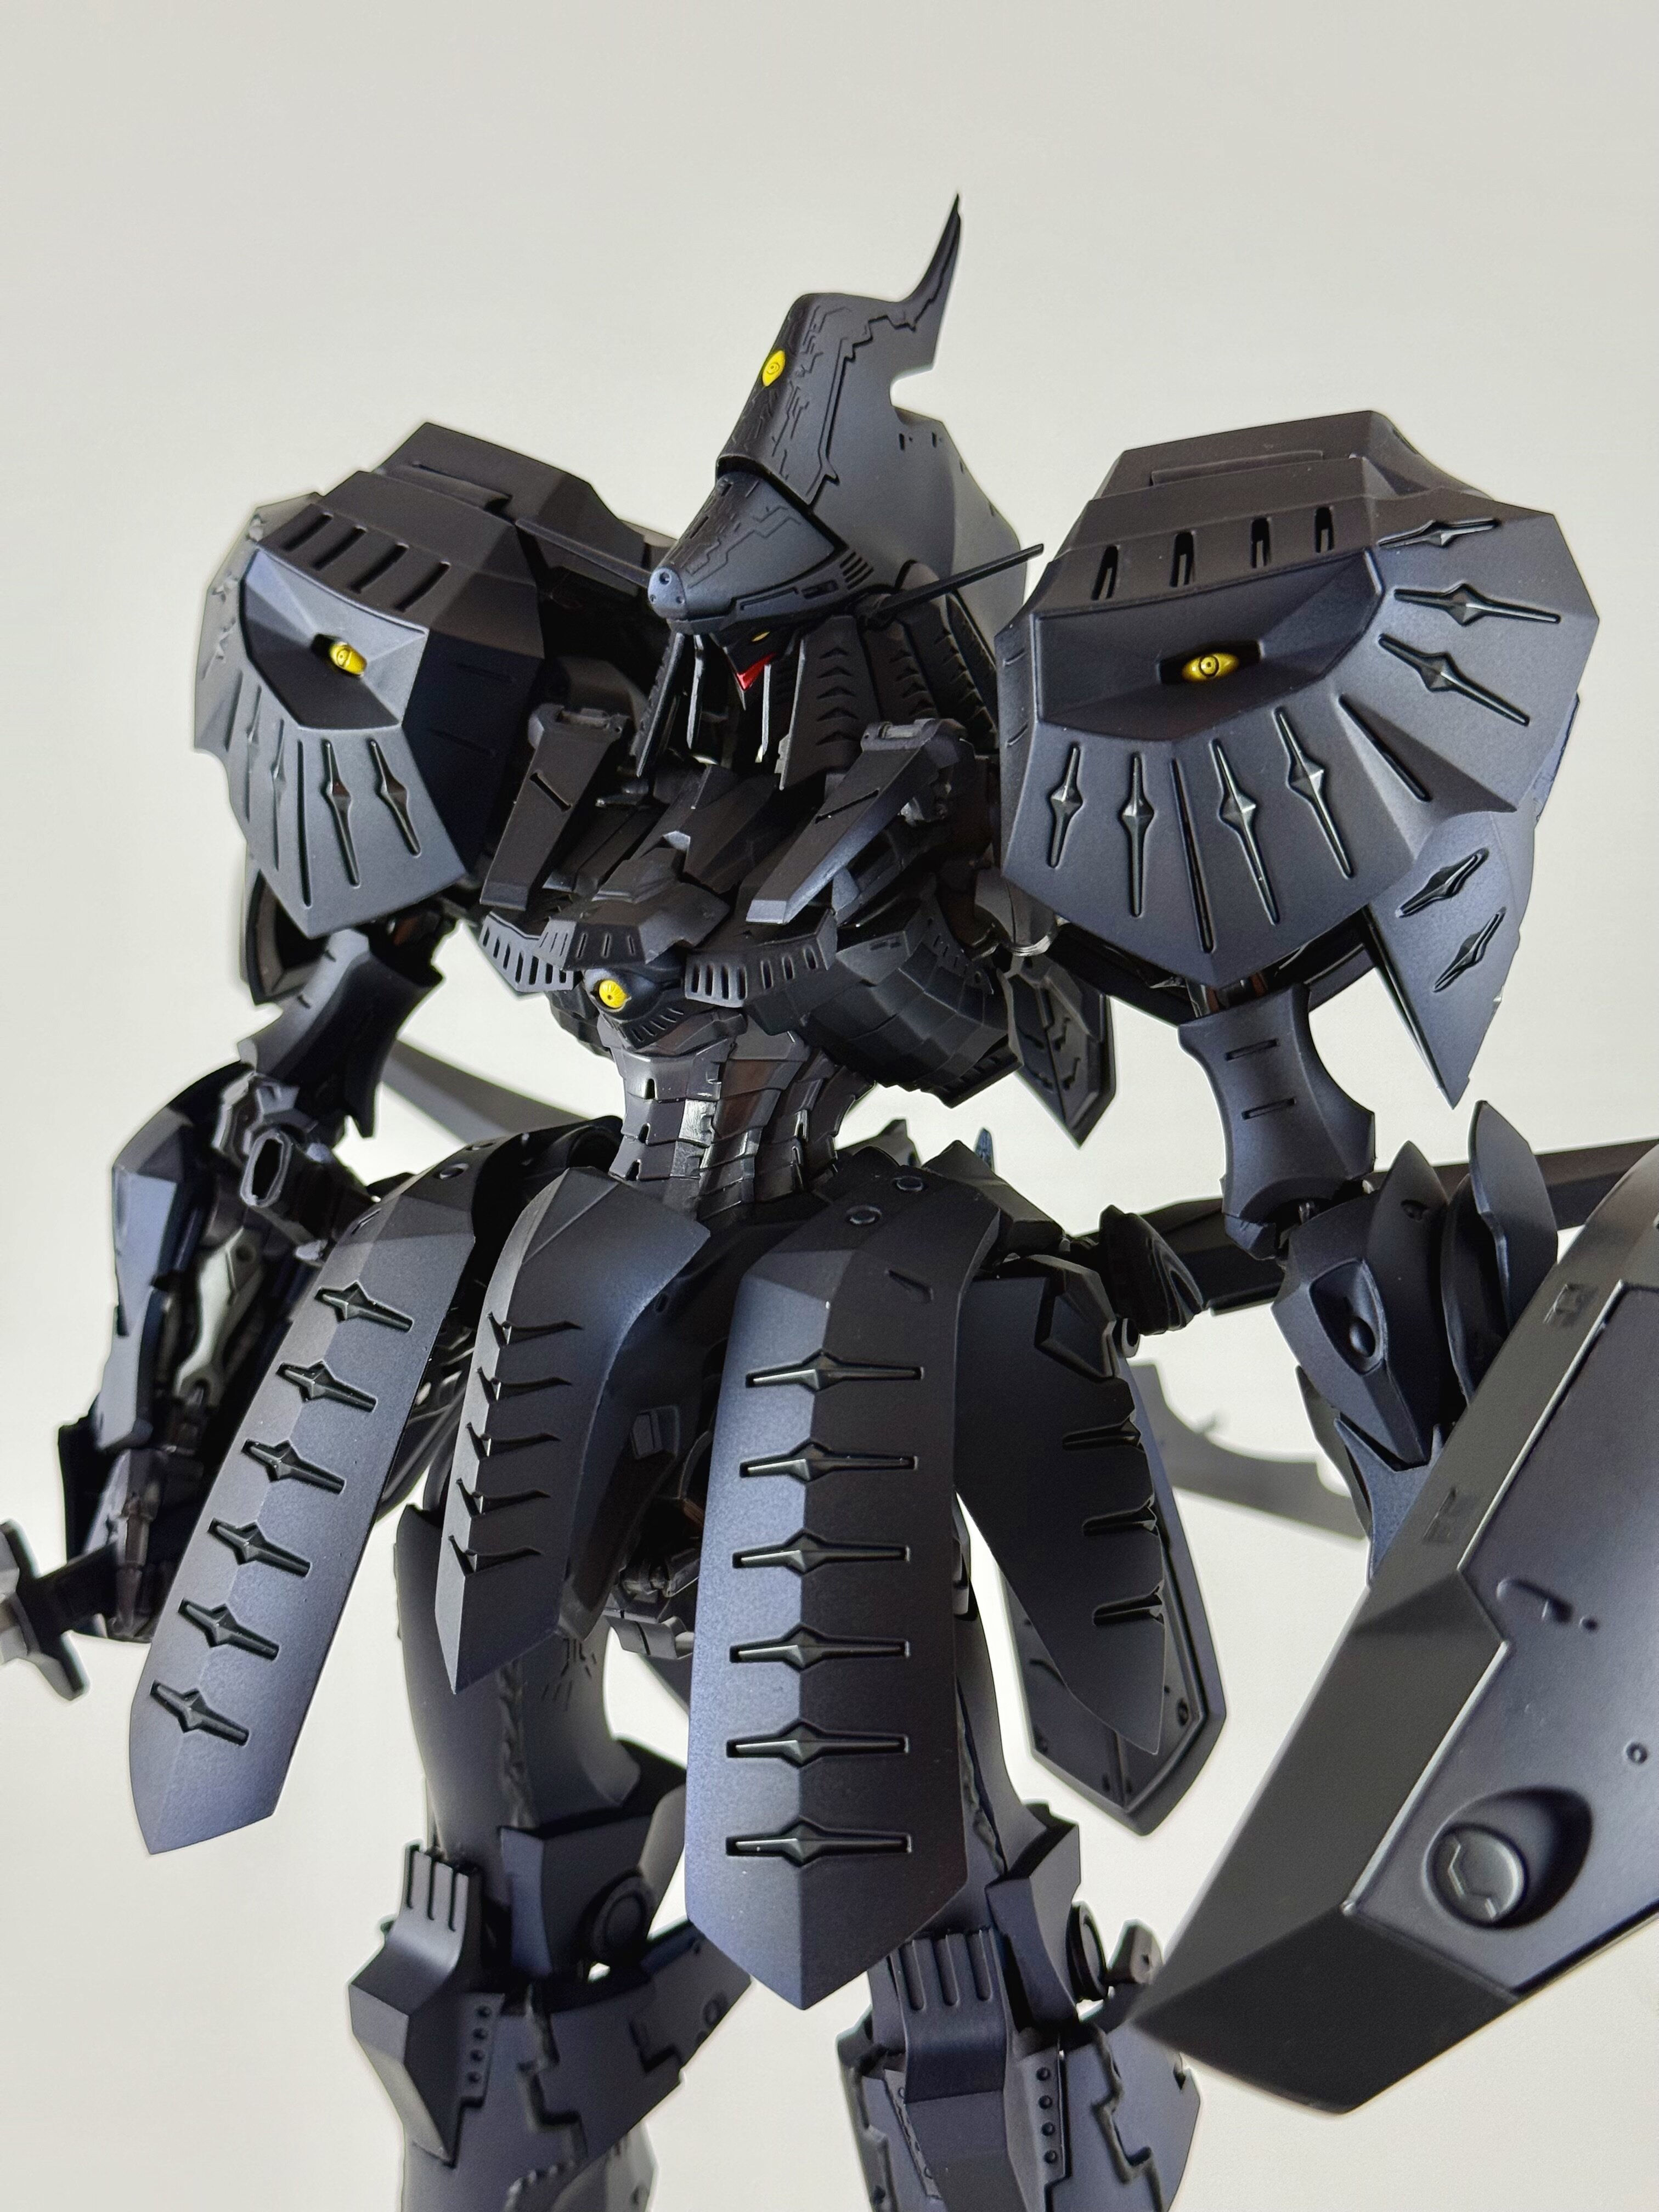
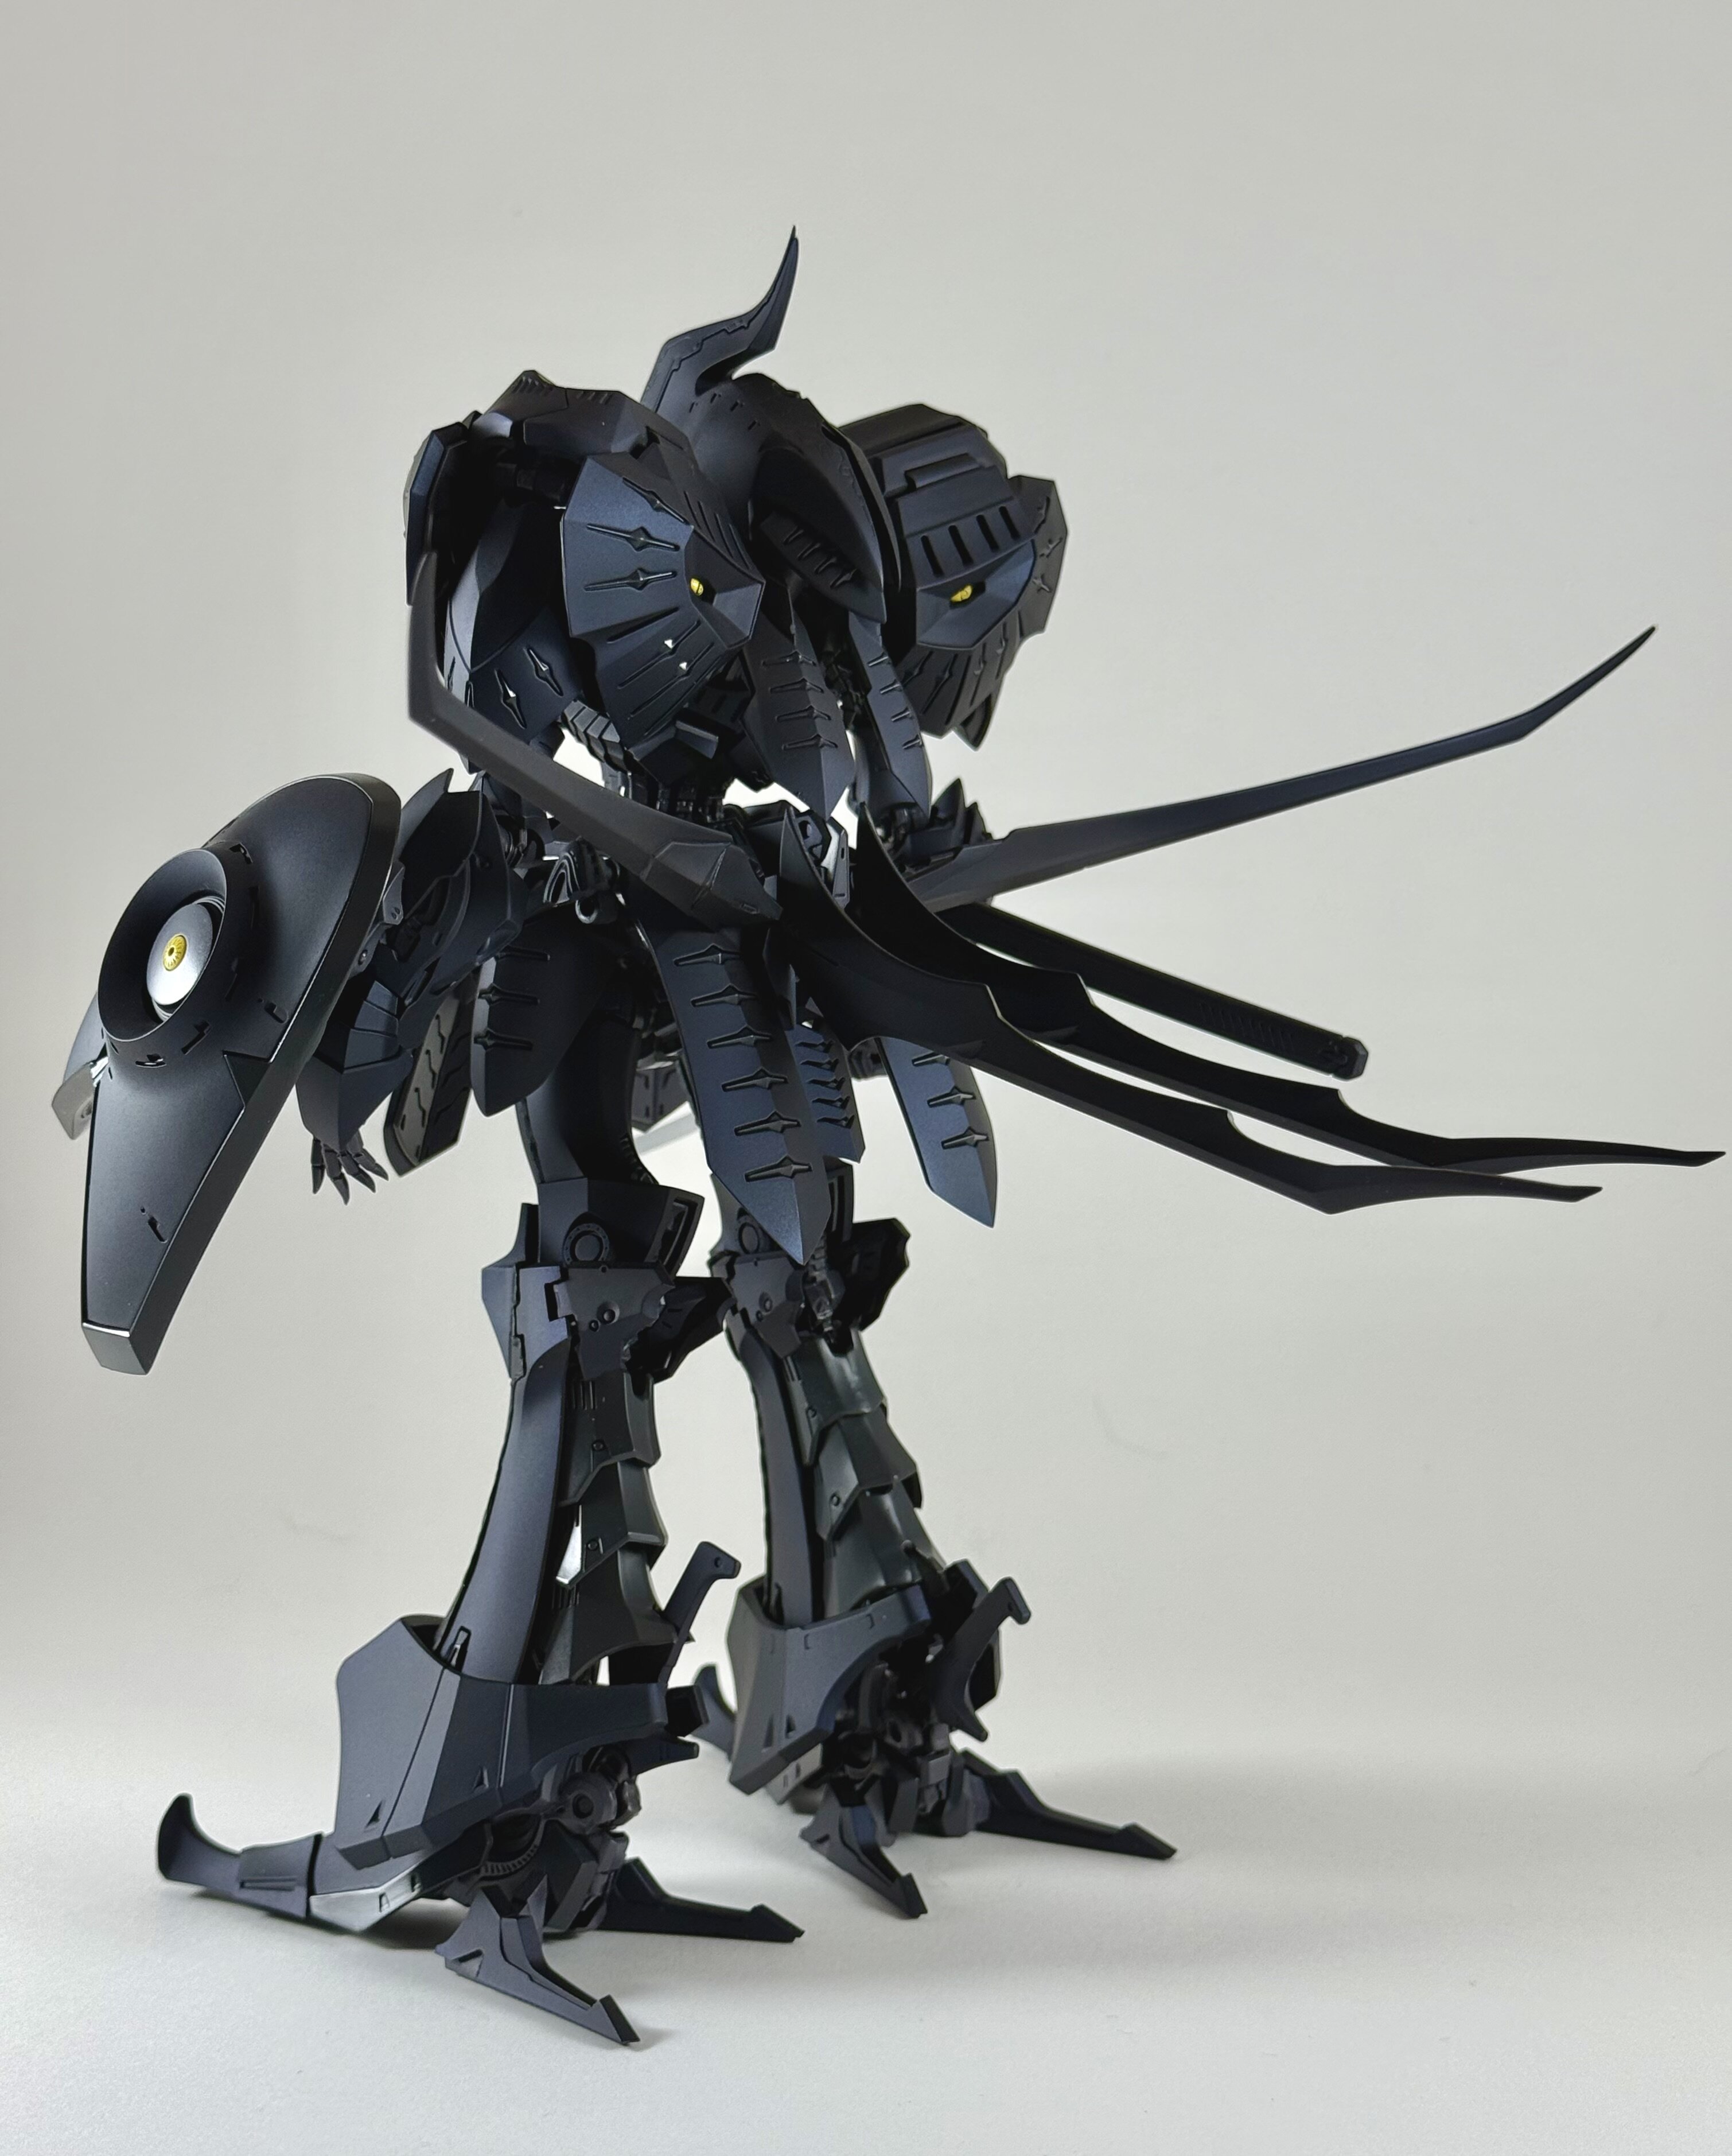
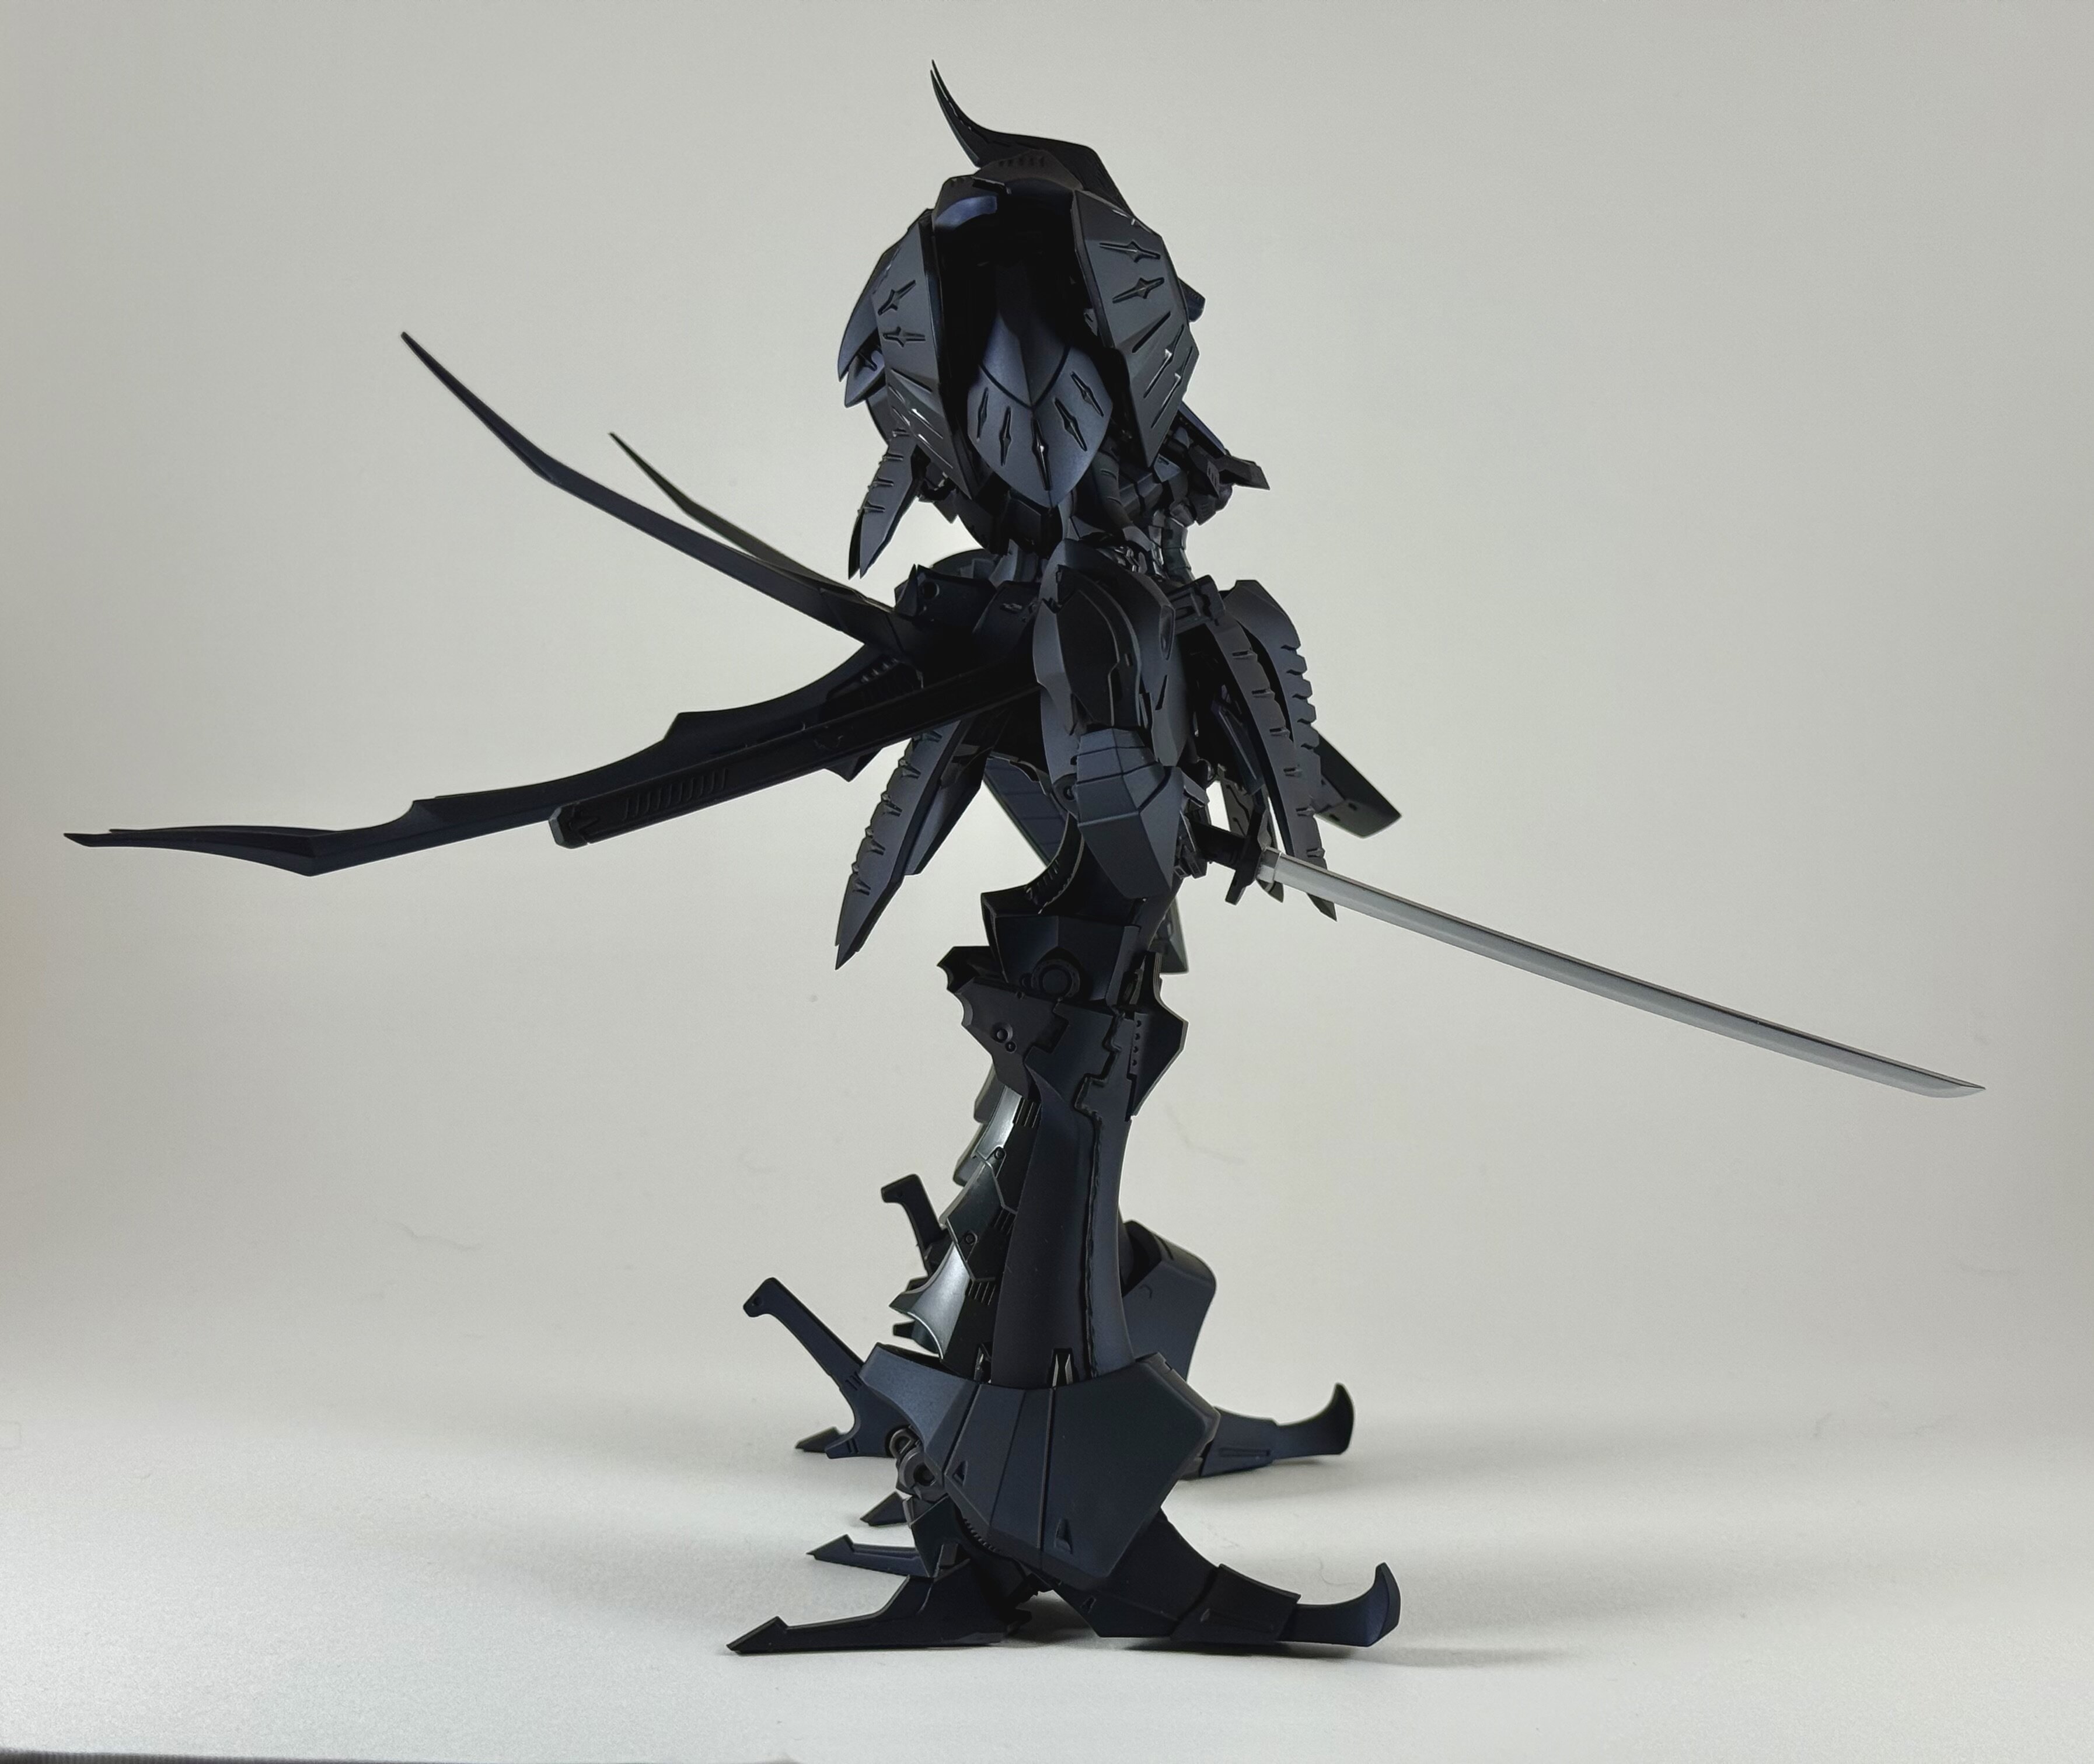
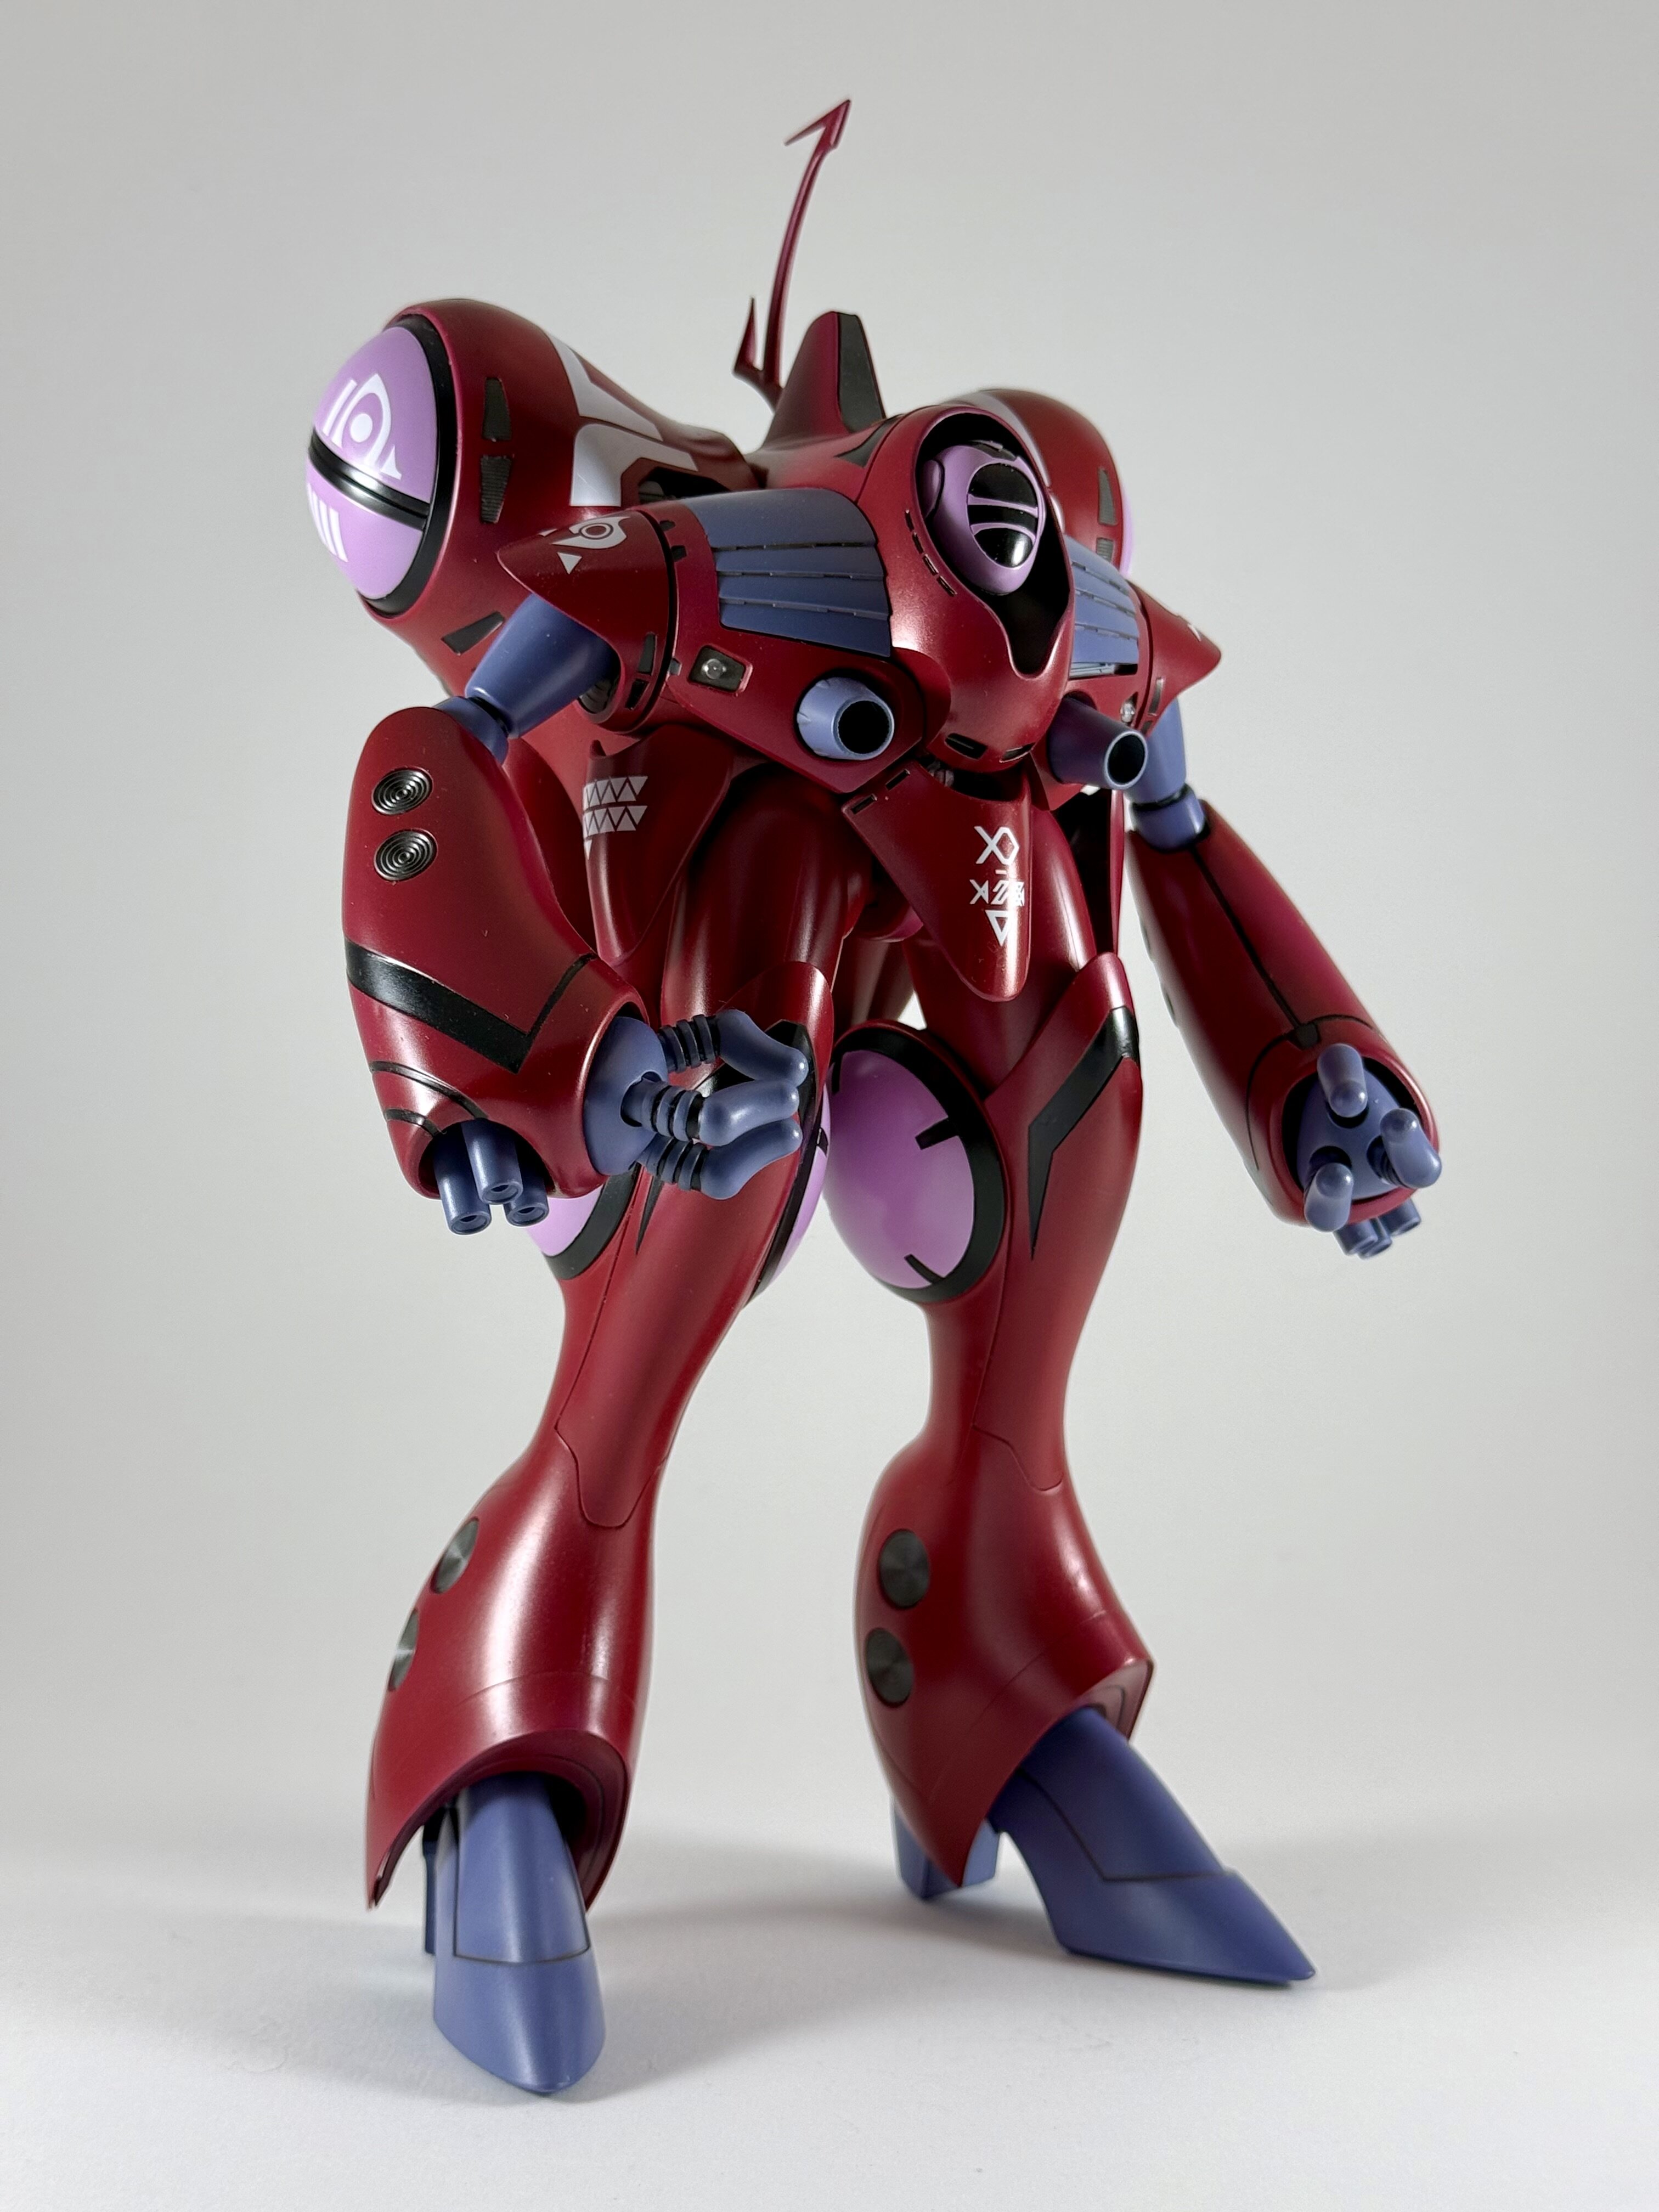
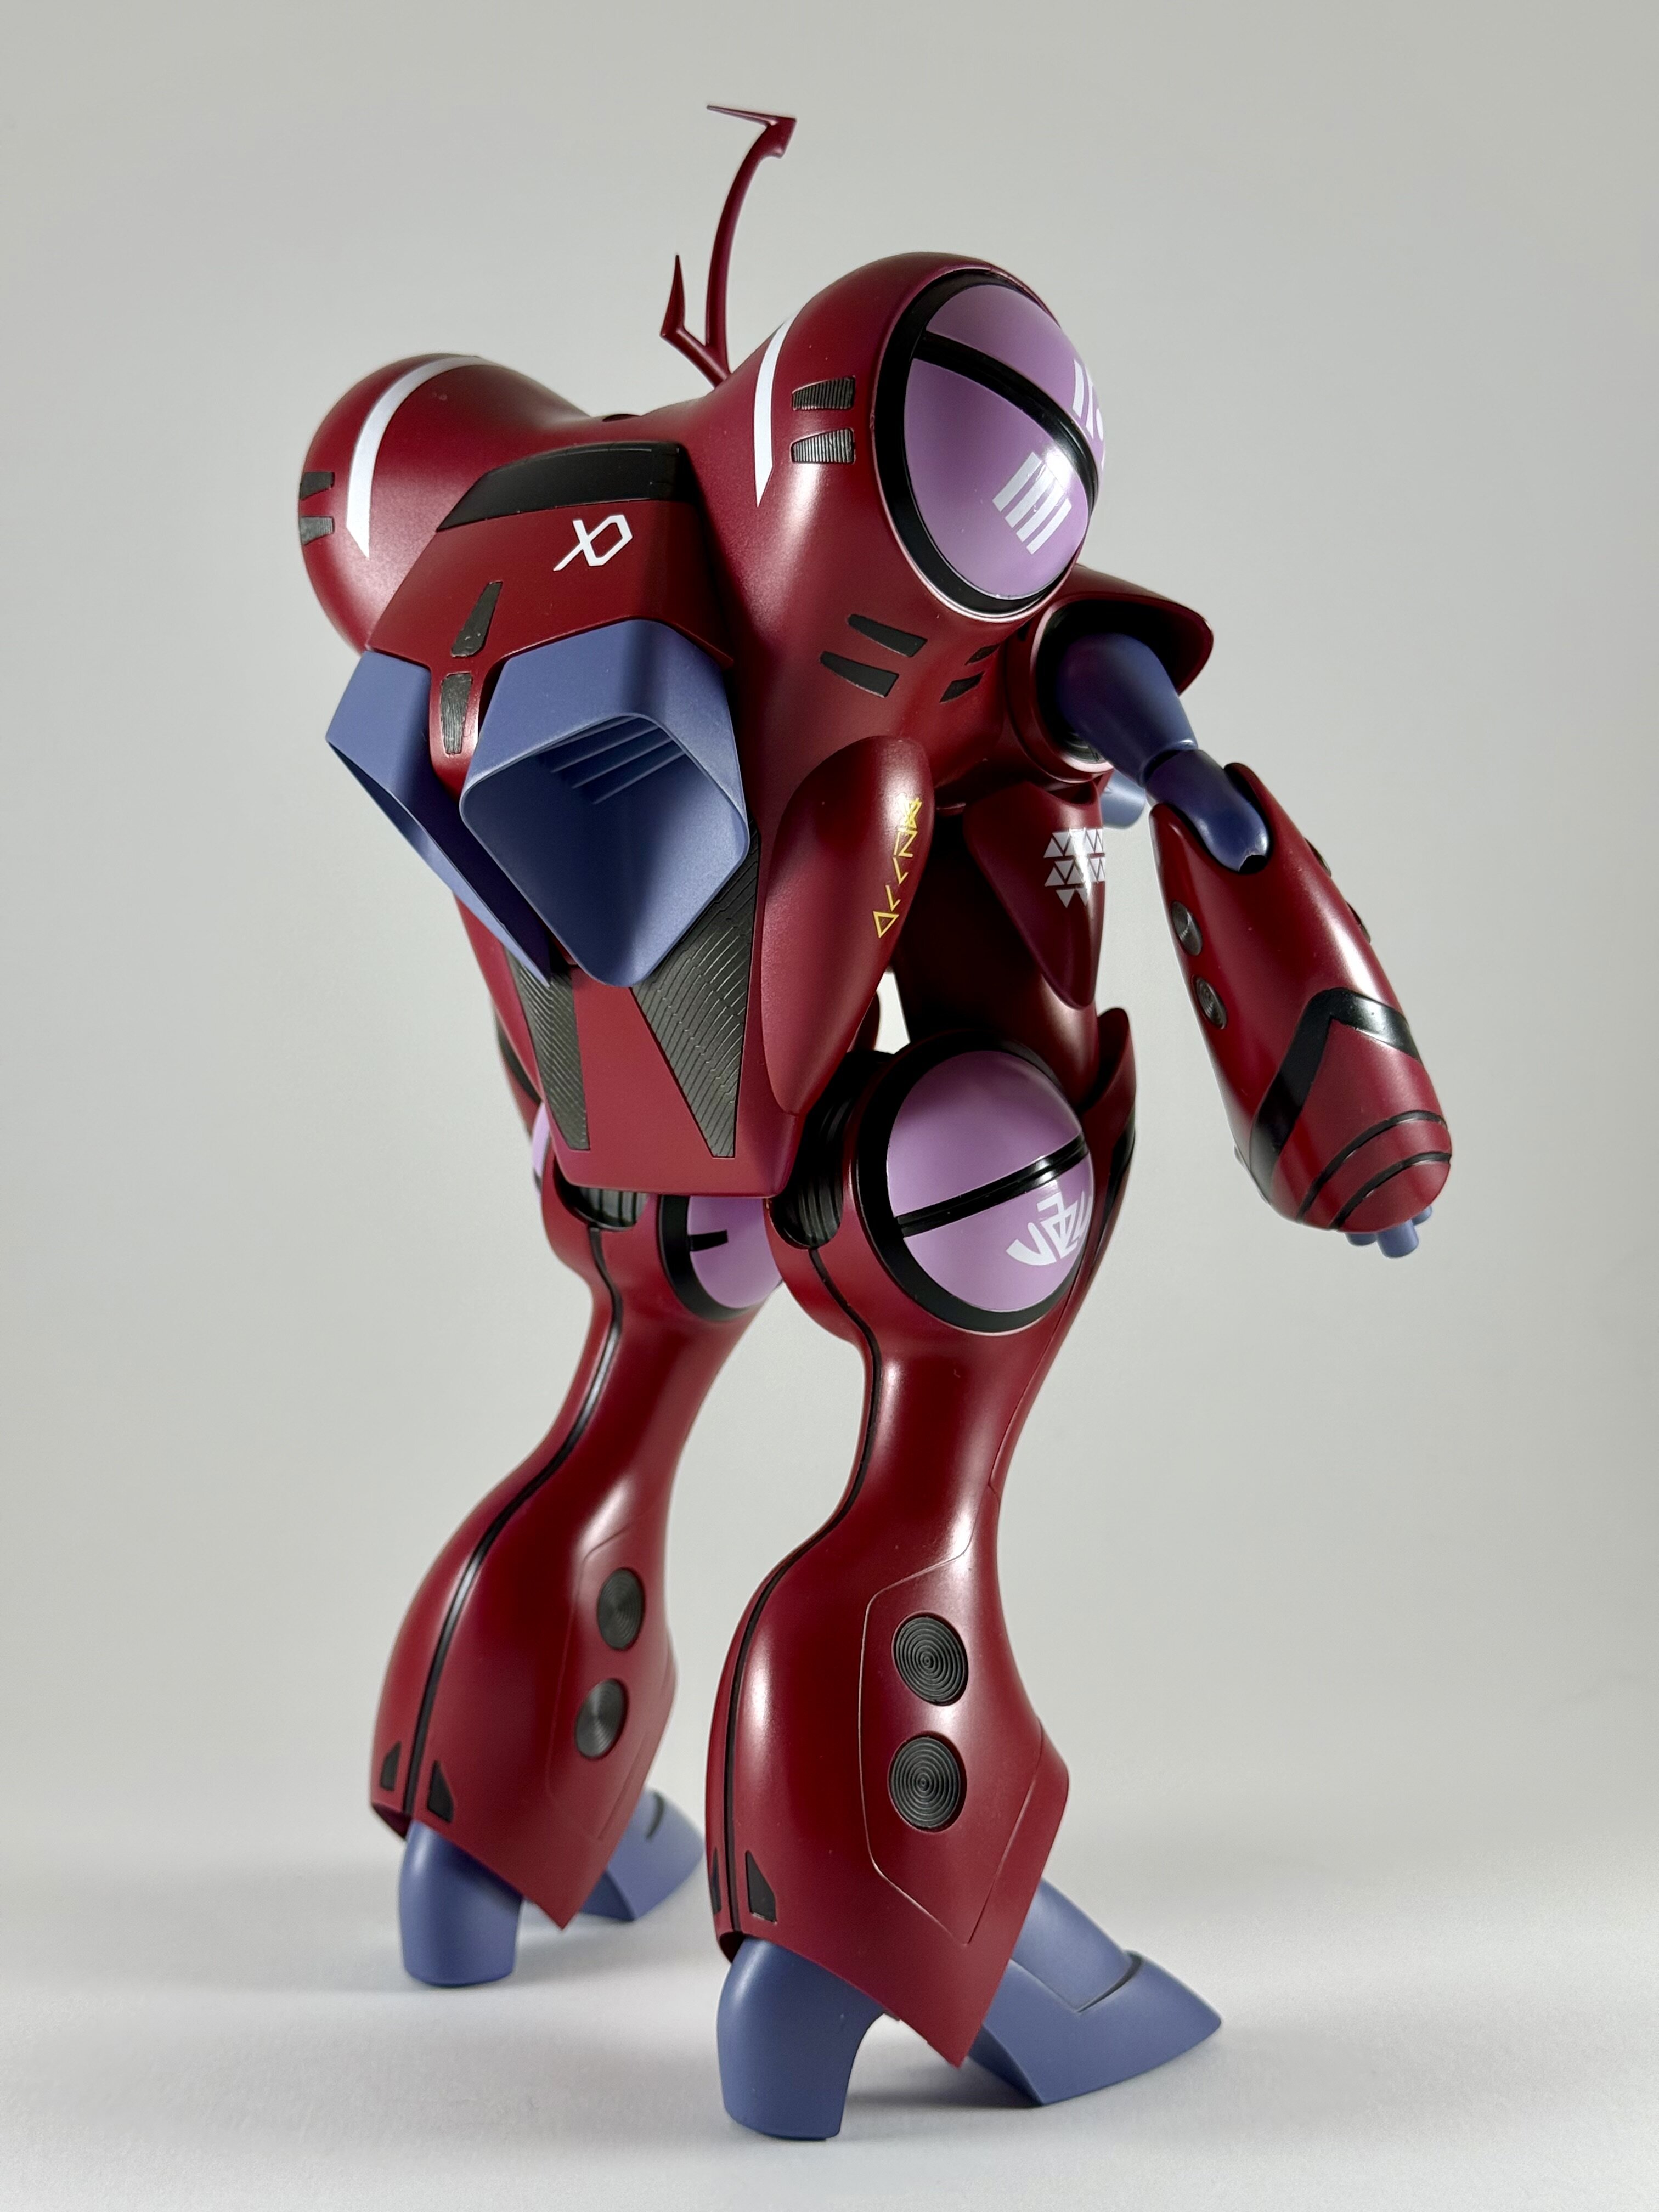
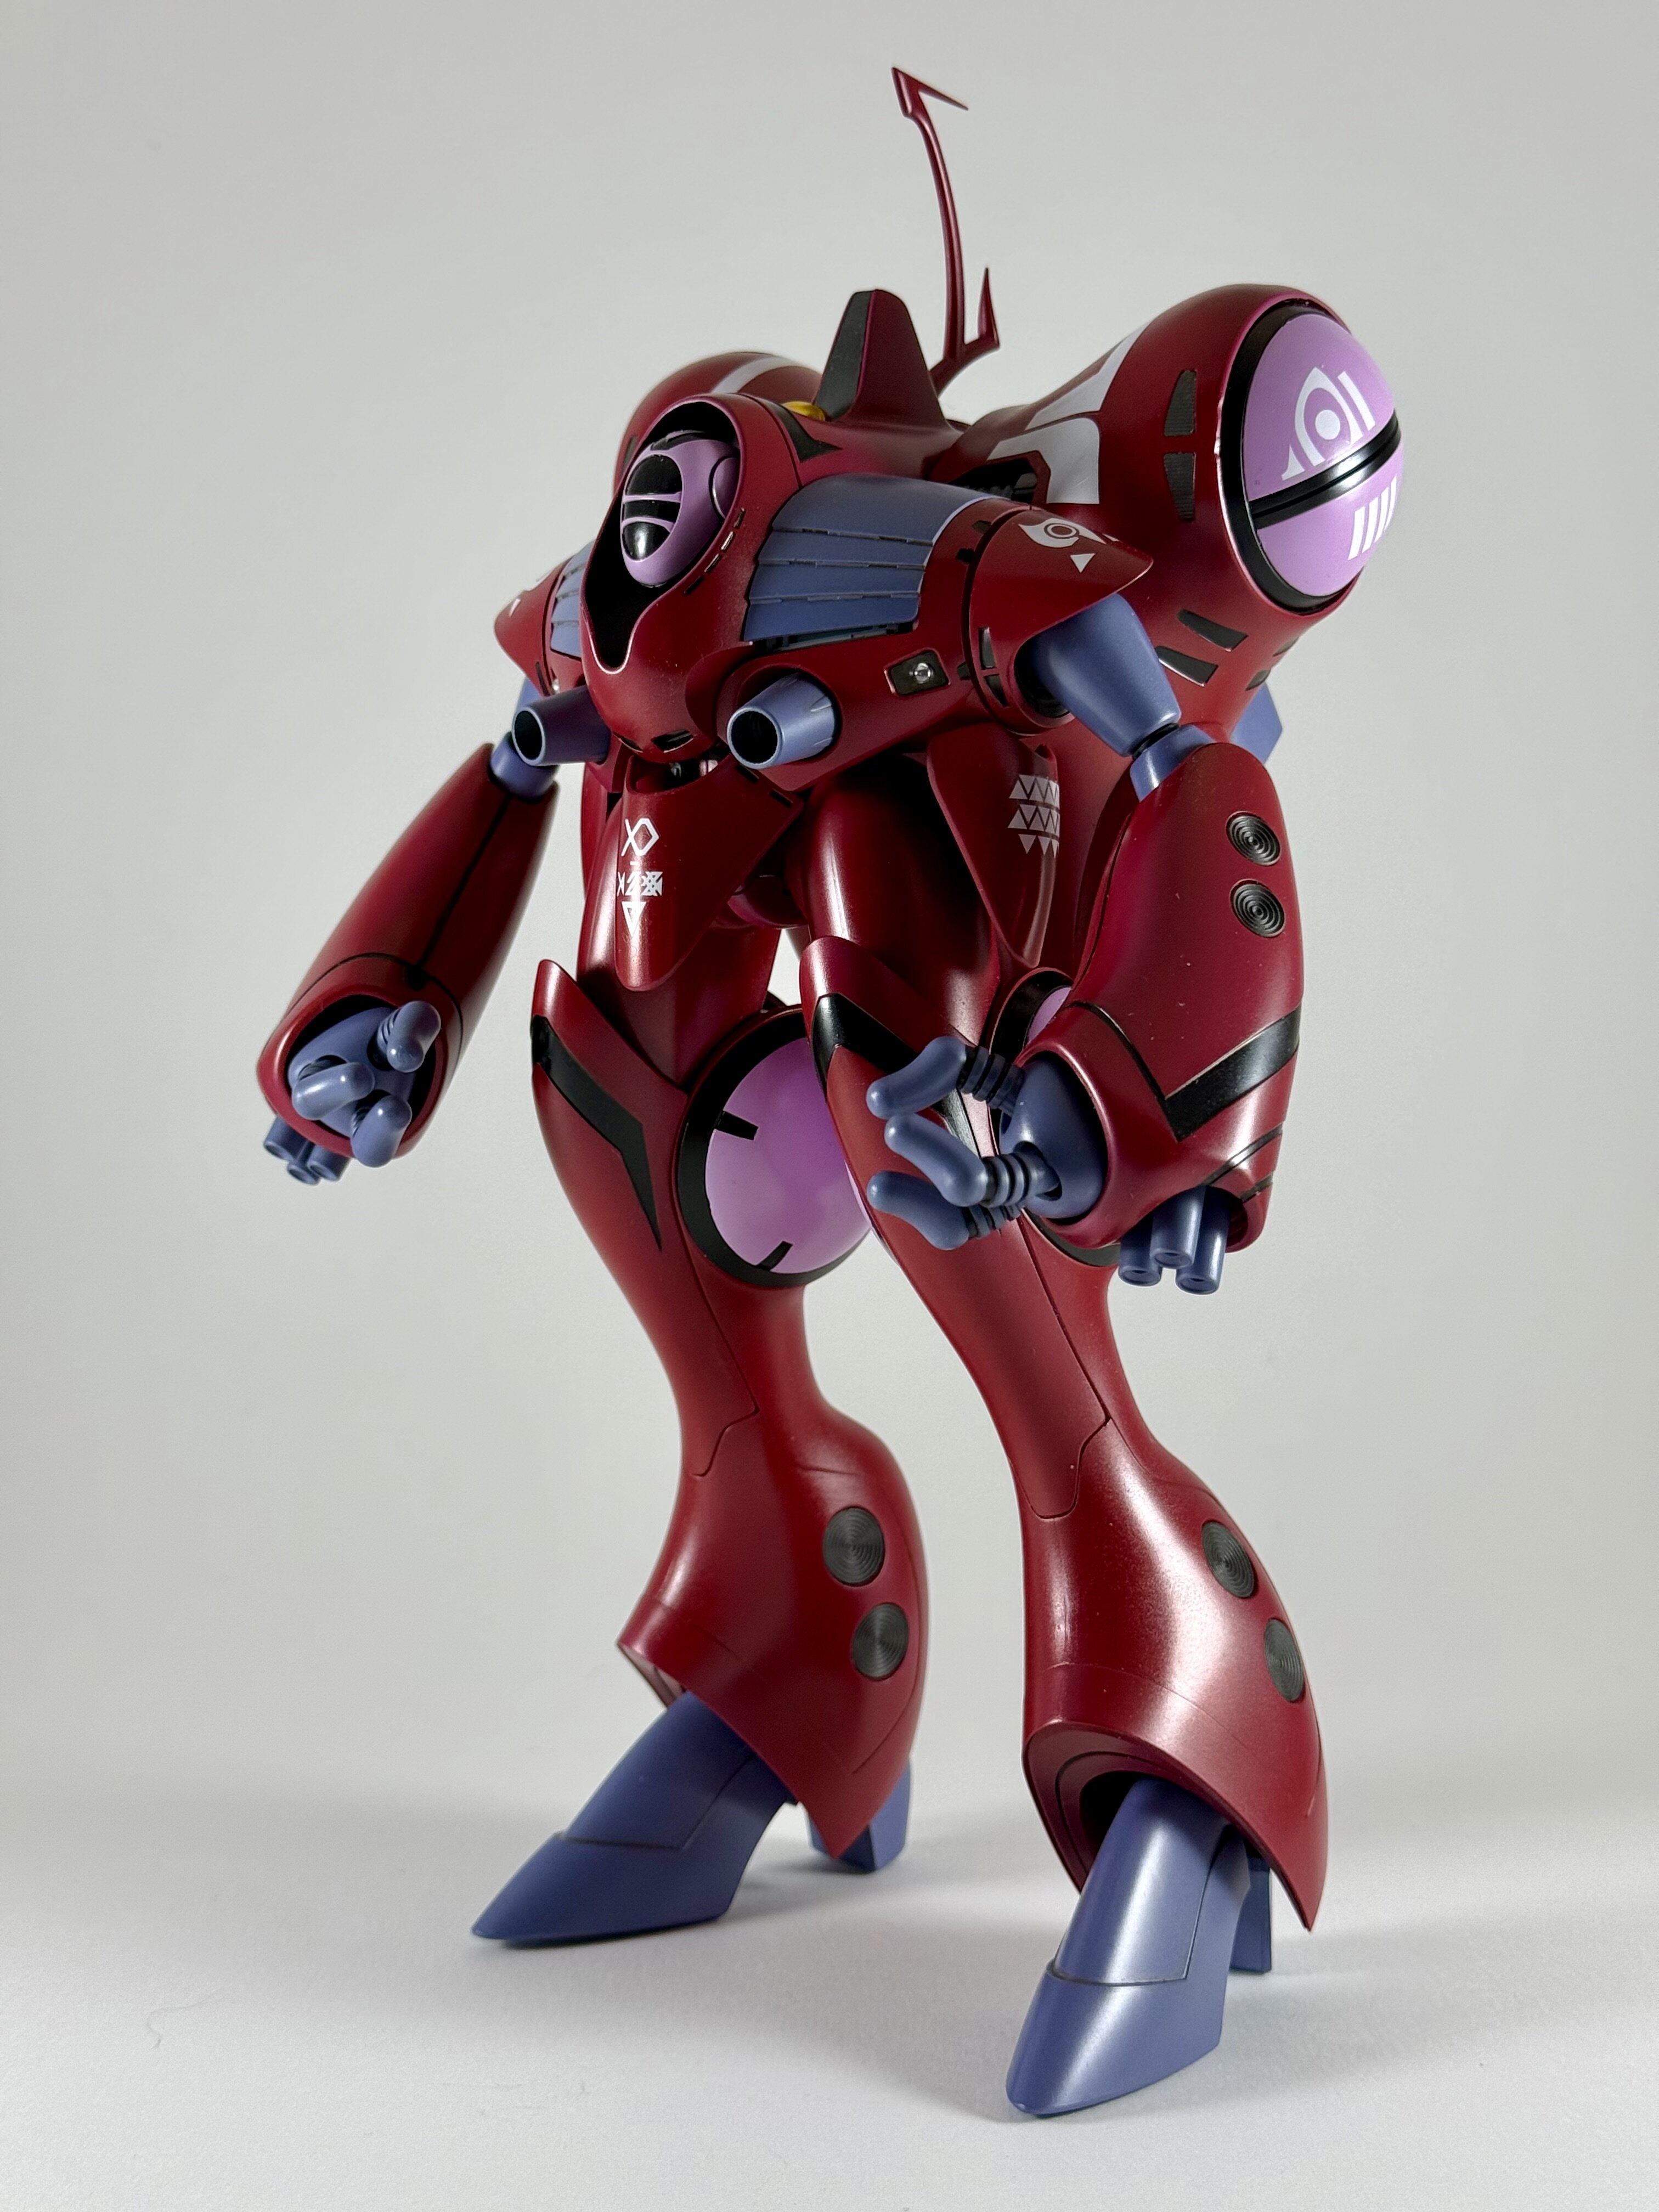
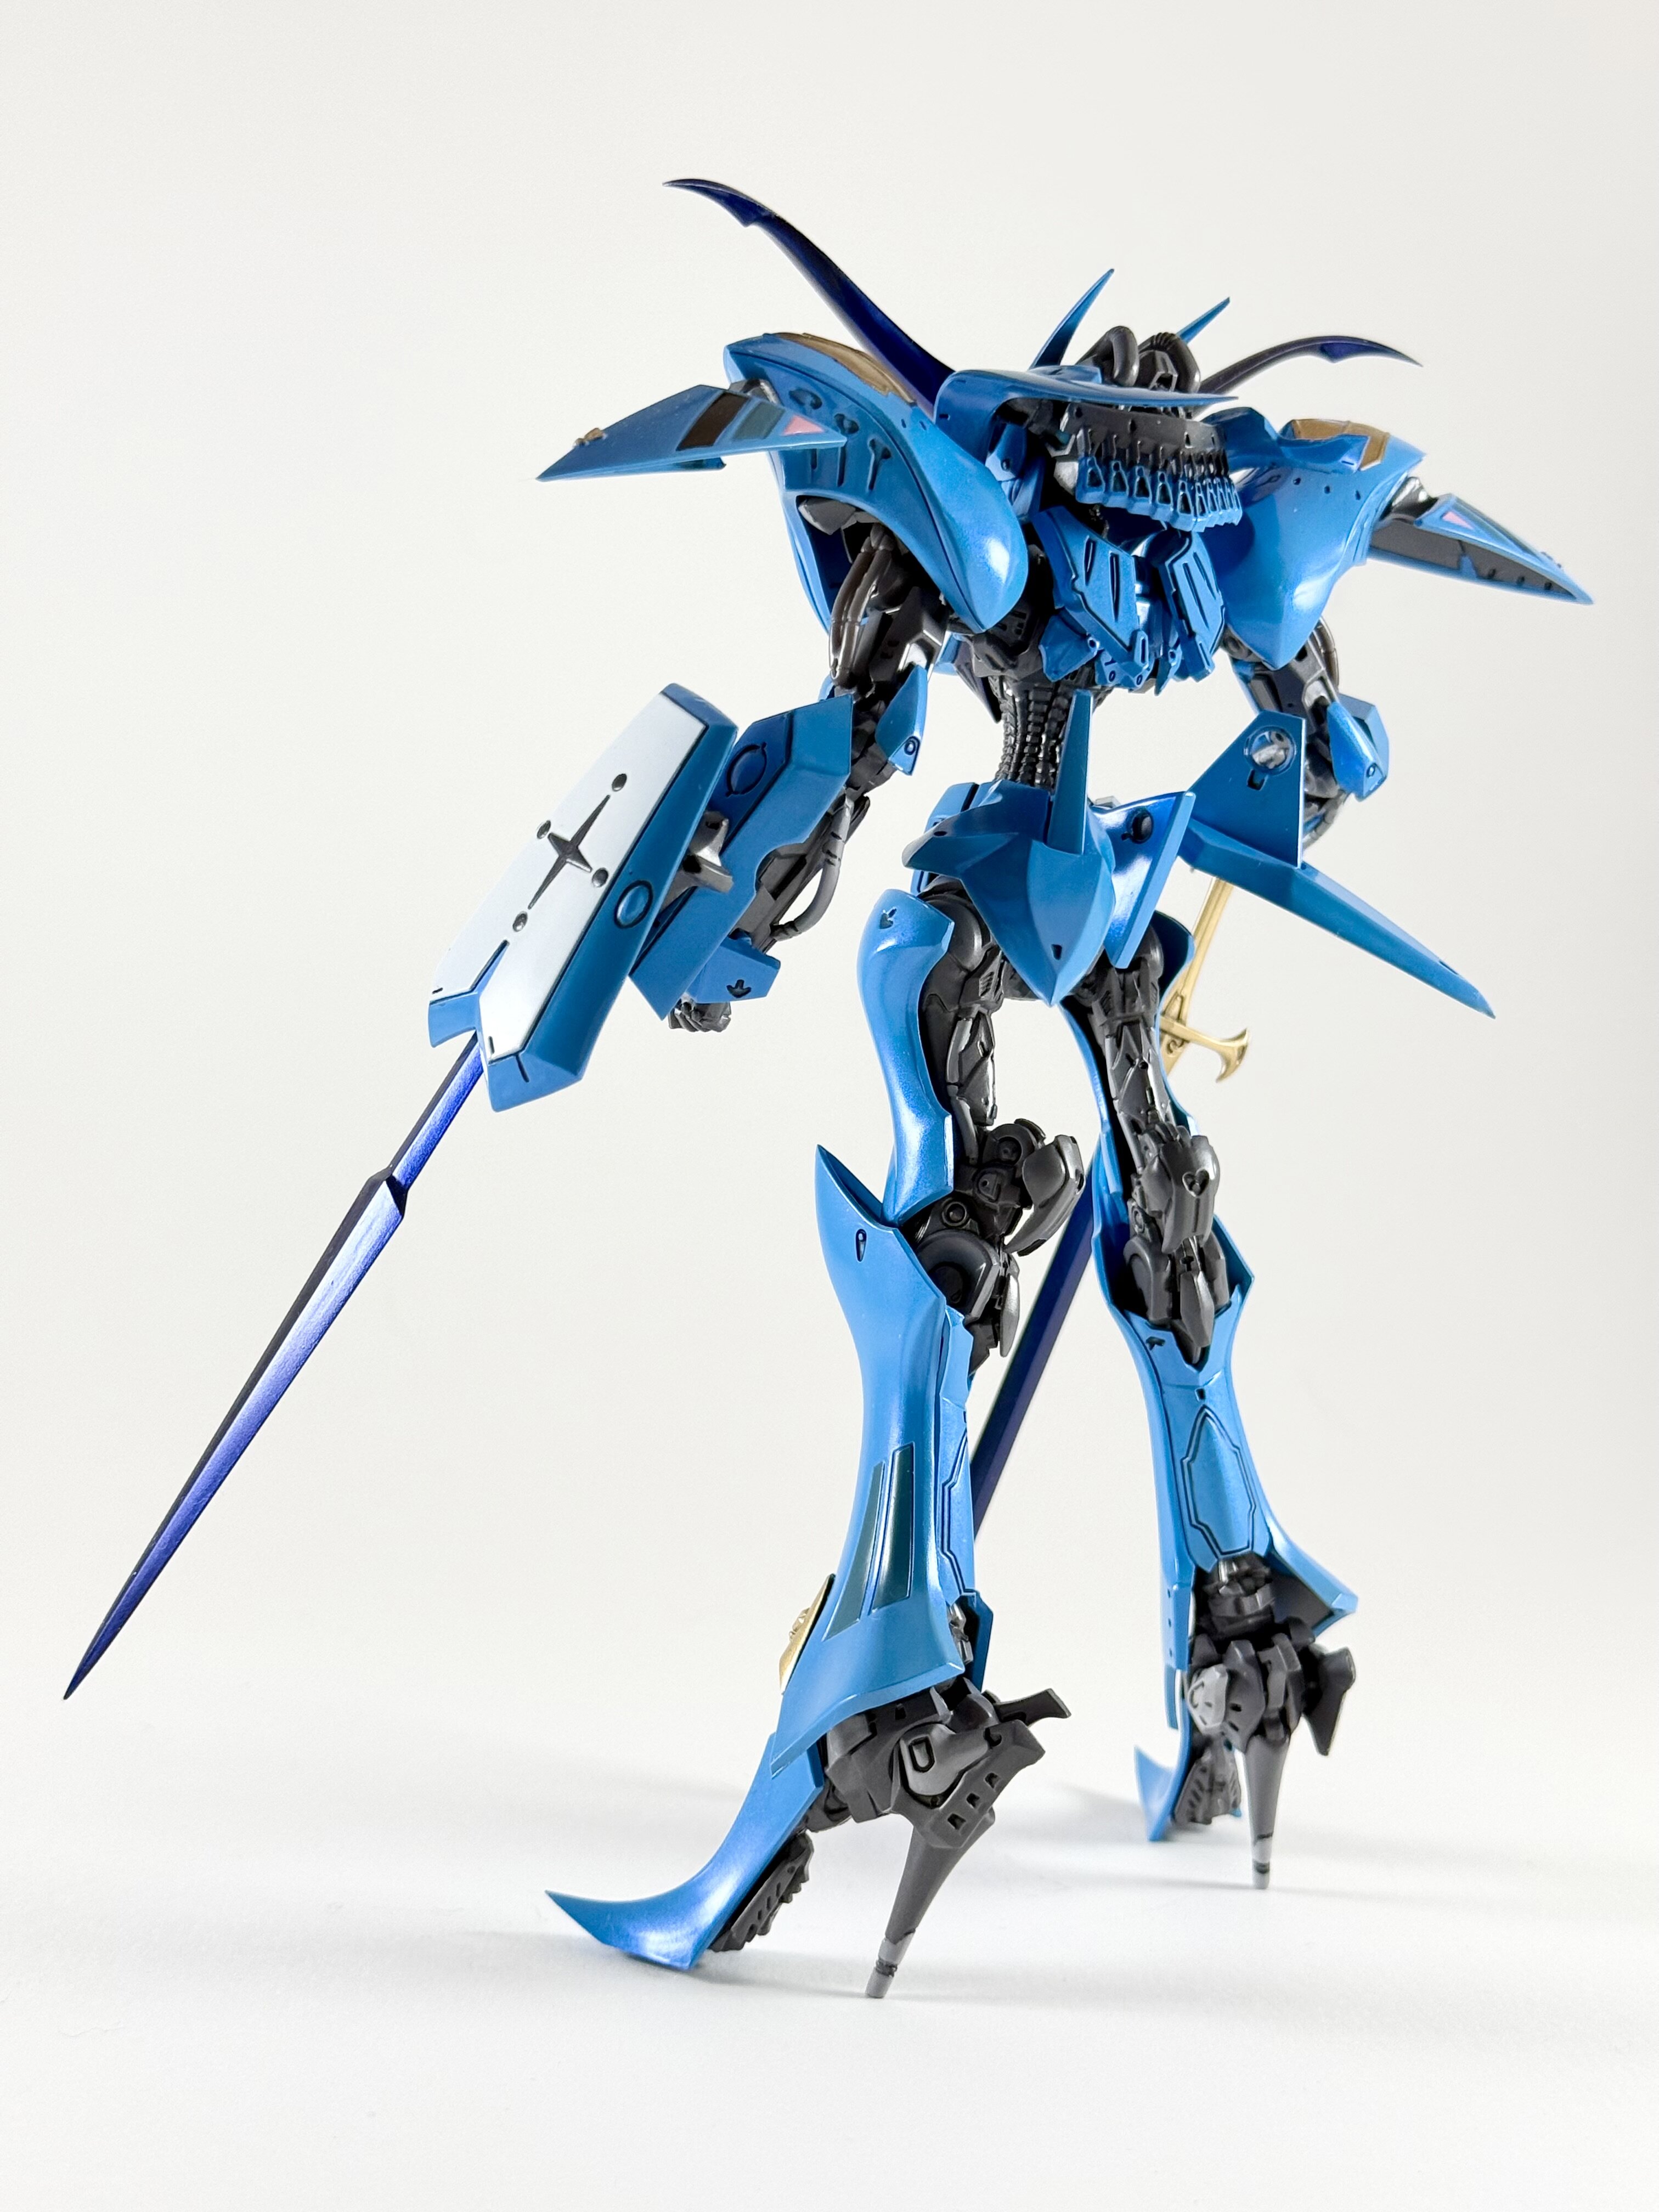
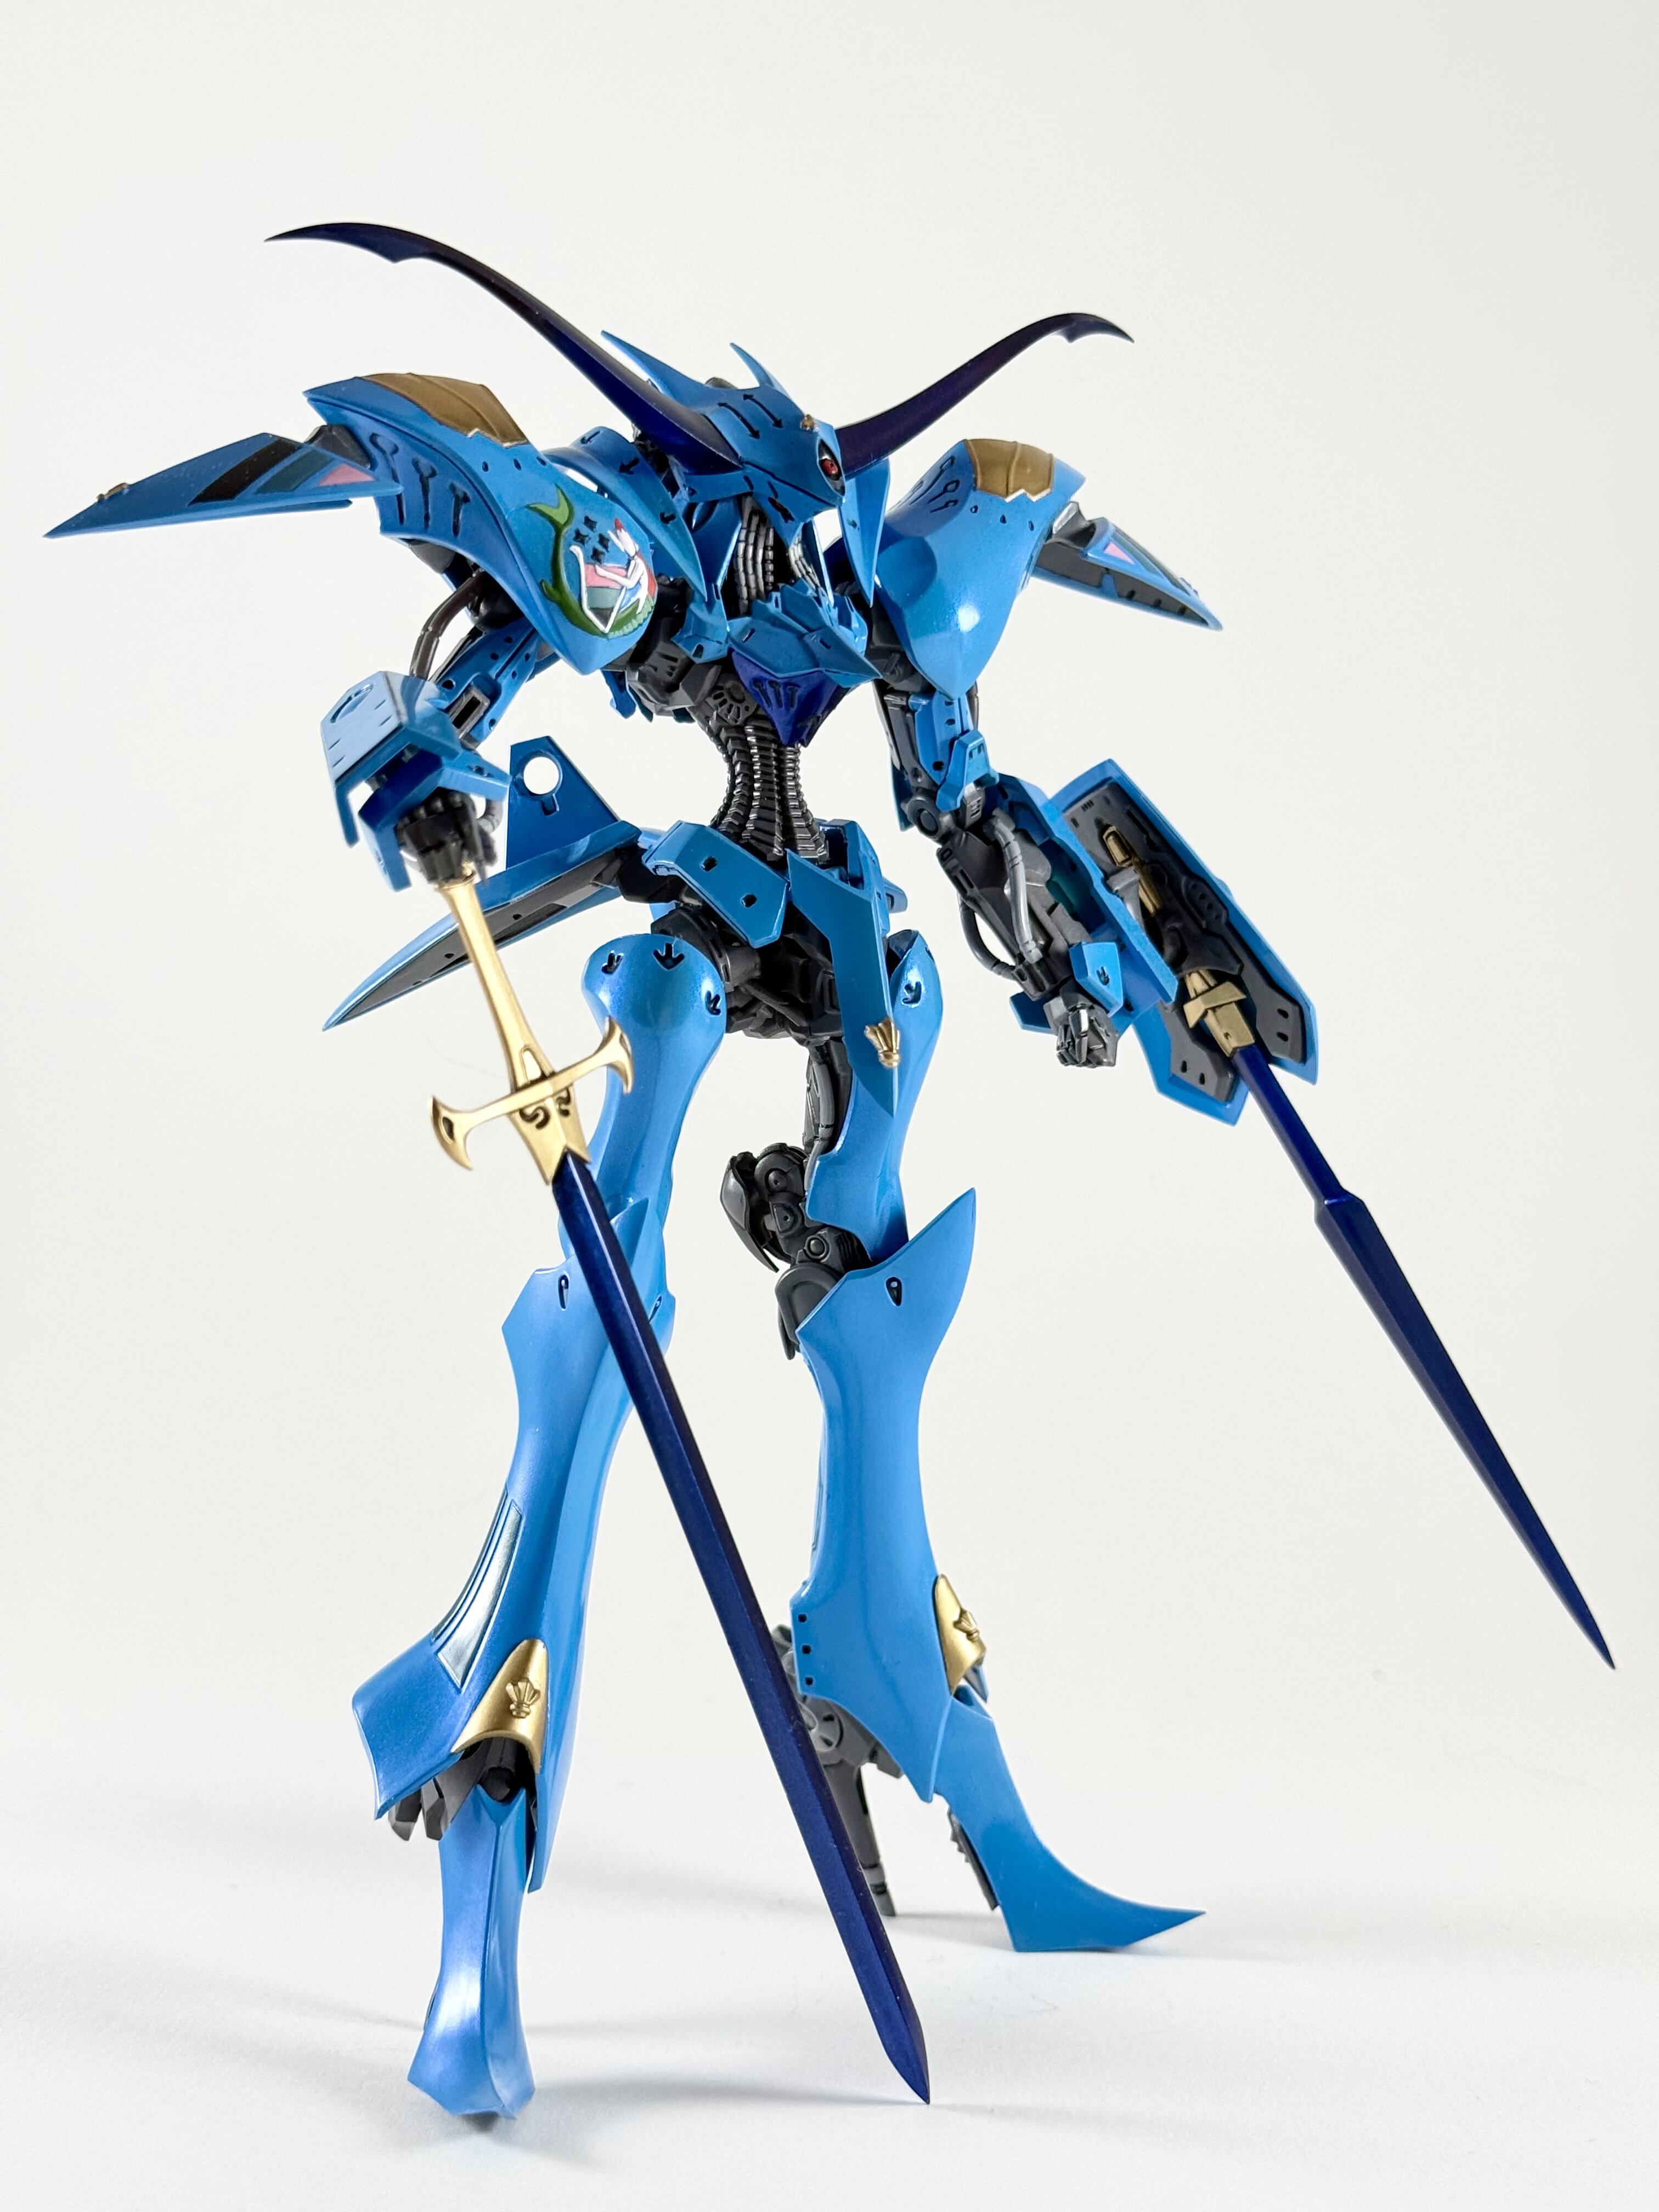
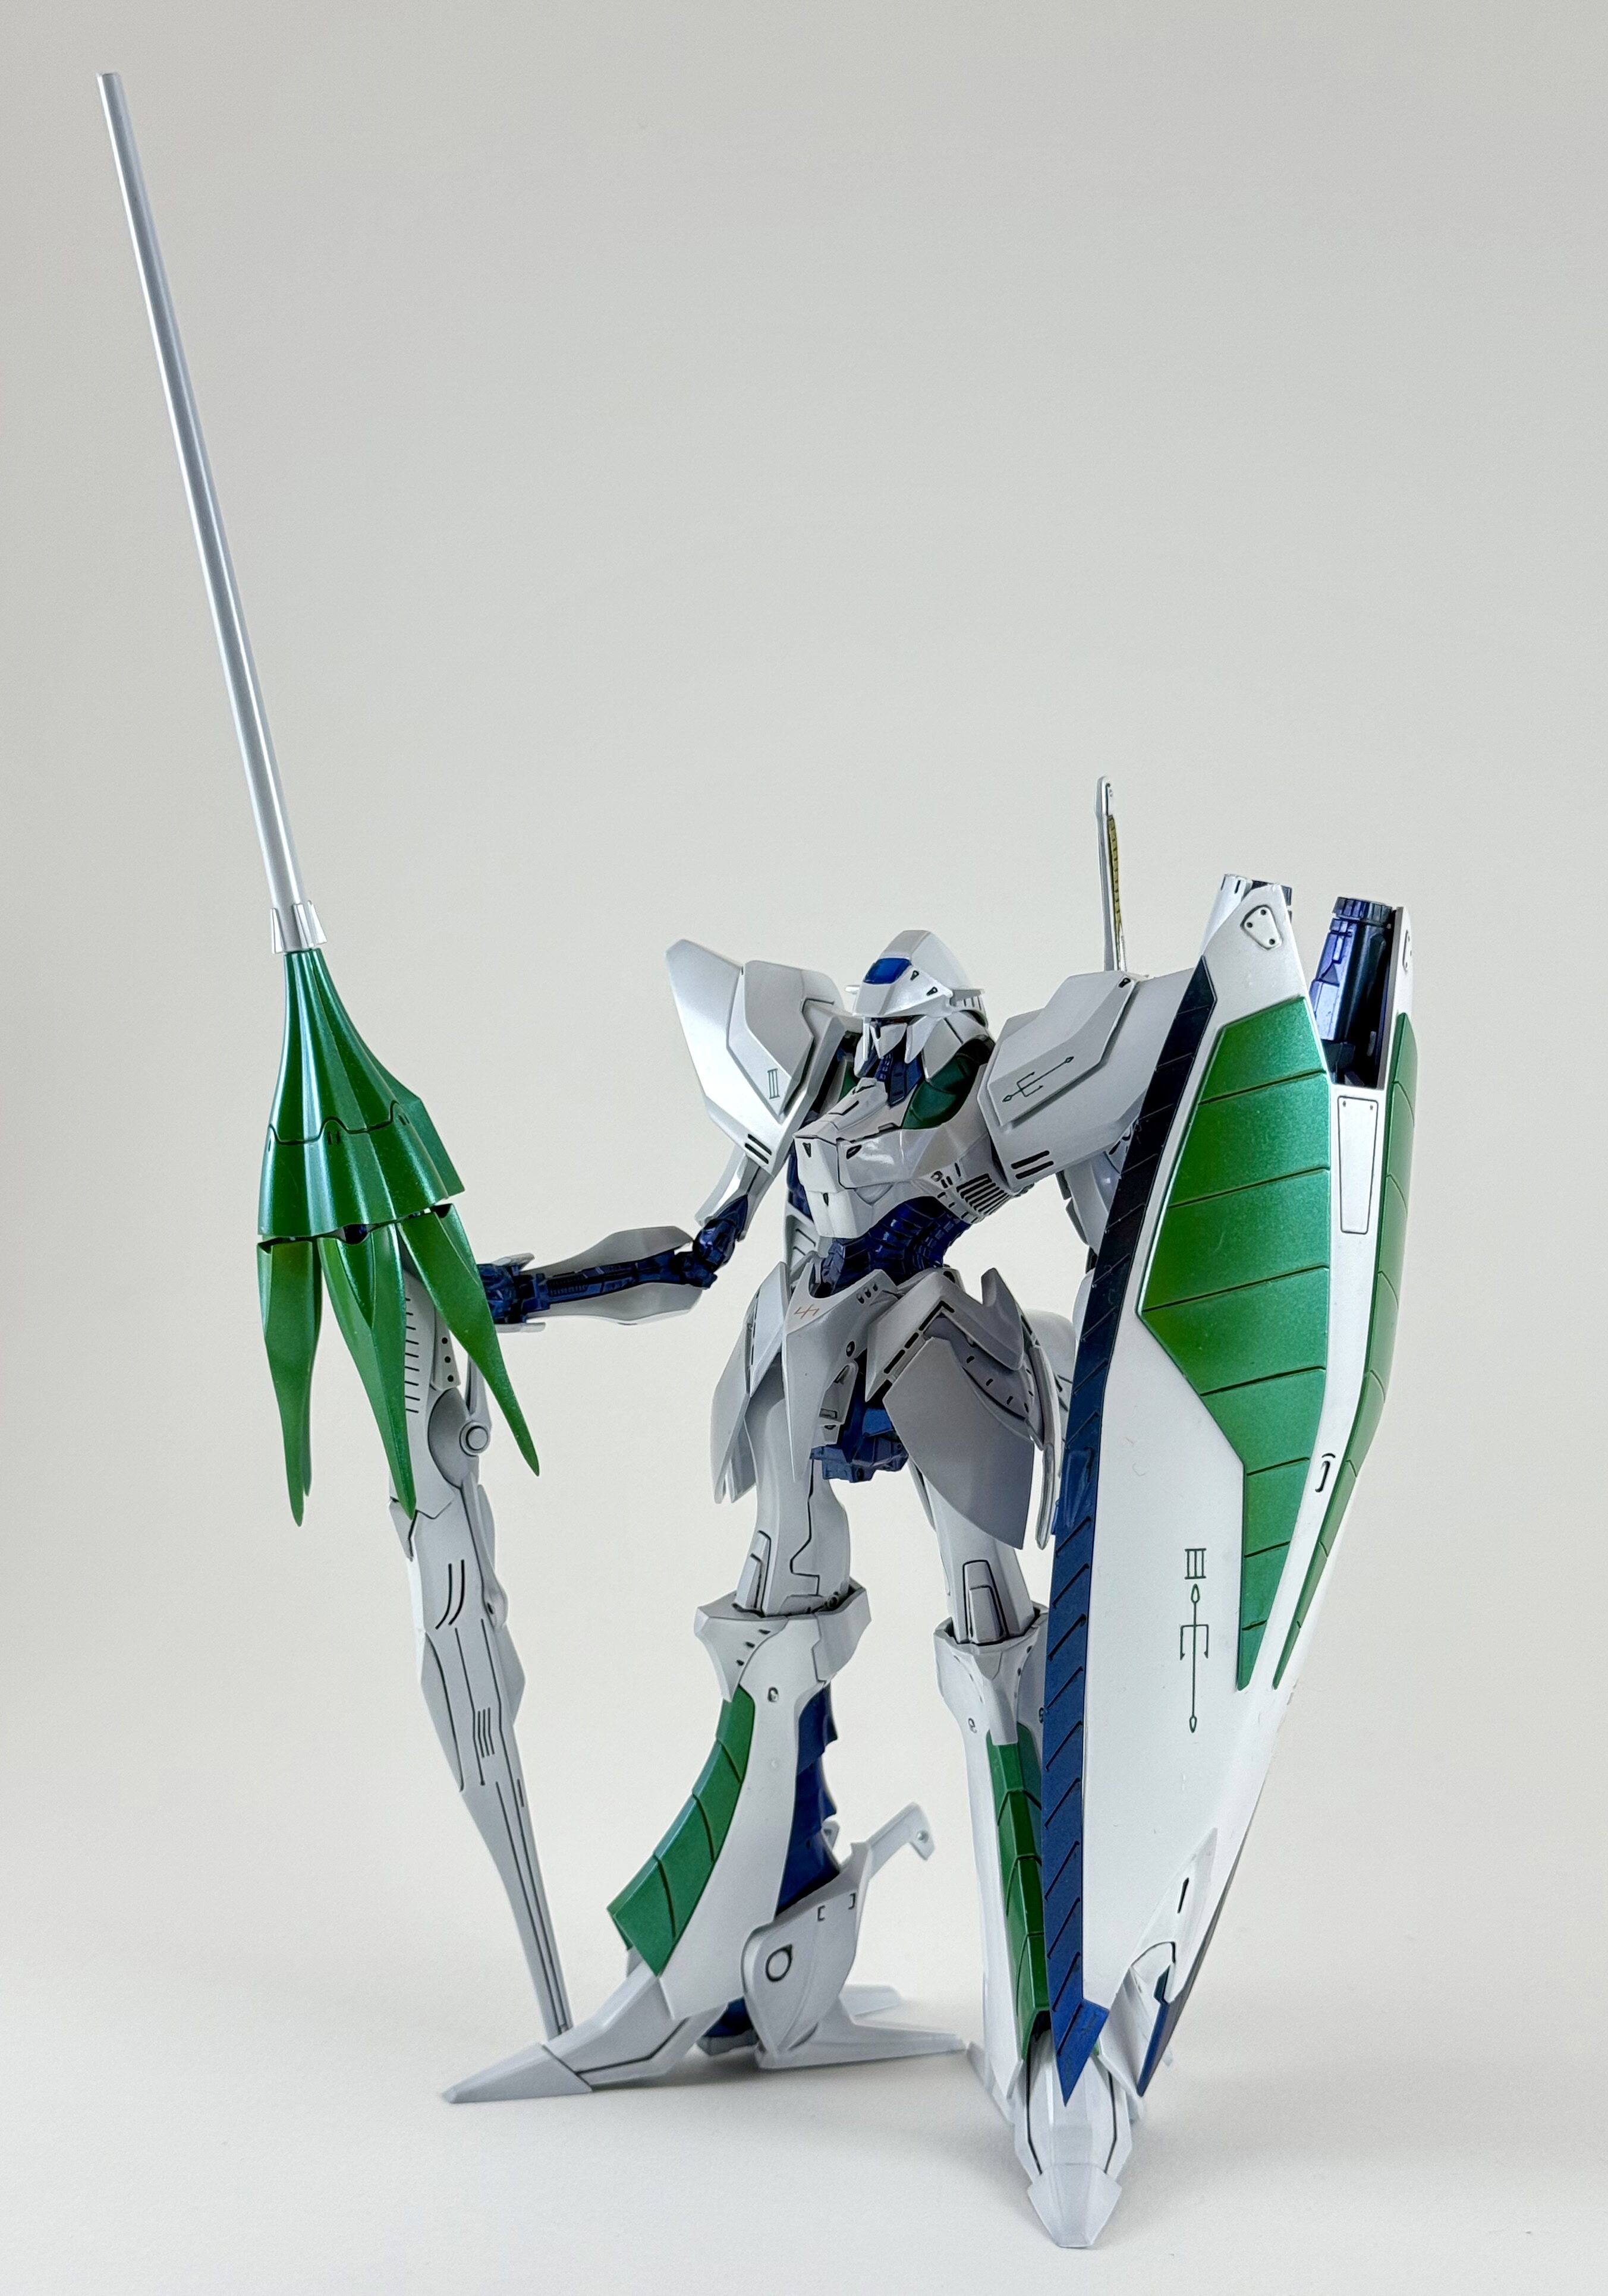
@pengbuzz hahaha @wm cheng Thanks @derex3592 I am also digging that bomber. I like seeing the payload from underneath. Very cool. Strange about the paint. Sounds like some of the layers didn’t like each other? @505thAirborne that’s a great looking ship. Reminds me of my childhood. I never did watch the reboot. Might have to take a look sometime. Ok so the Volks 1/100 IMS Terror Mirage is done. It was more fun and slightly archaic as far as final construction and finding secure ways to connect it all. Anyway. Here’s a few pics from the phone before hitting the hay zzzzzzzz.
-
I totally agree. Where as this hunk of junk is more rough for wear, can’t be bothered and has never touched water or soap. Hahaha
-
She’s a complete boss on the battlefield but couldn’t stomach the idea of weathering her.
-
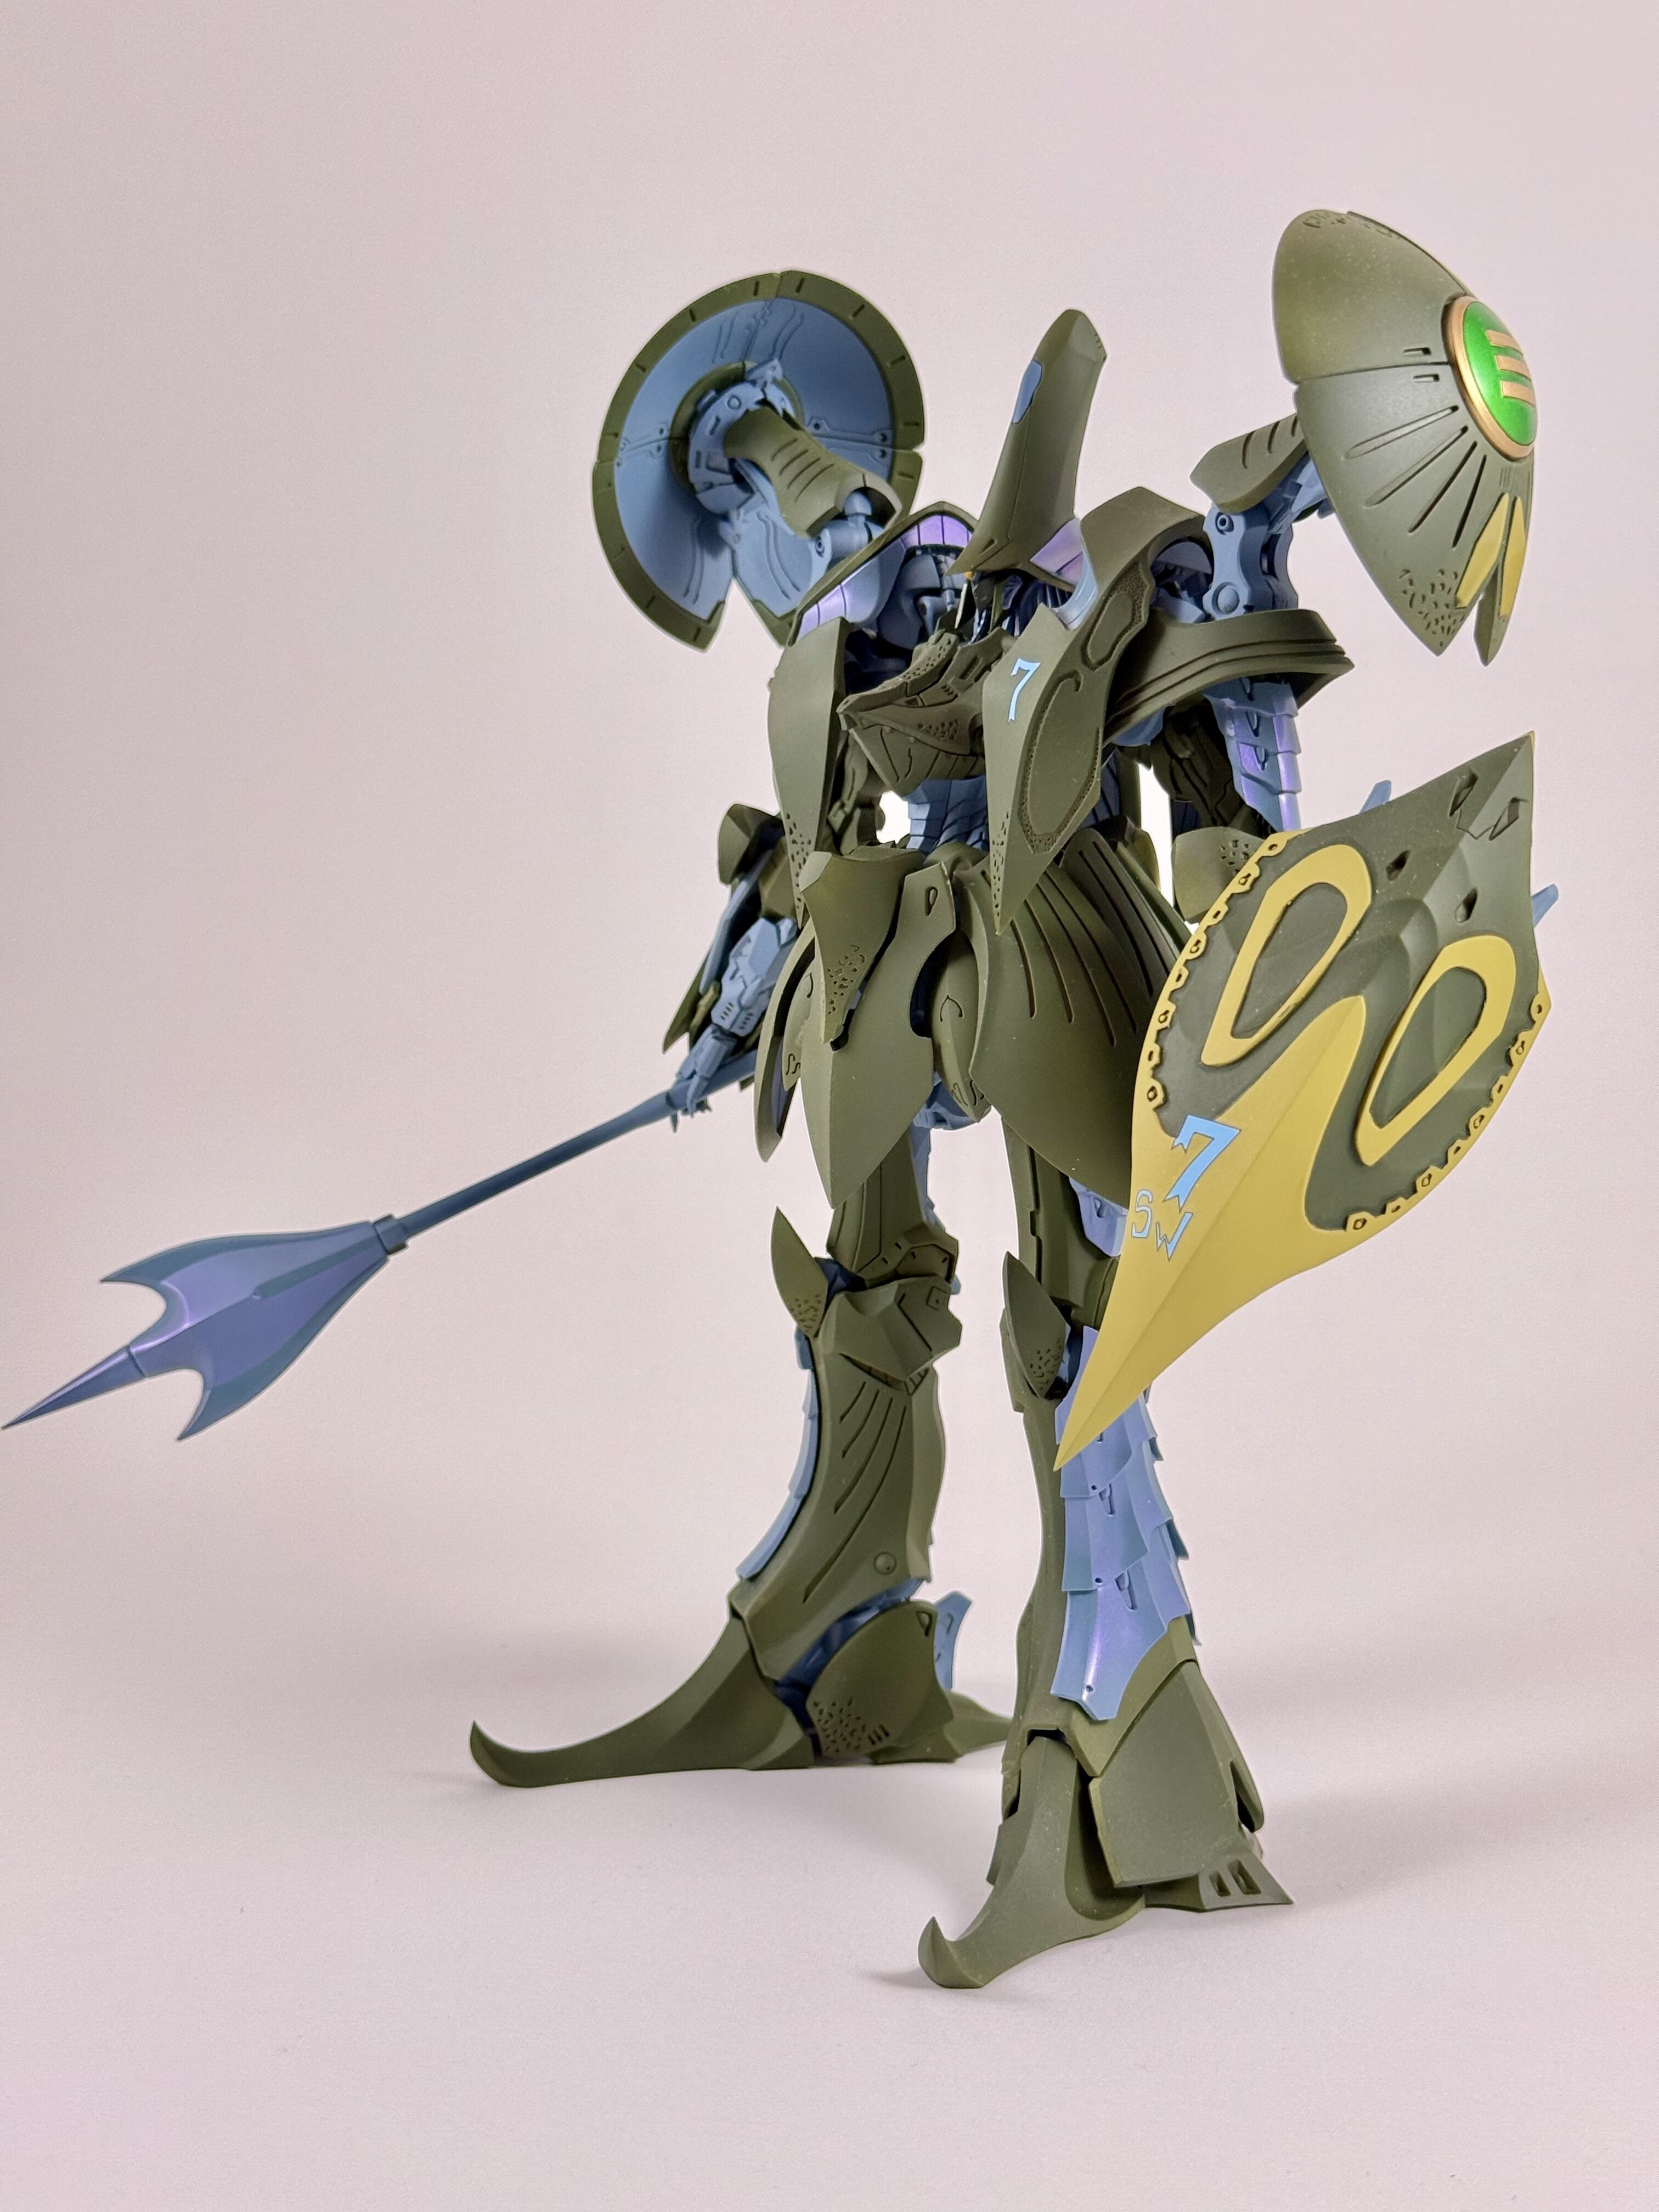
Took some better phone pics of my Q-Rau I need to get my Max version on the bench.

-
@Big s Thanks
-
Oh yeah! Excited for an update.
-
@505thAirborne hey thanks! Same to you. Love seeing what you are working on. @Cheese3 That looks great! Making some progress on final assembly. Using a combination of regular cement and CA since lots of the connection points are just shallow rectangular shapes that slide around and I’m nervous about glue messing/creeping around on the paint. Slow and steady.
-
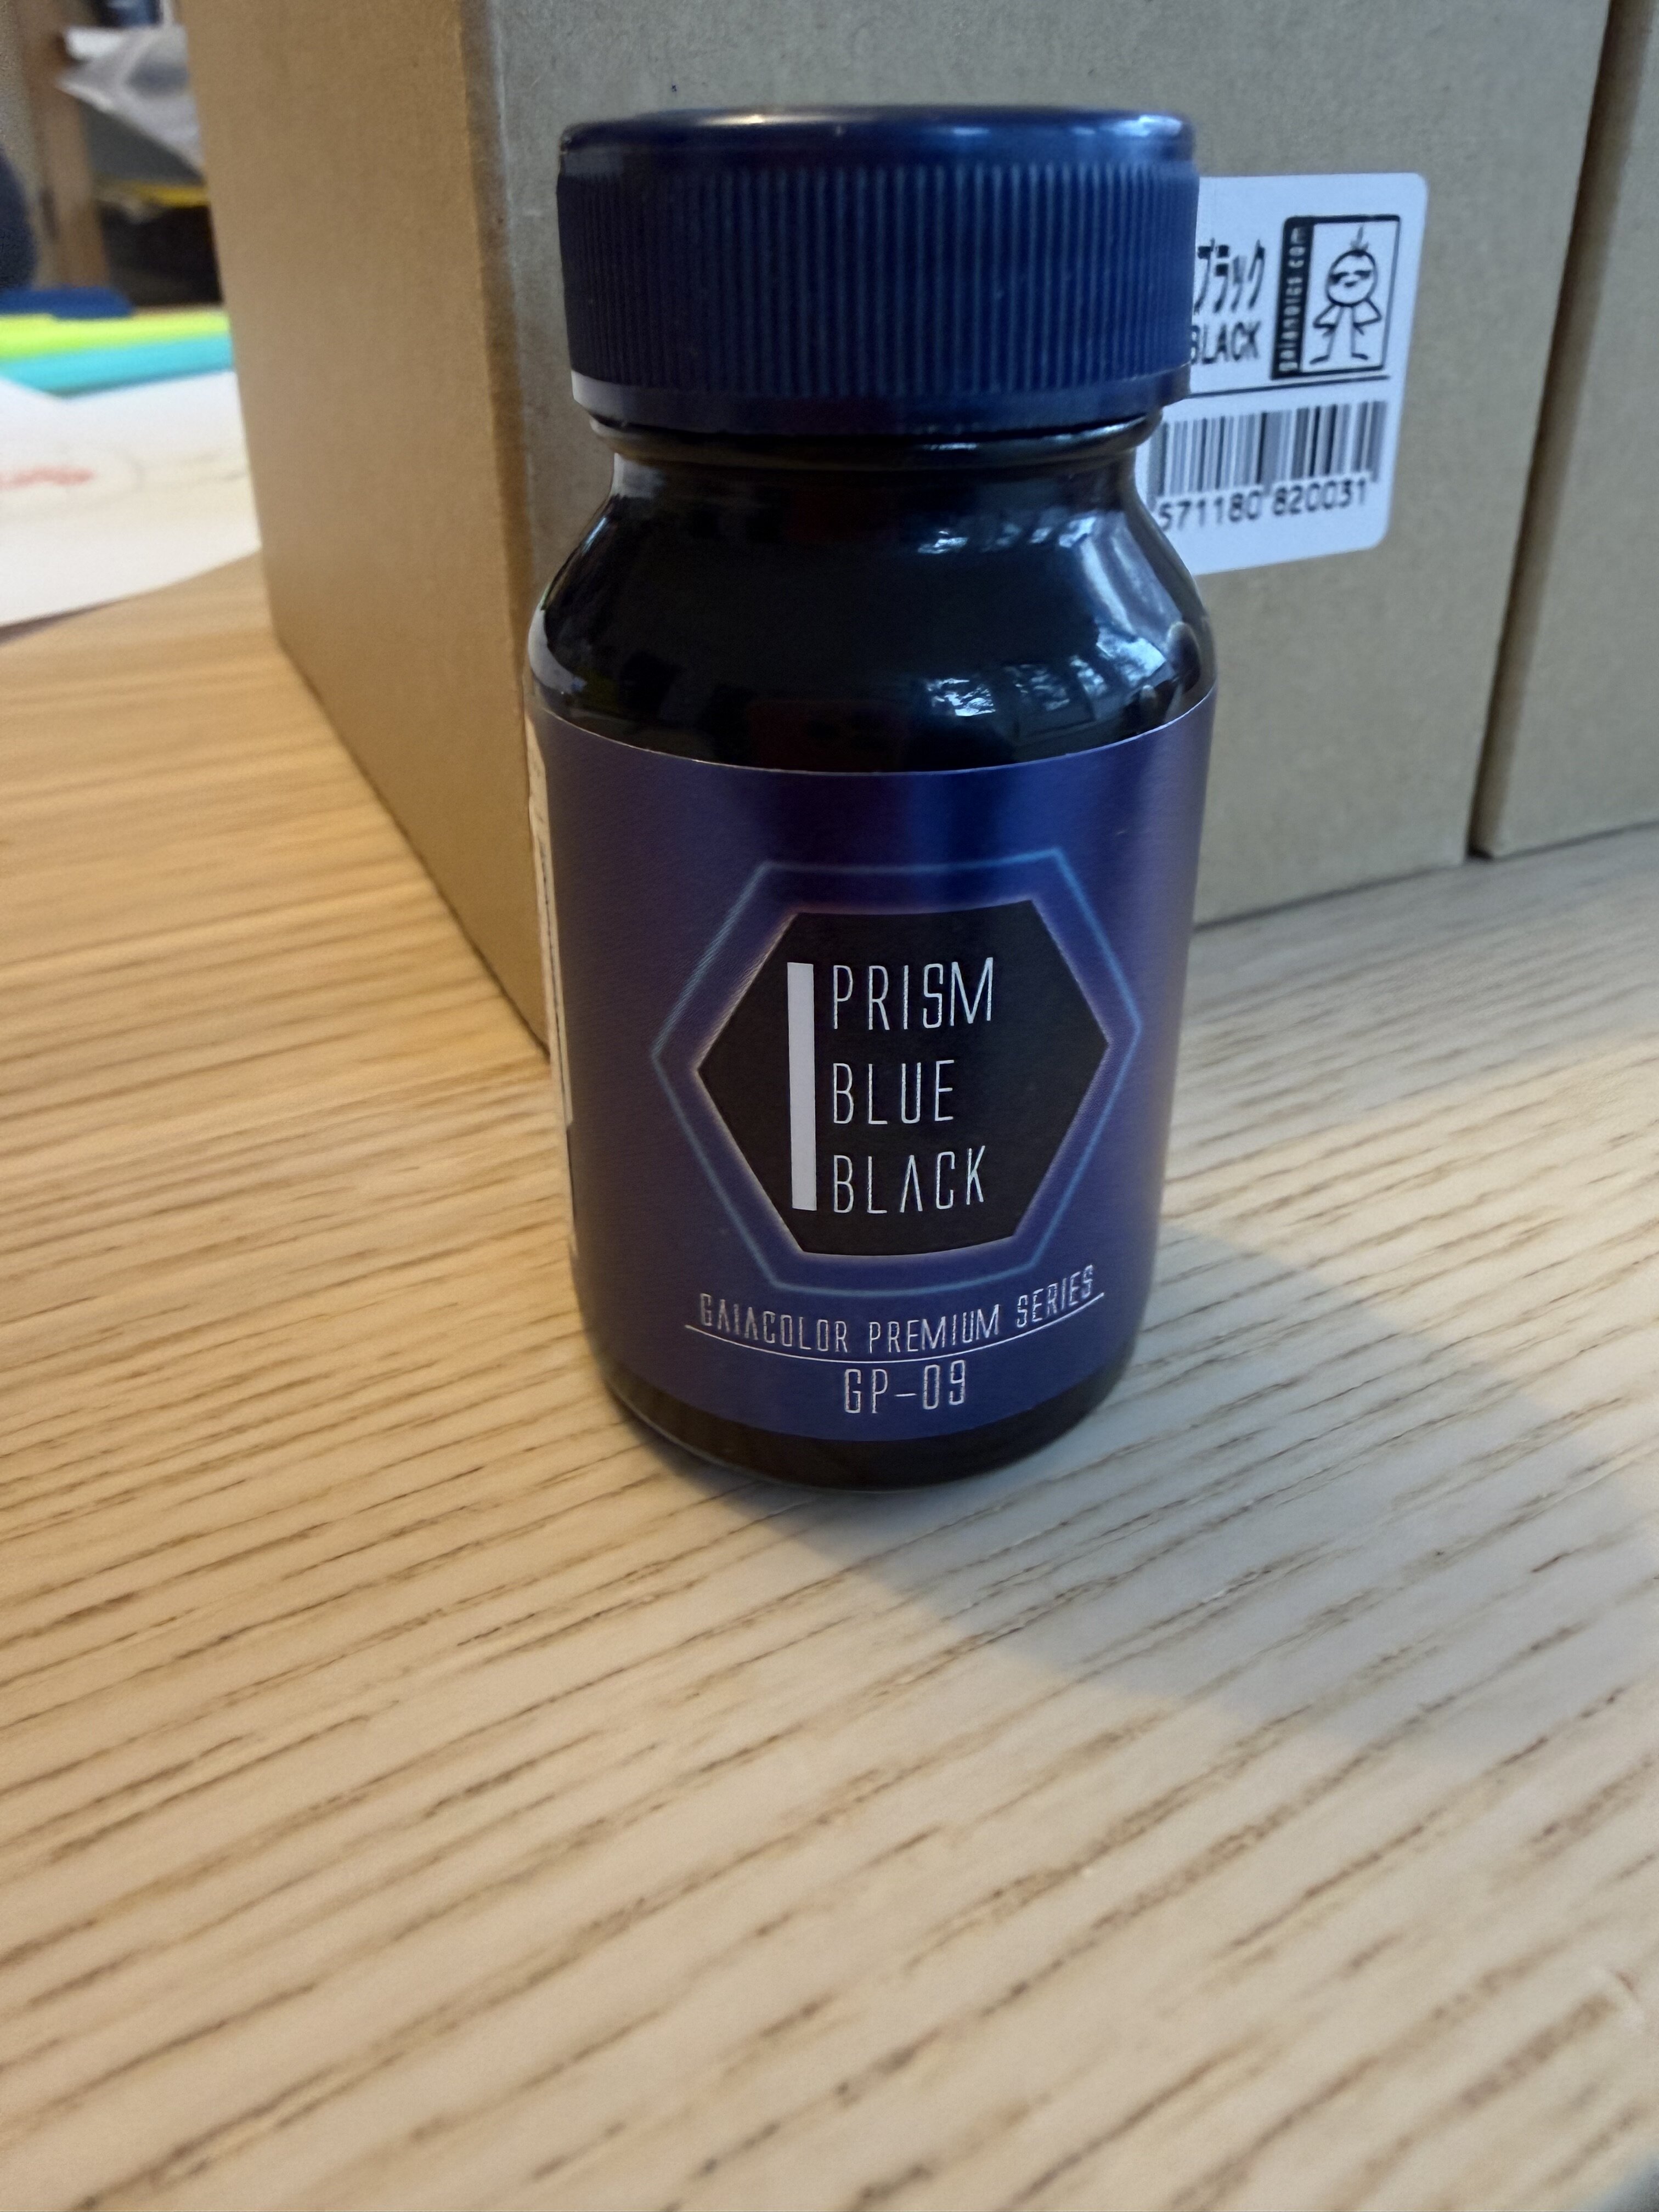
First time spraying Gaia lacquers. This is Prism Blue Black over MR Hobby mahogany surfacer. Finished it off with Mr Color flat topcoat. It’s hard to capture on phone photos. The color when a flat topcoat is applied makes the paint appear dark blue, almost black and has this satin/velvety texture when light hits it just right. I’m loving it. My hope is it will provide a nice contrast to the underlying glossy gray frame and rib like details.
-
@derex3592Wow. That’s a ton of work and it’s looking sooo good. I bet you’re feeling awesome!
-
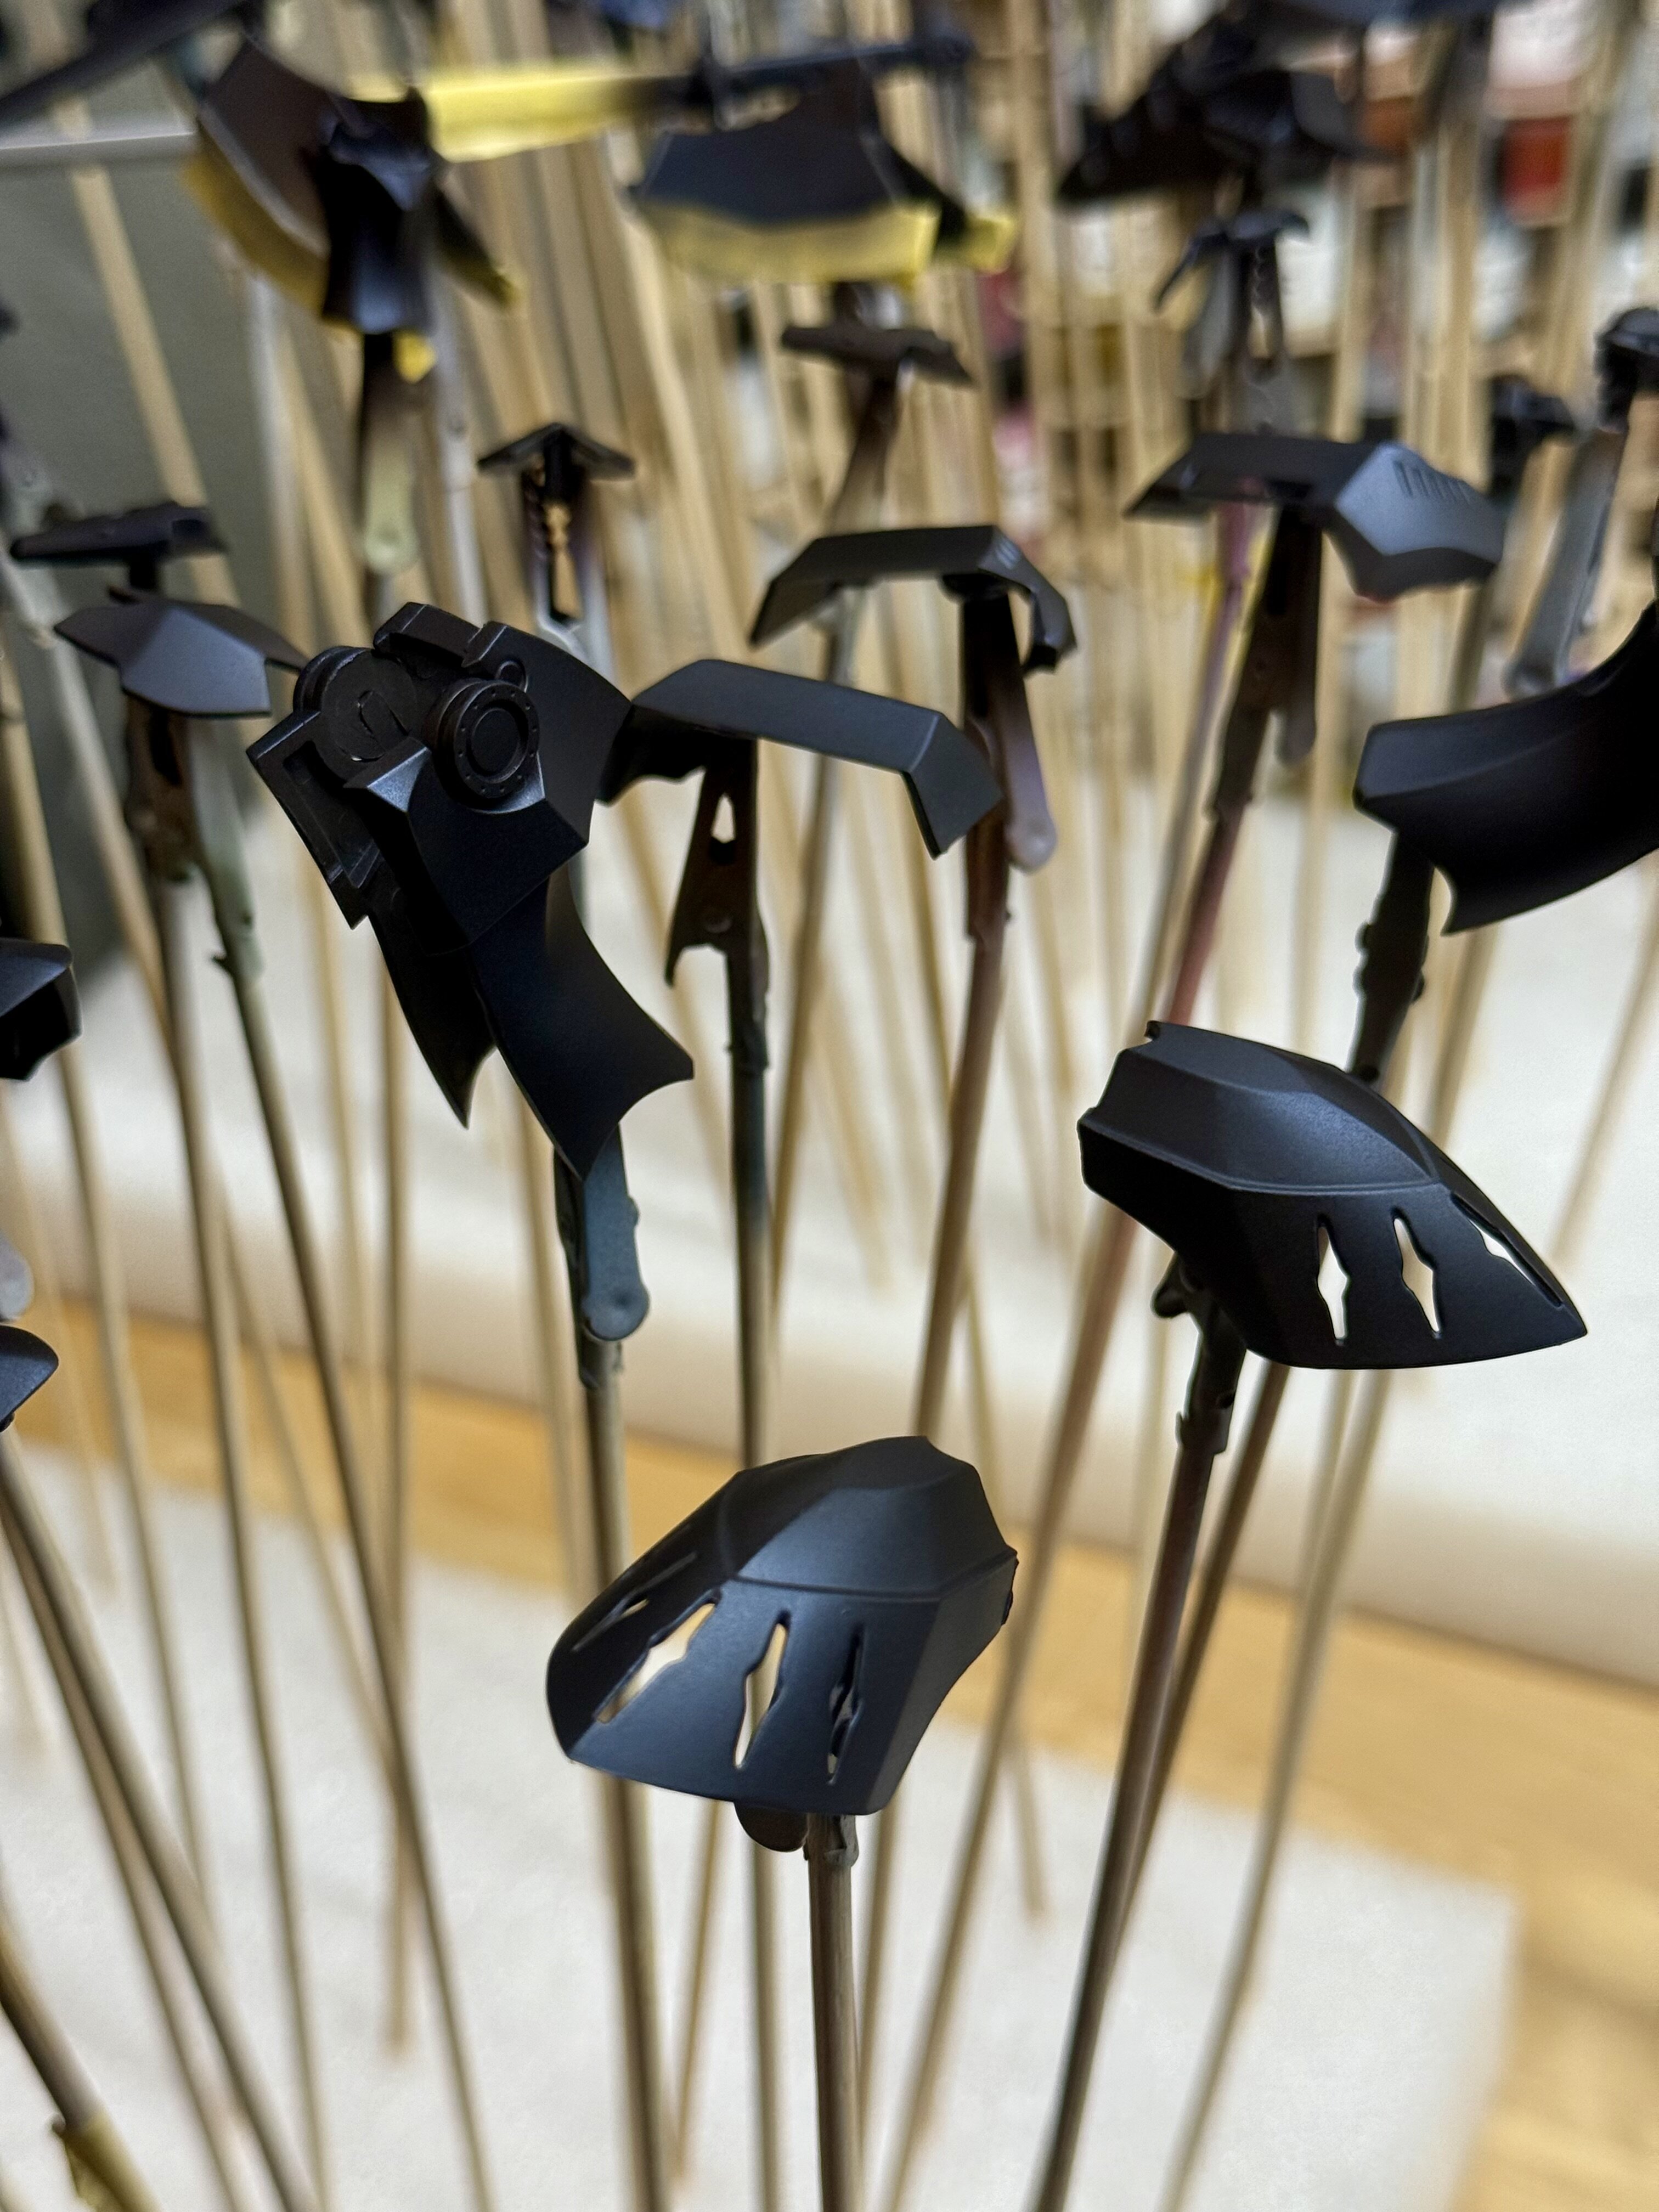
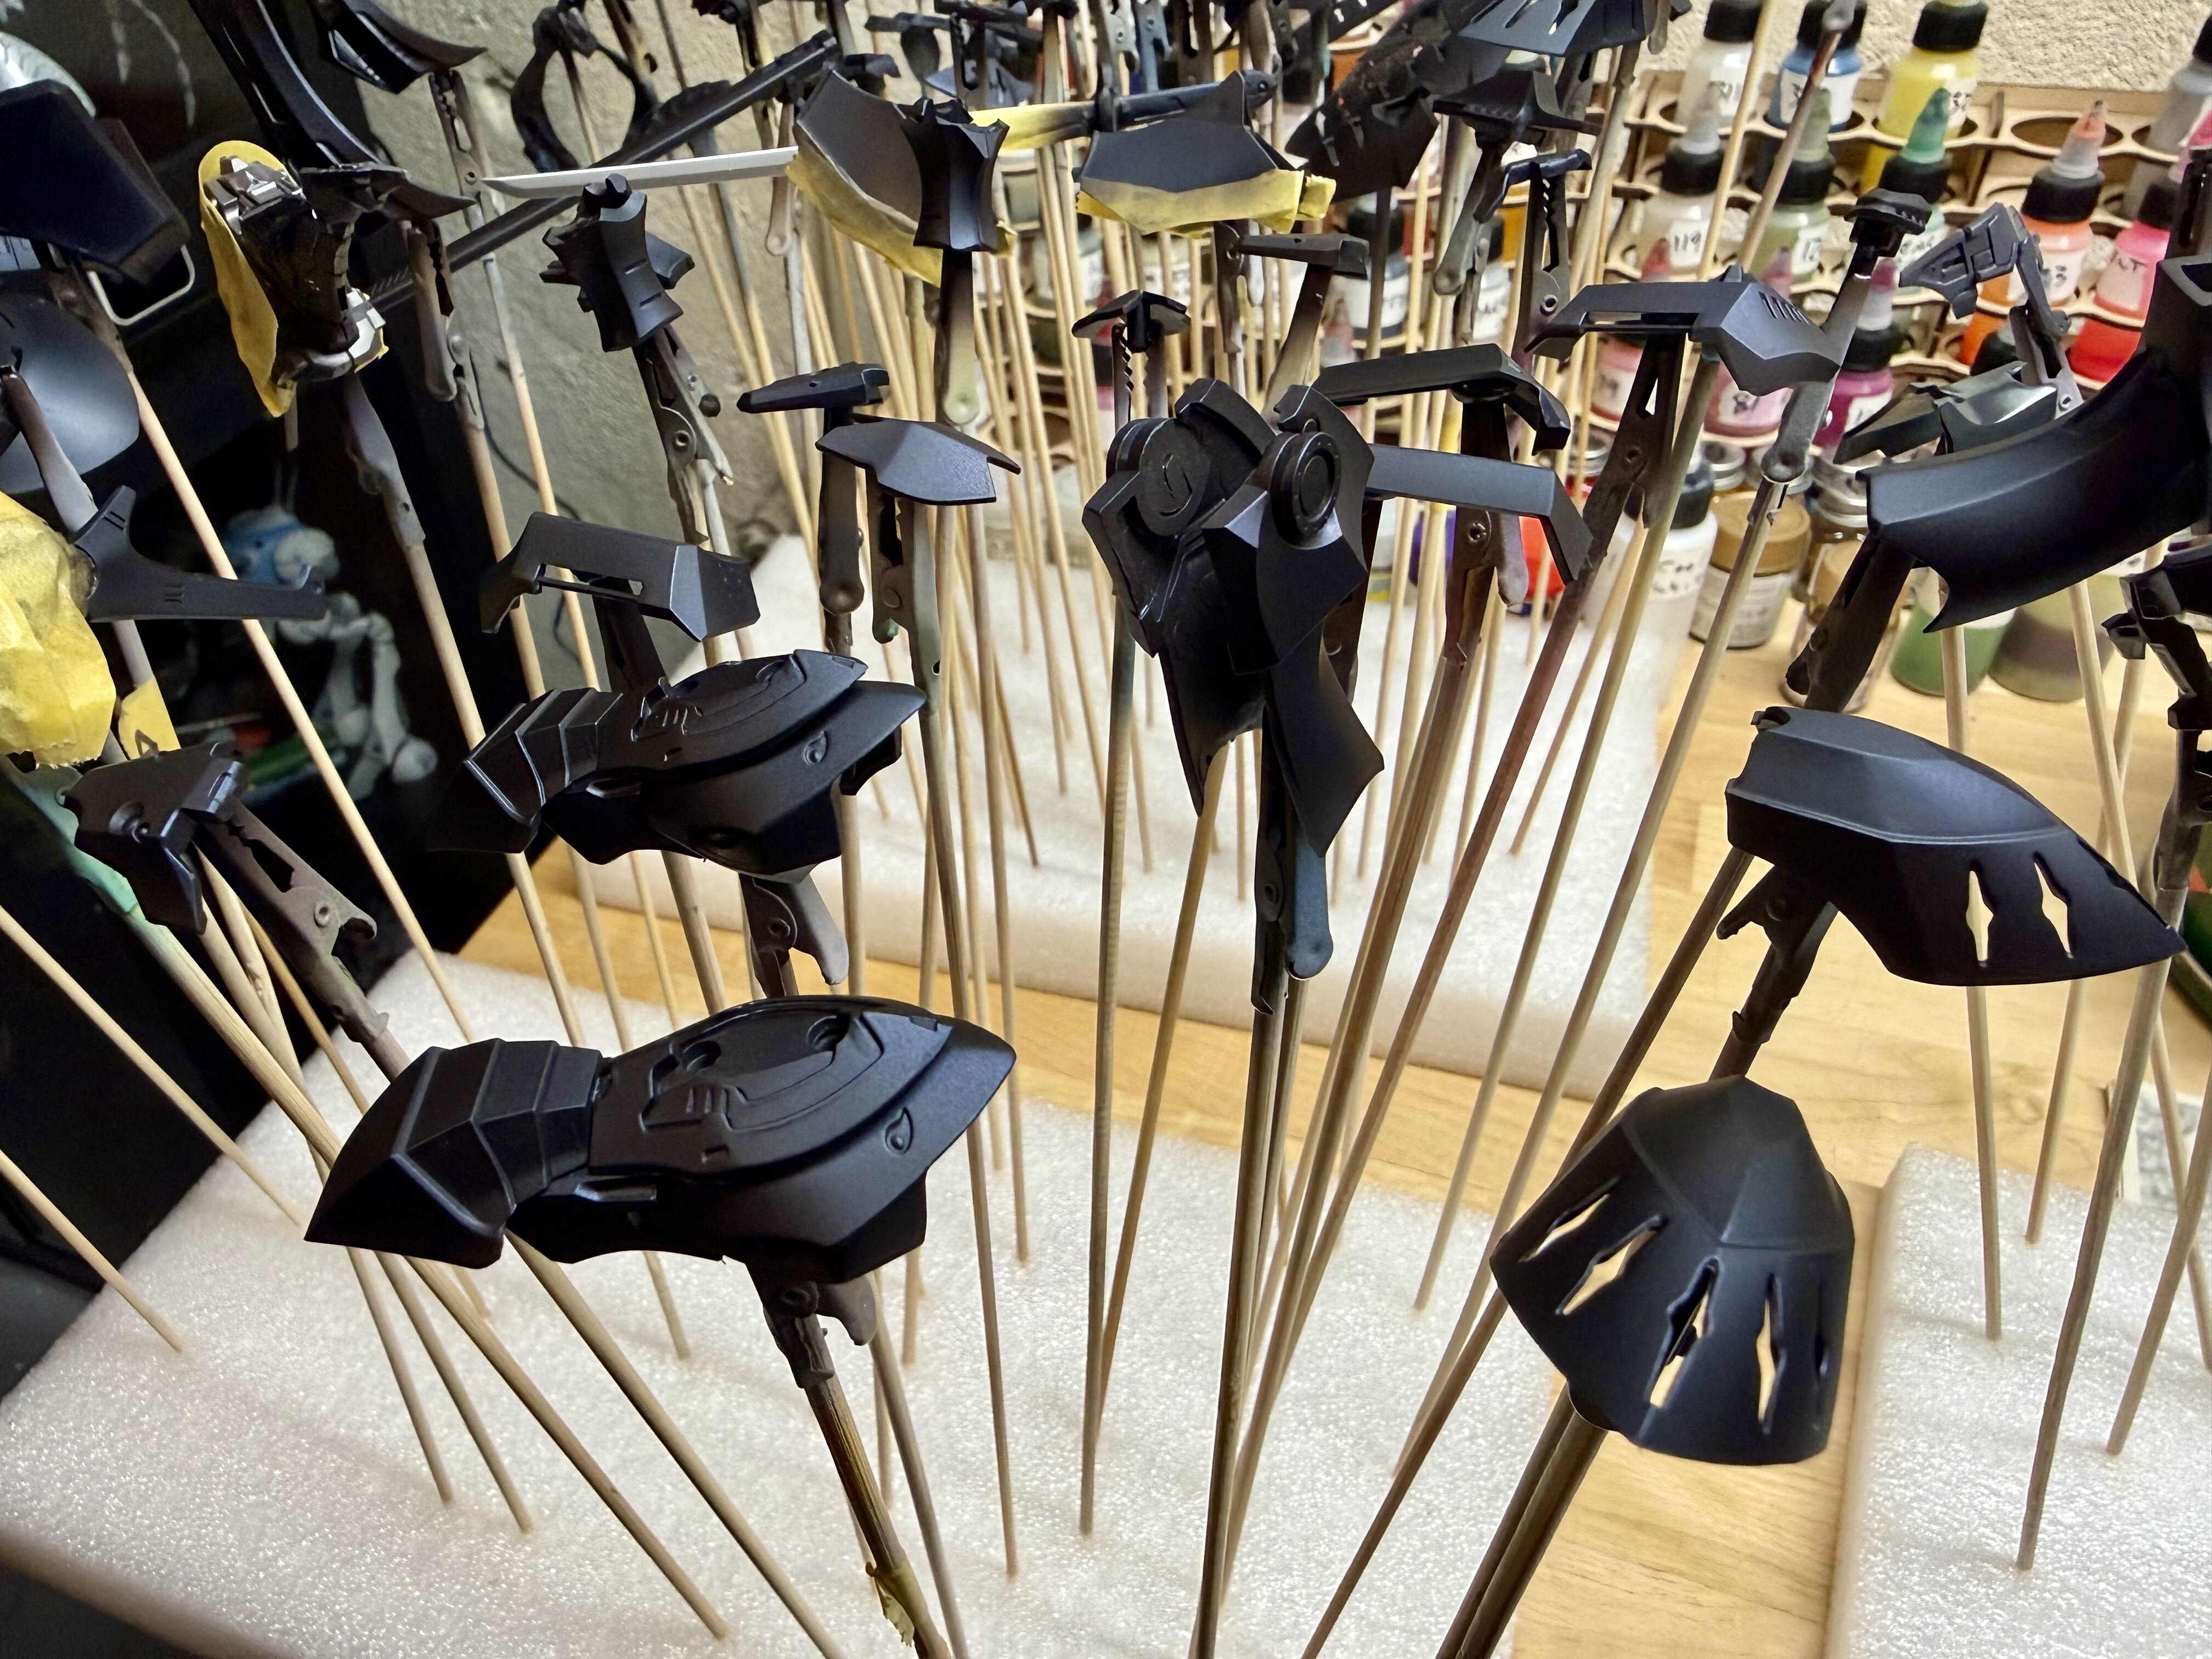
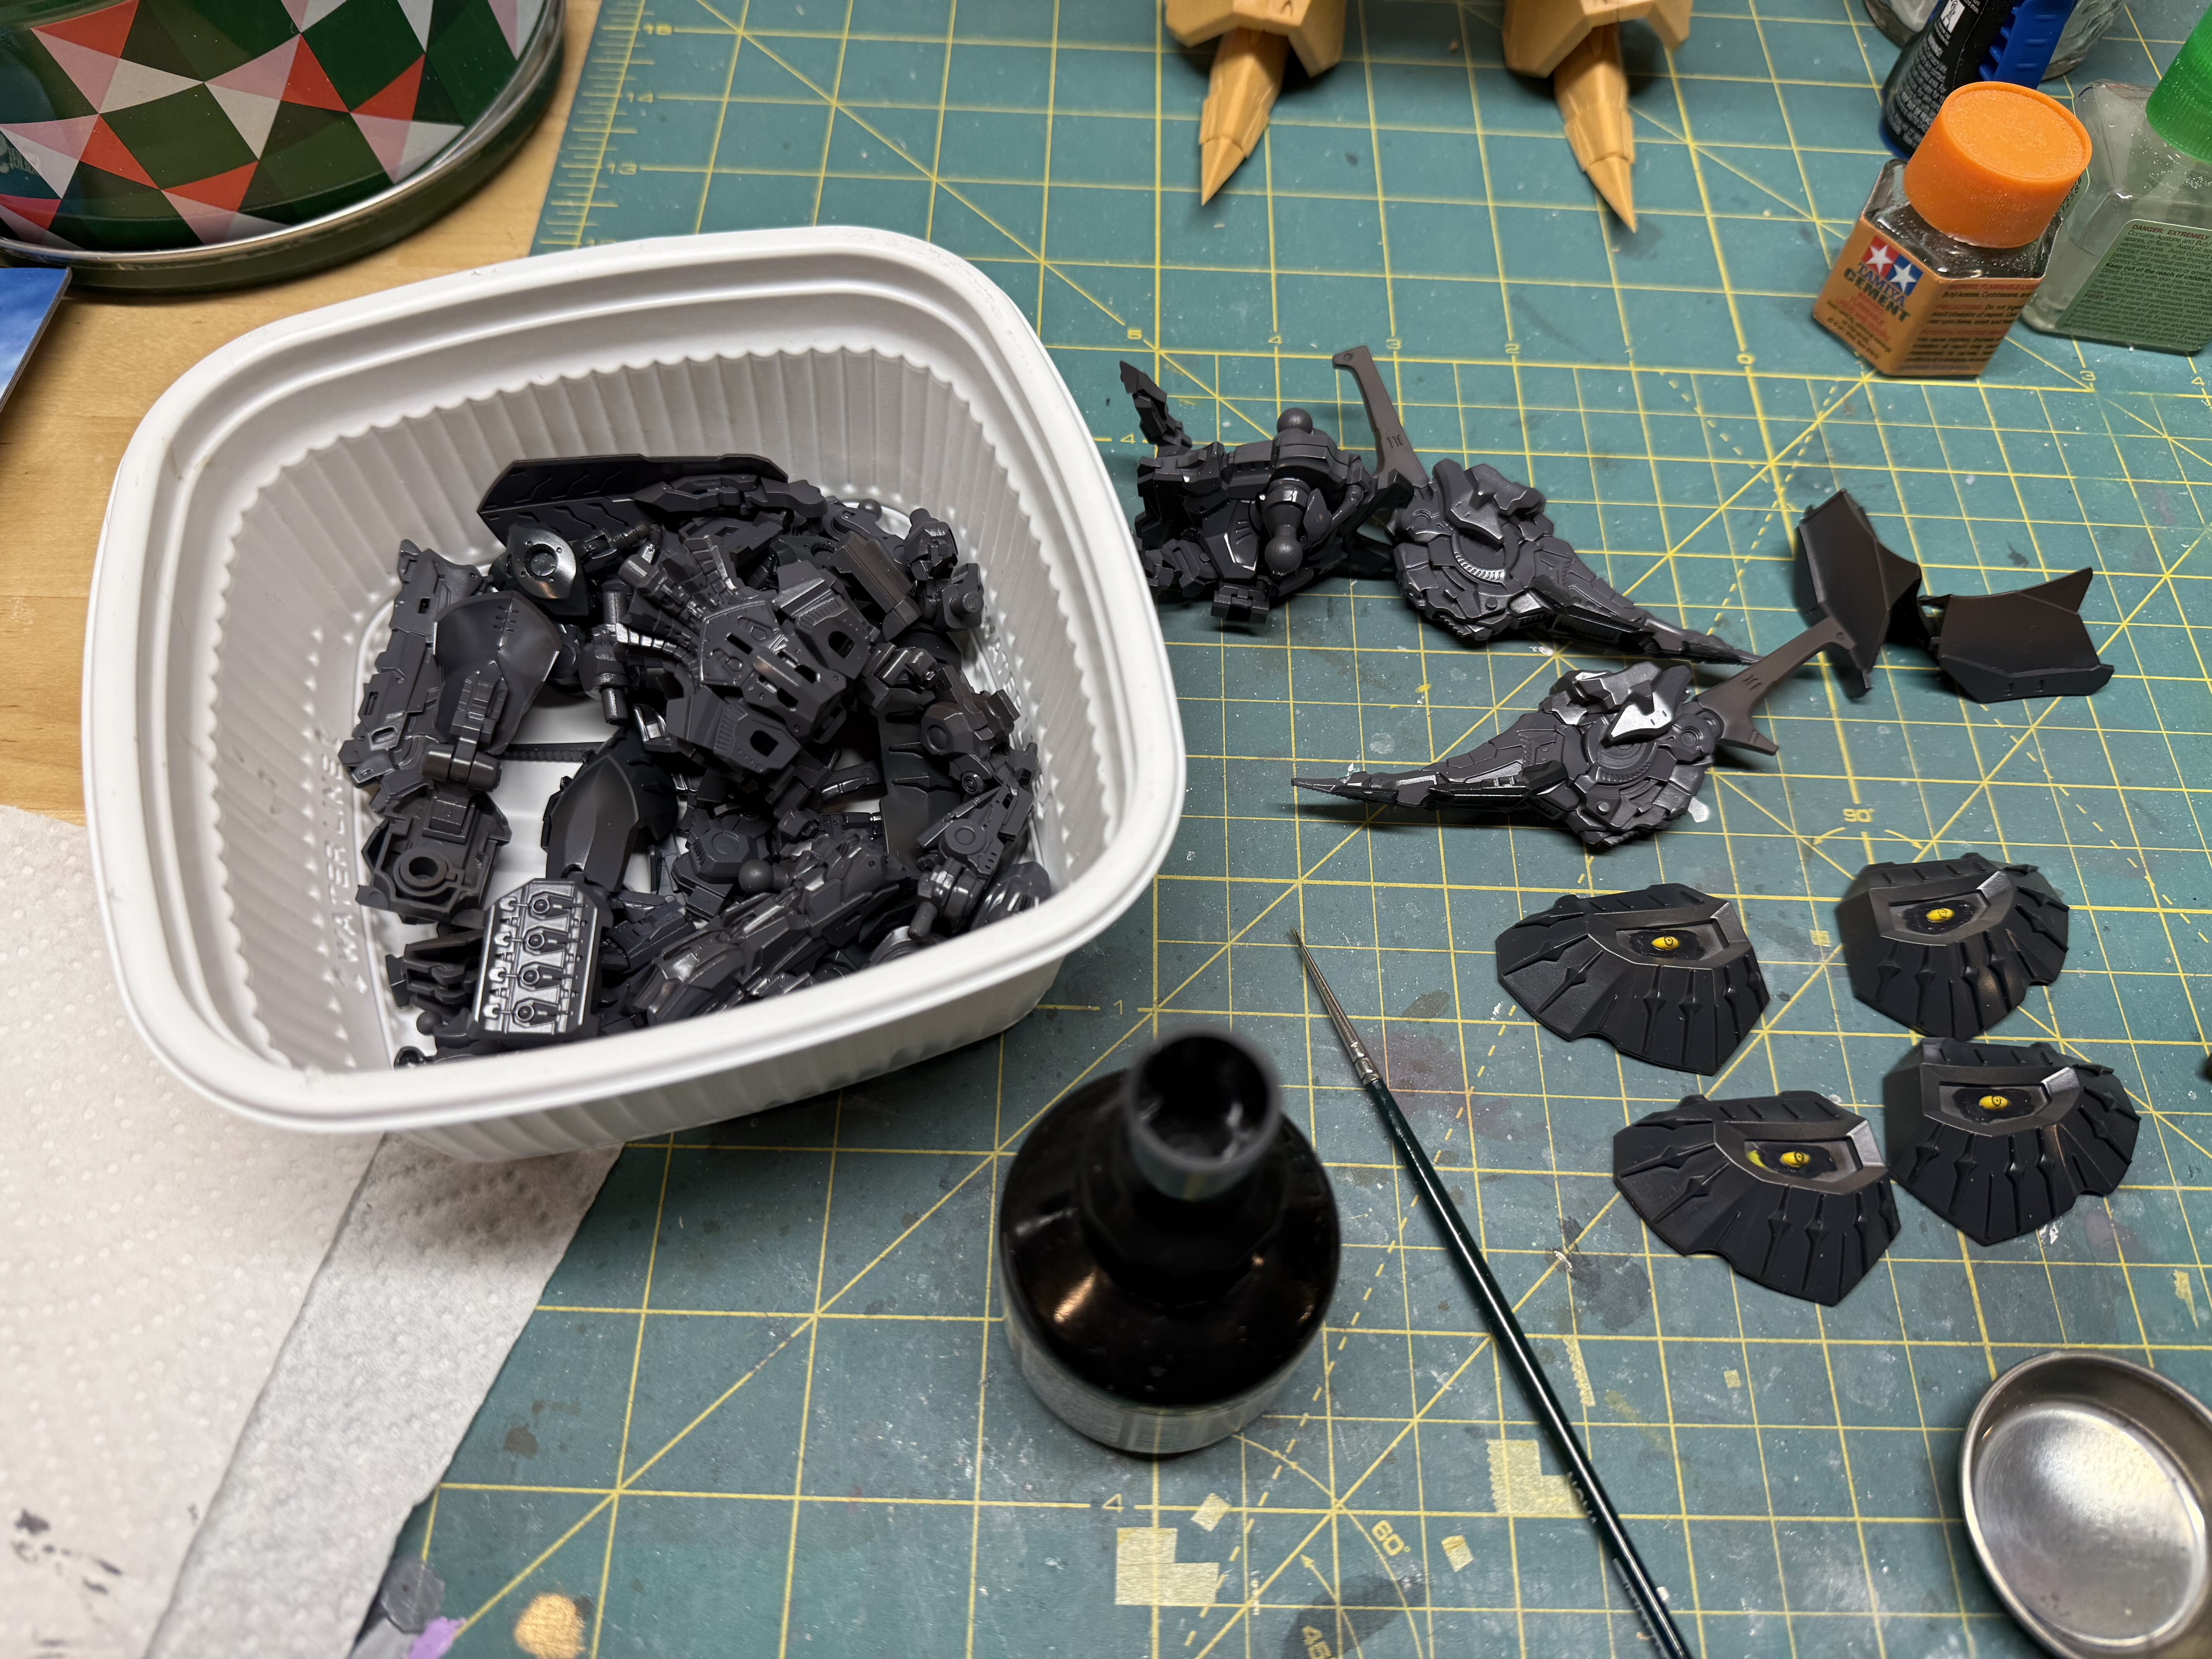
All parts on the Terror Mirage finally primed and ready. Paint for the armor should arrive today. Sooo excited! I primed and painted most of the frame parts but had to wait on others since I ran out of clips. Lol
-
@ChasThats great! Use it or lose it and making your own recipe sounds awesome! @505thAirborneDamn that sucks! I was always curious about what folks do on lighting in models if they stop working. I imagine implementing a hatch for possible repairs may or may not be possible based on the construction. I guess like you said now it’s just an awesome build without lights.
-
Hahaha So true.
-
My thought completely. Lol Jokes aside that’s some amazing tiny detail.
-
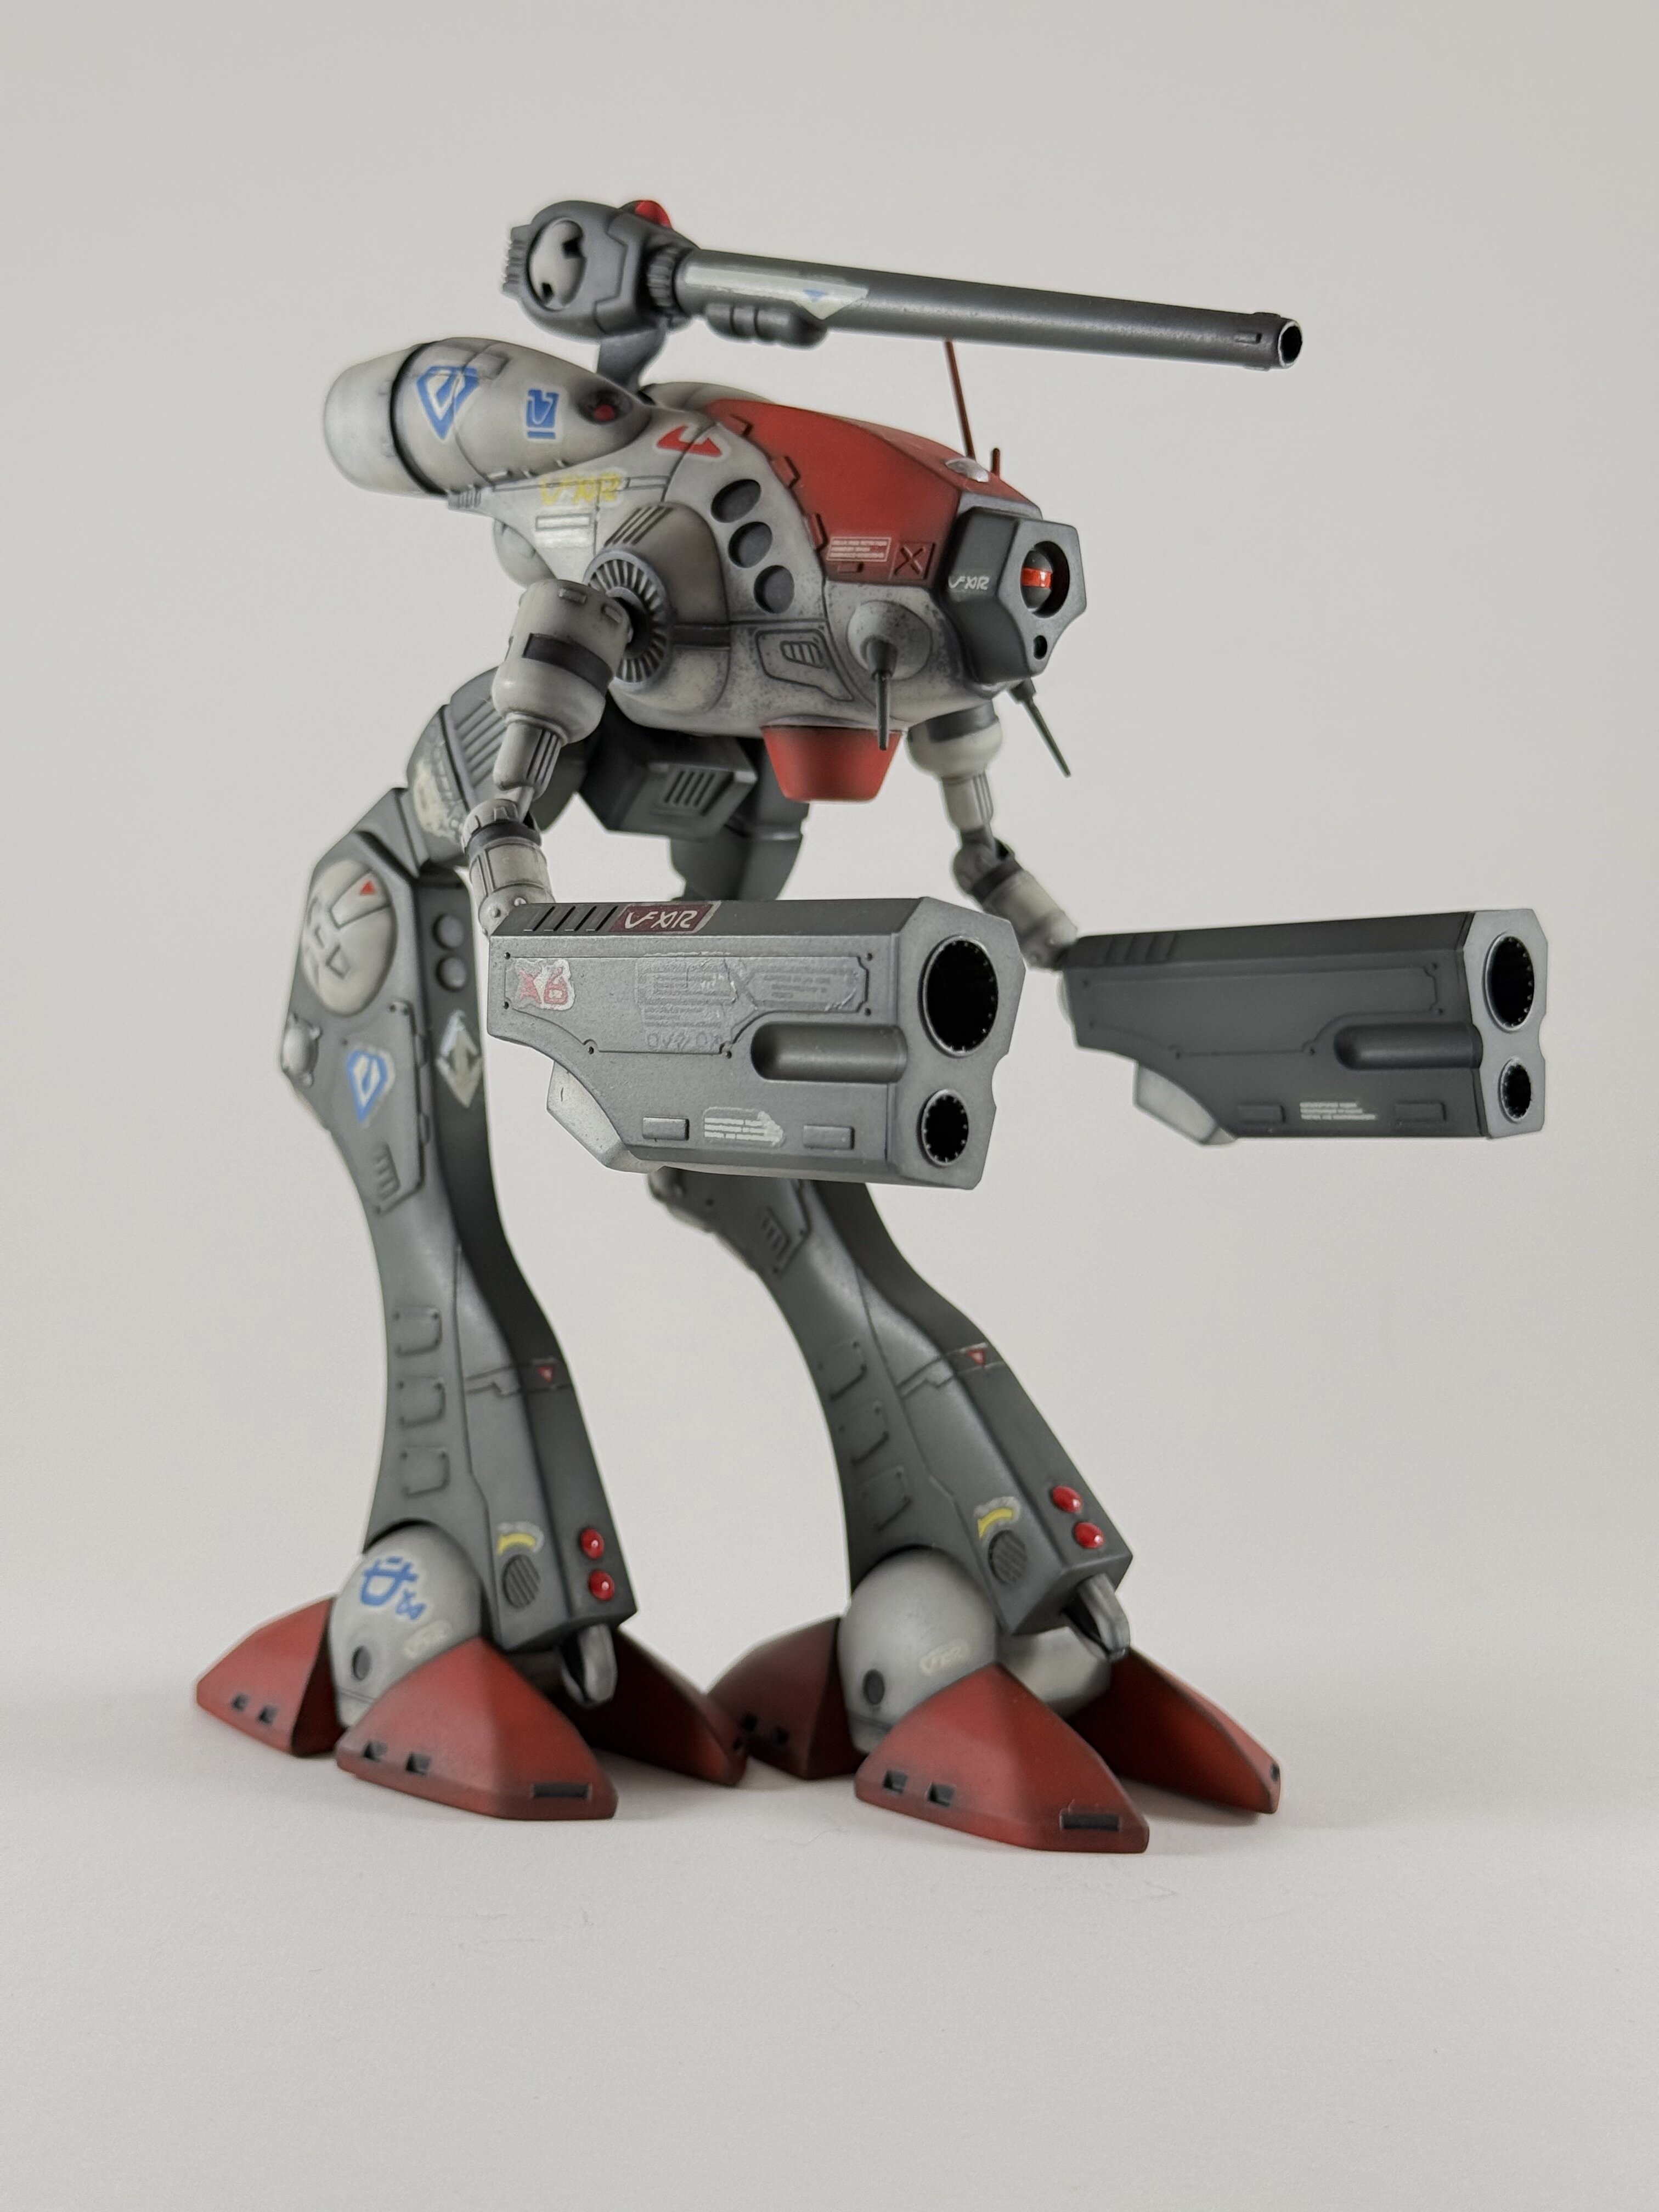
Get a few phone photos of the IMS 1/144 Neptune I built last fall. I think it was last fall? Wish the sparkling blue came through the photos. It usually alludes me. The decal shoulder emblem failed on me so I brush painted it. It didn’t turn out too bad.
-
@electric indigoThats great to know. Thanks so much. Do you glove up during a lot of the process or do you just degrease right before you prime? Inquiring minds want to know. 😊 Also it’s true, Ted does an outstanding job and doesn’t break the bank.
-
@tekering What a cool discovery and looks like you are well on your way (= Yeah I think the 4 builds going on thing is just because I’m some sorta sicko. Hahaha. I imagine my dedication to drinking copious amounts of coffee probably is a contributing factor. Who’s to say? Besides that I’m rather chill. 🙃
-
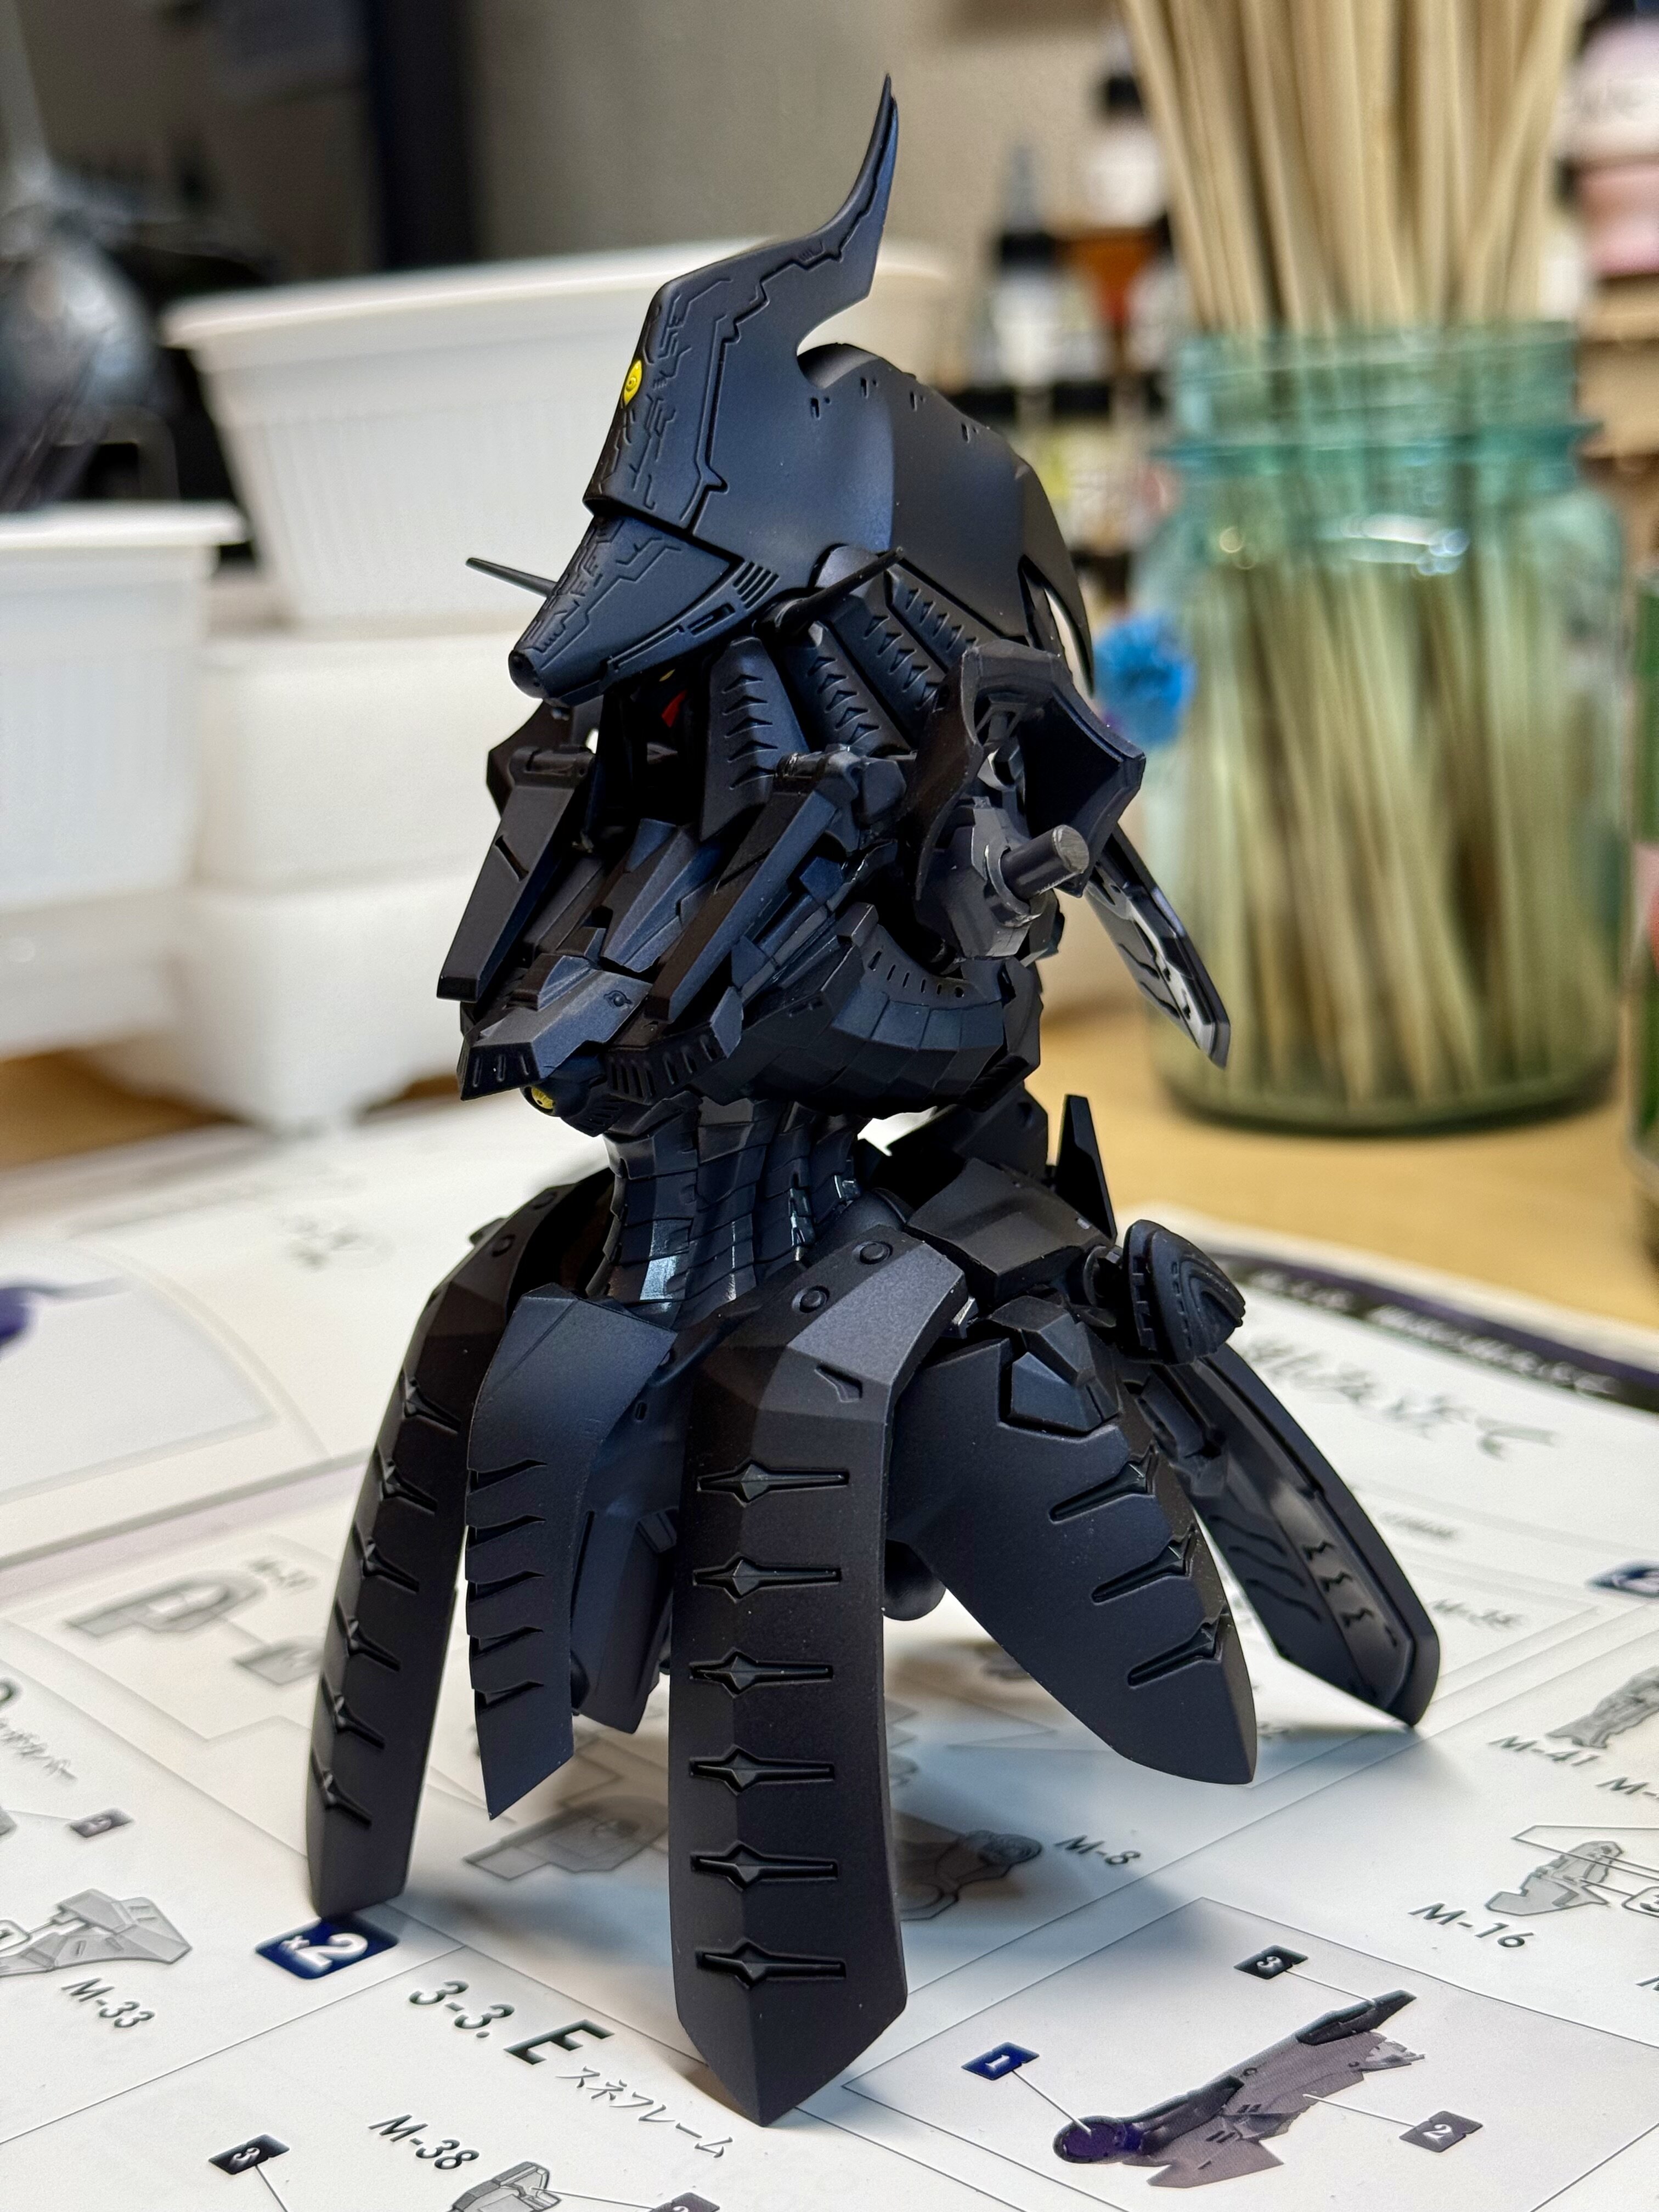
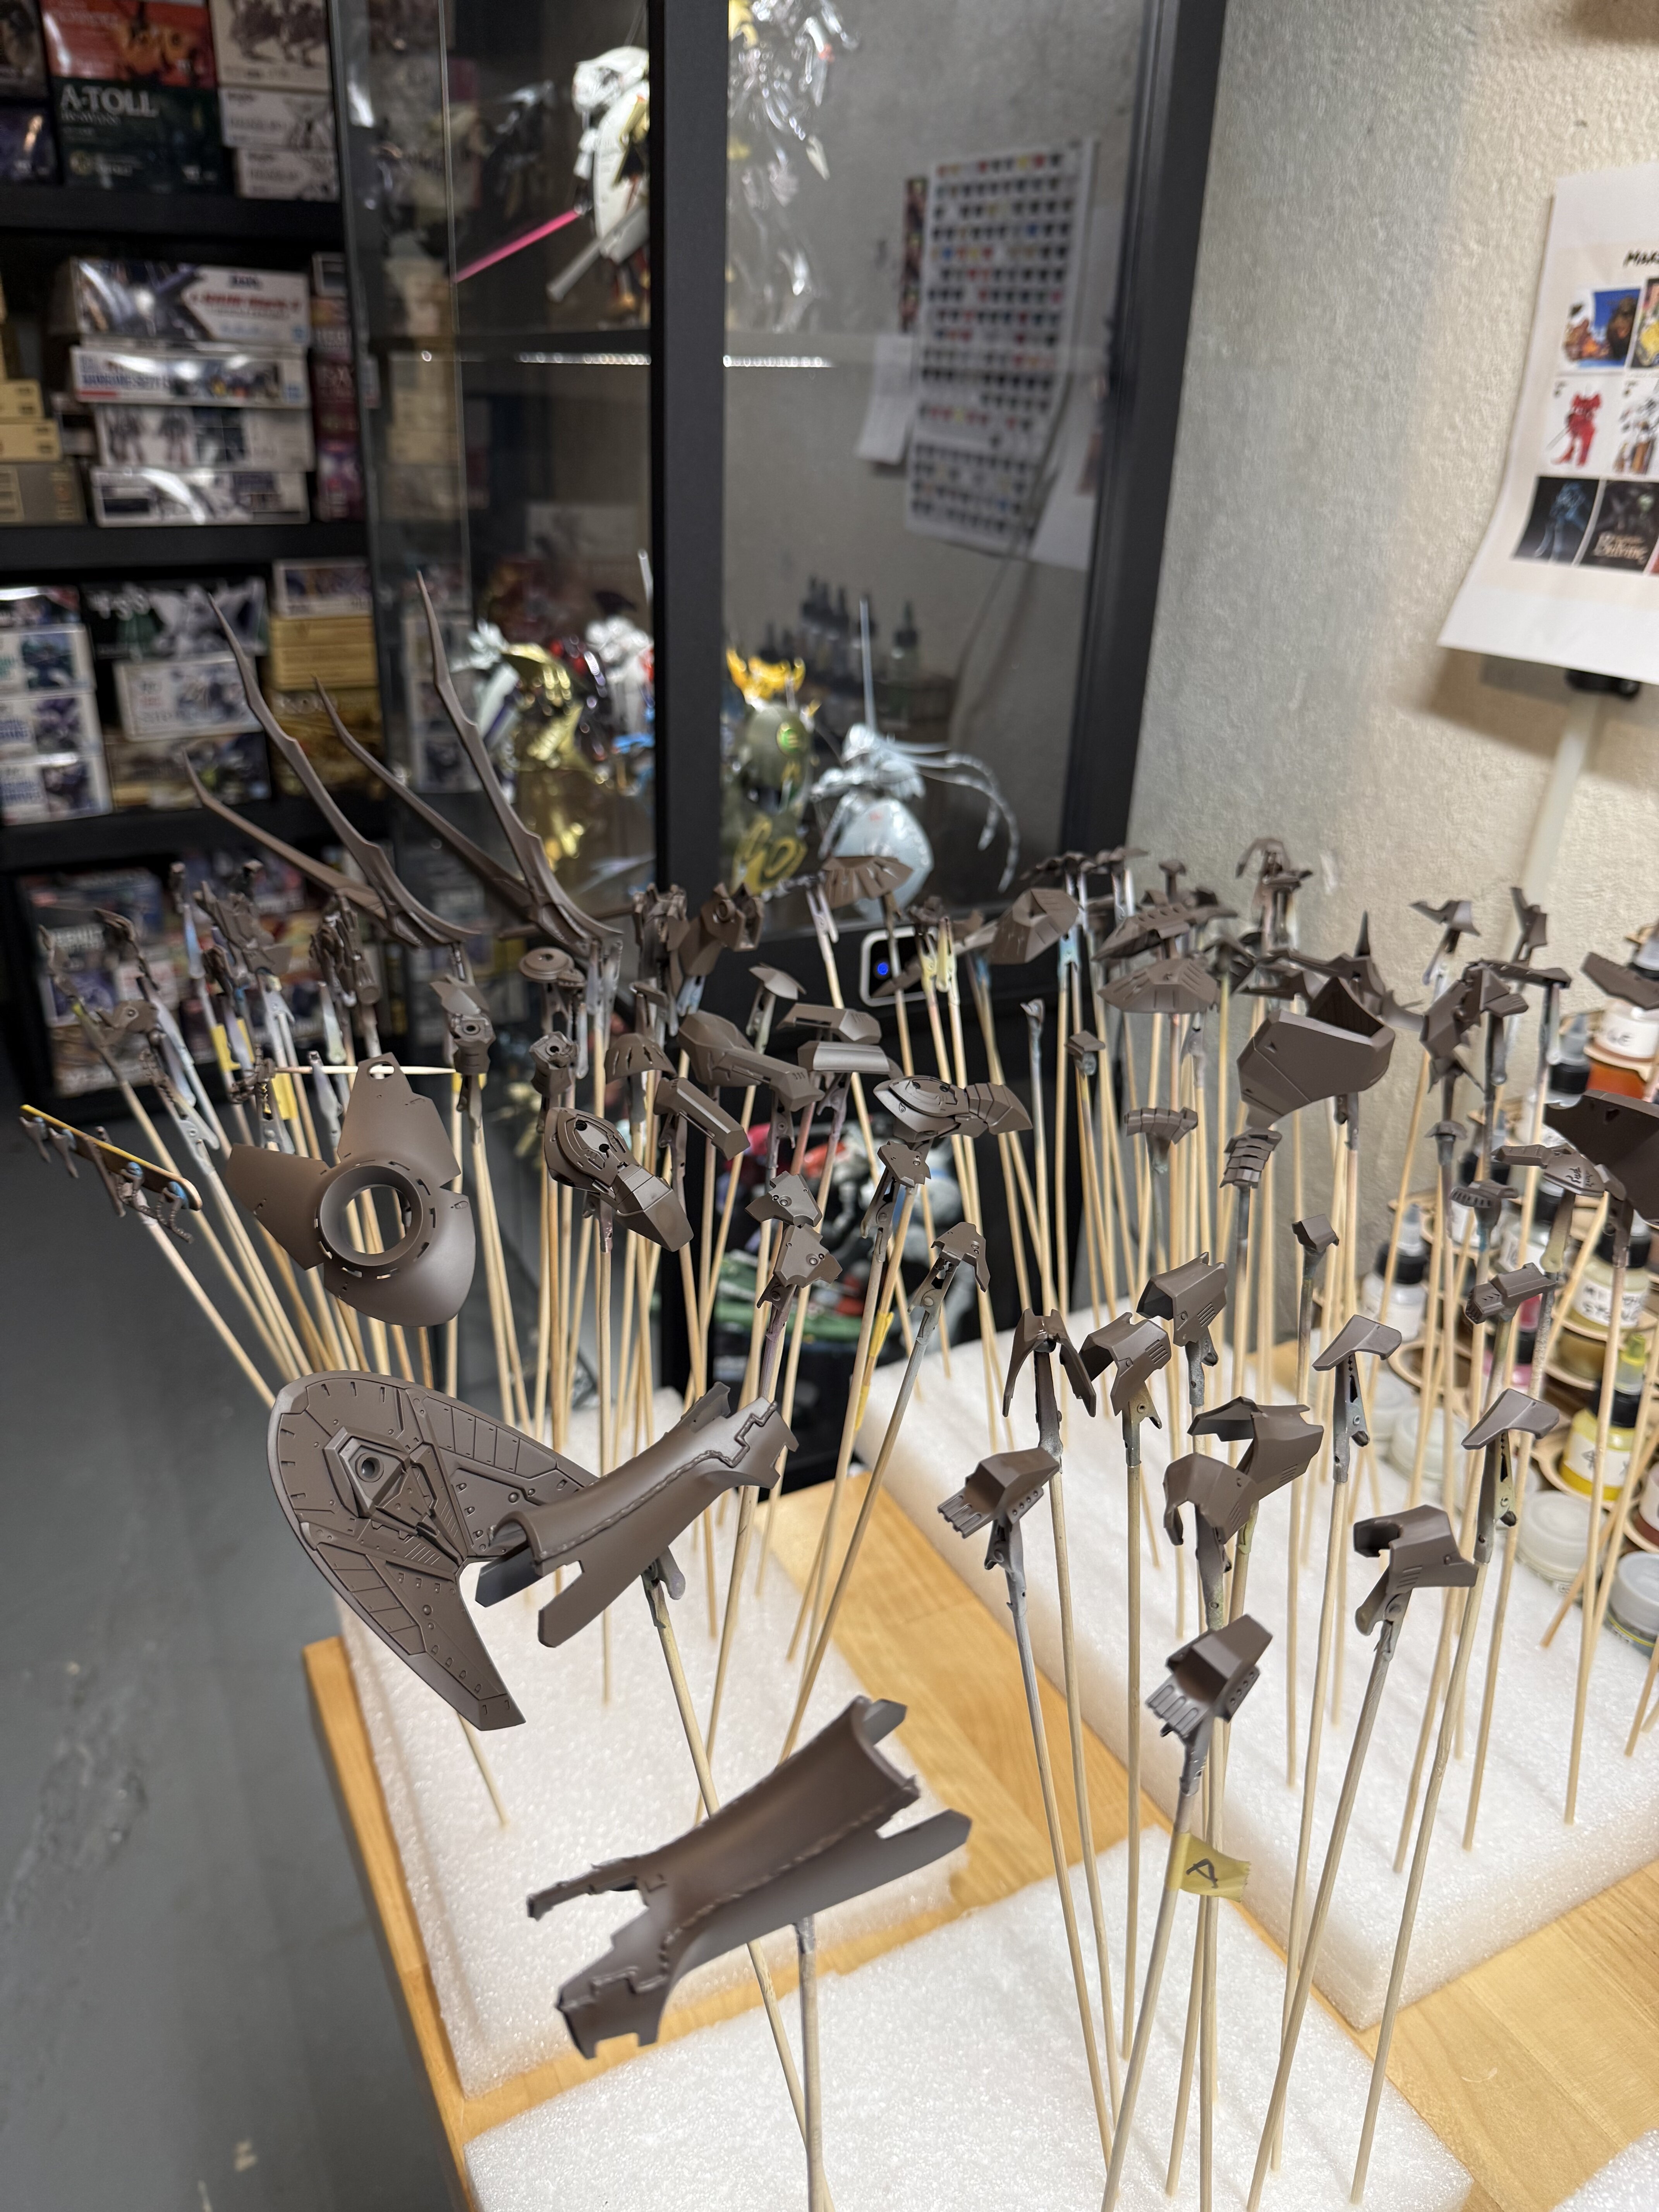
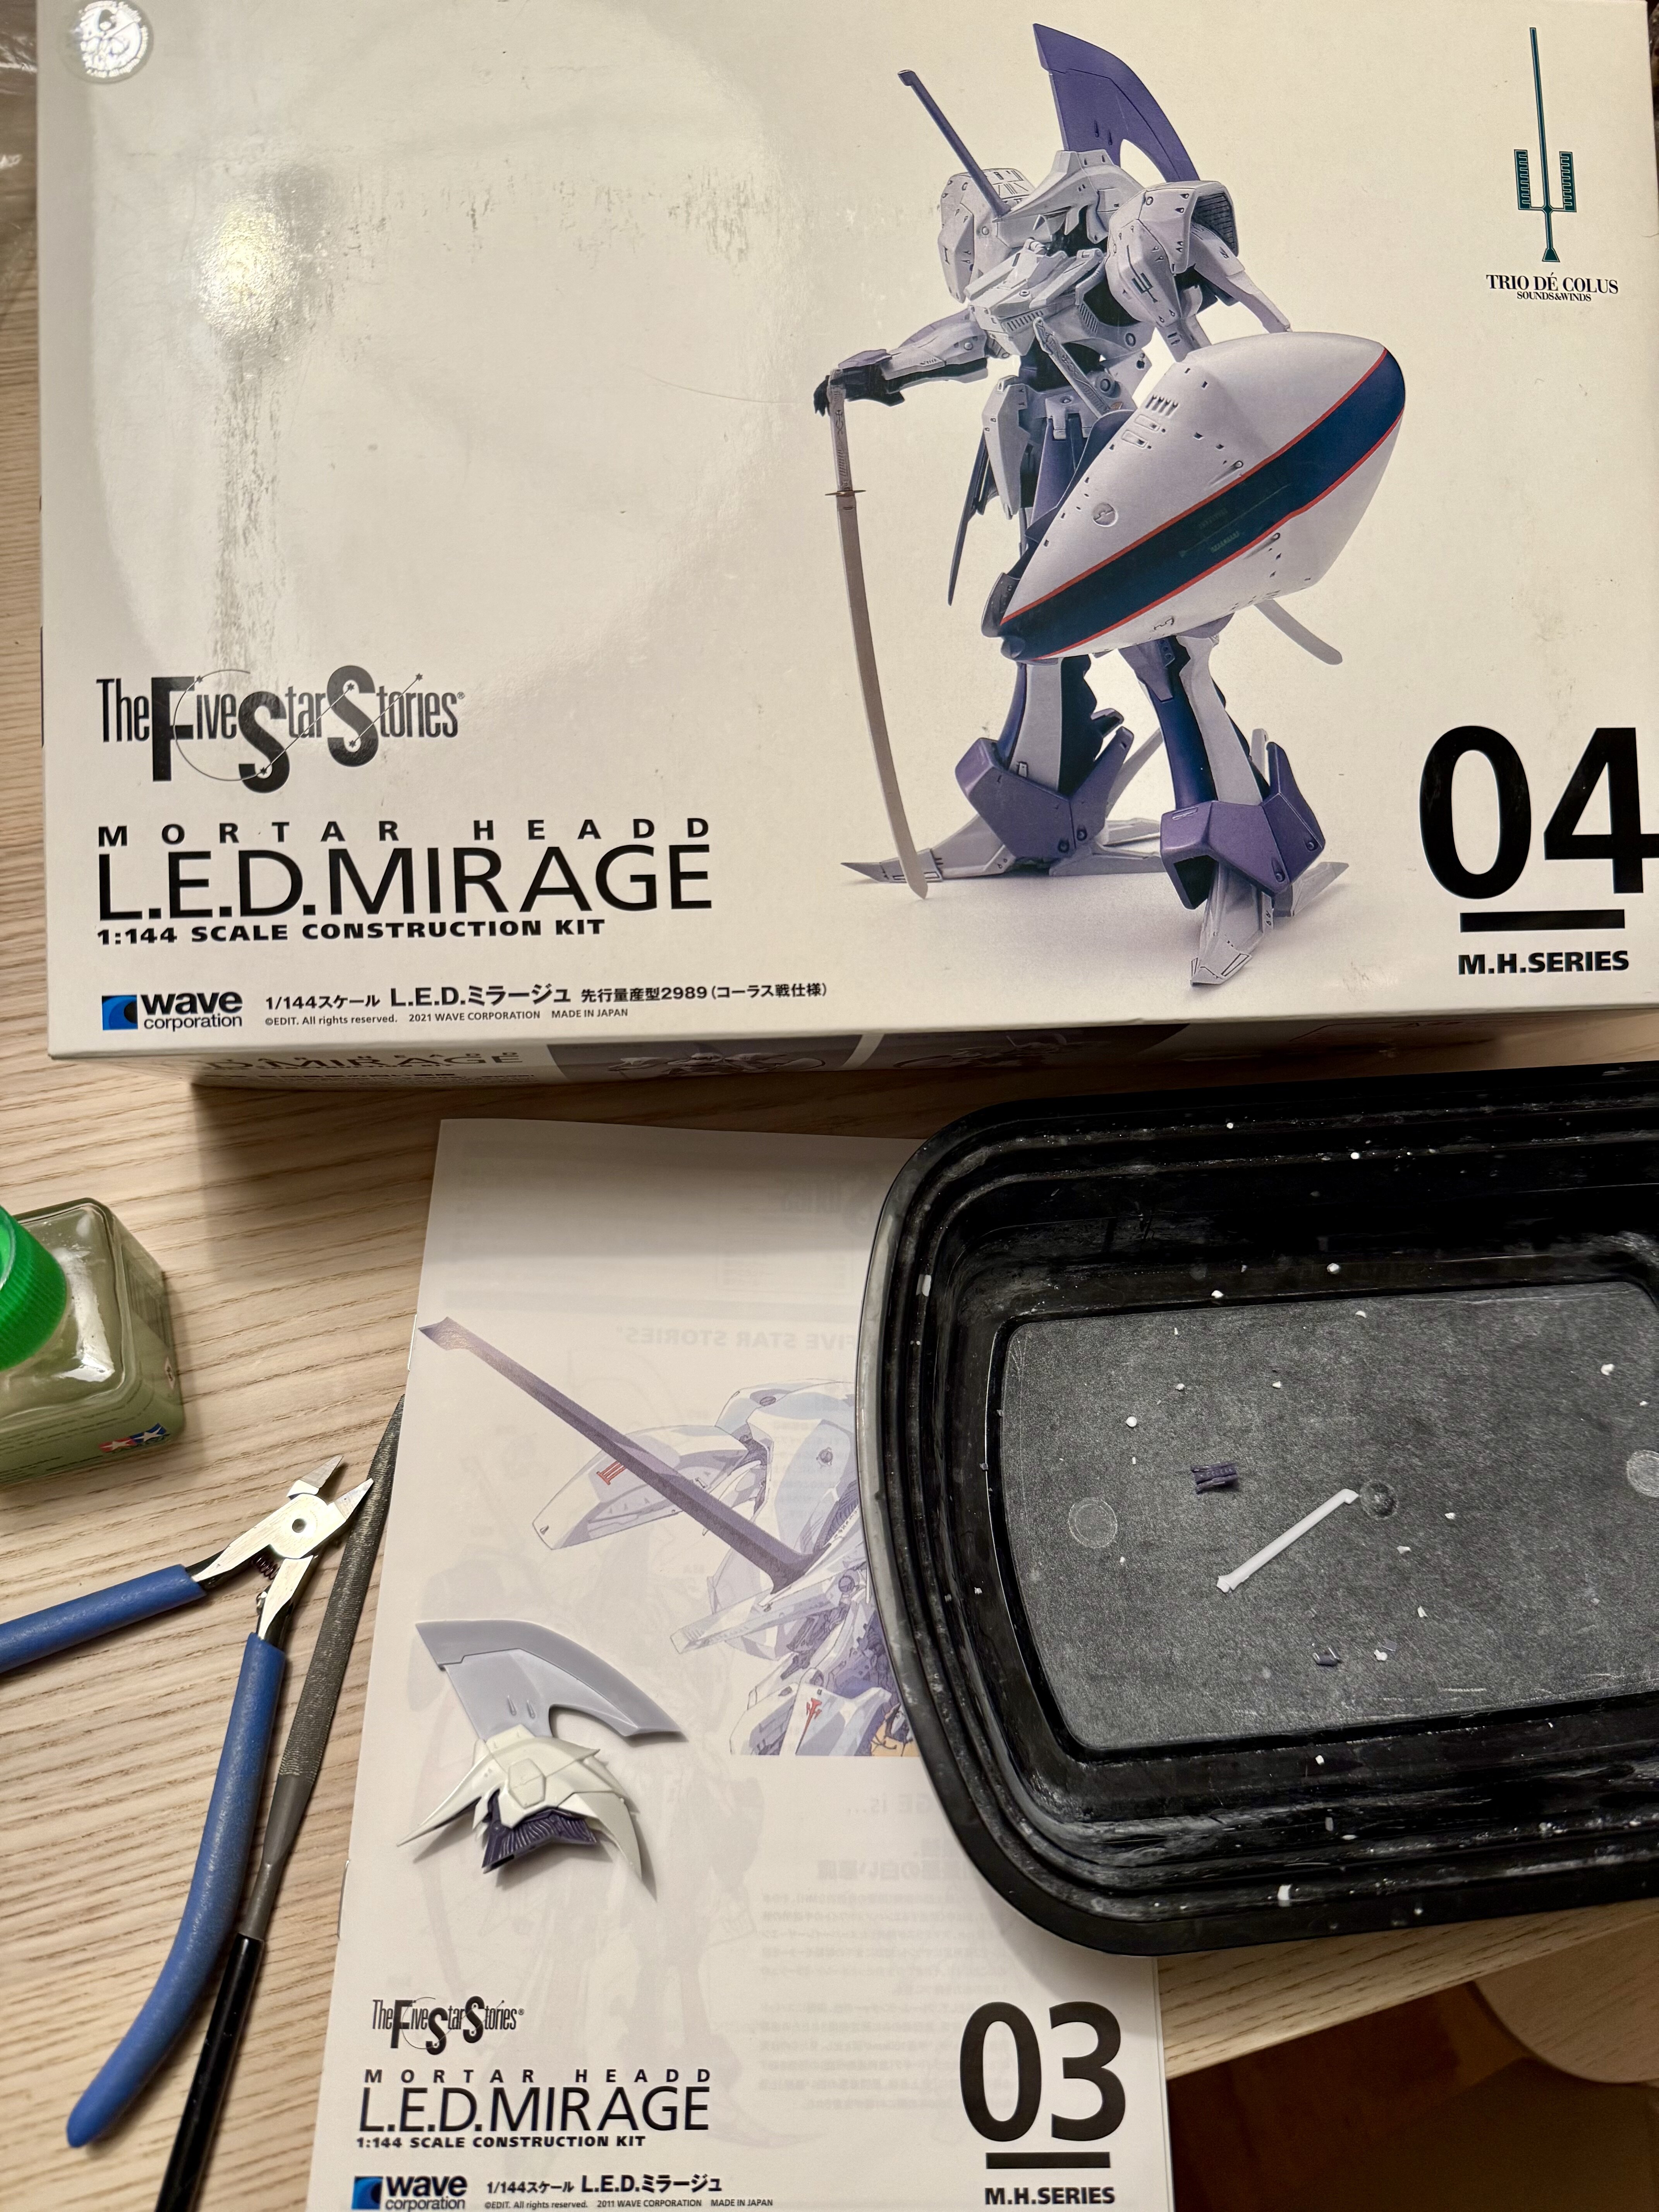
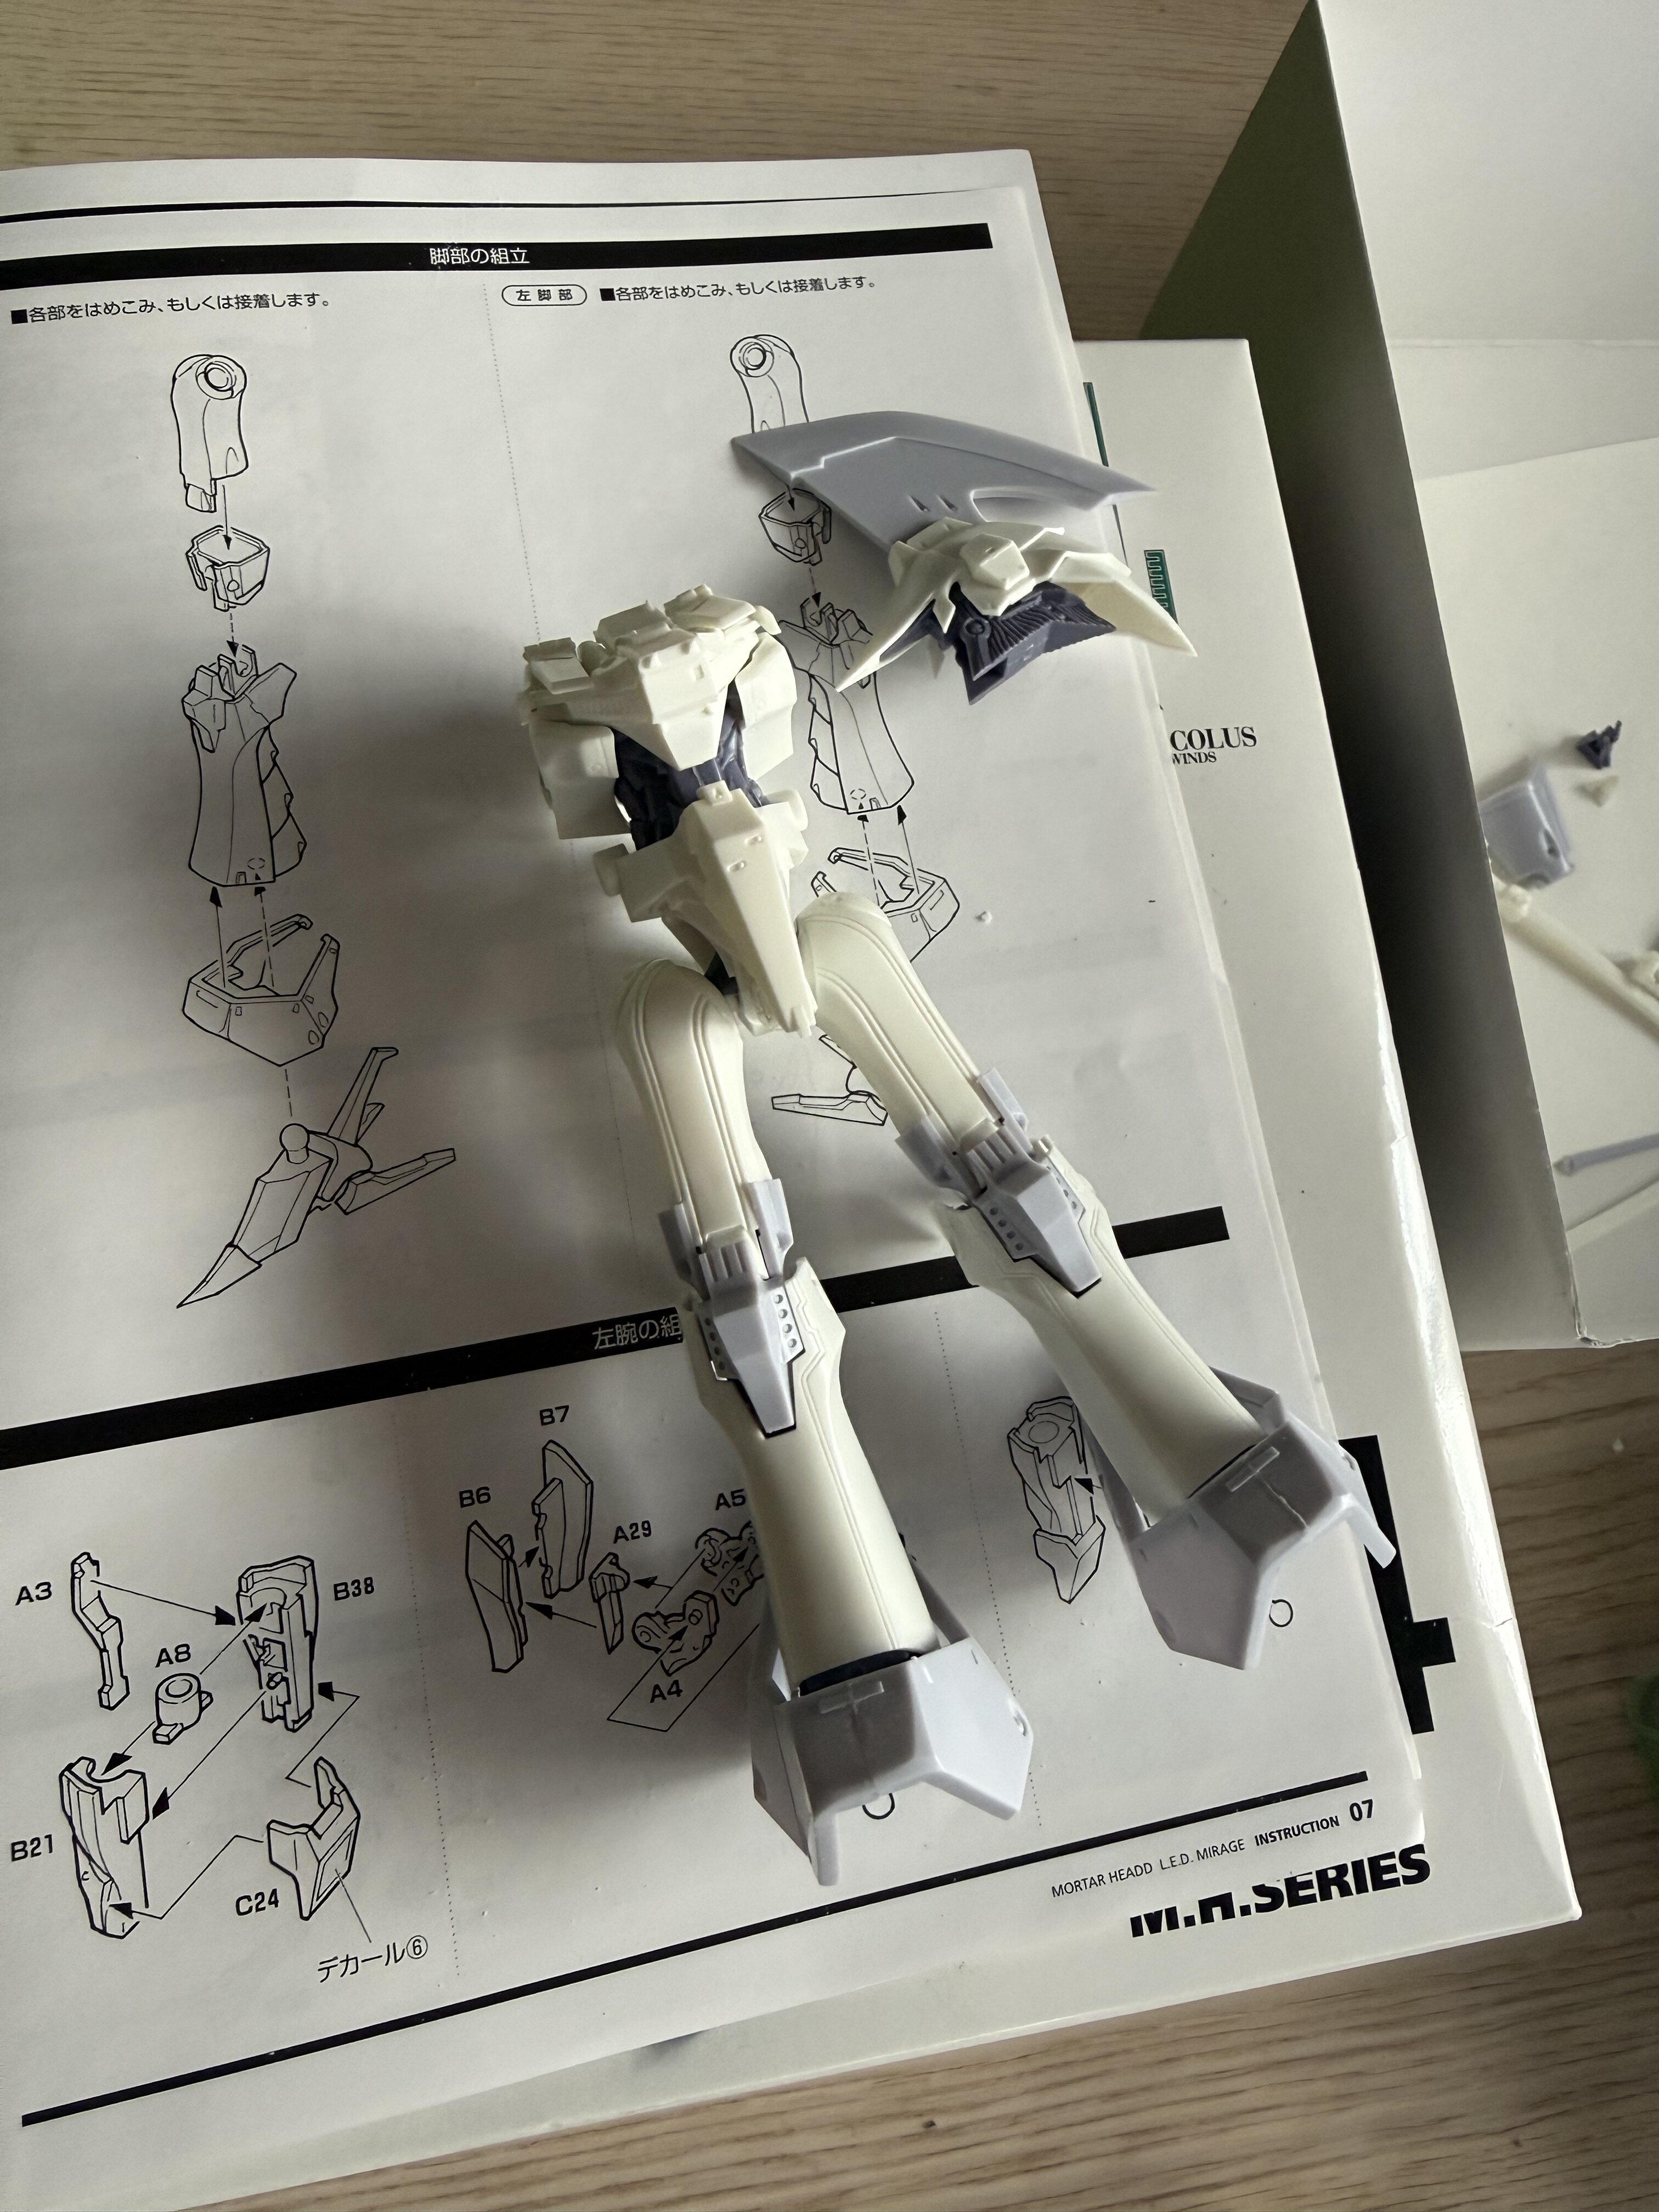
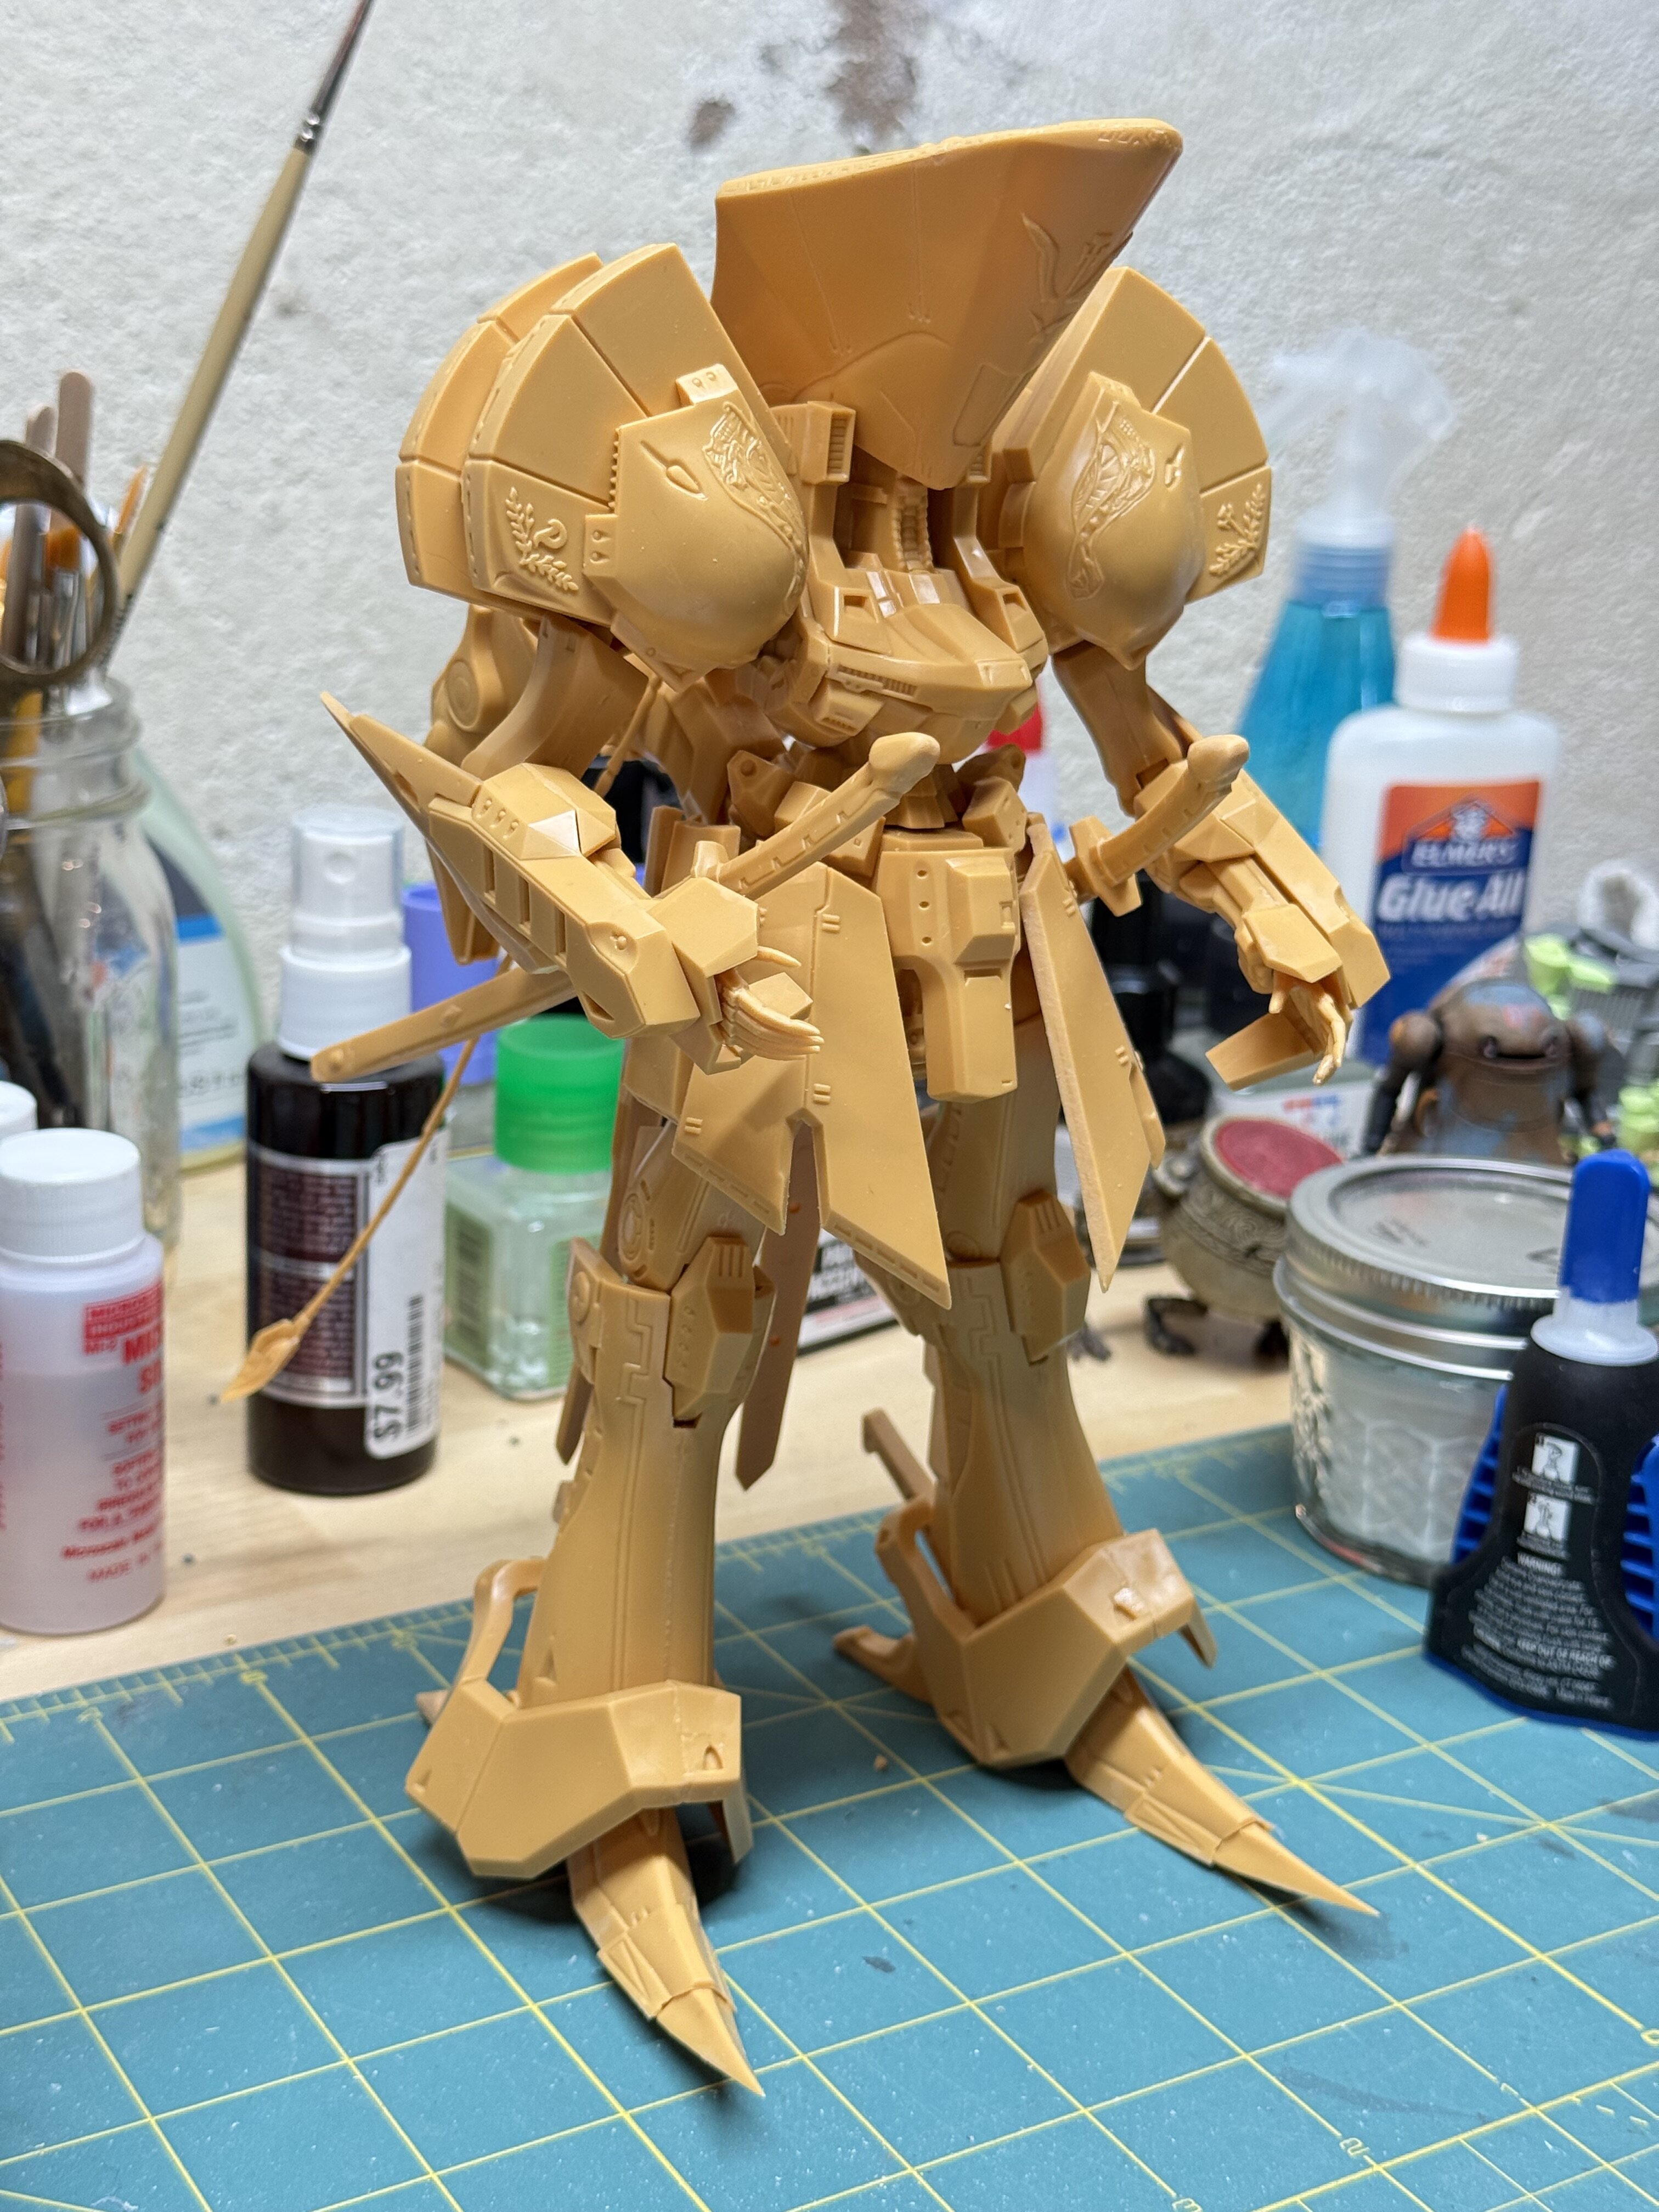
Got a few more things cooking. I think 4 builds are in the mix. Finally got my first resin kit degreasing and 3 plastic kits in various stages of completion. the Terror Mirage is waiting on paint to arrive, the KOG 7777 has only been test fit and the newest addition is the Wave 1/144 LED Colus. Man I love these Wave kits. Really fun to build.

-
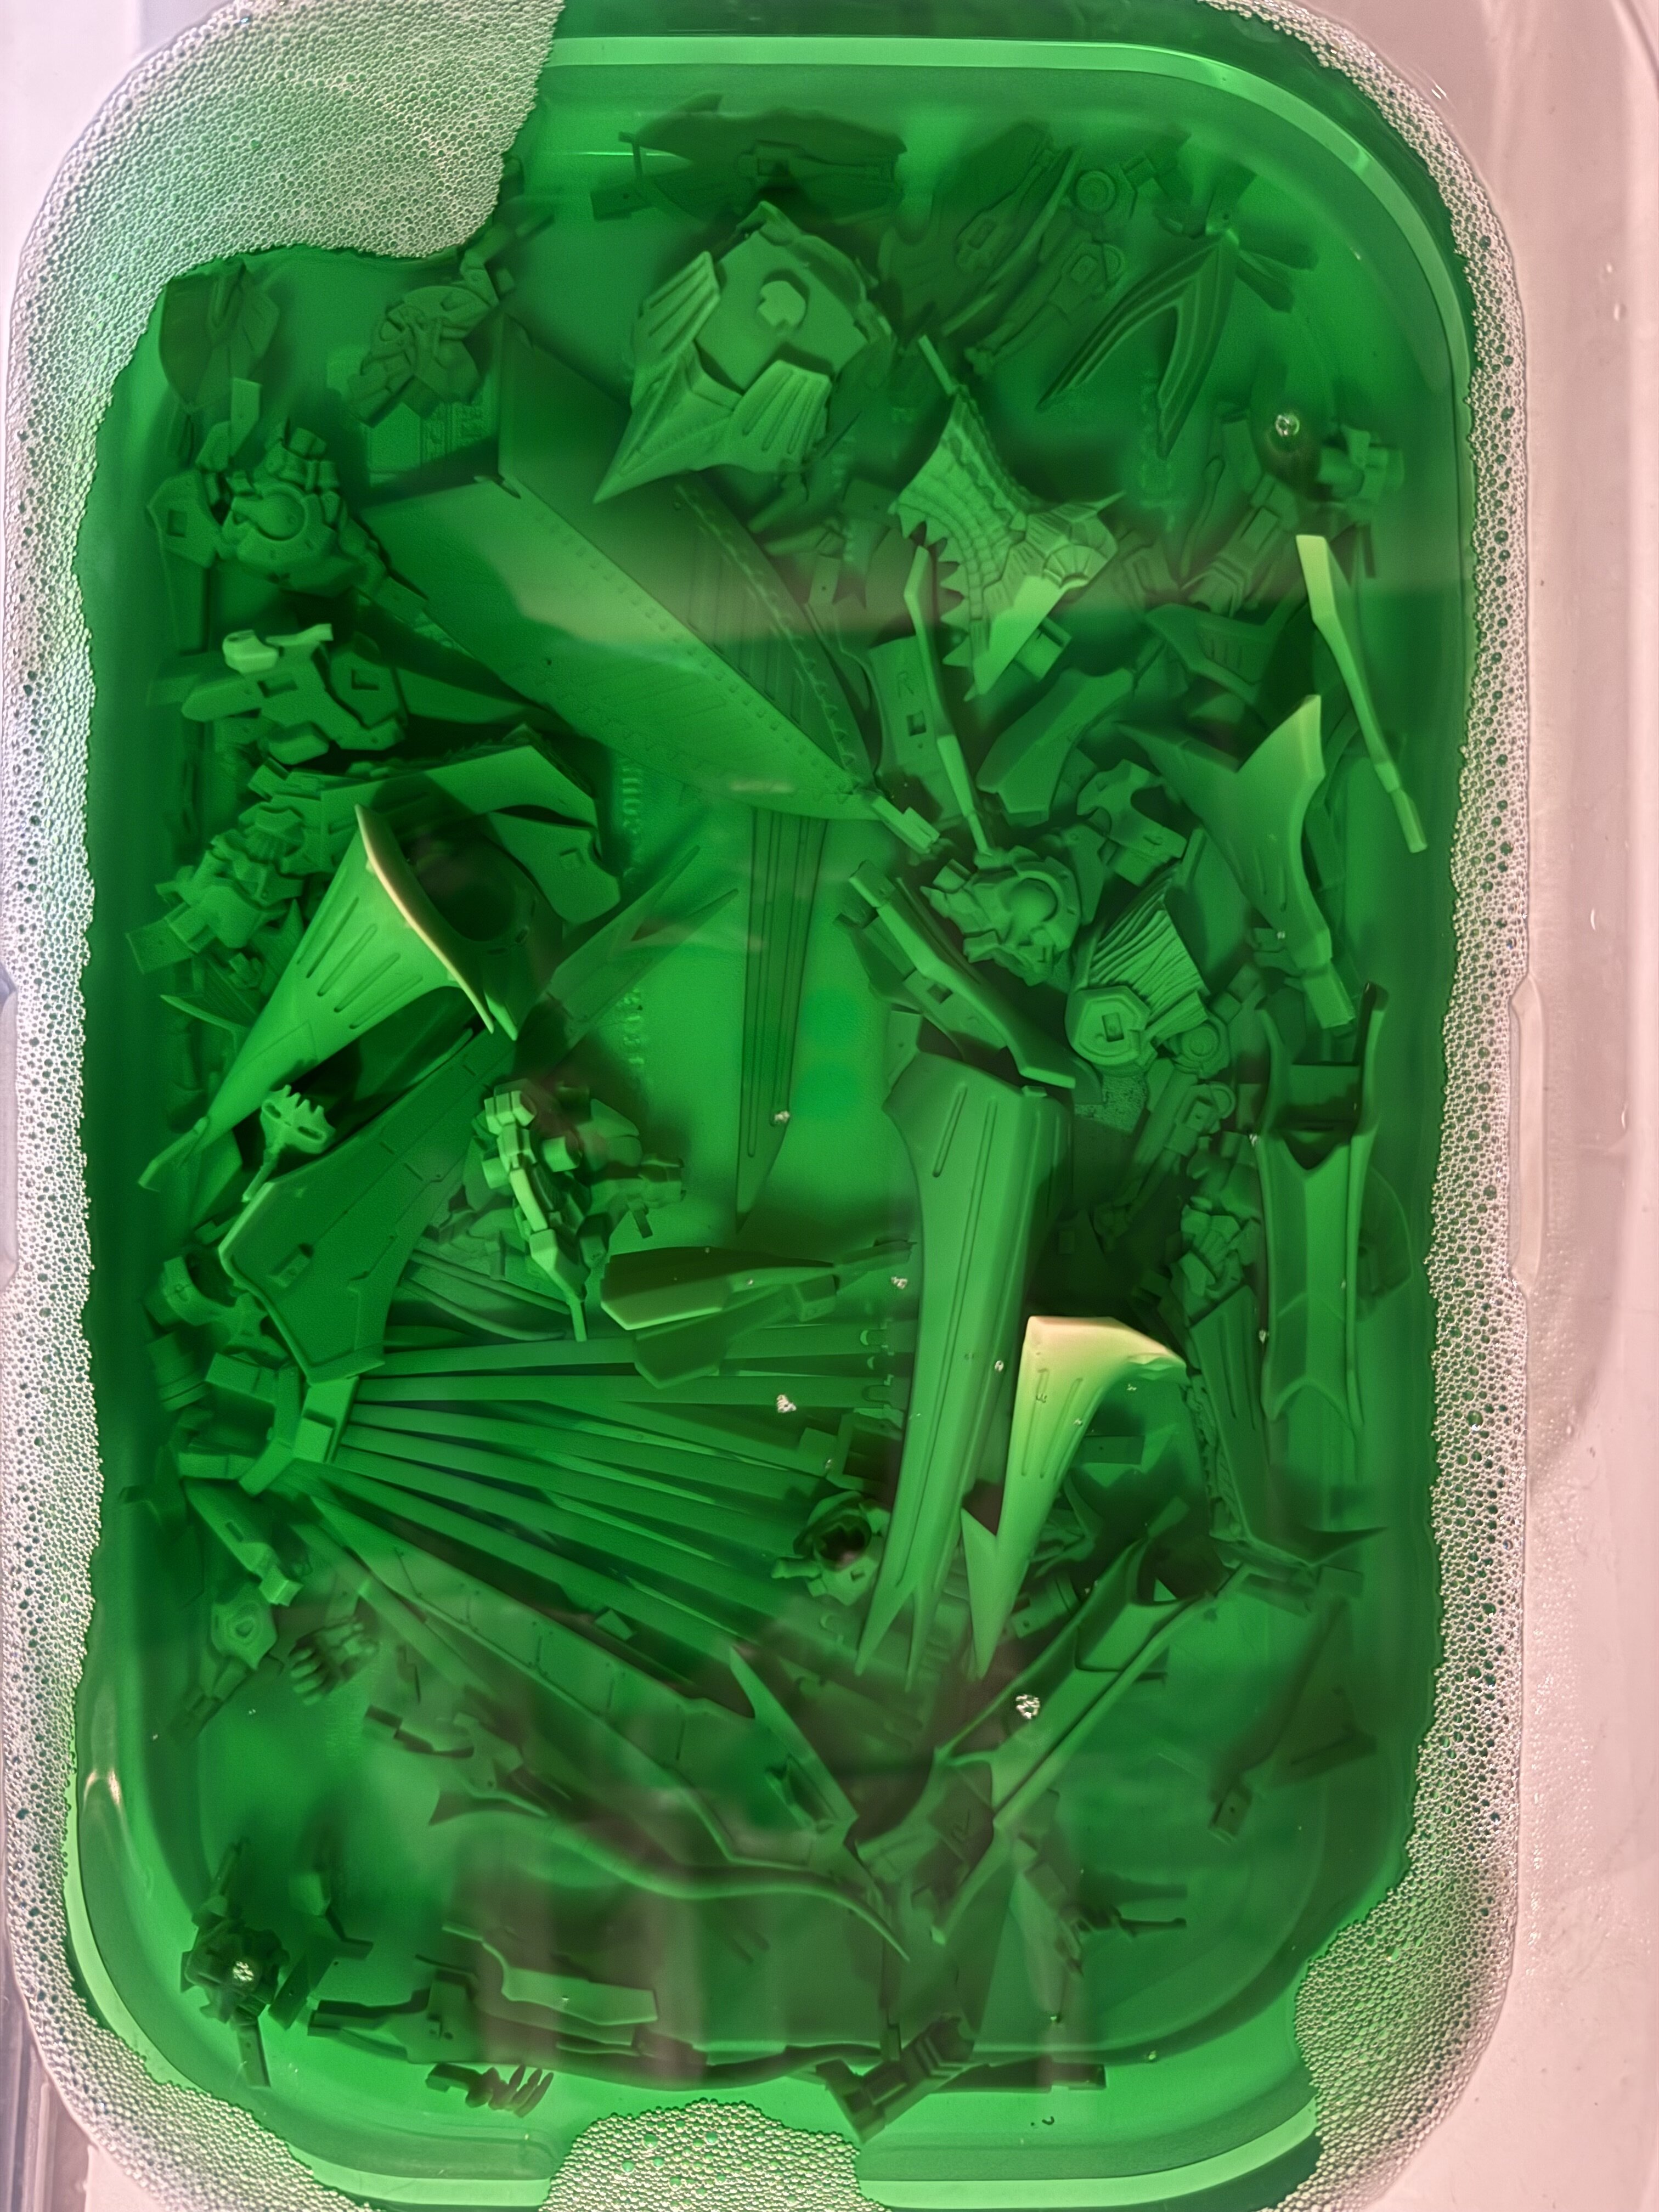
Thanks so much! That KOG you hooked me up with is starting to take shape. Also my first resin kit arrived and is taking a bath in degreaser. A new adventure begins. I have lots to learn.
-
Been slowly taking better phone images of my FSS builds. Here are a few favorites.

-

The 'Hey look at this really cool model build I saw' post
Papa Rat replied to Shawn's topic in Model kits
Love the stock build. The paint is beautiful, but don’t care for the cannon plopped on the shoulder. Feels out of place. -
Silent Möbius has a special place in my heart. Besides Macross, it was one of the first anime I loved along with Appleseed, Bubblegum Crisis, Vampire Hunter D. I most definitely will be getting that kit once it drops. Thanks for sharing. Lookout Lucifer Hawk!
