

SteveTheFish
-
Posts
204 -
Joined
-
Last visited
Recent Profile Visitors
1523 profile views


SteveTheFish's Achievements
")
Sharon Apple Concert Attendee (4/15)
250
Reputation
-
That seems to be a cultural difference when it comes to modeling. While modeling is held in a much high regard here in Japan than in America (where people just think it's something that kids do), IPMS is not so popular. Modeling events in Japan, or at least the ones I've been to, are not about a contest but rather just coming together and enjoying the hobby. The biggest event is the Shizuoka Hobby Show. One convention hall is used as a tradeshow with companies' booths while the other convention hall is a private exhibition hall. Individuals as well as modeling clubs have their models on display. Dorobou Hige has his table as does Wild River, there's the Studio Ghibli Modelers group, a group for Yamato/Starblazers modelers, the lovely Tomoe Ogoshi 054 has her group of women modelers, etc. There is no contest; it's rather a celebration of the hobby. And the level of imagination on display there will blow you away. A Gundam taking a crap on a toilet reading a magazine, Hatsune Miku in a Power Loader from Aliens battling an actual crab, a psychedelic-colored Messerschmitt, an Easter basket of eggplanes painted like Easter eggs, a Hello Kitty Starship Enterprise... It's unreal. Way more fun than dealing with stuffy judges with their heads up their ass or grown-ass men throwing temper tantrums because they didn't get first place. Anyhow, sorry for going off-topic. I haven't been been to the Shizuoka Hobby Show since 2016, and even then I had to work at the event and couldn't really enjoy the sights. I was stuck babysitting a Lamborghini for two days straight and my feet were killing me.
-
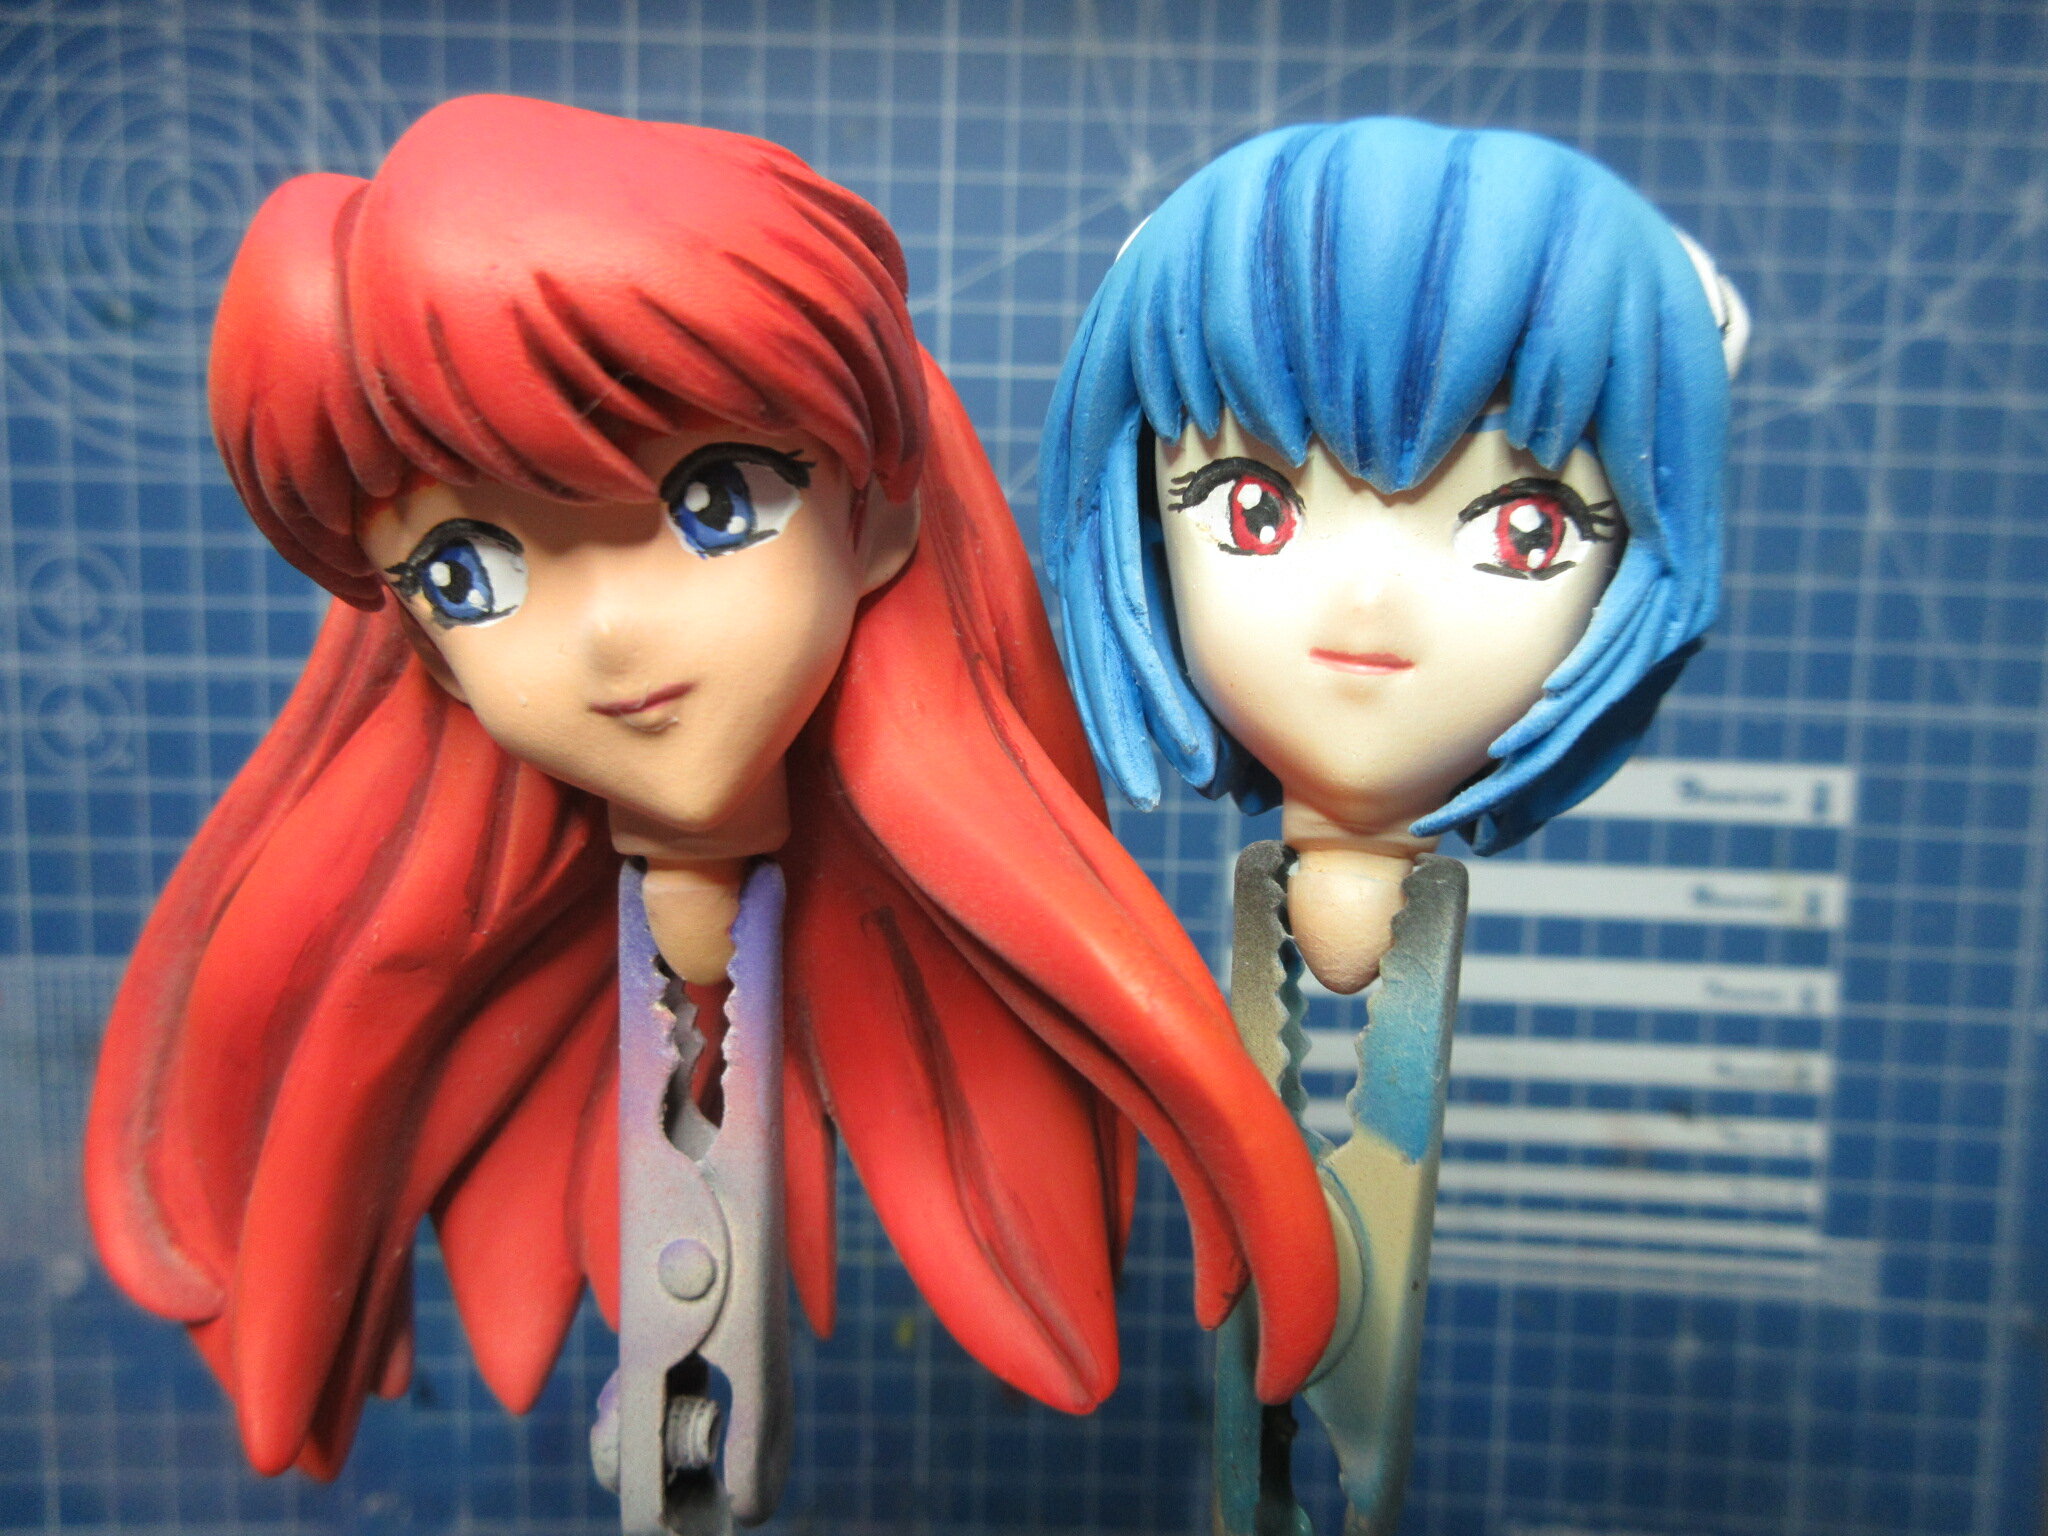
That's how I remember them to be, so it's why I asked. I went to the IPMS national convention in Phoenix, AZ in 2010 and the showroom was row after row of models built exactly as they are supposed to be built. Not so much inspiration or originality. The SF section was just along one table and that was it. The IPMS club I attended once was mostly just grumpy old geezers who couldn't appreciate anything SF. I'm glad to hear that it's changed, but the contest judging remains obstinate from what I hear. My friend in Canada built a Bandai A-Wing to look just like the Ralph McQuarrie concept art. It looked beautiful with the blue and white scheme, and displayed it for the IPMS event there in Calgary or wherever it was. He was demerited because it "wasn't weathered enough." Well, tell that to Ralph McQuarrie. I'm sure that the judges know Star Wars, but beyond that they probably didn't even know what they were looking at. Anyhow, my Rei and Asuka are done. I have them both placed on a wooden plaque. I'm thinking that I might paint the plaque and print out an Evangelion or Nerv logo decal (although I honestly don't really care for the show). Yesterday it was 34 degrees C (I think that would be 91F) and last night I saw that Asuka was leaning forward. Drat! It's because of the way their feet are made, in segments. If they were just one piece, I could fill them with plaster better. As it is, sofubi tends to bend when warm. I removed the 2mm copper rod and I will replace it with a much longer one to give her leg more support. Also, the two girls have those life support backpacks or whatever they are. On Rei, I put some superglue in the wrong place and it turned out messy. It's that semigloss black section on her back. I wetsanded most of it off and now it doesn't look so bad. I'm not sure if I should risk trying to remove more or not.
-
I've seen several mentions of IPMS. I attended one meeting in the Chandler, AZ area in 2011, the year before I moved back to Japan. I found that the atmosphere there was not very friendly towards sci-fi modeling, as if it wasn't respected as a legitimate form of modeling. Do you guys get flack for being Macross modelers? I've heard that it's pretty hit-and-miss, depending on who's running the local chapter. Some are welcoming of SF modeling while others treat such subjects with disdain.
-
Almost done with my Rei and Asuka sofubi figure set. I still need to attach Rei's left arm. She also has a bit of a fit issue with her legs unfortunately. I have a gap to fill. I'm pleased with the gloss/flat red and gloss/flat white idea I had for their plugsuits. It looks nice.

-
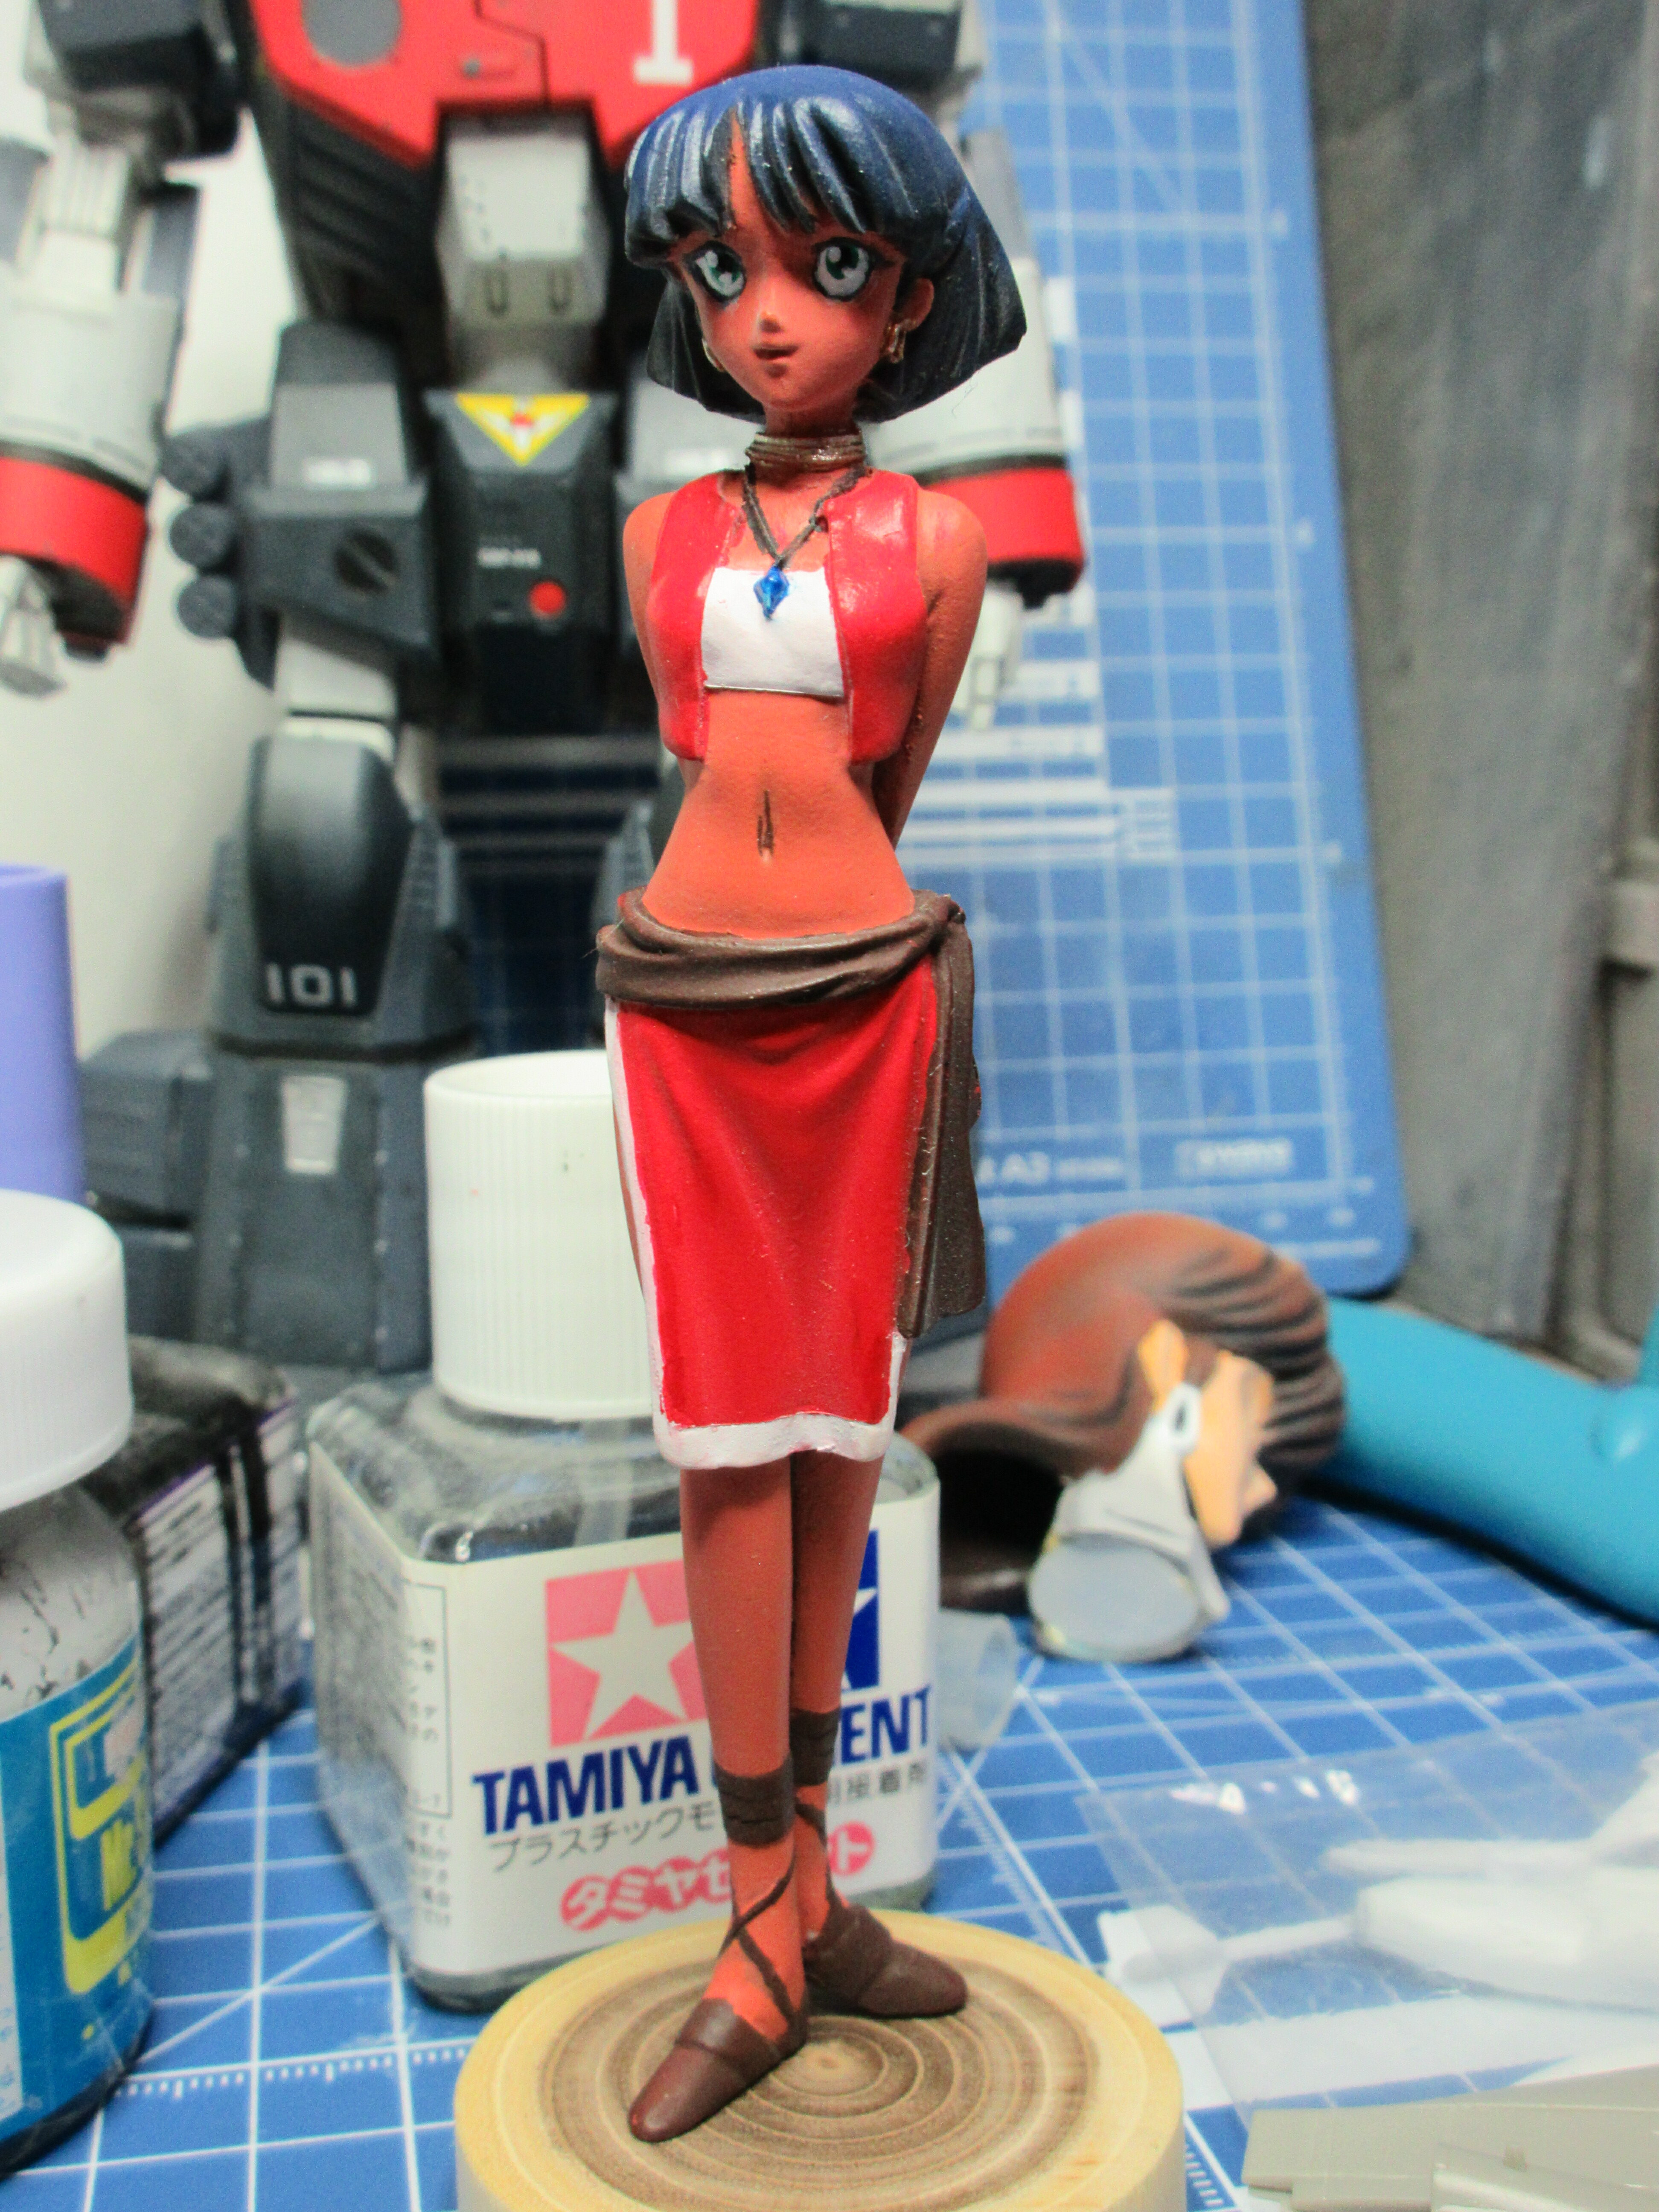
That's what I thought. I actually did try to use a brown wash after the flat coat and it was messy. I had to rub it off rather well to remove what happened. I don't know any other way to do something like that. As you can see her standing next to the bottle of Tamiya cement, she's real tiny, like not even 6 inches tall. I painted her eyes and gold jewelry using optivisors and I added the glints of light in her eyes with a toothpick at the end. I can't really notice any such flaws on model kits until I get up real close to take photos. Then I notice the specks of dust, imperfections on paint lines, etc. Just wash the crap out of the resin with degreasing detergent. Soak the parts for days. Scrub with a toothbrush and pumice powder if there aren't delicate parts that can break (like strands of hair and such). Lately I've begun giving the parts a temporary soak in lacquer thinner too as I am sick of paint lifting off. It happened a few times with this Nadia figure I've finished. Like everything seems to be going well and then I lift up masking and it yanks the primer and paint off, down to the bare resin. Ever seen what happens to Thunder at the end of Big Trouble in Little China? I feel like that when it happens.
-
Thanks for the tip, but do you think a wash would be effective over a flat coat like this?
-
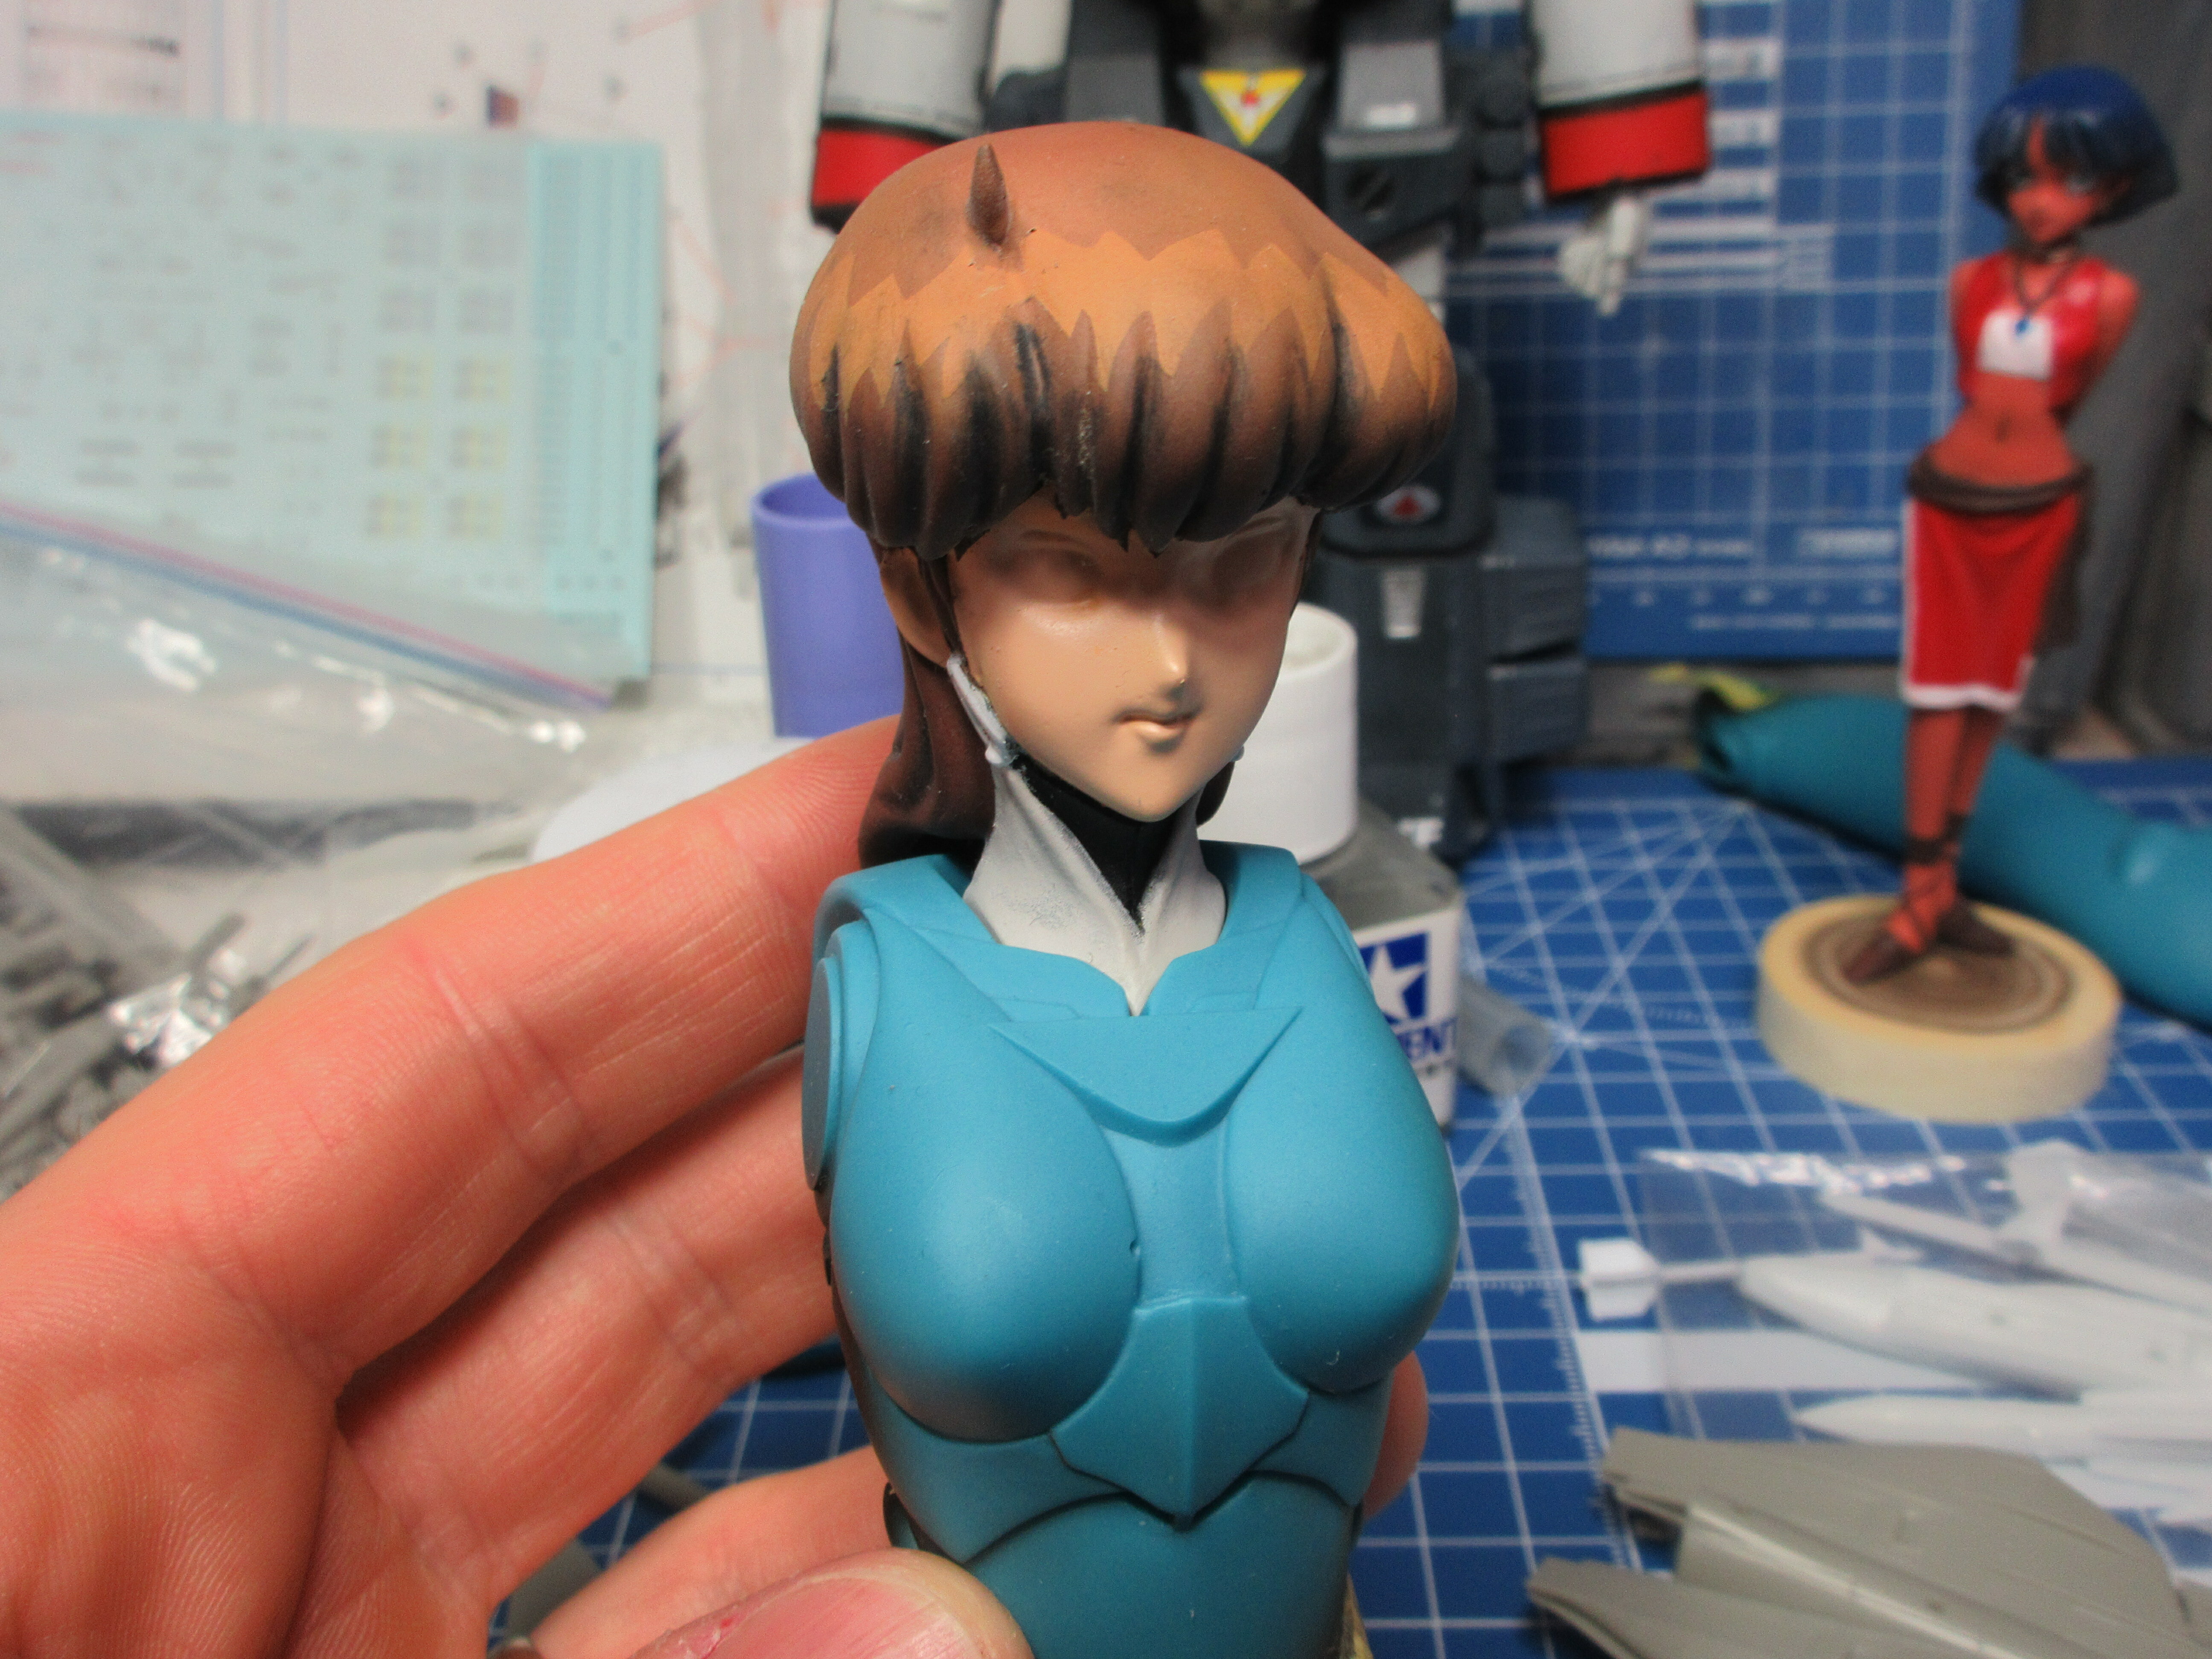
I have finally finished that mini Nadia resin figure. It's real tiny, so the closer I get to it, the more the flaws become obvious. I'm also working on a sofubi of Priss from Bubblegum Crisis.

-
I saw a video on YouTube in which a modeler used Lego ball joints for his Imai/Bandai Monster kit. Somebody sent me a link to that video and the result looks great. (I think it could have been the builder himself, but I can't remember.) I cannot recall the name of the channel, but maybe you can find the video through a search. I'm also finding that Japanese model builders can provide a lot of great information too on modifying these older kits to really make them look much better, less stiff and more stylized. Your work on that Gerwalk is fantastic
-
My Rei and Asuka sofubi figures are coming along. I used dark blue pastel chalk to do the recessed areas of Rei's hair and an acrylic goache mix of burnt umber and red to do Asuka's hair. Then I did a flat clear coat of V-Color to seal them in. I think I'm ready for assembly now.
-

The 'Hey look at this really cool model build I saw' post
SteveTheFish replied to Shawn's topic in Model kits
This J-YT modeler modified the crap out of this old IMAI/Bandai Regult kit with ball joints. -
I'd suggest replacing the hands with Kotobukiya's MSG Normal Hands 2020. Use Wave's ball joints to modify the legs to have them splay better. Here is a project I am nearly finished with. This is my build of the old 1:100 Imai Armored Valkyrie I've shared some pics of on here. https://odysee.com/@stevethefishdotnet:2/Imai-Macross-1100-Armored-VF-1J-Valkyrie-plamo-build-1-マクロス アーマードバルキリー:3
-
I'm watching Kousaka's video of Aoshima's booth. Looks Kaneda has gone all-out with the whole furry thing. Sheesh. Yet he won't make a VFG of Misa riding a VF-1 Valk.
-
Which kit is this again?
-
My Asuka and Rei sofubi figures are looking good! I was thinking I'd do some pastel chalk in their hair to darken the recesses, but I haven't decided yet.

-
Fixed! I just used a bit of Tamiya's pink brown wash and then used Tamiya gloss pink acrylic for her tongue. Here's a link to my photoset on Tumblr.

