Olitech Industries
-
Posts
202 -
Joined
-
Last visited
Content Type
Profiles
Forums
Events
Gallery
Everything posted by Olitech Industries
-

Olitech Industries Prometheus Build - Collaboration
Olitech Industries replied to Olitech Industries's topic in Fan Works
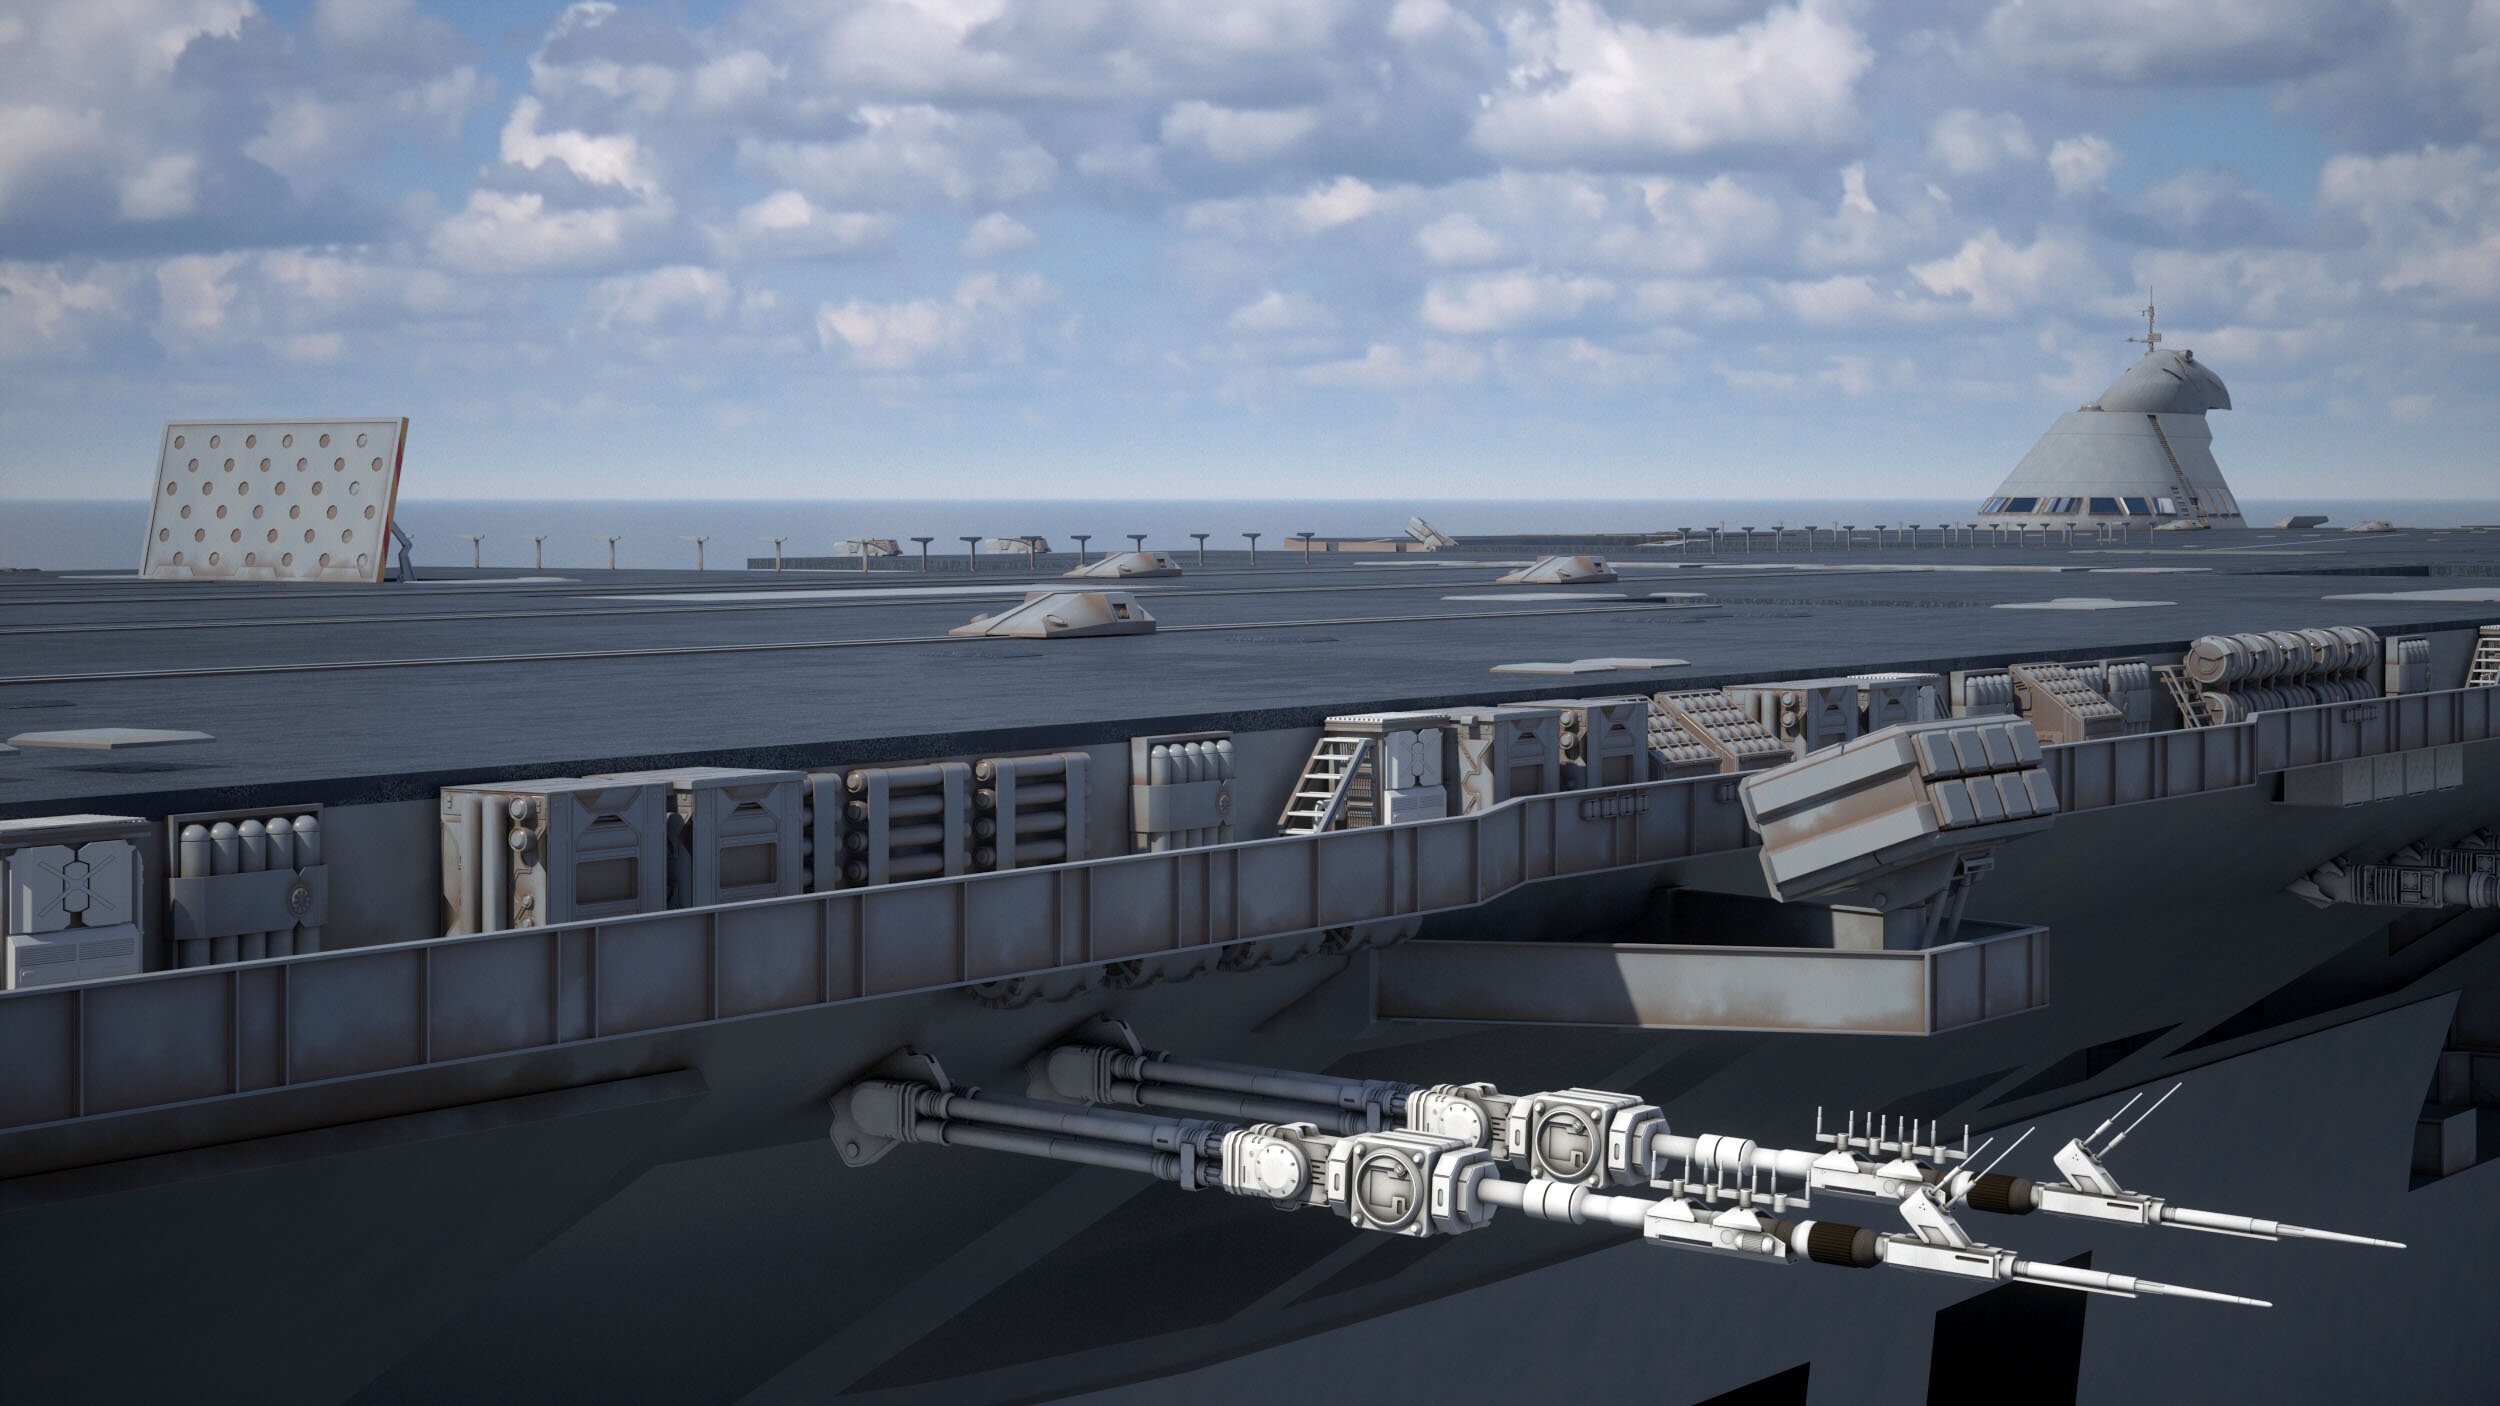
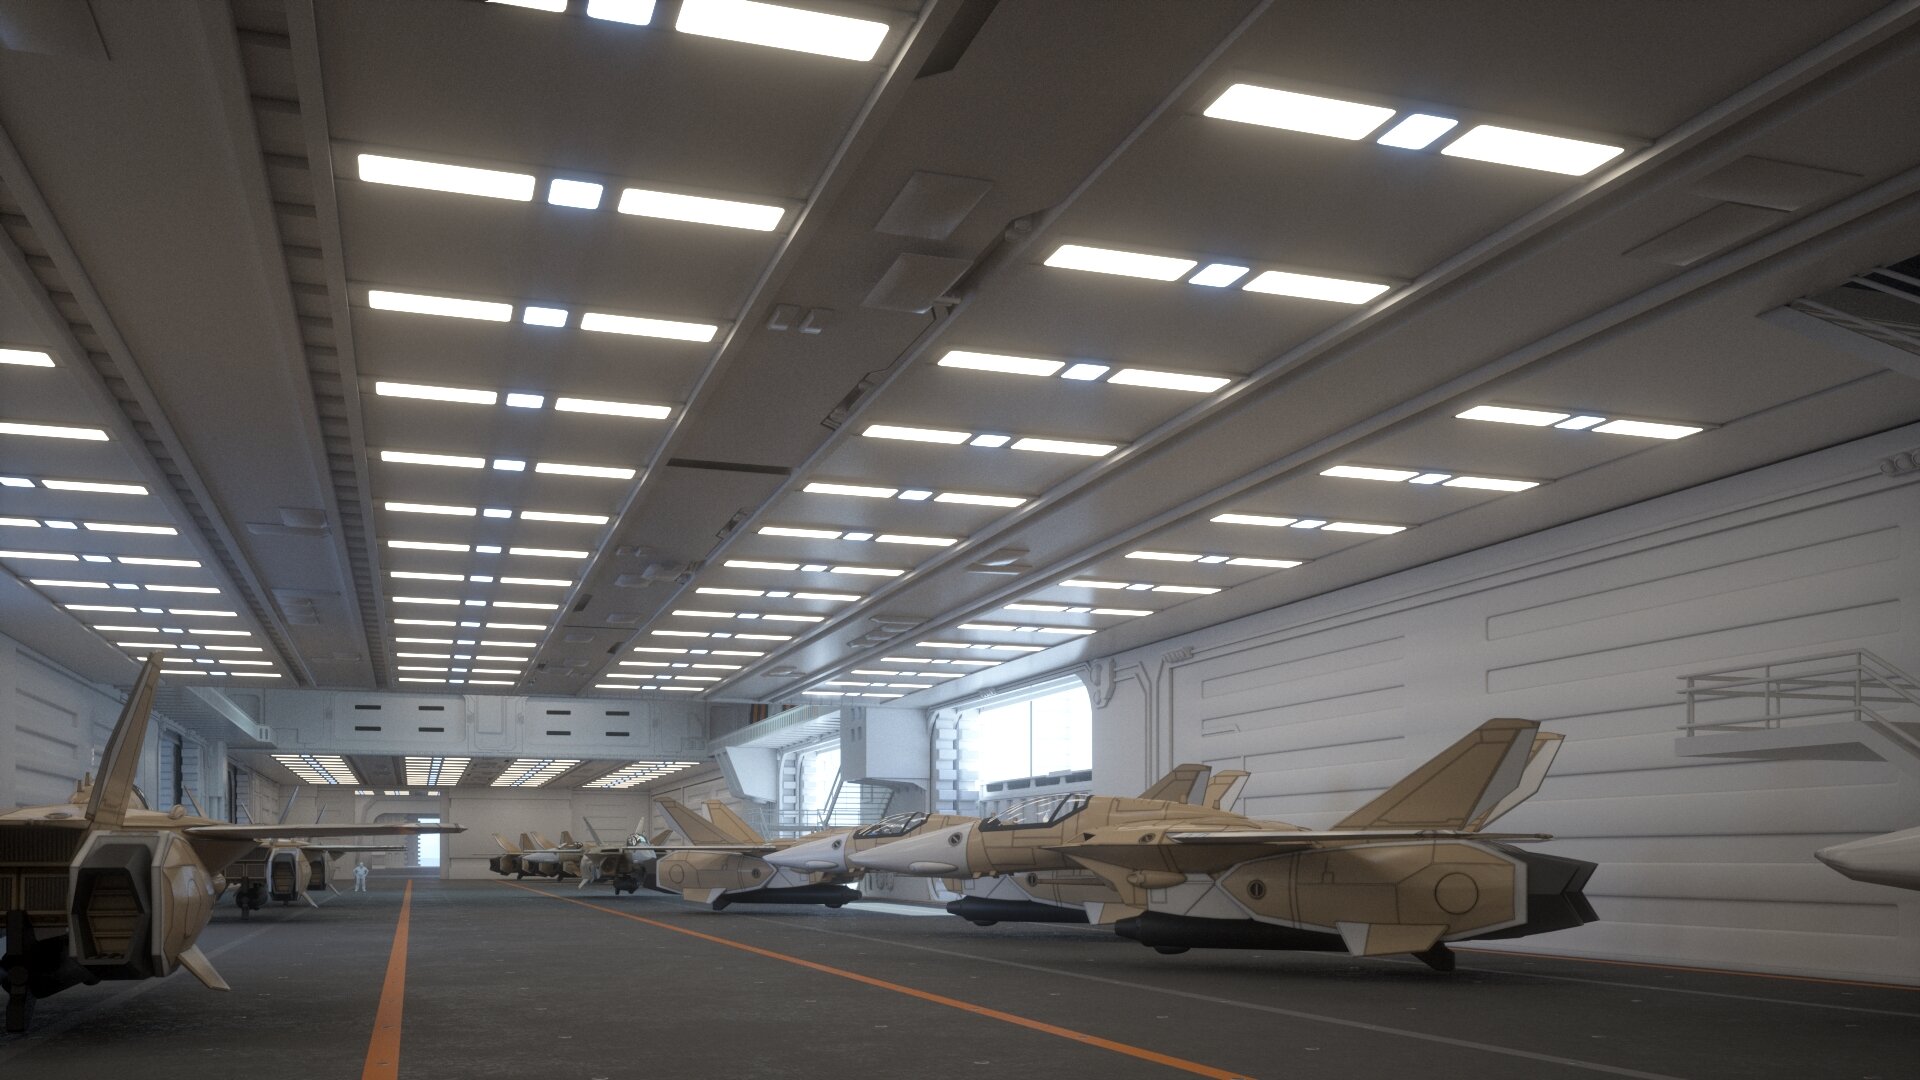
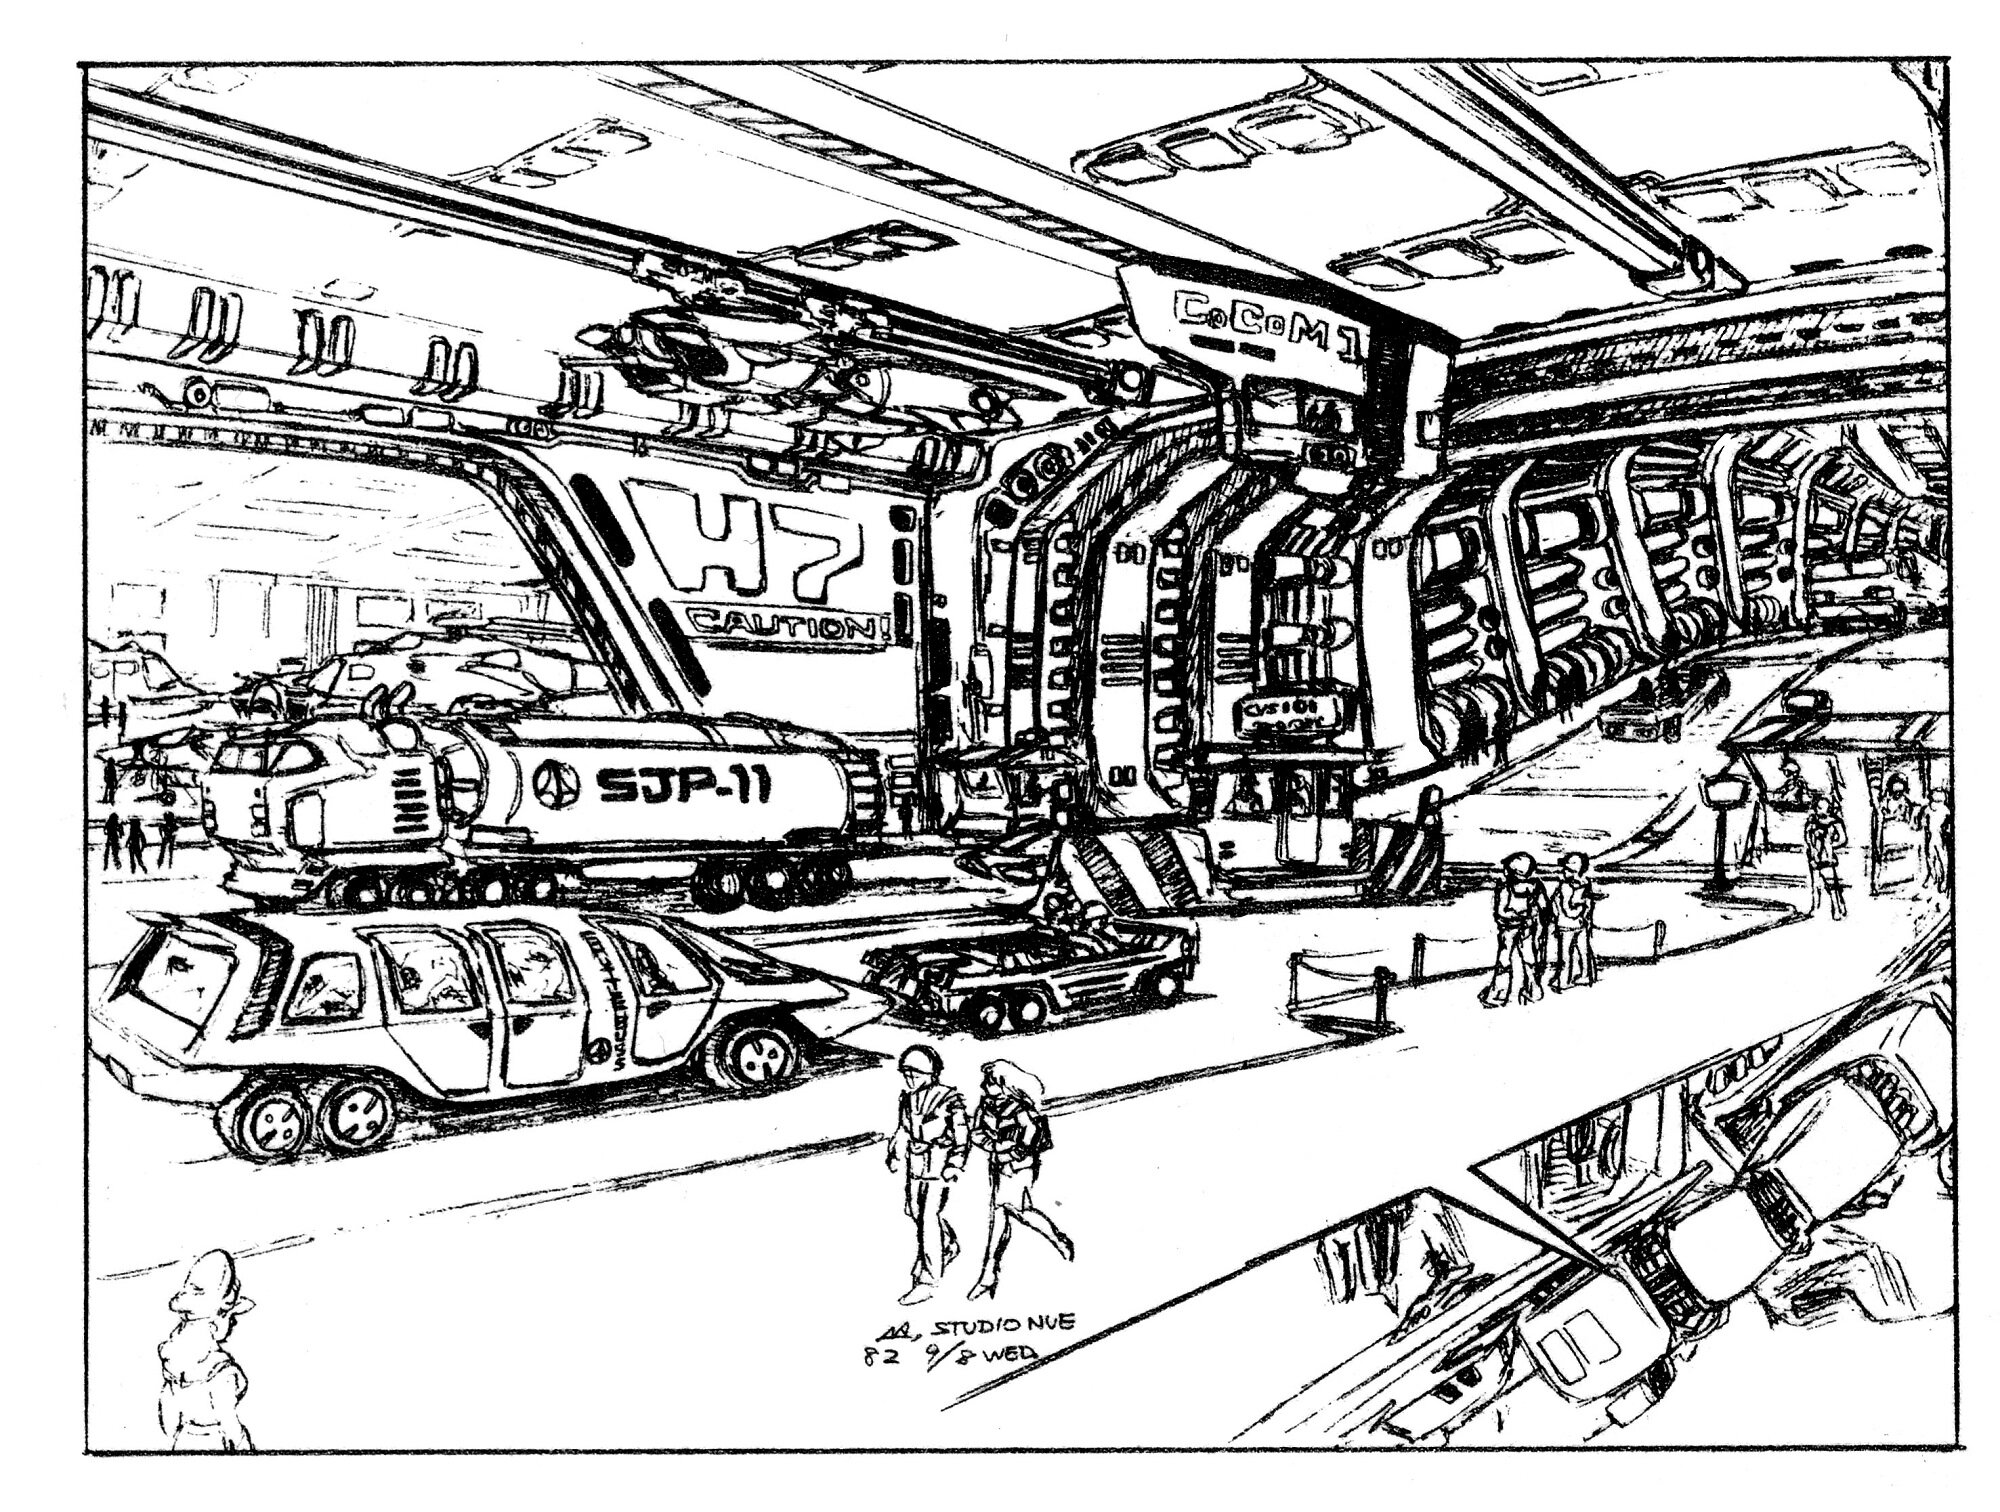
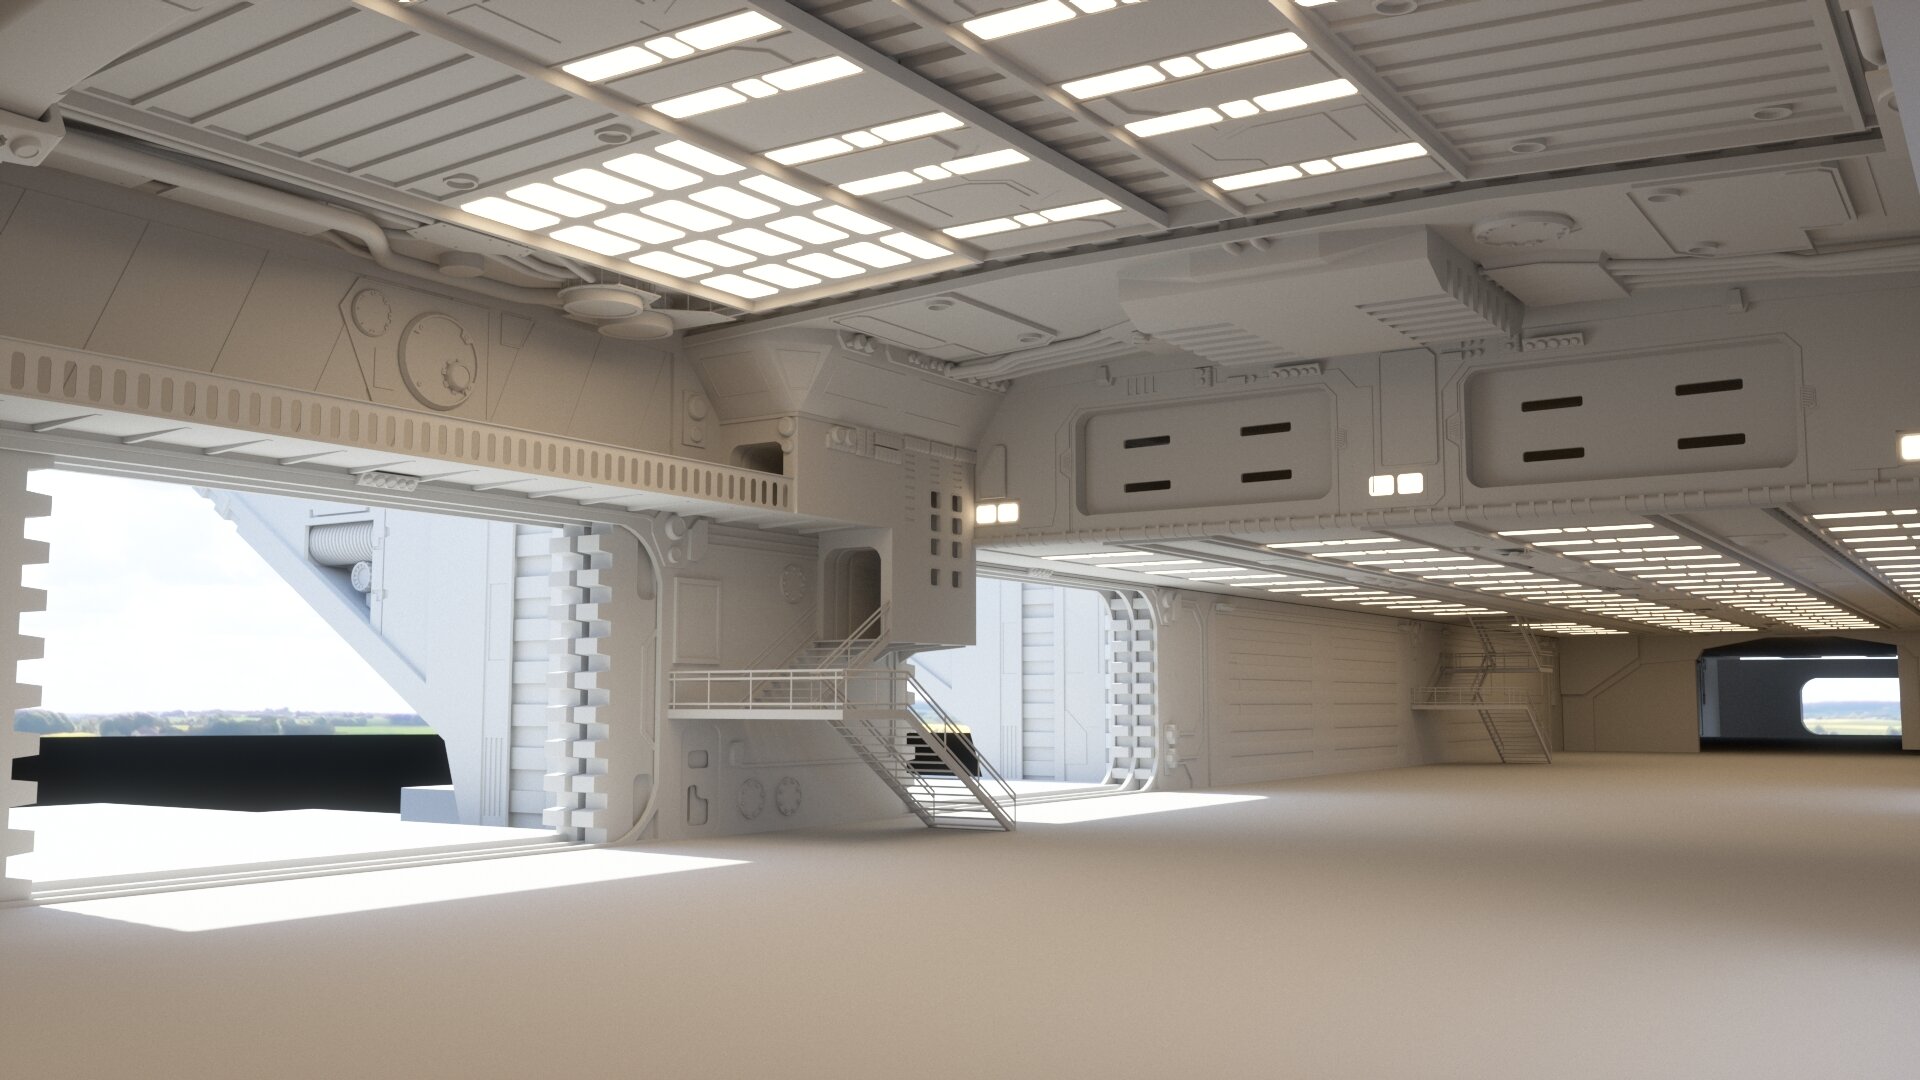
Some exterior modelling by mark jordan, lit and rendered by me. Still a lot in progress, but you can see where this is going. Hopefully! Basic textures for now until I distress them for scale. FYI, I know the catapults are backwards.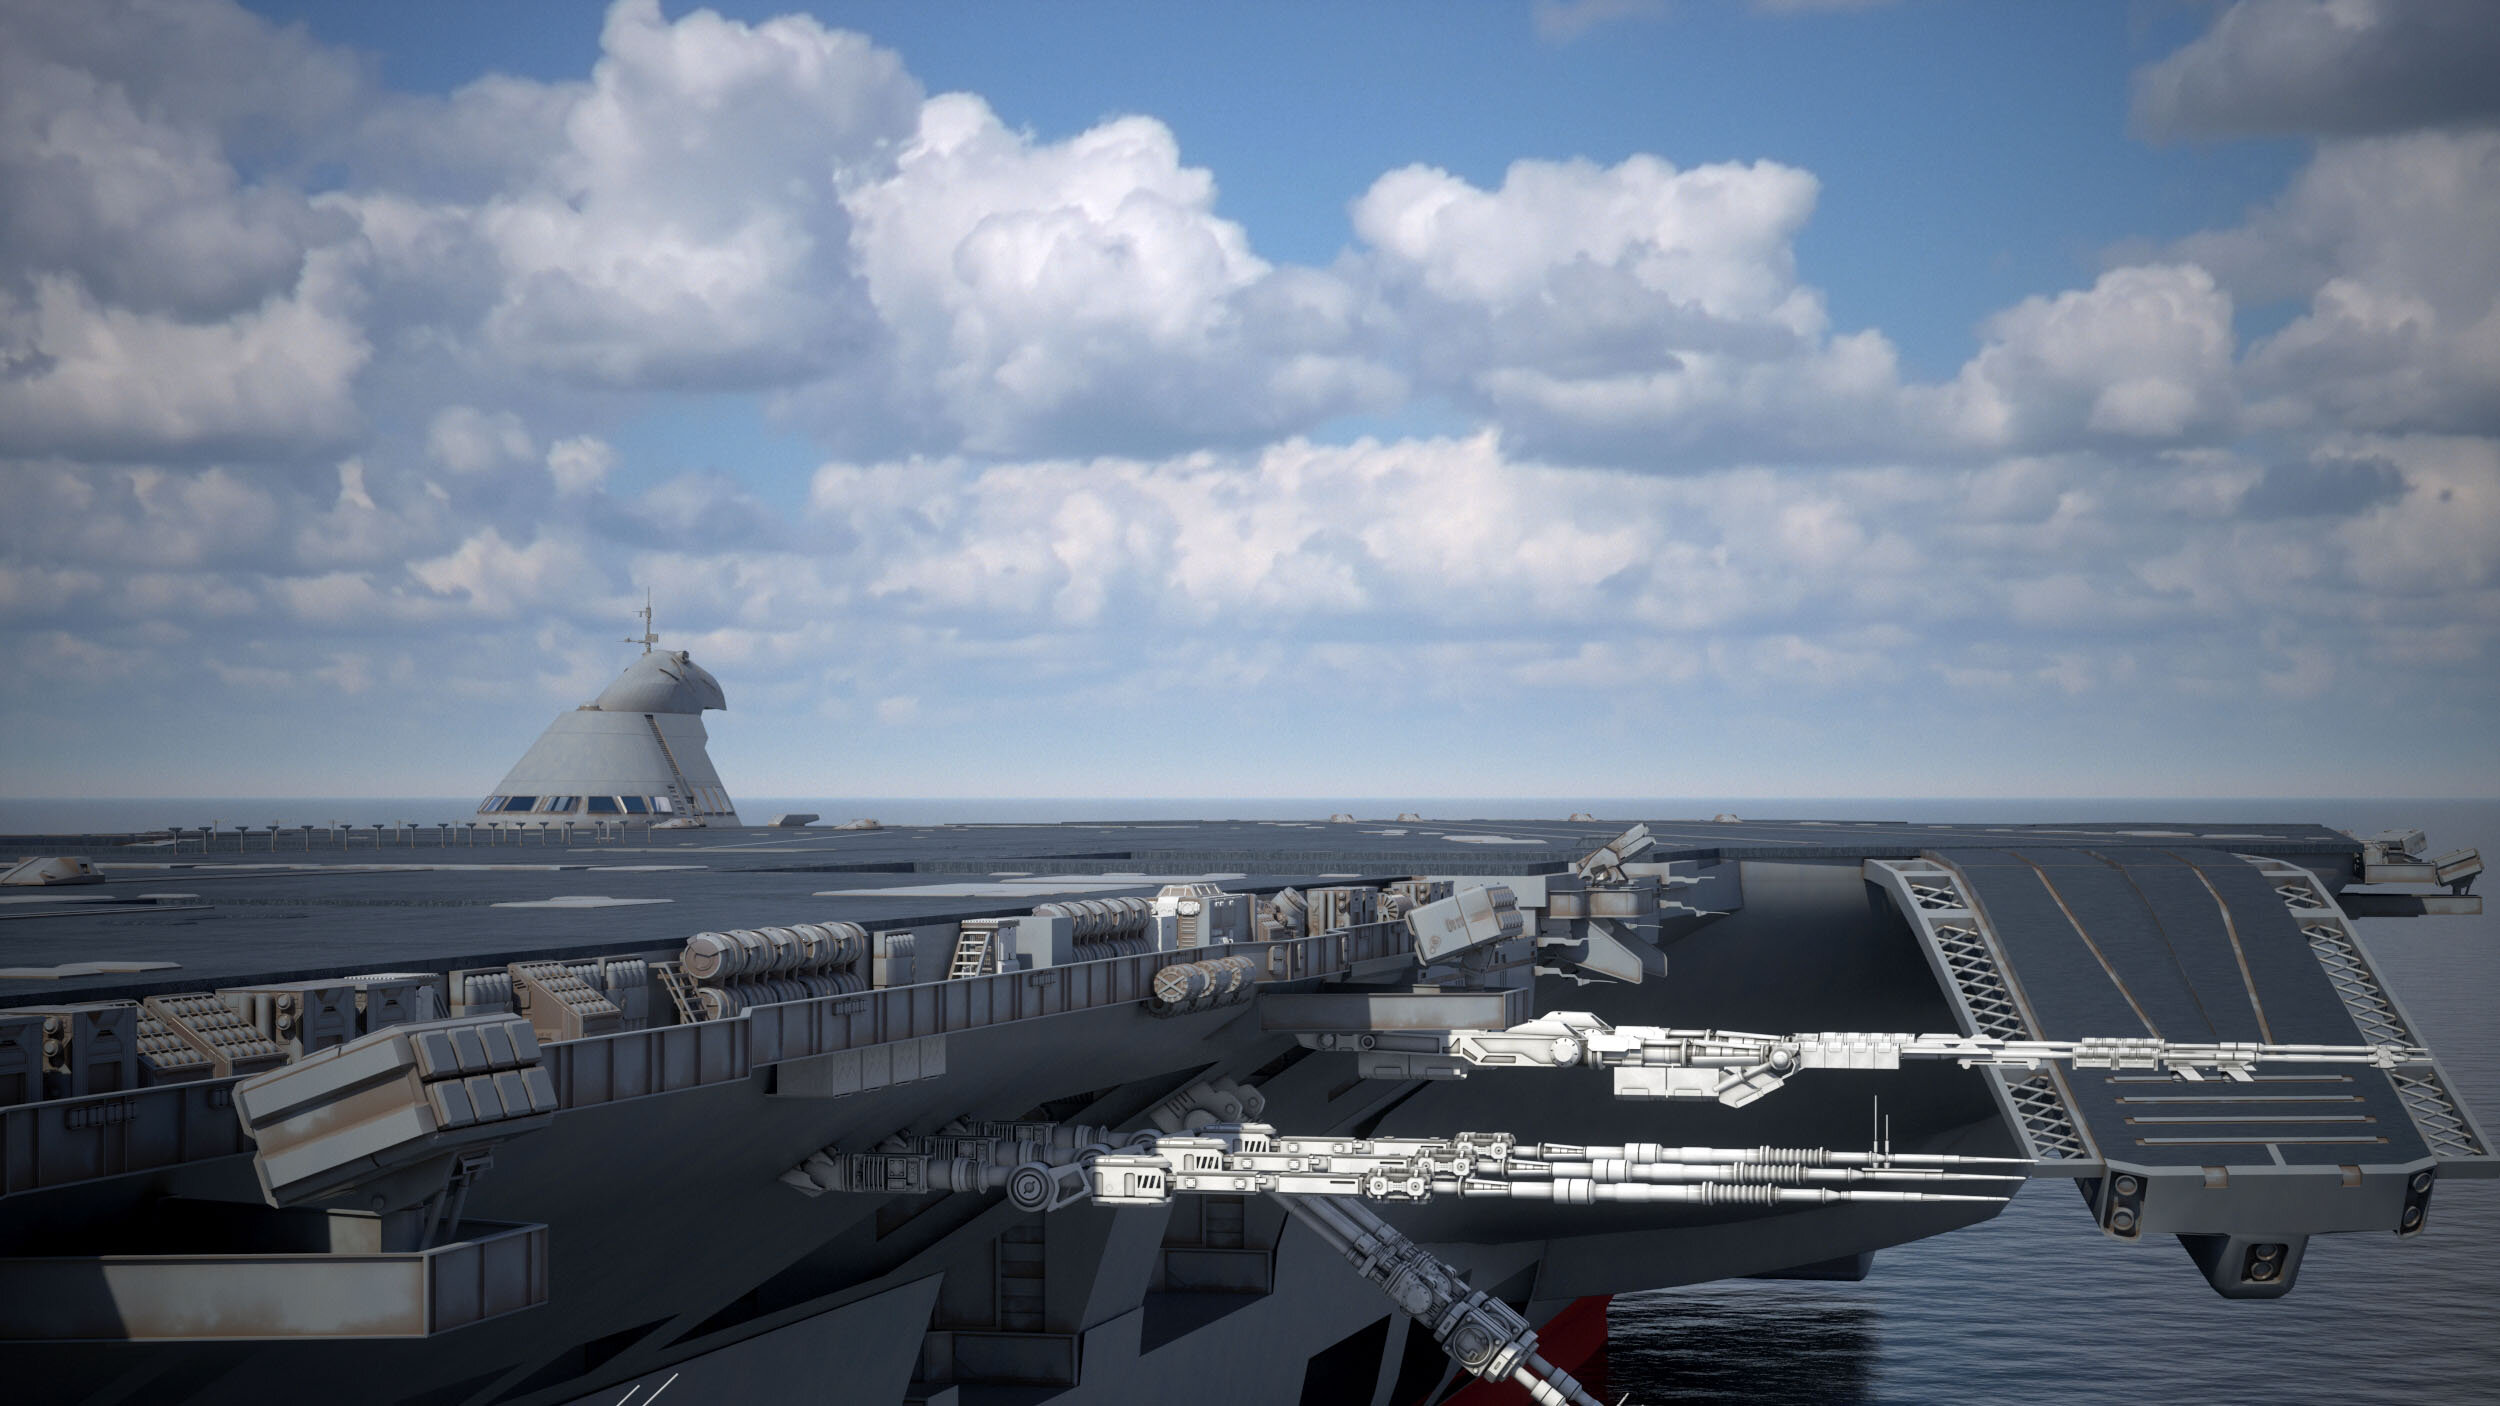

-
Olitech Industries Prometheus Build - Collaboration
Olitech Industries replied to Olitech Industries's topic in Fan Works
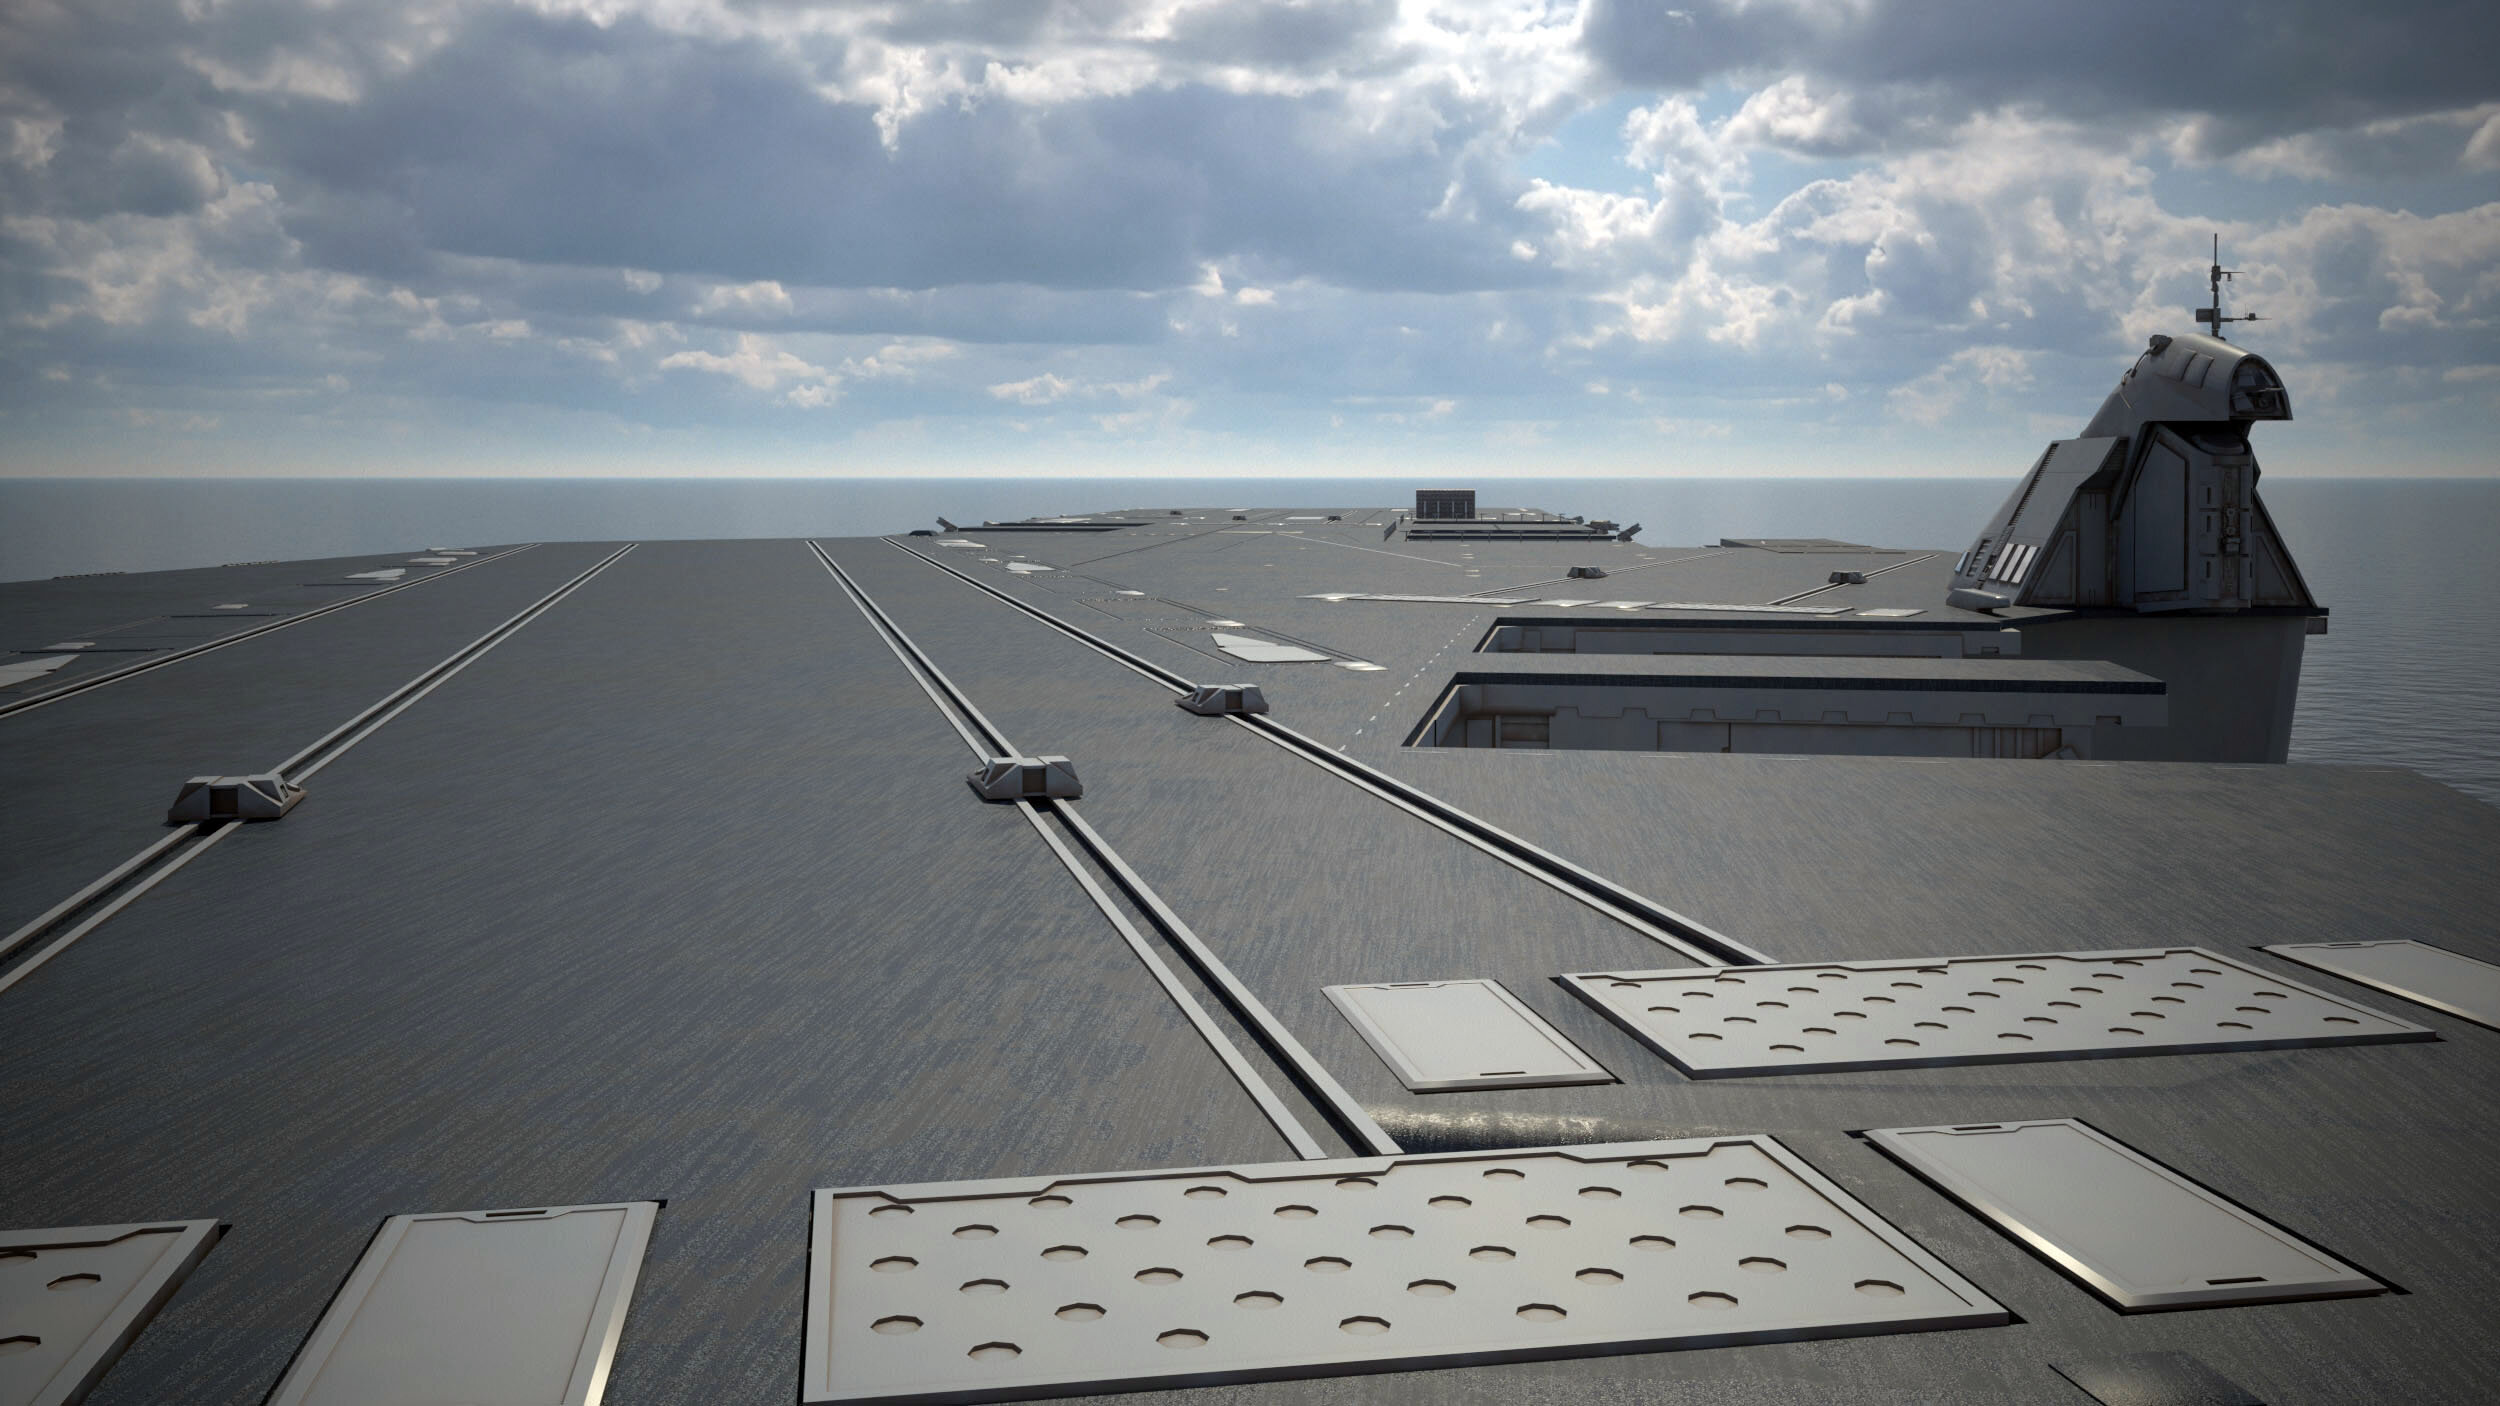
A little more progress today on the deck texture, and signage graphics. Starting to add the support vehicles - standard tow tractor for now, as I haven't built have any Macross ones yet. This one was a freebie from grabcad.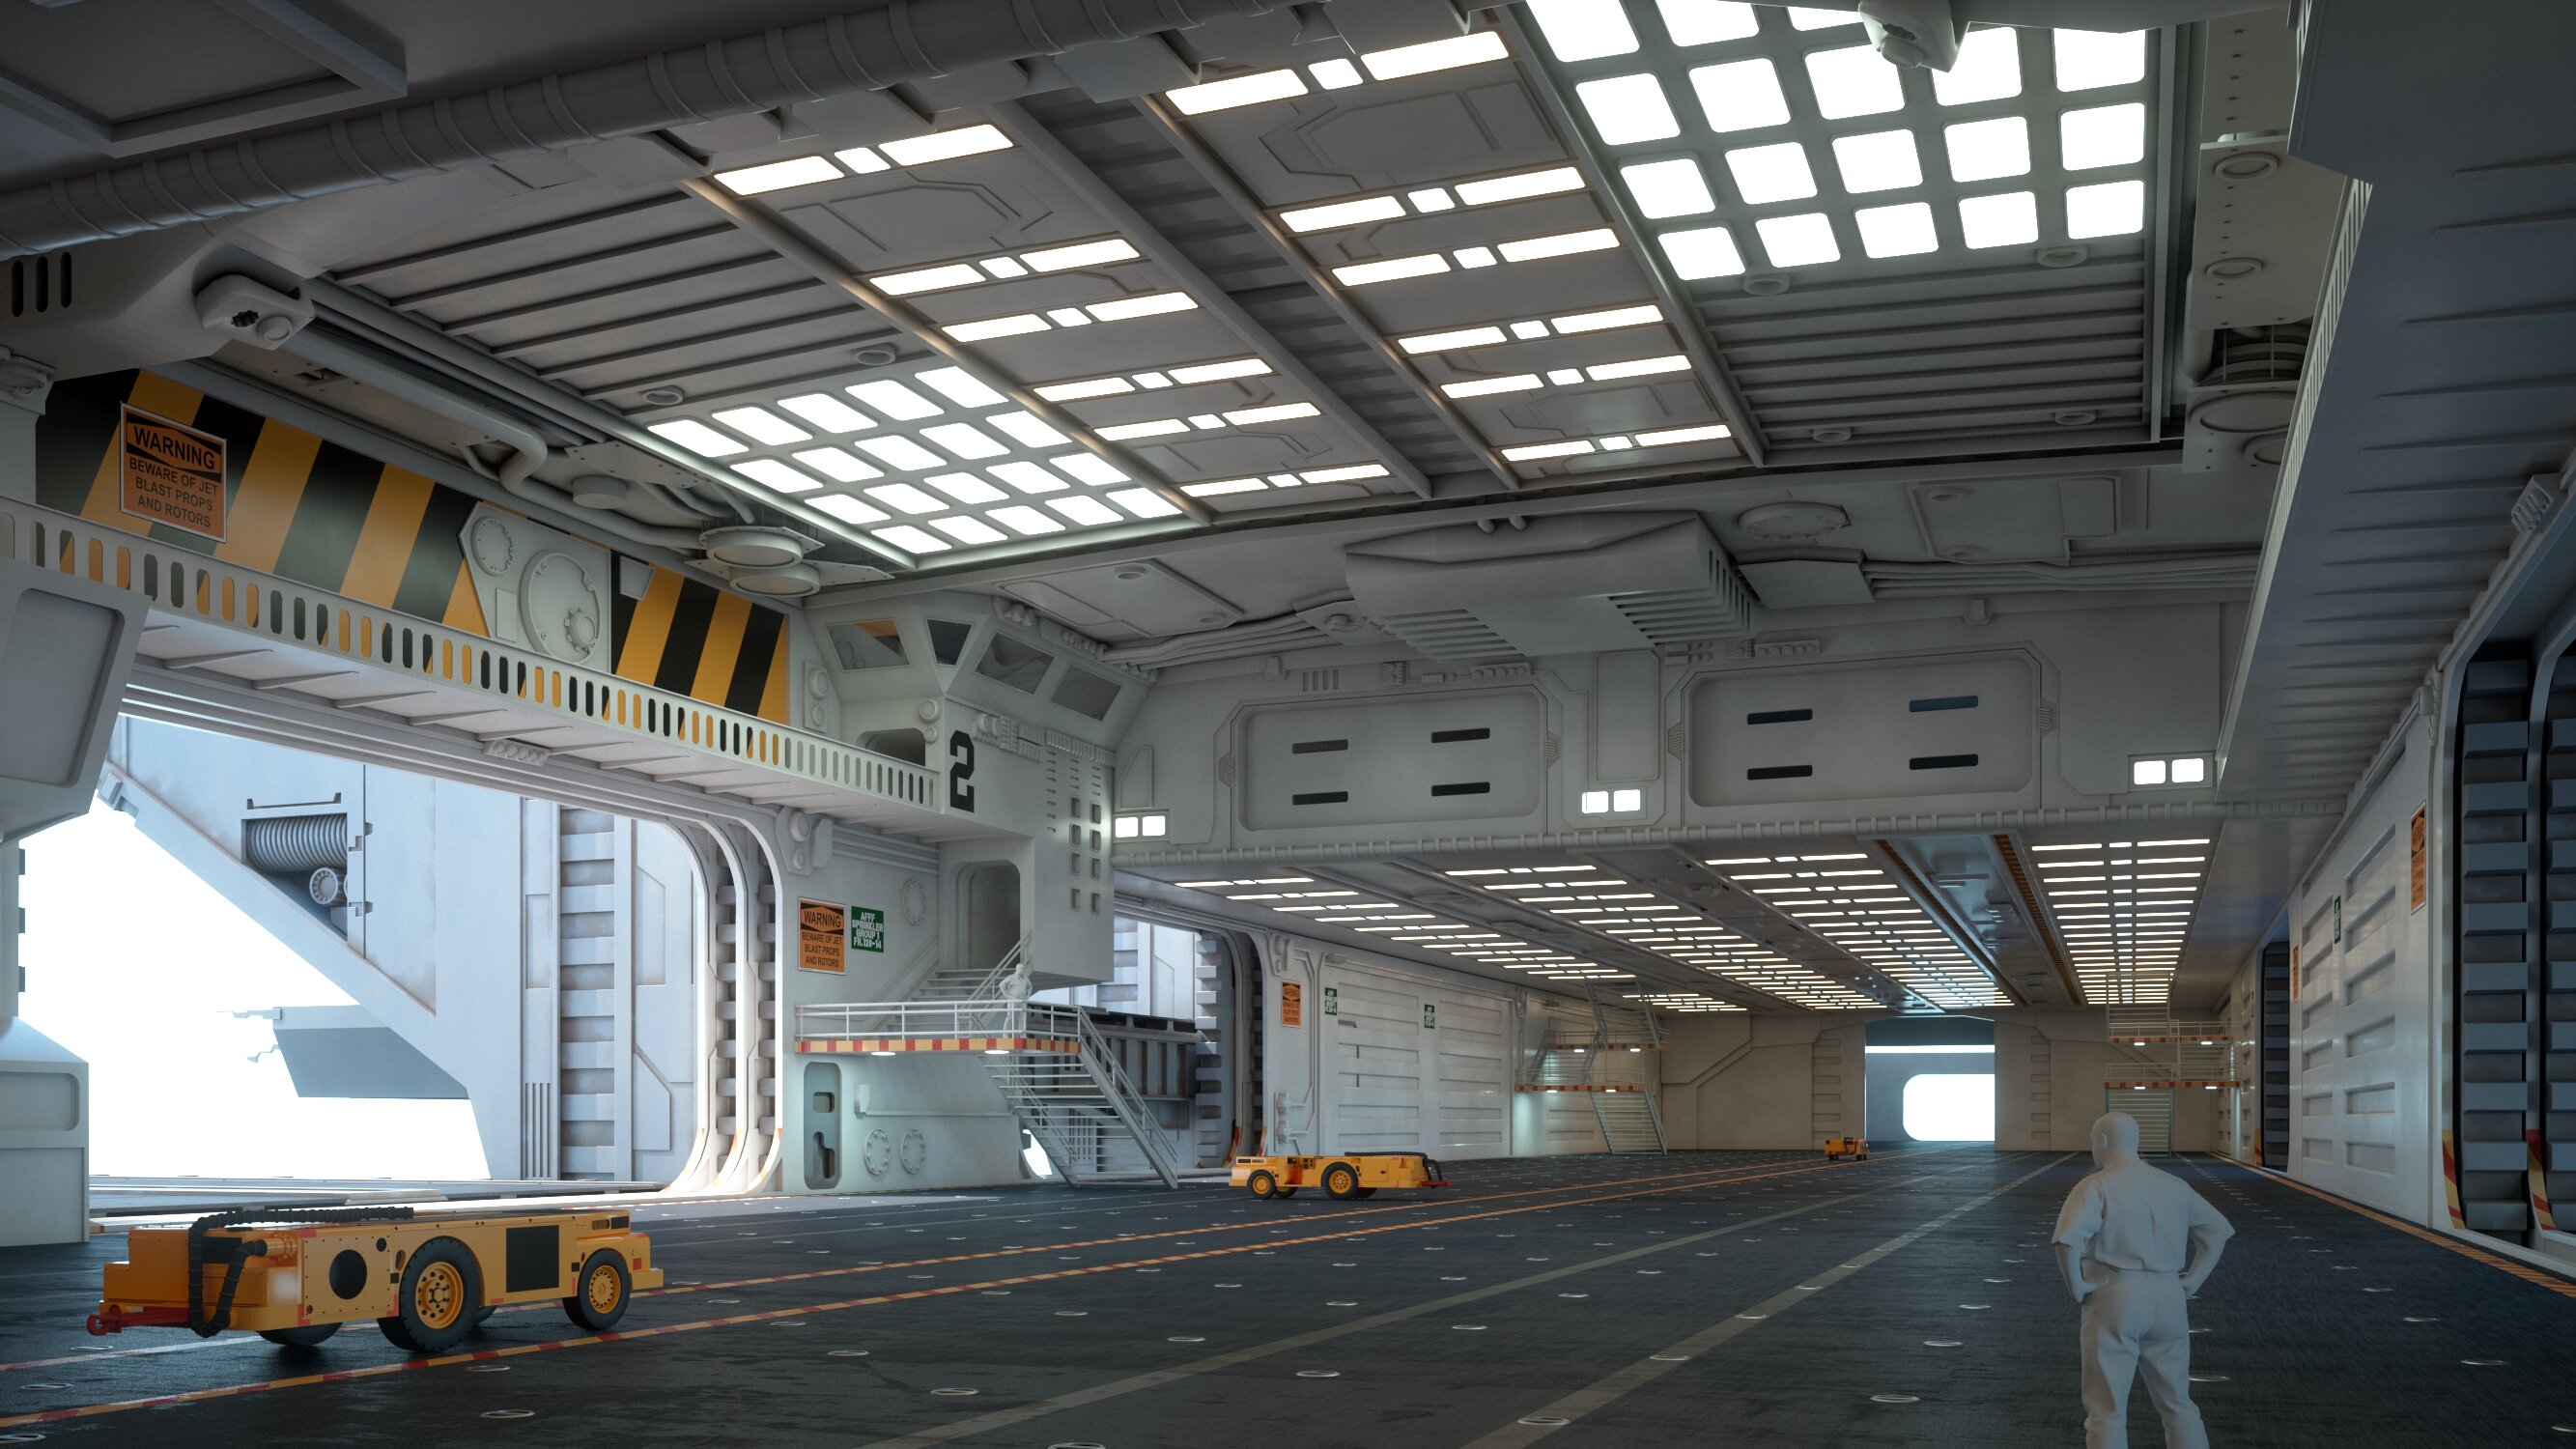
-
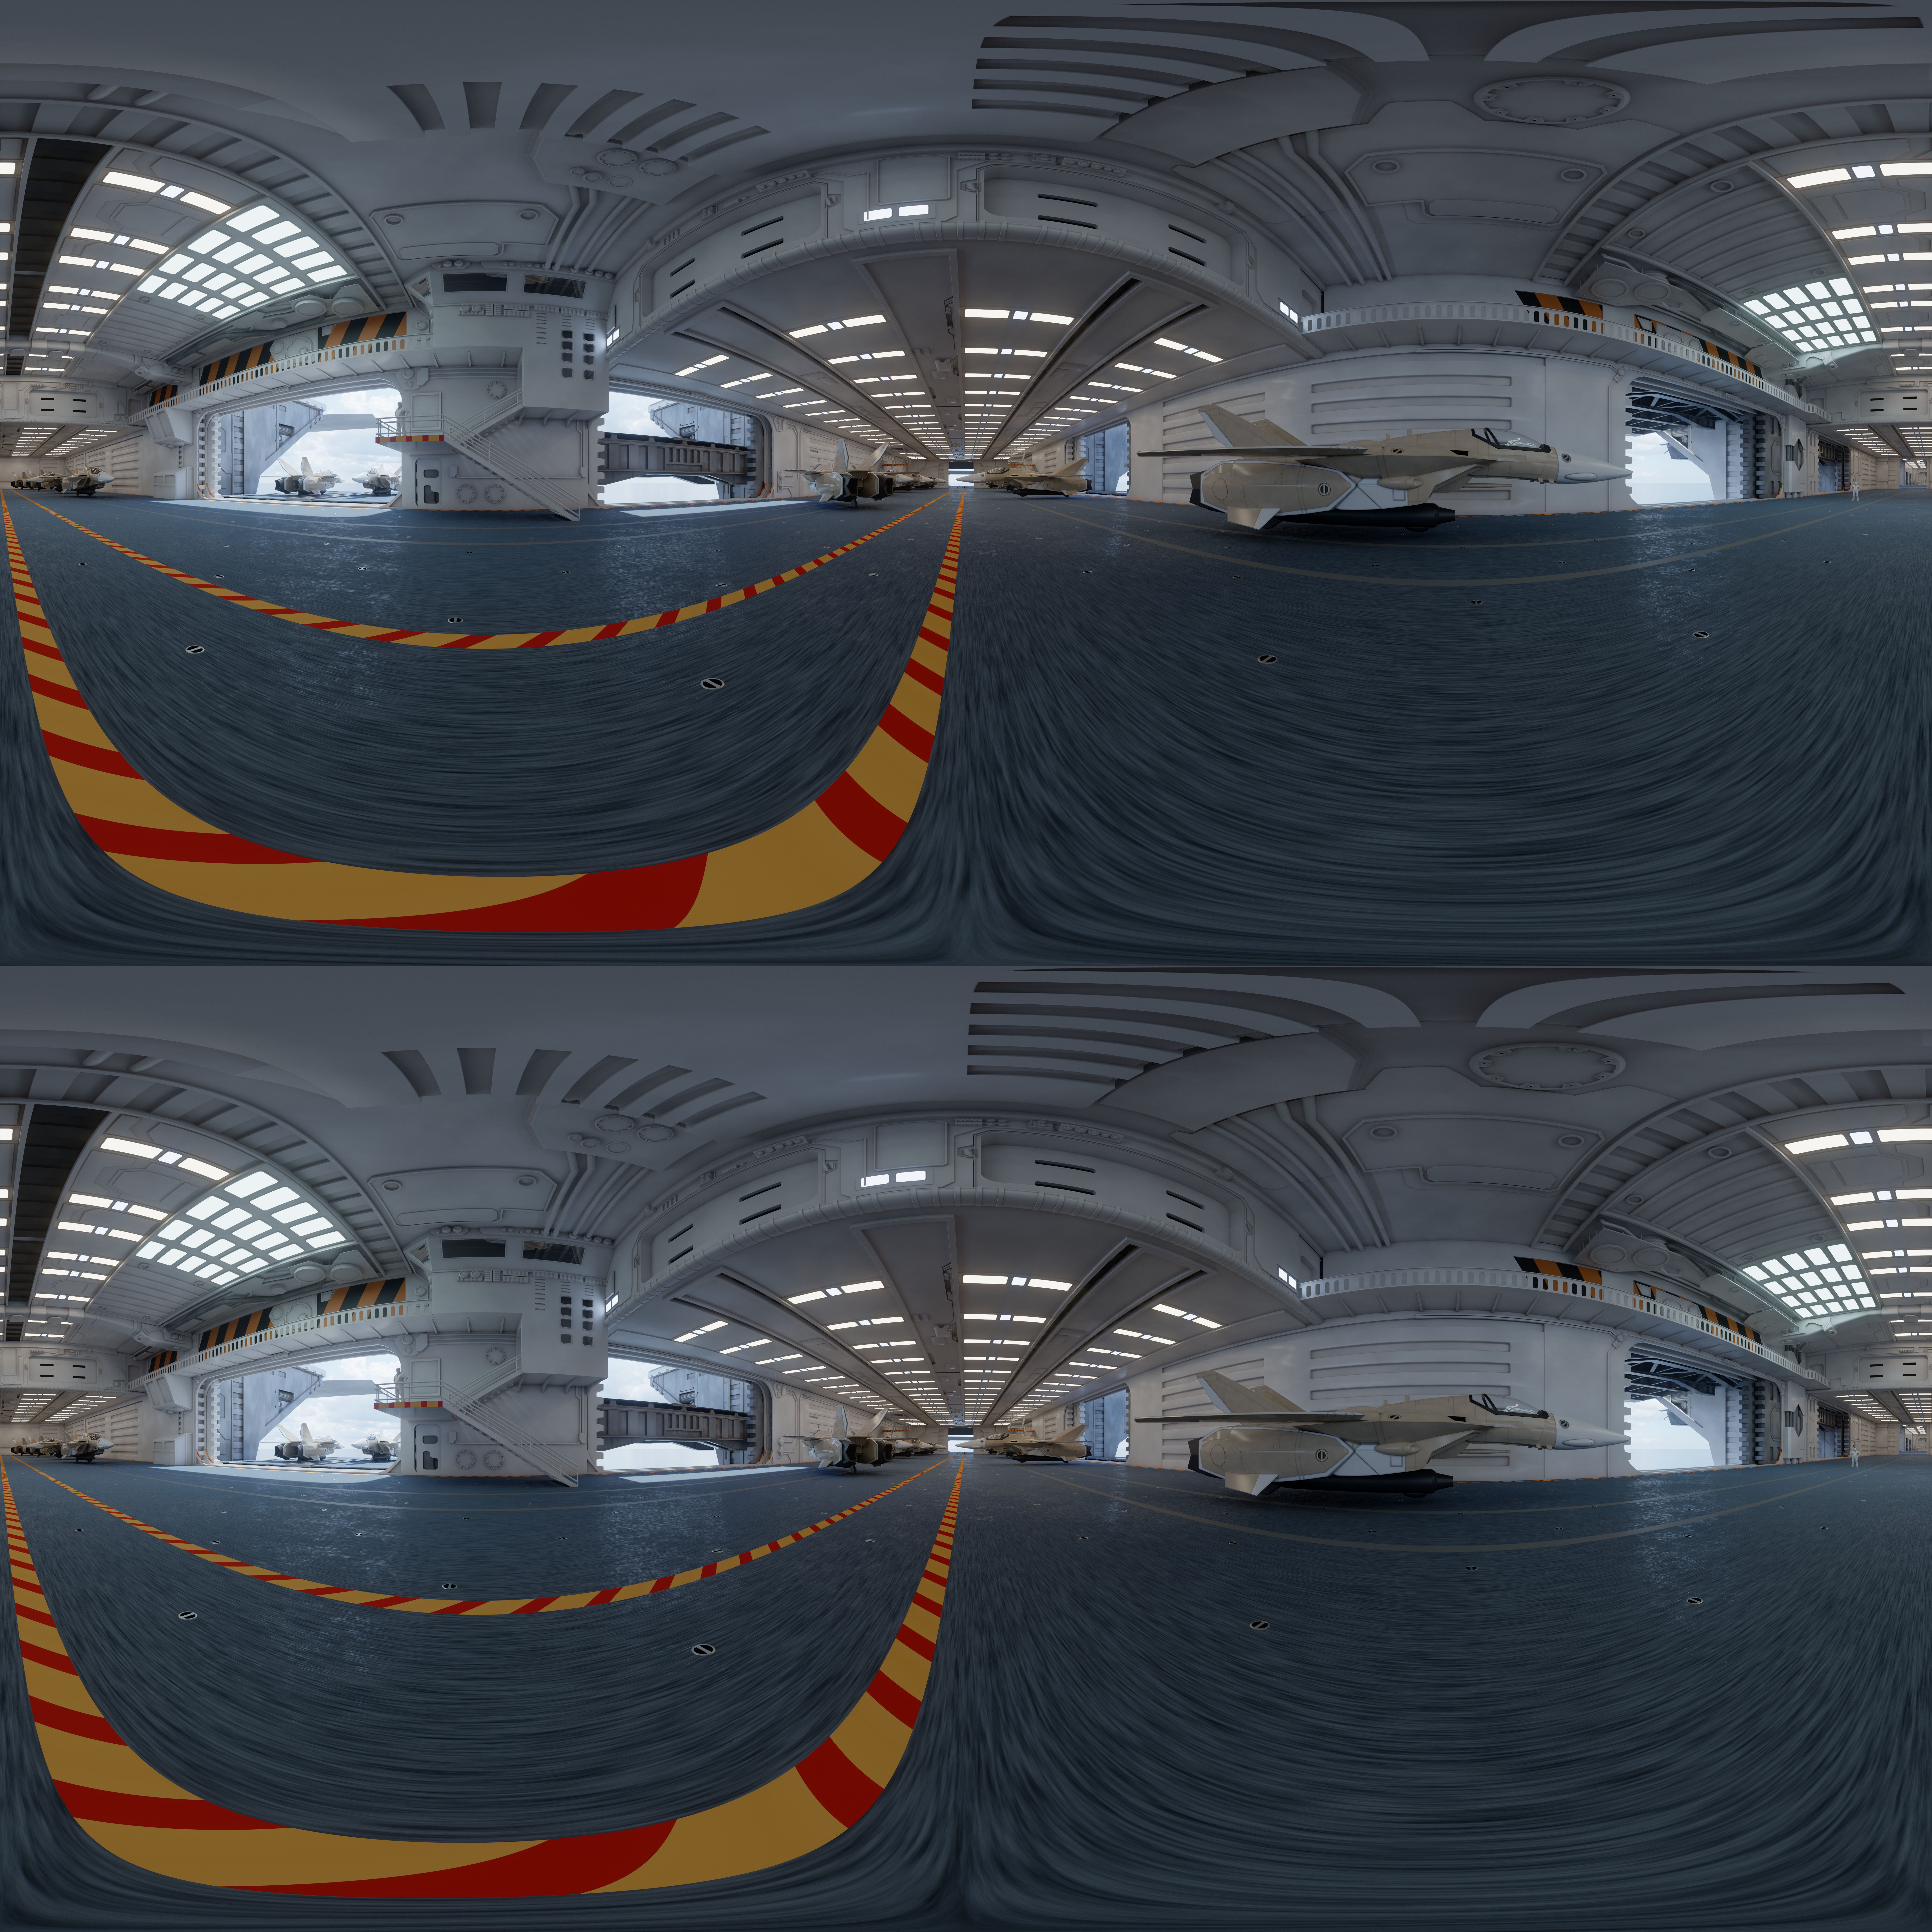
Another Hangar Bay, but without the cardboard planes. 😃
-
Olitech Industries Prometheus Build - Collaboration
Olitech Industries replied to Olitech Industries's topic in Fan Works
Nice!!! And thank you! Great to hear from you Bolt! All roads lead to Megaroad... -
Olitech Industries Prometheus Build - Collaboration
Olitech Industries replied to Olitech Industries's topic in Fan Works
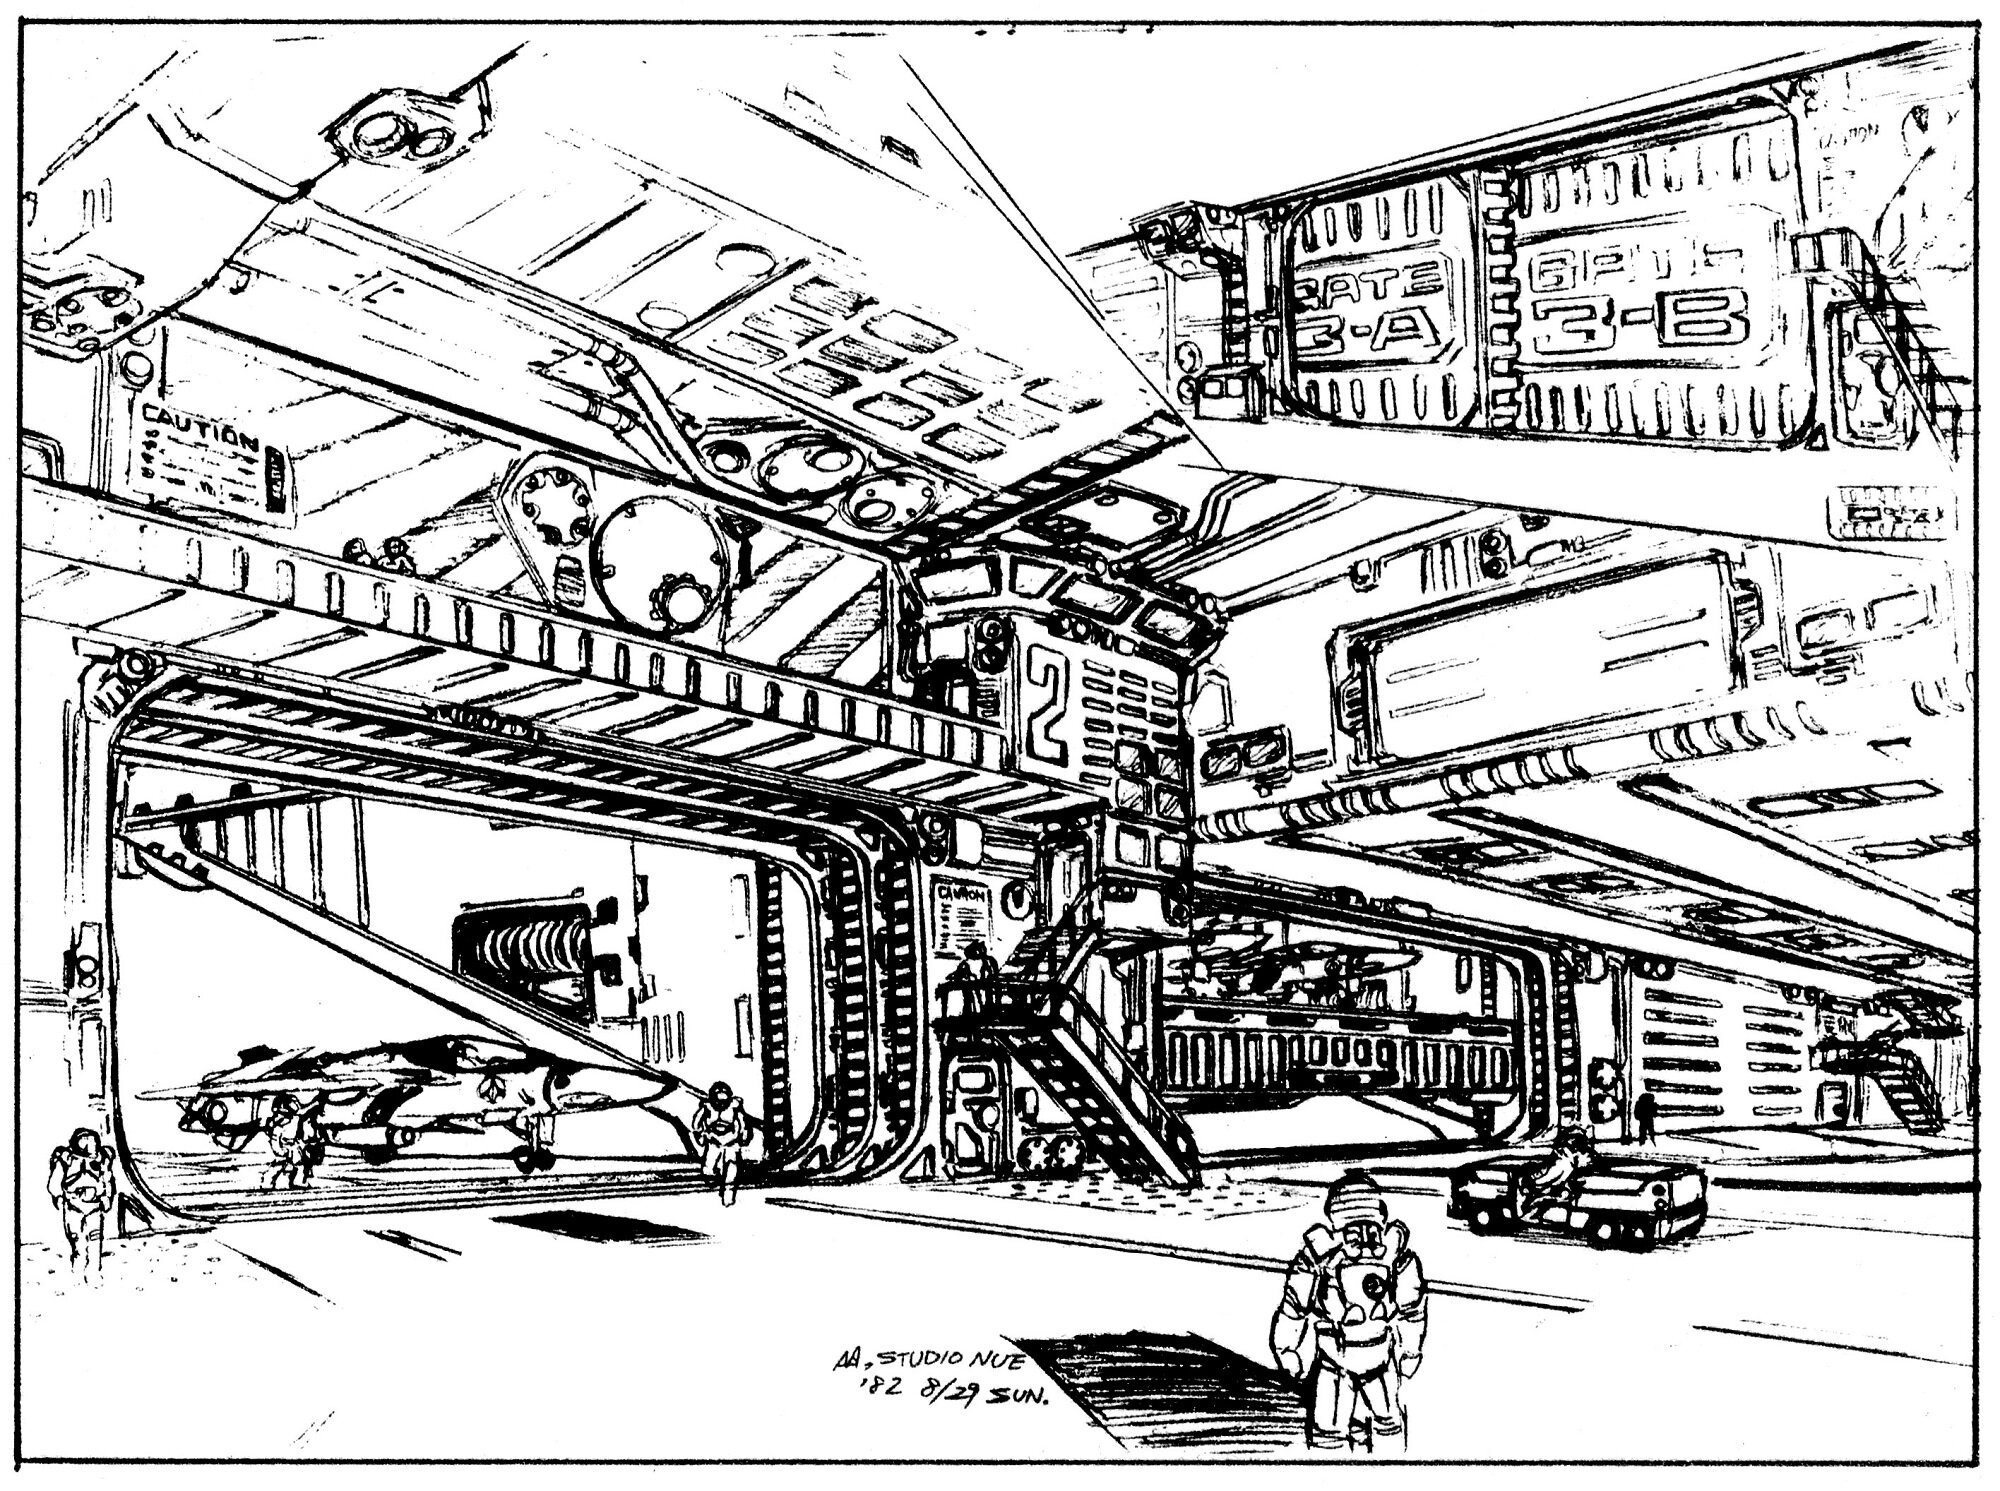
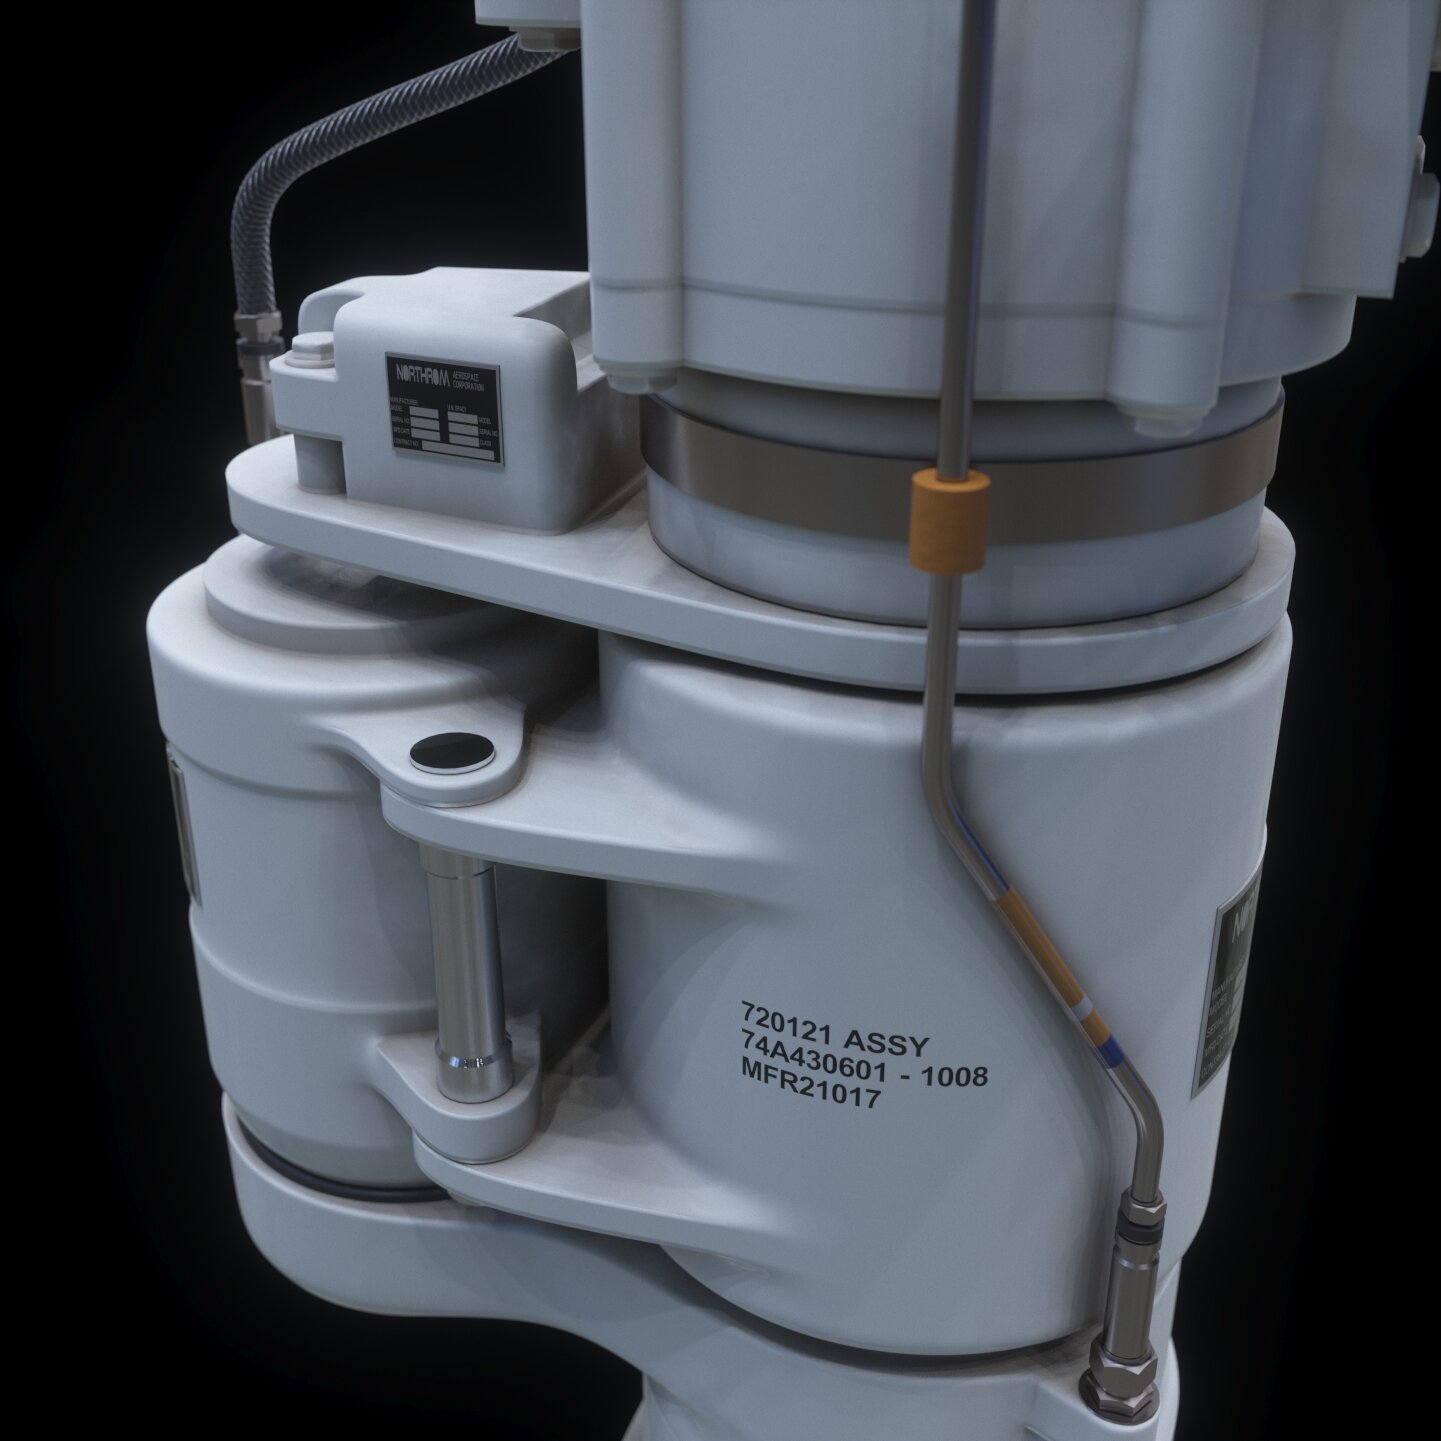
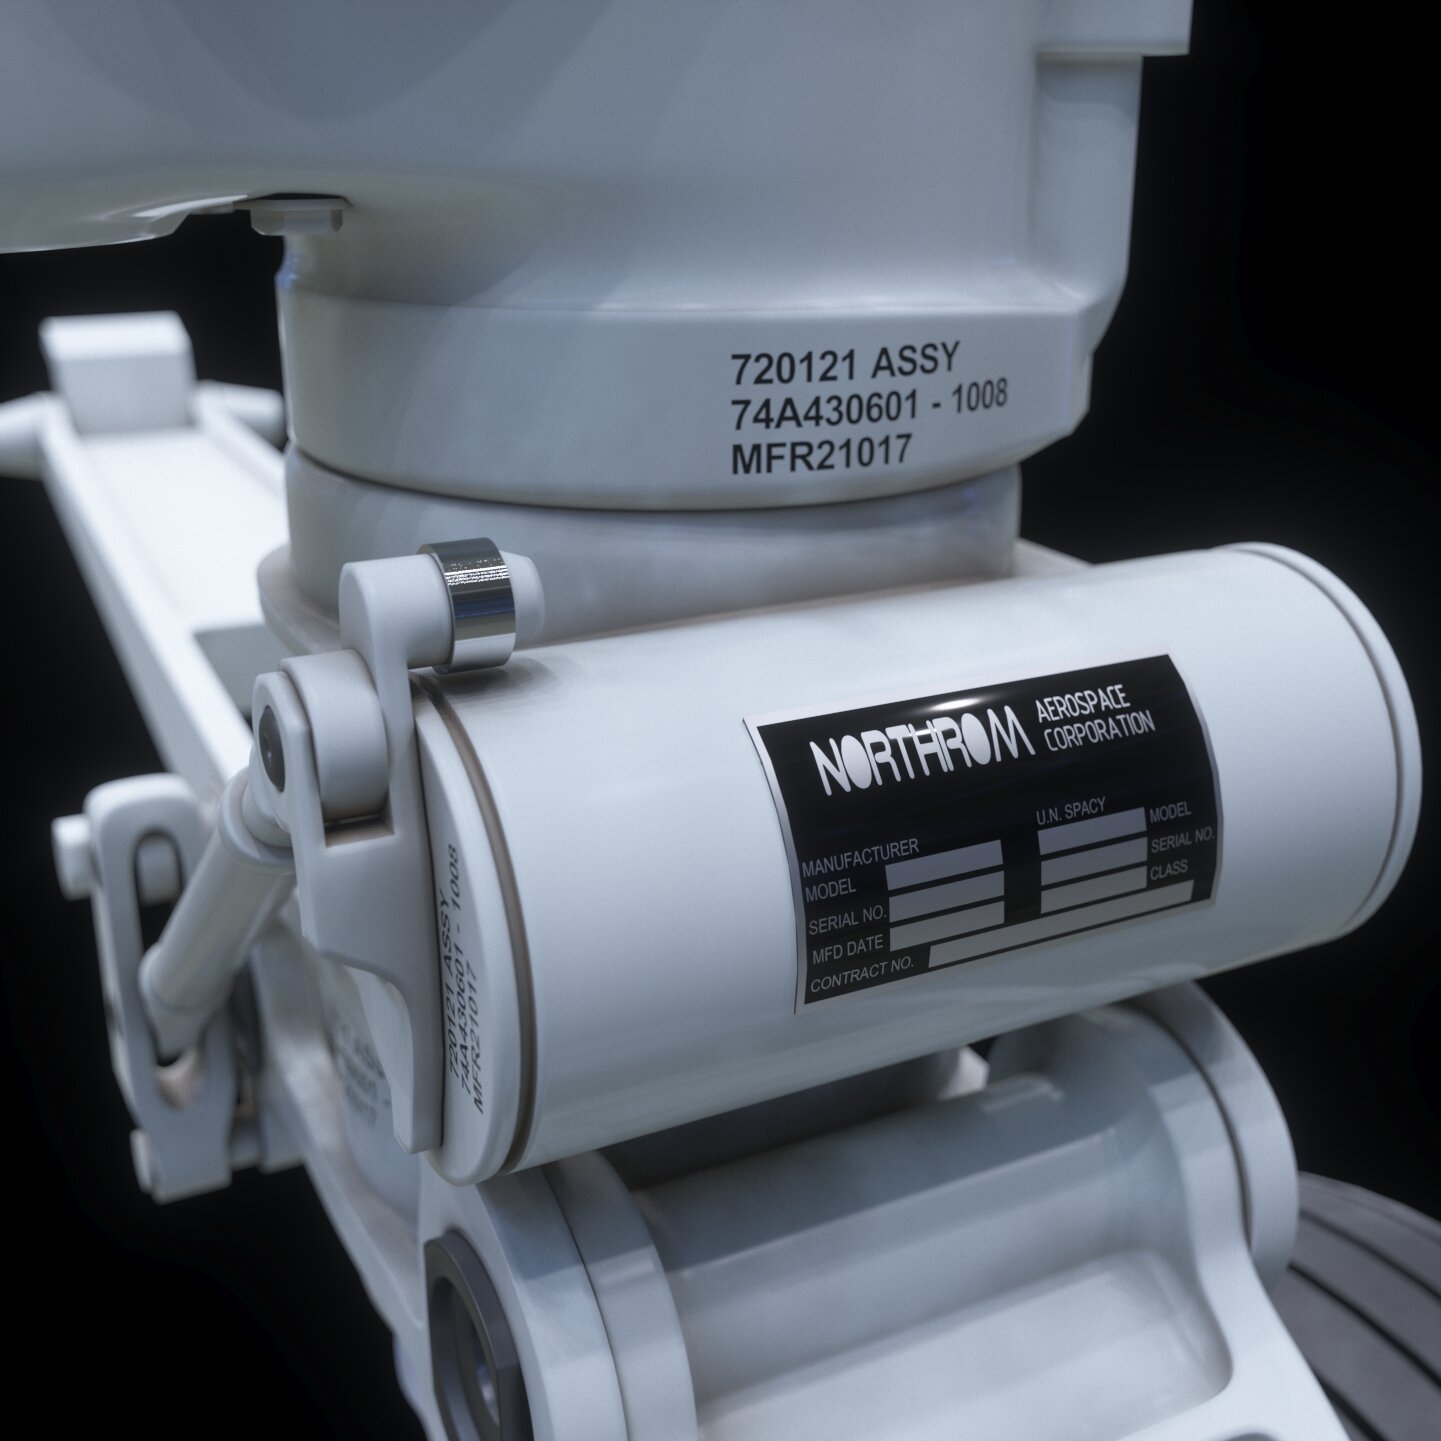
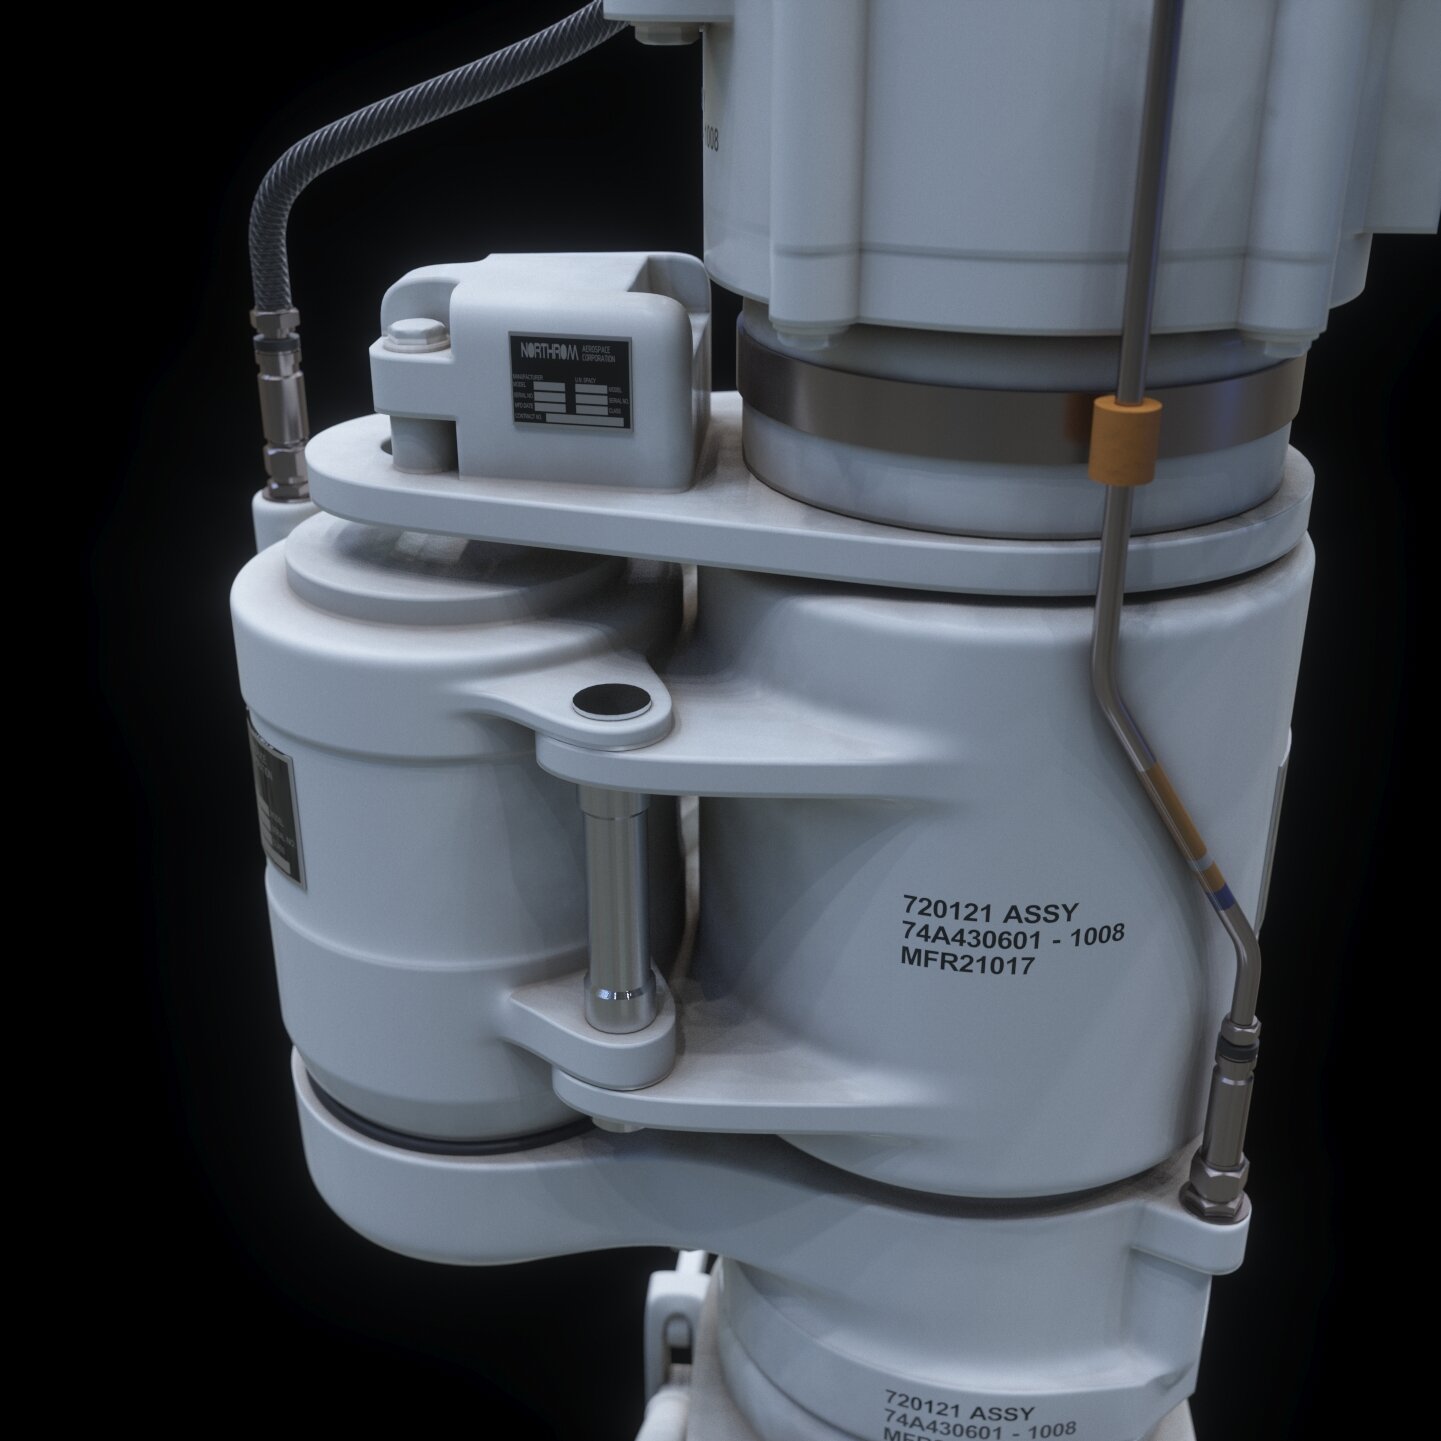
At the end of the second week, I managed to squeeze out some basic paint colours before leaving the office. Flat Haze Grey for the exterior, Gloss Marine White for the interior. I bumped up the Pad Eye size from about 6" to 10". Anti Skid paint on the Deck.. Hazard Stripes on the Deck, Platforms and Bay Doorways. . I lined up the 'lanes' on the deck to line up with the tracks in the ceiling. Bay lighting colour is a combination of 3000k (high pressure sodium), 5000k (in mercury vapour) and 6500k in metal halide. Or simply yellow, white teal and white blue. This project will mainly be Shader and Lighting work for me, as Mark is not as comfortable at complex PBR Shaders as I am...yet. He will be. Oh he will be.....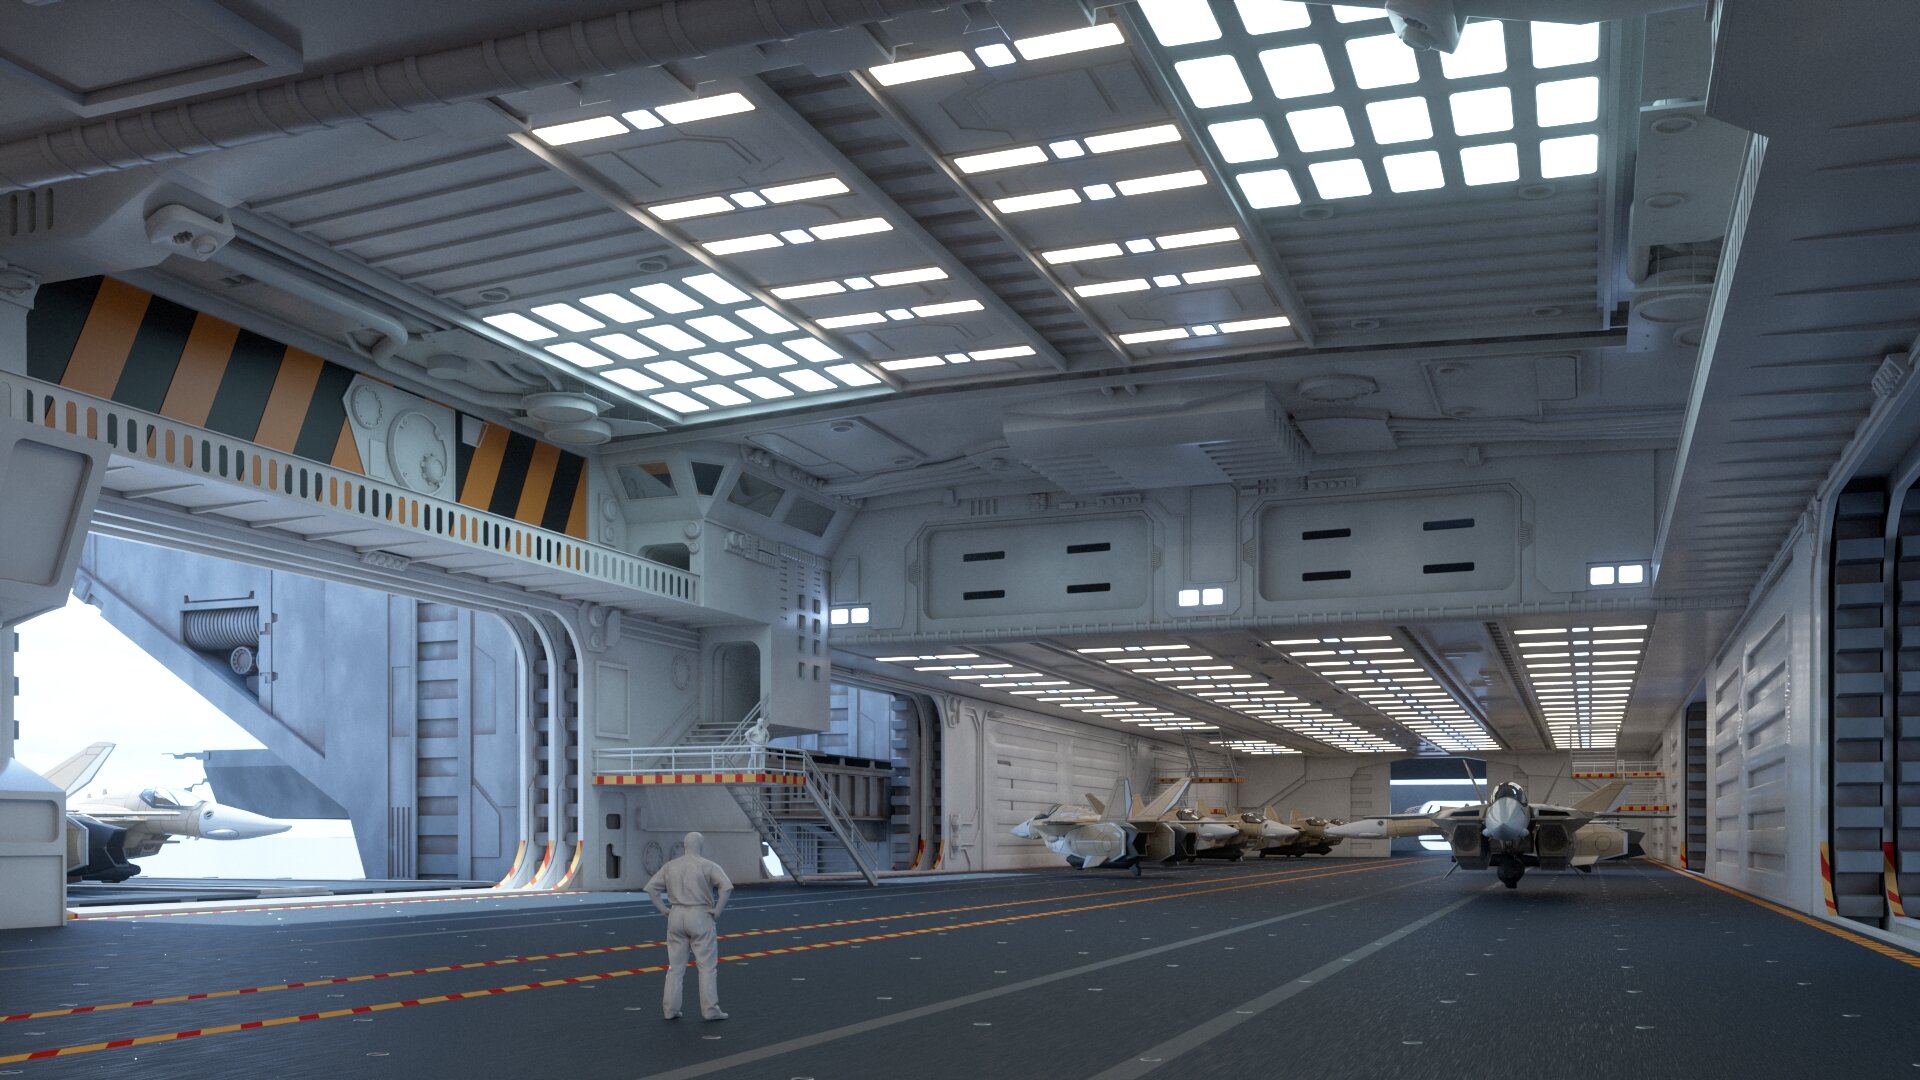
-
Olitech Industries Prometheus Build - Collaboration
Olitech Industries replied to Olitech Industries's topic in Fan Works
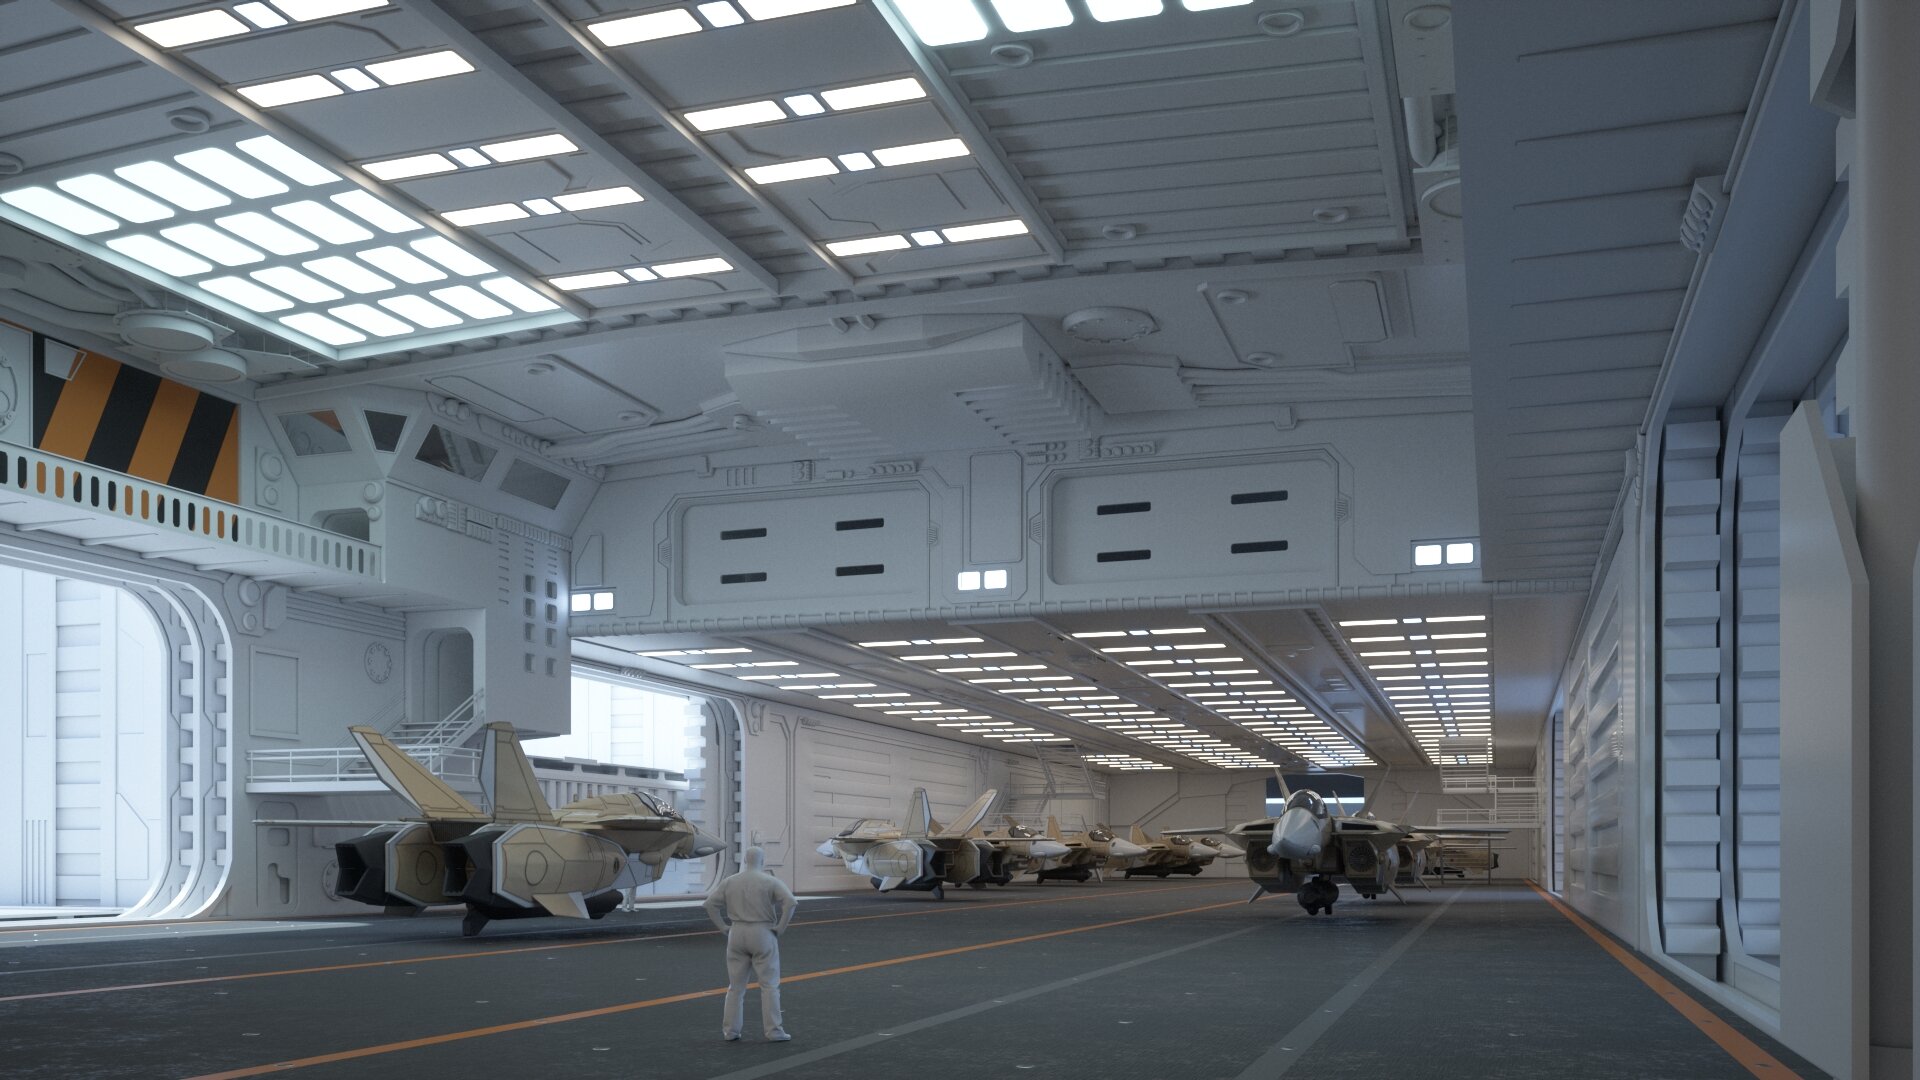
Also in the second week, some very basic lighting and texturing from me. I lightly modified and dropped in Michal Ryan's (Senovis) VF1 for scale while mine is still under construction at Skunk Works. A VR rendering WIP here: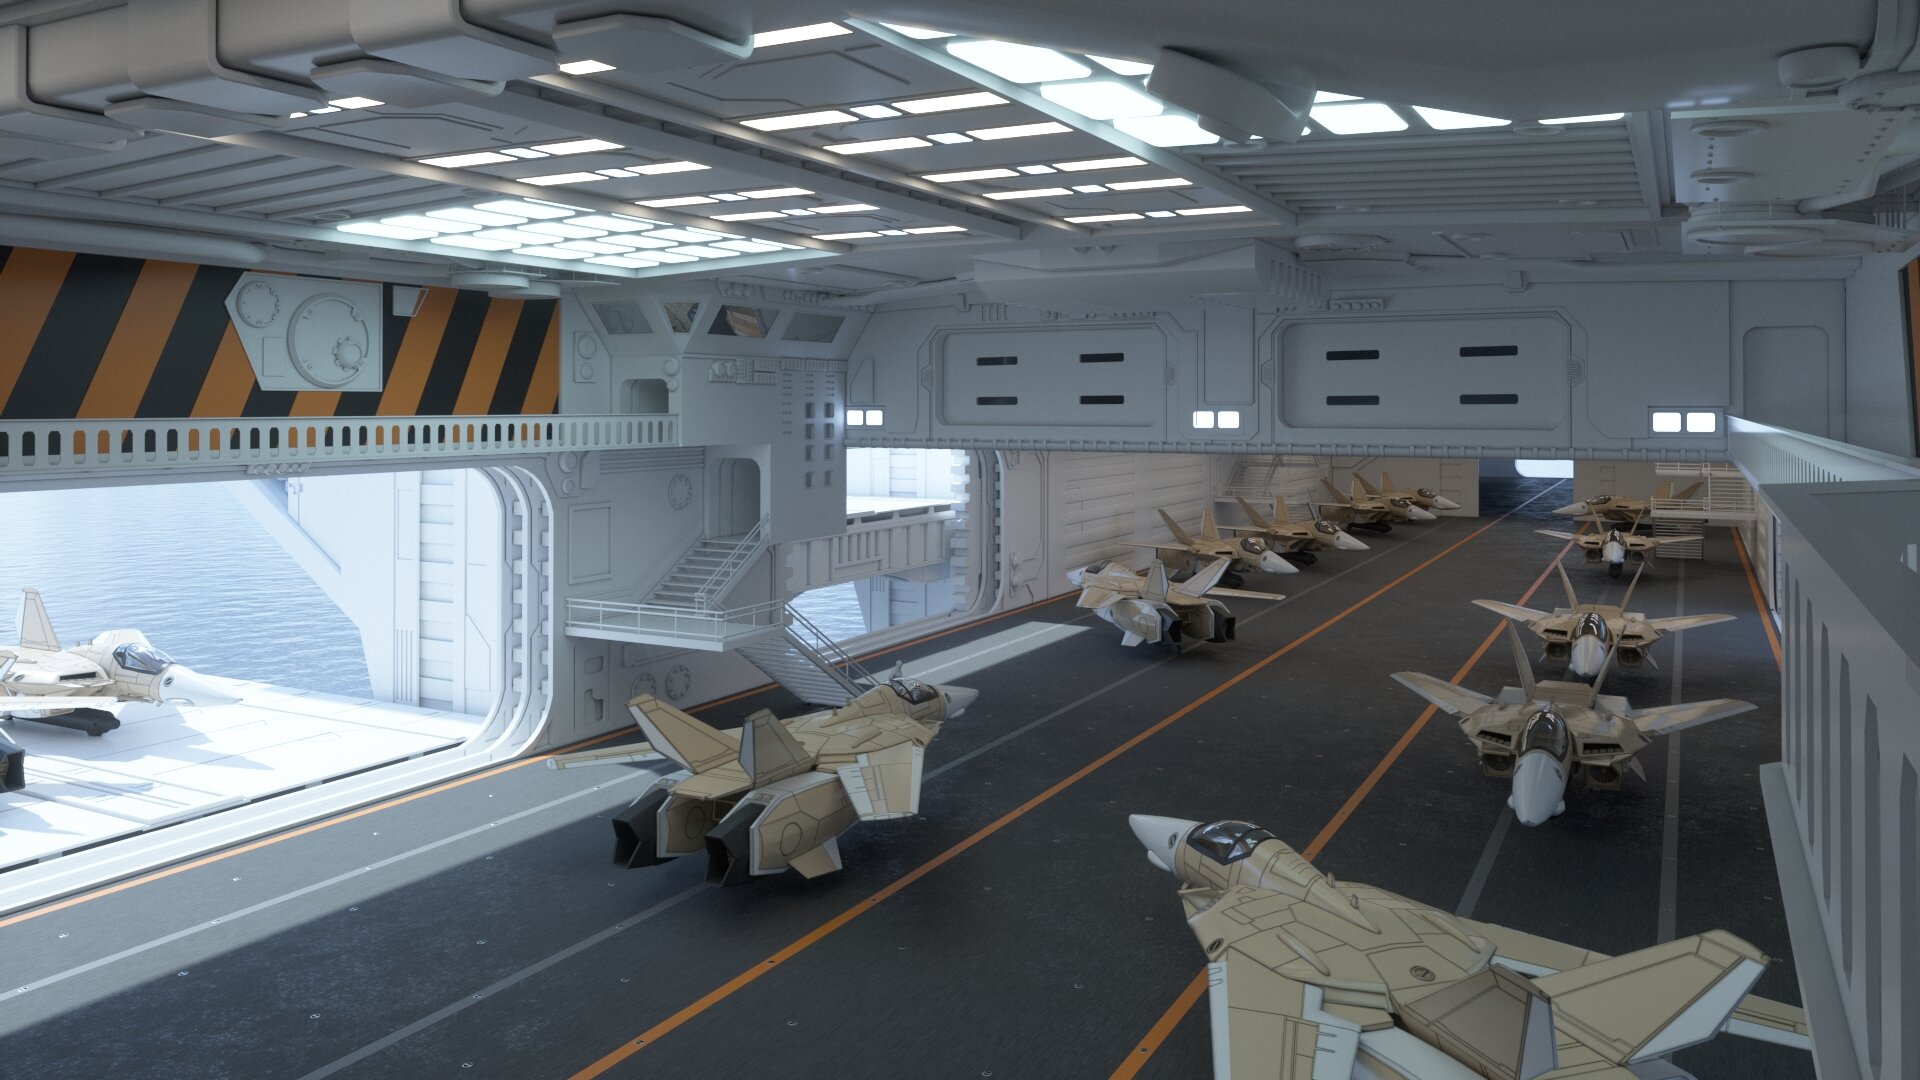
-
Olitech Industries Prometheus Build - Collaboration
Olitech Industries replied to Olitech Industries's topic in Fan Works
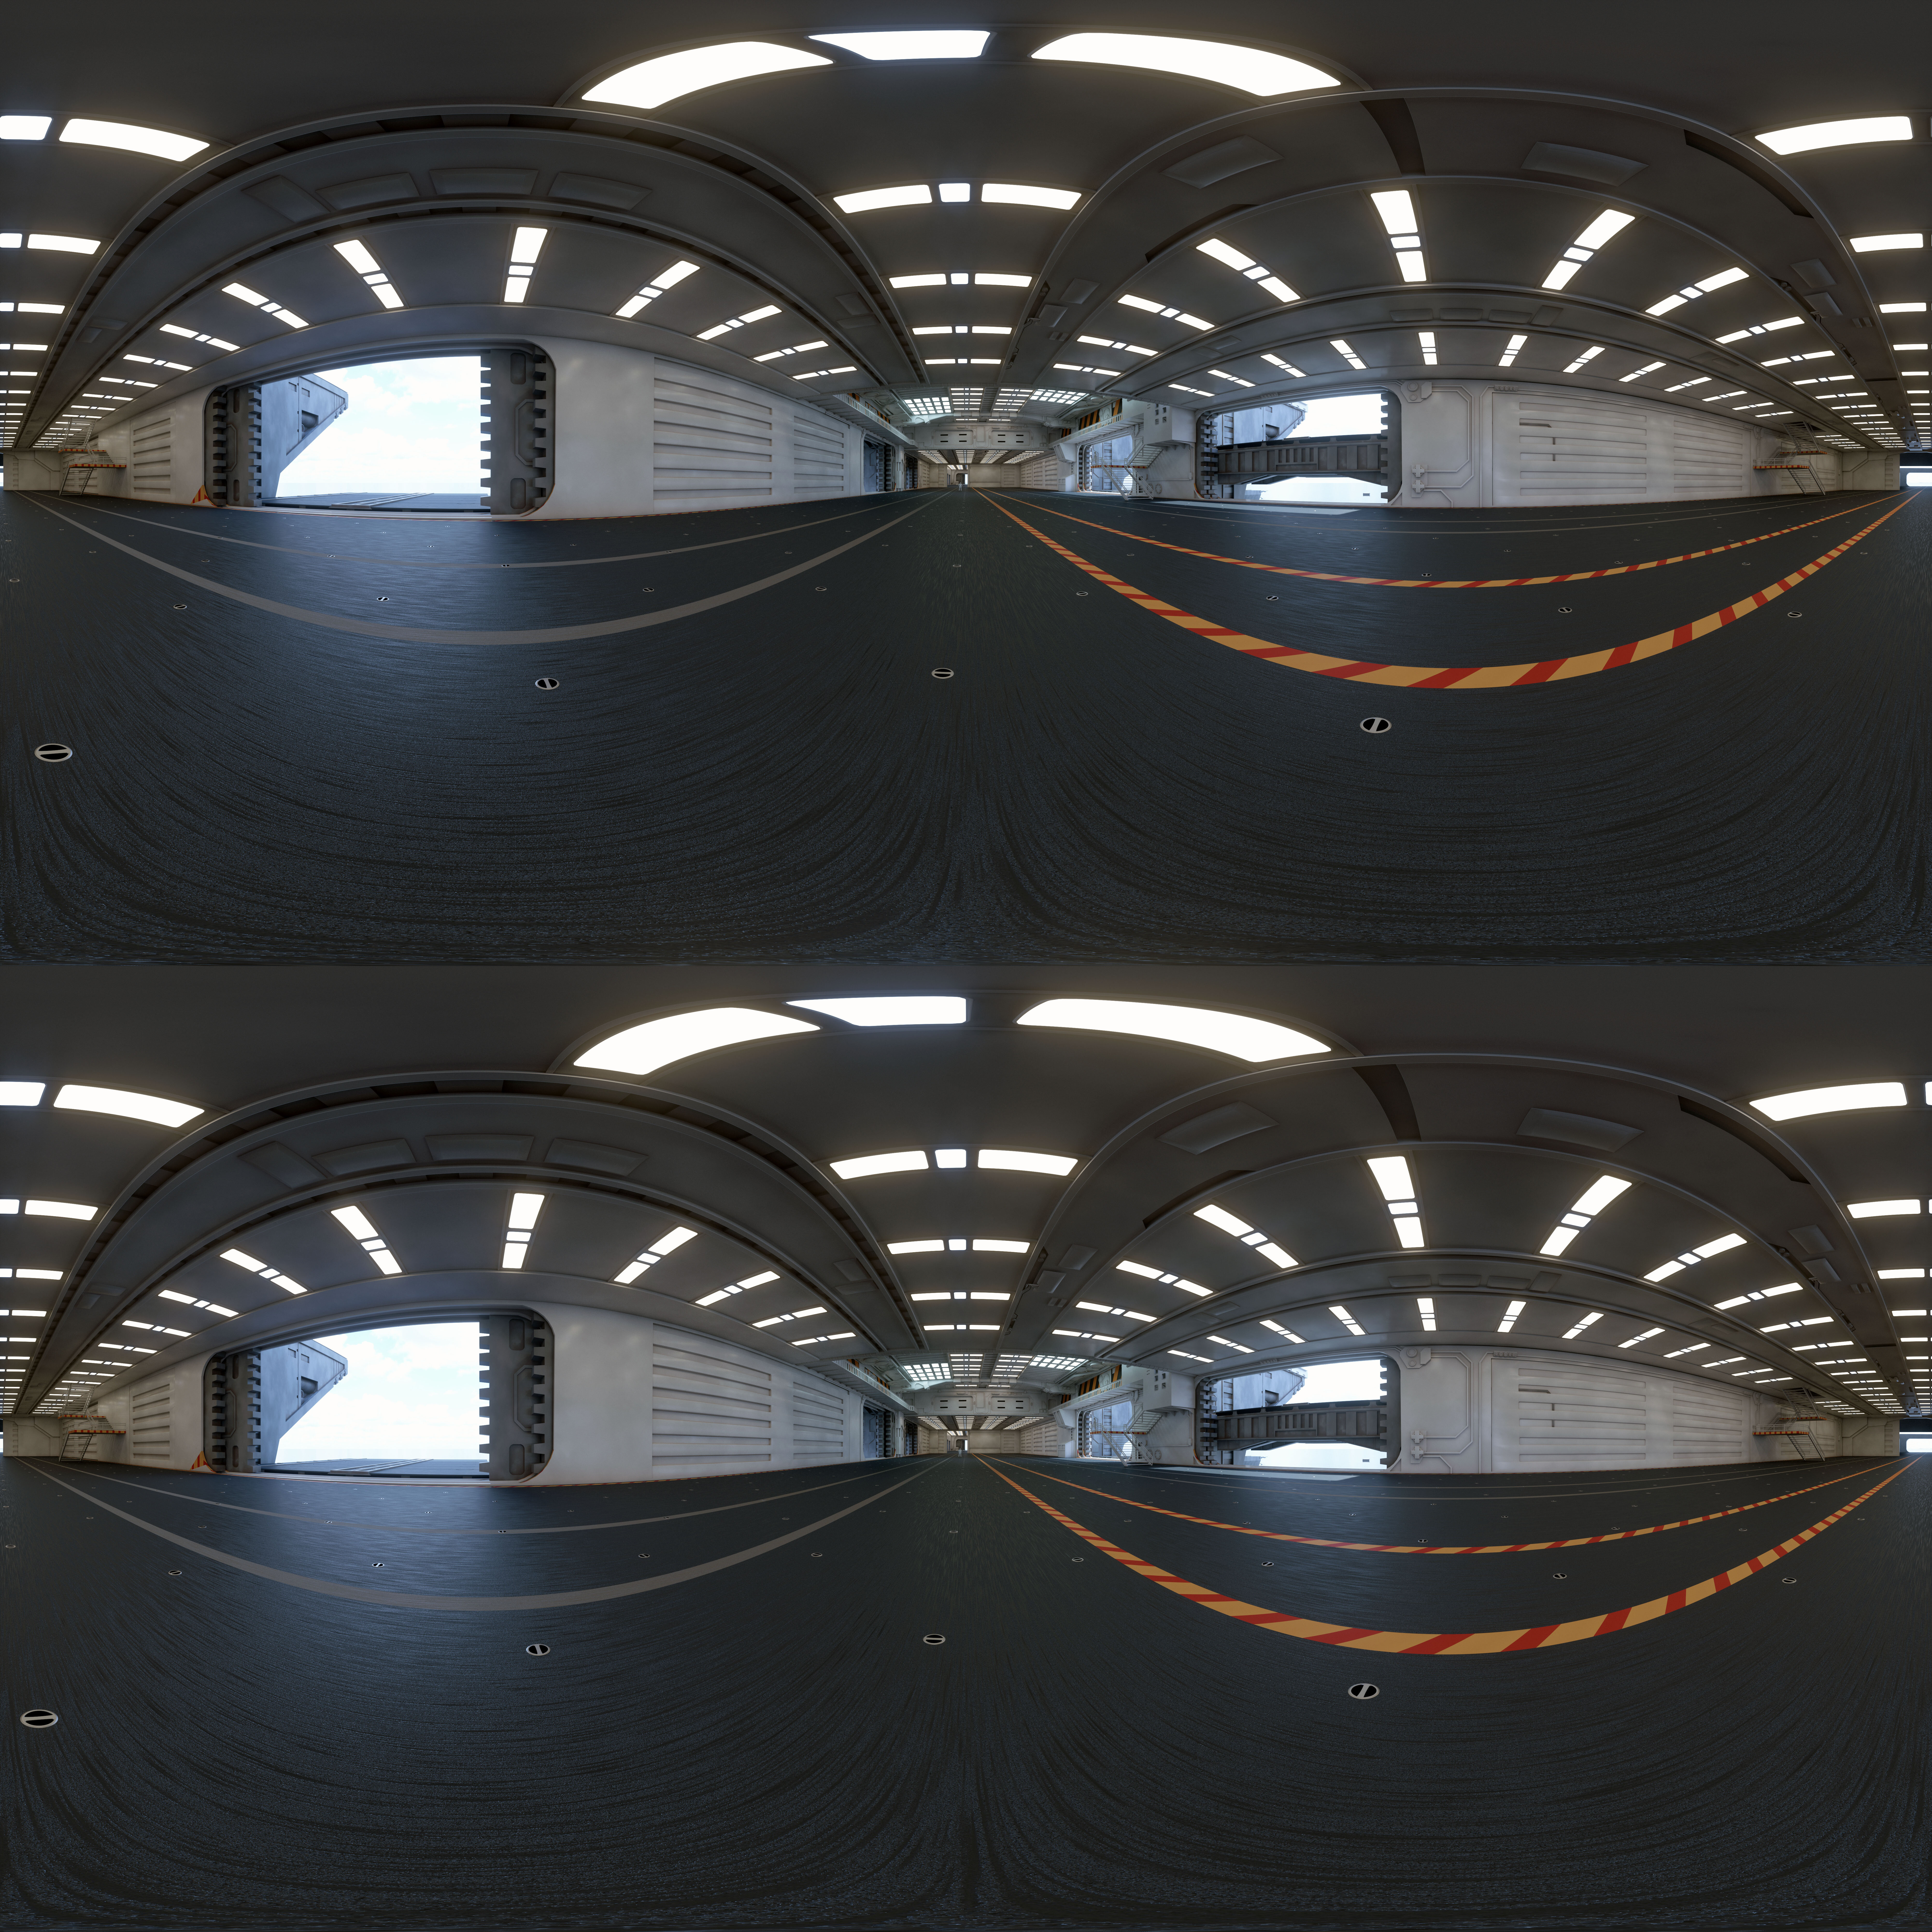
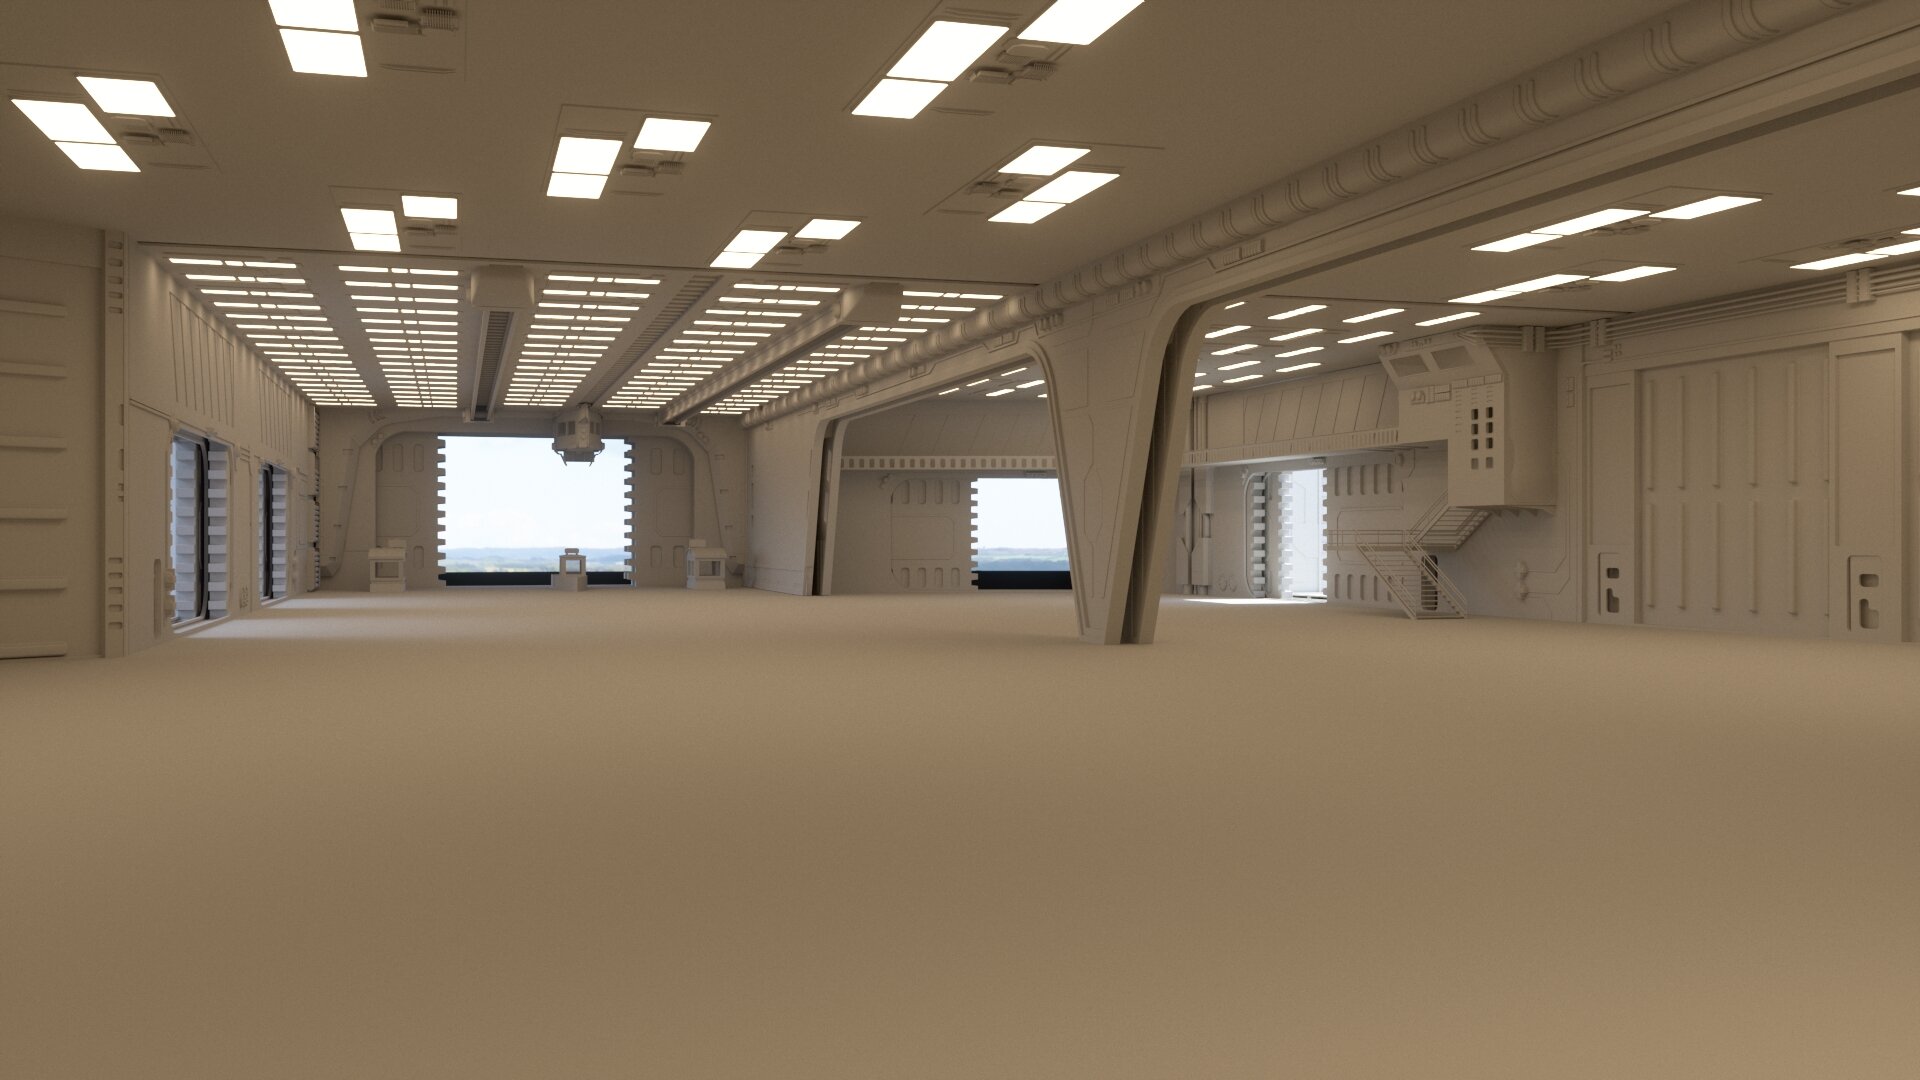
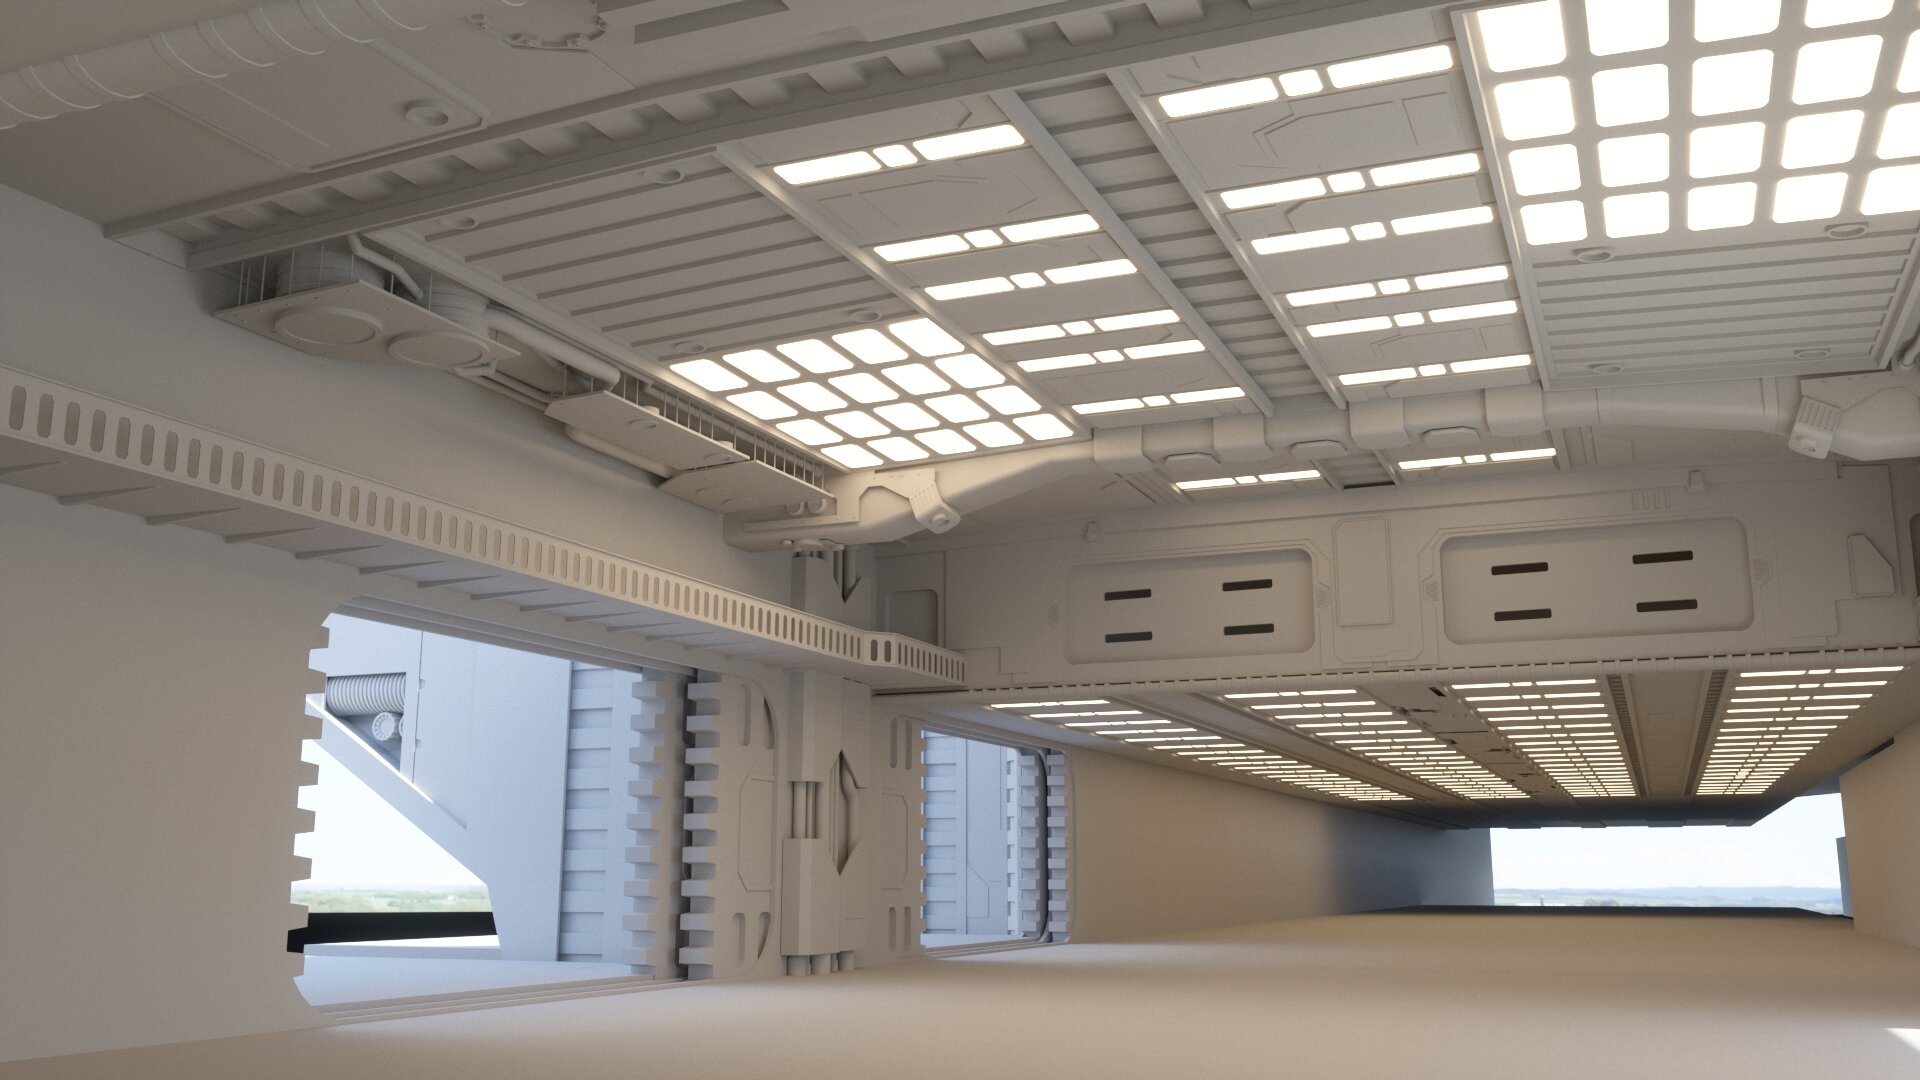
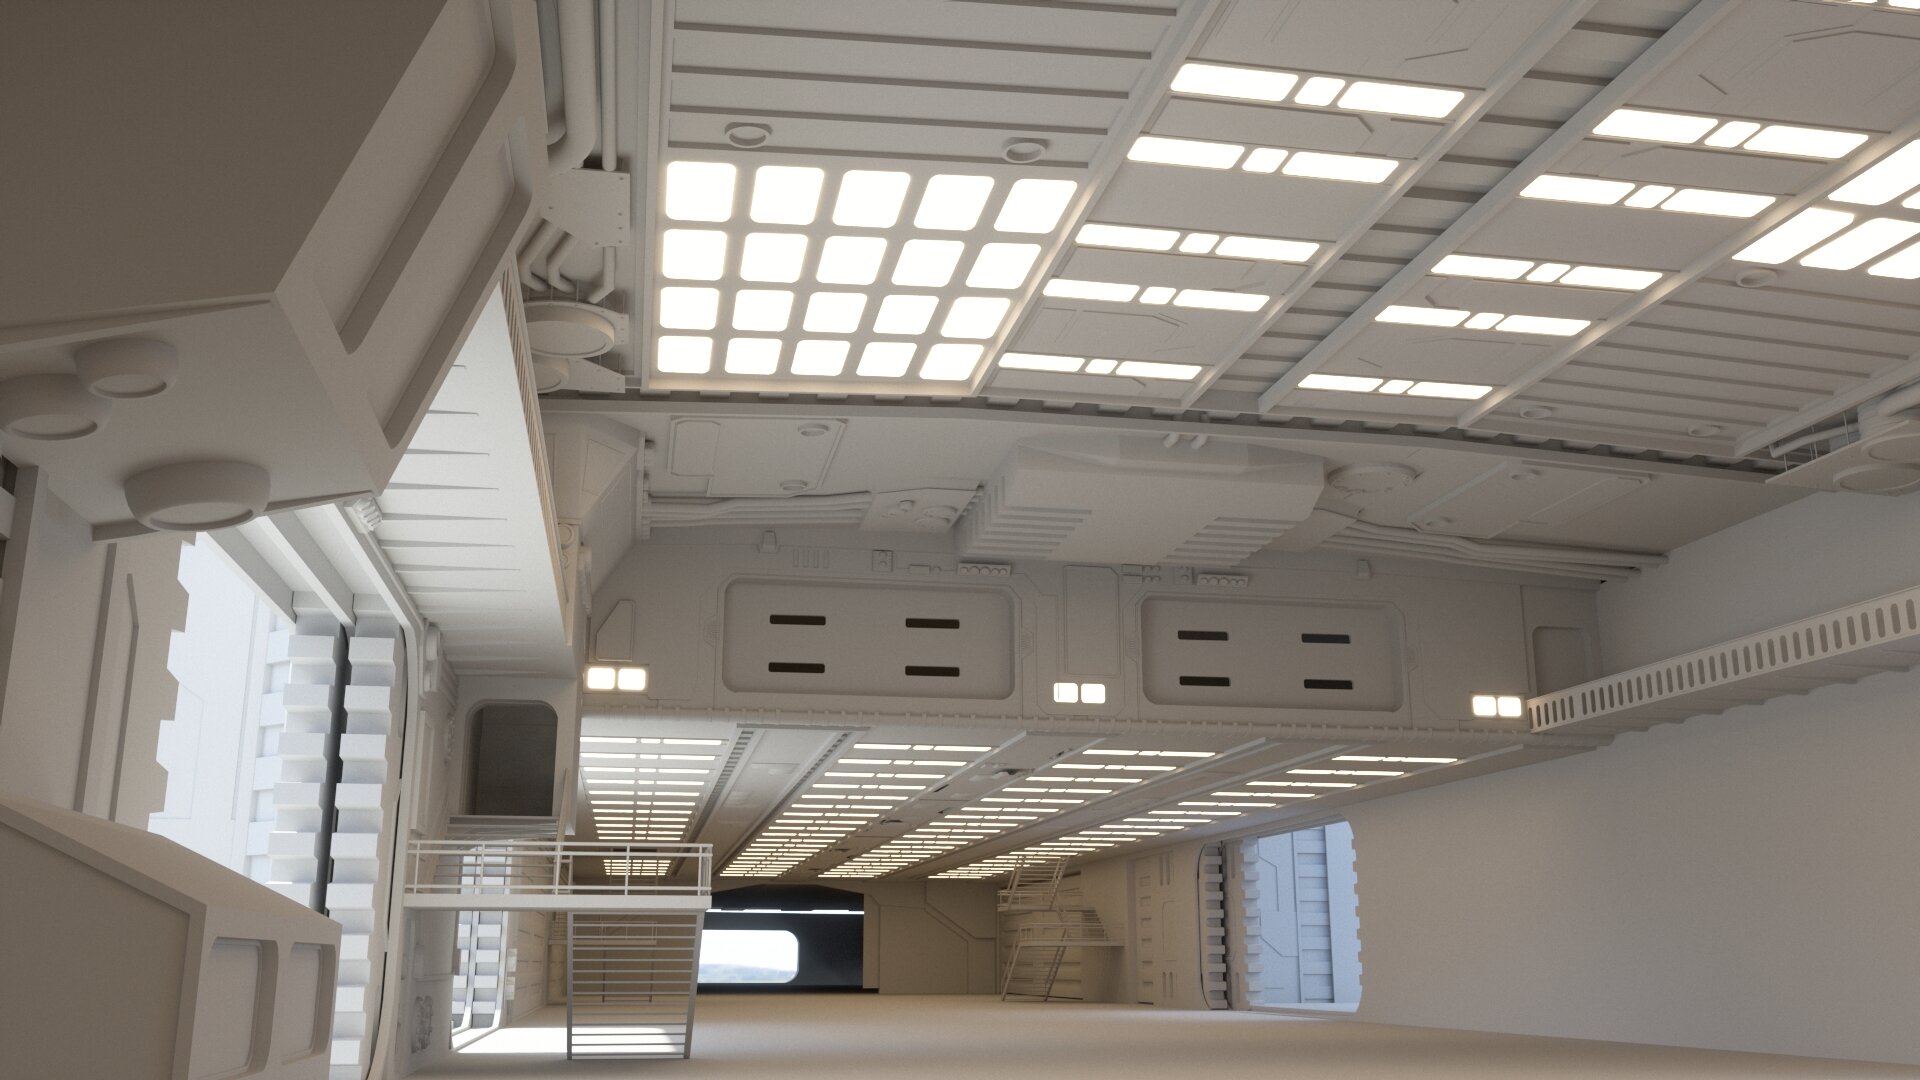
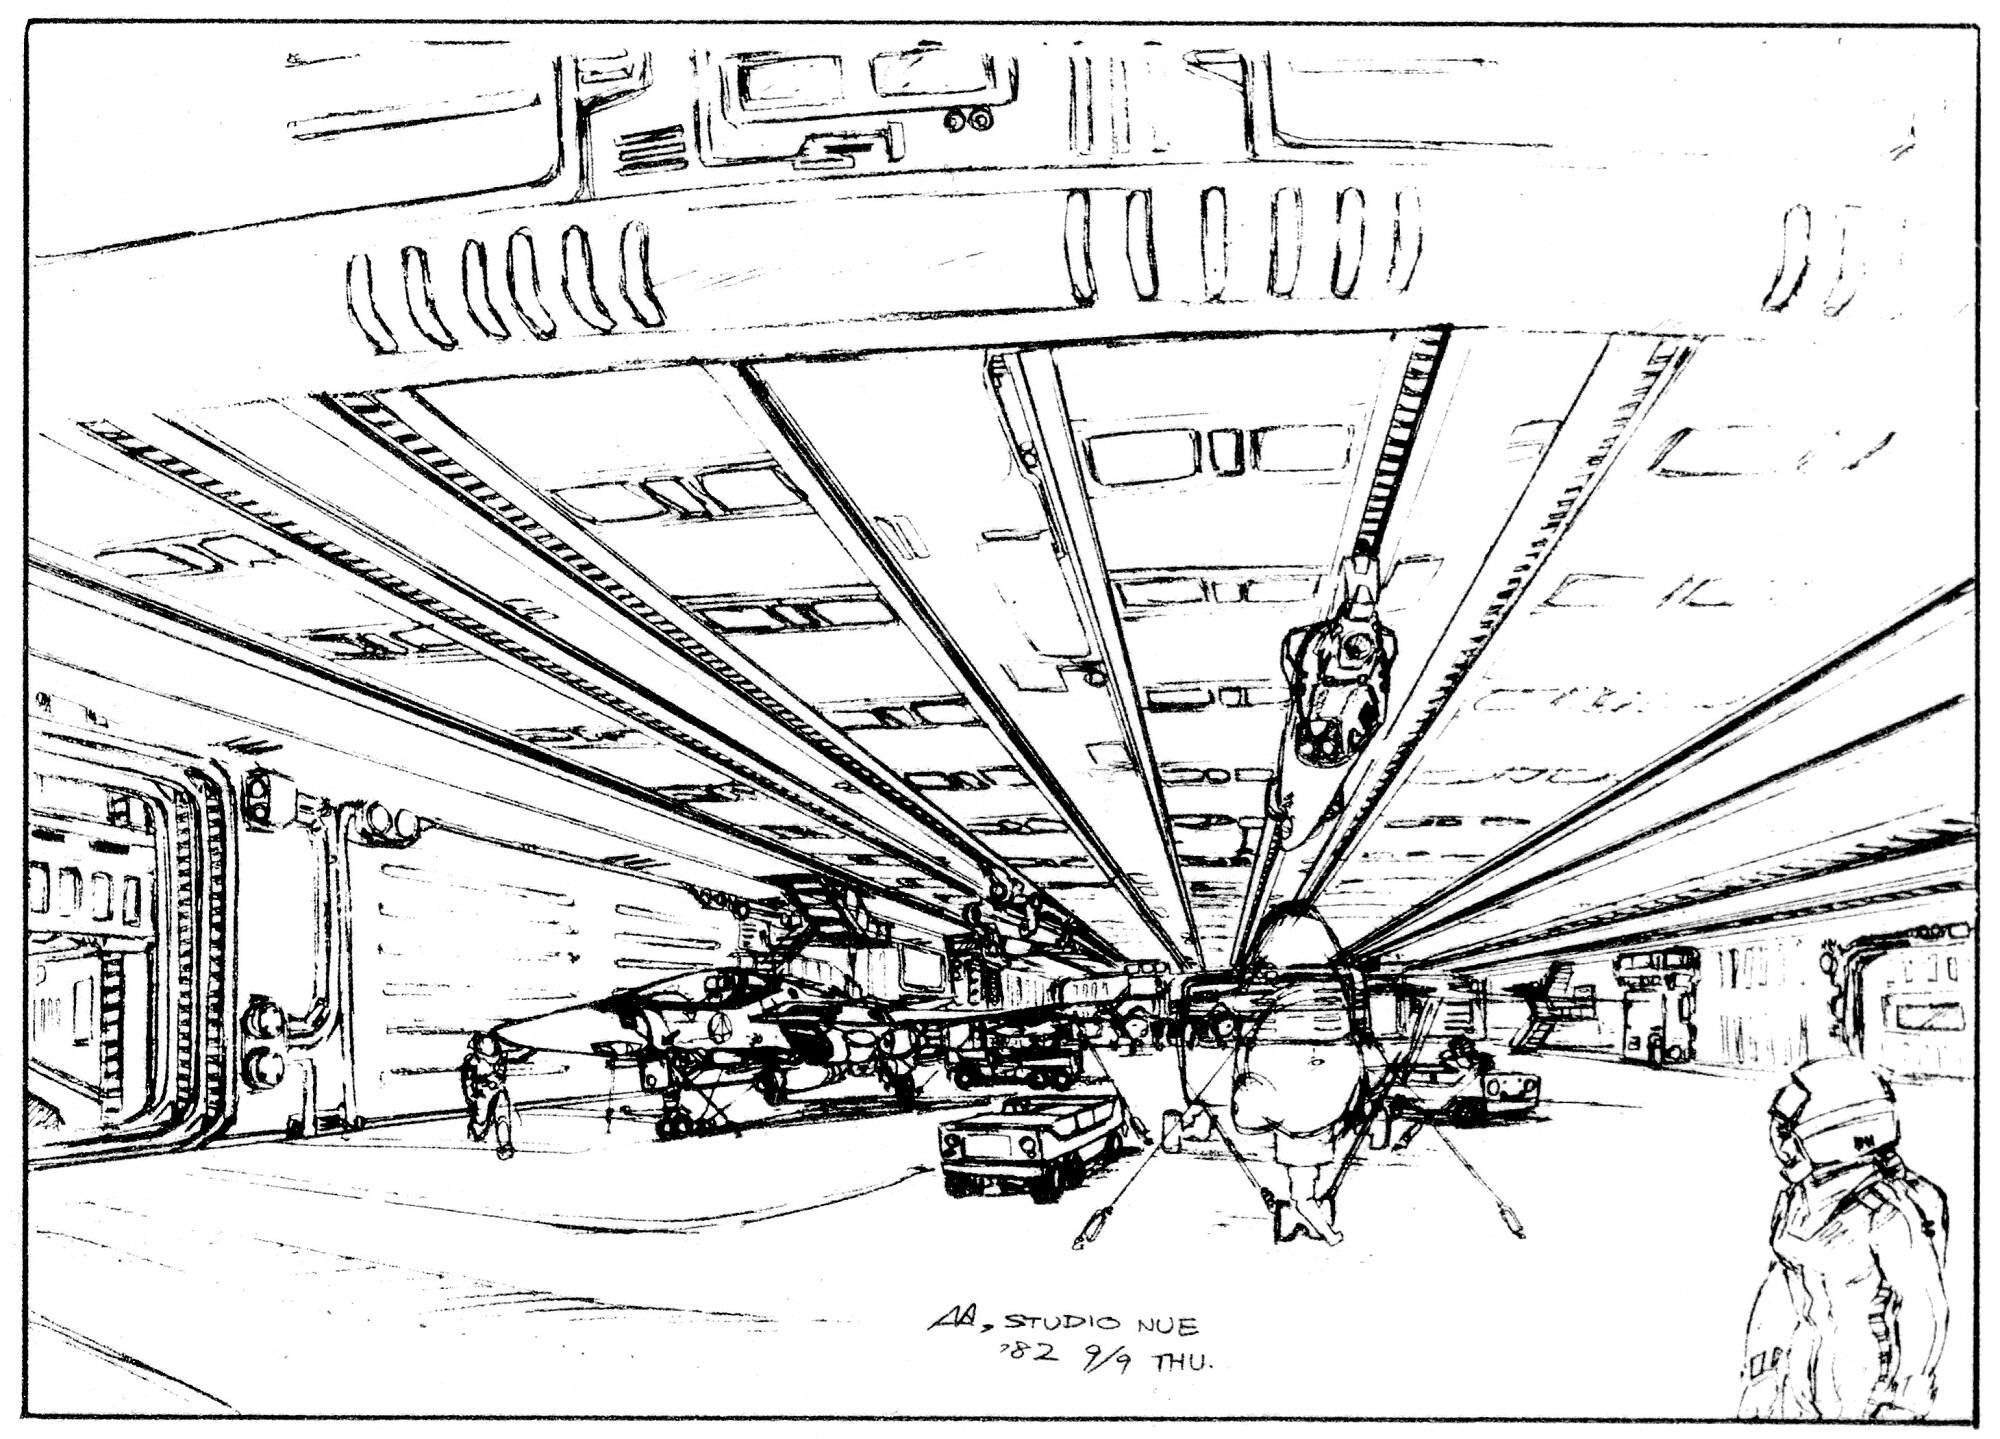
Second week progress. The stern section on the upper hangar bay.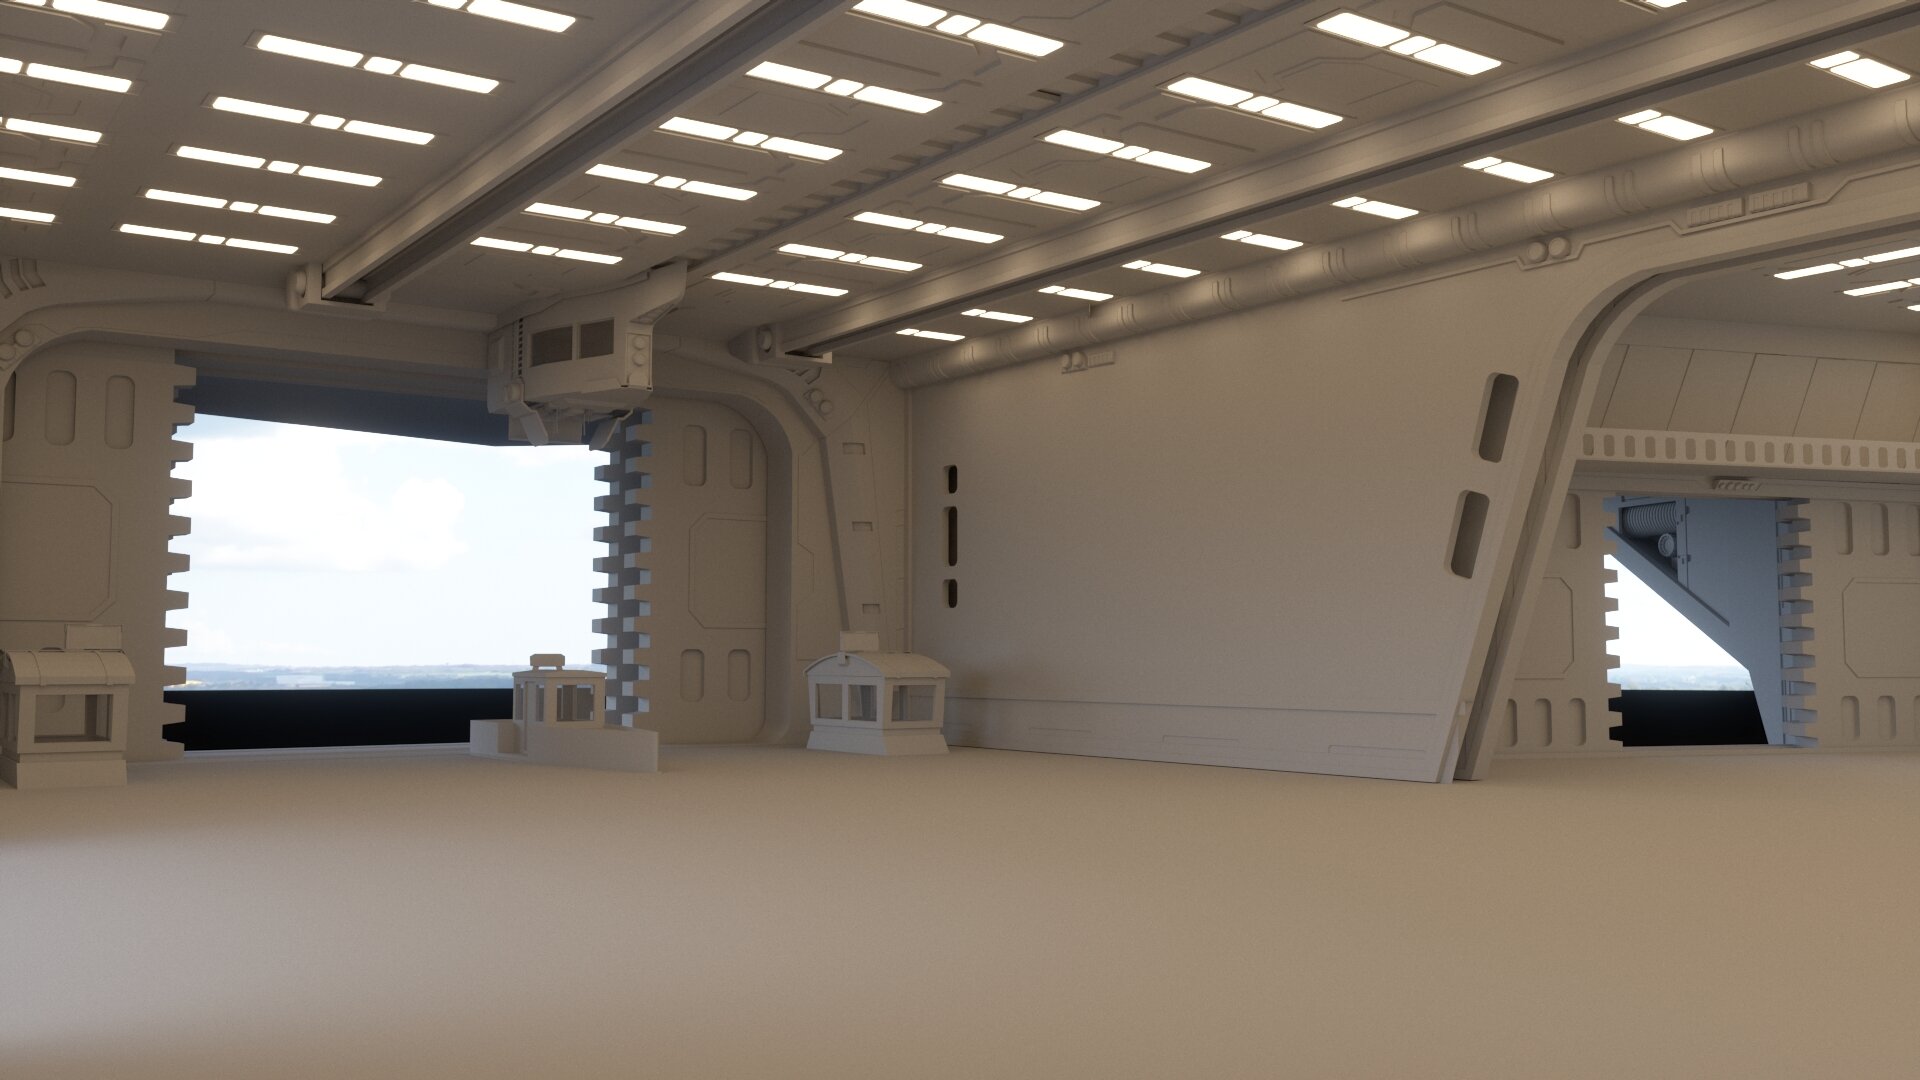

-
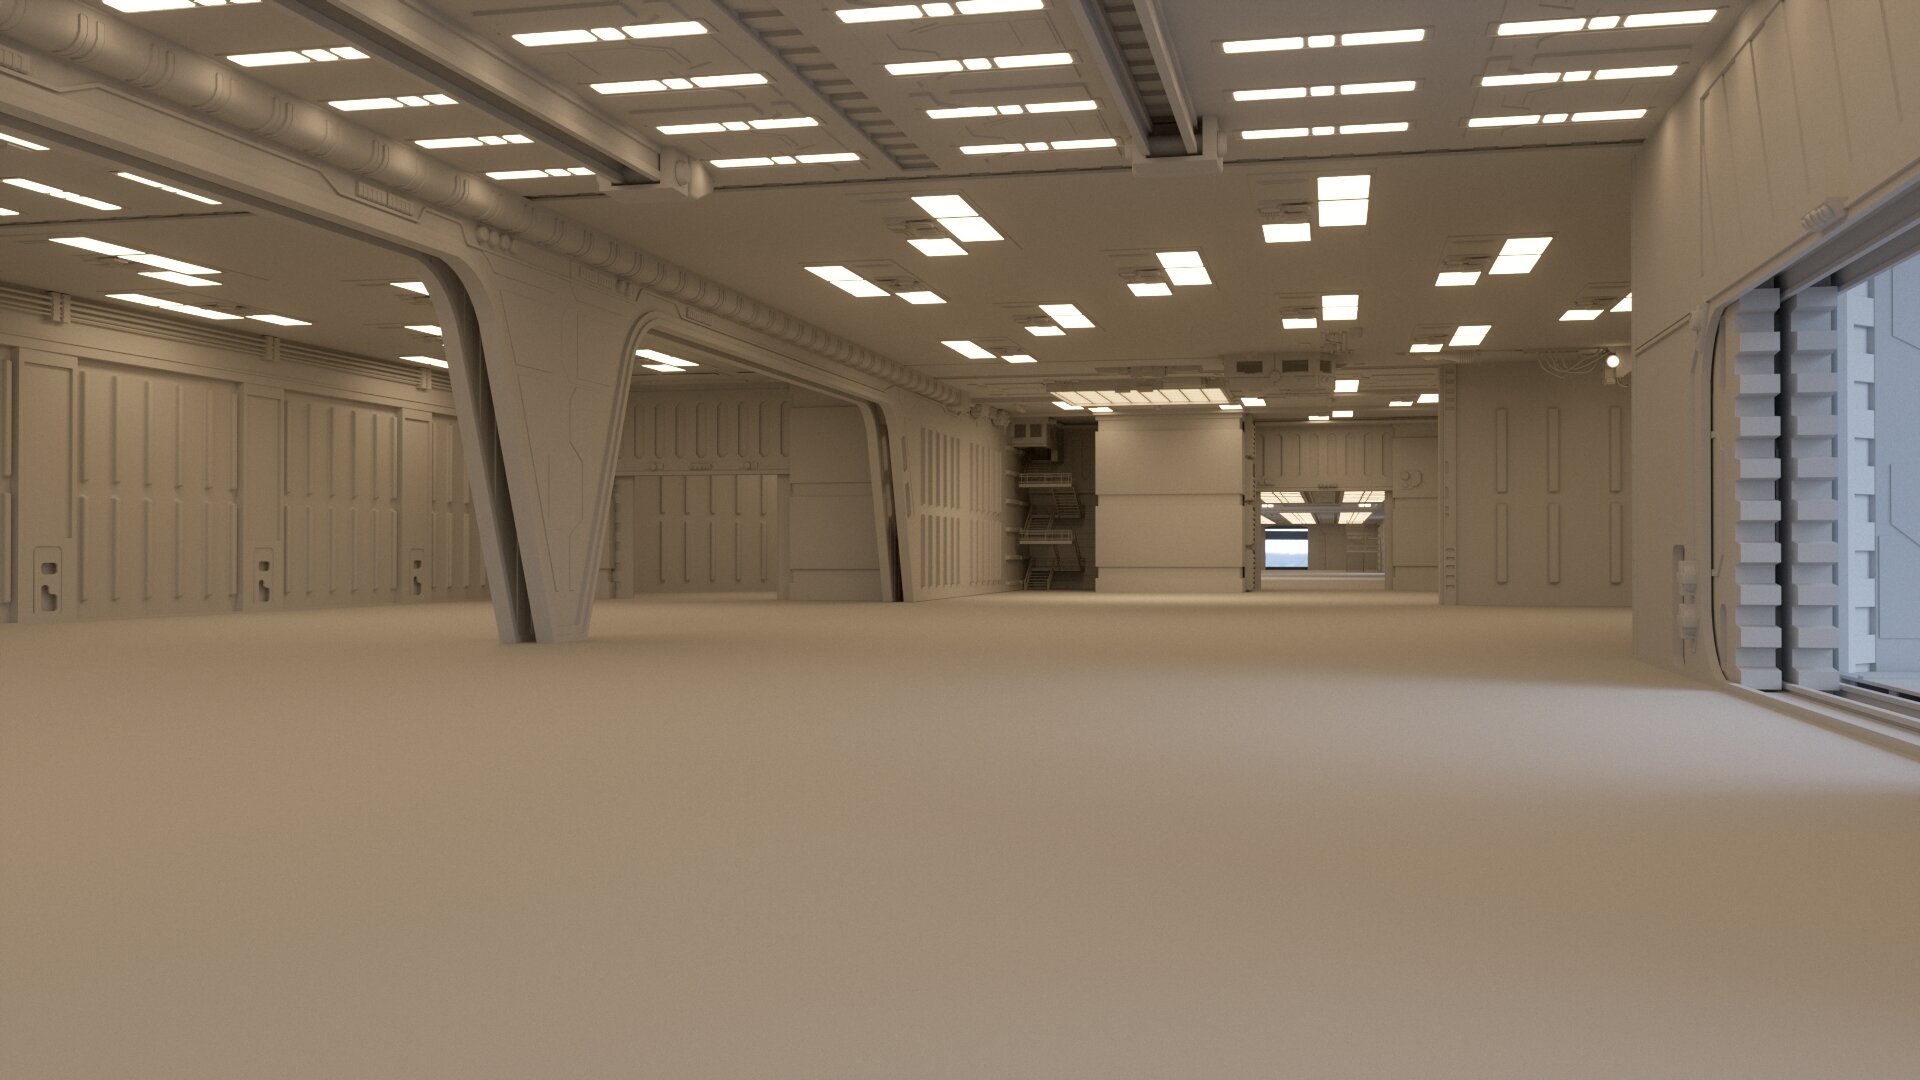
Making a record of this build here. Prometheus Carrier model in progress by my work colleague architect Mark Jordan. I'm directing him, but he is building the 3D model. Like super fast. I will be texturing, lighting, populating and composing. In true Olitech Industries fashion, he is taking 'canon' dimensions as much as possible, then filling in the blanks with real world precedents. It will be one of the permanent homes for my VF 1:1 project. I will be shooting HDRI panos from it for free so that other artists may use it for lighting and reflections. Examples to come on my VF posts. But this project truly needs it's own thread. And thus it begins... He completed the top middle hangar bay the first week. First 5 main elevators.
-
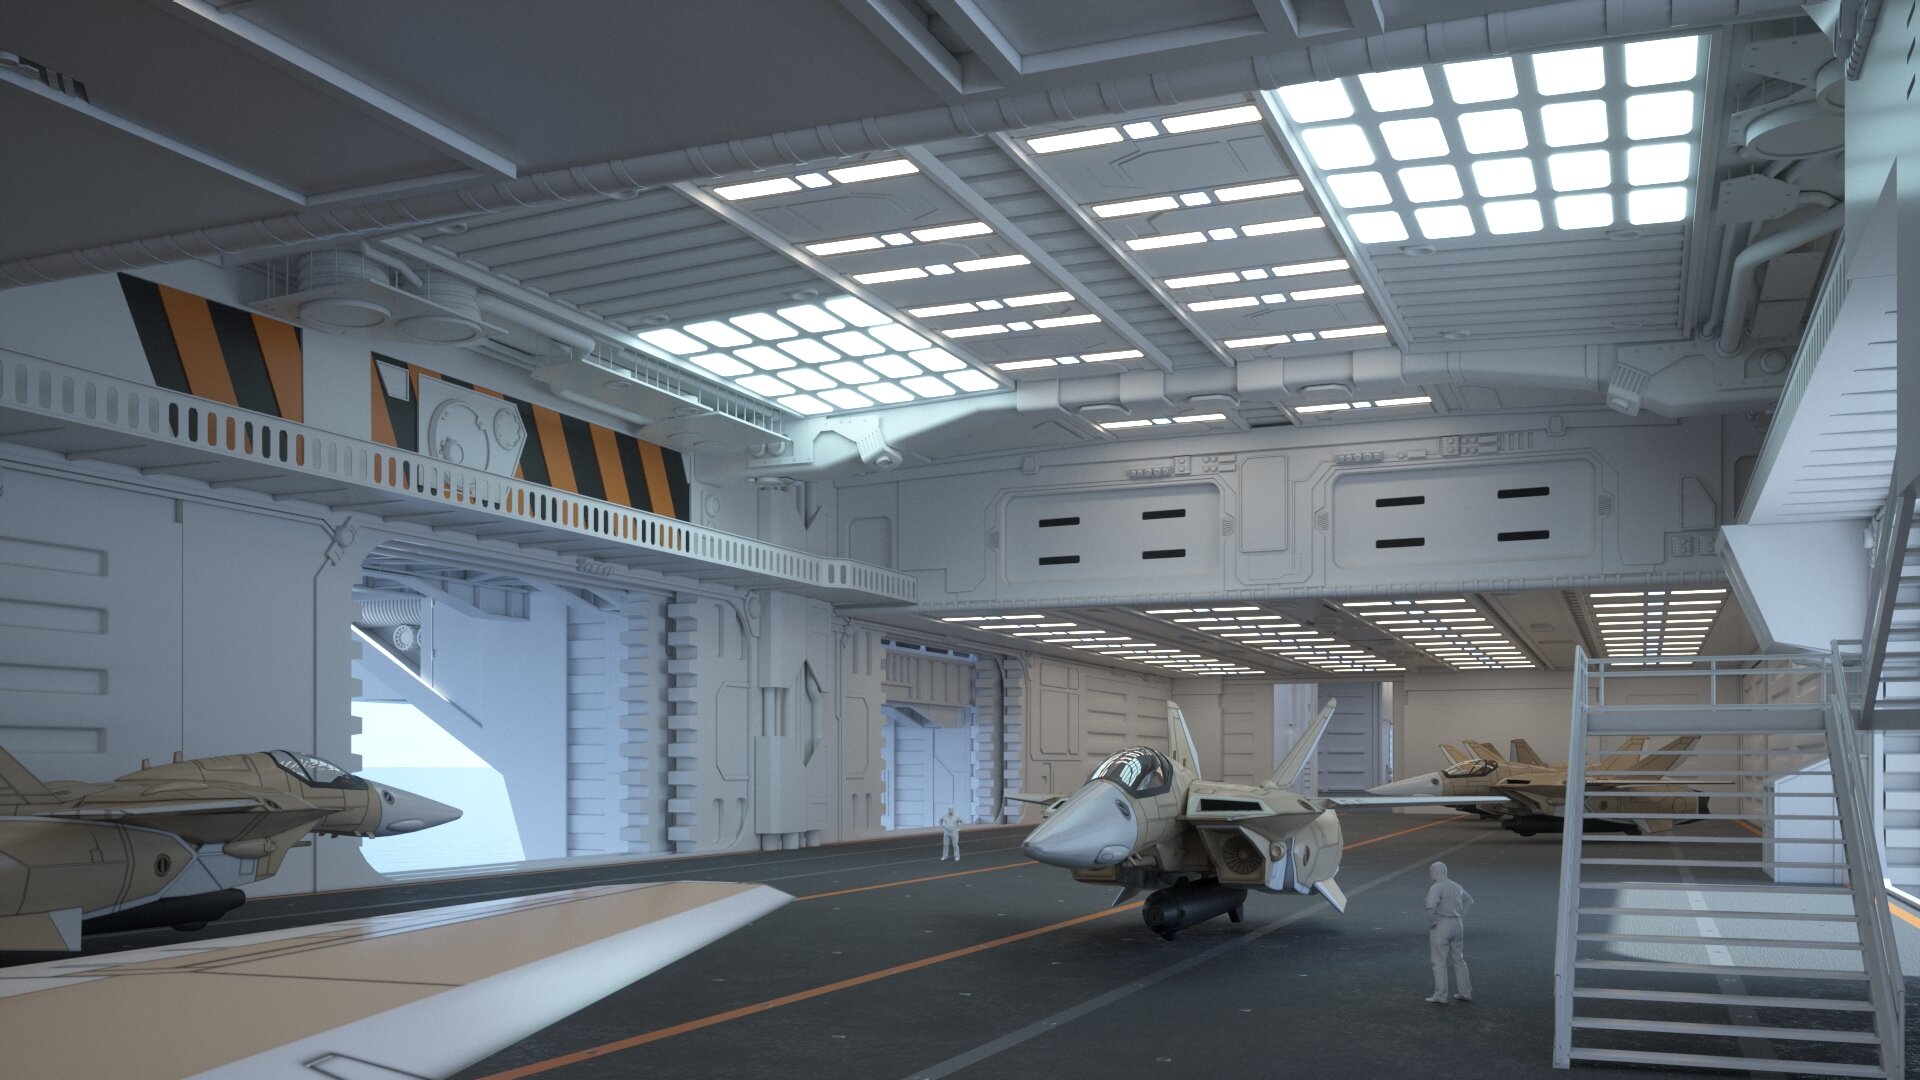
Ok! You ALL have to check this out. Even if you have to beg, borrow or steal a pair of VR goggles. Still very rough. Prometheus interior (WIP) modeled by my colleague Mark Jordan. VF low poly model by Michael Ryan, aka Senovis. I will eventually swap out this VF for mine. 😃 But my gawwwwwd. The scale of this hangar! A must see in VR.
-
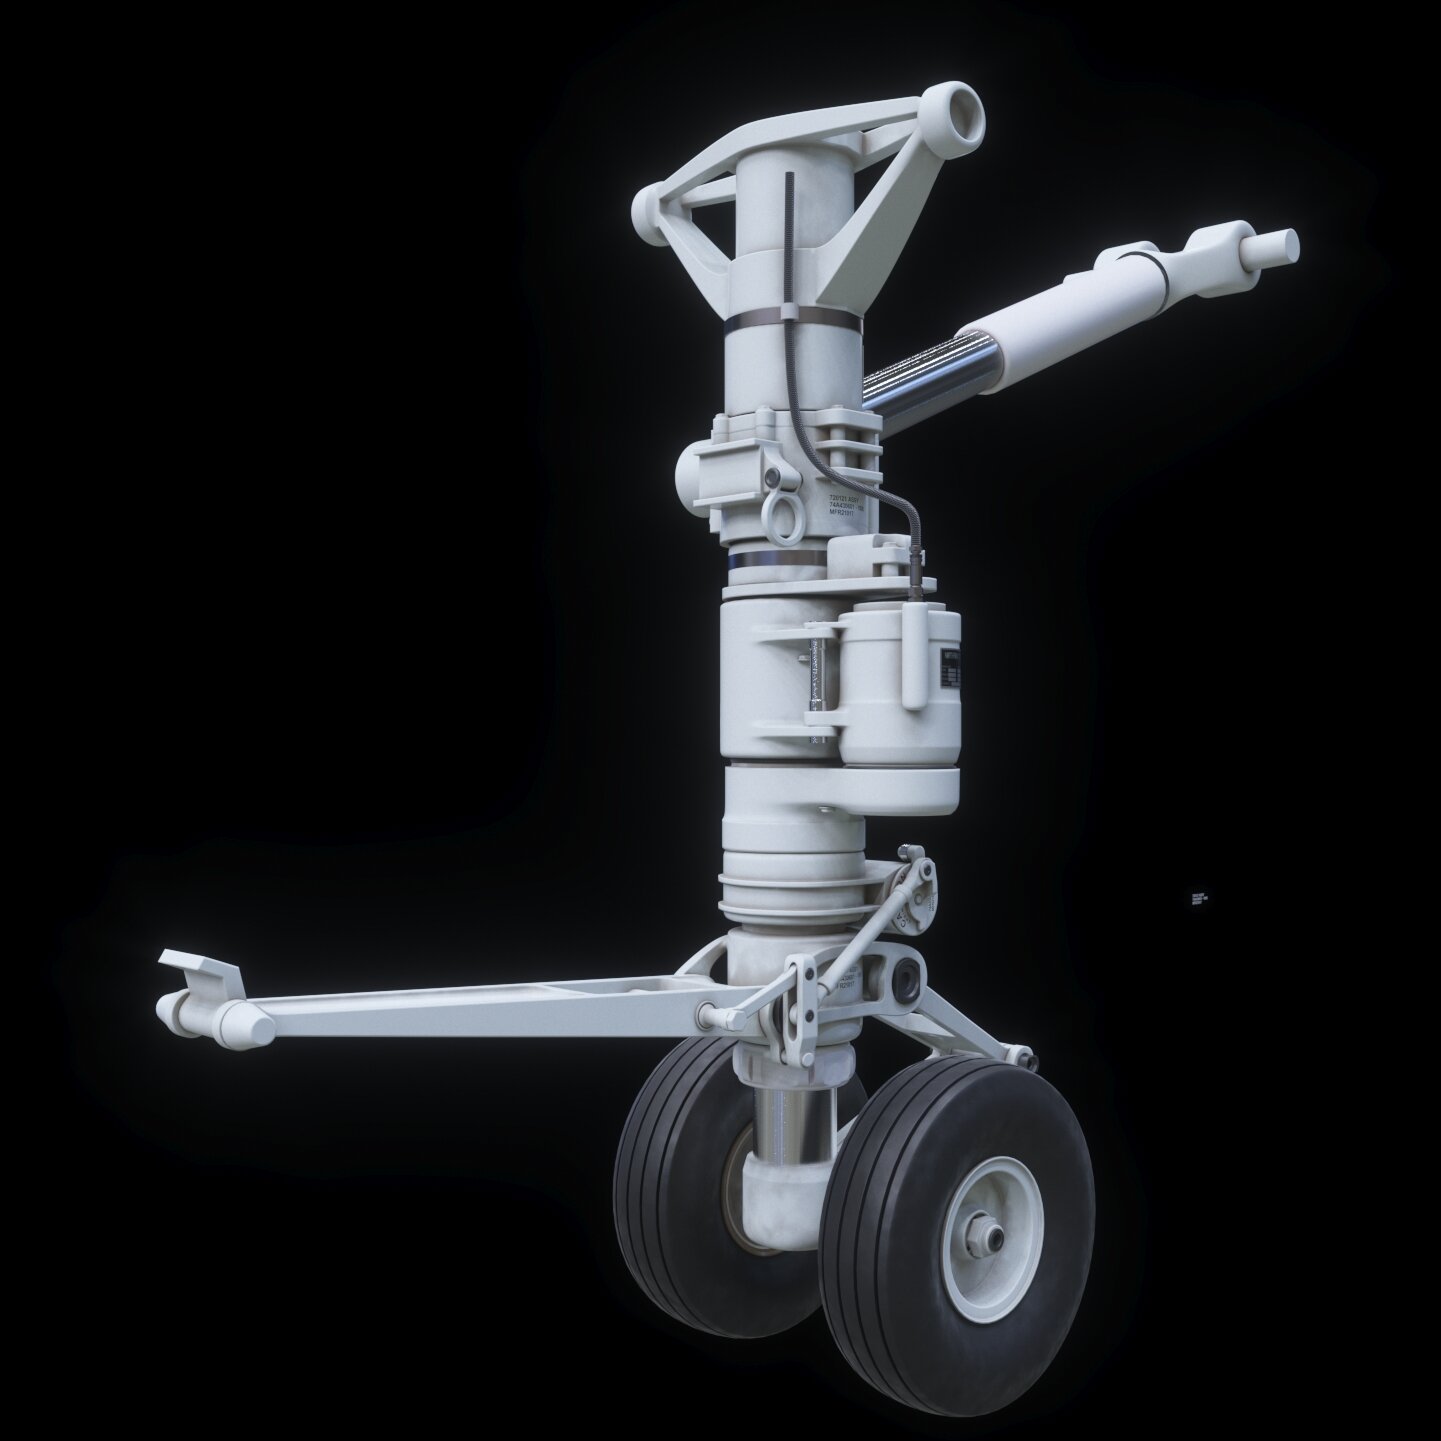
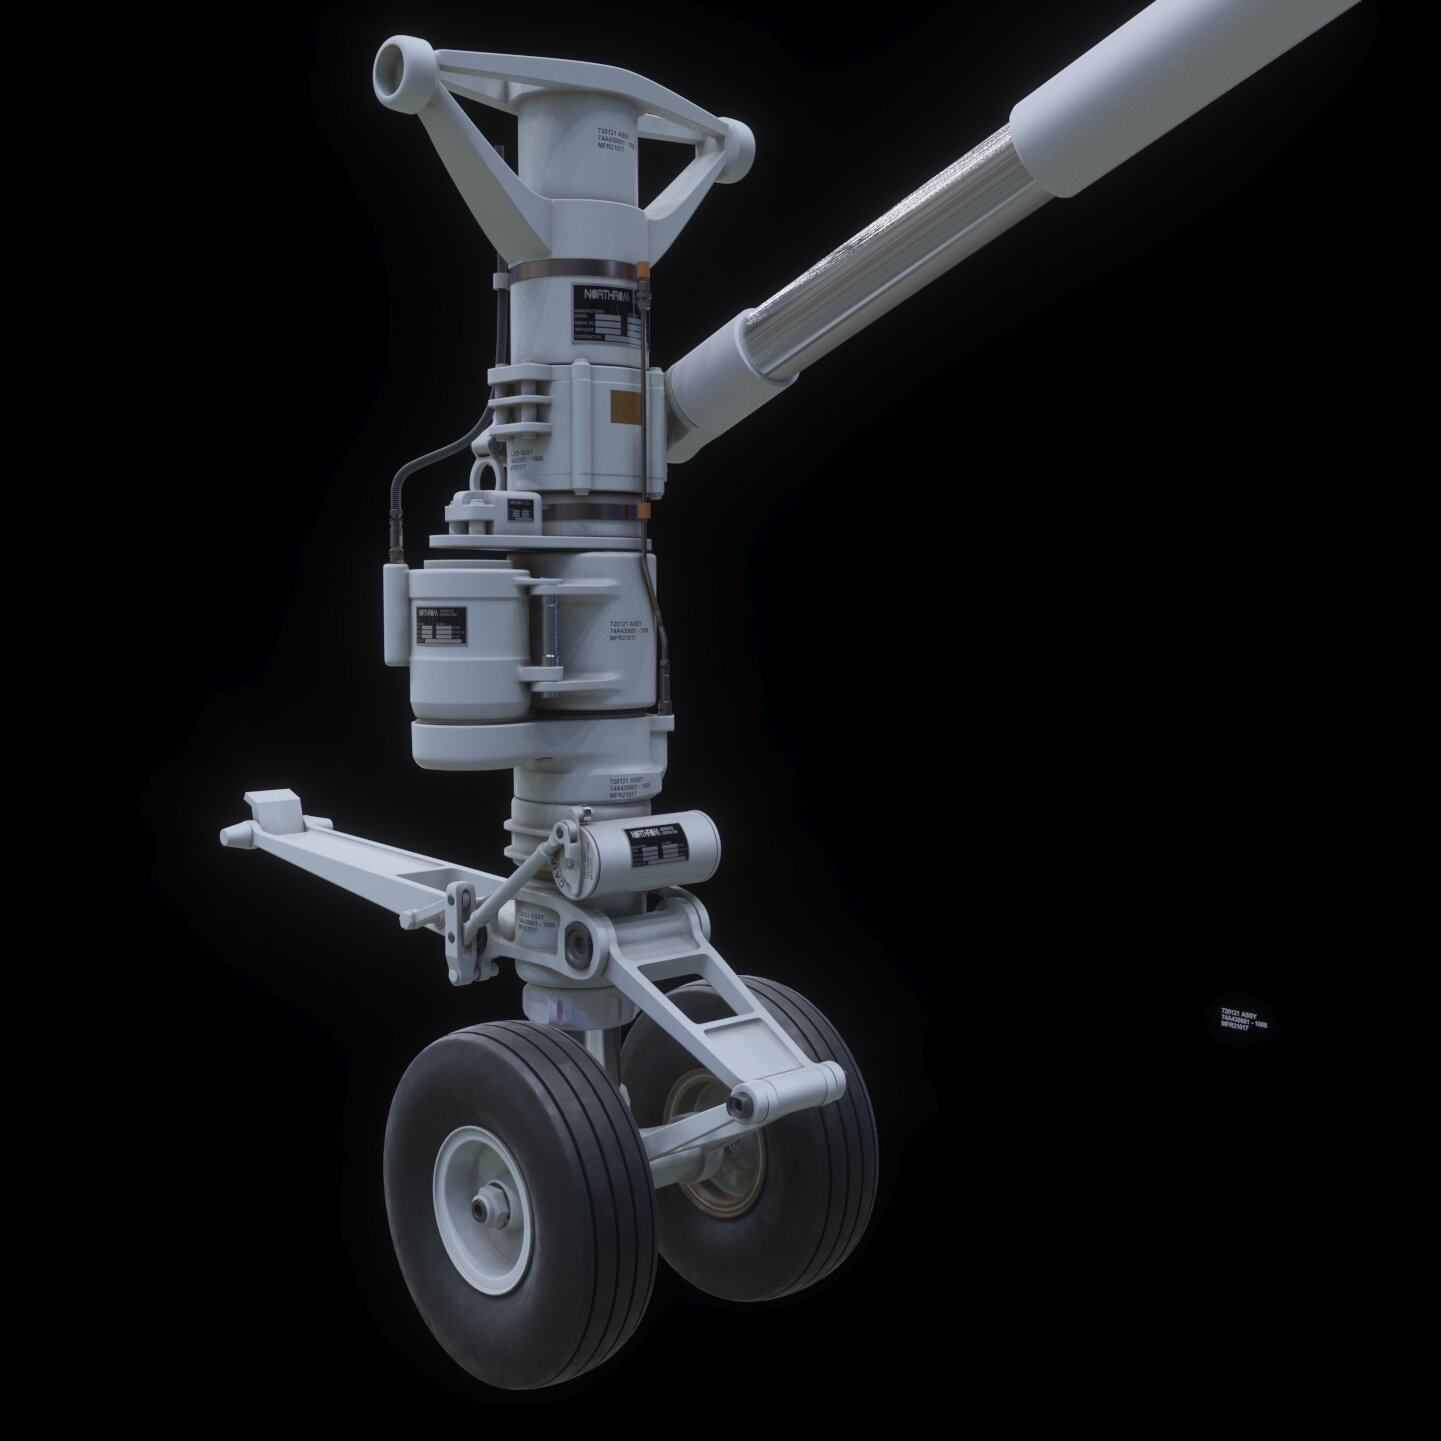
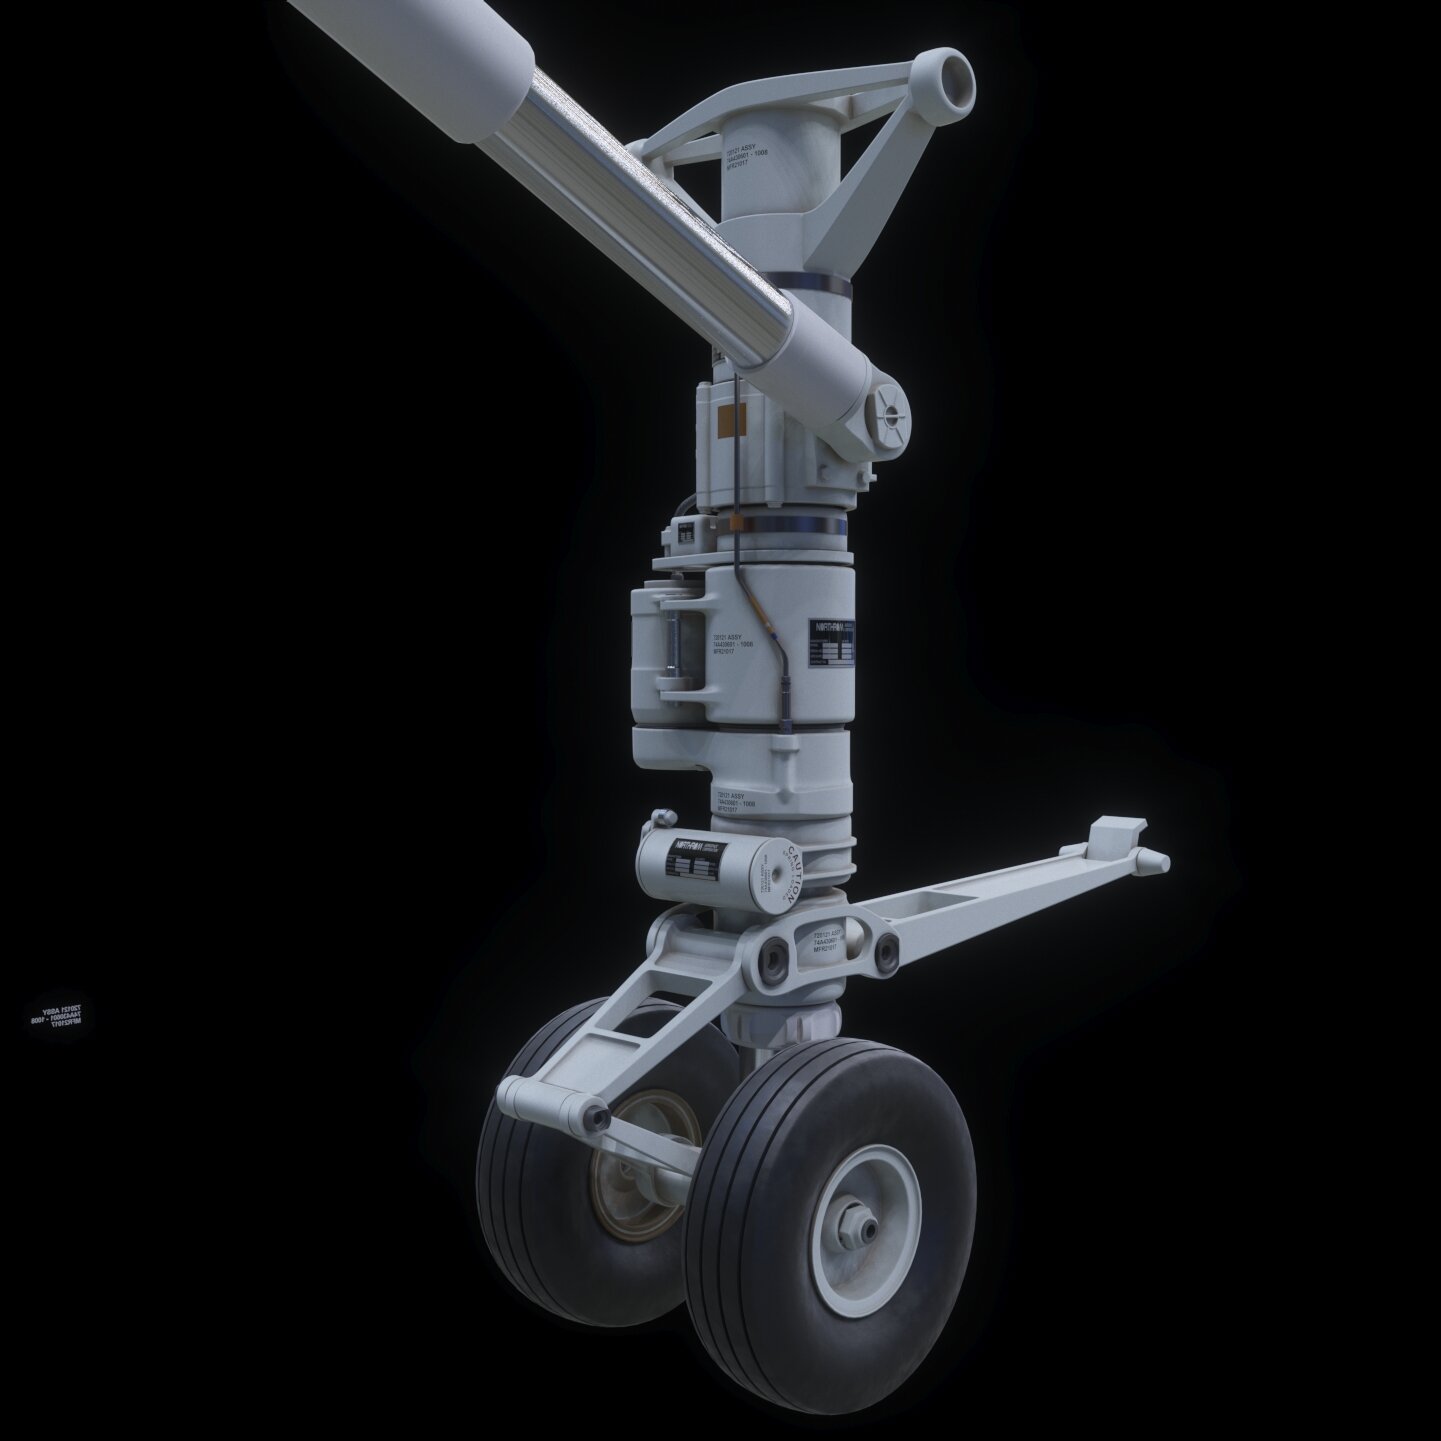
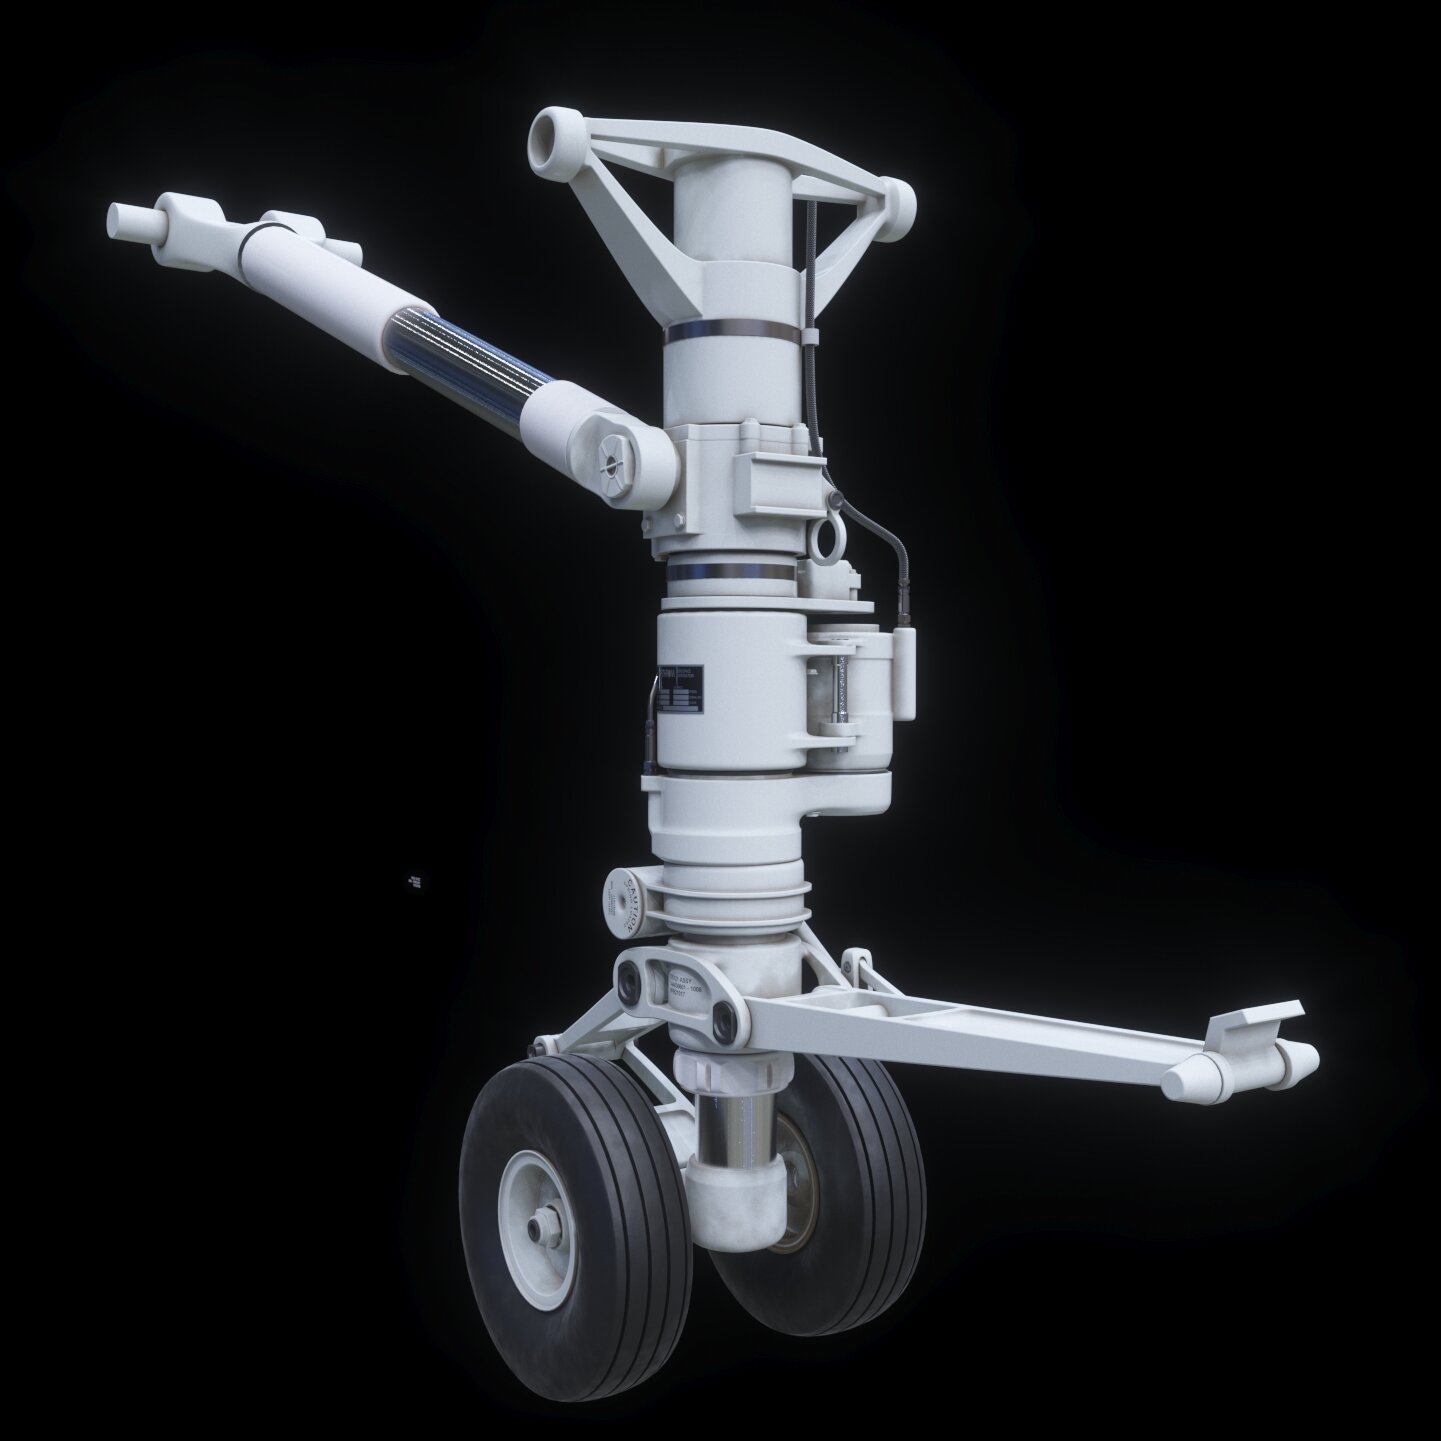
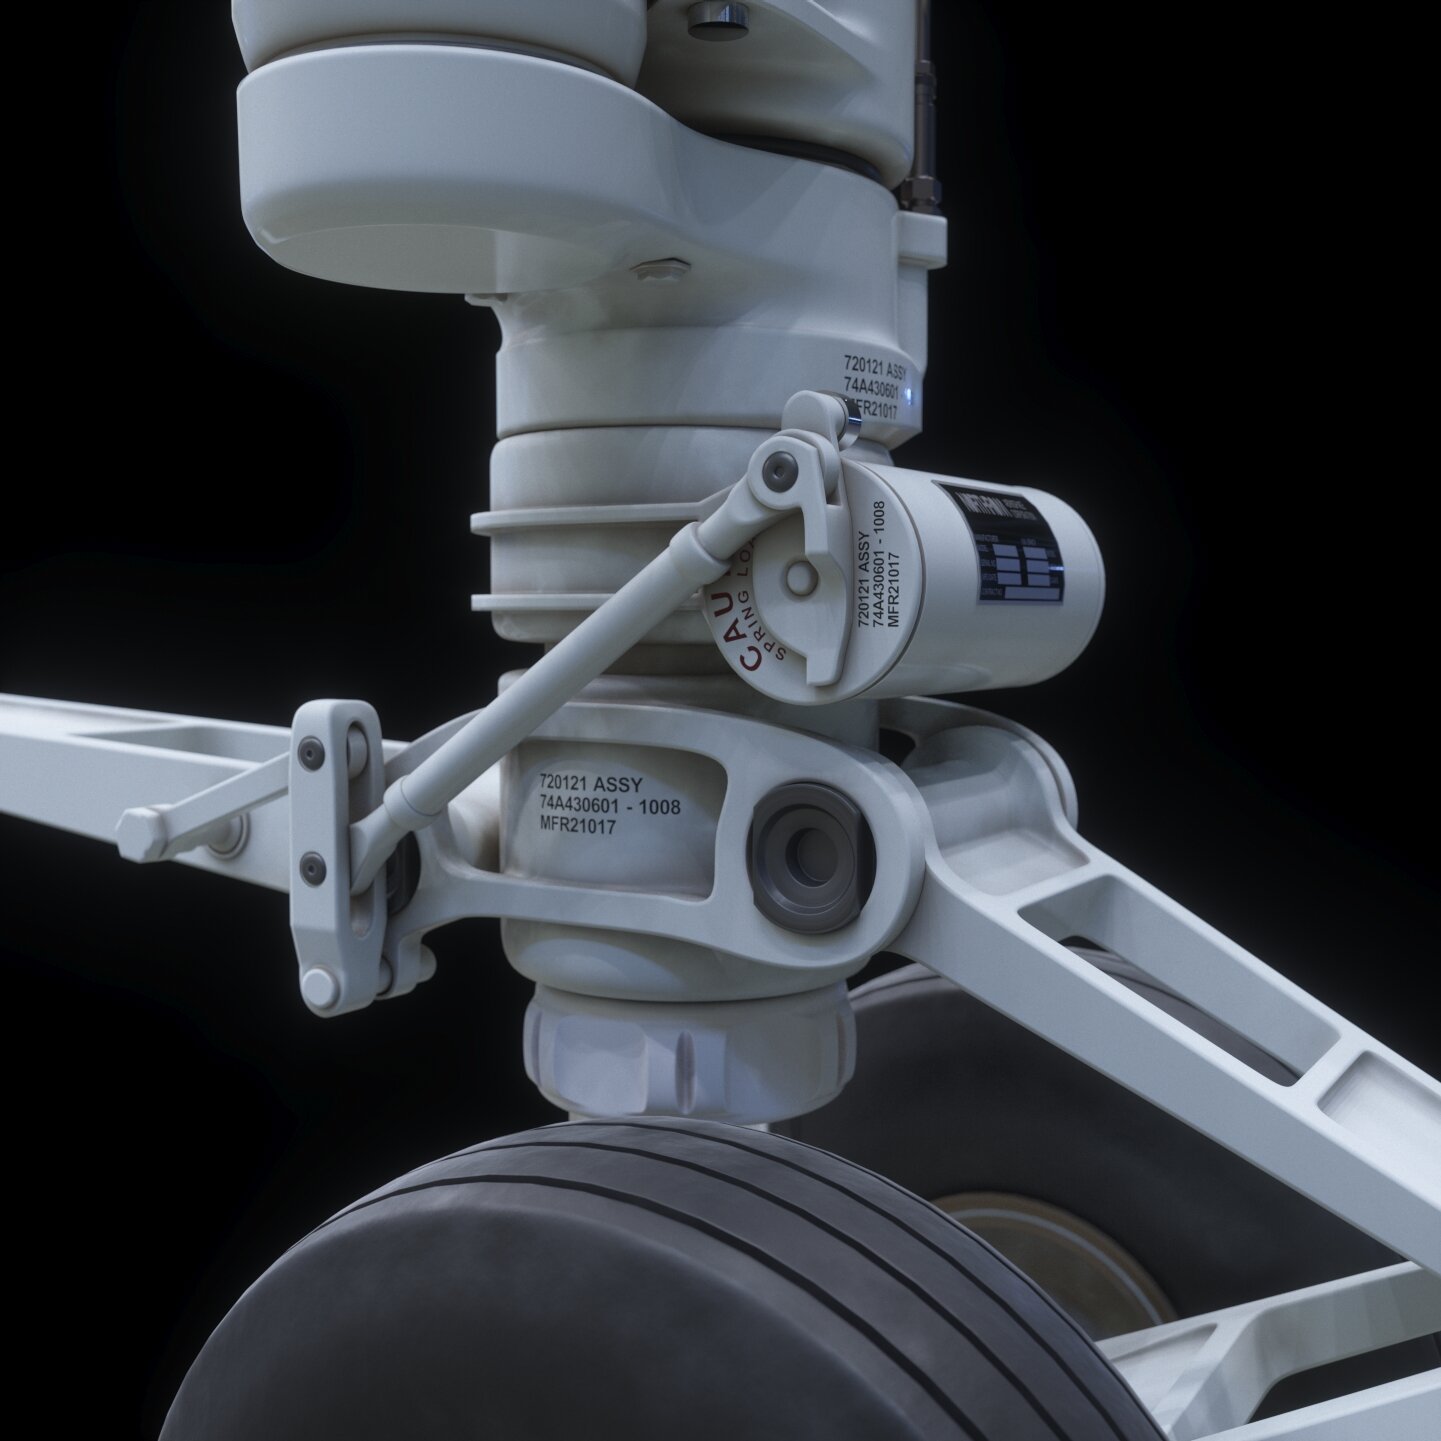
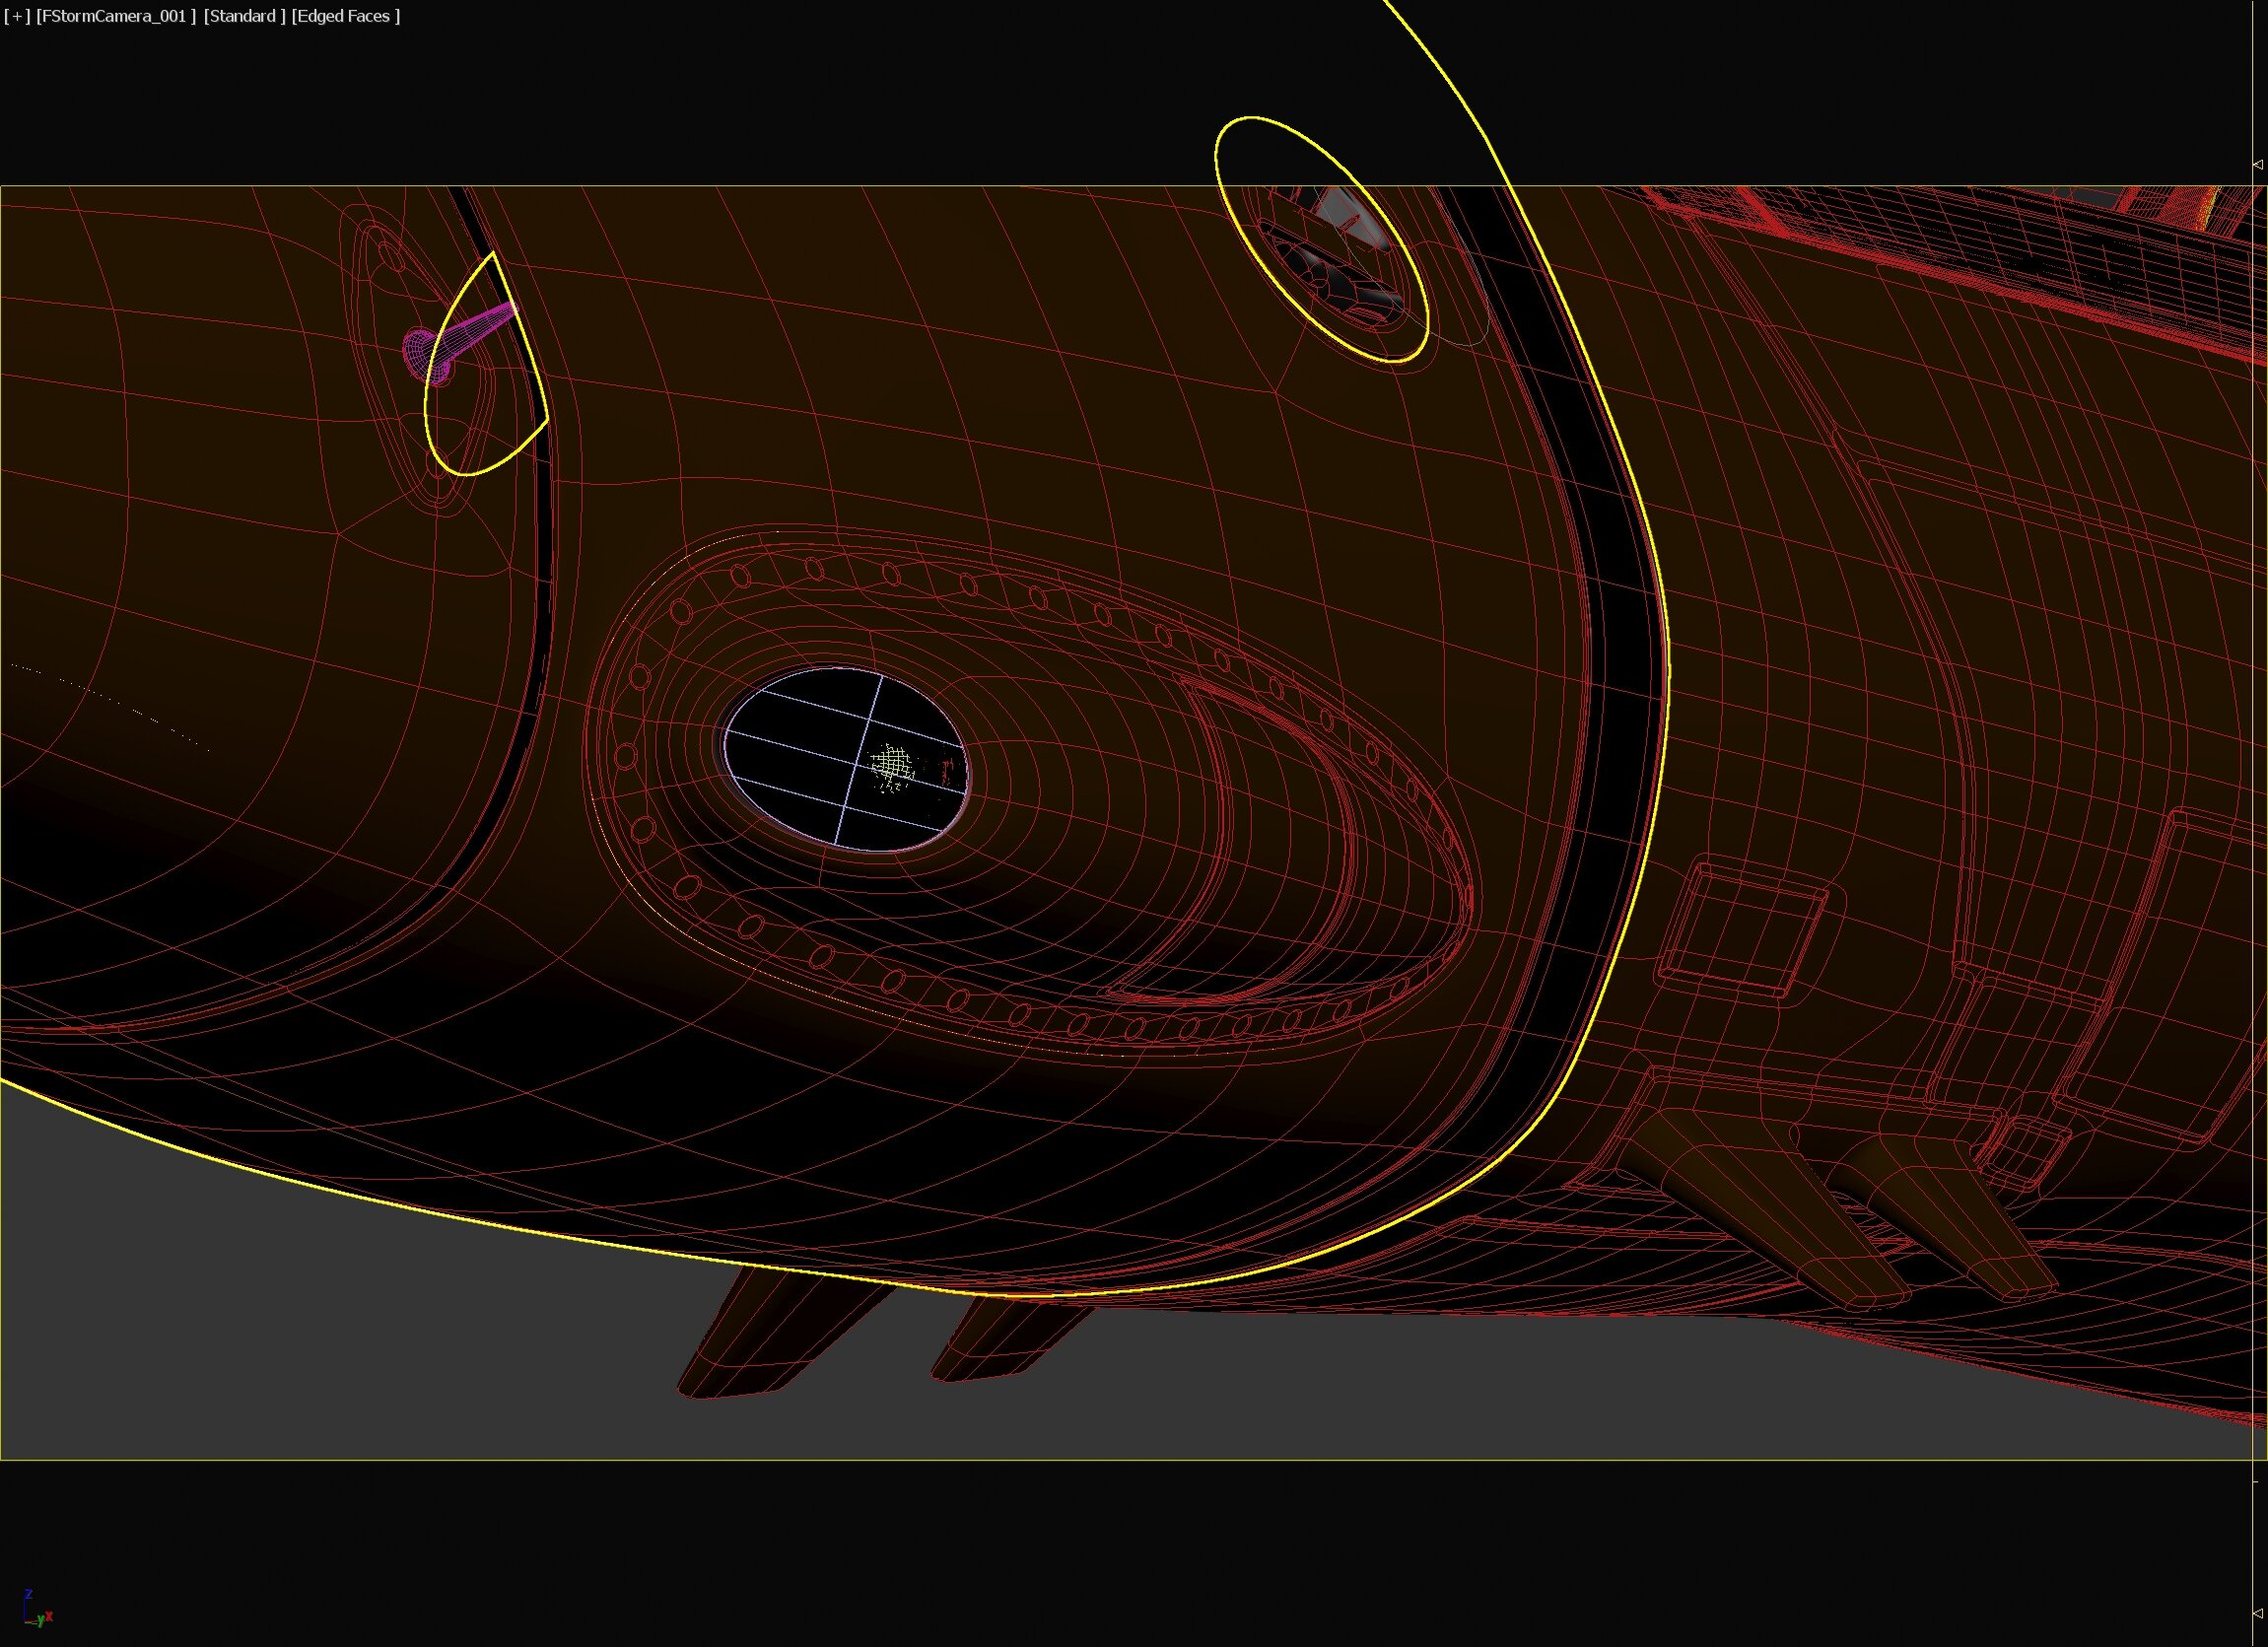
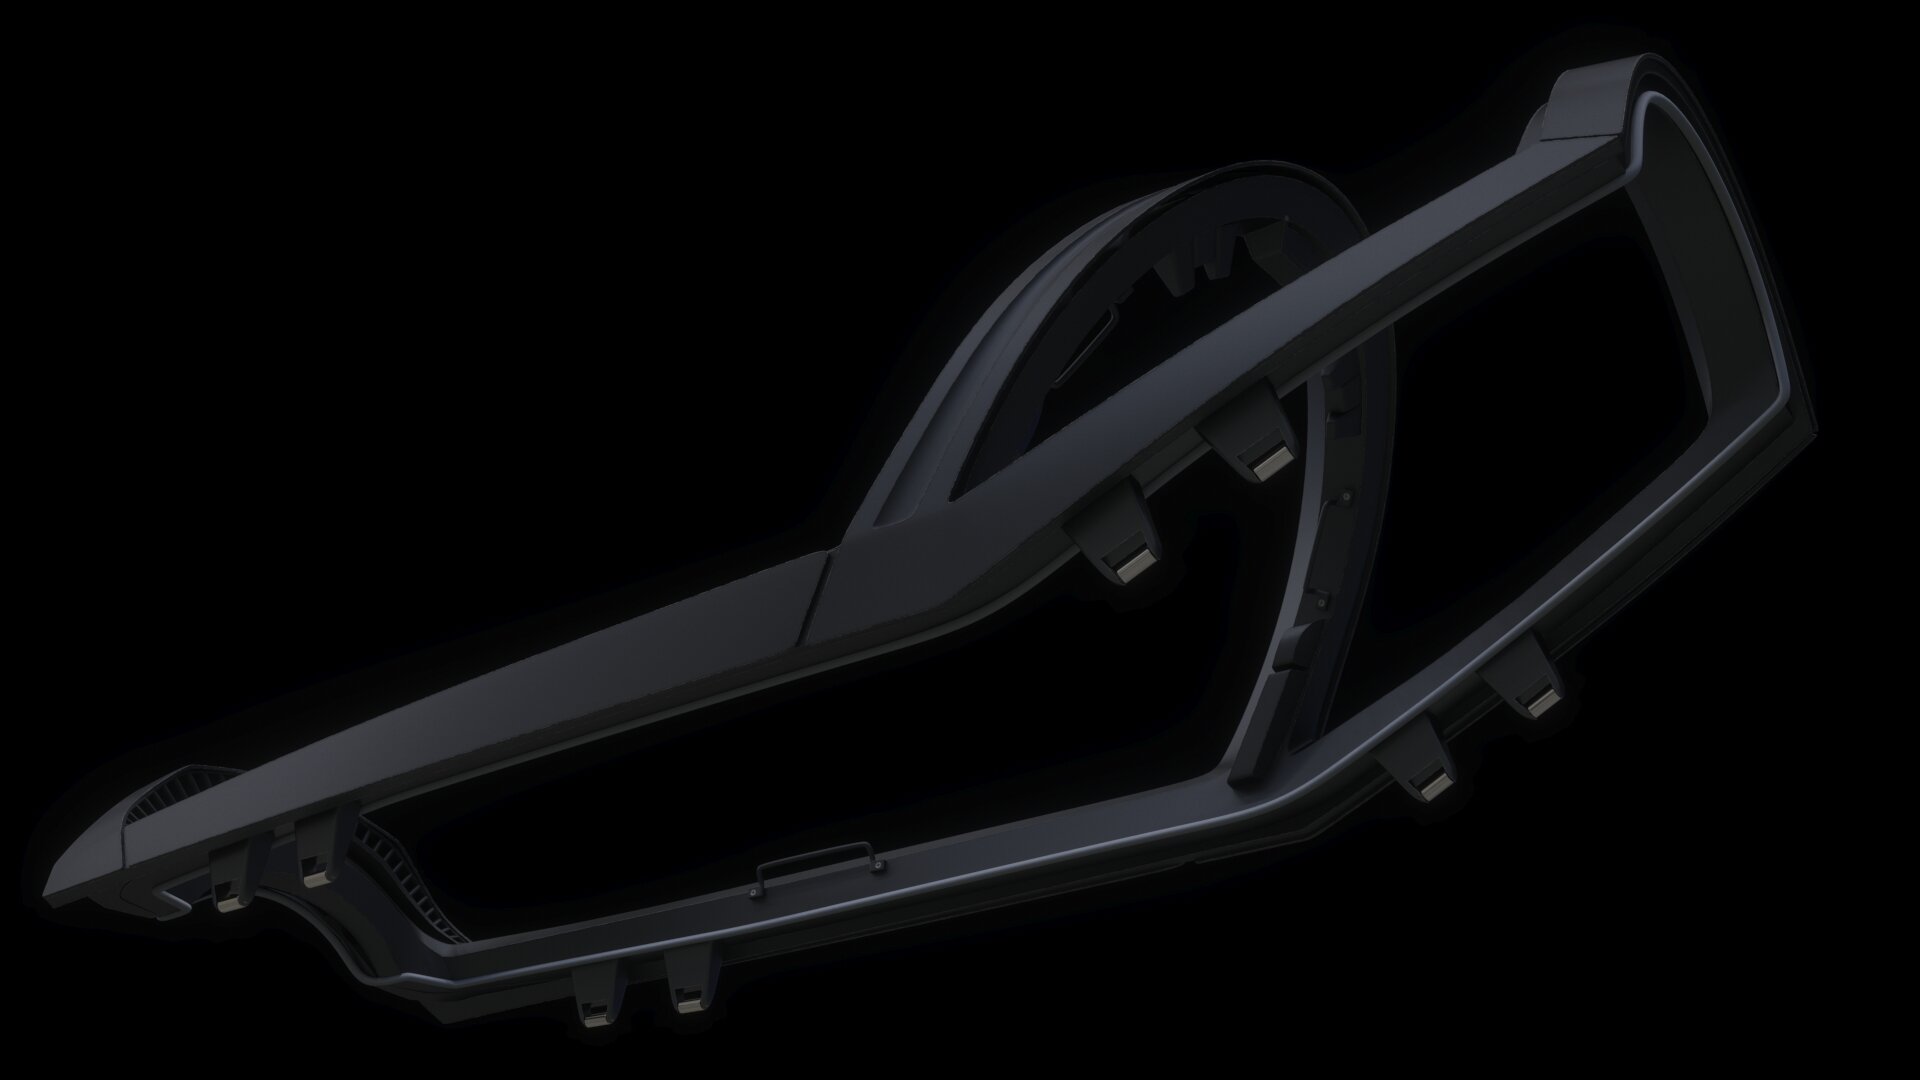
Ok enough rigging for now - back to the details. So I had to flip a couple of things around. Not sure why they keep showing the steering motor above the drag bar in the drawings and in the Masterfile illustrations? I tried to keep it this way, but my drag bar piston kept popping through the mount - there simply wasn't enough room for that config. I flipped the steering motor and drag bar mount, and now everything fits. Lastly, I went with an f-18 launch bar mechanism. Thought it looked cooler than the Masterfile one. Oh well! A special shout out to Cthonic for the Northrom logo!!!
-
Oh SNAP. That was you! Hilarious. Nose lasers. Sigh. Thanks for having my back (lol). Just like footsteps on the beach. I only discovered/joined MFC last month. So still a newbie.
-
Whew, there you are Knight26 - thought I lost you.
-
Ok some work on the nose landing gear. I'm so rusty in IK that it took me a while to figure out this simple rig. I had to re-culture hard into IK with no bones. Finally got it all working! I set up some animation to help me visualize the way rig should function. Just have to link up the launch bar/motor assembly and we are off to a good start. Now that the mechanics work reasonably well, I can get back to the aesthetics. 1626525360_VF1NLGTESTING.mp4
-
Whoops, sorry I replied with my other (unused) account. This is me! Did you get it to work in the Oculus? Because that's the real show.
-
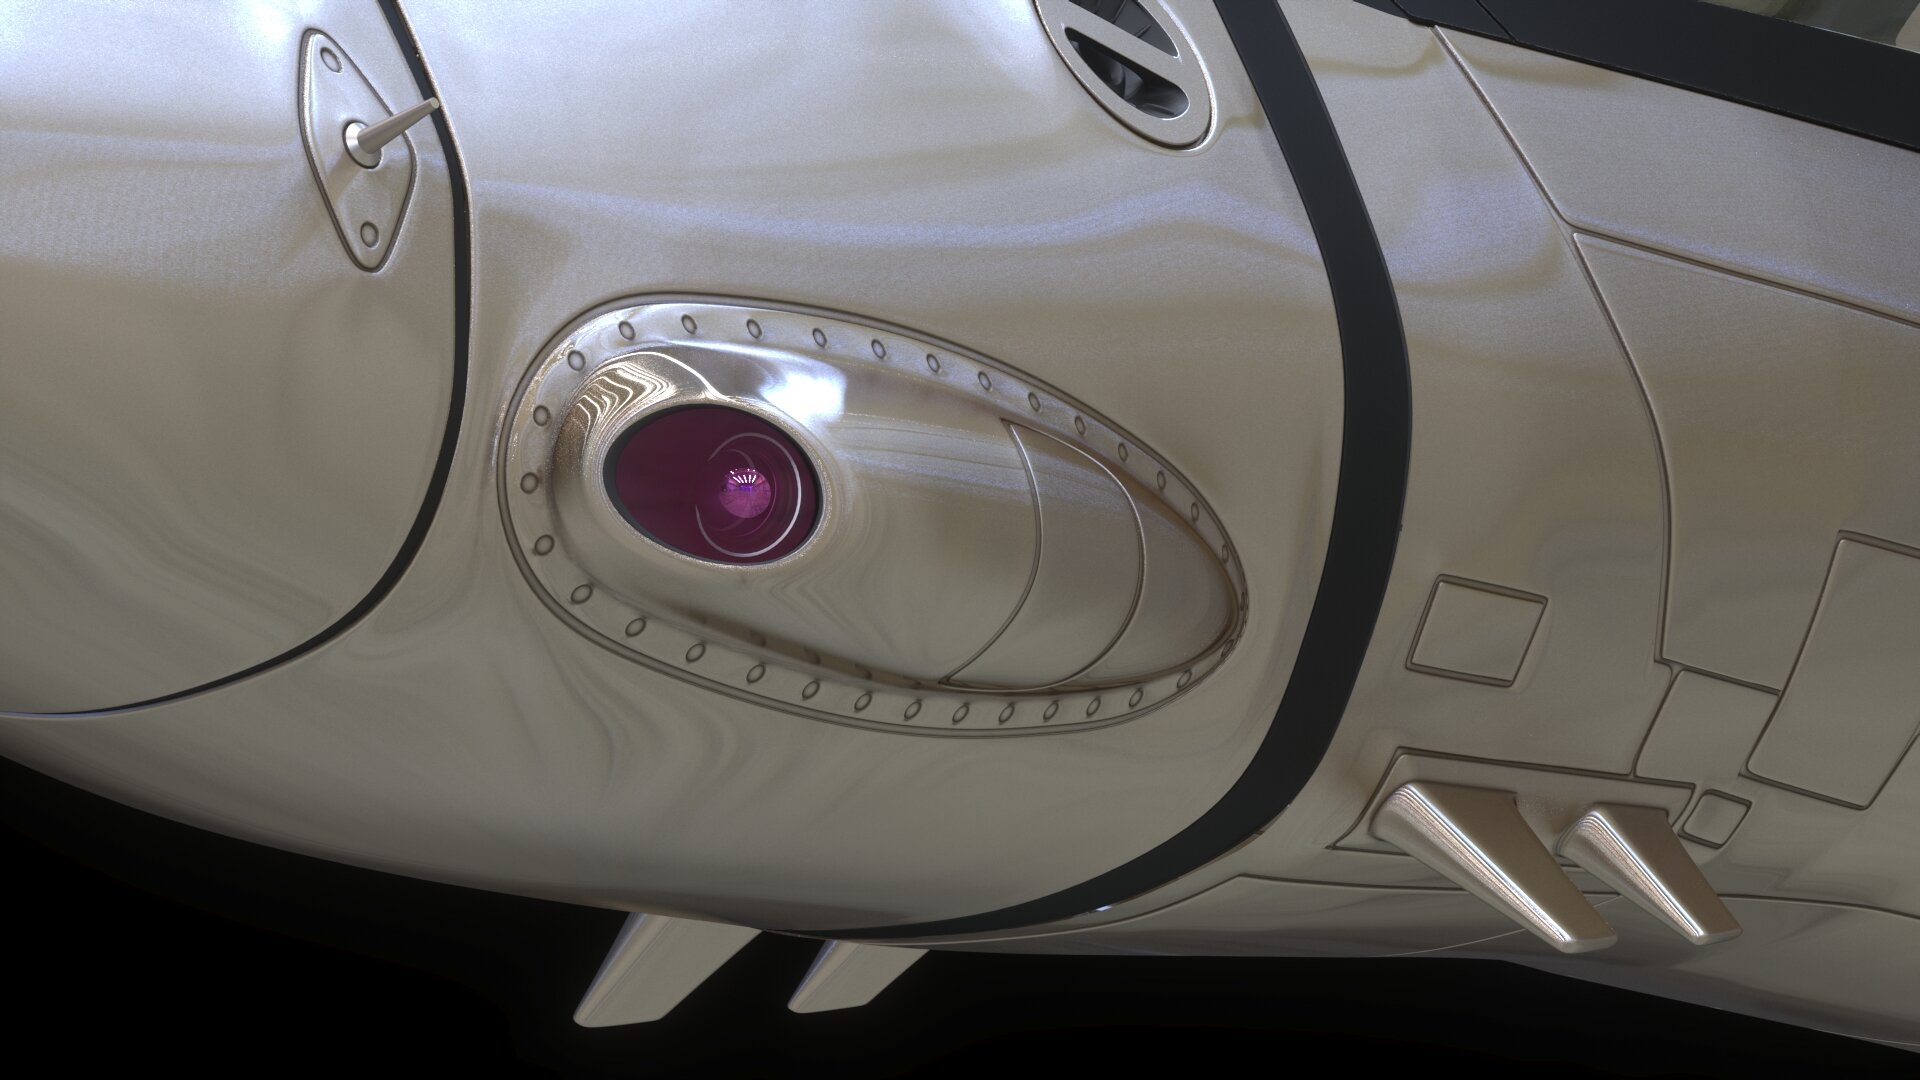
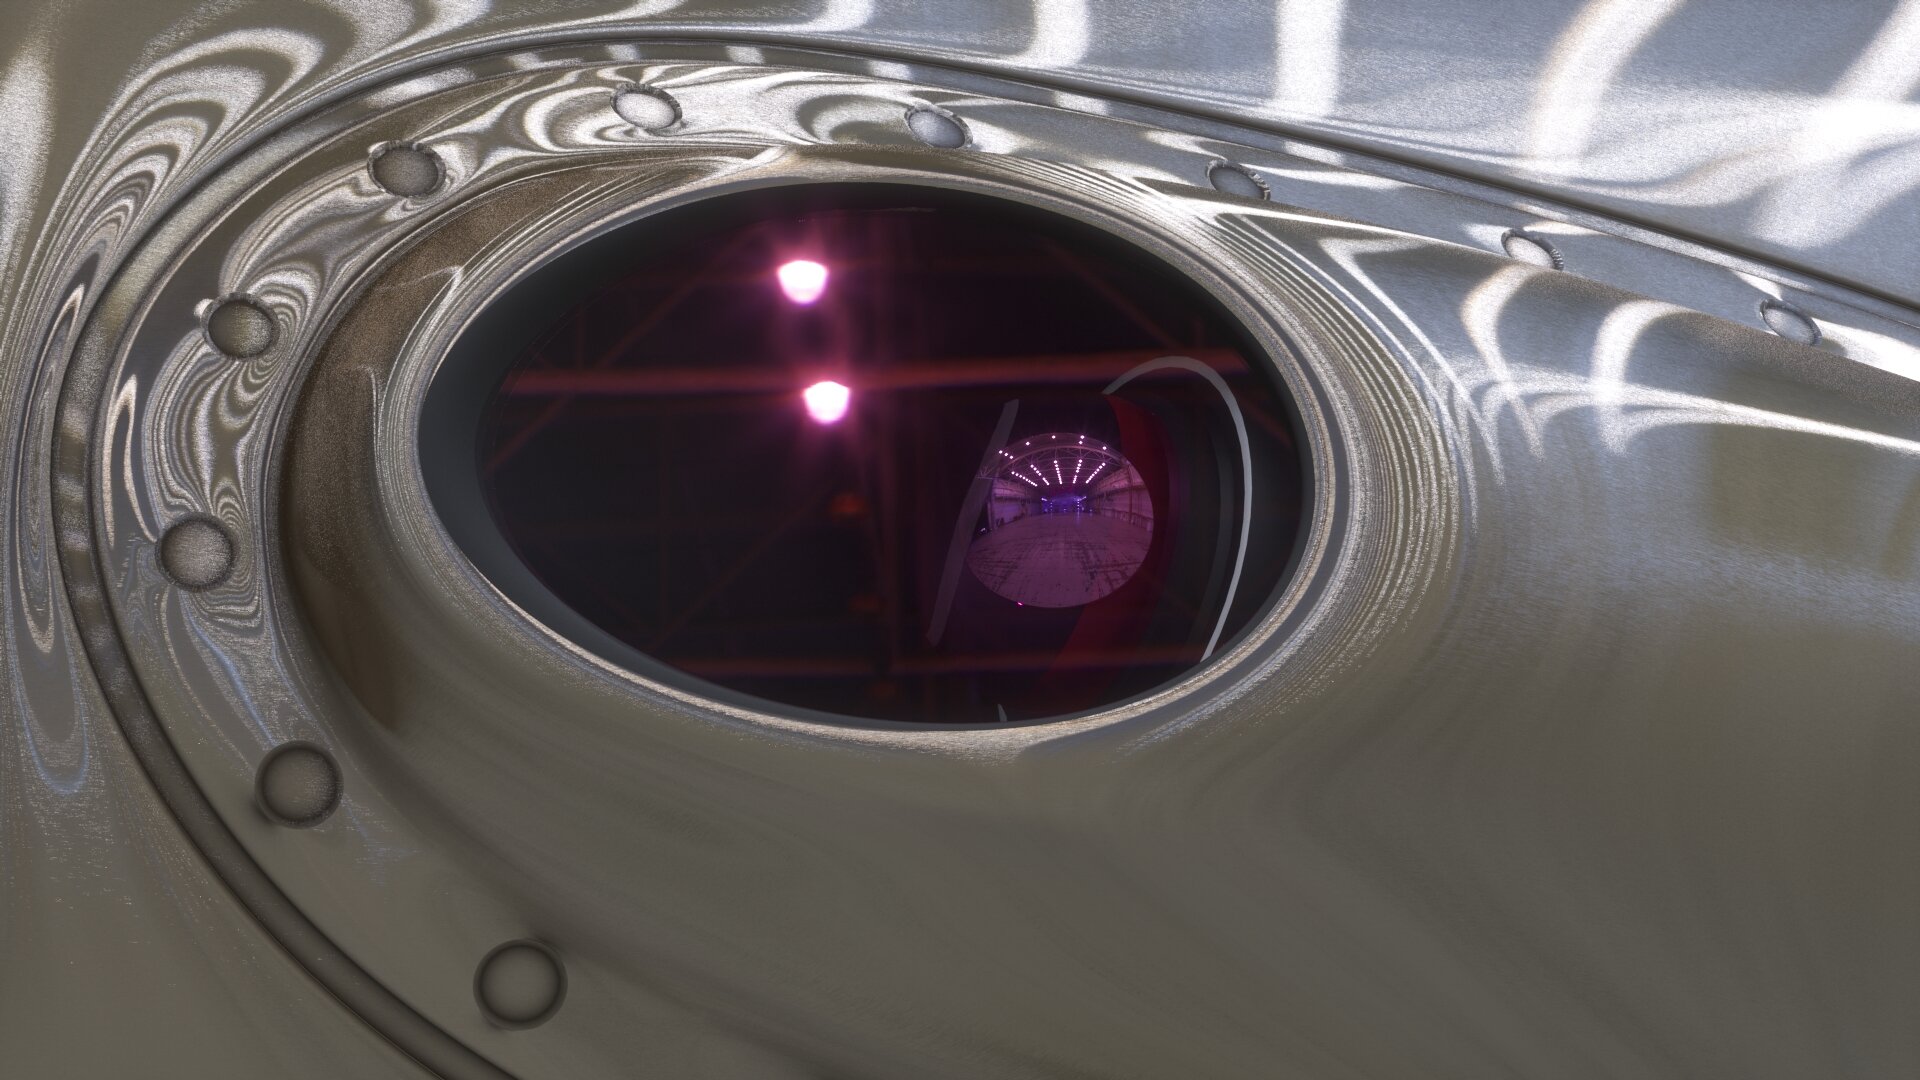
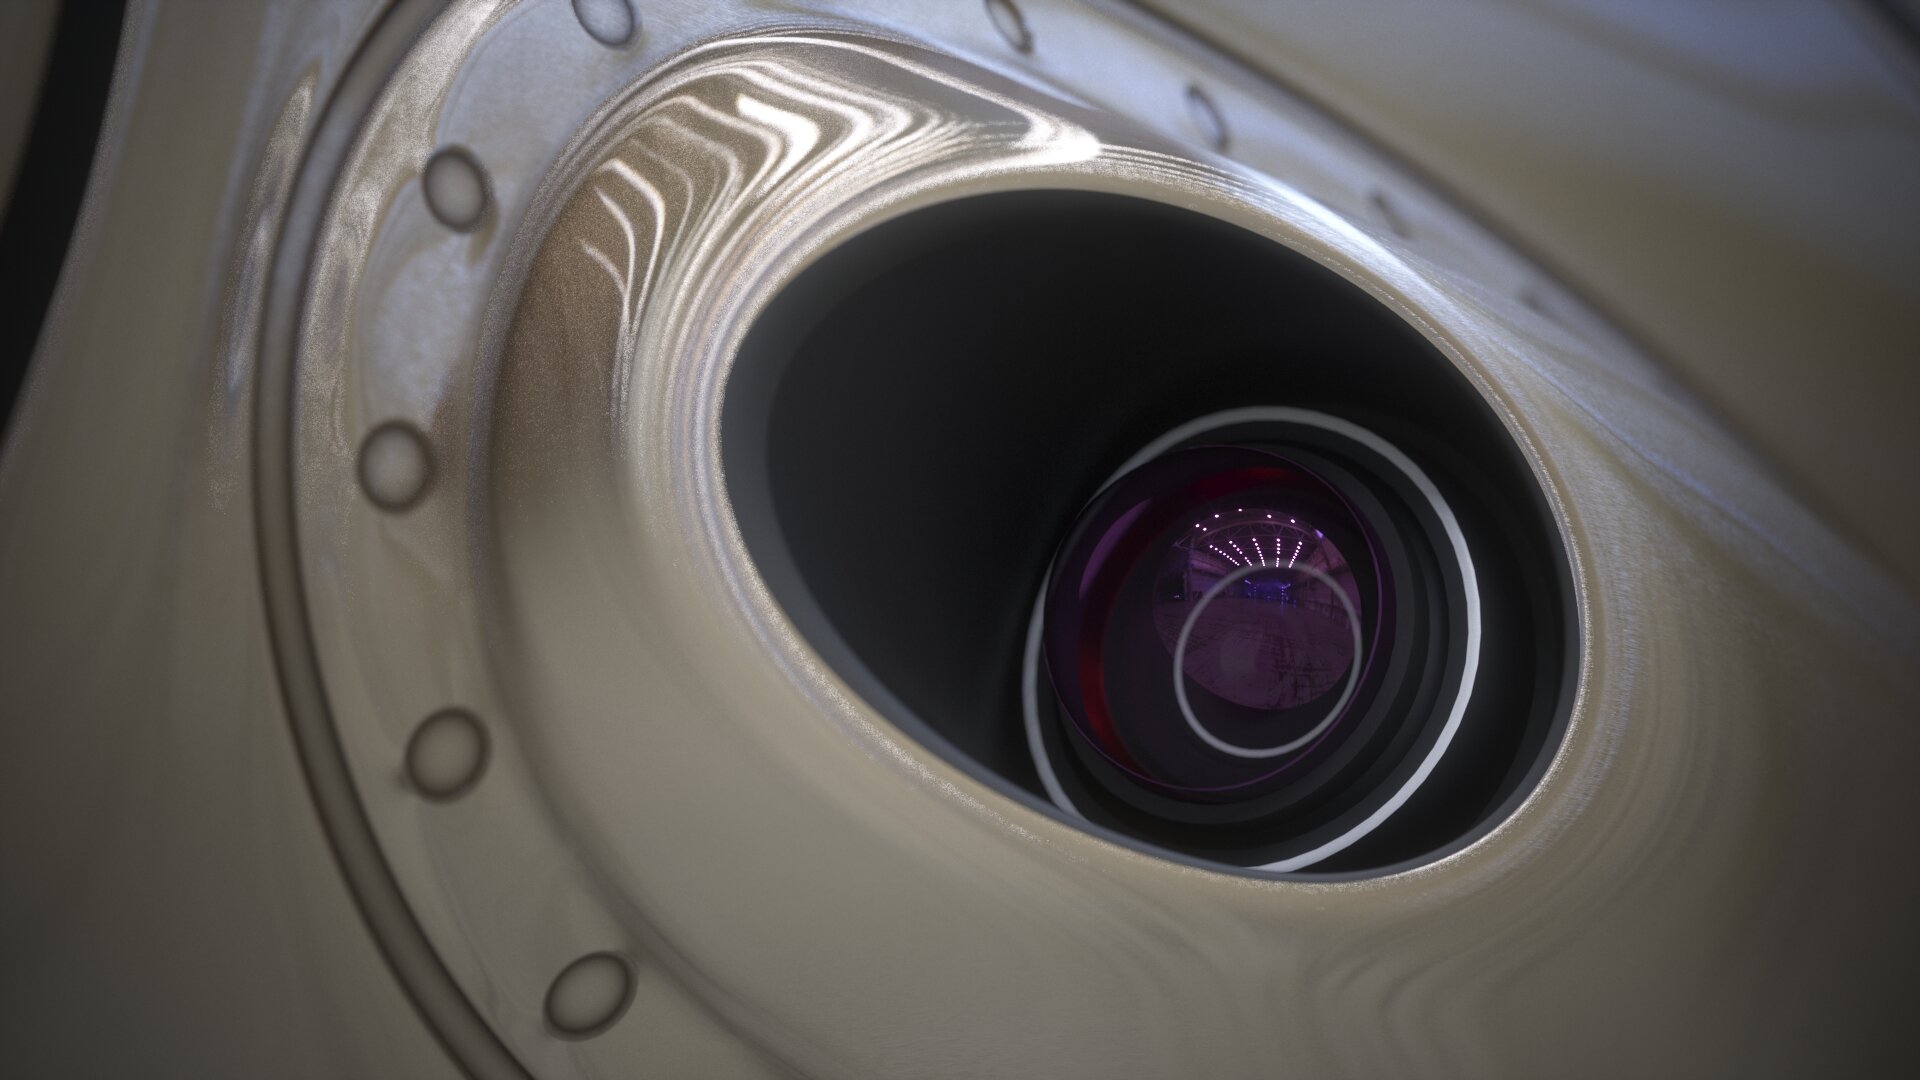
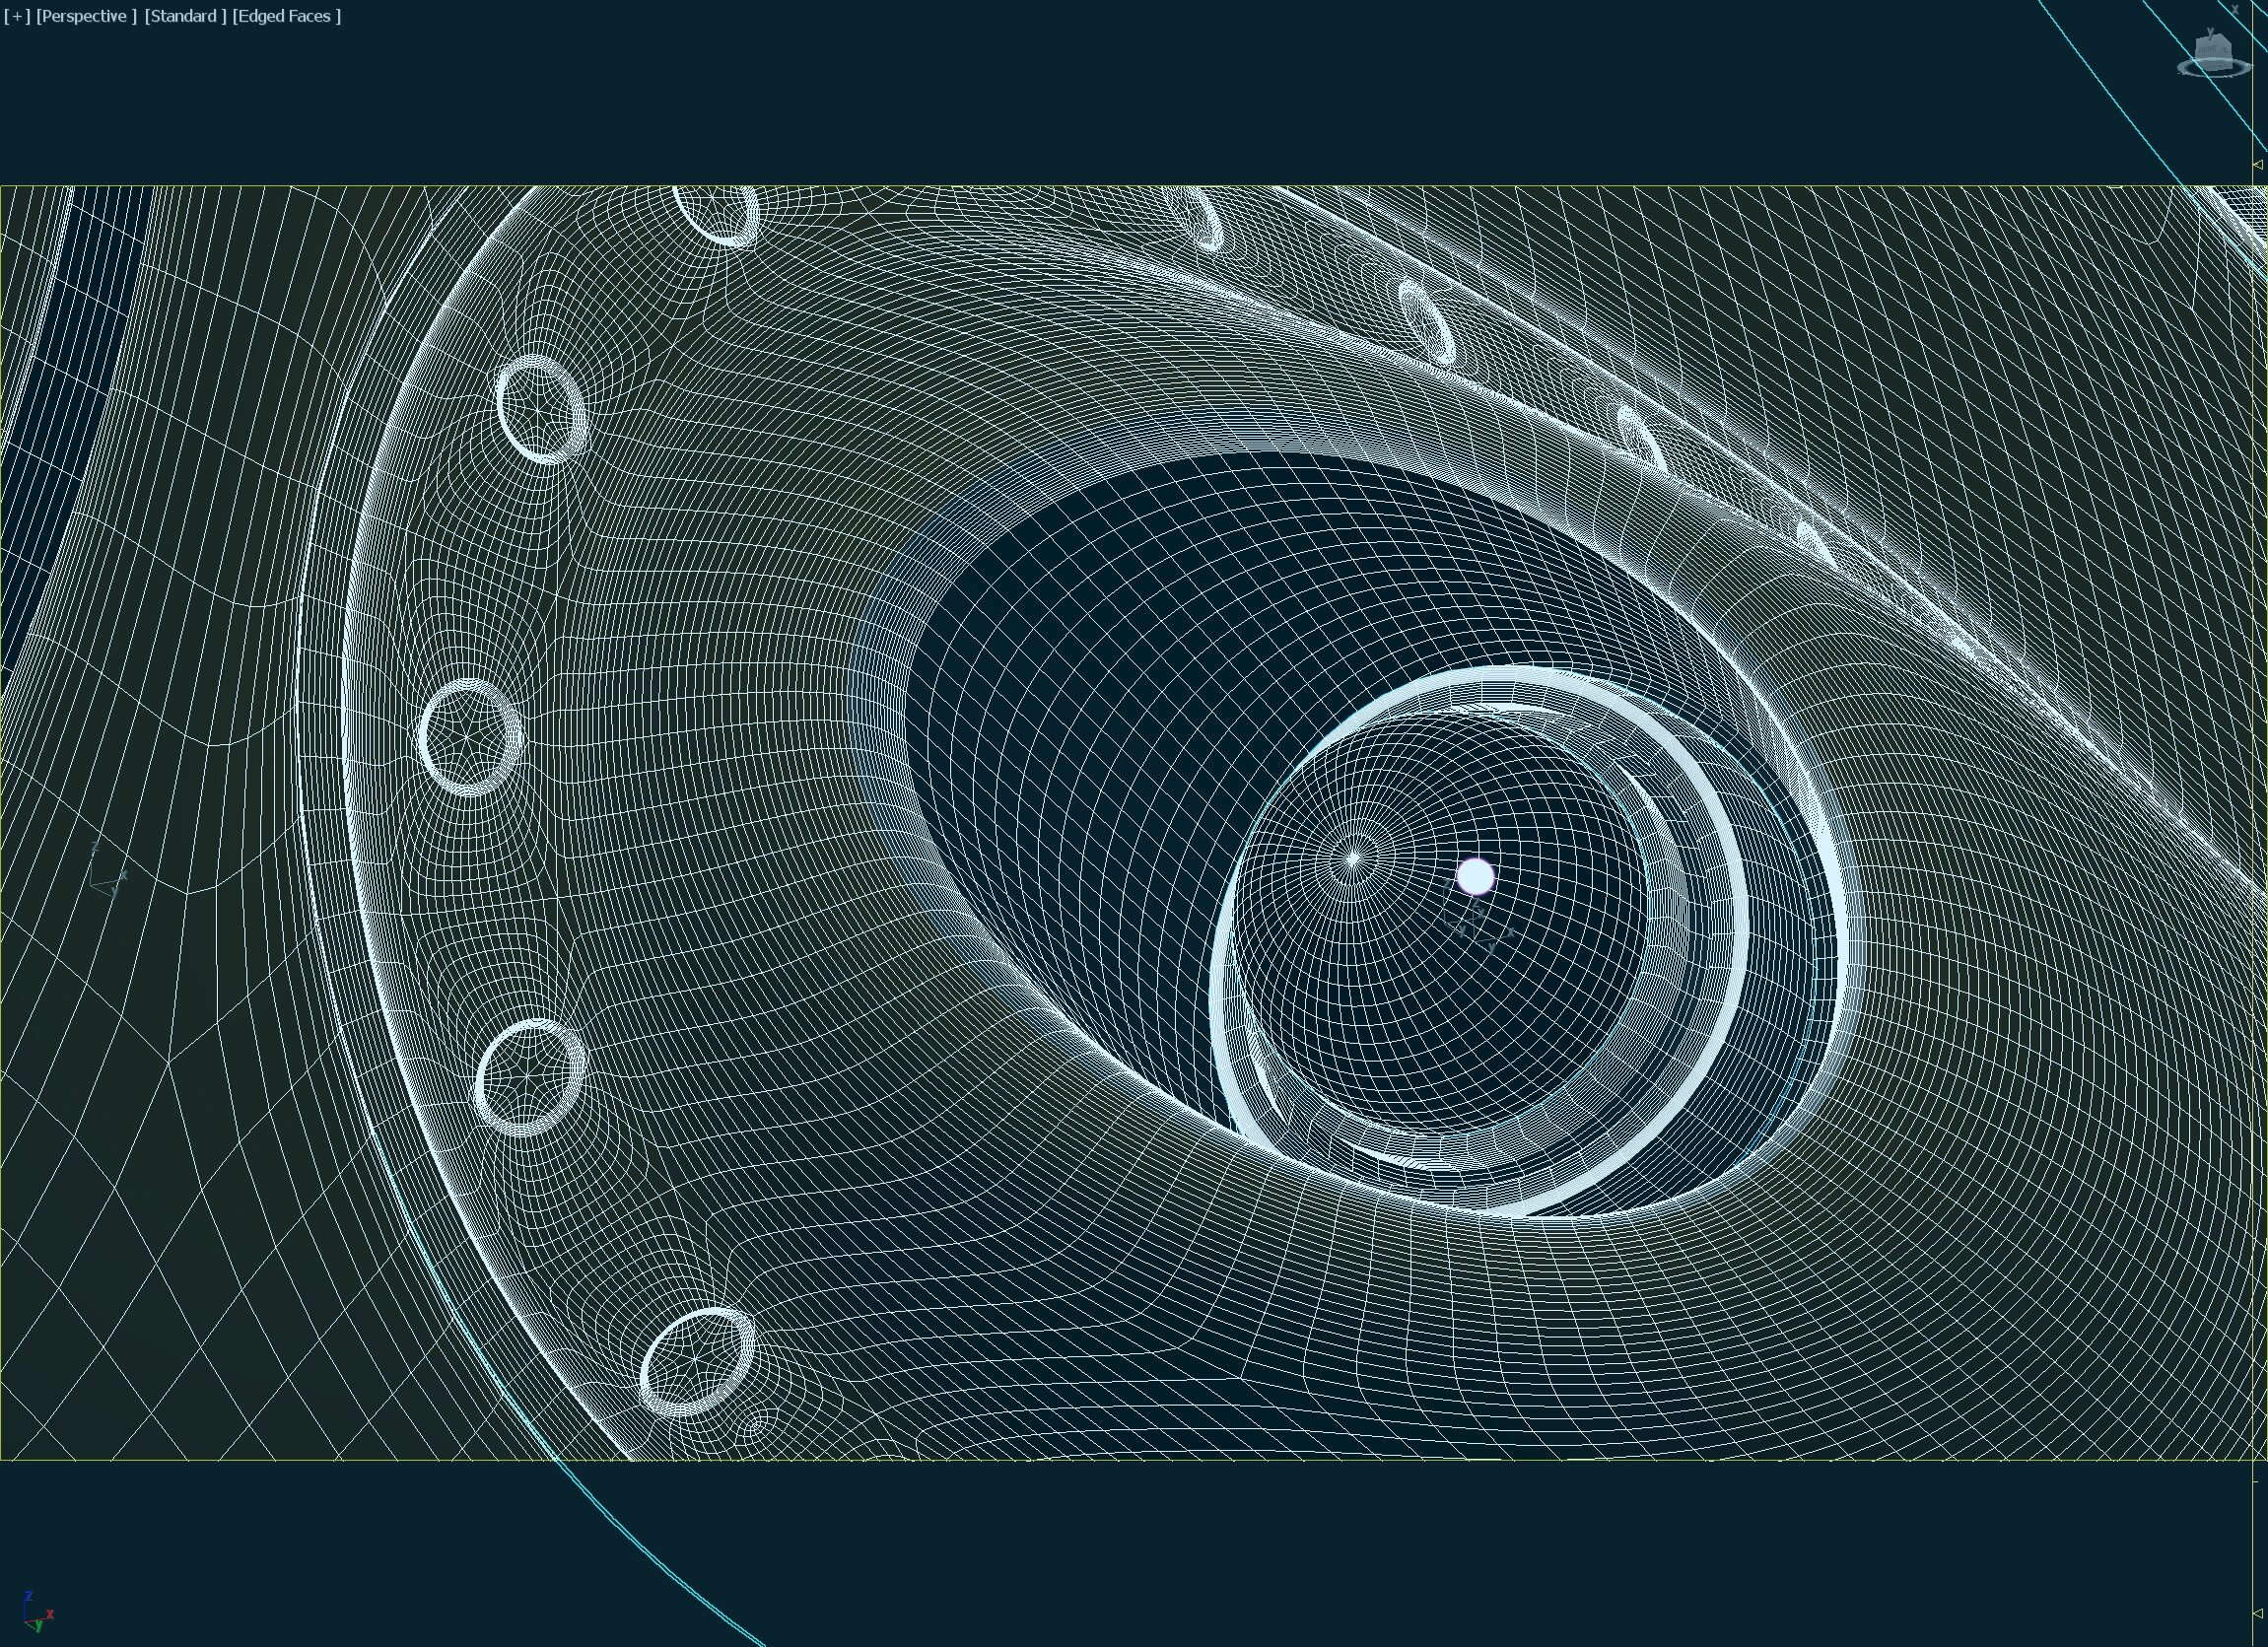
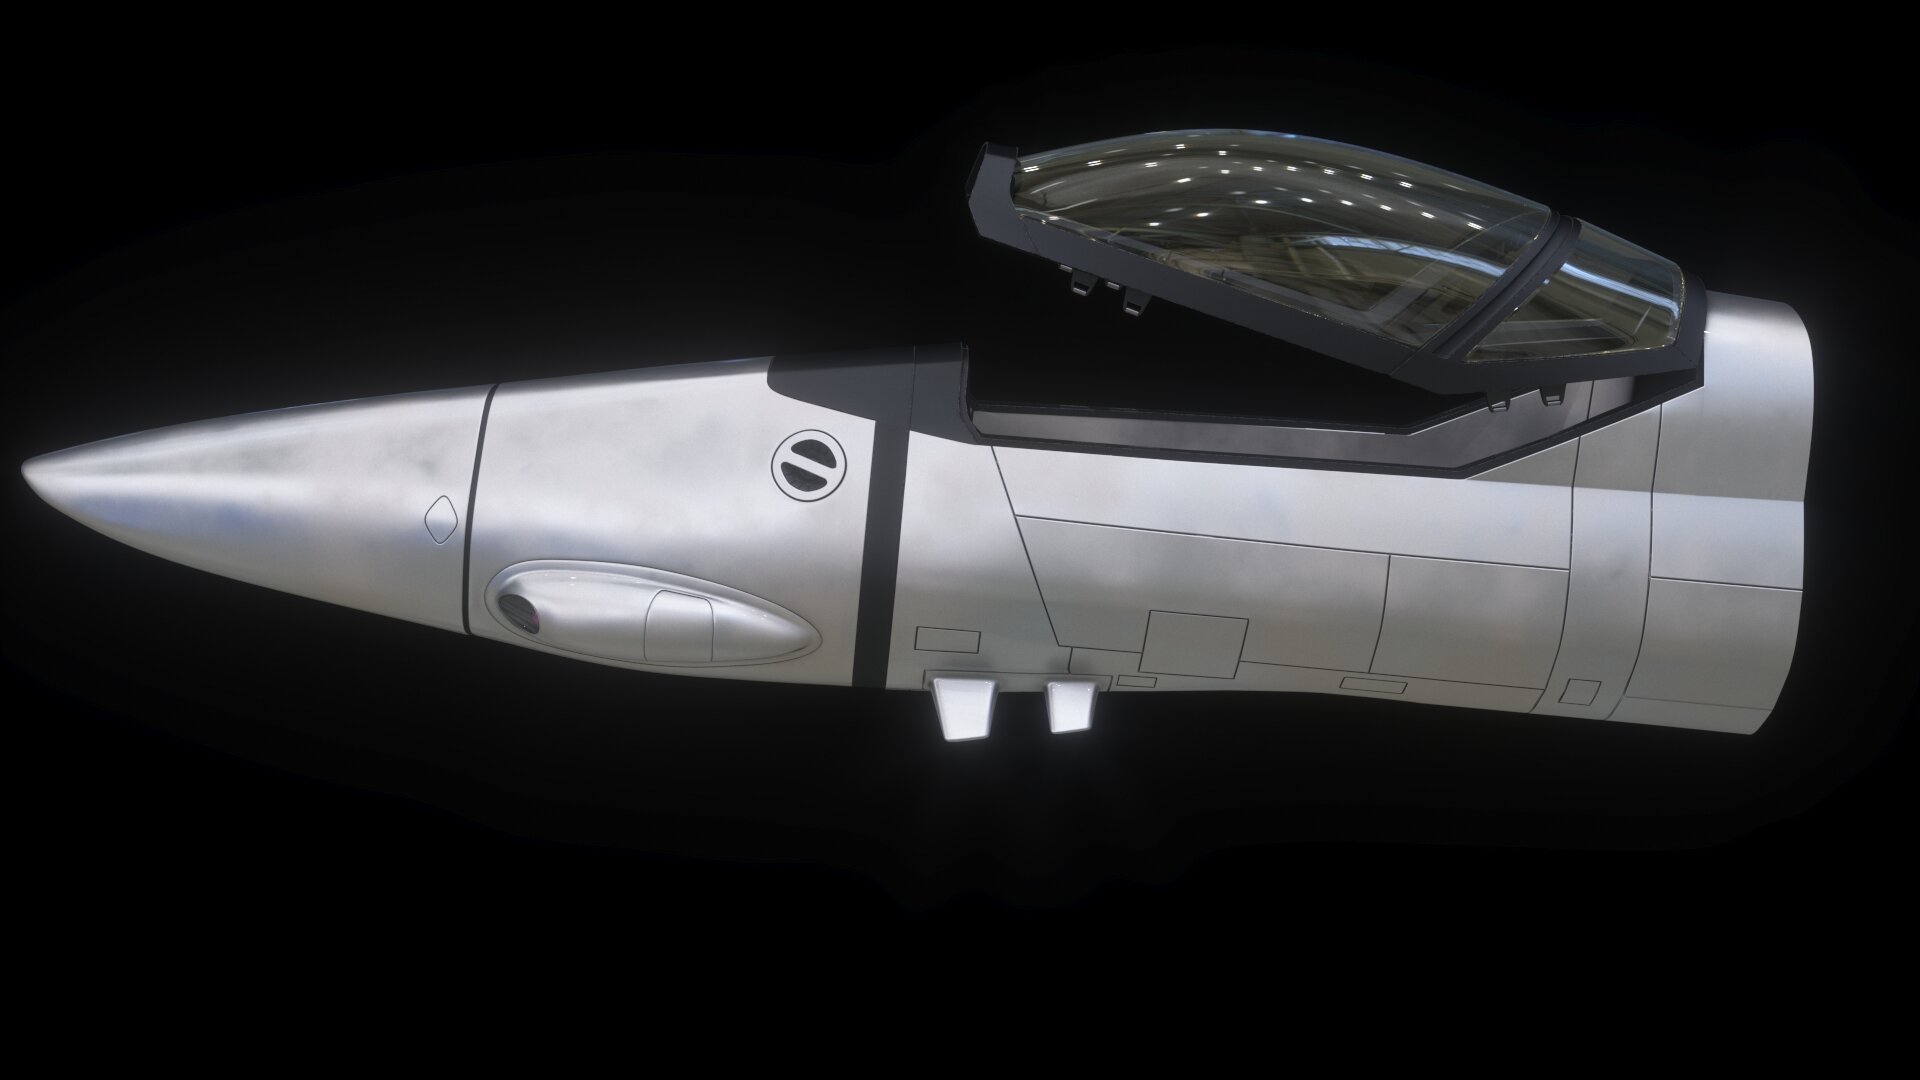
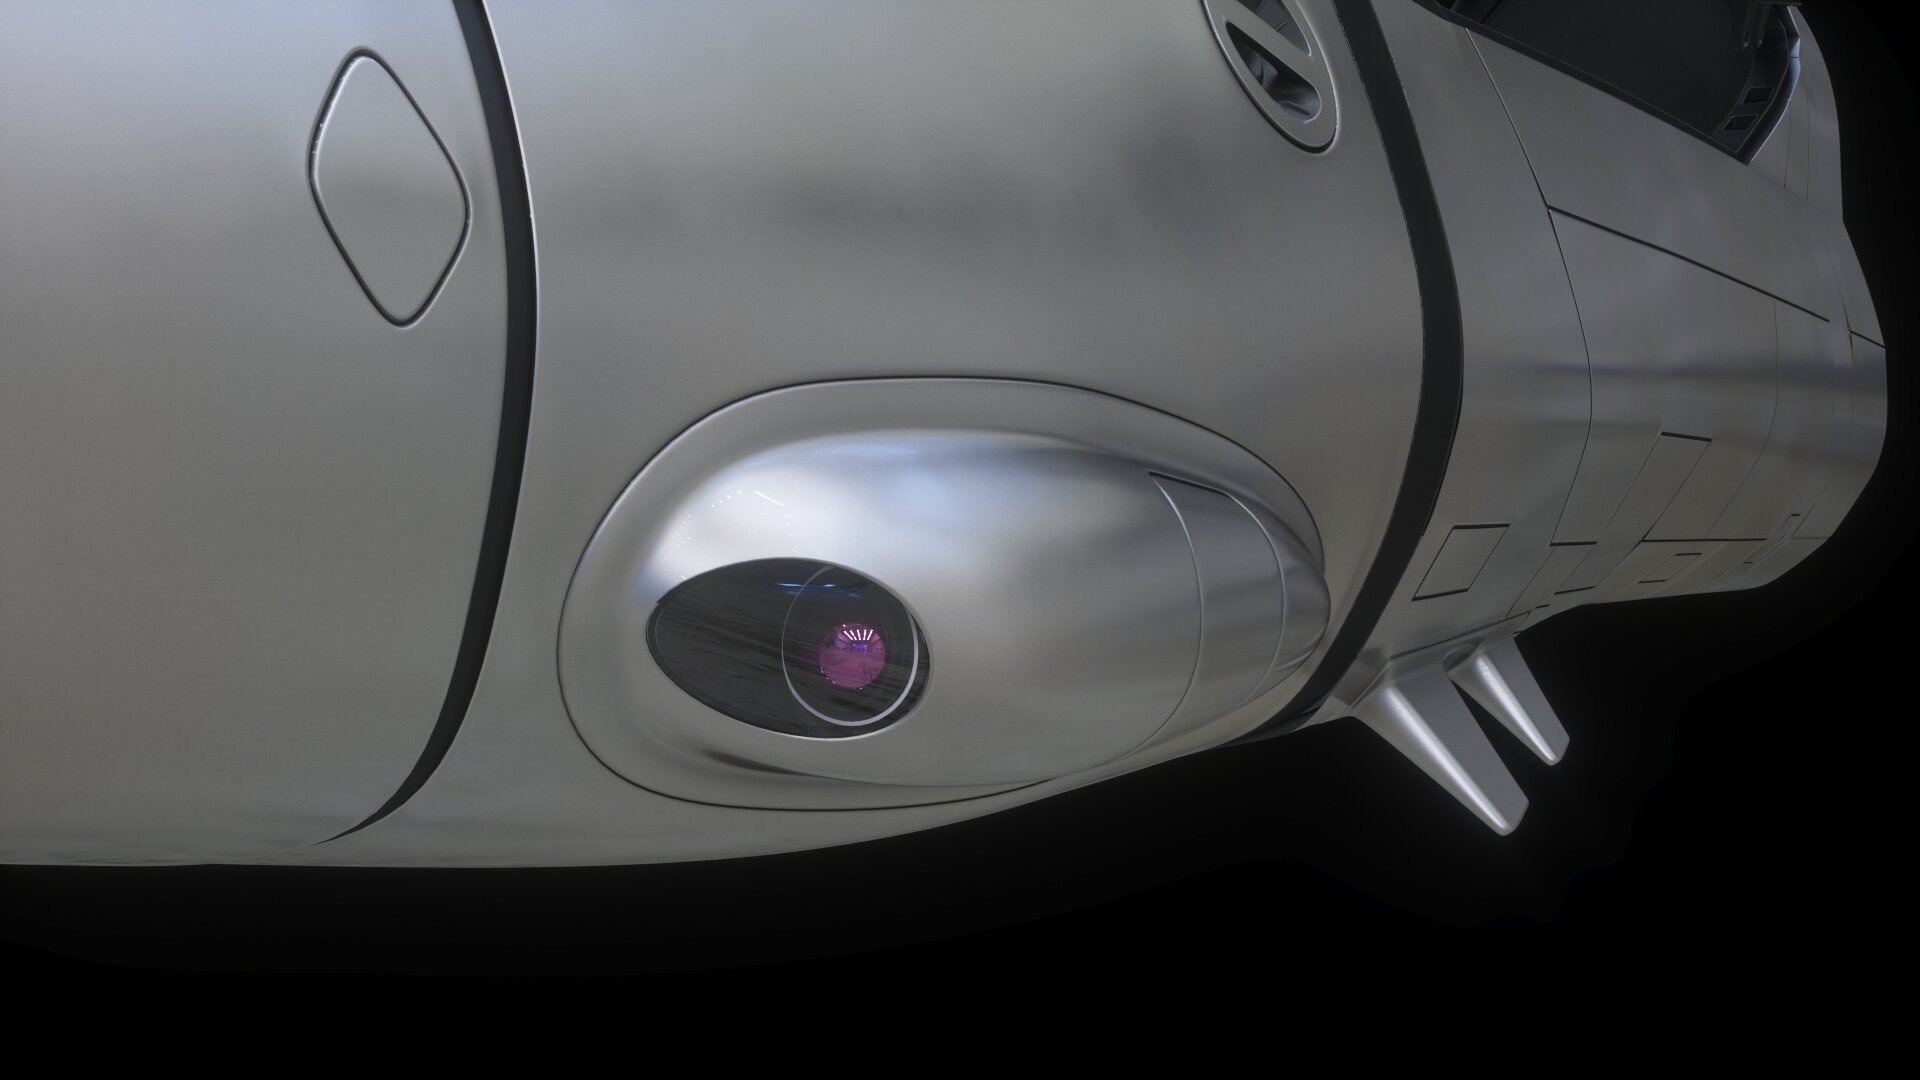
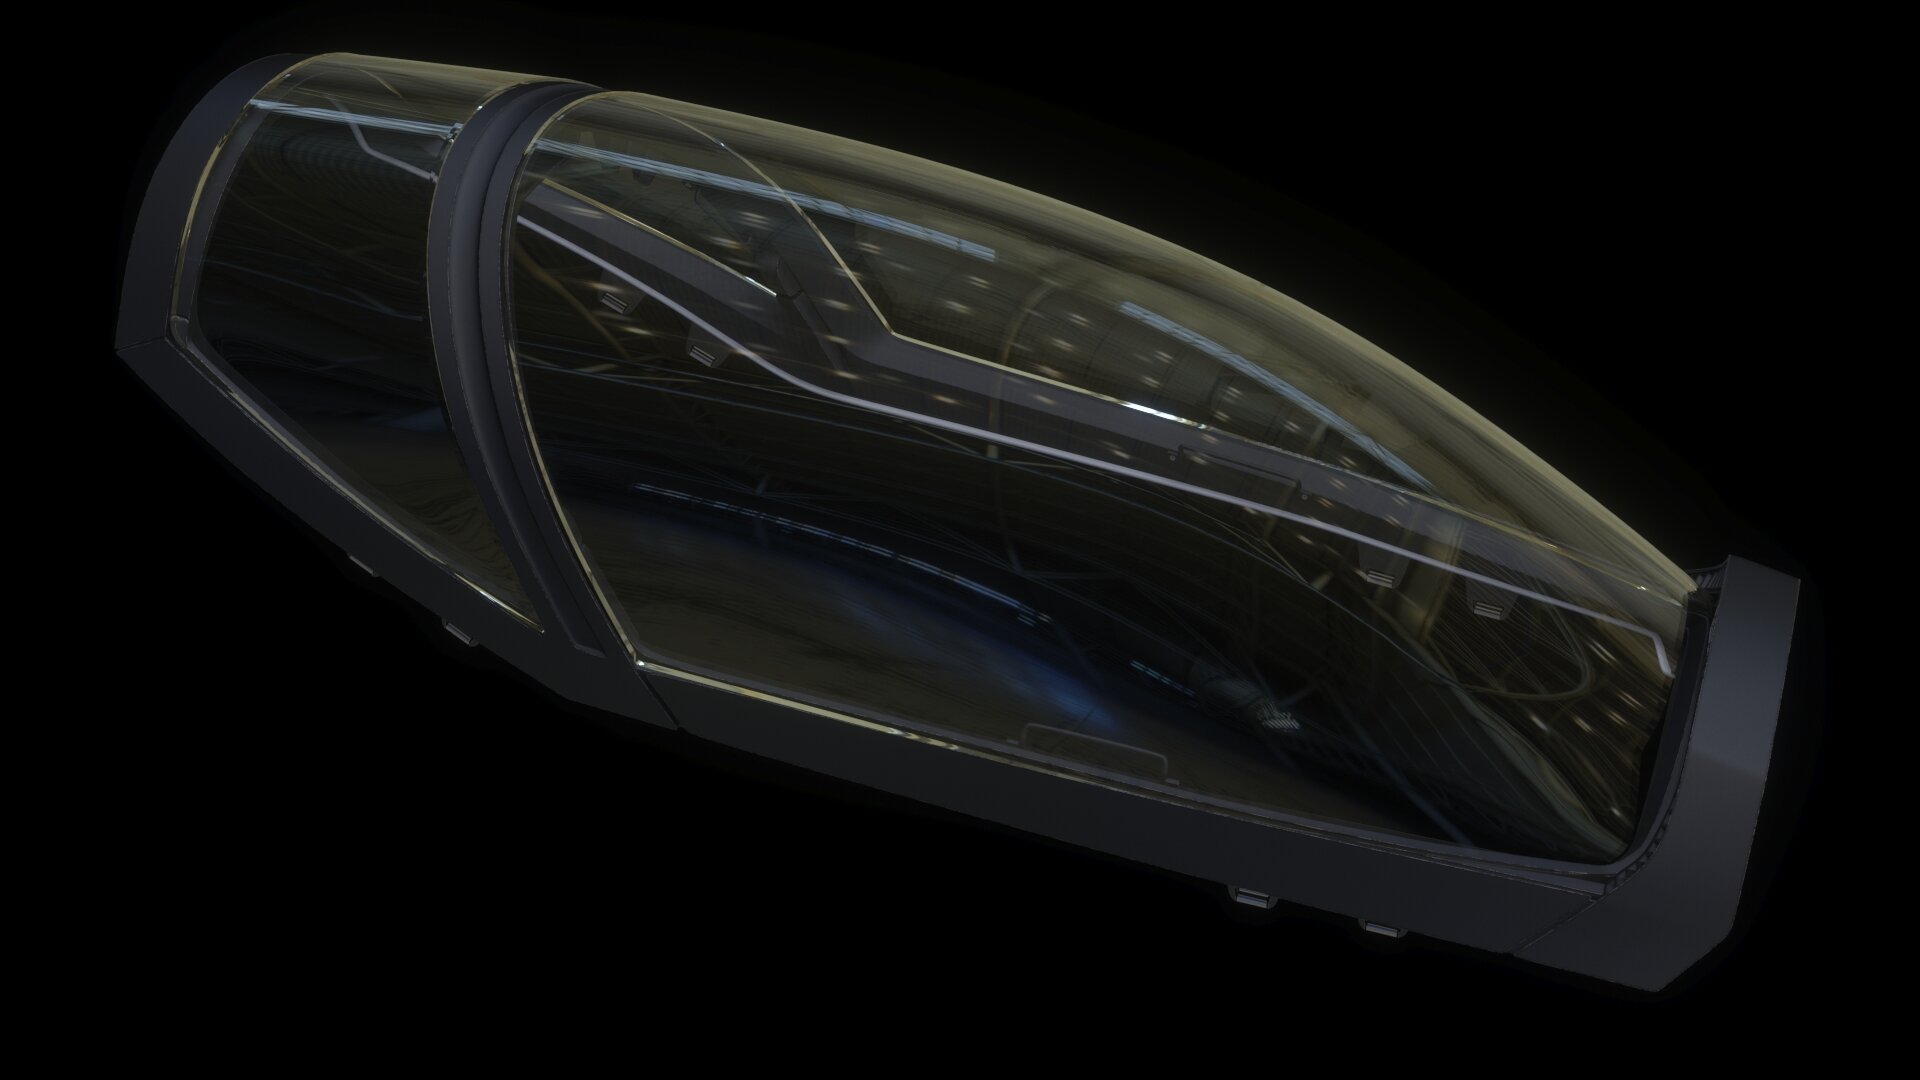
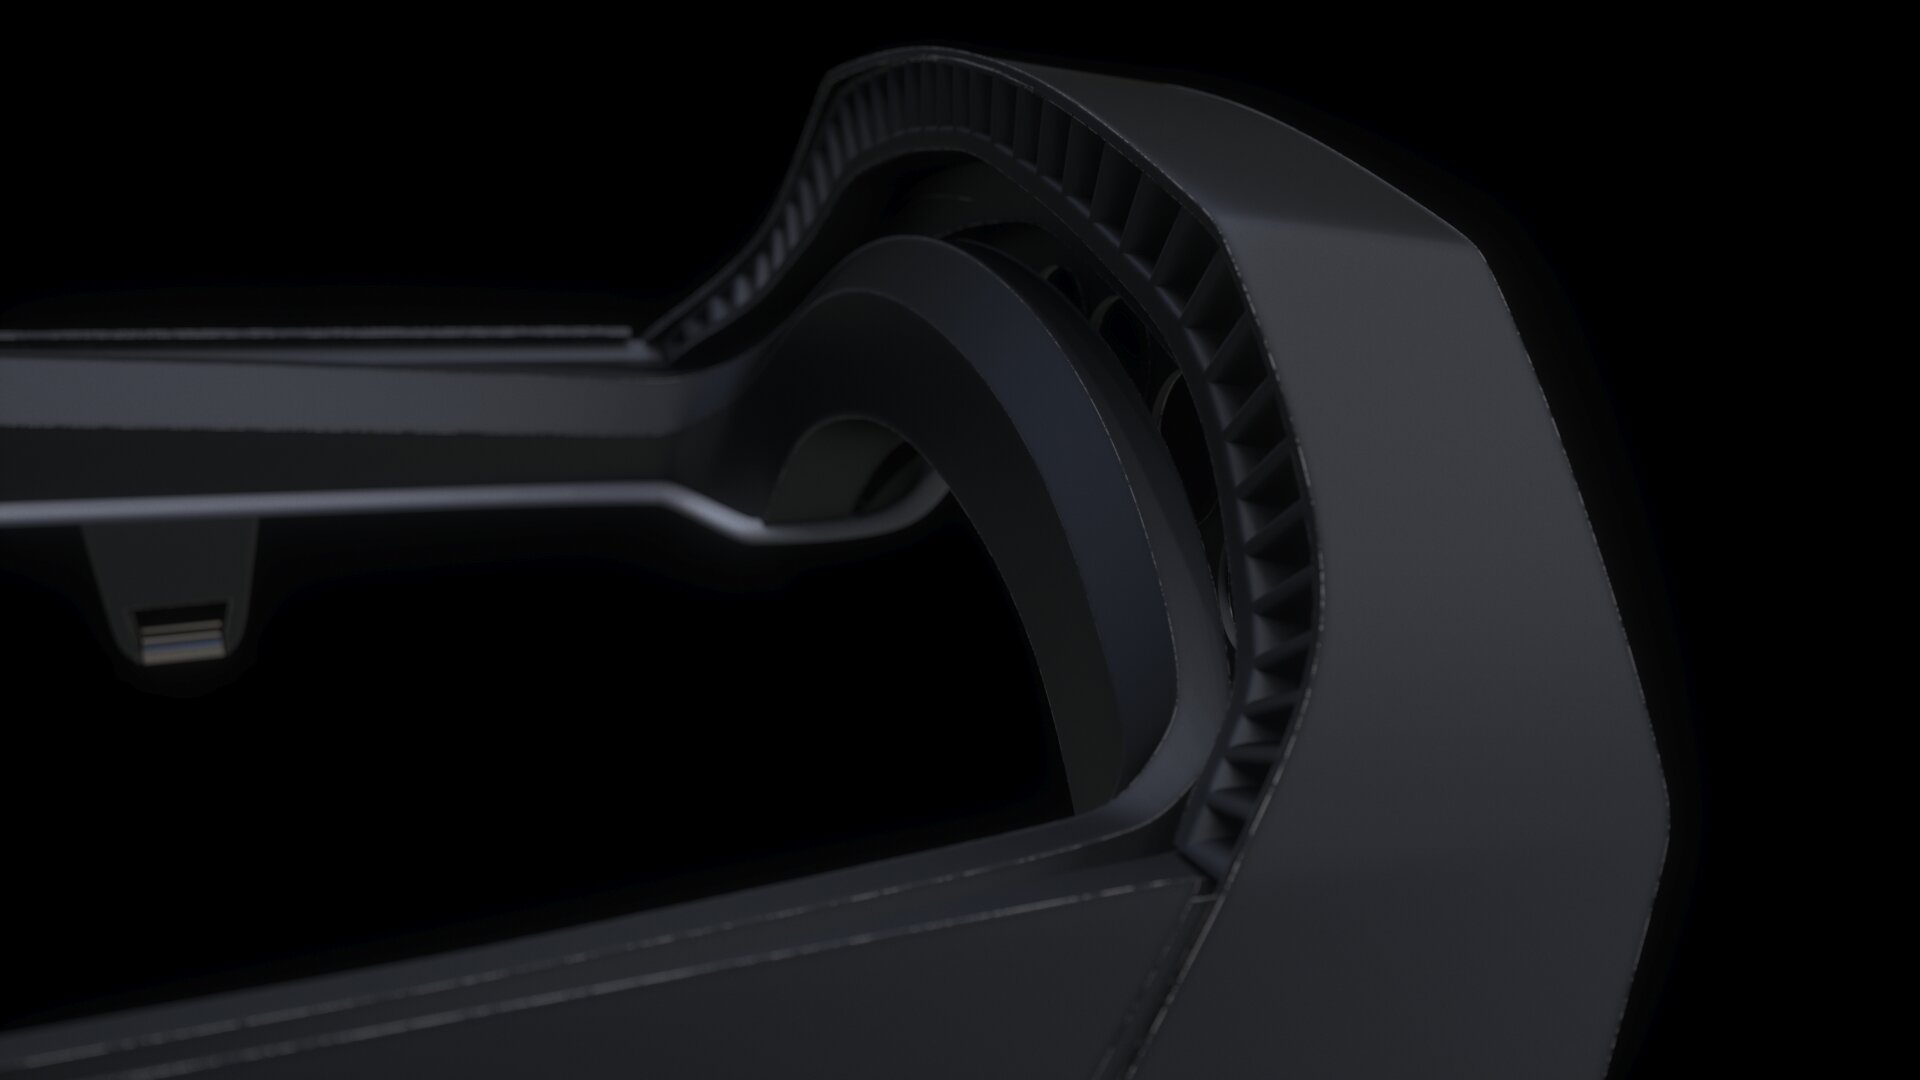
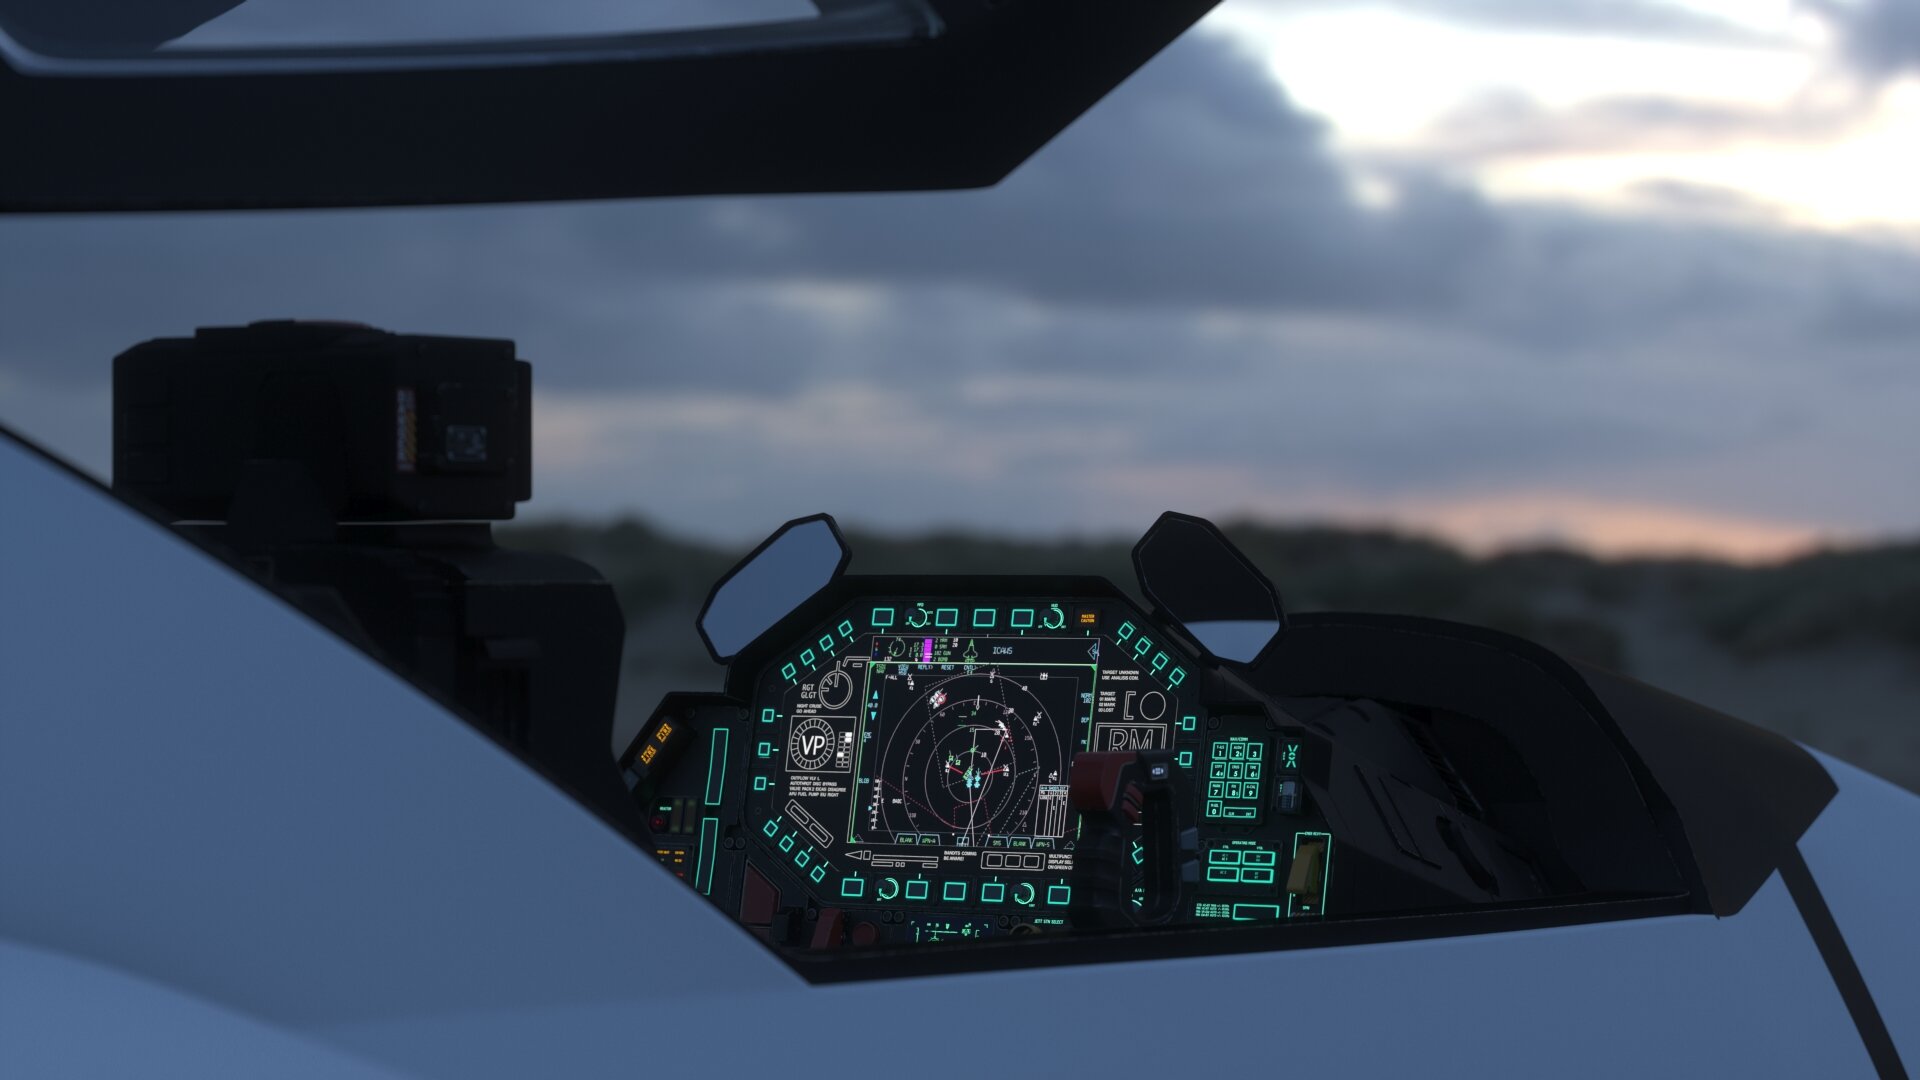
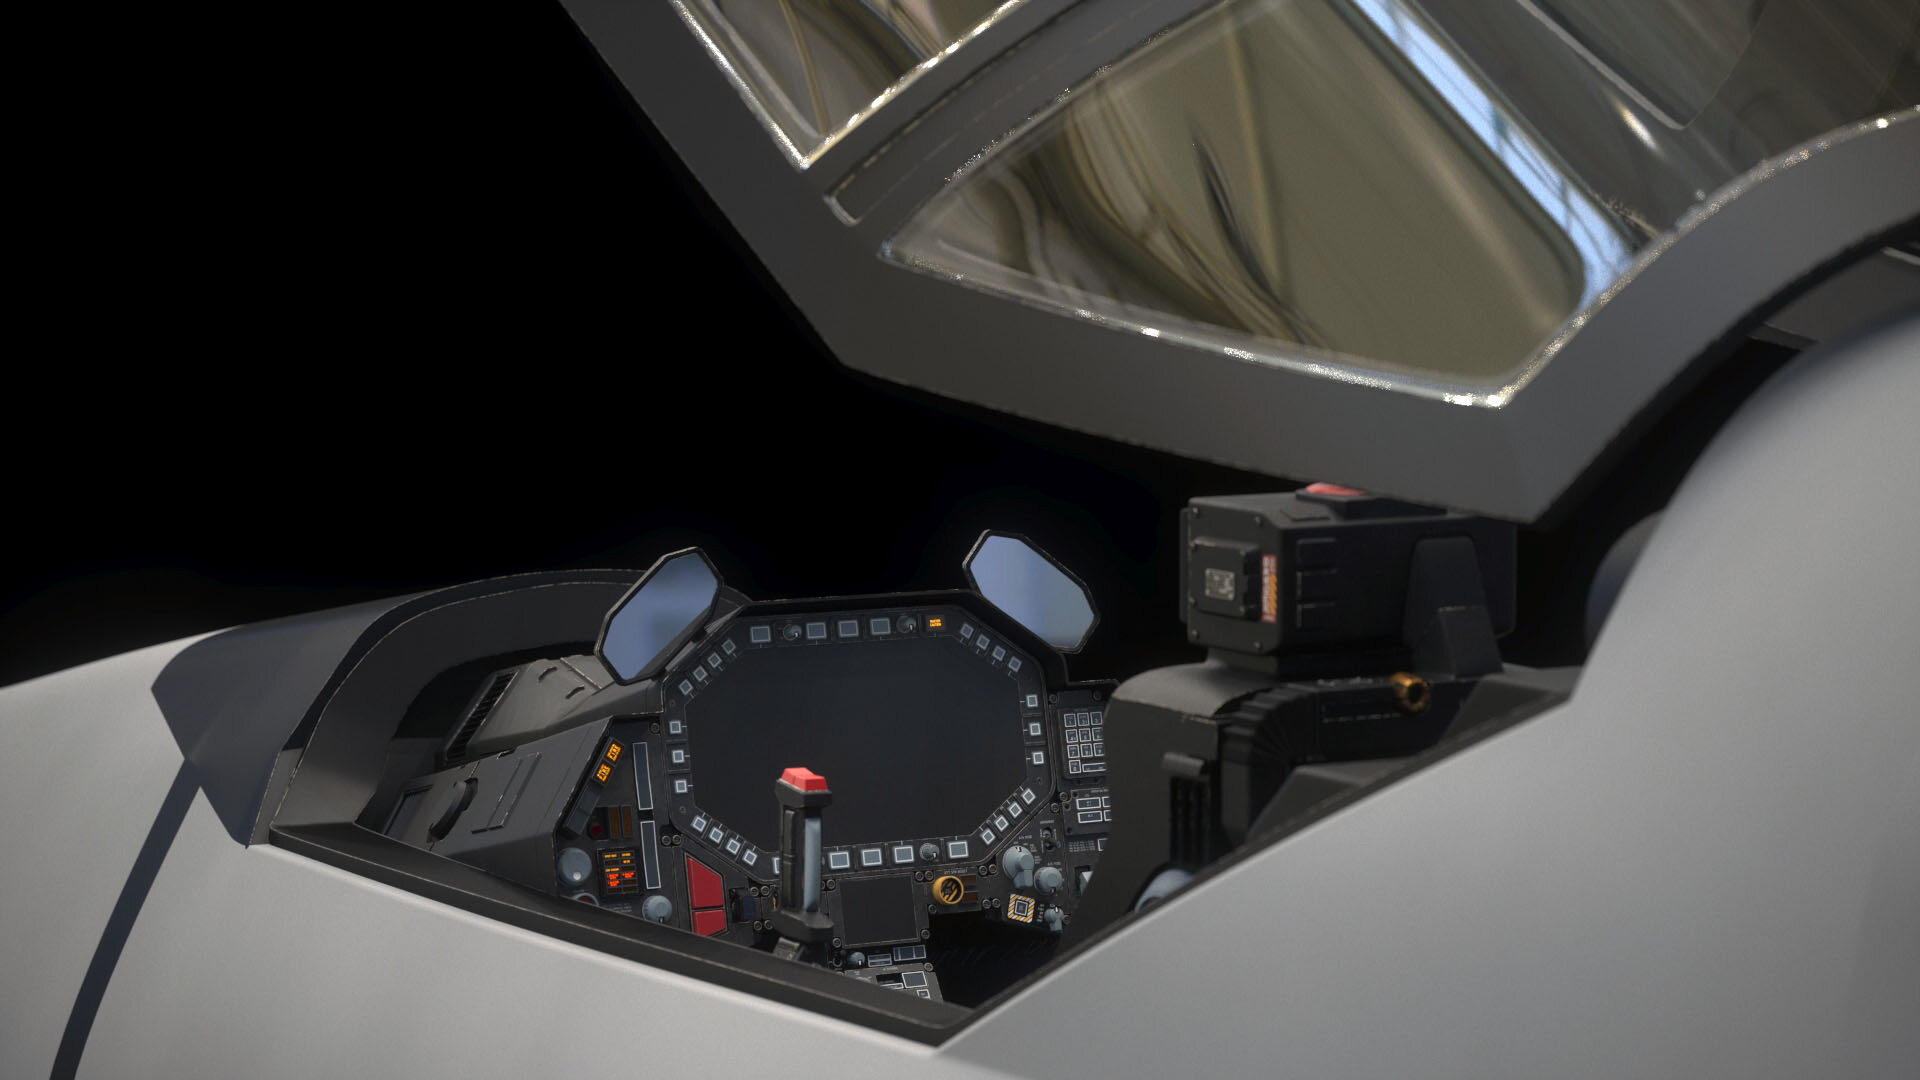
Smile! You're on candid camera. Ended up spending 2 whole workdays on the FLIR alone. I think it's worth it though. If it was me, I would have mounted the lens on the inside wall of the blister cavity instead of the rear. I know it's called a 'forward looking infra red' camera, but in my opinion, mounting it 90 degrees from where it is now would give you maximum FOV. Especially since there are 2 of them on either side of the fuselage. However it's not me, it's only through me. (LOL) So the original design remains. Shown with and without the protective glass.
-
That's not the final shader. It's just temporary until I get to it. The final materials will be so good, you'll wanna throw the model away. 😃
-
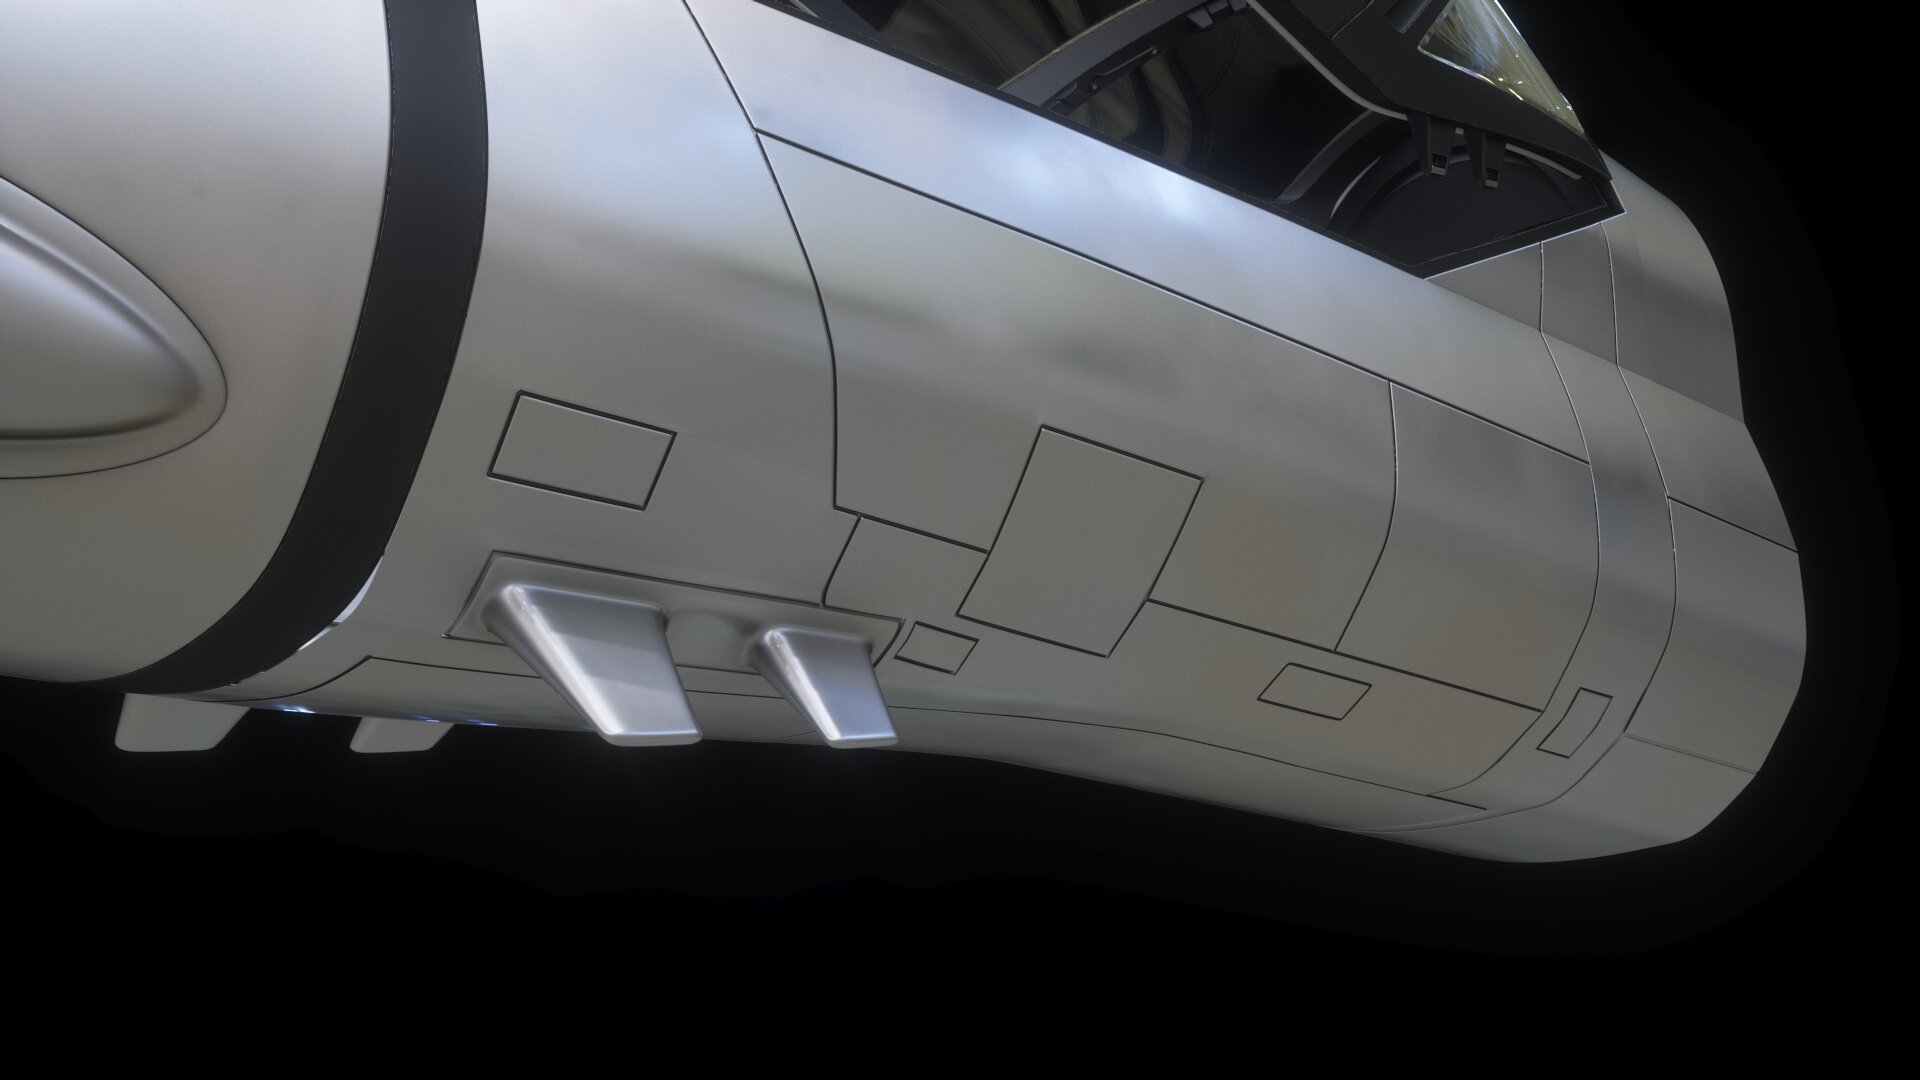
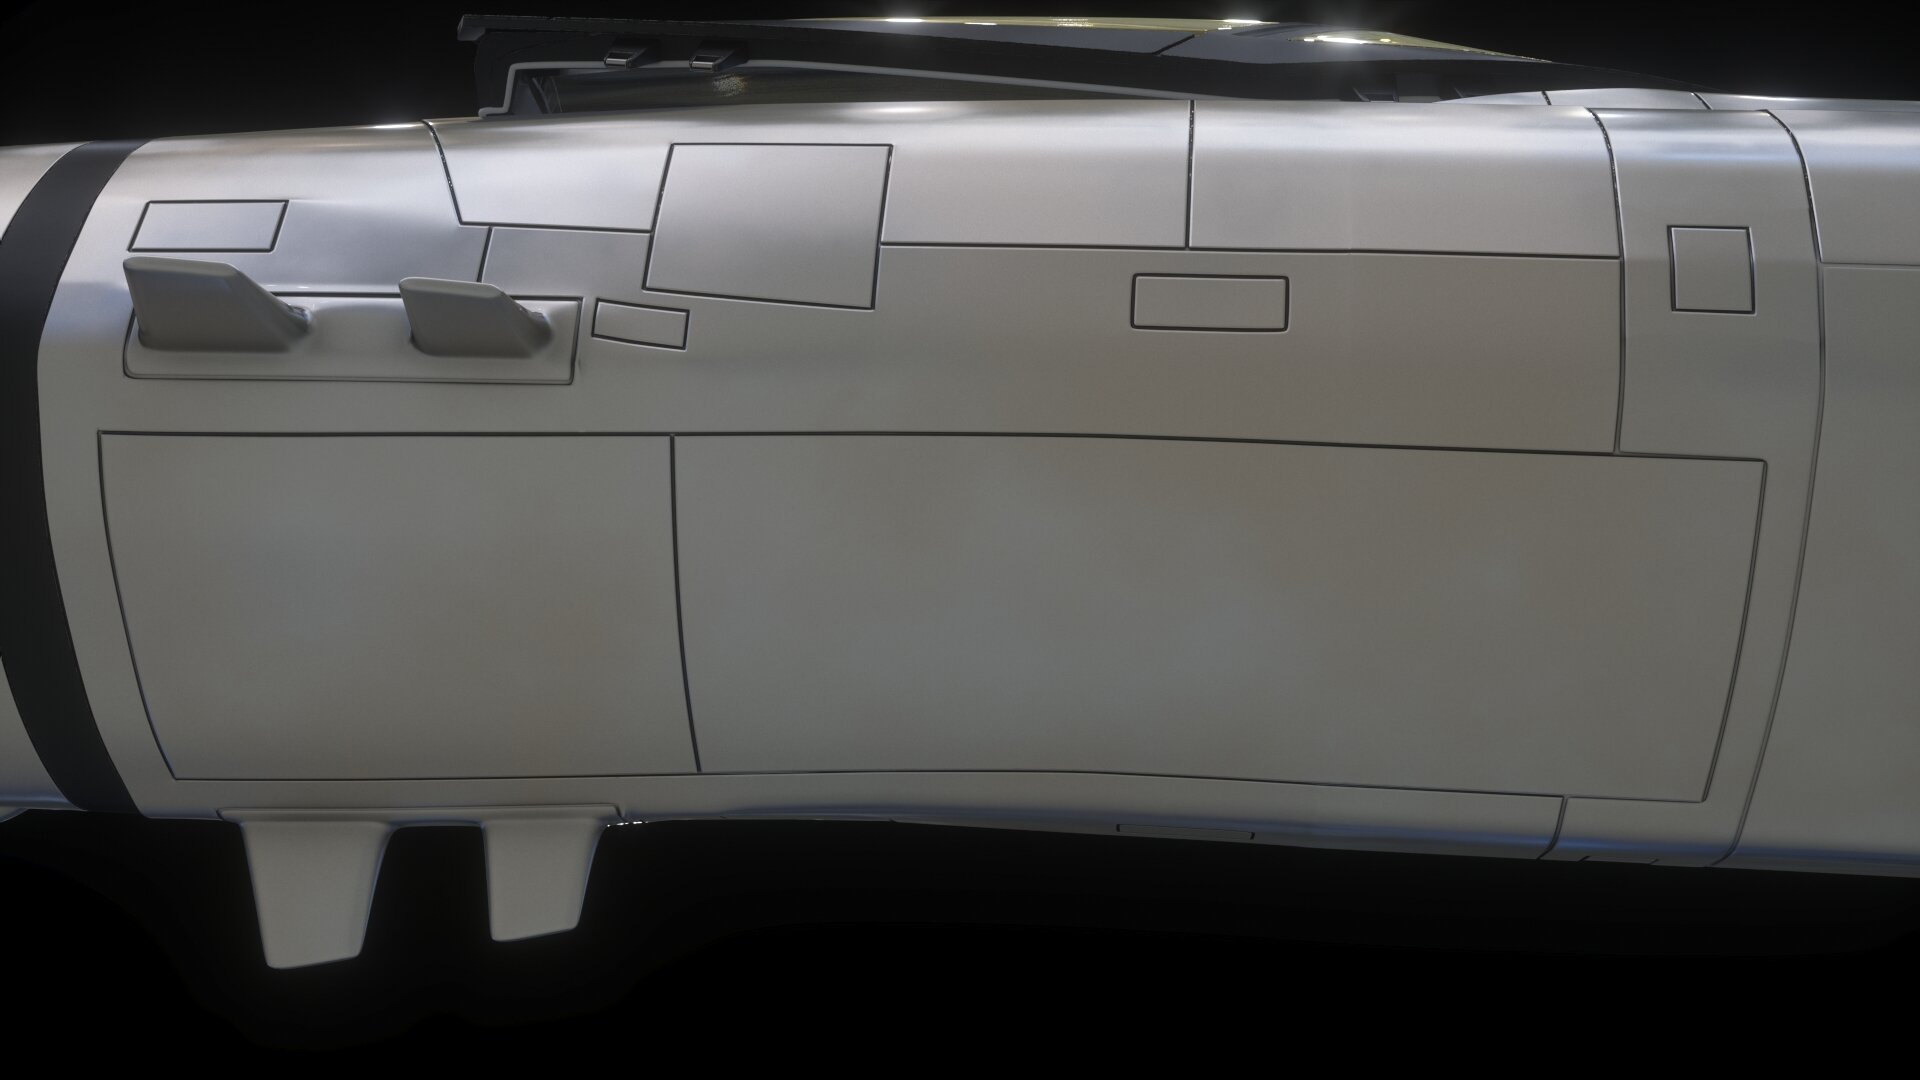
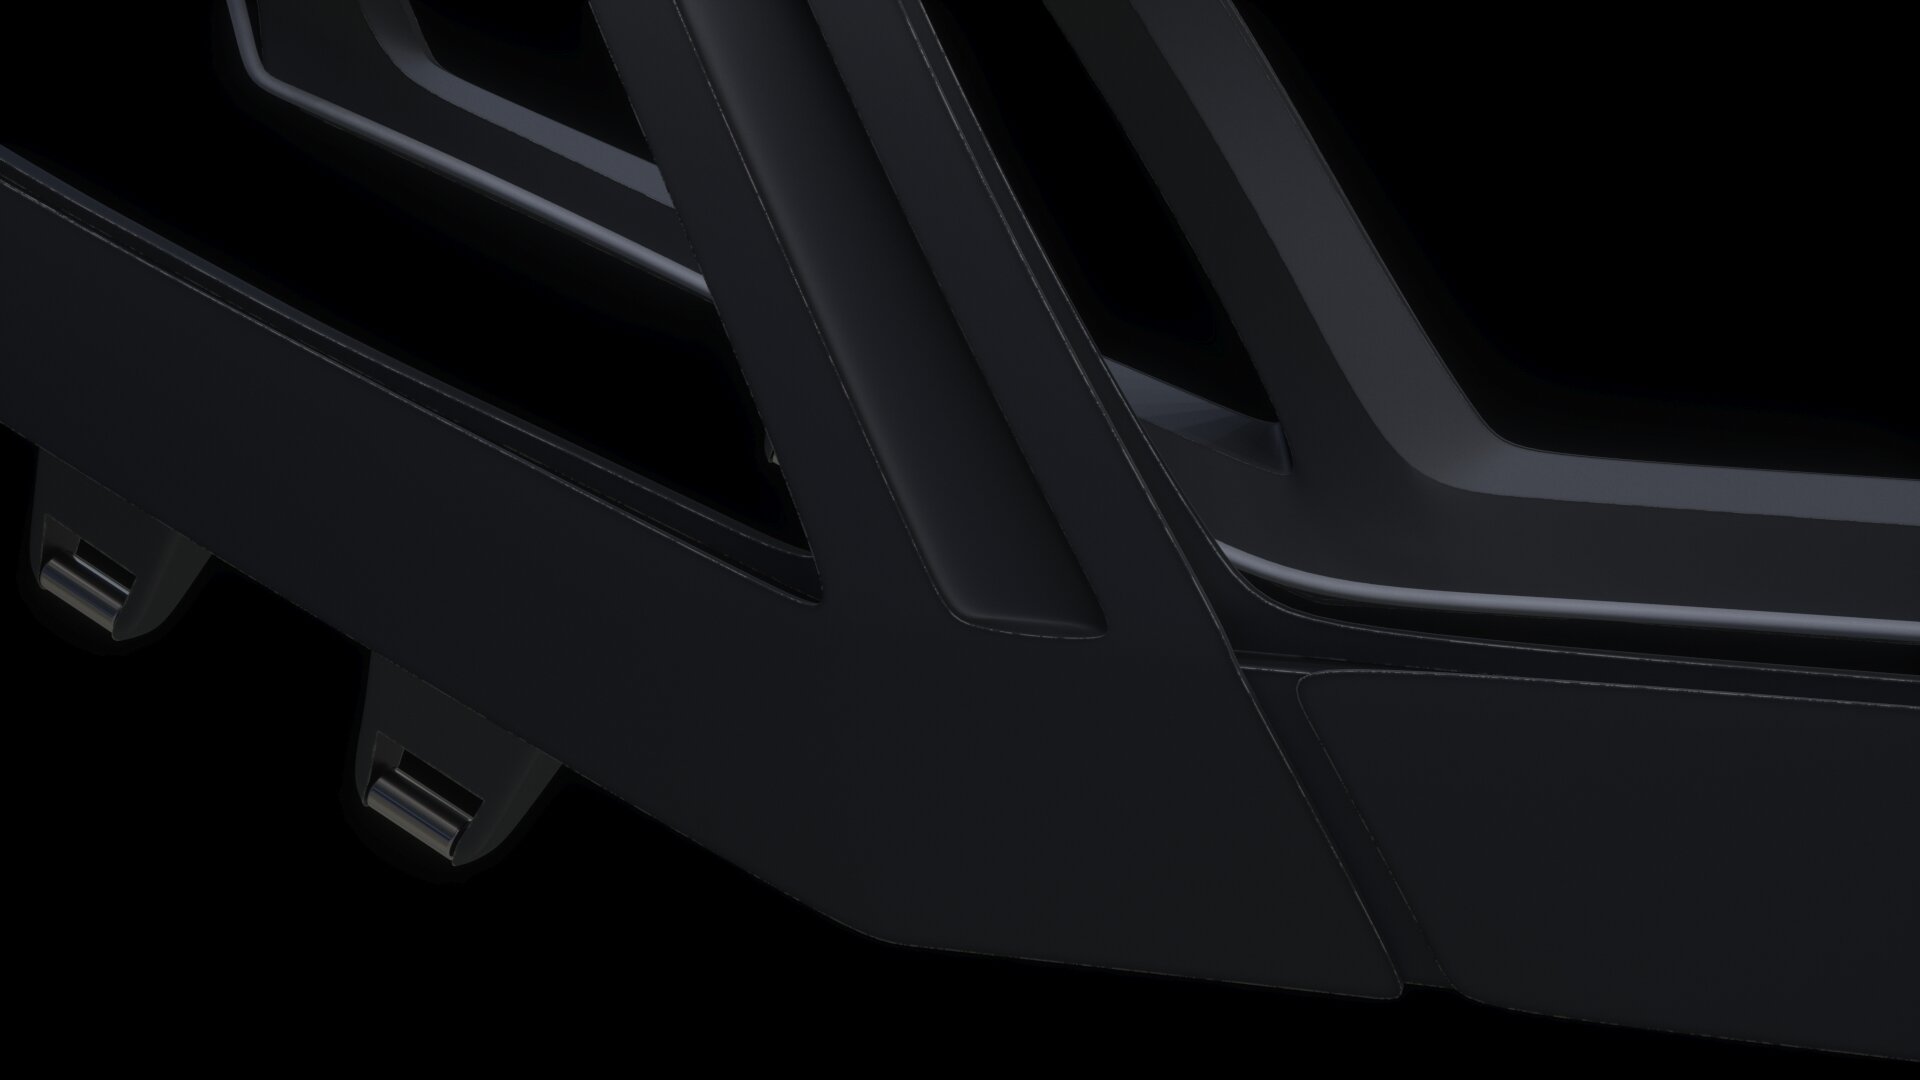
Haha, thanks for the kind words Pengbuzz! However, I would never accept an award because I am kind of against them. (But that's another story) My reward is your excitement. It's an honour just being nominated. (LOL) Ok back to business. Panel lines being cut, and thus the bodywork begins. Finally getting back to a similar point with this V2 model as with the V1 model at the start of this thread! I'm so glad I rebuilt it - this one is just magic. It even looks good from the INSIDE! Happy Friday MW family!


-
Sorry, not a real update, but just had to share this quickie on my break - I gotta say, for me there's very little that's more satisfying that seeing something you created from nothing start to become something. Fuselage detail commencing. Shown in my favourite colour - primer grey. Seriously!
-
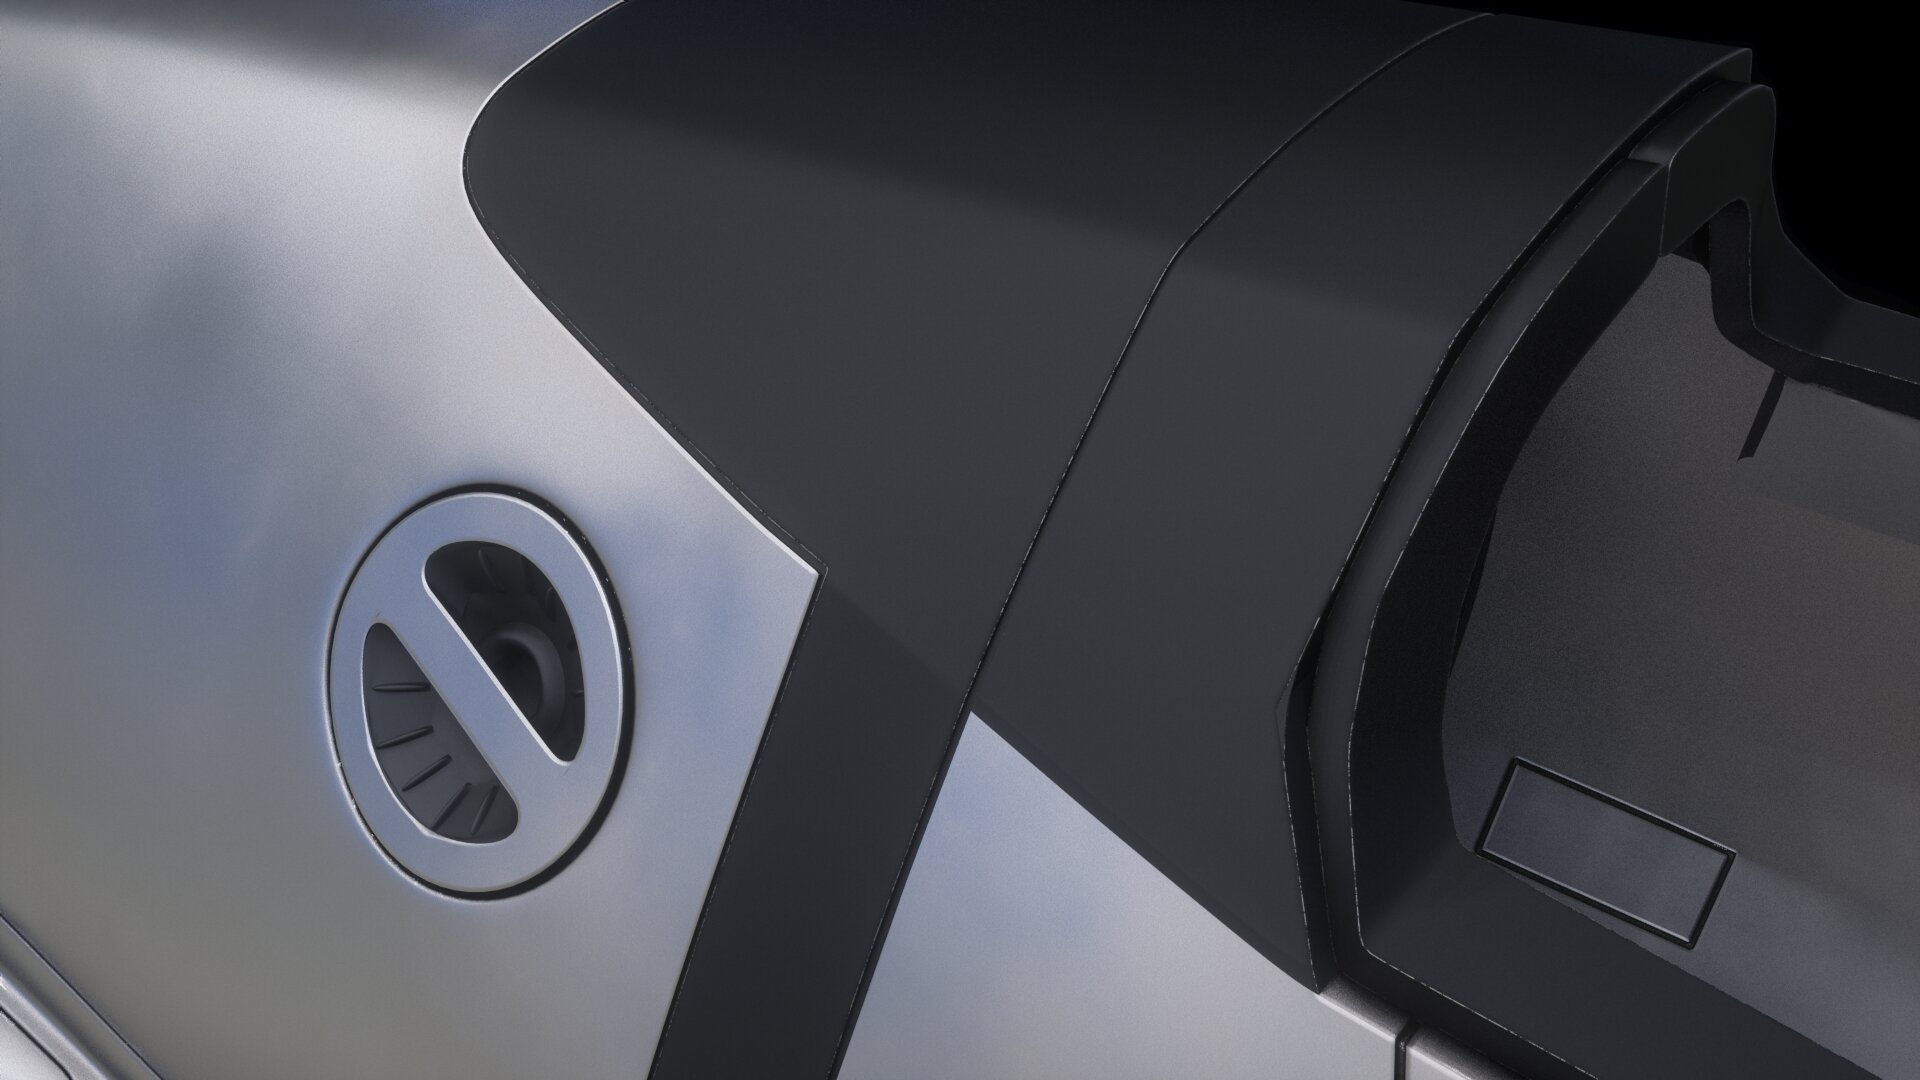
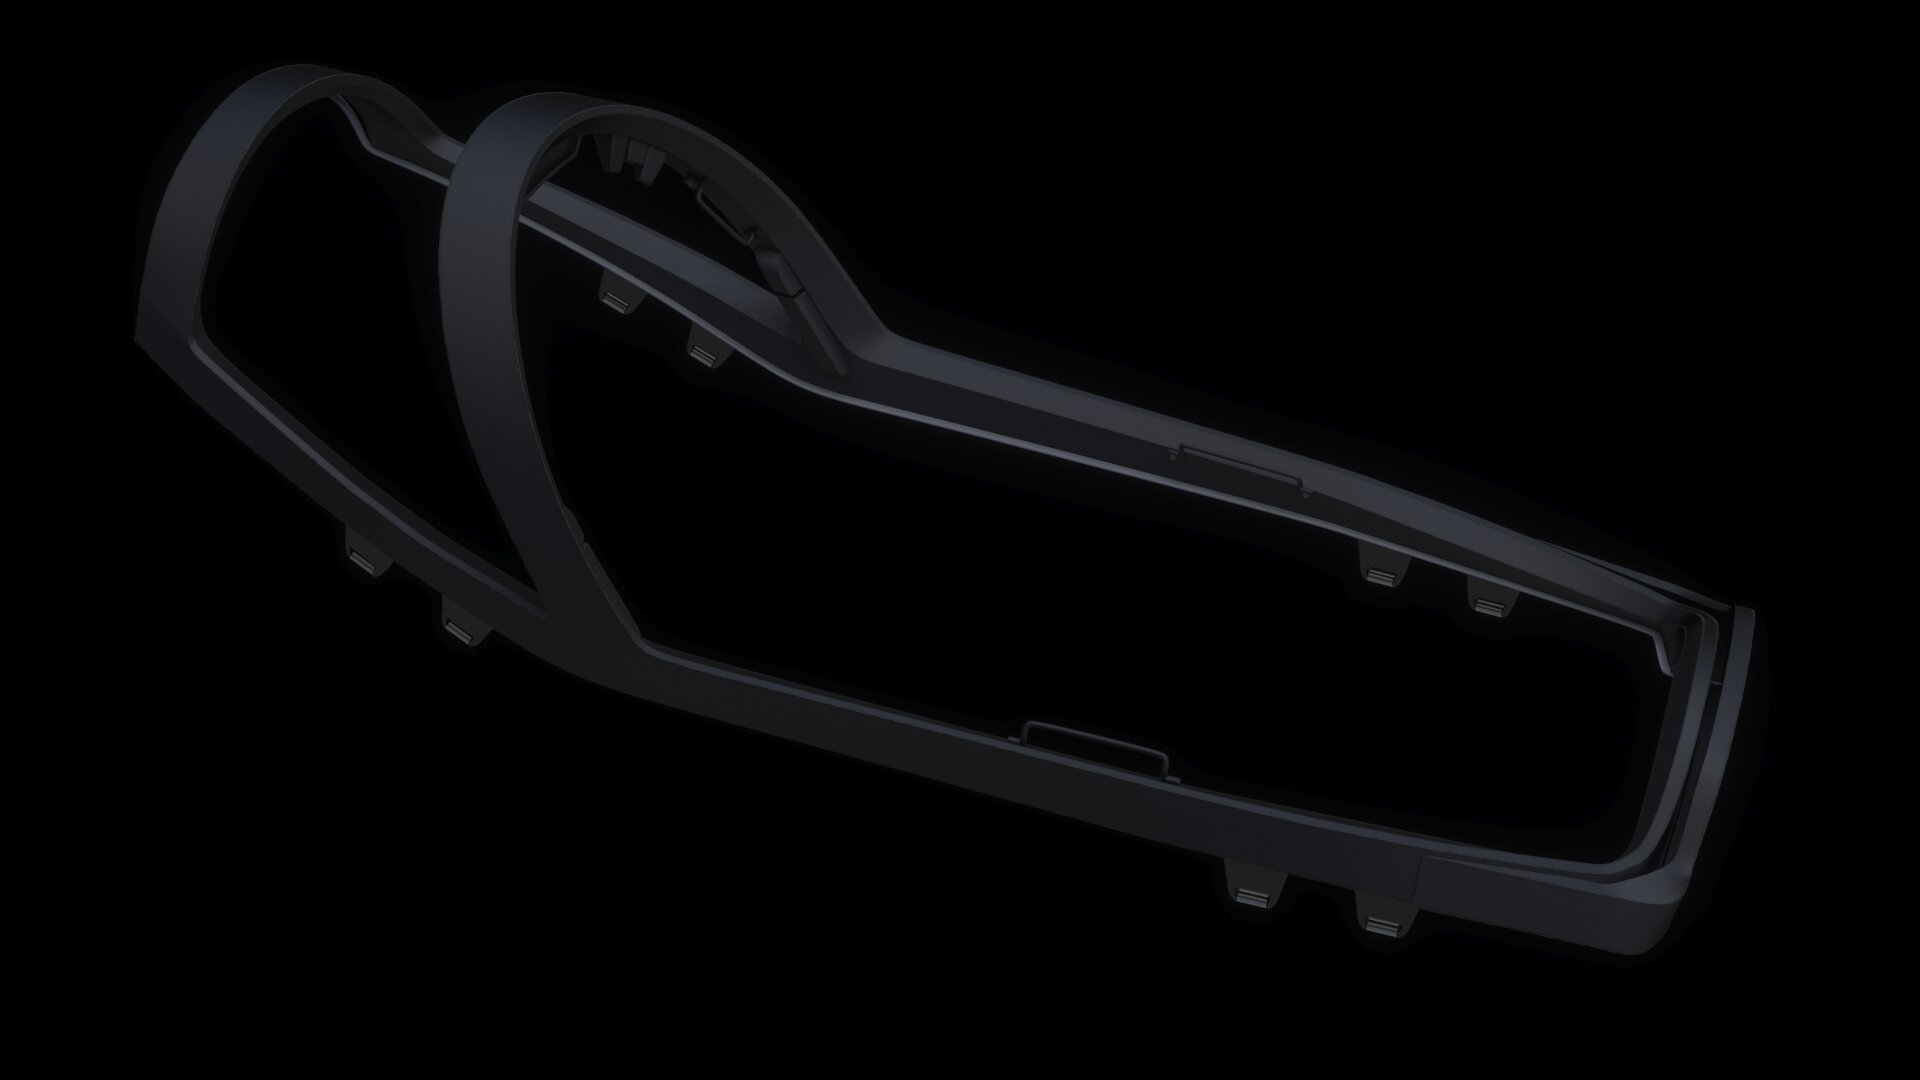
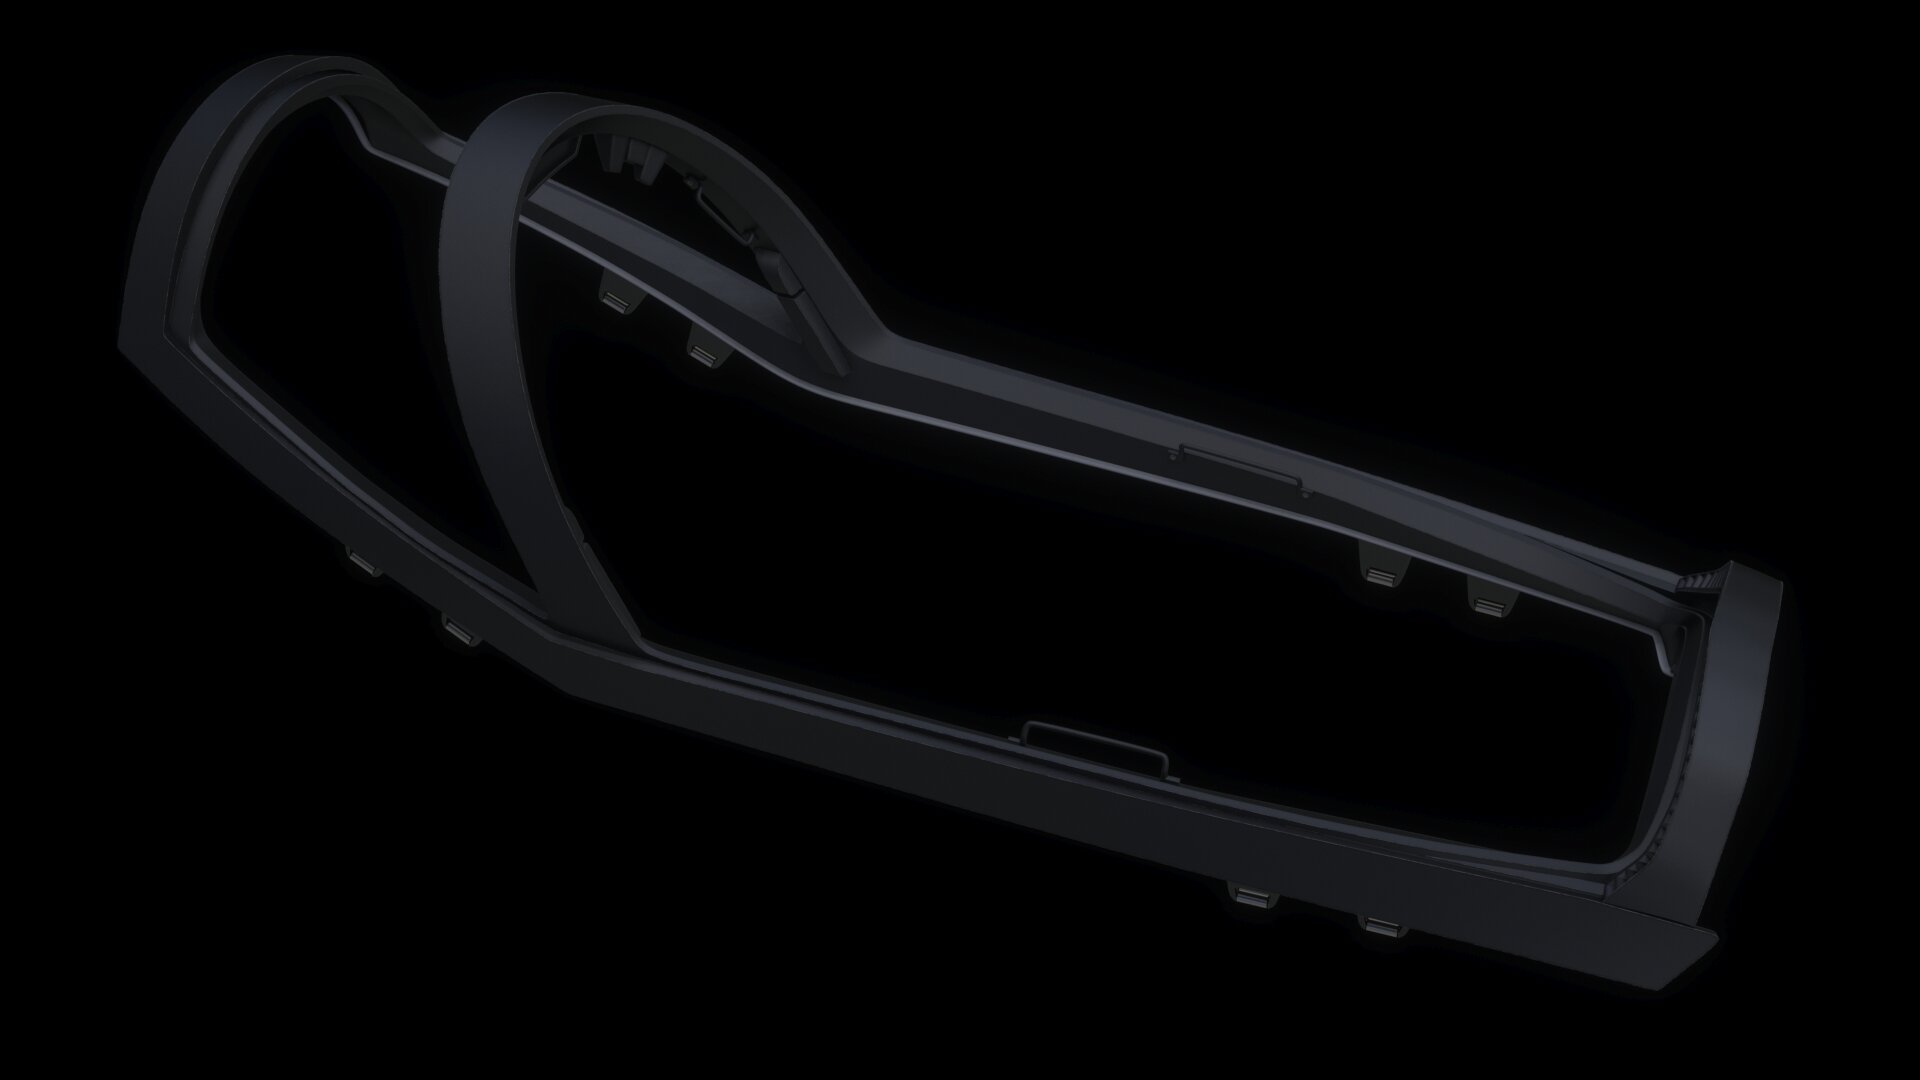
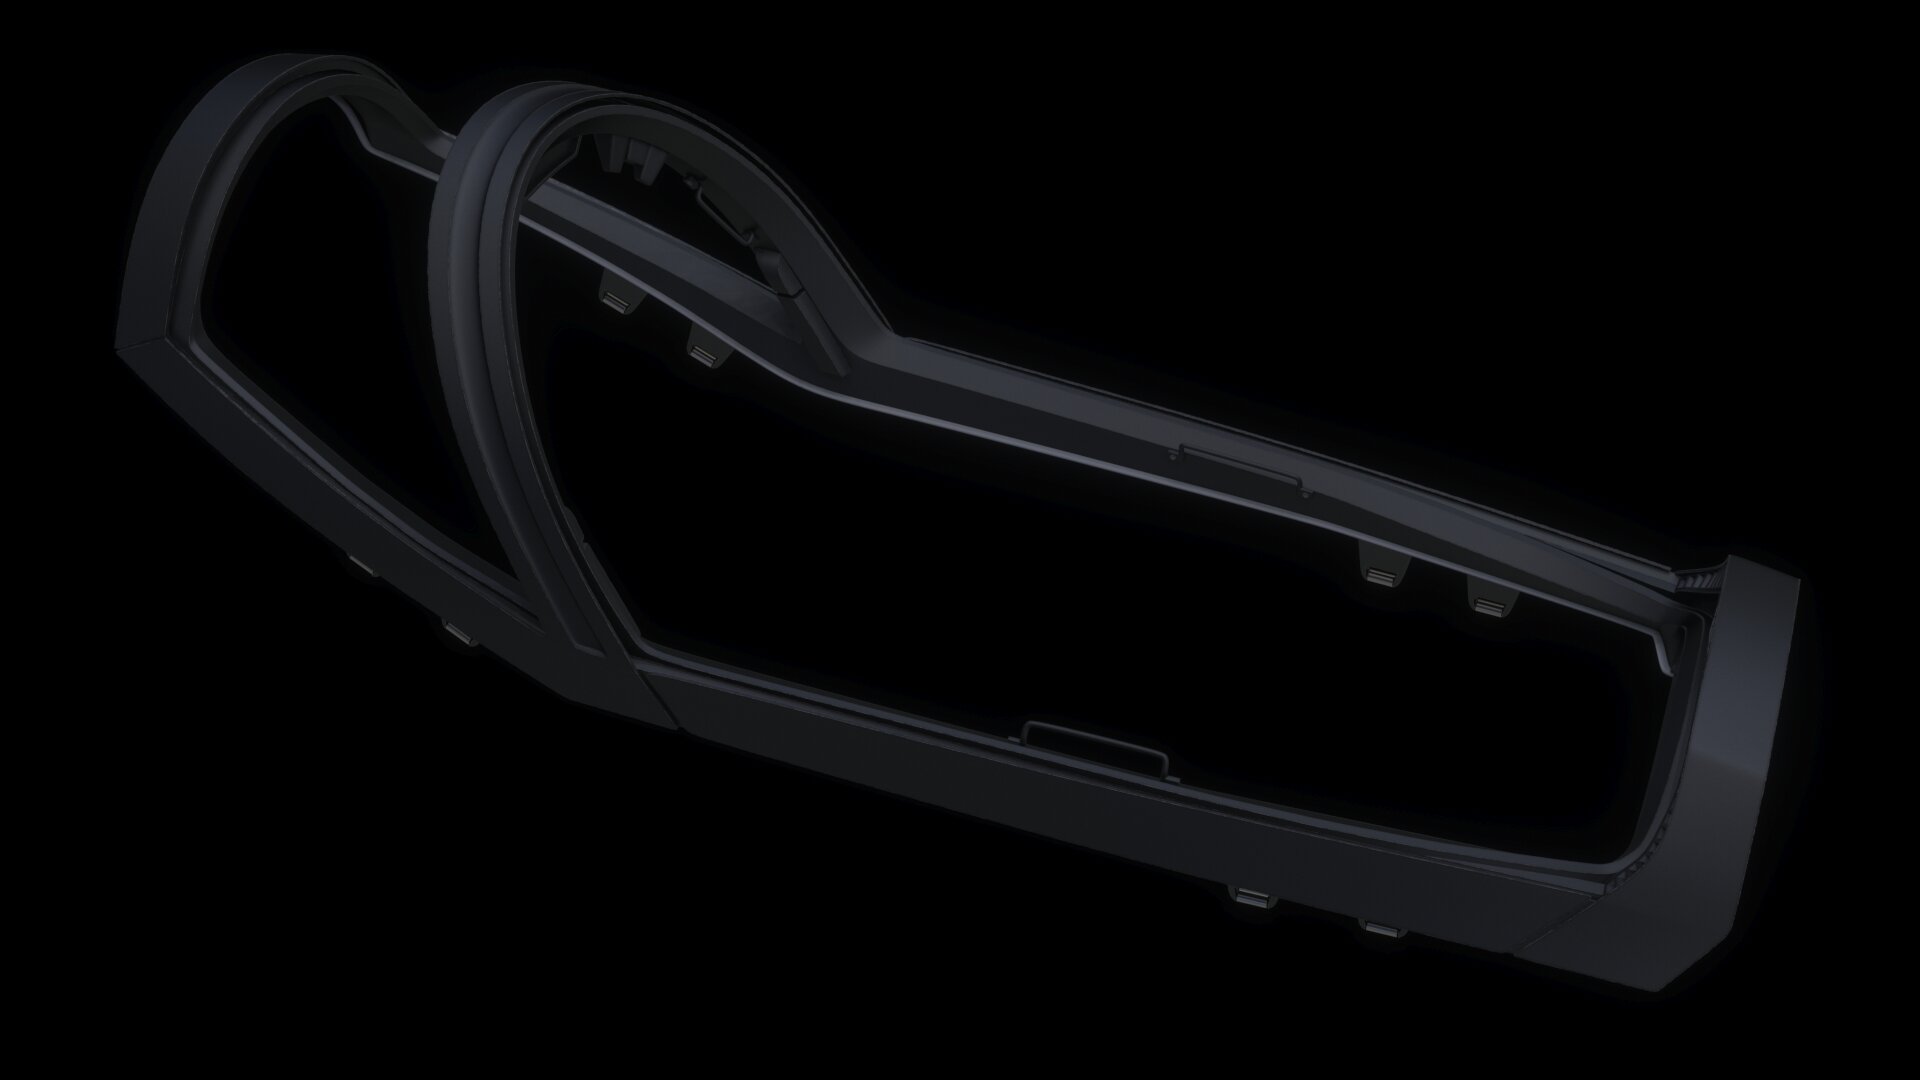
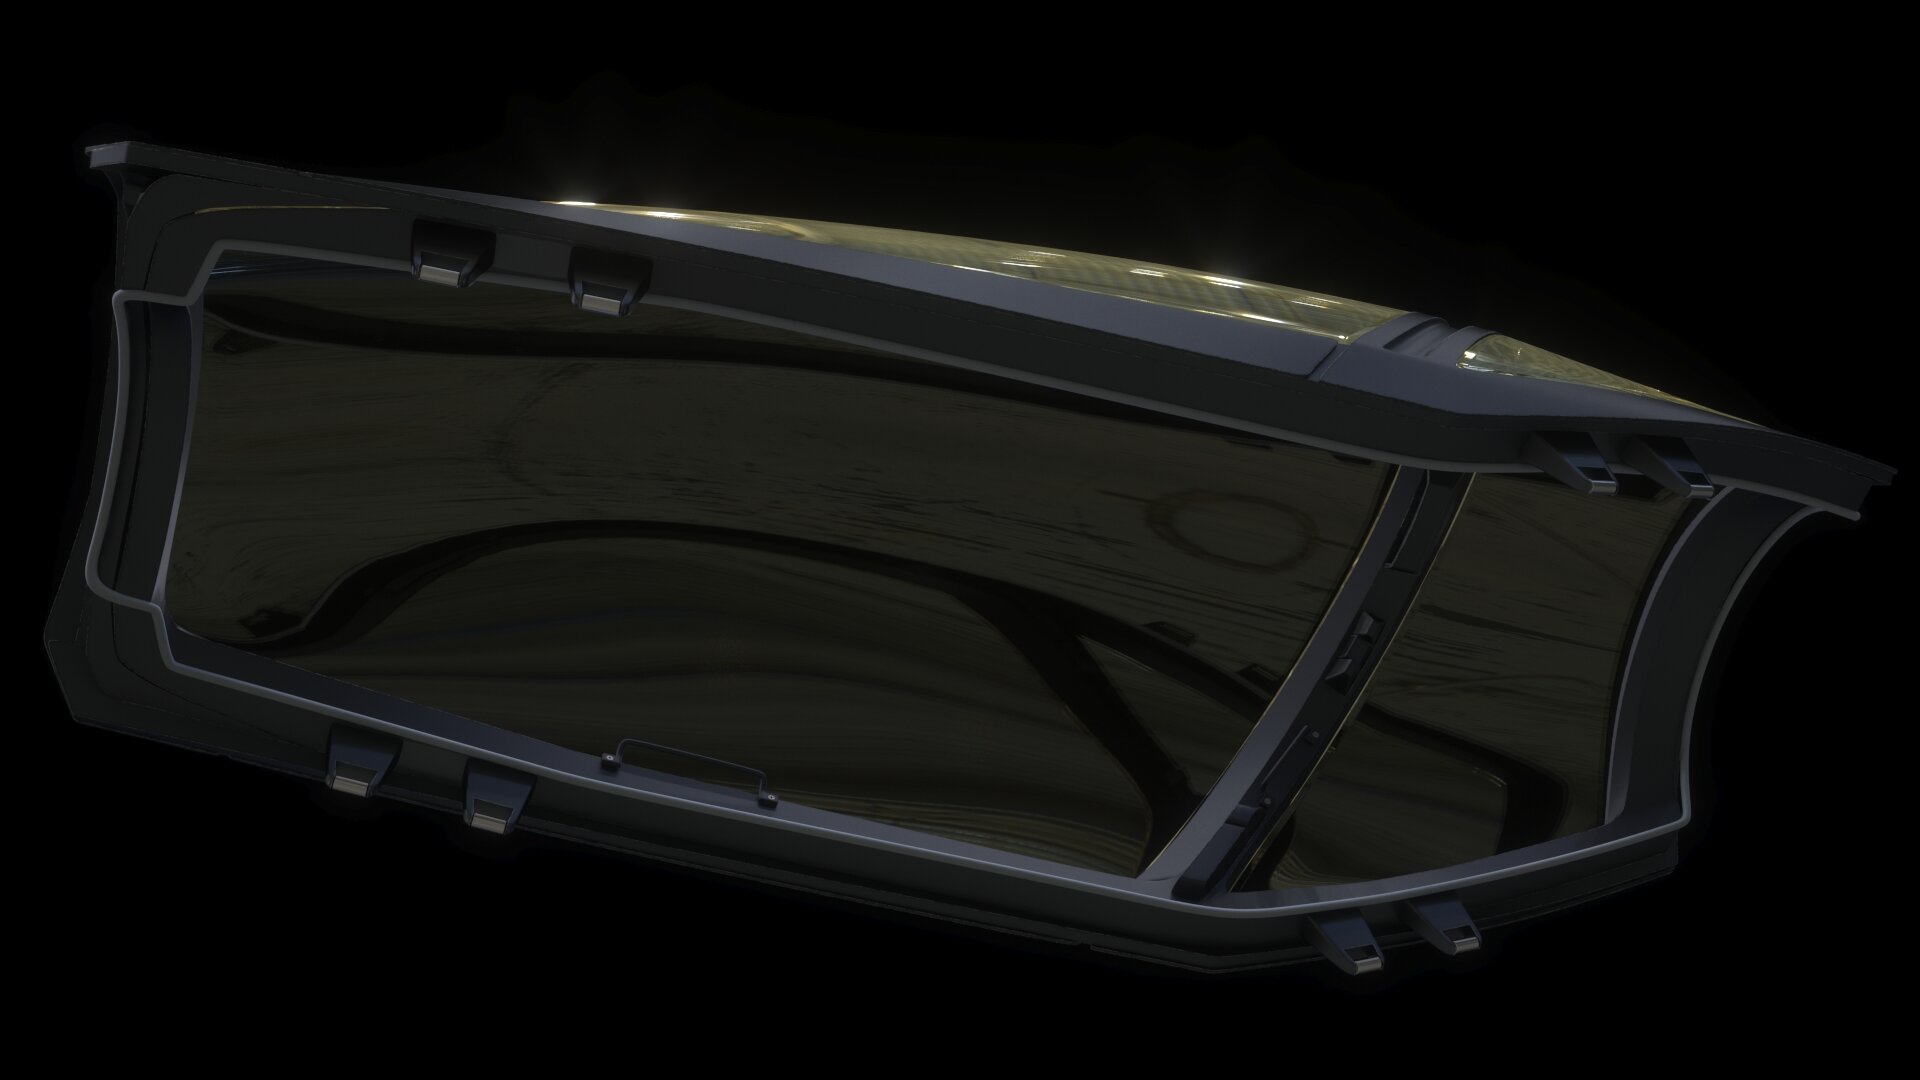
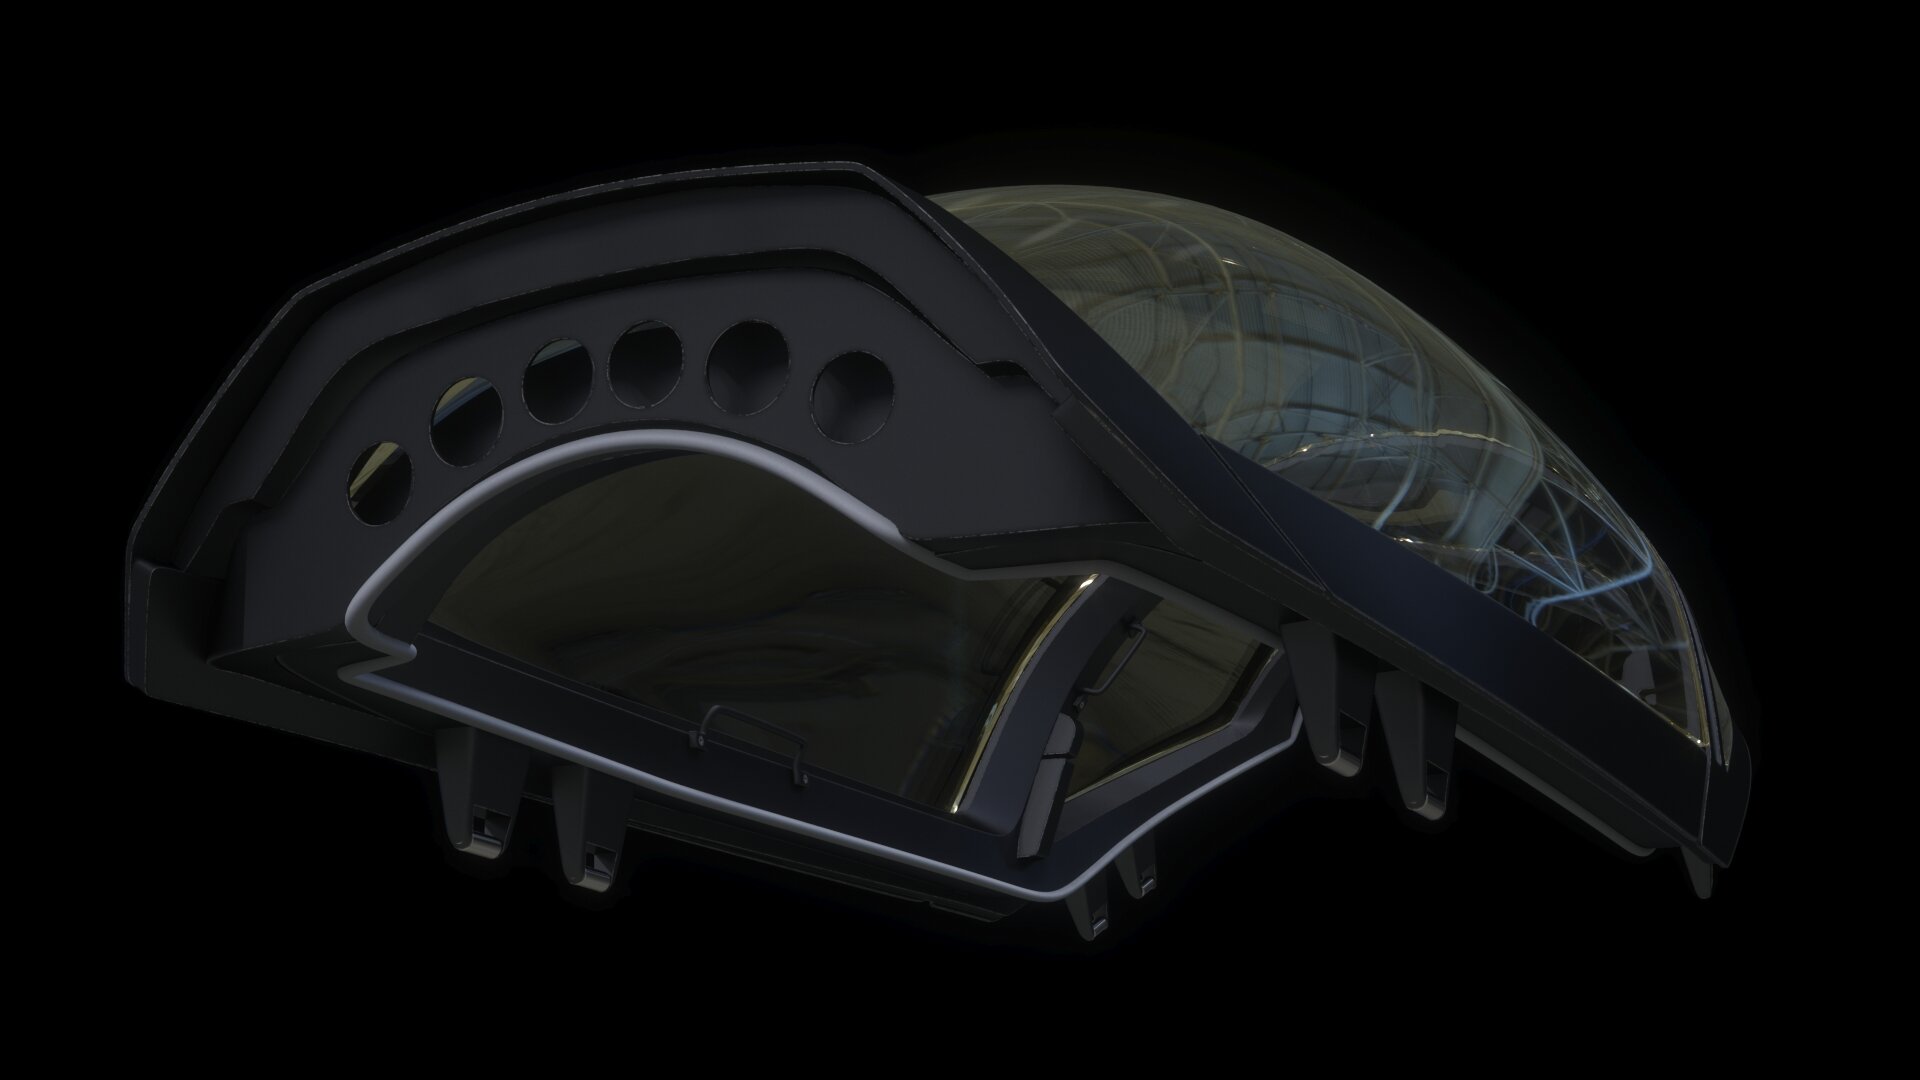
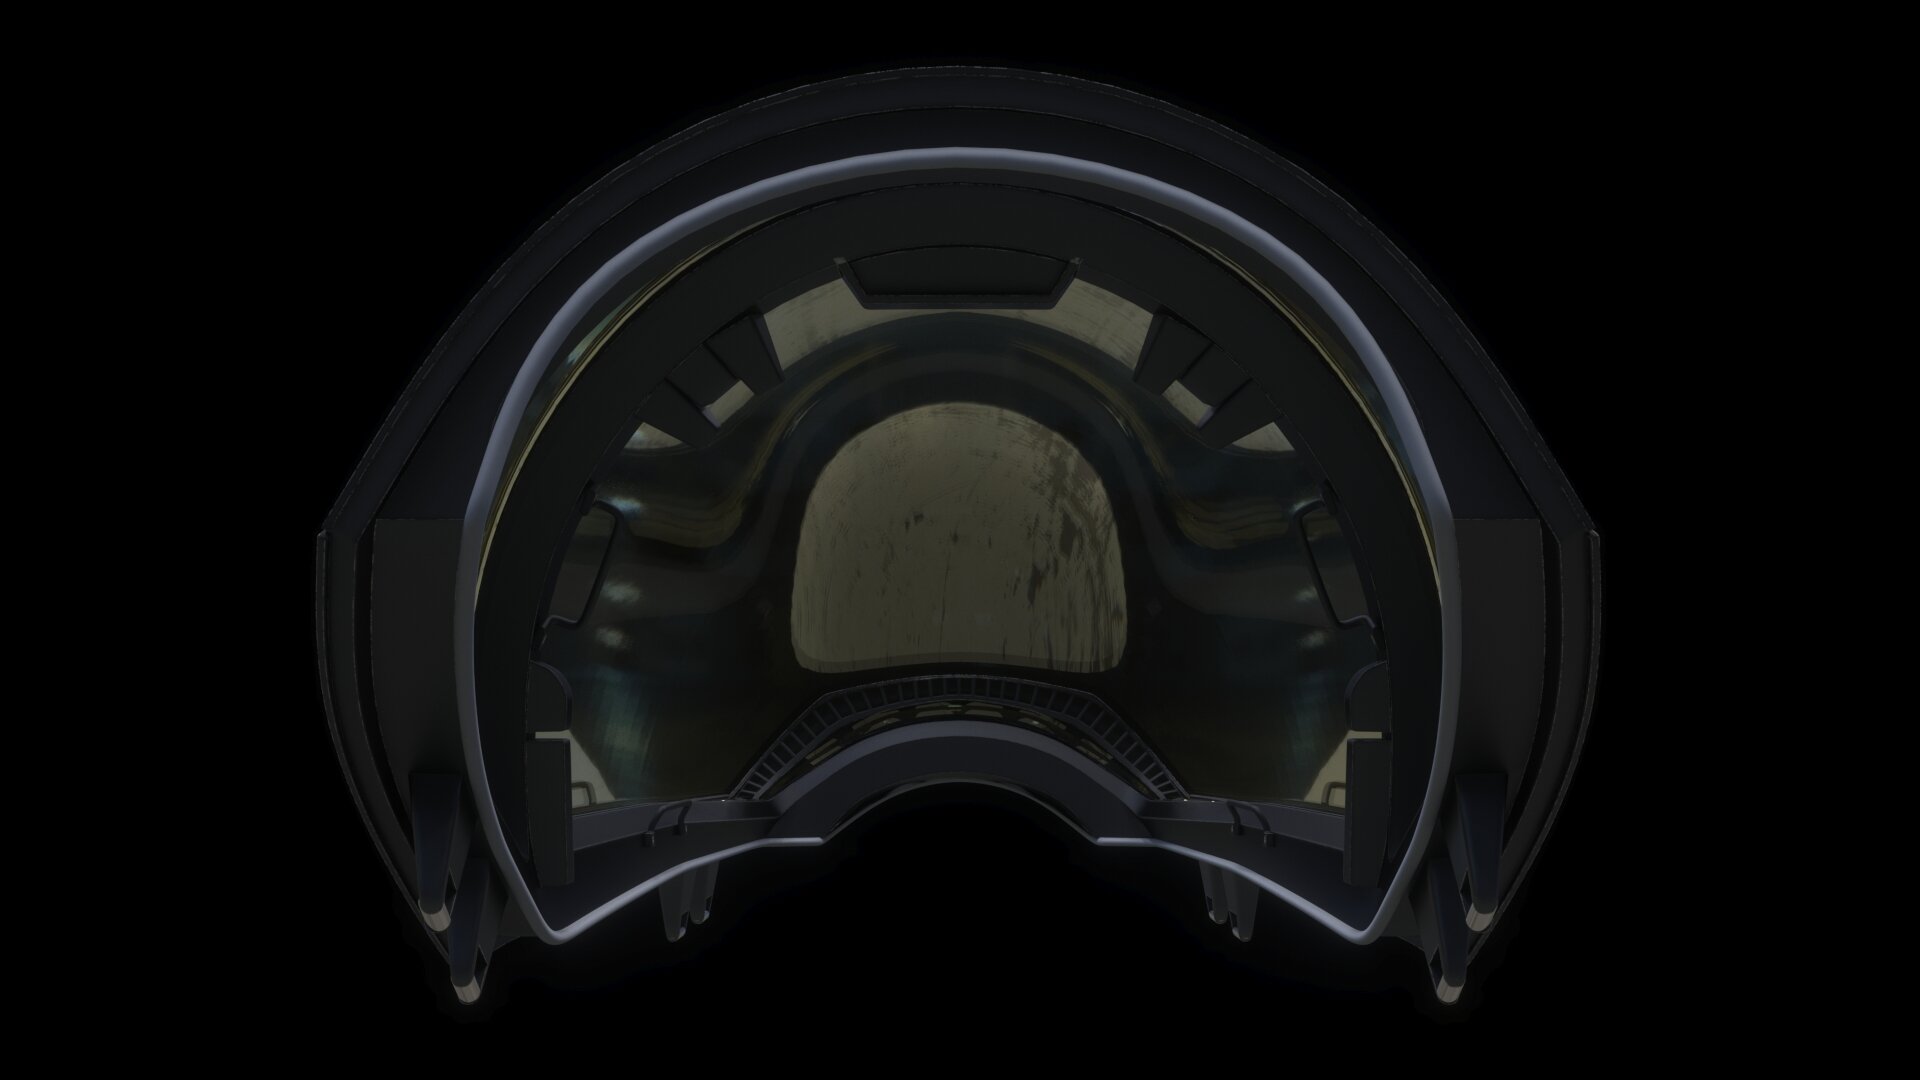
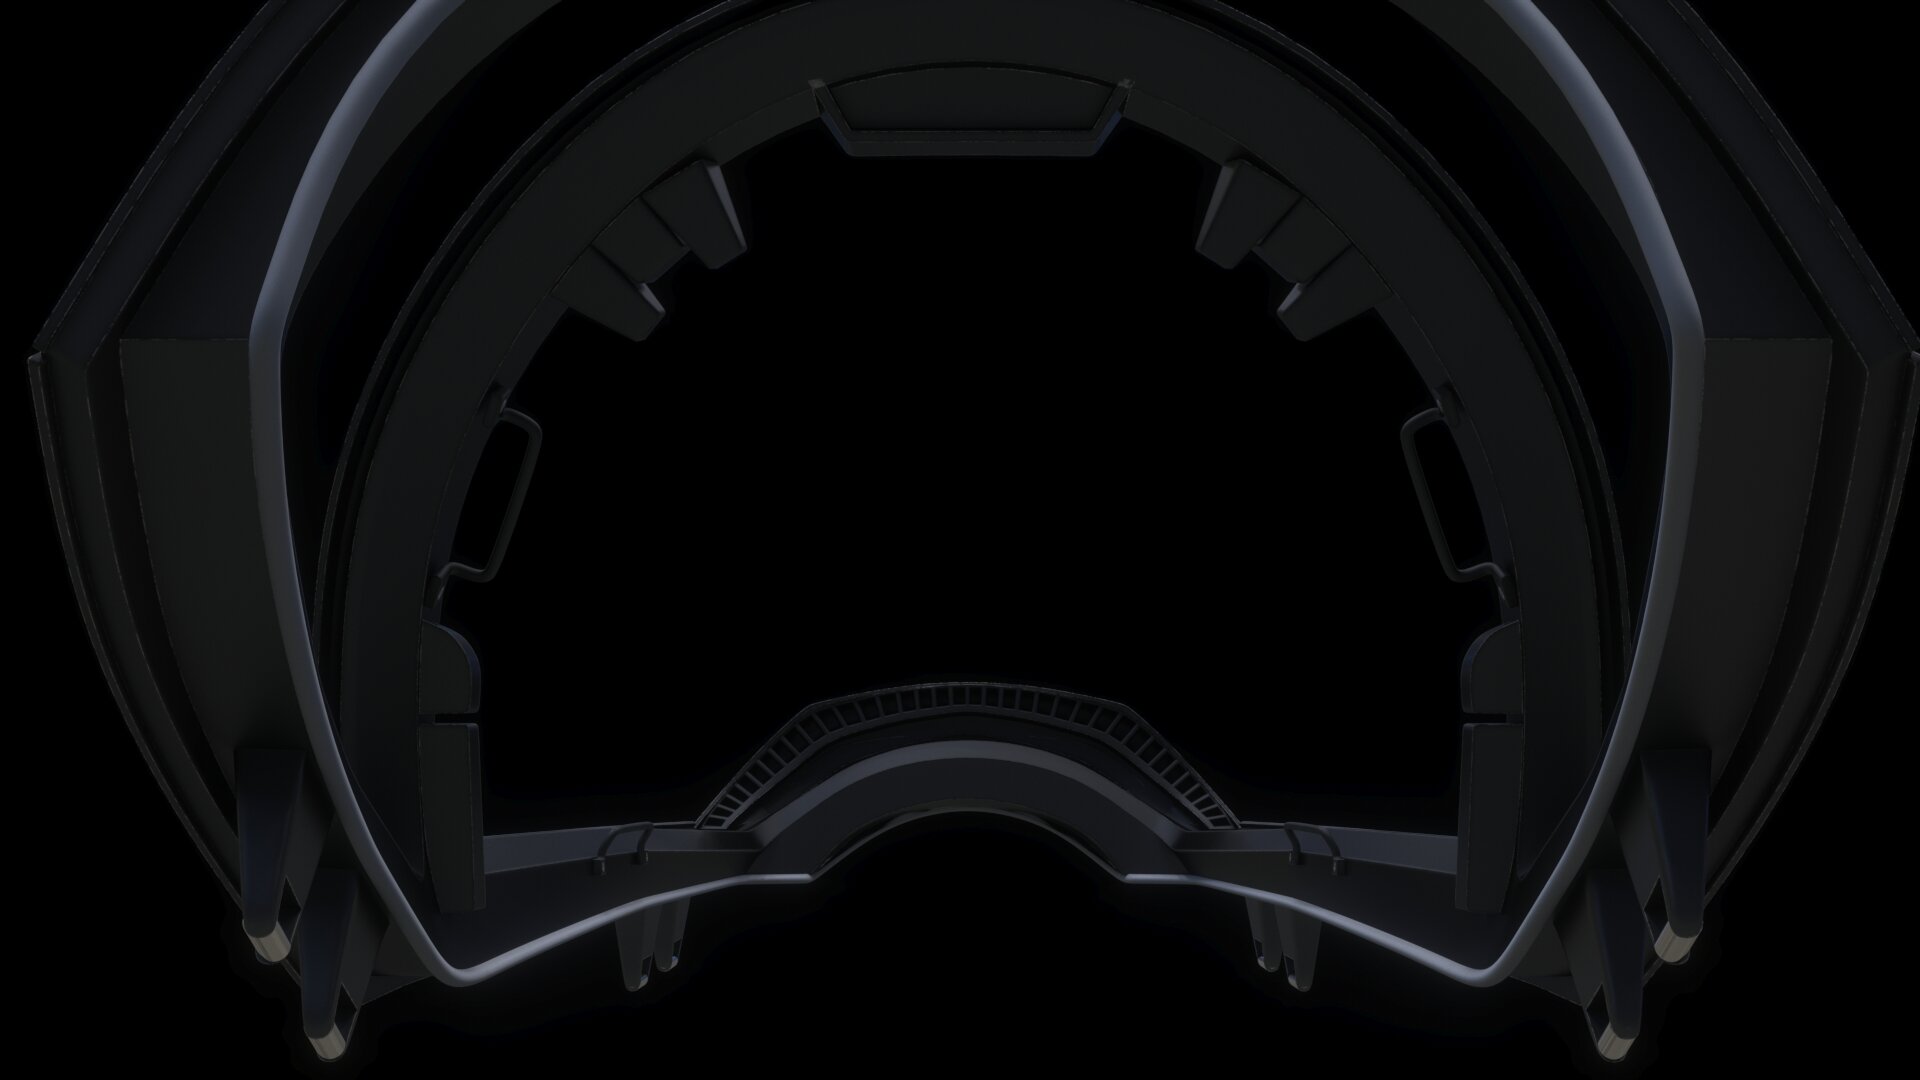
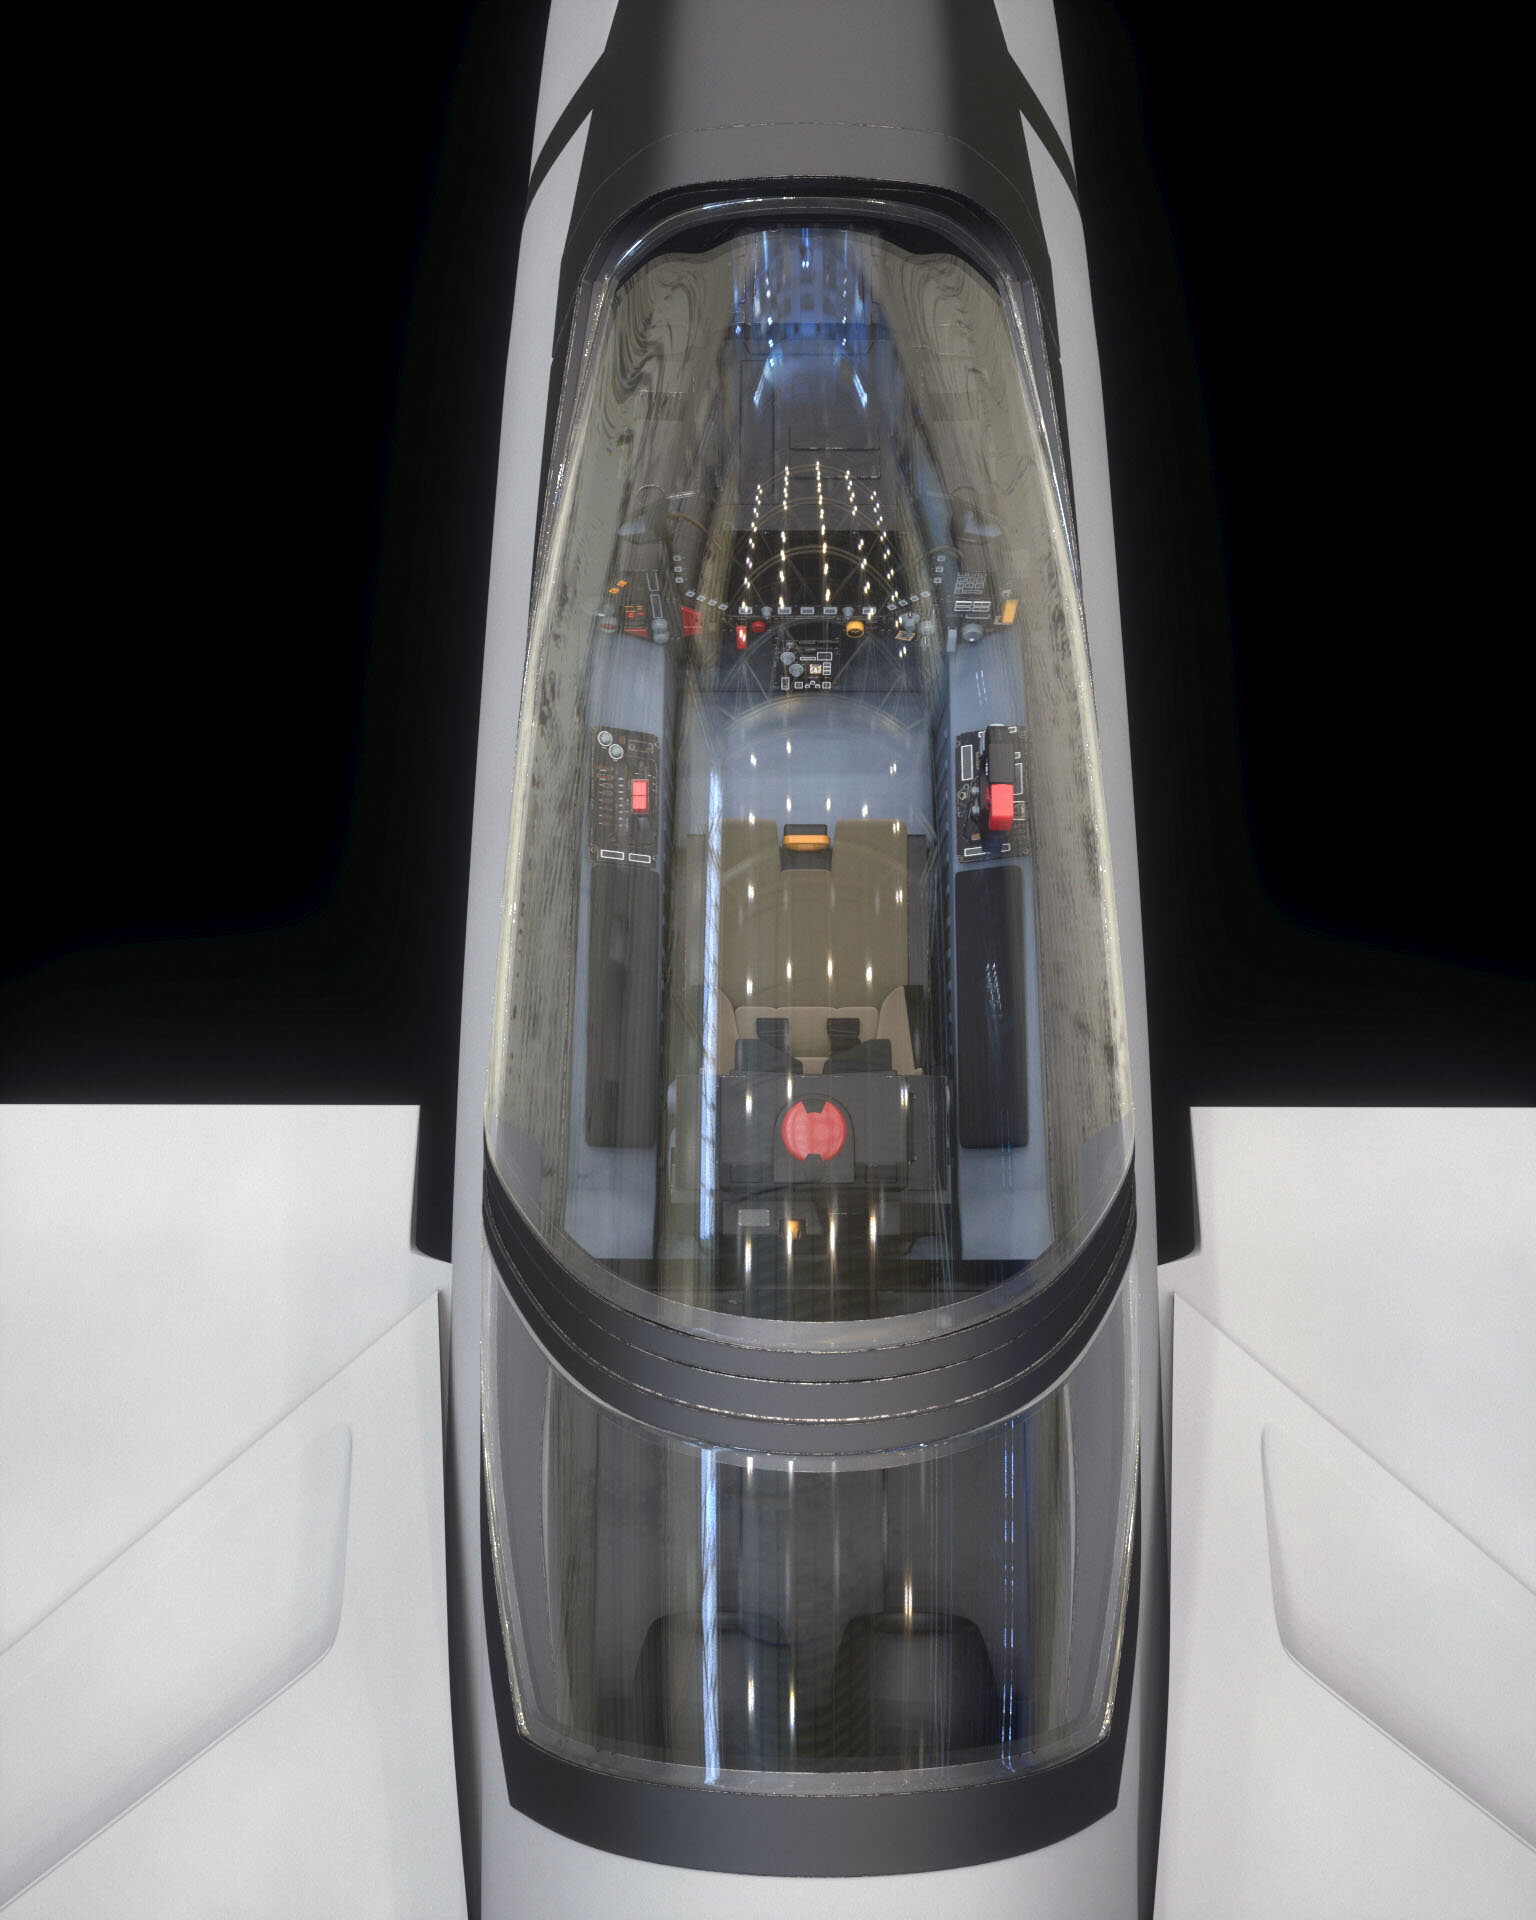
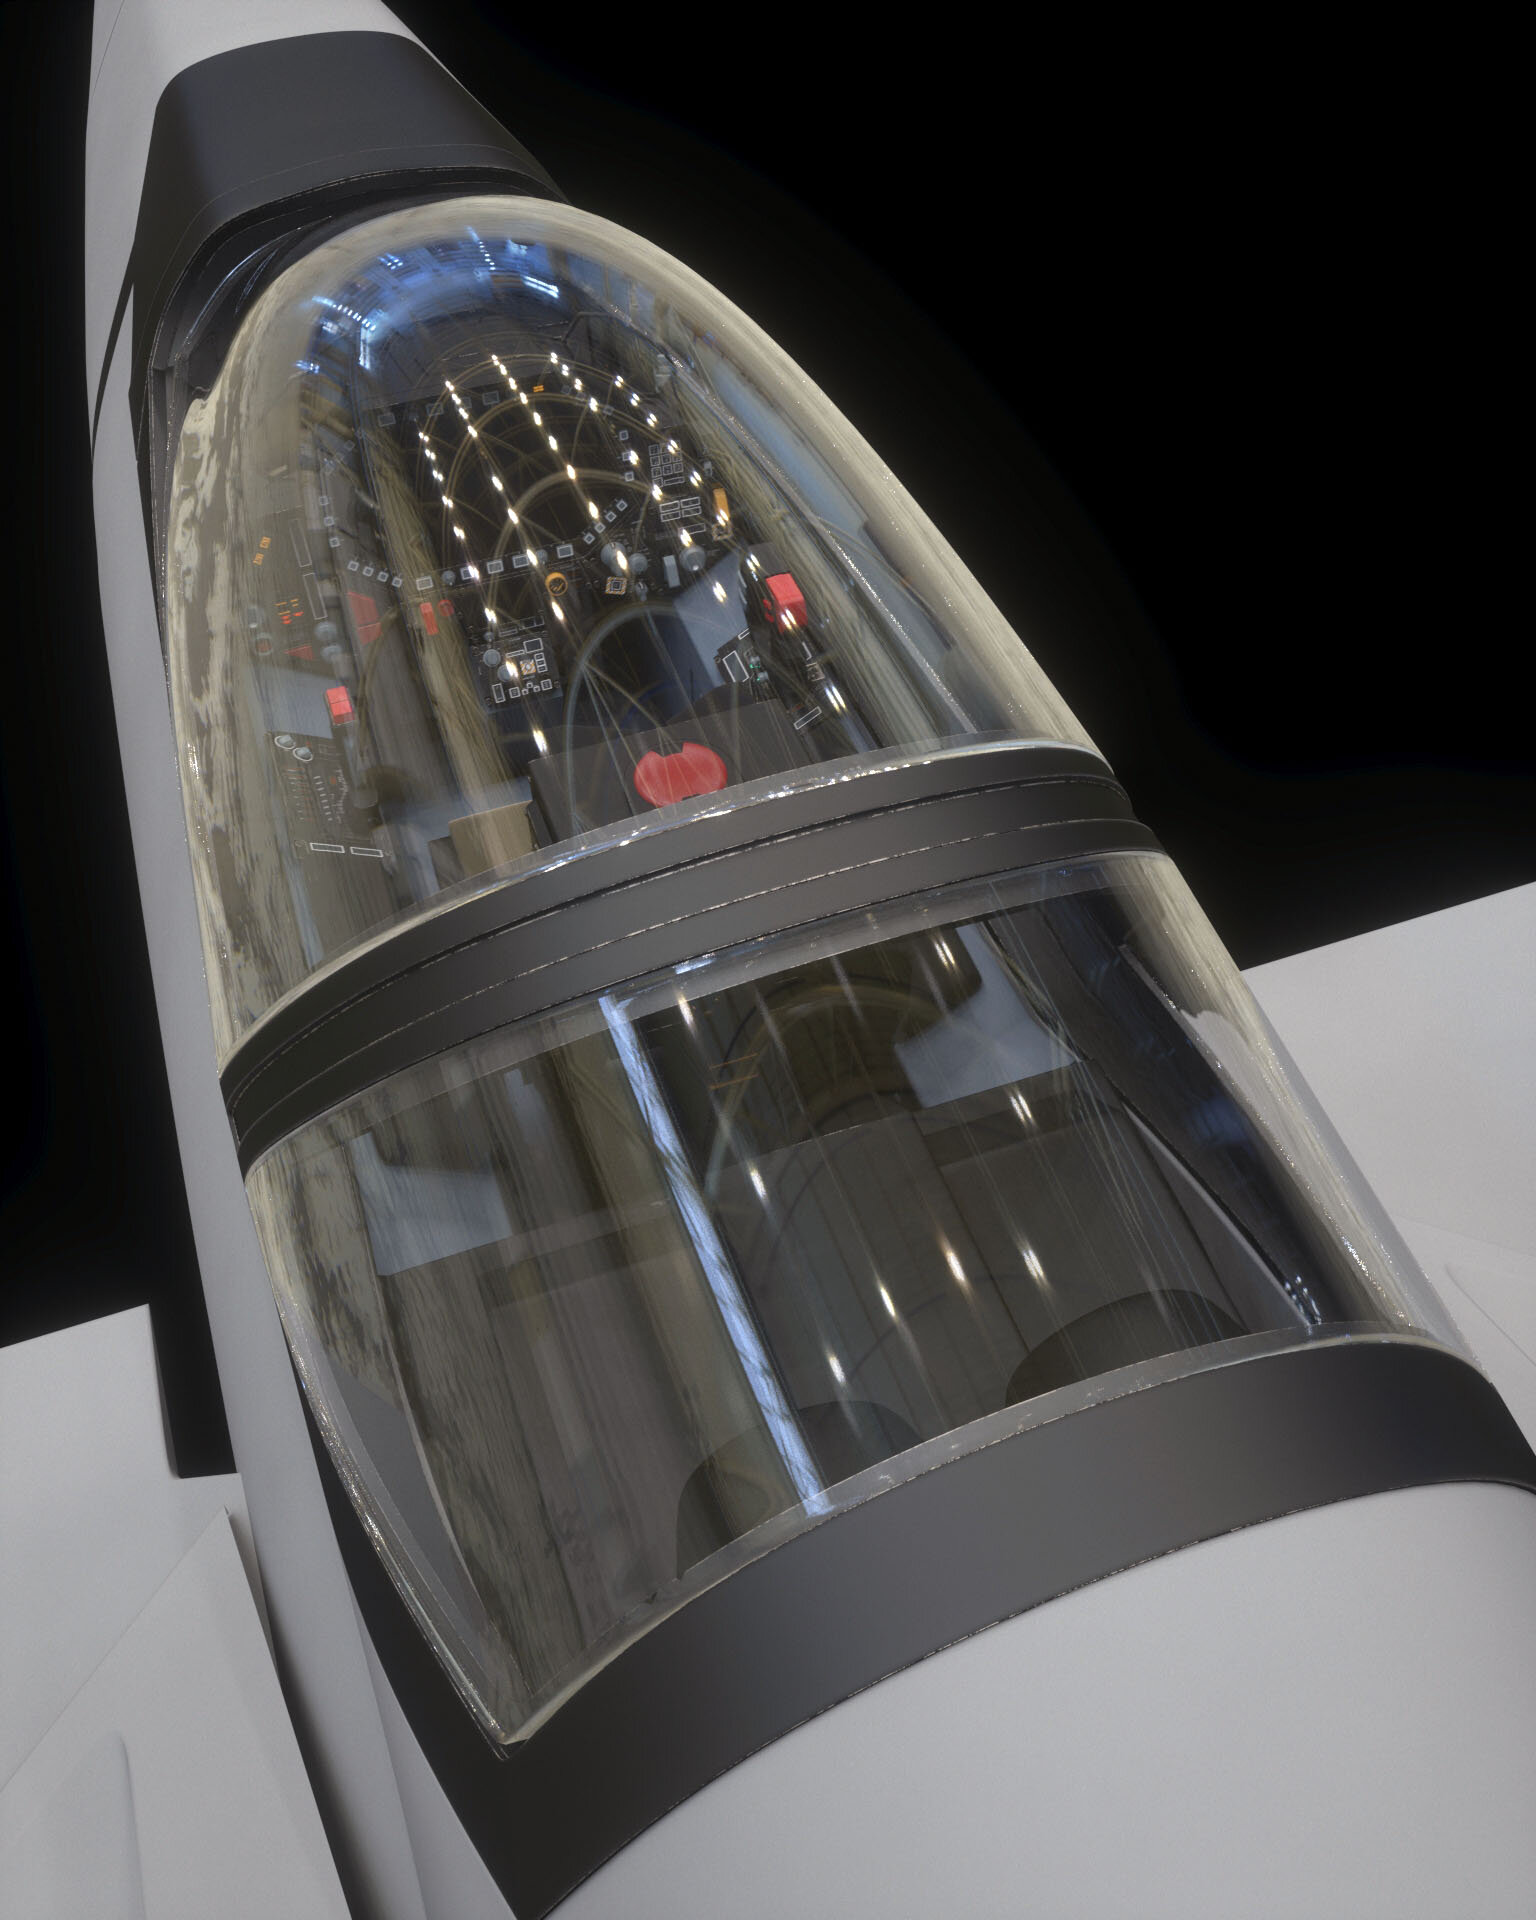
Some detail work on the canopy: -frame inside -frame mid -frame outside -frame vents, handles, sealing hose, locking pins, mumbo jumbo


-
Good! Because....
-
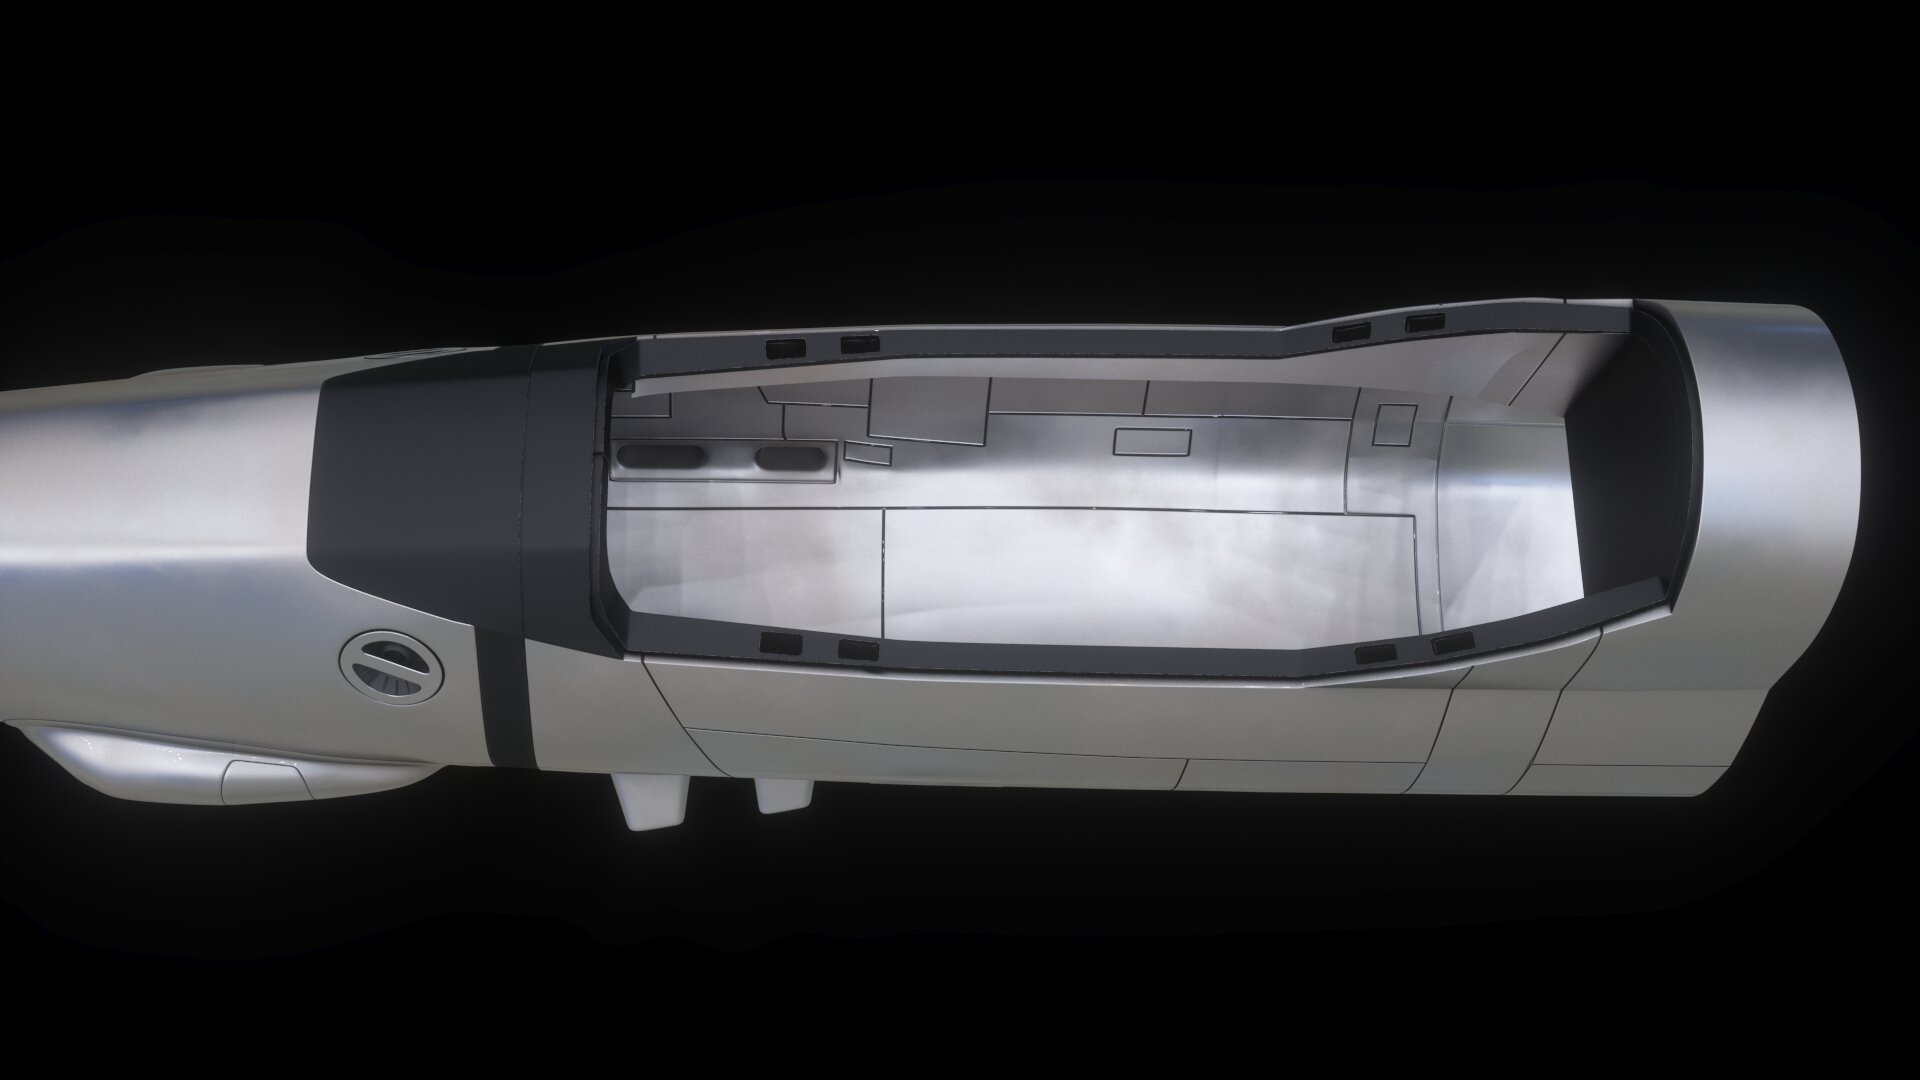
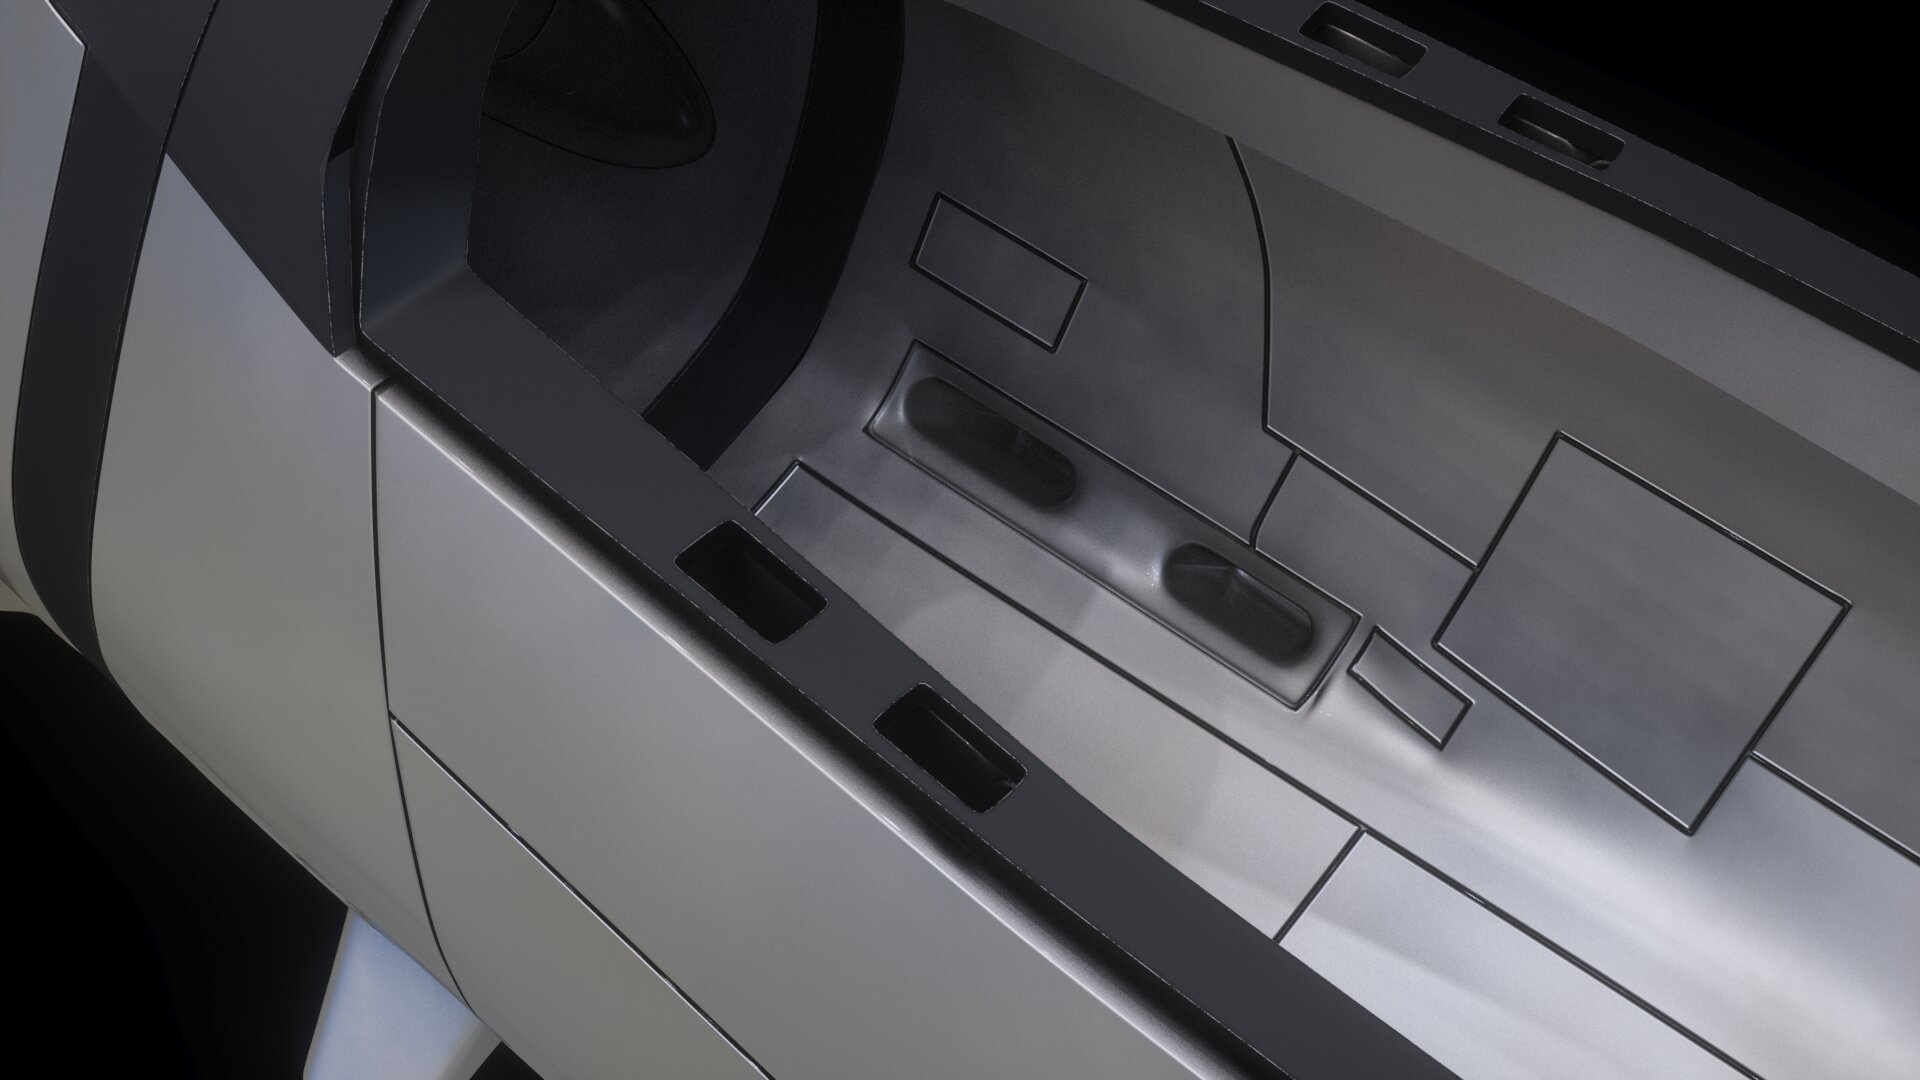
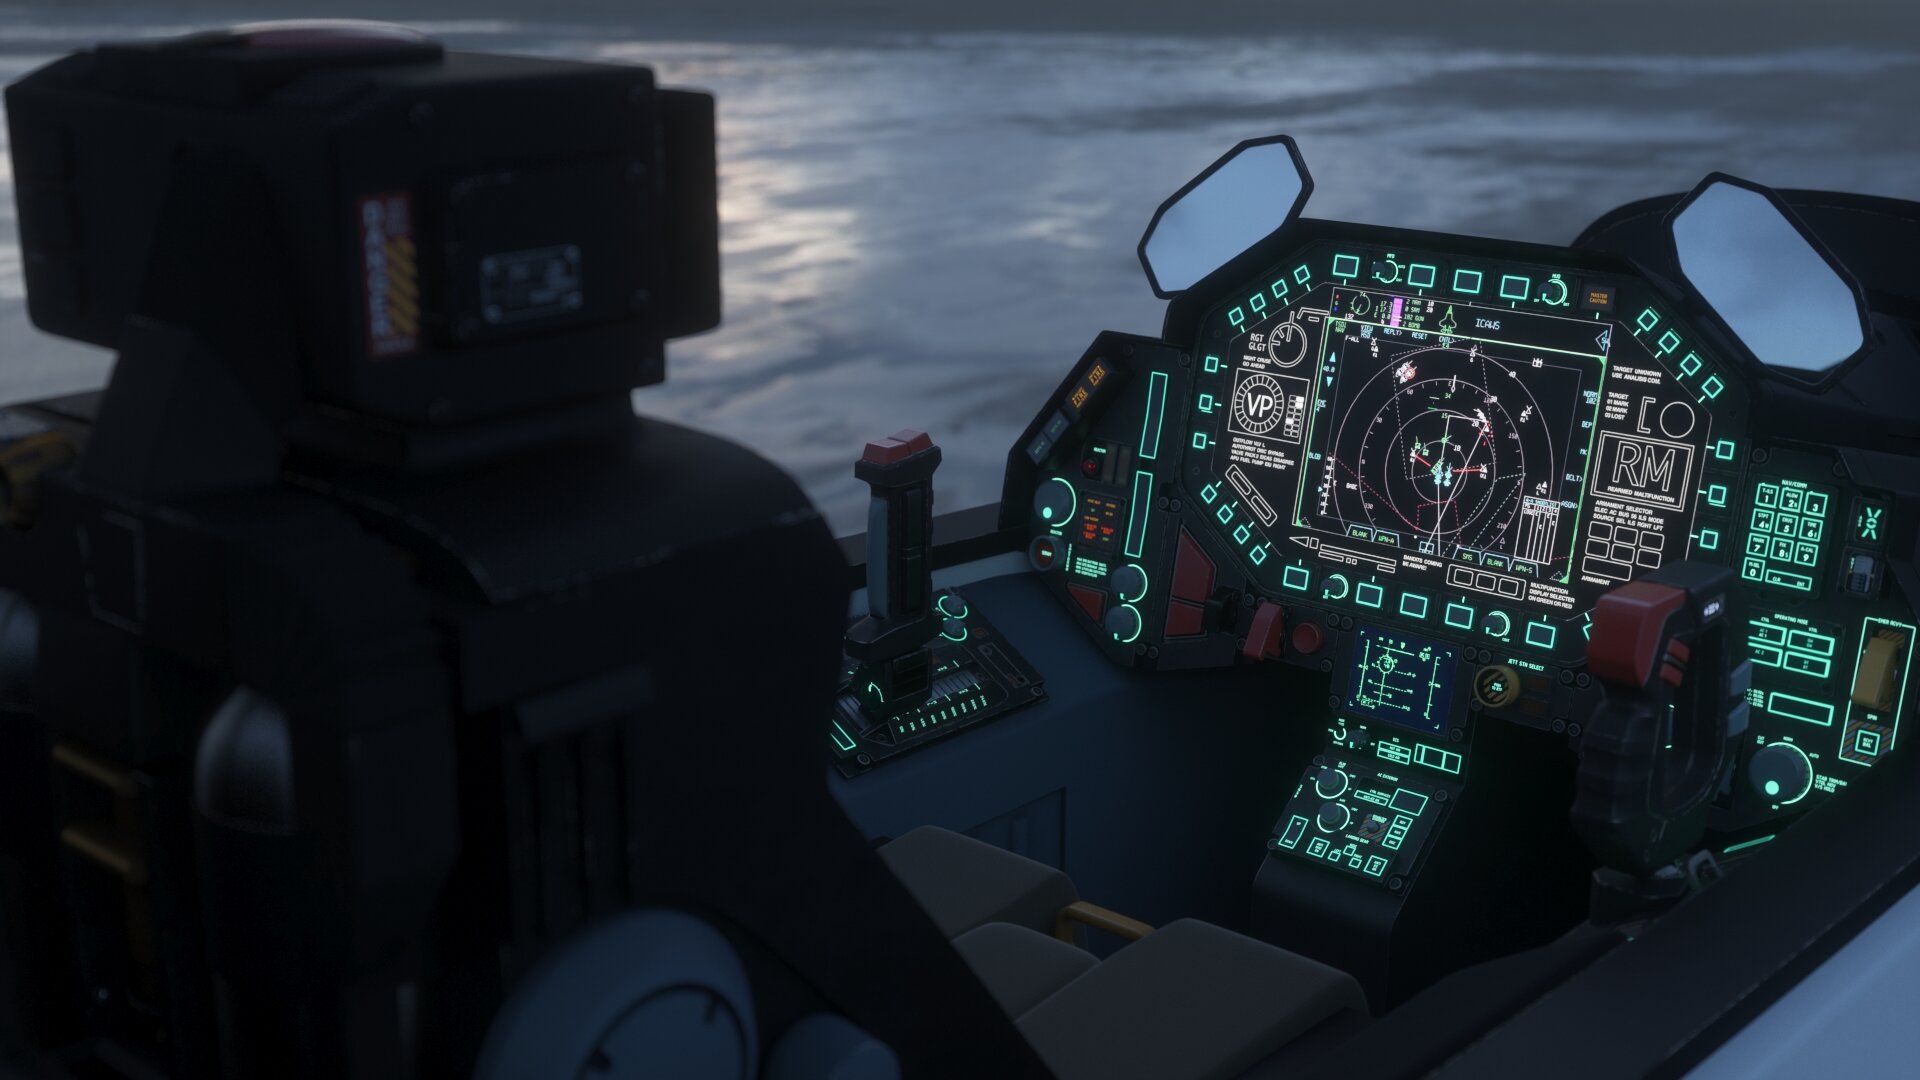
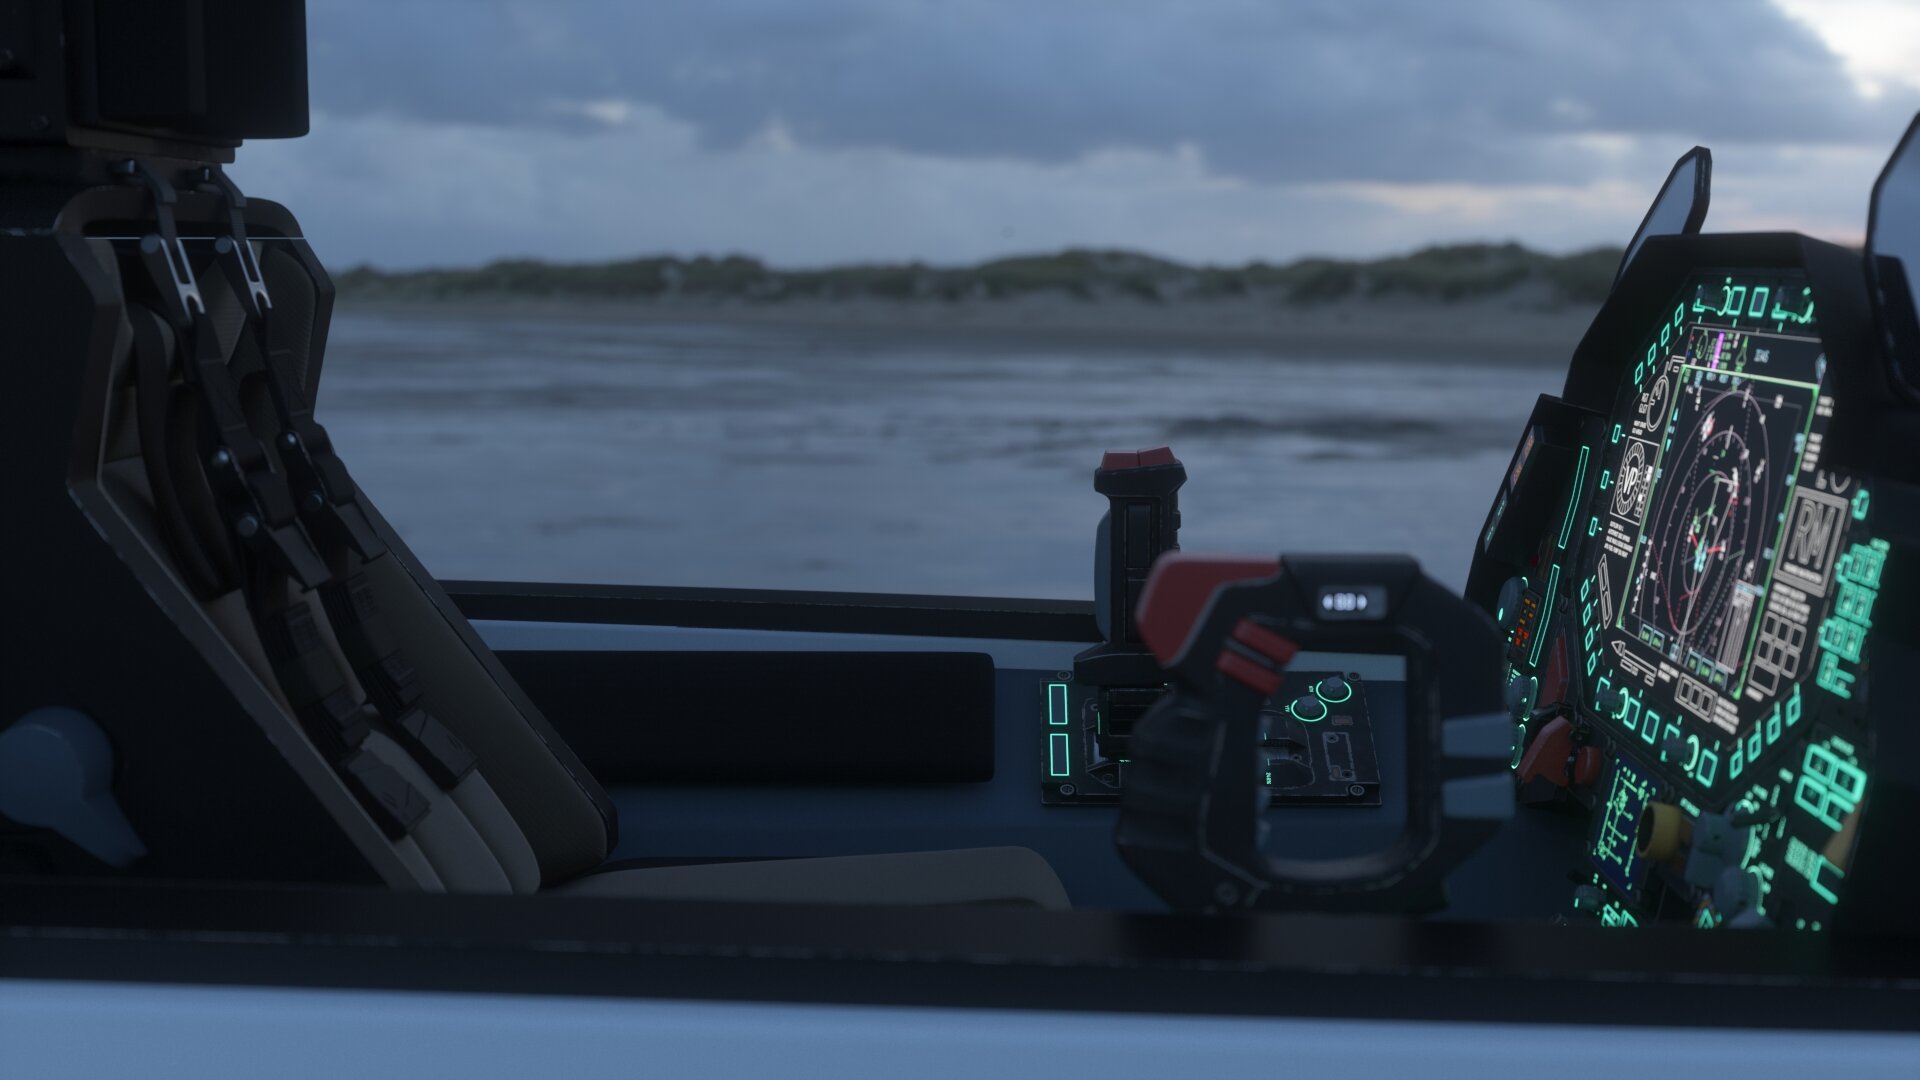
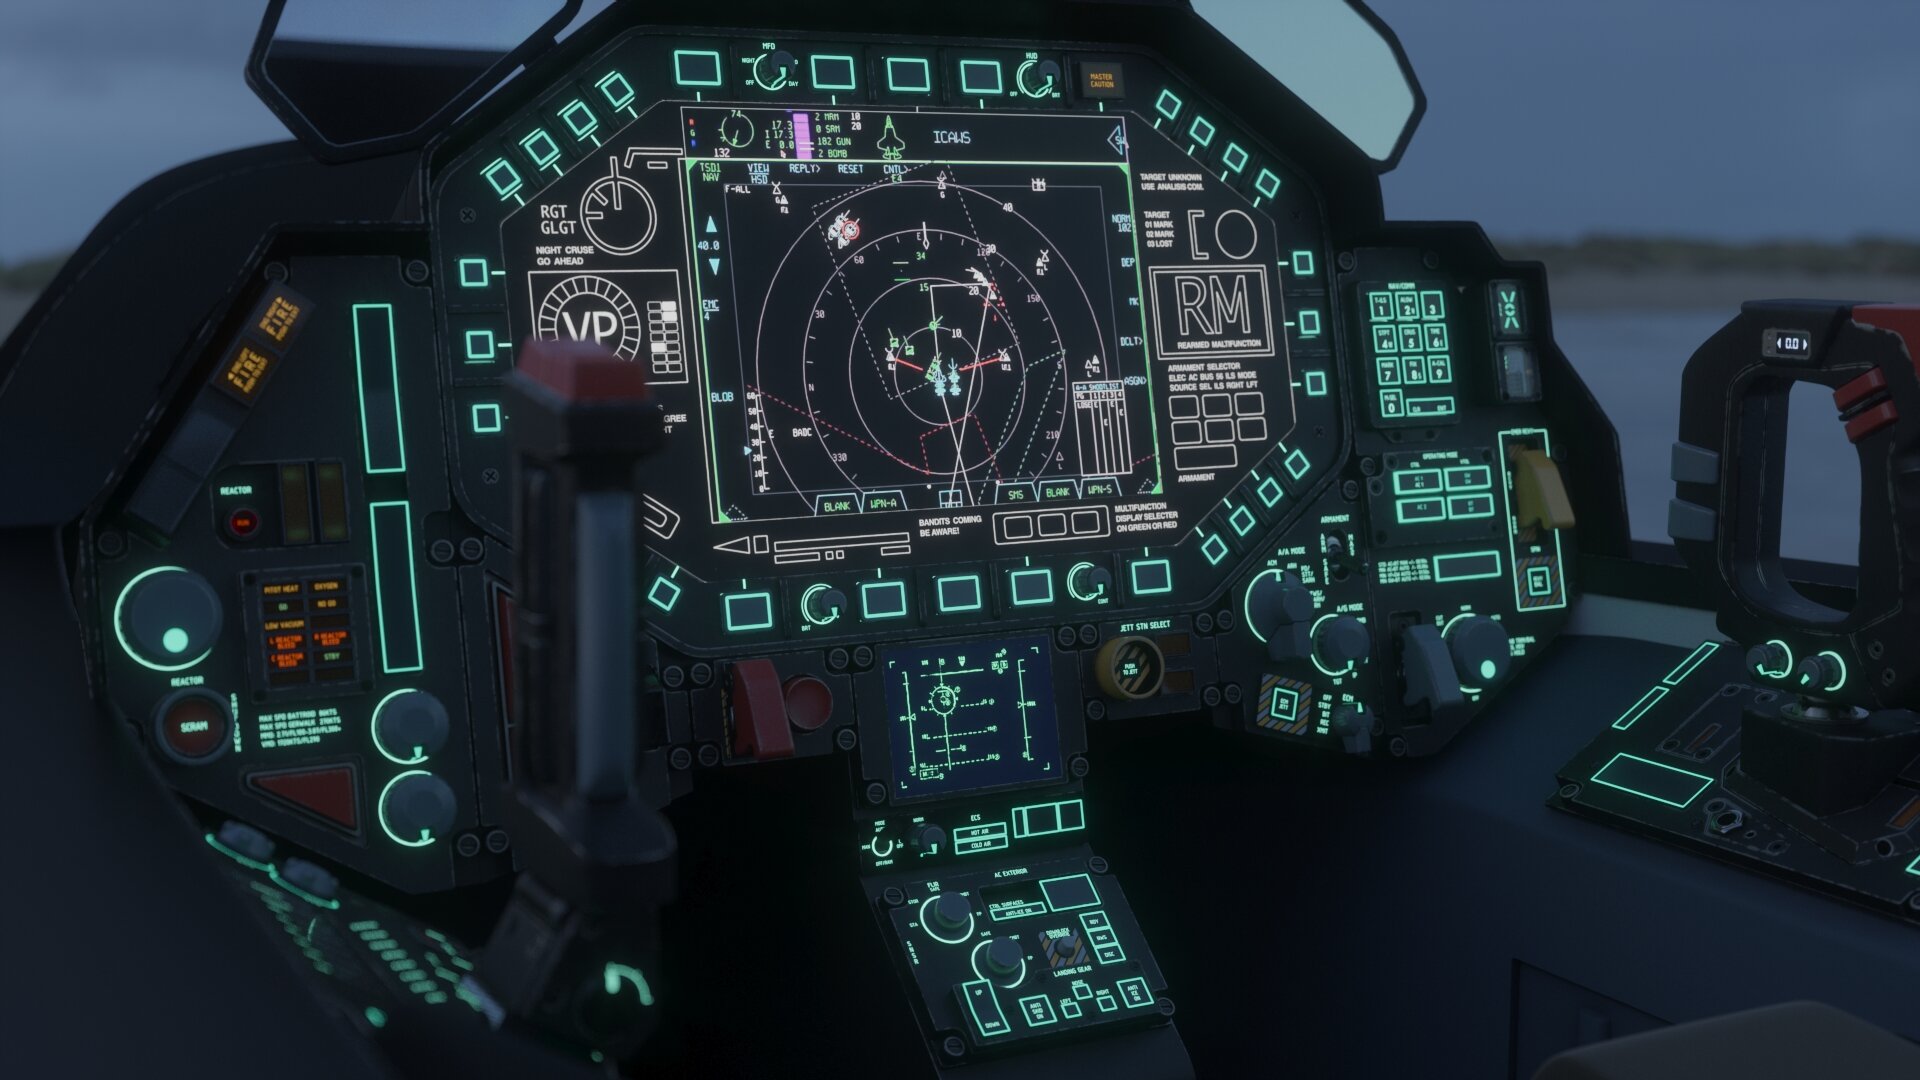
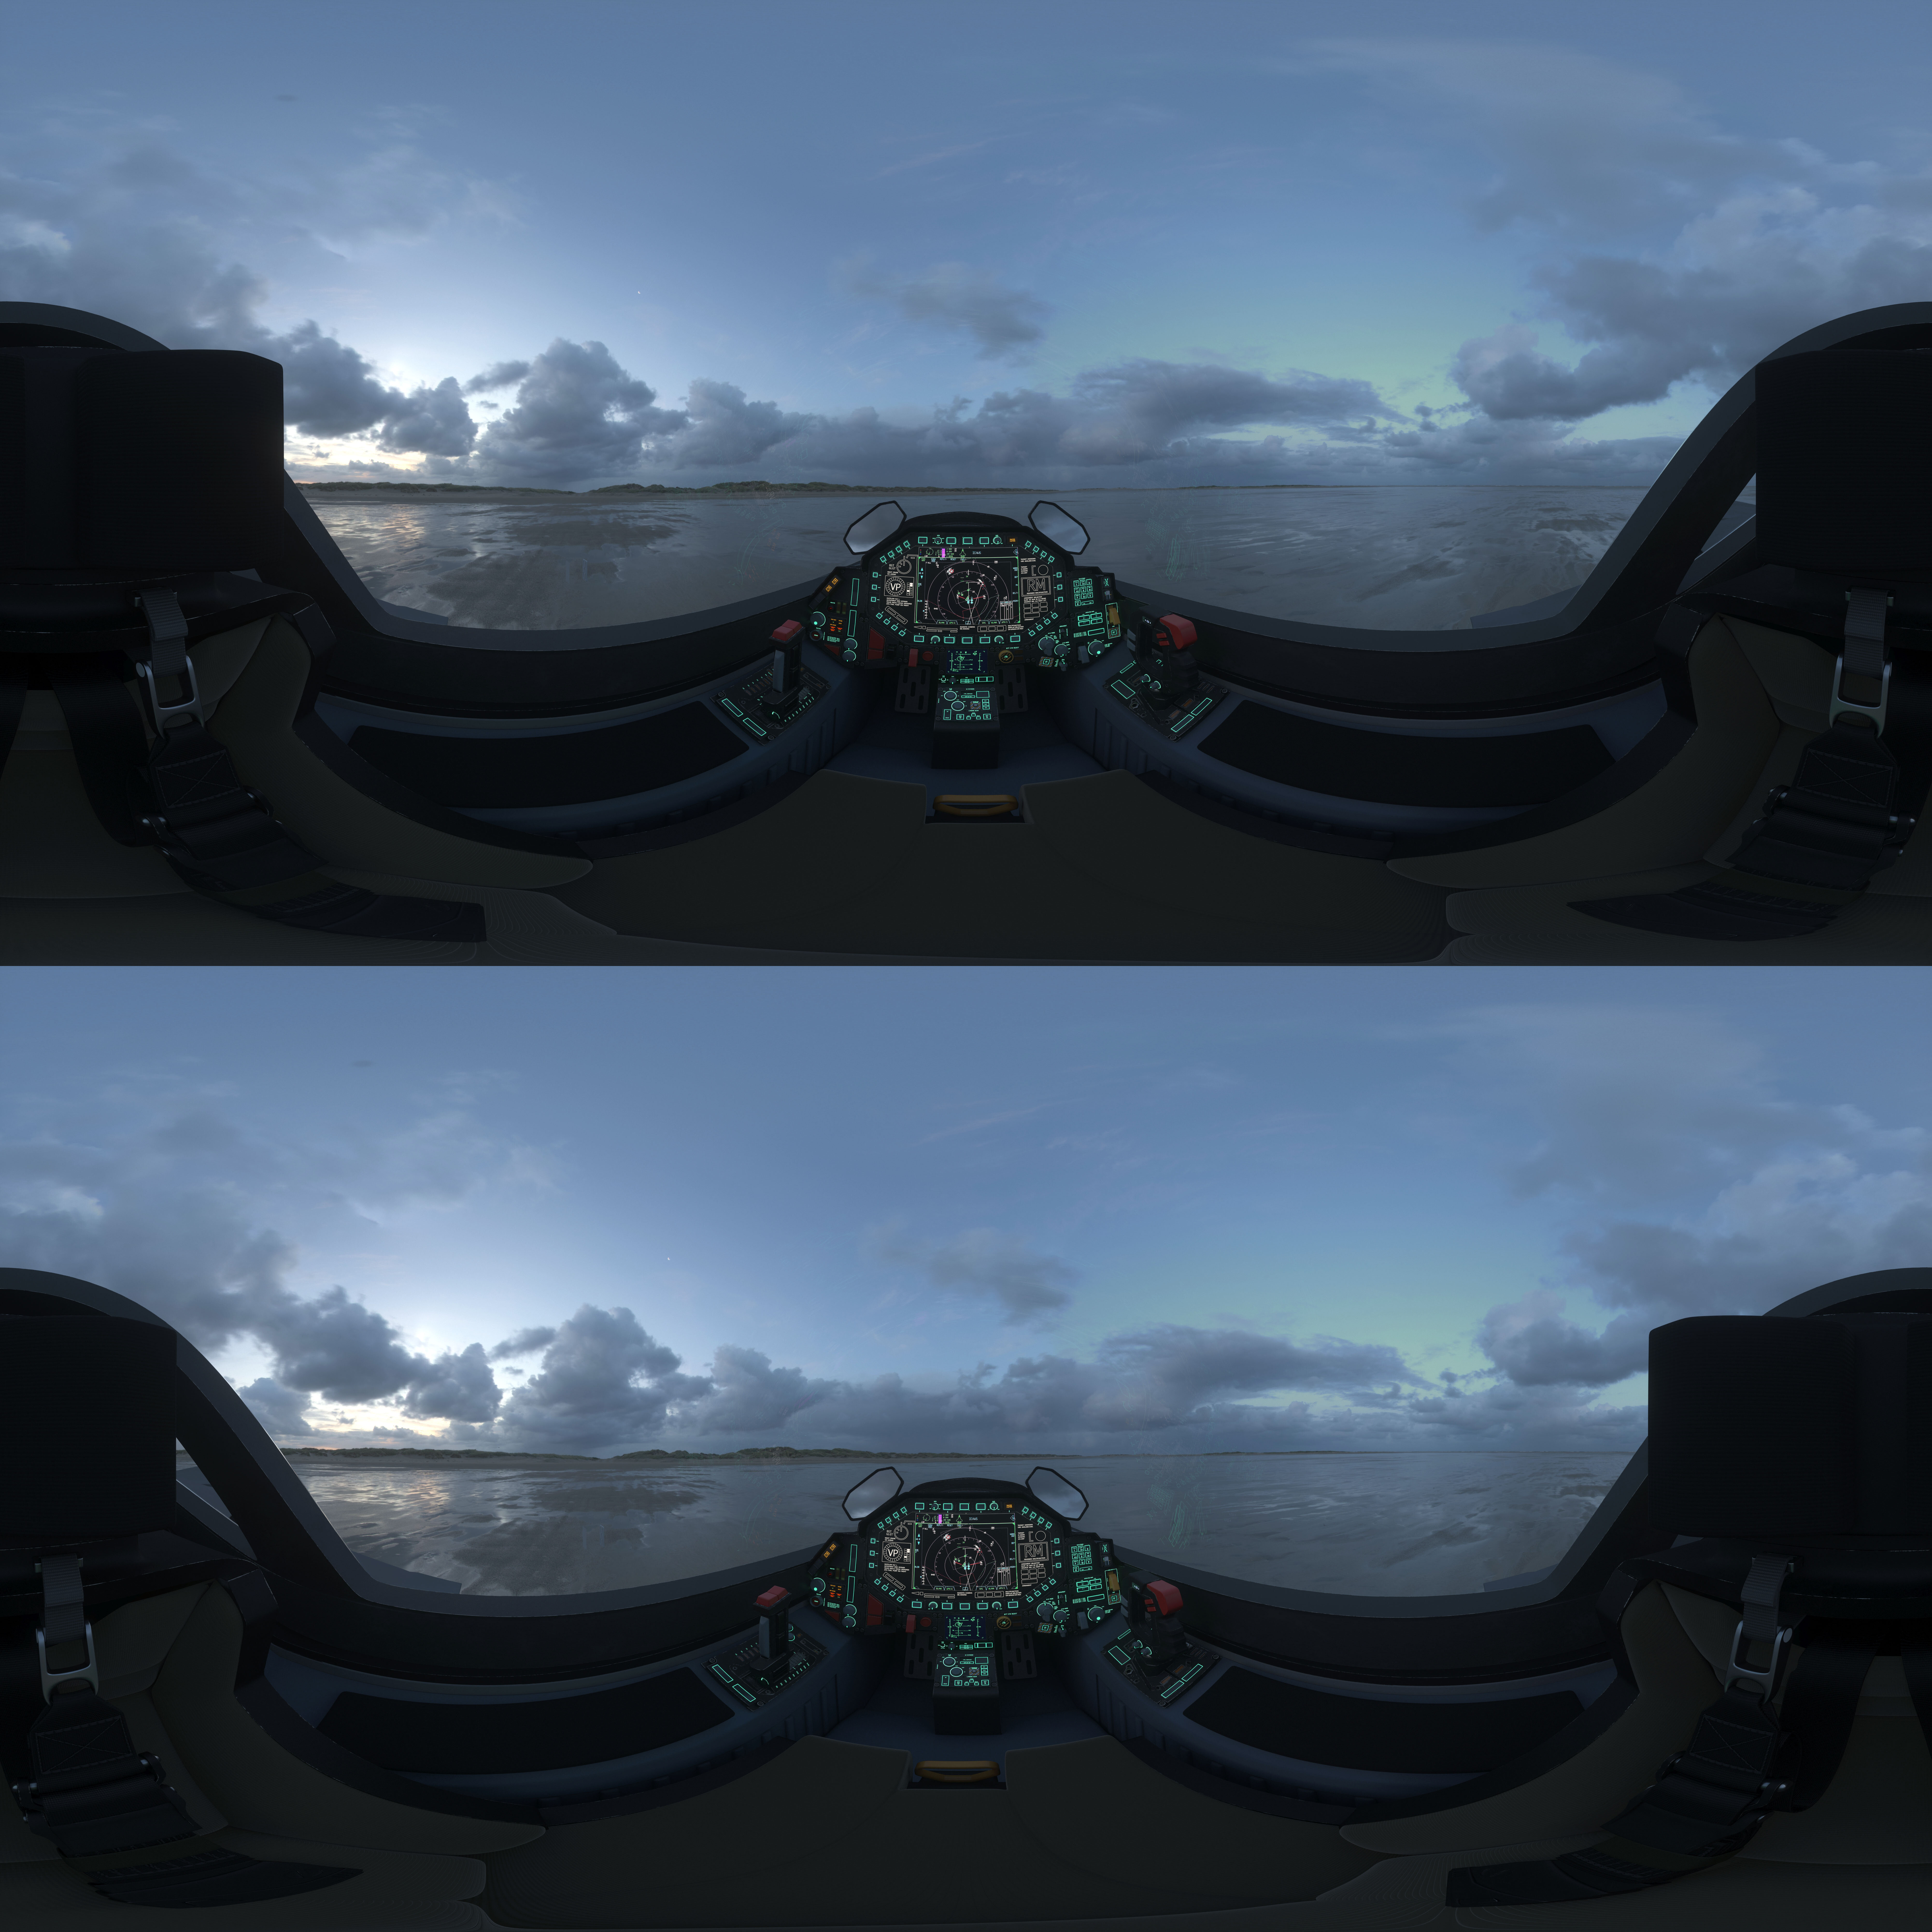
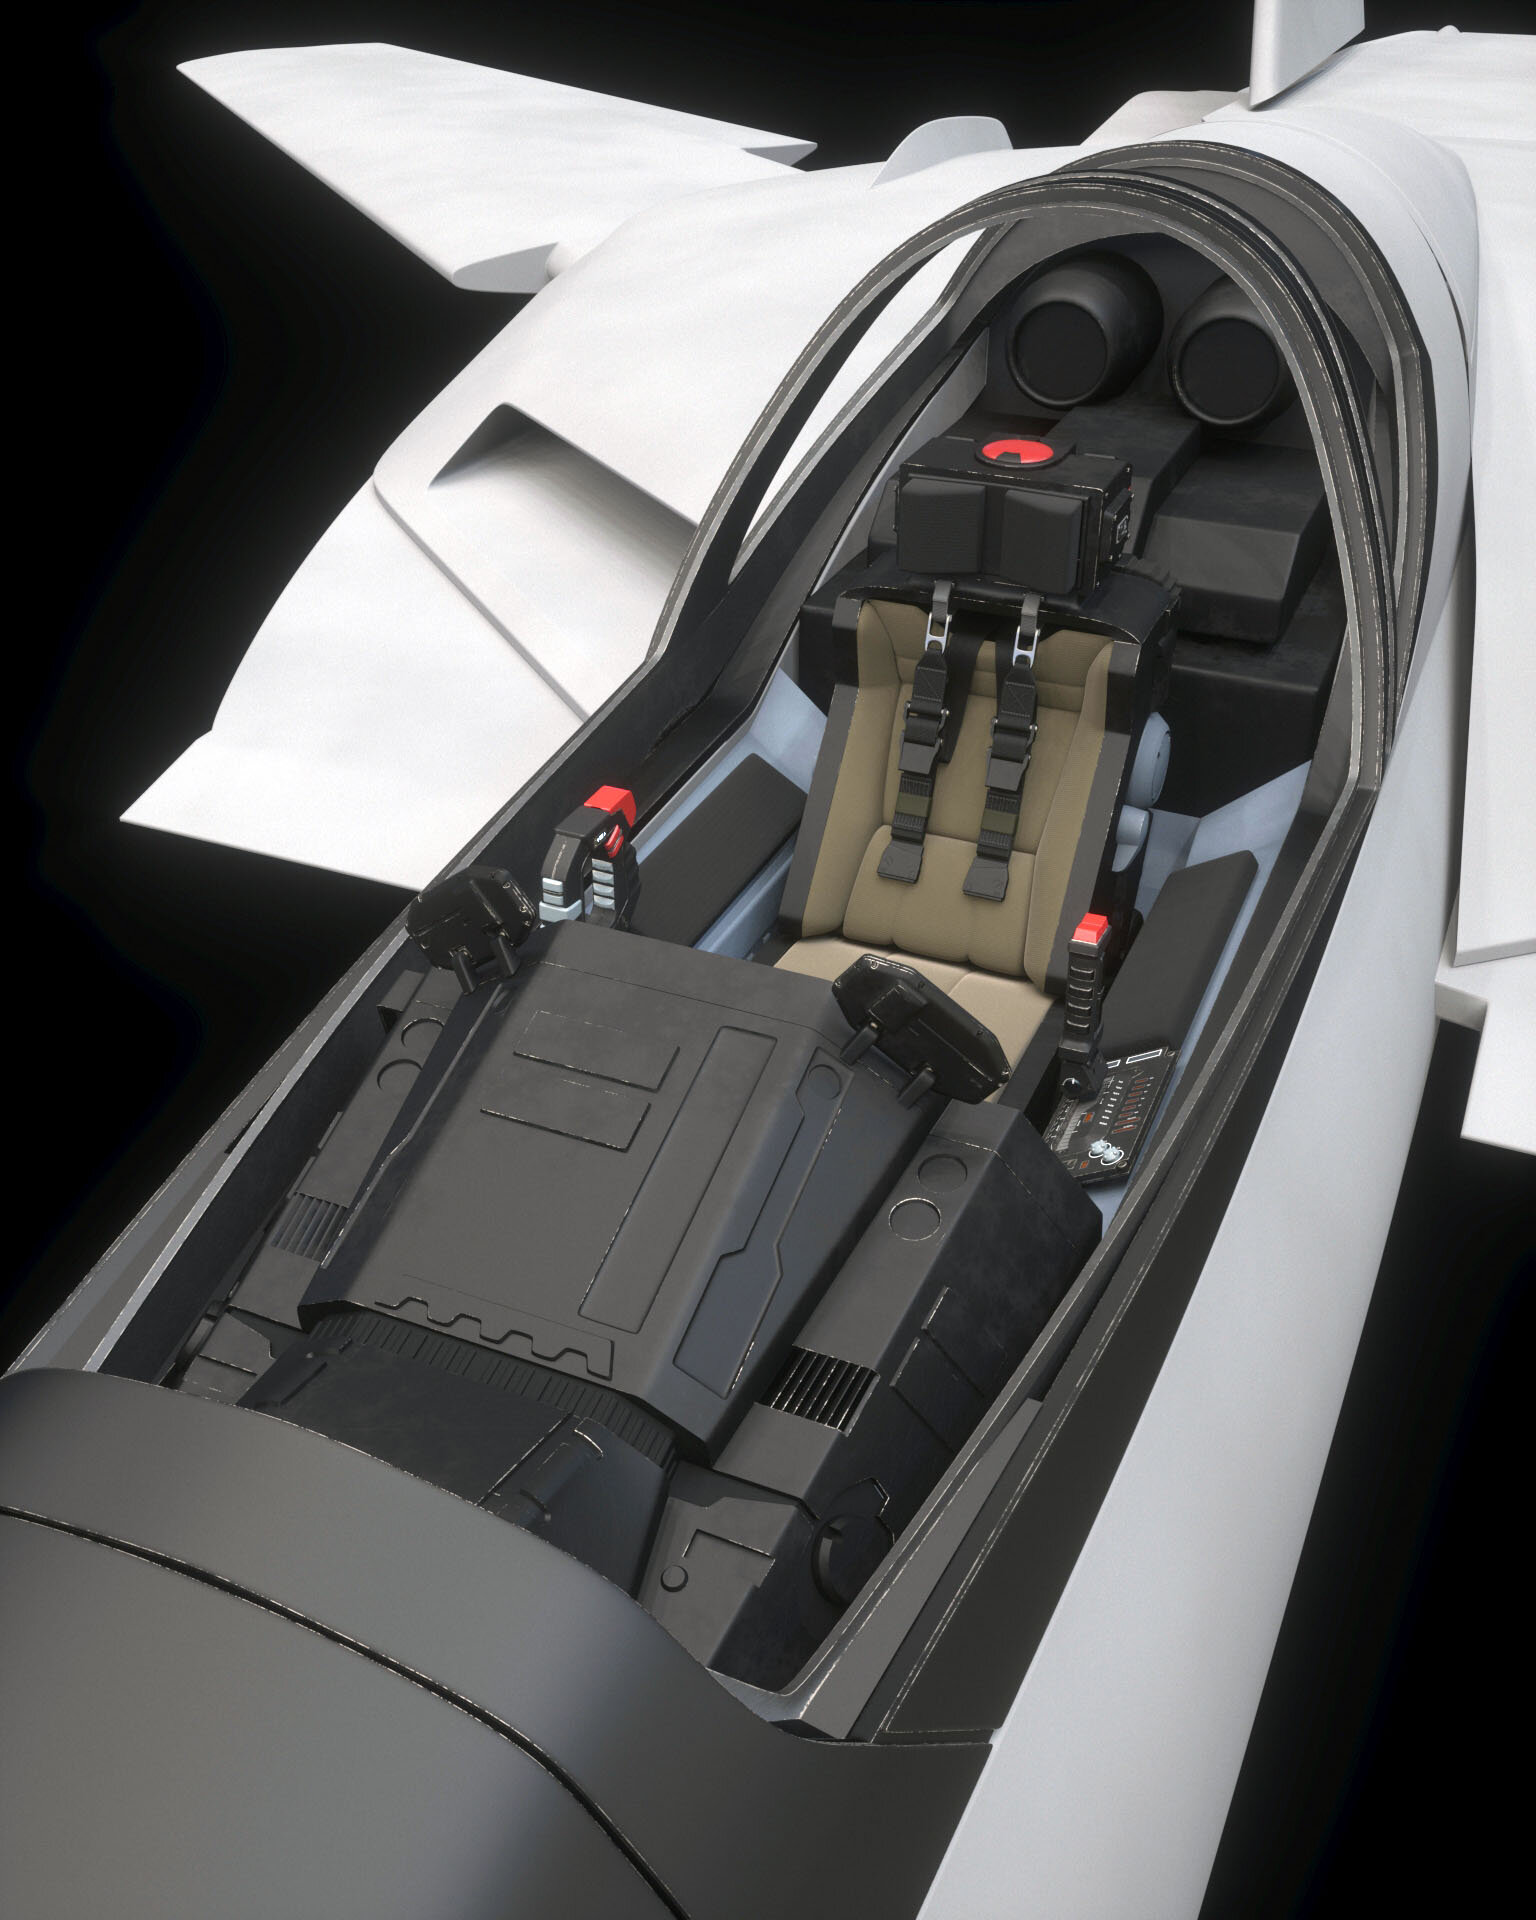
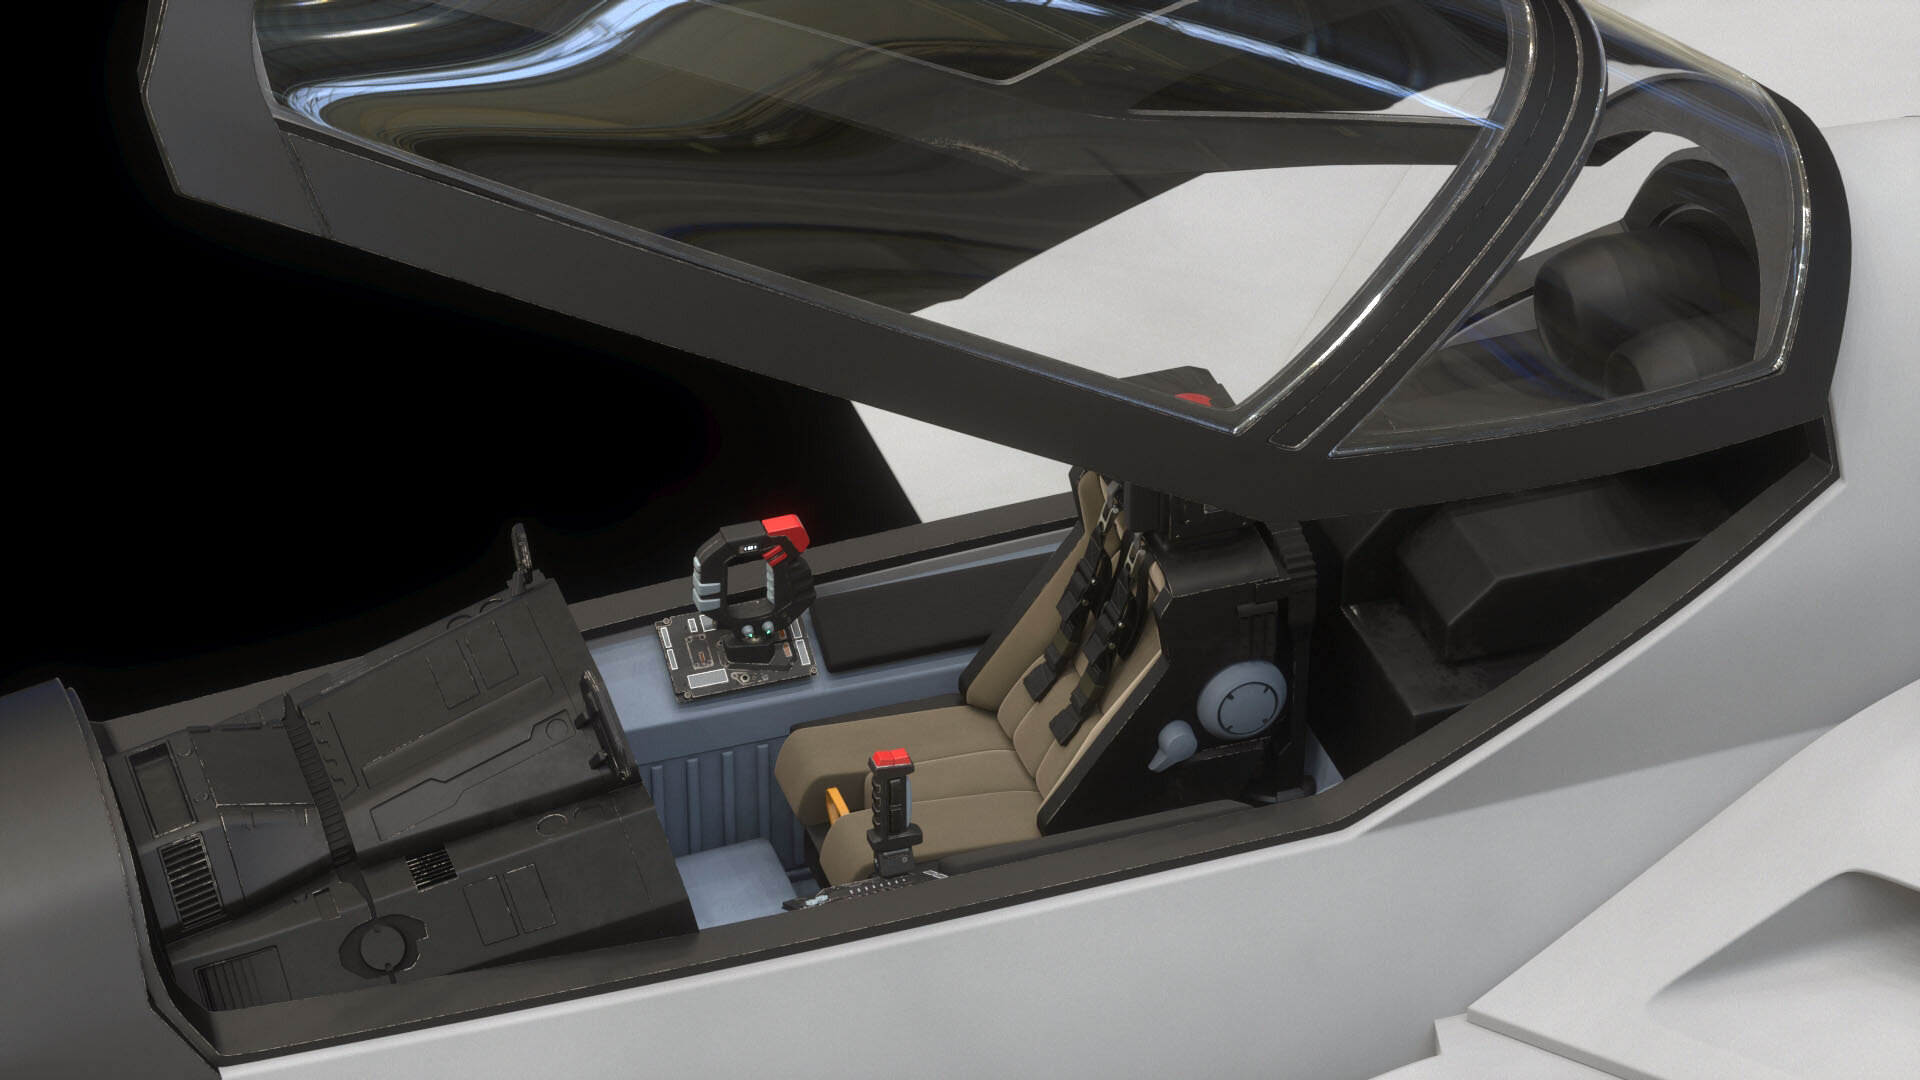
Ok. So I found the last Instrument Panel very small - which affected the width of the cockpit. This one is enlarged slightly to accommodate Real Life sizing. Overall, it feels better (to me). Man, the beach one...wowzers.
-
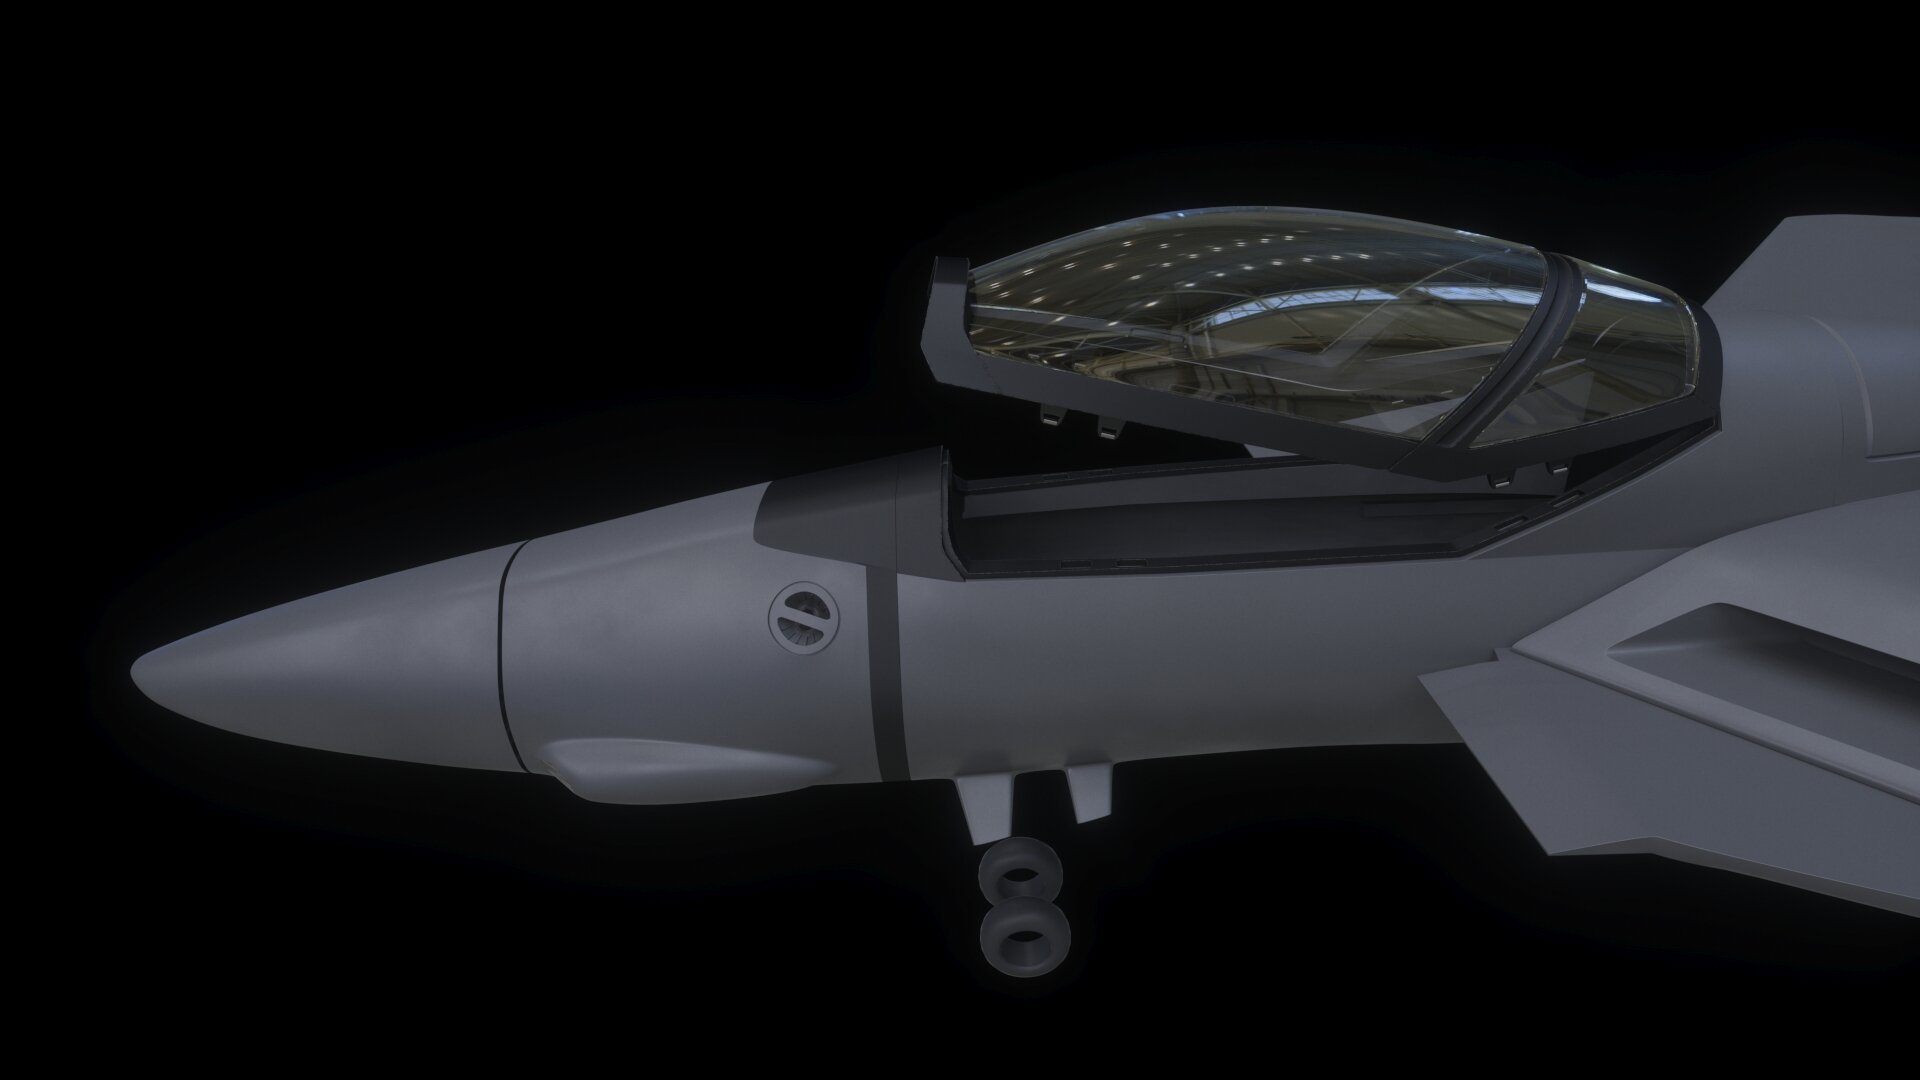
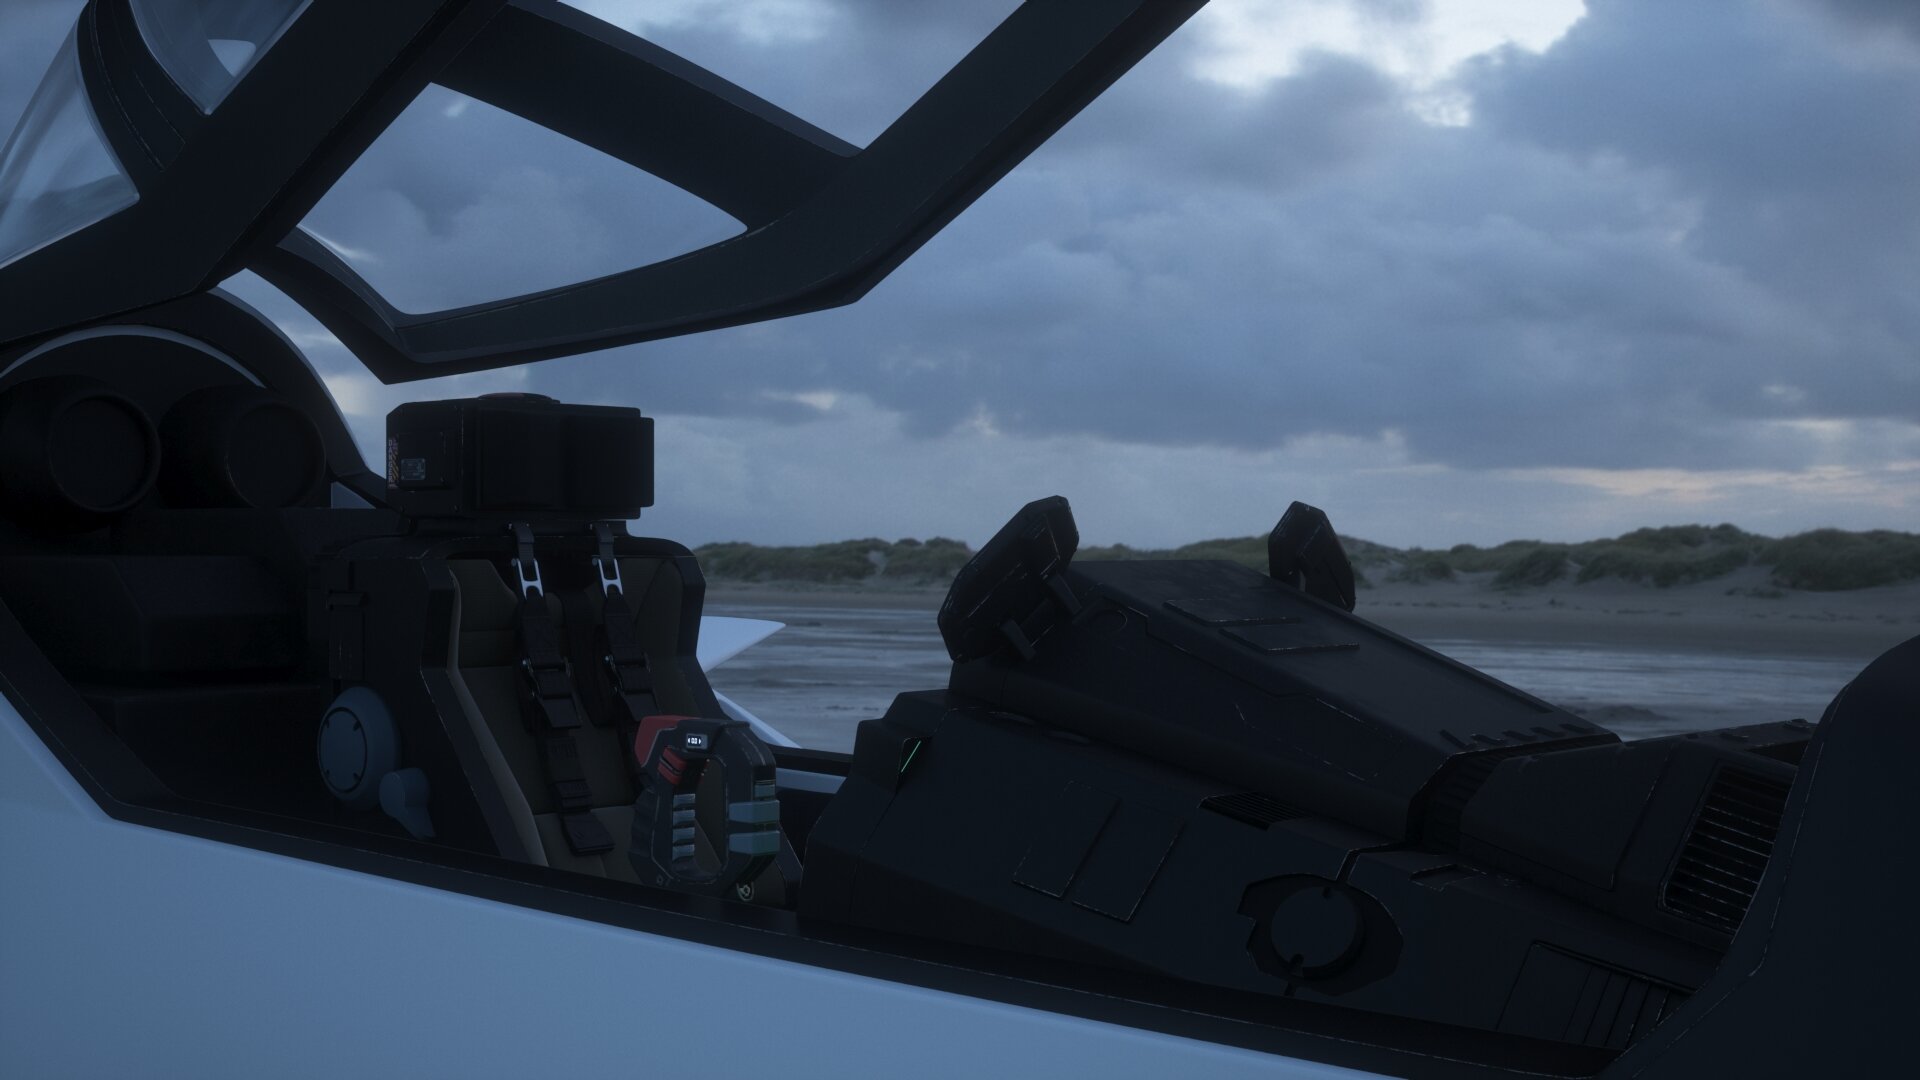
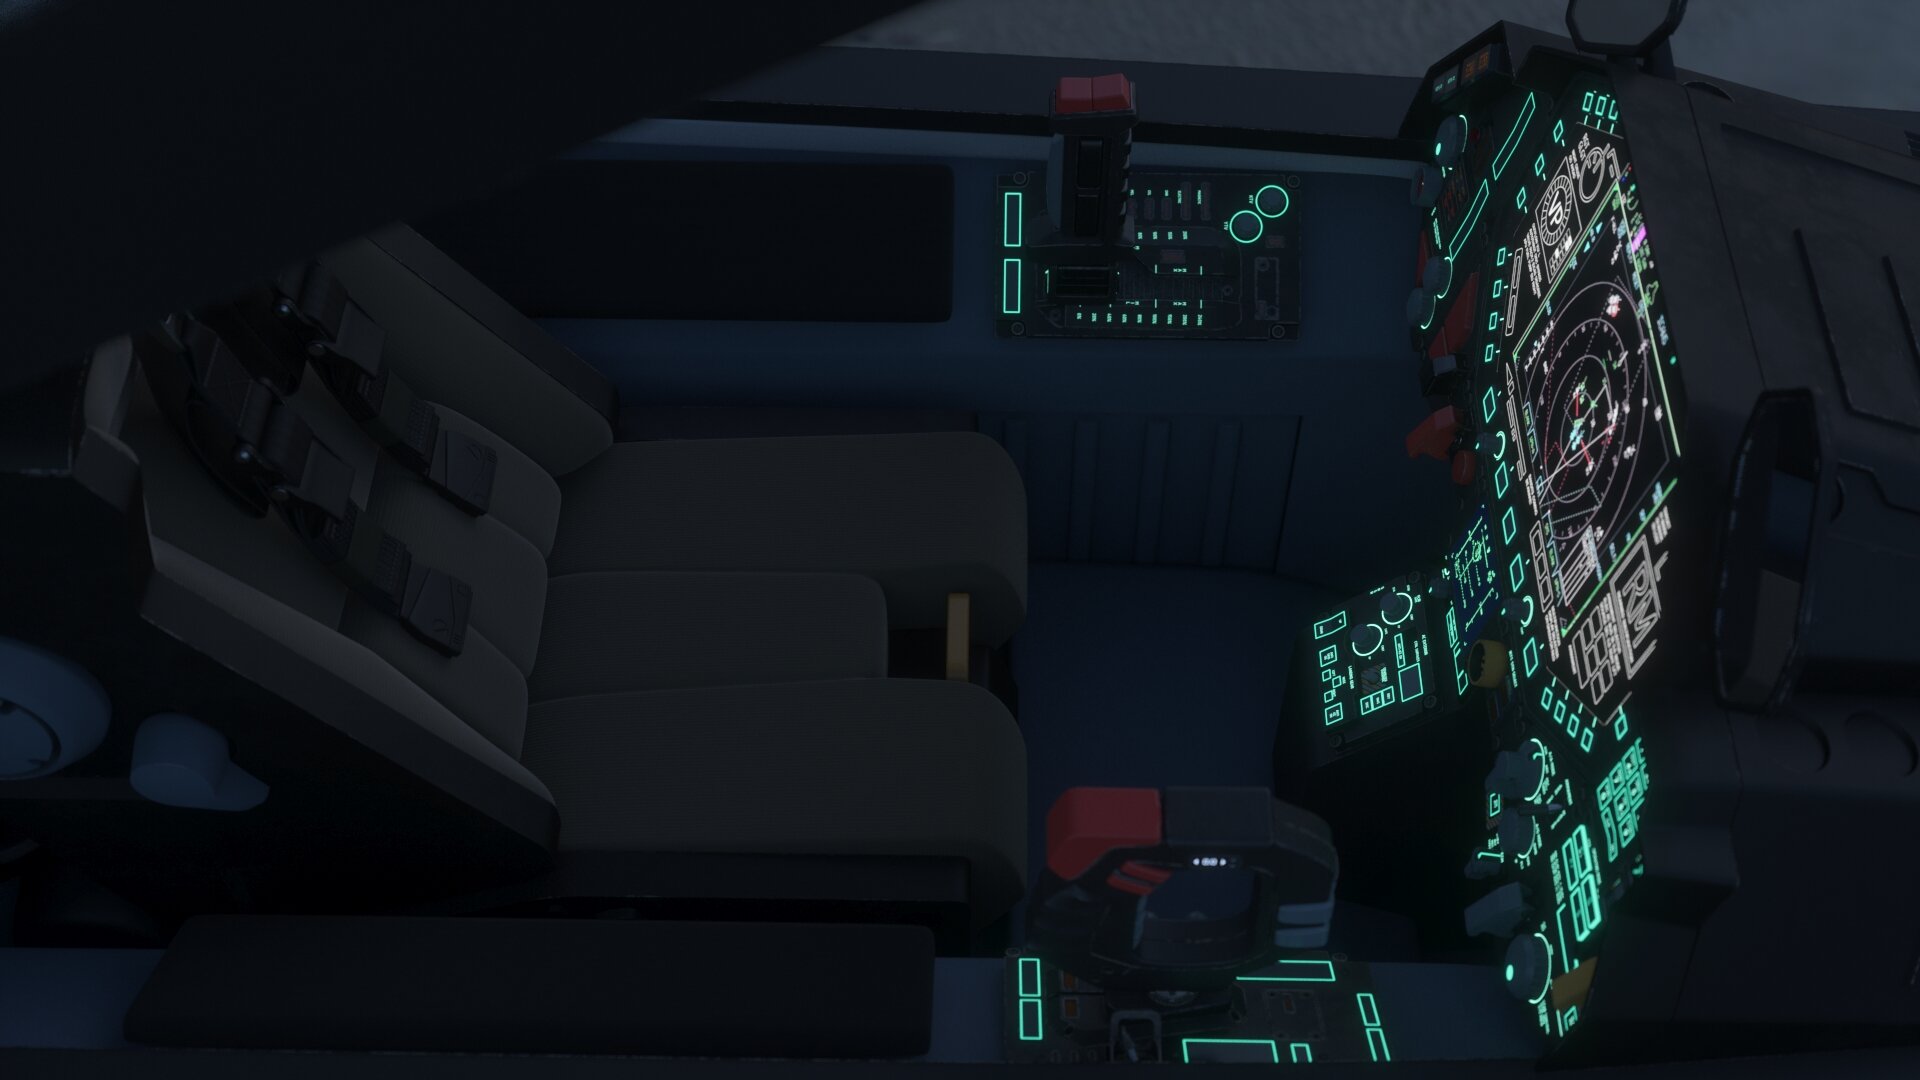
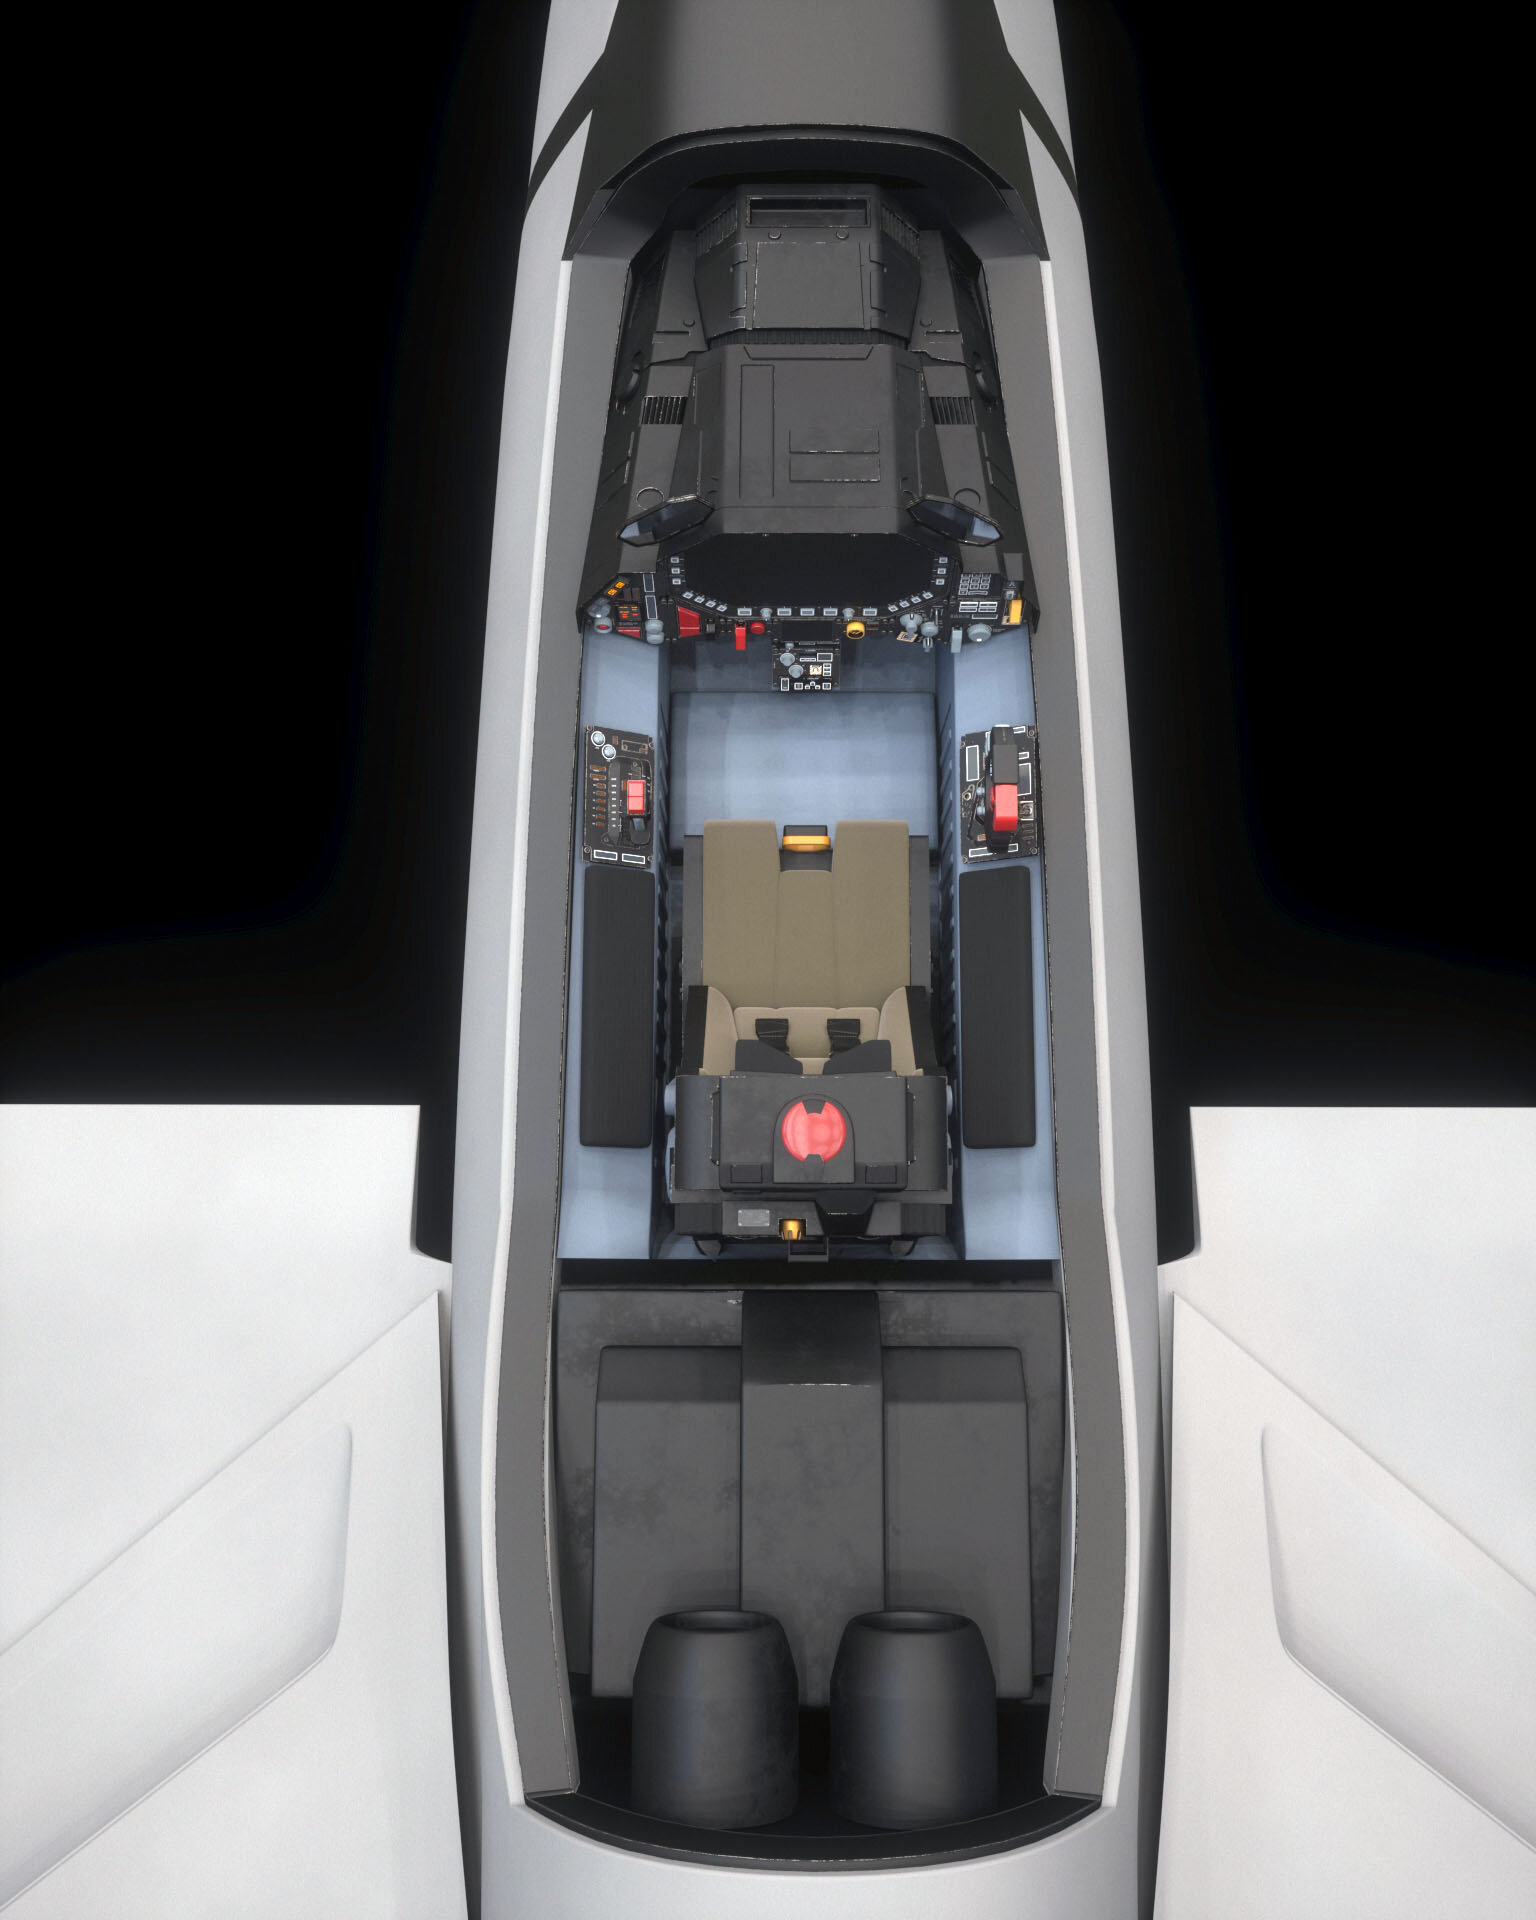
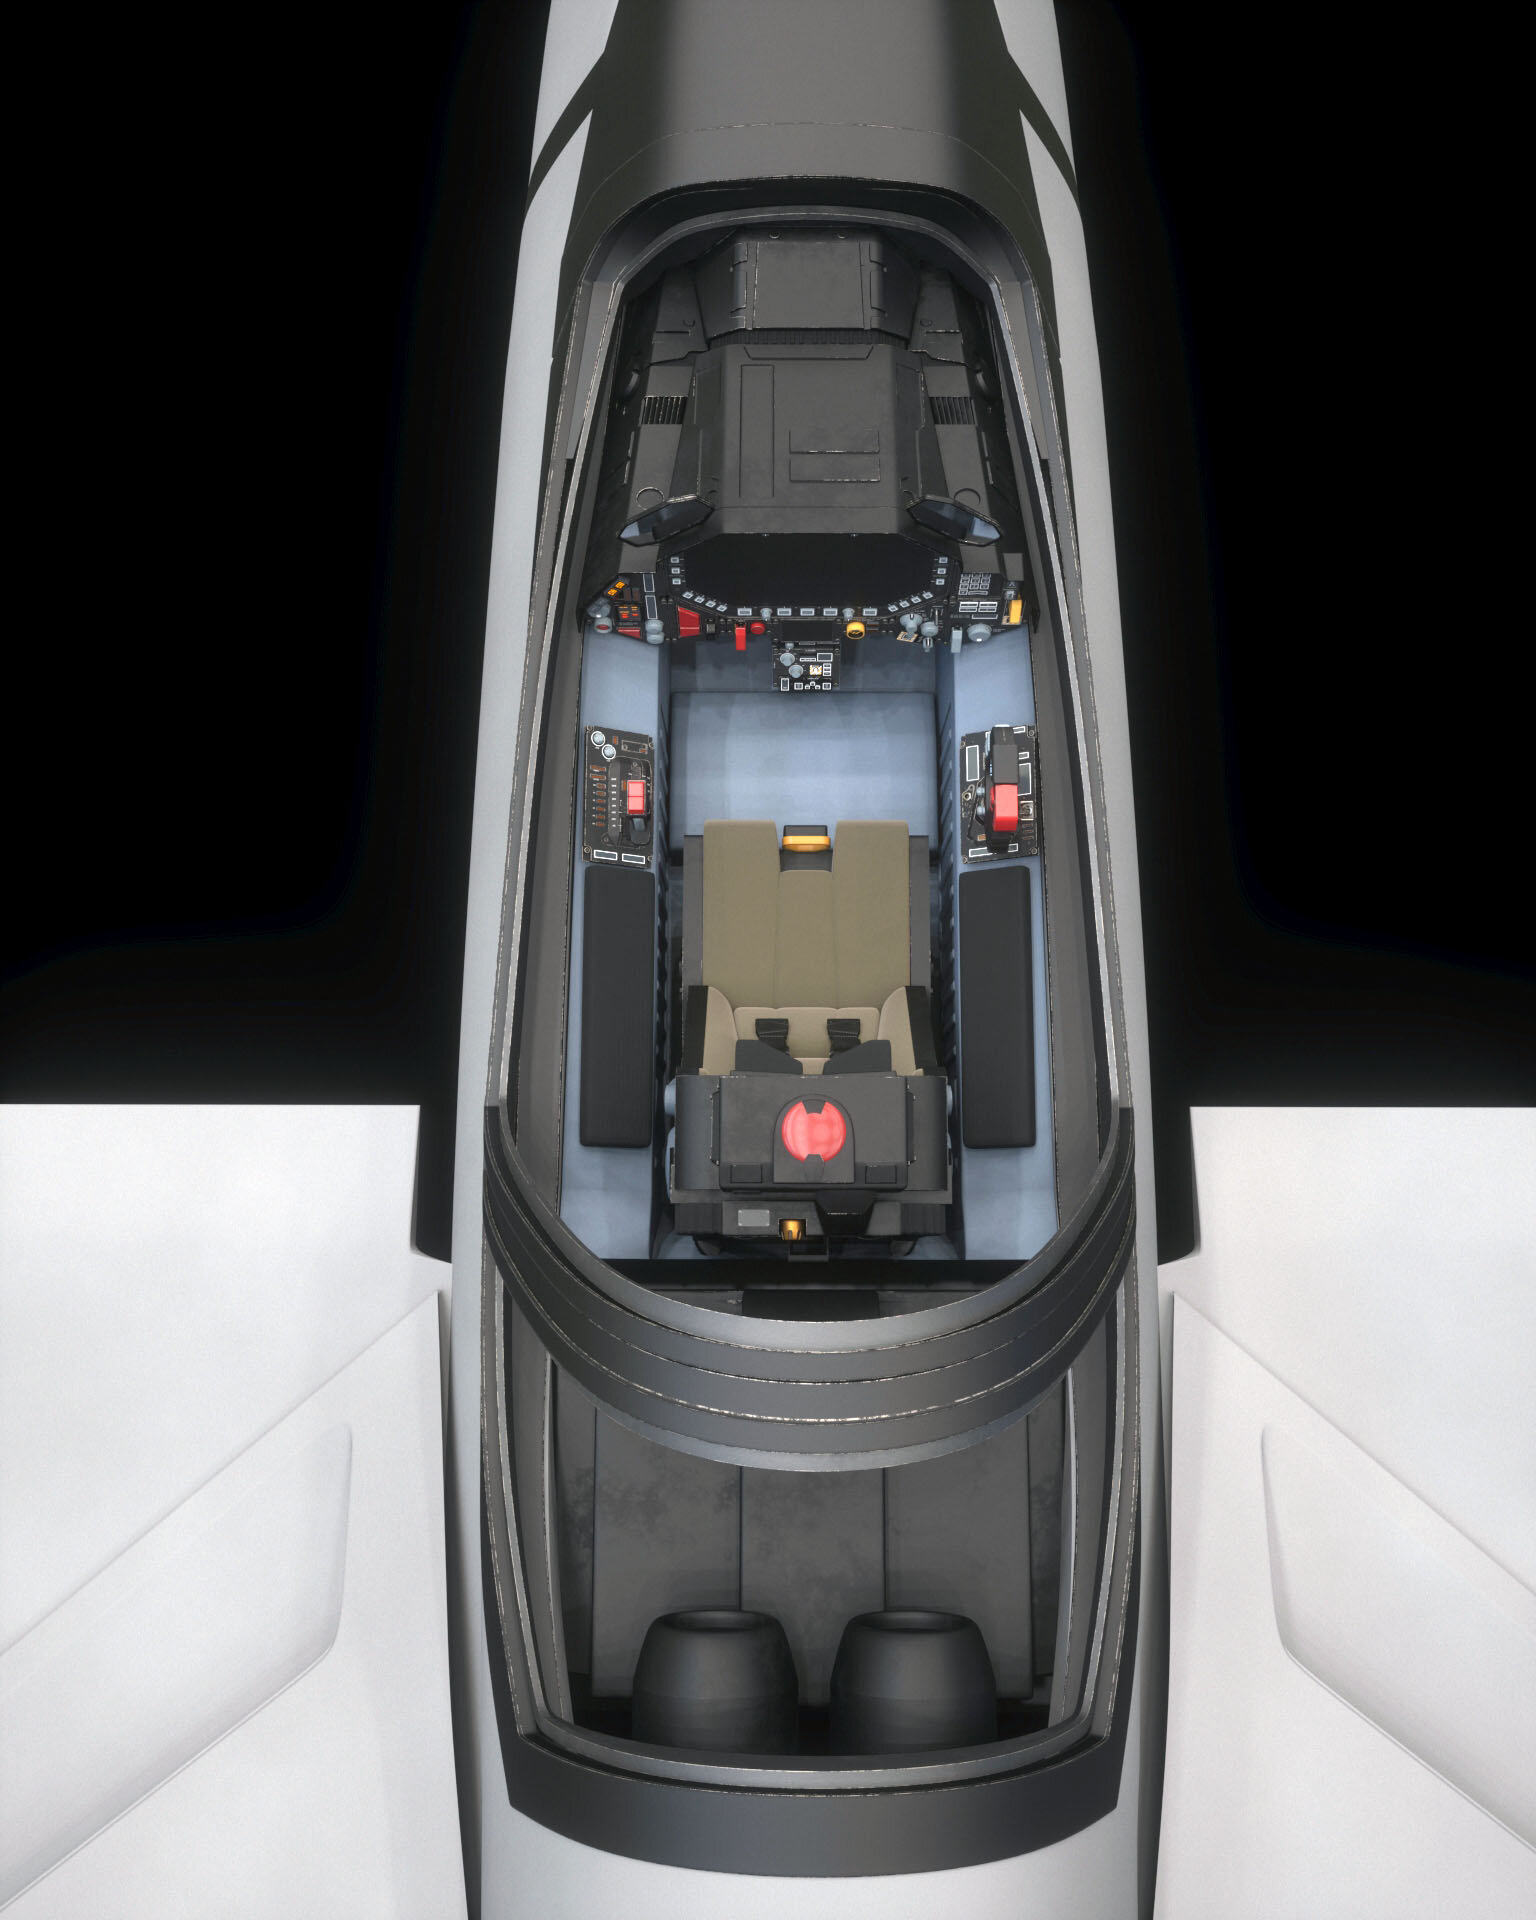
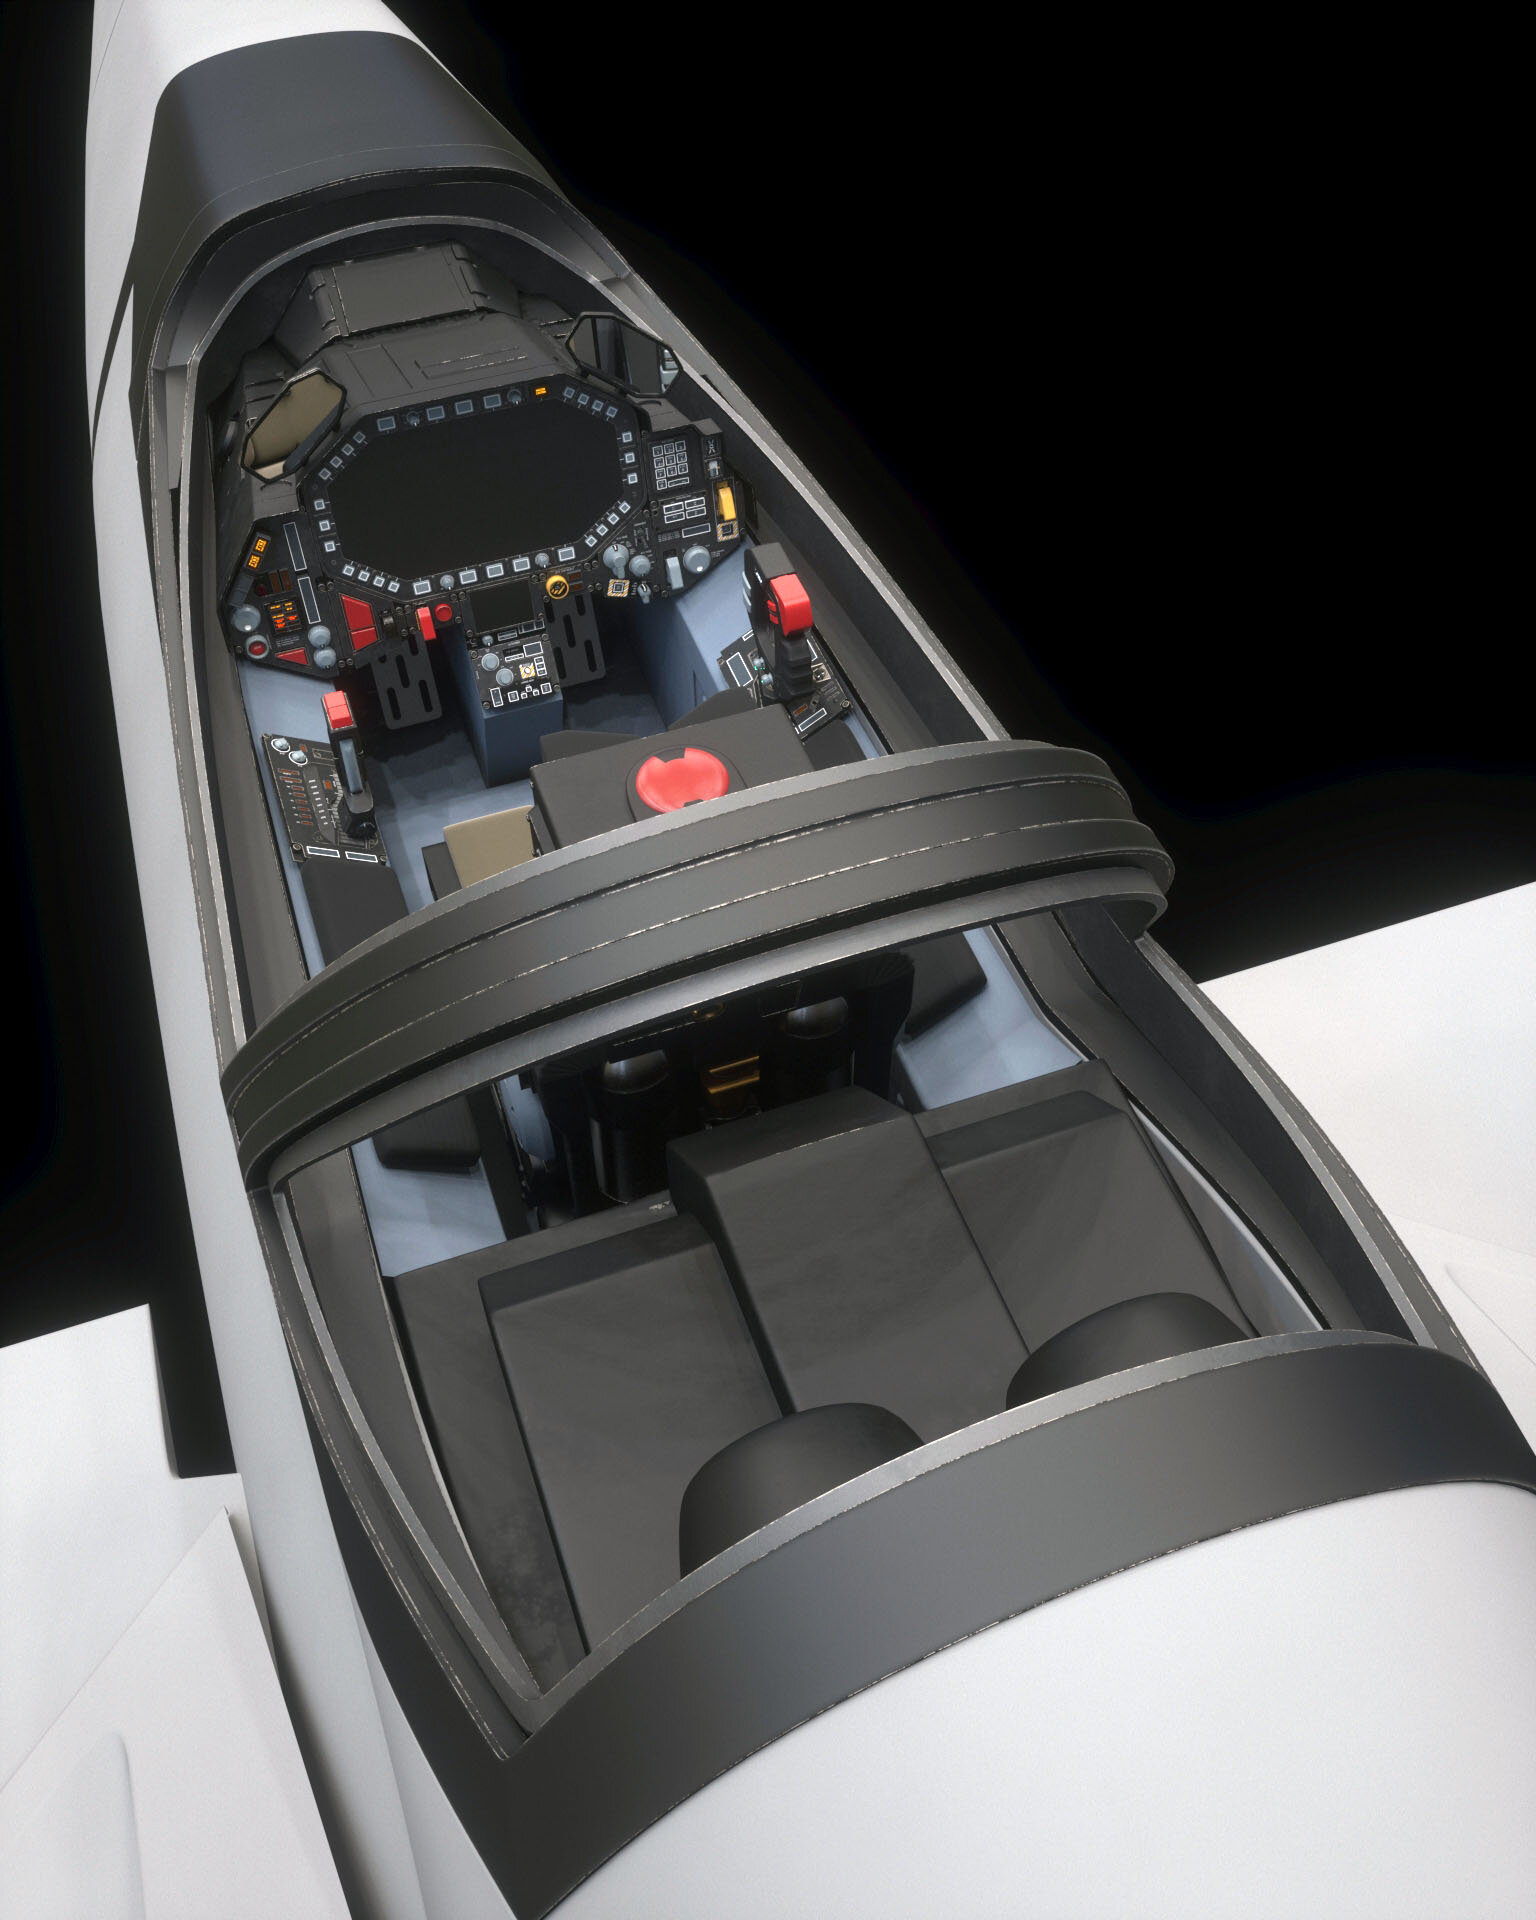
*POOF* Aaaaand we're back. Hit the ground running with the canopy WIP. Dry fitting the cockpit, so I can lock down the fuselage shape and start cutting. FYI, will be updating this in my VR thread weekly.
-
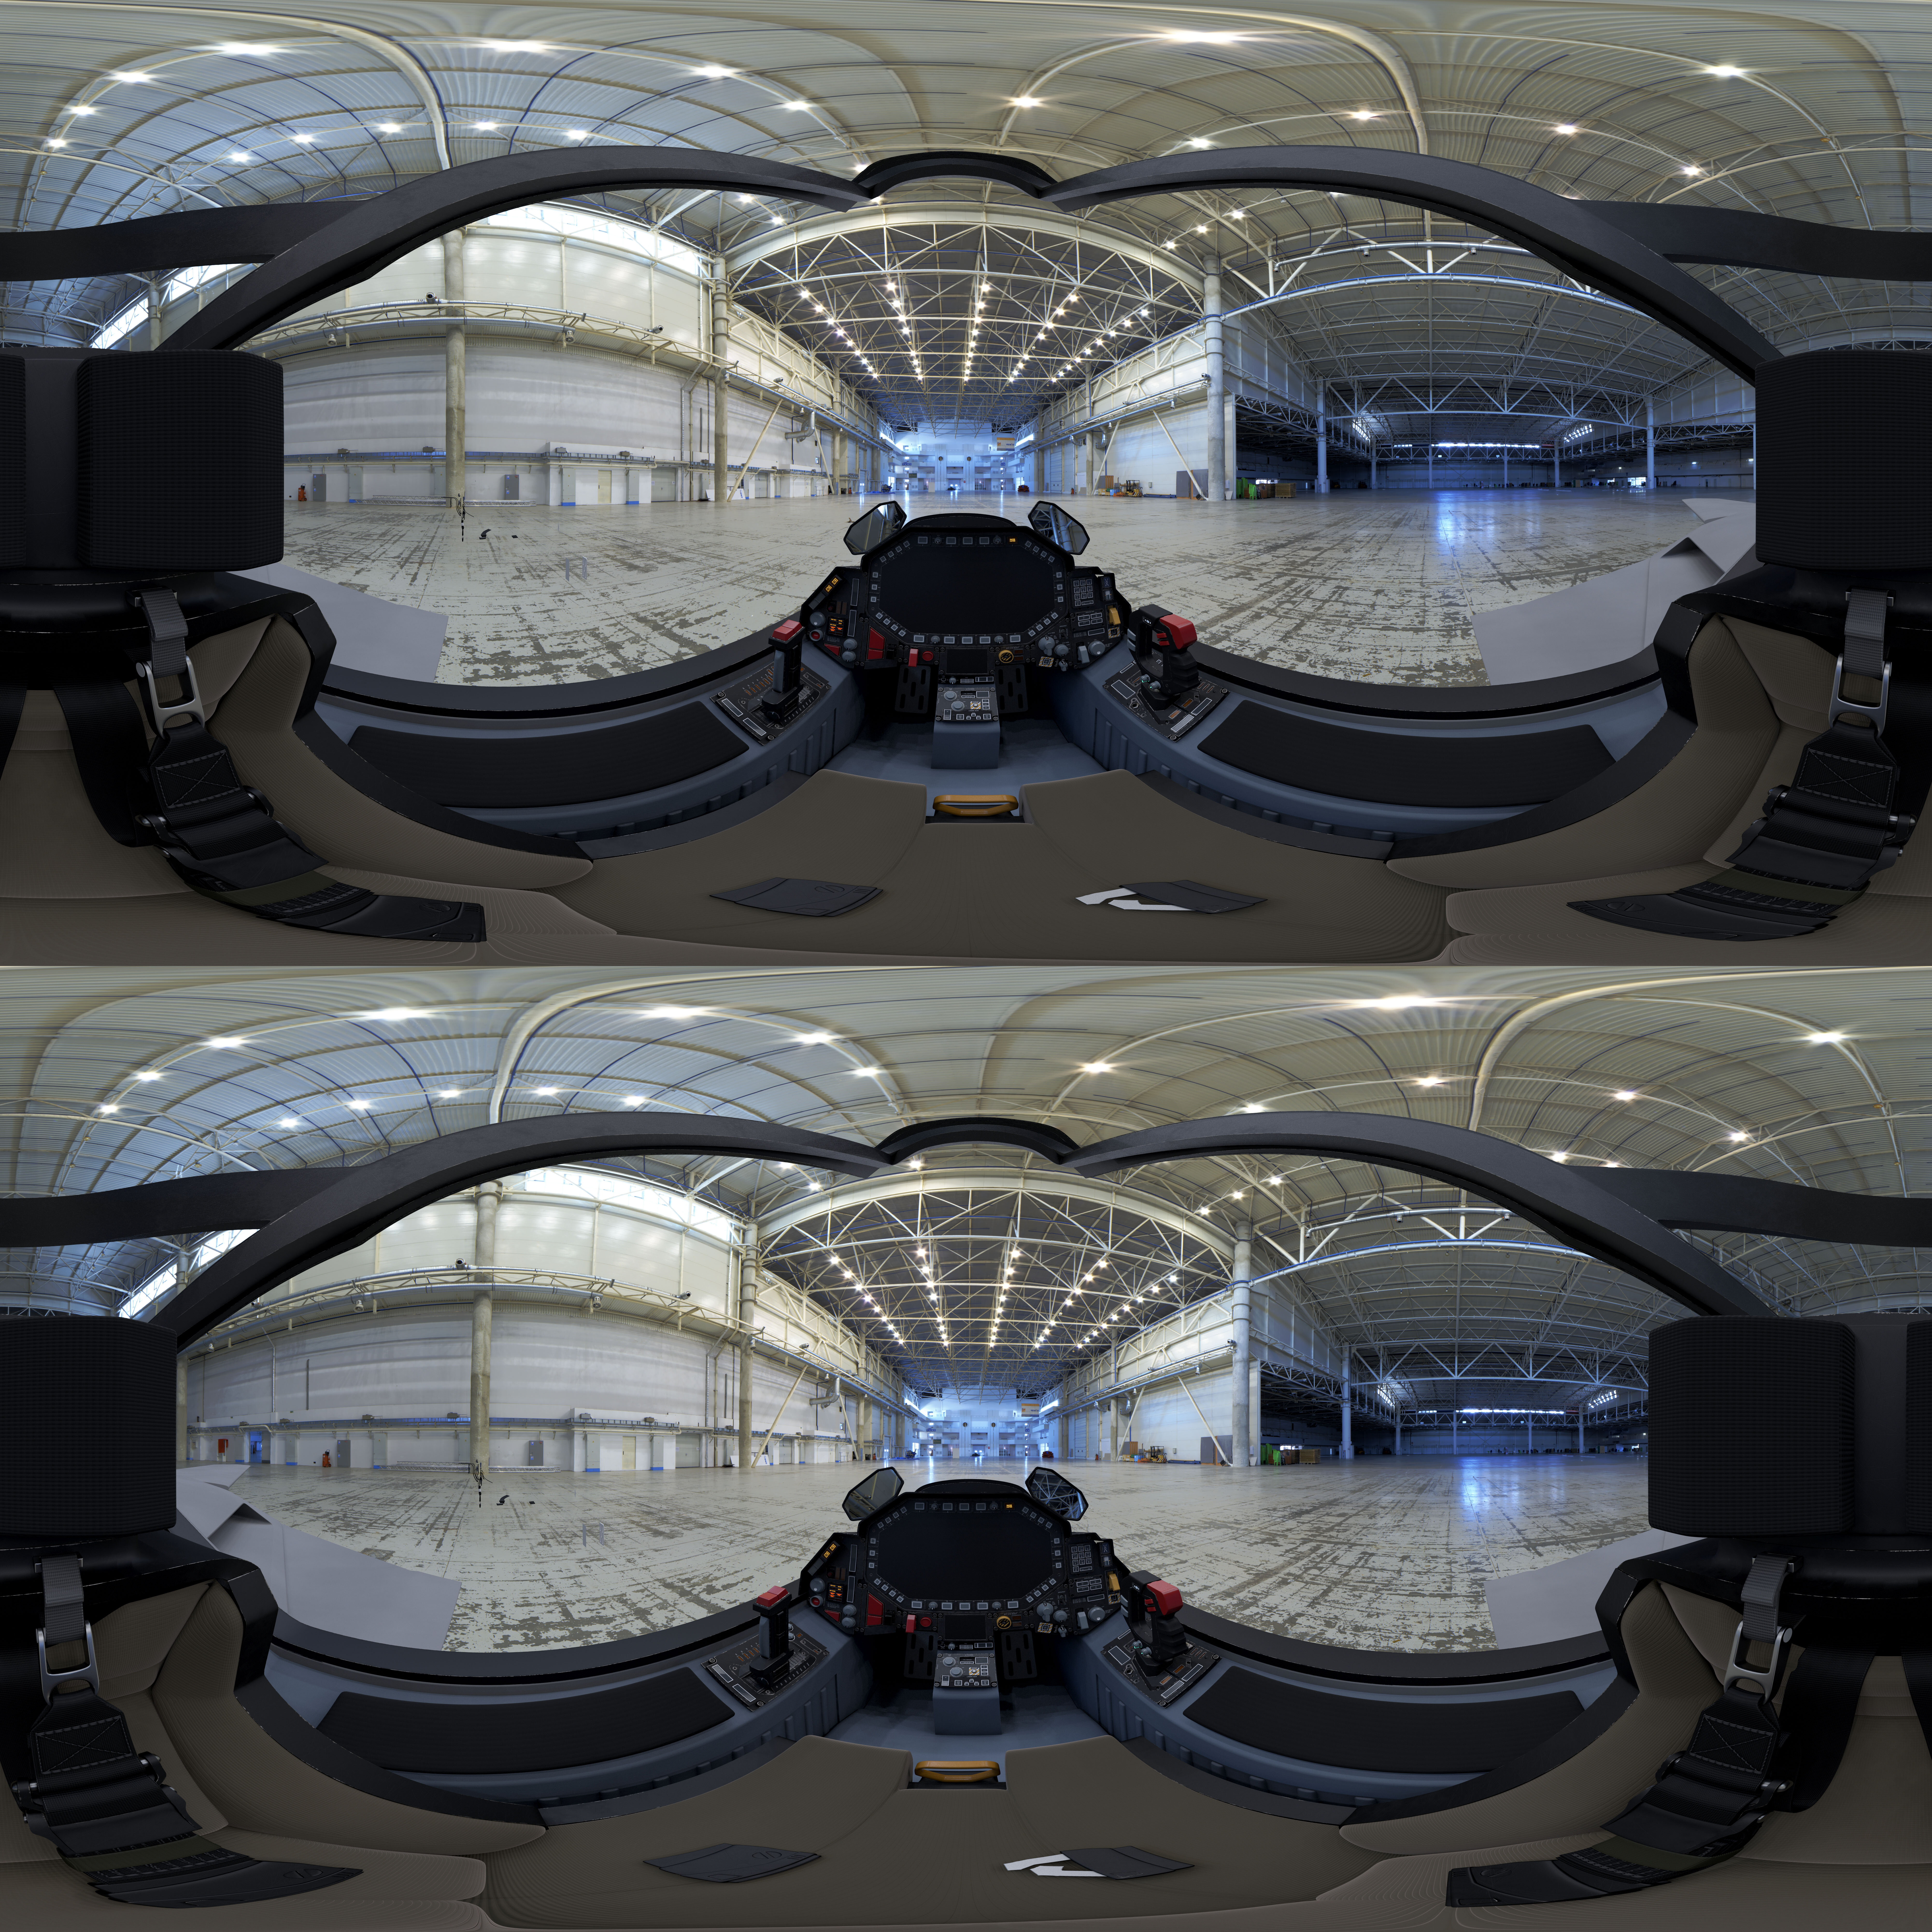
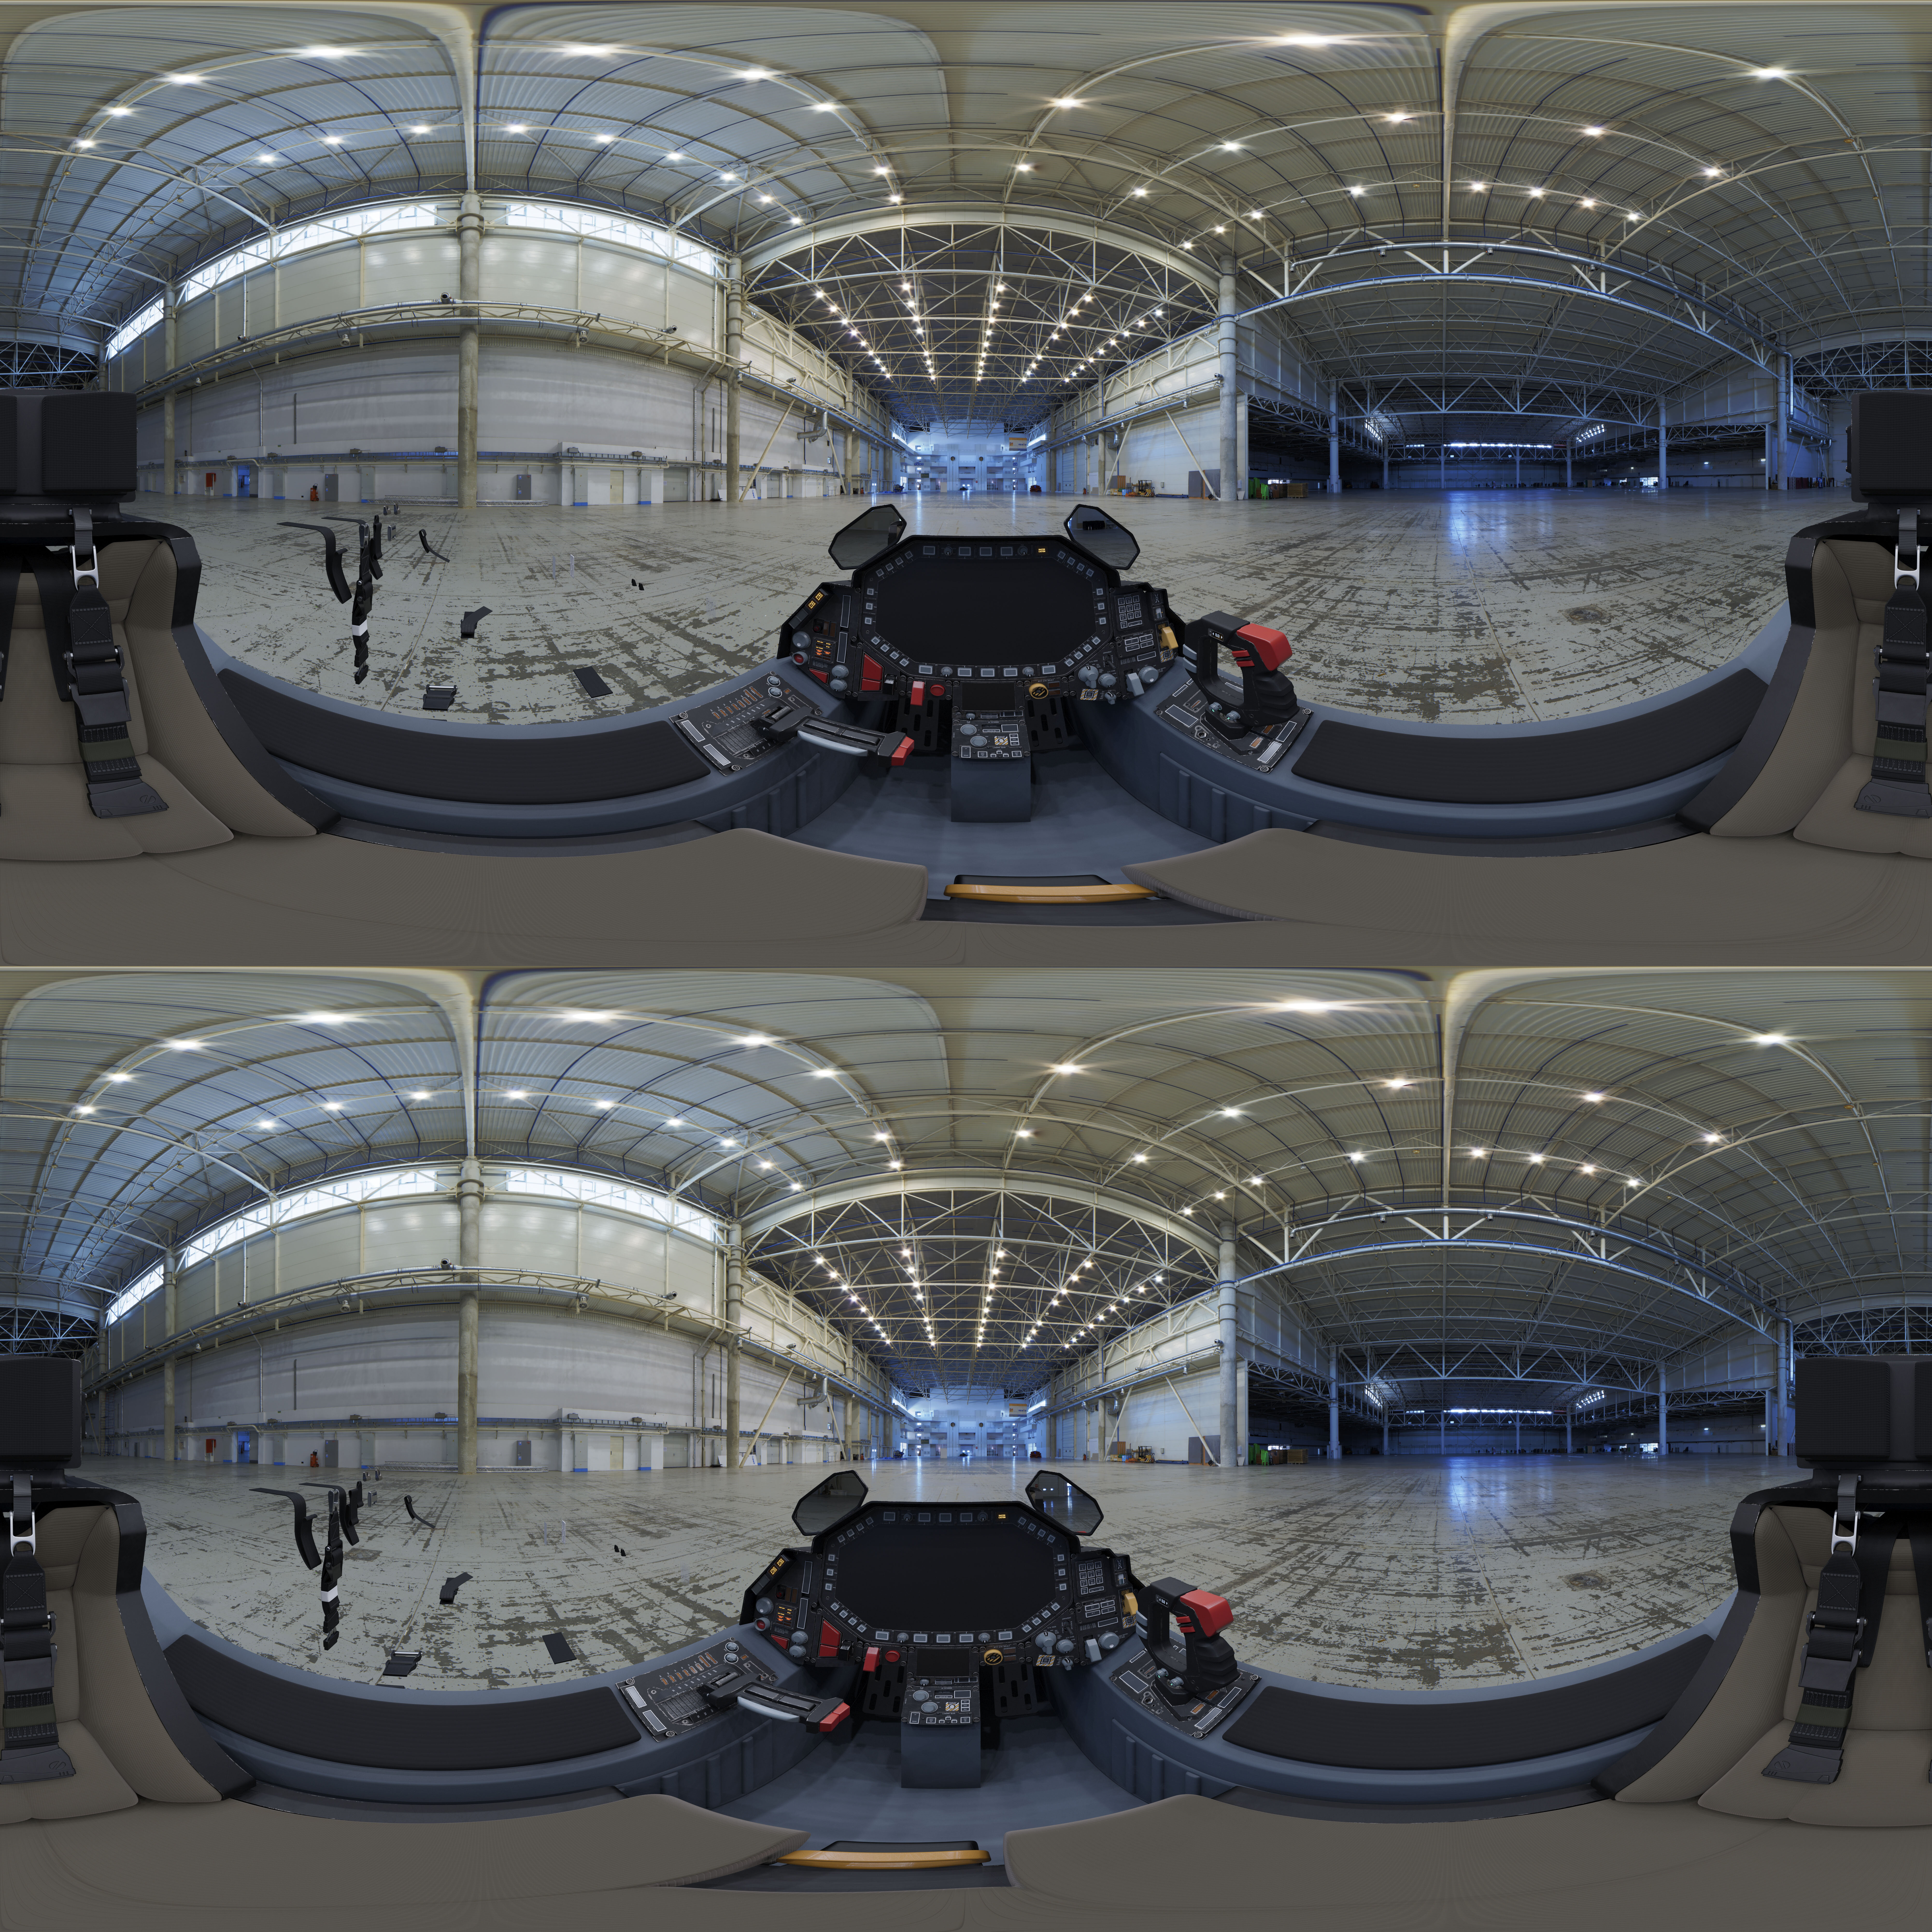
See if my above directions work for your Rift. I don't see why it shouldn't? If you can get the renderings into the native TV App, it should work.
-
Ok, I know this is waaaaay premature, because I'm still trying to perfect the format, but still worth it. I load these images into the native Oculus Quest 2 "TV" app. Load it into the goggles using the Link Cable, then click on the image. On the right side, change it from "2D" to "360 3D". 8k VR. Do it.
-
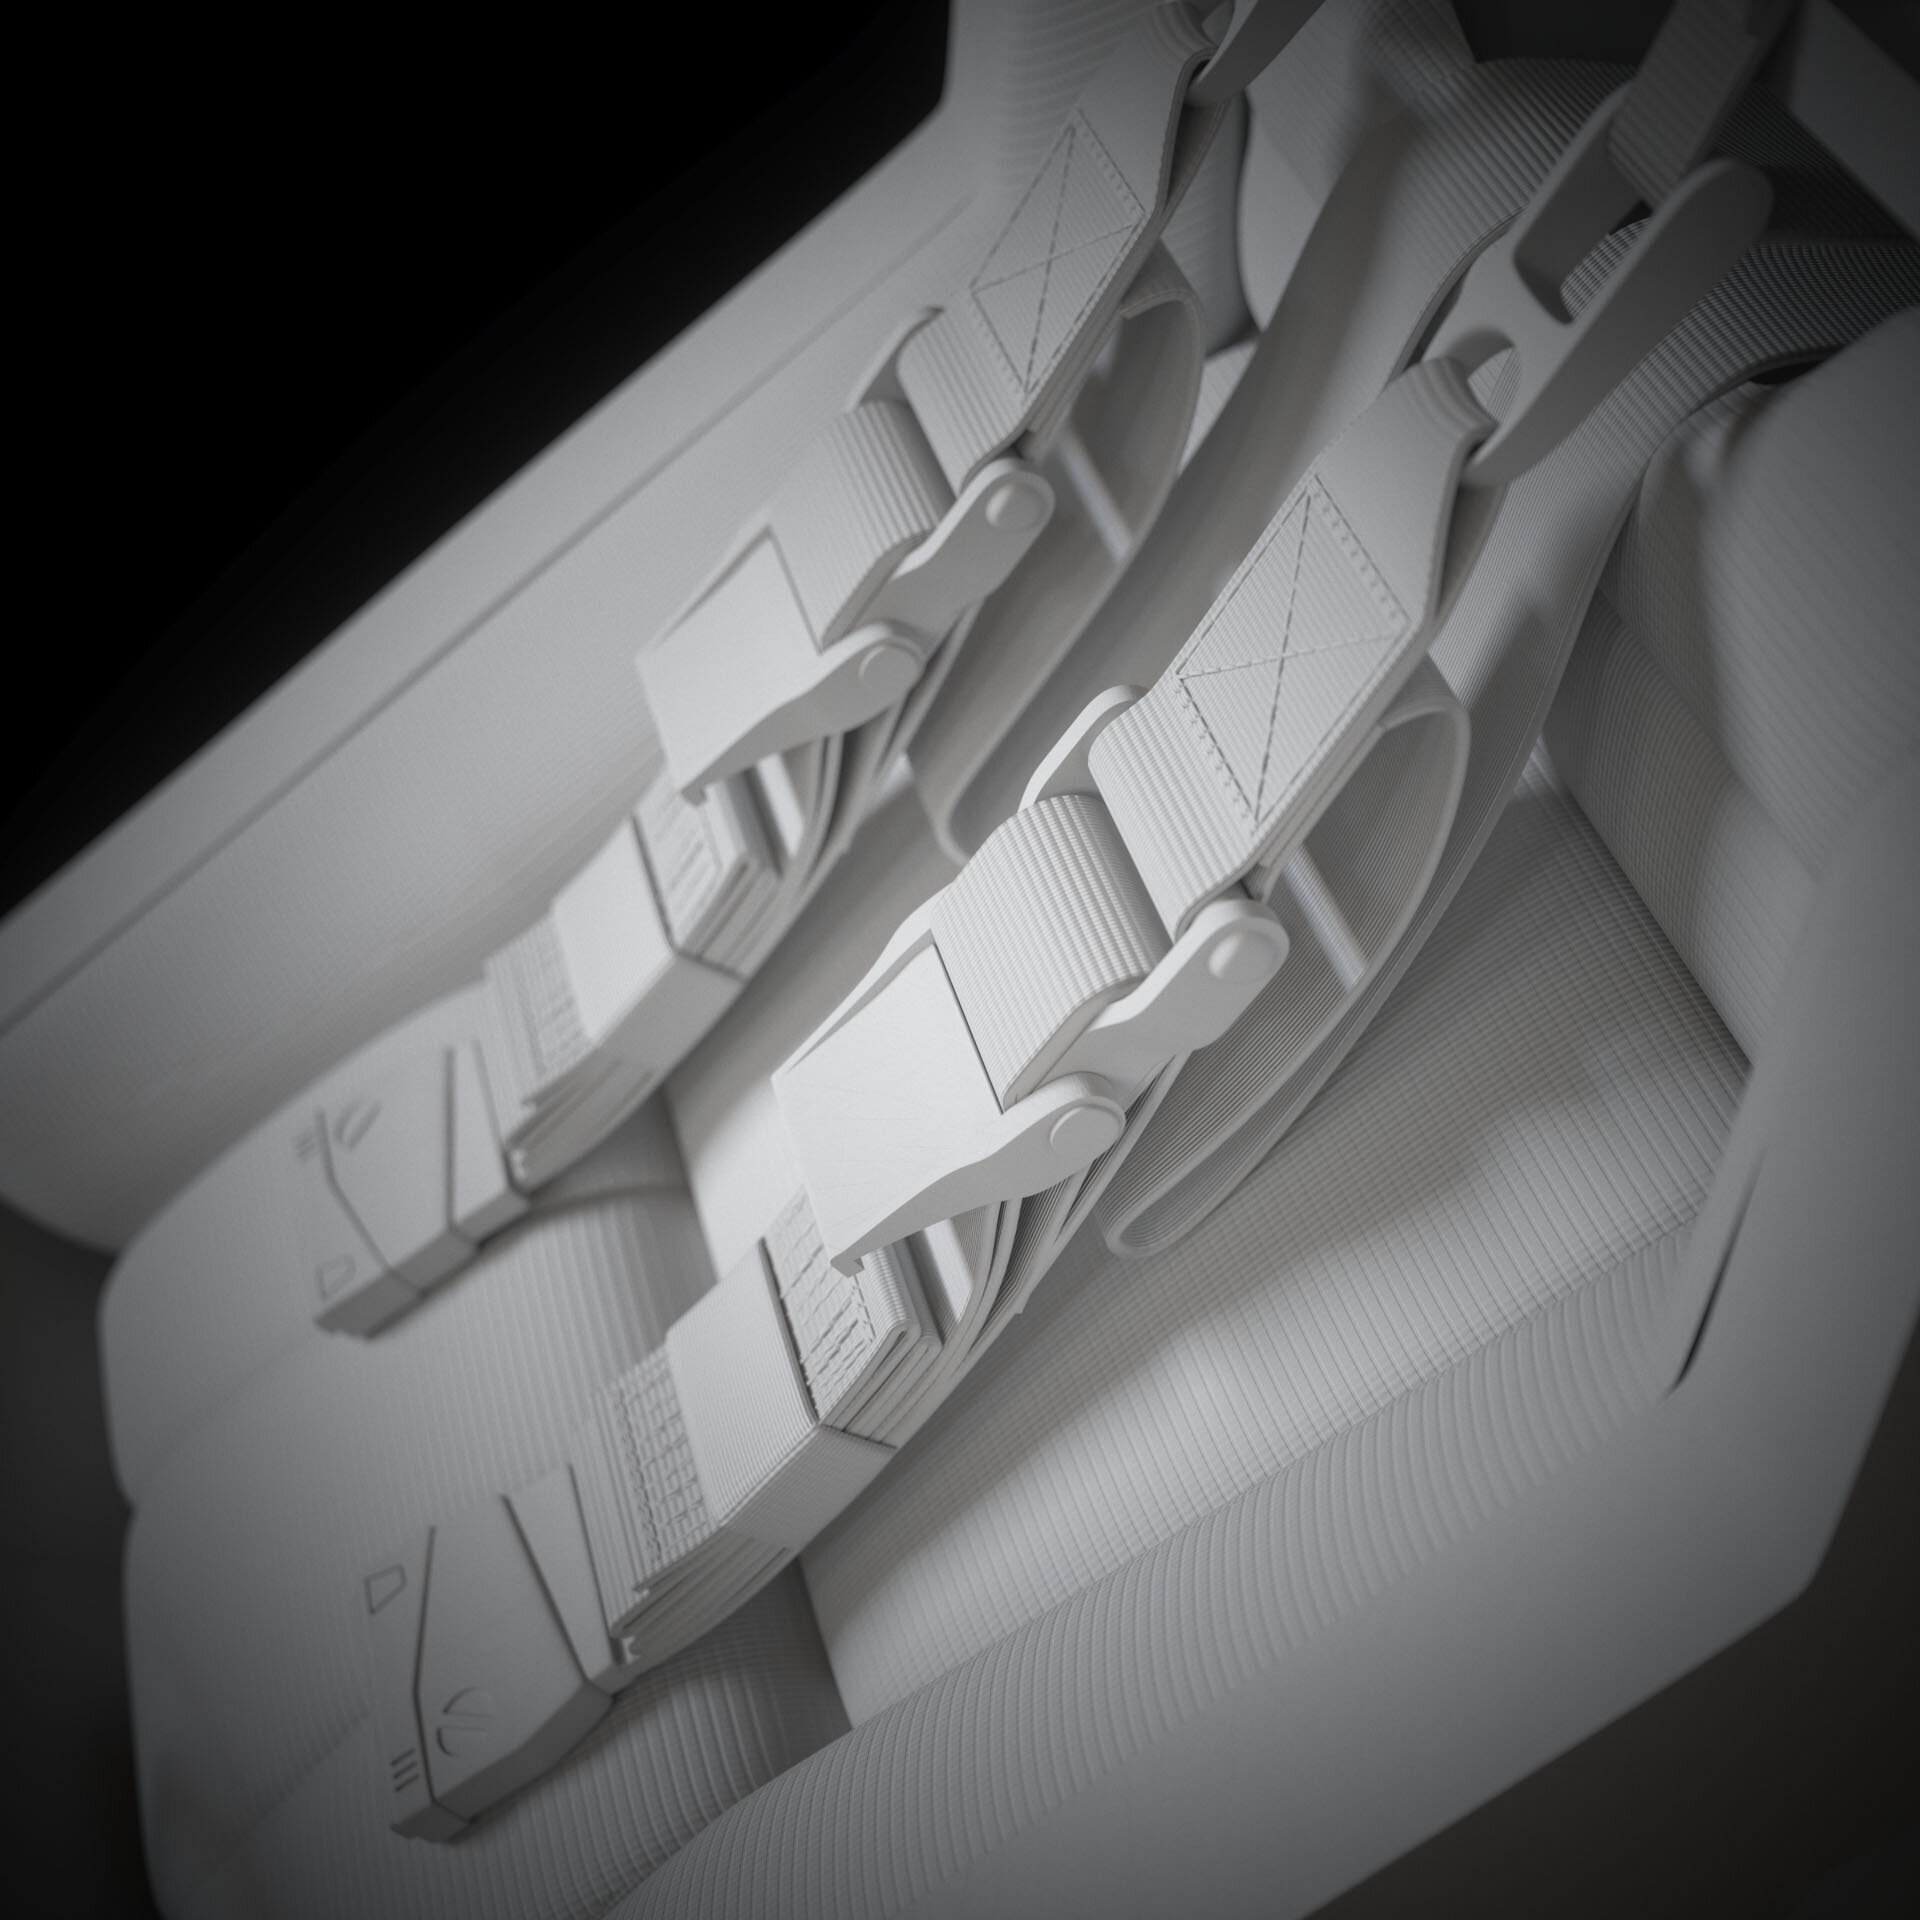
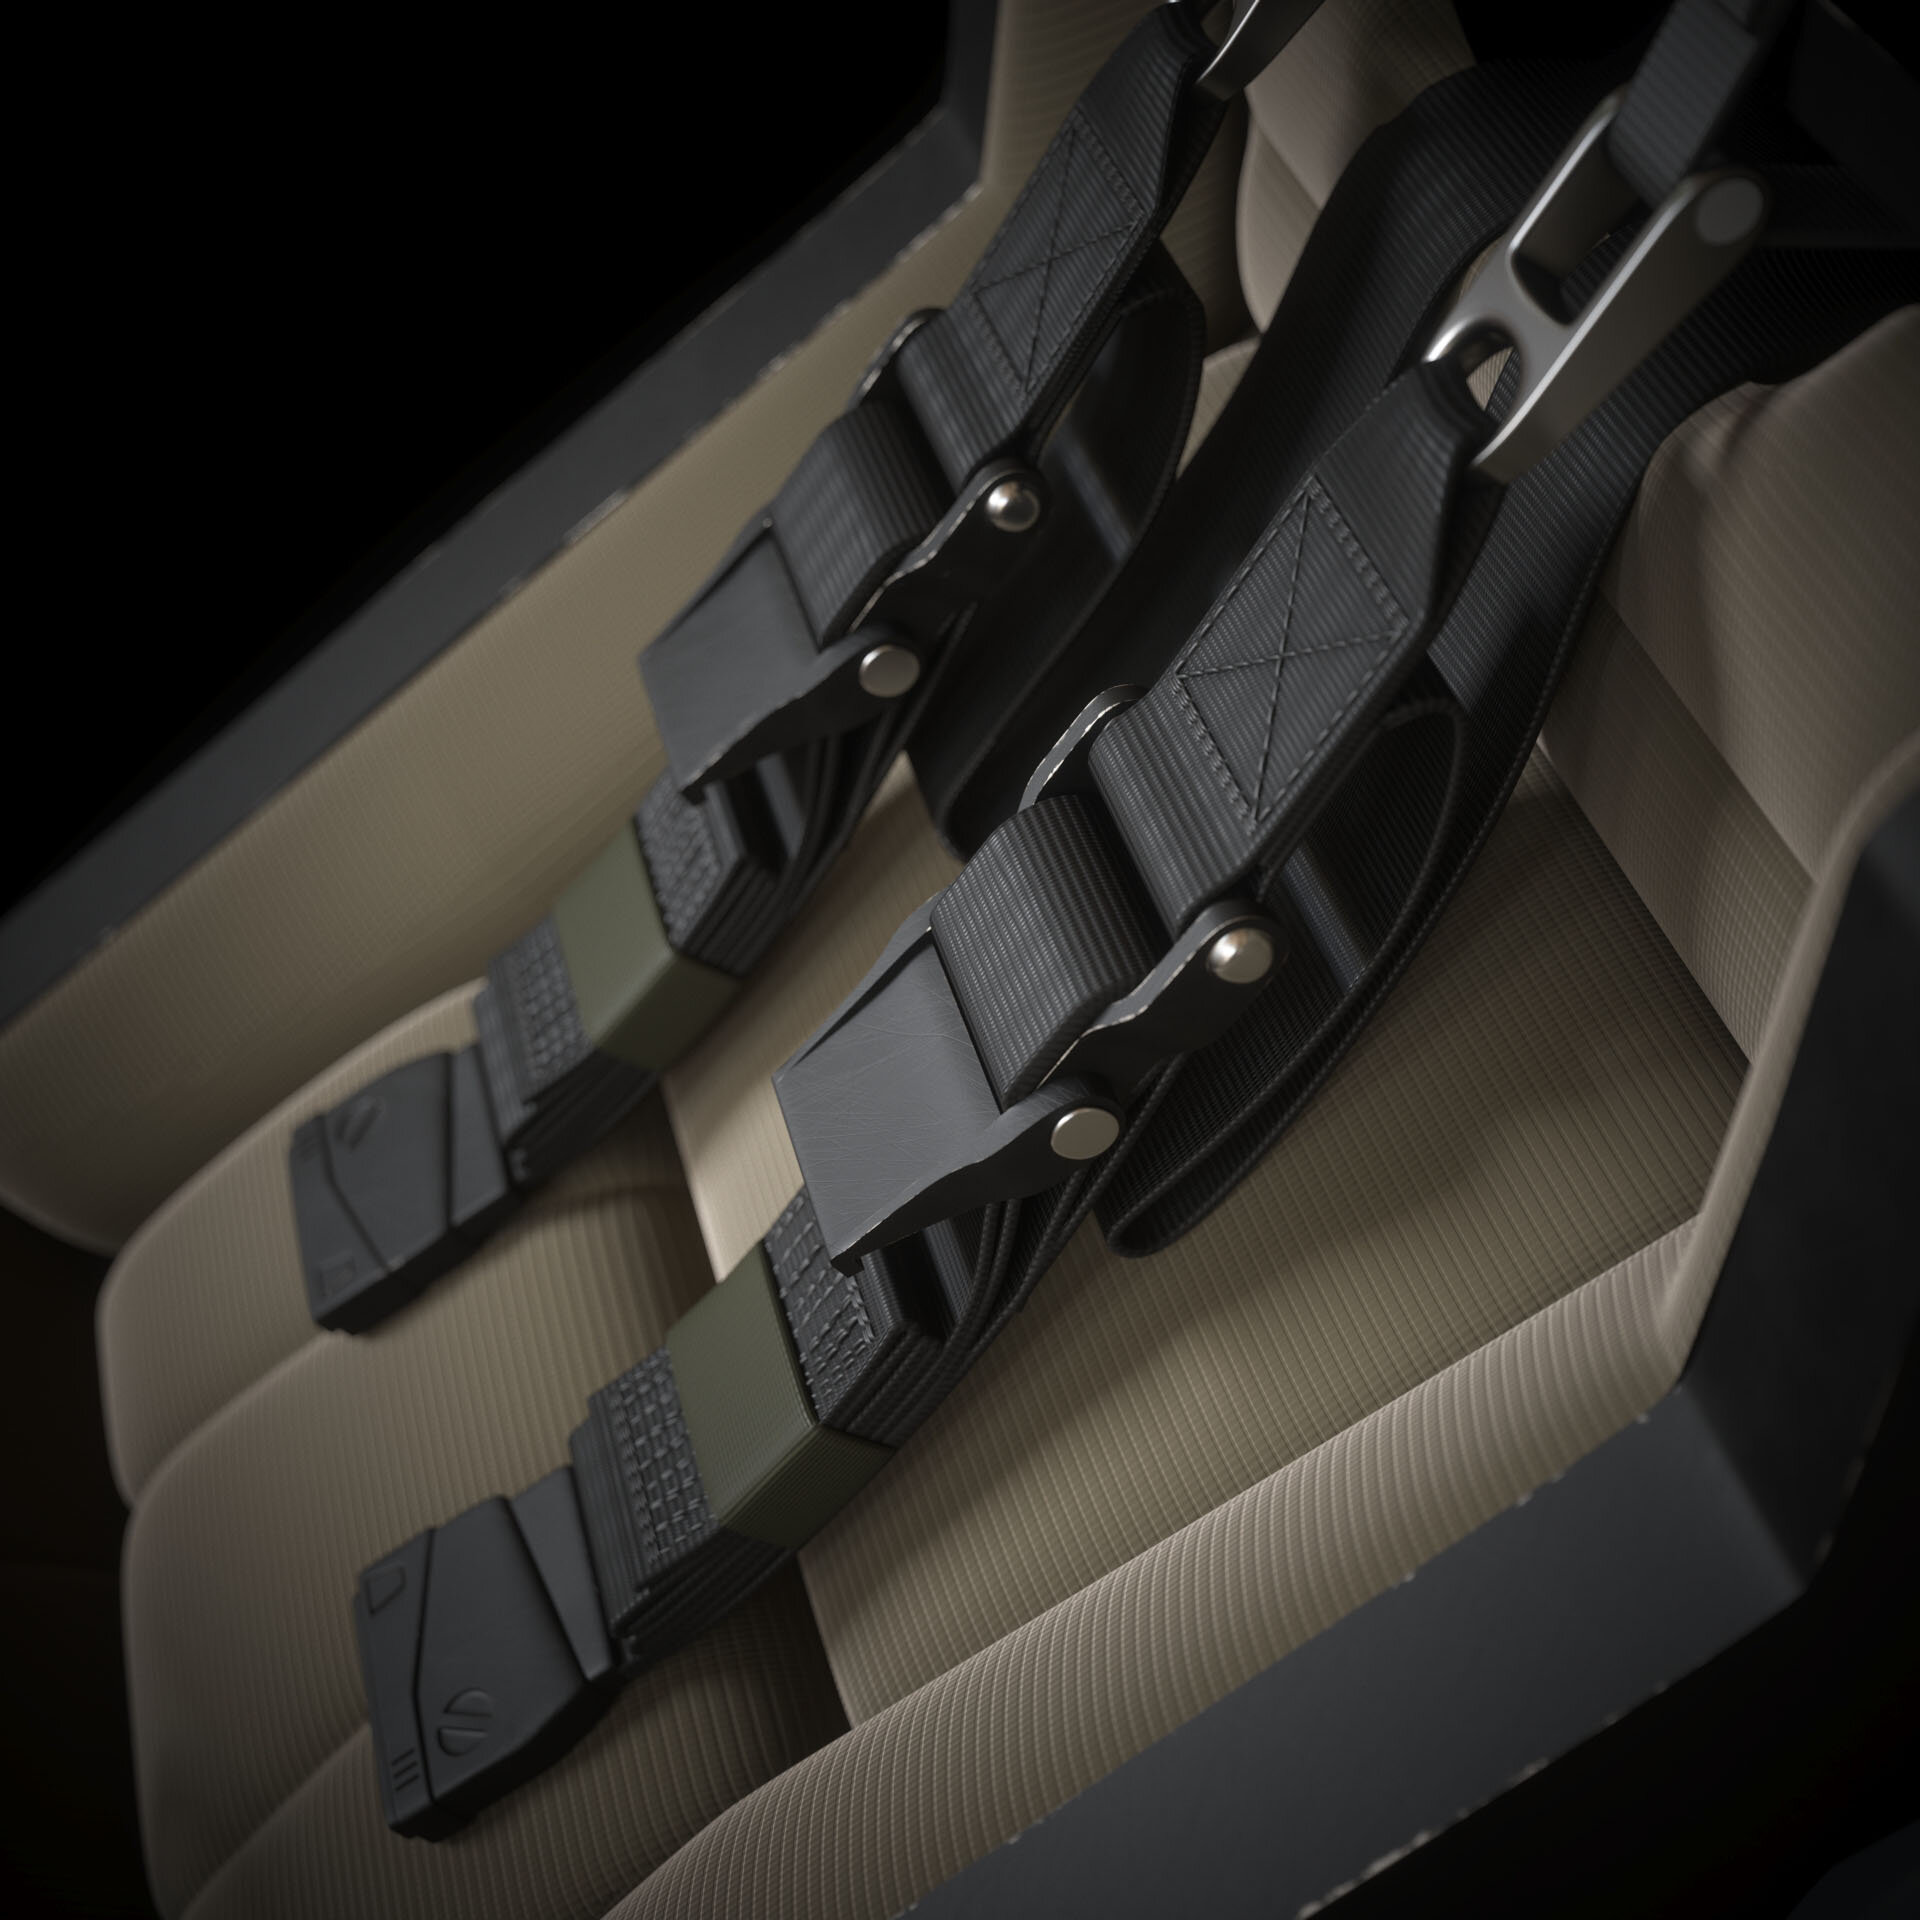
Not as far as I had hoped this week, but I'm going for quality over quantity. Shoulder harnesses and reinforcement stitching update.