macroadster
-
Posts
159 -
Joined
-
Last visited
Content Type
Profiles
Forums
Events
Gallery
Everything posted by macroadster
-
Their kit seems very attractive. I will probably place an order after I am settled in my new apartment. Thanks.
-
Is there any tutorial on vac-casting? What type of resin do you recommend that I can buy from the local stores like Home Depot or Michaels? I am only casting regular pieces, therefore clear resin is not required factor. I also like to find a local shop for Silcone. I casted my previous piece in InstaMold, which is way too rough to get a model piece out. Right now, I am casting my new piece by layering with Mold Builder. It's taking me 3 days to put 0.5" thick of liquid latex on the master. It seems like it will take weeks before I have a usable mold. I was looking at starshipmodeler.com for casting tips. However, the resin and molding material are so expensive from the recommended vendor. If you know a place that has cheap/easy cast resin, let me know. Thanks
-
I read about vac-formed sheet a lot, but I haven't seen an online tutorial that will walk a newbie step and step. My master piece is a plastic, would vac-forming work?
-
I guess that's 10 dollars going down the drain. I had the feeling that I must be using the wrong type of resin because my resin kits don't look and feel so soft. I am only trying to cast regular pieces, but I couldn't find opaque resin in the local Michaels store. I am afraid to order resin from online because it's flamable. I wonder what would be a good place to buy resin near the San Jose, CA area.
-
Is clear resin suitable for casting small model pieces, like 1/4"? This is my first time trying to cast in resin, and I am not sure if I am doing the right thing. For now, the casted pieces are some what sticky. Is this related to the resin, or related to the ratio of catalyst and resin? In addition, the clear n' casting resin texture is a little rough. Is this caused by the property of the resin or the mold?
-
I have a step by step build up of Hase VF-0S, but MW_Cheng's build up is probably more detailed and looks better. VF-0S pictures Build up page
-
I like the reference pose more. The current pose with the arm around the waist makes her seem a little agitated. Just my opinion. Keep up the godly work. It agree with the above said, Ryuji definitely has the skill. He can build it from scratch, and nothing wrong with calling this a scratch build.
-
Sweet, now that's custom!
-
Thanks. I am planning to replace the forearms with recast parts from Bandai VF-19, shoulder will be swapped out by LS Legioss armo-soldier shoulder. The nosecone will be replaced by recast part of VF-19 nosecone. Now I only need to learn how to recast parts. By replacing the shoulder and forearms, the VF-0S upper body might actually become movable, and provide different pose. We will see how it goes.
-
Macross World Map Project.
macroadster replied to Metal_Massacre_79's topic in Conventions and Local Gatherings
One more, Macroadster Lat-Long: 37° 19' 22" , -122° 1' 48" 37.3229 , -122.03 Cupertino, CA USA -
Your craftsmanship is out of this world! Those photos look just like my dreams...
-
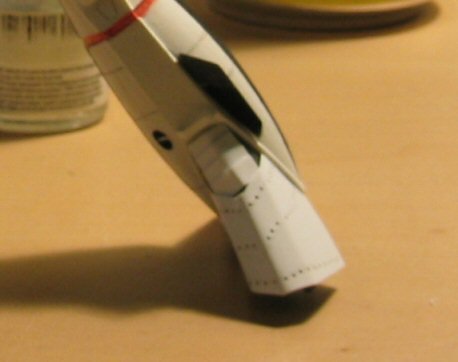
Here is the close up of the after burner before it was painted.
-
Wow! Nice! Very nice!
-
Good job on the modification. It's posing ability is great! Are you air brushing this baby or paint it by brush?
-
show me the pictures!
-
This thing is looking very good! Great job! Graham: you have almost a philosophycal question here! What's a model and what's a toy? If I take appart a superposeable and fix all the deffects, cast new parts, glue it again and pose it fixed (no more movement) paint it with my airbrush and make it look just as a "model"...aside from a waste of time and money: it is still a toy? I wonder about the same thing. If the toy is heavily customized with model parts (say 20% toy, 80% model parts), what category will it fall under?
-
I cut sheets of styrene and stack them together like stairs to create the ribbed effects. My afterburner doesn't really have any gap with the leg. Therefore I could glue the stacked styrene to the original afterburner. I think you might need to use putty to extend the afterburner and glue the stack of styrene on the putty.
-
Thank you so much. I am too poor to afford a 1/72 resin kit, but I surely like to build this paper model. You are the best!
-
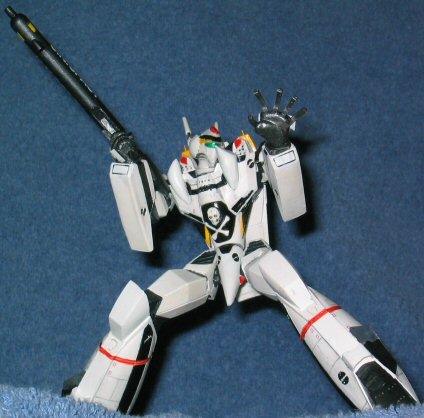
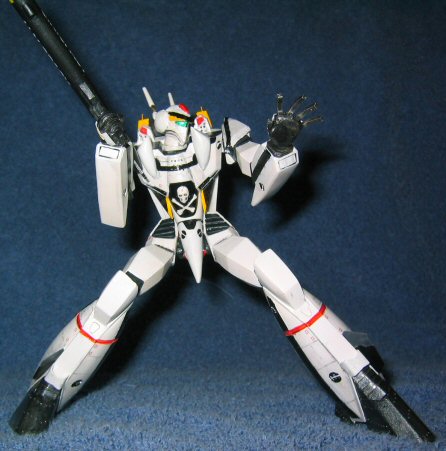
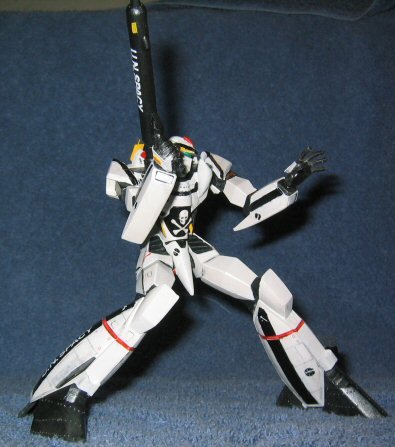
I did post this before, and it was in this thread. I didn't give it enough attention, so I spent some time to refine the hand, shoes, fender, panel lines and decals. Small details are added every inch of the battloid. Unfortunately, my photo skill sucks, so the pictures don't justify the details. I still have to replace the upper arm with more rounded parts, like the arm from a YF-19, and shoulder from Mospeada Alpha's shoulder. If and only if I could find those kits at fairly lower price. Your YF-19 is coming alone great. I am still waiting for more progress that.
-
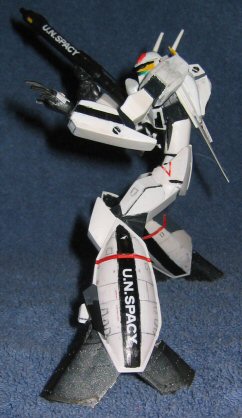
This is built from the old resin VF-1 Wonder Fest kits.
-
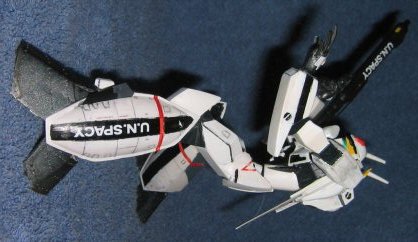
Last one, shot from the back.

-
New hands made from scratch by putty and plastic strips..
-
New decals from Hase's optional decal set 1.
-
Some new shoes...

-
It's not finished yet, but it's getting there...