UN_MARINE
-
Posts
903 -
Joined
-
Last visited
Content Type
Profiles
Forums
Events
Gallery
Everything posted by UN_MARINE
-
Thanks! The canopy's definitely scheduled for vacuuforming, the buck is next on the build list.
-
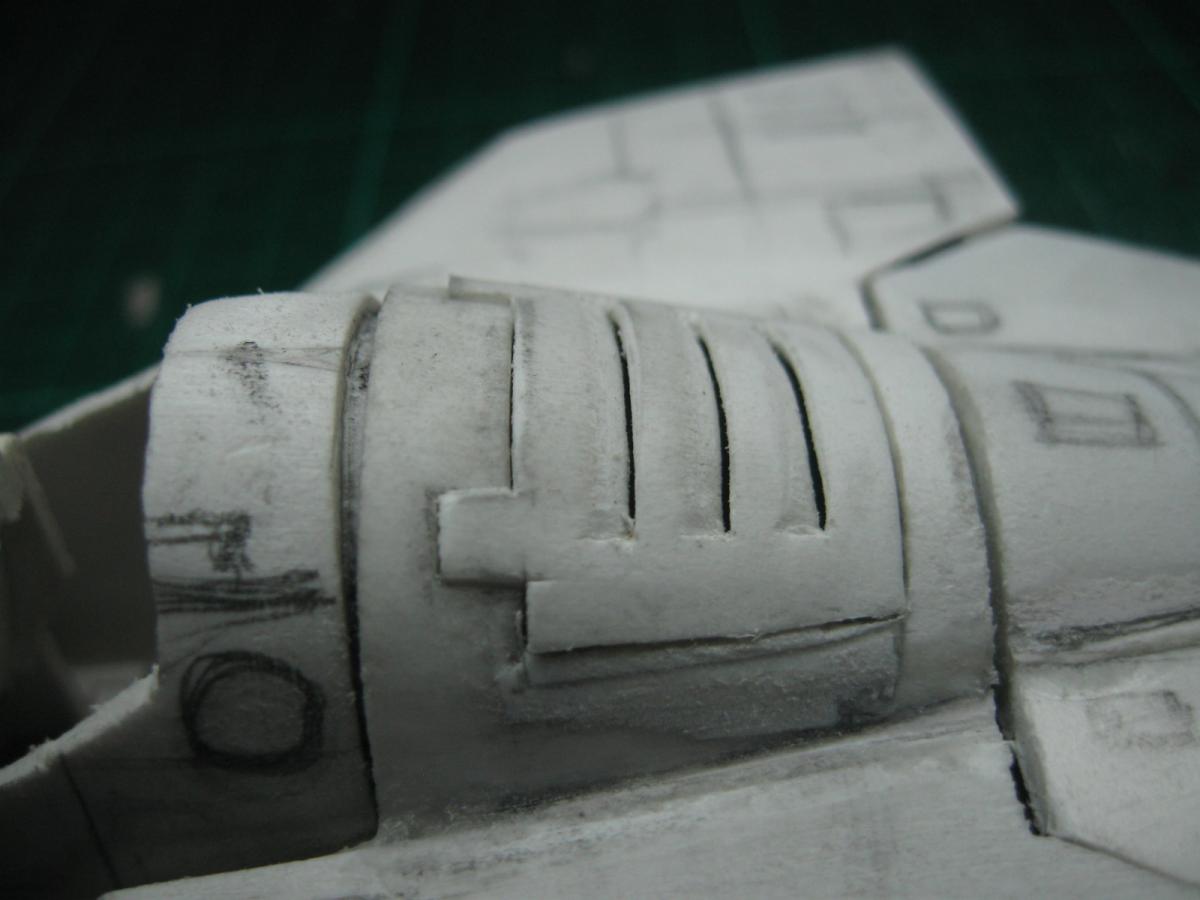
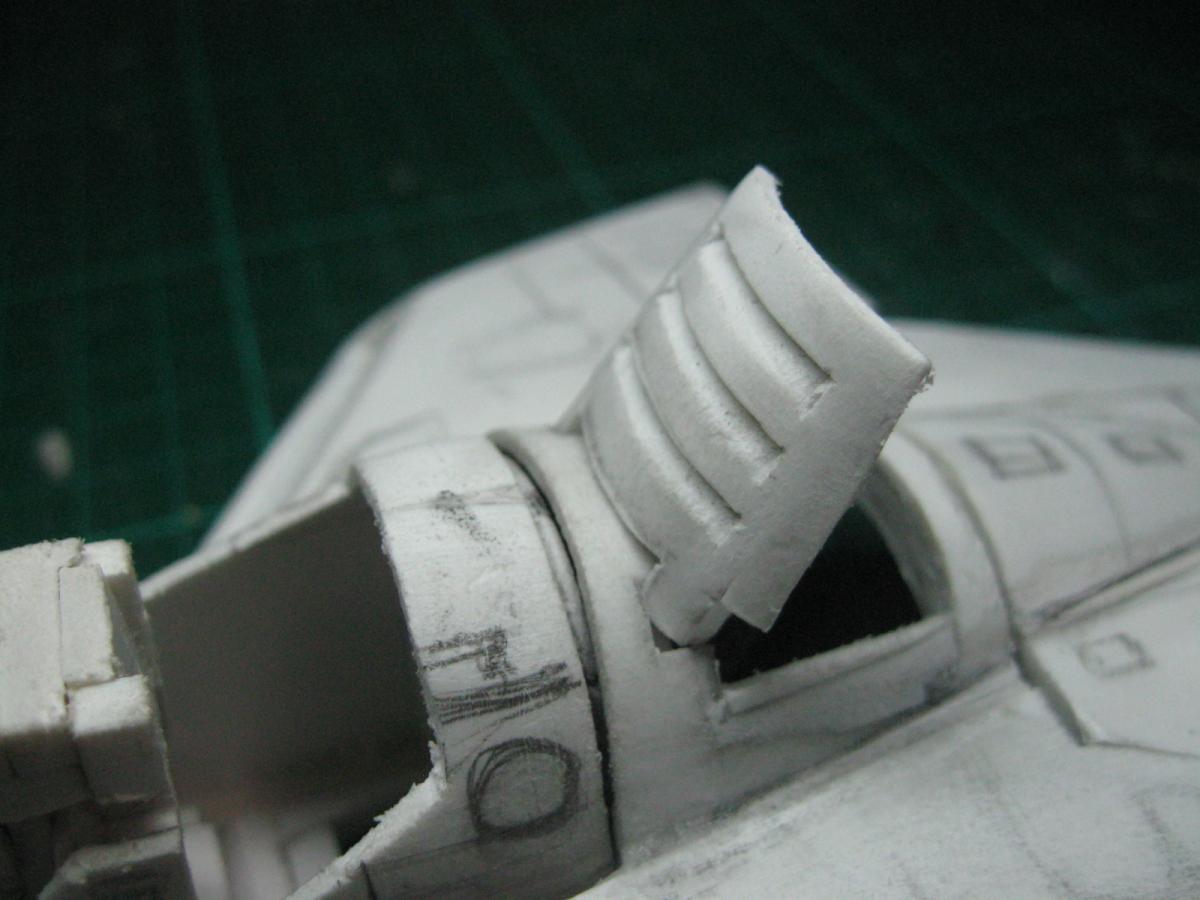
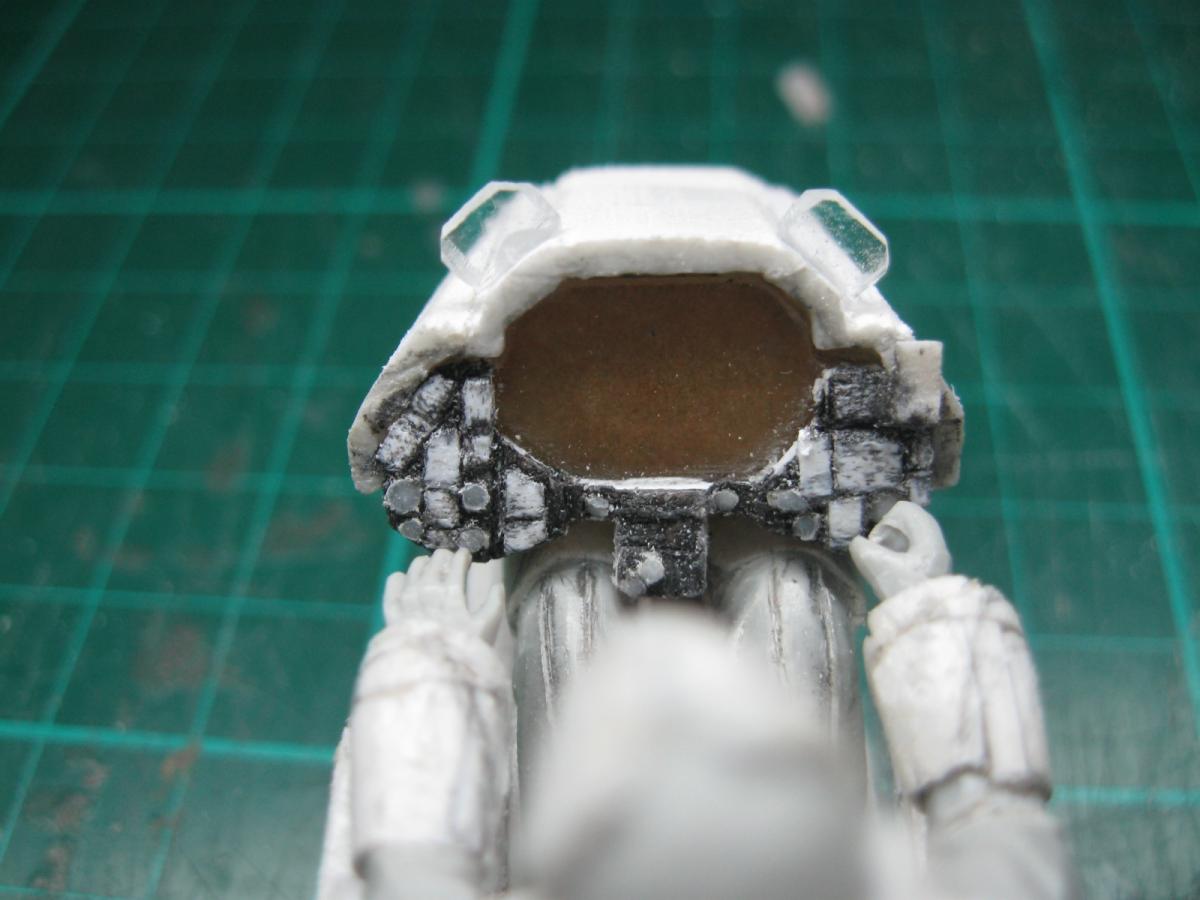
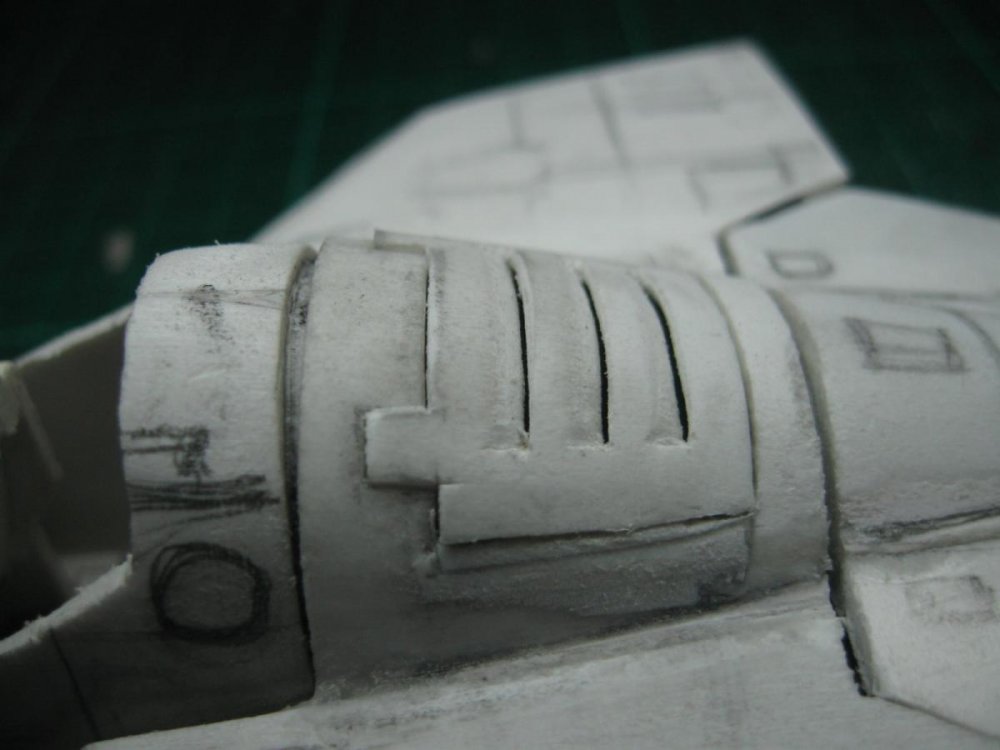
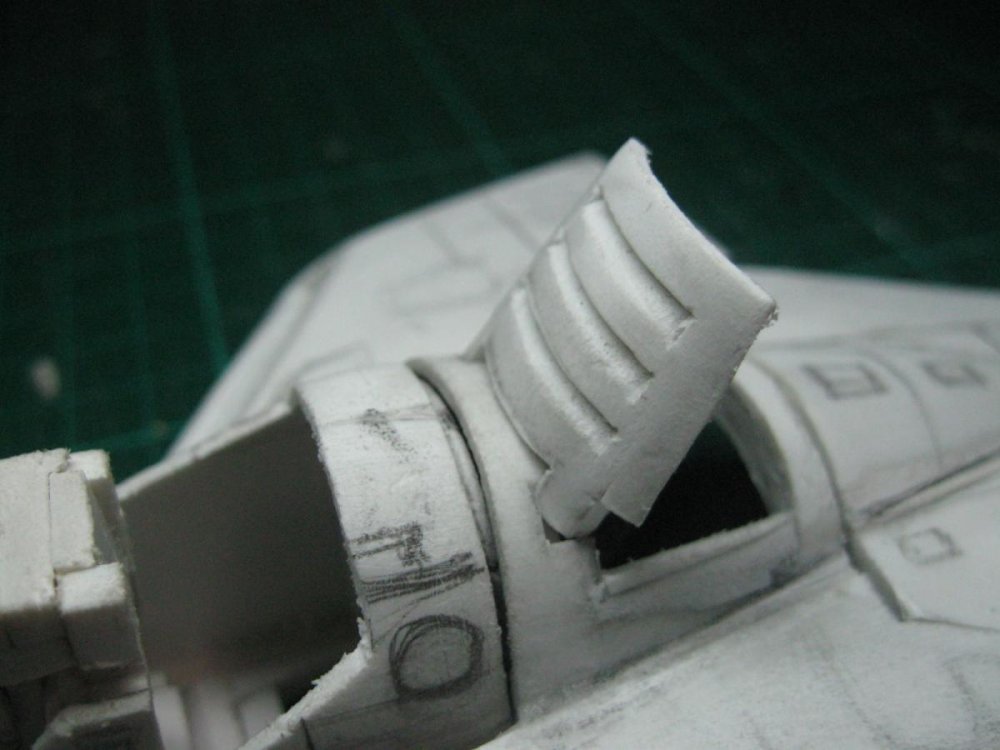
Thanks! Separated the air brake panel & started with a piece of the back section. Air brake vent detail. I think they're oriented in the correct direction(?).

-
Good question. Maybe? It could, in theory. Let's see if I'm smart enough to pull it off.
-
Chest plate! I still have to figure out which panel lines to keep - there's almost 4 sets of line art on the left chest segment.

-
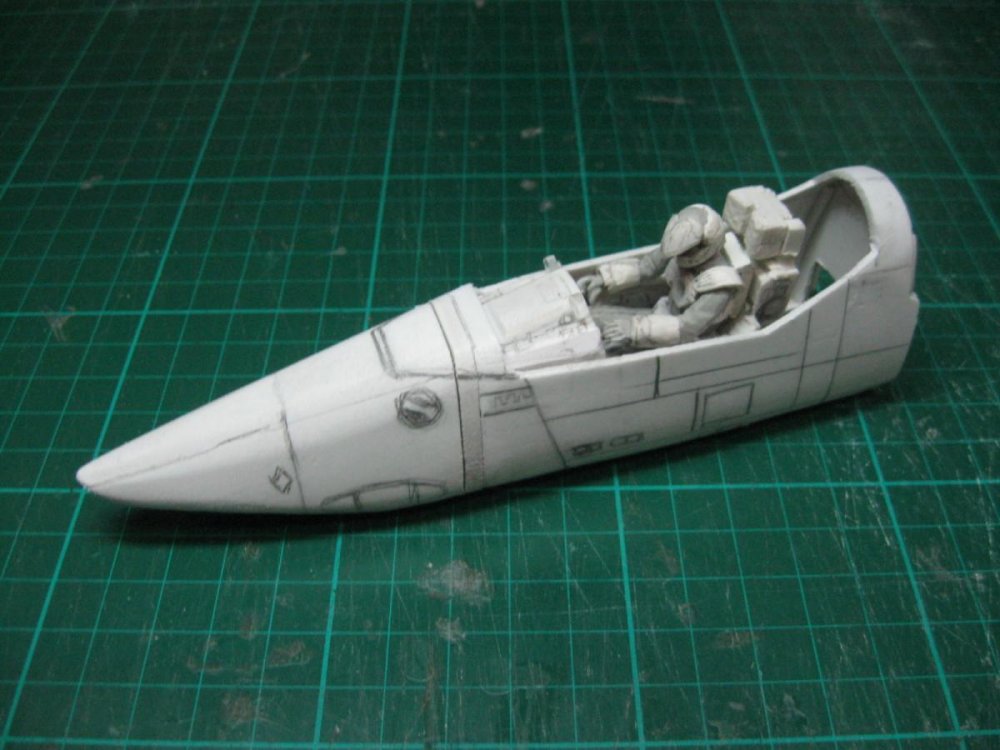
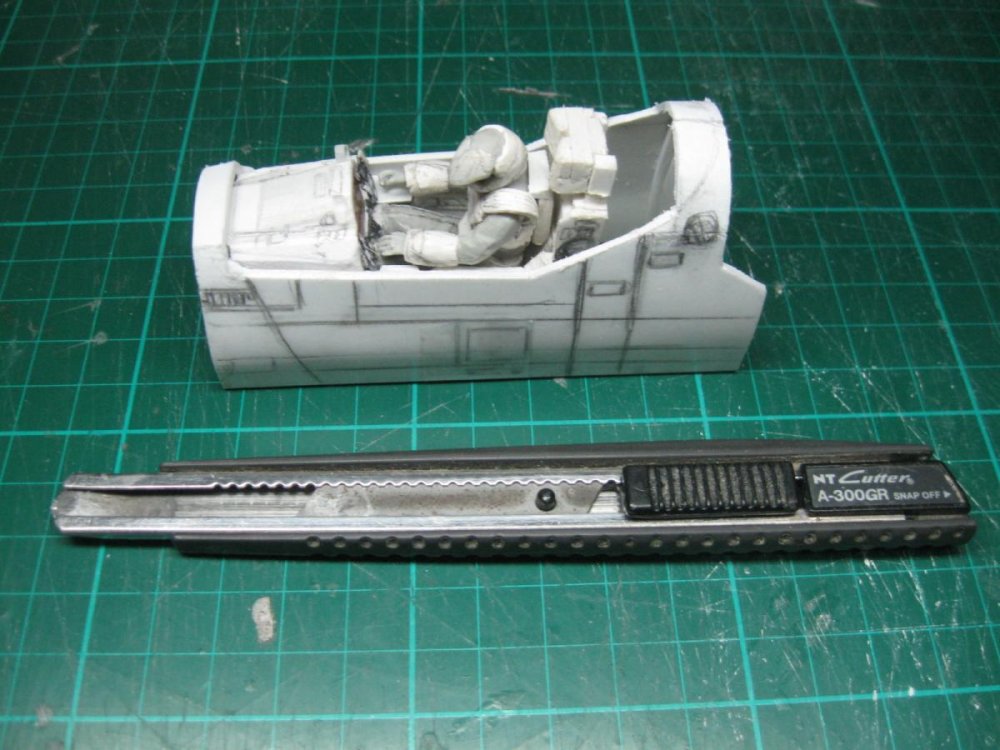
Thanks! Really slow, but steady progress - I think 1/3 of the difficult geometry's done (nose/tub, canopy, heat shield). I guess it'll be the remaining 80% for the next few updates.
-
Thanks! I aim to please(and as much accuracy as possible). I think we can call that a weekend.


-
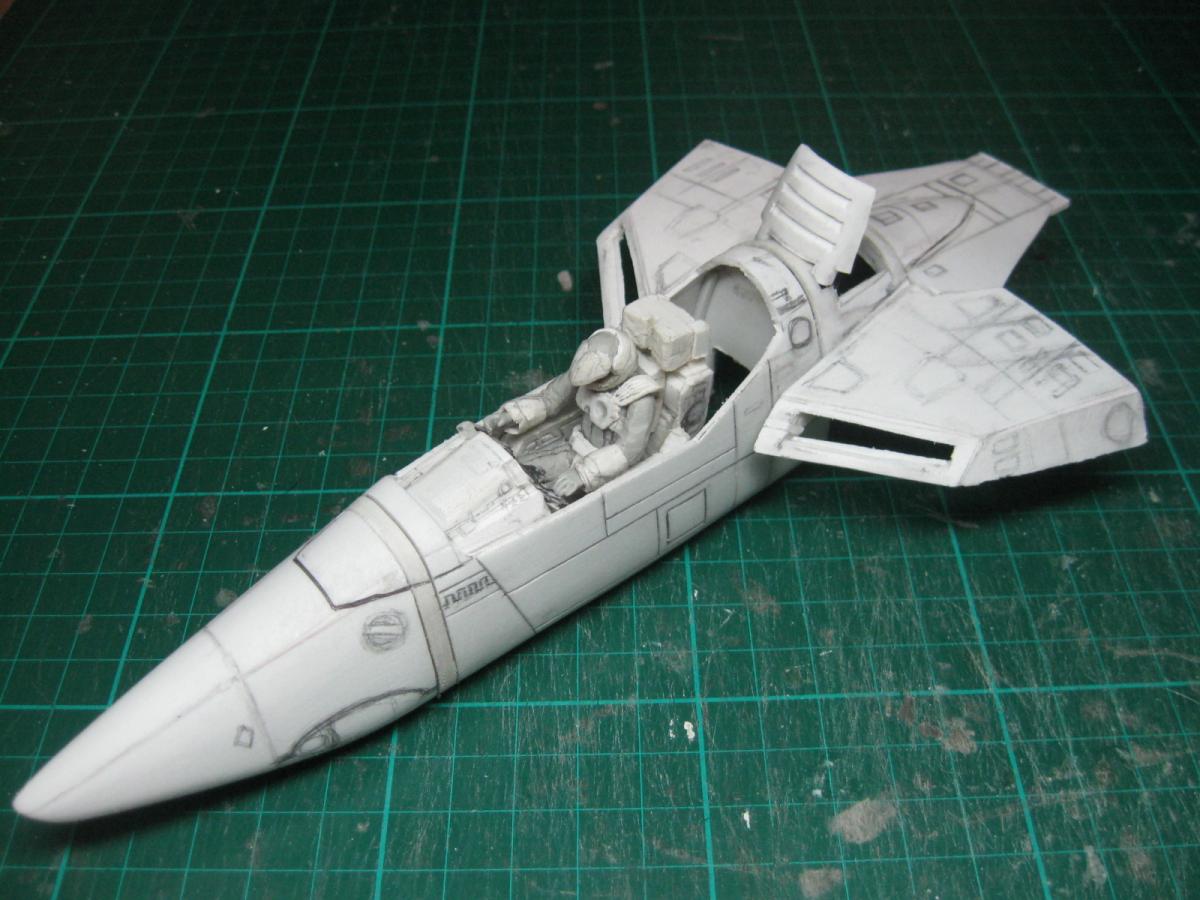
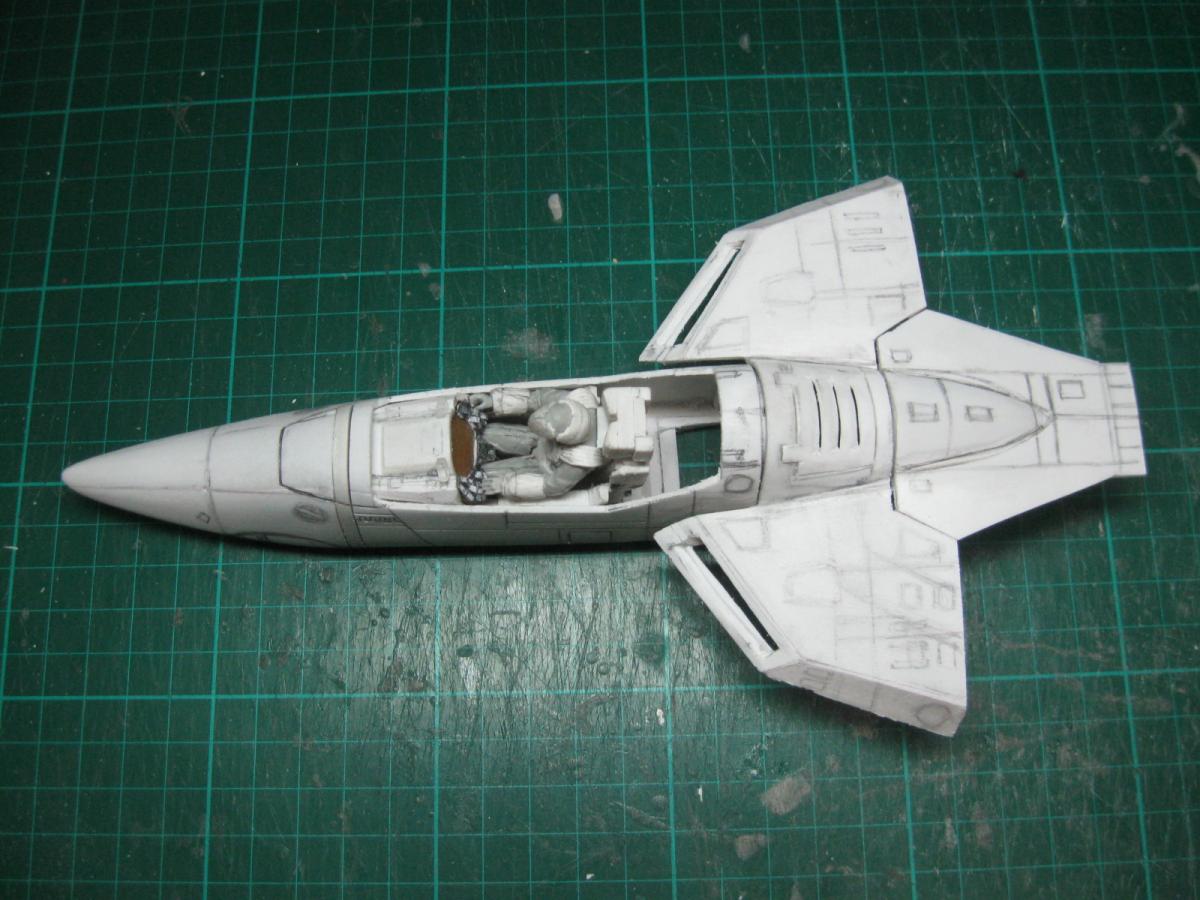
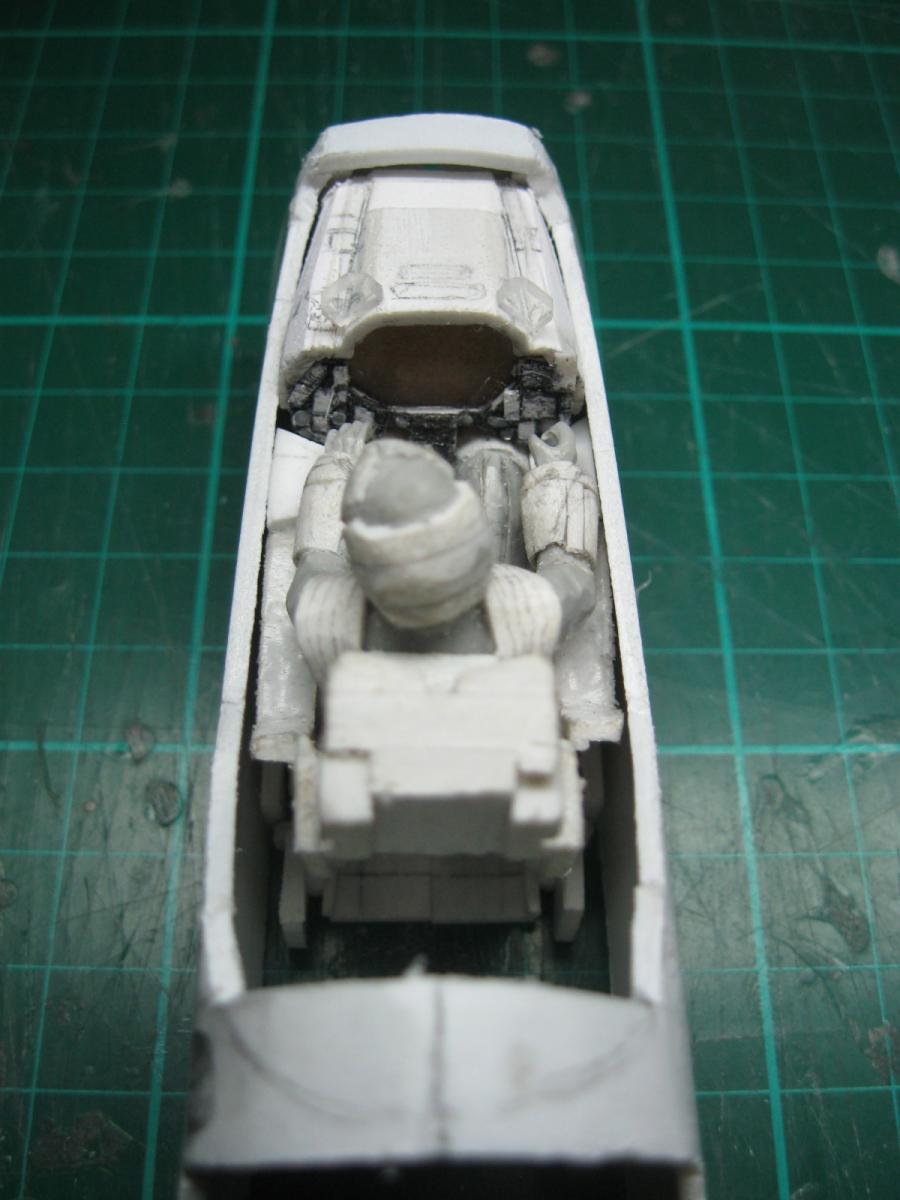
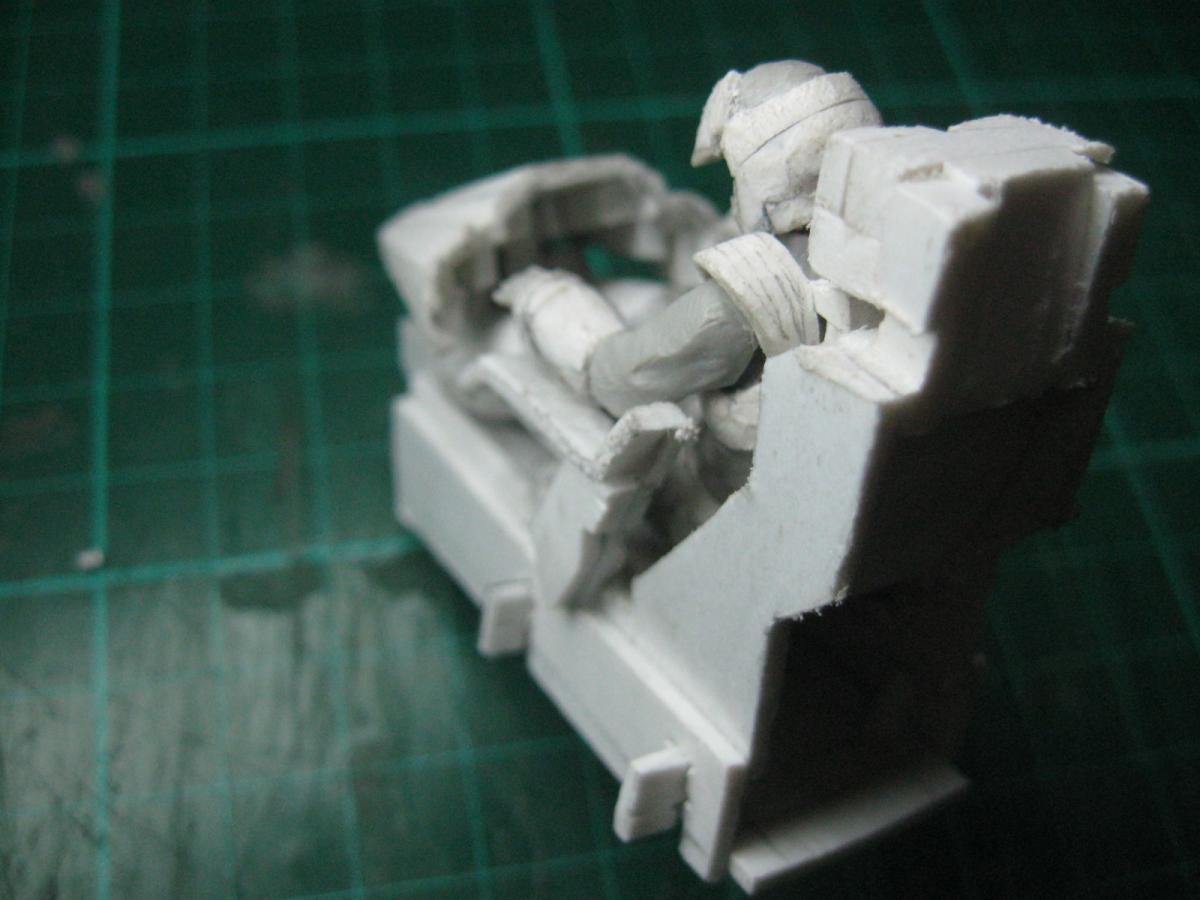
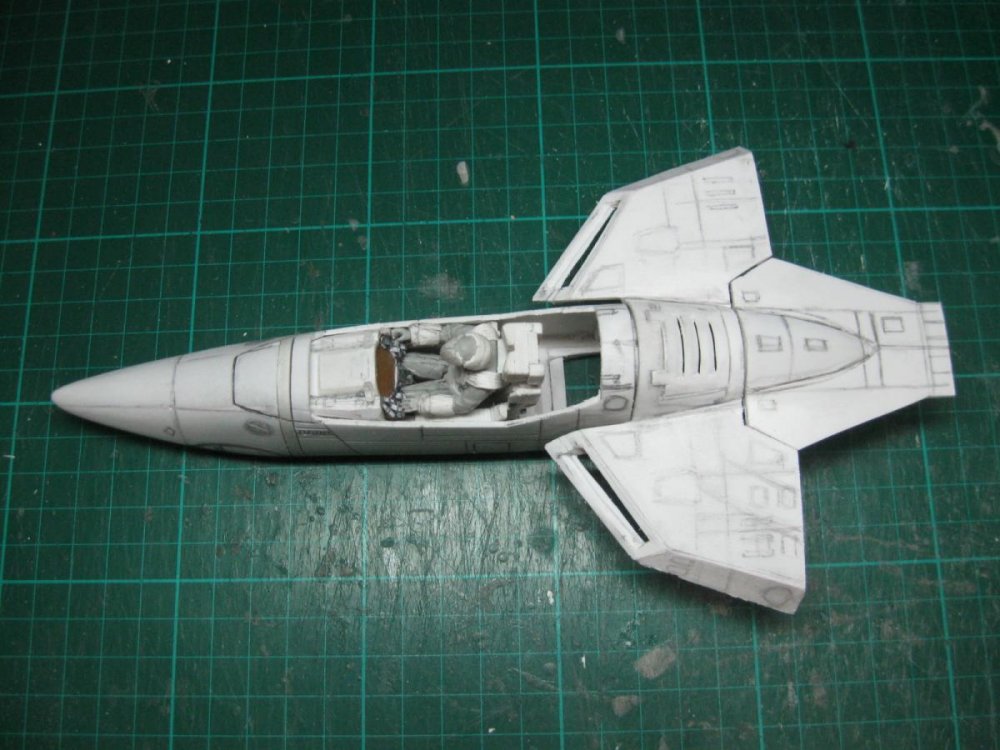
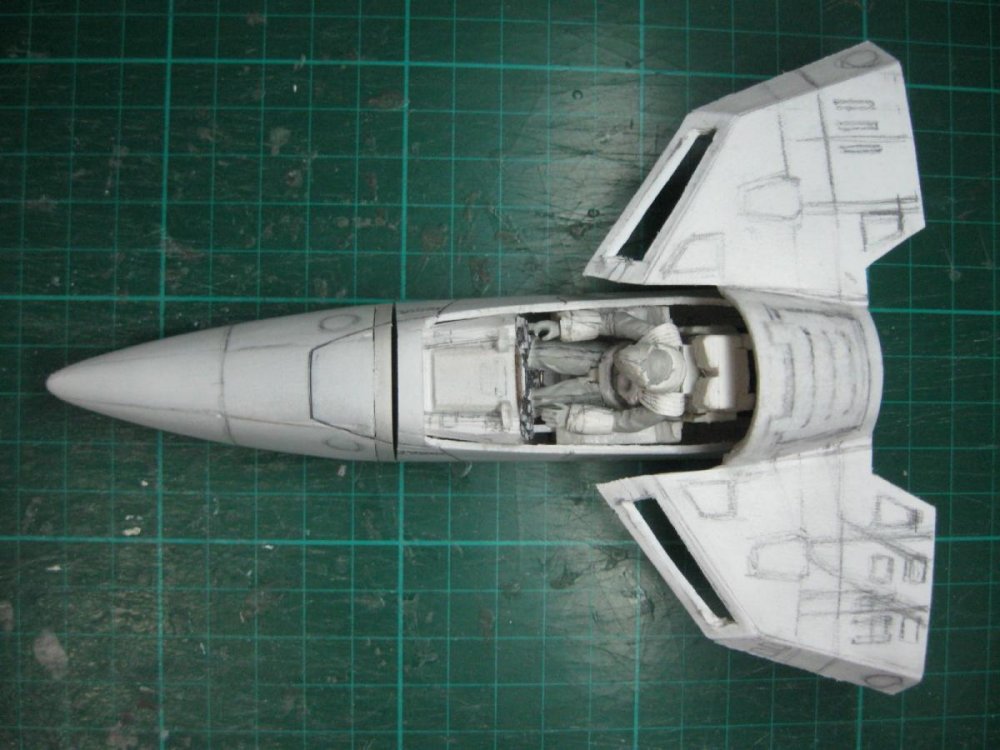
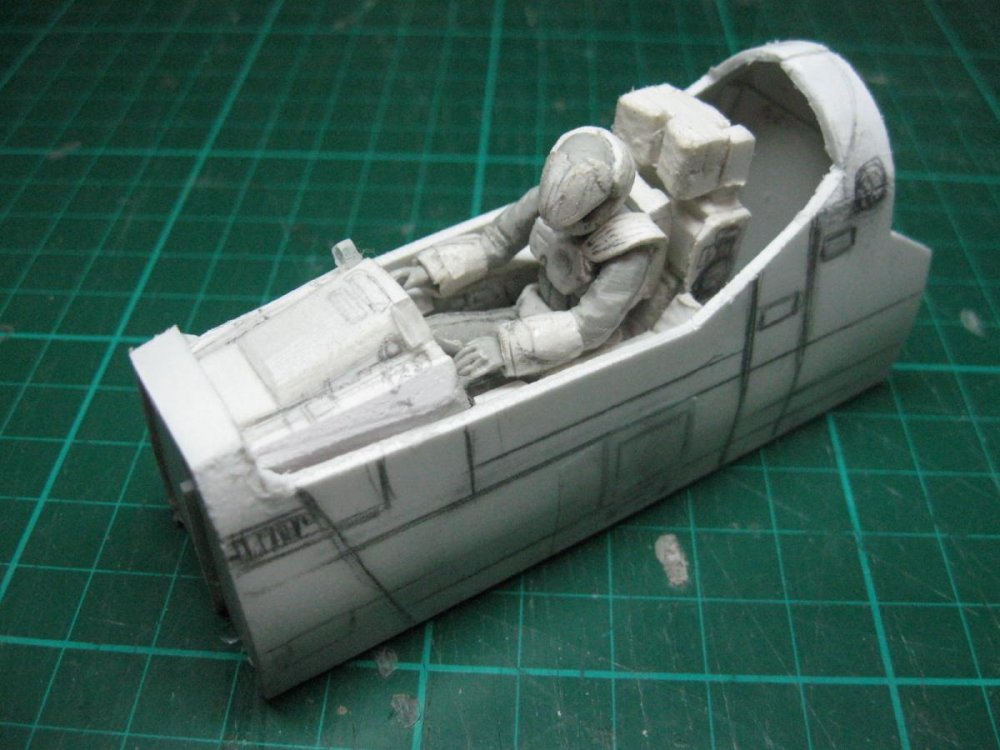
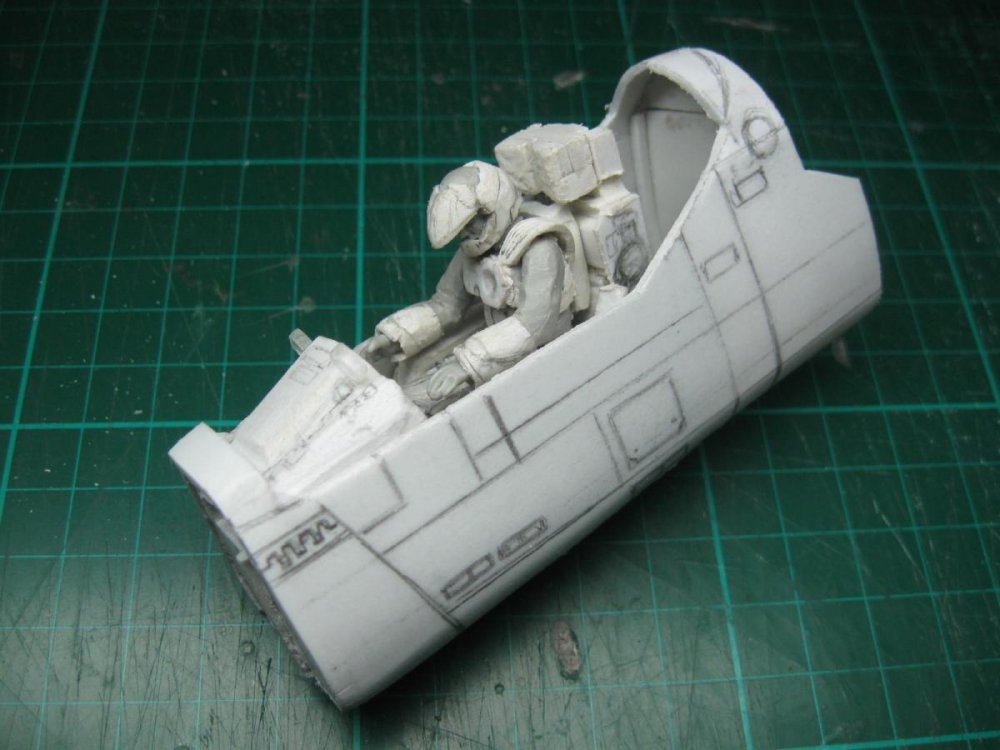
Thanks! I just hope it meets expectations when it's done. I may have to adjust a few more things to the cockpit tub assembly, but it's looking good so far. We're beginning to get a sense of scale for this project. EDIT: Some more adjustments.

-
The build's using pretty much every material known to mortal modelers - Styrene, PVC/Sintra, Plexiglass/acrylic, paperclips, etc. and eventually, 3D printing. And door pics!

-
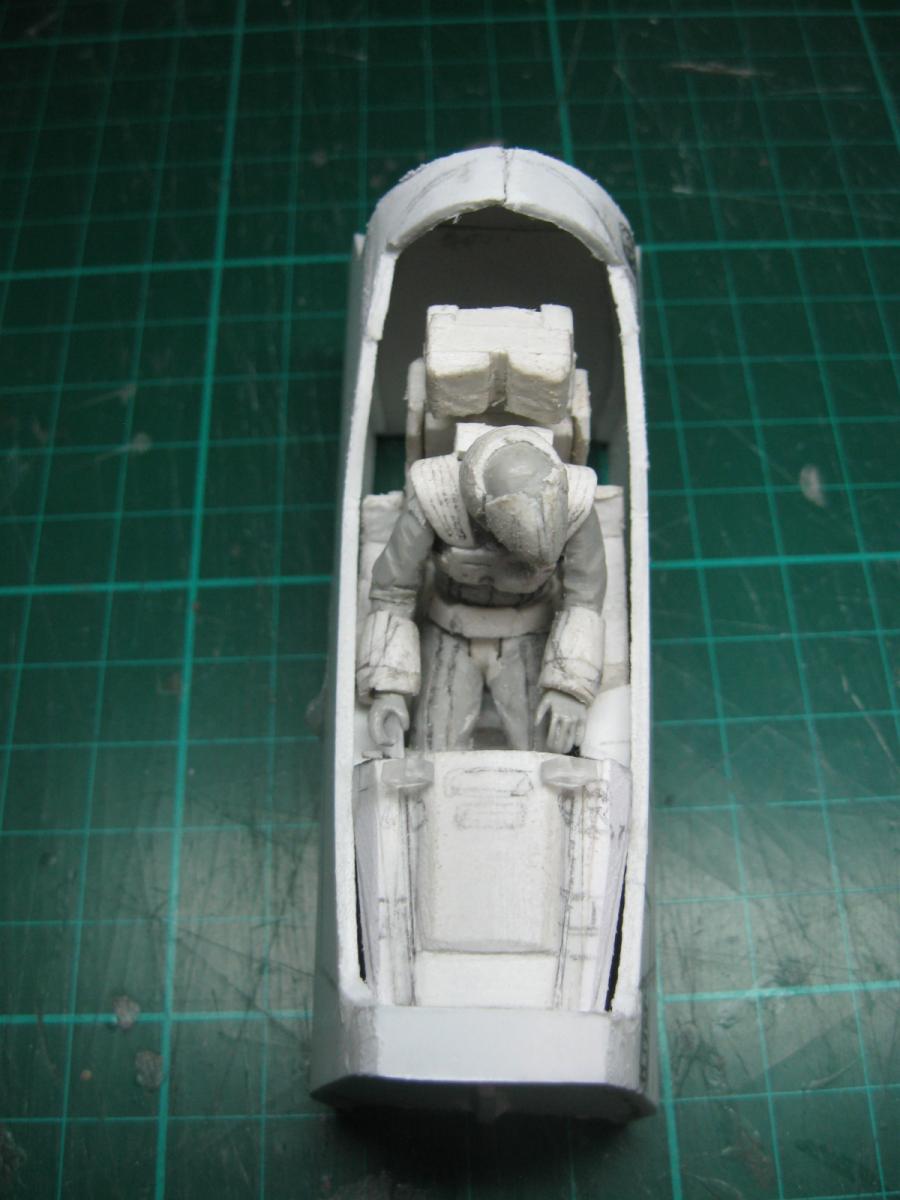
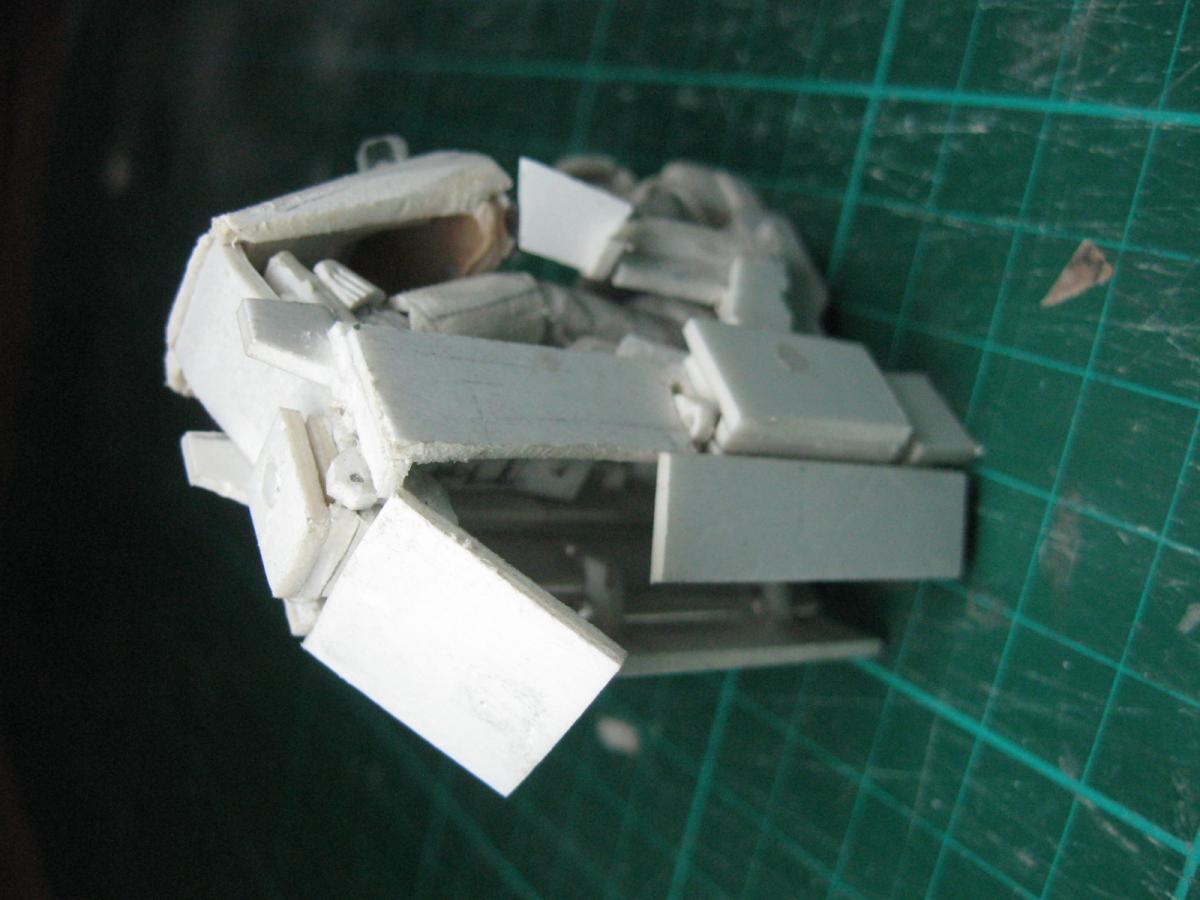
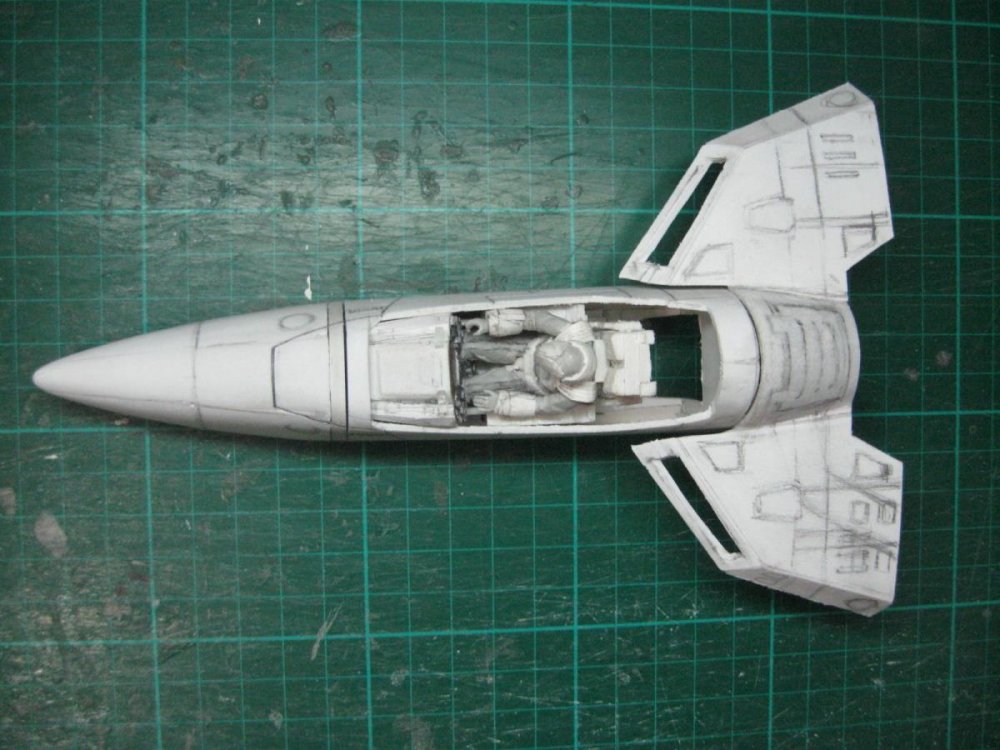
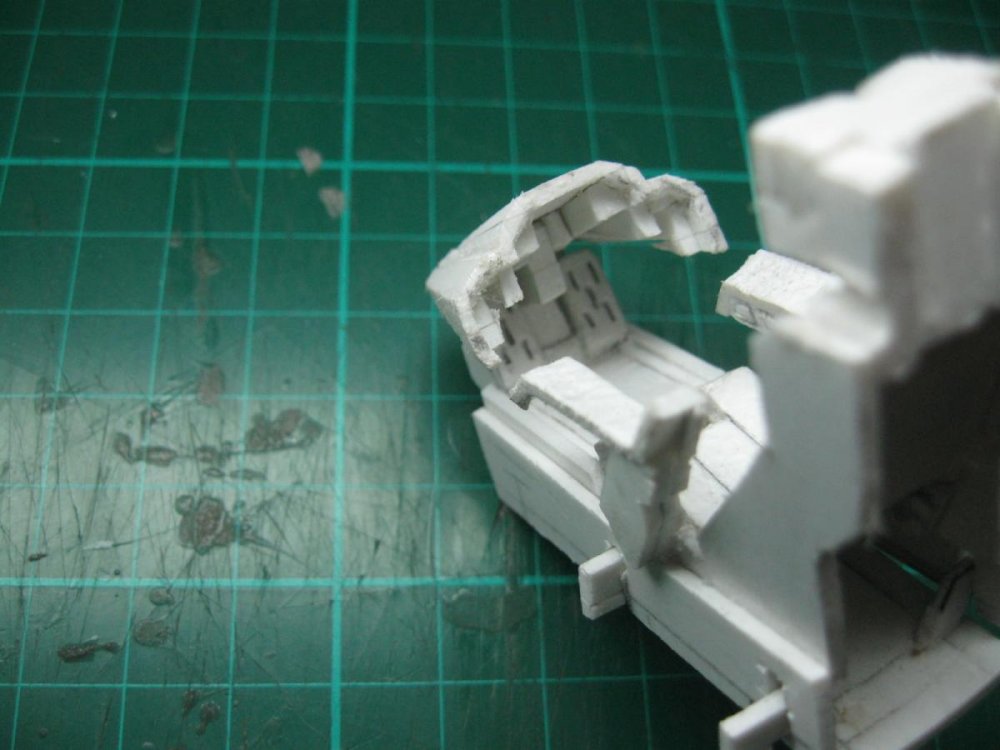
We have an instrument panel! (with clear screen!) - still haven't removed the backing paper. The display decal will go behind the screen. Also adjusted the arm rests to make room for the flight stick & throttle. It's a little messy for now, but we can call it progress. The landing gear bay doors work now, but the camera batteries died before I could take pics.

-
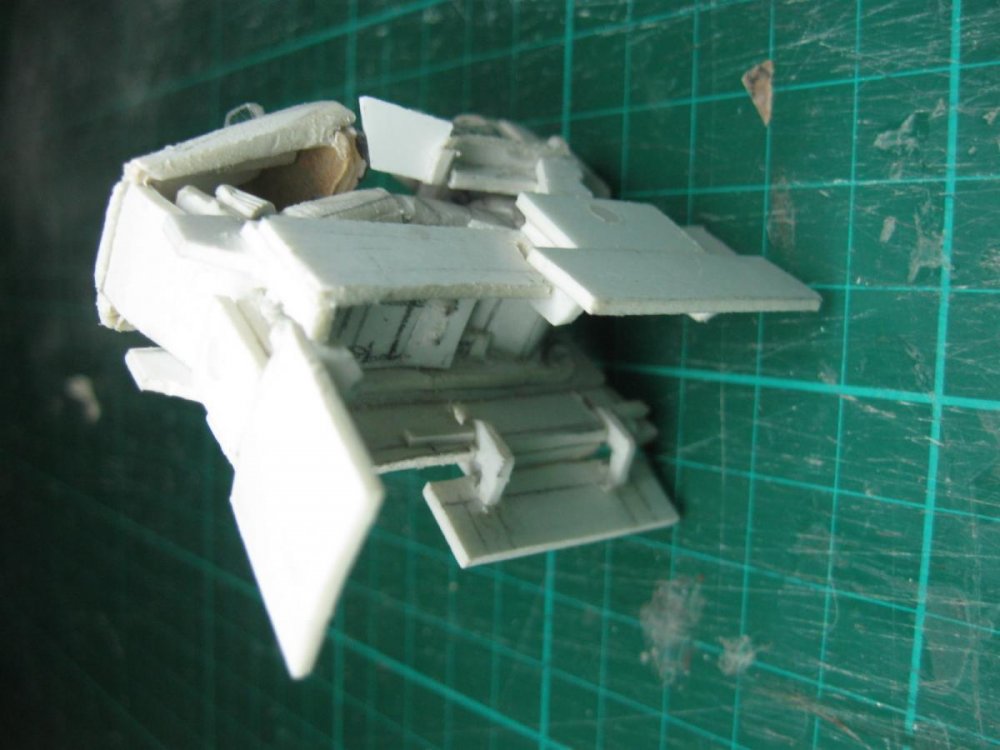
The main console now has space for the instrument panel. I'm planning to make the center screen a clear part. Also, foot pedal detail! Also started building the landing gear bay & doors. Even at this scale, these parts are tiny!


-
Thanks! I'll 3D model & print parts too, most likely the areas that need greater precision or strength - the landing gear are definitely on the list.
-
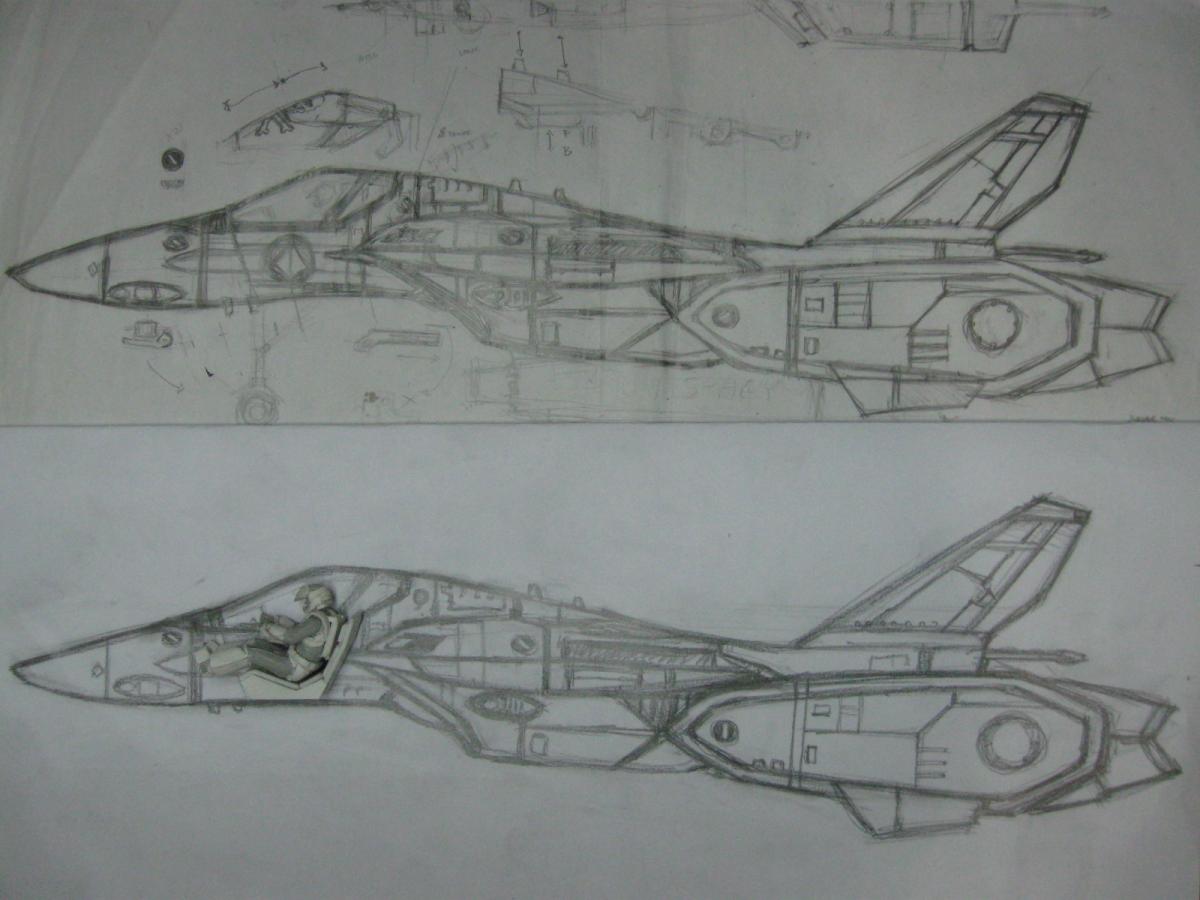
I built something a while back, that took its hilarious & frightening toll. After such a project, you start to really consider the implications of committing to a super complex build. Same here! I hope it's not a flaming wreck at the end. Amazingly complicated! Thanks! New drawing! Added the gunpod to the drawing (because I forgot!). Got some of the support structures & instrument panel housing done. The arm rests need a little bit of shortening, but for now, gotta focus on adding assemblies. So far, looks like everything still fits.
-
I hope it meets expectations when it's done! Yup, gonna make it exist out of thin air! I was thinking a combination of both. I got access to a printer, so might as well use it on this project! There's a slight chance of a possibility that I maybe probably most likely considered transformation. We'll see if I'm smart enough to pull it off. Yup, there's no apparent physical difference with the 1x Plus. I'm calling it a 1x Plus because I haven't decided on which head I'll build for it, plus a couple of extra features.
-
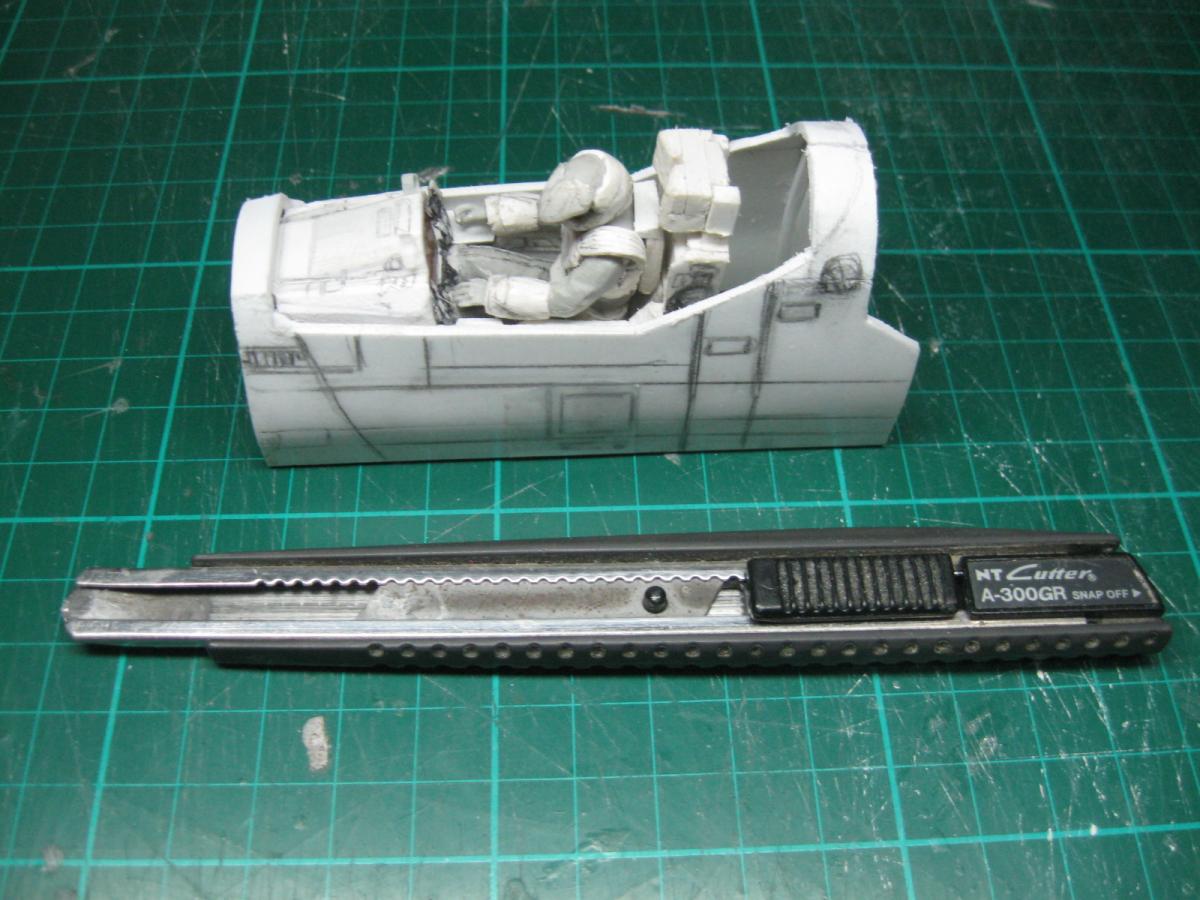
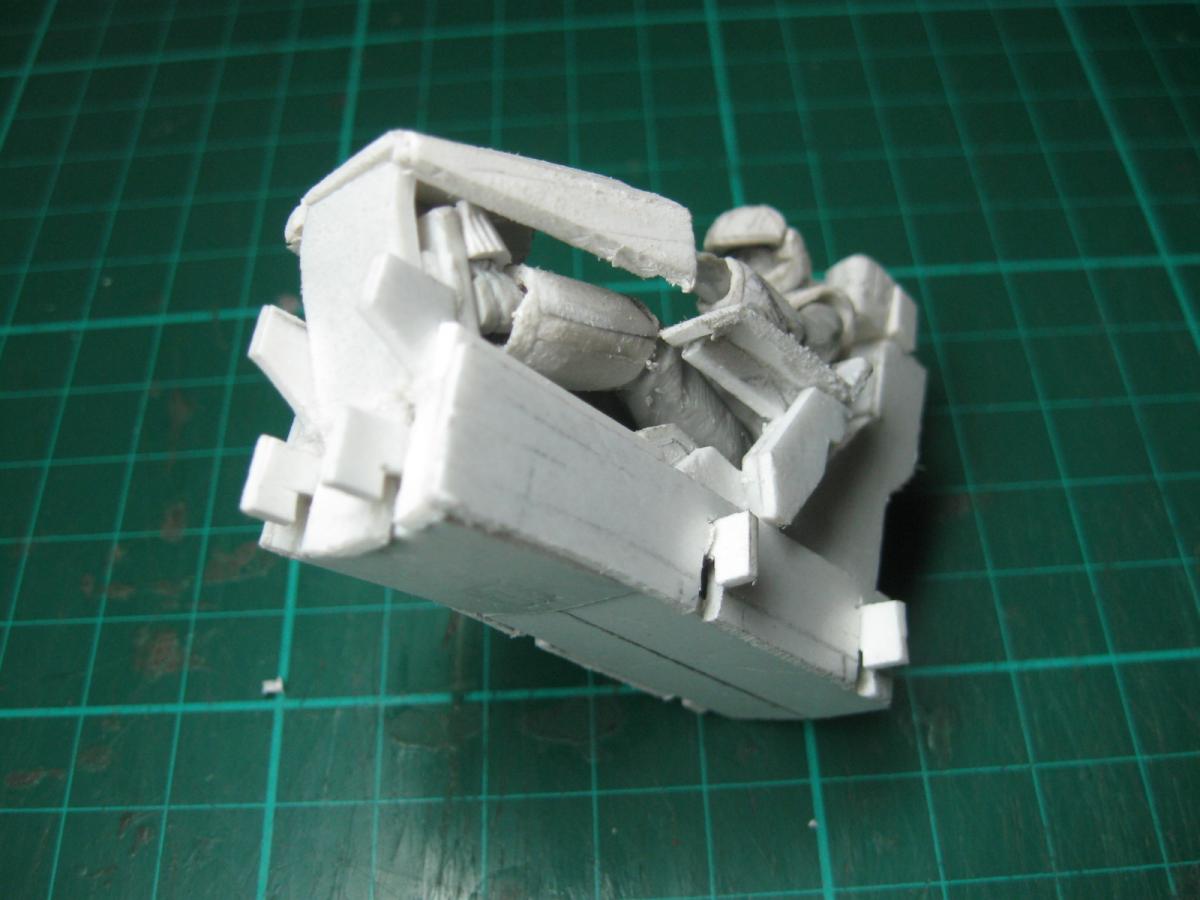
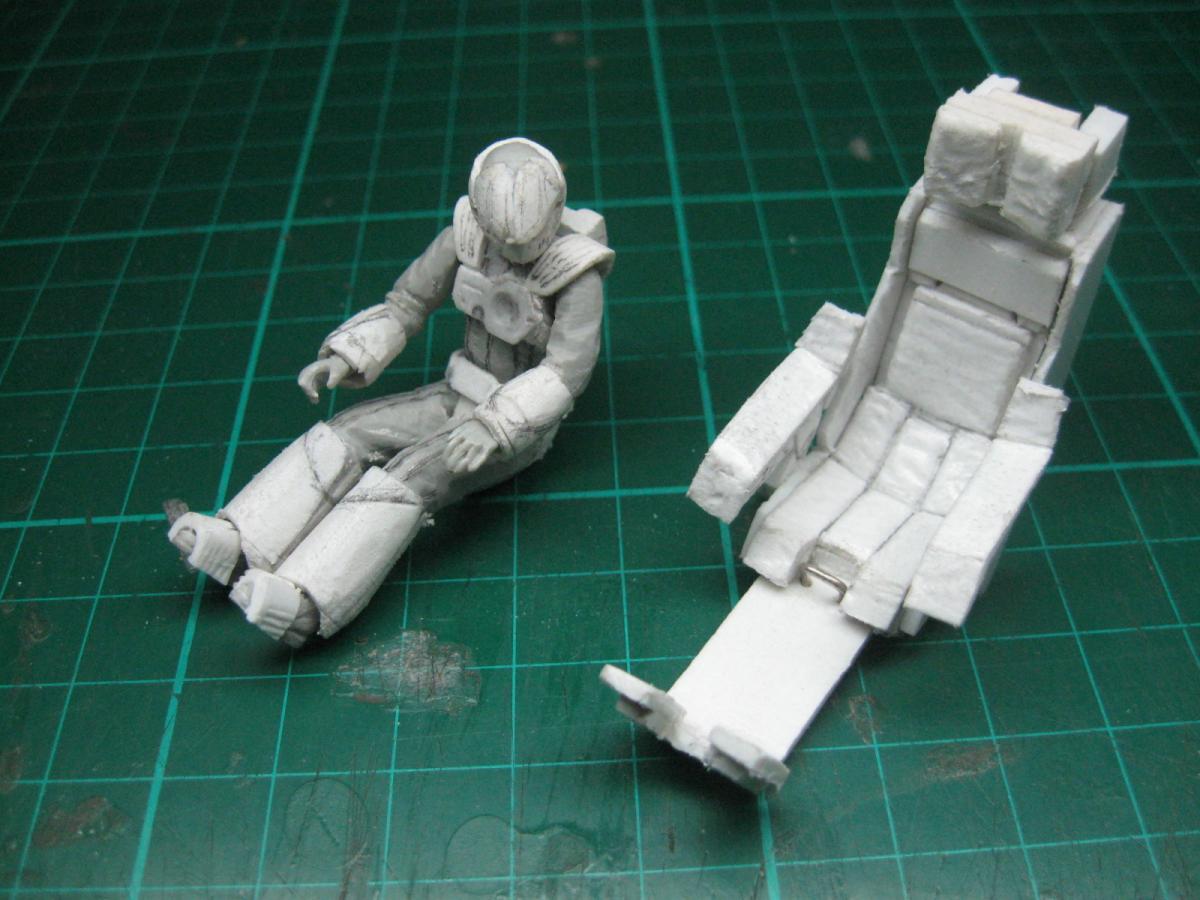
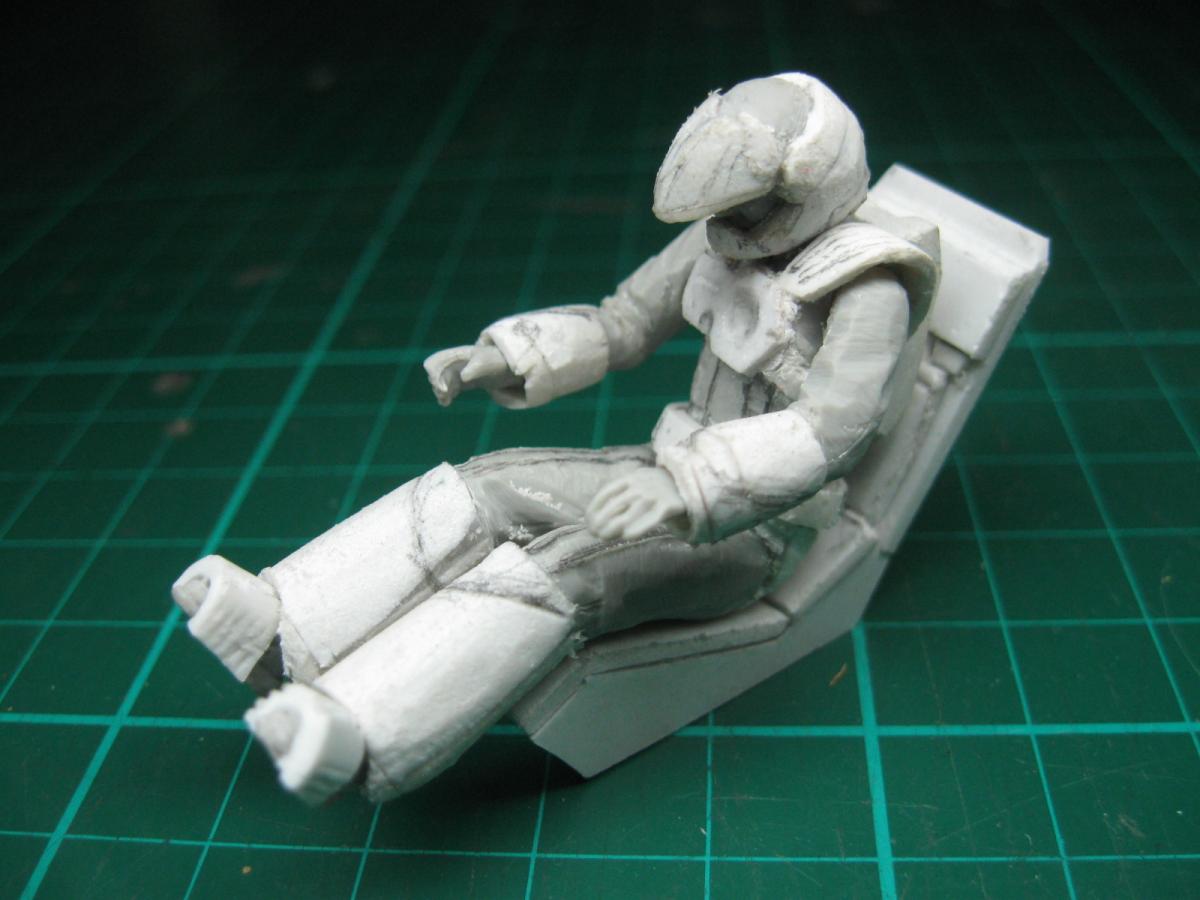
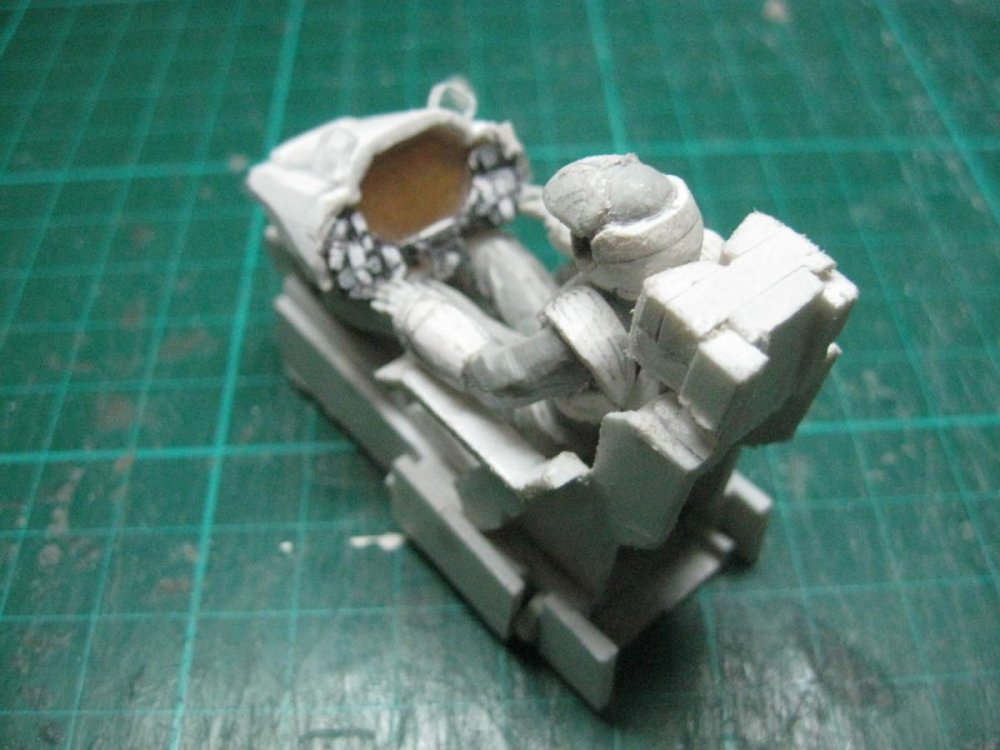
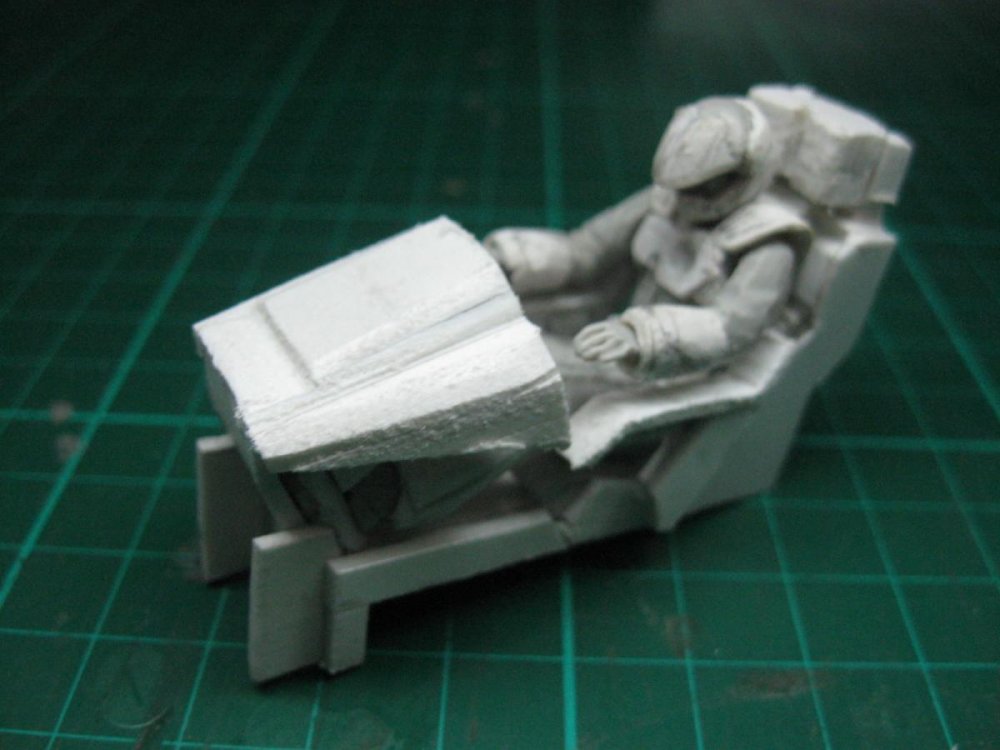
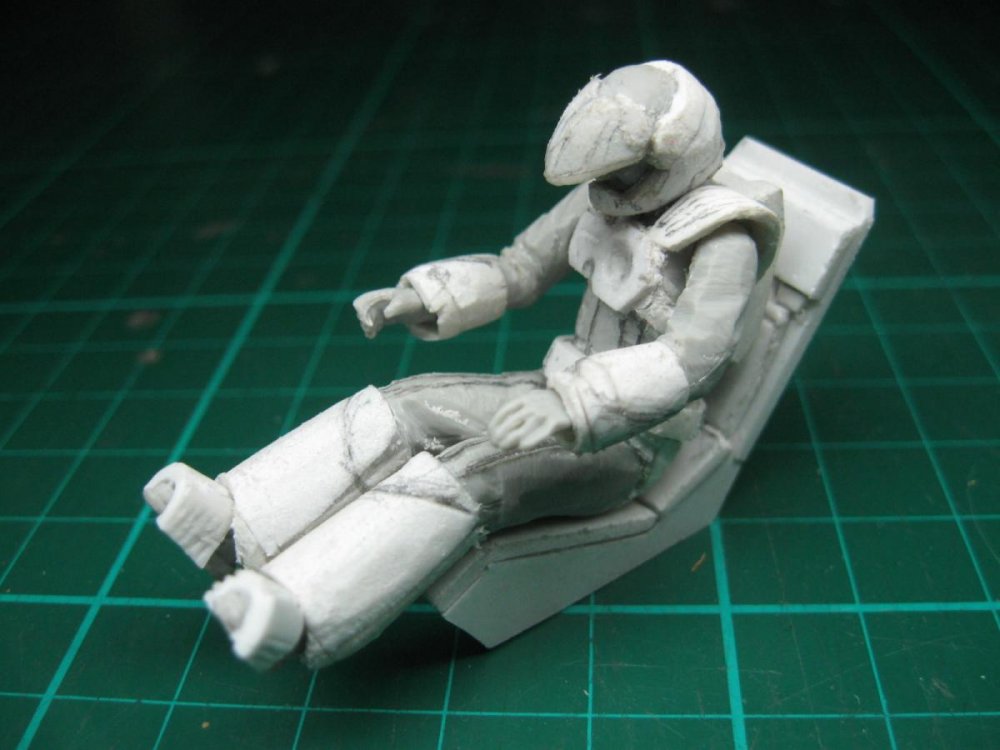
Some improvements to the seat. I've decided to stick to the line art dimensions, so it'll be a "true" 1/35 scale fighter. Some magic will be involved. I think I've taken a little too much space in this thread... Time to relocate! http://www.macrossworld.com/mwf/index.php?showtopic=43411

-
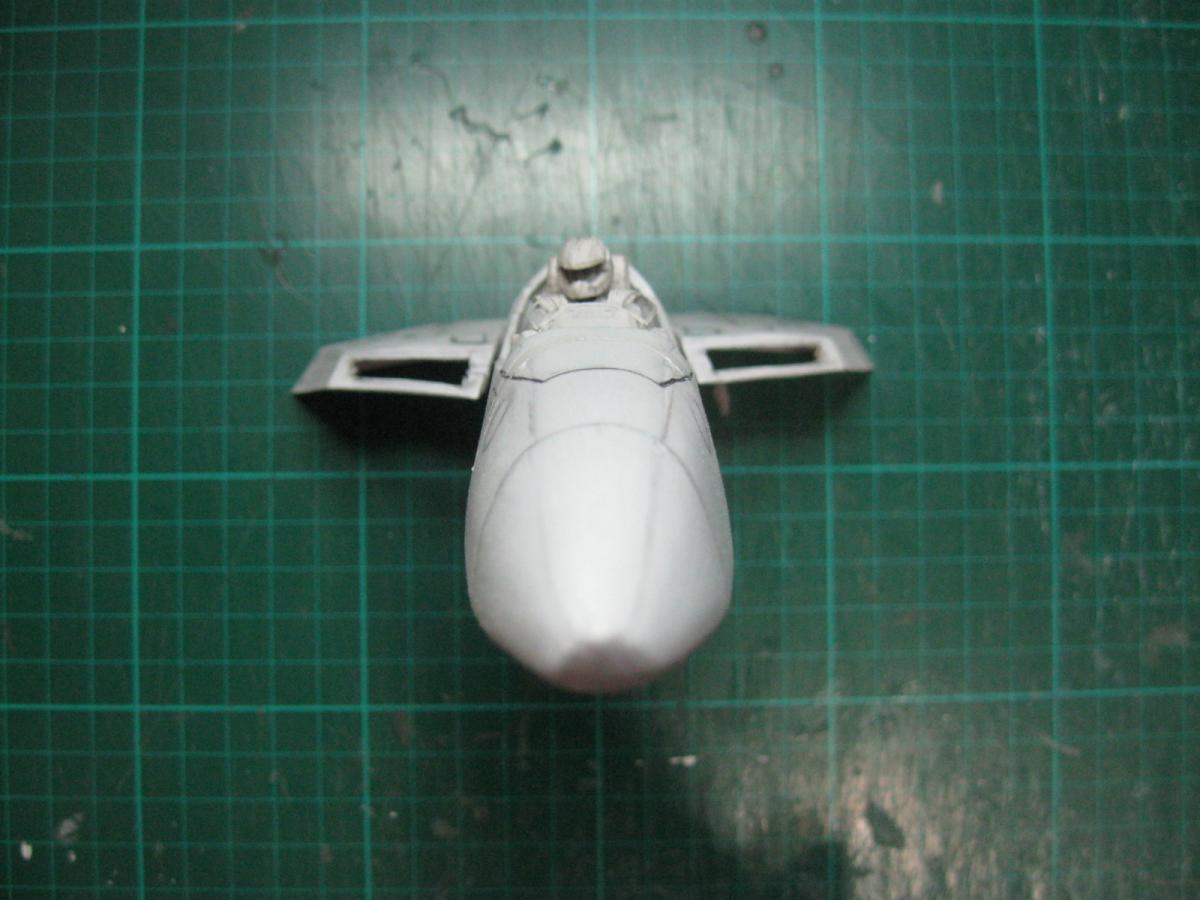
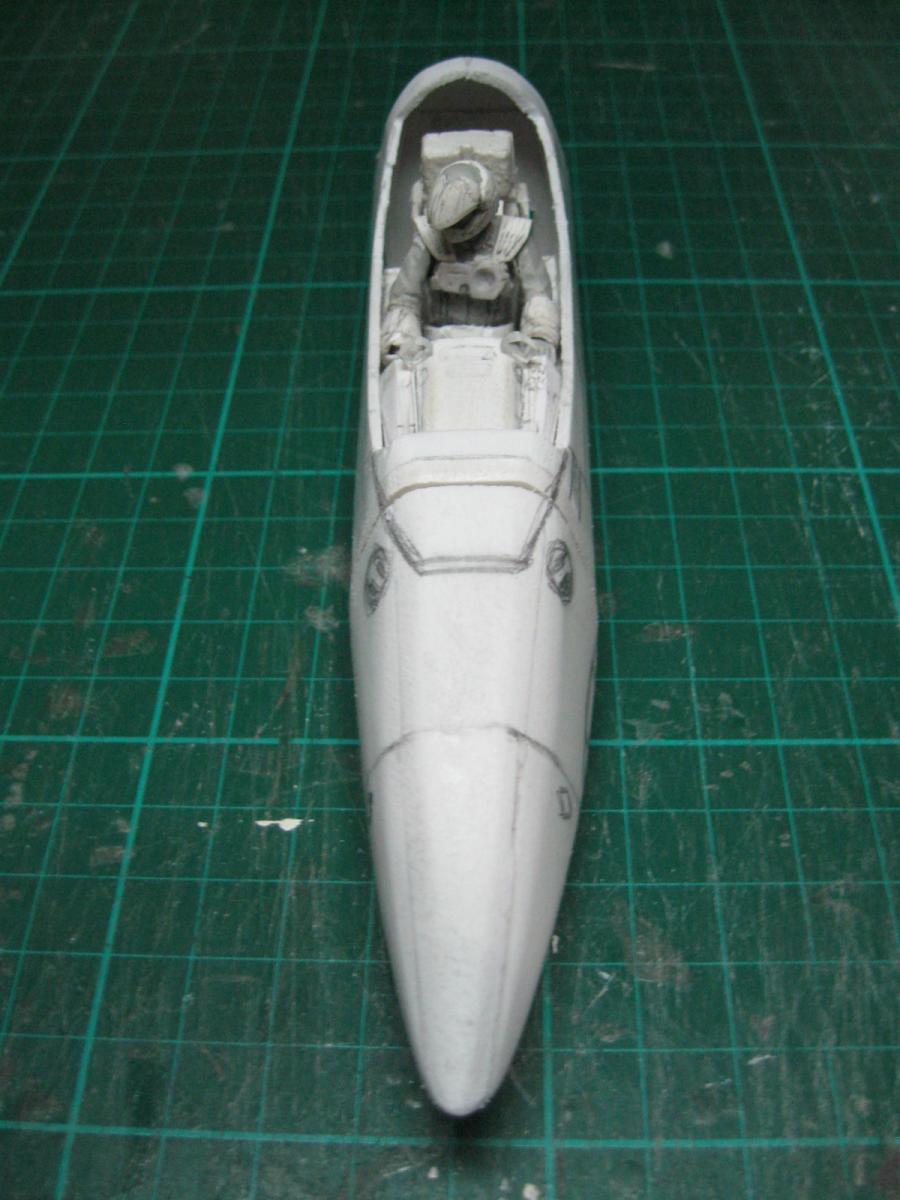
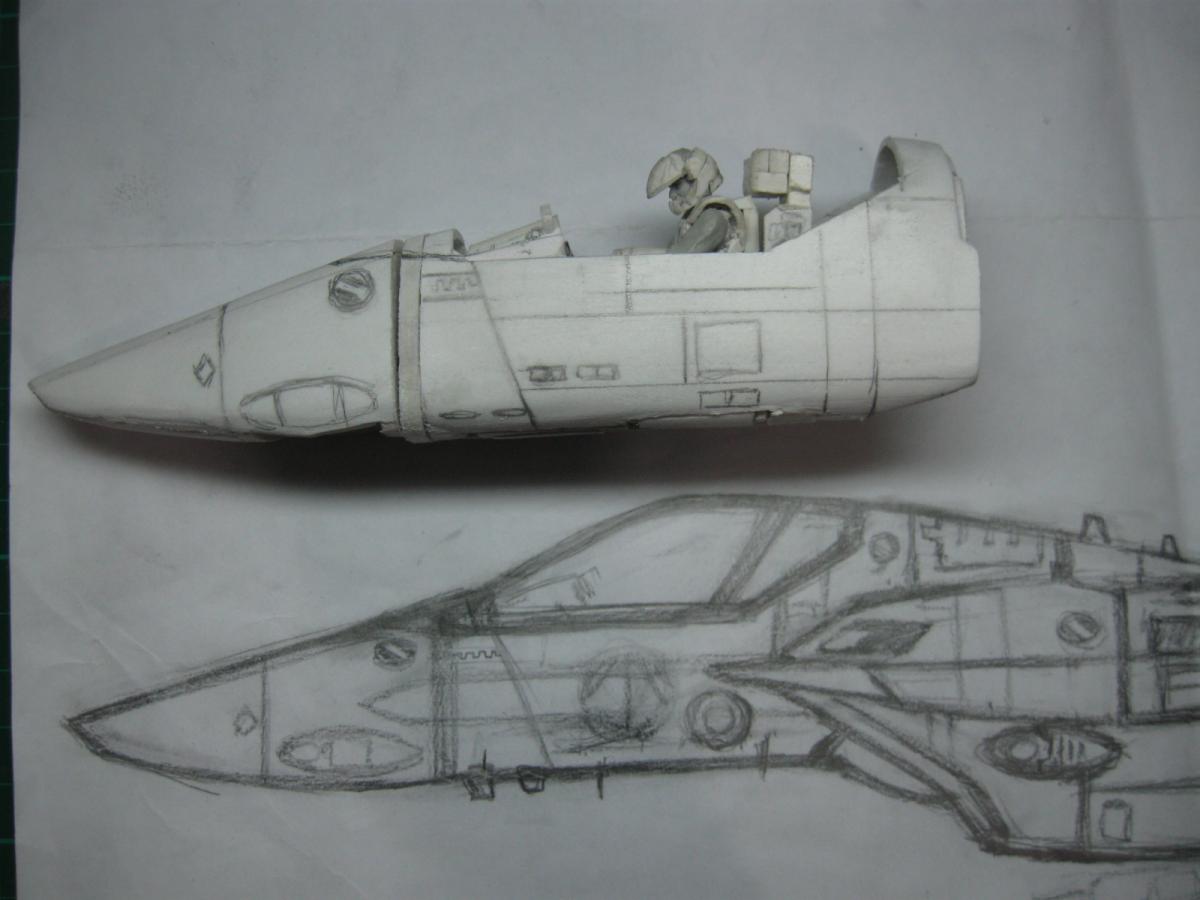
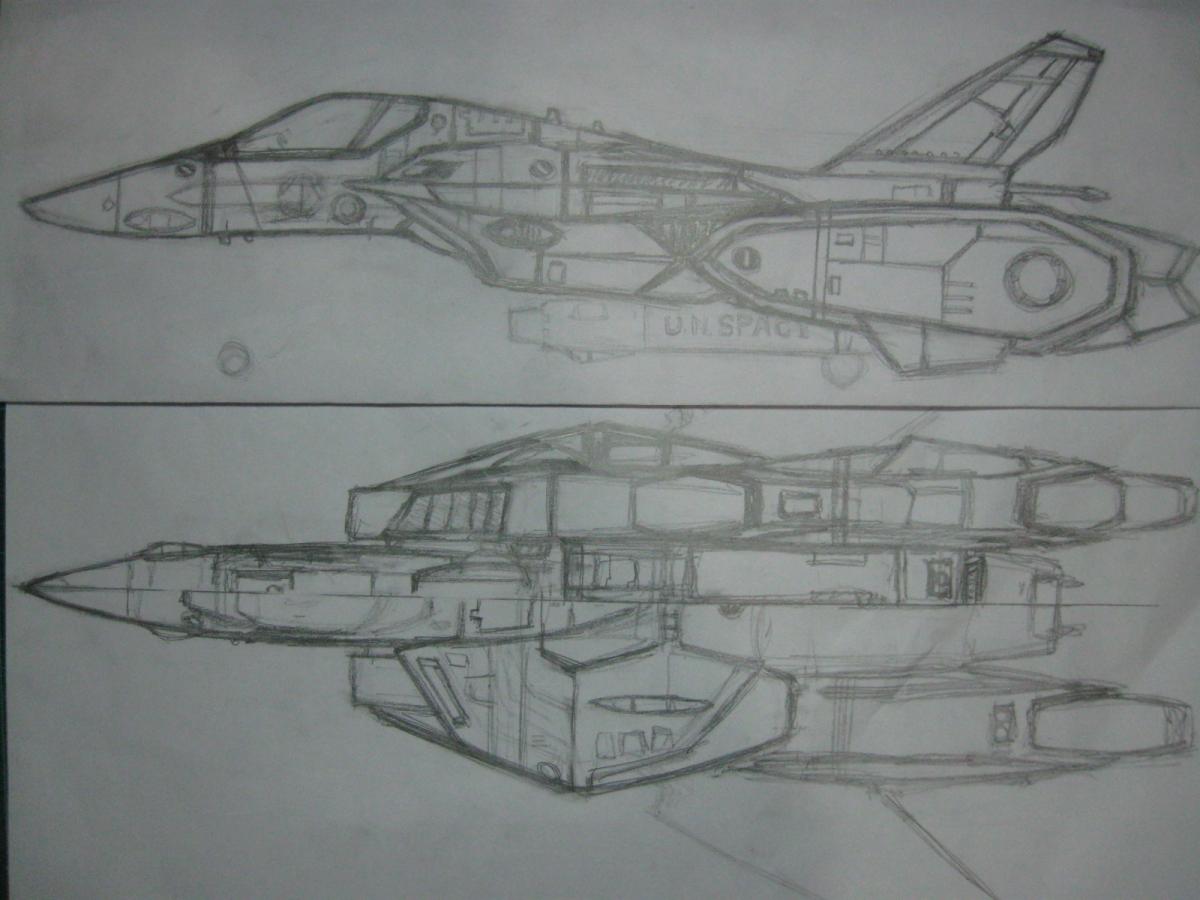
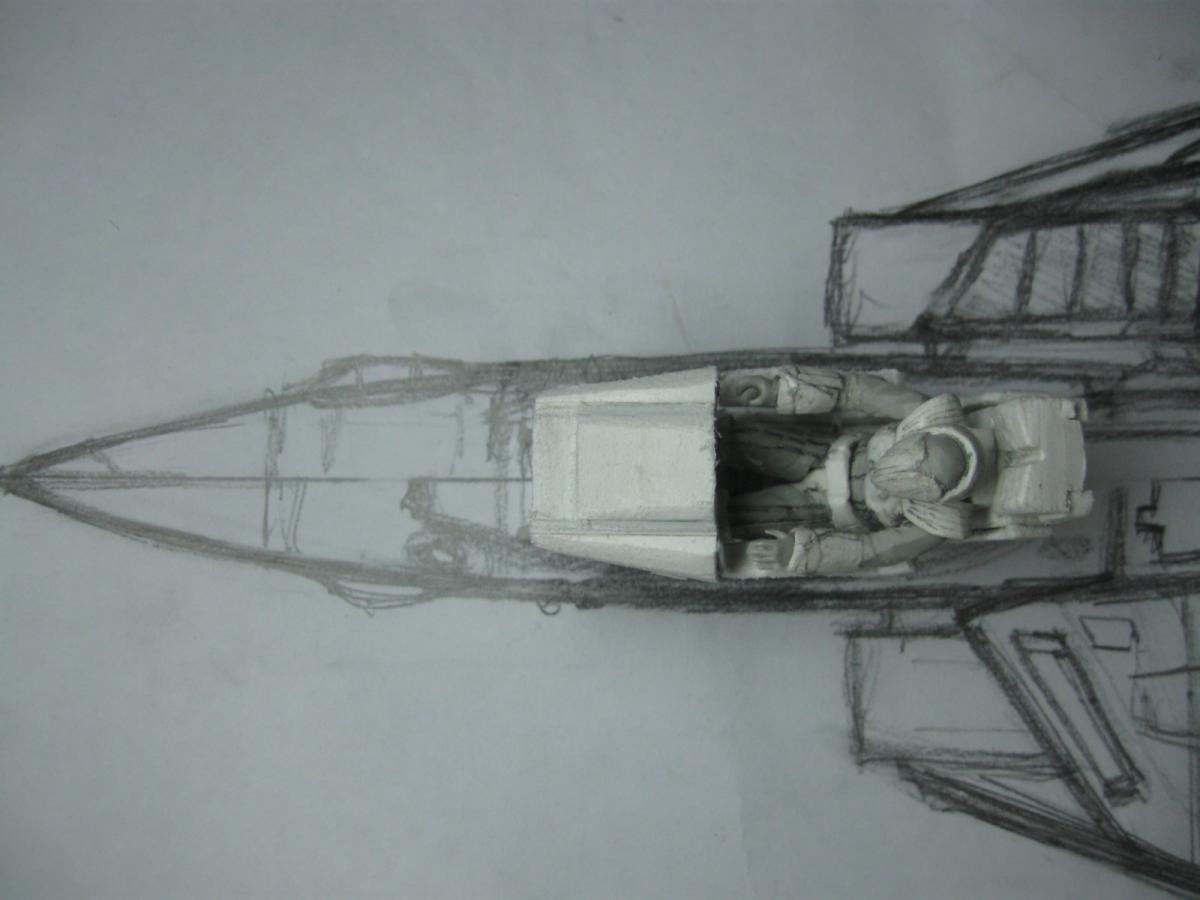
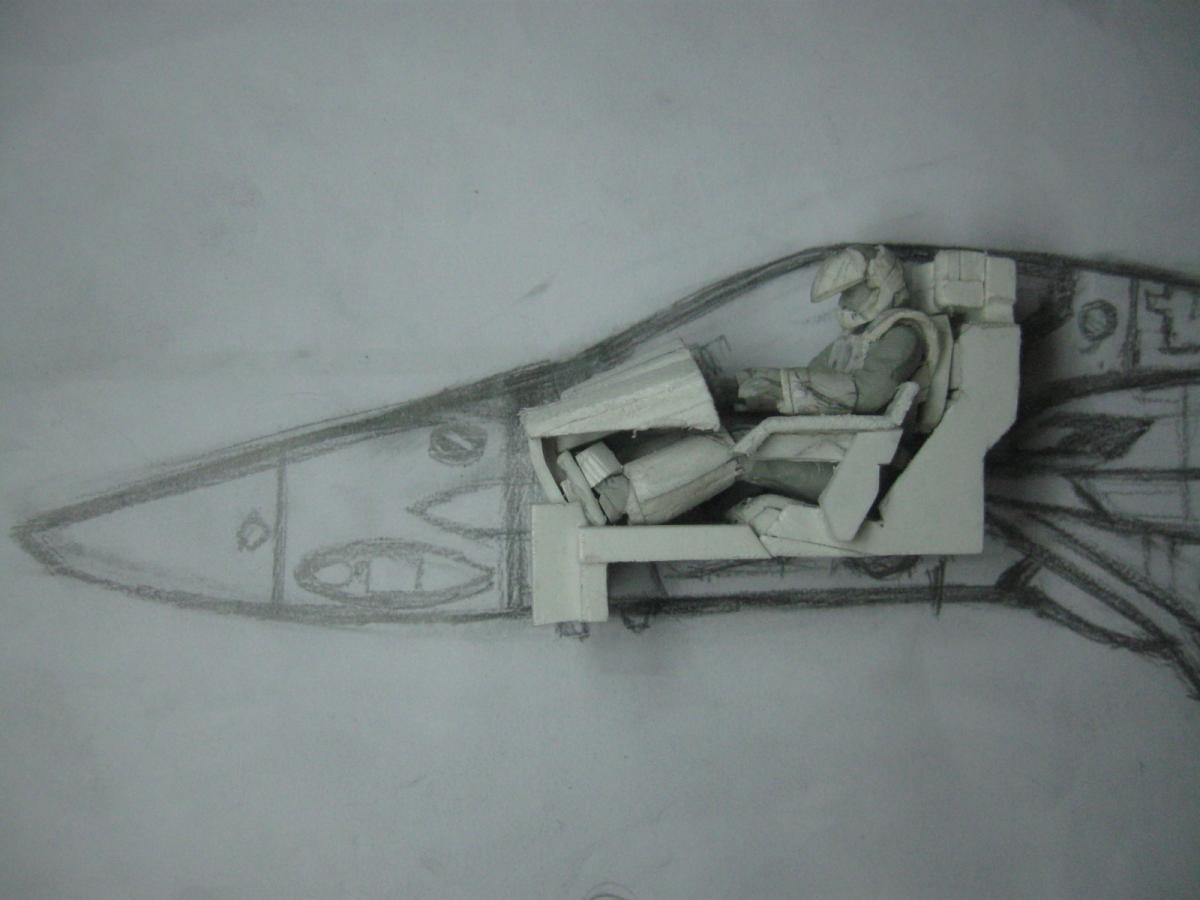
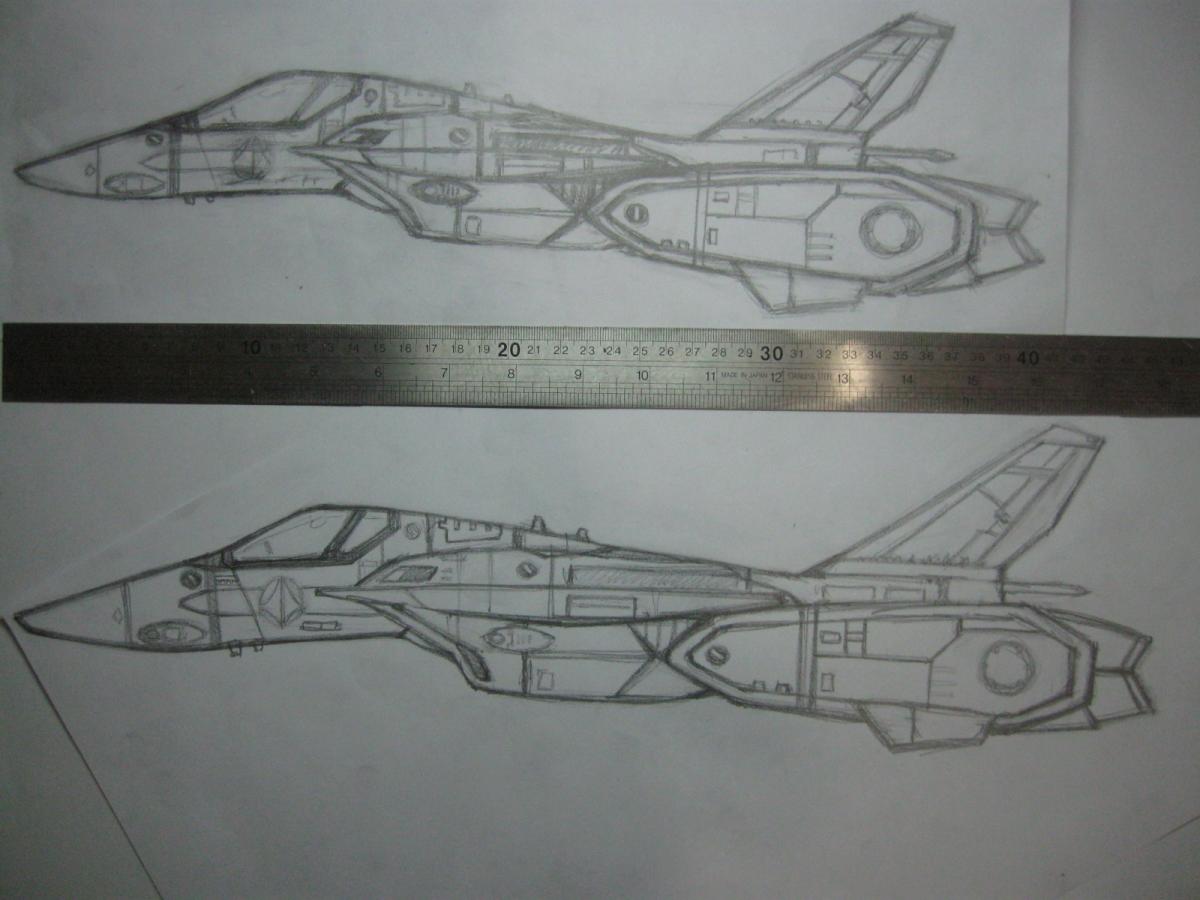
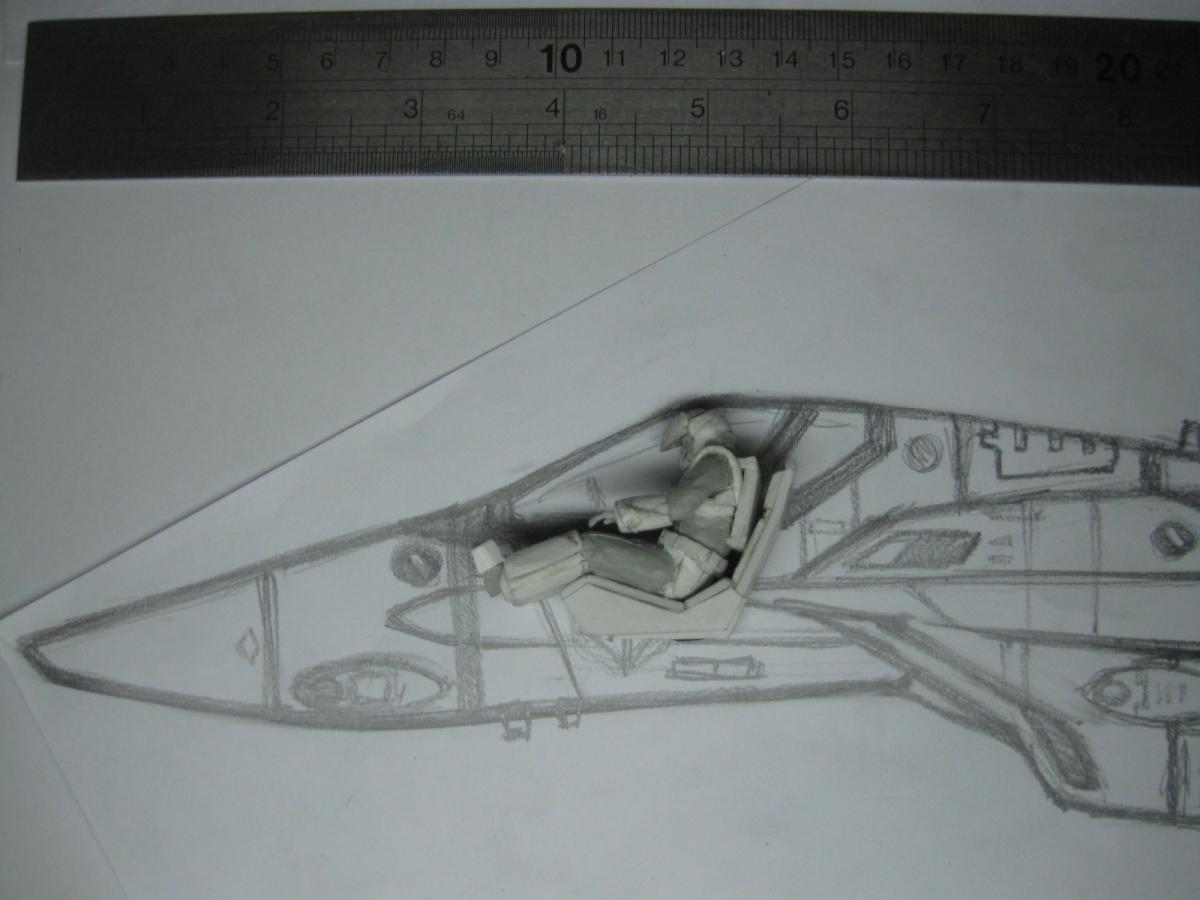
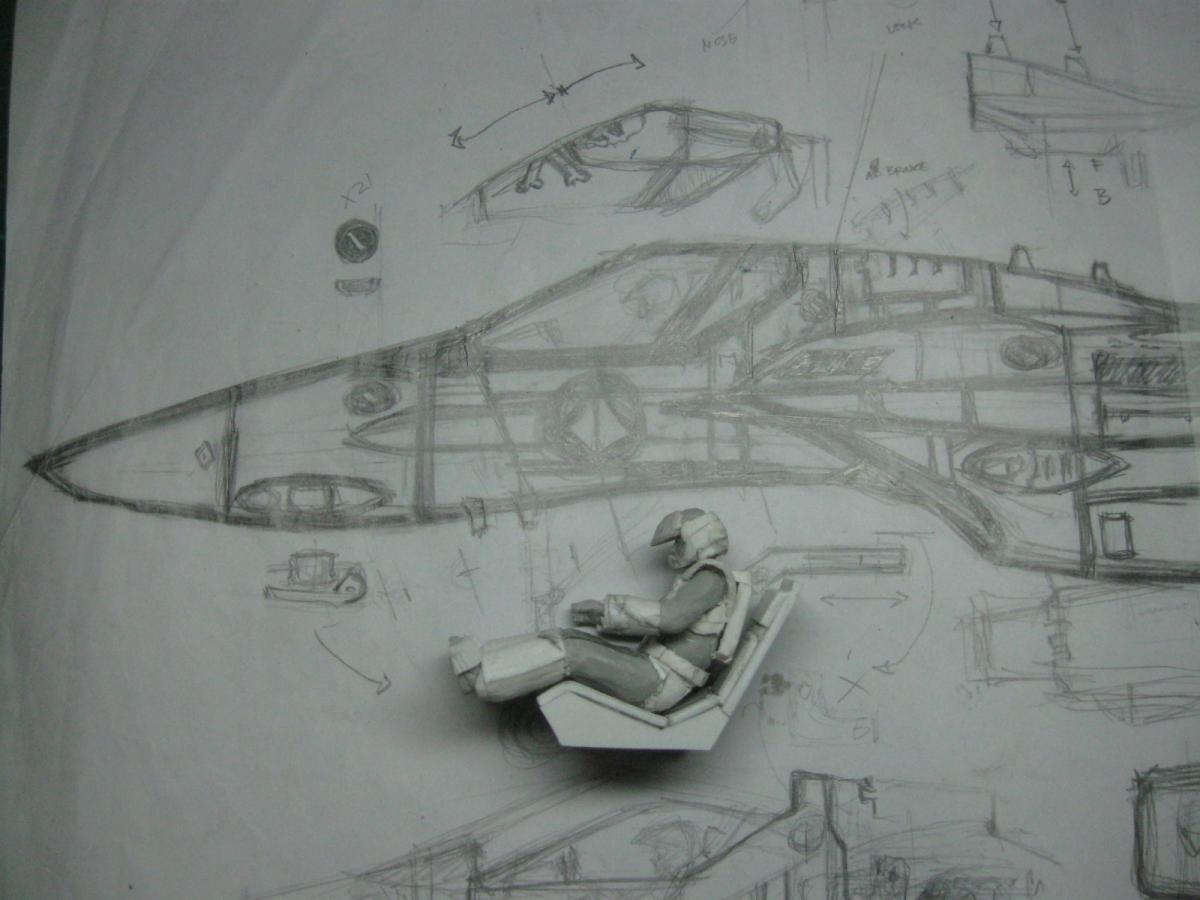
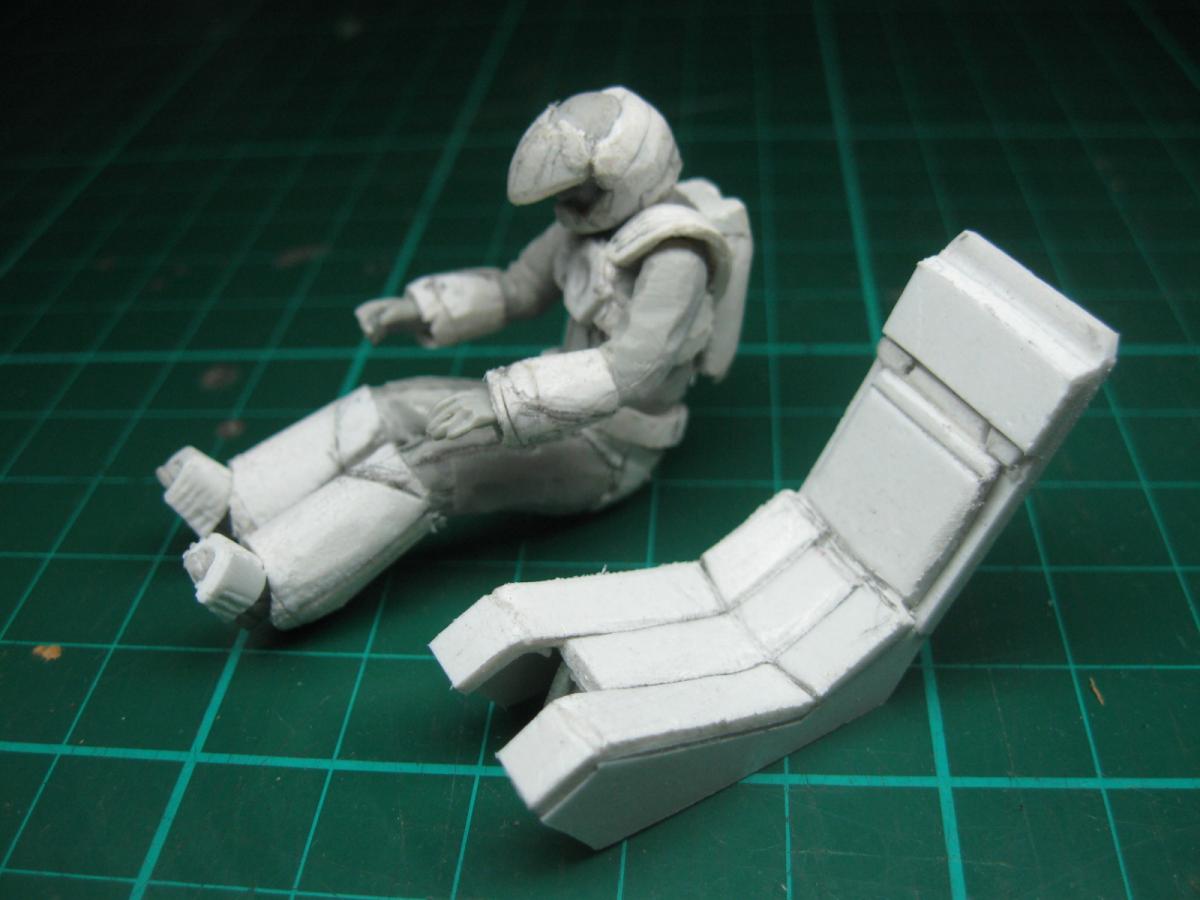
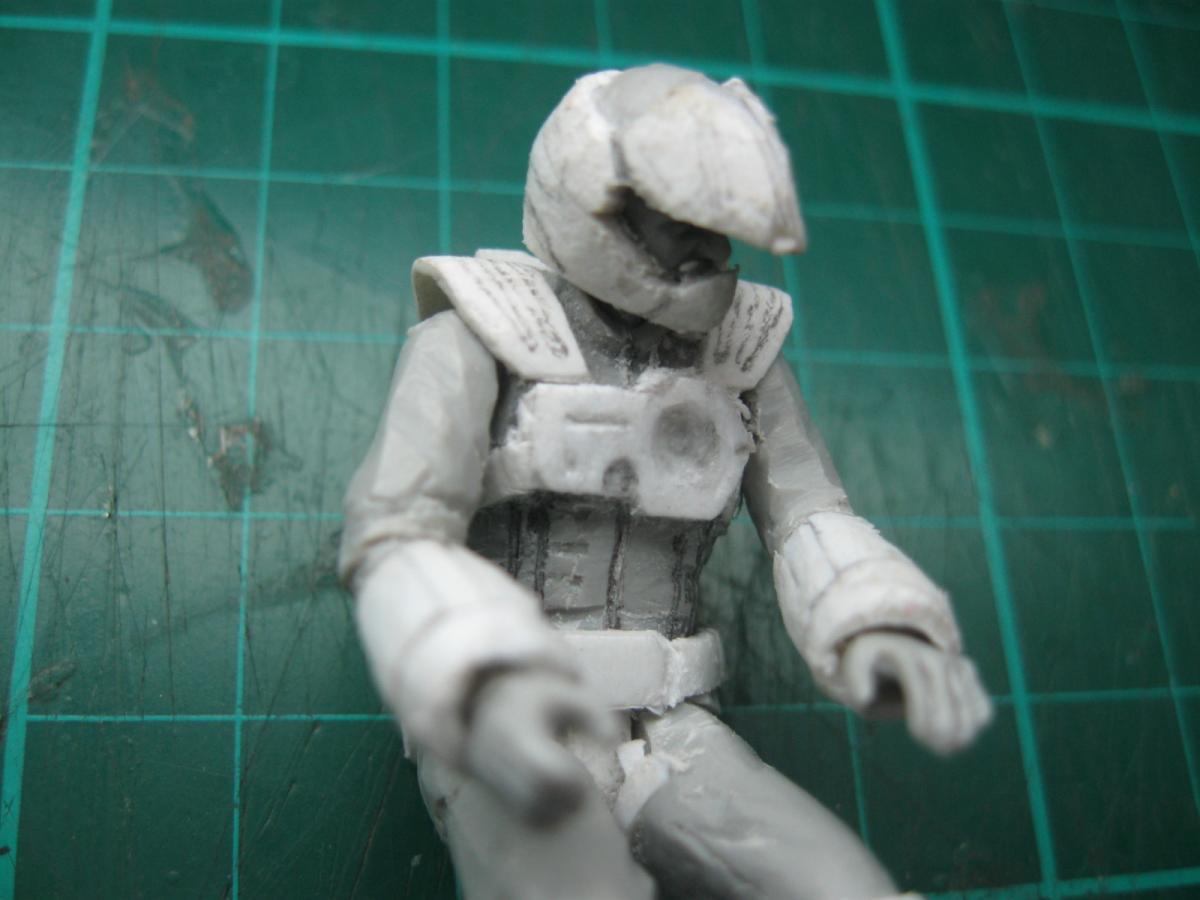
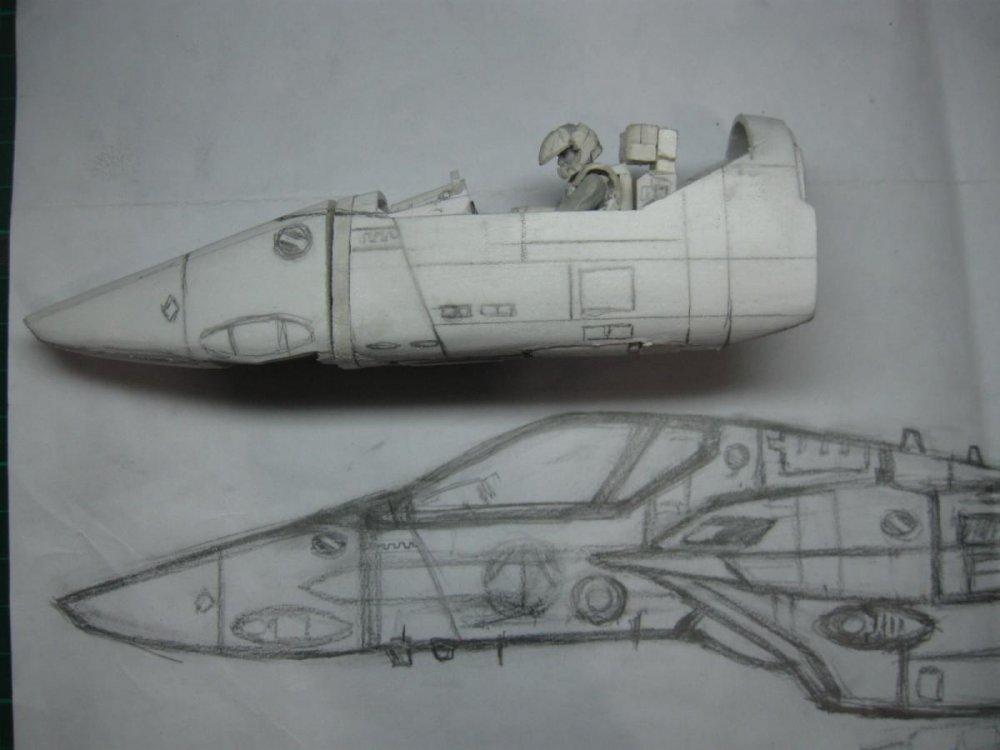
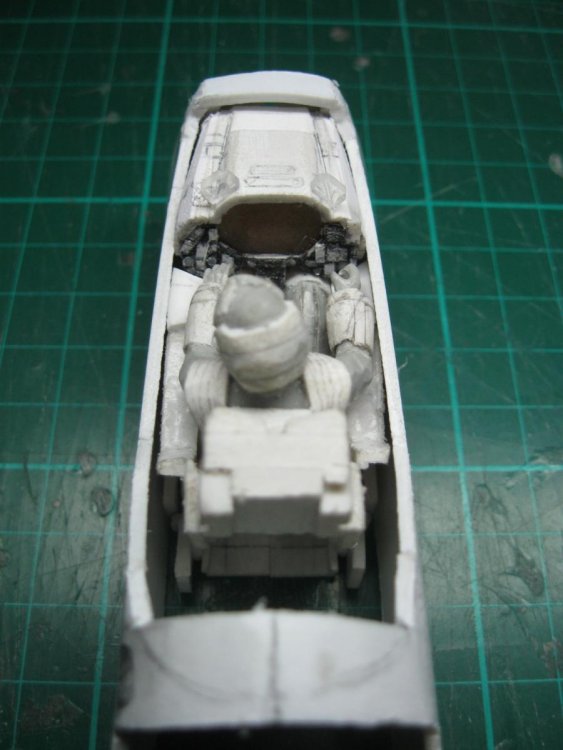
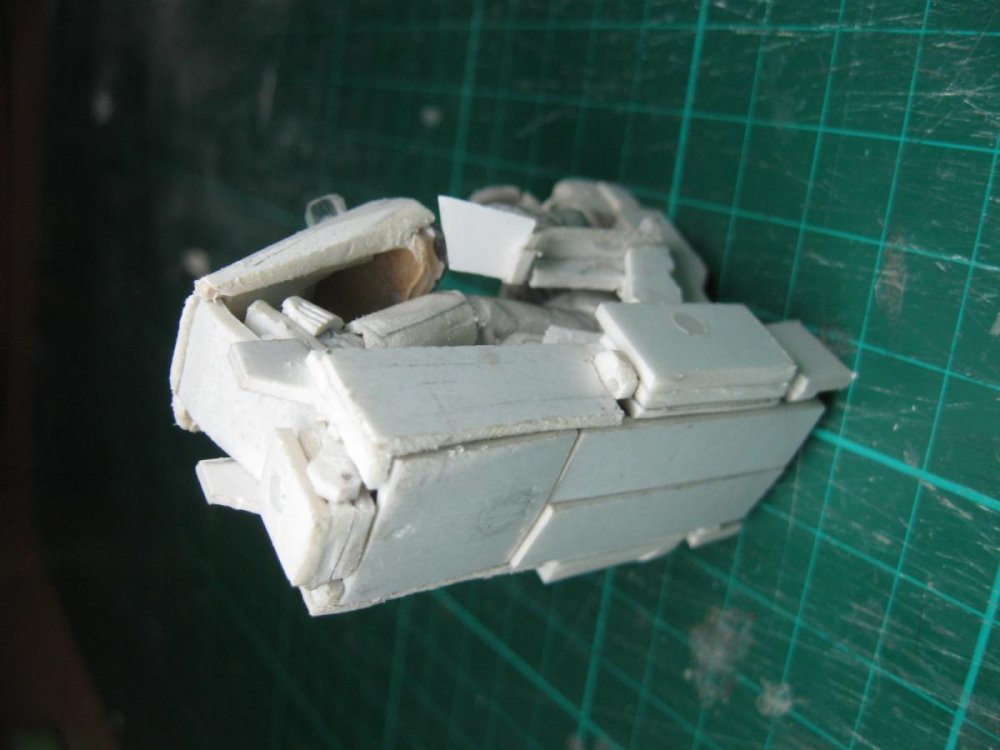
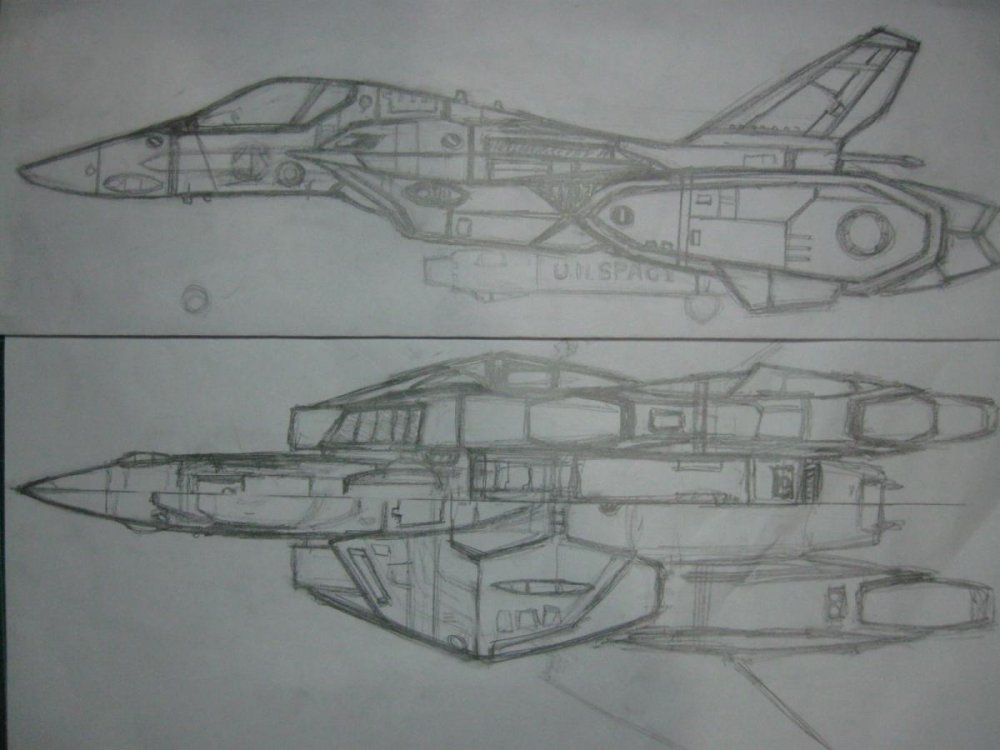
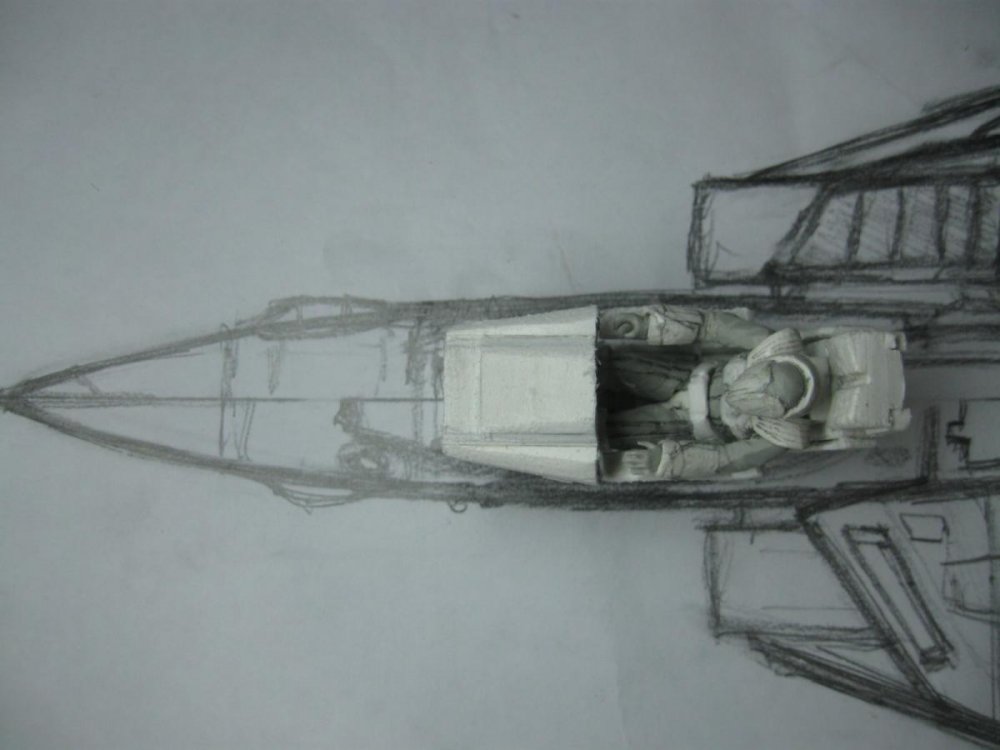
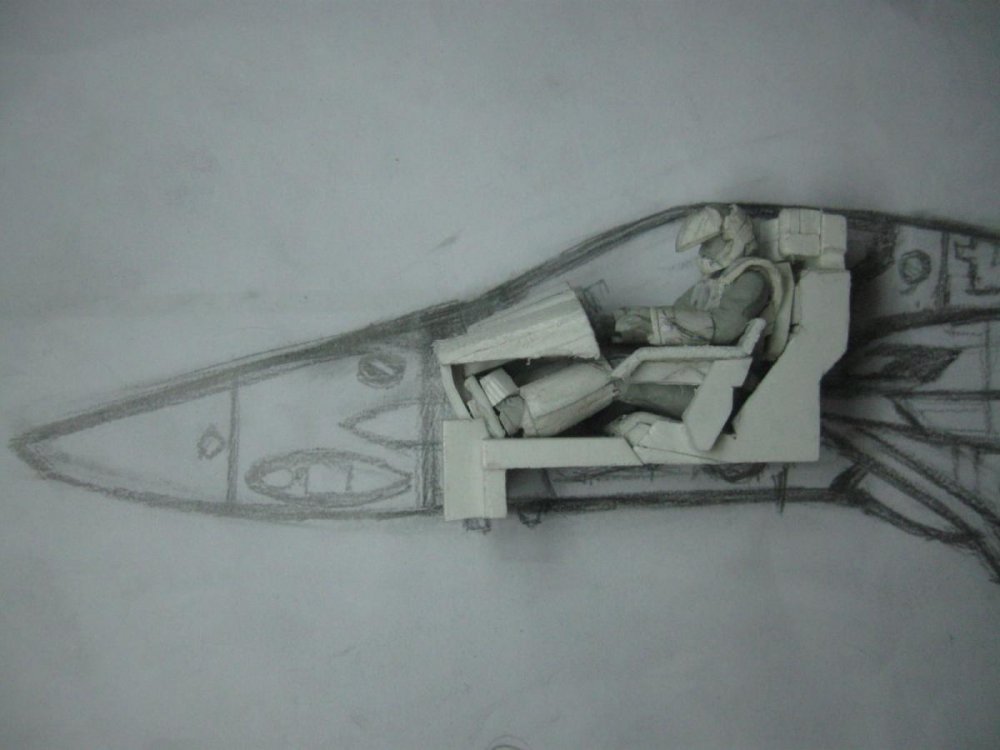
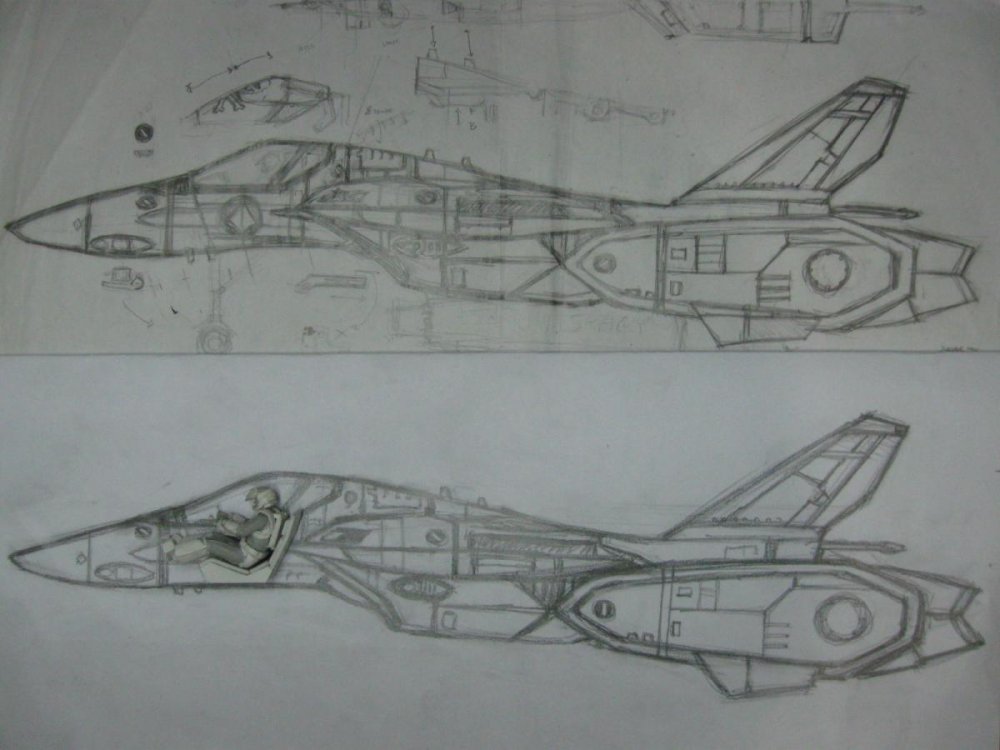
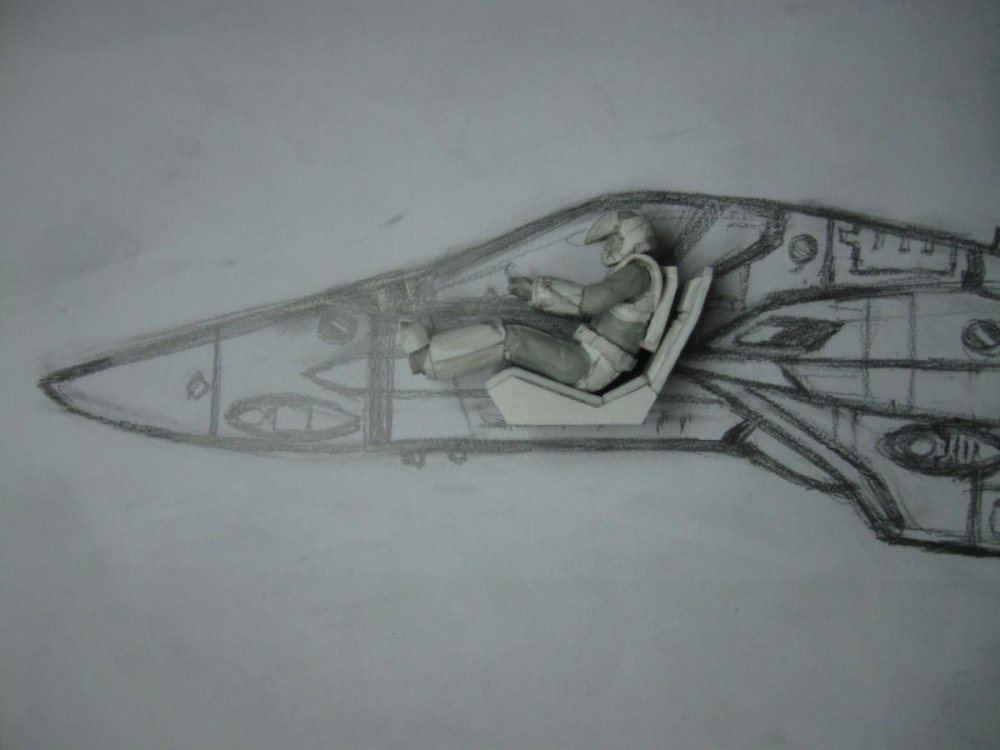
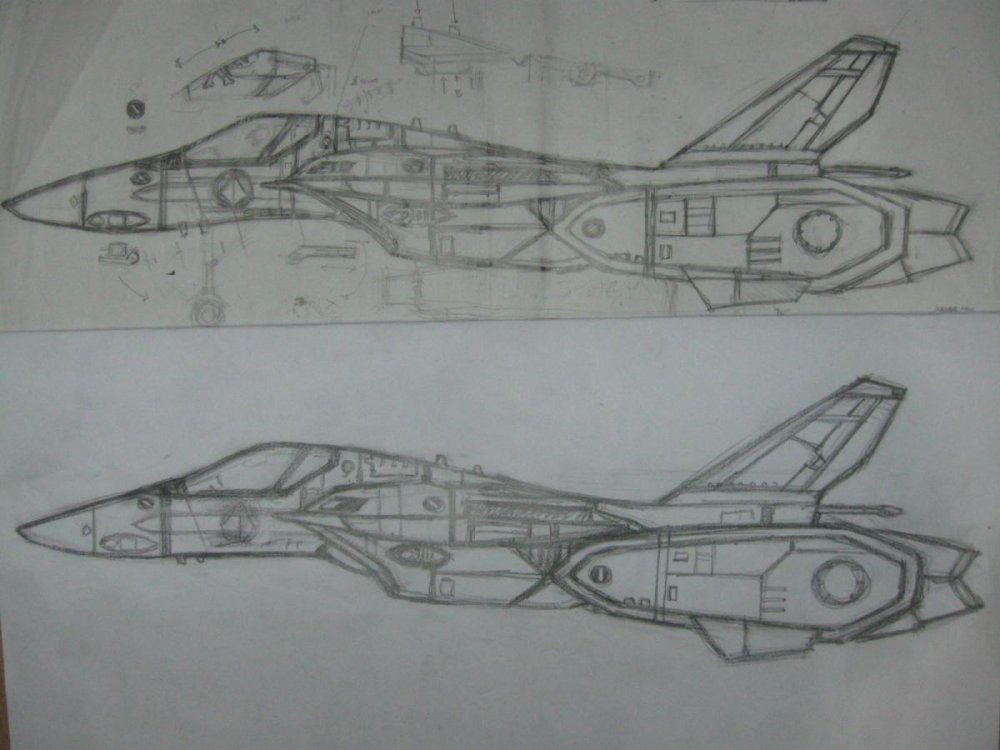
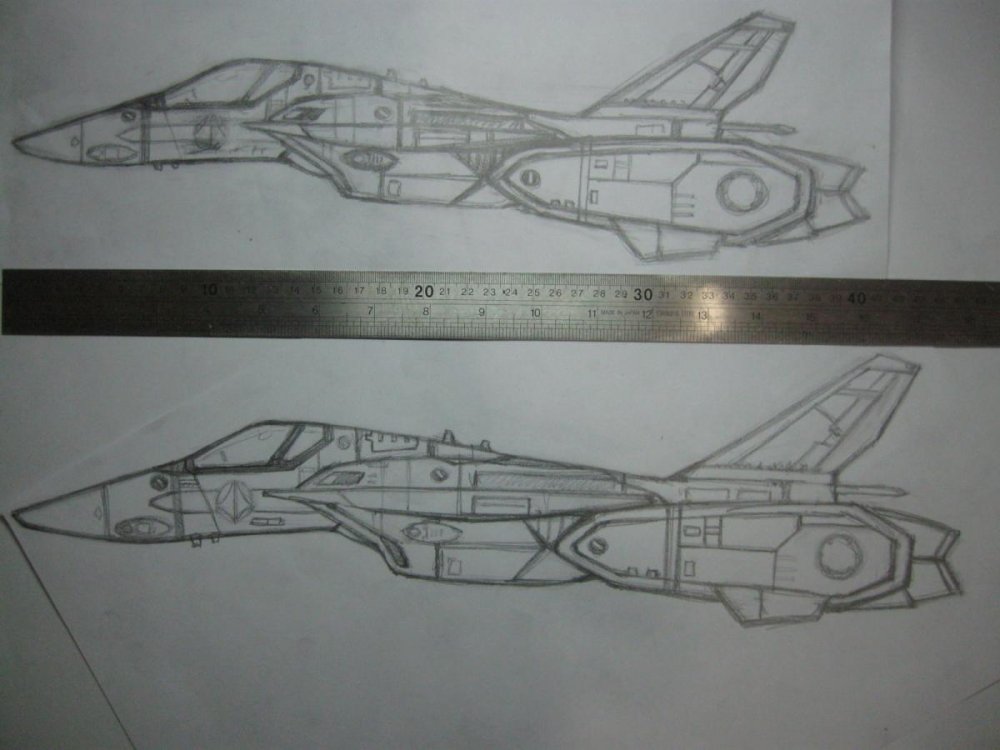
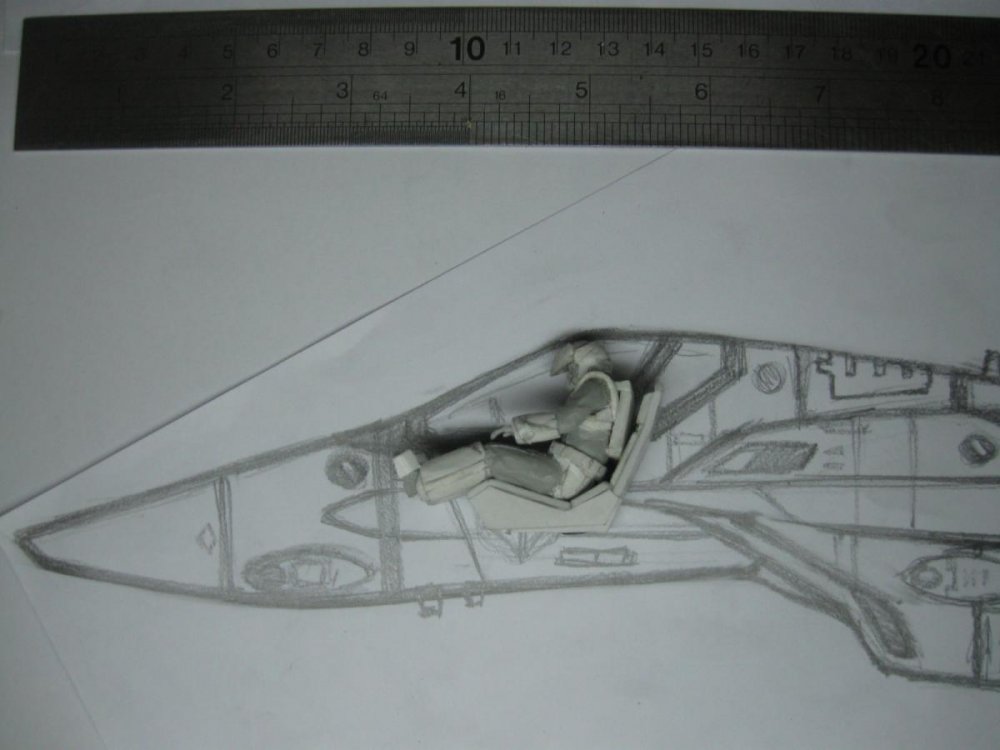
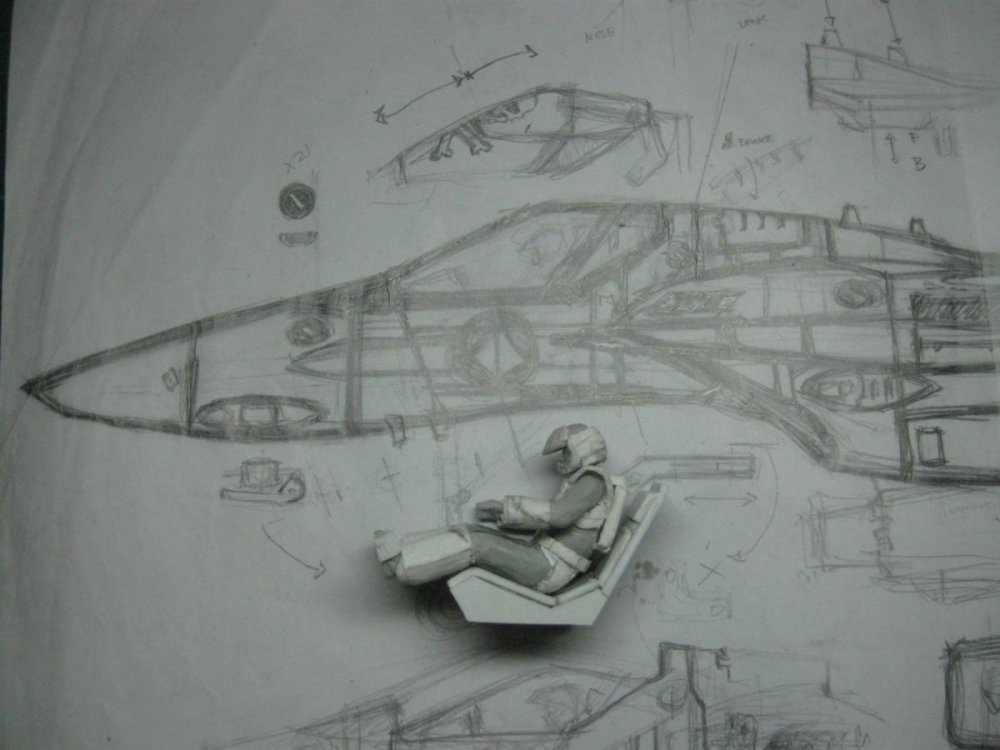
So yeah... VF-1x in 1/35! I'm building it based on an average between the DYRL? line art, Master File line art, & Hasegawa kits. Let's see where it goes. So far, we have the pilot & seat. 1/35 scale reference drawings. Had to adjust a few times, but I've decided to stick to official dimensions. The pilot will have to get used to the tight space.


-
We could, but it doesn't solve the space problem. I'd like to avoid sanding away the pilot's bottom half, if possible. The math checks out - a 6'2 pilot + flight suit at 1/35, scales down to 5.5cm tall. (It's like the VF-1 was built around short pilots! ) If the VF-1 is scaled to the pilot, it ends up at 1/31.6 - 1/32 scale. Here's the re-scaled drawing, it solves the cockpit space problem, but it's now a whole 2 inches longer. (1/32 scale) I'd prefer to have the fighter in 1/35 though. (less work!)
-
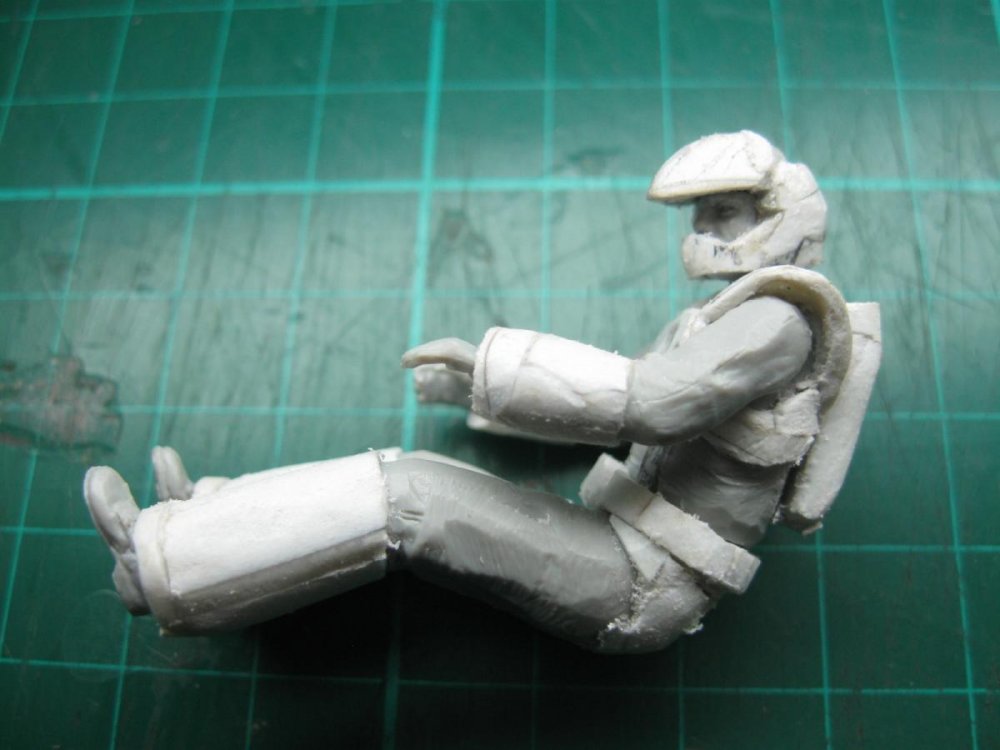
The pilot was originally from a 1/35 US infantry kit, so it would be a 6.2ft - 6.4ft guy, I figure. So that's the dilemma - scale the VF-1 around the pilot, or stick to the official dimensions. Thanks! Cool. I meant combining the seat & gear bay in a model/toy sense, it was the only way the parts would ft in such a confined space. I wanted to build it with completely separate components - I was on the way to making the bottom half of the seat when I found out it wouldn't actually fit! The seat's based on the line art in Master File, I can only take credit for building it in scale.
-
Cool. There's actually enough room for the landing gear without further adjustments - the seat would just double as the landing gear bay. Definitely "no" to strange proportions!
-
Thanks! The total length of the drawing is correct to scale, but adjusting to the pilot ends up with a cartoonishly large cockpit, just like the 1/18 Matchbox Vf-1. I could adjust everything to correct for size, but it wouldn't match up with the scale dimensions. Serious dilemma! What do you guys think? 1/35 scale based on official dimensions, or 1/35 based on the pilot figure?
-
Yes. Yes, indeed, it does.
-
Thanks! Got the math, proportions, & magic line art to play nice (for now). Now there's a little more room for everybody.


-
I got the pilot to a serviceable state, and figured I could move on to greater madness. I'm building it around an average between the DYRL? & Master File line art, plus a bit of Hasegawa. I think I need to redo the math on this one... At 1/35 (40cm) fighter length, that's a tiny cockpit. Looks like Roy would've been really crammed in his VF-1. Line art magic, indeed!

-
Thanks! I use PVC/Sintra board. It's rigid enough for structural & mechanical work, but also soft enough that you can scribe panel lines with a toothpick.
-
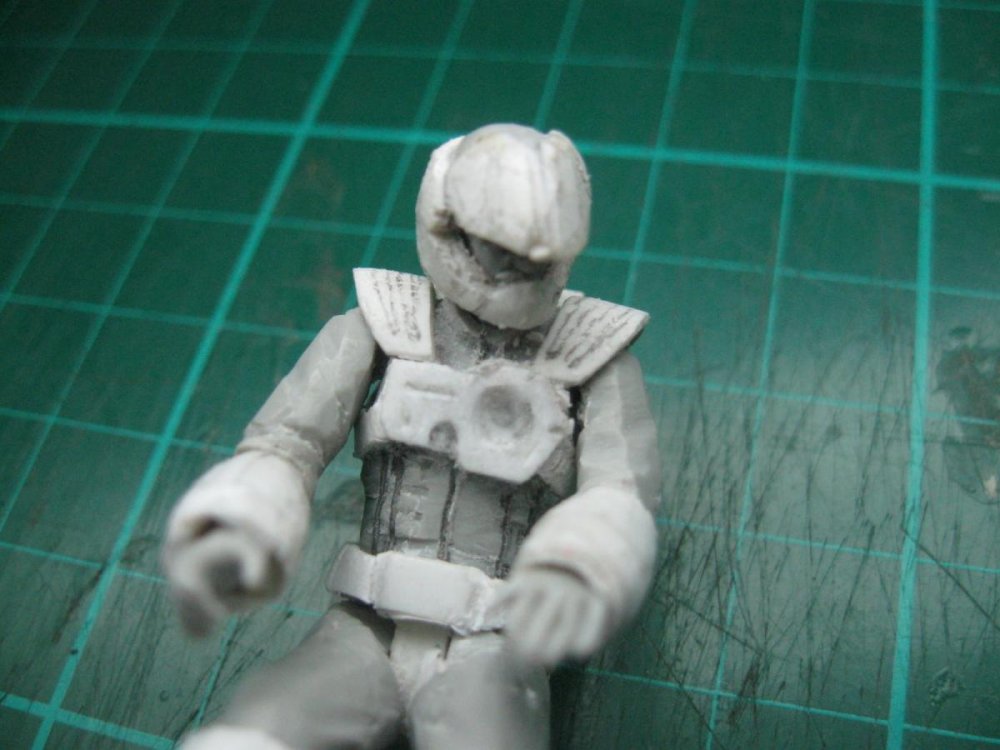
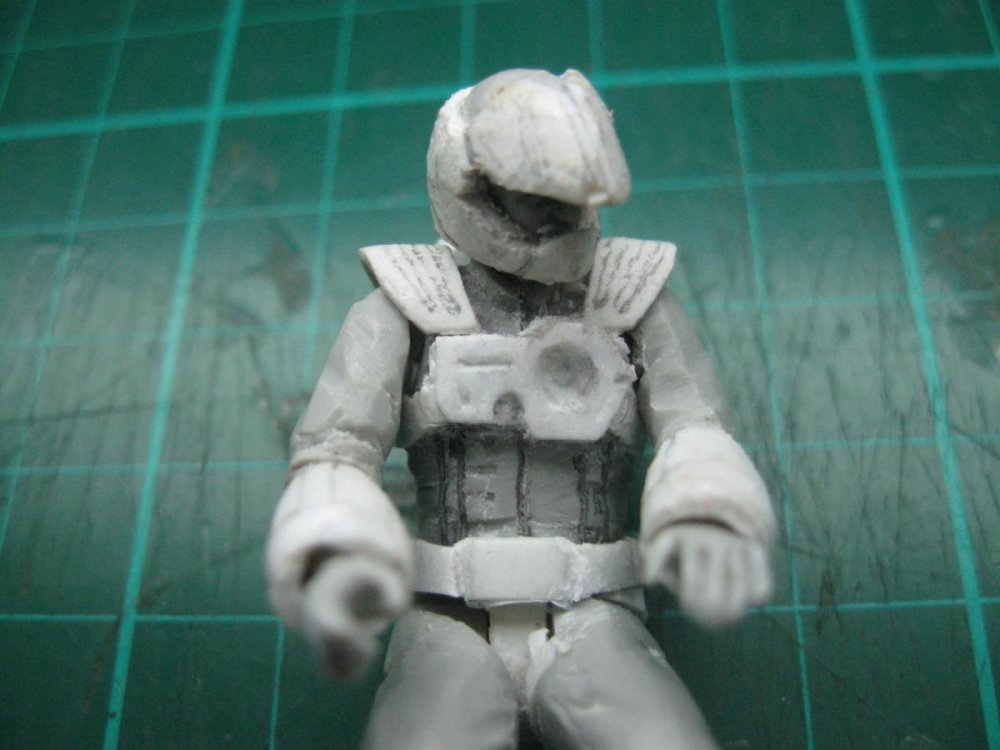
A little progress this week. Got to detail the chest section. The original kit is barely recognizable now. . I'm still trying to figure out if I should keep it in a fixed pose or attempt some basic articulation... "Forever Project" or "Articulated Infinity Project"

-
I wish I was that good! Would you believe... 1:35? I re-purposed a random modern infantry kit.