MechTech
-
Posts
4650 -
Joined
-
Last visited
Content Type
Profiles
Forums
Events
Gallery
Everything posted by MechTech
-
Thanks Xigfrid and Thom. In case you didn't see it, I gave a description of how to do it on the previous thread page. I like it because it is so EASY and not a lot of painting is involved. - MT
-
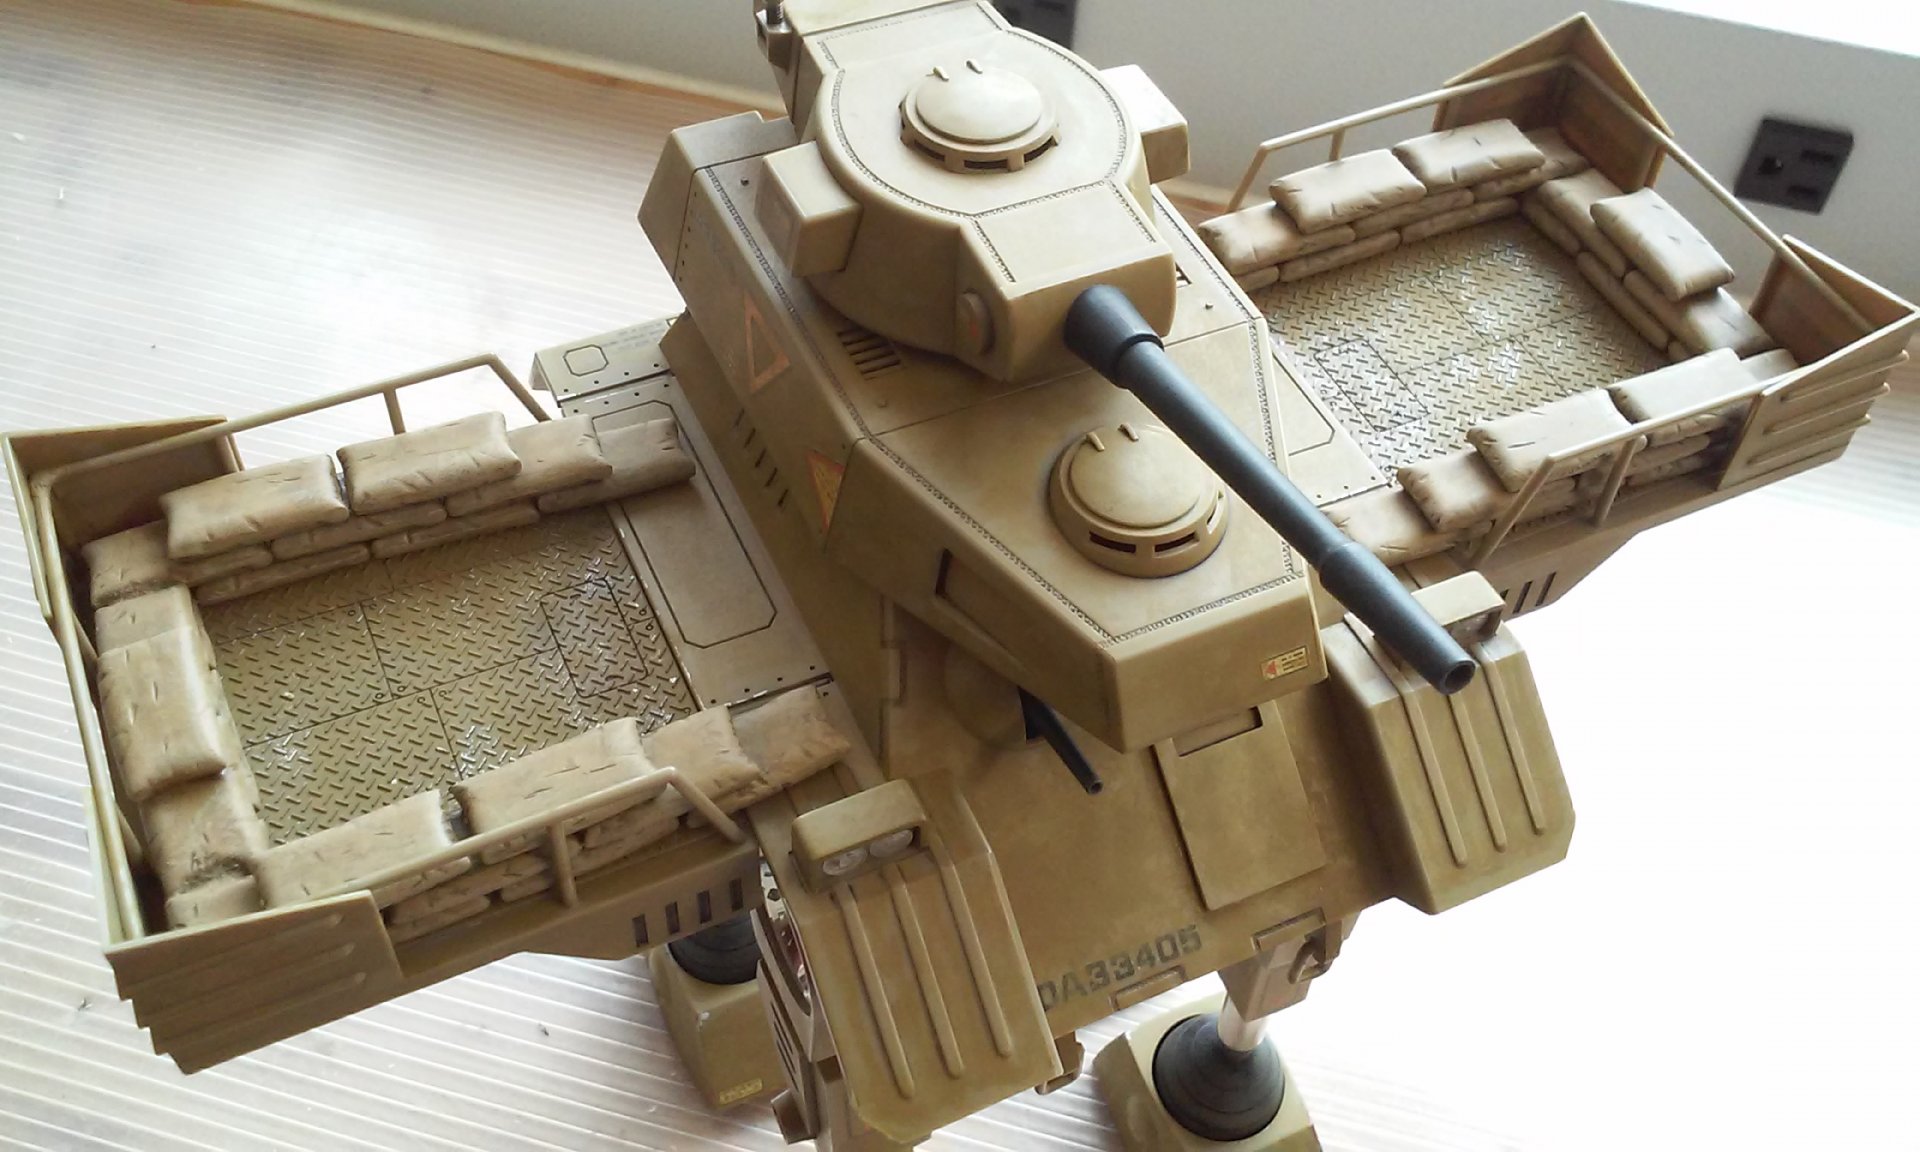
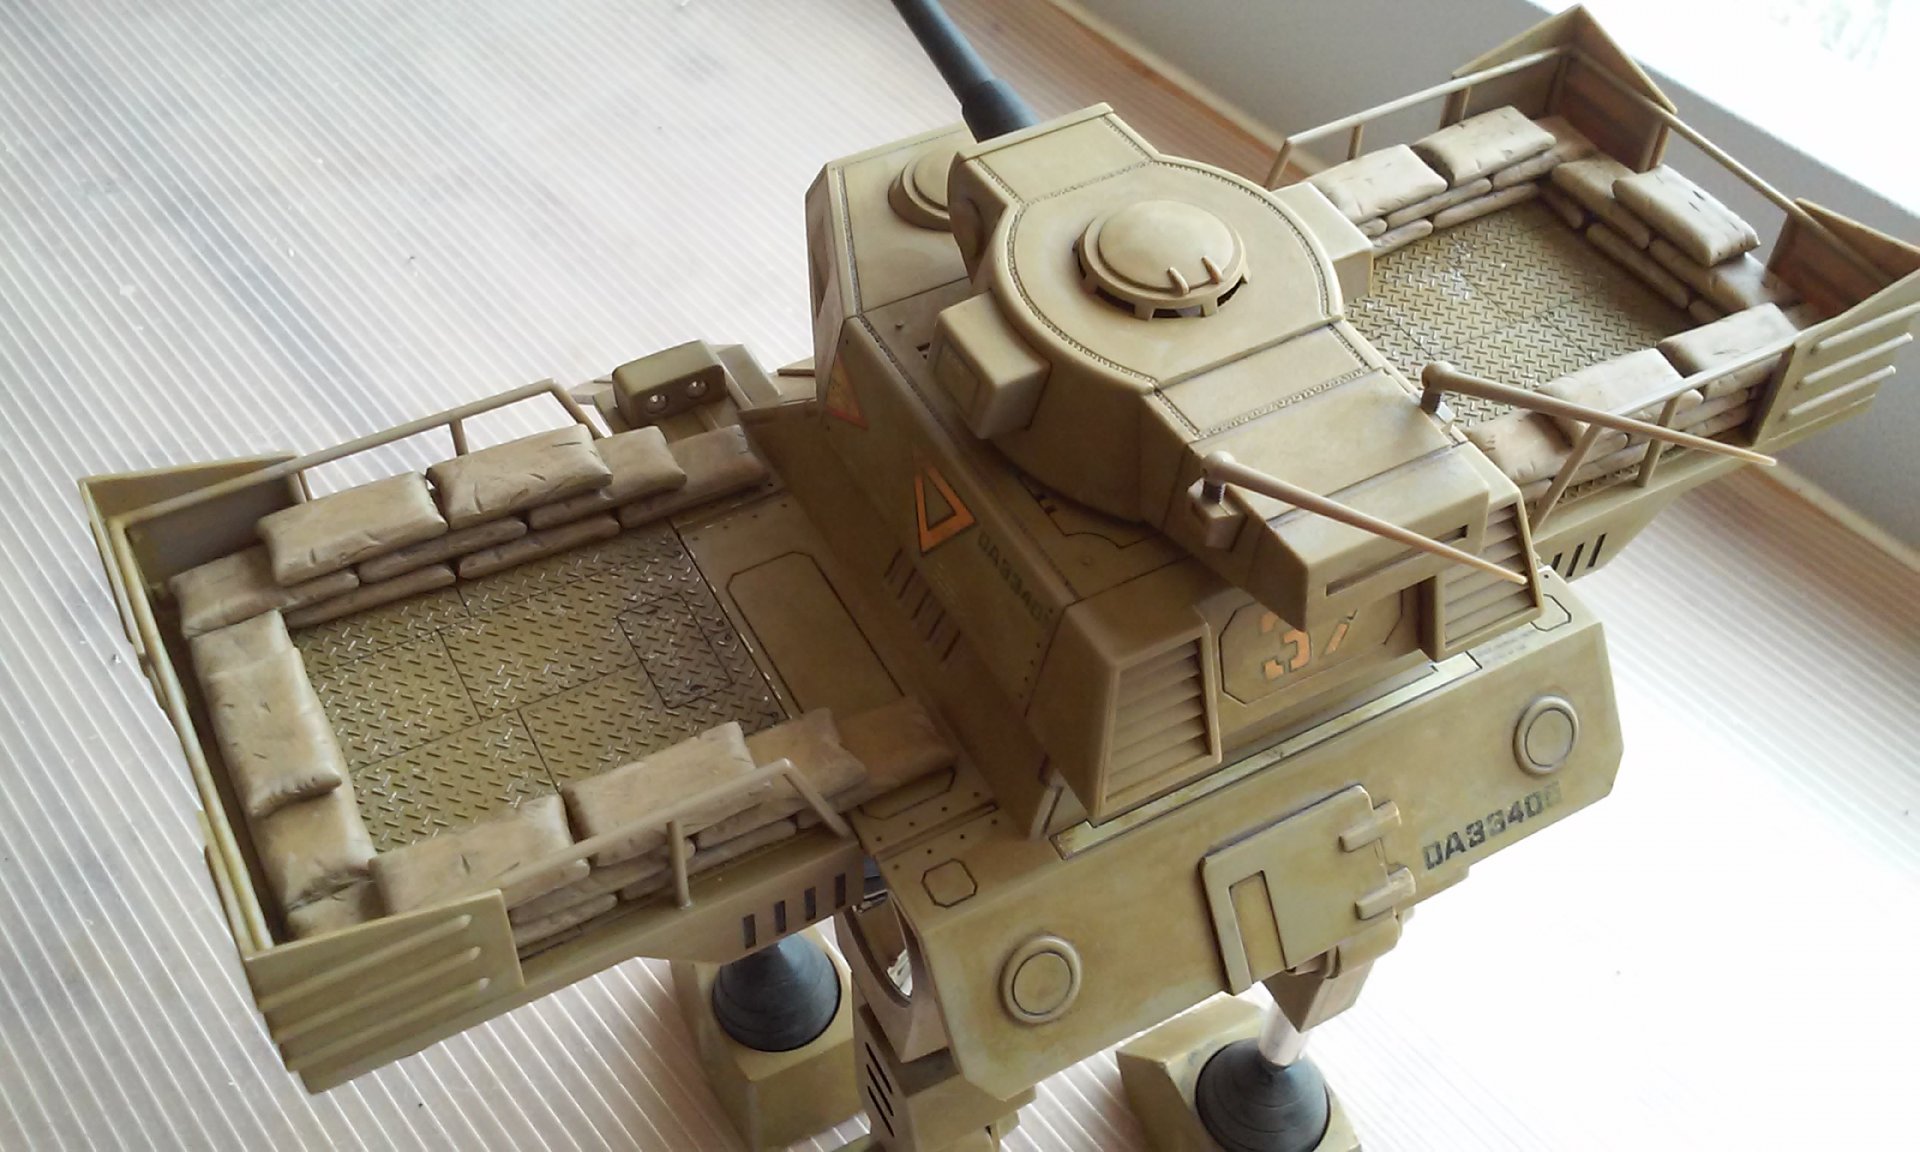
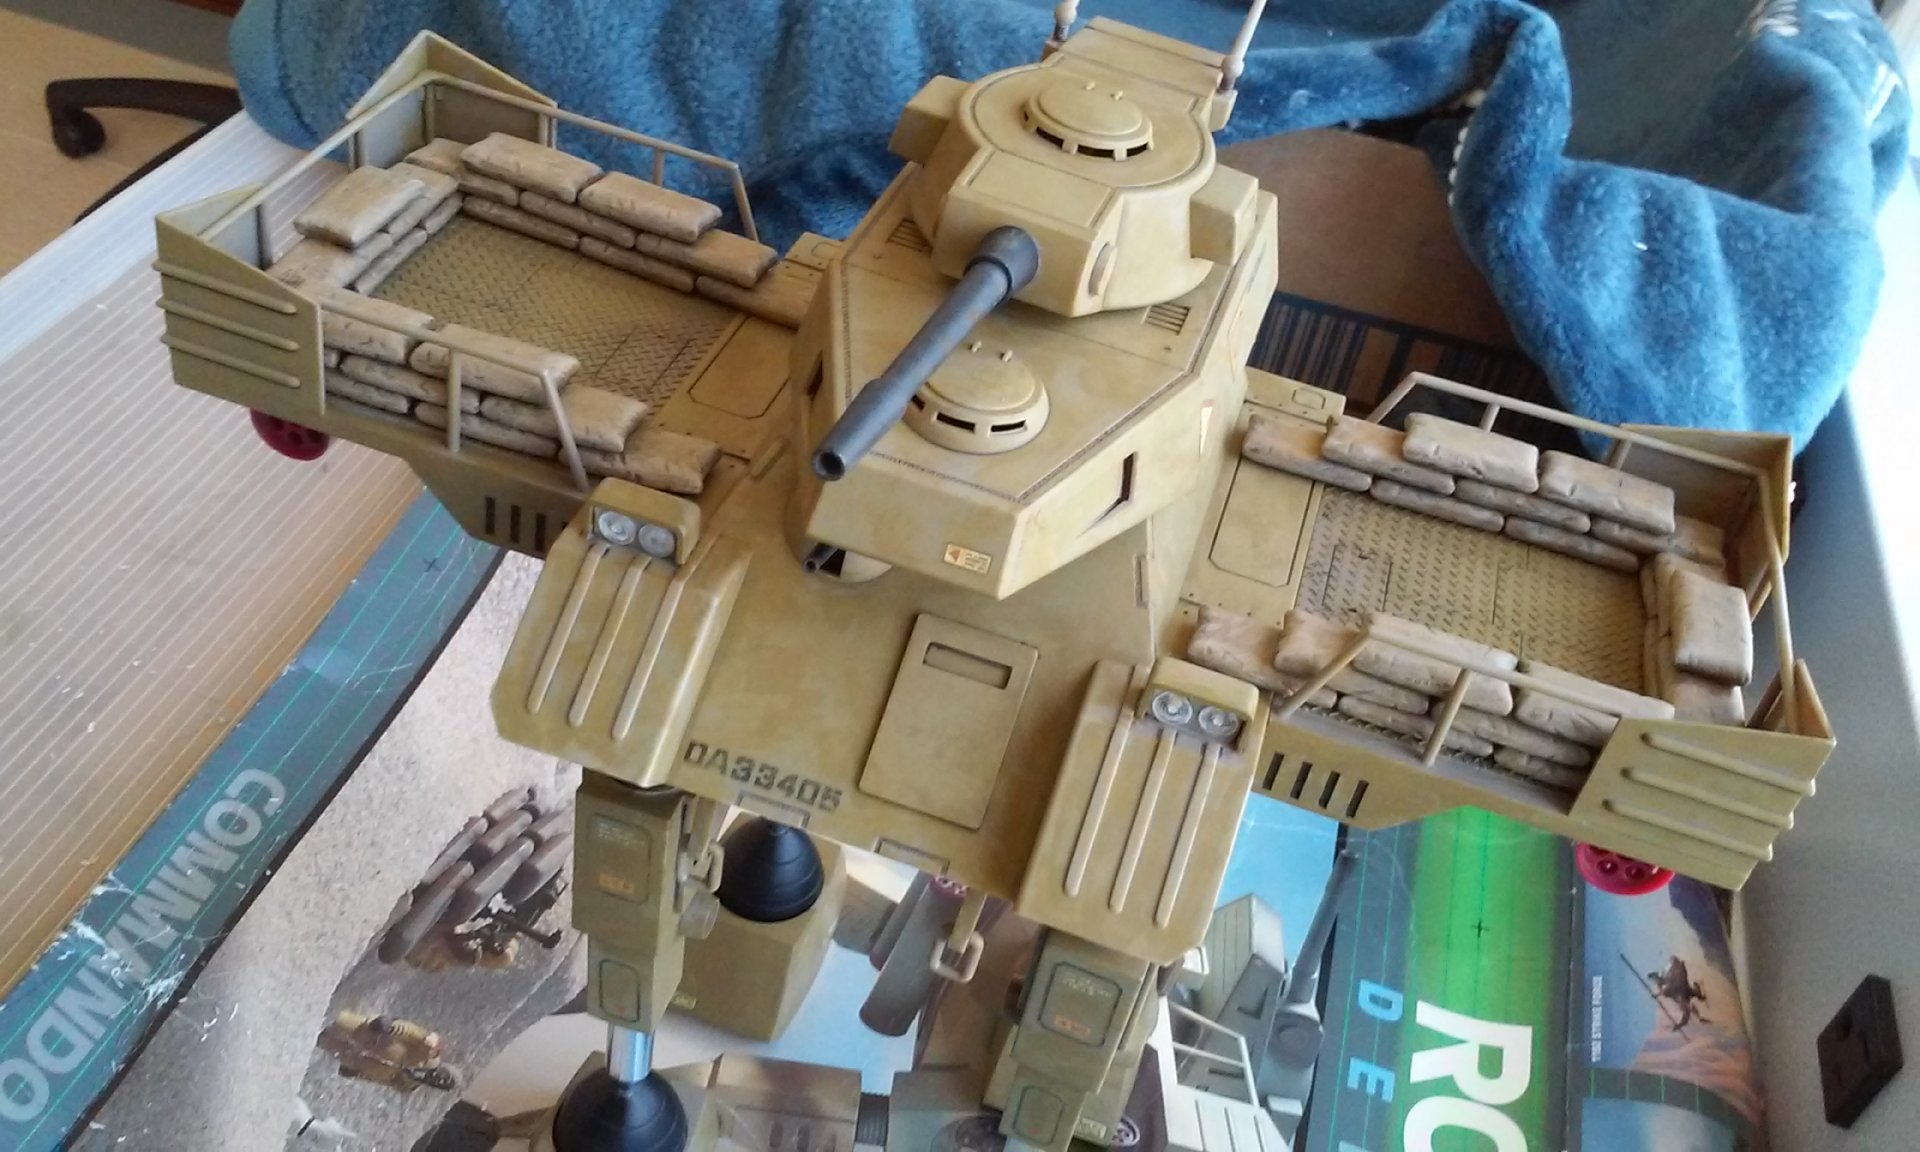
Looking good Thom! Your -31's are coming along nicely 505! Being nearly fininshed with the Dougram Tequilla Gunner, I used some Tamiya Matt Base and decided to cover some decaled areas with it. BIG mistake! It turned white and I had to clean it all off. Not sure what happened since it was the first time I used it. After cleaning it up and finishing the weathering, I am calling the build done. I just have to paint the crew now! - MT

-
007 - I like the Valhalla. I almost did that in 1/200 scale because of its size and cool design. That's looking great Electric Indigo! I always wondered what's the deal with all those thrusters on that design. I had the first version model back in the day... UN Marine, what method are you going to use to clean up the bias on the printed parts? It's a big job, but I think your mod is coming along nicely! Alright, be prepared to write down my secret paint formula. 1. Get a model in the right color already. 2. Build carefully without leaving any physical seems. Polish up the seems so they are as smooth as the surrounding plastic. 3. Clean and decal up your model. Use softener to make your decals hug the model. 3. Buy or mix (I mixed) a color that is matt and slightly darker than the plastic. 4. Splotch the paint on with a sponge or old sock. I'm high-tech - I used an old sock. Splotch heavily over the joints to cover them. 5. Wet the sock with isopropyl and splotch it out some more to spread around. Cover the decals a little with the thinned splotched paint. 6. Wipe the edges and wear areas off of any paint to simulate wear. Seal with a matt coating if you need to protect it. 7. Enjoy all the time and money you saved NOT priming and painting your model! Still deciding if I want to matt clear coat this. It takes away depth from the "dirt." - MT
-
This is looking awesome! The next version of the LED programming is great! - MT
-
I'm just seeing this thread for some reason, but your model looks great! Sunlight makes all the difference for photographing too. - MT
-
Those look great, thanks for sharing! - MT
-
Thanks for the news! I guess time will tell... - MT
-
This is cool Christopher! It's out of my scale range, but I will be following your progress. - MT
-

Figuarts/Figma Scaled 3D Printed Sharon Apple Virturoid
MechTech replied to QuinJester's topic in The Workshop!
That looks cool QuinJester! Man, I'm sure glad we're a long way off from something like this for real! - MT -
That looks great CrossAir! It's a nice clean build! Derex, hopefully you have a mask on when machining those parts out. The resin dust is REALLY nasty stuff and I fell for you having to cut that stuff out. It's a drag! I covered the Tequila Gunner with a similar "splotched" color to create a dirty, sandy effect. I think I went overboard though. What do you guys think? Got the sandbags washed and painted. Nearly done... - MT
-
Yeah, you can paint over it no problem. Its not paint, so no matter what you do, the finish won't come of using paint chemicals. I cleaned it with lacquer thinner afterward! That is a cool tool! It takes forever with an Xacto knife scraping it. Some of the other wires just melt away with the heat of the solder like my current light job. That was nice! - MT
-
Its a monster chunk of resin, isn't it? The details go great with that. I agree with RTK. - MT
-
This came out great Xigfrid! Congrats! - MT
-
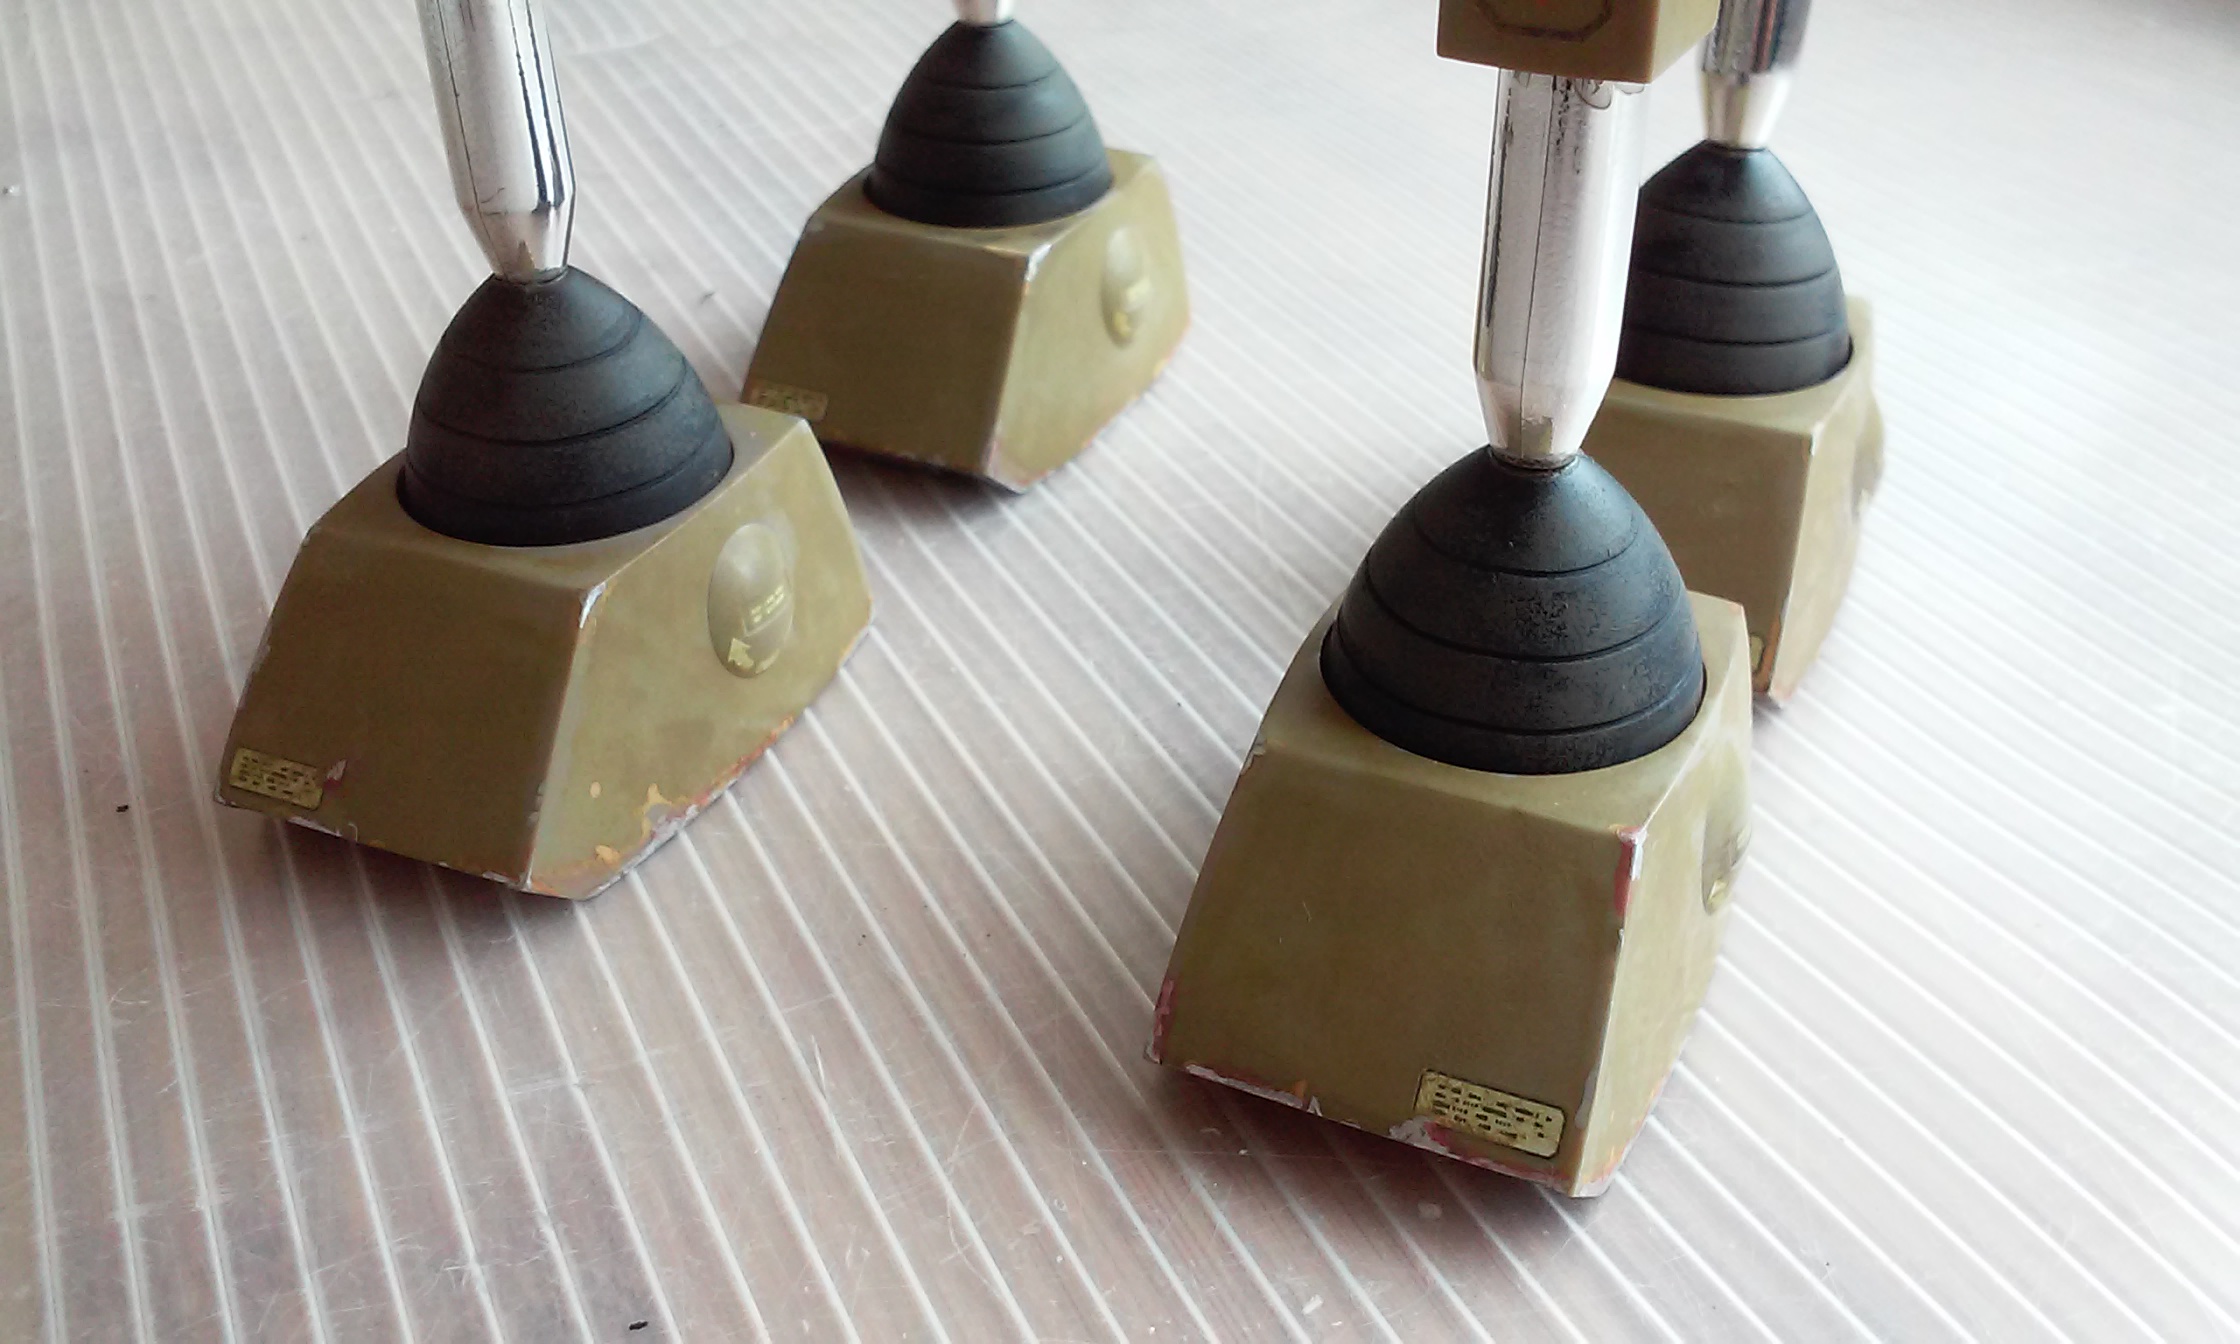
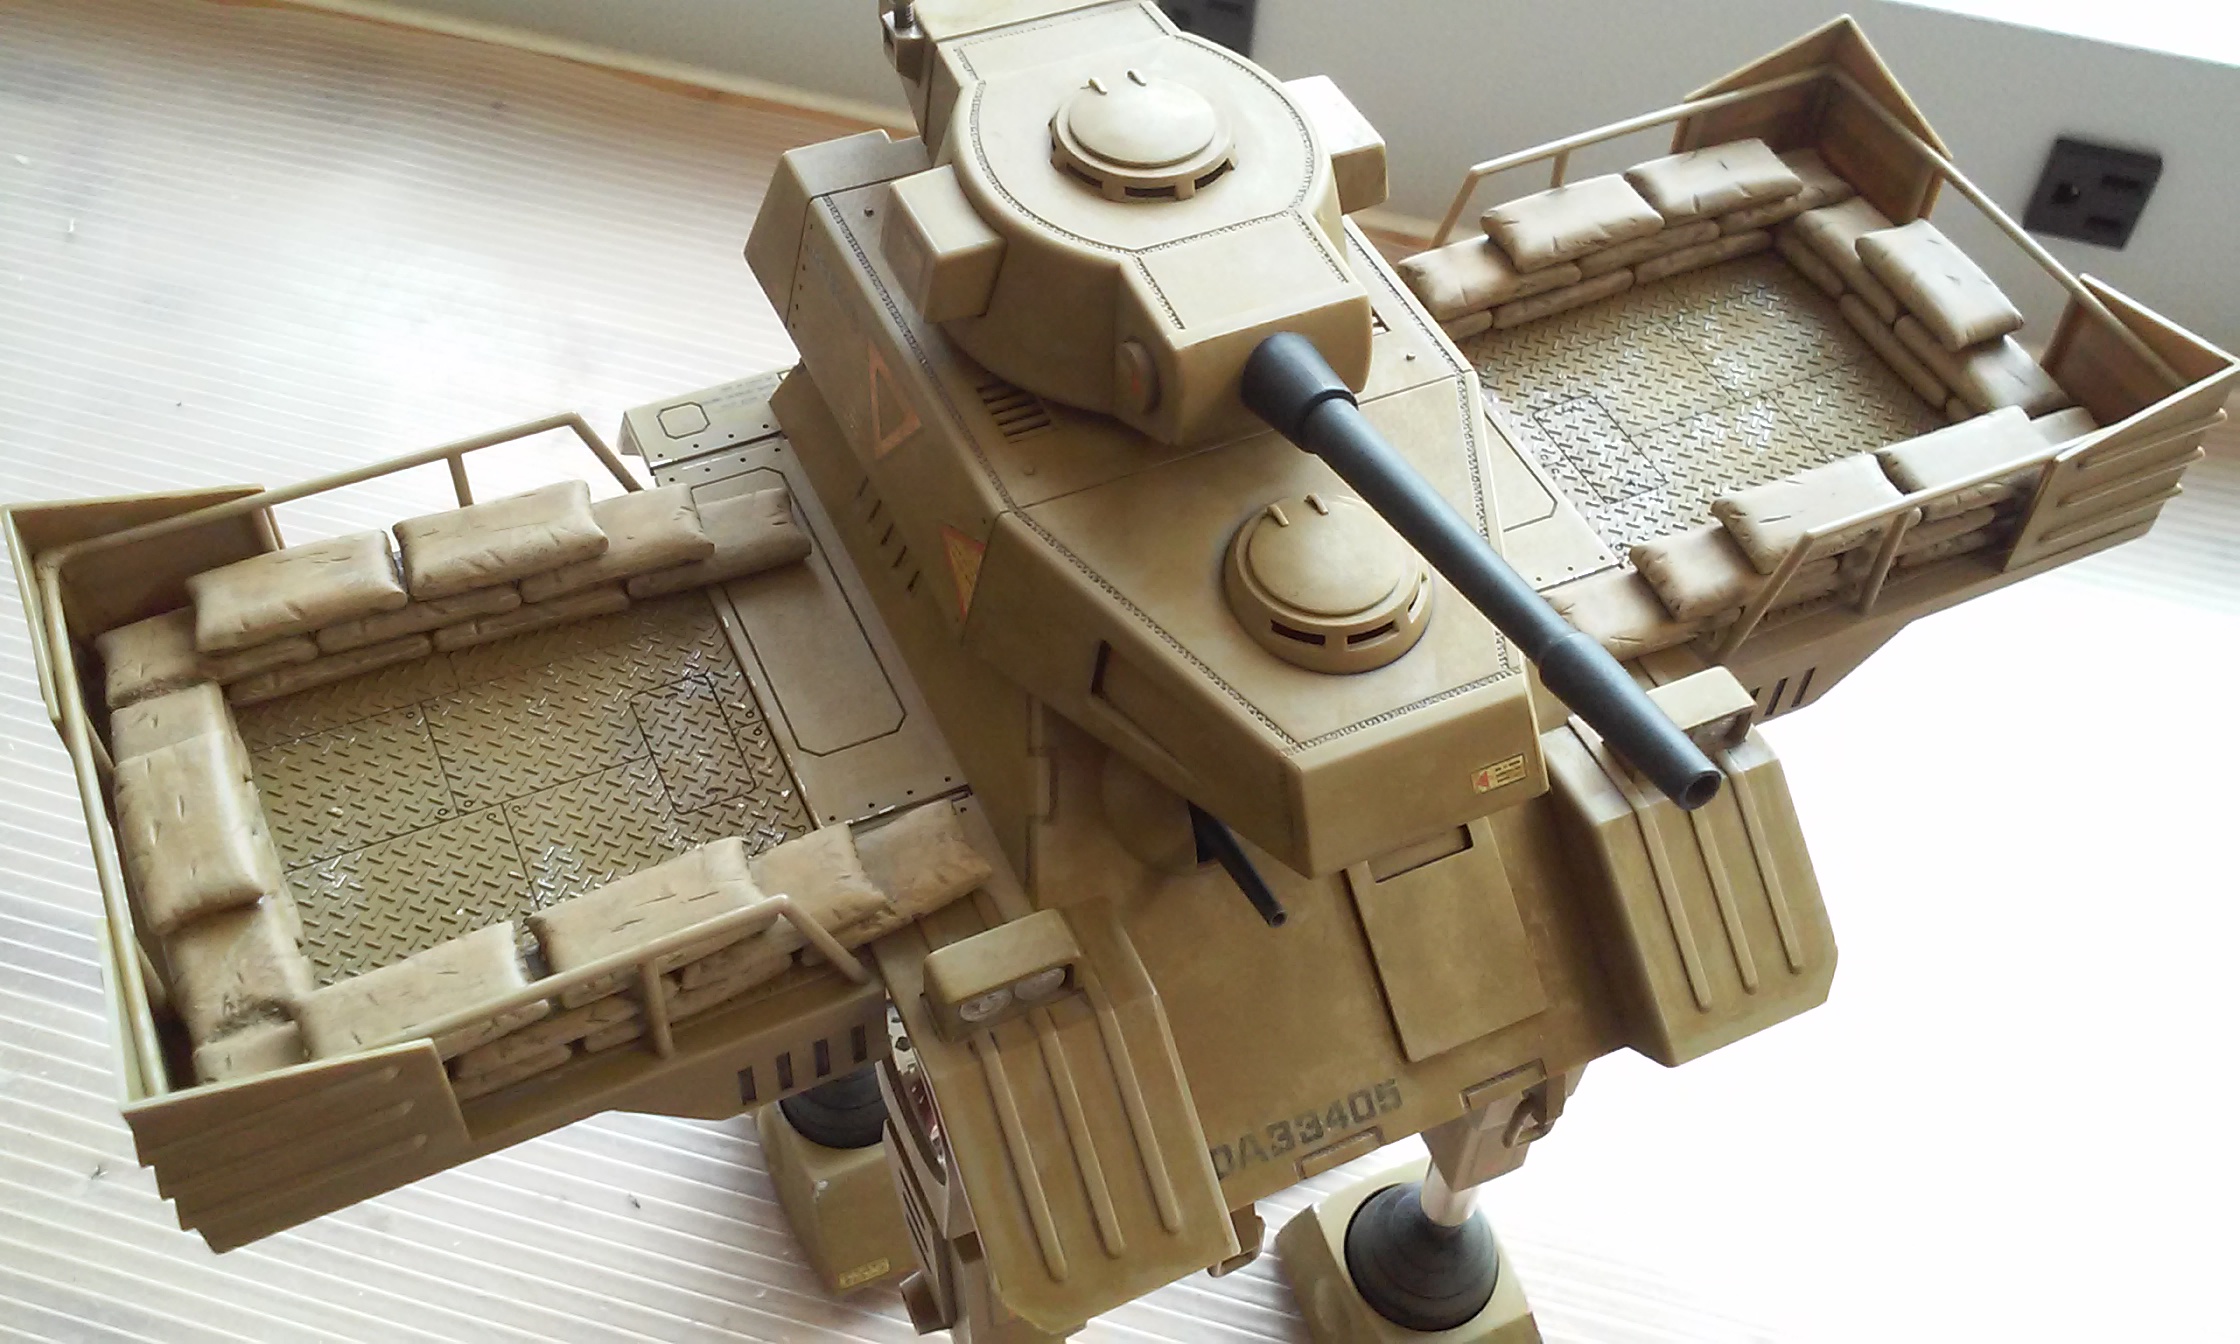
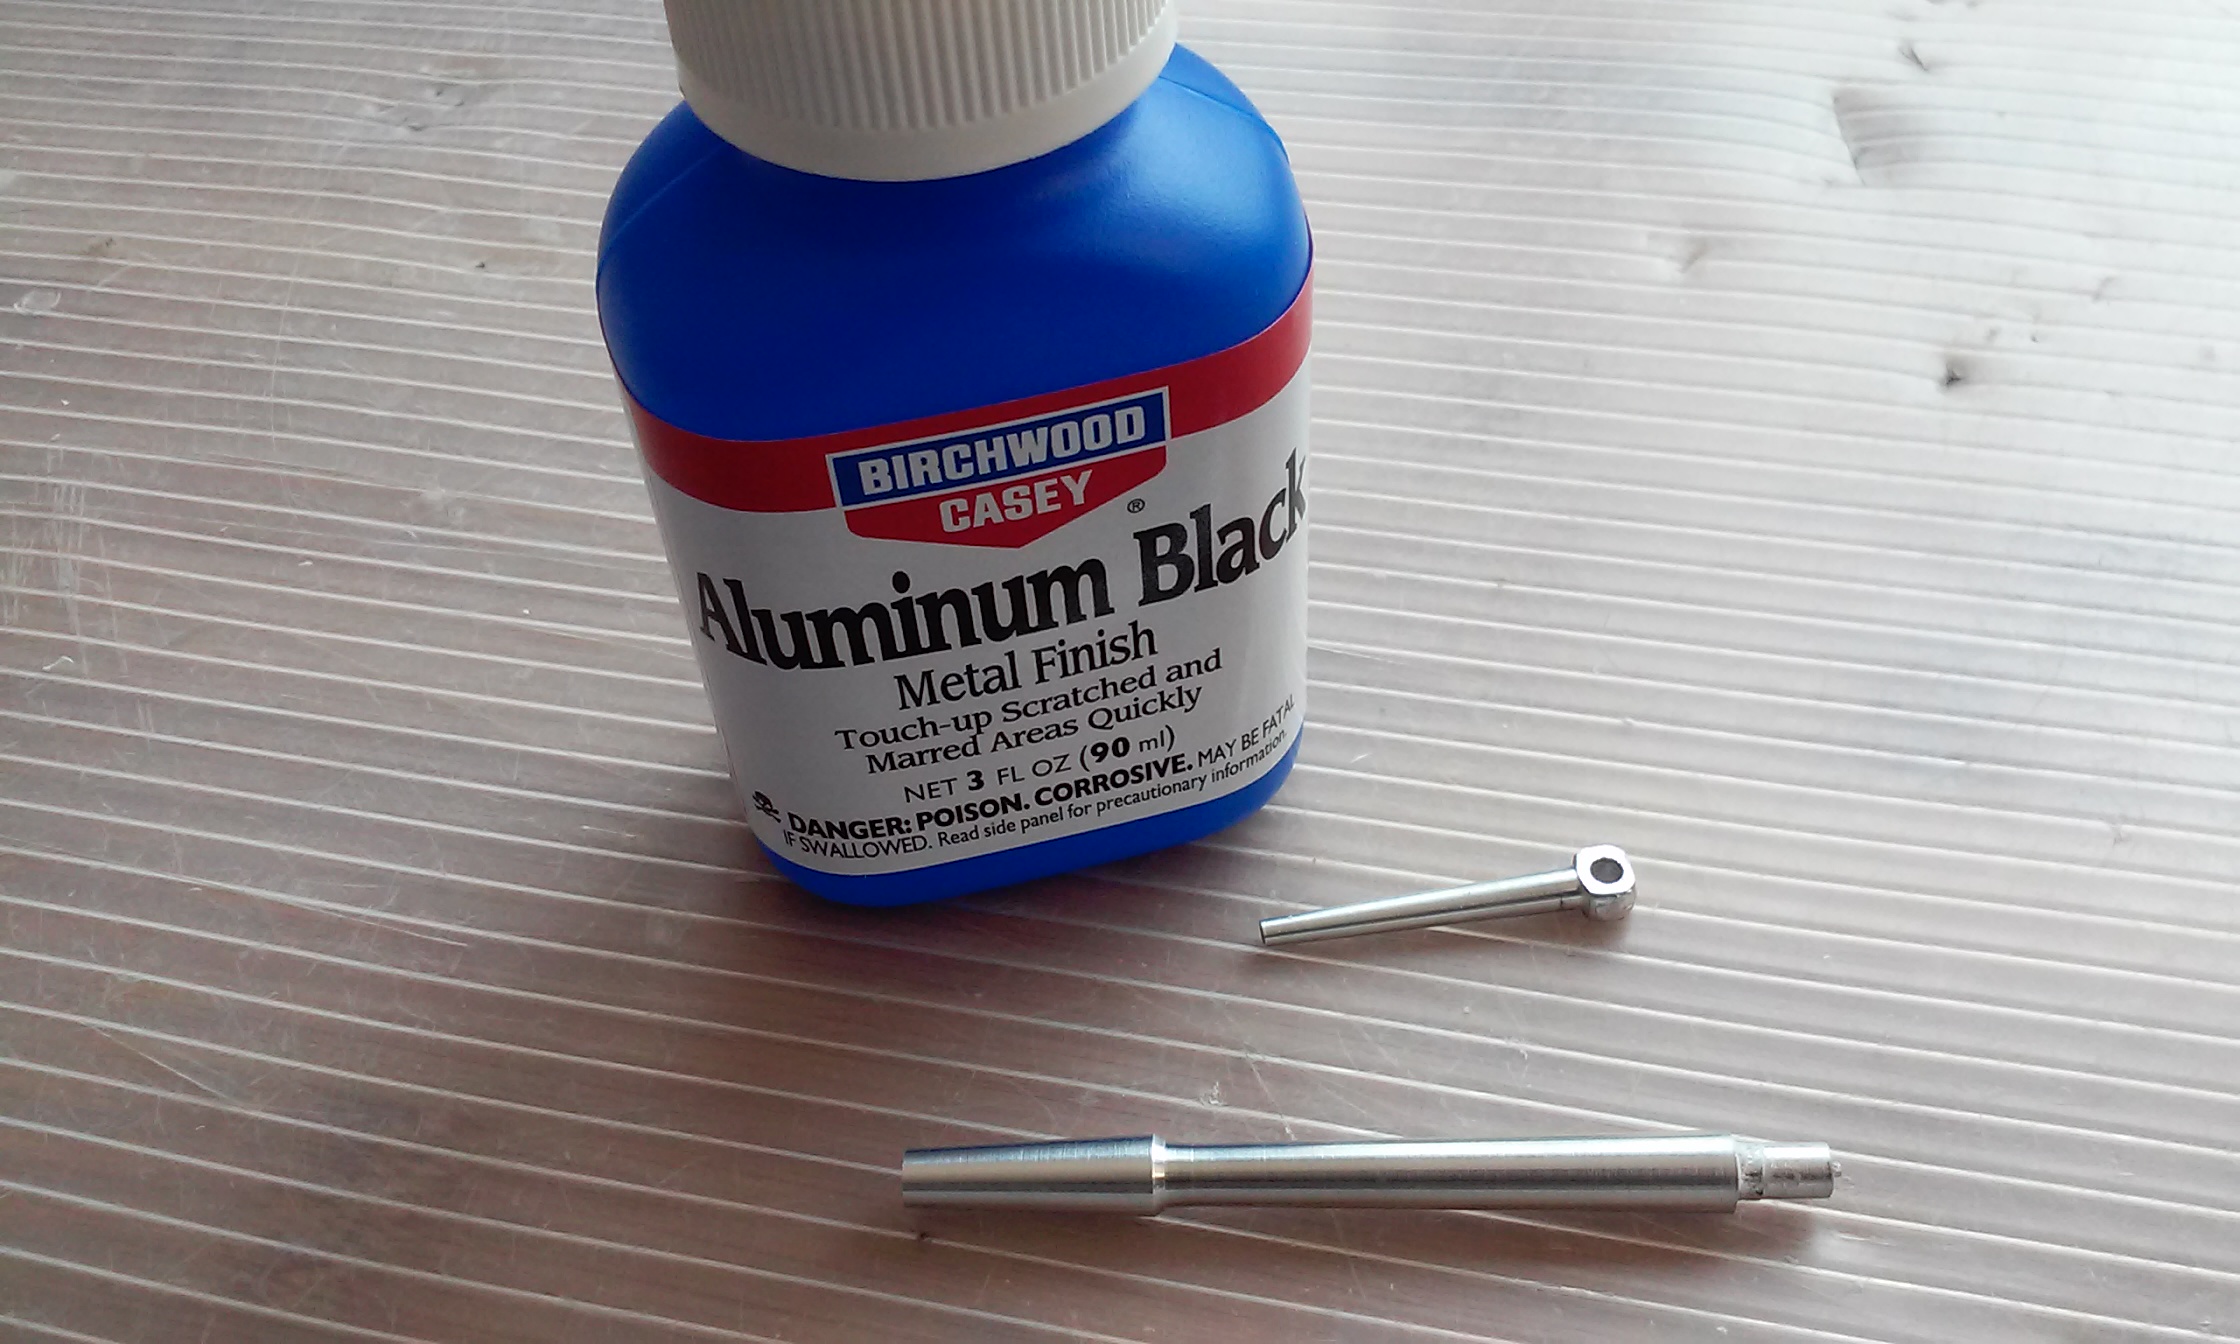
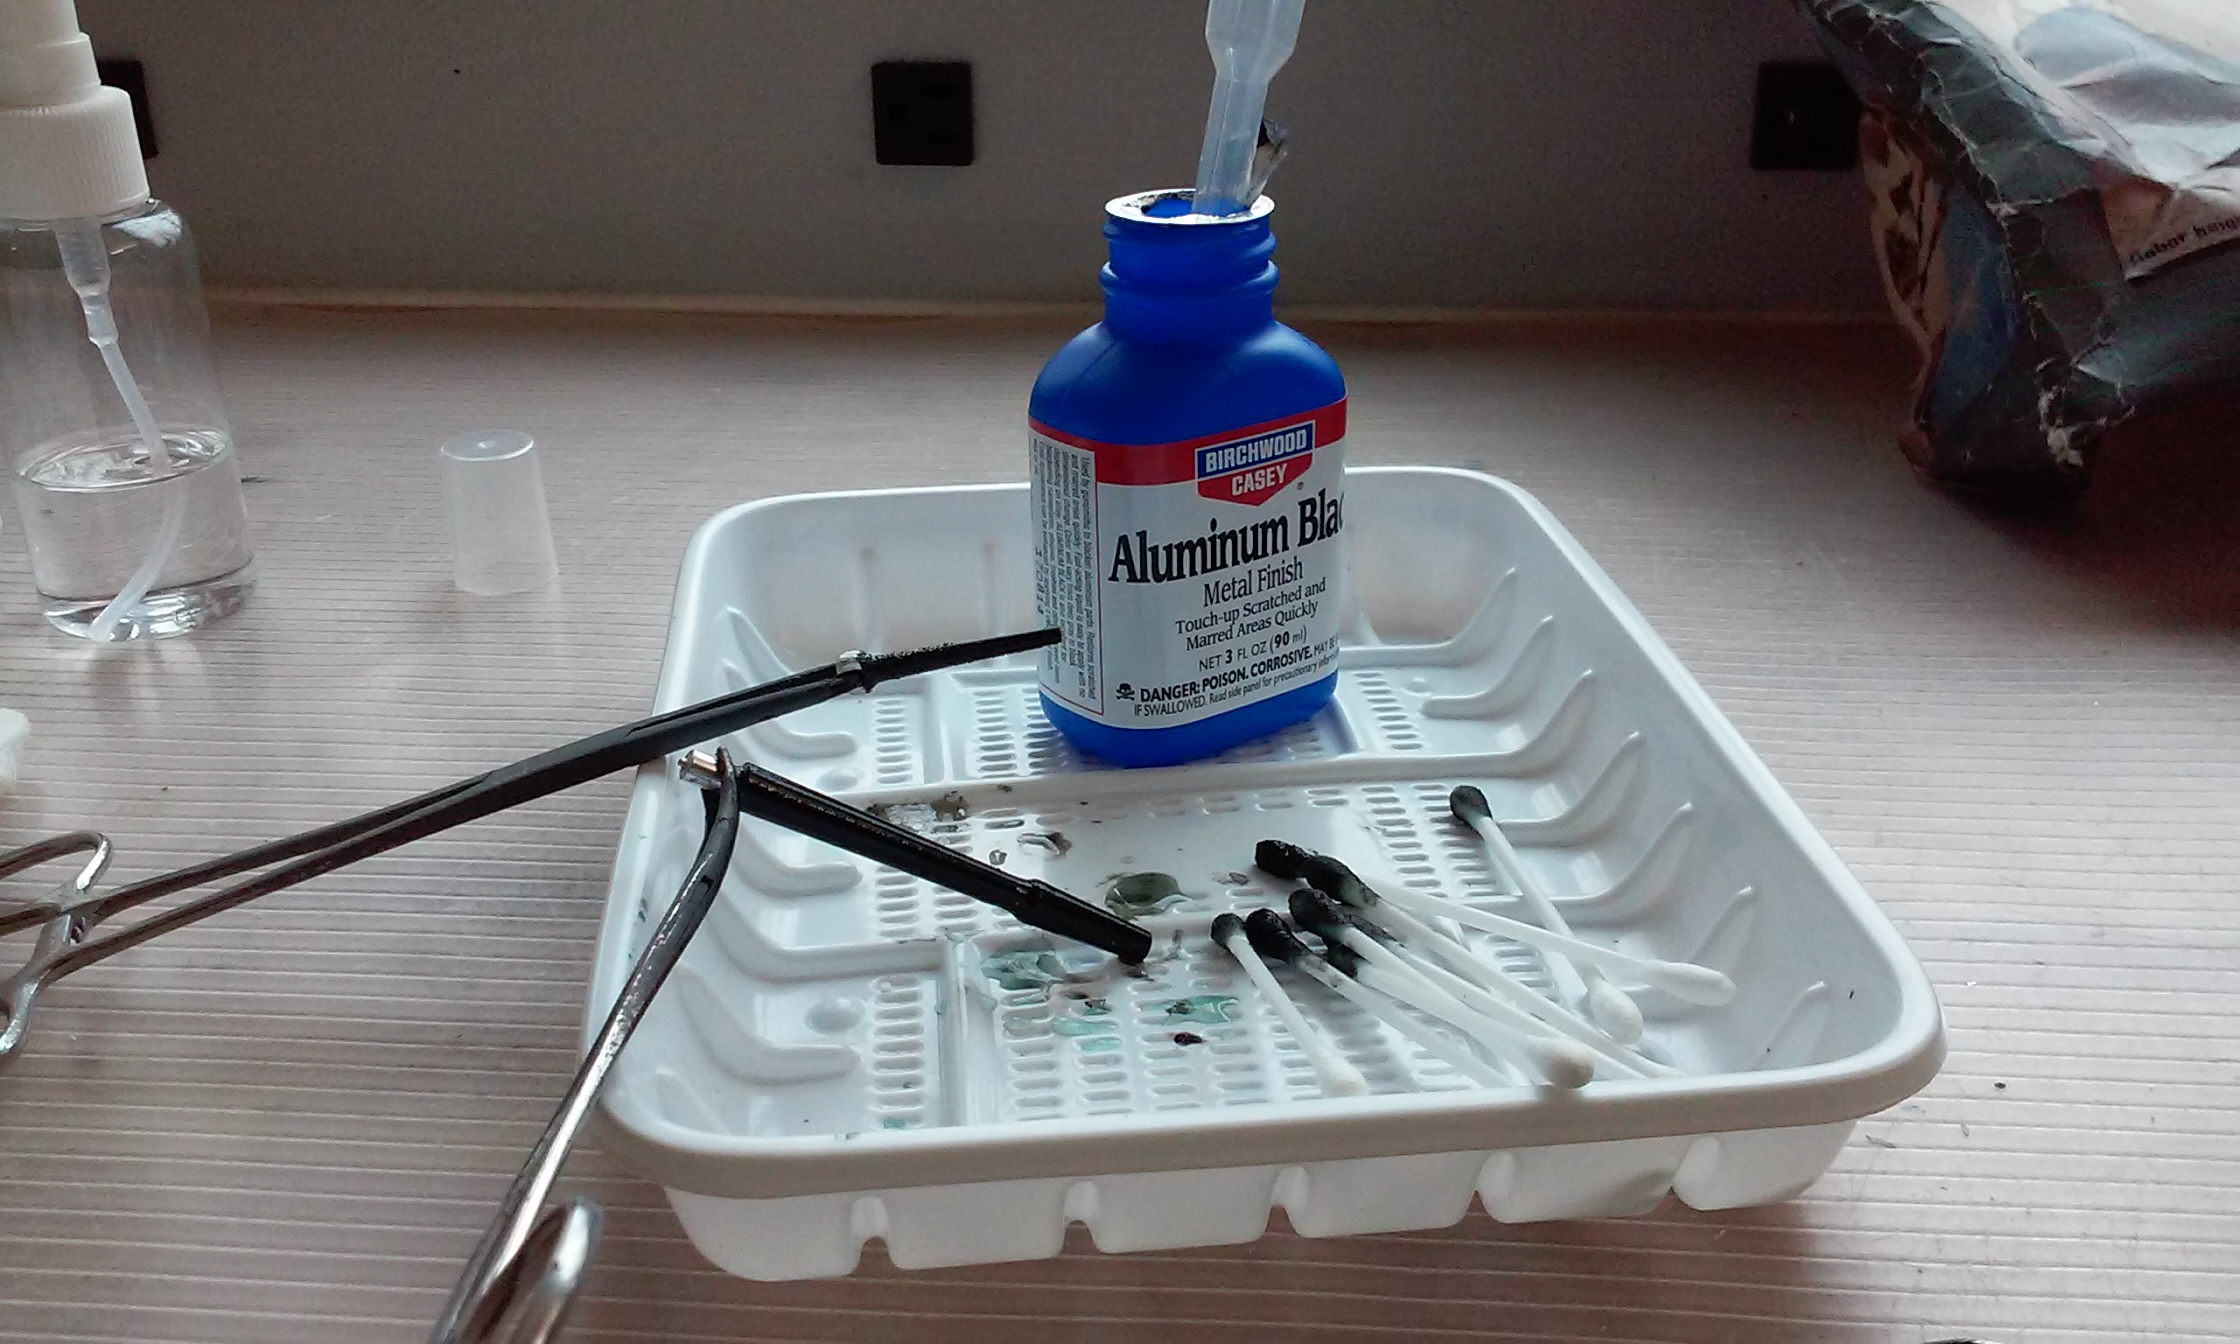
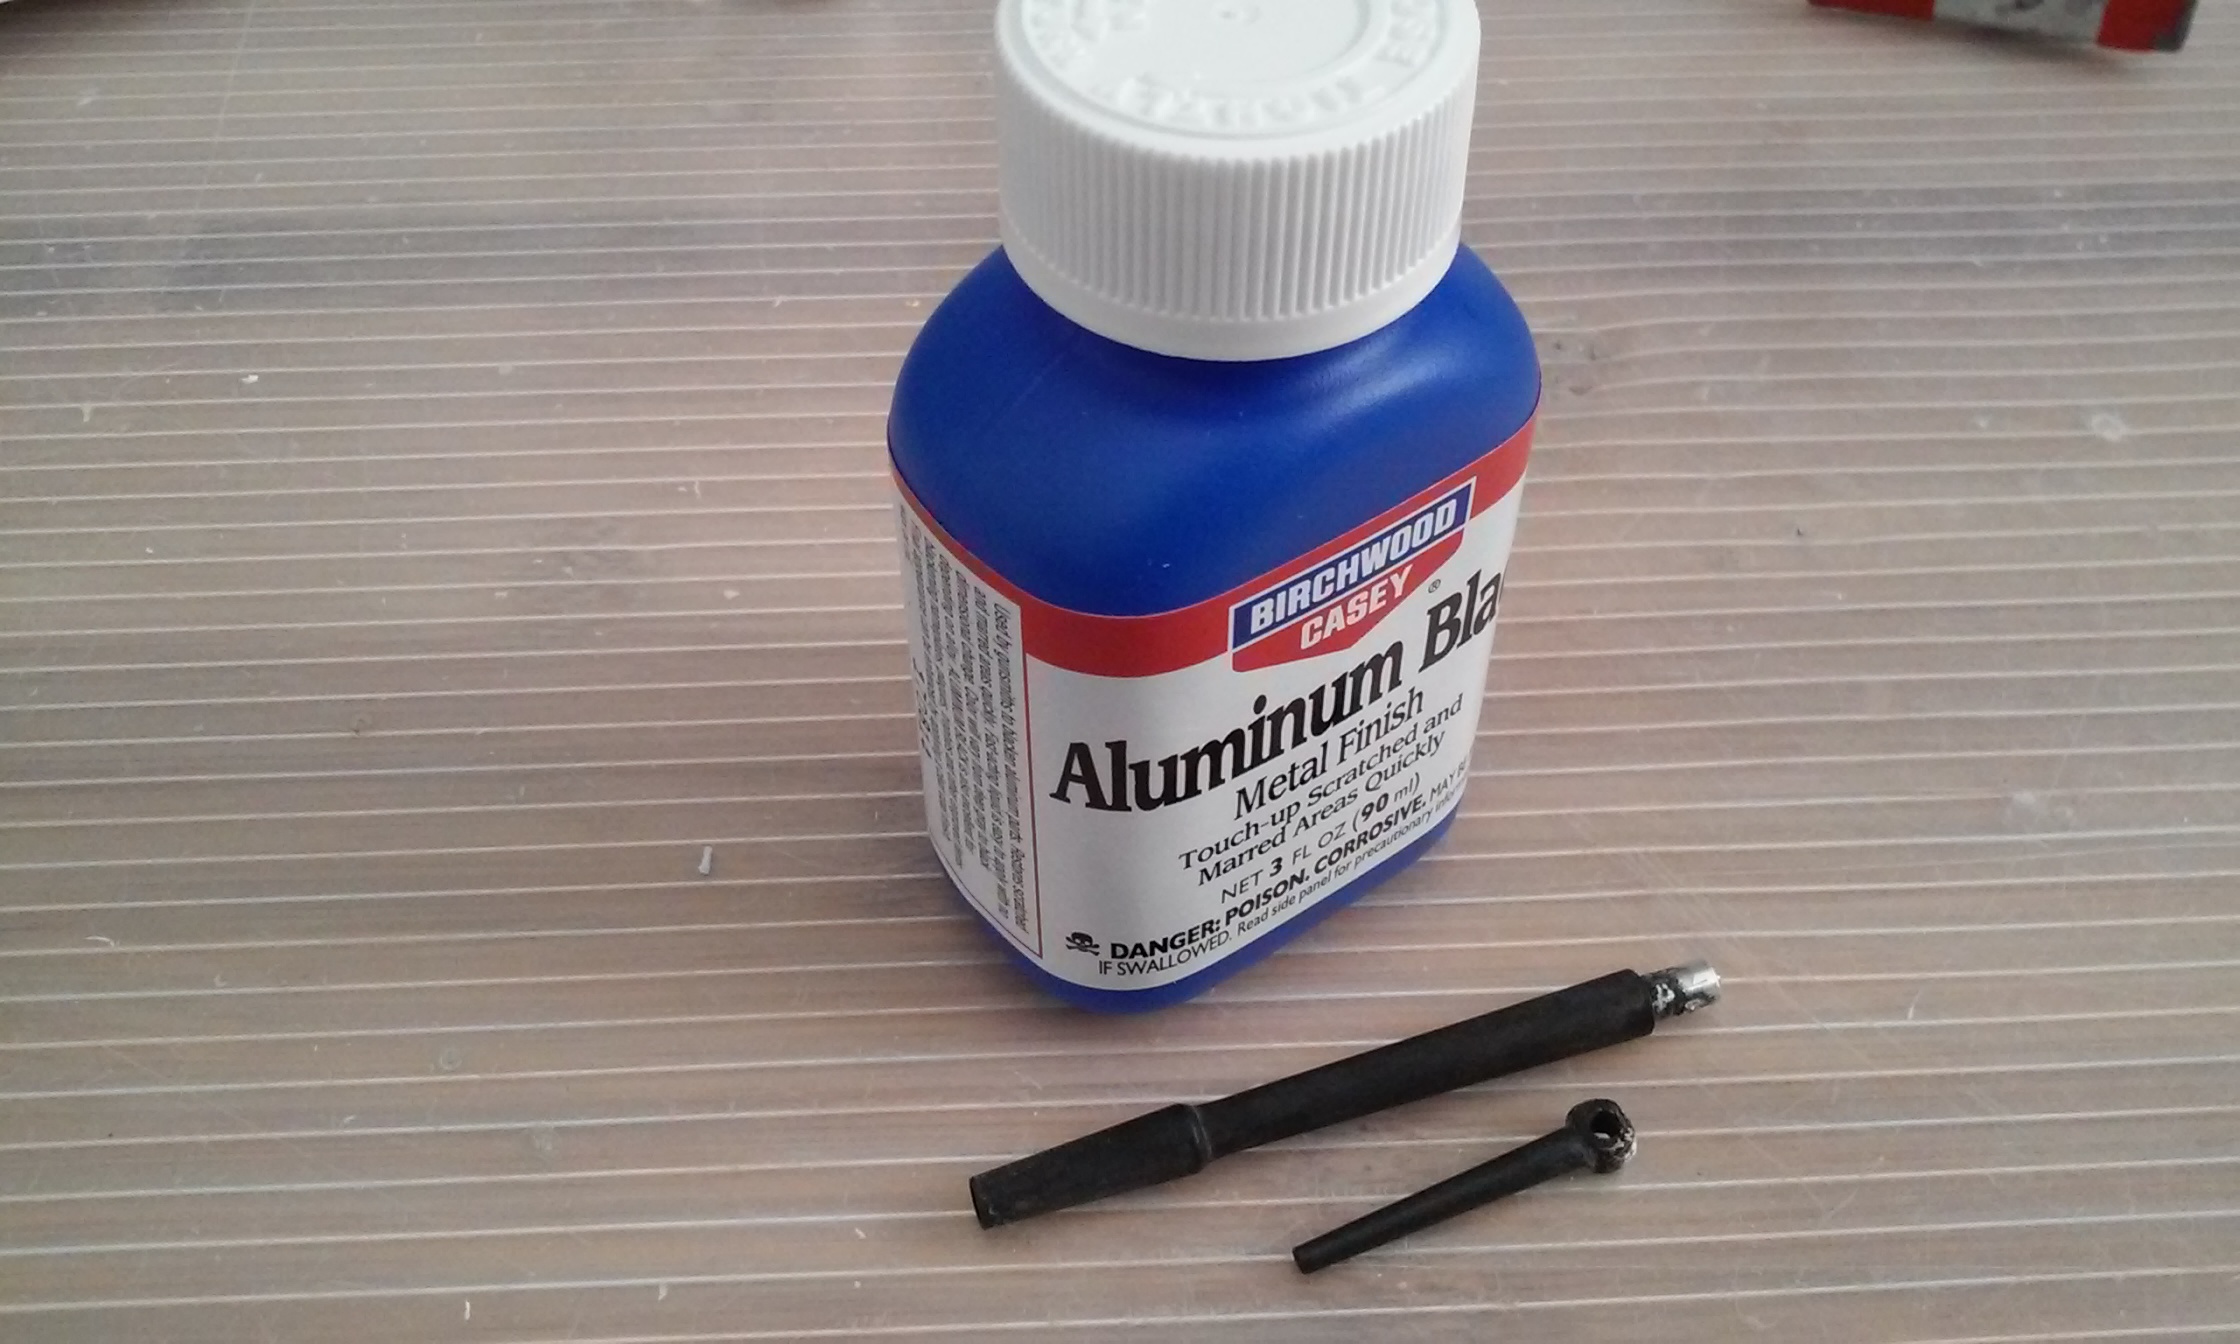
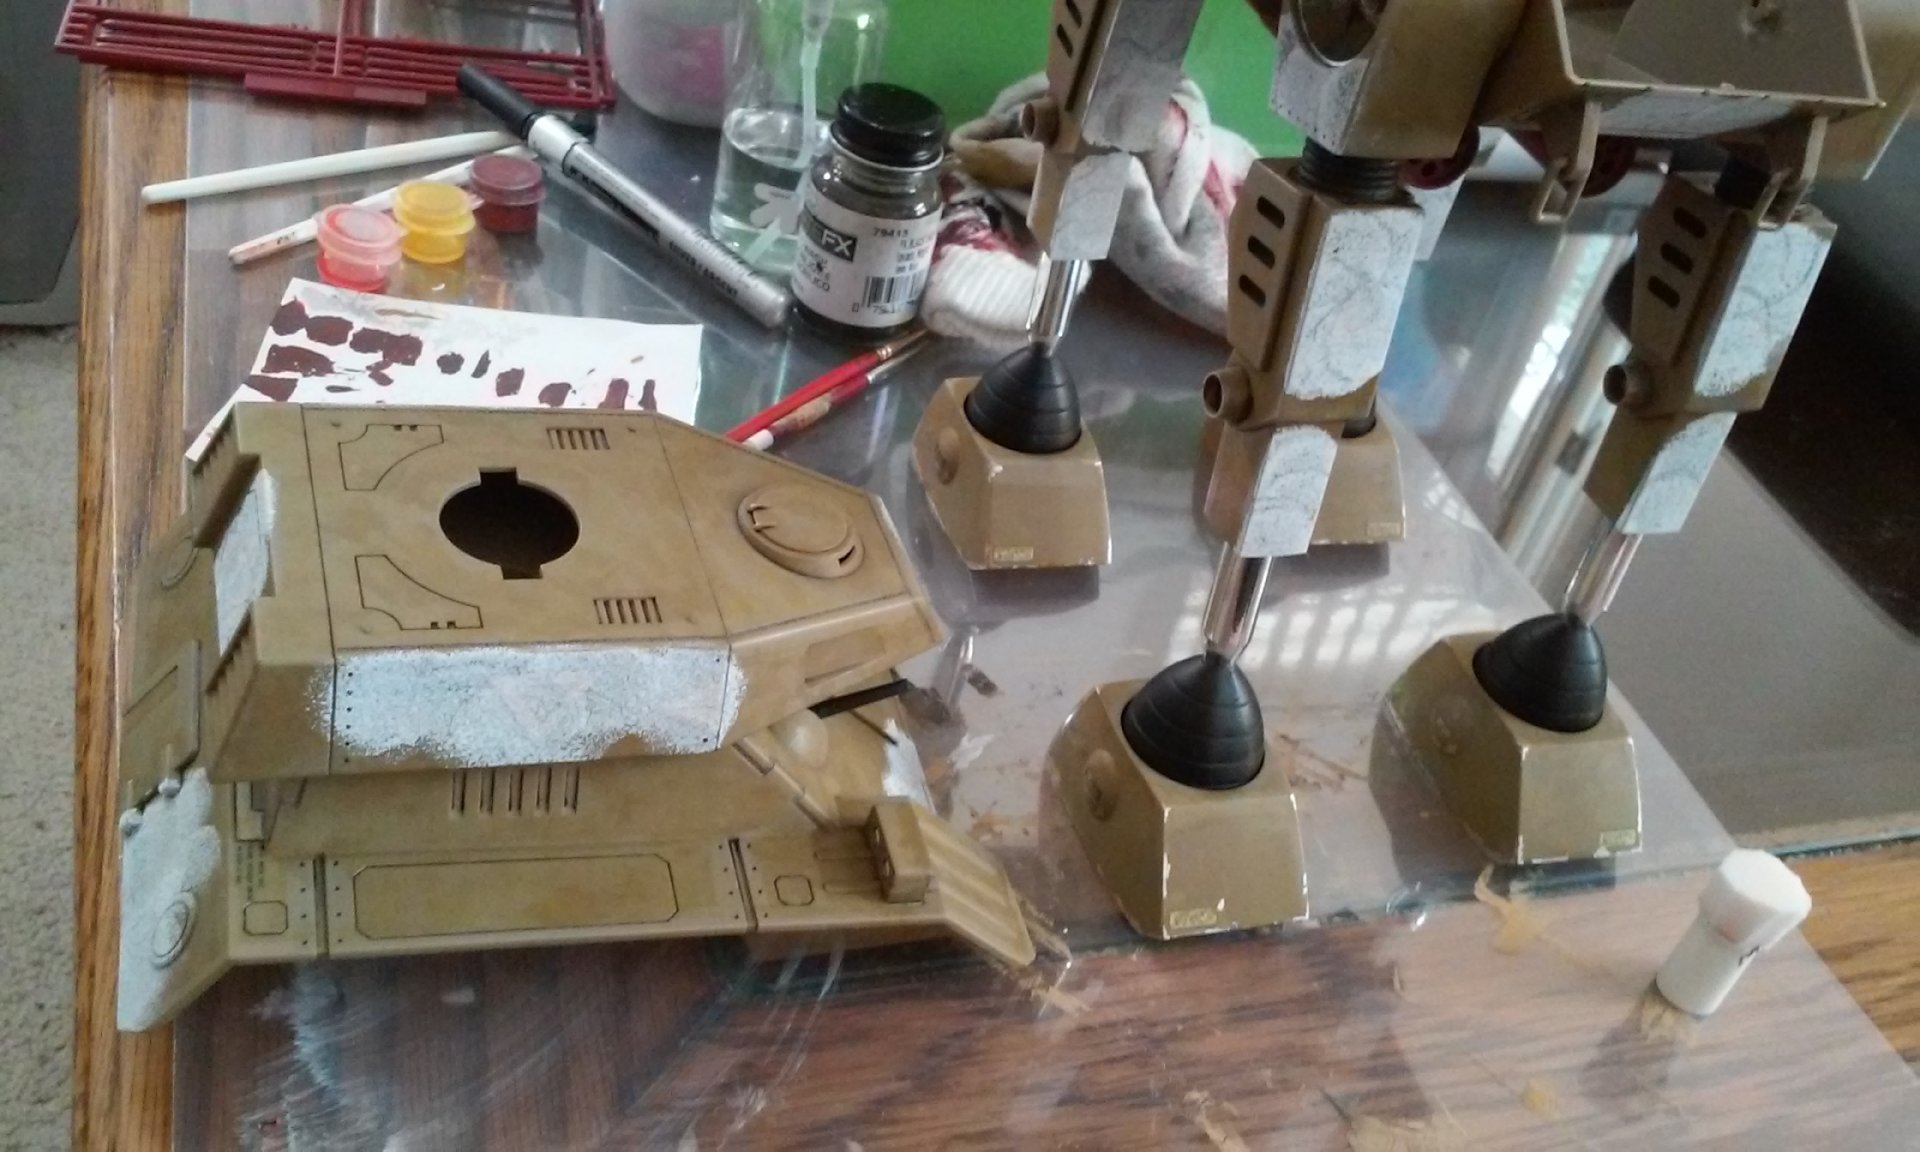
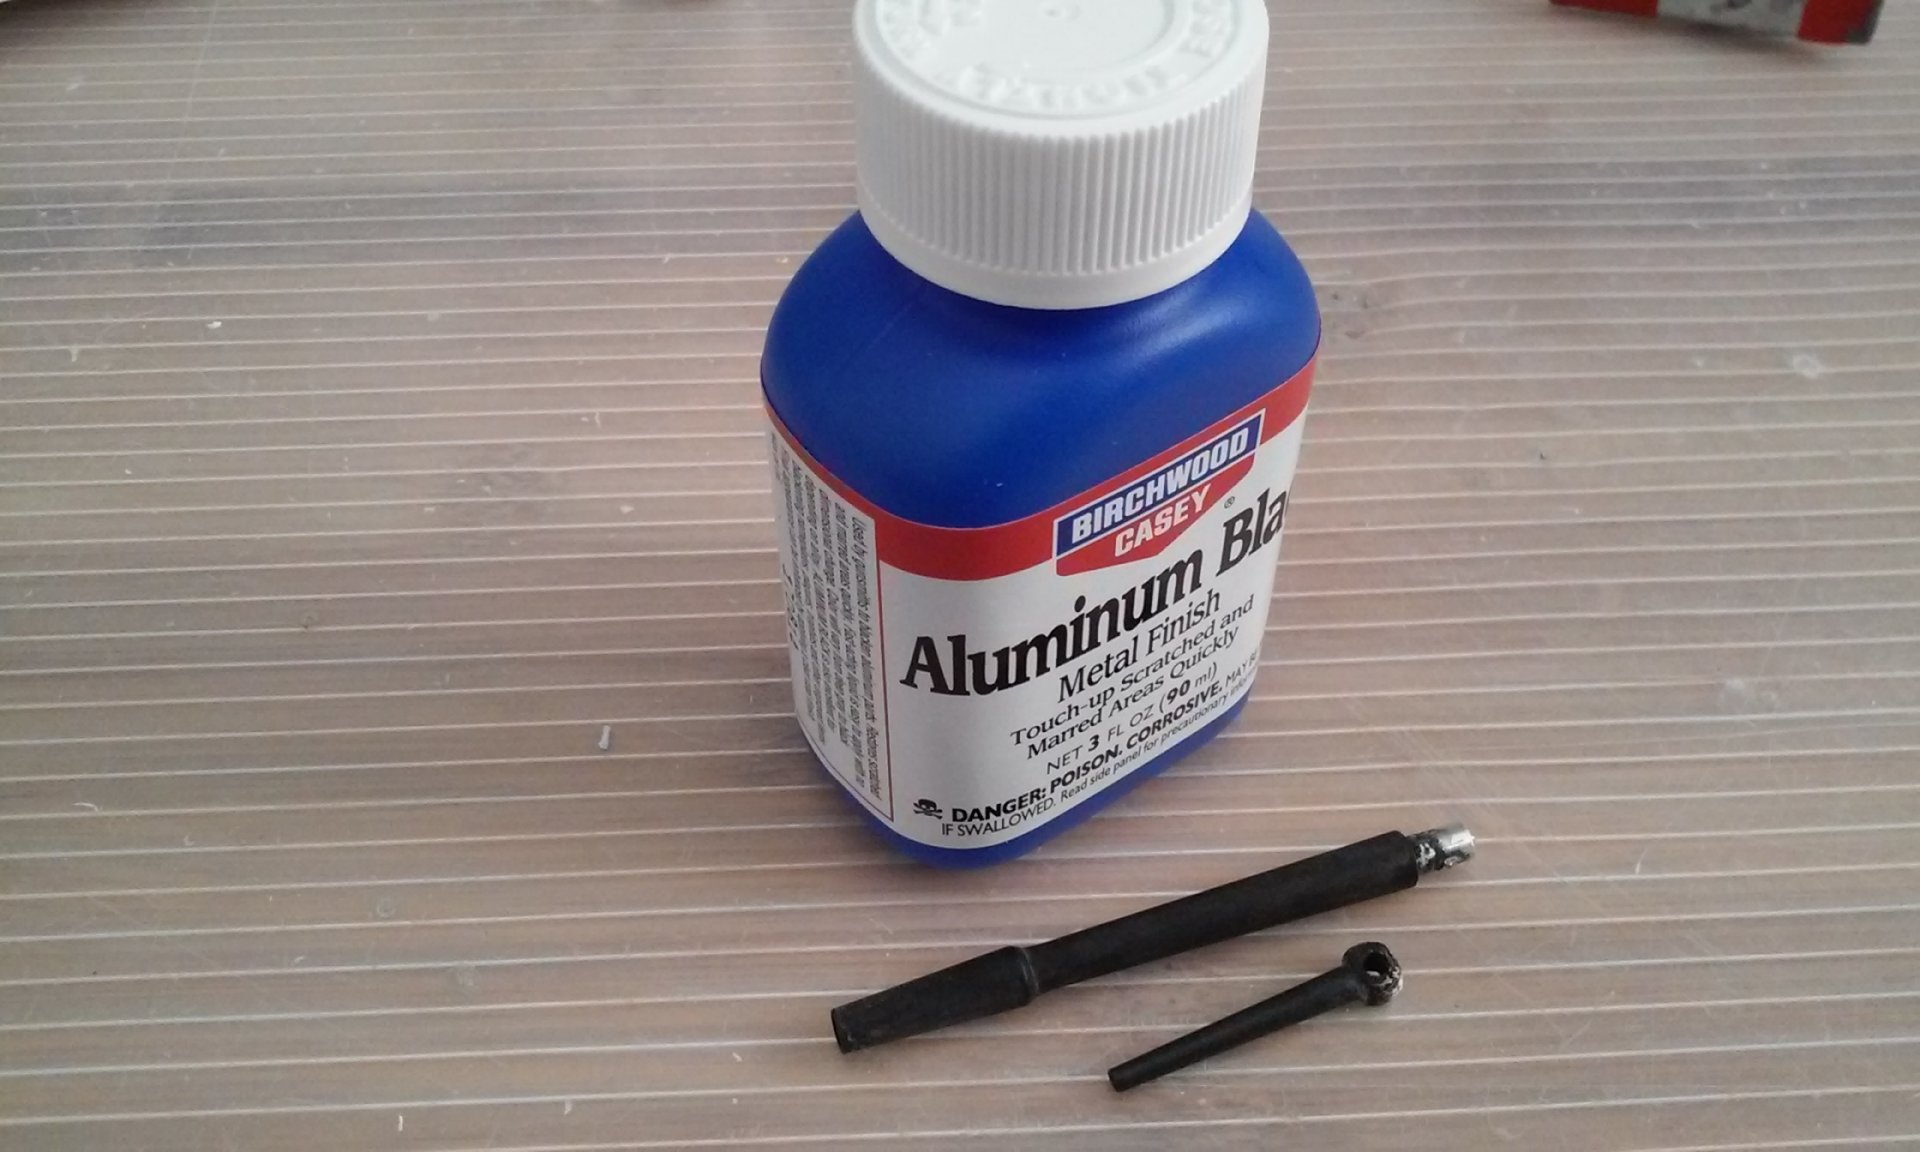
That is going to be a Cool build Derex - Yeah Baby! I should insert some sort of cooking / baking pun in here, but I can't serve one up! OK, something new for most of us including me. I hate how paint comes off of metal parts easier than plastic after painting. I researched what gunsmiths do to create a durable finish and came up with Birchwood and Casey "Aluminum Black." It actually is an acid that etches and discolors the aluminum (they have it for brass too). It is only a minor etchant so you don't lose any detail. The fluid is clear blue - it is NOT a paint (see puddles in tray photo). So I wouldn't contaminate the bottle contents and save fluid, I used a dropper to soak cotton swabs and "paint" it on over the tray. For best results, THOROUGHLY clean your parts of all gunk and oxidation, then either soak your parts or QUICKLY coat them uniformly. Casually painting it on a little at a time starts to wash off old reacted areas. Its double trouble - poison and corrosive so wear proper protection and ventilate. Rinse the parts off in water when the acid is done reacting and let it air dry. When its wet it can still scrape off fairly easily. It took a little practice, but I love the finish. The finish is absolutely MATT BLACK! The good news is it can be buffed to add a sheen to it if needed after it dries. I spent all of Saturday soaking the decals for 30min each (they are 34 years old) so decaling went slowly even after letting them soak in advance. Kylwell was right about the decals being tough. Mr. Mark Softer under the decal and then generously over it after swabbing it down made them stick like glue without bubbles underneath. Then I cemented the sandbags together. The results are below. No paint and no clear coats on yet, hopefully that's this week. - MT


-
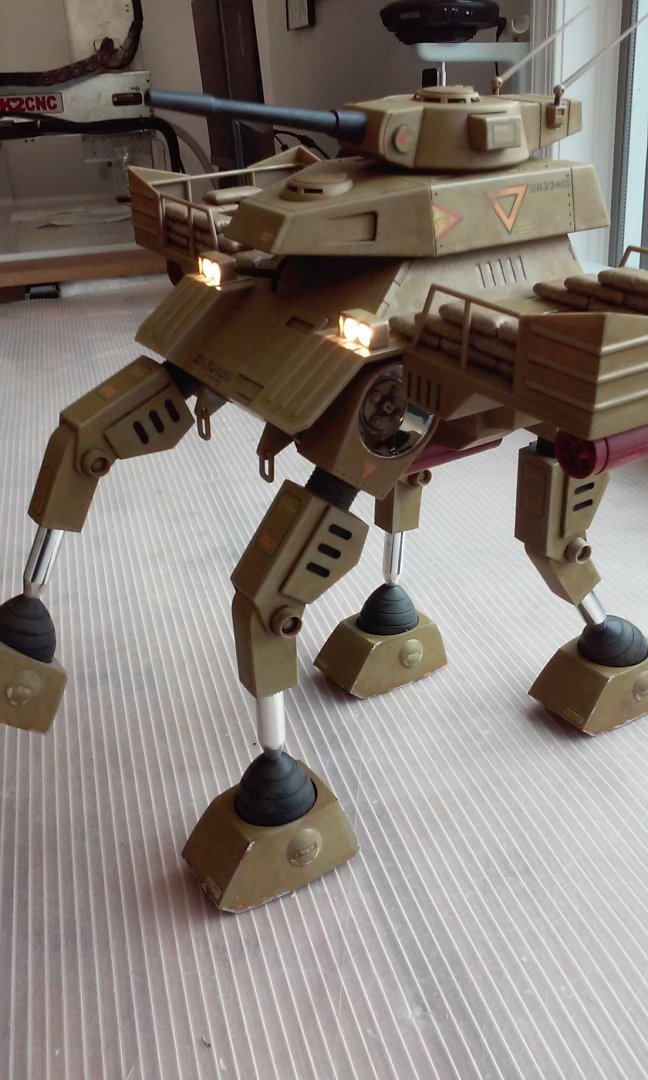
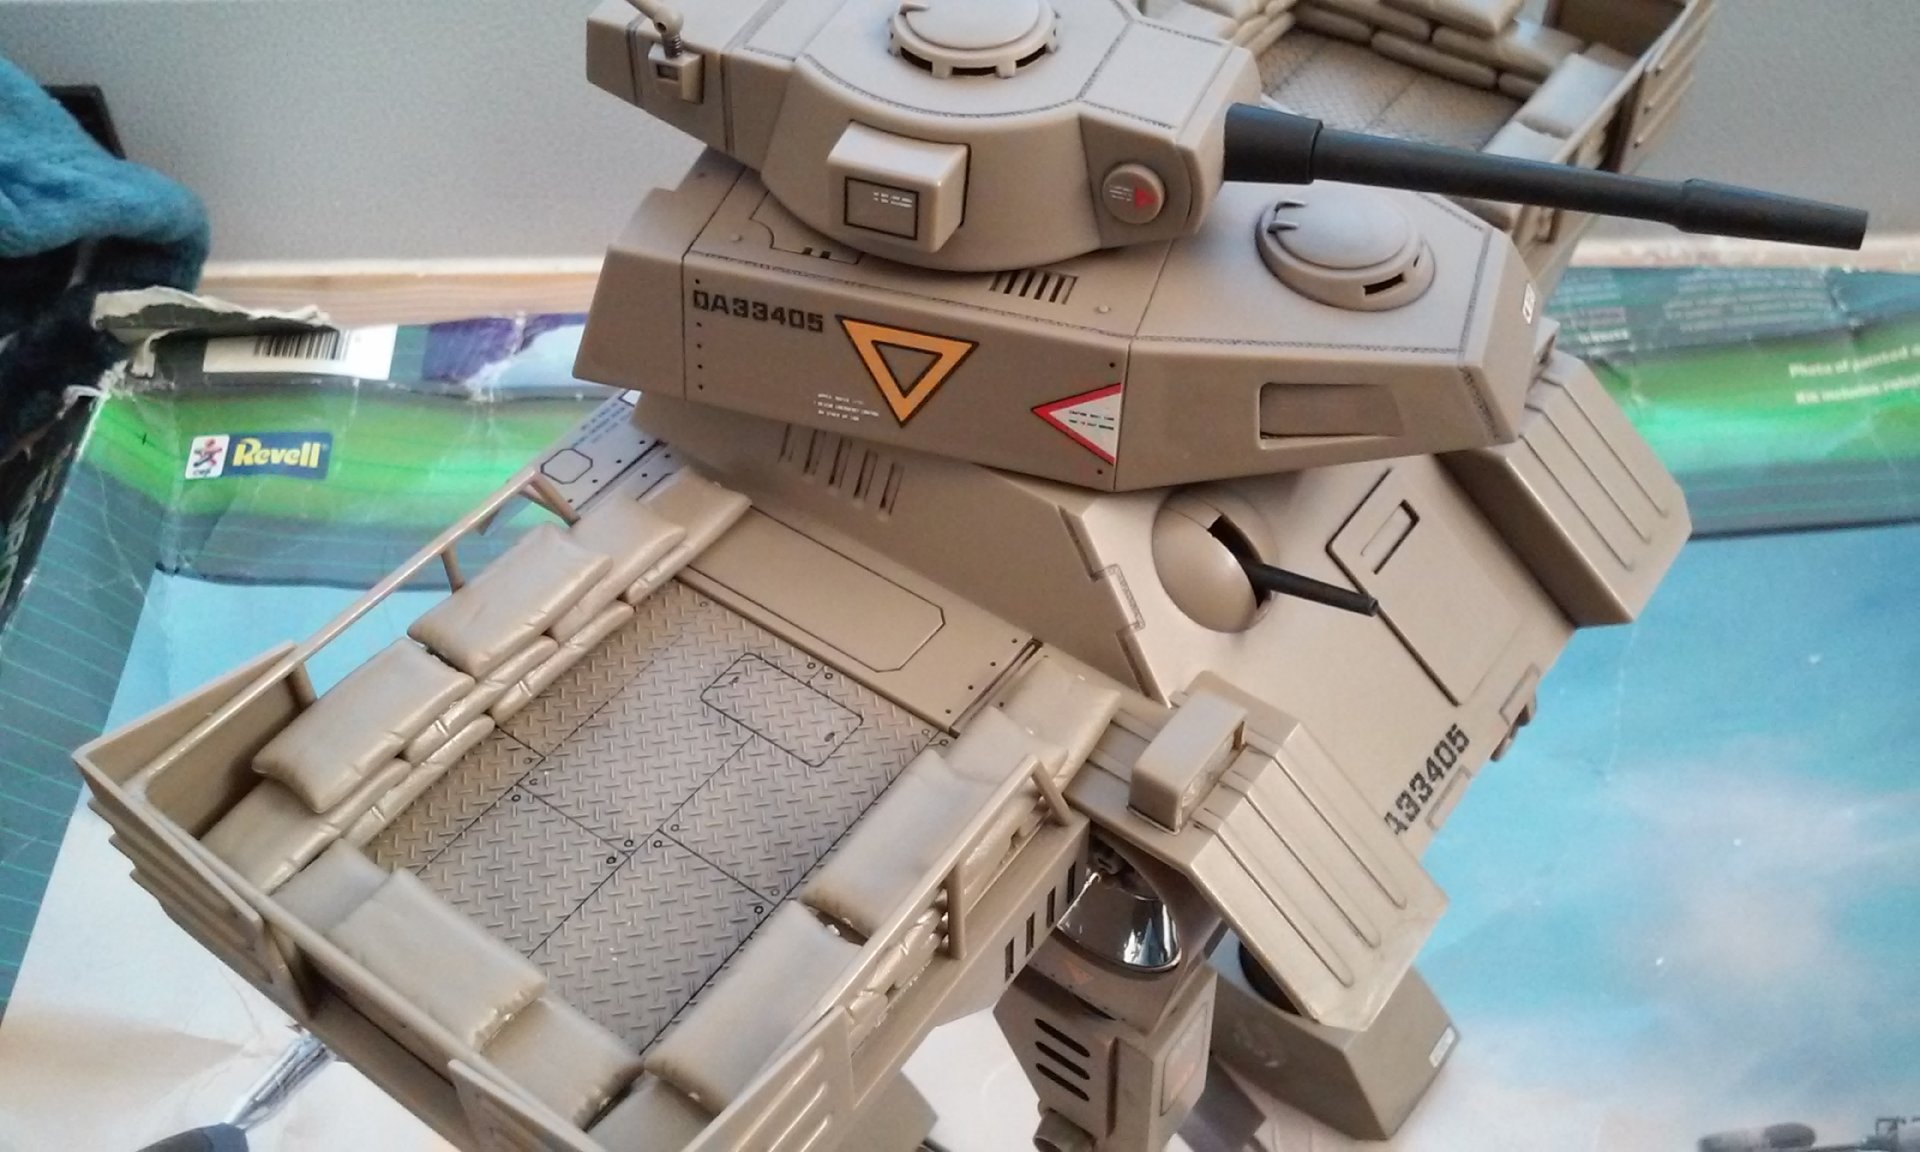
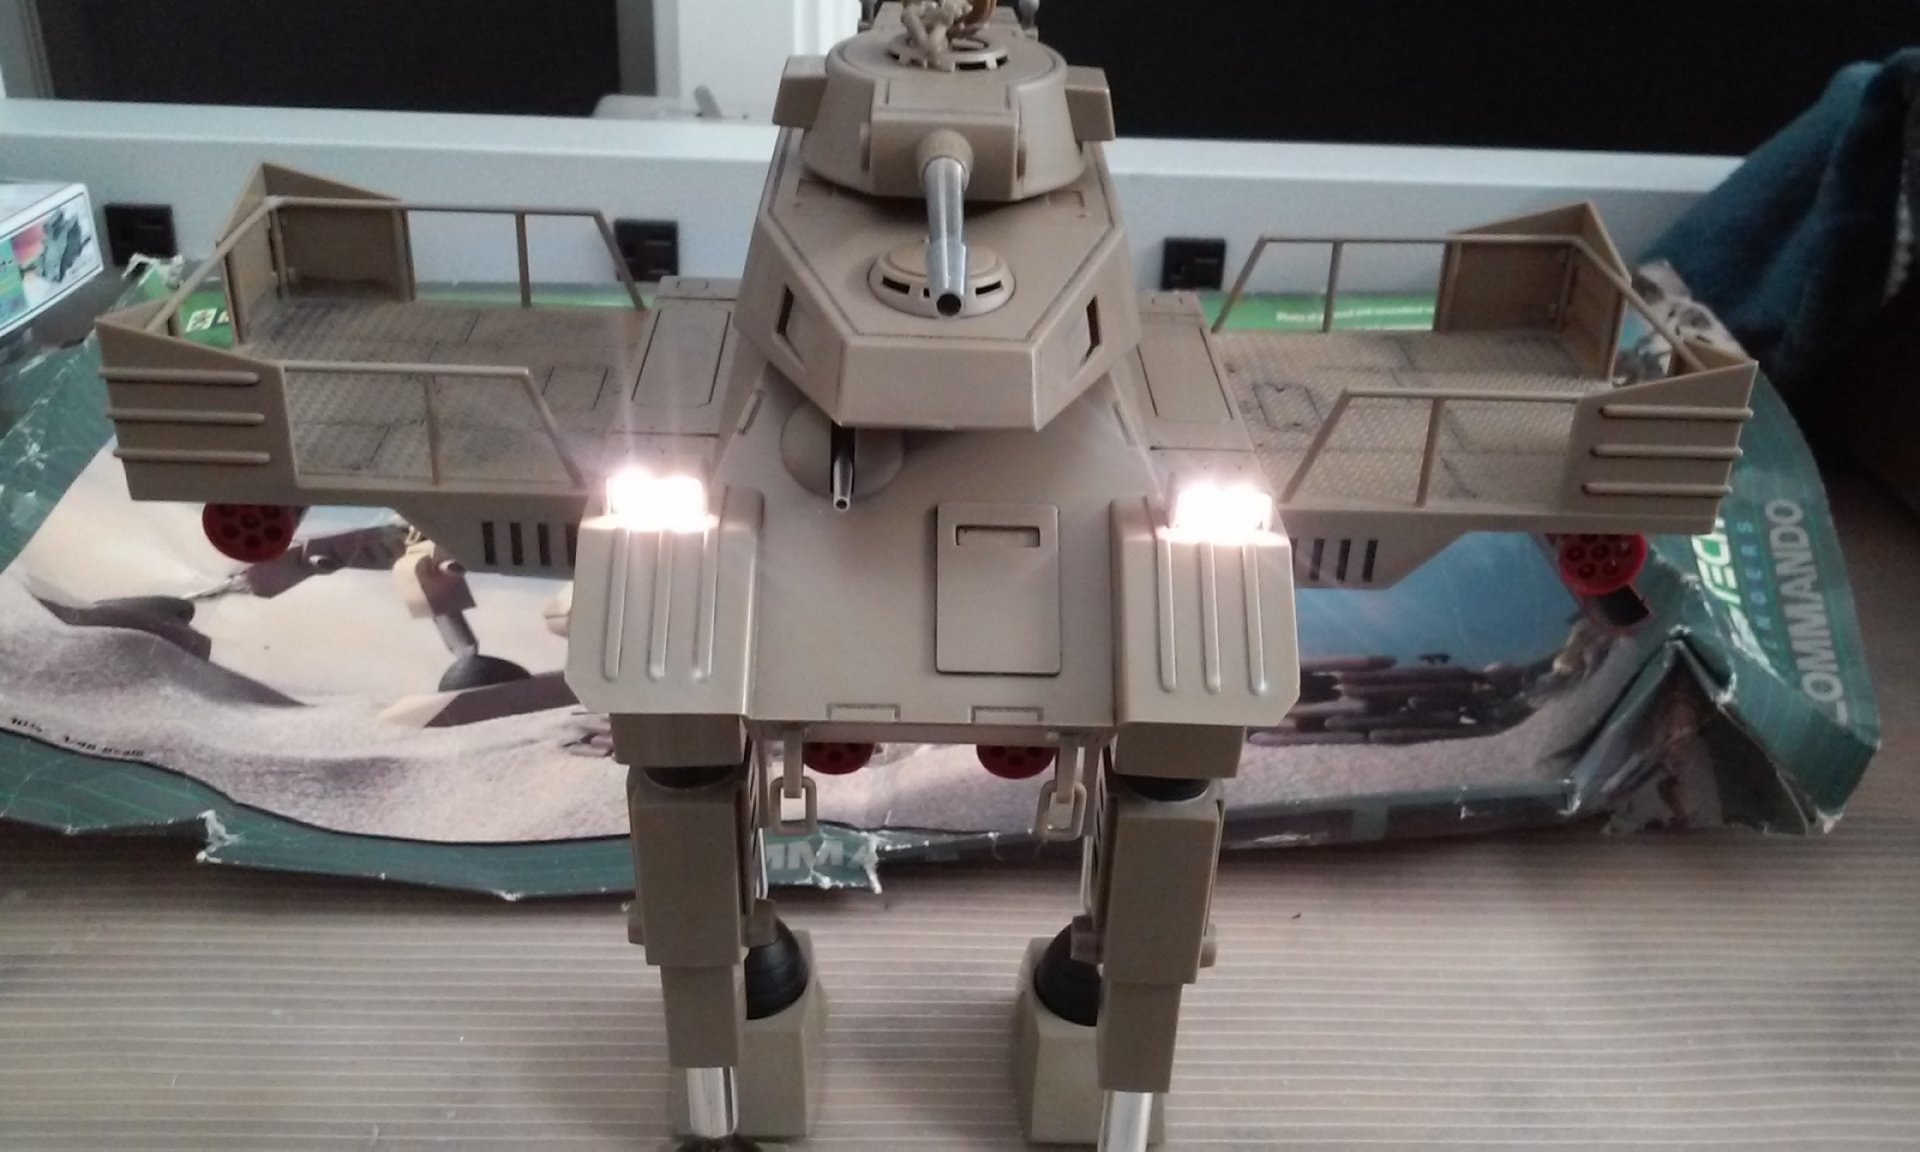
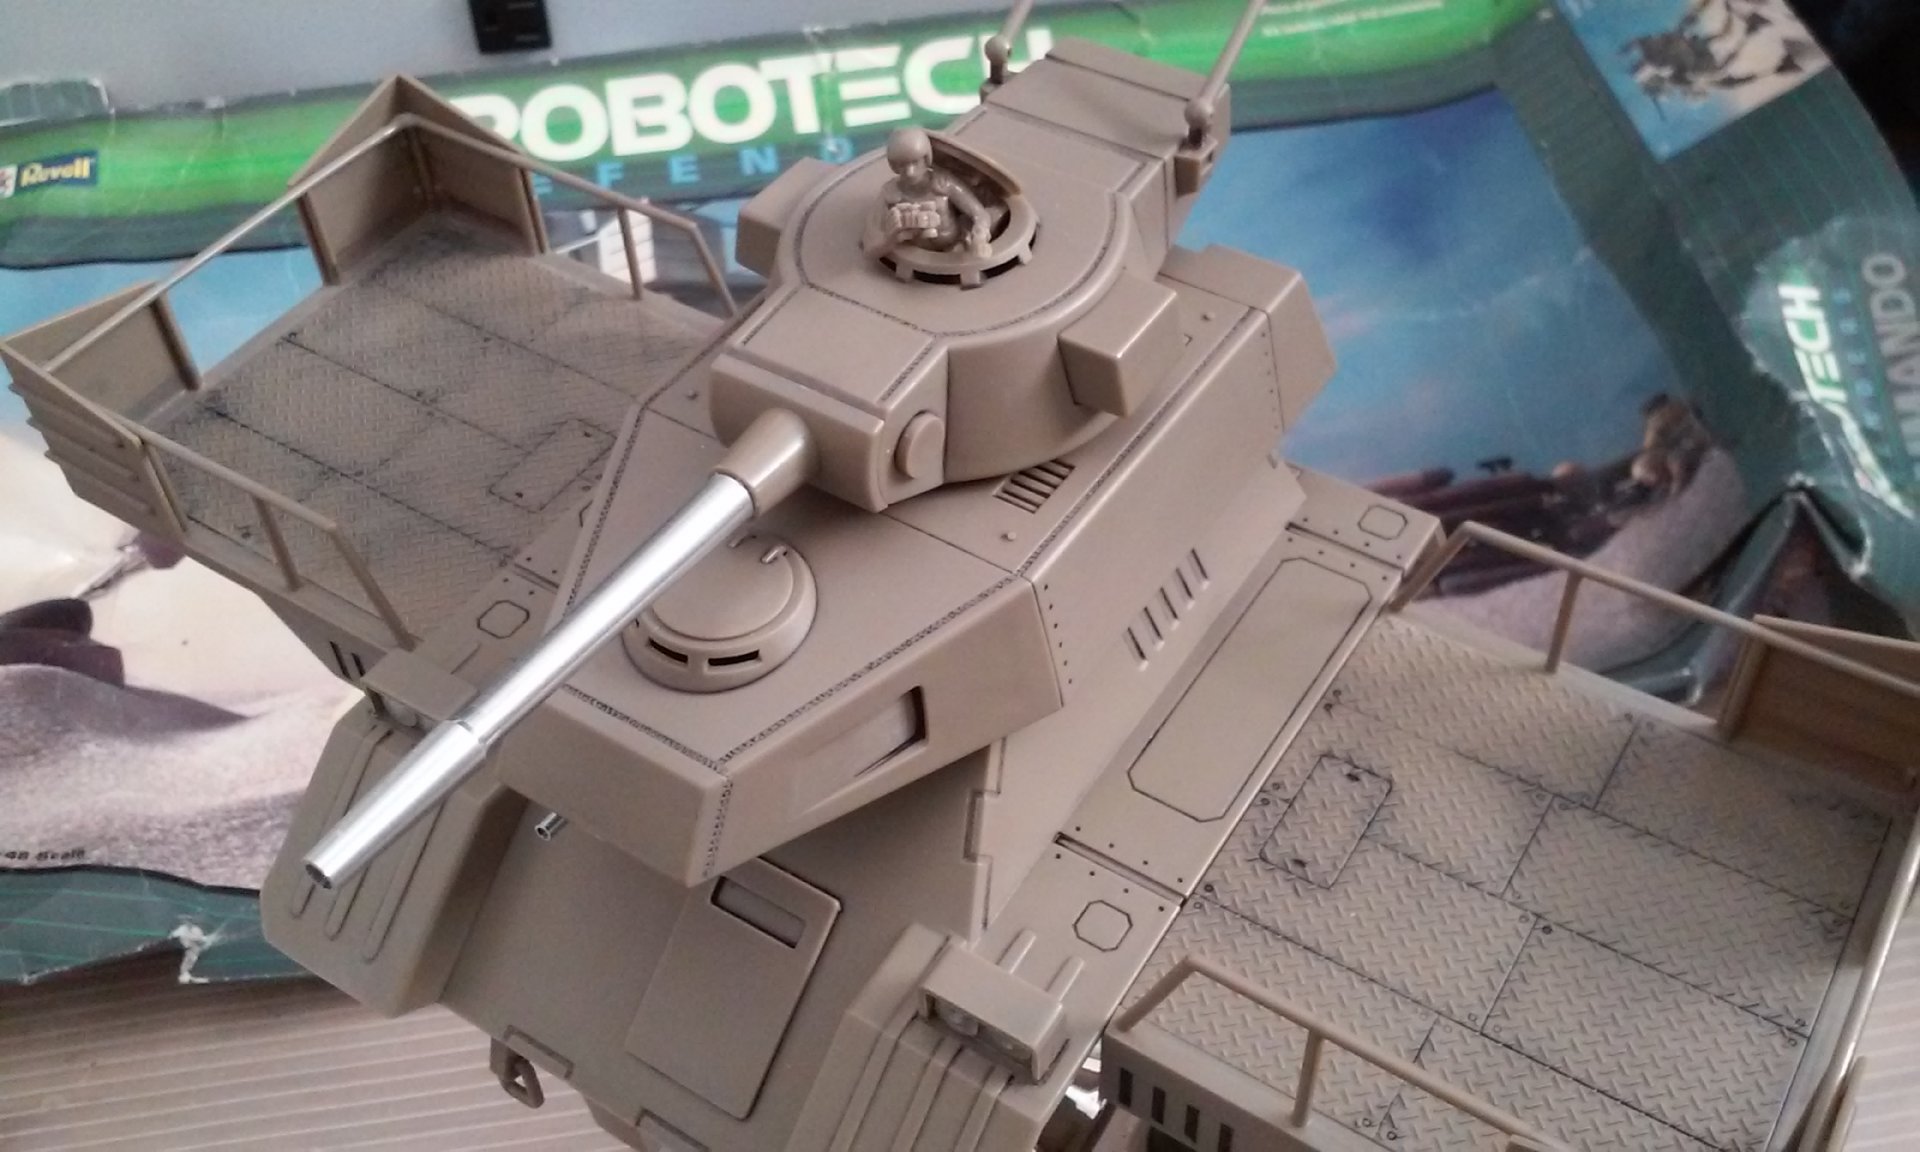
That is a nice shade of green Electric Indigo! The shading looks great. Edstuff, I was thinking of Sharknado when I saw your post. Hulk survived everything but the Sharnado! Seriously though, good combination. Arbit, I don't have their name, but you can email sales@houseworksltd.com or http://www.houseworksltd.com/ for part #1122. Their phone is 770-448-6596, hopefully their info is still good. They may only do wholesale through a local dealer. They are micro hinges for doll houses. They are only 8mm wide. If you can find a place that sells doll house goods, you want to look them up. They have micro insulated wire and all sorts of good stuff like micro LEDs and stuff too. And to answer your other question, this is the Tequila Gunner from Dougram. My son and I have been watching the show. It was the second biggest show after Gundam in the early 80's. Getting their with the build portion, nearly done. I got "lazy" on this one and used pre-wired lights similar to what you see in craft stores made of the wires with SM LEDs in a string. Folded, they fit right into the headlights looking like bulbs. I ended up resoldering them anyhow, so not much effort saved anyhow. Time for marking and decals... - MT


-
You made those old molds look great! The models are originally kind of square and bland detail wise, but you made them look good Gatsu! I have these four models too. I found them all over, one or two in the weirdest of hobby shops too. - MT
-
Thanks for the update guys! This is looking good and Max made it look all the more better! - MT
-
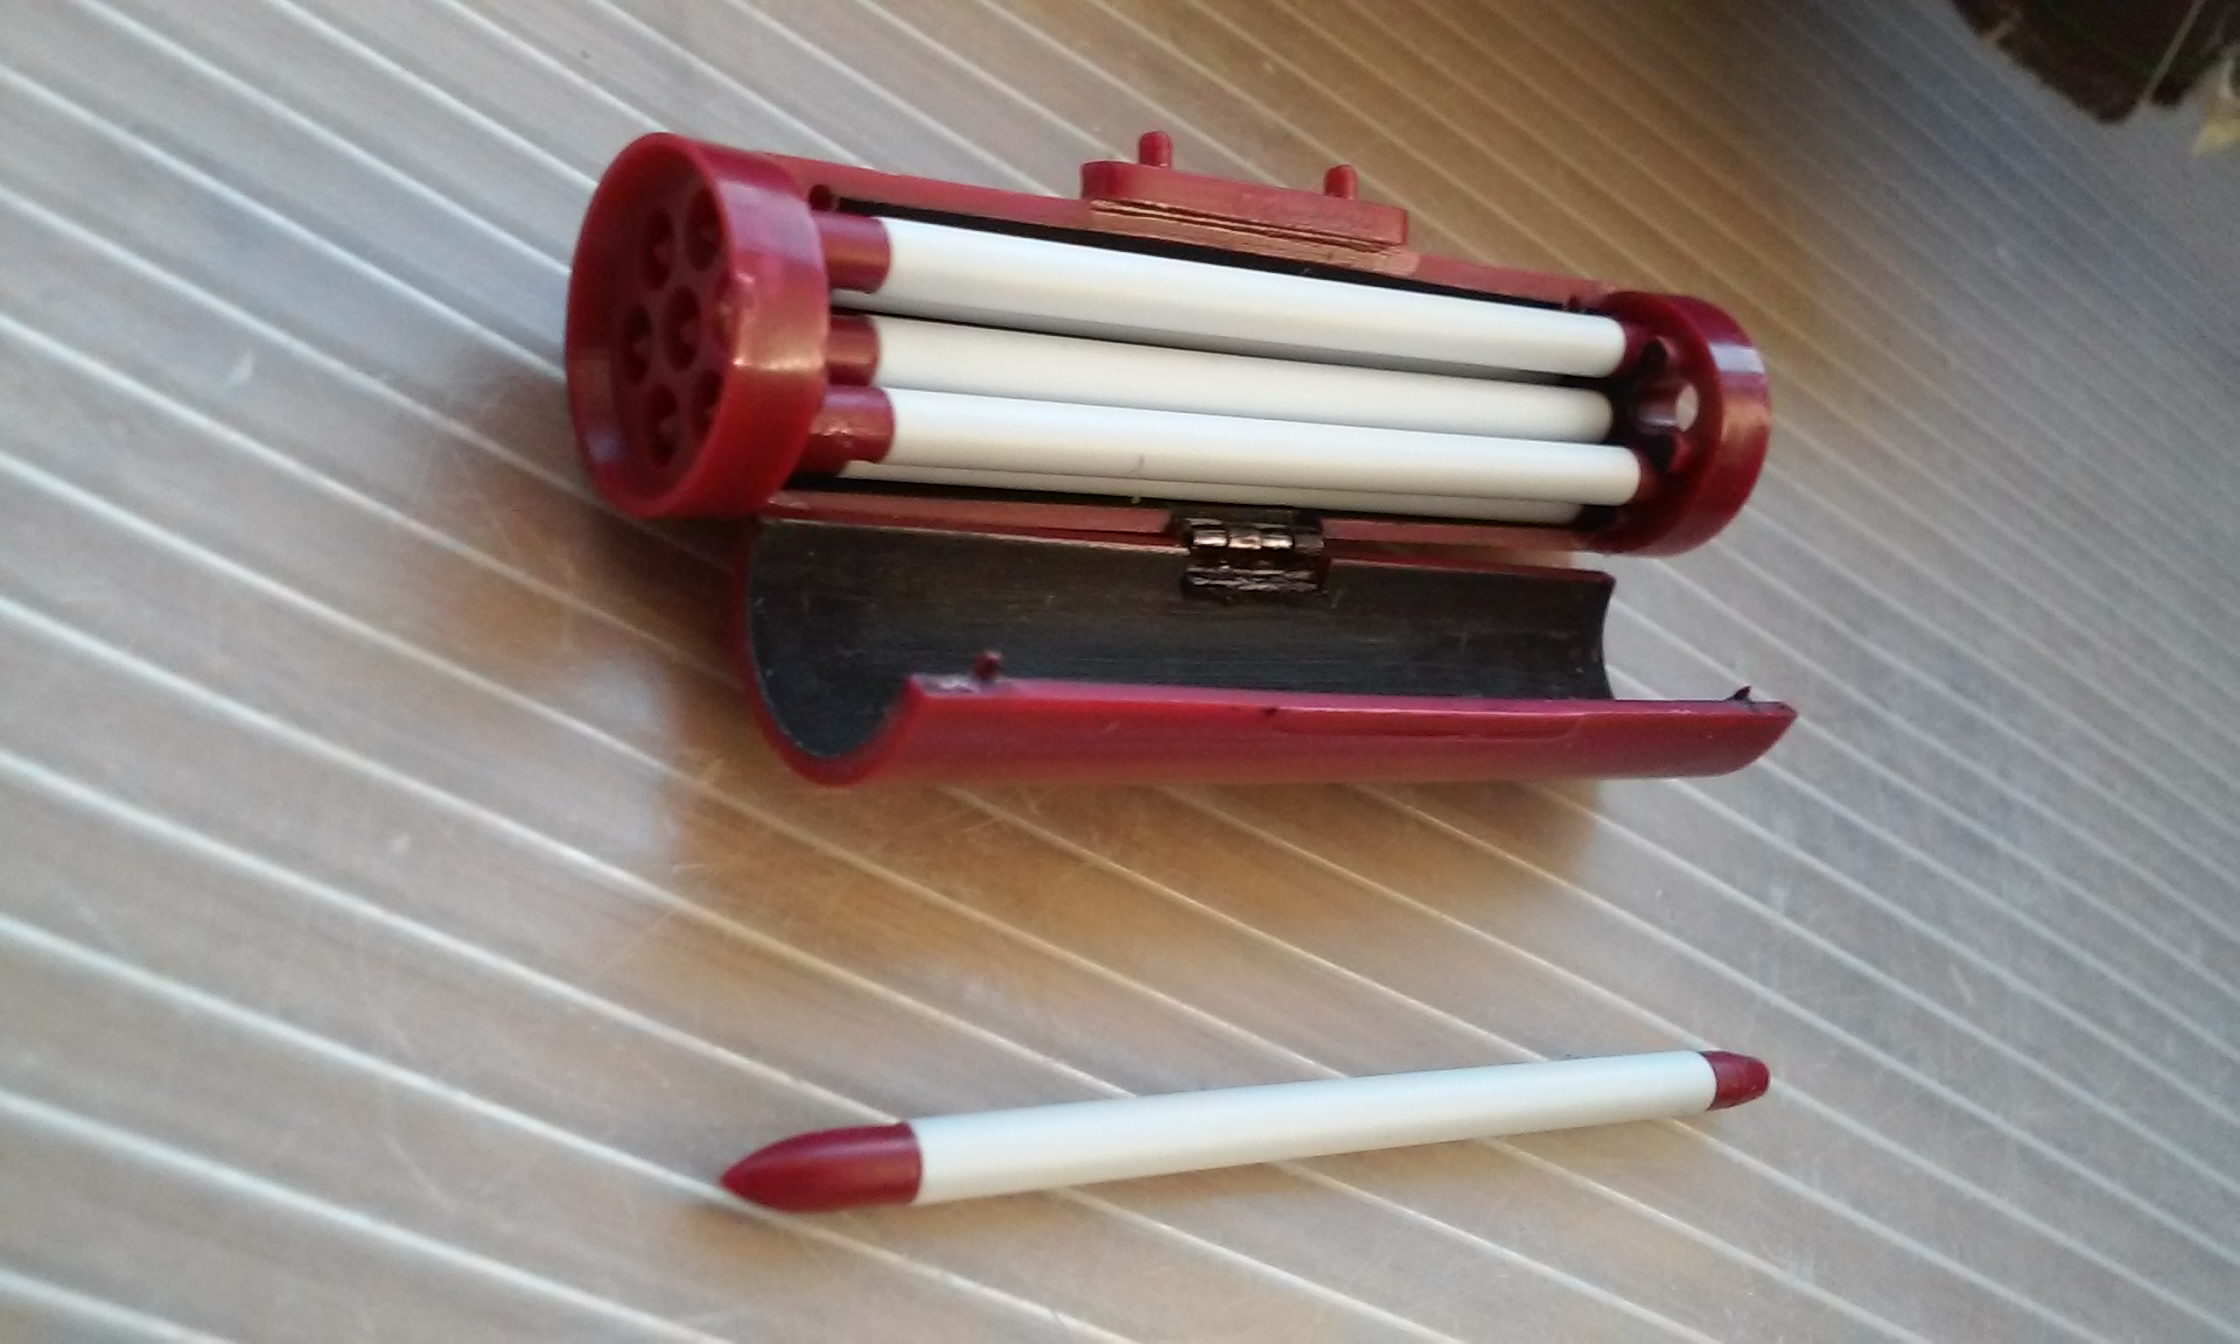
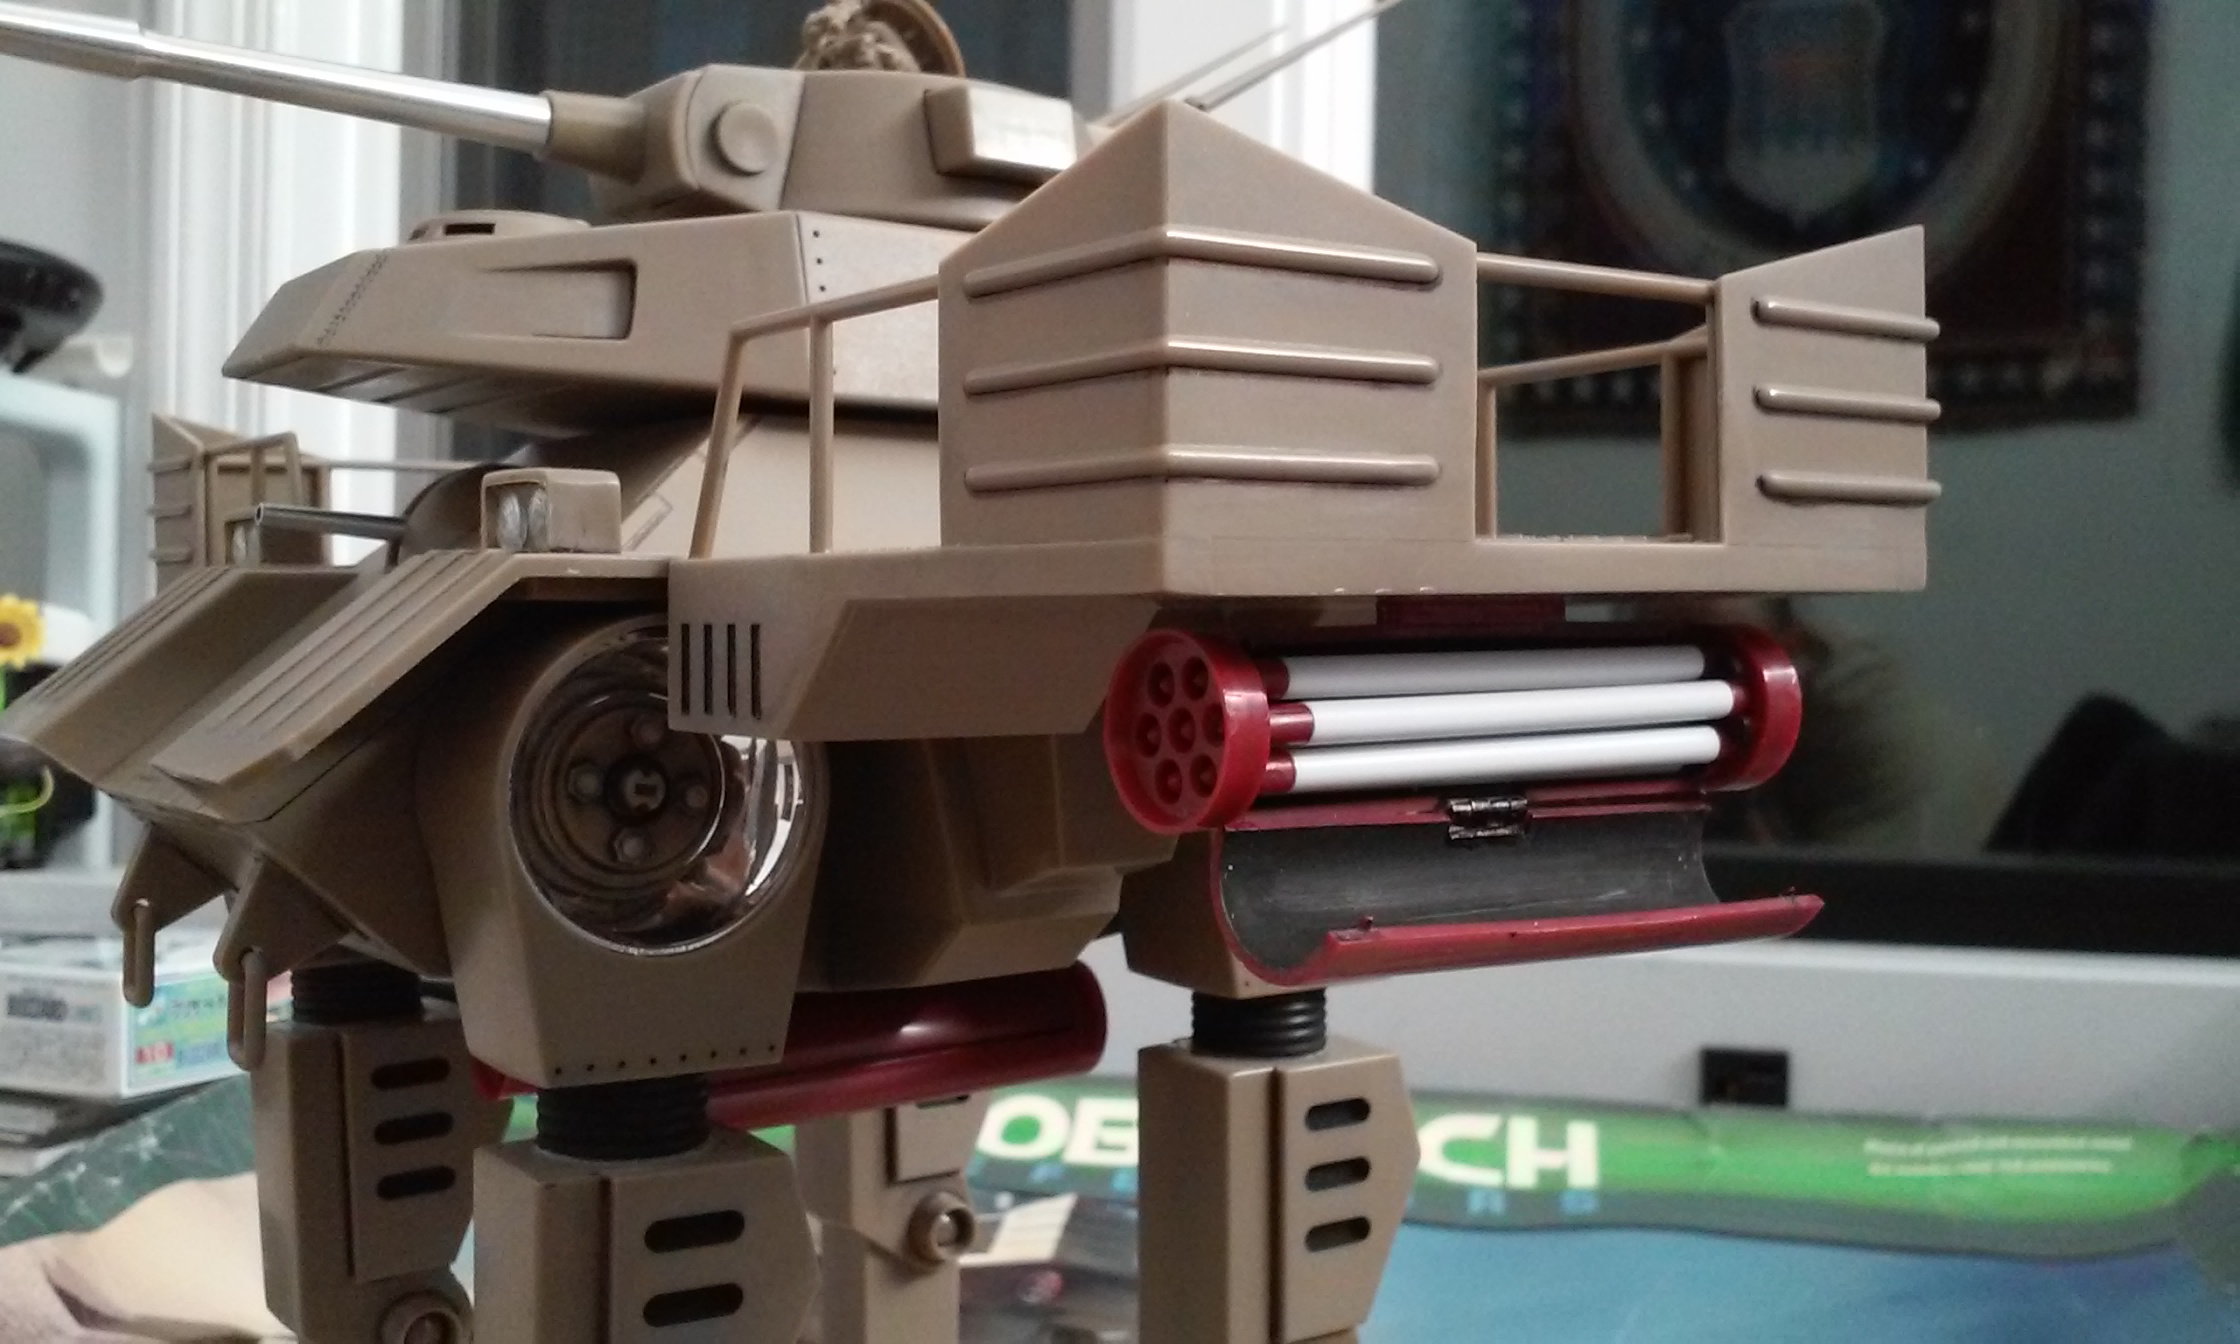
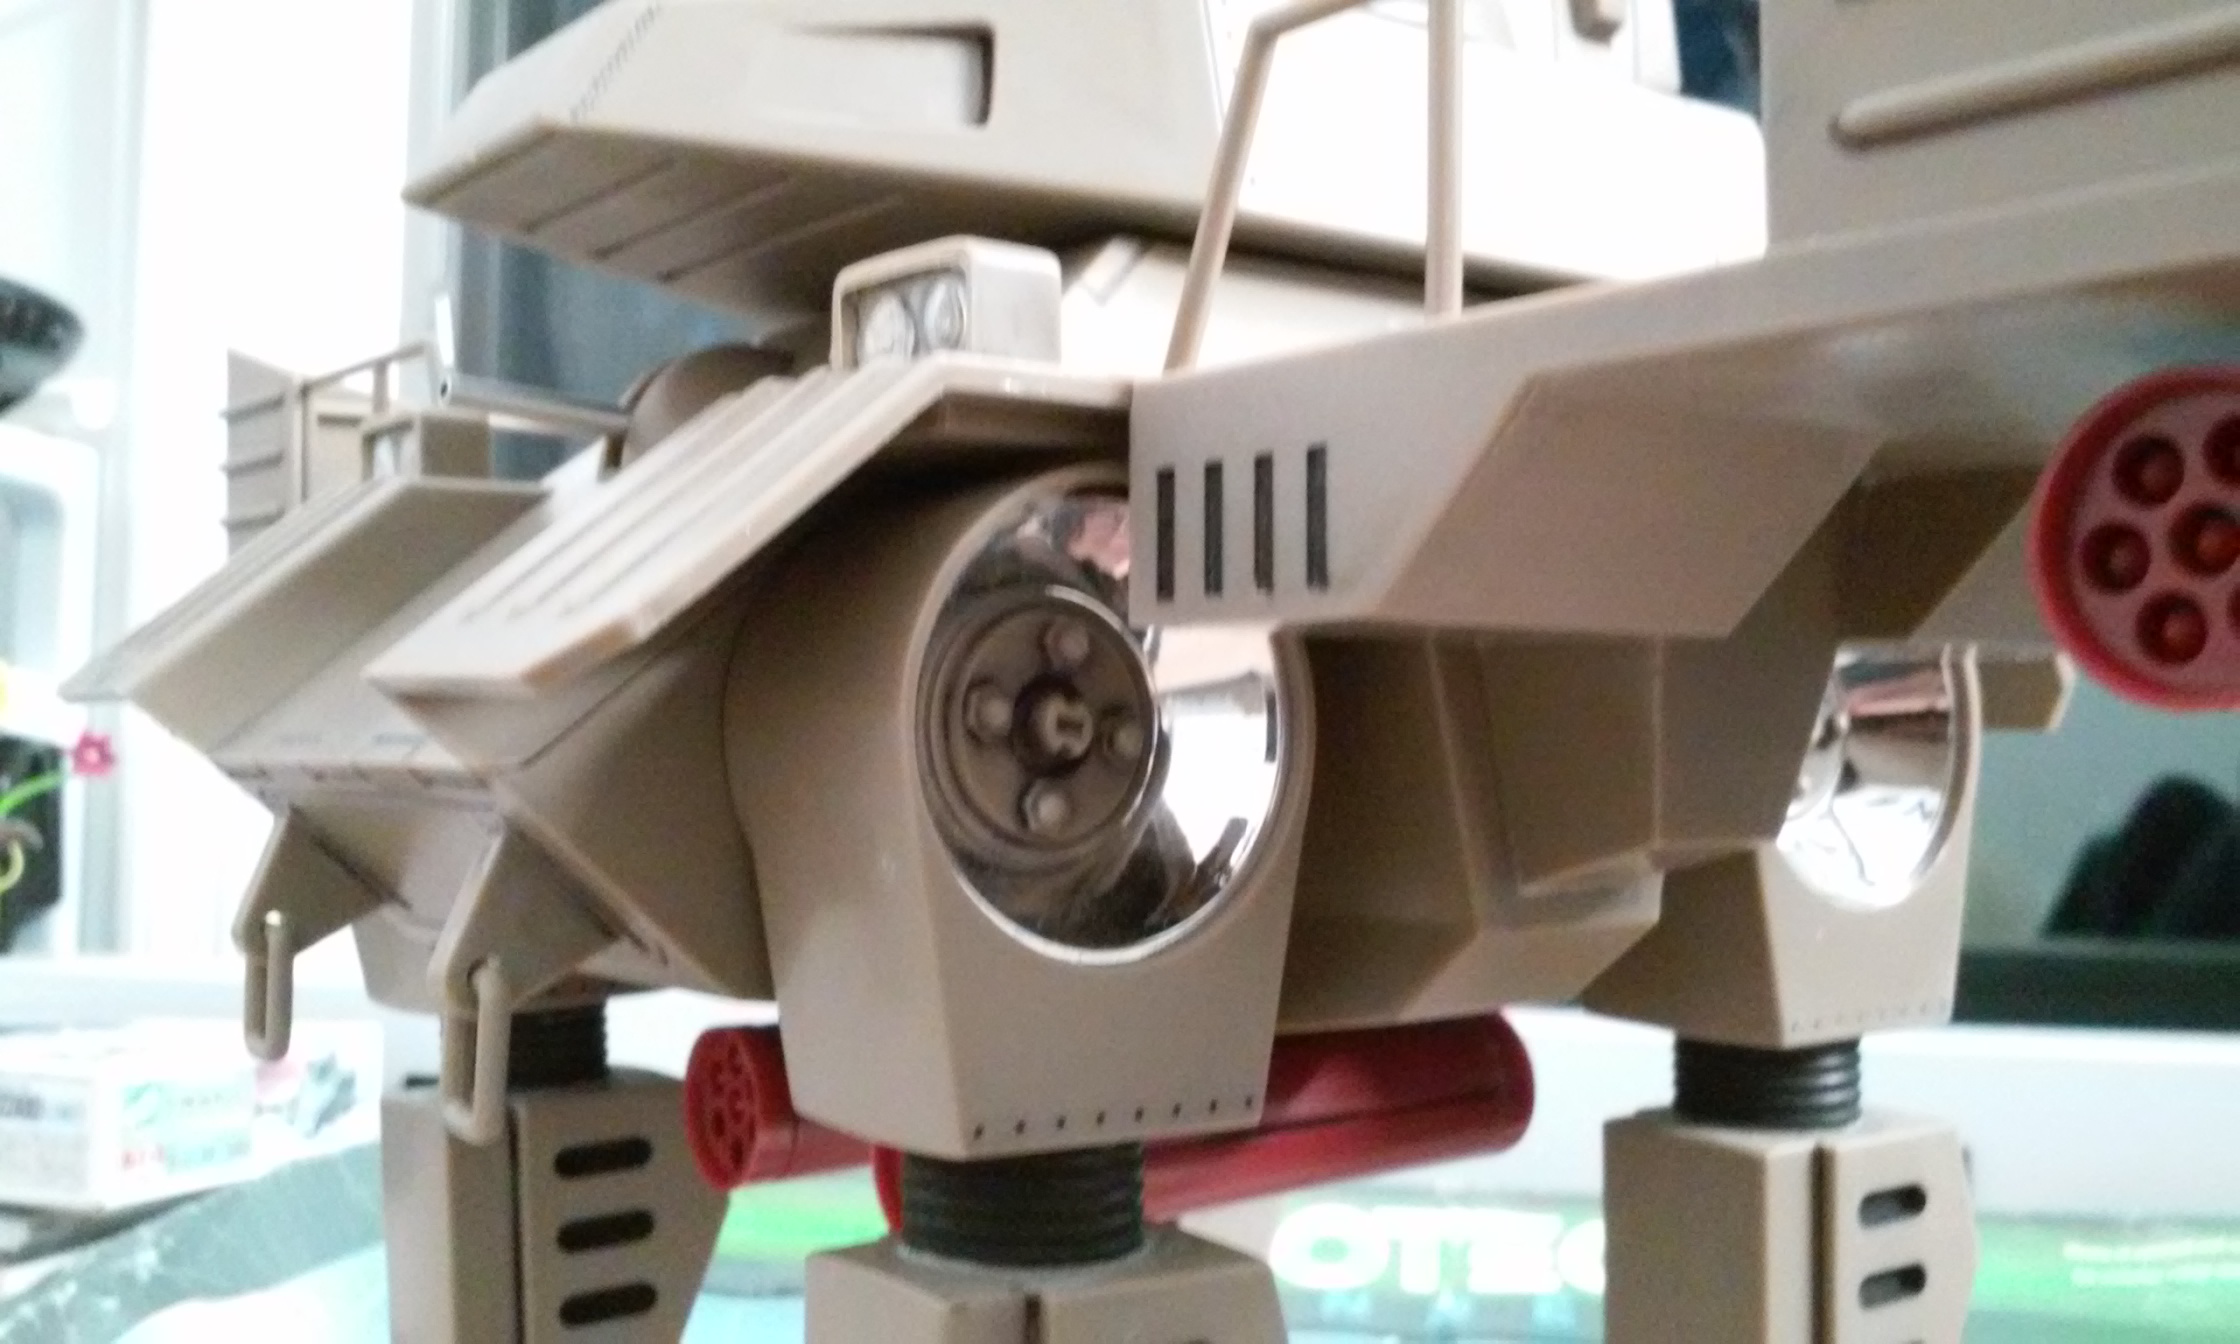
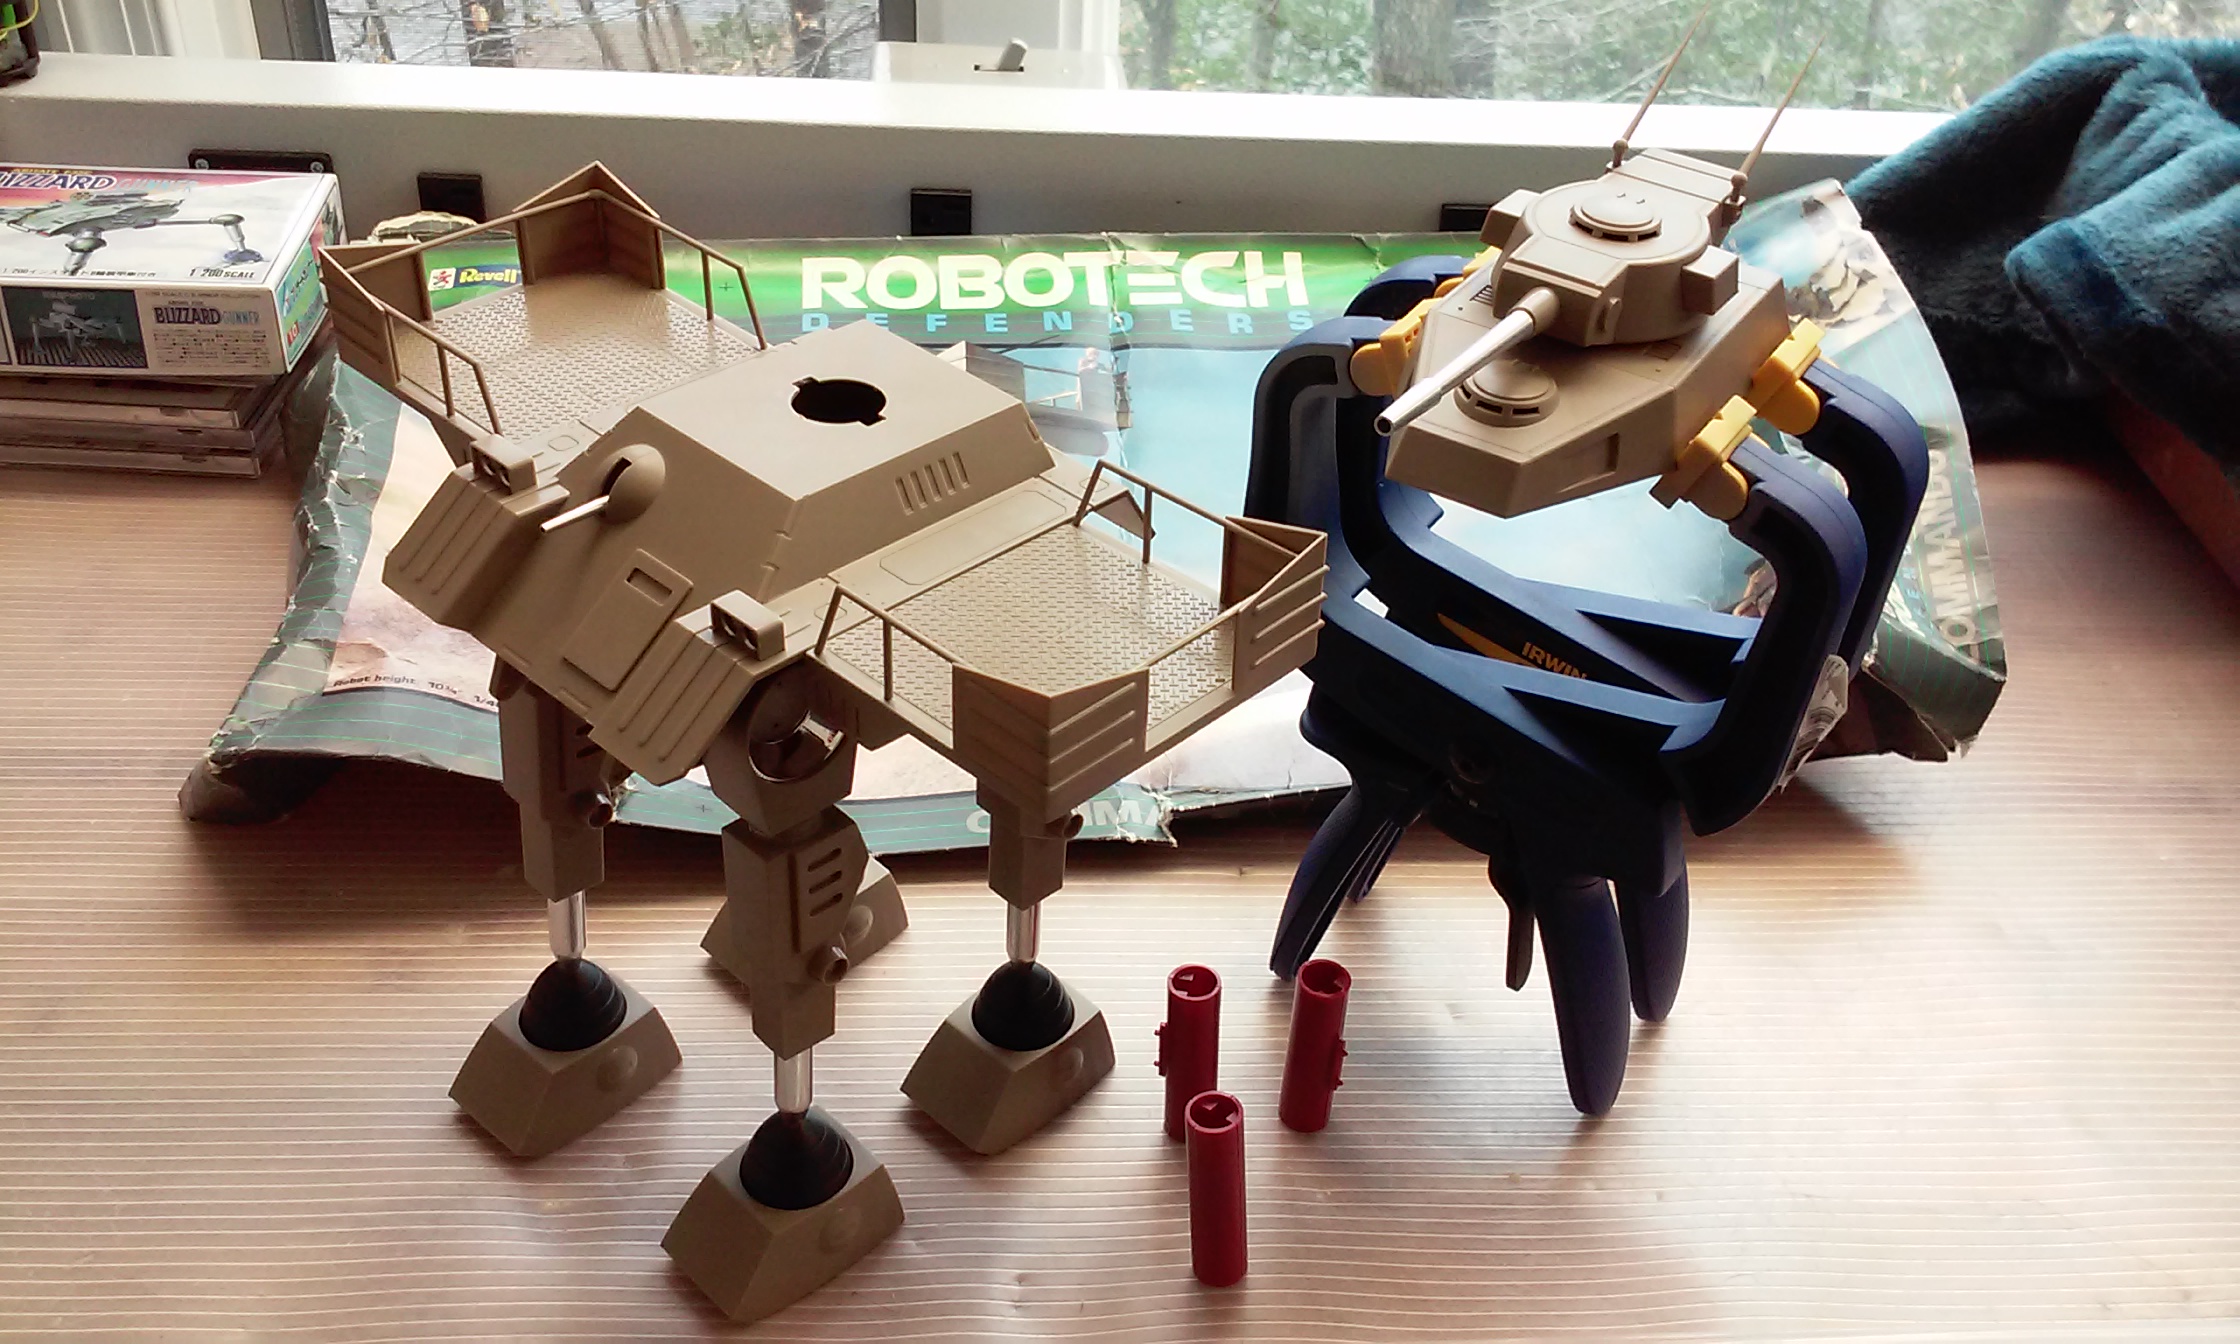
Thanks Kylwell, I'll remember that about the decals. Your paint and decals look great CrossAir! Nice n clean build and finiish! "Who let the dogs out..." OK, I did. It took me a good couple of hours to clean them up and make all the parts fit right. It took a lot of glue to soften and fill in the gaps. Then a little putty still yet. The model has the gimmick of containing missiles to fit into a few of the slots in each pod. I took one pod and made the missiles out of white and original maroon styrene. Then added a hinge so it can open up to reveal them as they have in some original box photos. Nearly done with the construction part of this build. - MT


-
AWESOME LED work Arbit! the cockpit especially. It looks like you swapped out motors for the wing sweep? It looks looks like too much blinking in the engines, but I know you're experimenting with the coding still. This project is top notch! - MT
-
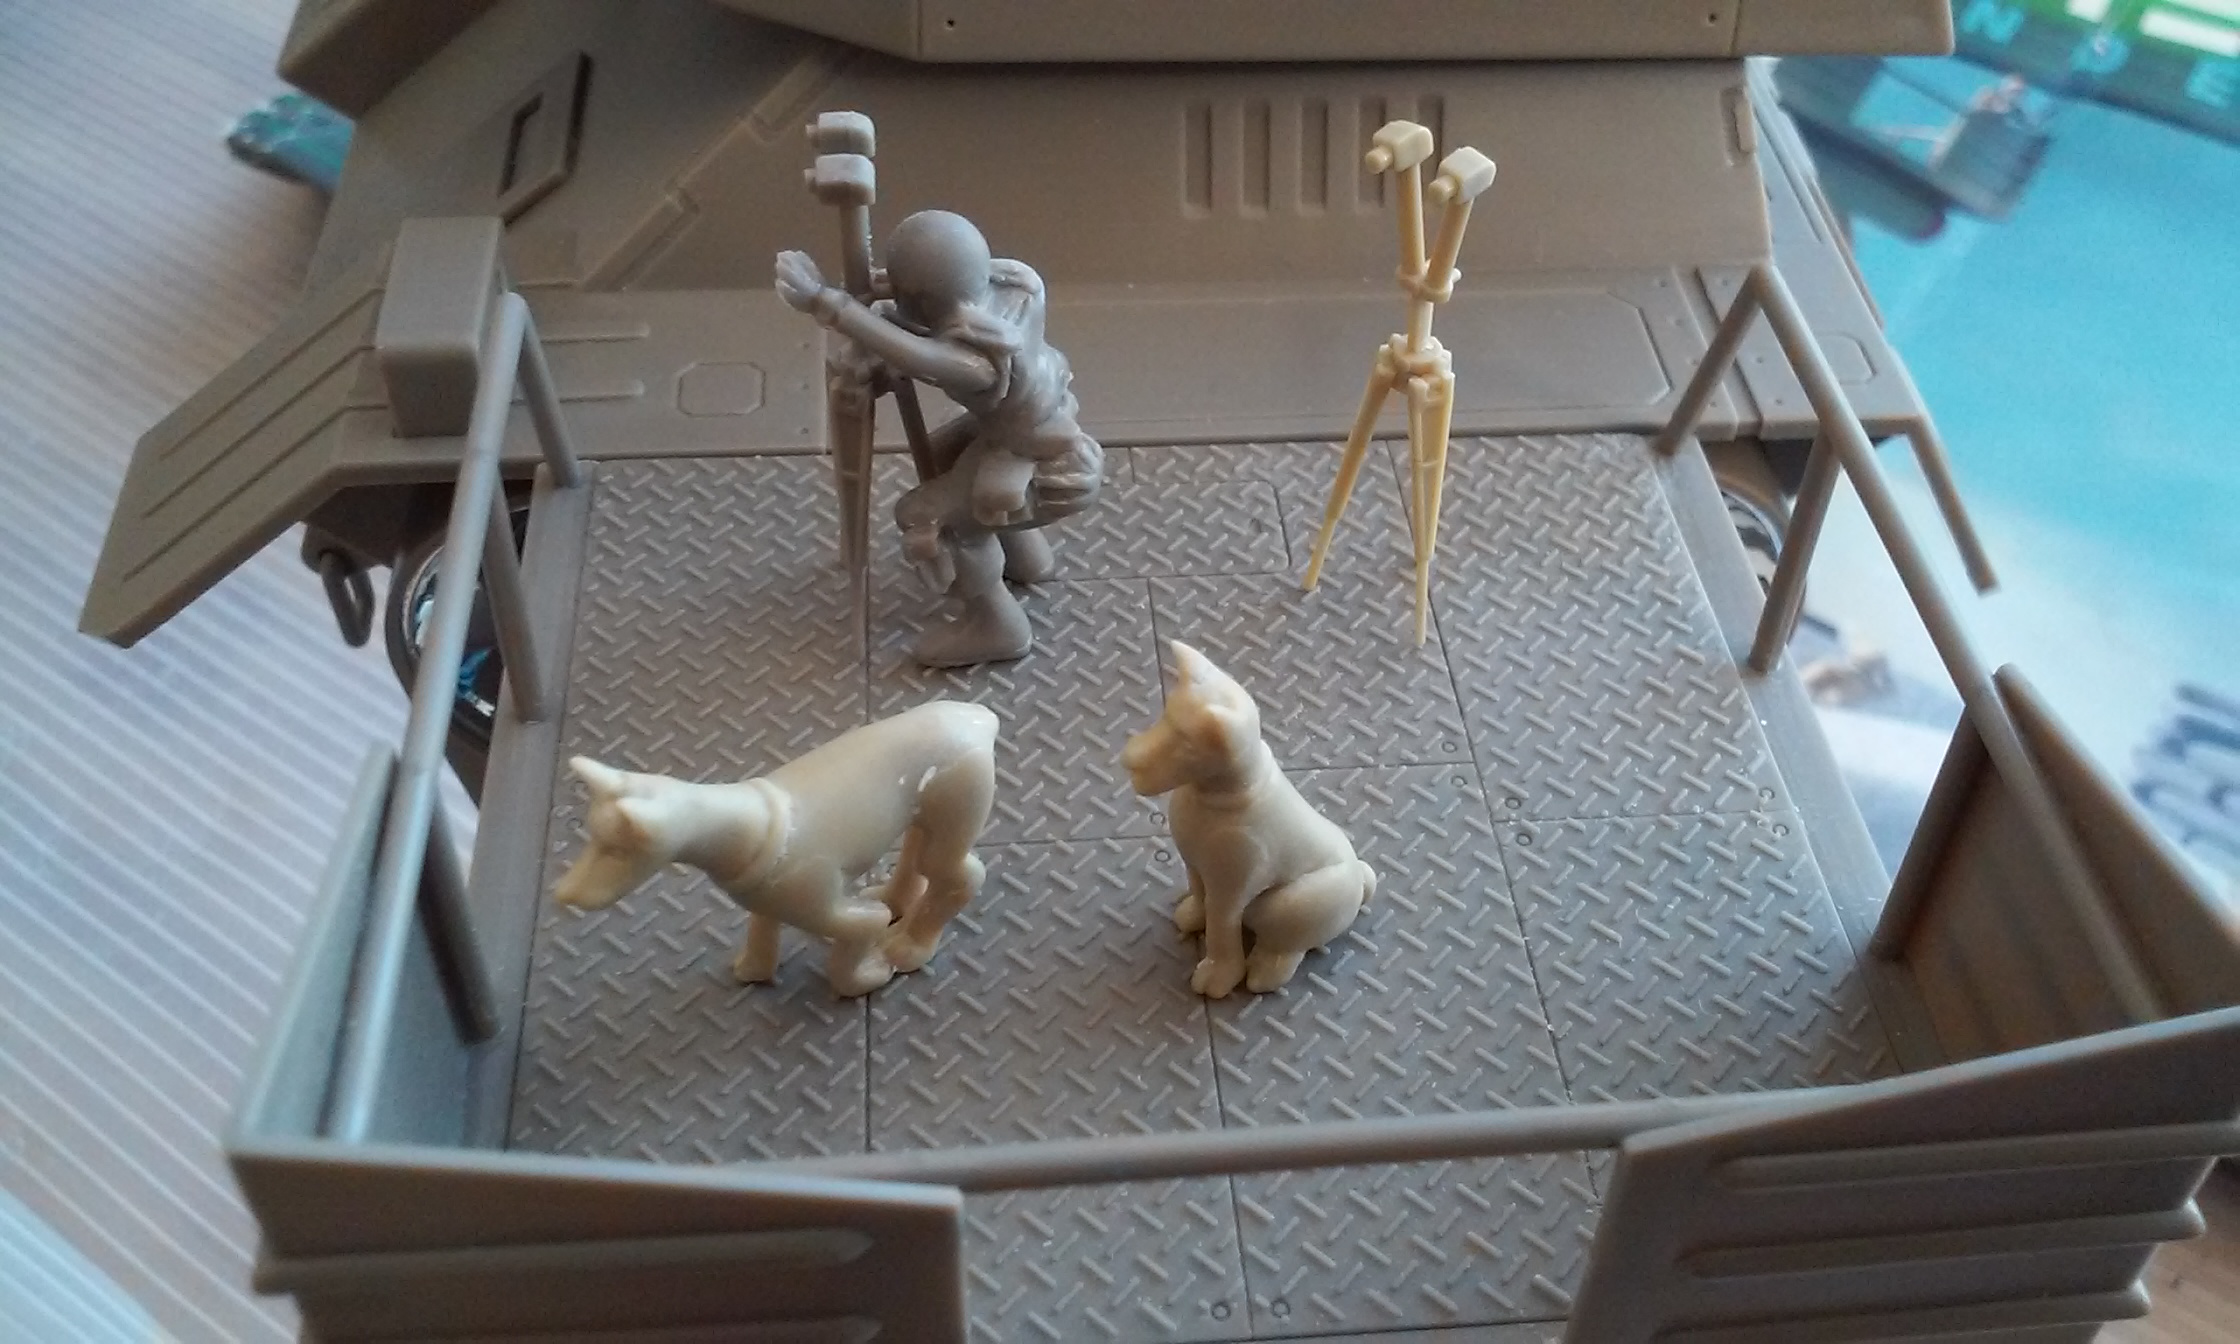
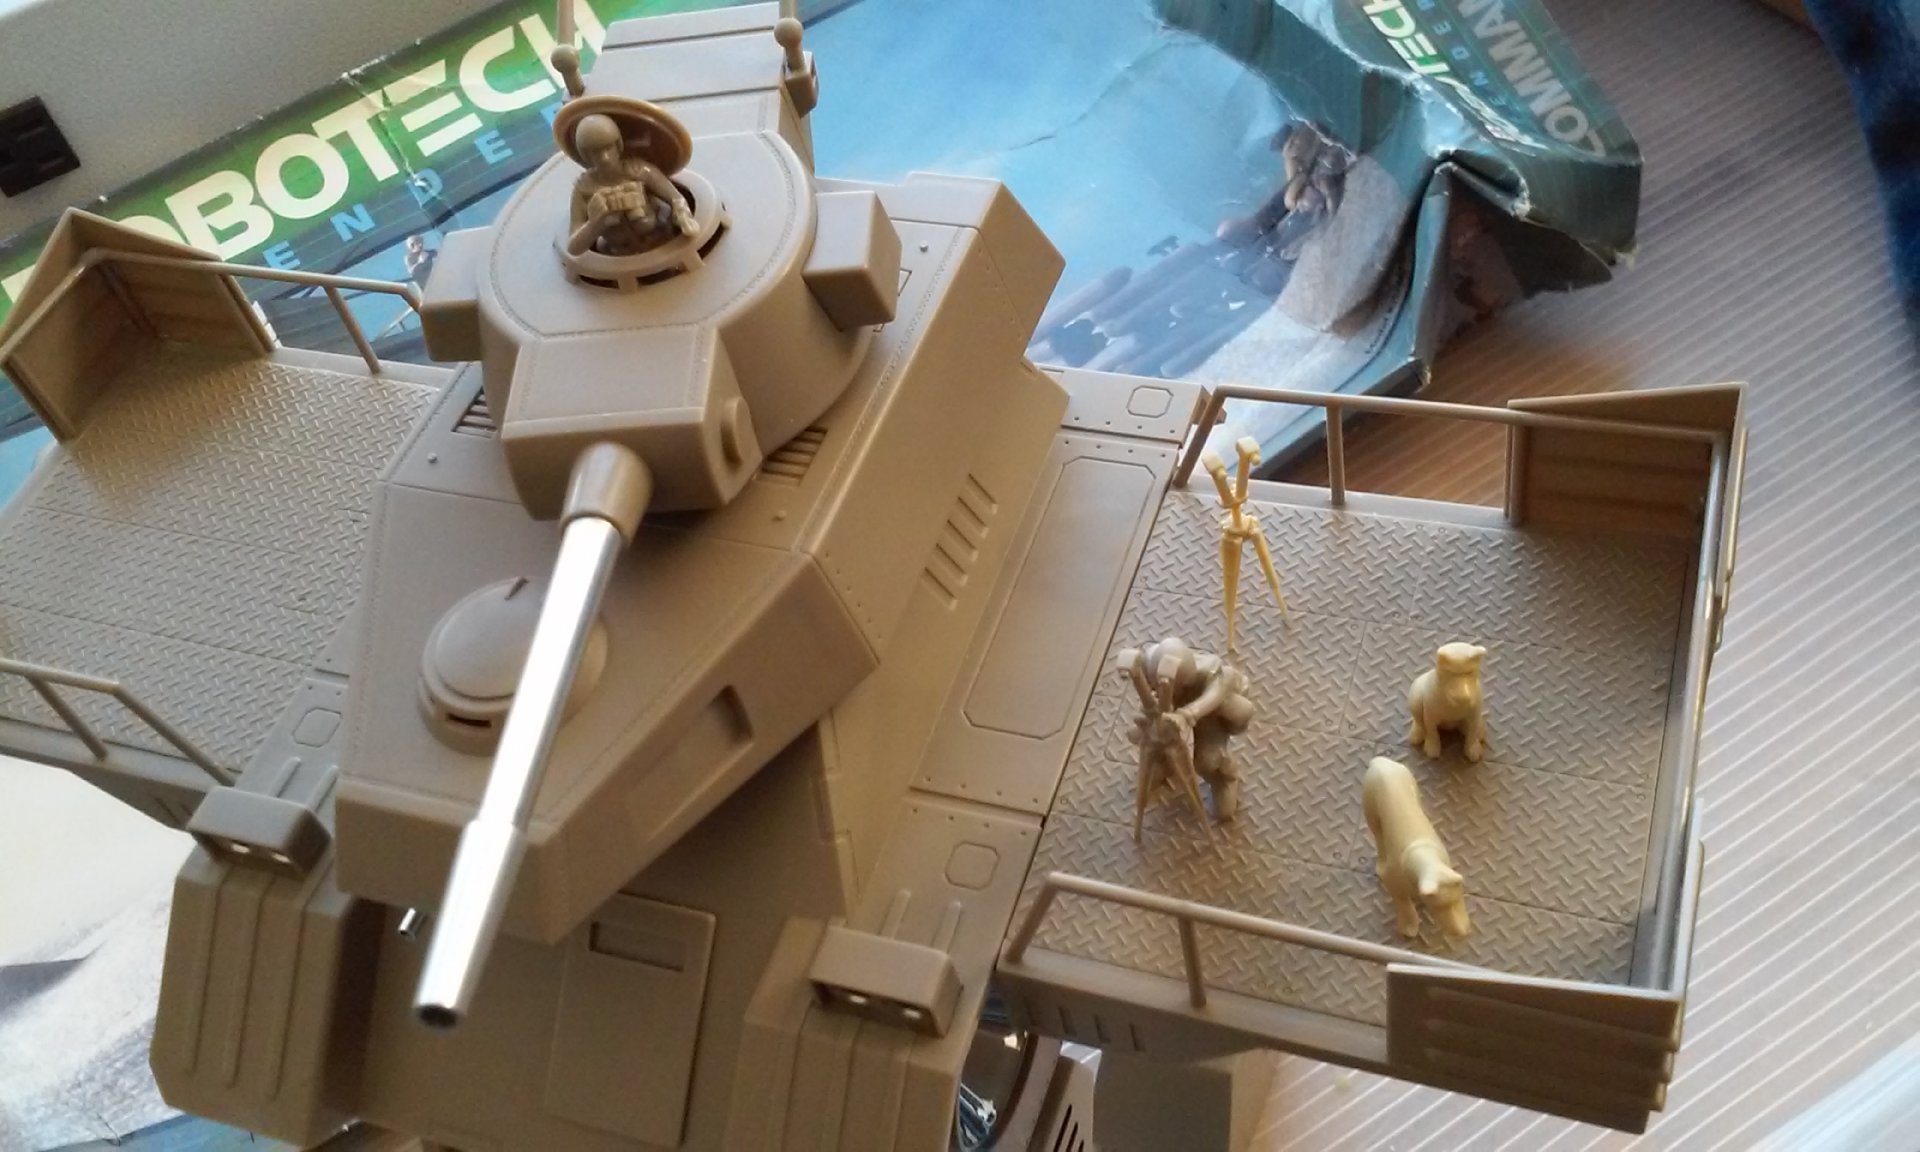
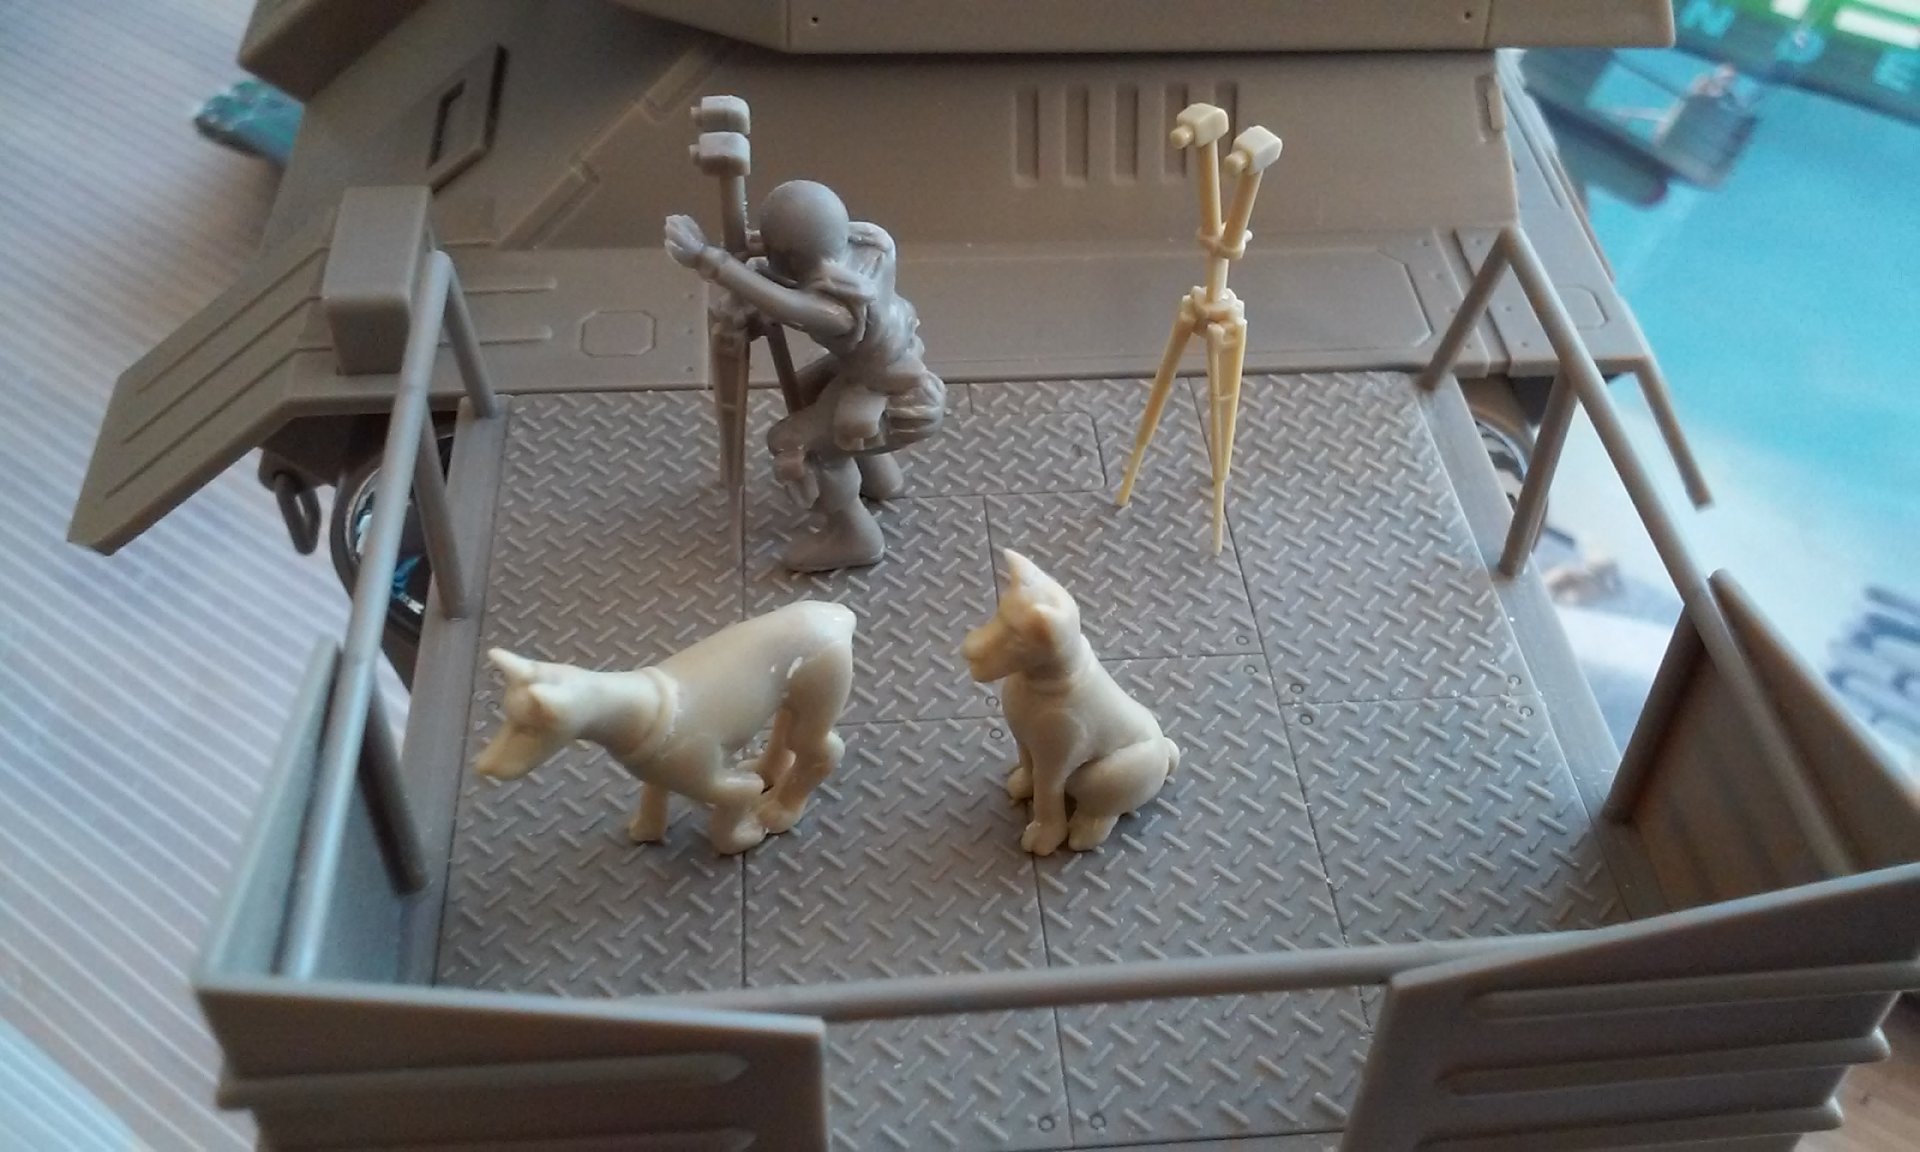
Thanks guys! Herve, your comic based paint scheme came out great! You could slice it in half down the center and display it in the comic book it matches so well! CrossAir, your Gunhead model looks nice and clean! I never saw the series, but the ads I saw drove me nuts because they were so foggy and you couldn't see the mecha very well. Nearly done with construction. I got the seems clean and the color is good, so matching paint will be used to look like dirt and cover the seems without going through the whole process of priming and painting only for it to get scratched up. One missile pod will be built to open and display the ordnance since they include it. This kit is a LOT of fun and not too bad fit wise. The toughest part is building the tiny tri-pod to put the range finders on that goes with the troops! - MT

-
Thats funny everyone! And space-FOLD - love it! - MT
-
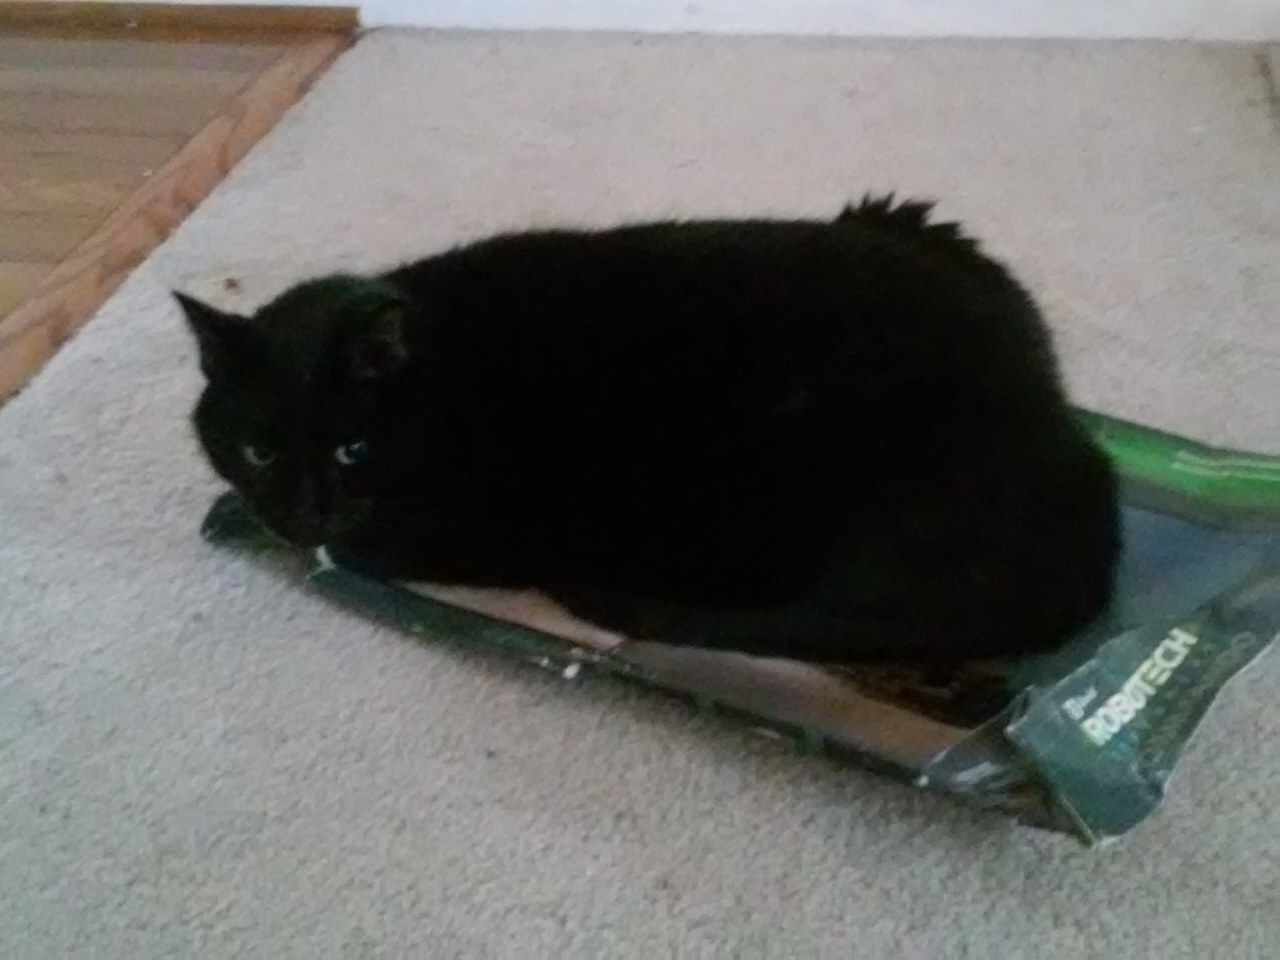
Ha ha ha! OK, my parents wouldn't let me have ANYTHING that resembled a weapon (because they knew me too well). BUT, my glue all over the place models got re-used to add more weapons onto some unsuspecting valkyrie kit or other Robotech kit. Today, EVERYBODY gets involved in model building in this house! (see attached) - MT
-
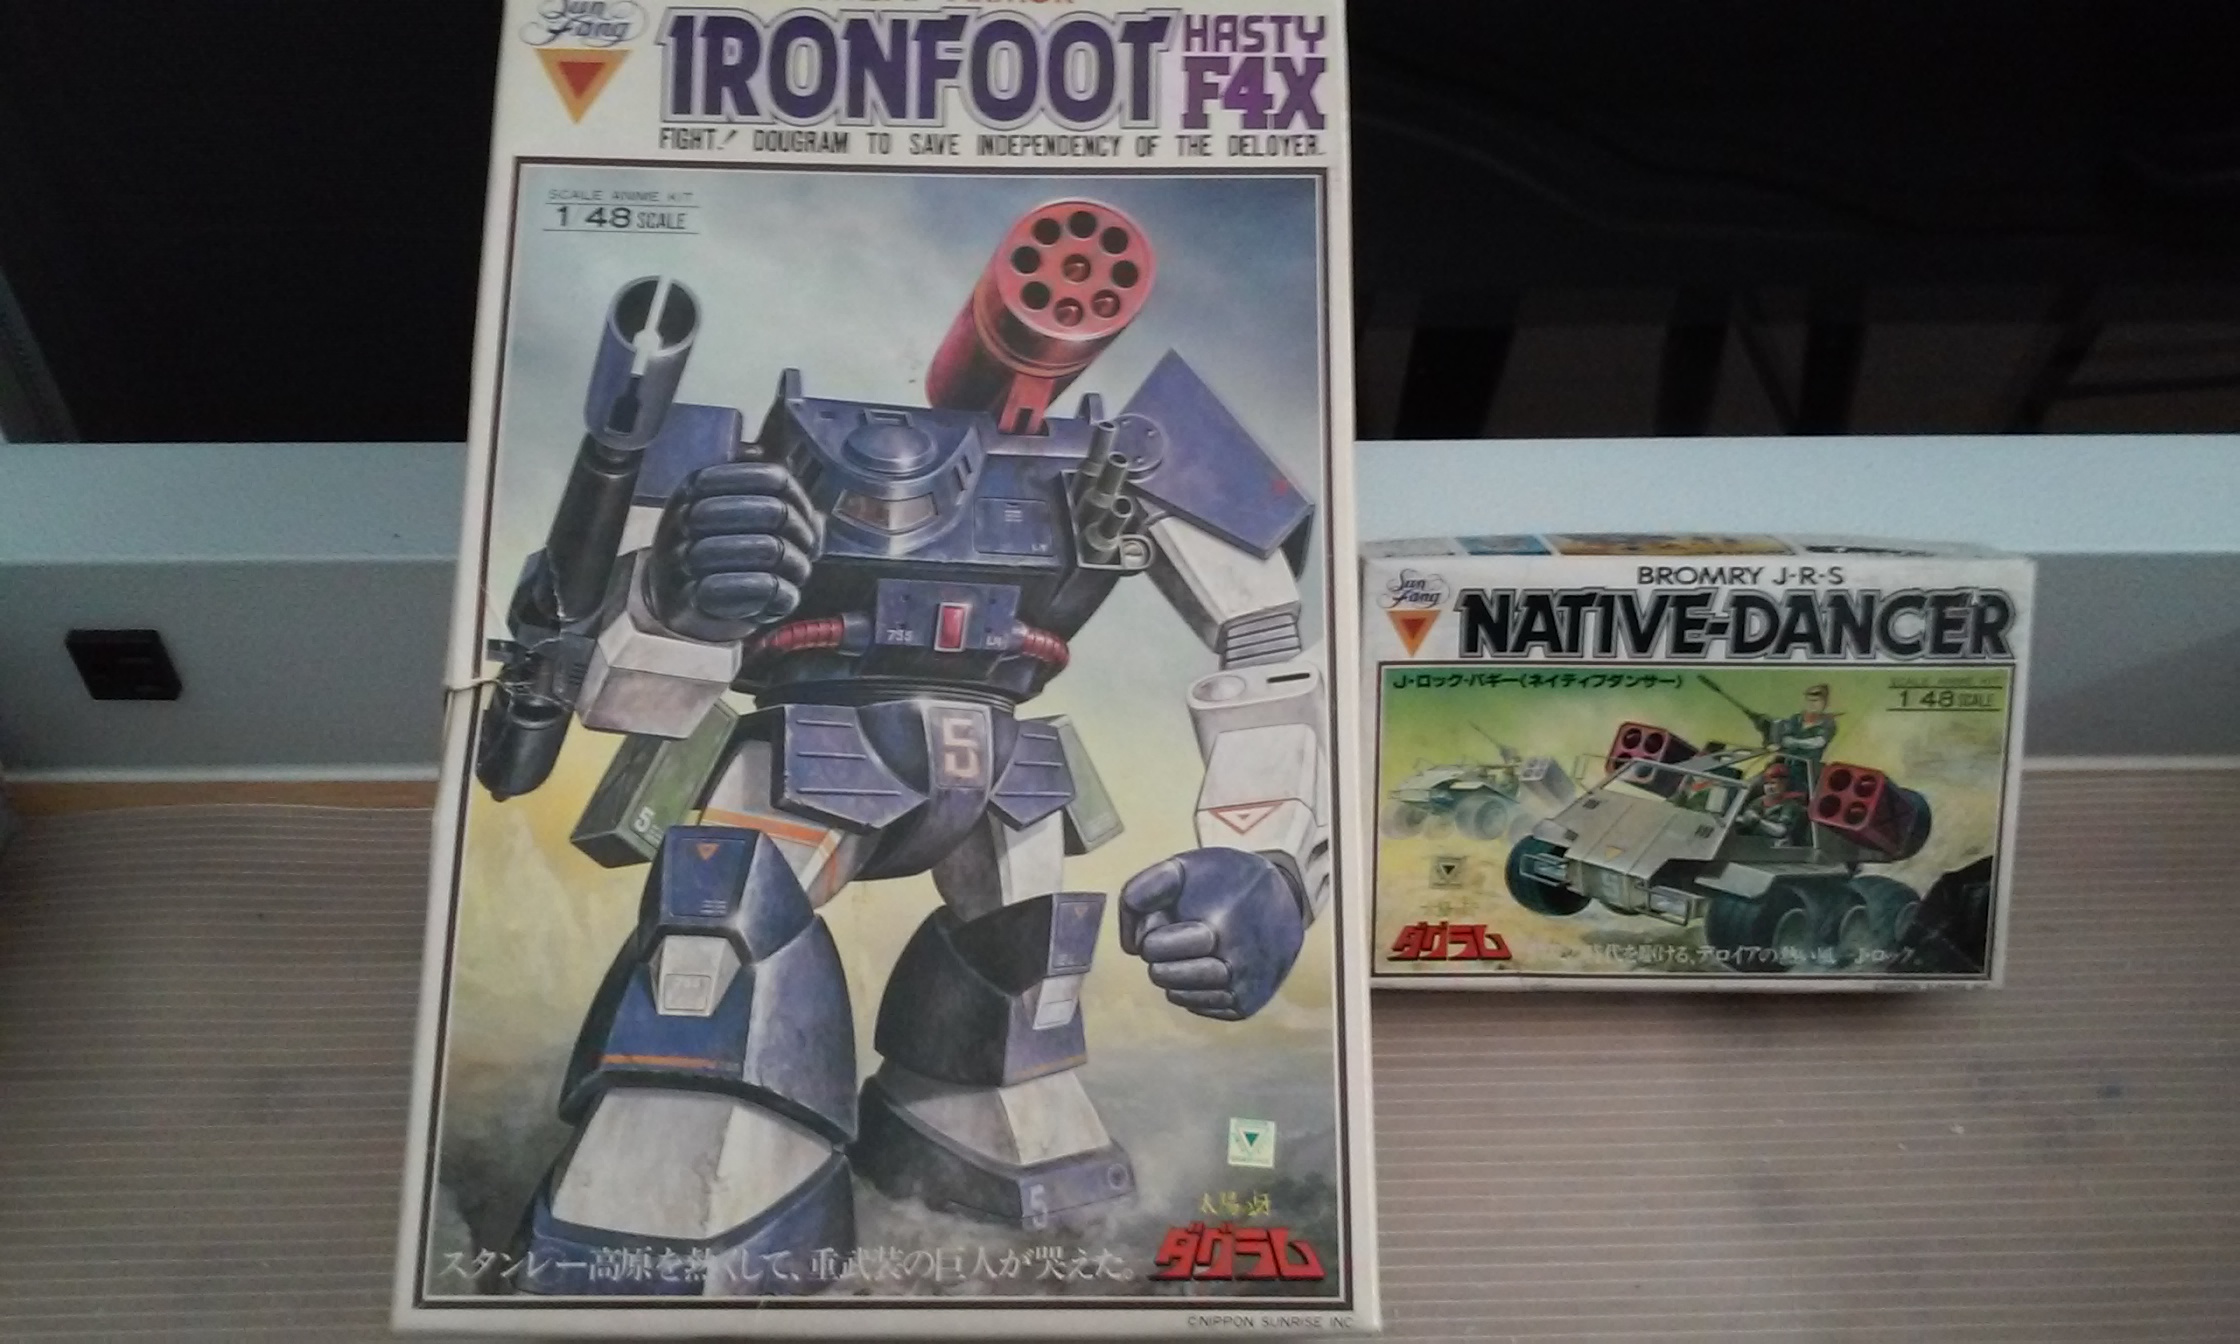
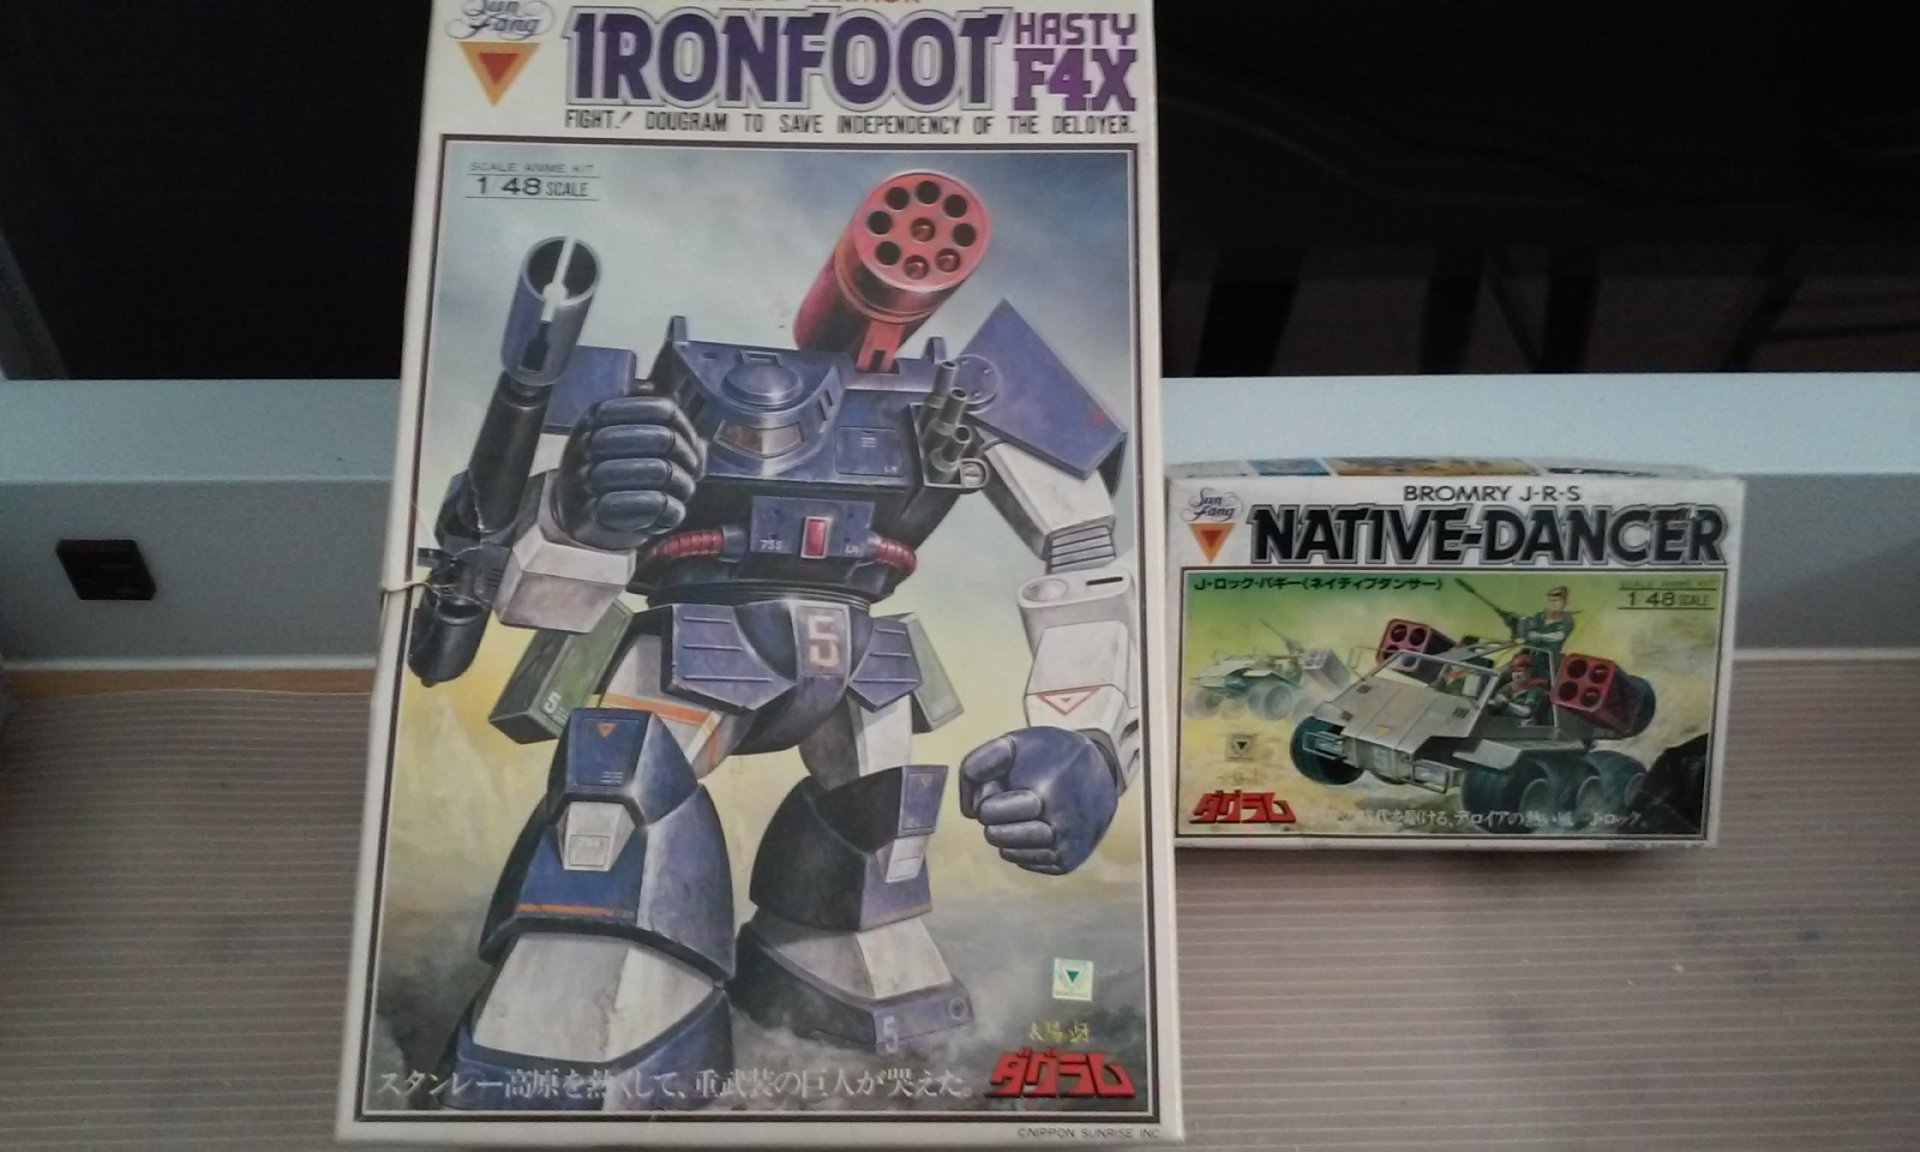
The 190 is looking great Herve! My next two vintage victims came in! I actually had a choice of two "Native Dancers" so I picked the cheaper one with a dirty box. Mandarake is SO cool to shop on! I built both models when I was a LOT younger! I forgot how advanced the Ironfoot kit is complete with various shaped PC parts for articulation and several cool details like a full cockpit and all the missiles being separate and removable. I'm thinking of lighting the "headlights" and cockpit. Did anyone every use the TINY lead tube of glue that came with these things - MT
-
I'm just now catching this. This is a REALLY awesome build! Thanks for sharing guys! - MT
-
That's looking cool! - MT