MechTech
-
Posts
4701 -
Joined
-
Last visited
Content Type
Profiles
Forums
Events
Gallery
Everything posted by MechTech
-
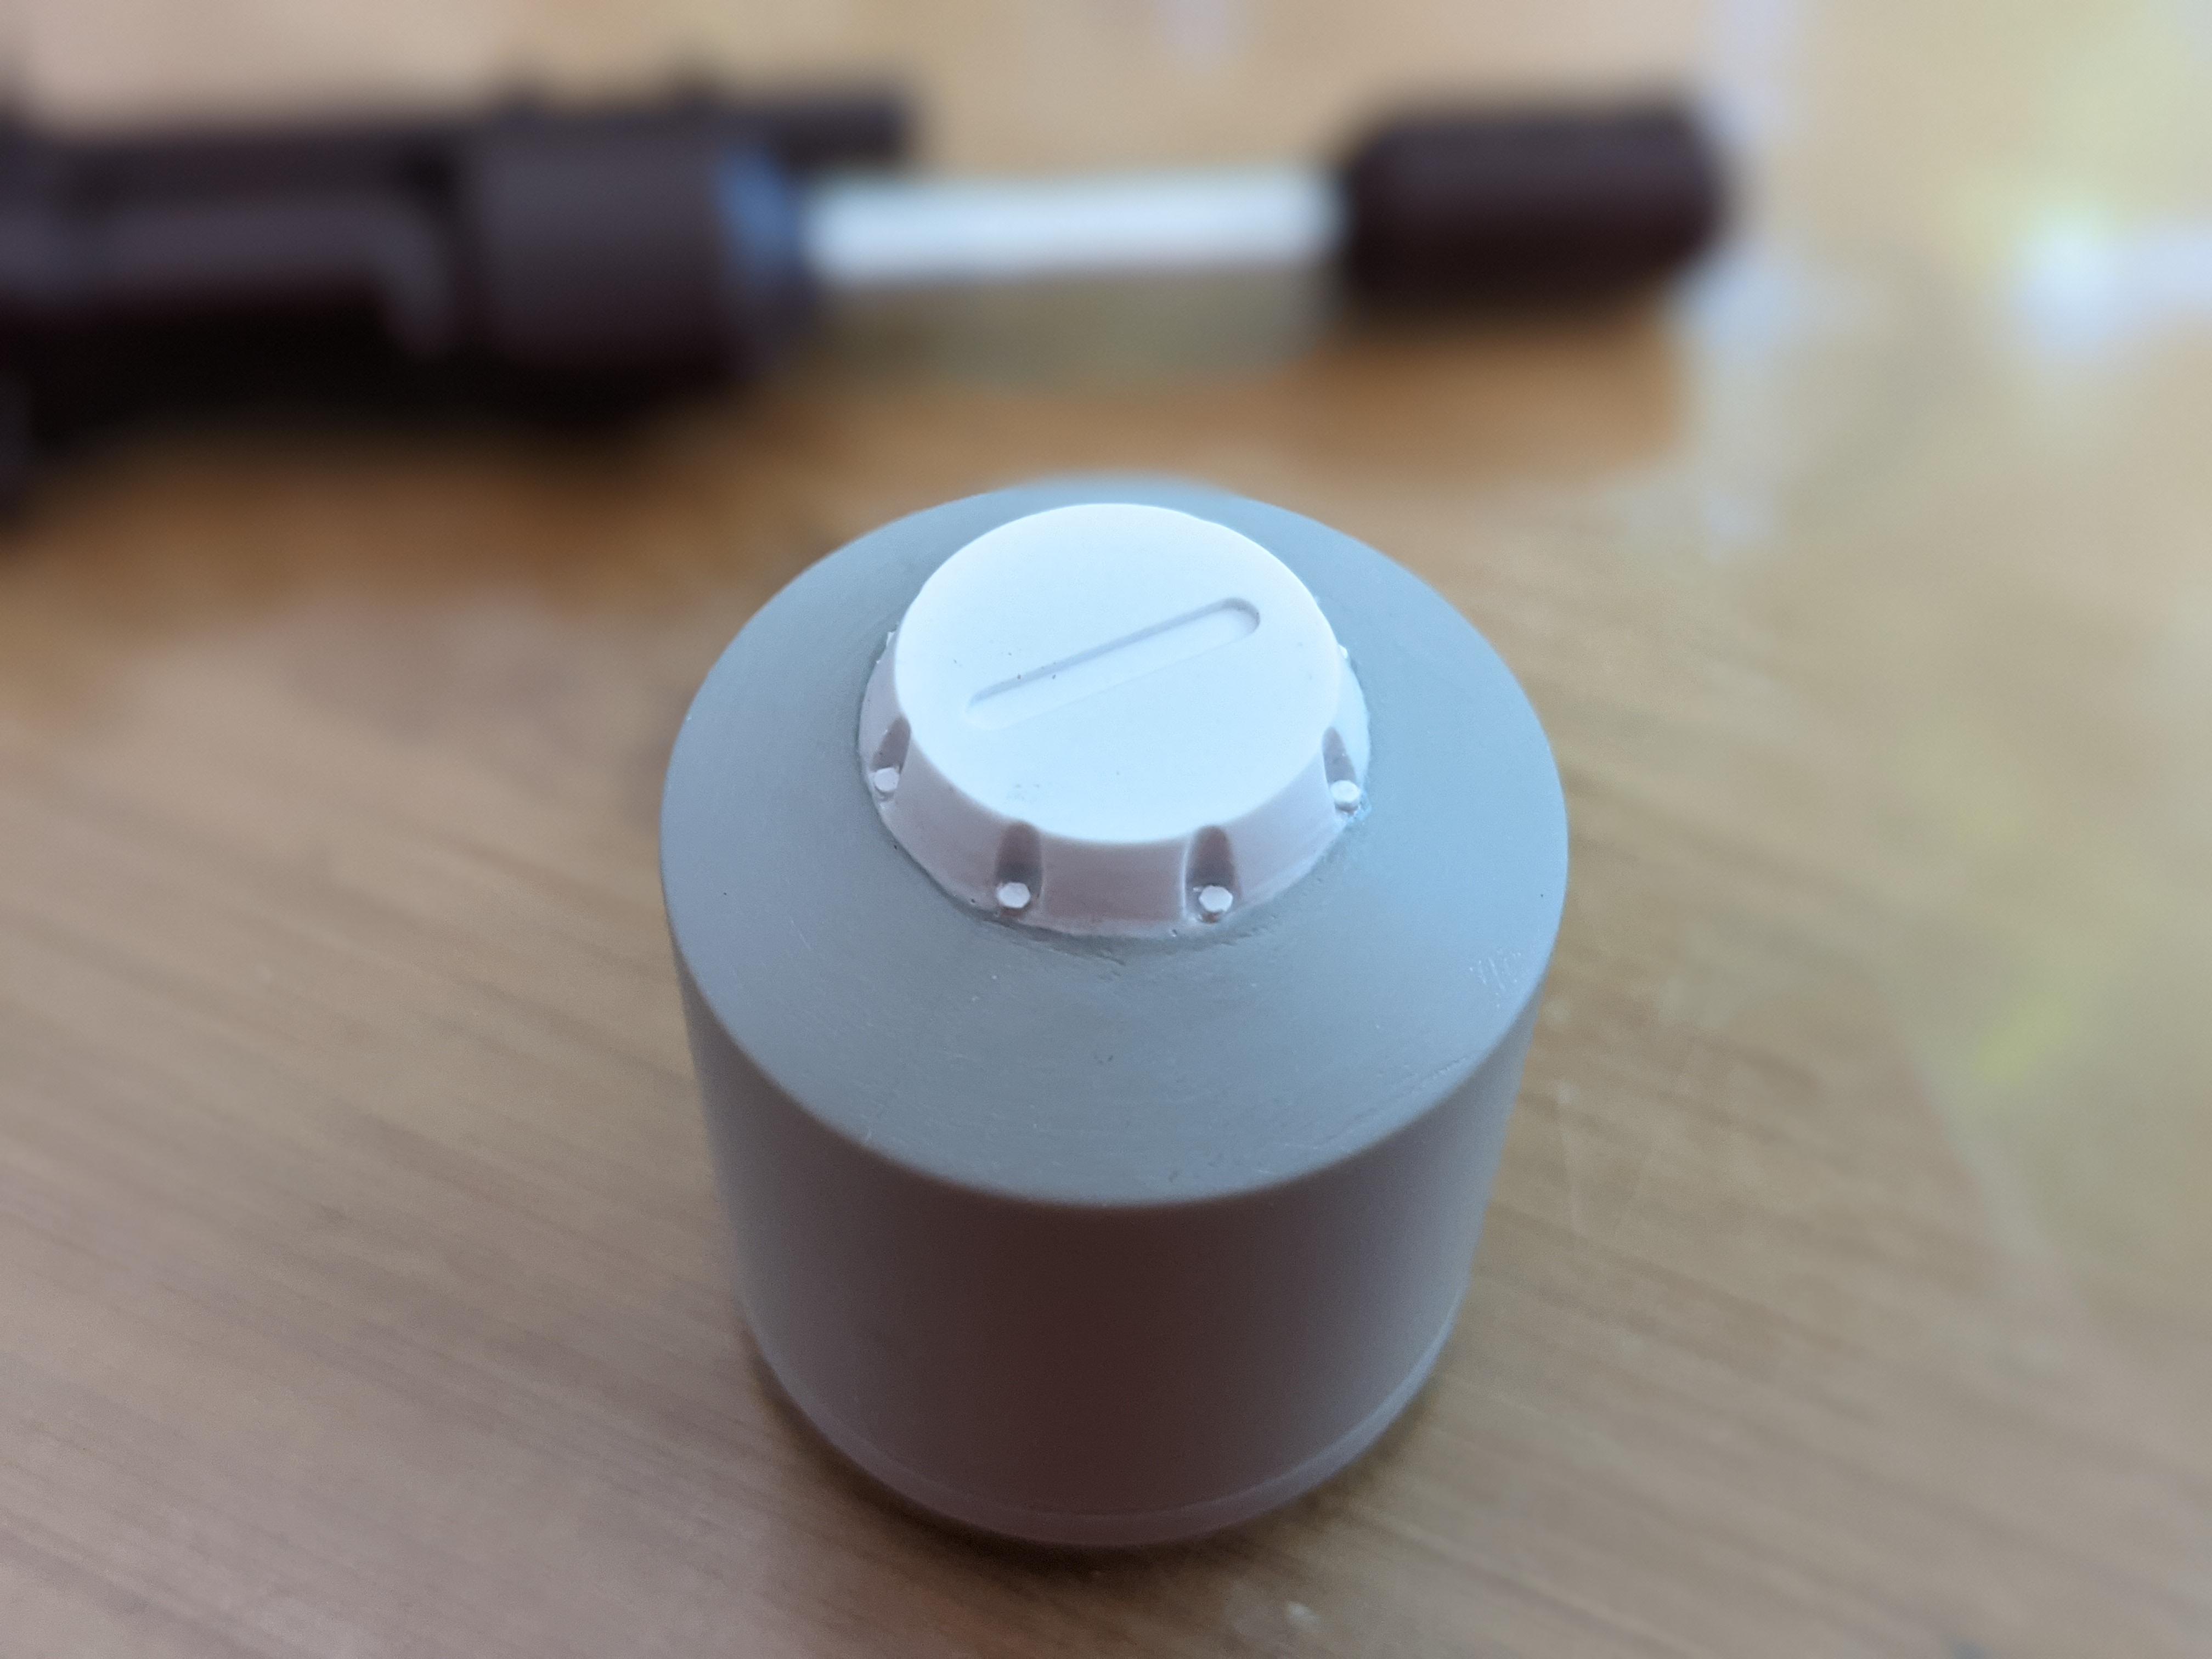
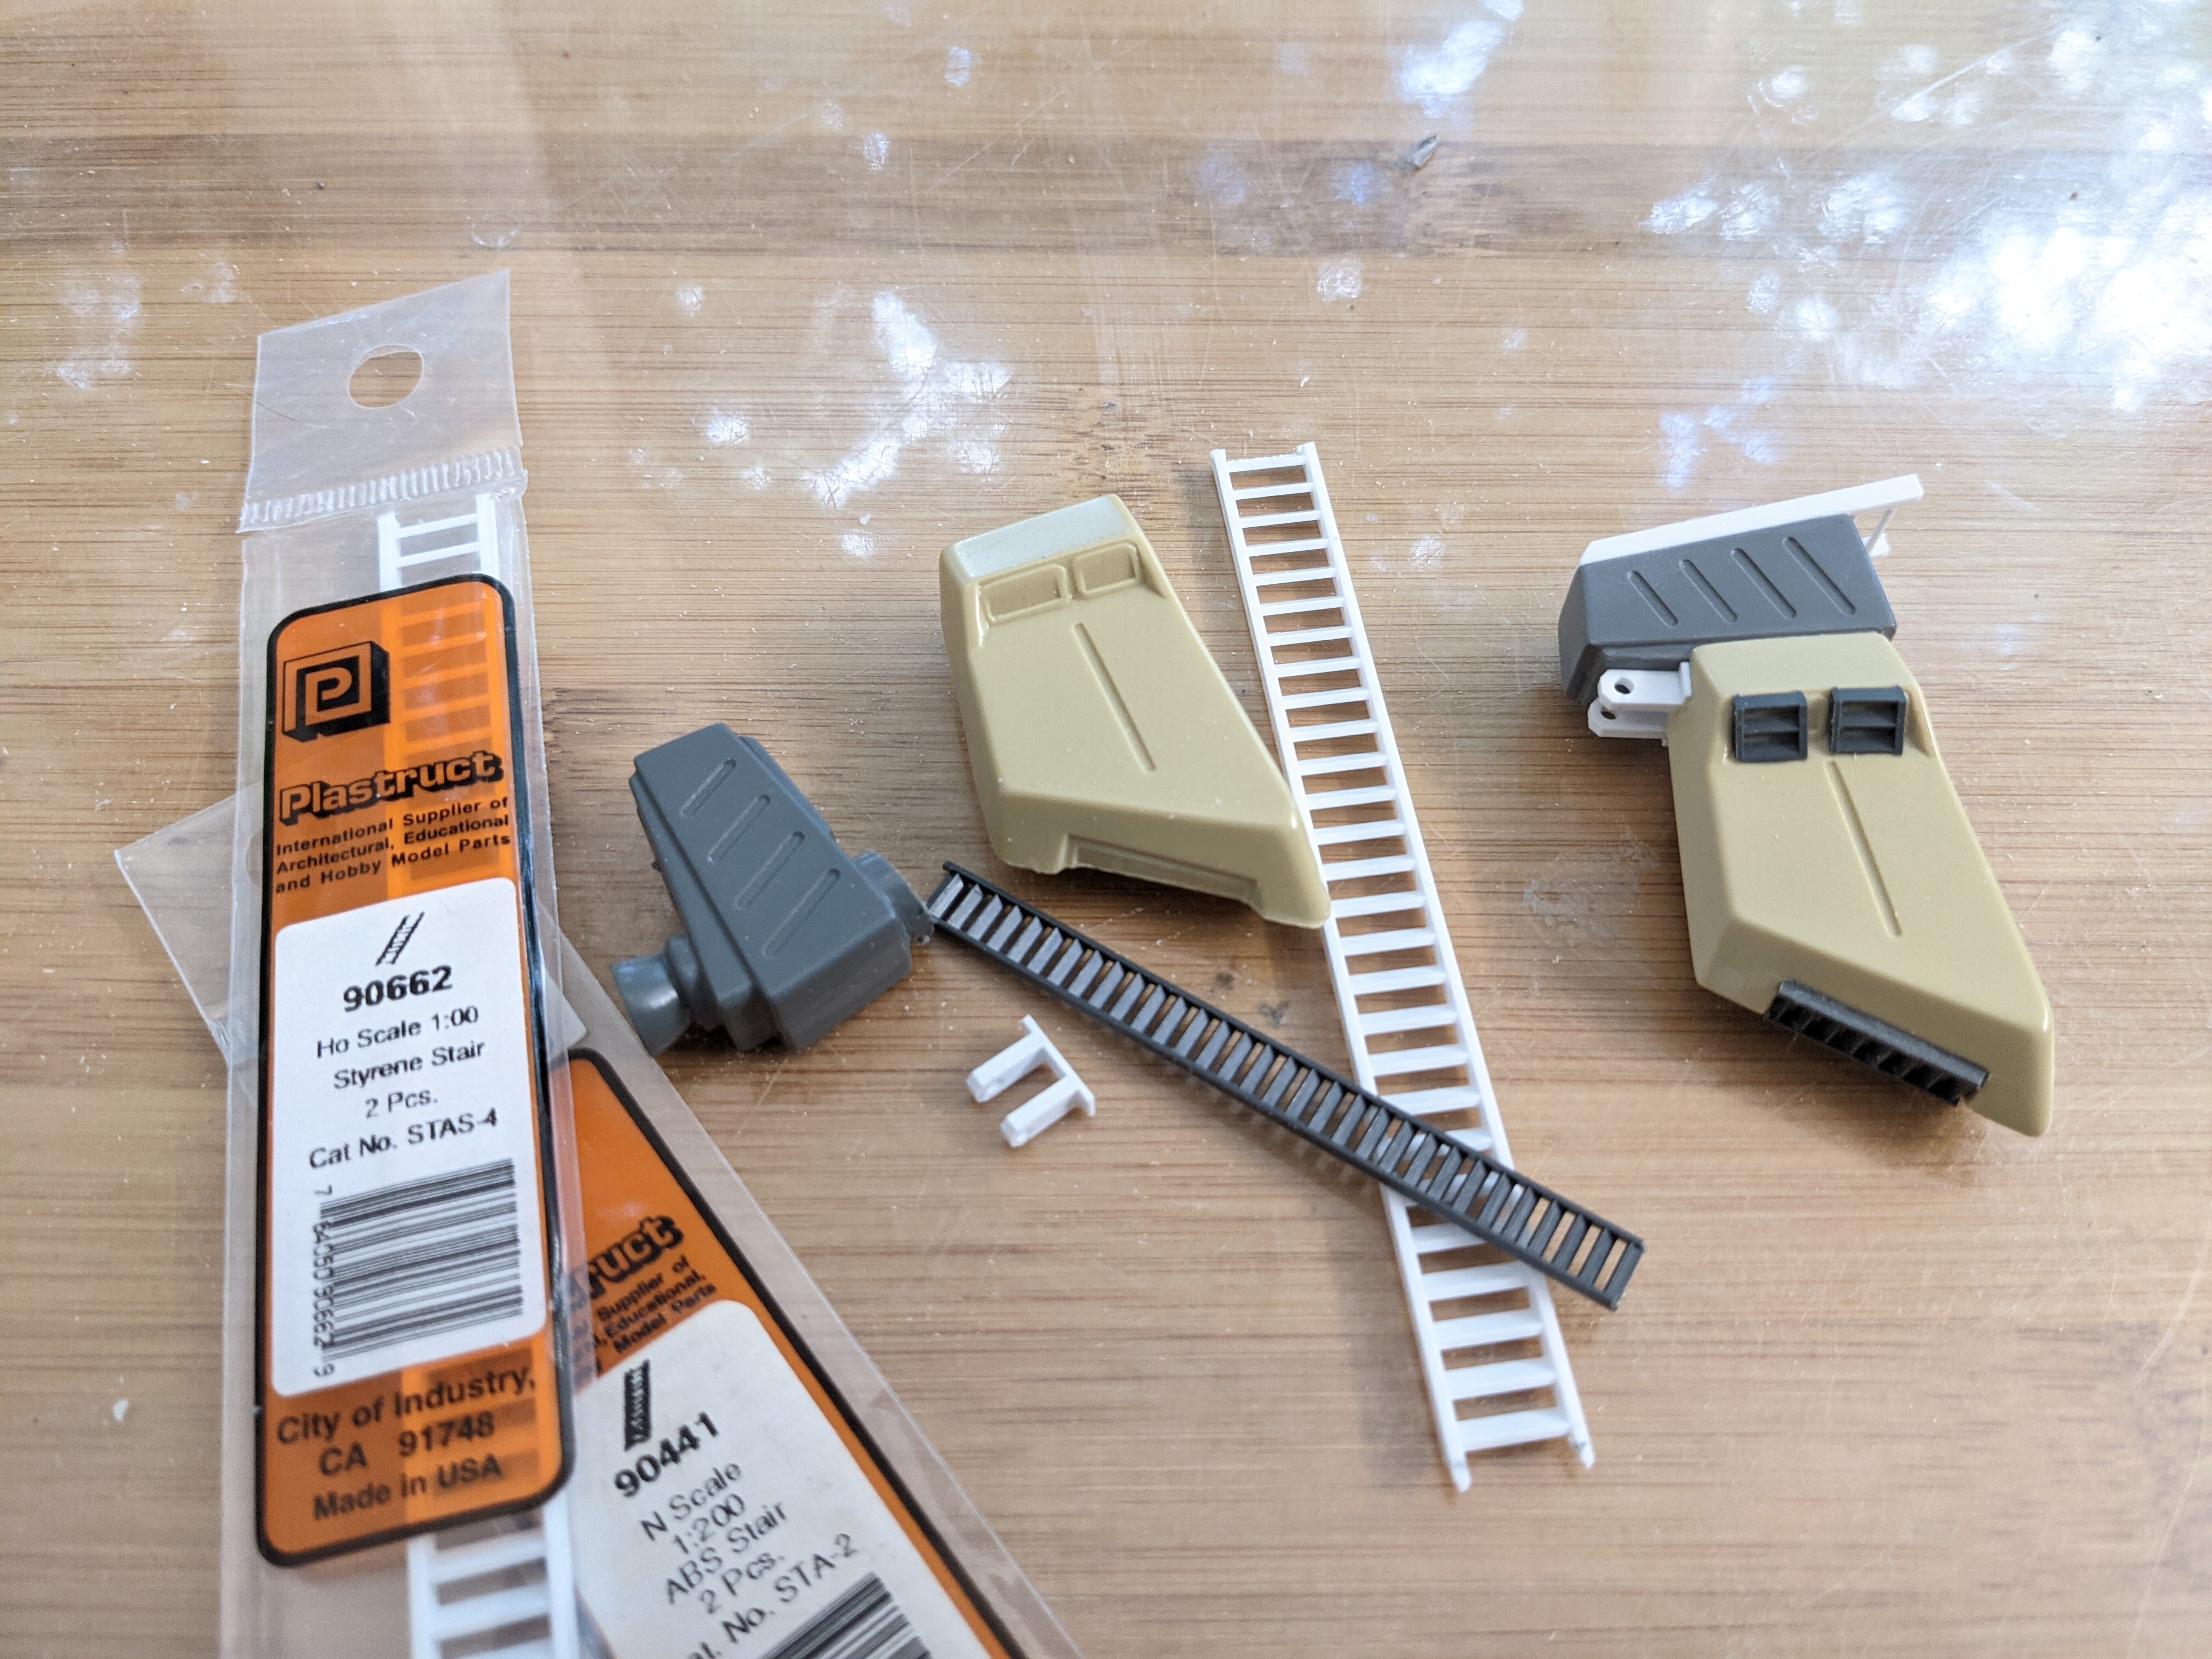
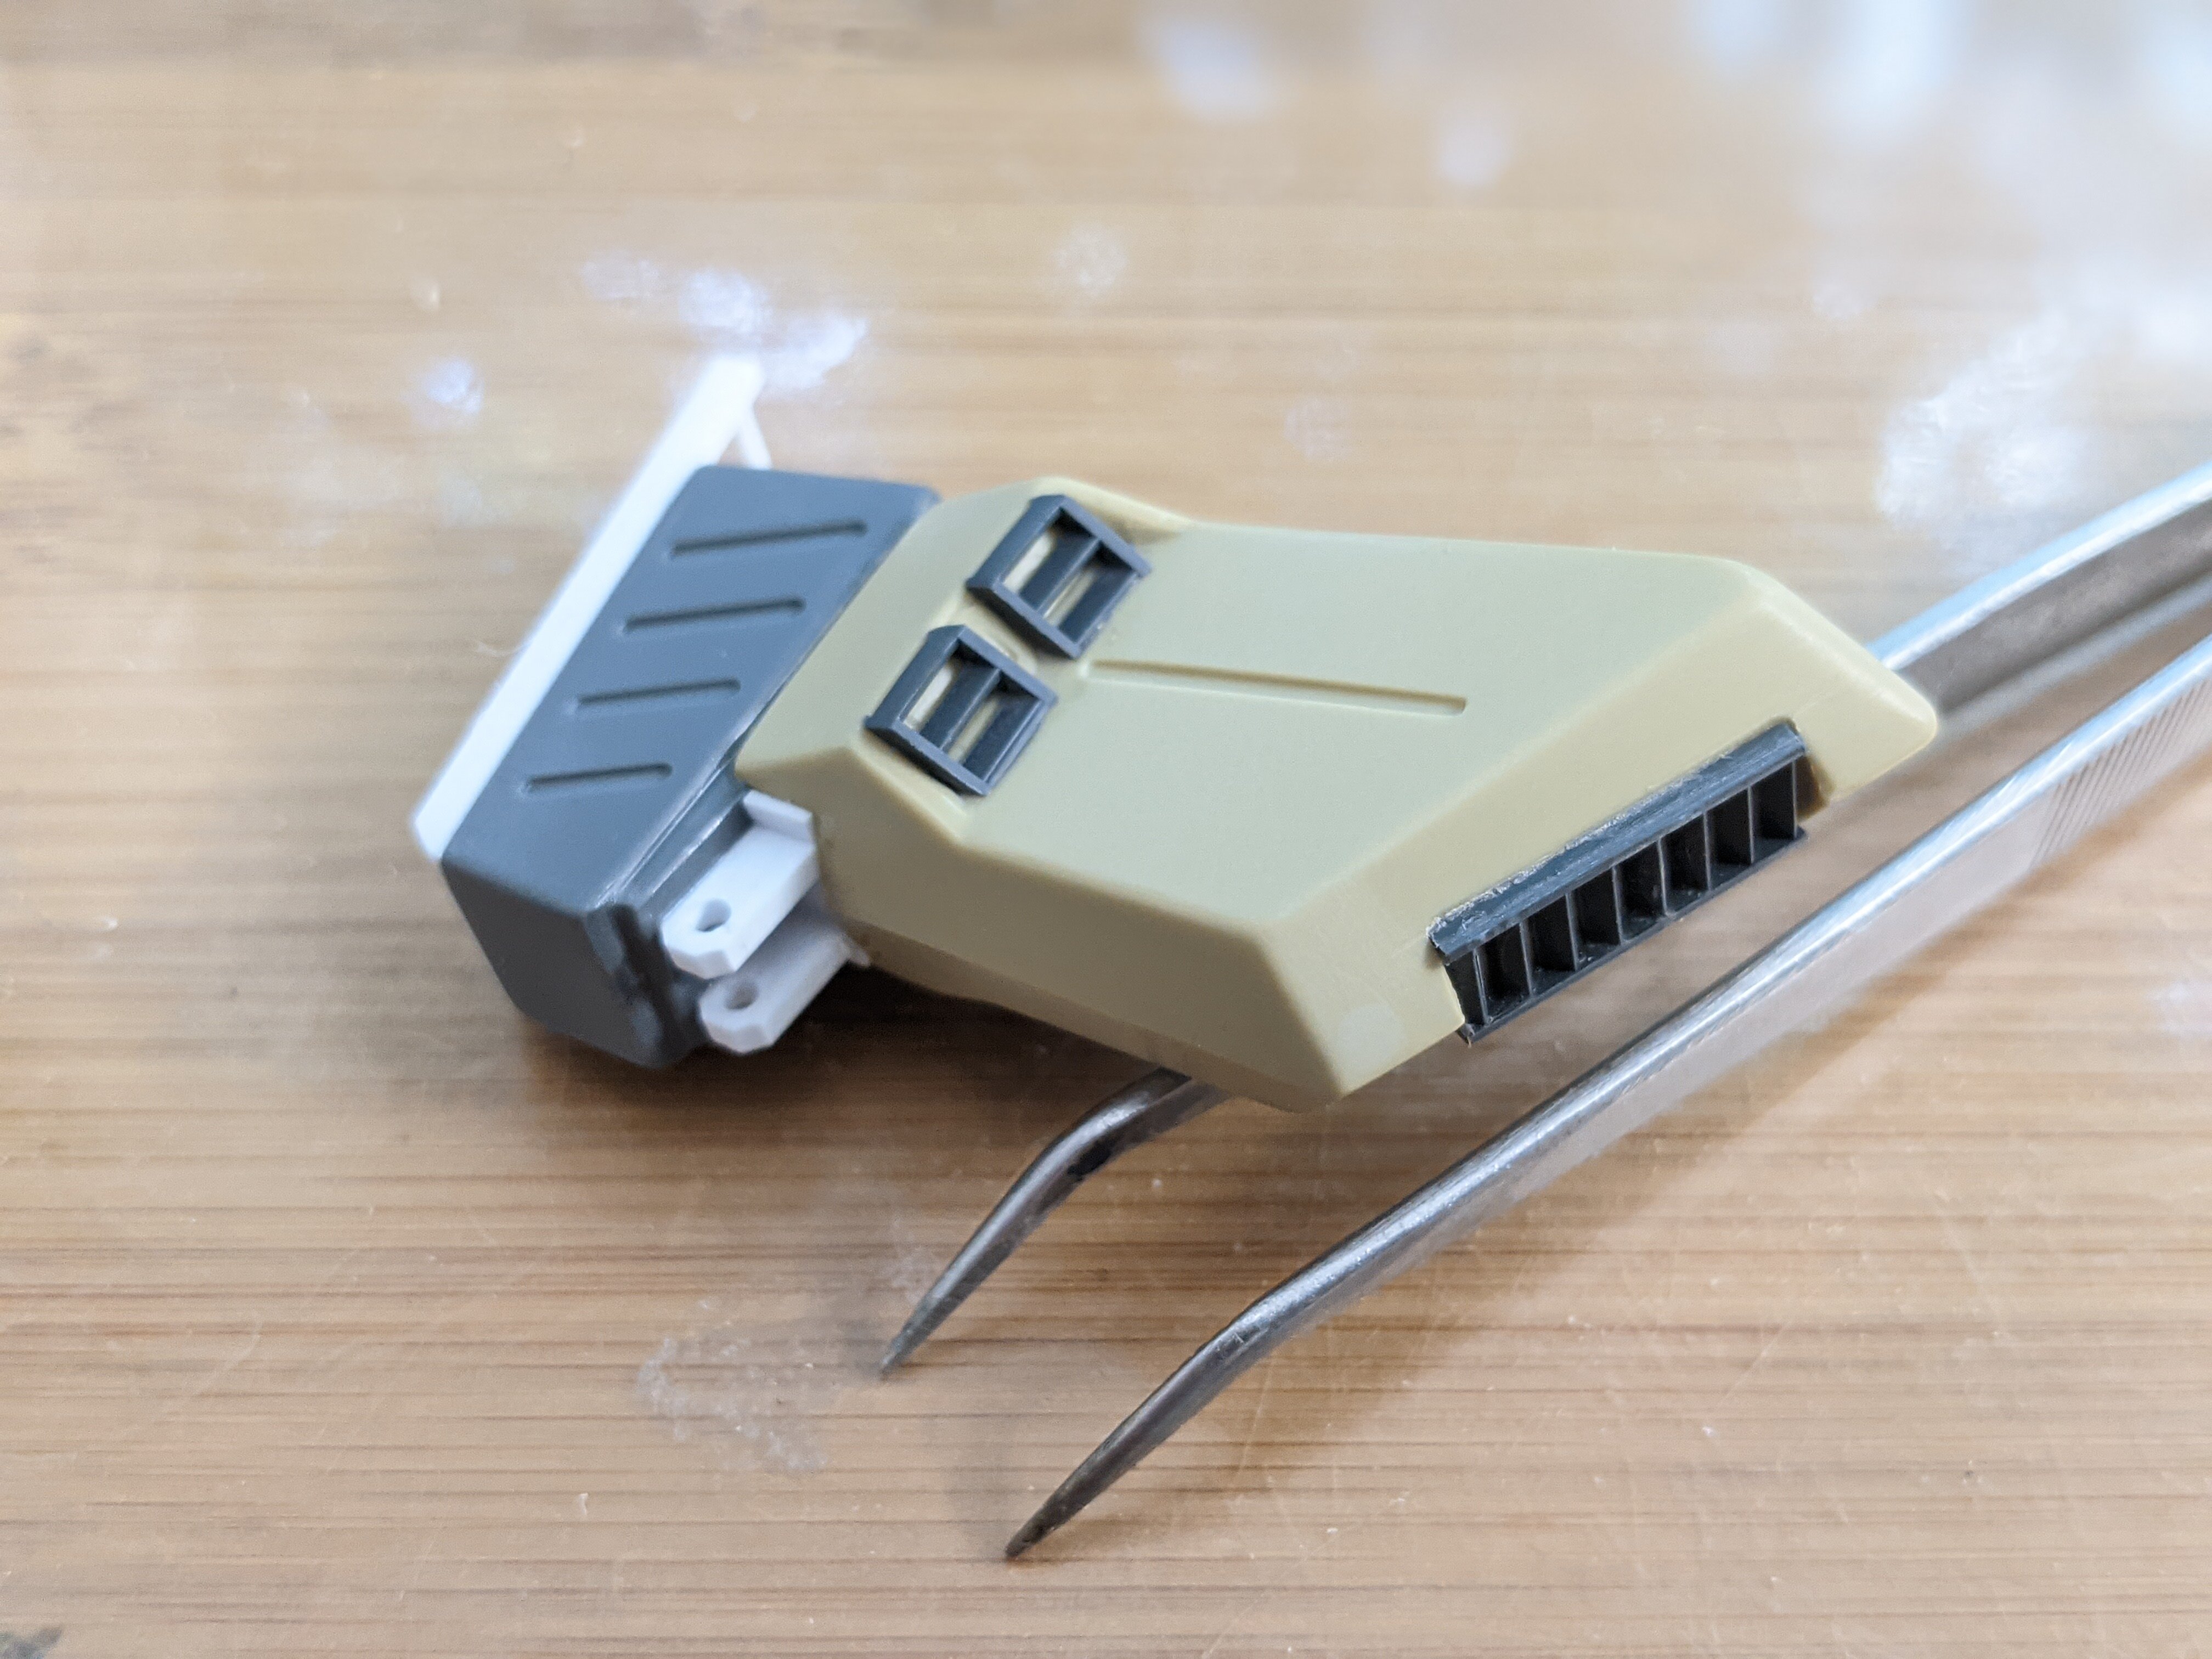
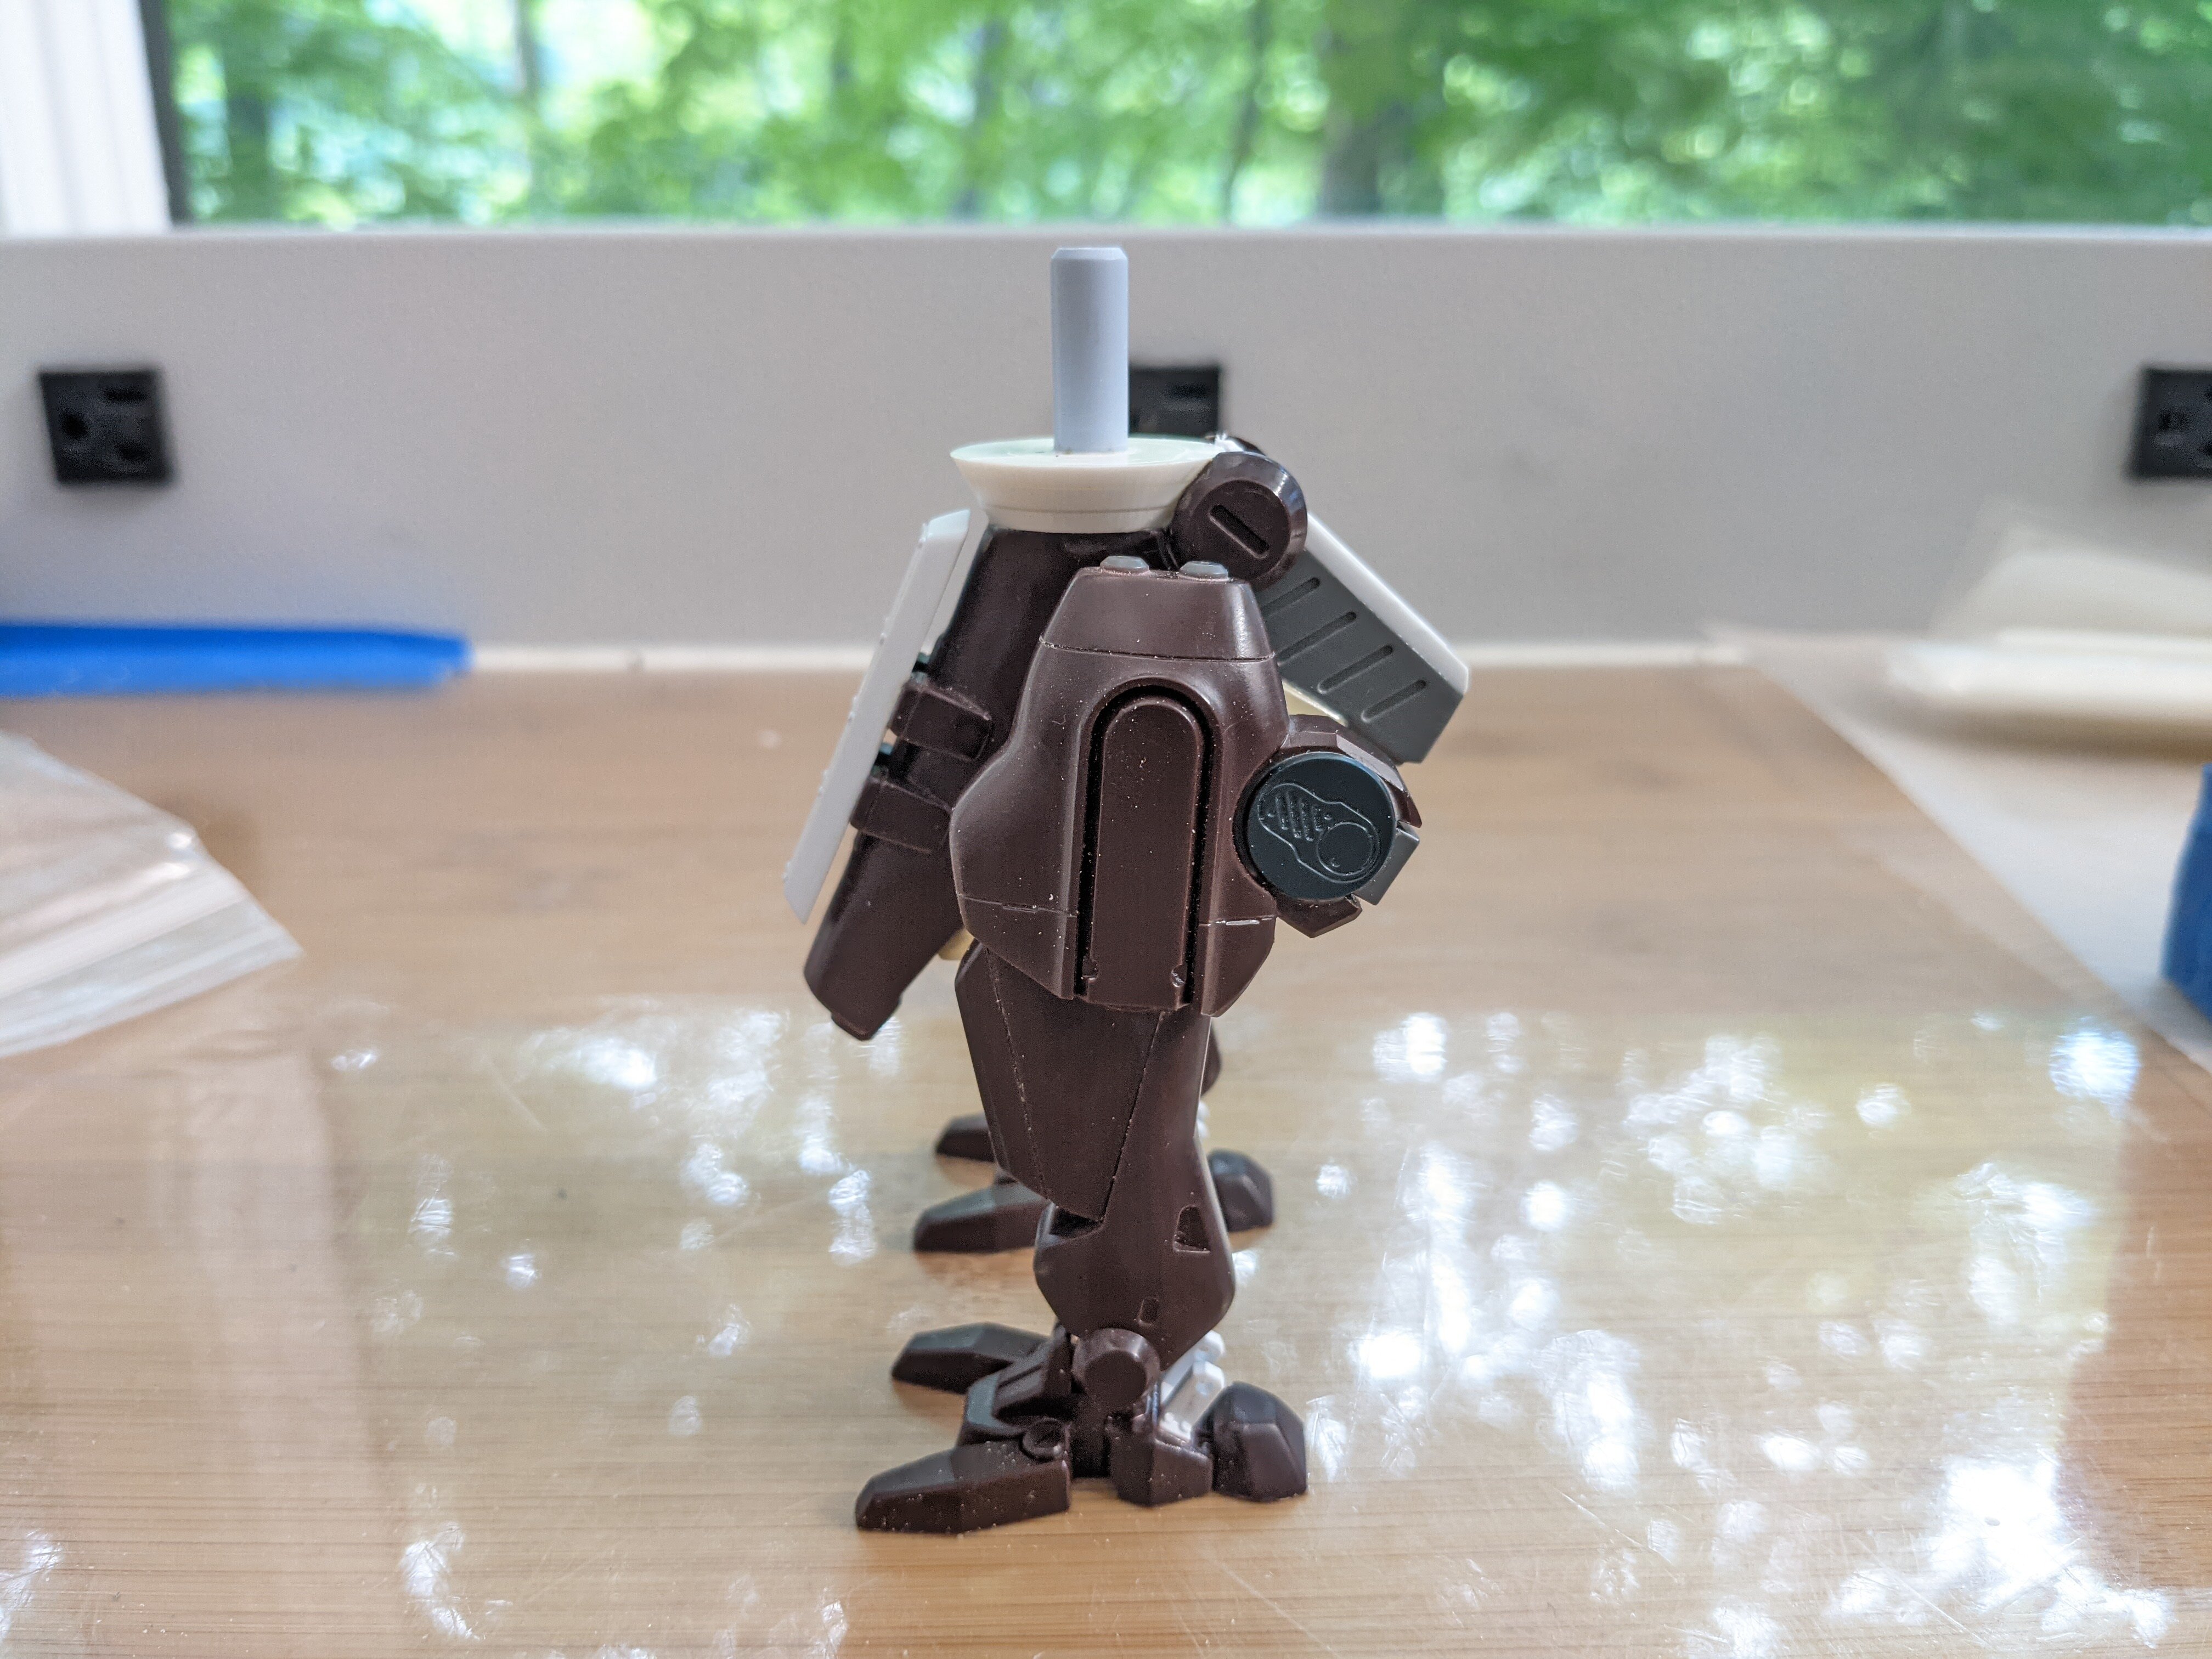
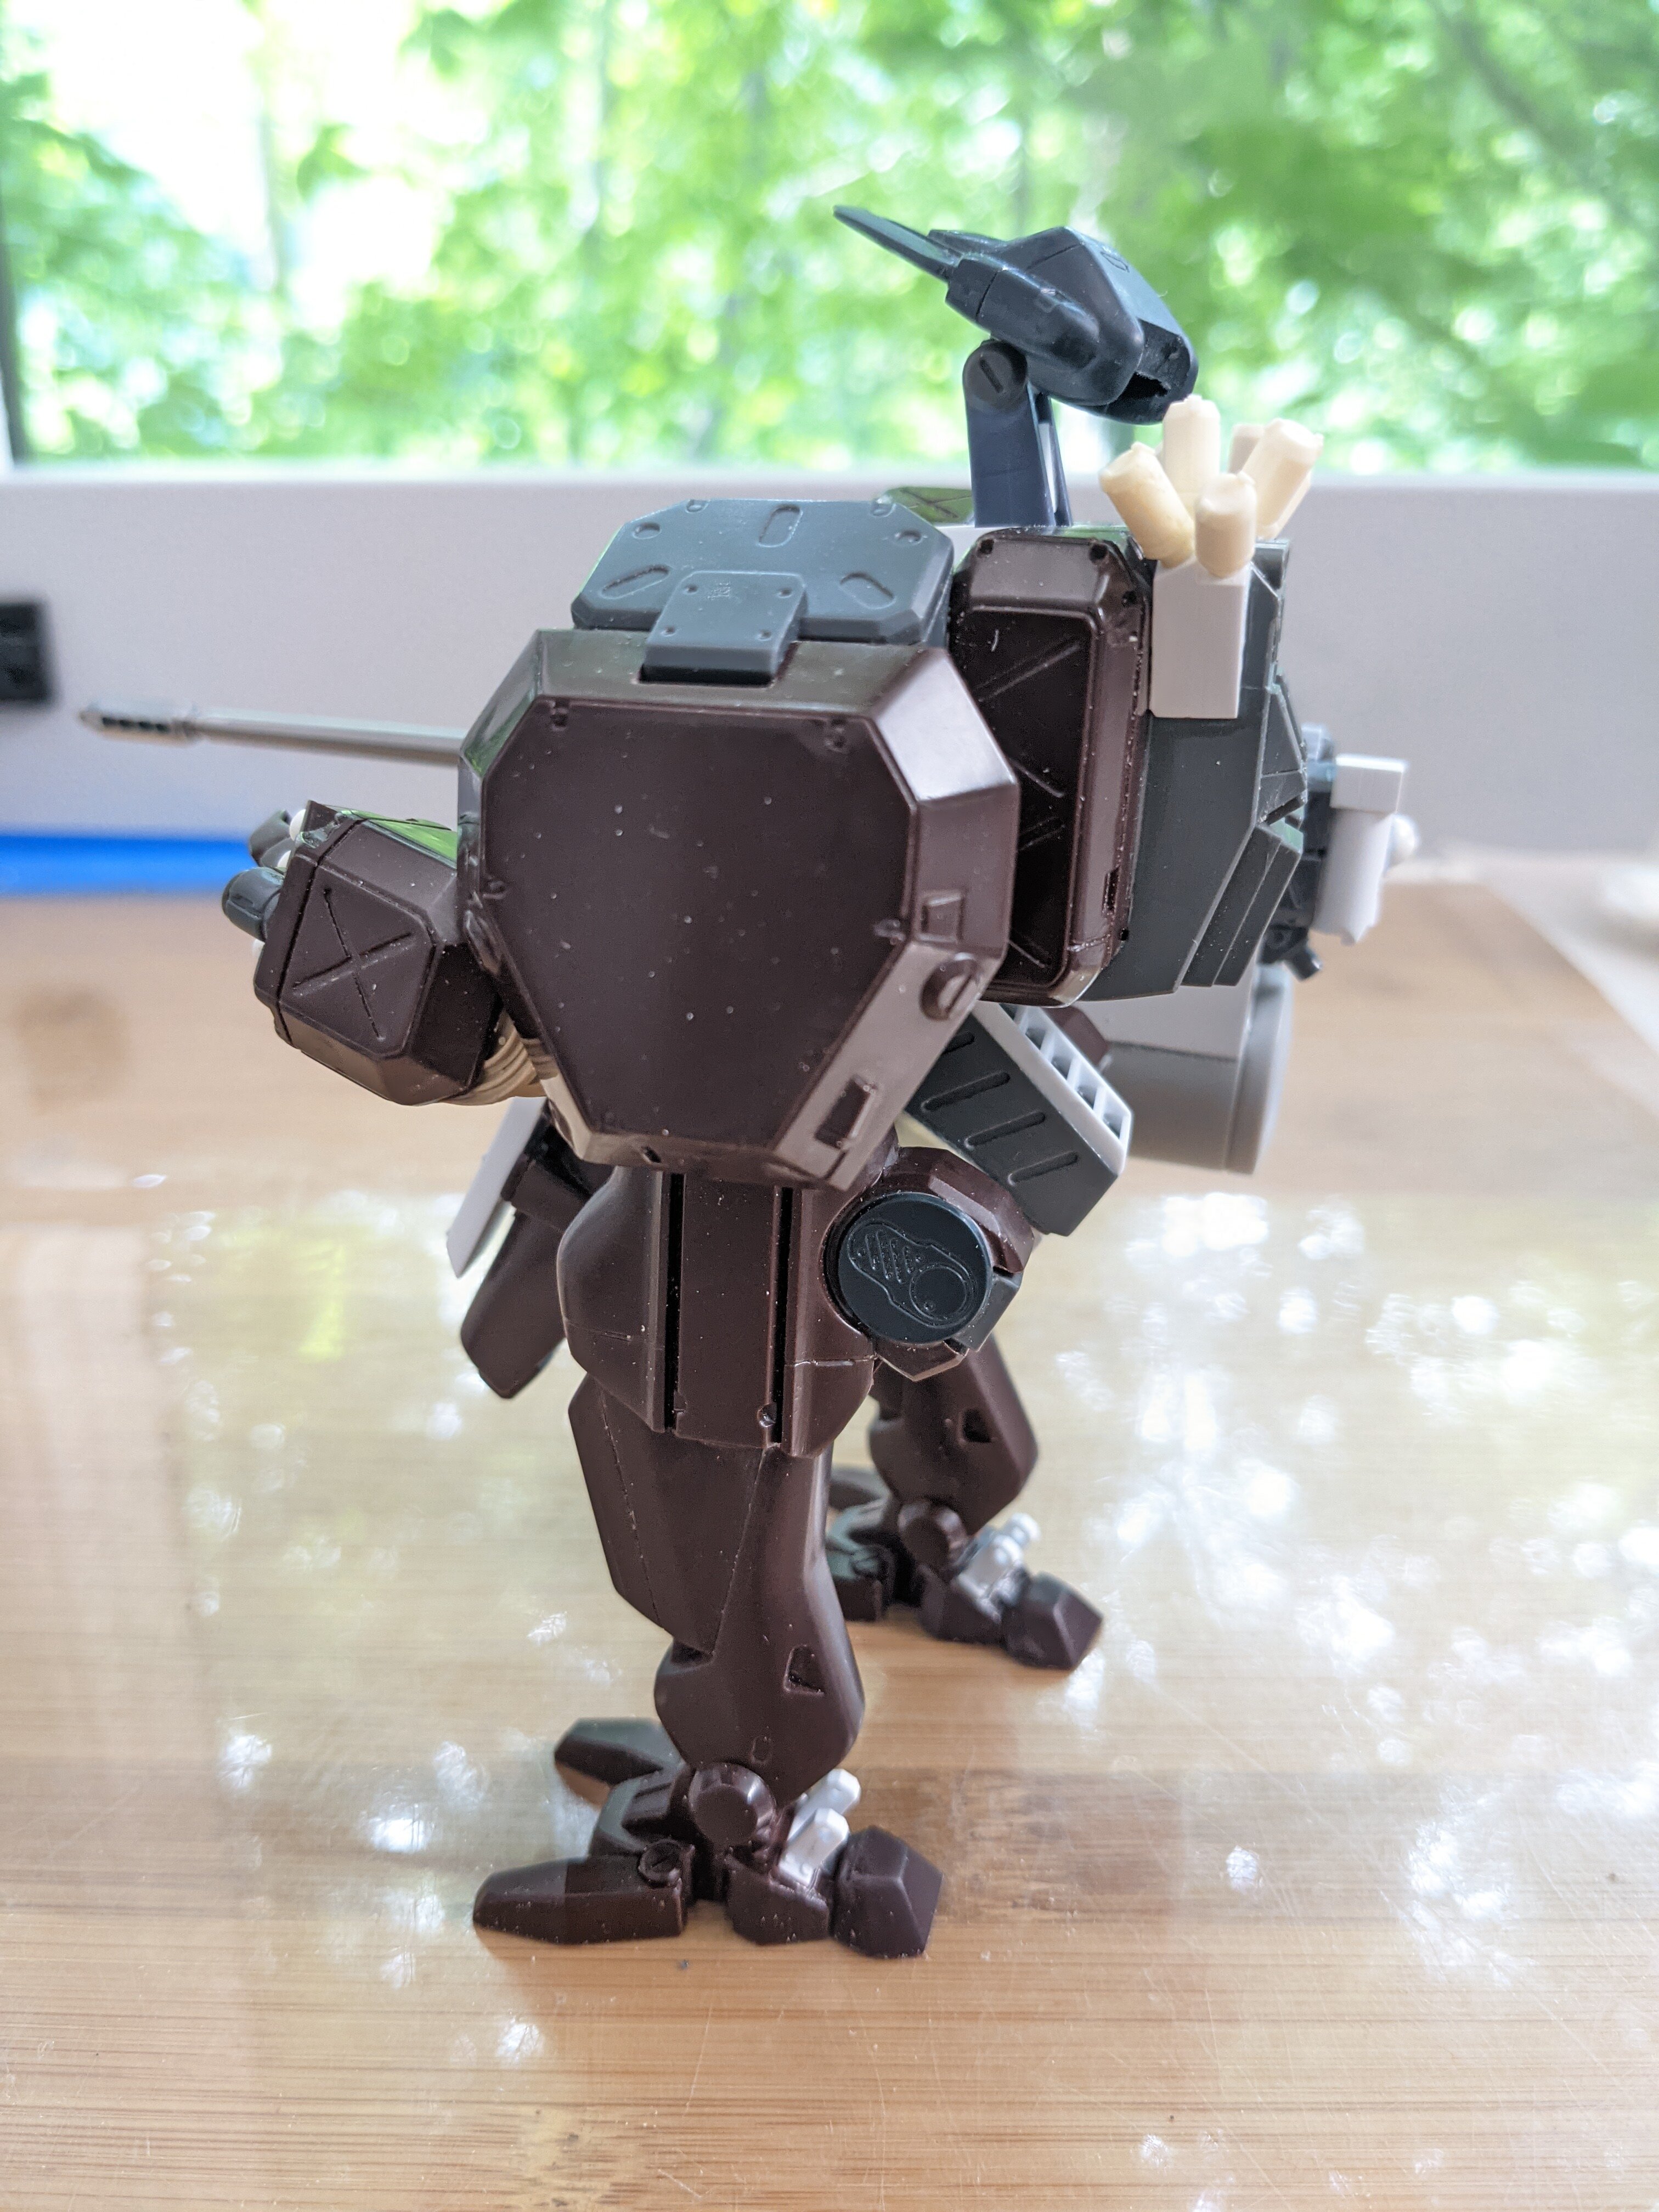
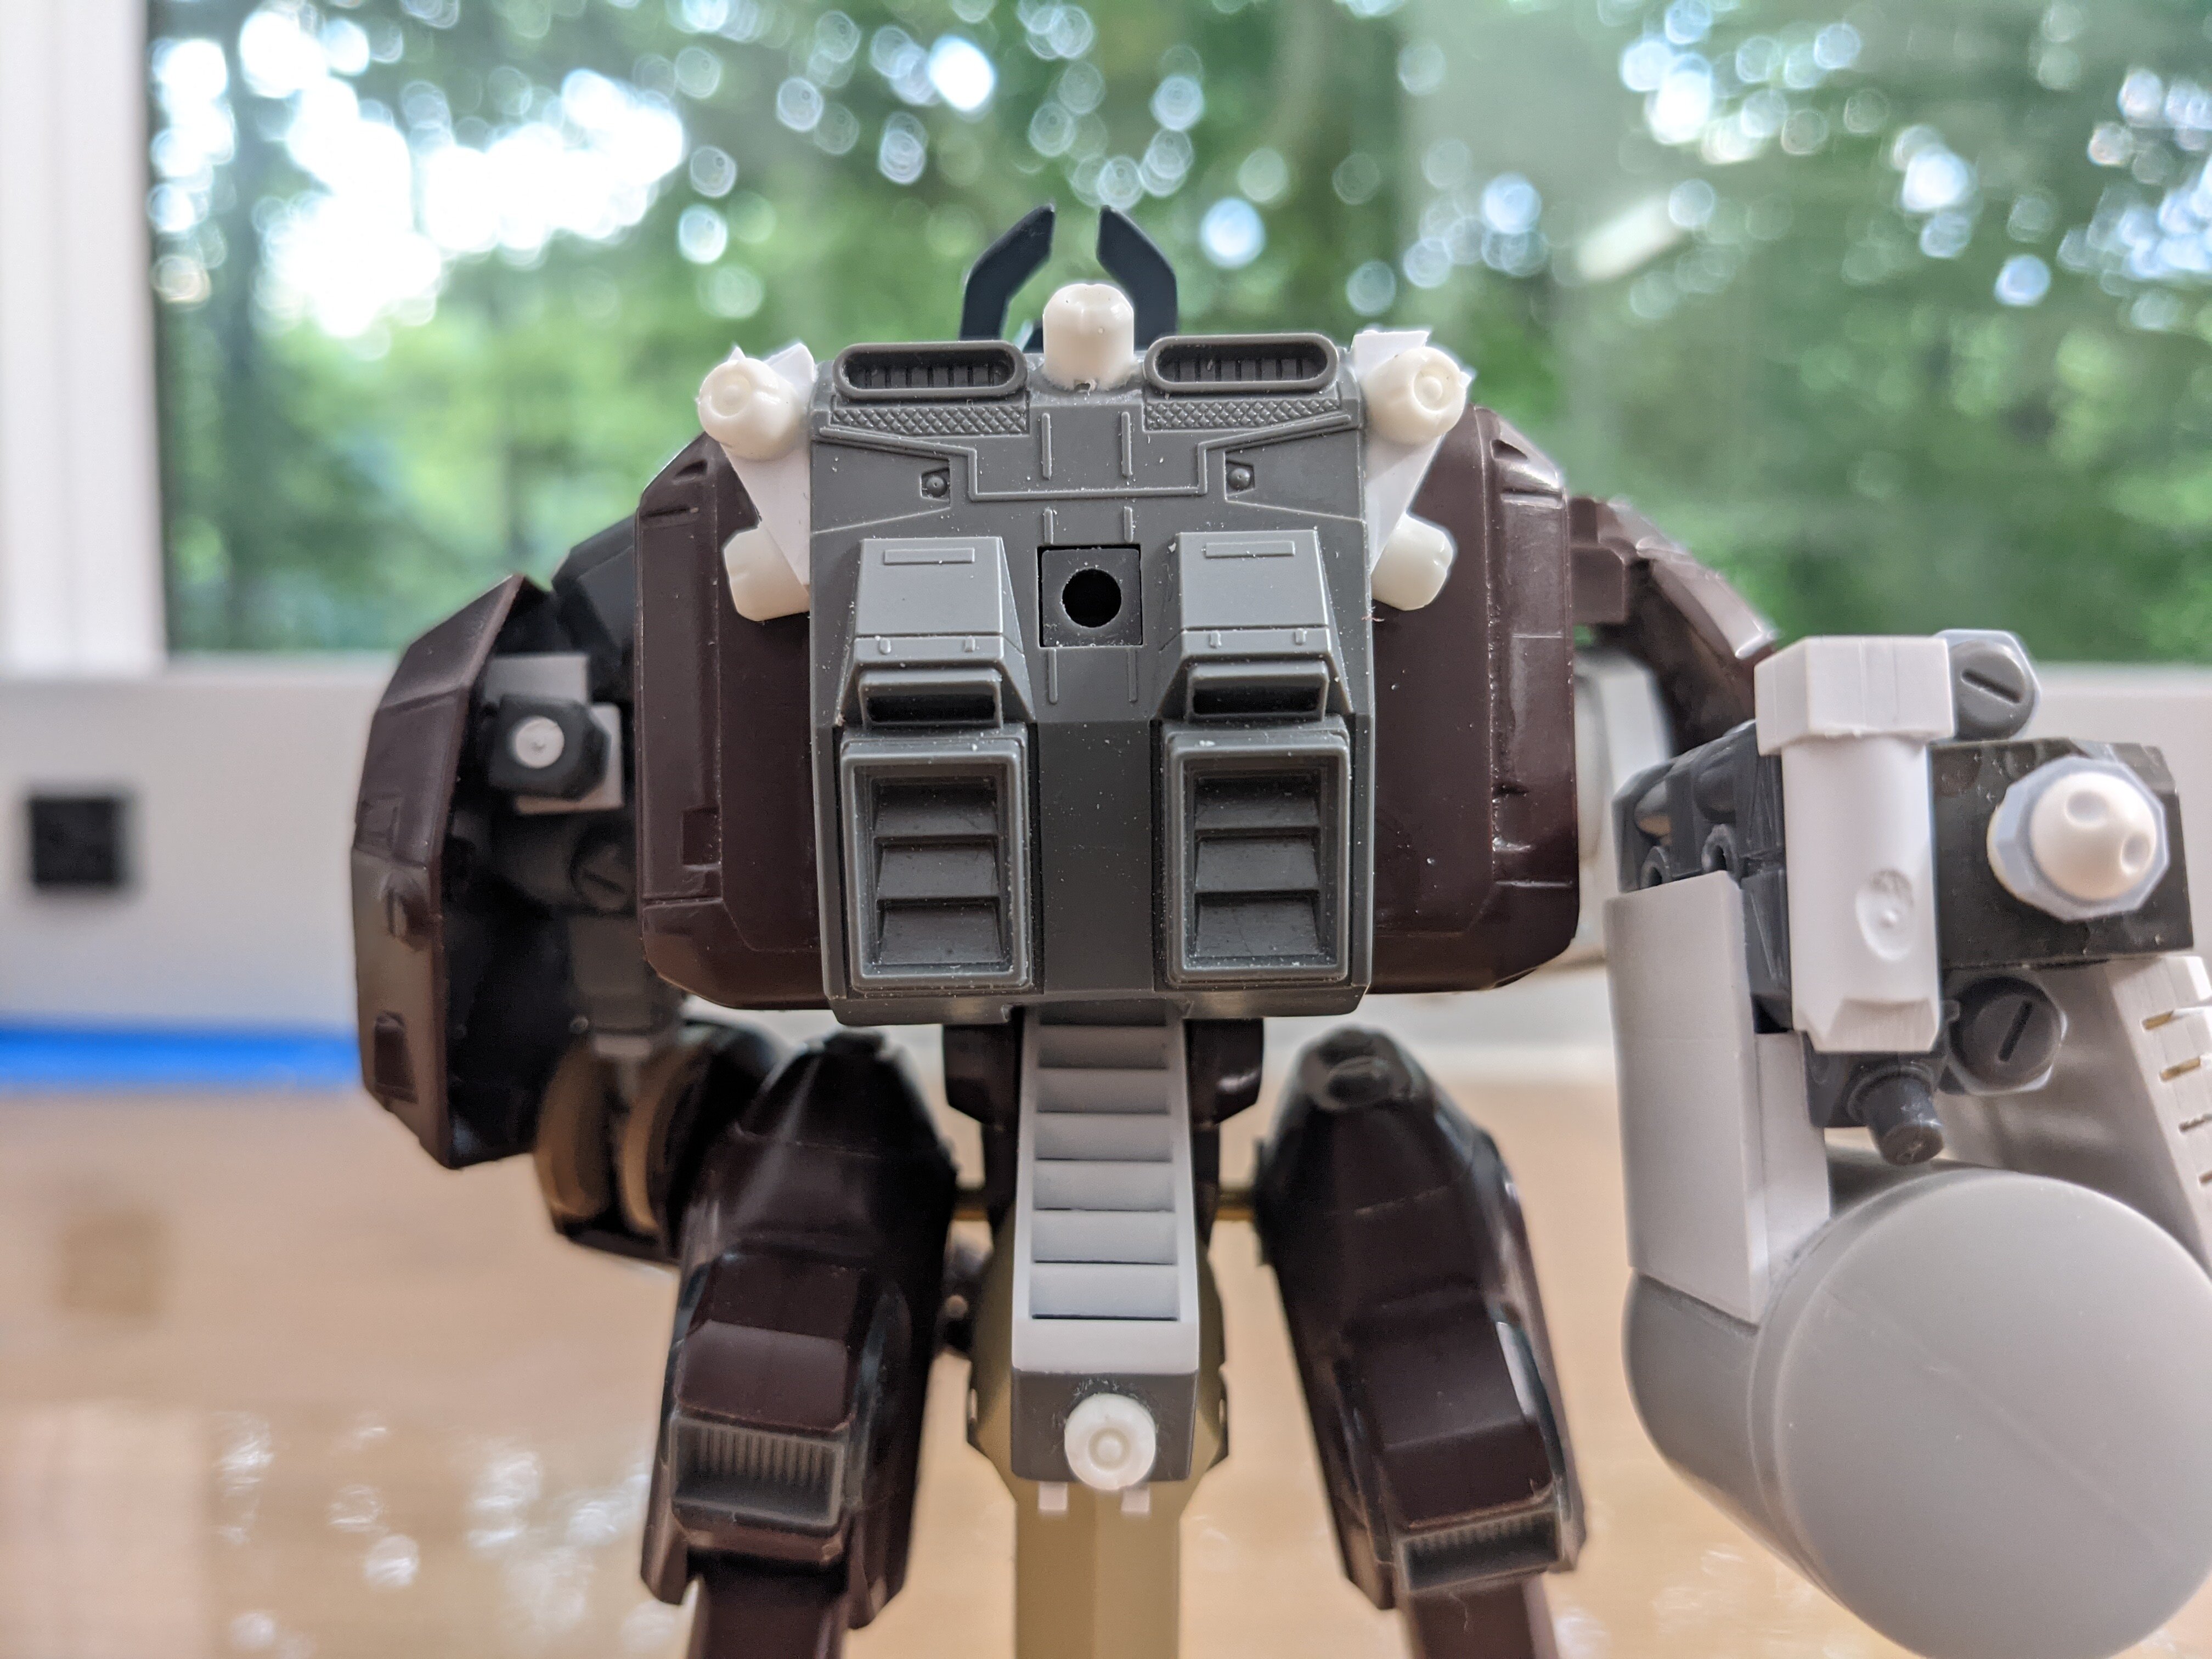
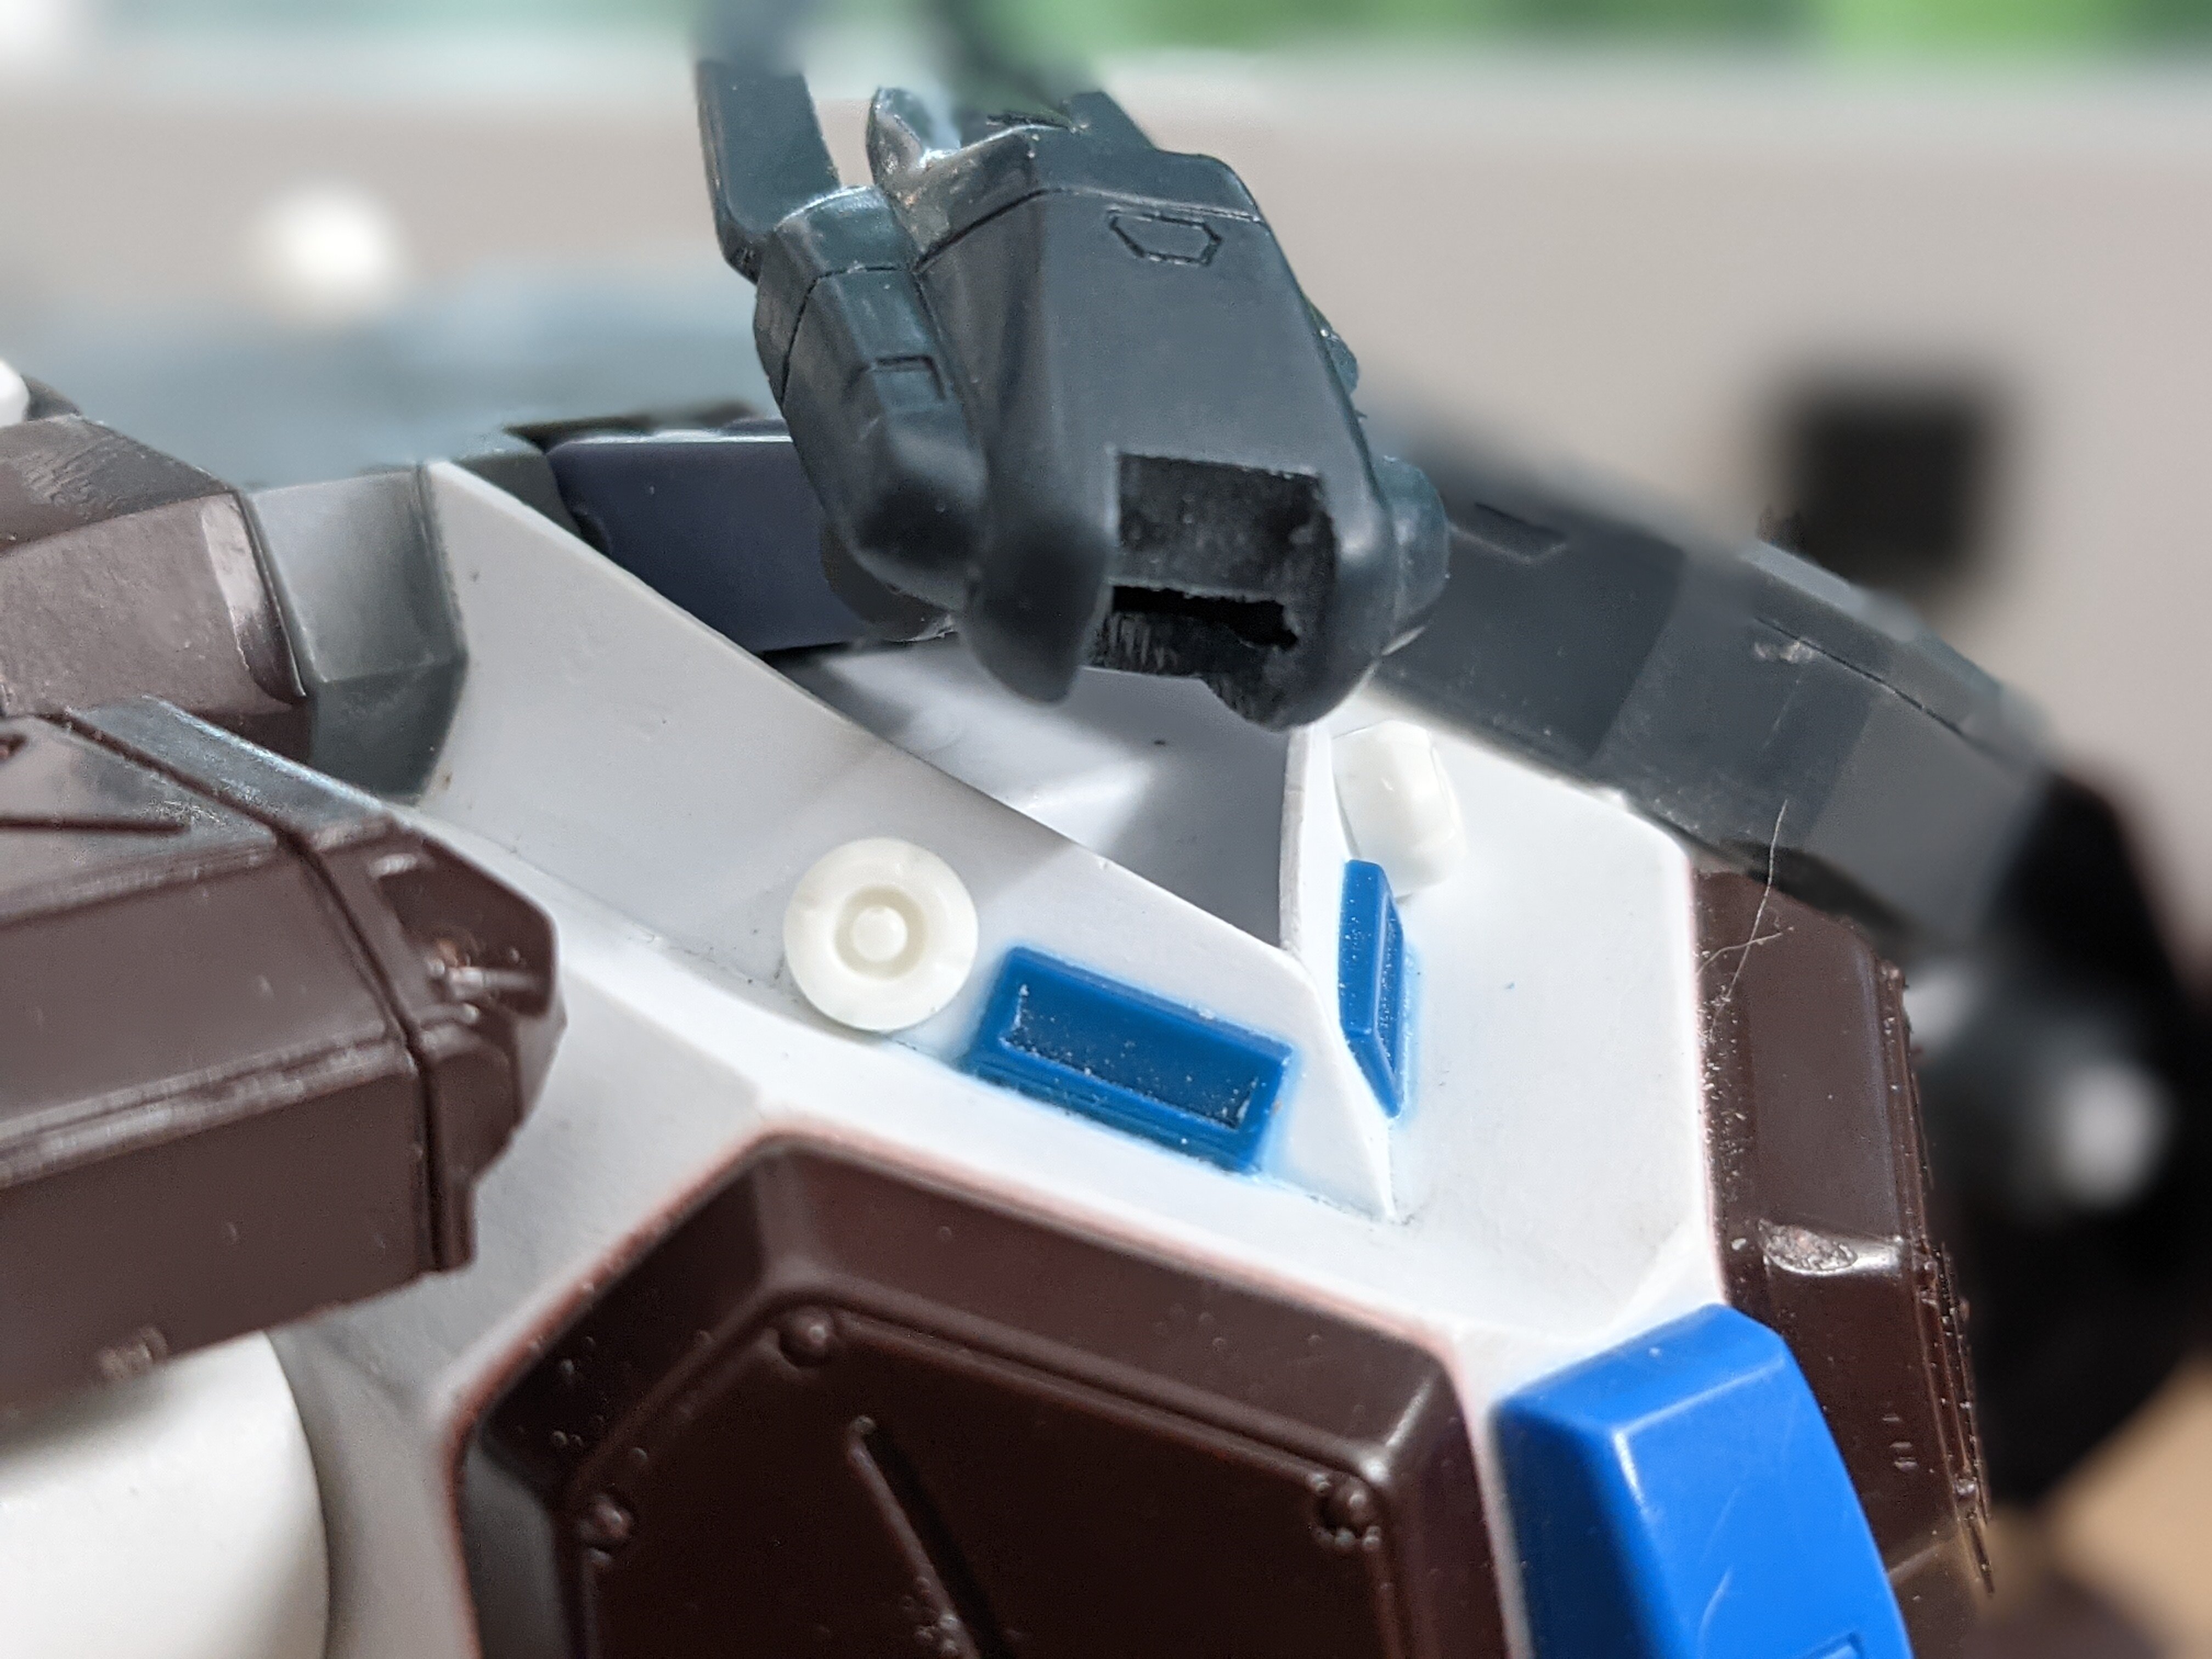
@505thAirborne That is dark blue! It does look smooth too! @arbit That print looks awesome! Have a good summer! @Thom That is looking beautiful! It's actually nice to see a civilian paint job for once - but don't quote me on that For all my fellow "Yanks," HAPPY INDEPENDENCE DAY!!! This weekend I got the lower torso done and added the defensive sensors. These are the main parts used. Note the ABS stairs. I glued them to the styrene using simple acetone. It worked great. One of the completed units ready to go. Side view without the legs mounted. 3/4 rear view. With the legs mounted. Does this make my butt look big!? 3/4 rear all together with smoke / decoy cannisters Rear sensors mounted. And the collar sensors for the front. That"s it everyone! Thank you for checking in.
-
I'm on the fence about that one. If I did, it would only be to make it easier to paint them - MT
-
@505thAirborne @derex3592 Looking good guys! The weatherman says its supposed to cool down and lower humidity today. Maybe I can join the "paint club" today too! - MT
-
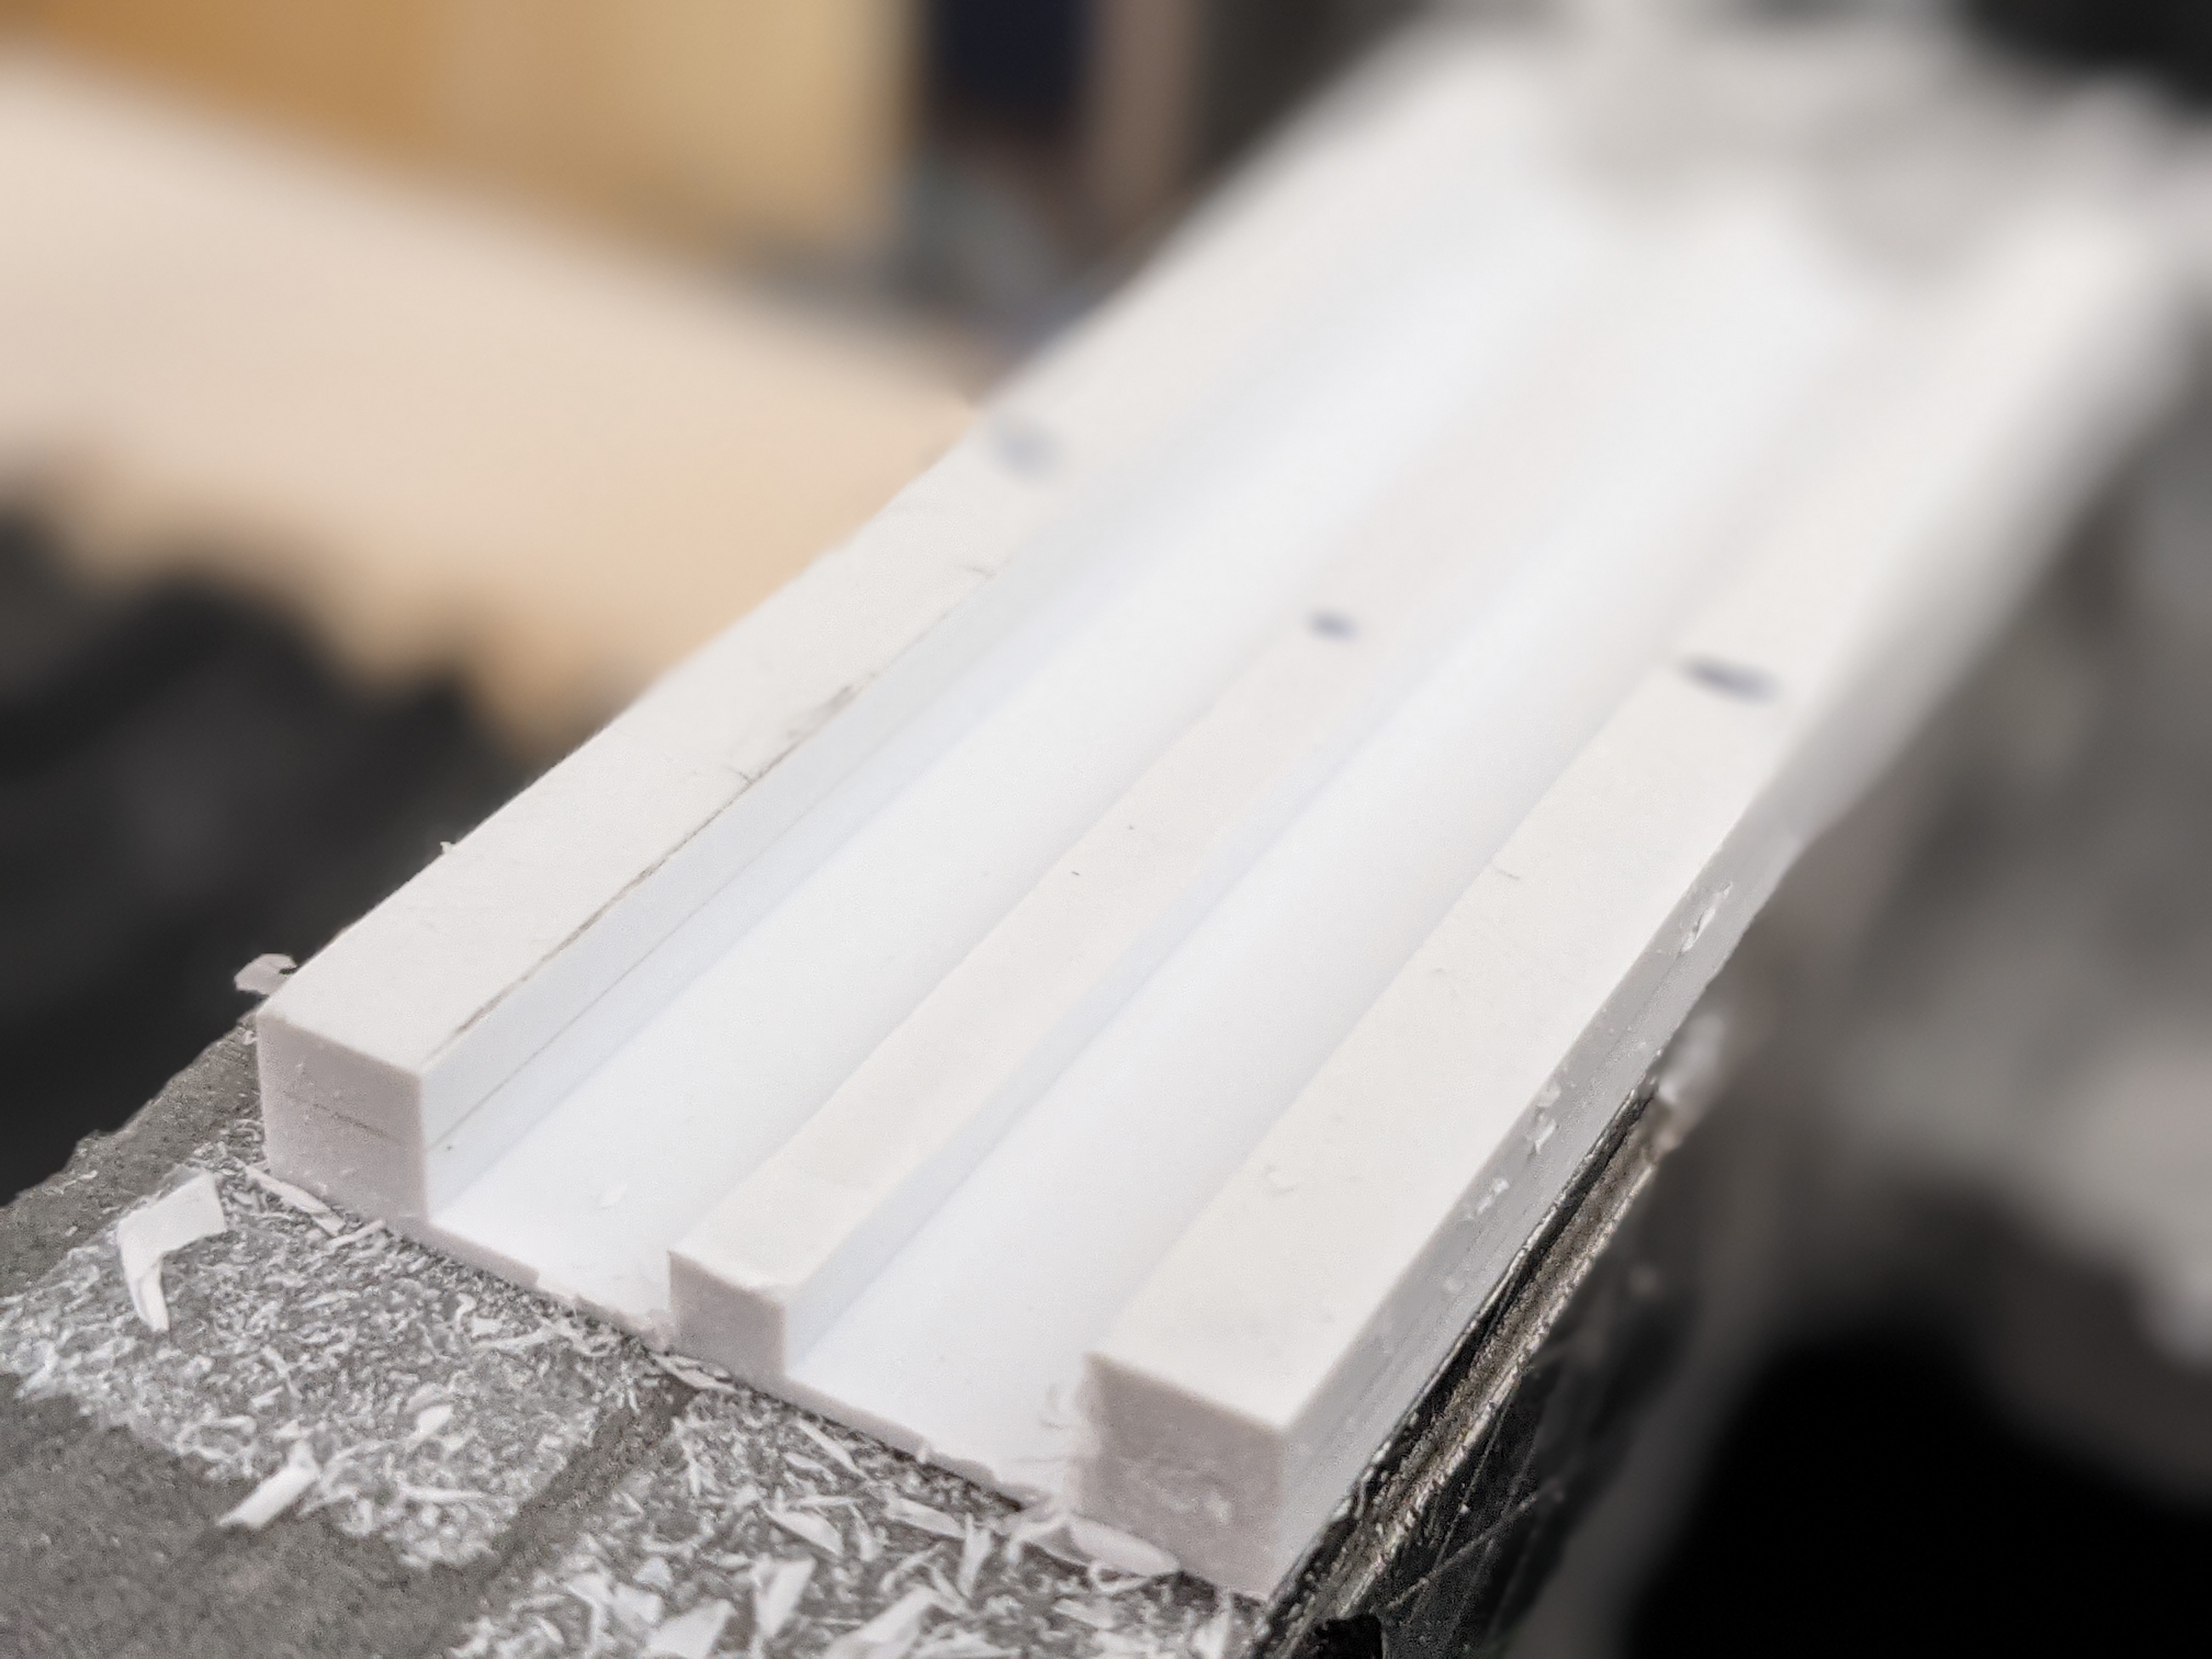
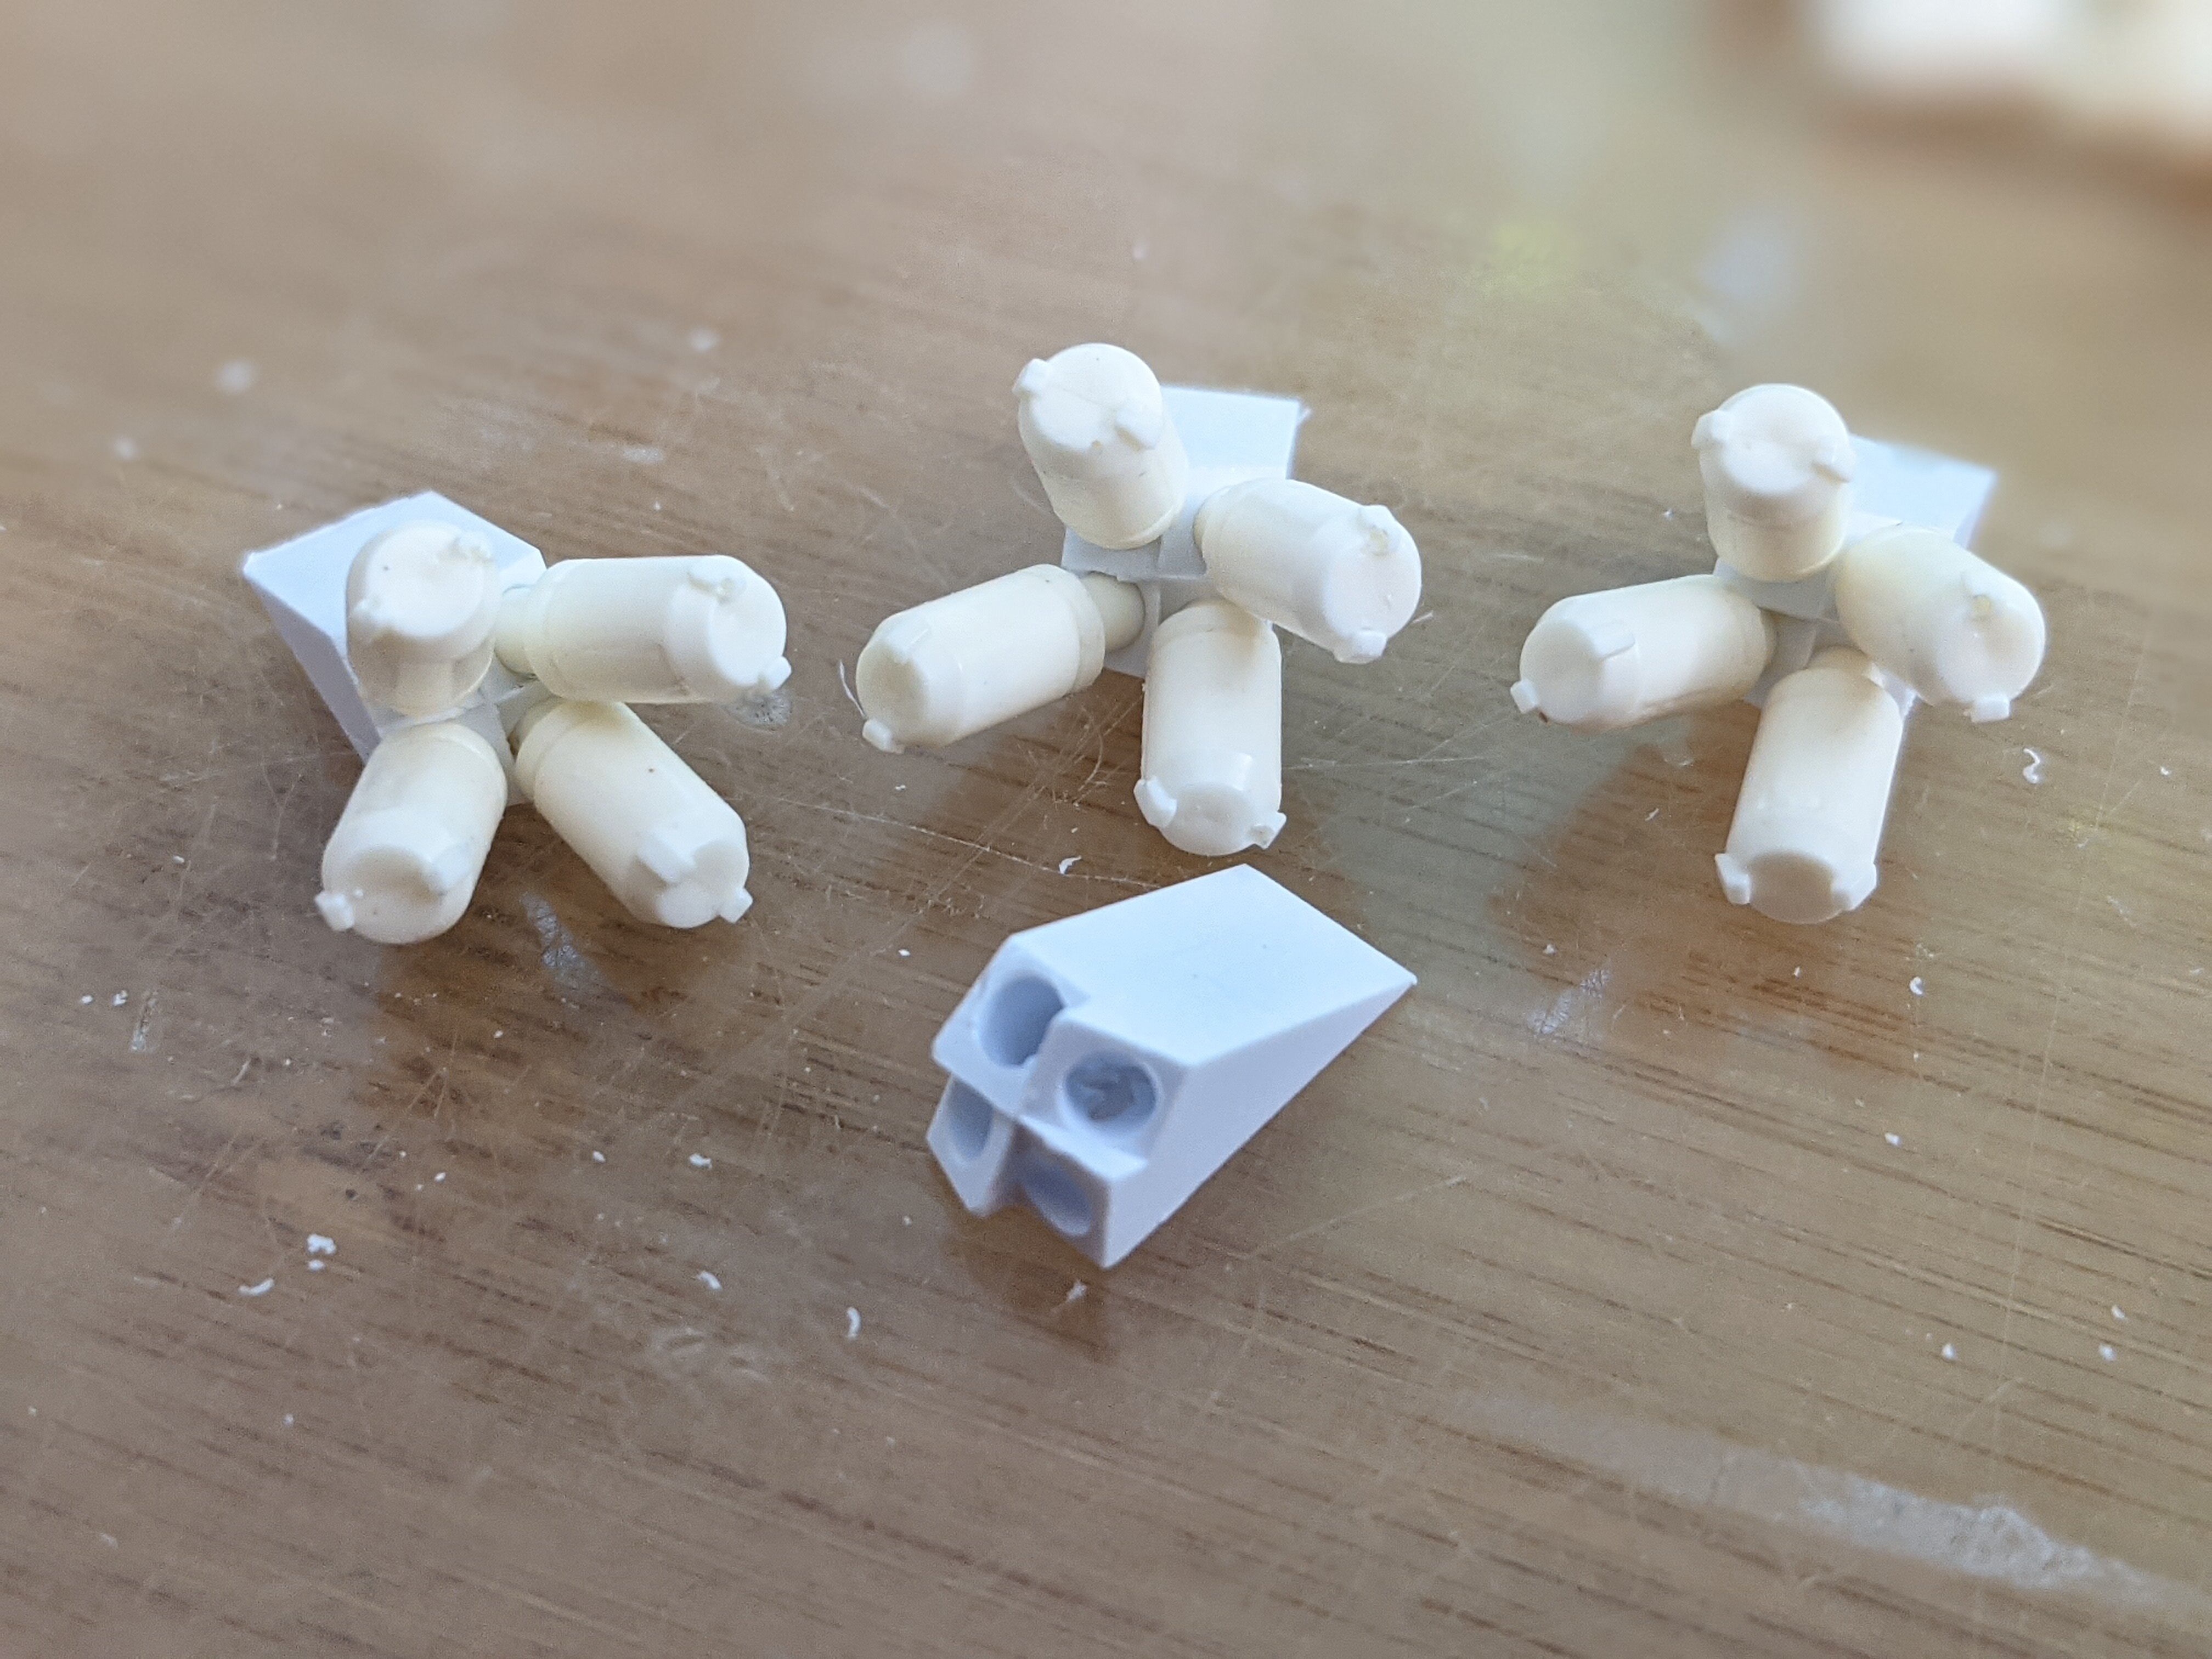
@derex3592 I hear you Derex! Sadly, Imai was probably the closest company to get out a near complete line of kits / products for the period. The 1/285th gaming pieces seem to be catching up now for Macross. Smoke if you got 'em! Smoke and decoy canister launchers for the mecha. This is a segment of machined 1/4" styrene square rod machined with angles and angled holes drilled into the tops. The canisters are resin copies from a Geara Doga I made also around 25 years ago. Some here are bubbled rejects for a test fit. They're kinda big, so I'm thinking about something smaller that will fit the launchers. - MT
-
@peter Your Enterprise looks great! Putting Macross decals on a Star Trek model!? Looks cool! I think you might have made a hole in the time space continuum. @derex3592 Your light choice for lighting the Titanic is realistic and I think a good choice! All lighting was "yellow" back then, electric or oil/gas. Your shuttle is looking good too! I'm glad the paint retarder is working. I should try that myself. Airbrushing is smooth, but a pain for just bit painting. @505thAirborne Great improvements over the original work. I hope the paint sticks solid! @Chronocidal Those little kits are great! I'm kicking myself now for not getting them back then. I just don't have many kits in that scale, so it didn't make sense. - MT @pengbuzz I'm glad you're back! That's weird you got bumped off the site. - MT
-
@arbit Great looking prints! What happened to break dancing MinMei?😅 Which printer are you using? Are you going to put the "big arrow" on your Yamato figures to help with painting? - MT
-
@derex3592 @peter The guys in my club swear by "Wonder Wire." It is 0.006 mil, great for rigging 1/48 and 1/72 aircraft, useful as well for armor vehicle antennas or aircraft that have aerial wires running from antenna to antenna. Here is the contact info for the guy that sells the stuff. He only takes credit card order over the phone (ol' yankee Vermonter for ya...), no web site or eBay: Precision Enterprises Unlimited 802- 885- 3094. We made a group order in the club and the guys love it! They say it is like ceramic ( I wonder if it's fiber optic, I haven't seen it under a magnifier). You don't cut it, you score it and break it, but it does flex. I have not ordered any myself, but once again, the guys in my club sweat by it. They have made several biplanes rigged and aircraft wire antennas with it and love it. There are other "filaments" you can search for on modeling sites. Even HLJ has some. Stretching sprue over heat works, but it is weak and will droop with age, especially if any heat like sunlight is involved. @Chronocidal That's a cool looking kit! The magnets being included are a nice touch instead of having to be modified that way. @derex3592 Your ship is looking good and it looks like you will get plenty of help "rigging" your ship (don't use a ball of yarn) @peter Looks like your shipyards are turning out more great ships! The clear parts look cool. @Thom Your Spitfire is looking slick! - MT
-

Hachette Collection 1/24 VF-1S (subscription collectable)
MechTech replied to CF18's topic in Model kits
The engineering in the legs for the gear and exhaust nozzles is cool! - MT -
Looking good so far! - MT
-
@Thom Thank you, Tom! @pengbuzz I hope you're feel better soon bro! @arbit Great sculpt Arbit! Can you tweak his glasses to have that HUGE 70's, kinda RayBan-ish look? The funny part is I don't believe most military pilots can fly with glasses. Today they have to have Lasik to correct their vision - last I heard for the USAF. - MT

-
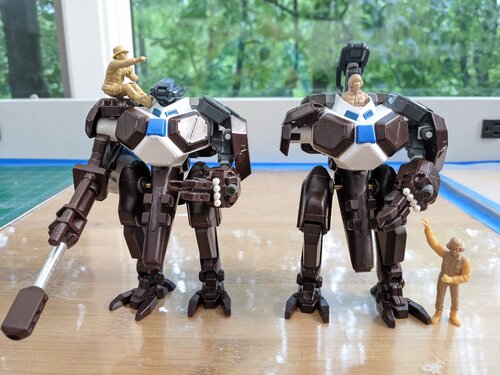
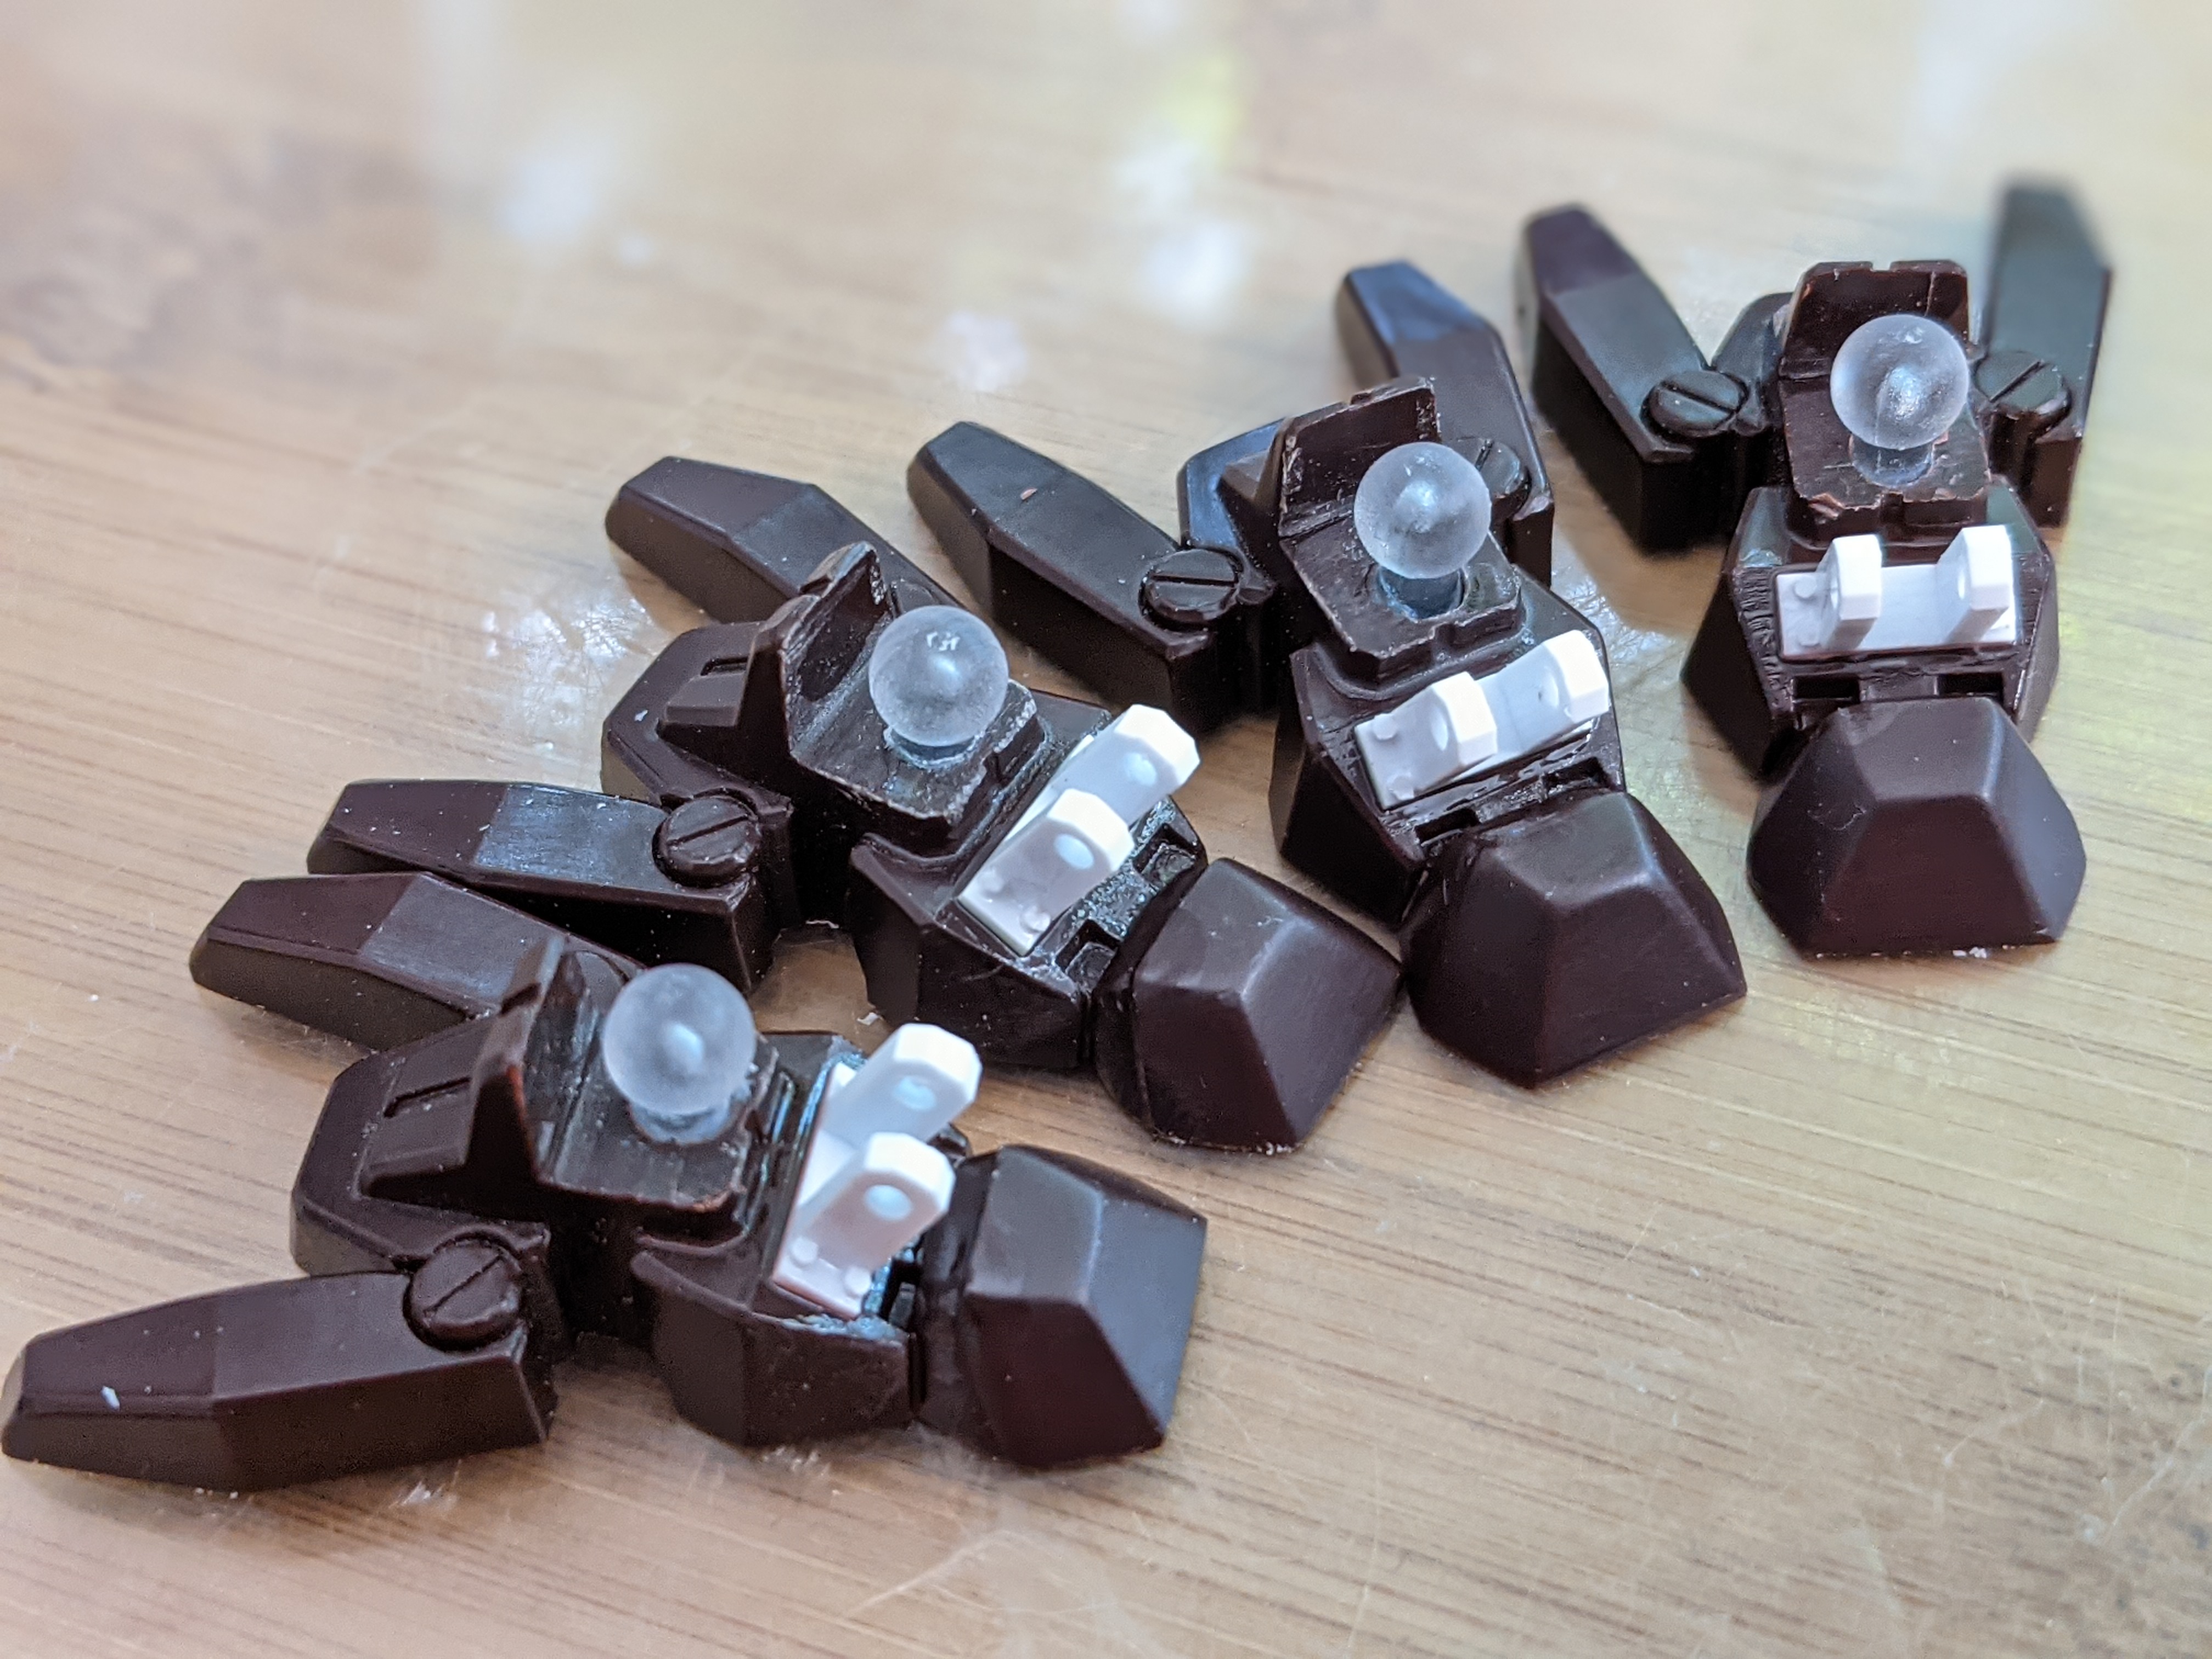
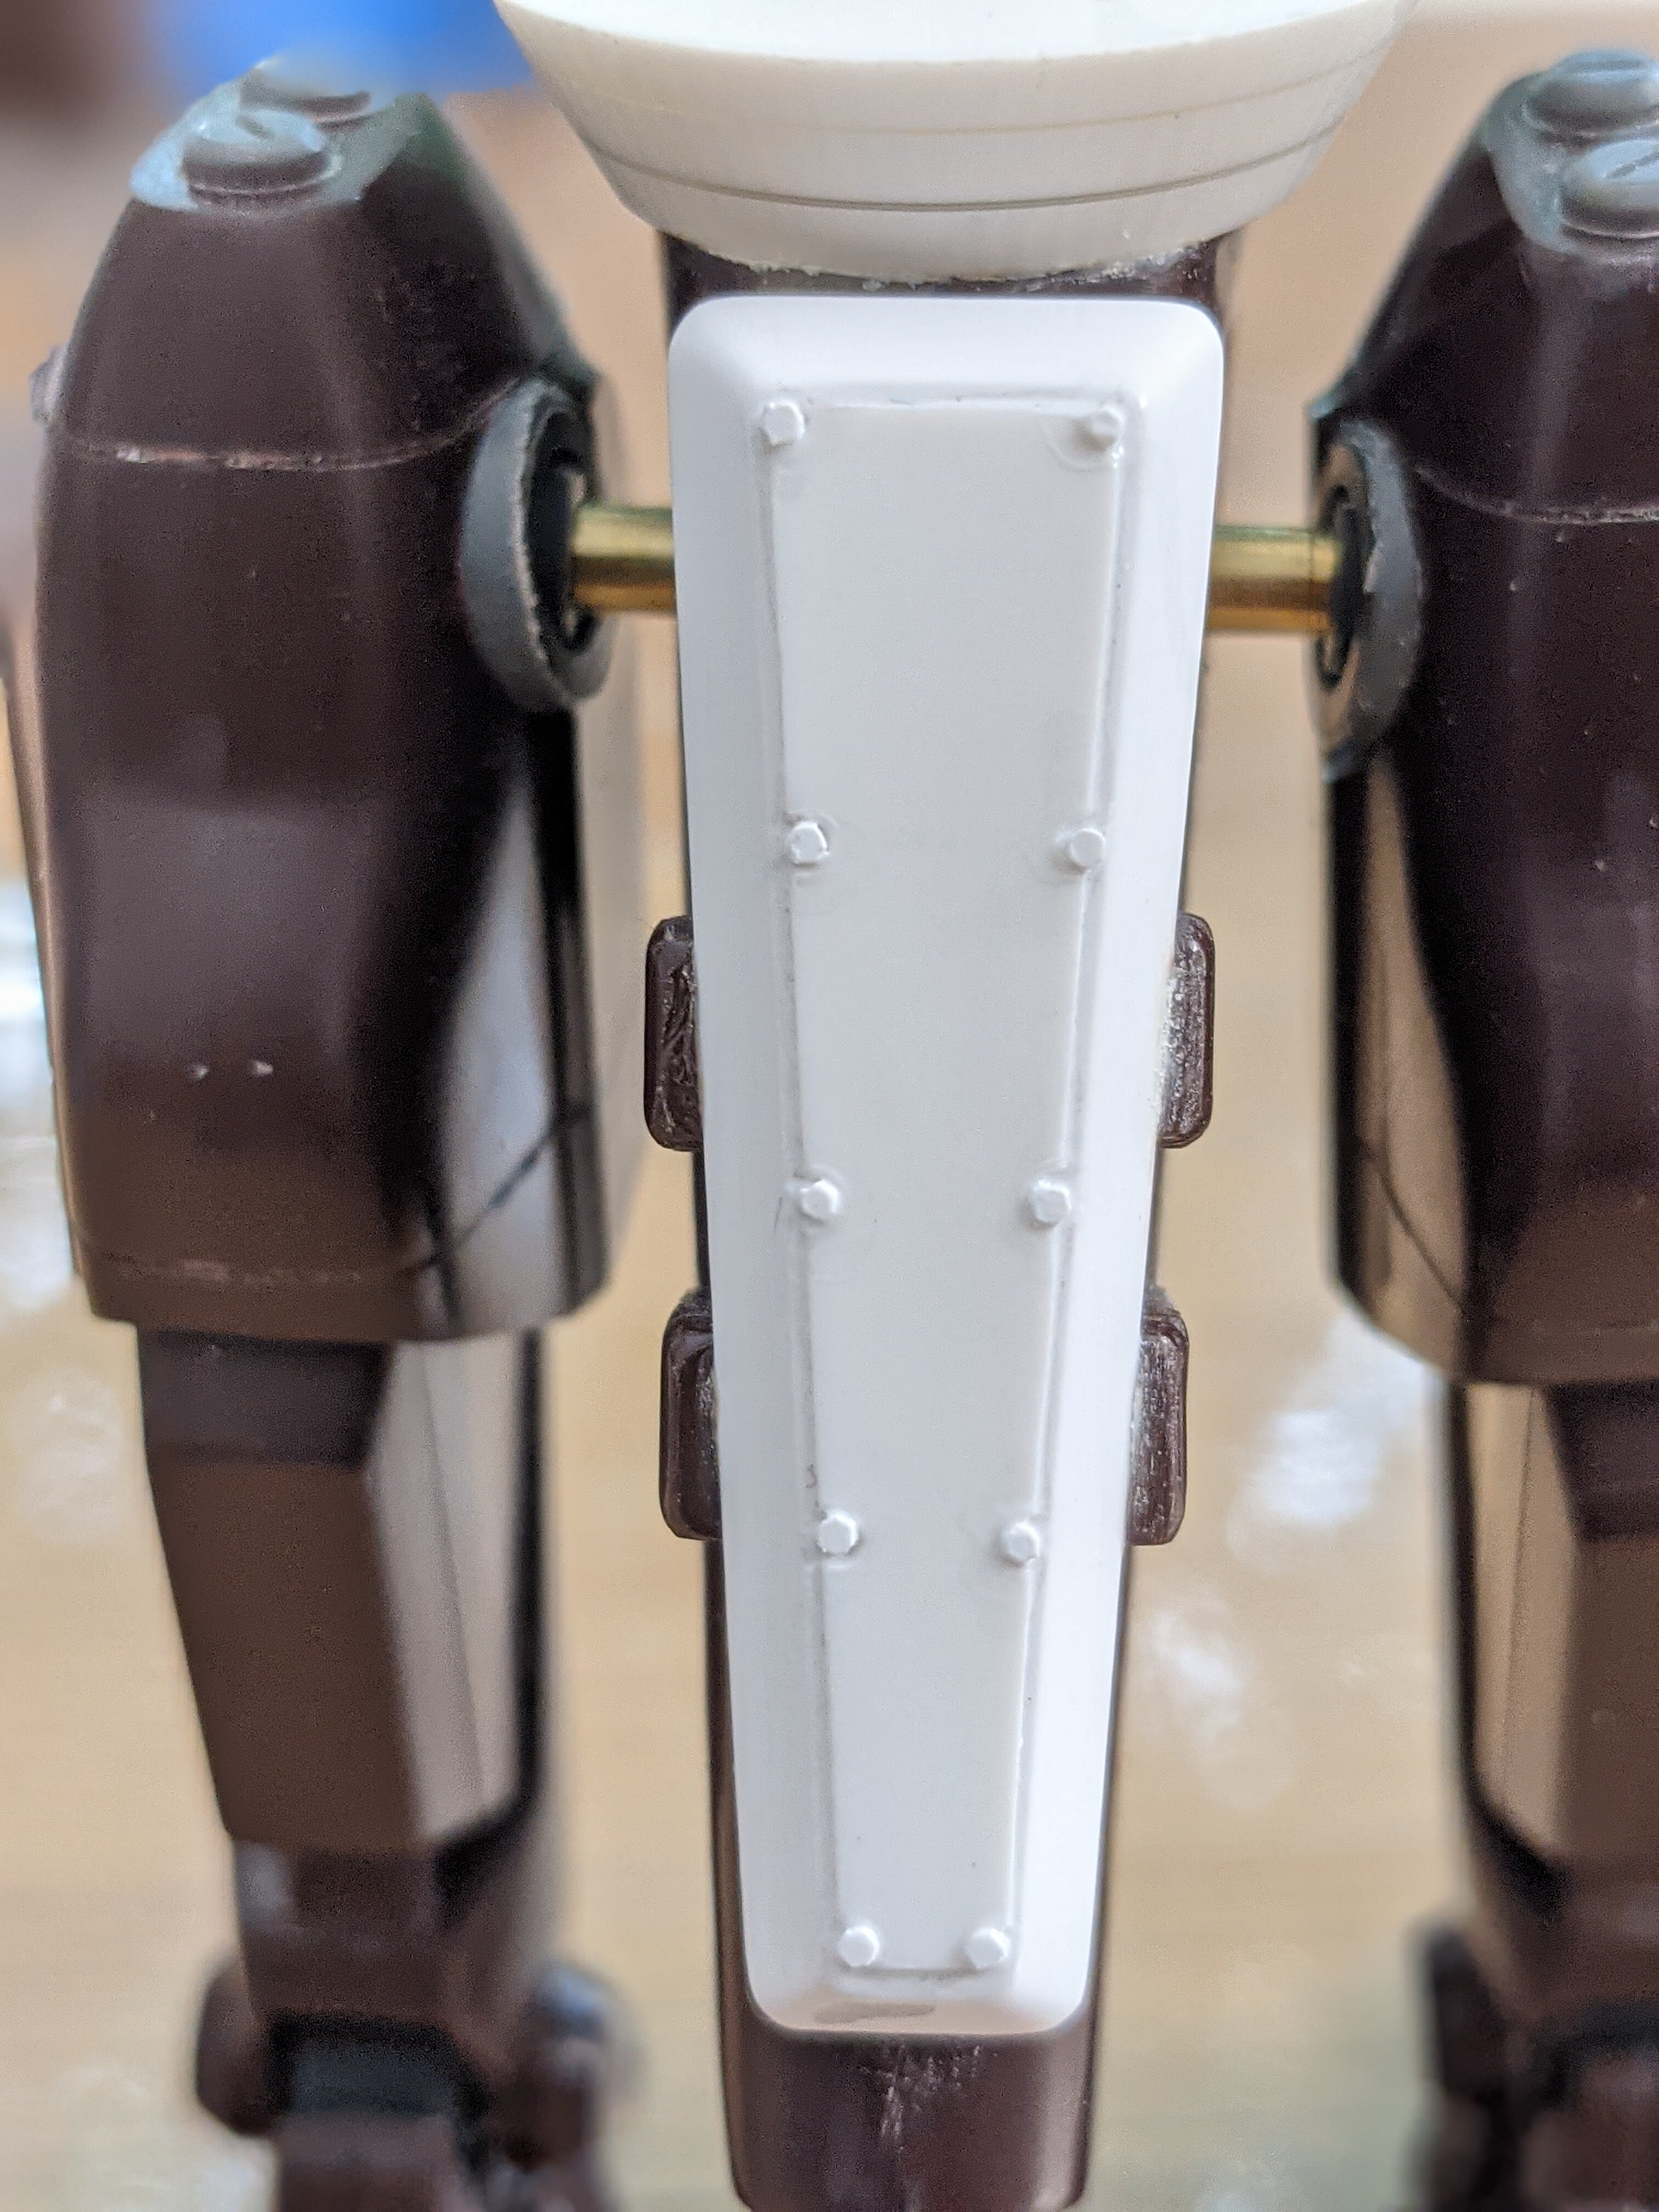
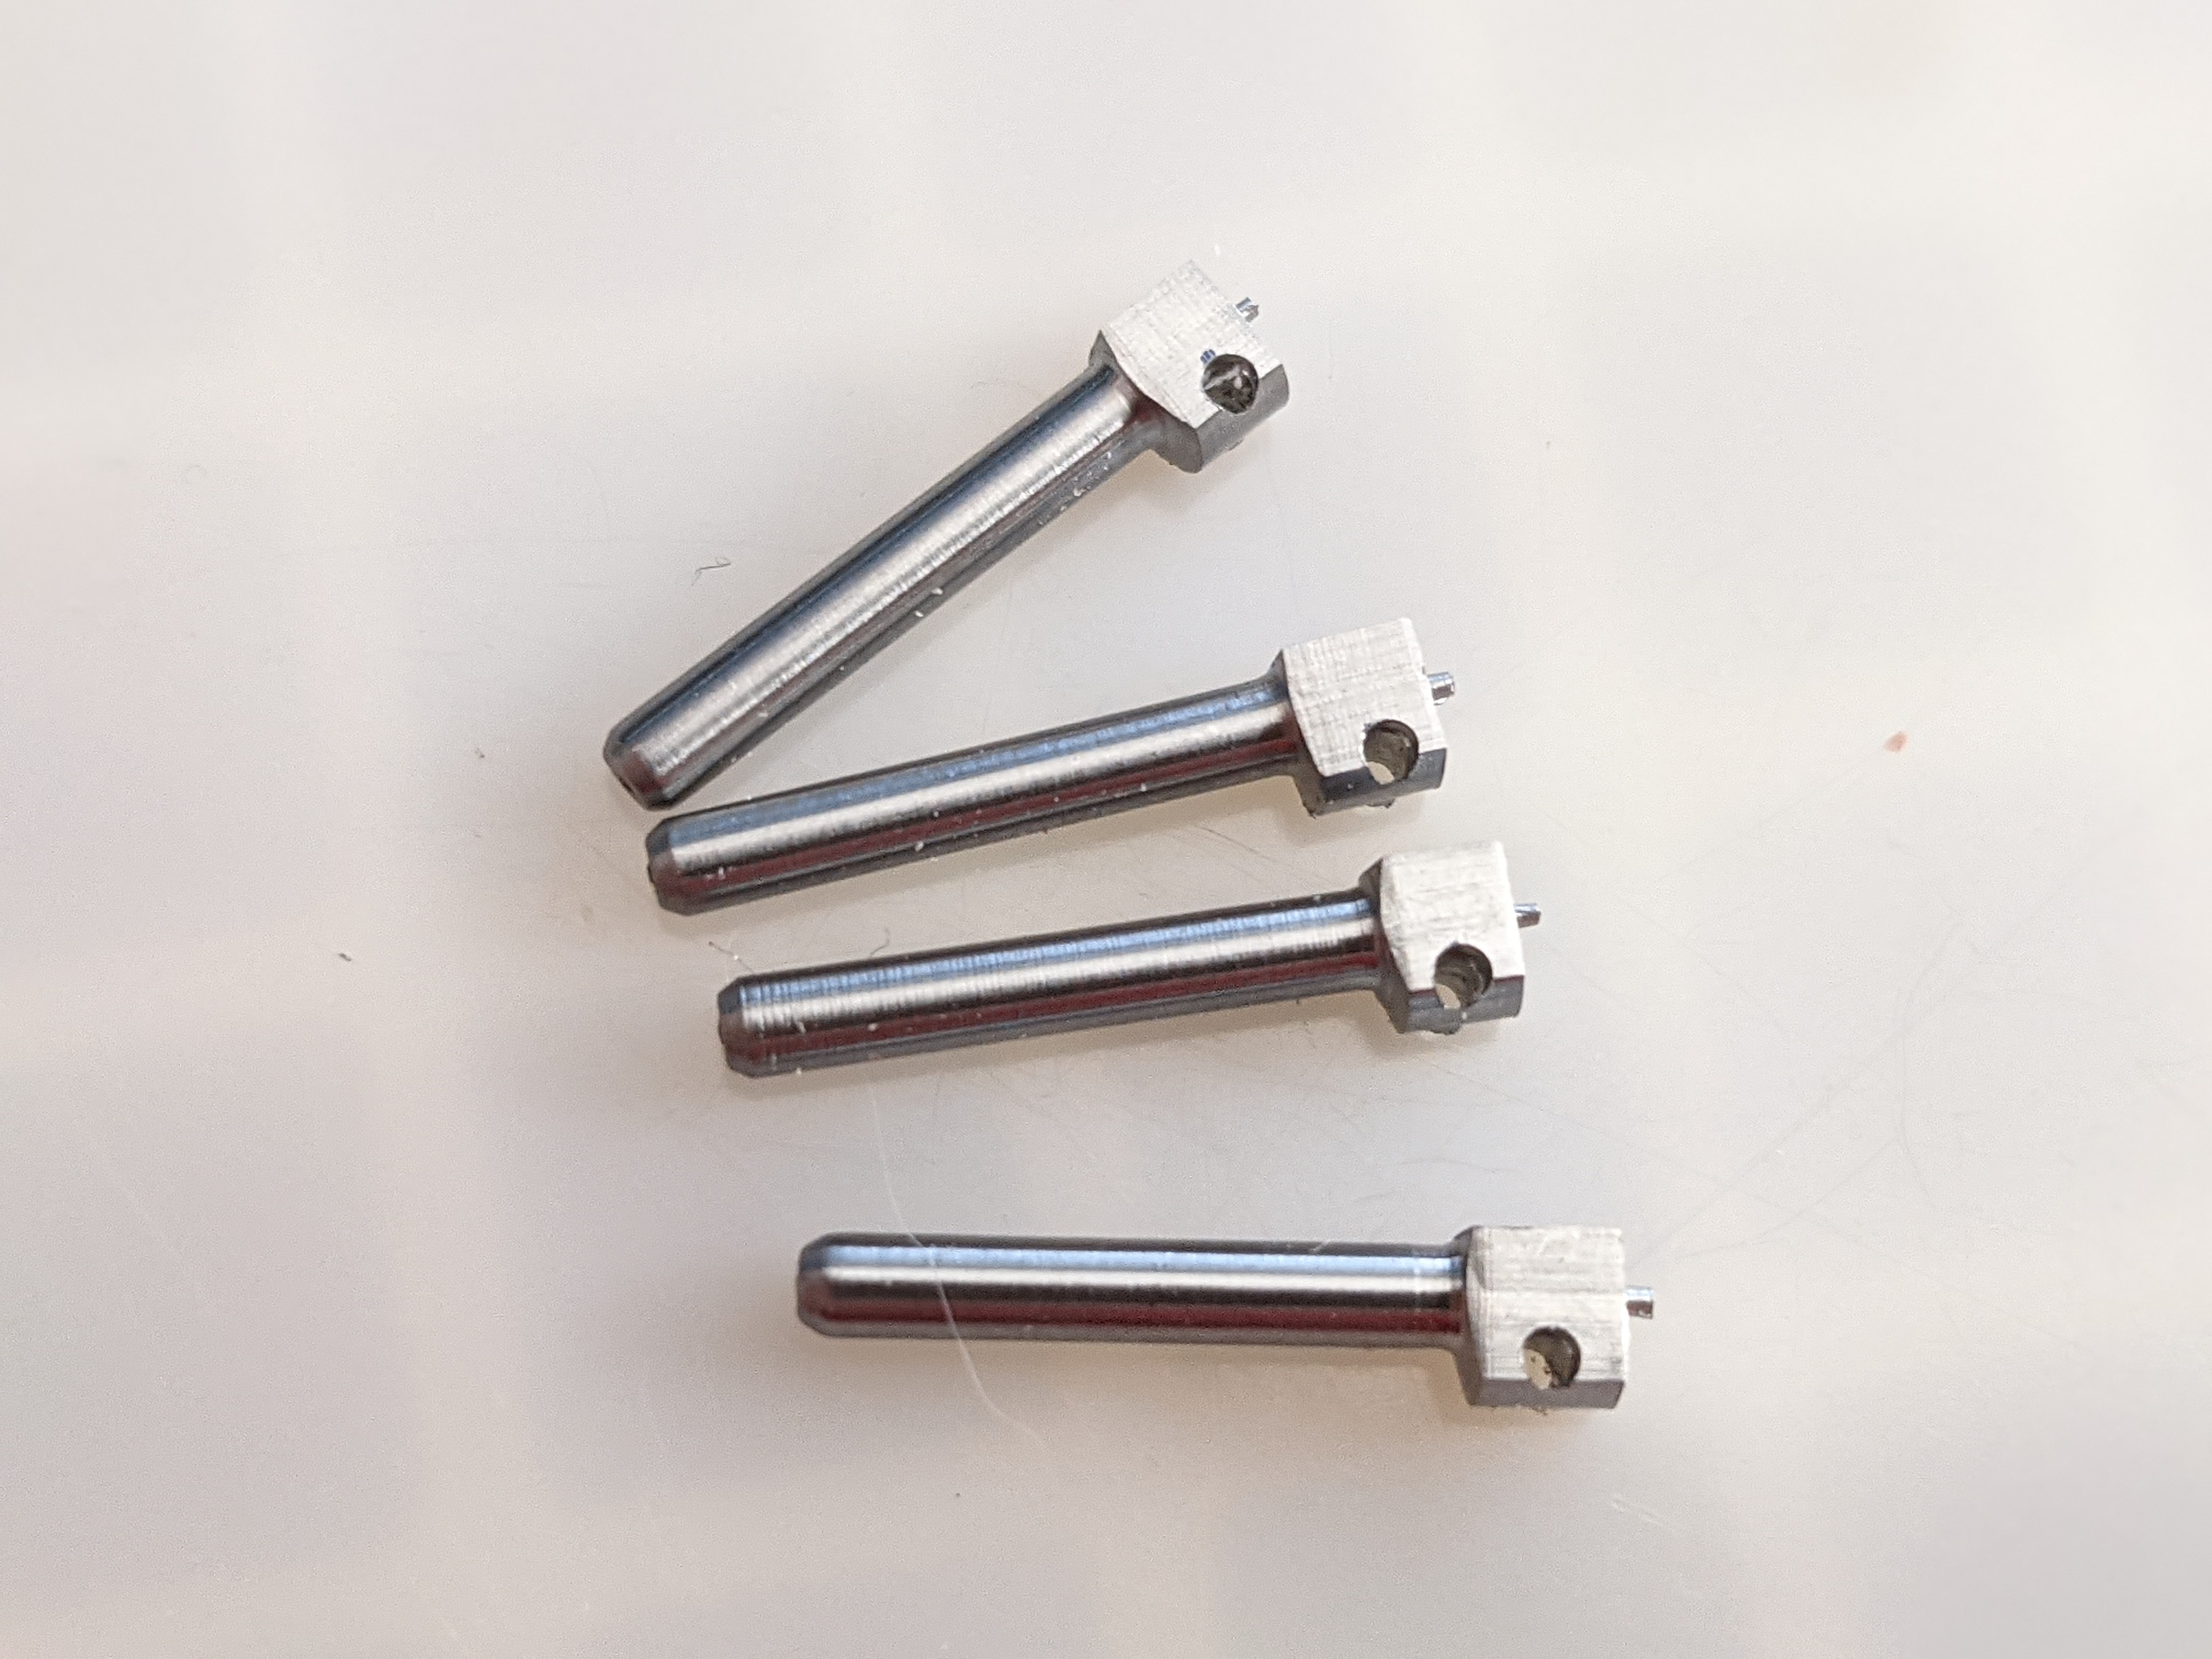
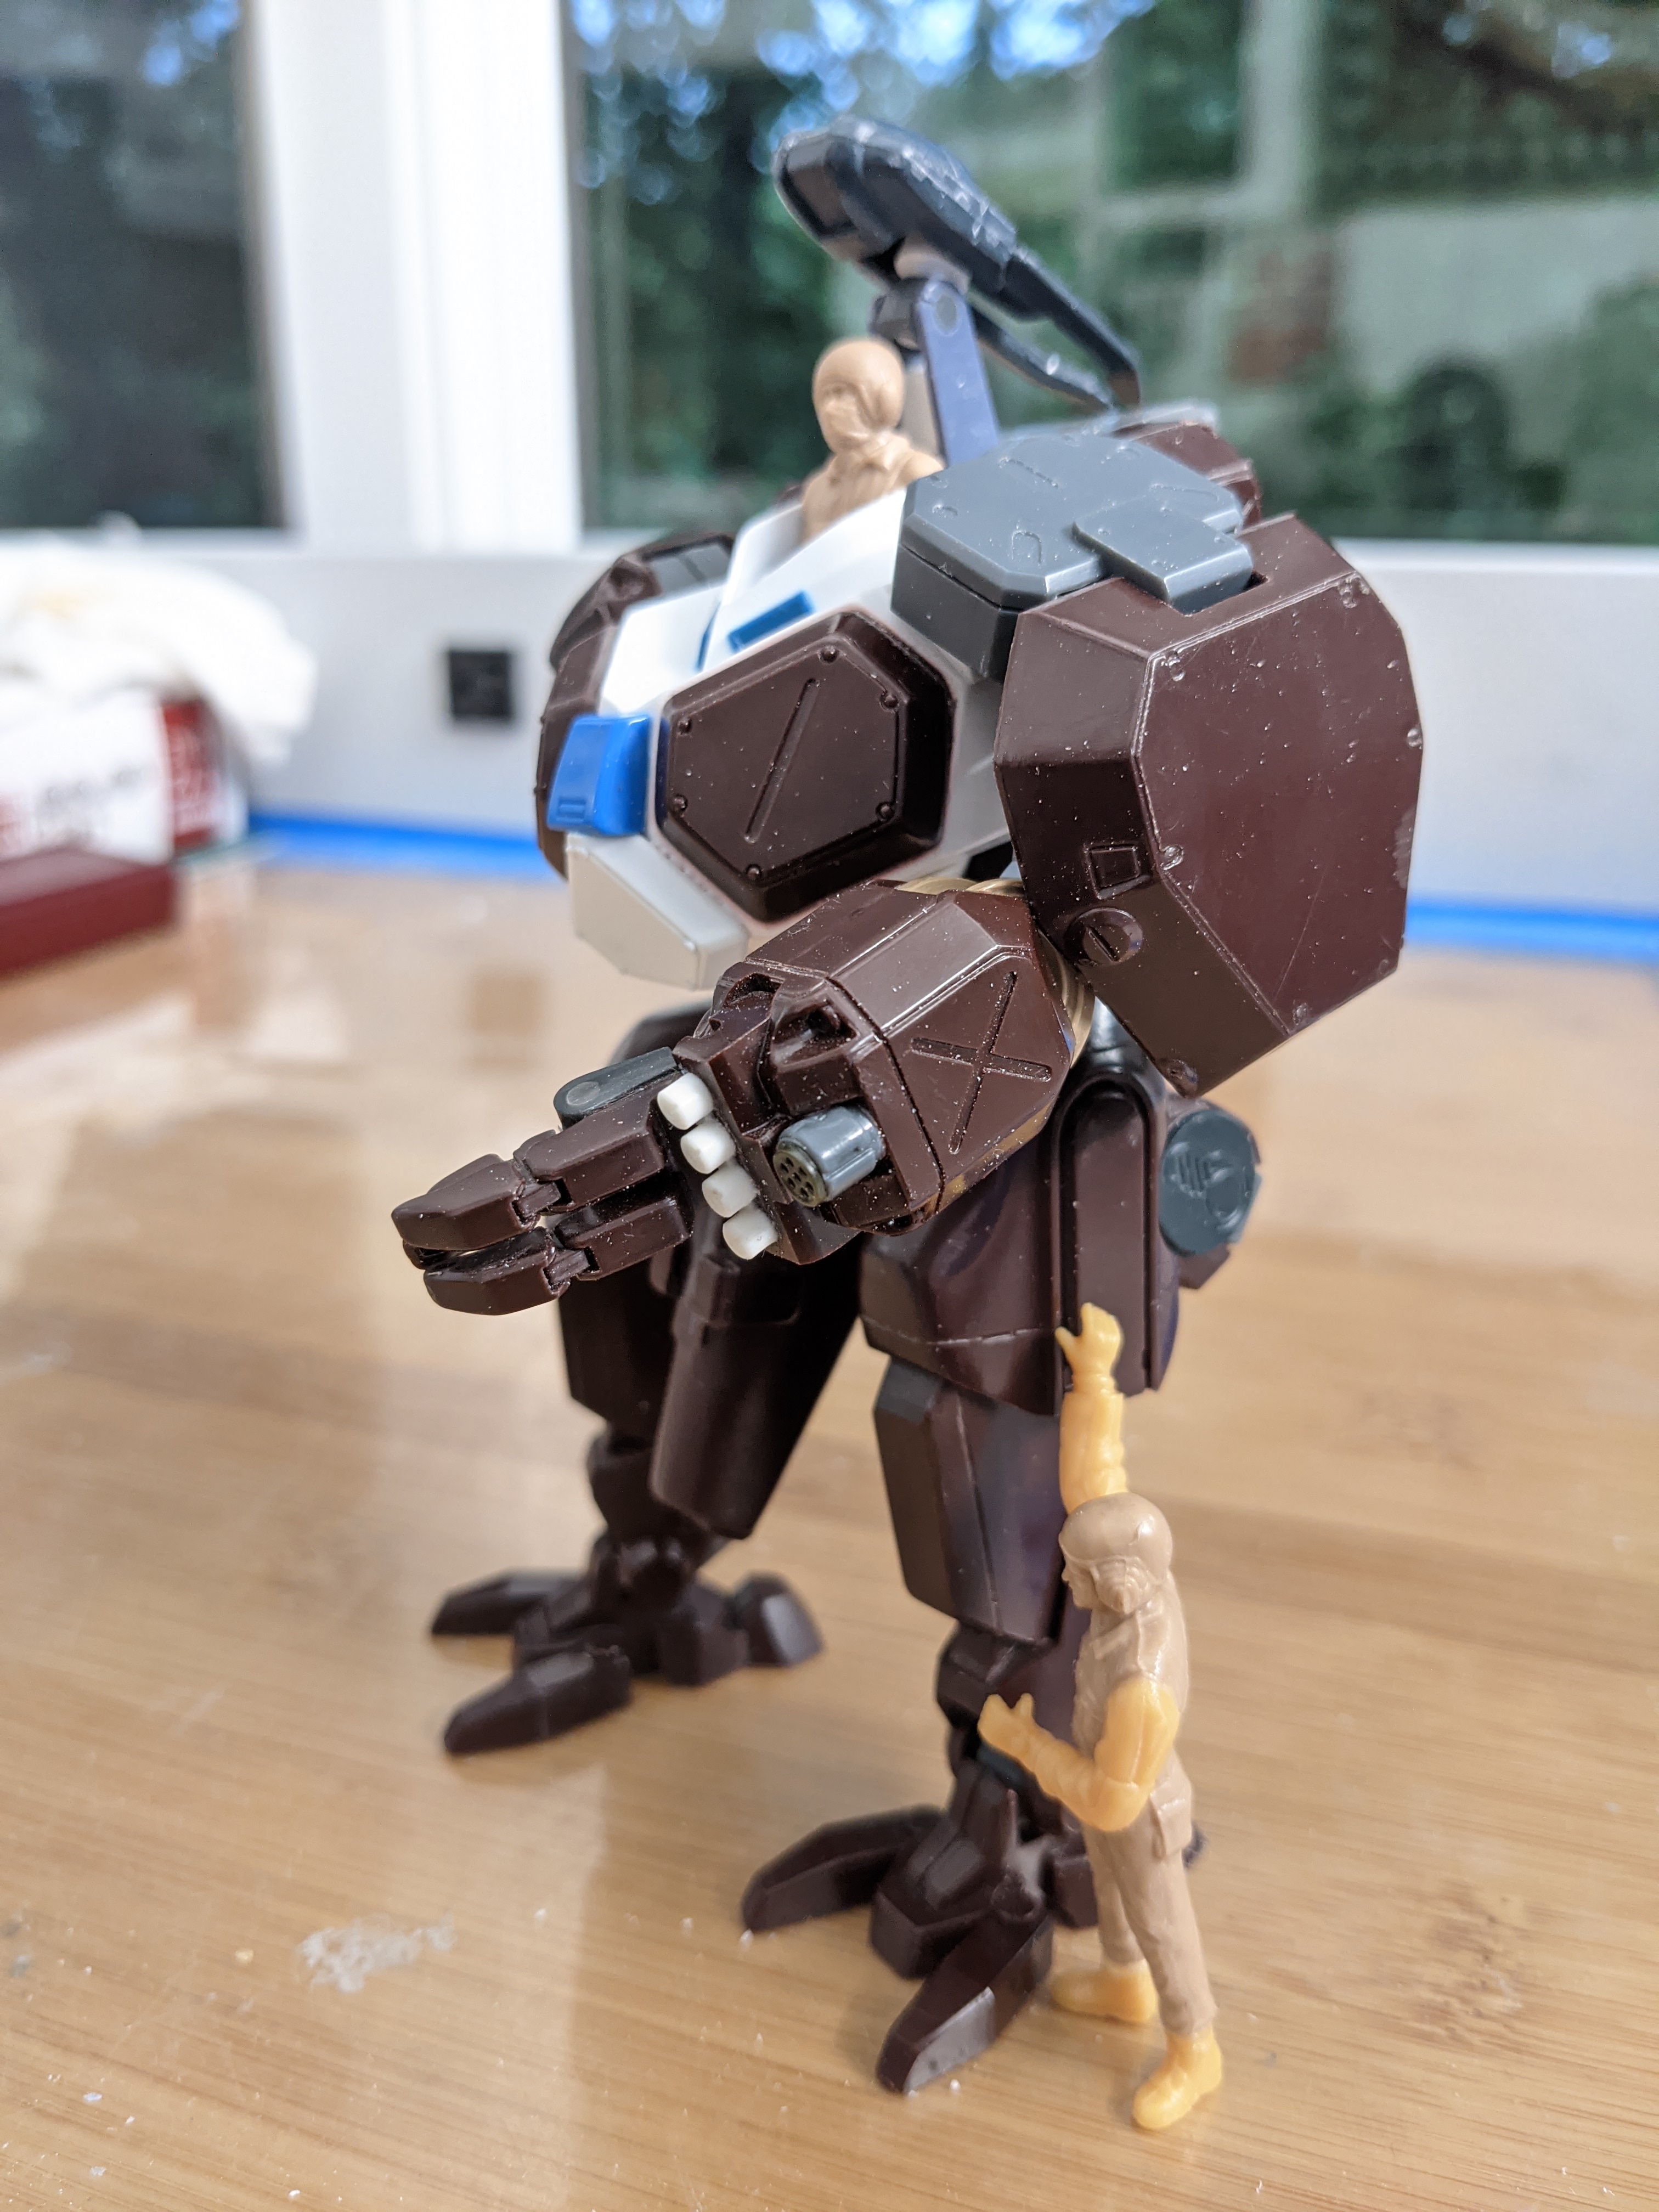
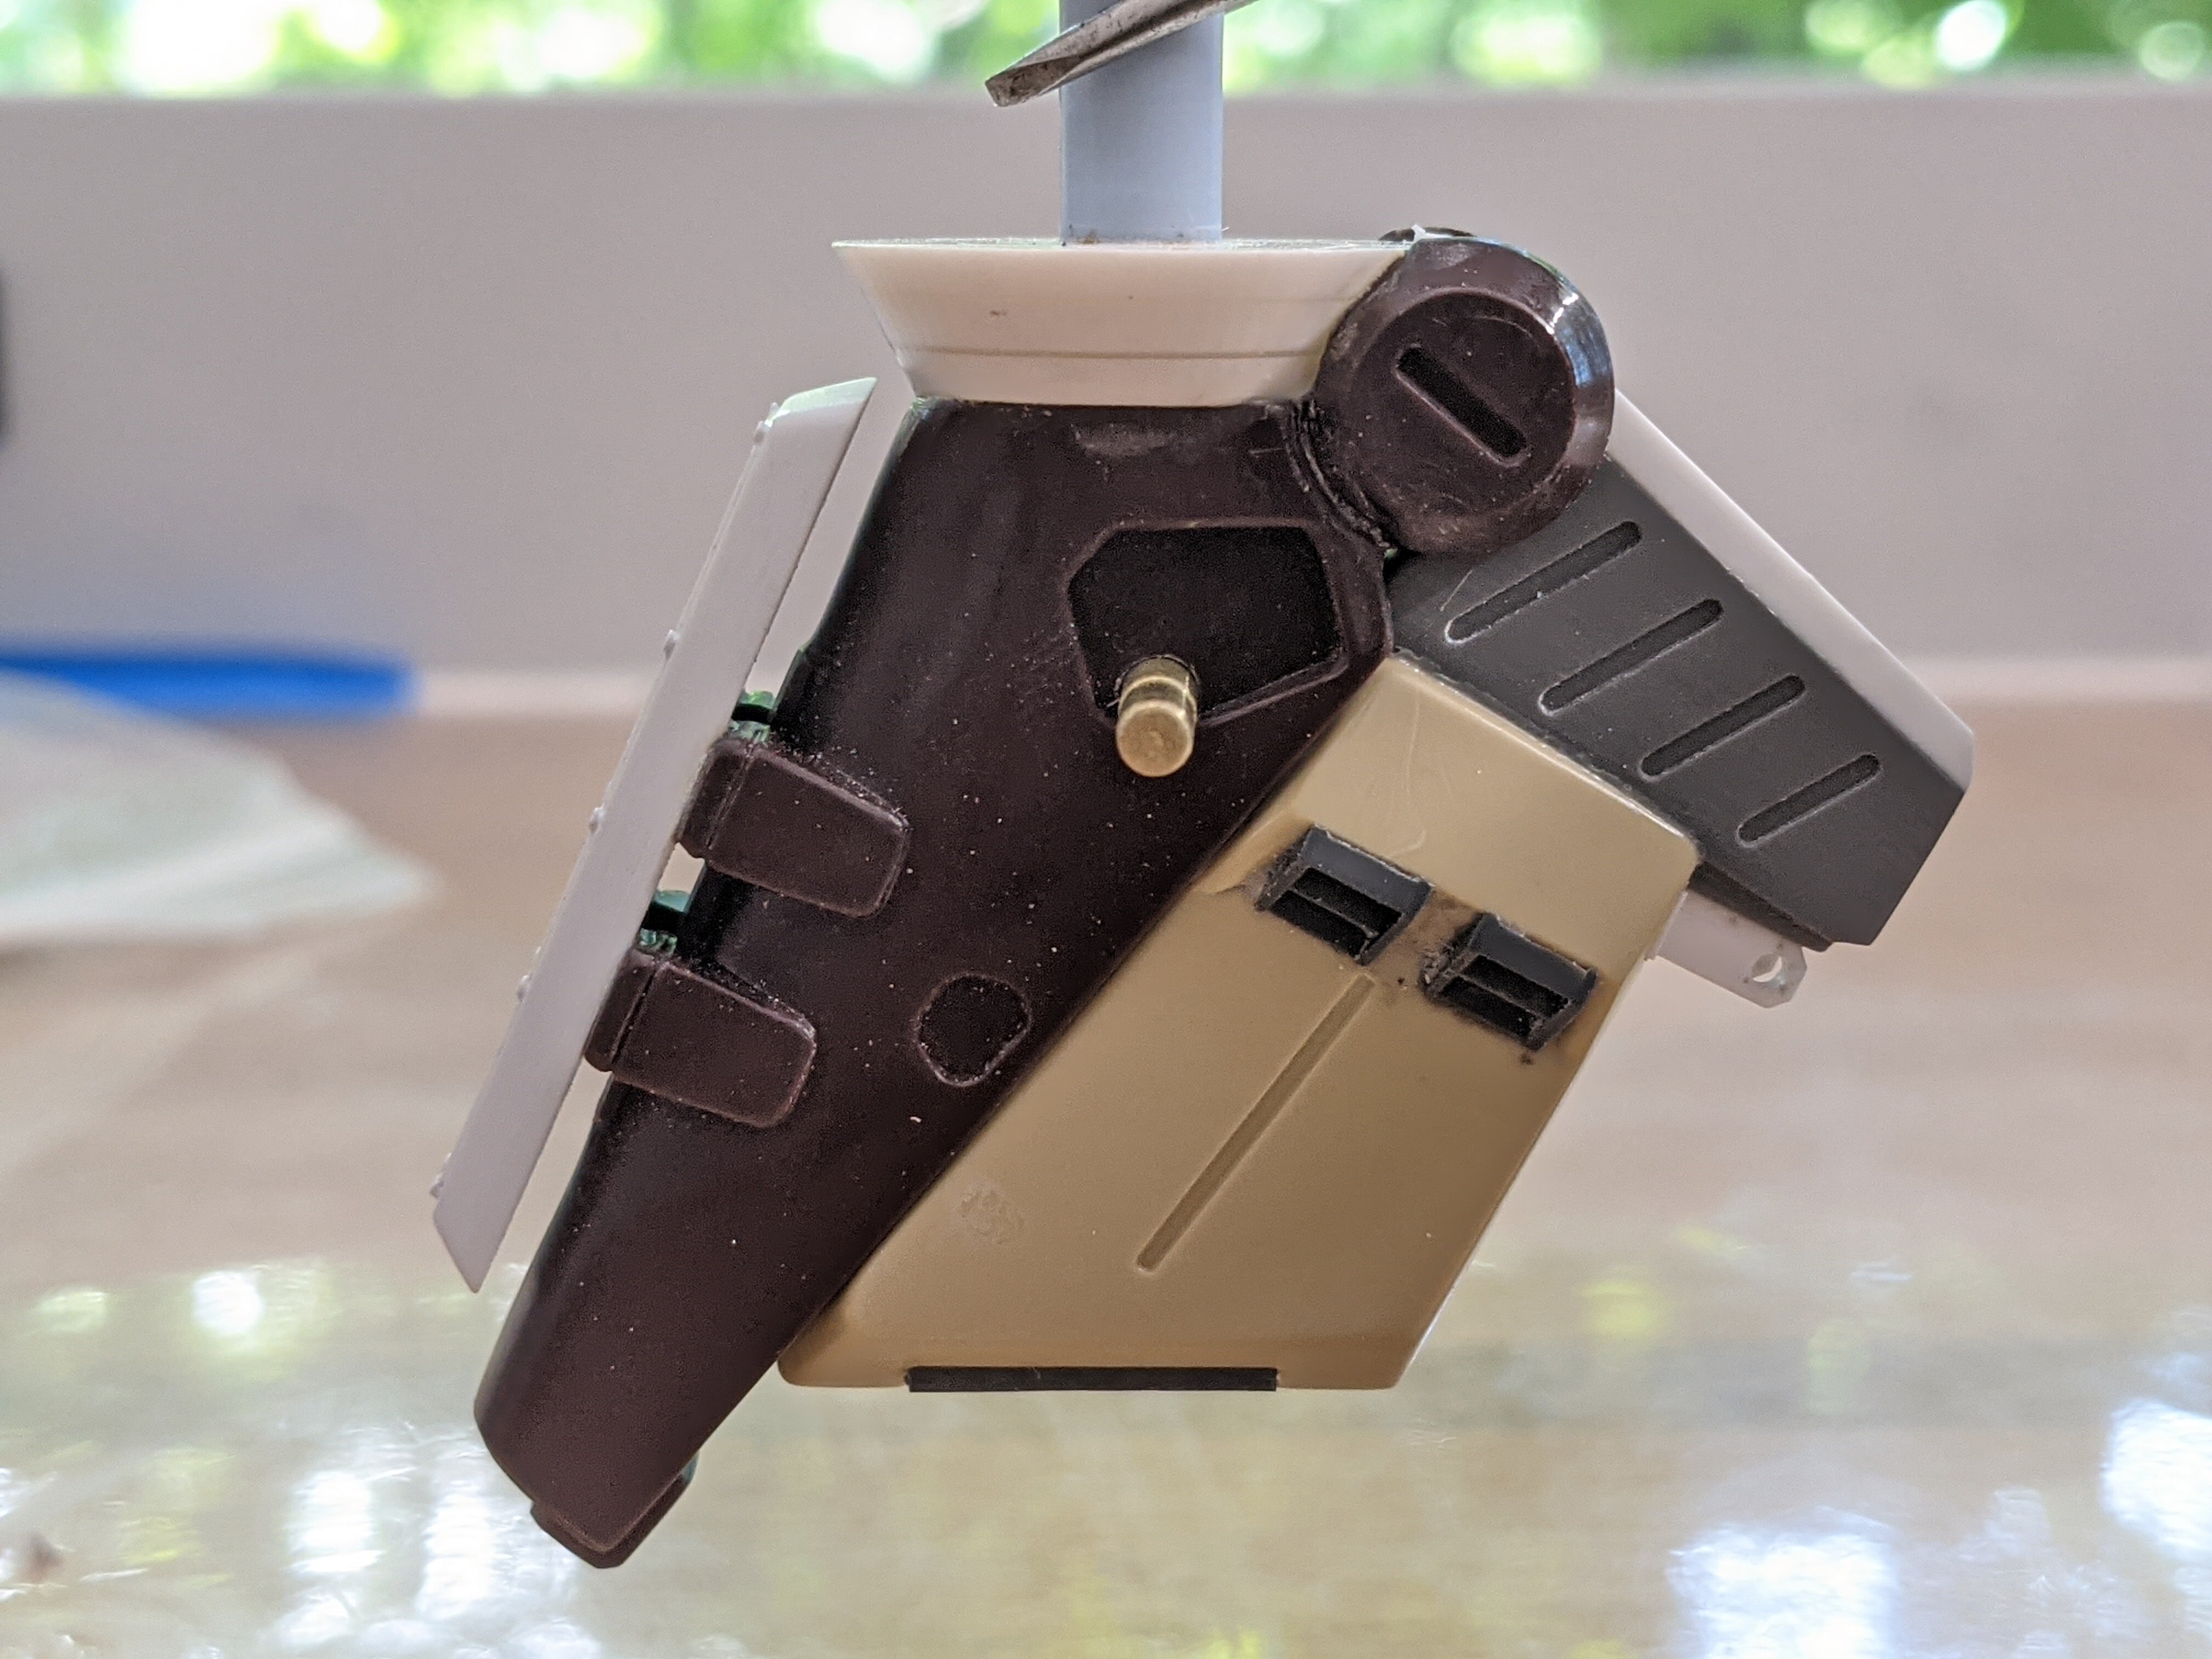
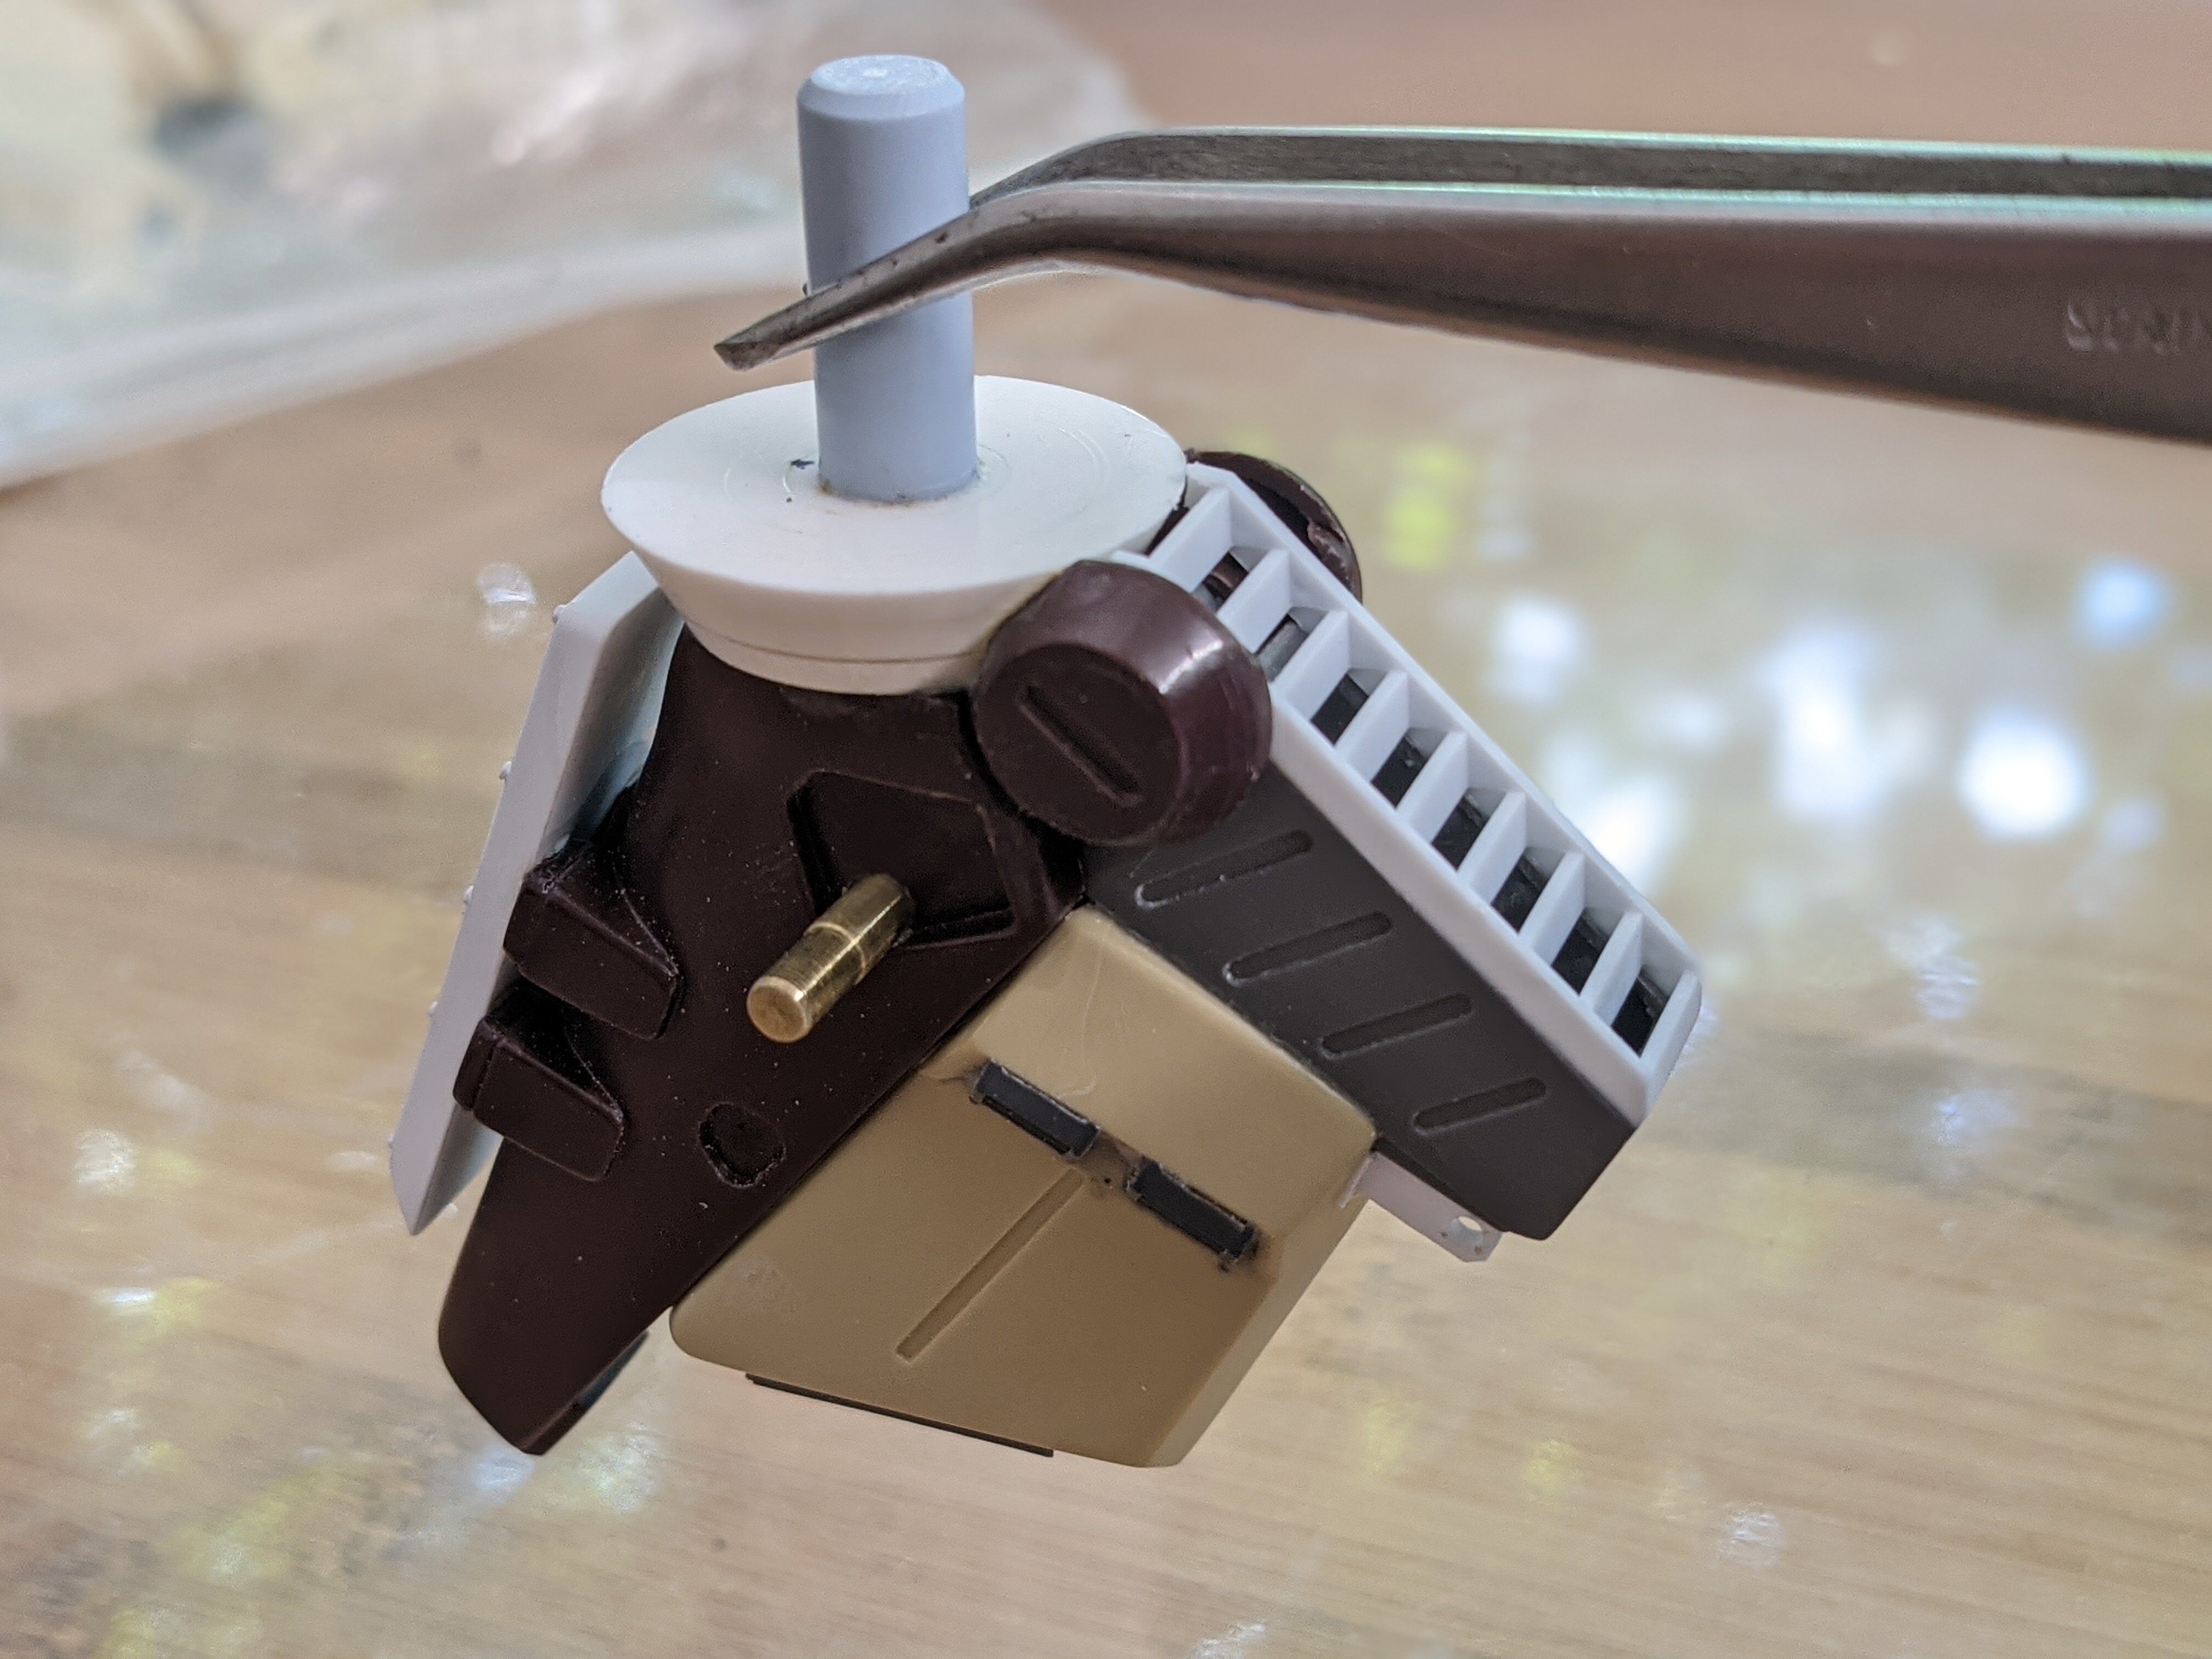
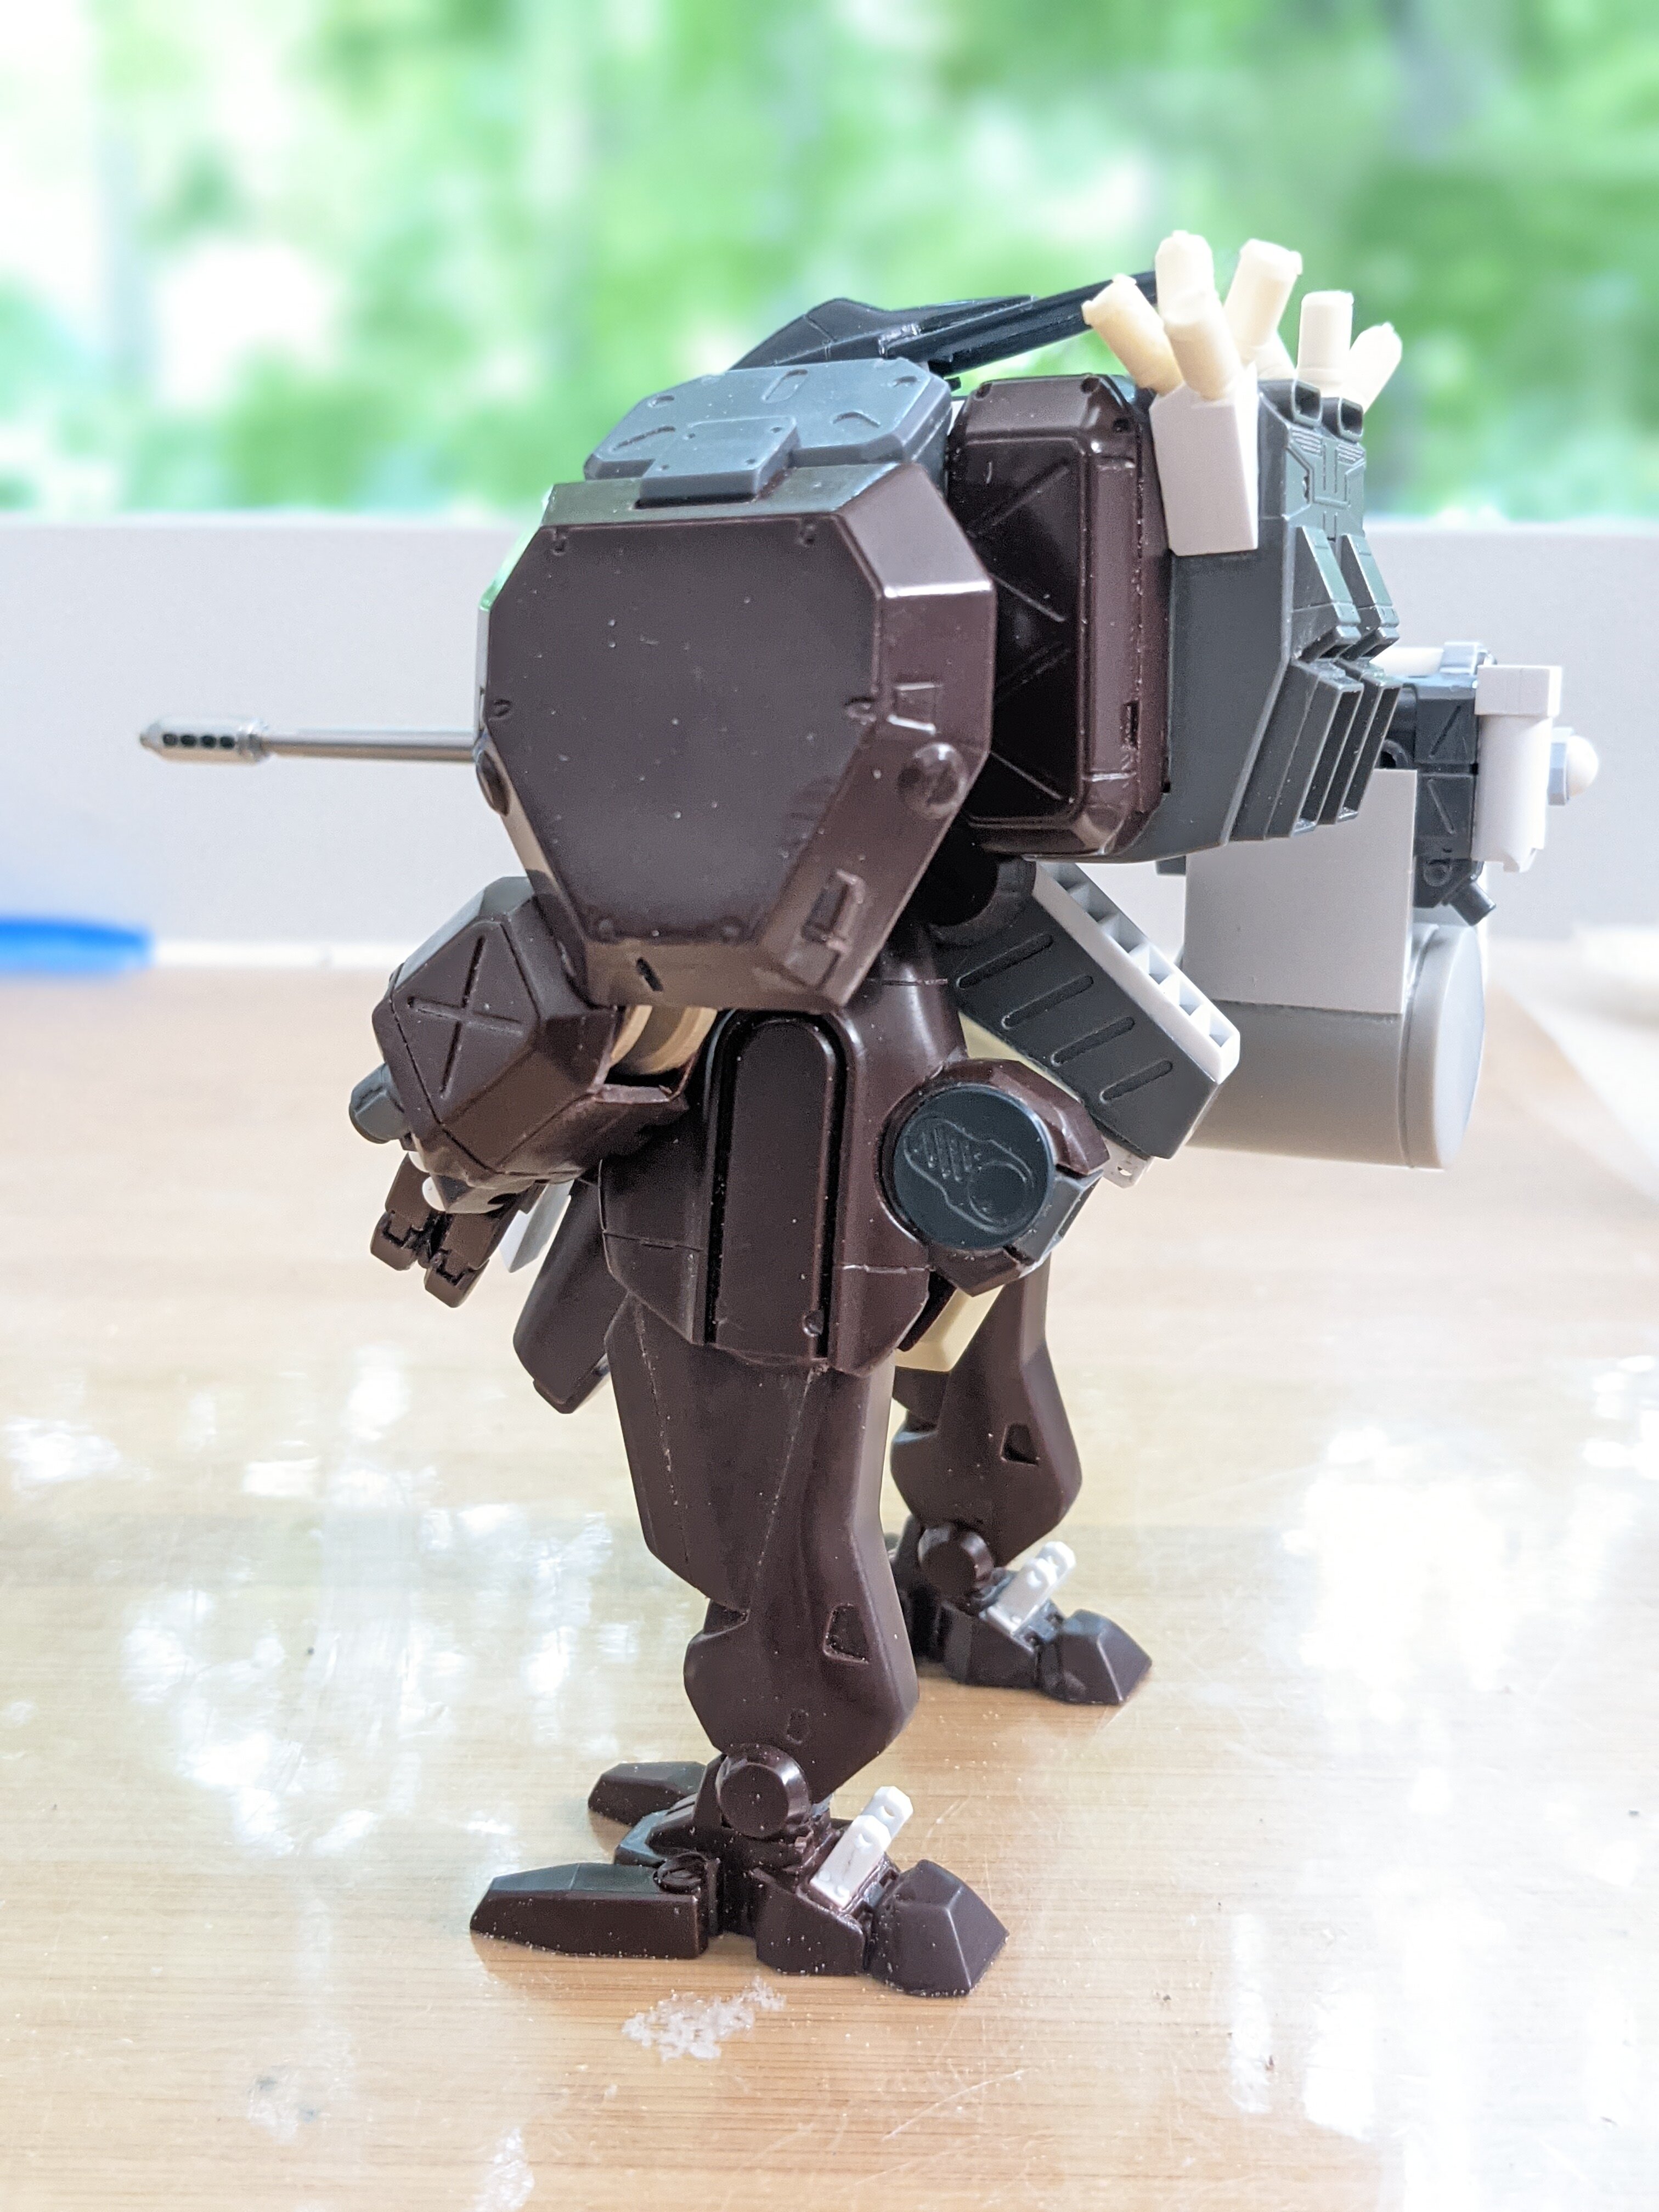
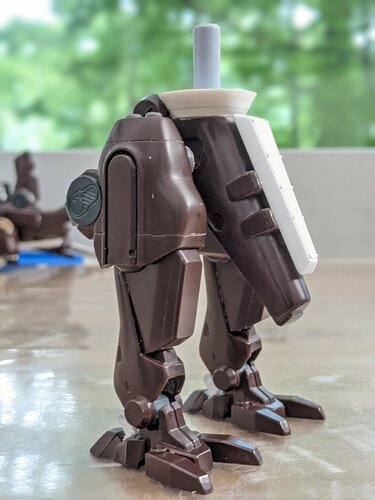
@peter Your collection of Yamatos and related ships is looking great! Your painting is adding realism to otherwise small kits. @Thom That Spitfire is looking great! Nice and smooth metalic finish too! @arbit Awesome looking Valk! Even with ordnance. Just don't sneeze! @Photogirl Your figures look good. Sadly, they're hard to see under the canopy anyhow. More work done this week on the mecha. The feet will have "achiles" actuators connected to the feet. So I made brackets with detailed bolts to "hold them down" and the hydraulic looking actuators to connect into them. The gun also needed hydraulic actuators for the absorbers, so those got machined too with bolt heads. The neck joints for the head are so thin, they were cracking. So greeblies like motors got added for strength. The heads are also cleaned up now for clear lenses to be made. Even mecha need protection for their "lunchbox"! So more armor plating was made, attached and bolted for details. That's it for this week. Thanks for checking in everyone! - MT


-
@joscasle Great looking plane! Photography is tough. If you can't get the lighting and exposure right, you can always fix it in Photoshop (most of the time). The white back dropped Tomcat looks a little orange. You can filter that in Photoshop. Orange and blue are opposites. Blue will help filter that out. So will lightening it. @arbit What are you using for a camera and settings? It sounds like you have too much exposure. I usually use my cellphone for here and find it like low light better than too much. Its weird. @peter Looks like the shipyards are running smooth despite the whole shortage of materials across the globe How is that plastic putty? Is it thick enough to build with, or is it more of a gap filler?
-
That came out great! Just enough weathering to look realistic. - MT
-
@peter Thank you! Your buddy's brake looks cool! It looks like a viper's head. @Thom Thank you! That's what I'm going for @arbit Your print is FAR BETTER than any of the other "stock" figures. GREAT sculpt and detail. He's got more hair peeking out the helmet than I have on my head! I think hand painting will cover up any bias marks. @joscasle That's a great "minty fresh" build! Nice n clean. @pengbuzz Your improvements look great! The landing pad is sharp! I did check out the other build and it DOES look cool. I've probably laminated hundreds of printed pieces to foam board and never thought of it for hobbies. It does dent easily though. - MT
-
The updates look AWESOME Arbit! - MT
-
The 'Hey look at this really cool model build I saw' post
MechTech replied to Shawn's topic in Model kits
This is AWESOME!!! It's a bit of cockpit and model together. Brilliant! thanks for sharing! -
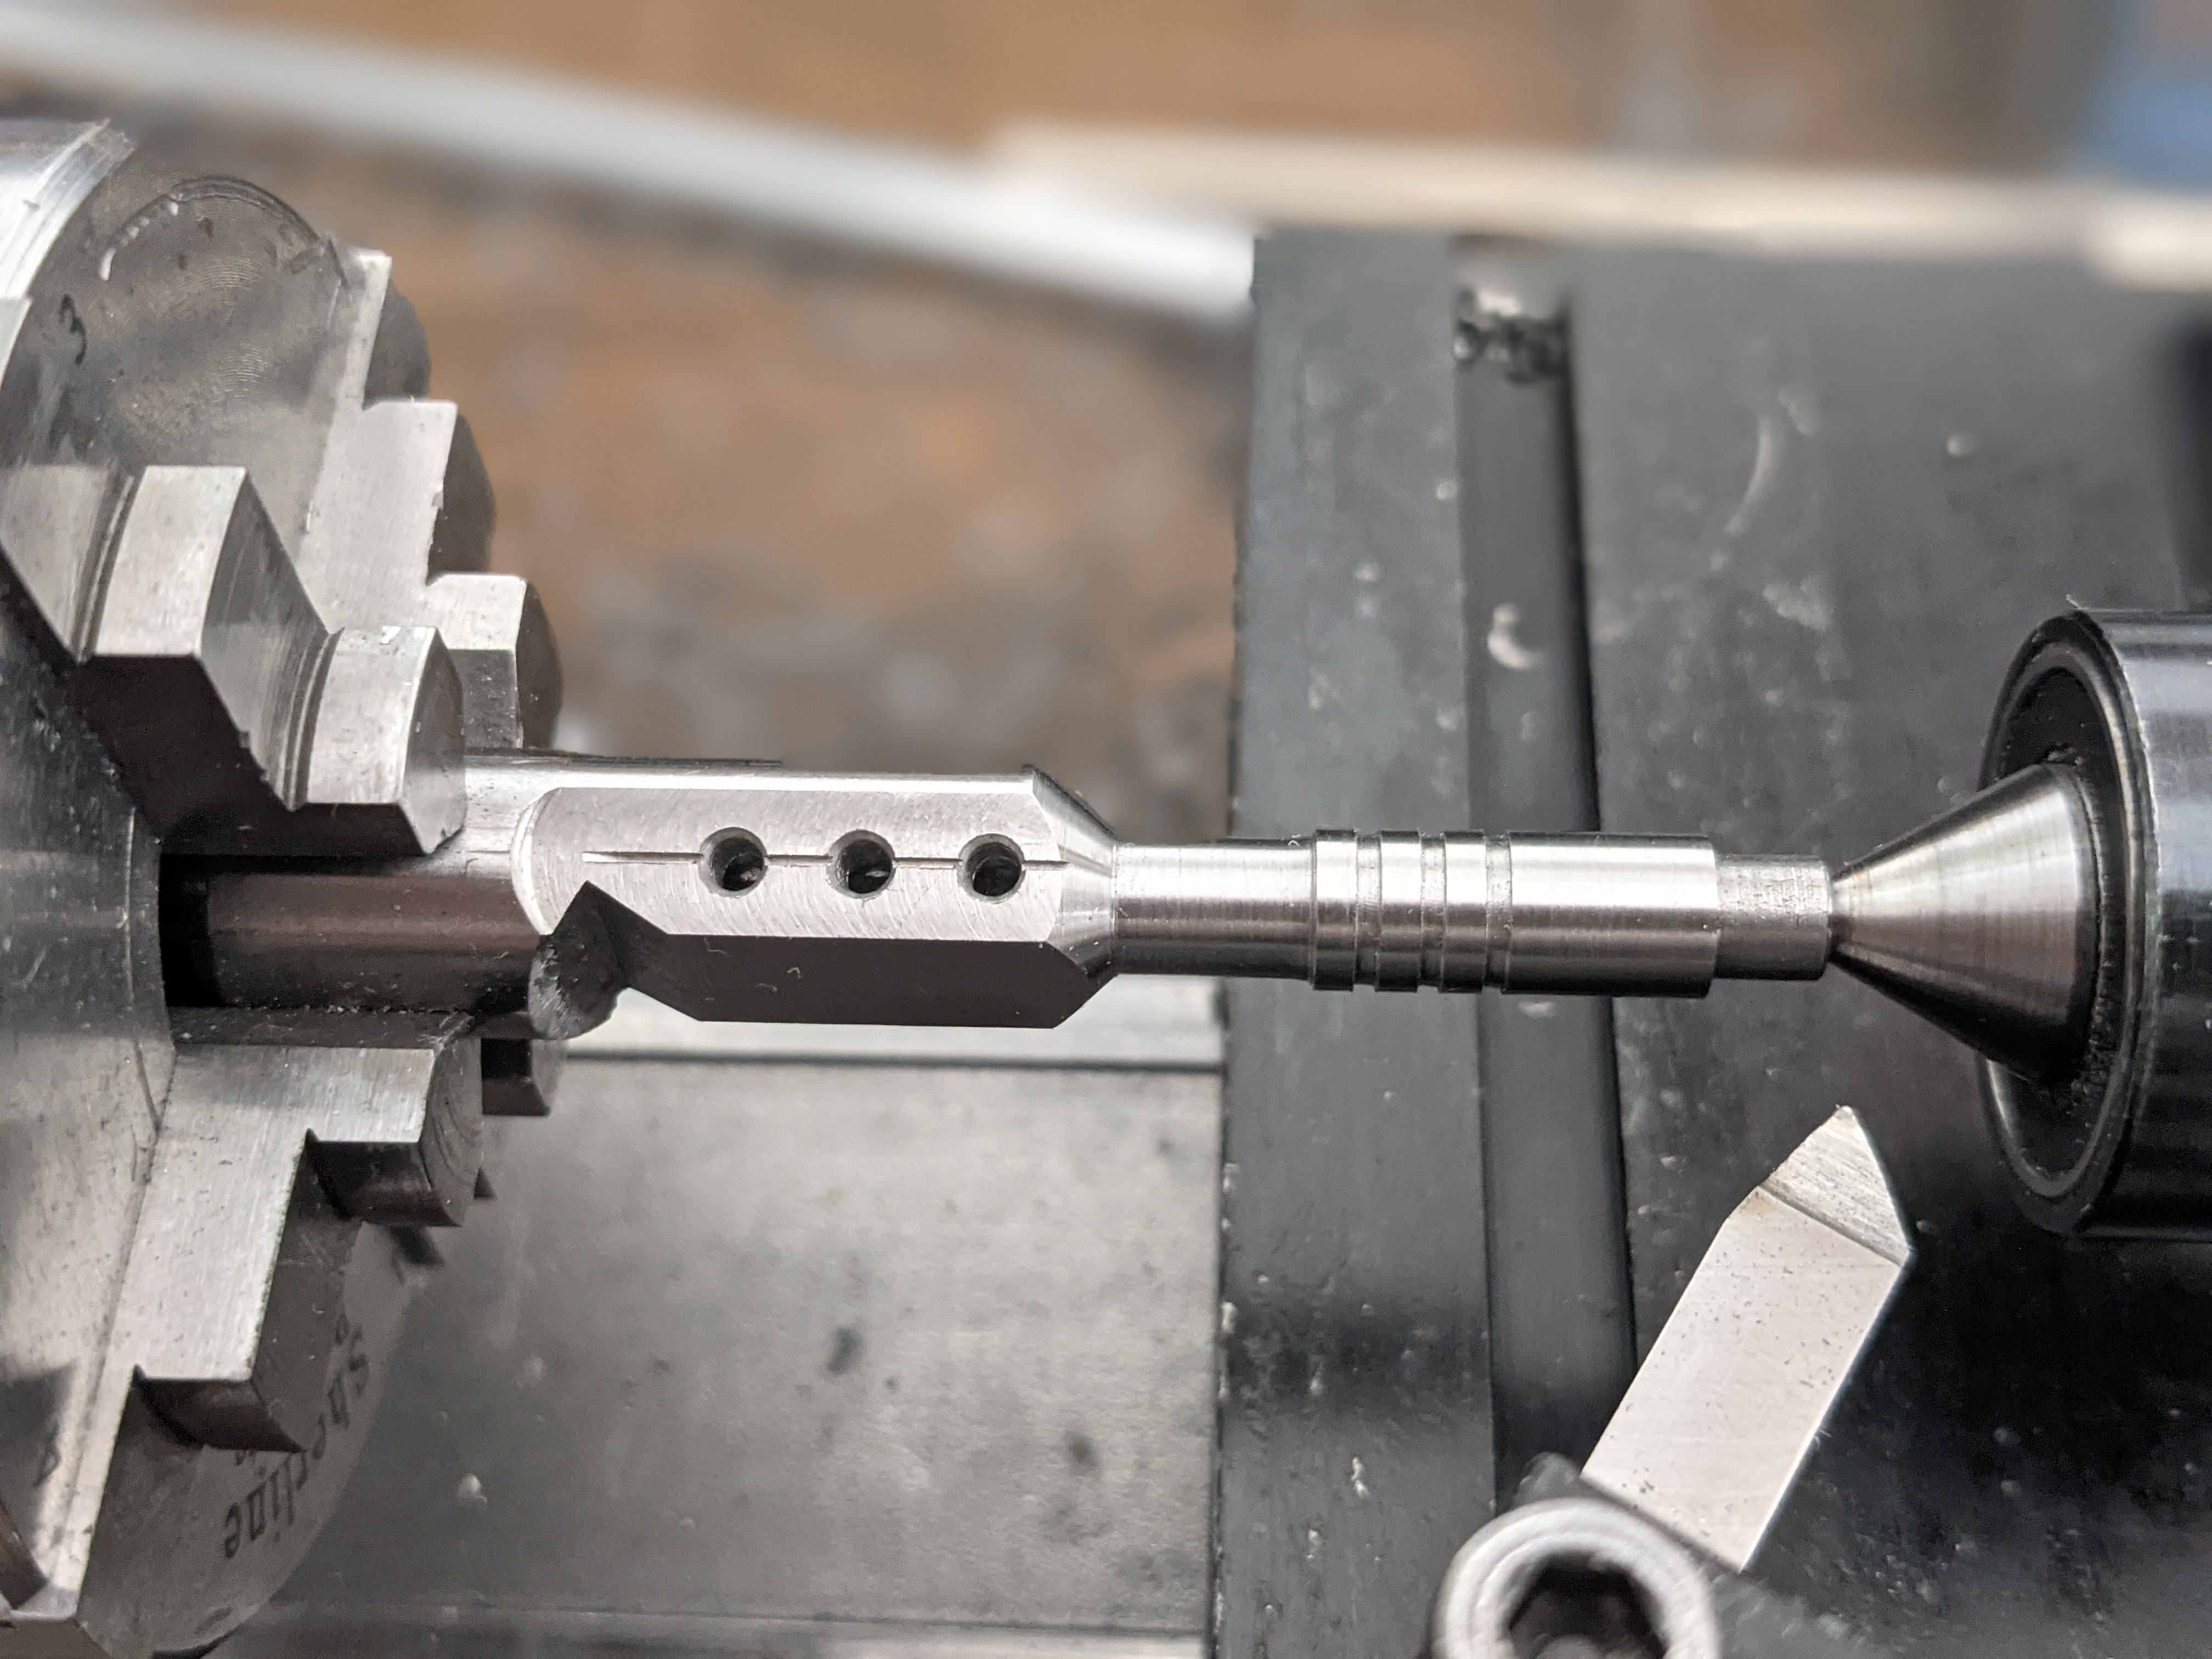
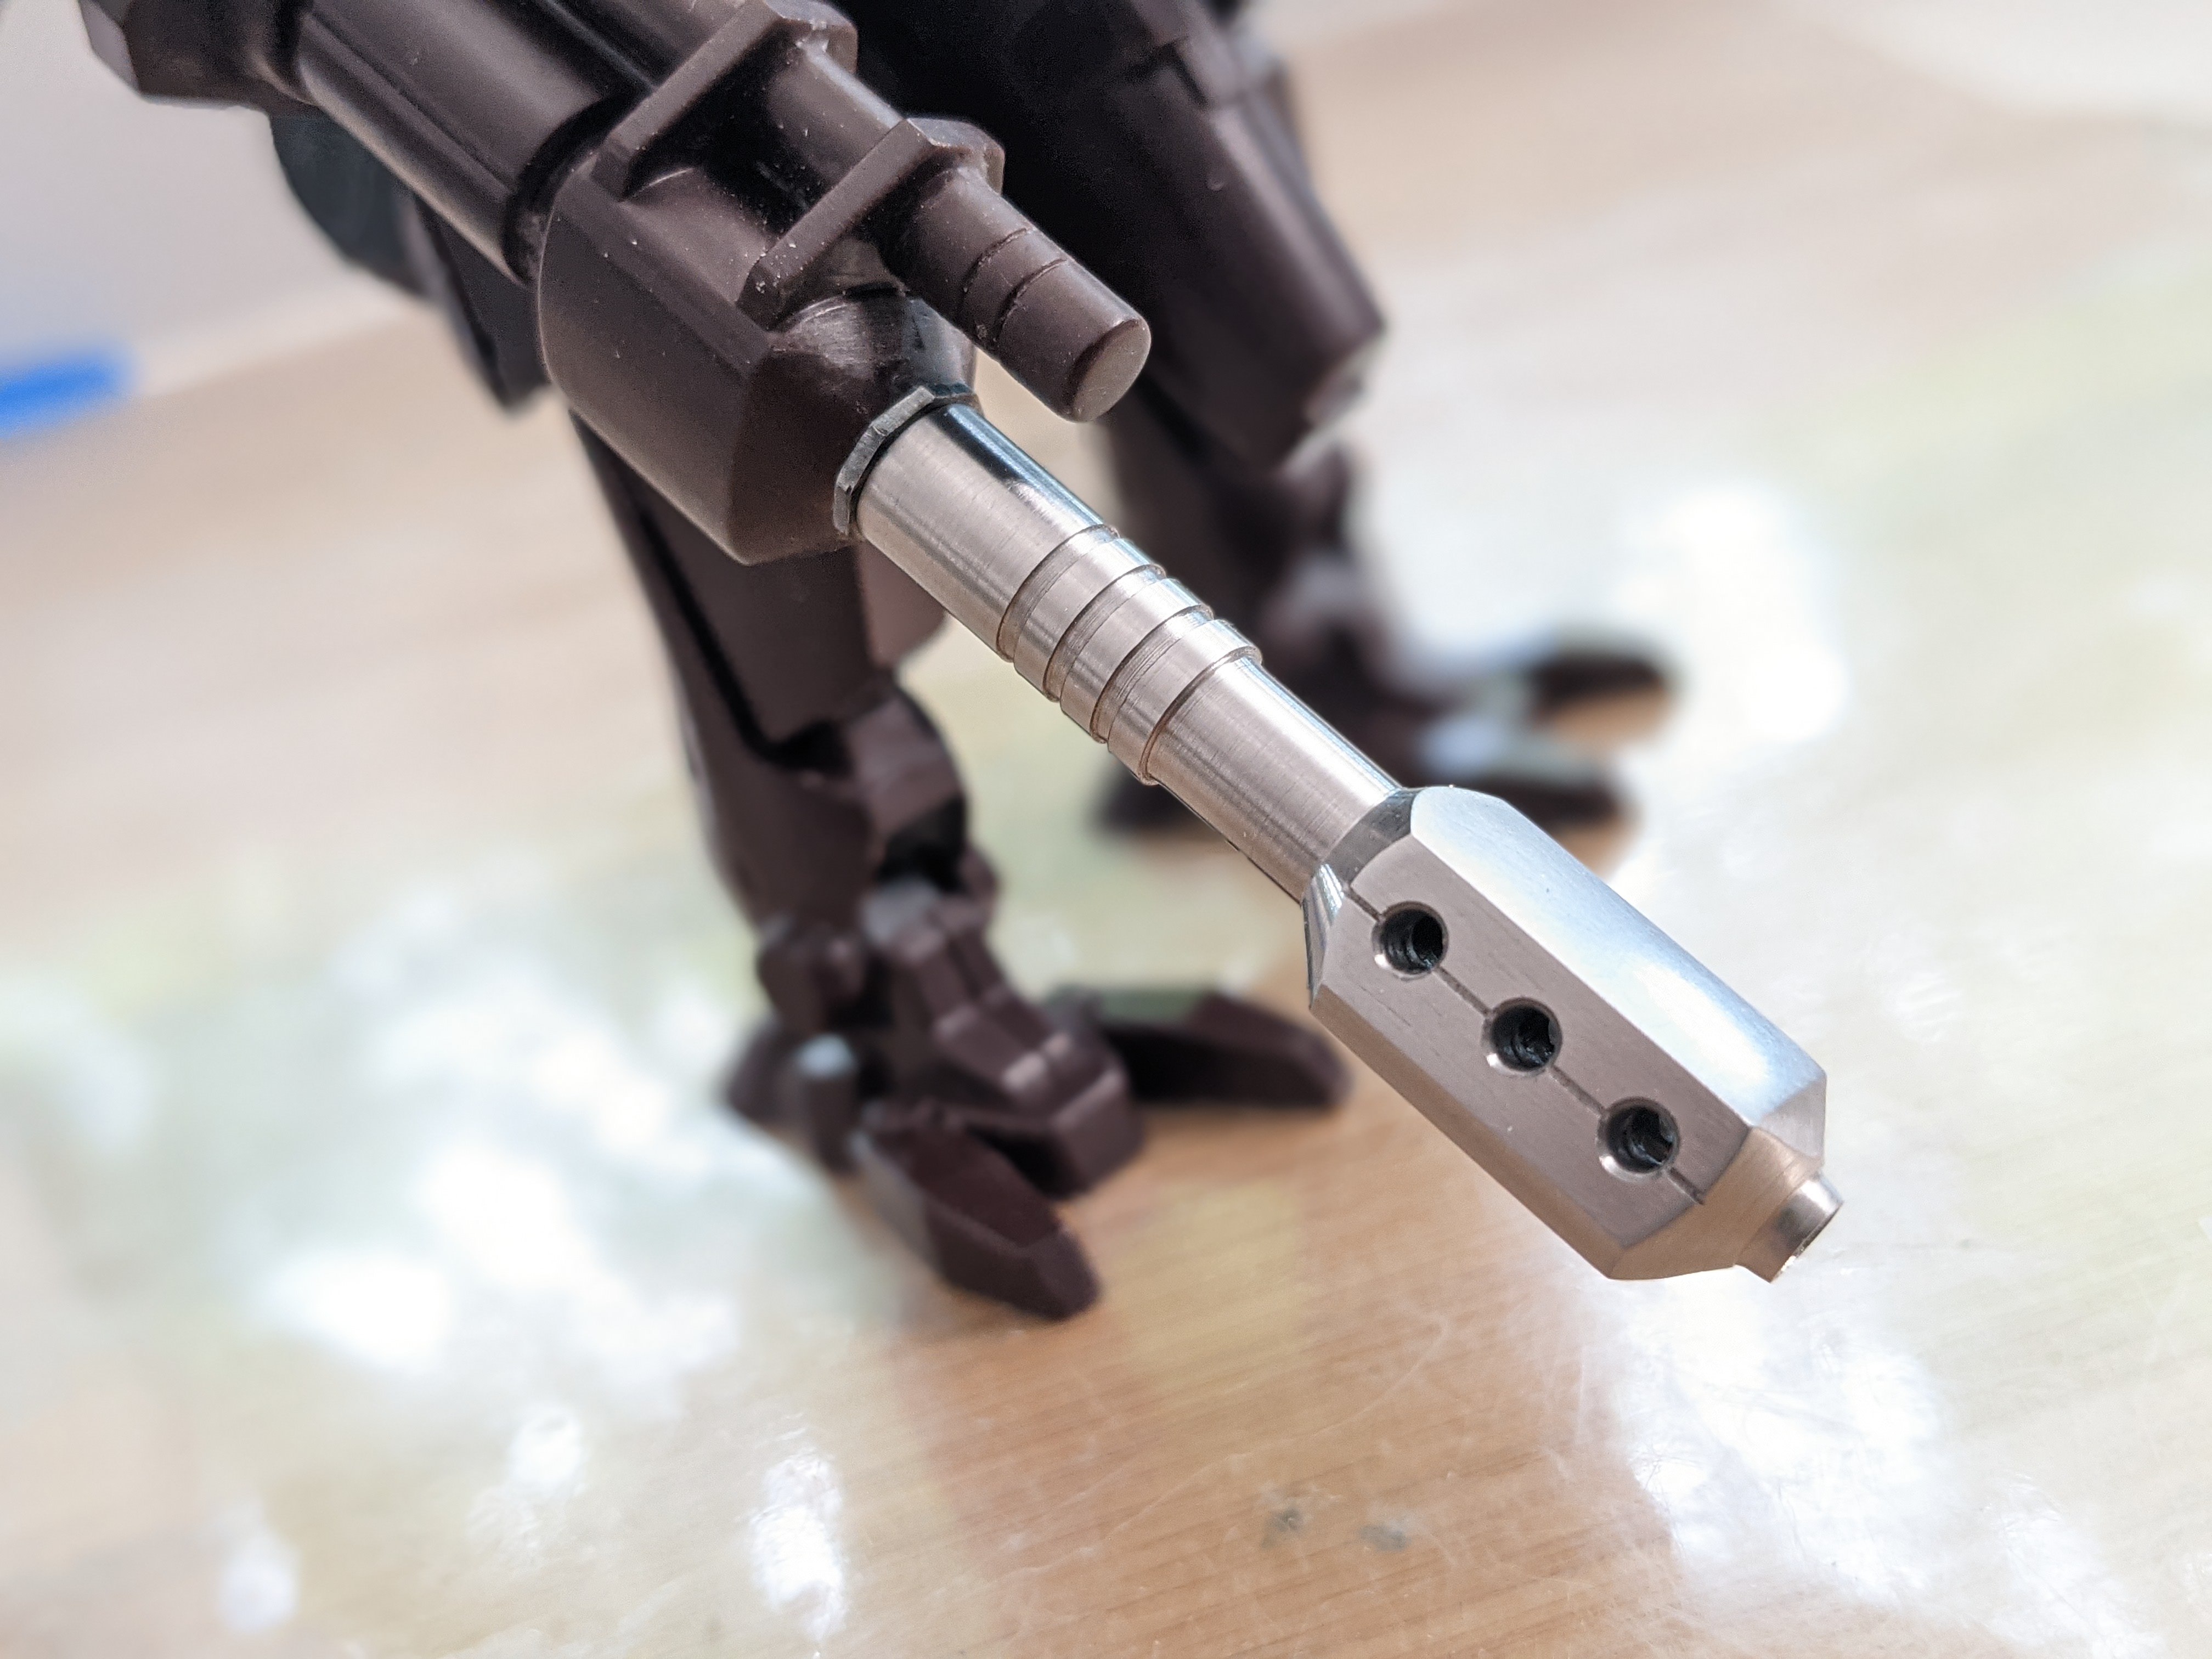
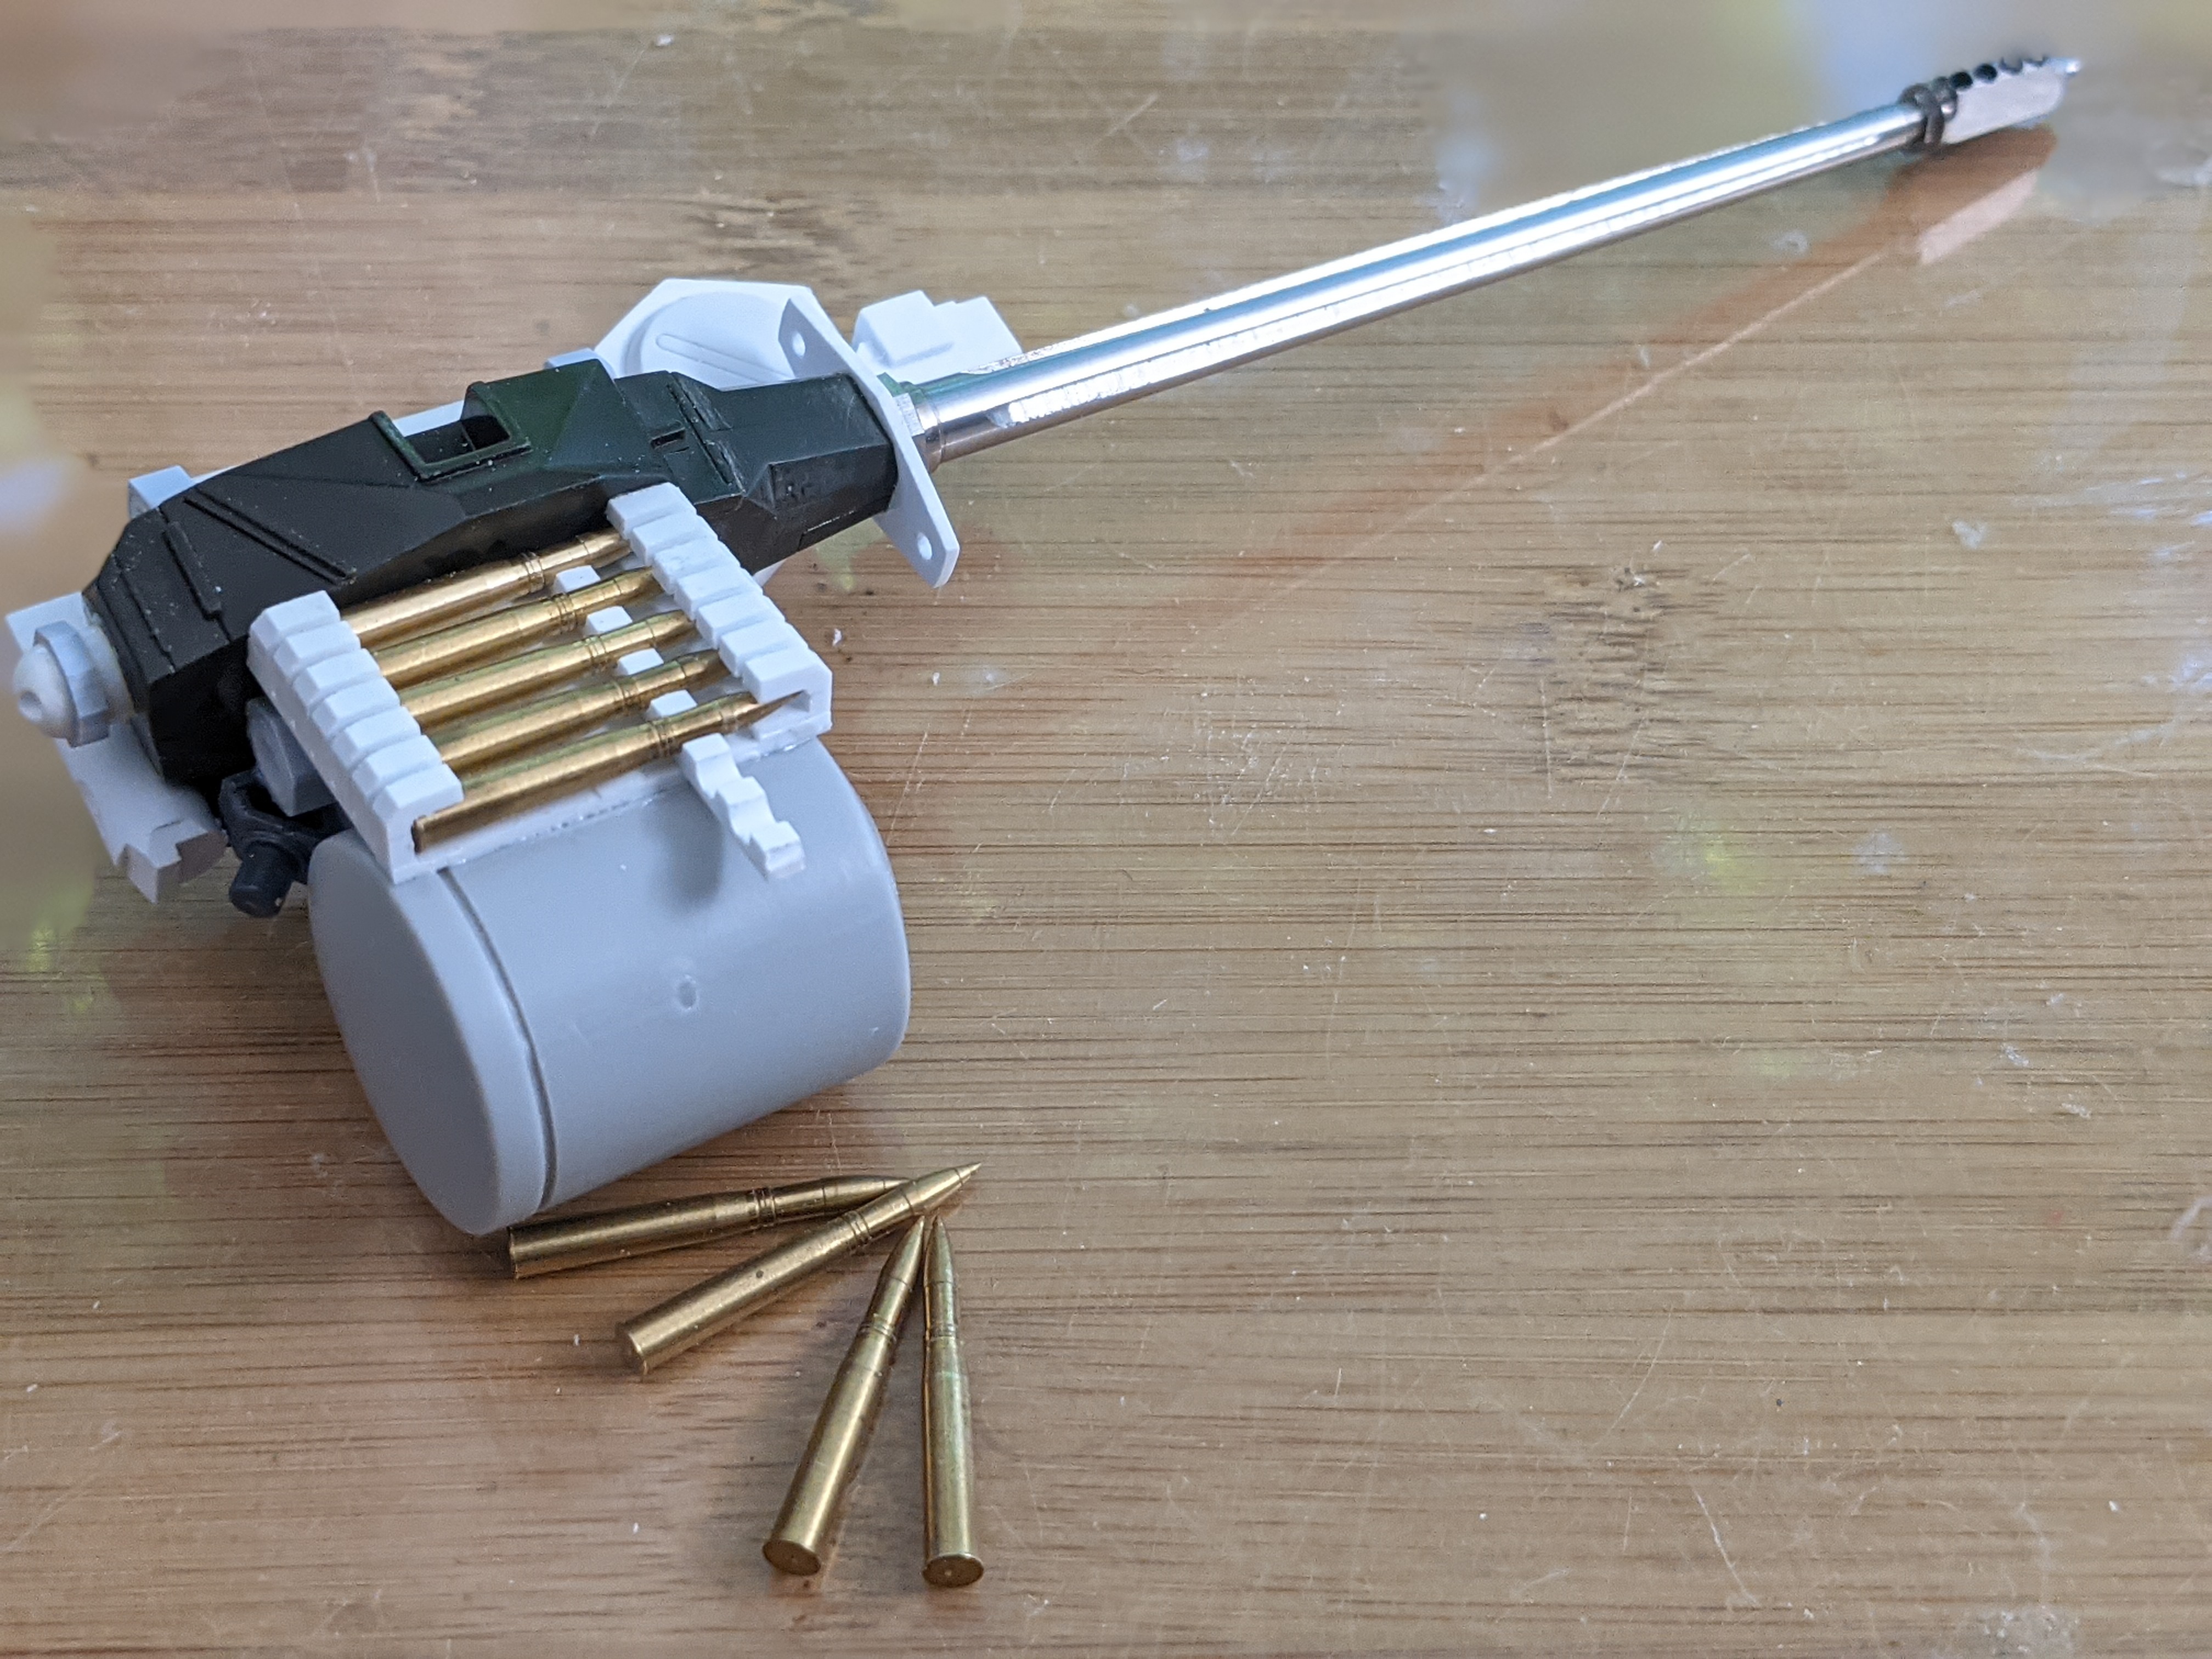
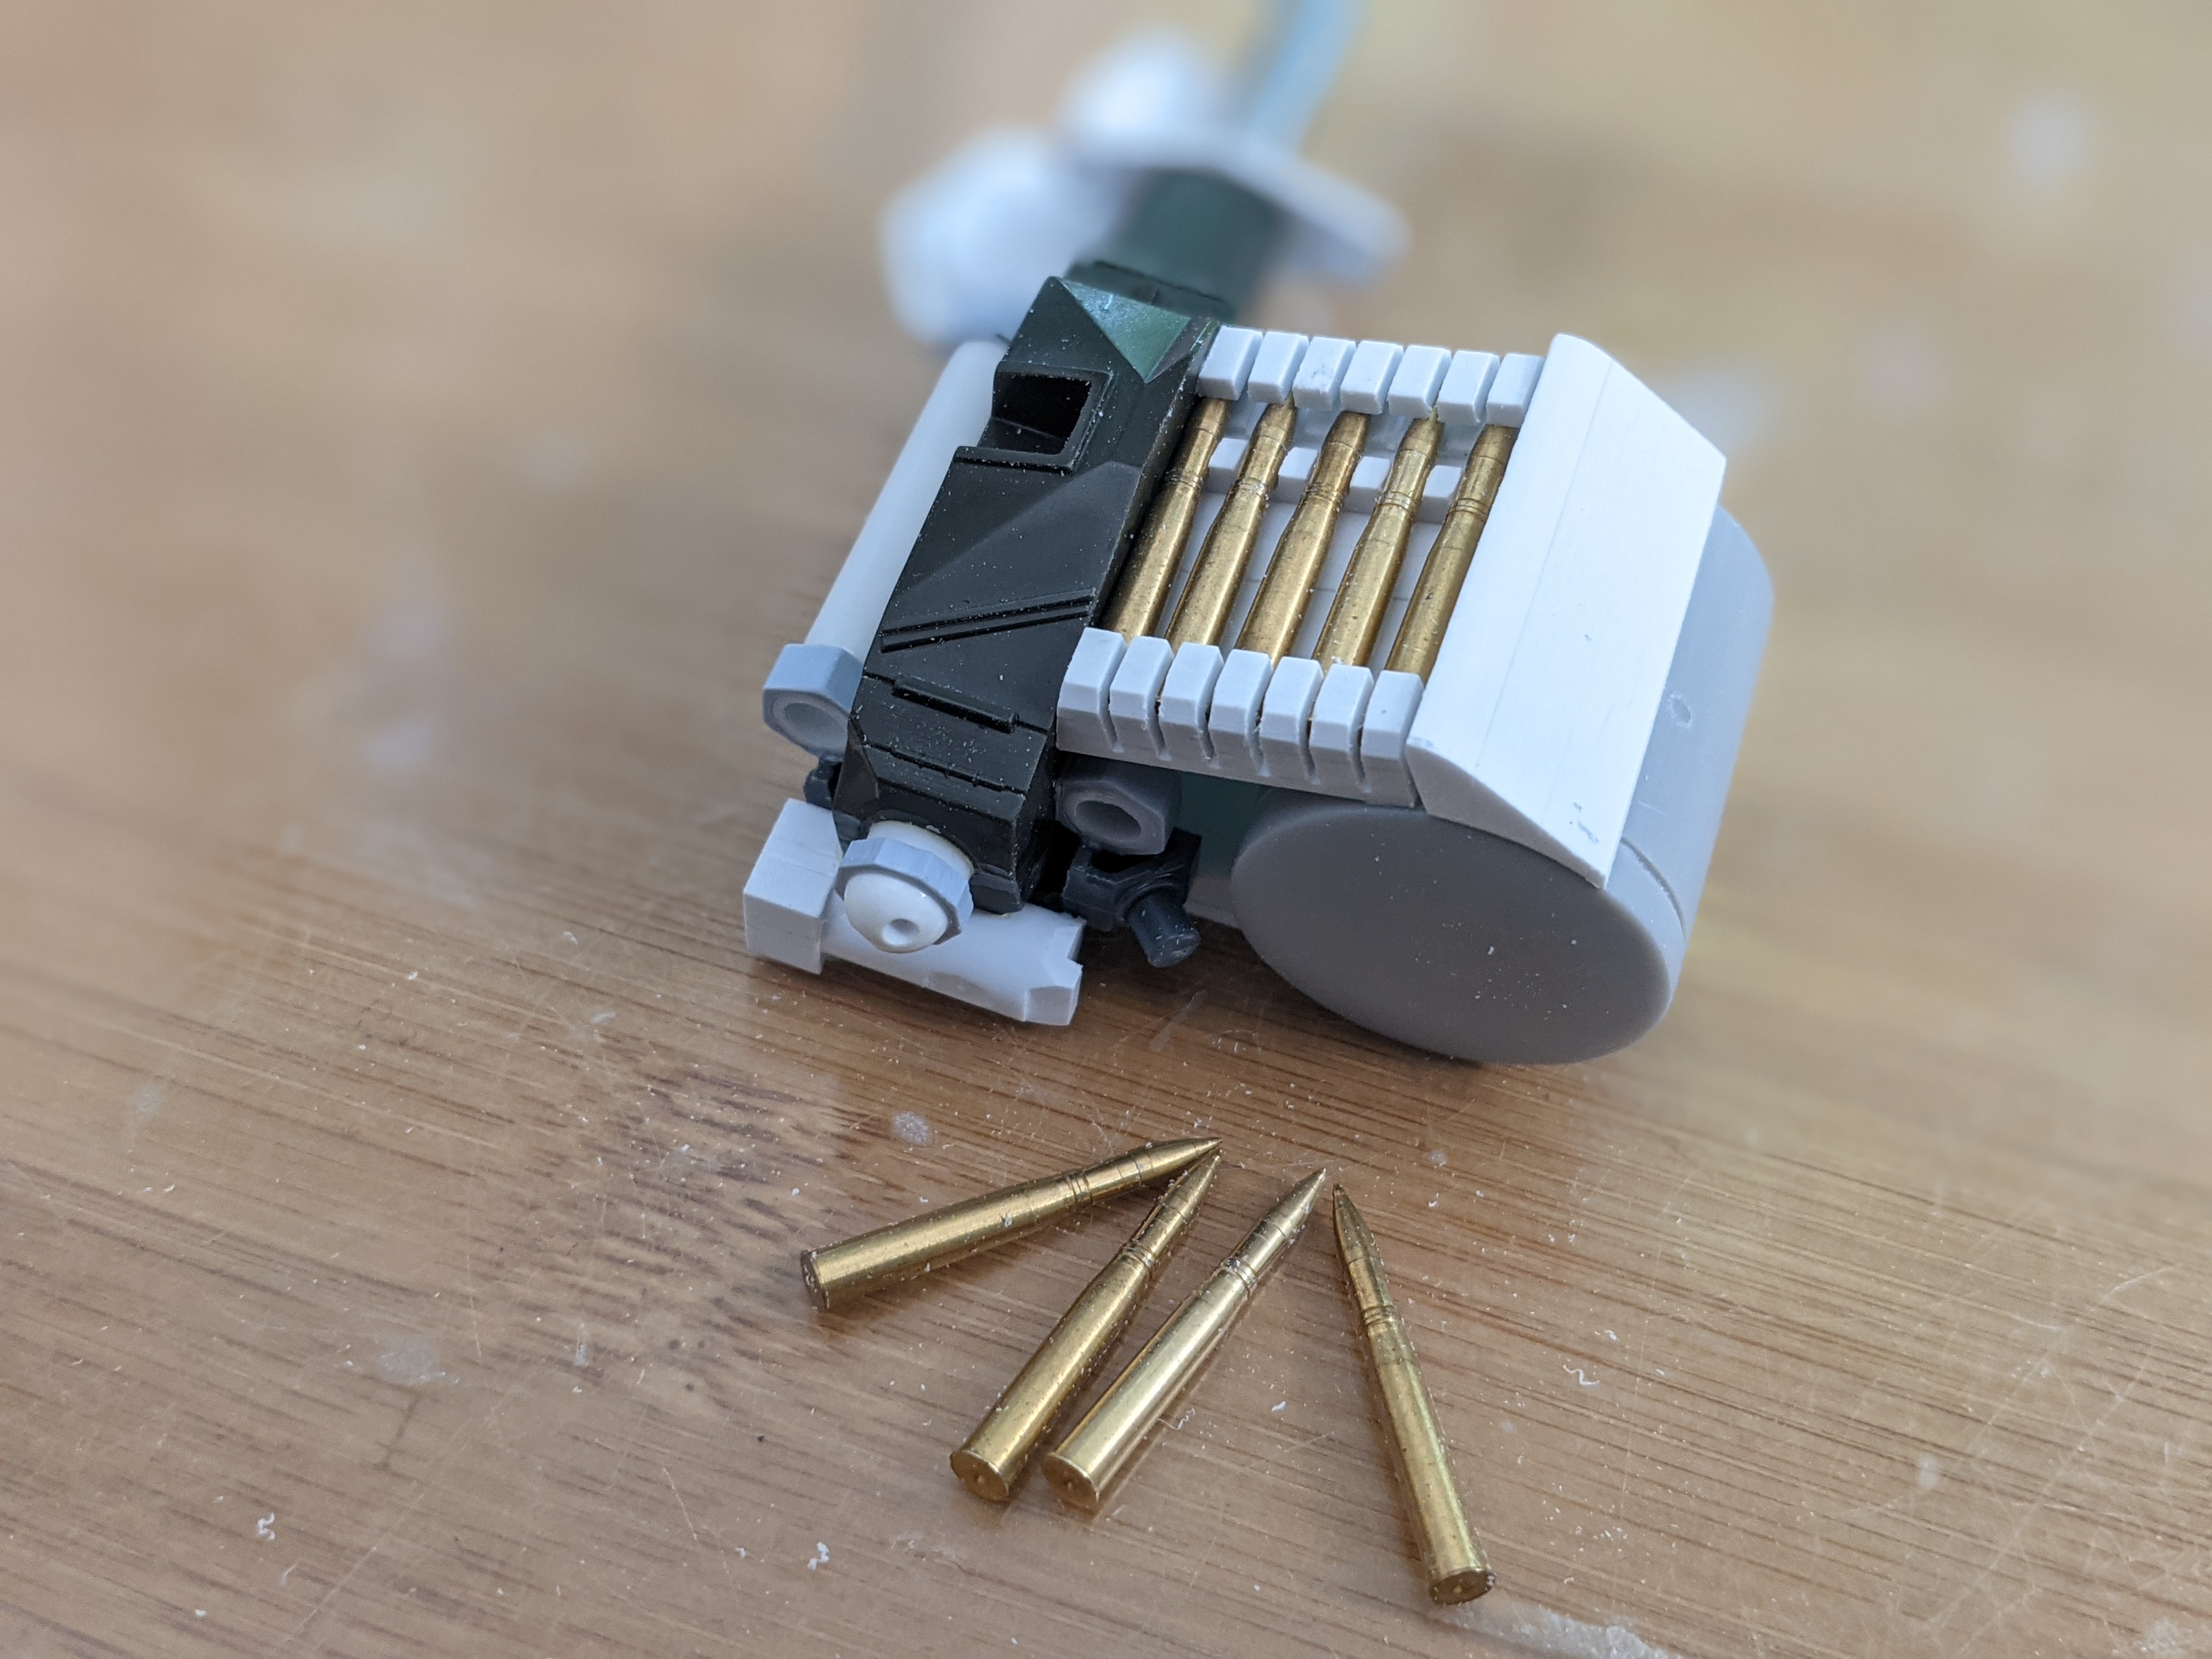
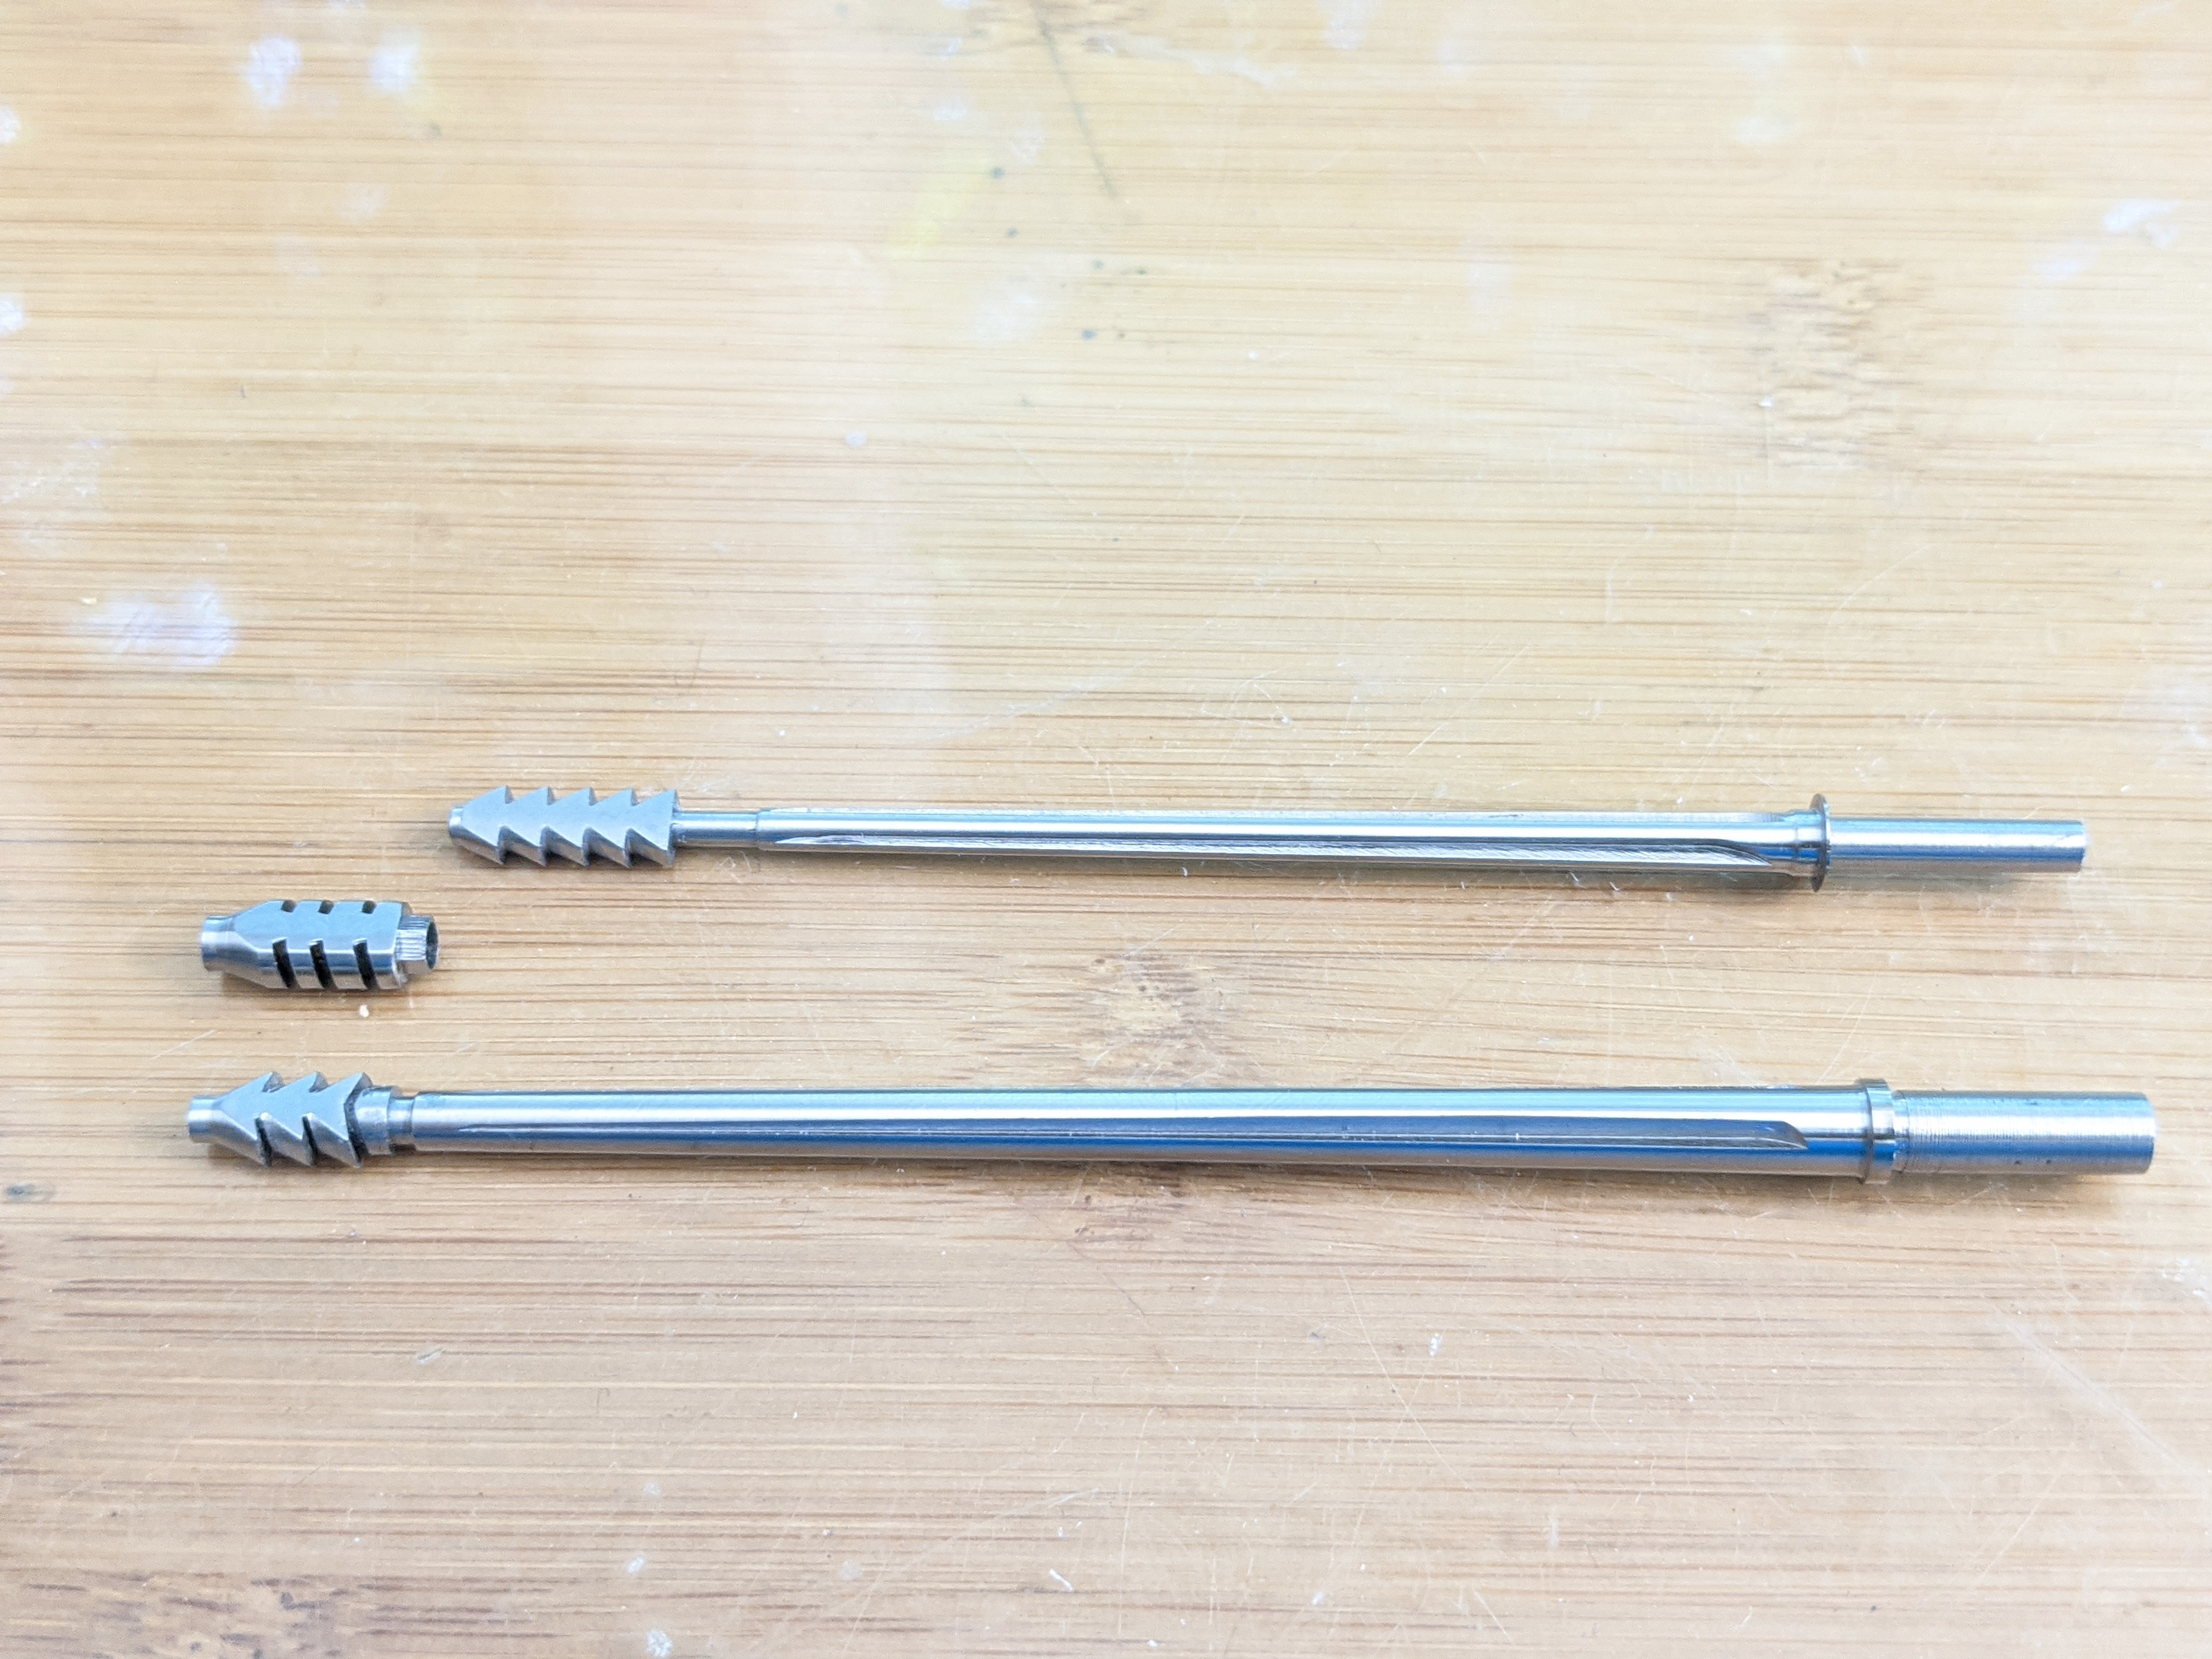
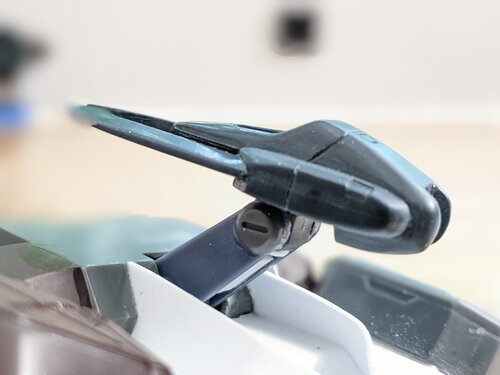
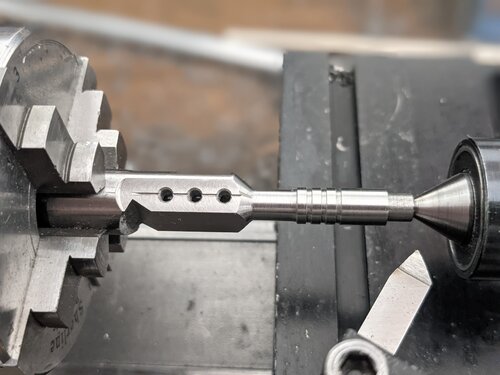
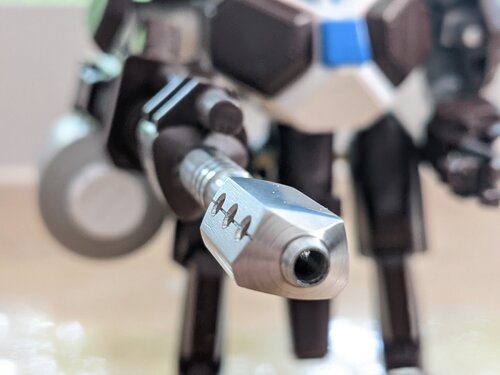
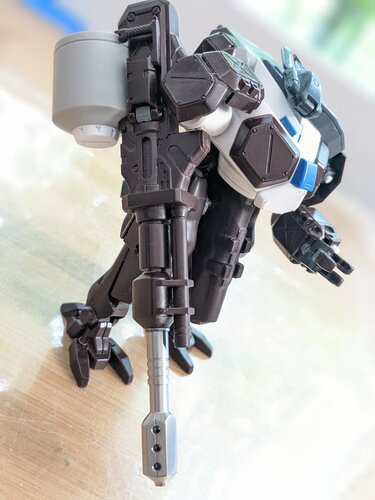
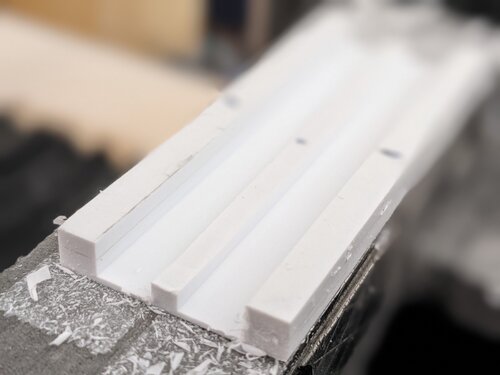
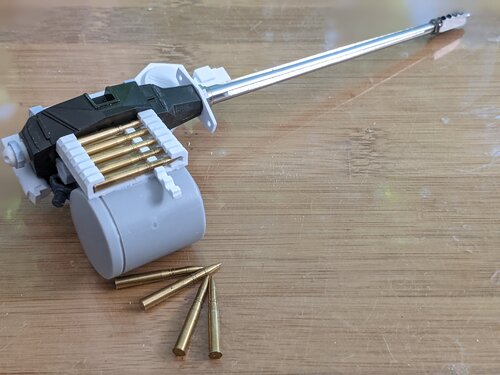
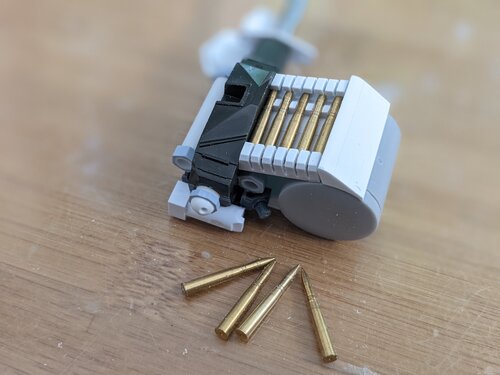
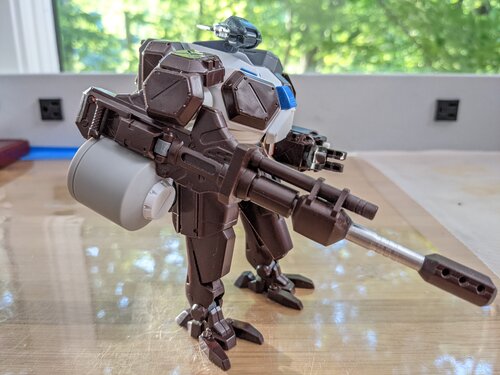
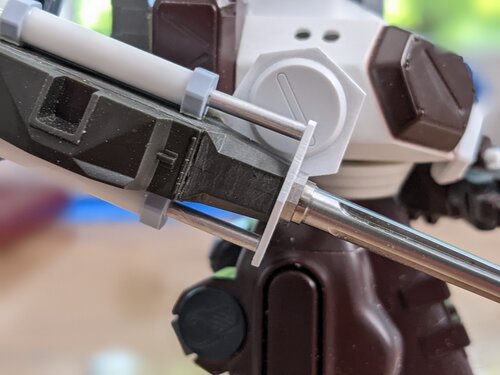
@peter Great looking models Peter! The finishes give them a nice touch. Can putting the Start Trek stuff and Yamato stuff in the same photo cause a rip in the space-time continuum? The lighting on the Yamato kits is cool. I like the way the engineered it. @arbit You've brought kit-bashing to a whole new level - digital! That's a cool idea and came out great! I've gotta start doing the same myself. Time to get into 3D. Both for my job and hobby. @Thom That's a cool kitbash; I like it! It doesn't look pieced-together. I redid the heavy unit's muzzle brake. The original was the kit plastic with a HUGE alignment tab right where the muzzle should be. When I drilled it out, there it sat in all its glory looking like something was in the barrel. Plus the barrel hole was way out of scale. So I milled one out of steel. Here it is on the final stage before being parted on the lathe and then up close. Where did all those scratches come from!? I didn't see them. As I was taking the last photos, the muzzle kept going out of focus. I thought my camera was messing up. Then when I looked at it, I realized the barrel was drooping downward. Yes, it's that heavy! I have to pose it so the frame can take the weight or it falls over! Next, on to the lighter version's armament. 25 years ago when I originally started on this build, I bought Tamiya brass rounds for it on sale (I miss a local hobby shop). I wanted to work them into the build. So I thought an ammo chute would look cool. This is laminated styrene sheet that has been milled one out. These are slots cut to make it more like the real ones that are segmented and flexible. To keep the Tamiya brass ammo aligned, there is a spacer that slips into the chute with the rounds. And a cap loosely fit on to cover it. That's it for now. Thanks for checking in guys! - MT

-
@arbit Sorry Arbit, your thread didn't pop-up when I made my last post, so I didn't see it until after the fact. That's awesome how your figure came out! Do they advise against sunlight to cure the resin? I know it can make a difference. The problem with all SLA prints is that they get brittle with age. Exposing them to light can affect that from what I've seen. @peter Despite a quick build, it looks good! @pengbuzz Thanks, Pengbuzz! Torching can make an uneven finish and then doesn't give you that nice deep black color that the acids can. I tried it before with disastrous results - MT
-
@derex3592 You know, you can build that as the sunken version - it won't have to be as "perfect." @slide As far as I know, the steel is not hardened. It was originally rollers in an inkjet printer. I haven't treated them myself not seeing the need in a model. I used Birchwood/Casey Super Blue ($8.99 at Wallyworld). The instructions end saying to allow to cure overnight. You must do that. I rubbed it a bit after treatment, and it came off slightly. The next day the coating was on solid. I've read other places to boil it after finishing to ensure all the acid is flushed out. I've also heard the heat helps to cure it. I may try that too after a cold rinse. A lot of companies use brass or aluminum for their model accessory parts. Steel has actually been easier for me to use. It holds up better in smaller pieces. Aluminum really never has a natural finish, even after polishing it will rub off. That's why it gets anodized a lot. Steal I have found to be solid. It just needs rust protection of some kind. - MT
-
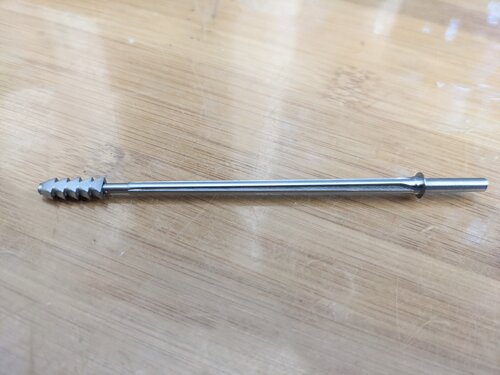
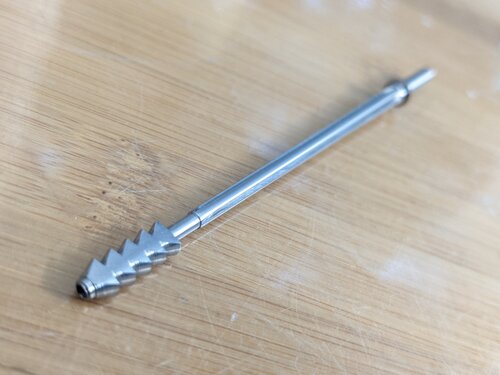
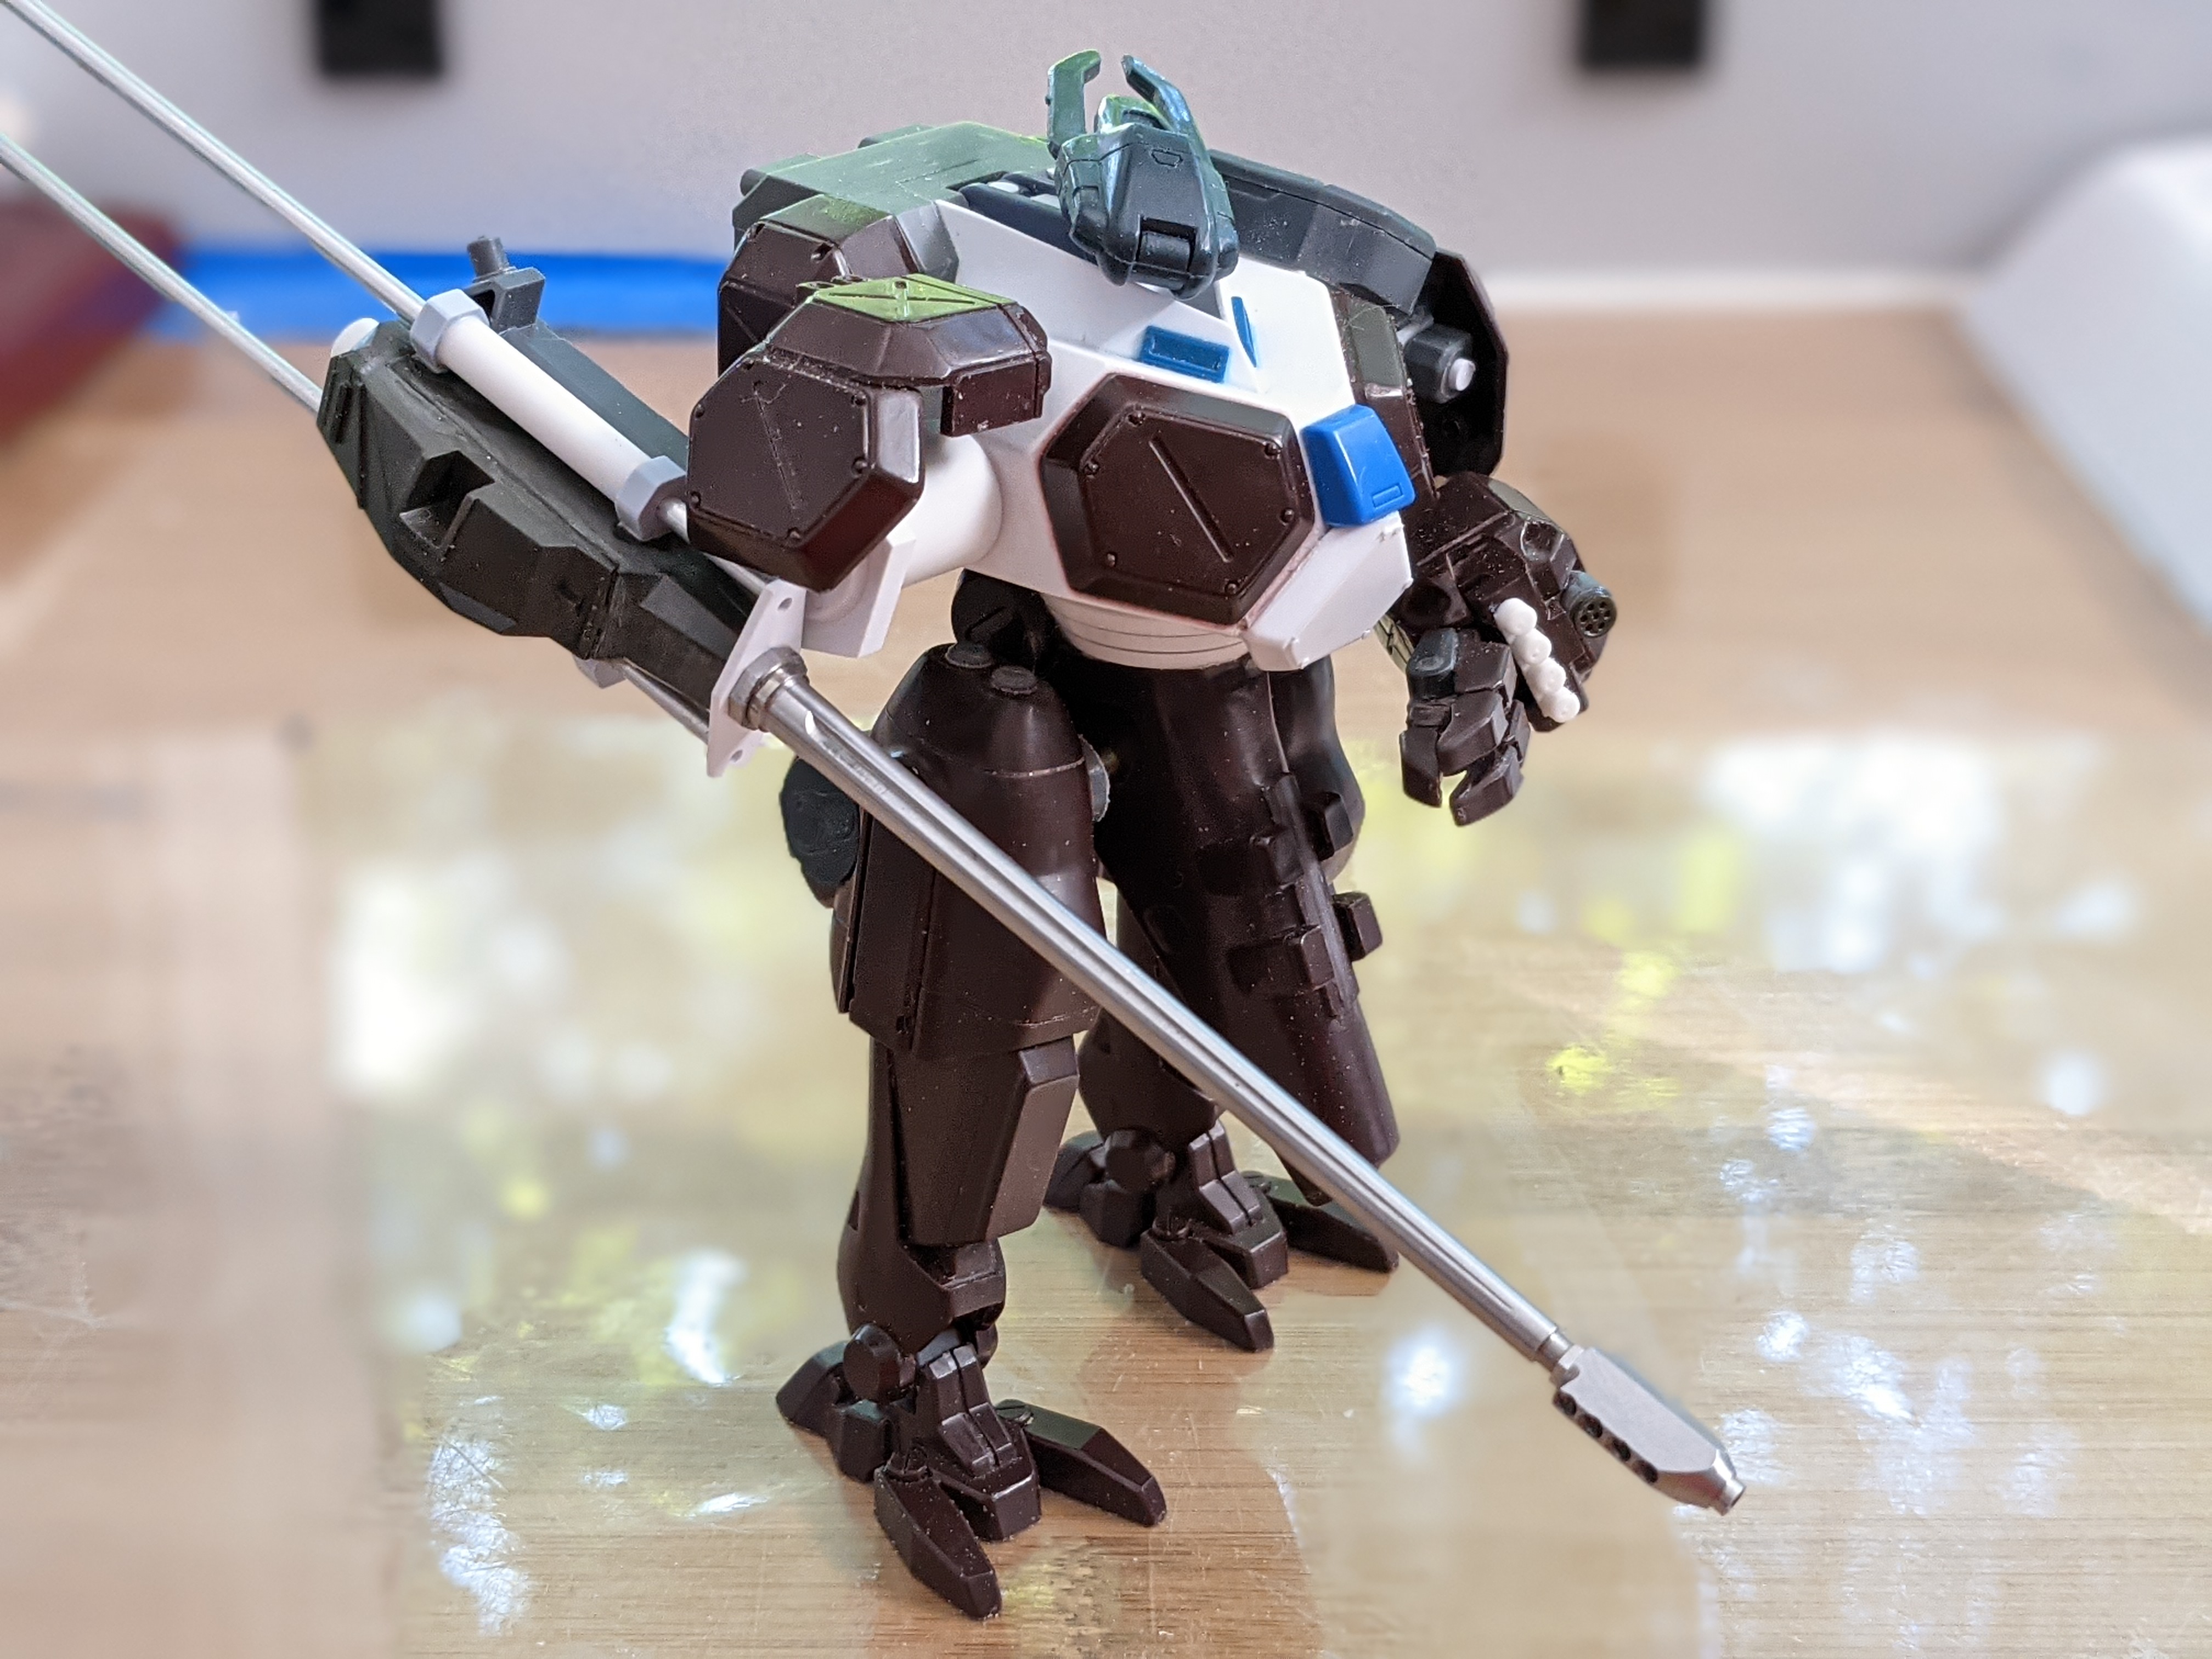
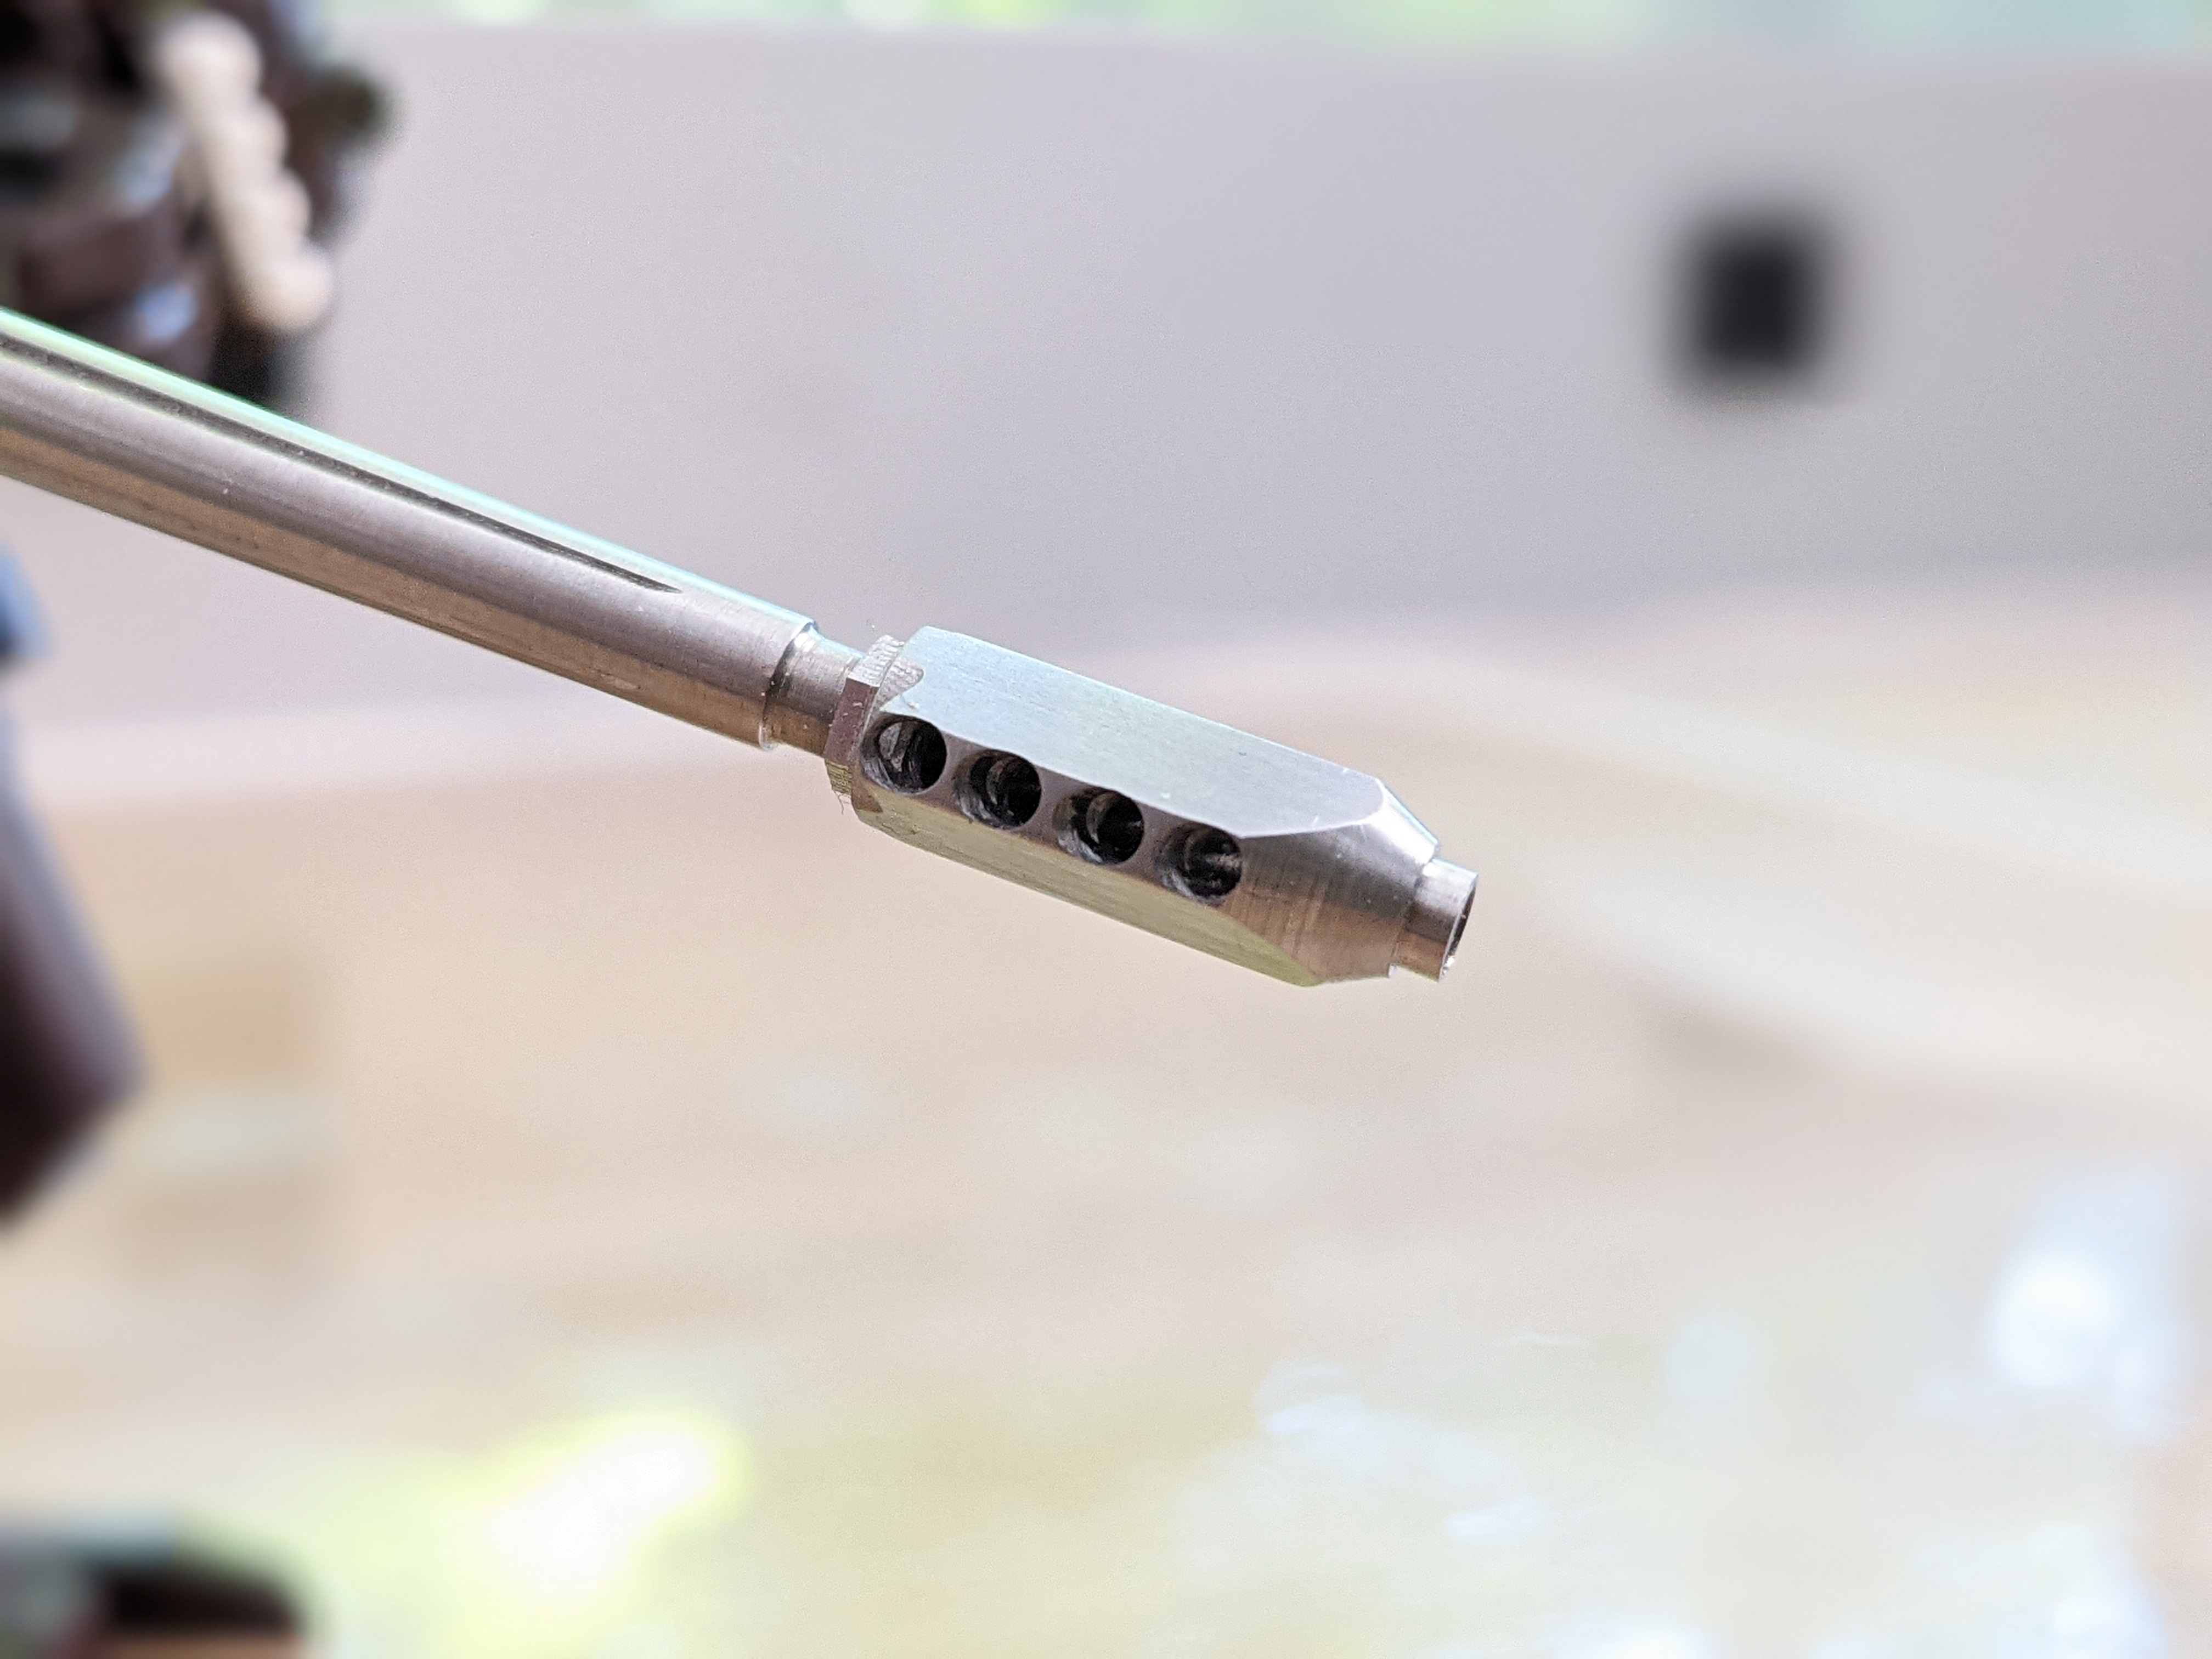
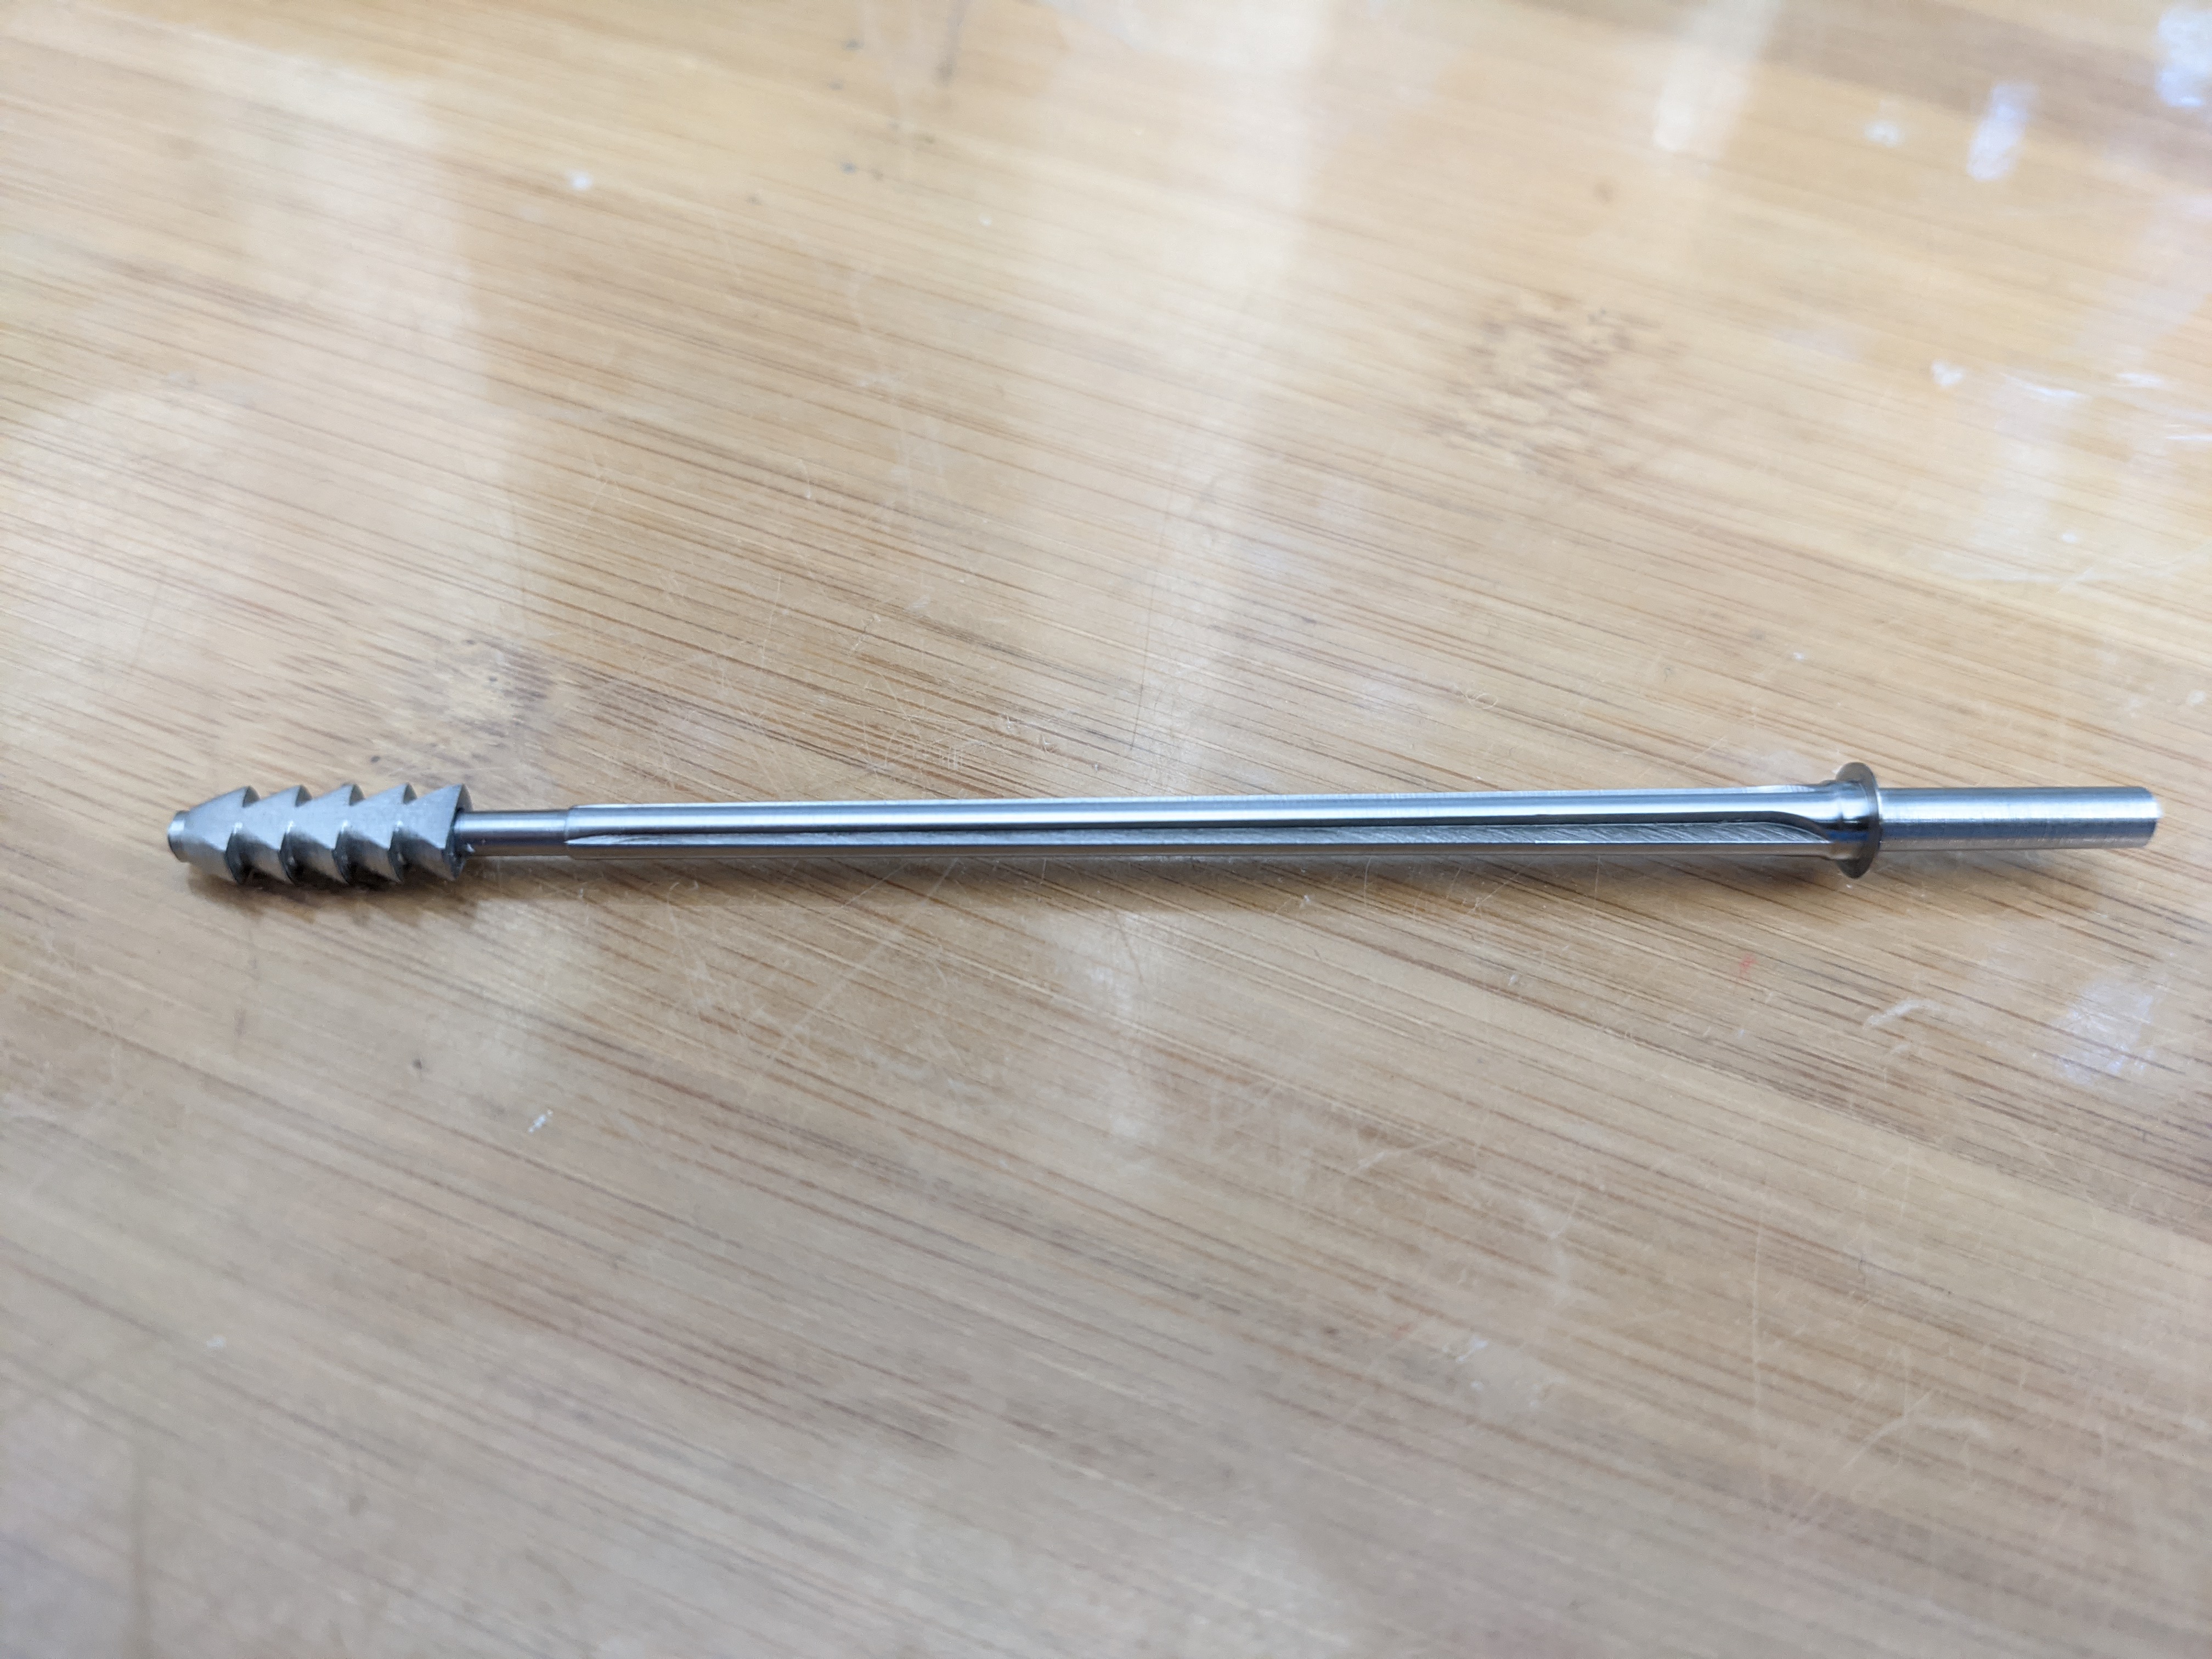
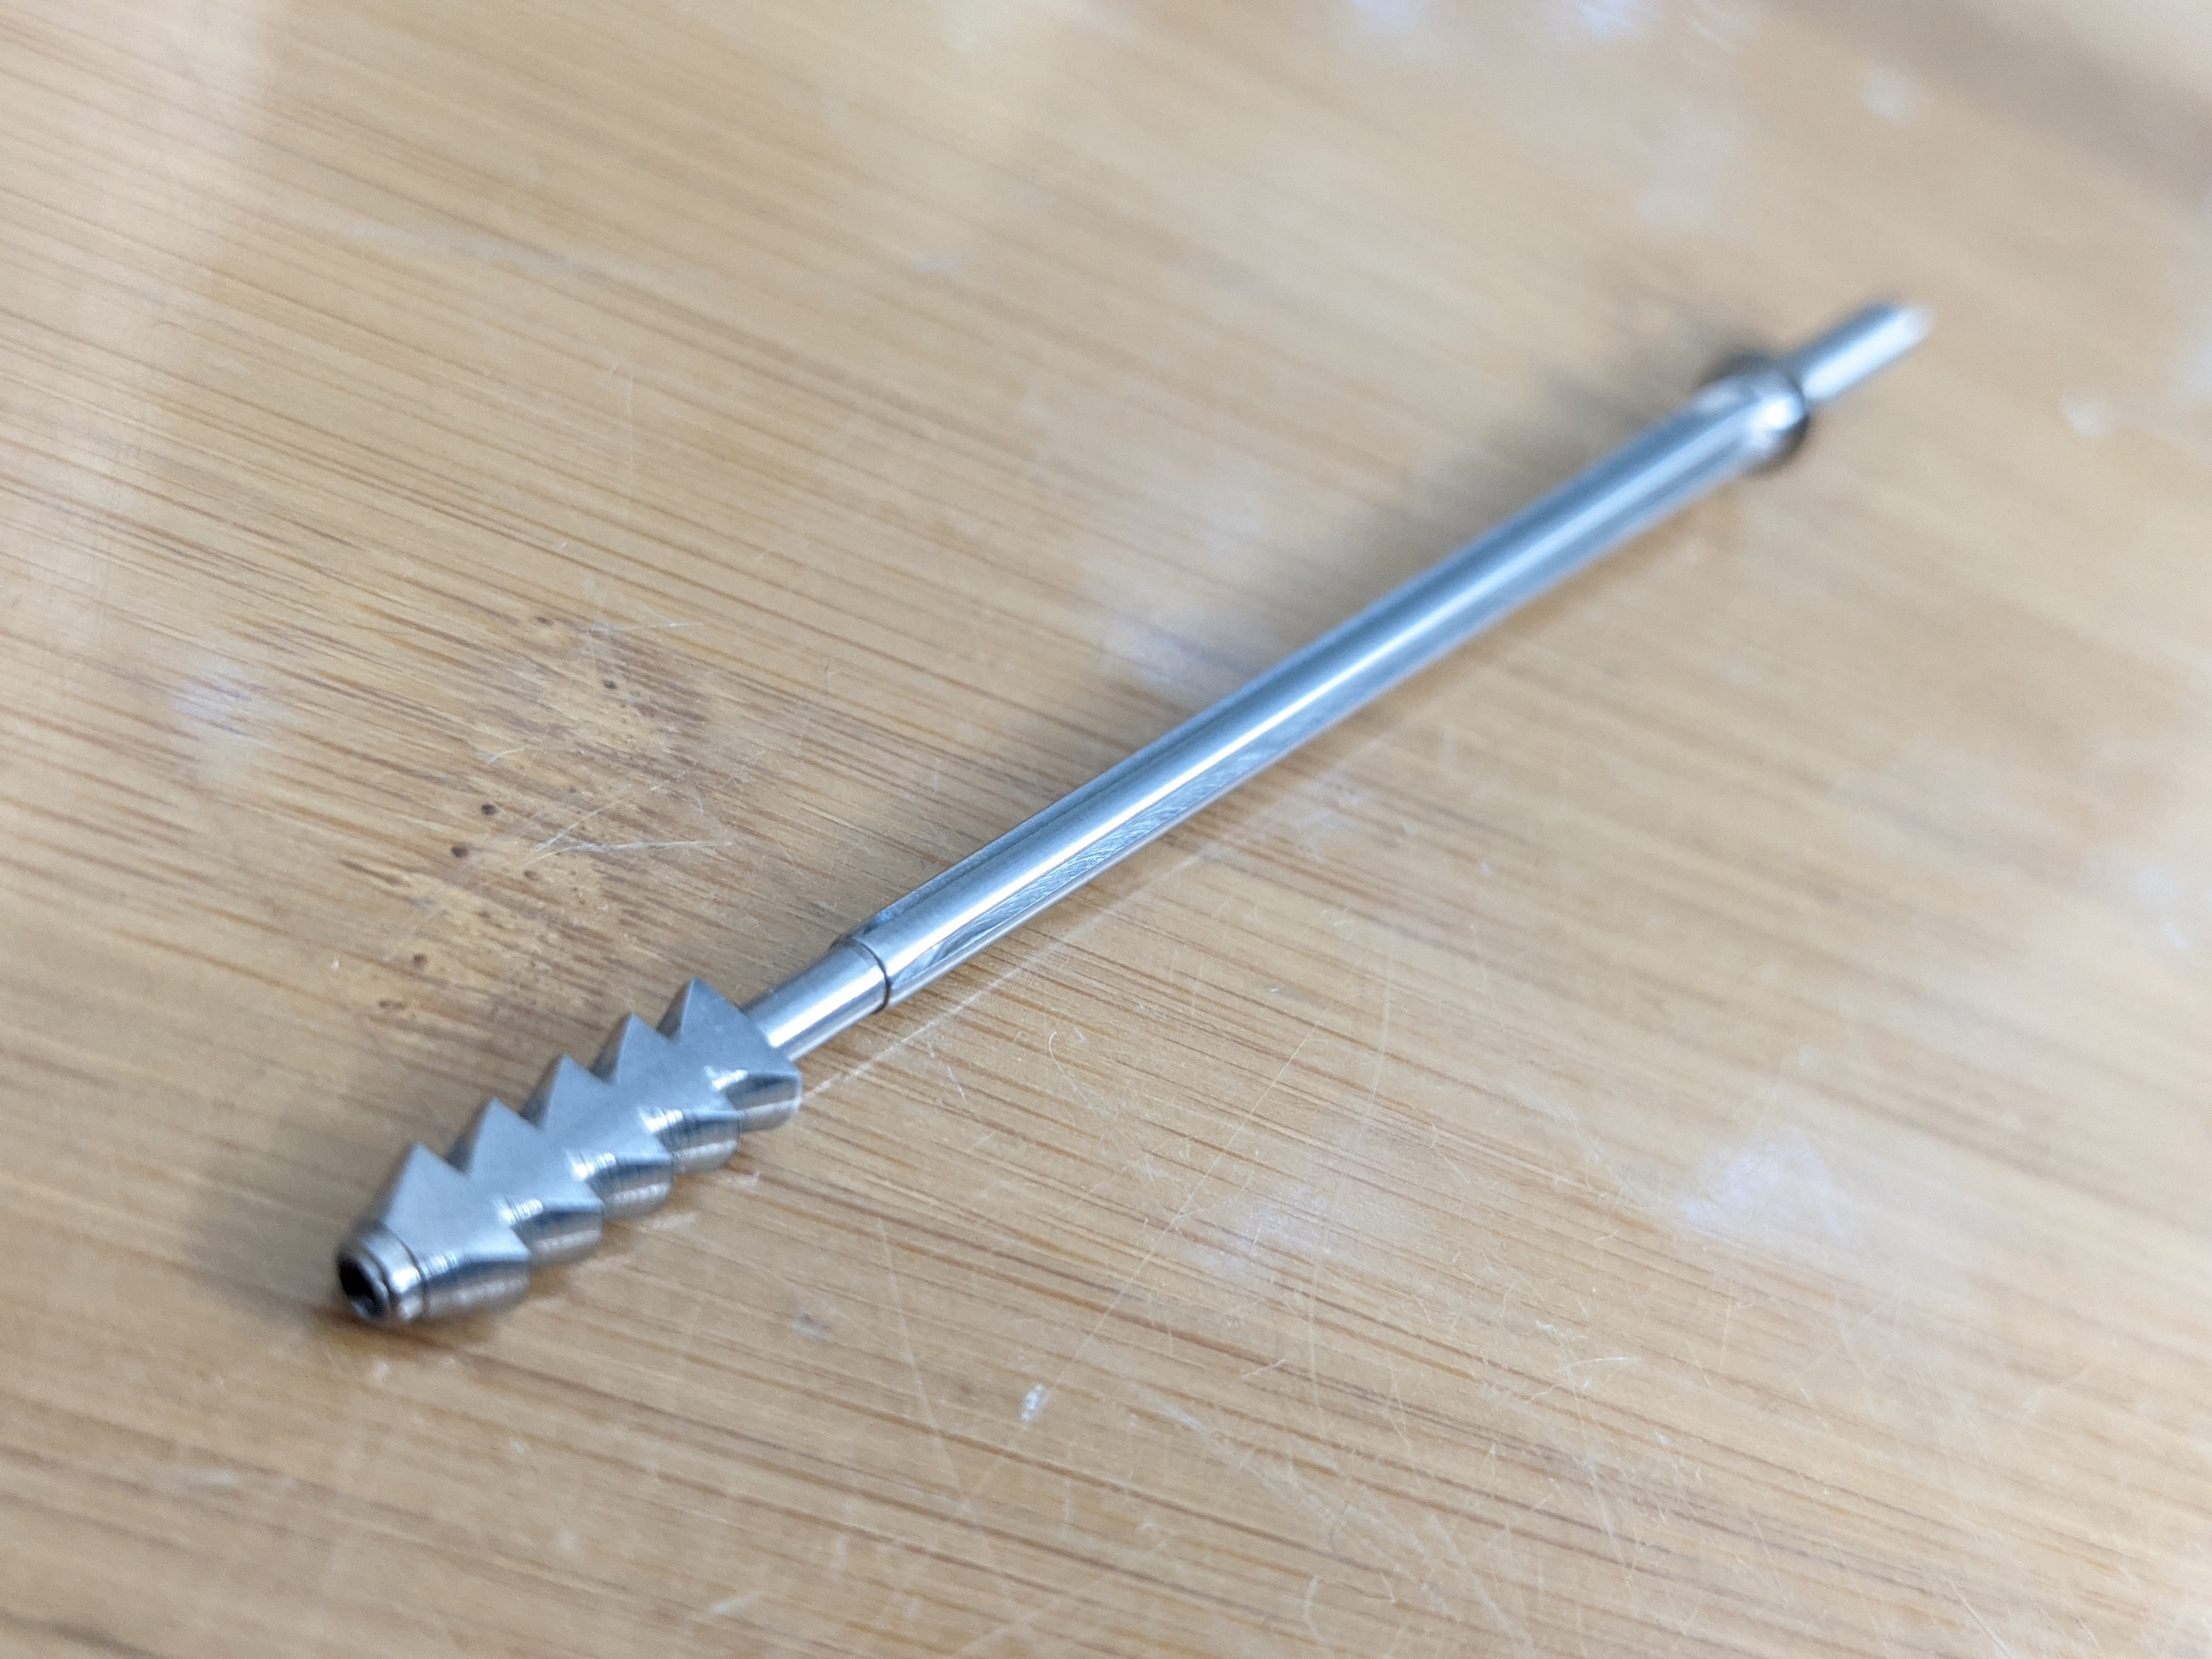
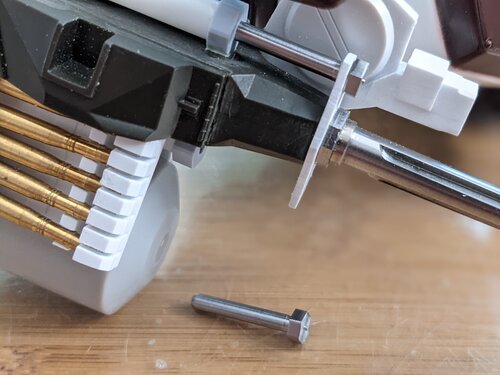
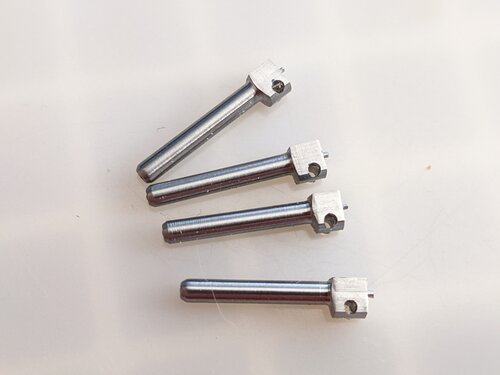
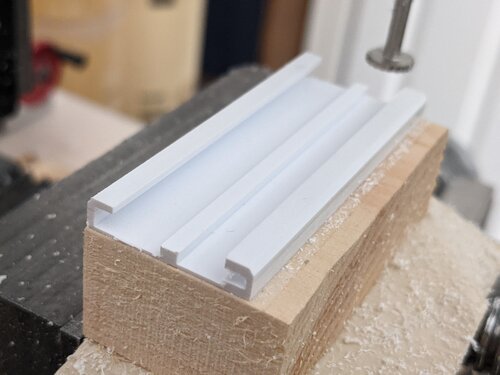
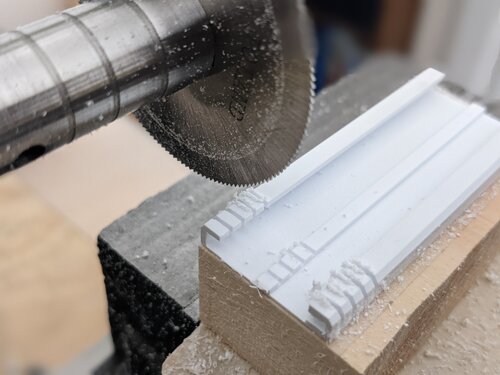
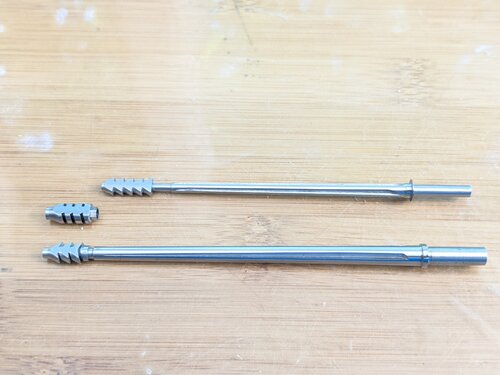
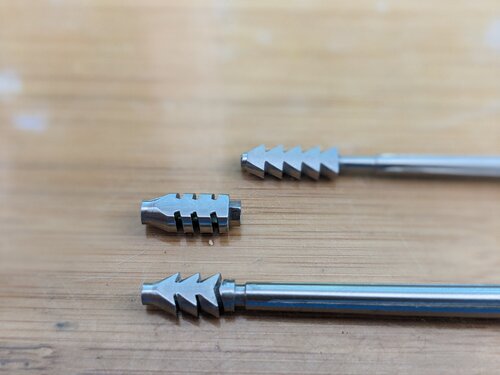
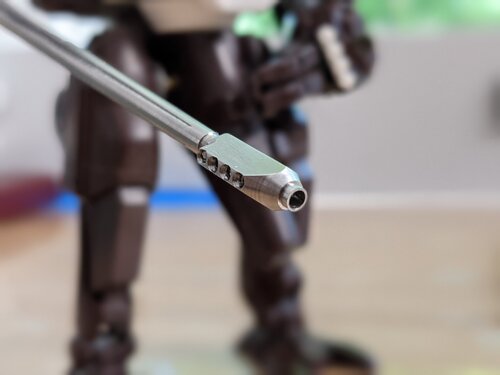
Whet the heck happened!? I was a kid building models, and then all of a sudden, my oldest "child" has graduated high school! It's been a good, but bittersweet week! Where does the time go? Sorry for all the photos, there was a lot I got done between last weekend and this week. Progress is going well with the "Bobbsey Twins." I spent last weekend trying to up-gun the second unit. I originally built the 57mm cannon barrel in the last post, but decided to go with a 75mm cannon instead. At the same time (25 years ago) I was working on the original mecha, I got a bunch of Tamiya brass ammo on sale. It too has been sitting around waiting to be used. So I made the bigger barrel to go with it. The barrel was easy. Making realistic muzzle brakes was another story. I went through five types before settling on the final version. I just didn't like the smaller muzzle brake. It looked like the vents were too small to actually work. That's what drove me to redo the whole design. The old barrel and the new one, both fluted for detail. The 57mm muzzle brake and newer ones. The middle was a reject due to spacing. Here's the new 75mm cannon recoil dampers close up... And an overall shot with the new muzzle brake (the aluminum tubes will be cut shorter). Close-ups of the new muzzle brake. The vents aren't perfectly spaced, but it will have to do. I'm at the limits of my machining abilities drilling at an angle. The gun is now complete for the heavy unit. The ammo drum got some anime styled details and bolt heads to make it look that much more convincing. And finally, people spend so much time trying to make model gun barrels look so realistic. Since these are machined in steel, I thought, "Why not blue them like a real gun barrel?" So here's a test on a reject part. It doesn't get any more realistic than the "real thing." So the barrels will be blued and I won't have to worry about paint peeling off them. Bluing is about the same cost as getting the paint for them. Thanks for checking in! - MT


-
@arbit In all honesty, her proportions look fine. The real test is print something mechanical and check the fit of parts, like a nut and bolt - with calipers. That should help you troubleshoot. Going backwards is the only way to go! Reverse engineer it! A buddy and I back in the 80's had a Japanese VCR tape rental place near our homes. We would go to check out videos, and they only had the end of the series available. So we saw the series backwards. It makes things more interesting. - MT
-
@peter Those Yamatos look great! @pengbuzz Cool Transformers design. Your Photo shopped photo looks great! Don't toss the model, that's what Photoshop is for @arbit Does she break dance? Congrats on a good print! I've got to get a 3D printer one of these days. - MT
-
Thanks, Peter! The adapter I made some months back made it relatively easy. Your muzzle brake is so big it must block part of your scope view! Your buddy's barrel must be expensive! Plus powder coated. For that I would have some kind of widely opened stock just to show it off! - MT
-
I can see clearly now...the haze is gone Great idea!
-
@peter Nice painting on the Yamato hulls! I agree, the sister ship should have been Musashi. Maybe they changed it for political reasons in the script. @Thom Good point with the battle damage! Great post with the clear lenses too! Thanks for the positive comments guys! The second unit will be lighter armored, more anti-aircraft. I have the Tamiya 1/35 35mm barrrels from the Flakpanzer Gepard and thought they looked cool, but also saw them getting easily broken. Like even if the model just fell over. So I machined a slightly thicker version in steel as a single 40mm cannon. I was feeling musical so I fluted it! Sorry, bad pun. I'm thinking of redoing the muzzle brake, but not sure. Got the second unit's shoulders on and fixed a figure's bust to fit in the cockpit hatch area. He's removable. I also modified some other figures for display to show the scale. Thanks for checking in guys! - MT