MechTech
-
Posts
4650 -
Joined
-
Last visited
Content Type
Profiles
Forums
Events
Gallery
Everything posted by MechTech
-
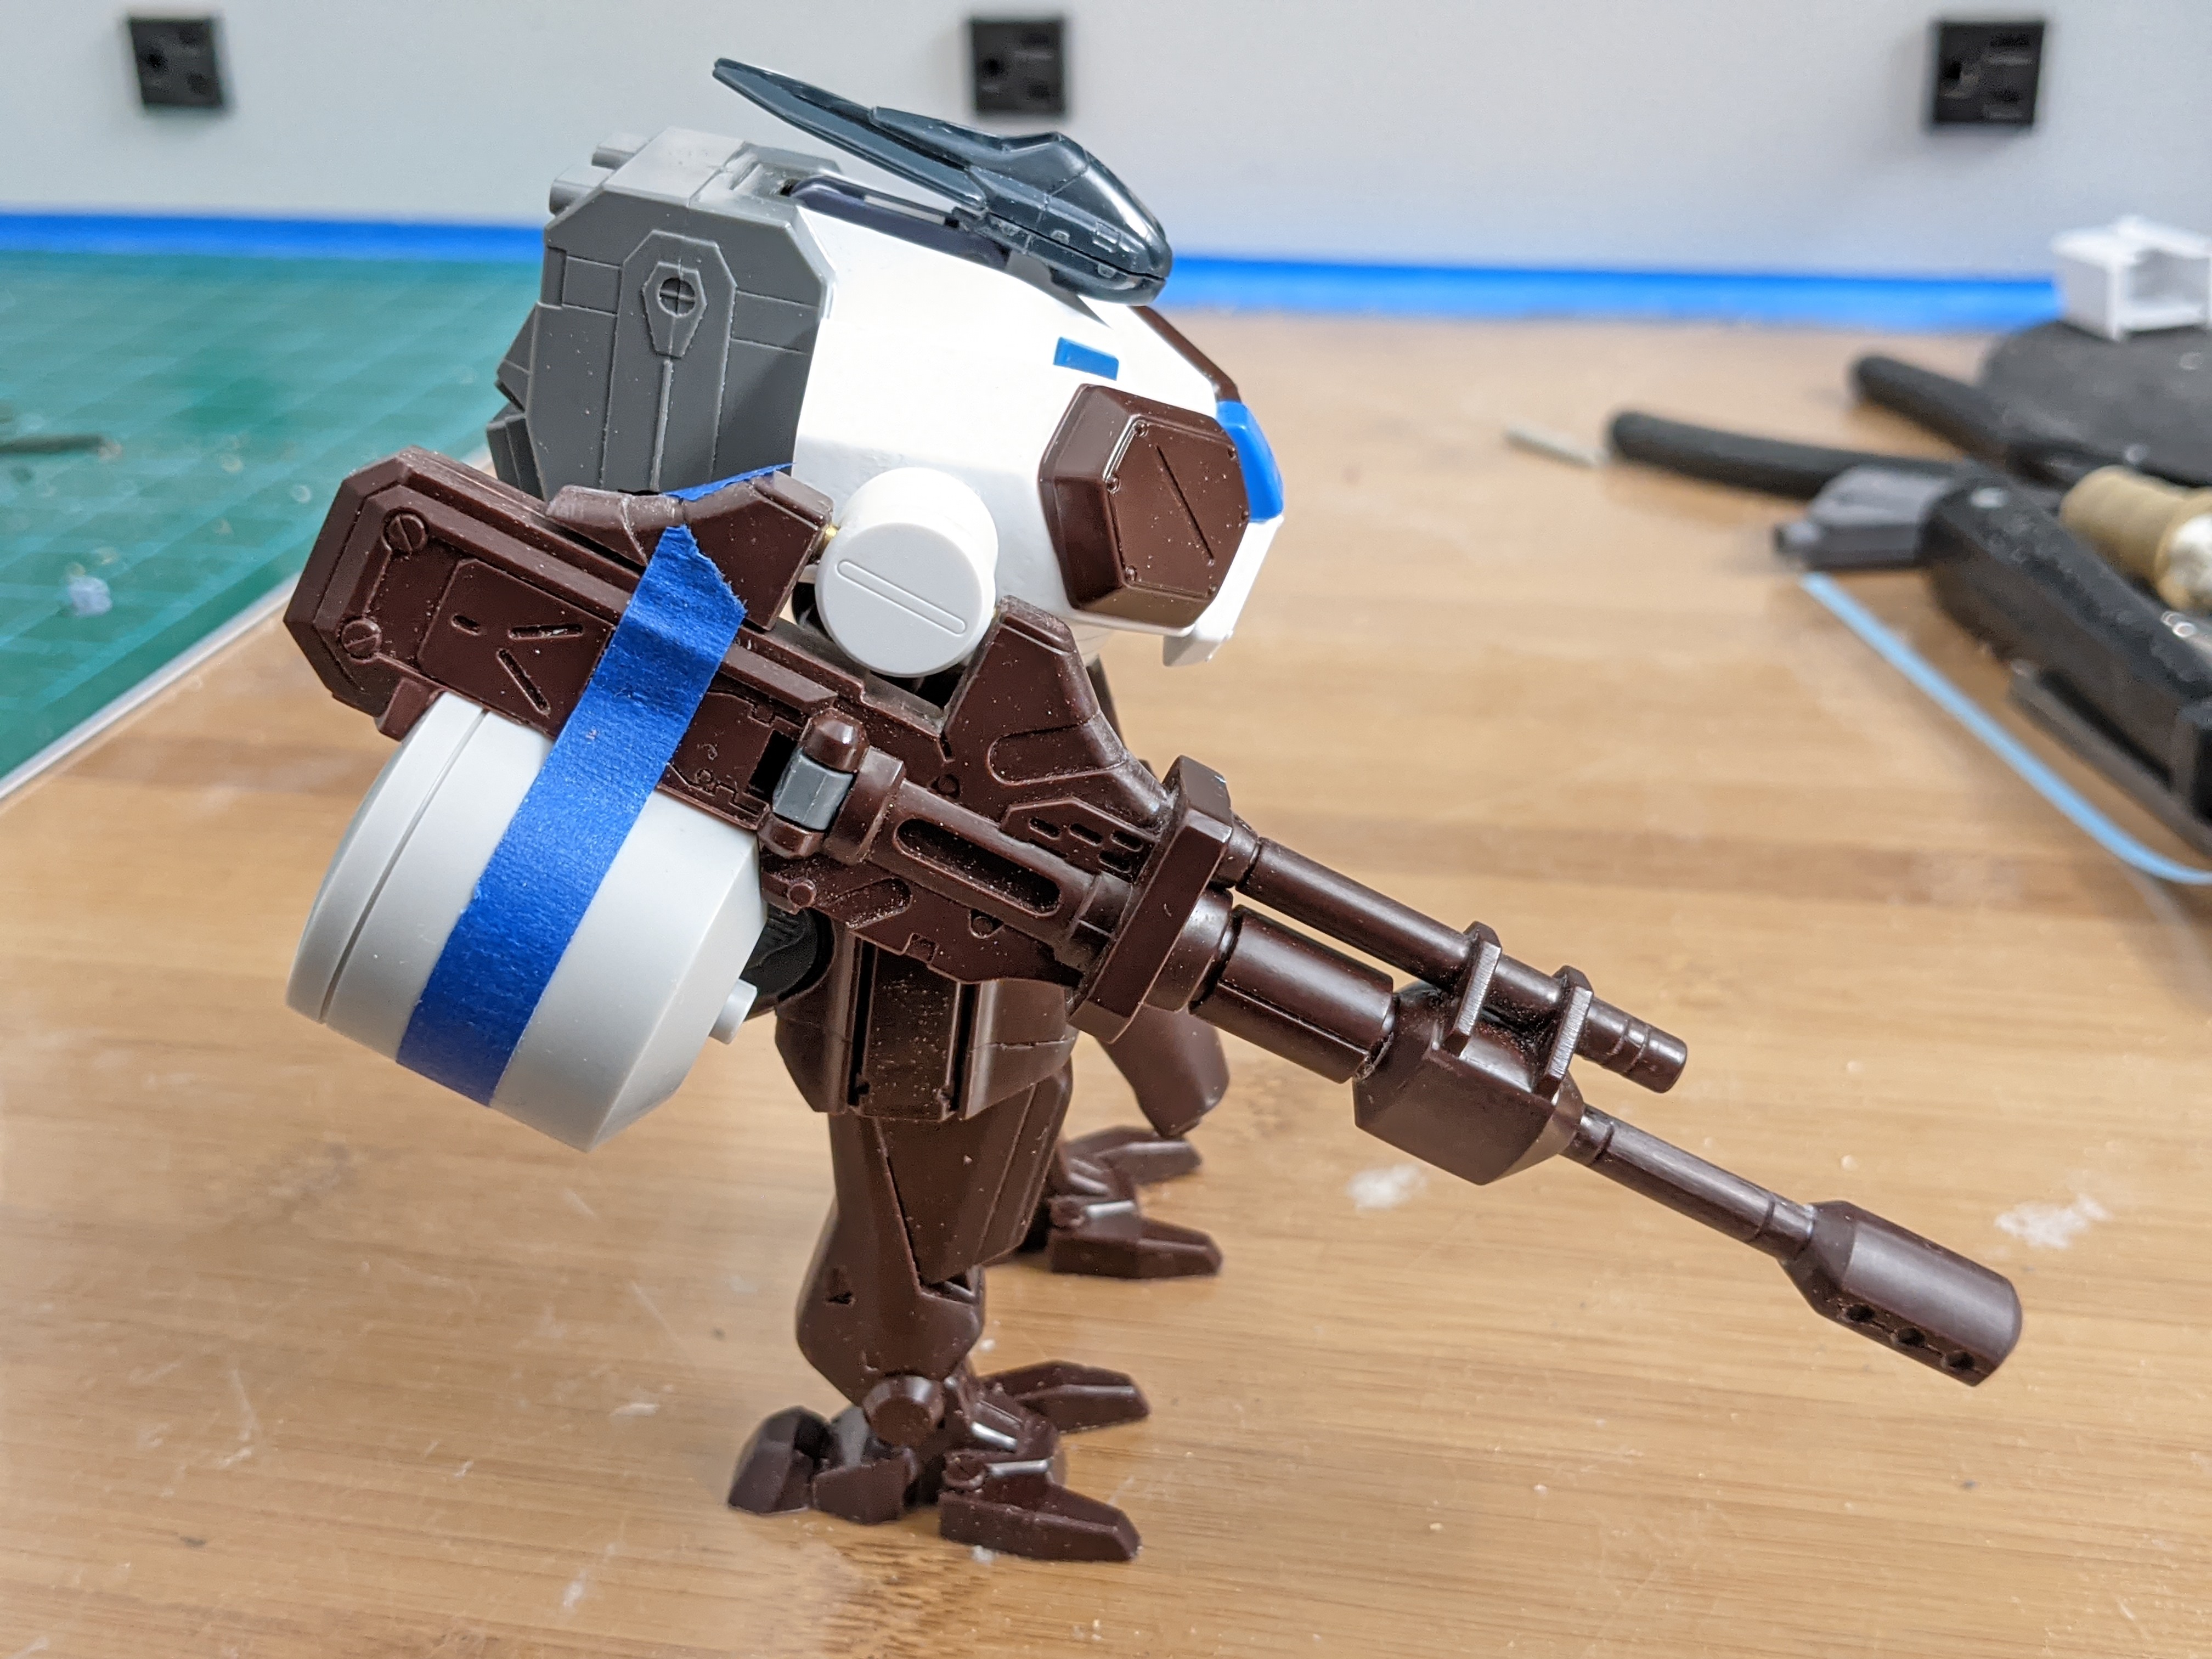
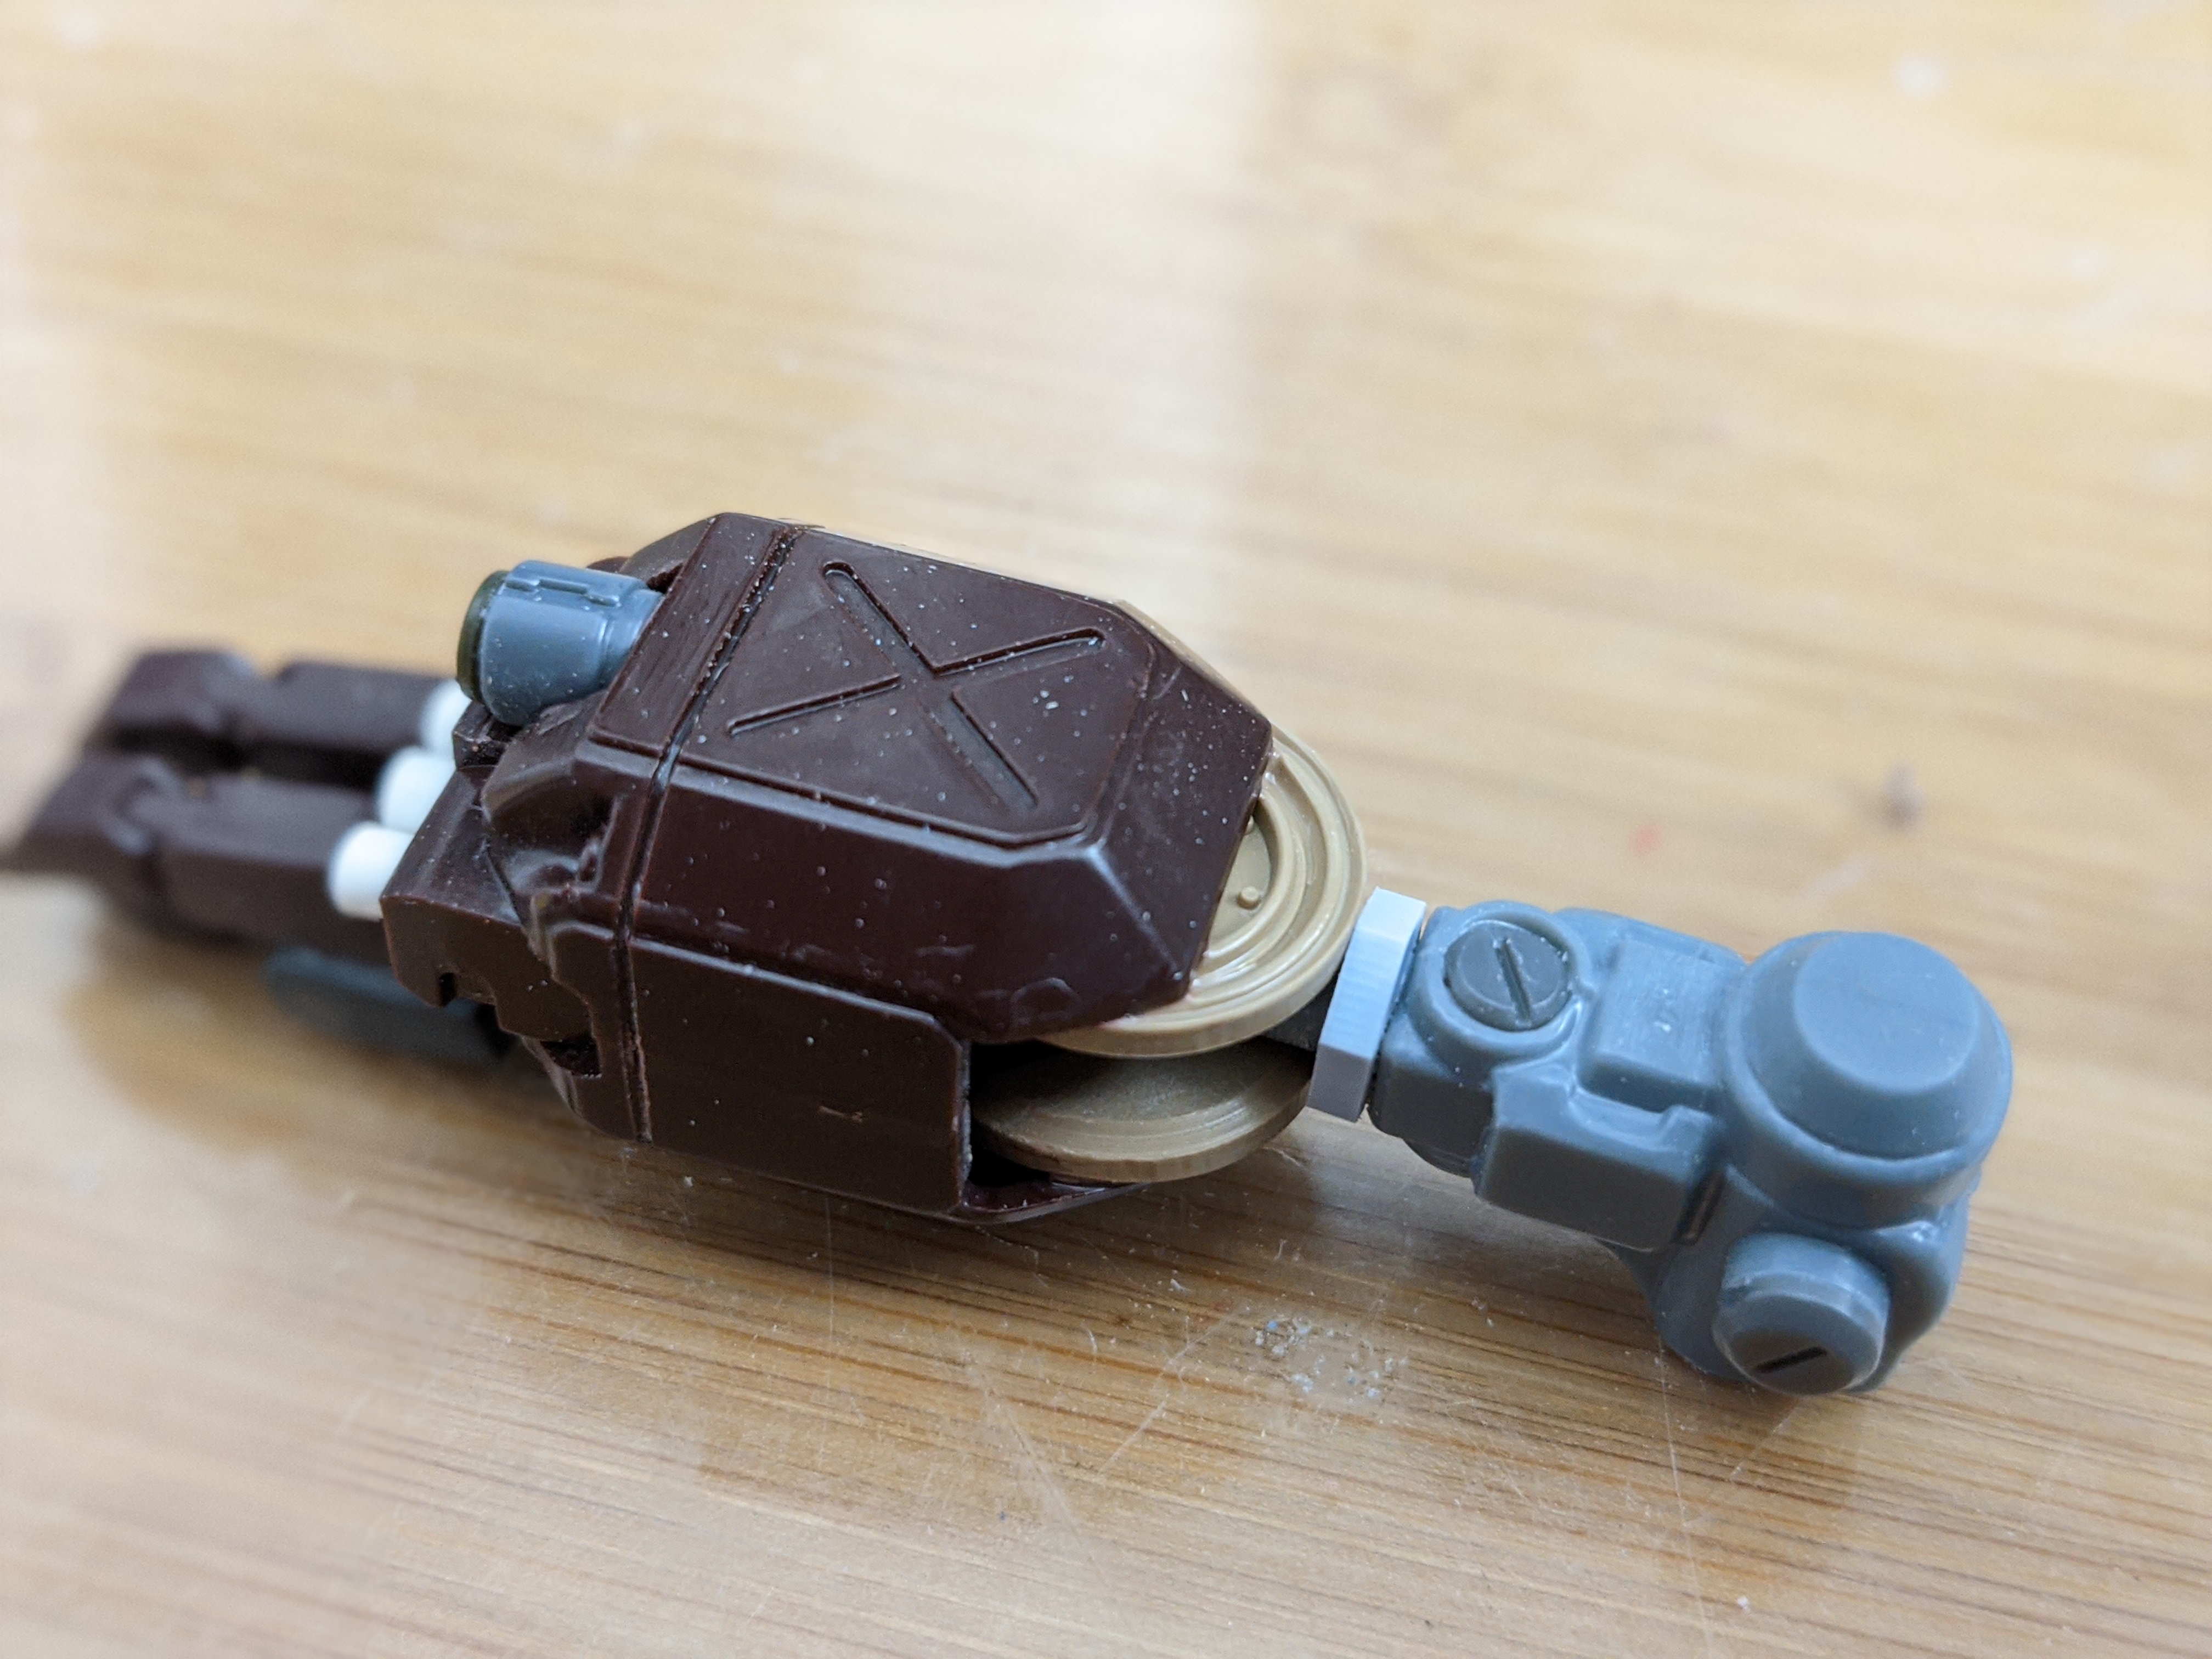
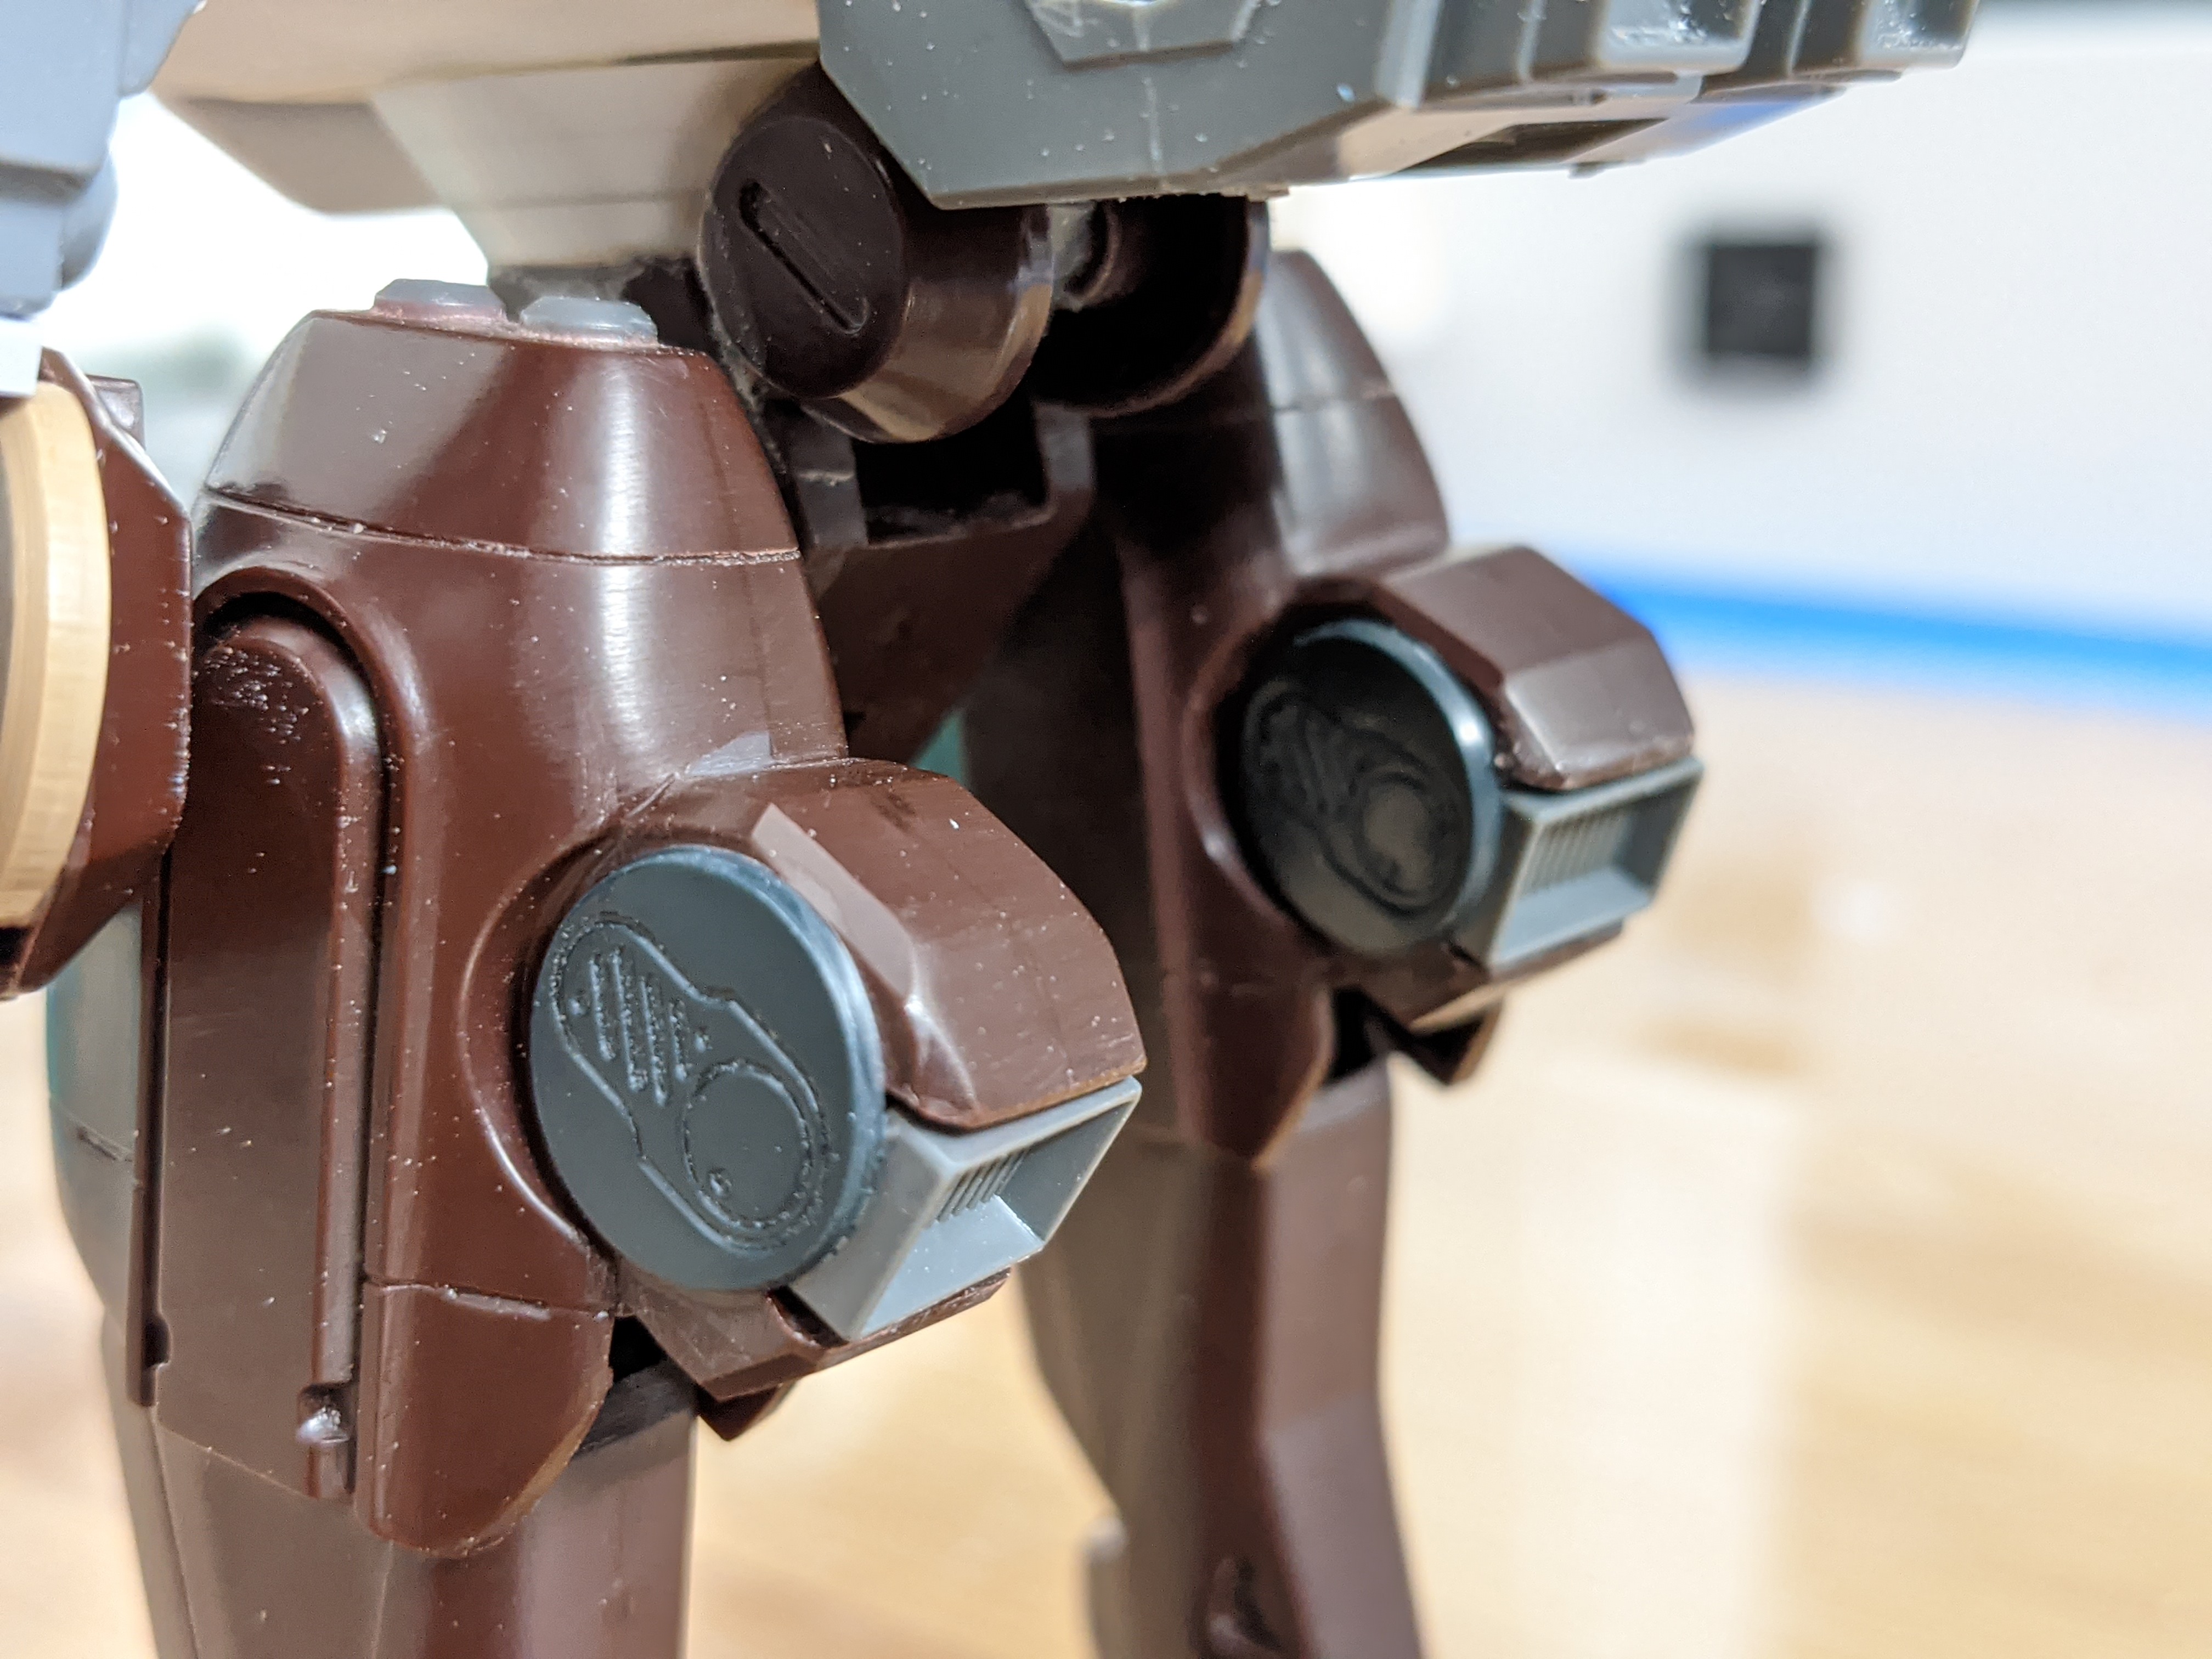
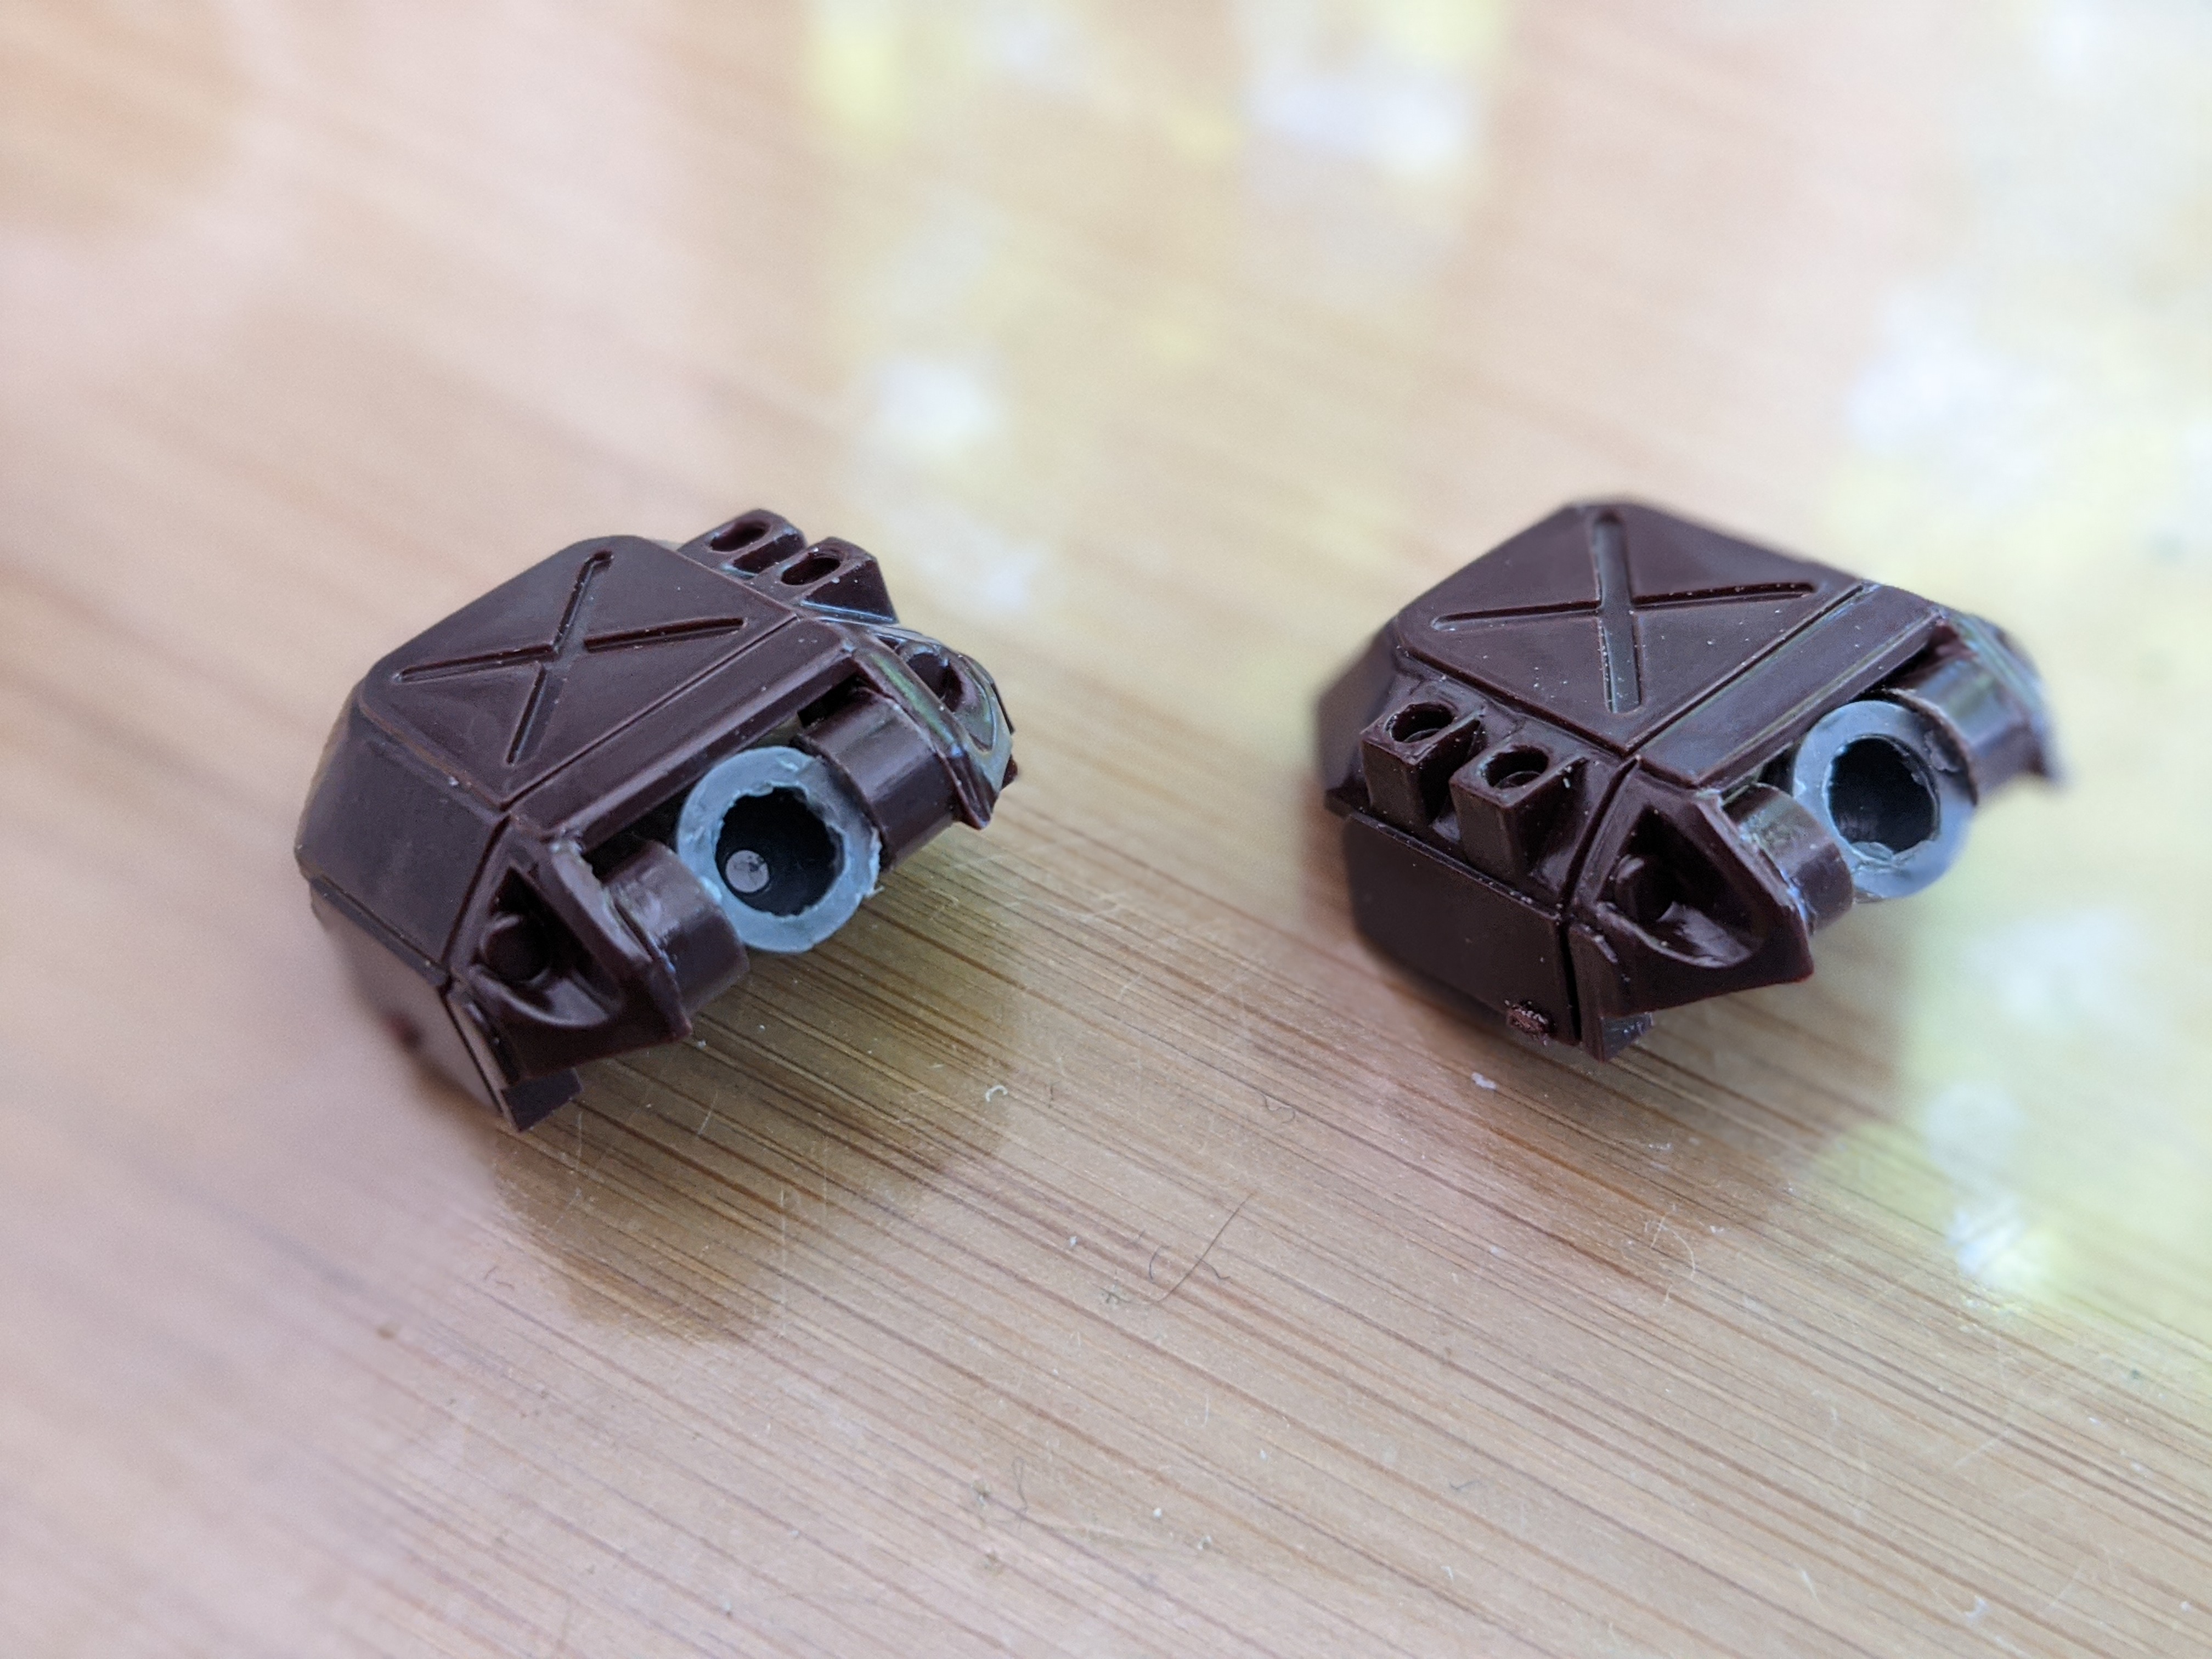
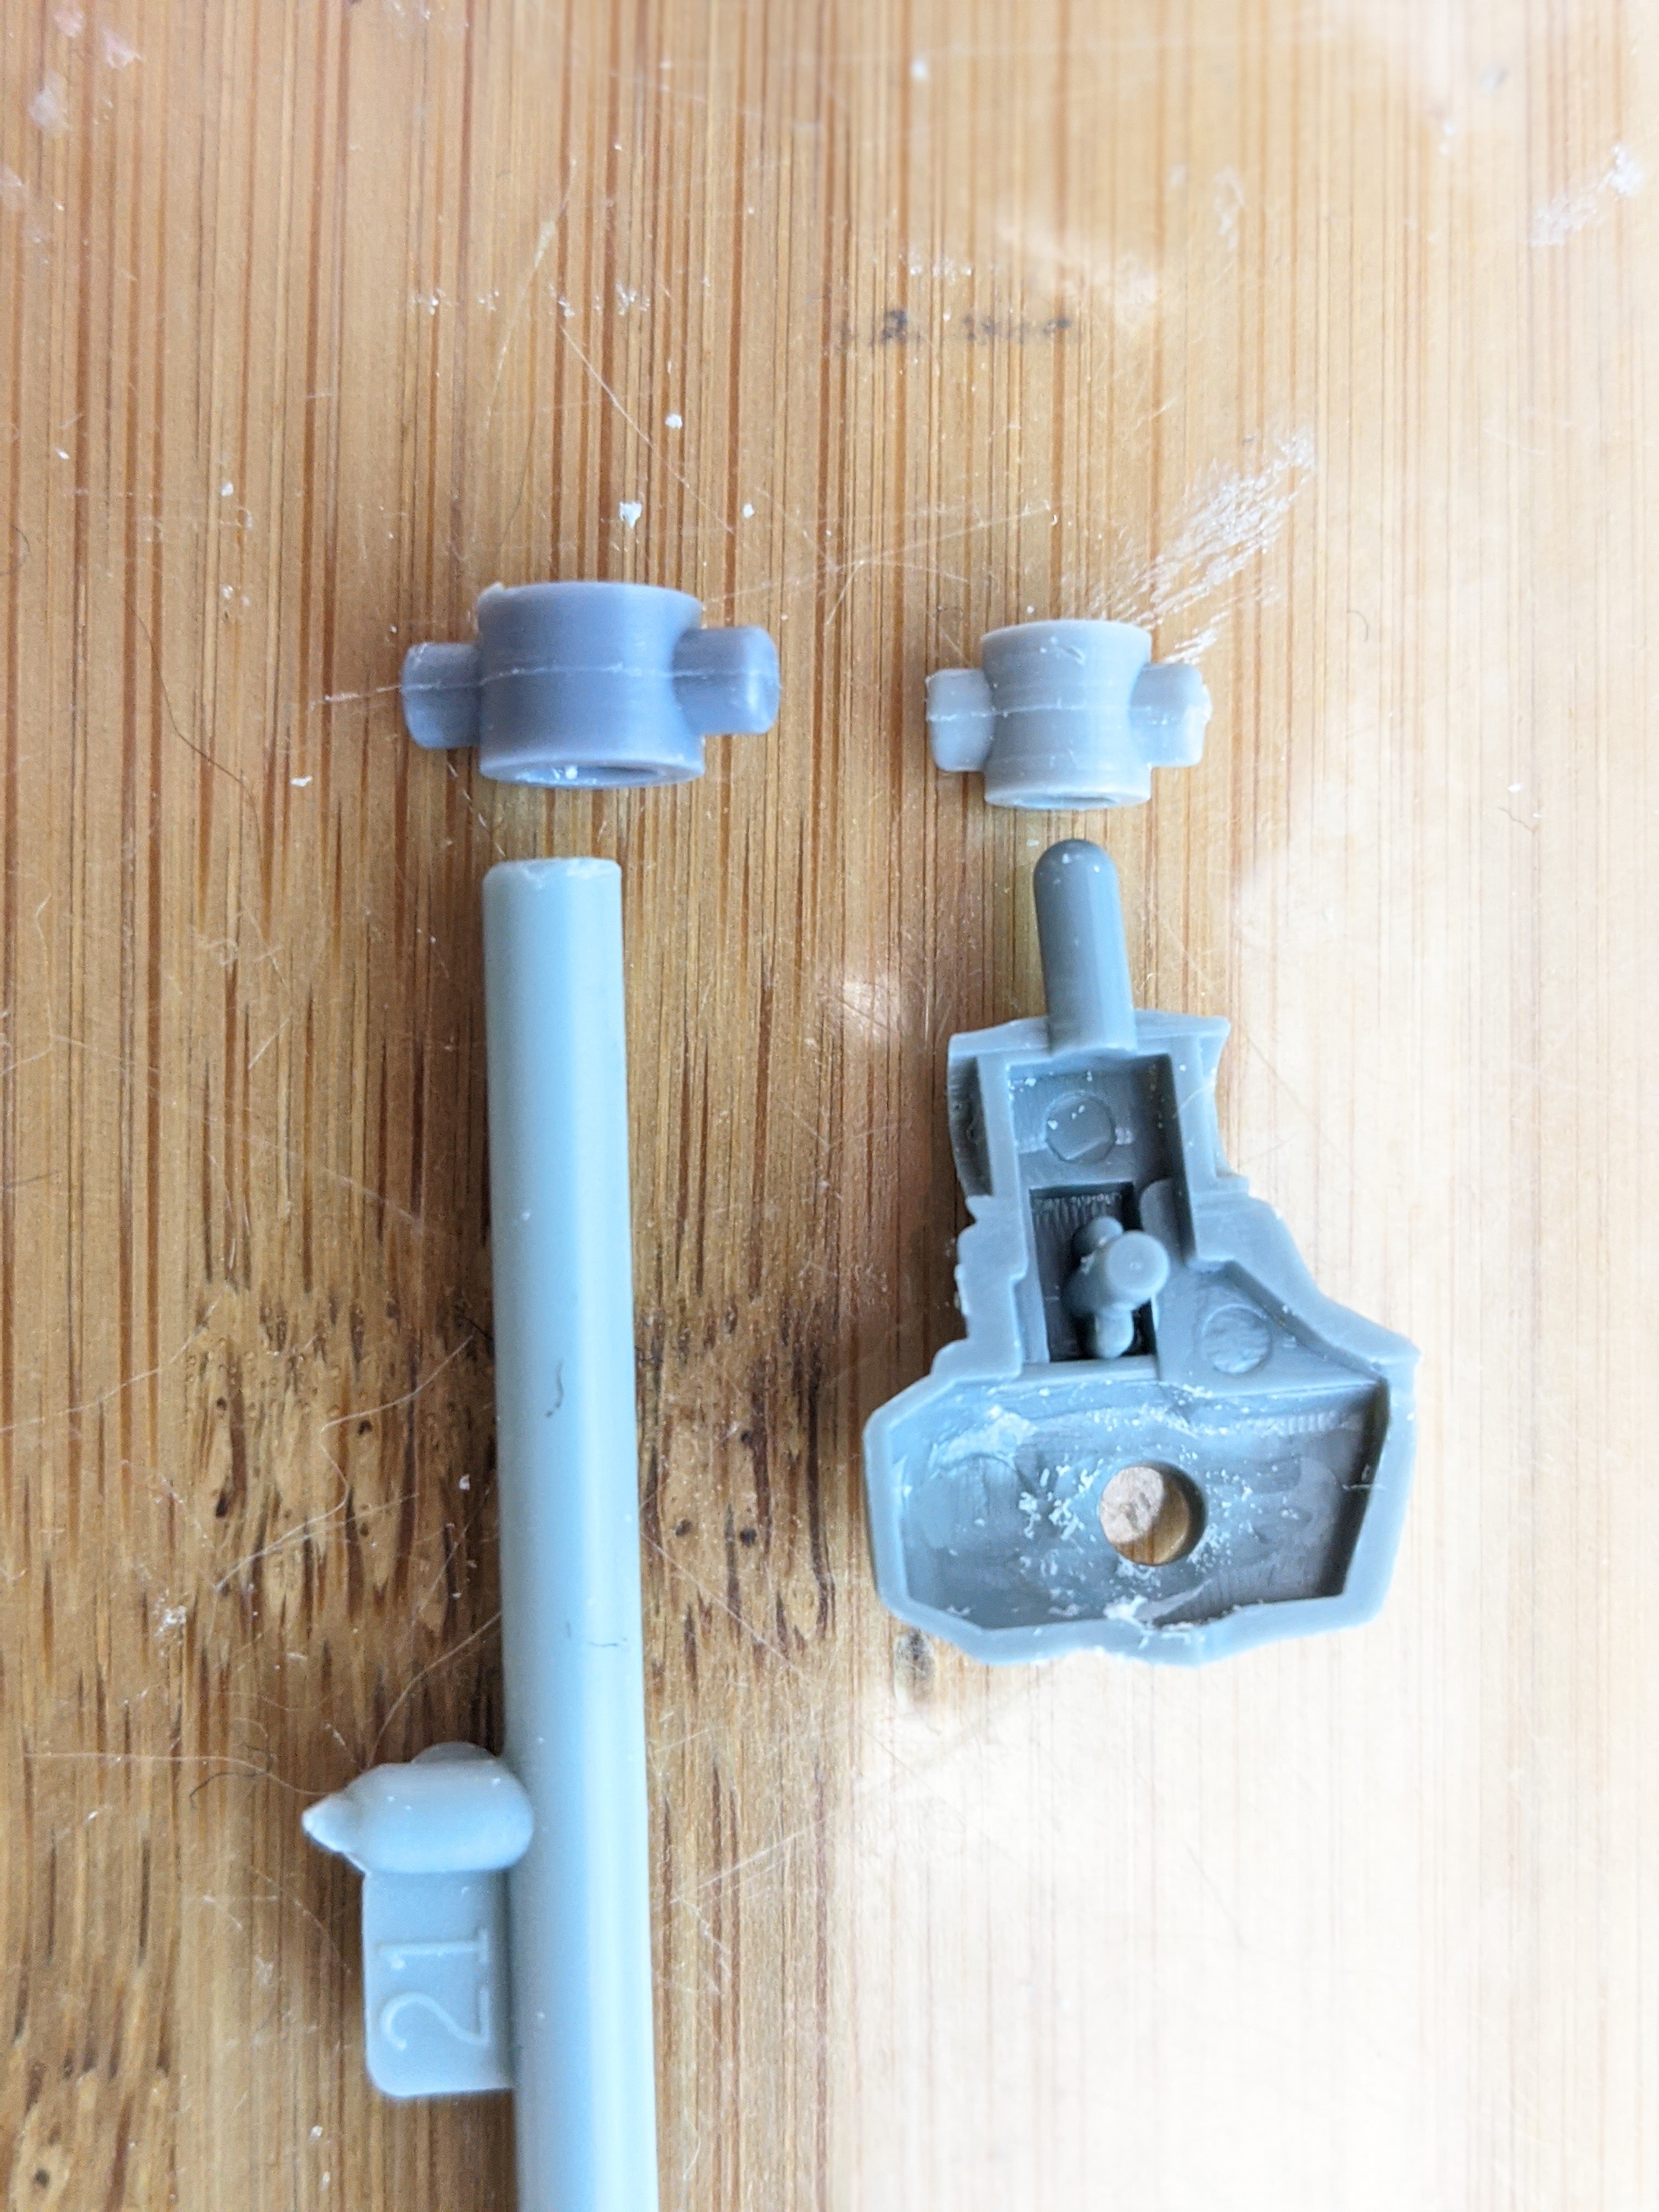
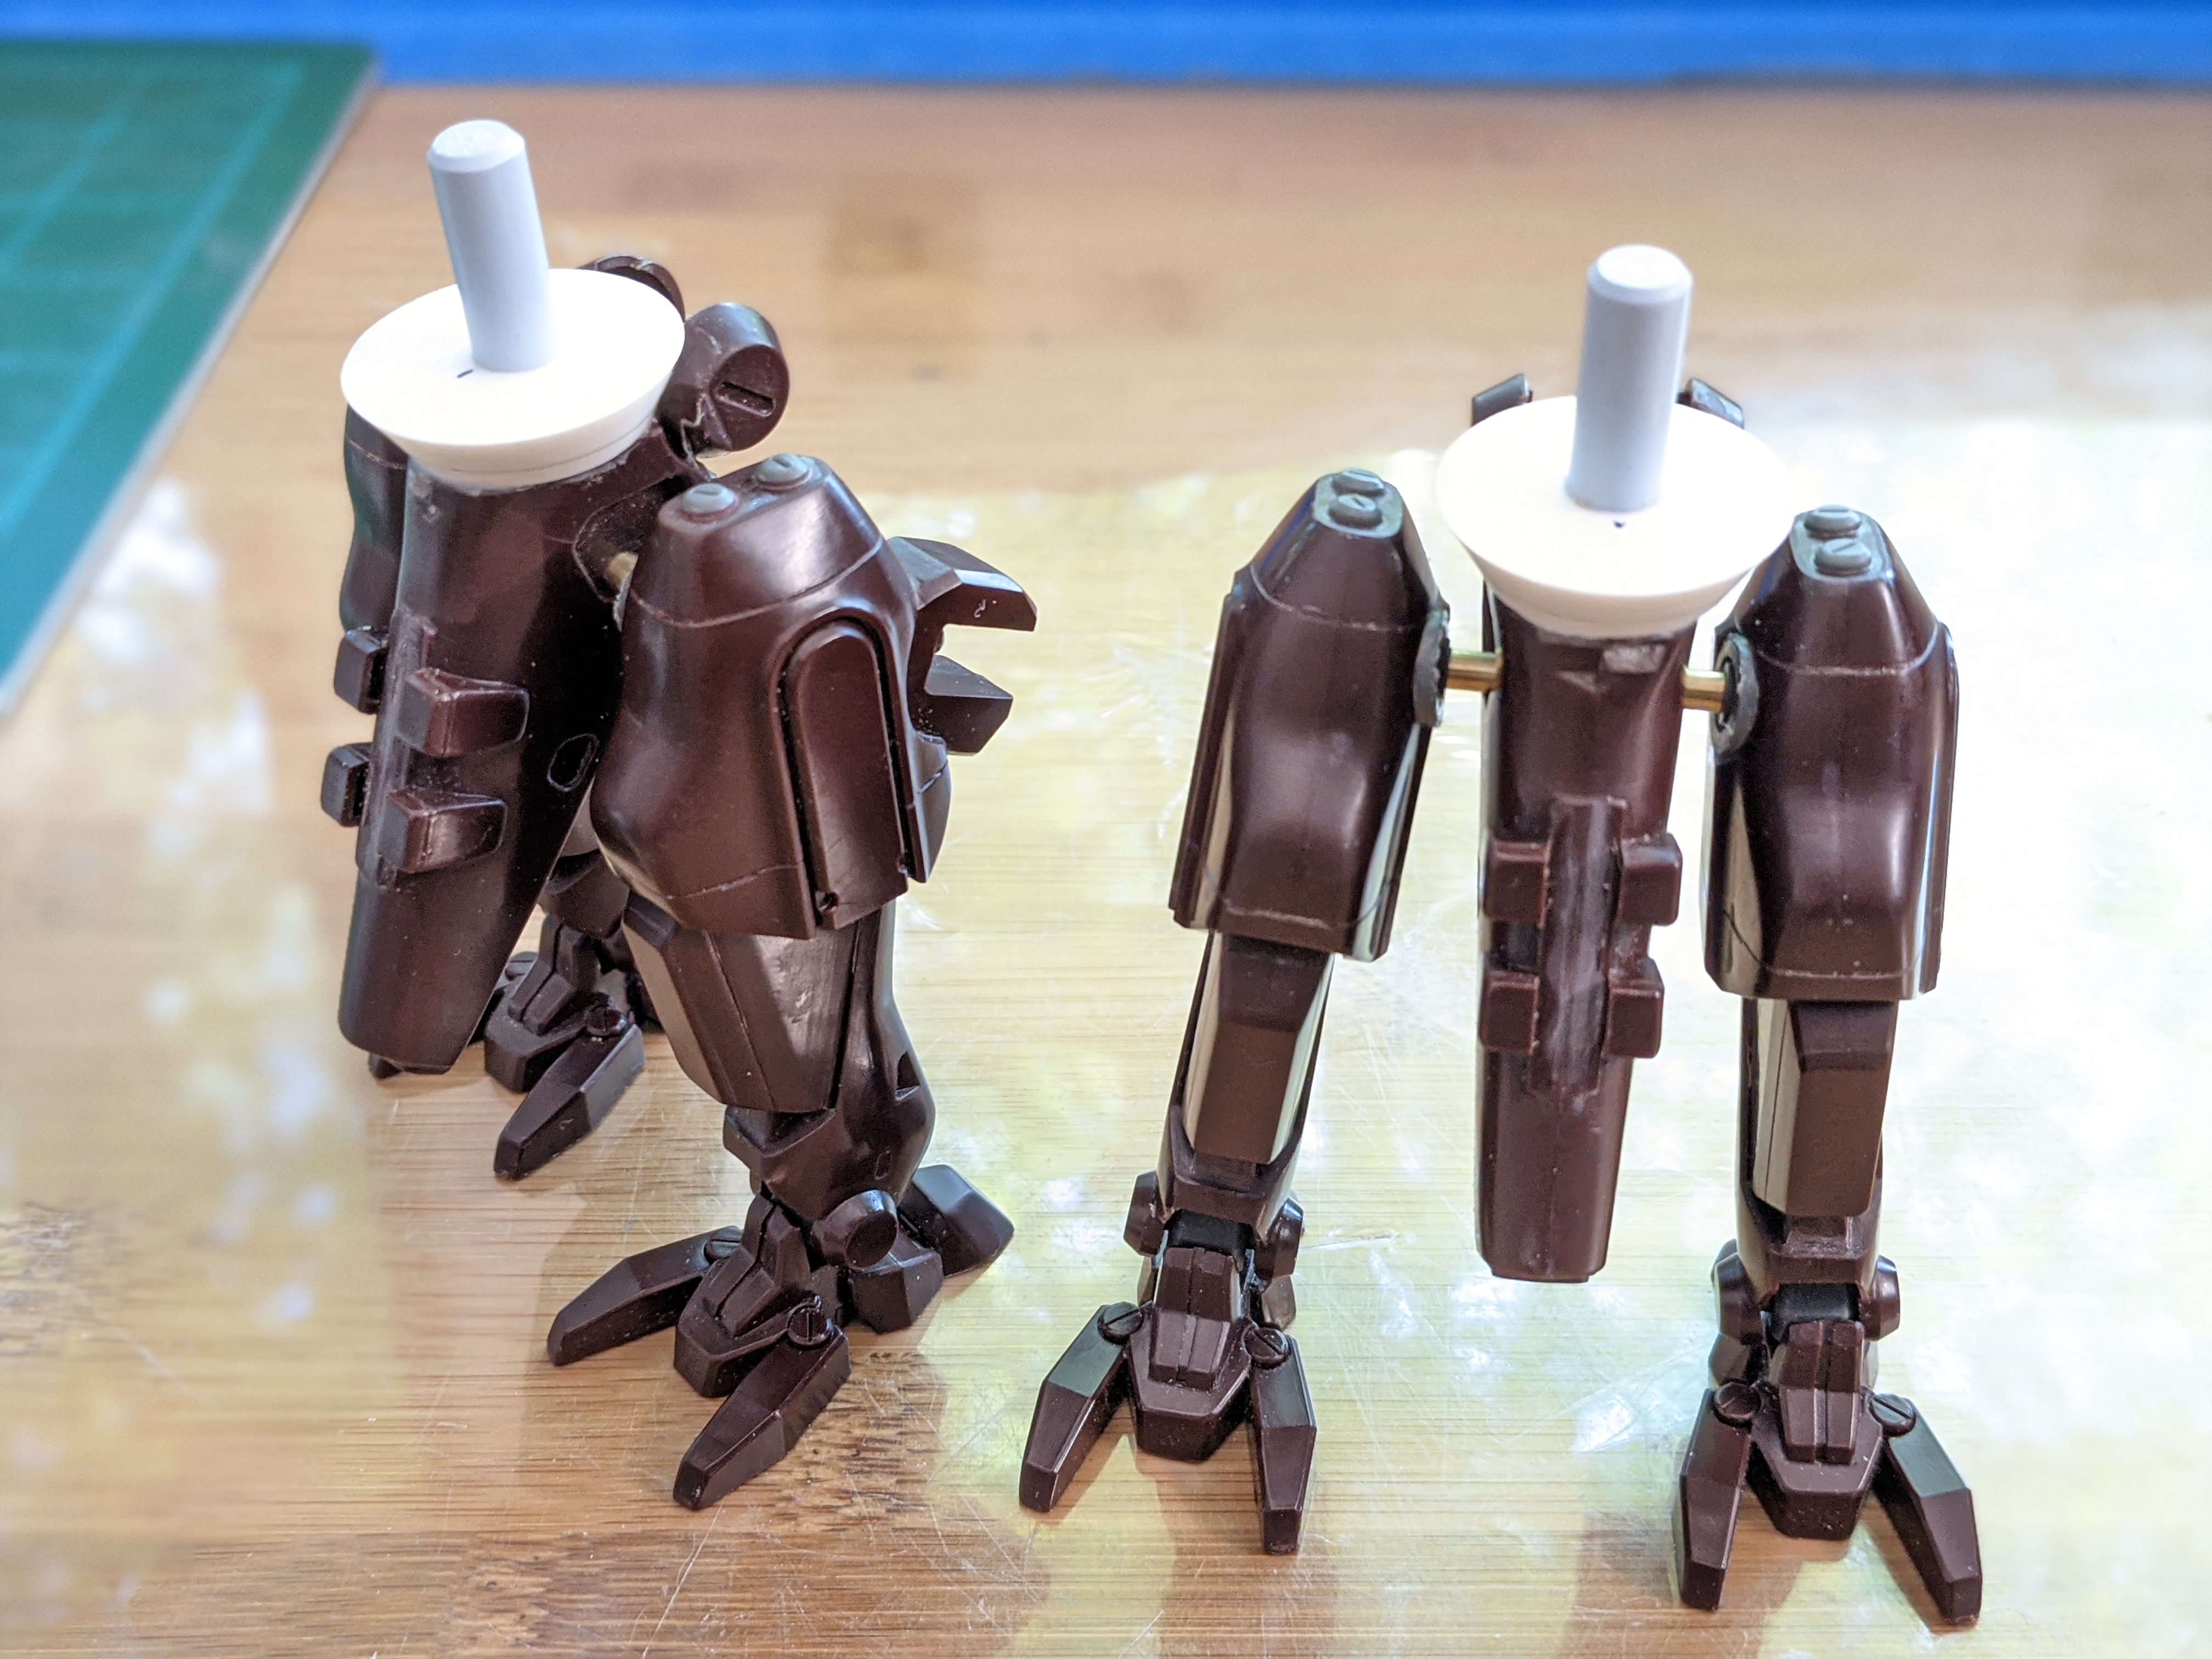
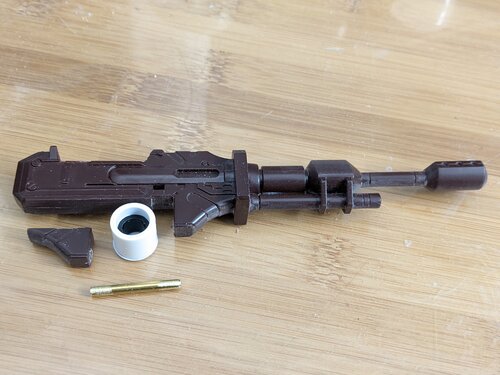
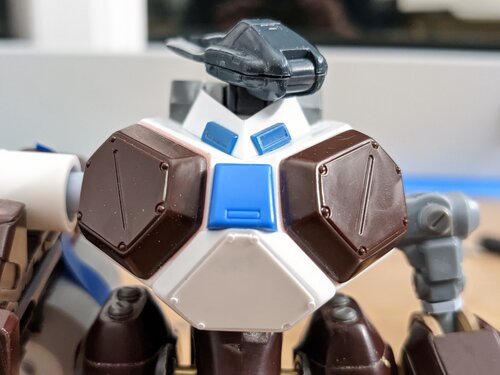
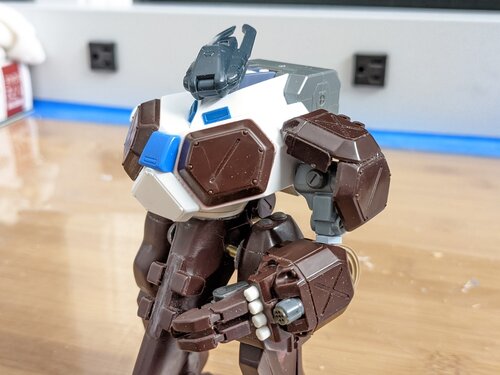
WOW! LOTS of great stuff everyone! Miss a couple of days and you miss a lot! @peter That shading on the Yamato does look great! The other builds are looking good too! @joscasle Your paint job is looking great! That's cool that the fit is so good, you don't need glue just to piece it together to check the fit. @Photogirl (Posted this after your update popped up. Hopefully the new sheet works out)...You may be able to coat the decals with Micro Superfilm, then let them soak in hot water. The film will prevent splintering. All of Microscale's products are great too. http://www.microscale.com/Merchant2/merchant.mvc?Screen=PROD&Product_Code=MI-12&Category_Code=FINPROD&Product_Count=6 Also, when I built the vintage 1/48 Dougram Hasty, each decal had to sit in water for at least 30 minutes each - no kidding! I started laying them out in order to use in the bowl and just let them sit while I watched TV, then applied them one at a time as 30 minutes passed. It's ultra slow, but its cheaper! @derex3592 Looks like you DID buy stock in Tamiya Then again, most of probably have! Runabout is looking good! Time to bring out the BIG gun - really! I highly modified the stock cannon to accept the polycap joint and a canister for use as an ammo drum. I sat there for hours trying to figure this one out. Thank God a solution came to me. The polycap in the joint is so large, I just drilled a hole in it for a brass rod to go through. The brass is needed for strength. So the polycap is working on two axis at the same time now. The photo perspective makes the cannon and chest look larger than it is - smart phones are not too smart sometimes. Then I created a plate to closely match the brown armor plates on the lower chest and added vision slots to the collar area. Have you ever done something and it turned out wrong in some way? After I say this, you won't be able to unsee it, but the chest looks like a frog's face right now! I'm hoping a coat of paint and decals clears it up. Next, I machined discs out of old wheels to cover up the joint area in the forearm. There is also a hexagonal piece added for detail and to space the arm pieces out on the joint. These are either going to be cooling systems or generators on the back of the legs. At least that gaping area is filled in now. And an oblique perspective shot to put it all together so far... Thankfully, everything is starting to come together - except that frog face thing Thanks for checking in! - MT


-
Thank you guys! Yeah, I think the longer heads looks better too! @505thAirborne Thanks! It is a kitbash of the same kit, but re-arranged with some scratchbuilt pieces such as the chest area. It's like re-arranging a Rubik's cube inside out! It WAS this... @derex3592 Great save on the winglet and that graphic looks great! @joscasle Looking good! Almost ready to be shot down! - MT

-
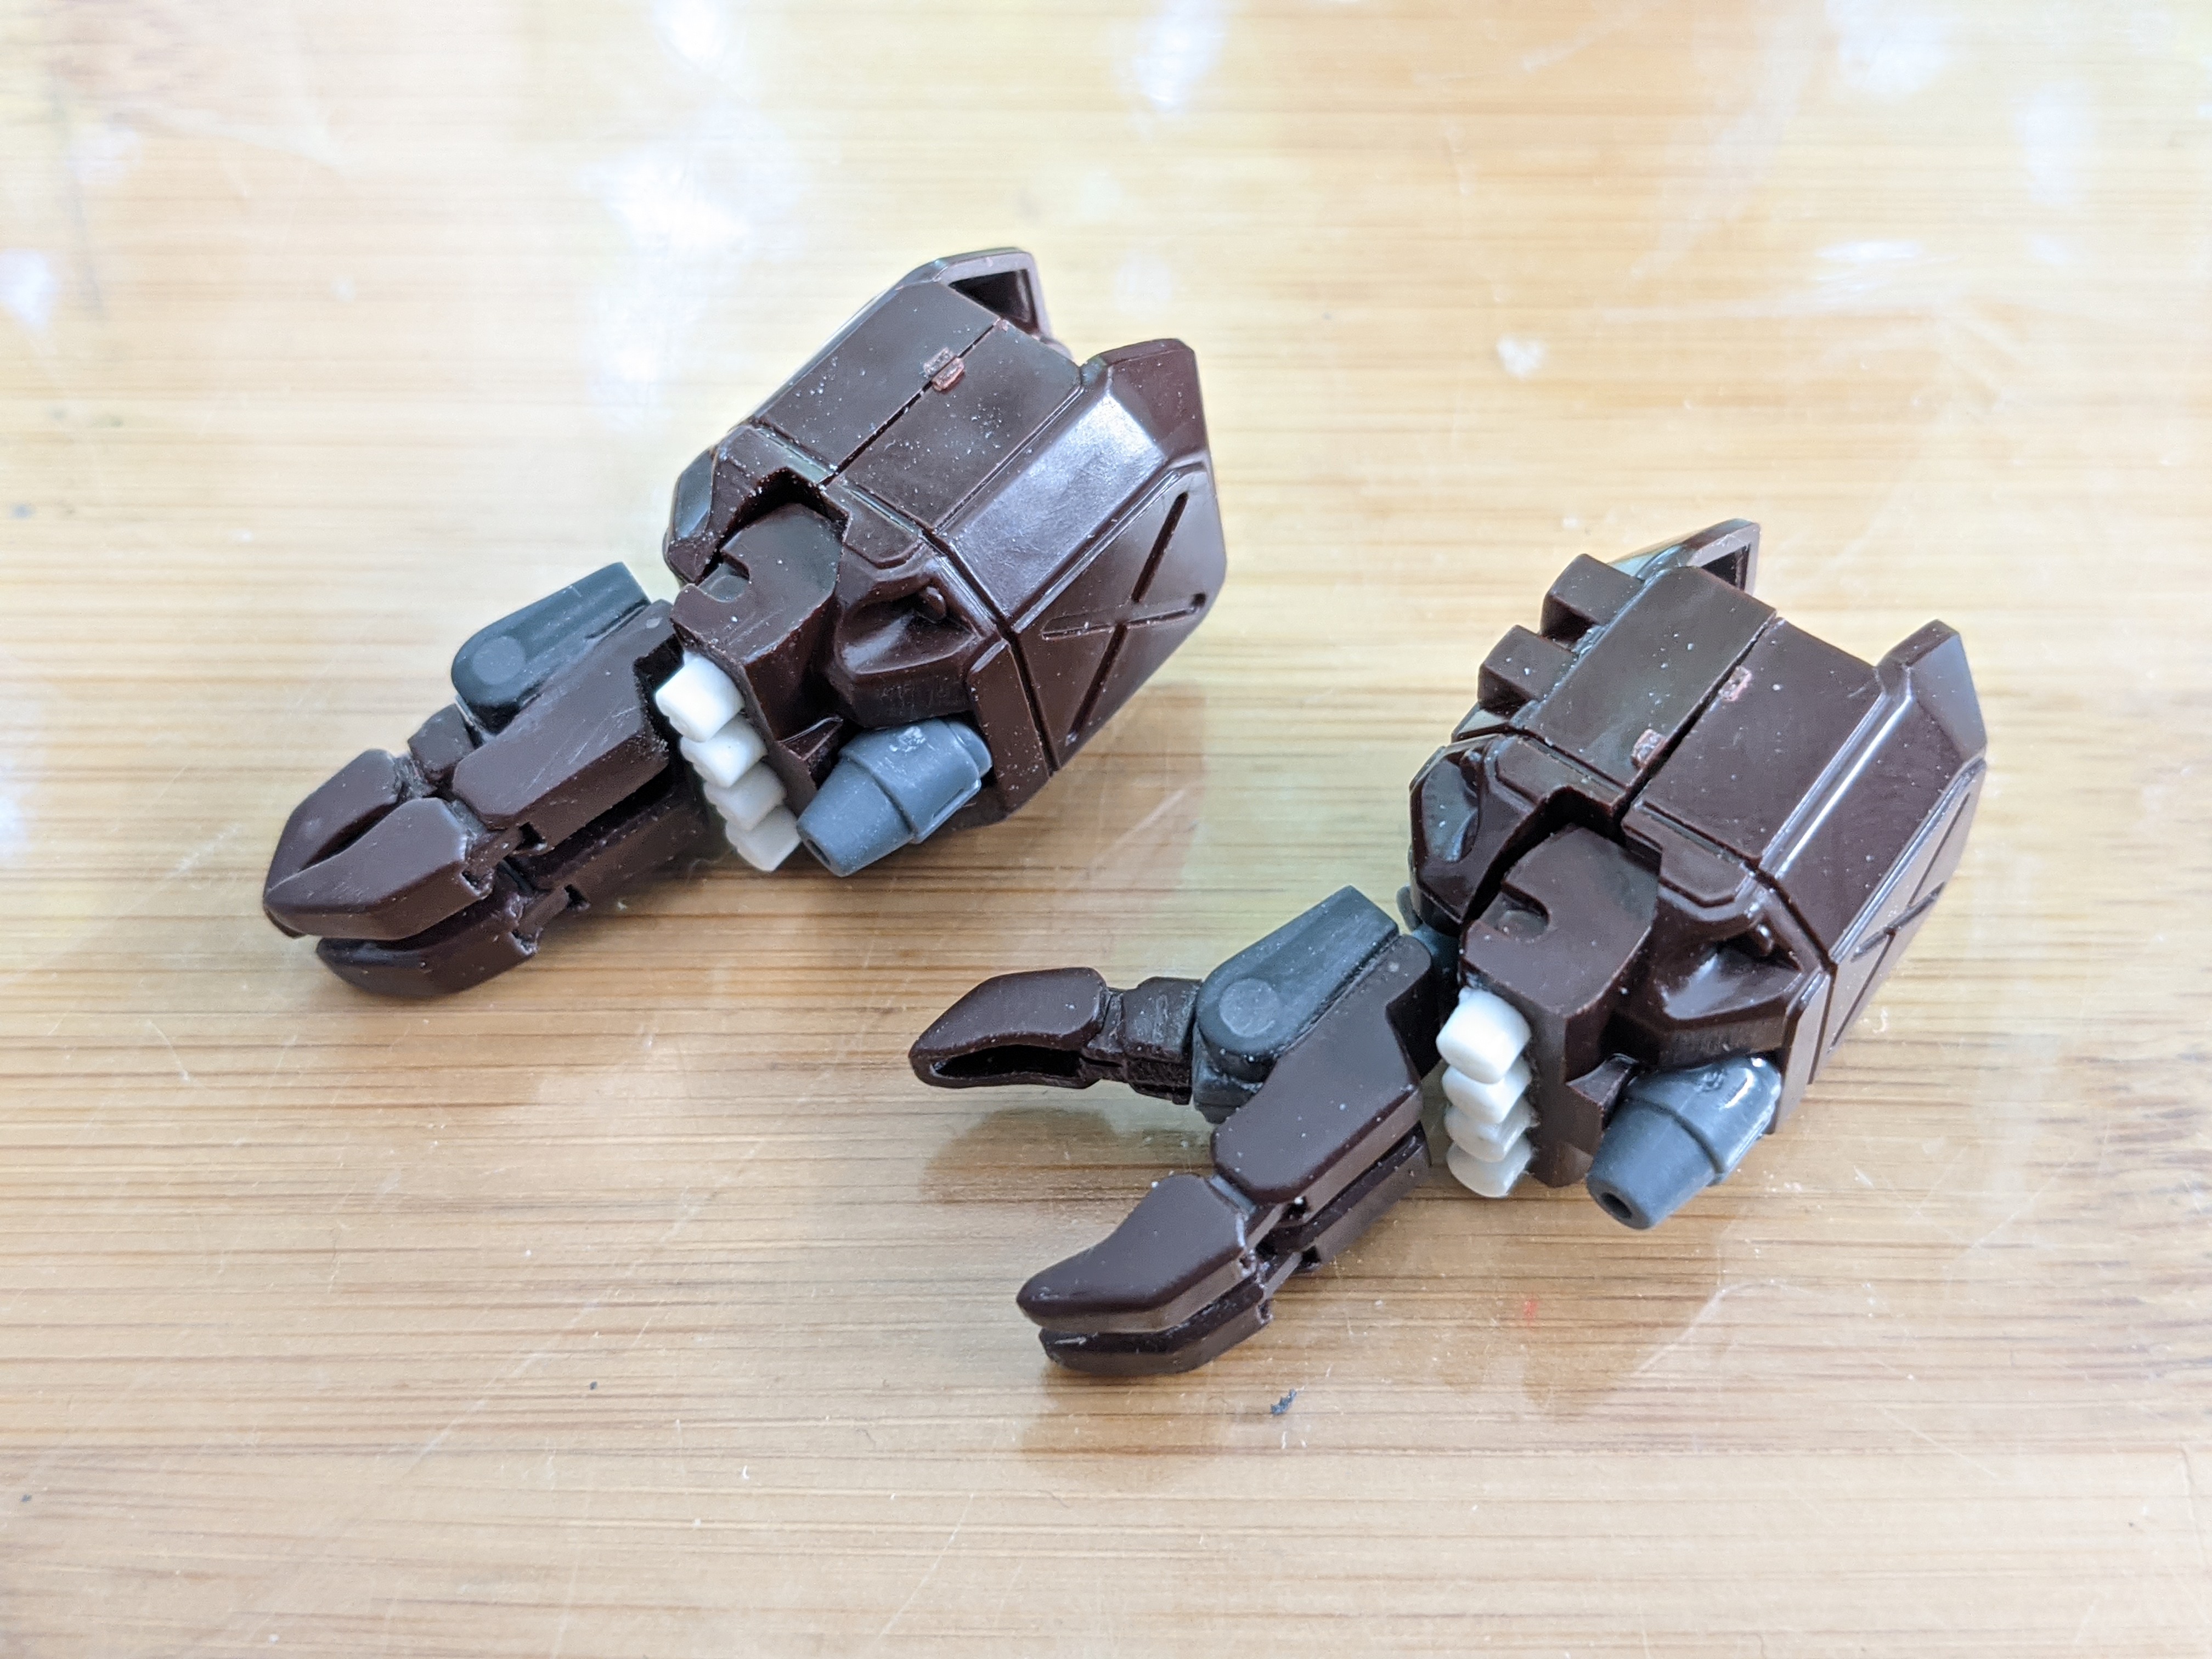
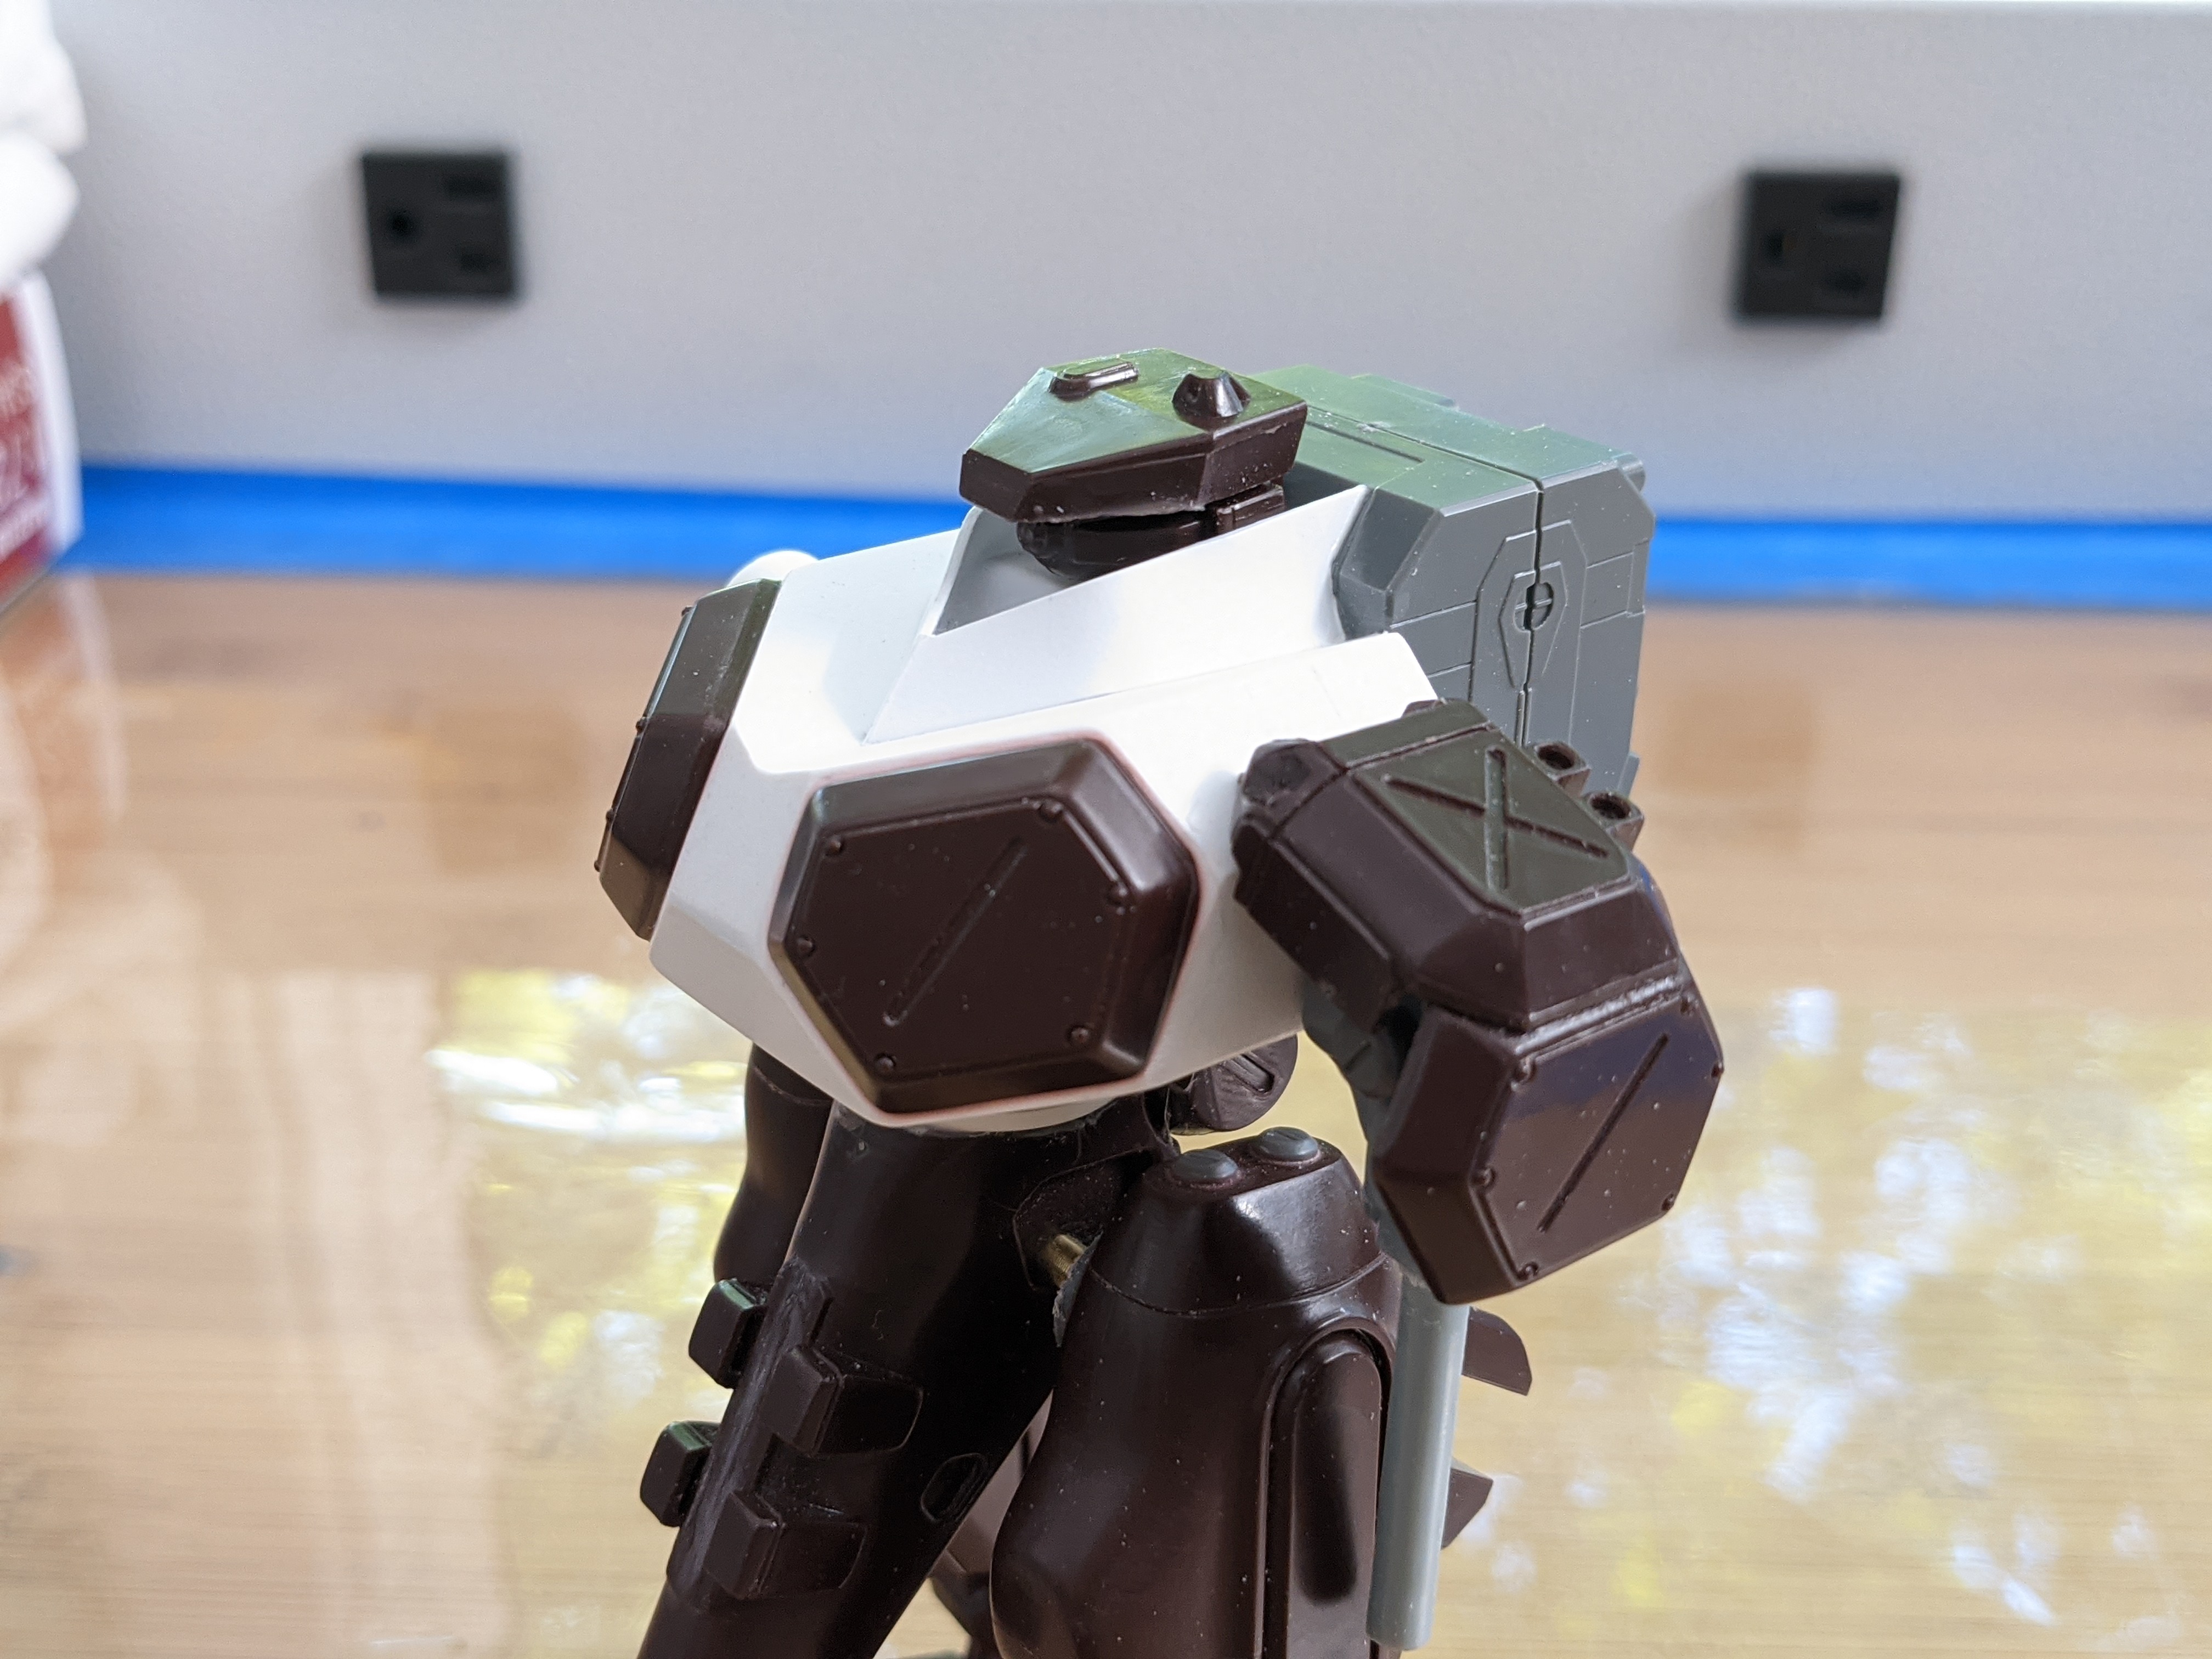
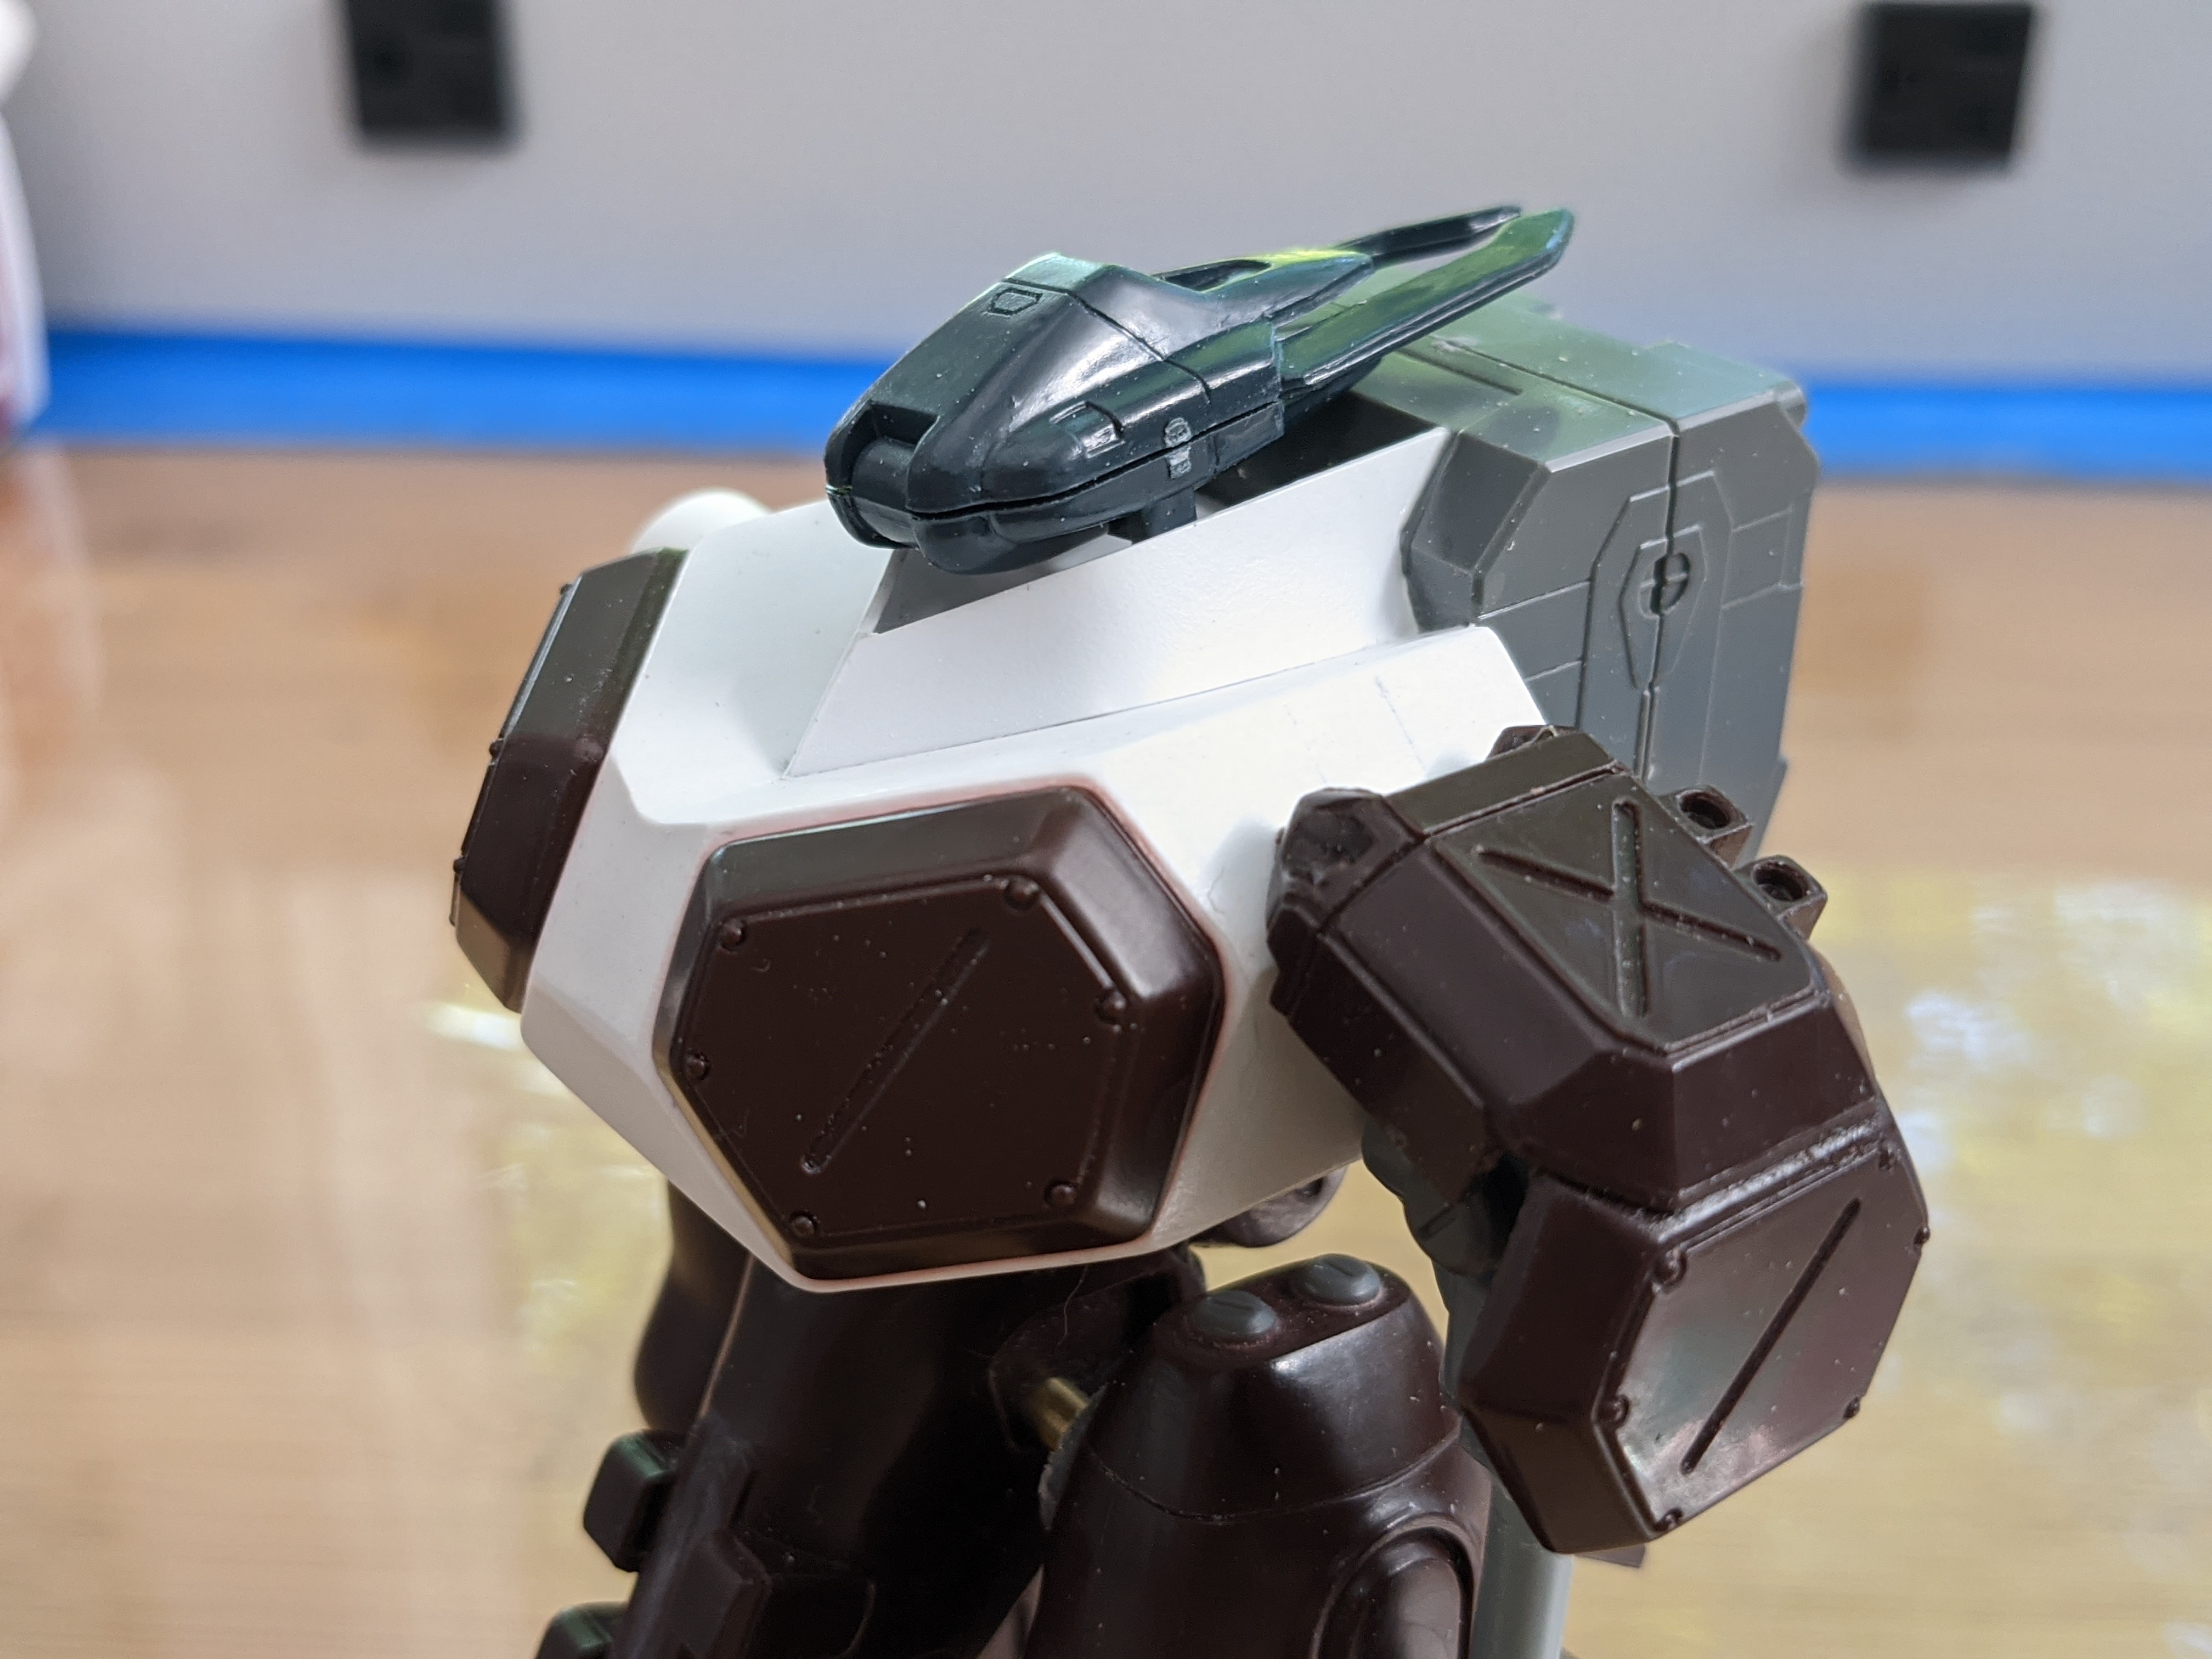
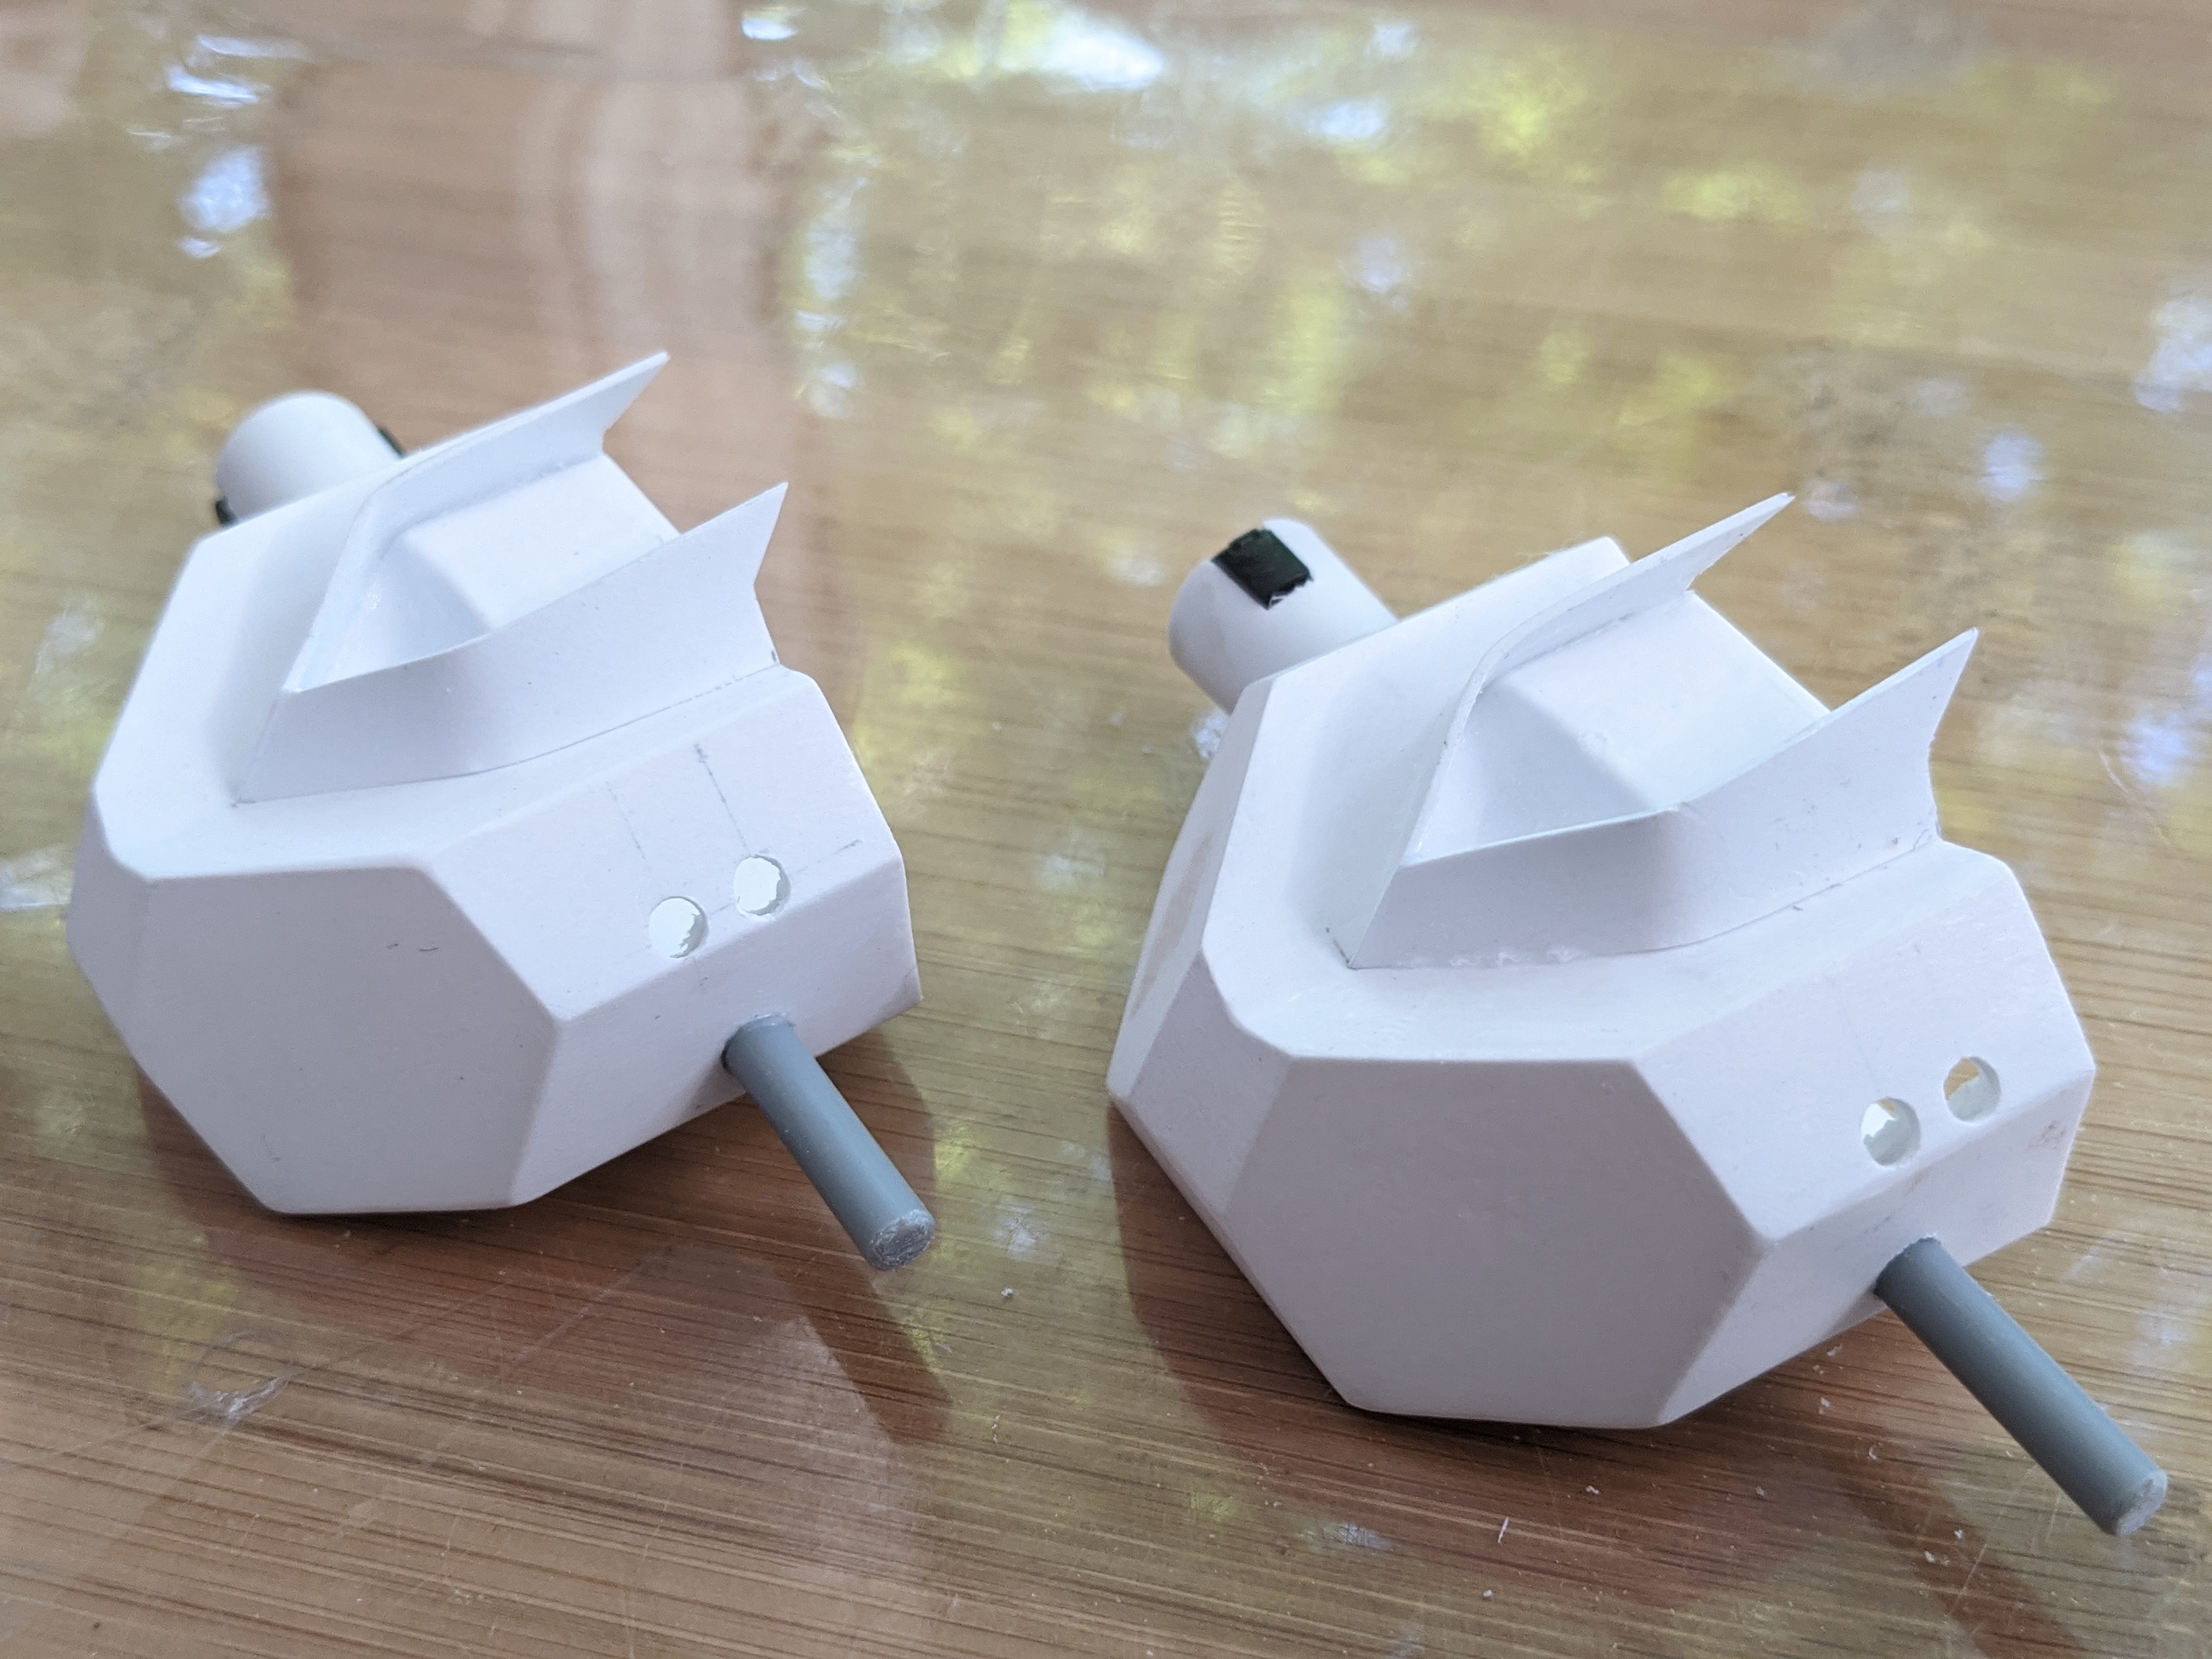
@Thom Looking good! @505thAirborne Great ktibash! You can't tell it's not canon-unless you know. @derex3592 An organized work area is a happy work area! OK, it's corny, but true! I did some of that myself too this weekend consolidating stuff. @peter Thanks Peter! Great work on the fence! We did similar last week. We planted a whole bunch of azalea bushes in the yard and got rid of some old rotten barrels overgrown with ivy. Too bad about the variable valk being that messed up, but I'm sure the fixed will look great too when you're done with it. Getting there on the armor. The inner parts of the arm had cut and glued "O" pieces to hold the ball joint poly-cap in place. This is the "wrist" area now. Then I added detail pieces into the shoulder joints and a beefed-up piece to go into the polycap of the fore-arm. I took the outer arms plate and added some resin missiles onto them and then a cover for the gun in the arm. I think I'm going to shave the gun barrel back and add a mini-gun cover instead. This one looks too much like a laser cannon or something sci-fi. Then I completed making the manipulators and you can see one open and closed. Glued on the chest plate armor and snapped the shoulder pieces in to check fit and dimensions. So everyone, what do you think? Which head do you think looks better? The left or the right? I'm kinda partial to the right, but not sure. Both pieces came with the original kit. The head was the head and the second piece was an engine. Thanks for checking in! - MT


-
@arbit I'll have to ask the ladies in the house what they think. The "neck" area seemed blah so I added a "collar" around it. It helps to cover a piece that holds the neck in place and allows it to elevate upwards. The collar smoothly transitions into the "backpack" power pack and fuel storage. Its not glued together yet for upcoming assembly. The left shoulders are done and the arms still need to be designed. I should glue the breast plates on to show the actual look to the whole thing. Getting there little by little... - MT

-
@peter Use the old variable valk! That way you can make mistakes on it before I do I think the size of it is closer anyhow, that's why I got the new variable ones (on sale) to try on the old variable kit. - MT
-
@arbit And...she gets sucked out of the airlock! That's awesome Arbit! Great combining of projects. And now we know what the piano was for! @joscasle That paint looks great! Clean lines. @peter I'm curious to see how you use the armor. I actually have the variable armor (each sold separately) to try and fuse with the original variable valk. Great minds think alike! I need to take more photos, but I'm still beefing up the moveable joints. The newer beefier one on the left, and the original on the right. - MT

-
@arbit Thanks, Arbit! I like Krylon's stuff too. Even if the coat is a little thick, that's OK; I'm basically painting a "tank" model - with two feet. Your detail work looks great! Details are what makes it look real. @joscasle Great job on the paint. I love the color mixture. @pengbuzz That stand looks looks AWESOME! I like how you used the schematic on the base too! @electric indigo Mr. T has nothing on that gold FSS kit! - MT
-
Thanks Arbit! @derex3592 That's what I would do! Yeah, forget airbrushing that much real estate! It looks good! I LOVE Tamiya's spray paints. I was going to get Krylon "sand" to paint my mecha, but maybe I should look at Tamiya. @electric indigo I loved the FSS stories designs. It will be cool to see how this turns out. - MT
-
@pengbuzz Wins the prize! What, I don't know! @peter I agree, drill and pin those pieces. That'll teach 'em! Getting there slowly... Milled some round waist pieces with a 30 degree angle and drilled a hole. Then milled a round peg to fit tightly into it. The light blue pieces are old Airfix sprues. They are 1/4" thick! They won't break easily. Then drilled holes in the right shoulders for pegs. The pegs were put in a lathe, had the ends heated up with a lighter to create a flange, and then trued it up to seat flush on the shoulder interior. The interior was then reinforced with a plate. Its nice-n-solid now. Have a good week guys! - MT
-
@pengbuzz Great repair and final finish on the Enterprise! That finished photo looks AWESOME! Congrats on a great finish to your model! @peter Great finish and photos with the valks! Natural sunlight makes a big difference when photographing. @derex3592 You KNOW that will look great! Definitely go for it. That is better than the heat transfer to metal which looks cheaper and the colors aren't as vivid. @Thom For a closed canopy, that cockpit looks great! - MT
-
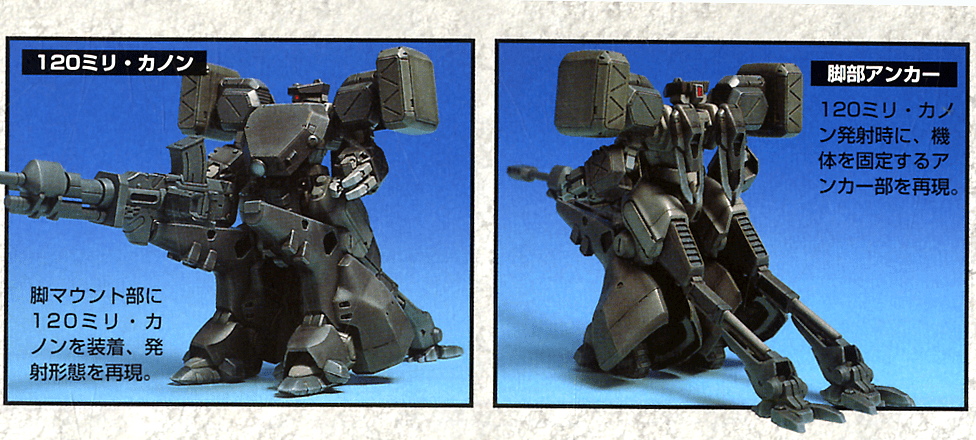
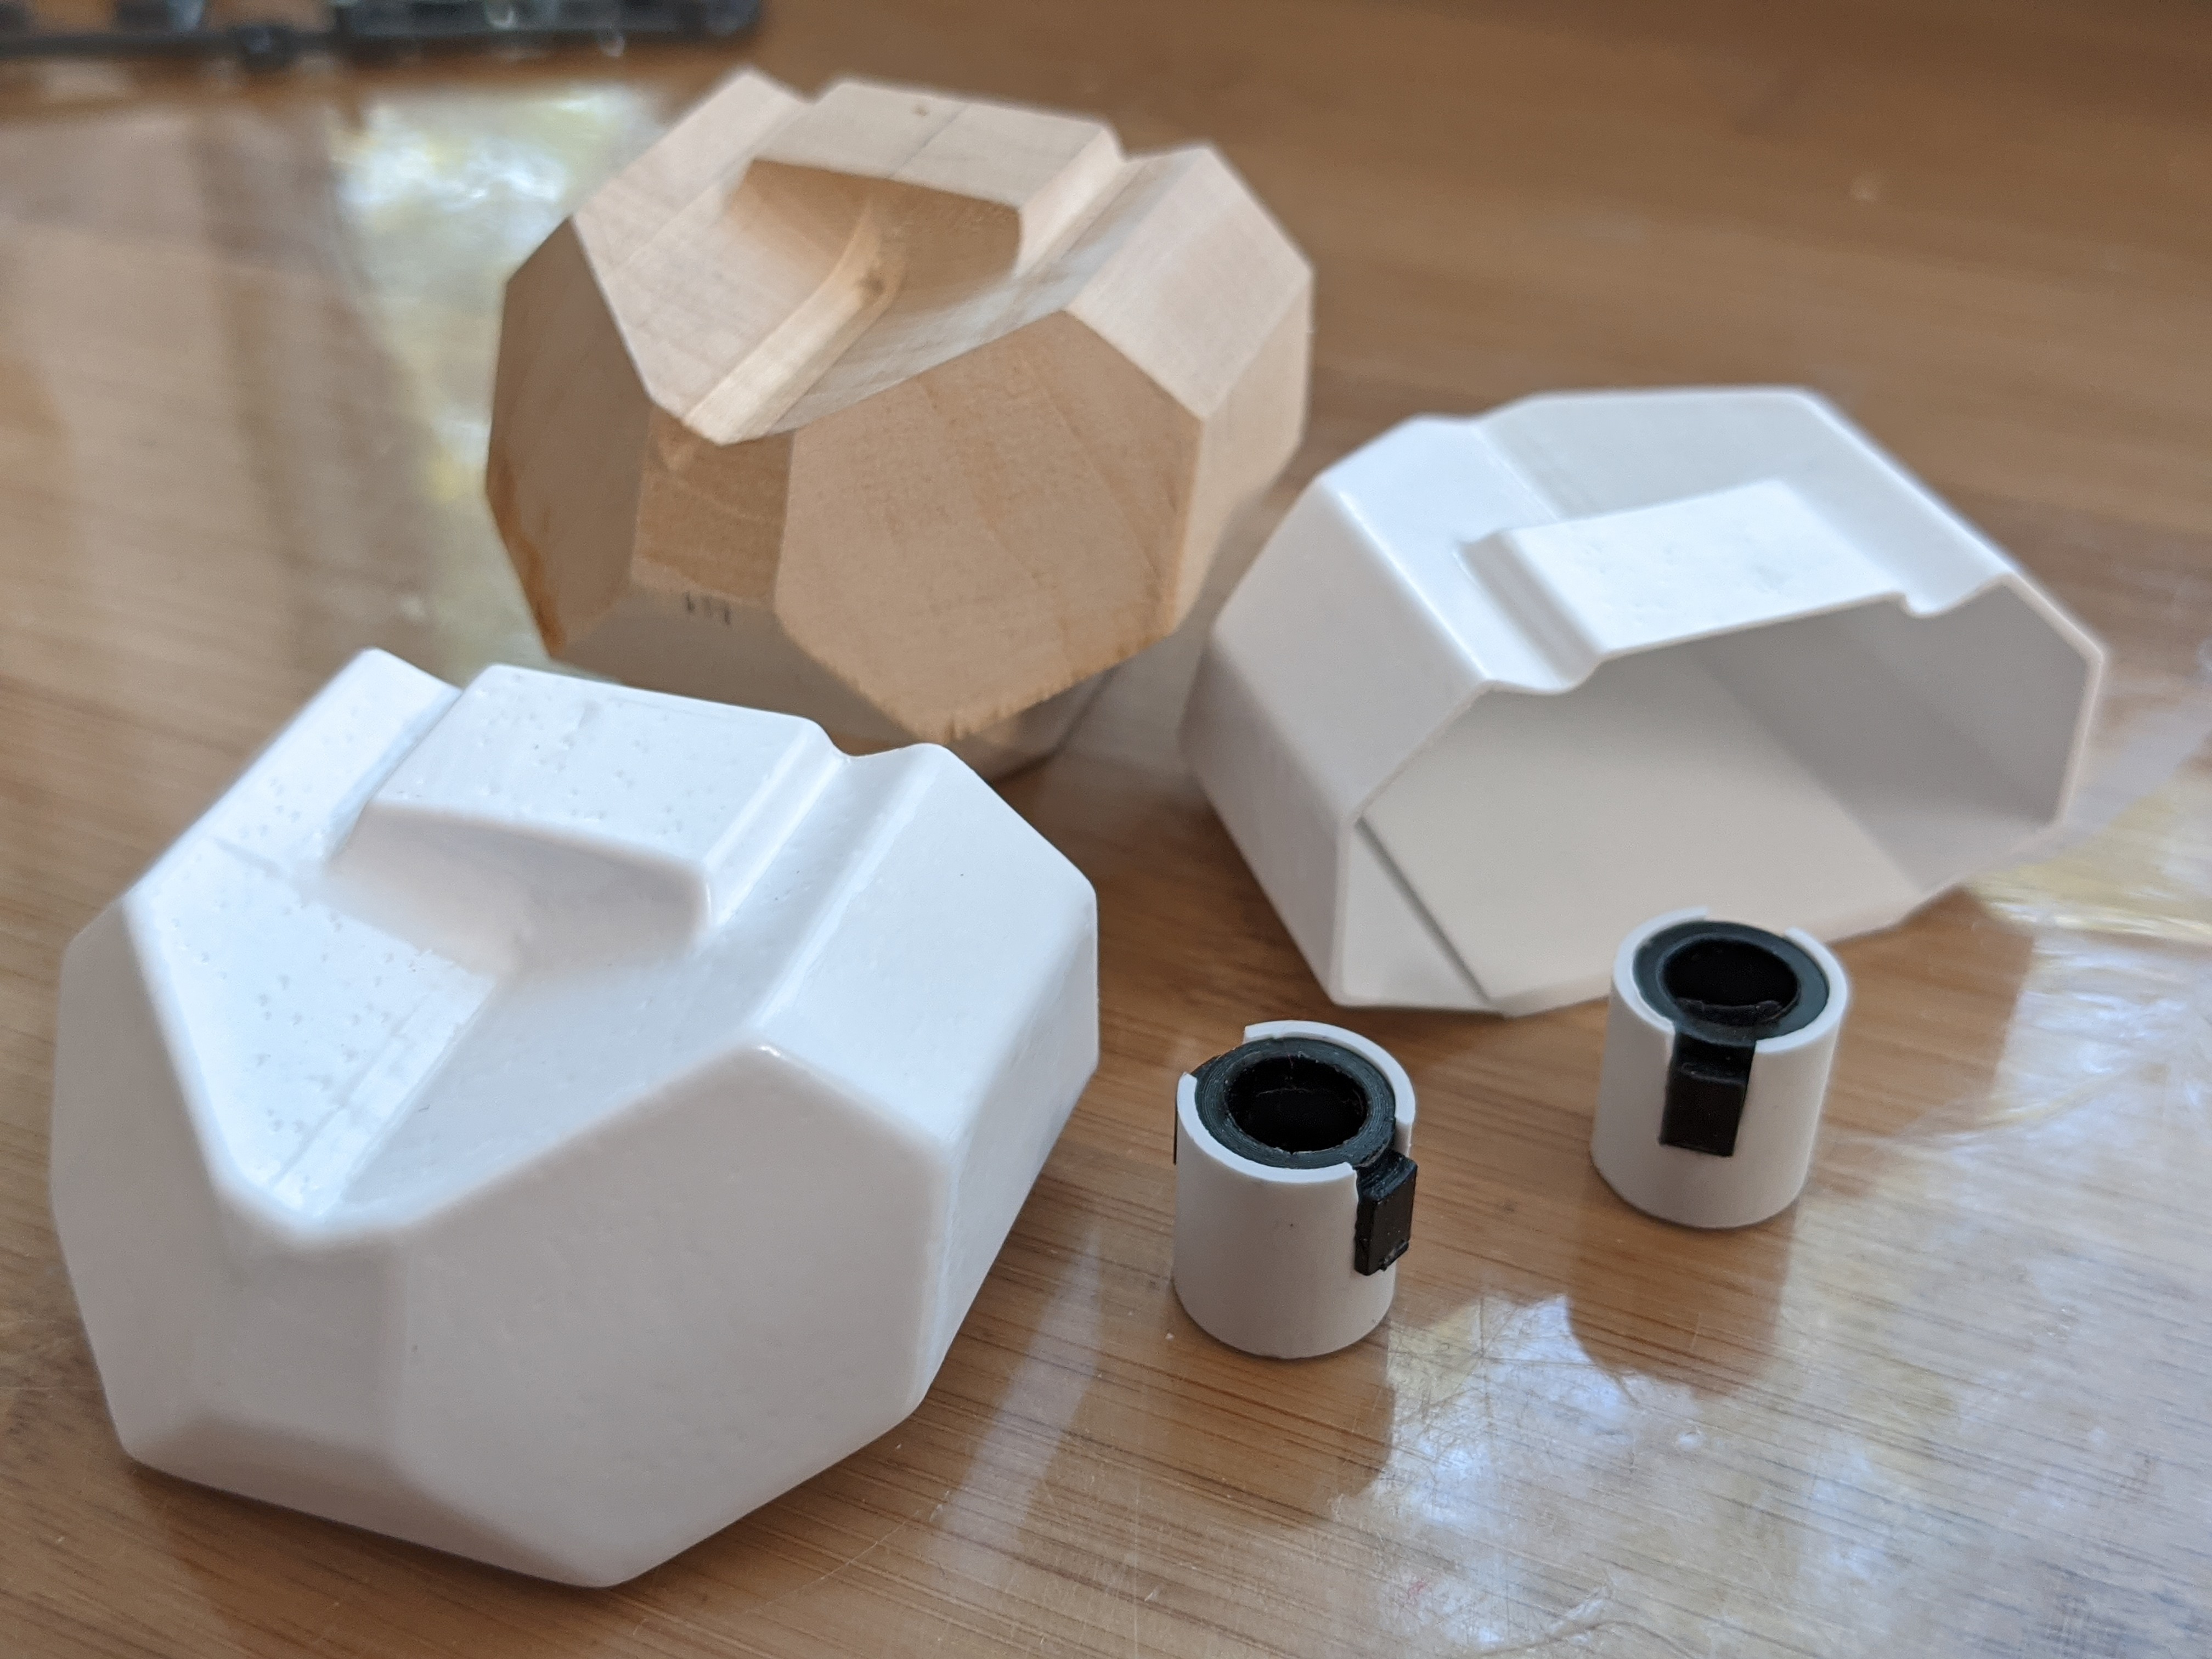
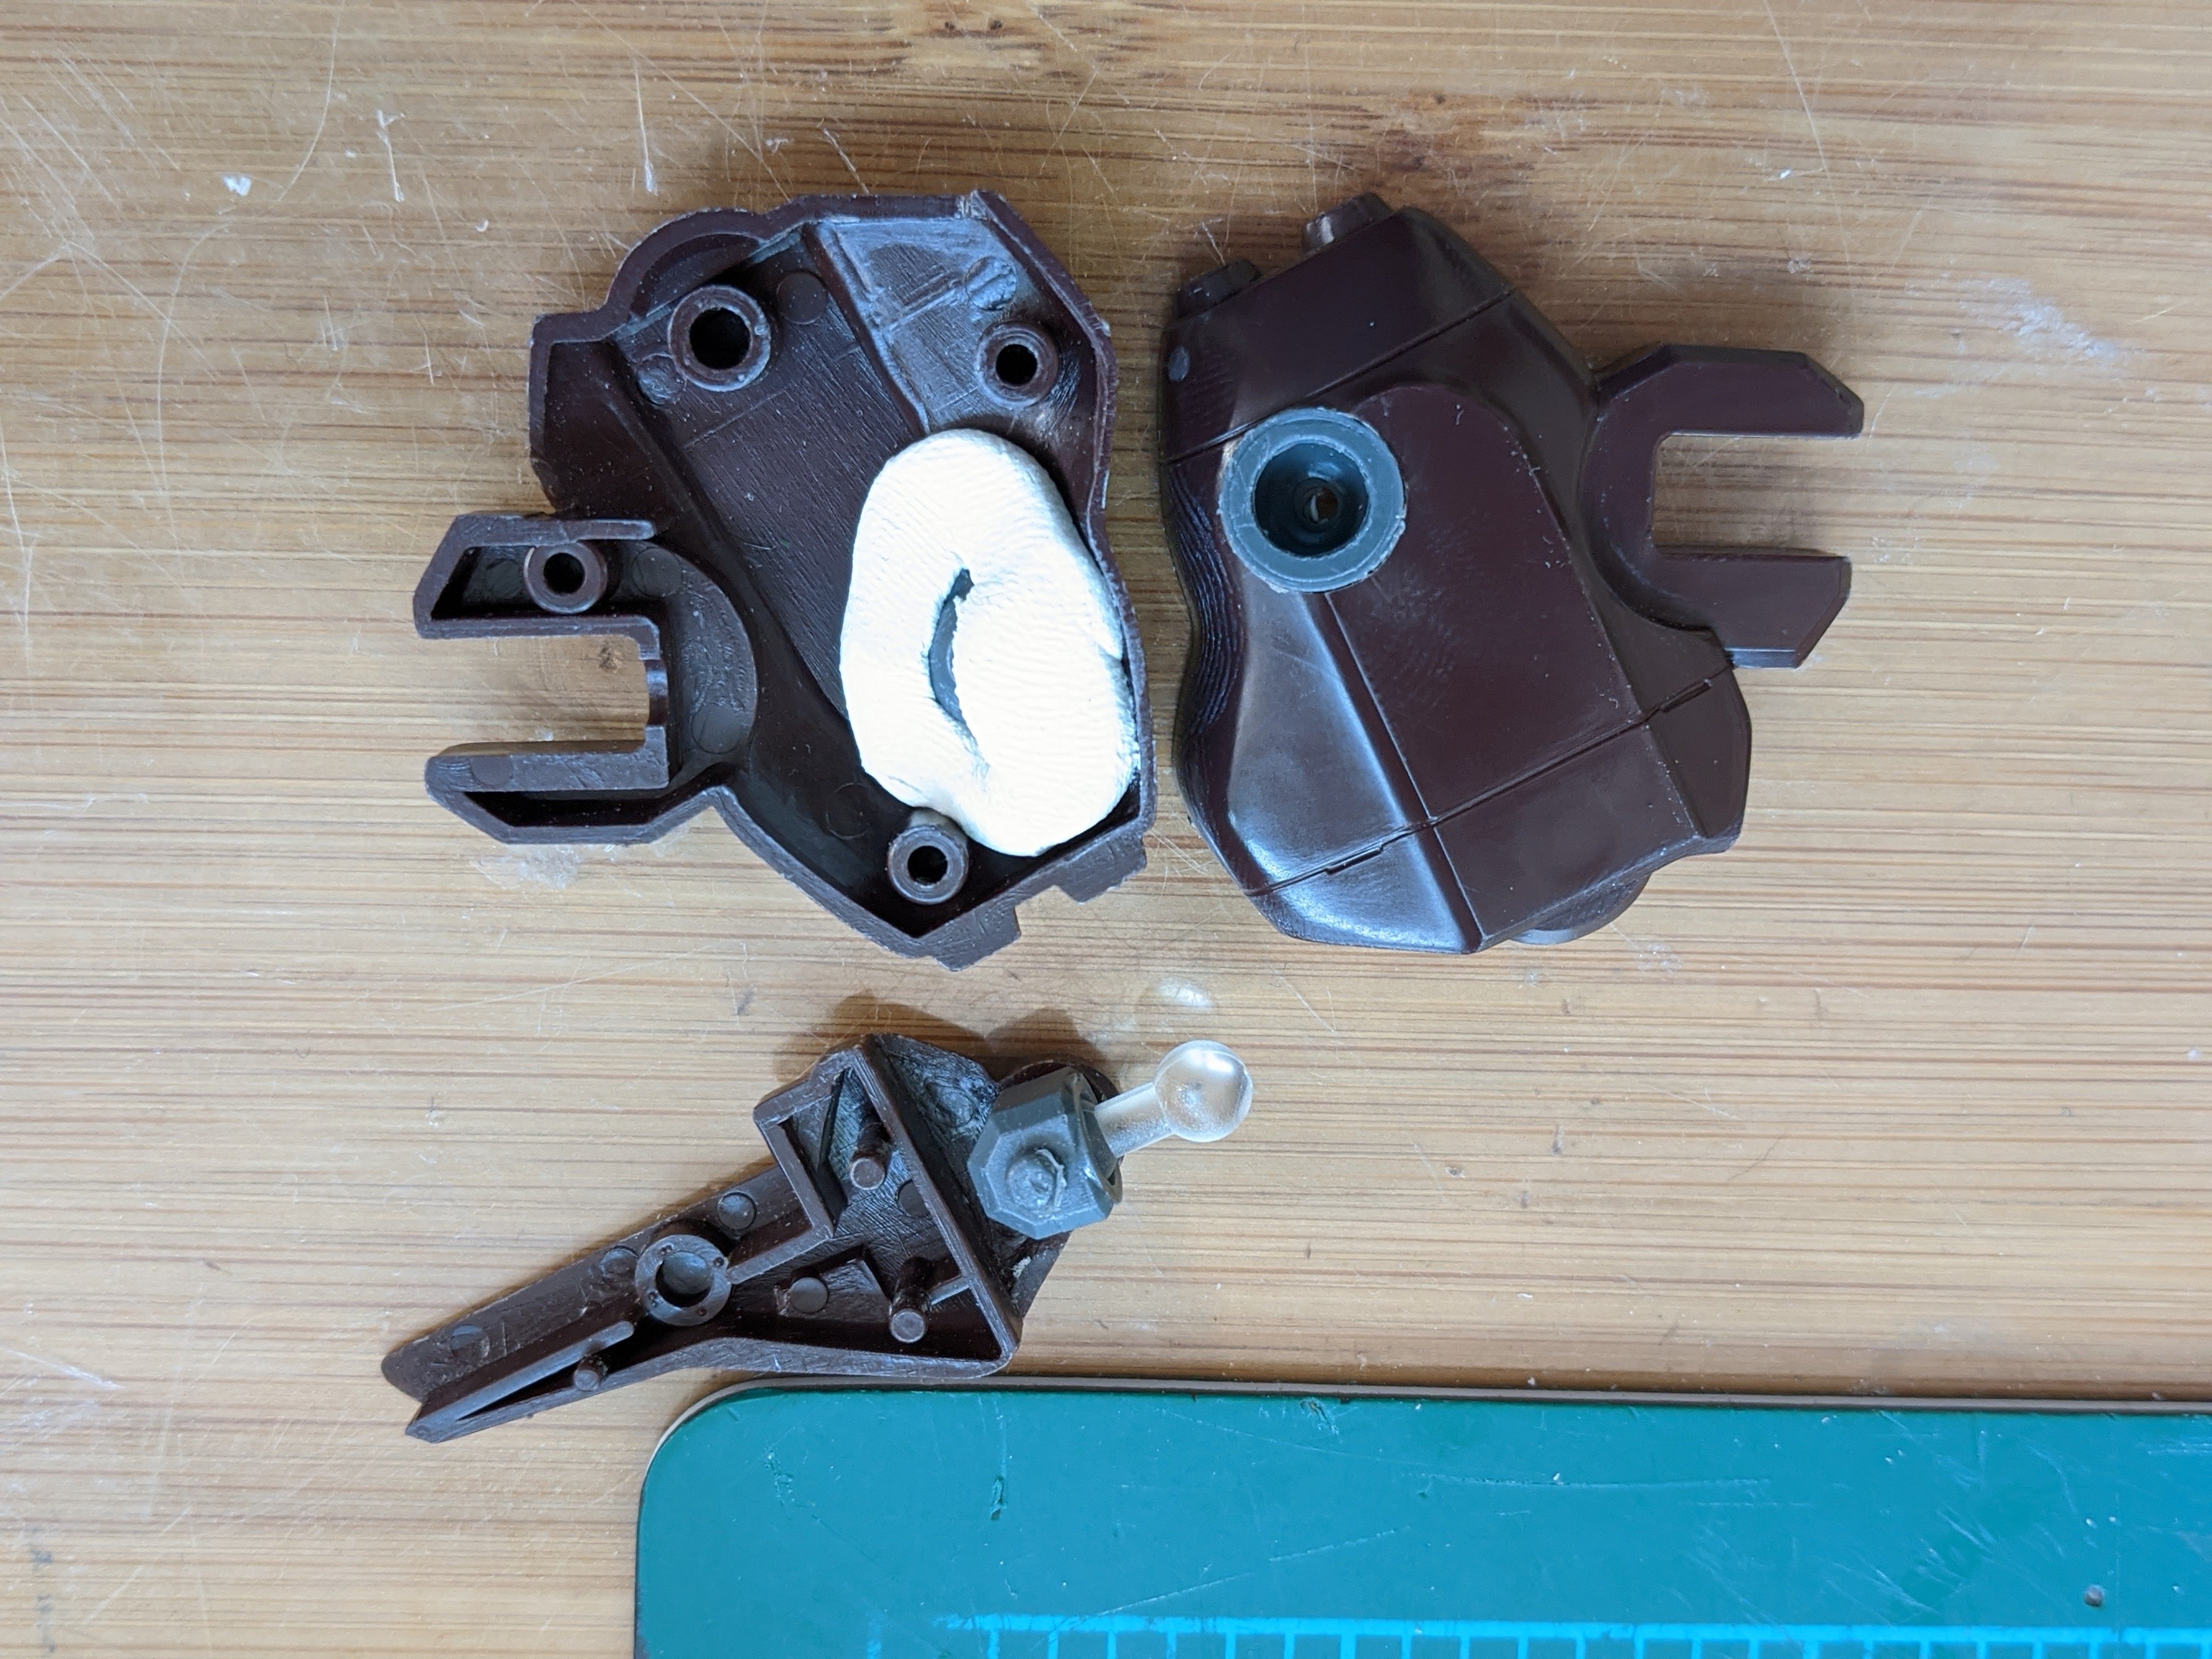
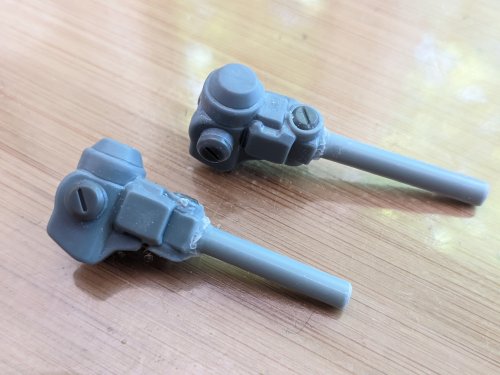
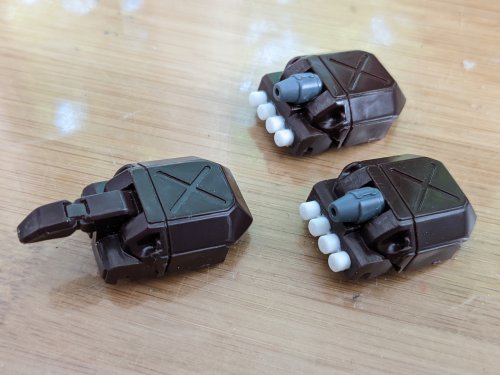
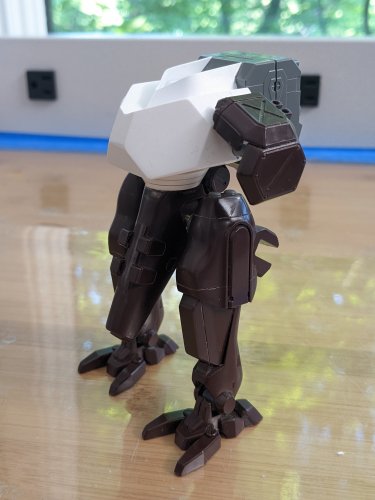
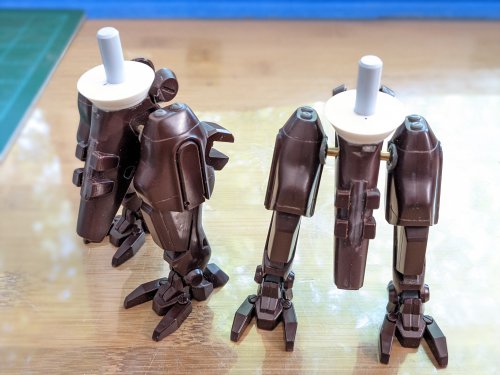
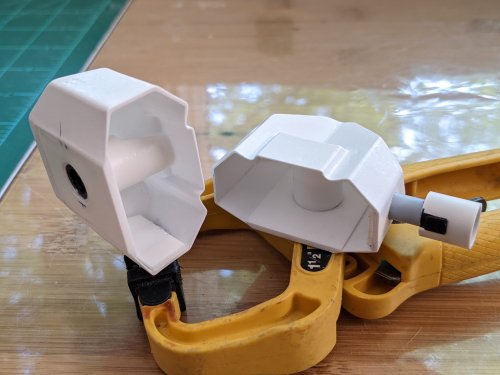
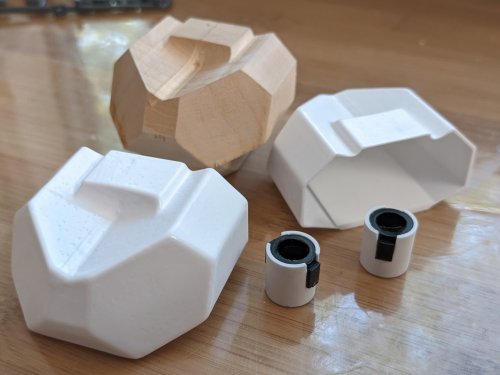
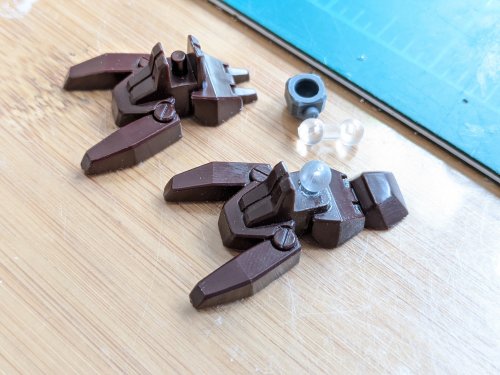
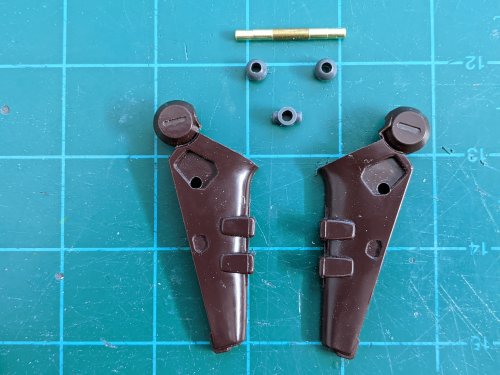
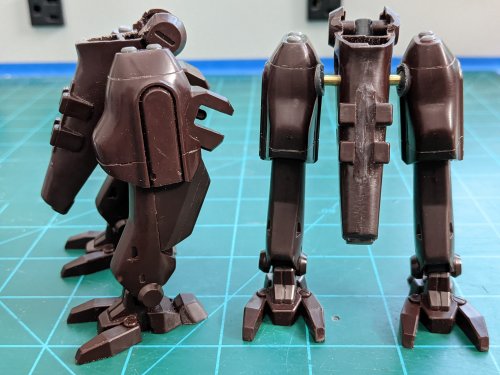
@Chronocidal That stand design goes great with the model. @arbit Oooh, more animated goodness coming our way... Taking a short break from my ship to work on a themed build... BACKSTORY - About 25 years ago I was working on designing / making a realistic looking, 1/35th scale combat robot. Something that would work side by side with mechanized tank and cavalry units in a near-modern day setting. I didn't have the parts needed to make the joints and we also were about to move, so it got abandoned. Plus, I was working on Macross stuff too! All these years I keep moving the "project bag" (not really) out of the way to get to other stuff in the spare parts box it resides in. So it kinda haunts me every time I see it as an unfinished "kit." Most of the model was made from the "Martian Successor Nadesico" Artillery Battle Frame kit. It's like kit-bashing, but with one kit. HLJ recently had a sale for the same kit (only $10.00) and I thought I'd tackle it again for this months sci-fi themed club build. The photo below shows the kit (still for sale at many places). The back supports in the box art are becoming the lower legs and other parts are for the hips and thighs. The arms will be close to the same. It's like having a robot model without the torso. So I have to make that from scratch. When I looked through the old parts, I realized I could STILL use them, so I decided to make two models! In a diorama, it would look more realistic. So everything will be in pairs. Machined a boxwood male buck for vacu-forming. Used OLD Gundam polycaps for the torso / hip joint. Next I worked on the hips. I replaced the joints with much beefier joints and made the hips double-poly cap to last longer. I stole Peter's epoxy putty idea for holding the joints, but also glued them into place after the putty set. By the way, JB Water Weld is about the same as Millliput White, but about half the cost! The feet were redone with heavy duty ball-joints. Stock is on the left and the redo is on the right. Next, the hips were made with a brass rod that won't break easily and the poly-cap balls to fit into the hips. And the nearly complete lower half of the models... That's it so far! Have a good week everyone! - MT


-
@peter Great progress on the Valks! It is funny how things have changed over the years. That's interesting how the cockpits changed on the battroid kit over the two versions. I remember it being flat too in the back. @derex3592 Is that a model I'm looking at or photos of the Grand Canyon! Nothing on you, Derex. Those kits are horrifically designed! Maybe that's why I haven't built any since I was a kid (and not being a huge Trek fan). All in all, you did an awesome job with the seams, sorry you have more to go. @pengbuzz CONGRATS on finishing your Cat! I like the coloring you used for the boots around the wings - a lot of people miss that and it drives me nuts Nice mod to the Enterprise decals too! I wouldn't know the difference between the original and modified unless you said something. @arbit Keeping the piano secret eh I don't think space is that dirty. I think you can leave that panel clean - if it matches everything else around it. @Convectuoso Nice clean finish - despite the troubles you had with the markings. - MT
-
@arbit I'm at a loss, where's the piano from? It looks cool and with LEDs too! @Rock Unless you tell someone, they may not notice Sometimes parts are accentuated / under accentuated for effect. This could be like that. @pengbuzz Alright, what communist came up with those roundels? Those were never put into service unless someone did them on a custom job. Then they would have been made to take them off. I know, they were trying to match the Top Gun logo, but you don't mess with American national insignias. There's laws that govern that. Kudos for fixing them! Your Superhornet is going to be released before the movie! - MT
-
@peter Cool work blending Gundam with Macross parts! I wish Bandai / Imai did that originally! I used to buy cheap Gundam kits (when there was a store by my home growing up) and do the same thing. Epoxy putty REALLY should be used with gloves, but then it sticks like crazy! I just used some recently to make a bottle and surgical needle thread together for a fine glue applicator. I just cleaned my hands really good! @Gabe Q That's looking good Gabe! So did you build the 1/72nd Strike Valk and it came with the different fast packs? If so, that's cool, but too bad they didn't use the same for both kits. @pengbuzz Nice custom decals to go with that scheme! I remember when the pilot, who originally inspired the story for Top Gun, came to our school and was telling us how he actually did fly inverted and gave the Soviets "the bird." It was a bomber though and they were escorting them out of the area. - MT
-
@Chronocidal Congrats on a cool kit! That came our great! lot of 80's square goodness. @pengbuzz That is one dirty cat! If you want the full effect, put some greasy hand prints around some access hatches. Like from a cut out eraser tip to stamp them on. Some friends that were maintenance said there were always hand prints around! We'd never let our aircraft get that dirty in the Air Force @Gabe Q Looking good Gabe! Clean and nice and sharp lines. - MT
-
@Chronocidal Great job with the printing! It's looking good! @peter Great finish on your models! They look realistic on deck and out in the sun. All that hair (and shoulder pads) on a pilot are just wrong! @pengbuzz It's great news that you got the printer going and decals printed up! They came our great! - MT
-
@derex3592 I love the lighting color. It looks warm and realistic. Looking good! @505thAirborne Those came out awesome! The colors really make everything pop, especially with the markings. @Chronocidal I hope everything goes well. That's a LONG print time! @peter Looking good on the assembly line! That Tamiya weathering stuff looks so much like makeup I'm actually going to get some when it's back in stock at the local Hobby Lobby. REAL dust has made some of my mecha look more realistic - MT
-
@pengbuzz The Tamiya canopy looks like it belongs on there! - MT
-
@505thAirborne That paint scheme DOES look awesome. You can't tell it isn't canon. @derex3592 I'm glad to see things are going smooth on the paint front for you! @peter Great progress on your Valk and Deck! The paint is looking good! Man, if I don't keep checking everyday, there's a TON of stuff I miss! It's good to see this sleepy thread becoming more active! - MT
-
@Chronocidal Your print came out great! The details look good too. Getting rid of print bias is a pain. If it's ABS, you can use a acetone vapor bath to smooth it over. If not, sorry. Priming and sanding are a pain (my least favorites). @arbit Your door came out great! @peter Your aircraft and flight deck are looking good! Yeah, ejector pin marks are a pain! I wish they would do other things to get the parts out of the mold, but that's the easiest way for now. @pengbuzz It probably feels like your wrestling a full-sized lion vs a tomcat, but your work is a HUGE improvement over the stock! - MT
-
@arbit Battleship parts - what made Star Wars movie models what they are today! Ship models are great for all sorts of bits! @pengbuzz That sucks about getting ripped off! Happened to me to by a well known internet vendor, who'll remain nameless. Have fun with the panel lines. The only thing more fun than that is watching paint dry or sanding seems - MT
-
@505thAirborne Those colors look good together! Nice scheme. @peter Where do you get all the free time to build! You're building up a massive armada to take over the galaxy! @arbit That's awesome Arbit! What's the little green box? I think I saw those micro switches at Radio Shack. They are TINY! - MT
-
@Chronocidal That's cool! I think you do have a manufacturer's advertising model. The internal logo inside the wing (as you pointed out) and "Douglas" on the box are indeed old markings you won't see anymore. I always loved that plane! We have one at the museum and the "Ford" was another great airframe design that suffered from an under powered engine. It just looks like it wants to fly. @peter Thanks! I know what I'm getting. If I see things correctly, that will be a 1/72nd scale 76mm cannon (since I already have ammo for it)! Concerning finding that book AFTER building all those valks... Yeah, been there, done that! HAPPY APRIL FIRST EVERYONE! Don't get pranked! - MT

-
@peter Dude, you are so wrong! That's funny! And thank you. Regarding the Yamato turret, no thank you! It's an awesome looking kit though! In your model stash, is that the M-82? I was thinking that would be cool to go with a mecha. @arbit Consider yourself virtually kicked in the pants and finish that baby! - MT
-
@pengbuzz Thank you and great change-up of details in the cockpit to include fixing the consoles too! You even striped the helmets! @derex3592 Thank you! I'd have to side with madman. That's what it felt like drilling all those holes and then threading the rods through them! Your Runabout is looking great! Your paint colors are great and like EI said, the nacelle colors look better than solid colored lenses. @electric indigo That just needs some sky for the background and some vortices and it would be hard to tell from the real deal! @505thAirborne That's a nice color! @arbit Thank you, Arbit! I kept thinking of Tweetie's bird cage! @Thom Thank you, Thom!