MechTech
-
Posts
4701 -
Joined
-
Last visited
Content Type
Profiles
Forums
Events
Gallery
Everything posted by MechTech
-
@pengbuzz Cool mechanism for the elevator. What did you use for power? @007-vf1 The monster dozer blade looks great with paint and so do your Zentraedi! @electric indigo I saw a similar kit on Newtype. I think your is different with better details. Its looking great! - MT
-
@Thom Thank you! I hope to get more done this week. @arbit Thank you too! "Reminds me a bit of Masamune Shirow's manga designs." I agree (though I didn't think of that). The exception is that my pilots are wearing more clothes! "True, that's why I'm keeping it low key, staying just on this forum for now." Well, I'm glad your sharing with us! @pengbuzz Great work on the elevator! Is it just me, or does it sound like on the way up Optimus needs to lose some weight!?😄 Just kidding! It's normal for drives to sound like that under load. Cool concept too! - MT
-
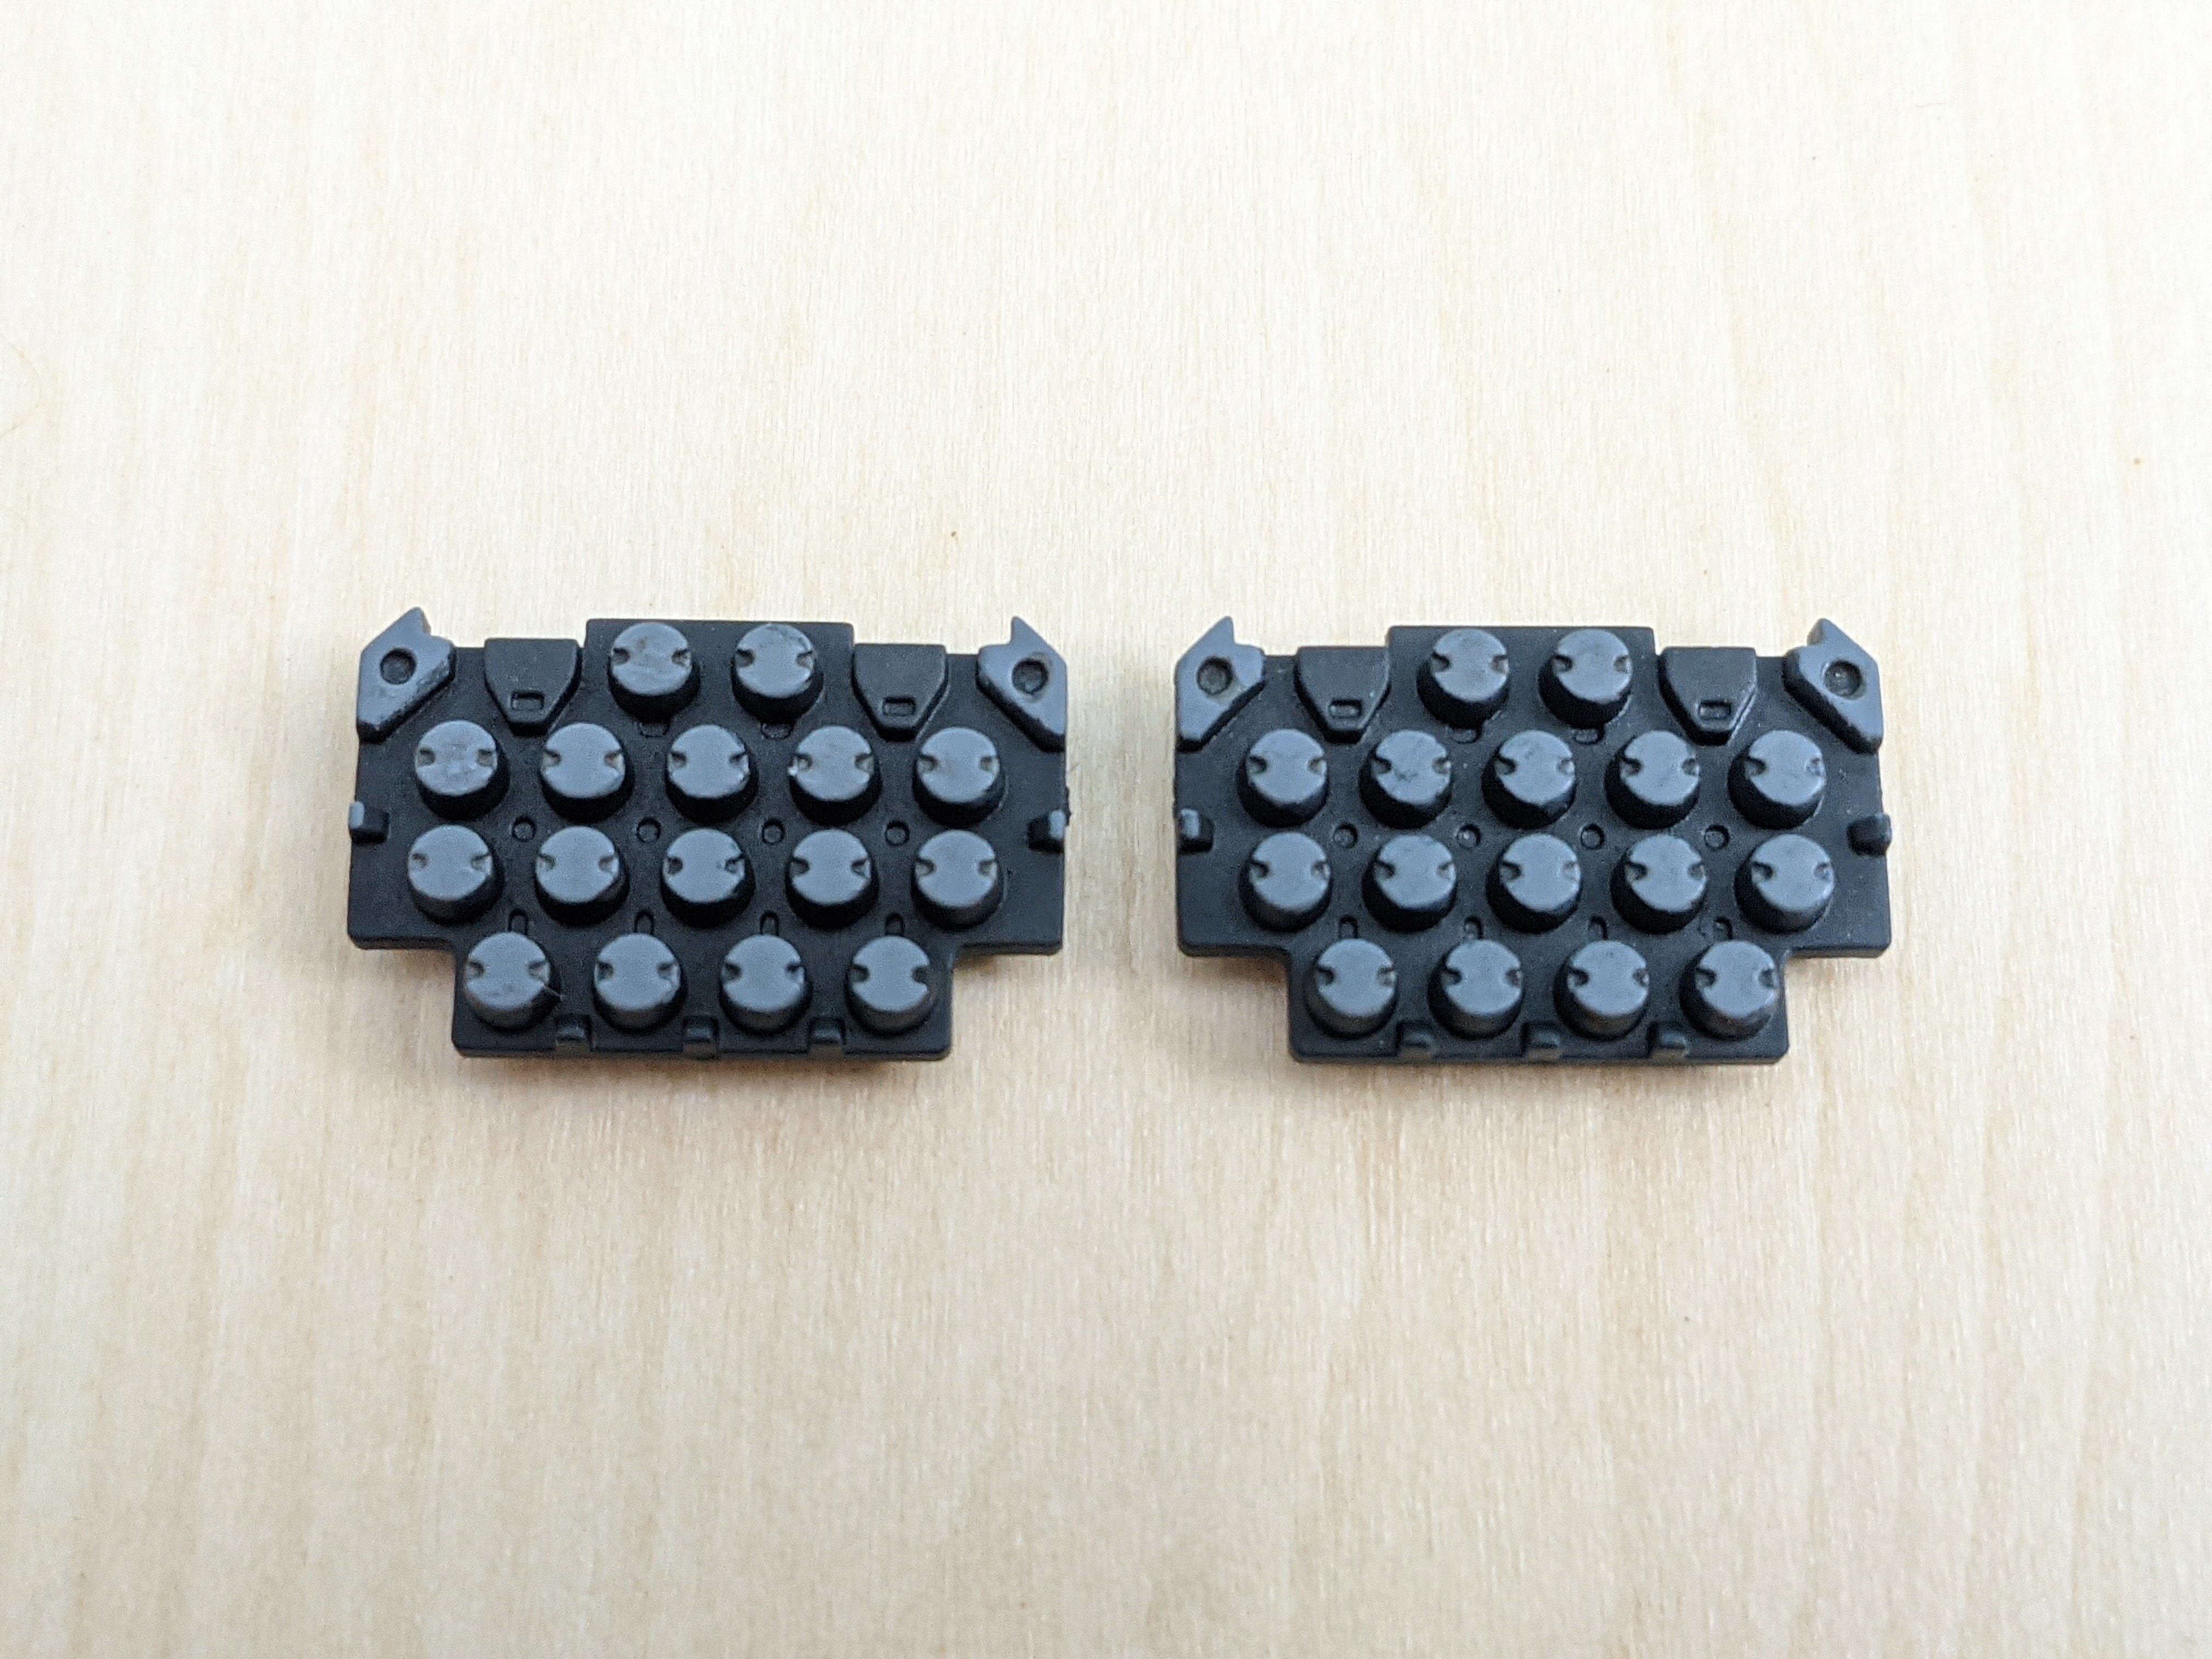
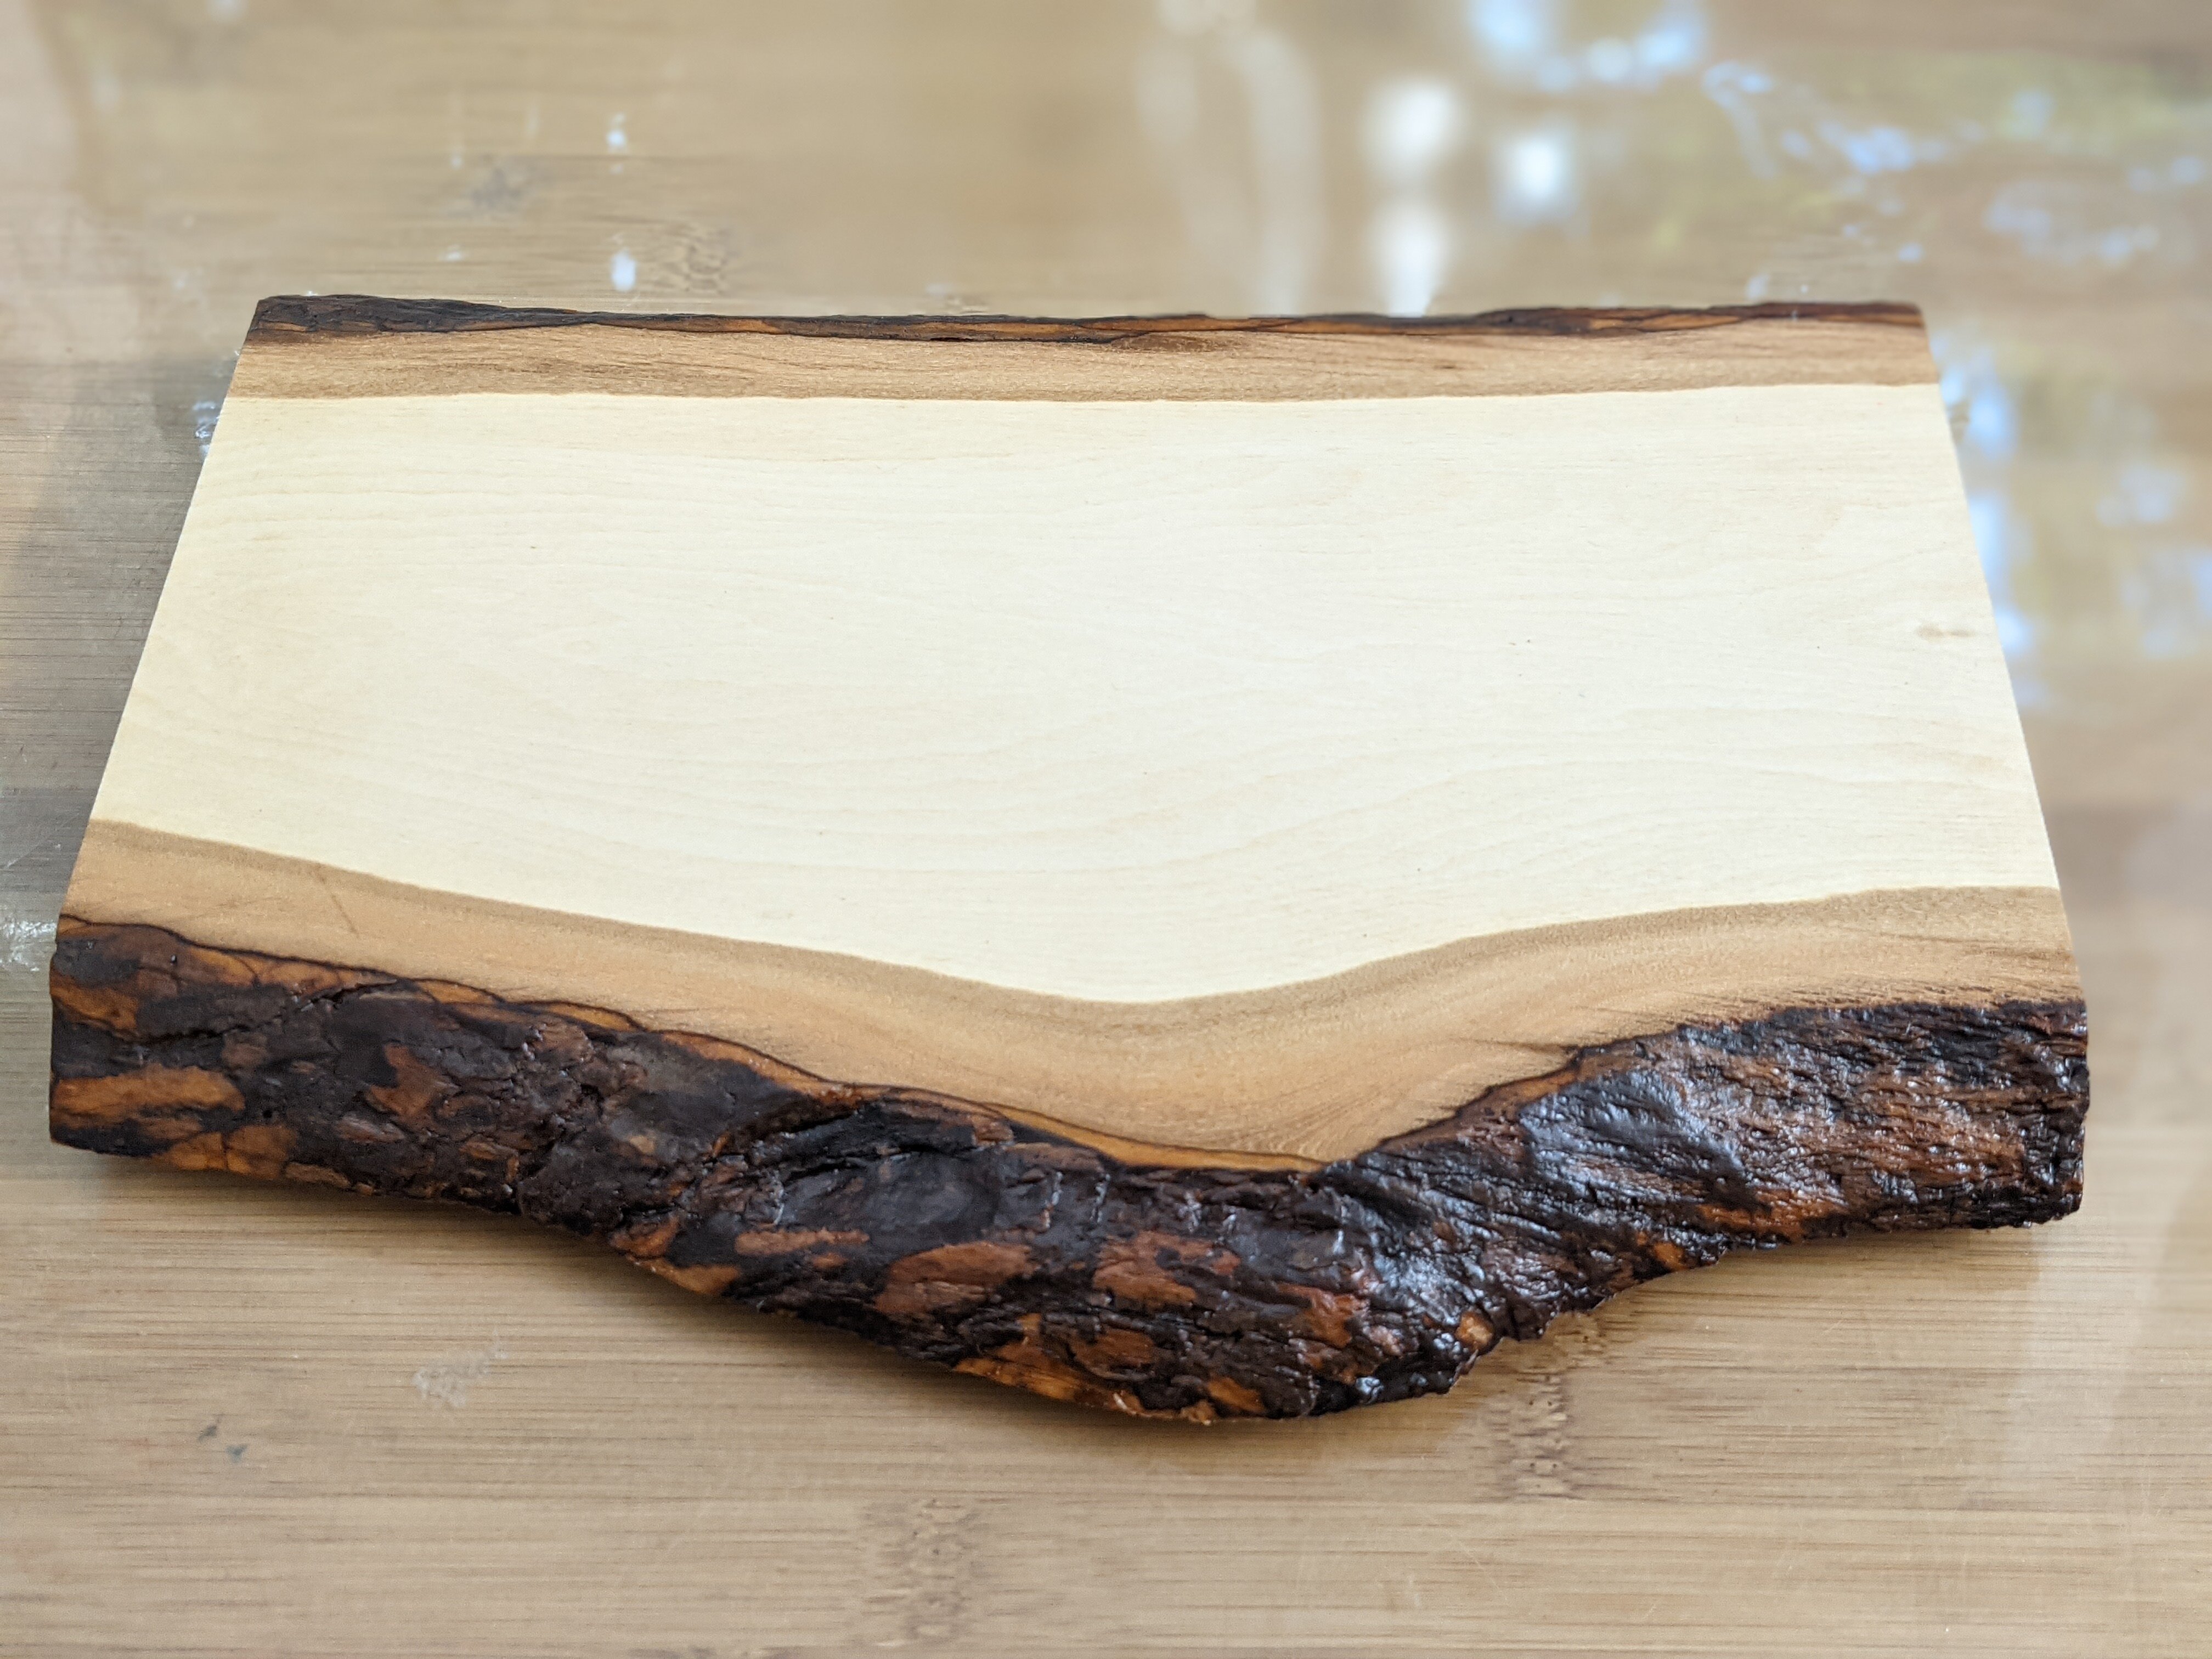
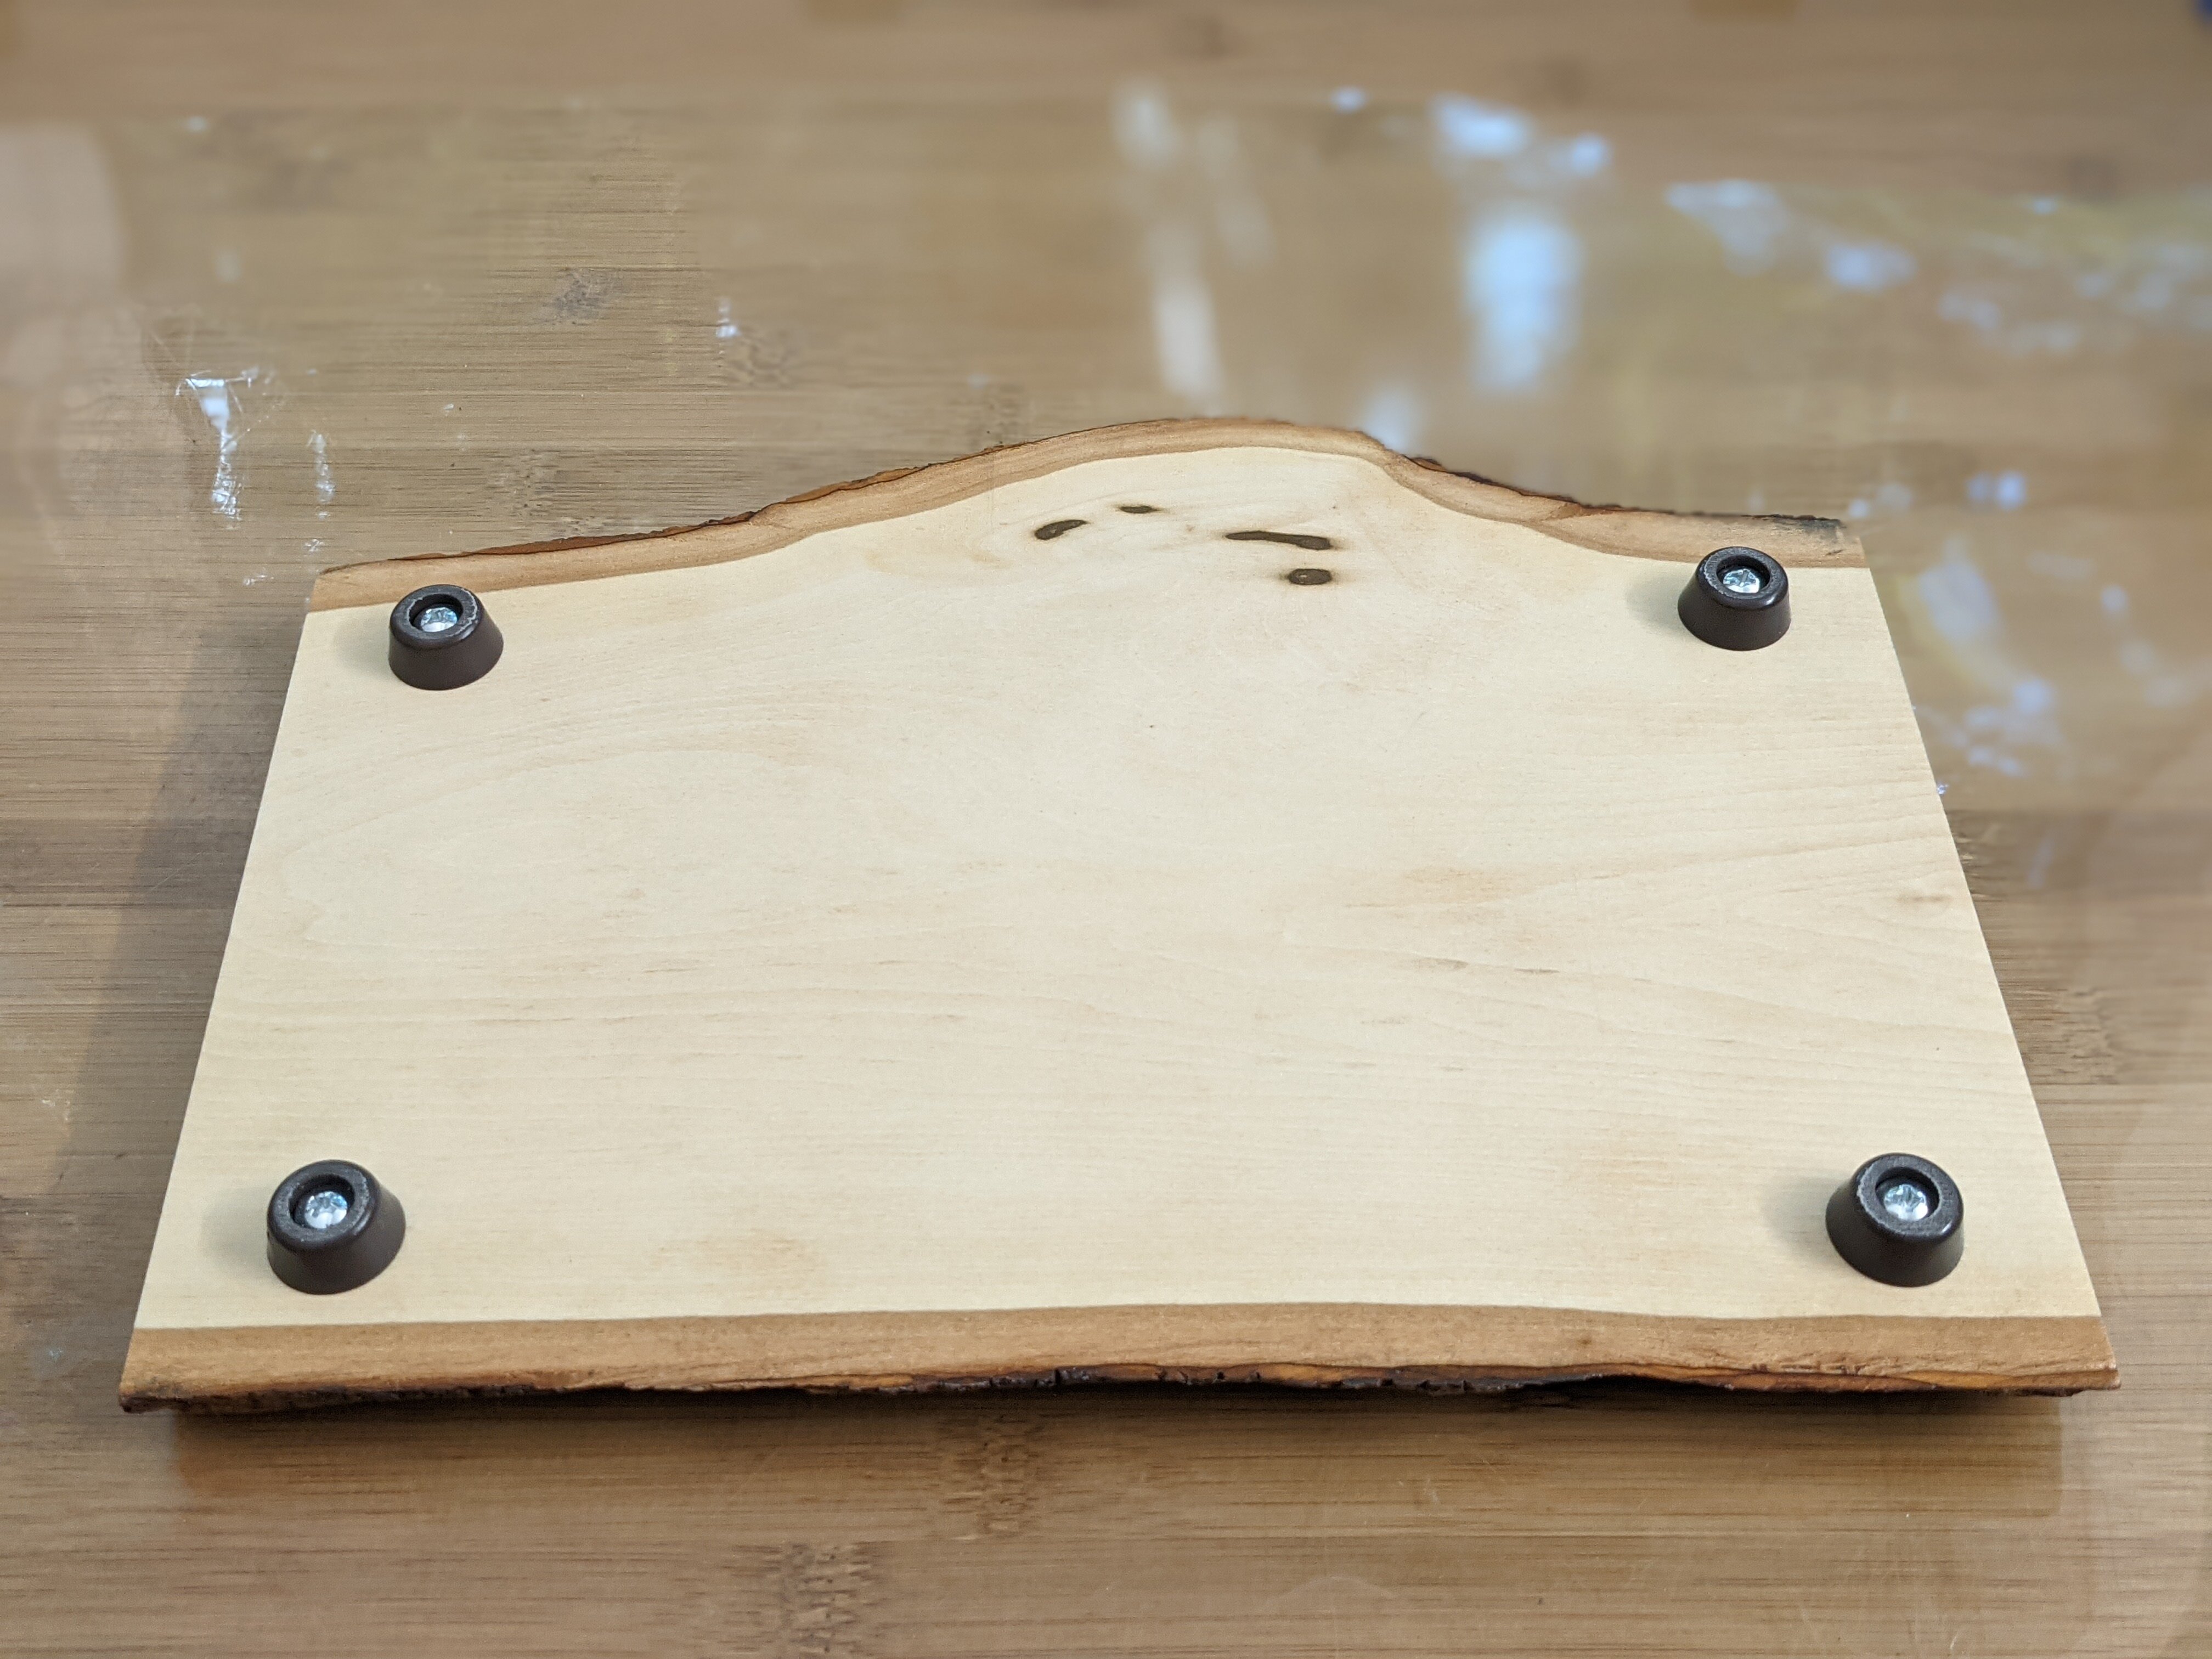
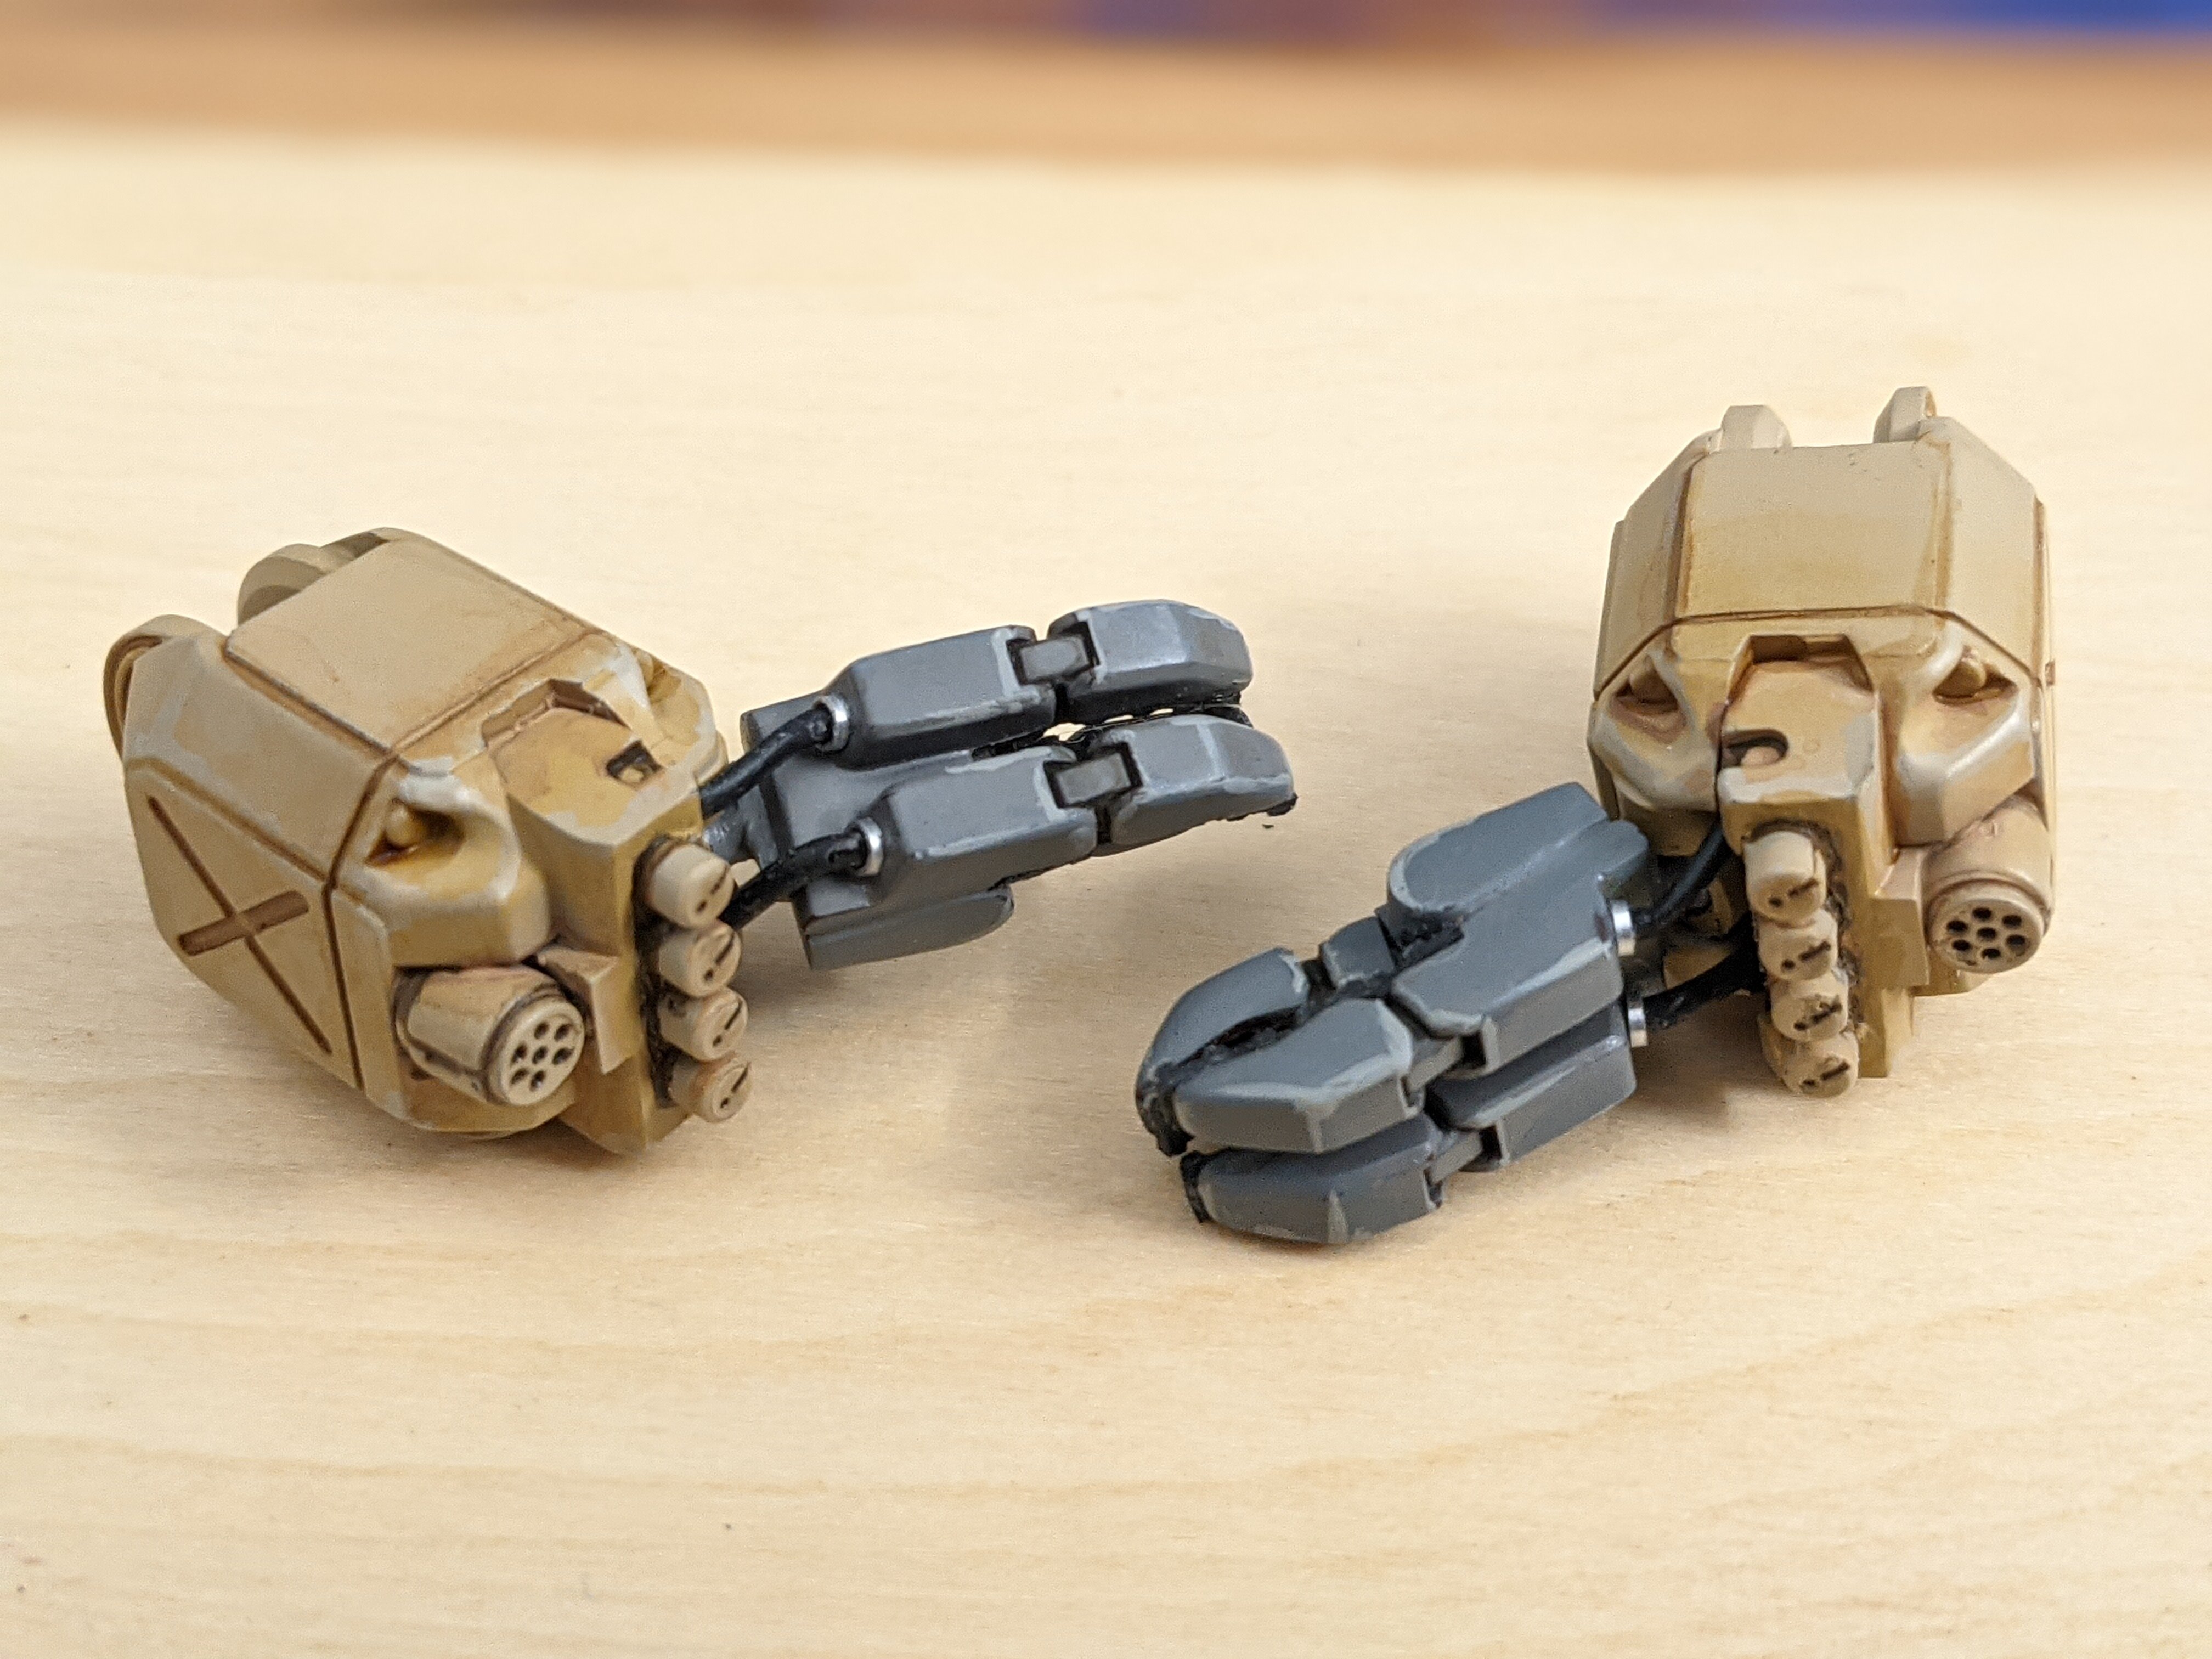
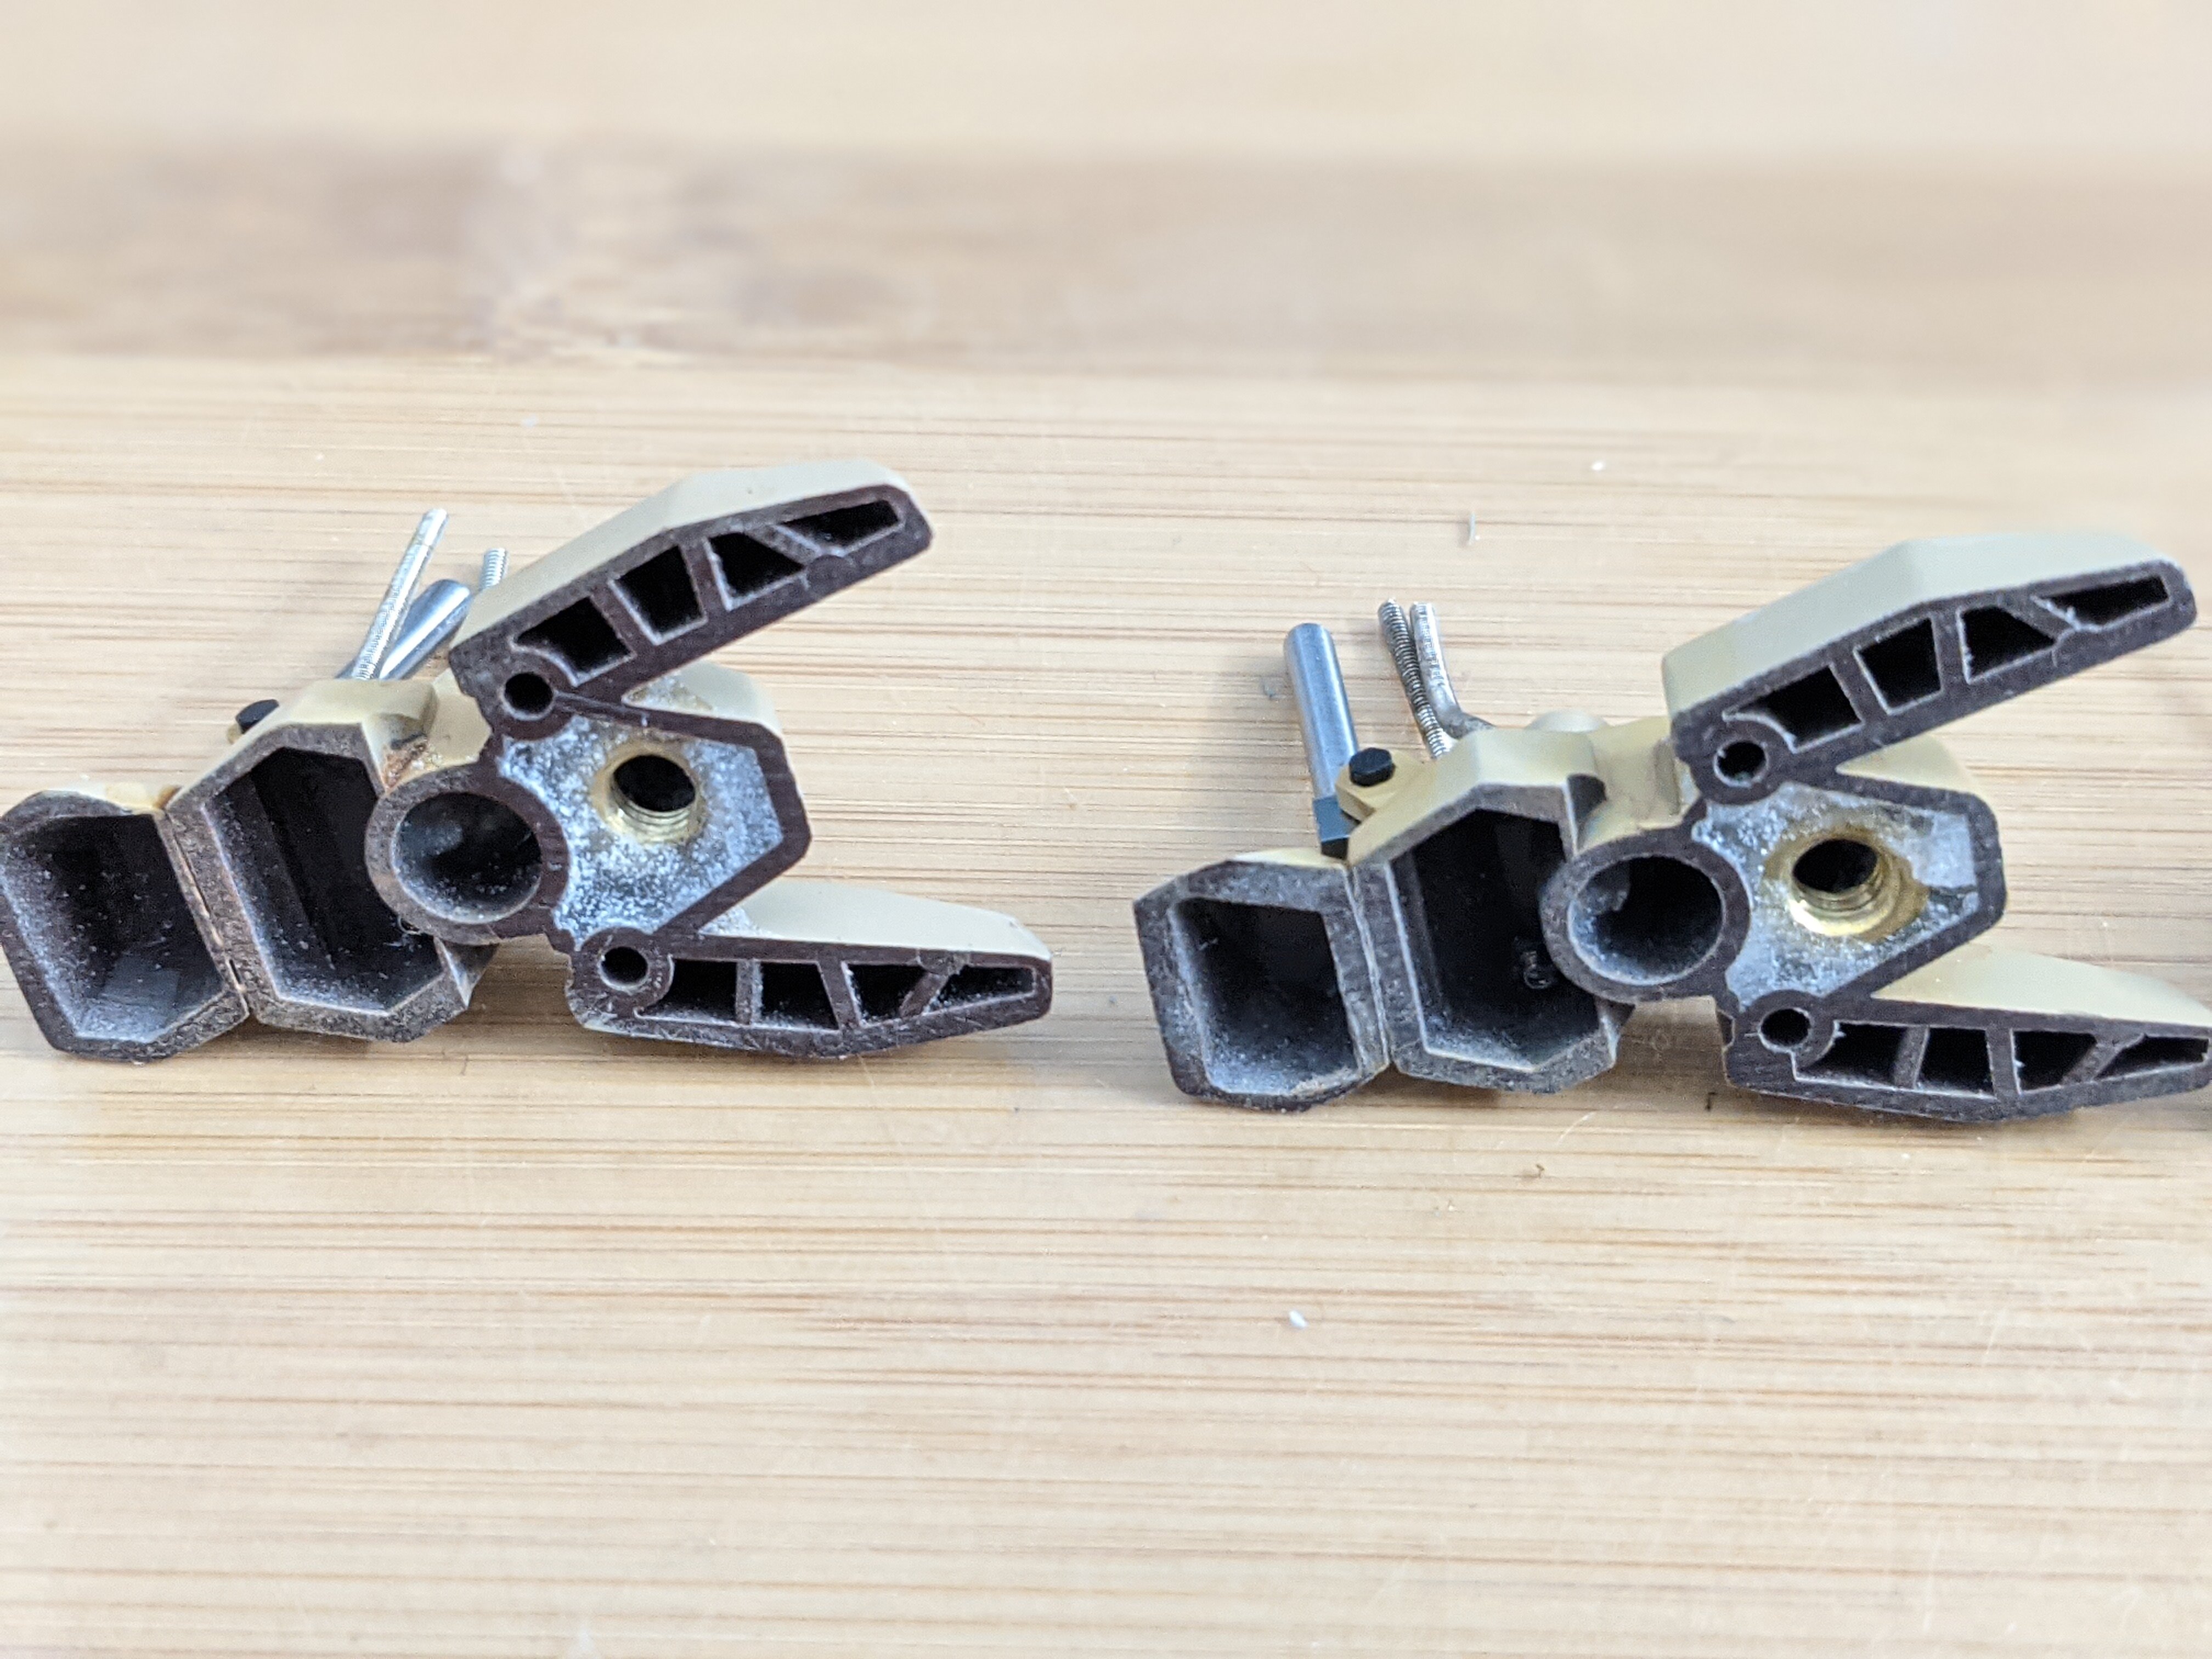
@arbit Great sculpt! I think you are going to get a lot of "Where did you get that!?" comments. And thanks for the tips on the free files! @derex3592 You're setup looks good! I spent several month in Texas. Great people, but I hated the weather (Georgia too). You GOTTA have a place where you can work in decent temperatures. Tell your wife I said that!😄 Except for painting on a nice table and light colored carpet (are you crazy ), everything SHOULD work. No smells from outside should be getting inside while the blower is running, unless you do have a leak. You'll still have the Tamiya paint smell, but that's OK and to be expected as it cures. You may have some temperature change from room to room before you did your setup. Did you check that? Various rooms in my house are like that already. All in all, three degrees is nothing really. Can you close a door to that room to help out during painting? I'm SURE you can get your setup to work! @Photogirl Great graphics work! I'm sure you're going to get people asking to buy a sheet! I spent more time reorganizing model supplies than building this weekend, but in the end, I have more room for stuff now and its easier to find things. One short tip. If you go through a lot of coffee cans, get three. Keep the bottom on one, cut the bottom off the middle one, and then duct or metal aluminum tape them all end to end. You'll have something to keep your longs bags of styrene tubes in. The longer Plastruct bags fit too! The smoke grenades (Kotobukiya missiles) are painted up. I added hydraulic lines to the manipulators with some rings to act as connectors. You guys get the magnified view so you can see all my flaws. And shown connected to the arms. I think I need to dial back the paint touch-ups and weathering. REAL military equipment usually doesn't have rust on it (except maybe ships). It gets touched up. Its called Corrosion Control. If you don't do it, you're not doing your job maintaining it. And because I TRY to stay well grounded, I glued brass nuts into the feet to attach to the base. And the base. Last week I got a great slab of boxwood with bark from Hobby Lobby. I wanted an uneven shape. I was going to clean the bark clean off, but my wife suggested I keep it on. I went a step further and cleaned the rough bark off, but kept the undercoat on it. When painted, it will have the texture of rock as on a hilltop. I coated it with about 5 coats of polyurethane to seal everything solid and prevent chipping. Then I got some plastic feet from the hardware store and added those on. That's it for now, thanks for checking in everyone! - MT
-
@Gabe Q Looking good Gabe! Nice n clean. - MT
-
@007-vf1 Those details are looking good! Much better than stock! @arbit I stand corrected! I wasn't thinking of "clothes," just that giant iconic arrow on the uniforms. None the less, he looks great! Don't make him a "soprano" 😄 - MT
-
@Gabe Q PMed...
-
@derex3592 @Thom Thank you guys! Its getting there... @arbit I think someone asked you about modding the clothing; but thanks for showing us how you did it! He looks great! Is he going to be one of your idols on stage!? @Gabe Q Your paint is nice and clean looking! @pengbuzz Do we need to get a walker or life raft for you? Did you guys fair alright in Hurricane Henri (according to your post)? - MT
-
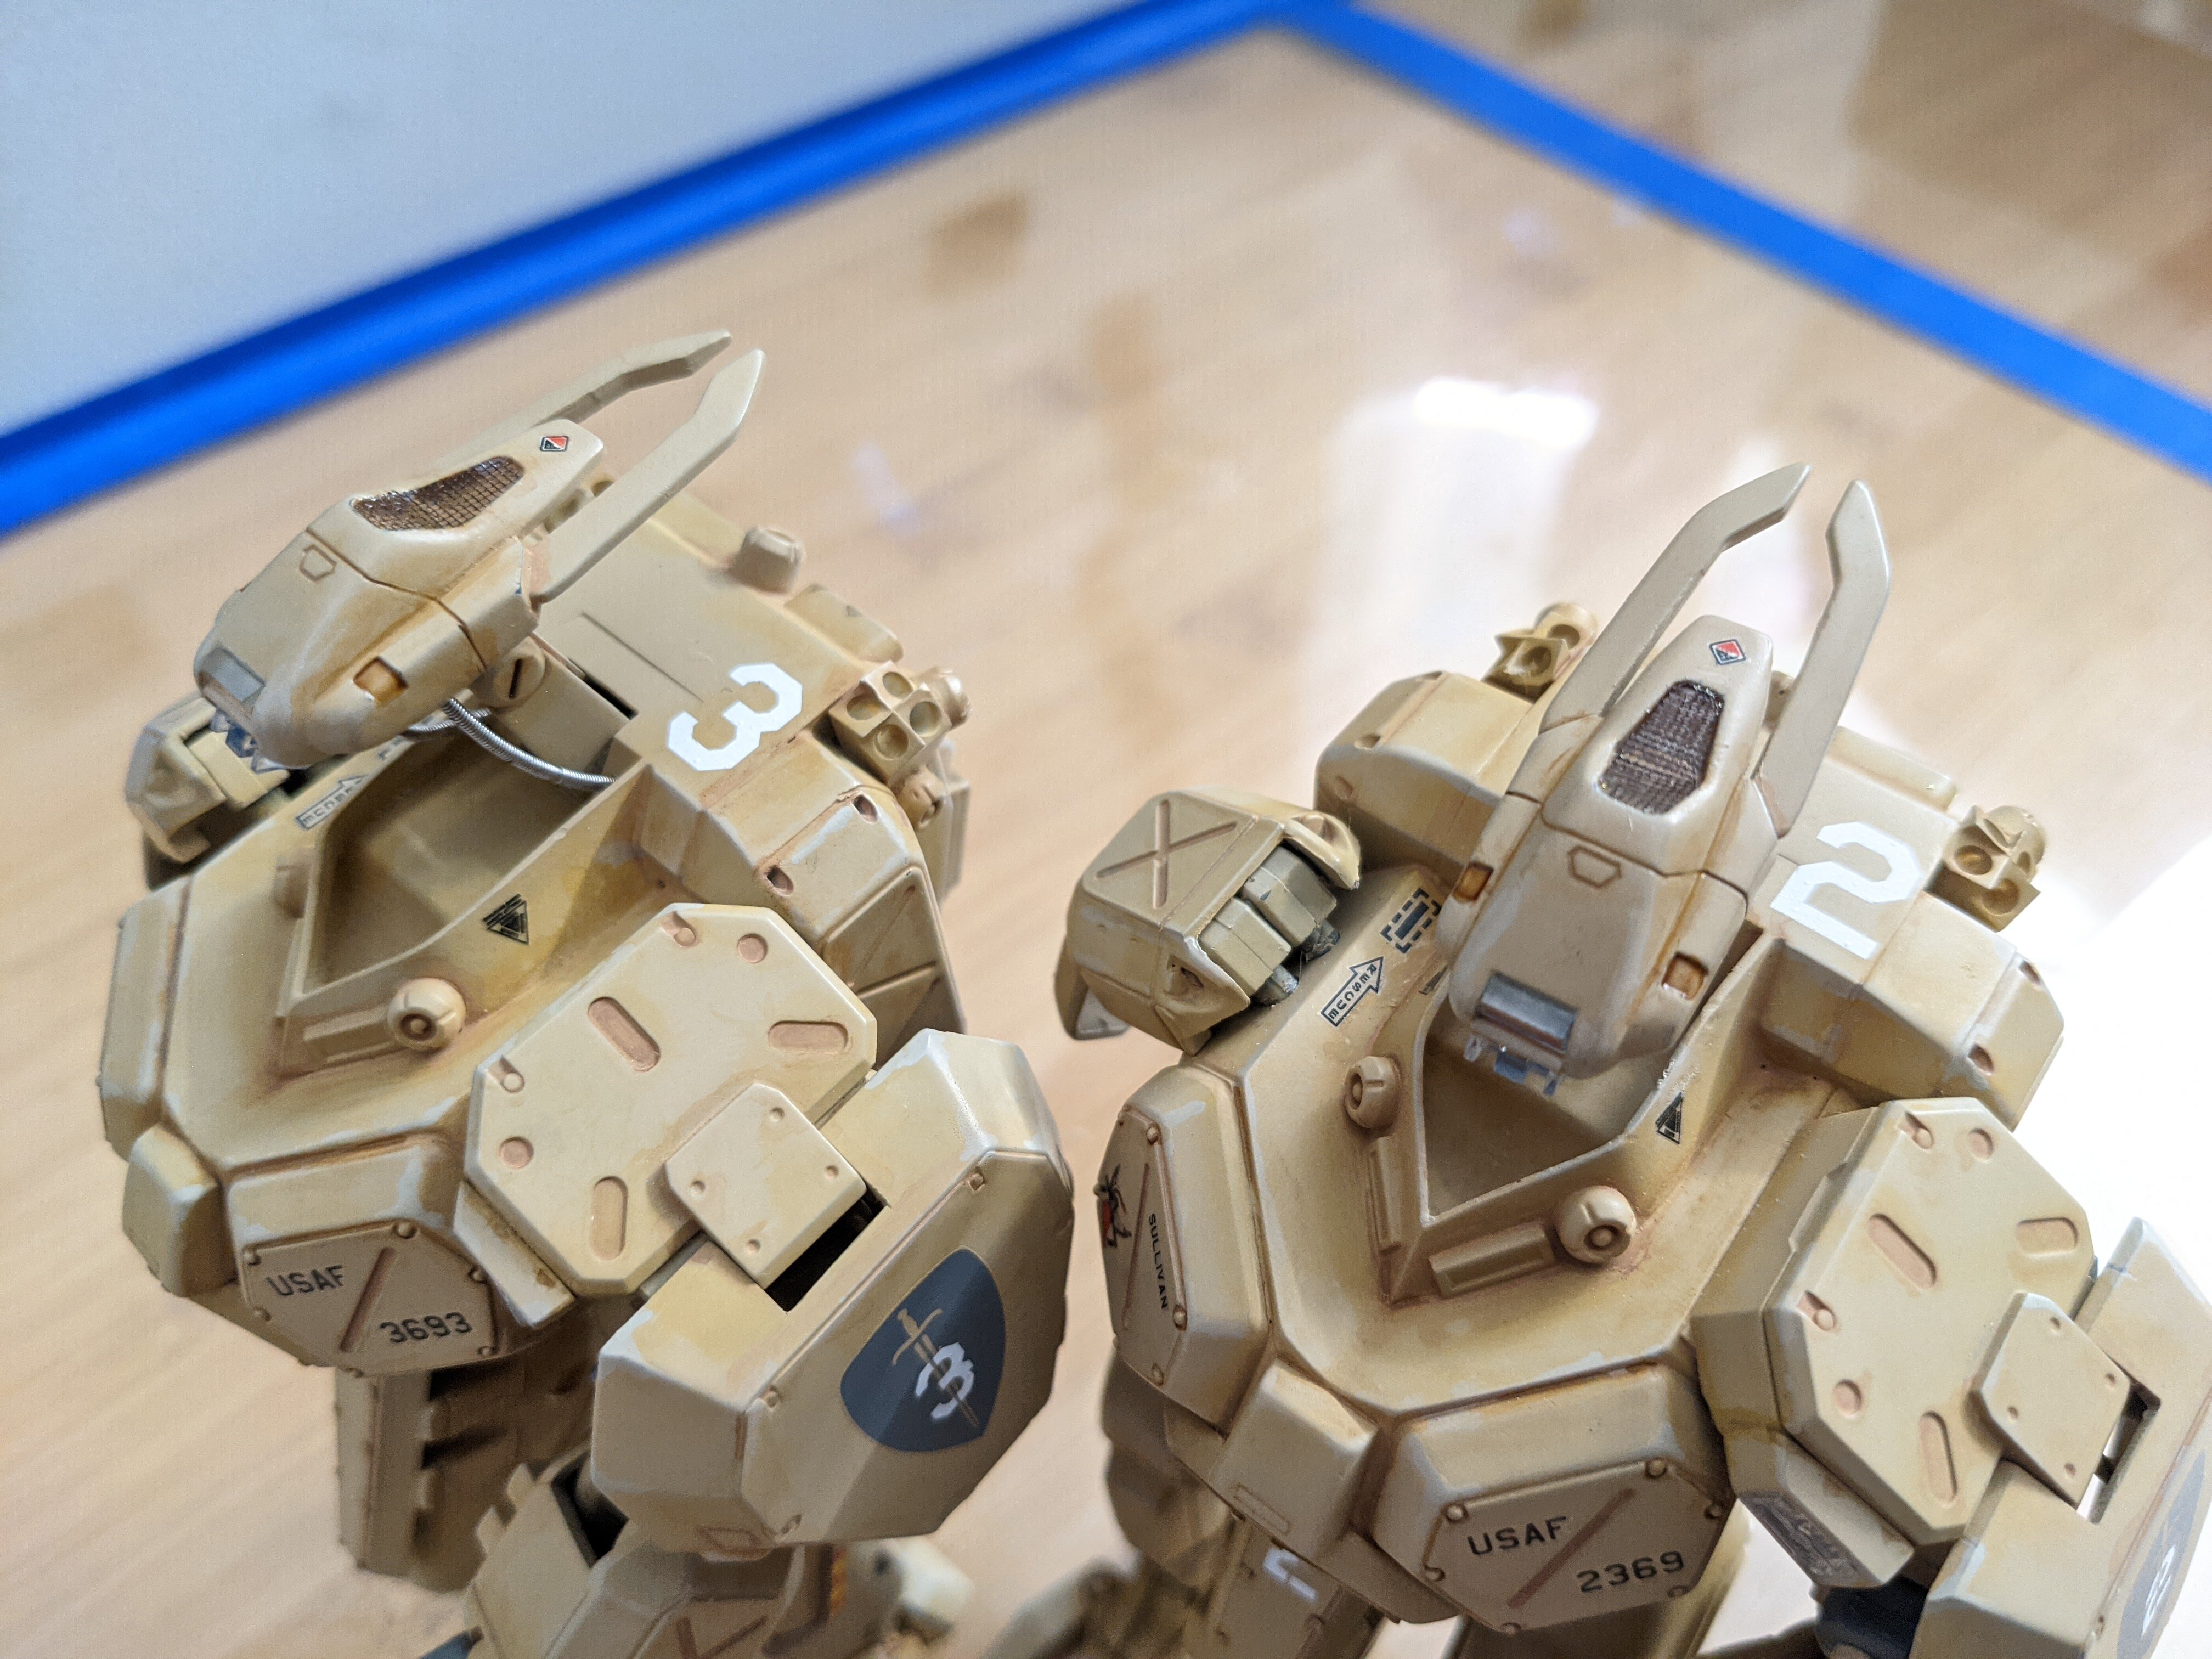
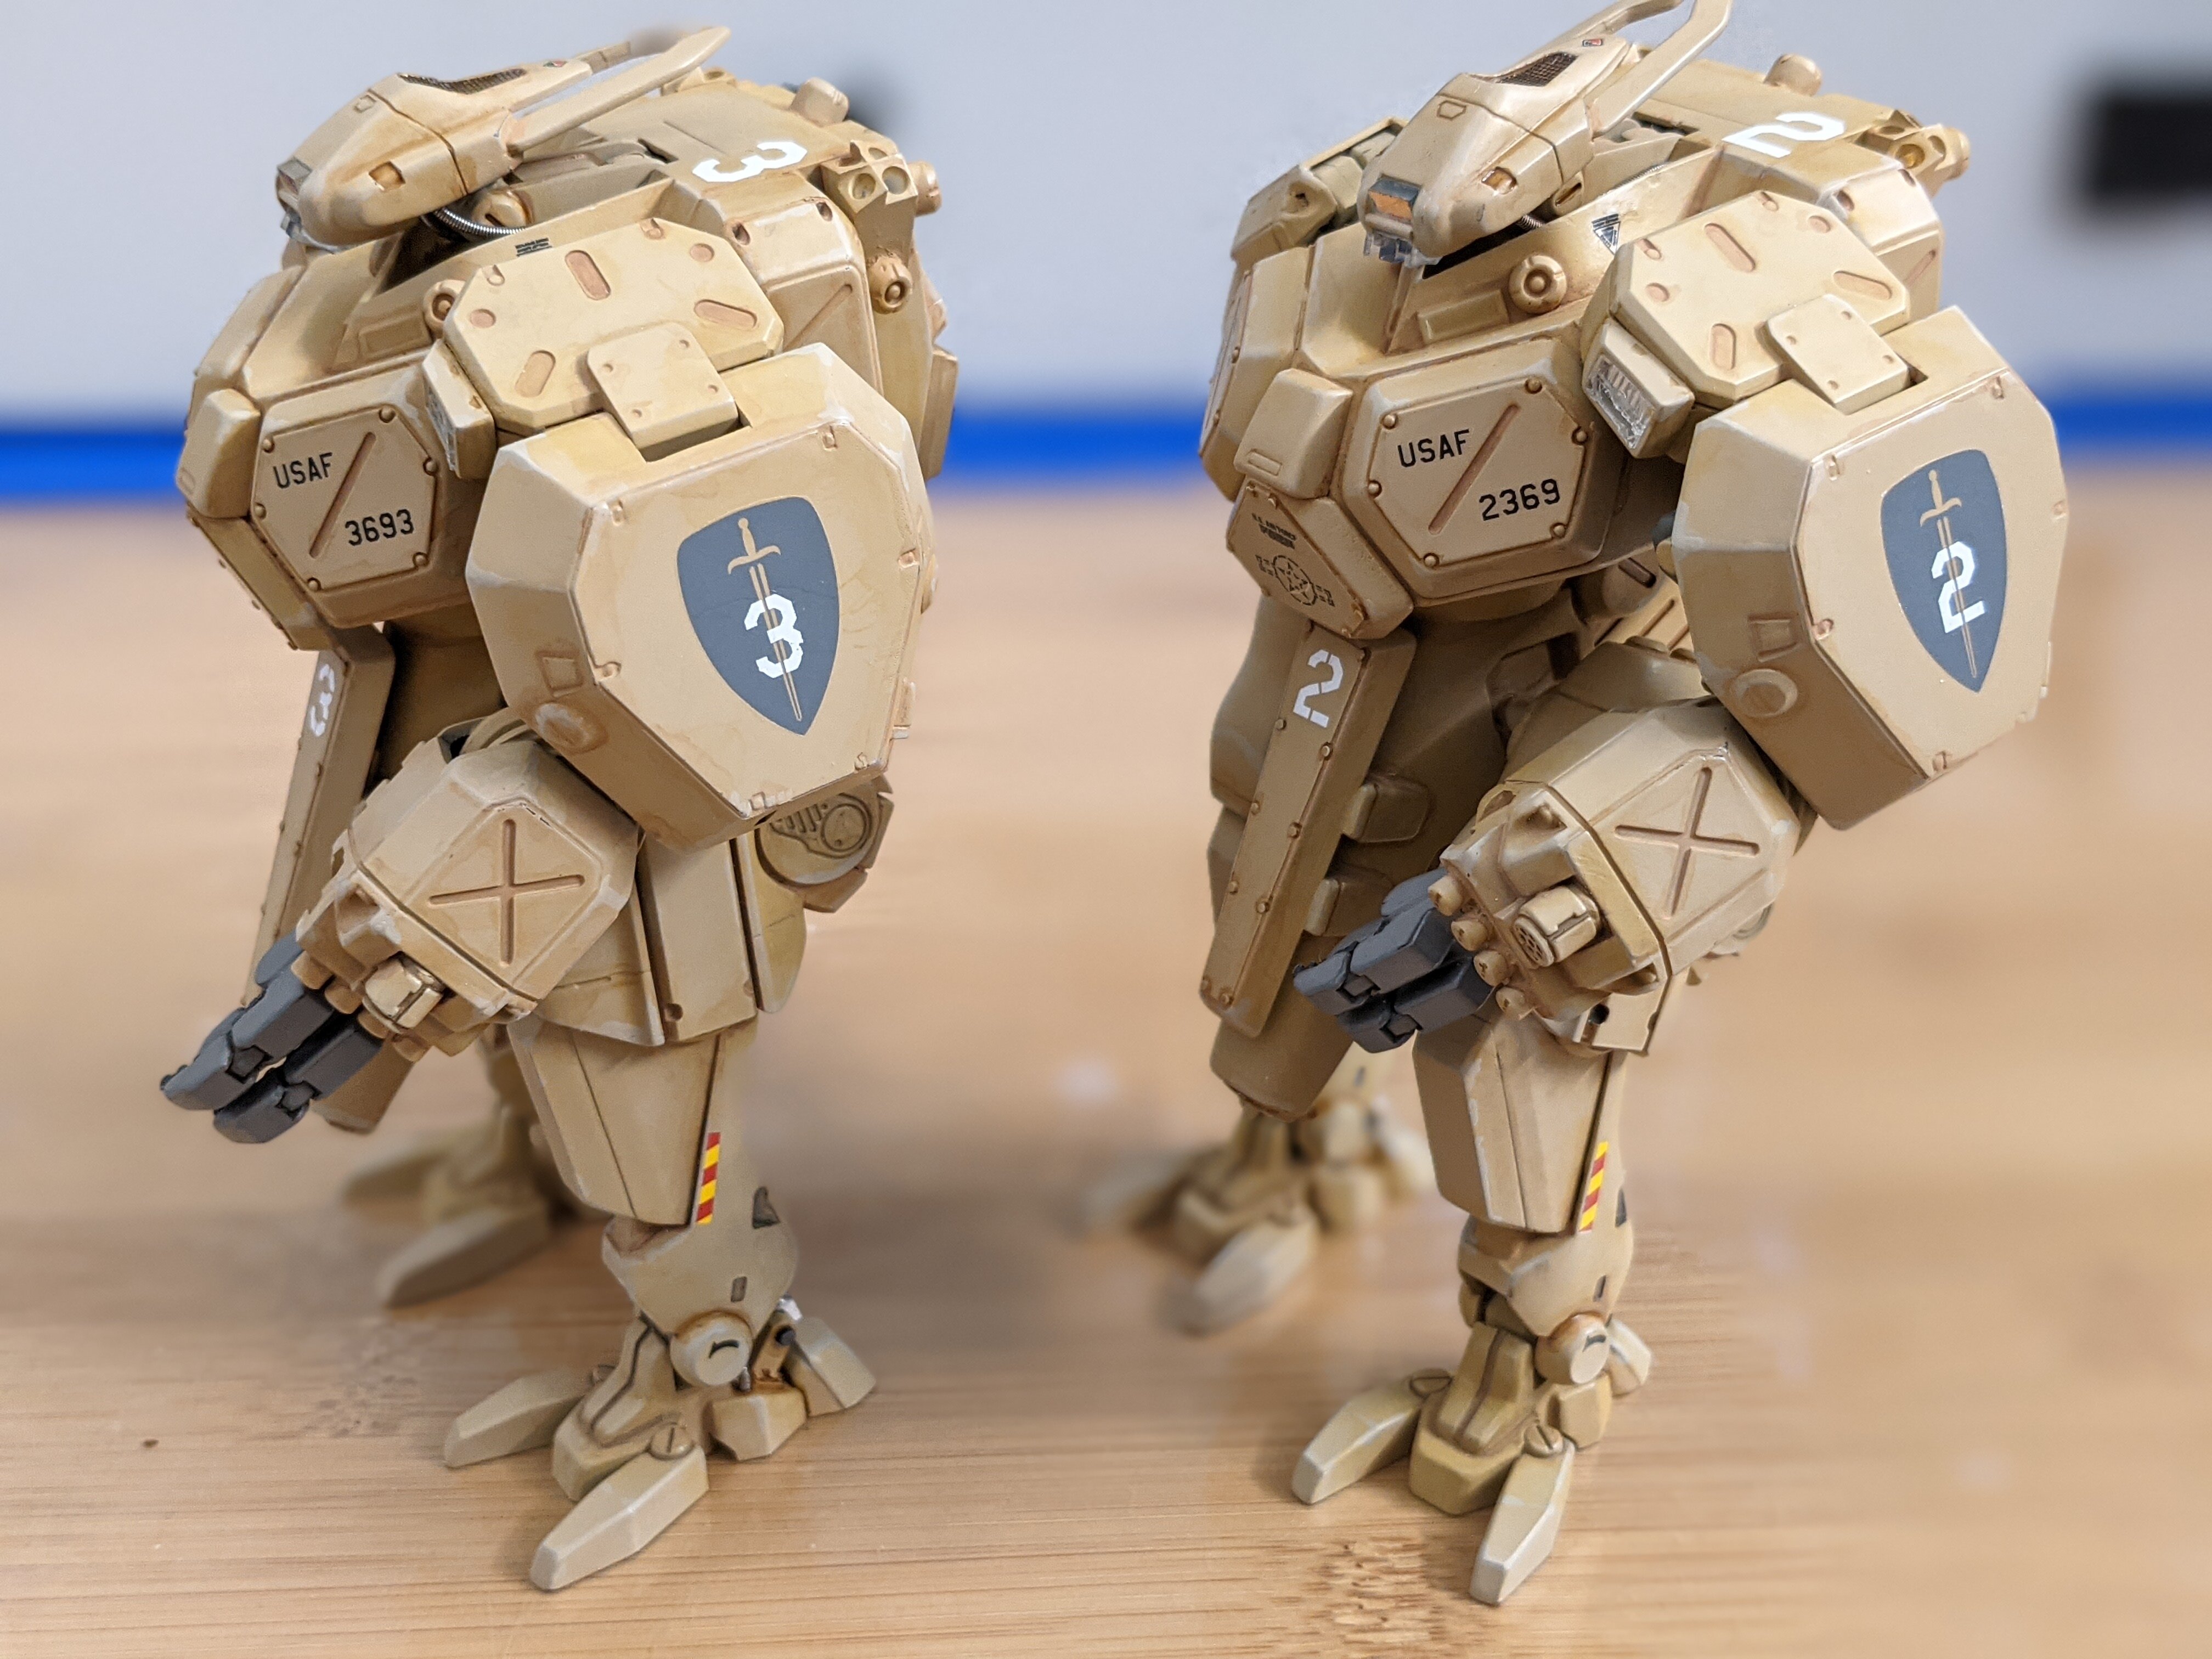
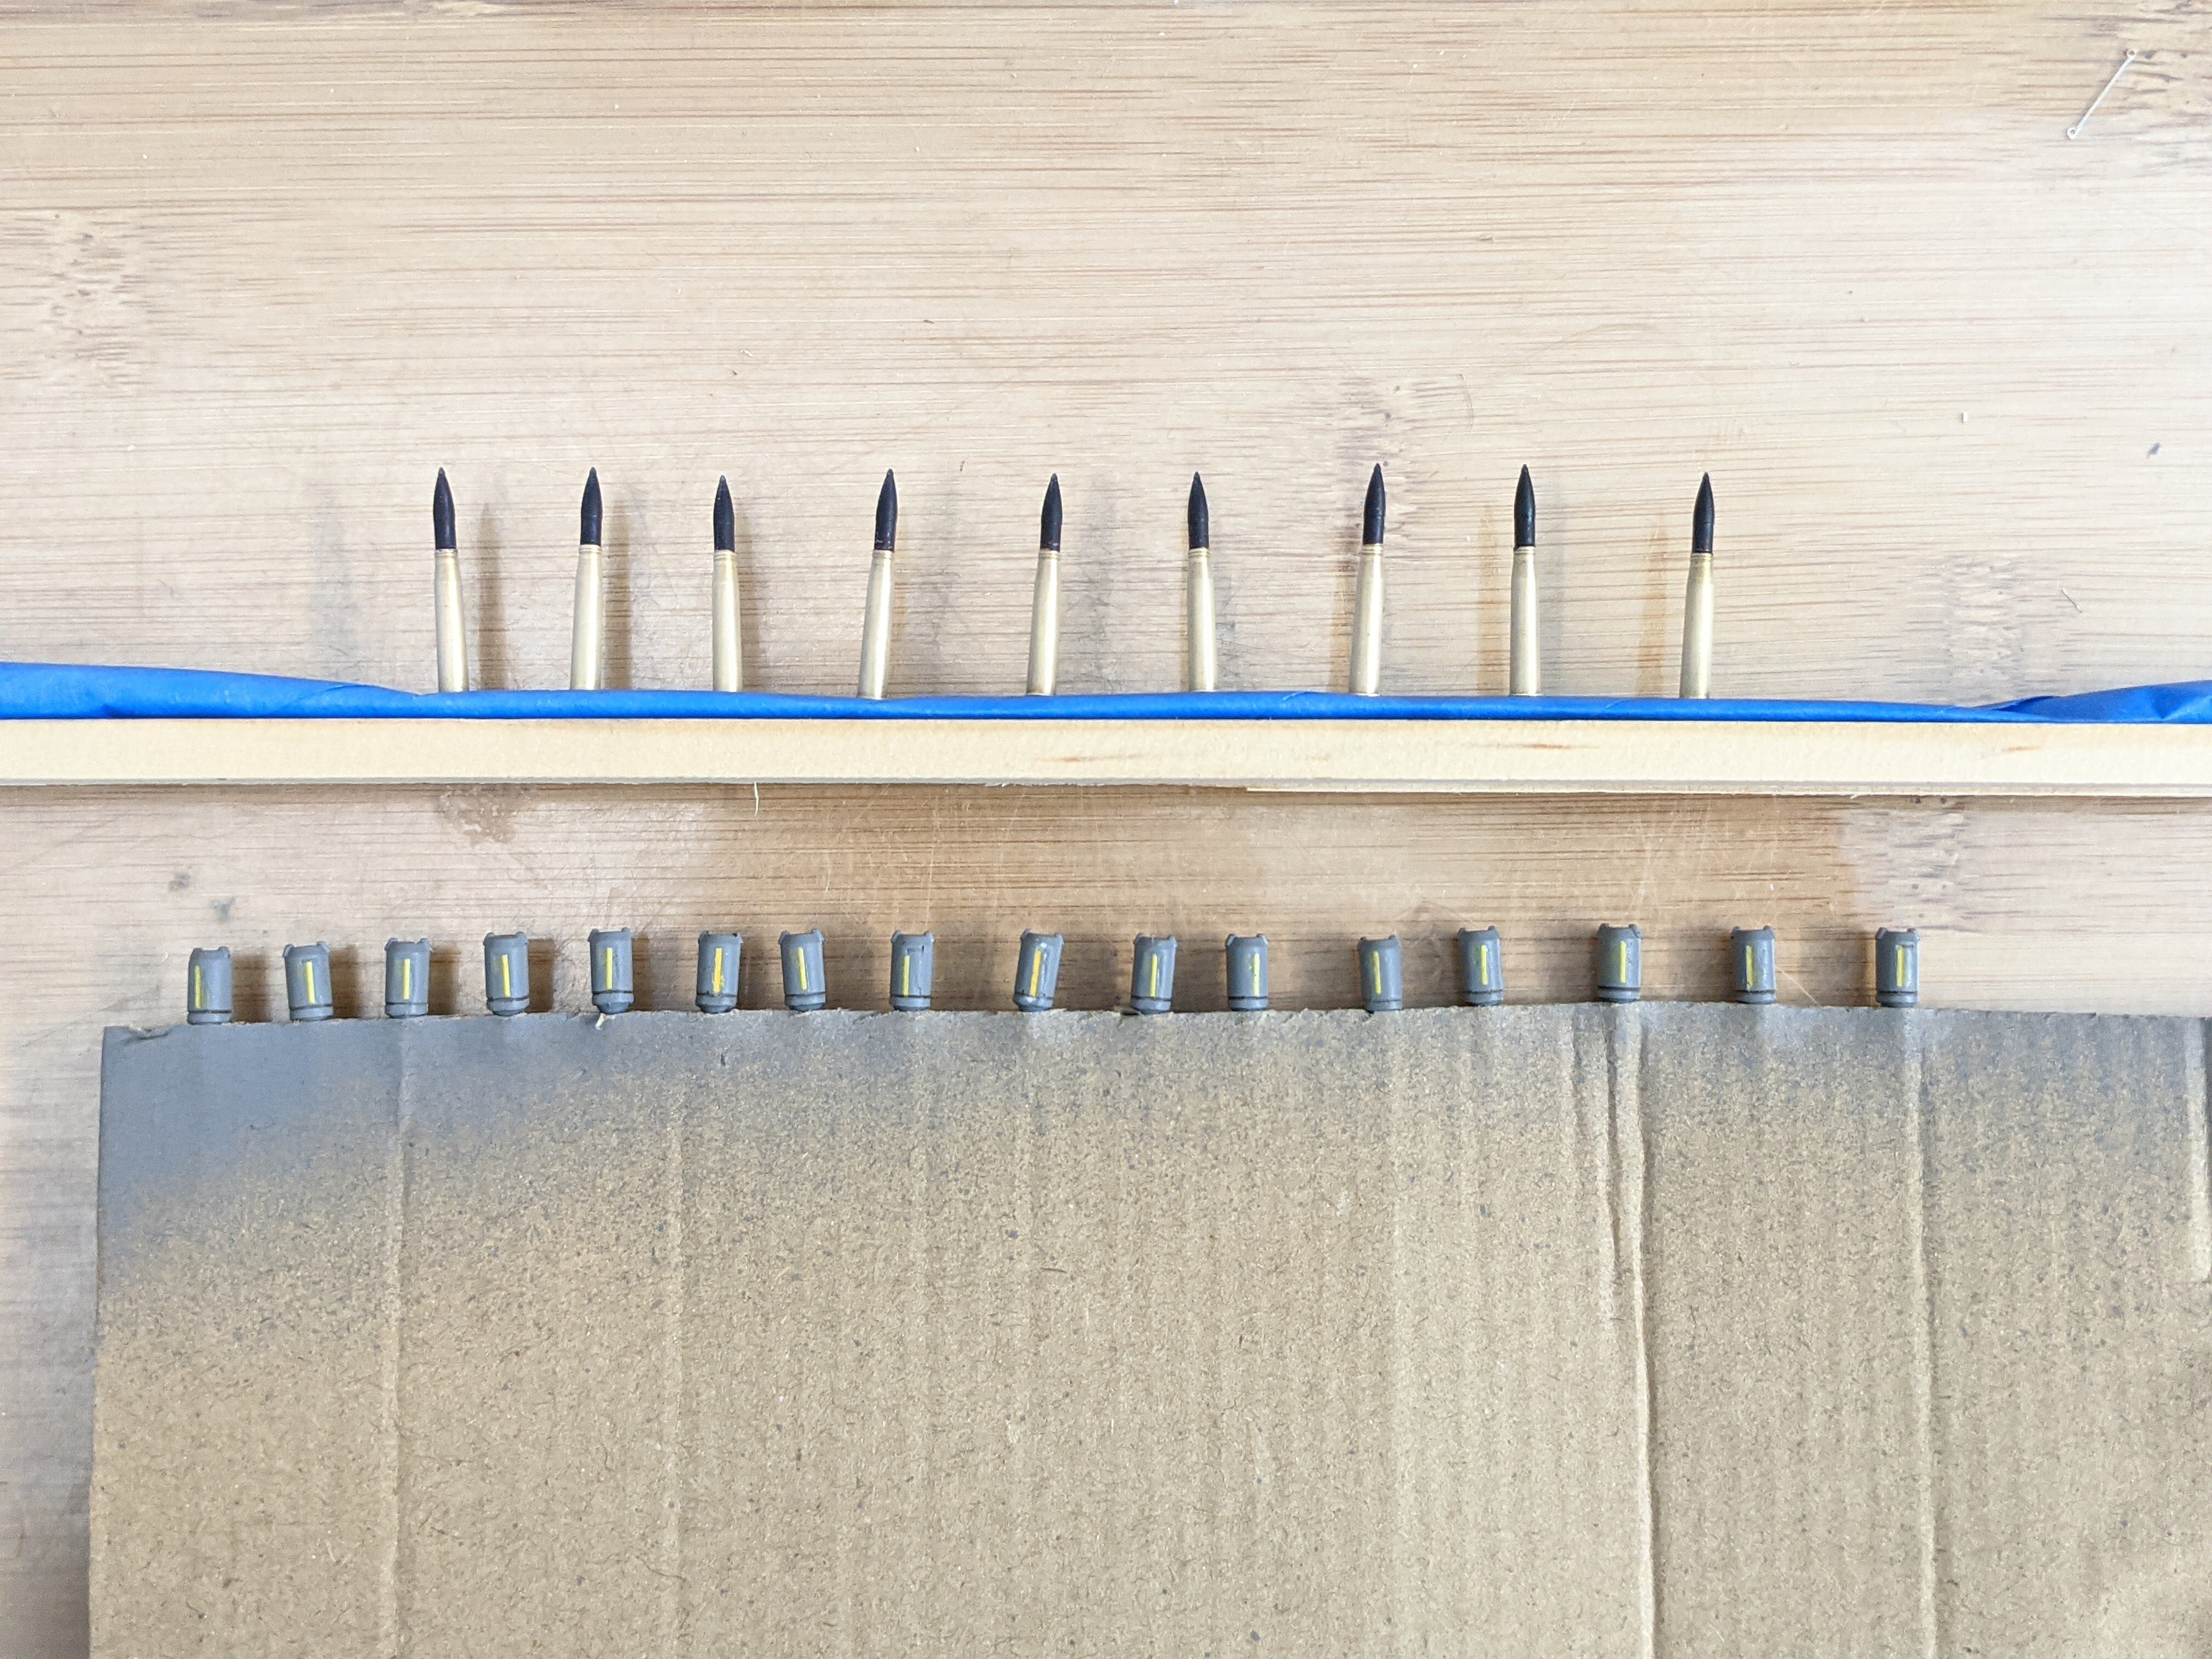
@derex3592 Heh heh, Humbrol! I hope they work for you. Some need some thinning. Got some more detailing done, but there is still a TON left to do and clean up! Then a matt clear coat to cover it all. Also working on the base... Decals - Check! Made some custom and repurposed some more. Ammo - Check! The 75mm brass is painted and coated. The defensive units are decalled and painted (two decals each, one on each side - I don't know why!). Yes, Air Force! OK, I may be slightly biased, but who had the first robot dogs? https://www.af.mil/News/Article-Display/Article/2551037/robot-dogs-arrive-at-tyndall-afb/ These of course are a manned design. Thanks for checking in! - MT
-

The 'Hey look at this really cool model build I saw' post
MechTech replied to Shawn's topic in Model kits
@electric indigo Thanks for posting that link! He's got some AWESOME dioramas he's done! - MT -
The pilots DO add realism to it. Looking good! - MT
-
@arbit That's AWESOME Arbit! It's cool to see what you did and how you did it. Thanks for sharing your process! Your models look great too! Thanks for taking the "mystery" out of it. Someday I'll have to start doing this - or get REALLY good with Milliput (which is probably not going to happen)😄 @peter That kit looks like you have to scratch build 25% of it! - MT
-
@arbit I hope you had a good vacation! Thank you! I did like Nadesico, but never got to see the whole thing. Long story short, only the first couple of VCR tapes (yes tapes) were available at the store. The models are really a kit reconfigure because it looks nothing like the original now - except bits of it. Another GREAT print! Yes, show us your process along the way. We might learn something @peter Peter says to himself, "HMMmmm, what are some of the most jacked-up kits I can buy and build to challenge myself? I know, all those old Star Trek kits that helped kill the hobby back in the day." But it's only making you a better builder (and more patient person) for doing it! - MT
-
@pengbuzz "We have the technology. We can rebuild him. Better. Stronger. Faster..." Hopefully it won't cost you Six Million Dollars! @derex3592 There's no school like the old school! I always liked the lines on that kit anyhow. Every beautiful woman has her quirks anyhow! - MT
-
@peter Hahahahaha! Great photo! How nice of them to put it in a maintenance stand for her. I hope she had ear plugs in! My wife worked for her more directly (MoD). @pengbuzz That's great that you got that kit like that! Our club president is building the Arizona from that same kit line. Not only is that kit NOT worth $30 bucks brand new, it has a lot of stuff that needs fixing. But its an ancient kit! @Gabe Q I'm glad you're getting into lighting! You'll see, it's easy. Just be be careful with the wires and you're good to go! Great fix on that kit! - MT
-
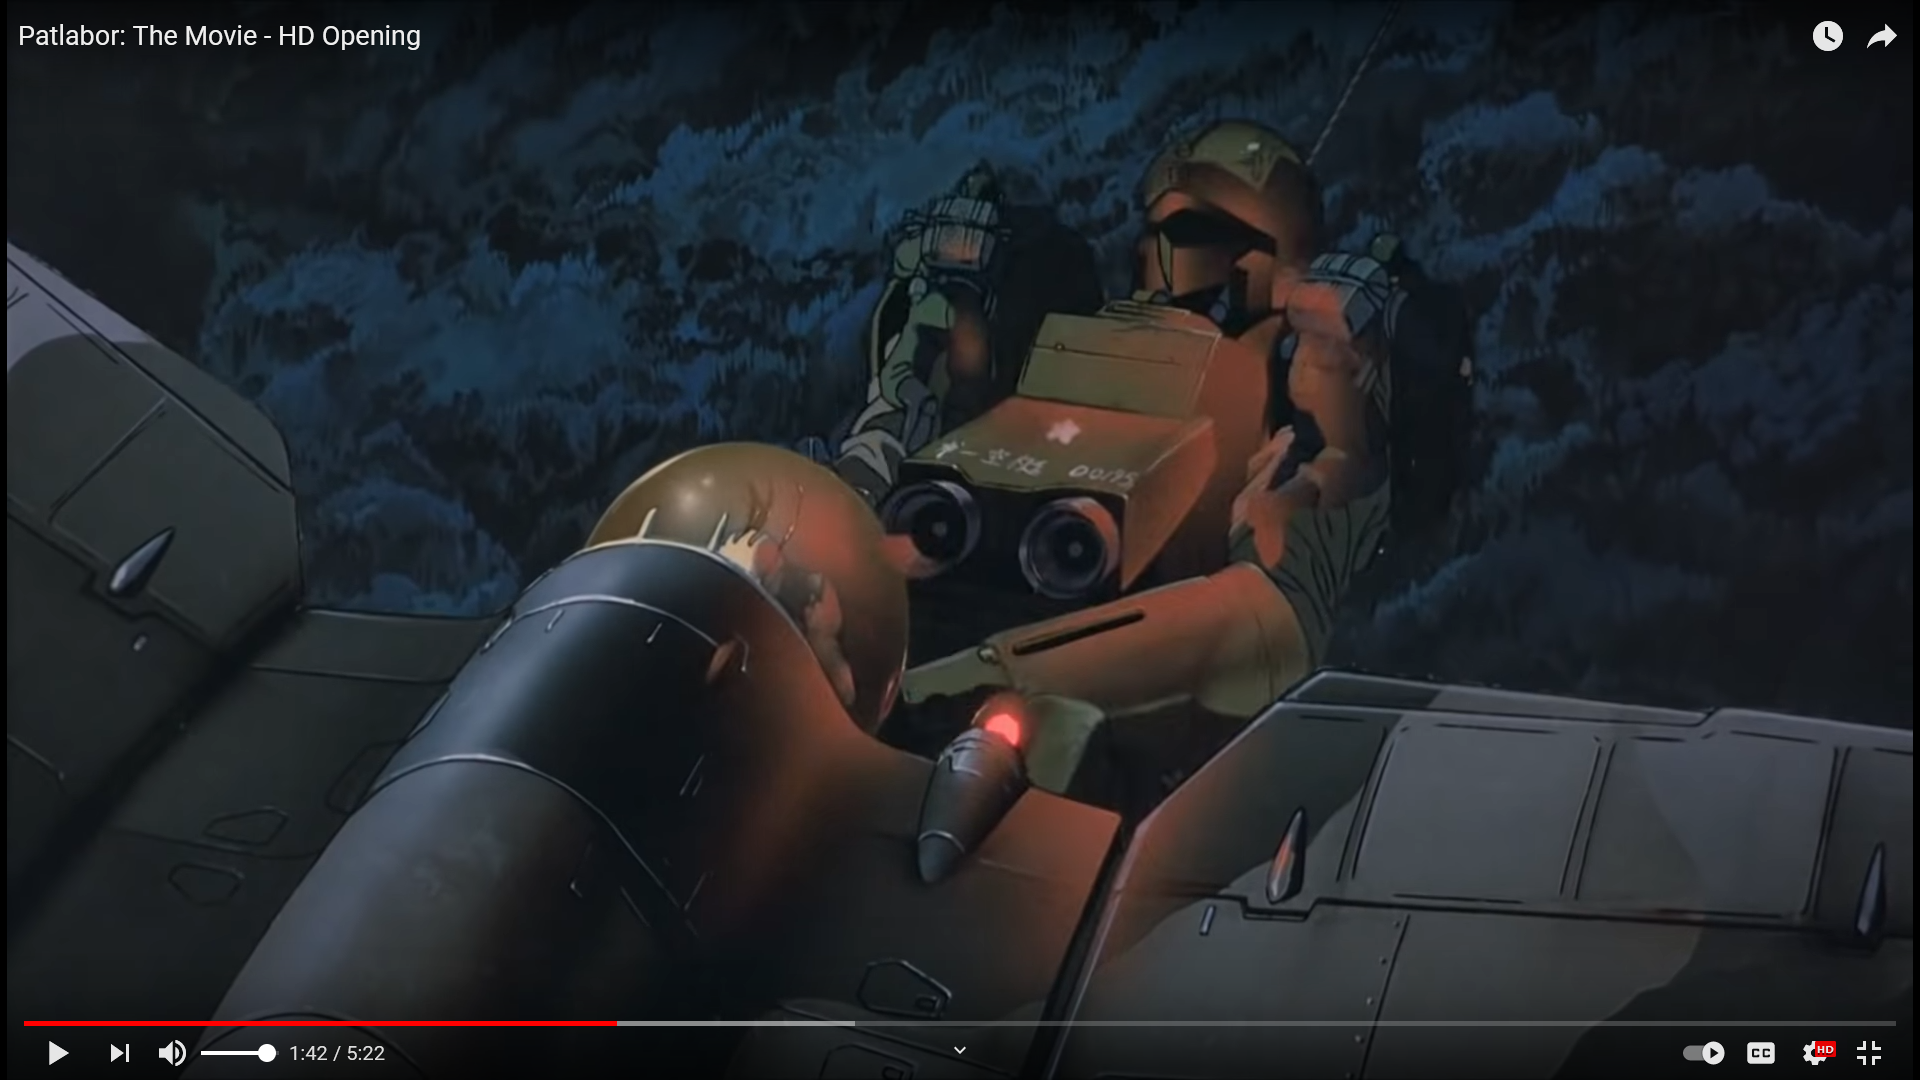
@F-ZeroOne @electric indigo Thank you guys! I believe you're both right about the design being from the QSTOL. And yes, it definitively has that "Antonov" feel to it. It's "anime magic," but the shoulders fold up. In this screens shot they're shown folded, but they are too tiny in all dimensions. They also stick up much higher over the front cockpit. Not only that, but there is a paratrooper riding each shoulder on the way down! That is crazy! The line art shows it, but not clearly. If I could read the Japanese notes, it might say that. - MT
-
That DOES look cool! He actually looks like he's doing something. - MT
-
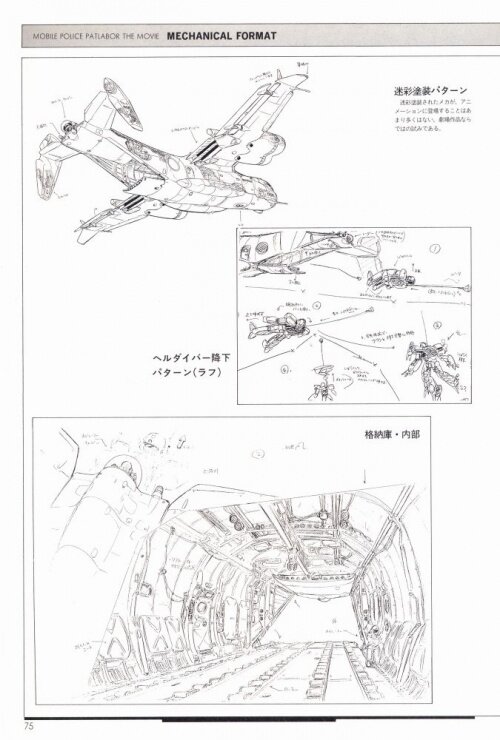
@Salamander @electric indigo Thank you both for your help with the line art. I found a Russian site with the book scans (since its out of print now - otherwise I wouldn't post it): https://nevsepic.com.ua/art-i-risovanaya-grafika/9681-this-is-animation-patlabor-the-movieartbook-260-rabot.html I'm superimposing my drawing over the A400. Its tough. The C-4 looks great in the drawings, but the perspective is off and details in the two views don't line up. Of course these drawings weren't intended to be "built on," They're just drawing references. Even the Anime screenshots don't line up with these. I'm still mulling over whether to do the conversion or not. EVERYONE: Please feel free to point out any errors or mistakes you might see in the drawing. I could use the help! I'm still working on the drawing - so its not complete yet. The plan is to possibly take a 1/72 Revell A400M and convert it to a C-4. It will take a lot of conversion, but it looks pretty straight-forward. Out of the box, the fuselage looks like a close match. Yes, the Moderoid Helldiver fits inside! But the shoulders not only have to be folded as in the movie, but require a little additional manipulation of the arms. That is BEFORE the parachute and rocket packs are fit on. So I may leave out the stock interior which takes up more space. Any ideas or suggestions are welcome! - MT
-
Just don't put her between Godzilla and Darth Vader - MT
-
@Gabe Q You're Valk is looking good! Don't let some wires intimidate you, you can light a kit! You can get stuff everywhere, but if you want it pre-wired: https://evandesigns.com/ @derex3592 Alright Derex, rockin' the work desk with your shuttle! @peter Thanks for posting that video. That's another way to do it with the cut-outs in the joints. Godzilla and Darth Vader. Good thing you didn't have the Queen's photo on the same shelf, people might start to talk😄 Is it just me, or is that high pitch voice in the video kinda creepy? Like the voice in Macross Plus warning about the fire in the studio creepy. Does anybody else's knife go "Ching!" when it cuts through styrene? I want one of those! - MT
-
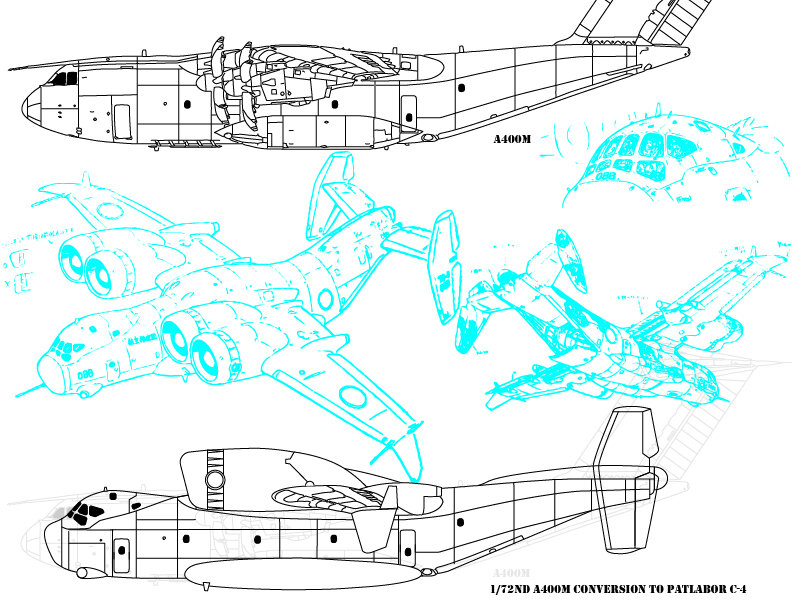
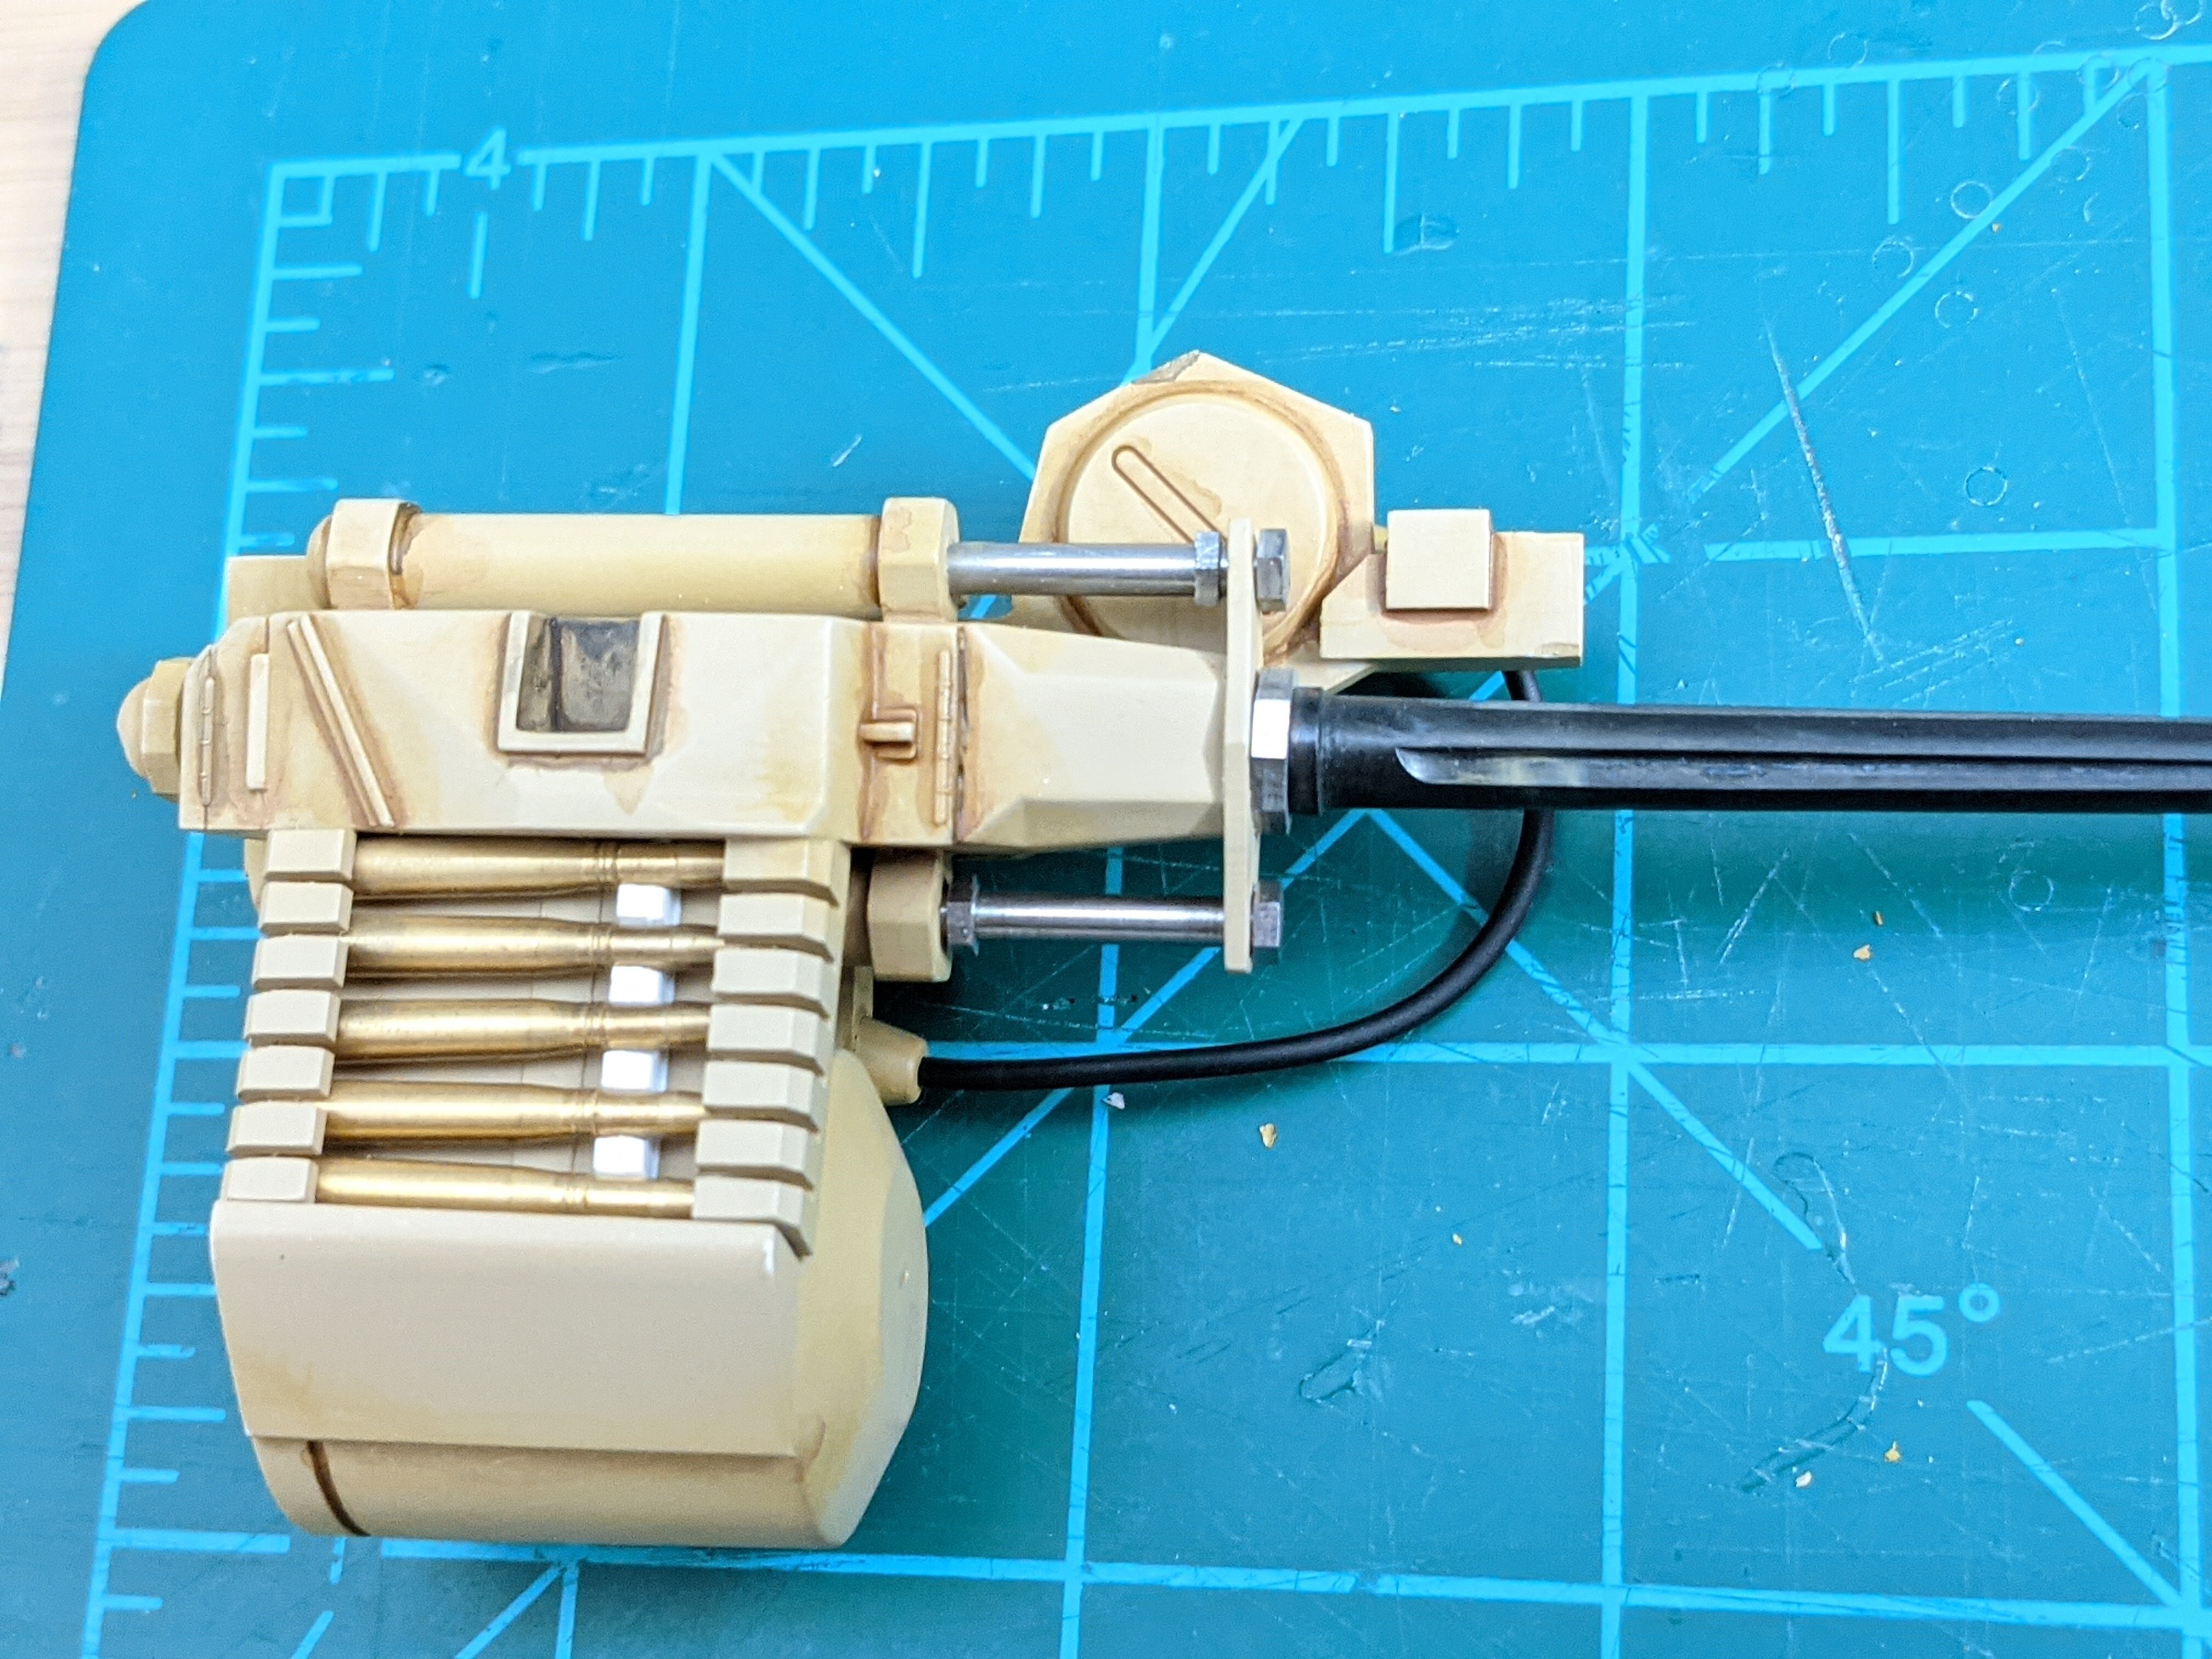
@Gabe Q Thank you for the kind words! Your valks are looking great! Nice and clean paint! @Thom Thank you! I've been saving detail bits up every time I see something that looks like it would work on a model. This project is actually using a lot of those parts up - what wasn't machined. @peter Yes, I was thinking of how much hardware I have on this now compared to your builds. I don't think I actually went to a hardware store for any of mine though. Some of it is jewelry 😄 But it's being used in a more macho way now! Sorry, the tank treads are just plastic tank treads. Your Star Trek models look great! Those decals DO look good too! Yes, time to build something Macross now, though my next build might be Patlabor - I'm still thinking about it. Not much work this weekend - back to school shopping time! Added a hose to the "lighter" gun and did more washing with some "Army Painter" washes from the local hobby shop to support them. They are actually really good and wiped off easy with isopropyl where I slipped-up with the paint brush. Normally you clear coat and then wash. I skipped that so that some of the wash runs out further. That realistically produces what happens when oil coats an area and dirt gets sucked into it. The big gun got more barrel painted and washed. The ejection port got painted too. All that black didn't look right since all the parts are usually the same color. I haven't done a model with a "competition" finish before. I'm trying this time around to build up my skills. I can build, but my finishes have been lackluster in the past. Thanks for checking in! - MT
-
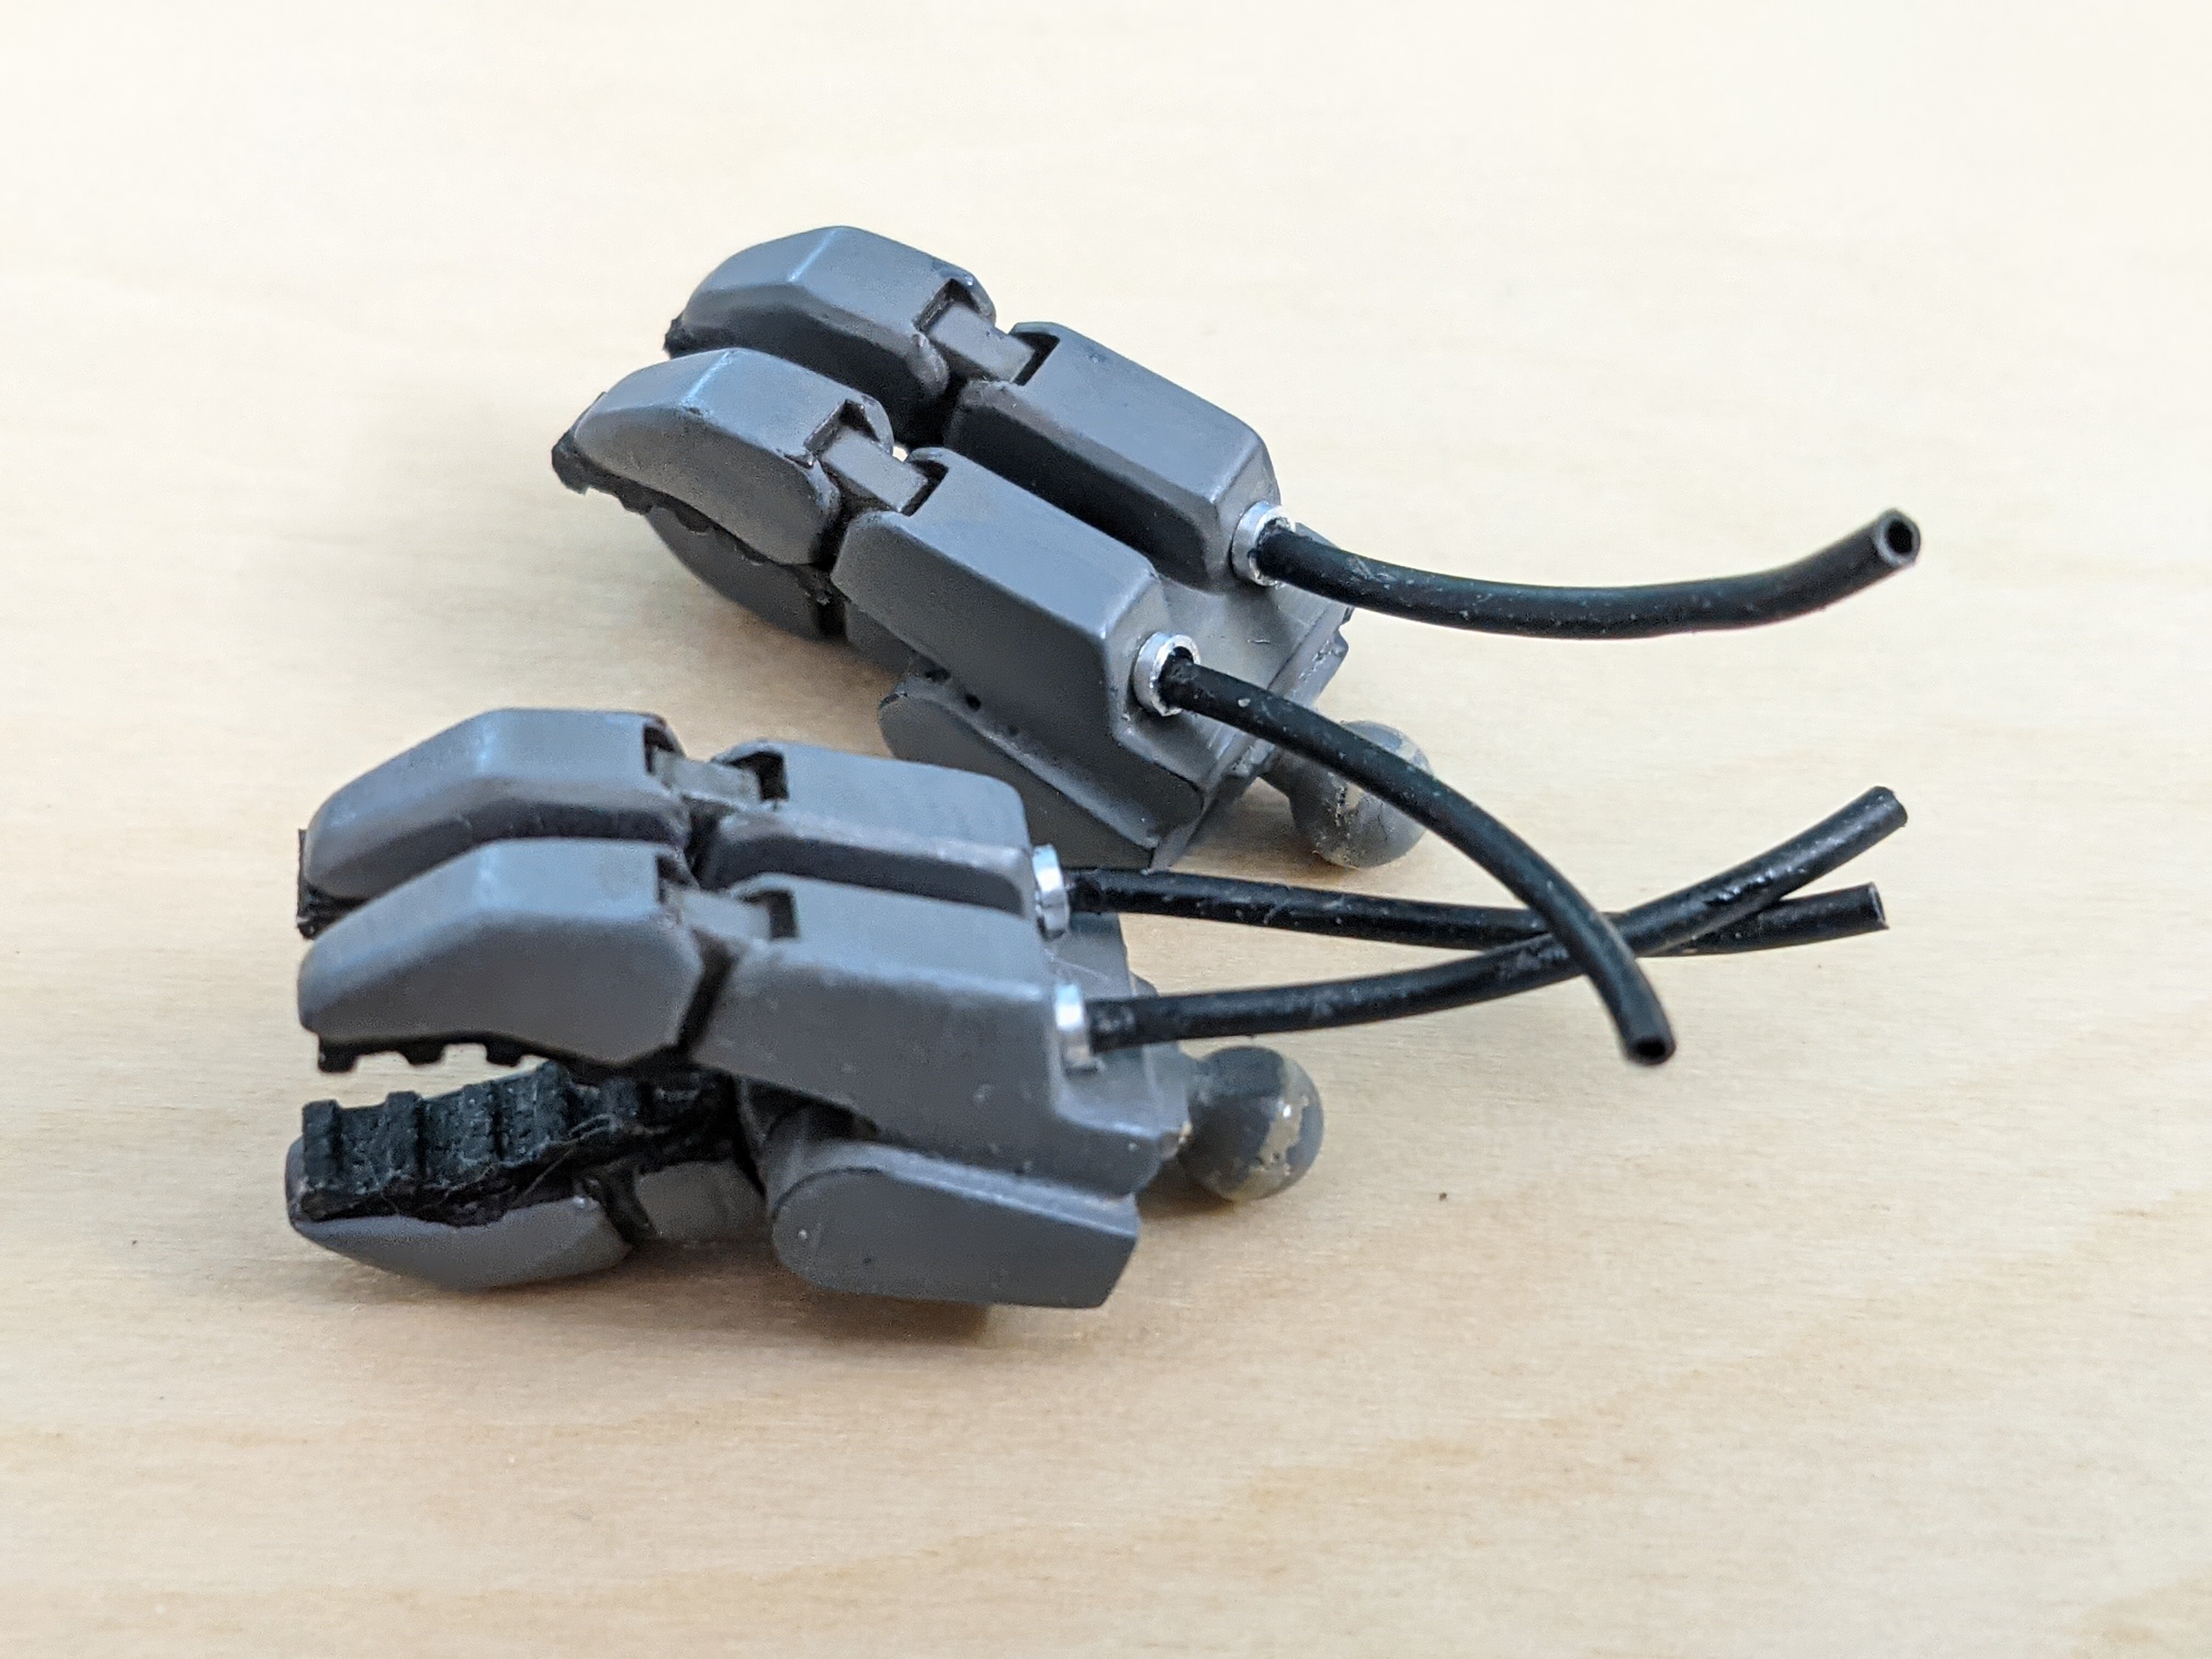
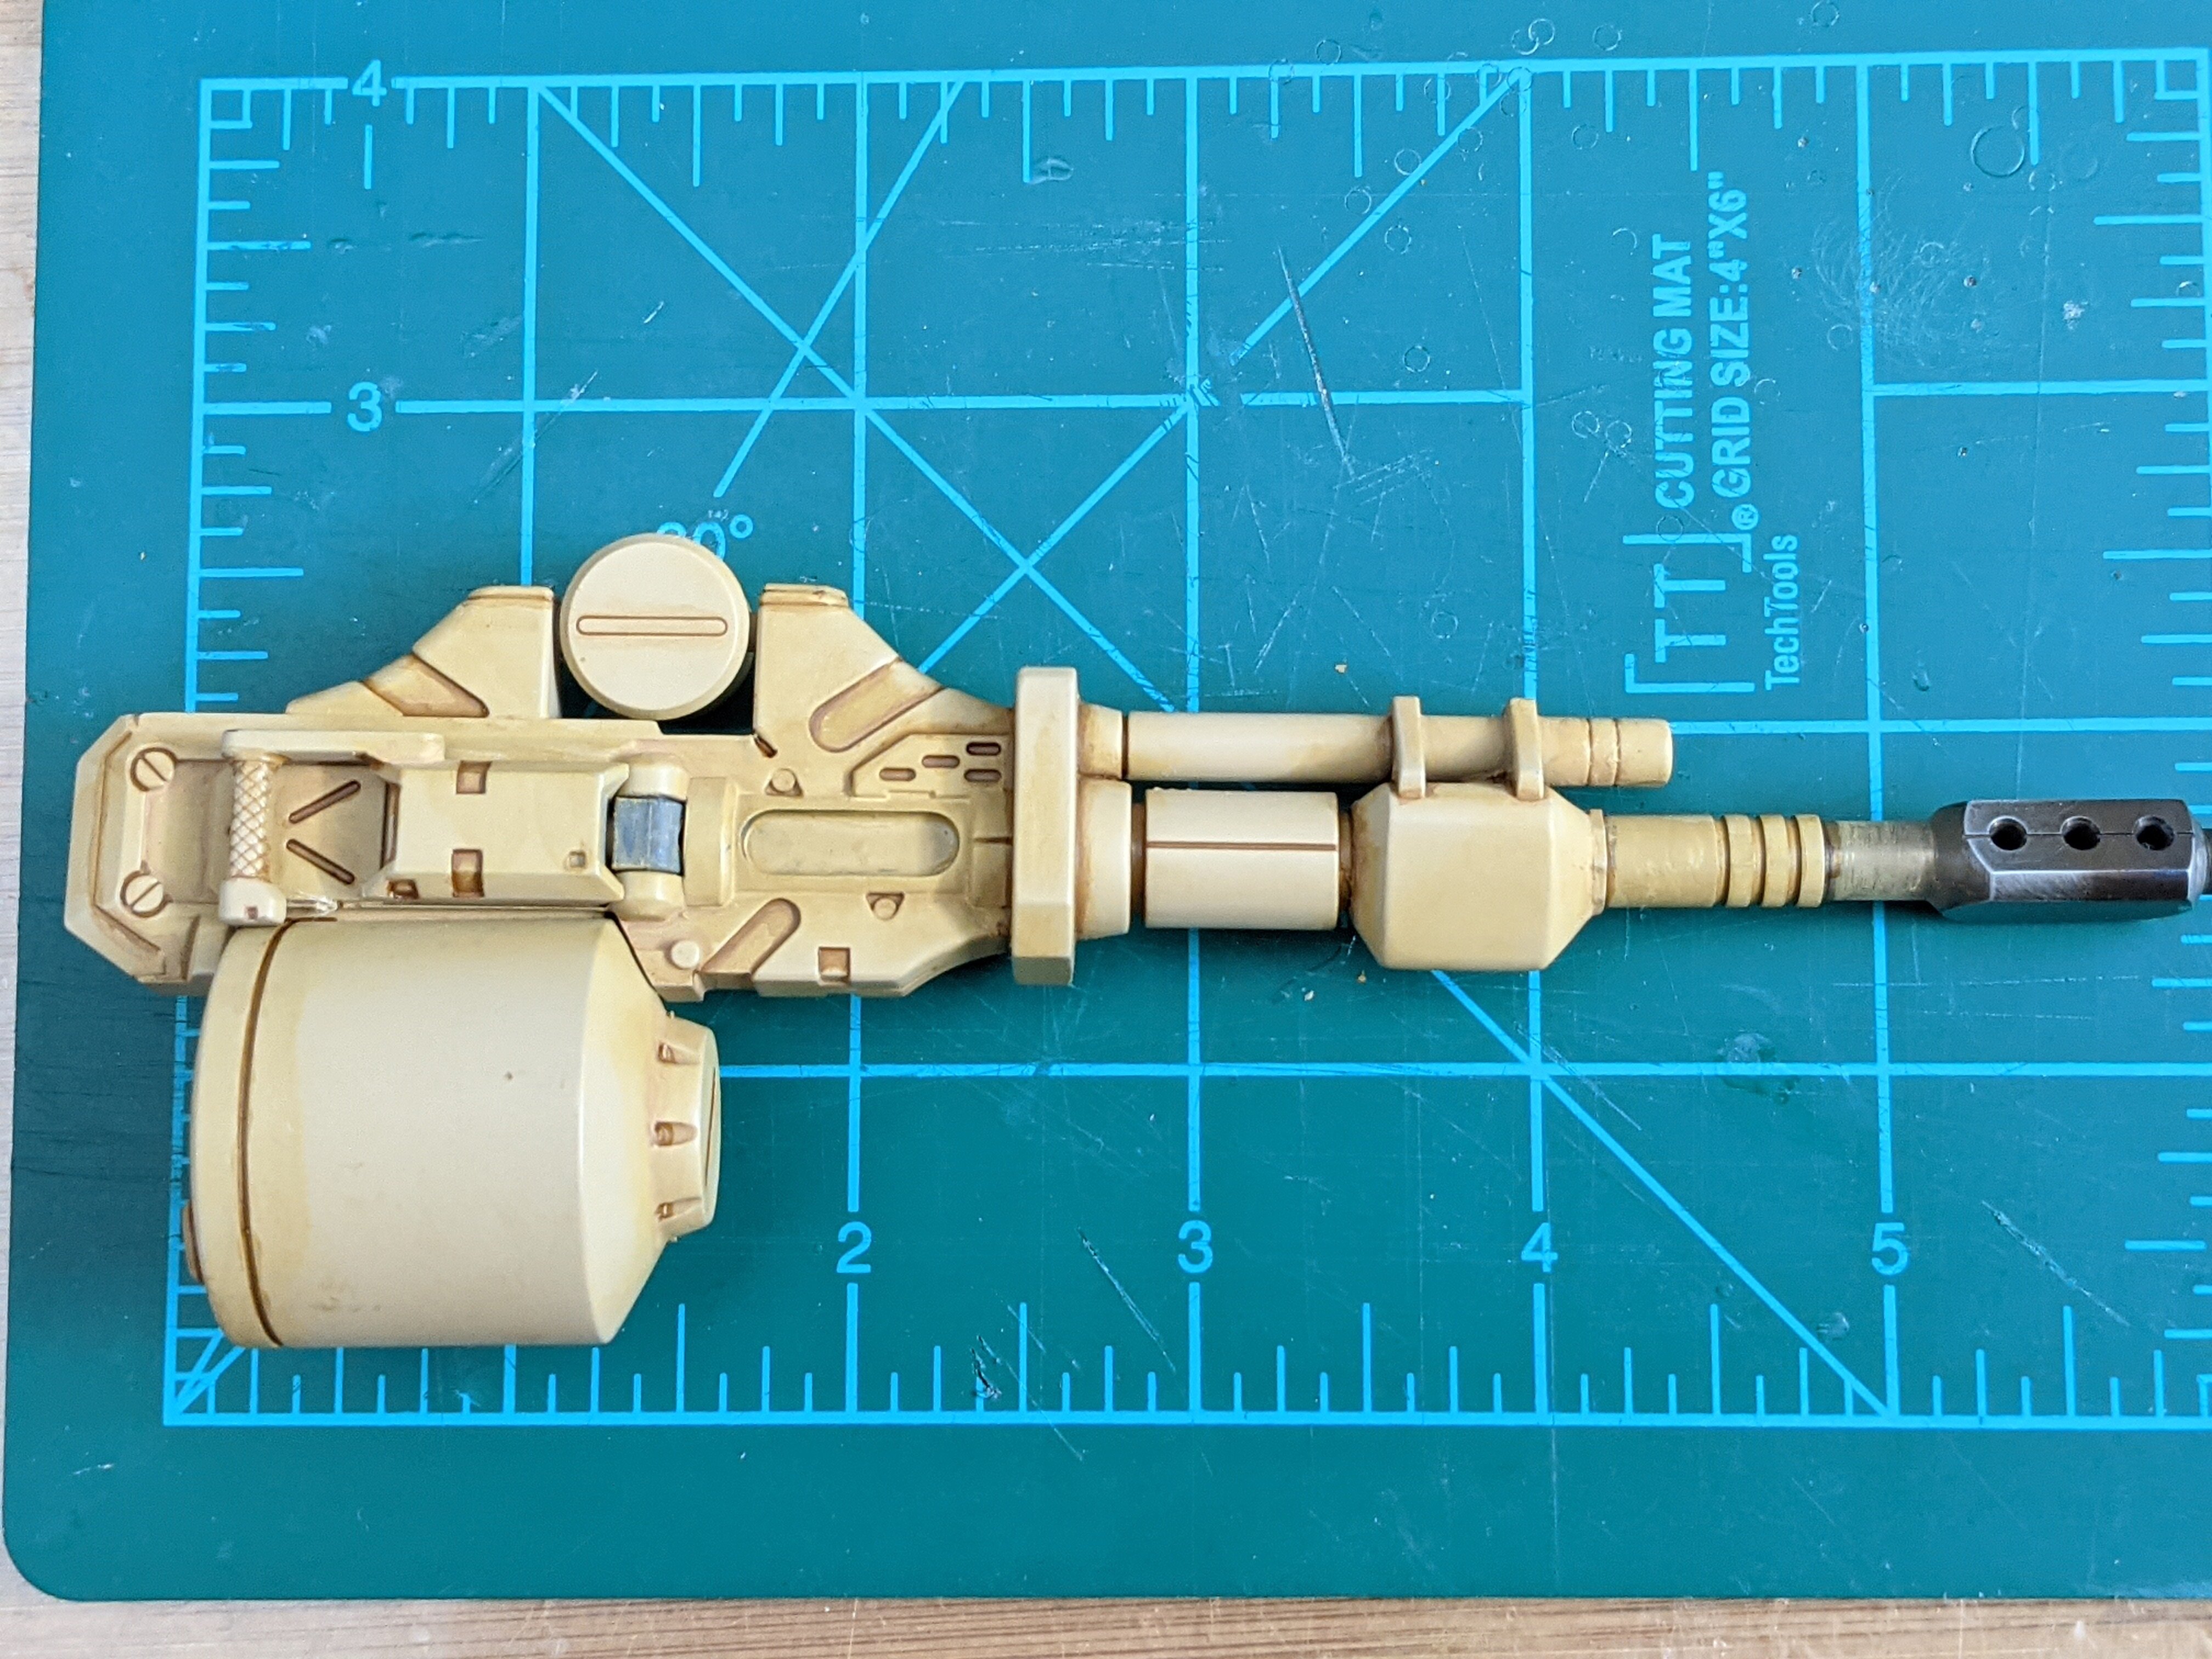
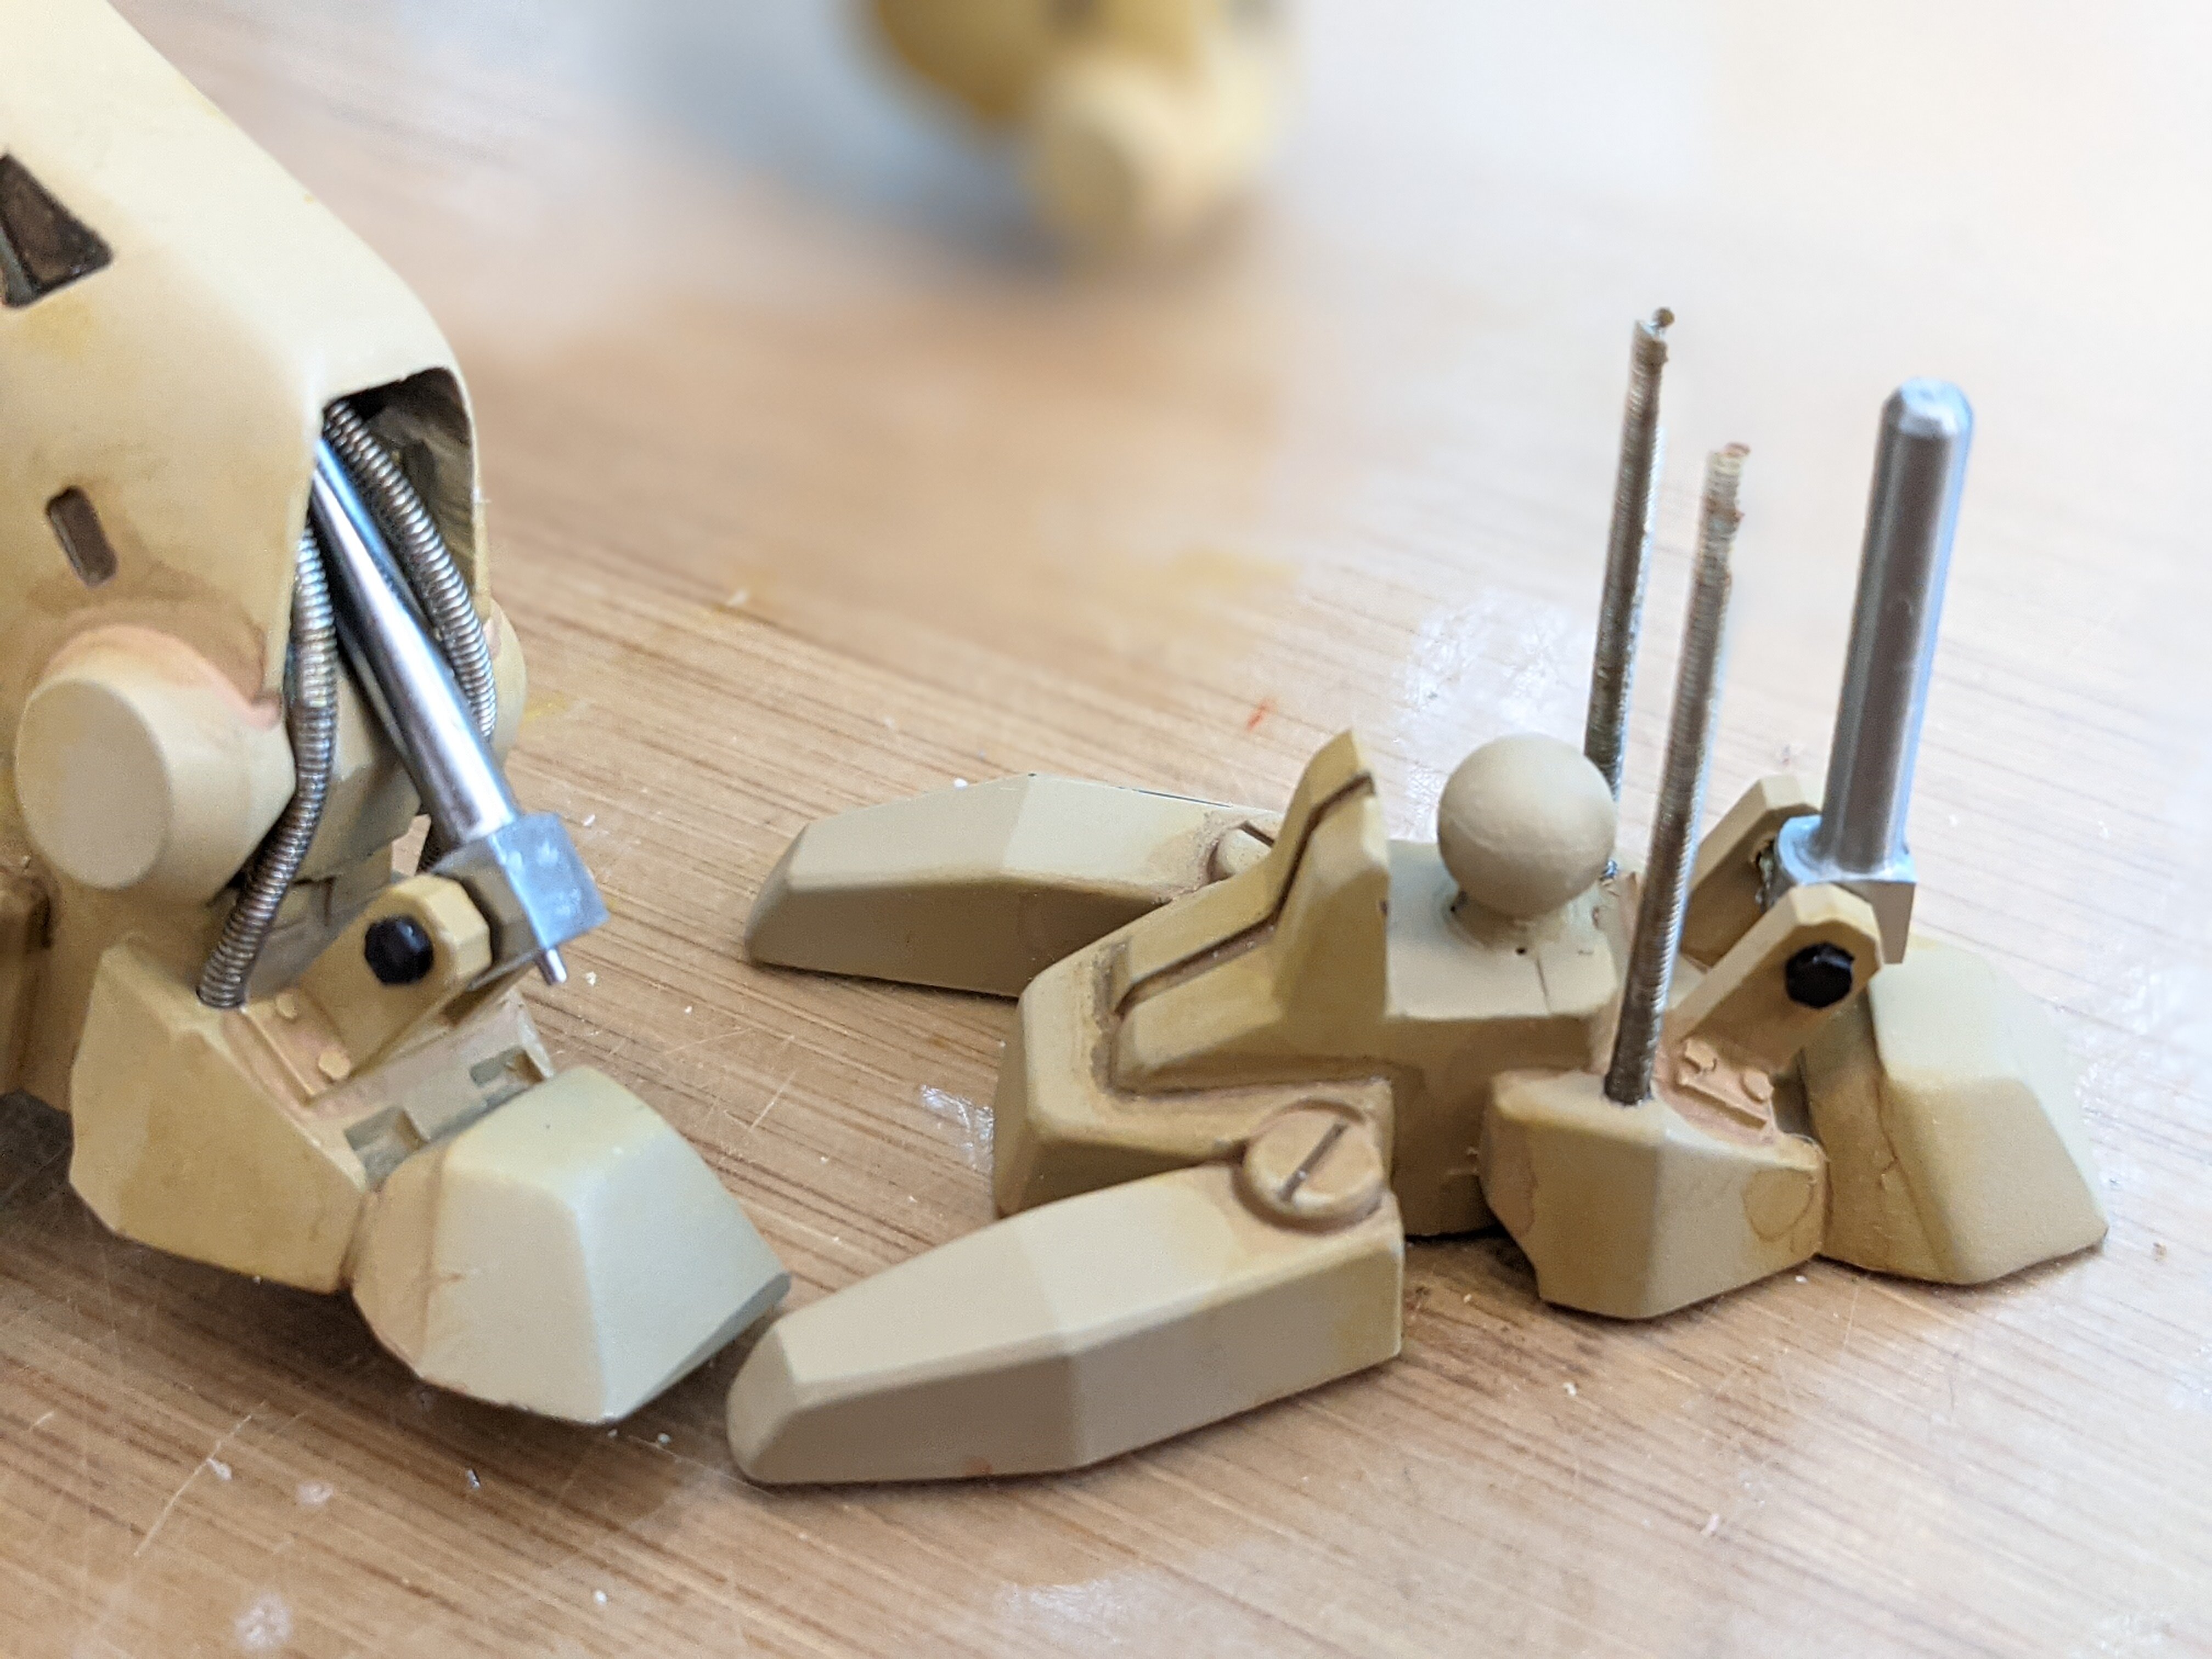
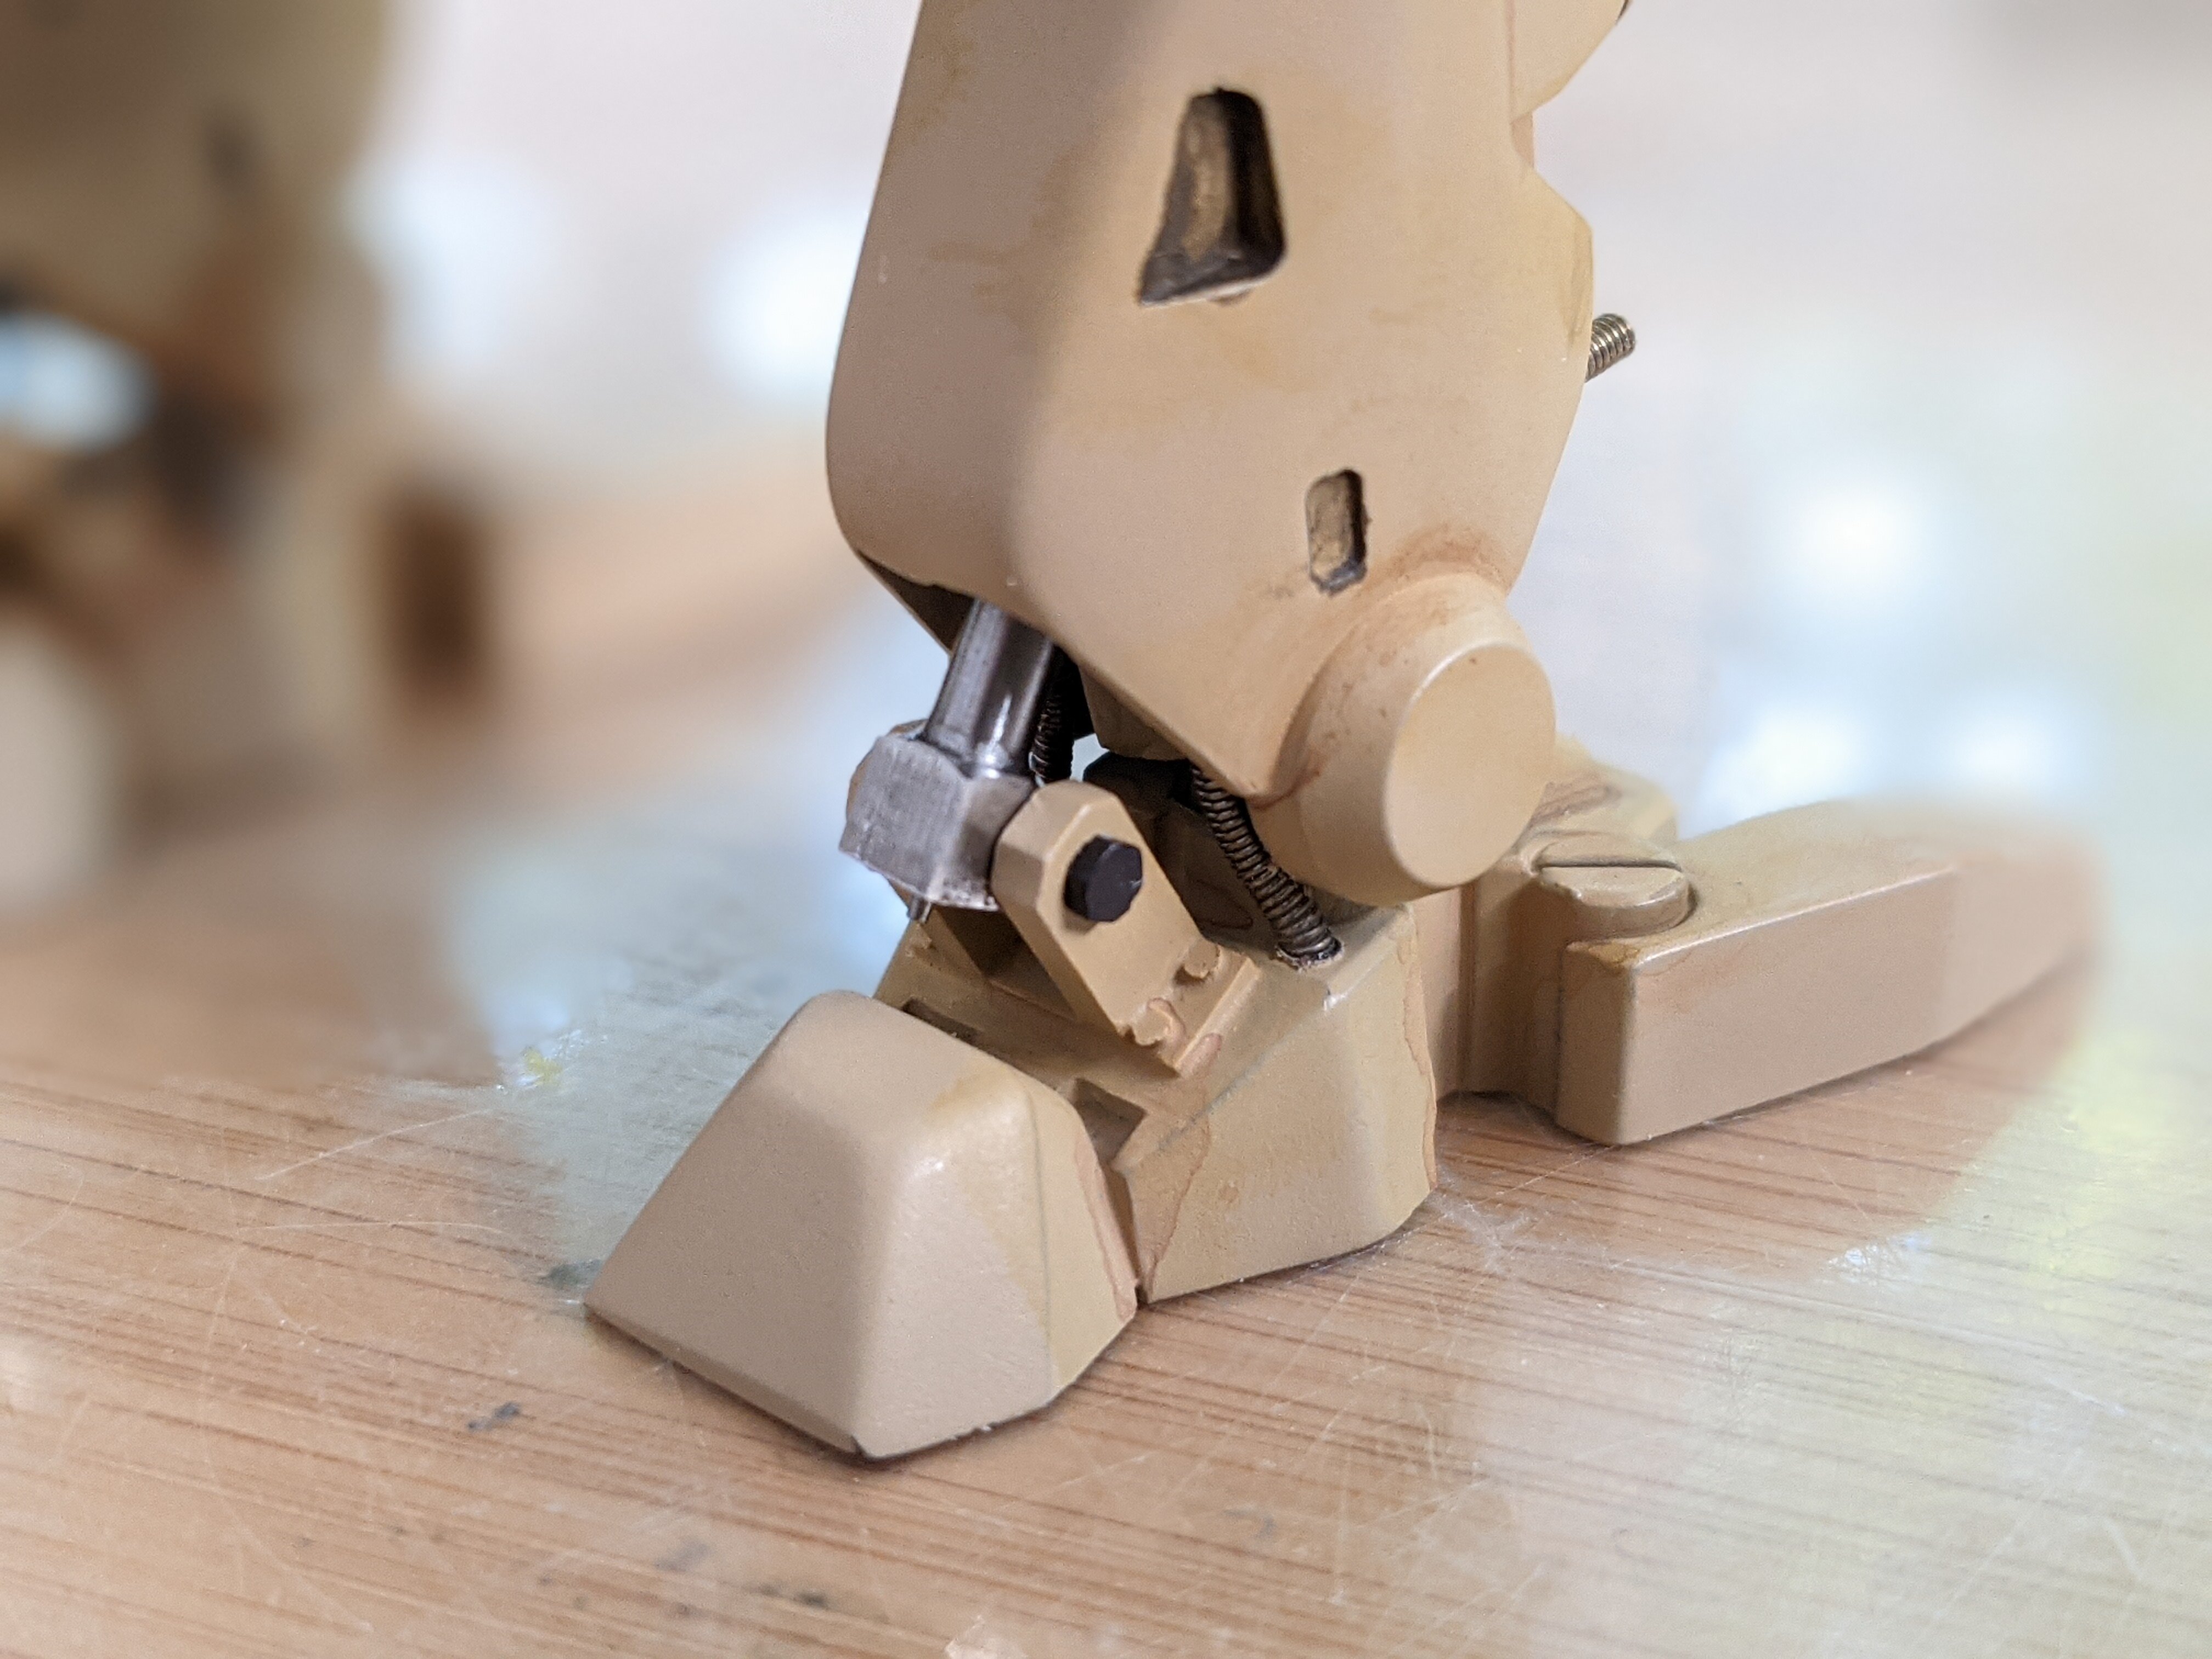
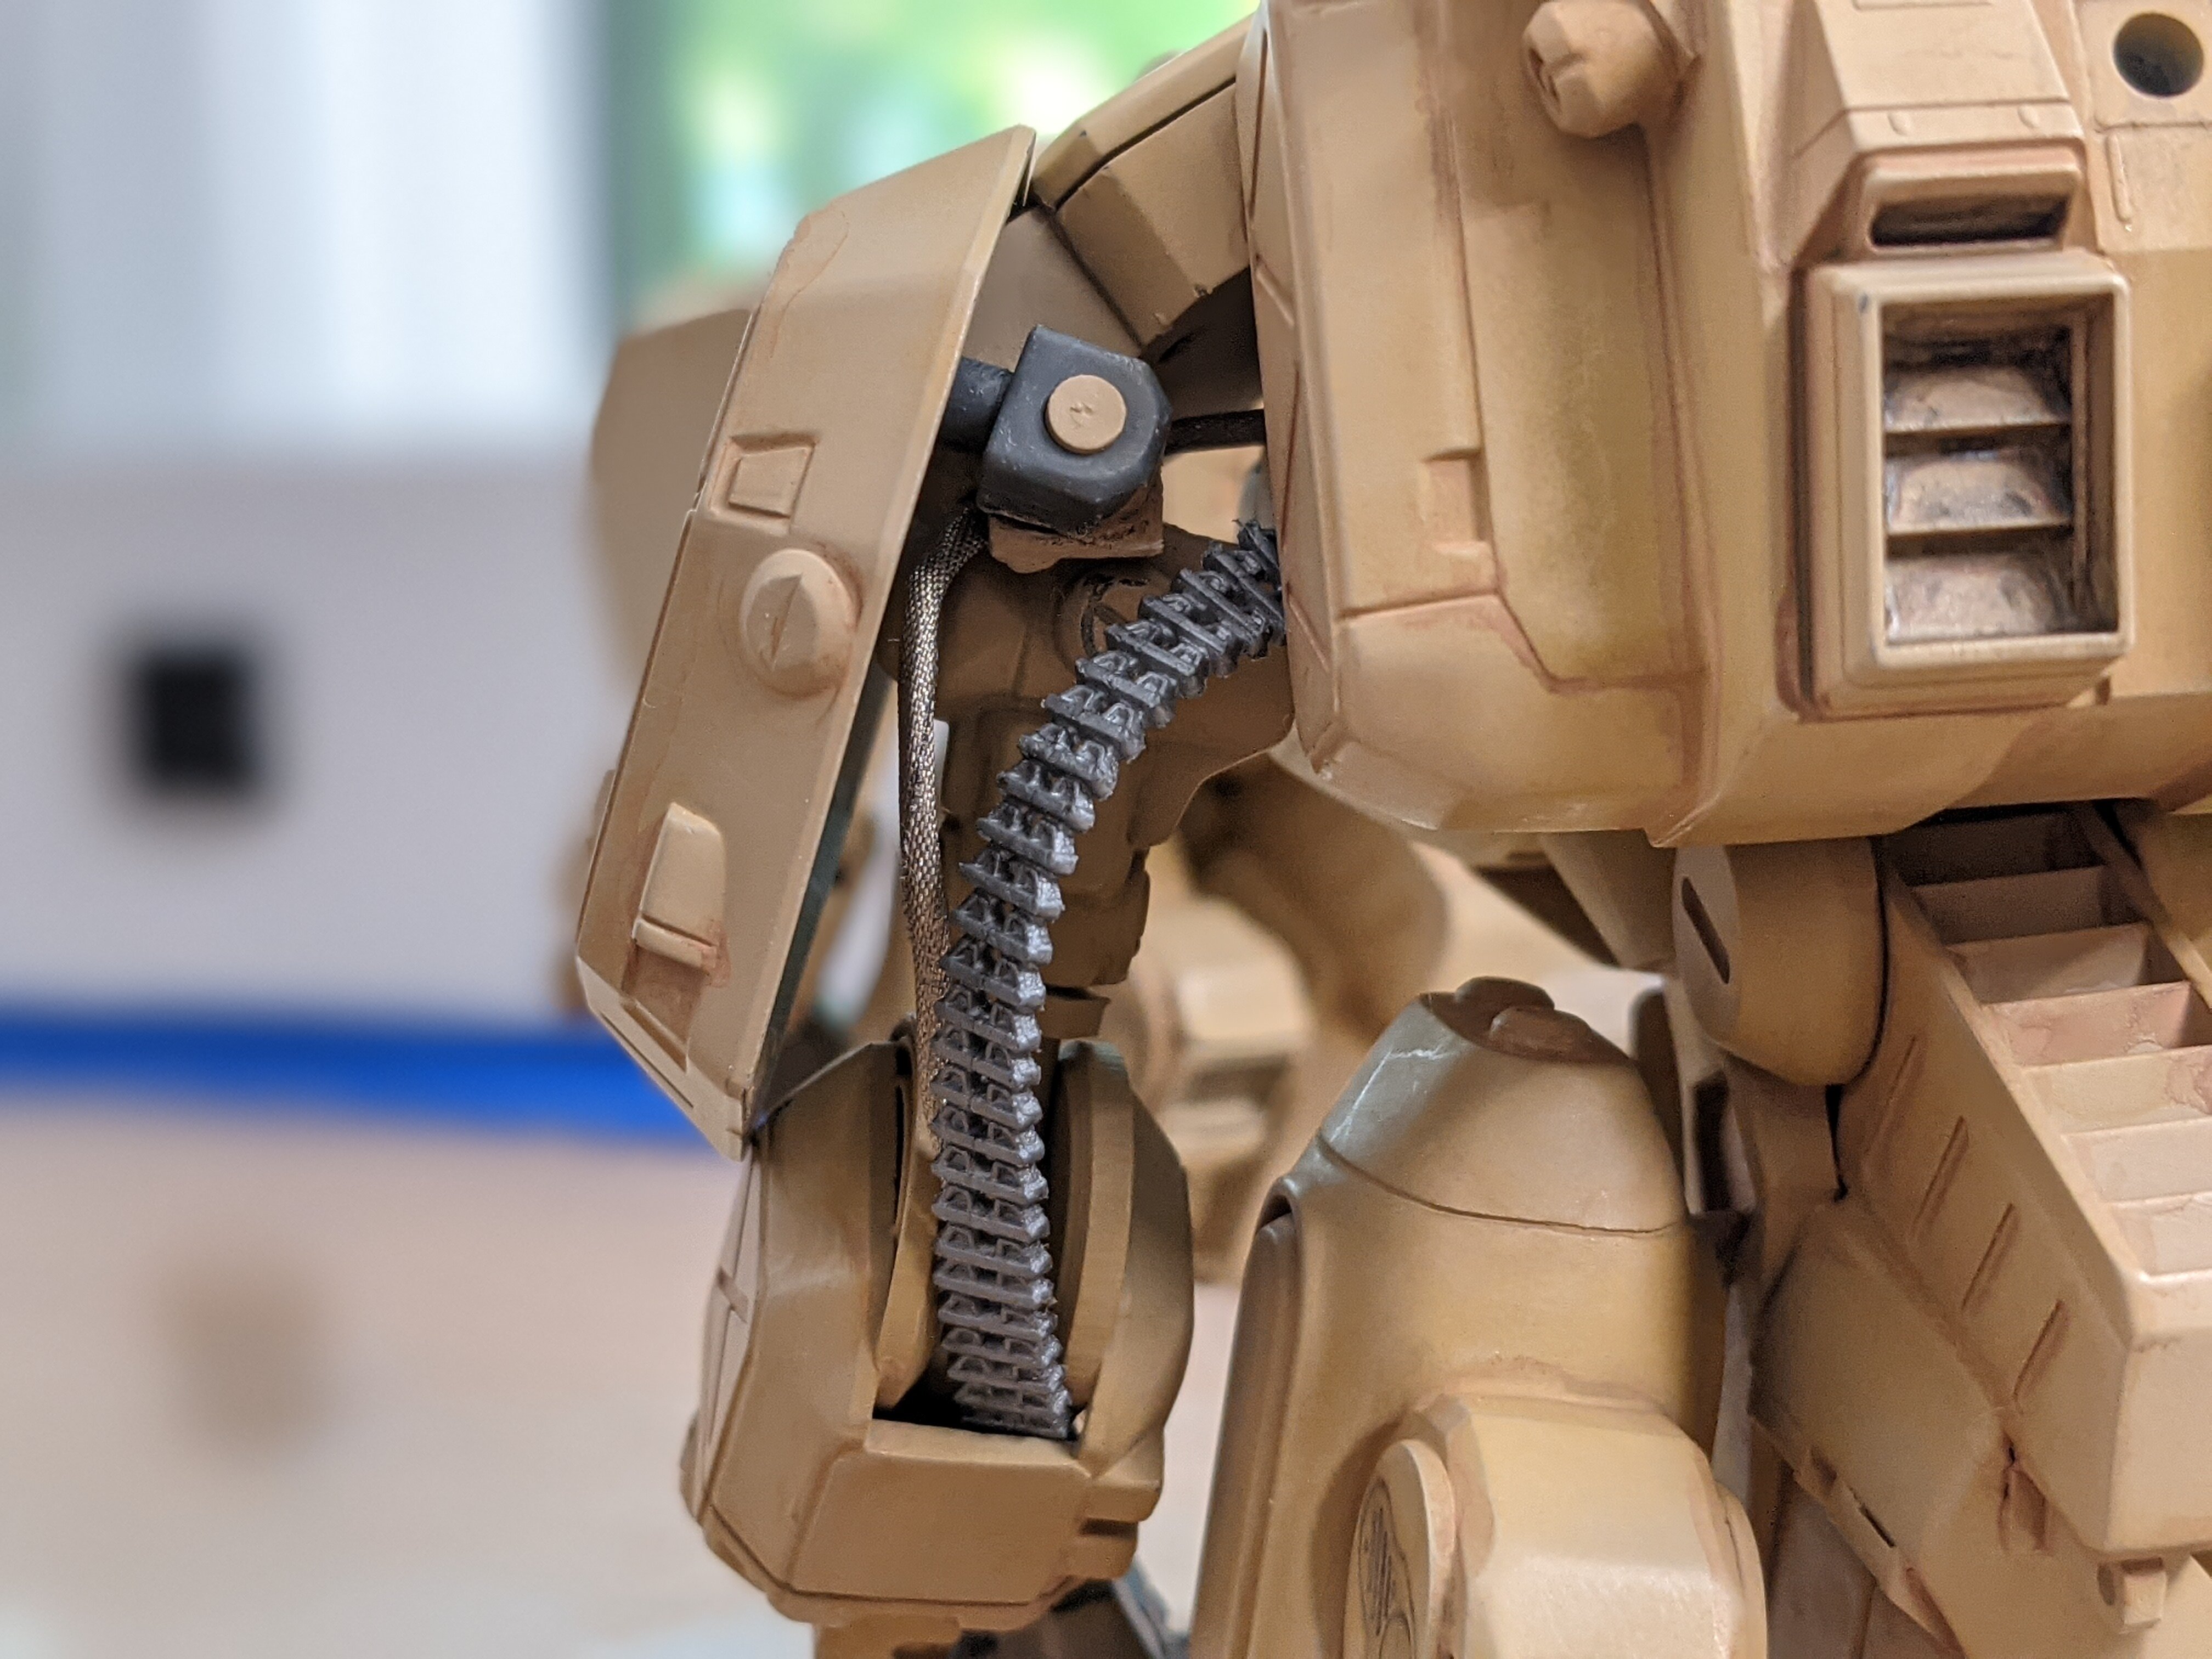
@David Hingtgen Only if it's styrene😅 Adding more hardware to the twins now. The feet got hoses and a hydraulic "hamstring" each. In the one foot photo I didn't see the hose was sticking out the front until I saw the photo The hydraulic is bolted in with two black styrene bolts. Next I used old tank tracks to make ammo chutes feeding the gun in the back of the arm (the elbow area). A meshed hose was added in as well for more detail. Well, I guess I really hosed-up my model! - MT
-
🤣 Funny!!! I can't believe there is that little detail on the original Enterprise! Things were more different then I guess. - MT
-
@derex3592 That came out superb! The lighting is just fantastic and helps bring it all home. The base is a great idea and also brings it up to another level. Congrats Derex on another great build! @peter The blotchiness was a nice touch to an otherwise boring surface. Really, no panel lines? That's cheap. Is that glitter I see in the photo!? - MT
-
The 'Hey look at this really cool model build I saw' post
MechTech replied to Shawn's topic in Model kits
That's some awesome work!!! That case is more of an equipment cabinet than a model ""box." Great execution of such a large project! - MT -
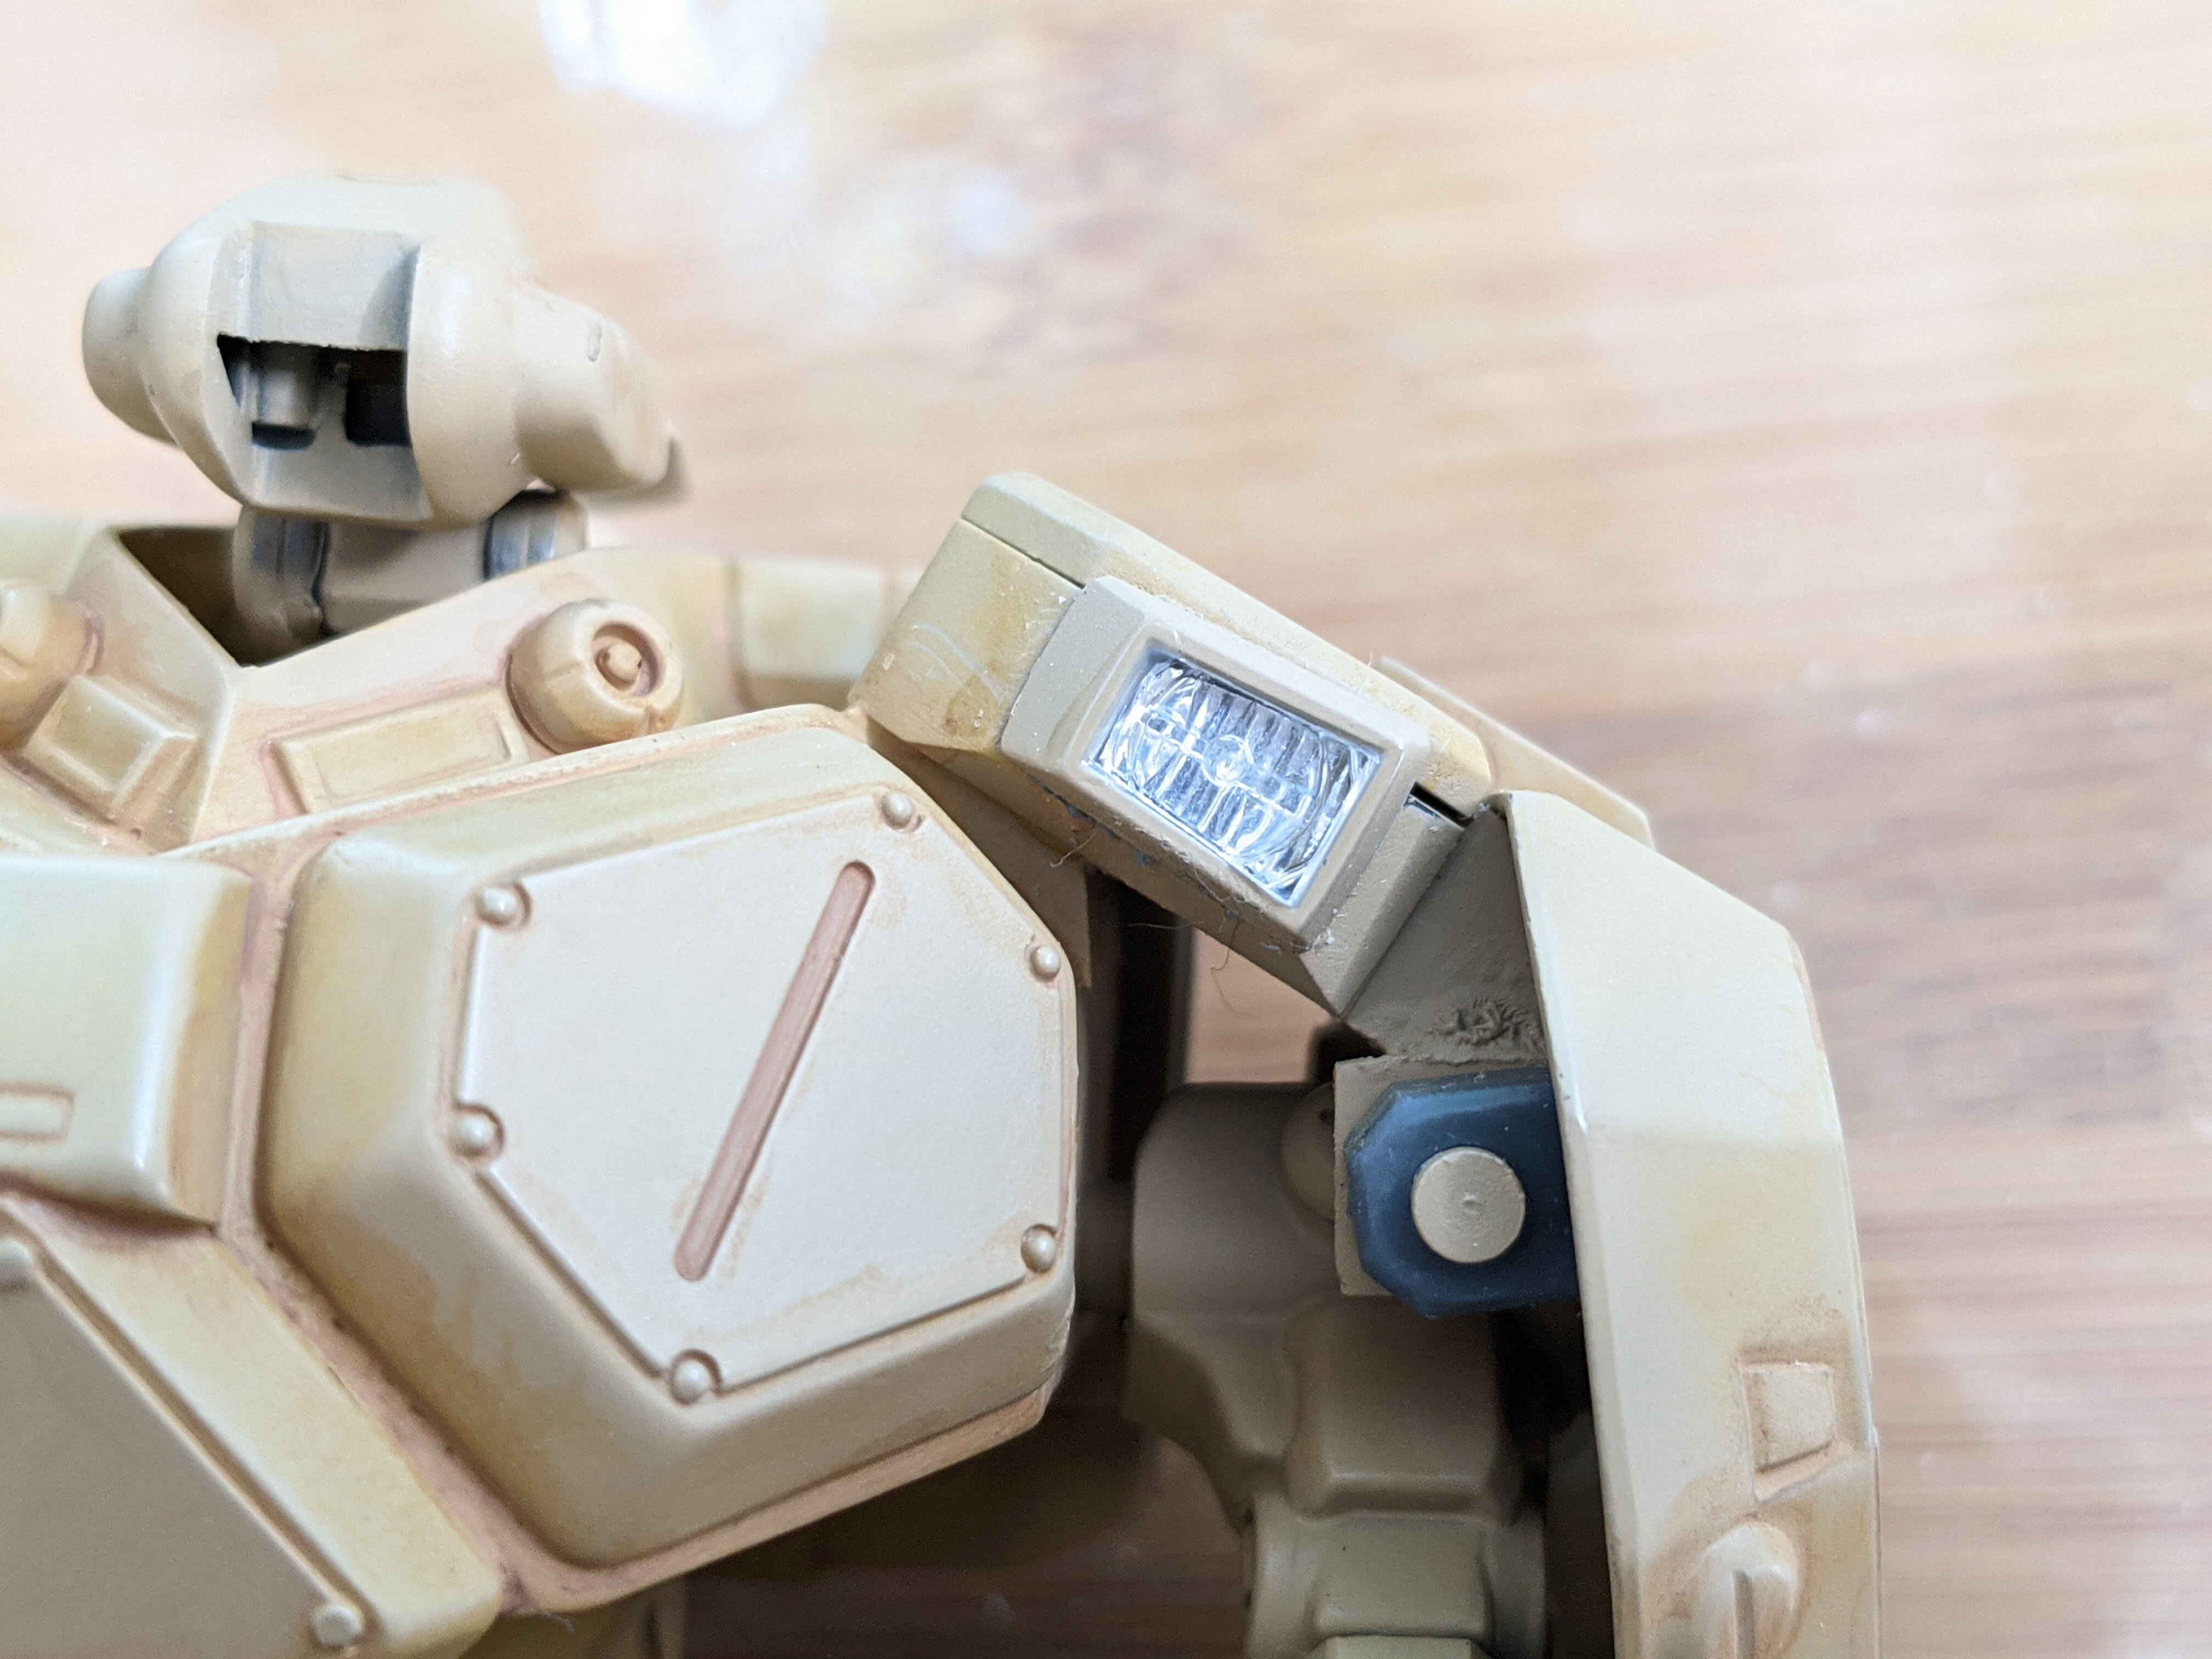
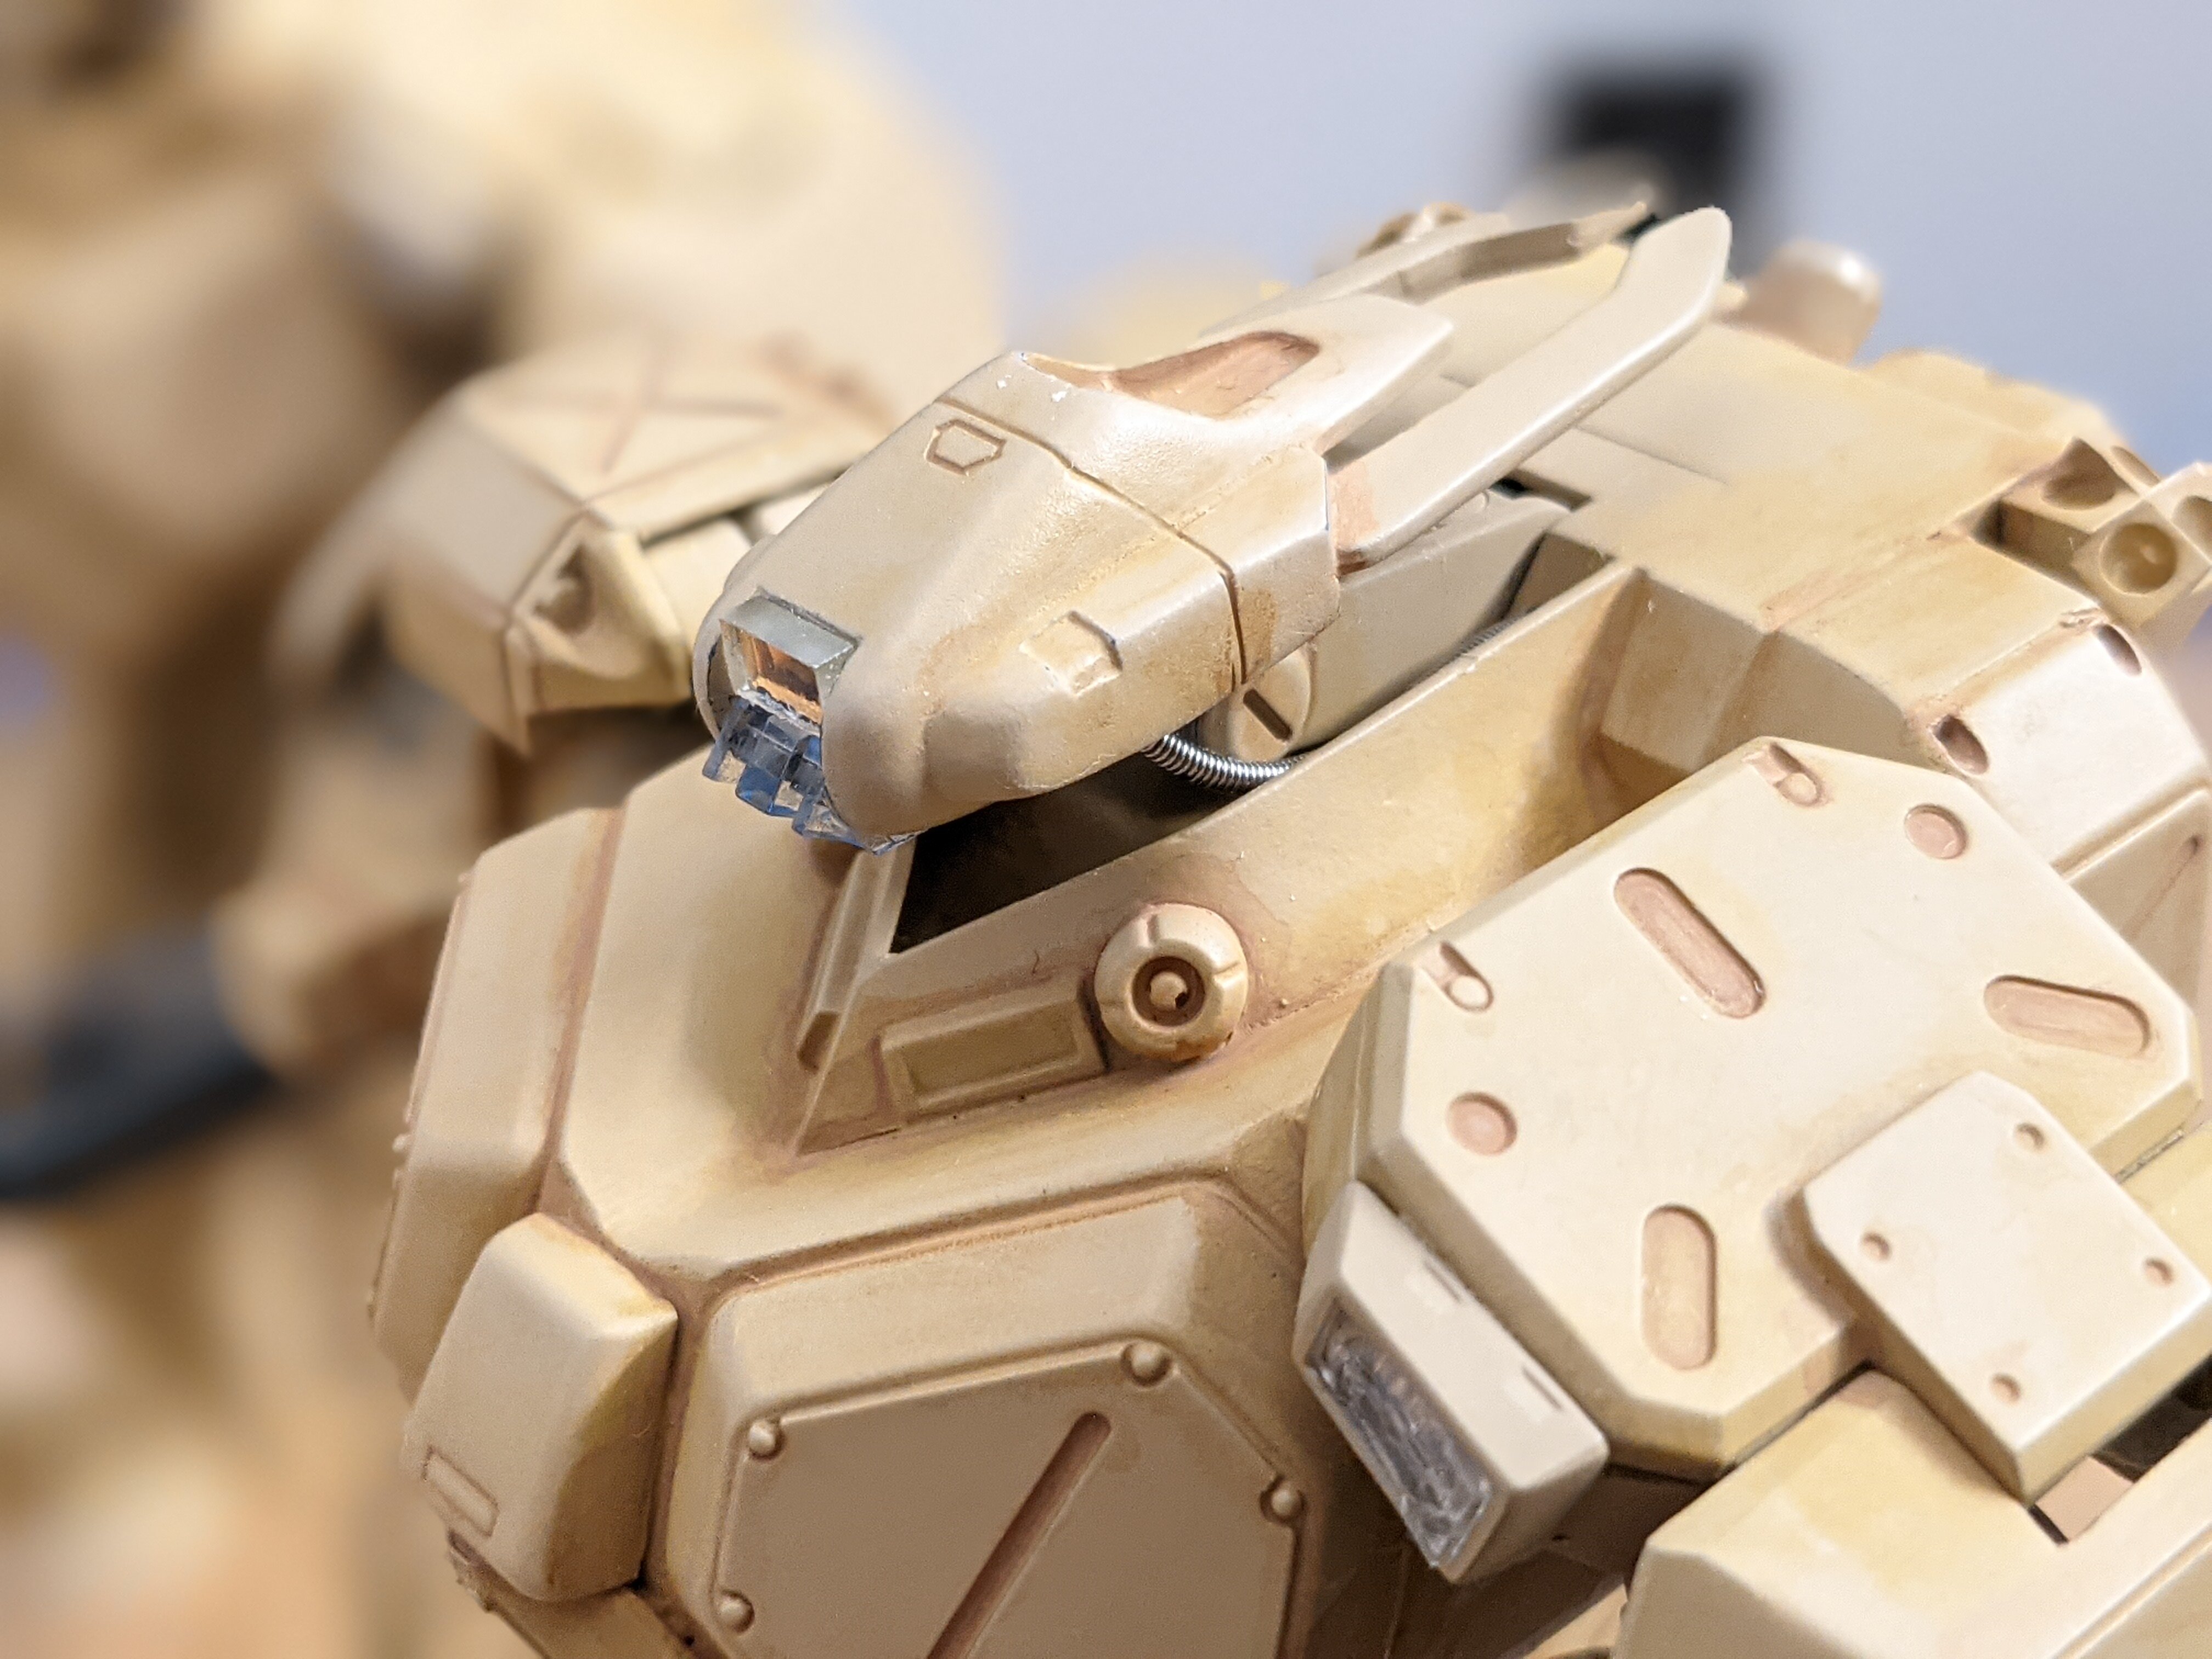
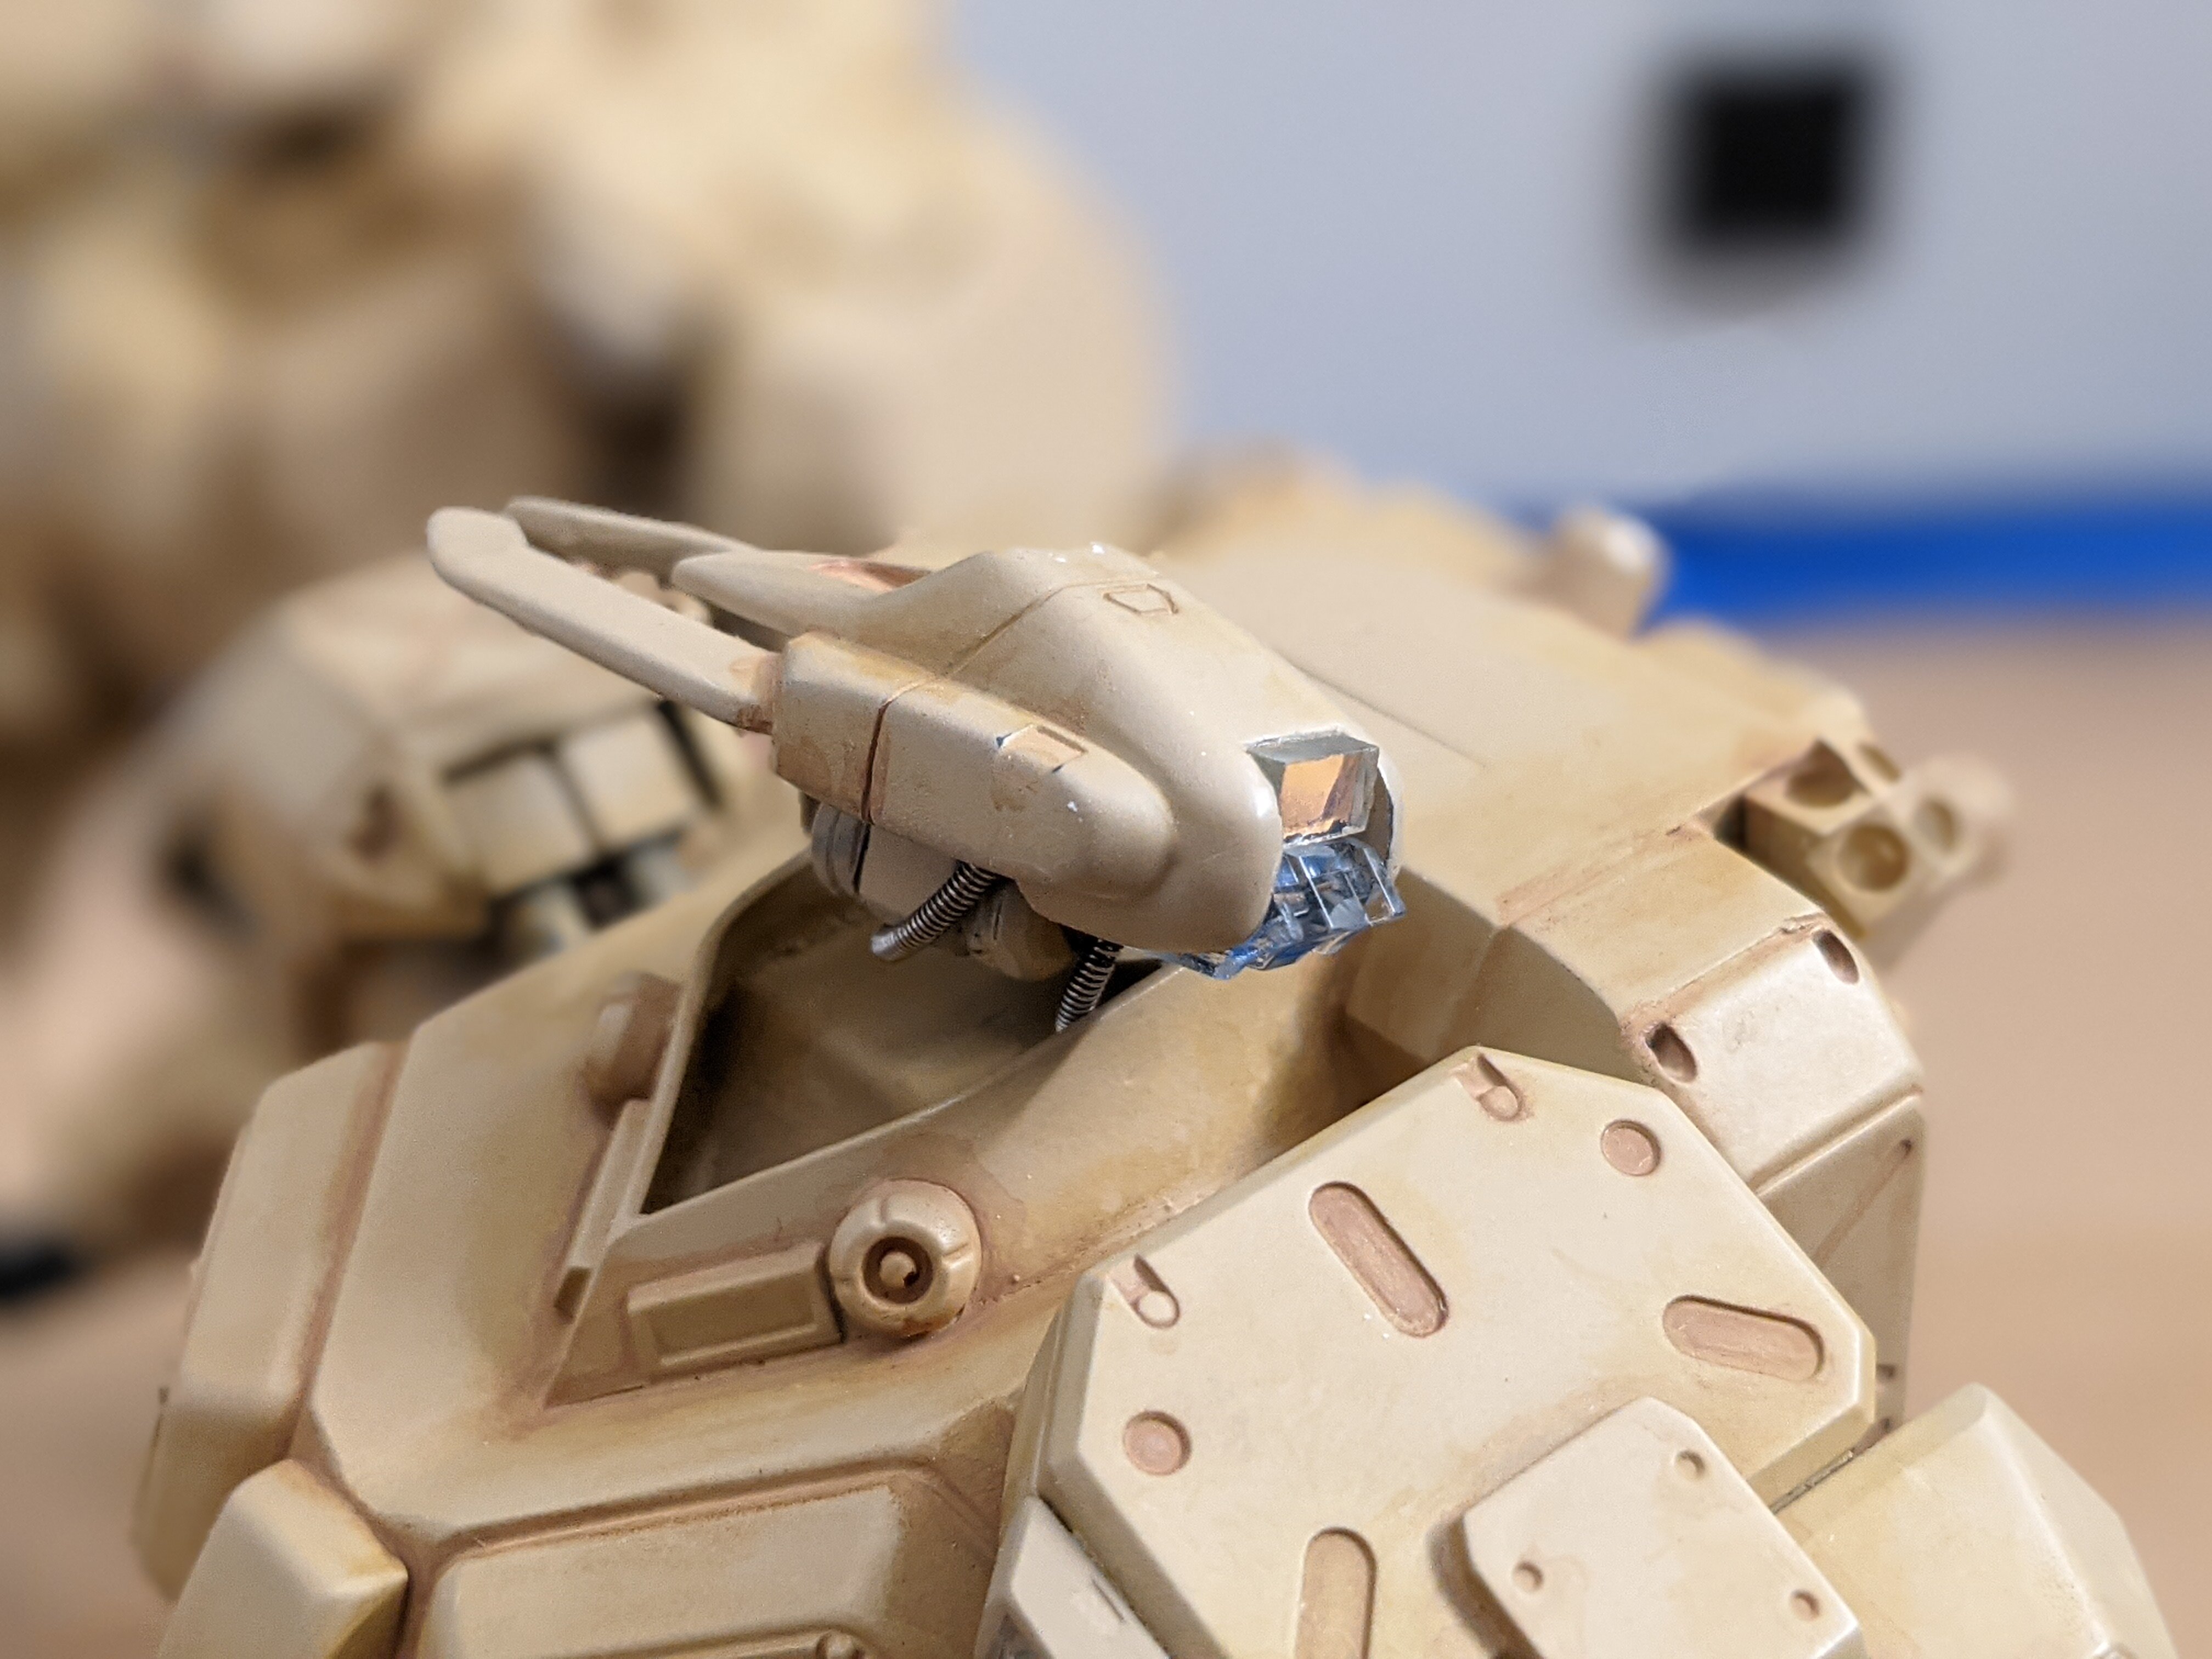
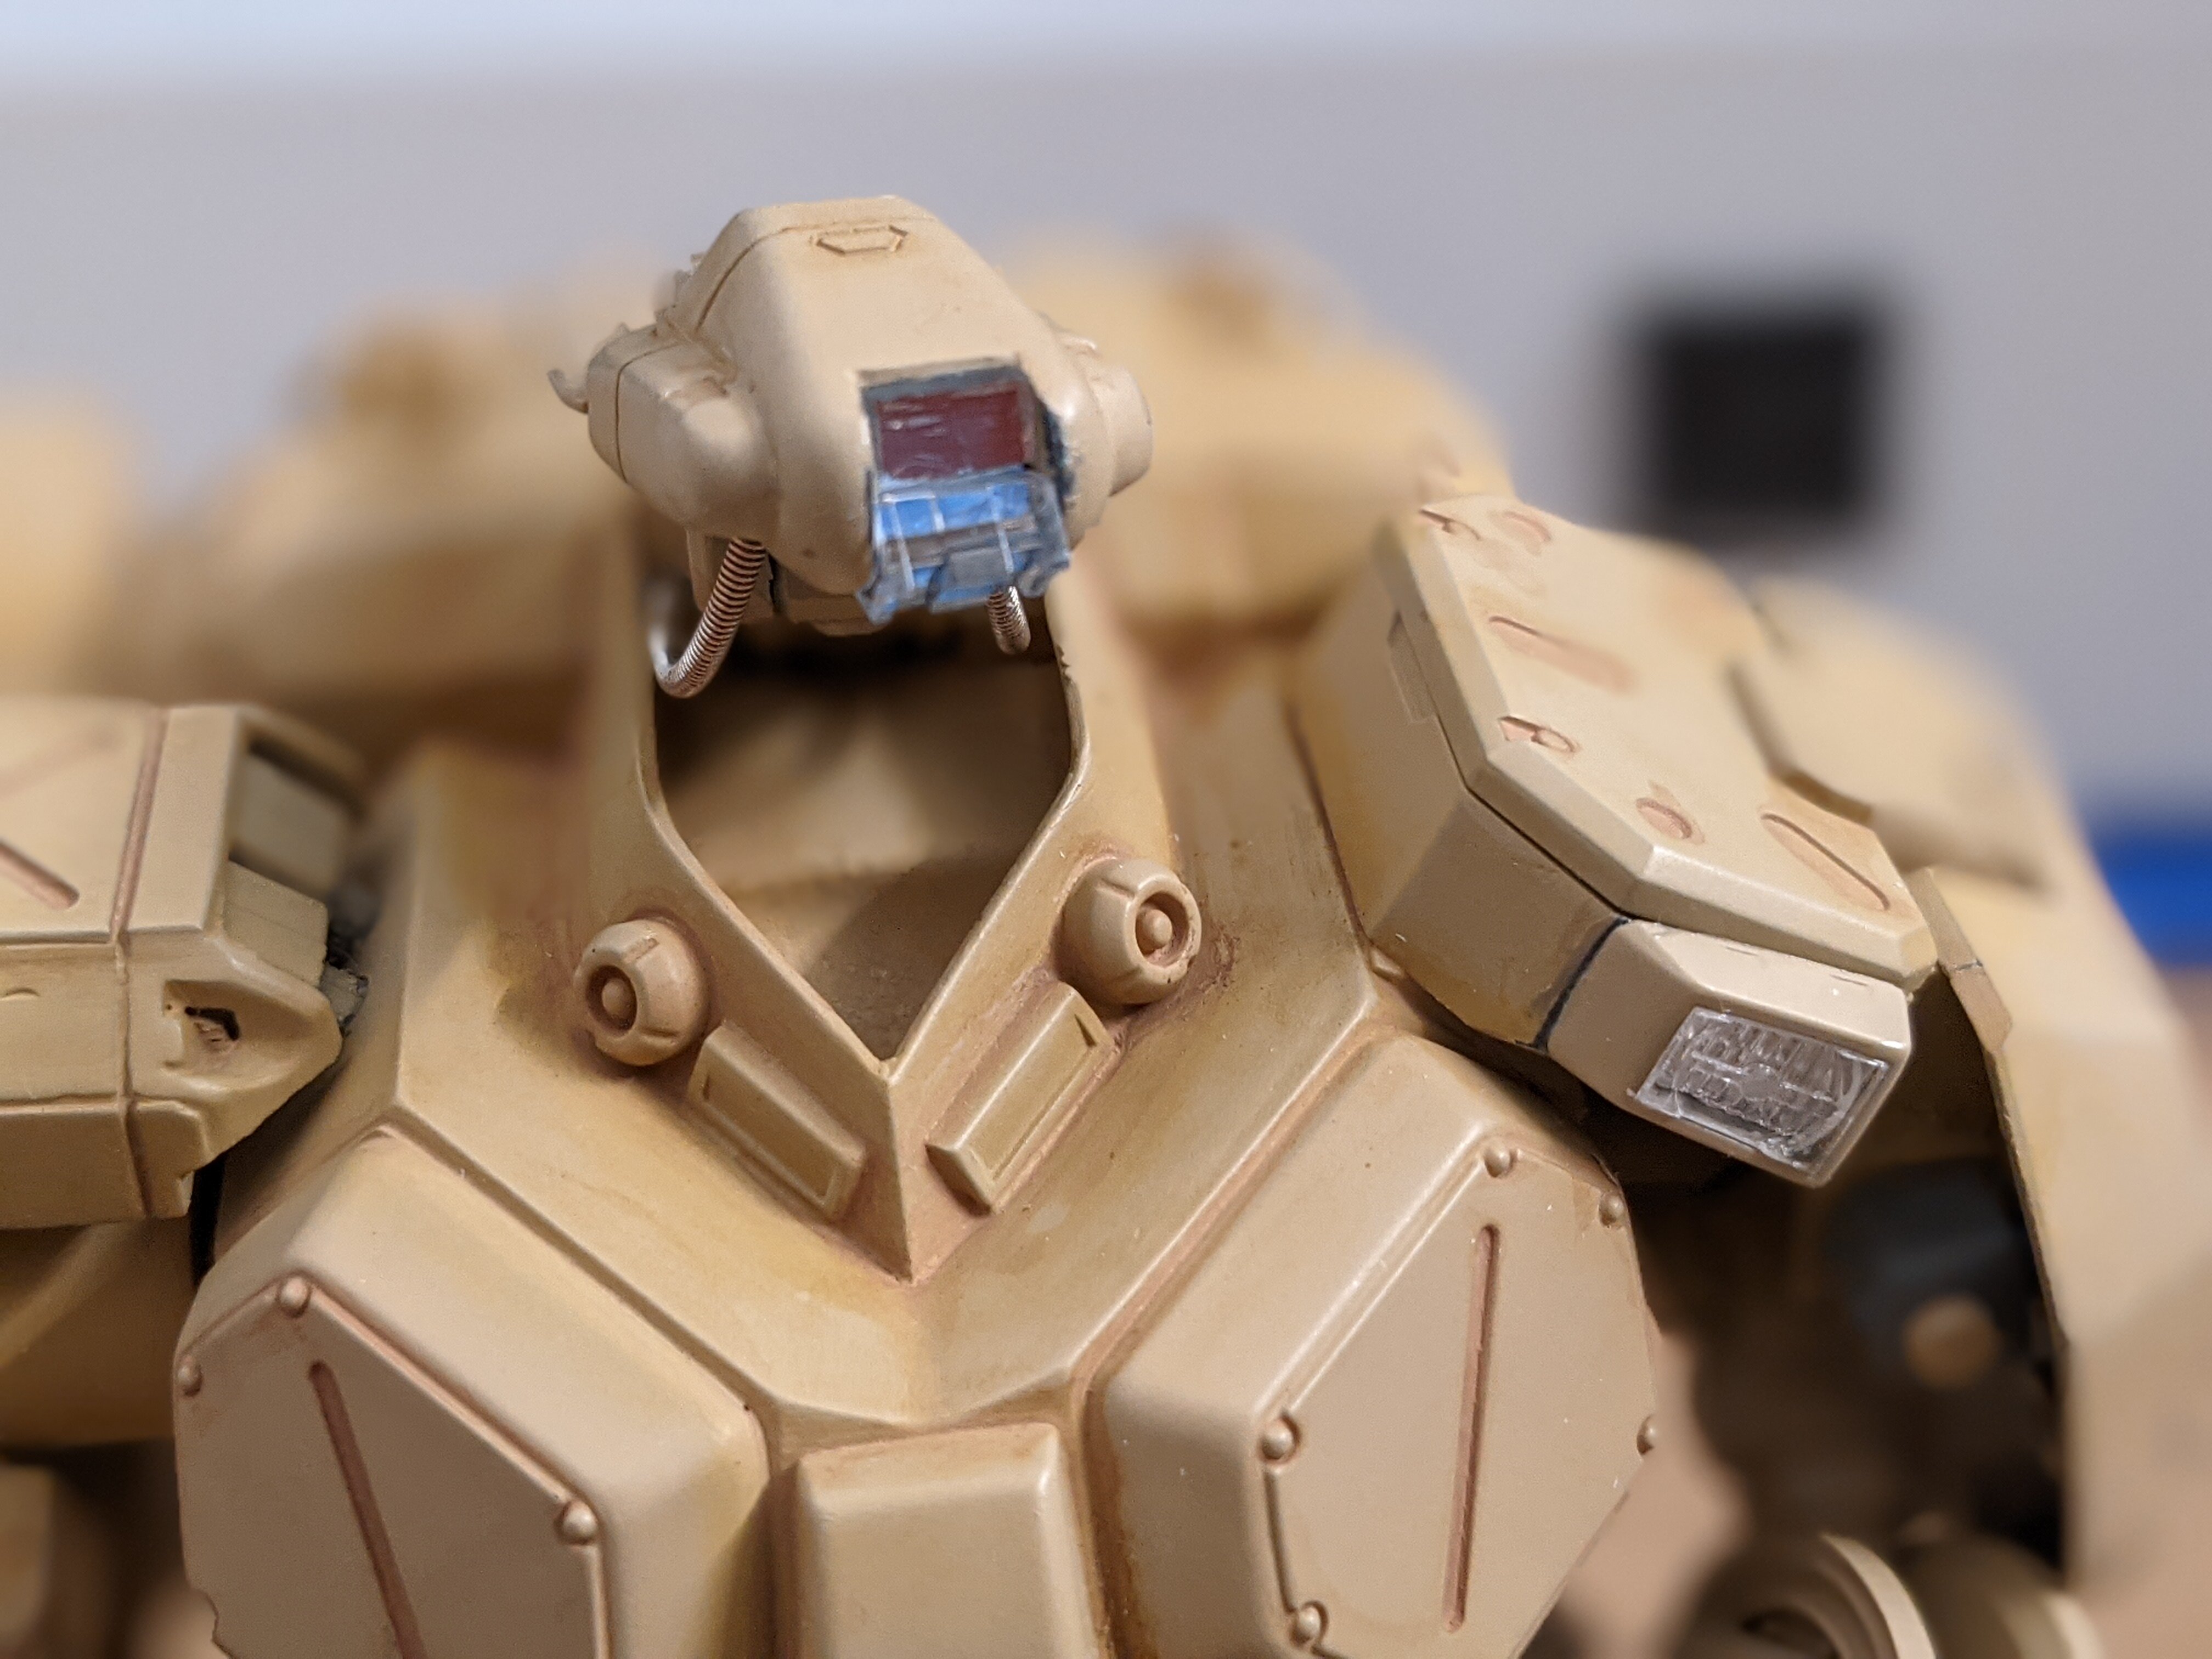
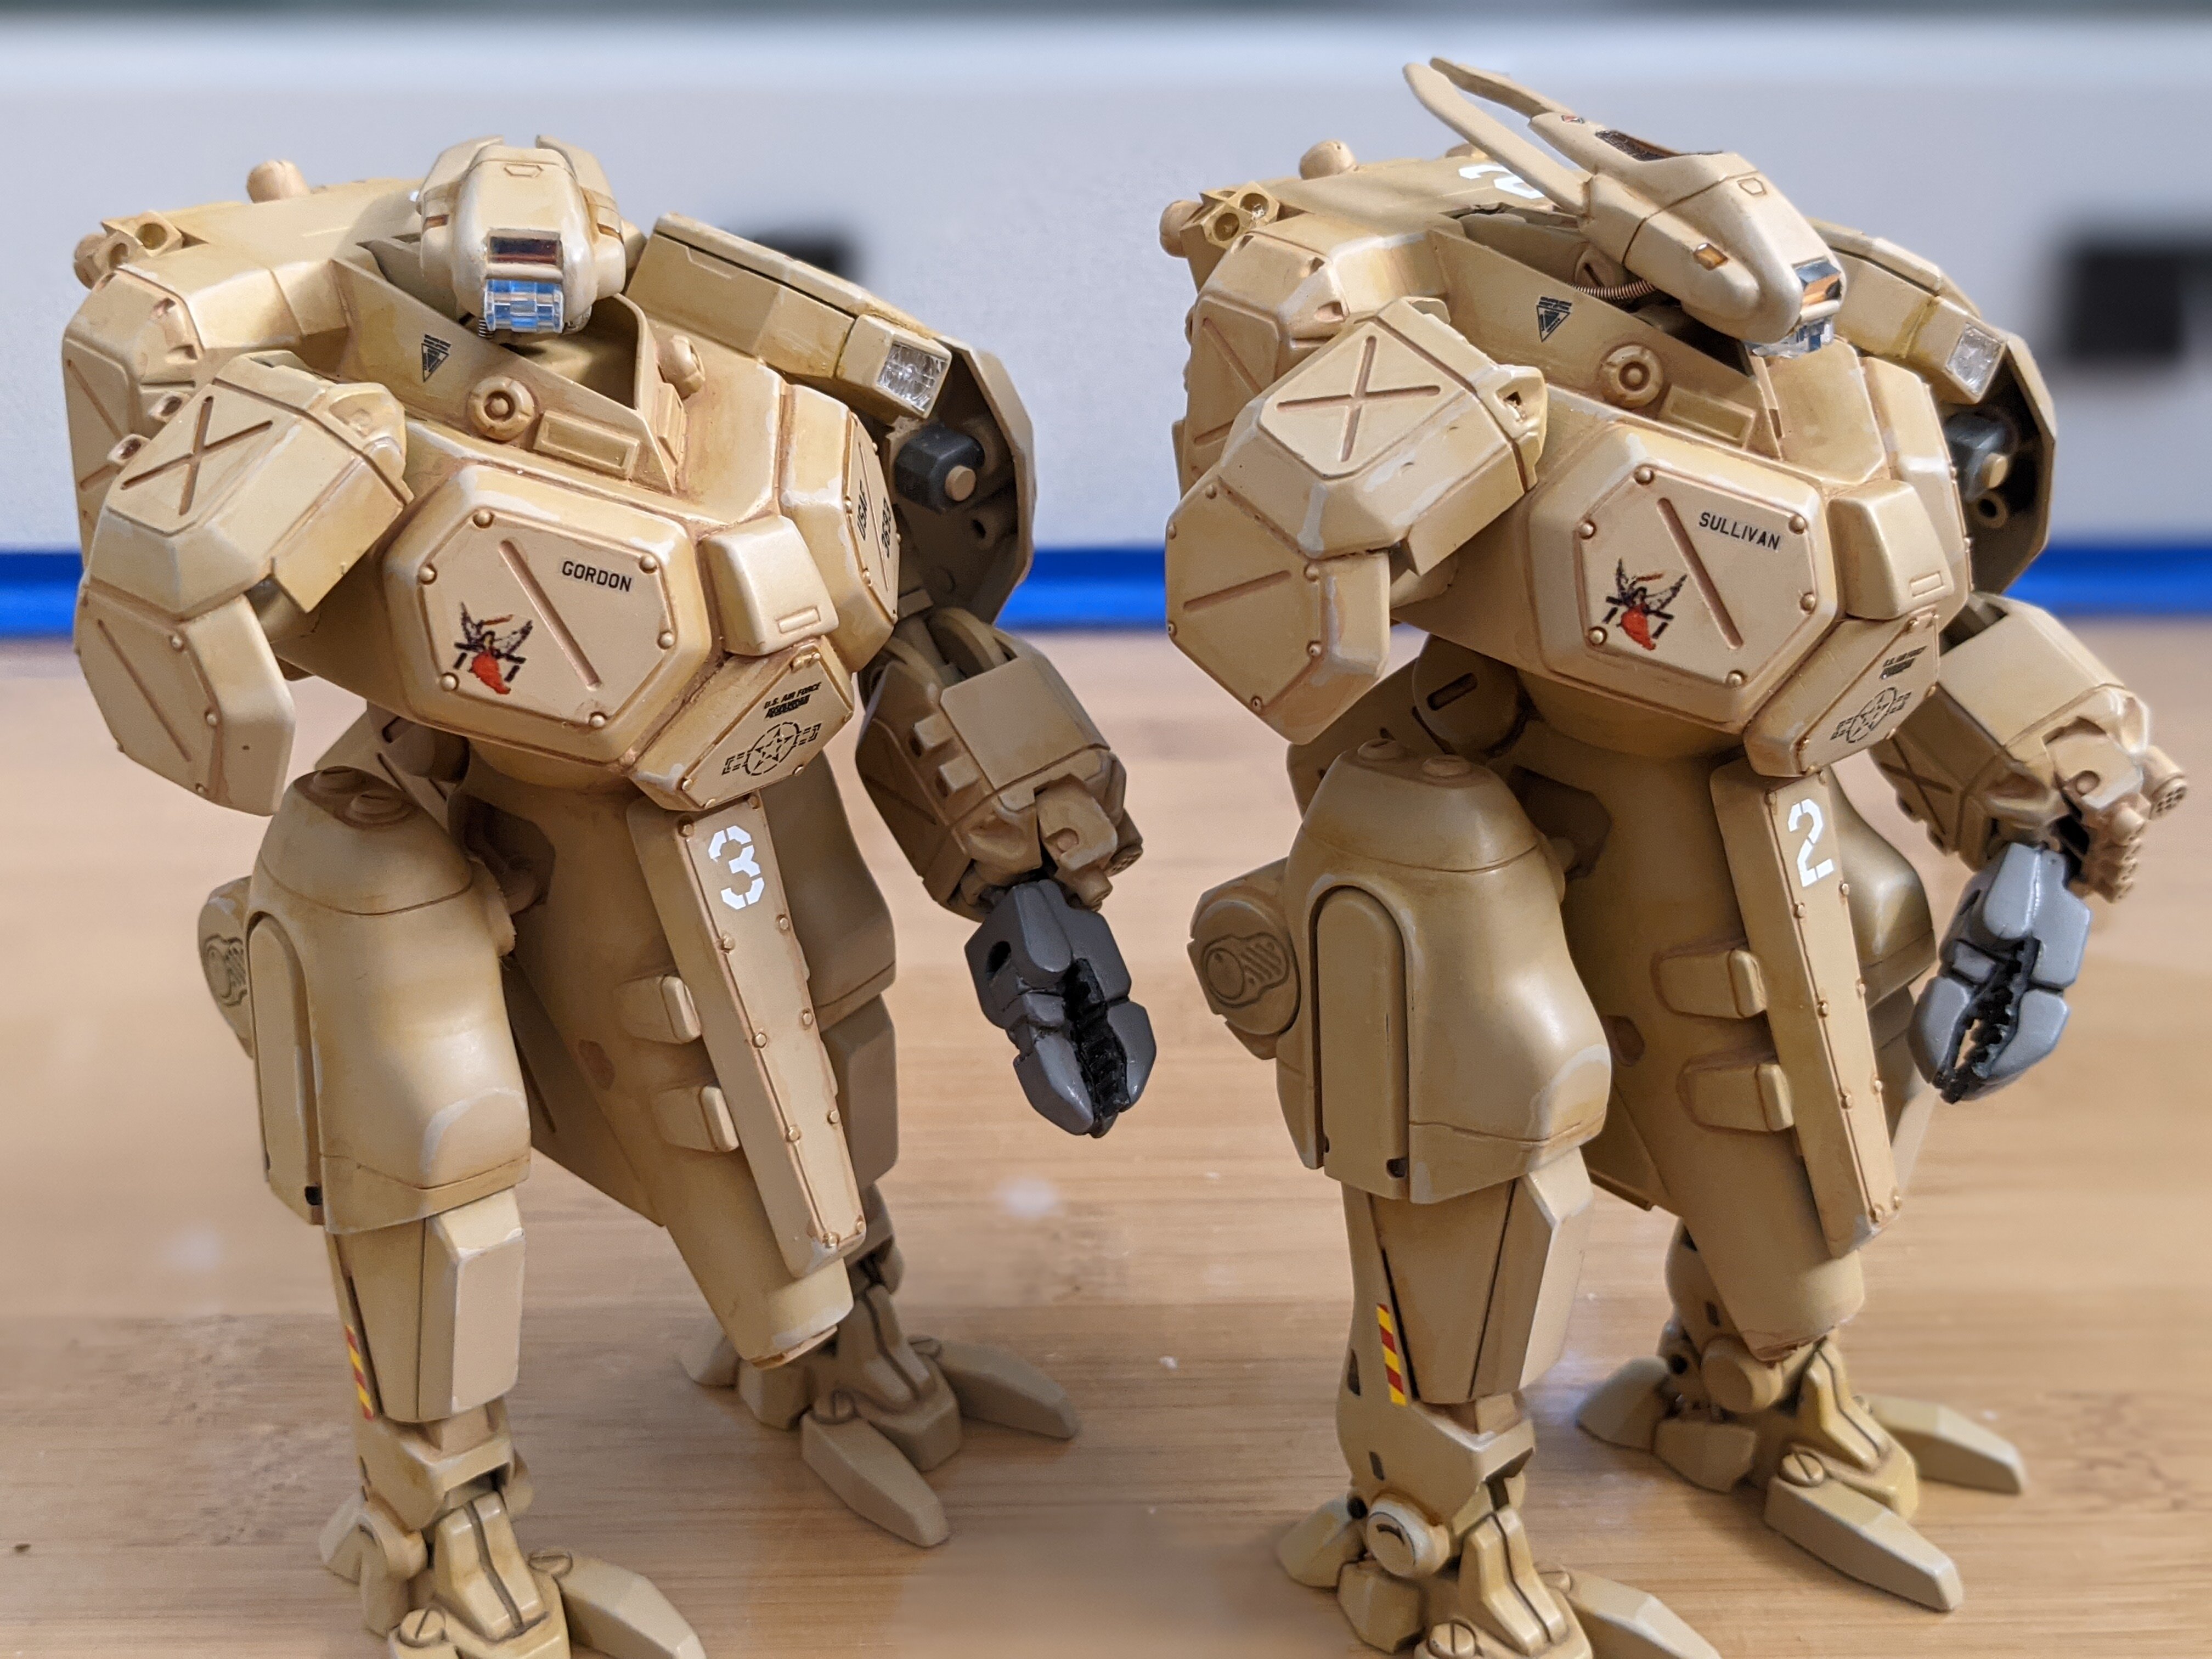
@electric indigo Your FSS stories collection is looking great! I have to watch that anime again. I haven't seen it since the 80's! That paint color and finish on your model is great! @pengbuzz Those upgrades are sweet! You're collection now has a great place to "hang out" in. @peter That "Puttyprise" is a sad engineering job! Those seems are big enough for a scale figure to walk through; but you're making it look great! @CrossAir SUPERB finish on that 25! It's hard to believe looking at the before and after pictures how different it looks. Congrats on getting something that was so tough to paint and decal to hold up. ABS plastic is not fun to work with and can be tough to get paint to adhere to. I'm starting to get "a-head" on the twins. I added in a spot light for "low tech" use. It's a Gundam nozzle with a foil sticker (save the foil borders from your Gundam stickers) and a custom cut lens from what used to be a ships window to give it that circular pattern. There is STILL A LOT of painting and touch ups needed on these models (to include cleaning fibers from the rag used to wipe excess glue). Also save the optics from your old cameras and phones. For the top optics glass on the head, I took optics glass from an old camera and got that anti-laser coated look on so many military optics today. The bottom blue optics are cut spare clear pieces with a piece of acrylic mirror inside coated with a blue Sharpie. It has a nice reflection with light like laser designators have. Also new on the head are the spring cable conduits. They're already a bit weathered so they didn't need any "help". The decals are also finally picked out from my spares, so that will hopefully get done soon! Thanks for checking in! - MT