
MechTech
-
Posts
4702 -
Joined
-
Last visited
Content Type
Profiles
Forums
Events
Gallery
Everything posted by MechTech
-
@Thom Your mods are looking good! @derex3592 You could have foiled me, the tarps look realistic😁 - MT
-
@Thom Your ship mods are looking great! @derex3592 Those lights AND your skylights both look really nice (other wise your furry friend wouldn't be there)😁 @electric indigo Your primer looks SMOOTH. @Urashiman Despite all the flaws still on the surface, that is a VAST improvement over the original! You can do it! @ahiachris Those look cool! What type of mod are you doing? - MT
-
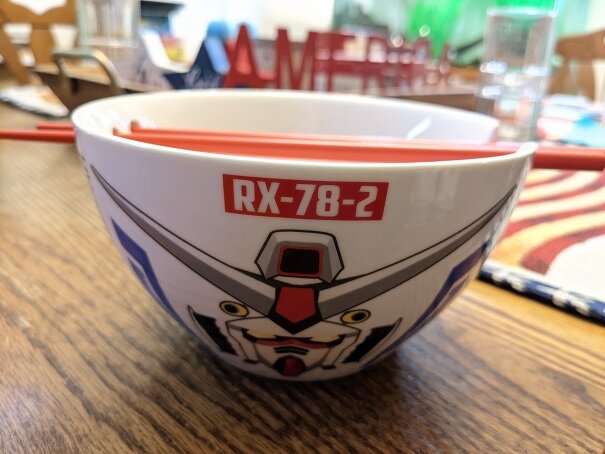
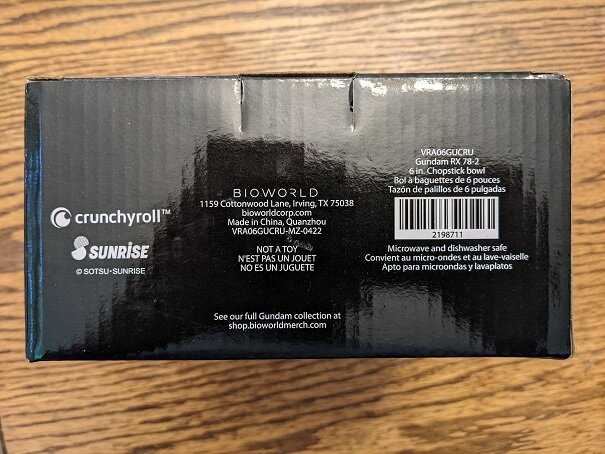
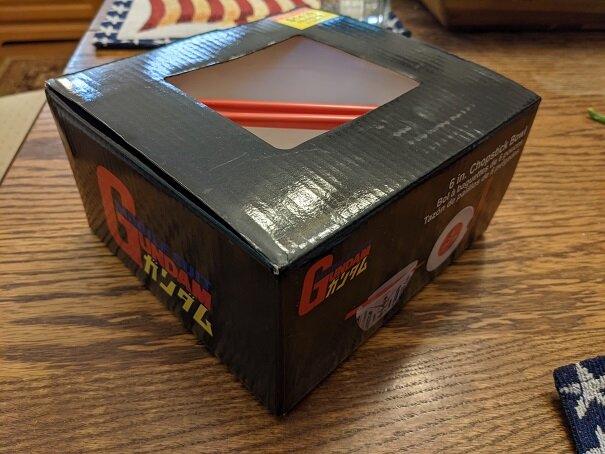
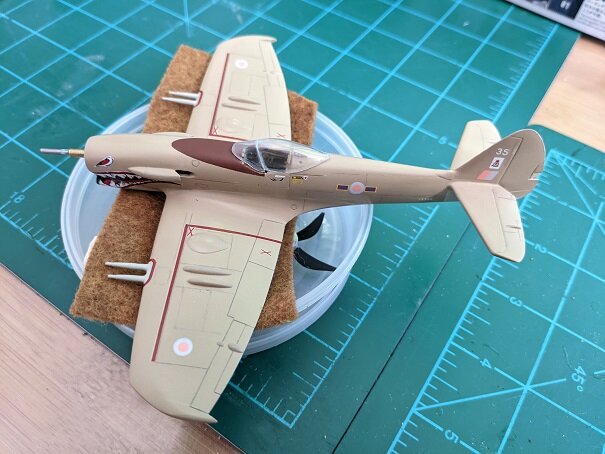
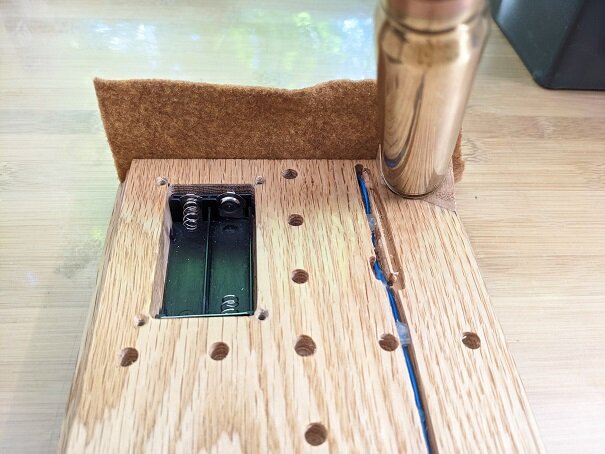
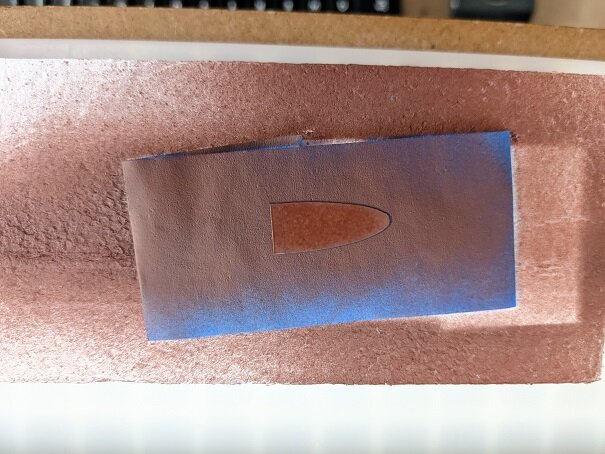
Happy Independence Day to my fellow Yanks! @pengbuzz Dude, you totally transformed the Lisa figure! She was like "Plane Jane", now she's like "Babe-alicious Barb!" You have some great skills transforming or scratch making figures. The "organic" sculpts are the tough ones for me. @Rock Oh , oh, someone's gonna get J'Dammed! Your ordinance looks great. For those Gundam fans near a Hobby Lobby, they are selling all sorts of anime related merchandise to include socks not listed online. You have to ask for a rain-check from management if they are out. One of the cool items they have is the Gundam ramen bowl. Here's some photos. Their prices are much better than other places. I found this adjacent to the models on an end cap. In fact, my son and I notice the anime models are pushing the conventional models down or off the shelves! More Gunpla kits now than ever. No Hobby Lobby near you? The last photo has their contact info on it. I know - I don't have time to post this in the "Gundam Thread." I've gotten a little work done on the Spitfire. I've completely redone the markings except the shark mouth. The decals are a modern British scheme from the 80's. Like Pengbuzz, I'm having fun polishing this windshield too. The parts DO NOT fit well out of the box. It's taking me about a whole day to make this windshield section. Then I'm covering the end with felt to cover the wire slot and also some for the bottom. It was a huge .33 cent expenditure. After it dries it needs to be trimmed. That's it for now. Thanks for checking in everyone! - MT
-
That's looking BEAUTIFUL!!! - MT
-
@derex3592 Your ship is looking great! The details will REALLY make it when you hand it over to its new owner. I hope your leg heals quick and thoroughly! Keep that knee moving😁 - MT
-
@Big s Yeah, mine helps inspect the new boxes for "defects." 😁 @Urashiman It may be a pain to do, but it looks good! @derex3592 That will add more "pop" to the upper decks when your done! The variations are a nice touch! - MT
-
That's funny! Looks like the "budget" version with less armor.😅 - MT
-
@Big s You get productivity out of yours?! You must share your secrets😅 @Urashiman That TOTALLY sucks! I guess you're not going to strip it down? My spitfire paint job did that too. I used a very fine sponge sander to get it smooth, then buffed it out with a rag. You may still be able to help it along. If you can save that F-5, you can save this. - MT
-
I'm HAPPY they did the small missile version. You KNOW the heavy missile version is coming. Most of the parts are already there. - MT
-
Boxing the kit with stickers is LAME! However, I like that they went the GunPla route with the construction on this model. - MT
-

1/72 F203 Dragon II Kit Proposal --Moscato Hobby
MechTech replied to captain america's topic in Model kits
Looking awesome Cap'n! Yeah, RenShape - at $100-$200 (USD) a board! - MT -
Were these VF-1J colors ever done as a custom by anyone?
MechTech replied to Radioguy's topic in The Workshop!
After watching Macross and loving it so much, I went the opposite way and was upset they "jacked up" the colors AND decals from the anime😁. But I was excited to get the models with the correct decals in the kit. Today I see the seam lines and other flaws in the box art. I guess I'm in the same boat as @DewPoint!😉 Today I also understand they went the way they did for licensing reasons. So the paint schemes are actually REALLY cool in what they did. - MT- 10 replies
-
- 2
-

-
- hayao kakizaki
- axoid
- (and 1 more)
-
@Urashiman I flew into East Germany twice en route to/from Afghanistan for refueling. It was weird being "behind the iron curtain." Of course I bought a couple of postcards with Berlin Wall fragments in them. 😁 - MT
-
@electric indigo Congrats on a new assistant! Remember, if it's out of their reach, its safe! Otherwise - it's your fault (goes for children too)!😁 - MT
-
That is a REALLY cool build and I love your colors! Congrats on having a rare bear in your collection! - MT
-
@Rock Your paint is looking really good! The engine discoloration is a nice touch! @pengbuzz Thank you! I'm trying. @arbit Thank you! Yes, more weathering and layers to come with the paints. Aluminum doesn't rust, and active military aircraft are not -usually- allowed to have corrosion on them. So I'm trying to get the right looking wear on them. Usually the paint chips off the zinc chromate (green) layer like you see or off the skin altogether - which quickly gets patched up. I have to create the patching up and weathering now. The masking technique is actually not masking. You paint decal paper and apply it as normal. I used glue because of some thin areas. This technique allows you to work with the material and no worries about paint bleeding or leftover residue from masking. Its not for everything, but was great here and for windshield frames. - MT
-
@Duymon That's cool! Thanks for showing a complete build! @no3Ljm Thanks for posting the photos! Reactive armor for Christmas! 😁 - MT
-
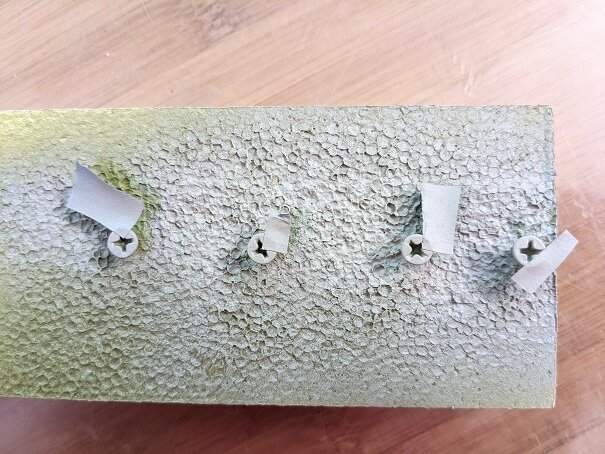
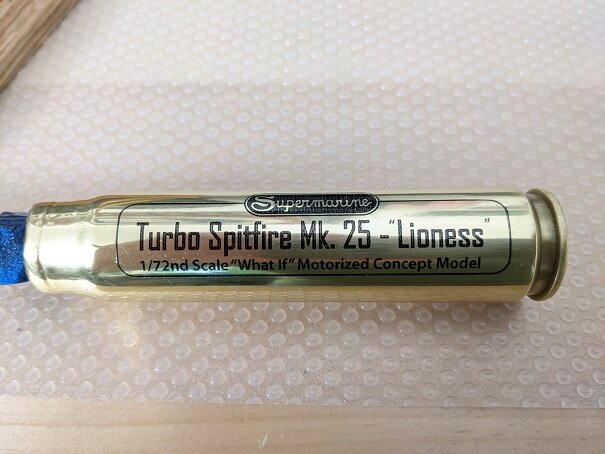
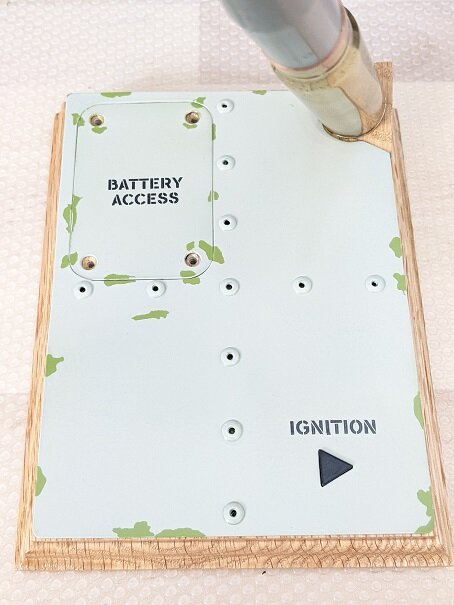
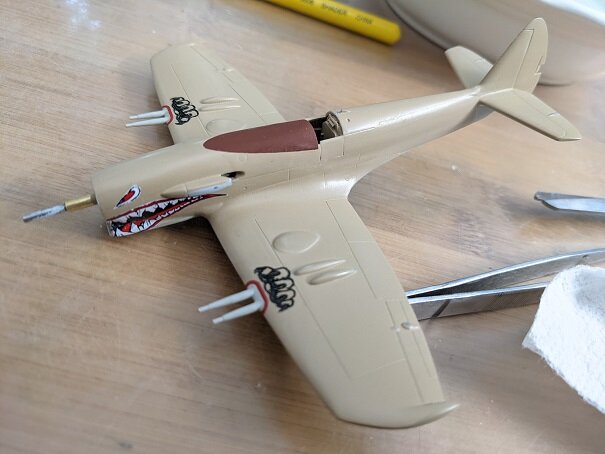
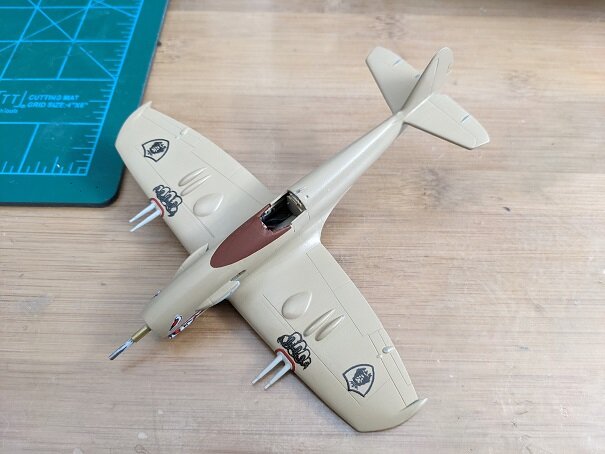
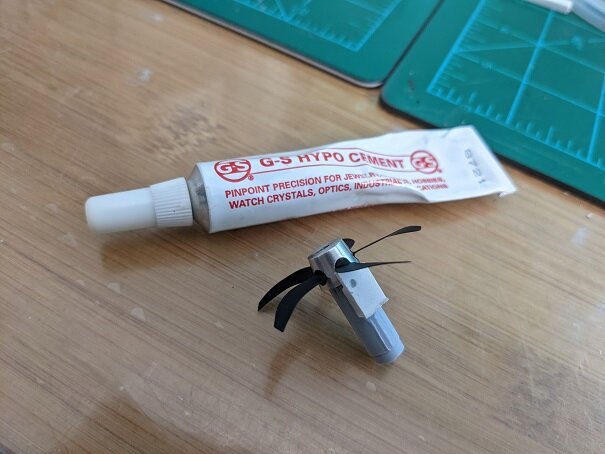
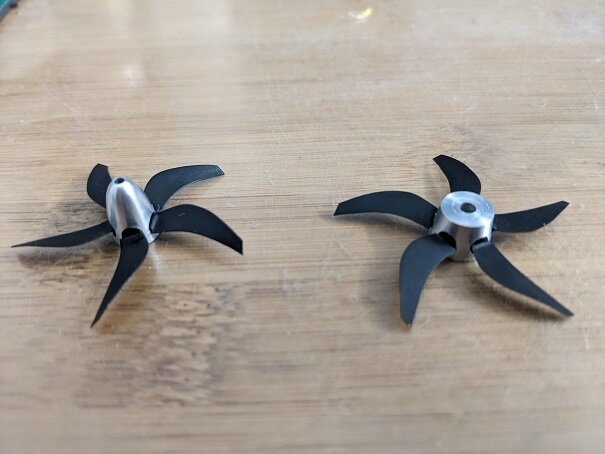
@Urashiman Your rendering is looking line-art accurate! You better hurry, ONLY six months left this year! @pengbuzz Your SDF-1 looks FANTASTIC Photoshopped with a background! The rail guns look great too! @Rock That's the kind of pasta I don't like, no flavor to it. Cool idea!😁 @Thom Your work and improvements are helping to add realism to that kit! @derex3592 In a square dance call: "Everyone prom-i-nade!" They're looking good! Thank God the weather changed this weekend! The humidity kicked in earlier in the week and all the clear-coating I was going to have to do would have been delayed. Thankfully we got great weekend days where the humidity was low enough to paint! Painted and clear coated the screws. Here they are masked for "chipping." After FOUR long and frustrating tries, I FINALLY got a good decal and the gloss coat to work together! It's the models name plate and an actual shell casing. The base after several coats of clear gloss (which didn't come out glossy). And then several coats of clear satin which DID come out glossy!?!?!?! I'm thinking I over did the chipping. I might hand paint over it to look like "corrosion control" paint. Then it needs a dirty wash of grime. Don't get frustrated trying to mask a tough shape on your model. Paint a pre-cut piece of decal paper. Apply it with some glue over your model. And then trim it! I'll have to redo the black lines around the shark mouth. Sadly, they chipped off when I was applying them. The sealer didn't work very well. Do you think the claws are too much around the cannon? Last step was to finally glue the props in place. CA sets too fast and might cloud the props. I needed something thin and that would clean up easily. So I used this glue and made a jig to set the blades all at the same angle. And the props ready to go. Excess cement just rubs off the aluminum hubs. I might put a cannon in the spinner. Someone suggested it in our club. That's it for now. Thanks for checking in! - MT
-
@Thom Your mods are looking good! @Rock Your paint looks good, even though you weren't happy with the other coats being hid. One thing, USAF aircraft are kept clean for the most part. Don't get too carried away with the washes. You'll make some crew chiefs upset😁 - MT
-
That is probably the MOST eclectic collection of Macross ships I've ever seen! You have some VERY RARE versions, let alone all being together too! Congratulations! - MT
-
The 'Hey look at this really cool model build I saw' post
MechTech replied to Shawn's topic in Model kits
That Macross Zero Dio and bright green Quedlunn look great! - MT -
It sounds funny, but yeah, we need a BIGGER Monster kit!😁 - MT
-
Hobby Japan Vintage #7 coming end of March...more Macross kits!
MechTech replied to Shawn's topic in Model kits
Wow! Cool! This is giving me more flashbacks than an episode of "Kung Fu!" - MT -
Great build and photos! I like how you made the navigation lights with fluorescent colors. They stand out. - MT
-
I guess they made special piece for the chest. Cool new scheme and box art! - MT