MechTech
-
Posts
4702 -
Joined
-
Last visited
Content Type
Profiles
Forums
Events
Gallery
Everything posted by MechTech
-
Great work Petar! At last, some crazy micro modeling I can relate too! If you squash mold that, some glass filler or epoxy resin might keep it from drooping over the years. Then again, it may just be light enough for it's size! Keep us updated! - MT
-
The LAV with stinger/avenger cannon looks great! I thought it was 1/35th. And of course the Ghost looks great too! - MT
-

Bandai 1/72 Scale Macross Frontier Plastic Models
MechTech replied to Graham's topic in Hall Of The Super Topics
For those that have any doubt that Bandai is TOTALLY behind making MACROSS stuff, this picture is for you (from crunchyrole.com) But I digress... - MT
-
The Glaug looks good. It's a pain painting the lighter round trim over the darker parts on the kit. - MT
-
Looking great! Keep it up. The finished product will be well worth it!!! - MT
-
Talk about a multi-media kit!!! This should help your trouble. I've used Micro Mark more times than I can remember. And oh, they have an export kit for you! http://www.ares-server.com/Ares/Ares.asp?M...ct&ID=82084 It may not be great for mass priduction, but it will educate you. I'd guess you could get a couple of kits out of it. Plus molding requires a little practice. - MT
-
What type of plastic is a YF-19 made of, and how do you glue it?
MechTech replied to David Hingtgen's topic in The Workshop!
Dave, the Plastruct stuff should work! I've been using a little ABS angle for the Daedalus and Duro superglue stuck right to it too! Not brittle or anything! If you're having gap issues, you may be able to scrape some etchings from the inside of the part and mix it with solvent. Just putty it into place and sand a couple of days later. All that provided you haven't "Done the deed already. - MT -
Help a newcomer please! Where to buy mecha kits in the likes of a
MechTech replied to BostonMacK's topic in The Workshop!
Welcome BostonMacK! If you want some old school fun (and on sale now!), wraith is right. Check this out: http://www.hlj.com/hljlist2/?MacroType=Inj...p;GenreCode=Sci Votoms is closer to what you've been building. The 1/20th Bandai kits are awesome! Multiple colored sprues, awesome fit, and the Red shoulder Scope Dog has tons of ordinance on it. They are slower on order processing, but most of us here have probably used them for years. What country are you in? There's other options too. The destroid monster is more easily available in resin. The plastic kit can be anywhere from $75 to $200 average last I saw - IF one is available. Other Macross related stuff from HLJ: http://www.hlj.com/hljlist2/?MacroType=Inj...p;GenreCode=Sci By the way, try not to drool on your keyboard . - MT -
The loader looks great! I'm trying to figure out what the happy face on the loader's side does . Talk about throwing in "random details" to surfaces. I thought the Star Wars models had some crazy stuff put on them. - MT
-
Not bad all things considered! - MT
-
The carrier does look cool. I always wanted the stealth carrier with one each of most valks. I think it is 1/700th. - MT
-
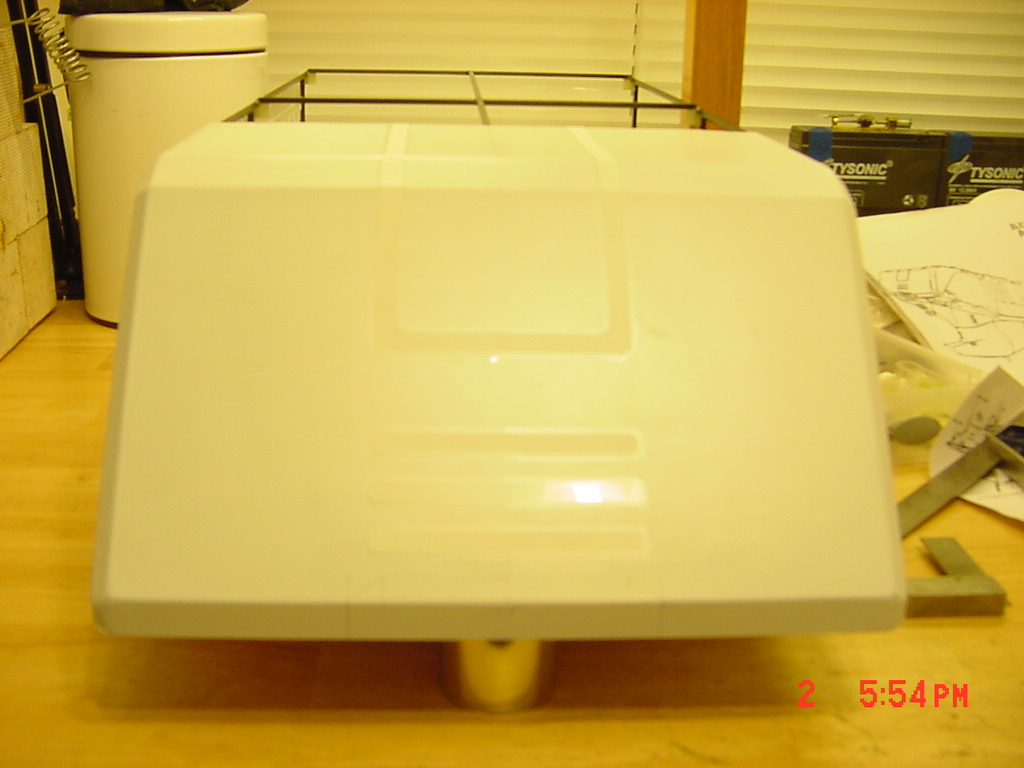
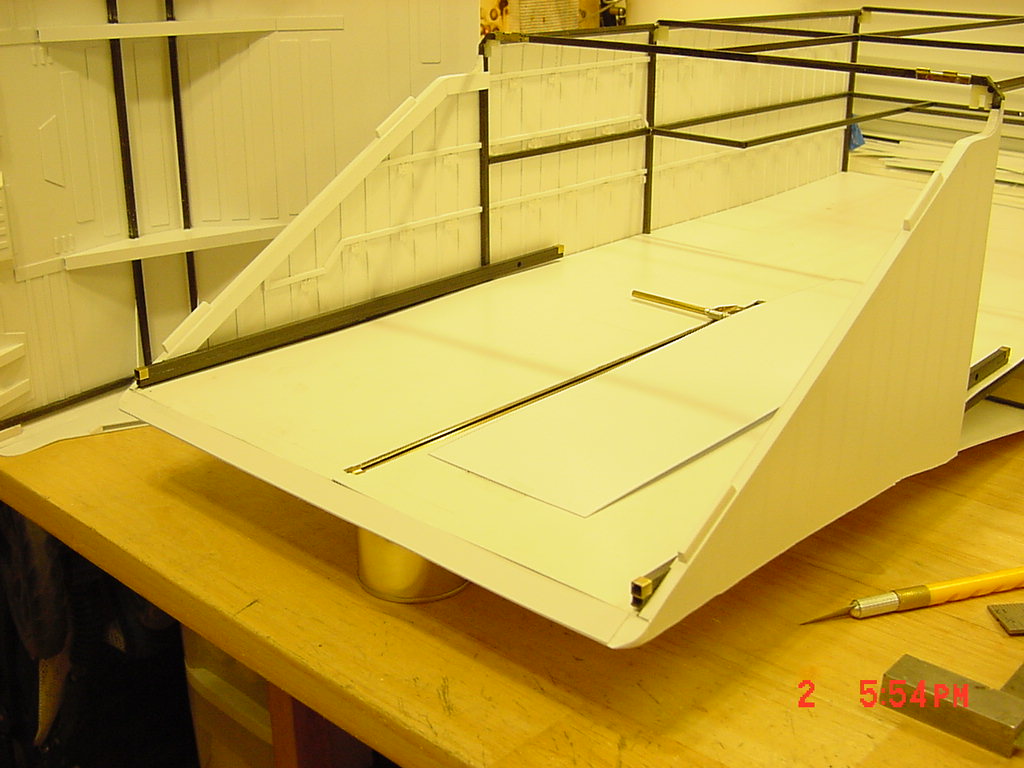
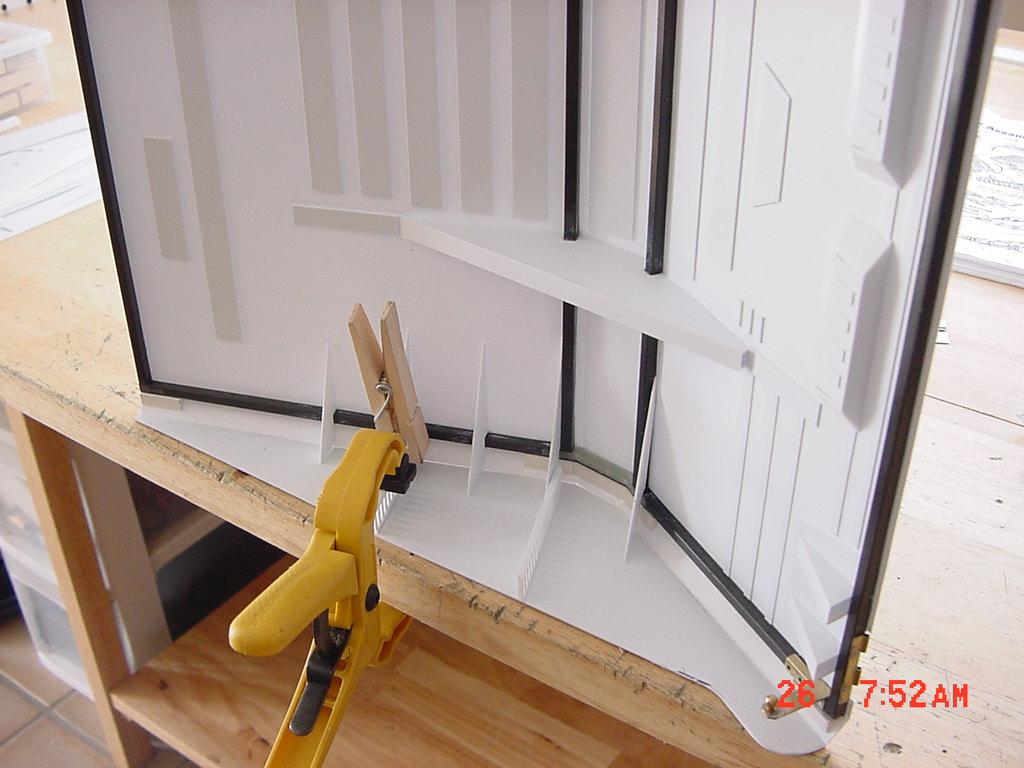
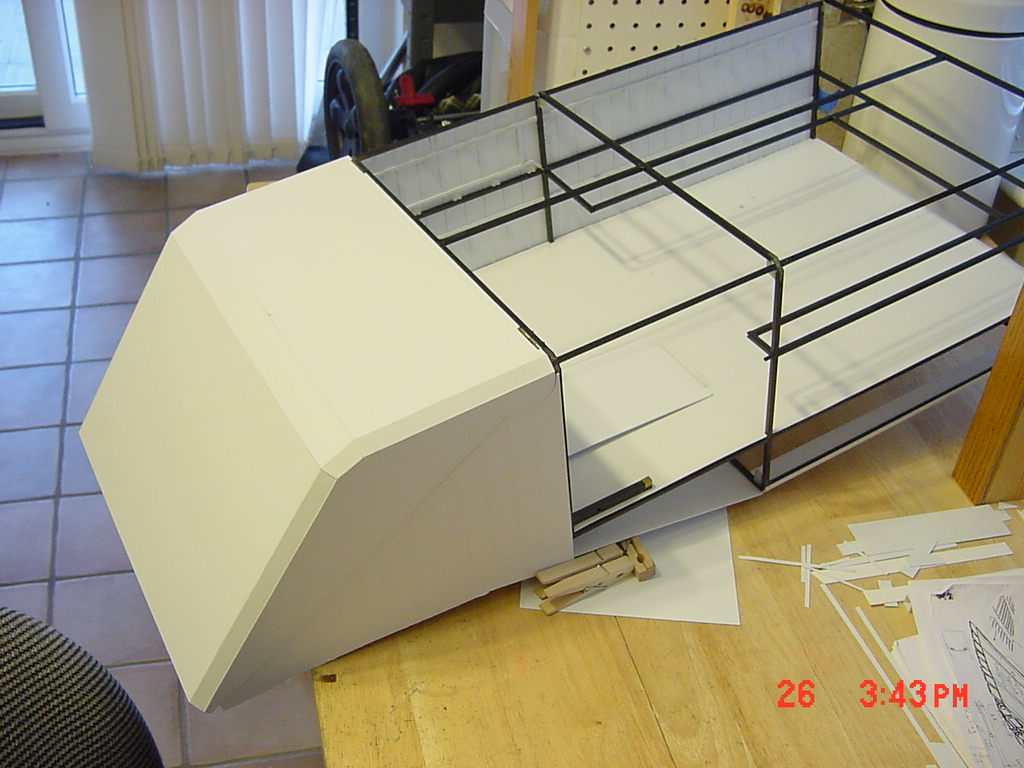
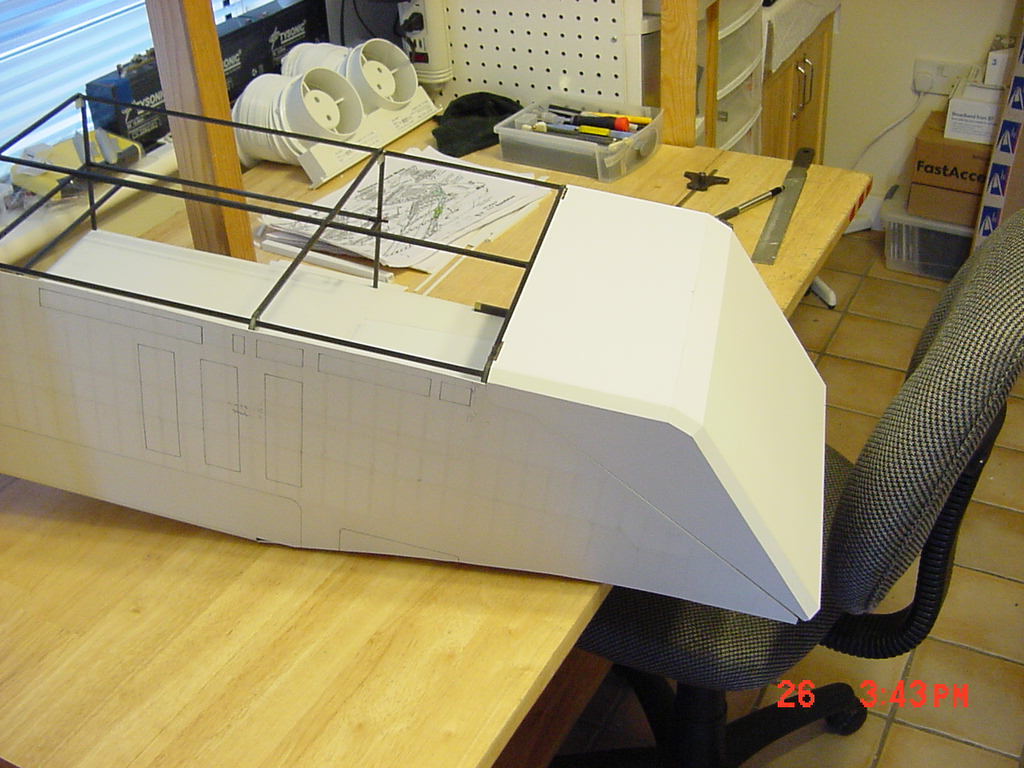
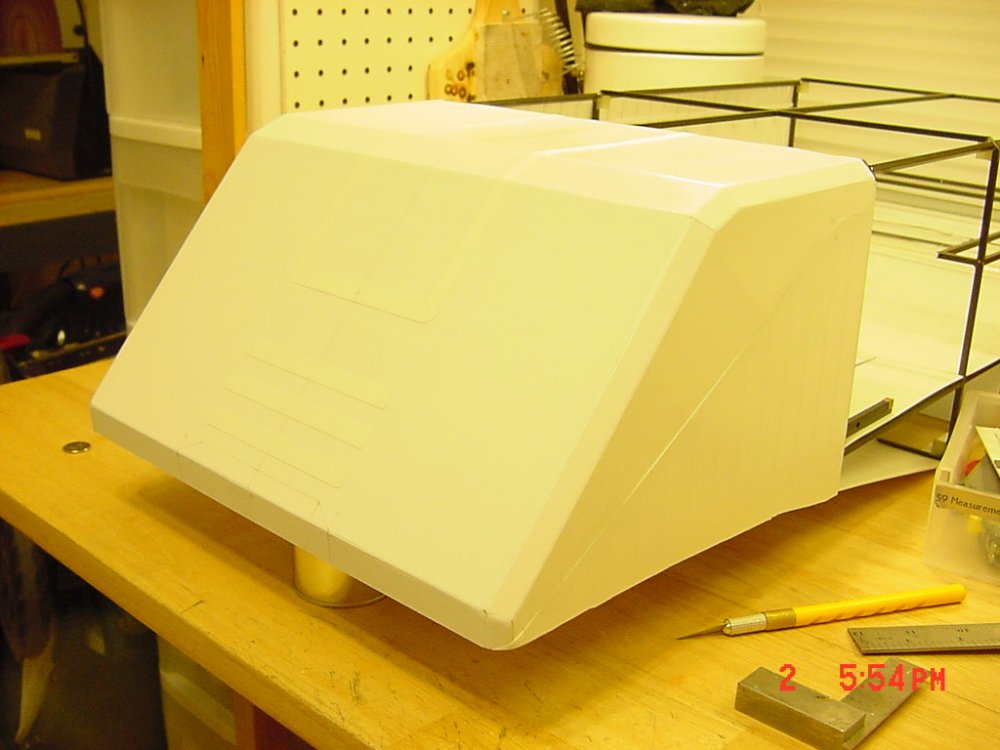
Valkyrie addict - I'm guessing about another year to complete. The hard stuff is nearly done. Everything else except the elevators on the sides will be just plane ole construction minus all the engineering to animate parts. Fly4victory - Thank you for the compliment! The upper deck will be laser engraved to simulate the tie-downs for aircraft. The ramp anti-skid strips will be black paint for scale thickness. I love scratch building and this thing is sure keeping me busy doing it! It takes a lot of refitting of parts to ensure it all goes together after an assembly. Sometimes not so successfully. B-52 GUNNER - Thank you as well for the compliment! I'll check out that site, I've never heard of them before. By the way, were you actually a B-52 gunner before the "pepper shot" conversions? UPDATE 4 Aug 08 Only three pictures, but a lot of work. The pictures were taken in low light, sorry. You can see the carbon fiber skeleton disappearing under the styrene parts now. The main hatch is mostly finished with the corners needing to be cleaned up. The front corner of the hatch has been put on and the corners rounded off to match up with each other. You can see the "teeth" on the doorway frame to align the hatch on closing. Now I don't have to put hinge pins back in every time alignment is needed to add something. If you remember (or look back), the lower front carbon fiber frame that was visible is now a "styrened over" pointed lip. The hatch aligns nicely with it. I added the big marks to the hatch topside and now I have to cut out a notch to install the mysterious winch looking thing in the door. If this was Star Trek, I'd say it was a deflector shield!? [att achment=56663:Bow_Hatch_Lip.JPG] I still have a lot of detail work to go on the hatch! That includes the interior spot lights and wiring. By the way, SO FAR the servo mechanism still drives the door open. It sounds like it's really working hard though! I'm still concentrating on lightweight construction! That's it for now. - MT


-
What, no "Petit Cola!?" The set looks really awesome. I wouldn't want to climb those steps either . It really makes me want to get to building the interior of my ship! - MT
-
Bandai 1/72 Scale Macross Frontier Plastic Models
MechTech replied to Graham's topic in Hall Of The Super Topics
Did you say retirement? - MT -
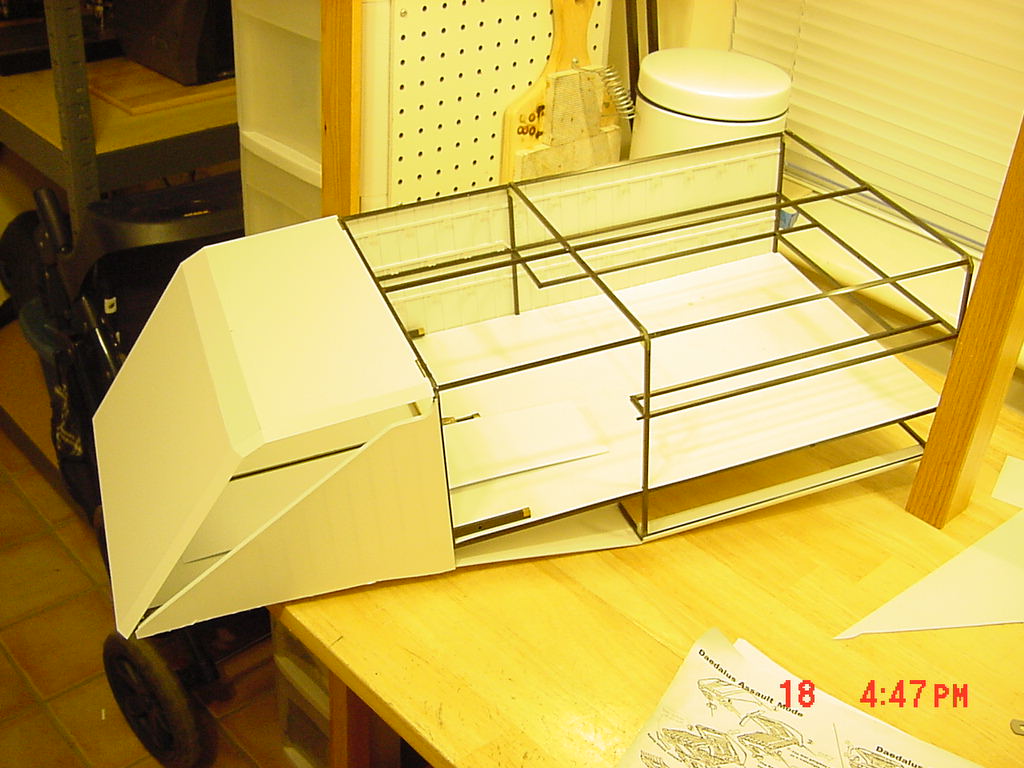
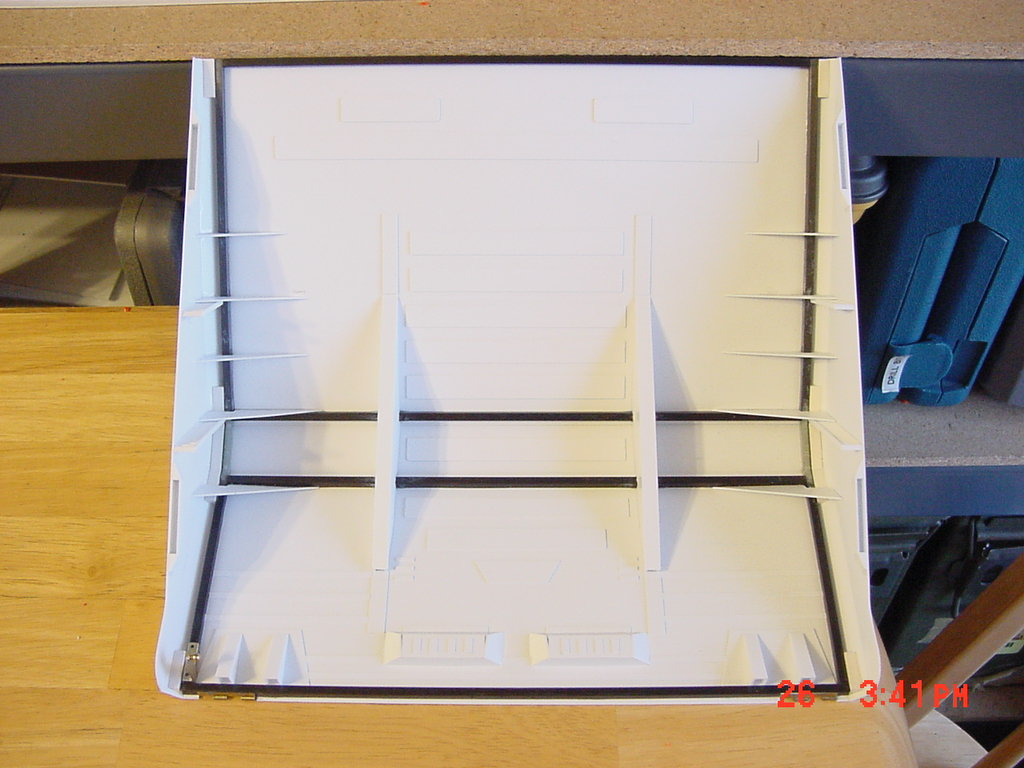
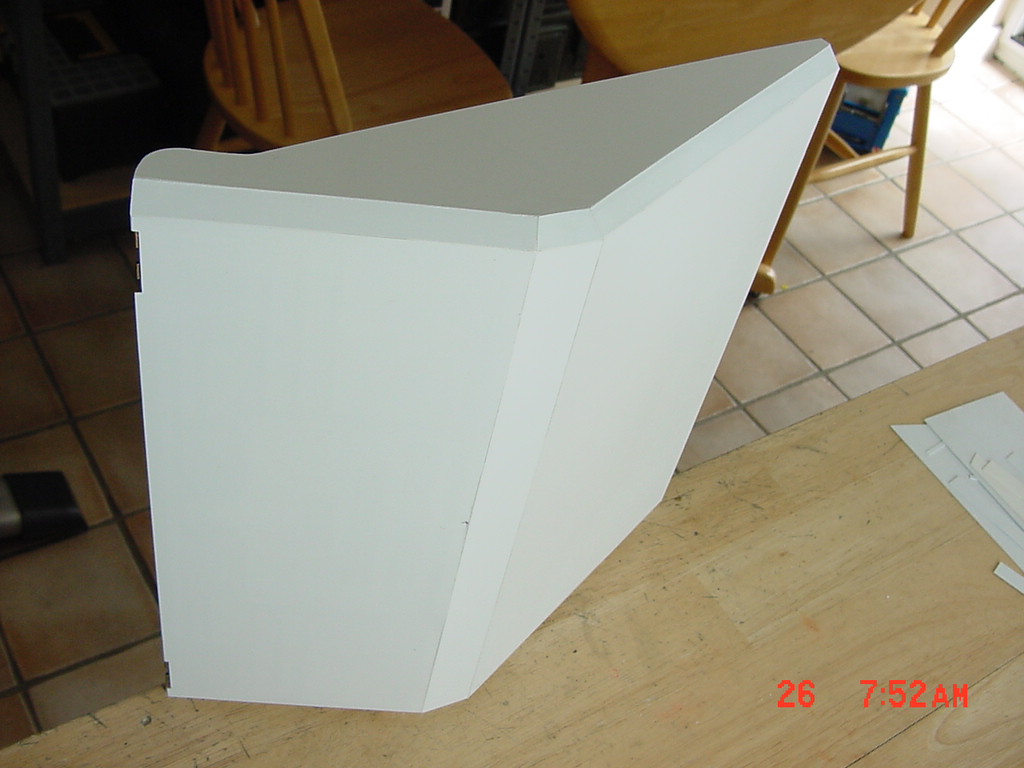
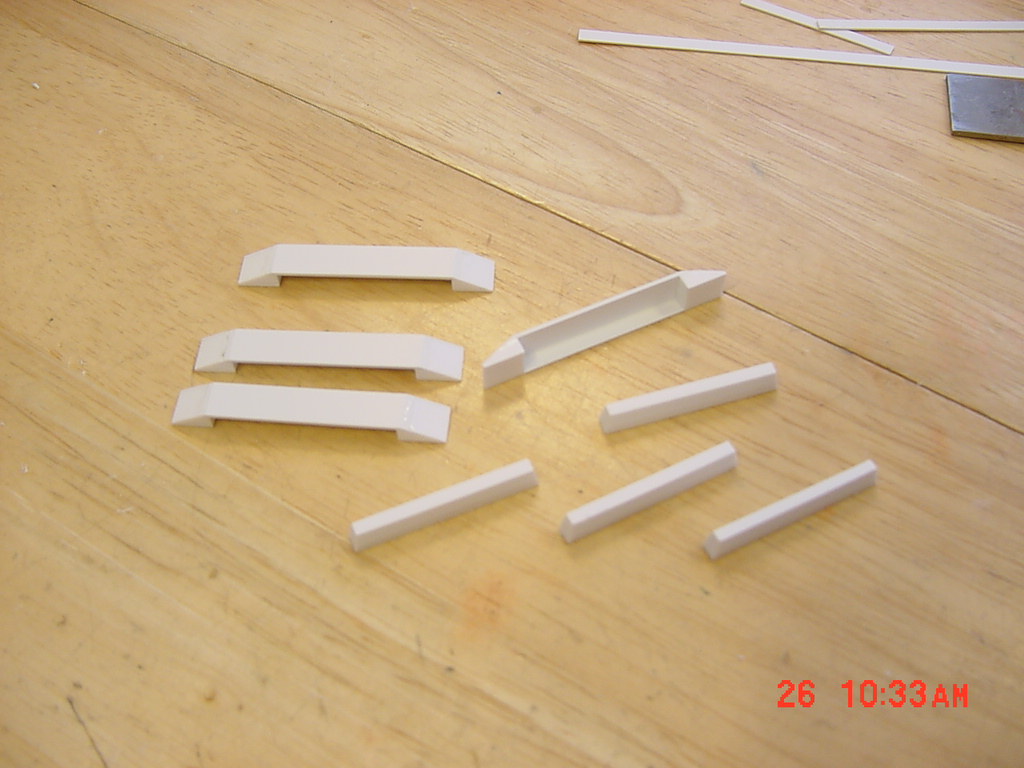
UPDATE - 28 July 2008 Thanks again guys! It's actually starting to look like something other than parts now. A LOT of work went into getting the main hatch to align right, but it ALL paid off! These pictures don't show the work I did tonight aligning it all up. [attac hment=56374:Teeth_and_Sockets.JPG] Building the hatch with MOST of the guts (still have more details) Now we're getting somewhere! This side is done for the permanent panels. The rest will be removable this side to reveal the interior. NOTE: the lower corners are NOT rounded off yet. That's another day's work. The hatch IS NOT aligned yet in these photos. In fact, the hinge pin is not inserted in one of the hinges. That's what I spent most of tonight doing. See ya later. - MT


-
That's awesome man! I thought about doing that with another kit, but I just couldn't bare to bust up a revoltech figure! Keep up the great engineering! - MT
-
That looks great! Too bad about the paint. When I can build kits in the original color, I do. I have yet to find a paint that doesn't scratch, rub or chip off easily! It's frustrating! I feel your pain! - MT
-
Lookin' great TSP! There's a lot of putty down there, but I can still make out all the detail. I don't know how many takers there'd be, but a recast might be in order. This would be a rare kit indeed! - MT
-
Welcome to MW Shadowx. I have no clue about your specific joint, but this may help: http://macrossworld.com/mwf/index.php?showtopic=26179 with replacements. These area available at hlj.com and sometimes at Starship Modeler. - MT
-
Looking great man! I love that kit. I think it's cool the way the nose tucks into the chest area. Your kit won't have the heaviness of resin and drooping some recasts may. - MT
-
The SDF looks nice and clean! Great job! I've got to find all the parts for mine and build it, someday. - MT
-
Bandai 1/72 Scale Macross Frontier Plastic Models
MechTech replied to Graham's topic in Hall Of The Super Topics
It looks like this model suffers from the same problem I'm having building the Daedalus in some areas, "anime magic." The gear is so large it would take up the whole nose if it folded inward (pilot and cockpit optional)! I can see the hands being removable, many kits have aftermarket parts followings to improve appearance. The gear and other potential parts being removeable would be a drag. It's still prototyped though... - MT -
For those in the US, Micro Mark has some great stuff: http://www.ares-server.com/Ares/Ares.asp?M...ment&ID=104 Just click on the category you need in the red box. I've made several sheets before in ink and toner. My advice: Ink: allow the sheets to dry thoroughly! Then use a good spray on fixative coating AFTER they have dried. Do not use a spray enamel (clear coat) to cut corners with. Your ink will run! Make a few light coats of the fixative. Toner: less likely to smear. One warning, sometimes the heat from the printer fuser makes the decal plastic brittle. Coat it with the fixative and then coat with clear decal making coating. Good for ressurecting old decal sheets that go brittle too. Make up some test area too and experiment. Thicknesses may vary and how much setting solution you need if used on bumpy surfaces. In the end, it WELL WORTH IT! Except for not being able to print white, it awesome! - MT
-
Official MacrossWorld Con 2008 Information Thread
MechTech replied to KiriK's topic in Conventions and Local Gatherings
I wish I could be there, maybe next time! Maybe business will bring me in the area next time around! Enjoy guys and it will be great to see some pics! - MT -
The vipers look great (though I don't watch the show). The destroids look great all together and in better lighting Neptunesurvey. - MT