MechTech
-
Posts
4679 -
Joined
-
Last visited
Content Type
Profiles
Forums
Events
Gallery
Everything posted by MechTech
-
Dada, fix the chips and fill the seems! Ooops sorry, not a model guy . It looks great actually. I'd tell my son, "dada doesn't do windows." - MT
-

Bandai 1/72 Scale Macross Frontier Plastic Models
MechTech replied to Graham's topic in Hall Of The Super Topics
Mecha porn (cover's 3 year old son's eyes)!? Yeah, I agree (switches to new thread... ) - MT -
Generically speaking, 1/72 is closest. More realistically, S-Scale for trains (1/64) is closer. I doubt you'll find pilots, but maybe a ground crew. One possible vendor: http://www.scalefigures.com/S/Sscale.htm I haven't shopped there. Hope that helps. - MT
-
Bandai 1/72 Scale Macross Frontier Plastic Models
MechTech replied to Graham's topic in Hall Of The Super Topics
Don't sweat it Miriya! My three year old and I just built the Bandai 1/20 Scopedog kit for HIM (really-I got my own in the box). He loves it and it looks awesome right out of the box! Except for the decal applications, I'm sure you'll be fine! It's taing a lot of 3 year old abuse too! PArts that would obviously break are ABS or softer plastic like polycap material (antenna). Still ON SALE TOO! http://www.hlj.com/hljlist2/?MacroType=Inj...p;GenreCode=Sci Bandai seems to be retooling the injections points so they have to be cut away instead of being part of the part. Less chance of tearing away nicks into the part. I'm digging the gunpod! I like how it separates (cooling I guess) and how detailed the muzzle is. Oh yeah, and the rest of the kit looks good too! - MT -
Bandai 1/72 Scale Macross Frontier Plastic Models
MechTech replied to Graham's topic in Hall Of The Super Topics
I like the looks of this kit too. Watching some MF this weekend helped feed the need too! Looks like the stand in fighter mode keeps it from drooping (like the 1/48 Legioss. As everyone else, I hope they'll do an armored version too. Let's see, it was in only the second episode, yeah, they'll do one! I better start budgeting! - MT -
Looks very realistic! Great work! I hate him as much as the "real thing" - MT
-
I've had success with PineSol taking paint off of REAL aircraft parts. I just wanted to soak them to get the grease off. It worked, and then some! - MT
-
Bandai 1/72 Scale Macross Frontier Plastic Models
MechTech replied to Graham's topic in Hall Of The Super Topics
Thanks for posting! It looks great! Better than the prototypes. The shiny table top is distracting though! - MT -
Looks awesome Cowie! It's good to see a completed project! I keep having to stare at white styrene - for now! There's no school like the old school! - MT
-
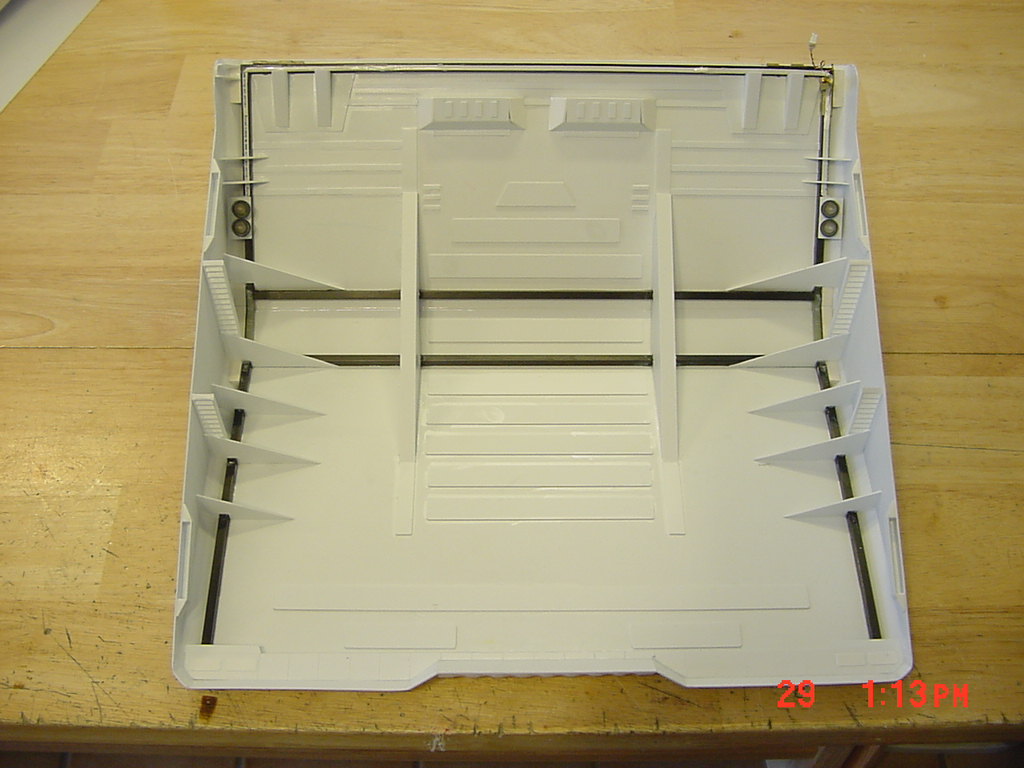
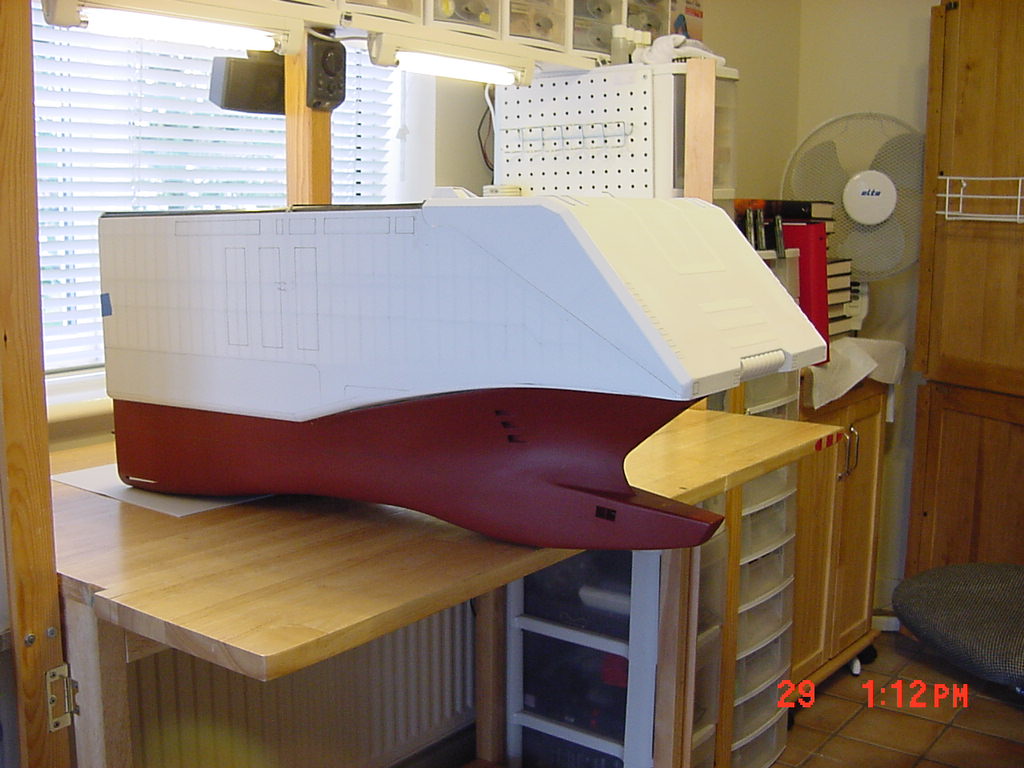
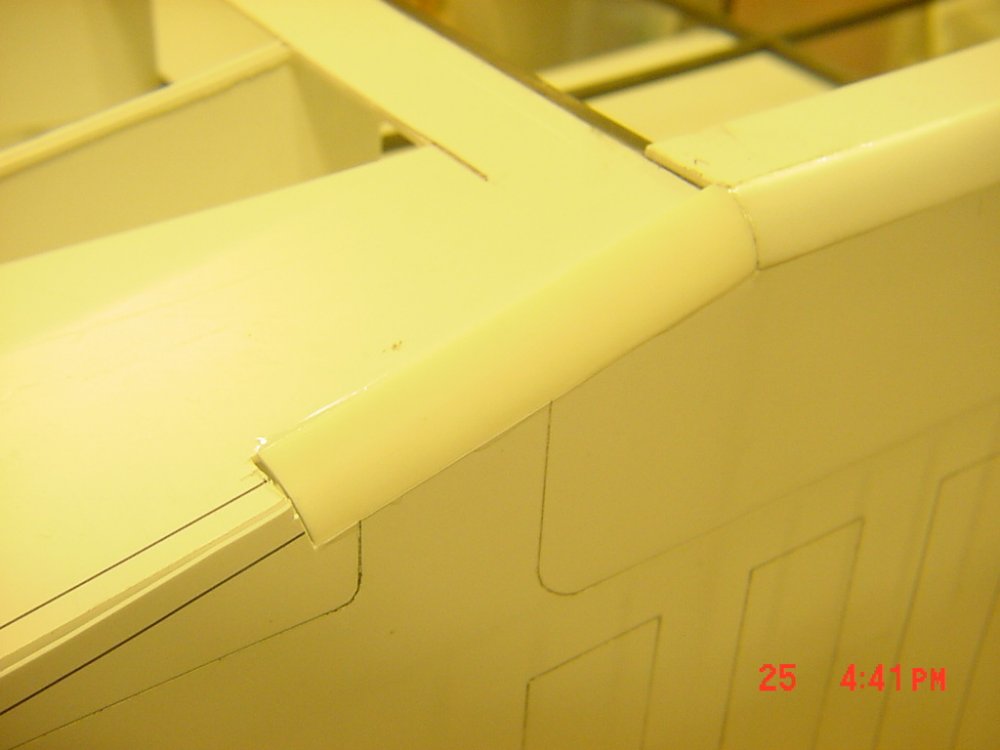
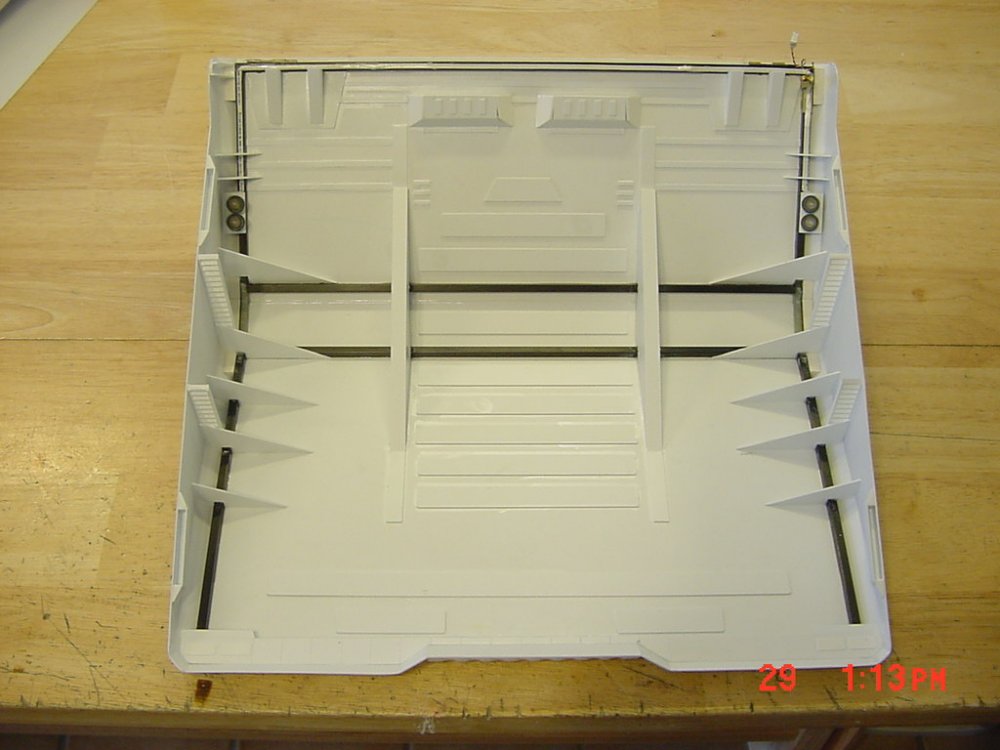
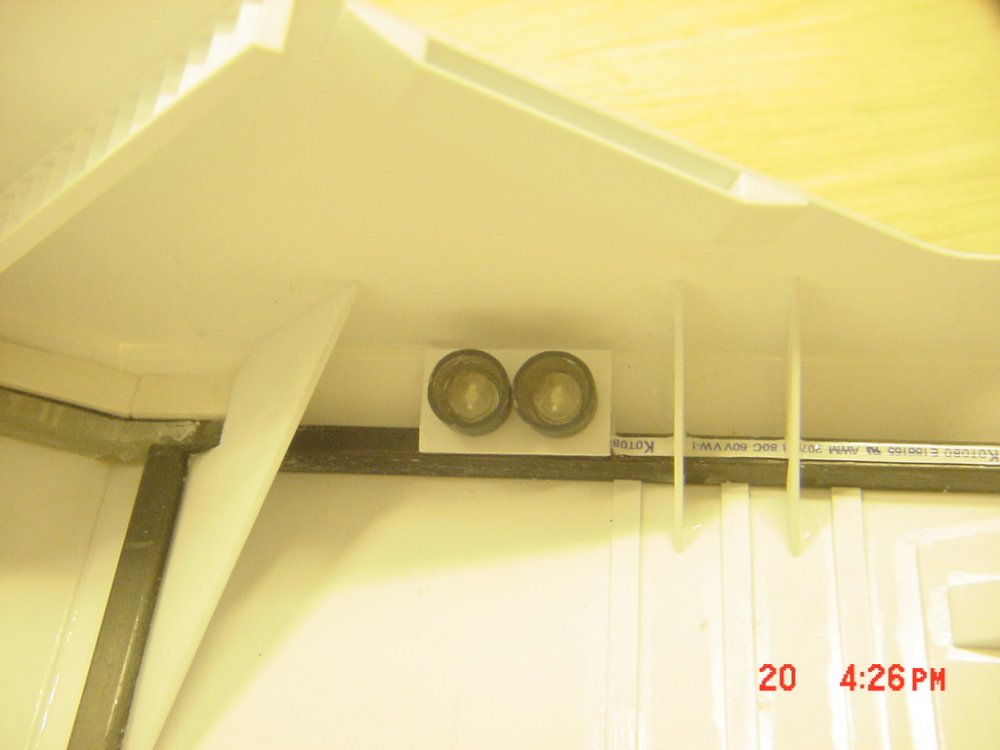
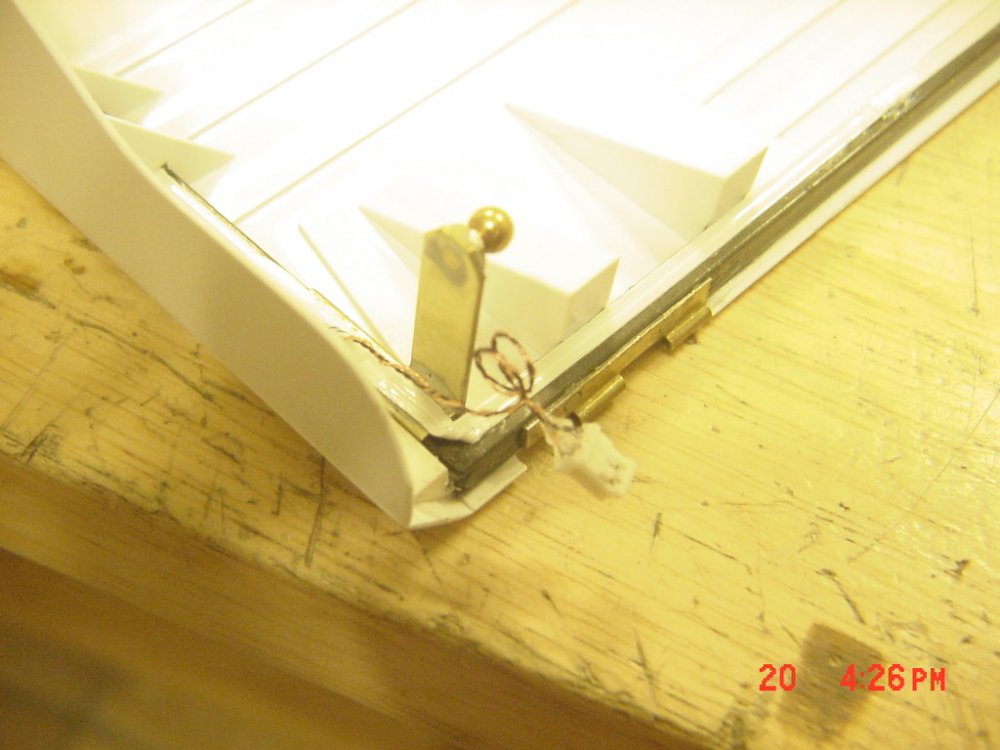
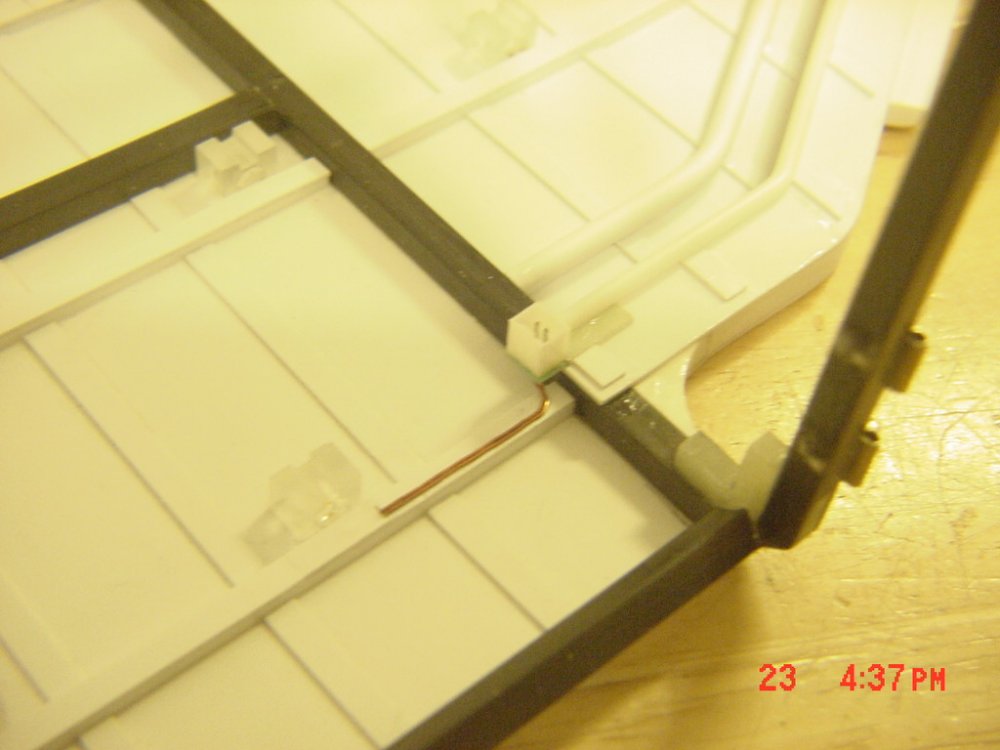
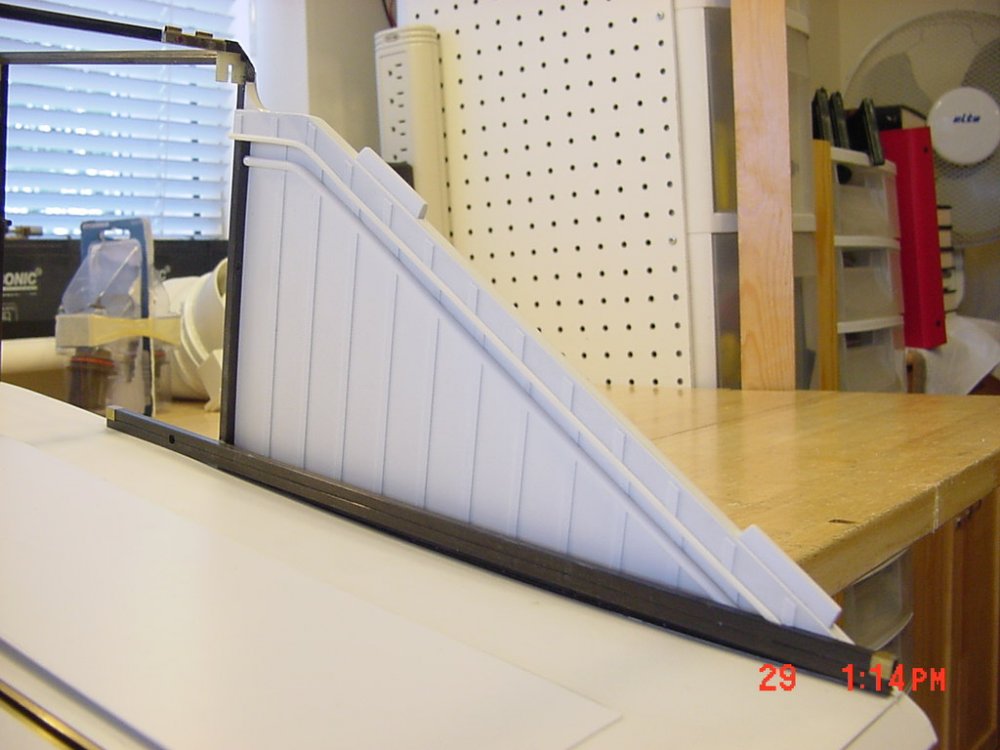
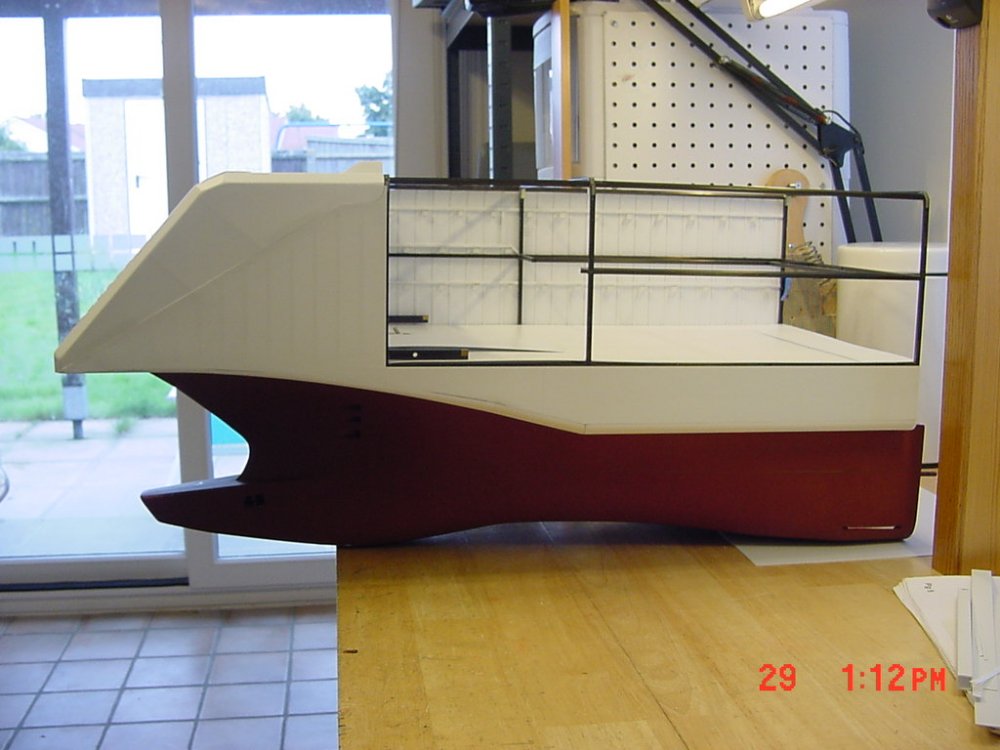
UPDATE 30 AUG 08 I forgot to place some size comparison objects in these photos - sorry! With the video (someday) I will. The part I dreaded most is done, the rounded compound corners on the lower side of the hanger deck. I used some curved and mostly flat 3mm strip with a TON of CA to fill the gaps - then removed so much plastic, I had to sweep the floor four times! It's smooth though! The hatch is FINALLY finished complete with floodlights too (interpreted from drawings). The connector for them is only 4mm wide! Entrance way interior detail is completed too... Does this remind you of anything yet? The big opening on the port side will remain. Remember, this is a display shelf/model and an R/C ship all in one. That panel will be removable or hinged. I'm still trying to decide. The hatch still opens fine despite the added weight and the actuator was also reinforced long-wise to prevent bowing under the pressure (like it was). I'm trying to decide on detailing the interior first, or wiring up all the actuators in the front end. Until next posting... - MT


-
AWESOME job! Is it real or a model? - MT
-
That came out awesome! It was worth the effort! Now you just need some Revoltech joints and .... - MT
-
That looks awesome. Great finish to a great idea! You should show it's extreme capabilities off by showing it picking it's nose! - MT
-
Microman Macro-Klan figure, with in-scale Michel & Q-Rau!
MechTech replied to AcroRay's topic in The Workshop!
Nice mods! Thanks for posting. It's good to see a little life being re-added to the old Imai kit too! - MT -
Thanks guys for the news and translation! I like the look. It's better than Bandai's 1/100. It's got potential... - MT
-
Good progress and the photos type j9 posted are great! I'm still whishing this was a "canon" design "in the Macross continuity." - MT
-
Bandai 1/72 Scale Macross Frontier Plastic Models
MechTech replied to Graham's topic in Hall Of The Super Topics
Thanks Graham! I think I might buy one after all! If this is poly-capless, all is not lost. I have some of the Kotobukiya joints and they are nice. Like styrene, there are different grades/densities of ABS they can use. If the joint gets loose, a little CA will tighten it up. This looks way better than the prototypes we saw. Time some people to get some salt and eat some words - MT -
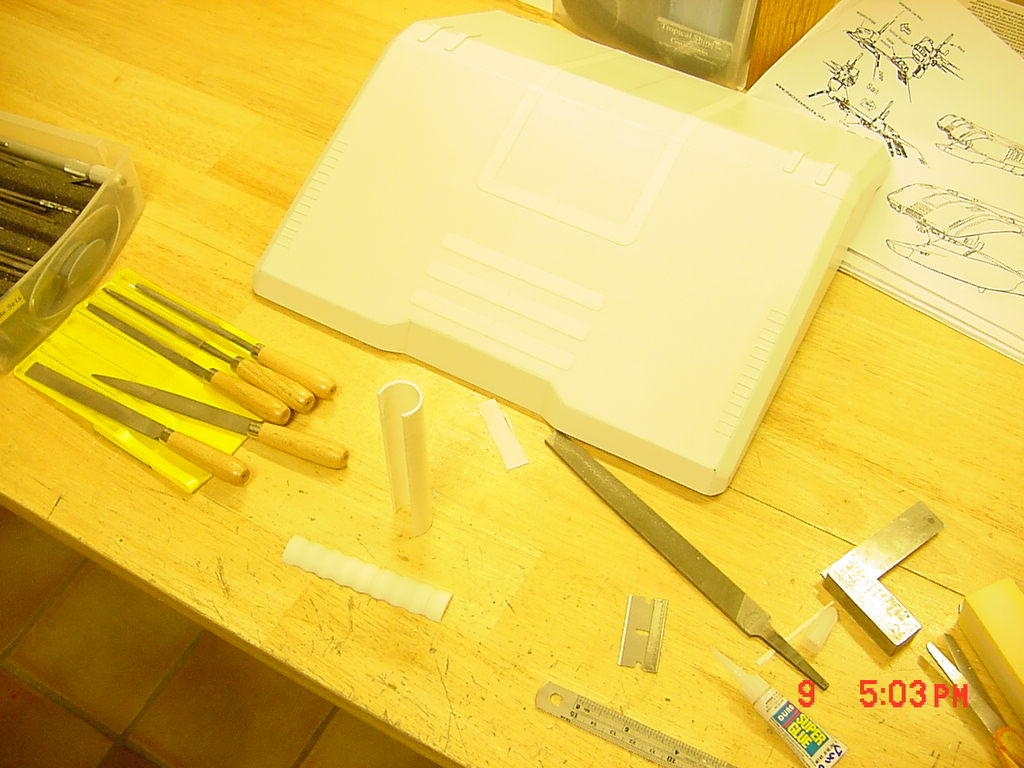
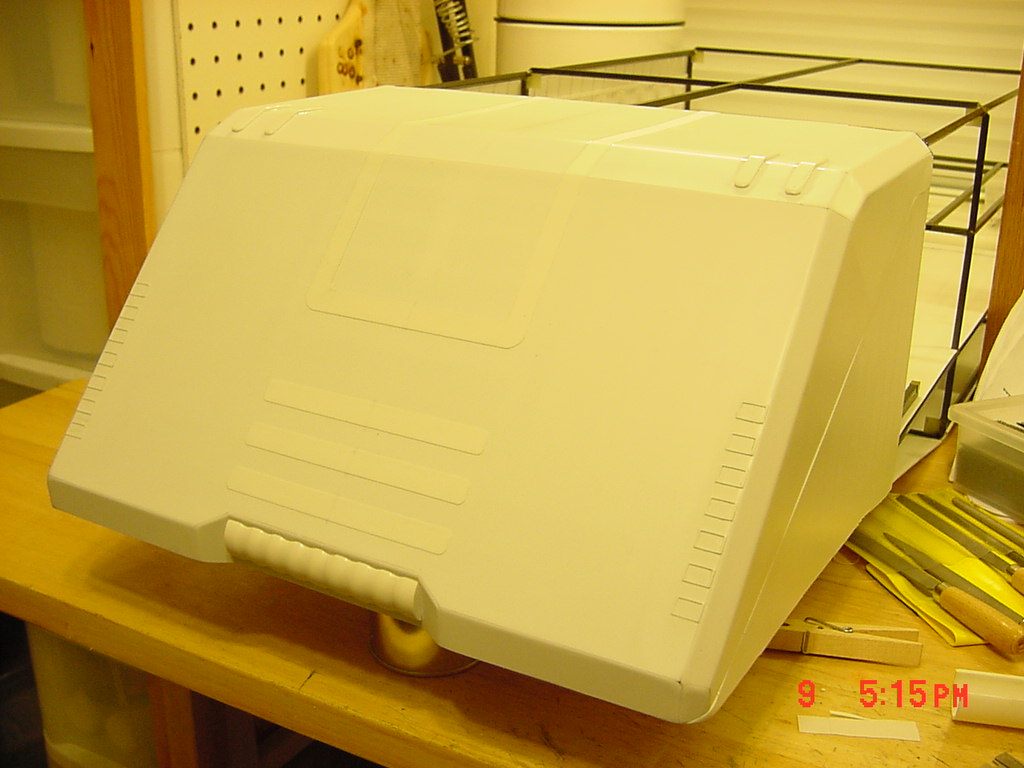
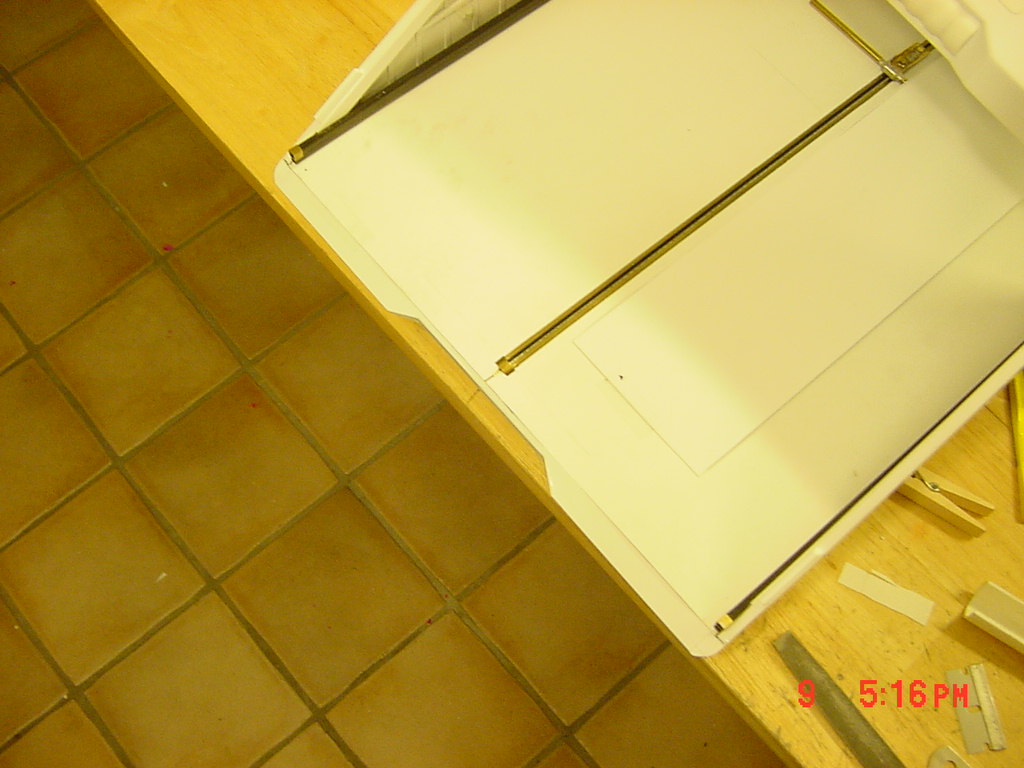
Thanks guys for the compliments. I'll put something to scale next time around. The funky piece is cut from styrene tube. I cut grooves into it with a saw and then folowed those with various files widening out the grooves. This was the lightest way to go. The motor still opens it - yeah!!! I've got a class this week so I don't know how much time there will be to work. I'm working on the spot lights on the hatch and minor details - almost done with the hatch! - MT
-
Aaaah, I see. FIRST, clean all the parts with detergent (or wipe down with 70% Isopropyl). Next, lightly sand the seam areas. THEN use a solvent glue. If your glue smells like citrus, it's not solvent. My personal preferrance is the watery liquid stuff. You can clamp the parts together (just where you want them) together and run along the seems with a bead of it, or build it up on the halves and connect. If you use enough, the softened edges will even fill in seemed areas if you work it right. A little goes a long way too. - MT
-
Howie, welcome to the boards! I'm not sure which type that is (they have a couple of orange caps). Regular solvent glues like Testors, Revell, Humbrol, etc... should work fine. After the parts are put together, it should only take about five minutes or so for the parts to hold on their own. If you're in a rush (bad idea), you can use super glue. Super glue is fine, I use it all the time. The only problem is that it is harder than the plastic when cured. Sanding/filing afterward can make uneven areas. Try another type of cement. Most evaporate quickly. If it's an "eco-friendly" glue, those take longer to evaporate verses regular solvent glues. Hope that helps. - MT
-
Thanks Gunny for the rack link! Everyone should check that out! Ron, the SDF-1 looks great! I must say, you did the Daedalus justice ! Cowie's right, that does look like a Domino! Domino shields up! - MT
-
Gunny - I'm jealous of your paint collection (especially since most of mine are old and crusty). What paint rack system is that you're using? I'm thinking of dropping down money for most of Tamiya's paints and racking them for easy ID. - MT
-
Still looking great! If I designed that thing, the sensor would be more missiles - but that's just my missile-itis flaring up! - MT
-
Bandai 1/72 Scale Macross Frontier Plastic Models
MechTech replied to Graham's topic in Hall Of The Super Topics
I think the sculpt looks good. The landing gear looks to be the same PC parts as on their VF-19 series. It's not a mark against them, but it shows the model/toy hybrid mentality Bandai has. It does look better than their 19 model too - improvement! I think it's a good model overall considering Bandai caters to younger children and not those of us who have children of our own! Plus metal gear for strength as on the VF-1's cost more. If you don't like it, dig into your spares box I guess - easy fix. Great opportunity for some MW'er to make after-market parts to fix it - subtle hint... - MT -
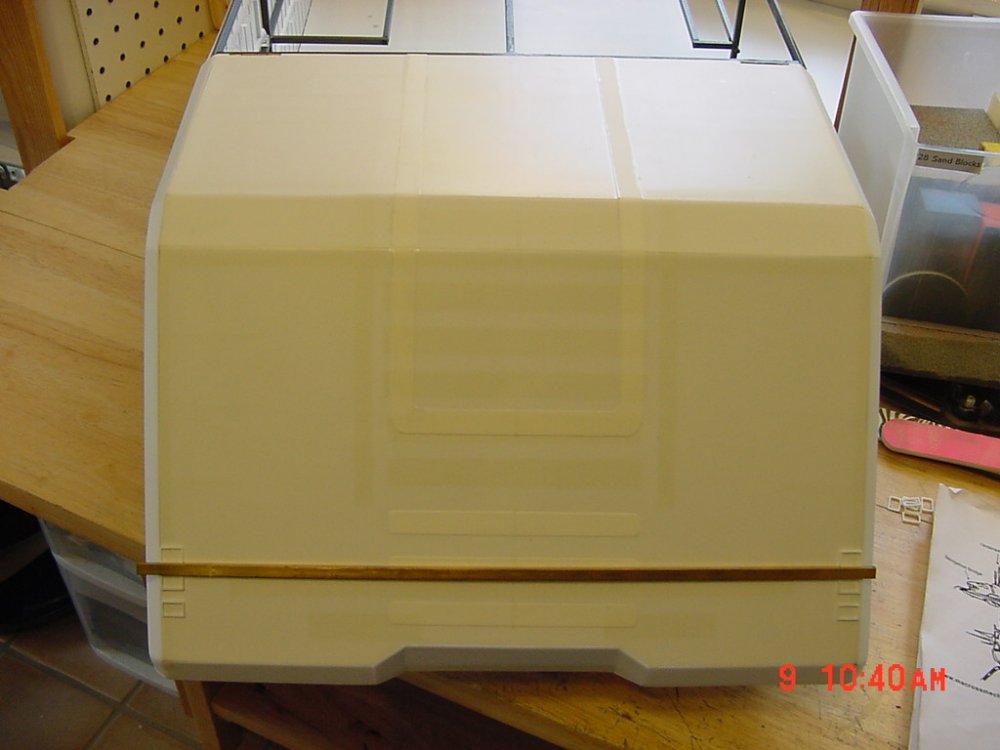
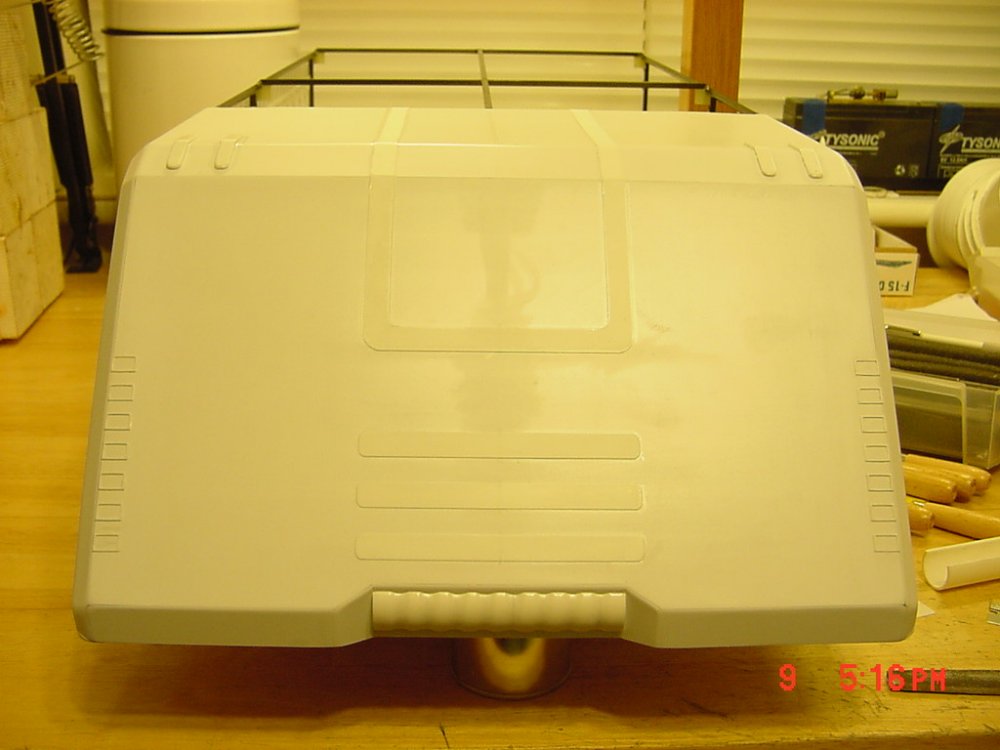
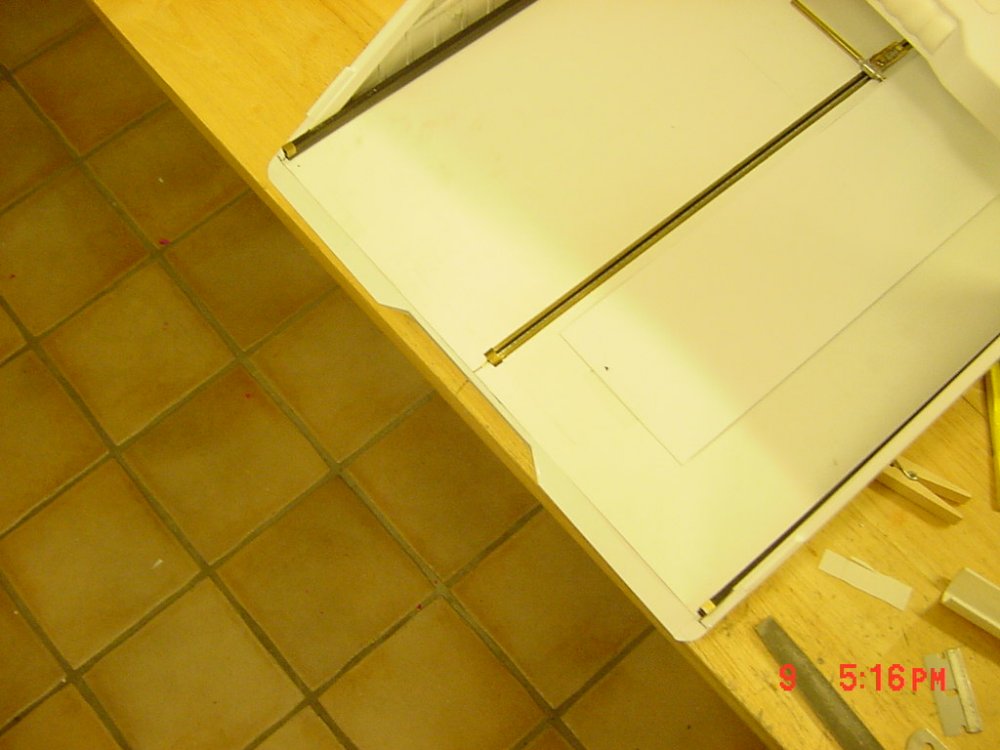
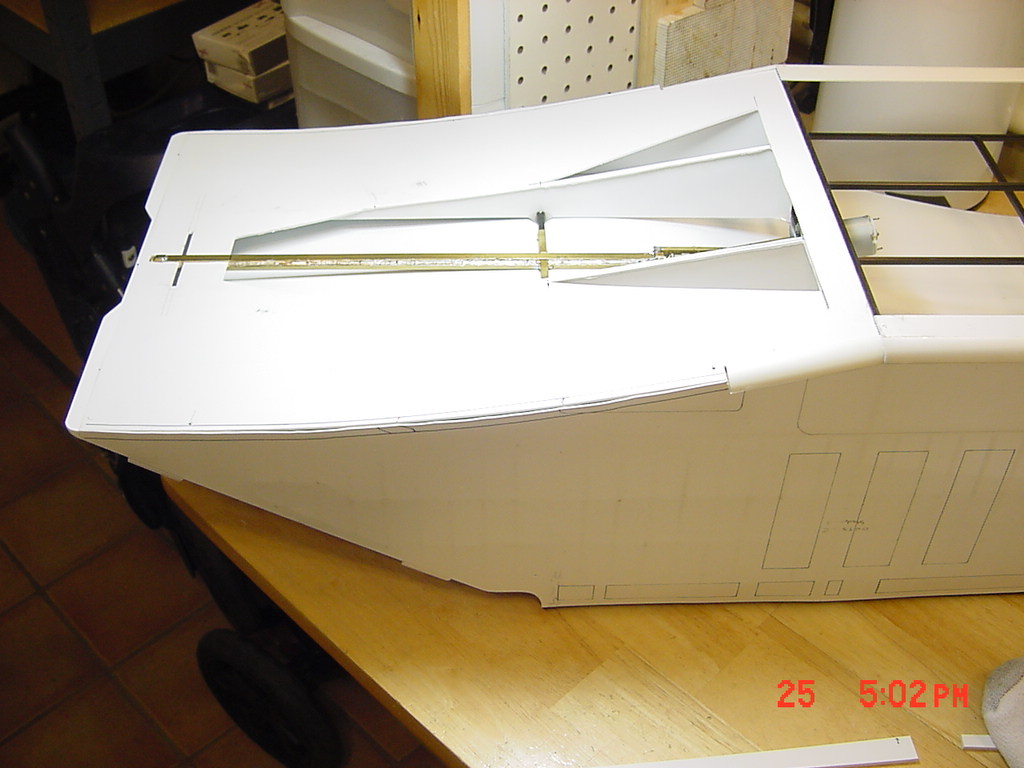
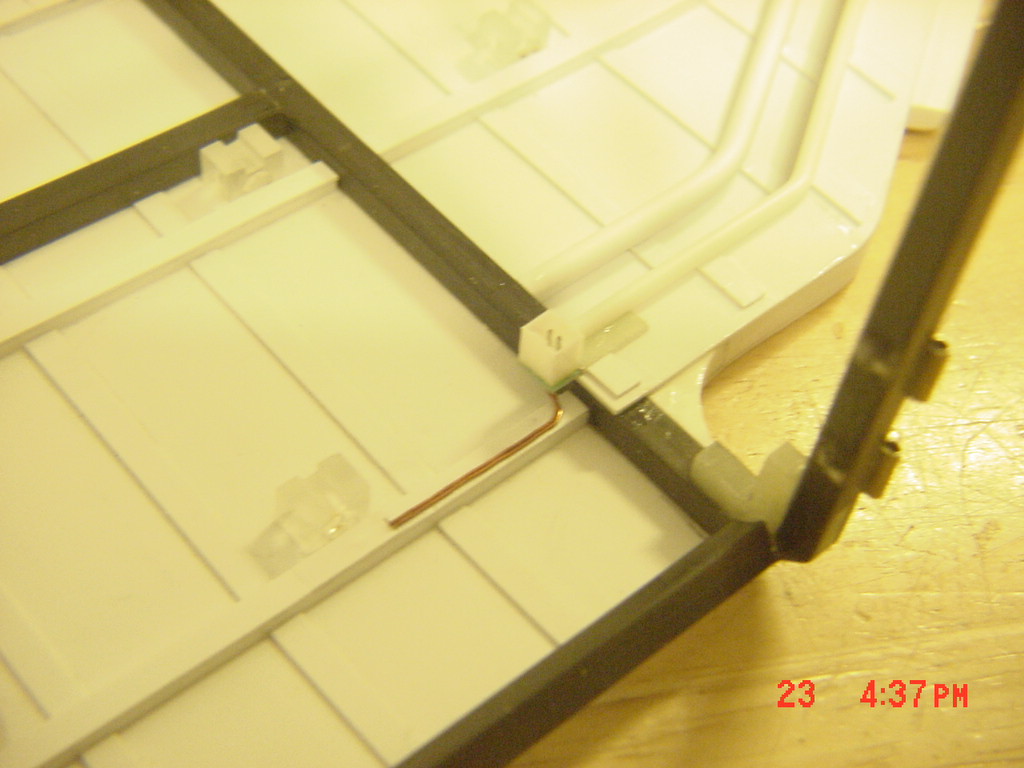
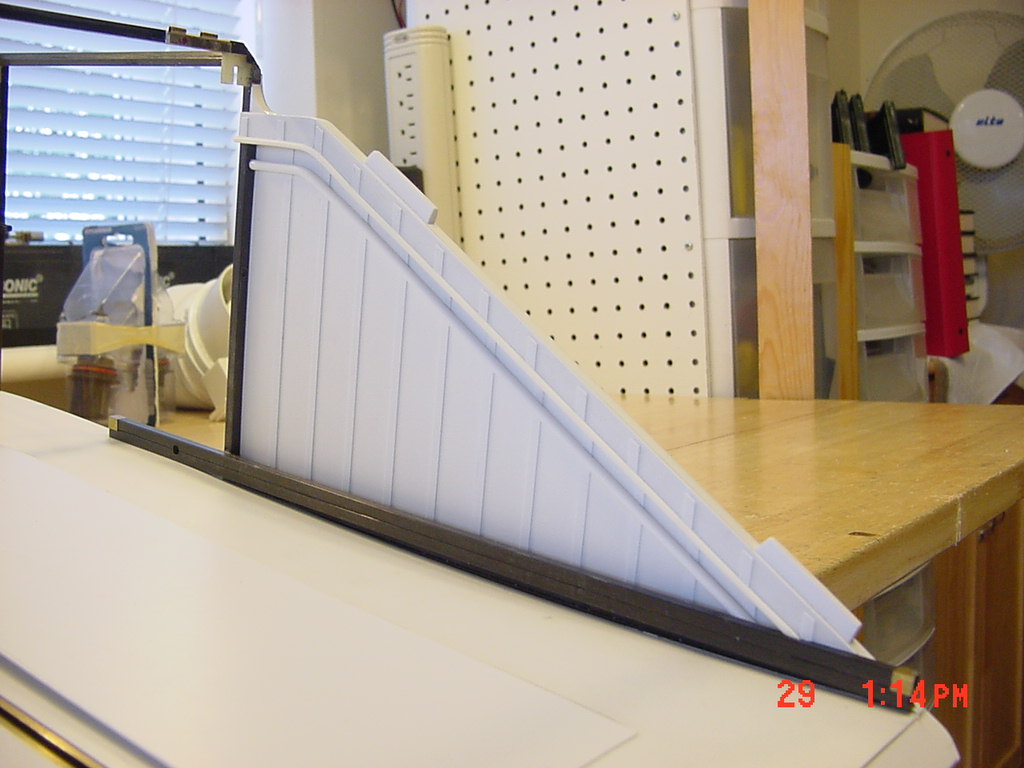
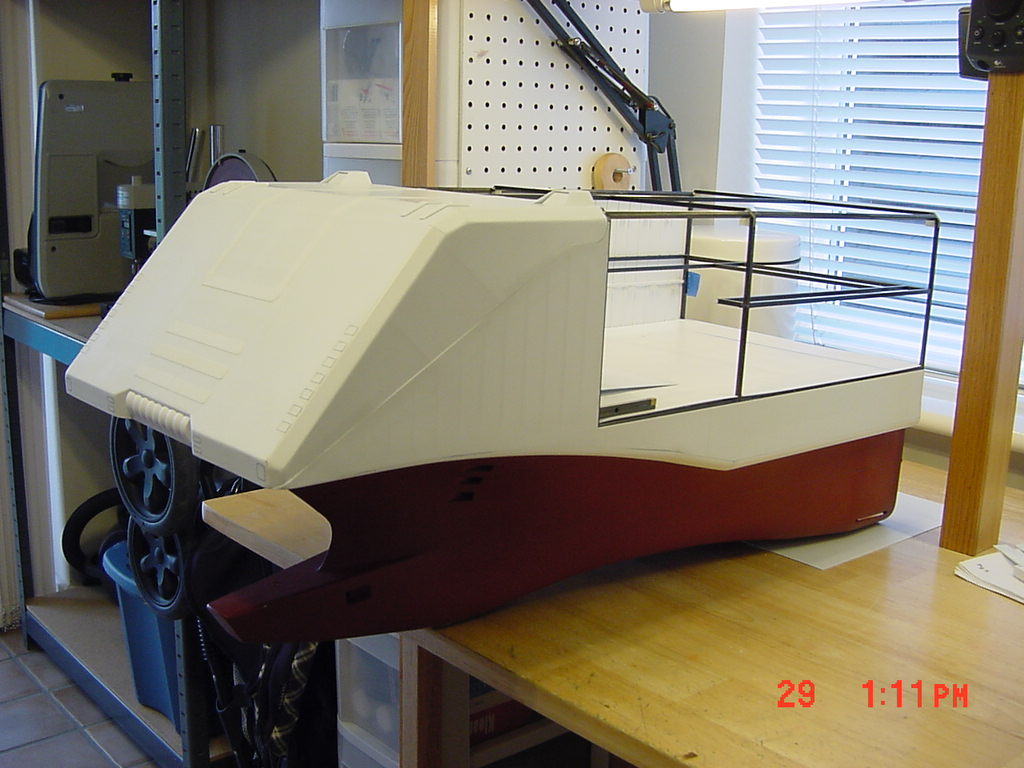
Thanks again guys for the encouragement! B-52 Gunner, that's really cool - both parts! I knew a dude who used to work around B-52's with the radar/vulcan cannon upgrade. He was walking around the flight line one day and had the feeling some one was watching him. He looked up and the 20mm was tracking him everywhere he went!!! He stopped and yelled out, "Can someone safety this thing!!!" They left it on after the mission! UPDATE 12 AUGUST 08 Now we're getting closer to line art reality. The progress is slow, but there is a lot of detail and measuring. Two notes, the hatch plastic is so thin, you can see through the corners after smoothing them over. Only the super glue is there (visible as lines). The indents on the front of the hatch on either side towards the middle aren't going to happen. The carbon frame is under there. So I'm going old school and using raised panel lines and black paint to represent them. Plus the structural integrity would be weakend. Putting the side marks on. A piece of brass channel for spacing/alignment. Most of the external details applied. The "deflector dish thingy" is sitting in front before gluing on. This was a piece of cut tubing and A LOT of shaping. I tried to wrap some 1/2 round plastic around a tube. It looked wrong and was too heavy, so I went this way. Nearly complete exterior views - sorry about the lighting. The lower lip indented to match the hatch. The fit is pretty good over all. Next comes panel lining and cleaning up some corners and scratches. - MT