MechTech
-
Posts
4679 -
Joined
-
Last visited
Content Type
Profiles
Forums
Events
Gallery
Everything posted by MechTech
-

Whats Lying on your Workbench MKIII
MechTech replied to HWR MKII's topic in Hall Of The Super Topics
The Meagan Fox vending machine would go well, with the guys. I think the females would take me to court Optimus at night looks great. I don't remember seeing that when I drove through LA. Then again it was in the daytime (Little Tokyo). The photos look awesome! - MT -
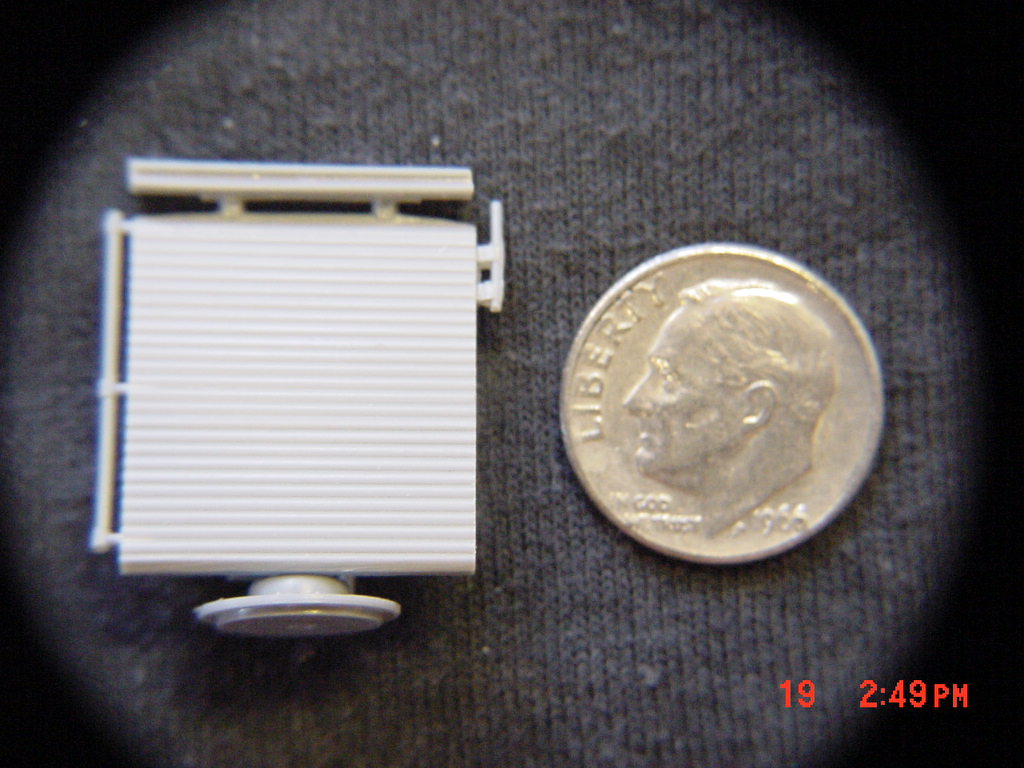
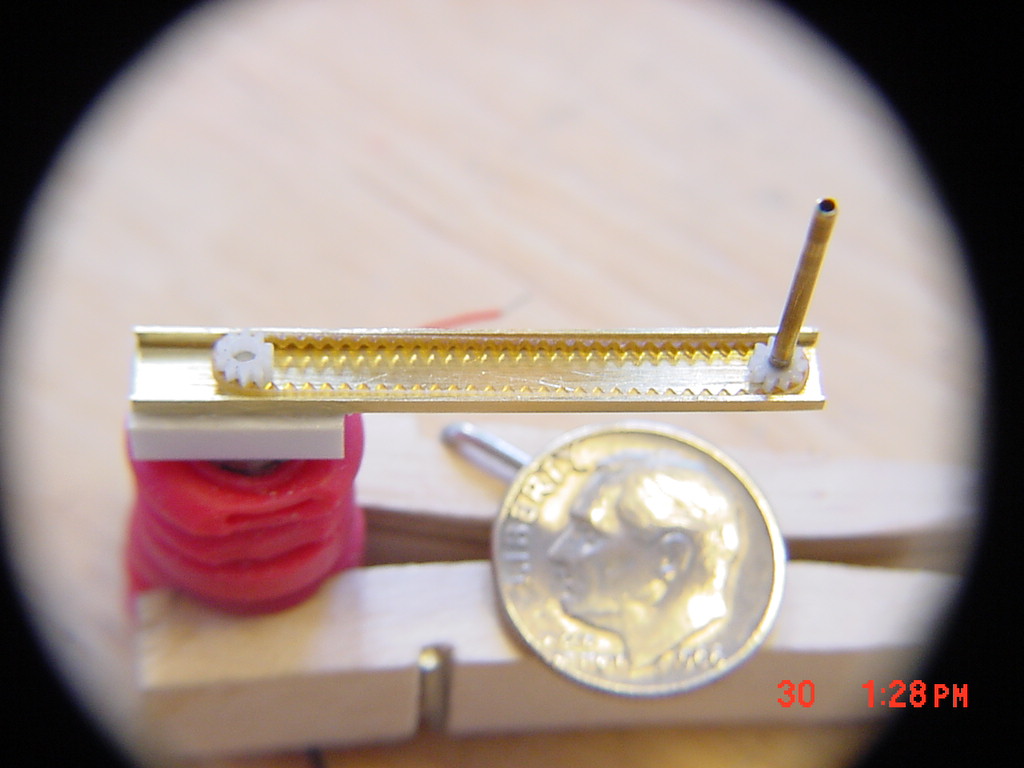
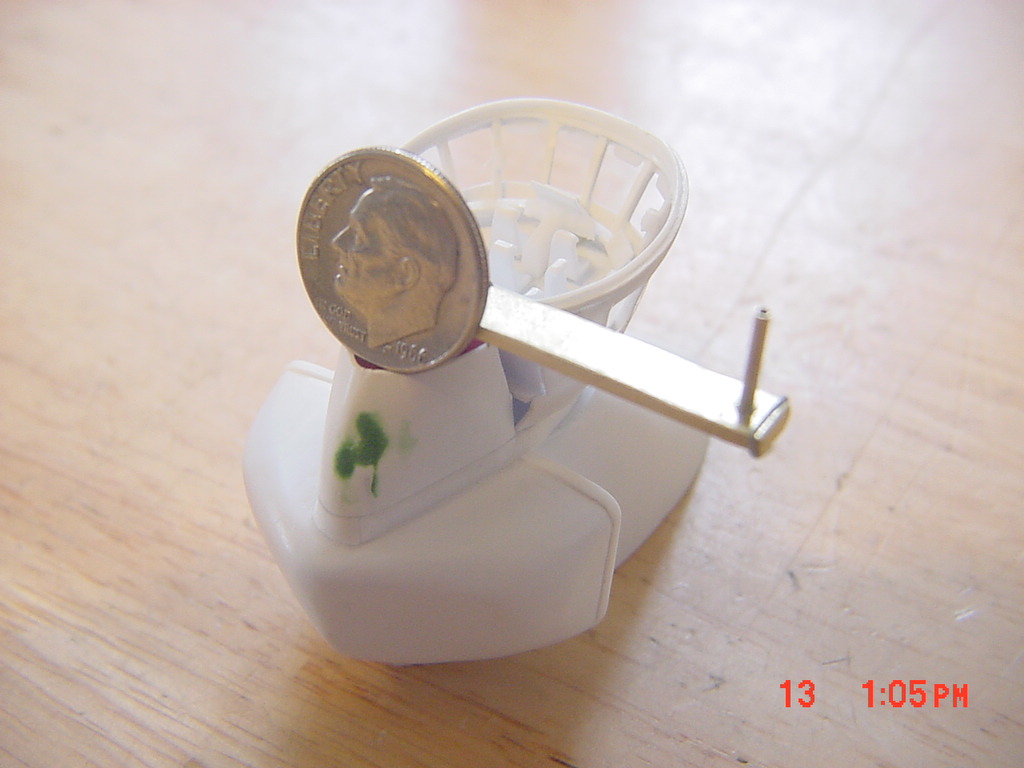
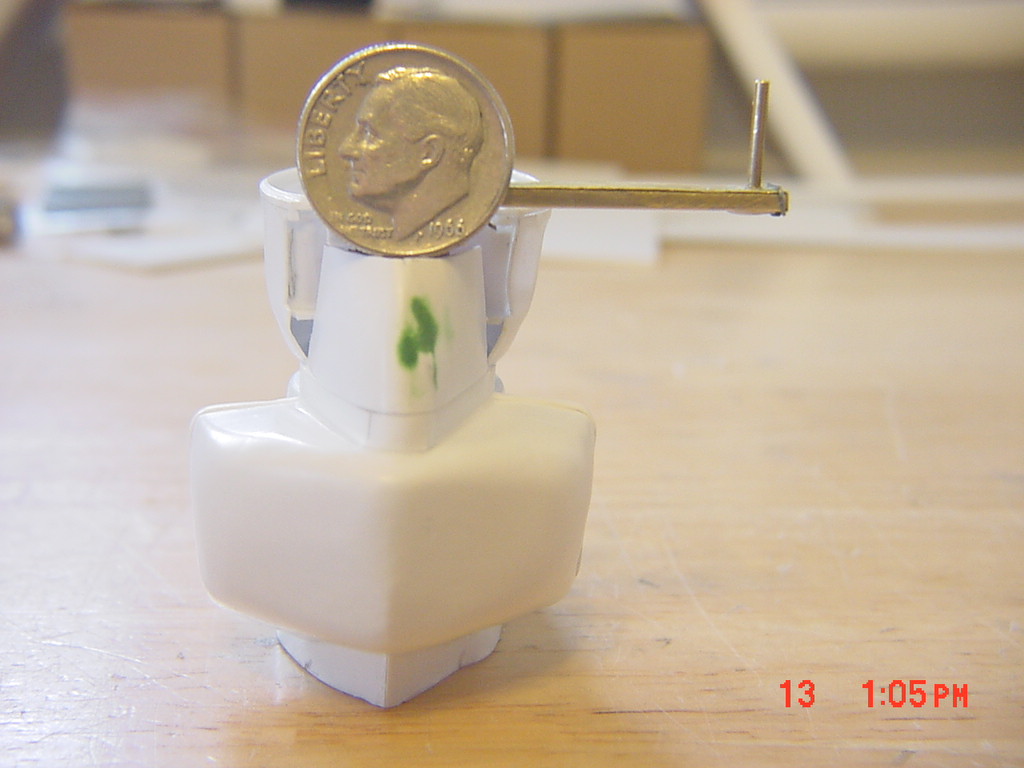
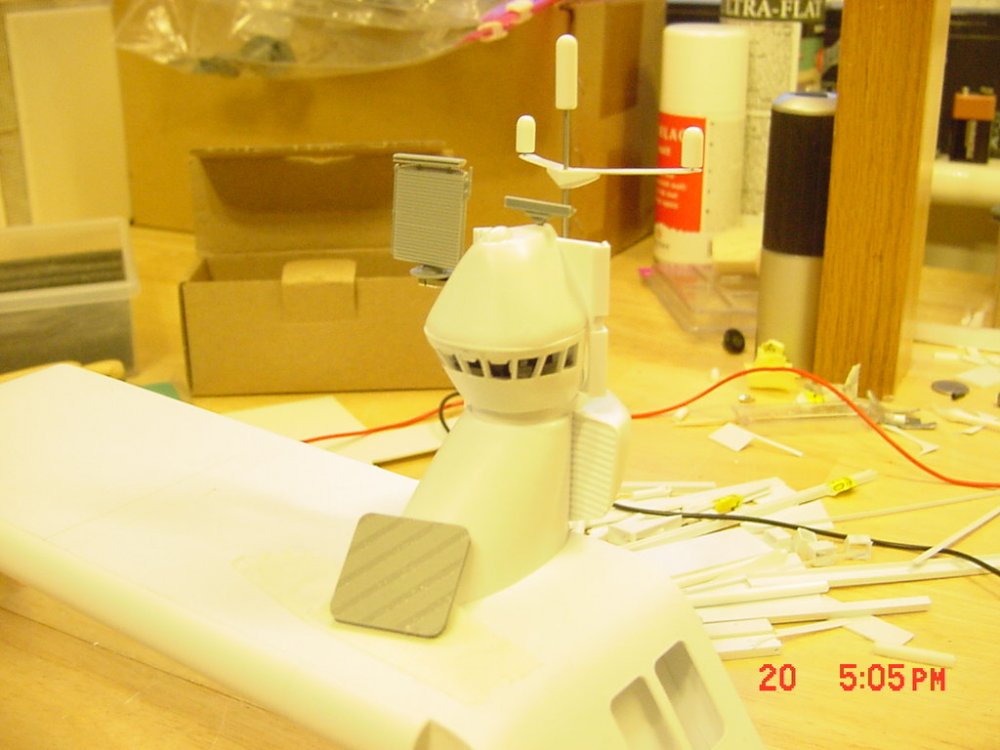
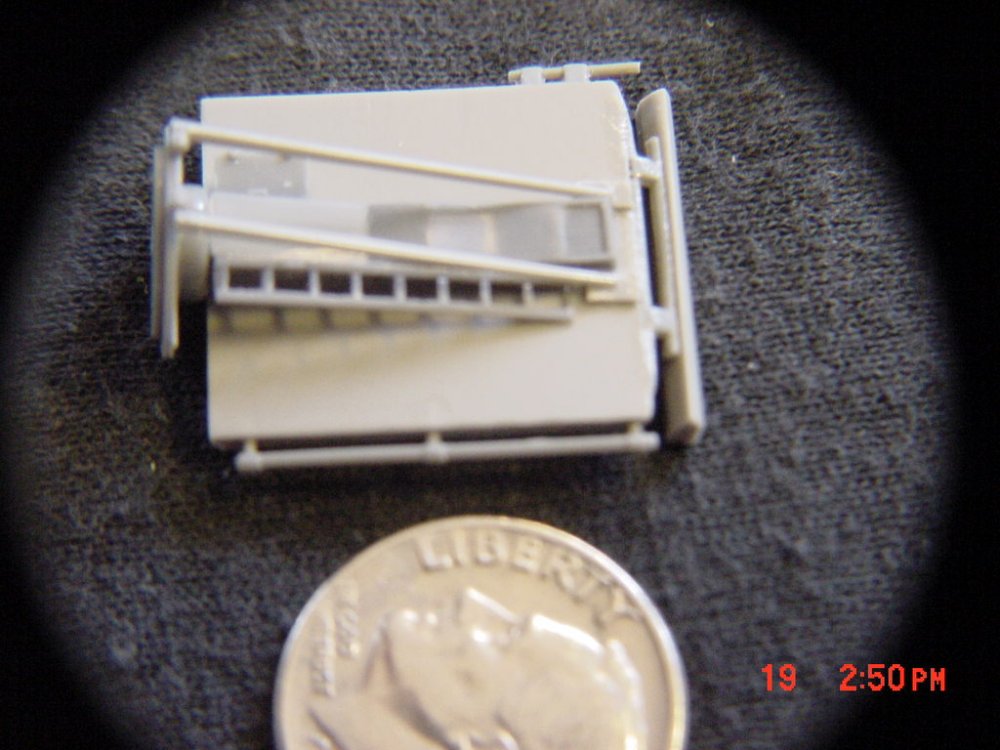
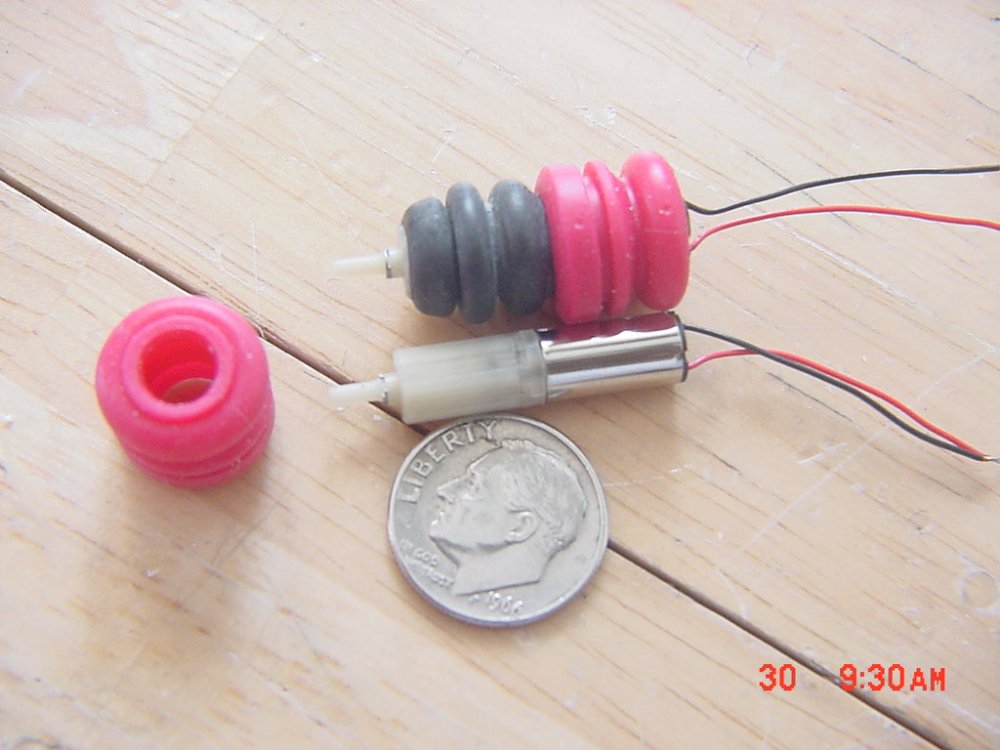
Thank you guys for the encouragement. I FINALLY got to do some work this weeknd. On that note, Happy Fathers day to my fellow dads in the UK and Stateside (yes its on the same day). UPDATE 21 June 2009 Progress has been a little slow, but it has been to detail and engineer a few things. This time, I'll work my way backwards. First the tower and mast temporarily fitted together. The radar antenna leaning against the tower is what would have been the radar to fit on the tower. It would have been "canon", but just too plane for me. (Note the two gray radar antenna - both rotate) So I built this: Why do all of this? Because there is already a fixed planar array on the lower part of the tower like the Aegis ship's SPY-1D. Even the Aegis ships have a couple of rotating antennas on them so I thought I'd add them for realism. So I took another Gizmoszone motor (their WWW address is below) and added rubber to it to insulate the noise from the structure. The motor is quiet, but the design of the plastic structure amplifies the sound. The gear case connects to a MICRO drive belt (1mm thick, 2 cm circle). Next I sealed off the "arm" with thin brass. You can see how thin it is: And for the secondary surface search radar, some take off gears the extend the unit away from the mast and keep it in unison with the bigger unit: That's it for now. I still have a lot to do on the bridge (tower) assembly) I knew it would take a while, just not this long - MT


-
SCRATCH BUILD MACROSS Armored Factory and Maintenance Bay
MechTech replied to MaveRick's topic in The Workshop!
Absolutely astounding work! My hat off to you for the great engineering of light and motion too! My opinion is if your going to make something that big, make it real! Thanks for sharing! - MT -
Whats Lying on your Workbench MKIII
MechTech replied to HWR MKII's topic in Hall Of The Super Topics
Concerning my room build, it was a work related project for a dormitory. I currently live in the UK. We did have an old cabinet with Meagan Fox in there, but we tore it out to make room for the vending machines . I love the 1/44th scale destroids. I almost went with 1/144th scale to do my Daedalus in because there is so much stuff in 1/144th. I think those models are pretty cool. - MT -
The making of a 1/72 Tacticar Pod Graug--the musical!
MechTech replied to captain america's topic in Model kits
The model is looking great John. With all those interior shots, I'm expecting to see/hear: "And here you can see the custom upholstery with 1000 Watt sound system. The 15" sub-woofers are co-located with the booster motors." You just need some fuzzy dice to go in the cockpit too . Seriously, awesome work on the model! Thanks for the posts and answering everyone's questions too!- MT -
So tell the truth, did you bust up your kids Magnetix Now I know why Kamjin was such a knuckle head, your picture shows he has a screw loose! Seriously though, cool mod a great way to have your cake and eat it too! - MT
-
Whats Lying on your Workbench MKIII
MechTech replied to HWR MKII's topic in Hall Of The Super Topics
Thanks Noyhauser. In this case it was a job, but I had fun with it. I got to use most of my skills which was a challenge! - MT -
Whats Lying on your Workbench MKIII
MechTech replied to HWR MKII's topic in Hall Of The Super Topics
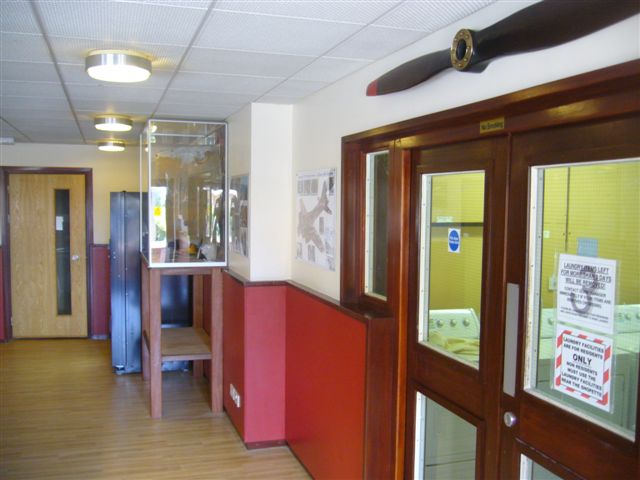
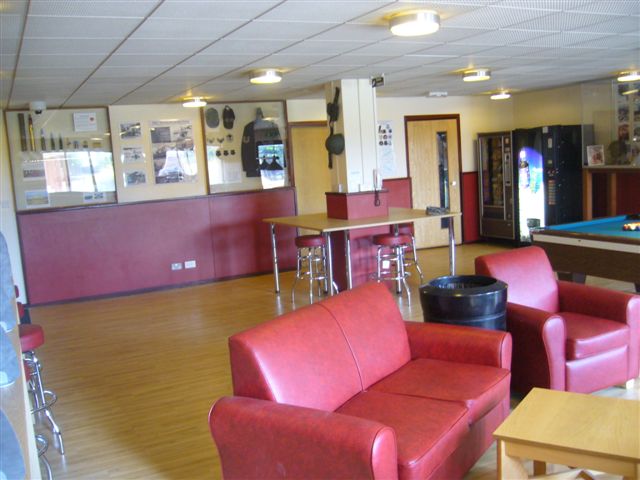
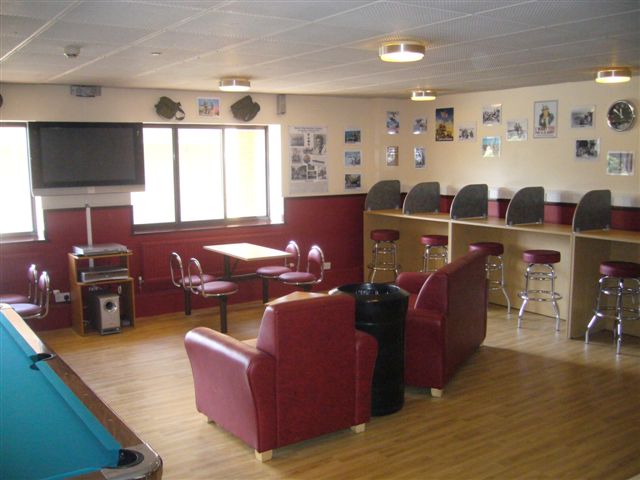
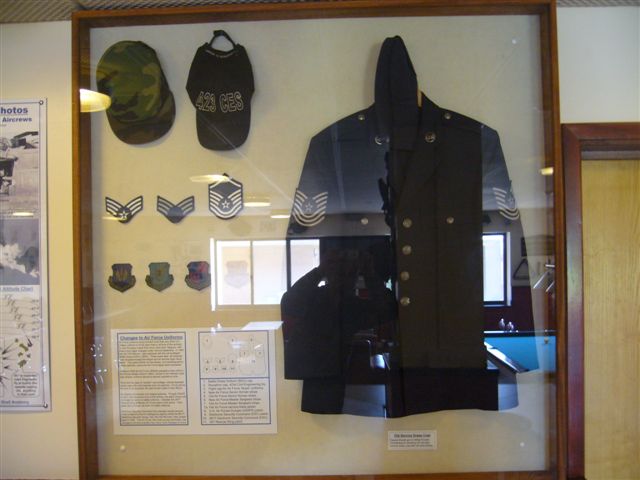
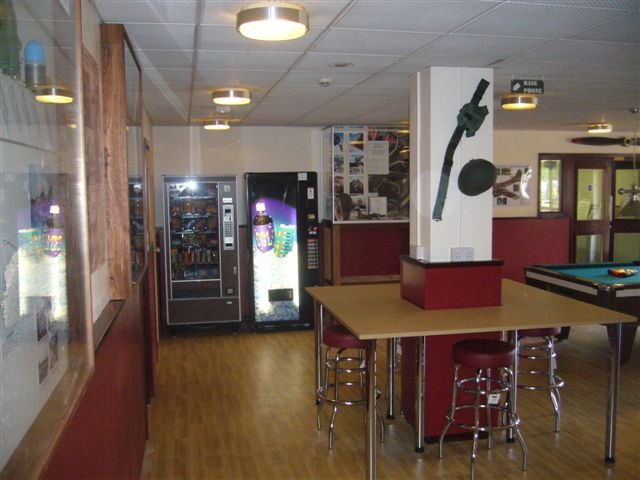
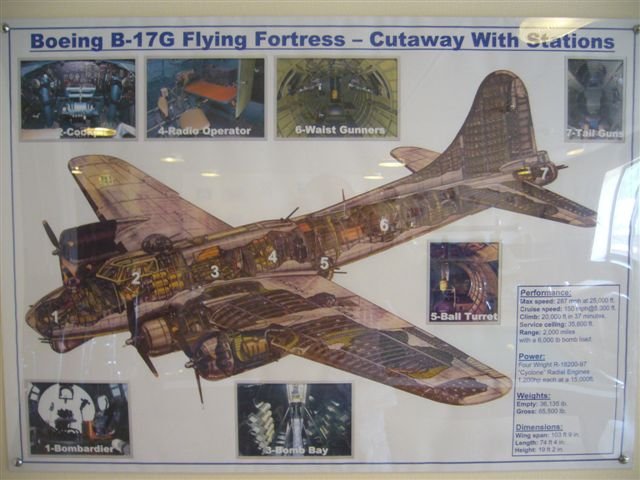
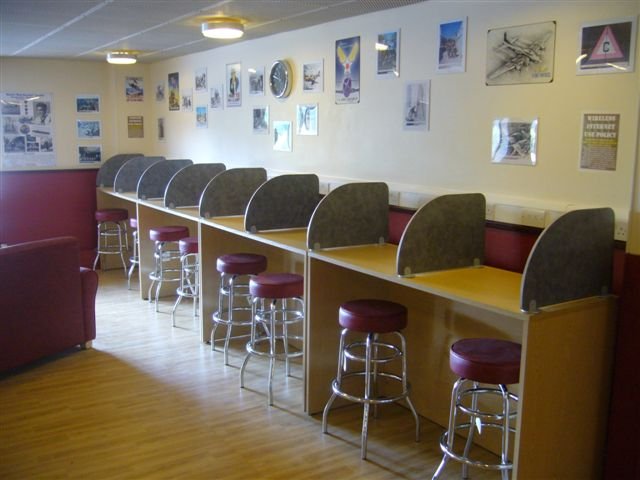
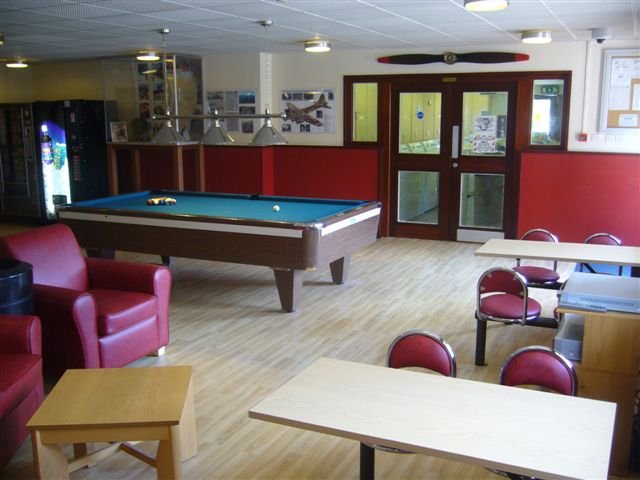
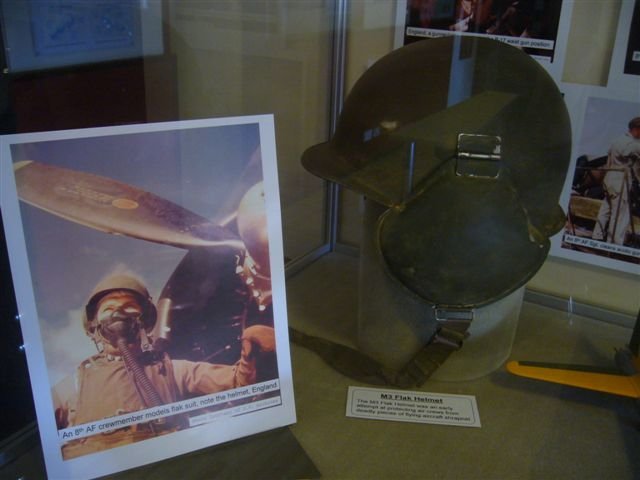
OK, both the Macross bay scenes look great AND the Battlestar. I was just going to chill tonight, then I thought I'd see if anything new was happening. All I can say is, mad props all the way around guys! Awesome work! This is what was on my workbench, floor bed, all over the house. It's a refurbished recreation center with a U.S. Air Foce Heritage theme. Hats off to my wife for putting up with the "temporary" decor. This is what I spent the last couple of weeks doing. Just a FEW sample photos. I did most of the design, layout and artwork all the way around. You'll recognize the helmet. I could not have done it without some Godly intervention and some great people helping out! [atta chment=68231:P1040194.JPG]


-
The making of a 1/72 Tacticar Pod Graug--the musical!
MechTech replied to captain america's topic in Model kits
Filming yourself while you work? Instead of the show "Big Brother," it would be "Big Sculptor." Just doesn't sound as good. I still do glue small blocks of styrene up. I just use CA to cut bacl on the fumes and set it to the side. It's not too bad after that, but does glob up with the heat of friction. That's the annoying part! - MT -
New heavy armour valkyrie conversion kit from Neograde?
MechTech replied to ahiachris's topic in Model kits
Yep, it's old and it's not canon (FYI). - MT -
The making of a 1/72 Tacticar Pod Graug--the musical!
MechTech replied to captain america's topic in Model kits
Looking awesome as always Capn'! I think I'm going to try some of that modeling board one of these days. Styrene just doesn't come in the sizes needed for some sculpts and gluing always leave seam marks no matter what you try. Keep up the awesome work! - MT -
Whats Lying on your Workbench MKIII
MechTech replied to HWR MKII's topic in Hall Of The Super Topics
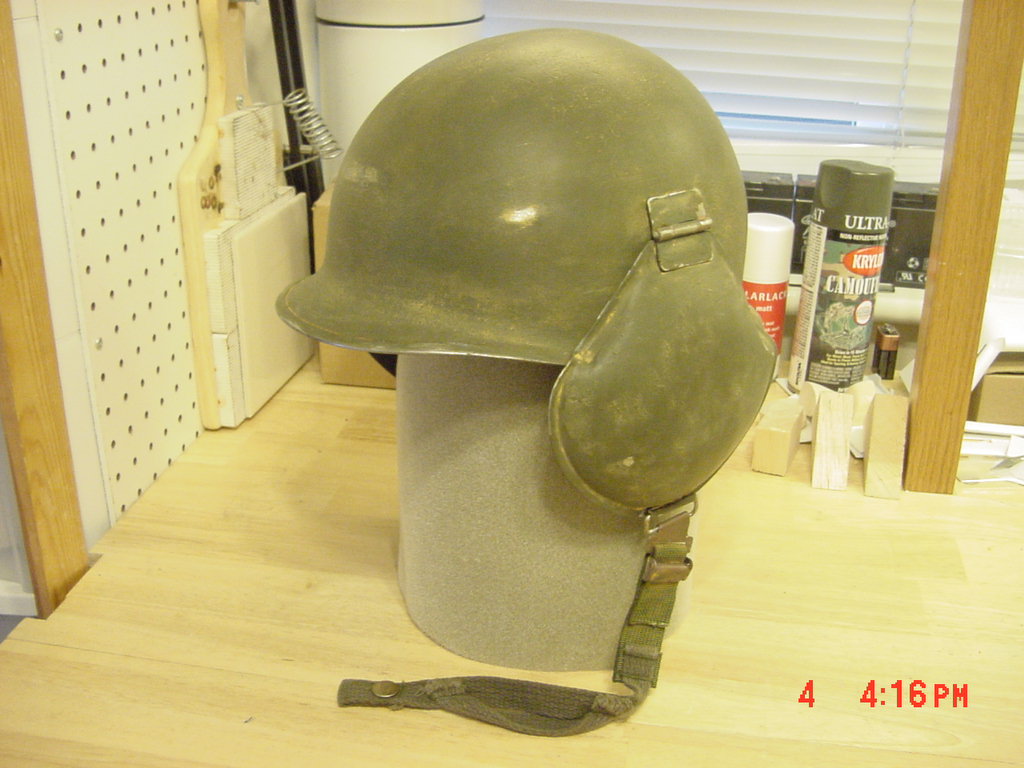
My helmet is done. I've got too much still to do on the other displays. Is your helmet a repro or real. If repro (I'm guessing), really well done! - MT -
Whats Lying on your Workbench MKIII
MechTech replied to HWR MKII's topic in Hall Of The Super Topics
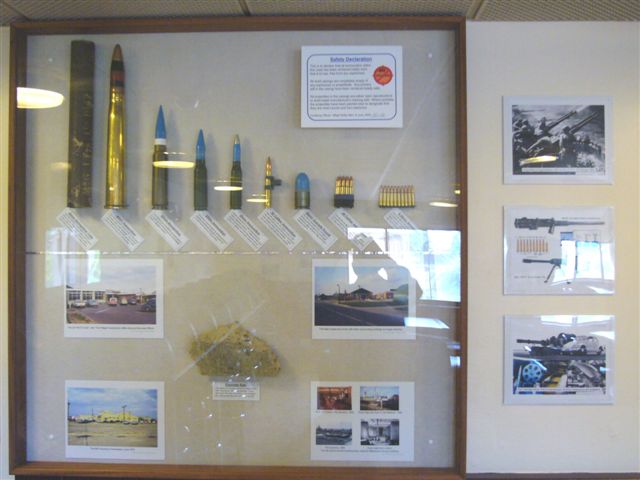
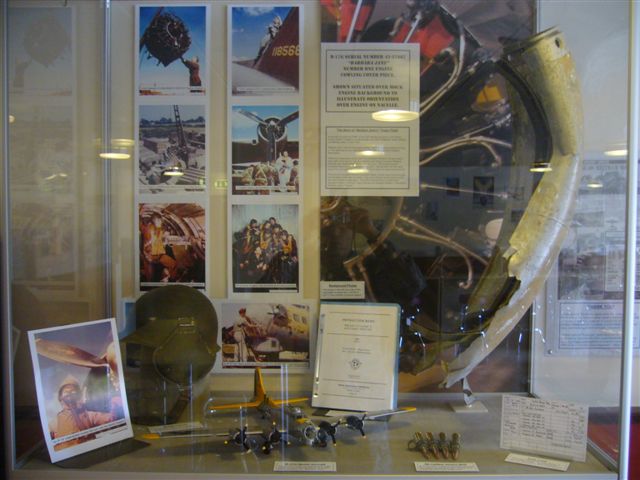
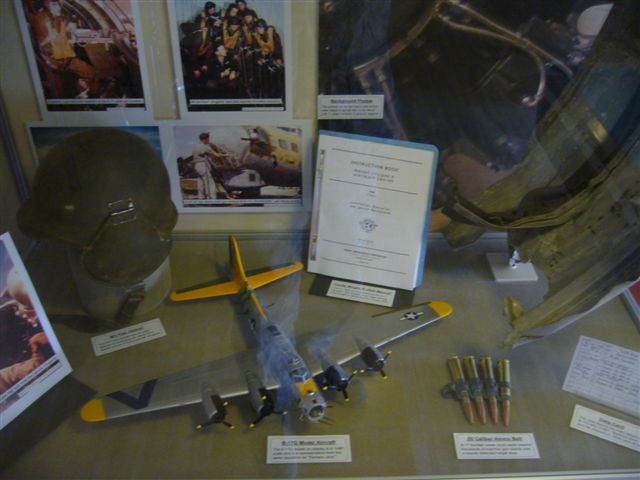
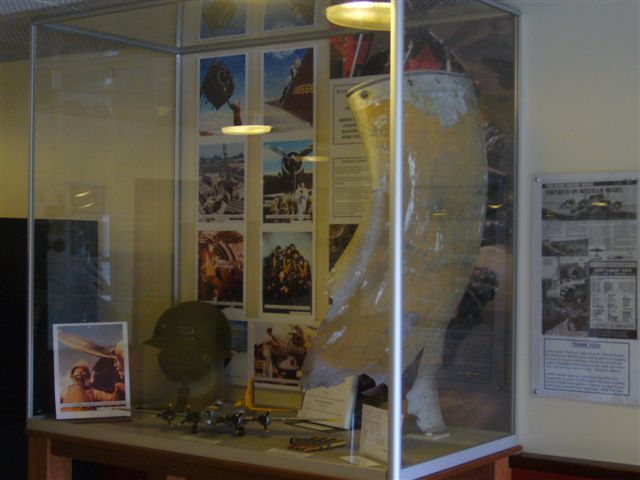
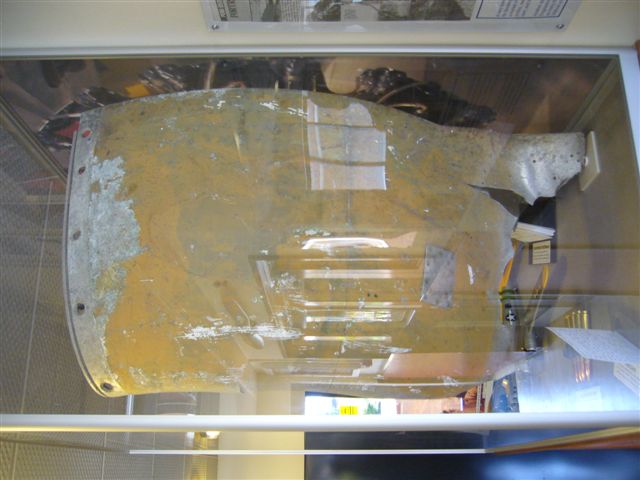
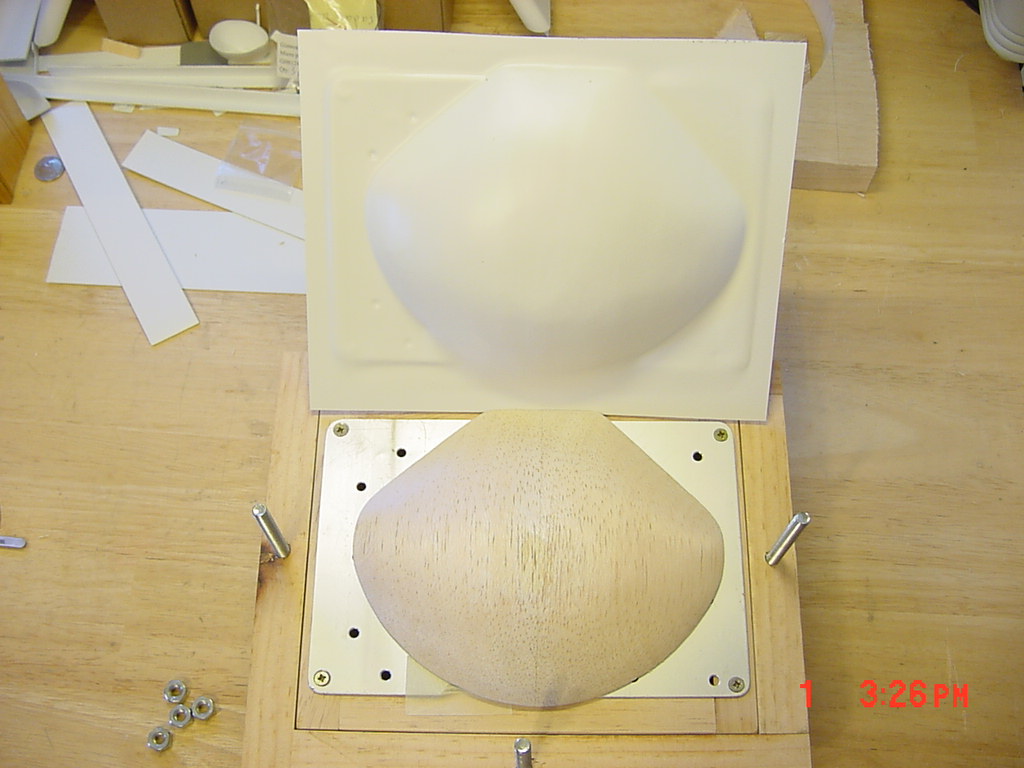
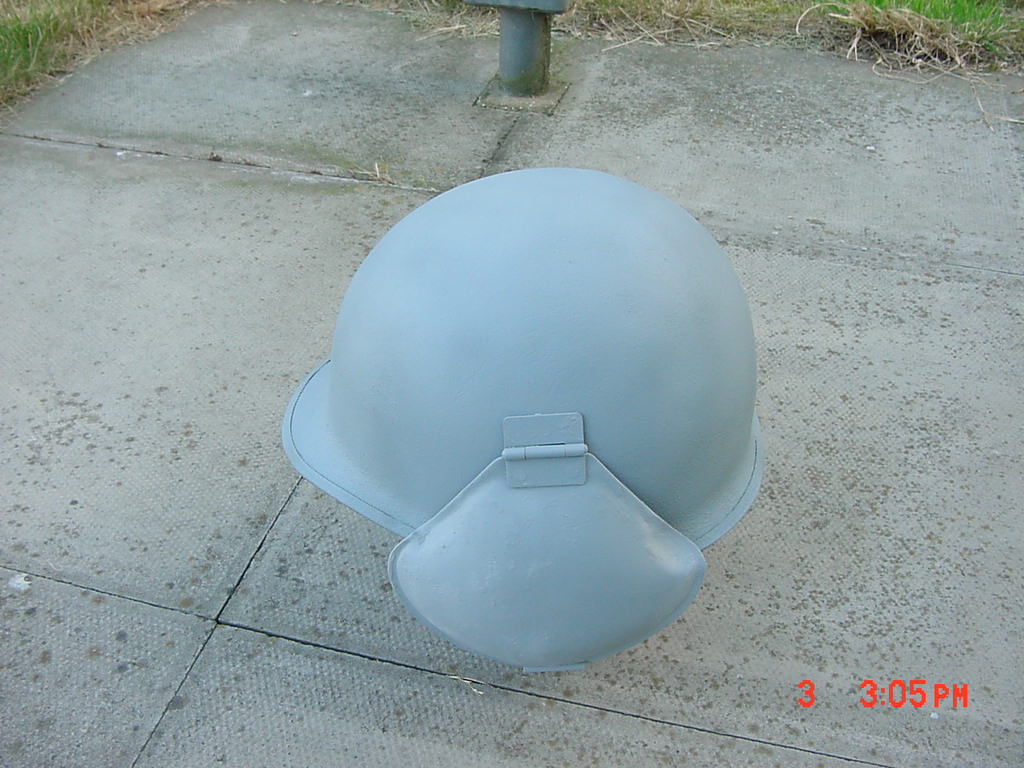
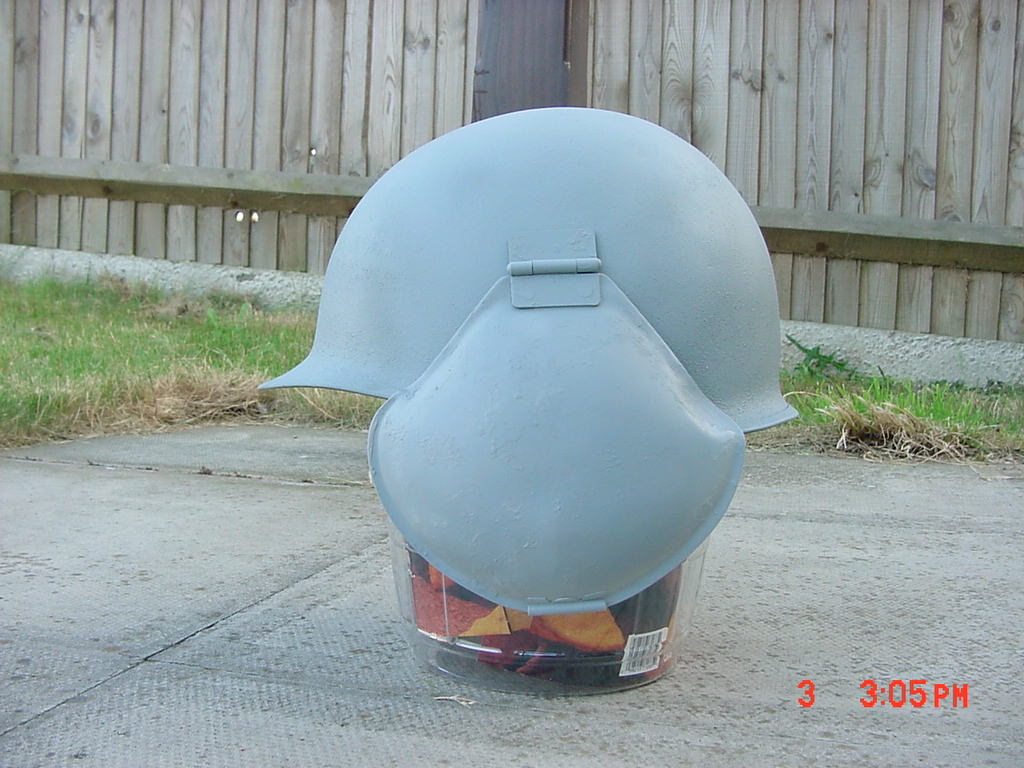
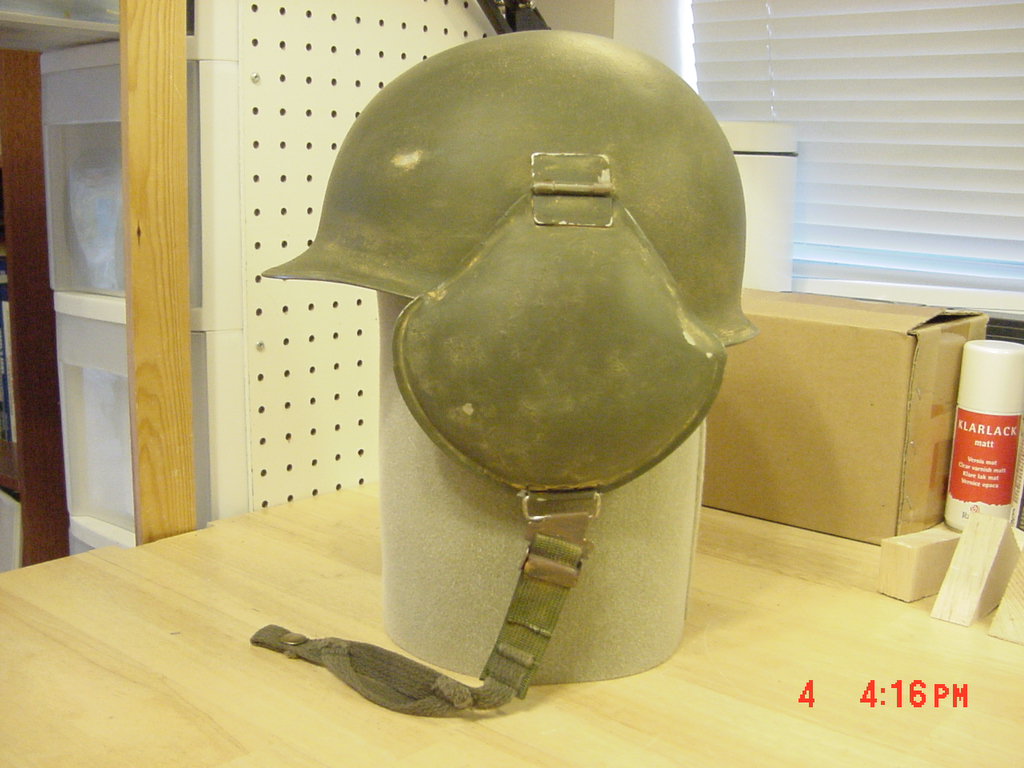
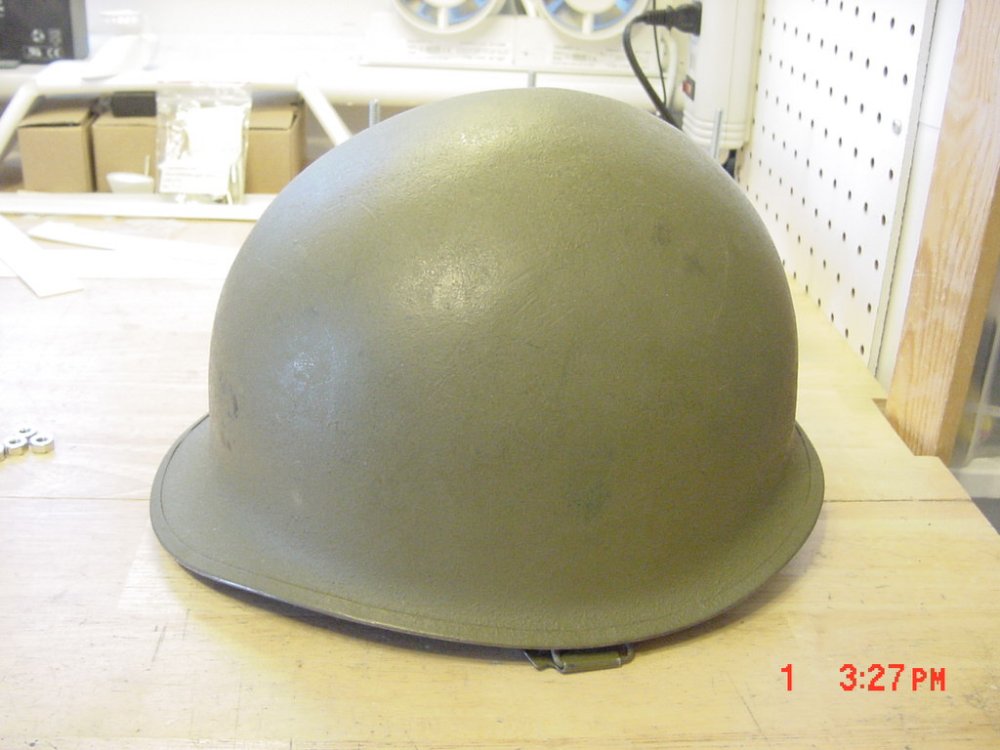
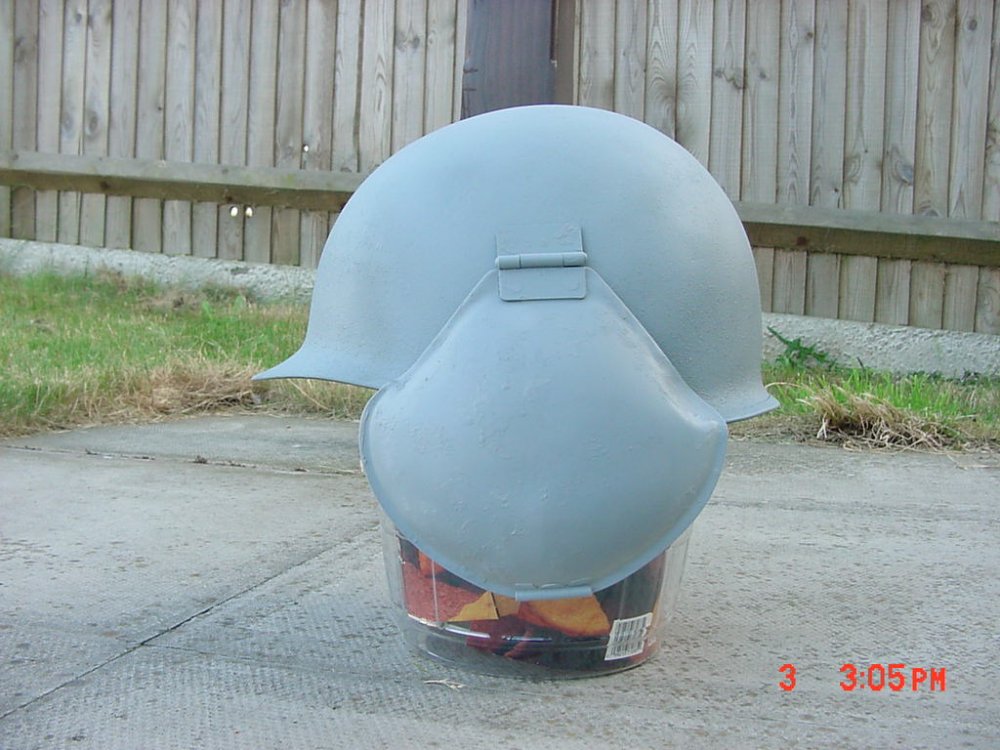
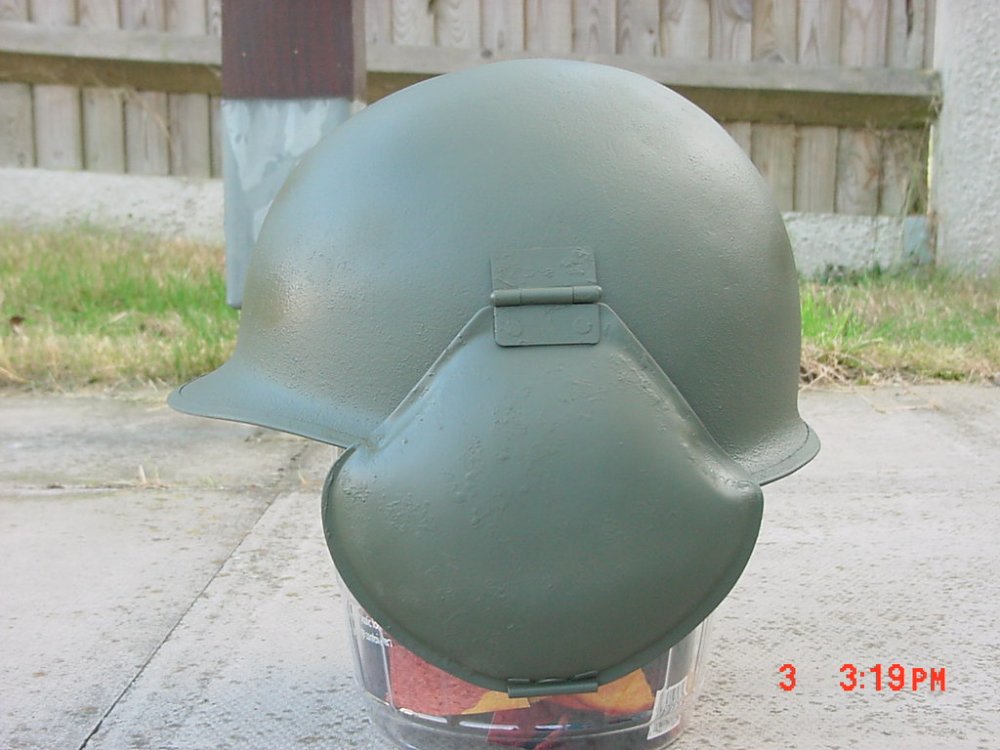
I could NEVER leave my workbench like that, my children would wreak havoc on it! The shotgun shell would get tossed and probably blow! A little "Real World" stuff. I'm building a heritage display. One of the areas is dedicated to US air crews in WWII. One of the items I thought would be cool is a bomber aircrew flak helmet. I could spend $500 for a helmet, or build one for $20. So I went with this: The rust is real rust taken from my car's cooling system. The "paint chips" are all affects except for a little "wear" added to the brim. I still have a bunch of displays to put together. No work on my Daedalus this weekend I'll post display photos when I'm done if anybody is interested. - MT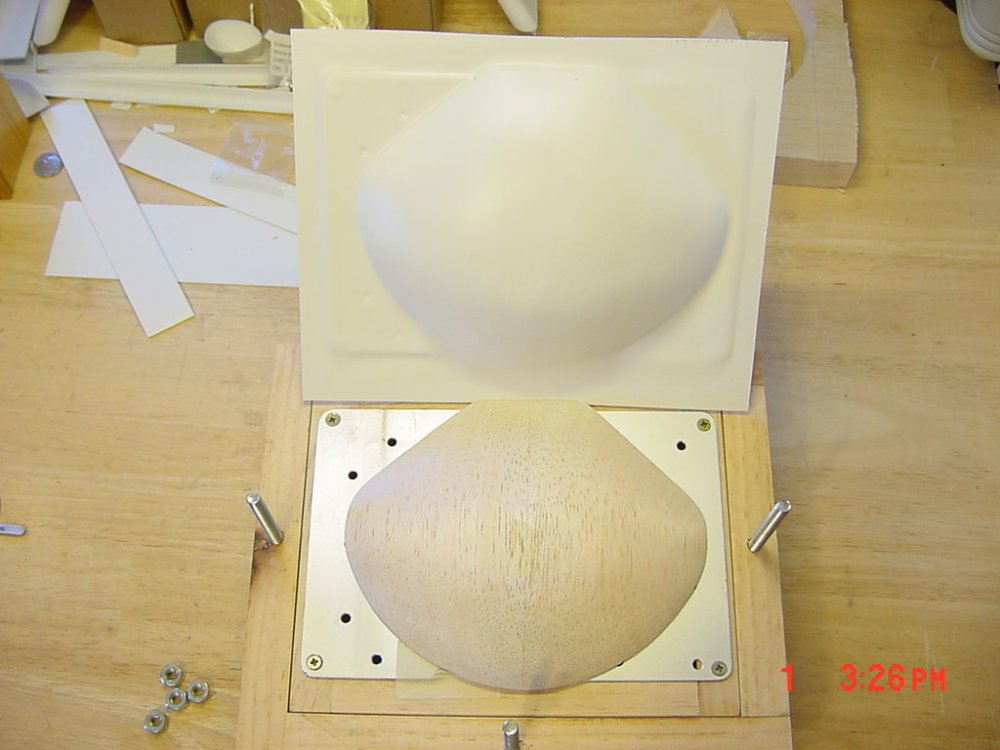


-
I'd have to say 1/200 as well. The Yamato 1/200 valks are excellent and well detailed! If you can find the Nichimo destroids, they're be perfect too. Of course, there's the 1/250 valks coming out (see the toys forum). - MT
-
My two cents, I think the Fokker paint job looks WAY better ! Great custom! - MT
-
Whats Lying on your Workbench MKIII
MechTech replied to HWR MKII's topic in Hall Of The Super Topics
Awesome work MJ! The whole project was an awesome execution from start to finish. The blue lights are a nice touch too! CONGRATULATIONS! - MT -
In that case: http://www.elbestbuy.com/?gclid=CP69o4ba3JoCFQWfnAodDiIL3Q http://www.thatscoolwire.com/ I got some cool strips for bikes with built in battery pack/power supply from American Science and Surplus. They may still have some. - MT
-
Lightsheet downsides - doesn't like humidity, is organic and breaks down more readily, bulky with power supply (high voltage-high frequency. There are many vendors for it too. Just ask if you're still interested. LED's are still you best bet. Smaller, indefeninte shelf life, low voltage, higher light output. - MT
-
Makes me glad I'm not a ground troop on the "receiving end" of it's wrath! - MT
-
Whats Lying on your Workbench MKIII
MechTech replied to HWR MKII's topic in Hall Of The Super Topics
Thanks guys! I finished the canopy frame, and flare/flare pod, the rest just needs painting whenever I get to it some day. Like EXO said, never get in a land war with China! (you know what I mean if you saw the movie). The GM is coming along nicelyGhost Train. - MT
-
This reminds me of a young kid I knew. He got his first job, bought a brand new big ole' BMW. He walked into his insurance agent (who was probably seeing a vacation to Hawaii) and walked out really in the hole for money. After a few months of Ramen and bologne (probably constipation too ) he sold it off! I'm not forgoing anything, I'm just saving my pennies!- MT
-
Whats Lying on your Workbench MKIII
MechTech replied to HWR MKII's topic in Hall Of The Super Topics
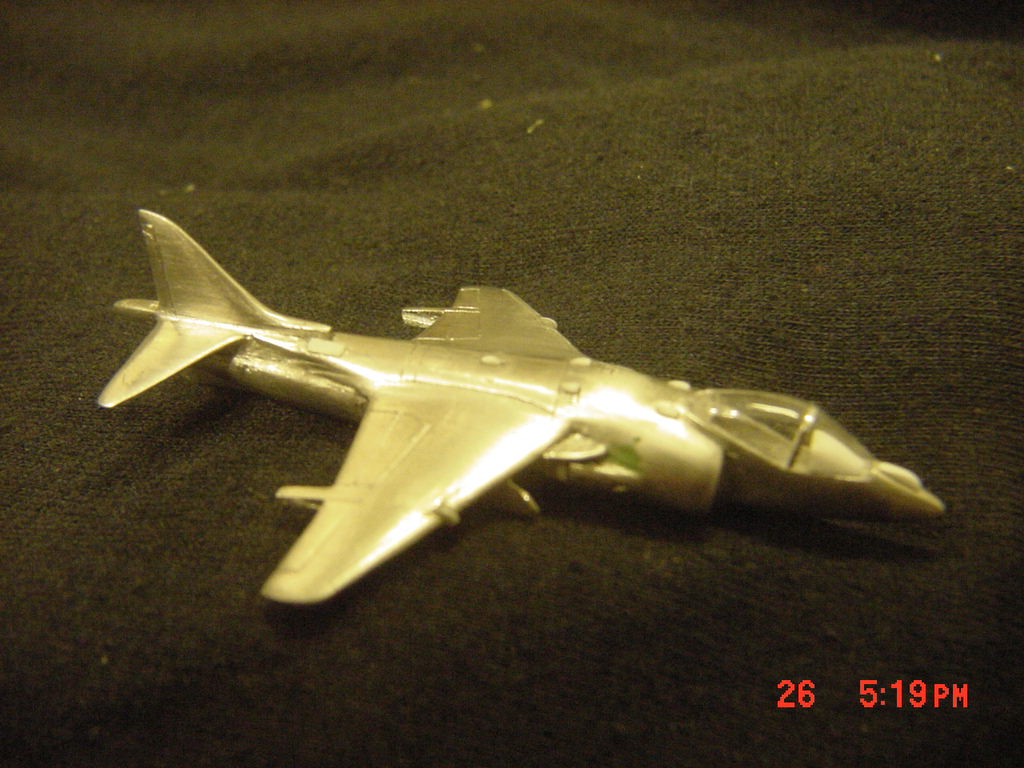
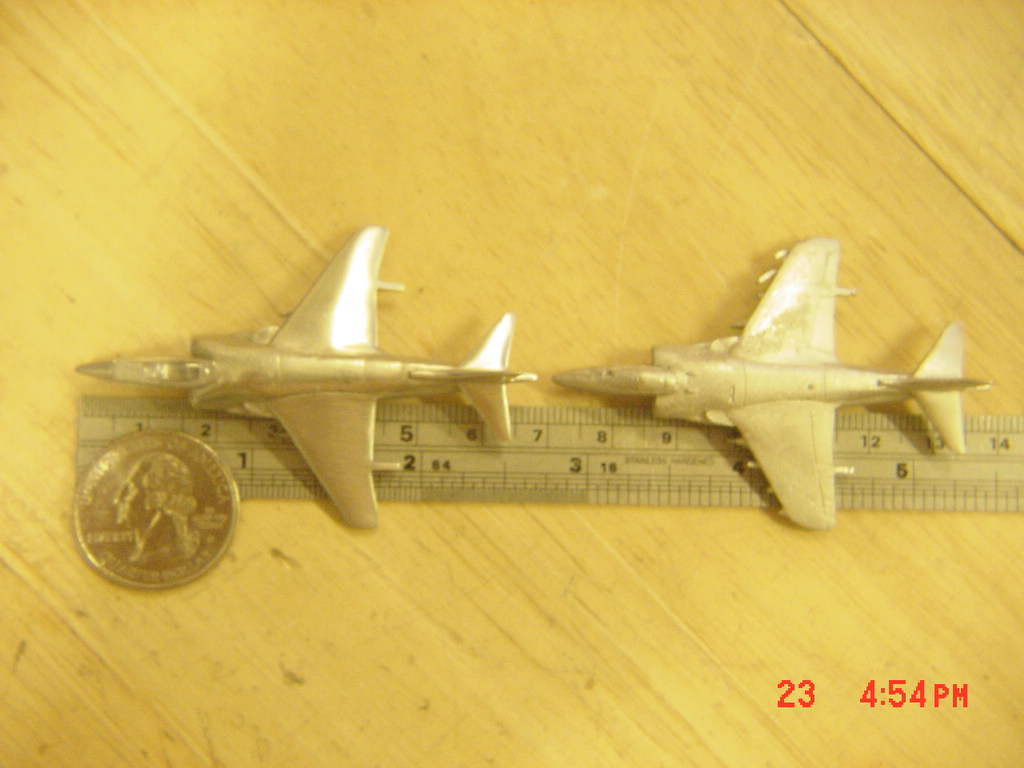
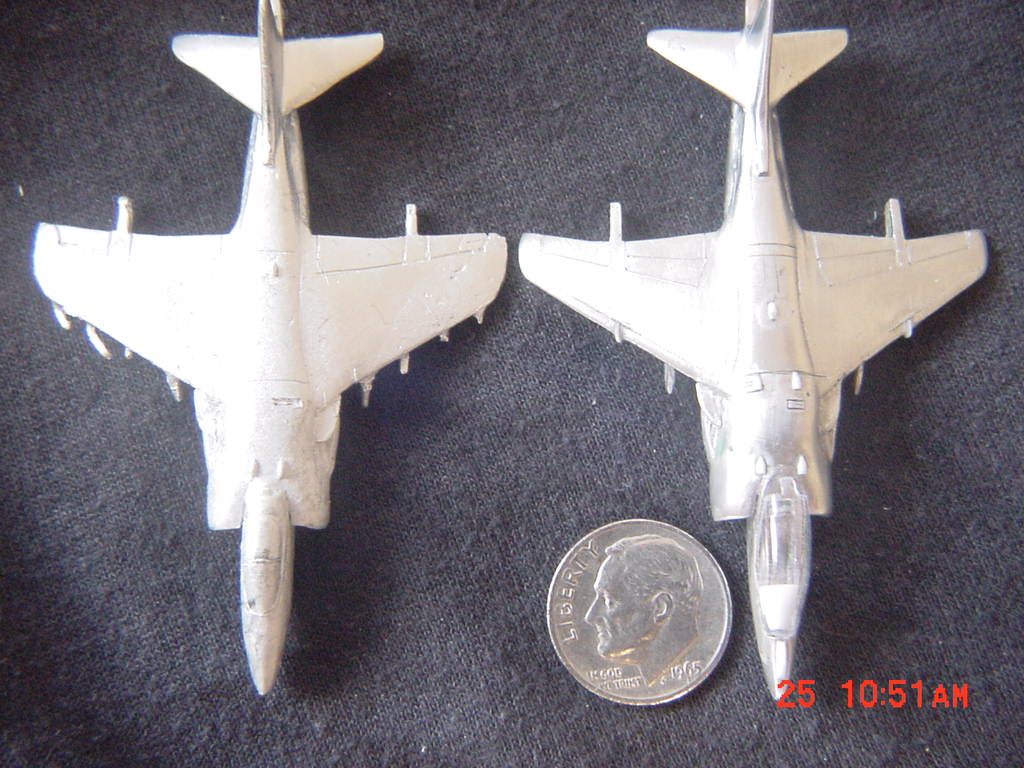
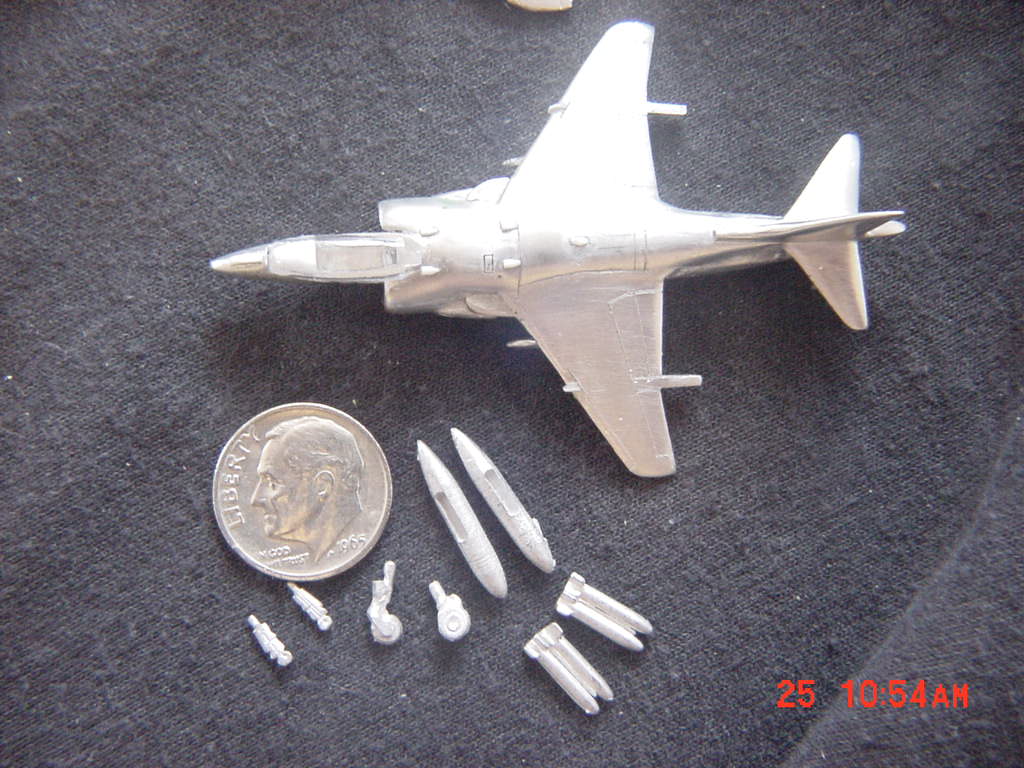
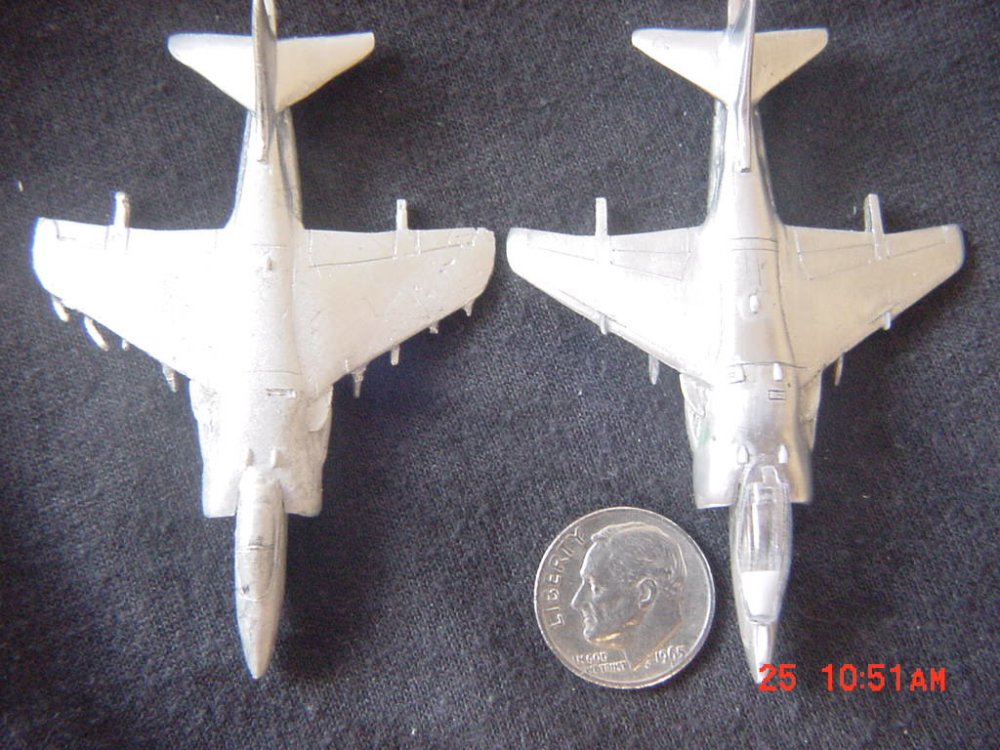
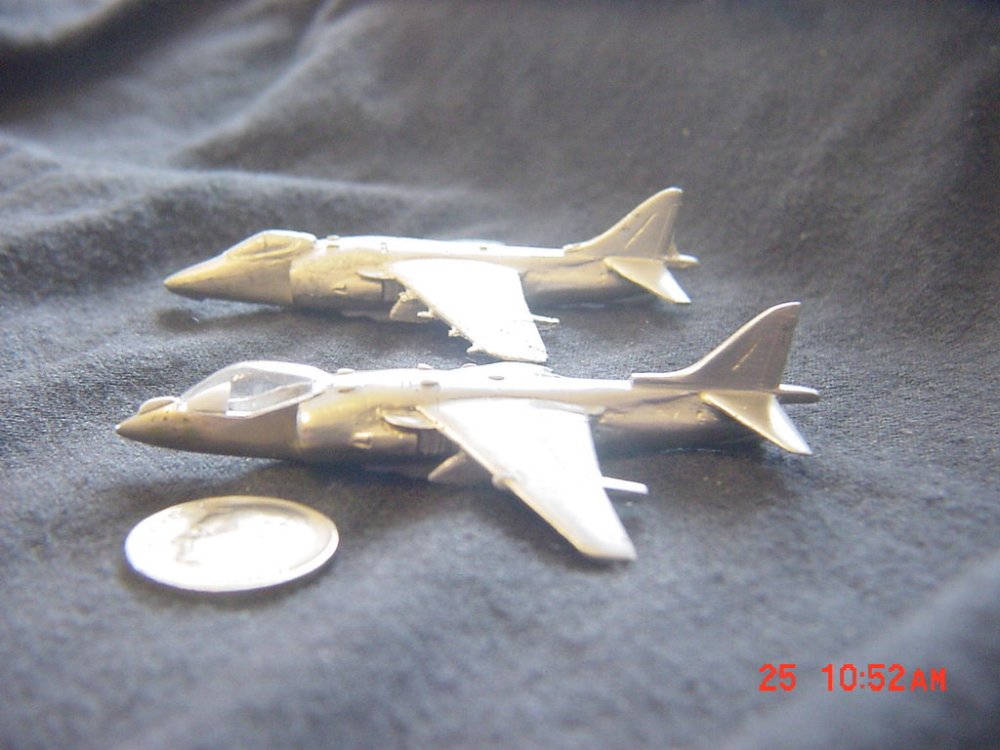
OK, the sound chip thang was a great idea Maiden Japan! I took a couple days break from the Daedalus and worked on one of two 1/200 scale Harriers I bought from Helmet Models UK. You can see the difference in improving the details. The cleaned one has NO DETAILS or engraved panel lines yet. These are lead based models which meant I used LOTS of solder to add or fix areas. Clean up is a mess and hazardous! With panel lines and details. Note the clear canopy (that still needs painted frames to look accurate. The cockpit was hollowed out and basic cockpit added. And yes, it comes with gear and ordinance! . - MT

-
Whats Lying on your Workbench MKIII
MechTech replied to HWR MKII's topic in Hall Of The Super Topics
REALLY AWESOME WORK!!! That thing needs a sound chip in it; "Autobots, transform and rool out - or I'll squash you because I'm so big!" - MT -
SCRATCH BUILD MACROSS Armored Factory and Maintenance Bay
MechTech replied to MaveRick's topic in The Workshop!
Still look'n good! - MT -
SCRATCH BUILD MACROSS Armored Factory and Maintenance Bay
MechTech replied to MaveRick's topic in The Workshop!
Looking great so far! If you want LED lights, buy them discounted now: http://www.christmasdepot.com/LED-Commerci...ghts_46_353.htm Just take the annoying heads off of them. Plug them into the wall and your good to go! White LED's work the best, trust me - MT