MechTech
-
Posts
4679 -
Joined
-
Last visited
Content Type
Profiles
Forums
Events
Gallery
Everything posted by MechTech
-
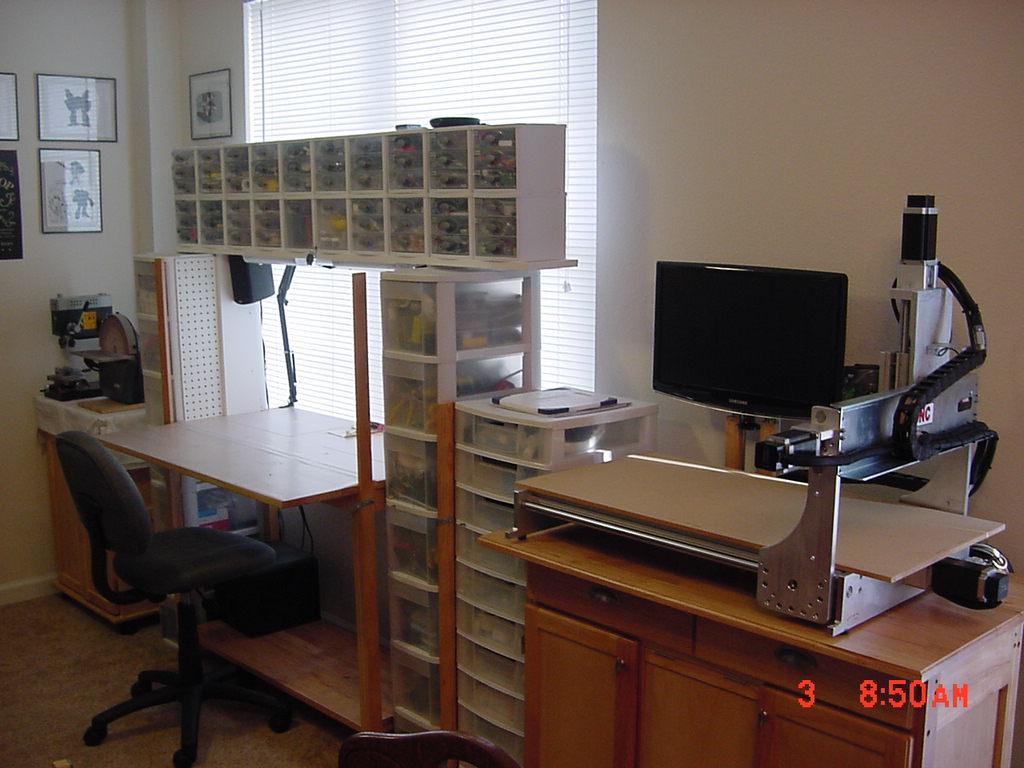
I SOOooo need to get a display case like you guys I've posted earlier versions of this, but it's a very SIMPLE setup. I got a cheap milk table (front folds up for more space) for the actual bench. The columns are simply cheap plastic pull out drawers screwd onto the table. On top of that took a cheap pine board and put several smaller plastic drawer units on it with bolts. Lights are hooked up under that. The important thing - this was done over a period of time so I could pay out a little at a time. I have moved four times with this setup and with the exception of a couple bins cracking, its hanging in there. The bad part, it's white and so are styrene parts that fly out of your tweezers - MT

-
Great job! I'd have to say the camo is more 90's like you see from that era. It looks great all the same. If you've never heard of adding talcum podwer to your paint to make it "chuncky", it works great. I also had some Tamiya paints that lasted about 20 years! The secret is to keep them in an airtight container like a modern ammo can. - MT
-
Awesome finish and build cool8or! The chipping looks great and realistic. The "bad guys" never were good maintainers. Thanks for sharing! - MT
-
Guys, what you don't realize is Mike has a full sized hanger for a "garage." That would have to explain all these giant builds, either that or he is slightly visually impaired and can only see big things - just speculation now... I agree with EXO on the scale issue. Many of the drawings and even size comaprison charts done don't match up with the stats. I'm going to use that to my advantage with some of my builds. It's easier to use a 1/72nd scale figure than try to find one in between that and 1/48th for a Zentraedi. I just went through trying to do the math on that one last week. It doesn't work out. Awesome build as always! Keep up the great work! - MT
-
Nice work everyone! I'm not a Galcactica fan, but what I remember of the pilot, the colors look good on the Galactica Derex. VF-19, that photo of the Andromeda helped sell my son to buy one - along with the newer 1/500 Yamato. Guess what will be on my bench when they get shipped Time to dig out the old stash of LEDs! - MT
-
$15 isn't bad for a 1/72nd old school valk. It's no Hasegawa and looks more like the lineart/anime than a real model. These typically had "meaty claws" for hands, big feet, and other over exagerated features. But they're still cool if you ask me. If I recall correctly the nose will need some work too. - MT
-
Tamiya's paints are water and isopropyl alcohol based so you're safe. There are other chemicals in them, but in smaller quantities. Here's a thorough breakdown in a thread elsewhere: http://www.network54.com/Forum/112088/thread/1001854333/The+proverbial+Tamiya+acrylic+thinners+question! These are probably about as safe as you're gonna get next to tempura paints. In a nutshell, I use over the counter isopropyl alchohol to clean and thin mine. It dries faster though, so keep to their stuff or something slower curing. Have fun! A dehumidifier or food dehydrator will help when the humidity gets too high! - MT
-
Hey BigF, that would be cool if they are in the same scale. I used to have some of those myself, don't remember what happened to them. Let me know if any of it is in scale and we'll see what to hit first. - MT
-
Thanks guys, I was thinking of making them available. I thought they'd be right for a chess set too. Thanks for the compliments as well! The recasts should be cheap too! I just need to get them casted and then I'll let you guys know the cost. I'm hoping not a lot - for all our sakes - MT
-
I'm just catching up with this, but remember, nothing is too ambitious! Even if it takes you six years to complete! Looking great so far. I'm thinking of doing some 3D drawing myself like this. You're doing it right. It's great to be able to make your virtual parts and check their fit, versus my method of making it, screwing up, and making it again until it fits right Keep it up! - MT
-
Thanks guys, I appreicate it! Still looking for a good reccomendation of a caster. - MT
-
Thank you Kyekye! Yeah, finally some paint! With tommorrow's high around 32 degrees F, it aint happening anytime soon! Thank Rotorhead, no sweat. I thought it was an "inside joke." If it make you feek better, the Imai 1/5000 kit has knees That's funny. Happy New Year guys! - MT
-
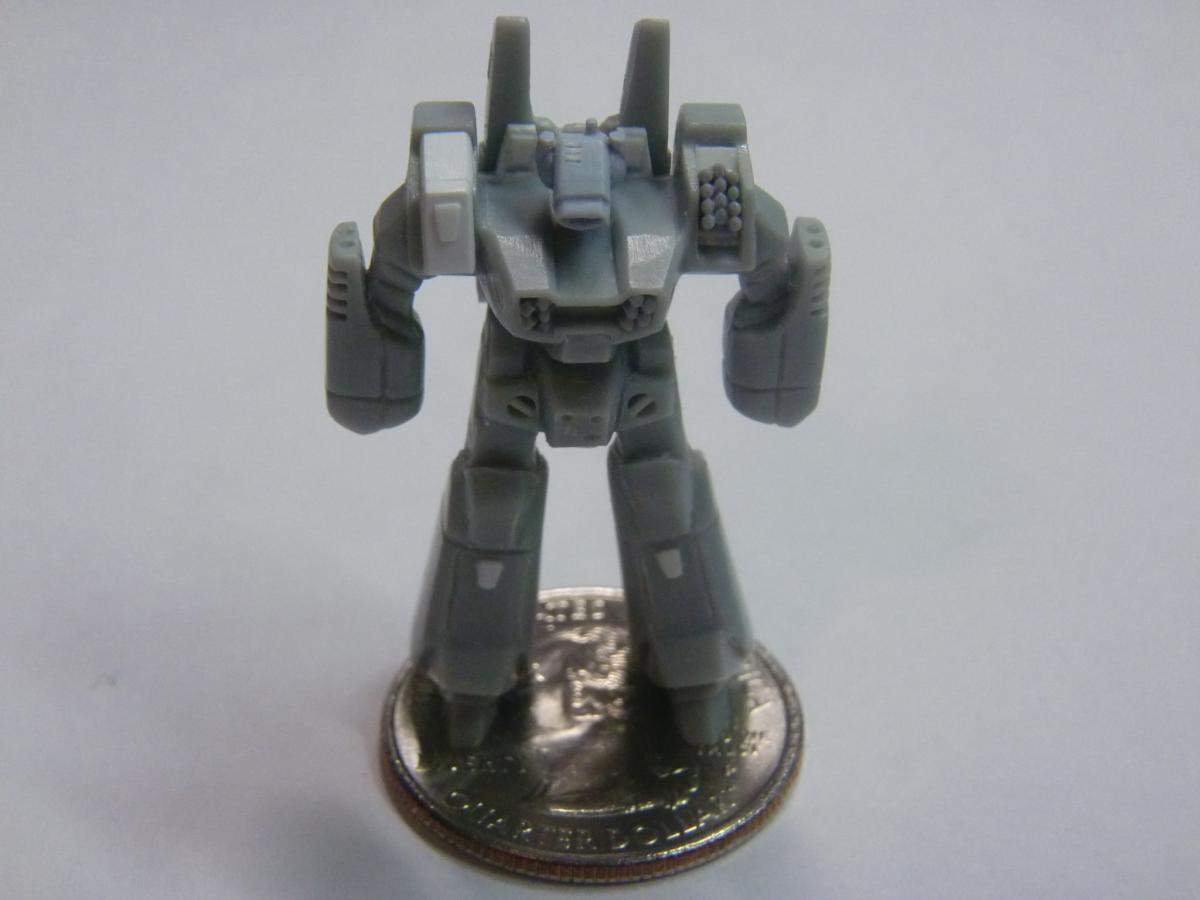
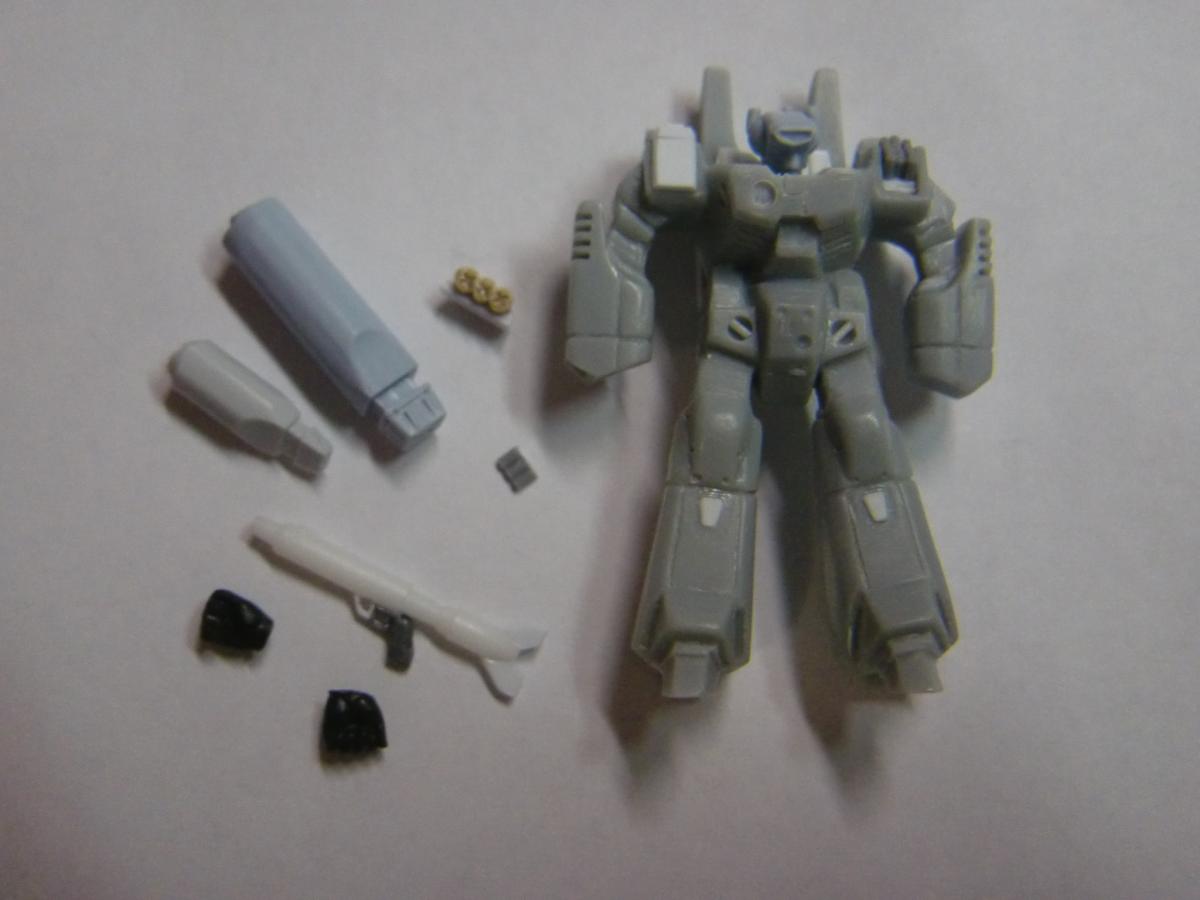
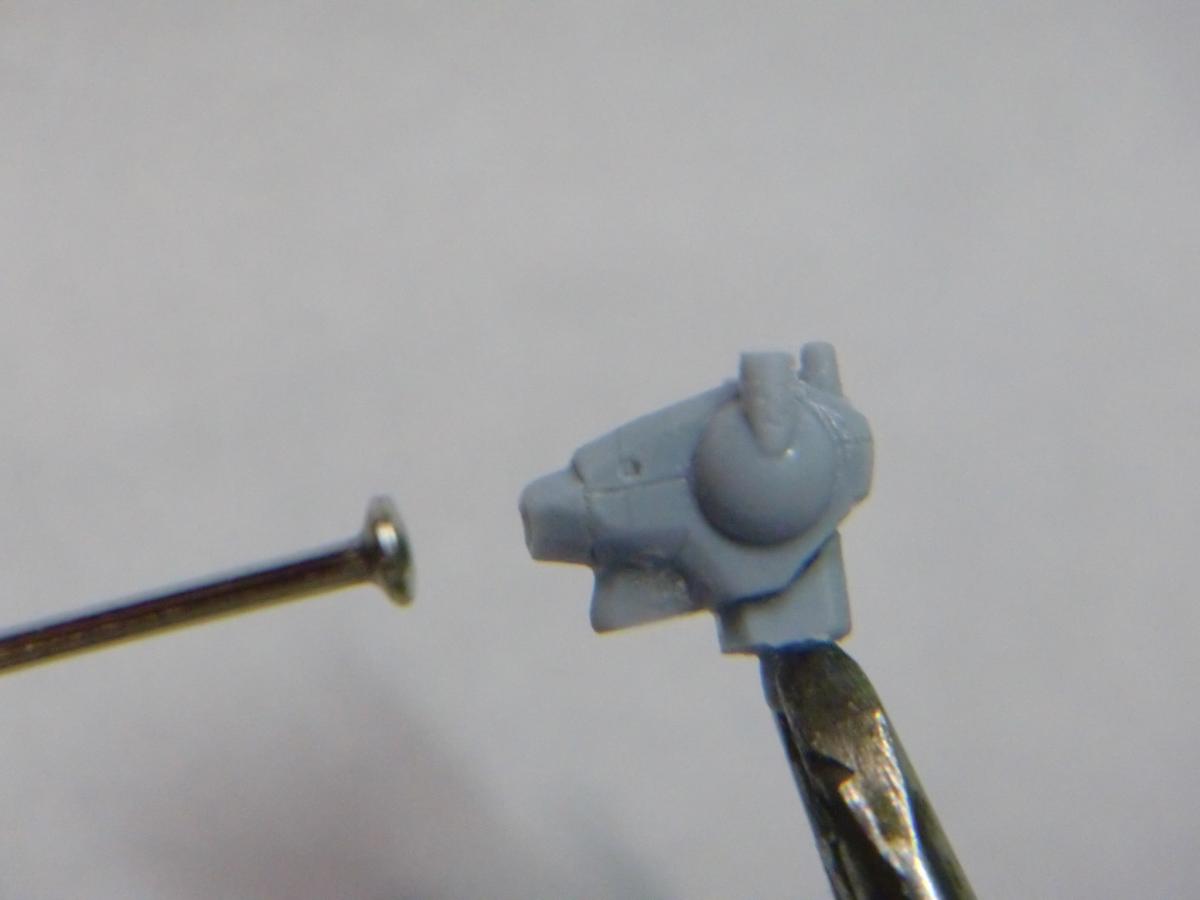
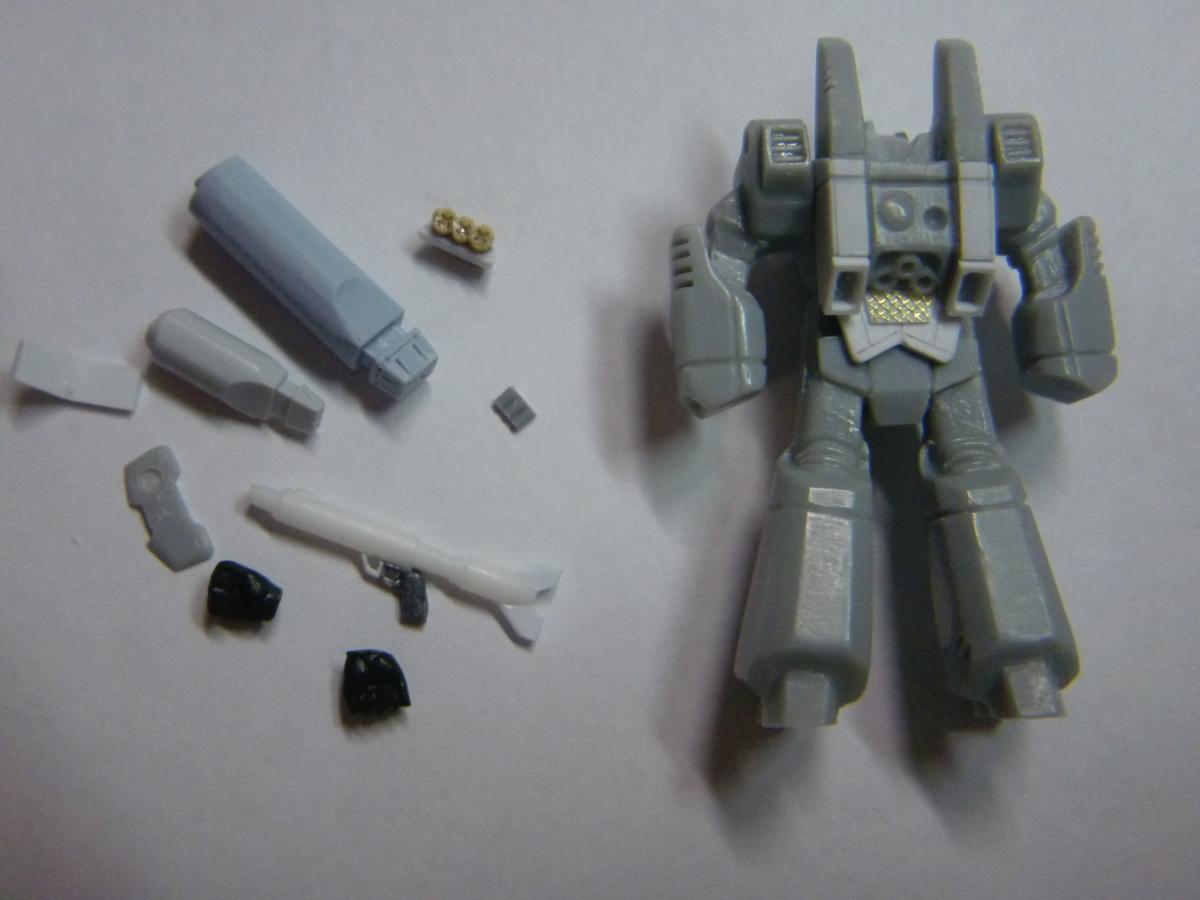
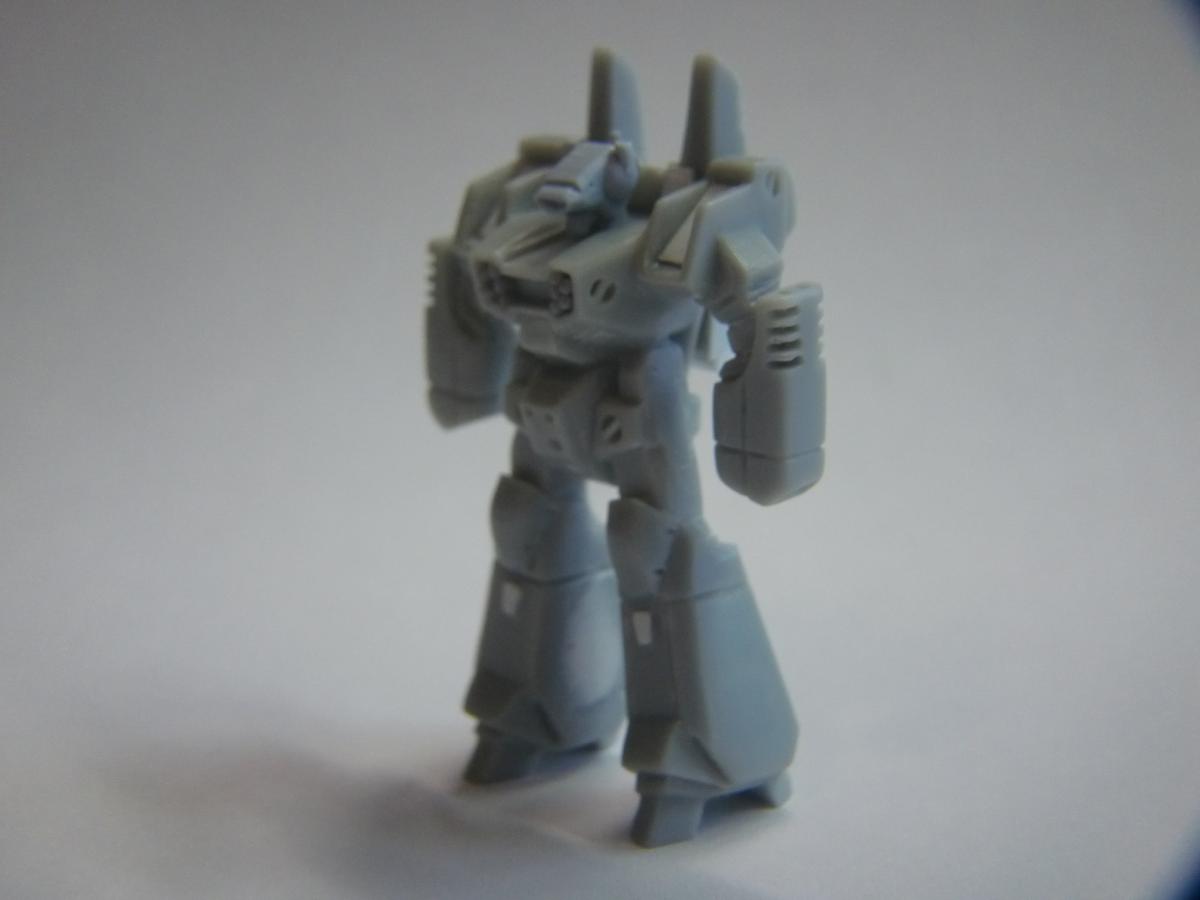
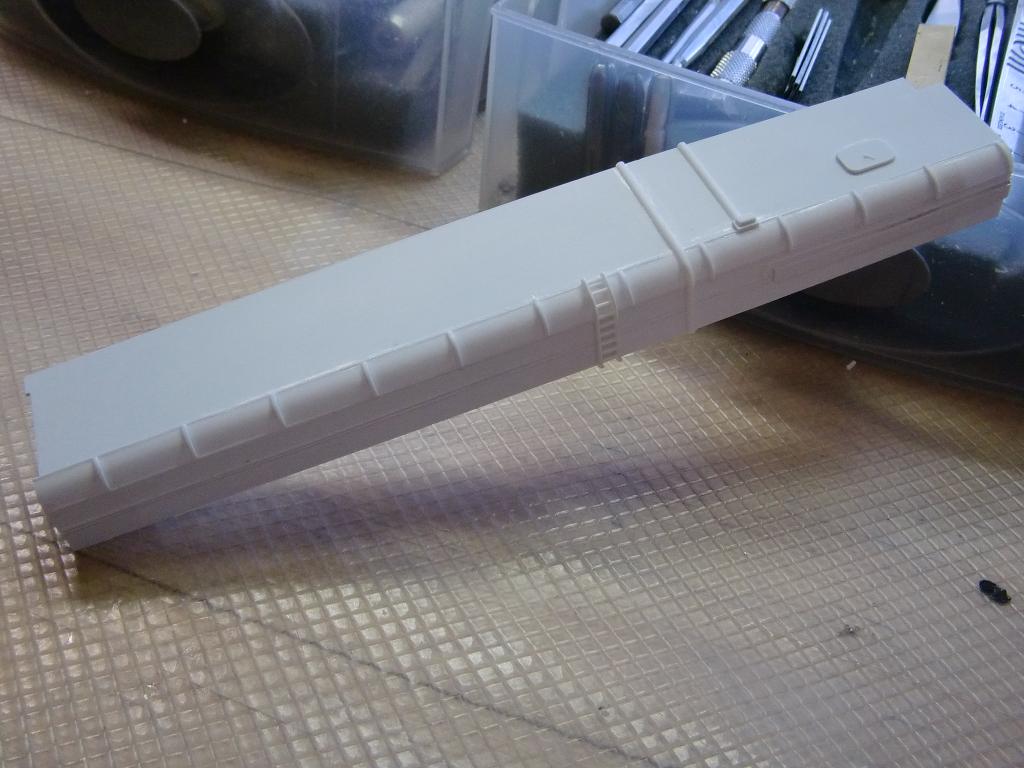
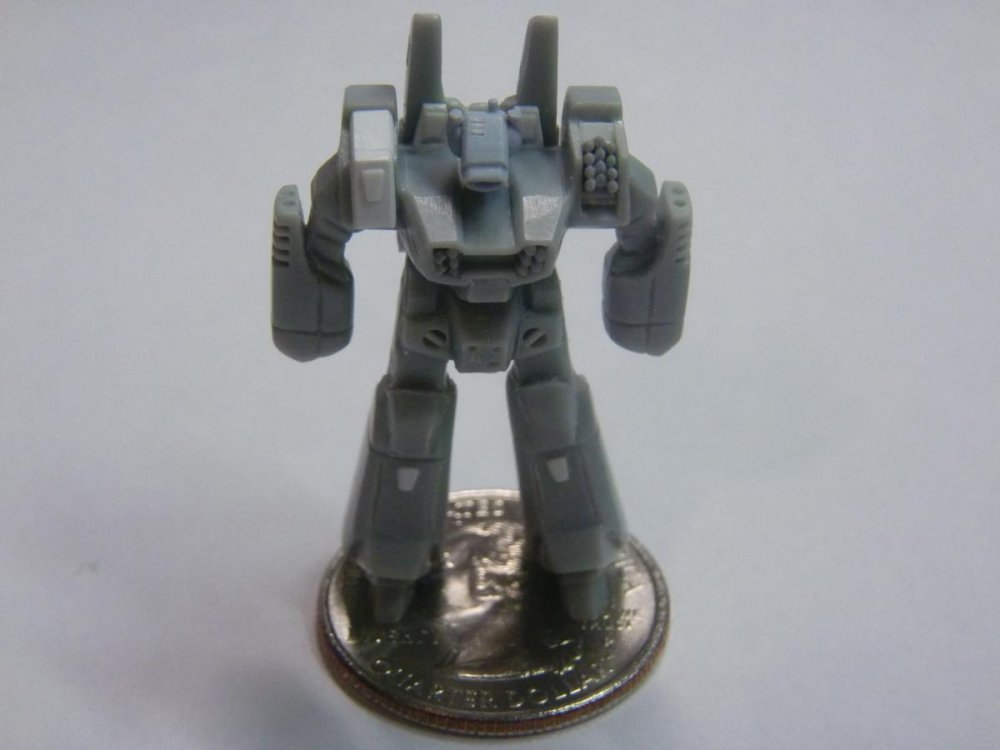
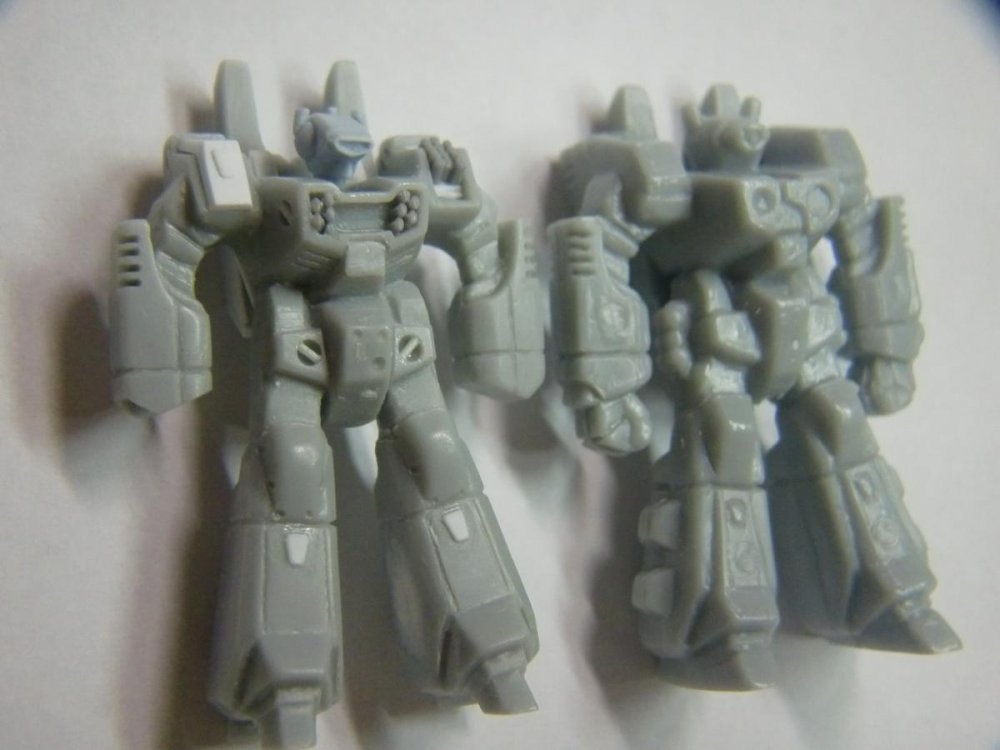
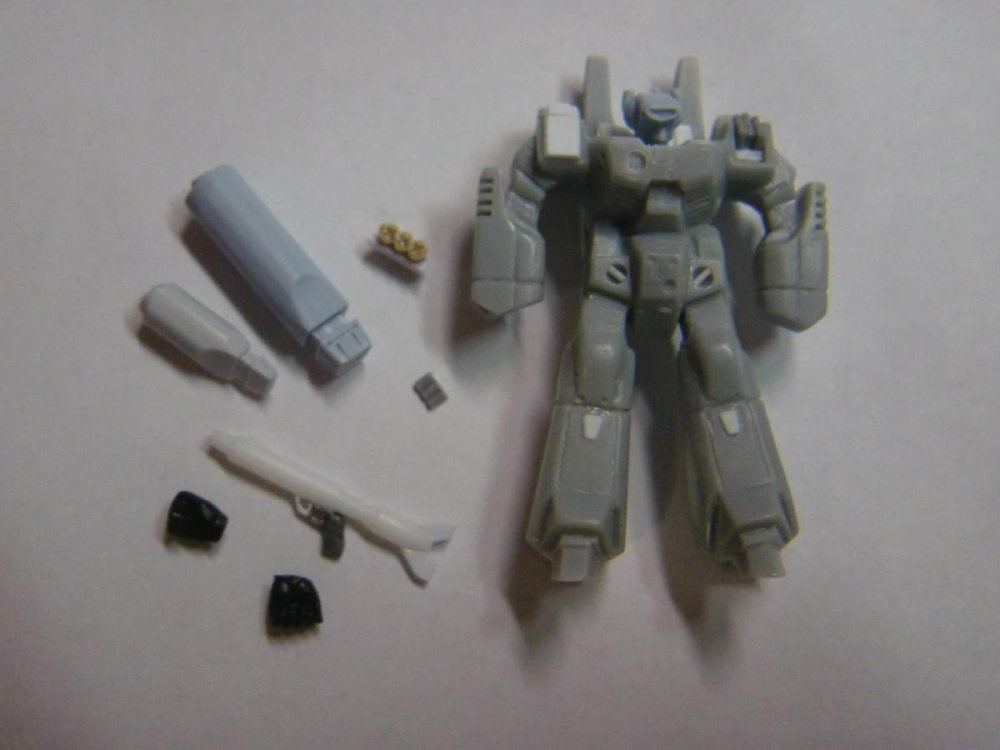
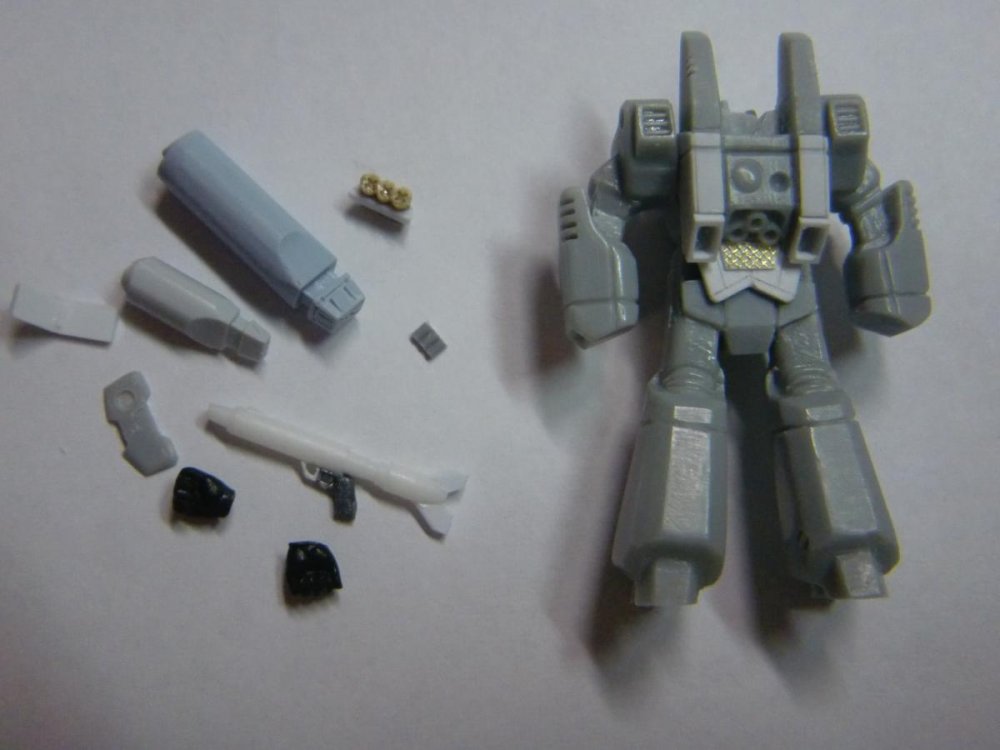
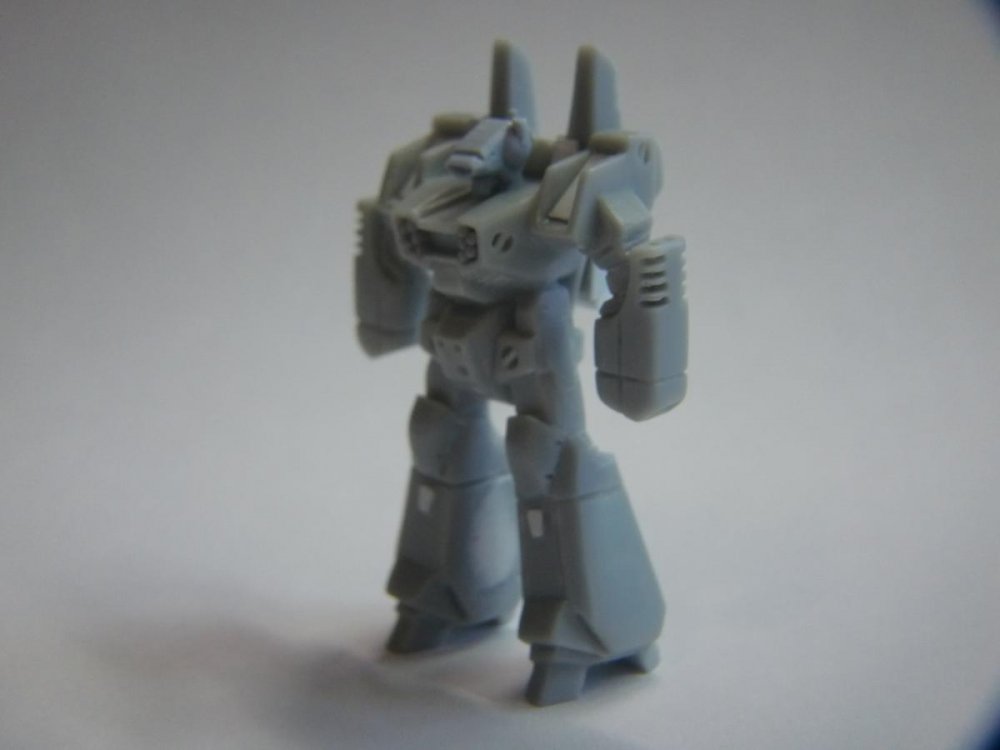
Hey Kelsain, It does look like it (I was using one to help me remodel this as a 3D referance). It's actually 1/350th scale, or 40mm "tall". It was one of the lesser known 1/320 kits (the original is in one of the photos, though its actually 1/350th). Due to lack of space to display things, I'm moving to 1/350th scale. I can get every plane/tank/ship I want in this scale, but it's going to mean doing some scratch building to get some Macross stuff. I even have Mospeada stuff in this scale now! So here's the first work. I'm using macro lenses so EVERY single speck of dust or flaw you can't see with the human eye is getting picked up. All of the parts are in one of the photos, they just need to be copied and glued together. Some interesting points, the original hands looked more like claws, so I used 1/35th scale hands. The GU-11 has a 1/35th scale .45 pistol grip on it (also heavily modified). The hip missile "X" detail was pressed into them using a sharpened micro phillips screwdriver head on my drill press. A lot of the parts are "doubles" since the originals flew out of my tweezers into the carpet and forever lost The VF-1J head is shown next to the head of a pin for size comparison. The next step I think will be a Regult and Zentraedi figure. I want to get several copies of all these done in resin, that's why I'm looking for a good caster who can do SMALL items like this. That's it for now, I'll probably post the next figure up in this thread too. - MT

-
I've spent the last 6 days working on this poroject while waiting on the weather to improve for painting the Daedalus. Before I go on and post more pictures and info that will make it obvious, does anyone want to take a crack at what scale this is in or at least the height? On a side note, do any of you know of a good caster? I need to get several copies of this made and I know I'm going to have issues with air bubbles and time to do it in. Thanks everyone! - MT
-
Thank you guys for the compliments, I REALLY appreciate it! The whole SDF-1 I'm thinking would be TOOooooo huge in all reality; but it's fun to think about doing it. Rotorhead, should I ask why the emphasis on the knees? - MT
-
Awesome work everyone! The Galacticas are looking good too, even if all the detail won't show up. The LEDs are a nice touch on the J Cesar. Does anyone have a good source for micro LED's? I've found some cheap zipper pull flashlights that have them inside, but they're about $2.00 a pop. - MT
-

Yamato 1/60 VF-1 (VE-1): what kind of glue is most appropriate?
MechTech replied to regult's topic in Model kits
Hey Regult, you've probably got parts made out of ABS. The Tamiya cement MIGHT work on it, but you'll need a lot to to get it to work right. ABS needs a stronger solvent. That part is also under a lot of stress in the area it broke so it'll probably break again anyhow. If you do glue it, you should add some styrene to one side to reinforce it and do some touch up painting if needed. Then there's plan "B", a new part. Sorry about your breakage. - MT -
Thanks guys! And I hope this new year finds more cool Macross stuff coming out, and more money available in our pockets to buy it with I've got to reactivate the notifications for this thread. Still waiting on warmer weather and I'm trying to find the right shade of paint for this thing. I'm looking for a rattle can due to the size of this job, but if an airbrush is the only option, well... How about an SDF-1 in 1/350th? It would be smaller. - MT
-
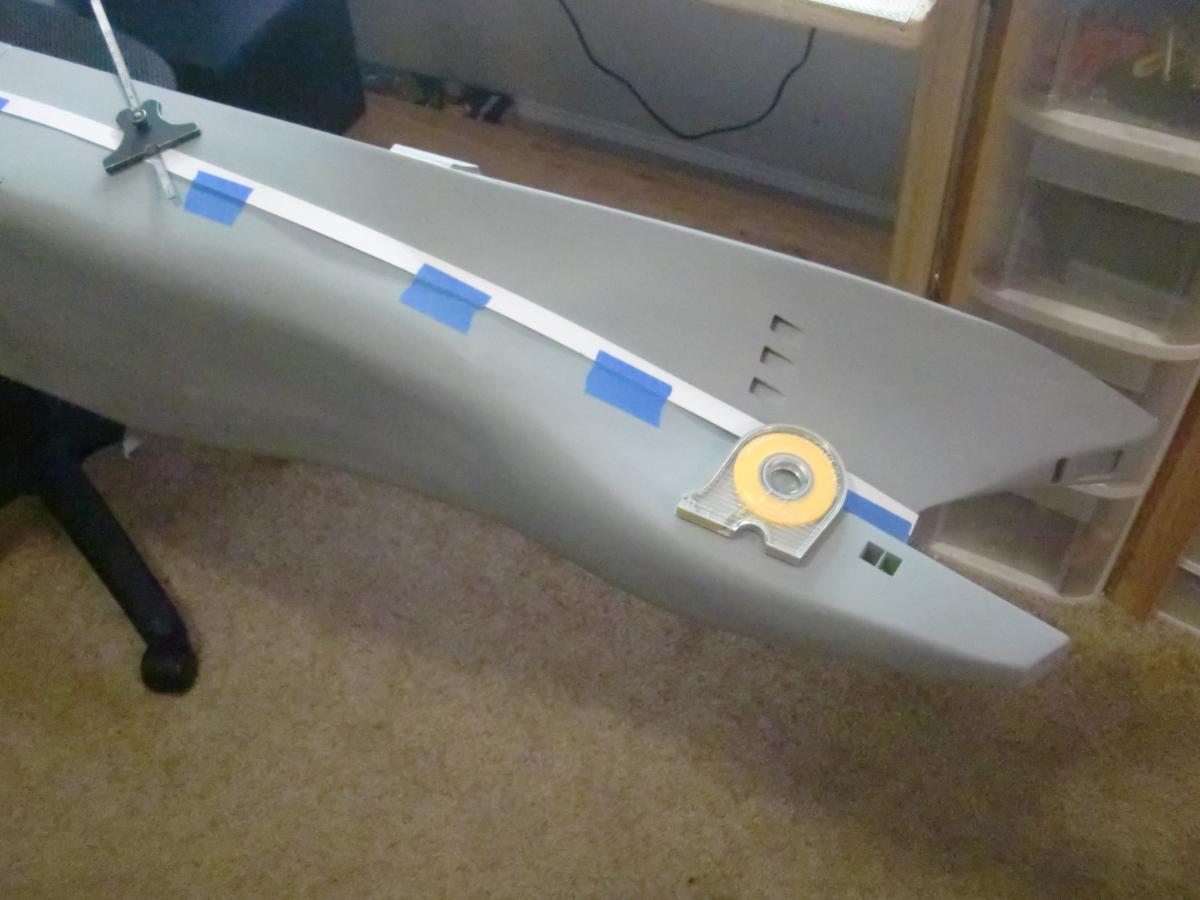
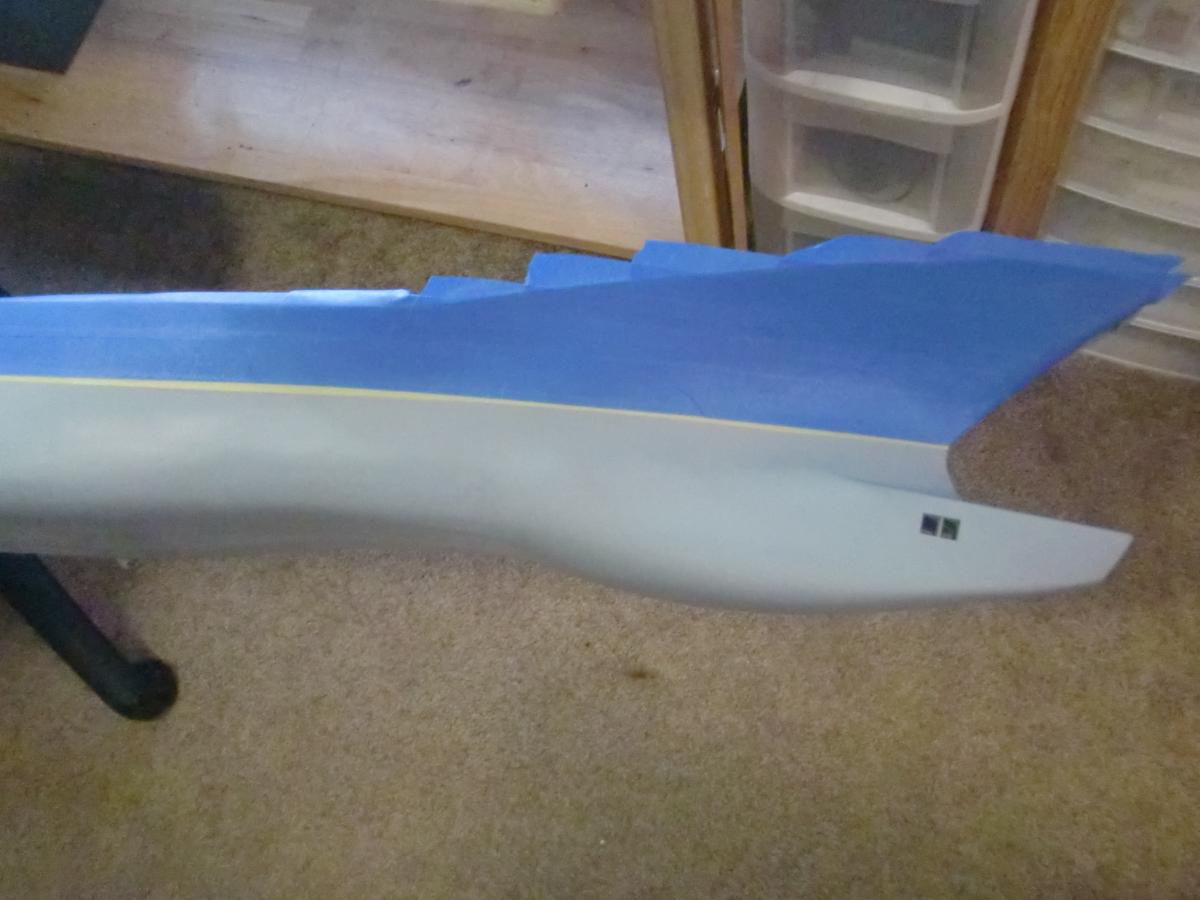
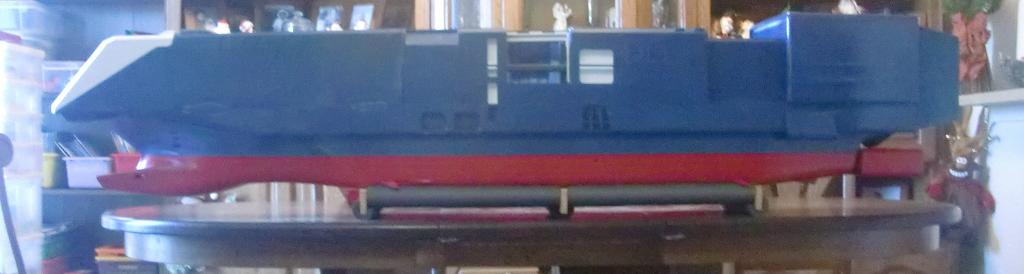
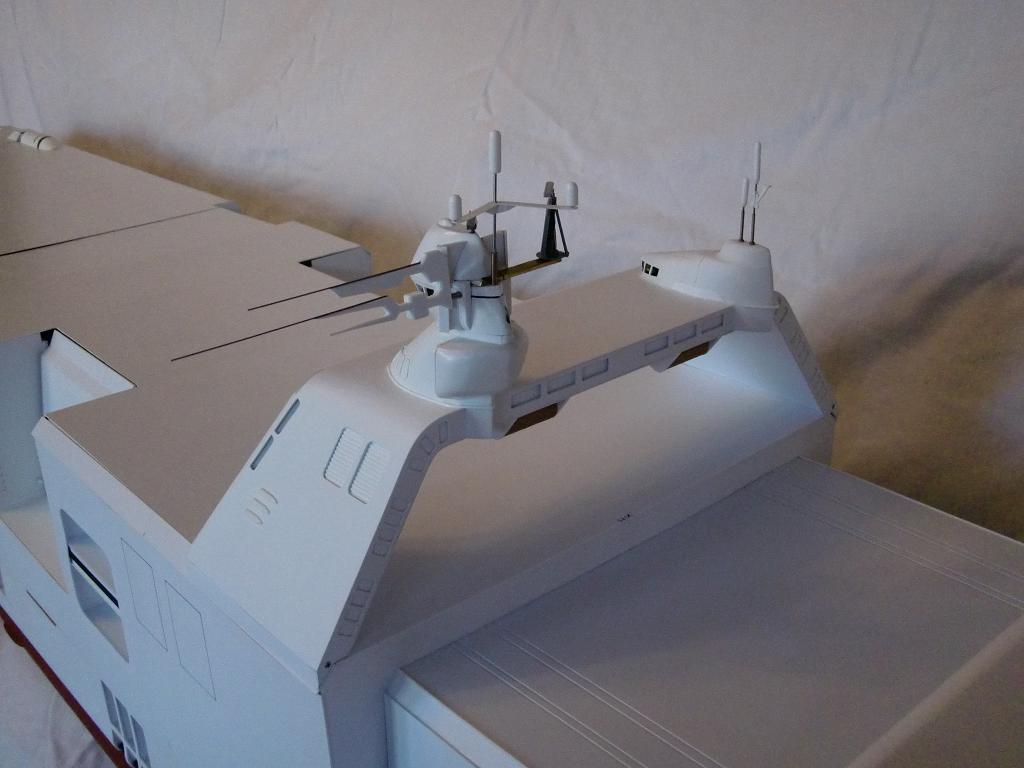
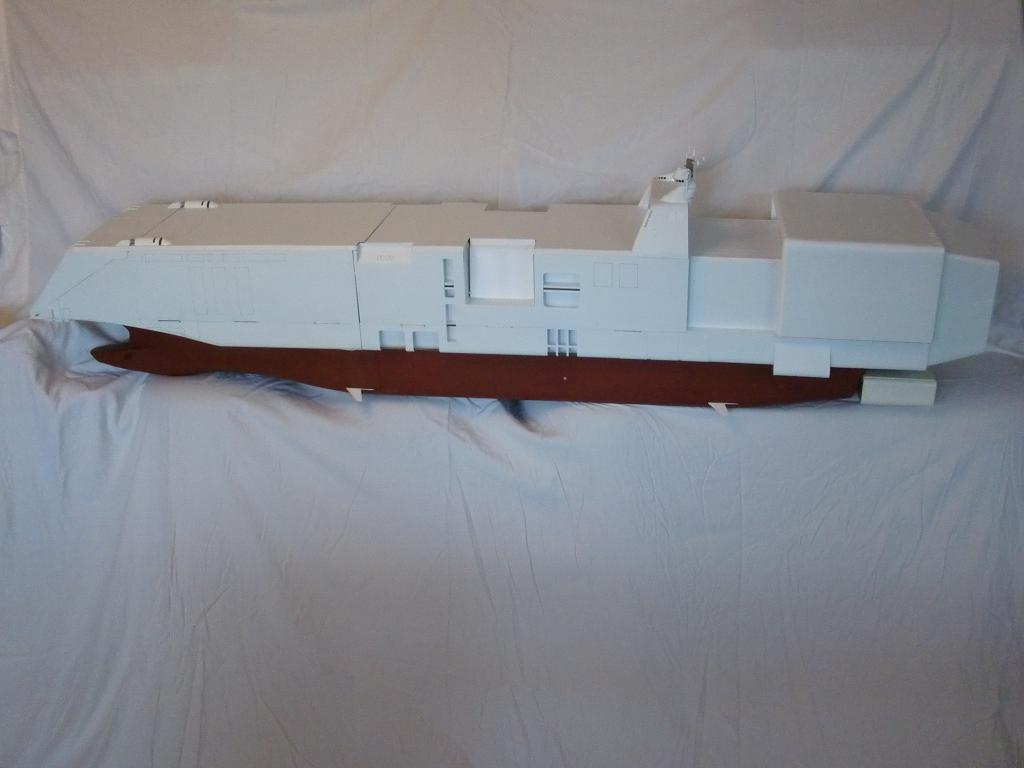
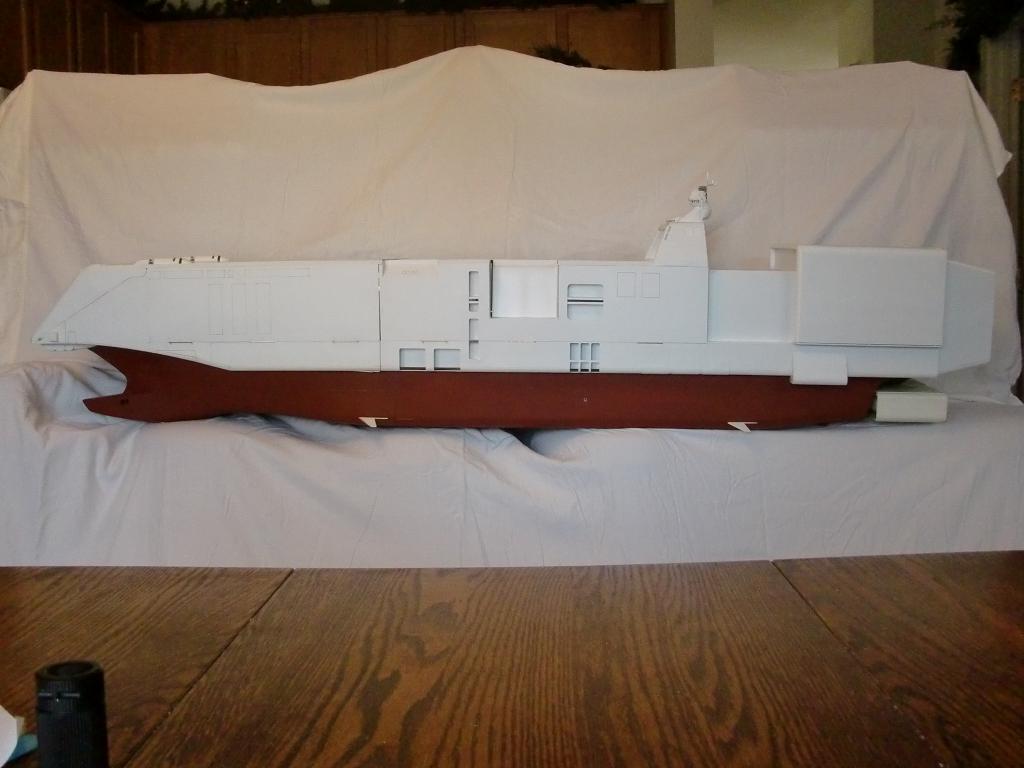
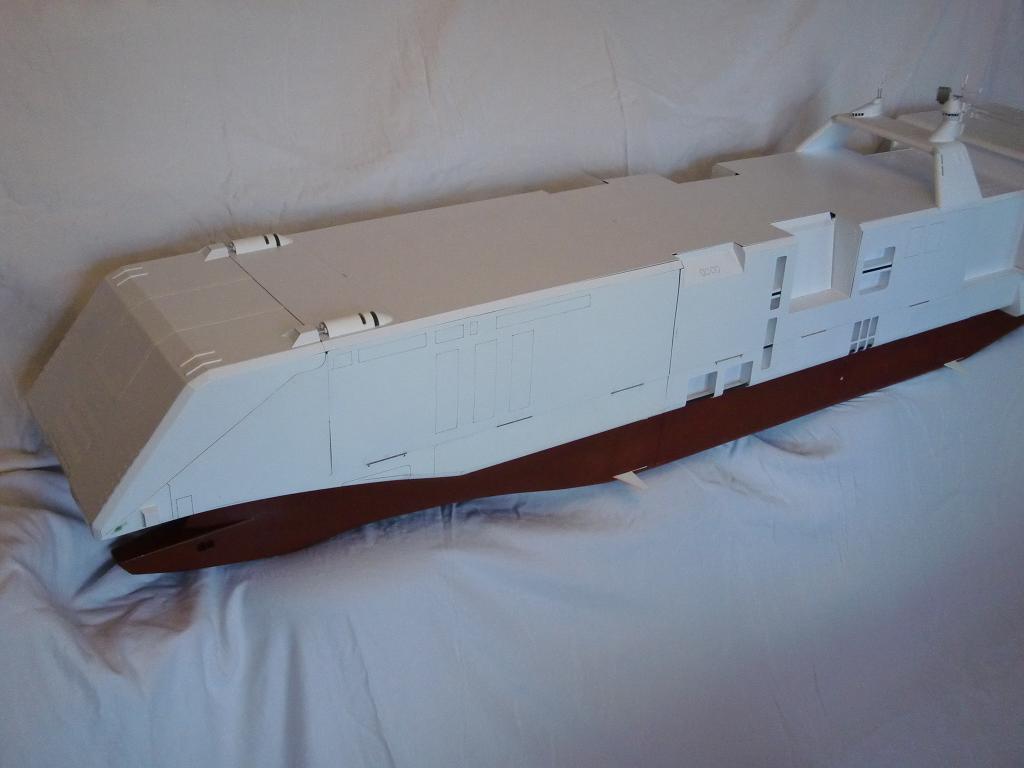
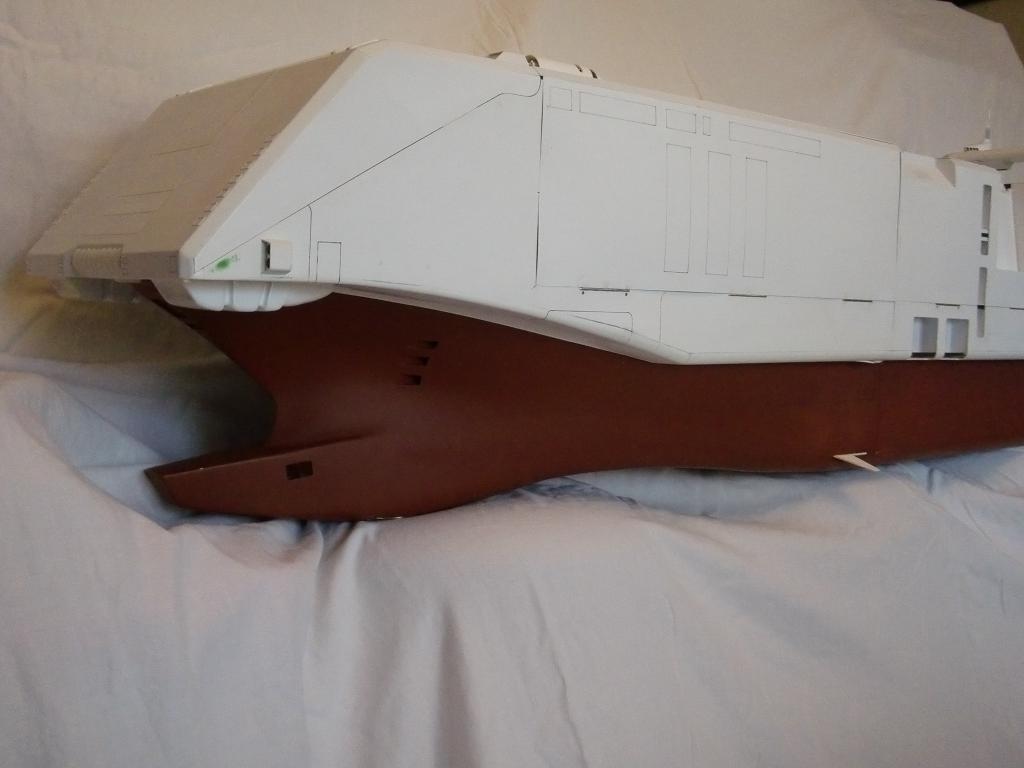
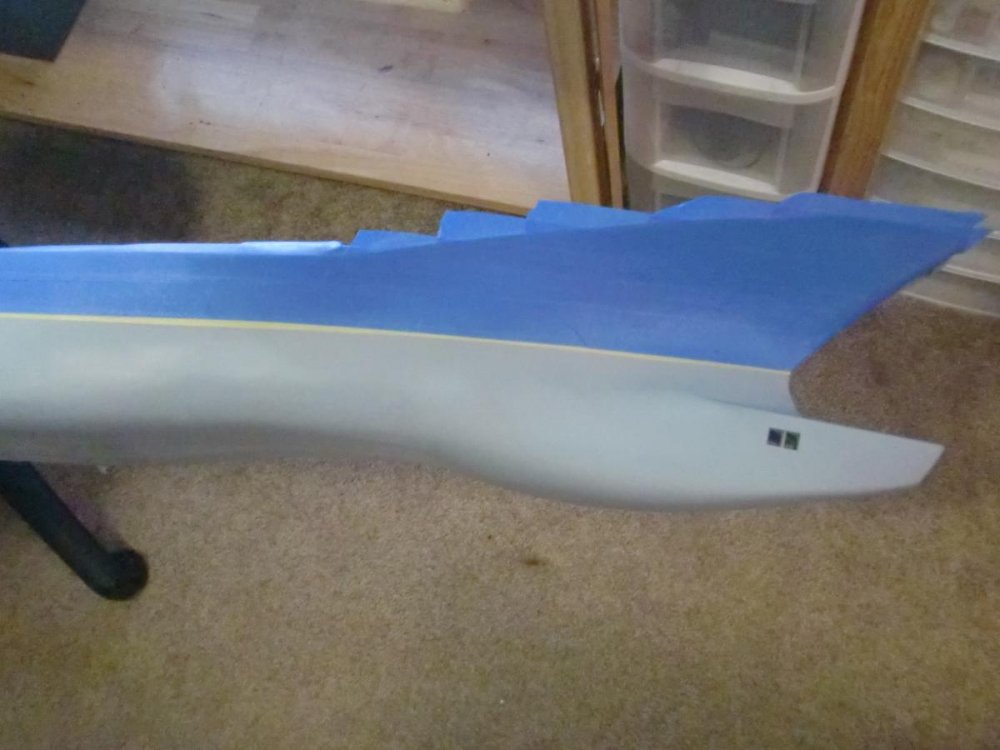
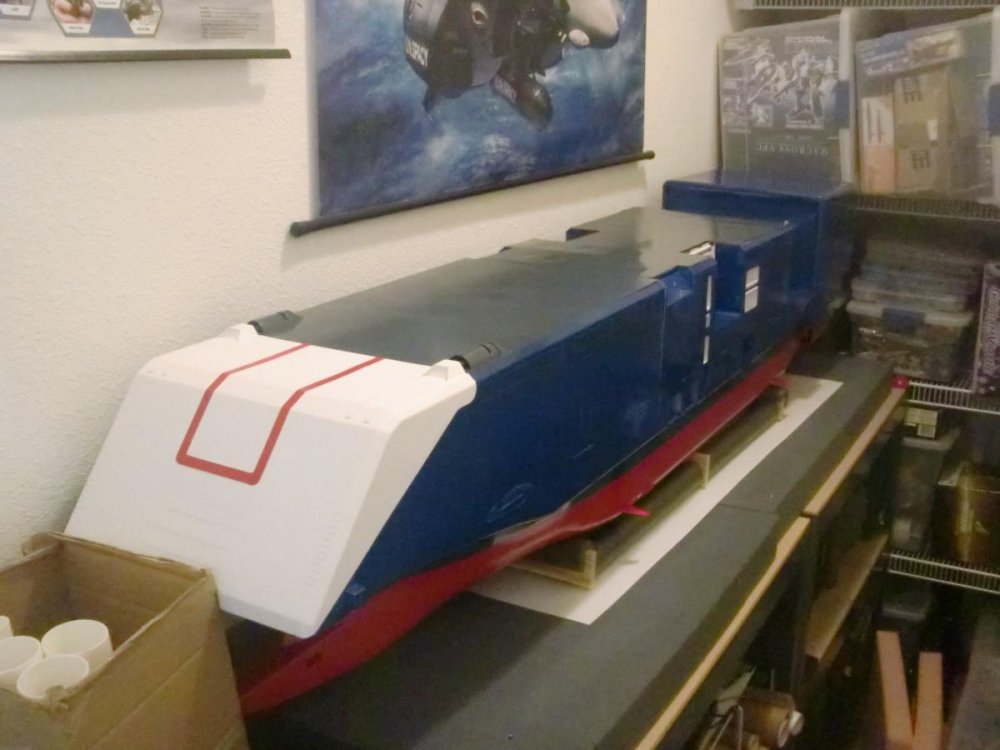
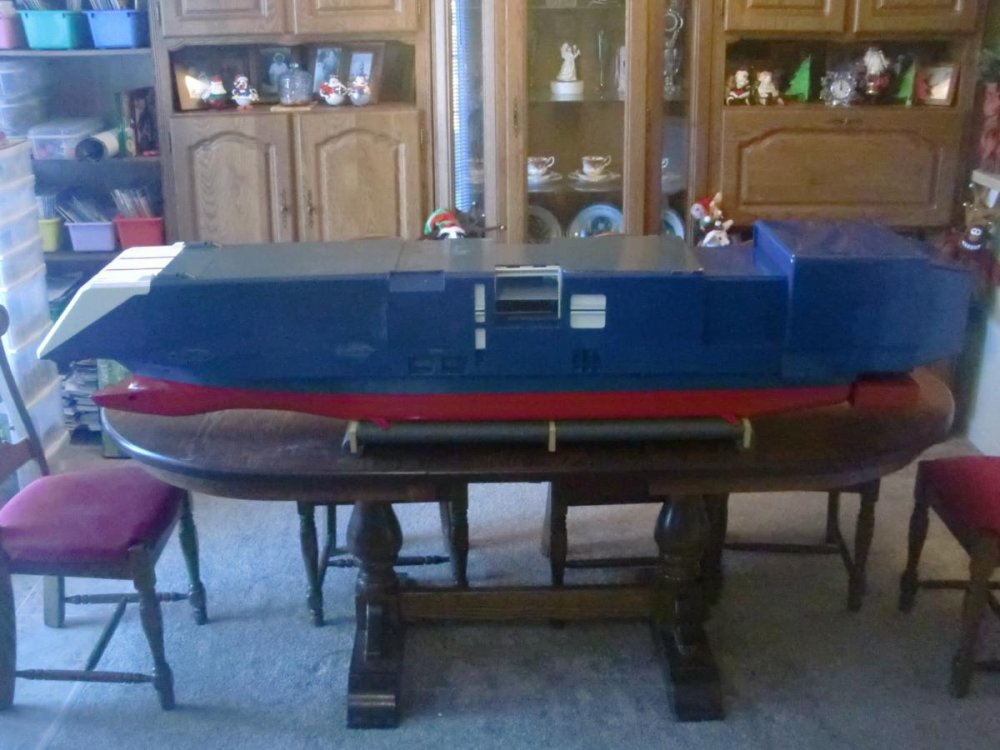
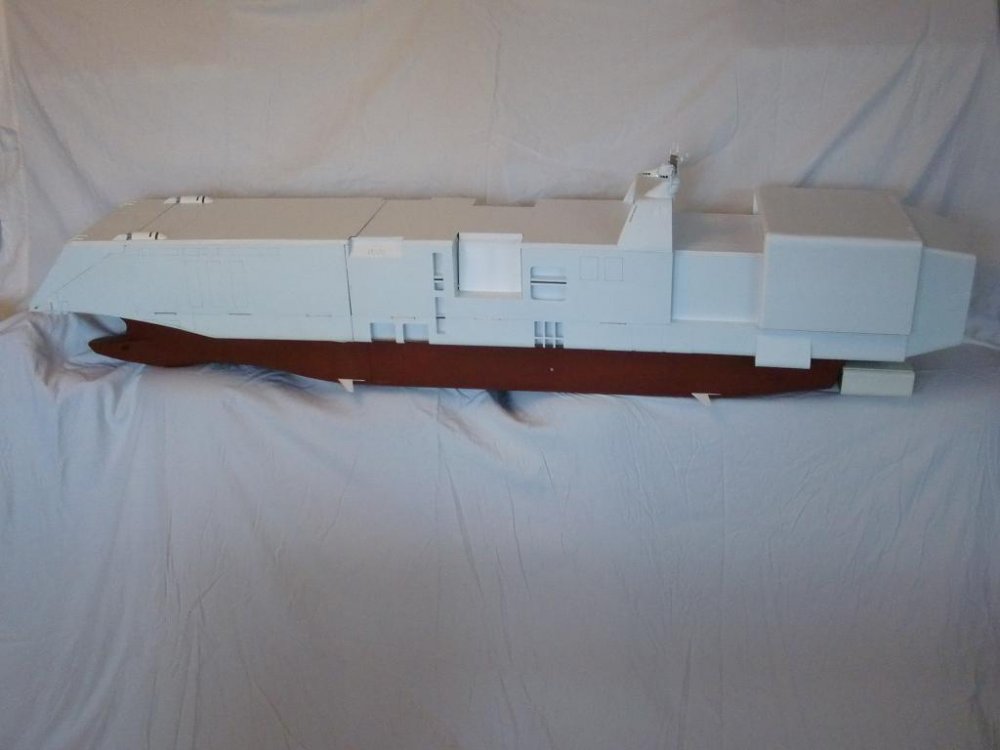
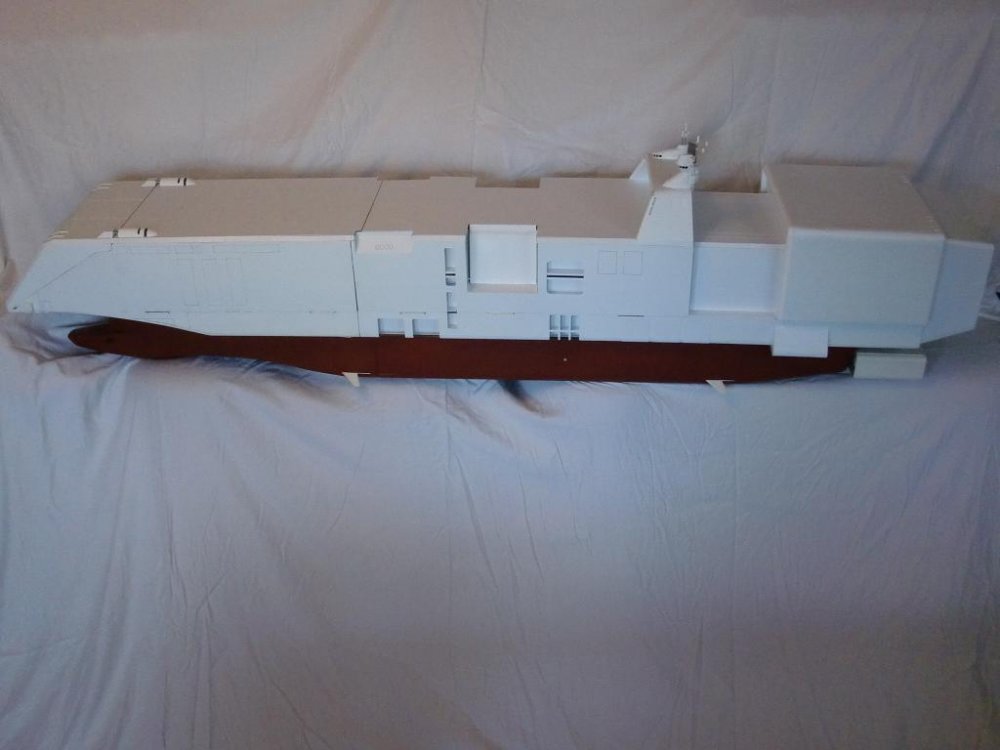
MERRY CHRISTMAS EVERYONE!!! UPDATE 24 DECEMBER 2011 [X] - Construction [X] - Wiring [ / ] - Paint Thank you guys AGAIN for all your compliments and even threats of legal action I'm almost done! Since I'm on Christmas break I've had opportunity to get some painting done. Whatever you do, DON'T use Valspar paint for your models! I bought some at nearly $5.00 a can so I thought it'd be great - wrong answer! It spatters and runs badly! Plus the color turned out WAY darker than the cap, so I AM REPAINTING the blue you see here. It should be a grayish blue. The Rustoleum "Plastic" worked great, especially since I primed it first. That's what the red bottom of the hull is. The weather has only let me get done what you see so far. So what you see is what you get for now until the weather warms up a bit. Enjoy the photos and I think they're self explanitory. You'll see places where the paint beaded like water despite cleaning the surface. I believe it's the silicone oil I used on the joints since it's styrene safe. The closet you see in the end is where I store my models and the Daedalus will wait for slightly warmer weather. In the mean time I'm building scooters and ginger bread houses with my children Merry Christmas everyone again and as always, THANK YOU for your support! - MT


-
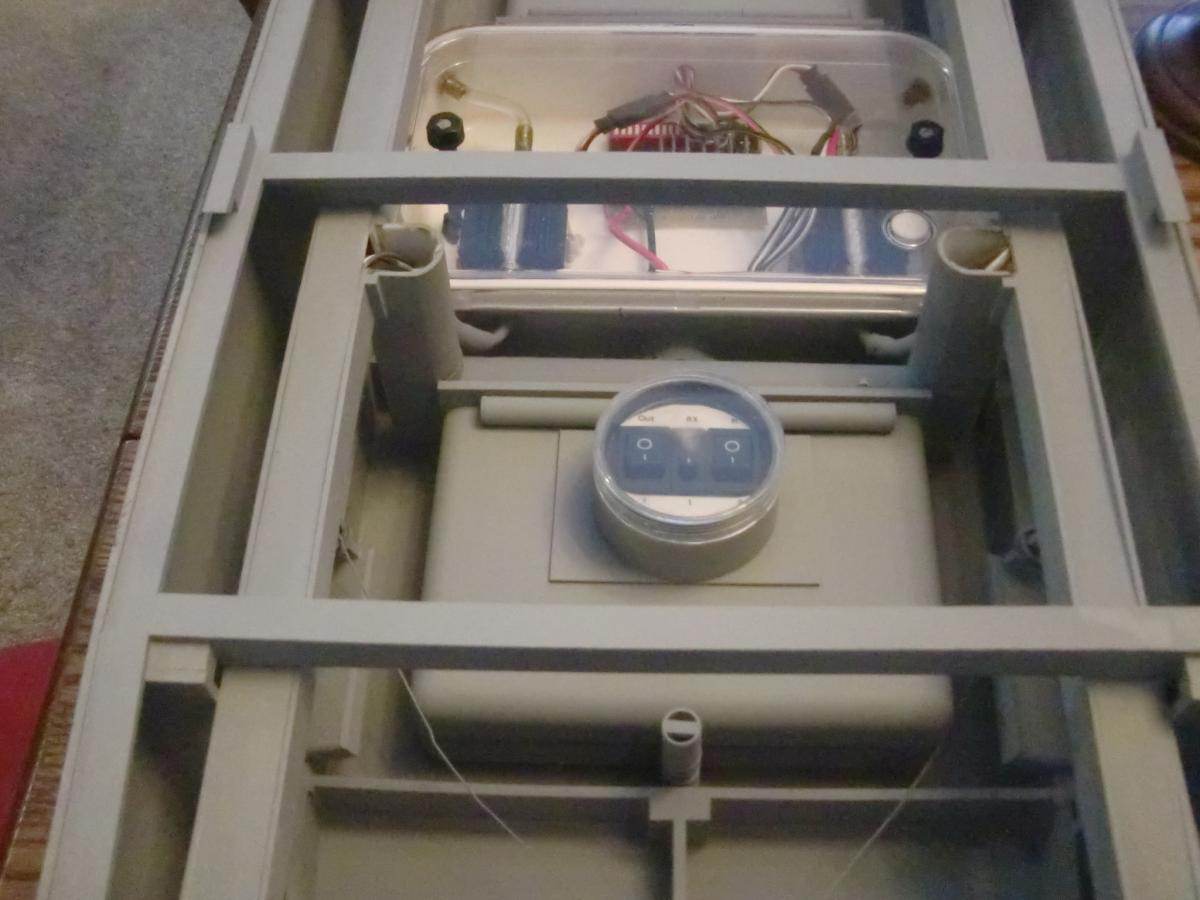
UPDATE 22 NOVEMBER 2011 [X] - Construction [X] - Wiring [ ] - Paint Thanks again guys for all of your compliments and inputs! As you see above, the wiring is done! I just need to fix the hatch opening drive. The clutch on it either needs tightening or replacing? It's on there so if someone (like my very young children at the time I built it) accidentally shoves it or pulls on it, it just slips. The problem is there is A LOT of pressure on it so it takes adjusting to get it just right. I didn't bother taking photos because there wasn't t really anything new or worth shooting. The cool part, everything now works from my controller to include the radar and bridge lights! I'm just SLIGHTLY stoked about that Hopefully over the Thanksgiving holiday I can get some more work done AND completed! Thanks again guys. Take care and HAPPY THANKSGIVING everyone! - MT
-
Macross Military vehicle kit in 1/72 and 1/48 scale
MechTech replied to tundrayeti's topic in Model kits
These look awesome! Keep up the great work! I'm glad to see after all these years you've taken up the challenge to get these vehicles done. There's been several people who started and weren't able to carry through. - MT -
I'm just now catching up with many of the threads. This is AWESOME WORK!!! I too wish I could have gotten in on this! At least I have your 1/350th sculpt of the Legios/TREAD I sure hope we get some WIP photos from those blessed to have gotten in on this! - MT
-
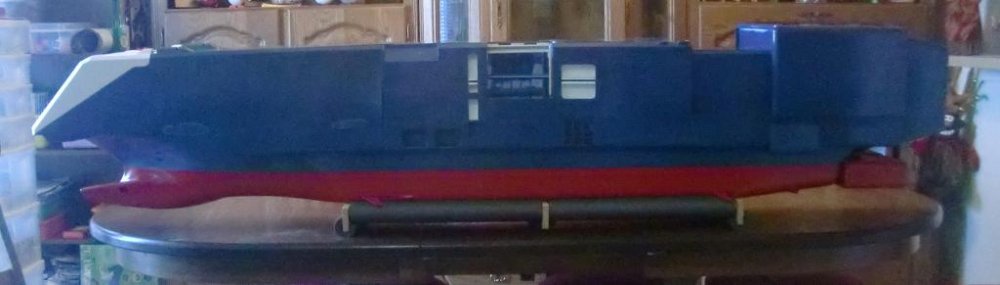
Thank you guys for your MASSIVE compliments, I REALLY appreciate it and you're very humbling . It's great to "see the light at the end of the tunnel" for this project now. I've got some wiring done already and a couple of items I've had to repair from years of wear while working on their assemblies (a few years already). On the photography: I actually photographed this across four bar stools AND a couple of boxes. This thing won't fit on my couch (full sized three seater) because of the couche's arm rests. I also did it near windows, but the clouds were holding out on me. When shooting, the camera didn't show the BAD warpage showing up in these photos. Oh well. I hope to post some more progress SOON! Thanks again guys! - MT
-
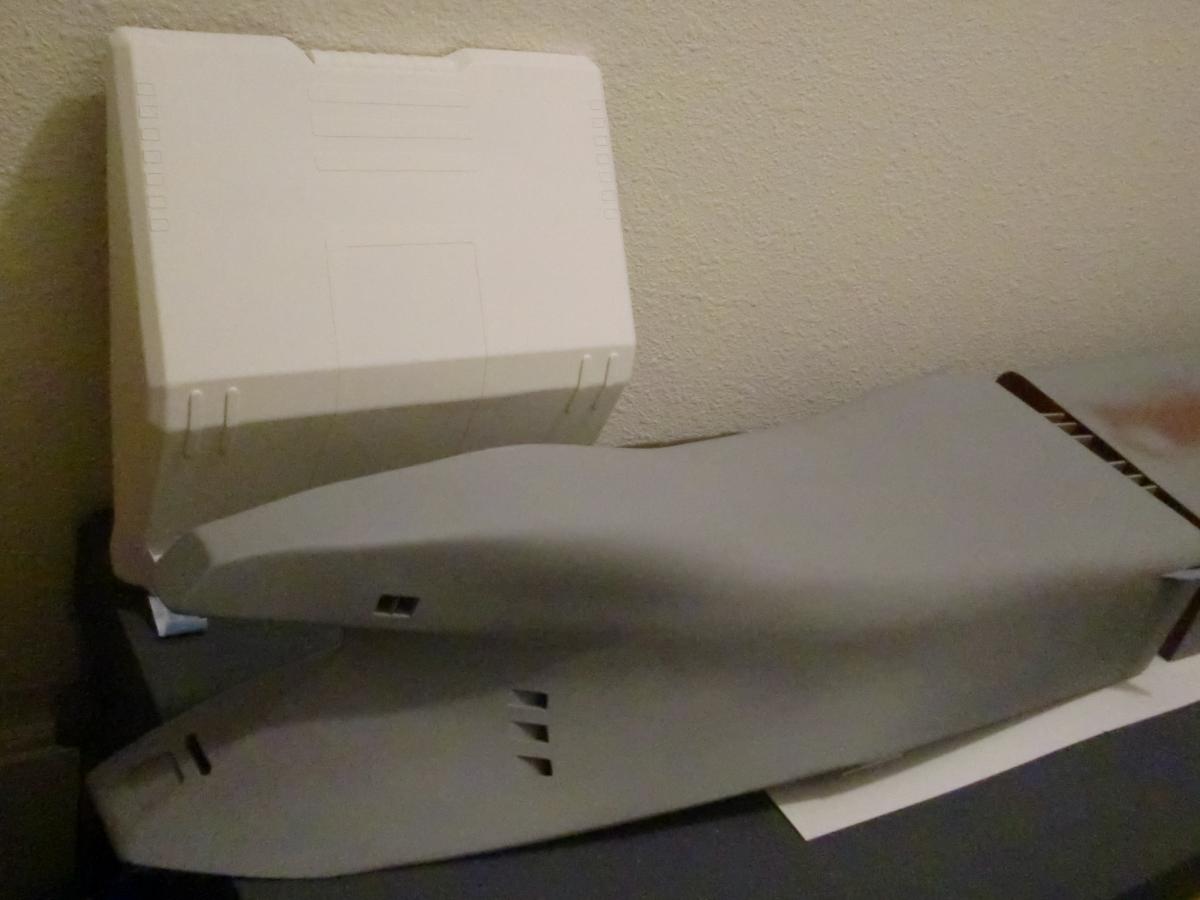
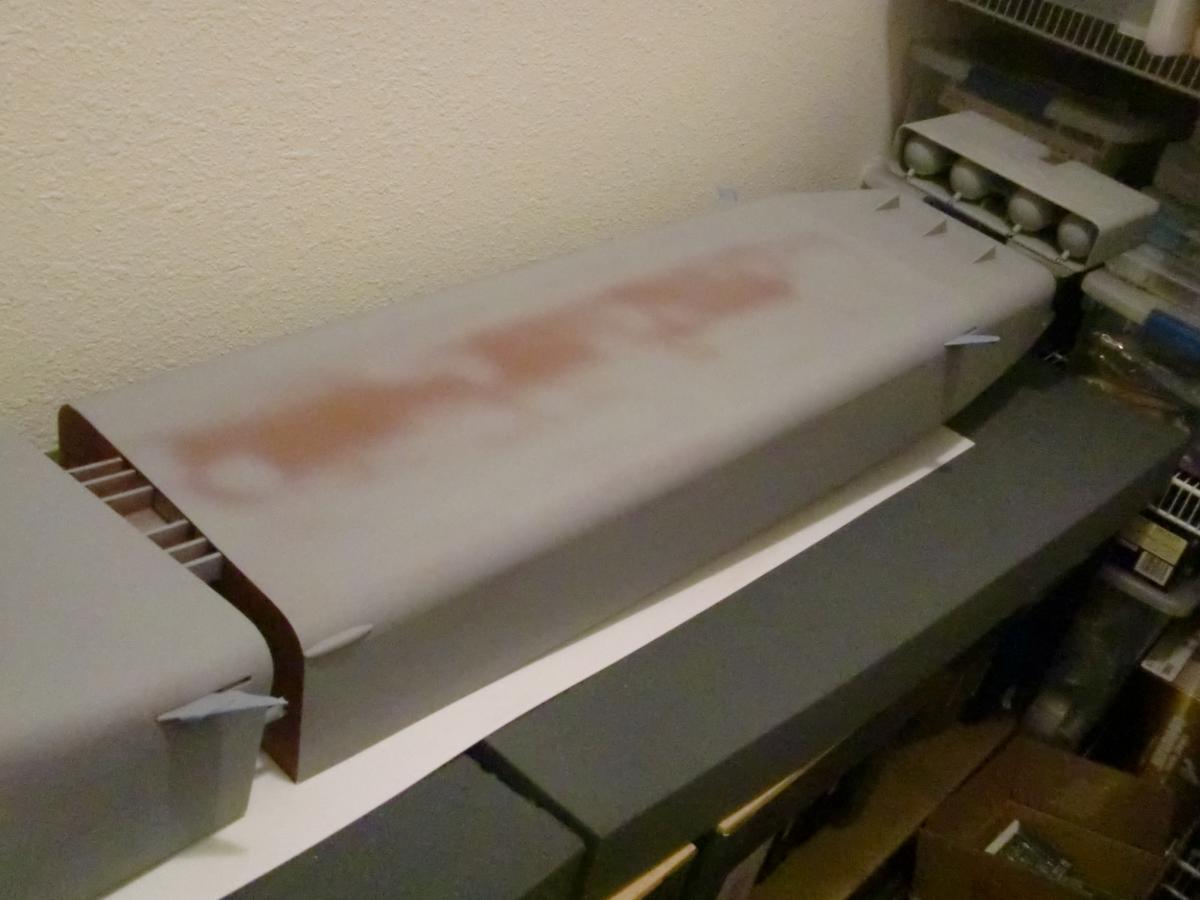
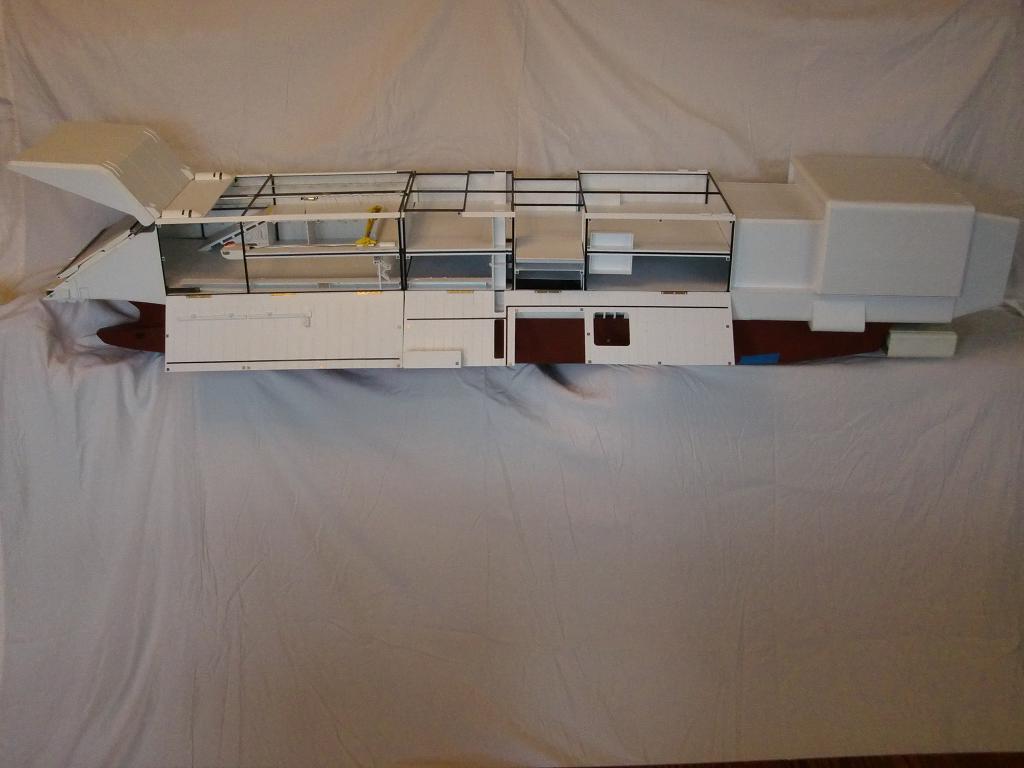
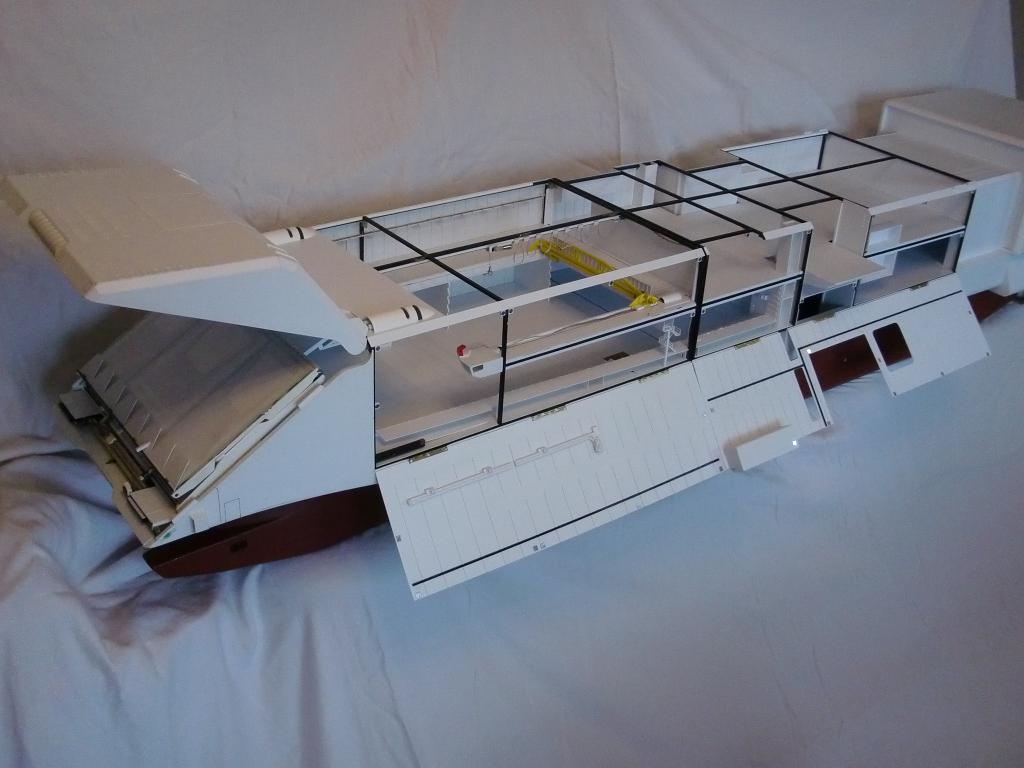
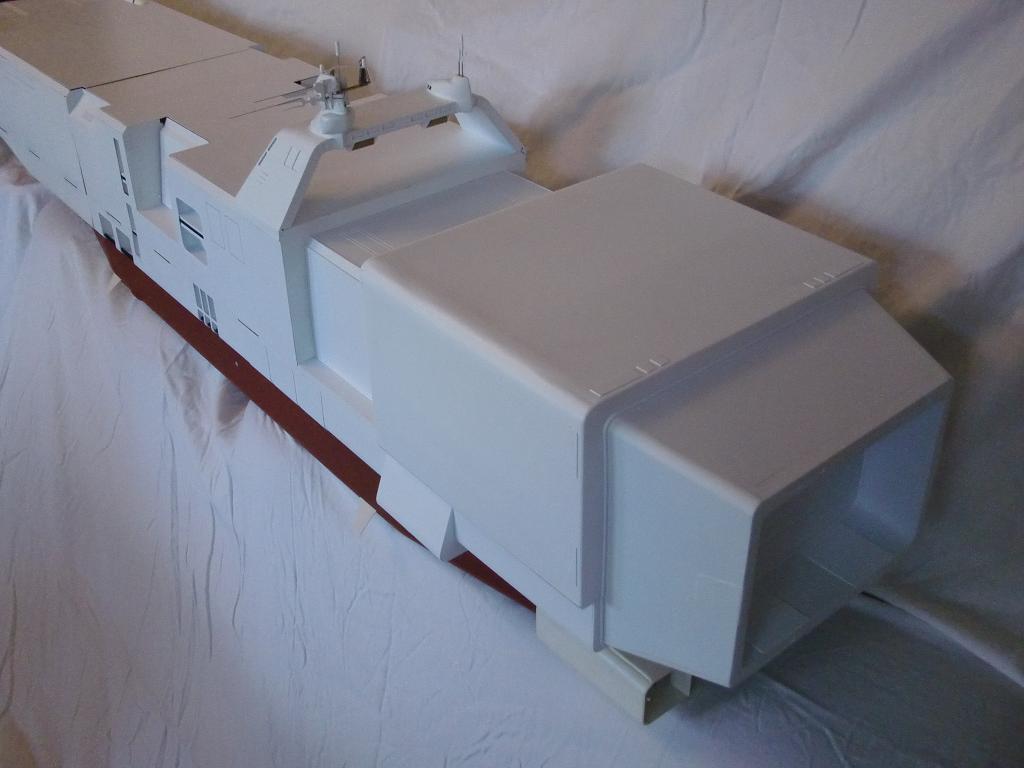
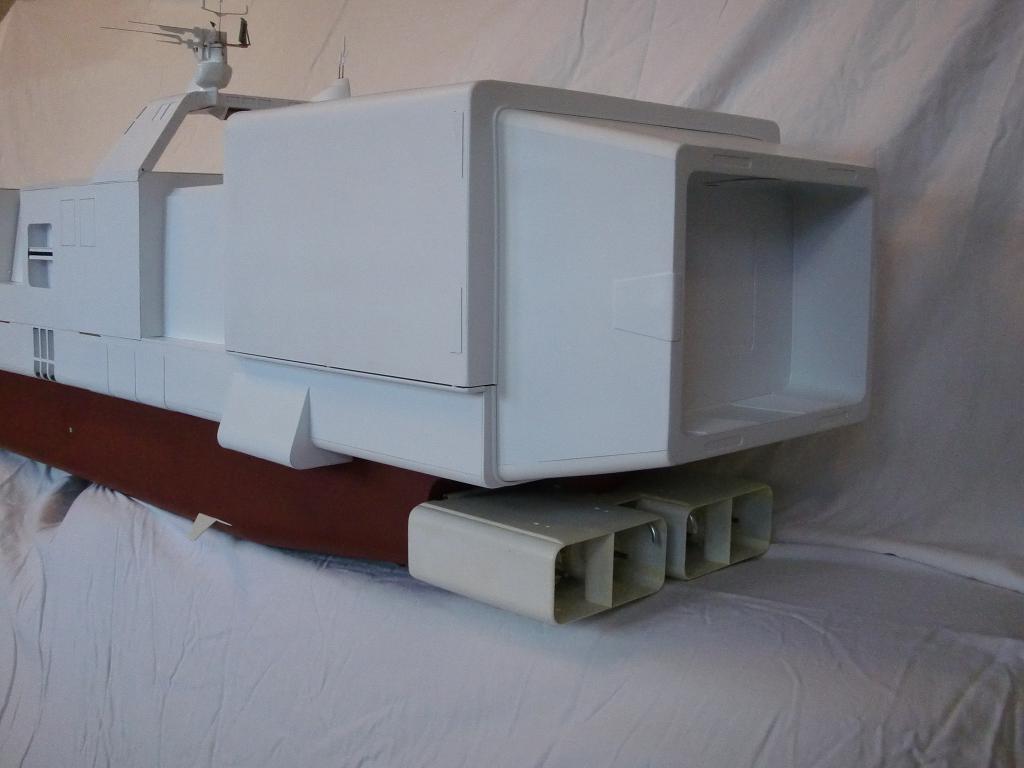
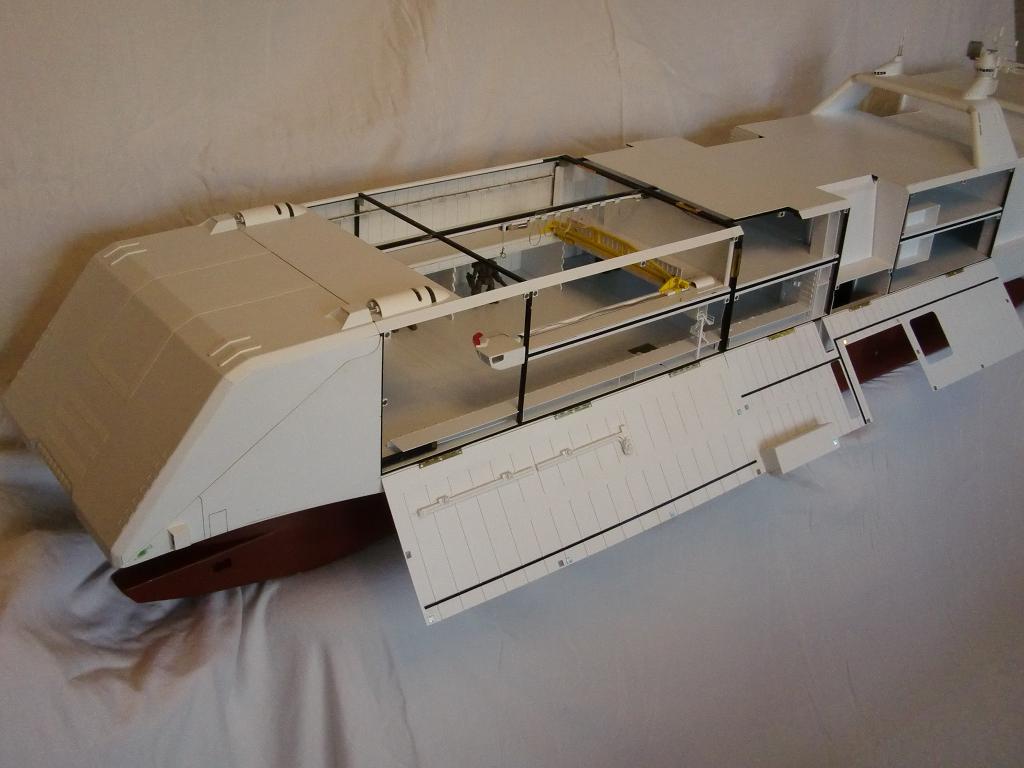
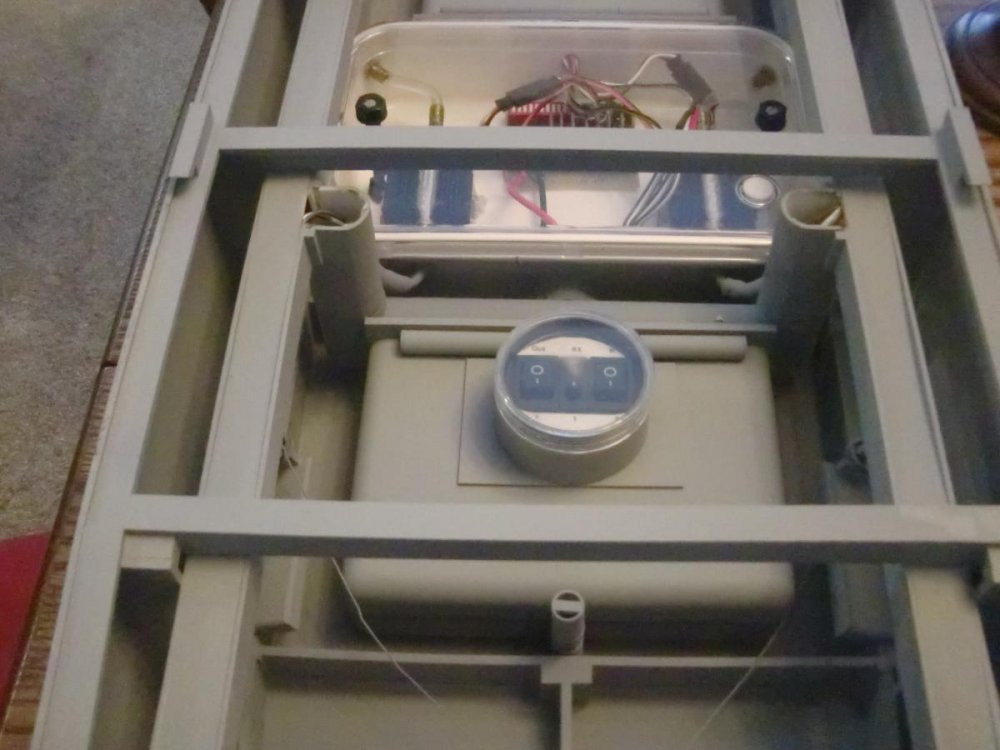
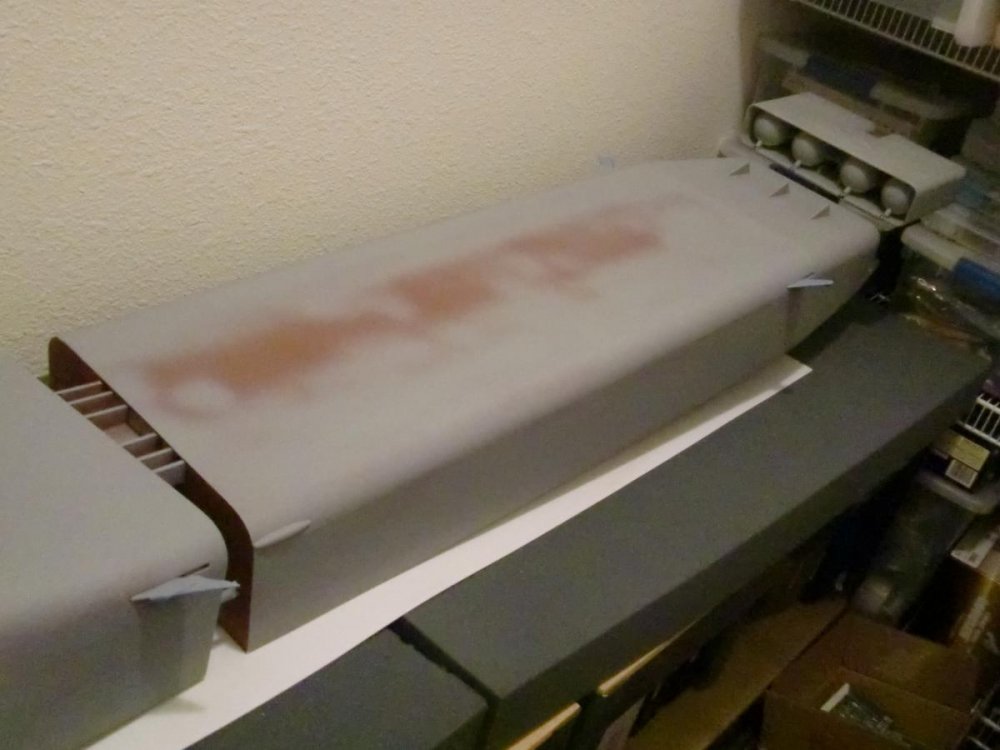
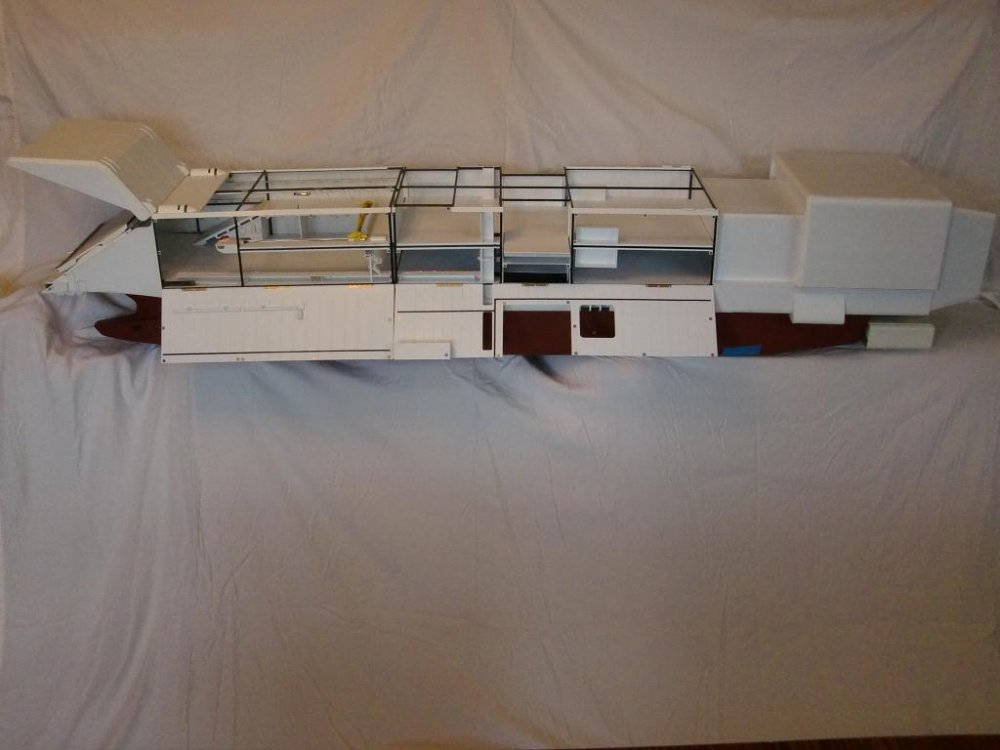
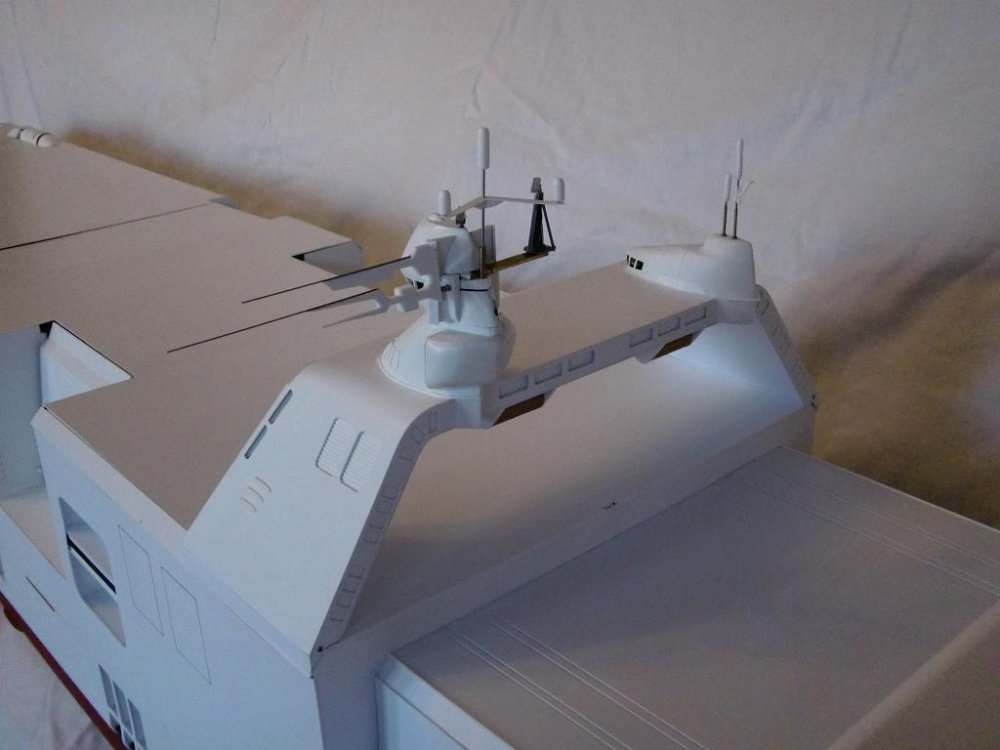
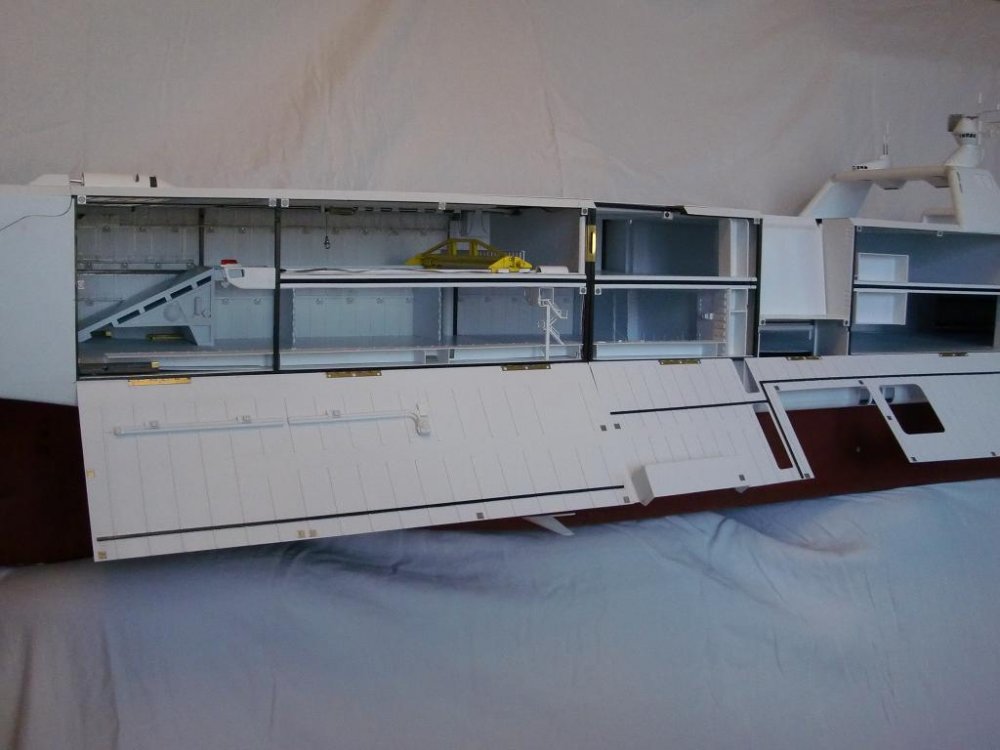
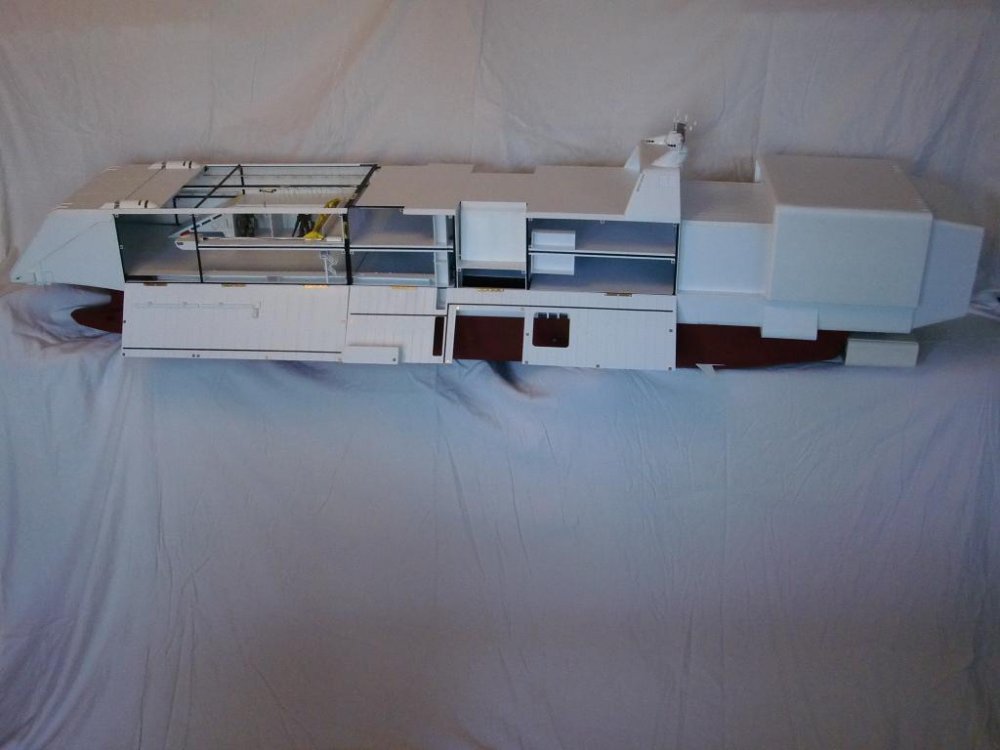
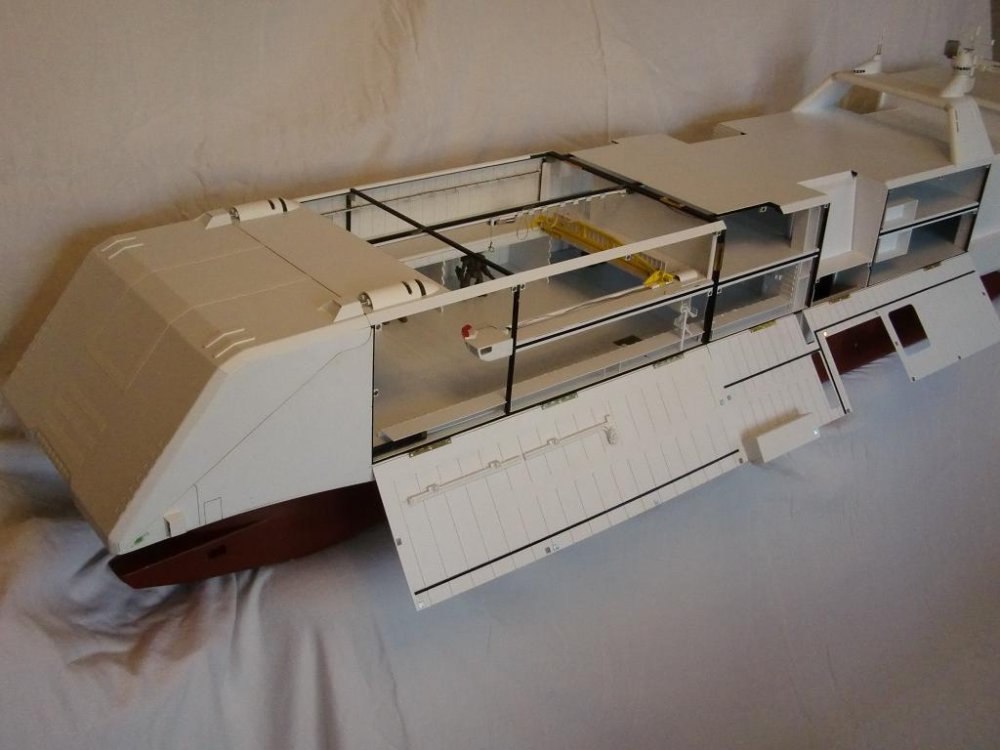
UPDATE 11 NOVEMBER 2011 - Pt 2 [X] - Construction [ ] - Wiring [ ] - Paint Thank God construction is over!!! Now it's on to a little bit of wiring to some connectors and then on to paint!!! :D Yes, I'm a little happy about it! Here's a bunch of photos randomly posted photos of the completed outside and inside minus paint. I'm sure you can figure out what's what. DISCLAIMER - DISCLAIMER - DISCLAIMER: This thing is SOOOoooo long, my camera lense is making it appear to bow in the photos showing the lengths. Maybe if I had a fancy SLR I could work around it. You'll just have to imagine everything is straight and right angled Note: the ceiling parts in the rear forward section are already masked. Can't wait to paint! That's it for this installment. I kept the photos small for space and since there was a lot of them. If anyone would like something posted in higher resolution, just let me know. Thanks for stopping by! - MT


-
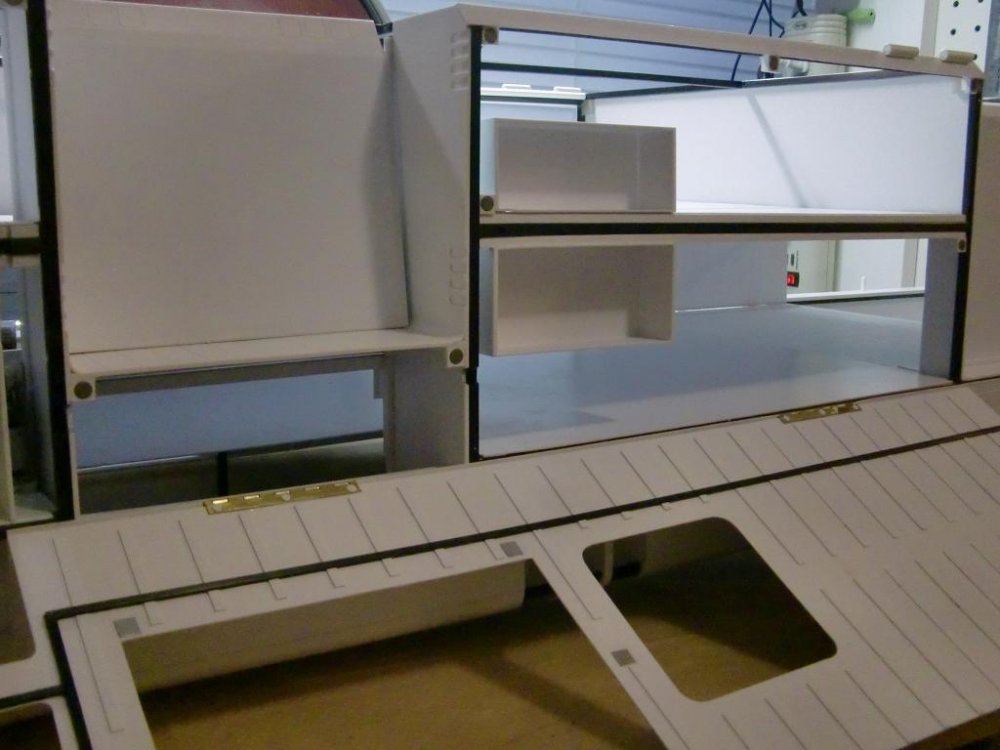
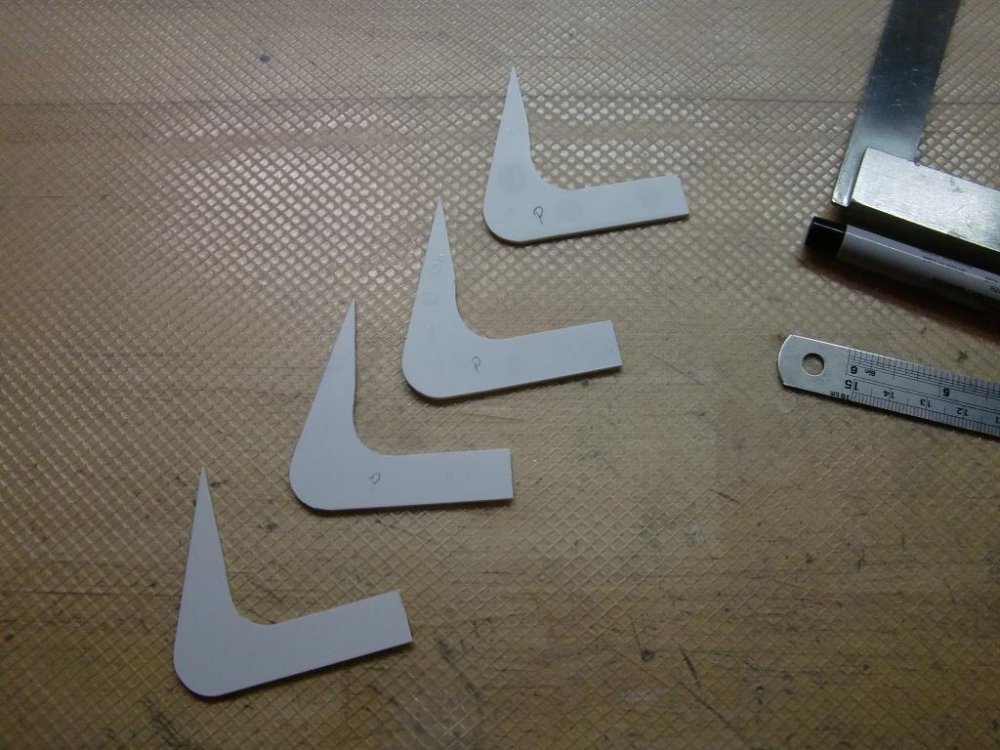
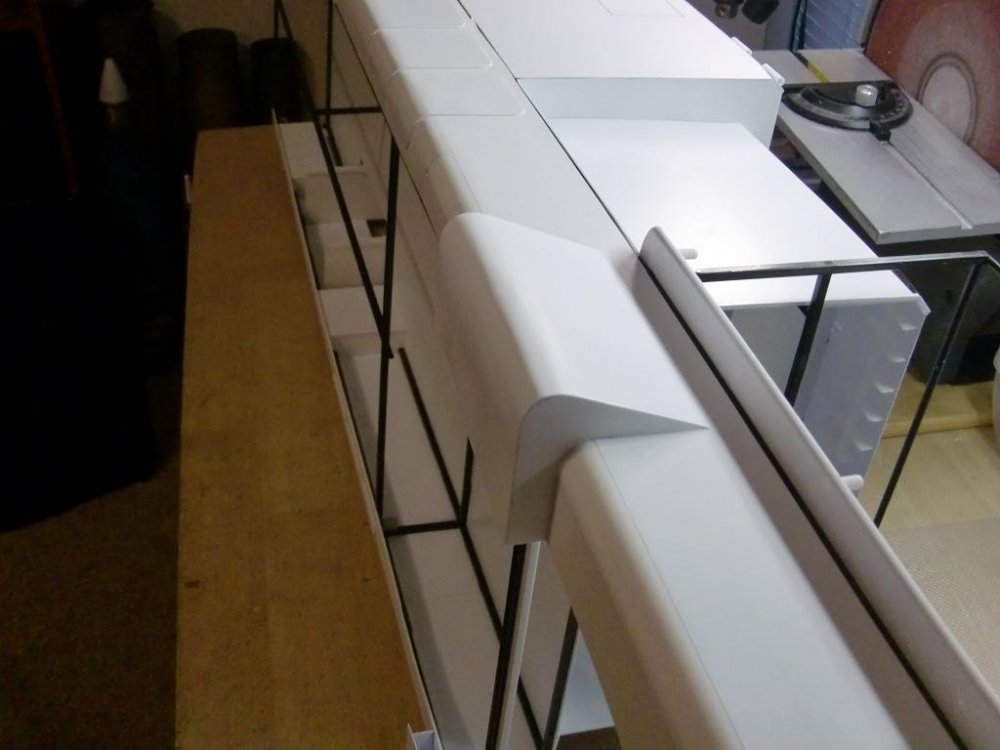
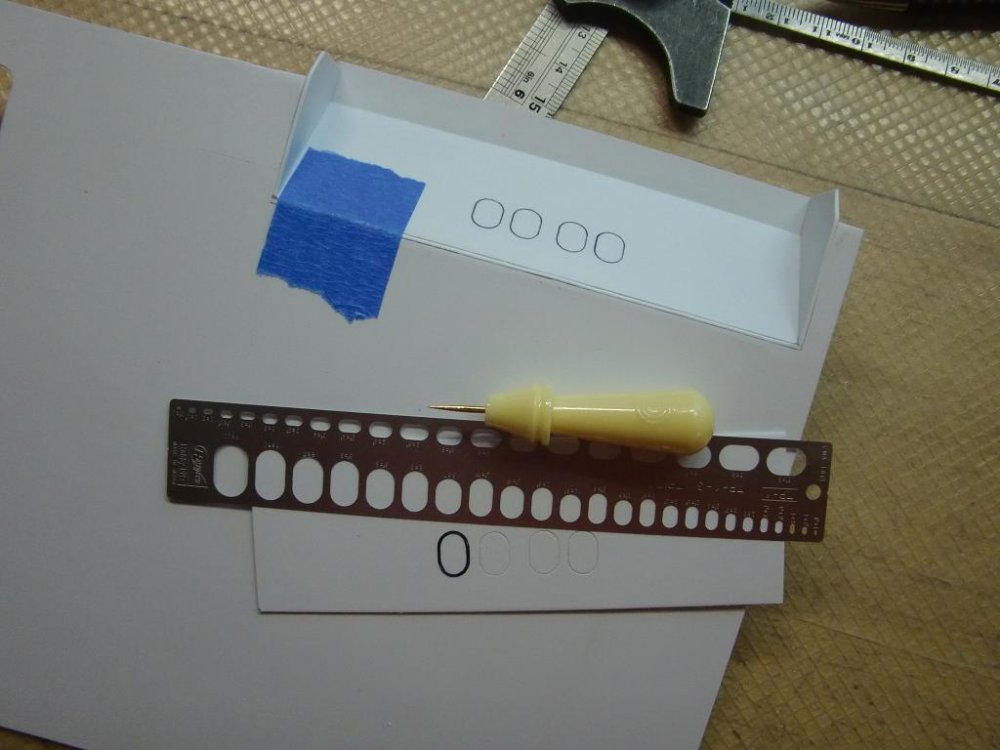
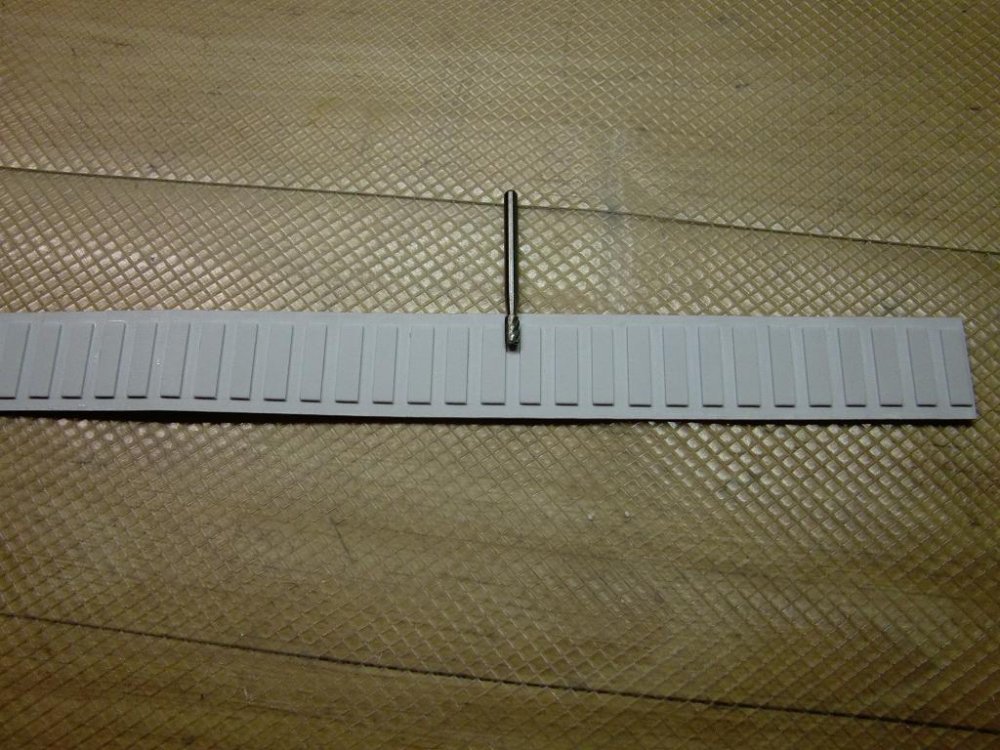
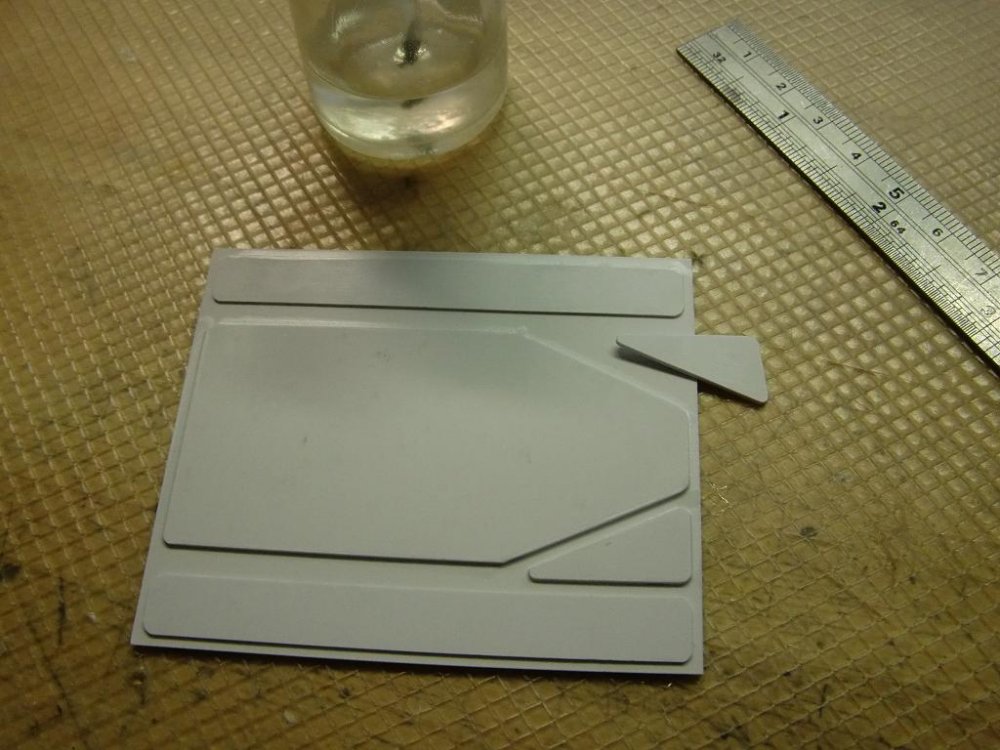
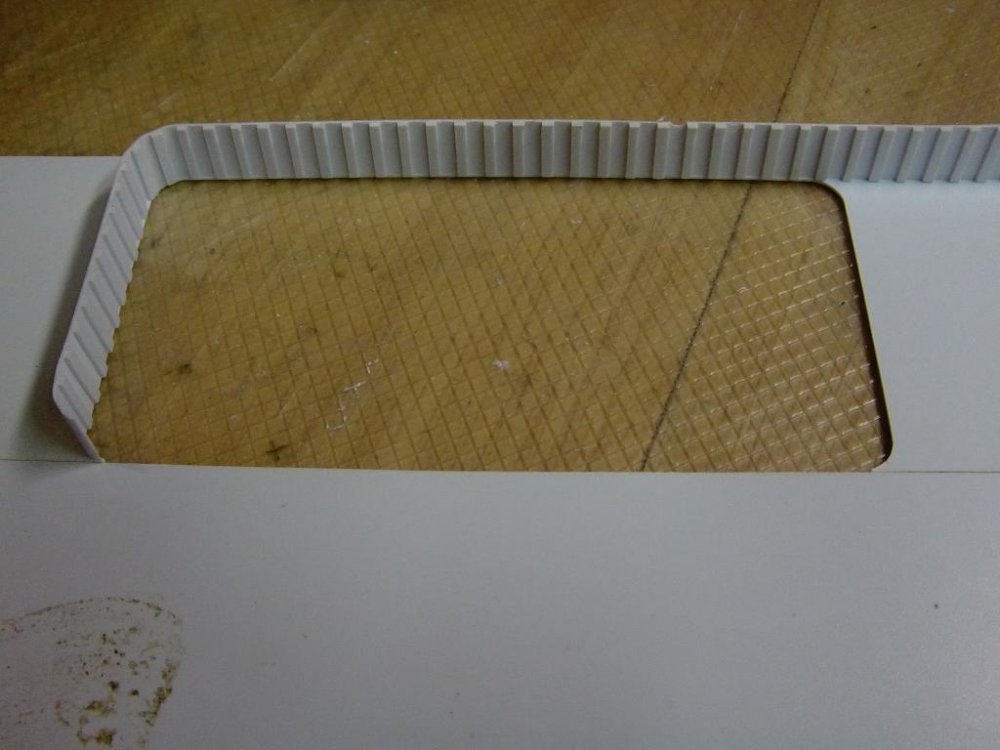
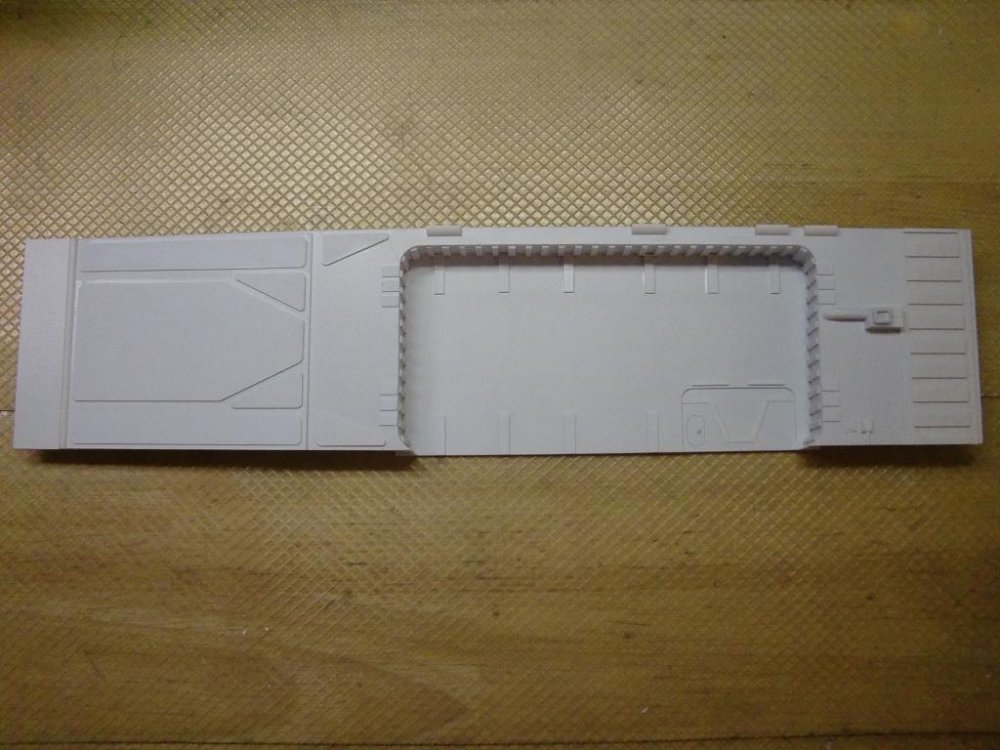
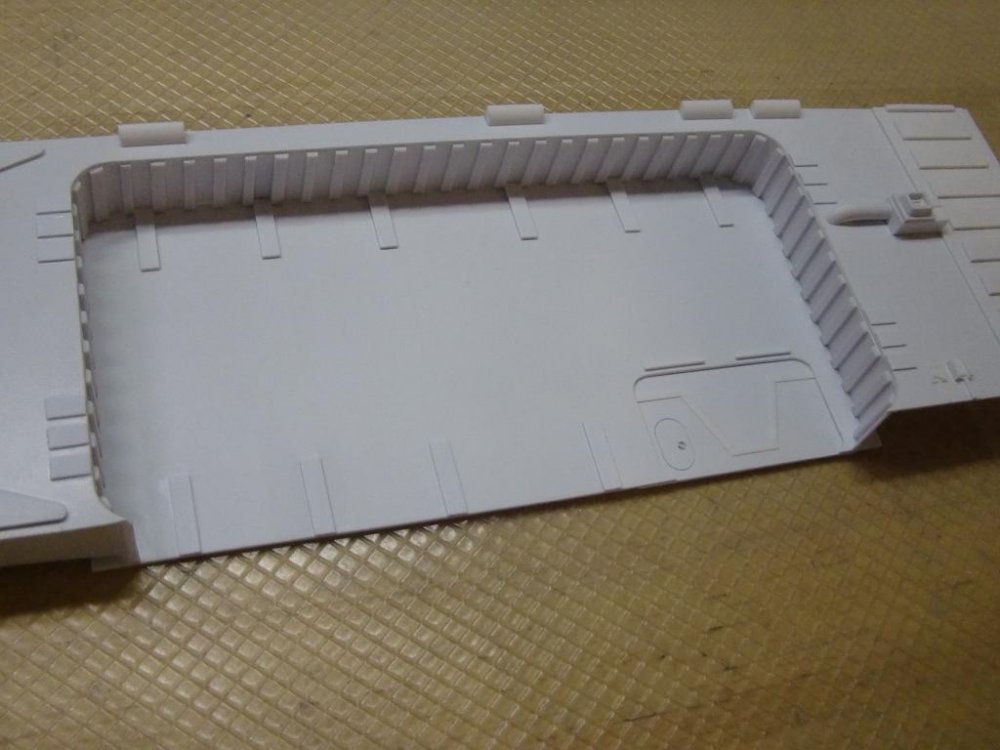
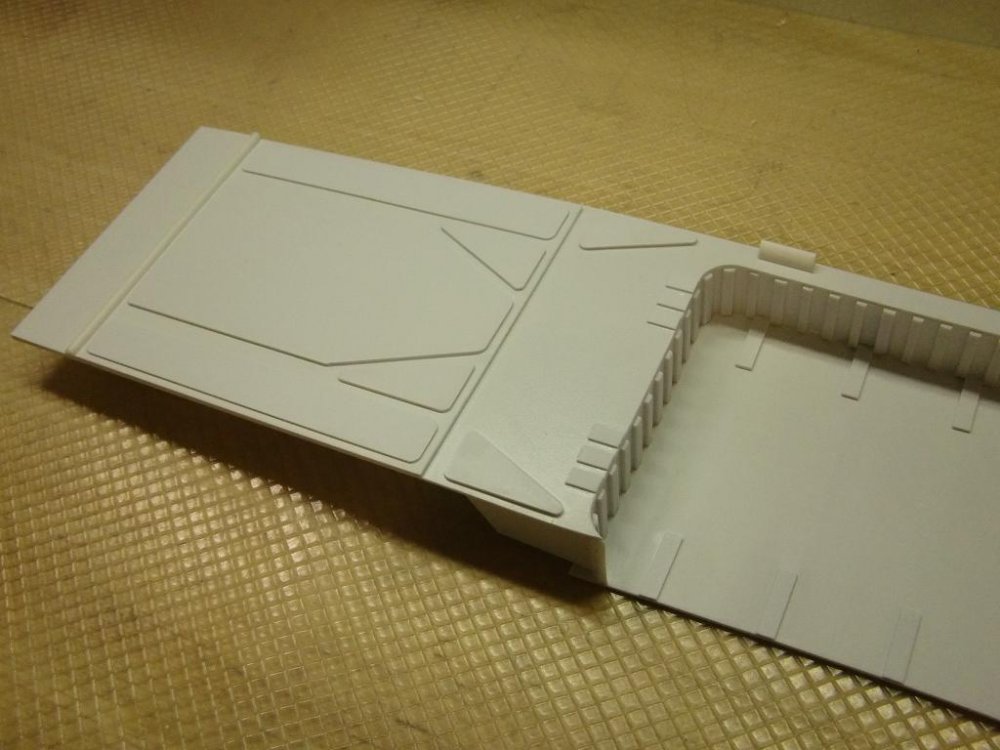
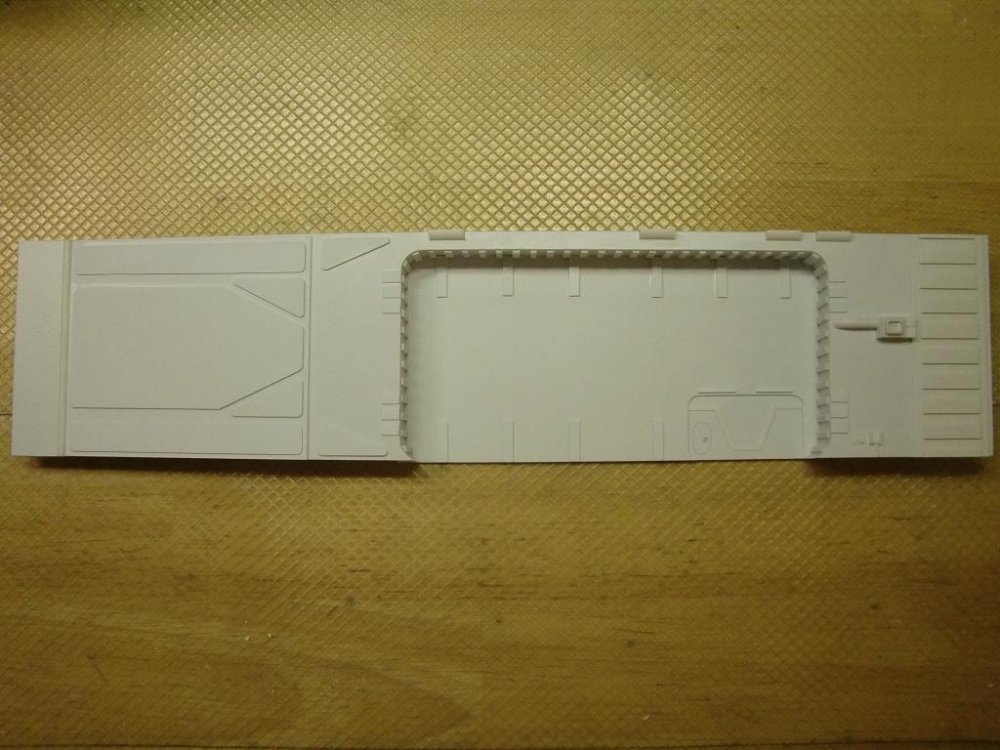
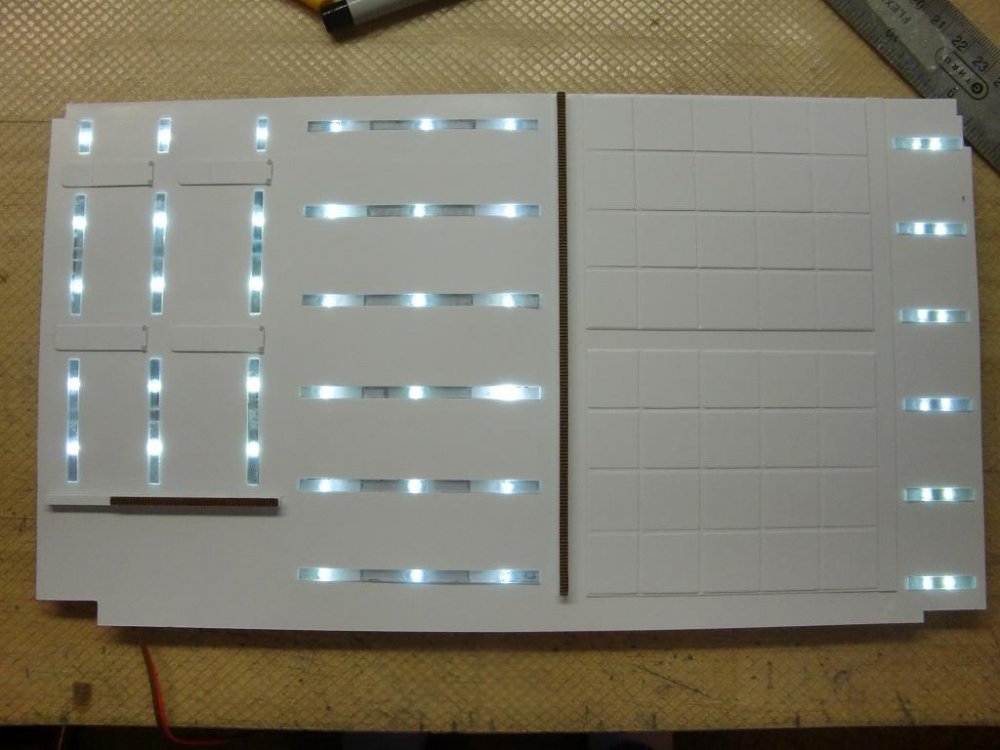
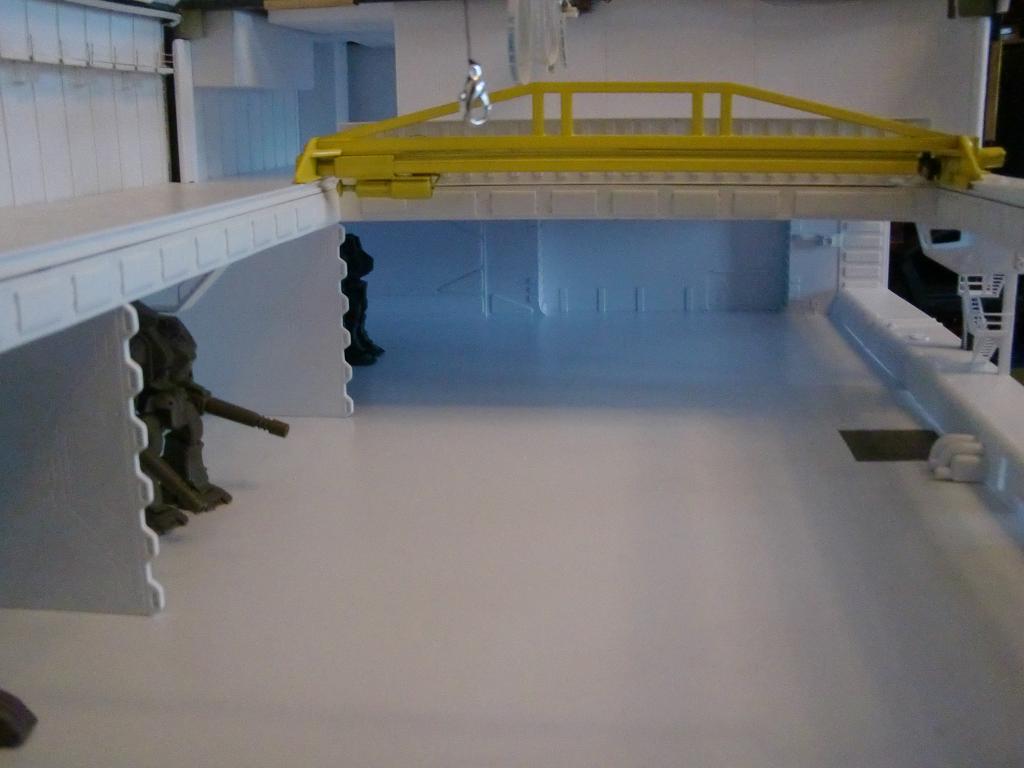
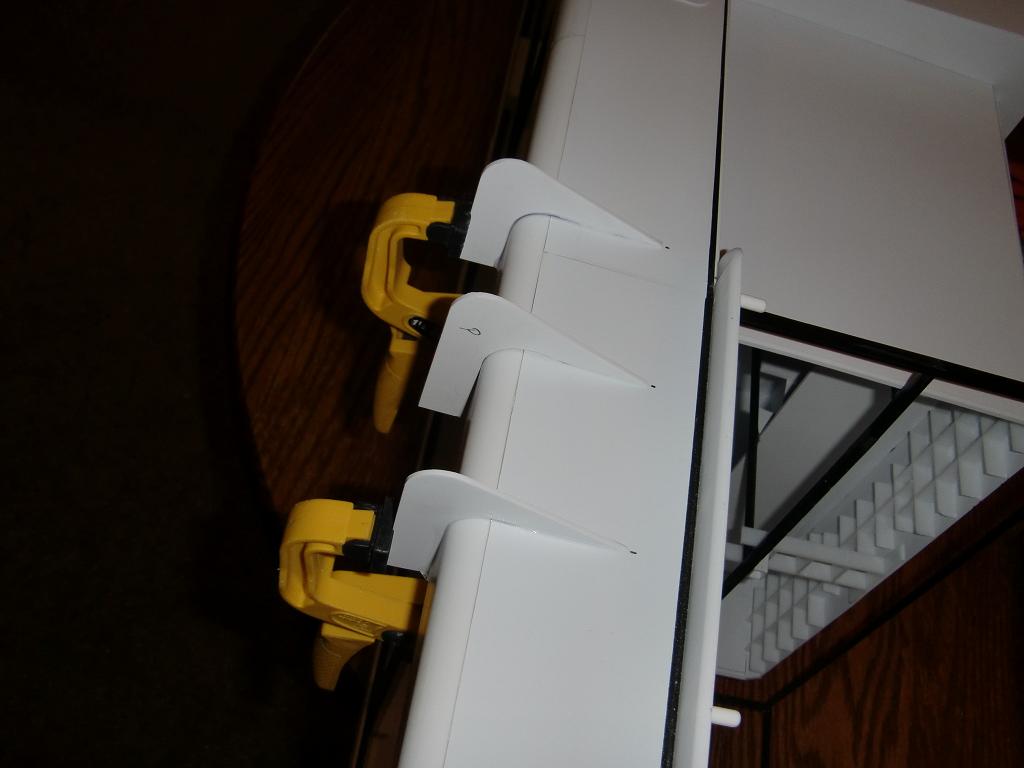
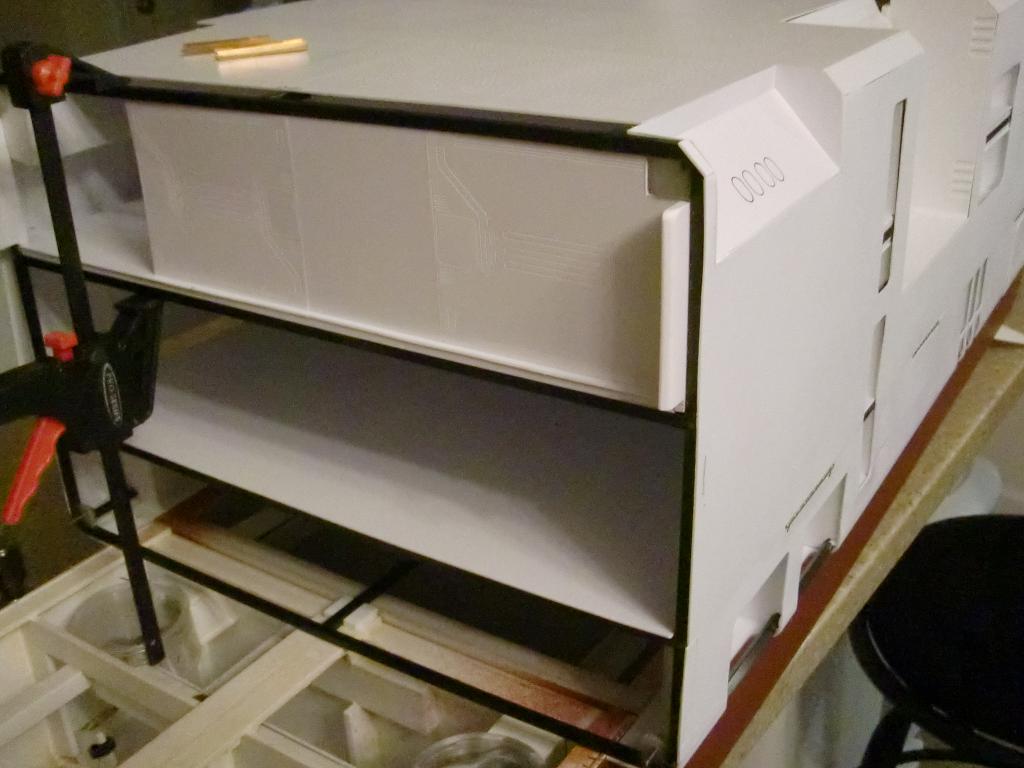
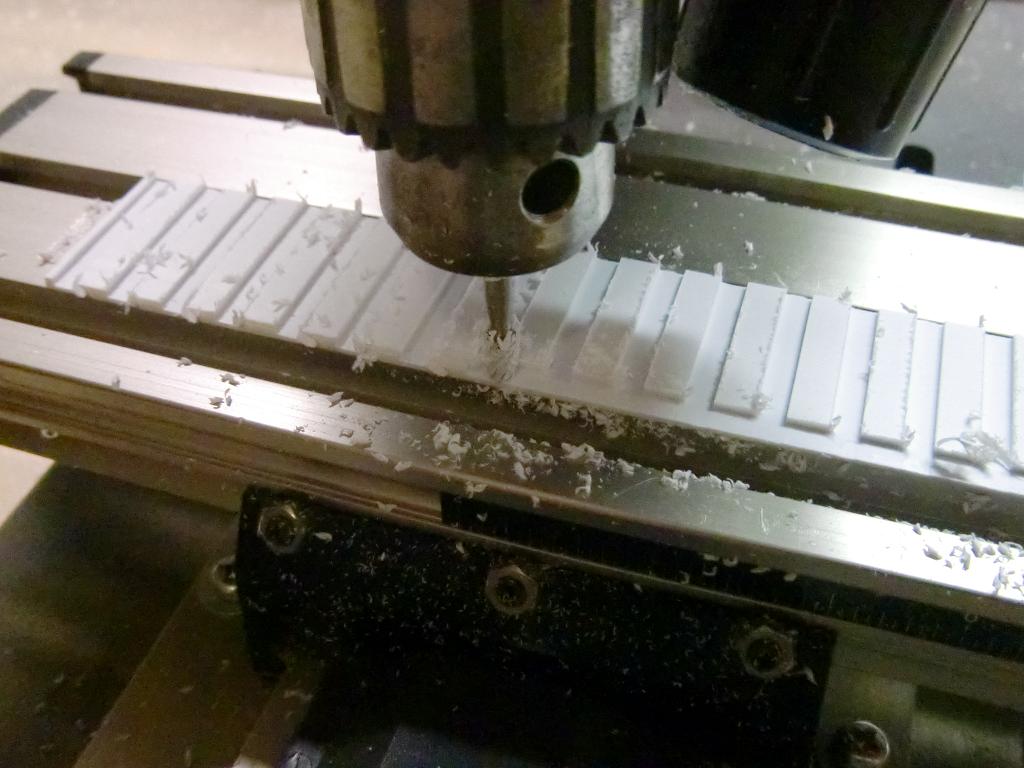
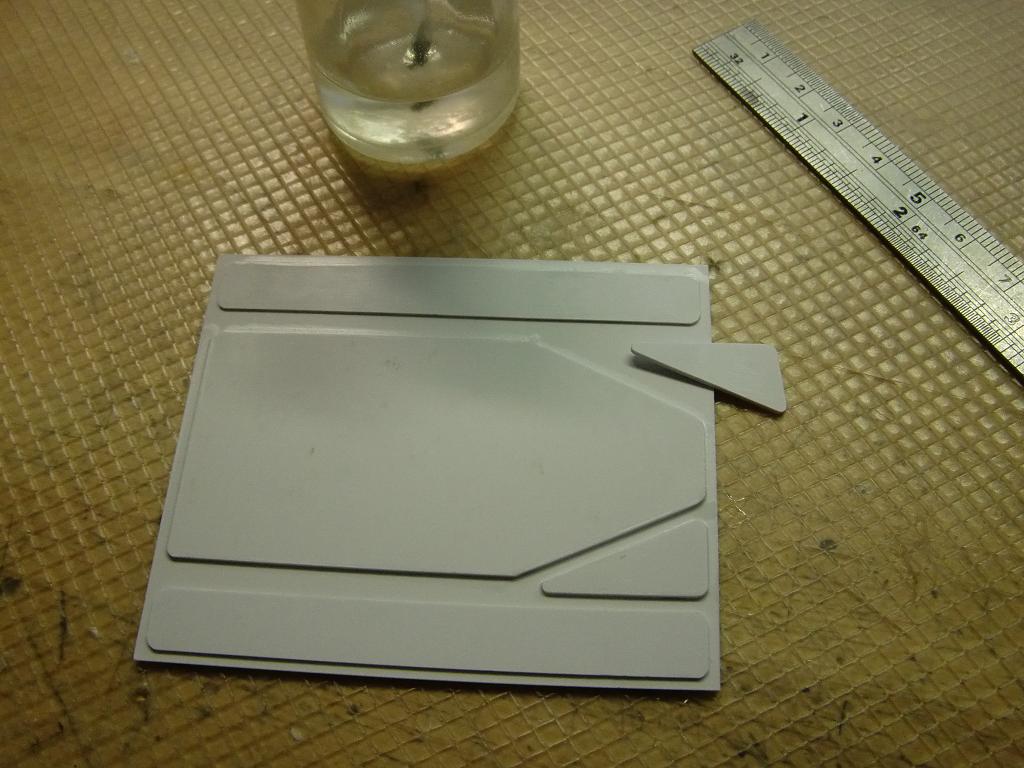
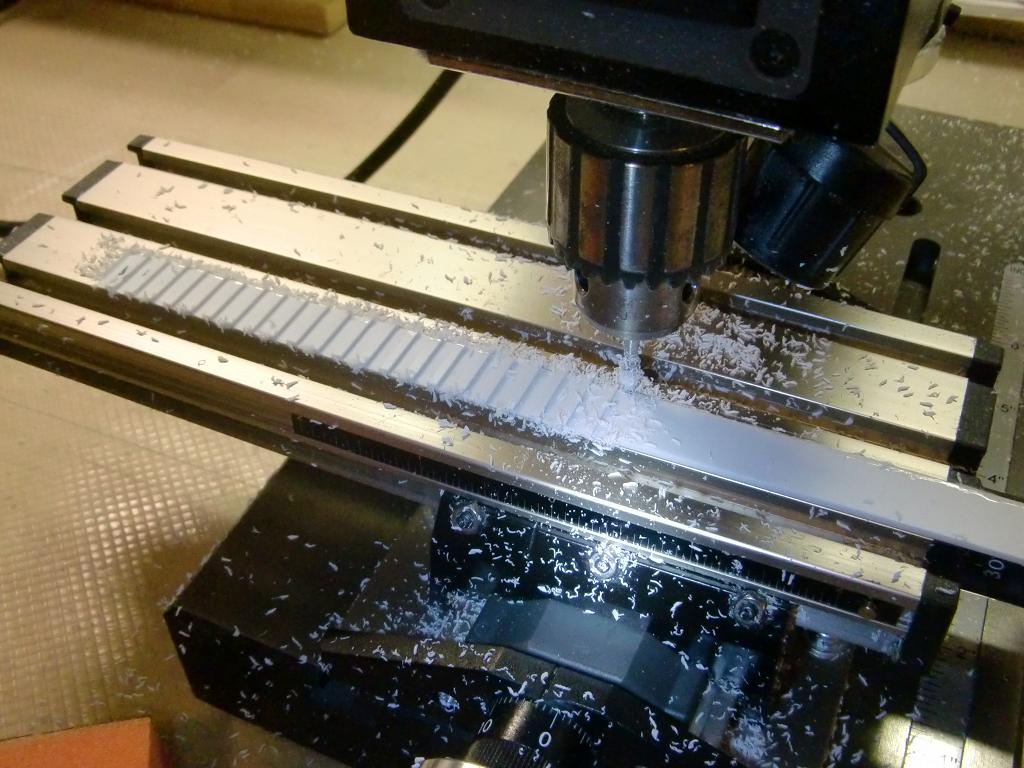
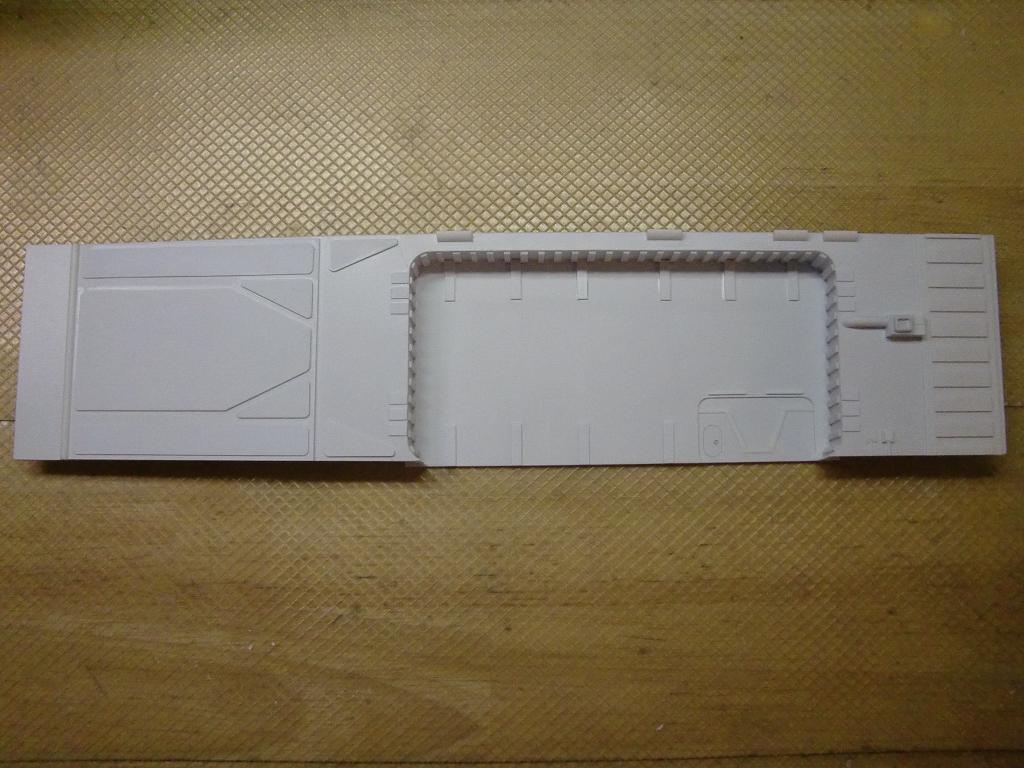
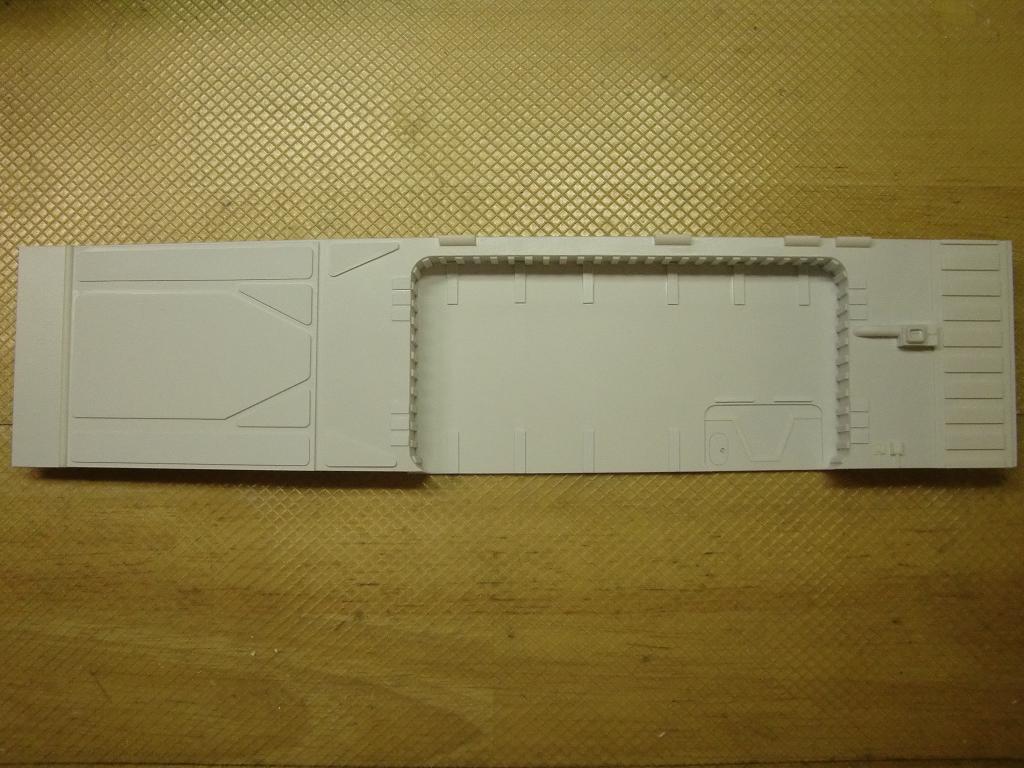
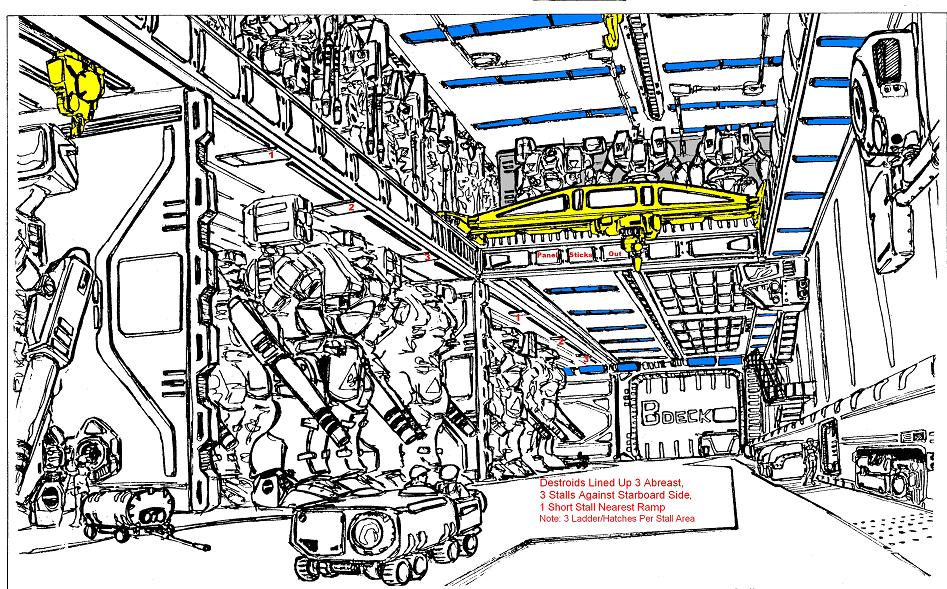
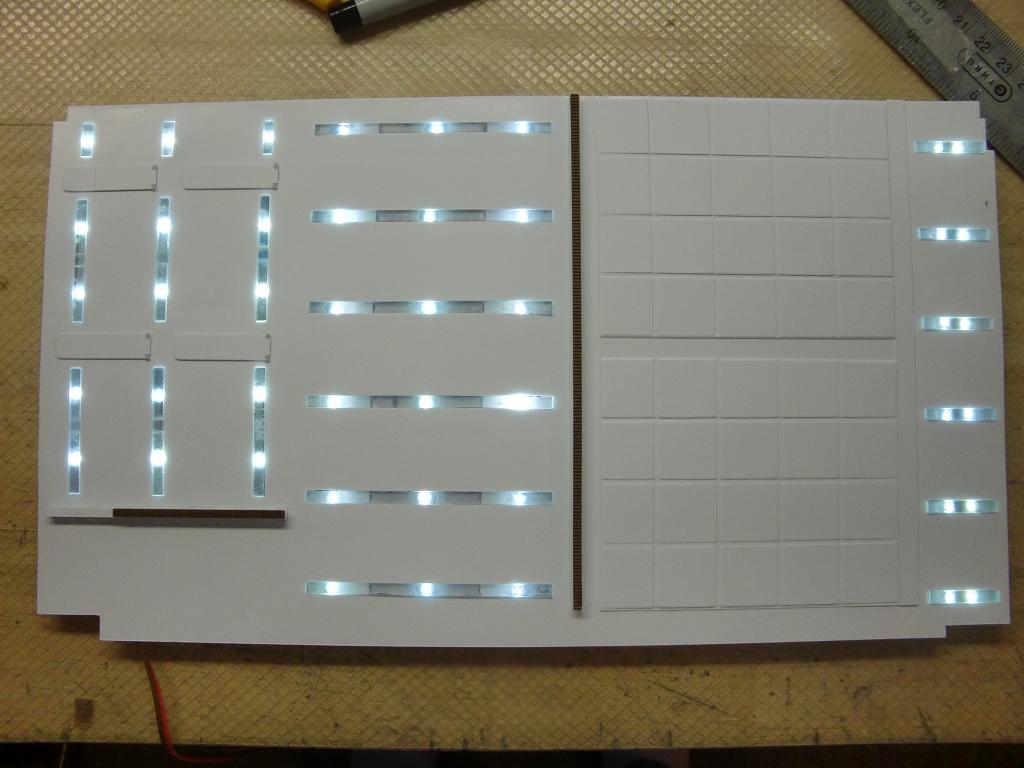
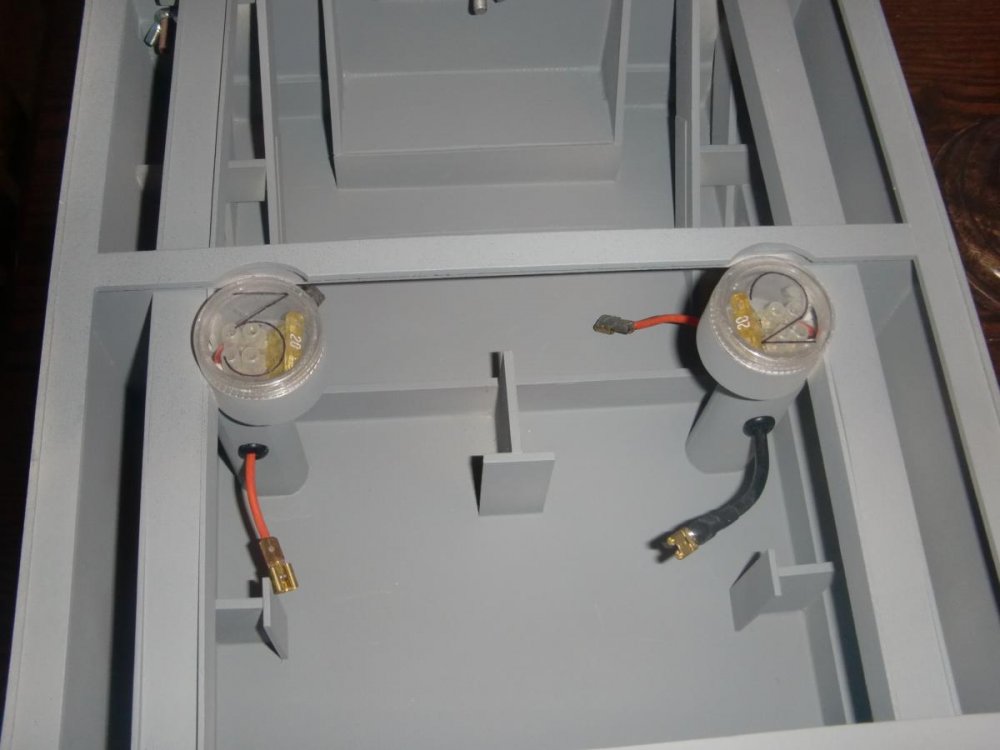
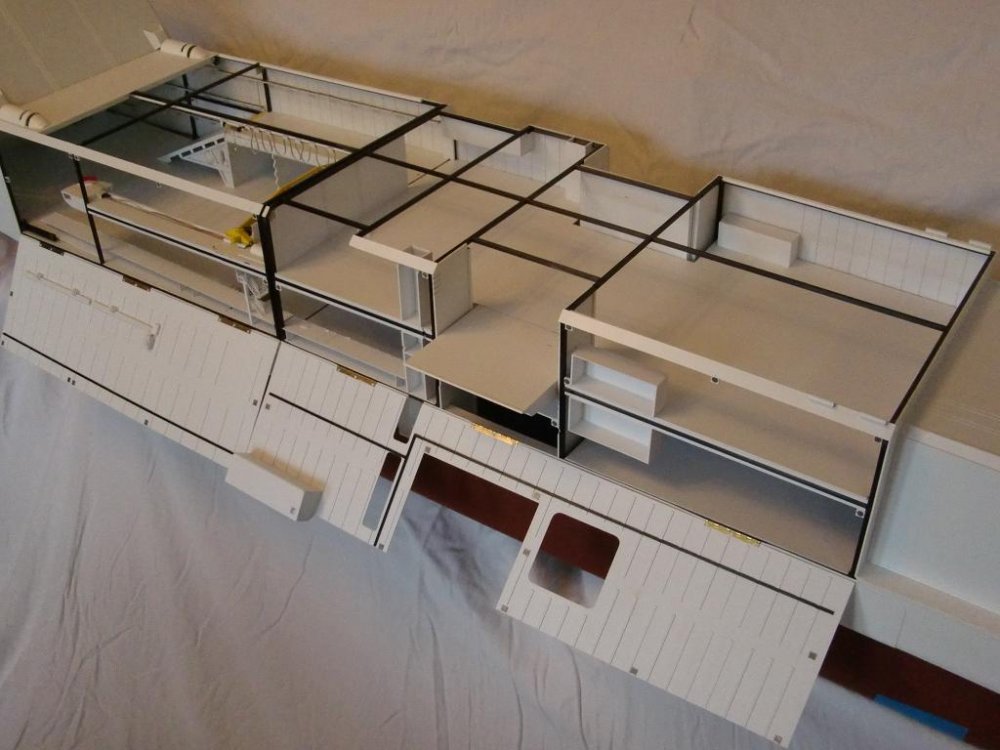
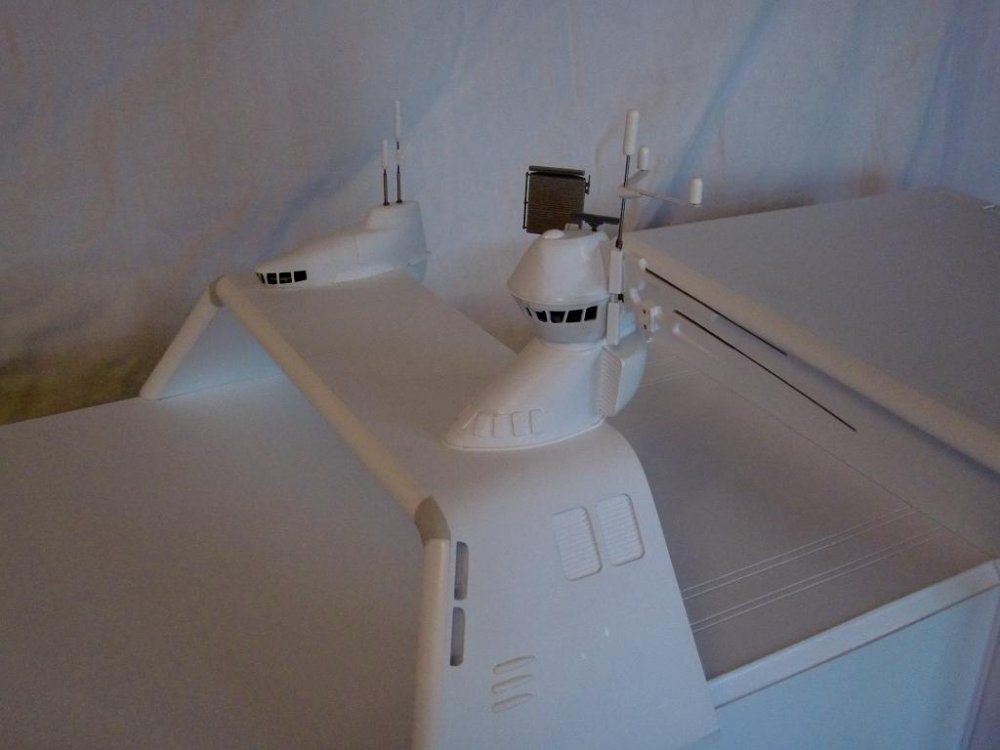
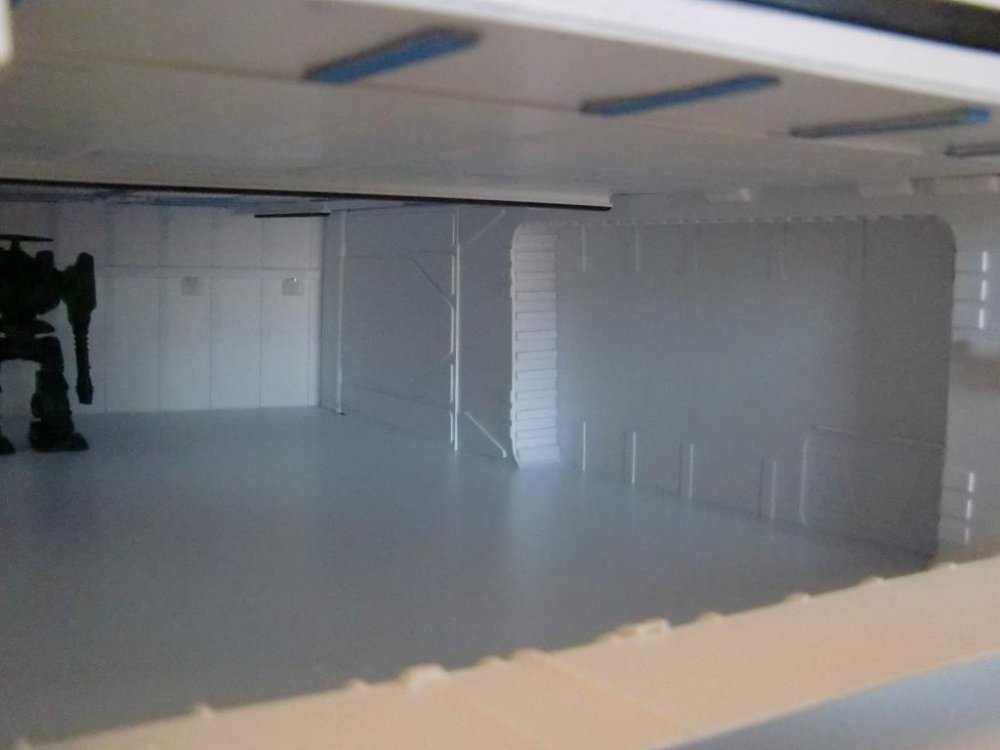
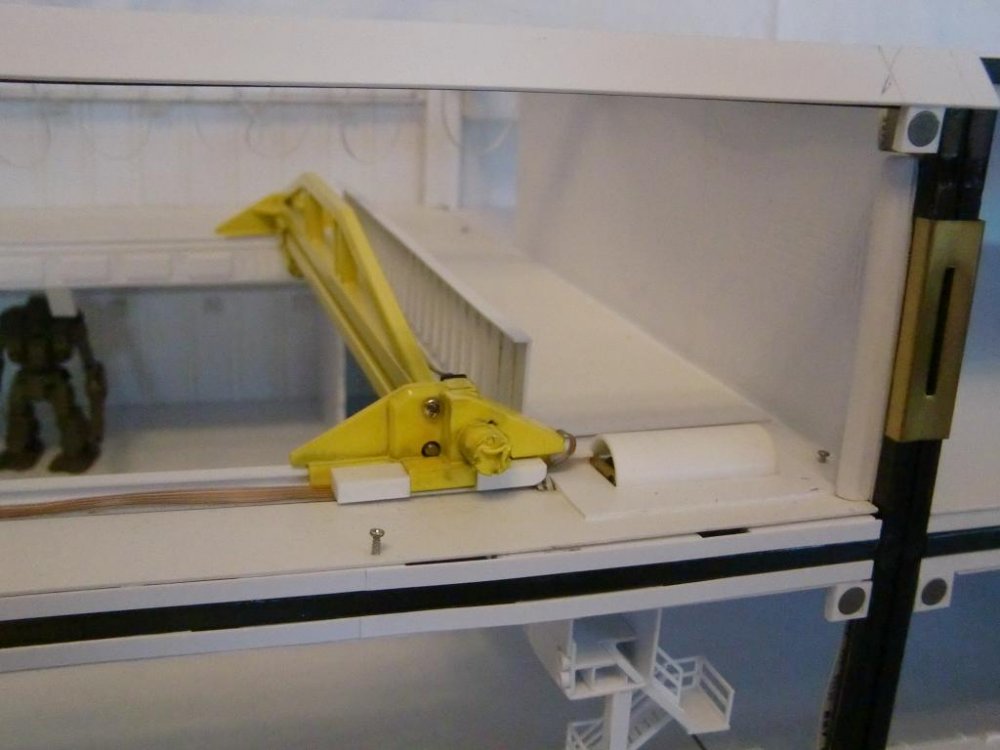
UPDATE 11 NOVEMBER 2011 - Pt 1 Hey Everyone, My apologies for taking soooo long to post. I've been so busy building in my spare time (versus being on the computer) that I haven't made any posts for a while. For those of you that have been following this thread, hopefully today will make it up to you. Speaking of today, A GIANT Happy Veteran's Day to those who have served. Many don't understand the sacrifices our forefathers made for us to have the freedom to do simple things like building and posting on a web site. This thread is in two parts. The first is to show the building completed on the interior, the second is to show the COMPLETED construction of the ship! That's right, main cosntruction is FINALLY completed! On to the build... I numbered and am posting the photos to go with the text in order. Hopefully this works... 0. This shows the magnets and steel squares used to hold the sides closed when in "ship mode." Note the hinges and carbon fiber flat rod to reinforce the sides and keep them relatively stiffened and strenghtened. 1,2 &3. Here's the parts and assembly for the bracket thingies that go underneath the big boxlike thingy in the back (sorry if I'm using complex terminology). They look like they attach to the bottom, but I built them onto the top half for simplicity. 4. These are the scribed pieces that fit into the smaller elevator looking recesses on the upper portion of the hanger bays. 5. This is an internal wall and also shows the scribed part mentioned in photo 4 on the outside. 6. The funny looking wall thing going across this photo sits on the edge of the upper floor. The rear Monster backs against this when parked in the hanger bay. The yellow crane is pulled to the side and back forthe photo. The dangling wires are for the ceiling crane in the very top of the hanger bays. 7 - 8. Here I'm machining the stock to make the walls on the FAR right hand side in photo number 12. This makes it more durable and spacing is easier this way. 9. Here's the wall section shown in the FAR left of photo 12. All of these are according to the interior line drawings in 15a. 10. This photo shows me machining the stock to go into the interior of the "giant" doorway. After I bent this and glued it into place, it was obvious that glued segments would have broken off and not taken the bends you see here. 11, 12, 13, 14, 15, 15a. Buildup and photos of the doorway. If you look at the line art in 15a, you'll see what this is all about. Note the "anime magic" drawn here. It's IMPOSSIBLE for this section to be that narrow and fit the meca in. So I had to "stretch" things out a bit and make them look more realistic. 16. Look at the back ceiling of 15a and you'll recognize this. This ceiling has the most lights in it of any assembly yet! 17. This is it!!! The last major internal or external assembly I should build on this ship! You' see this in place in Pt 2 of this post. This sits in the very back and partially blocks your view inward of the portside when in "display mode" (sides opened up). That's it for Pt 1. Part two shows the COMPLETED construction BEFORE being painted. I still might make some small details to the outside like defensive weapons or small boats and other small details, but construction is over! - MT