
MechTech
-
Posts
4702 -
Joined
-
Last visited
2 Followers


Recent Profile Visitors
22639 profile views


MechTech's Achievements
")
SMS Squadron Leader (11/15)
1.3k
Reputation
-
@pengbuzz I am so sorry to hear about your loss bro! I know you loved her VERY much! My thoughts and prayers are with you! Please don't be a stranger and don't go it alone! - MT
-
@Big s Yeah, it's difficult getting used to them not being there. You could make a Rick Dom II Custom! Whatever you want. Just not as awkward as the GQuuuuuuuuuuuux version😁 Thanks @electric indigo! It's cool to see new subjects coming out! - MT
-
@pengbuzz That looks GREAT! Normally I'm geek enough to look at kit bashed stuff and know what parts came from what, but that one's a tuffy! @Big s I'm sorry to hear about your "little helper". It was last Feb we had to put ours down and we still miss him. It is tough despite the joy and laughter we have with the two kittens who litterally fly over us on the couch as they chase each other or cuddle with us at bedtime and our original one. One of them sits upright at night and watches what I'm doing on my workbench. That Rick Dom upgrade would be cool! I bought several of the original 80's Rick Doms or II's (in the 80'as) and probably only built one as intended, but kit-bashed the others into something completely different! I'm sure you can find some nice joint or poly cap kits that will work for your mods. Thanks @Papa Rat! And another FSS kit to add to your collection soon! @derex3592 Yes, crazy!!! I knew one of Grumman's test pilots who worked with the Corsair. He had all sorts of crazy stories! Here's one with a jet engine on it! - MT https://www.facebook.com/paxmuseum/posts/testing-the-first-american-designed-jet-enginethese-three-views-show-a-goodyear-/10163858805070392/
-
@Chas Cool looking paint on that Valk! @Papa Rat BEAUTIFUL colors on that Junone! @derex3592 All the detail work on the Texas and that B-52 are paying off. They look great with each step! The details especially on the Texas will make it rich looking. @wm cheng The custom metalic finishes on that Zero look beautiful! I'm just starting to get into metalics myself, including powdered micas. @pengbuzz I like the cool mods to the Naboo (or whatever it will be now🙂). You going for a cruiser or battleship looking model design? The Shin Musha Gundam case and parts are getting an upgrade. Hobby Lobby had small bags of 3/16" thick polished marble bits in the marked down section. So I got two. Then some acrylic based grouting to make the base so far. Then the black gun and sword stand is getting an "expansion" to hold the large beam canon and a couple of simulated fire pots for lighting. Made these with scraps and the spare parts box(s). Saturday night worked on this late make Rick Dom II in the living room without paint. It looks great without and details so far! It was a smooth build. And because there are so many cat lovers on the boards, I couldn't resist sharing this: And how cold it is on the East coast this Monday morning... There's an icey glaze on everything! Thanks for checking in everyone! - MT


-
@pengbuzz Praying for you guys! I thought they would have already been treating her cancer? - MT
-
@Chas I'm still outa reactions, but your Bronco looks awesome! Just say it was painted for after the time bomb went off😁 Thanks for sharing that RARE build with us! @tekering Thank you, I appreciate it! I think that's a good idea with the head lenses. I think white is good; it looks anime accurate actually! That Tomcat is cool! Almost looks like it is a ducted fan model! - MT
-
Sorry guys, I've just been busy and not online enough to post. @pengbuzz NOTHING better than getting your wife back and some model building! Congrats. I pray for a solid recovery for her! I ran out of "likes" trying to like all the awesoe work you guys have been working on! Quick post. This is my "living room model" I build in the living room while watching TV with my wife. That way she's not a "hobby widow". This is Bandai's Shin Musha Gundam. Mostly stock. Redid the shafts for the staffed weapons and the matchlock styled canon. Also added a steampunk styled weapon from an older Gundam model that fit this style perfectly. I'm putting it in this case my wife got for me years ago from the thrift store. Gotta get going! - MT


-
@Urashiman Woo hoo! 500 pages!!! @Papa Rat Those FSS builds are looking awesome! @derex3592 Your "Texas" is looking good! Nice n clean (so far before the rust)😉 @Chas That's cool! That's the first Bronco I've seen as a kit. Even cooler since my son and I recently finished watching "Orguss". What was with that ending!🥺 @LocusPocus Cool kitty ship! Gives me an idea for a "Muppets" skit - "Cats in Space!" 🤣 "Scarlet Johayase" looks like a very scary fembot right now!🥺 - MT
-
 MechTech changed their profile photo
 -
@pengbuzz Your Enterprise is looking good so far. Sorry about the decal 🥺 Can you reglue it back on with white glue and water? @electric indigo The paint looks GREAT on that. It looks like a Pilatus or Tucano, but the tail and canopy are wrong. - MT
-
@Papa Rat I think Laputa - Castle in the Sky is one of our favorite anime movies! I look forward to seeing the airship built! I LOVE using latex, especially for canopies. A toothpick will get it into the nooks and crannies perfectly. @derex3592 I'm sorry to see what happened! If you clear coated it for decals, you can skip that scary step. Just buff out the areas to a gloss/semi-gloss finish that will have decals on them. It will allow them to lay flat without risking your finish. One of our top award winning modelers does that. It also helps protect surface detail from being filled in with coatings. @tekering That's cool! Usually the model is big and the background is small. you blew that opposite out of the water!😁 @Rock That looks great so far! I'm working on the same thing in the RG kit. I love that model. The mechanics are wesome! - MT
-
GREAT builds guys! Sorry I haven't been on the boards more. Not much time to get on the internet for "fun", but I have been working behind the scenes a little. To give you an idea, I compeleted ONE whole model in 2025! The Bandai 1/100 MG Zeta Ver Ka - out of the box. Sad. But lots of components for other builds. I'm at least trying for two builds to go to show early this year. @Papa Rat OK, you have to convince me that you are NOT a Five Stars fan boy (even if you got the collection box).😁 More importantly, they all look GREAT! I think you were just sand bagging us with that "I haven't modeled in a long time" comment.😉 @505thAirborne You sir have your work cut out for you (see what I did there)😁 But I know you can do it! @tekering I think you need to see if Toho has any Godzilla movies they are planning on filming. Then you can profit off of it. If not, you have a new storage shed for the back yard😁 @derex3592 Your paint looks great! You are right. The colors change. For that reason, you may want to try some colored panels and shading. It builds depth. Our "Best Of" model two years ago was a also a battleship, 1/350th with insane detail. He also made extensive use of shading to build depth. Kinda like gaming pieces building depth and shade. I hope we all have a HAPPY NEW YEAR fellow styrene heads! - MT
-
@Cheese3 And the collection grows before our eyes! Cool! @electric indigo Great looking fix to the kit! @pengbuzz Cool! I look forward to seeing it get an update! @Thom The Sea Vixxen was all kinda funky! Even the poor radar operator had that "skylight" window. I look forward to the build! - MT
-
Thanks guys! @Thom I didn't know Trumpeter was doing kits like that now. They must have gotten smart and got on the band wagon! Yours came out great!!! @Papa Rat Your knight looks terrific! Finishes like that are a PAIN to pull off and yours looks great! @SteveTheFish WOW! BIGTIME FLASHBACKS! I had and built that kit back in the 80's! One of the advantages of living near Little Tokyo, LA. If any parts are warped, some hot water should make them pliable to shape. I loved that kit, but lost it over the years. It has GREAT detail on it too. - MT
-
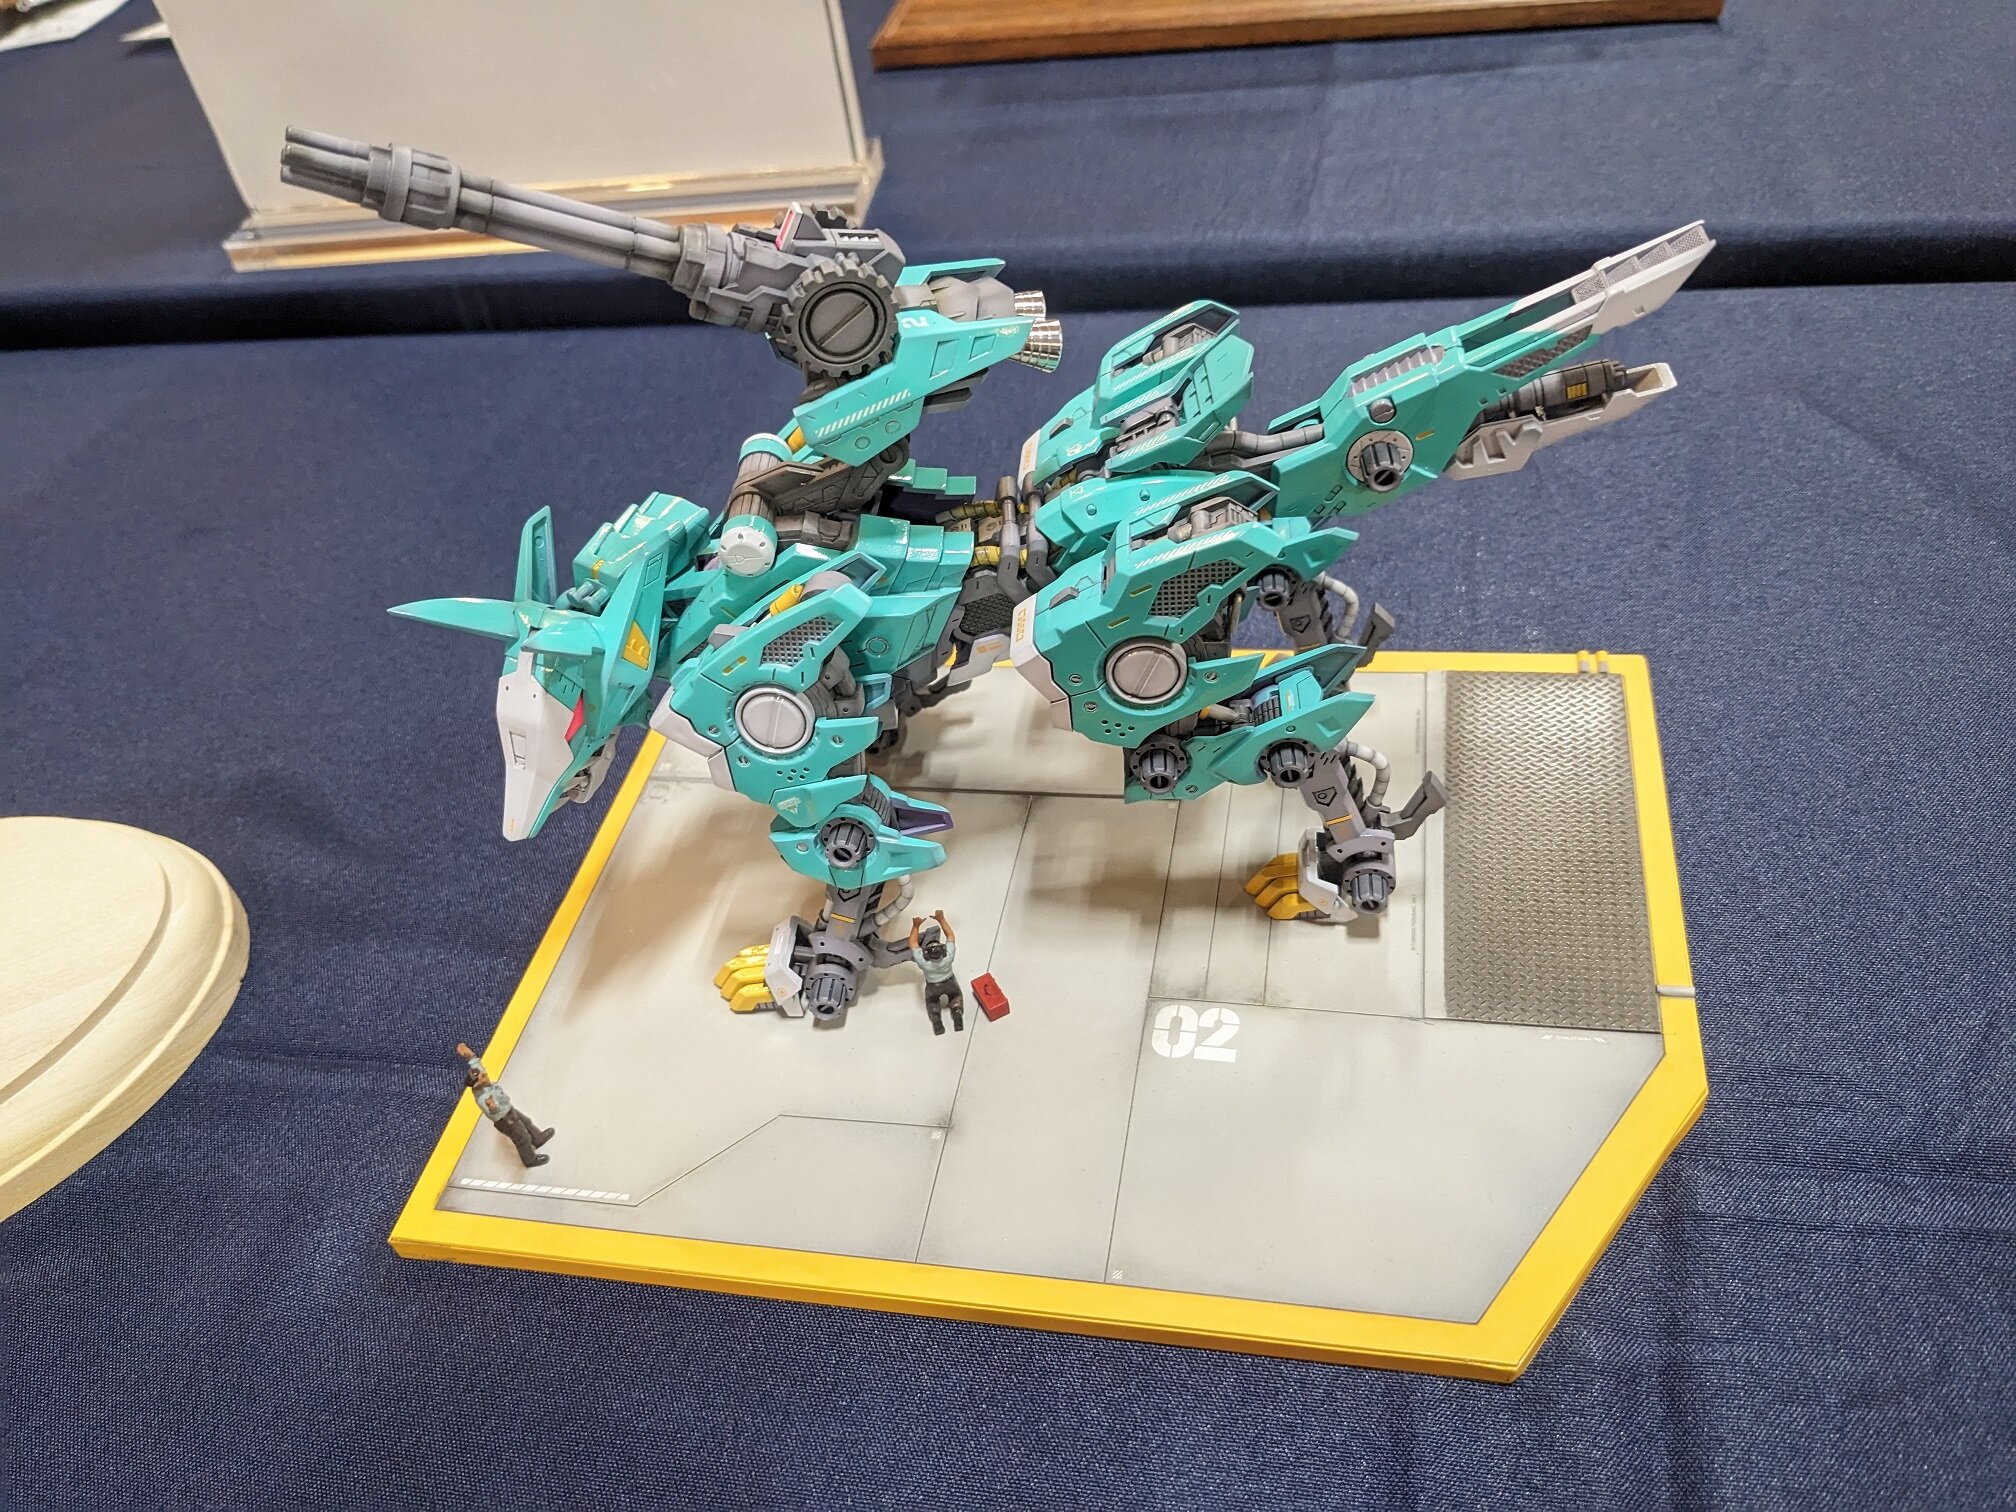
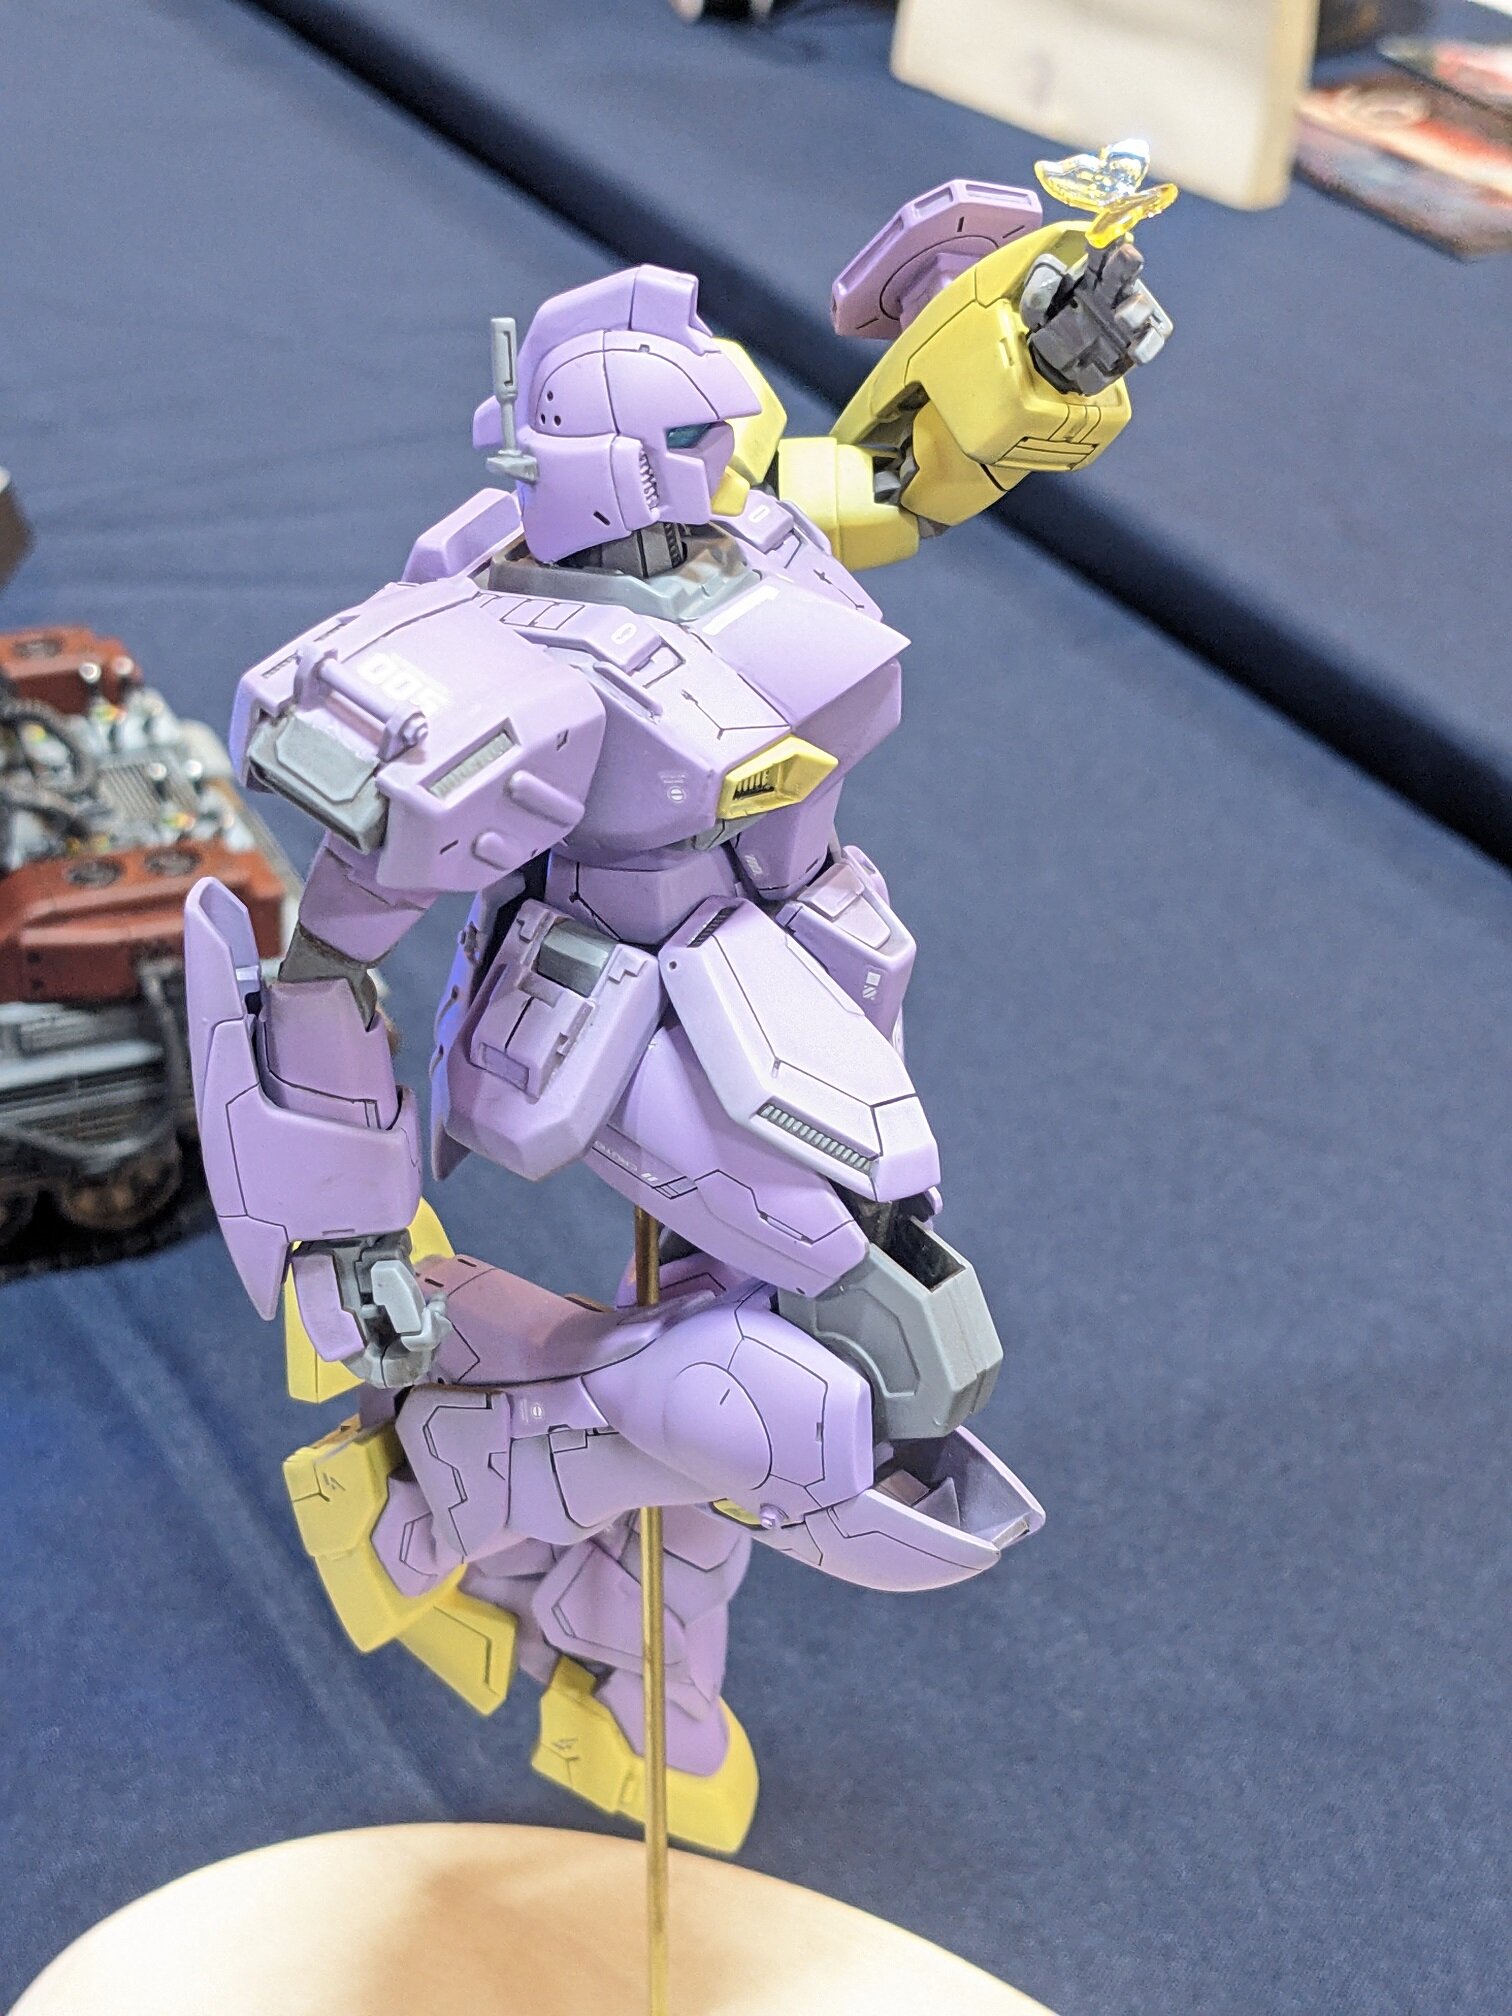
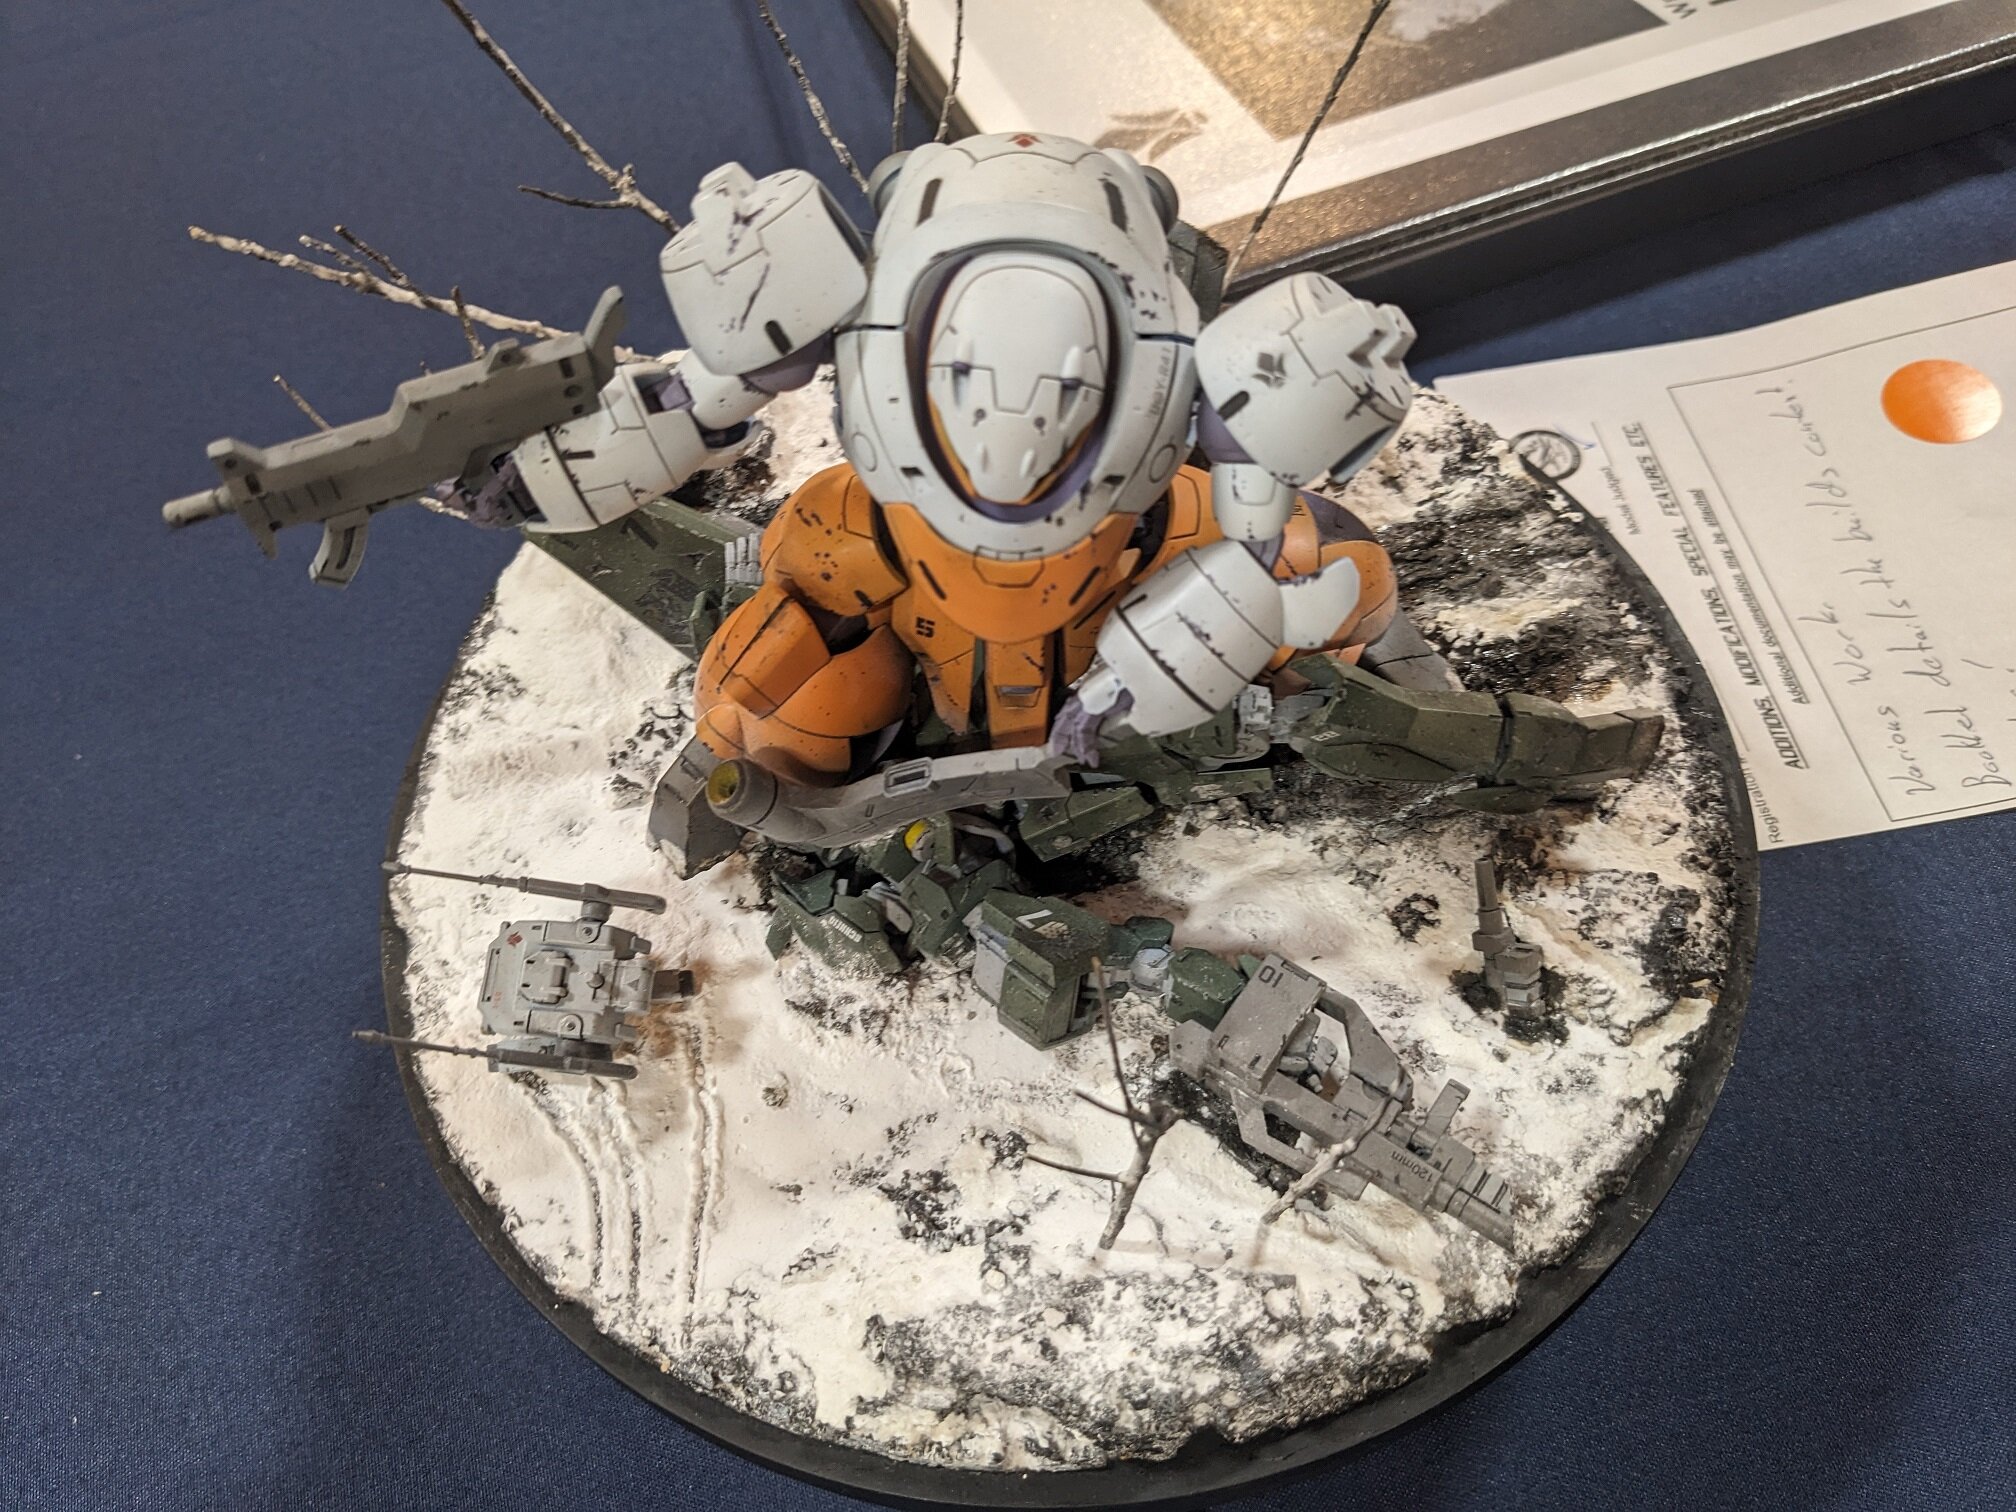
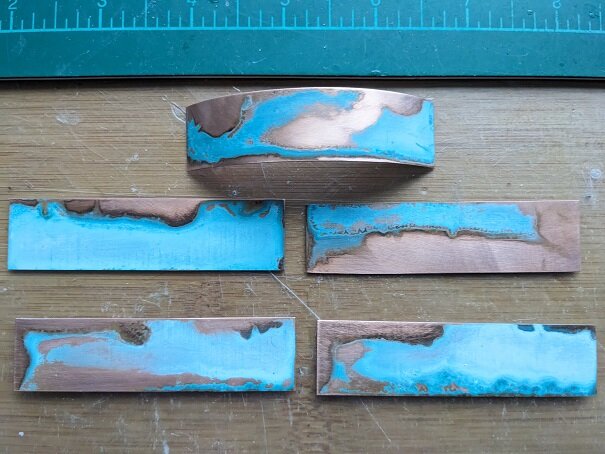
Sorry guys, life has been BUSY the last three weeks! I missed so many pages of AWESOME builds you have been working on! Two weeks ago we had our modeling convention. Here's a couple of highlights that were our better builds from the "Sci-Fi" category. TWO of these were by women! The Gundam diorama was actually entered in the "Diorama" category of judging. This Zoids build got gold and "Best Of" category for Sci-Fi. And for making trophies for our work golf tournament, I wanted patina copper placards. I found a good recipe! Three tablespoons apple cider or red wine vinegar and one tablespoon of Miracle Grow plant food. Let the copper sit in it for 30 minutes. Take it out wet and let it dry. When it dries, it looks like these: I gave it a LIGHT sanding to clean up the exposed copper. Thanks for checking in! - MT
-
@pengbuzz That mini diorama is a COOL idea! It has a nice 3rd dimesion to it. I think the curvature was good and forced persepctive on the subject. @Papa Rat It will be cool to see those built! I got a couple of the "newer" ones when they went down drastically in price. @Big s The Dunbine models drove me nuts too. It reminds me of the original Atari video game art. The cartridge shows two dudes battling it out on a tennis court. You get the game and its just two sticks and a ball. The "ball" wasn't even round! - MT
