johnybgood18
-
Posts
90 -
Joined
-
Last visited
Content Type
Profiles
Forums
Events
Gallery
Everything posted by johnybgood18
-
and finally, the last one!
-
and now, the the belly.
-
one more!

-
and another one!
-

-
:-)

-
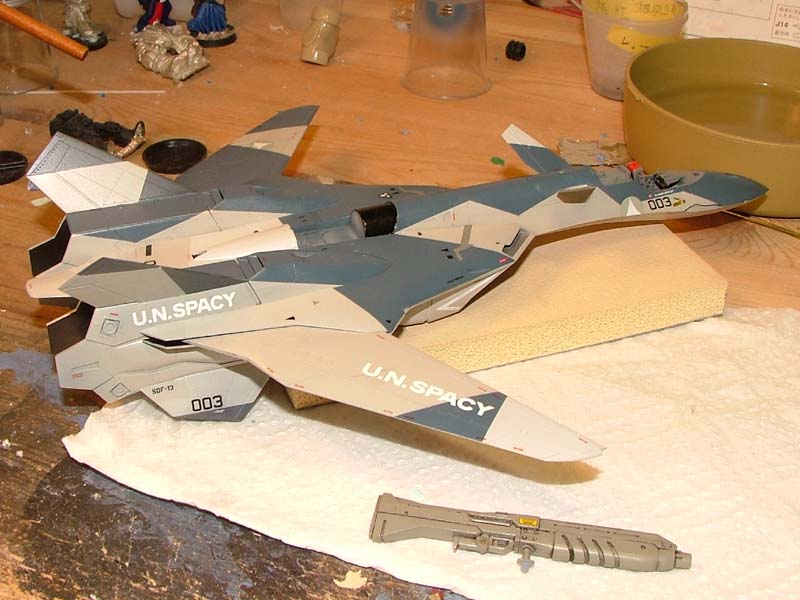
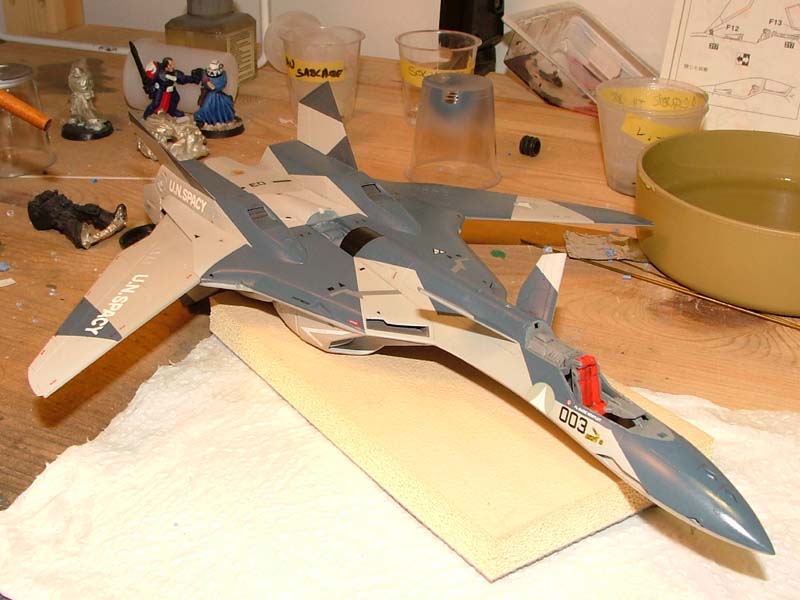
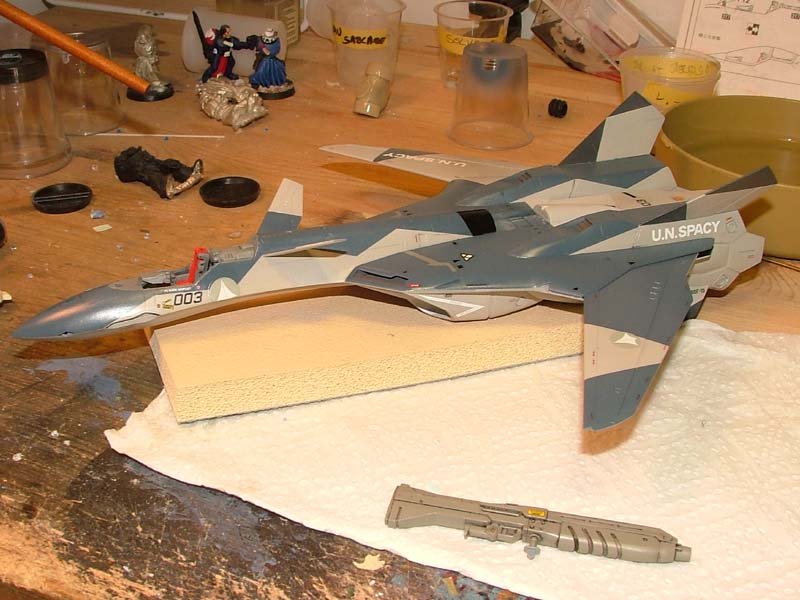
Here are some pictures after the decals have been applied. I will let this dry for another 2 days and then, I'll spray another coat of "Future" to seal the decals and prepare the surface for the weathering. The weathering stage won't probably be before next week, as I need to pack my stuff and unpack so this might take a little while! Well... here goes, enjoy and as usual, your comments are welcomed!
-
That is a tough question... When I use Mr. Surfacer, I clean my brush with lacquer thinner. Now, lacquer thinner is very strong... it melts plastics... so I'm not too sure if you want to thin it with that and apply this to your model. You will have to experiment... I don't want to be held responsable if anything happens to your kit, so use a scrap model to test on first! I hope this help...
-
Yup... that's exactly what I think... I should have waited a bit more before spraying a gloss coat! Oh well... we all learn from our mistakes! I thin my Gunze with either rubbing alcool or water! It depends on my mood. GS takes both really well. More pics soon... I hope!
-
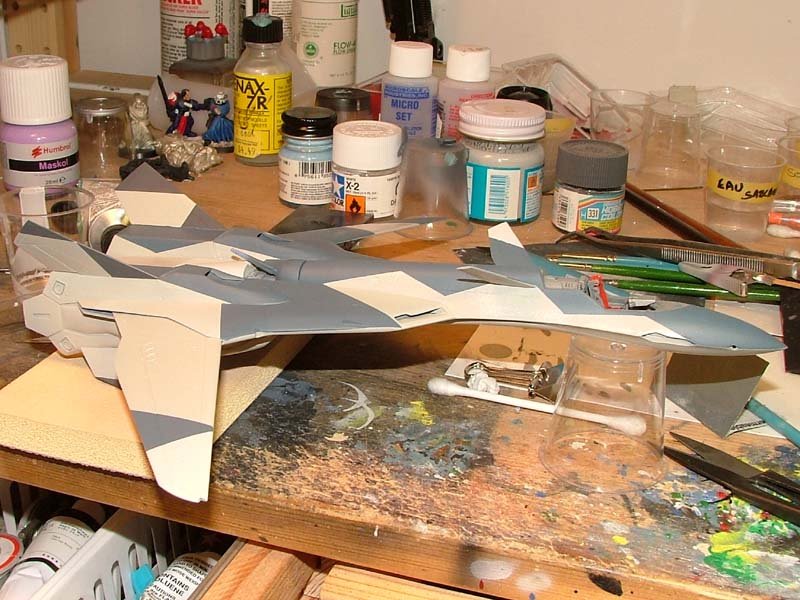
--- UPDATE --- A really strange thing happened. I finished painting the kit, leave it to dry... I then sprayed a thin coat of MM Acryl gloss... put a second thin one and then disaster struck... again! The wings, when the gloss coat started to dry, had some really fine cracks, like a desert! :-( the fynny thing is that it only happened on one color, the only one that was glossy "out of the bottle"! For you info, I used on ly Gunze colors for the camo. What a bad day it was! I left it there for a week... just looking at it in desparation! I then proceded to sand it (when I was sure that the gloss coats were dry!) with 1500 wet-and-dry sandpaper, then re-sprayed the color on the worst areas (the wings). Re-sanded again, re-sprayed... did that a few times until I had enough! My patience has worn out! It'll stay like this! If you look closely, you'll see it but from a normal viewing distance, it doesn't really show. Also, it's under the wings, so it ain't that bad. On a ore positive note, today, I sprayed a thin coat of "Future" to prepare the surface for decalling. Tomorrow, I'll spray another one and on wednesday, it'll be time for me to start packing... and if I have time, I'll for sure start decalling it. I doubt I'll have the time as I'm moving on saturday so I'll need to get everything ready by friday! Well... it's turning out OK so far (crossing fingers)! I really hope that nothing bad happen again... 2nd kit I built... problems again, different one tho, but still... not really good! Well, take care all and I wish you all a Happy New Year!
-
Here it it "phule" http://www.jpsmodell.de/dc/luft_flug_e.htm Enjoy
-
hummm... It depends! I would recommend using the brand own stuff if using enamels. If using artist oil paint, talk to the salesman (saleswoman) at the store, they should be able to help you out. You can also use turpentine, although it really smells bad! I use a stuff which is odorless but I must admit that it ain't that good... it seems like it can't disolve all the paint and leave a grainy feel to the wash when dry! i have to find something else! Cheers
-
On a final note... sorry about the mess... I'm a model builder, not a maid! Conclusion... Did I like doing this? No! Too much headache just figuring out where to put the lines... Would I do it again? Absolutely (sort of a masochist)! but with another camo... which makes me think... I have a 2nd VF-0A on the way! I wonder what they do with their old stuff??? Hummm... gotta think about this one! ;-) That's it for now folks... I'll try to spray the Future tomorrow and start decalling so it'll, hopefully, be ready to weather during next week... If the New Years Eve parties aren't too rough! Happy New Year to all of you guys! Chris

-
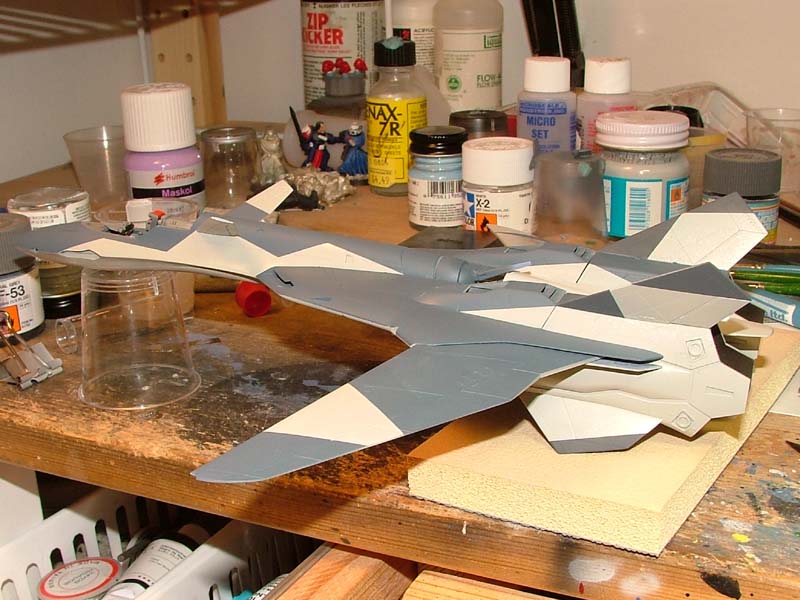
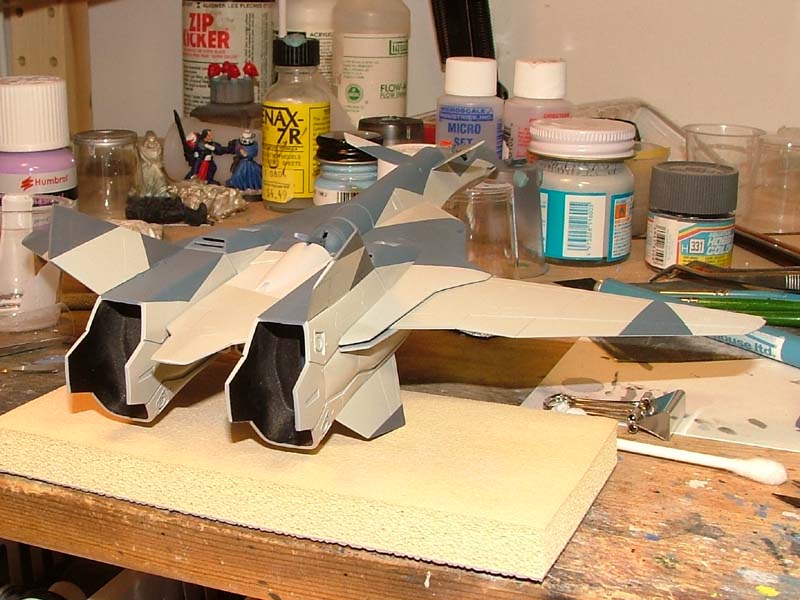
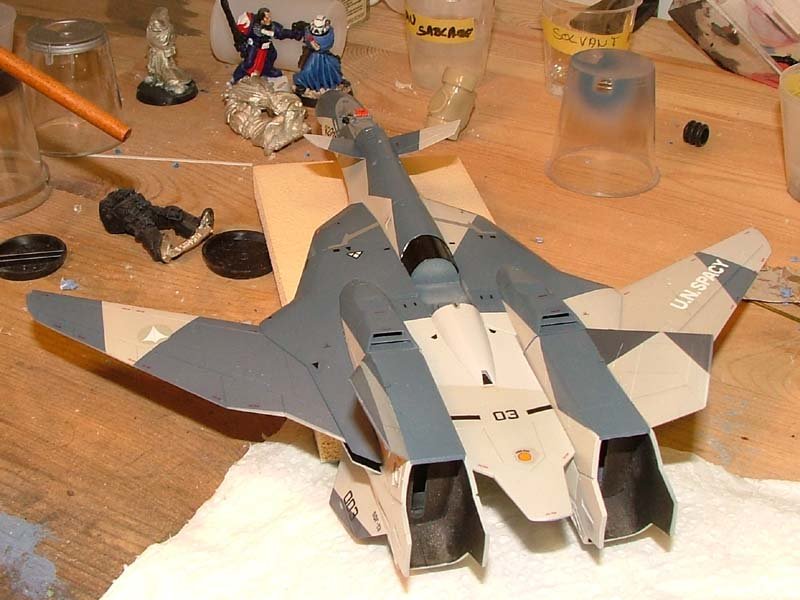
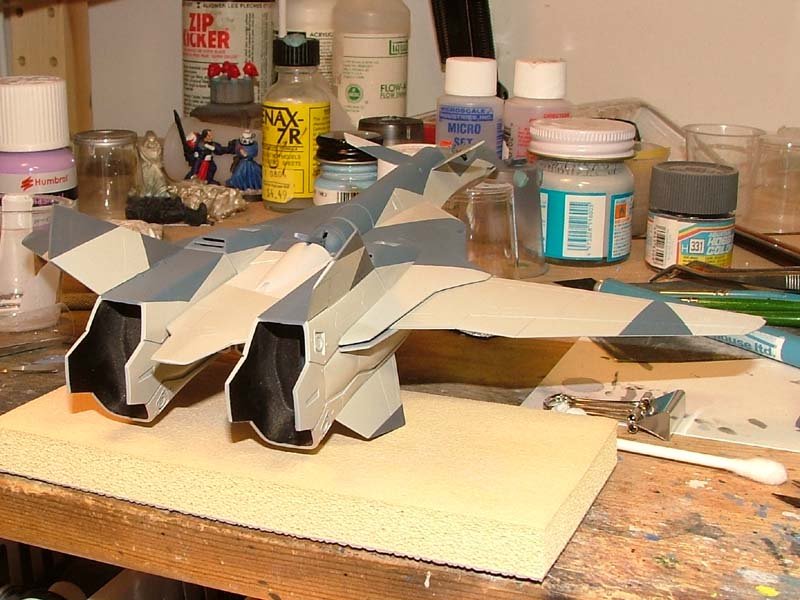
Another one... As you can see, this camo has 4 colors. Their were some with only 3 colors but I prefered the differences in tone from this one and especially, the rudders were another grey that you won't see on the rest of the plane. The dark gray on the planes is actually a dark blue grey.
-
As you can see, some touch ups are needed. I'm just waiting for the paint to really cure before touching it again.
-
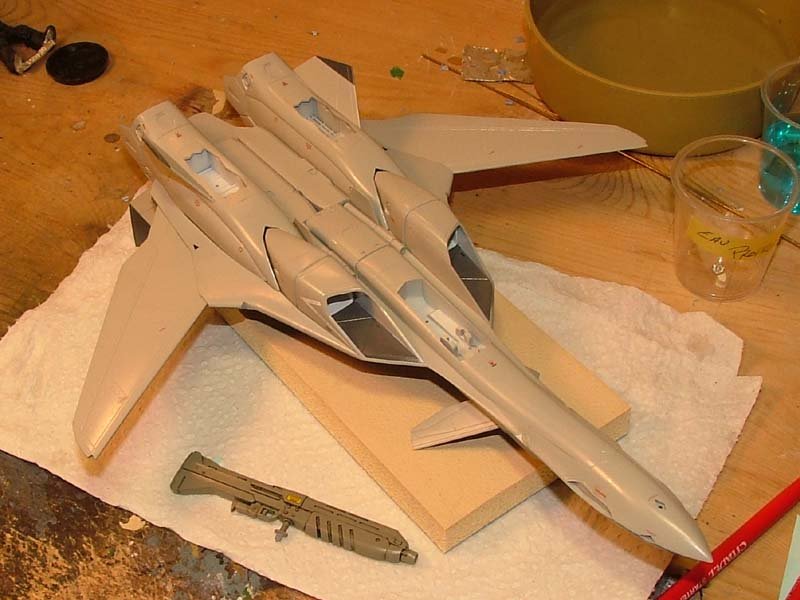
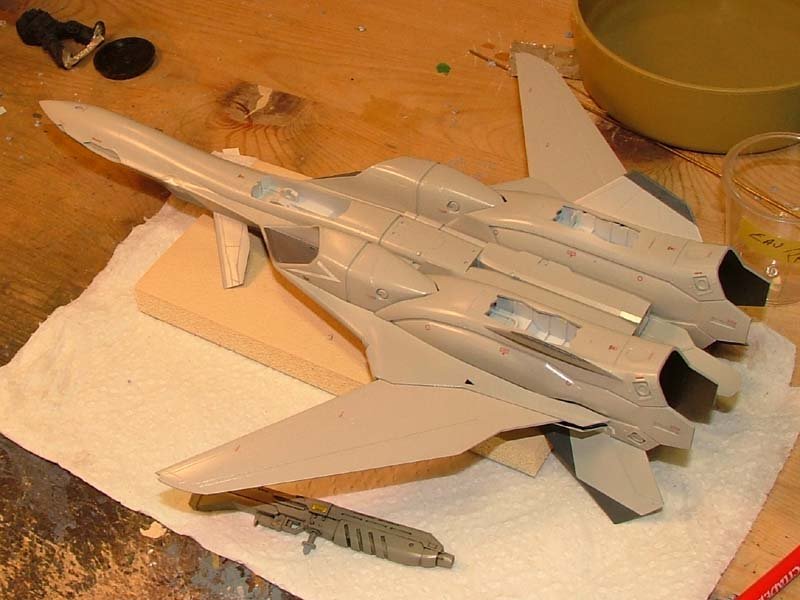
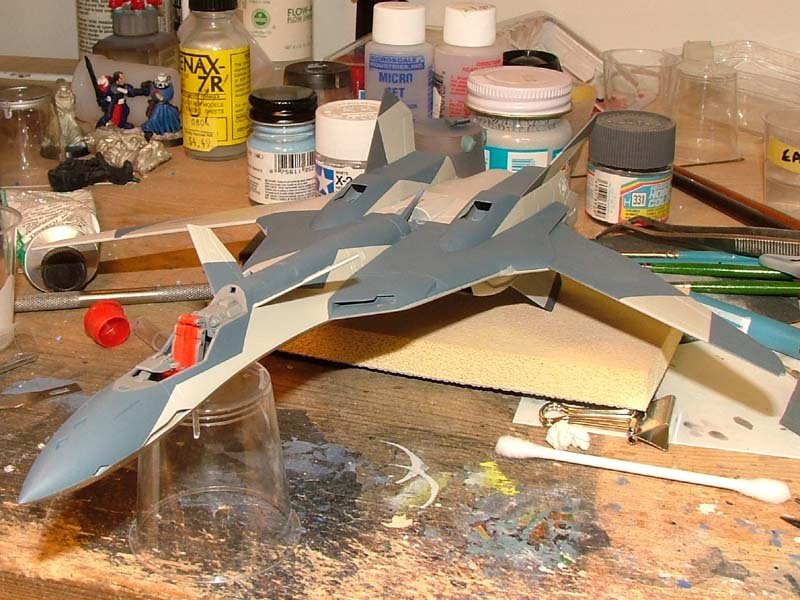
The VF-19A after the first coat of the camo has been applied. There is a few of the under different angles. This idea of camo came out from a website. This site is from a guy who has his own brand of paint. He has a lot of different camo. It is a variation of the Ferris scheme. Other than that, I have no idea from or what it is exactly. I just thought it was cool! I tried to stick as close as possible to the FS number of the real thing. I just couldn't find a real match for the dark gray so I had to improvise. The guy does sell it but my problem is time. I'm moving in about 2 weeks and I really want to finish this kit before I move, I couldn't afford to wait for weeks for this paint since it's coming from Europe! So here goes... any comments are most welcome! Next step is the clear coat... and I'll try "Future" this time.
-
One of the front engine nacelle after assembly and the interior painted.
-
A close-up of the cockpit.

-
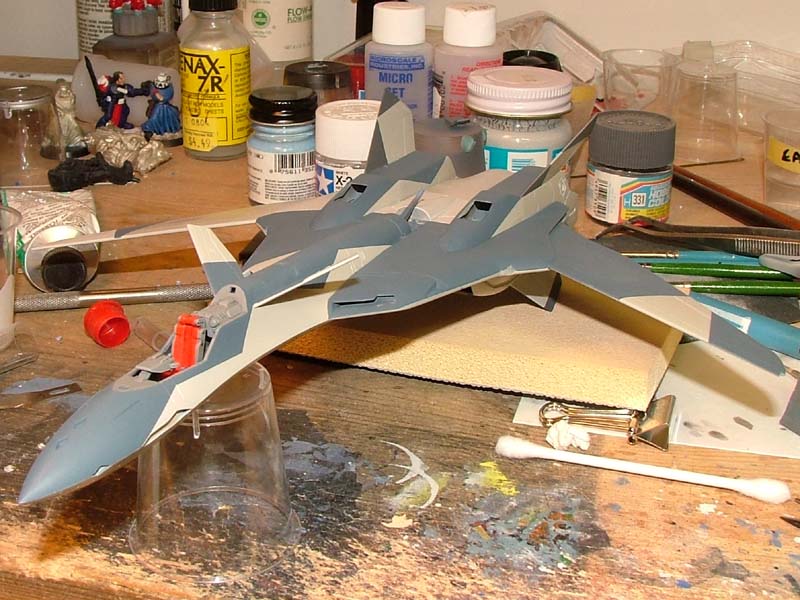
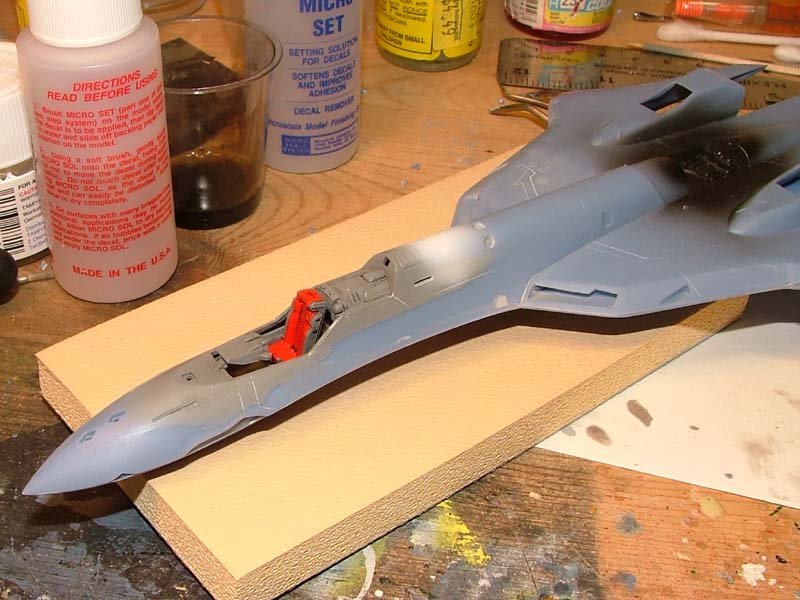
Ok... back for more! Here is the fuselage with the cockpit, before masking it for painting.
-
Yeah, I do... been working a lot on this one! I'll post some new pics tomorrow. I started the painting of it and found the camo too...
-
Well, never mind that post, I got the scheme I want! :-) It won't be an "aggressor scheme", but something I haven't seen so far!
-
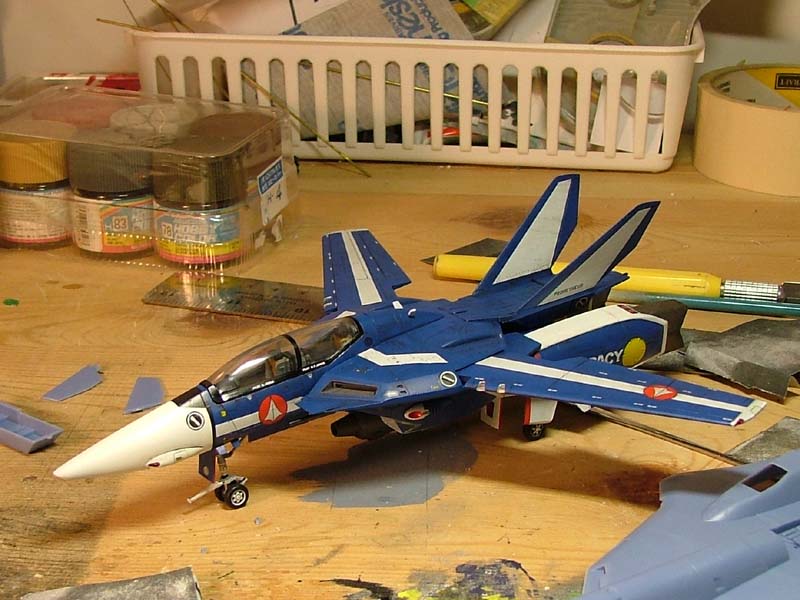
Ok... here is my VF-1D. With all the splendor of my work area! :-) Eventually, there will be a YF-19A.

-
Hi again, I need some help on deciding what scheme I'll paint this baby up! I bought the Hasegawa option decal sheet with the aggressor VF-19A. I thought it was an amazing idea but... I think there are much better "aggressor scheme" out there (thinking of Viperbite VF-0S! Which I think is just amazing!). So... can anyone help me out there and send me links, pictures, etc with their idea? or maybe... Viperbite would be kind enough and tell me more about that scheme??? :-) Thanks in advance
-
That's it for today folks... stay tuned for another exciting episode of.... yeah, whatever! I hope you enjoy this! See ya...
-
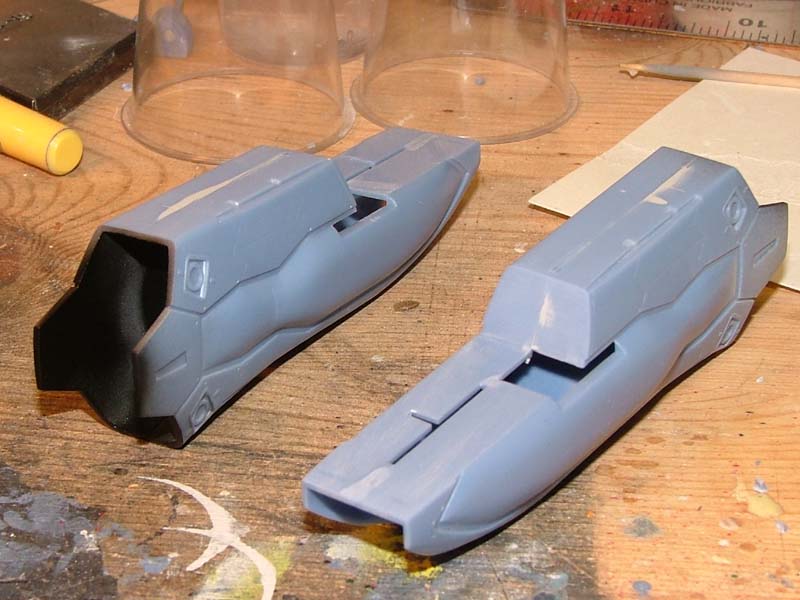
And here are the assembled, sanded but not rescribed, nacelles.